


|
Yep, it's a side LP! And for those following Breath of Fire 2, do not worry; This will not delay production of those episodes. Skaizo just wanted to do something different once in a while. Anyways: 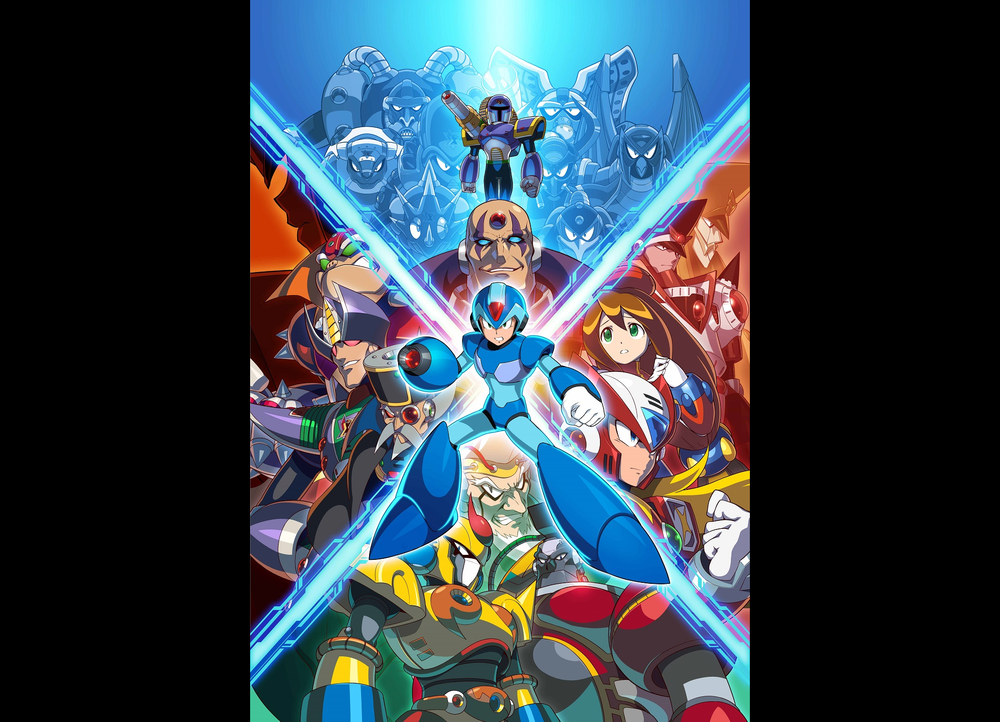 Yes, we're going to be going through the entire series by the end of this! This is one of my favorite series of platformers, next to Ninja Gaiden! Amazing sound, amazing graphics, I love the character designs, and a lot of the games even manage some really cool and challenging boss fights. Plus, the Mega Man Legacy Collection re-releases have added achievements to mix things up a little. So, it will be my pleasure to show all these games off, and show you the easiest ways to beat them, the most efficient ways to beat them, and even how to do Buster-Only strategies! So strap in folks, because this gonna be a wild ride!
|
 #
?
Feb 7, 2021 02:57
#
?
Feb 7, 2021 02:57
|
|


|

|
| # ? May 2, 2024 12:08 |
|
|
Starting off, we have the Highway Stage, and Chill Penguin! More relaxed episode, as we look at the intro crawl text, go into the basic mechanics, and some rules-of-thumb for combat... But next episode will REALLY go into overdrive!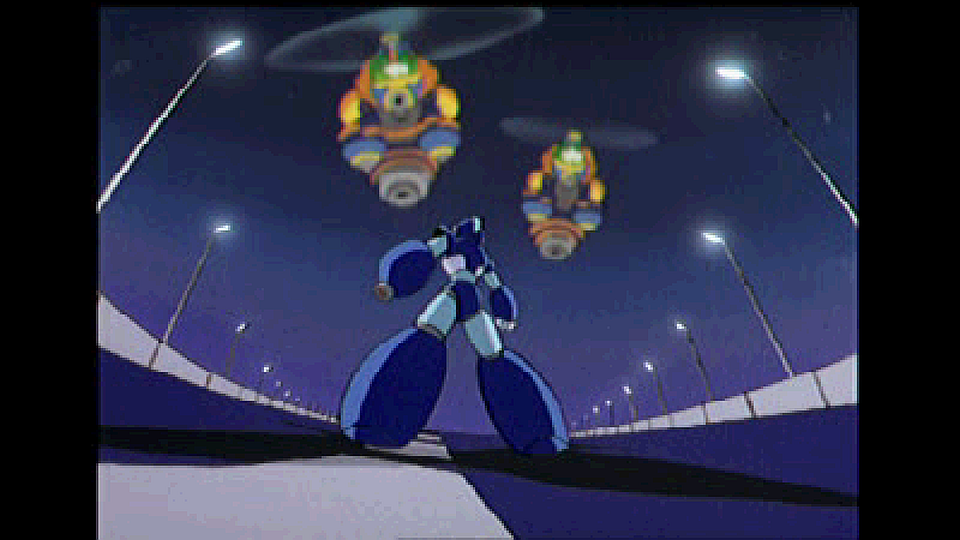 Part 1: Mega Man X1 (100% Guide)—Opening & Chill Penguin (All Trophies/Achievements) BASIC INFO: 1) I'm playing the plain SNES version, so I'll be using captions to mark what achievements I would've won, had I been playing on the Legacy Collection version. 2) X starts with 16 HP (units of health), and can increase that to a max of 32. 3) LVL 2 Charges (green shots) usually do twice the damage of regular shots 4) LVL 3 Charges (blue shots) usually do quadruple the damage of regular shots 5) Dash Shots (dash before shooting) do twice the damage of regular shots 6) Enemies can sometimes drop health & weapon energy. Enemies also respawn when you leave, so you can farm health and weapon energy this way. 7) You can climb up walls by walking into them and pressing Jump. 8) The longer you hold Jump, the higher X jumps. Just tapping it isn't usually enough. ACHIEVEMENTS SO FAR: 1) "His Name is Actually Vava"—Beat the opening stage of X1, X2, X3, or X4 in both the English & Japanese versions (technically not won, but doing it twice doesn't do anything) 2) "In Buster We Trust"—Beat any of the eight Maverick bosses. REGARDING THE HIGHWAY STAGE: Vile (the boss at the end) is invincible, and will activate the next cutscene when he stuns you. He only stuns you when X is at 4 HP, which is why I intentionally hurt myself on the 2nd Beeblader. REGARDING THE ROUTE: Chill Penguin's stage has the Dash Boots upgrade, so he's always first. REGARDING CHILL PENGUIN: LVL 3 Shots do only 3 HP of damage, instead of x4 times a regular shot. ENEMY LIST (Opening): The three numbers are shots LVL 1, 2, & 3 Spikies (Spiky balls): 2 HP (1/2/4) Gun Volts (Big blue guys): 32 HP (1/2/4) Crushers (The things smashing roads): 4 HP (2/4/5) Ball De Voux (The balls with two legs): 4 HP (2/4/5) Bomb Beens (Orange flies): 2 HP (1/2/4) Jammingers (Flying faces): 2 HP (1/2/4) Road Attackers (manned): 5 HP (1/2/4) Road Attackers (empty): 4 HP (1/2/4) ENEMY LIST (Chill Penguin): Ray Bits (Rabbits): 4 HP (2/4/5) Axe Maxes (Axe Guys): 8 HP (1/2/4) Batton Bones (Bats): 2 HP (2/4/5) Flammingles (Flamingos): 8 HP (1/2/4) Metal Wings (Igloo Flies): 1 HP Ride Armors (Giant Robots): 16 HP (1/2/4) Snowballs: 4 HP (1/2/4) Snow Shooters: 8 HP (2/4/5) MINI-BOSSES: Bee Bladers: 32 HP (1/2/4) BOSSES: Vile: 127 HP (1/2/4; Refills to 48 every time it hits 0) Fionordequester fucked around with this message at 03:00 on Feb 7, 2021 |
|
#
?
Feb 7, 2021 02:58
|
|
|
I love this game and understand the "easy to edit" qualifier, at least for the first few games since 100%ing the early ones can be done with minimal backtracking. One of the other "nice" things about this game is the random enemies who react to hurting you Axe Maces and Jammingers, you purple fuckers who I will always call out for being the Bladers for a new generation.
|
|
#
?
Feb 7, 2021 03:57
|
|

|
It always gets me when they show how terribly built X has for specs. Infinite memory and 1990s amount of cache.
|
|
#
?
Feb 7, 2021 05:00
|
|

|
Scalding Coffee posted:It always gets me when they show how terribly built X has for specs. Infinite memory and 1990s amount of cache. Lol. Guess they should've just put "infinite" there too, huh  ? ?
|
|
#
?
Feb 7, 2021 05:02
|
|
|
are you gonna grind for the hadouken? i remember that took me so long and needing to extend the rental from blockbusters
|
|
#
?
Feb 7, 2021 07:22
|
|

|
augias posted:are you gonna grind for the hadouken? i remember that took me so long and needing to extend the rental from blockbusters "Grind" is a strong word, since I know the secret to how that works... But yeah, I'll be getting it. It's needed for the "In the Heart of Battle" achievement!
|
|
#
?
Feb 7, 2021 11:24
|
|
|
And here we go! An episode with lots to unpack! Three different boss routes to cover, Boomer Kuwanger himself, and the fabled Iceless Jump! That last one especiallyshould help everyone who's struggled with it in the past! 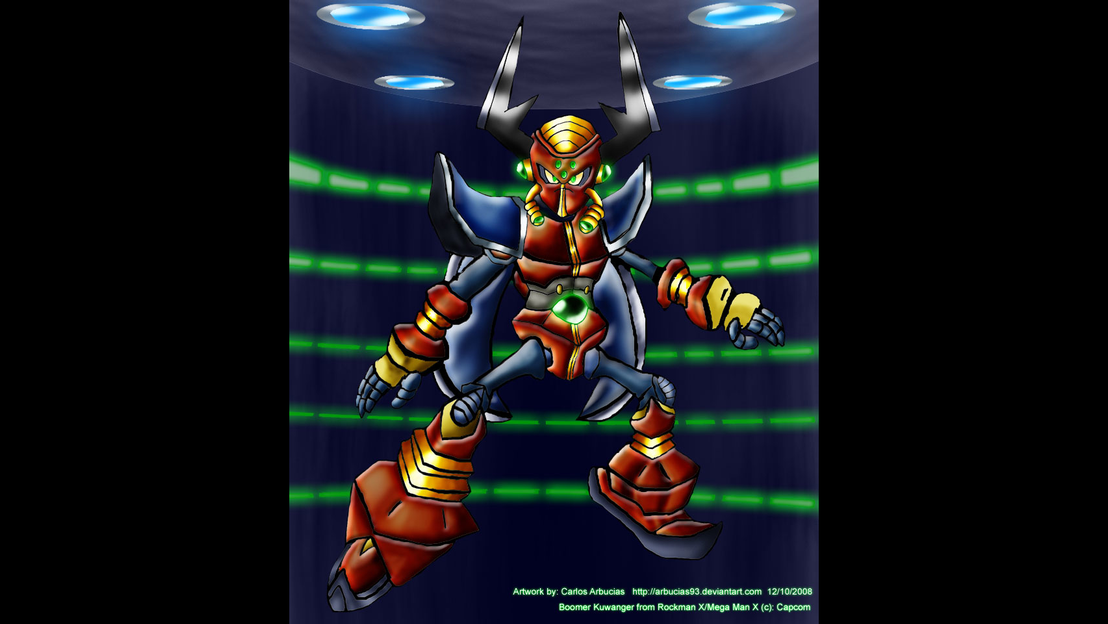 Part 2: Mega Man X1 (100% Guide)—Route Order, Iceless Jump & Boomer Kuwanger (All Trophies) THUMBNAIL ART BY: Shinobi-Gambu (The uncropped version is in his art gallery!) Shinobi-Gambu's ART GALLERY: https://www.deviantart.com/shinobi-gambu Special thanks for giving me permission to use it! WEAKNESS ROUTE (Not recommended): Chill Penguin (Dash) → Spark Mandrill → Armored Armadillo → Launch Octopus → Boomer Kuwanger (Boomerang Heart) → Sting Chameleon (Armor) → Storm Eagle (Helm) → Flame Mammoth (Buster) x4 Revisits: Chill Penguin (Heart), Spark Mandrill (Sub Tank), Boomer Kuwanger (Heart), Armored Armadillo (Hadouken) EFFICIENT ROUTE (Ignoring Achievements): Chill Penguin (Dash) → Storm Eagle (Helm) → Flame Mammoth (Buster) → Boomer Kuwanger (Icy Heart) → Launch Octopus → Sting Chameleon (Armor) → Spark Mandrill → Armored Armadillo x2 Revisits: Chill Penguin (Heart), Armored Armadillo (Hadouken) MY ROUTE (Getting Achievements): Chill Penguin (Dash) → Boomer Kuwanger (Iceless Heart), Storm Eagle (Helm), Launch Octopus, Sting Chameleon (Armor), Flame Mammoth (No Buster), Spark Mandrill, Armored Armadillo x2 Revisits: Chill Penguin (Heart), Armored Armadillo (Hadouken) THE NORMAL WAY TO GET THE "ICELESS" HEART: You'd typically charge an Ice Slide via the Shotgun Ice + Arm Upgrade, then ride that slide off the ledge. You'd jump off it while in mid-air, then grab the ledge. That, or you would return with Kuwanger's Boomerang Cutter, and snag it that way. ICELESS JUMP INSTRUCTIONS: 1) Get a good wall kick from as far as possible, between the upper black seam and the upper red part of the wall. See the screenshot at 6:43 to see what that looks like. 2) Hold Right and Jump until X is out from under the ledge, then Pause. See the screenshot at 6:56 for what that looks like. 3) Keep holding Jump until you get the right height. See the screenshot at 7:09 for what that looks like. 4) RELEASE the Jump button at this height, while Pausing. 5) PRESS the Jump button as the game fades back in from the Pause menu, and you should get it! REGARDING SHOTGUN ICE: A single shot is fired, which then breaks up into 5 smaller pieces when it hits. Each piece will usually do twice the damage of whatever a LVL 1 Shot would've done to that specific enemy. You can do up to 10-20 Damage, if you get it as far inside the enemy as possible! You can also hit the Shield guys from behind with it, so if you really wanted to fight them, Shotgun Ice is the way to do it. However, I encourage you to practice Dashing through the enemies instead. That will be good practice for the later games. ENEMY LIST (Boomer Kuwanger): The three numbers are shots LVL 1, 2, & 3 Hoganmers (Shield Guys): 8 HP (1/2/4) Dodge Blasters (Red Wall Cannons): 3 HP (1/2/4) Sine Fallers (Flying Guys near Laser Guys): 1 HP Ray Traps (Invincible Laser Guys): -- HP Mega Tortoises: 16 HP (1/2/4) Jammingers (Giant Faces): 2 HP (1/2/4) Slide Cannons (Pops in and out): 6 HP (2/4/5) [These do not drop health] Ladder Yadders: 3 HP (1/2/4) [These do not drop health] Turn Cannons: 5 HP (1/2/4) [These do not drop health] BOSSES: Boomer Kuwanger: HP: 32 (1/2/3) Damage: 2 (Boomerang Cutter), 4 (Contact), 4 (Dead Lift) Invincibility Frames: 1 second's worth. Fionordequester fucked around with this message at 02:04 on Feb 11, 2021 |
|
#
?
Feb 11, 2021 01:53
|
|
|
Boomer has more glowing points than Zero. He wouldn't have trouble seeing in the dark.
|
|
#
?
Feb 11, 2021 03:54
|
|
|
Scalding Coffee posted:Boomer has more glowing points than Zero. He wouldn't have trouble seeing in the dark. Wouldn't be surprised if he was raised in darkness. You see those horns?
|
|
#
?
Feb 11, 2021 04:43
|
|
|
Also, one other thing. How would you guys feel about the HP displays being on all the time? Someone requested that on Serenes Forest.
|
|
#
?
Feb 11, 2021 09:35
|
|
|
I don't mind.
|
|
#
?
Feb 11, 2021 13:20
|
|
|
I know you'll be waiting until the end for the buster upgrade, but will you be showing where it is in the Flame Mammoth stage? I feel like there has to be a better way to get to it besides my method that ends after about 100 attempts and a slew of profanity.
|
|
#
?
Feb 11, 2021 18:43
|
|


|
Protip: you aren't cursing enough.
|
|
#
?
Feb 11, 2021 21:01
|
|
|
oldskool posted:I know you'll be waiting until the end for the buster upgrade, but will you be showing where it is in the Flame Mammoth stage? I feel like there has to be a better way to get to it besides my method that ends after about 100 attempts and a slew of profanity. I will. And yeah, that one used to give me trouble as well... Hope I can help!
|
|
#
?
Feb 12, 2021 00:08
|
|
|
Today we kill three more Mavericks, complete most of our armor, and even show off something called the Phantom Grab! Check it out!.png) Part 3: Mega Man X1 (100% Guide)—Storm Eagle, Launch Octopus & Sting Chameleon (All Trophies) ACHIEVEMENTS SO FAR: 1) His Name is Actually Vava—Beat the opening stage of X1, X2, X3, or X4 in both the English & Japanese versions (technically not won, but doing it twice doesn't do anything) 2) In Buster We Trust—Beat any of the eight Maverick bosses. 3) Gimp My Ride—Destroy an enemy Ride Armor EAGLE PHANTOM GRAB INSTRUCTIONS: 1) Jump to the ledge with the Heart Tank, face left, and line the back of X's foot just one pixel from the edge. 2) Hold Jump till X starts to descend from his jump, then shoot a boomerang. 3) Hold right to walk off the edge, then Pause Buffer until one of the two visual cues shown in the video (I prefer the 1st, but some people's TVs will cut it off). 4) Press Jump + Dash at the same time, so X will jump in the air without moving, and still move at Dash speed when needed. 5) Press Right immediately after you get the Heart Tank, and the SFX are playing. Do it right, and you'll have spawned a platform inside your boomerang! 6) Get on the platform and ride it up until you've passed the clouds, then start wall-kicking its right side until it's over the tower with the Sub-Tank. I haven't mastered this last part...so see this video by Walrus_Prime (1st place in Any%, 2nd Place in 100%), starting from 12:45: MMX 100% Speedrun Tutorial Part Four: Storm Eagle WHY THIS WORKS: The game has "spawn points" for spawning different sections of its levels, including the objects in each one. If you grab an item from one spawn point, then enter another spawn point exactly frame after you acquire the previous item, the game will get confused and overwrite it with the next item, instead! In this case, the Heart Tank was in one spawn point, and the platform was in the other. The Heart Tank entered X immediately before the platforms spawned, so... The Heart Tank became another platform! REGARDING BOOMERANG CUTTER: It usually does double what a LVL 1 shot would've done to an enemy, but will do triple to anything weak to it. It goes in an upward arc, unless you're coming down from a Jump. Then it goes in a downard arc, instead. You can also use it to grab items. REGARDING STORM TORNADO: It has a deceptively large hitbox, and does 1 DMG per frame to anything that doesn't have invincibility frames. This increases to 3 DMG per frame to anything weak to it. "Frames" are a fraction of a second, and Mega Man X runs at a little over 60 frames per second. That means this attack does over 60 Damage in JUST a second! You basically have the touch of death on most mini-bosses, and every regular enemy! REGARDING HOMING MISSILE: It does 3 DMG to [1/2/4] enemies & 2 DMG to [2/4/5] enemies. No mini-bosses are weak to it. ENEMY LIST (Storm Eagle): The three numbers are shots LVL 1, 2, & 3 Sky Claws (Grabby guys): 2 HP (1/2/4) [These do not drop health] Hoganmers (Shield guys): 8 HP (1/2/4) Lift Cannons (Pops out of the Ground): 2 HP (2/4/5) [These do not drop health] Gun Volts (Big blue dudes): 16 HP (1/2/4) Flamers (Fire guys on platforms): 6 HP (1/2/4) [These do not drop health] Fuel Tanks: 32 HP (1/2/4) [These do not drop health] Metall C-15s (Mettaurs): 2 HP (1/2/4) Ball De Vouxs: 4 HP (2/4/5) Turrets: 13 HP (2/4/5; Weak to Boomerang Cutter) ENEMY LIST (Launch Octopus): Amenhoppers (Grasshoppers): 2 HP (1/2/4) Mega Tortoises: 16 HP (1/2/4) Sea Attackers (Seahorses): 2 HP (1/2/4) Gulpfers (They swallow you): 10 HP (1/2/4) [These do not drop health] ENEMY LIST (Sting Chameleon): Amenhoppers (Grasshoppers): 2 HP (1/2/4) Planties (Grass Mettaurs): 2 HP (1/2/4) Iworms (Water worms): 1 HP Axe Maxes: 8 HP (1/2/4) [These do not drop health] Crag Men (Rock guys): 8 HP (1/2/4) Mad Peckers: 6 HP (1/2/4) Creepers (Big worms): 1 HP Hoganmers (Shield guys): 8 HP (1/2/4) Jammingers (Giant faces): 2 HP (1/2/4) Armor Soldier (Ride Armor riders): 3 HP (1/2/4) [These do not drop health] Ride Armors: 16 HP (1/2/4) [These do not drop health] MINI-BOSSES: Anglerges (Angler Fish—Octopus): HP: 64 (2/4/5; Weak to Boomerang Cutter) Damage: 2 (Snakes), 4 (Contact) Invincibility Frames: 0.15 seconds' worth (Storm Tornado=7 HP) Cruiziler (Ship—Octopus): HP: 64 (1/1/2; Weak to Storm Tornado. Resists other weapons) Damage: 3 (Torpedoes) Invincibility Frames: None (Storm Tornado=Dead) Utuboros (Water Snakes—Octopus): HP: 72 (1/1/2; Weak to Boomerang Cutter. Resists other weapons) Damage: 4 (Contact) Invincibility Frames: None (Storm Tornado=Dead) RT-55J (Sumo Bot—Chameleon): HP: 64 (1/1/2; Weak to Boomerang Cutter. Resists other weapons) Damage: 2 (Arm Grab), 2 (Contact) Invincibility Frames: Half a seconds' worth (Storm Tornado=2 HP) BOSSES: Storm Eagle: HP: 32 (1/1/2) Damage: 2 (Boomerang Cutter), 4 (Contact), 4 (Dead Lift) Invincibility Frames: 1 seconds' worth. Launch Octopus: HP: 32 (1/2/3) Damage: 2 (Missiles), 2 (Homing Missiles), 1-15 (Energy Drain), 4 (Contact) Invincibility Frames: 1 seconds' worth. Sting Chameleon: HP: 32 (1/1/2; Weak to Boomerang Cutter) Damage: 2 (Spikes), 2 (Chameleon Sting), 4 (Iron Tongue), 4 (Contact), 8 (Ceiling) Invincibility Frames: 1 seconds' worth. Fionordequester fucked around with this message at 08:28 on Feb 20, 2021 |
|
#
?
Feb 20, 2021 08:04
|
|
|
Behold! The world's very first All Achievements speedrun for Mega Man X1! 43:37! Pretty good for my first run, eh?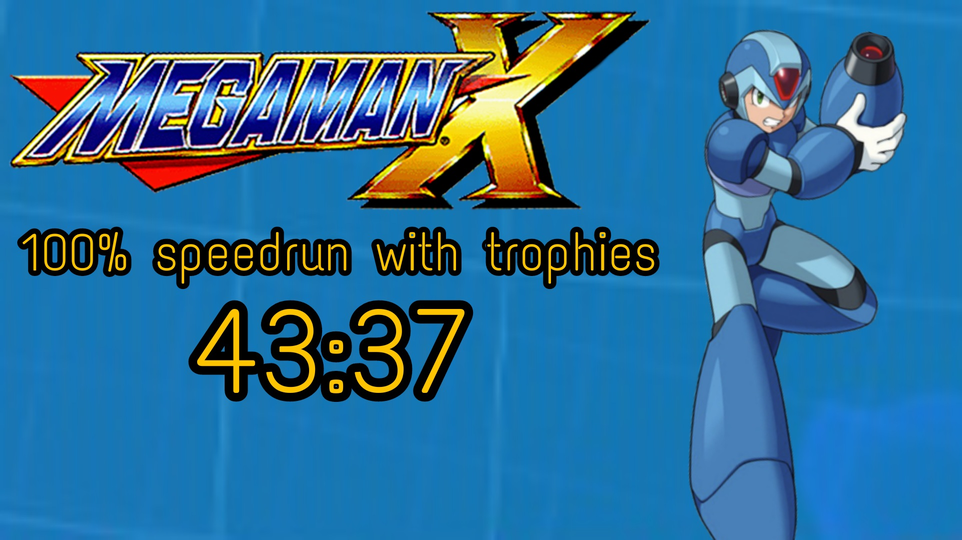 Mega Man X1—100% Speedrun with All Achievements/Trophies (43:37.071) THUMBNAIL ART BY: Vrime YOU CAN FIND HIM AT: https://youtube.com/channel/UC4Jdmm9bddQLGYQ1kaQeFdw [Special thanks. He made this for me for free!] NOTE: The frame counter and "Power button pressed" message is there to let verifiers know that I'm not playing back a movie file. This was recorded all in one sitting, no save states used. Here it is on the Leaderboards! https://megamanleaderboards.net/index.php?game=12&category=339 Fionordequester fucked around with this message at 07:04 on Feb 25, 2021 |
|
#
?
Feb 24, 2021 06:51
|
|
|
I guess it's not an official Mega Man game without shenanigans involving the edges of the screen (and wonky ladder physics)!
|
|
#
?
Feb 24, 2021 16:19
|
|


|
dotchan posted:I guess it's not an official Mega Man game without shenanigans involving the edges of the screen (and wonky ladder physics)! Ooof, that reminds me... One of the runners said I coulda skipped those Kuwanger tortoises by dashing off some of those ladders. Hindsight, am I right?
|
|
#
?
Feb 24, 2021 22:42
|
|
|
Double post, but, it looks like I forgot to actually include the leaderboards link, lol. Just added it into the speedrun post. And Part 4 is coming soon!
|
|
#
?
Feb 25, 2021 07:05
|
|
|
They put so much love & attention into MMX. Stage variants that there's an above average chance the player will never see. Boss battle modifications via non-weakness weapon usage. Curious why you went with Rolling Shield against the Anglerges miniboss. Also curious why Rolling Shield is objectively the worst weapon (is it the only weapon in MM/MMX lore that isn't actually used by the boss that gives it?) & how the developers knew it and that's why they made VILE and Final SIgma weak to it
|
|
#
?
Feb 25, 2021 16:37
|
|
|
oldskool posted:Curious why you went with Rolling Shield against the Anglerges miniboss. Also curious why Rolling Shield is objectively the worst weapon (is it the only weapon in MM/MMX lore that isn't actually used by the boss that gives it?) & how the developers knew it and that's why they made VILE and Final SIgma weak to it So here's the thing about Rolling Shield. It's actually really strong, considering it's just one blast. It does just as much as a full-power LVL 3 Buster shot, which no other special weapon does. Flame Wave and Storm Tornado do more damage overall, but only because they do a lot of little hits every frame. So, against mini-bosses with invincibility frames and no special resistance (like Vile & the Angler Fish), it's shockingly effective. Speaking of Vile... He's not actually weak to it, believe it or not. He's just... Well, we'll get to it in the next episode but... Let's just say Vile's not all cracks himself up to be.
|
|
#
?
Feb 25, 2021 22:19
|
|
|
Sigma's cronies are dust, and I have a strat for the Arm Upgrade! Tune in to see it all play out!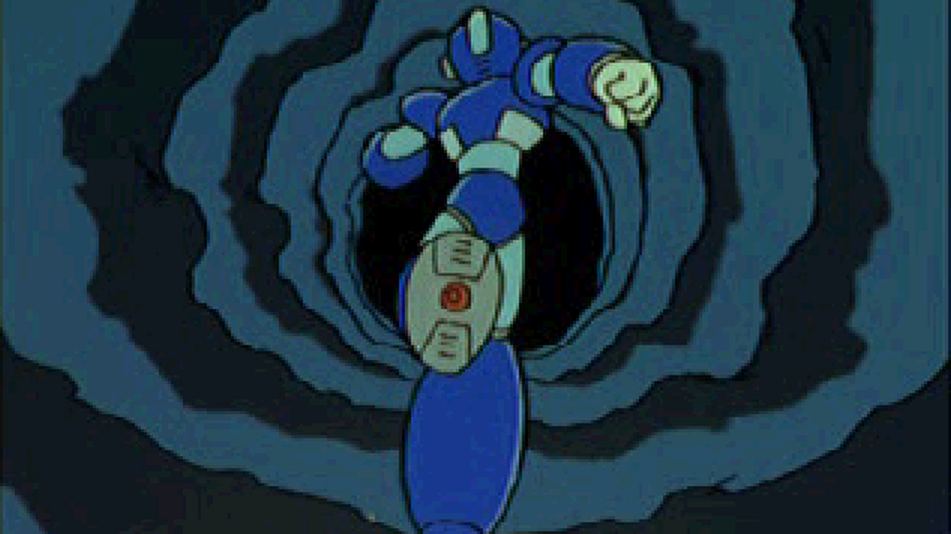 Part 4: Mega Man X1 (100% Guide)—Spark Mandrill, Flame Mammoth, Armored Armadillo (All Trophies) ABOUT "MANDRILL 4TH & ARMADILLO 5TH": This isn't safer, to be clear. Octopus 4th & Chameleon 5th gets you the armor earlier. It's just, you also get the Rolling Shield for the Angler Fish mini-bosses in Octopus, which kills them even faster than the Boomerang Cutters, and this route isn't *that* much more dangerous. Plus, you also have Octopus' weakness weapon, if you're good at hitting him with it. That's why I chose this route for my speedrun. REGARDING CHAMELEON STING: Each of the three prongs do twice the damage of what a LVL 1 shot would’ve done. It starts as one blast before splitting off, so you need some distance to enjoy its full power. This is the opposite of Shotgun Ice, where you want to be as close as possible. REGARDING ELECTRIC SPARK: This does 2 Damage to [1/2/4] enemies and 6 Damage to [2/4/5] enemies. It will split into two, if it hits a wall, with both sparks doing the same amount of damage. REGARDING FIRE WAVE: Does 1 HP every two frames, but does not work underwater. ENEMY LIST (Spark Mandrill): The three numbers are shots LVL 1, 2, & 3 Gun Volts (Big blue dudes): 16 HP (1/2/4) Hotarions (Flying guys): 1 HP Famingles (Flamingos): 8 HP (1/2/4) Rush Roaders: 6 HP (1/2/4) Turn Cannons (ceiling & floor mounts): 5 HP (1/2/4) Mega Tortoises: 16 HP (1/2/4) Ball De Vouxs: 4 HP (2/4/5) ENEMY LIST (Flame Mammoth): Scrap Robos (Blue guys with no legs): 8 HP (2/4/5) Scrap (Dragon heads): 12 HP (2/4/5) Sky Claws (Grabby guys): 2 HP (1/2/4) [These do not drop health] Dig Labours: 8 HP (2/4/5) Metall C-15s (Mettaurs): 2 HP (1/2/4) Rolling Gabyoalls (Pipe guys): 1 HP (immune to all but Rolling Shield) Hoganmers (Shield guys): 8 HP (1/2/4) ENEMY LIST (Armored Armadillo): Batton Bones (Regular bats): 2 HP (2/4/5) Batton M-501 (Retro bat): 2 HP (2/4/5) Famingles (Flamingos): 8 HP (1/2/4) Metall C-15s (Mettaurs): 2 HP (1/2/4) Spikies (Rolling balls): 2 HP (1/2/4; Will never die in one hit) Dig Labours: 8 HP (2/4/5) Metal Wings: 2 HP (2/4/5) MINI-BOSSES: Thunder Slimer (Mandrill): 48 HP (1/2/4) Damage: 4 (Lightning), 5 (Contact) Invincibility Frames:~ 0.116 seconds' worth (Storm Tornado=9-10 HP) Mole Borers (Armadillo): 60 HP (1/2/4; Weak to Flame Wave. Resists other weapons) Damage: 2 (Contact) or Instant Death (Spikes) Invincibility Frames:~ 0.083 seconds' worth (Storm Tornado=15 HP) BOSSES: Spark Mandrill: HP: 32 (1/2/3) Damage: 4 (Electric Spark), 6 (Dash Punch) 6 (Contact) Invincibility Frames: 1 seconds' worth. Flame Mammoth: HP: 32 (1/1/2) Damage: 0 (Oil), 2 (Fireballs), 2 (Fire Wave), 4 (Contact) Invincibility Frames: 1 seconds' worth. Armored Armadillo: HP: 32 (1/1/1) Damage: 4 (Head Beam), 6 (Roll), 6 (Contact) Invincibility Frames: 1 seconds' worth.
|
|
#
?
Feb 26, 2021 22:56
|
|
|
The first time I played this game I picked Storm Eagle and he destroyed me because one of his attacks is basically undodgeable without the dash. It kinda sucks! Looking forward to Skaizo's reaction to Flame Hyenard 
|
|
#
?
Feb 26, 2021 23:24
|
|


|
Did you explain how stages are different if you beat certain bosses?
|
|
#
?
Feb 27, 2021 00:03
|
|
|
Seraphic Neoman posted:The first time I played this game I picked Storm Eagle and he destroyed me because one of his attacks is basically undodgeable without the dash. It kinda sucks! Indeed. You can stay in the center once you've memorized where that is, but you'll definitely lose a few lives before you do... And yes, I too am excited for Skaizo's reaction to the spoiler .Scalding Coffee posted:Did you explain how stages are different if you beat certain bosses? Nope. Been having a hard time figuring out where to explain that, but... I think the revisits after Sigma 1 will be a good place.
|
|
#
?
Feb 27, 2021 00:28
|
|
|
Btw, important question—I'm not going too fast through these vids, am I? Or doing things you're not sure you could imitate? It's a walkthrough first and foremost, so if I'm going too quickly or giving you tips you can't use, that's important to know.
|
|
#
?
Feb 27, 2021 03:58
|
|
|
You did go fast in that speedrun.
|
|
#
?
Feb 27, 2021 04:10
|
|
|
Scalding Coffee posted:You did go fast in that speedrun. Hehe, thx ! But it sounds like the walkthrough vids are a good mix between fast and slow?
|
|
#
?
Feb 27, 2021 04:36
|
|
|
They are good.
|
|
#
?
Feb 27, 2021 04:41
|
|
|
Btw, I was actually really surprised by how that speedrun turned out. It's sort of a "no-no" to insist on a new speedrun category without actually being willing to do one yourself, so... Eventually I just set out to do one. Wasn't aiming for a good time or anything, just wanted one that'd' make a decent enough first impression. To me, that meant "do the Opening, Penguin, & Iceless Heart well, then do the rest without anything really bad happening"... It ending up 9 minutes off from the WR was a big surprise to me. Funny thing is, that's still 274th place on the Leaderboards! Crazy how competitive the game really is, huh? Fionordequester fucked around with this message at 04:58 on Feb 27, 2021 |
|
#
?
Feb 27, 2021 04:55
|
|
|
Today, we go over all the beginner strats! What to do if this Walkthrough is a little scary for you! This was inspired by NessEggman (on GameFAQS) saying his friends may be intimidated by some of the tricks I showed, so... Good on him! Also, this briefly goes over stage effects.  Parts 2-4 (Beginner Version): All Upgrades & Mavericks (with Achievements) NOTE: You should watch this if you have trouble following the normal Walkthrough. Otherwise, you can skip it without missing anything. ABOUT THE FRAME RATE: You must set Youtube to 720p for it to display the SNES' full frame rate. Otherwise, the flickering effects of stuff like the Rolling Shield aren't going to render properly  . .PASSWORD (NO ACHIEVEMENTS): 2221 2222 2222 Skips Opening, gets you x5 Heart Tanks, x2 Sub-Tanks, and the Arm Buster. Also defeats Armored Armadillo, Launch Octopus, Storm Eagle, & Flame Mammoth. [Still needs to get Penguin Boots, Kuwanger Heart, Chameleon Armor, Eagle Heart & Helmet, Mammoth Heart, Mandrill Sub-Tank, and Armadillo Sub-Tank & Hadoken] PASSWORD (ALL ACHIEVEMENTS): 2222 2682 2222 Skips Opening, gets you x5 Heart Tanks, x1 Sub-Tank, and the Dash Boots. Also defeats Armored Armadillo, Launch Octopus, Chill Penguin & Boomer Kuwanger(!!!) [Still needs to get Chameleon Armor & Heart, Eagle Helmet, Mammoth Heart & Sub-Tank, Octopus Heart, Mandrill Sub-Tank, and Armadillo Sub-Tank & Hadoken. However, you want to save Armadillo's stuff till after you beat Sigma Stage 1! You must also remember to knock off Armadillo's armor with Electric Spark, in the refights.] HADOKEN INPUT (Kills bosses in 1 hit): Down, Down + Forward + Forward. Roll your D-Pad to make that work. Fionordequester fucked around with this message at 02:31 on Mar 4, 2021 |
|
#
?
Mar 3, 2021 17:46
|
|
|
I mean the cannons in storm eagle aren't really dangerous, they're just annoying cause you need to methodically charge shot all of them if you're not using special weapons
|
|
#
?
Mar 3, 2021 22:40
|
|
|
Seraphic Neoman posted:I mean the cannons in storm eagle aren't really dangerous, they're just annoying cause you need to methodically charge shot all of them if you're not using special weapons True. I think I more just felt bad about damage boosting past them, just because I already learned the safe way to do so a long time ago. Great for a Let's Play... Not so great for a Walkthrough.
|
|
#
?
Mar 4, 2021 01:40
|
|
|
"As you can see..." *can't see half the time due to frame rate limitations* FeyerbrandX fucked around with this message at 02:23 on Mar 4, 2021 |
|
#
?
Mar 4, 2021 02:06
|
|
|
FeyerbrandX posted:"As you can see..." *can't see half the time due to frame rate limitations* ...Gah! I forgot to mention—you need to set the quality to 720p to get the full frame rate .
|
|
#
?
Mar 4, 2021 02:29
|
|
|
...It begins... Part 5: Mega Man X1 (100% Guide)—Vile, Bospider, Hadouken, & Rangda Bangda (All Trophies) REGARDING ROLLING SHIELD: It does x4 the amount of a regular LVL 1 shot. This makes it *just as powerful* as a LVL 3 shot. It does just as much as a full-power LVL 3 Buster shot, which no other special weapon does. Flame Wave and Storm Tornado do more damage overall, due to doing damage every frame… But Rolling Shield is shockingly effective against mini-bosses with invincibility frames and no special resistances (like the Angler Fish in Octopus’ stage). That’s why the speedrun utilized them against those things. This is also what makes them works so well against Vile. REGARDING THE LVL 4 SHOT: This tends to do as much as a LVL 3 shot at long range, but also tends to do only 1 DMG, at close-range. At least, that’s how it seems… To be honest, I have a hard time predicting when it will do good DMG, and when it will do bad DMG. Whatever it is, though, it’s sort of difficult to work with. I would recommend avoiding this until you need to earn the “Pretty (Devastating) in Pink” achievement. REGARDING THE CHARGED WEAPONS: Shotgun Ice—Creates a Penguin Sled that does 8 DMG Boomerang Cutter—Creates three giant boomerangs that each do 6 DMG [1/2/4] or 10 DMG [2/4/5] Electric Spark—Creates two waves of electricity that fly to the sides and do 6 DMG [1/2/4] or 3 DMG [2/4/5] every frame. Storm Tornado—Creates a vertical tornado that does 4 DMG [1/2/4] or 1 DMG [2/4/5] every frame. Fire Wave—Creates a trail of fire that does 1 DMG every two frames Rolling Shield—Creates a shield that negates many small projectiles (as well as random things, like Sting Chameleon’s tongue). Does either 4 DMG [1/2/4] or 6 DMG [2/4/5] upon contact. Chameleon Sting—Makes you invulnerable for a short period of time Homing Torpedoes—Creates five torpedoes that each do 3 DMG [1/2/4] or 8 DMG [2/4/5] ENEMY LIST (Sigma 1): The three numbers are shots LVL 1, 2, & 3 BOSSES: Vile: HP: 32 (1/2/4; No resistances or weakness) Damage: 0 (Stun Spheres), 4 (Knee Bombs), 8 (Contact) Invincibility Frames: 0.4 seconds' worth (Storm Tornado=2-4 DMG). Bospider: HP: 32 (1/2/3; Weak to Shotgun Ice; Resists all else) Damage: 4 (Small spiders), 8 (Contact) Invincibility Frames: 1 seconds’ worth. Rangda Bangda’s Left Eye: HP: 10 (1/1/2; Weak to Chameleon Sting; Resists all else) Damage: 2 (Eye Beams), 6 (Contact) Invincibility Frames: 1 seconds’ worth Rangda Bangda’s Right Eye: HP: 10 (1/1/2; Weak to Chameleon Sting; Resists all else) Damage: 2 (Eye Beams), 6 (Contact) Invincibility Frames: 1 seconds’ worth Rangda Bangda’s Nose: HP: 12 (1/1/2; Weak to Chameleon Sting; Resists all else) Damage: 6 (Contact), Instant Death (Spikes) Invincibility Frames: 1 second’s worth
|
|
#
?
Mar 10, 2021 11:39
|
|
|
Something I like about Bospider is how it behaves like a spider when you are directly under it and it drops right on you. Real spiders just want to have a look at you when swing by, unlike centipedes who use you as a fall buffer.
|
|
#
?
Mar 10, 2021 13:06
|
|
|

|
| # ? May 2, 2024 12:08 |
|
|
Scalding Coffee posted:Something I like about Bospider is how it behaves like a spider when you are directly under it and it drops right on you. Real spiders just want to have a look at you when swing by, unlike centipedes who use you as a fall buffer. Fun fact—it also stops in place and drops little mini-spiders, if you jump before it lands.
|
|
#
?
Mar 11, 2021 02:57
|
|