


|
My  In any case, it has many charms such as:
It has some other alright stuff. It has a weird old garage in the backyard that is my workshop:  I don't think it's original, because the interior boards are all common width rather than rough cut like the joists and studs in most of the house. At some point I may be asking for goon opinions/advice because it needs to be jacked up, have the weird cinderblock foundation fixed, and then brought back into square because half the studs are twisted and the sill plate is hosed in a few places. Once that's all done I might try and run electrical to it. It also has about 20 original, double hung sash windows. Last month I traveled to Hannibal, MO to learn about restoring old sash windows from Bob Yapp, who used have a show on PBS sort of like This Old House. He has something he calls the Belvedere school where he teaches all about restoring old houses: https://bobyapp.com/about-the-belvedere-school-for-hands-on-preservation/. I spent three days restoring a window alongside my randomly-assigned partner and three other two-person teams who also had their own window. It was frankly the hardest I have ever worked, including when I wrote about a third of my dissertation in one month so I didn't have to pay an additional semester's tuition. Since then I have been gathering the tools and supplies, and mustering up the courage to get started. Danhenge fucked around with this message at 01:57 on Aug 17, 2021 |
 #
?
Aug 16, 2021 03:49
#
?
Aug 16, 2021 03:49
|
|

|

|
| # ? May 9, 2024 08:47 |
|
|
Today was the day! In general, I'm planning to work on rear-facing windows first, because that way the ugliest windows will be the ones no one else sees. But one of the windows in my office needs re-roping, because it won't stay open when the weather is nice. So we begin: The first thing you do when tearing open a sash window like this is to pull off the interior stops, which are small pieces of trim around the inside edge of the window. They keep the bottom sash from swinging out of the window frame and makes up one half of the groove the bottom sash runs in. If you look closely, you can see a seam:  For this step of the process, I have a spray bottle of water that I use to mist all the parts of the trim that I'm currently loving with. The idea is that the water will cause any paint chips (which may contain lead) to fall straight down instead of spraying out in a fine powder. I do not know how effective this is, but Bob claimed he has never had a notably elevated lead level in his blood and he apparently always does this part without a respirator. First, I jaggedly and inexpertly scored the paint around the trim seam:  Next I grab a pry bar to wiggle the trim off:  For the interior stops, you want try start wiggling the trim off from the side which faces the exterior. You won't ever be able to see that seam from the outside unless you get up close and look for it specifically. The molding on the interior stop, if it's original, could be very difficult to replace if you gently caress it up really bad in the process of getting the trim off. You also want the slimmest possible pry bar, and this pry bar is truly not slim enough. This part took a while, and I went looking through my tools to see if I had anything better (I did not). Eventually I got it off. There are usually about five to six trim nails in a stop of this size, so you basically just work your way up and down the stop, carefully prying the nails and trim away from the window frame. I am going to be knocking the nails out of the interior stops and adding stop bead adjusters with screws later for easier maintenance. More on this in a future post. This sash was pretty big so it was hard for me to get a full picture of it, but a few things are of note. Whomever did the reglazing on this window the last time around did a gross, awful job. It might be hard to see in this photo but it's shameful and ugly looking.  It's probably that bad-looking because somebody used the bucket of dap glazing compound I found in the basement. When I get to glazing this window I'll be using a high-quality linseed oil based glazing compound instead. More in a future post. They also didn't bother to glaze the top part of the window???  Bonus shot of my favorite pair of cowboy boots, fresh from two-stepping to live music last night for the first time in over a year. It was some excellent blues rather than excellent country, but fiance and I no longer live in the land of excellent country music so beggars can't be choosers. Somebody also drilled an extra knot hole in each side of this sash at some point, god knows why.  Okay! With the interior stop off, I can pop open the weight pocket. I'm really interested to see if the top sash still has weights and if the ropes are intact, because at this point I am imagining the screw that's randomly placed in the window frame is holding it up.  The weight pocket is huge! The bottom screw was also spinning freely so I had to use the window piece to apply pressure to get the screw to come out until I could grab it with needle nosed pliers to pull it out. Inside...  Excellent! Both weights are in here and at least one of the ropes for the top sash is under tension, which means that the top sash is not just going to fall down immediately when I free it up. The next step is to pull out the parting strip, which is the plain-looking rectangular piece of wood between the bottom and top sashes. In some top sashes it'll be built in a way where one side is easier to pull out than the other. Easy side:  You can see there's a little bevel which left space for me to twist out the parting string. On the other side, no such bevel exists and actually kind of traps the parting strip:  As before, mist all the wood, start scoring the seams with a utility knife, and pry out the parting strip. This is one of those parts where I'm glad I took Bob's class, because I learned that breaking the parting strip is allowed and can sometimes be expected when restoring old windows. Obviously it's not great to waste old wood if you can help it, but sometimes you can't help it. Also, I think whoever worked on this window last hosed up and installed the parting strip wrong, because it was blocking the weight pocket on the right side. Manufacturing a new parting strip is easy, and in fact Bob advocates for making a parting strip that's just a little narrower than stock. So anyway, I broke the parting strip prying it away:  This is where I stopped for the night.  You can't see it, but I also ended up cutting through part of the left parting strip, because I accidentally started on the wrong side which didn't allow me to pry it out so easily and it was just sort of awkwardly wedged in the window. Anyway I cut the bottom of the parting strip off with my multitool. Because I am a huge baby with an abundance of caution, I had my fiance hepa vac the dust I was creating while cutting and we both wore p100 respirators while I did it. So, in the normal course of things, once one of the parting strips is free, you can actually angle the window out of the frame and pull the ropes free of the knot holes. However, I discovered somewhere through this process that the screw in the window frame had nothing to do with keeping the window up. I think it's just painted in place? But it's definitely painted in place on the outside of the window, which is a second-story window. I don't have a ladder that tall and I hate heights. One of my neighbors does painting jobs around the neighborhood and I've been meaning to talk to him about paint, so I may have to ask him to help me with this. I feel like an rear end in a top hat though, it'll probably take more time to set up the ladder and then take it down than it will to do the actual paint scoring. I also shot an e-mail to Bob to see if he had any bright ideas. Edit: Agh. I'm a dummy. Can I get the home improvement tag on this topic when a mod gets the chance? Danhenge fucked around with this message at 04:11 on Aug 16, 2021 |
|
#
?
Aug 16, 2021 04:04
|
|
|
Fixed the tag. Great thread-really looking forward to learning about this!
|
|
#
?
Aug 16, 2021 13:49
|
|

|
Kaiser Schnitzel posted:Fixed the tag. Great thread-really looking forward to learning about this! Thanks! Bob responded to my e-mail this morning before I ever woke up, suggesting that I take a block of wood brace it against the window and hammer around the frame to loosen it up. I think in his imagining, I'm working with old & dessicated paint and not relatively recent-looking oil paint. I tried it out and it didn't do me much good. What I ended up doing was wetting down the wood and then carefully cutting into the parting strip right about here:  I made sure I wasn't cutting into the window sash itself, and stopped just shy of the frame. Then I was able to use the leverage I had to break the wood right there and kind of pull it out, then I got a screwdriver up in the slot to pull the wood out until I could get one of my prybars between the strip and the frame and lever the rest out. Once I had more leeway on the left side I could wiggle the window a little more and just kind of pry the paint on the window's right side apart by main force. Unfortunately, the window is still painted shut around the top edge where I can't get at it, but I'm close to free. I may have to end up also pulling the rest of the top parting strip destructively to get it free. I'm headed to the hardware store(s) to see if I can find a pry bar that will help me accomplish this more expeditiously.
|
|
#
?
Aug 16, 2021 22:28
|
|
|
No luck at Lowe's. I'm guessing maybe my pry bars are slim enough, it's just that somebody did a more complete job of painting all this stuff than the poorly maintained slum apartment windows I was helping restore in Hannibal, so the seams between the various pieces are simply more difficult to get into. I also remembered to take a photo of the house, which I will edit into the OP as well:
|
|
#
?
Aug 17, 2021 01:57
|
|
|
One of the really stiff 5-in-1 painters tools might let you wiggle enough to get your prybar in? I�ve definitely seen painters free up windows with them.
|
|
#
?
Aug 17, 2021 02:42
|
|
|
Kaiser Schnitzel posted:One of the really stiff 5-in-1 painters tools might let you wiggle enough to get your prybar in? I�ve definitely seen painters free up windows with them. It's tricky because the "stuck" part is on the outside where I can't reach, and the groove is about a quarter inch deep so getting prybar(s) all the way in is tricky. I'll try my 5-in-1 tomorrow though to see.
|
|
#
?
Aug 17, 2021 02:51
|
|
|
I work from home, I did even before the pandemic started. I don't have a commute, so once I finished work I turned around from my computer and considered the problem. I decided that I needed to get the top part of the interior stop off to give me better access to the top of the parting strip. I just could not get access to the seam of the trim behind, so I very gingerly put the corner of one of the slim pry bars near the bevel where the two pieces meet and I tap tap tapped it until the piece started to come away. I pried it off without any obvious damage, although the trim nails went through the piece rather than coming off. Oh well. If it looks bad I can fill it with epoxy later. Next, back to the parting strip on top. Fiddled with my 5-in-1 a little bit but couldn't get that to work. So eventually I gave up and just grabbed my beefiest pry bar and a hammer and stuck one corner into the top parting strip and pulled. It came out without too much trouble, although I could quite get the leverage I liked and accidentally broke the top parting strip too. 3 for 3. Once again, I can only say "oh well." At this point I had assumed that I would be able to wiggle it free from the paint, but was not able to. At this point my 5-in-1 did come in handy because I was able to wiggle it into the gap between the window and the window frame on the right side and then rock it back and forth to widen the gap just a smidge, and I did this all the way along the edge. By the time I reached the left side I had a sizeable gap on the right side that I could get the hook end of my largest slim pry bar into and then just lever up to break the paint holding it in place! Success!  Truly a disgusting amount of paint holding this thing in place.  Now I could pull the window down and out of the frame. You an see one of the ropes held in the knot hold here:  Traditionally there would be a nail to hold the knot into the window frame, but whomever created this second set of knot holes just stuffed the knots in there. Bob had us secure them back into the knot holes with star-drive screws, which I will probably do too. You just have to be careful to aim the point of the screw away from the glass and into the "meat" of the sash stiles. Once I wiggled the knot out, I just gently lowered the weights until they rested inside the sash pocket. Even though these ropes are intact, I think I might replace all of the ropes anyway because I have no idea how old they are and obviously the lower sash ropes were broken too. Once the sash was free I took it down into the gross six sliding door Trex "addition." There's a gross amount of paint around the top edge of this sash. It also looks to have taken off some of the wood from the frame itself. That's unfortunate! But again, if I really want to, I can get some wood epoxy putty just proud of the plane of the wood and then sand it down, once I've taken all the paint off the window frame. Shot of the top of the sash:  One other weird thing that somebody did to every window in this house at some point in the past:  There's some sort of sheet plastic in the bottom of every single window. I cannot figure it out. My suspicion is that it has something to do with Maryland's requirement that for rentals to get lead certified. The bottom of many window frames will have a ton of lead dust in them if the windows are not well maintained or haven't been fully stripped. Nailing some plastic to the bottom right before the test might have been a way to pass the wipe test. I need to pull those nails out so I can expose the wood underneath fully. As I have said twice already...epoxy and epoxy putty to fill the holes, likely. These nails are pretty tight, I can't get my catspaw in there very well. Any tips? So what's next? Here's a non-exhaustive list:
 Supposedly the infrared heaters are a lot safer than heat guns, because when used properly they don't get the paint hot enough to vaporize the lead. Bob also made the claim that they heat up the sap & oil left in the wood and force any lead that's impregnated in the wood out in the process. I'm skeptical of this claim. We wore p100 masks while we did this part, just to be safe, and I'm planning to do that as well. I will also be hepa-vaccing regularly. Once I've bulked it free, I'll also be doing some dry scraping, although I want to minimize that. We used the speedheater 1100s in class which are a lot bigger and allow you to heat up long sections of the sash all in one go. However, these tools are expensive and my fiance requested we only buy one to start with, so I went with the cobra because I also need to...

There are a few optional steps that I've left out. Bob's full system involves routing grooves into the sides of the sashes, the bottom of the bottom sash, the top of the top sash, and into the meeting rail on the top sash. Then you screw zinc weatherstripping into the sides of the window frames, and fit the top, bottom, and meeting rail with rubber gaskets so that when you close the window the whole thing is more weather-tight. When I reinstall the parting strip and the interior stops, I'm planning to do it with screws rather than finish nails, which should make the removal process much simpler if I want to go back and weatherstrip everything later.
Simple, right?
|
|
#
?
Aug 18, 2021 02:07
|
|
|
I'm so grateful to you for doing this. My house dates to 1931 and has one broken pane in a sash, and one sash window where the PO cut the drat ropes and then painted it shut. I want those windows functioning again, and I'm looking forward to learning from you.
|
|
#
?
Aug 18, 2021 03:49
|
|


|
Arsenic Lupin posted:I'm so grateful to you for doing this. My house dates to 1931 and has one broken pane in a sash, and one sash window where the PO cut the drat ropes and then painted it shut. I want those windows functioning again, and I'm looking forward to learning from you. Happy to try and field questions too. I was contemplating someone trying to do this based on my posts and thought about "little" things I didn't document. Stuff like the fact that the I had to spend a lot of time using my utility knife on all the paint gooped up around where the interior stop meets the bottom of the window frame. Also how loud the nails are when you pry them out. And the fact that the interior stops are just really flexible. I'll try and get some shots of what they look like when I'm prying them out, because I think it would really scare me if I hadn't done it to one of Bob's windows first. Also, Scott Sidler has a whole video course on his website. It's not cheap, but it's probably cheaper than my whole trip to the midwest, and you can always buy the 30-day course when you start your first window: https://the-craftsman-blog.teachable.com/p/diy-window-restoration No idea how good it is or how it compares to Bob's hands on class. I was only medium-impressed with his "Old Windows In Depth" book so I can't be sure it doesn't give short shrift to important subjects. Also re: IR paint strippers...the Speedheater brand IR paint strippers are high-quality and very durable, but they are also quite expensive. Sidler has a newer product that uses ceramic heaters rather than bulbs, but is supposed to do the same thing. It's currently out of stock, but it's also much cheaper than either the Cobra or the Standard 1100: https://thecraftsmanstore.com/ir-paint-stripper/ Bob wasn't super impressed because he broke the ceramic plate pretty quickly on the one Sidler sent him. Hard to say how good the longevity or warranty will be. My window partner bought one and we've been keeping in touch, so hopefully I'll be able to pass along her impressions.
|
|
#
?
Aug 18, 2021 17:06
|
|
|
Not a lot of progress today. It's threatening rain and my power to the garage is all extension cords, so I'm leery of setting all that up until the threat of rain passes. I might do a little bit of scraping after dinner, we'll see. Did get the plastic and nails out of the bottom of the window frame. First I just took some scissors and cut a notch in the plastic so i could tear around the nail on one side, and then just pulled it up and it tore around the nails, until I had the window frame and the nails exposed. After that I could fit my big pry bar between the nail head and the wood and tap it with my hammer until I had it wedged and could swap it around and lever it up with the angled sided.  Based on previous experience I thought these were going to be big honking suckers, which is why I was contemplating picking up once of those forged crescent nail pullers, but it turns out they were teeny baby thicc nails.  In other news I bought a tripod for my phone to take video on, because I've decided some of this will be more interesting if you can see it in action and I LOVE attention. When I do get outside to do some paint stripping, I'll see if I can get some interesting shots of the IR heater + scraping in action.
|
|
#
?
Aug 18, 2021 22:44
|
|
|
Glad I'm not the only insane person out there. My windows are nothing special from back in the day; the stops are rounded bead, which was still available six years ago when I did the last round. I remove the stops using a paint scraper/putty knife; slip it in from the front & give it a twist, work up from the bottom. Once it's started you can get a flat-bar going.. I caulk up the joints between reassembly & paint. Your windows look to be a bit higher-end, so your caution is commendable. It never occurred to me to try prying the stops from inside the slide channel. That does not look like glazing putty; it looks like caulk, and I curse those who use it on glazing. drat you all to hell. I pulled the parting strips with Vise-Grips. They, too, were available; what ones were broken into too many pieces I replaced. Pre-drilled holes for the nails. I sanded the sashes and other wood bits with 60-grit outside to strip them, then finished with 120-grit. Could definitely smell the lead paint on a few; it's a smell that triggers childhood memories. None of the sash rope anchors were nailed in. The knot-holes were drilled angled slightly upwards towards the rope channel. I made new anchors where needed out of 10-ga single-strand wire which I wrapped around a 3/8"" socket wrench extension. Replaced all rope with sash chain so I wouldn't have to tear the windows apart when I was 75.
|
|
#
?
Aug 19, 2021 03:38
|
|


|
I hope it's not caulk. We'll see when I get to it. I removed some caulk from one of my practice panes. Horrible. If it's caulk I'll probably just break all the panes out and cut all-new glass. Like i said, there's a bucket of DAP glazing down in the basement so I'm hoping someone just did a terrible job of that.
|
|
#
?
Aug 19, 2021 03:59
|
|
|
Today was a bit of a mixed bag. I worked a little bit during lunch and after work on paint scraping and deglazing. For reference, here are the hand tools I used in conjunction with the cobra I posted earlier.  From top to bottom that's a boomerang scraper, a roller chisel, and a putty scraper. The boomerang scraper (as you'll see in a moment) is pretty good for removing paint on either of its two scraper sides. It can also leave nice jaggy lines in the wood if you're not careful. Thankfully I'll be scraping and sanding later so it shouldn't be too bad. The roller chisel can be really great for removing glazing, if you have great technique. If you have bad technique (I have bad technique) it can also be great for taking nice shavings off the edge of your glazing beds. Another oops. Putty scraper is what it sounds like, it's for scraping glazing putty. I started with scraping the paint off of the sides of the sashes where the glazing beds are exposed, so I wouldn't be loving with lead paint dust while I tried to get the glazing off. Also, the way that Bob taught us involved removing the glazing first as it gets heated up by the heater, but it wasn't working so well today. I'll try again later. So, here's a video I took of the paint removal process. https://www.youtube.com/watch?v=ZKWR3wY1w00 Enjoy the sounds of me breathing heavily through my respirator. The metal plates are just aluminum step flashing that I hammered flat with a mallet. Keeps the heat off of the glass and makes it less likely to break. Once the paint is bubbling and smoking slightly, it's time to scrape. Ideally you scrape in the direction of the grain-ish, but at a slight angle. I have the sash clamped to my bench so I can use both hands on the scraper. You're always going to have some sound when you scrape, but if you hear a sound like a scrape on a chalkboard you're dry scraping to the point where you're likely making lead dust. I think I got off at least 4 layers of paint and primer, maybe more! I sucked it up in our hepa vac as I went, trying to avoid spreading this crap all over the place. Note: You also have to be careful where you point the cobra when you put it down, since you could potentially start a fire. There's now a slightly scorched looking spot on my workbench. I might buy a small fire extinguisher. No picture of this, but I'll try later. I also don't have any good shots of me working on the glazing beds. This is in part because as PainterofCrap predicted, about half of the "glazing" was caulk. The side of the sash where I took a video of me stripping was all glazing, but the bottom was 95% caulk and the other side was 80% caulk. I had the smallest blessing possible under the circumstances, because the caulk was probably no more than a decade old and reasonable quality, so it still had some flex but wasn't completely sticky. It wasn't too hard to get off, but where it had been applied over older glazing the intersection of the two was difficult to work with without further damaging the sash. The other thing you have to be aware of as you go is that there should be glazing points holding the glass in set periodically into the wood. I used the pointy hooks on the boomerang scraper, and also sometimes just the flat part of the putty scraper to get them out. Whenever you're working with the glass, two of the things you have to be really careful to do is to keep your tools as parallel to the glass as possible and to not leave your tools on the glass absentmindedly even though it's a nice parallel work surface...  These are reasonably fancy glazing points, actually. I don't know why there are two types. Somebody at some point may have had a fancy glazing point gun, because those tiny diamond ones are difficult to put in with a hand tool I think. I'm contemplating getting one, because at ~$200 if I save a day's worth of effort on putting in glazing points later, I'll break even. And I could probably resell it later, if I wanted. Anyway, I spent a lot of time with the roller chisel and the putty scraper getting the putty off the glass. I also had to lift the sash at about an 80-85 degree angle so the glass was still resting in the sash and use my utility knife on the bottom of the glazing bed to help free it from the sash. The top part that was unglazed is actually a groove that the glass rests in, so I had to kind of lift it out and pull it back. Once it felt like it was coming free off the bottom of the sash, I lifted the sash up and push as gently from the bottom as I could, trying to find the spots where it was sticking to old glazing or caulk on the side of the glazing bed. It took a while, but I got it about 95% of the way free and then...pressed too hard and broke one corner...  Moderately frustrating! But also likely unavoidable that I break glass throughout this process. I'm going to hang onto that piece of glass because I might be able to cut it down for re-use later, most of the sashes in the house are smaller than that monster. I think there's only like 4-6 total that are as big as this one. In any case, the sash is free of glass and now I need to do bulk stripping of the rest of the paint and primer off this thing.  edit: do youtubes not embed? Danhenge fucked around with this message at 23:37 on Aug 19, 2021 |
|
#
?
Aug 19, 2021 23:35
|
|
|
Nothing happened with the windows the past couple of days. We drove a couple of hours to see fiance's parents yesterday, and then drove back today. We got a bunch of her stuff out of a storage unit at her parents, and we also grabbed this. A 50 lb 5-inch vise that rotates. It's 25+ years old because the owner left it behind when they bought the house 25 years ago. I don't know what I'll do with it or where I'm put it, but it's cool.
|
|
#
?
Aug 21, 2021 23:06
|
|
|
Still nothing on the windows, it's been super loving hot even in the morning when I get up so I don't want to be outside scraping the paint off of sashes. I finished something else, though. I swear it's more square than the perspective makes it look. Also sorry this floor is so gross. When we bought the house, my fiance absolutely hated the kitchen. It's like 70-80s super dated ugly mdf + melamine cabinet doors and drawer faces (as you can see around the new door). The curtains to the right are covering up the cabinets under the sink. That right corner was installed by an rear end in a top hat and it's clear that it's always been a problem location for opening and closing the cabinets, and that at various times the cabinet doors have like splintered off the hinges via the leverage they could get off of one another. So we agreed to the curtains under the sink and I agreed to build a new cabinet door for this spot. This new one is poplar stiles and rails with an MDF flat front. I only realized between the first and second coat of paint that we were probably using the wrong kind of paint for the cabinets, so this is likely to get beat up pretty badly pretty fast, in addition to poplar not being a particularly hard wood. If we're still living here in five years we'll probably be looking at a full kitchen remodel anyway, so this only has to make my fiance happy in the interim. I might still re-do this one and paint all future ones with Benjamin Moore self-leveling paint. We'll see!
|
|
#
?
Aug 27, 2021 23:52
|
|
|
Alright, it wasn't too hot this morning so I got out and did some more scraping for a couple of hours. First, I did bulk scraping using my speedheater, with attention to the molding profiles using a contour scraper. A contour scraper is just a carbide scraper with differently shaped heads and can help you minimize the damage to your molding profile. Here's a video of me working on the molding: https://www.youtube.com/watch?v=3AZn0v8jIrs After that, I busted out my Proscraper tool, which is essentially just a carbide scraper on a vacuum attachment handle so you don't spray paint/lead dust everywhere while dry scraping. You probably only want to do it with a hepa vac, although I know Bob just 16 gallon shop vacs with bags + hepa filters for his general lead dust cleanup. We didn't use a proscraper in class, I don't think they're part of his regular set of tools. I used the proscraper to do detail scraping to turn the sides of the sash from this:  To this:  Pretty exciting! Whatever lead paint is left on this sash will be basically completely encapsulated after I prime + paint it, even if the paint starts peeling a little at some point in the future. I also tried out dry scraping the top and bottoms using the proscraper because I don't have a great way to set them up to use the speedheater. It worked okay, but the top layer of paint on my sashes is not that old and is still in decent shape so it was hard to get through the first layer. I think with poorly maintained dry/chipping paint you could probably bust through the paint really fast with a proscraper. I think it would have been faster to use the speedheater and just vacuum the paint off the floor, for me. I still need to do a little bit of work on the glazing bed and the molding, as well as the corners where the paint is tricky to get out. There's also a spot on the top exterior side of the sash where the wood is a little bit water damaged. I need to back and read my notes and the window book, but I think if i put my liquid wood epoxy on there it should reinforce and weatherize the wood. The other weird thing I ran into is that there's a weird groove in the glazing bed just above the level of the glass that I haven't seen anyone talk about :  The white line is a slight groove. Total mystery to me! Maybe it's to help create the seal with the glazing? It's going to be a pain to clear the groove out. edit: Aha! The video wasn't loading inline because I had that option turned off. Danhenge fucked around with this message at 21:18 on Aug 28, 2021 |
|
#
?
Aug 28, 2021 21:10
|
|
|
Made some more progress today! I took Friday off because it was lovely and would give me a four day weekend. I had planned to work on the windows, but the whole work area was a total mess. I ended up taking a trip to the dump on Friday, and then one yesterday, and just doing general cleaning and reorganizing. I've been slowly winnowing down the pile of construction materials (garbage) left behind by previous tenants and owners. I finally decided that the weathered-looking decade old hardie plank wasn't likely to be used by us to replace anything so it went to the garbage along with some old pieces of shelving i finally decided wasn't salvageable. Now all that's left in the backyard are various metal objects that I can probably find someone to haul off for free on facebook marketplace. Anyway, I did a little more cleanup up on the bottom sash (no photos) and got started on the top sash. Before lunch I got one pane out:  After lunch I got lazy and it was a little hotter. After dinner I got two more panes out:  Two things slowed me down. The first is that this whole window is an obnoxious combination of glazing and caulk. I'm assuming at some point someone just caulked any failed glazing seams while the window was in place and then painted over it. Where there is still glazing, I'm getting a lot better at heating just right and then using the roller chisel to pop most of it out in one go. The middle pane of the three I got out was already cracked, so I wasn't super careful and managed to break it. Once I've had more practice getting panes out, I'll probably just smash any broken panes rather than trying to take them out carefully. That's what Bob did in a couple cases with caulked windows at the window class. I decided rather than try and heat and scrap the narrow bits of muntin I'm just going to dry scrape those with the proscraper. Speed heating is really good for bulk scraping, less good for delicate bits like that. In other news, I bought a vintage fletcher diamond point gun on eBay:  It was only about $80. If it saves me 3-4 hours of labor across all the windows I do, it'll basically pay for itself. At some point I may try to clean it and repaint & polish it. The craftsman blog guy sells refurbished versions of this driver for $200 a pop so if I decide to get out of the window game for good I can probably resell this for close to what I bought it for.
|
|
#
?
Sep 6, 2021 02:00
|
|
|
Just wanted to comment that this is a good thread and I'm really interested in how you're progressing. It's just that I know two facts about restoring old windows and both of them are wrong, so I don't have a lot to say.
|
|
#
?
Sep 6, 2021 02:10
|
|

|
Motronic posted:Just wanted to comment that this is a good thread and I'm really interested in how you're progressing. It's just that I know two facts about restoring old windows and both of them are wrong, so I don't have a lot to say. Thanks! I've been watching the thread views climb so it seems like people are interested. I'd be curious what your two facts are. I forgot to mention my other problem was that my lighting was set up so that it would be over my table saw and mobile workbench in the middle of the space, and not this side bench. So I was constantly casting shadows now that there wasn't any natural lighting. After I was all done I realized I have a tall Ikea floor lamp in my office that I don't use anymore because this house has actual overhead lights. I can probably take it out there and use it as task lighting.
|
|
#
?
Sep 6, 2021 02:14
|
|
|
Danhenge posted:I'd be curious what your two facts are. That was sarcastic, but my experience is mostly doing awful things with scrapers, pry bars and hammers to get painted over windows unstuck.
|
|
#
?
Sep 6, 2021 02:32
|
|
|
Motronic posted:That was sarcastic, but my experience is mostly doing awful things with scrapers, pry bars and hammers to get painted over windows unstuck. Sorry there was a huge whooshing sound while your joke went over my head. And yeah, I have a feeling I'm going to be doing a lot of that here too since I bet nearly every single upper sash is painted shut.
|
|
#
?
Sep 6, 2021 02:41
|
|
|
Alright, today was much more successful. Last week when I was having trouble, I was wondering if part of my issue was the edge on the roller chisel. I know I've dropped it once or twice like an rear end in a top hat, and some additional research about chisels suggests that they often come not-all-that sharp. Here's what it looked like when I was worried about it:  Since I have more money than sense I bought a diamond stone and a cheap honing guide. They got here yesterday and I tried my hand at milling the cheap guide to make it better by following a video by the wrangelstar guy but it turned out to be way harder than I expected. Even though I was unsatisfied with my attempt to tune the honing guide I went ahead and tried to sharpen the roller chisel. I was also pretty ambivalent about the edge I ended up putting on the chisel, so I didn't take an "after" photo, but today's results feel like it was at least reasonably successful. Here's a video of me cutting out both glazing and caulk: https://www.youtube.com/watch?v=_W2Bxs6fluA You can see the glazing pop out pretty nice at the bottom of the piece of glass, and then about 2/3 of the way up I cut into the caulk. Whomever "fixed" these most recently clearly just shored up the failing glazing with caulk. Anyway, as I worked today I felt like I got a much clearer sense of exactly how clean the glazing bed needs to be to pop out a pane. In the first few panes I spent a ton of time try to free up the bottom of the pane so I could pop it out when it was still trapped by glazing on the top. Today I was able to clear the glazing more swiftly and completely and just pop the panes out nicely. I only broke one additional pane, and I actually did it by putting too much pressure on it when I was clearing out glazing rather than trying to pry it free. So, five additional small panes out and the whole thing is clear:  One other detail - don't forget to label your panes as you go:  In case it's not clear, the extended tic-tac-toe box represents the 8 panes, the x is where that particular pane goes, and the arrow shows which way is up. Generally speaking, your panes will be interchangeable, but it's not always entirely true. Knowing which pane came from where can make it a lot easier to fit your panes back in later. Next I need to clean up the exterior side a little more with the proscraper, and then get the pane of the top, bottom, and interior side of the sash. It also looks like there's some water damage to the muntins on the uppers sash as well as some of the bottom edge of the bottom sash. The wood is still basically intact, just soft. I'll be shoring up the damaged-looking spots with liquid wood epoxy from Abatron. I'll probably show that off a little bit in the next week or two.
|
|
#
?
Sep 11, 2021 21:22
|
|
|
Worked on this a little more today. We went camping last weekend, so I didn't have any time then. The weather has really turned, so it's pretty nice out, I don't get as covered in sweat while I work out in the garage. Did some cleanup on the interior side of the top sash and the glazing bed:  The wood on that side is pretty rough. I've roughed up the fibers in a bunch of places, but I think there's also rot where the glazing failed previously (and possibly moisture trapped under the caulk). I'll need to reinforce it with liquidwood.  At least one of the muntins is loose against the frame of the sash. This thing really wiggles around. I'll have to figure out how I'm supposed to secure it, we didn't cover that in the class.  This is where I left ti:  Scraping the profile of the moulding without loving it up is pretty difficult, even with my profile scraper. It's also extremely tedious. It also doesn't help that the muntins are partially rotted & wiggle some. I don't think that these are bad enough that I need to look into having new window pieces cut, but the whole sash is frankly in pretty bad shape. It's going to get a ton of liquid epoxy and it has some gouges that look like they might have been filled with some low-quality wood filler in the past. I may dig them out with dental picks and refill with the epoxy putty that I have.
|
|
#
?
Sep 26, 2021 23:19
|
|
|
Epoxy will fix anything and it works really well under paint. You can warm it up a bit to make it thinner and maybe get some inside the joints of the loose muntins.
|
|
#
?
Sep 27, 2021 13:36
|
|
|
Today's update does not concern windows. Is the window still disassembled and I have just the storm window and a thermal curtain keeping the cold out? Yes. Do I want to discuss it? I do not. Our heating bill hasn't been outrageous, merely high. We can afford it, so I'm just going to take it as a lesson not to start taking a window apart any later in the year than July. My goal is to toughen up a little bit and spend more weekends out in the garage when it's at least in the high 40s/50s because if I'm doing some effortful I'm so out of shape that I get really warm pretty quick anyway. I actually wasn't going to post about this one originally so there aren't complete photos. Basically, at some point in the past, my house's Gary or some rear end in a top hat they hired left one of three wires in a junction box hanging out with one stripped end just kind of floating in the basement joists. The closer end is the one they left floating and exposed:  I had a lot of trouble getting it to focus but whatever bright spark did this just wrapped the hot wire in electrical tape and called it good. Unfortunately, the box that this all went to was directly underneath an old darkroom table that someone had abandoned inside the basement at some point. I didn't take any photos of it while it was still assembled but it was maybe 5'x2.5' in size and made of plywood with some kind of fiberglass coating on the inside to make it watertight. The legs were attached in perhaps the least sturdy way I can imagine, without any stretchers and mounted poorly to the underside of the "sink" part as opposed to having any independent structure. The restricted nature of the space and the fact that it was so badly build meant that it was hard to keep in one position once I started to take it apart, but eventually I managed it:  One interesting thing I learned in the process of fixing the junction box is that there are actually two kinds of old wire in this house. There's the piece I pulled down which has the paper insulation on the inside. Nearly all of those wires come out of the main panel in the west wall of the basement. Then there are newer wires coming off of what used to be a fuse box and is now a sub-panel mounted on one of the brick pillars near the center of the basement. You can see in this photo that it uses some kind of rubber sheathing on the inside:  Another thing the rear end in a top hat who did the wiring to this junction did was leave the ground wire snipped off almost all the way inside the sheathing. There was maybe a half inch of it free inside the box. Because they were an rear end in a top hat, they didn't secure the wire within six inches of the box. So I inexpertly managed to get at least a little more of the wiring inside the box and put something on the ground wire. I know it's not ideal that there's no ground coming from the box, but I know for a fact there are only three outlets on the circuit. One outlet is only two pin, and the other two are gfci's that I've already previously marked as no equipment ground. I can't really do anything about the state of the sheathing from the older wiring, because as you can see it's secured about an inch from the box and there's no slack in it. Still to do:
Slightly longer term, I'm considering buy some 14/2 and just running it back to the box myself. This circuit comes out of the sub-panel, so it's easy enough for me to turn off the power to the sub-panel entirely so there's not much risk of working with energized conductors. That way the at least part of the circuit will be properly grounded. I'm willing to bet whoever did most of the rest of the runs didn't leave any ground wire exposed though. ugh. Danhenge fucked around with this message at 23:46 on Feb 5, 2022 |
|
#
?
Feb 5, 2022 23:44
|
|
|
Still no window updates. Garage is getting sprayed with some sort of borate solution a week from tomorrow because of powderpost beetles in the framing. Feeling irritable about the garage so I haven't done as much work on there. Kind of makes me wish I had enough money to knock it down and rebuild because the thing is a mess, but the fiance and I are getting married this year. Also we are putting a new roof on the house. It turns out all our shingles are nailed directly to old cedar shakes: Fiance said she remembers the inspector talking about this when he looked at the attic. I had forgotten and assumed it was just the ugliest and most decayed OSB that I'd ever seen and not looked closely. We're working on getting quotes now, but obviously we're looking at a full re-sheathe. We also want to try and get a tax credit, because the home is a contributing structure in a historic district. So long as the Maryland Historic Trust agrees that we're still historic enough to be contributing, we can get 20% of the cost of rehabilitation projects (such as roof replacement, brick repointing, and rewiring) as a tax credit. Up to $50,000 in a 24-month period, and the tax credit is apparently refundable so we can even exceed her/our state tax liability. Nutty. The only tricky part is that the project has to conform to the secretary of interior's guidelines for rehabilitation of historic structures, and if we do anything that substantially messes up the historic character of the home in 5 years, they can claw it back. I need to call the MHT tomorrow and figure out what kind of ventilation we can do that might qualify. Anyway, the house has a Florida room that has had all sorts of bad stuff done to it:  At some point all of these windows could be be opened and had screens. They are now all mostly painted and/or caulked shut. We're going to work on fixing that someday, but today was a smaller project. The threshold of that door was chipping really badly and you could see the wood underneath on the vertical surface, so I got out my Proscraper and took off all the old stuff. The part of the threshold closer to the interior door had like five layers of paint (white, red, dark green/black, more white/maybe primer), I'm assuming some lead in there. Good thing I was wearing my respirator. I went ahead and used some of the exterior wood primer that we bought for the windows, and I'll paint tomorrow afternoon probably: 
|
|
#
?
Apr 3, 2022 20:48
|
|
|
Today's update is more in the realm of "fixing PO's bad decisions" than "restoring windows." A few weeks ago my fiance and i started exploring this lovely old deck on the side of the house, as we realized that it was slanting towards the house and therefore driving moisture towards the siding/the foundation. Not great. I posted about this in another thread, but whomever built the current deck appears to have built on top of a previous deck structure, and then hid their half-assed job behind some plastic lattice:  In the photo below you can barely see that at least part of this seems to be built on posts sunk into the ground?  But the part nearest the house just has the joists resting on stacks of beams:  So when I knocked off work today I decided I'd start stripping fiberon (not trex! it still has tags on it) decking off. I'm going to post it on facebook marketplace and see if anyone wants free dirty used composite so I'm not just throwing a shitload of plastic away, so I'm taking it off piece by piece. It seems like the decking was basically holding moisture into the wood. It rained on Tuesday, and the wood was still pretty damp to the touch:  Extremely rotted near the ends that are resting on the deck joists.  They used decking screwed sideways into the side of the deck to build a partial support for the top step/trim piece that was here. There were a layer of successive screws that were revealed as I pulled each piece off. These were not resting on the step below them, so the part of the step that was resting on this decking was relying on the shear strength of the screws, rather than the support of the structure below it:  The back edge is resting against something that's not siding - might be the sill plate? Maybe it's just part of the cladding. Parts of it are fine, I'm going to have to maybe put some wood hardener on it and paint over it.  Overall it sucks and is gross. I feel like somebody who really should have known better built this deck, because the composite is held on by trim-head torx screws that are all 1/2" too long and have some sort of weird plastic wrapped around the screws near the trex. Not sure what that's about. Pretty sure there are carpenter ants living in the deck too, very exciting to figure out the extent of that as I get deeper into this situation.
|
|
#
?
Apr 30, 2022 00:11
|
|
|
Composite is heavy!! I woke up this morning and ached way less than I imagined I would. My Klein gel-cushion knee pads that I got when we first bought the house are perhaps the greatest purchase of my entire life. Seriously if you're in the market for knee pads, check these out: https://www.kleintools.com/catalog/working-knee-pads-and-kneeling-pads/tradesman-pro-knee-pads Every other knee pad I tried on I could tell that the gel was just going to squish out of the way and I'd still be kneeling directly on hard plastic. These things are like kneeling on a cloud. Anyway, progress:  Partway through this afternoon's work, it occurred to me that I was doing this really stupidly. i was unscrewing as much of one piece of deckboard as I could and then prying it off for any screws that were stripped or spinning freely. So I methodically removed as many screws as I could and after started prying up deck boards. Also, shoutout to Motronic for constantly banging the drum of "impact driver bits are disposable" because I've tossed two in the process of pulling deck screws and I'm sure it's saved me a tremendous headache. I also decided to finally take down a horrible PVC planter you can see in this old photo:  I had to pull off the top of the rail so I could sawzall through the stripped deck screws that were used to attach it to the balusters. In the process, I discovered one of my most favorite structural details so far:  It's about time to start demoing the first layer of the deck. I need to see if I can rent a dump trailer or something, I don't want to take the rotted wood in the bed of my SUV all that much.
|
|
#
?
Apr 30, 2022 21:36
|
|
|
Pretty pooped. Took up the last of the composite and cut down most of the unsafety railing, and started taking up some of the rotted wood nearest the house: Joists are nice and rotten in spots:   Structural pallet confirmed Structural pallet confirmed 
|
|
#
?
May 1, 2022 23:15
|
|
|
lol what a mess. Looks like you're doing a good job there.
|
|
#
?
May 1, 2022 23:34
|
|
|
Motronic posted:lol what a mess. Looks like you're doing a good job there. Thanks! I think we might need to regrade this whole part of the yard, it looks to me like the ground (in addition to the lovely deck) slopes towards the house in way that's mildly worrying. What sort of contractor do we talk to about that?
|
|
#
?
May 1, 2022 23:49
|
|
|
Danhenge posted:Thanks! I think we might need to regrade this whole part of the yard, it looks to me like the ground (in addition to the lovely deck) slopes towards the house in way that's mildly worrying. What sort of contractor do we talk to about that? Any excavation company might have somebody that can stop by with a skid steer and fix you right up. Also an actual landscaper (not a lawn mower who occasionally plants some beds) would have some of the same equipment.
|
|
#
?
May 1, 2022 23:54
|
|
|
Motronic posted:Any excavation company might have somebody that can stop by with a skid steer and fix you right up. Also an actual landscaper (not a lawn mower who occasionally plants some beds) would have some of the same equipment. Hm. Getting it back there is going to be a pain. Might have to move a raised bed.
|
|
#
?
May 2, 2022 00:02
|
|
|
Weekends have been busy or gross, but I've kept at the demo piecemeal. Here's the support structure up against that sliding glass door:  Finally, it appears as though I've got a multi-tiered pallet structure:  The pallets are loving rock solid too. Only part of the whole thing that doesn't wobble at all.
|
|
#
?
May 14, 2022 02:54
|
|
|
Got down to the final layer, and I'm not sure if I actually have a pallet going on here or just a slightly ramshackle-looking original deck. It's not square to anything, but the four posts it's attached to seem pretty firmly in the ground.
|
|
#
?
Jun 13, 2022 22:53
|
|
|
Not a super interesting update, but I learned today that Citristripper is not really any easier than the heat approach for getting paint off of the muntins. I'm going to go back tomorrow and scrape the rest of it and then clean it off. I've decided that any nonfunctional surfaces, which is to say anything that doesn't rub or doesn't have a pane of glass going back into it can stand being a little less perfect. Particularly second floor exterior-facing stuff.
|
|
#
?
Jun 20, 2022 00:36
|
|
|
Alright! Since the last post I learned that Citristripper works a little better than I thought but you really do have to leave it for the full 24 hours for a tough job. Since the last post, we did indeed qualify for the historic tax credit. We got a new roof put on, with a solar fan and some passive vents in the back rather than a ridge vent. It probably won't keep the roof quite as cool as the ridge vent will, but it's better than what was there before which was literally just the hole and vent cover but no actual fan. Squirrels nested in it during the two separate Springs in the just over a year that we have lived in the house. New gutters went up Friday. I just realized I don't have any photos, I'll put one up later. Overall it was kind of a medium experience. They were not as careful about the landscaping as they claimed that they would be. They weren't reckless but fiance wasn't completely happy with how it went. They were also clearly not all that careful around the molding of the roof trim when they pulled up the shake part of the roof, it got broken in a couple spots. It's covered by drip edge. They also broke some of the cedar siding during the install, which wasn't entirely surprising, they were tiny triangles of siding on the side of the house where the tiny side gambrels come down the side of the house. We had some siding that is presumably leftover from when they roofed over the remaining covered deck that's been living in the garage, so we gave them that and asked them to fix it. They did a really bad job and just basically had inch wide seams with clear sealant all around it. In a couple spots the roofing nails went between the house trim and the side of the house and popped some trim. We called them up and had them came back and they pulled the roofing nails and fixed the siding. It's not beautiful but it's a lot better than before. The broken trim is under the drip edge and behind the gutters so I guess we'll just live with that part. We're going to have a local guy paint and he does some exterior trim carpentry so we'll probably have him put in some trim nails to re-secure the loose trim. I trust him more than the roofing guys. They did do a very thorough job cleaning. I haven't found a single roofing nail yet and I think they ended up cleaning up a bunch of loose screws and old nails that flew off while I was tearing up the old deck. That's a bonus. Over the long weekend, we (mostly fiance) did some work on one of the columns in the front, specifically the right column in the photo. They both have cracks running through the paint job, and the caulk around some of the bottoms seams has started to crack. Well, it turns out they're stave columns, which are basically columns assembled like a barrel: 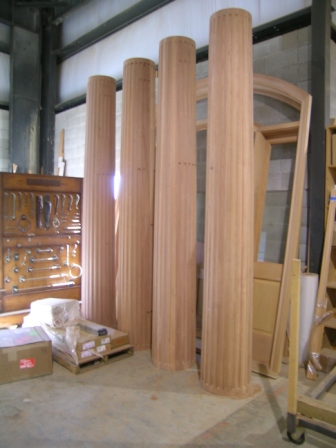 And they're coming apart, which is they the paint job is cracking. Somebody before us had clearly fill those columns with spackle/wood filler and then painted over, which is what we ended up doing because we weren't really in a position to take them down and fix them correctly over the course of a weekend. It also appears that the columns (or at least that right column) isn't structural, but it's also not cladding around some sort of beam?? When I dug out a bunch of the old cracking caulk there was a gap I could slide a metal ruler into easily and I could wiggle it around without hitting anything. I'm honestly not sure what's holding up the portico. I guess some are built into the side of the house? If we still live here in a decade maybe I'll take them down and fix them. I guess whatever glue was holding them together has long since disappeared. I want to get an architectural engineer out here one day to take a look at our cracked joist and make a plan for us plus and also to review the current jenga jack post setup that's holding up part of the front of the house were some ancient termite damage was remediated, maybe I can ask them about it. Finally, today I spent some time cleaning up the window sashes. They are essentially as clean as they are going to get. The molding on the muntins is really delicate and I essentially arrived at a point where attempts to get them scraped cleaner was just chewing up the profile. Here's the top sash:  The white globs on the center muntin and top rail are abatron woodepox, it's basically two-part epoxy with some sort of binder in it. It comes in two tubs and it's the consistency of playdough. They're two different colors and you mix it together in equal parts until it's all the same color. The top rail had a hole that seemed like it was filled with glazing. Probably not the worst, but not as good as the putty. The muntin had a huge gouge out of it before I pulled it down. I'm going to see if I can sand it down closer to the profile. We'll see how it turns out. Here's the bottom sash:  The dark part is a long bit of the bottom rail that seemed like it had some sort of water damage going on. I put some LiquidWood on it which is the liquid version of the same two-part epoxy which hardened it up nicely. Obviously it would be a little ugly to use on exposed wood, but since it's going to be painted, who cares? I'm not entirely proud of the job I did. Both of those pictures are after I did hand sanding and they look slightly better, some of the tool marks are gone or have been reduced. I also got rid of the jaggedy bits where I wasn't as clean with one of the carbides as I might have preferred. My consolation is that this is a second-story window so it'll be harder to see. One other thing Bob taught us to do around this stage of the work was to pin the mortise joints to stiffen them up a little bit. The "pin" was basically just a trimmed stainless steel trim nail. But I don't need to, because all of these clearly have already been pinned:   While I was working I also found an old rear end pencil label on the top sash:  Seems like it's near one of the original paint colors, I guess it might have been to keep straight where it was to be installed? The windows might also be 3 feet wide. Not sure. Finally, here's a shot of all the liquidwood I wasted because all my mixing containers are inappropriately large for my purposes:  Love to waste money and create useless plastic. Anyway I ordered some disposable mixing cups with smaller gradations for any future work. With the windows themselves I still need to:
Other remaining tasks before the window I started nearly a year ago is finished:
Optionally I might also put in some metal weather stripping but I haven't decided if I want to go all the way or just get this drat window in. I'm getting married this fall and have other stuff to worry about. I also want to re-do the spring bronze on the front door before it gets cold this year, so that might take priority. The current spring bronze was not installed very well and covers the hinges, and I need to get to the hinges so I can try and fix that it sticks when the house is cold.
|
|
#
?
Jul 11, 2022 03:02
|
|
|
Alrighty, more updates. Here's an exterior shot of the house with new roof and gutters: I need to get some extenders for the downspouts but w/e it's cheaper to do it myself than to get them back and ask them to do it for me. Trying to fix damage from somebody before me on the chewed out muntin went OK:   If I'd left it a little more proud and spent more time on sanding it might look better but I think it's an improvement. From a distance it'll look like the profile got chewed up a tiny bit rather than scooped out entirely. EDIT: In these photos I can also see what I didn't see so well before I started priming which was that I didn't do a particularly good job sanding the trim side of this window... Next I attached side rails:  These are just a 1x6s cut in half lengthwise. The sashes themselves are about 1 1/2" so I just put the sash up on 2" spacers and then clamped them up, scribed the center of the wood and then drilled and screwed in some 2" screws very carefully.  What's the point of these? Well, they serve a couple of purposes. First, it lets you prime both sides of the sashes at once without waiting for one side to dry. Secondly, you don't ever prime or paint the sides of the sashes where they have contact with the window frame, so this helps keep primer off of those sides. I'll probably have to scrape a little off the sides later, but that's ok.   EDIT: I forgot to note here that I vacuumed both sashes with a brush attachment and then used a tack cloth to get any lingering dust particles off the sashes. Prep is key, even if my sanding turns out to have been mediocre in spots. Several hours later, both sashes are primed. I don't have pictures of the bottom sash but whatever, trust me, it's primed. Holy poo poo was all the fiddly trim on the top sash a pain in the rear end to prime. In particular you want good coverage on the glazing beds where the putty will go, because if not the dry old wood will suck all the oil out of the glazing putty and make it fail sooner. That's one of the reasons you prime before you put the glass back in, to get the glazing beds covered. Some people will just put linseed oil in there, but this seemed as easy as anything to me. I think maybe I need to explore latex exterior wood primers a little more. Bob Yapp is the kind of guy who learned how to do everything one way 30+ years ago and it takes a lot for him to change his mind. He hammered home that we needed to use oil-based primers, so I used Benjamin Moore's exterior wood oil-based primer. I'm not sure that it matters so much anymore. Reading a bit, it seems like water based primers have improved a whole lot in the past few decades. Maryland's VOC control laws mean that I can only buy the primer in quart rather than gallon buckets. Any spectators out there with paint know-how, I'd be curious to hear your thoughts. Also, I know I'm not the world's best painter. I did my best to go back at least around the big frames and clean up some of the brush marks but I dunno how it's all gonna look at the end of the day. What's next? Well, glass has to go back into the sashes on the sash side. I need to clean up the globbed up paint on all the old trim pieces and in one case I'm probably going to have to carefully glue it back together. I also need to clean up some of the interior surfaces of the window:  You can see where the top sash was painted shut here. Layers of paint + small amounts of wood came out in the process of freeing it up. That all needs to get cleaned off to allow the top sash to move freely.   Many layers of paint where the top sash would move in the bottom half of the window. That trim piece right up against the aluminum storm window is what broke when I was getting it out. Somebody used a ton of clear silicone to seal it up, maybe when they put in the aluminum storm windows so getting it out was a pain. I have no idea where I'd find a replacement, because it's a pretty unique looking piece so I'm just going to carefully clean all the paint off and try and titebond 3 it back together. It seems like maybe it was related to some sort of screen or storm window system that's long gone now. I've actually started to try and get the paint out of the window frame, but I didn't like how it was going. I used the proscraper vacuum attachment at first but I felt like it was making more dust than felt safe. I was wearing a mask, but it would be easy to track that poo poo all over the house and I hadn't put down any plastic. The really old stuff scrapes off easily, but a lot of the newer paint simply would not come up. Someone did a really good job with their paint + prep and so it's actually got great adhesion at the moment. I'm going to have to bring the speedheater cobra up and use to try and carefully remove the paint. Then I'll have to prime, and I will almost certainly use some sort of exterior non-oil primer for that because this room is my office + where my personal desktop is so I'm not going to wait a full day for the brain-killing fog to lift out of this room. Danhenge fucked around with this message at 20:48 on Jul 16, 2022 |
|
#
?
Jul 16, 2022 20:41
|
|
|

|
| # ? May 9, 2024 08:47 |
|
|
LOL well I went to the orange store just now to buy some extenders and stainless steel sheet metal screws but by the time I got home it was raining. In one case we probably don't need the extender as bad as I thought because the velocity of the water shoots it into the concrete drain thing even though it ends a couple inches short. One corner definitely needs the downspout extension. The "best" part was unanticipated though. Fiance called me into her office saying "you should come look at this water situation." https://www.youtube.com/watch?v=8Mq08O2ZxpY Hm. Ok. I went around to the covered deck area and leaned out one of the deathtrap sliding doors with no stairs to capture this: https://www.youtube.com/watch?v=-7njDSfkR-U Beautiful job. No notes. Danhenge fucked around with this message at 00:07 on Jul 17, 2022 |
|
#
?
Jul 17, 2022 00:01
|
|