


|
DACK FAYDEN posted:if you're on pc you can just whip up a quick autohotkey script, takes like ten seconds to just do something like this crap I had lying around for when I was playing some crappy browser game:  Psion posted:at this rate I don't trust that there won't be a Scenario E, F, and probably G so you never know...
|
 #
?
Sep 1, 2022 09:04
#
?
Sep 1, 2022 09:04
|
|


|

|
| # ? Apr 29, 2024 01:07 |
|
|
Hi everyone and welcome back to Linda4! 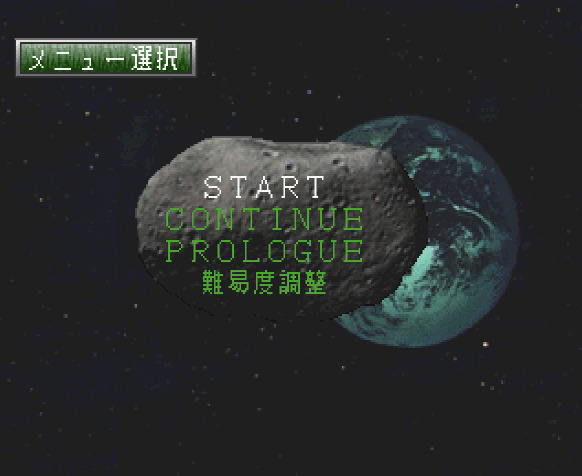 Last time, after finishing Scenario C, we ended up back at the main menu, whereupon...  ...we discovered the existence of a secret Scenario D! As you might imagine, it's triggered after successful completion of previous scenarios. It DID NOT in fact exist in the original PC Engine version--this is one of the additions in the remake version! So, let's select it and see what it is. 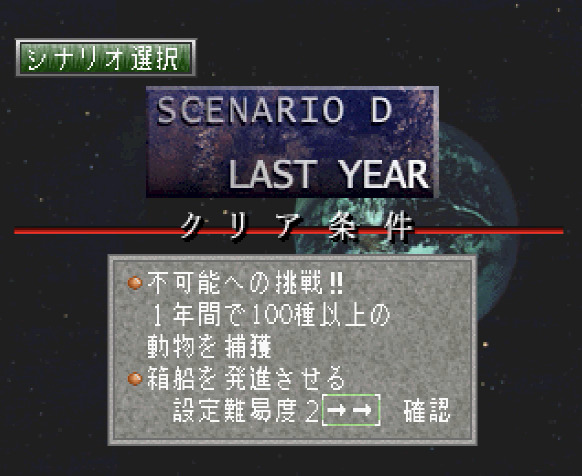 Here are the conditions: - The impossible challenge! Collect at least 100 animal species in just one year! - Take off with the ark. All right, so the basically the idea is if you thought that Scenario C had too much plot, then this is for you! Except there's one catch. You have to fulfill the conditions of Scenario C in just one year--specifically the last year starting in Summer 1998! Well, you might ask yourself, but how is this possible? At least some of the animals in Scenario C we received as quest rewards and it all seems like it would just take to long and be actually impossible--not to mention some animals are already extinct by this point--and besides, aren't most people already gone from the planet by Summer 1998? Yes, that's all true, but the game has thought of that, as we'll see in a minute! Incidentally, this scenario always plays on "normal" difficulty. If you try to use another difficulty the game tells you that in the interest of fairness, everybody has to play this one under the same conditions. Neat. To be clear, it IS indeed possible to get all 120, even if we do only have one year to do it! You just have to plan things carefully--I will describe a couple of ways to deal with a tight time limit as we go. In any case, our goal here certainly is to get up to 120 if we can. So let's see how we manage! Maybe there's an extra reward for all 120? Who knows! Let's get started. As always, we start just as... 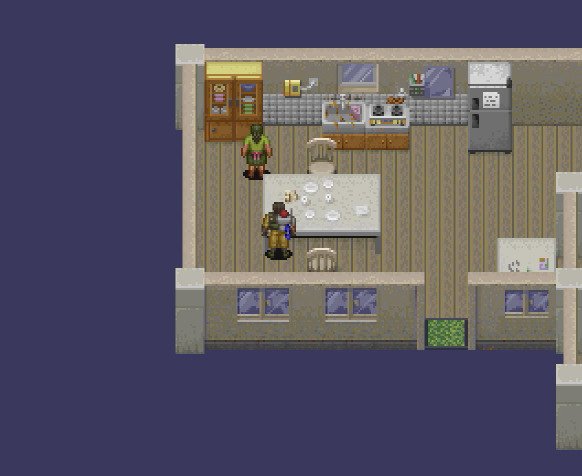 ...Ken is finishing his breakfast at his mother's house!   You! Do you think this is some kind of an extra time trial mode or what! You! Do you think this is some kind of an extra time trial mode or what!And, well, that's about all the plot we're going to get in Scenario D. So let's go out and start collecting. 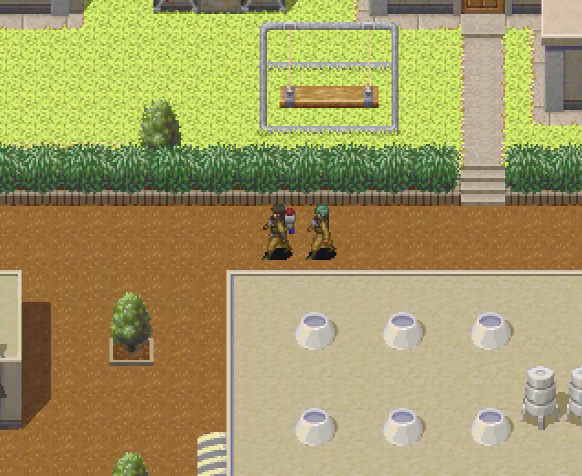 Linda is again with us from the start, as you might expect. All right then, first of all, let's check how we're doing. 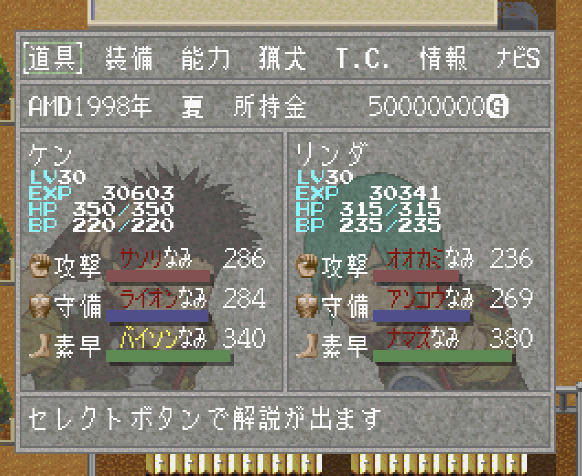 So, actually, we start under the following conditions: - Both characters start at level 30 - Both characters have a starting dog weapons and equipment - All abilities are already learned (including those from the eight rings) - All teleporters are already activated - All shops are already closed As you can see, the game is definitely throwing us a bone here, so we don't start from level 1, but instead with "fully equipped" characters. Another thing you might notice is that we have 50 million G in our pocket. That's because all the shops are closed already, so there's no way to sell any excess animals/items to earn the money--but you still need money for Bird Line shoot service and the items they sell (one of which you'll definitely need multiples of). In any case, 50 million is more than enough for this. But, there's another thing. If we check our TransCargo backpack: 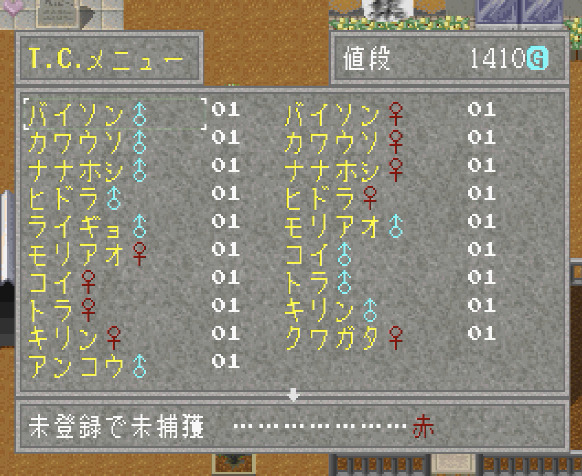 ...we can see that there is already some stuff here. Here we already have things like: - Animals which are a bit of a pain to get to, such as ladybird or carp--this latter one means we do not have to spend time traversing Tricross at all, which is great relief. - Animals you get from quest rewards, such as giraffe and female stag beetle (although giraffes are actually possible to get in Gapia) - Animals which we can't get for other reasons (e.g. male anglerfish, because the egg incubator facility is closed) - Animals which go extinct before 1998 (these are bisons and otters) - A couple of other random animals such as tiger or hydra, which are not particularly difficult to get, but we're given them anyway.  Checking outside with the left luggage office, we find also... 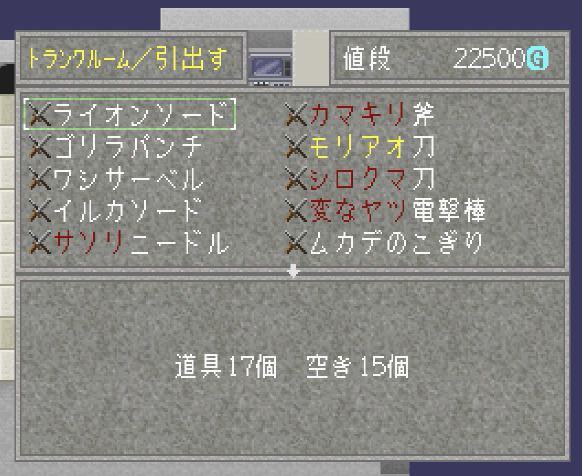 ...that the game has left us a whole bunch of different weapons in storage. Notably, there is one eagle sabre here, which I equip on Ken immediately. We will make a second one for Linda later on. Unfortunately, the left luggage is still subject to you losing access to it as employees leave the planet, so anything you plan to use you probably might want to get out of there now. In particular, you should take out the squirrel needle because of that one enemy (the shining guy/firefly) who has only 1 HP and is hard to catch with any other weapon. Other weapons are not super critical--eagle sabre carried us fine through to the end of Scenario C, so no reason why it can't do the same here! In addition to a bunch of weapons, we are also given all the keys in the game sitting here in the storage. Of course it's only items which are hiding behind doors, but they're there if you want them. We probably won't bother. As far as the dogs are concerned, since you obviously can't buy any, you are also given four dogs. They are at levels 5, 10, 15 and 20, so that you can use them as needed. Again, we probably won't as it only makes things messy as you don't know what the dog will do. So as you can see, this challenge is not quite so impossible as it seemed at the start as the game does play "fair" and provides you all the tools already so that you don't have to waste time. There is definitely one final gift, but more on that shortly. All right, now I think we've gone through all the preamble, so now we can really start gathering. From now on this will be in a kind of a summary style, since we've already seen all the towns, dungeons and animals (e.g. I won't really spend time on dungeon traversal unless there is something special). I will also go into a few more technical details regarding the game's mechanics/inner workings here and there which I didn't put in the main LP as the updates there were already ridiculously long and wordy. Step 1. Shannai We'll start our hunt up north in the West Area, for reasons I will explain shortly. For now, we head to Shannai. 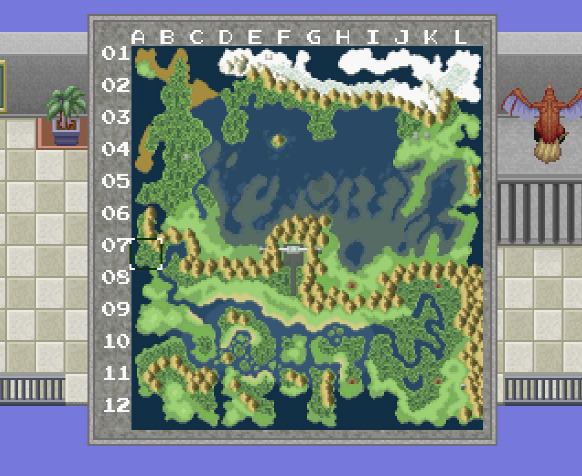 Just use shoot service. It's important to minimise the time spent walking on the overworld, since that's when the time passes the fastest. Therefore always when you can, use the shoot service to get directly to a particular location. You have more than enough money. This would probably be a good minute plus walk from Battle Park (the big place in the middle at F-07)--the time you DO NOT have to waste. So just shoot there directly! 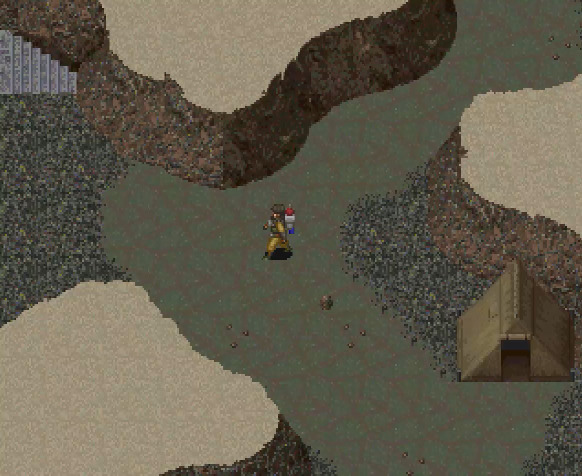 In here, we catch the following: 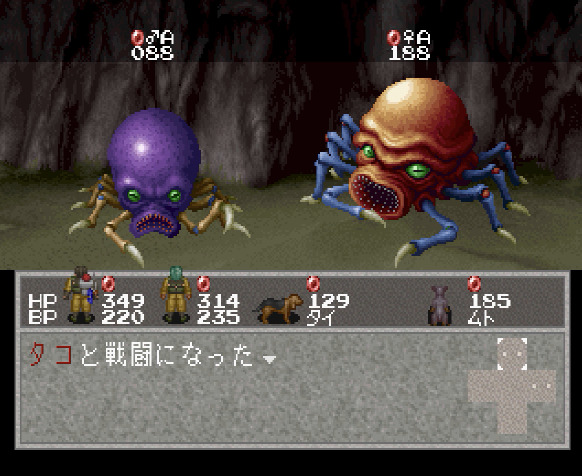 Octopus. They're running around everywhere on the lower level, you will find them easily. 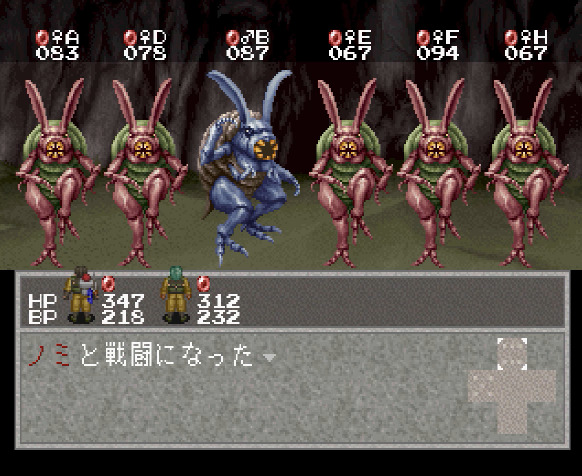 Flea. As usual, they look like little dots on the screen, so look closely. Against very low HP enemies like this, Linda's Snow Blizzard ability might come in handy, as it deals very small damage, but just enough to knock these guys out in a couple of casts. Since you can't sell the animals, unless you need them to make a weapon or process into meat, you can just get rid of any extras.  Tanuki. They are a bit rarer here, so you might have to wander about a bit to make them spawn. Don't spend too much timg walking around, rather if they are not showing, reload the game and try again. There is one other trick to "make" an animal appear, but I'll discuss it later. There's another species in Shannai, but we can get it later without passage of time, so we'll do that. After this, we simply use the "escape unit" consumable item to immediately leave the dungeon without needing to walk all the way back out (the item is sold by the Bird Line counter). Then we can use Ken's "whistle" ability to return straight to Hardia and the ark.  If we go and hand this in at the ark...  ... we find here an interesting situation. Although we have only 12 complete species (these 3 plus the ones we got in our backpack as "gift"), we actually have a total of 71 animals. What this means that we have around 40-ish or so "single" animals ALREADY registered at the ark, for which we only need to find the animal of other gender. So as it turns out the "impossible challenge" is just a touch less impossible than the game was trying to make it seem. I believe these are among others a few species which have a stronger seasonly variation in genders, so the "rarer" gender is already registered here so it would not hinder you in your time trial. Anyway, on to the next step. Step 2. G-Factory and surroundings area 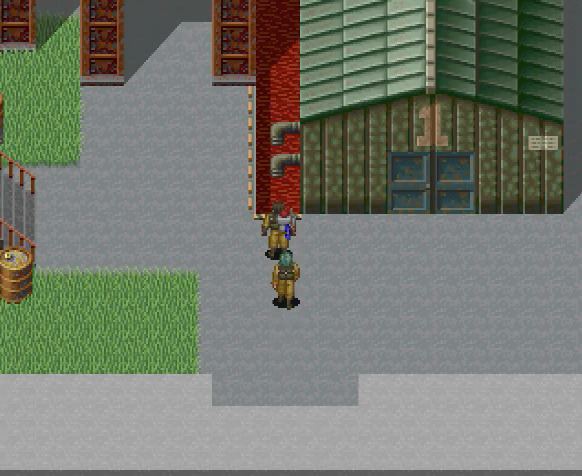 Since G-Factory counts as a town, the time does not pass inside of it, so you don't have to rush. 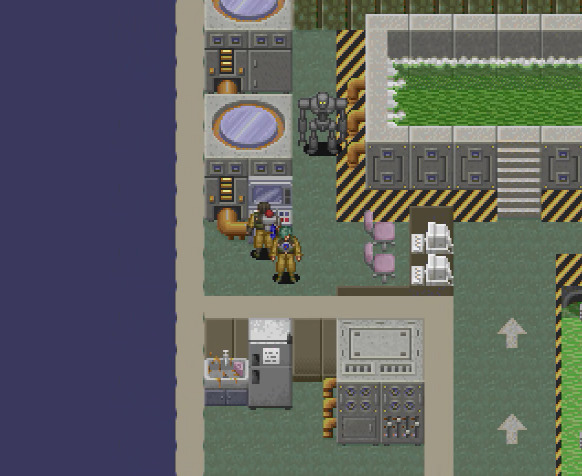 In any case, the only thing to be found here is this computer which gives you a pair of ducks from the cryogenic storage!  Ouside, though... 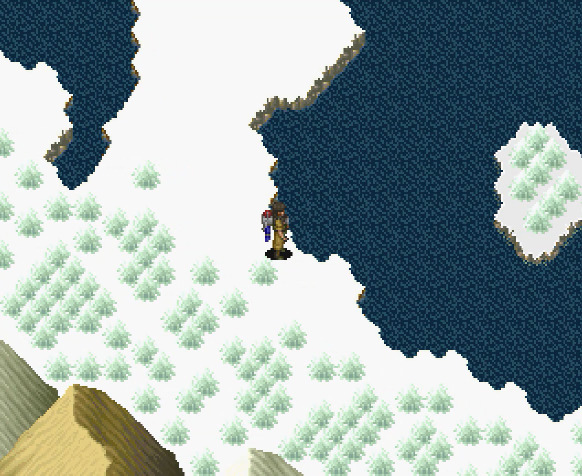 ...we had over to the whale island and make it come to us in the usual ways. 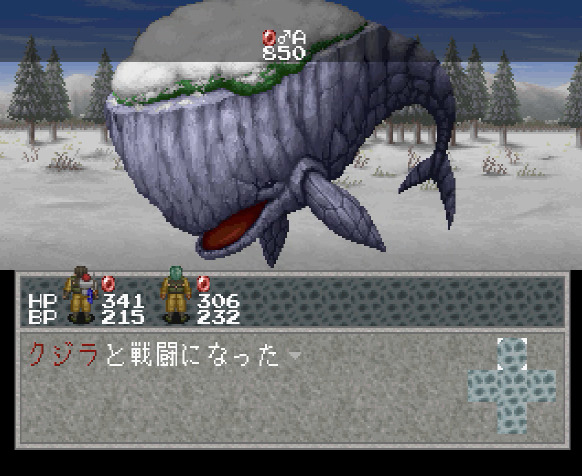 Unfortunately, because it's not winter, we only get a male this time. So we'll have to come back later again. There is a certain probability for female to spawn even when it's not winter, but it's small. You can reload the game and try a few times to see if you get lucky. Anyway, they are pretty strong, so make sure you buff yourself properly with Linda's ring abilities. Here you can definitely use your strongest abilities to fight them--no danger of overkill for sure. Once you've dealt with the whale, we can find a couple more animals here. 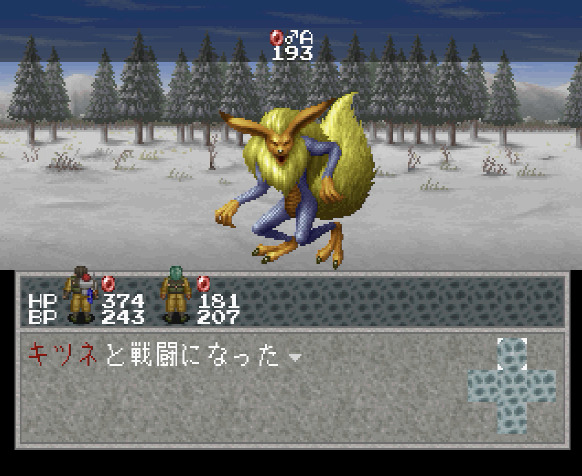 Fox. This is only a male, of course, but that's fine in this case, since the female is already "preloaded" in the ark. 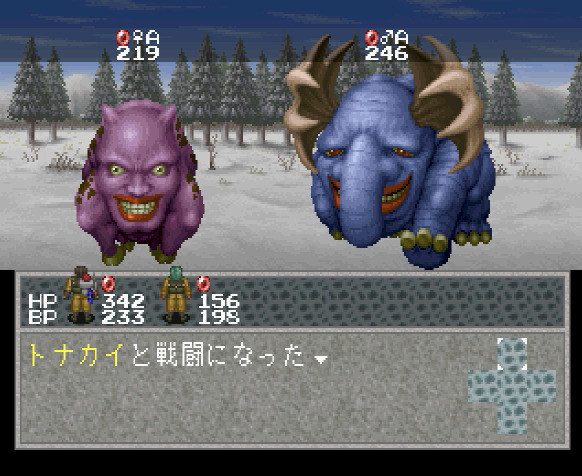 Reindeer. They don't appear when the whales are around, so go into town and back out to make them spawn. As a side note, it is a good idea to start with the West Area like this. The reason is of course whales and pandas. Whales appear only once per season so you may need some time to catch a female. On the other hand, pandas appear only after you've caught all other species in the West Area, so you also might want to get a head start on that. Step 3. Swallowm 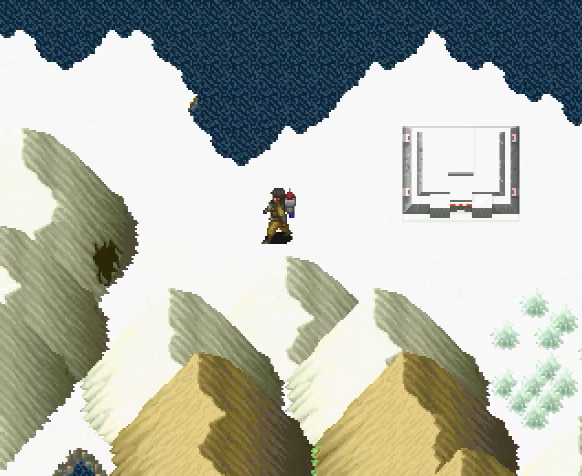 It's actually right next to G-Factory. 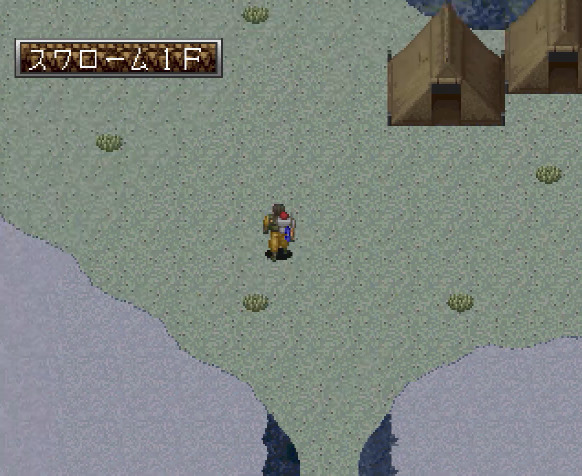 Just make camp anywhere near the entrance. Both species we want from here can be caught by getting ambushed by them (which is usually the fastest way, when possible). 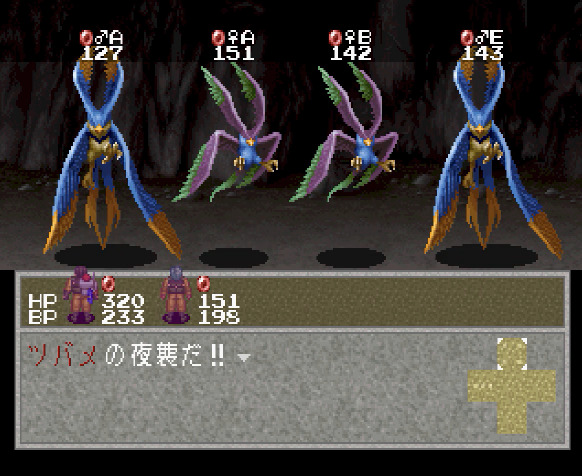 Swallows. No need to do the dance with getting rid of rats first. They're already here, so you can just capture them. 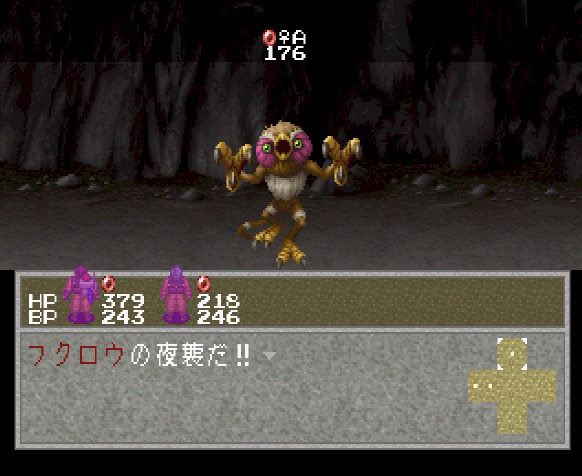 Owl. The picture shows only female, but both genders appear here regularly, so no issues there. Do NOT use wind based attacks on them as it will heal them! By the way, you can assume that between each two steps I go to the ark to hand in the animals. As ususal it grows your stats a bit every time you do. Step 4. Uruma We're still in the West Area, by which I mean we're in the north. 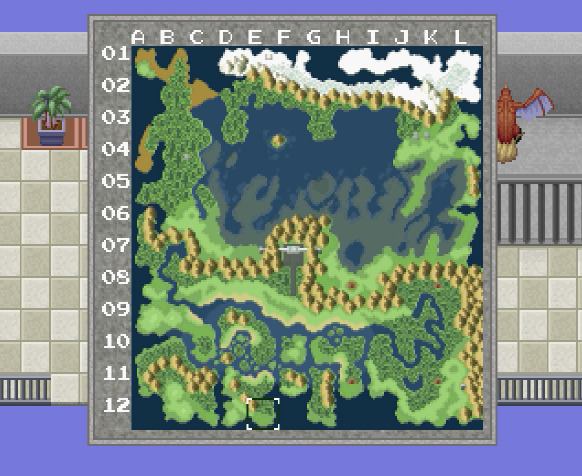 We're taking the shoot service down to the entrance of this cave, right here. 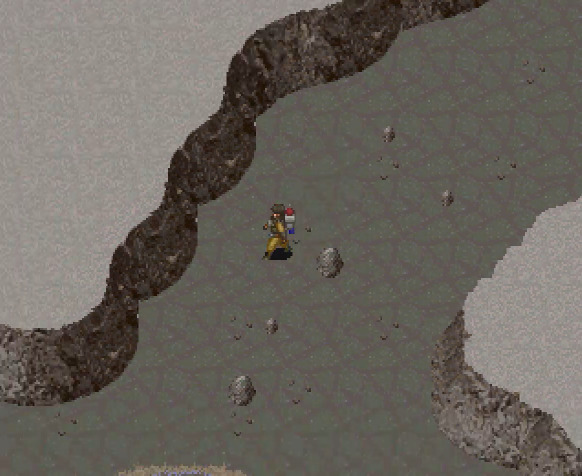 Here we have a few species to catch. 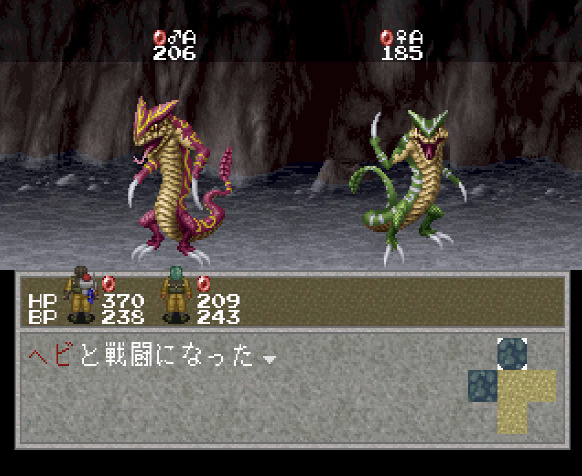 The viper. 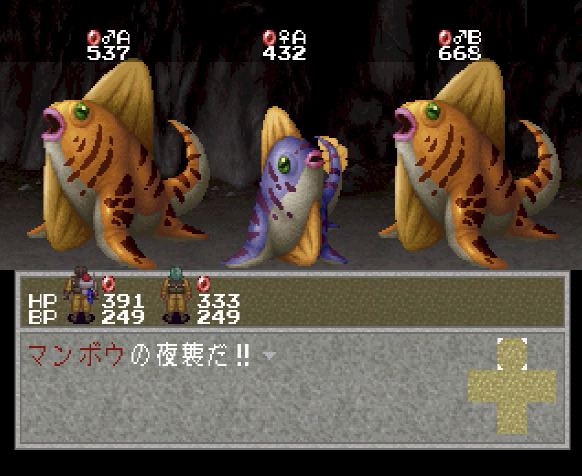 Sunfish. They do appear directly in the cave, but for some reason they don't spawn so readily. However, I've had good success with simply letting myself get ambushed during the camp, so I think that's probably the way to go here. 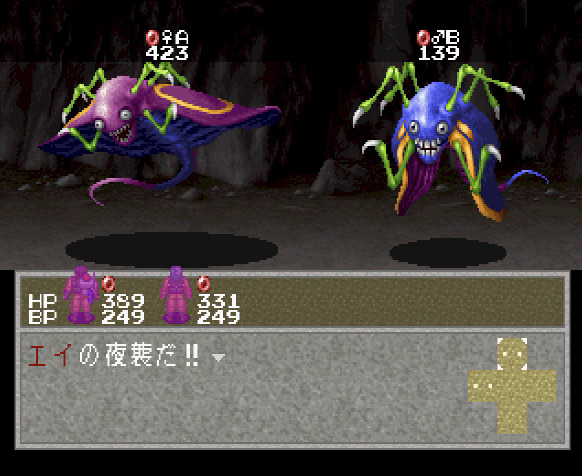 Stingray. Just let yourself get ambushed on the lower level of the cave. 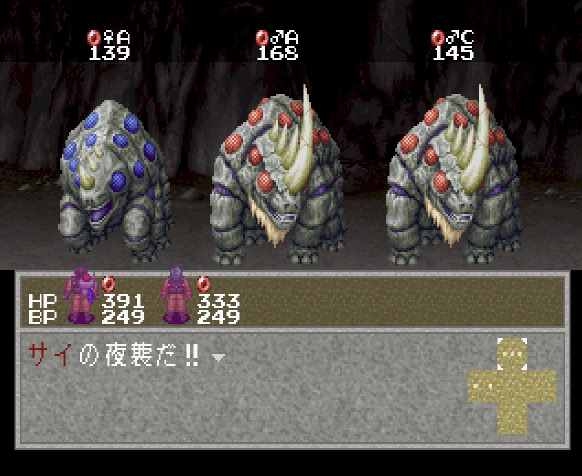 Rhino. Same strategy as stingrays to find them. For enemies with this kind of HP, Ken's "fainting shout" ability is perfect. Not only does it do just the right amount of damage, but it also has a side effect of paralysing the enemy for a few turns. Did I mention that it also hits all enemies in front of you? So if the damage is not enough, at least they won't be able to run away. It's the perfect ability for enemies wtih 150-300 HP or so (above 300 you can usually just use your normal attack). Step 5. North Kamenos 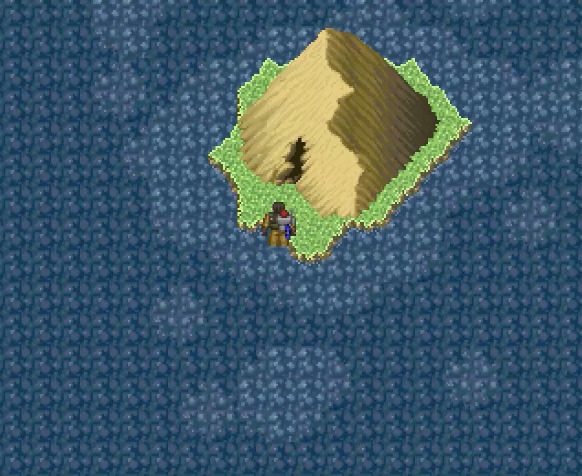 We're still in the north, and it's this thing here on the little island. 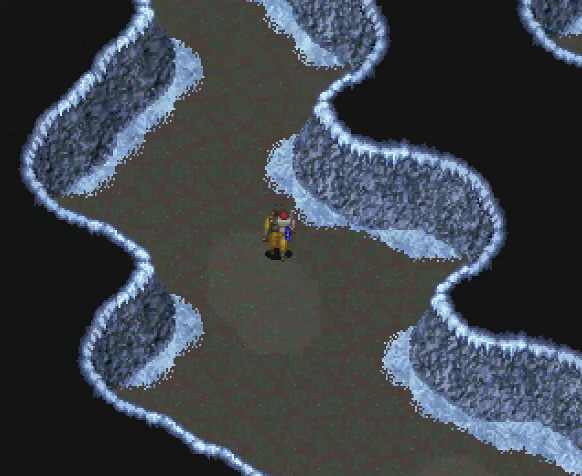 It's the "icy" dungeon. The goal here is to get to the bottom level as quickly as possible. You might encounter foxes, turtles and dolphins on the way. If you didn't already catch a fox, you can do so here. Don't worry about turtles and dolphins, there's an easier way to do those two a bit later. On the bottom level, you want to find the following two:  Northern sea lion. 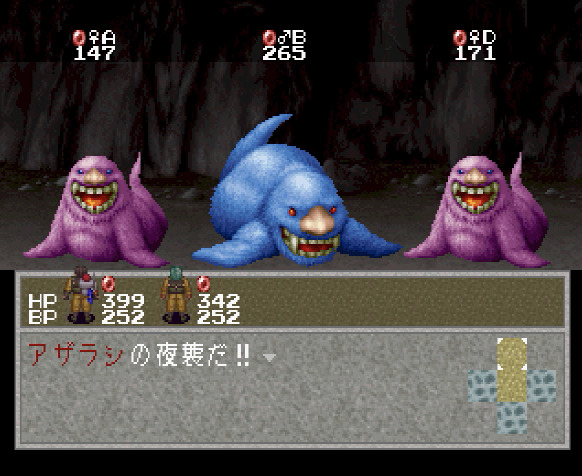 Seal. For both of these, if you don't see them around, it's also possible to get yourself ambushed by them, so perhaps use that to save time. Step 6. Rose Garden It's time to go south for a bit! 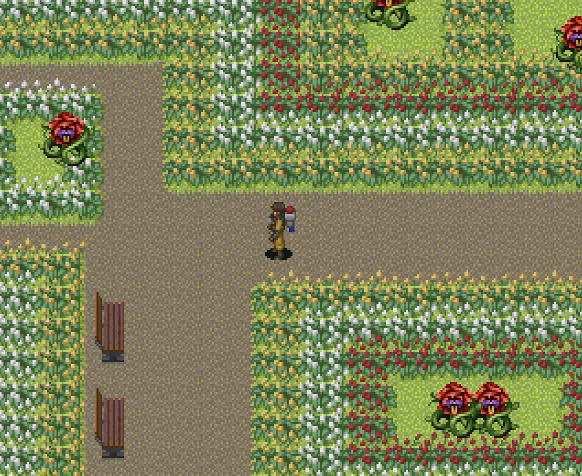 Again, this is a moment to relax, since Rose Garden counts as a town (where time doesn't pass), so we can spend as much time as we like. It's a good thing too, since some species here don't spawn so easily. Except one, they can all be found elsewhere, but... this way we use zero time, as opposed to some time, however small! So first what we want to catch here: 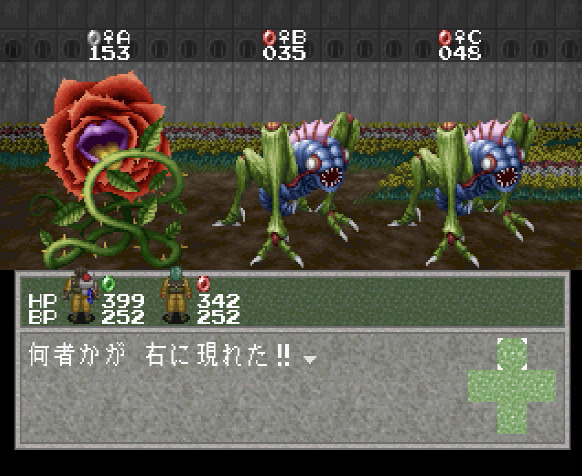 Grasshopper. As usual, they're summonned by roses and can't be found otherwise. Ken's "fire shot" ability is perfect for them. Other than that, flying around the garden can be found the following other insects: 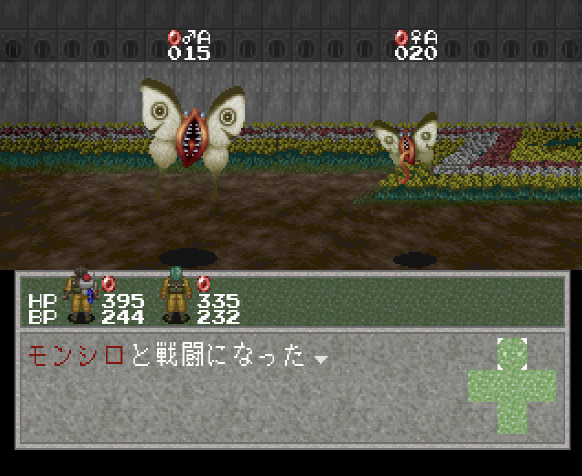 The cabbage white. Because of their tiny tiny HP, the only viable option is Linda's "carpet of fire" ability. It changes the floor into lava, which does a tiny damage to enemies on every turn. Basically cast this and then just use "defend" in every turn to wait it out. There really aren't many other good ways. 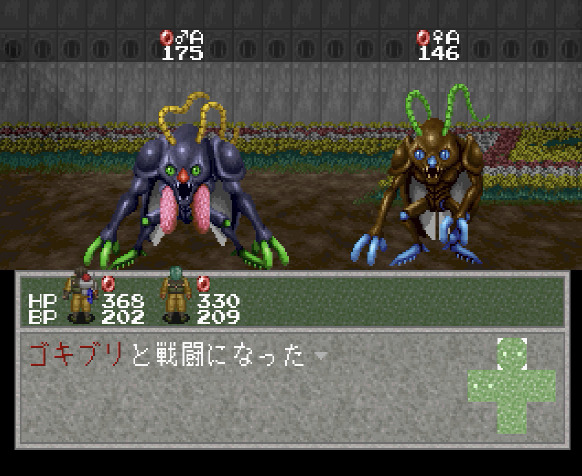 Cockroach. Ken's "gale cutter" is perfect for these due to their stats. It will exactly one-shot them. 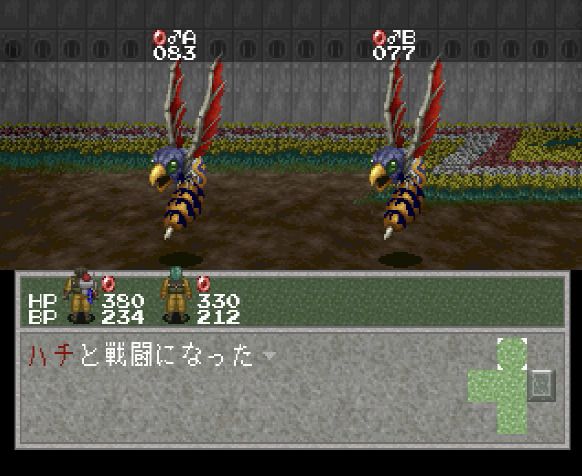 Bee. Linda's "blizzard" works for these. A female is already registered at the ark, so we're good for that. Step 7. Ozport  Of course, as you might guess...  ...we're heading to that hidden underground area! Here we find: 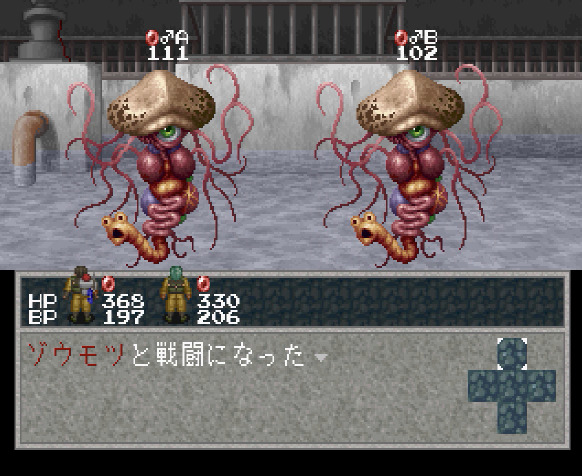 Entrails. 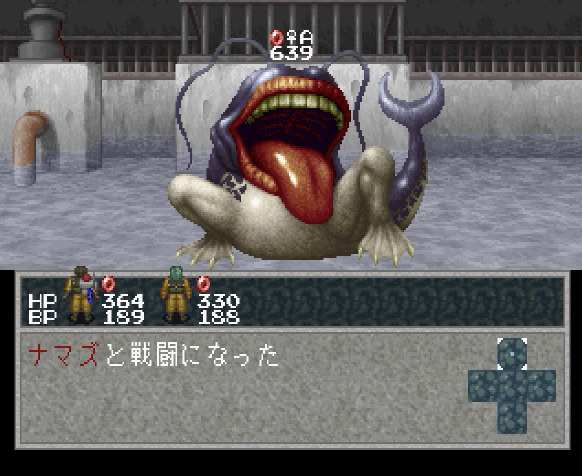 Catfish. You probably want to buff yourself when dealing with the females here. Step 8. Garex It's time to go back south now. First let's head to the abandoned research facility of Garex.  Here we are.  We'll take this entrance...  ...and then the lift, all the way down.  In this room are three computers which control the cryogenic storage. By using them, you receive: a pair of hermit crabs; a female squid; a male impala. The missing ones (female impala and male squid) are already at the ark, so I'm not entirely sure why they did it like this. I guess maybe if you tried to catch them where they appear normally? Anyway, there's nothing else here. Step 9. The eastern outskirts of Dogy Figh 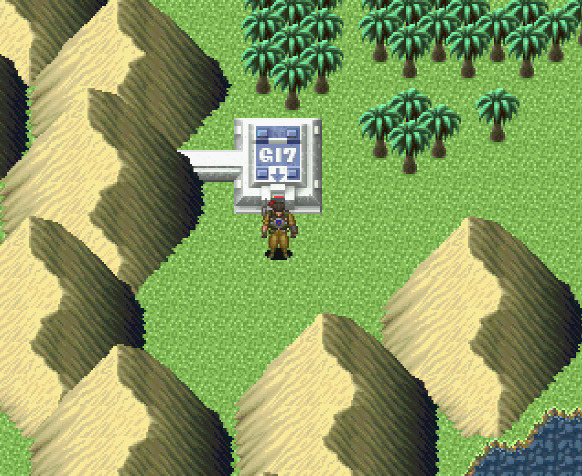 So, it's been Summer 1998 for a while, and we're cutting it really close here with the season change. But luckily when we travel to Dogy Figh and exit to the east, the season doesn't end up changing yet--probably literally by mere seconds, but nevertheless it doesn't and it's still Summer 1998. This means that we are now able to spend as much time as we want and the change won't be triggered, as long as we follow a couple of rules. Basically the season change is checked always when returning to the overworld, and those are the only times it's checked. Under "returning to the overworld", we consider the following situations: - Waking up from an overnight camp when camping on the overworld (camping in dungeons does not count) - Exiting from a town - Exiting from a dungeon So, as long we don't do any of these three things, our time in Summer 1998 is unlimited. What this means in practical terms is the following: we can explore by walking around the area we're in now as long as we want, under the condition that we do not use the camp option. After this we can go to one dungeon and fully explore it (including camping inside). If we do it like this, the season will not change until we exit the dungeon. As you can see, this gives us a HUGE leeway, we get one whole part of the overworld, plus one whole dungeon that we can explore for essentially free, as long as we make sure to do it just as the season (would be) about to change. Hope I've explained this clearly, but ask me if not! Generally this little quirk is the main thing you have to use to "gain" yourself more time in this scenario. I'm not really sure the whole thing would even be possible without it, but I don't really know for sure. For now, there's a number of species to be found here on the eastern side of Dogy Figh. 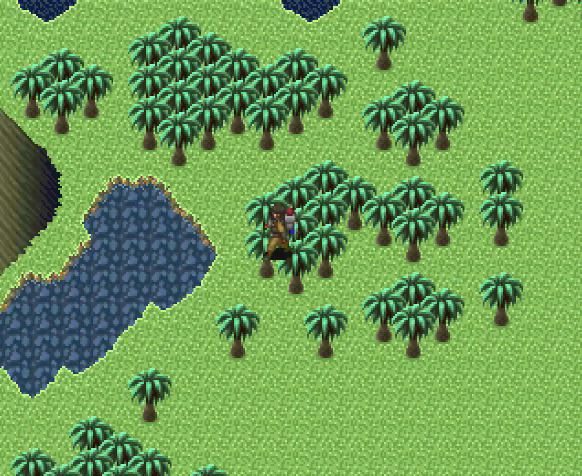 First of all, there's this little pond here. Normally, sea slugs spawn there, but they are a bit hard to make appear. So in our particular situation it doesn't matter how much time we spend to walk around and hope they spawn, but there will be situations where it will matter, therefore, there is a little bit of a trick to use to make life slightly easier for yourself. At least as far as spawning enemies on the overworld is concerned, the game engine operates on a clock of 1 second (yes, I know, I should properly say that the clock is 1 Hz!). So each second it calculates what animals to spawn on the next screen in the location Ken is facing. However, if you're walking around in circles or something, getting anoyed that the animal you need isn't spawning, actually by walking around you're messing with this process and making things worse. Instead, what you want to do is face the direction you want with Ken, and STOP MOVING ENTIRELY for a few seconds. This will usually cause the game to spawn a bunch of animals in the direction Ken is facing because you've given it time to settle down and calculate it instead of constantly changing direction. It is also a good idea to have Ken face a relatively open looking area with a good amount of space, because any animals that are calculated to spawn on top of objects like walls and rocks will simply not be spawned. In the end what I'm trying to say is that sea slugs here have a bit of a lower probability to appear (I guess you can say the probability is counted as 1 group of animals every X cycles/seconds or something like that), so what you want to do is move a bit eastwards so that the pond is out of your view, face towards it with Ken and then stand still for a few seconds. Then walk towards the pond and see if they spawned. If they didn't, try again. But don't, repeat, DON'T walk around in circles as that makes things worse. 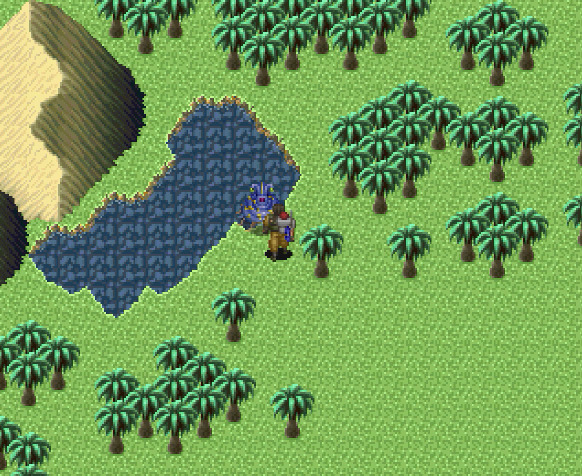 Phew, okay, so here they are finally. 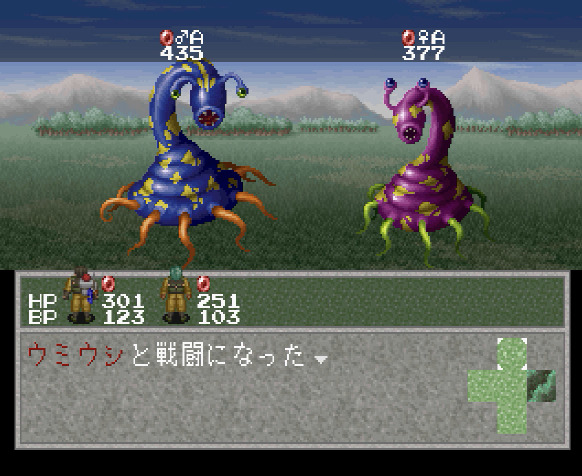 The sea slug. Other than that, generally on the eastern side of the southern continent, we find the following: 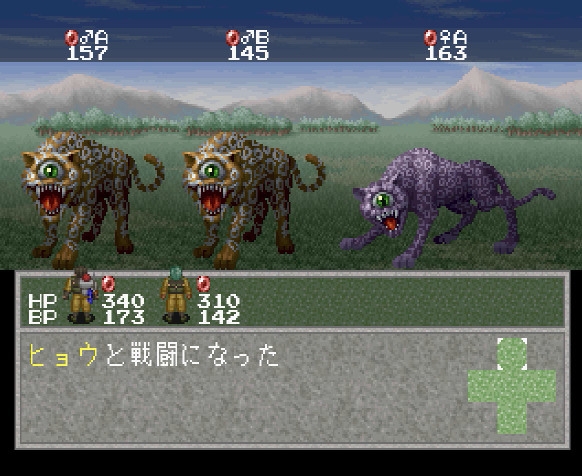 Leopard. 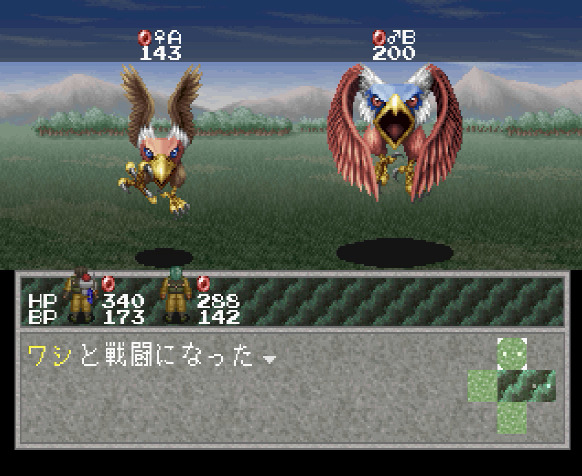 Eagle. 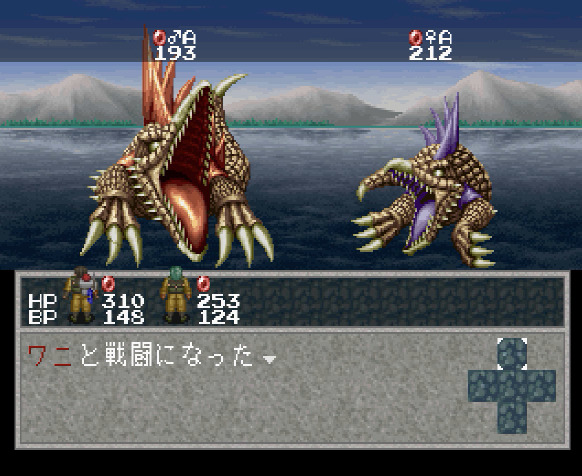 Crocodile. 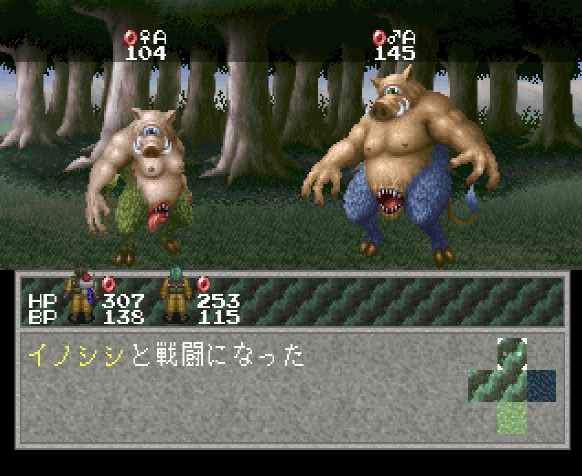 Boar.  Hippo. 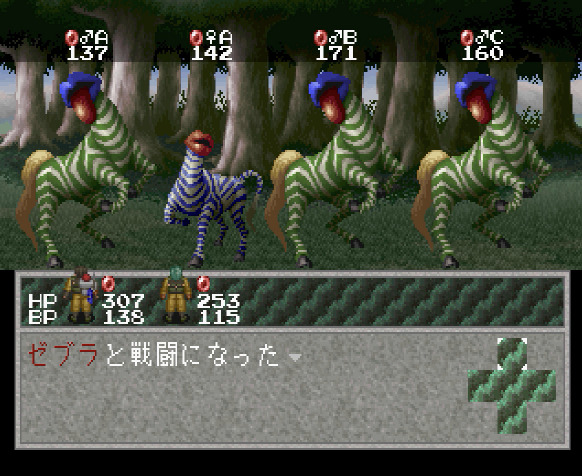 Zebra. Nothing really special about any of these, they re all low-mid level, so just find whichever of your offensive abilities works best for a particular species. Linda's "Blizzard" is always a good first try, as well as Ken's "Fainting shout". Interlude. The second eagle sabre 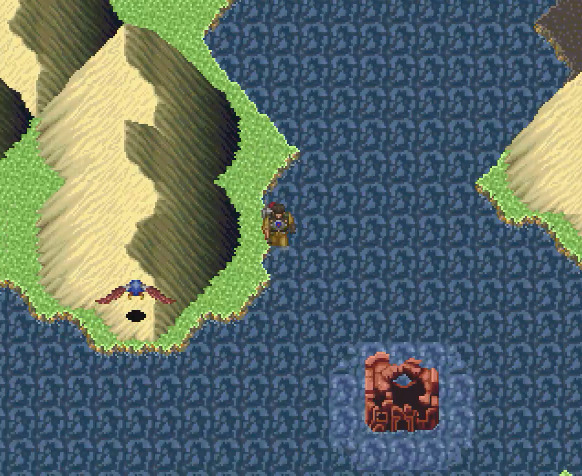 Since we're on borrowed time anyway, and we happen to be in eagle territory, we can take this opportunity to catch additional 10 males, in order to make a second eagle sabre for Linda to use. Of course, we need to make camp in order to craft the weapon, so we won't be able to do it immediately, since camping out here will trigger a season change as per previous discsussion. However, camping in dungeons doesn't count for that purpose, so we can do it as soon as we enter the next dungeon. Spoiler alert: After catching enough eagles, I promptly forget about this and only end up doing it when I'm about to be finished with the dungeon! Step 10. Dark River 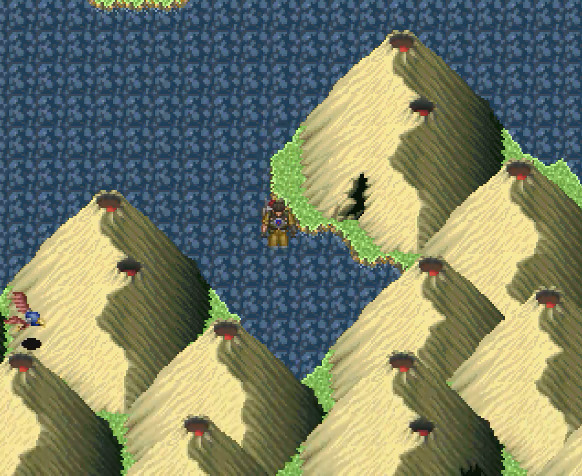 It's over here, in that big lake east of Dogy Figh.  It's home for a number of species, a few of them endemic. Already on the entrance floor, you can find quite a few. 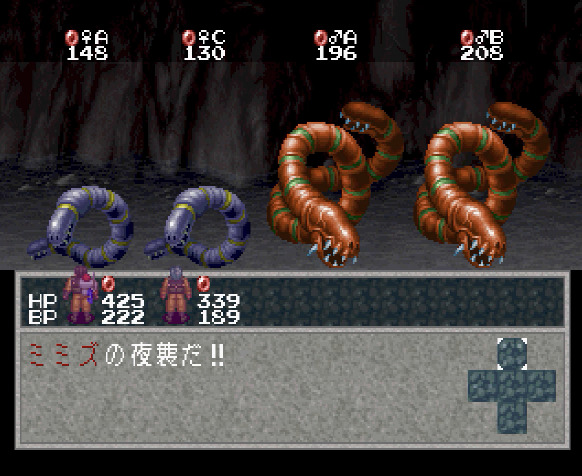 Earthworm. We used to go to Marblepolis for them, but they do appear here too, so we'll just do it here. Both species from Marblepolis (earthworm, chicken) appear elsewhere, so you completely don't even have to go there at all in Scenario D. As always, if you don't see an animal which should be in that particular location, simply try getting ambushed overnight and it is likely to appear (like above). 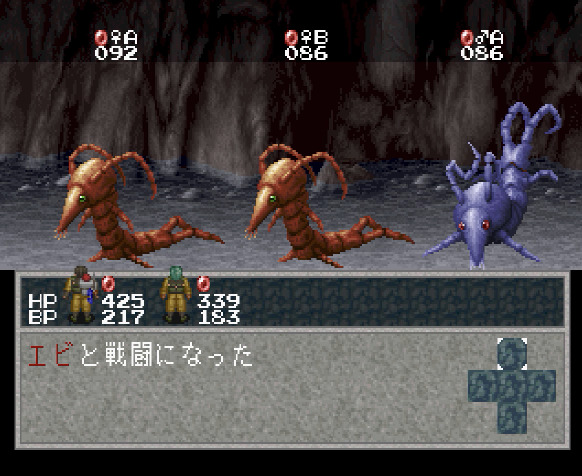 Shrimp.  Dolphin. This is why I mentioned not to bother with them previously. You can do it here on "borrowed" time instead of spending "real" time.  Snail. 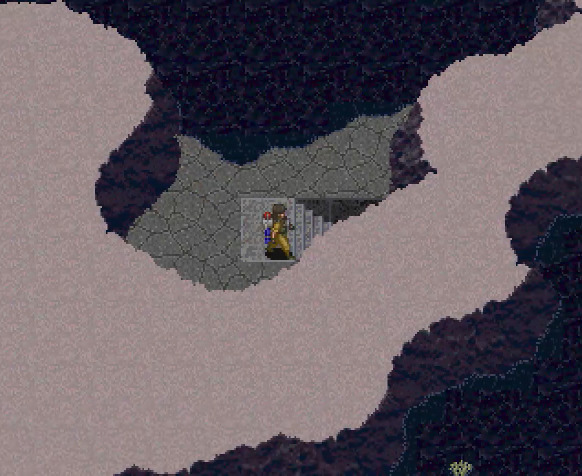 We head deeper into the cave. As you might recall, Dark River has two entrances. Our goal is to make it all the way to the other entrance because there is a specific species which is only found there. In the meantime, we find the following: 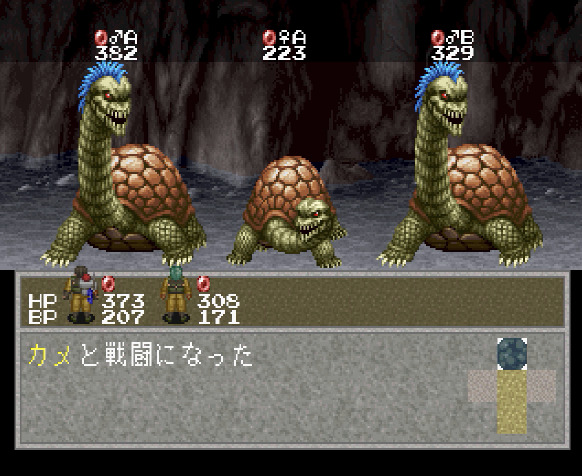 Turtle. Again, this is why you shouldn't spend time on them in North Kamenos. 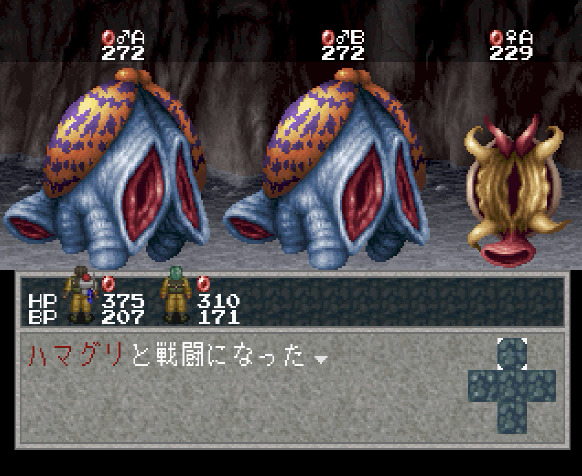 Clam. 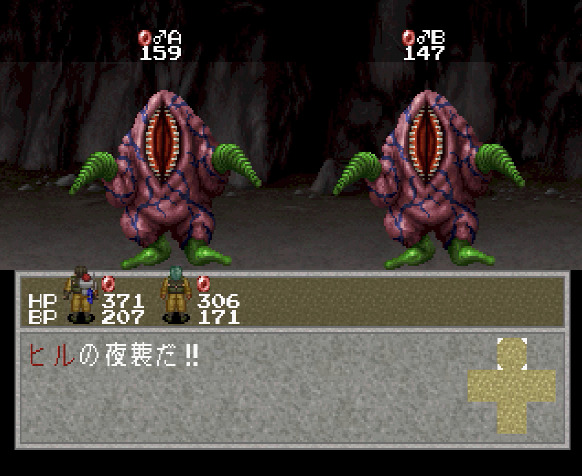 Leech.  Cat. In theory they should be found on the lower levels of the cave in dry parts, but I've never seen them. Ambush works fine, though. That's about everything except one, now we should find our to the other exit for the last one.  It's pretty easy. Just go upstairs here from where we found the cats.  And then a bit to the east and upstairs again.  Here's what we were looking for (ignore the snail). 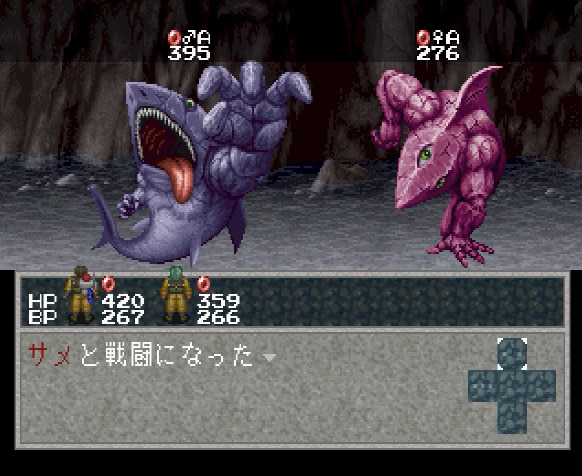 Shark! This is everything you can find in Dark River (not exactly, there are also crocodiles, but they are also outside and in many other places so you can get them easily anyway). Normally I would say use the "escape unit", but as explained we're right next to the exit anyway. 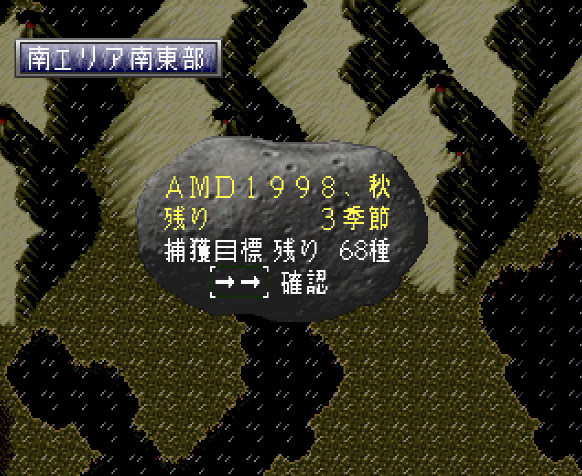 As expected, returning to the overworld finally triggers the long overdue season change to Autumn 1998. Let's head back to ark (using the whistle of course) and hand in the last bit.  After handing it all in, this takes us to a full 48 complete species and some bits and pieces of others. I would say probably not too bad for one season's work! So I hope this kind of format is ok for everyone for Scenario D, I didn't think it made sense to go into details again about traversal and items and such and it leaves some space to give a few bits of more technical info about the game for those who are interested!  So, I've realised that since other than cutscenes and boss fights, this has been mostly a strictly screenshot LP. Therefore, I thought it might be interesting to see a bit of a longer gameplay segment in one go. So the video below contains the entire part of the Dark River traversal from this update and the return to the ark to hand in the animals afterwards! So please give it a look if you're interested to see what this game looks like to actually play. Note: the video does include subtitles with commentary/explanation and is the actual video used to make this update with only some minor edits! Well, that's it for today, next time we continue with Autumn 1998 as we try not to fall behind in our mission! ivantod fucked around with this message at 22:19 on Sep 5, 2022 |
|
#
?
Sep 4, 2022 20:05
|
|
|
The summary style for this is perfect, loving it. Really interesting how tight the timer ends up being, even with all the stuff they give you to make it possible in the first place!
|
|
#
?
Sep 4, 2022 20:30
|
|

|
Yeah, the summary works well, and despite not having any plot D scenario actually seems pretty cool, I assume the idea from the dev team is that you would have made tons of notes during the first 3 scenarios so it's a bit less overkill. It doesn't fit every kind of game, but it's a neat thing.
|
|
#
?
Sep 4, 2022 21:00
|
|


|
I'm a little surprised at how much of a bone the developers are throwing at the player. It's nice to see that they made an impossible challenge, then also went "Wait, we're sticking you in the end game after most things have closed. Here's the best equipment, a variety of dogs, all of the quest reward skills and animals, and enough money to spam the fast-travel. Have fun!" Still a solid challenge and test of your knowledge, but not relying on TAS-levels of skill.
|
|
#
?
Sep 4, 2022 21:10
|
|


|
I love Linda Quadratic.
|
|
#
?
Sep 4, 2022 21:17
|
|

|
This mode definitely feels like something the developers though would be neat, but towards the end of development so they didn't have a lot of time to fully test, fine tune or change things so they popped open the developer tools to give a bunch of pre-set stuff to make it possible without being a nightmare. Also seems like the mode that would get a lot of speedrunners interested in it to optimize routing and stuff.
|
|
#
?
Sep 4, 2022 22:51
|
|

|
Something I've been meaning to ask is how capturing works- it doesn't seem to have a specific command. Going by the video above you just need to hit an enemy for most or all of their HP, but not too much over, and it automatically happens?
|
|
#
?
Sep 5, 2022 06:30
|
|

|
Sum Gai posted:Something I've been meaning to ask is how capturing works- it doesn't seem to have a specific command. Going by the video above you just need to hit an enemy for most or all of their HP, but not too much over, and it automatically happens? rannum posted:Also seems like the mode that would get a lot of speedrunners interested in it to optimize routing and stuff.
|
|
#
?
Sep 5, 2022 18:42
|
|
|
So the Beastians are...Ken and Lisa's Bloodline, intermingled with the natives. Humanity left Earth/Neo-Kenya to come here. But they can't live properly anywhere but here. The planet keeps renewing. But then...where did humanity come from in the first place? Bloodly fucked around with this message at 10:44 on Sep 6, 2022 |
|
#
?
Sep 6, 2022 10:42
|
|

|
Charming ending! Forgive me if I missed it, but do we get to know what happened to the Garex explosion or who created the Arks?
|
|
#
?
Sep 6, 2022 10:44
|
|
|
Morgenthau posted:Charming ending! Bloodly posted:So the Beastians are...Ken and Lisa's Bloodline, intermingled with the natives. ") P.S. Who's Lisa?
|
|
#
?
Sep 6, 2022 22:03
|
|
|
maybe the humans are coming in from an(other) alternate timeline where they lost the coordinates to earth?? then they go to neo kenya, time travel, etc
|
|
#
?
Sep 7, 2022 10:22
|
|


|
Welcome back to Linda4. Currently we're in Scenario D, attempting to collect as many animals as possible in the limited timeframe of one year!  When we last left our characters it had just turned Autumn 1998. So let's see what we can do in this season! This time, to give you a bit of an idea about how actually quick you have to be about doing things, I will give you an approximate amount of time that we spend on some of the steps. The time will be given exclusive of the time spent in battles--since the clock stands still during fighting. Step 1. The ark  From Autumn, on the second floor of the ark, a certain animal starts to appear.  You have to go around a bit and look for them...  ...but ultimately here they are. 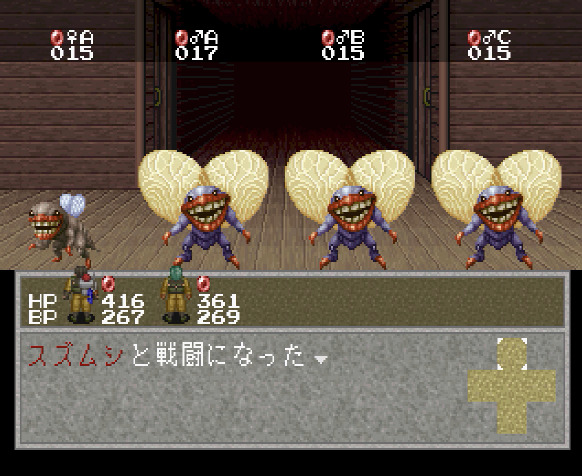 Bell crickets. As before the clue is the sound they make when they are present on the ark. Their tiny HP means they are probably a good candidate for Linda's "carpet of fire". Just cast it and wait it out, that's it. Step 2. South Area, southeastern part We want to finish today with all animals available on the overworld in the South Area.  You might recall that one of those animals is the pelican, which prefers that we do not have any money on us. So before heading down, I deposit all the money in the bank. 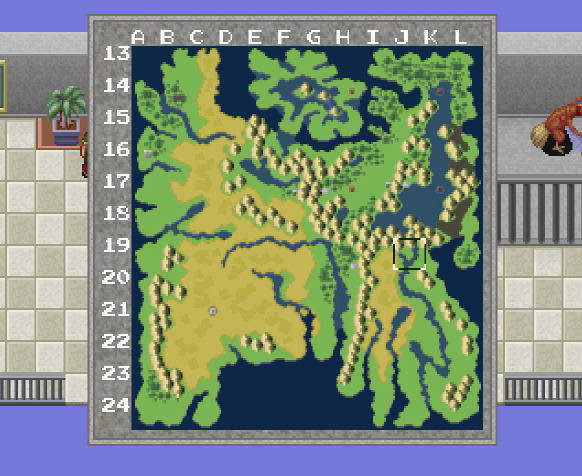 After than, we head approximately here. Last time we dealt with the eastern and northeastern part. Now, we want to sort out this big peninsula in the southeast. There are only two species here that we need. 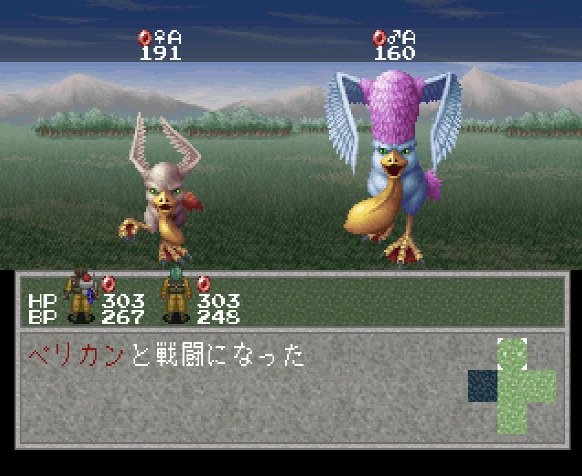 Pelican. 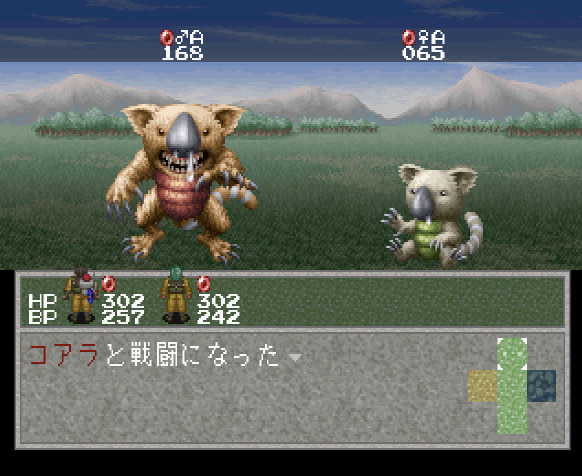 Koala. They spawn a bit more rarely, so just use the "wait" method to get them to appear. If they still don't appear, reload the game to avoid wasting time. I will demonstrate a bit later how it actually looks when you apply the "wait" method. For this whole part in total, excluding the battle time, we want to spend not more than 1 minute in total. This means that, as during most of the Scenario D, you probably want to keep that sprint button preseed down to speed up your walking. Yes, it does deplete HP, but it does so relatively slowly, so it's not as big of a deal as it seems. If you need to, you can heal during battle without using up any of the precious time. But personally I didn't find this to be a noticeable issue. Step 3. Samakia 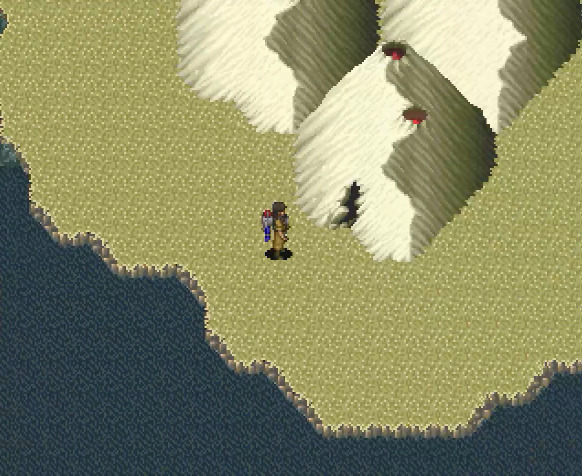 Samakia is just down here on this same peninsula, so it makes sense to do it now, so that we don't need to waste time coming back. You may remember it is the place where ants live. 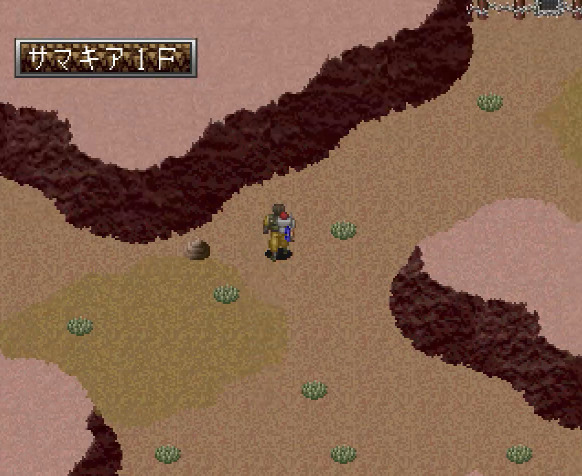 Male ants are already in the ark, so we need to get the female, plus two other species that live here. This will start to sound a bit crazy, but excluding battle/menu time, we should ideally be in and out of here in 30-40 seconds maximum. I will put a video of this down in the extras section to show that this is indeed completely possible and without any particular issues either! So the ant queen is down in the furthest part of the lowest level of this cave, but on the way there, we can pick up: 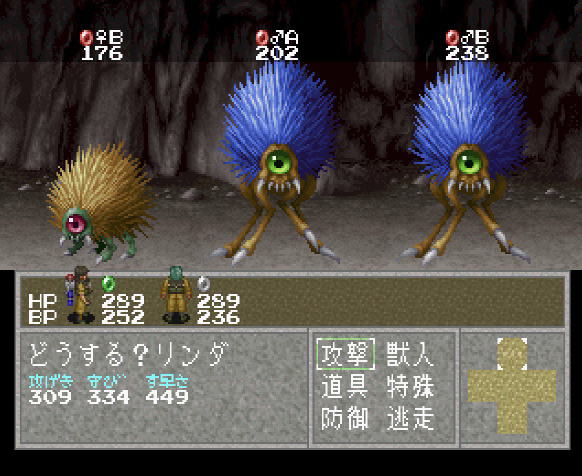 Sea urchin. 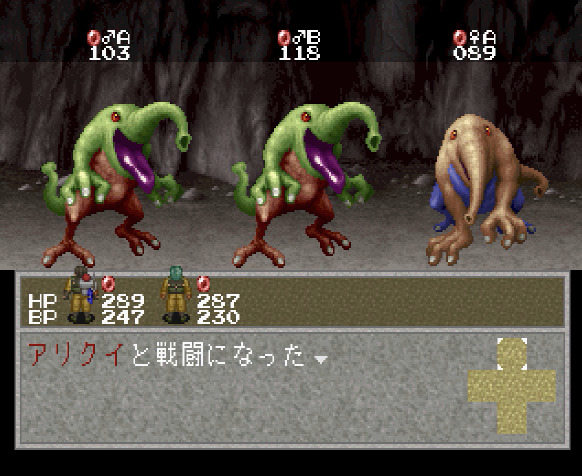 Anteater. 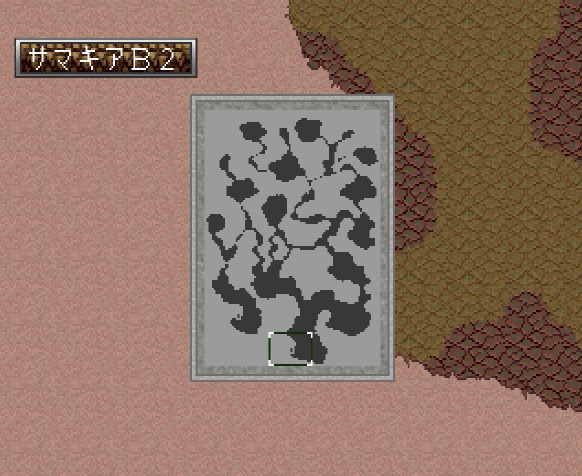 After getting down to the deepest level, study the map to figure out the shortest route to the ant queen. She's located in the "chamber" on the very top left of the map. From where we are, we want to go along the rightmost wall about halfway up and then take a left turn and go directly to her location from there. 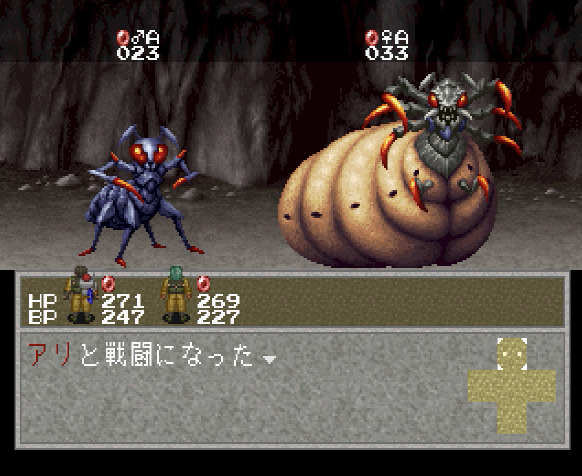 Ant. As usual, fire carpet will work. You can also try to pick up some poop at the entrance and throw it at her, but picking up will waste precious seconds, so maybe not. As usual, we use the "escape unit" item to leave the dungeon instantaneously. In fact, the game gives you several of those at the beginning of the game for free and you can buy an unlimited amount from Bird Line. In addition to these three species, here you can also find hydras if you let them ambush you. They are already in the ark, so it was not necessary for us to bother with that, but it wouldn't really have been a problem either way, honestly. Step 4. Flora Jam  Situated in the far northwest of the south continent, this place is large and full of distractions with fake animals, but there is actually only one species we can get here. 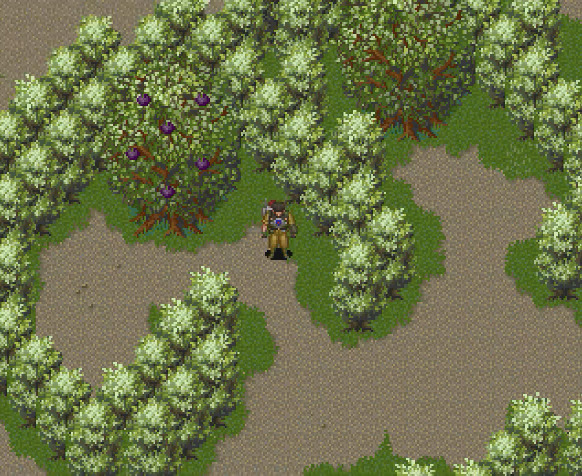 The best place to find them is around these two trees. If you don't see them around, try the ambush, chances are it will work. Of course, I'm talking about... 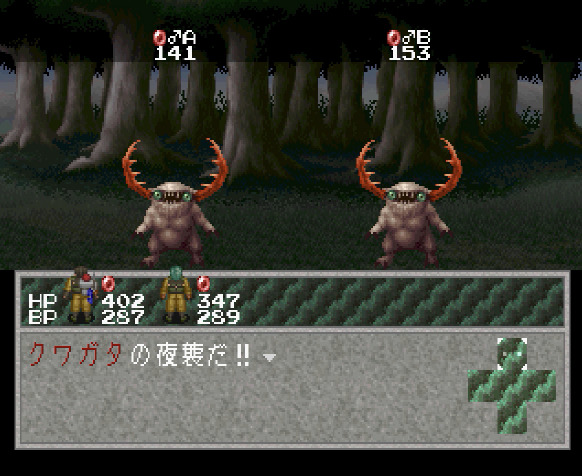 Stag beetle. Male only, of course, since females are not found in the world, and therefore we already have one in the ark. Even here you can and should use the escape unit to get out; for the total time spent, there is absolutely no reason that you should spend more than 10-15 seconds maximum in here. Yes, it's a good idea to figure out the route beforehand, but honestly, this place is really not difficult to navigate around so this should be easily doable. Step 5. Sand Hole Now we head southwest. 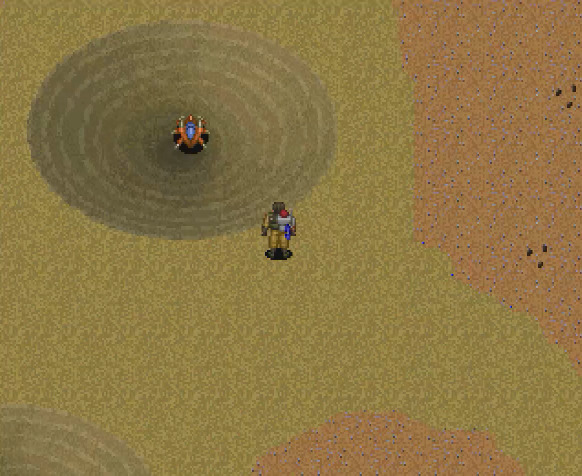 Head immediately to the lower level. There we find:  Scorpion. We only need a male. 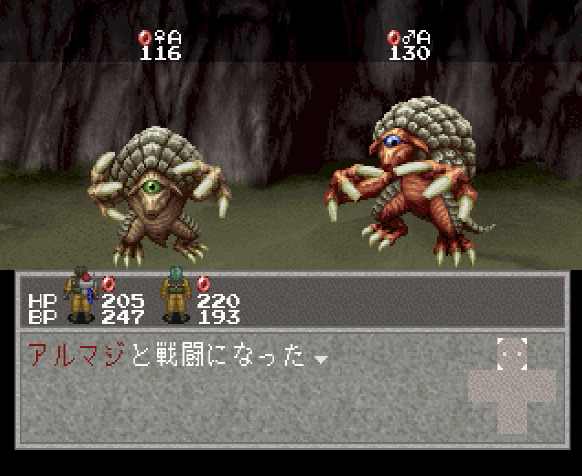 Armadillo. Only if you see them walking around. If they are not around, then don't waste time looking as they can be found easily in the next step too. In and out in less than 20 seconds is what you want here. Although this place has several levels, you only need to go one level down, catch a scorpion and (possibly) an armadillo and teleport out. Easy. Step 6. South Area, western part 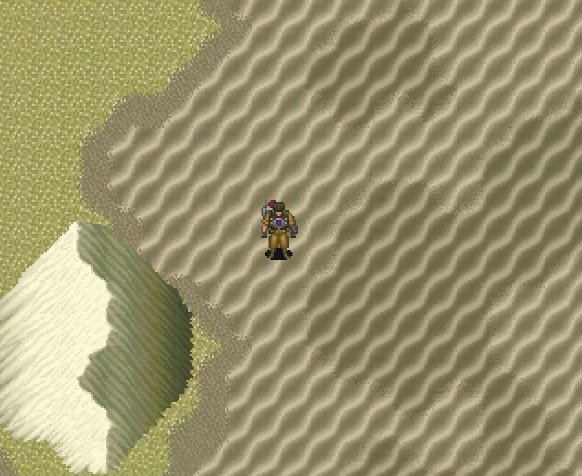 Now we want to catch all animals which live in the western desert part of the southern continent. Also the reason why we were saving up so much time by being quick in the dungeons--we now need to spend time catching several species on the overworld, where time passes quickly. Here they are: 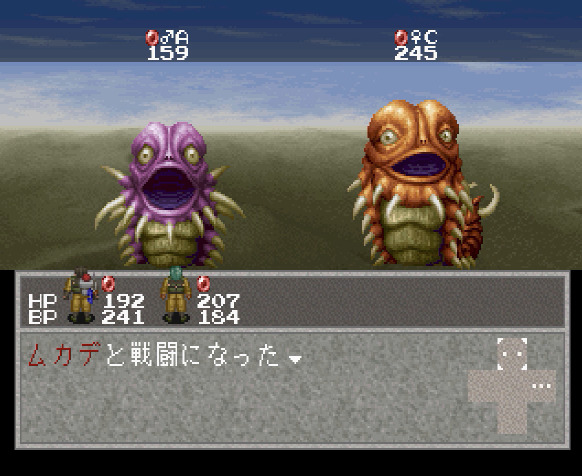 Centipede. As always, they burrow through the sand so you have to look carefully to see them. 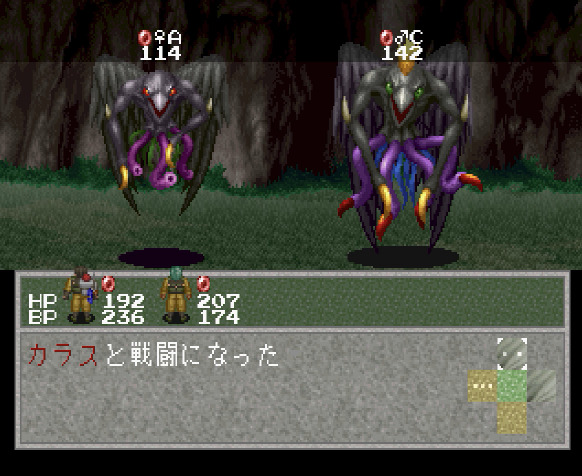 Crow. 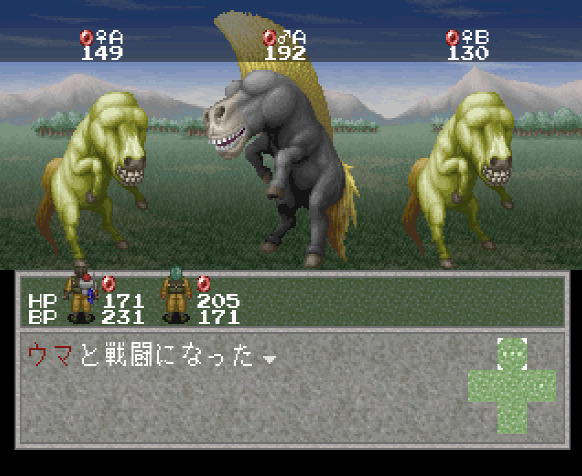 Horse. Mostly found along the southwestern coast. 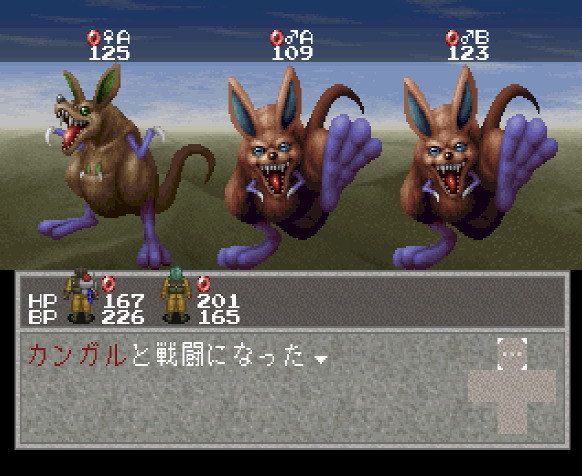 Kangaroo. As before, they only appear when Ken's HP is less than half. Therefore, use previous fights to reduce your HP without using any time so that they would appear. 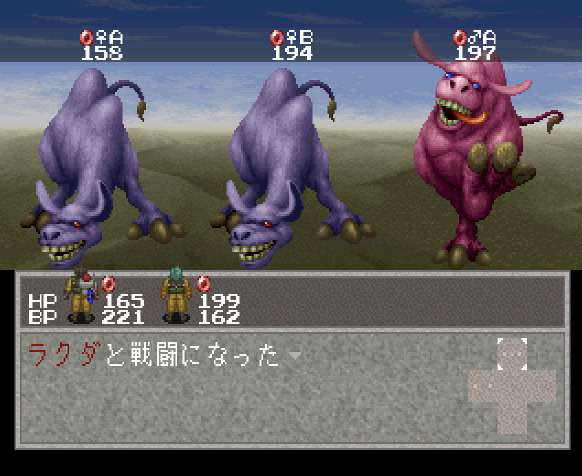 Camel. 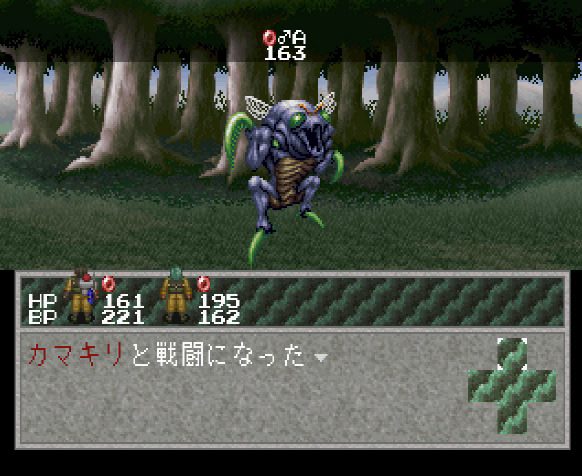 Mantis. They generally spawn mostly around the Flora Jam area in the northwest. They probably spawn the least of all animals in this step, so you may need to use the "wait" method. If you didn't get armadillos previously in Sand Hole, there are tons of them in the desert so you can easily get them here. So this is basically the critical/make or break part of the Autumn run. You need to catch a good few different species, and if the RNG really doesn't go your way (camels and mantises can be a bit problematic with their spawn rate here), you may have to go back and reload the game from before this step. Step 7. West of Hardia  After the gruelling run in the previous step, we use the whistle to come back to the ark once again. If the season doesn't change when you teleport back here, you're on good track, but a failure is still possible. 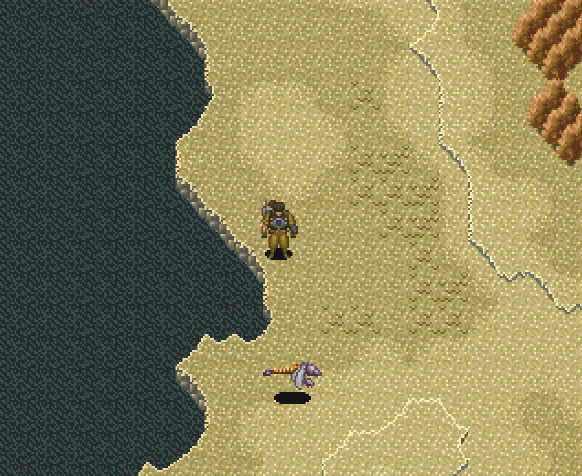 We only have time for one species here. 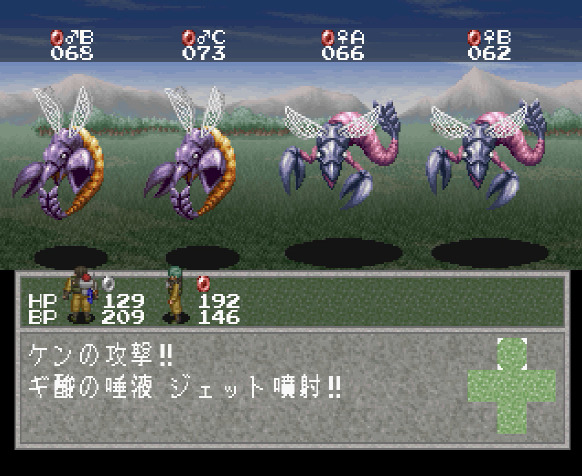 Dragonfly. The main problem is that you need a female and they spawn rarely. Luckily, you're right next to Hardia and a telephone, so keep reloading the game until they spawn. Therefore, since you will reaload between each attempt, this should in the end take less than a minute total. Step 8. Western Area, Central Lake Next, we want to head to that big lake in the north. If we're lucky, the conditions will be snowy with the lake being frozen--this will allow us to catch one extra species which only spawns during snow. In order to get there, first take the Bird Line to Battle Park. 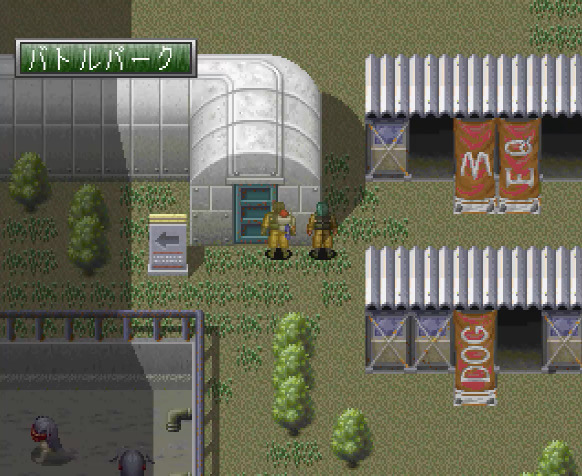 Then take the tunnel leading west. 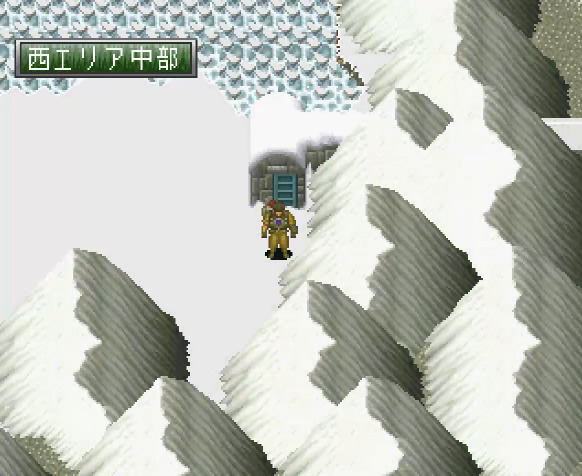 Upon exiting the tunnel, it looks like we were lucky and it is snowy here! Nice, we can save a tiny bit of time later on! Also, this Autumn has been somewhat hectic, but if the season doesn't change into Winter when you exit the tunnel, then you can finally relax. From this point on, we're on borrowed time and there's no more chance for the season to change, unless we do something stupid like use the camp on the overworld. We can now take our time, first to pick up several species in this part of the overworld. 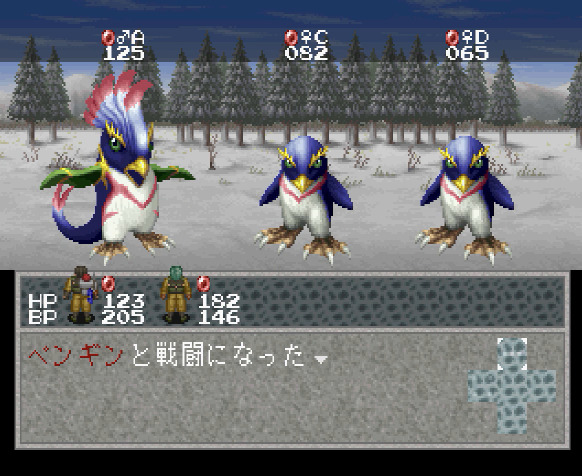 Penguin. 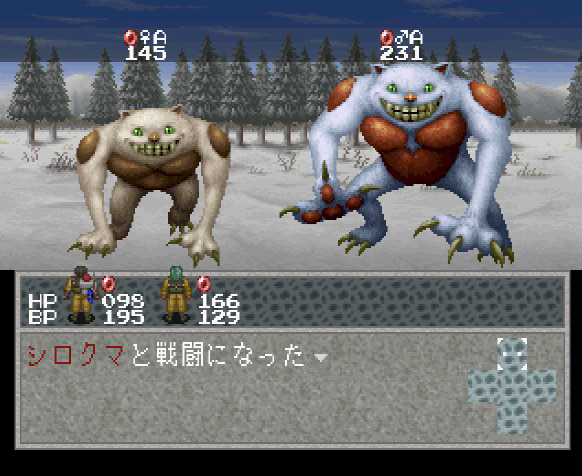 Polar bear. They only spawn if it's snowy; during Autumn it usually won't be unless you're super lucky. If it's not snowy, you will have to come back here in Winter to get them, because it will always be snowy during Winter. But, we got lucky, so we don't need to do that! 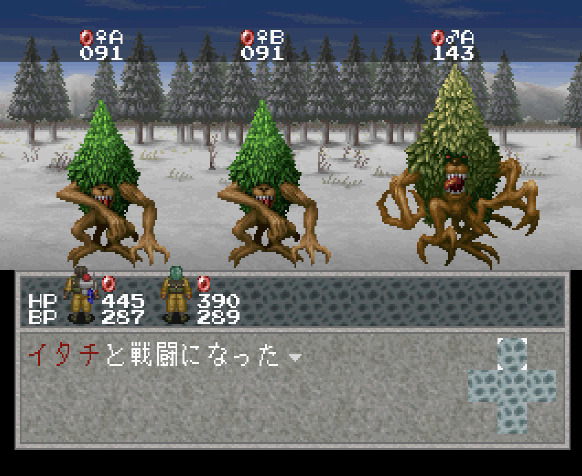 Weasel. They mimic trees, so walk through clusters of trees to trigger them. 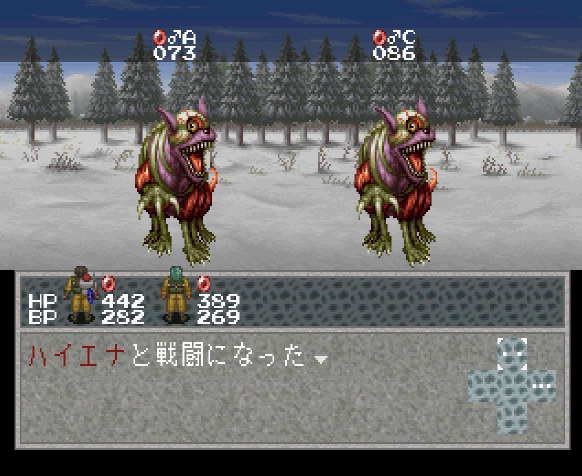 Hyena. As before, they will only spawn if you have carrion in your inventory. This game is so nice that it even gives you one piece for free when you start the scenario! Normally you would have to process a caught animal into meat and then wait a couple of seasons for meat to rot; so to avoid this problem, the game simply gives it to you already. Just... don't throw it away accidentally! 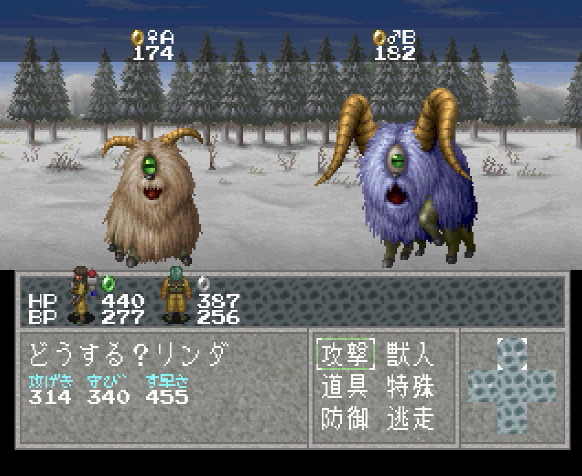 Goat. They spawn on the far northwestern peninsula. Step 9. Lina Valley Since we're on borrowed time, it means that we can still do more, as long as we don't return back to the overworld. First, we head to Lina Valley. Remember not to use the whistle or anything like that. By this point, the season change is definitely overdue, so you want to exclusively walk to Lina Valley on foot! And still don't accidentally use the camp!  We want to go inside this shack. 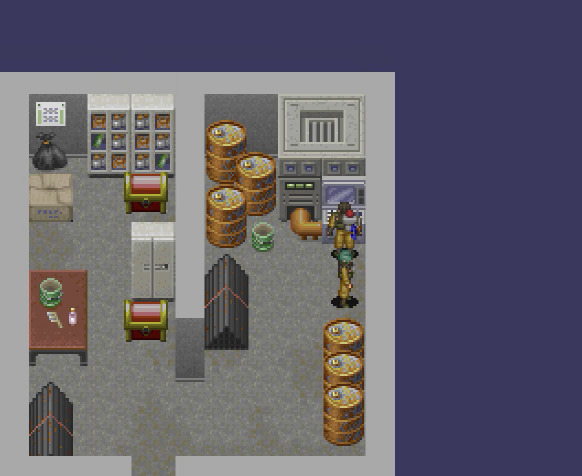 There is a cryogenic storage machine here. Activating it gives us a pair of buffalos! This shack also has two chests with two weapons: gorilla punch and shark crush. They are decently strong, so feel free to use them against more powerful enemies later on. Step 10. Sperm Lina 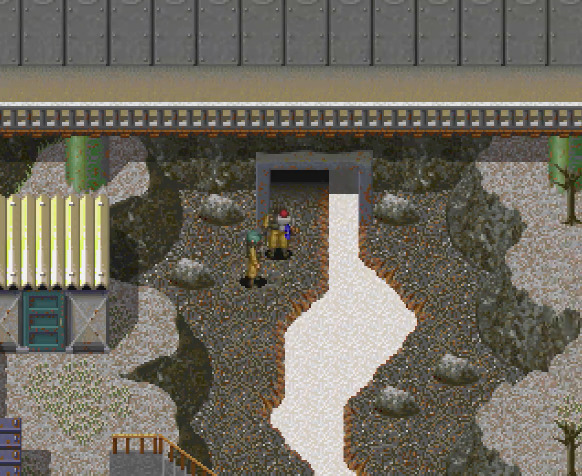 Of course, Lina Valley is a bit unique in that it has a dungeon entrance (Sperm Lina) right in the town! So we'll definitely take advantage of that and keep going on borrowed time to get a few more species which are endemic to this dungeon. Here's what we can find around the cave. 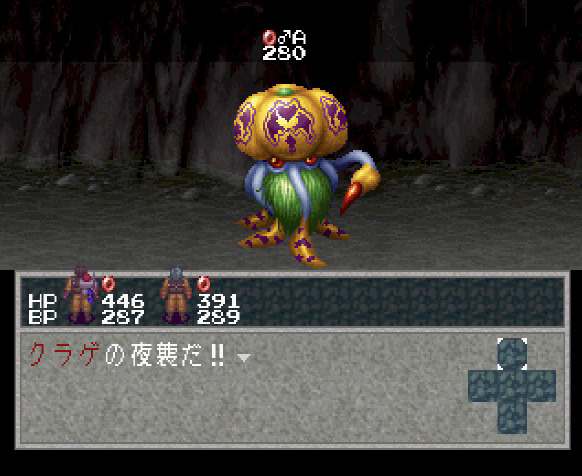 Jellyfish. You have to make camp directly while standing in the poison muck in order to trigger them to ambush you. They do not appear otherwise. 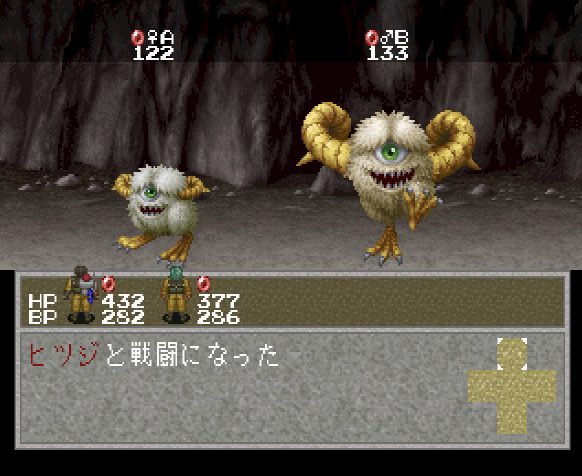 Sheep. They are EVERYWHERE in this cave, you will not have a problem at all. 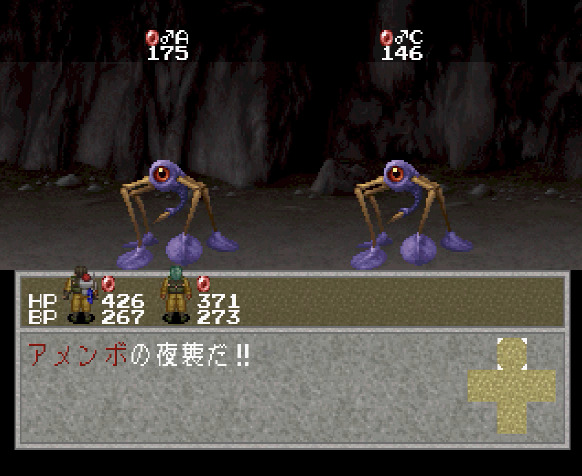 Water strider. Often you'll see them wading through poison muck, but ambush also works. Your choice. 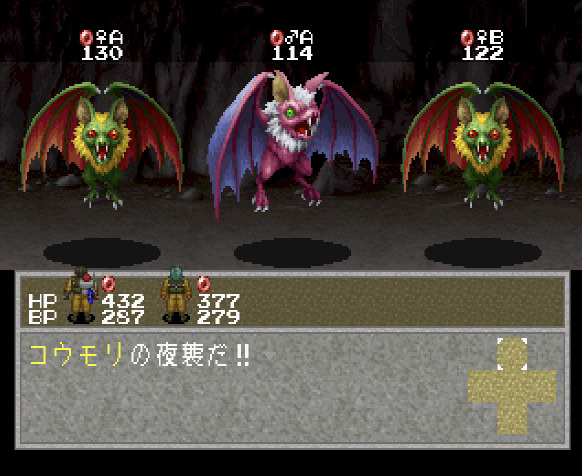 Bat. Get yourself ambushed on one of the deeper levels. They do not appear normally outside of that. 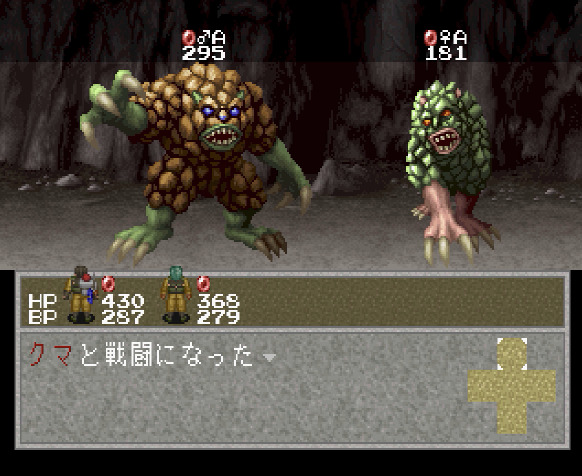 Bear. They take form of rocks in the deepest level of the cave, but will suddenly start rushing towards you when you come near. Just check out all the rocks you see on the ground as you explore the cave. Before continuing, I did a camp with Linda to recover HP, and it actually triggered some dialogue we haven't seen before. I'm not actually sure if this is specific to Scenario D, or just RNG never picked it, but either way, here it is: Interesting. I'm glad I caught this one. Anyway, one last species here. 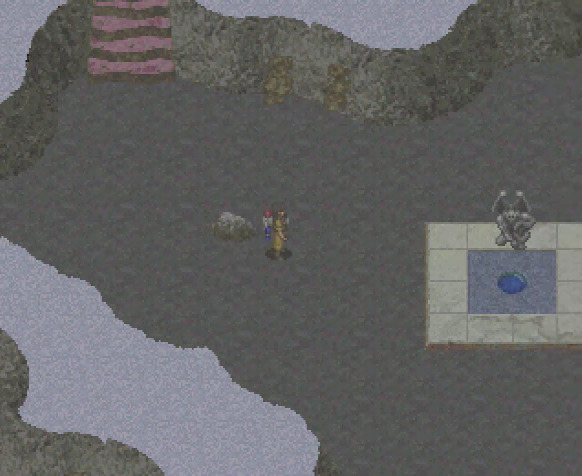 For that, we have to come over here where the teleporter is. Here you almost HAVE to use the "wait" method to make them spawn. There are currently no animals around. 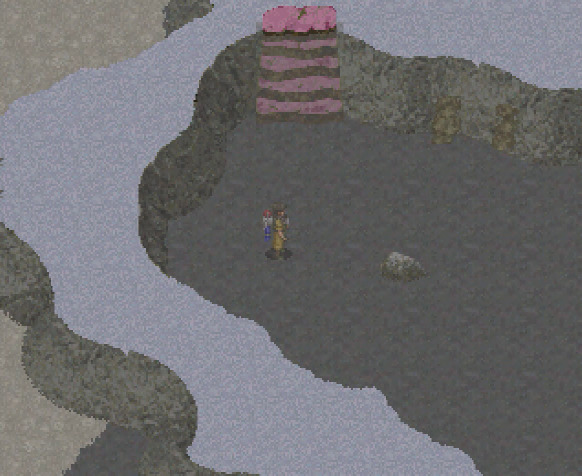 So we point Ken like this looking towards the right where there is some open space. We let him stand there for a few seconds without moving. And then, when we walk to the right where he was looking towards... 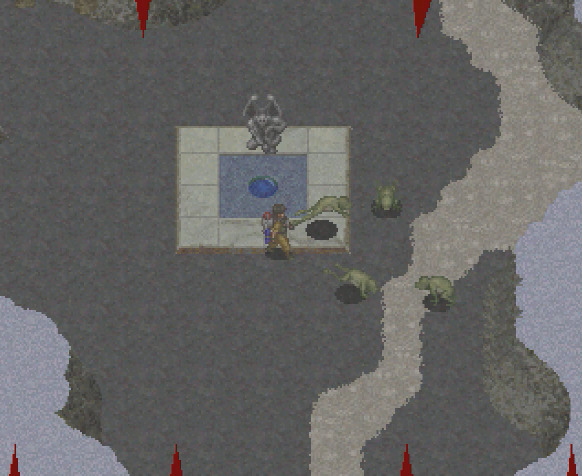 ...well, look at that! A whole bunch of them have spawned! This is how the "wait" method is really useful to force an animal to spawn that doesn't spawn so readily sometimes! It is absolutely essential in order to reduce time you spend "looking" for a particular species. 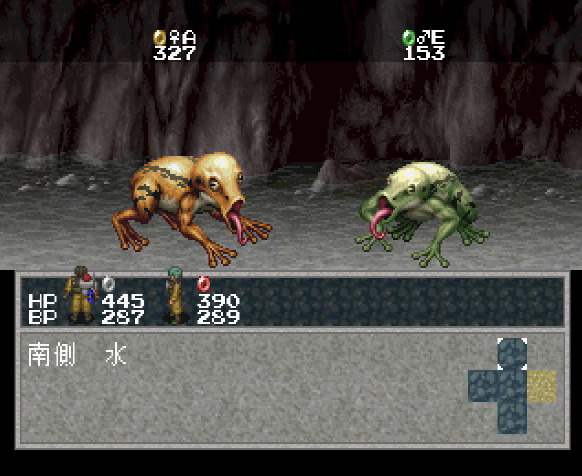 Frog. Females spawn rarely, most groups will consist only of males. Unfortunately, we need a female for the ark. So you will probably spend a few minutes here until you find one group which does contain a female. But it's not a problem, since we're on borrowed time anyway! With this, we're done here and can now make our way back to Lina Valley and the overworld! 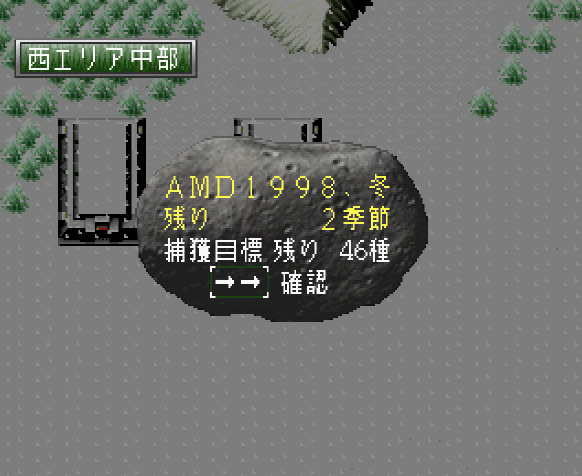 Upon exiting, of course, it turns into Winter 1998, but again this was planned and expected, so no need to worry! Let's just use the whistle to get back to the ark.  We hand in everything...  ...and afterwards, we find that our total now sits at 76 out of 120. Not too bad, and it shows you actually how much you can do with careful planning when you're laser focused on collecting! Next time, we'll finally head down into the underground, but also finish up with the West Area, and you know what that means: whales (again) and pandas (brrr)! Hope you didn't find today's episode too stressful though! Because we still have a bit to go before we reach the goal! So, I guess some of the required maximum times I mentioned above might seem just a touch crazy. However, here's a video of me completing the capturing in Samakia (which I've used to prepare this update). You will see that in the video, excluding the time spent in battles (where the clock is stopped anyway), the total time spent walking around Samakia is just under 40 seconds only! The video includes explanatory subtitles, as always. Then, take care and see you again in Winter 1998 when we continue our challenge!
|
|
#
?
Sep 8, 2022 23:26
|
|
|
All right then, I've finished playing/recording all the way to the end of Scenario D. So the only question remains... was I really able to get all 120 in just one year or not?
|
|
#
?
Sep 10, 2022 16:56
|
|
|
100%. I believe in you.
|
|
#
?
Sep 10, 2022 16:59
|
|

|
I have faith in you.
|
|
#
?
Sep 10, 2022 17:03
|
|


|
I'm going to be the naysayer and say you didn't, but you came close, but couldn't quite figure out the routing to get the last few in the time given.
|
|
#
?
Sep 10, 2022 17:06
|
|
|
Obviously not. No one can, it's impossible. 
|
|
#
?
Sep 10, 2022 17:09
|
|


|
You got 119, then blasted off with the last one in your backpack as the timer went to zero just to flex on the entire thread.
|
|
#
?
Sep 10, 2022 17:13
|
|

|
The Happy Hyperbole posted:100%. I believe in you.
|
|
#
?
Sep 10, 2022 17:23
|
|


|
All right, glad confidence levels are high! I'll try to post the next update later today, but tomorrow at the latest, and the final one a couple of days after that! Then we'll really be completely done with this game--there is definitely not a secret Scenario E to pop out at us suddenly!
|
|
#
?
Sep 10, 2022 17:26
|
|
|
Of course not. It jumps to Scenario F instead, because the scenario numbering is based off the North American school grading system.
|
|
#
?
Sep 10, 2022 19:56
|
|
|
Welcome back to Linda4. We're still trying to collect all animals in the limited time of only one year! 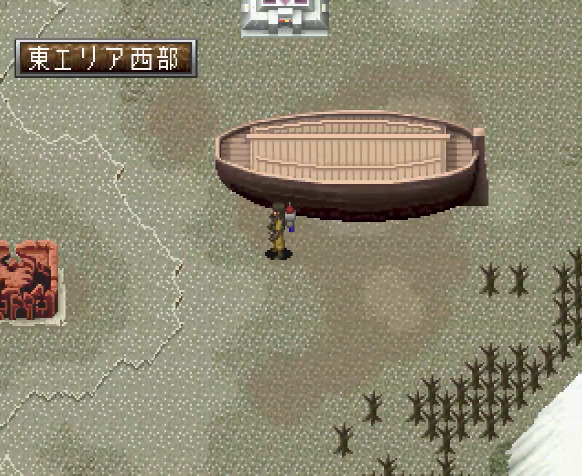 Last time when we stopeed, it just turned into Winter 1998. So we're about at a half-way mark time-wise. Let's see how we proceed. Step 1. Eastern outskirts of G-Factory 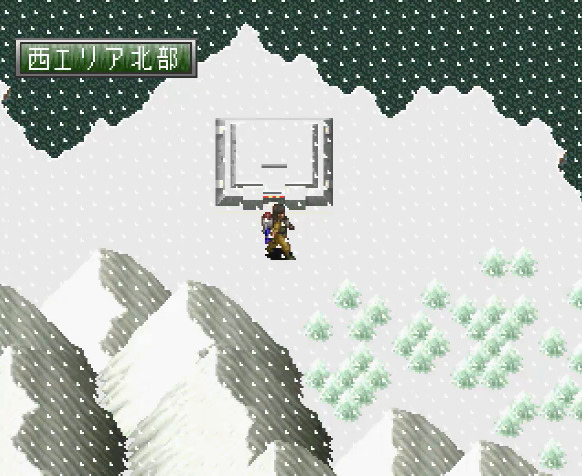 Of course, we want to go again and try to find a female whale!  We'll use again Linda's "animal call" to get the "island" to come to us! 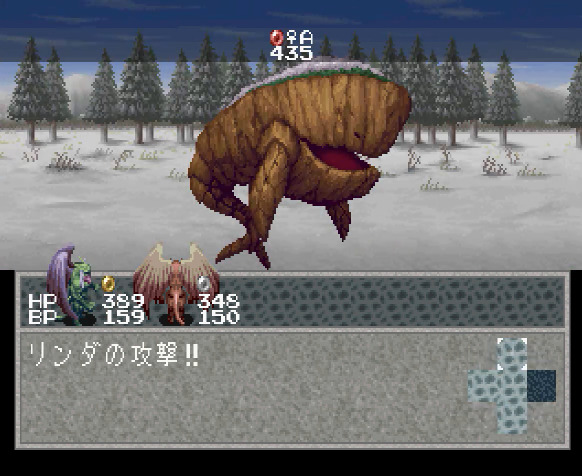 Ah, there we go. It's important to note that of course you can reload your game several times to make her appear, BUT you need to reload from before coming to G-Factory itself. It seems that the game "decides" on the whale situation as soon as you arrive, so reloading from that point will not help. Step 2. Minago and going underground 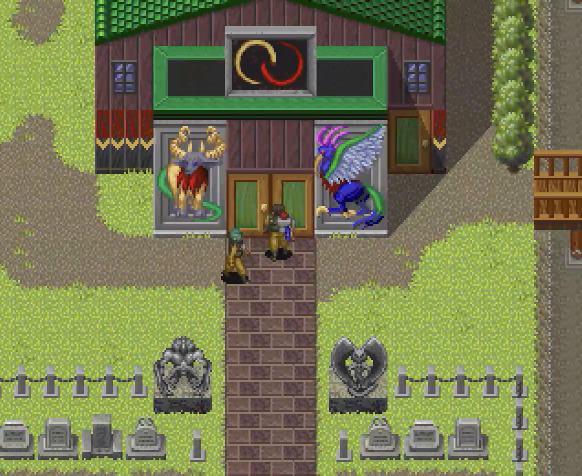 First we head into the church.  On the upper floor, there's a cryogenic storage machine which gives us a pair of sea cucumbers! Neat.  Now we head into the well. 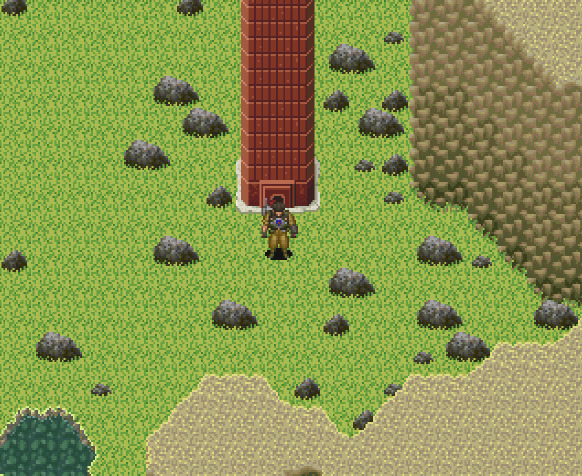 Our main destination today is the pyramids, but first, here we pick up for now: 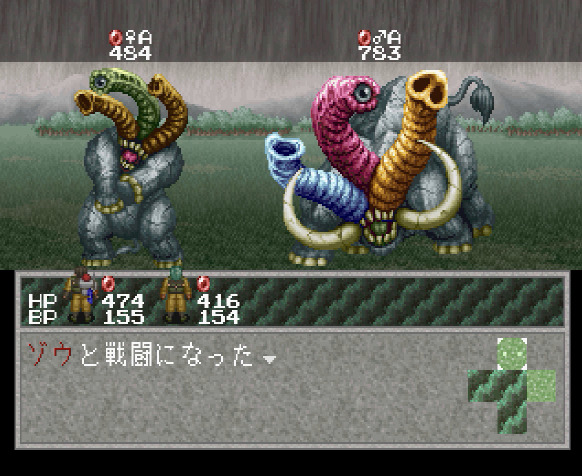 Elephant. Step 3. Tricross 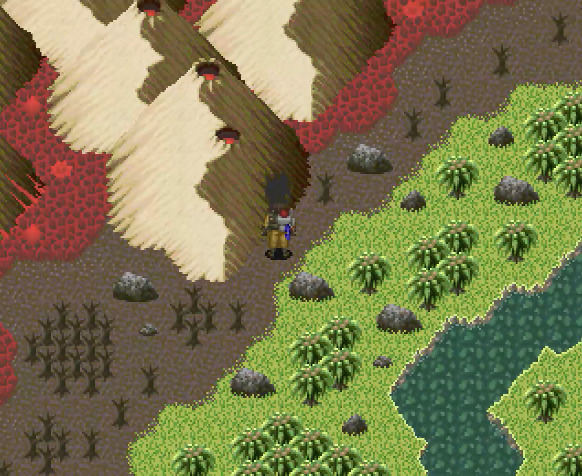 I mentioned that we definitely do NOT have to traverse Tricross cave (since we already have a pair of carps in the ark), however, we do need to at least pop in to pick up that one endemic species which is only found there. Tricross has multiple entrances, and luckily one of them happens to be exactly on the way to the pyramids! So we briefly come inside and pick up: 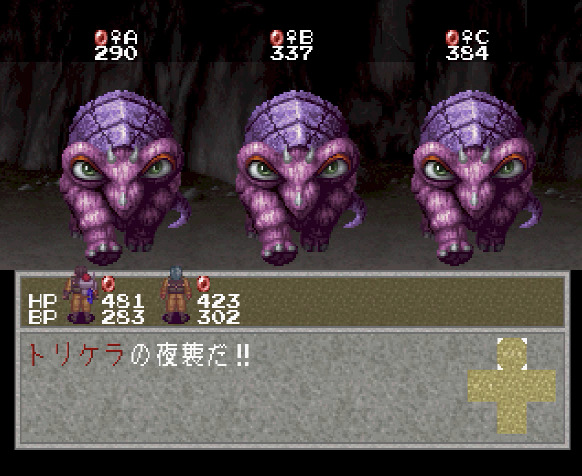 Triceratops. They sometimes appear in large groups, so you may want to use Linda's "Moon of Yabasa" to put them to sleep if you want to make things a bit easier. Step 4. The pyramids  We have no need to go into the big pyramid. We already have the ladybirds in the ark, and the T-Rex can be also found in the small one. So we'll head directly into the small one then. 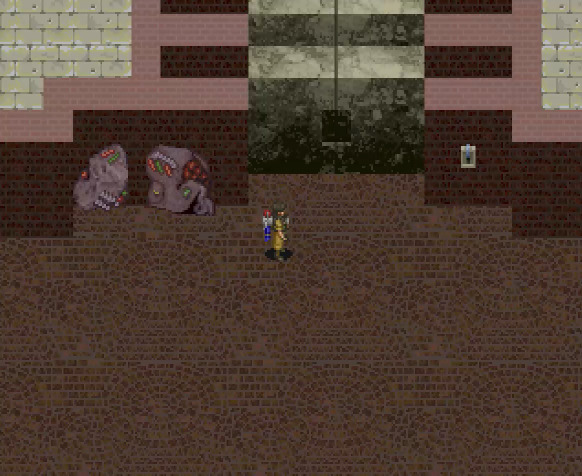 Yes, it's that place where we have to activate switches in order to open the doors! 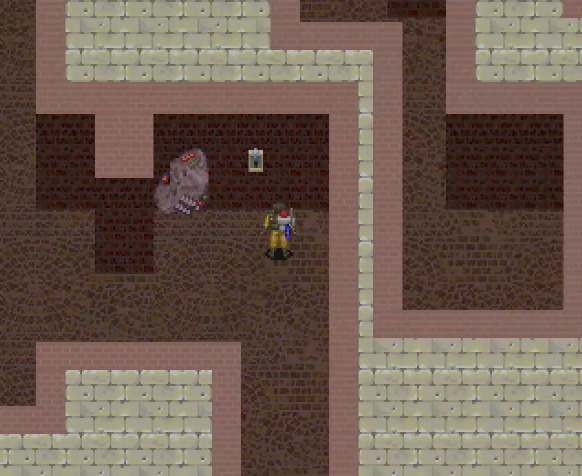 There are three individual switches... 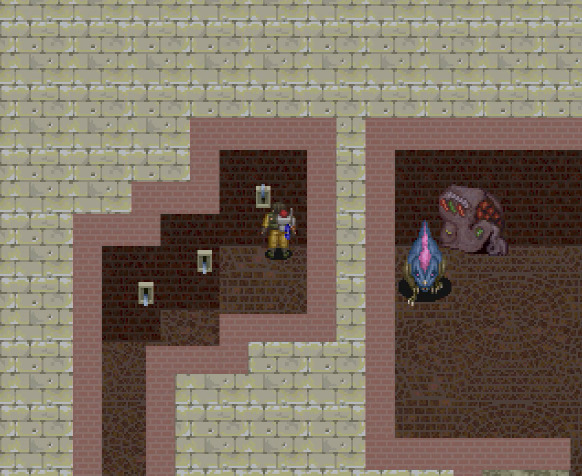 ...and then also these which control the entrance to the room next door which houses T-Rexes.  T-Rex ("The Ultra Strong"). Opening the doors of course releases them so you can capture them. Definitely use Ken's "Earth of Yabasa" for good damage to all enemies at once! 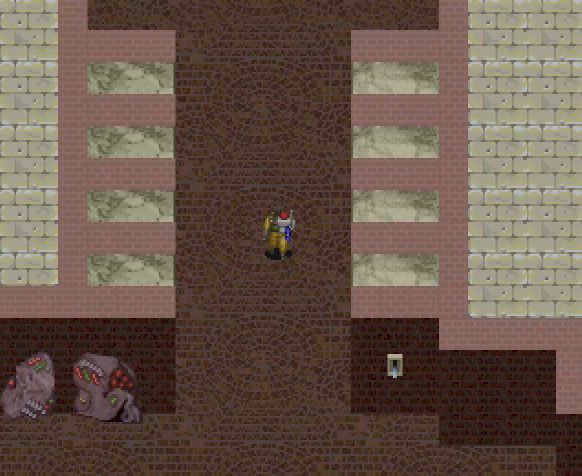 The other doorway ultimately leads to the teleporter... 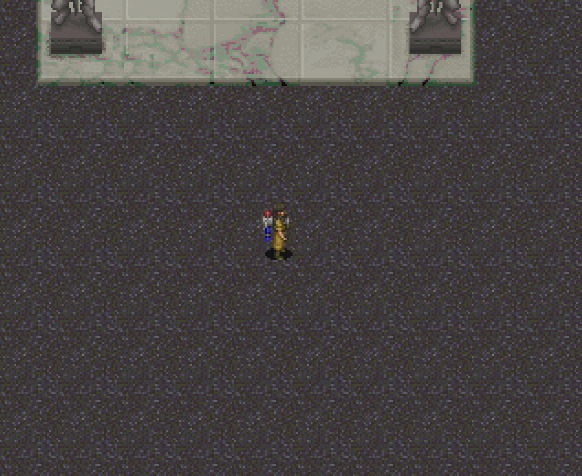 ...which leads to this dark and empty place. But we have to come here, because... 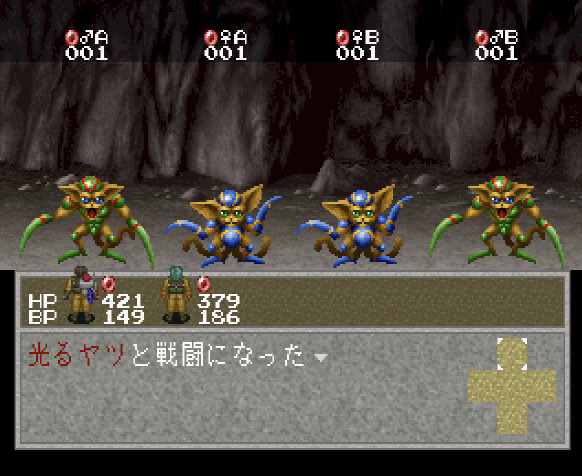 Firefly ("The Shiny Guy"). The game gives you "squirrel needle" weapon in the left luggage storage. Pick it up from there as soon as you start the scenario and this guy will be no problem, despite its silly HP. Definitely take the weapon from storage immediately at the start, as the left luggage employees also leave the planet gradually, so, uh, you don't want to find yourself without an easy way to get this guy. I suppose if you're despereate, you can try throwing some poop and hope it does exactly 1HP damage. Anyway, we're done down here in the pyramid. Step 5. Fontana 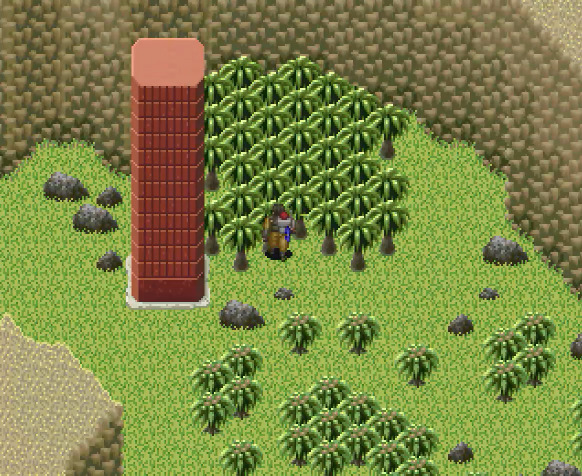 Fontana is that forest place with a big waterfall.  Gorilla. Just let yourself get ambushed. 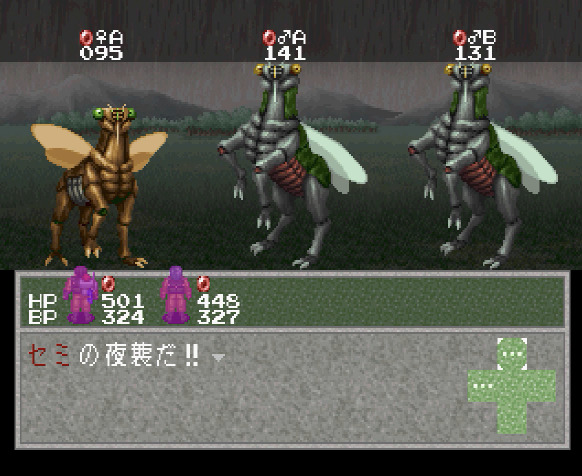 Cicada. Also you can get ambushed by them. But don't waste time as they are more easily found elsewhere. 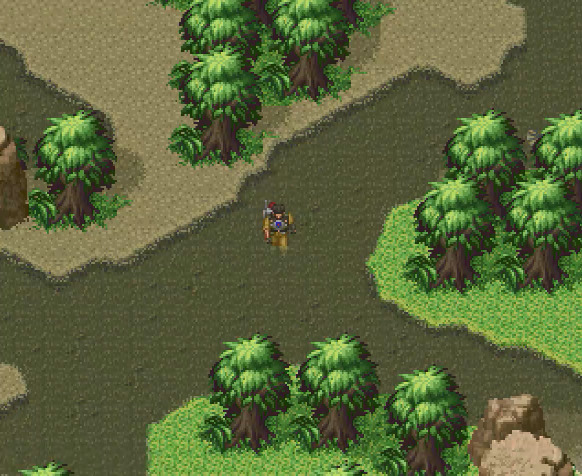 Also let yourself get ambushed in the water, because... 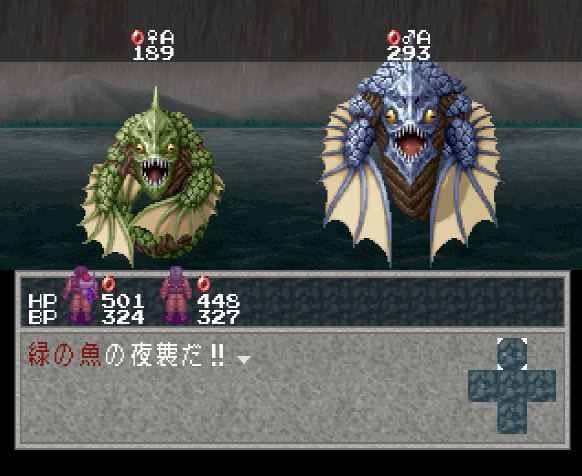 Piranha ("The Green Fish"). 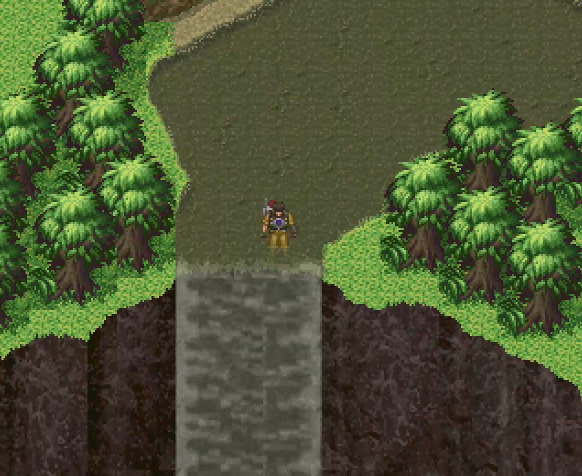 Then we go down the waterfall! 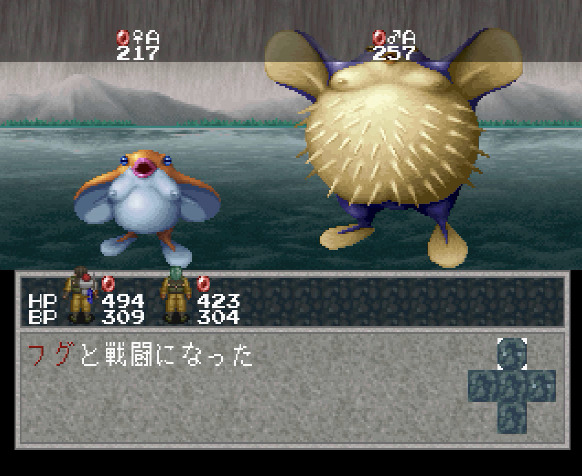 Pufferfish/Fufu. Found in the pool at the bottom of the waterfall. 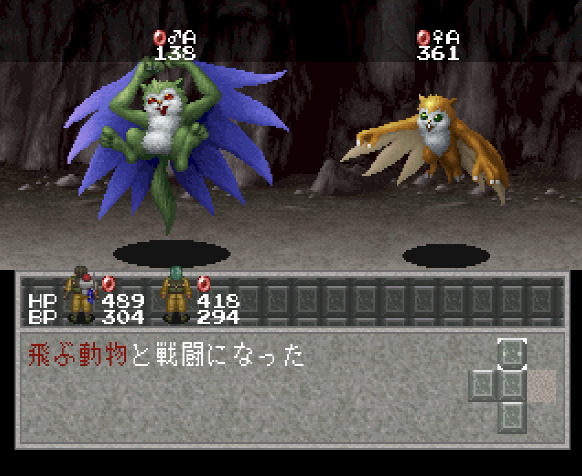 Flying squirrel ("The Flying Animal"). Found in the small cave behind the waterfall. Step 6. Underground, northwestern part 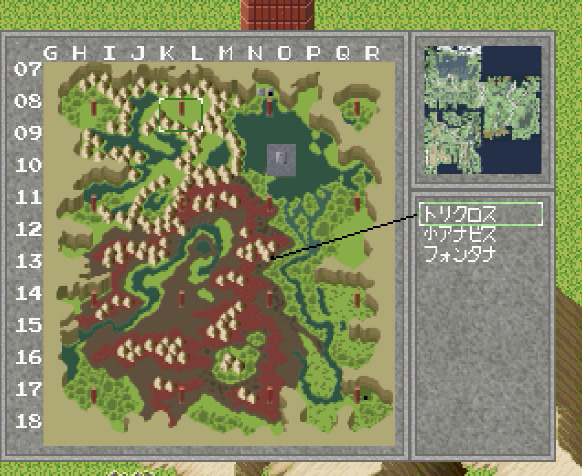 We're heading into this part, which is separated from the rest by mountains (note the rectangle indicating our position). 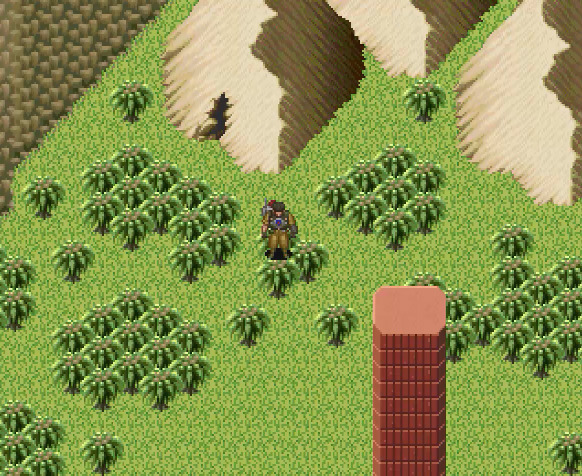 First, recall that antelopes (serows) live here disugised as trees.  Antelope. Use Linda's "animal call" ability to get them to come out of their disguise and to approach you. 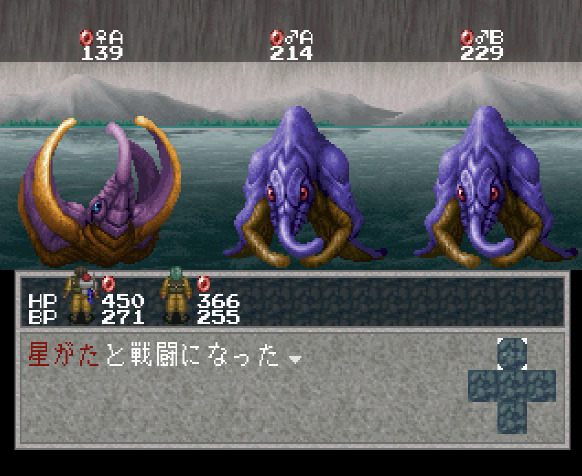 Starfish ("The Star-shaped"). Look in the water for them, or get ambushed in water. Interestingly when using a lightning spell against an enemy in water (like here), it will actually attack ALL enemies. Makes sense, but you don't always see this kind of attention to detail. 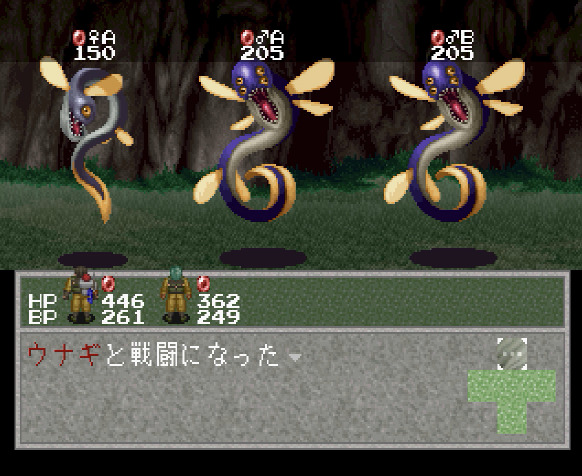 Eel. Of course, lightning attacks will heal them. Step 6. Gapia  Gapia entrance is right in this same little area, so it makes sense to do it now while we're here. 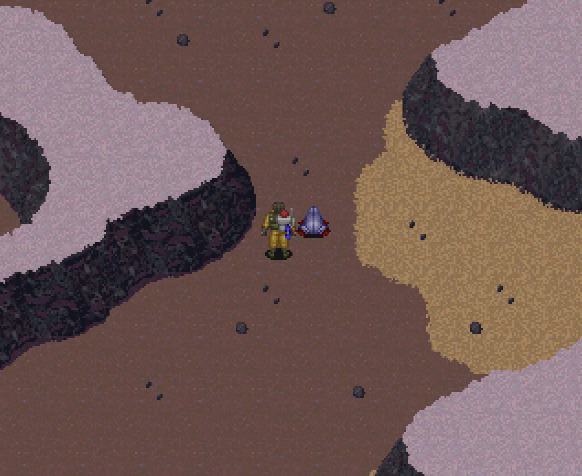 The infamous tree frogs are here, but we actually already have them in the ark, so no need to bother. This I don't get a bit... you have to come here anyway and tree frogs are quite plentiful and easy to catch, but the game still gives them to you. They could have actually given you less without making the challenge significantly harder. But I'm having a weird impression that they implemented this scenario a bit by using at least partially some sort of a "saved state" from Scenario C. The reason why I say this is because (a) you can still see all quests in the quests menu, but they are all finished, and (b) you can also see all messages from quests on the answering machine, but also they have all been listened to. So it kind of feels almost like somebody from the devs played through the game and then they just made a save when they were happy with the situation. Of course that doesn't explain the extra dialogue you get at the beginning from Ken's mum, but who's to say that you can't trigger that in Scenario C also if you are at a particular situation with regards to capture. Ah, I don't know, but it's pretty obvious that Scenario D was definitely "hacked in" at least to an extent. Anyway, moving on. Since we also have a pair of giraffes, and also we just got a pair of sea cucumbers from the church, there's really only two species left to find here. 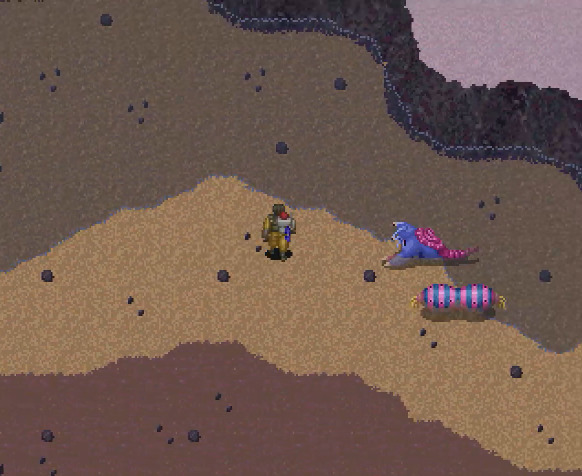 First off, this guy. 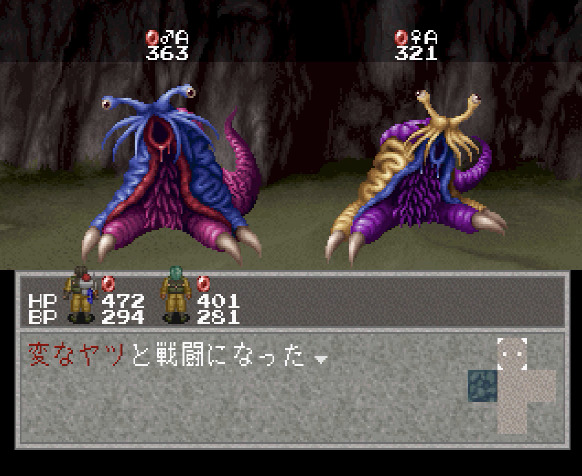 Slug ("The Strange Guy"). They are a bit reluctant to spawn sometimes, so either use the "wait" method or alternately see if you can get ambushed by them in water. They seem to get healed by most elemental attacks, so be a bit careful. 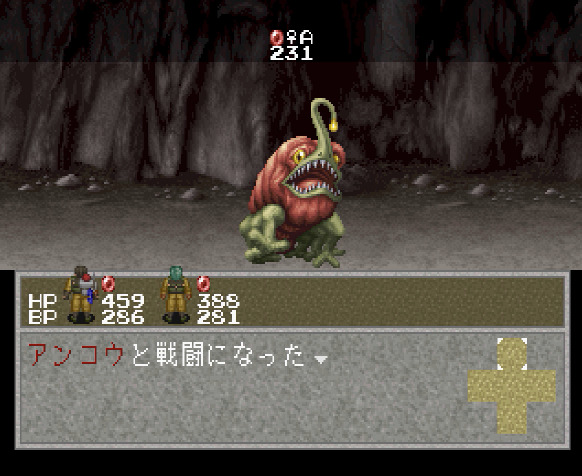 Anglerfish. The other species we still need from here, female only of course, since we already have the male in the ark--at this point in time, there would not be anybody around to dismantle the anglerfish to get the egg, nor would there be anybody at the incubator to hatch the male anglerfish from the egg, so it has to be this way. That's all we need from Gapia. If the season doesn't change when you come back out of the cave, it means you're golden! Step 7. Melt Pot 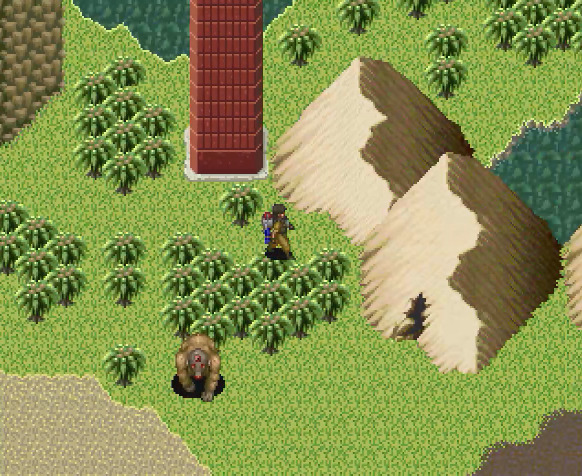 If the season didn't change after exiting Gapia, that means we can now relax. Melt Pot can be accessed from this same little patch of underground, simply by walking to it, which means we now enter the "borrowed time" part and can spend as much time as we want in Melt Pot, as the season will not change until we come back out! As you can see, the success of Scenario D definitely hinges in large part on making good planning decisions what to do in "borrowed time", so you can leave that moment for longer overwold captures and dungeons that may take a bit loger to deal with. 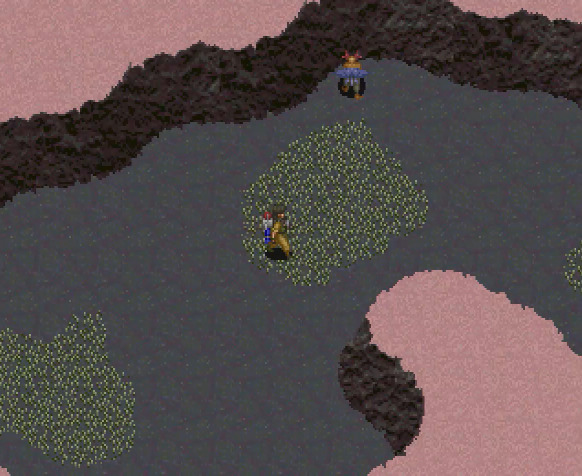 Inside first we find an old friend. 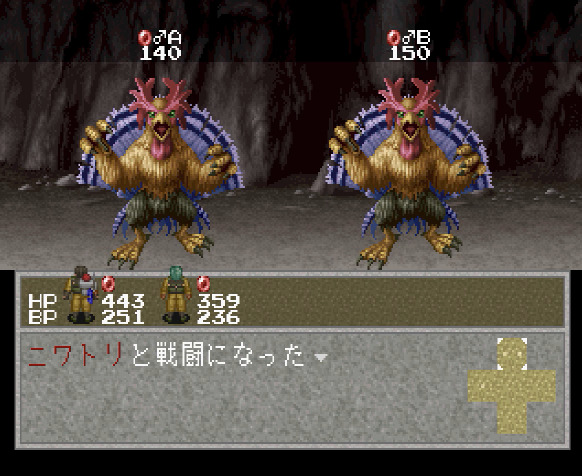 Chicken. As you can see, we were able to completely avoid going to Marblepolis--both species from there can be found in other places. It's also important to realise this and to optimise your work by only going to places which you really need to go to--which is still most of them, but at least a couple can be avoided, for example, Marblepolis. On the deeper level we find also the following: 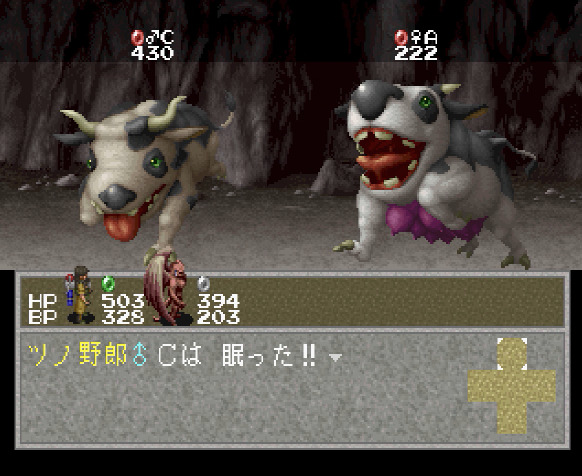 Cattle ("The Horned Guy"). If they are too strong for you, you can put them to sleep (like I've done in the screenshot!). 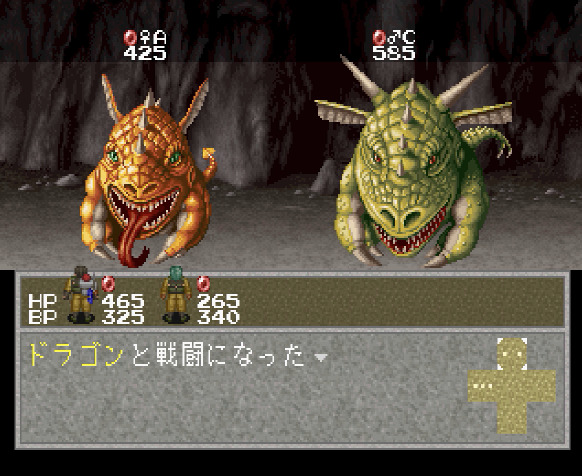 Dragon. They are really strong and have some nasty attacks like a stronger version of "fire carpet" which puts it automatically on all four sides (Linda's version just puts it in front). Fire carpet on all four sides means that the "Escape" command is not possible, because well, you can't escape through fire (and dragons just happen to be immune to it!). Also, dragons are immune to sleep too. So, uh, I guess, just do the best you can? By the way, make sure you're not carrying hot poop with you. As explained previously, it's the dragon poop and if you have it they will chase you, thus making impossible to get a preemptive attack by approaching them from behind--this latter ting being essential to have time to cast buffs before they start going crazy on you! It is potentialy worth to spend time and catch 20 female dragons and craft a full set of dragon clothes for both Ken and Linda. It will help in case you get into a spot of trouble with pandas. We are on "borrowed time", so we can spend time doing it, but its really a highly optional extra thing--if you get a preemptive attack on pandas, probably you will be ok either way as you have time to cast the buffs. Anyway, I did craft the equipment, and here's where the characters ended up: 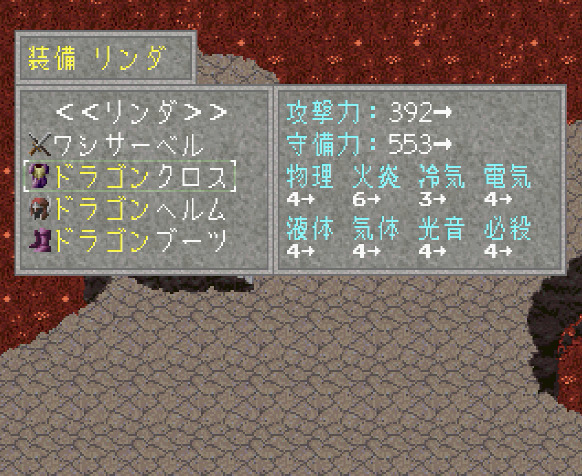 Linda.  Ken. Of course as weapon we still use the eagle sabre. Although there are stronger weapons around, the ability to hit all enemies at once is much more important in my opinion. If you missed the cicadas, they can be easily found here in Melt Pot too, there plenty of them around. As for dragons and cattle, they both have a spawn rate a bit on the low side, so as always, use the "wait" method to make them appear. However, we are done here... 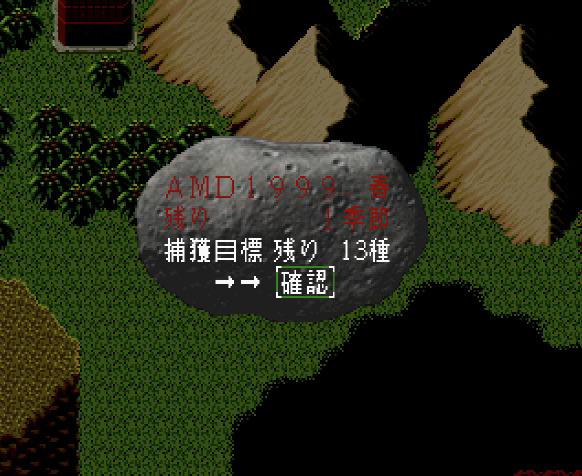 ...and after exiting, of course it becomes Spring 1999. We only have one season left to finish the job. In the meantime...  ...let's hand this in at the ark.  We're currently at 95 out of 120, which means next time we need to get the last 25 species in one season. Sounds doable? Eh, probably? So, there was some interest in what happens if you do not manage to collect the required minimum number of animal species. In the end, nothing really wery dramatic. First of all, there's no big explosion or anything and no special animated cutscene. 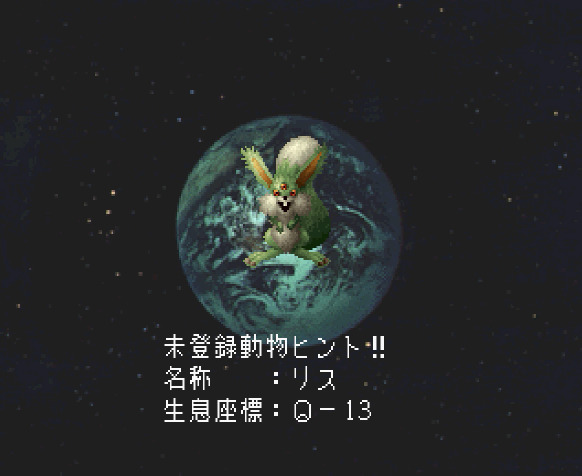 The game will simply give you hints (like this one above) for a few species you haven't found, what they are called and where they might be found on the map. But only a couple of hints like this, not for all of them. And then...  ...you are finally left with an encouraging message from the game, pronounced in Linda's annoyed voice to you, the player! And that's all for today. Next time, we'll finally make the last push as we try to get to 120 in this time trial mode! There's still a number of locations we need to visit, so it's going to be a bit more of a whirlwind/hectic tour of the planet. Also, now that we're done with the whales, the pandas will finally grace us with their presence! So I will see you next time for the truly final final part of this LP!
|
|
#
?
Sep 10, 2022 21:30
|
|
|
So wait, we get absolutely no explanation of how the Ark initially came to be, et cetera?
|
|
#
?
Sep 10, 2022 22:14
|
|


|
Holy potatoes, I continue to love this
|
|
#
?
Sep 10, 2022 23:25
|
|


|
Tallgeese posted:So wait, we get absolutely no explanation of how the Ark initially came to be, et cetera? it was magic also ahaha, its p nice that the game gives you some hints if you bust the timer
|
|
#
?
Sep 11, 2022 00:06
|
|
|
Hirayuki posted:Holy potatoes, I continue to love this Tallgeese posted:So wait, we get absolutely no explanation of how the Ark initially came to be, et cetera?
|
|
#
?
Sep 11, 2022 18:07
|
|
|
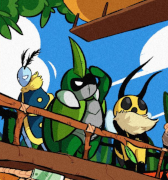
 Welcome back to Linda4. We're definitely still trying to collect all animals in the limited time of only one year!  Last time when we left off, Spring 1999 had just started--our last season! We still have 25 species to collect, so let's see if we can manage it. As you can see, Linda and Ken are still on the ark, but there's a good reason for that! So let's get started! Step 1. The ark, living quarters  It's been quite recently, so I'm sure you haven't forgotten that in Spring 1999... 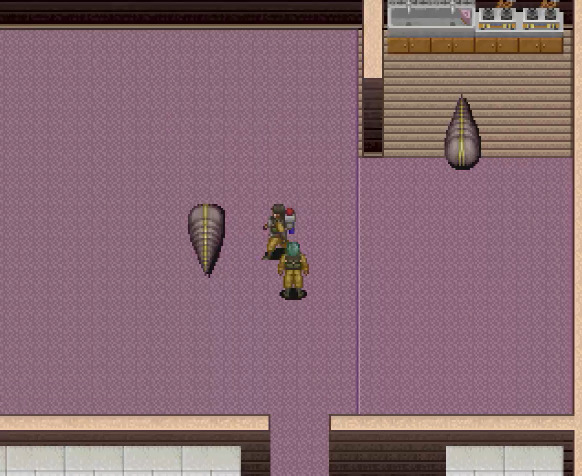 ...there's a maggot infestation in the living quarters! 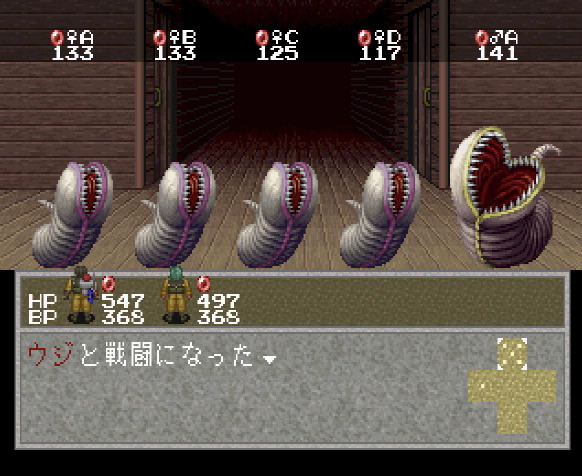 So definitely make sure to stop by here and pick up a couple, otherwise you won't get to 120! I guess ice spells work well on them. By the way, if you somehow mess up both battles with maggots in the room and don't manage to capture them (I don't see how, but let's say you do), you can simply go out and back in to respawn them! Step 2. Hardia So, while we're here, let's quickly stop in Hardia.  Another recent thing...  Don't forget to stop by the elderly couple...  ...so that you can obtain a pair of aye-ayes! They are definitely NOT "preloaded" in the ark and you absolutely need to come here in Spring 1999 and talk to them! Step 3. West Area, central lake 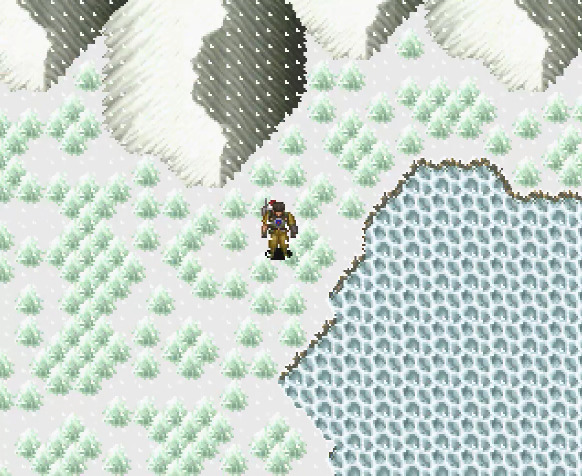 Since we have finished capturing all other species from this part of the world last time...  ...it means we can now find pandas roaming in the blizzard. 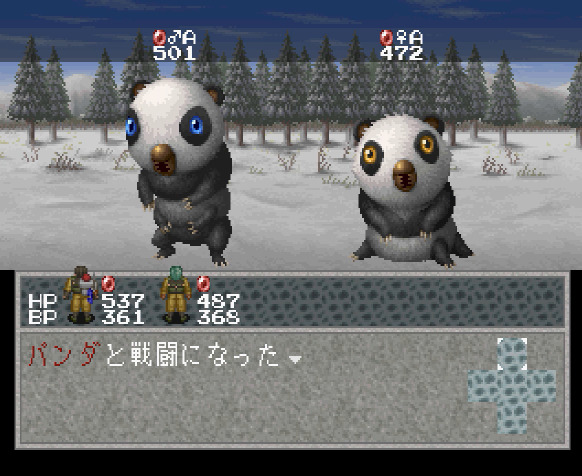 The strategy is the same as before. Approach from behind so you get the first turn, use that to transform Linda and buff your speed with the ring ability. Also transform Ken and start attacking. In the second turn, Linda uses the other ability to buff attack power. Done. Step 3. Daicave Maybe it wasn't entirely obvious, but we have pretty much left most of the East Area for last--we've been focusing on west and south so far. So there's quite a bit still left to do here around the ark and surrounding towns. Let's start with Daicave. We have three species to pick up here. 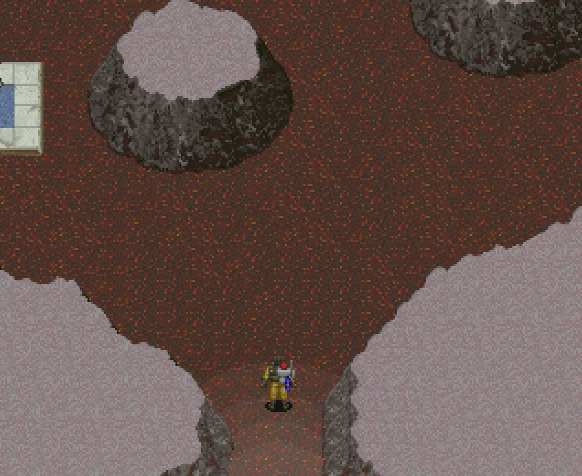 First, as soon as you enter, you can let yourself get ambushed. 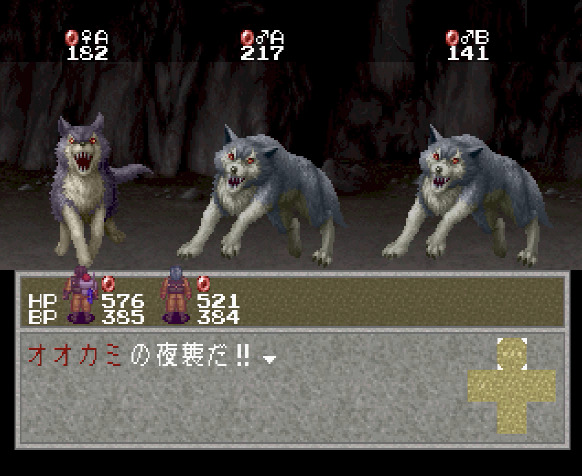 Wolf. Instead of looking for them, just obtain them via an ambush. Using night ambush whenever possible saves a fair amount of time. Now we need to head to the deeper levels. 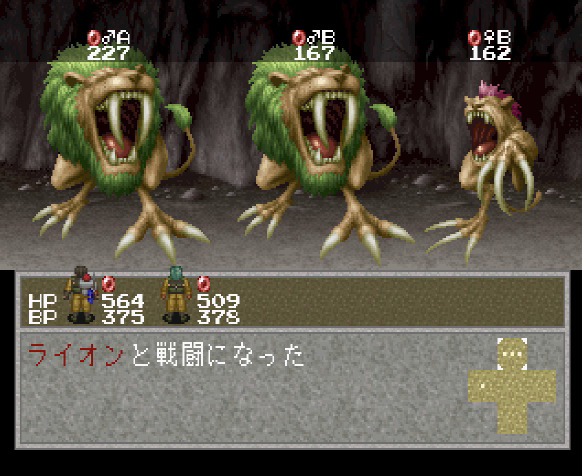 Lion. Just pick them up on the way. 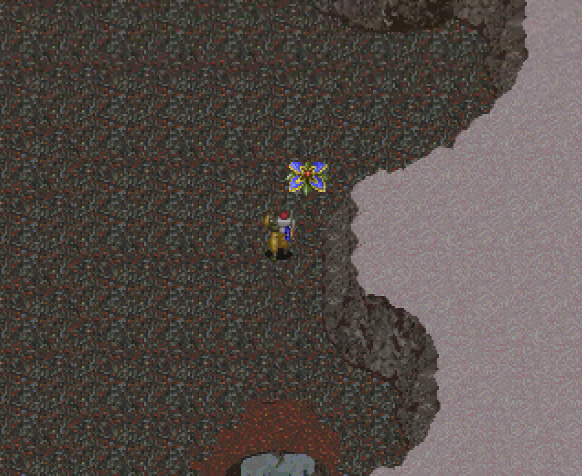 We needed to find this area with blue flowers, some of whom are peacocks in disguise! 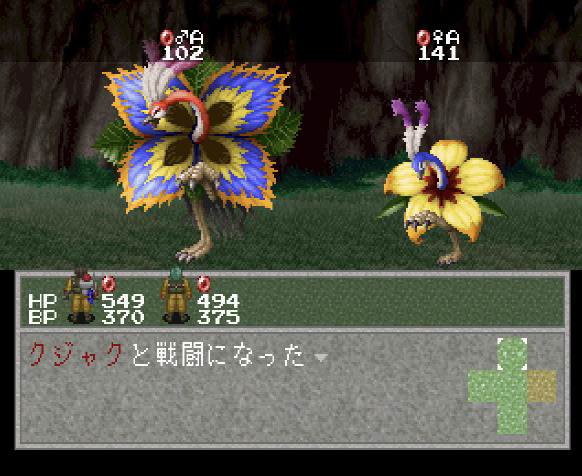 Peacock. This one is a little bit of a pain, but there is no other option but to walk all the way down here--check the maps to find the quickest way. If you didn't already find lions, there will usually be some here roaming around the flowers, so you can get them now. Well, at least now it's done so we can simply use the "escape unit" to teleport out immediately. Step 4. Yamapit 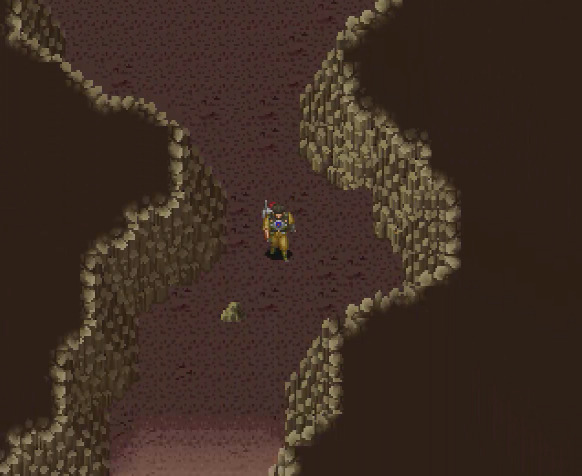 As always, just look for these rocks on the ground...  Turban shell. These guys appear in the last couple of years here disguised as rocks. Unlike bears, these rocks don't chase you. This is everything from here. Step 5. East Area, eastern part 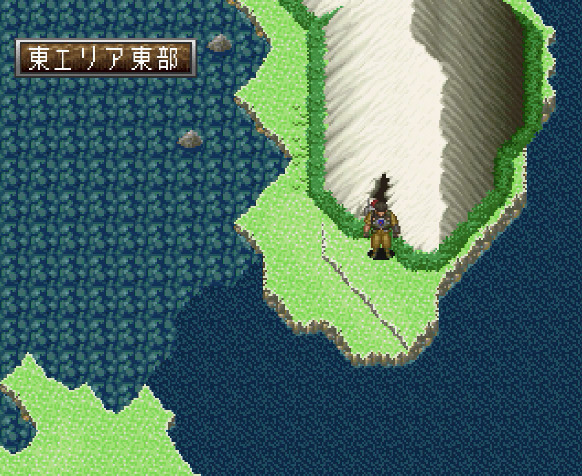 Afer exiting Karagoram, you're basically already here, so it makes sense to finish this area right now! Here we find the following: 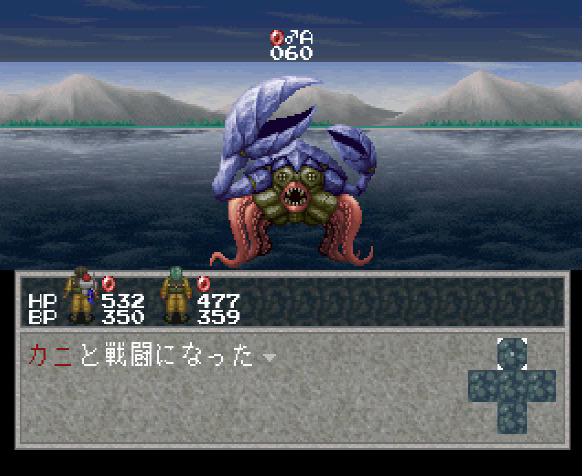 Crab. We only need a male, since a female is already in the ark. 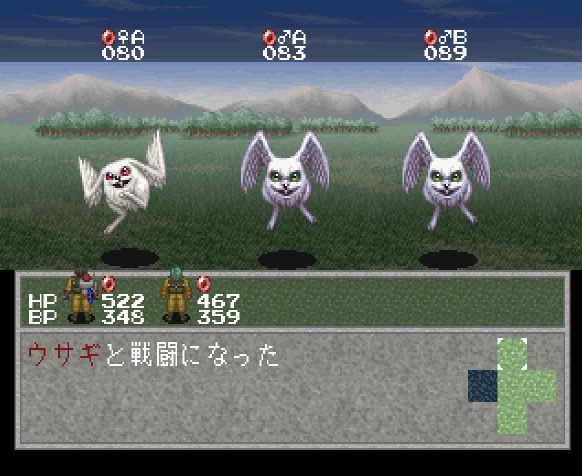 Rabbit. 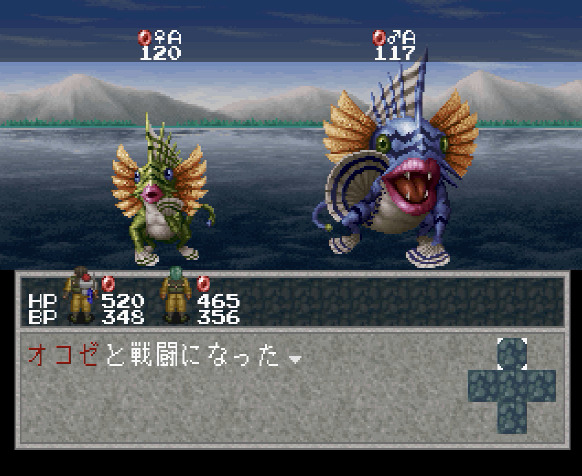 Stonefish. 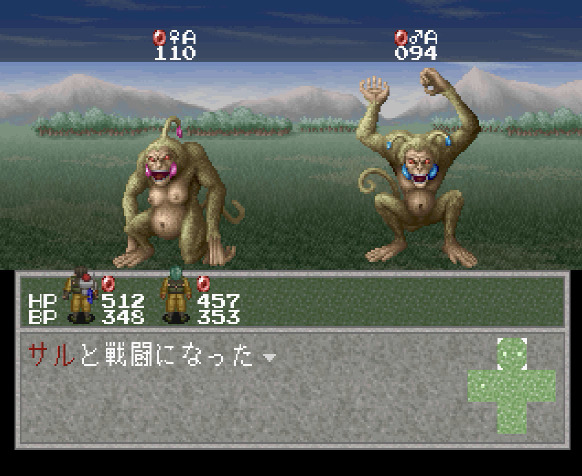 Monkey. All of these can be caught simply by finding them on the overworld. They generally appear in good quantities so you should not have trouble here. Step 6. Karagoram 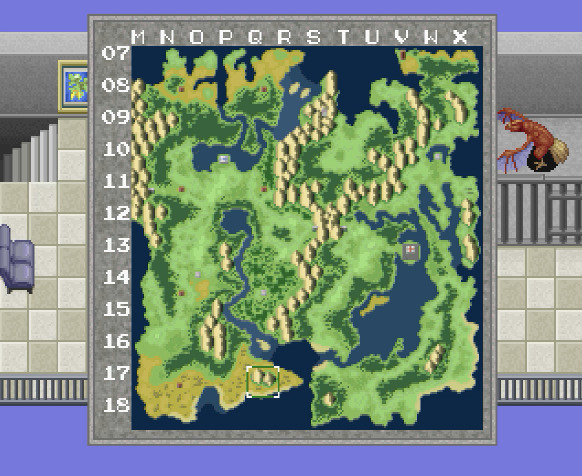 It's located here, south of Minago.  We'll employ a bit of an unusual strategy. This place has a couple of disjointed parts, so we'll also do this in two parts. First we head down one staircase. 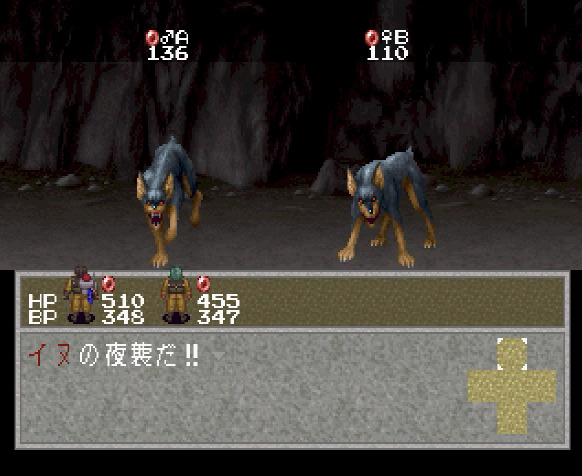 Dog. Let yourself get ambushed immediately after going downstairs. 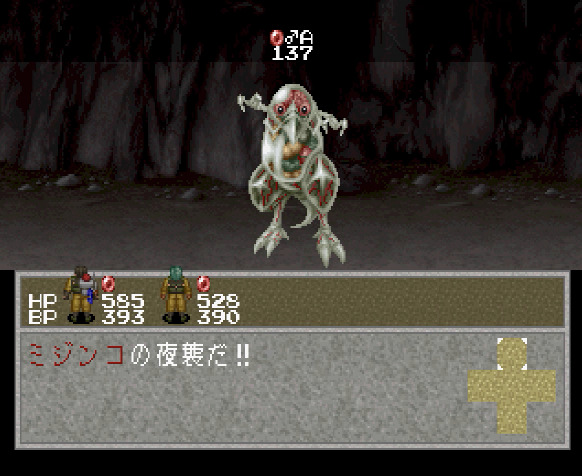 Daphnia. If you proceed one level lower, and get an ambush, it will be these guys. No need to go through the whole dance of donating 100,000 G--this time around, they're just here already like that's all happened. Now we want to get to the other side of the cave, but... turns out, it's faster to use "escape unit" to teleport out and then go back in and follow the other route! So that's what we'll do, in order to check out the rest of the cave. 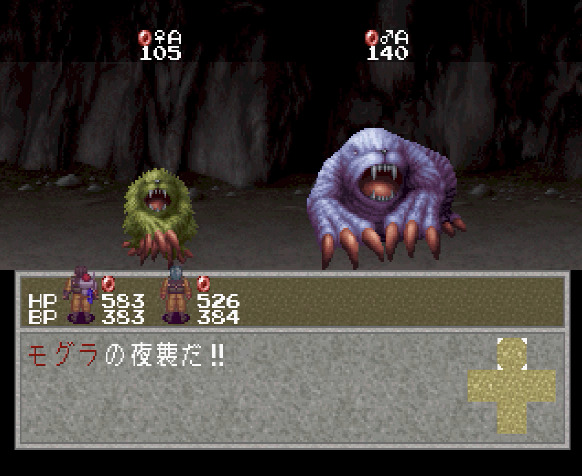 Mole. Easiest to is to get ambushed on the lower level. 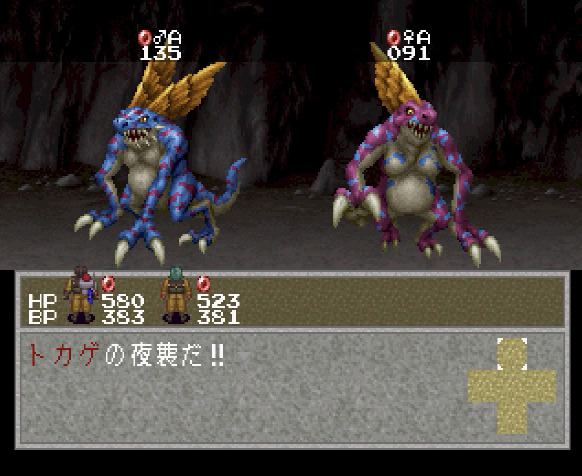 Lizard. They will ambush you on an upper level. This is all there is to be found here, so now we can leave. Step 7. East Area, western part Now we can finish the other half of this area. We got the dragonflies last time, but there's still more. 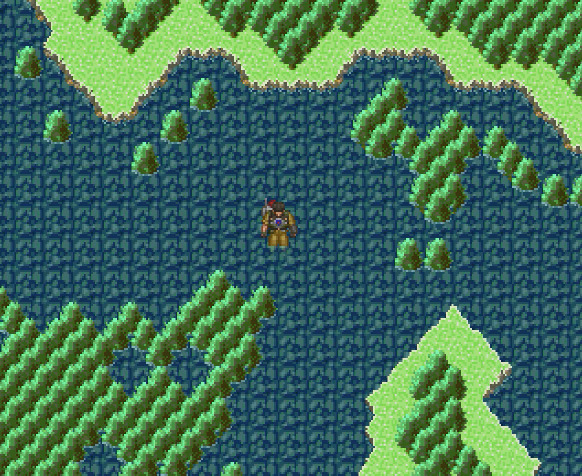 First, we'll make camp in the water north of Ozport. 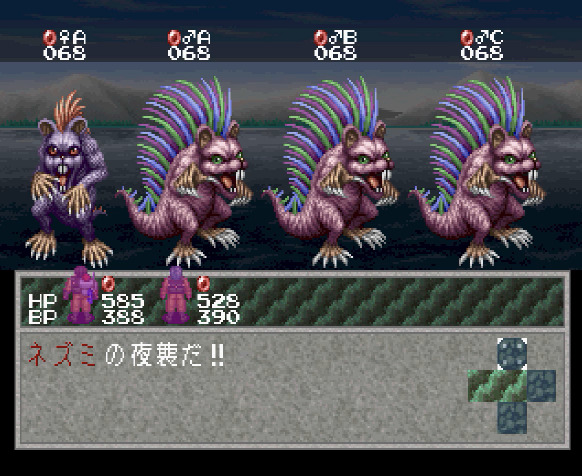 Rat. They do roam the area, but are small and hard to see and also fast and hard to catch. Since in this game rats are aquatic creatures, simply camp in the water here to trigger an ambush by them. 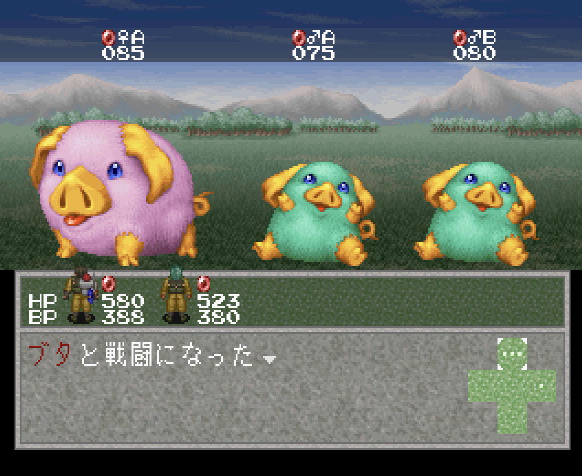 Pig. There's loads of them in this area. 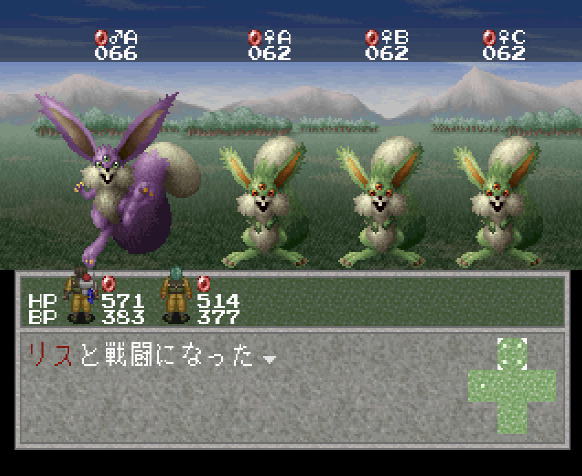 Squirrel. They also roam the area, but are not as common as pigs. They will gravitate more toward forests, so look for them there.  Ostrich. There's also plenty of them around here, but you may have difficulty to find a female. In that case save in Hardia and then go out, fight one and reload if it's only a male. You can't afford to waste time by walking around and fighting multiple groups in hopes you find a female--much more efficient to just reload when you're right next to a telephone! Step 8. Underground, southeastern part 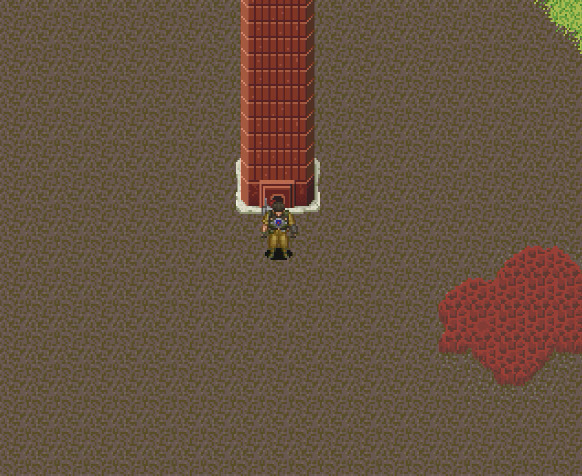 In order to get here, you have to use the teleporter at the tip of the lake east of Dogy Figh. If the season doesn't change when you arrive here, then you're basically done. It's not possible to fail any more--means for the rest of this part we're on "borrowed time"! There are two more species remaining on the overworld part. 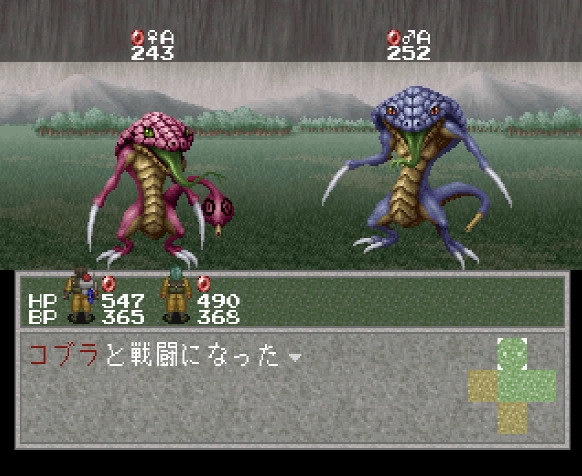 Cobra. 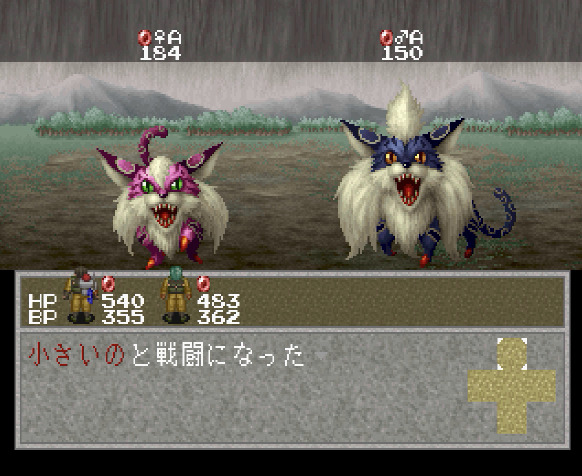 Sandcat ("The Little"). Step 9. Pteranodon Terrace 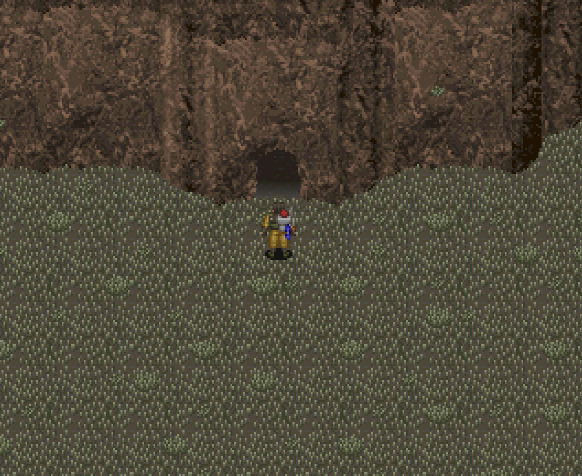 Remember this place? Yeah. As always, as part of our "borrowed time", we finish by visiting a dungeon which takes longer to traverse and has no real shortcuts. So once again we have to climb to the top of this place. On the way, we catch the following: 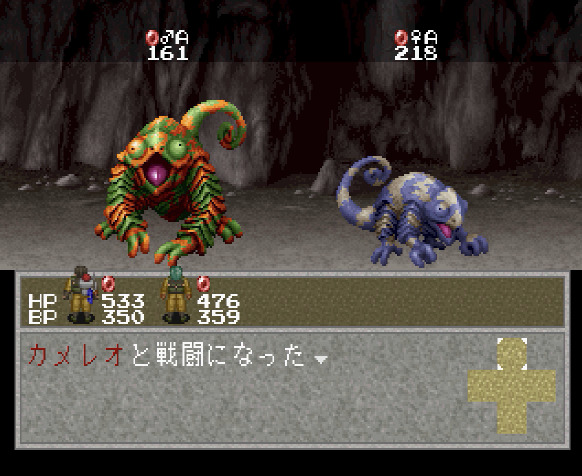 Chameleon. As mentioned, they are invisible, but you can use Linda's animal call to get them to come to you. Just remember to stand still while doing that, as moving around may cause you to miss them. You can also try to get ambushed by them, or even just walk through the dungeon normally and you still might run into them randomly. So plenty of options here. 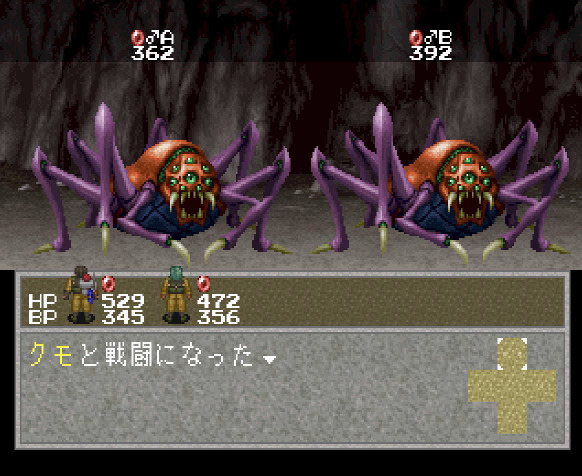 Spider. Found on middle levels of this place. There are a ton of them, and if not, just use the "wait" method.  Pteranodon. Found on the outside ("terrace") parts of this dungeon. 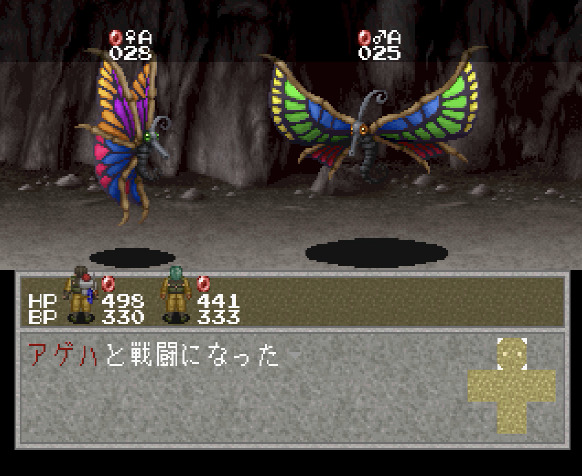 Swallowtail. Found on the very top level, just before exiting out to the pteranodon nest with eggs. Ken's "formic acid" (kind of like poison with continuous damage) ability works well here and seems to do exactly the right amount of damage to one-shot them. Alternatively, you can try "fire carpet", but that's not so good as they are prone to running away. Ok, well, that's all we can find here, so let's get outside. 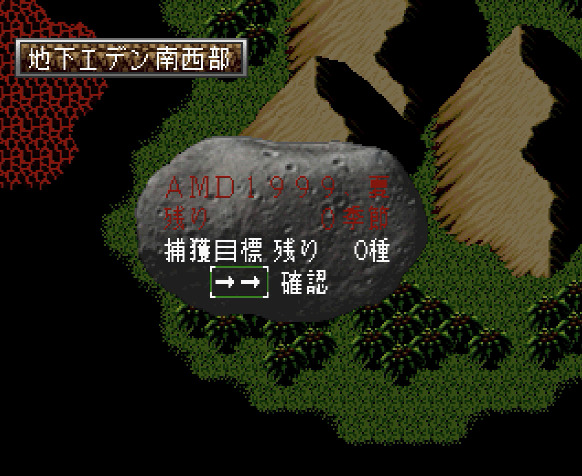 Needless to say, upon exiting, it's now Summer 1999. We need to be leaving the planet ASAP. So, uh, let's head to the ark and see how we did?  Let's hand in all the remaining stuff.  So, what number will you give me, friendly robot? 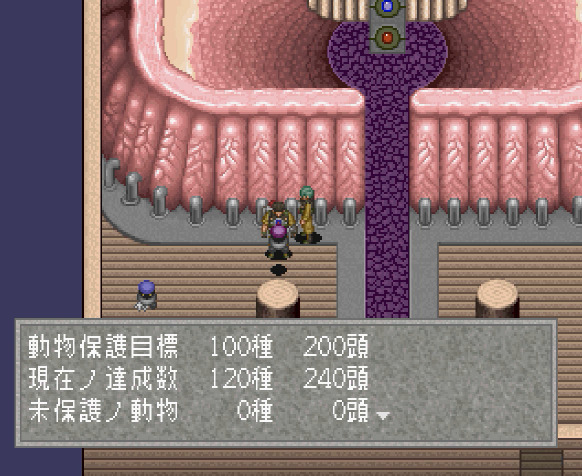 Ah, well. Looks like we did it, the full 120. Not quite as impossible as the game tried to claim, huh? Obviously, there are for sure other ways of doing it, this was just one example of how it could be accomplished. But anyway, let's lauch the ark then.  Of course, we are heading into the control room.  The same procedure as always. 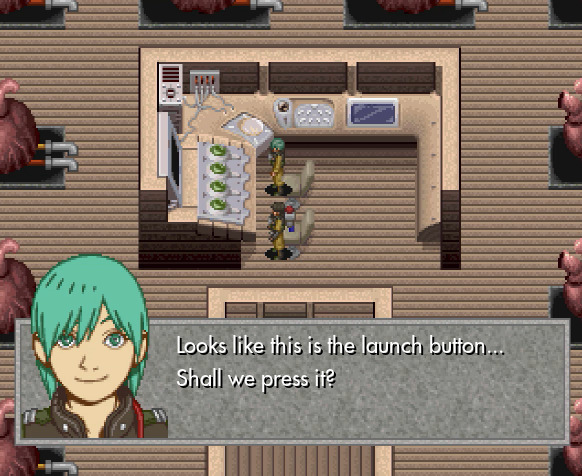 Why would we want to turn back?  And there we go. As far as the ending cutscenes go, they are the same as in Scenario C, so I won't repeat them. That is... until you get to the seven chimes part. Instead of all that, if you managed to collect all 120 species in Scenario D, you get something slightly different:  For your hard work, you will be rewarded with the blessings of the bells! ❤  Press the O button to make the bells ring as many times as you like! ❤ And so, well, instead of getting the fixed amount of chimes, you can just press the O button to make them ring as many times as you want!  Every time you press it, you get a rainbow like this. Once you get bored, you can press the X button to finish and... well, that's it.  You just go back to the menu and can play any of the scenarios again if you want. But at this point we've seem pretty much everything there is to be seen in this game. There are no more secret scenarios, that's it. So this brings us to the end of the game for real now, and by extension to the end of this LP. It was fun for me, and hopefully for you too, and thanks for reading this far! I hope I was able to properly show off a game that many have heard about but only a few have played outside of Japan, due to various reasons such as language barrier and so on. As I've indicated before, the game always has been and remains popular in Japan, including activities such as speedrunning. As we've seen the game features quite a number of mechanics not really seen much in other JRPGs of the time period, and what's even funnier is that many of them are just alternatives that you don't even have to use! And even some things are there almost just for fun, like dog fights and so on. Although it was not really the goal of this LP, since the idea was to show how to play the game when you know what to do, it is a game that really does reward exploration and experimenting with absolutely everything! You do get (obscure) hints for some of the things, but really not everything (whale island, anyone?). I can say the one thing where I think the game falters a bit is the battles, which don't often require more than figuring out which of your abilities does the right amount of damage to prevent overkill (that is if the normal attack is not doing the job). There are only a few stronger enemies requiring a bit of strategy, but even that is fairly easy once you have at least some of the "ring" abilities. Although Ken and Linda end up with quite a few abilities by the end, you probably will not use more than half over the normal course of a playthough. Focus is firmly on actually finding where all the different animals are hiding, rather than on fighting them. On the other hand, writing and the worldbuilding (by Shoji Masuda and others) is pretty great. The fact that not everything was directly explained notwithstanding, this game features some of the cleverest writing I have seen in a JRPG--most of the NPC dialogue is absolutely golden. And the characters... well, I think we've already said a lot about that. Technical aspects are also not bad--although the graphics mostly look like "higher resolution SNES" or thereabouts, I think it's compensated for by fantastic sprite design and animations, not to mention the insane animal designs and the animated cutscemes. For most of the graphical aspects of the game, we can say thanks to Tatsuyuki Tanaka (a.k.a. "Cannabis") whom you might know as one of the key animators for the "Akira" movie. As I've mentioned before, I feel that the music (by Ryouko Kihara) is definitely on a par with Final Fantasy games of this time period and is nicely augmented by the three vocal songs. Anyway, let me stop rambling at this point, but to those who wish to obtain/play this game, I will offer the following advice: - You should probably get the PlayStation version because you can get it cheaper than the one for Sega Saturn. You lose out on the rearranged soundtrack CD and a couple of minor extras like the in-game picture gallery, but the games are otherwise entirely the same, the only difference is a few minor adjustments to the dialogue which do not influence the plot in any way. PC Engine version is interesting as a curiosity, but honestly there's no reason to play it since it's mostly inferior in every way and lacks content which was added in the remake (although it does feature some pretty crazy animal designs, that has to be said). The one thing that PC Engine does have as advantage is that the remake does "tone down" some of the more gruesome aspects a bit. But I will say that both original and the remake are still popular in Japan, so the original has very definitely not fallen into obscurity or anything like that. - If you're getting the guide book also to help yourself through the game, make sure to get the one whose picture I posted in the OP. There is another, earlier version, with a different cover, which has little information and is borderline useless. So be careful here. (Yes, I ended up rambling again just after I said I would stop. I know.) And with this, I'm simply going to post this image again because it just seems fitting for the end of this playthrough. Well then, see you in the next LP soon (hopefully)!
|
|
#
?
Sep 12, 2022 22:13
|
|
|
This was great to follow along with, thank you for the immense amount of hard work and care that you put into showing us this game!
|
|
#
?
Sep 12, 2022 22:32
|
|
|
Congratulations on getting all the animals in this challenge mode! And thank you very much for doing such a terrific job at showing off this gem of a game. The crazy twists and turns are amazing. And I think it's maybe for the best the game didn't try to explain absolutely everything. Leaves an air of mystique and so many games have fallen flat with bad explanations for the phenomena in them. I've said it before, but it bears repeating. If it weren't for the menus still being in Japanese, I'd forget this wasn't an English copy of the game. You did an awesome job. I really enjoyed reading it.
|
|
#
?
Sep 12, 2022 22:36
|
|
|
That was a great RPG, thank you for translating it for us. What a treat! The scenario D was a nice victory lap too, collecting all those effeciently. Little surprising the Aye Ayes were something you still had to grab from the NPCs; just furthers my thoughts that this whole thing was modified off a save state they made on a Route C run. Do you have any links to a nice speedrun, I'd love to see the "optimal" gameplay the community's gotten to
|
|
#
?
Sep 12, 2022 22:58
|
|
|
Thank you so much for this LP! It was wonderful to read through and learn about this classic(?) game.
|
|
#
?
Sep 12, 2022 23:12
|
|

|
Thanks for this LP! My favorites are the ones I never could have experienced any other way, and this definitely qualifies there.
|
|
#
?
Sep 12, 2022 23:13
|
|

|
A most excellent LP of an incredibly ordinary game! Thank you for showing us this ivantod, I doubt most of us would've ever had a chance to experience the utter normality without this LP.
|
|
#
?
Sep 12, 2022 23:45
|
|

|
awesome lp, thanks for all your hard work
|
|
#
?
Sep 13, 2022 00:02
|
|

|
Congratulations on finishing the LP! This was clearly a lot of work. This game is bizarre and fascinating, and I would never have seen it otherwise; it's definitely an interesting piece of history and well worth learning about. Thank you for showing it to us.
|
|
#
?
Sep 13, 2022 00:27
|
|
|

|
|
#
?
Sep 13, 2022 00:32
|
|

|

|
|
#
?
Sep 13, 2022 00:35
|
|

|

|
| # ? Apr 29, 2024 01:07 |
|
|
Thanks for the insanely high effort LP!
|
|
#
?
Sep 13, 2022 00:54
|
|
