


|
I don't remember much between the valve cover and the oil filter for leaking, unless it was the head gasket which seems unlikely. My valve cover experience was that it leaks from the rear. Maybe clean it up as best as you can and watch for somewhere new.
|
 #
?
Dec 20, 2021 21:22
#
?
Dec 20, 2021 21:22
|
|


|

|
| # ? Apr 27, 2024 17:50 |
|
|
WTFBEES posted:An aside - the sensor under the freeze plug in the first picture above sure is strange. I presume it's the OEM oil pressure sending unit, out of which sticks an uninsulated rigid and solid length of copper. It goes nowhere now. Unless I come across a good reason not to, I'm going to chop it off one of these days. are you sure it's a sensor, and not just a fitting that goes into the oil gallery, which would be plumbed to a mechanical gauge? because that's what it looks like to me. if someone ran hard copper the whole way without care, it could have work hardened and broken. if it really goes nowhere, that sounds like a good candidate for your source of oil i would at least pull that whole stack of fittings off and stick in an NPT plug, for now.
|
|
#
?
Dec 20, 2021 22:10
|
|

|
Raluek posted:are you sure it's a sensor, and not just a fitting that goes into the oil gallery, which would be plumbed to a mechanical gauge? because that's what it looks like to me. if someone ran hard copper the whole way without care, it could have work hardened and broken. if it really goes nowhere, that sounds like a good candidate for your source of oil No but now that you say that, that makes a lot of sense. I've just assumed it was a sensor but a hastily and poorly plugged fitting would fit the theme of everything else we've seen here. Worth adding - there's another fitting in this exact spot but further back a bit more. This one runs to the aftermarket pressure gauge and is confirmed functional.  We'll find some plugs and give that a try!
|
|
#
?
Dec 20, 2021 23:26
|
|

|
WTFBEES posted:No but now that you say that, that makes a lot of sense. I've just assumed it was a sensor but a hastily and poorly plugged fitting would fit the theme of everything else we've seen here. Hell while you're at it get the right electric pressure sensor and wire it, rather than sending hot oil to the cab.
|
|
#
?
Dec 20, 2021 23:34
|
|
|
StormDrain posted:Hell while you're at it get the right electric pressure sensor and wire it, rather than sending hot oil to the cab. I did regretfully inform my father that we'd never pass NHRA tech like this. He seemed unphased.
|
|
#
?
Dec 20, 2021 23:43
|
|
|
Hows the bottom side of the exhaust manifold gasket look? Could you be leaking enough past the valve stems that its weeping from the bottom of the exhaust manifold gaskets?
|
|
#
?
Dec 24, 2021 16:38
|
|

|
fresh_cheese posted:Hows the bottom side of the exhaust manifold gasket look? Could you be leaking enough past the valve stems that its weeping from the bottom of the exhaust manifold gaskets? Boy I sure hope not. We haven't had the manifolds off but I don't feel any fresh oil immediately under them. Let's get a mini-update in. On the heels of the advice here, we removed that mystery fitting at the front of the block. Now that I can get a good look at it, this almost certainly was used for a different, hardlined oil pressure gauge. The line also fits so poorly in the fitting that there's almost no way it didn't leak.  Yeah, let's get rid of that While we were at it, we also ditched the 90* elbow and capped off rubber hose that occupied the center hole and ran to nowhere. Wonder what that one was supposed to be.  Much better. It'll be a bit before we get to test whether it worked or not as we need a new gasket for the oil filter mount and weren't about to pay what the Scout specialty places wanted for one.  Gasket material should be here early next week. That should be a fun one to cut out. Pickup truck - Still just sitting there until I can get the cab off, but I did finally get the title the other day. Quick backstory on that - when I went to buy it the seller did not have the title and had a story about how he was waiting on his friend to do something. I was ready to walk away until he said to just take the truck today and pay for it when he got the title. That seemed fair enough and he did eventually come through, so all's well that ends well. Anyways, title in hand I went to a remote DMV location to get it put into my name. The girl behind the counter was a little taken aback when I laughed at her question about mileage, but all was well until she informed me she needed to register the truck at the same time, which would also require an emissions test. That's not going to work for obvious reasons. After a bit more conversation, it seems there is an option to do a title transfer only, but not without an inspection first. And of course, that requires an appointment and borrowing a trailer again just to say "yeah no poo poo it's not operable." End result - no transfer or registration. I'm tempted to make an appointment in the new year and show up with the bare cab and nothing else, but I'm all ears if any of you AZ goons have recommendations or easier tips here.
|
|
#
?
Dec 24, 2021 17:24
|
|
|
Oh poo poo, I've missed this thread (for months apparently) because all I ever do is bookmark browse.
|
|
#
?
Dec 29, 2021 18:40
|
|


|
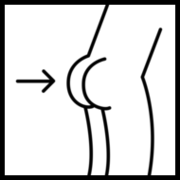
yay update time And actually, before I get to that, I need to give a hats off to any of you who actually do a good job of maintaining a project thread. I can't tell you how many times we've finished doing a thing and then realized I took zero pictures of it. Shame on me. Anyways, let's talk Scout. Last we chatted, we had a not-insignificant oil geyser out the side of the block. We think it was coming from a janky oil pressure fitting that had been plugged and replaced, but we couldn’t fire it up until refitting the oil filter mount. Let’s do that.  Here’s a gasket we made. I’m happy enough about how that turned out and everything fit fine. At this point, for some reason I cannot remember, we removed the driver’s side motor mount. Of all the pictures I am mad about not taking, I am most mad about this one. No words can describe what years of neglect, abuse and a persistent oil leak has done to this thing. Also indescribable is how dumb the process to reattach this mount is. I couldn’t have gotten pictures of this if I tried, so have some MS Paint instead.  Back in 1974, the mount and mount cup looked like this:  The price listed for this part is “Very rare.” We figured this was code for “way too much” and wrote off getting a new one. At least for now. In theory the single bolt pointing up in that photo was somehow captive and would just stay there as you put this whole sandwich of bits together. If this were the case, it would have all gone together quite easily and been entirely unnoteworthy. In practice, this bolt was entirely loose and also happened to be completely flat without any way to hold it in place while moving the whole thing in place and then tightening a nut to the top of the Mount plate thing. The access hole in the frame was entirely too small to fit some other bolt through, so that was out of the question. We fought this for an entire day and did things as stupid as cramming a shop towel into the rubber part of the mount to hold the bolt in place. That didn’t work at all. Eventually we found a different bolt and washer that could be pressure fit into the rubberish part well enough to get everything in place. Then we got the nut attached to the top of the mount plate and tightened the whole thing by doing ??? I honestly don’t even remember and there’s a good chance none of this makes any sense to anyone reading it, it’s there and in place and I sure hope we don’t have to do that again. Let’s move to something else shall we? An outstanding issue has been a minor leak at the upper radiator hose. Nothing major, but it was all accessible so let’s pull the hose and take a look at what’s going on.  Huh, wonder why that wouldn’t seal. We should probably pull that off and clean it up. How about the radiator side?   Lookin’ good. Guess we should pull that neck piece and keep digging.  I was not exactly surprised to see no thermostat here. Off this went too.  Queue lots of scraping, grinding and more gasket cutting, eventually giving us this.  Much better. We also jammed a hose into the radiator and block for a halfassed flush of all this garbage. No pictures of that, but imagine rust colored water all over my garage floor and you’ll get the picture. Time for some good news – after throwing all that back together and firing it up, we are free of both oil and water leaks! Ending on a high note, we walked away for the day. Next up for the Scout is TBD. My dad wants to throw the front wheels back on it and go for a very cautious drive around the block. I figure we should probably look at the brakes first. Pickup time – The pickup has been stalled while I waited for the manpower to pull the cab. More good news – that happened.   45 years of road grime and dirt is a lot of road grime and dirt. Time to make a mess of my driveway too.  After this comes scraping, grinding and sanding. To prep for paint. This is boring and ongoing, but nice to make some progress once again. Next up for the pickup – spending money. Lots of money actually. You’ll have to check back next time for the details on that though.
|
|
#
?
Jan 10, 2022 17:59
|
|
|
Frame looks good, now is the time to replace some of the suspension crap what is awkward to get off without a lift like the rear shackles.
|
|
#
?
Jan 10, 2022 18:33
|
|


|
BigPaddy posted:Frame looks good, now is the time to replace some of the suspension crap what is awkward to get off without a lift like the rear shackles. Pretend spoiler for the next update: every bit of the current suspension is getting replaced.
|
|
#
?
Jan 10, 2022 18:52
|
|
|
Just an FYI, lower control arms are hard to find and I ended up getting a tubular set as the original stamped steel ones were pretty shot and pressing the bushings in and out can damage them. LMC Truck claims to have complete lower control arms and be careful of places like Amazon that will sell you C10 lower control arms that are for a C20 etc....
|
|
#
?
Jan 10, 2022 19:05
|
|
|
WTFBEES posted:Pretend spoiler for the next update: every bit of the current suspension is getting replaced. Just remember to not fully tighten any of the bolts that go through bushings until you have the full vehicle weight on the suspension, unless you go with greased poly bushings. I ignored that (as I didn't understand what the problem was) the first time I did suspension work in 2009 and hey why the gently caress did my bushings last less than 5k miles?  must be crappy quality rubber, clearly. must be crappy quality rubber, clearly.
|
|
#
?
Jan 10, 2022 19:33
|
|

|
You know, I was going to hold off on this until getting something ordered, but why not get everyone's two cents on the topic. So let's talk suspension. The goal for the GMC is to be a "daily" driver. With that, one of the boxes I want to check is a good quality, modern suspension. Other boxes include looking rad and sitting low (but I repeat myself). That's what led me to looking at coil-over setups. There are a few setups out there, a few of which I specifically have my eye on. Let's look at them and the pros and cons as I see them (feel free to add more that I am missing). QA1 - https://azproperformance.com/products/qa1-front-rear-coilover-system-73-87-c10?variant=30318028161139  Pros: -Cheapest of the three options -Includes sway bars front and rear -Bolt-in install -AZ Pro Performance is just down the road from me, so that's nice. Cons: -Does not include drop spindles (approx $300 extra) -I don't love the way the rear suspension mounting brackets look (yes this is silly and irrelevant but I'm including it anyways) Ridetech - https://www.ridetech.com/product/coilover-system-1973-1987-c10/   Pros: -Bolt-in install -Includes drop spindles -Includes front sway bar Cons: -Not cheap -Does not include rear sway bar (though does this even matter? How suspension works is a mystery to me) No Limit Engineering - https://nolimit.net/store/Wide-Ride-Chassis-Pack-C10-p100537197   Pros: -Most complete of the three, including rack and pinion steering and brake upgrades standard -Can be optioned with LS motor mounts at a slightly cheaper price than if purchased separate -Can be optioned with cheaper upgraded brakes -Is a whole drat front crossmember Cons: -The most not cheap (though cheaper than either of the above would be if a rack and pinion kit were added) -The most complex to install (needs welding which I wouldn't trust myself to do) -Smallest name of the three companies At this point it's probably worth addressing the elephant in the room - even the cheapest of these options approaches three times the cost of what I bought the whole truck for. Some people might say that's crazy and complete overkill for my goals. To that I would reply "yeah lol" So with that, chime in with any thoughts or votes. Or just tell me I'm dumb. Just don't get offended when I ignore good advice and pay for it later.
|
|
#
?
Jan 11, 2022 00:36
|
|
|
Having done some of this research myself If you are not going to be racing the thing then those kits are over kill but you covered that. The QA1 kit was used on an episode of Hot Rod Garage on a 69 C10 and it looks like a good kit but did need some fiddling. The way I see it new trucks still use leaf springs in the back so refreshing the springs, bushings etc… likely will get you where you want to be for a daily driver and spend some of that money on sound deadening and other comfort items for the cab, newer over drive transmission to keep RPM low. Edit: I mean I have dropped nearly $4k into my $4k salvage squarebody so I am not someone to point out spending money on stuff that really doesn’t deserve it. BigPaddy fucked around with this message at 02:30 on Jan 11, 2022 |
|
#
?
Jan 11, 2022 02:19
|
|
|
BigPaddy posted:The way I see it new trucks still use leaf springs in the back so refreshing the springs, bushings etc… likely will get you where you want to be for a daily driver and spend some of that money on sound deadening and other comfort items for the cab, newer over drive transmission to keep RPM low. Counterpoint: having ridden in a trailing-arm C10 (I believe it was just a plain old cut-spring drop, given that this was circa 2002 and that truck had probably been built/lowered in the mid 90s), it is so much nicer than a leaf-spring setup. I've wanted to convert my truck ever since. I have the CPP coilover setup mostly-installed on the front of mine. Still haven't loving finished so I can't really say much about it yet.
|
|
#
?
Jan 11, 2022 02:34
|
|
|
imo, the QA1 is "fine" but it's not great if you want anything more than grocery getting out of it i would go for ridetech, but then again im probably just saying that because i did the same for my car lol i was vacillating between ridetech and some lesser parts, when i discovered that there are some vendors who get some pretty good deals on that stuff, and it brought the ridetech stuff down at or below the prices i was seeing for the nominally cheaper alternatives. i got all my ridetech stuff from MCB, they seem like a good resource
|
|
#
?
Jan 11, 2022 06:31
|
|
|
IOwnCalculus posted:I have the CPP coilover setup mostly-installed on the front of mine. Still haven't loving finished so I can't really say much about it yet. Front coilover setups for these are such a hassle with cutting the spring pocket out that I get this. I am not anti trailing arm suspension by any means but I personally would not do it for a daily driver that doesn't have a lot of power. If you want to throw an LS in it and twin turbski it for 1000 bhp then you will need it as spring wrap sucks. I think there is a bunch of us in the Phoenix area with C10 projects that we should all work on but yeah that rona  Edit: I have a cheap plasma cutter if you want to borrow it for the coil over kit install. BigPaddy fucked around with this message at 19:07 on Jan 11, 2022 |
|
#
?
Jan 11, 2022 19:05
|
|
|
Oh I have that part done, used a big-rear end hole saw. It killed my old first-generation M18 compact drill but that was just an excuse to buy a new brushless one which didn't break a sweat. The majority of the work to be done on the suspension is adjustment / torquing everything down, and then finishing my rewiring project. I'm nowhere near that kind of power (and never will be, 650hp in a C7Z was mind-bending enough for me). But with a 4" leaf spring drop and no C-notch, the springs are stiff as hell and there's only a tiny bit of travel before axle tubes smack bump stops. I'll do a rear suspension someday, but at the rate the Jeep keeps sucking up money, that's not anytime soon.
|
|
#
?
Jan 11, 2022 21:09
|
|
|
Quick picture light update for you old truck followers - big week for the Scout! First up though, some little stuff. The Scout's dash pad was unsurprisingly cracked and garbage. It got tossed aside as soon as we started messing around under the dash and not really thought of since. Or at least I hadn’t thought of it. My dad did though. He found a local interior dude who said he could recover it for more money than I would have paid. However, I am a dirt bag and probably would have paid zero. Besides an original pad in acceptable condition also cost way too much, so interior dude it was. Fast forward to this week and we now have a REALLY nice dash pad.  Honestly it’s probably too nice and mostly serves to make everything else around it look even worse, but oh well. We’re not going to mount it now for fear of messing it up, but it’ll be there someday. After a handful of uninteresting odds and ends (including replacing a brand new starter solenoid because we stripped the terminal and remaking some battery cables), we realized the truck was actually at a point where it could maybe possibly drive. To date we hadn’t actually tried to make it go anywhere and my dad’s been getting antsy, so on went the wheels and in we went. I had good intentions of getting video of the first drive, but I was more concerned with not falling out of the doorless, beltless untested truck with questionable brakes and dry rotted tires. However, I can report that the Scout does drive up to a quarter mile at speeds reaching 30 MPH! It even shifts into second, turns and brakes! I know none of this would be an accomplishment for most of you, but I need to reemphasize that we really don’t know what we’re doing. I’ve got decades of magazine info stashed away and my dad had cool cars that needed wrenching 30+ years ago, but otherwise we’re just figuring things out as we go. To see what we’ve done so far actually function was pretty rad. Anyways, after that I was an idiot and pulled all the plug wires from the distributor trying to diagnose a misfire only to realize we hadn’t marked any of their positions, so there went most of a day getting things retimed. We fix the issue though (bad plug wire) so that’s good. We’re still in need of tuning as it’s running way rich at idle and turning carb screws while hoping for the best hasn’t yet worked. Other next step on the Scout is ordering and installing a new floor mat / pad / thing. You’ve probably noticed the existing floor is hardly there and Rockauto has replacements for surprisingly cheap. Once that’s done, the front half of the interior should actually be in respectable condition. Pickup – I did it the thing I knew I was going to do and went all out on the No Limit suspension setup. I was leaning in that direction when I posted the above and then later realized the only welding needed is on the rear axle. Everything on the frame just bolts on (in theory). So in 2-3 weeks, I should have suspension, crossmember, steering and brake upgrades in hand. The goal between now and then is to ditch the entire front end, unrivet the leaf spring shackles, finish stripping the frame and get it all POR’d and nice. After that I just need to assemble an entire truck. No problem I’m sure. EDIT: Two pictures is not enough pictures. Have a family photo now that the Scout is pointed the right way in the garage. 
WTFBEES fucked around with this message at 04:58 on Jan 25, 2022 |
|
#
?
Jan 25, 2022 04:55
|
|
|
WTFBEES posted:Anyways, after that I was an idiot and pulled all the plug wires from the distributor trying to diagnose a misfire only to realize we hadn’t marked any of their positions, so there went most of a day getting things retimed. We fix the issue though (bad plug wire) so that’s good. We’re still in need of tuning as it’s running way rich at idle and turning carb screws while hoping for the best hasn’t yet worked. is it an older holley? could be a blown power valve. if you turn the idle mixture screws all the way in, and it still runs, it's probably the PV. especially since you were dicking with the timing, so it could have been advanced enough to backfire.
|
|
#
?
Jan 25, 2022 06:08
|
|
|
WTFBEES posted:I had good intentions of getting video of the first drive, but I was more concerned with not falling out of the doorless, beltless untested truck with questionable brakes and dry rotted tires. However, I can report that the Scout does drive up to a quarter mile at speeds reaching 30 MPH! It even shifts into second, turns and brakes! That's awesome! First drive is always a sketchy but amazing death ride wondering what's going to fall off of your unfinished, possibly unregistered, most likely uninsured jalopy as you trundle around the neighborhood reducing your neighbors property values by the minute.  On my similar drive in my latest project, I was 3/4 down the runway outside the shop I built it in doing 75mph when I realized I hadn't the foggiest clue of what condition the brakes were in, it hadn't moved under its own power in 7 years, and I didn't have much pavement left Most of us learned the same way, you're doing great. I didn't know poo poo about gently caress when I started wrenching on my Jeep in 2008.
|
|
#
?
Jan 25, 2022 06:36
|
|
|
Raluek posted:is it an older holley? could be a blown power valve. if you turn the idle mixture screws all the way in, and it still runs, it's probably the PV. especially since you were dicking with the timing, so it could have been advanced enough to backfire. Yep, it's a 4150 and we have DEFINITELY backfired through the carb. And yes, it'll run happily with the idle screw all the way in. We'll check the power valve. Thanks! kastein posted:That's awesome! First drive is always a sketchy but amazing death ride wondering what's going to fall off of your unfinished, possibly unregistered, most likely uninsured jalopy as you trundle around the neighborhood reducing your neighbors property values by the minute. It's a lot of fun to be that guy in the suburbs, scaring the children at play and getting dirty looks from their parents. Surely it will not be the last time.
|
|
#
?
Jan 25, 2022 15:22
|
|
|
WTFBEES posted:Yep, it's a 4150 and we have DEFINITELY backfired through the carb. And yes, it'll run happily with the idle screw all the way in. We'll check the power valve. Thanks! that's a classic weak spot on those. according to holley, it's pre-1992 carbs that don't have the protector check valve. if it's one of those, you can retrofit one if you feel ok with drilling: https://www.holley.com/products/tools/carburetor_tools/parts/125-500 either way i bet you'll find a blown diaphragm in there!
|
|
#
?
Jan 26, 2022 07:19
|
|
|
I successfully drilled a check valve into mine, it's not difficult.
|
|
#
?
Jan 26, 2022 15:50
|
|
|
Hell that'll pay for itself in like 1.5 backfires. I'm in. EDIT - Now that I've started spending money on the pickup, I've pondered keeping a spreadsheet of expenditures. Bad idea or worst idea? WTFBEES fucked around with this message at 19:17 on Jan 26, 2022 |
|
#
?
Jan 26, 2022 19:08
|
|
|
That way, madness lies.
|
|
#
?
Jan 26, 2022 21:17
|
|
|
I'm a sick motherfucker so I've got multiple spreadsheets of parts to buy with prices from various sites so I know where to get poo poo from to save a few bucks. Do not - I repeat - do NOT hit that 'autosum' button.
|
|
#
?
Jan 26, 2022 22:36
|
|

|
if I was keeping tabs on the C10 and Pontiac I would cry.
|
|
#
?
Jan 26, 2022 22:40
|
|
|
If you've been careful penny pinching you might be happy about it, otherwise don't even think about doing that. I am 150% spite by mass and some crusty old boomer told me I'd never finish the project or I'd spend ten grand plus so I naturally did the mentally healthy thing and kept an exceedingly detailed spreadsheet that ended up at just under 3500 running and driving, just so I could rub it in his face. But if I'd started just buying fancy billet aftermarket parts brand new and replacing things willy nilly I could have easily spent 7+. Double edged sword, pick your poison. I think you'll do alright aside from that dash pad and similar stuff probably.
|
|
#
?
Jan 26, 2022 23:53
|
|
|
I feel like even if I took the amount I spent on my truck and had used that to buy a clean example I still would have spent money on it because even the clean shiny versions need things.
|
|
#
?
Jan 27, 2022 00:03
|
|
|
Clean professionally restored I know what I have! Translation: it had a Macco paint job and a Craigslist rebuilt engine everything else is decades old and destroyed.
|
|
#
?
Jan 27, 2022 00:07
|
|
|
kastein posted:But if I'd started just buying fancy billet aftermarket parts brand new and replacing things willy nilly I could have easily spent 7+. I feel like i should put that awkward looking monkey puppet meme here.  No spreadsheet it is!
|
|
#
?
Jan 27, 2022 00:33
|
|
|
Holy loving poo poo  Yeah do not under any circumstances add any of this up
|
|
#
?
Jan 27, 2022 05:59
|
|
|
Quick pickup only update for today. As implied earlier, I spent a whole lot of money and went with the No Limit suspension setup. No rational person could justify spending this much on this junky old truck, but I’ve done so by telling myself it’s not just suspension but also brakes, steering and motor mounts. Hell, a stand-alone rack and pinion upgrade is like 2 grand, so I’m practically saving money! I’ll ask you all not to poke any holes in that logic and move on. I’m quoted 2-3 weeks for shipping, so let’s get this thing ready for some new hardware. Needless to say everything about the current suspension needs to go away so that’s job one. The front crossmember and suspension comes off uneventfully with 10 bolts. What was eventful was moving this thing. Protip to anyone planning to do this – leave the tie rods in place. Without them you’ve got a few hundred pounds of unbalanced and floppy steel and rubber that is nearly impossible to move. Eventually we brute forced this whole mechanical monstrosity into the backyard where it will sit until I eventually decide to sell it. Rear suspension is a bit more involved. Dropping the rear axle + leaf springs was simple enough. This all goes to the pile in the backyard.  Good luck taking out the garbage future me. Step 2 got more fun – ditch these leaf spring perches. Each of the four perches is held on with 5-6 rivets that have decided they really like where they’ve lived for the last 45 years and didn’t care to budge. Queue the angle grinder, drill, punches, chisel and hammers.   Good news – we did not set the garage on fire. Also good news – all this garbage is gone.  Goddamn that was a lot of work. I now understand why they rivet together battleships and poo poo. Also pictured here are the front sway bar mounts. Not pictured but also removed was the spare tire mount. That’ll make more sense in a coming update. The aftermath is a huge mess and a frame that could not be more bare.  Well, almost couldn’t be. The frame still needs the old paint and surface rust stripped which I messed around with a little bit. Early reports are these rust remover wheels kick rear end and make metal shiny with almost no effort. https://www.amazon.com/dp/B07VBMK9JS?psc=1&ref=ppx_yo2_dt_b_product_details  I was toying with the idea of getting the frame POR’d next before realizing we still need to drill a bunch of holes and cut C-notches and it probably makes more sense to do those things first. Of course, that means putting a bunch of stuff together only to take it apart immediately after, but what are you going to do. For now let’s just clean this mess up.  Lastly, a teaser for what’s to come – race car poo poo. 
|
|
#
?
Jan 30, 2022 23:00
|
|
|
Keep hold of the lower control arms as most places do not even list them and LMC is out of stock. That is why I bought a set of tubular control arms from POL.
|
|
#
?
Jan 31, 2022 00:25
|
|
|
POR 15 bonds really well to rust and like poo poo to shiny metal. It kinds of beaded up and rolled off of it when I tried. If you have it that clean but not perfect I'd look at another product like Rust Encapsulator by Eastwood. I used that on the back half of the frame on the Binder when I had the bed off and it went on really well and is sticking around a year later. It's easy to top coat too. If you had it dipped clean and it was factory fresh I'd recommend just epoxy primer, but you'll always have some junk in the corners and overlaps so something made to cover rust is still good.
|
|
#
?
Jan 31, 2022 17:18
|
|
|
StormDrain posted:POR 15 bonds really well to rust and like poo poo to shiny metal. It kinds of beaded up and rolled off of it when I tried. If you have it that clean but not perfect I'd look at another product like Rust Encapsulator by Eastwood. I used that on the back half of the frame on the Binder when I had the bed off and it went on really well and is sticking around a year later. It's easy to top coat too. I've heard conflicting things on this and it has me concerned. Did you use the POR Metal Prep before the coating? I've got a gallon of it here and ready to go hoping that'll do the etching and make it work.
|
|
#
?
Jan 31, 2022 18:10
|
|
|
WTFBEES posted:I've heard conflicting things on this and it has me concerned. Did you use the POR Metal Prep before the coating? I've got a gallon of it here and ready to go hoping that'll do the etching and make it work. Yeah, not arguing with stormdrain, but my experience following all the instructions to the letter with por15 is it works really well. It’s also a pain in the rear end.
|
|
#
?
Jan 31, 2022 18:43
|
|


|

|
| # ? Apr 27, 2024 17:50 |
|
|
Yeah, it doesn’t stick to shiny metal and you definitely want to use the metal prep. If you have a bit of work left to do before paint then let it sit and get a bit of surface rust before you metal prep it and then paint it.
|
|
#
?
Jan 31, 2022 20:16
|
|
