


|
Burma
|
 #
?
Nov 12, 2023 20:21
#
?
Nov 12, 2023 20:21
|
|


|

|
| # ? Apr 29, 2024 21:02 |
|
|
Vote's closed! Calling things here for Burma.
|
|
#
?
Nov 13, 2023 02:10
|
|


|
Bayinnaung - Part 1: The Burmese Tigers Age of Empires II: Definitive Edition - Burmese Theme Very well, then let us begin, the tale of a king and his faithful older brother. 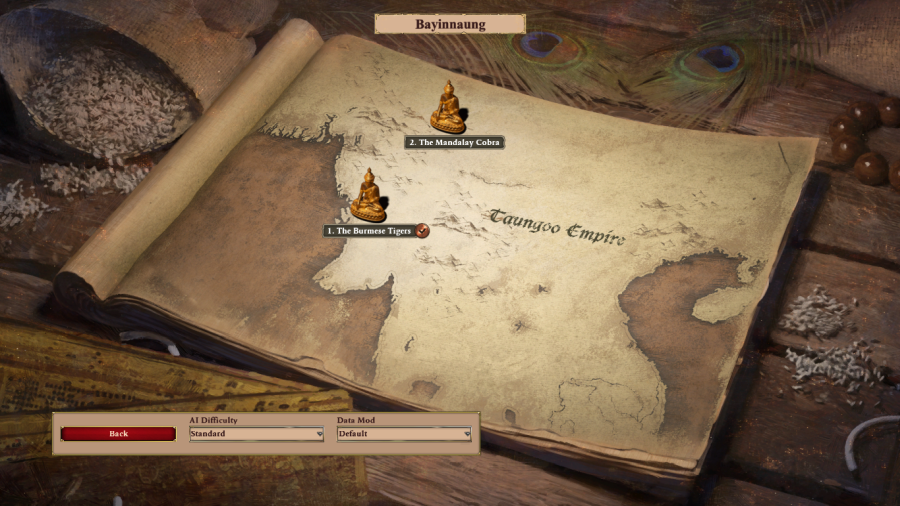 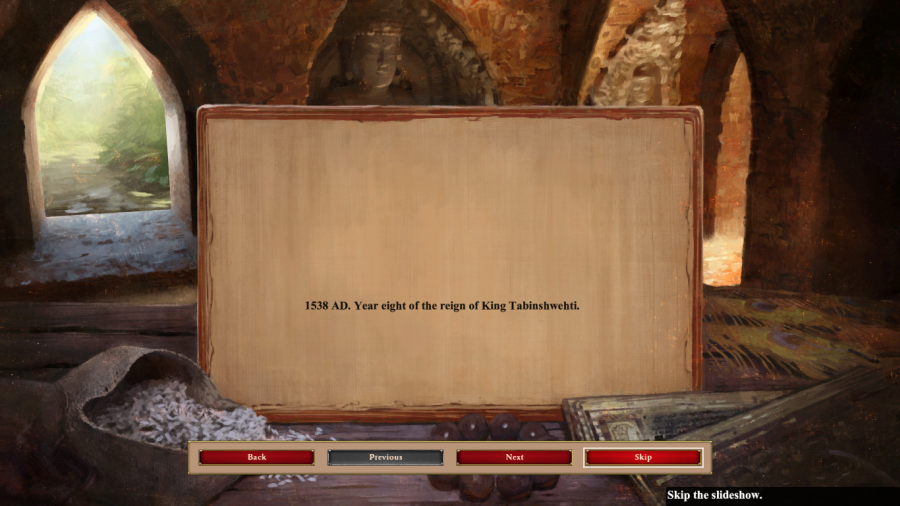 Mission 1 Starting Text "1538 AD. Year eight of the reign of King Tabinshwehti. Over two decades ago, an old village shaman came to our little mountain kingdom of Toungoo. He claimed to speak with the nats, the ancestral spirits worshiped by our people before the coming of Buddhism. The nats had told the shaman that an ancient warrior prince would be reincarnated in our kingdom. This prince would rule as the Cakkavatti, the universal ruler embodying Buddhist virtue. Soon after, the king had a son named Tabinshwehti. At the same time, a servant girl had a son, and she was made the newborn prince's wet nurse. I know this story well, as I am the son of that servant girl and was raised alongside my future king. Thus the nats joined the fates of a king and a servant. My mother is not so sure Tabinshwehti is who the nats spoke of. She says the nats are tricky spirits who mislead with their blessings. But I tell my mother I am no prince! Only King Tabinshwehti can lead our small kingdom against our enemies! And our enemies are many. Our lands are under attack by the Shan, a warrior people from the far north. Our walls cannot stop them so we attack south, to gain a stronger foothold in Hanthawaddy. The nats bring fear into the heart of the Hanthawaddy king. He flees to his allies just as a frightened water buffalo runs to his herd after smelling a tiger. The King and I are the Burmese tigers, chasing after that buffalo!"  Bayinnaung: We stand alone against the Shan. Do not fight for glory - fight for Burma, our history, and our future! You start this mission with a small base, a couple of Battle Elephants, Arambai, and our heroes: King Tabinshwehti (an Elephant Archer hero unit), Bayinnaung (a Battle Elephant hero unit), and Thado Dhamma Yaza (a Monk hero unit). More important to note, there is a five minute countdown timer. That's how much time you have before King Takayupti of the Mon (and the Kingdom of Hanthawaddy) starts running from his starting location just a bit further southeast to the safety of his Castle. If you don't want this scenario to take forever, then the first five minutes of the mission are crucial. 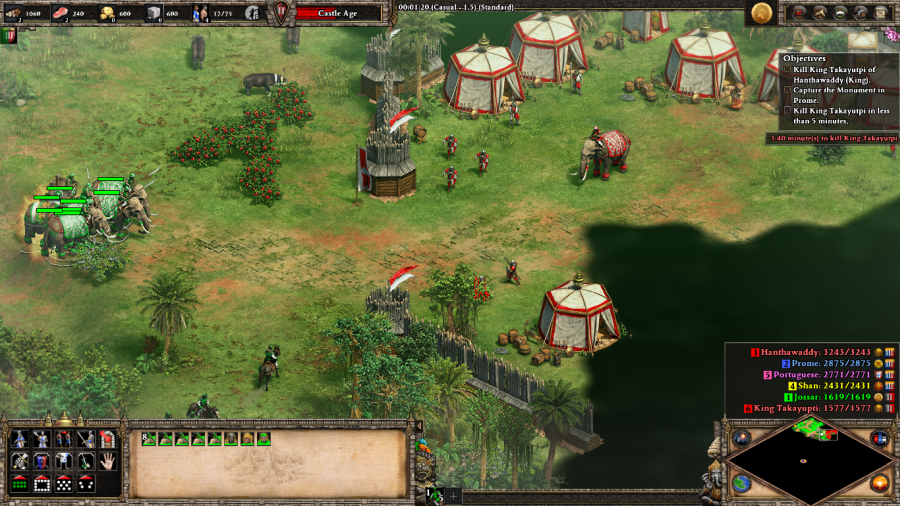 I spend the first couple of minutes clearing out the entrance to King Takayupti's camp while teching up to the Castle Age. Unless you have really amazing micro, both of these are crucial: King Takayupti has 150 HP (used to be half that pre-Definitive Edition) and moves very fast, so the best way to assassinate him is to get Husbandry ASAP so the Arambai can have the speed to circle around the King and shoot him to death. The less troops in the way, the easier this is to accomplish, but you have to be careful as going too far into the base also counts as a trigger to send King Takayupti running for the hills. 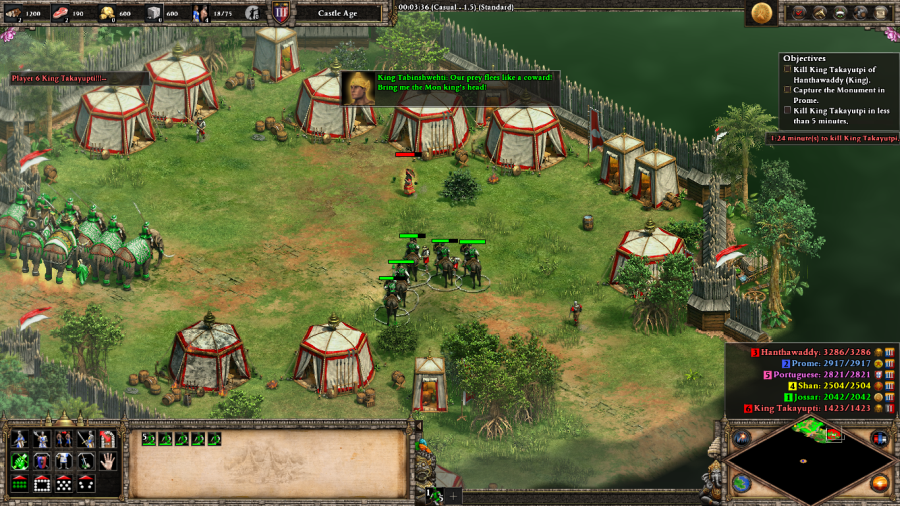 King Tabinshwehti: Our prey flees like a coward! Bring me the Mon king's head! If victory is achieved withing five minutes: Bayinnaung: A lightning victory! The scholars will think we were Garuda, flying to destroy our enemies! I lose a good bunch of the Arambai here, but the assassination is successful. Doing so gets you 500 Gold and an achievement. The gold is useful for a side objective that I want to complete in a bit, but the most important thing is taking out the enemy King early. Fail to do so and he'll keep running off to a series of increasingly better-defended Castles guarded by the most powerful enemy faction on the map. But with King Takayupti out of the picture, the only objective that remains is to get clear and present control of a Monument in the center of the map, even for just a second. 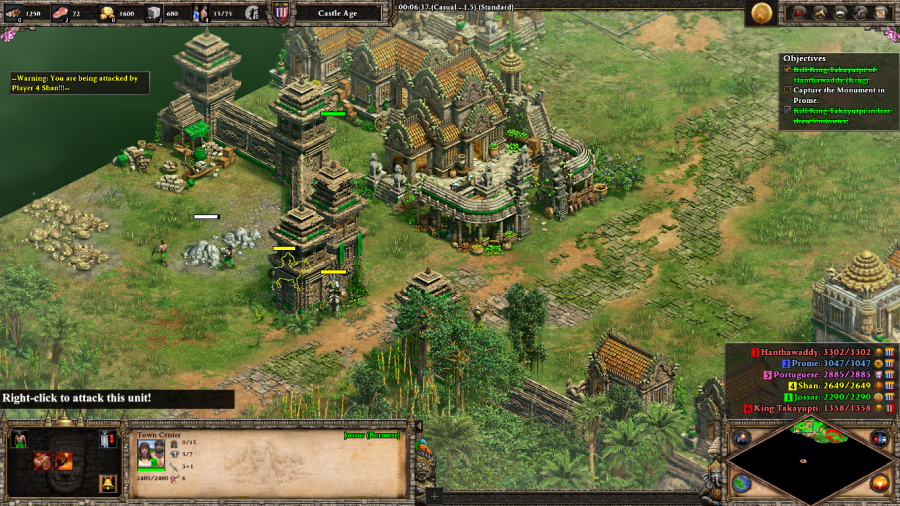 The downside to putting all of your focus on carrying out the raid is that getting your economy up and running is drastically slowed down. Making this worse is that the Shan will almost certainly catch you with your pants down via an early attack, which will force you to send your villagers running until the main force can get back to defend the base. (Prome, the city in the center, will also send out a couple of raiding units, but generally speaking they attack from the less vulnerable southeast and are much less dangerous than the Shan.) 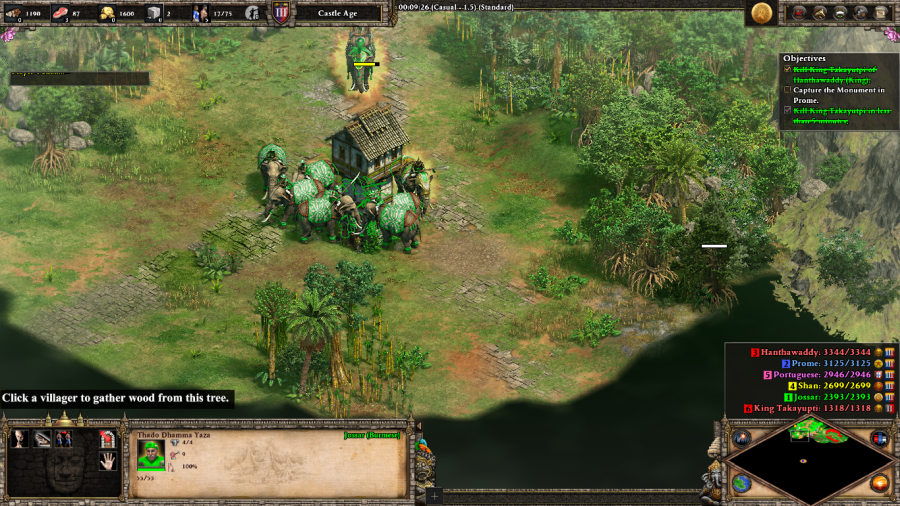 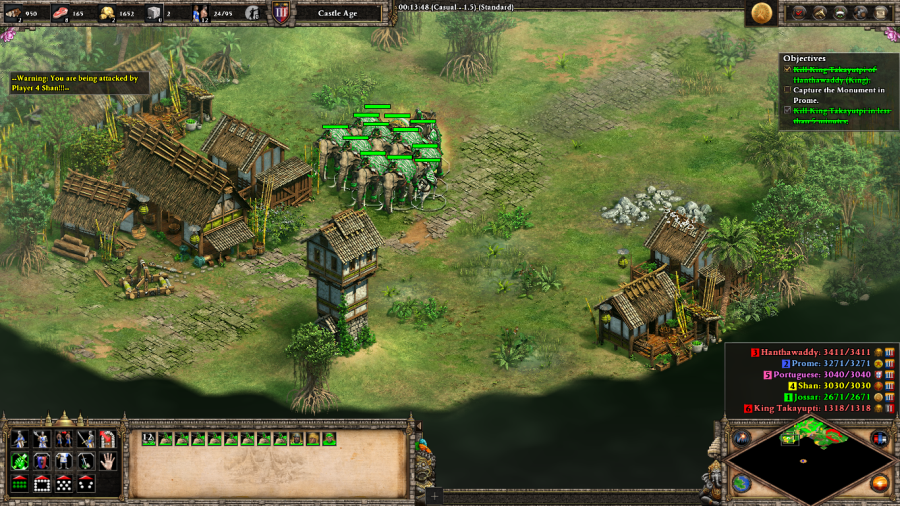 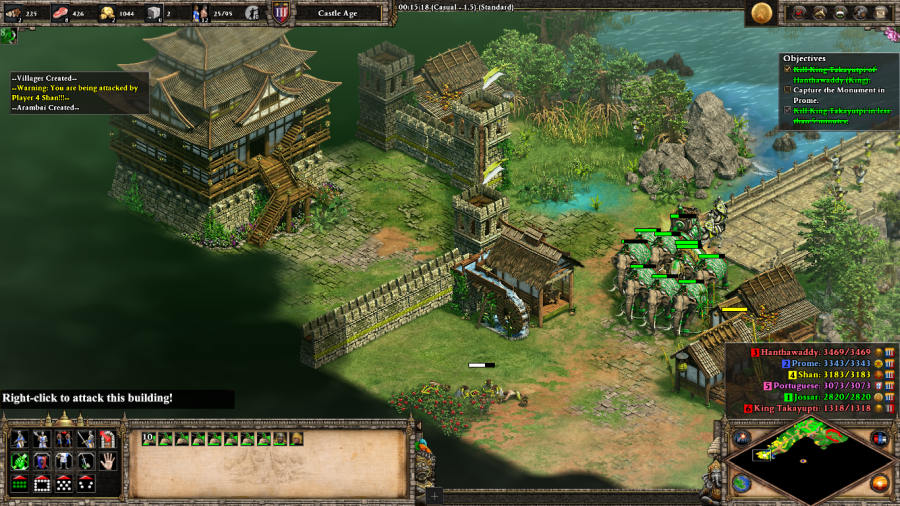 Once the Shan are routed, I clear out a Tower or two of theirs on route to Prome and send my army southwest through their base. The goal here is to reach... 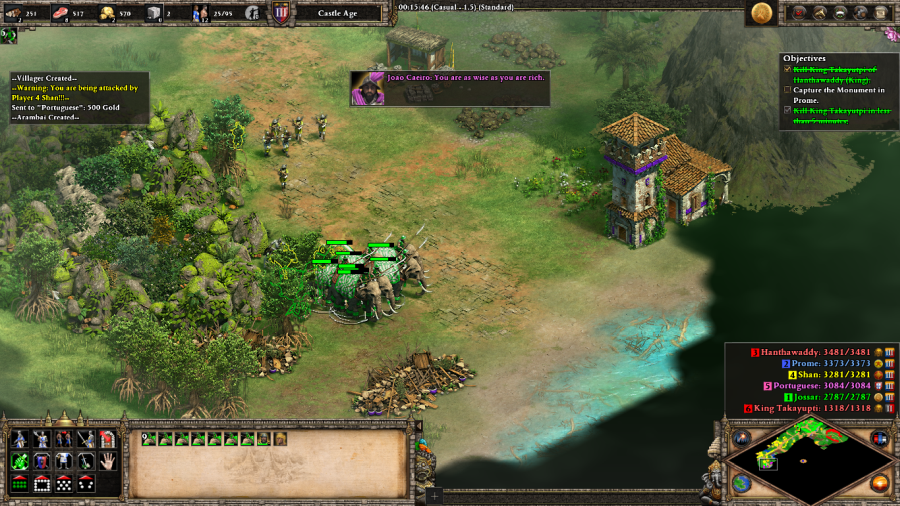 Joao Caeiro: Your enemies pay me much gold to fight you. I will spare your life for now if you pay me 500 gold. (after tributing the Portuguese 500 gold) You are as wise as you are rich. 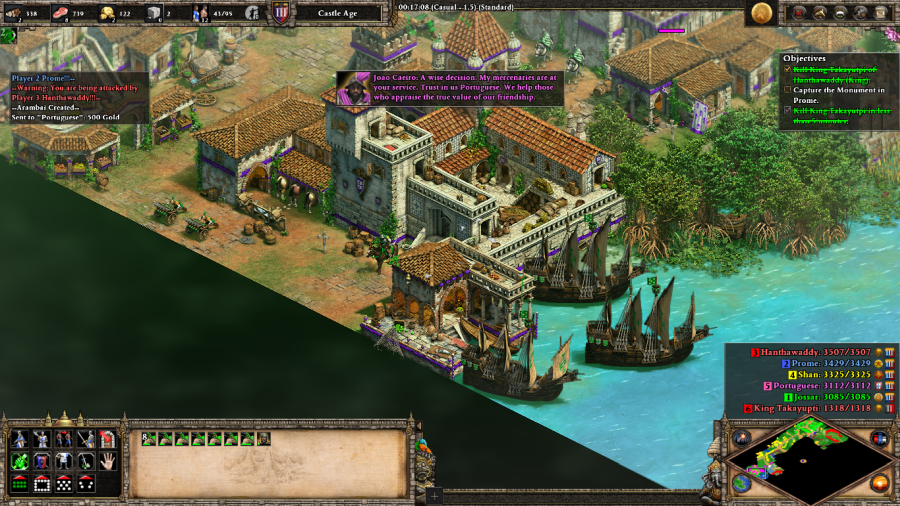 Joao Caeiro: Show that you know the value of my friendship more than your enemies do. Give me 500 gold and I will join you in battle. (after tributing the Portuguese another 500 gold) A wise decision. My mercenaries are at your service. Trust in us Portuguese. We help those who appraise the true value of our frienship. ...this Portuguese fort. 500 gold gets them to stop shooting at you, another 500 gold gets you their Knights, Organ Guns, Caravels, and Joao Caeiro himself (Conquistador hero unit). Pre-Definitive Edition, this was a large enough army to flatten everyone else on the map. With DE they toned it down, and I honestly don't know if it was even worth the losses I sustained breaking through Shan to grab these guys. Oh well, at least I get to show them off. 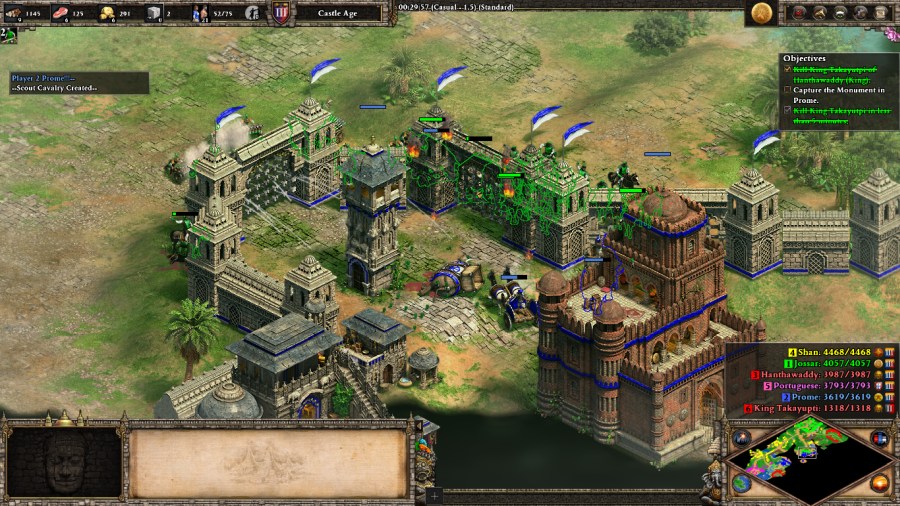 After bringing these mercenaries back to my cleared approach to Prome and combining them with more Arambai and Battering Rams, I get to work on the walls. As long as you can avoid being in range of the Castle, the defensive garrison isn't too scary. 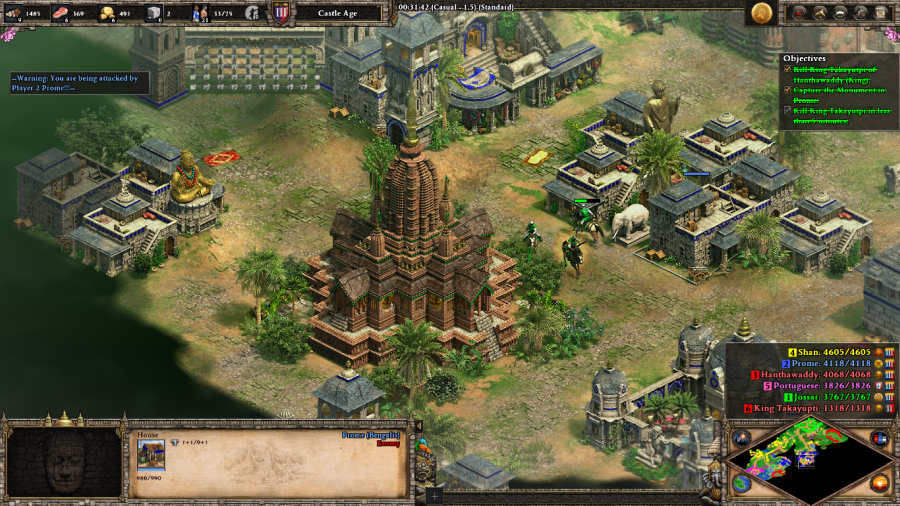 Then it's just a matter of sending a Cavalry unit through the city to the Monument to quickly claim it and victory. King Tabinshwehti: What a great hunt! Stay by my side, my brother, and we will hunt in these lands like hungry tigers! Mission 1 Ending Text "To reward my service in battle, my king bestowed a name of great honor upon me: 'Bayinnaung', which means 'King's Elder Brother'. Though he is a King and I am but the son of a servant girl, he embraced me and declared a shared blood! I am no longer a simple servant. I am Bayinnaung. I am a prince." This scenario is a good example of something that I heard about the Burmese campaign in general: if you know exactly what to do, most of the missions are incredibly easy, but take one wrong turn and you get stuck in an hours-long slugfest. Guess I'd better read up! Extra Slides Mission 1 - Intro Slide 1 Mission 1 - Intro Slide 2 Mission 1 - Intro Slide 3 Mission 1 - Intro Slide 4 Mission 1 - Intro Slide 5 Mission 1 - Intro Slide 6 Mission 1 - Intro Slide 7 Mission 1 - End Slide 1 Mission 1 - End Slide 2 Jossar fucked around with this message at 05:10 on Nov 14, 2023 |
|
#
?
Nov 14, 2023 05:04
|
|
|
Jossar posted:This scenario is a good example of something that I heard about the Burmese campaign in general: if you know exactly what to do, most of the missions are incredibly easy, but take one wrong turn and you get stuck in an hours-long slugfest. Guess I'd better read up!
|
|
#
?
Nov 14, 2023 07:16
|
|
|
The key to killing Takayupti early (and easily) is squeezing your arambai between the forest and the palisades, go towards they exit of the camp and break through the walls there. This allows you to pass off Takayupti as he starts fleeing, and arambai do enough damage to kill him as he runs past.
|
|
#
?
Nov 14, 2023 20:58
|
|

|
Bayinnaung - Part 2: The Mandalay Cobra Mission 2 Starting Text "1543 AD. Year thirteen of the reign of King Tabinshwehti. Our conquest of Lower Burma has brought fear to the Shan warlords. They call upon their allies, the Kingdom of Ava and the mighty Rakhine people, to raise armies against us. My King and I march north to Upper Burma, following the pilgrimage trail to Pagan, city of 10,000 temples. From this city, the ancient kings of Pagan once ruled over a united Burmese people. If my King is to rule all of Burma, he must be crowned in Pagan. I will march ahead of my king to secure the ancient city and prepare for the coronation. With my help and the blessings of the nats, my brother will fulfill his prophesied destiny."  Bayinnaung: We will need gold for the king's coronation. The monks of Pagan will assist us if we defend their monasteries and the relics they contain. This mission starts with a large sprawling base in the form of the temple city of Pagan. The city comes stocked with six Monasteries, each with a relic producing gold. The catch is that if a Monastery would otherwise lose the relic, it's gone forever. Gold piles only exist in enemy bases, so the majority of your gold income comes from keeping the Monasteries protected. Additionally, since Pagan is a temple city, you're stuck without being able to build Walls, Castles, or Markets. So no cheating your way to a gold victory and the place has to be defended with troops alone. 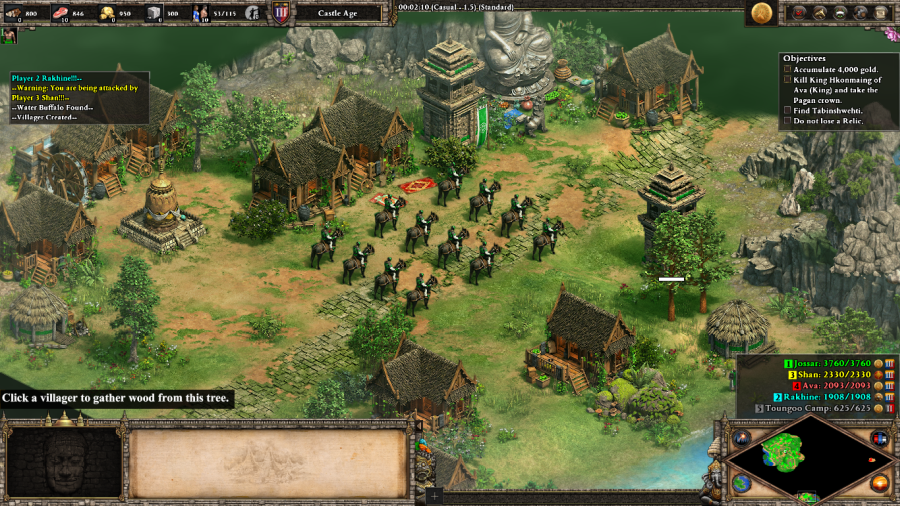 Bayinnaung: Our enemies approach. They are powerful so we must be like the cobra: when they raise their hands against us, we strike where they are undefended! Apart from the city starting with a decent number of troops including Bayinnaung and Thado Dhamma Yaza, there's also this sizable force of Arambai in the south of the map, which seems to be intended as a strike force with which to destabilize your enemies. I just bring them up to help my main army directly. 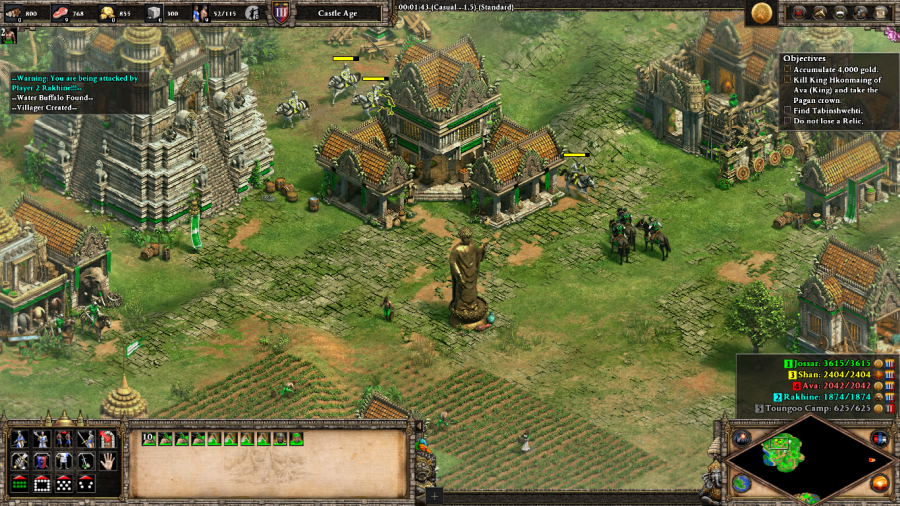 Right at the beginning of the scenario, all of the map's enemies start throwing troops at me, with the largest attacking force coming from the Shan. After defeating the initial assault, I come to the following tactical conclusions: Ava is stuck in the pocket, and after some slight organization of my naval forces, Rakhine is pretty much entirely contained as long as I can block their Transports from landing. Going forward, the only real threat for the rest of the scenario is the Shan. Therefore, they need to be dealt with ASAP.  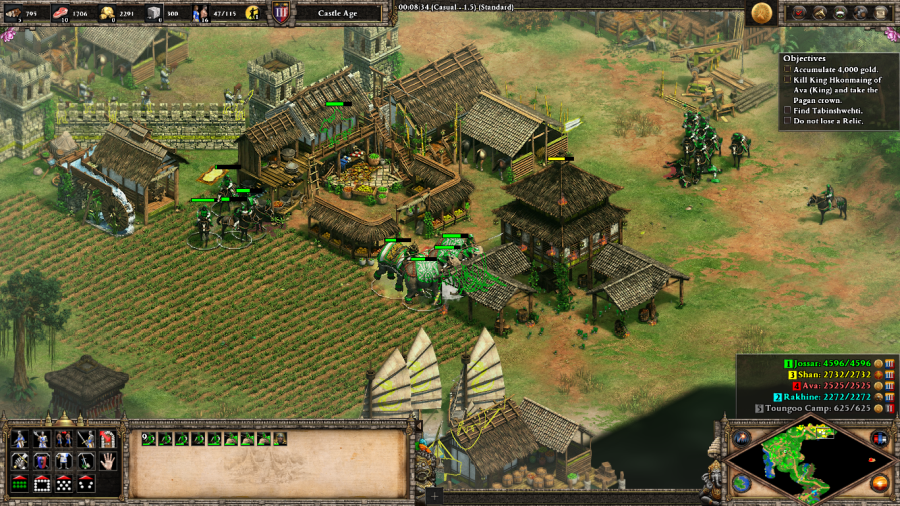 So I use most of my starting forces to take out the two Shan Town Centers. This is about the point at which my offensive started to stall out, but...   King Tabinshwehti: It is good to see you, my brother! You will join me on my coronation march to Pagan. But first, we must dispose of these unwanted guests... Scattered around the map are a bunch of free units, most notably King Tabinshwehti's half Burmese/half Portuguese army under the command of the king himself and Diogo Soares de Albergaria, a Conquistador hero unit.  All of these additional troops, combined with a few Battering Rams allow me to maintain my momentum and destroy the Shan Castle, eliminating them from the game.  This also frees up their relatively untouched gold piles for mining. Waste not, want not, right?   With my gold income skyrocketing, all that's left is to build a massive horde of Battle Elephants and Battering Rams supported by a few Monks, shatter Ava's army, and tear down the Castle where the enemy King is hiding. Bayinnaung: (upon killing the King) My brother will wear this ancient crown. (upon completion of both victory objectives) The monks of Pagan recognize our king. He will rule Burma with the wisdom and justice of the Cakkavatti! Mission 2 Ending Text "Our kingdom is mighty under King Tabinshwehti. The greatest monks, warriors, and administrators in all of Burma come to our court. The king has made me his chief minister but I worry for my brother. A man from distant Portugal has stumbled into the court and intrigued the king with his foreign ways and bottles of strong wine. I fear that the blessed path that we have walked together will come to a cursed end." I think Dynasties of India might have bugged this mission a little bit when it revised certain aspects (such as you being limited to the Castle Age), but after going back and reviewing the overall scope of the mission, the only really noticeable thing is that Rakhine wasn't quite sending out as many boats as one would expect. But all that really would have changed is that I would have had to build a few more boats to patrol the western part of the river. The fundamental way of dealing with Rakhine remains unchanged in any event. This mission is supposed to be a showcase to demonstrate the Burmese' strengths as a civilization. Lots of gold to mass Monks and Battle Elephants, with the Arambai being a mobile strike force that can pop out of the jungle, deal massive amounts of damage to an opponent, and then run away. But like the last mission, it's easily beatable without dealing with the intended slugfest. The mission gives you so many free event troops such that if you grab them all and march on the Shan right away, none of the remaining two factions can provide a credible threat and you can march on Ava at your leisure. A player with better micro than me might have even been able to lead directly into Ava after beating up the Shan or just ignored the Shan entirely for an alpha strike on the King. Extra Slides Mission 2 - Intro Slide 1 Mission 2 - Intro Slide 2 Mission 2 - Intro Slide 3 Mission 2 - Intro Slide 4 Mission 2 - End Slide 1 Mission 2 - End Slide 2 Jossar fucked around with this message at 03:50 on Nov 17, 2023 |
|
#
?
Nov 17, 2023 03:37
|
|
|
I noticed something similar with the Rakhine, I managed to destroy their pre-placed Docks with lots of Demo Ships and after that they didn't send a single transport. They did build them from rebuilt docks, and the troops to fill them, but they just sat there for the rest of the mission. As for protecting the relics, I surrounded the monasteries with houses and used a strike force of around 15 Arambai to eliminate the attackers, then repaired the damage with villagers. Simple enough mission really.
|
|
#
?
Nov 17, 2023 15:05
|
|
|
Bayinnaung - Part 3: The Royal Peacock Mission 3 Starting Text "1550 AD. Year twenty of the reign of King Tabinshwehti. I am the chief minister of a kingdom without a king. The man from Portugal has corrupted King Tabinshwehti. My lord has taken to drinking and forgotten both the ways of Buddhism and the blessings of the nats. He leaves with the foreigner for weeks at a time on long, wine-filled hunting trips. Even when he is in court, khe King orders executions in drunken fits! Many of the kingdom's officials have pleaded with me to depose the king and rule Burma justly. But though I love my country, I cannot betray my brother! I should have known rebellion would come. A monk named Htaw, brother of the dead Hanthawaddy king, incites a revolt in the south. The king is leaving on yet another hunting trip but he has ordered me to take the army to defeat this rebel. I will follow my king's instructions but I am concerned. A minister named Sawhtut is eager to see me leave. I do not know what trouble he has brewing."  Loyalist: The king has been murdered. We must tell Bayinnaung of his brother's death. Only he will rule Burma justly. You start this scenario with a Blind Lame Priest who, appropriately enough, can't move and a Villager. So it's a short RPG section. The Villager is blocked from leaving the Palace by a pair of Battle Elephants, but try and have the Priest convert them and the Elephants will move out of the way.  Move down further through Pegu and you'll find a Monk. Unfortunately, the road ahead is blocked by a number of Priests. What are you to do?  At the back of the line of Priests is a Toungoo Warrior, who can be converted. Do so and he'll kill all of the priests, freeing you up to move onwards. 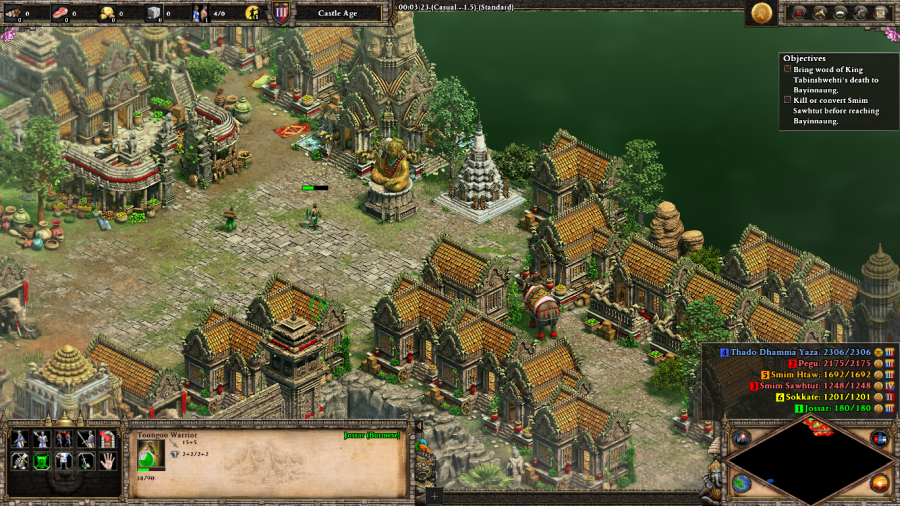 Loyalist: Hatred is never appeased by hatred. The king's assassin repents. Further down the pathway out of the city is Smim Sawhtut, who appears to just be a renamed Elephant unit rather than a hero. Converting or killing him is optional, but doing so immediately switches Smim Sawhtut's forces to Ally and defeats them, functionally ending this section. The alternative is trying to escape out of the city and it's not really worth it. About the only benefit you get from not immediately neutralizing Smim Sawhtut's forces is that you can get one of the enemies closer to your base to temporarily ally with you... except this is AoEII, so they will eventually betray you anyway and also make it to the Imperial Age with a whole bunch of extra resources, which they wouldn't do otherwise. 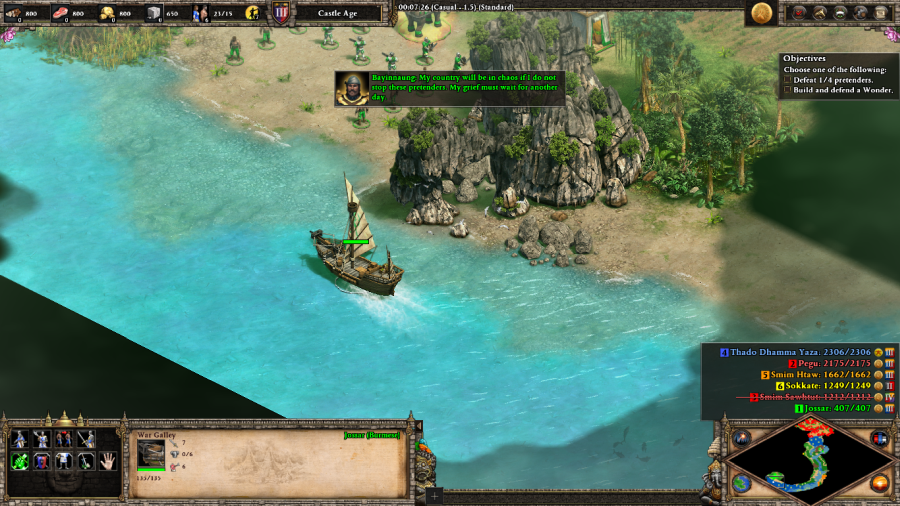 Bayinnaung: My country will be in chaos if I do not stop these pretenders. My grief must wait for another day. Once Smim Sawhtut's forces switch to Ally, a ship appears by Pegu's Docks which can be sailed down to Bayinnaung. A Heavy Demolition Ship can be recruited along the way and is sometimes useful for destroying an enemy ship sent out to patrol the river by Smim Htaw's forces. Bayinnaung comes with a set of mostly Burmese troops, some normally barred Hand Cannoneers presumably from the Portuguese, and a few Villagers. So begins the base-building segment of the mission. 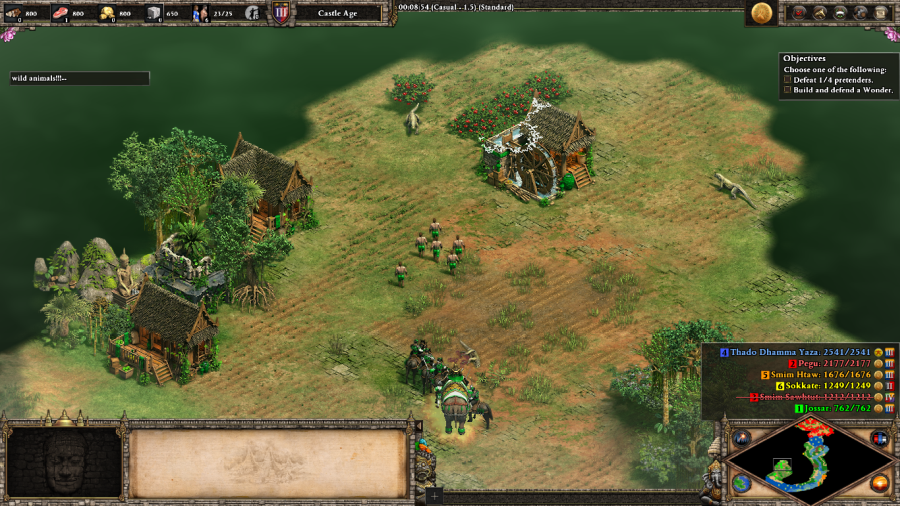 The game gives you a couple buildings to get started with if you explore north a little bit. Nothing too fancy, just some houses and a Mill near some berry bushes. 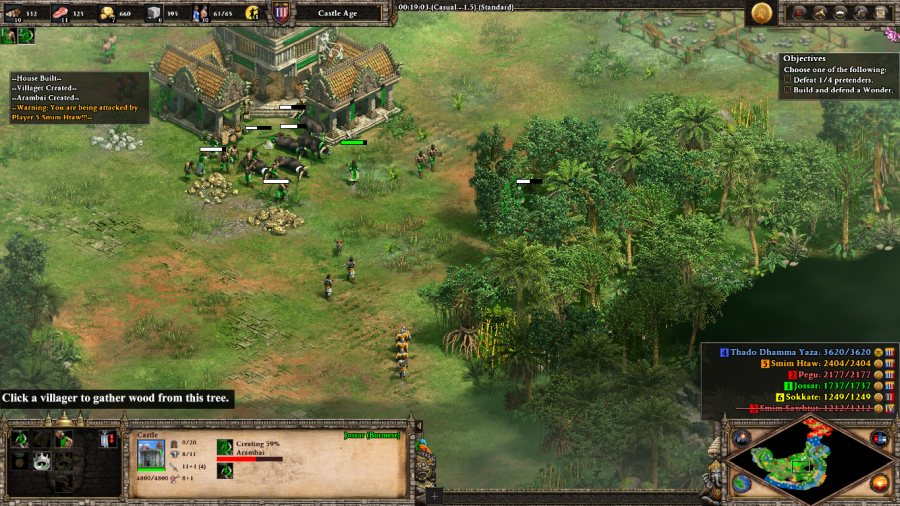  Here, I get caught off guard by some early attacks sent by Smim Htaw and Thado Dhamma Yaza. Smim Htaw's attacks are easily repulsed, but I accidentally got caught up into drawing out some of Thado Dhamma Yaza's home guards and get pretty badly savaged.  Bayinnaung: To be master of his roost, the fighting peacock must be vicious against his enemies! Fortunately, I was able to get back to a defensive Castle that I had placed just north of my village, and was even able to snipe the enemy Monk hero himself. Rip Thado Dhamma Yaza, you were a useful Monk hero for the first two missions. Unfortunately, unlike Smim Sawhtut, defeating the other leaders doesn't make their factions spontaneously give up. You still have to fight them until their bases are mostly destroyed.  After a long period of build up and recuperation, I place a defensive Castle to the southeast of my base to start pressuring Smim Htaw's forces and secure this gold mine. Apart from that I'm mostly content to just hold the line here until I've defeated Thado Dhamma Yaza's forces. Honestly, at some point during the build, I could have pivoted into a Wonder victory and that would have gone faster. But I was in the mood for wrecking people tonight.  Thado Dhamma Yaza's base proves to be an annoying nut to crack, as it constantly produces Elephant troops and Scorpions. Part of this is also that I was trying to make Elite Arambai work, but eventually found them to be too flimsy and just switched to Elite Battle Elephants, Monks, and Trebuchets. Eventually, I clear out Thado Dhamma Yaza's base and outlying economy and I'm free to move on to the other opponents.  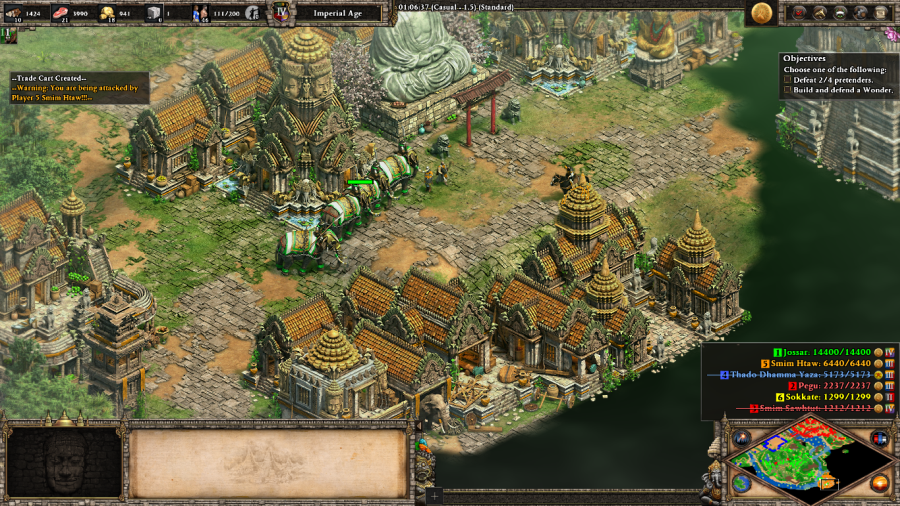 But really, Smim Htaw is no threat at this point. While he does keep sending a surprising amount of troops at me, there's no siege, so I've had him on lockdown for a while now. He and his Monks make taking the city more annoying than it has to be, but at this point Smim Htaw has thrown away too many resources to have anything resembling a real army left to throw in my general direction. 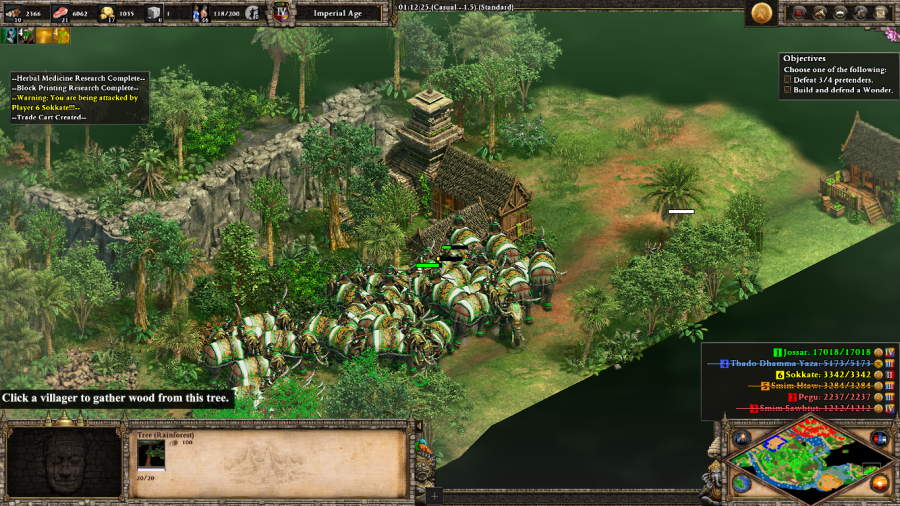 Sokkate's rebels are an afterthought. Just a bunch of feudal era troops hiding out in the jungle with no real town to speak of, supported by some houses and a couple of military buildings. Bayinnaung: Tonight, I will shed tears for my dead brother, the king. In the morning, I will take the throne and build the empire he dreamed of ruling. Mission 3 Ending Text "Sawhtut paid two swordsmen of the King's bodyguard to enter my brother's tent as he slept. Their pockets heavy with the traitor's gold, they drew their swords and beheaded my brother. His body was found by a monk and quietly cremated. I would throw away this crown if it brought my brother back but he is among the nats now. The nats were tricky just as my mother told me. They took my brother from me. I should not be King, I should not be the Cakkavatti, but the nats made it so. I reject them." The RPG section is pretty neat. Like all of the other Burma missions so far, the gimmick of killing off/converting Sawhtut makes the rest of this mission a breeze, especially if you're going for a Wonder victory, since he's one of the two opponents on the map that uses Battle Elephants (the only real threat to a Wonder in a mission absent enemy siege) in a meaningful capacity. Extra Slides Mission 3 - Intro Slide 1 Mission 3 - Intro Slide 2 Mission 3 - Intro Slide 3 Mission 3 - Intro Slide 4 Mission 3 - Intro Slide 5 Mission 3 - Intro Slide 6 Mission 3 - End Slide 1 Mission 3 - End Slide 2 Jossar fucked around with this message at 06:57 on Nov 18, 2023 |
|
#
?
Nov 18, 2023 06:52
|
|
|
quote:]Bayinnaung - Part 3: The Royal Peacock Popping in to say this level is an adaptation / reimagining of Chou Kung 1: The Mandate of Heaven, the first level in a classical AoE1 custom campaign, with a similar "the king is dead, escape the palace complex" premise. You can download it or its port to AoE1DE here.
|
|
#
?
Nov 18, 2023 14:14
|
|
|
Bayinnaung - Part 4: The White Elephant Age of Empires II: Definitive Edition - Bust Mission 4 Starting Text "1563 AD. Year thirteen of the reign of Bayinnaung, king of Burma. The tiger rules the forest but he is always hungry. It is the same with me as I look to the Thai kingdoms of the East. I have ruled for thirteen years but how am I Cakkavatti if I am only king of Burma? Ayutthaya is the strongest of the Thai kingdoms. Her king, Chakkraphat, has defied me for too long! He encourages the rebellion of one of my vassals, the King of Lan Na. Even now, he sends his daughter to marry the ruler of the kingdom of Lan Xang, in exchange for an alliance against me! But these schemes alone do not drive me to war. I know that Chakkraphat has seven white elephants, a symbol of luck and divine favor. Already, I hear the murmurs in the court. People with more spirit than sense whisper that if I truly am the Cakkavatti, why would the nats have blessed Chakkraphat with the elephants? I cannot allow this Thai king nor the nats themselves to defy me! I will send my armies east but they will not just bring war. I will send Buddhist monks with them to carry the word of my blessed Buddhist rule." I will note that Bayinnaung's voice actor is pretty good overall, and in this mission does an especially fantastic job of conveying the now-king going off the deep end, doubly so in the pre- and post-mission cutscenes. 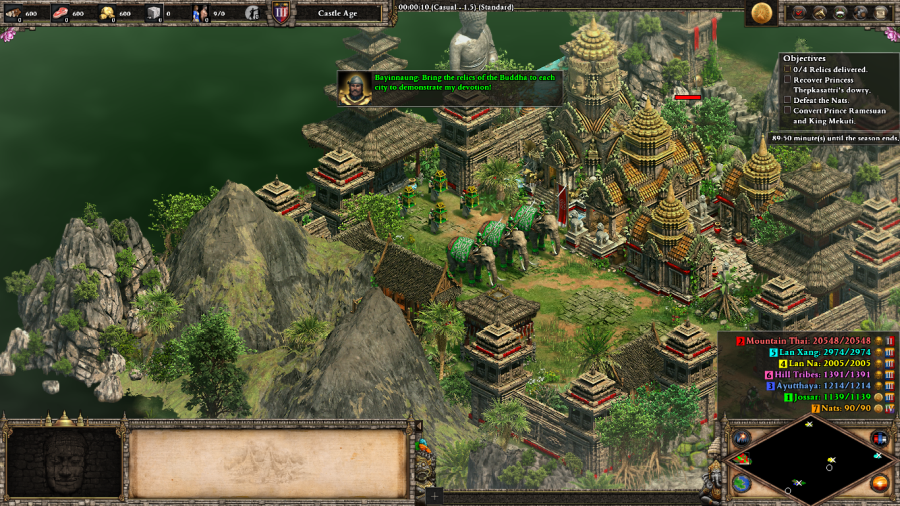 Bayinnaung: Bring the relics of the Buddha to each city to demonstrate my devotion! Unlike the last scenario, which started out as an RPG scenario and then turned into a base-builder, this one is a small scale tactics mission all the way through. You have four relics, and it's your job to get them to each of the major opponents' Monasteries before 90 minutes elapses (at least on Standard difficulty). 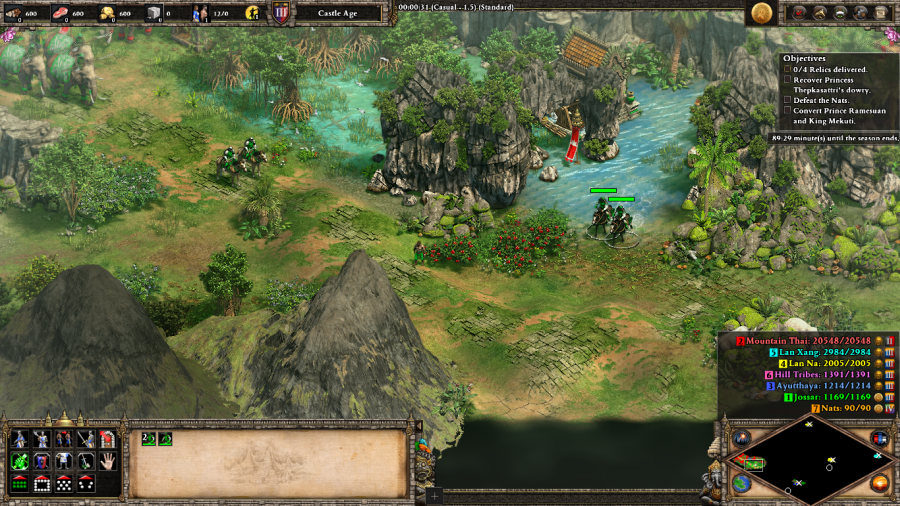 Scattered throughout every nook and cranny of the map are hidden bonuses, either in the form of additional resources or troops, with which you can bolster your forces to an approximate 40 unit maximum.  But what's more interesting is that the map contains a lot of secret passages, through which you can skip sections of the enemies' defenses. For instance, going through this village means that I skip the outer Wooden Palisade wall of Ayutthaya completely.   Bayinnaung: The Thai prince has been reminded of the Eightfold Path. His men lay down their spears! (after a few seconds) With this city, we can train reinforcements. There still is a fight at Ayutthaya's main gate, but as the first enemy city on the map it's a complete pushover. Rushing to put the Relic in the Monastery or converting the local hero unit ASAP is advised, as either way, that gets the rest of the city to surrender and have most of its units and buildings join you going forward. Doing so also frees up a Monk to now act autonomously in a support role, rather than having to micro them to put down and pick up their Relics during and after a fight.   Bayinnaung: Kill the nat enchantress quickly before she bewitches the men! Wandering out of Ayutthaya introduces you to the non-major enemy forces present on the map. The Hill Tribes are comprised of wandering groups of Rattan Archers, Arambai, and Karambit Warriors that can harass your forces. The Nat Enchantresses are renamed Scythian Wild Women that hit hard and can grow stronger the more of your troops they kill. Neither faction is powerful enough to pose a real threat, but they do force you to slow down a little in order to deal with them.  Bayinnaung: Take the princess away and confiscate the dowry. In the middle of the map there is a small Ayutthaya camp containing a number of Royal Guards protecting the princess mentioned in the intro cutscenes. It's not necessary to defeat them, but doing so gives you some dialogue and a couple hundred Gold. 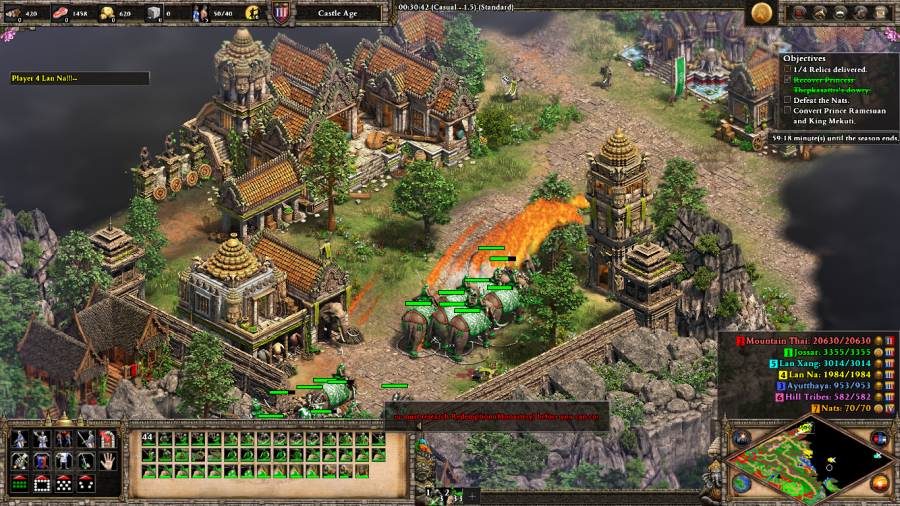 As far as I can tell, there is no clever way to deal with Lan Na's northern town. You just have to brute force your way through it, including a scenario-limited Fire Tower, and get the Monk to his intended destination as quickly as possible. 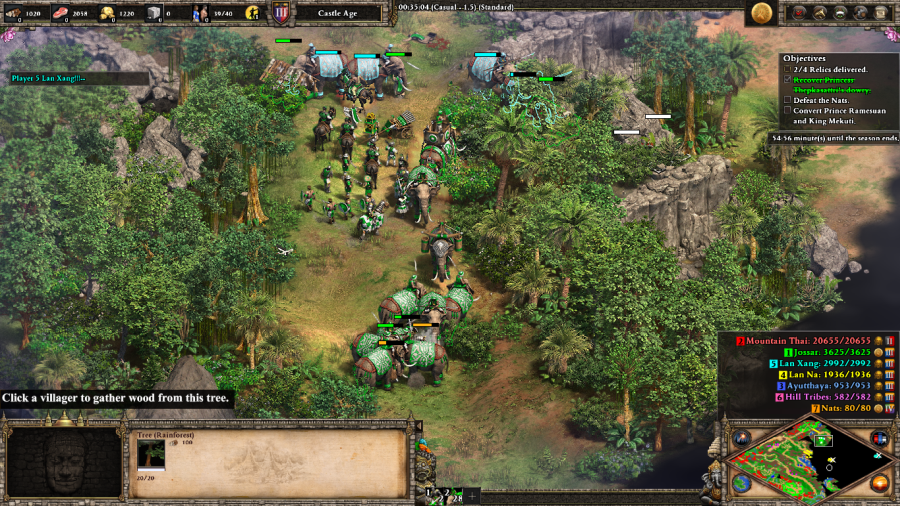 Bayinnaung: The nats have been driven from the land! Over their remains, I will build statues of the Buddha! Moving on from the northern Lan Na town, I get caught in this trap between the last couple of remaining Nat Enchantresses and some of Lan Xang's Battle Elephants, but fortunately the damage done is limited and can be assuaged by healing or recruiting more units. You have to be careful with your Monks though, as there are a limited number on the map as potential recruits. You can end up with what is effectively a mission failure state by being unable to deliver the Relics to the required Monasteries, if you play very sloppily. 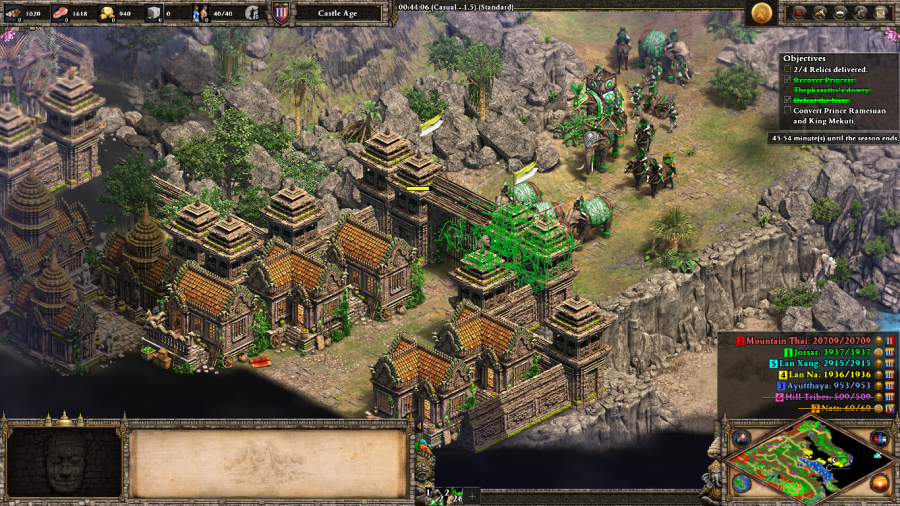 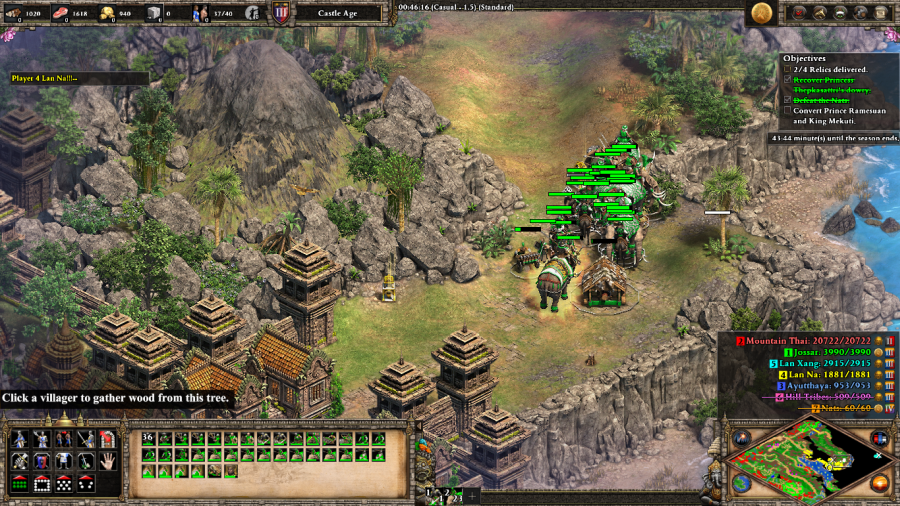 By going through the northern Lan Na town, I opened up this back door to the central Lan Na city that involves a lot less fighting/not smashing my face into an enemy Castle. Here, I make sure to take extra care to convert King Mekuti to get the city to surrender before moving in my Monk to the now pacified city to deliver the third Relic.    Lan Xang is a similar situation, where the obvious route of entry is a fortified death trap... but you can just ferry your troops across the lake, where to the south there is an undefended entryway that lets you march into the city with a minimal amount of fighting. From there, run a Monk underneath an enemy Tower to deposit the last Relic and achieve victory. Bayinnaung: My enemies bow before me! I am the White Elephant carrying peace and good fortune over the earth! I am the Cakkavatti! Mission 4 Ending Text "I have conquered my enemies and made them bow before me. I have purged the land of the nats, building stupas and monasteries where once the spirits ruled. I am the Conqueror of the Ten Directions. I am master of all between the foothills of Tibet and the waters of Malacca, between the plains of India and the mountain jungle of Vietnam. The kings of Sri Lanka and Portugal send me gifts from across the ocean. The emperors of India and China call me their equal. My life will be written in the legends of three nations for centuries. I am Bayinnaung. I am the Cakkavatti." This definitely feels like the "core" mission of the campaign, from whence the others were added on. A fun romp through Thailand, using the minimal amount of force necessary to utterly demolish everybody else. It does do the Burmese campaign thing where you trivialize most of the mission by knowing what to do... but here you feel really clever for finding hidden routes and forces rather than just circumventing the rest of the intended sequence, especially given that you're on a time limit and need everything you can get in order to meet it. Extra Slides Mission 4 - Intro Slide 1 Mission 4 - Intro Slide 2 Mission 4 - Intro Slide 3 Mission 4 - Intro Slide 4 Mission 4 - Intro Slide 5 Mission 4 - End Slide 1 Mission 4 - End Slide 2 Mission 4 - End Slide 3 Mission 4 - End Slide 4 Jossar fucked around with this message at 22:12 on Nov 18, 2023 |
|
#
?
Nov 18, 2023 22:00
|
|
|
Bayinnaung - Part 5: The Old Tiger Mission 5 Starting Text "1580 AD. Year Thirty of the reign of the Cakkavatti. Though the tiger grows old, his hunger does not leave him. It grows with age, driving him to fresh hunting grounds and giving him a taste for more dangerous prey! For thirty years, I have ruled Burma and made a dozen kings bow before me. But what will they say of my life? That I ruled by the sword and killed many men? That I, a King, was a slave to my desire? The Old Tiger is stubborn but he knows when his hunger has gotten the best of him. My sons lead the army to conquer the Rakhine coast; the gateway to India. They are like their father once, chasing in vain across the earth for their greatest victory..."  Nanda: Father, please sit and allow your sons to fight. You are tired from the long journey...  Bayinnaung: Long is a mile to him who is tired, but short is life to him who is idle. I will go to meditate. You may watch over me. This scenario starts you off with a massive army and navy split in two parts. Bayinnaung is still present, but has been turned into a Monk hero unit. It's your job to escort him to four Wonders dotting the map, in the midst of enemy territory. You have some capacity to replenish your forces by using Monks to convert enemies, but otherwise for this entire section of the mission, what you see is what you get. None of your starting buildings can build troops, and although you can convert enemy buildings, the most you can do is upgrade units since you don't have any population space anyway. Maybe you could convert a ton of Houses? This mission is kind of a mess as we're going to see...   Pretty much immediately, I stumble off the beaten path and into East Rakhine's base. Now I'm kind of worried that if I leave at this point, they're going to already be aggro'd and chase me down, so I figure that I might as well commit to wiping them out.  This also means that I end up running into the Portuguese. Unlike East Rakhine which is supposed to be neutral during this phase unless you accidentally trigger them, the Portuguese are always supposed to be hostile, but send out a limited amount of units to attack you. Since I'm in for a penny, I decide to go in for a pound and wipe out the Portuguese as well. 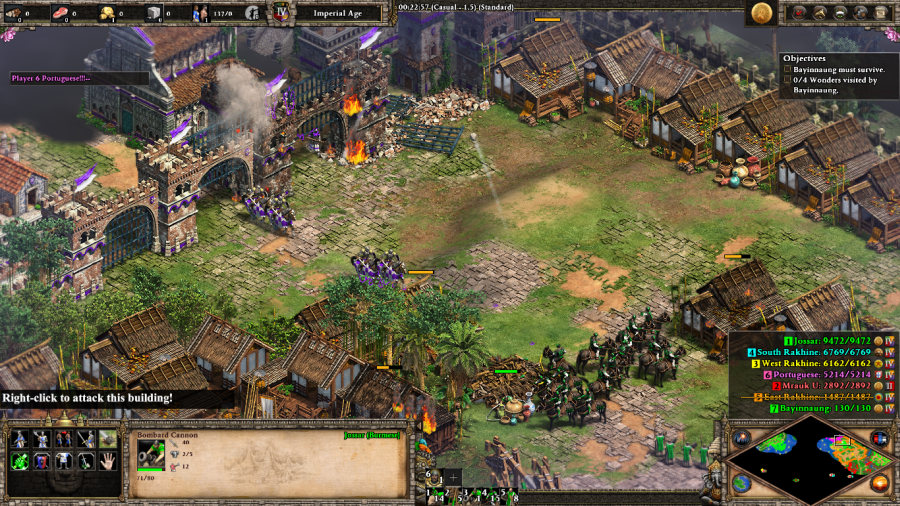 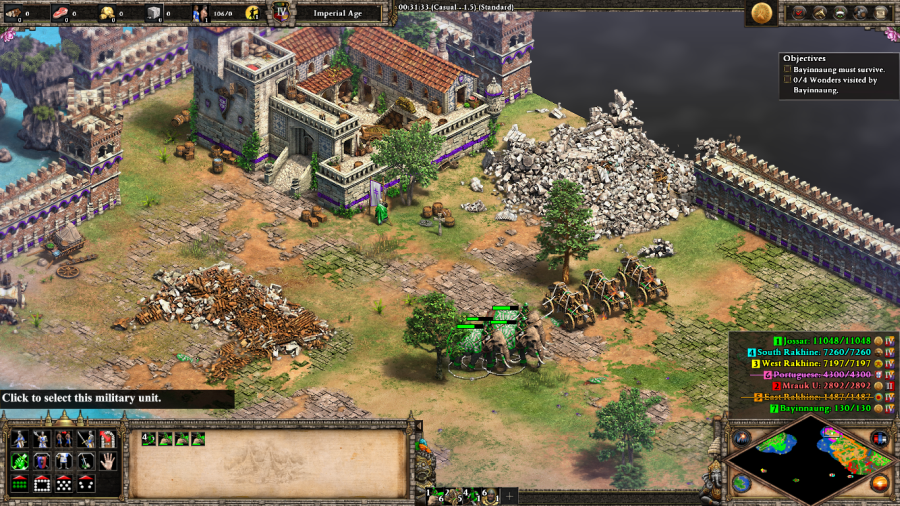 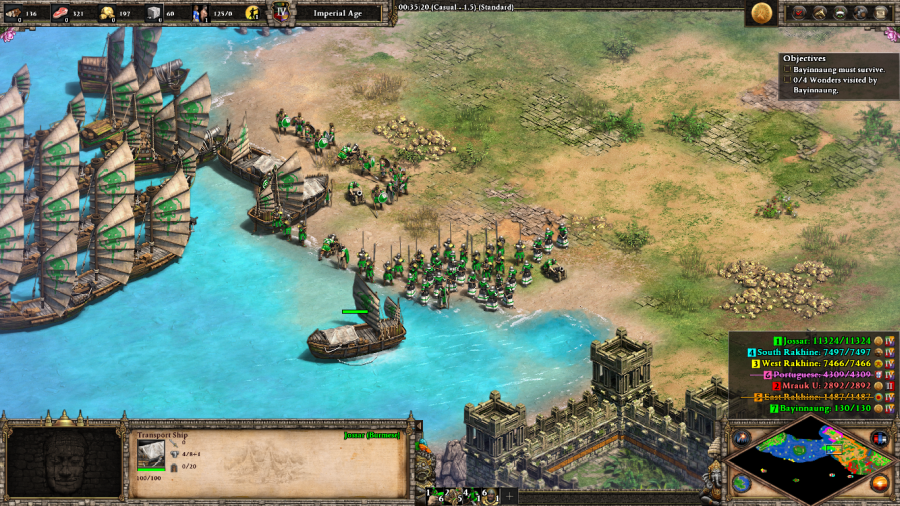 This, predictably, goes poorly. I've traded most of my army for the early defeat of the two largest potential threats, but that only leaves me the shattered remnants of the eastern army and the western reinforcements to finish off Bayinnaung's tour of the Rakhine Wonders. 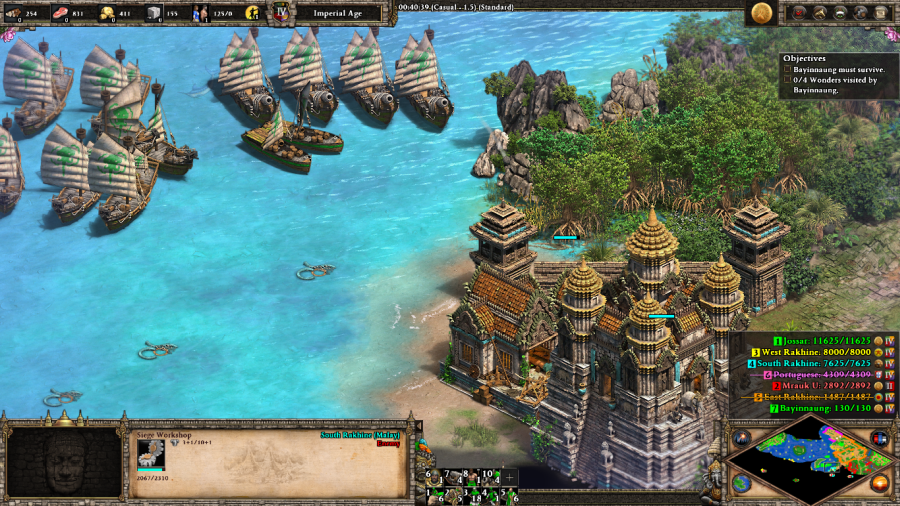  So I bring down my navy, which has a couple of Cannon Galleons, to participate in a dual-pronged attack on the South Rakhine. It's my hope that if I hit them hard by sea, they'll be distracted enough that I can make it through their lands and complete the pilgrimage in one piece.  Nanda: Stand fast, men! Guard the Cakkavatti while he meditates! Bayinnaung: Drop by drop is the water pot filled. Likewise, the wise man, gathering it little by little, fills himself with good. (after the meditation is complete) My journey is not yet finished. I will go to another temple to meditate on the Noble Truths. Nanda: The men will protect you on your journey, Father. Once Bayinnaung reaches a Wonder, he switches to being on his own allied team for a minute or so while he meditates. If you haven't already cleared the area surrounding the Wonder, this is the most dangerous part of the sequence as he is still vulnerable to attack, but can't be moved out of harm's way.  Bayinnaung: Everything is changeable, everything appears and disappears, there is no blissful peace until one passes beyond the agony of life and death. Because of how I raked over the South Rakhine here, there is very little to stand in Bayinnaung's way as I escort him up from the first temple to the second.  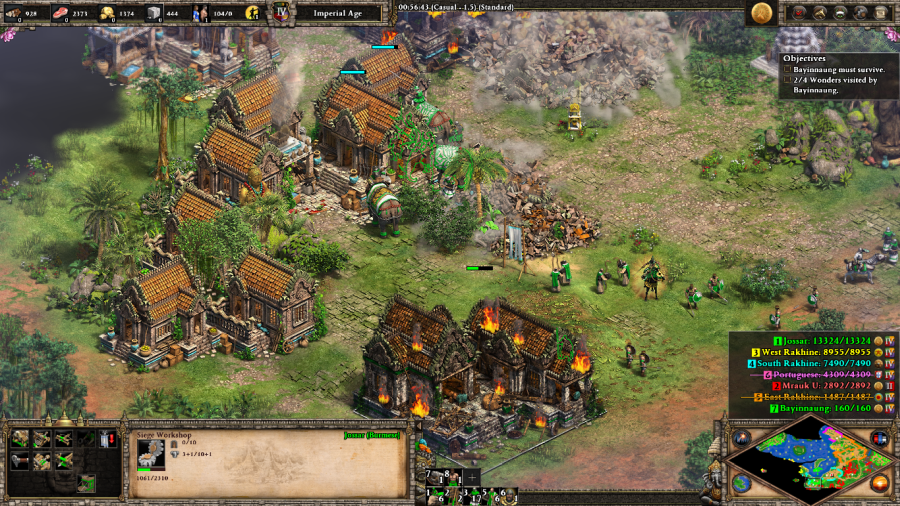 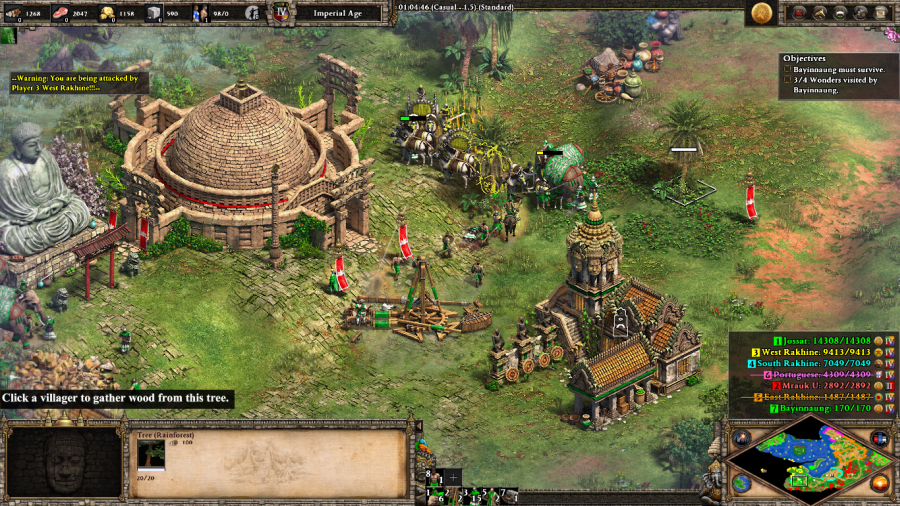 Bayinnaung: Thousands of candles can be lit from a single candle, and the life of the single candle will not be shortened. Such is the bliss of the Way. I continue my sweep further westward, eliminating the last of the coastal presence of the South Rakhine. In fact, they've collapsed so thoroughly at this point that the West Rakhine take over in their stead, which provides this tension-filled screenshot where my army and a West Rakhine strike force are duking it out, while Bayinnaung's just calmly sitting there meditating on the Way. 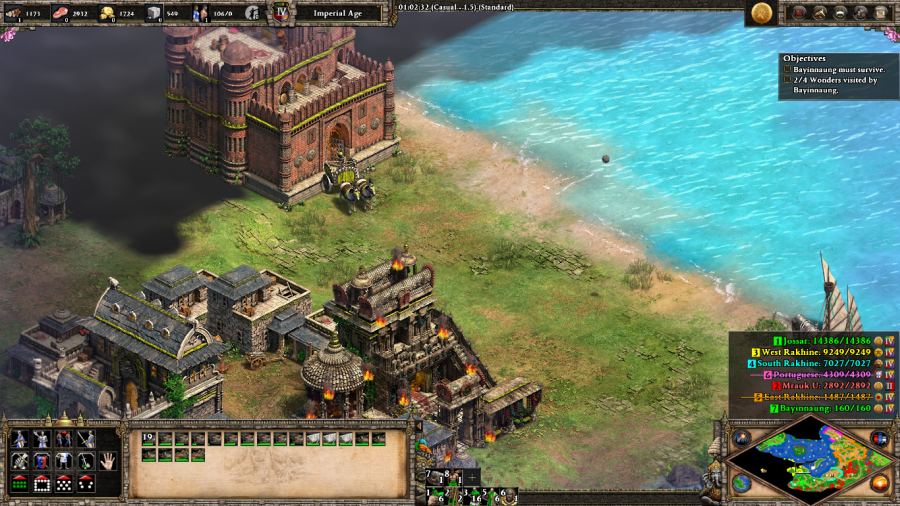 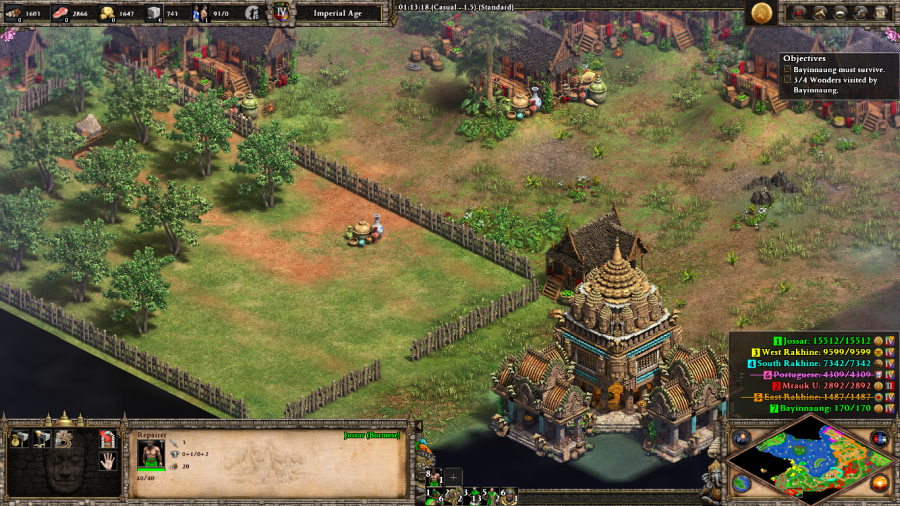  My navy's about reaching the end of its useful lifespan, so I send everything that I still have to screen for my one remaining Cannon Galleon as it takes down this coastal West Rakhine Castle. Meanwhile, my land-based army pauses from the pilgrimage to wheel around and destroy the remnants of South Rakhine before it can pick itself back up again.  And like that, both of the remaining enemy factions surrender. I was expecting South Rakhine to resign because I'd destroyed the last of their Town Centers and Castles. But while I had done a decent amount of damage to West Rakhine, I wasn't expecting that I'd hit them hard enough to knock them out of the fight. It's almost like they gave up on seeing that my victory was inevitable, much like a human player would. So then, in awkward silence, my army ambled over to the final Wonder.  Bayinnaung: Even death is not to be feared by he who has lived wisely. Though the flame be put out, the wick remains. Nanda: My father has crossed the stream. I will mourn tonight, but today we have a city to conquer. Okay, so what's supposed to happen here is that with his pilgrimage complete, Bayinnaung dies, and you gain Deathmatch level resources to close out the mission, although with very limited ways to replenish them if you run out. But because all opponents have already been defeated, once Bayinnaung visits the last Wonder, the scenario and campaign draw to a quiet close. Broken only by the voice of Bayinnaung's son and heir, Nanda. Nanda: Rejoice, men of Burma! We have conquered a mighty enemy, but the greatest victory this day belongs to my father! Mission 5 Ending Text "My father did not live to see the conquest of the Rakhine. The doctor claimed the lung sickness took his life, but I know my father. No man who rode a charging elephant into throngs of Shan archers, who stormed the cities of the Thai, or who ruled an empire not seen since the ancient days would die from a mere cough! No. My father left this world because he chose to. There was only one conquest left worthy of a man like Bayinnaung. I know legends will be told of him. I know old shamans will tell prophesies. But no deed would match his final act. Greater in battle than the man who would conquer a thousand men is he who would conquer just one � himself." Pre-Dynasties of India, this was arguably the toughest scenario in the entire game, in part because the enemies didn't have economies and you were forced to pit your limited army against unlimited unit spam. Post-nerf, it's still a pretty engaging scenario, though nowhere near as difficult. Bonus points for being the one scenario in the Burmese campaign where you don't have an easy answer to your problems, at least not until you've already gotten through the hard part. The Burmese campaign feels like the last two missions are the story that the designers really wanted to tell, and the first three missions sort of got thrown in as filler. From a narrative perspective too, it feels like there should have been at least one more mission focused on the kingship of Bayinnaung himself, just to make things flow a little better from his ascent to kingship to his end-of-life world weariness. Which is weird, because that's the sort of thing you'd expect from a retooled Forgotten campaign, not one that was designed for the ground up for Rajas! Extra Slides Mission 5 - Intro Slide 1 Mission 5 - Intro Slide 2 Mission 5 - Intro Slide 3 Mission 5 - Intro Slide 4 Mission 5 - End Slide 1 Mission 5 - End Slide 2 Mission 5 - End Slide 3 Mission 5 - End Slide 4 Jossar fucked around with this message at 03:19 on Nov 20, 2023 |
|
#
?
Nov 20, 2023 03:08
|
|
|
Campaign Vote #23 A. Le Loi - Vietnamese B. Tamerlane - Tatars C. Ivaylo - Bulgarians D. Kotyan Khan - Cumans Voting lasts for 24 Hours from the time of this post. In the event of a tie, I will act as the tiebreaking vote between the two tied options. Please bold your vote in order for it to be counted, as well as noting if you are changing your vote from something else. At this point, I'm pretty sure I'm just gonna get thrown back into the jungle one last time, but might as well make it official, hmm?
|
|
#
?
Nov 20, 2023 03:09
|
|
|
A. Let's finish off Southeast Asia.
|
|
#
?
Nov 20, 2023 04:41
|
|


|
Technowolf posted:A. Let's finish off Southeast Asia.
|
|
#
?
Nov 20, 2023 06:07
|
|

|
That was a neat campaign, all in all.Technowolf posted:A. Let's finish off Southeast Asia.
|
|
#
?
Nov 20, 2023 10:50
|
|

|
A.
|
|
#
?
Nov 20, 2023 10:59
|
|
|
Vote's closed! We march with Heaven's Will! We march with Le Loi! Jossar fucked around with this message at 04:11 on Nov 21, 2023 |
|
#
?
Nov 21, 2023 03:13
|
|
|
Le Loi - Part 1: The Dai Viet Uprising Age of Empires II: Definitive Edition - Vietnamese Theme Very well, then let us begin, the tale of the peacemaking king. 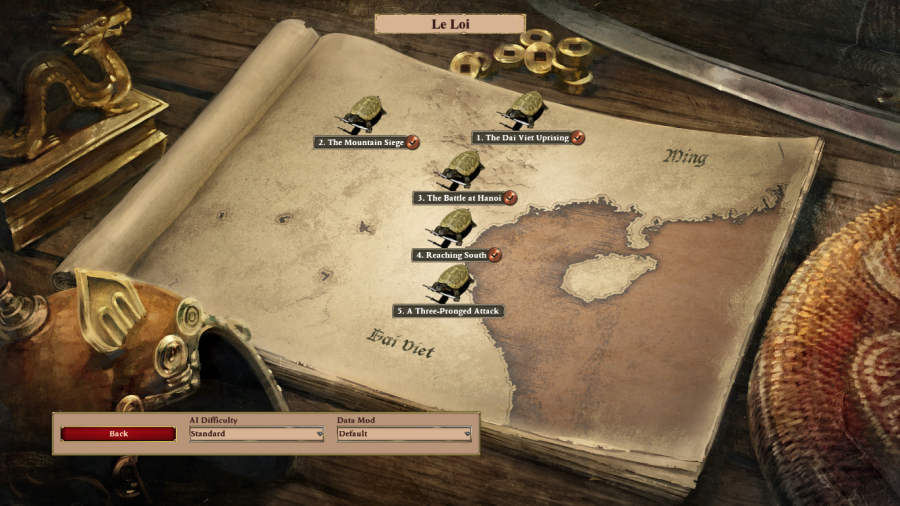  Mission 1 Starting Text "The kingdom of Dai Viet is no more. A storm came from the north and plunged the land into darkness. Torn apart by civil war, the kingdom drew the hungry eyes of the Ming emperor. He sent an immense force armed with weapons of fire and smoke to conquer Dai Viet. The Vietnamese people stood no chance against such a menace. Foreign soldiers entered the villages and occupied the land. While the Vietnamese aristocracy collaborated and prospered, the common people suffered. The invaders imposed harsh taxes on the people and destroyed many of the holy places. The Vietnamese needed a hero, and that hero was Le Loi. Although the son of a nobleman himself, Le Loi despised the aristocracy who had sided with the enemy. When the Chinese came, he fled north to the lands of his family. There, in the hills, he was outside the reach of the Chinese while he organized the resistance. Vastly outnumbered by the large Ming army, Le Loi knew he could not defeat them in open battle, and so he turned to guerrilla warfare. He raided Ming camps to steal supplies and gave them to the starving farmers." 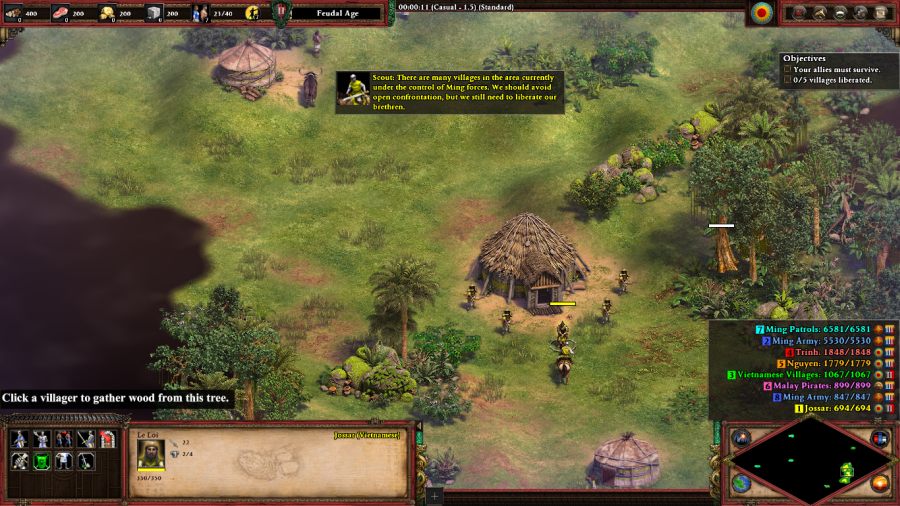 Scout: There are many villages in the area currently under the control of Ming forces. We should avoid open confrontation, but we still need to liberate our brethren. The scenario starts out with a small number of troops and villagers under your control, including Le Loi, an Infantry hero unit. 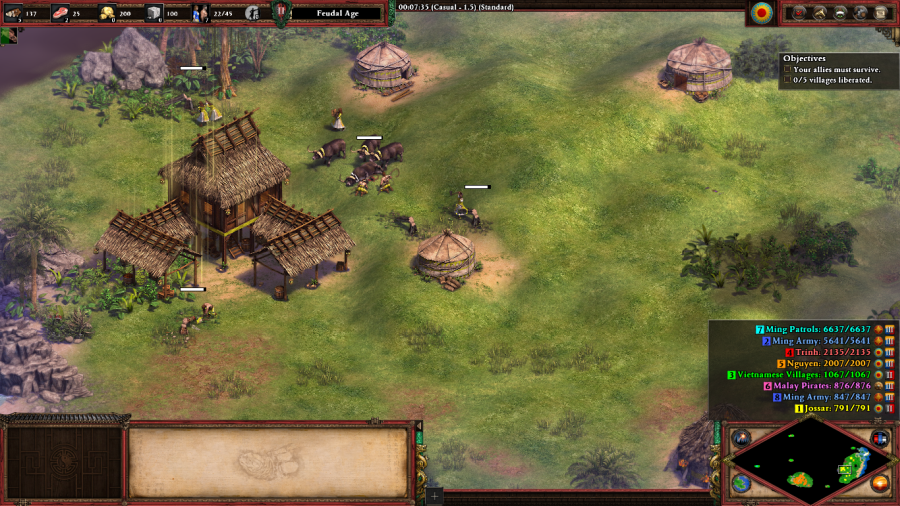 You don't start with a Town Center, but are free to build one wherever you like, and are encouraged to do so as close to gold piles as you can. Just note that a lot of the ground is rolling hills and too uneven for a Town Center to be constructed upon. (There are a few gold piles just offscreen, in case you were wondering.)  The goal of the mission is to liberate the five allied Vietnamese villages, which are guarded by pretty large Ming Patrol Garrisons, supported by a series of towers. I lose all of my starting force to take this village. The strategic win is worth achieving, even at the cost of a terrible tactical loss, as the various enemy factions don't really care about you at all this mission. The Ming Patrols only guard the villages themselves and the roads in between them...  Nguyen: Our family has always cared for the fate of our people. We will help drive away the Ming!  Trinh: Our men will fight for you, Le Loi. Together we will free our people! And the Ming Army, although housed in a number of strong fortresses spread across the map, is exclusively focused on trying to destroy the two allied nobleman factions. These guys are competent enough to defend themselves early on, but will eventually get overwhelmed if left on their own.  With my economy fully developed, I build up to my pop cap in Vietnamese' HP boosted Battle Elephants and Rattan Archers (Vietnamese unique unit, heavily armored Anti-Archer Archer) and go to town on the enemy patrol garrisons. 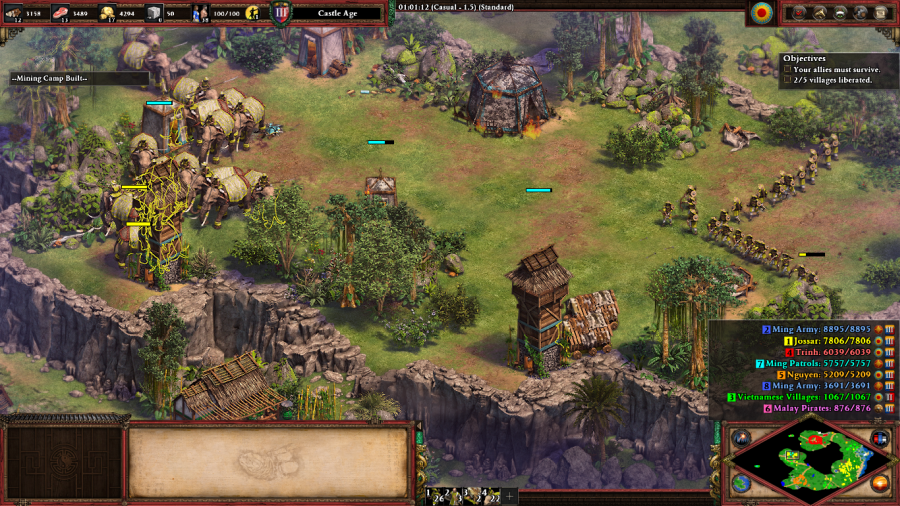 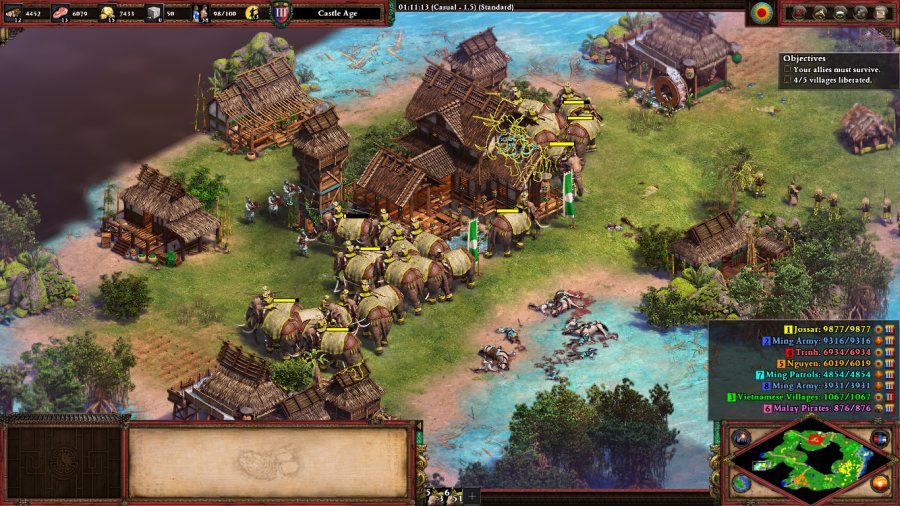 And that's pretty much it. The Ming Patrols can't stand up to a fully realized Vietnamese army, the Ming Army forces were starting to get close to overwhelming the allied nobleman factions, but didn't manage to make it all the way there before I won the mission. And the Malay Pirates only have a tiny beach force to remind you they exist on an island to the east of the map, which is the centerpiece of a side-quest that's not worth completing no matter the difficulty level. Vietnamese Soldier: All villages in the area have been liberated. This is the first step to winning back our lands! Mission 1 Ending Text "Le Loi's resistance could only succeed through planting the seeds of rebellion in his people. The resistance began slowly and with only minor successes, but Le Loi's reputation grew each day. The people started calling him 'The Peace Making King' and wanted to see him on the throne of the old kingdom." The base-building segment felt really slow for some reason, but maybe it's just because I've gotten used to accelerated campaign starts. Apart from that, it's a starter mission designed to ease you into playing the Vietnamese. Well, some people would disagree with the "ease" part, as defending the two allied camps can be annoying on higher difficulty levels. Chinese are probably not the greatest opponent for showing off the civilization, as Chu-Ko-Nu multi-arrows mitigate some of the benefit of your Rattan Archers, but really, who else are you going to be facing as the Vietnamese? Extra Slides Mission 1 - Intro Slide 1 Mission 1 - Intro Slide 2 Mission 1 - Intro Slide 3 Mission 1 - Intro Slide 4 Mission 1 - Intro Slide 5 Mission 1 - Intro Slide 6 Mission 1 - End Slide 1 Mission 1 - End Slide 2 Jossar fucked around with this message at 05:08 on Nov 21, 2023 |
|
#
?
Nov 21, 2023 04:52
|
|
|
Le Loi - Part 2: The Mountain Siege Mission 2 Starting Text "The Ming heard rumors of this rebel king and vowed to crush him before his seeds of rebellion could take root. Disaster struck the Vietnamese rebels when the Ming defeated them in battle and forced them to retreat to the Chi Linh mountain fortress. Encircled by a large Chinese army and with no hope of help from the outside, Le Loi's situation became grim. Supplies would not last long and the Ming cannons had already begun to batter the old walls of the fortress. The end of Le Loi and his rebellion seemed imminent..."  Vietnamese Soldier: Enemy soldiers are attacking the walls! 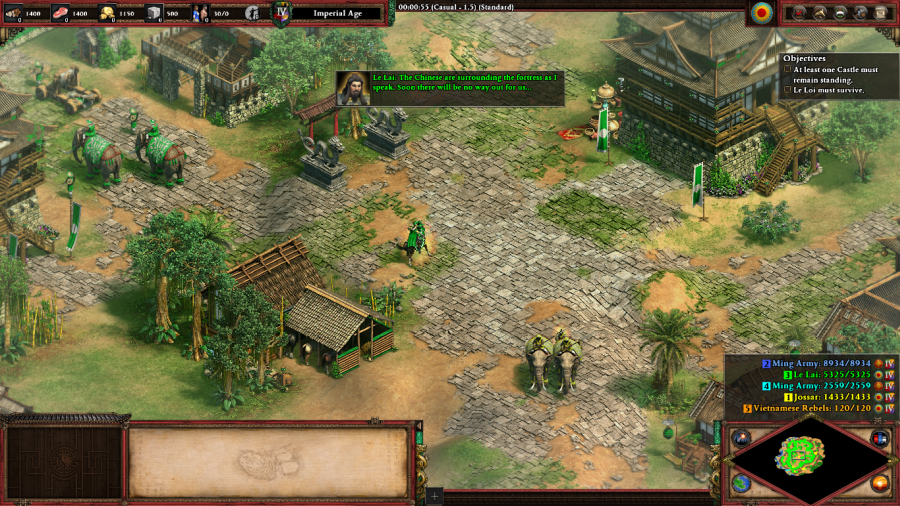 Le Lai: The Chinese are surrounding the fortress as I speak. Soon there will be no way out for us... (after a few seconds) However, there is still a small chance for the rebellion to survive. The Ming only have a small presence to the east. If we clear that side, it would allow our men to escape. This mission starts with you sharing a starting fortress with an AI player, Le Loi's brother, Le Lai. Le Lai is okay on defense, but left to his own devices, the Ming will eventually outclass him and break through the walls. So you have to contribute at least something like a moderate anti-Siege strike force to ensure that the place isn't entirely overrun and all of the Castles are destroyed, or else you fail the scenario. But apart from that, most of your attention is going to be focused on the actual goal of the mission: trying to get out of Chi Linh in one piece. 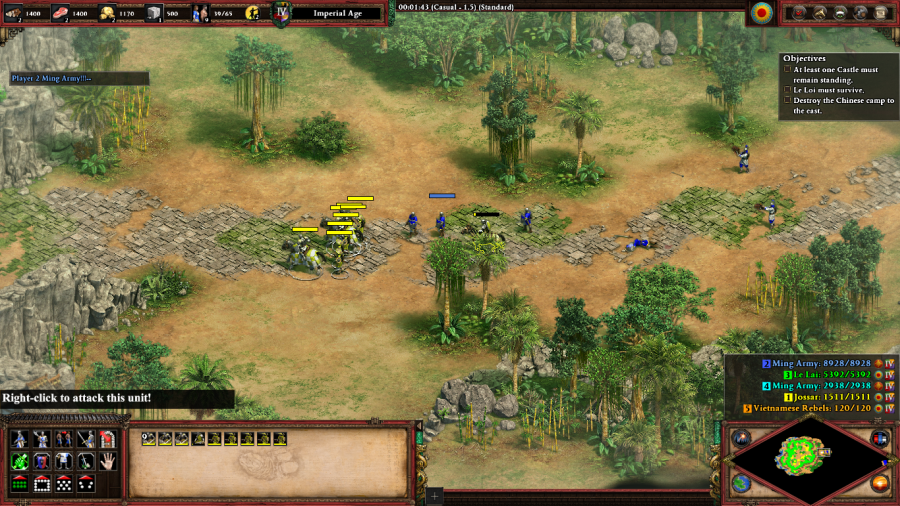 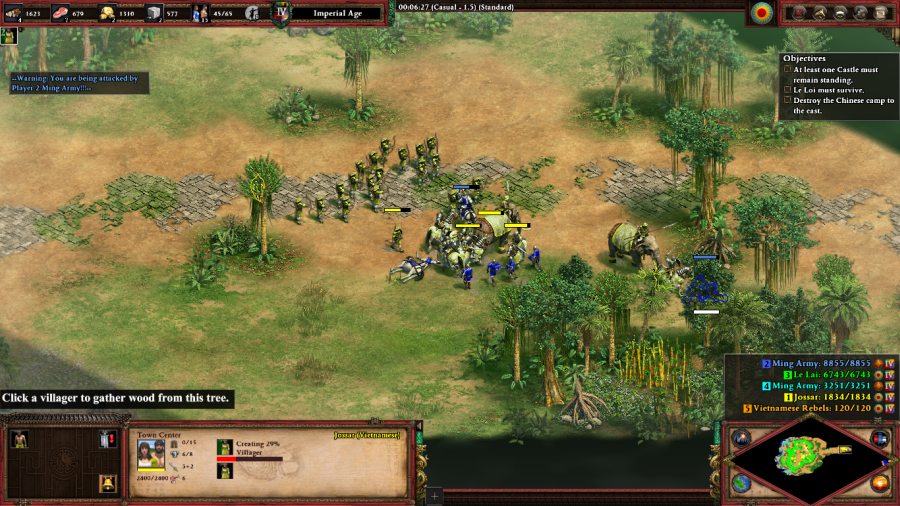 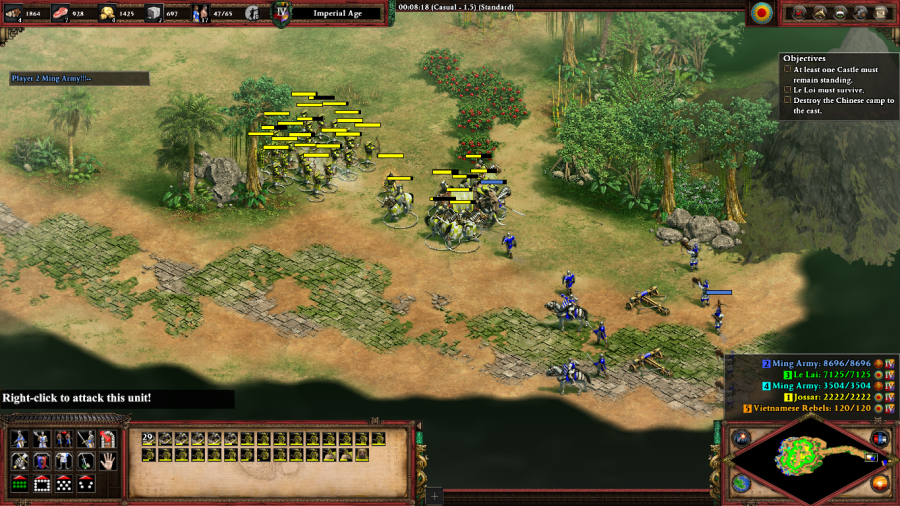 For that reason, while my villagers are off booming, I combine all of the soldiers I have floating around the fortress into a single big army and strike out east to destroy all of the static Ming patrols blocking the road. The Scorpions are kind of annoying, but the rest of the units can be dealt with rather handily. 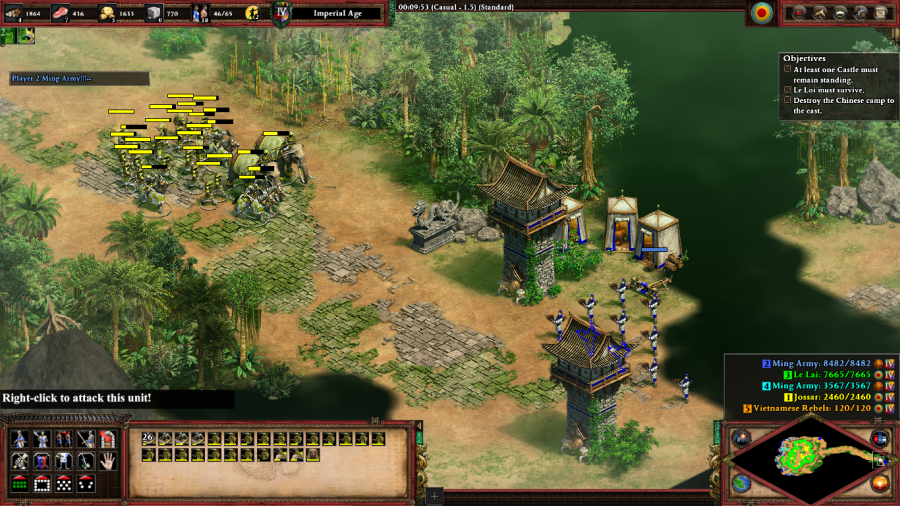 The final obstacle for this part of the mission is taking out this fairly well-defended camp that the Chinese have set up here to prevent anyone from sneaking out of the mountains. It does a pretty good chewing through my forces, and I have to send a few more Battle Elephants all the way down from the main fortress to finish off the Towers, but in the end the way is clear. Vietnamese Soldier: The path east lies open. Soon, our soldiers will start leaving the fortress. We must cover their retreat. 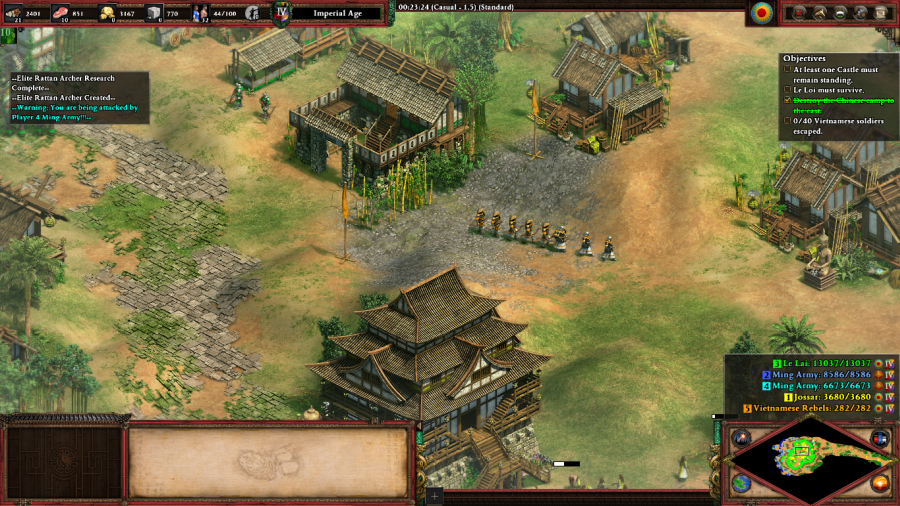 Vietnamese Soldier: A group of our soldiers is heading east and need [sic] our help. This opens up the second part of the mission. Groups of allied rebel soldiers will spawn in the middle of the fortress and immediately start running for the exit to the east. It's your job to protect them as they make their way there.  And the Vietnamese Rebel troops will absolutely need your protection, as they have the awful habit of slamming face first into every possible Ming patrol that exists along the route and getting utterly annihilated at the drop of a hat. Seriously, these guys are just so dumb.   The Ming produce additional troops to try and attack the rebel soldiers along the route, but a couple of medium sized forces stationed at regular checkpoints can be used to destroy the enemy raiders before they create any real trouble and keep the road clear.  Vietnamese Soldier: The majority of our soldiers have made it out! Now, only Le Loi has to make it there. At this point, the mission is pretty much set. Continue defending the fortress and the escape route against Ming assaults until you reach forty soldiers escaped, bring Le Loi to the exit, and victory is yours. The game concludes with a mini-cutscene of Le Lai charging off to face the Ming in order to guarantee Le Loi's escape.  Le Lai: I will hold off the enemy to cover your escape! Good luck, Le Loi! Mission 2 Ending Text "Just as defeat seemed inevitable, Le Loi's second in command, Le Lai, and his men sacrificed their lives to save what was left of the Vietnamese Rebellion. They mounted their horses and led a final charge right into the Ming besiegers. In the ensuing confusion, Le Loi and the rest of the army escaped through the fortress' drainage system. One witness who saw the charge said that he saw the spirits of the Vietnamese ancestors riding along Le Lai and his men as they plunged into the lines of Ming pikes. It was a sad day for Le Loi and the Vietnamese. They had lost much and all that remained of the resistance was smoldering ashes and dead bodies. However, the tale of Chi Linh spread throughout Vietnam and lit the spark of resistance. The Vietnamese people were no longer willing to tolerate the Ming occupation." Win fast or die fast. On Standard, this mission is a cakewalk, but on Hard it's supposed to be one of the hardest scenarios in the game because of the necessity of having to split your attention in order to deal with the constant attacks by the Ming armies on every front. Which is probably why the game lets you have a large number of Imperial Age toys this early on in the campaign, even though we're about to get dumped back into Feudal again. Same basic gameplan either way though, unless you try to achieve some level of relief from the swarm by going on the offense against the Ming production facilities instead. Extra Slides Mission 2 - Intro Slide 1 Mission 2 - Intro Slide 2 Mission 2 - End Slide 1 Mission 2 - End Slide 2 Mission 2 - End Slide 3 Mission 2 - End Slide 4 Jossar fucked around with this message at 04:24 on Nov 22, 2023 |
|
#
?
Nov 22, 2023 04:15
|
|
|
I like this mission! It's got a very unique set up and it's challenging without being a grind It's also possible to cheese by building a dock in like, on spot that isn't under fire and build cannon galleons, or at least it was
|
|
#
?
Nov 23, 2023 08:42
|
|

|
Le Loi - Part 3: The Battle of Hanoi Mission 3 Starting Text "People from all over Vietnam came to Le Loi - even veterans of old forgotten wars and boys barely old enough to carry weapons. Le Loi needed to use the momentum of the rebellion to deal a decisive blow to the Ming forces. The rebel army would strike at the old capital of Hanoi..."  Vietnamese Commander: We will need more men to besiege Hanoi. We have to find the mountain rebels and ask them for support against the Ming! This mission starts you off with a moderate army, and your goal is to gallivant around the countryside, attacking targets of opportunity to free the peasants while you march your way over to the north of the map where the mountain rebels are. There, you can join up with them and prepare to undertake a proper siege of Hanoi.  Vietnamese Soldier: Watch out! Meanwhile there are, of course, a bunch of Ming soldiers patrolling the roads who will impede your progress.  Farmer: We sincerely thank you, my lord. We are now free from Ming oppression. We will supply you with food from now on. Free this set of rice paddies to the west, and the farmers here will tribute you food throughout the rest of the mission.  In addition to the main group of rebels that you're supposed to meet up with, there are a number of small camps of friendly Ming Deserters scattered throughout the map. These are useful to help resupply your army, as a lack of Monks means that without perfect micro, you're going to get worn down as you wander through the various Ming patrols.  This is the first "significant" Ming army camp. It's not too tough, and is mostly a sign that you're heading in the right direction rather than exploring the map for goodies.  Vietnamese Soldier: There has been an attack here. Hopefully the farmers are still alive. LOOK AT THE BONES, MAN!   Villager: Le Loi has come to save us! If you need more help, there are Ming deserters nearby that might join you. Despite the macabre scene of skeletons littering the ground throughout the entirety of the village, most of the Villagers are in fact still alive and will join you after you liberate them. They have nothing to do for the moment, but are a welcome slingshot to your economy once you gain access to one.  Vietnamese Soldier: We can use these Transports to cross the river. There is a Ming base to the northwest of the previous village that you can fight through in order to reach the rebels, but it's fairly well defended. Better to fight the local garrison here in this village and commandeer their transports instead.  As a bonus, it's on the way to the Ming Deserter encampment that the Villagers mentioned, which contains the largest single group of additional recruitable troops.  From there, it's just a quick hop, skip, and a jump across the river and through friendly territory before reaching the Rebels. 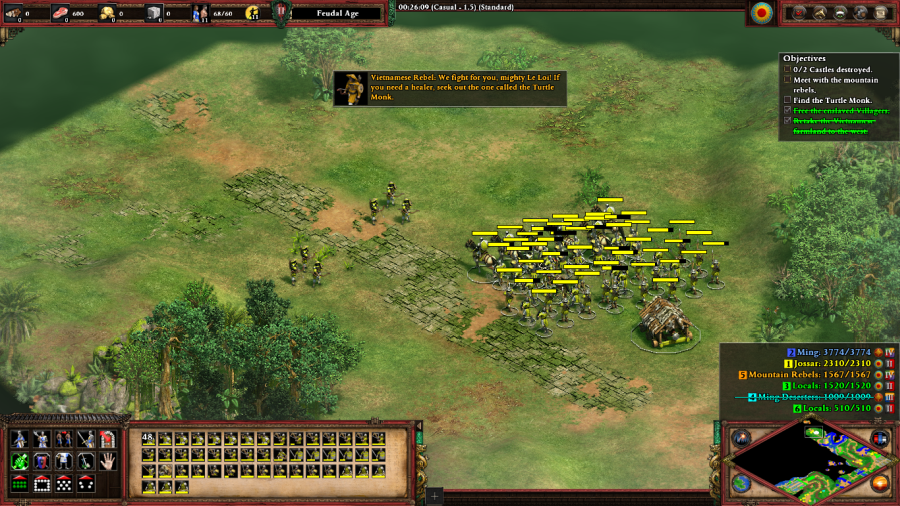 Vietnamese Rebel: We fight for you, mighty Le Loi! If you need a healer, seek out the one called the Turtle Monk. 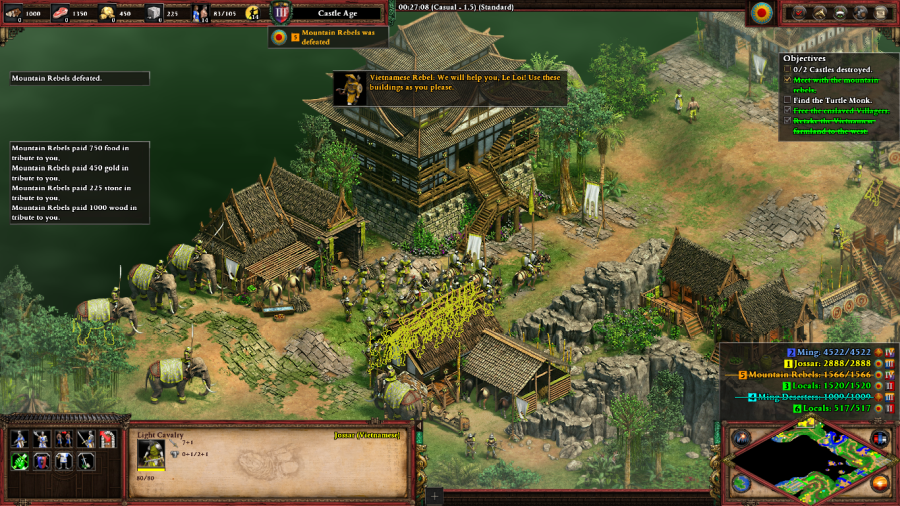 Vietnamese Rebel: Le Loi has come! (after a few seconds) We will help you, Le Loi! Use these buildings as you please. 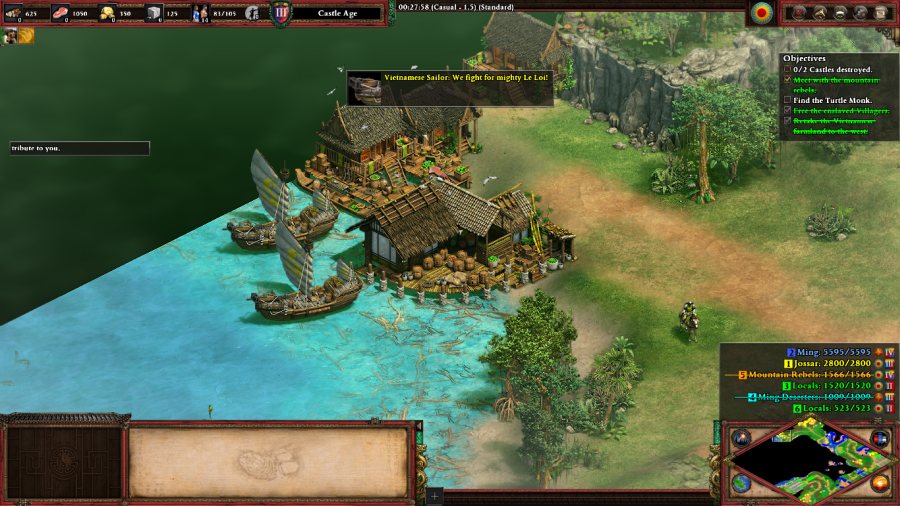 Vietnamese Sailor: We fight for mighty Le Loi! Guys, please stop with the effusive praise. I haven't even done anything yet. But yeah, the Rebel base is decently well set up, although it's missing an economy. This is what all those Villagers from before and a few within the base are meant to support. 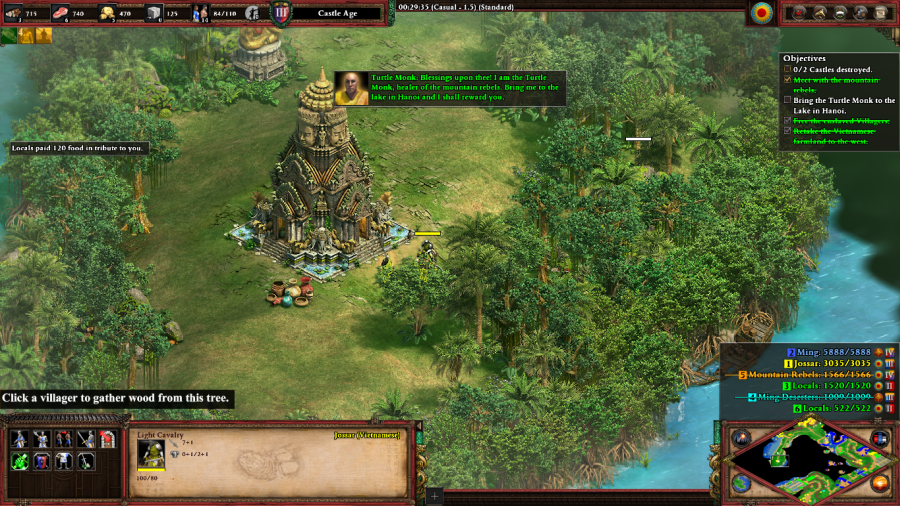 Turtle Monk: Blessings upon thee! I am the Turtle Monk, healer of the mountain rebels. Bring me to the lake in Hanoi and I shall reward you. Since you can't build a Monastery, this guy and his Monastery are your primary source of Monk related things. We'll be seeing that lake he mentions in just a little bit. 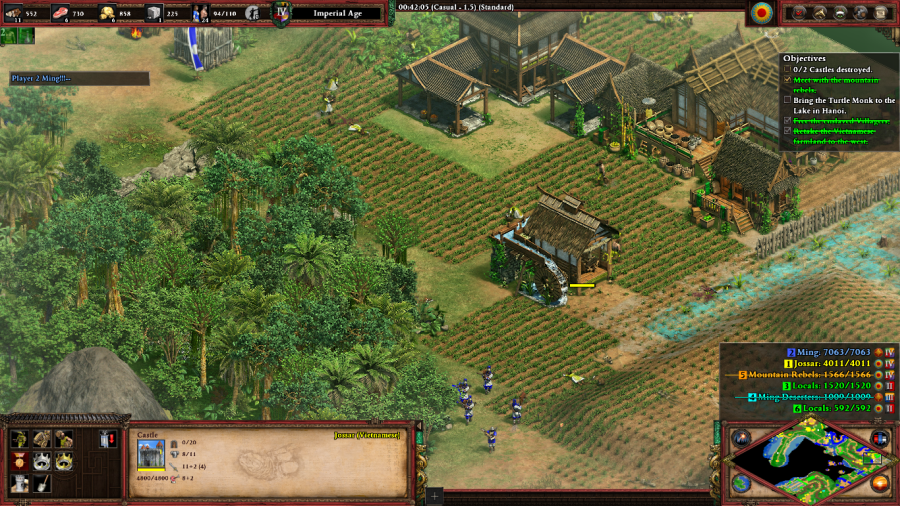 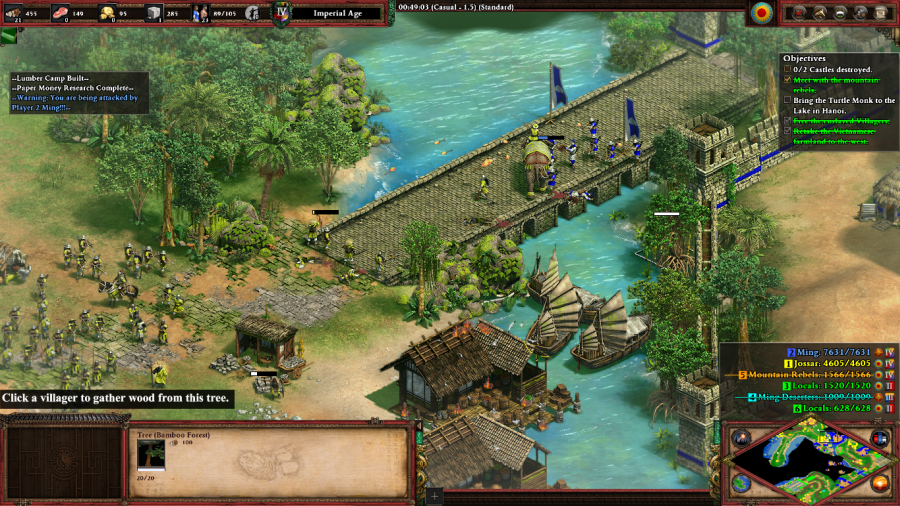 Meanwhile, all over the map, the Ming will try to raid your outlying camps. This is really annoying because I had some Villagers all the way back in the starting half of the map, and you really should just focus everything in a defensible position by the rebel base rather than just putting up supply camps wherever like I did. 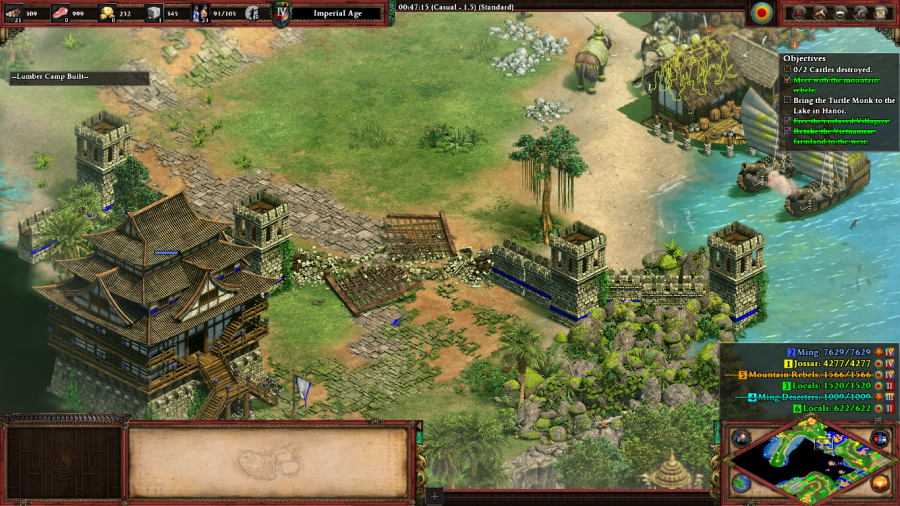 Eventually, after clearing the Ming out, I build a Dock and some Cannon Galleons just to the northeast of Hanoi itself. These guys can, pretty much uncontestedly, take out Hanoi's outermost defenses and production buildings. This includes this Castle, which is notably not one of the central two Castles that need to be taken out in order to win the mission. 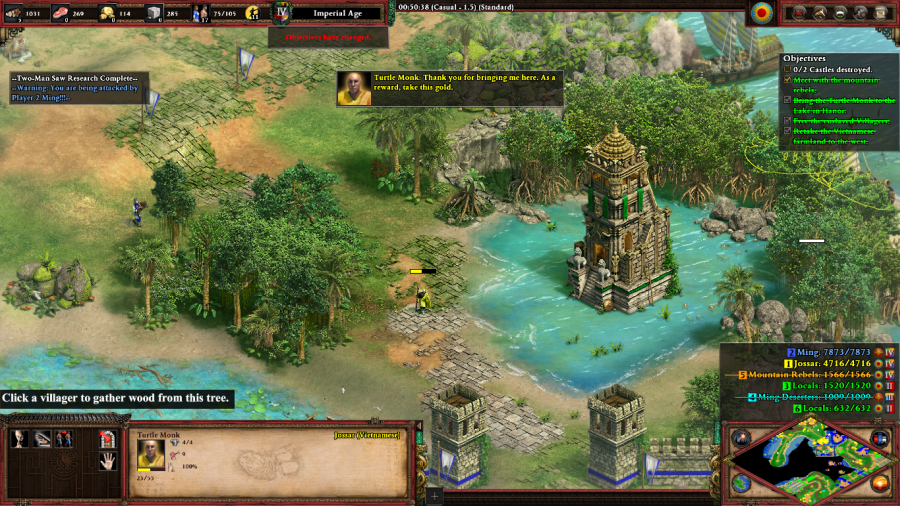 Turtle Monk: Thank you for bringing me here. As a reward, take this gold. With the initial wave of Hanoi's defenses clear, I'm free to return the Turtle Monk to his house on Lake Hanoi. For doing this, he gives you 1000 Gold. You'd think he'd leave at this point, but nope, he sticks around until the end of the scenario. This side quest is kind of awkward, because while gameplay-wise it's interesting to have to escort this guy to the lake while he's in the middle of the line of fire, it doesn't really make any narrative sense at all. It's a modified version of the pre-Definitive Edition version of this quest where the gift was 500 gold and an extra +4 attack to Le Loi, who was also a playable unit in that version. But even then in its more RPG-esque form, the quest still didn't make sense because it's referring to a legend that doesn't happen until after the end of the events of the campaign, at which point Le Loi returned a magic sword that he had acquired during the rebellion to a turtle spirit dwelling in the lake in question. Alright, you know what, let's move on...   Cannon Galleons can pretty much destroy everything in Hanoi above a certain line, including one of the two target Castles, only being stopped from doing further damage because they can't navigate the local river any further due to a waterfall. With that done, the now weakened Hanoi can be finished off with a whole bunch of Battle Elephants/Rattan Archers and a couple Trebuchets to take out the last Castle from a distance. Vietnamese Soldier: We have retaken Hanoi! Mission 3 Ending Text "Hanoi was captured and now all of the southern Ming occupation forces were cut offfrom China. The Chinese emperor was furious with the failure of his generals. Therefore, he sent his most capable general, Wang Tong, to Vietnam. Wang was a veteran of many wars against the nomads of the north and a brilliant tactician. If anyone would be able to challenge Le Loi, it would be him." For some reason I like this mission, but can't really give a good reason as to why, given that it's an incredibly boring hybrid scenario which can be easily trivialized by Cannon Galleons once you get to the base-building section. *shrug* Extra Slides Mission 3 - Intro Slide 1 Mission 3 - Intro Slide 2 Mission 3 - End Slide 1 Mission 3 - End Slide 2 Jossar fucked around with this message at 16:41 on Nov 23, 2023 |
|
#
?
Nov 23, 2023 16:29
|
|
|
You forgot to post the starting text btw.
|
|
#
?
Nov 23, 2023 16:37
|
|


|
Fixed. I'm kind of having a lazy Thanksgiving update. For instance: not depicted is that closing out this mission took way longer than that last screenshot indicates, not for any particular reason, but because I couldn't be bothered to play properly and just screwed around in some of the worst gameplay this LP has seen for 45 in-game minutes until I finally got around to massing a proper group of Rattan Archers and Battle Elephants.
|
|
#
?
Nov 23, 2023 16:45
|
|
|
The mountain fortress missiion is an absolute nightmare pre Definitive Edition. Also, I've been playing the AoE1 campaigns that were ported over by the devs, and now I understand why they initially didn't want to do this: all these campaigns loving suck lmao.
|
|
#
?
Nov 25, 2023 06:53
|
|
|
As child I remember thinking the mission where you begin with only a monk was the coolest thing i'd ever seen in my limited video game experience, but i recall absolutely nothing beyond that.
|
|
#
?
Nov 25, 2023 07:38
|
|
|
Le Loi - Part 4: Reaching South Mission 4 Starting Text "With Hanoi under Le Loi's control, the Chinese retreated behind the walls of the larger towns and cities of the south. There, they would wait for Wang Tong, the approaching Ming general. Le Loi had to act quickly, but he could not underestimate the Ming. The garrisons had large stockpiles of gunpowder and Wang Tong's army marched at a frantic pace to reach the besieged cities."  Vietnamese Commander: There is another Chinese fortress to the south. The Ming store a lot of gunpowder there - we should capture it to increase the power of our army! This is a build and destroy mission where you're given a moderate, but lightly defended, base and a few troops to start with. There are, however, a few twists attached. 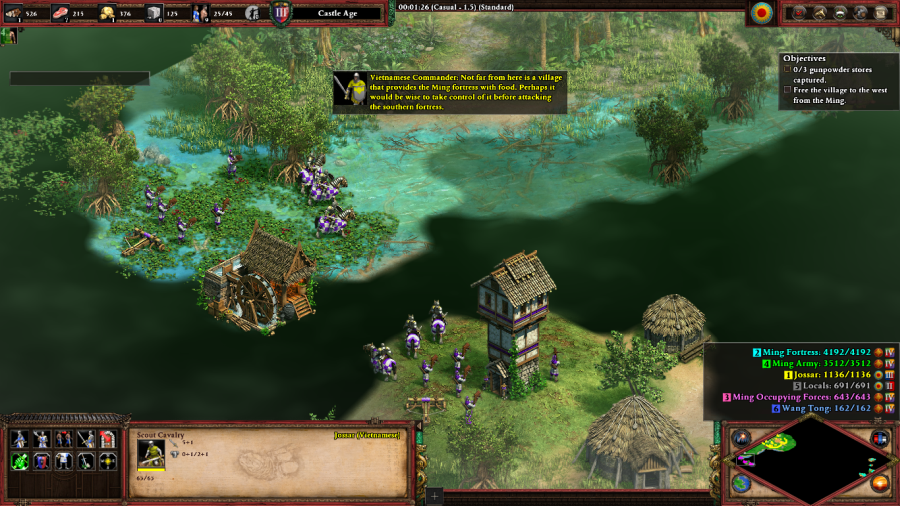 Vietnamese Commander: Not far from here is a village that provides the Ming Fortress with food. Perhaps it would be wise to take control of it before attacking the southern fortress. First twist: there's a side objective where if you go down and kill these Ming Occupying Forces, you can free the associated village and get a constant supply of food. This is the remnant of a more expansive quest from the pre-Definitive Edition version of this mission, that isn't really worth completing in DE. If you have the units to spare to fight a group of Imperial Age troops that otherwise does not interact with the rest of the map, you really should be using them to advance towards winning the mission rather than getting some extra food.  Wang Tong: (before the first attack) If you know the enemy and know yourself, your victory will not stand in doubt. If you know Heaven and you know Earth, you may make your victory complete. (after the first attack) Pretend to be weak so that your opponent will grow arrogant. Second twist: Wang Tong is a player on the map, but he does not have a base. He'll do an early raid with Knights to alert you of his existence, take one legitimate shot at you with Cavaliers/Arbalests and maybe some Siege, and then peace out. It's a pretty nasty sucker punch, especially if he can line it up with the rest of his allies, but it also means that if you can fend off that one big attack then the rest of the mission is basically a cakewalk, as your enemies are never going to throw anything at you again with the same level of firepower. Fun fact: all of his four lines of dialogue in this mission are quotes from Sun Tzu.  The Ming Army is the less dangerous of your two non-static on-field opponents, training Long Swordsmen, Light Cavalry, Crossbowmen and Chu-Ko-Nu, upgrading them to their Imperial versions if they live long enough. They have a base to the north of the map and while not strictly speaking necessary to take out, represent the easiest target of expansion once your gold mines start running out, so in practice they need to go so that you can focus on preparing your army to defeat the fortress to the south.  The Ming Fortress, despite being farther away, is the more organized of your two opponents and sends larger attack groups consisting of Knights, Pikemen, Crossbowmen, Chu-Ko-Nu, their upgrades, and various Siege units. I was lucky here, as I just barely managed to get my defensive Castle up before these guys hit my base.   With the initial waves of enemy attacks defeated and resources built up, my attack on the Ming Army began in earnest. A couple of Trebuchets were helpful in long-distance building demolishment here, but the real stars of this mission were the Rattan Archers. Once these guys were massed up, they tore through practically everything in sight. 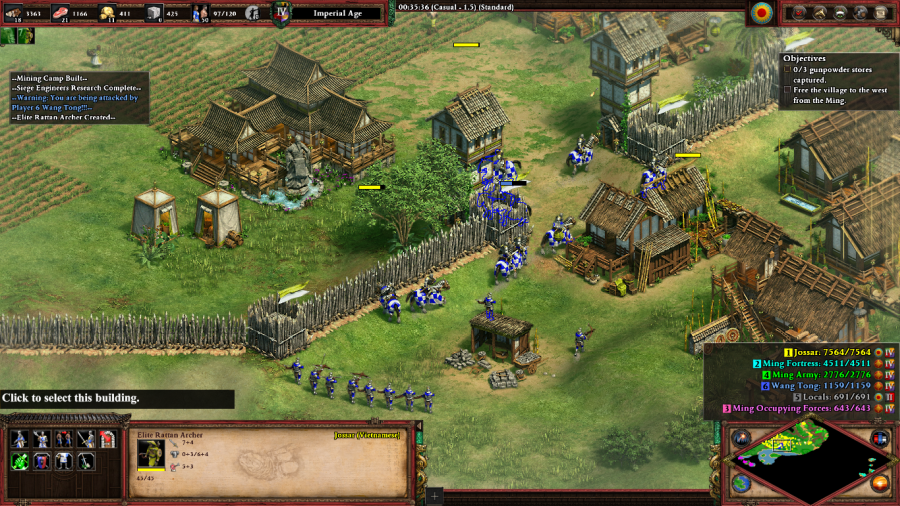   Wang Tong: (before the second attack) A kingdom that has been destroyed once can never again come into being, nor can the dead ever be brought back to life. (after the second attack) He who advances without seeking fame, who retreats without seeking blame, whose one aim is to protect his people and to serve his lord - that man is a jewel of the realm. In the middle of my attack on the Ming Army, Wang Tong pops up with his second army, split in two to simultaneously attack my home base and delay my army from running back to defend it. Meanwhile, the Ming Fortress sends in a Castle-sieging squad. If I hadn't already hit the exponential growth curve, I would have been dead. As it was though, I just had to stay calm and micromanage my Rattan Archers to flatten each individual army as quickly as possible in order to make it back in time to finish off Wang Tong's Cavalier base rush before it could cause too much lasting damage.  With Wang Tong out of the way and the Ming Fortress temporarily paralyzed, there's nothing left to stop me from finishing off the Ming Army, hollowing out their gold mines, and turning southward.   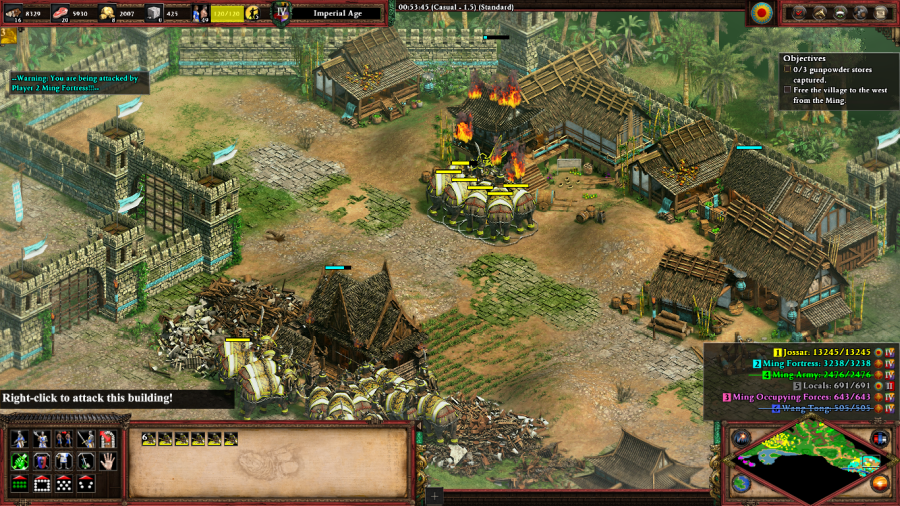 The Ming Fortress is very large, but fortunately this isn't one of those scenarios where the AI is set to turbo-murder mode with unending resources the instant you hit their base, so it isn't that hard of a fight to break through. Here lies the final twist of the mission: rather than needing to destroy the three indicated Gunpowder Stores (renamed Trade Workshops), you have to destroy the Keeps protecting them to take control, and if any of the Stores are destroyed you lose the mission. This just means you have to be very careful about what you send your troops to destroy, or instead focus on defeating the Ming Fortress normally, at which point they resign and the triggers hand you the Gunpowder Stores, completing the mission anyway. Vietnamese Commander: The Ming fortress is in our hands and we have captured their valuable gunpowder! This is an important achievement, my brothers! Mission 4 Ending Text "After capturing a major citadel with its gunpowder stores intact, Le Loi was able to take several key towns and hold off Wang Tong and his army. Wang Tong knew that his position was poor, and so he retreated to strengthen his supply lines and replenish his forces. For now, there would be no battle. Le Loi marched further south with Wang Tong and his army following closely, and gaining strength..." I enjoy this mission, but similar to the last one, it feels like I do so in spite of the mission itself. Seems like all the interesting parts were stapled on to what is otherwise an incredibly generic scenario. Extra Slides Mission 4 - Intro Slide 1 Mission 4 - Intro Slide 2 Mission 4 - Intro Slide 3 Mission 4 - End Slide 1 Mission 4 - End Slide 2 Jossar fucked around with this message at 00:44 on Dec 3, 2023 |
|
#
?
Dec 3, 2023 00:38
|
|
|
it says something that you beat the mission while exploring less than half the map, I think and it's a relatively small map size too
|
|
#
?
Dec 3, 2023 01:04
|
|
|
Le Loi - Part 5: A Three-Pronged Attack Mission 5 Starting Text "Under Le Loi's leadership, the Vietnamese rebellion turned from a rabble of peasants to a real army. Their warships lined up like clouds, their armor shone against the sun, their firearms piled up, and their gunpowder stockpiles were full. Finally, Le Loi would be able to face the full brunt of the Ming forces. Wang Tong had been close on Le Loi's tail, watching his every move like a stalking tiger, waiting for Le Loi to make a mistake. Le Loi did not have the luxury of time - every week he waited, more Ming soldiers would arrive. He needed to consolidate his holdings quickly. Despite the risk, Le Loi split his troops to deal with the Ming garrisons, the northern army, and the hostile tribes to the west. This was the moment Wang Tong had been waiting for, and the tiger pounced on the divided and vulnerable Vietnamese forces..."  Vietnamese Soldier: General, if we prevent the Ming reinforcements from reaching Wang Tong, our troops to the south can take Nghe An. This mission starts off with a short cutscene showing Vietnamese forces attacking a Ming supply convoy heading to the southeast, where Wang Tong is stationed. After the battle... 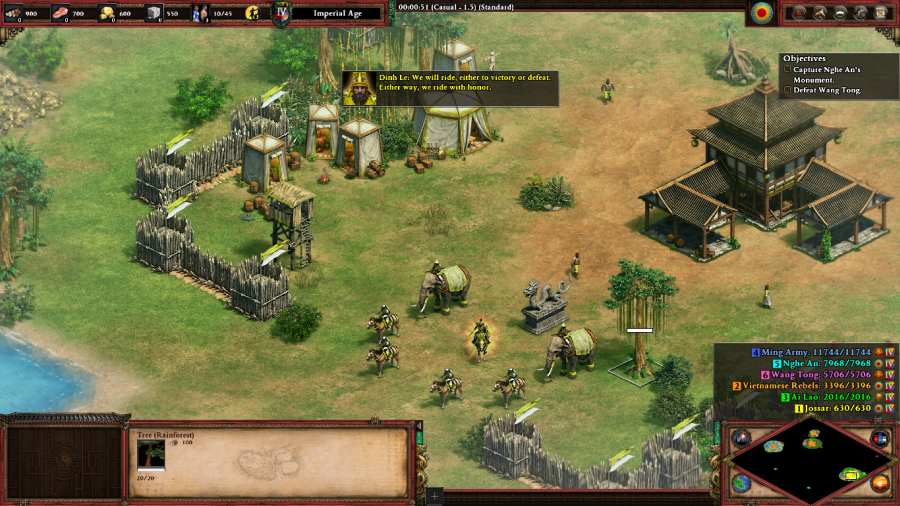 Dinh Le: We will ride, either to victory or defeat. Either way, we ride with honor. 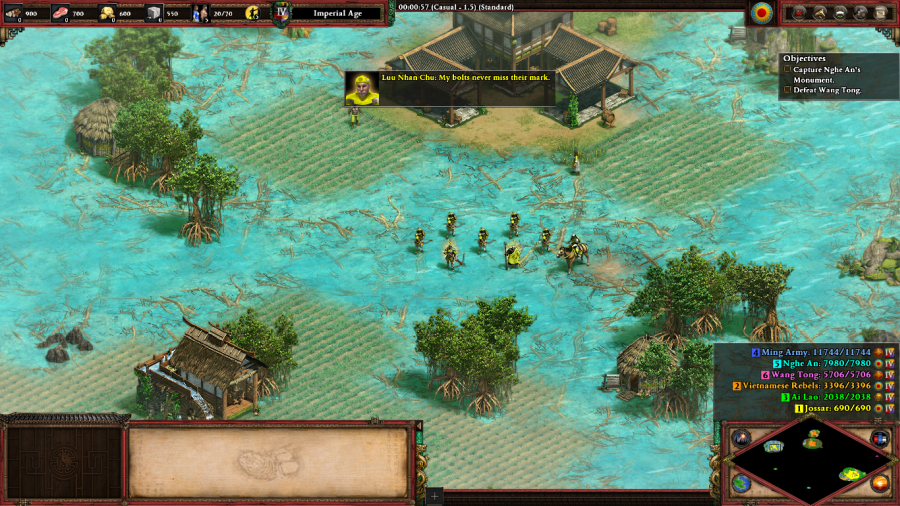 Luu Nhan Chu: My bolts never miss their mark. Bui Bi: Our greatest glory is not in never falling, but in rising every time that we fall.  Le Trien: The Ming will learn to fear Le Trien's skills on the battlefield. You get a paraphrased greatest hits version of AoEII character dialogue as you're introduced to the three different bases you control for this mission. The western one is primarily a food base and can be used to attack Ai Lao, the eastern one covers most of the other materials (although with a limited gold supply) and can be used to attack Nghe An or Wang Tong. The central one has no economic capacity whatsoever, but starts with a number of troop production facilities and is necessary to fight the non-garrison portions of the Ming Army and also Wang Tong. None of the heroes are crucial to this mission, although if you keep them all alive, you get an achievement for doing so.  Every couple of minutes, the Ming Army will send an additional guarded convoy of supplies to Wang Tong along the northern route covered by the central base. Failure to intercept these slingshots Wang Tong, who otherwise has a mediocre economy and troop production capacity, into being a real problem. Therefore, the first objective of the mission is to build up a large enough army at the central base to guarantee continuous interception of the convoys. Once that's accomplished, you'll have bought yourself enough time to smash through the Ming Army's camp and destroy the six Towers which guard the passes through which Wang Tong's supplies are arriving from further north.   Eventually, I manage to shift the fight's momentum enough to start my approach to the Ming Army encampment... only for Wang Tong to start sending in waves of troops to attack my base. Le Trien is able to ward off the first wave of Chu Ko Nus well enough, but when he starts bringing in Cavaliers and Trebuchets, I have to call back my army to play defense for a bit. While annoying, it is cool to see Wang Tong sort of acting like a player would, and have a set of tactics that he uses over multiple missions. 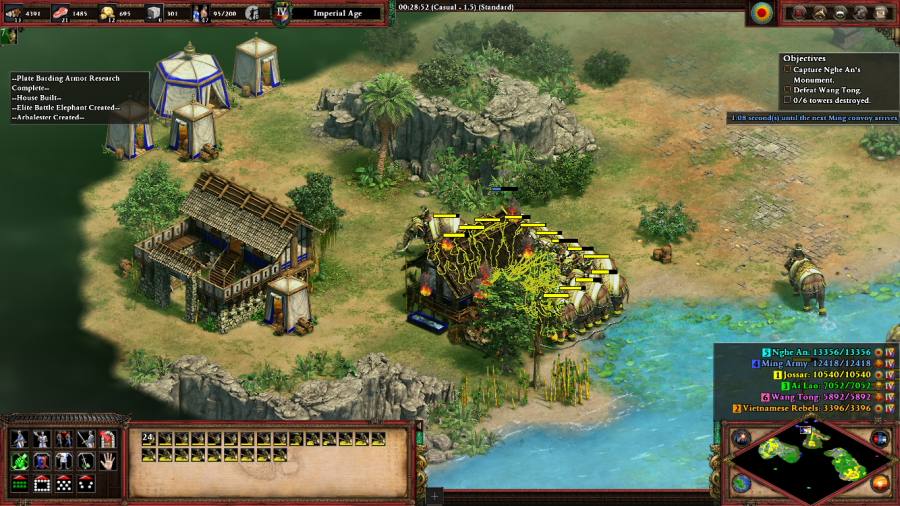 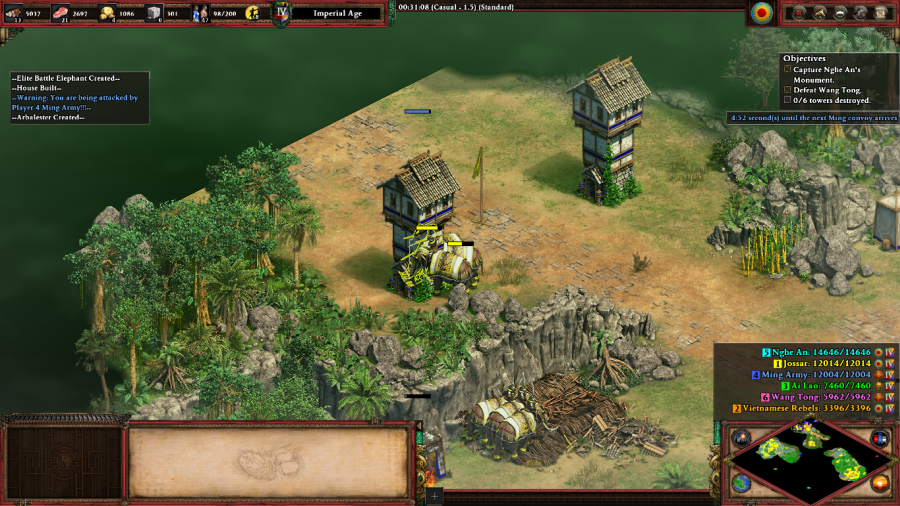 Vietnamese Soldier: The Ming army sent to reinforce Wang Tong is retreating to China! Eventually, I'm able to get things under control enough in the North to finish off the Ming Army's Towers and force them to retreat. This frees me up here to entirely go on the offensive against Wang Tong. 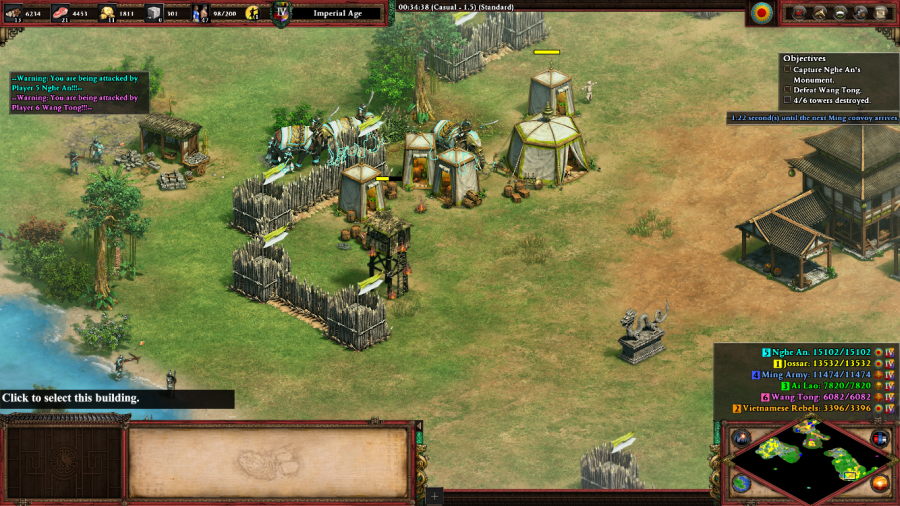 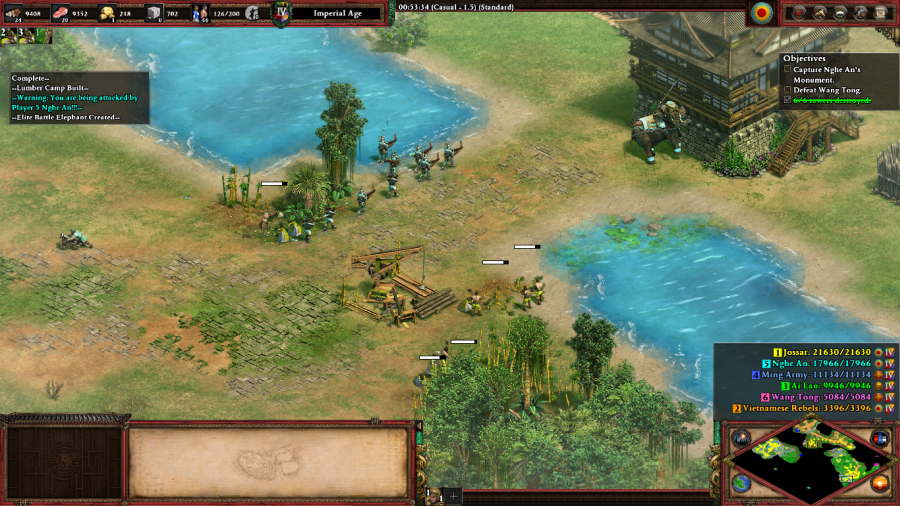 Things aren't going so hot to the south though. Nghe An pretty much runs roughshod over my eastern base with Battle Elephants, Imperial Skirmishers, Arbalesters, and Halberdiers, and for a while I sort of just resort to running away deeper into the forested mountains after extracting mineral piles. I'm eventually able to set up a series of Castle deathtraps to contain them and regain map control, but I'm always on the lookout for Bombard Cannons hiding in the background that might signal Nghe An making a push, at which point I need to drop everything I'm doing and focus on countering them as quickly as possible. 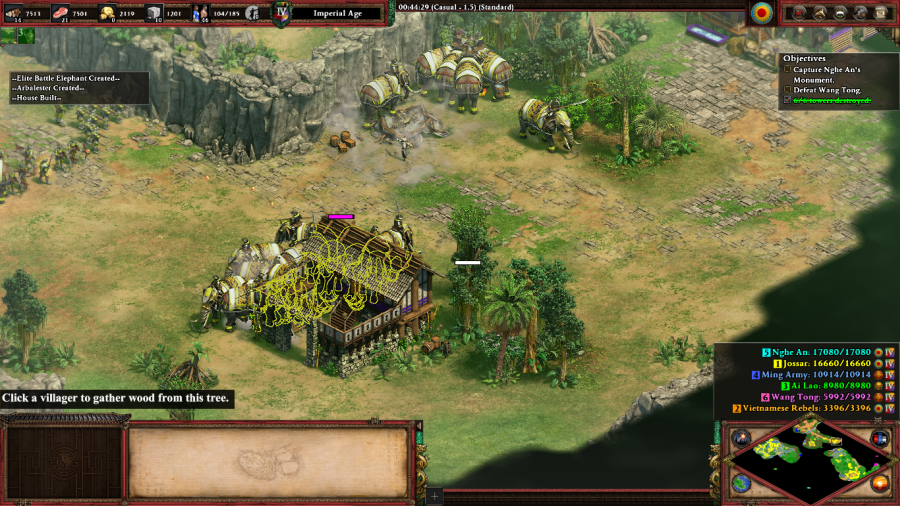 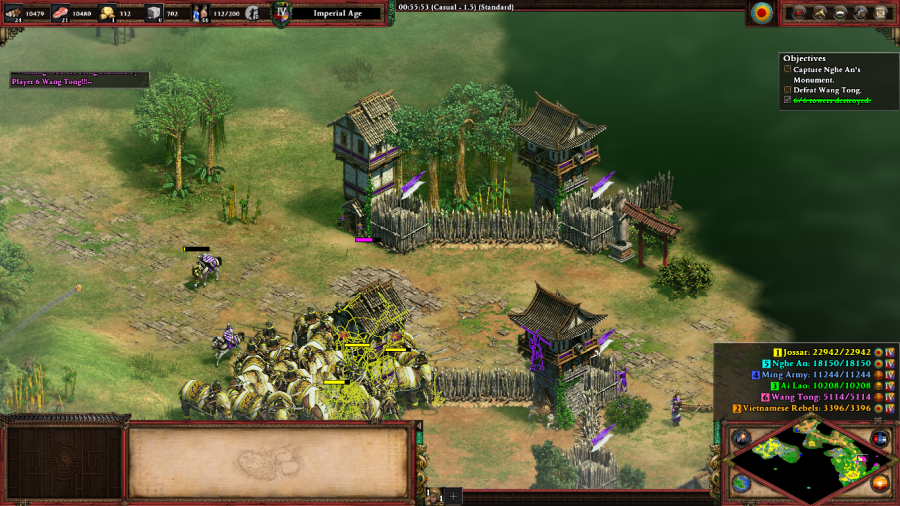 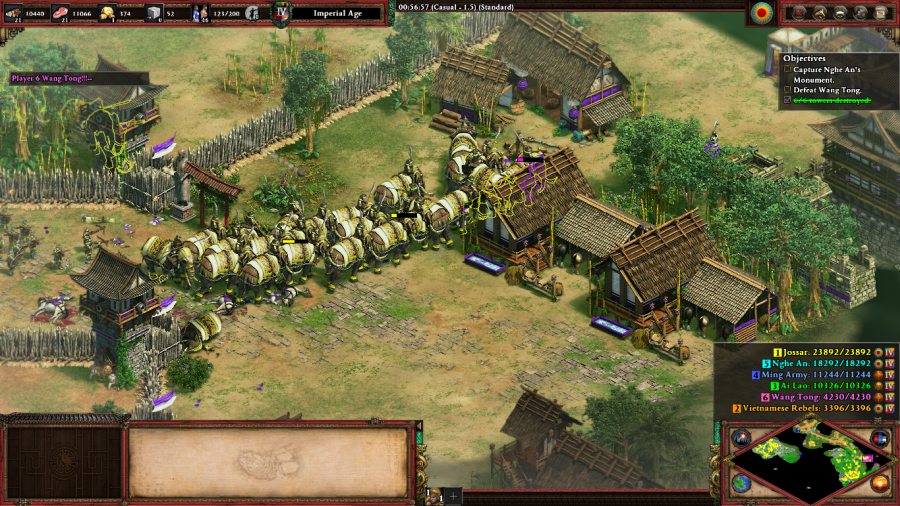 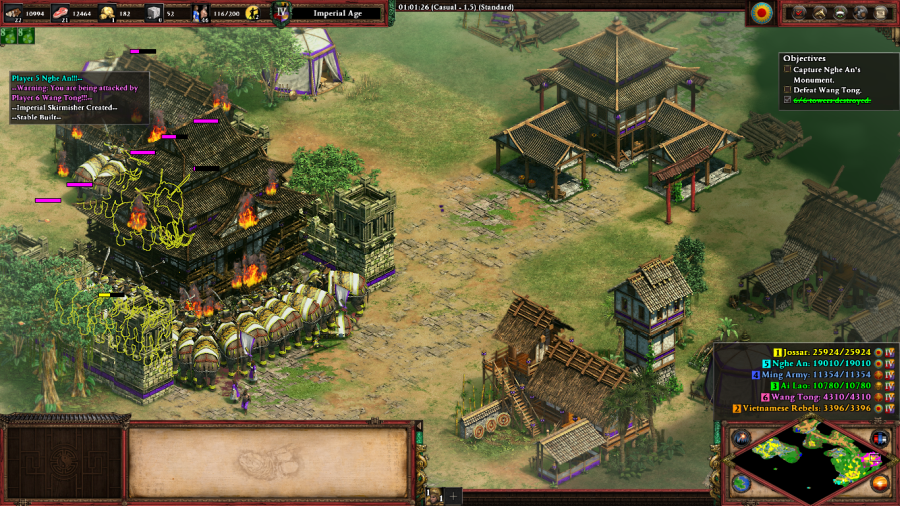 Wang Tong has a lot of production facilities, but without economic support from the main Ming Army, he can't make use of them to their full potential. Bulldozing his base connects my central and eastern forces and is supposed to defeat Wang Tong... but this bugs out, which is going to make the end of this scenario drag on much longer than it has to. 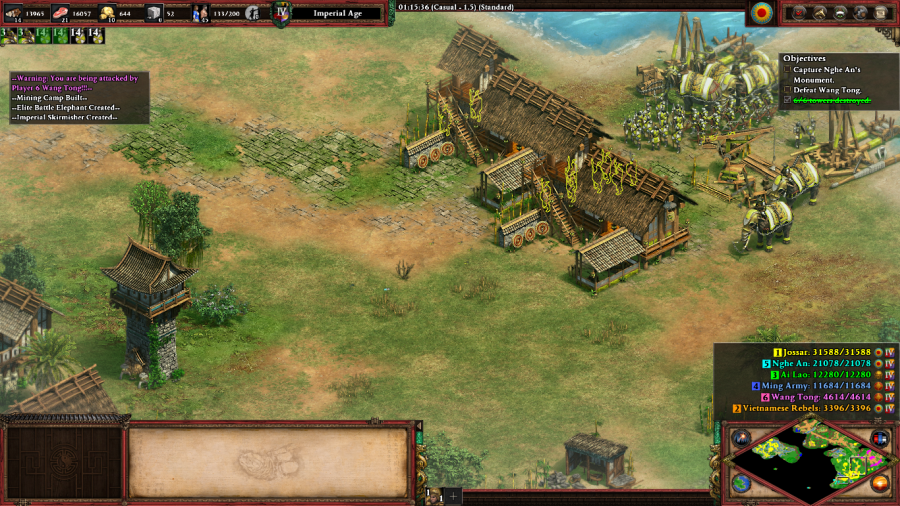 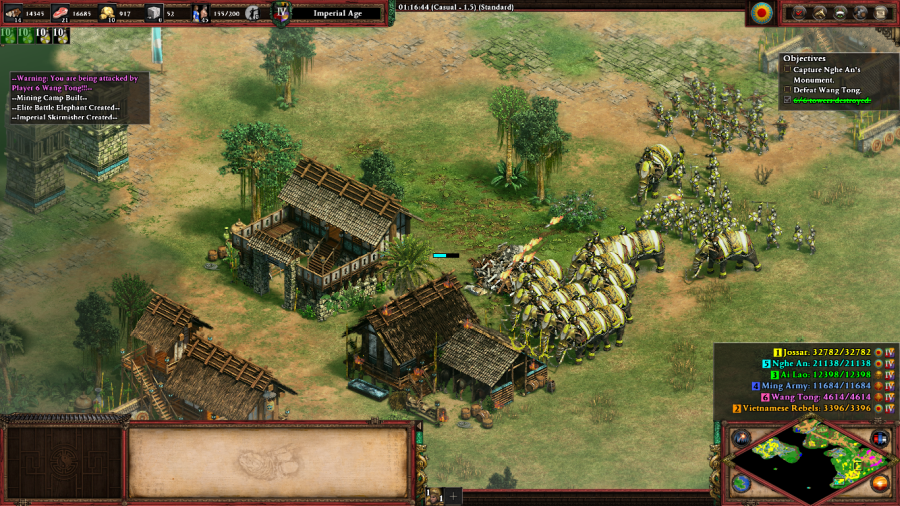 Although this is a pretty long scenario as-is. As gold piles become increasingly scarce, I find myself relying more and more on Imperial Skirmishers as a stop-gap unit for defending my eastern base's approach to Nghe An. After a certain point, it becomes a solid enough force that I use the production facilities there as my launch point for the attack on the enemy city proper. 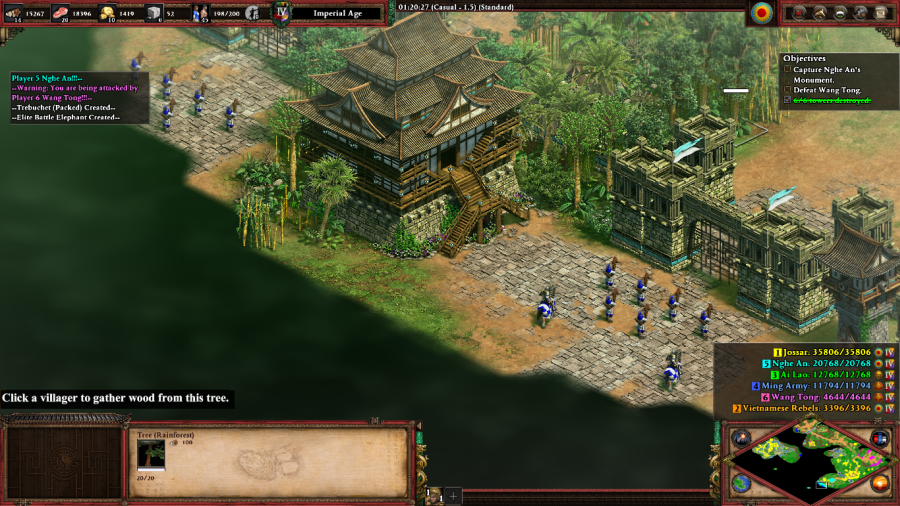 Okay, this really isn't how you're supposed to attack Nghe An. What the game wants you to do is use your western base to defeat the otherwise passive enemy faction of Ai Lao, and then use what is the relatively weaker western entrance to break into Nghe An and rush the Monument at the south of the map. But all of my (now gold-limited) troops were in the east anyway, so I figured it was easier to just break through there than try to rebuild everything in the west. 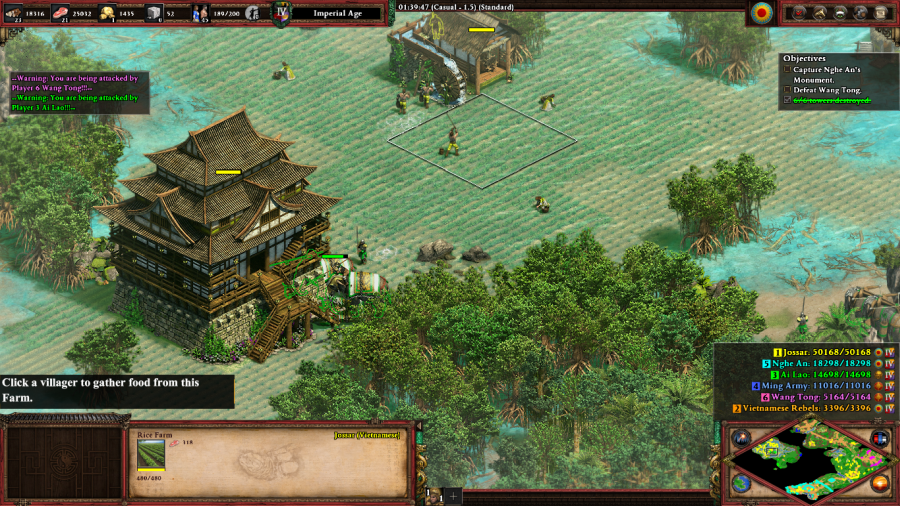 Unfortunately, the thing with Wang Tong refusing to surrender is that I was kind of getting nervous as to where his last set of production facilities might be hidden on the map, so while looking for them, I ended up making Ai Lao actively hostile anyway. Whoops. At least there's nothing in that western base I really care about that can't just be built back up after their Ballista Elephants/Battle Elephants/Two Handed Swordsmen finish venting their wrath on my farmers. 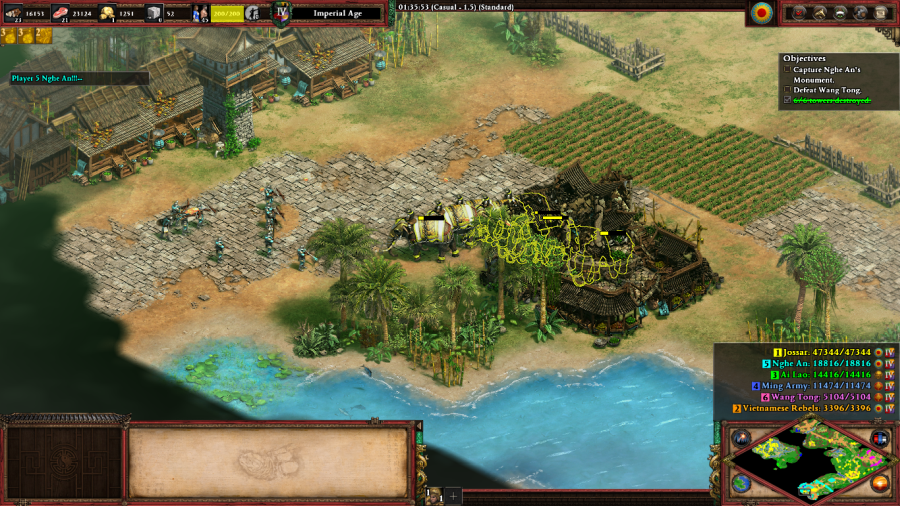 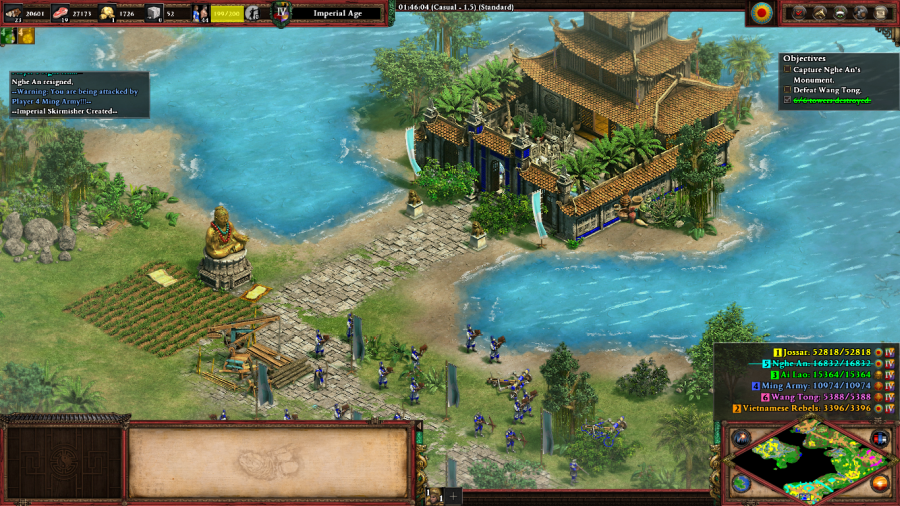 Nghe An is a massive city and between its' local defense forces and the Ming Army garrisons, the place is a real slog. Claim this monument at the bottom of the map from the Ming Army and one of the two victory objectives is complete. As for Wang Tong... 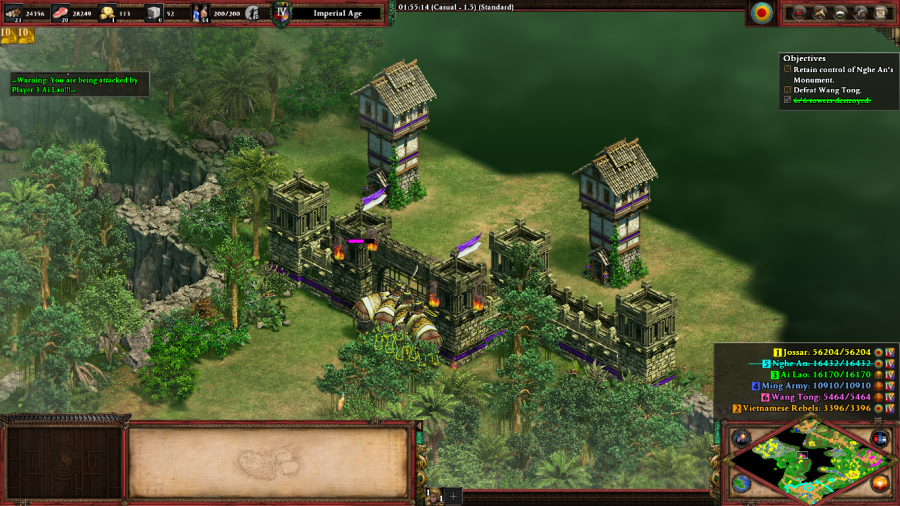  In the center of the map is a Ming Army chokepoint that in theory could be used as a shortcut between your eastern and western bases, but in practice requires clearing out a set of fortifications, this Castle, and Ai Lao to be of practical use. For some reason, the game decided that after I completed the Tower objective, all of the Ming Army's buildings on the map would instead switch control to Wang Tong, so I had to come here, with Ai Lao nipping at the back of my army, to destroy the chokepoint to defeat Wang Tong and finish the mission. From what I can see elsewhere, this doesn't seem to be an intended part of the scenario. Wang Tong is supposed to be limited to his base in the east and when you crush him there, that's it for his part of the mission. Oh well. Vietnamese Soldier: Against all odds, we succeeded! Now the Ming will be the ones who must hide. Mission 5 Ending Text "Against all odds, Le Loi's generals held off the Ming army. The Chinese lost many soldiers and even one of their generals. These losses meant that they would never again hold the advantage in the war. The Ming could only defend their remaining holdings from Le Loi's inevitable victory. Without more Chinese troops, not even a general as talented as Wang Tong would be able to stop the Vietnamese army." Okay ignoring the bug, this was a pretty cool scenario. Like Genghis Khan 4, if both sides of the map were sizable threats instead of the Russians being a joke after they got their one big attack in. Still has the same problem where there's one base that's doing nothing except being a resource feeder to rest of your economy, unless you're micro-ing super hard. But that works better in a three base scenario than a two base one, because it means even at a minimum you're still engaging with the core concept. Although, hmm... I guess unlike Genghis Khan 4 where you couldn't abandon the northern base altogether because Subotai surviving was a mission requirement, there's nothing stopping you from just giving up on everywhere but the eastern base as long as you're willing to fight against both Nghe An and super-Wang Tong at once? I'm not sure if I like that or not. Sounds like it would take hours to resolve though, even mostly ignoring Ai Lao to minimize logistical complications made this mission take longer than it should have. Also no, this isn't the final scenario. Le Loi is the only campaign in Rajas to have a sixth, for some reason. Extra Slides Mission 5 - Intro Slide 1 Mission 5 - Intro Slide 2 Mission 5 - Intro Slide 3 Mission 5 - End Slide 1 Mission 5 - End Slide 2 Jossar fucked around with this message at 19:03 on Dec 3, 2023 |
|
#
?
Dec 3, 2023 18:51
|
|
|
Eh, y'know what, might as well have my erratic schedule give more content for once. Let's bring this on home. Le Loi - Part 6: The Final Fortress Age of Empires II: Definitive Edition - Gyam Shorts Mission 6 Starting Text "Dong Do was the last fortress in Ming hands. Wang Tong sent for aid, but reinforcements would not be able to reach him easily while Le Loi held the north and the coast lines. Still, Wang Tong's fortress was well-fortified and well-supplied. If this fortress could hold out long enough, a new Ming army, now marching from China, would break the Vietnamese army and send Le Loi and his men back into the hills. The war was only one battle away from being over, and the fate of Vietnam hung in the balance." 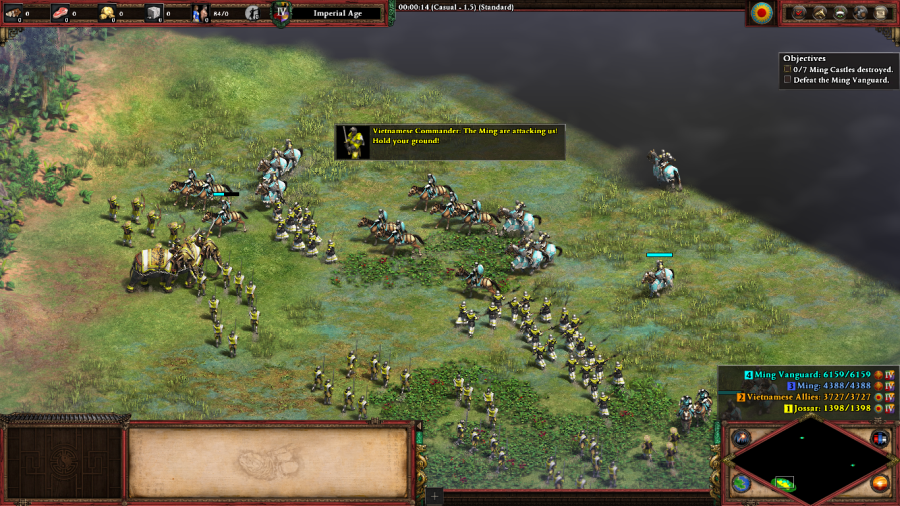 Vietnamese Commander: The Ming are attacking us! Hold your ground!   Vietnamese Commander: Attack them in the flanks, men! This mission is a big old Post-Imperial Age brawl, and just to let you know that it's not messing around, starts with a huge fight between your forces and the vanguards of Dong Do. Each of you gets a reinforcement wave, although your Rattan Archers and Battle Elephants are better than their generic units and turn the tide in your favor.  Vietnamese Commander: Fight with courage in your hearts, men! The Ming are all but defeated! Upon your defeat of the initial Ming Vanguard army, you gain control of two towns in the south and southwest corners of the map. The position of these towns sort of matters for map control, but moreso you just need to be given a really big economy right away or else you won't be prepared for what happens next.  Wang Tong: It is the unemotional, reserved, calm, and detached warrior who wins, not the rash man seeking vengeance, nor the ambitious seeker of fortune. Starting almost immediately, the Ming Vanguard will send alternating waves of fully upgraded Chinese troops from each of their bases to attack each of your bases. 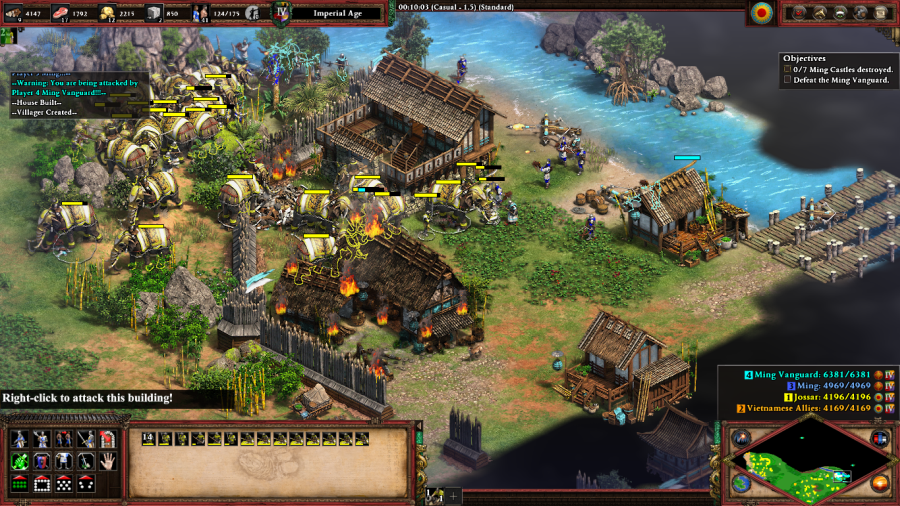  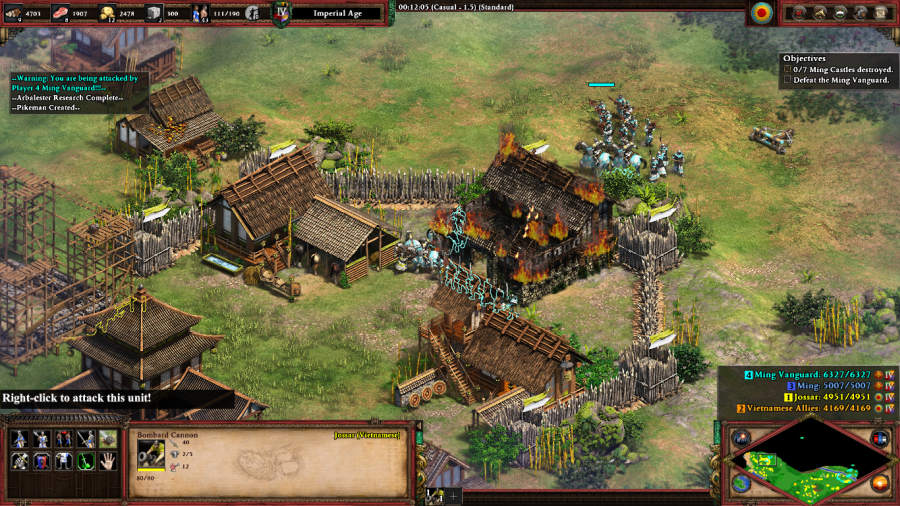 Therefore, it is of the utmost importance to, as soon as possible, grab everything that you have and throw it at one of the two Ming Vanguard fortresses. This is going to leave you vulnerable to a counterattack in the base opposite to the Vanguard fortress that you didn't pick, and you will need to hold said counterattack off with hastily improvised static defenses. But it has to be done quickly, or else the sheer number of opposing forces will be entirely overwhelming. 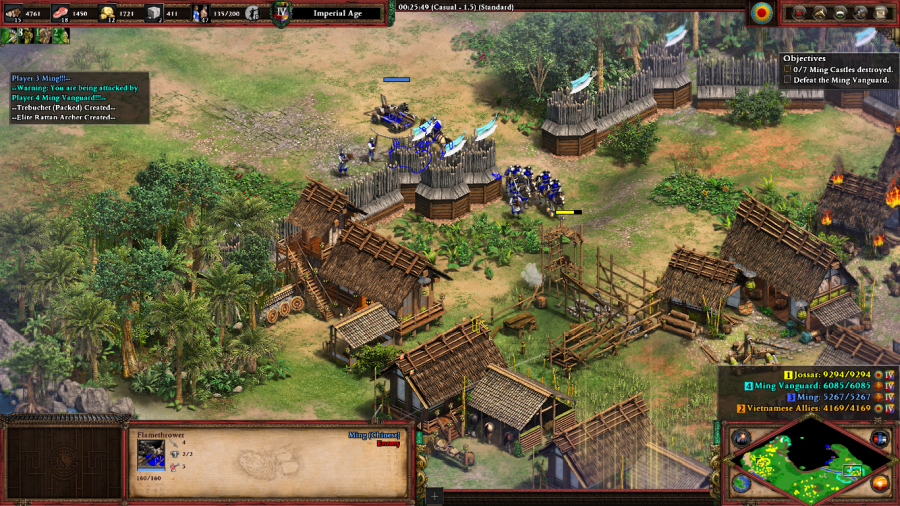 I tried to build a forward operating base in the now supposedly safe Ming Vanguard fortress, but as it turns out, the main Ming forces don't take too kindly to having production facilities on their doorstep and react quickly to tear everything down. I've heard conflicting reports on whether these guys are supposed to be inactive until a certain time threshold in the mission, but my experience was that while they're not as insanely aggressive as the Vanguards, the Ming do still act like a normal enemy player right from the get go. They also have these Flamethrower siege units which used to show up in several Forgotten campaigns, but since the replacement of those campaigns with the Definitive Edition versions are now unique to this mission. They deal very low damage, but hit very fast and deal bonus damage against buildings. 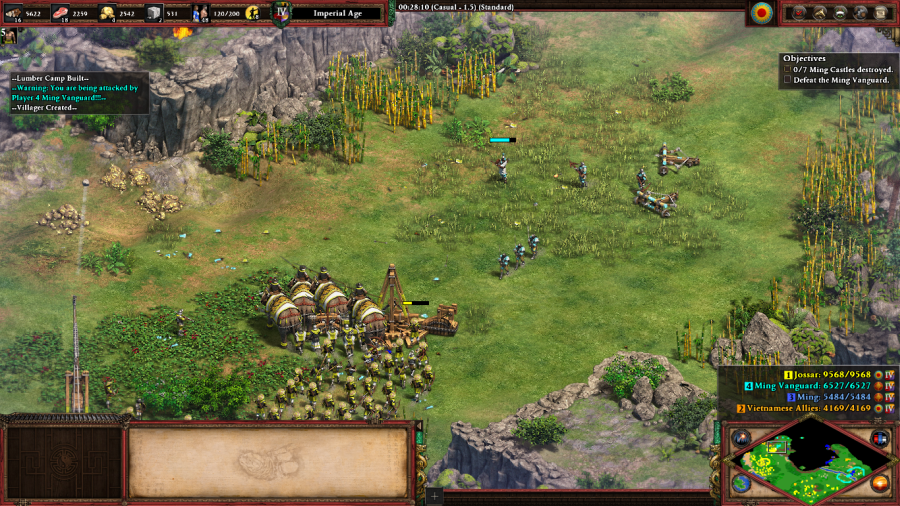  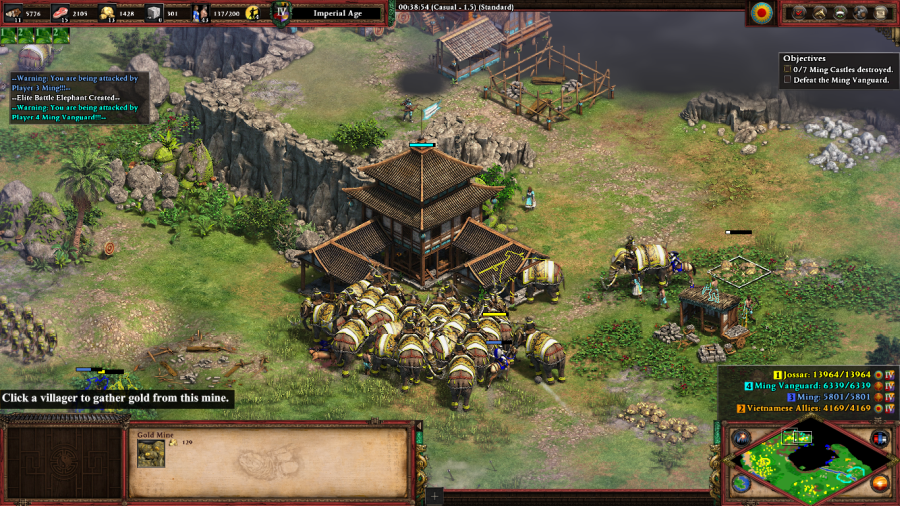 There's another set of cross counters here, where I finish off the other Ming Vanguard base... 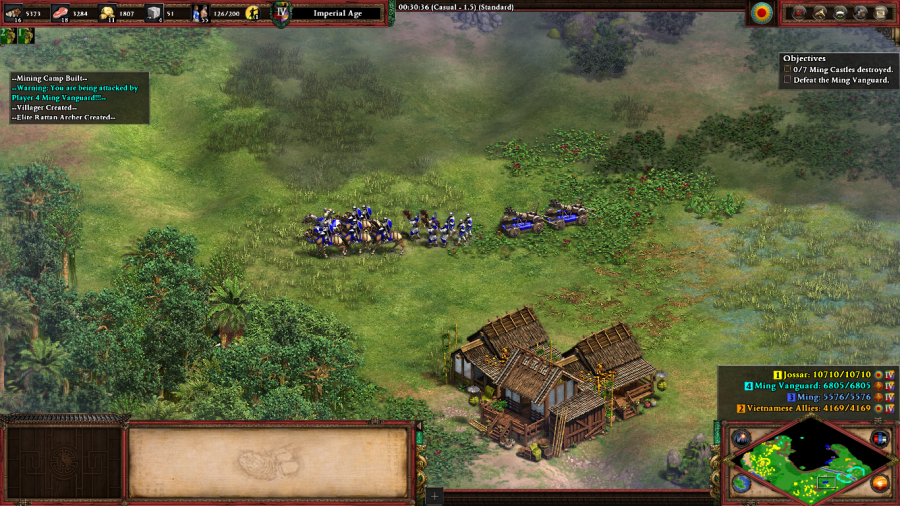 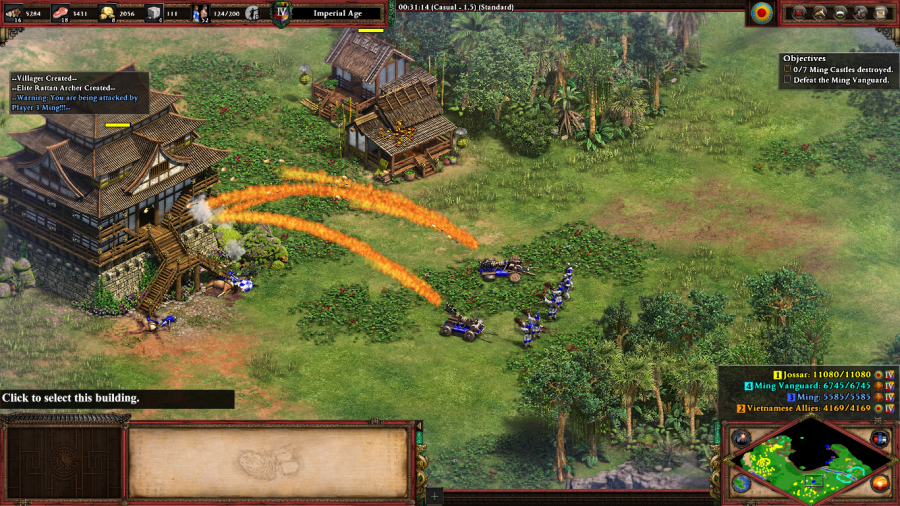 ...while the Ming do their best to destroy my southern base. The Castle here catches most of the enemy troops, but a few raiders do slip through and manage to make a real mess at my Town Center and wood line until I can spare some Rattan Archers to corner the raiders and shoot them down. 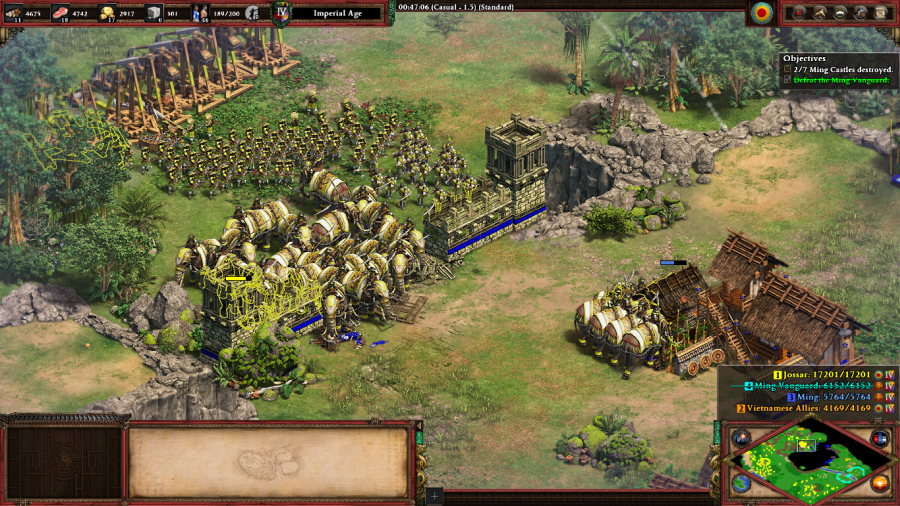   With both Vanguards defeated, the fight becomes much easier: the Ming no longer have the luxury of sparing forces to go out on raids when they're fighting to hold the walls of Dong Do, after all. Of course, the other side of that is that the fortress has seven Castles, Keeps, Bombard Towers, and a ton of production facilities, making it an incredible deathtrap. The final push consists of me having my Rattan Archers instantly evaporate anybody who approaches the battle line while the Trebuchets slowly and methodically take out the Castles and Towers. After enough of the static defenses go down, I let the Battle Elephants rampage throughout the fortress to accelerate the process and victory is mine. Vietnamese Commander: All enemy castles in the fortress have been destroyed. Victory is ours at last! Mission 6 Ending Text "The Ming were defeated on the battlefield and their last fortress fell. Le Loi and Wang Tong met for the first time and agreed to a truce. It was apparent that the two had great respect for each other. The remaining Ming soldiers, numbering more than 80,000, were now at the mercy of the Vietnamese. Le Loi was lenient, however, and spared their lives. He invited the Ming generals to a lavish banquet and allowed all of the Ming soldiers to return to China unharmed. He even provided ships to transport them and released all prisoners that were taken in the war. Le Loi knew that the Ming emperor would never give up while his honor was at stake. To make the sure the emperor would not lose face and to secure the future of Vietnam, he sent lavish gifts to the emperor and offered Dai Viet as an independent tributary state of the Ming. It was a small price to pay for peace and stability. Le Loi became emperor and his dynasty would reign over an independent Vietnam for centuries. Le Loi would forever be known as the hero of the people of Vietnam." Alright, wrapping up a lot of things here. The scenario is very hectic, but very fun. Simple, but if there was anything complicated going on in addition to the Ming/Vanguards going full bore at you, your head would explode. Wang Tong (or well, the Ming army directly under his command) sticks the landing and remains just interesting enough of an AI opponent to feel clever but not infuriating. The campaign really wants you to build a kind of grudging admiration of Wang Tong. Pre-Definitive Edition, the story used to end by revealing that he was the narrator, but he's since been replaced with a generic Vietnamese commander. Pre-editing in this final summation, I accidentally called this the Vietnam campaign and not the Le Loi campaign. Le Loi himself aimlessly drifts in and out of the in-game scenarios, and you're kind of left confused as to how much he really matters. This sort of attitude reflects on the campaign as a whole for me, where I feel like if it was a bit more cohesive in terms of story and gameplay it would have all made sense, but with what's here, I'm just kind of confused. By the end I sort of thought it was good? Which is how I feel about Rajas overall. I was expecting a lot worse by its' reputation, but it's... mostly fine. Only Gajah Mada was a test of endurance all the way through, the rest of the campaigns just seemed like they almost made it to the verge of greatness but then ran out of gas right before the finish line. But in accordance with the spirit of the LP, I'm still glad that I got to play them. I hear that with 1-2 exceptions, everything from this point onwards in AoEII proper is amazing though, so looking forward to that. Extra Slides Mission 6 - Intro Slide 1 Mission 6 - Intro Slide 2 Mission 6 - Intro Slide 3 Mission 6 - End Slide 1 Mission 6 - End Slide 2 Mission 6 - End Slide 3 Mission 6 - End Slide 4 Jossar fucked around with this message at 04:45 on Dec 4, 2023 |
|
#
?
Dec 4, 2023 04:05
|
|
|
Campaign Vote #24 A. Tamerlane - Tatars B. Ivaylo - Bulgarians C. Kotyan Khan - Cumans Voting lasts for 24 Hours from the time of this post. In the event of a tie, I will act as the tiebreaking vote between the two tied options. Please bold your vote in order for it to be counted, as well as noting if you are changing your vote from something else. I sat back and thought about it, but if I kept the old voting pattern we wouldn't even get to start a Definitive Edition expansion pack before already having the next one sitting on the docket. Gonna mandate from this point on that we need to get at least one campaign from the last expansion pack added to the pool out of the way before the next pack is added to the voting pool.
|
|
#
?
Dec 4, 2023 04:34
|
|
|
Unlike more recent campaigns, I don�t think there�s much in the way of crossover characters, but when playing through these recently I thought there was a ncce thematic arc going chronologically through Kotyan -> Ivaylo -> Tamerlane. Kotyan is difficult at times however I think it�s probably my favourite campaign. C.
|
|
#
?
Dec 4, 2023 05:00
|
|
|
C
|
|
#
?
Dec 4, 2023 13:40
|
|
|
I wasn't a fan of Le loi overall but the last one is a nice fun beatdown from start to finish, felt like a real good capstone. C - If I remember right this one has a vibe for sure 
|
|
#
?
Dec 4, 2023 14:48
|
|


|
The Chad Jihad posted:If I remember right this one has a vibe for sure It surely does, and the designer did a great job reflecting it mechanically.
|
|
#
?
Dec 5, 2023 00:04
|
|
|
Vote's closed!Corambis posted:Unlike more recent campaigns, I don�t think there�s much in the way of crossover characters, but when playing through these recently I thought there was a ncce thematic arc going chronologically through Kotyan -> Ivaylo -> Tamerlane. Kotyan is difficult at times however I think it�s probably my favourite campaign. Oh there's a crossover character in Kotyan Khan's campaign alright... It's Subotai. 
|
|
#
?
Dec 5, 2023 05:04
|
|
|
Kotyan Khan - Part 1: Raising the Banners Age of Empires II: Definitive Edition - Cumans Theme Very well, then let us begin, the tale of a khan hunted by wolves and falcons.   Well, that's not ominous sounding at all! Mission 1 Starting Text "Like a swarm of locusts, the Mongol horde emerged from the east, driven by a madman named Genghis Khan. When we first heard the rumors of their approach, we thought the Mongols were but mere bands of raiders, not unusual on the steppes. But when spies from east told us that the Mongols had utterly destroyed the Persian Empire, putting its civilians to the sword and burning its cities to ash in three short years, we realized that we had severely underestimated them. Not much later, our own people faced this new scourge. Our Kipchak brethren to the east fought bravely but were easily defeated and several of their khans were captured. The Mongols buried the Kipchak khans alive underneath a podium on which the Mongol commander, Subotai Ba'atur, sat to celebrate his victory. The Mongols called it an honorable death, only reserved for nobility and royalty. I believe that these Mongols are evil demons, sent to torture us. Only the western part of our once mighty confederation remains, and with it the great Cumania has become a mere shadow of its former self. However, one of the khans, Kotyan, recognizes our peril and is rallying all of the tribes to unite against the invaders. Putting aside his pride, he has turned to our sworn enemies, the Rus, and is asking them to join the fight. They may be hostile towards us, but we have no other choice. The Mongols will scourge this earth and enslave everyone on it. Let us hope that the Rus princes come to realize that too, before it is too late."  Cuman Horseman: Mighty Khan, I was unable to convince the Cuman chiefs and Rus' princes to fight against the Mongols. You will have to meet them in person. You start the scenario with Kotyan Khan, a Cavalry Archer hero unit, and a few steppe-type Cavalry units favored by the Cumans - Kipchaks, Scout/Light Cavalry, and Steppe Lancers. The game gives you the option to either visit the Cuman tribes or the Rus principalities, but it's a false dichotomy for reasons I'll explain in a little bit. 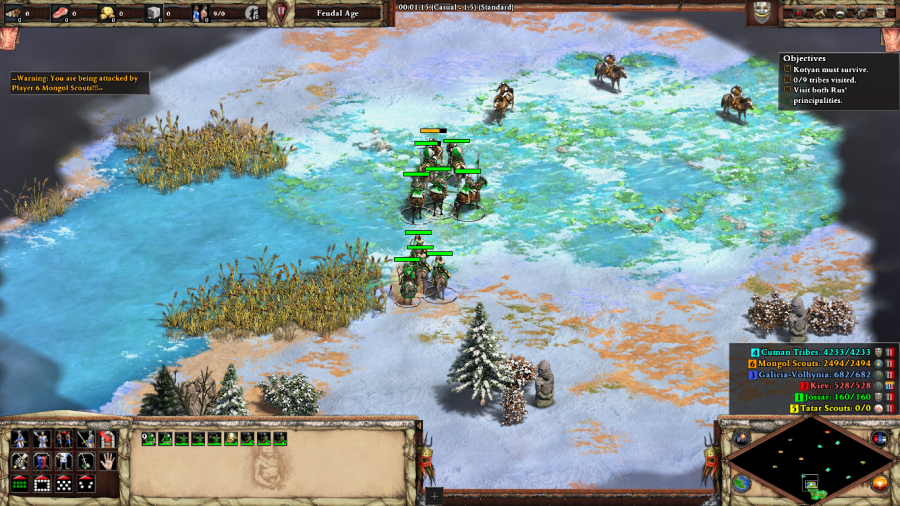 Dotting the map are small patrols of cavalry units belonging to the Mongol Scouts. These are at their most dangerous at the beginning of the mission and grow less so over time, but their primary purpose is to ensure that Kotyan Khan can't run all over the map without opposition. This is important, because... 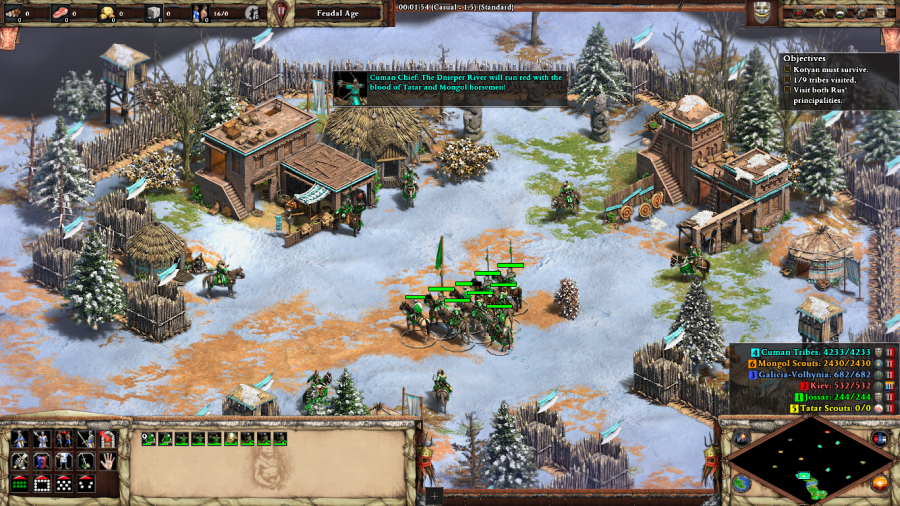 Cuman Chief: The Dnieper River will run red with the blood of Tatar and Mongol horsemen! 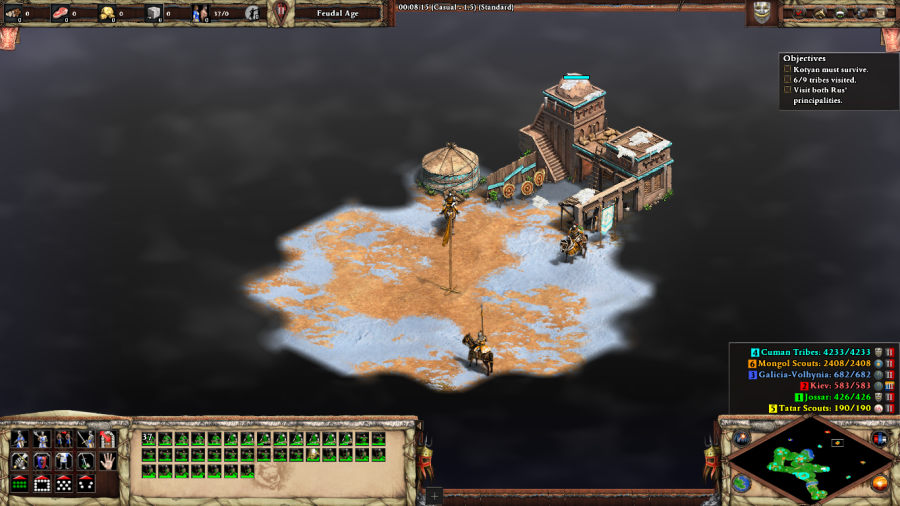 ...you're on an invisible time limit. The Rus principalities will stay as they are forever, but each of the individual Cuman Tribes can be convinced to bend the knee to Genghis Khan if the Mongol Scouts get troops there before you can bring Kotyan over to convince them of the merits of fighting the great khan. This converts all the troops that the tribe in question would have given you to enemy units instead. There isn't a hard limit that causes you to fail the mission or anything like that, but you can run into the practical problem of not having enough troops to win the battle at the end of the scenario if you dally too long.  Some parts of the map will have a few Towers in addition to some extra Mongol Scouts. These are best bypassed rather than trying to fight them, and again, serve more as roadblocks for a player trying to speedrun the mission than anything else. 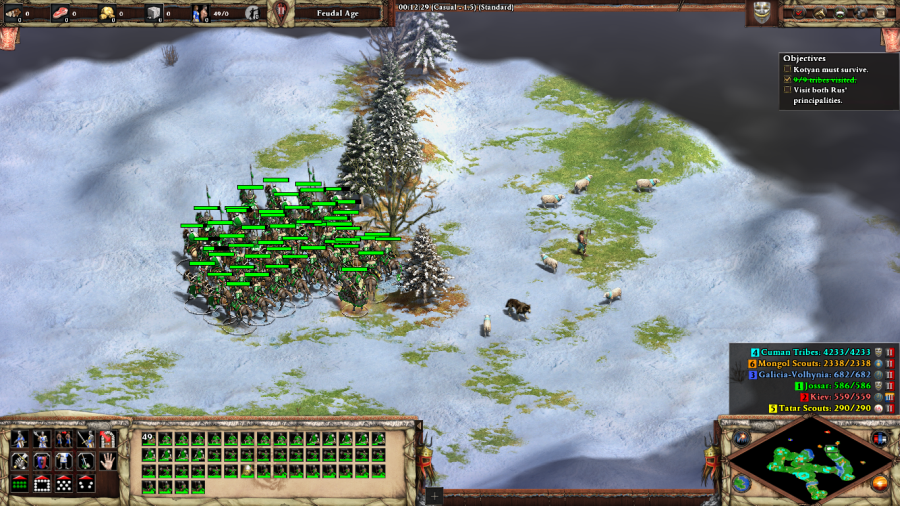 Cuman Horseman: We have convinced all of our tribesmen to join, but to stand a chance against the Mongols, we will need the help of our Rus' neighbors. I managed to grab 6/9 of the tribes, which left me with a decent size army to carry out the mission's remaining objectives. You can grab all 9 if you're fast enough, know the map well, and are good at dodging, but it's pretty difficult. There isn't too much to the recruitment process other than the race against the Mongol Scouts, so I've just collected all the remaining chief quotations here rather than displaying 5 additional screenshots of similar looking villages. Cuman Chiefs: (1) We ride for Cumania! (2) So many tribes already fell to the invaders. May the sky god be on our side in the upcoming battle. (3) I may be old, but I still have enough strength for one last fight. (4) We have been waiting for your arrival, great Khan. My men are eager to fight. (5) My father died in battle against these wicked Mongols. I will have my revenge! 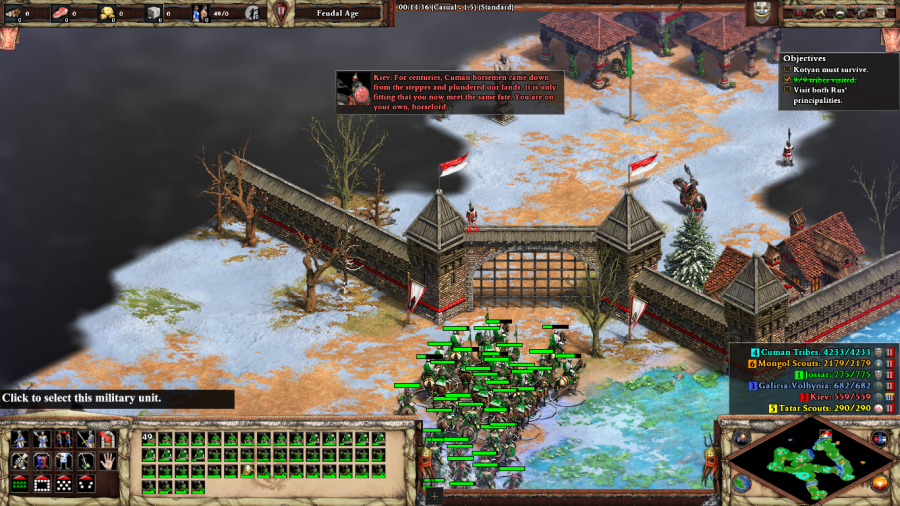 Kiev: For centuries, Cuman horsemen came down from the steppes and plundered our lands. It is only fitting that you now meet the same fate. You are on your own, horselord. 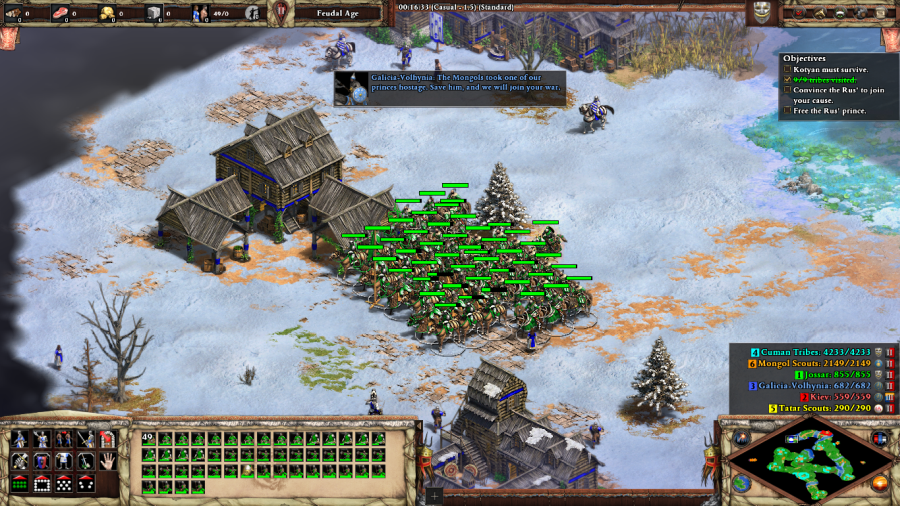 Galicia-Volhynia: The Mongols took one of our princes hostage. Save him, and we will join your war. Moving on to the Rus' principalities, Kiev tells us to get bent, but Galicia-Volhynia is willing to join the war effort if I complete a side-quest. 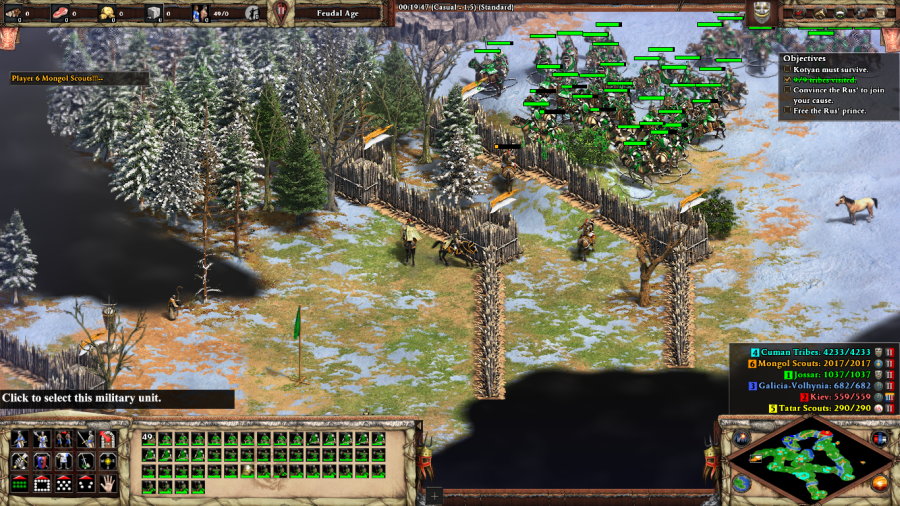 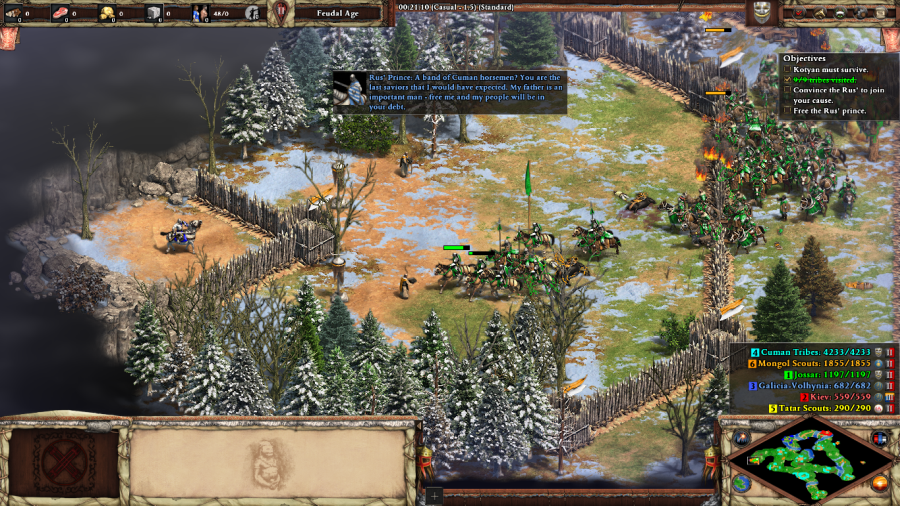 Rus' Prince: A band of Cuman horsemen? You are the last saviors that I would have expected. My father is an important man - free me and my people will be in your debt. The prince that you need to rescue is locked up behind some Palisade Walls, guarded by Cavalry Archers, Mangudai, and Monks. A bit more intimidating than the random bands of Light Cav and Cavalry Archers sitting on the rest of the map, but not to this growing band of Cuman horsemen. The Rus' Prince will bail back home as soon as you let him loose from his prison, and is pretty good about making it there safe and sound, as long as you haven't left any obvious enemies undefeated in your wake. 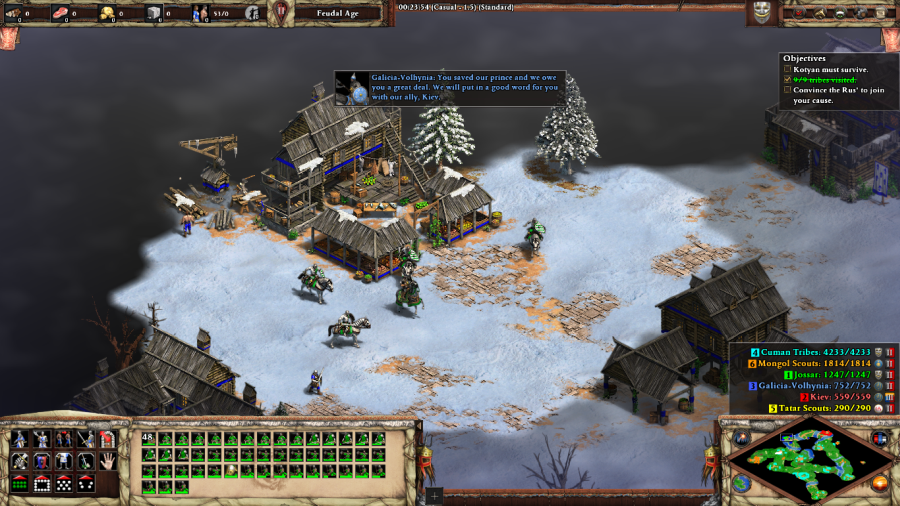 Galicia-Volhynia: You saved our prince and we owe you a great deal. We will put in a good word for you with our ally, Kiev. 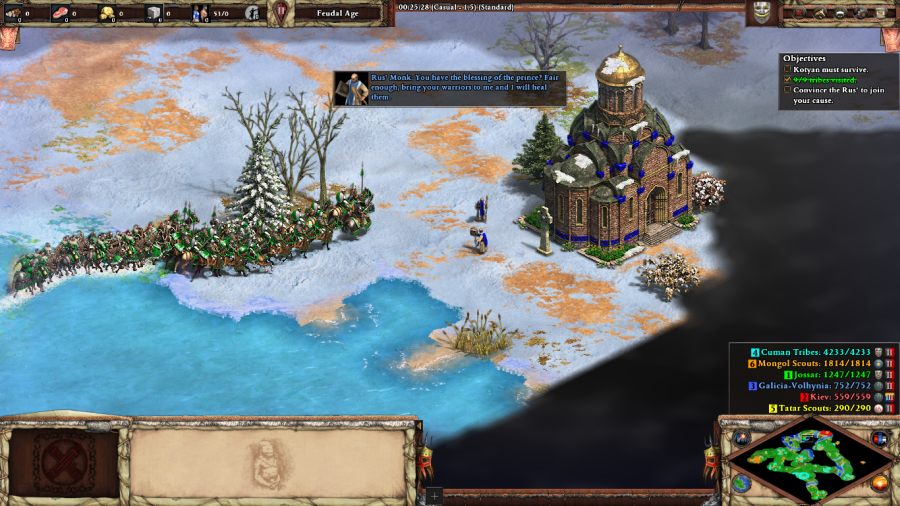 Rus' Monk: You have the blessing of the prince? Fair enough, bring your warriors to me and I will heal them. Finishing Galicia-Volhynia's request gives you a few Knights and a Boyar, healing for your troops, and most important of all - an in with Kiev so that you can finish allying the Rus principalities under Kotyan Khan's banner. 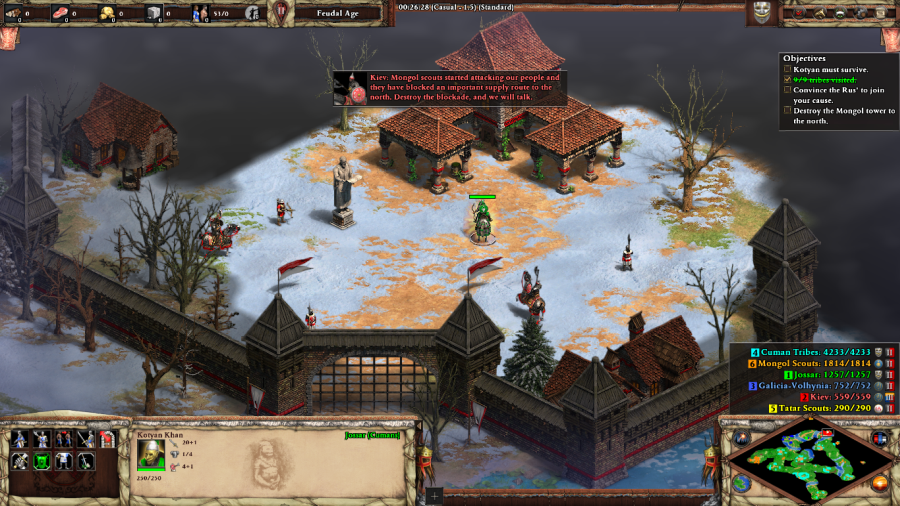 Kiev: Mongol scouts started attacking our people and they have blocked an important supply route to the north. Destroy the blockade, and we will talk.  As Kiev says, there's a barricade to the north with a similar level of troops as protected the Rus' Prince instead guarding a Tower. Destroy said Tower and the side quest is complete. 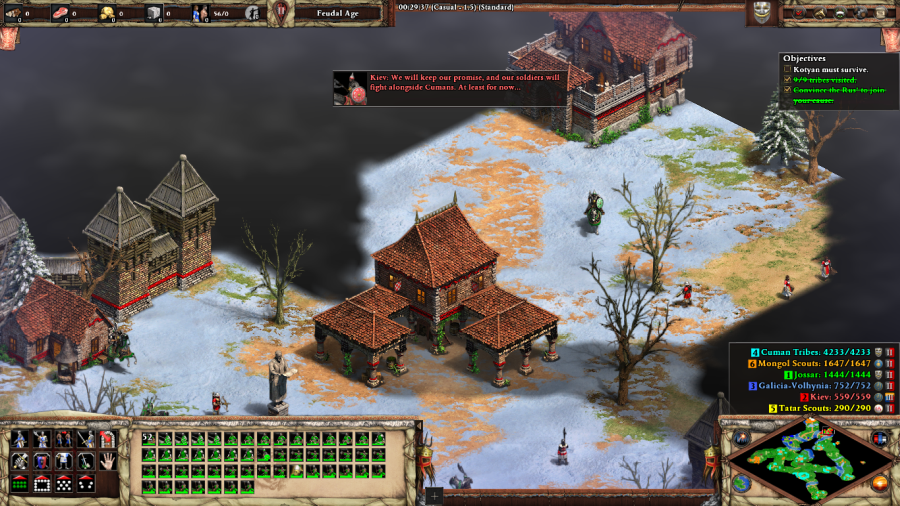 Kiev: We will keep our promise, and our soldiers will fight alongside Cumans. At least for now... 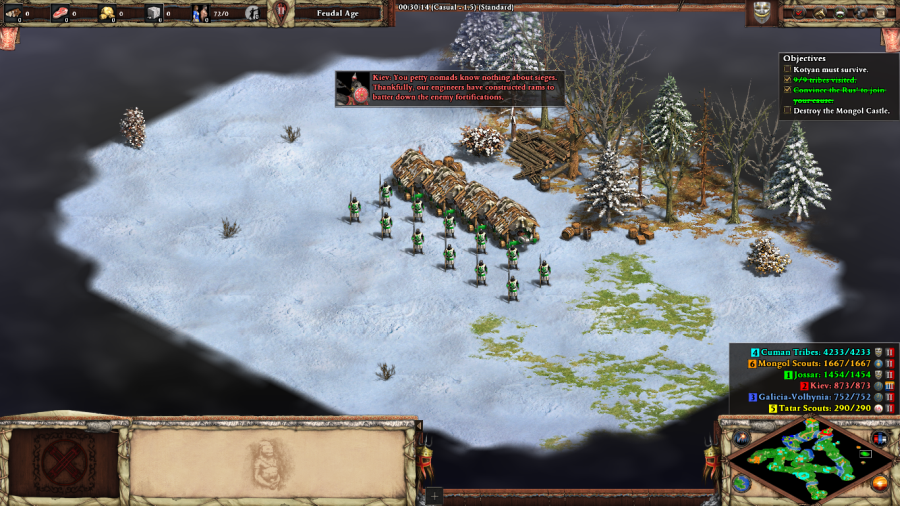 Cuman Horseman: We have raised as many men for our army as we can. Now we must destroy the encampment from which the Mongol vanguard operates. Kiev: You petty nomads know nothing about sieges. Thankfully, our engineers have constructed rams to batter down the enemy fortifications. Cuman Horseman: Oh, how I would like to twist the little necks of these arrogant Rus'! With all the other objectives for this mission complete, only one more remains: destroying a Mongol Castle to the east of the map. The game knows that no matter what it's given you, the Castle will tear your troops to shreds, so it gives you some Rams and Pikemen to garrison them with. 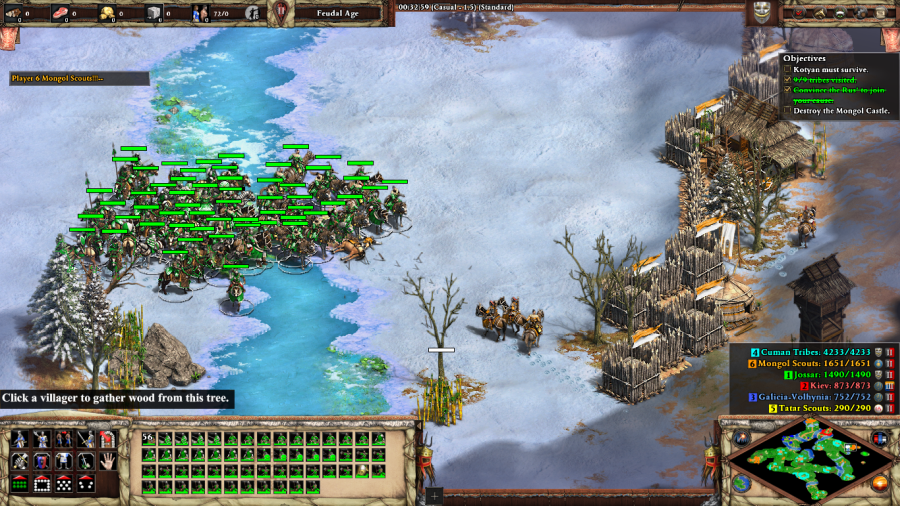 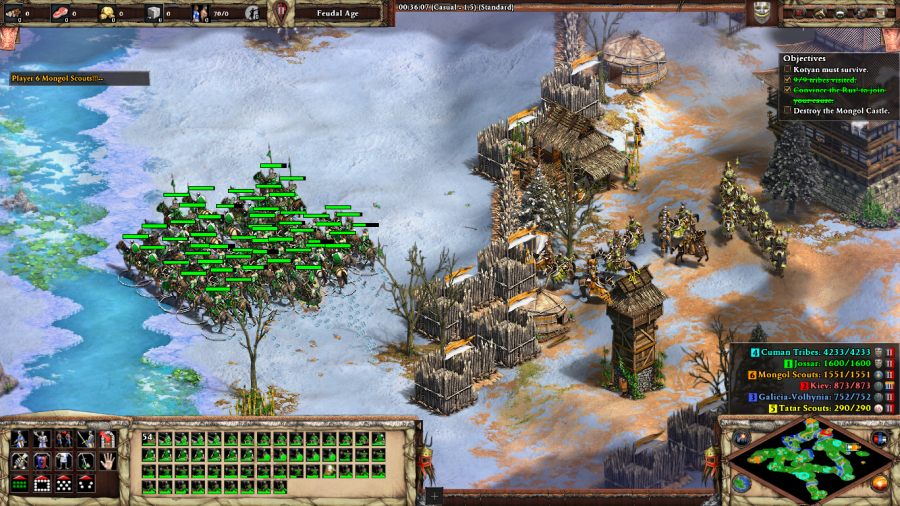 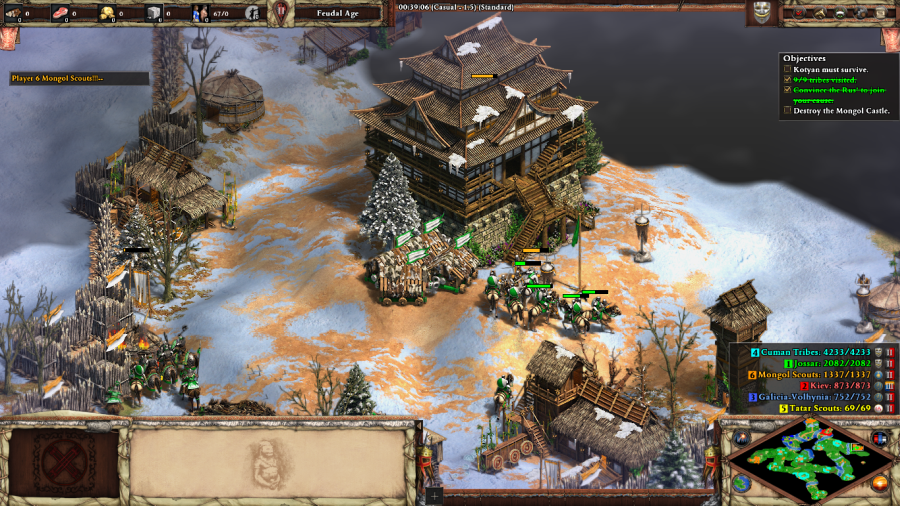 But leading the Rams directly to the Castle is a recipe for disaster, as the Mongols and their Tatar allies have a whole bunch of troops sitting under it. Therefore, you're highly encouraged to have your main army approach from the west to lure out and destroy as many units as you can before you're forced to commit to a pitched battle and send in the Rams from the east to finish the job. Cuman Horseman: Excellent! We have burned the Mongol encampment to the ground! When their army comes, we will be ready. Mission 1 Ending Text "The Rus principalities were not easy to persuade. However, when news reached the Rus princes that a large Mongol army was riding west toward the Dnieper River, they accepted Kotyan's offer. Now, a united army of Rus soldiers and Cuman horsemen stand together to face the incoming Mongol horde. It is a magnificent sight to behold as our combined armies march to meet the Mongols on the field of battle. Beams of sunlight dance on the shields of Rus foot soldiers, the full body armor of the Boyars and the iron-clad Cuman horsemen. If this odd coalition of Rus' and Cumans can stand united, we might have a chance of withstanding this scourge from the east." We're so screwed. The Kotyan Khan campaign is a horror story where the player has to live with the knowledge that nothing you do is going to work because you've already seen how this plays out in the Genghis Khan campaign, where the Cumans are barely even a footnote in Mission 4 as the Mongols flatten everything in their path on the way to Hungary. The best you can do is survive. This mission pretty much highlights that perfectly in its parallels to Genghis Khan 1, but with everything going wrong. You're riding around trying to unify the Cuman tribes, but the Mongols keep stealing your potential recruits. Those Kara-Khitai encampments that could be avoided without consequence? Now you have to make a choice as to whether avoiding the Mongol Scout Towers is worth slowing down your run. There, there was a neat and tidy subplot where you "solved" a conflict between recruitable factions by getting rid of one of them and perfectly folding the other into your growing confederation. Here, you have no choice but to work with all of the Russians, with Kiev personally hating your guts, and the alliance can't go five minutes without people snipping at each other over the pettiest of insults (  ). All that's left for you to do is watch the ensuing chaos in the scenarios to follow... ). All that's left for you to do is watch the ensuing chaos in the scenarios to follow...Extra Slides Mission 1 - Intro Slide 1 Mission 1 - Intro Slide 2 Mission 1 - Intro Slide 3 Mission 1 - Intro Slide 4 Mission 1 - Intro Slide 5 Mission 1 - Intro Slide 6 Mission 1 - End Slide 1 Mission 1 - End Slide 2 Mission 1 - End Slide 3 Jossar fucked around with this message at 13:46 on Dec 6, 2023 |
|
#
?
Dec 6, 2023 06:19
|
|
|
Kotyan Khan - Part 2: The Battle at the Kalka River Mission 2 Starting Text "The sky has turned dark with the smoke of burning tar. Through it one can see the bodies of men and horses scattered on the battlefield. Despite our large numbers, our armies were swept away from this earth like dust on the field. The Mongols knew perfectly how to exploit or weaknesses and divide our forces. The hooves of the charging Mongol horsemen sounded like thunder and their arrows poured down on us like rain. Smoking projectiles fired by Mongol catapults caused confusion among our ranks and blocked our line of sight. We saw Rus' princes charge into the smoke, never to be seen again. After nine long days, the combined Rus' and Cuman armies were completely annihilated. Morale is at an all-time low for those who survived. We Cumans know that all hope is lost for our ancestral homeland. To escape certain death or slavery, we will retreat beyond the Dnieper River to rally and ride west. At least Khan Kotyan survived the battle, which gives us a tiny bit of light in these dark times. His calm presence and confident voice can still give hope to the men."  Cuman Horseman: Warn the defenders! The Mongols are hot on our tail!  Kiev: Our people are leaving this godforsaken land, but perhaps you can find shelter with your people to the west... Boyar: Curse you Kotyan, for dragging us into this!  Rus' Peasant: These are our homes. Our prince may have abandoned us, but we will never leave our homeland! This mission starts with you in control of Kotyan Khan and a small group of cavalry units running for your lives throughout a modified version of the map from the last scenario. Meanwhile the Mongols, who have taken over the entirety of the eastern side of the river, are sacking every town in sight. Double RIP to Galicia-Volhynia, by the way: we saved their prince in the last mission, only to have him bail even before we finished the intro cutscene for this one.  Togortac Khan: Kotyan! Please help us! We have managed to hold the major river crossings, but the Tatars have slipped across the river in the middle of the night and are now threatening to outflank our army! Once you make it over to the western side of the river, where the shattered Cuman Tribes have managed to regroup, you're given a base and your primary objective for the rest of the mission. The game doesn't expect you to be able to retaliate against the Mongols. Instead your mission is to defeat the Tatars who have crossed the river and are trying to trap the Cumans against it, with the hope that by defeating the Tatars, you will allow the Cumans to escape to safety.  Subotai: How dare you defy our Great Khan. Your horses, your women, and your gold all belong to the horde now. Hey, it's the return of otherwise nameless or minimal dialogue NPCs from the Age of Kings campaigns showing up in the Definitive Edition as the villain and having a lot more to say. Anyway, even though your goal has nothing to do with the Mongols, they're still trying to kill you and will be dead set on breaking through the Cuman Tribes in order to do so. How successful this is depends on a combination of difficulty level and good old RNG/weird version interactions. Even on Hard, it's possible that the Mongols never manage to break through the Cuman Tribes and are functionally a non-entity for the rest of the scenario, as was the case this time around. But sometimes, even on Standard, you have thirty minutes to finish the mission before Subotai's Post-Imperial Age troops swarm every corner of the map. 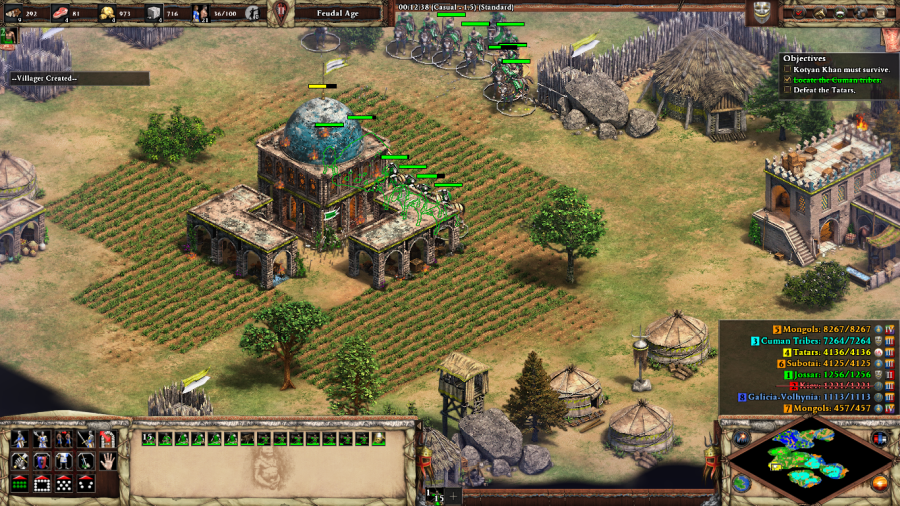 Subotai: My cavalry are coming for you, Kotyan. You better hide like the little mouse that you are. Between the ability to build a second Town Center and Siege Workshops in the Feudal Age and the looming threat of the Mongols, the game is really urging you to try and rush the Tatars as quickly as possible. If you do so fast enough, you can keep them stuck in the Feudal Age and functionally neutralize their development, leaving their static defenses as the largest remaining threat. I don't manage to act that quickly, but I am able to knock out one of the two major Tatar economic centers, greatly slowing down their growth and reaction time. Following this need for speed, managing to win the scenario without making it to the Castle Age gets you an achievement. The Tatars are allowed to make it there, but in practice if they do so, you probably aren't rushing them hard enough to win with only a Feudal Age army. 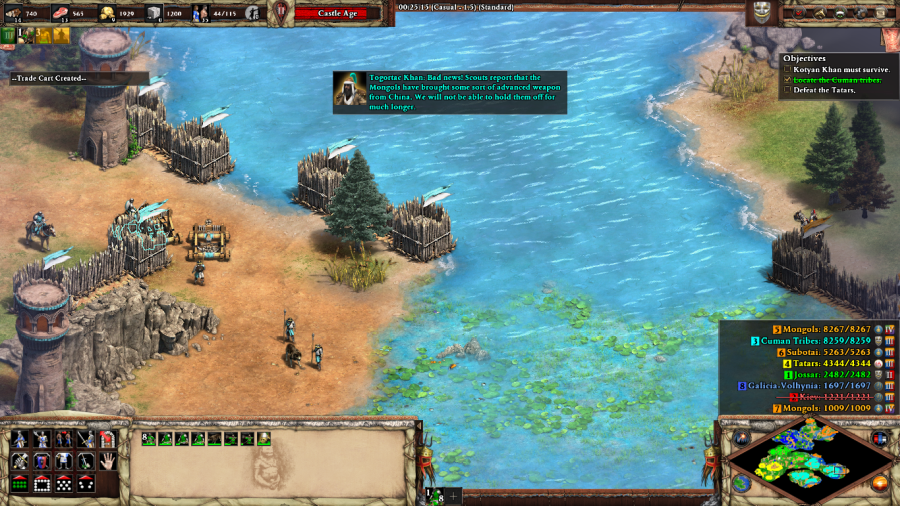 Togortac Khan: Bad news! Scouts report that the Mongols have brought some sort of advanced weapon from China. We will not be able to hold them off for much longer. While I'm building up my economy, the situation is rapidly getting worse on the Mongol front. At this point in the mission, Subotai's dragged out those Bombard Cannons from Genghis Khan 3, and now the Mongols get to build them, even though they usually don't have access to land-based Gunpowder units. 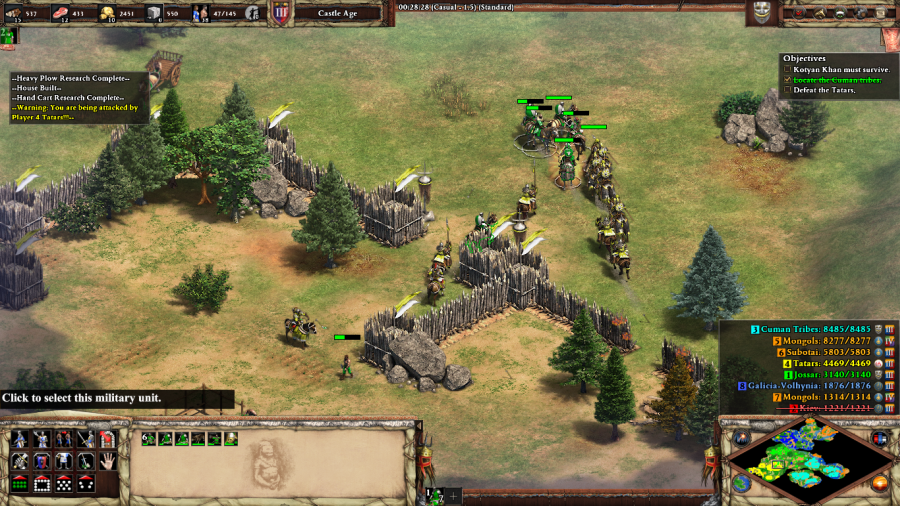 By this point the Tatars have recovered from my initial shock to their economy and are counter-raiding me. Here, I had to get Kotyan out of the line of fire as quickly as possible and establish a defensive Castle. Had I not managed to do so, I might have very well had to restart the mission for having missed the window of opportunity to keep the Tatars contained enough to be defeated without risking the Mongols getting directly involved. 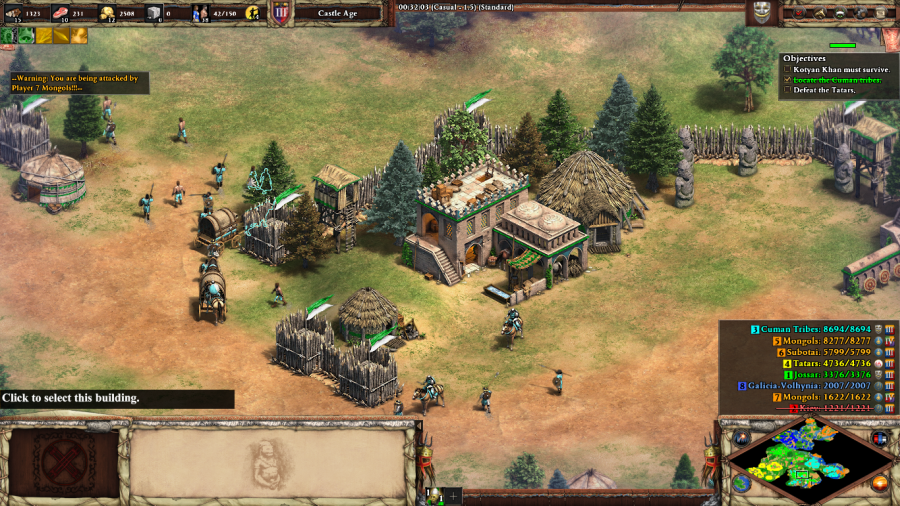 Togortac Khan: Kotyan. I can no longer risk the lives of my people for this hopeless fight of yours. We have found a gap in the Mongol defenses, so we are leaving this place.  Eventually, Togortac decides that he's had enough and bails. The forces representing his part of the Cuman Tribes leave and his buildings swap over to your control. This is good, because it means you now have an additional series of production facilities right near the heart of the fight. But it is also bad, because it means that now you have to deal with the Mongols to some extent, or risk them collapsing that portion of the front entirely.    Fortunately, by this point I've had enough time to build up an army of Keshiks, Steppe Lancers, and Rams to drive back into the heart of the Tatar base and disable them once and for all, before tearing down their Castles. Doing so brings victory, at least as much as this can be called one. Subotai taunts you one final time before the cutscene plays: Subotai: So, you have decided to run again, little mouse. You can run, but there is no place where you will be safe from the mighty horde! Mission 2 Ending Text "When looking into the empty eyes of the men sitting in front of the yurts, it is hard to imagine that these men were once fierce steppe horsemen-warriors who were feared by European kings and Byzantine emperors alike. Our khan is devastated by the recent events as well and has not eaten since the battle. Each time Kotyan emerges from his tent, his face appears older and more gaunt. Pressured by the Mongol horde, we have no other choice than to keep on moving south. At night, Tatar and Mongol raiding parties ambush Cuman guards who wander too far away from the camp. It will be yet another sleepless night for the men." This mission used to be absolutely brutal when Definitive Edition first came out, and on Hard difficulty, the Mongols are still pretty scary most of the time. Which is why it's interesting that there's a bunch of fun, small bonus content if you manage to drive the Mongols back, or even take out Subotai's big tent Wonder on their side of the map. In any event, now that we've had the narrative stakes set, the game feels like it has a bit more of an opportunity here to unwind and display the gameplay strengths of the Cumans with this scenario, encouraging quick and decisive raiding. And the more you manage to play to those strengths, the smoother the mission goes. Extra Slides Mission 2 - Intro Slide 1 Mission 2 - Intro Slide 2 Mission 2 - Intro Slide 3 Mission 2 - Intro Slide 4 Mission 2 - Intro Slide 5 Mission 2 - Intro Slide 6 Mission 2 - End Slide 1 Mission 2 - End Slide 2 Mission 2 - End Slide 3 Jossar fucked around with this message at 06:53 on Dec 7, 2023 |
|
#
?
Dec 7, 2023 06:36
|
|
|
I found this one of the hardest missions in the game, and one of the only I had to lower the difficulty to beat. It never felt unfair though, just brutal. This campaign does a really good job of communicating just how hopeless things are while pushing you into playing to the unique features of the Cumans: going all out feudal aggression with scouts and feudal age rams makes things notably easier.
|
|
#
?
Dec 7, 2023 11:05
|
|
|
Oh yeah, just a constant feeling of doom and dread in these. I don't know if it's a timer thing, but the Mongols will eventually crush poor blue as things progress. Having the first two levels be on closely similar maps was neat storytelling
|
|
#
?
Dec 7, 2023 14:54
|
|
|

|
| # ? Apr 29, 2024 21:02 |
|
|
yeah I love this mission, it actually succeeds at the age old video game dilemma: how do you let the player win the level, but still lose the narrative? and most players would probably have fond, nostalgic memories of playing the mongol campaign, so now the reversal where we're on the other end is great
|
|
#
?
Dec 8, 2023 23:24
|
|