


|
Kotyan Khan - Part 3: Saving the Huts Mission 3 Starting Text "Although many of us had given up hope, Khan Kotyan still believed in our survival. The messengers that he had sent west returned with good news. Even though we did not expect much grace from the Europeans that we raided for so many centuries, King Bela IV of Hungary offered our people asylum in his country. For the first time in months, our people rejoiced. However, before we leave for Hungary, we must first save kinsmen trapped by Mongol and Tatar raiders in nearby Wallachia. The situation is dire, but news reached us that a fellow khan named Girgen is fighting off the enemy raids, trying to rescue our people. If we can reach him in time and rally the remaining tribes, we might have a chance of saving what is left of the free Cumans."  Cuman Horseman: I know this region well. Many of our tribesmen live here. Girgen Khan is their leader and he will be able to aid us.  Tatars: Cuman scum! Come, brothers, let us cut their throats! This mission starts you off, as is standard for the Cuman missions, with Kotyan Khan and a few Cavalry/Cavalry Archer type units. After traveling to the south a bit, you get into a fight with a Tatar patrol, which sets the tone for the rest of this mission. Nearly all of the relevant enemy forces are going to be bands of Tatars, either scattered around the map or concentrated into garrisons, rather than fortified static positions.  Cuman Nomad: Somebody help me! Tatar raiders are pillaging my yurt! Continue south and you run into this nomad, who is having a really bad day. I'm not sure that saving the man and his yurt does anything, but I make sure to do so nonetheless. It is just a little bit worse for the wear, but I'm sure those fires won't take too long to put out.  The next real goal of the scenario is here. A slightly larger Tatar force attacks Girgen Khan's forces. He can hold them off on his own, but it's still worth assisting the friendly khan in defeating the Tatars to keep things moving as quickly as possible. Doing so starts a set of what are basically interactable cutscenes. Cuman Horseman: (after defeating the Tatar group) Kotyan! You could not have come at a better time. Follow me and I will take you to our leader. 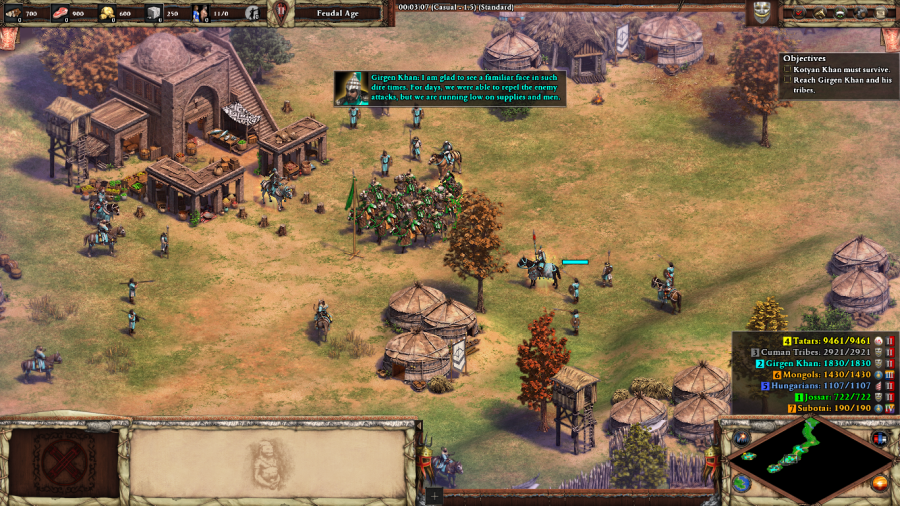 Girgen Khan: I am glad to see a familiar face in such dire times. For days, we were able to repel the enemy attacks, but we are running low on supplies and men. (after a few seconds) It is only a matter of time before the Tatars break through our defenses. Ride to the village to the north and reorganize our troops there. You are our last hope, Kotyan. 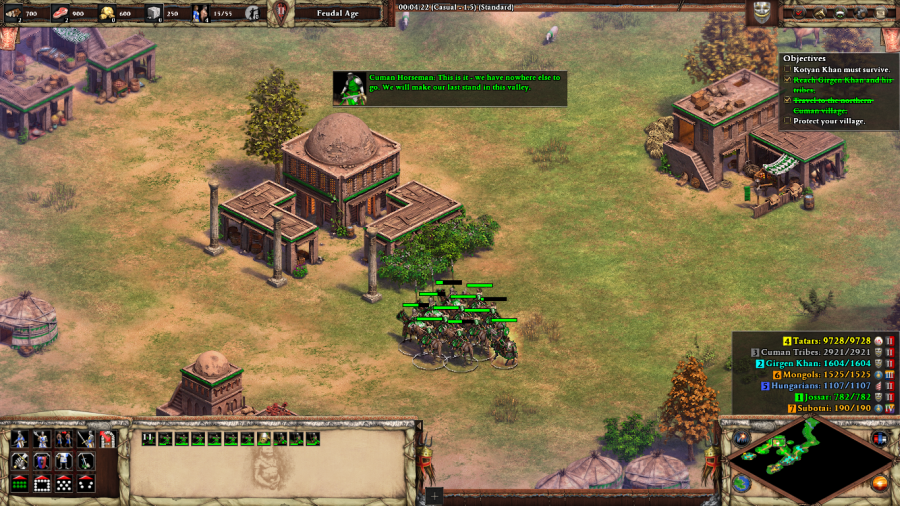 Cuman Horseman: This is it - we have nowhere else to go. We will make our last stand in this valley. So begins the base-building portion of the mission. For a couple of minutes, the game gives you literally nothing to do but boom. 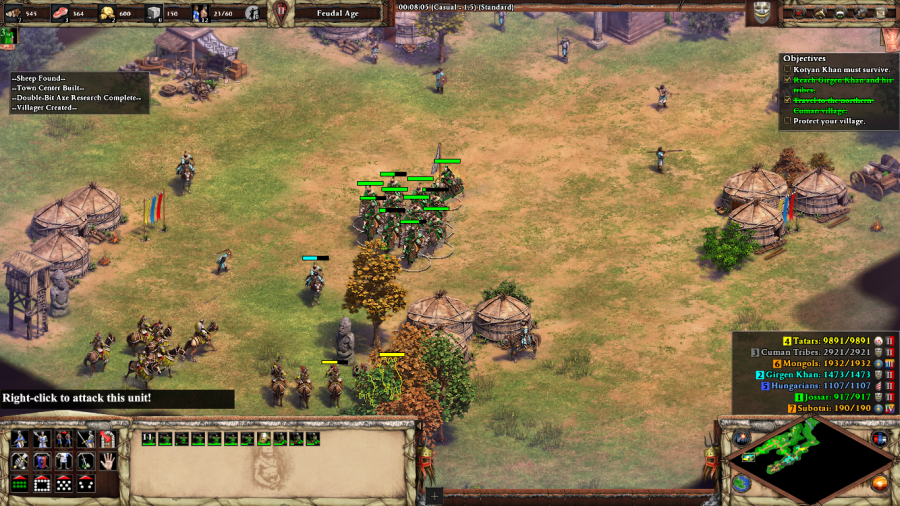 Well, I guess you can try and run out and defeat the Tatars. I manage to clear out the closest Tatar group early. You can't trigger the mission objectives for the next part of the scenario until an invisible timer runs out, but you can be in a position to take advantage of them when everything activates. At some point, Girgen Khan's forces will be defeated, at which point he tributes you a bunch of resources to help slingshot your economy. He's really more of a plot device than a functional faction in this mission. 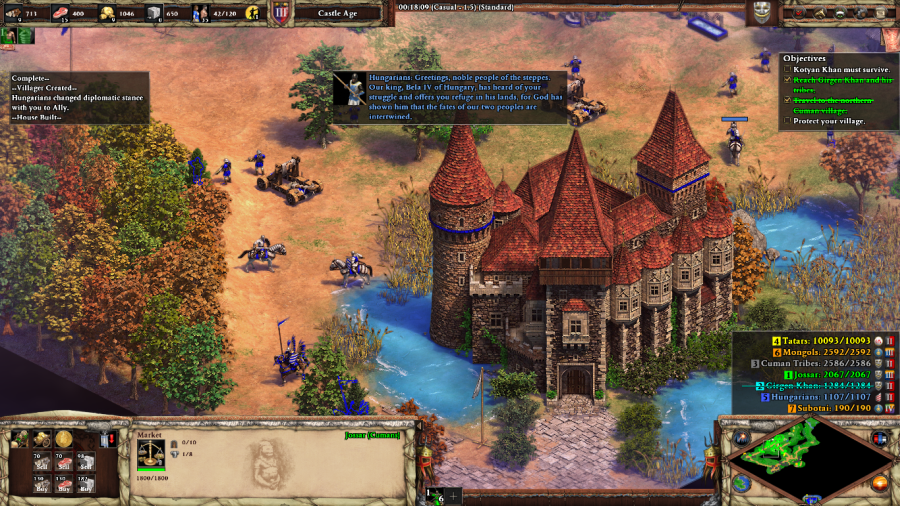 Hungarians: Greetings, noble people of the steppes. Our king, Bela IV of Hungary, has heard of your struggle and offers you refuge in his lands, for God has shown him that the fates of our two peoples are intertwined. Cuman Horseman: The great sky god smiles upon us. We must rally our banners and travel to Hungary, where we will be safe. Around twenty minutes in, the Hungarians offer you refuge, which starts the next phase of the mission. You have to take control of five Cuman camps scattered around the center of the map by defeating the occupying Tatar troops, at which point the final goal of the scenario will be unlocked.  Cuman Horseman: The Cumans in this village are free once more. We should protect them from enemy raids. And as soon as the mission goes up, the first of the tribes, which I've already liberated, comes under my control. You get the buildings, but generally it isn't worth expending the resources to do anything with these outer bases, unless you need to develop a forward military production camp. During this time, the Tatars try and raid my base, but I manage to get up a defensive Castle to the southeast of my village, and that effectively stops this and all future raids for the rest of the mission.   I start work on trying to liberate the second tribe, but it turns out to be host to one of the bigger Tatar groups on the map. So I need to do some hit and run, luring Tatar troops back to the aforementioned Castle. However, I am interrupted by the following message: Cuman Horseman: My Khan, our spies report that Subotai and his army are on their way here. We must flee this place while we still can. Subotai will be here in 40 minutes. Hmm, now where have we heard that before? Genghis Khan 6 posted:Mongol Soldier: Lord Ogedei, we must hold off the Hungarians until Subotai arrives. He will be here in 40 minutes. Fun fact: Subotai has the highest speed of all non-cheat units in the game. It would go a long way in explaining his punctuality.  The announcement that the Mongols are getting serious starts an effective timer to your defeat. Once Subotai arrives, he will send increasingly large waves of Post-Imperial Age Mongol troops at you until you die. The second village here is probably the best defended on the map, including several Mongol Towers alongside the Tatar troops. It's a bit difficult to clear, but marks the last real point where this is the case. 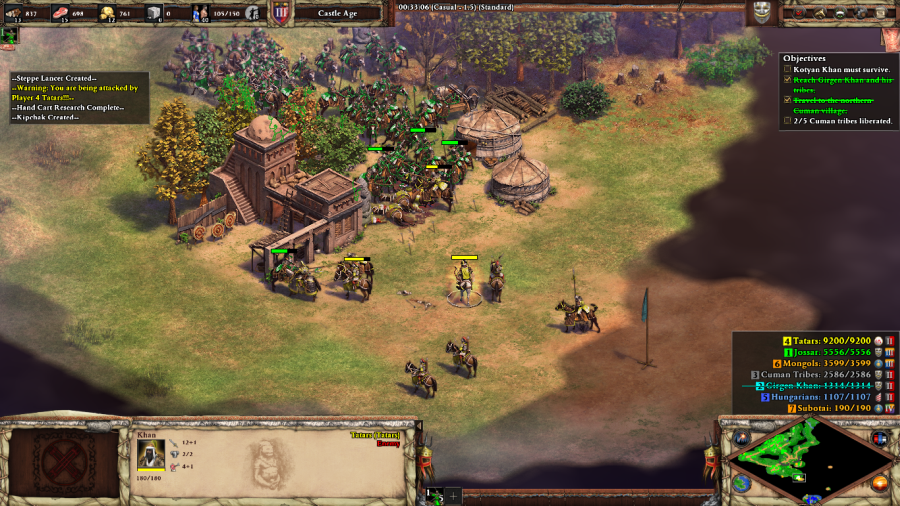 Like last mission, by now I've hit the point where my economy is strong enough that I can just spam dozens of Keshiks and Steppe Lancers and overwhelm the Tatars in the three remaining camps. 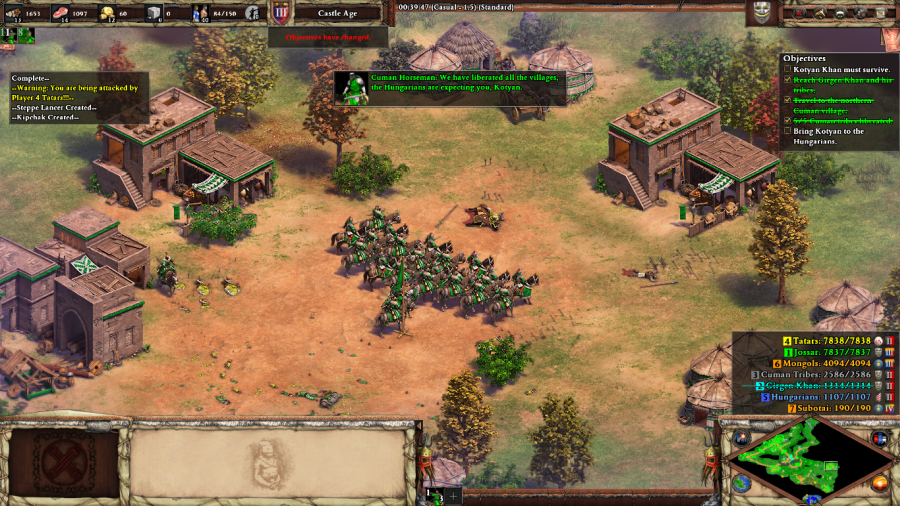 Cuman Horseman: We have liberated all the villages, the Hungarians are expecting you, Kotyan. Once the final village is freed, all that remains is bringing Kotyan Khan down to the Hungarian base in the south and victory is complete.  Cuman Horseman: Subotai will be here in 20 minutes. At around twenty minutes remaining, the Mongols already present on the map (they're hidden off to the east beyond the fog of war) send a small raiding party to attack one of my bases. But at this point it's not a serious concern: all that matters is getting the hero over the finish line. 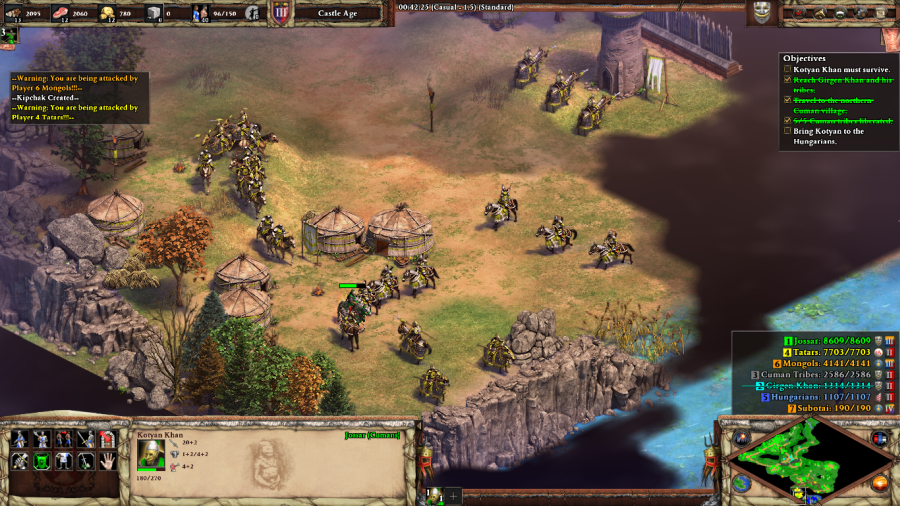 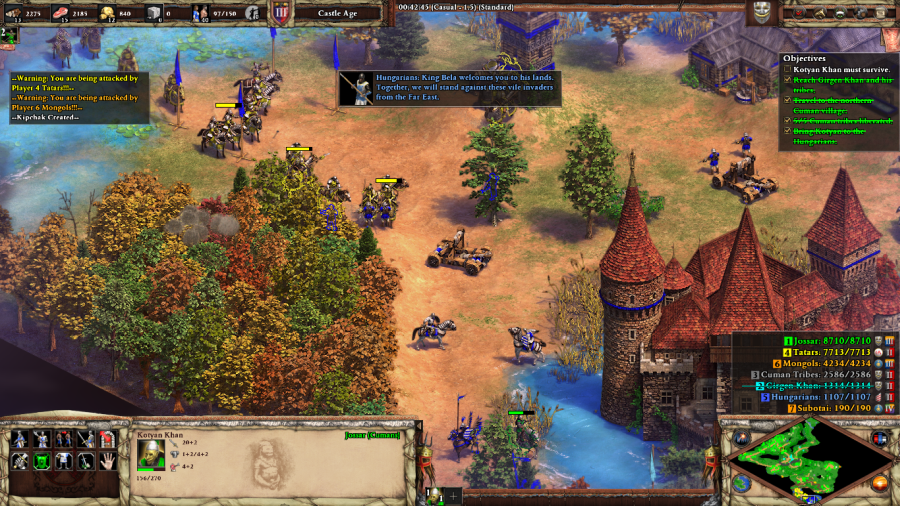 The Tatars have a surprisingly nasty army and some Towers positioned to intercept Kotyan Khan on his march to Hungary, but in the absence of a set of solid walls, it's easy enough to juke and dodge around them until you reach the border and are welcomed in by the Hungarians. Hungarians: King Bela welcomes you to his lands. Together, we will stand against these vile invaders from the Far East. Mission 3 Ending Text "Although our people numbered up to 40,000 men, women, and children, the Hungarian king welcomed us with open arms. Hungarians and Cumans greeted each other amicably and festivities ensued for days. Our leaders were baptized by the Hungarian priests and many of our people followed their example. When the festivities end, we will settle in the Hungarian valleys, set up our yurts there, and send our herds out into the field. Everything seems to be better now. Still, we should not get too comfortable with the Mongol army converging on the Hungarian border. Our horsemen will help the Hungarians defend their lands, but we are not the only ones who have come to their aid. Duke Frederick of Austria, an old rival of King Bela, has come to Hungary with a company of heavy armored German knights. We are suspicious of these strangers, but there is no time for internal squabbling. Not in such dire times." Mr. Narrator, I'm sorry to burst your bubble, but we've got two more scenarios to go. There is no way this ends well. The main problem with this scenario is that it's basically the last one, but not executed as well. You do have to engage in a legitimate amount of work to clear out the Tatars, but otherwise you're playing out a glorified cutscene to justify how the Cumans make it to Hungary. The Mongols are theoretically terrifying, but unless you're an incredibly slow boomer, they'll never even have the chance to show themselves beyond a few advance scouts before the mission is well and truly in the bag. Extra Slides Mission 3 - Intro Slide 1 Mission 3 - Intro Slide 2 Mission 3 - Intro Slide 3 Mission 3 - End Slide 1 Mission 3 - End Slide 2 Mission 3 - End Slide 3 Jossar fucked around with this message at 13:29 on Dec 9, 2023 |
 #
?
Dec 9, 2023 06:36
#
?
Dec 9, 2023 06:36
|
|


|

|
| # ? Apr 29, 2024 22:11 |
|
|
Kotyan Khan - Part 4: Blood for Blood Mission 4 Starting Text "Treachery! While attending a lavish feast thrown by an Hungarian lord, Khan Kotyan was murdered in cold blood by Hungarian and German knights! Our people are outraged and are out for blood! The Hungarians think we will scatter without Kotyan's leadership, but they were wrong. They have united us in pursuit of one goal�to avenge the death of our one true Khan! Our clan leaders have come together and taken an oath according to the old Cuman traditions: with sword in hand over a dead dog, cut in two, they will swear not to dismount their horses until Kotyan's death has been paid back in blood. If our leaders fail to honor their oath, their own clansmen will ensure that they suffer the same fate as the dog that they swore the oath upon. That is the way of the Cumans. We will act before the combined armies of Frederick and the Hungarian lords arrive. We know that there is a safe haven to the south in Bulgaria. The Bulgarian emperor is of Cuman descent and is ready to provide safe passage for our elderly and young. In the meantime, all men and women able to mount a horse will venture out to raid the Hungarian countryside. Our vengeance will be swift and thorough. We will show no mercy. Hungary will burn..."  *sigh* I played this mission incredibly poorly. And unlike Le Loi 3, I didn't even do so in such I way that I can give you a mostly competent playthrough where I cut out the bit where I took forever. No, to properly set the mood for how this is going to go, you must imagine the above group of Cuman horsemen solemnly swearing their oath of vengeance, and then proceeding to bumble around the Hungarian countryside to Yakety Sax.  Hungarian Villager: Please help us! Tatar raiders are attacking our village! Cuman Horseman: (if the village falls) Savagery! Another village devastated by Tatar raiders. The first part of this mission consists of a series of small quests, with the first being saving this Hungarian village. If you manage to do so, it will continue to produce Ox Carts for you as long as the Tatars do not successfully manage destroy it at a later date. These Ox Carts can be traded in at the fort you're trying to reach for resources and a free Kipchak, and can also be obtained by finding them in the countryside and completing the other various quests. In this case, the Tatars killed all of the Villagers, and even with the soldiers and buildings still standing, the game considers that to be a fail state. However, I did at least make an effort to try and save the village, so the scenario's internal logic still considers this quest to be complete for the purposes of advancement.  Tatar: Death to all who stand in our way! Hungarian Priest: (after being saved) Thank you, child. These pagan savages have been destroying our Christian sanctuaries all over the country. A dark time is upon us. Further on, a group of Tatars will try to attack this Monk. Save him, and he'll provide you with free healing for the rest of this section. It should be noted that scattered throughout this side of the map are additional groups of Tatars. It's useful to clear them out, although you'll end up facing a great deal of attrition in doing so without good micro or making use of this fellow.  Cuman Chief: Welcome. We heard that you were coming and we could use your help. You can train additional soldiers in my camp. Just a little bit further to the east is the Cuman fort which forms your base of operations for the rest of the first part of the mission. It's just a small military fort, suitable for training a few extra soldiers or researching Blacksmith upgrades. You never truly get a large base or economy this mission, remaining primarily reliant on Ox Carts and destroying buildings for supplies.  Hungarian Noble: Finally, a relief force! The Tatars have been besieging my camp for four days now. Clear the surrounding lands of all our enemies and I will reward you kindly. (after clearing out the Tatars) The Mongols demanded that we hand over your people to them, but our king refused. Perhaps he was right to do so. Here is your gold. The quest that this nobleman gives is simple and straightforward: kill the Tatar siege force sitting in the swamp. Due to the routines of the Tatar patrol routes, I run into them right outside the nobleman's camp. I lose a few troops, but the real problem here, which I don't know yet, is that this means I've already completed the second to last quest and am about to get booted into the next phase of the mission earlier than I'd expected. 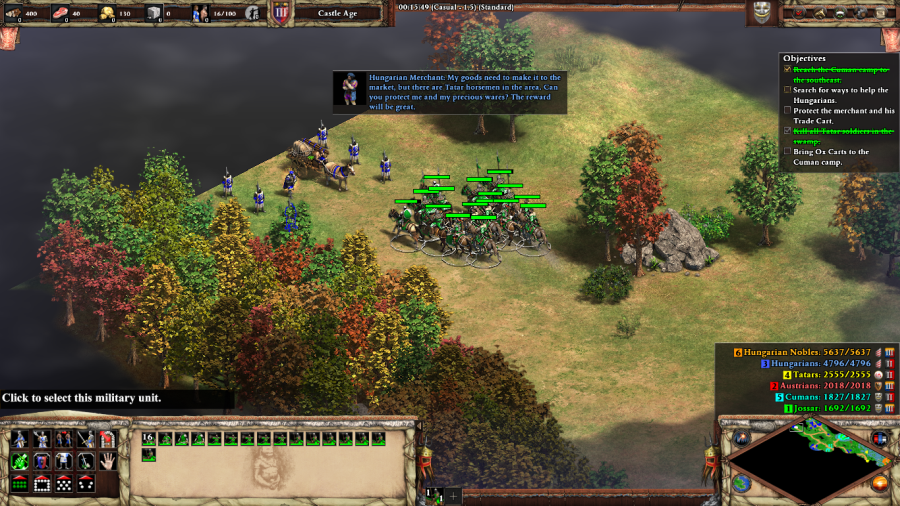 Hungarian Merchant: My goods need to make it to the market, but there are Tatar horsemen in the area. Can you protect me and my precious wares? The reward will be great. (after completing the quest) As promised, here is your reward. The village market is now available to you as well. The last quest is offered by this merchant, back over here, just to the southwest of the starting zone. Tatar troops will spawn in along his route to a nearby village. Defeating them and ensuring the merchant makes it to the village safely gives you resources and is supposed to give you the ability to use the Market, but... 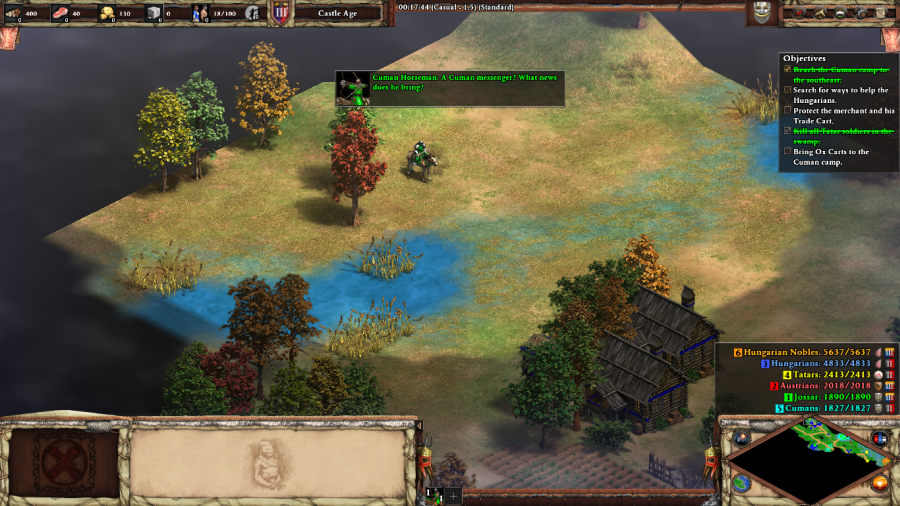 Cuman Horseman: A Cuman messenger? What news does he bring? Cuman Rider: I bring ill tidings! The treacherous Hungarians have murdered Kotyan in cold blood! Cuman Chief: It is no longer safe for us here. We can cross the Danube River and head south, but we will need siege equipment to get to the ships in the nearby town. Completing all four quests triggers this cutscene, after which point the Hungarians and Hungarian Nobles all immediately become hostile, removing use of the Market and requiring me to immediately go running off back to camp in order to ensure that the warriors of the caravan I just protected don't start taking potshots at my units. 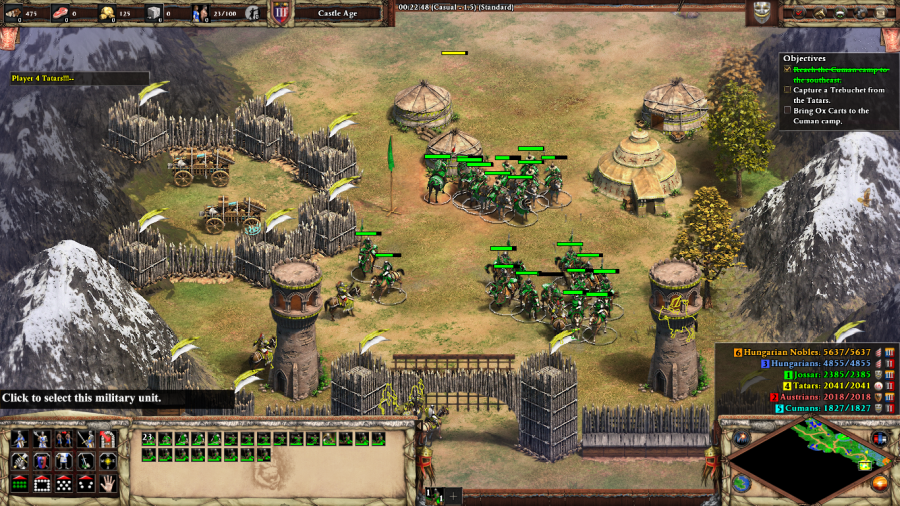 Cuman Horseman: With these trebuchets, we can tear down the enemy walls and capture the Hungarian transport ships. The only place to get siege units is inside the main Tatar base on this map. They're only protected by Towers and Wooden Palisades, but the fight against the Tatar troops is a bit more even than I'd like due to the minimal amount of resources I was able to obtain. Offscreen, Hungarian Noble forces start attacking my yurts, and I panic, thinking that I need to run for the transport ships or they'll find out that my troops aren't there and hurry to reinforce the town. This means that I end up rushing past a group of event troops, which are supposed to join up with your guys in taking down a band of Tatar warriors, but by themselves end up slaughtered. I am able to rescue a few Ox Carts from a different group of Tatars on the way to sieging the Hungarian town, though. 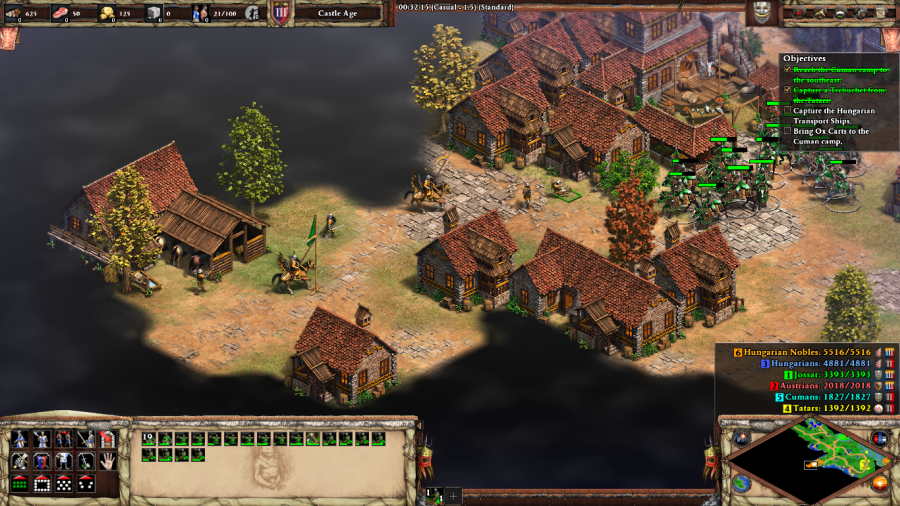  Cuman Horseman: On the other side of the river are several Hungarian towns ripe for plundering. Let us cross. The siege of the town turns out to be formulaic, although the Hungarian Noble troops mainly centered around Magyar Huszars, Knights, and Crossbows put up more of a fight than the Tatars that have troubled my troops so far.  Crossing the river fully brings the first section to a close, rendering you baseless. You'll eventually have to rendezvous with Cumans who have already reached this side of the river, but right now the primary focus is on sacking the Hungarian towns. There are nine Hungarian towns, and taking out their important buildings grants you a bunch of resources directly related to what they were gathering and some Ox Carts. Most are only protected by a scattering of Feudal Age units representing local militias, but the more important towns are each also protected by a moderate size group of Hungarian Noble troops.  I manage to make it two towns in with no problems, but the third is one of the larger towns, and although I am able to win, my forces are devastated. At this point I have to immediately gun it for the Cuman fort to seek reinforcements, or the mission is lost.  Fortunately, the fort in question has a very large garrison waiting to go forth and plunder, and turbocharged by the resources that I've brought from the Hungarian towns that I've already sacked, I can build up a sizable army with which to do so.   Apart from protecting the towns, the Hungarian Nobles also have a small contingent of troops and a few boats protecting the river. This seems pretty important, so I take them out just in case I need the river clear for later.  Having reached the Cuman fort, the full scope of my remaining objectives for this phase of the mission is made clear. While there are nine Hungarian towns, only six need to be cleared, although the rest will of course provide additional resources for the Cuman war machine. Beyond that, two Castles belonging to the Hungarian Nobles have to be taken out. As with the river town, the first Castle puts up a decent fight, but not enough to truly threaten my forces. Defeating it brings a very large amount of resources and an upgrade to the Imperial Age to go along with them.   The second Castle was a real problem though. The troops there faked me out in thinking that they were going after my main army, before circling around and destroying my out of position Trebuchets. Since I had already spent all my resources on additional troops, I was reduced to manually tearing down the Castle, at a great cost in terms of units spent.  Duke Frederick: I warned the Hungarians not to trust you, nomad scum. My armored knights will crush your petty horse army and I will deal with the pagan hordes here once and for all. Destroying the second Castle starts the final phase of the mission. Despite the player's best efforts, this has once again become a hopeless scenario where the only option is escape. I got caught off-guard by the Austrians here, as I wasn't expecting them to coordinate with the remaining Hungarian Nobles and move fast enough to attack my camp. I have the resources to build more troops, but I don't have the time before they wreck the buildings, unless I stand and fight. But considering that the Hungarian Nobles and Austrians have multiple roadblocks set up on the path to the exit, this is going to become a nasty fight of attrition...  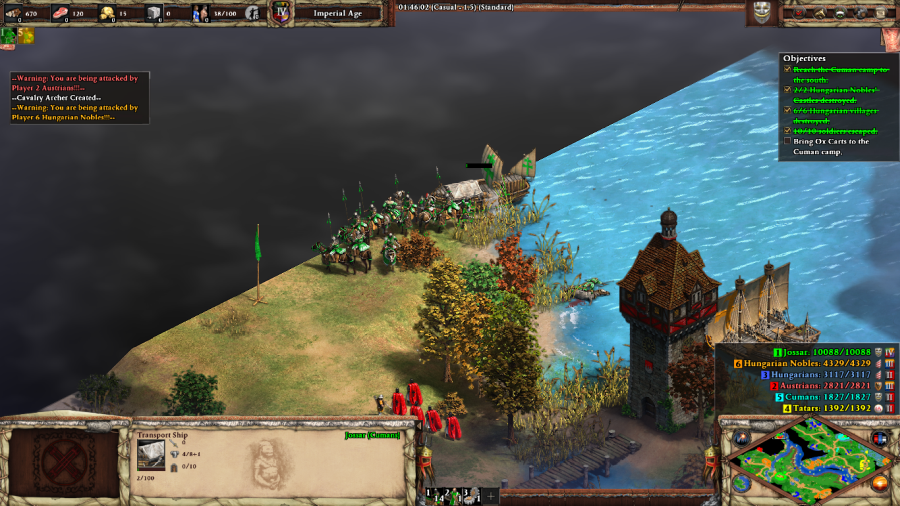 ...well, if I play their game, that is. It turns out that destroying that River Fortification and those boats on the southern side of the Danube River before came in handy after all. The Hungarian Nobles do have a bunch of other boats on the river, including multiple Demolition Ships. But it turns out that I had carved out just enough of a gap such that, combined with my boats hugging the coastline, the Hungarian Nobles didn't notice I was making an endgame run on the escape route until it was too late. Once they realized their mistake, they started shooting at my boats, but it only takes one Transport's worth of troops landing successfully to count as satisfying the victory condition. I'll take it. Cuman Horseman: We have razed all of the villages and castles to the ground, and the road south lies open. Let the Mongols take care of the corpse of the once-mighty kingdom of Hungary. Mission 4 Ending Text "We left no stone unturned and spared no living being. Every shack, hovel, and hut was burned to the ground, all livestock killed, and all farms trampled to dust. After we had plundered the last village before crossing into Bulgaria, I looked over my shoulder and saw nothing but a nightmarish vision of red and black�as if we had brought hell to the surface of the earth itself. The Hungarians will think twice in the future before double-crossing us." A bit more relaxed of a mission, meant to be taken at your own pace, as opposed to the previous ones using the Mongols to keep you on a time limit. The starting quests almost make you feel like a kind of adventuring party? Interesting way of depicting the Cumans trying to integrate into Hungarian society before the axe falls. The whole sequence usually works pretty well, although you really should be slow and thorough about it, just to be sure. The scenario's supposed to end darkly triumphant, with the Cumans having finally managed to do some real damage, and leaving all of their enemies behind to kill one another while they look for greener pastures. But I think it's a bit more appropriate to keep the perspective focused on this being just one more escape from another group of people who want them dead. Or maybe I'd be feeling smug about it too, if I'd smashed the roadblock properly. Who knows? Extra Slides Mission 4 - Intro Slide 1 Mission 4 - Intro Slide 2 Mission 4 - Intro Slide 3 Mission 4 - Intro Slide 4 Mission 4 - Intro Slide 5 Mission 4 - Intro Slide 6 Mission 4 - End Slide 1 Mission 4 - End Slide 2 Mission 4 - End Slide 3 Jossar fucked around with this message at 07:28 on Dec 10, 2023 |
|
#
?
Dec 10, 2023 07:12
|
|
|
I'm in two minds about this mission. The first half is a fun power fantasy, wherein you get to play as a hardened mercenary, riding about the countryside and slaughtering as you go. The second half is fun too�it's got a good balance between difficulty in individual encounters that really feeds into that, they're challenging at times but never frustrating. But the trabsition between the two halves is awful. You're rushed into the transports with no real guidance on where to go. If you blindly move towards the northern end of the river you run into a lighthouse that shoots at your transports supplemented by patrolling ships, yet it doesn't seem like you're intended to disembark to the south�you end up landing under a tower and in combat. Try to avoid the tower and you run into another flotilla. It's a really rough intermission that detracts from what is otherwise a really fun mission.
|
|
#
?
Dec 10, 2023 10:54
|
|

|
I honestly remember questioning why I was helping the Hungarians in the first half of the mission before that event triggered, and I realized that despite being in the Mission Opening, my forces hadn't actually been TOLD about Kotyan's murder yet.
|
|
#
?
Dec 10, 2023 14:56
|
|
|
Kotyan Khan - Part 5: A New Home, Side A (Bulgarians) Mission 5 Starting Text "After we left Hungary weakened and defenseless, the Mongols invaded, defeated King Bela and his army, and devastated the country once more. The kingdom is in such a poor state that refugees say that the church bells in Hungary have been quiet for weeks and wild animals now roam the streets of the cities. King Bela fled to Austria where Duke Frederick used King Bela's weak position to extort land and make him swear fealty to the Holy Roman Emperor. Just like us, King Bela fell for the treachery of the Austrian duke and the Hungarian nobles. Our people stand at a crossroads. We received letter from King Bela pleading with us to return to Hungary and help him deal with those who wronged us. Many of our leaders are not convinced and still wish to go to Bulgaria. It is not an easy decision, but it is I who have to make it. For I am the new great khan of the Cumans, and they depend on my wisdom. I am no Kotyan, but I will follow in his footsteps and ensure the survival of our people and their legacy, something which we had fought so hard for." 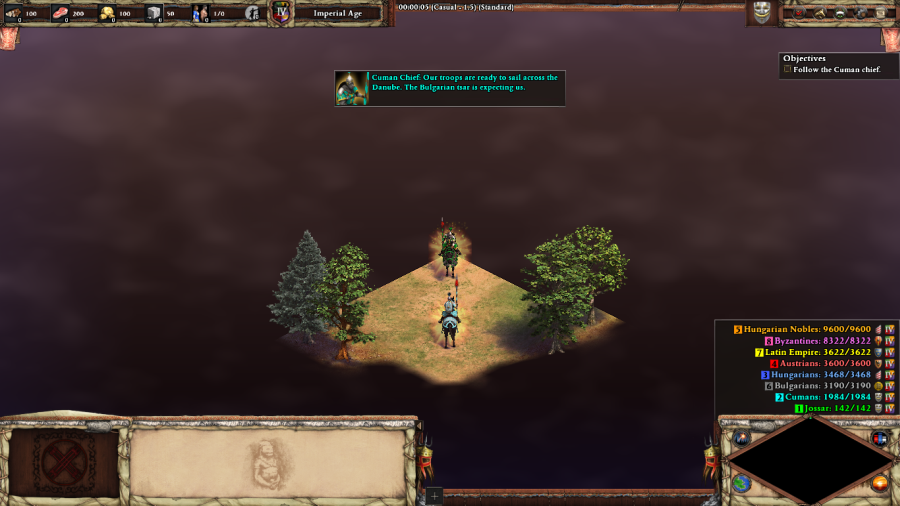 Cuman Chief: Our troops are ready to sail across the Danube. The Bulgarian tsar is expecting us. So this scenario is a bit special... 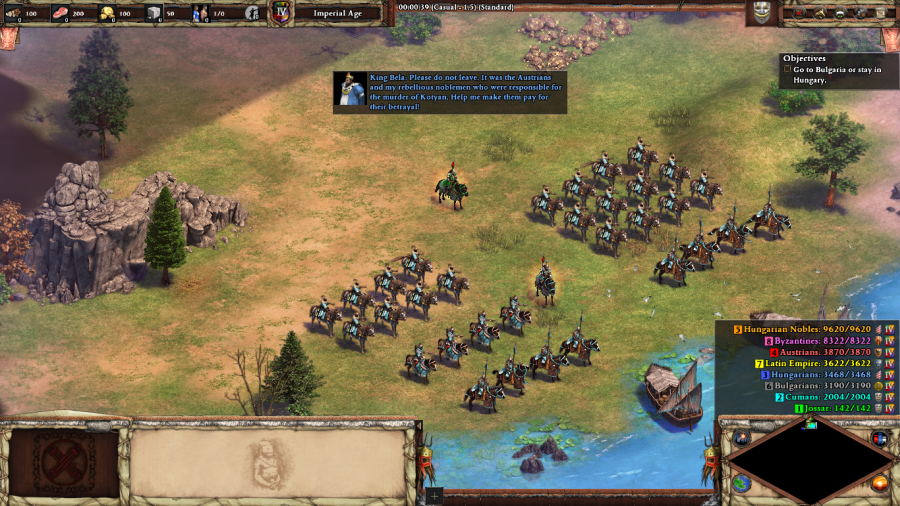 King Bela: Please do not leave. It was the Austrians and my rebellious noblemen who were responsible for the murder of Kotyan. Help me make them pay for their betrayal! The Danube River bisects the map such that, since the Cumans cannot make Docks in this mission, the choice you make here at the beginning locks you into what is effectively one of two entirely different scenarios. Usually I just do one playthrough and leave the road not traveled to the audience's imagination. But this is a special enough case that I decided to play through the mission twice, and will end the Kotyan Khan campaign with a double-header update. 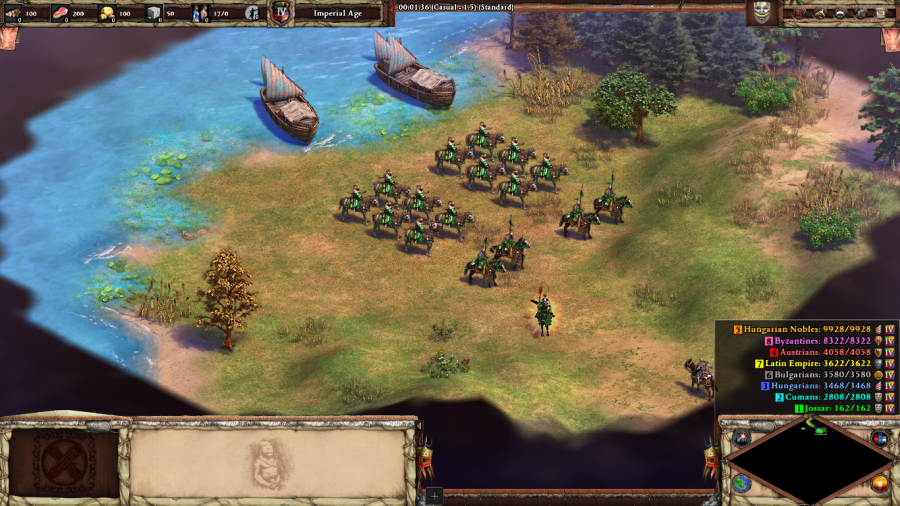 Cuman Chief: I am sorry, but we are not yet ready to leave Hungary. Not while Kotyan's death remain unpunished. Bulgarians: We are glad that you have accepted our invitation. Our camp is just ahead of here. I'll start with what is going to be Side A of this mission, the Bulgarian route, taken by having your Khan embark on the Transports. In a neat touch, no matter which option you choose, half of the gathered forces instead head off to assist one of the other chiefs in completing the option that you didn't pick.  Bulgarians: The Latins have taken Nesebar from us! When we tried to retake it, their knights attacked our camp under the cover of night. (after a few seconds) Our force is now too weak to retake the city, but you can resume the siege if you free the villagers that the Latins took hostage. The Bulgarians hand you the lead up to the first part of the mission, rescuing some Villagers so you can build a base and attack the Latin Empire in Nesebar.  Along the way, you can grab the Pavilions that the Bulgarians abandoned, which will cover most of your housing needs, although you will still need to build a few more houses to reach the scenario's pop cap.  Latin Knight: What are you doing here? This land belongs to the Crusaders! Continue onwards and you reach the Latins, presumably about to execute all of the Villagers in the holding pen by hanging. Really not sure what other implication those gallows are supposed to have. They're a small force, and you have units that dance circles around them with good micro, so it's not too much work to free the Villagers.  Bulgarian Villager: Thank you, kindly strangers. The crusaders expelled us after capturing Nesebar and we have nowhere to go. Will you help us take back the city? Anyway, you all know the drill by now - I grab the freed villagers and start booming.  From this point onwards, every couple of minutes the Bulgarians will give you a set of ten Konniks. I didn't find these guys to be particularly useful for anything, maybe because they don't have all of my upgrades? In any event, you do end up with a lot of them, so they're good for raw damage and eating up arrow fire on behalf of more important units like Kipchaks.  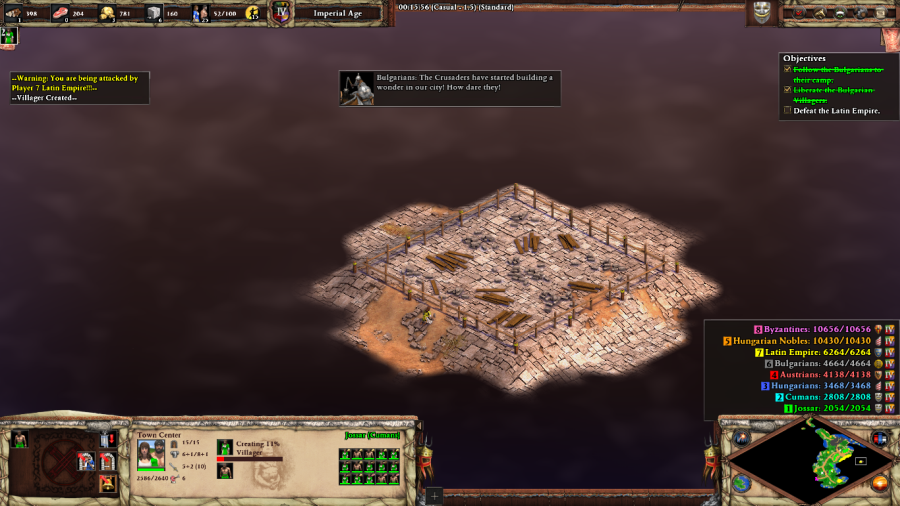 Bulgarians: The Crusaders have started building a wonder in our city! How dare they! After a few minutes, the Latin Empire starts raiding both my pavilions and main base, and still finds the time to start construction on a Wonder. The raids are cleared out with Konniks, and I keep building up an attack force to assault Nesebar and stop the timer, but there's one piece missing. 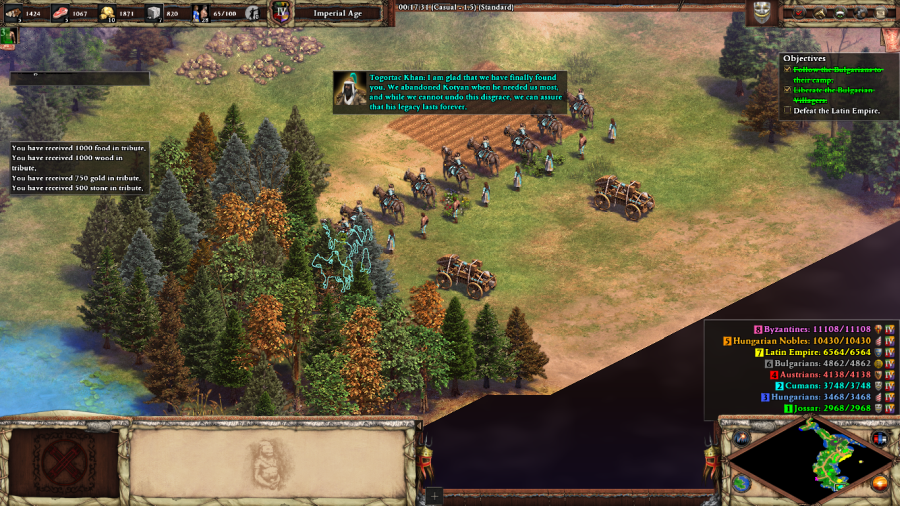 Togortac Khan: I am glad that we have finally found you. We abandoned Kotyan when he needed us most, and while we cannot undo this disgrace, we can assure that his legacy lasts forever.  On both sides of the scenario, Togortac Khan will eventually show with additional troops to try and make up for running out on Kotyan Khan back in Mission 2. Here, they're just what I need to begin the siege in earnest. 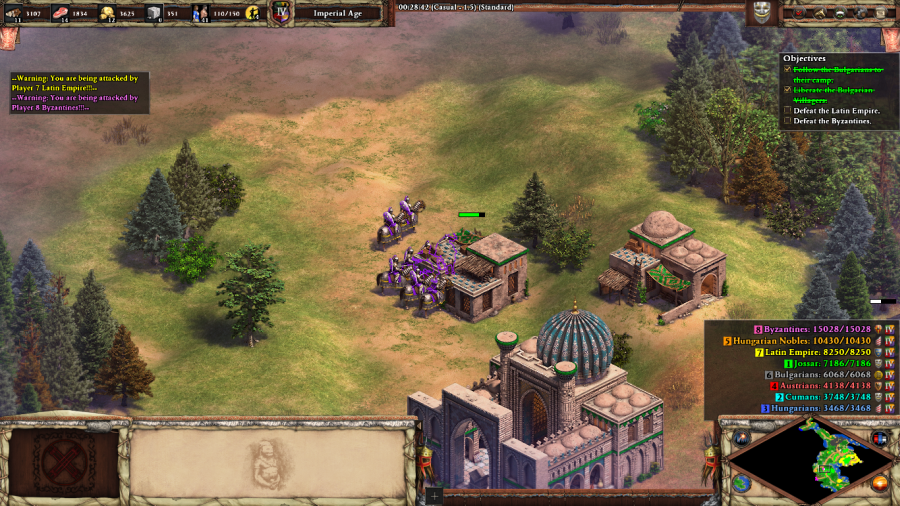 Byzantines: My emperor in Nicaea has ordered me to attack the Latins. Back off, Cuman, for Nesebar belongs to the Byzantines! I'm not sure if the Byzantines have a set timer on when they're supposed to get involved, or they just become aggressive the instant you start a proper siege on Nesebar. Either way, they're here too, and represent a threat on the entirely opposite front from the Latin Empire that you have to work to contain. If left unchecked for long enough, they'll also become a threat by sea, which you have limited options for countering. But I found that this only started becoming a problem right as I was about to win the scenario anyway, so I didn't focus too much on that aspect. 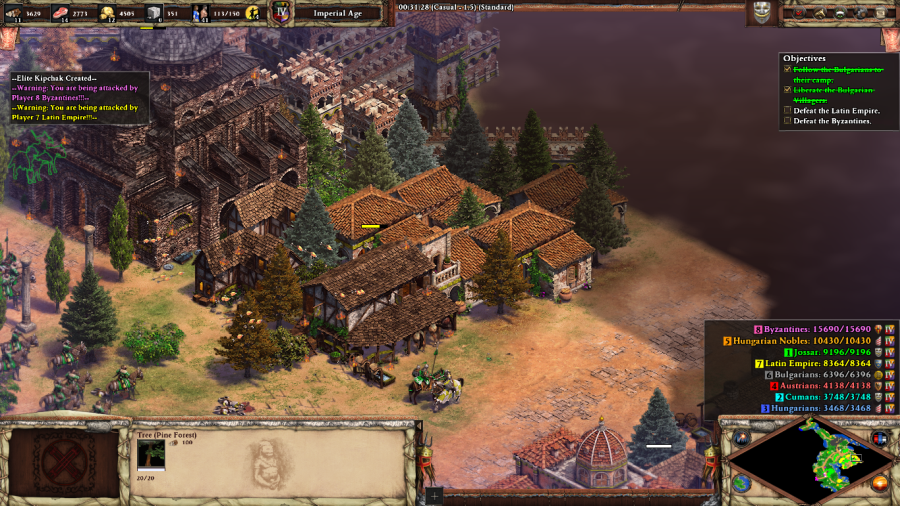 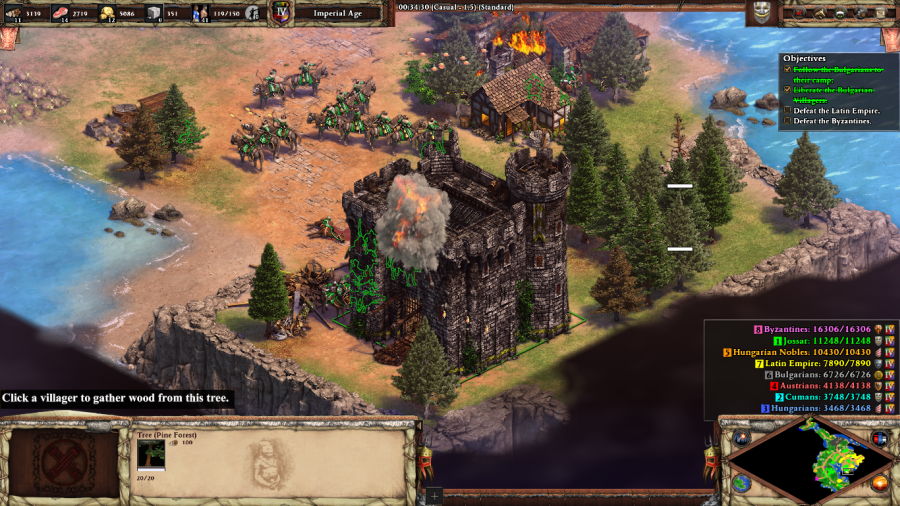 I continue on with destroying Nesebar, which although a large city, only puts up a moderately difficult fight. Defeating the Latin Empire frees up the Bulgarians to take control of the city, and from this point onwards they stop being a Konnik farm, and instead act like a real player. With enough resources gathered, they'll start to build a Wonder, which can serve as an alternate victory condition for the mission if you choose to keep the Byzantines contained rather than bringing the fight to them.  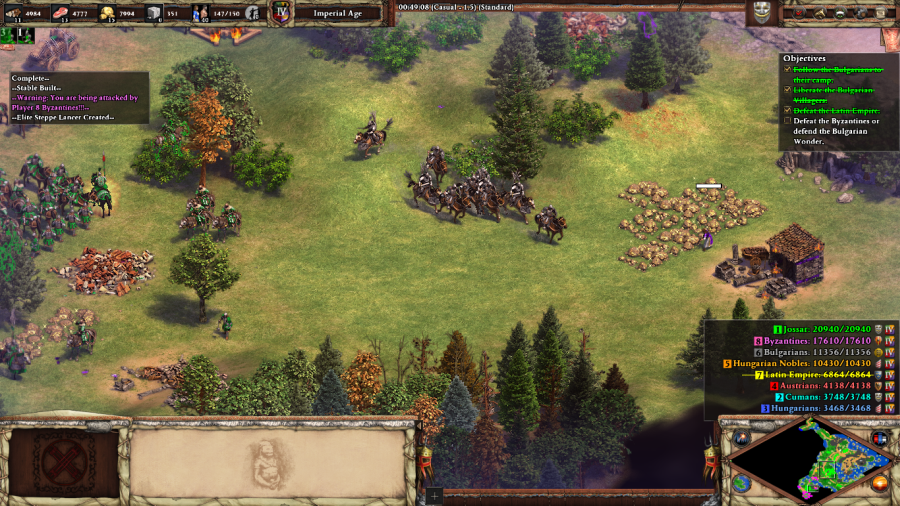  But given AI building habits when it comes to wonders, that's going to take a really long time, so I just redirect everything from the Nesebar siege into the heart of the Byzantine base. They have a lot of Towers everywhere, which my troops are perhaps not the best at dealing with, and combined with their Cataphracts and Halberdiers that makes this a pretty tough fight. But with a little bit of backup from the Bulgarians, the Byzantines are crushed and the mission is complete. Bulgarians: Nesebar is ours again. Blessed be the future of Bulgaria! Mission 5 Ending Text "It has been years since I last saw the lands of my ancestors. Although I still often find myself awash in fond memories of my younger years on the Eurasian steppes, I do not grieve, for it is fate that has led us here. Our people have spread out to all corners of the world, leaving a strong mark on it. In Hungary, the daughter of Kotyan married the eldest son of King Bela and many of our people live there in peace now. The Cumans who were enslaved and sold by the Mongols years ago have carved out a new empire in the Middle East. I even heard that these 'Mamluks', as they are now called, have defeated the Mongol army invading Syria, halting their relentless expansion once and for all. Much blood has been spilled, but I can see a bright future for the people of former Cumania�one where we, like our ancestors before us, will keep on shaping the records of history." This is an alright scenario, if a little bit paint-by-numbers. Defending the Bulgarian Wonder can be an interesting challenge on harder difficulties, but I still think that unless you're thoroughly overwhelmed, taking out the Byzantines would be faster. That being said, the other side of this scenario is a bit more fun... Extra Slides Mission 5 - Intro Slide 1 Mission 5 - Intro Slide 2 Mission 5 - Intro Slide 3 Mission 5 - Intro Slide 4 Mission 5 - End Slide 1 Mission 5 - End Slide 2 Mission 5 - End Slide 3
|
|
#
?
Dec 11, 2023 05:07
|
|
|
Kotyan Khan - Part 5: A New Home, Side B (Hungarians) Mission 5 Starting Text "After we left Hungary weakened and defenseless, the Mongols invaded, defeated King Bela and his army, and devastated the country once more. The kingdom is in such a poor state that refugees say that the church bells in Hungary have been quiet for weeks and wild animals now roam the streets of the cities. King Bela fled to Austria where Duke Frederick used King Bela's weak position to extort land and make him swear fealty to the Holy Roman Emperor. Just like us, King Bela fell for the treachery of the Austrian duke and the Hungarian nobles. Our people stand at a crossroads. We received letter from King Bela pleading with us to return to Hungary and help him deal with those who wronged us. Many of our leaders are not convinced and still wish to go to Bulgaria. It is not an easy decision, but it is I who have to make it. For I am the new great khan of the Cumans, and they depend on my wisdom. I am no Kotyan, but I will follow in his footsteps and ensure the survival of our people and their legacy, something which we had fought so hard for." Alright, time for round two. 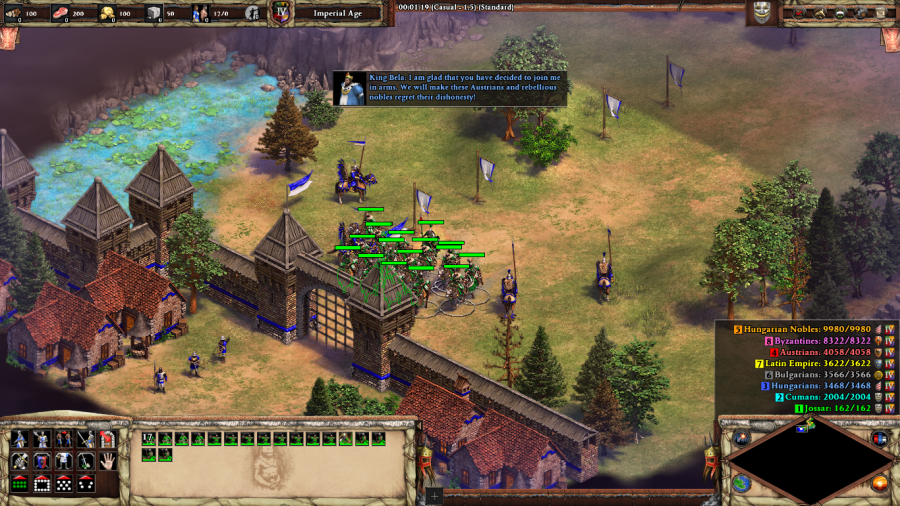 Cuman Chief: I fear our paths separate here. We cannot forgive the Hungarians for what they did to our people. We will go to Bulgaria instead. King Bela: I am glad that you have decided to join me in arms. We will make these Austrians and rebellious nobles regret their dishonesty! Side B, the Hungarian route, is taken by having the Khan ride down to the Hungarian border. As before, half your troops leave, this time to go do the mission that I just completed. 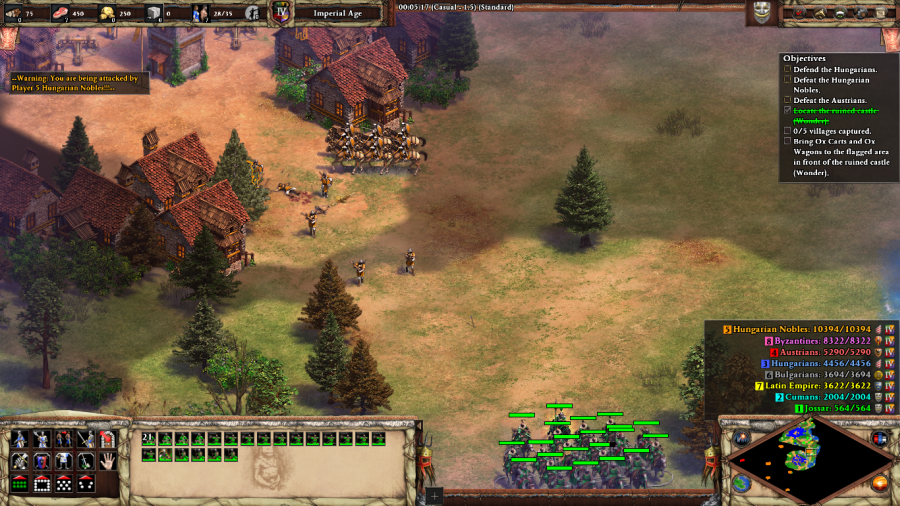 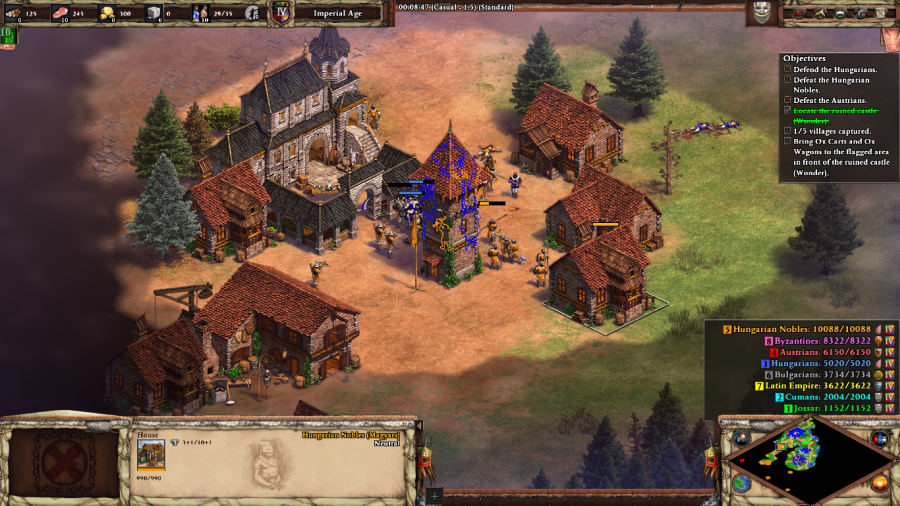 King Bela: The villages in this region will provide us with resources if we can keep them under our control. Duke Frederick: It seems that King Bela still conspires with the pagans. He forgets that he bent the knee to me once before. This mission has an achievement, but it's only for the Hungarian side: taking out the Austrians within 45 minutes. After my performance in Mission 4, I'm determined to finish off the Cuman campaign on a high note, so I don't have much time to lose if I want to make that happen. These villages work like the ones from the first Gajah Mada scenario or the second Vlad Dracula scenario, being villages that swap hands between factions based on who has current control of the central tower. These ones in particular feed resources to the alliance that controls them. With my starting troops, I go and attack the first of these resource-granting villages by myself, luring out the troops from underneath the Tower, and then hammering the now-isolated Tower into submission. Afterwards, I join the Hungarians, who are quite an active participant in this scenario, in taking the second village before I run out of steam. 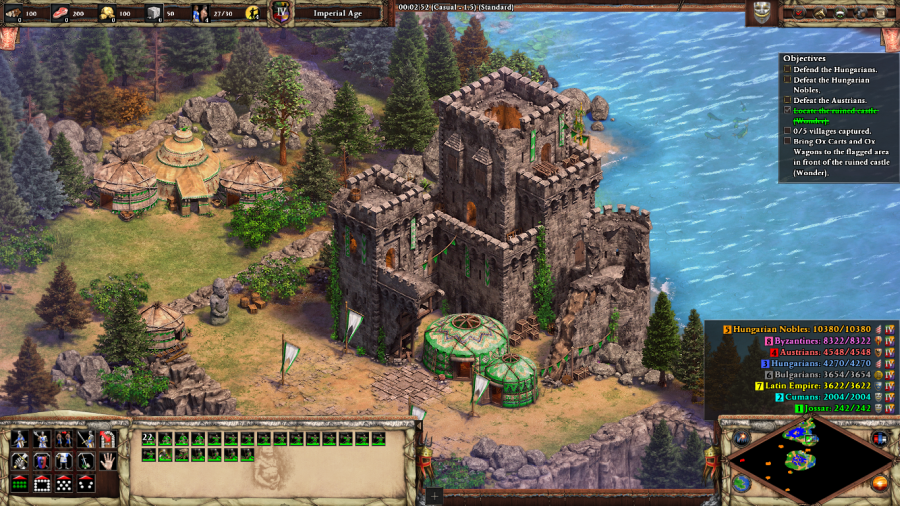 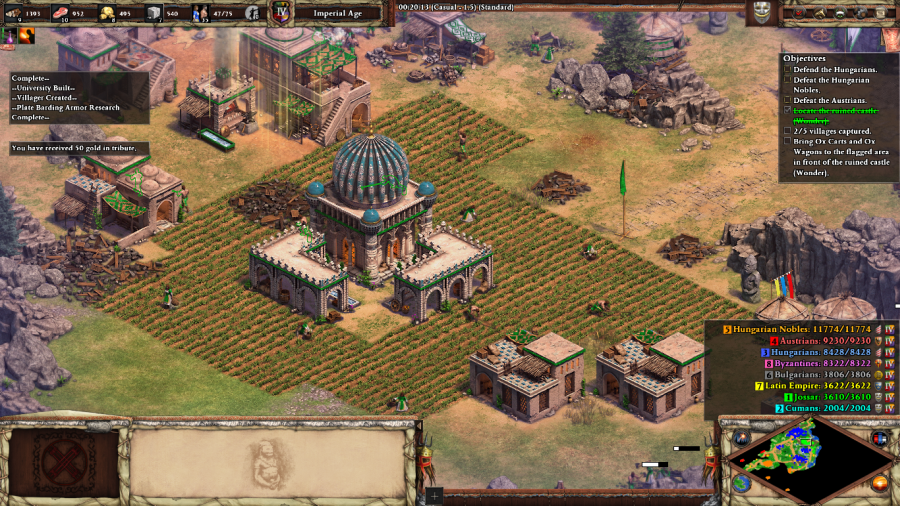 Meanwhile, by dragging the starting Ox Wagon and Ox Cart that King Bela gave me to this Wonder, I'm able to get enough resources and Villagers to build a base camp from scratch. More of these dot the map, and they are useful for helping to slingshot your economy further ahead and provide you with some extra Kipchaks when found, but they're not quite as crucial to the scenario for victory as they were in Mission 4. 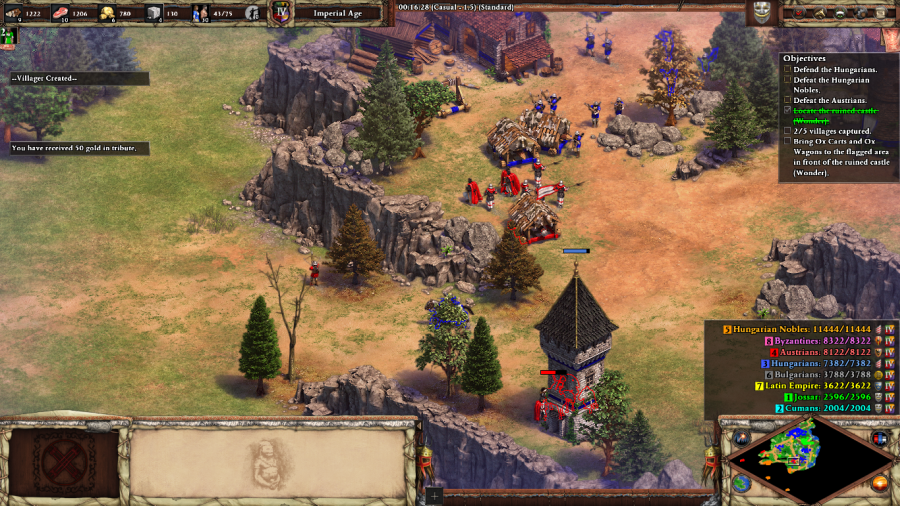 Duke Frederick: My proud knights defeated the fierce Mongols that invaded Austria. What chance do you think that you have against us? 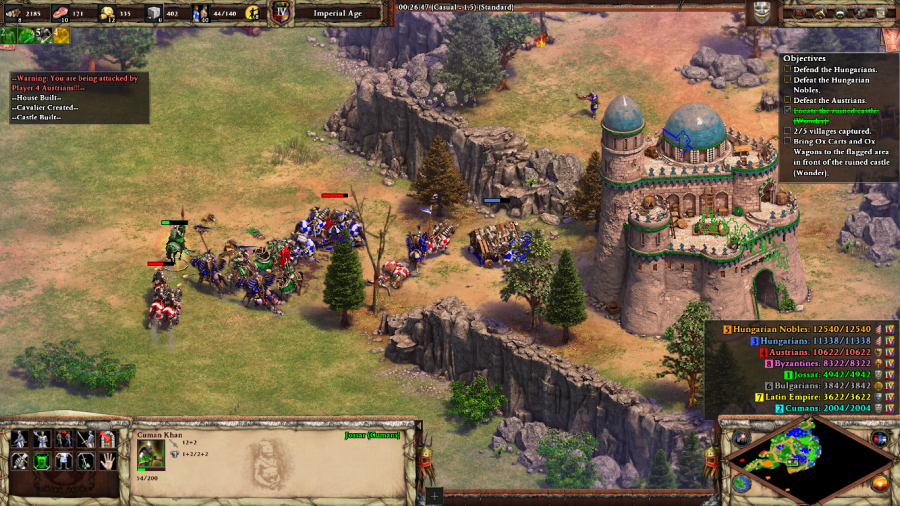 Apart from the Austrians being the primary target because taking them out early is necessary to claim the achievement, they're also the biggest priority on the map because they are super aggressive. The Hungarian Nobles are pretty passive and mostly focused on patrolling the map and protecting their villages. Austria, on the other hand, barely cares about the villages at all and will run right past them in an attempt to knock out the Hungarians' forward base, with multiple waves of fully upgraded, armored, and implacable Teutonic units. After the first attack, I had to sacrifice the remainder of my starting units in order to build an additional Castle in the Hungarians' base to stop the Austrians from running fully rampant while the Hungarians got their act back together. 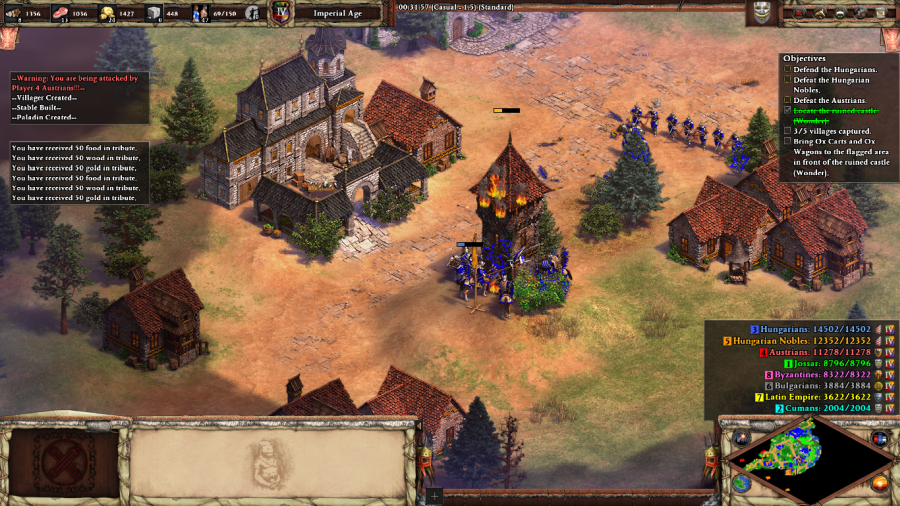 Fortunately, once the Hungarians were back on their feet, they were able to go out and take the rest of the villages while I focused on getting ready for the big assault... 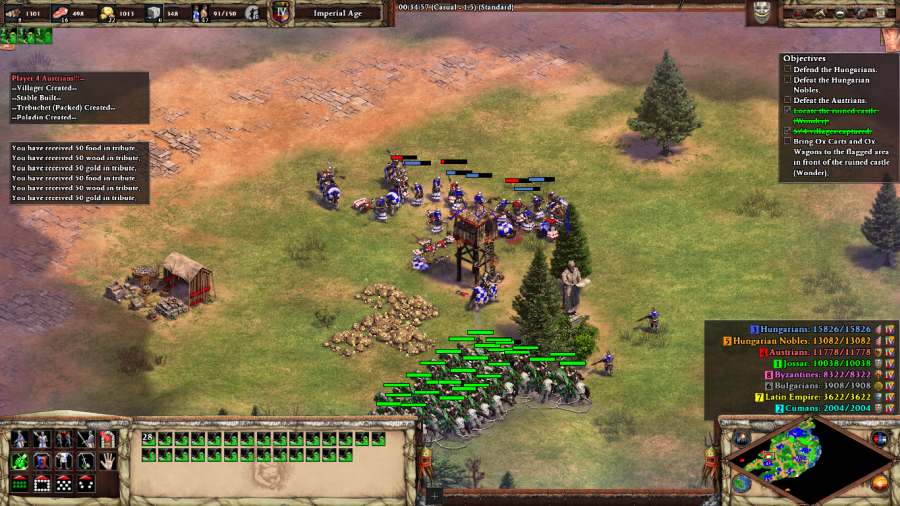 Yeah, yeah, I slammed the big button labeled "ALL THE PALADINS" again. As much as I like trying to show off unique civilization strengths, sometimes there really is no substitute for just shoving 60 fully upgraded Paladins into an opponent's face, provided that the civilization in question is capable of deploying them. The game wants you to use Kipchaks to deal with the Austrians bringing Halberdiers to the fight, but they were a little too distracted by my allies in this case. 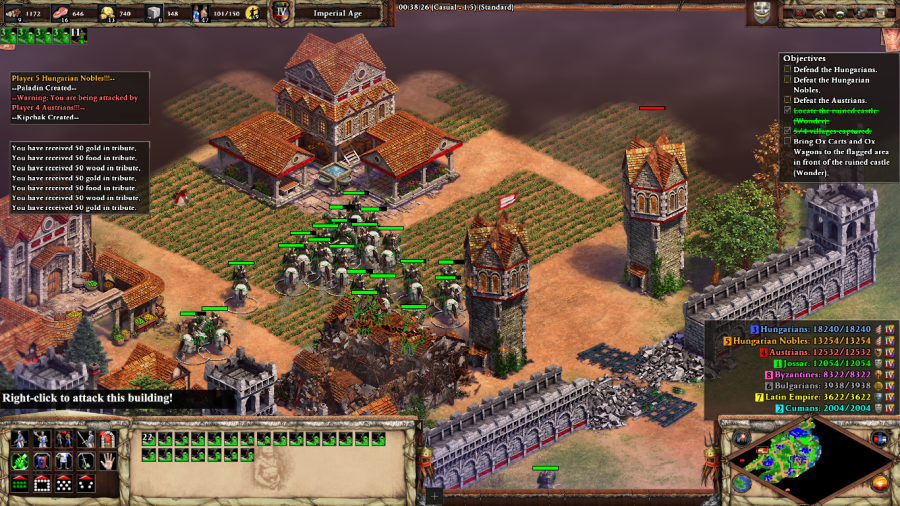 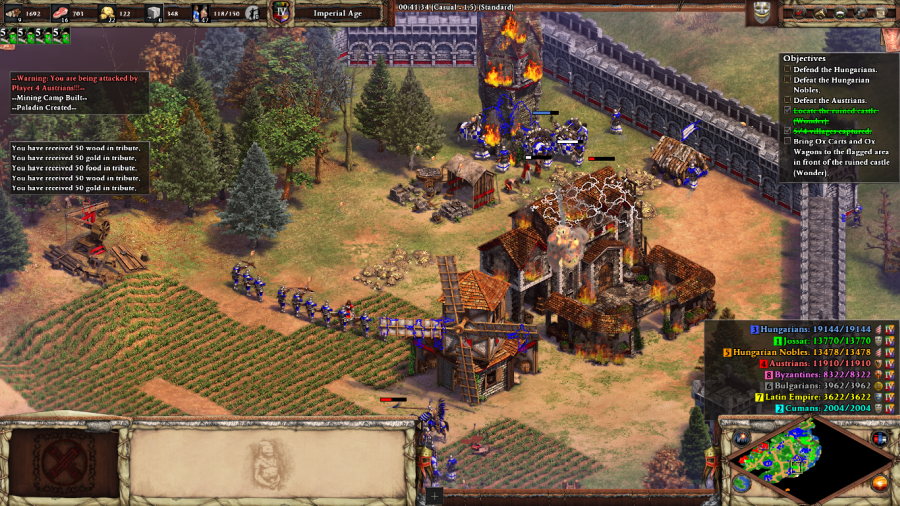 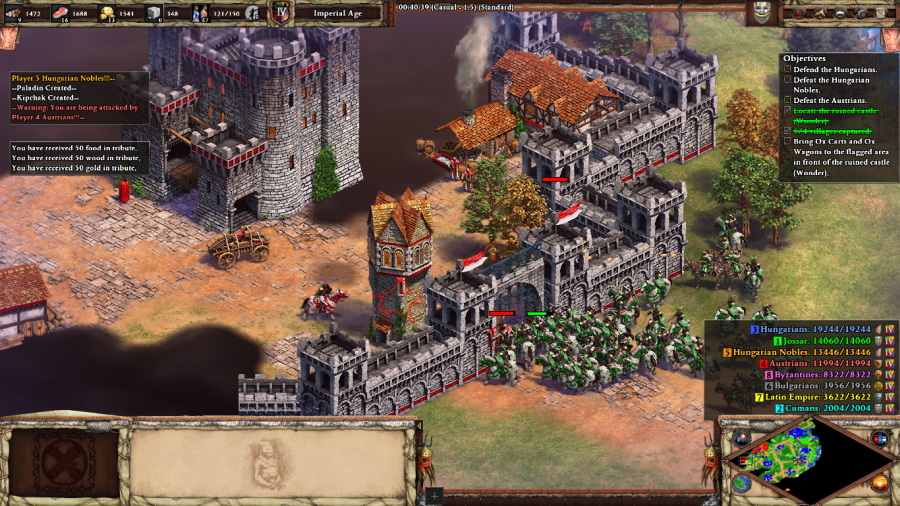 The Austrians have two forts located to the west of the map. I smash all of the important buildings in the more easterly one and leave the Hungarians to clean up what remains while I keep moving west to their second fortress. 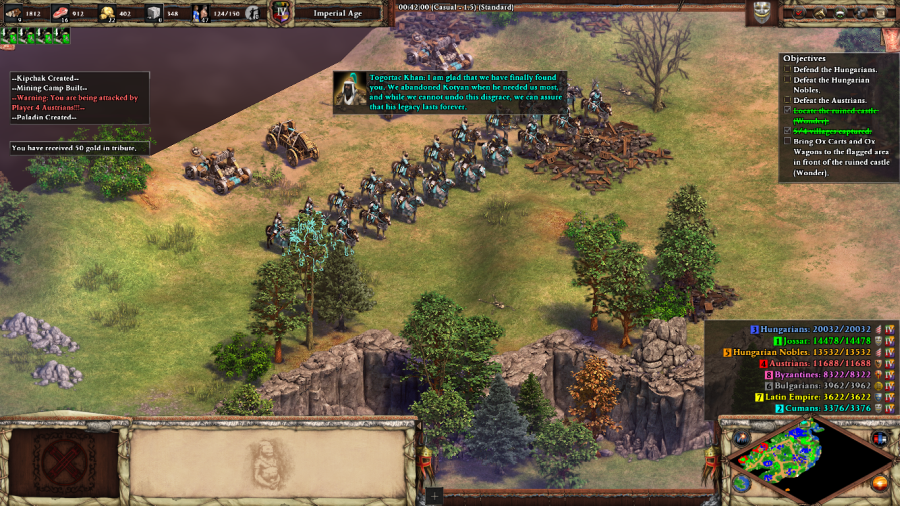 Togortac Khan: I am glad that we have finally found you. We abandoned Kotyan when he needed us most, and while we cannot undo this disgrace, we can assure that his legacy lasts forever. Unlike last mission, Togortac's forces aren't timely at all, and I already have things in the bag even without him. I think they never even make it to the final fight.  Duke Frederick: No, it cannot be! I, and I alone, was to rule over Austria and Hungary! You landless vermin have caused me nothing but grief.  I cut it a little close, but by 43 minutes the Austrians are defeated entirely. All that remains is a five minute pivot southward to break through the Hungarian Nobles' gates and destroy their Castle, and the campaign comes to a conclusion. The Hungarians under King Bela even show up to provide a final send off, both in the game and in the closing text. King Bela: We have dealt with the insubordinate lords that tried to destroy my kingdom. Your people... have my eternal gratitude. (after a few seconds) For a moment, I thought that the Kingdom of Hungary was lost forever, but with your help it has survived this dark time. Hungary is in your debt, Cumans. Mission 5 Ending Text "It has been years since I last saw the lands of my ancestors. Although I still often find myself awash in fond memories of my younger years on the Eurasian steppes, I do not grieve, for it is fate that has led us here. Our people have spread out to all corners of the world, leaving a strong mark on it. In Hungary, the daughter of Kotyan married the eldest son of King Bela and many of our people live there in peace now. The Cumans who were enslaved and sold by the Mongols years ago have carved out a new empire in the Middle East. I even heard that these 'Mamluks', as they are now called, have defeated the Mongol army invading Syria, halting their relentless expansion once and for all. Much blood has been spilled, but I can see a bright future for the people of former Cumania�one where we, like our ancestors before us, will keep on shaping the records of history." This half of the scenario feels like it got more thought put into it than the Bulgarian one, and it shows. I'd even go so far as to say it's Vlad Dracula 2 done right, although that one was more technically impressive. Here's our real narrative triumph, the one that the last mission lacked. You've set the stage for the Mongols to be defeated in Syria with help from the Cumans and beaten a foe that even they could not break. And now that the nightmare is over, the Cumans are finally free to settle down and start building again. This is admittedly taking some deep liberties with the history, especially on the Bulgarian side, but it works for the purposes of the campaign as a story. I don't really have anything to cover mechanically for the Kotyan Khan campaign as a whole that I didn't already state for the individual scenarios, so let me just restate that this was a great introduction to the post-Definitive Edition campaigns. The only exception being Mission 3, and even then I can see how on a higher difficulty setting the Tatars might run you up to the clock for Subotai's arrival, making the mission more tense. Extra Slides Mission 5 - Intro Slide 1 Mission 5 - Intro Slide 2 Mission 5 - Intro Slide 3 Mission 5 - Intro Slide 4 Mission 5 - End Slide 1 Mission 5 - End Slide 2 Mission 5 - End Slide 3
|
|
#
?
Dec 11, 2023 05:07
|
|
|
Campaign Vote #25 A. Tamerlane - Tatars B. Ivaylo - Bulgarians C. Edward Longshanks - Britons D. Grand Dukes - Burgundians E. The Hautevilles - Sicilians Voting lasts for 24 Hours from the time of this post. In the event of a tie, I will act as the tiebreaking vote between the two tied options. Please bold your vote in order for it to be counted, as well as noting if you are changing your vote from something else. Oh man, I'm tired after that. I'm sure there must be errors a plenty, that will no doubt be pointed out. It's already time to add in the Lords of the West, aka, "the Bad Guys" expansion, but I already know in advance that my schedule's going to be pretty erratic for the next couple of weeks so I don't know when I'll be getting updates out.
|
|
#
?
Dec 11, 2023 05:13
|
|
|
Fun mission, and I agree that the Hungary side is the more fun version. For some reason I got it in my head that the AI would also be playing the other half of the map while you did yours, and I was sorely disappointed when I marco polo'd it on the second playthrough
|
|
#
?
Dec 11, 2023 05:24
|
|


|
A. Tamerlane
|
|
#
?
Dec 11, 2023 05:50
|
|

|
I think this expansion works best when progressing chronologically, so B. Ivaylo.
|
|
#
?
Dec 11, 2023 07:21
|
|
|
Ivaylo.
|
|
#
?
Dec 11, 2023 13:58
|
|
|
B
|
|
#
?
Dec 11, 2023 14:02
|
|


|
On Hard difficulty, the Byzantines are super active in the Bulgaria path. As soon as you touch the city's walls, they declare on you, immediately dropping a castle right on your doorstep and sending waves of imperial age troops. It's very hectic and tough, containing them while making progress towards the Wonder.
|
|
#
?
Dec 11, 2023 14:48
|
|

|
I found the Bulgarian side much harder than the Hungarian one. The Byzantines are much more aggressive than the other enemy AIs, and it seemed like King Bela's AI is much better at being a useful ally than the Bulgarian one. Very good scenario though, and a great campaign overall. Let's do Ivaylo next.
|
|
#
?
Dec 11, 2023 23:00
|
|
|
Vote's closed! I guess everybody liked our little trip to Bulgaria so much, that they want to see more of it with Ivaylo.
|
|
#
?
Dec 12, 2023 12:57
|
|
|
I guess we'll learn whether the first Ivaylo mission is still completely broken; when I played it, it was technically beatable without cheats, you have to divine what to do though.
|
|
#
?
Dec 20, 2023 19:42
|
|
|
i was able to beat it a few weeks ago without a problem. What was wrong with it?
|
|
#
?
Dec 20, 2023 19:59
|
|
|
The mission just stops giving you new objectives after you reach the first village. So I did some testing, and this apparently only happens on Standard difficulty (and still does, at least for me), while the higher difficulties seem fine.
|
|
#
?
Dec 22, 2023 16:14
|
|
|
Ivaylo - Part 1: A Most Unlikely Man Age of Empires II: Definitive Edition - Bulgars Theme Very well, then let us begin, the tale of a tsar found amongst pigs.   Mission 1 Starting Text "The day has come for you to know the truth. For many years, I avoided your instructions, my child � about you, about me, about your father. But you must know. You are not from here. Your homeland is to the north, in Bulgaria. Let me tell you a tale. Once, a powerful noble named Konstantin led a rebel army to Tarnovo, the capital of Bulgaria. The reigning tsar, a murderer who had usurped the throne, fled with his son Ivan to the court of the Roman emperor. The grateful nobles of Bulgaria, a class of men called the bolyars, proclaimed Konstantin tsar. The new king brought peace to Bulgaria. He wed the emperor's niece and even arranged the marriage of the Roman ruler's daughter to a one-eyed Mongol khan. But such peace was not to last. Men are like wolves; they smell weakness. While riding, the tsar fell from his horse, shattering his legs and spine. The crippled tsar watched helplessly as his kingdom descended into anarchy. Tatar raiders invaded his lands, while the bolyars busied themselves with increasing their own power. For fear of the raider's torch, the peasants accepted the bolyar's whip. A most unlikely man changed this fate. A common pig farmer appeared in a small village. His hands were calloused and his weathered face was like that of any man who worked for his livelihood. But this man was different. Not only did he urge the people to resist the Tatars, but he somehow turned his words into action, leading a militia to defend the villages. Soon, his unlikely successes attracted the attention of far more powerful and ruthless men..." 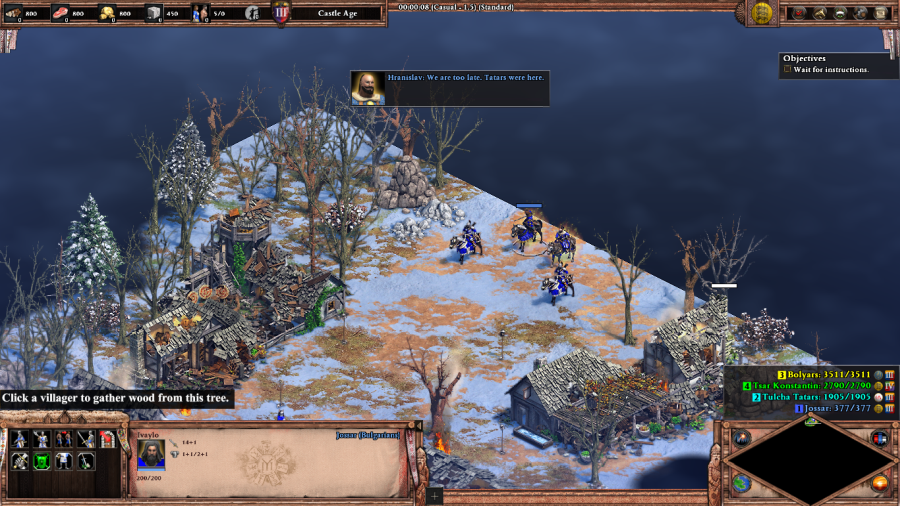 Hranislav: We are too late. Tatars were here. Scout: Ivaylo! Tatar horsemen approach!  It isn't as comprehensive as the last campaign, but the Ivaylo does contain its fair share of having to deal with Tatars as a pain in the rear enemy. Here they start off attacking Ivaylo's small band, consisting of the man himself (a Konnik hero unit), Hranislav (a renamed version of a different Kipchak hero unit), the Scout, and a couple of Heavy Cavalry Archers. This is a surprisingly tough, micro-heavy fight if you want to keep everybody alive, although no one in this scenario is truly essential to victory, not even the hero units.  Bulgarian Soldier: Tatars! Man the walls! Hranislav: The Tatars slaughter our people, but the treacherous bolyars do nothing! They would sooner take the bread from our mouths than defend Bulgaria!  Hranislav: No crops grow here in the dead of winter. We will need to find animals. The Tatars burned the villages but left the livestock to roam the woods. Here's the scenario's main gimmick. On all difficulties except Standard (and even then, I played this mission as though the gimmick was in effect) you can't build farms and are stuck doing hunting/shepherding/coastline fishing and maybe trading if you're desperate to obtain food. It's a cool idea, and early on you're heavily encouraged to scout the map to look for livestock herds while preventing your enemy from stealing them, along with other miscellaneous economic buildings and bonus Villagers granted to you by the peasantry. But there's a reason most AoEII players eventually just settle into having large scale farm economies and it's because this whole process is super micro-heavy. Fortunately the map is pretty bountiful with respect to livestock/hunting supplies and thus I only started really getting off-task for sustained periods of time near the end of the mission once things were basically wrapped up in any case.  Bolyar: What is this? Peasants taking up arms in the villages? End your mischief, serfs, or I will have you all flogged and hung! The Tatars will continue to raid you throughout the rest of the scenario if left alone, and I found them to be the most dangerous opponent, although I suppose it might be possible to bottle them up if your defensive architecture is entirely oriented towards their side of the map. But once the Bolyars complain about you defending against their Cavalry Archers, Keshiks, Archers, and Steppe Lancers, it's only a couple of minutes before... 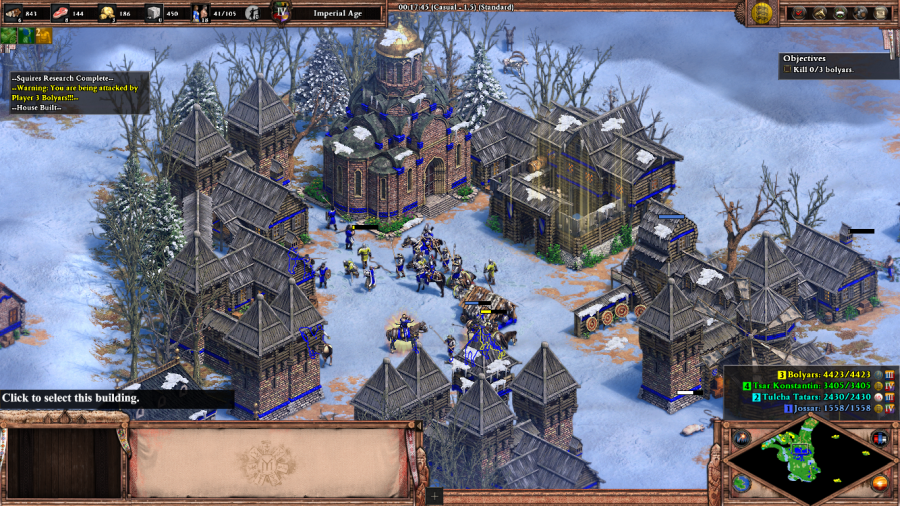 Bolyar: A mob of serfs with spears and swords! I will not tolerate rebellion in my villages! ...they attack you as well, mostly with Long Swordsmen and Konniks. These guys are honestly nowhere near as annoying as the Tatars and I never quite take them seriously throughout the rest of the scenario. 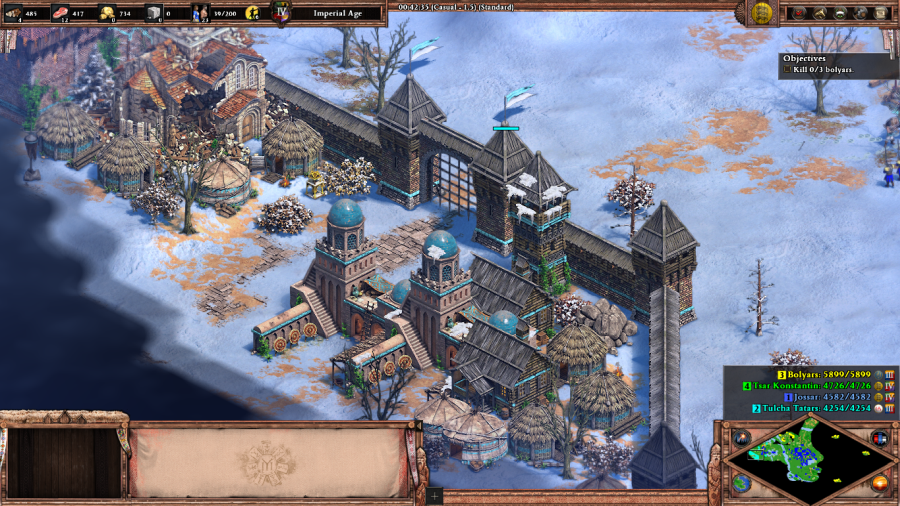 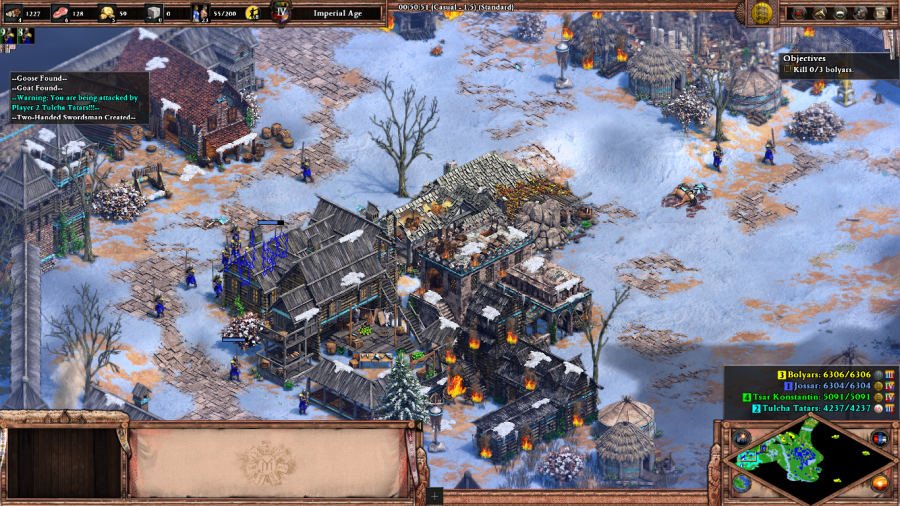 So even though the official objective is to take down the Bolyars, I proceed to instead focusing on demolishing the Tatars to the west first. They have two Town Centers as gathering points outside of the larger, fortified town of Tulcha that takes some effort to crack. Fortunately, once the Tatars are defeated, their remaining buildings swap to my side and I can now use their more defensible and resource rich position to turn around and annihilate the Bolyars. 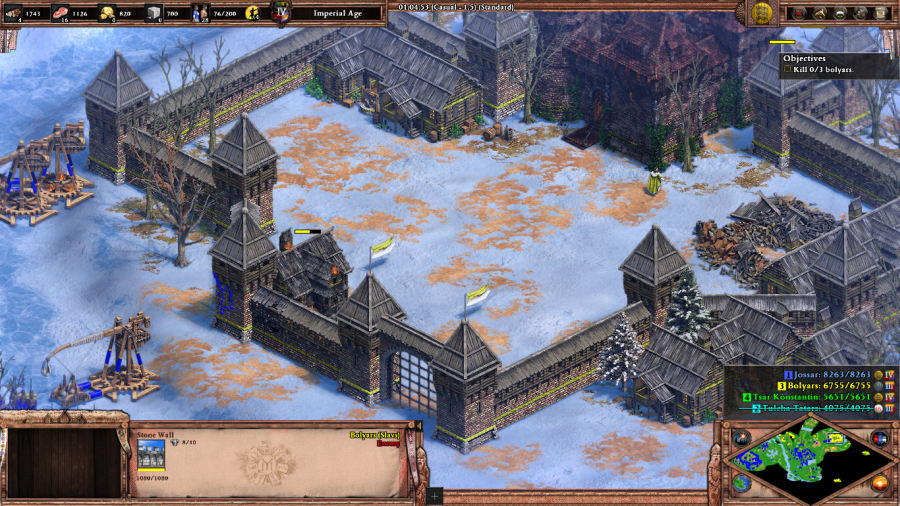 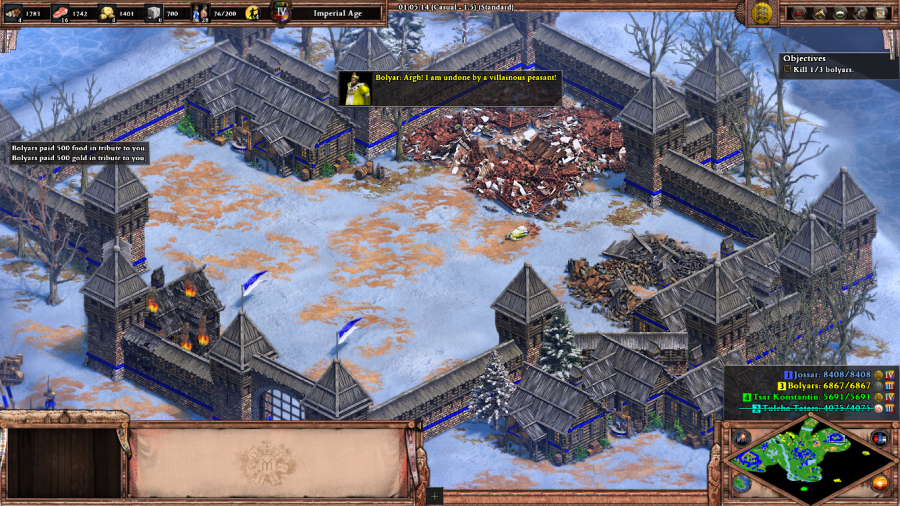 Bolyar: Argh! I am undone by a villainous peasant! The Bolyars have three Castle forts to the east where an individual Bolyar (renamed king unit) is garrisoned, alongside a centrally located troop production facility. Defeating a Bolyar claims the fort in which he was stationed, so it's possible to snipe them and grab the Castle, but in this case I found it to be more trouble than it was worth, and instead just blew everything up with Trebuchets from afar. 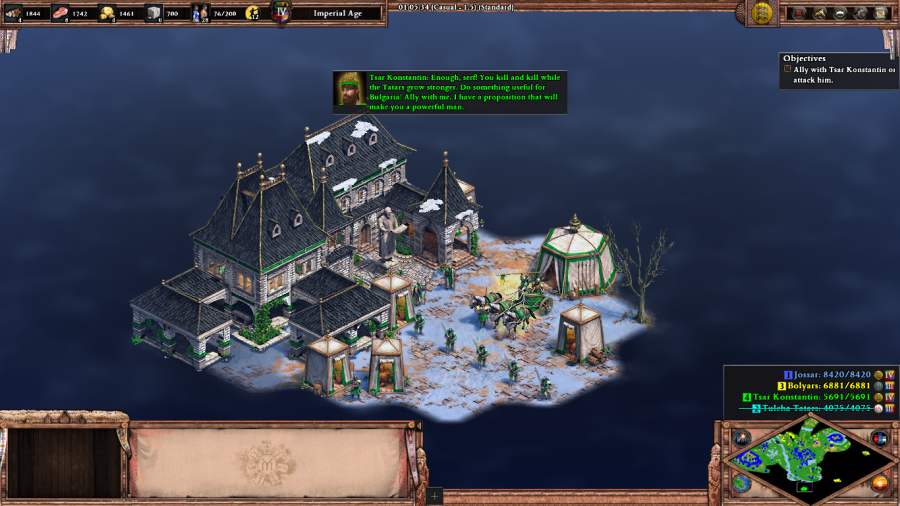 Tsar Konstantin: Enough, serf! You kill and kill while the Tatars grow stronger. Do something useful for Bulgaria! Ally with me, I have a proposition that will make you a powerful man. After killing off the first of the Bolyars, Tsar Konstantin tells you to knock it off and ally with him. If you agree to his deal, both he and the Bolyars will swap to Ally, allowing you to solely focus on the Tatars if you haven't dealt with them already. Then Tsar Konstantin will send you back against the Bolyars to finish them off, and after the Bolyars are defeated, he will predictably betray you so that all of his problems are dealt with in one fell swoop. If you don't, then the game just skips ahead to telling you to kill him. In this case, with the Tatars already defeated and the Bolyars not being any real threat, I opt to ignore him and move towards the end of the mission. Tsar Konstantin: (after rejecting his alliance) You dare defy your tsar? I will blot you out! 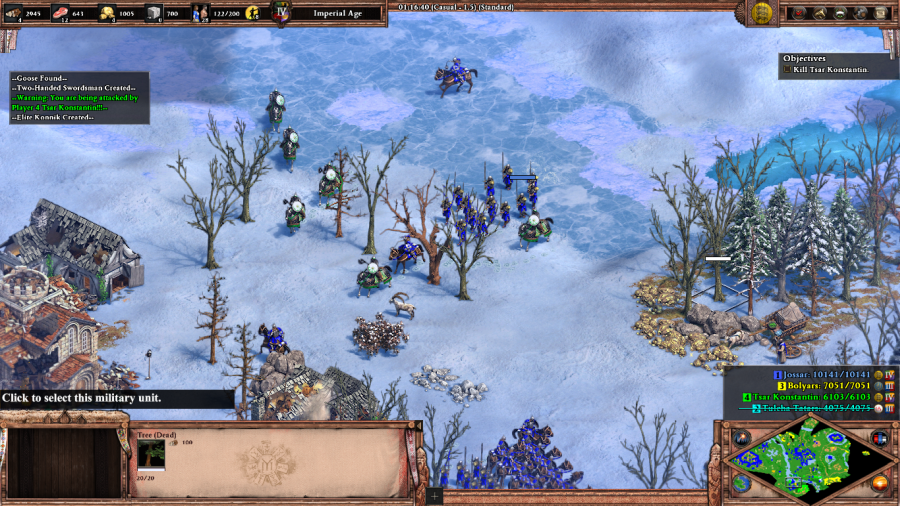 Tsar Konstantin: You were born a peasant and you will die a peasant! Konstantin has an elite bodyguard comprised of the full spread of Bulgarian units with full Post-Imperial Age upgrades, but once you defeat them, he's got no ability to produce additional troops. 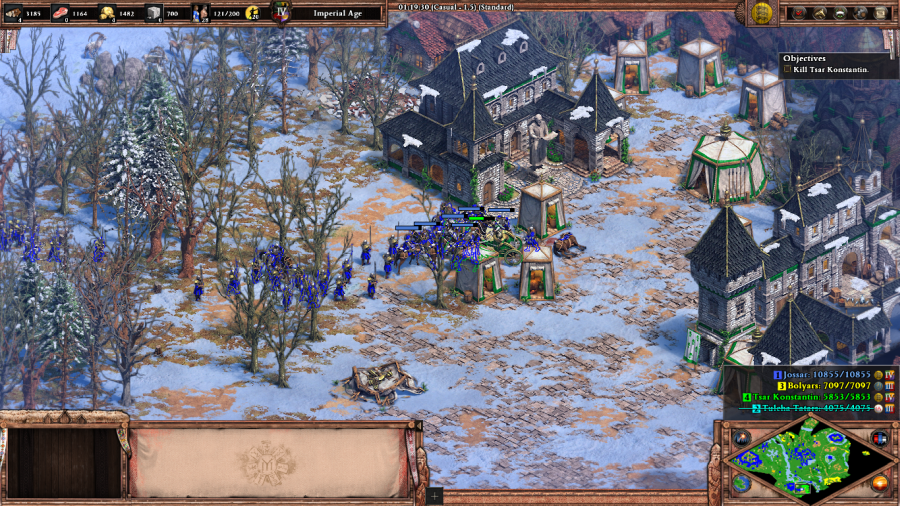 Tsar Konstantin: How I will enjoy crushing you. I may be crippled but I am a tsar and you are a peasant! Never forget that! Tsar Konstantin himself is trapped to this small little plaza here, but as a cavalry hero unit in a chariot with trample damage (amazingly enough now no longer an entirely unique combination, since Mountain Lords gave the Bengalis' unique chariot unit trample damage in its melee mode) he can do a lot of damage. I suppose it would be easier to defeat him with a smaller number of high quality units... but it's so much more satisfying to just throw enough units at him that his bonuses don't really matter. Tsar Konstantin: You kill the only man who kept the Mongol khan and the Roman emperor at bay. You cannot understand the ruin you have brought to Bulgaria! Mission 1 Ending Text "Sometimes, the actions of others force us to make drastic decisions. Such was the case with Ivaylo. Whatever his intentions, the armed band he led grew beyond him. It became a force of fury. And of revenge. Having overthrown their masters, the peasants took vengeance on the hated nobles, murdering their families before blinding them with scorching hot needles. Ivaylo himself was said to have slain Konstantin. The tsar's severed head was carried by a horseman to Tarnovo, the capital. There, it was presented to the tsar's wife, Maria, and their seven-year-old son." This is a lot of detail given to the uprising given that, except for Ivaylo's background as a swineherd, this is pretty much the last time anybody outside of the nobility is important ever again, at least on the scale of the larger narrative. Despite that, it is a good start to this campaign's unifying theme, that no matter who's in charge, nothing really stops Bulgaria from being everybody's punching bag. Extra Slides Mission 1 - Intro Slide 1 Mission 1 - Intro Slide 2 Mission 1 - Intro Slide 3 Mission 1 - Intro Slide 4 Mission 1 - Intro Slide 5 Mission 1 - Intro Slide 6 Mission 1 - Intro Slide 7 Mission 1 - End Slide 1 Mission 1 - End Slide 2 Mission 1 - End Slide 3 Jossar fucked around with this message at 22:31 on Dec 31, 2023 |
|
#
?
Dec 31, 2023 22:25
|
|
|
Ivaylo - Part 2: An Unlikely Alliance Mission 2 Starting Text "After her husband's murder, the tsarina ruled a kingdom in disarray. Though this would have challenged even the most capable tsar, the dark-haired Greek princess was greater than most men. Beautiful and cunning, Maria Palaiologina Kantakouzene was a daughter of two of the greatest families in Constantinople. She had wed the tsar on the orders of her uncle, the emperor, but her byzantine guile proved as much a benefit to her husband. When a rival bolyar threatened Konstantin's rule, Maria offered to adopt him as her son and heir. The opportunistic bolyar accepted and feasted in the tsar's court, only to be found dead shortly afterward. Poisoned. But now, with an uprising in the countryside and scheming bolyars in her own court, it would take all of Maria's cunning to preserve her power. But a more threatening menace came from her own uncle... The headstrong Roman Emperor Michael Palaiologos demanded his niece's submission. The tsarina, just as strong-willed, refused. Furious that his own niece stifled his ambition, the emperor chose an exiled prince to place on the Bulgarian throne. Ivan, the returning son of the Asen dynasty deposed by Konstantin, led a great Roman army in order to retake his father's kingdom.The tsarina alone could not defeat the Romans. Nor could Ivaylo challenge both the tsarina and Ivan. The logic of these facts dictated a most unlikely alliance: between a rebel leader and the wife of the Tsar he murdered."  Tsarina: Ivan Asen and his Roman thugs are desecrating the Church of the Patriarchs. Save the church and you will be rewarded beyond your dreams. A word of warning: this whole mission's narration kind of feels like something out of a low budget (though non-archaic) imitation of the Alexiad, if Anna Komnene didn't have any self-restraint at all. That is, apart from the already established bit where everybody insults Ivaylo's heritage by calling him a literal pig. ...I may be grasping at straws to find something historical to base this off of here. Anyways, you start with Ivaylo, some Konniks, and some Cavalry Archers and are instructed to ride toward the Church of the Patriarchs in the center of the map. You're technically on a timer here, as Ivan Asen currently controls the Church, which gives 200 in-game years until he wins the mission, but it's fairly generous and can be safely ignored for now. 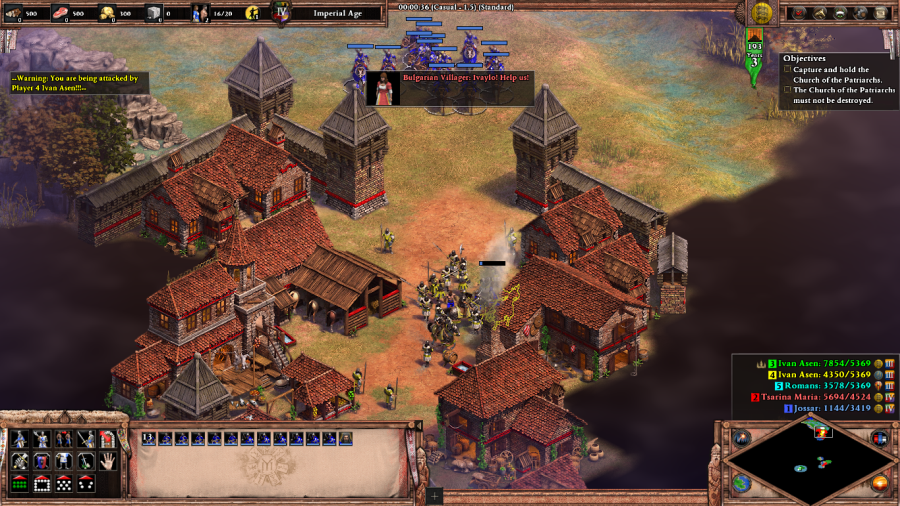 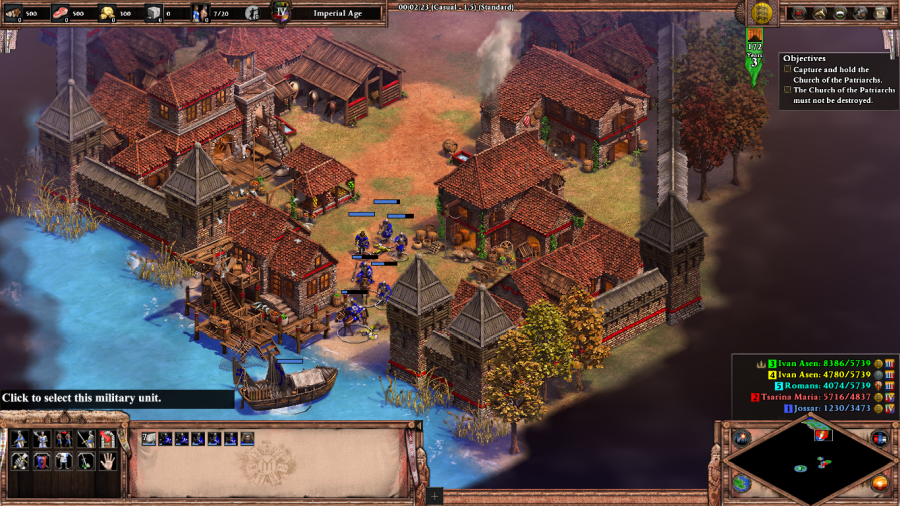 Bulgarian Villager: Ivaylo! Help us! Ivan Asen: The little piglet has come to play. Do not worry, piglet. You will have a place in my kingdom: shoveling pig dung! On your way south, at a small riverside village, you'll encounter the first of Ivan Asen's troops. These guys, marked in yellow, are the first of his native armies, played by the Slavs. Like last mission, this early game fight is surprisingly tough, and given that the Transport can't hold your full complement of units, it's expected that you're going to lose a few units while making your escape. Tsarina: (after surviving Ivan Asen's forces) Join me, Ivaylo... I promise you that no woman is quite like me. Ivan Asen: Run run run back to your sow, little piglet! 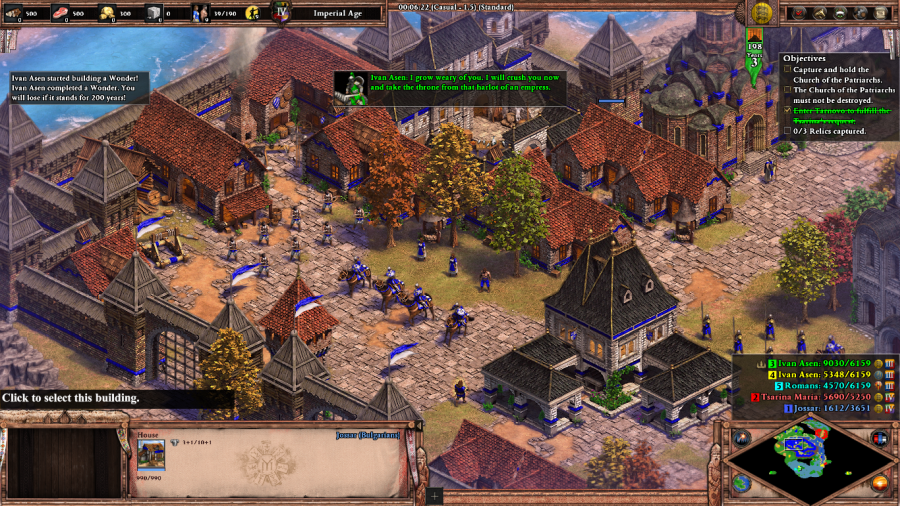 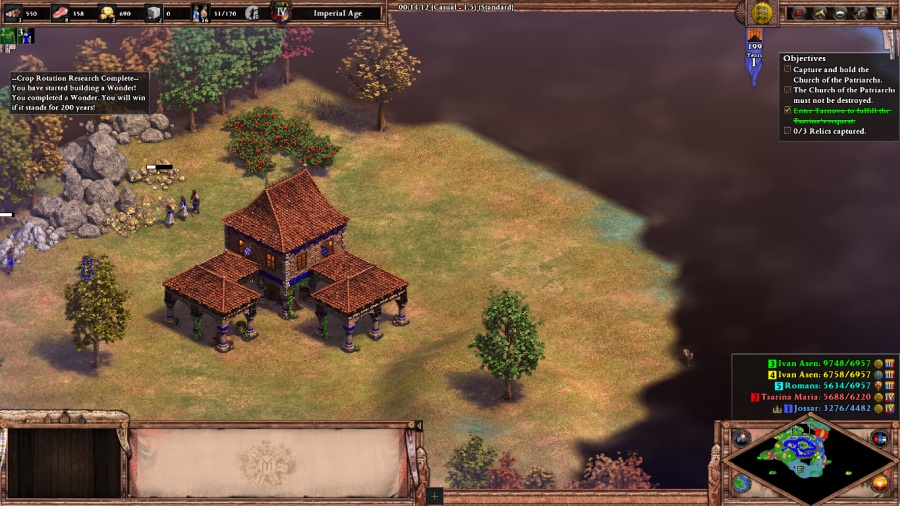 Ivan Asen: I grow weary of you. I will crush you now and take the throne from that harlot of an empress. Tsarina: Oh, that pesky little Ivan is still running about! It would please me if you made him squeal for mercy. After your escape, your only real option is to use the Transport to get your remaining units to Tarnovo to take control of the city, its outlying resource gathering facilities, and its defensive forces. These include Patriarch Macharius, a Monk hero unit, and Georgi Terter, a cavalry hero unit (who you also could have gotten in the last campaign if you joined with the Tsar, but he's not worth the effort). The Tsarina also gives you a side quest to claim some relics, but as we're about to see, this is incredibly difficult to complete and appears to provide no additional bonus beyond the extra gold flow. As you can see, I've also taken the opportunity to nab the Church of the Patriarchs. It's pretty easy to do, as the Church sits in the center of the map, is typically unguarded by enemy troops, and no buildings can be built near it. I don't expect this to last, but all I really care about until my final attempt at claiming the Church is ensuring that it's knocked out of Ivan Asen's hands long enough to make sure that he doesn't win. In that sense, even though it's sort of a hybrid-Wonder/King of the Hill victory, for most intents and purposes this mission plays like a standard game of King of the Hill (The Wonder is mostly there to ensure you don't try to cheat the mission by destroying Ivan Asen's forces without trying to claim the center of the map first, as this will destroy the Wonder if it currently belongs to the resigning faction.)   Ivan Asen: No bother. They are only men. There's many more where they came from. From this point on, Ivan Asen will constantly throw troops at you, primarily aimed at your main base. It's a ferocious and never-ending onslaught, combining the forces from his Slav army, his Bulgarian army (the green faction) and the Romans who are so intertwined with his command that they might as well be counted as his Byzantine army (the cyan faction). I just hole up and create a killing field out of Castles and Kreposts (a sort of Bulgarian half-Castle) while creating an army of Elite Konniks, Halberdiers, and Monks. Well, apart from sending a cavalry unit out to reset the timer on the Church of the Patriarchs every so often. 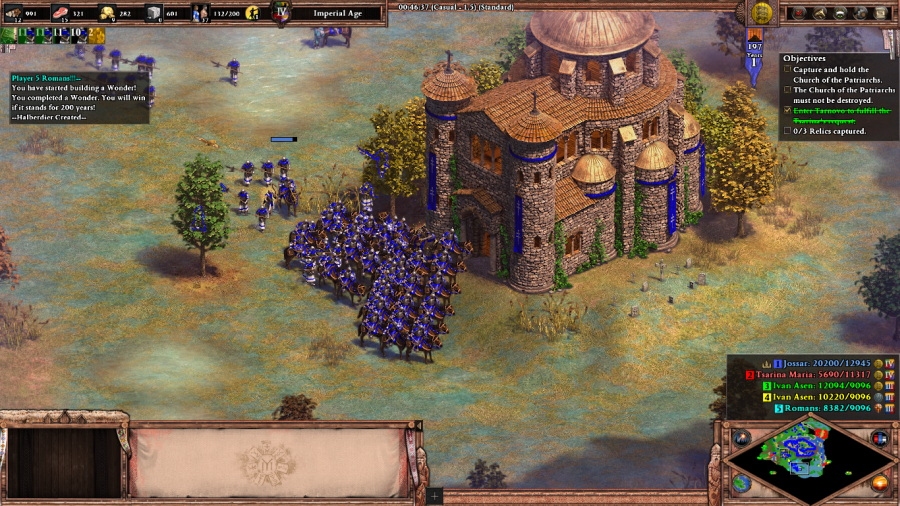 Once I'm sufficiently comfortable that my static defenses can handle anything that Ivan Asen's forces throw at me, I take all the troops that I've massed and then dump them all on the Church of the Patriarchs' front lawn. At this point, I've built up too much for the enemy factions to pose any serious resistance and the mission is practically won.  Tsarina: Da! Da! Oh Ivaylo, our enemies are almost defeated! Hold the church a little longer! Ivan Asen: I will not be denied my kingship! Ride, konniks! Ride to the church and slaughter my enemies! At 50 years away from victory, Ivan Asen spawns in one last large group of Konniks in his Bulgarian base to try and take back control of the Church of the Patriarchs, but said base is right on the edge of my Castle/Krepost line and they all get shot to pieces as they try to ride on through. 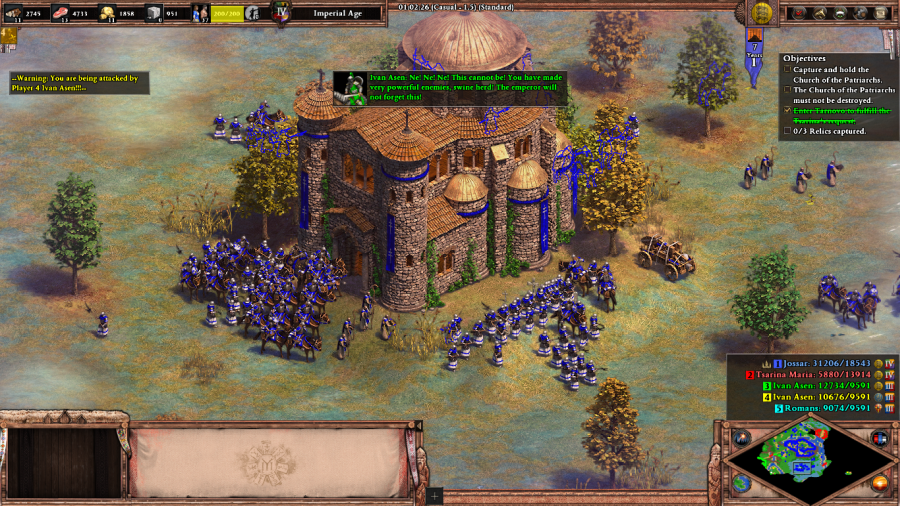 Ivan Asen: Ne! Ne! Ne! This cannot be! You have made very powerful enemies, swine herd! The emperor will not forget this! Mission 2 Ending Text "Ivaylo's army filled the Yantra River with Roman dead, securing Maria's place on the throne. Now, the tsarina had to fulfill her end of the bargain. As Ivaylo approached the gates to the fortress, Maria waited silently for the man who had killed her husband. As Ivaylo stepped before her, the tsarina placed the tsar's crown, once worn by her husband and father of her child, on the swineherd's head, crowning a peasant a king. The objections of the watching nobility were silent but palpable. Then, in a hasty ceremony, Maria wed the newly crowned tsar, tying her fate with his." This is a decently challenging mission, but it's not very fun. Highly recommended to fans of the Teutonic Death Trap style of play, though. Extra Slides Mission 2 - Intro Slide 1 Mission 2 - Intro Slide 2 Mission 2 - Intro Slide 3 Mission 2 - Intro Slide 4 Mission 2 - Intro Slide 5 Mission 2 - Intro Slide 6 Mission 2 - Intro Slide 7 Mission 2 - End Slide 1 Mission 2 - End Slide 2 Mission 2 - End Slide 3 Jossar fucked around with this message at 19:48 on Jan 1, 2024 |
|
#
?
Jan 1, 2024 19:43
|
|
|
Ivaylo - Part 3: Tsar of the Bulgars Age of Empires II: Definitive Edition - Rich Slavic Leather Mission 3 Starting Text "Ivaylo watches suspiciously as the bolyars bowed their heads in his presence. No matter what respect they showed him as tsar in daylight, he knew they whispered and cursed him in the shadows. 'Murderer... Peasant scum...' Tarnovo might be the 'City of the Tsars', but it belonged to the bolyars. Ivaylo knew that remaining there would be a death sentence, but he was tied to the city � the tsarina was carrying his child. Yet fatherhood would have to wait... The emperor was undeterred by Ivan Asen's defeat. He enlisted his son-in-law, a great Mongol warlord named Nogai, to unleash war on Bulgaria. A descendant of Genghis Khan, Nogai was broad-shouldered and barrel-chested. He had lost an eye battling a brother in the Caucasus, a disfigurement that cost him the chance to rule as Khan of the Golden Horde. However, that was to his liking. Nogai was not a man to sit idly in a golden tent; he became the kingmaker and the real power behind the Horde, leading its warriors into battle. Mongols, Tatars, Cumans... warriors as numerous as blades of glass streamed across the Danube into Bulgaria. Ivaylo raced in the middle of the night to the river town of Drastar. There, he would raise an army and make his stand. In Tarnovo, the tsarina, alone and with child, waited for his return." 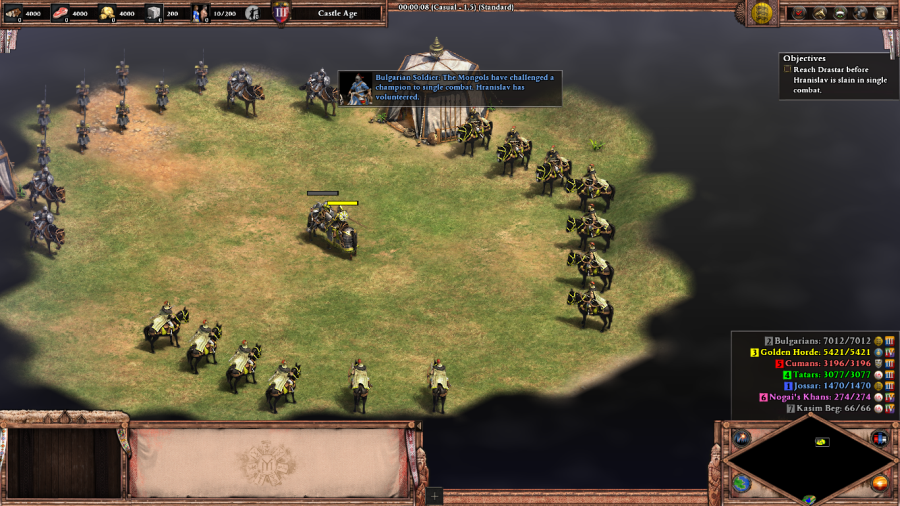 Bulgarian Soldier: The Mongols have challenged a champion to single combat. Hranislav has volunteered.  Bulgarian Soldier: If he dies before we reach Drastar, the garrison will lose hope and surrender to the Mongols. We must hurry, Ivaylo! 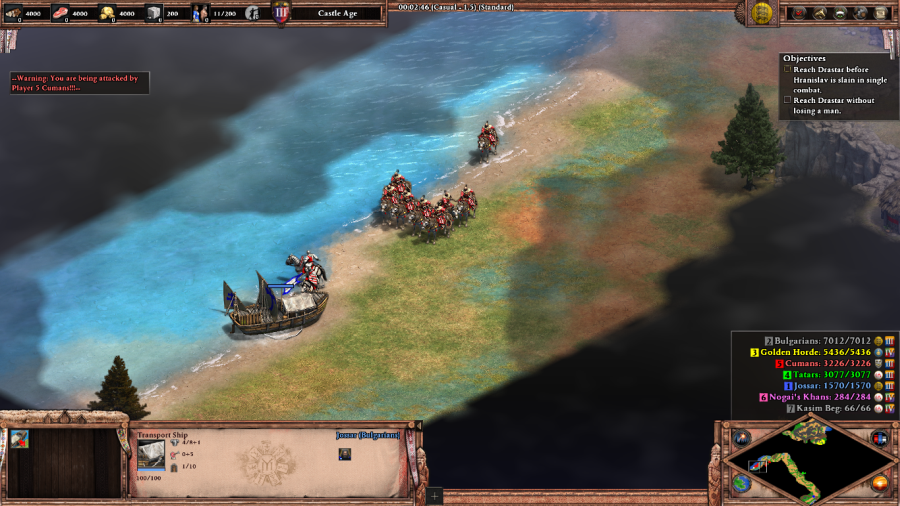 This time around the mission-start timer is a little bit more explicit: have a unit make it to the city before Hranislav is killed. As a bonus, if you manage to do so without losing a single unit, you'll get an additional 2000 gold. This is useful enough to be worth pursuing, so I take Ivaylo and carefully run him solo up to the waiting Transport Ship, dodging him past all these Cuman forces, even if it means that in the long run I end up throwing away most of the other starting units since they won't be able to navigate the rest of the map as easily. Gold is gold. 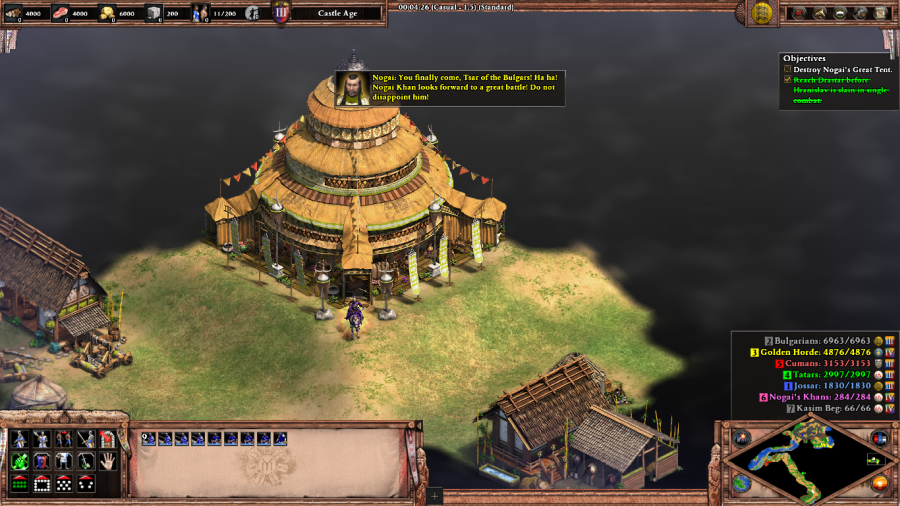 Nogai: You finally come, Tsar of the Bulgars! Ha ha! Nogai Khan looks forward to a great battle! Do not disappoint him! Get used to Nogai Khan here chewing the scenery, he's going to do it pretty much nonstop for the rest of the scenario.  Garrison: Tsar, do not worry yourself over resources. We have stocked the town with everything you will need. Lead our armies and we will provide for them. Anyways, getting to Drastar provides you with the remaining main goal of the mission: destroying Nogai's Great Tent all the way on the east side of the map. You can't really build a solid economy, although you do have a few villagers. They're mostly there so you can build additional military buildings though. Instead, the vast majority of your resources come from the town, making this almost more Deathmatch-y than an actual game of Deathmatch.   Like last scenario, you have three main enemies. The Golden Horde, playing Mongols, and Tatars and Cumans playing their eponymous civilizations. Like last scenario, they all attack you constantly in overwhelming numbers. However...  Garrison: Tsar, a Tatar has been waiting for you outside the city walls. He calls himself Kasim Beg, and says he has an offer for you. Kasim Beg: Tsar Ivaylo, we are kindred spirits - we both wish to free our peoples. Kill the khans who rule the Tatars and Cumans and these tribes will turn against the Mongols! ...unlike the last scenario, you can relieve the pressure a little bit without outright destroying the enemy factions. After a little bit of fighting, Kasim Beg, a Cuman Chief hero unit, shows up along with his dog (a reskinned Ornlu), and gives you a sidequest: Kill the purple Khans spread between each of the the subordinate steppe factions and they'll switch sides. The Tatars and Cumans aren't as strong allies as they are enemies, but even so it's nice to have them off your back.  So after building up troops and pushing out a defensive line out towards the Golden Horde, I'm ready to go and liberate the Cumans and the Tatars. Interestingly enough, Nogai will notice if you're building counters to his units and will mock you for it. Nogai: (upon building Skirmishers) Cowardly skirmishers! Be a man, Tsar! (upon building Spearman-line units) Your puny spearmen are nothing to the riders of Nogai Khan! (upon building Castles or Towers) You have built many towers but Nogai Khan will topple them!  Kasim Beg: My Tatar brothers, I have freed you! Ride, ride against Nogai Khan! Nogai: Nogai Khan's horsemen are like blades of grass on the open steppe! Thousands may be trampled, but the horde marches on!   Kasim Beg: Ride, Cumans! You are now free! Destroy the Mongols! Nogai: Strong steel can only come from a hot forge. You have shown Nogai Khan who is weakest among his warriors. The Castles in each of the Tatar and Cuman camps are somewhat annoying, but you don't really want to destroy them. Too much wasted energy spent on destroying them and too much damage done to your new allies. Just accept the cost of the castle dive, free each faction and move on to the main event.   Nogai: You fight well. Nogai Khan will grant you a noble death. You will be boiled alive and impaled in front of Nogai's tent! The Golden Horde's base is pretty large and protected by a pair of clifftop Castles, each with a ton of military production facilities dumping out Mangudai and Cavalry Archers. But really, once you've flipped the Tatars and the Cumans the momentum has swung in your favor, and it's your fight to lose.  Nogai: Ha ha! The smell of burnt flesh and the taste of blood! Does it not fill you with joy? Nogai himself is standing right outside of his tent, but is almost incidental by the time you finally make it there. Burn it down and the scenario is complete. Nogai: Ha ha! It has been an honor to fight a strong enemy! Go now, Tsar of the Bulgars! Your throne has been taken by traitors! Mission 3 Ending Text "A lone rider approached Drastar and called for the Tsar. Ivaylo wondered, was this a messenger of the one-eyed khan offering peace? But as the tsar raised himself against the battlements, he could see the horseman was a Bulgarian. What word did he bring from Tarnovo? Did he come to tell Ivaylo of the birth of his child? No. The rider bore a message which chilled Ivaylo and the survivors of the siege. 'Tsar,' the horseman began, 'Your men in Tarnovo are dead, murdered by the bolyars who have opened the gates to Ivan Asen. Ivan has taken the tsarina and your newborn child and delivered them as prisoners to the emperor.'" This is the first scenario in this campaign that hasn't felt like a complete drag. Everything's been executed well on a technical level right from the beginning, but having to constantly endure onslaughts from the word go is kind of exhausting. Truth be told, this scenario isn't any different, it's just that you're given a lot of resources to ensure that you can start the counter-onslaught right away rather than after 20-40 minutes of buildup so it feels more fun. Also, Nogai's a delightful opponent, in an "amusingly unhinged" sort of way. Extra Slides Mission 3 - Intro Slide 1 Mission 3 - Intro Slide 2 Mission 3 - Intro Slide 3 Mission 3 - Intro Slide 4 Mission 3 - Intro Slide 5 Mission 3 - Intro Slide 6 Mission 3 - Intro Slide 7 Mission 3 - End Slide 1 Mission 3 - End Slide 2 Mission 3 - End Slide 3 Mission 3 - End Slide 4
|
|
#
?
Jan 3, 2024 02:07
|
|
|
Ivaylo - Part 4: Echoes of Heroes Mission 4 Starting Text "Ivaylo rode south, galloping past torched villages and overturned fields. He rode under the tall peaks and through the narrow passages of the Balkan Mountains. There, the remnants of his army would make their final stand. A great Roman army was approaching, sent to reinforce Ivan's faction in Tarnovo. The army was commanded by the general Michael Glabas, who had strengthened his already impressive numbers with Tatar mercenaries. With Ivan in the north and the Romans marching from the south, Ivaylo knew neither refuge nor retreat remained for his last followers. His men would win or die in these mountain passes. But these valleys have witnessed impossible victories before. Here was where Bulgarian khans and tsars etched their places in history. The walls of granite rock echoed the names of heroes like Krum, Simeon, and Kaloyan the Romanslayer. To these, the names of Ivaylo and his men would be added."  Michael Glabas: Bulgarians, lay down your swords and turn over the one called "Ivaylo". The emperor will spare your lives. He only demands your leader. Georgi Terter: Roman dog! Come and take him! This mission starts off with you in control of Georgi Terter and a few Monks as you come under attack from a couple of the Romans' Cataphracts. The intended play here is to use Georgi and the allied Bulgarian garrison to delay the Cataphracts while using the Monks to convert as many of them as possible. Once this initial wave is defeated, the map perspective shifts.  Kozma: Like you, my people are forced by persecution into the mountains. They mark their hideouts with ancient statues. Help me shepherd them and they will aid you. Fleeing from Devnya, Ivaylo is joined by Kozma, a named Priest (though notably not a hero unit) who is the leader of the local Bogomils. The next part of the mission is an RPG segment where your goal is to get through the mountains, trying to avoid ambushes and hardpoints belonging to the Roman Infiltrators while gathering as many gaia units as possible so that Ivaylo can have the strength to break through those Roman Infiltrator camps that he can't avoid. You'll also find a bunch of miscellaneous economy buildings that are useless on their own, but if you convert the occasional Bogomil villager, can serve as a small eco-boost to help you prepare for the next part of the mission. 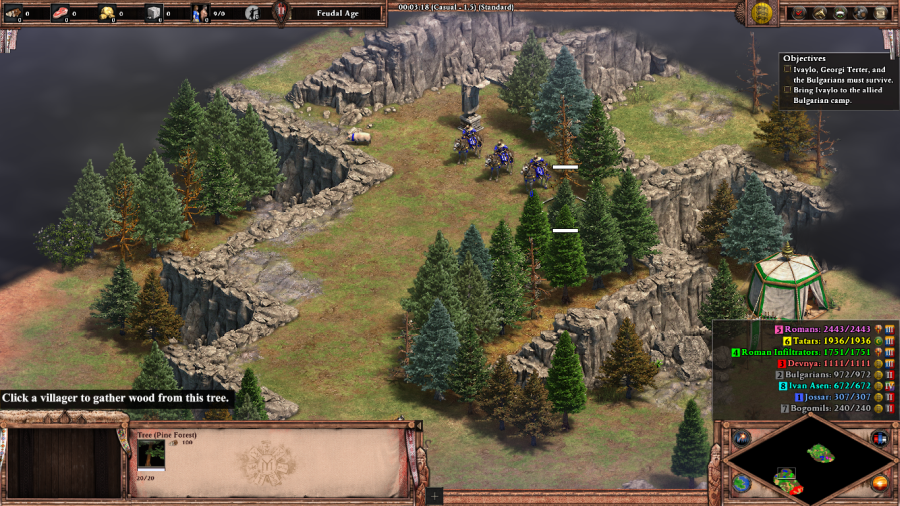 Kozma: I have heard of scouting with sheep, but pigs? That's crazy enough to work! Early on in this segment, you'll find a bunch of pigs. As suggested by the game, they're a good scouting aid for the purposes of finding the first few units and otherwise notifying you of when an ambush is up ahead. After that, you're probably better off just sticking to regular units as scouts, although I tried to make maximum possible use of the pigs for quite a while. 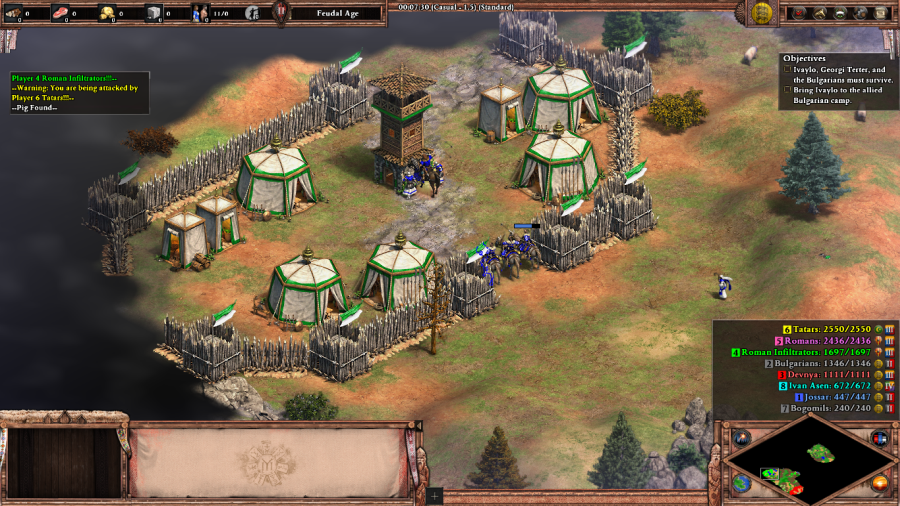 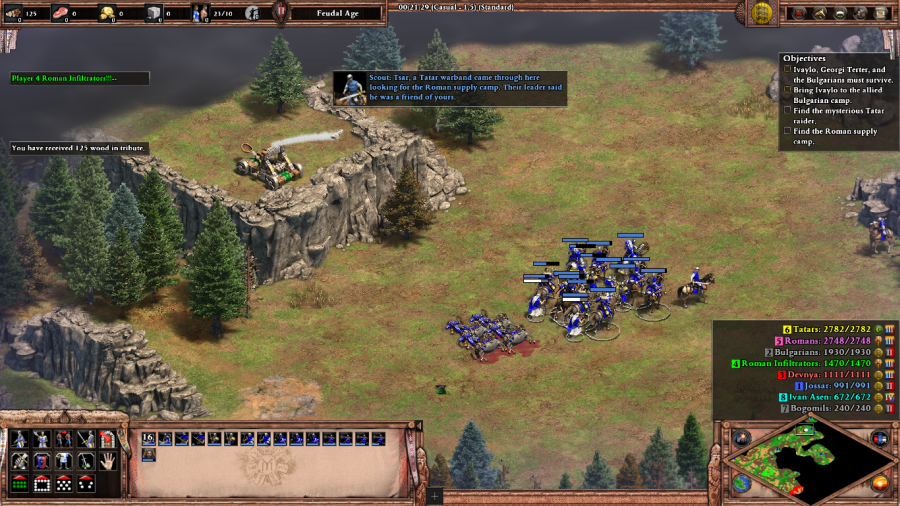 Scout: A Tatar warband came through here looking for the Roman supply camp. Their leader said he was a friend of yours. Keep advancing and eventually you get word of what is almost-certainly Kasim Beg, back from the last scenario. There's a couple more things you can do in this segment, like finding an Onager to help you in an early raid on the Roman supply camp, but my time was cut short by running into this enemy Onager here that flattened a lot of my escape forces. I probably should have converted more villagers and used them to make a more southerly escape route, oh well. Instead, at this point I had everybody book it for the Town Center. 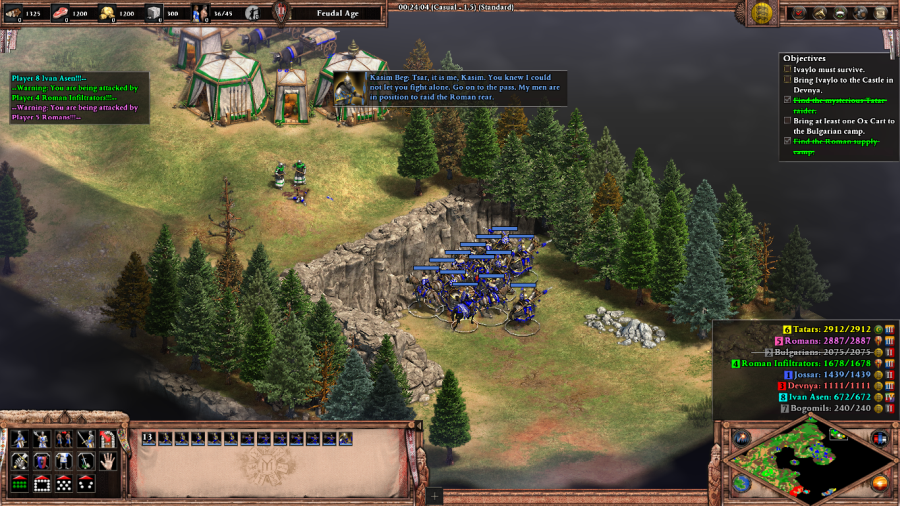 Kasim Beg: Tsar, it is me, Kasim. You knew I could not let you fight alone. Go on to the pass. My men are in position to raid the Roman rear. Go far enough and you run into Kasim Beg's men. They're in kind of an awkward position where they can be used to raid the outlying Roman economy, but they don't have a real escape route and are doomed to eventually get cut down unless you're very careful about playing hit and run. I do a couple of raids but after a while can't handle the micro any more, and leave them to their fate. Directly above them on top of the cliff is the Roman supply camp. Smashing the tents and bringing back the Ox Carts to your base gives you 1000 Food and Gold, which is going to be useful for jumpstarting your economy now that the base-building section is just about to start. 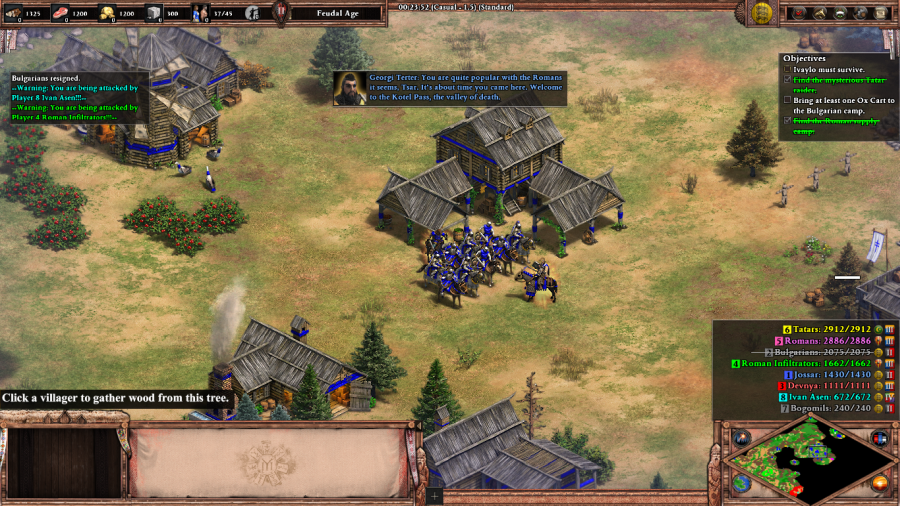 Georgi Terter: You are quite popular with the Romans it seems, Tsar. It's about time you came here. Welcome to the Kotel Pass, the valley of death. (after a few seconds) Tsar, I have no intention of discouraging you from killing every cursed Roman, but our goal should be Devnya. If we take the castle, we control the region. And there it is. Just like every other mission in the Bulgarian campaign, you've made it to your base, now fend off the obligatory enemy onslaught until you can build up a large enough army to march across the map to the victory objective. 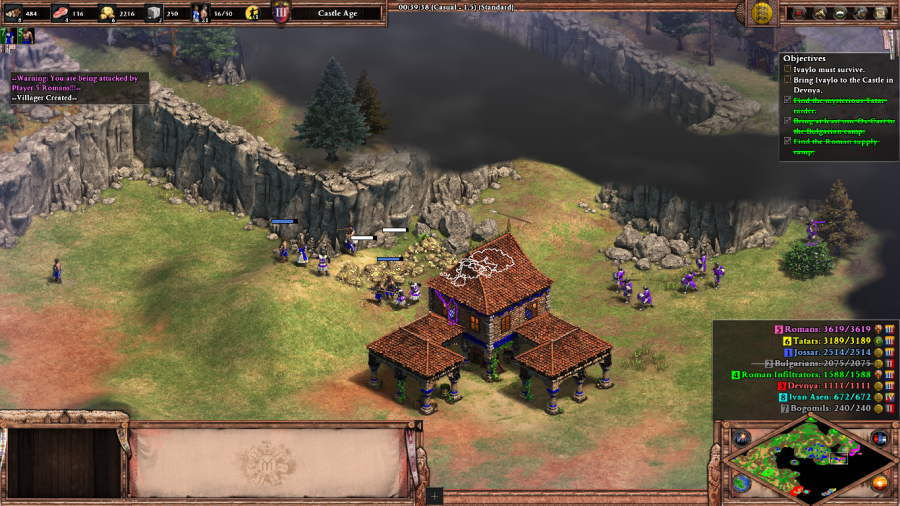 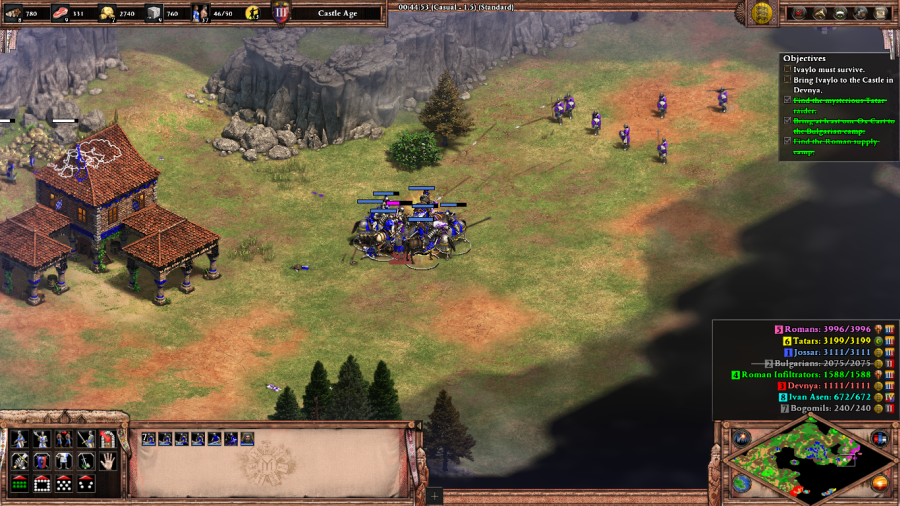 Michael Glabas: The emperor has taken good care of your wife and child, Ivaylo. He will be merciful to you. Surrender now. Unlike in Mission 2, Ivan Asen is an entirely passive force, his units only defending the captured town of Devnya. The Tatars are just a roadblock to stop you from getting into Devnya. So the only real threat is from the Romans, who do a pretty good job of streaming out units towards you from the east. If you can successfully contain them, it's a straight shot to the finish line, but that's easier said than done. 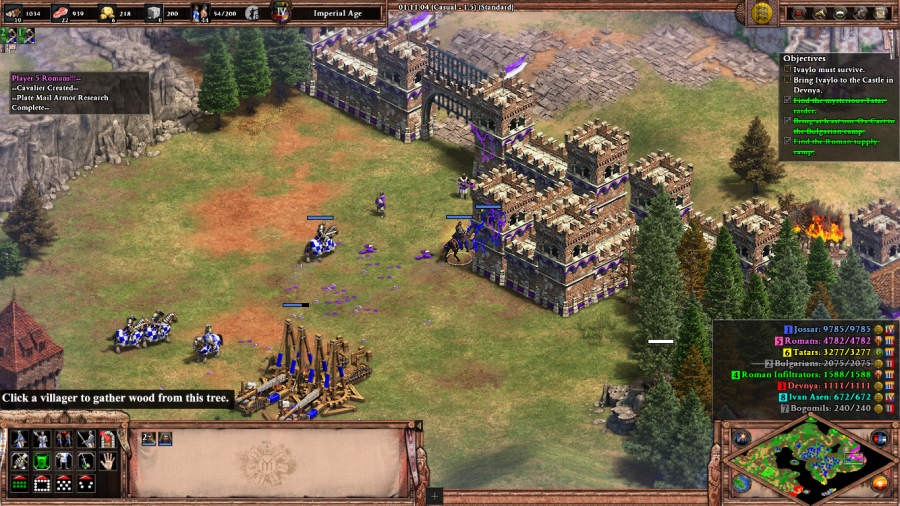  Michael Glabas: I have defeated Turks and treacherous Latin crusaders. I will not return to my emperor without victory! In fact, the Romans are so annoying that I take the time to thoroughly crush them, dismantling their walled fortress section by section before moving on.    And from there, the rest of the mission is more of a glorified cutscene than anything else. (Also, Ornlu makes another hidden cameo just to the southwest of Dvenya for some reason, next to one of Ivan Asen's more remote Monks.) Messenger: Tsar! I bring news from Tarnovo! That cursed dog, Ivan Asen has fled like a coward after hearing how we have been killing Romans here! Georgi Terter: Tsar, I will go to Tarnovo at once. I will rally your supporters and we will take back the city. Mission 4 Ending Text "Ivaylo's impossible victory at the Kotel Pass brought fear to Ivan. He abandoned Tarnovo and fled to the emperor's court. The emperor offered no solace to the coward. In Tarnovo, no sooner had the bolyars discovered the tsar's throne empty than they began to squabble over it. The wisest of the bolyars reminded the others that the kingdom was still threatened by both Mongols and Romans. Bulgaria needed stability and that would mean all bolyars would need to unite under a single banner. From among their ranks, the bolyars found a warrior to defend and unite the kingdom � a man descended from the tribe of the legendary Cuman warrior, Kotyan. They chose Georgi Terter as the tsar." Curses. Betrayal. Outrage.  Y'know game, maybe this would hit harder if you'd given Georgi a personality sometime in the last three missions before this one. Apart from that? The RPG section is the real star of the show here, and the devs do a decent number of clever things with it. Kind of wish they'd extended it, and made that the whole mission instead of just using it as a springboard for another build and destroy. Extra Slides Mission 4 - Intro Slide 1 Mission 4 - Intro Slide 2 Mission 4 - Intro Slide 3 Mission 4 - Intro Slide 4 Mission 4 - End Slide 1 Mission 4 - End Slide 2 Mission 4 - End Slide 3 Jossar fucked around with this message at 05:25 on Jan 4, 2024 |
|
#
?
Jan 4, 2024 05:13
|
|
|
Ivaylo - Part 5: Where the One-Eyed Man is King Mission 5 Starting Text "Betrayed by Georgi Terter, Ivaylo returned to Tarnovo, but the gates were barred to him. His men finally gave up hope. They returned to their fields, their uprising and Ivaylo's brief reign just a memory, to be lost and forgotten. But Ivaylo could not forget. As he stood powerless before the city's walls, the weight of his fate as a mere pig herder finally weighed upon him. He had defied all odds. He had not just challenged a tsar, a khan, and an emperor, but had upset the very order of the world. He, a swineherd, had dared to overthrow kings and make men free. With these thoughts, Ivaylo took the greatest risk of his life. Perhaps blinded by his ambition, or blinded by his hope, Ivaylo turned to his enemy for help. He sought redemption in the land of the blind, where the one-eyed man is king."  Georgi Terter: Bring me the head of that renegade bardokva! Fun fact, Georgi is calling him "lettuce" here, in reference to a story about how Ivaylo was so poor before taking the throne of Bulgaria that at one point he had an all-lettuce or cabbage diet.  You start this mission off with Ivaylo as a named Monk standing in a Monastery courtyard, with several of Georgi Terter's men battering down the walls to try and kill you. On Moderate and above, this is a short puzzle, with the intended solution being to convert the nearby Villager, use it to fix the nearby Tower and escape via garrison mechanics. On Standard this is literally just a cutscene. 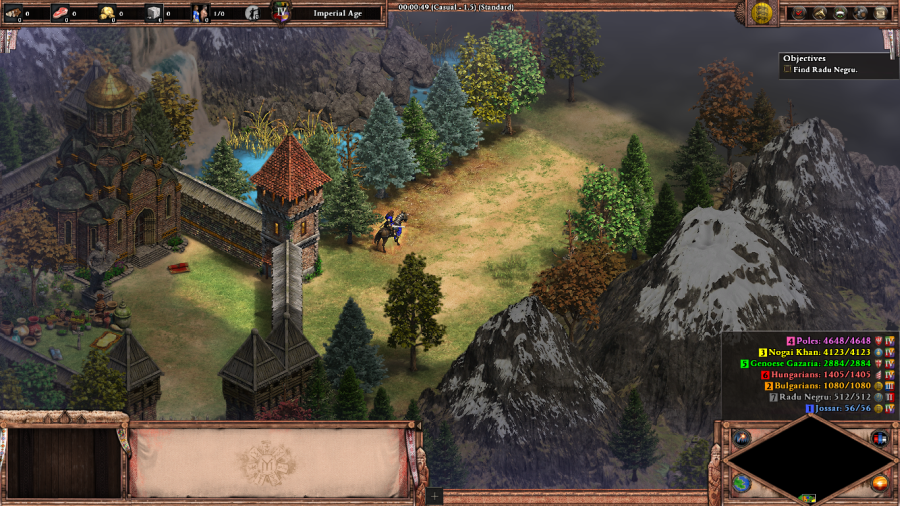 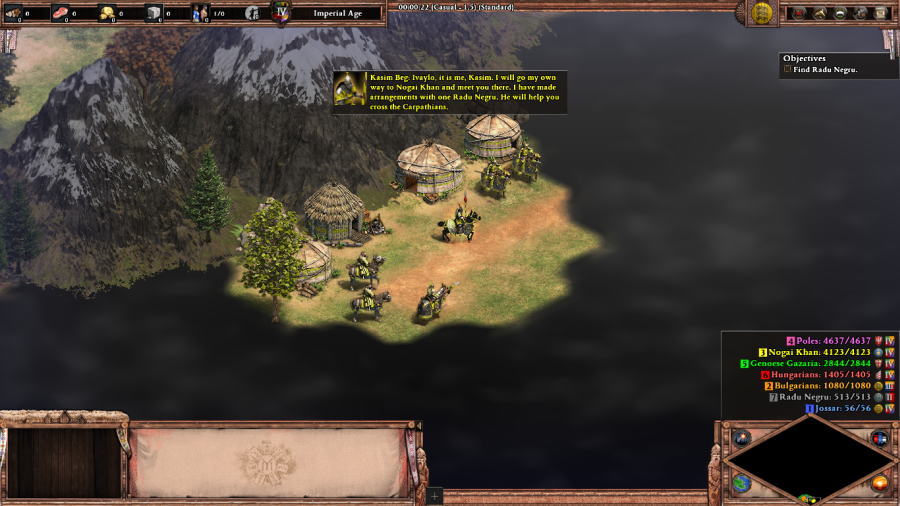 Kasim Beg: Ivaylo, it is me, Kasim. I will go my own way to Nogai Khan and meet you there. I have arrangements with one Radu Negru. He will help you cross the Carpathians. Once horsed, Ivaylo is given instructions from an unreachable Kasim Beg on how to continue the mission. Just keep riding north until you run into Radu. 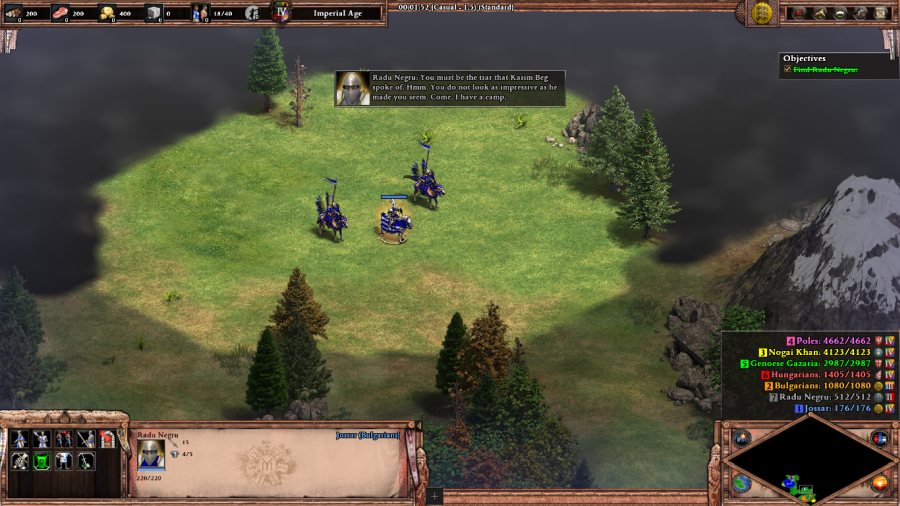 Radu Negru: You must be the tsar that Kasim Beg spoke of. Hmm. You do not look as impressive as he made you seem. Come. I have a camp. 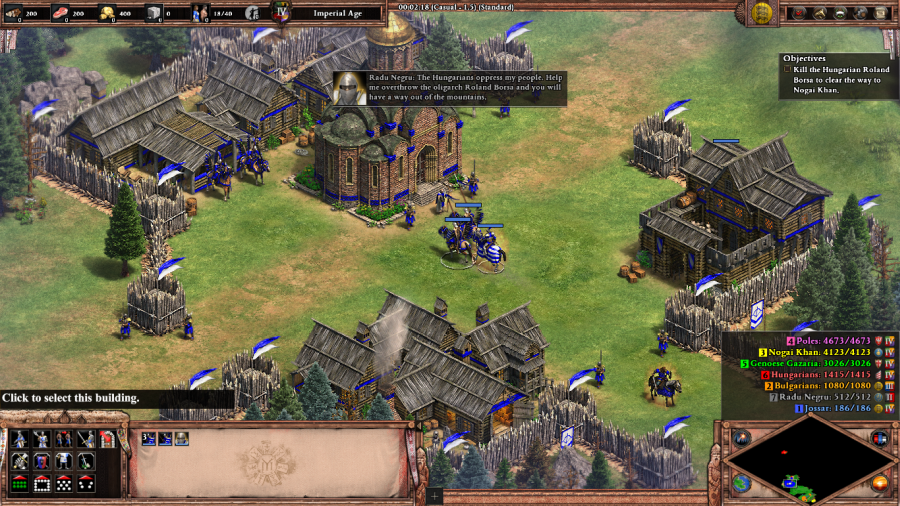 Radu Negru: The Hungarians oppress my people. Help me overthrow the oligarch Roland Borsa and you will have a way out of the mountains. Once you meet up with Radu, he gives you a small army and gives you the first big objective of the scenario, attacking a Hungarian fortress to the north of the map and killing the King inside. You can theoretically do this with the starting army, but most people will want to use Radu's hero Monk to convert villagers and build up an economy/army. Note that any remaining resources that you have from this segment of the mission will not carry over to the next one, but research does, so it may be worth it to sit and boom up depending on how much you value having full Post-Imperial status from the word go for round 2. 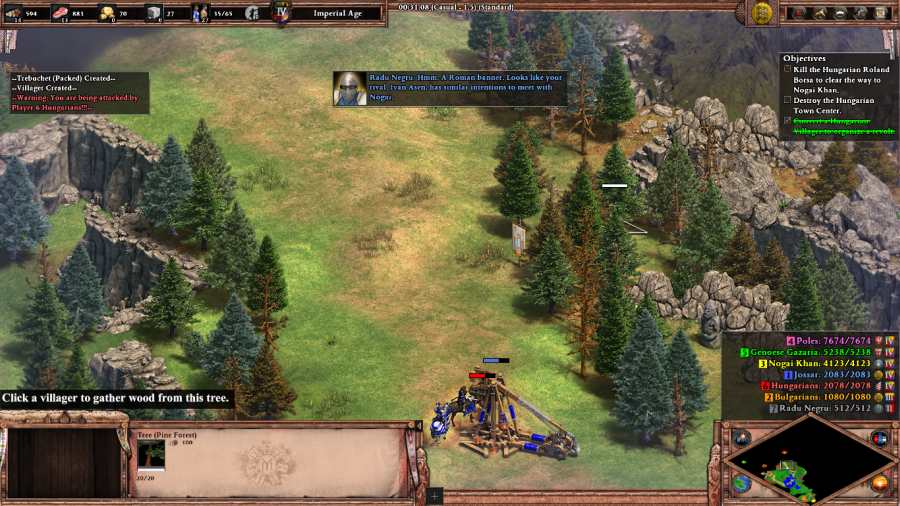 Radu Negru: Hmm. A Roman banner. Looks like your rival, Ivan Asen, has similar intentions to meet with Nogai. As you go prepare to assault the Hungarian fortress, you encounter this banner, which tells you that the Bulgarians exist as an enemy faction in the next segment. But apart from a few early ambushes with Konniks before Ivaylo makes it to his new base, their only meaningful contribution is to hide at the edges of the map and ensure that nobody else can grab relics easily. They can safely be ignored. 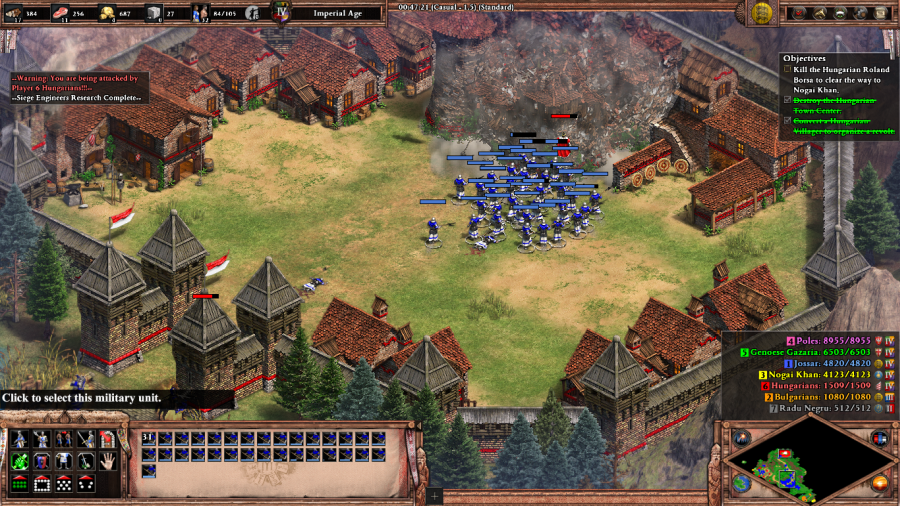 The Hungarians aren't a big threat, especially if you've destroyed the rest of their economy during the build up phase. Just lay waste to the place and move on. Radu Negru: Thank you, Tsar. No matter what happens to your people, you have helped free Wallachia. Take comfort in that. Now go to Nogai Khan. 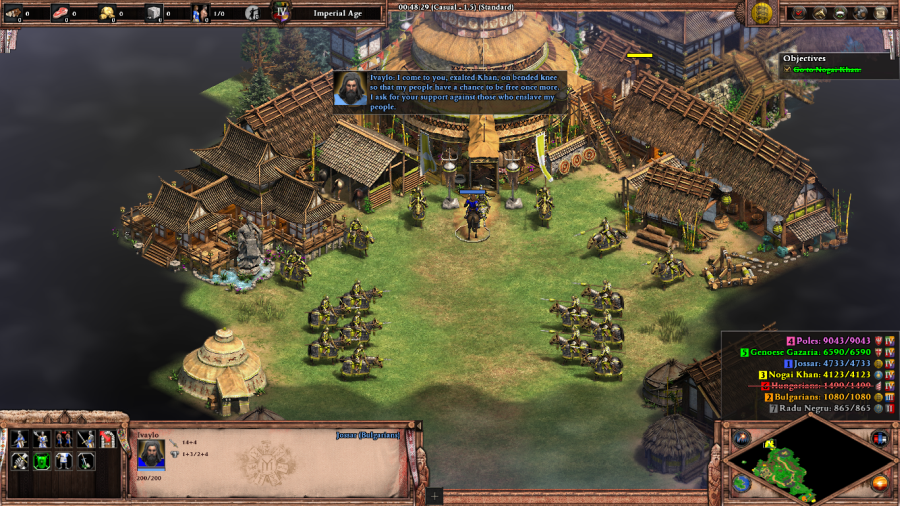 Nogai: Speak. Ivaylo: I come to you, exalted Khan, on bended knee so that my people have a chance to be free once more. I ask for your support against those who enslave my people. Nogai: You are not the first tsar to come grovel at Nogai's feet. But you have twice the manhood of this Ivan Asen. (after a few seconds) The Great Khan has joined the ancestors. Nogai cannot war until a successor sits in the Golden Tent. You will raid Kiev and Crimea in Nogai's name. Do this and Nogai will consider your request. So yeah, funny enough the only time Ivaylo himself speaks all campaign is when he's down on his knees begging Nogai Khan for help. I will say that the voice acting in this campaign has been pretty good, and this is exemplified by our protagonist here who just sounds so utterly defeated by everything that's happened up until this point. 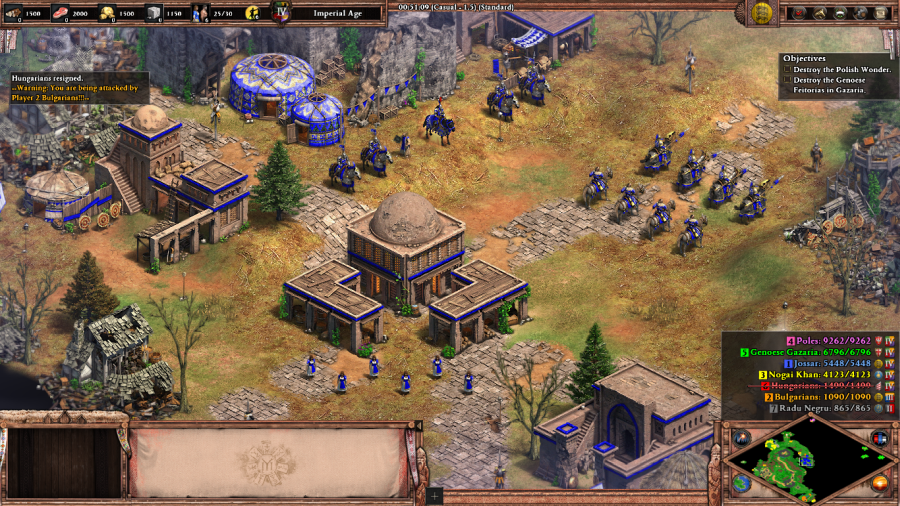 After riding a little bit to the southeast past some of Ivan Asen's goons, you will reach the town that Nogai gives you for the purpose of raiding, along with a decent number of steppe units (and Kasim Beg) that can be supplemented by finding additional raiders scattered throughout the map. Your final objectives in this scenario are to take out the Polish Wonder in Kiev and destroy three Feitorias belonging to Genoese Gazaria in Crimea. 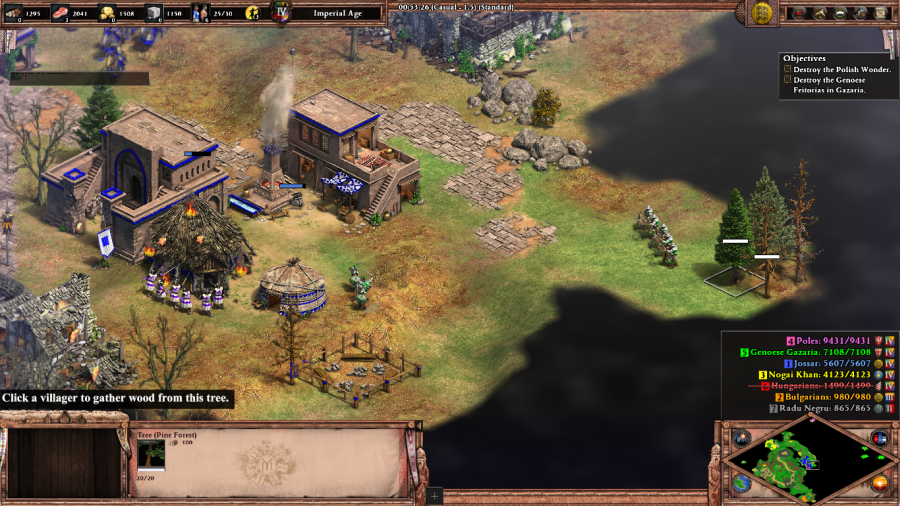 The Poles and Genoese Gazaria are active enough opponents who will keep you on your toes, especially if they attack together, but I didn't find them to be quite as overwhelming as the enemies from other scenarios to defend against. 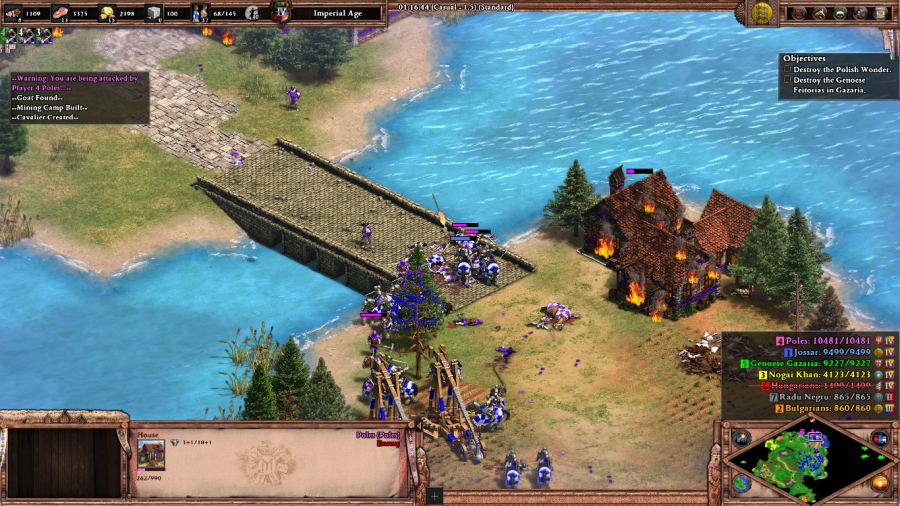 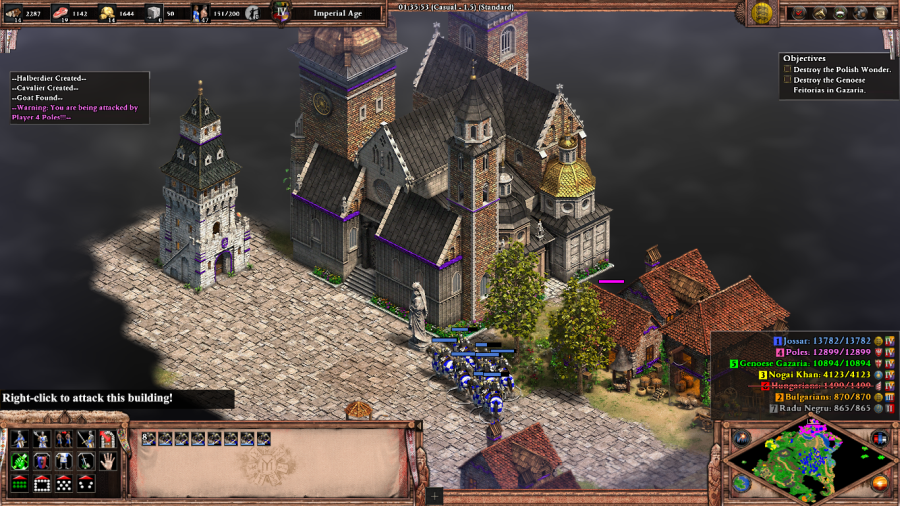 On the offense though? Kiev is a massive city and even after destroying the initial couple of Polish armies will still be constantly swarming with troops, which will do quite a good job of bogging you down. Nevertheless, once you finally manage break your way into the city, it becomes much easier to carve a path towards the Wonder as long as you can keep your Siege properly defended. Take out the Wonder and the Poles swap to Ally, meaning that there's no distractions from the final part of the scenario... 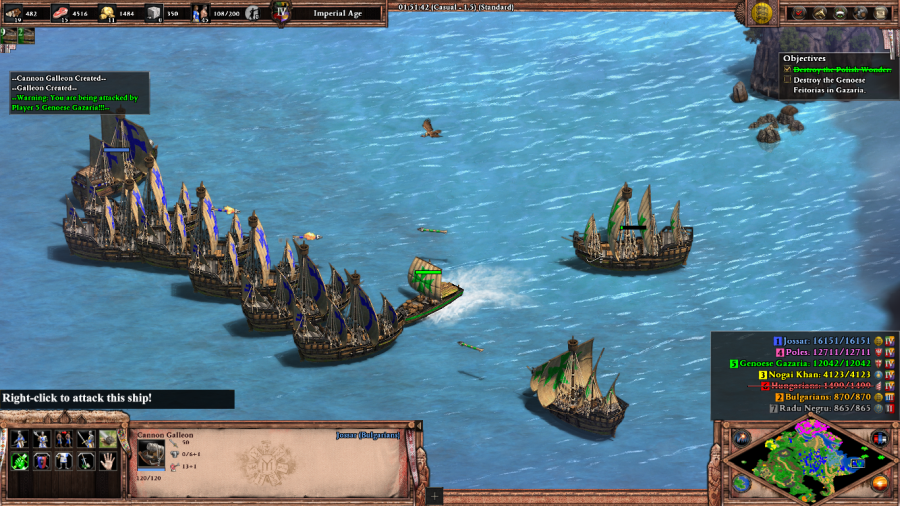 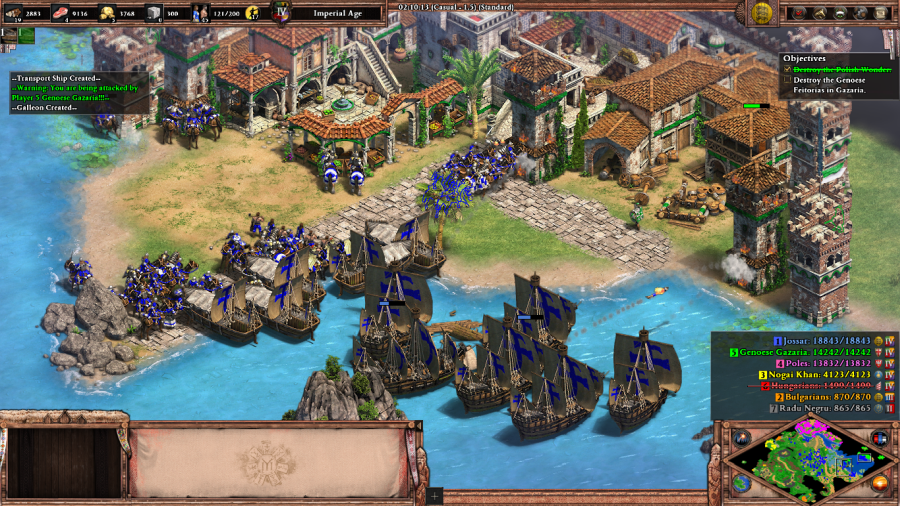 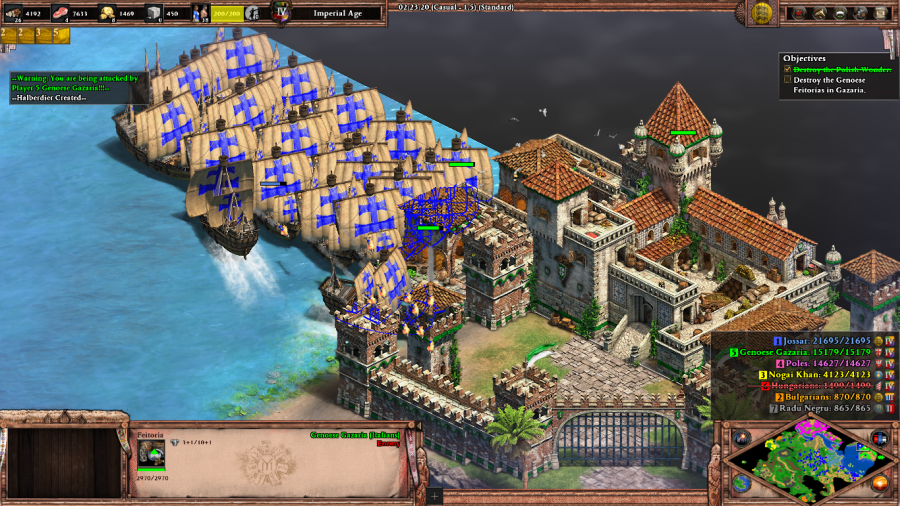 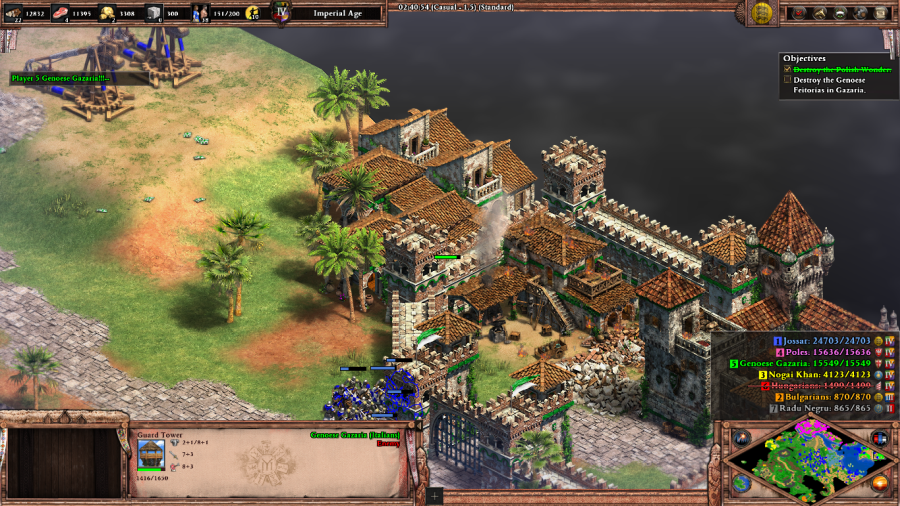 Okay, so do you remember that part in Barbarossa 3 where the game spontaneously decided that you were going to have to do a naval invasion with Teutons? Imagine that but it's a necessarily multi-pronged invasion and the landing zones are narrower, so it's harder to just dump all of your ground forces onto the enemy side at once to circumvent needing a real navy for longer than a few seconds. And you don't have access to Fast Fire Ships or Heavy Demolition Ships. And instead of facing Franks, who were a mostly-peer civilization on water, you're facing Italians, who are one of the best. This is not one of the most enjoyable campaign finales. But in any event, it's done. Once both segments are completed, the perspective shifts back to Nogai's tent for one last cutscene. 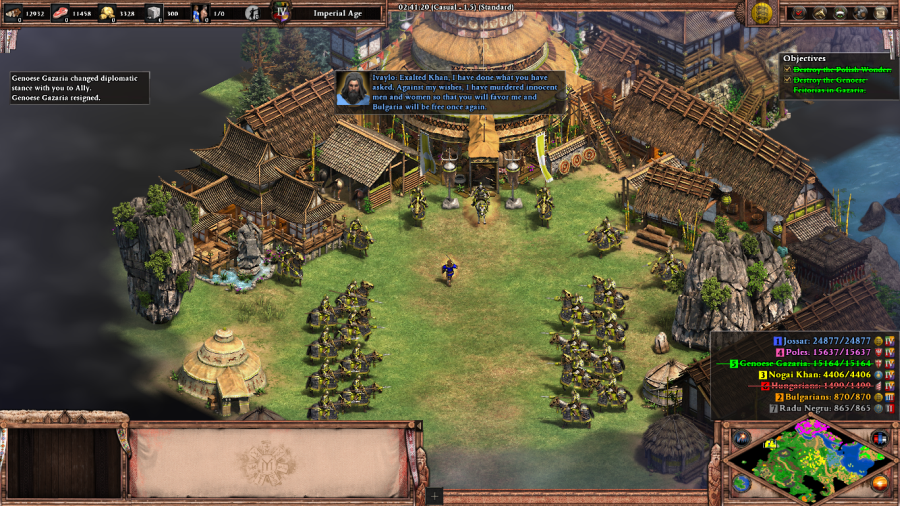 Nogai: Speak. Ivaylo: Exalted Khan, I have done what you have asked. Against my wishes, I have murdered innocent men and women so that you will favor me and Bulgaria will be free once again. Nogai: You are an honorable warrior, but honor alone does not make men free. Come into the tent and tell Nogai why he should favor you. Mission 5 Ending Text "The one-eyed khan ordered a feast for Ivaylo and Ivan Asen, where he listened to their arguments on why he should support one over the other. Then, having heard enough, Nogai rose and pointed to Ivaylo. In that moment, it is said that Nogai's guards seized Ivaylo and murdered him. The body was taken away as Nogai returned to his seat and finished his meal. But I am not so sure that was the end of our hero. In the years since, Ivaylo has appeared again in many places and many times. Wherever the downtrodden have the courage to fight for freedom and justice, Ivaylo seems to appear. He lives in all of us and especially in you, my child. I can see you are confused. I know you are thinking, 'What does this pig herding tsar have to do with me?' Don't you see, my dear? I lived in Bulgaria then. So did you, in fact. You were very young, then. A mere baby when I wrapped you in your swaddling clothes and carried you here. It was on the day when the emperor, my uncle, took us from Tarnovo and from your father, Tsar Ivaylo."   The triggers are either broken or intentionally disabled, but this map has a hidden easter egg. You're supposed to be able to bring Ivaylo from Nogai Khan's court to this cave, which unlocks a secret pig level, complete with a flag featuring the logo of the Forgotten Empires' development team. Anyways, most of this level's story is made up. I'm not sure if that's better or worse than the historical record, where Ivaylo just ran straight from Bulgaria to Nogai Khan's court, where he sat around for a couple of months before getting murdered. At least here he gets to do something, but on the other hand, that's a lot of people killed for literally nothing. But it does sort of explain why the whole thing feels disjointed and episodic. It was definitely different from the last few scenarios, though! I was not a fan of the Ivaylo campaign. There are a lot of individual elements of it that are really clever or well done, but they didn't really make that big of a difference on the lion's share of my playtime. I'm surprised, because I heard a lot of good or at least neutral reviews regarding the campaign, and was not expecting something that, personally, felt just a step above Montezuma. Extra Slides Mission 5 - Intro Slide 1 Mission 5 - Intro Slide 2 Mission 5 - Intro Slide 3 Mission 5 - Intro Slide 4 Mission 5 - End Slide 1 Mission 5 - End Slide 2 Mission 5 - End Slide 3 Mission 5 - End Slide 4 Mission 5 - End Slide 5 Jossar fucked around with this message at 01:09 on Jan 6, 2024 |
|
#
?
Jan 6, 2024 00:54
|
|
|
Campaign Vote #26 A. Tamerlane - Tatars B. Edward Longshanks - Britons C. Grand Dukes - Burgundians D. The Hautevilles - Sicilians Voting lasts for 24 Hours from the time of this post. In the event of a tie, I will act as the tiebreaking vote between the two tied options. Please bold your vote in order for it to be counted, as well as noting if you are changing your vote from something else.
|
|
#
?
Jan 6, 2024 00:56
|
|
|
I liked, or at least respected, the Ivaylo campaign. It was ambitious- pretty much every mission had some sort of twist or novelty. However they didn't really work out all that well- like this last mission essentially being two mission in one, but was just an awkward reset. It also felt like the gameplay climax was mission 3, and then 4 and 5 were steps down. The narrative, style and acting was great, though.
|
|
#
?
Jan 6, 2024 01:09
|
|

|
That's fair. I can definitely see the ways in which it wants to be an innovative campaign, so for a lot of people it will be much higher in their personal rankings. Alas, I am on record that in the end, I prefer solid competency over ambitious failures, so that colors my perspective quite a bit.
|
|
#
?
Jan 6, 2024 01:15
|
|
|
You�re more forgiving than I: I couldn�t stand this campaign. The defence against the Mongols stood out as particularly bad, I found it one of the most frustrating levels in the game on hard, while all the other missions posed virtually no challenge. At least running around with monks and stealing cataphracts was fun I guess. Tamerlane was much better, even if it never really got difficult. The campaign does a great job of making you feel like the bad guy, encouraging you to salt the earth the minute an opponent so much as looks at you. A.
|
|
#
?
Jan 6, 2024 01:18
|
|
|
Tamerlane, because sometimes ruining everyone's day with a horde of cavalry led by the world's angriest man is just fun. It's not hard by any means, but its enjoyable to play.
|
|
#
?
Jan 6, 2024 02:53
|
|
|
A. Tamerlane
|
|
#
?
Jan 6, 2024 03:51
|
|
|
I too enjoyed the little puzzles and would've liked the campaign to focus more than that vs. fighting mongols and byzantines again, which is kind of what everybody sharing a time zone with either of those ends up doing eventually. A Horse archer time!
|
|
#
?
Jan 6, 2024 19:05
|
|
|
Vote's closed! Time to cackle like a madman as I ride with Tamerlane and crush all of Central Asia before the hooves of many Tatar horses and their mighty riders.
|
|
#
?
Jan 7, 2024 01:07
|
|
|
Tamerlane - Part 1: Amir of Transoxiana Age of Empires II: Definitive Edition - Tatars Theme Very well, then let us begin, the tale of the man of many titles.   Mission 1 Starting Text "The man's eyes surveyed the room as he began to speak. 'A life of flight is a cruel thing. I have seen numerous battles and escaped clutches of death too many times to count. Thousands of men once followed my call, but I am now without land, army, or title. All that I have left is my quest for vengeance.' Precious time passes as I speak, so I will be blunt: Doom rapidly approaches your land, and you must be ready of it! The armies of the accursed Tamerlane draw ever nearer, watering the ground with blood. This warlord is the greatest scourge ever seen in all of Asia! If you will listen, I will tell you his conquests, of the terror that he has inspired. Born into the Barlas, nomads inhabiting the Central Asian steppe, Tamerlane was bred from birth to be a warrior. He spent his youth as a mercenary in the service of the local chieftains, but soon rose to power when his father, a powerful chieftain himself, died. At this time, Transoxiana was divided between four powers: In the west lay the White Horde and the Blue Horde, mere shadows of the former glory of the Golden Horde. In the east were the two wings of the declining Chagatai Khanate. Tamerlane set his sights on these divided rivals. He was outnumbered, but he had a plan. Tokhtamysh, a chieftain challenging his uncle Urus for rule of the White Horde, had sent messengers to Tamerlane seeking his support. If Tamerlane could defeat Urus and install Tokhtamysh in his place, then Tamerlane could rely on the support of a powerful ally." 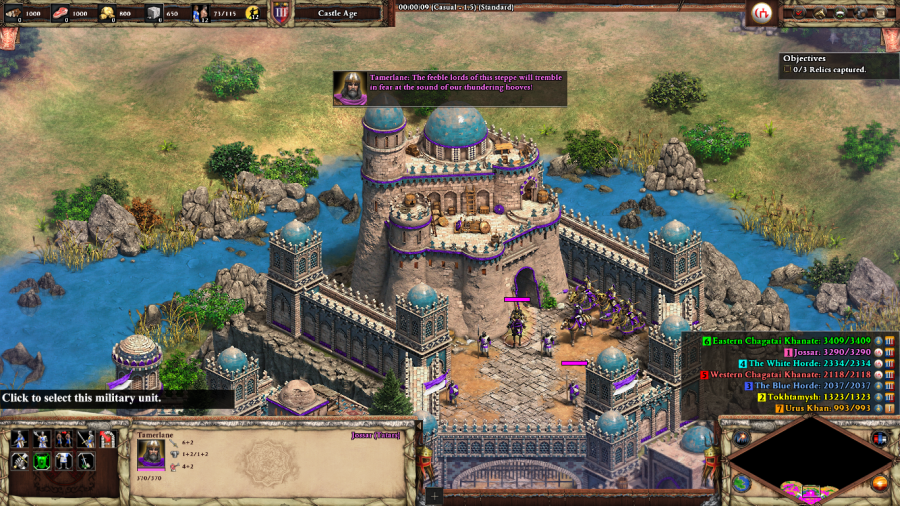 Tamerlane: The feeble lords of this steppe will tremble in fear at the sound of our thundering hooves! 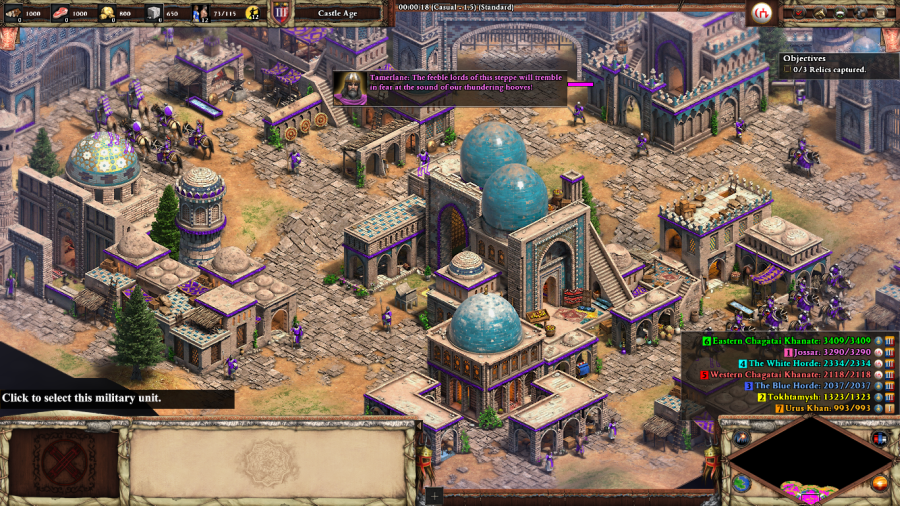  Been a long time since we were last in Samarkand, huh? I'm not sure this iteration shares that many similarities with the one in Genghis Khan 4, but it is still a lovely sight. In any event, this mission starts you off with a large army lead by Timur himself (represented by a Mangudai hero unit) and a fully developed base. You have a large number of the offense focused upgrades already, so all that's left to do, apart from developing a little bit of an economy, is go forth and conquer. 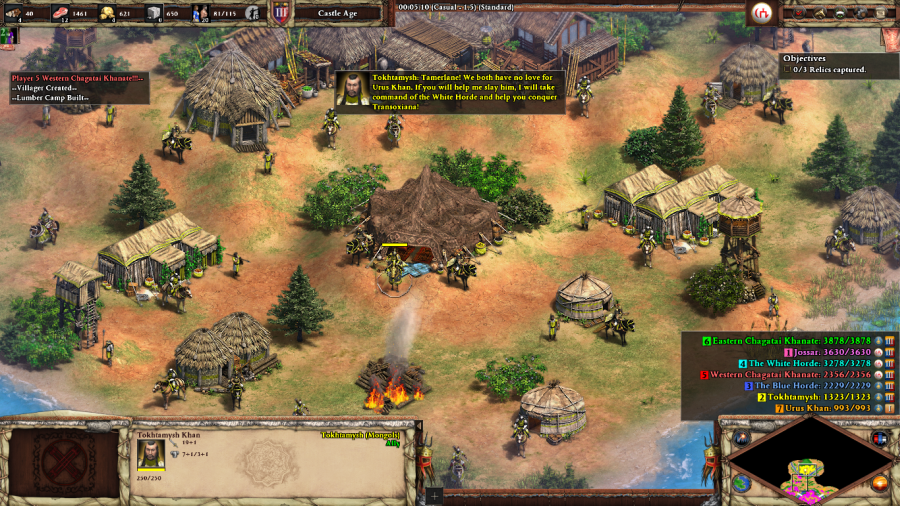 Tokhtamysh: Tamerlane! We both have no love for Urus Khan. If you will help me slay him, I will take command of the White Horde and help you conquer Transoxiana!  Urus Khan: Turn back now, Tamerlane, and I will spare your worthless life! (after dying) I am slain! A thousand curses on you, Tamerlane and Tokhtamysh! Tokhtamysh: The White Horde follows me now! Together, Tamerlane, we will conquer all of Transoxiana! Speaking of which, since Tokhtamysh here remains a loyal ally for the rest of the mission there's no reason not to do as he says and immediately snipe Urus Khan before he can build up to become a real threat. The Castle can do a lot of damage, but killing Urus Khan switches it over to Tokhtamysh's control along with the rest of the White Horde's buildings, so don't be too afraid to go big. Defeating the White Horde also grants you the first of three Relics needed to win the scenario (and boost gold income, of course!) and a dock on the Aral Sea to supplement your economy by building fishing boats, uncontested by any of the other factions on the map. 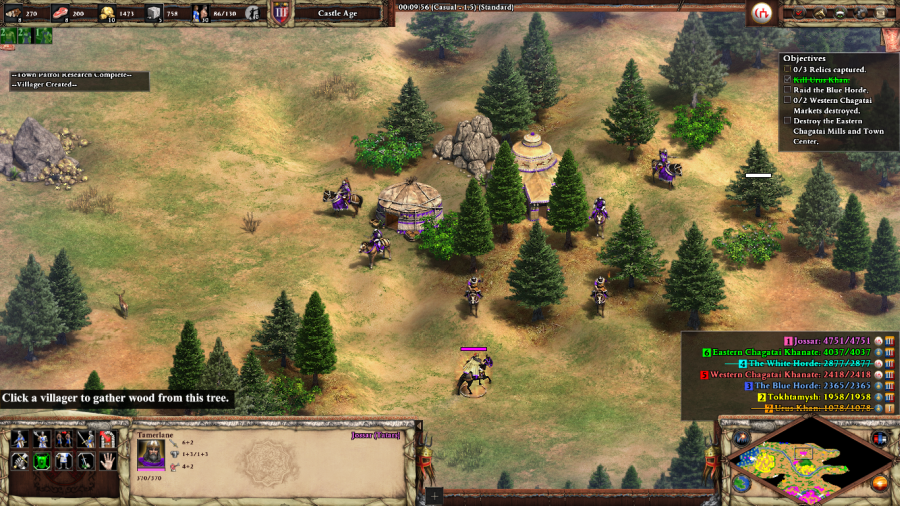 Oh hey, look, a couple of spare riders. Useful for keeping your momentum going: All of you, get out of your gers and follow me! 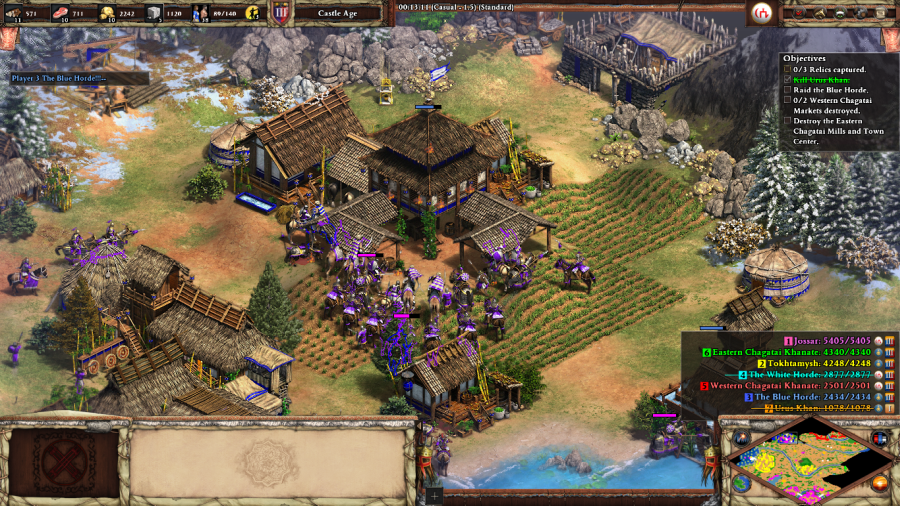 Blue Horde: Tamerlane's armies approach our lands. To arms! To arms! Tamerlane: The frail Blue Horde is no match for our forces! All of the remaining three enemy factions on the map have side quests, and after completion, the faction's primary source of income (a scripted, regular flow of tributed resources) stops, rendering them vulnerable to destruction. The Blue Horde is the weakest remaining enemy faction, and so their "side quest" is simple - just cripple their economy. 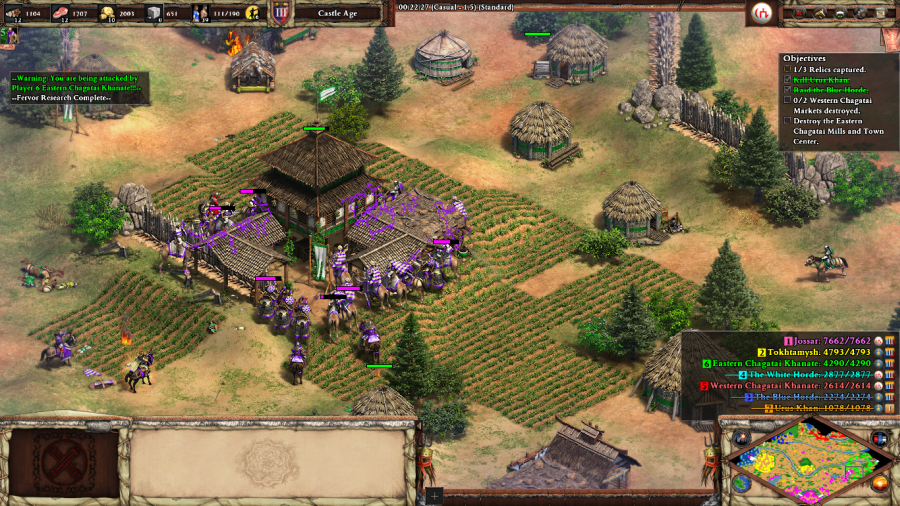 Eastern Chagatai Khanate: Tamerlane's raiders approach our farmland. Send forth all riders! 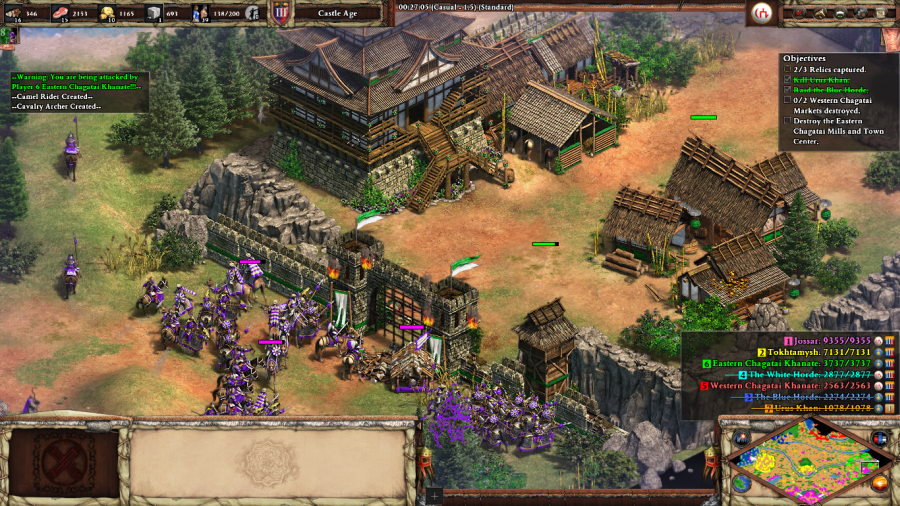 Tamerlane: Let us see the Chagatai Khans field armies without food. Sow the fields with salt!  Each of the Chagatai Khanates has a Relic lying around, so you only need to wreck one of them to grab said Relic and finish off the mission. They're the only enemies on the map that put up a real fight, each having a full set of Walls and multiple Castles. But even having to break out a few Rams doesn't slow down the Tatars too much. In this case, I fight through the Eastern Chagatai Khanate until I can grab this Relic off of the bridge in the middle of their base and bring it on home for the win. Tamerlane: I was a common brigand when I first entered these lands. Now, I am Amir of all of Transoxiana! Mission 1 Ending Text "As a child, Tamerlane had been dragged into Samarkand in chains by the Mongols. Now, all of Transoxiana was his to command. The leaders of the rival hordes all flocked to him to pledge their loyalty. The wind roared, whistling through the hall. Flames flickered in the great fires burning within, their distorted shapes resembling the forms of agile warriors. 'The unlucky few that did not submit were destroyed with fire and sword. Towers were built from their bones!' 'Tamerlane was now a great amir, or lord, but his thirst for conquest was far from over.'" After the last campaign, it was really refreshing to be let loose into this scenario with my feet immediately in stirrups from the word "go" and wreck everything in just over a half hour in-game time. Afterwards, I even found myself kind of wishing that I hadn't beaten the mission objective properly, so that I could instead win by defeating the Western Chagatai Khanate too. Definitely a sign that I'm in for a good time with this campaign. Extra Slides Mission 1 - Intro Slide 1 Mission 1 - Intro Slide 2 Mission 1 - Intro Slide 3 Mission 1 - Intro Slide 4 Mission 1 - Intro Slide 5 Mission 1 - Intro Slide 6 Mission 1 - End Slide 1 Mission 1 - End Slide 2 Mission 1 - End Slide 3 Jossar fucked around with this message at 02:59 on Jan 7, 2024 |
|
#
?
Jan 7, 2024 02:50
|
|
|
Tamerlane campaign AKA "We ARE the baddies and drat proud of it!"
|
|
#
?
Jan 7, 2024 17:25
|
|
|
Tamerlane - Part 2: Gurkhan of Persia Mission 2 Starting Text "Convinced that my guest knew a great deal about this Tamerlane, I asked him for more insight. I had heard that Tamerlane had been maimed by arrow wounds to his hand and leg. How could his armies accept a lame man as their leader? 'A fair question,' he answered. 'It is said that Tamerlane and his fellow tribesmen agreed to decide who would lead them by a footrace. Although Tamerlane's men ran more swiftly, he cast his cap onto stake marking their goal, and thus won the race.' This man seemed cunning as a fox, a dangerous adversary for any commander. I asked my guest to continue his tale. 'Tamerlane gazed southwest to Persia, a land torn by strife ever since the fall of the Ilkhanate. Persia was vast, its terrain a challenge for any ambitious conqueror. It would not be easy to take.' 'Tamerlane, however, could count on the support of his ally Tokhtamysh, who had reunified the Golden Horde. Together, they would ride down the squabbling Persian kingdoms.'"  Tamerlane: Descend upon the cities of Persia, my riders! Strike fast and hard at our enemies! Timurid Rider: Amir, we should hasten to press our advantage. Well-directed actions can sap our enemies of their strength. This mission once again has you start with an already fairly large army and a camp in the middle of the map from which you are to strike out against your enemies. Five enemy factions exist and you need to destroy the Castles of three of them in order to trigger the next stage of the mission. Again, as with last time there are plenty of side quests to do, and this time they're a little bit more involved/differentiated so you're really spoiled for choice.  Sabzevar: These laborers will work for you, Tamerlane. (when tributing resources) We have readied more supplies for you, Tamerlane! Tokhtamysh: These horse archers will help you in your battles! The big difference from last time is that while you can build an economy, you can't build a Town Center. Your allies, Tokhtamysh to the north and the town of Sabzevar to the northeast, instead tribute you extra units, villagers, and resources every so often. Sabzevar's tributes can be shut off if their respective buildings are destroyed, but you'd really have to be slacking to let things get to that point.   Tamerlane: With these towers, our sentries can spot incoming supplies and prevent them from reaching Herat!  Tamerlane: Towers of human skulls will replace the fortifications of Herat! Herat's quest is simple: build six Towers in marked locations around the city. This represents putting the city under siege, and shuts off its flow of resources. Once Herat's economy collapses, their standing army is no real threat and Herat is easily sacked.  Timurid Rider: Undefended targets simply beg to be plundered!  I continue the sweeping wave all across the map. Tabriz' outlying Monastery is simple enough to take out, but having gotten used to fighting Mongols and Tatars, I'm finding that the Persians in Zaranj and their War Elephants are a bit beefier of an opponent than I'd like to fight.  Isfahan: Tabriz will surely blame us for the sacking of their monastery, Tamerlane. If you bring us the relic found in their ruins, we will join you against Tabriz. (after grabbing the Relic) You are a man of your word, Tamerlane. Together, we shall crush Tabriz! So I pivot further northward. Isfahan will grab the Relic from Tabriz' Monastery as soon as it goes down, so there's very little effort involved in getting them to ally with you.  Tamerlane: These mountain scum shall plunder the caravans to Mecca no longer. Hurl the prisoners from the crags! Tabriz' real side quest is destroying this mountain camp that's covertly funding the city by plundering travelers making the Hajj from Central Asia and further down along the Silk Road. Guess you either loot for Tamerlane, or not at all. Take out the camp and Tabriz is stuck with what it has.  Admittedly, their standing forces do put up a good fight, being Mongols with Cavalry Archers and Siege, locked behind city walls. The AI just loves pinpointing my Cavalry Archers with Mangonels and watching them crumple.  Tamerlane: Ahmed Jalayir flees west like a mouse before lions. Tabriz is ours! Isfahan: Your aid against Tabriz was appreciated, Tamerlane, but it is time for you to leave our lands for good. Tamerlane: I expected nothing less from a ruler who thought nothing of putting out his father's eyes. Isfahan will burn to the ground! But Tabriz still falls before the might of my horsemen. Isfahan, of course, backstabs you the instant Tabriz is defeated. 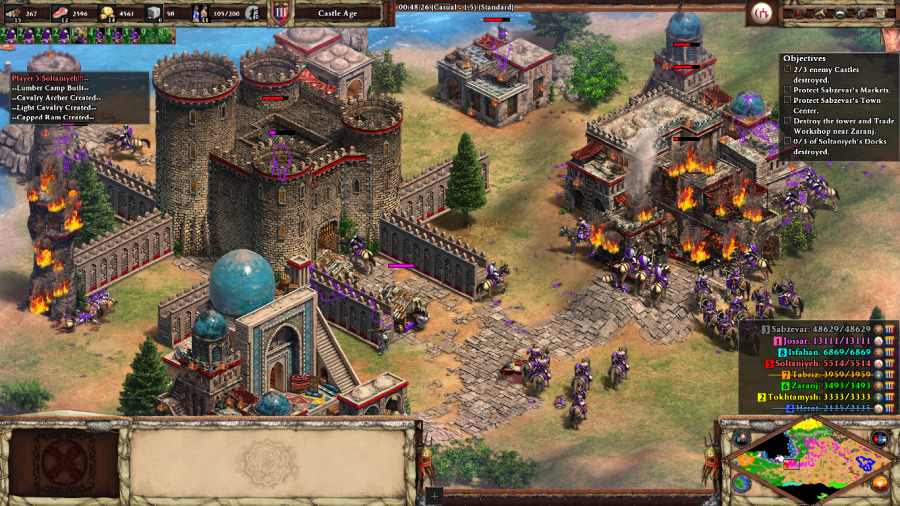 Tamerlane: The Chobanids will never again claim the lands of the Ilkhanate as their own! They get to live though, as I'm better positioned to focus on destroying Soltaniyeh instead. No fancy side quests or tricks here, it's more trouble than it's worth to ride past the Castle to destroy the Docks than just focus firing down the Castle itself. 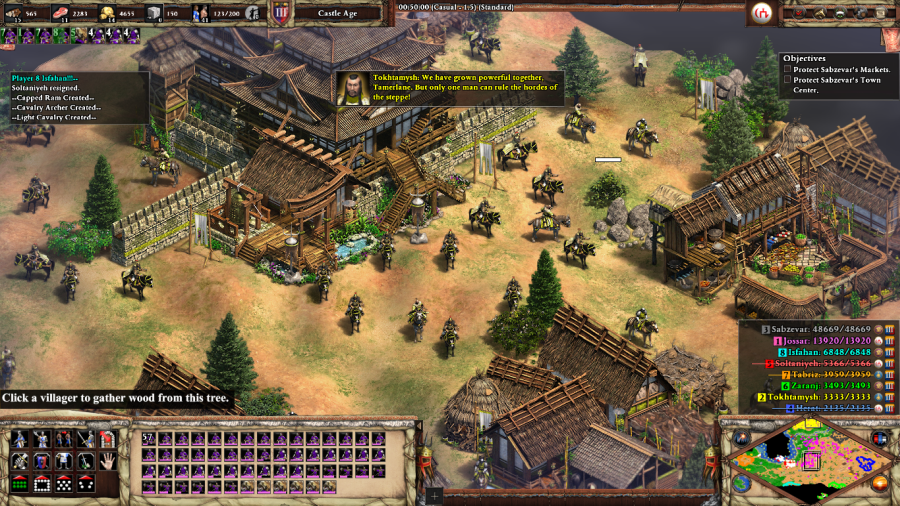 Tokhtamysh: We have grown powerful together, Tamerlane. But only one man can rule the hordes of the steppe! Tamerlane: War it is, then? So be it. After 3/5 of the enemy factions are defeated, Tokhtamysh decides that since this is the most exhausted that Tamerlane's ever been since Tokhtamysh grabbed the White Horde, if he's ever going to make a power play for everything it has to be now. 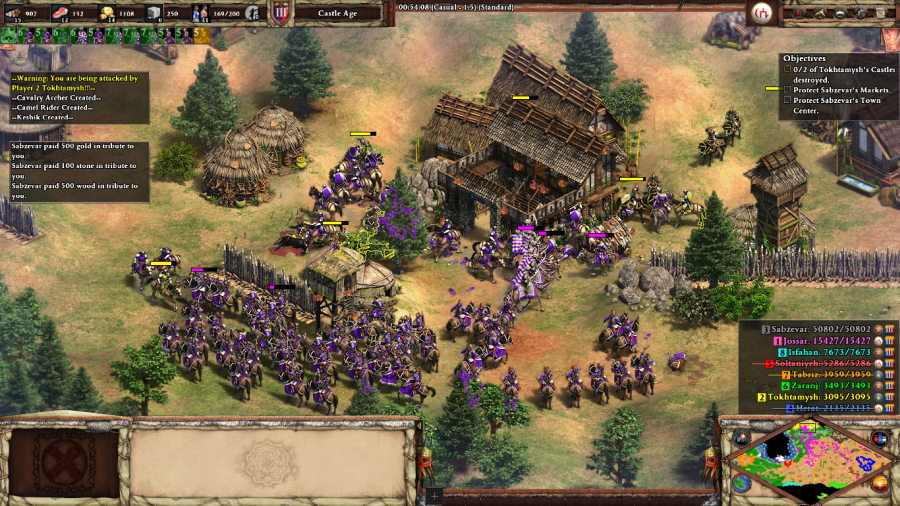 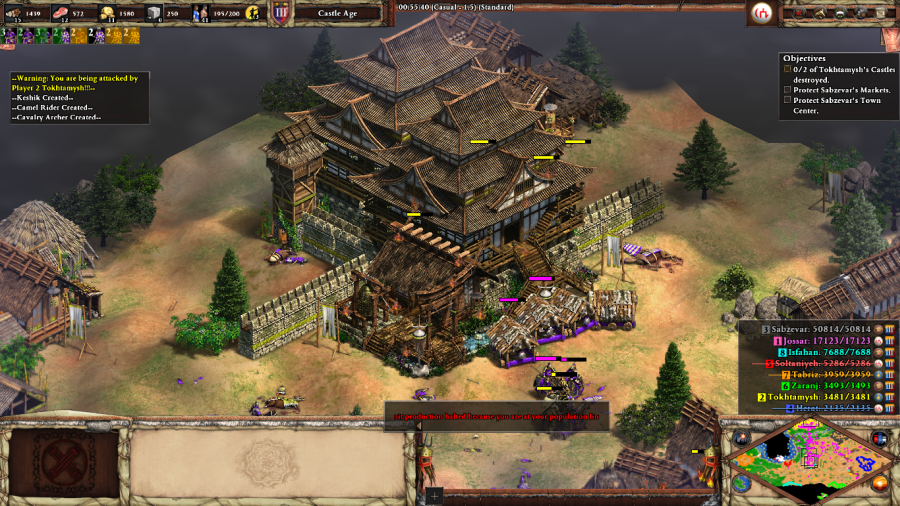 Unfortunately, he missed the part where I still have 100+ Cavalry units and a dozen Capped Rams ready to throw at his base. Wipe out Tokhtamysh's puny army and take out both of his Castles and the mission is complete. Tamerlane: Flee, Tokhtamysh, while you still can! My hordes will pursue you all the way to Russia! Mission 2 Ending Text "'Tokhtamysh's betrayal brought Tamerlane to a rare burst of fury. The man that he had regarded as a son, for whom he had sweated and bled, had stabbed him in the back.' 'Tamerlane was forced to halt the Persian campaign to cope with this treachery. Thousands of battle-hardened cavalryman ceased their pillaging and thundered northwest through the steppe to the lands of the Golden Horde and its allies in Russia.' As if a foreshadowing of the tale to come, the snow of early spring began to fall outside. Winters lasted a long time in these parts, and even the nobles in the hall, clad in their furs, shivered. 'Tamerlane's vengeance was fearsome to behold.' the man whispered." Kind of like a larger scale version of the last scenario, for which reason I was more than happy to call it quits when the mission said I was done rather than wanting to destroy everyone around me. The sheer number of more-expansive side quests and the slight variant take on the economy are interesting, although that does make the scenario a little more overwhelming at the start until you know how you want to approach it. I think I like the last one a bit more, but this one has more long-term replay value. Extra Slides Mission 2 - Intro Slide 1 Mission 2 - Intro Slide 2 Mission 2 - Intro Slide 3 Mission 2 - Intro Slide 4 Mission 2 - End Slide 1 Mission 2 - End Slide 2 Mission 2 - End Slide 3 Jossar fucked around with this message at 18:31 on Jan 7, 2024 |
|
#
?
Jan 7, 2024 18:24
|
|
|
Ah, the mission where Tokhtamysh does the absolutely worst thing he could do. What an idiot.
|
|
#
?
Jan 7, 2024 22:41
|
|
|
You say "Tamerlane has been fighting for a while and must be tired, now is the time to strike" I say "Tamerlane has MOMENTUM going and his forces are riding the high of multiple back-to-back victories"
|
|
#
?
Jan 7, 2024 22:44
|
|
|
"Hmm, Tamerlane has just destroyed someone who betrayed him. What should I do? I know, betray him!"
|
|
#
?
Jan 8, 2024 03:32
|
|


|
Tamerlane - Part 3: Harbinger of Destruction Mission 3 Starting Text "The blasts of wind intensified, snuffing out some of the torches within the hall. Servants bustled about, tending to the meat roasting over the fire. The scent of cooked birds, game, and mutton filled the air. This was the first time that Tamerlane's forces had ventured into Europe. The winters were harsh, and Tokhtamysh surely hoped that the biting cold and far-flung supply lines would prove too much for the wily tactician. The armies of the Golden Horde burned crops and took all they could carry as they retreated.' Tokhtamysh knew that Tamerlane would show no mercy. Terrifying reports reached his ears of torched villages and mountains formed from the bones of the slain. Wherever Tamerlane went, it seemed that flocks of carrion birds were never far behind. Entire towns surrendered upon hearing of the brutal destruction of one of their neighbors.' 'Tokhtamysh had no choice but to engage the rampaging forces of his enemy. The armies met near the banks of the Kondurcha River, sometime during the early weeks of the summer. Crows and vultures circled above the field, an ominous foreshadowing of the carnage to come.'" 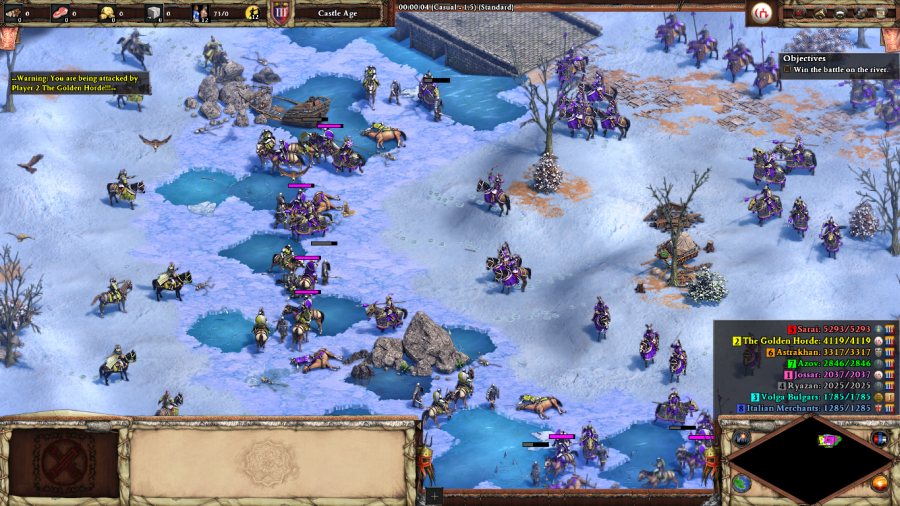 Tokhtamysh: Charge! Kill them all! Tamerlane: Forward, men! Drive through the center and smash these fools through the ice!  Tamerlane: Tokhtamysh is trying to outflank us! Deploy our reserves to hold him off! (after defeating Tokhtamysh's forces) Hah! The enemy forces flee helplessly before us! This mission starts with a decent size battle between your army and that of the Golden Horde, lead by Tokhtamysh. Interestingly enough for one of these introductory cutscene-type battles, you have full control of all of your units from the start, and can just deploy the reserves to help fight off Tokhtamysh's initial wave of troops before he even sends out his reinforcements. 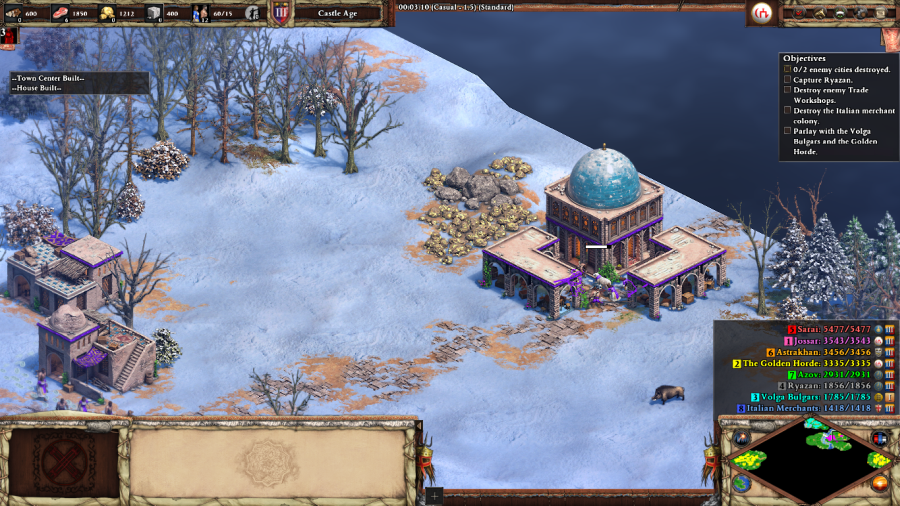 Tamerlane: Now the path is open for us to strike at Tokhtamysh's heartland in Russia! Timur Qutlugh: We have greatly underestimated the power of Tamerlane's army! Volga Bulgars: Perhaps it would be wise for us to join him against Tokhtamysh. Edigu: Agreed. After defeating Tokhtamysh's army, the mission switches to a standard build and destroy. You have to defeat two of the three remaining big enemy factions (Sarai, Astrakhan, and Azov). The Volga Bulgars and Golden Horde switch to recruitable factions if you complete some basic objectives for them (Tribute 1000 Wood and send them two Siege Towers, respectively. The Volga Bulgars provide Food and a couple of Konniks every few minutes, the Golden Horde is mostly useless), and the last two factions are optionally defeatable in order to improve your situation (defeating Ryazan upgrades your Siege Workshop siege to Imperial, useful as you're otherwise stuck in Castle Age, defeating the Italians weakens Sarai, the most powerful enemy faction on the map and likely gives you a bunch of gold from sacking their buildings). 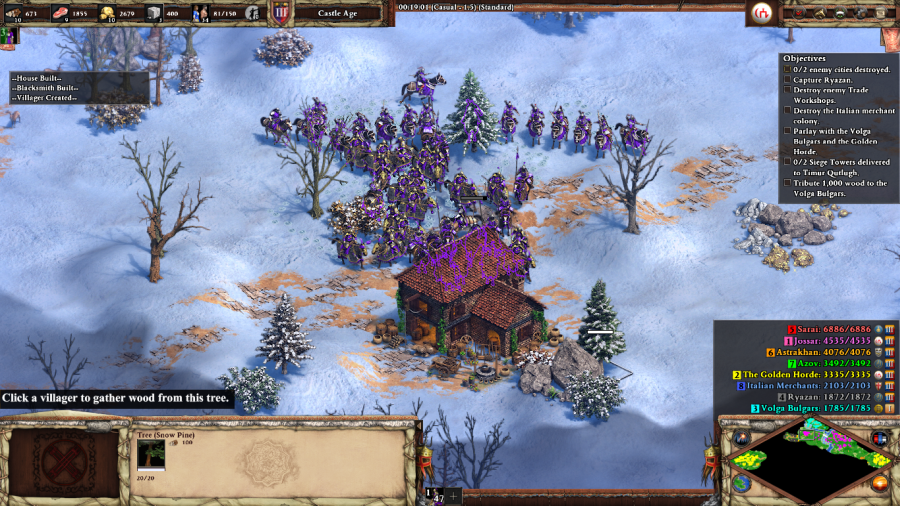 Timurid Rider: This food will feed many horsemen! Since you're invading Russia in the middle of the winter, this map also shares Ivaylo 1's gimmick where you can't build any Farms. But you can sack the storehouses of the various enemy factions for a cool 1000 Food each. Combined with the Volga Bulgars' tribute, this covers most of your Food needs and makes the gimmick limitation mostly nonexistent. Going after the storehouses is also useful as it removes a separate tribute of resources that each individual enemy faction is quietly receiving to bolster their forces. 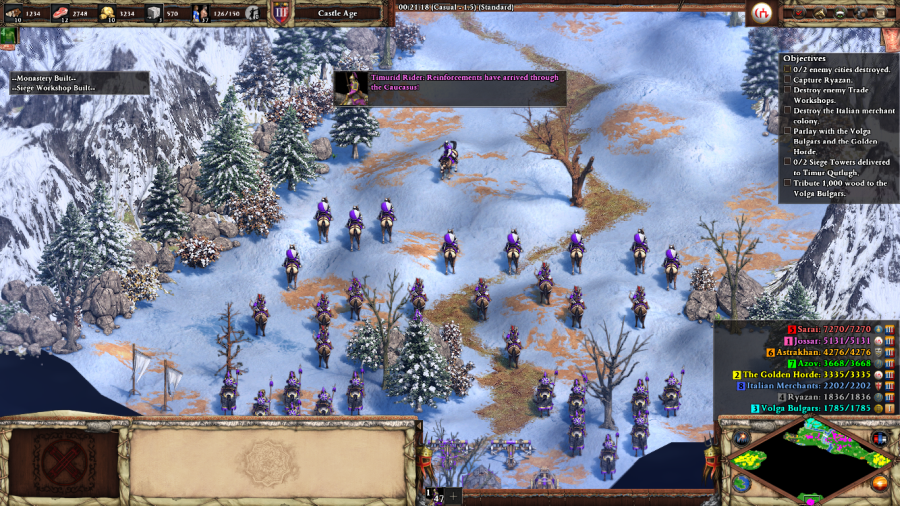 Timurid Rider: Reinforcements have arrived through the Caucasus! At 20 minutes in, you receive an additional large army from the Caucasus, including a bunch of Imperial Age Siege, most importantly two Trebuchets. 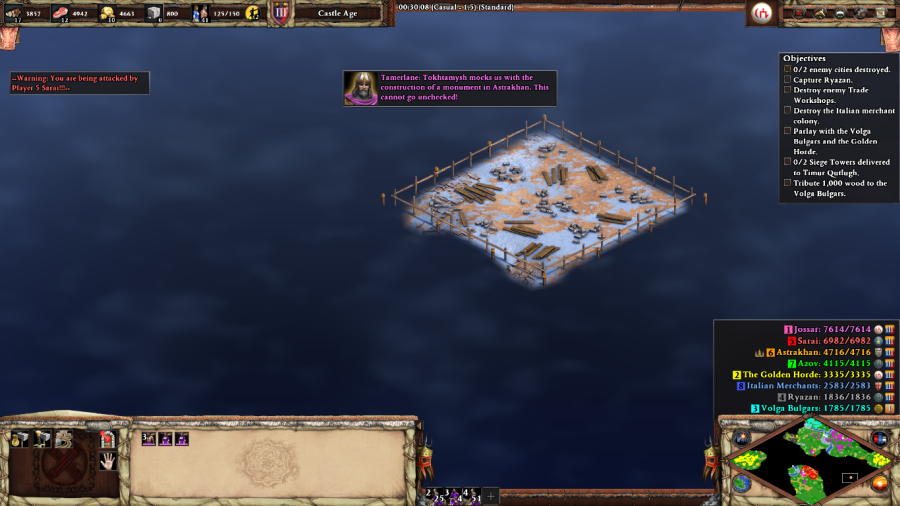 Tamerlane: Tokhtamysh mocks us with the construction of a monument in Astrakhan. This cannot go unchecked! And to cap things off, at 30 minutes, Astrakhan will start to build a Wonder. 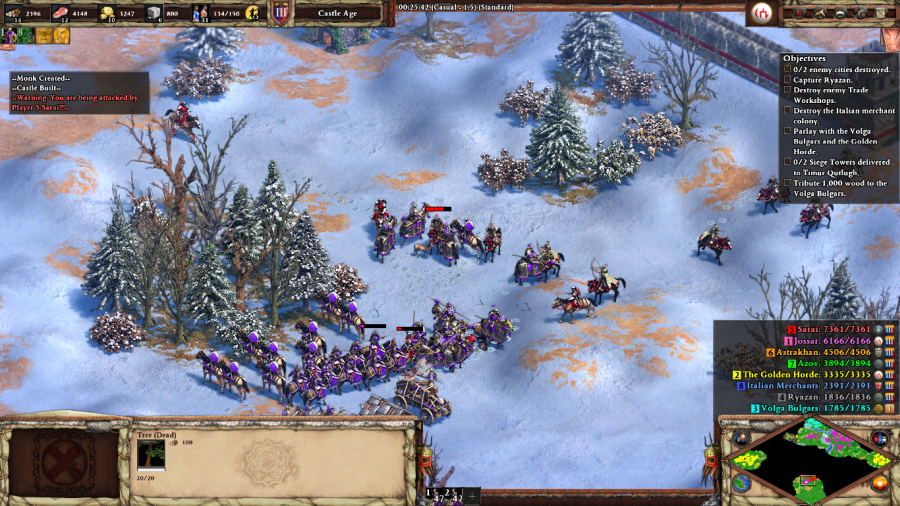 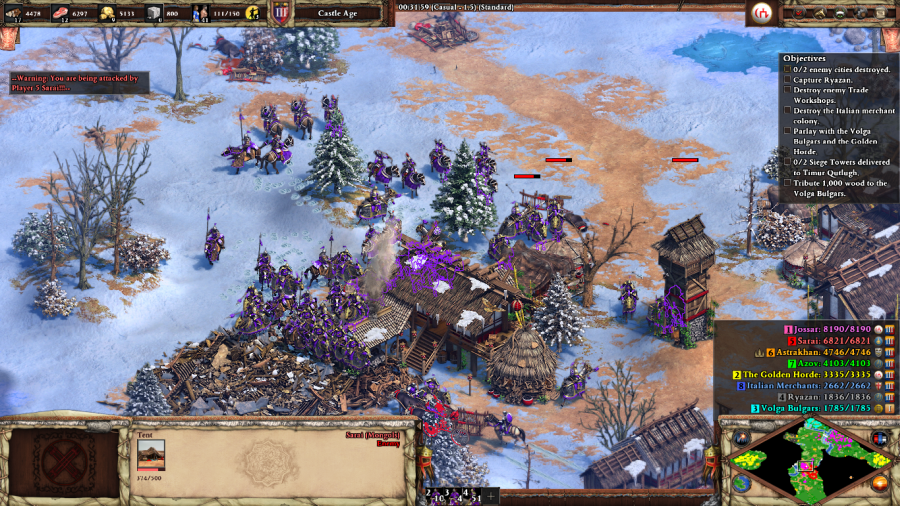 Unfortunately, this is where things start falling apart from any pre-organized plans of mine. The reinforcement army gets a bit too stuck in while testing Sarai's southern defenses and forces me to commit the entirety of my forces to an early push on Sarai. 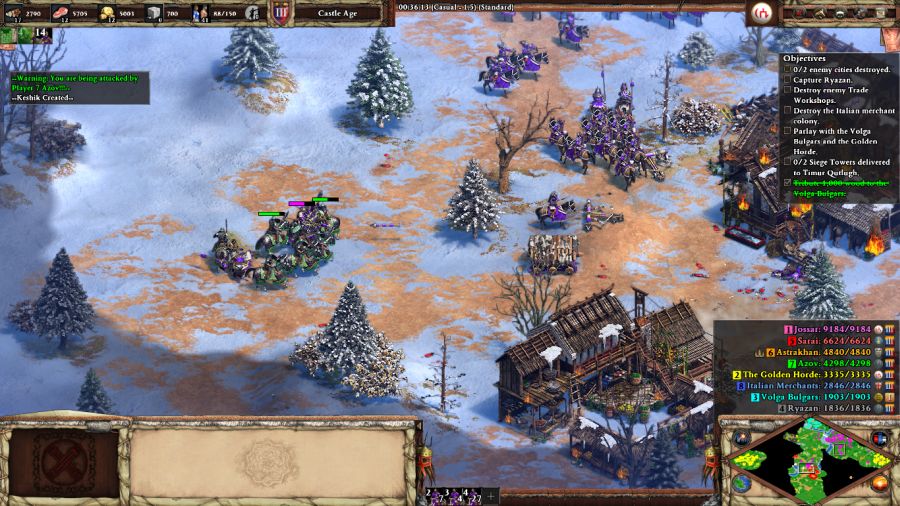 This mostly works, at least in terms of greatly savaging Sarai and removing them as a real threat for the rest of the game, but the intensity of Sarai's defenses combined with reinforcements from Azov destroys the entirety of my army and I'm left having to rebuild everything from scratch. 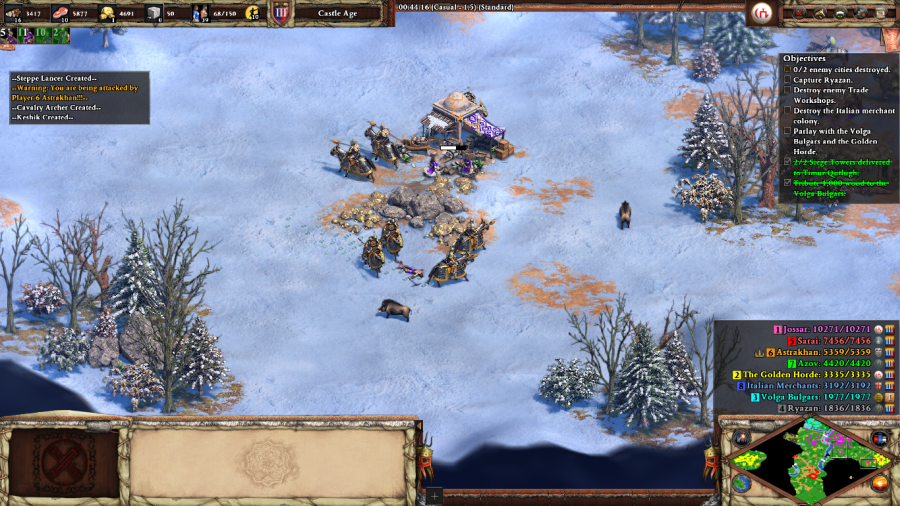 Astrakhan takes the opportunity to raid my outlying mines, even making it all the way up to my main base, and they continue to remain a real pain until I build a Castle specifically meant for containing the raids independent from the rest of the fighting. 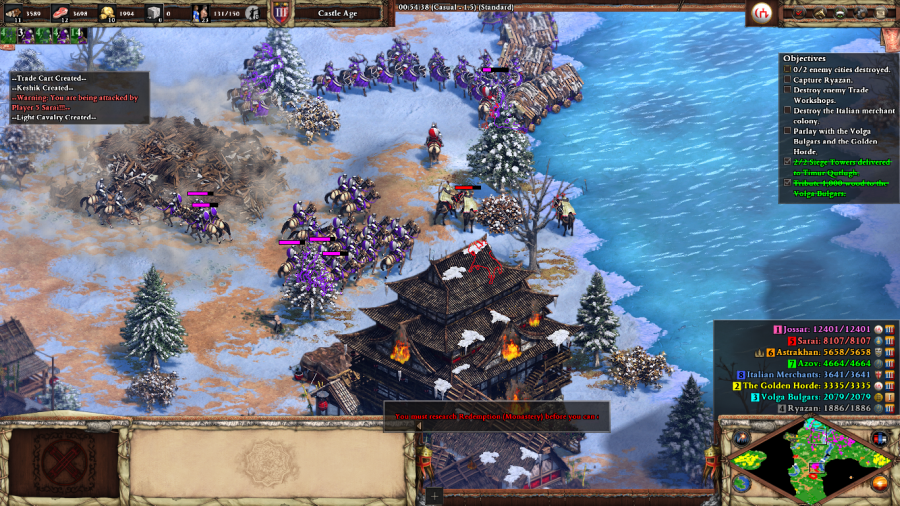 Tamerlane: Sarai burns while my men build towers from the skulls of the slain! But with Astrakhan under control and my army rebuilt, it's an easy enough task to stomp back into Sarai and finish them off for good.  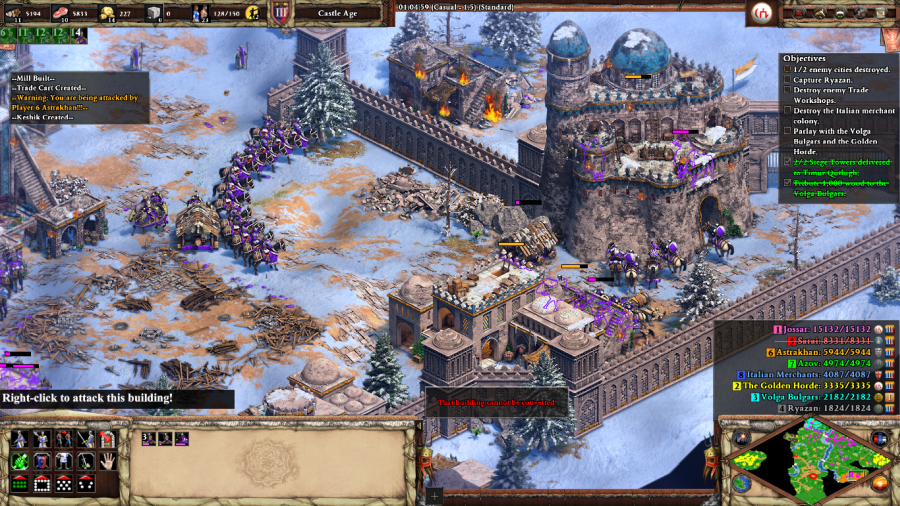 Tamerlane: Spare no one! This city will regret having ever opposed me. With Sarai defeated, the spine of enemy resistance has been shattered, and wanting to stop their Wonder from getting built, I target Astrakhan next. Even without the upgrades from Ryazan, their city falls easily enough, bringing the scenario to a close. Tamerlane: Hah! With his empire aflame, Tokhtamysh will have no choice but to flee like a craven to Lithuania! Mission 3 Ending Text "'Raging fires, torrents of blood, piles of ash, the clash of iron, and the screams of the dying. These were the horrors that Tamerlane visited upon the cities and people of the Golden Horde.' The cities of Ryazan, Sarai, Astrakhan, Azov, and Ukek were reduced to rubble. All that remained aside from the ruins were the towers of bones that were built from the corpses of the dead. Those who survived were driven like sheep to march in unspeakable cold.' Tokhtamysh had no choice but to flee west to Lithuania. Tamerlane was determined not to let the traitor escape, but word soon reached him of a rebellion within his homeland. Leaving the hunt in the hands of his two generals, Tamerlane swiftly returned home to restore order...at the point of a blade.'" This isn't the last we'll be seeing of Tokhtamysh, but the game has to cover the rest of Tamerlane's conquests, so he's definitely going to fall out of focus from this point going forward. I'm not sure what to think of this scenario. I feel a little bad judging it harshly when I clearly went off the beaten path, but on the other hand, this is the first scenario where all the extra options felt like they were distracting me from the mission goal rather than opening up additional options like they were supposed to. Maybe this is better on Moderate/Hard, where you can't just smash Sarai to pieces quite as thoroughly without doing a little bit more side-questing first, but I could very easily be wrong here. Extra Slides Mission 3 - Intro Slide 1 Mission 3 - Intro Slide 2 Mission 3 - Intro Slide 3 Mission 3 - Intro Slide 4 Mission 3 - End Slide 1 Mission 3 - End Slide 2 Mission 3 - End Slide 3 Jossar fucked around with this message at 15:37 on Jan 20, 2024 |
|
#
?
Jan 20, 2024 15:30
|
|
|
Tamerlane - Part 4: Sultan of Hindustan Mission 4 Starting Text "Listening to the stories of this stranger had stirred our appetites, and we eagerly began to devour our meal. I invited the old man to sit next to me. I still thought that this Tamerlane was more myth than man. Surely he had been beaten in battle at least once. The man has the cunning of a wolf and the composure of an owl. In some battles he strikes hard at the center of the enemy line, while in others swift horsemen outflank the opposition. They then feign a retreat to bait the enemy into a trap � a storm of arrows. When Tamerlane decided to cross the Khyber Pass into India, a different and terrifying challenge faced him. The armies of the Delhi Sultanate ruled the battlefield through their powerful elephants, monstrous beasts known to crush a horseman with a single foot! Drawing up his lines, the clever warlord waited to spring his latest trap." 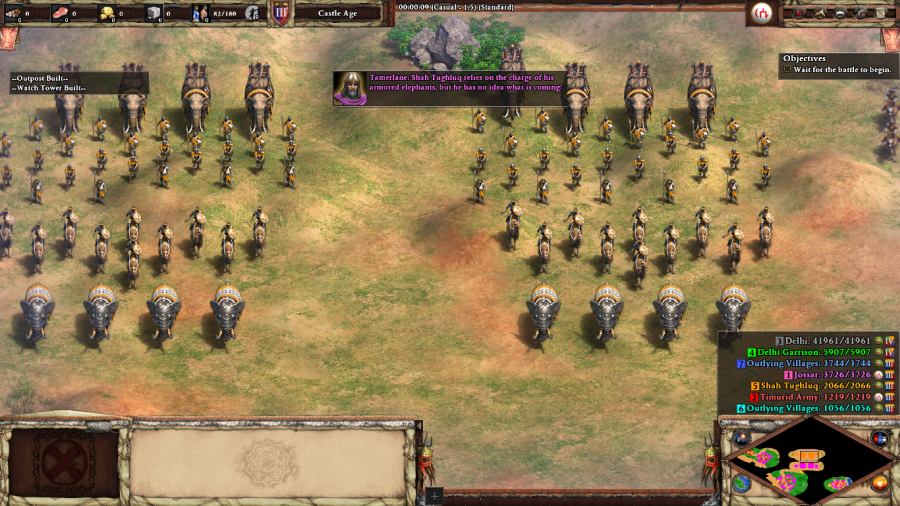 Tamerlane: Shah Tugluq relies on the charge of his armored elephants, but he has no idea what is coming!  Tamerlane: Send forth the flaming camels!  Tamerlane: Hah! The elephants fear my camels and stampede back towards their own lines. Press the attack!  Tamerlane: Now nothing stand between us and the riches of Delhi! Let us claim them for our own! This mission starts out with a pretty spectacular introductory sequence. You and Shah Tugluq each start off with a large army, although he starts off with the better one. But almost immediately, Tamerlane deploys a bunch of Flaming Camels to cause the enemy War Elephants to swap sides, turning things to your advantage instead. (Sadly Flaming Camels do not do this in game, just being a very niche Tatar unique unit that's the anti-Cavalry equivalent of a Petard.) After a massive controllable battle, your side comes out victorious and is ready to lay waste to the rest of the map.   The remnants of your army are more than enough to destroy these outlying villages on the west side of the map. They have a small number of troops and some Monks, but these are fairly easily dispatched. Your reward for doing so is access to a large number of mineral piles, some relics, and a resource cache for destroying their Market. Even if you're not particularly keen on the resources, it's still important to annihilate these guys quickly, because as long as either of the village factions remains undefeated they will continue to tribute resources to the Delhi Garrison, with a bonus if both village factions are still in play.  Timurid Rider: Inspired by our piety, Ghazi troops have arrived from the west to join us! As a nice little bonus, destroying each of the Monasteries in the western village faction also spawns in a couple of Elite Mamelukes to help keep you going in this initial raiding phase.  Shah Tugluq: You will pay for looting my lands, Tamerlane! The eastern village faction is a bit better organized, having a couple more troops and some light static defenses in the form of Towers and a Town Center, but they also have a lot more resources for you to loot, primarily concentrated in their Docks and Town Center.  With both village factions destroyed, all that's left to do is swell up my army to the pop cap and assault Delhi itself. You can't tarry for too long while booming, as there is technically a timer on the scenario before Tamerlane's supply lines run out, but it's pretty difficult to lose on time unless you're just staring off into space. Which makes it doubly weird that they decided to stick an achievement here for beating the scenario with more than 5 minutes left on the clock. 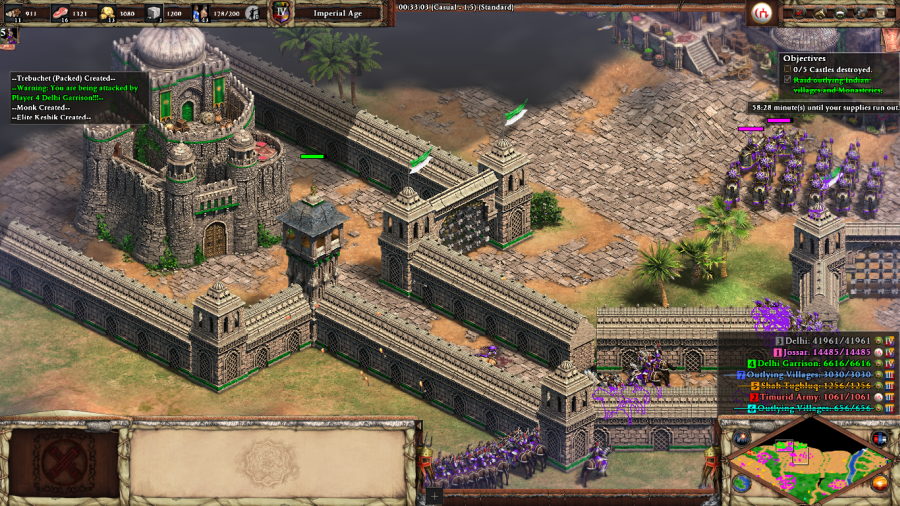 Delhi is a massive city, so this is another scenario where most of the city buildings themselves are Allied to you, while the garrison itself is the main threat. Destroy all five of their Castles to win. 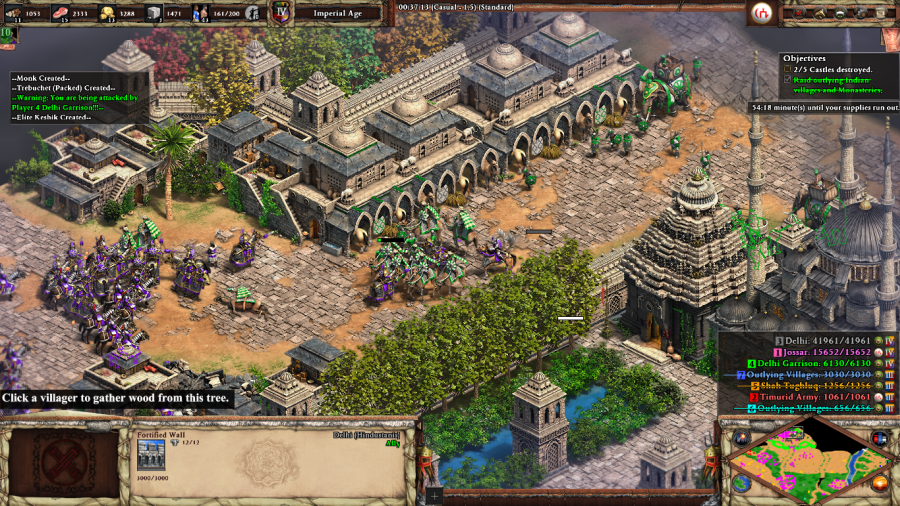 Even moreso than any of the missions I've been playing so far, this is where the classic Tatar gameplay comes into the fore: having Timurid Siegecraft-enhanced Trebuchets level the city to rubble, with Elite Keshiks (the main Tatar unique unit, Cavalry unit that's fast, cost efficient, and generates gold while attacking enemy units, but is offensively weaker than comparable units) serving as meat shields for Heavy Cavalry Archers, which kill everything that moves. 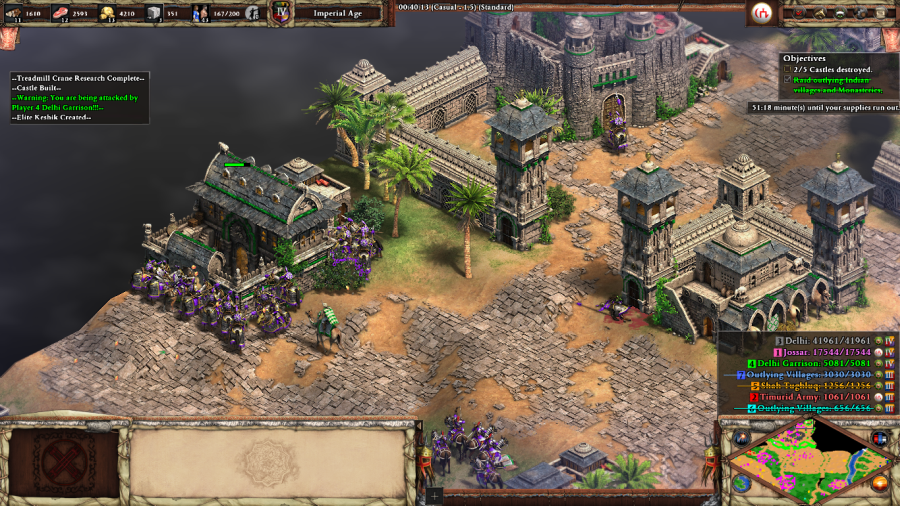 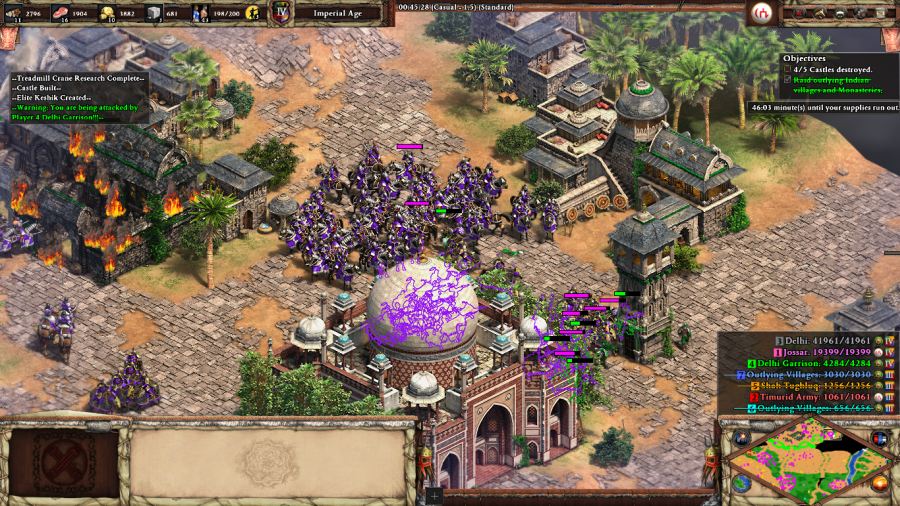 Three of the enemy Castles are in the walls, with the last two being deeper in the city itself, but I found it easier to break through at the gates of the city in the middle and then circle around before finishing things off next to this Wonder. Well, technically the final blow comes when my Trebuchets, which are offscreen to the northwest, proceed to reduce the final Castle, which is offscreen to the southeast, to rubble. But that's not very photogenic, now is it? Tamerlane: Delhi is ours! Its vast riches will be more than enough to finance my future conquests. Mission 4 Ending Text "The Indian army relied on the charge of its dreaded elephants to shock their enemies and drive them into disorder. No stranger to the art of war, Tamerlane knew this. In a stroke of genius, he loaded the camels in his baggage train with straw and wood and set them aflame, whipping them towards the enemy lines. The sight terrified the elephants, who doubled back and trampled their own men. The battle was a rout. Two hundred years' worth of Indian treasure was loaded onto a train of wagons and carried back to Samarkand. In response to an uprising, Tamerlane's armies reduced the jewel of Northern India to a charnel house. Death and fire mingled in a putrid stench that enveloped Delhi for weeks. Still, Tamerlane was not satisfied�there was unfinished business to the west." Back to proper form with this scenario! Just as well, since this is the first mission where you get unfettered access to the Imperial Age and thus the full set of toys available to the Tatars. Scenario might have been improved by taking out some of the last part of the siege and replacing it with a big, final battle against the Delhi Garrison as they realize that their defenses can't hold and ride out in force, but it's kind of hard to figure out where that would have gone and the scenario already had the intro battle, so I can respect the decision to finish things off with a siege instead. Extra Slides Mission 4 - Intro Slide 1 Mission 4 - Intro Slide 2 Mission 4 - Intro Slide 3 Mission 4 - End Slide 1 Mission 4 - End Slide 2 Mission 4 - End Slide 3 Mission 4 - End Slide 4 Jossar fucked around with this message at 17:03 on Jan 21, 2024 |
|
#
?
Jan 21, 2024 16:56
|
|
|

|
| # ? Apr 29, 2024 22:11 |
|
|
Tamerlane - Part 5: Scourge of the Levant Age of Empires II: Definitive Edition - Hazulu Mission 5 Starting Text "Silence gripped the court as the narrative evoked fear and awe. The meal had been finished for some time, and the fires were beginning to die low. 'If Tamerlane turned west, he surely would have collided with the mighty Ottoman Empire. Would he even dare to do such a thing?' For some time, the local Turkoman tribes of the Levant had been requesting aid against Ottoman aggression. With his army rested and his coffers full of Indian riches, Tamerlane was ready for more bloodshed. He knew that there was more than one way to motivate an army. Religious fervor and promises of land and plunder drove his men forward.' This land was familiar with the terror of previous invasions, but nothing could prepare them for the onslaught that lay ahead. Thirsty for glory, Tamerlane's armies flooded across mountains, plains, and rivers to terrorize Armenia, Georgia, and the Levant.'" 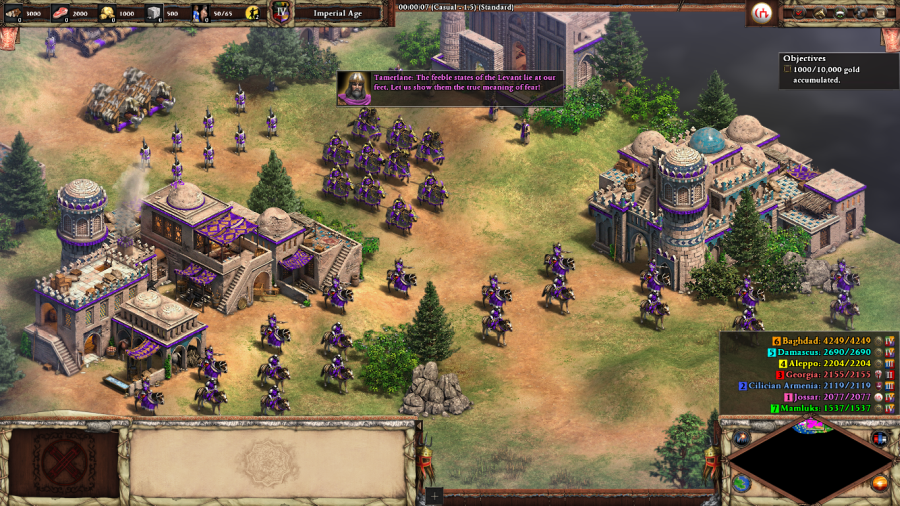 Tamerlane: The feeble states of the Levant lie at our feet. Let us show them the true meaning of fear! This mission is basically the same as Attila 3, but reworked so that instead of facing a couple of small Byzantine cities and Constantinople, you're instead plundering your way across the more varied factions of the Caucasus and the Levant. You start with a small base up north and a decent size army, although all you can do for right now on the civilian side is train some Fishing Boats on the Black Sea. 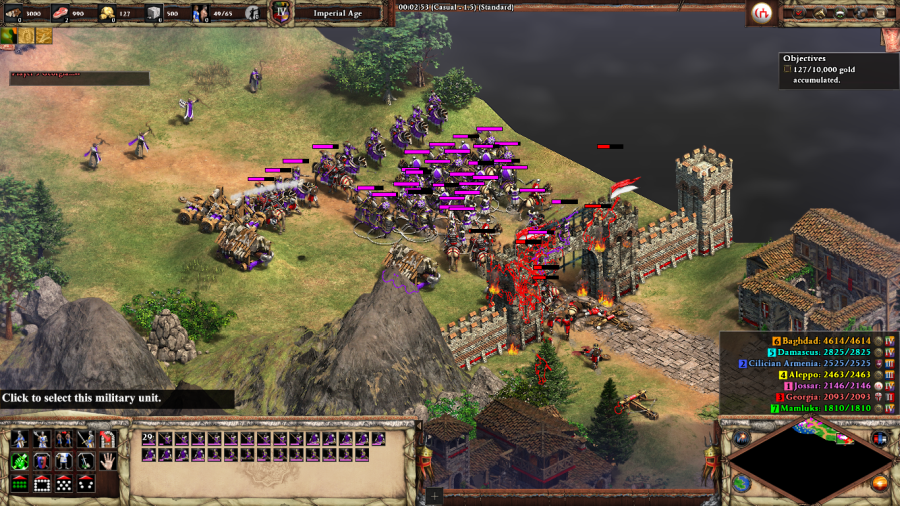 Timurid Rider: As the air fills with smoke, local dignitaries flock to us with the false hope of trading their gold for their lives! 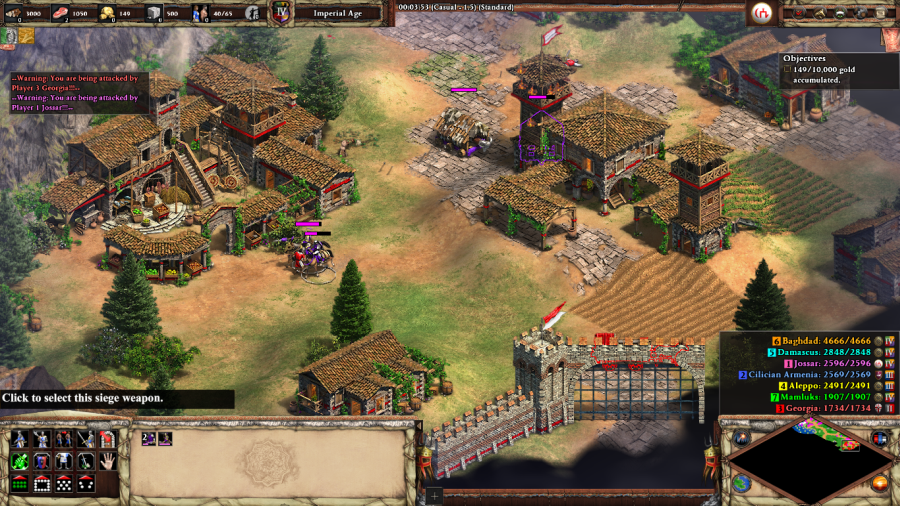 Georgians: No, not our precious market! Take this gold, please, and go elsewhere! (after destroying the Town Center) Tamerlane has descended upon Van and hurled its inhabitants from the crags! Pray for the fallen! Georgia has a small, hopelessly out of date army with which they try to defend their capitol of Van. Battering it aside leaves the town open to be ransacked for some easy early resources. The NPCs in this mission are, somehow, even more terrified of you than the people of Constantinople were of Attila. Which fits, if you're gonna go all-in on the power fantasy of being the conquering horde, might as well include the wailing and gnashing teeth somewhere. Case in point... 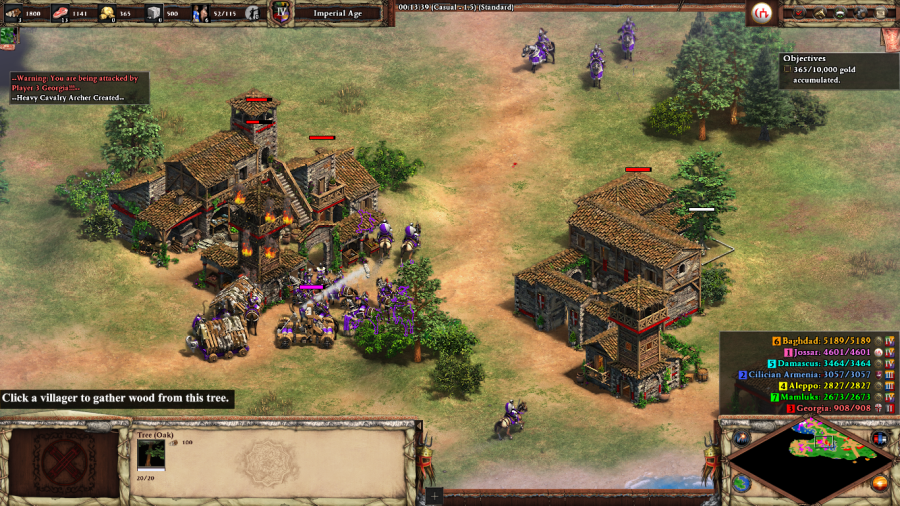 Georgians: How will we catch fish to trade without our dock on Lake Van? Timurid Rider: The Georgians fell to us like leaves before the approaching winter, Amir. Going too far south from Georgia sends you towards Baghdad, the most powerful faction on the map, so I instead double back around and destroy this camp, which finishes of the Georgians for good.  Timurid Rider: Amir, this Turkoman village has offered to help supply our horde! Directly to the southwest of the lakeside Georgian Dock is a Town Center and some villagers, allowing you to start construction on a proper economy and build troop production facilities closer to the fight.  Timurid Rider: Dismayed by the slaughter, enemy envoys hasten in vain to offer us gold in exchange for leaving their lands! Slaying some of the trade carts belonging to the other factions can get you a small amount of Gold, but you're mostly interested in doing so to try and limit enemy faction gold income. Doing so supposedly increases the aggression level of the enemy factions targeted, but I didn't notice any significant deviation in their behavior from what I otherwise expected.  Aleppo: What on earth... our monastery is now a pile of rubble! (after destroying the Town Center) You have destroyed our Town Center! Is there nothing we can do to make you leave?  Aleppo: Tamerlane has torched our finest madrassa! God save us! (after destroying the Market) Our marketplace, jewel of our city, lies in ashes! A blight upon these Tatars! Timurid Rider: Aleppo lies beneath our heel! Our path to Anatolia is now open. Continuing southwest, Aleppo is a slightly tougher fight than Georgia, but not by much. I guess they throw around a few more Monks. I will say that this mission had Rams doing wonders for me, when usually I would just stick to Trebuchets. No particular bonuses to Tatar Siege Rams that I can think of, maybe it's just because the open spacing of these towns meant there was less merry havoc with their pathfinding compared to usual.  Cilician Armenia: No! Now our eastern trade routes are lost!  Cilician Armenia: Tamerlane has plunged into Anatolia and demolished our trading center! (after destroying the Town Center) We have lost our town center to the ravaging horde! Surely the apocalypse has come...  Cilician Armenia: Tamerlane's armies have demolished our fortress at Sis! Where will we find refuge now? Timurid Rider: Cilician Armenia shall fall into obscurity, my lord. Completing the southwestern sweep, Cilician Armenia is the first tough enemy of the map, as they love to spam Composite Bowmen (Armenian unique unit, Foot Archer that ignores the pierce armor of non-Siege land units) and have a proper military camp, complete with a Castle, but my engine's up and running at this point and they're heavily outmatched.  And with that, the mission's already over. After defeating Cilician Armenia, I was only a couple hundred gold away from victory, so rather than start a whole new offensive or sit mining gold for a while, I just built a Market and got to 10,000 gold through selling resources. Tamerlane: Ashes and rubble are all we leave behind, but the wealth that we have plundered will ensure that my line prospers for eternity! Mission 5 Ending Text "Tamerlane's forces ran rampant, looting and burning as they went. For a land that had only recently experienced the plague, this scourge must have seemed to signal the end of the world.' Although he was known for his military campaigns, Tamerlane was also a patron of the arts. When a city was sacked, the artisans and scholars were spared and sent to his capital at Samarkand, where they created a vibrant blend of cultures.' 'Populations who resisted him, however, were not so lucky. After his siege had broken the Armenian fortress of Van, Tamerlane ordered its inhabitants hurled from the crags.' Just like Hulegu roughly a century before, Tamerlane showed particular cruelty to the city of Baghdad. Each man in Tamerlane's army was required to bring him two heads. The warriors slaughtered the population of the city, then slew the prisoners they had brought with them. It is said that to satisfy Tamerlane's command, some even slew their own wives.' For the survivors of this savagery, it seemed as if the sun would never rise again.'" I've sat and thought about it, and while I do still enjoy this mission a little bit more than Attila 3 in the execution of the same baseline concept, it's a closer call than I would have expected. Game should have cut out one of the weaker opponents so that it's more likely that the average player would have to finish things off by fighting one of the stronger enemy factions like Baghdad or Damascus instead. Extra Slides Mission 5 - Intro Slide 1 Mission 5 - Intro Slide 2 Mission 5 - Intro Slide 3 Mission 5 - End Slide 1 Mission 5 - End Slide 2 Mission 5 - End Slide 3 Mission 5 - End Slide 4 Mission 5 - End Slide 5 Jossar fucked around with this message at 04:30 on Jan 24, 2024 |
|
#
?
Jan 24, 2024 04:18
|
|