


|
 Age of Empires II: Definitive Edition - Main Theme Introduction Age of Empires II, originally subtitled "The Age of Kings", is a Real Time Strategy game originally developed in 1999 by Ensemble Studios as the sequel to the highly successful Age of Empires. Instead of being set at the dawn of civilization, you play a bunch of civilizations/cultures from all over the world between what the Europeans would classify as the Dark Ages and the Renaissance, locked in scenarios of economic development and combat. AoEII did really well for itself and became a staple of the RTS genre, but sort of fell by the wayside for newer games or ones with more comprehensive competitive scenes, though it always retained something of a strong cult following, even as official multiplayer networks floundered and people started moving to informal network gaming services. Fast forward to 2013. Hidden Path Entertainment, coming off of successfully releasing Counter Strike: Global Offensive and having one of the original AoEII's lead developers in its company lineup, says it's going to remake Age of Empires II as the "HD Edition". It releases to mixed reviews - the general opinion is that nothing was really done to improve the game beyond giving it a new coat of paint. New players find the lack of modern quality of life improvements stifling, old ones hate that the that they're being forced to buy the game again for no reason and that the competitive scene community now has to choose whether to stay on their external networks or migrate to Steam. But enough interest was generated in the idea of an HD remake that Microsoft decided to step in and promise to redo the whole series, "done right" this time. Age of Empires II: Definitive Edition was released in 2019, to mark an even 20 year anniversary of the game, and this time has been regarded as the remaster of AoEII that people actually wanted. The game's in as good a state as it has ever been, and is being maintained on a continual basis with balance tweaks and miniature expansion packs coming out every few months. How This Will Work Alright, let's start with one thing up front: I am not a very good AoEII player. Part of the goal of this Let's Play is as much to motivate me to become a better player, as much as anything else. For this reason, this will be a screenshot Let's Play covering the highlights of scenarios so you don't get bored to tears while I mess around for an hour trying to get things done. The goal is to show off all of the campaigns and one-off scenarios that come with the game on Standard difficulty. I might be encouraged to do stuff from the Steam Workshop/Standard Multiplayer/Alternate Mode Multiplayer/those random scenarios that were hidden in the 1999 version but you had to manually dig them out, but that's all subject to personal discretion and how well this Let's Play goes in general. I will be completing the William Wallace tutorial campaign and then opening up the floor for people to vote on what my next campaign would be, subject to a few limitations. For instance, I'm going to try and have the first couple of votes limit themselves to campaigns that came with the original Age of Kings and its first expansion: Age of Conquerors so people can get a feel on how the old game was structured before going more freeform. (I also don't own any of the expansions to start with, but I will buy them all before we're done here. They're each only  a piece off-sale anyway.) a piece off-sale anyway.)Spoiler/Historical Discussion Policy Okay, look. Even moreso than Empire Earth, which got a bit wacky about this, reading a history book is going to spoil the game. Don't go out of your way to intentionally spoil the current plotline's narrative climax, but I can't really condemn half a page to black lines because I'm worried that talking about the Austrians in one scenario gives away the game for the Ottomans in another. Likewise, you are free to talk about history, but keep it civil. If I see people restarting the Crusades in the thread while discussing the Crusades in the thread, I am going to shut things down until the next update. Jossar fucked around with this message at 16:24 on Mar 26, 2023 |
 #
¿
Mar 26, 2023 15:54
#
¿
Mar 26, 2023 15:54
|
|


|

|
| # ¿ May 16, 2024 13:07 |
|
|
Learning Campaign - William Wallace - Part 1: Marching and Fighting Age of Empires II: Definitive Edition - Celtic Theme Very well, then let us begin, the tale at the beginning. 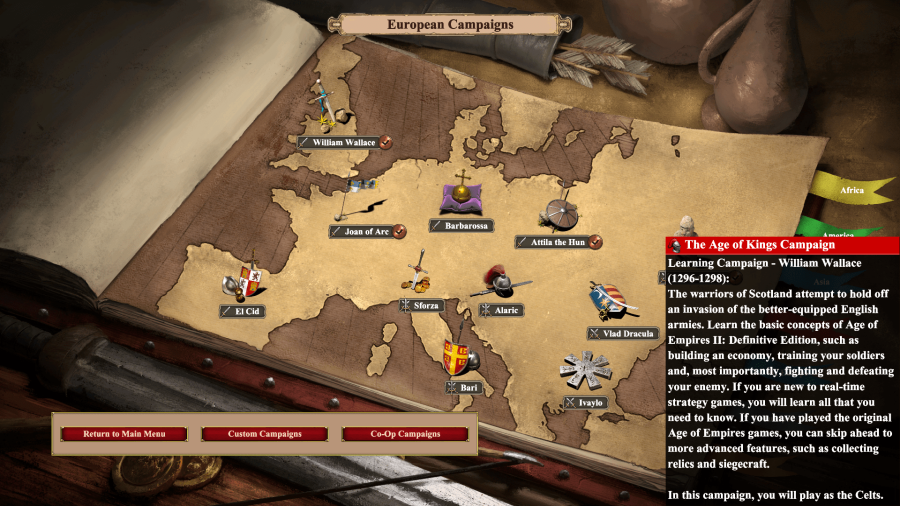 There are a lot of campaigns in Age of Empires II. A lot. Some have more scenarios than others, but they average out at around 5-6, and there's 11 campaigns here just in Europe alone, though it is the most populated continent compared to the others. A bronze checkmark here means that I have previously beaten the campaign completely on Standard, the easiest difficulty setting. Just so you know what I've already gone through and what will be at least slightly new to me. 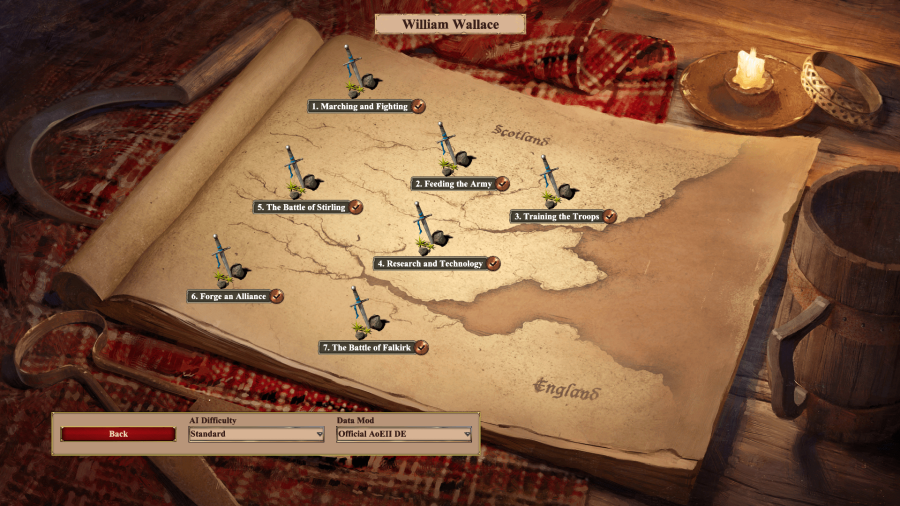 The tutorial campaign, set in Scotland during the First War of Scottish Independence is divided into 7 scenarios. The first couple of scenarios are just basic explanations on how to play the game, but by the time you get to scenario 5, you're basically playing a slightly easier version of a full-scale campaign. It's also a bit more Braveheart than the real thing, right down to the old version of the narrator, who has been toned down a bit for the Definitive Edition. 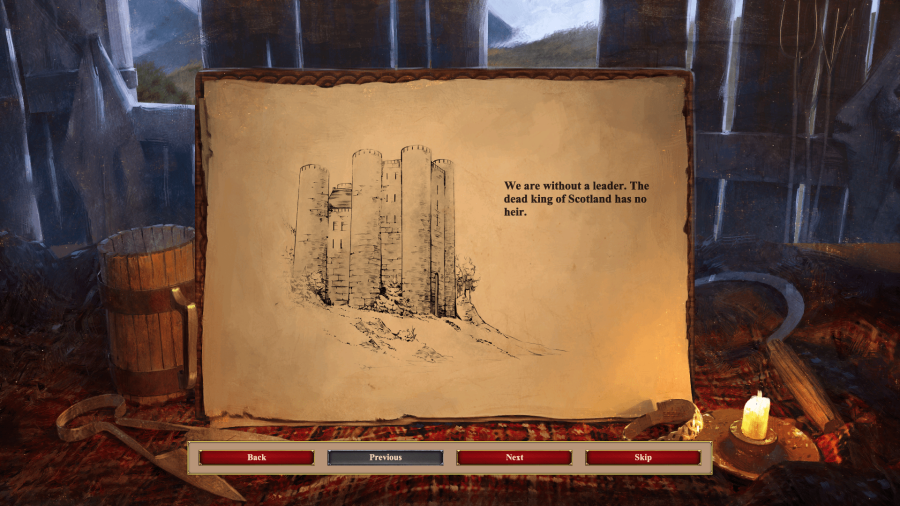 Starting Text Each scenario comes with a neatly illustrated set of slideshow cutscenes to explain the narrative/historical basis of what you're about to do. I'll post them as links at the end so as not to eat up posts, but will include the dialogue under the starter slide. "We are without a leader. The dead king of Scotland has no heir. War creeps in from the south, where Edward Longshanks, the avaricious King of England, has returned from successful campaigns in Wales and France. As Longshanks turns his attention to Scotland, the shadow of fear settles across the Highlands. The English have thousands of Welsh longbowmen, hundreds of knights on horseback, and dozens of siege weapons. We Scottish have a rabble of untrained soldiers who do not even know how to march in a straight line. We must act soon. If we are to have any chance of resistance, we need to forge an army by any means necessary."  Here's the start screen to every mission. The Objectives screen gives you your scenario goals, which will periodically update. The Hints screen gives a few tips related to the mission, and the Scouts screen usually gives you a rough description of where the various factions are placed and what their signature force composition is going to be. I will skip showing this off for the rest of the tutorial campaign as things are relatively straightforward. 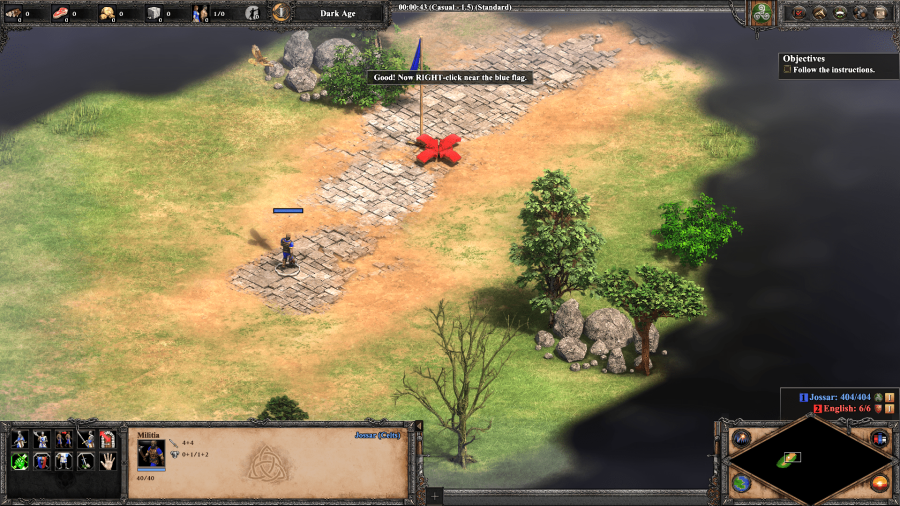 Standard RTS gameplay that we might as well get out of the way - left click on units to select them, right click to have them move. 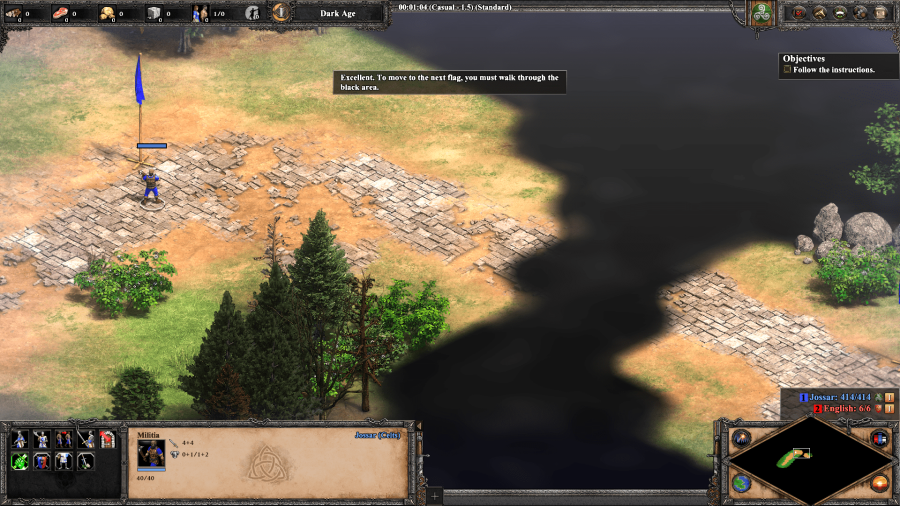 Fog of War exists in two forms - entirely blank area that you know nothing about depicted as an inky-blackness, and area that you know the rough composition of but don't know its current status because you do not have current line of sight. 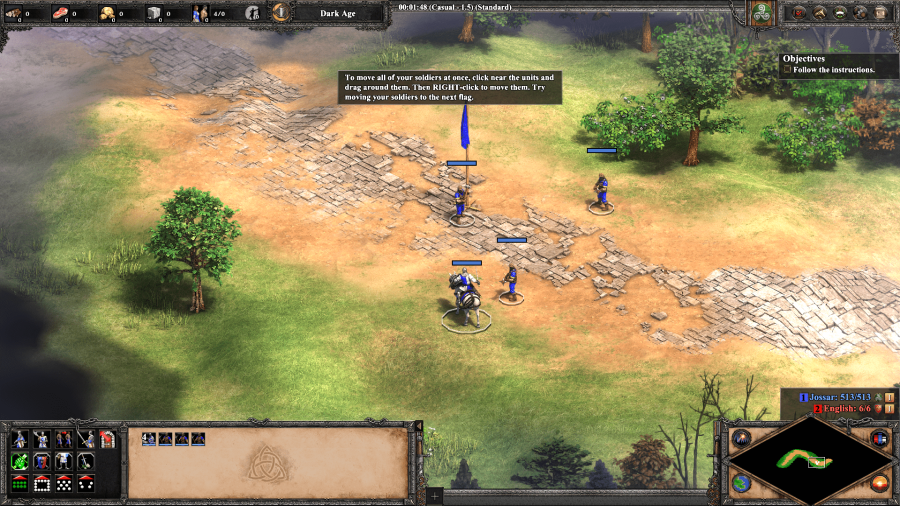 Click in a square around units to select all of them at once, and move them all. Units move at the speed of the slowest unit selected, so if you wanted that Knight to run off ahead, you'd have to let him go off on his own. 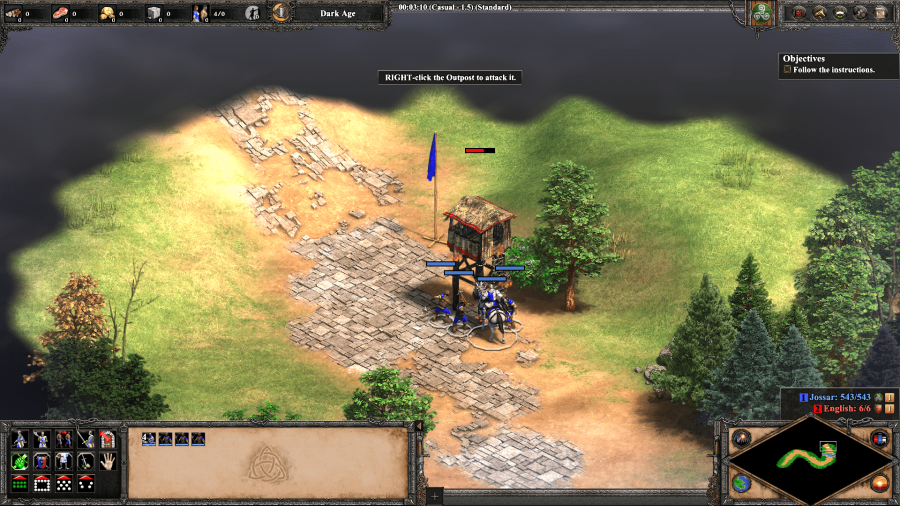 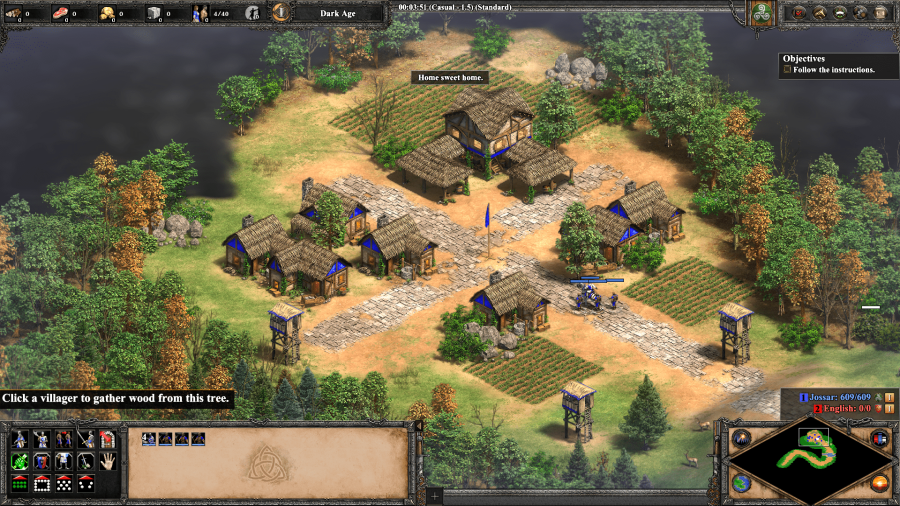 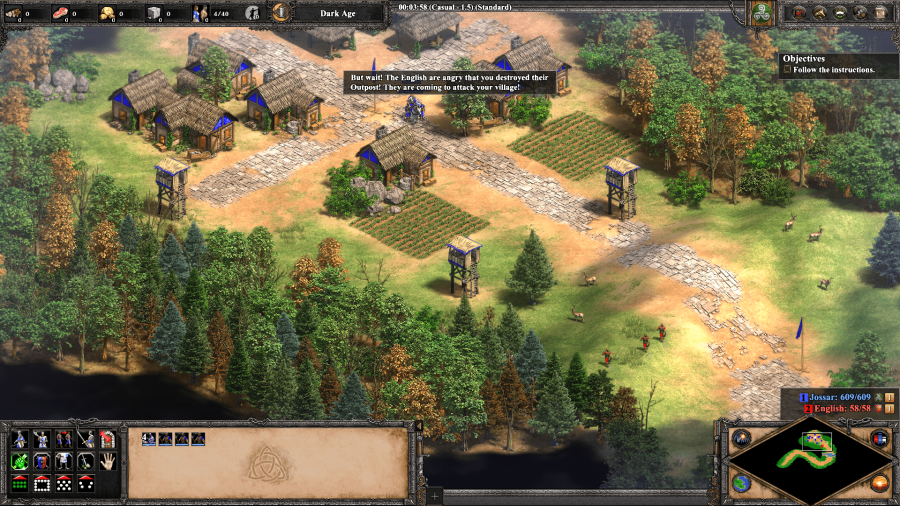 You are tasked with destroying an English outpost, then returning back to your home village, only to have to defend it against an onrush of English militia who are annoyed that you destroyed their outpost. Killing the enemy militia ends the scenario. It's a tutorial scenario, so of course it's going to be fairly simplistic, but I do love the little atmospheric touches like the game letting you bask in your cozy little your village for a few seconds before the counterattack.  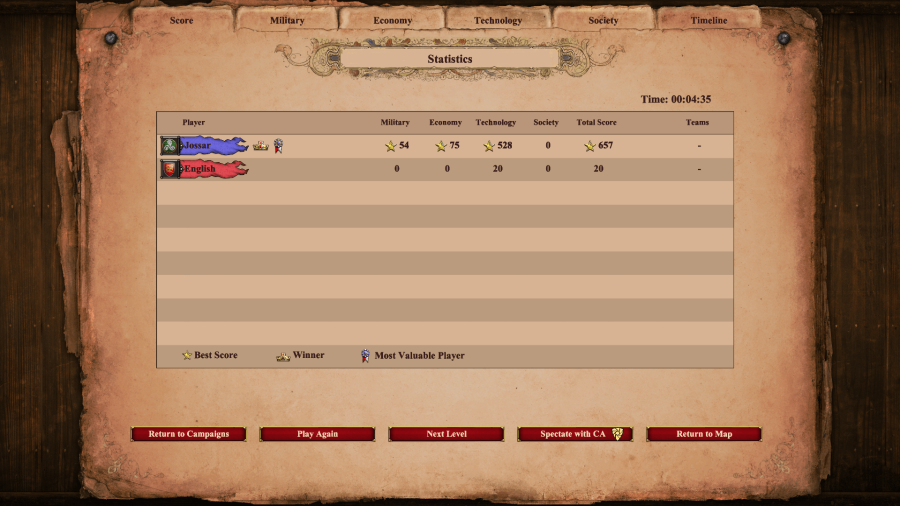 Going to take this opportunity to show off the victory/statistics screens this first time around. The game lets you review how you did in-depth on a variety of screens, which is admittedly more useful for figuring how things shaped up during a Random Map game. Stars indicate you did the best in a particular category, the crown shows that you were on the winning team, and the ribbon shows that you were your team's MVP (in a significant, notable way). I will probably skip statistics for the future unless there's something very noteworthy that pops up. There's also usually a slideshow cutscene after the mission. I will usually just post the text for that one, and otherwise include its slides with the others: Ending Text "Scotland has soldiers now, if only a few. But if we are to turn back the greed of Edward Longshanks, we will need many more recruits, and much more gold in our coffers. These ancient stones and oaks around us will soon be drenched with the blood of clansmen." I'll try to get the tutorial campaign out of the way rather quickly so we can move on to things that aren't just "press button to move unit" soon enough. Extra Slides Intro Slide 1 Intro Slide 2 Intro Slide 3 End Slide 1 End Slide 2 Jossar fucked around with this message at 02:46 on Apr 29, 2023 |
|
#
¿
Mar 26, 2023 17:20
|
|
|
Fixed. Apparently I did three whole Let's Plays without knowing how to convert regular images into ones that wouldn't break image scaling before this. They really do let anybody post on the internet! 
|
|
#
¿
Mar 26, 2023 18:40
|
|
|
coop52 posted:I spent so many hours playing the original release back in high school. I played mostly the random maps and occasional PvP, usually some custom map type where there was a forest separating the enemy sides so you couldn�t rush the opposition in the early game (forget the term, started with an M?) because I�m a huge piece of chicken poo poo. I had no idea they came out with another edition after the 2013 one. I'll have to check it out. Neat. Looking it up on the wiki, I think the map you're talking about is called Michi and it now comes with Definitive Edition (edit: I'm not sure if it's in by default or was added only to the Lords of the West pool though). Learning Campaign - William Wallace - Parts 2-4: Feeding the Army, Training the Troops, Research and Technology Yeah, the rest of the early tutorial missions are pretty much complete nothings. Let's just get them all out of the way in one post. Mission 2 Starting Text "An army marches on its stomach, or so the old saying goes. My clansmen have been farming and tending sheep for hundreds of years... but gathering enough food to feed an army is a different matter entirely. Without a strong economy, the meager forces that we have cobbled together will collapse again."  The goal is to get 50 of each resource except Stone, simple enough. Here is a Villager, your basic resource gathering and building unit, standing next to a Town Center, your basic resource dropoff point and production center for more Villagers. The Town Center is surrounded by a couple of trees, which provide Wood and has a berry patch to the southwest which provides Food. In the Definitive Edition, it's a little bit easier to see at a glance how many resources are left in several of these resource piles just by hovering over them. Villagers gather resources until they're full, and bring them back to a dropoff point, unless you personally tell them to haul everything back ASAP. 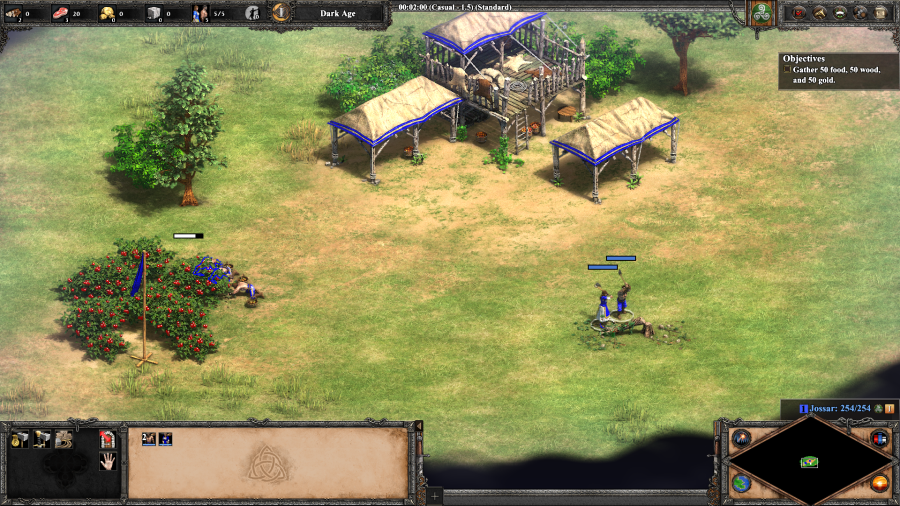 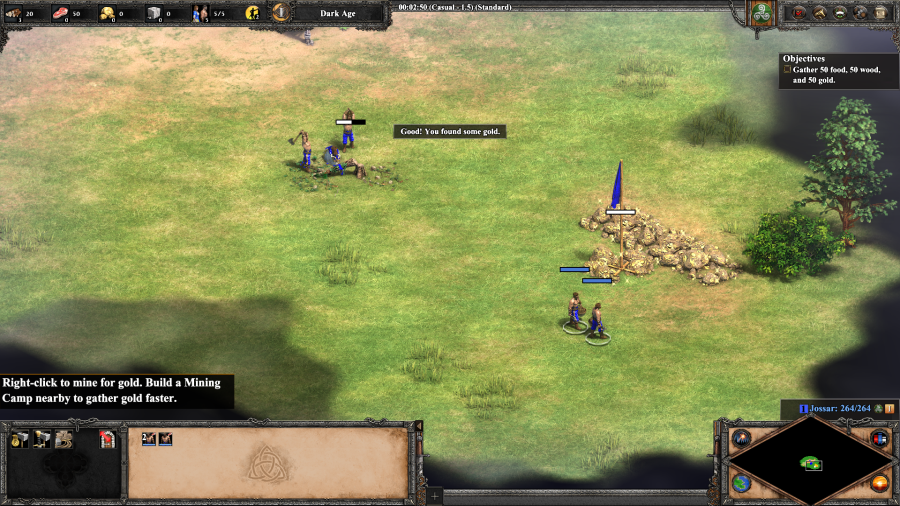 After your first couple of berry harvests, which you can track in the upper left corner of the screen, the game gives you a couple more villagers to speed up the rest of the process. The only thing that isn't immediately obvious is where the gold mine is, but it's just a little bit to the southeast of the town center off in the Fog of War. Finish gathering 50 of each of these resources and the scenario ends. Mission 2 Ending Text "Edward Longshanks, for all his disrepute, has shown his military tactics in Wales, England, and France to be very effective, if not cruel and ruthless. He is indeed an enemy to be feared. The English sacked the town of Berwick-upon-Tweed. With that I could call it a battle, but it was truly more of a massacre. Unless we organize our army, there will be more massacres to follow. I pray that we can be ready for when Longshanks comes." Mission 3 Starting Text "In villages throughout the Highlands, there is grim talk of skirmishes between Scotland and England. We lost the town of Dunbar last week. Scottish defenders broke ranks and fled. The English have an army that is larger and better trained. To compete with them, we are going to need new recruits to pick up spear, sword, and bow. We must transform these shepherds into soldiers." 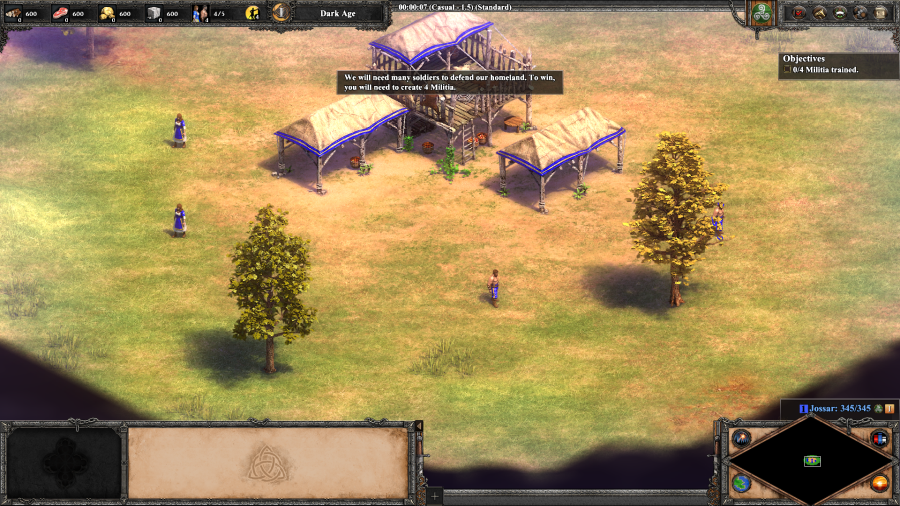 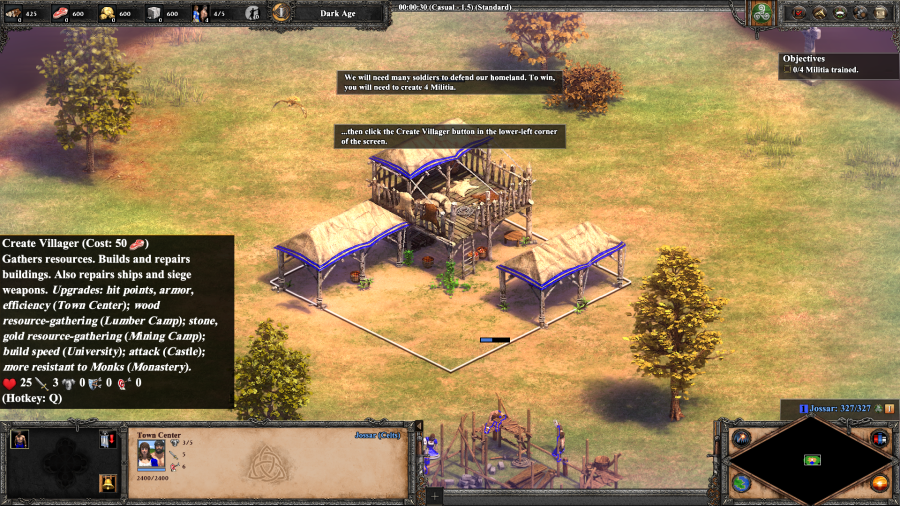 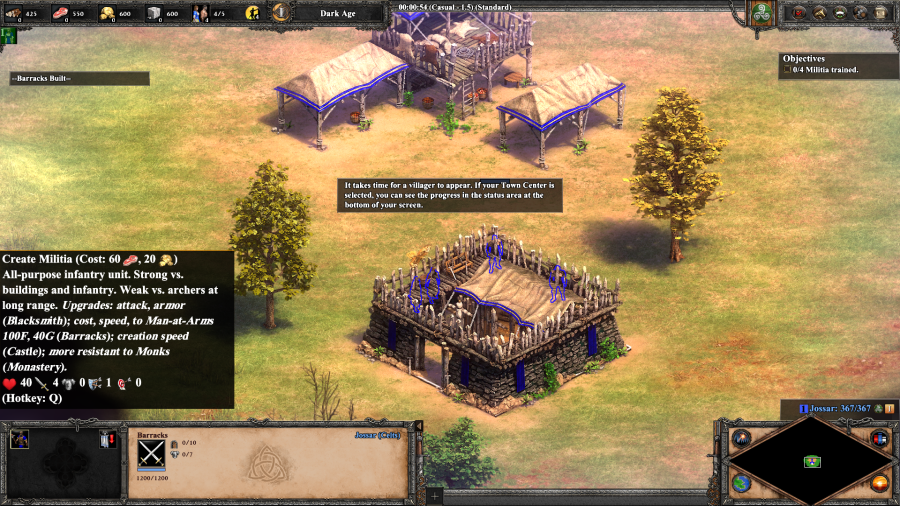 The goal is to create 4 Militia units, or the lowest tier of Infantry. The game wants you to go to the Town Center to start creating additional villagers, which I do, but at the same time I also start building a Barracks, the main Infantry troop production facility. Construction goes faster the more villagers are working on a building, but of course, the more villagers that are doing that, the less you have to gather resources. 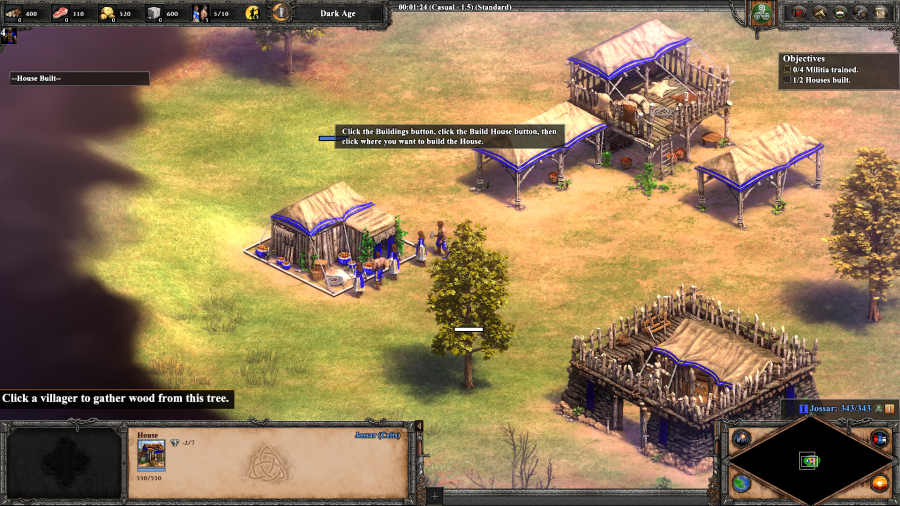 You can't skip the tutorial entirely though! I mean, you can if you kill off all but one of your villagers and produce 4 militia, but assuming that you are playing normally you will run into your population capacity limit. It's the number next to the stone, with the left number representing how many people you currently have and the right number representing your current population limit. This comes in two forms, the local limit that can be increased by constructing buildings such as Houses, Town Centers, and Castles, and a total potential limit which you cannot go over for an individual map no matter how many additional buildings you create. 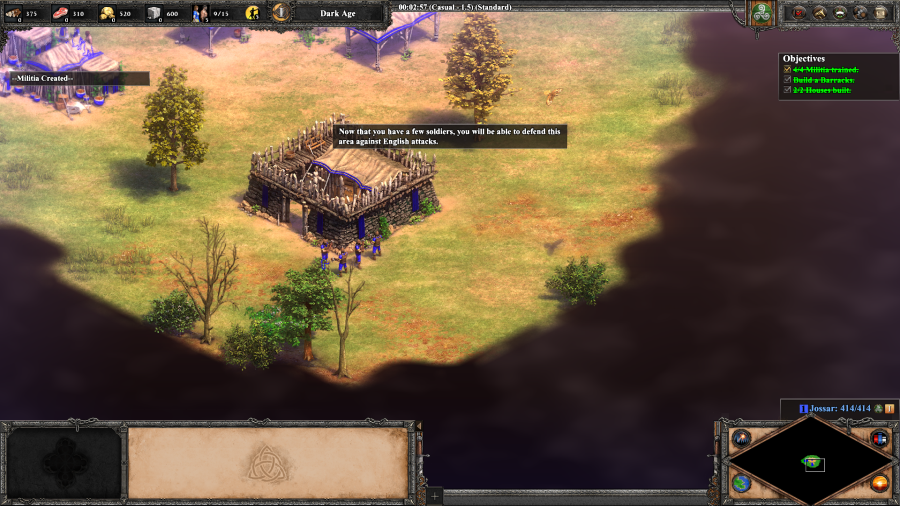 Once you've solved the housing shortage, you have more than enough resources to create 4 Militia at the barracks and finish the scenario. Mission 3 Ending Text "Now that we have militias stationed across the border, the English have slowed their raids. But facing Longshanks' army will be another matter. The wicked English king has yet to bring his famous longbows to bear. Our militias can only get us so far. We are going to need more advanced weapons." Mission 4 Starting Text "Rumors creep from the south of a giant who leads the forces of Scotland, his great sword driving through earth, man, and horse alike. If this mythical knight can stall the English advance, it will give us time to develop the arms we need. Even now our smiths are forging swords, and fletchers are crafting arrows and crossbow bolts." 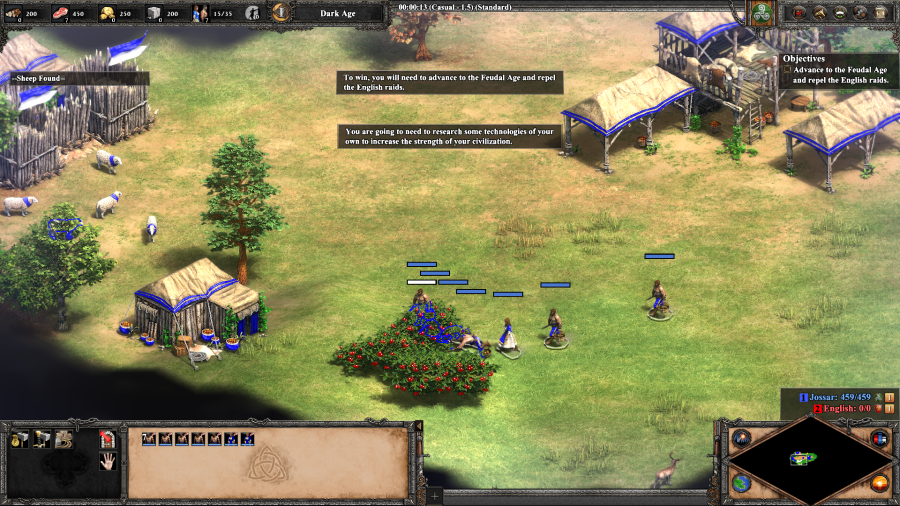 The goal is slightly more interesting this time, advance to the Feudal Age, upgrade your troops, and repel a more sizable English raid. The first goal is to have all of our villagers gather berries until we hit 500 food. This is fairly simple as there's a berry bush right next to all your villagers, along with a bunch of sheep. Herd animals are mobile sources of food that you can drag near resource points and kill for easier accessibility. This is just the tip of the iceberg of a large series of calculations that people have made regarding the Food economy, which can be summarized as: Unless you have a bunch of coastal fish nearby your start, the most efficient thing is to lure aggressive animals near your Town Center and kill/harvest them there until you have the Wood to setup a fishing economy or Farms, using Mills near other hunting sources/berries and herd animals as a stopgap measure. Once you get to the level where you need to worry about sustainable/long term Food solutions, Fishing is more cost efficient in terms of wood than Farming until the lategame, but you aren't always guaranteed water and there are enough asterisks involved depending on civilization and your preference for speed over efficiency to make your head explode. This generally reflects a tendency for the early game to be more micro-heavy than the late game. 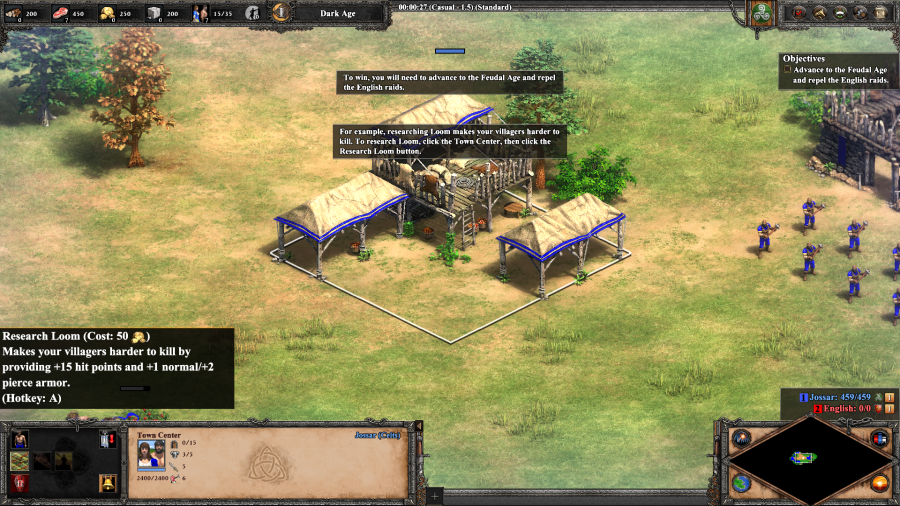 While the villagers are working, the game also takes the opportunity to teach us about technology research in general. Definitive Edition also provides an additional little glow as a visual cue to show if your buildings are busy researching something or not. Loom is one of the early technologies that pretty much universally gets researched as quickly as you can at the Town Center to minimize potential casualties from enemy raiding. You would almost think it should be researched by default, but trying to figure out how to slot it in is sort of the game's way of getting you to think about how to manage the early game's action economy. This is more important if you're playing a Random Map game than in the campaigns, though never underestimate the damage that can be done by early raiding, especially if you're playing against mid-higher level AI. 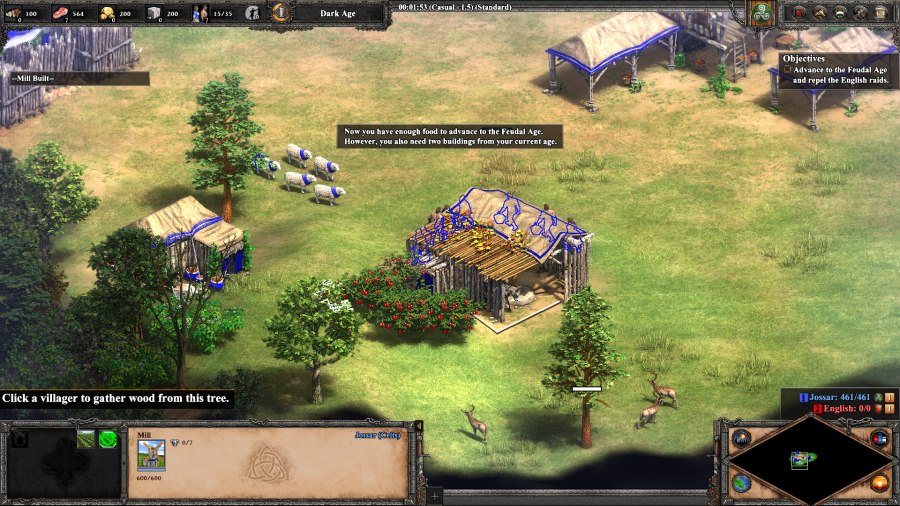 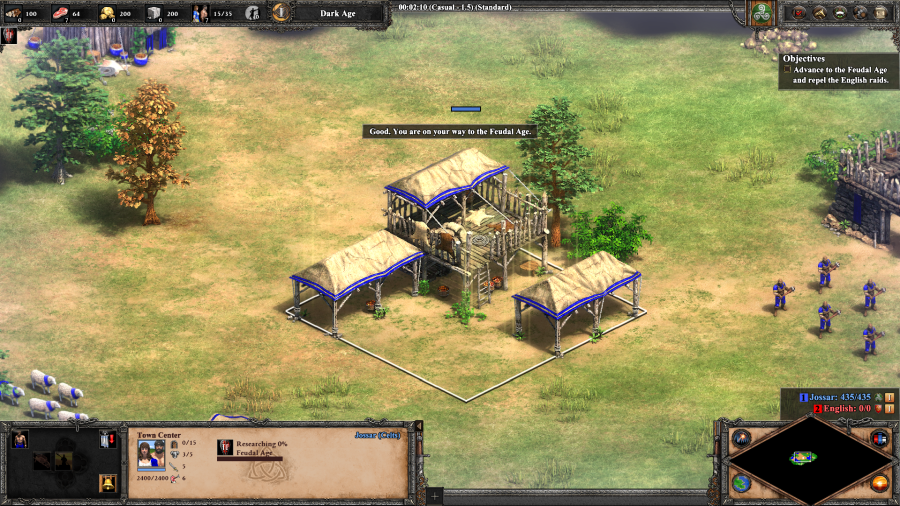 Apart from 500 Food, the other prerequisite for teching up from the beginning age or Dark Age, to the Feudal Age, is having two buildings of your current era built that aren't Houses/Walls/the starting Town Center. The game has a Barracks already built offscreen, so all you need to do is build a Mill (a Food dropoff point and research facility) next to the berry bushes and you'll have everything you need to Age up, which is done at the Town Center.  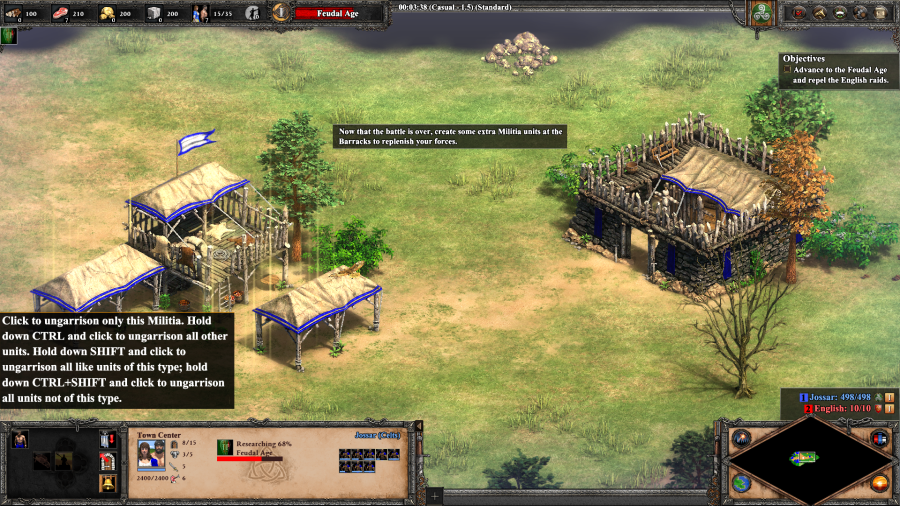 During the Age transition, the English attack your town. This is probably meant to show off that you can keep working on stuff in the rest of your town even while the age up is happening, but I find something else to do with the time. I garrison all of my military units into my Town Center, which allows them to slowly heal up, and shows off that when garrisoned, the Town Center gains a ranged attack versus enemies. The normal use case for this is to have your villagers to run into the town center during raids so that they aren't killed and can help your military fend off a small-scale enemy attack. 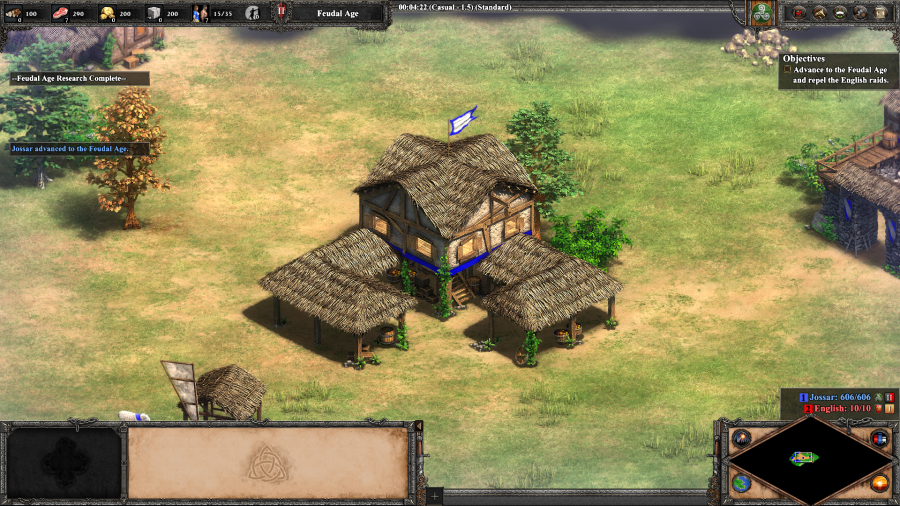 The Feudal Age upgrade completes, also cosmetically altering all of your buildings and making it look like you live in an actual town rather than a glorified hunting/military camp. This grants you access to additional buildings, units, and researches. 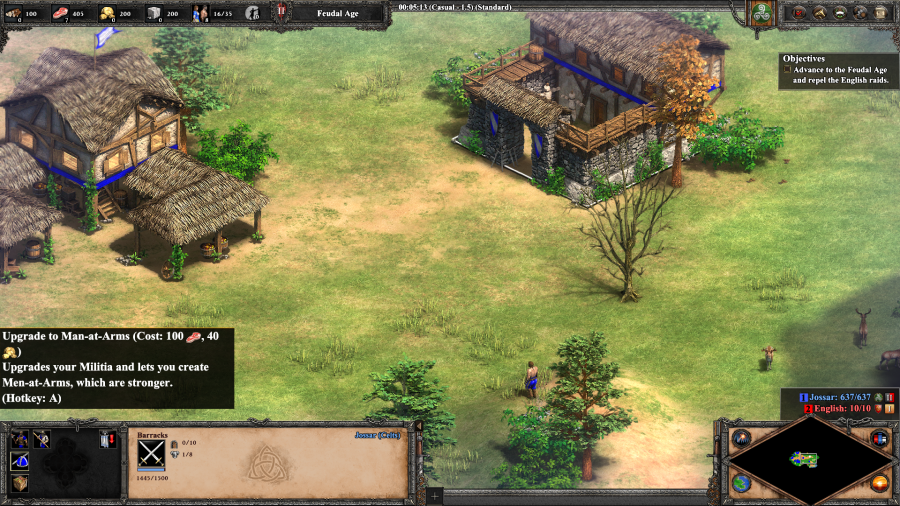 Like so - going back to the Barracks allows you to upgrade your Militia units into Men-at-Arms.  With the upgrade complete, the English send in a Knight and some Militia which are easy to trounce, ending the scenario. Mission 4 Ending Text "Longshanks has invaded, stormed, and sacked the city of Perth. Worse, he has captured the fabled Stone of Scone and declared himself King of Scotland. If we cannot bring about a victory in battle soon, the Scottish armies will be too demoralized to put up any fight at all. If this mythical Scottish giant does exist, I wish that he would bring up his forces to Stirling, where we shall next do battle." Next update, we finally turn things around. Both in terms of there being the start of actual gameplay and the Scottish army not immediately collapsing into cutscene defeats no matter how well we upgrade our units. Extra Slides Mission 2 - Intro Slide 1 Mission 2 - Intro Slide 2 Mission 2 - End Slide 1 Mission 2 - End Slide 2 Mission 3 - Intro Slide 1 Mission 3 - Intro Slide 2 Mission 3 - End Slide 1 Mission 3 - End Slide 2 Mission 4 - Intro Slide 1 Mission 4 - Intro Slide 2 Mission 4 - End Slide 1 Mission 4 - End Slide 2 Jossar fucked around with this message at 02:50 on Apr 10, 2023 |
|
#
¿
Mar 26, 2023 22:43
|
|
|
Well this sure blew up overnight. Always glad to introduce/reintroduce AoE2 to people, especially in its modern form. Learning Campaign - William Wallace - Part 5: The Battle of Stirling Mission 5 Starting Text "The time for minor skirmishes is over. We now prepare for war. The villain, Longshanks, is poised to cross the River Forth and threaten the town of Stirling with a force of men-at-arms, heavy cavalry, and a multitude of archers. Our newly forged army marches southward to establish our own base and attack the English before they can ready their troops." 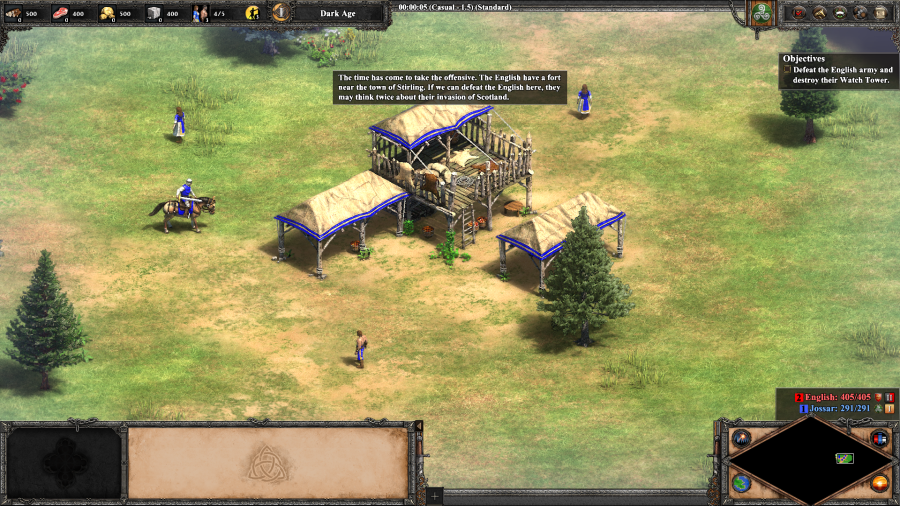 Age of Empires II: Definitive Edition - Shamburger So yeah, this is the first scenario that sort of resembles a real game. You have the standard opening of 3 Villagers, a Town Center, and a Scout Cavalry. The English/Britons are somewhere on the map, find them and destroy their Tower. As such, I try to play it like a Random Map game, although I'm still getting back into the rhythm of things and don't play it perfectly. 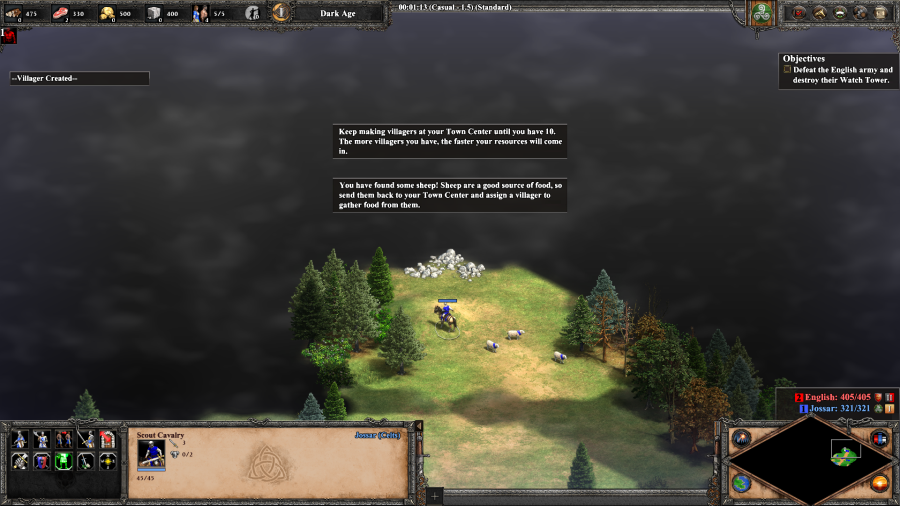 Always make sure to get your Scout Cav out and exploring around your base, this can usually net you a few Sheep. The Scout also discovers a Stone pile, though for this mission it isn't going to be of much use. 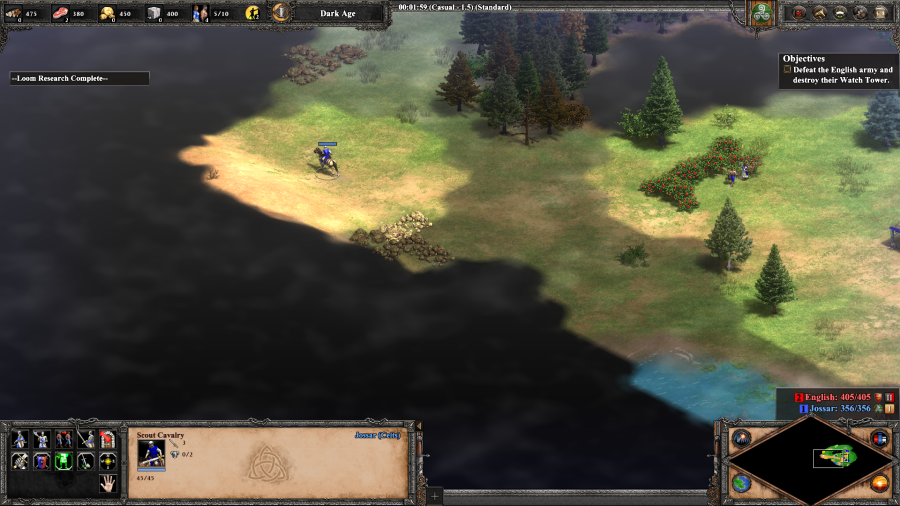 Of greater importance are these Gold piles to the west of town. The game recommends building a Watch Tower on top of the hill just overlooking the gold piles, but one tower by itself isn't really too useful for holding the English off. 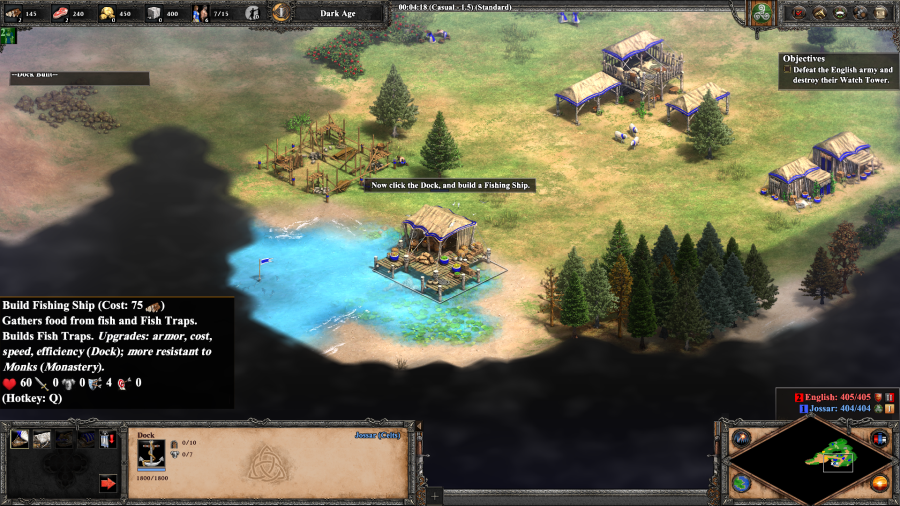 The biggest priority is getting the economy going. I wasn't able to find a Boar quickly and the game gives you plenty of Wood to start, so I just focus on getting a Dock and a Barracks up so I can set some Fishing Ships and rush researching the Feudal Age. By the way, this is also a good opportunity to notice that Definitive Edition tells you how many units are currently working on each resource, it's next to the resource icon. 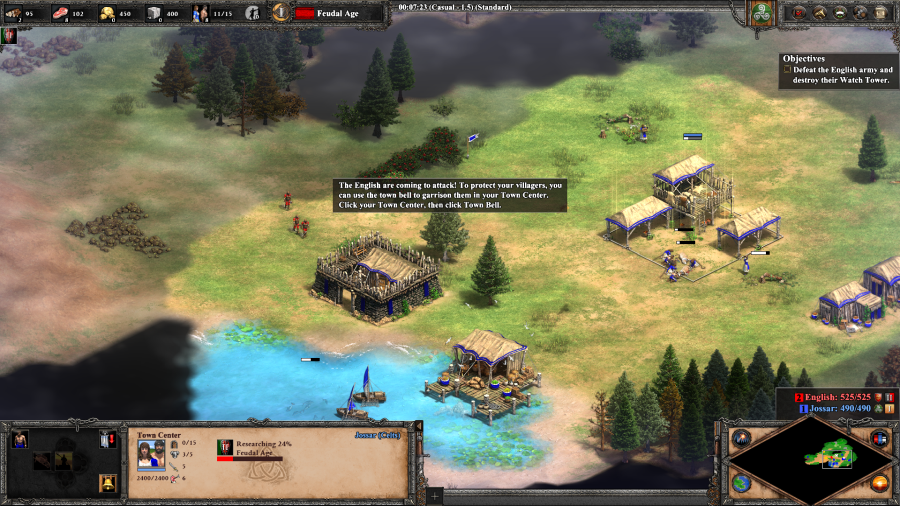 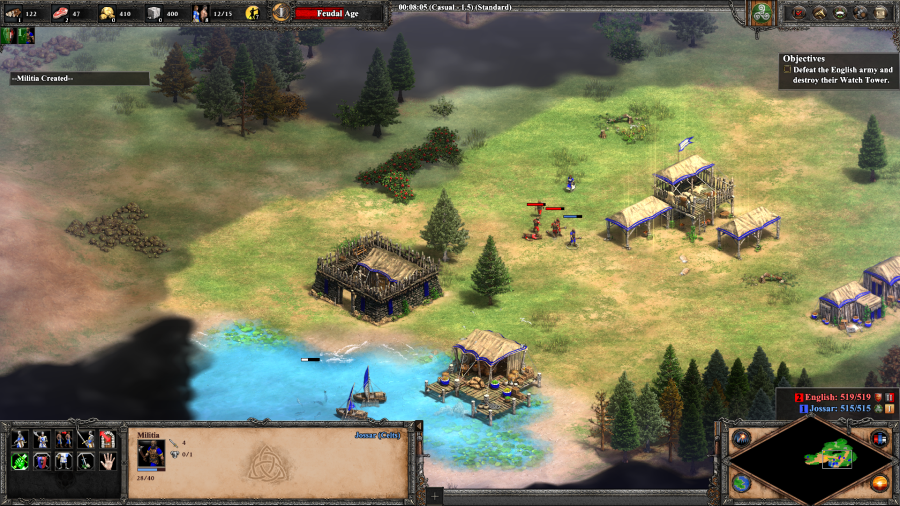 Speaking of rushes, the English send a bunch of Militia at you fairly early on. The game recommends you using your Town Center to fend them off, but the enemy Militia are much more interested in taking down my Barracks. Fortunately, a little bit of kiting with a Militia of my own is enough to get the English Militia into the line of fire. 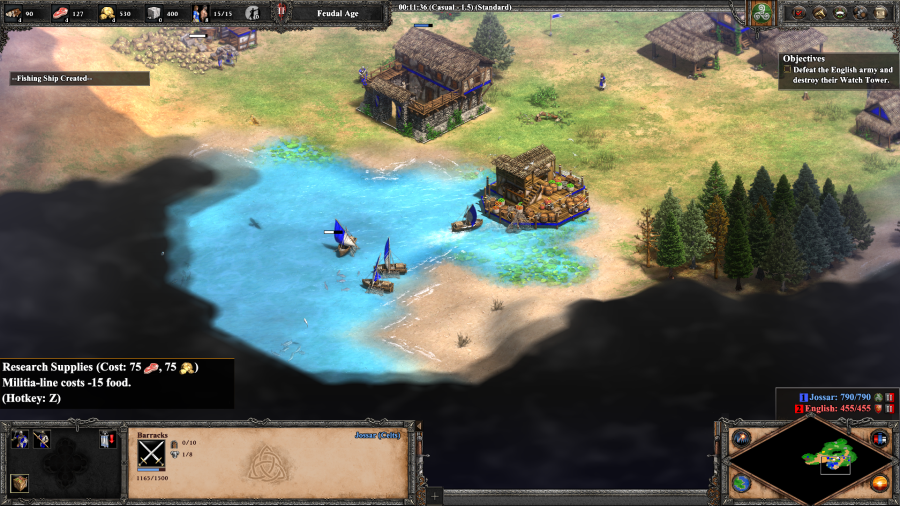 With the English rush defeated, I am free to finish teching up to Feudal, claim the gold piles, and start building up some troops. Here you can also see Supplies, a Feudal Age Research that reduces the Food cost of troops in the Militia line that was introduced in the Definitive Edition to make them a more viable pick in mid-late game fights. 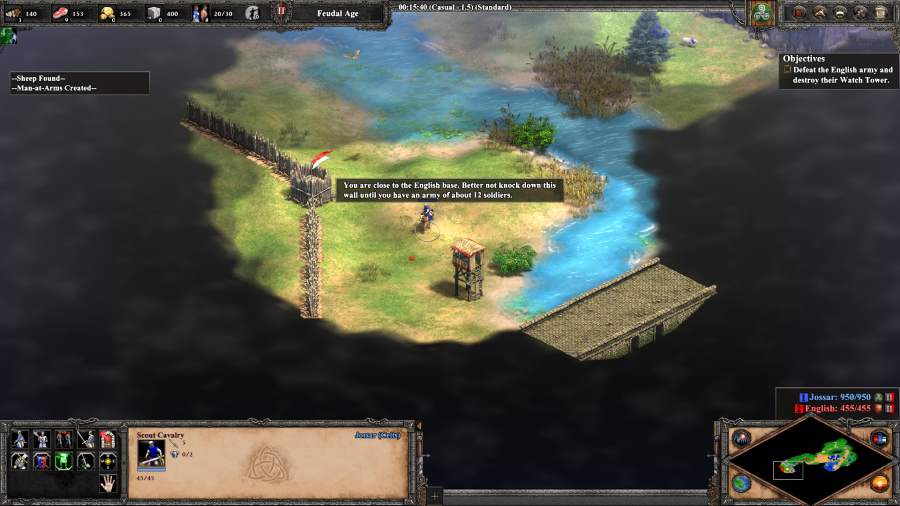 The English base is off to the west. It is lightly defended in terms of static fortifications, with only a few wooden walls, but there's enough troops inside that you don't want to attack it until you have a double digit number of soldiers like the game recommends. 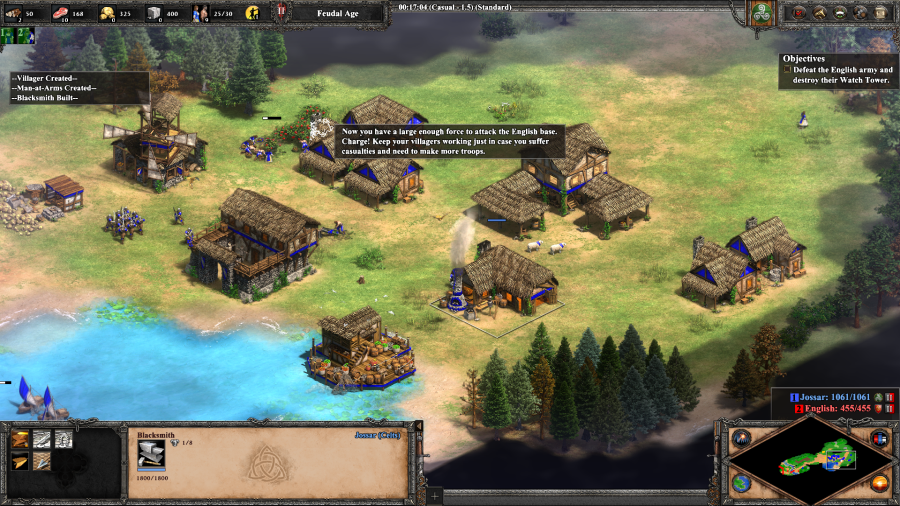 Simultaneously with training more troops, I build a Blacksmith, a Feudal Age Research building, so I can get some increases in Melee unit armor and attack before my army gets to the English fort. 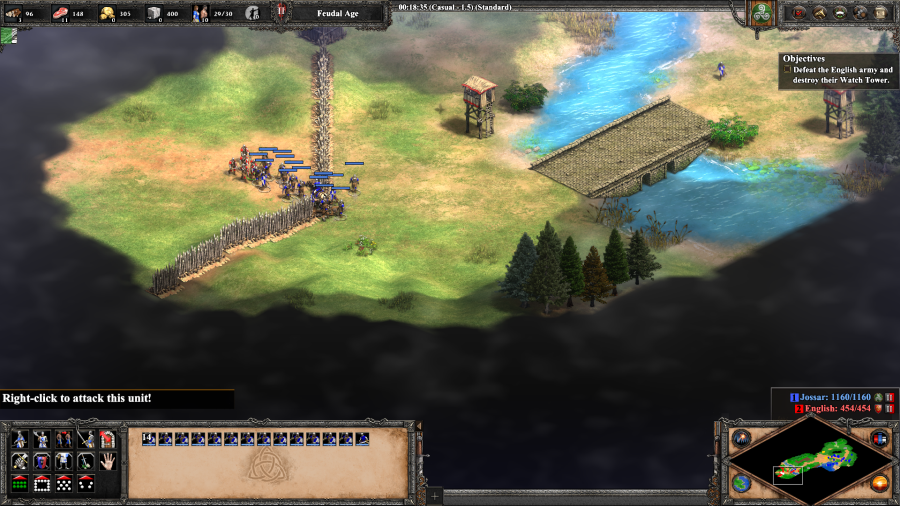 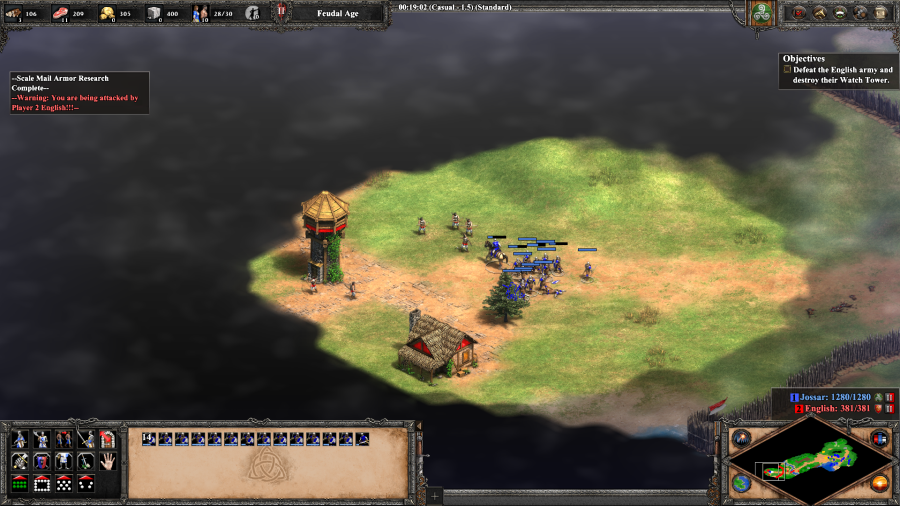 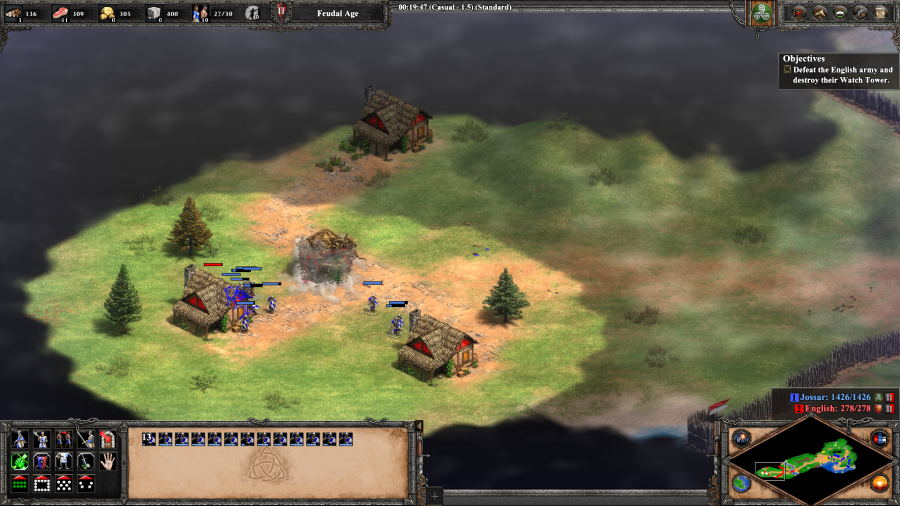 Break through the walls, a wave of Men-At-Arms, and a wave of Archers and you're free to whale on the Tower until it crumbles. Literally! Another new change in the Definitive Edition is that instead of buildings immediately collapsing once they hit 0 HP, they now cinematically crumble to the ground. A nice little touch. Mission 5 Ending Text "Stirling was our first great victory. Even as we held the coastline, word arrived that Stirling Bridge had been held by a force of Scots led by the mythical knight of whom so many have spoken. Now we know his name: Sir William Wallace, the bane of the English. Edward Longshanks names Wallace a traitor and a criminal. Sir William replies that he cannot be a traitor, for he never swore fealty to an English king. With Wallace leading our armies, the men fight with renewed vigor. Perhaps the tide of our misfortunes is about to turn..." The game has traditionally considered this to be the end of the "Beginner's Tutorial" and says that you now know enough to play a Random Map game. Realistically, unless you're playing against a low level AI or are a very hands-on learner, you really do want to get through the next two missions to learn the additional features and how combat plays beyond the Feudal Age. Extra Slides Mission 5 - Intro Slide 1 Mission 5 - Intro Slide 2 Mission 5 - Intro Slide 3 Mission 5 - End Slide 1 Mission 5 - End Slide 2 Mission 5 - End Slide 3 Mission 5 - End Slide 4 Jossar fucked around with this message at 00:33 on Mar 28, 2023 |
|
#
¿
Mar 27, 2023 23:43
|
|
|
Yeah, there's a lot of "silly" or "out there" track names floating around, especially relative to how grandiose the music itself can get.
|
|
#
¿
Mar 28, 2023 03:53
|
|
|
Learning Campaign - William Wallace - Part 6: Forge an Alliance Mission 6 Starting Text "Our coffers were depleted at the Battle of Stirling, so we need to strengthen our economy once again before pushing south into lands held by the English. We need to construct a market and establish trade routes to the villages of friendly clans. Local legends speak of three sacred relics hidden south of Stirling. Acquiring these artifacts for Wallace's army will be a great boost to Scottish morale." 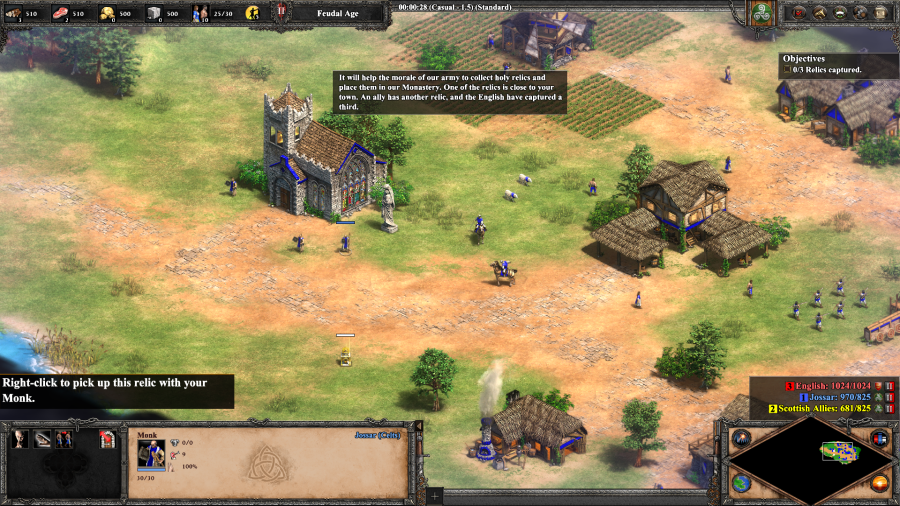 This scenario tries to fill in several of the concepts that the game didn't have the chance to teach you about while getting your fundamentals up and running. The first of these are Monks and Relics. Monks are a unit that you can build in Monasteries, starting in the Castle Age (the game is cheating here). They are typically slow moving, but have the ability to heal your own units, convert enemy units, and pick up Relics that are strewn about the map. The Relic is that glowing tiered box just south of the monk.  Picking up the Relic has no immediate effects except for turning it your color, and making the Monk unable to use its other abilities unless you put down the Relic. 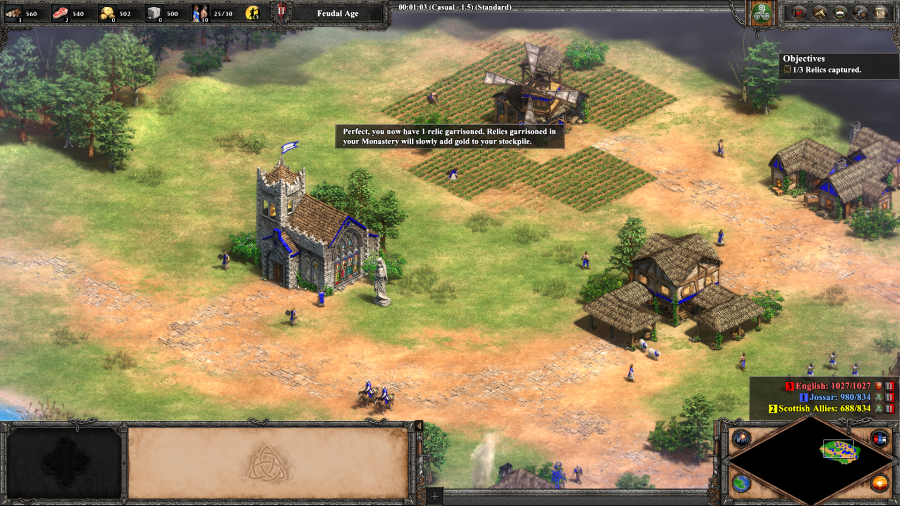 Get the Relic back to one of your Monasteries and you can garrison the Relic inside of the Monastery. Doing so starts generating passive gold income. Additionally, if you are on a Random Map game and have the appropriate victory condition unlocked, having all of the map's relics locked in your/your team's Monasteries starts a countdown timer which ends in victory for you/your team. 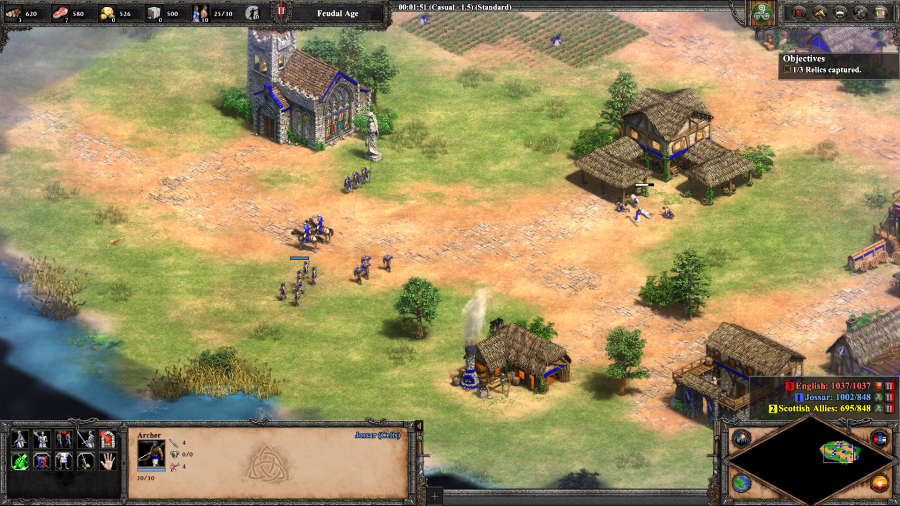 The second is that there are multiple unit types. The game has shown off a couple before, but has mostly been expecting you to beat up the English with the Militia line. Let's go into a little bit more depth on these units that we have here. Archers are Ranged units and they and most of the other Ranged units are built at the Archery Range (which can be built starting in the Feudal Age). They are generally good against Melee/Infantry units and are generally countered by Cavalry or Skirmishers (an Anti-Archer ranged unit). In practice they tend to have very little Armor of any kind, except what they are given through armor upgrades. Scout Cavalry is the most basic of the Cavalry units, which are built at the Stable (which can be built starting in the Feudal Age). They are generally good against some Ranged units and things that you have to chase down (Monks, against which they specifically have a Conversion resistance bonus, and Siege Weapons). They are generally countered by heavier Cavalry or Infantry, especially the Spearman line which has a bonus against them.Skirmishers (an Anti-Archer ranged unit). They have a small amount of Pierce Armor (which most Ranged and spear units use) but no melee armor (which most Cavalry and non-Spearman Infantry use), except what they are given through armor upgrades. They are also informally considered to be a Trash unit, one that can easily be spammed in the late game because they cost no Gold, which runs out faster than Food and Wood. Men-at-Arms are the Feudal Age upgrade of Militia, which are built at the Barracks, the only Dark Age era military production building. They are generally good at fighting Skirmishers/Scout Cavalry/Spearmen, which are collectively the general Trash units, but are countered by Archers/Siege and heavier Cavalry, although you don't see the last until Castle Age. They have a very small amount of Pierce armor, in fact originally it used to be 0, and no Melee armor, except what they are given through armor upgrades. They also have a small amount of bonus damage against buildings, but as you are going to see this is only really useful if you can mass them. 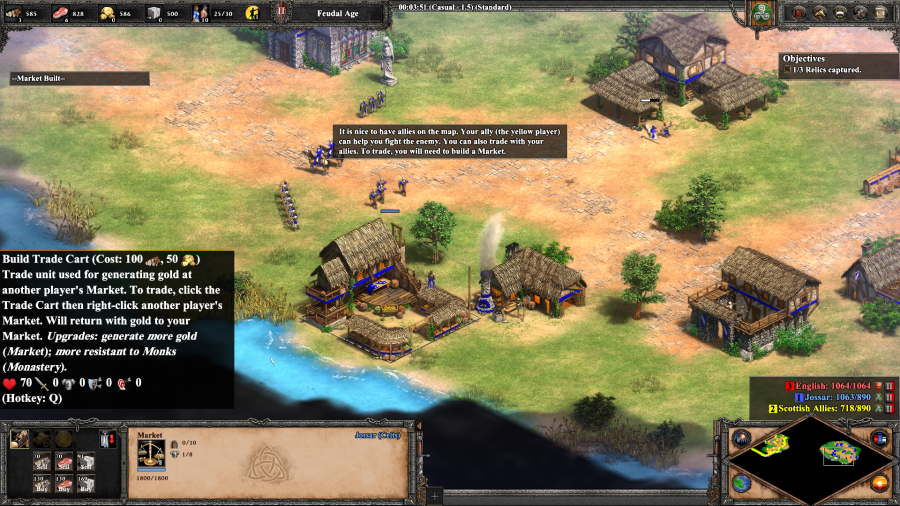 Third and finally, Markets. Markets allow players to trade resources that they have in excess for Gold, which can be used to buy other resources. Buying/Selling resources affects the global price of resources, although there are hard limits on crashing the market. There are also hard limits on raising prices, but it's a lot less likely you'll ever see those. The market also serves as the production and drop off point for Trade Carts, which make Gold when they arrive at another player's Market based on how far away the Cart had to travel, before returning to your own Market to dump off the Gold into your stockpile. This is the primary source of Gold in late game matches with multiple players. Finally, building a market allows you to tribute resources to an ally for a fee. 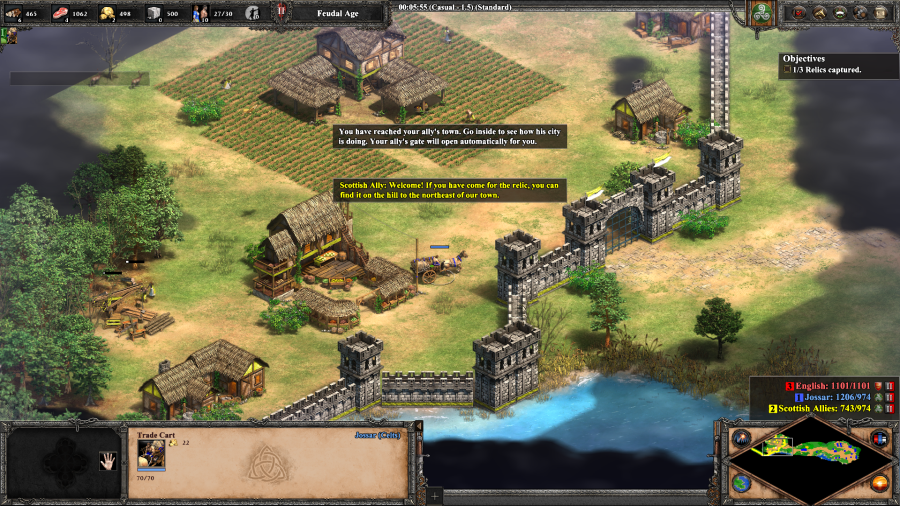 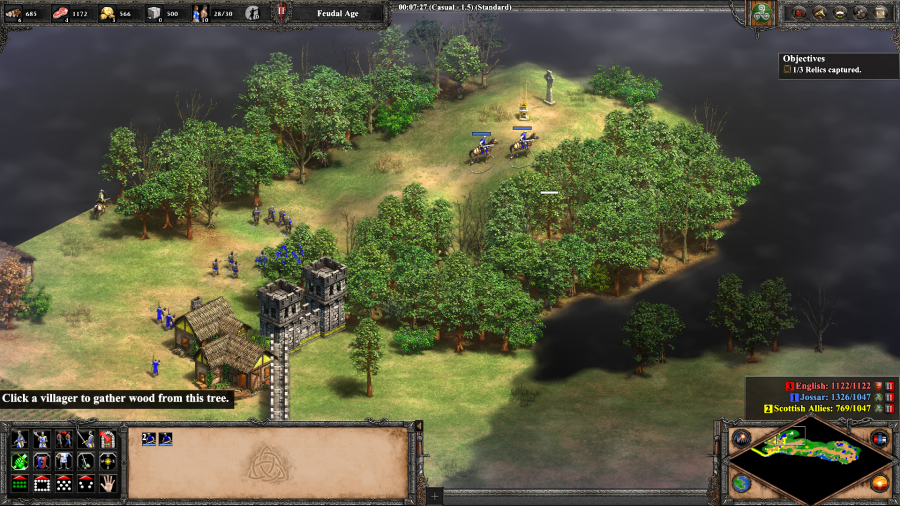 As you can see, the game gives us an allied player on this scenario. It used to be that you needed to build a Market before you could get allied Line of Sight, and I think the game is still playing buy those rules, but now you just get it automatically in Random Map. They're a welcome source of gold, although the scenario is fairly generous as is. More importantly though, their town is home to the second Relic. 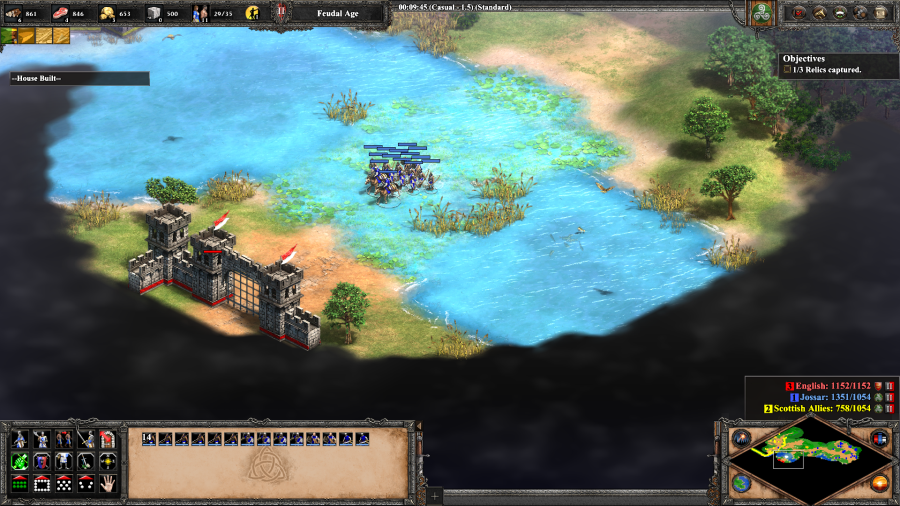 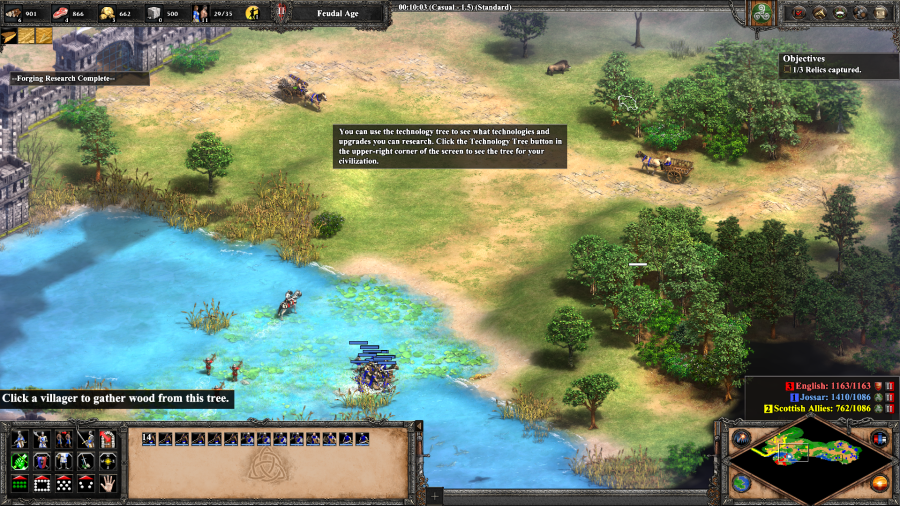 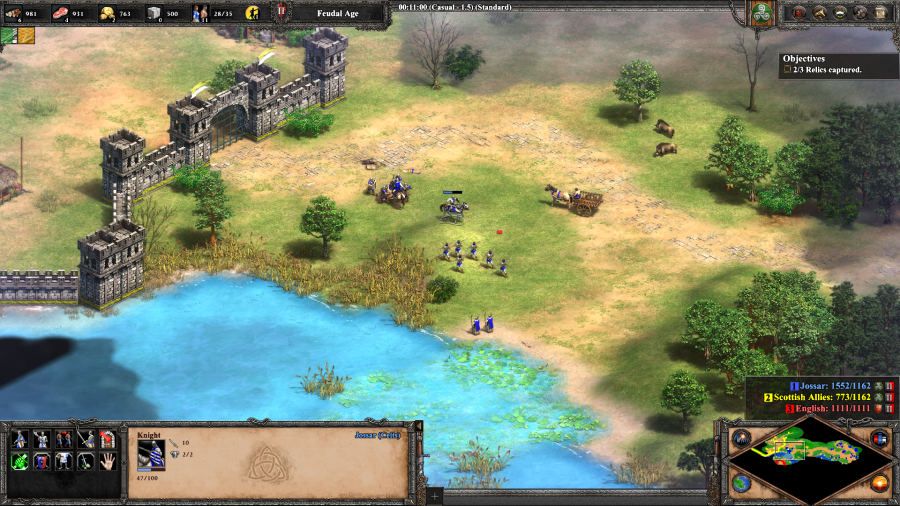 The English are on the other side of the river and have Stone Walls and are in Castle Age. The game gives you the ability to tech up to the Castle Age here, and I probably should've done it, but I felt like being cheeky. I lure out the majority of the English forces to the river and mob them to death, with my Monks providing healing and converting the enemy's Knight for good measure. 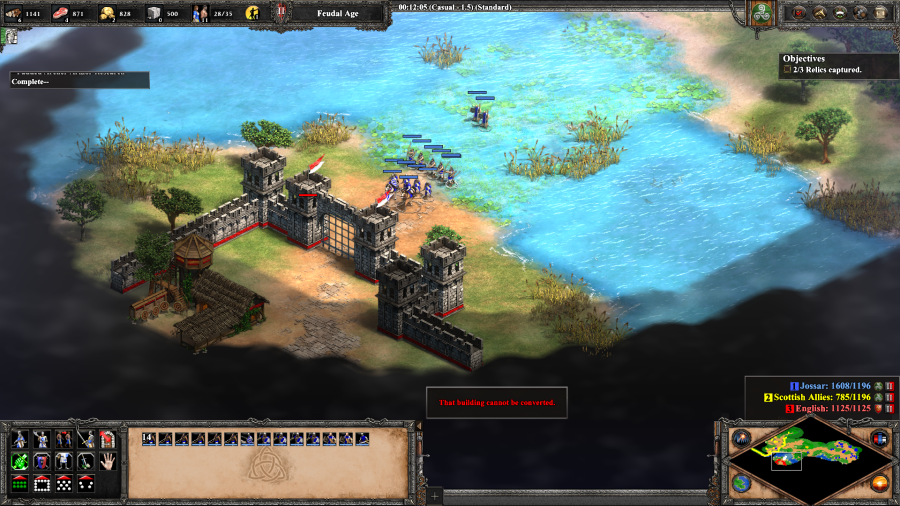 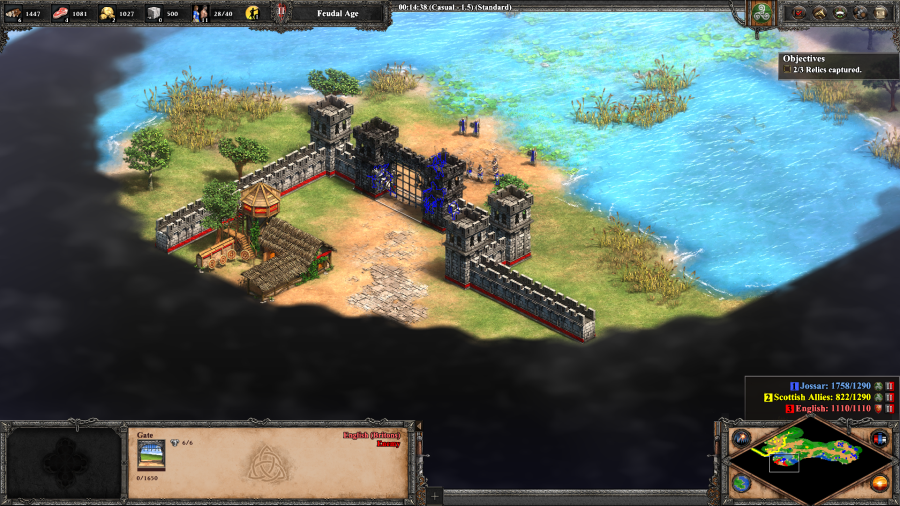 Uncontested, I then break down the English Gate Wall. After sitting there for nearly two and a half minutes. Take heed because I will not be doing this during the actual campaigns unless the scenario conditions force me to - barring an army of dudes, if the enemy is at Stone Walls, you really want Castle Age and a Siege Workshop up before trying to break them down. 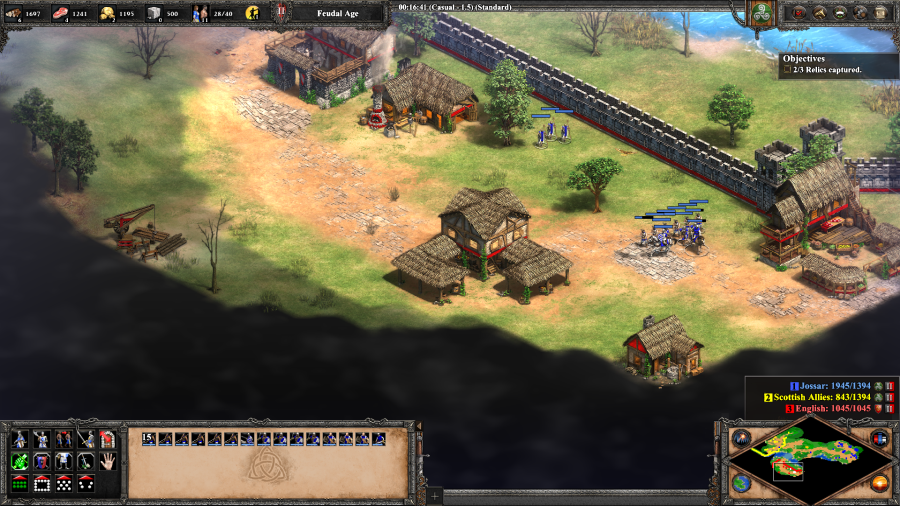 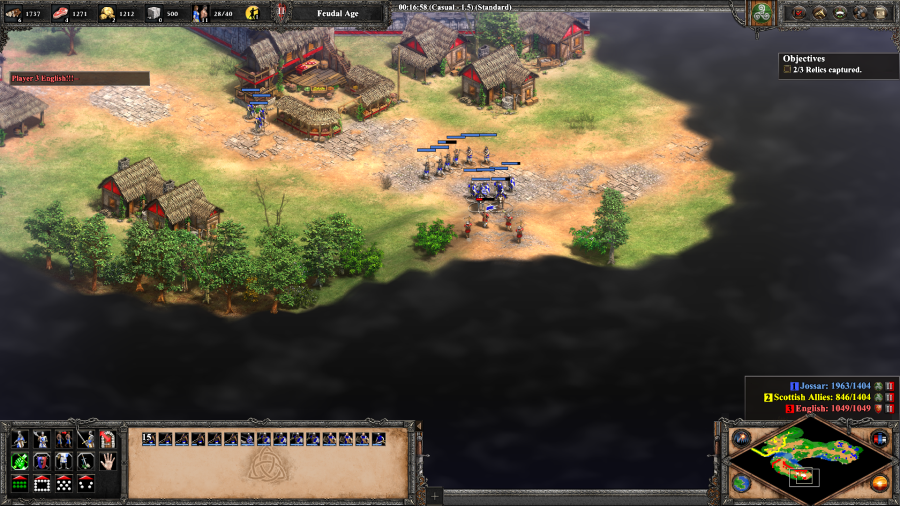 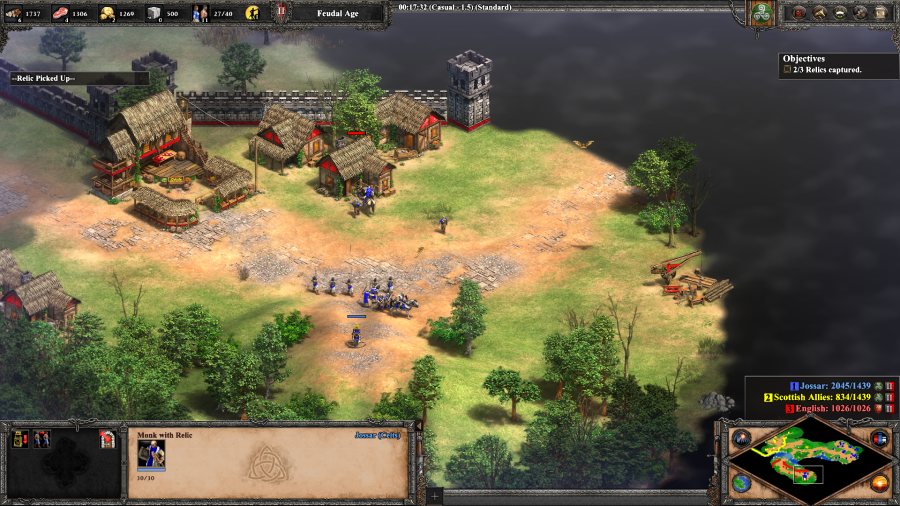 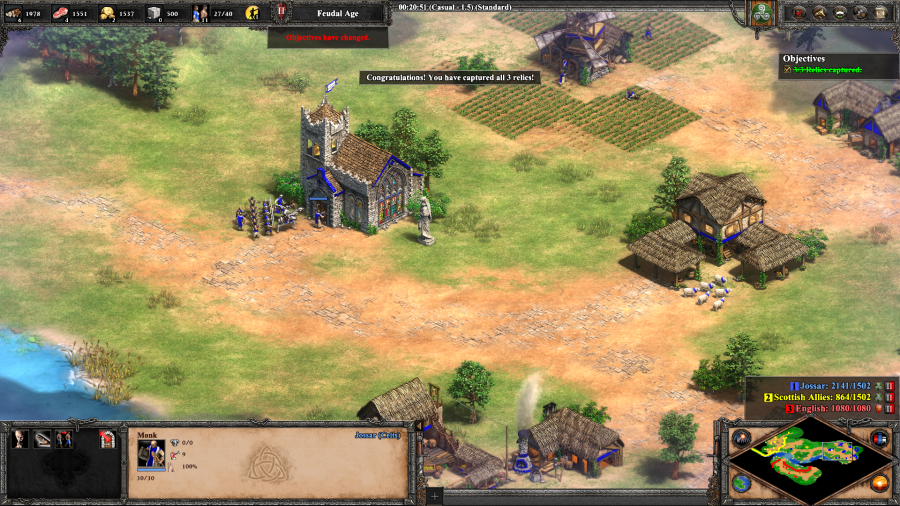 I could burn down the rest of the town, but since this scenario doesn't actually care about beating the English, I just raid the Relic spot and run back to the Monastery to obtain victory. Mission 6 Ending Text "With the three relics locked away in Scottish churches, men murmur that we are blessed by the heavens. Our army now stands a chance as we prepare for the final clash with the English. Scotland now has archers and knights of our own with which to meet Longshanks. We march south, to Falkirk, where we will join with the army of William Wallace and plan our combined attack upon the English castle." This one's very clearly just meant to show you the ropes on these other functions, but it's still more high octane than the early tutorials were. On to Falkirk! Extra Slides Mission 6 - Intro Slide 1 Mission 6 - Intro Slide 2 Mission 6 - Intro Slide 3 Mission 6 - End Slide 1 Mission 6 - End Slide 2 Mission 6 - End Slide 3 Jossar fucked around with this message at 01:35 on Mar 29, 2023 |
|
#
¿
Mar 29, 2023 01:32
|
|
|
Learning Campaign - William Wallace - Part 7: The Battle of Falkirk Mission 7 Starting Text "The only way that we can hold the boggy lowlands around Falkirk is to build a castle and as many walls as we can construct in a short time. These fortifications will serve to protect our camp as we construct siege weapons with which to assault the English castle. Once the castle is constructed, Wallace himself has sworn to join our forces. Together we will attack Longshanks and his English troops." 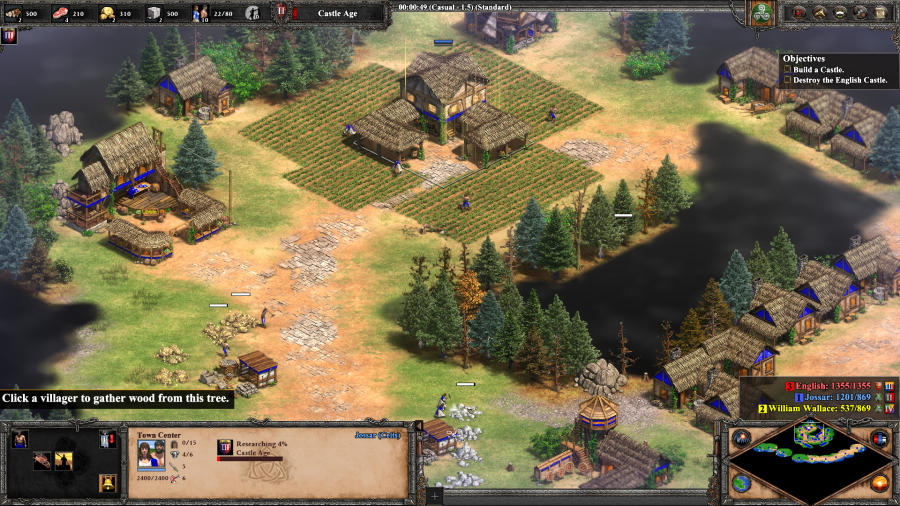 Welcome to the final mission of the tutorial campaign! While the AI doesn't quite have its training wheels off yet, it's finally off the leash and willing to take a proactive role and bring the fight to you. Therefore, speed is of the essence. The first thing I do after getting Villagers on resources is tech up to the Castle Age.  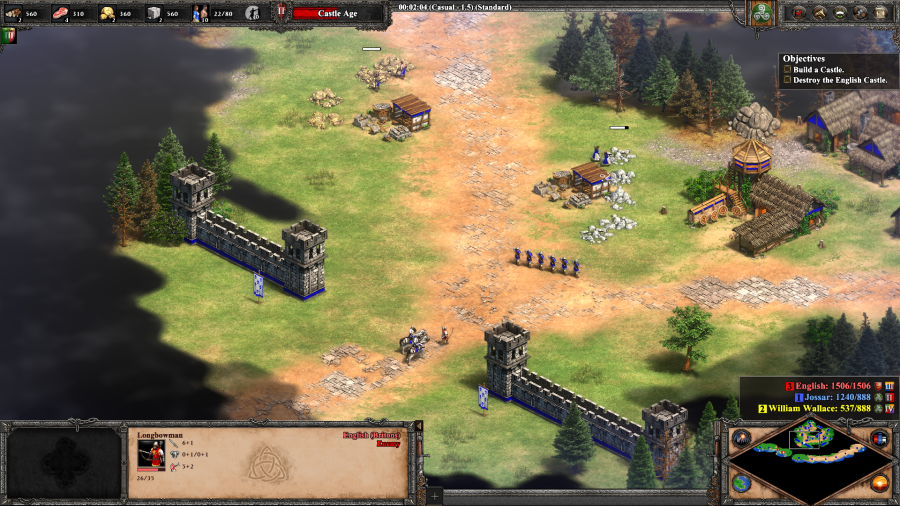 Case in point, here's the English sending out a raiding party to destroy one of my forward Outposts and even trying to sneak one of their Unique Units, the Longbowman, into my base to start shooting villagers. The English will be constantly churning out troops, and while they initially prioritize destroying your Outposts, if you lose enough of them, they'll just start sending everything directly into the heart of your base. 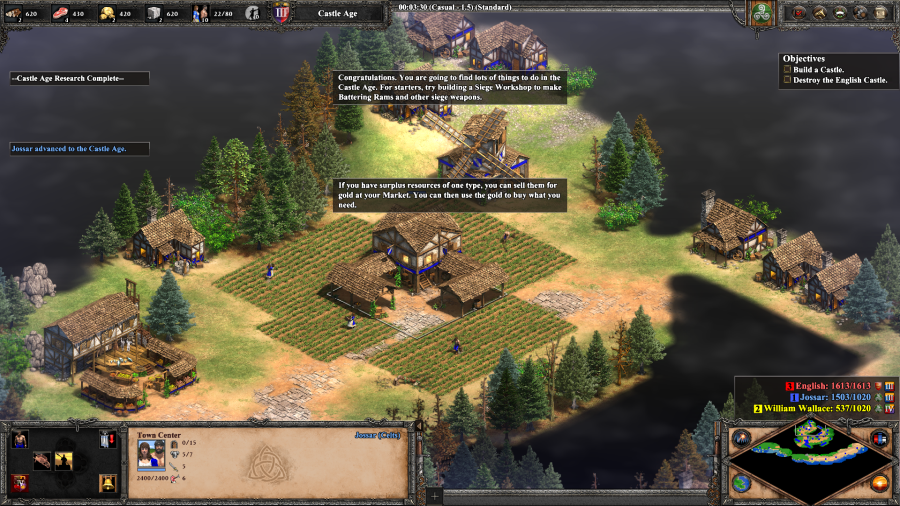 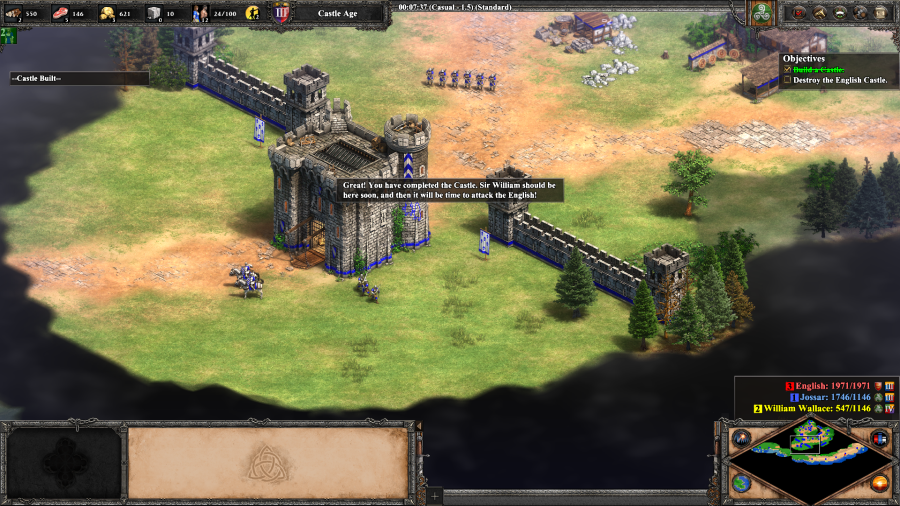 Alright, it's the Castle Age and my first priority is to, well, build a Castle! They're very stone intensive but serve as a massive defensive roadblock between their huge HP and high attack power/multiple arrows. They also serve as the research point for a couple of technologies including your civilization specific ones and the build point for your civilization's Unique Unit. If I wasn't confident in my ability to destroy whatever the English were going to throw at me, I would have built a series of Stone Walls with the Castle inside the Walls. Fortunately this is unnecessary... 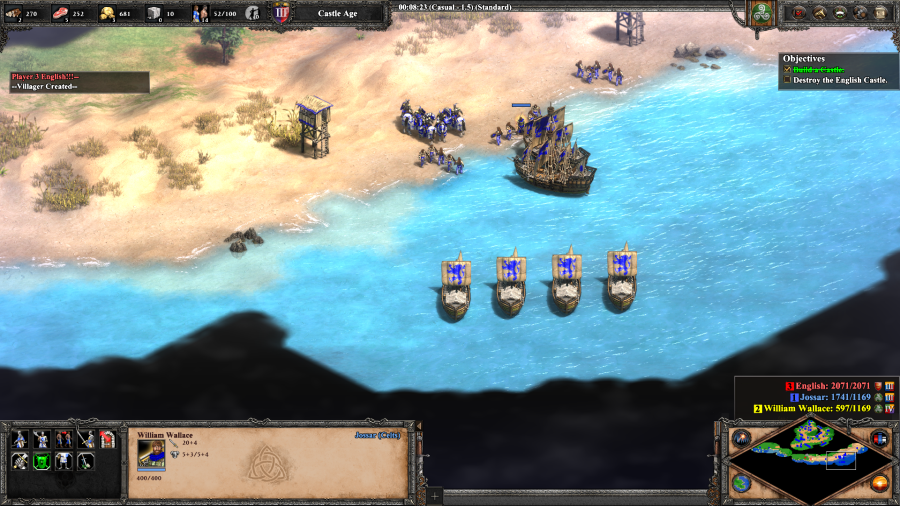 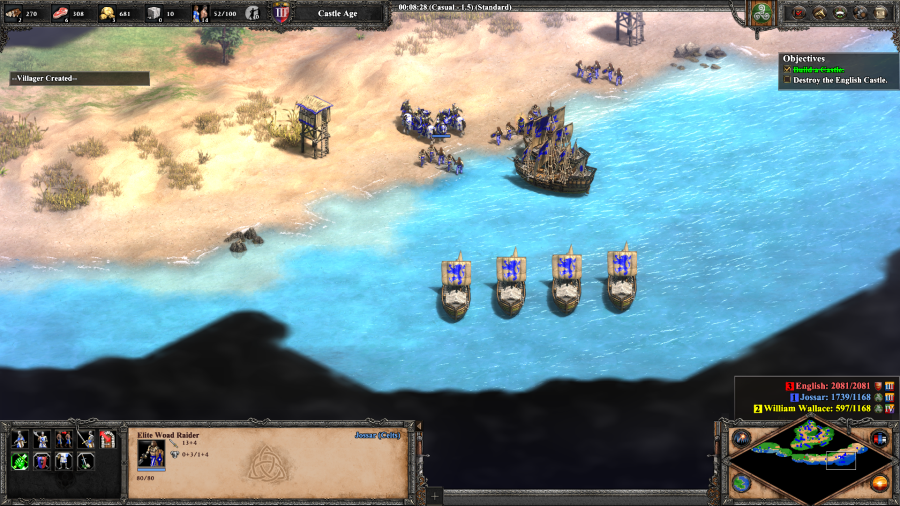 Because building the Castle spawns in William Wallace's forces, a whole bunch of Imperial Age troops. Wallace is a unique hero unit, who is functionally a super version of the Imperial age version of the Militia line, the Champion. In addition to just having more stats, he also heals himself and acts faster than a normal Champion would. Paladins are the final upgrade of the Heavy Cavalry line, which can be built at the Stable (but you can't even make their predecessor units until Castle Age). They are generally good against most units, except for their specific counters of the Spearman line , Camels, Elephants, and Monks, their main weakness being that they are fairly expensive. They have a decent amount of both types of armor. Galleons are the final evolution of the standard ship line, they're weak against Fire Ships and static defenses, but good against Cannon Galleons and Demolition Ships (unless they're caught out). These guys won't be of too much use in this mission, but they're nice to throw against enemy units randomly walking through water shallows. Transport Ships are exactly what they sound like, they exist to move land units across the water. Finally, there are Elite Woad Raiders, the upgraded version of the Celtic Unique Unit. They're kind of like if you took a Champion and made it beefier and a lot faster, but with less armor after all the upgrades were said and done. Faster spawn time too, but they have to be made at Castles rather than Barracks. They're not a one to one stand in, but you'll probably be using them a decent amount anyway, because the Celtic Light Cavalry isn't as great as it could be and you need something speedy and good as a generalist damage dealer. 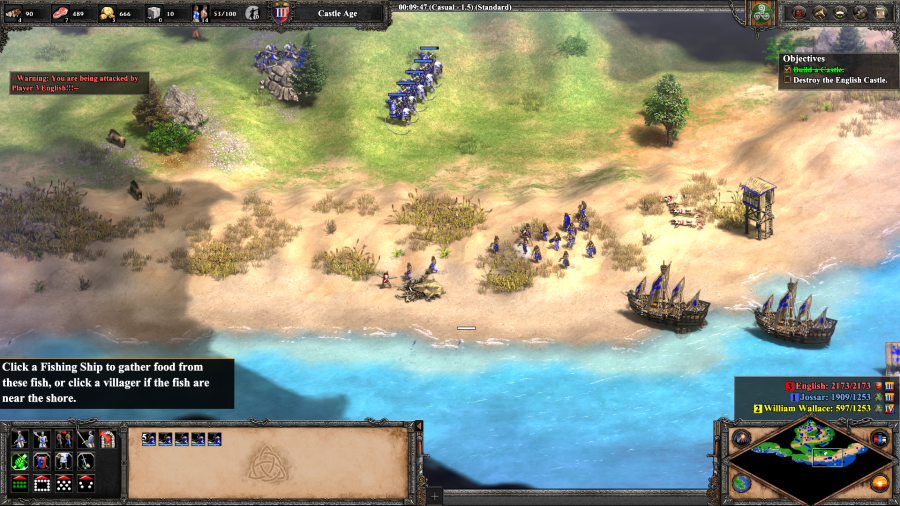 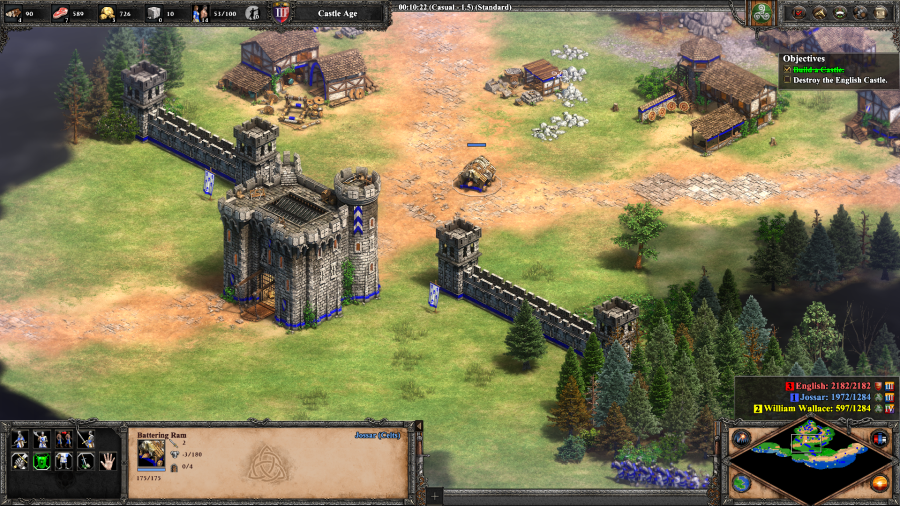 Wallace's forces meet up with mine to mop up the slow English tide that's destroying the Outposts. Meanwhile, back at base, I build up a Siege Workshop and have it start cranking out Battering Rams. While Rams do have a place in absorbing arrow fire, their main role is to bring buildings down, and there's an English castle looking to have a few hammering away at it. 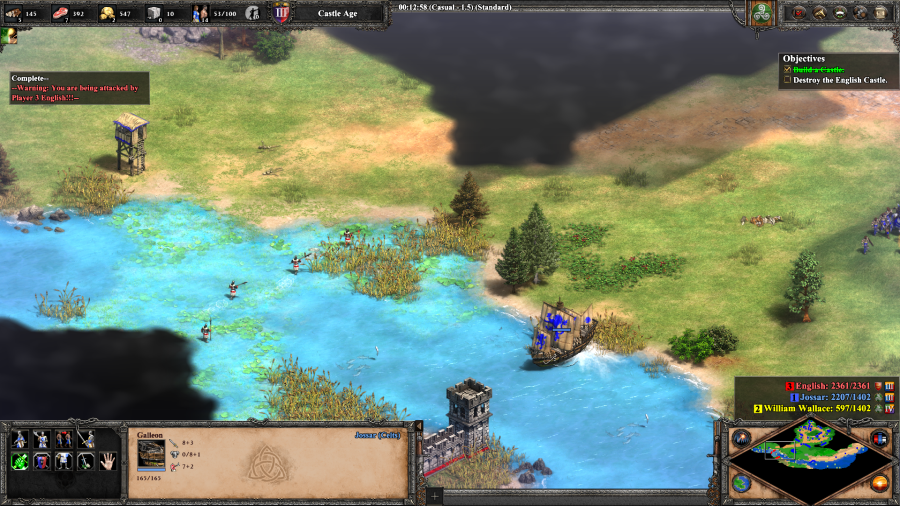 The English are sending off lines of Infantry, but they're easily mopped up at this point. Now what the game clearly wants you to do is go and attack the gate that all of these guys are pouring out of, but it's got a whole bunch of Towers next to it and is clearly a deathtrap. 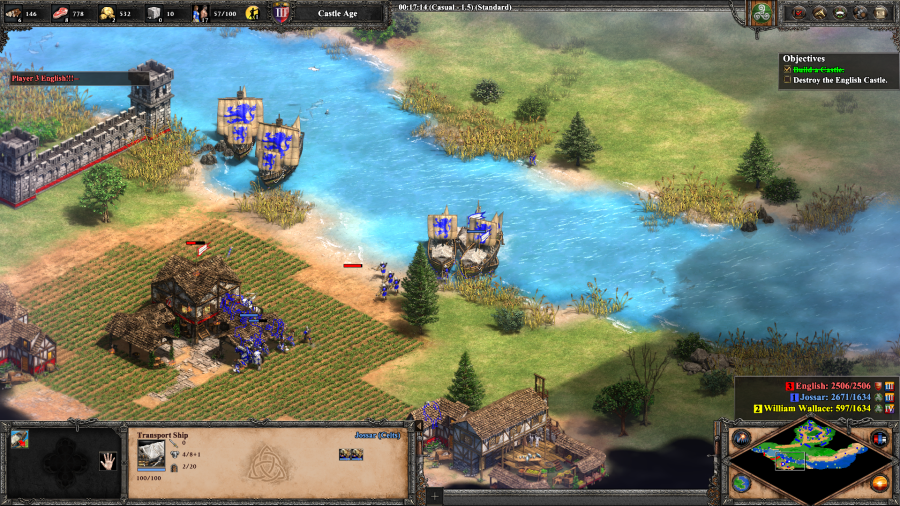 So instead, I use the Transport Ships that Wallace brought to just ferry my army over directly into the heart of the English base. Much easier. 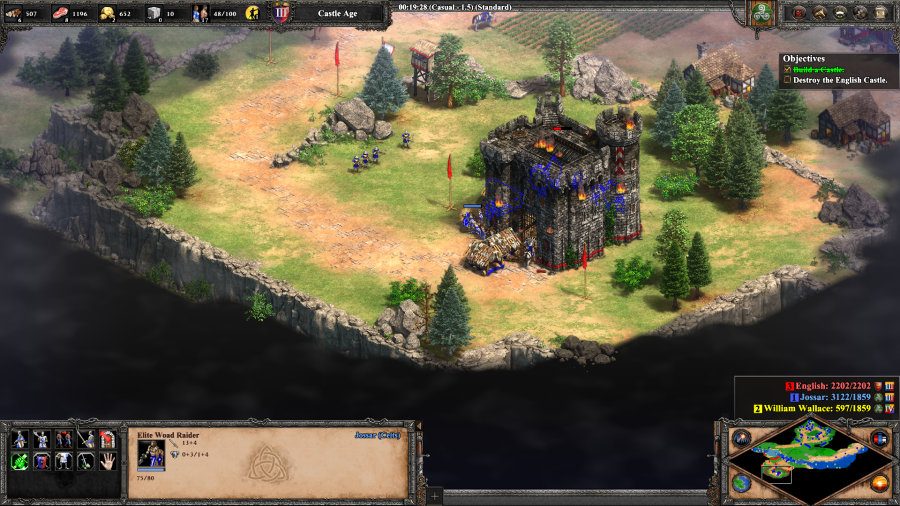  The English Castle is located on the top of a hill just behind the Town Center. If you don't try to make this a slog for yourself by going through the front door, then defeating the rest of the English army in your way and destroying the Castle is a breeze. Mission 7 Ending Text "It looked certain that we would be defeated at Falkirk. Yet somehow though outnumbered and outranged by English longbows, we were victorious. The English castle was torn down, and a Scottish one shall be built in its place. William Wallace has shown us the path to victory. Although he is but one man, he inspires great deeds in others. Many of the Scottish knights and lords have drawn their swords with his. Wallace's own sword is a five-and-a-half-foot beast, forged of course in Scotland. He has sworn not to rest until his sword finds the neck of Edward Longshanks. The struggle will continue, but we have learned the ways of war. Now it is the English who will know true fear." And that's the end of the William Wallace Campaign! The game used to say that it had nothing left to teach you and to go experiment on your own. Nowadays, the Definitive Edition comes with an additional set of Advanced Tutorials called the Art of War to teach you how to play the game efficiently, but since those are just the game quoting Sun Tzu at you and otherwise having minimal story content, I will not be doing them. VostokProgram posted:Are you going to show off all the standalone missions from the Conquerors expansion? I will be doing the Battles of the Conquerors/Forgotten though! Not all at once, I will probably just give you guys a vote option for doing a whole bunch of them at a time in the place of a single campaign. Speaking of which... Campaign Vote #1 It's time to vote on where to go from here. For this first vote, the options will be between the other 4 original Age of Kings Campaigns, to be broadened with the next vote. Joan of Arc's is typically considered to be the easiest of the four main campaigns, and for many will likely be the most nostalgic, but even the most difficult of these is still manageable (especially relative to some of the later expansions). A. Joan of Arc - Franks B. Saladin - Saracens C. Genghis Khan - Mongols D. Barbarossa - Teutons Voting lasts for 24 Hours from the time of this post, the winner being the option with the absolute greatest number of votes, independent of majority. In the event of a tie, I will act as the tiebreaking vote between the two tied options. Please bold your vote in order for it to be counted, as well as noting if you are changing your vote from something else. Extra Slides Mission 7 - Intro Slide 1 Mission 7 - Intro Slide 2 Mission 7 - Intro Slide 3 Mission 7 - End Slide 1 Mission 7 - End Slide 2 Mission 7 - End Slide 3 Mission 7 - End Slide 4 Mission 7 - End Slide 5 Jossar fucked around with this message at 01:47 on Mar 30, 2023 |
|
#
¿
Mar 30, 2023 01:42
|
|
|
Sally posted:oh man, goonspeed! i know there's been a few attempts at AoE and AoE2 that haven't gotten too far. one of my favourite games of all time, but so, so, so massive. i am shocked and terrified at the prospect of a Return to Rome expansion being released and destroying even more of my freetime. i love playing AoE2's campaigns. Thanks! I'm pretty sure there was a complete AoE1 Let's Play on the forums, but it wasn't archived or placed on the Master List, so I have no idea where it went.
|
|
#
¿
Mar 30, 2023 01:52
|
|
|
As I said, I wanted to try and ease people into the game by playing the old campaigns/providing the original experience in an updated format before tackling the new stuff. Makes a good dividing point too, so I'm not dropping dozens of potential campaigns on people at once. Also, I notice that there's a bunch of people who haven't bolded their votes! Given that this is actually shaping up to be a close contest, let me take this opportunity to remind you that non-bolded votes will not be counted.
|
|
#
¿
Mar 30, 2023 12:38
|
|
|
Vote's closed! Relatively close, all things considered, but Joan of Arc won out in the end.
|
|
#
¿
Mar 31, 2023 01:47
|
|
|
Joan of Arc - Part 1: An Unlikely Messiah Age of Empires II: Definitive Edition - Frank Theme Very well, then let us begin, the tale of the Maid of Orl�ans. 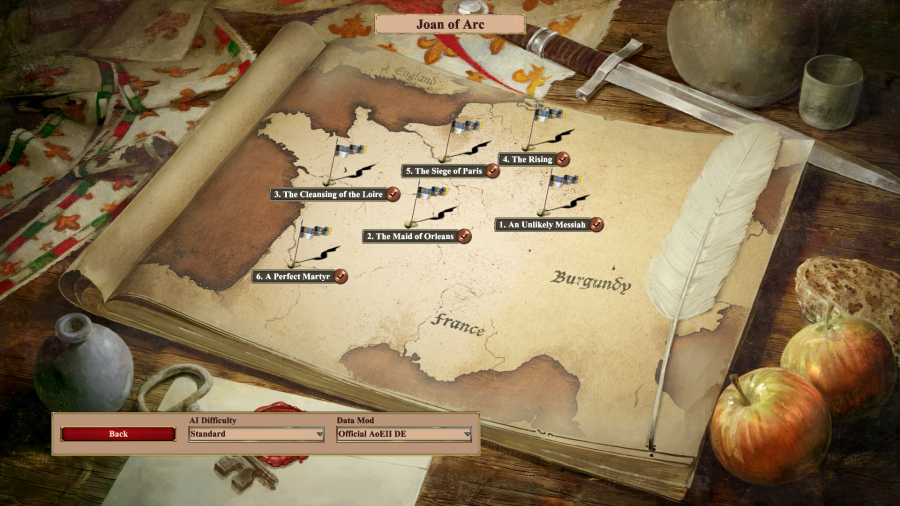  Mission 1 Starting Text "February 19, Army Camp near Vaucouleurs. This morning I awoke to visions of fire and steel. These nightmares come more often now that I have seen my beloved France eaten away by years of war. I wandered through camp ignoring the new snowfall, but observing the wounds and weariness of every soldier under my command. Observing the desperation in their eyes. It was then that I first saw the girl. She told us that her name was Joan. She told us that she was but a peasant who did not know how to ride or fight. She told us that she intended to rescue France. The darkness lifted from the men's souls. Her voice rang with conviction, and we drank in her every word. I may have lost my faith, but Joan has not lost hers, and that is enough for me. Joan has asked our ragged band of soldiers to take her to Chinon, where the rightful ruler of France, the dauphin, hides from his foes." 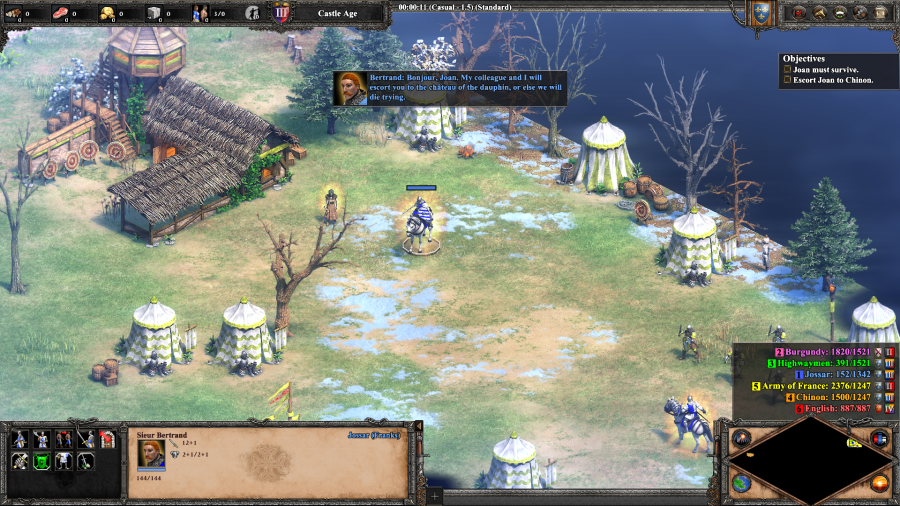 You may have noticed from the intro text, but the game is about to get a whole lot wordier. Bertrand: Bonjour Joan, my colleague and I will escort you to the ch�teau of the dauphin, or else we will die trying. De Metz: I am Jean de Metz, and I will protect you with my life. Anyways, the goal of the scenario is to get Joan the Maid from here in Vaucouleurs over to the Dauphin's ch�teau in Chinon, represented by that orange dot visible on the other side of the minimap. The countryside is under assault from Burgundians and Highwaymen and the French Army itself is useless, but Joan pretty much causes every French soldier she meets to immediately join her so I'm not going to be strapped for troops. Joan herself is not very good at fighting, although not entirely defenseless and regenerates health. Which is useful, because if she dies you fail the scenario. The two knights are hero versions of their Cavalry counterparts. 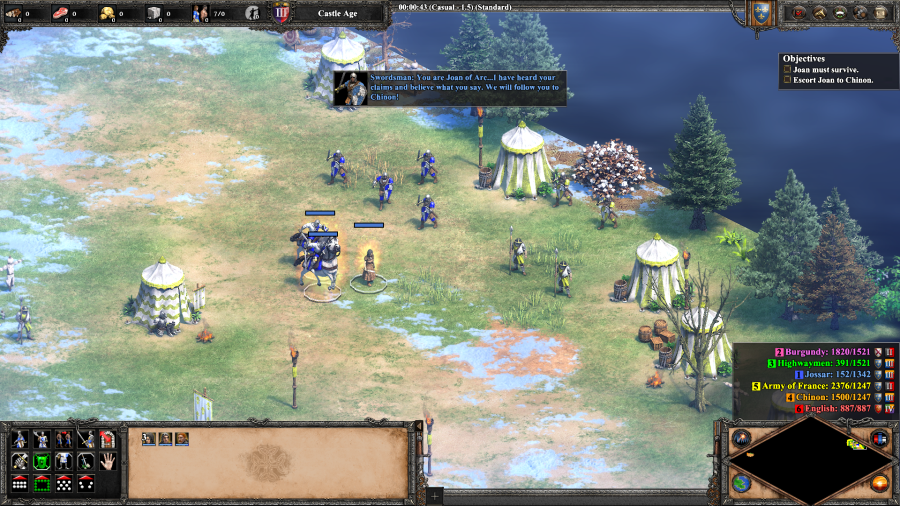 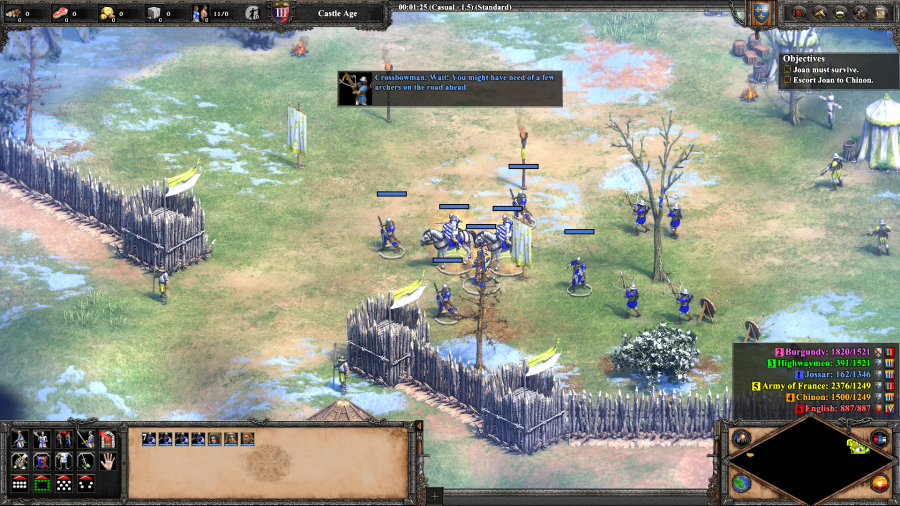 Swordsman: You are Joan of Arc... I have heard your claims and believe what you say. We will follow you to Chinon! Crossbowman: Wait! You might have need of a few archers on the road ahead. No, it really is almost every French soldier on the map. Spearman: You must be wary on the road ahead. Our enemies, the English, are out in force and their Burgundian allies are thick as rats. Discretion is the better part of valor. 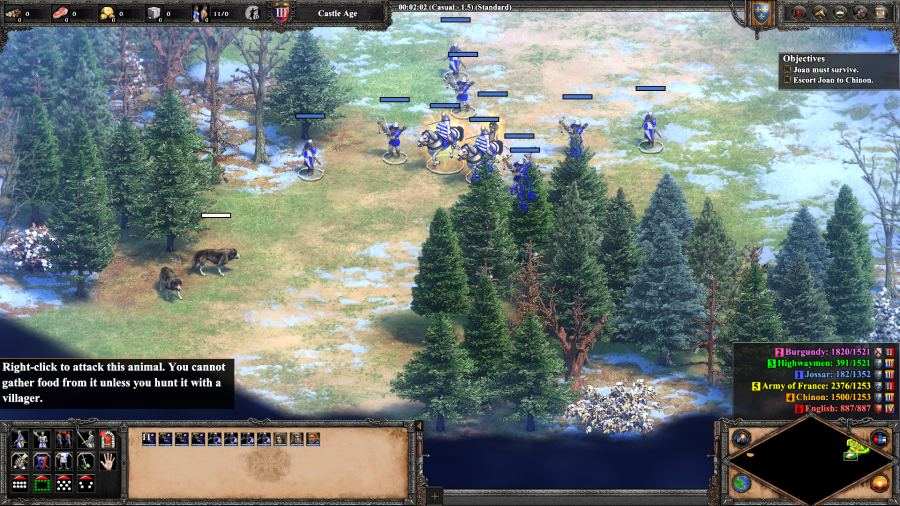 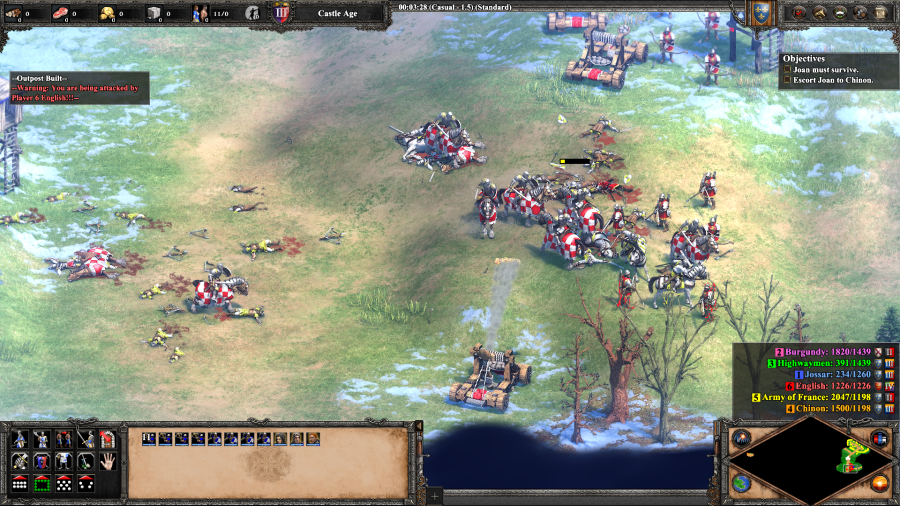 This scenario's pretty much entirely on rails. A scout warns you if you try to go north that there's a Burgundian fortress in that direction, so the only way forward is south. Clear out a few wolves and you eventually come across the English giving a beatdown to the French Army. De Metz comments before and after the battle... De Metz: (Pre-fight) Look out! A battle rages ahead! Stay back lest we be caught in the crossfire! (Post-fight) Another glorious loss for France. I hope you really can turn the tide of this war, Joan of Arc. 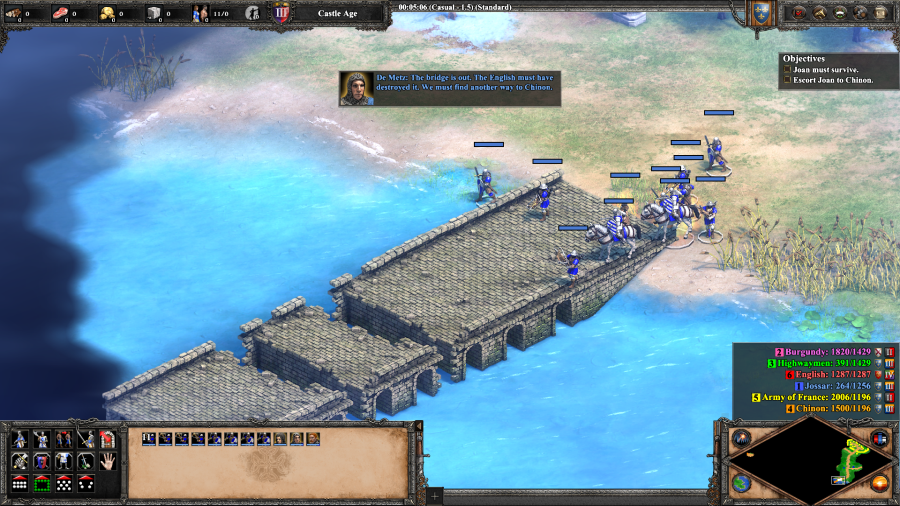 De Metz: The bridge is out. The English must have destroyed it. We must find another way to Chinon. This piece of architecture, apart from looking cool, exists to justify why you can't just take the straight line path across the map to Chinon. 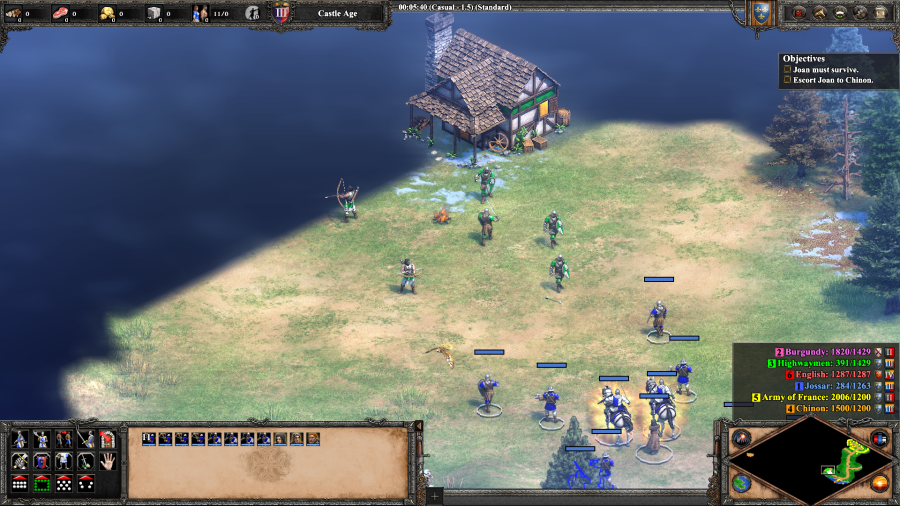 Bertrand: Highwaymen preying on helpless travelers. What has become of our homeland? Oh hey, the first actual fight in this scenario! It's a bunch of Feudal Age highwaymen, or is that Feudal Age units for the Castle Age era highwaymen? I have numbers on my side, heroes, and more advanced units. If you choose to directly engage the camp to the north there's a slightly tougher fight and a Tower you'll have to deal with, but it's not really necessary to keep on advancing. 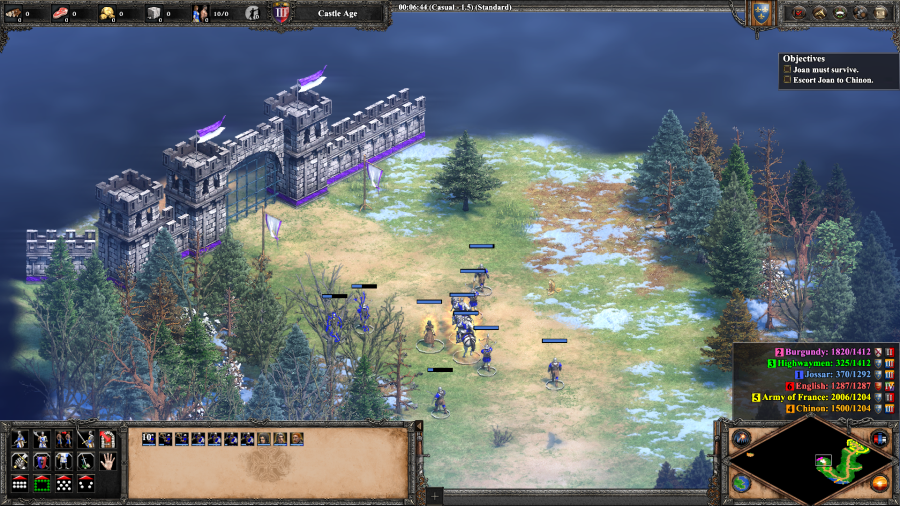 De Metz: A Burgundian encampment! We'll never get through that wall without siege equipment. What you want to do is go up to this encampment without touching the walls. There's a few archers on the inside, but as long as you don't directly attack the town they'll let you ride along northwards to the next objective. 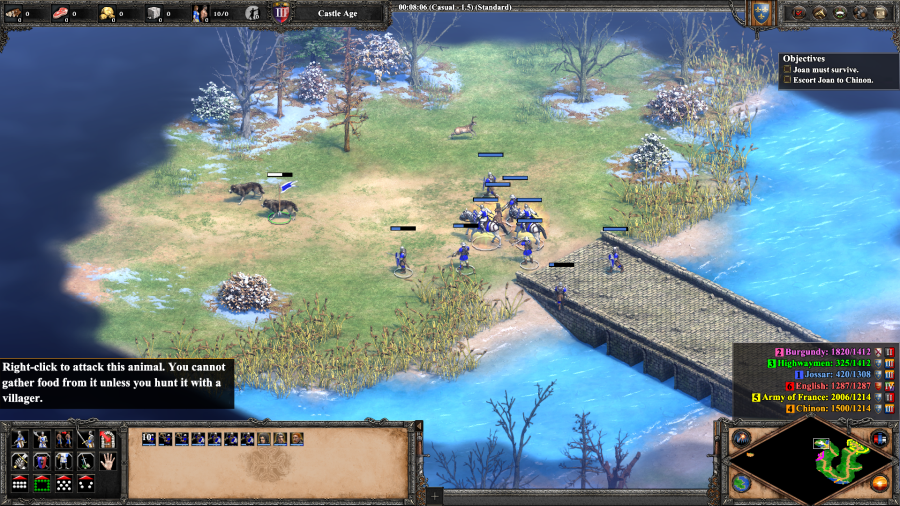 I kill a few more wolves in the woods and reach the neighboring allied French town. 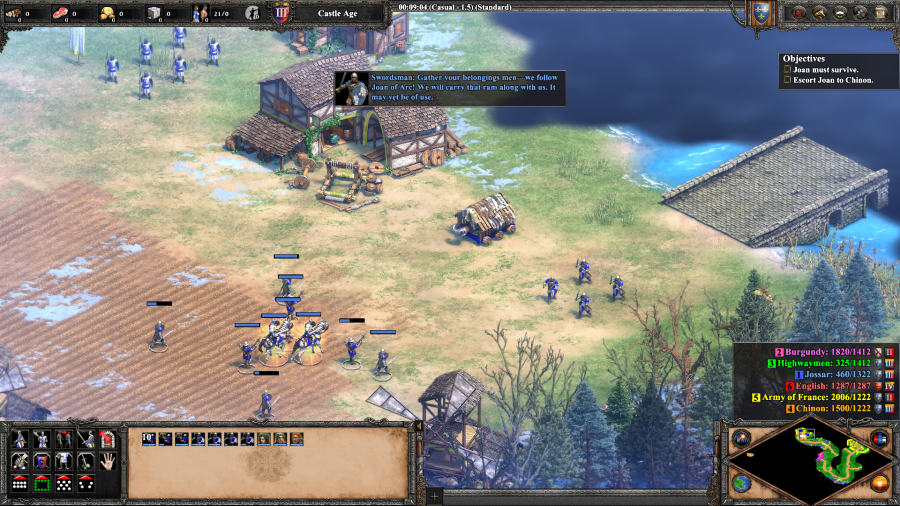 Swordsman: Gather your belongings men - we follow Joan of Arc! We will carry that ram along with us. It may yet be of use. In said town are a number of additional troops, and most importantly, a Capped Ram. Don't go past that bridge by the way, because... Swordsman: Are you mad? Across that bridge lies a Burgundian castle and many men! Turn back at once! You can blow it up, but it's a tough fight for absolutely no purpose, except bragging rights. 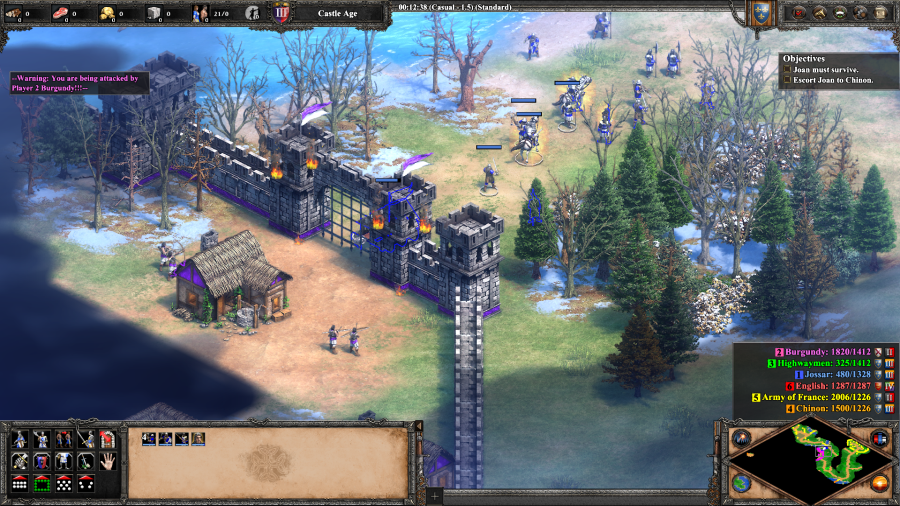 I return to the Burgundian encampment and use the Ram to break through the walls. Despite some heckling... Burgundian Soldier: You French don't know when to give up! There isn't that much that the Archers stationed here can do to your army, especially if you lead with the Ram to soak up their fire. 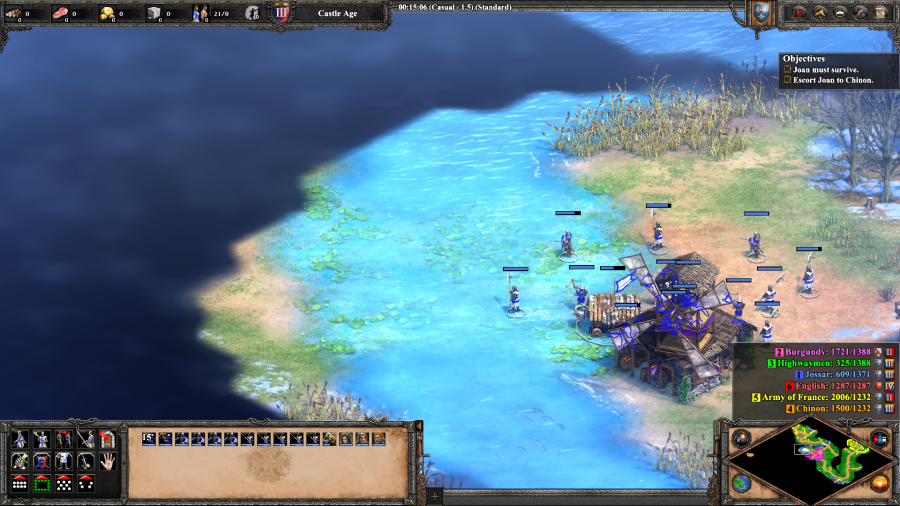 From that point it's just a hop, skip, and a jump through the shallows to get to the part of the Burgundian encampment that faces the river proper. Unfortunately... 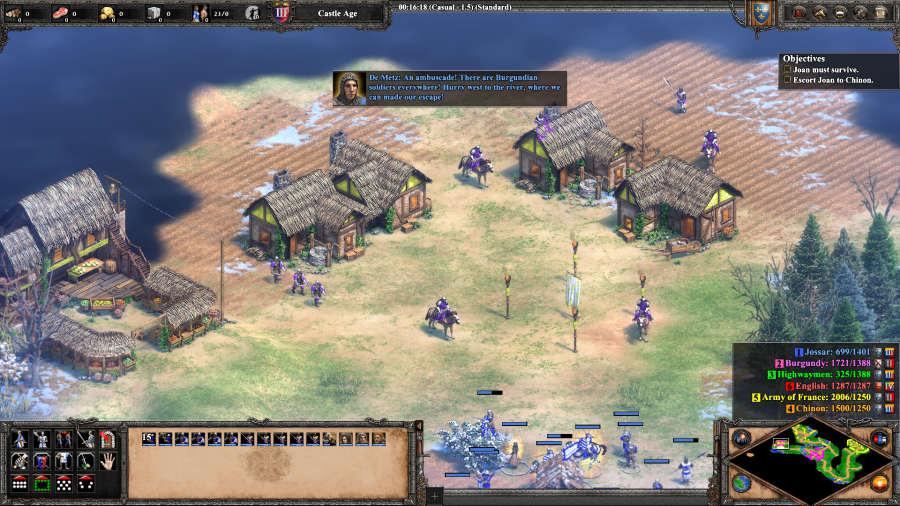 De Metz: An ambuscade! There are Burgundian soldiers everywhere! Hurry west to the river, where we can make our escape! It isn't quite as bad as De Metz makes it out to be, but there are enough Burgundian soldiers here that if you're careless you might lose the mission if you let a few get through to Joan and kill her. 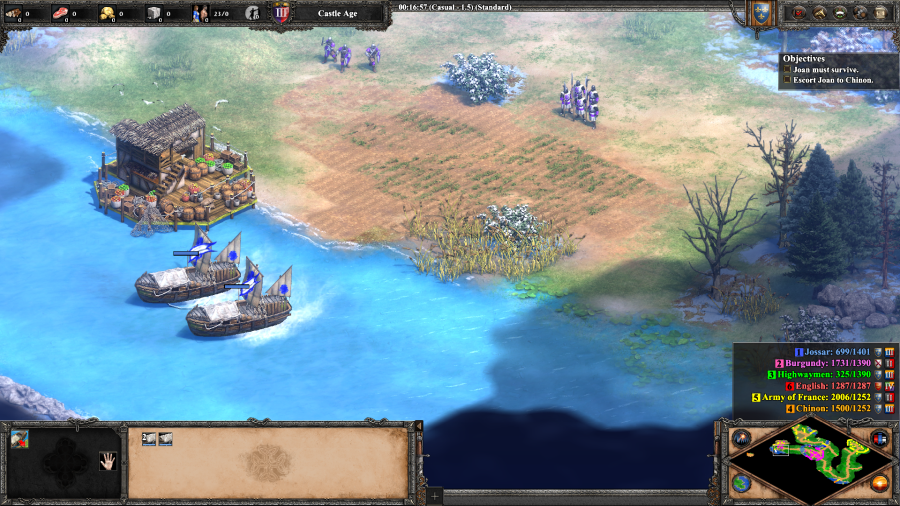 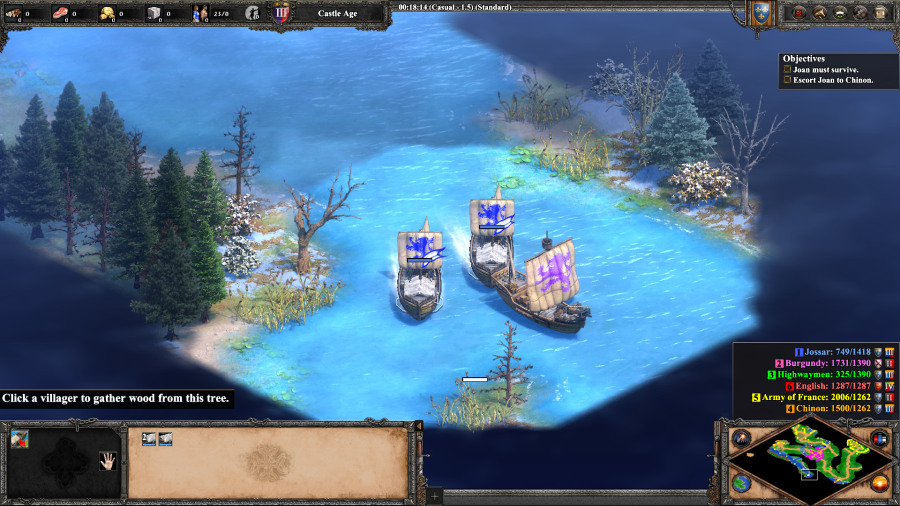 Reach this Dock and two transport ships spawn in for you to make your escape down the river. A Burgundian ship patrols the river to punish players who just casually tell their Transports to march into a random spot in the fog of war, but it's easy enough to run away from. Finish jetting down the river and you can land your troops on a friendly island connected by shallows to the mainland. It has some more troops... 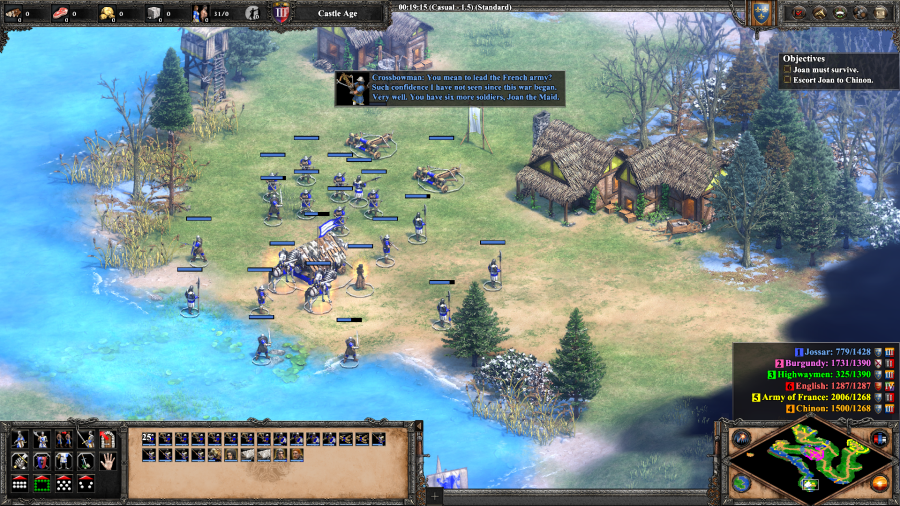 Crossbowman: You mean to lead the French army? Such confidence I have not seen since this war began. Very well, you have six more soldiers, Joan the Maid. ...and some Scorpions, Siege units which do damage in a line based on the trajectory of their arrows. As with most of the Anti-Unit siege, it is theoretically very devastating, but in practice depends on your ability to micro. 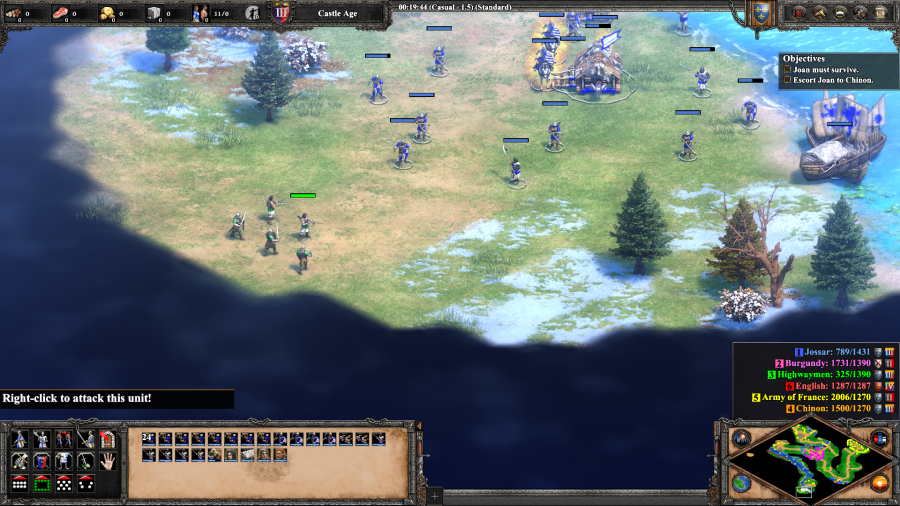  A group of Highwaymen and a group of Burgundians are the last real threats in the mission, though since I kept my army intact they're just speedbumps. 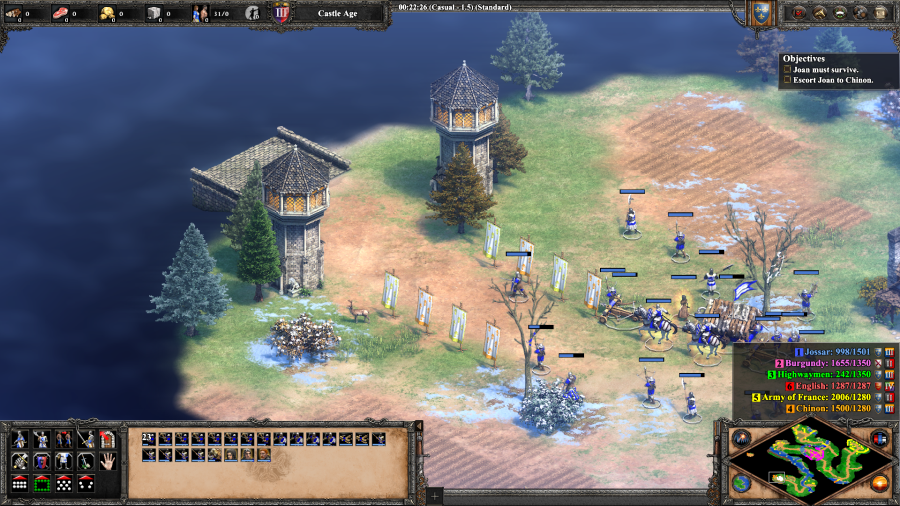 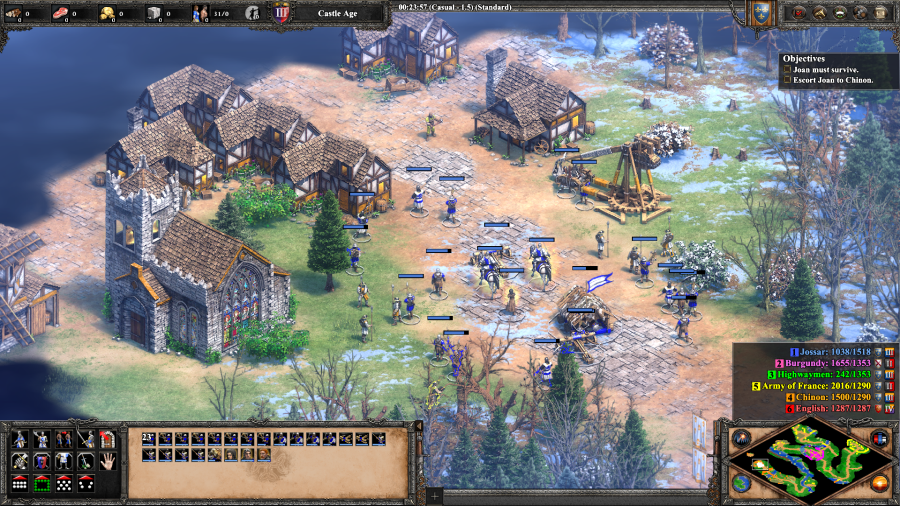 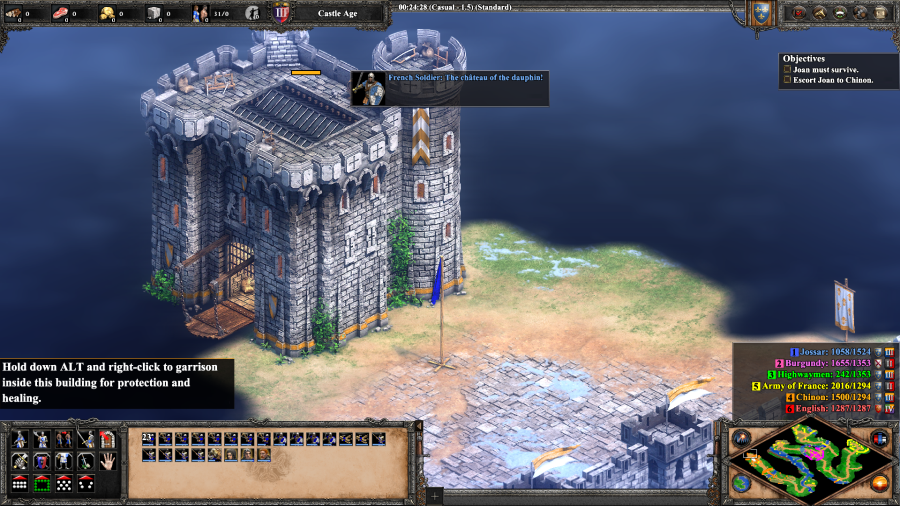 The rest of the scenario is just a walk through Chinon, culminating with a Courtier acting like a receptionist and saying that the Dauphin will see you now. Mission 1 Ending Text "As Joan's footsteps echoed down the marbled hall of the ch�teau, the fat and whispering dukes did naught but stare. The dauphin himself seemed afraid when she kissed his feet. 'My gentle dauphin,' she demanded, 'why does England claim what is ours? Why are you not crowned King of France as is your right?' The courtiers began to murmur. The chamberlain whispered lies into the dauphin's ear. But the dauphin pushed the chamberlain away and rose to meet Joan's gaze. She stands only to the shoulder of the shortest man, but all of us must look up to speak to her. I know not what silent conversation passed between the dauphin and his would-be savior, but it was obvious that his Majesty was in the same thrall as we." And there's the first scenario. It's very tightly organized which has its ups and downs, but mostly means that it's focused on the tactical scale of the game and telling a story. Just make sure that you don't accidentally lose a bunch of soldiers on one of the smaller fights to stupid mistakes and you'll come out alright. 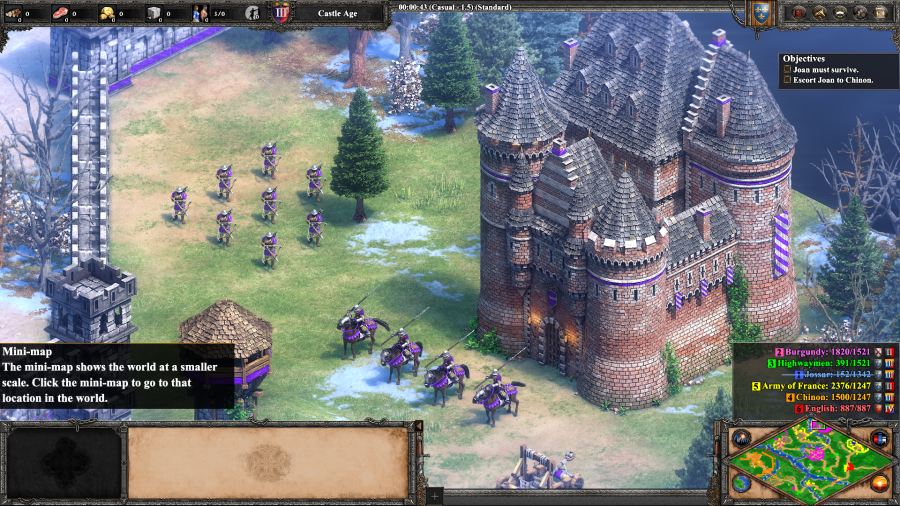 I want to show something off here. If you do go and attack the Burgundian castle up at the north of the map, it looks like this. That is because starting in Definitive Edition they went and updated all the campaign factions to be represented by their relevant civilizations when appropriate. Back in the original version of the game, the Burgundians were just a differently named version of the Franks, but now they're... well, Burgundians. Extra Slides Mission 1 - Intro Slide 1 Mission 1 - Intro Slide 2 Mission 1 - Intro Slide 3 Mission 1 - Intro Slide 4 Mission 1 - Intro Slide 5 Mission 1 - Intro Slide 6 Mission 1 - End Slide 1 Mission 1 - End Slide 2 Mission 1 - End Slide 3 Mission 1 - End Slide 4 Mission 1 - End Slide 5 Mission 1 - End Slide 6 Jossar fucked around with this message at 16:20 on Apr 2, 2023 |
|
#
¿
Mar 31, 2023 02:57
|
|
|
Joan of Arc - Part 2: The Maid of Orl�ans Mission 2 Starting Text "March 26, Chinon. It is one thing for a band of dispirited soldiers to put their trust in a teenage girl. It is entirely another for that girl to be given command of the army of an entire nation. We were filled with pride when we heard the dauphin's heralds pronounce Joan the Maid as commander of the army of France. So that she may look like a general, the dauphin presented Joan with a great warhorse and a suit of white armor. Joan instructed me to look for an ancient sword buried beneath the altar of a local church. I was skeptical, but not only did the men unearth a rusted blade, but we found that the sword had belonged to Charlemagne, grandfather of France. I shall not doubt her word again. Still visible on the hilt was the fleur-de-lis. Joan adopted the fleur-de-lis as her symbol and had it blazoned upon her battle standard. Wherever Joan goes, the standard goes also. It goes with us to Orl�ans. The city of Orl�ans is one of the finest in France, but it is under siege by our enemies, England and Burgundy, and is about to fall. This war has dragged on for one hundred years with precious few French victories. The people of Orl�ans need a savior. They will receive Joan of Arc." 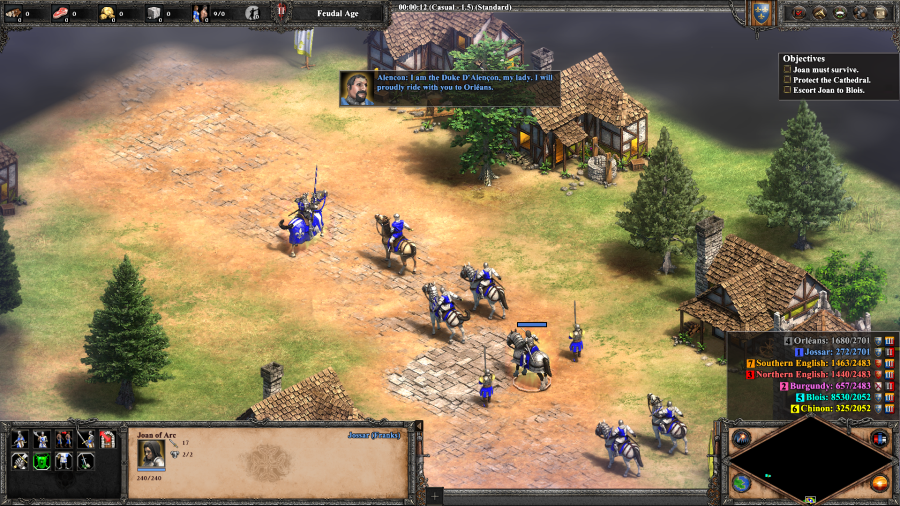 Alen�on: I am the Duke D'Alen�on, my lady. I will proudly ride with you to Orl�ans. Joan has a horse now! Instead of being a weak melee unit, she is now functionally a self-healing Paladin with slightly worse Pierce Armor but much better attack. Alen�on doesn't make the tradeoff, but has slightly less attack in exchange. After that a popup comes from a Villager. Orl�ans Villager: Our city needs help! The English are coming! ...Don't suppose you could tell us whether they're doing a land approach or a naval approach, buddy? 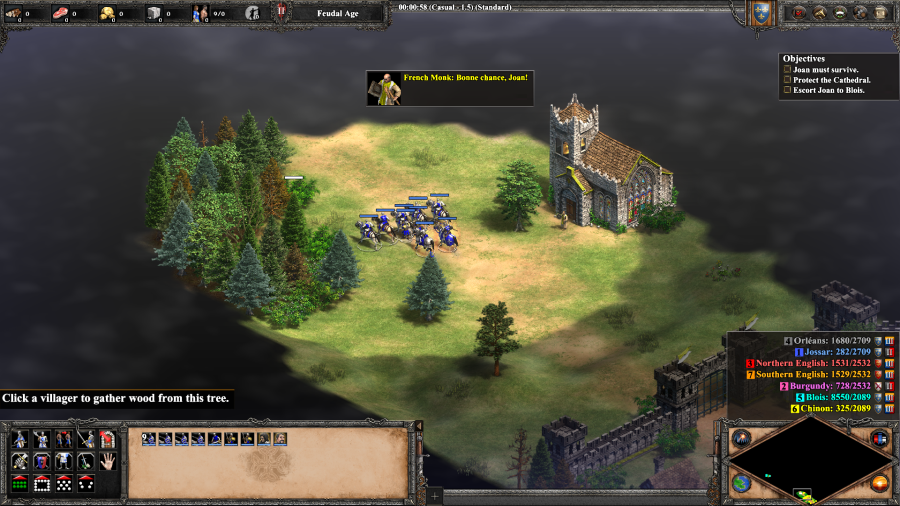 French Monk: Bonne chance, Joan! I always liked this little Monk and him giving you well-wishes as you leave Chinon. No particular other reason to include him. 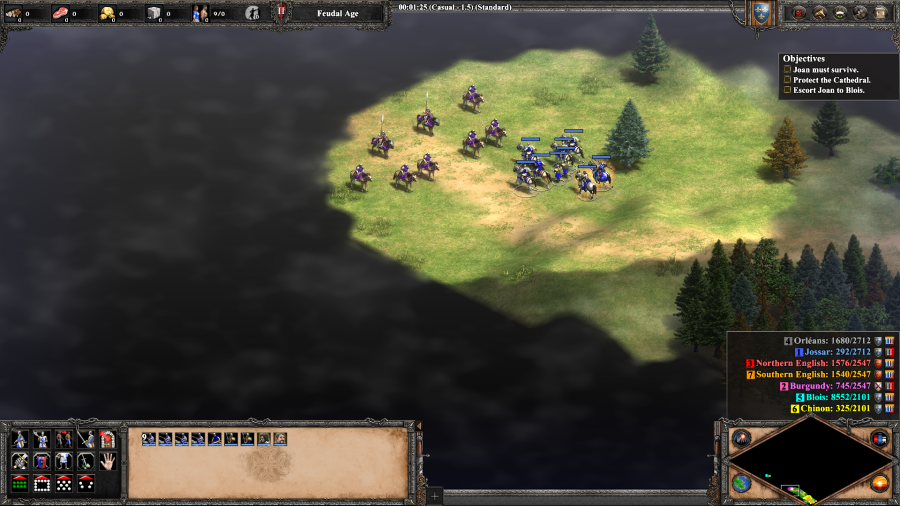 Alen�on: This Burgundian rabble shall not stop us! On the road to Blois, you're attacked by some Burgundians. Definitive Edition including their Unique Unit makes them surprisingly dangerous for a random fight, but with heroes and focus fire they're manageable. 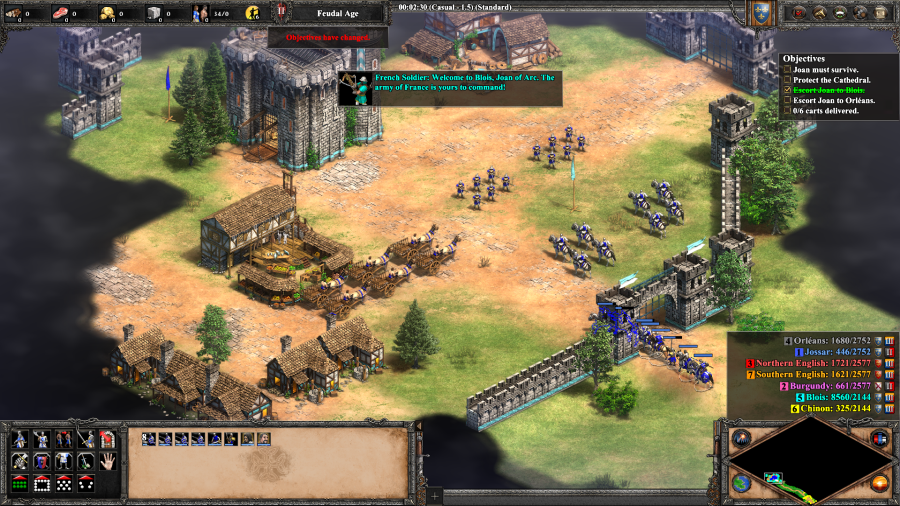 French Soldier: Welcome to Blois, Joan of Arc. The army of France is yours to command. You're given a moderate number of soldiers and a number of Trade Carts that need to be brought to Orl�ans to provide the city with supplies. Lose any of them and you fail the mission. 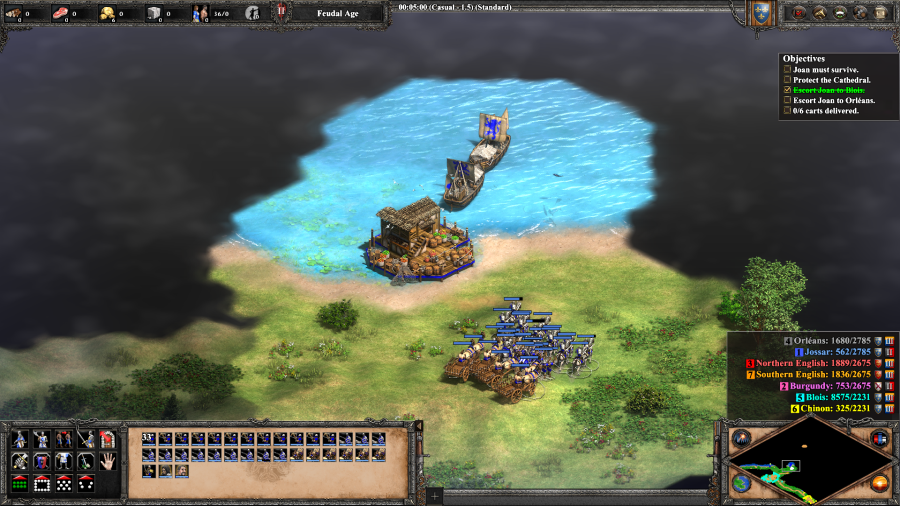 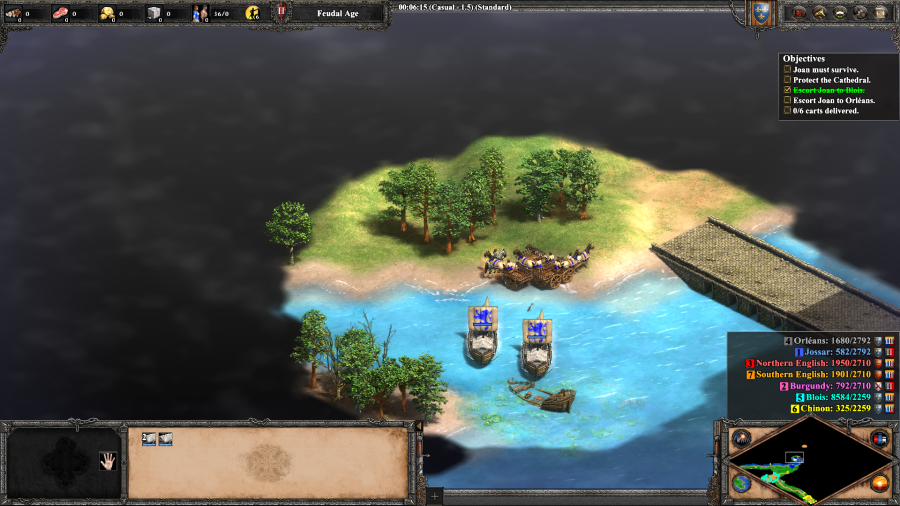 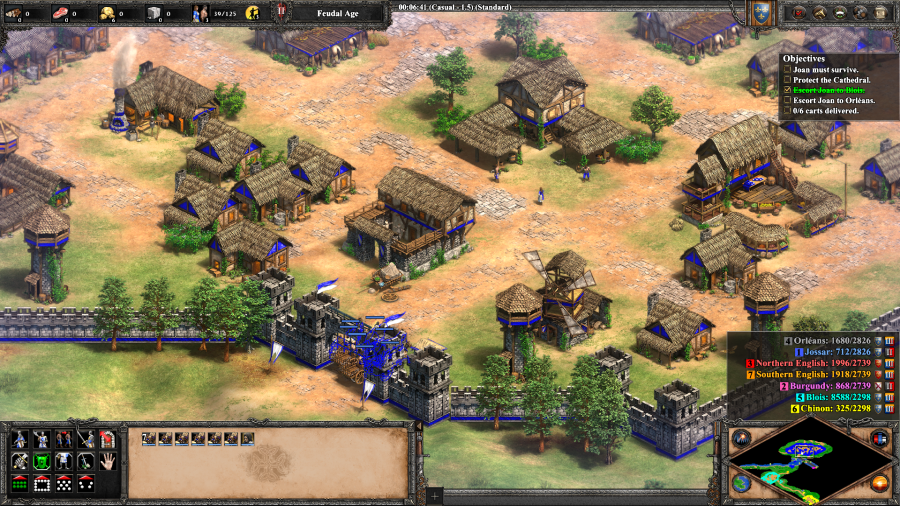 Go the land route and you'll have to deal with all the carts being present while you fight a decent sized Burgundian road blockade, complete with a Guard Tower. Walk along the coast, however, and the game gives you a dock and two Transport ships. Put Joan and the Trade Carts on these and you can just hop across the river and ride directly to Orl�ans without any interference. Getting Joan to the Gates gives you control of the Town and getting the Trade Carts to the Town Center gives you a whole bunch of supplies. 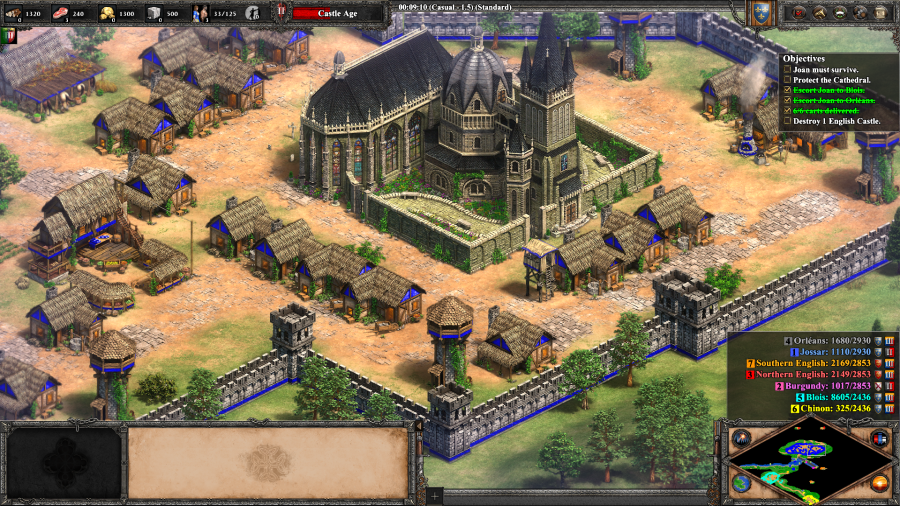 Taking control of Orl�ans trades one loss condition for another. Here's the city's Cathedral. If it gets destroyed, you lose. 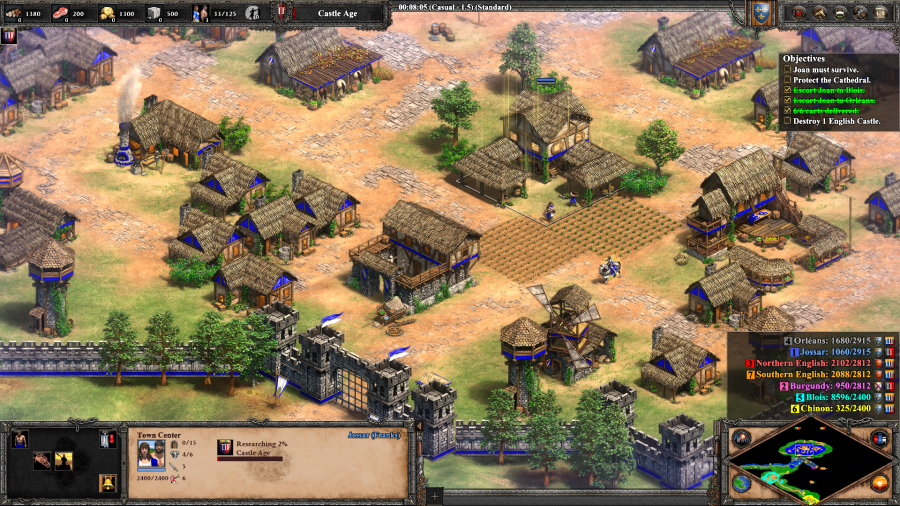 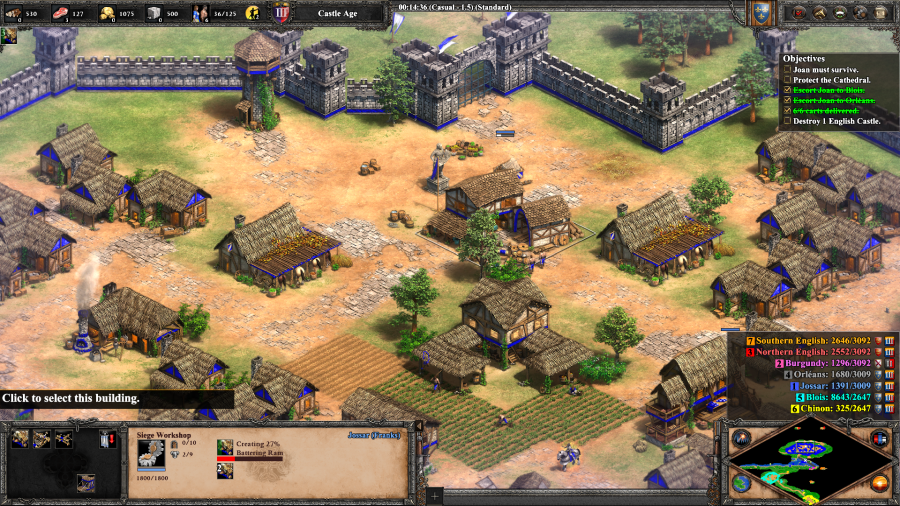 I quickly tech up to Castle Age, put down a Siege Workshop, and start cranking out some Battering Rams. Hmm, I feel like I'm forgetting about something. What was it again? 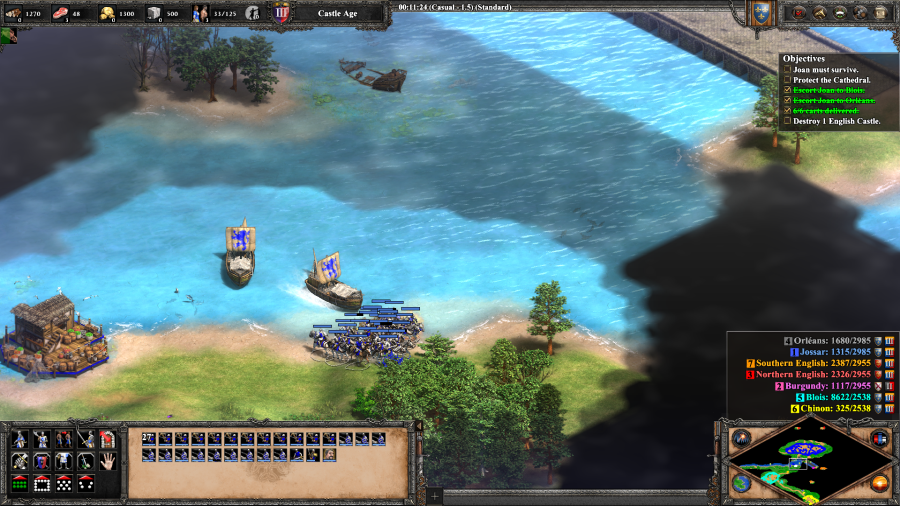 Oh, right. 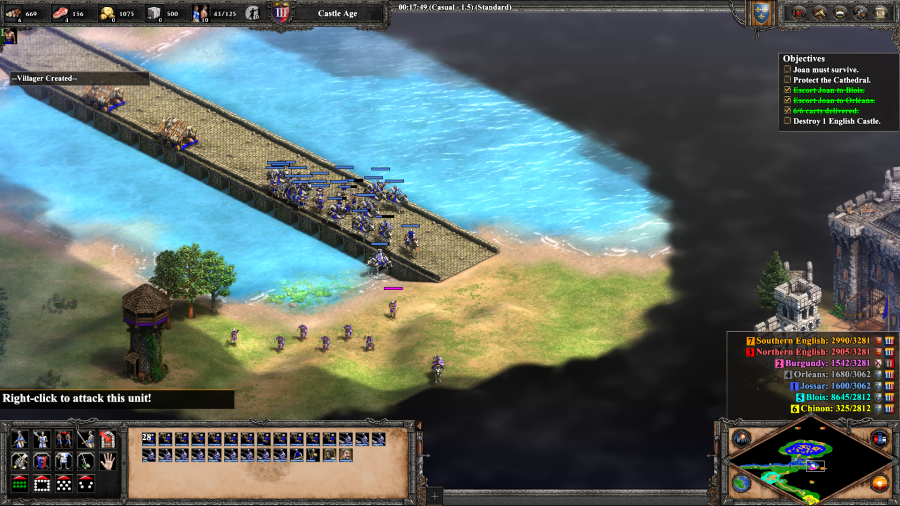 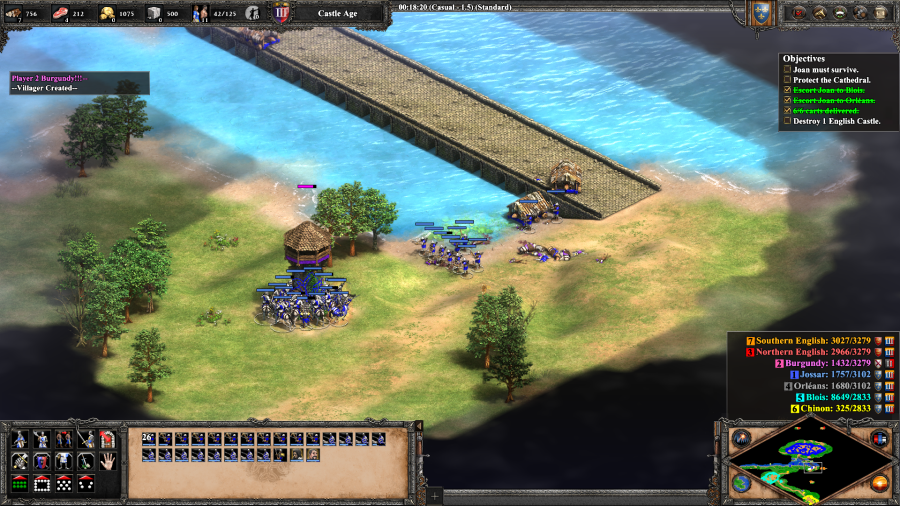 Once the Rams start waddling their way over, I grab Alen�on and the rest of the army, send it to the other side of the Burgundian encampment and assault it from a position which encourages them to leave the safety of their Guard Tower rather than have me fight through it. In an ideal world, the fight would have finished just in time for the Rams to do the dirty work of taking down the Tower, but they are really slow and the army has to take that out as well. 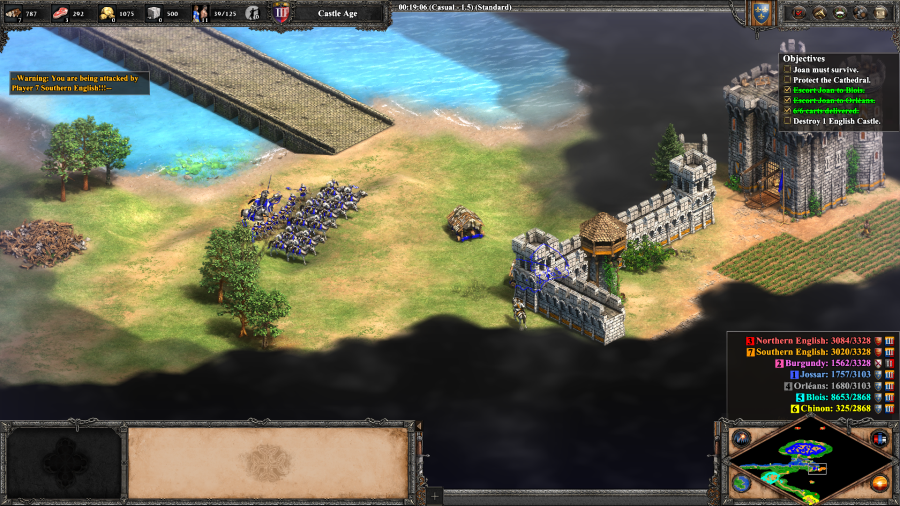 The ultimate goal of the mission is fairly straightforward - destroy a single one of the enemy's Castles. One of them happens to be right next to the Burgundian camp. In addition to taking the least amount of maneuvering to get to, this Castle also happens to belong to the English faction that never gets Murder Holes even on the higher difficulties. That means their buildings can never attack directly below them, so if you blow up everything around the Castle and have 1 Ram plinking away at it, you will eventually win, although it might take a while. 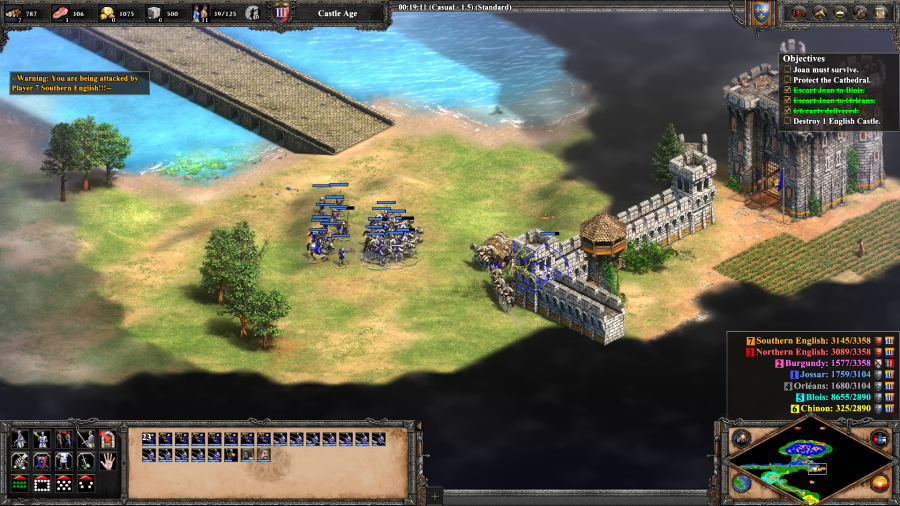 The Southern English aren't going to just take this lying down though, they have a bunch of Knights and will keep producing more in attempt to repulse your attacks. 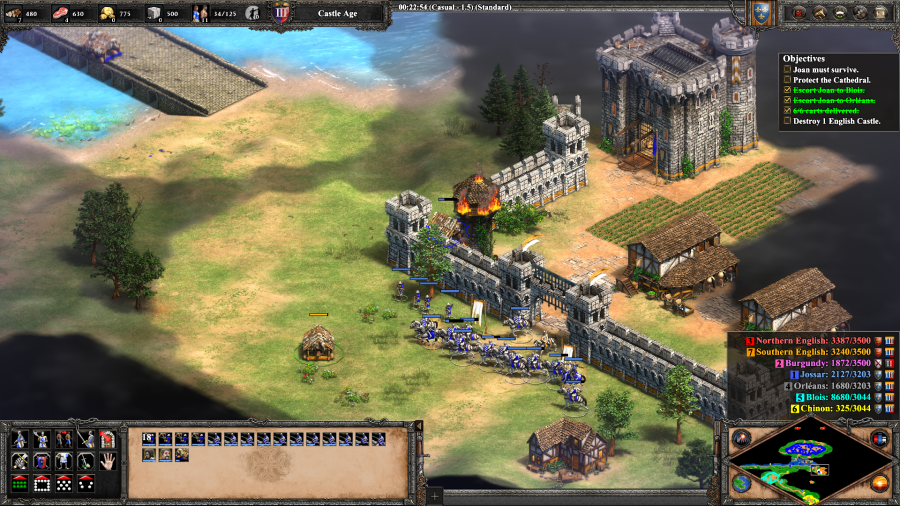 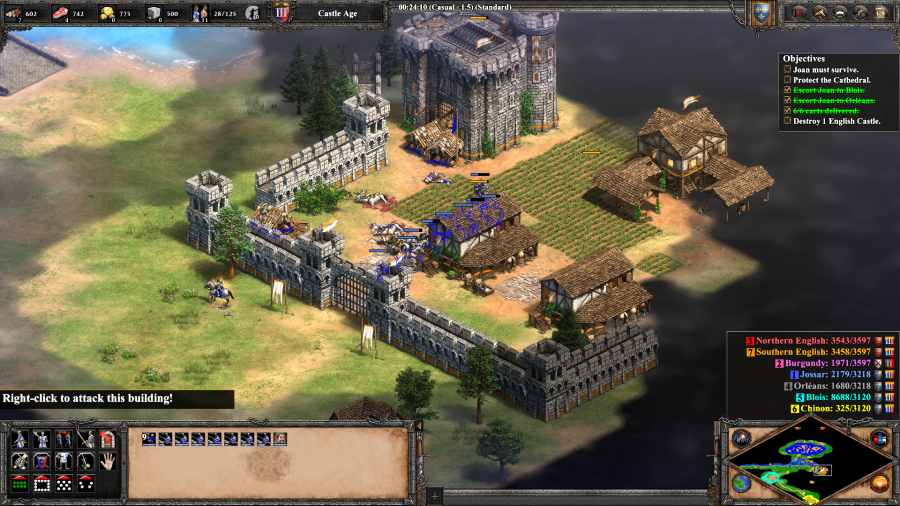 I break through the walls and start working on the immediate threat of the Guard Tower, before moving to the Castle itself. That Southern English Battering Ram in the first shot isn't a defense unit, by the way, it will slowly make its way up to attack Orl�ans if you let it. 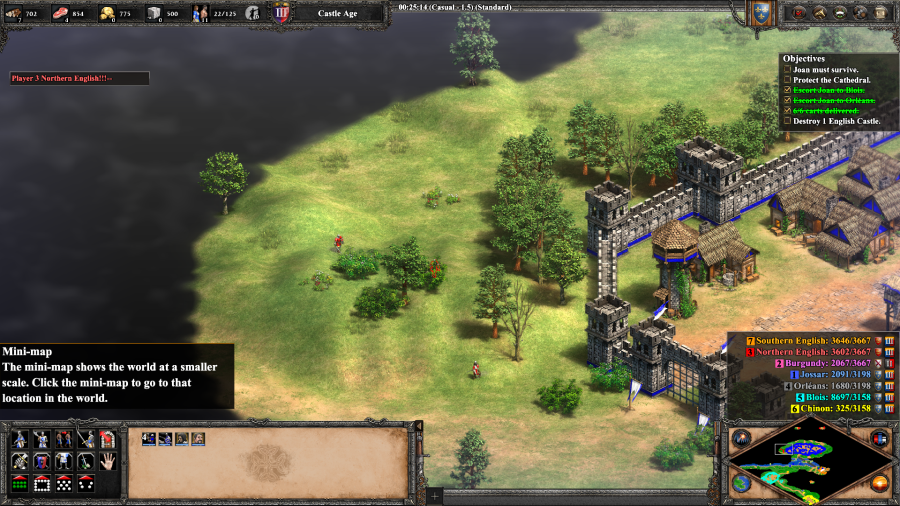 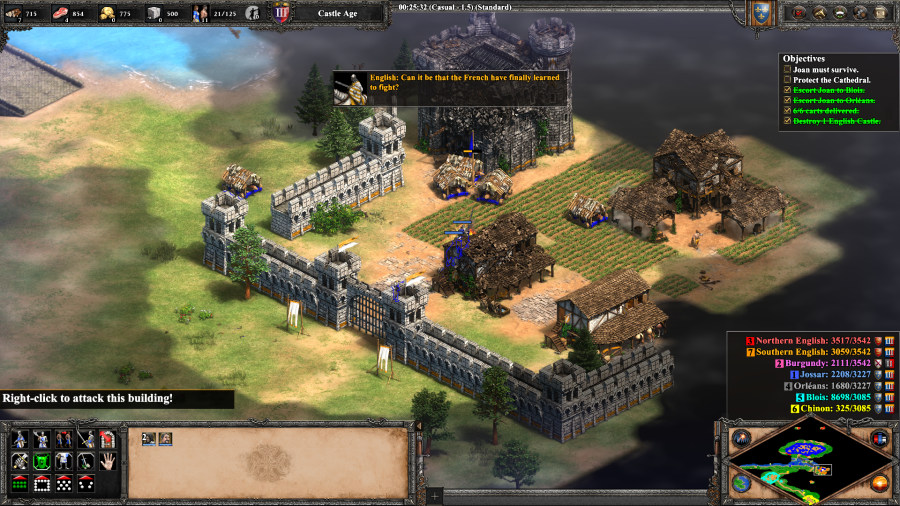 The Northern English finally manage to send some units to start attacking Orl�ans... about 20 seconds before I complete the scenario objective. English: Can it be that the French have finally learned to fight? Mission 2 Ending Text "Joan prophesied that she would be wounded at Orl�ans. At the height of the battle, an arbalest bolt knocked her from her horse. We could not believe our misfortune. But as we carried Joan away from the carnage, the battle was won. Orl�ans was free. When we entered the city, the entire population cheered us on from windows, rooftops, and city streets. They fired artillery into the night sky and shouted aloud their nickname for Joan: 'La Pucelle'�The Maid of Orl�ans." For those of you expecting an epic battle, I am sorry to disappoint. This scenario is 3/4 prep time, followed by a battle which mostly consists of my starting forces serving as a shield for Battering Rams. If you move fast enough, there's pretty much no threat of the English ever seriously contesting you - the one exception to this being if you try to take on the Castle before you're ready, fail your first attack, and then have to deal with a prolonged siege as you rebuild your forces for a second go around. This is the last time you can get away with this nonsense. The rest of the campaign is either built around objectives that explicitly expect you to rush and have been adjusted accordingly, or much bigger fights. Extra Slides Mission 2 - Intro Slide 1 Mission 2 - Intro Slide 2 Mission 2 - Intro Slide 3 Mission 2 - Intro Slide 4 Mission 2 - Intro Slide 5 Mission 2 - Intro Slide 6 Mission 2 - Intro Slide 7 Mission 2 - Intro Slide 8 Mission 2 - Intro Slide 9 Mission 2 - End Slide 1 Mission 2 - End Slide 2 Mission 2 - End Slide 3 Mission 2 - End Slide 4 Jossar fucked around with this message at 02:42 on Apr 1, 2023 |
|
#
¿
Apr 1, 2023 02:25
|
|
|
Aces High posted:I don't think he has ever appeared as a major character in any modern Joan of Arc media. It's been years since I played AoE2 so I can't remember all the heroes that show up but considering what de Rais did after he stopped being a soldier, I get the feeling most people don't want that stinking up their stories I think I can spoil that Gilles de Rais does not show up in any form, nor is he even talked about. Not that most people would really notice, since most of the campaign's side-heroes kind of only serve as cameo appearances, and then fade out into the background of the Hundred Years' War. You can definitely see that this campaign has the marks of being a very early one with how much we're being moved around by the history, with even the nominal main character just sort of being there. Gilles de Rais shows up a lot in Japanese games, for some reason. That PSP game that was talked about earlier, for instance, along with the Fate series. Cythereal posted:One inaccuracy here: Joan's sword in most versions of the folklore surrounding her was said to be the sword of Charles Martel, Charlemagne's grandfather. If I had to guess, the game went with Charlemagne because he'd have a better chance of being known to non-French players. It bounces back and forth, given the legendary and therefore imprecise nature of the sword. It would not be entirely unreasonable to say that the sword belonged to both Charles Martel and Charlemagne though. Jossar fucked around with this message at 14:05 on Apr 1, 2023 |
|
#
¿
Apr 1, 2023 12:56
|
|
|
Joan of Arc - Part 3: The Cleansing of the Loire Mission 3 Starting Text "June 14, Orl�ans. Our rescue of Orl�ans was a setback for our enemies, but only a minor one. The English still possess half of France. Tragically, we have cooled our heels for weeks while the Dauphin's advisors debate. Joan became irritated with the delay and reassembled her army. She talks of nothing but her mission to drive the English into the sea. The force of Joan's will is titanic. She has gathered to her banner swearing brigands and knaves and turned them into patriots and heroes. Among them is the man La Hire. A giant clad in plate mail, he drives men on with curses and fists. There will be plenty of English necks for La Hire to break at Patay. Patay is the gateway to the Loire River Valley. The English hold the Loire in a grip of steel, whilst a huge army under Sir John Fastolf devastates the countryside. Joan leads us to Patay to capture the English castles. However, we must avoid Fastolf's army 'til we are strong enough to face his veterans."  Age of Empires II: Definitive Edition - La Hire Will Beat On Your Behind That's not what the song is called. La Hire: It's better. Look, the readers have already memed you to hell and back, can we please not... La Hire: No chance! You are boring, and La Hire has arranged for a distraction to narrate the scenario without your so called "help." Oh really, and how are you going to do that? La Hire: A raid on your gold supply. That doesn't work in real life, idiot. Hey! Don't touch that! No, I don't care that it's made out of "purestrain gold", that's a stupid... La Hire: Enough of this! La Hire wishes to kill something. 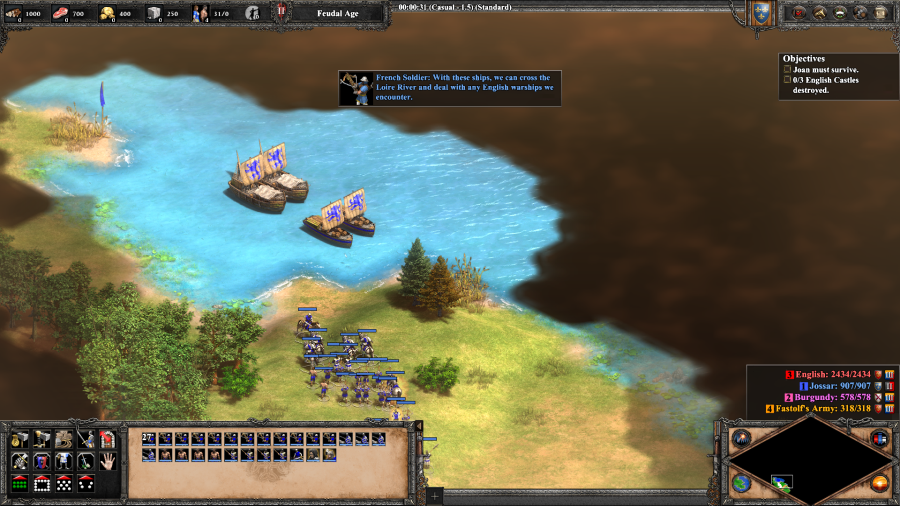 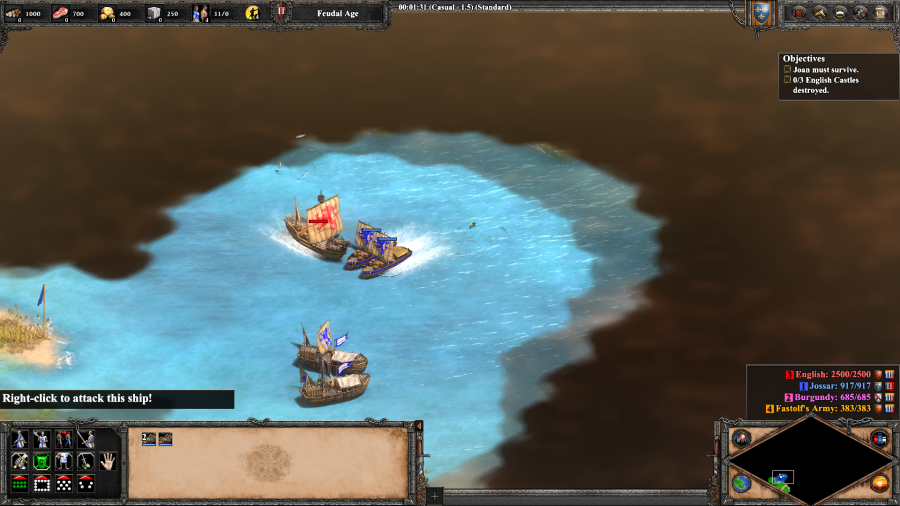 La Hire: The English and their Burgundian whelps hide behind the Loire. Nothing guarding the river that explosives can't handle! 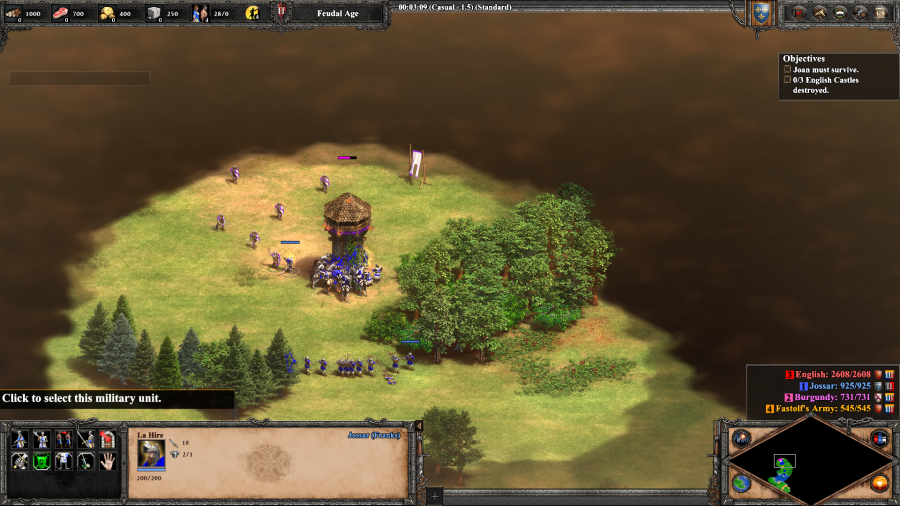 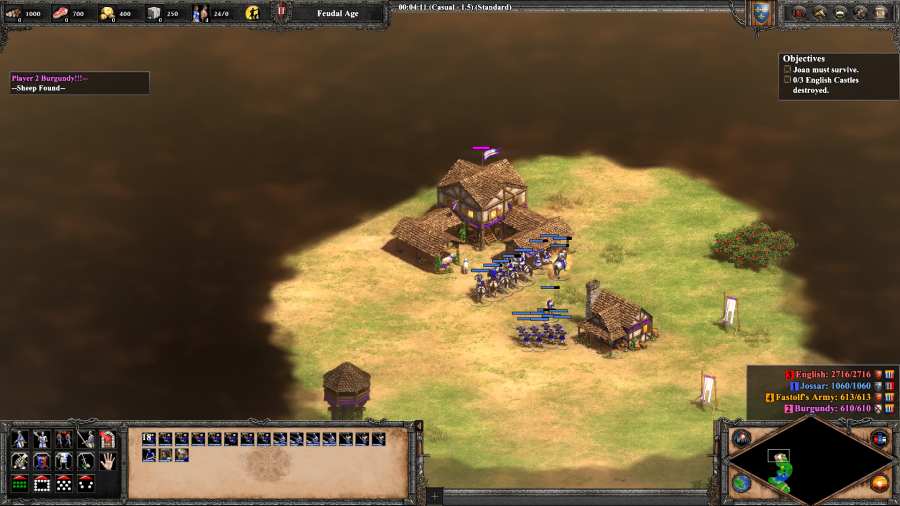 La Hire: North of the river, the Burgundians wait in force. Good! The blood on La Hire's sword is almost dry. 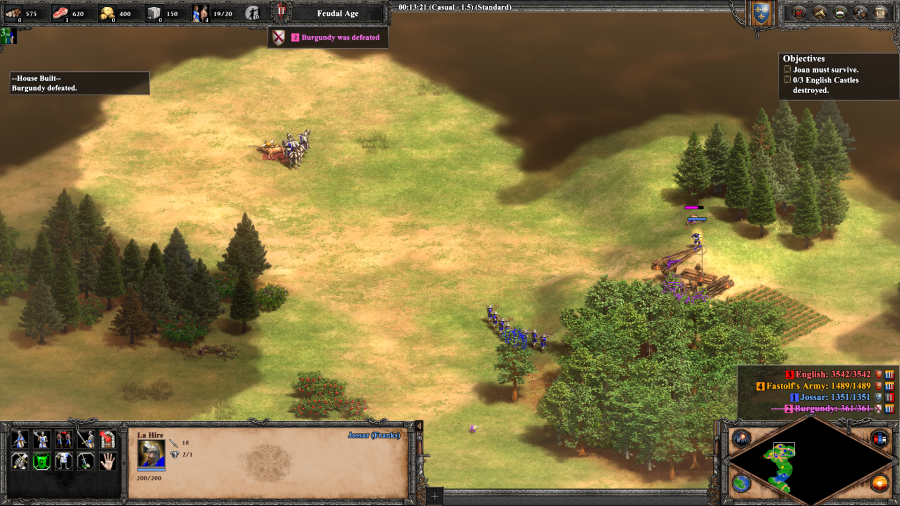 La Hire: La Hire even dealt the final blow! On to tougher necks to snap. 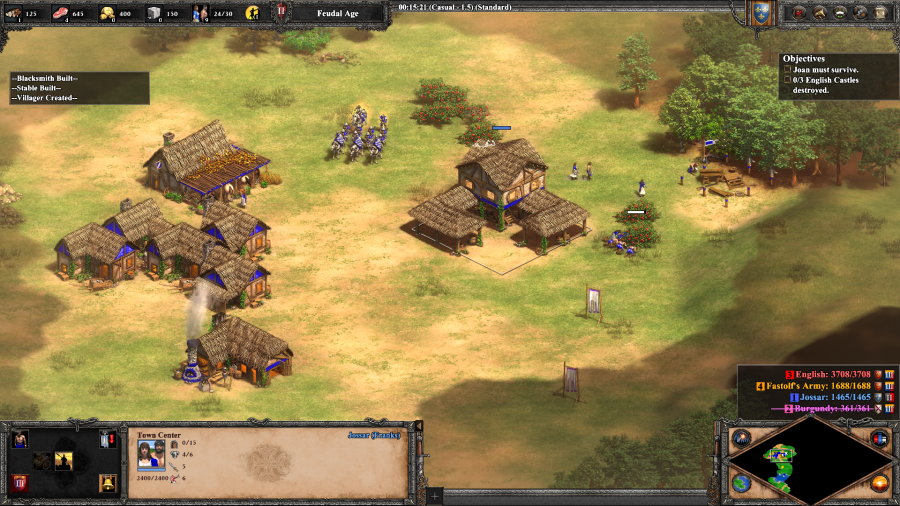 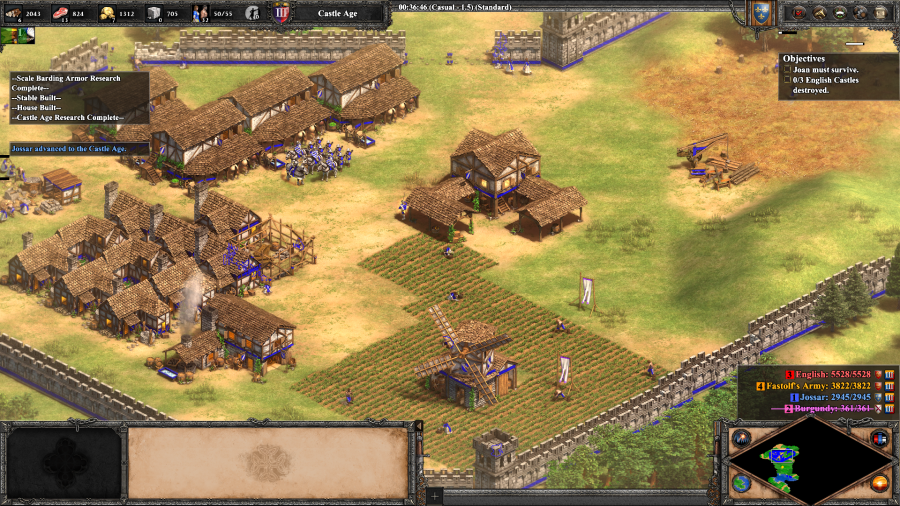 La Hire: La Pucelle makes La Hire sit around while the workers build a camp. It is necessary work, but BORING. 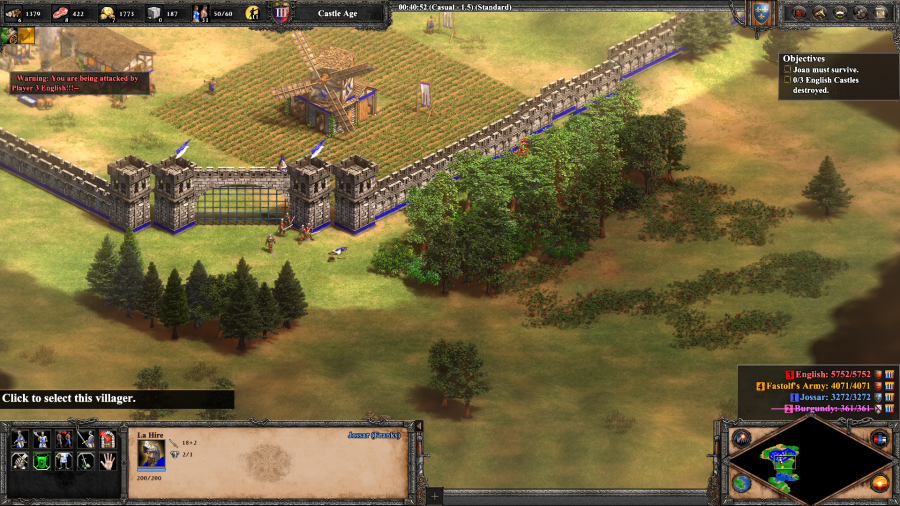 La Hire: Finally, some more English to kill! La Hire shall leave the walls and face them all by... *thwip* French Soldier: La Hire has been grievously wounded! ... Anyway... 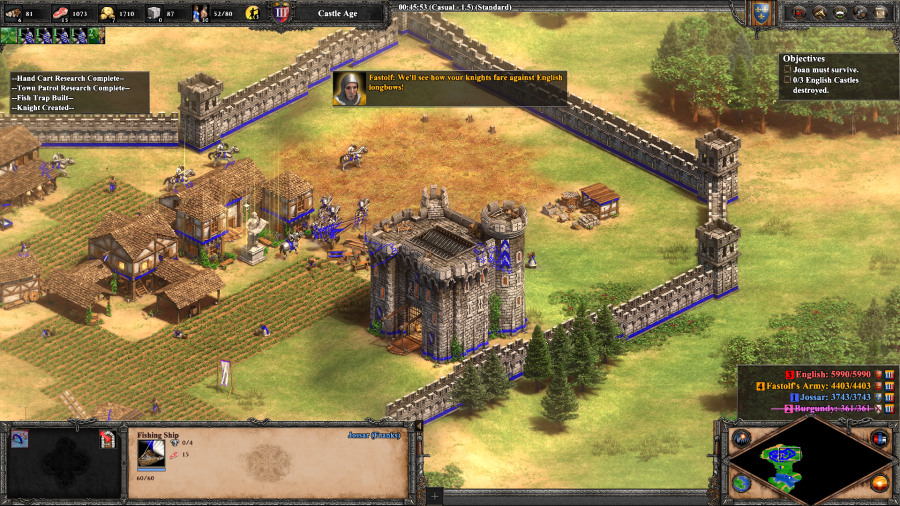 Fastolf: We'll see how your knights fare against English Longbows. I'm not sure what triggers Fastolf saying this line. I think he just automatically says it after 45 in-game minutes to remind you that he exists on the map as a separate force from the rest of the English castles. Fastolf has a lot of dialogue lines like that.  During the Castle Age you also get to build multiple Town Centers, which is useful for helping your economy to run ahead. There's a limit to how useful that's going to be because you're stuck in the Castle Age in this scenario and can't research all the big, expensive Imperial Age techs. 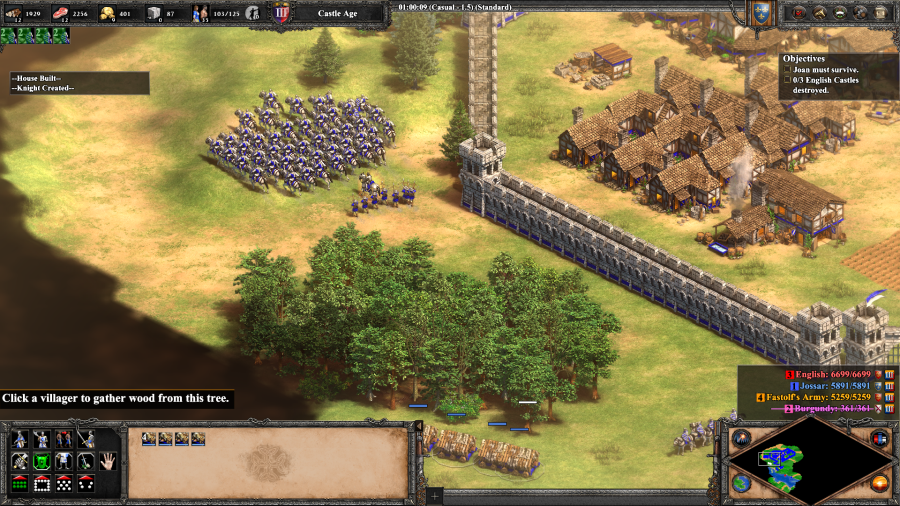 Fastolf: An army of Rams, how quaint. The Franks are primarily a Cavalry civilization, so that's what I go heavy on, with a couple of Rams thrown in for building destruction. The AI doesn't build a ton of Pikemen, or else I would try and diversify with some of their Unique Unit, the Throwing Axeman to counter the counter. But even then, Cavalry is what you do best and everybody knows it, especially in Multiplayer.  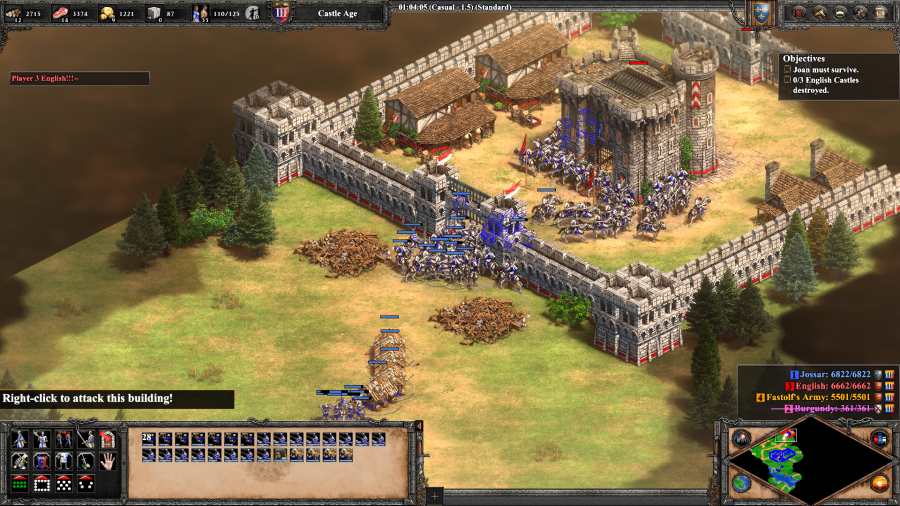 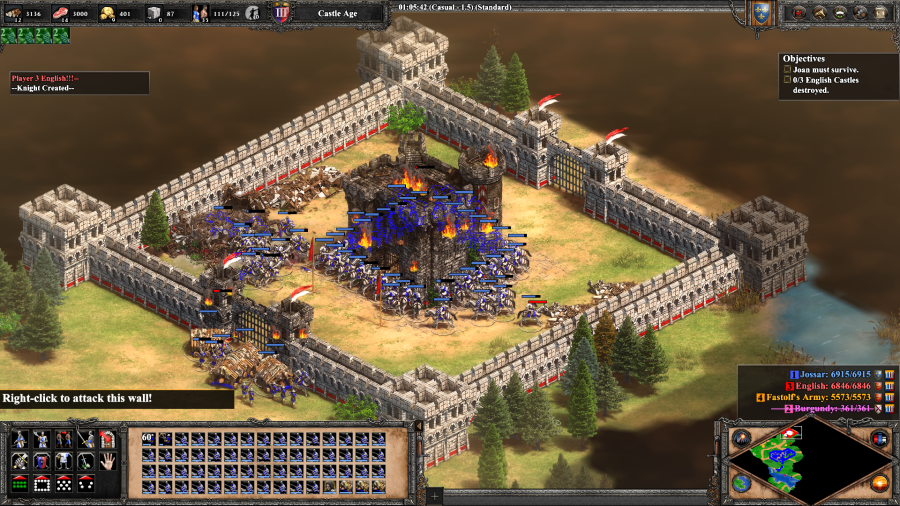 English: The French are attacking our castles! Fastolf: Enough of this! I shall deal with Joan of Arc. The big blue blob of destruction smashes the first of the English castles. This sets Fastolf's forces on a countdown to mobilize against your base, and is the real reason why you're supposed to build up heavily before attacking the English castles. 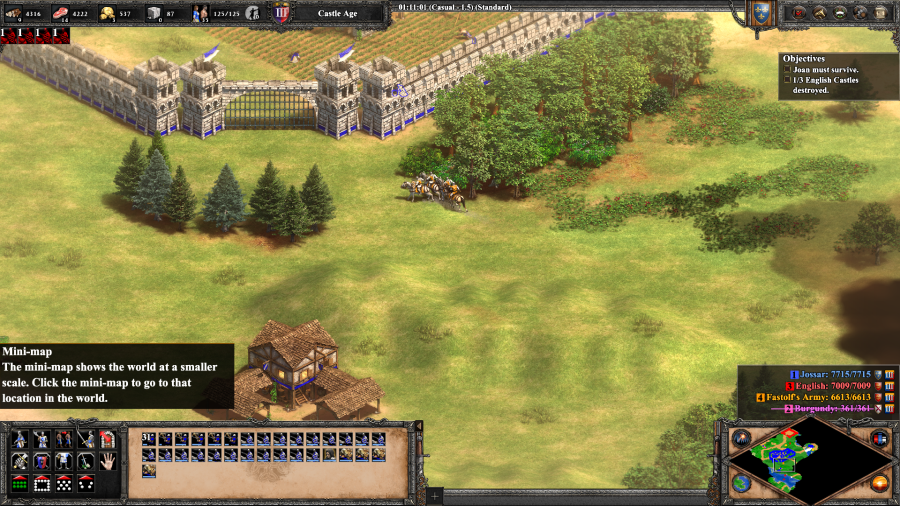 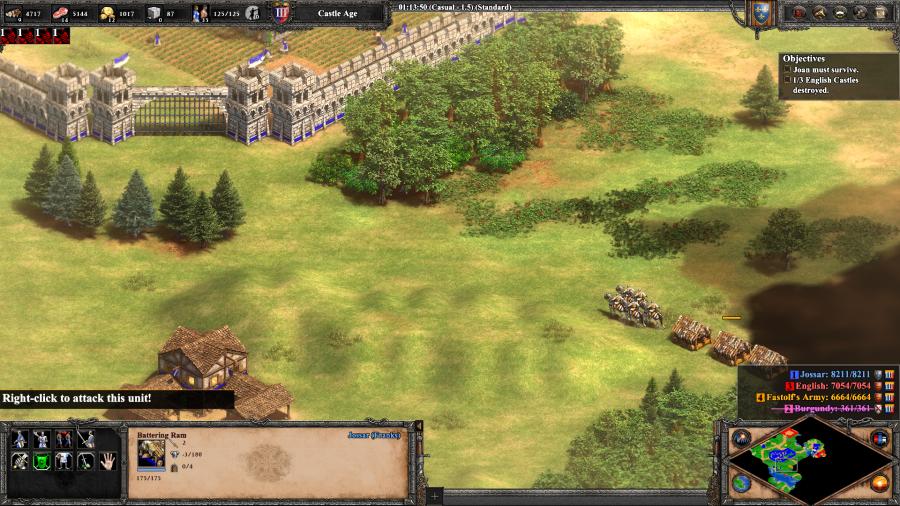 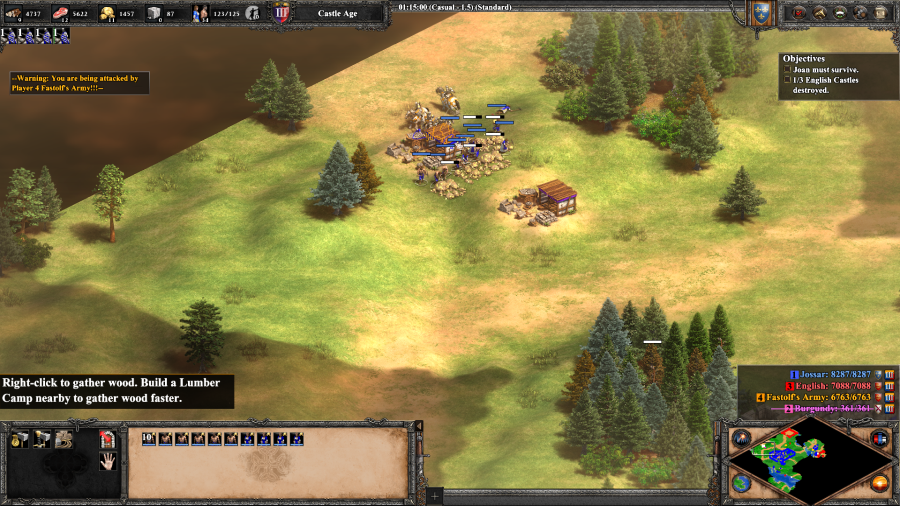 Fastolf: Methinks this peasant girl should go back to her sheep. I come for you, Joan of Arc! (If La Hire is still on the field, he will respond with: Do your worst, you English fop!) I overprepared for this, but I also got lucky and Fastolf decided to split up his army to try and go after easy targets of opportunity rather than send the whole thing in at once. Does mean I never got Fastolf himself though. 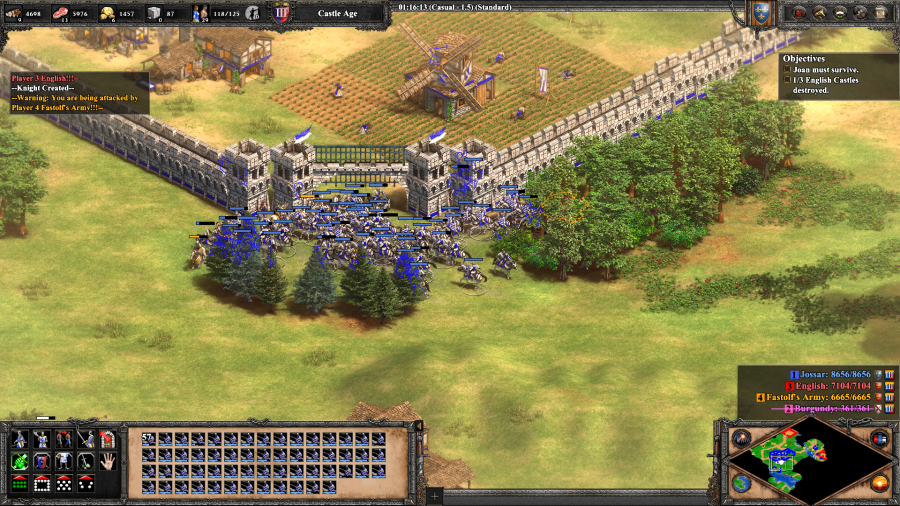 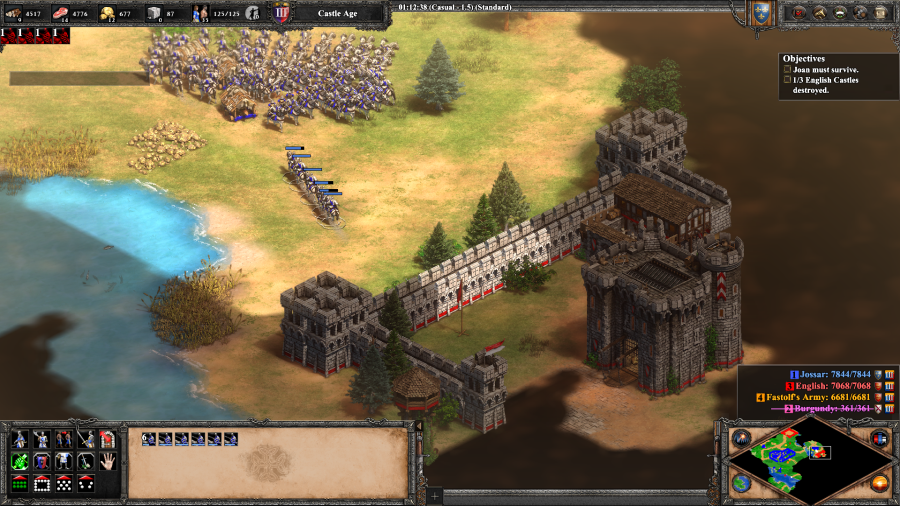 After mopping Fastolf's army up, I get back to work sieging the second Castle, although I had started while Fastolf was getting into position, hence the wonky timing. 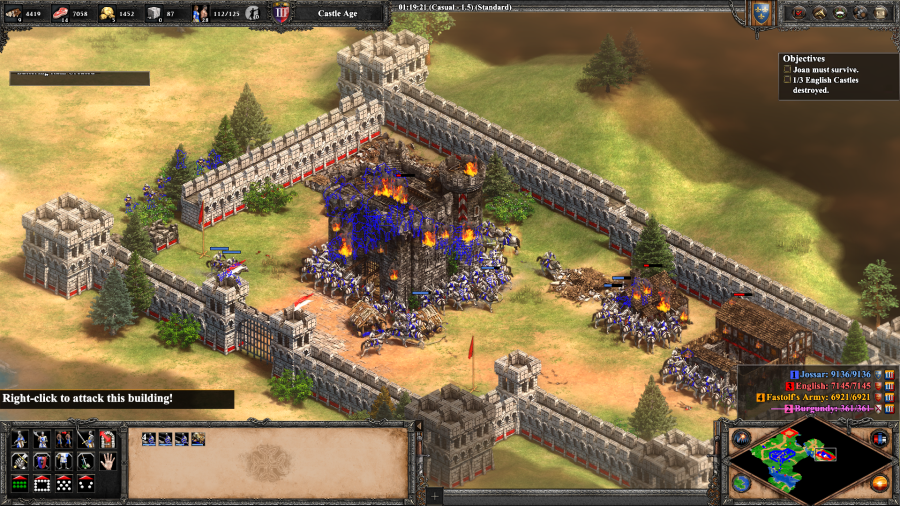 French Soldier: With two English castles destroyed, we have but one more to raze! (If La Hire is still on the field, he will respond with: Them Brits can't make a castle stronger than La Hire.) 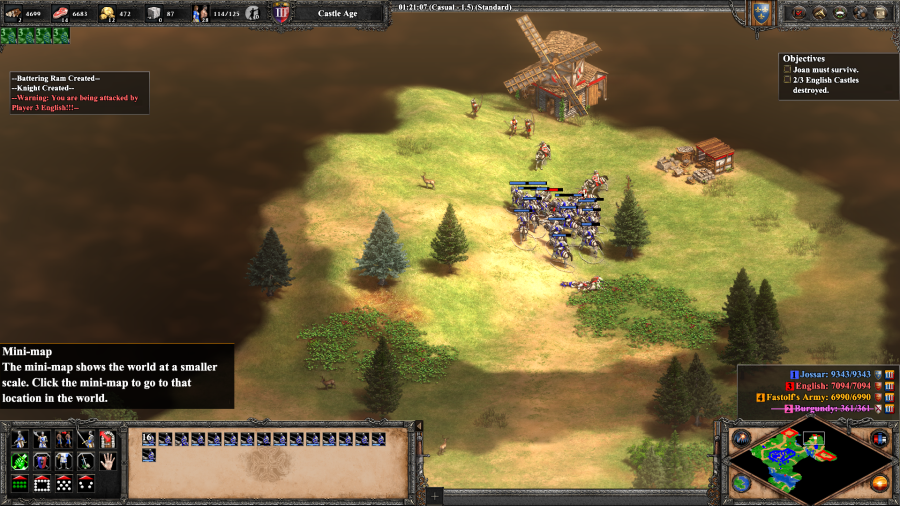 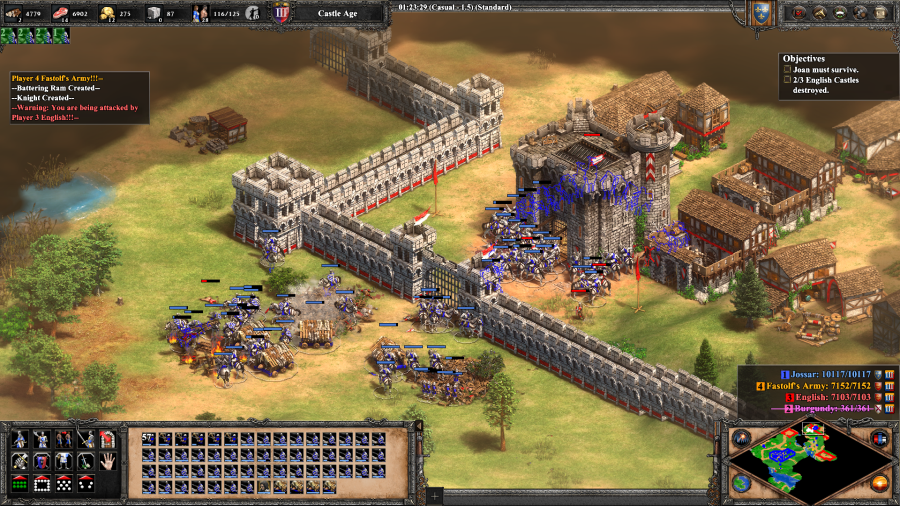 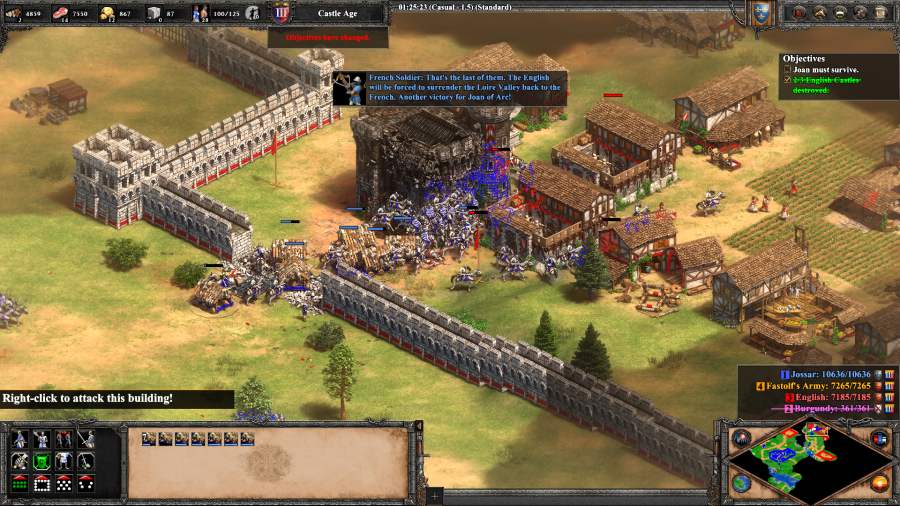 There are two different castles left which can be taken down to complete the scenario, but to end it with a bang, I decide to attack the more difficult one to the North. French Soldier: That's the last of them. The English will be forced to surrender the Loire Valley back to the French. Another victory for Joan of Arc! Mission 3 Ending Text "After Patay, the myth of English invulnerability was dispelled. Now our army knows it is possible to win, but only if we are resolute and cunning. The English are a most deadly enemy, and their longbowmen time and again have decimated a charge of French Knights. To make matters worse, we now face enemies on both sides. The Dauphin's advisors spend more and more time wrangling, jealous of Joan's influence at court. I pray that Joan can complete her divine mission before the Dauphin's envious advisors betray her." From a technical perspective this update kind of turned into a disaster, but in retrospect it was funnier that way. 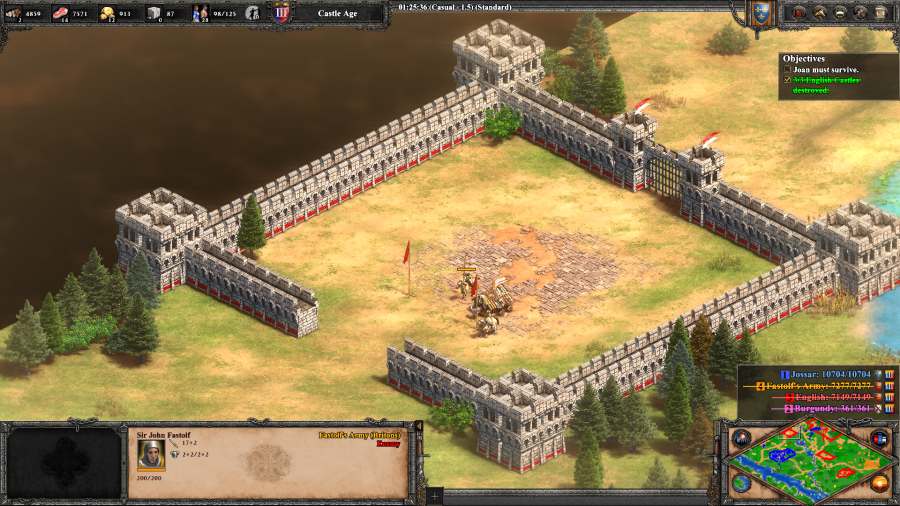 Here's Fastolf hiding out in the middle of nowhere. If you kill him, he just takes it with a stiff upper lip and says: "I die for England." Notably this does not automatically defeat his base, and vice-versa, defeating his base does not prevent him and a series of guaranteed Imperial Age troops from spawning in once you take the first Castle. Extra Slides Mission 3 - Intro Slide 1 Mission 3 - Intro Slide 2 Mission 3 - Intro Slide 3 Mission 3 - Intro Slide 4 Mission 3 - Intro Slide 5 Mission 3 - Intro Slide 6 Mission 3 - Intro Slide 7 Mission 3 - Intro Slide 8 Mission 3 - End Slide 1 Mission 3 - End Slide 2 Mission 3 - End Slide 3 Mission 3 - End Slide 4 Jossar fucked around with this message at 17:47 on Apr 1, 2023 |
|
#
¿
Apr 1, 2023 17:42
|
|
|
SIGSEGV posted:The twin bladed design has no real origin that I can point at but is the one that was favored in fascist illustrations and took over the representation with time. At least I suppose that was the trajectory for that, it might not be. Okay, so after a dive down the literature rabbit hole... The apparent source for this is Agathias, a Byzantine historian living in Emperor Justinian's day who, if you believe translations of his Histories, does claim that the Franks of 500s CE had double headed axes: "They have neither bows nor slings, no missile weapons except the double edged axe and the angon which they use most often." I could only find secondary sources in English attesting to him, and one relatively clean copy in Greek and Latin that isn't hidden behind an academia paywall, but I can't read with any greater accuracy than shoving into Google Translate. Whether the Franks actually had double-headed axes as a matter of archaeology/material culture is more speculative, but it is at least plausible that this isn't 100% made up... with about the same level of confidence as anything else written by an ancient historian. Rody One Half posted:
Alaric remains the earliest campaign date. The latest singular battle is Admiral Yi's defeat of the Japanese at Noryang Point in 1598, or if you want a full campaign - then the Bayinnaung campaign, which extends until 1581. The game stretches its definition of the period a lot. Jossar fucked around with this message at 00:42 on Apr 2, 2023 |
|
#
¿
Apr 2, 2023 00:28
|
|
|
Eh, it's the weekend, I've got time for more of these. Joan of Arc - Part 4: The Rising Mission 4 Starting Text "June 25, Orl�ans. Dead France is returning to life. Our army swells with new recruits. In olden times, men swore fealty only to their particular lord. Now we fight not for insolent lords and ladies, but for France. For all of us, Joan is France. There is no distinction in our minds. The Dauphin himself has arrived in Orl�ans. Never have I seen such a celebration. France needs a king now, so we must escort the Dauphin to Rheims where he can be properly crowned. Yet the city of Rheims is dangerously menaced by the Anglo-Burgundian army. The cities of Troyes and Chalons also bar the way. Joan commands that we must liberate all three cities before the coronation, and we eagerly seek to fight." 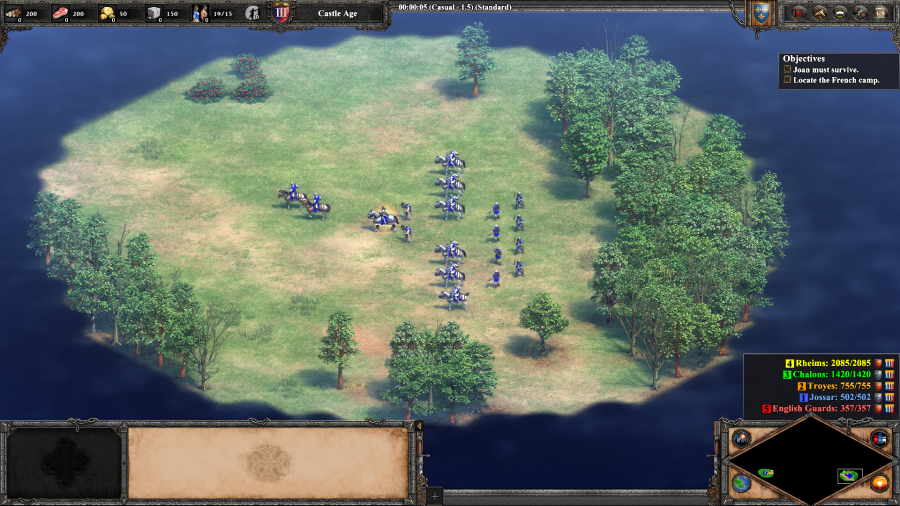 No colorful cast of characters this time, I'm afraid. Just Joan and a small group of troops marching along the road. 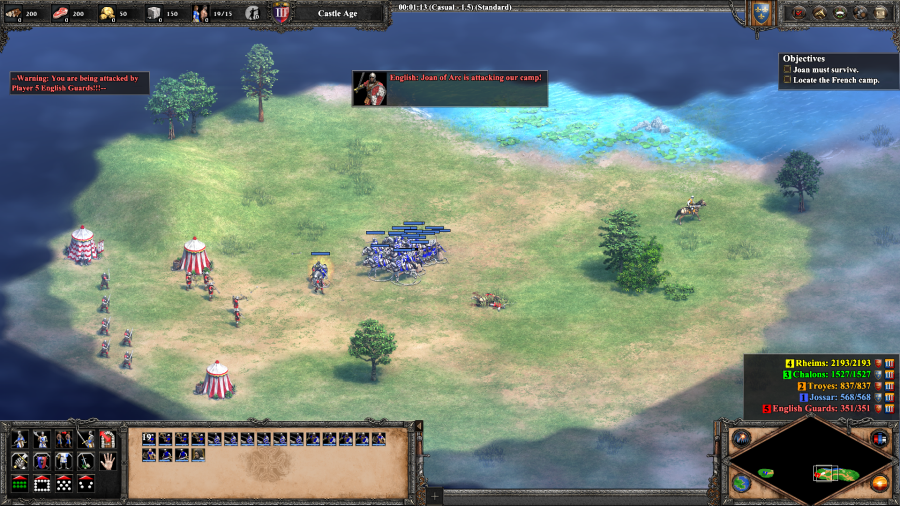 English: Joan of Arc is attacking our camp! Rheims: Do not let her cross the river! The English Guards here are a speedbump that are defeated entirely once you clear out this camp. Their primary purpose is to wake up the town AIs and tell them to start building. 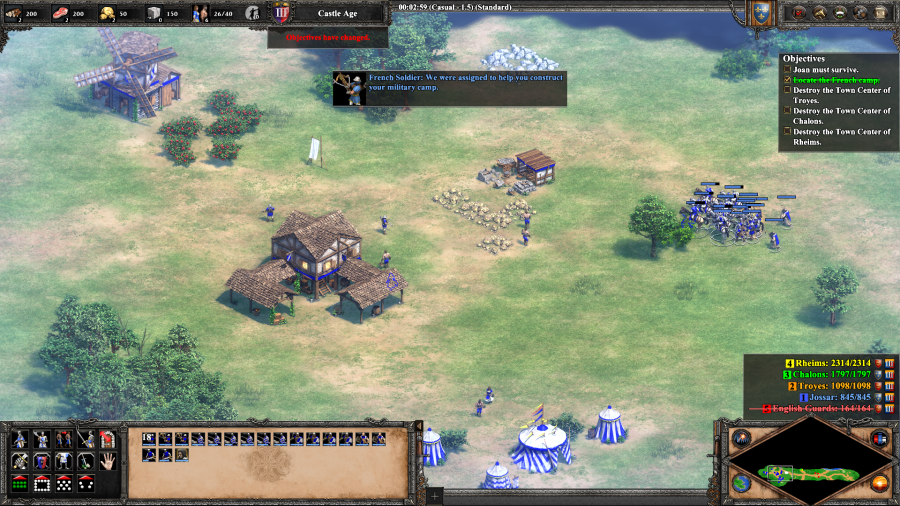 French Soldier: We were assigned to help you construct your military camp. You're given access to a pretty generous amount of resources here, though it is still possible to run out. Fortunately, there's a way to remedy that. 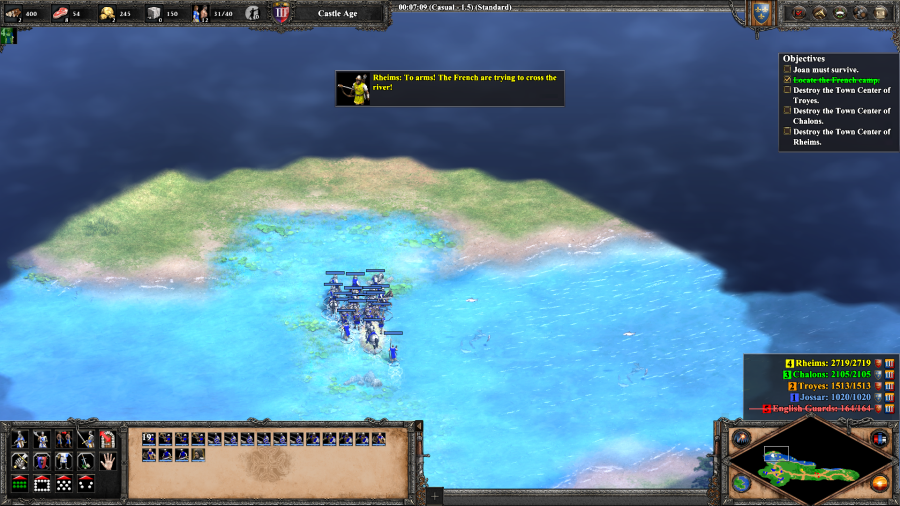 Rheims: To arms! The French are trying to cross the river! 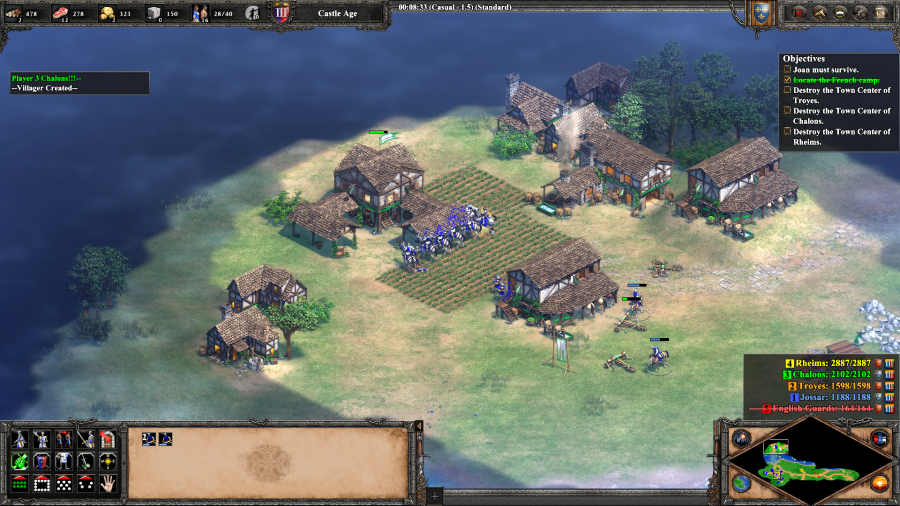  Chalons has a small number of Knights and Scorpions, but if you attack right away, you can destroy their Town Center with your starting forces. This used to raze everything to the ground, in the Definitive Edition, they now become your ally. They don't really do anything, except maybe serve as a Market, but it's nice to know you're not burning half the French countryside to the ground. Interestingly enough, Chalons is the only enemy faction represented by Franks. The others are all represented by Britons.  The more important thing is that now they're not too active in gathering resources, so you can eat those up as a supplement to the ones in your southern base. However... 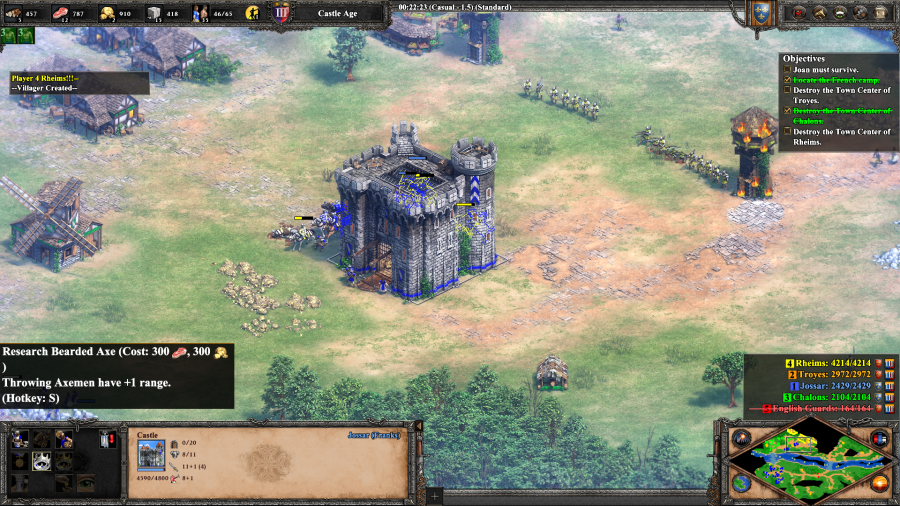 I make a mistake and build a forward castle in front of the gold line. If you are playing along at home, DO NOT DO THIS. Any military buildings past that line, especially a Castle, drive Rheims berserk and makes them dump their entire army on you immediately. 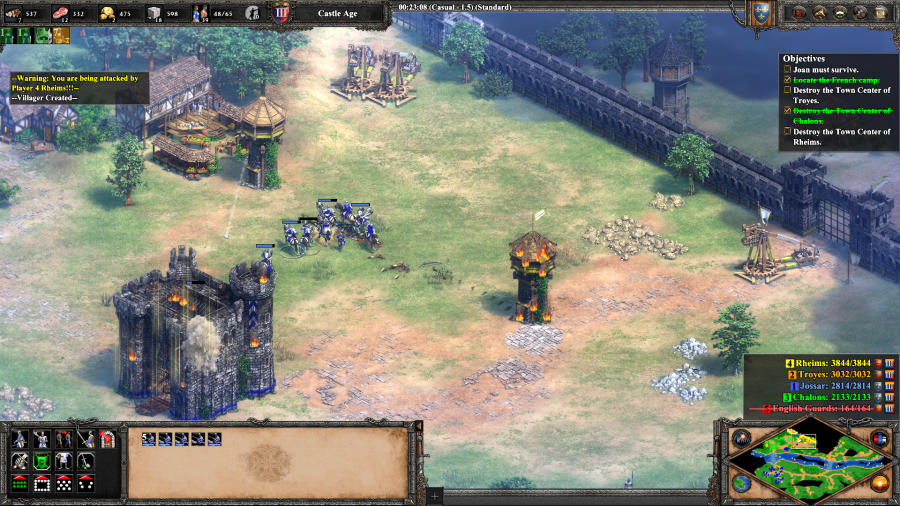 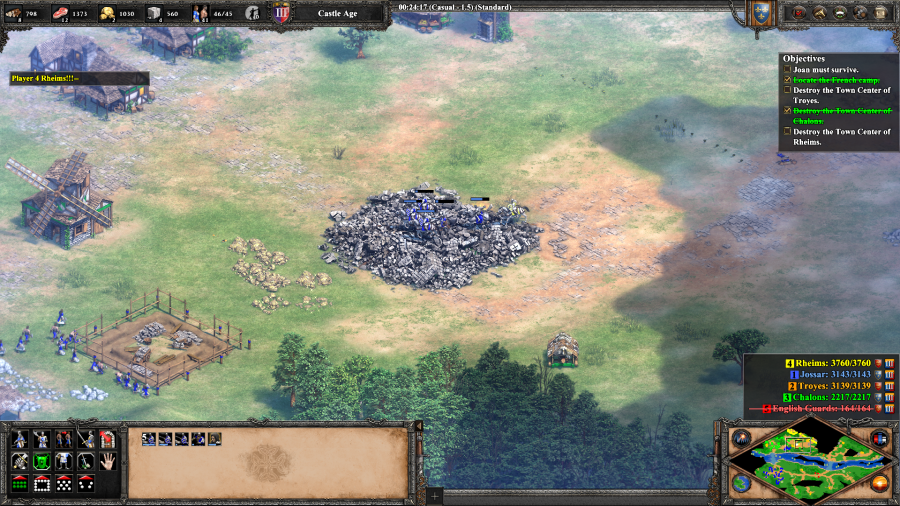 I manage to destroy the majority of Rheims army and forward Towers, but at a heavy cost to my own and Rheims manages to take out the Castle. I consider this a good trade, but build all future military buildings further back towards Chalons. 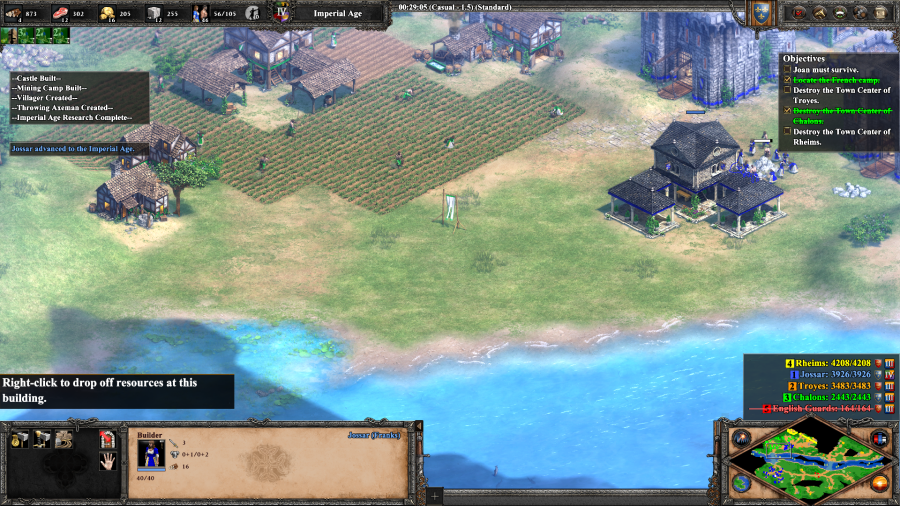 This is the first tech up to the Imperial Age that we've seen so far. You could've done it in the Scottish campaign, but it would have been massive overkill. 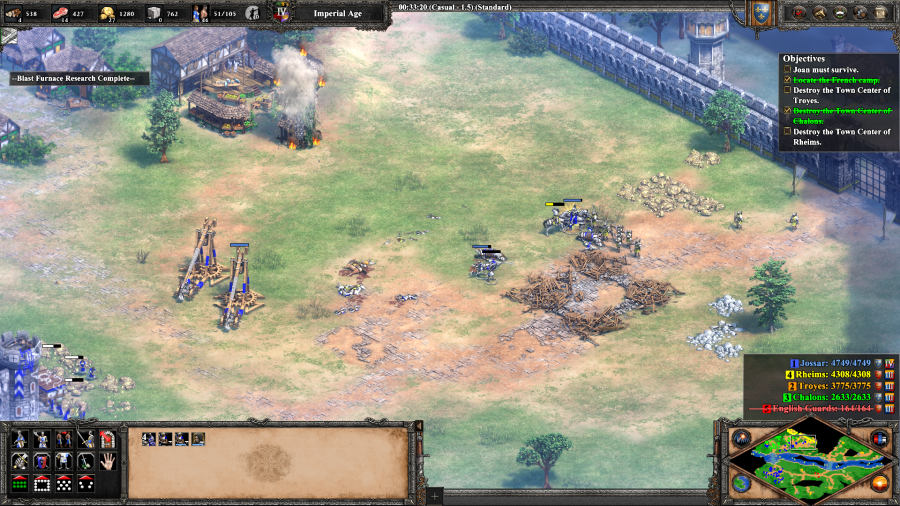 Every so often, I send troops out to stop Rheims from growing its army too large, and prevent them from forward castling. 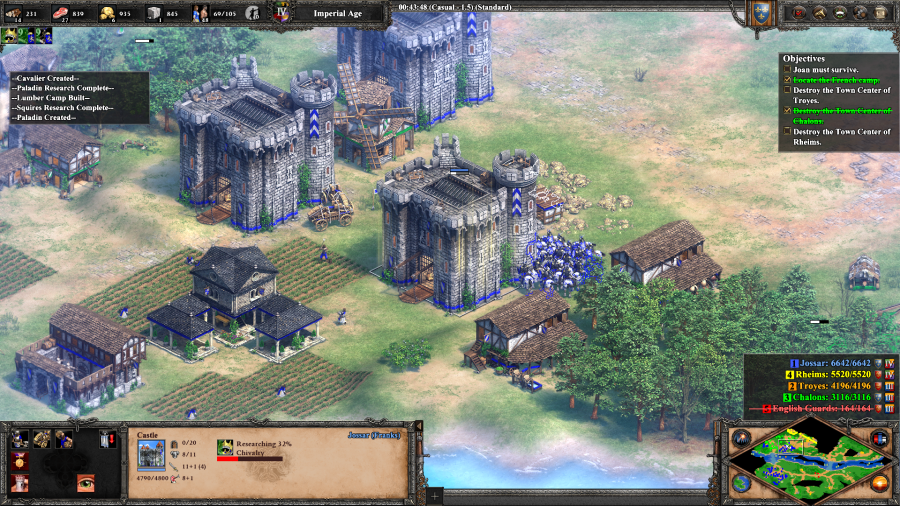 Meanwhile, the Franks' Castle cost reduction bonus is proving handy back at Chalons. Initially, I intended to use all of these Castles to shove out a bunch of Throwing Axemen, but the vast majority of Rheims' army is Longbowman, which chew them up. So instead, they're just an impenetrable wall of defense while I fall back on the tried and true French strategy of flooding the map with Paladins and the occasional Trebuchet (the actual multiplayer strategy would swap out Gunpowder units for Trebuchets, but you can't produce Gunpowder units in this scenario for some arbitrary reason). Shown here is the unique French Imperial Age research, Chivalry, which makes Stables produce troops even faster.  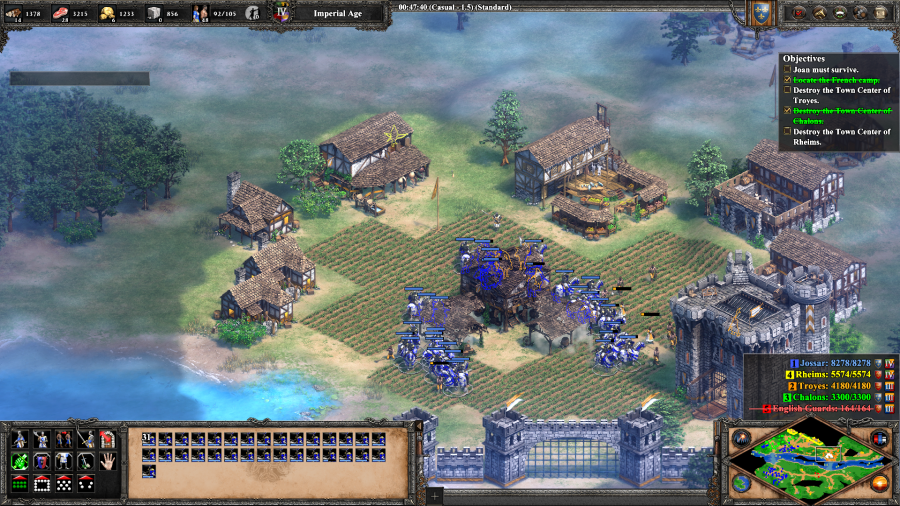 Once I have enough Paladins, I start the final assault. The first step is taking out Troyes, which is really more of an afterthought than anything, but necessary to win the scenario. French Soldier: The English in Troyes have been defeated! 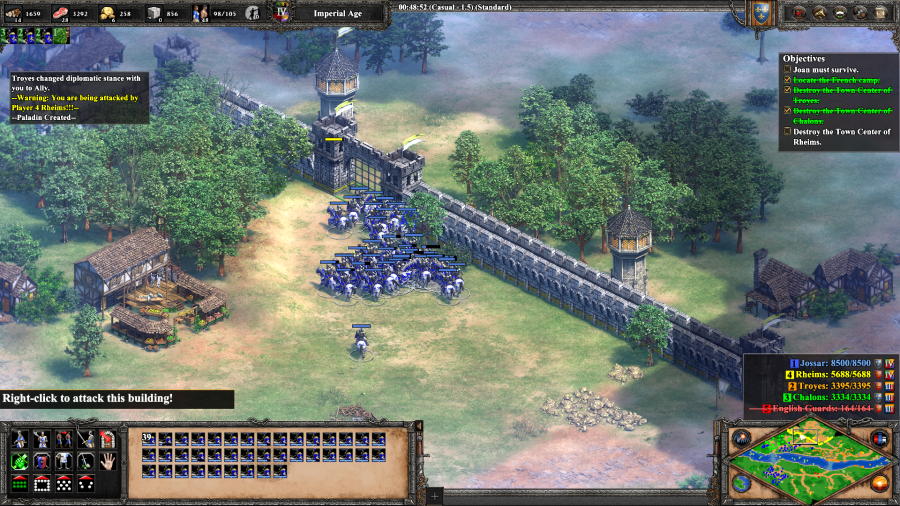 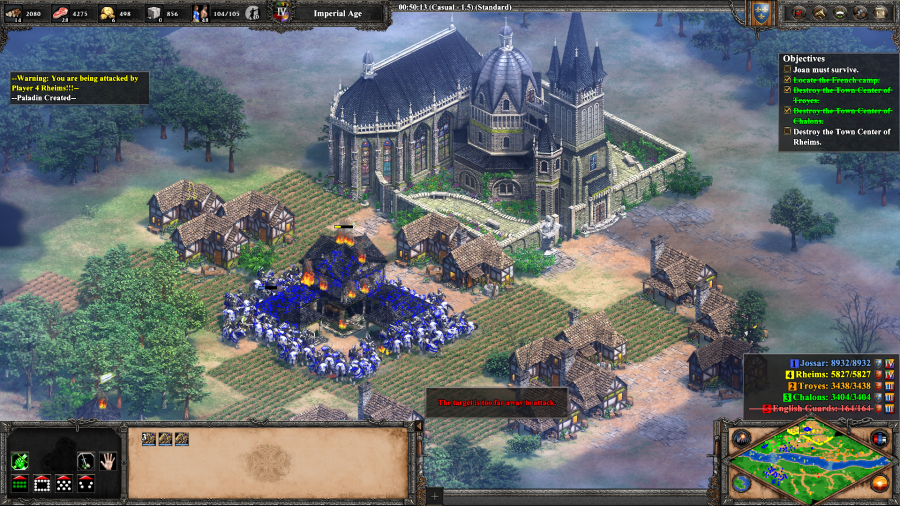 The second is shattering the battered remnants of Rheims' army, before breaking through their full Imperial Age panoply of Fortified Walls and Keeps, and trashing the Town Center. French Soldier: (Rheims) Rheims is liberated! (Scenario Victory) Now the coronation of the dauphin can proceed! Mission 4 Ending Text "As we rode into Rheims, a sea of peasants and lords knelt before Joan. Some even knelt to kiss her horse's hoofprints. Cannon thundered and a thousand flags danced in the breeze. In the enormous palace, the Dauphin knelt before the archbishop and rose as King of France. Prayers, anthems, and sermons filled the great ch�teau. Interspersed among perfumed dukes and ladies were tattered soldiers from our army, many still bearing wounds. Joan herself was at the king's side, as was her bedraggled battle standard. Despite the celebration, I know in my heart that this war is far from over. Our fathers and grandfathers died fighting against the English. Joan gives us hope, but I do not know if hope is enough to ensure victory." Fastolf was annoying because the game gave him more advanced toys than you to play with, but he folded like a chump once you negated that. Rheims is a legitimately dangerous threat, especially if you follow the standard new player strategy of sitting back and booming rather than taking Chalons out of the picture quickly and moving to contain them. Their army can shoot Joan to death really quickly if you're not paying attention, and this is the first mission where I felt like she was more of a liability than an asset. Extra Slides Mission 4 - Intro Slide 1 Mission 4 - Intro Slide 2 Mission 4 - Intro Slide 3 Mission 4 - Intro Slide 4 Mission 4 - Intro Slide 5 Mission 4 - Intro Slide 6 Mission 4 - End Slide 1 Mission 4 - End Slide 2 Mission 4 - End Slide 3 Mission 4 - End Slide 4 Mission 4 - End Slide 5 Mission 4 - End Slide 6 Jossar fucked around with this message at 03:18 on Apr 2, 2023 |
|
#
¿
Apr 2, 2023 03:06
|
|
|
That's fair! The main reason I mentioned Gunpowder units as the "preferred" play is partially because they better synchronize with the army you'd be fielding at endgame when you're in maximum "flood the map with Paladins" mode, but also because in this case you'd be playing against the Britons, who would be a difficult matchup if they decided to counter with their own Trebuchets thanks to Warwolf. But there is certainly a place in the Franks lineup for the Trebuchet, throughout all of Imperial, but especially during Early Imperial when you're more likely to be able to outproduce your opponent thanks to your cheap Castles.
|
|
#
¿
Apr 2, 2023 04:03
|
|
|
I think you might mean the final mission. Not that this one doesn't have problems of its own... Joan of Arc - Part 5: The Siege of Paris Mission 5 Starting Text "September 3, Rheims. France has a king once more. However, as Joan gains influence with the people, jealousy grows within the court. The king's evil advisors now seek to destroy Joan. It is only a matter of time before they succeed in poisoning the king's mind. Joan must hurry to fulfill her mission. Paris, the jewel of France, has been under English tyranny for decades, and French patriots trapped within the city are eager to escape. We are now marching on Paris, hoping that the reinforcements we have been promised will arrive in time." 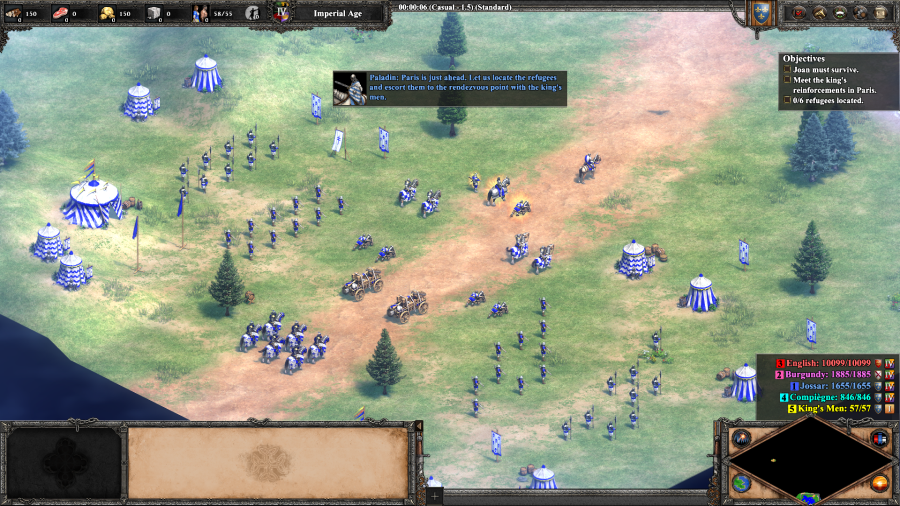 Paladin: Paris is just ahead. Let us locate the refugees and escort them to the rendezvous point with the king's men. You start this mission with a large army, including two heroes, an Arbalest-variant named Lord de Granville and a Cannon Bombard variant named Jean de Lorrain. Well, since I have Gunpowder units, might as well talk about them. They (mostly) require a prerequisite tech, Chemistry, to be researched at a University in the Imperial Age. Their general tendency is that they are really strong but inaccurate. Bombard Cannons however are the opposite, they are perfectly accurate, but as Rogue0071 discussed their main advantages compared to other Siege are their mobility and use against Units, as well as their ability to be built at Siege Workshops unlike the age's other premier anti-building unit, the Trebuchet. They also have friendly fire. In a very crowded map. 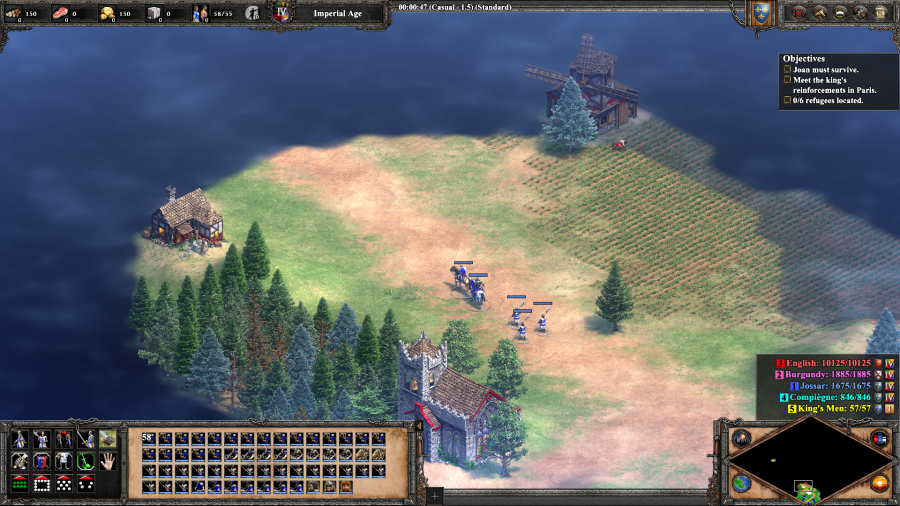 For this reason, and to avoid my units picking unnecessary fights, I turn them all to No-Attack Stance, marked by the sword in the bottom left corner of the screen. You really do not want units to have any tactical flexibility on this mission, as it will cascade into a disaster. 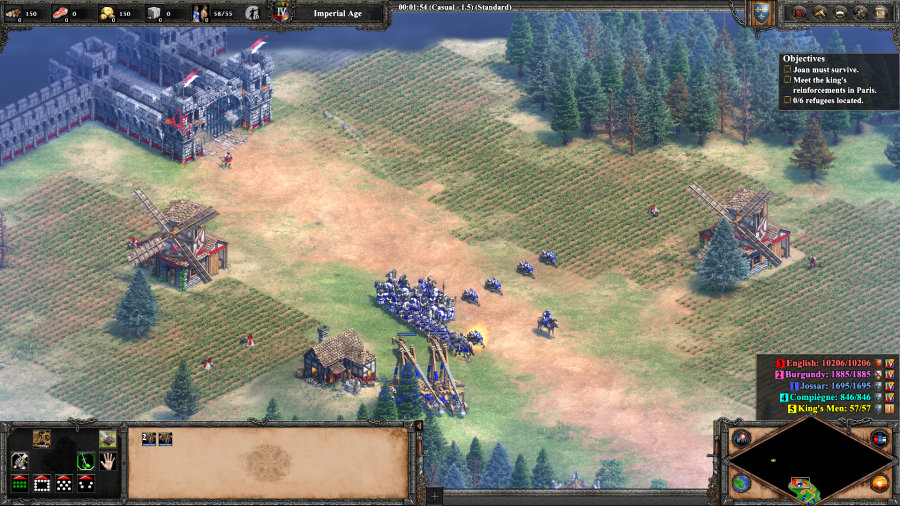 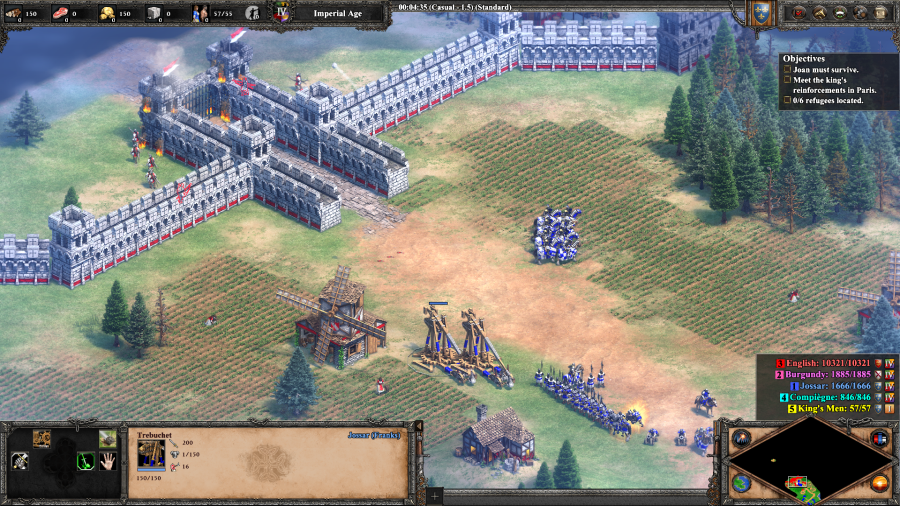 The front of Paris is guarded by a double-layered Gate with a killing zone on the inside and a whole bunch of Longbowmen. I do my best to stay at range, and only engage the Longbowmen with my Cavalry when I have to. In retrospect, I probably shouldn't have taken the intended route into Paris. There's a lot of ways to sneak your way in through a side-wall with less of a fight. 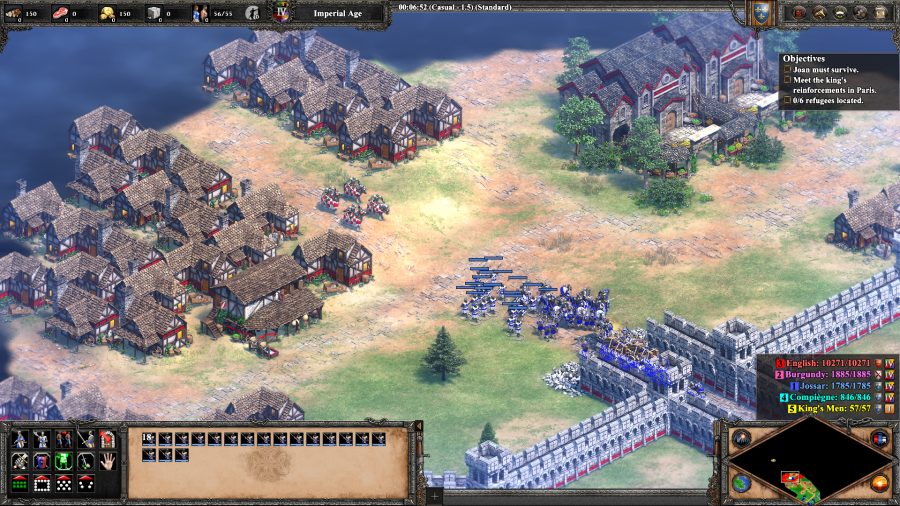 Small groups of Englishmen patrol Paris and I do my best to engage them in a controlled manner and not send the entire city falling down on my head. 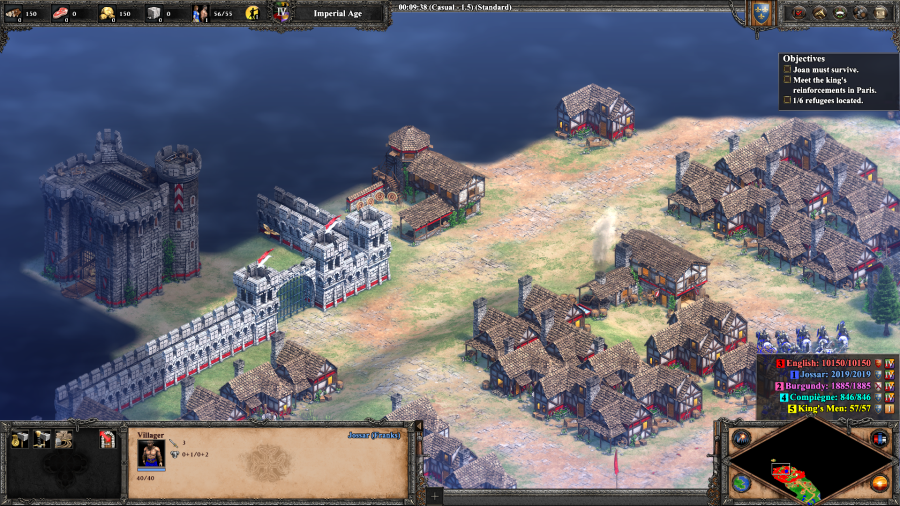 This can get really bad if you do so. 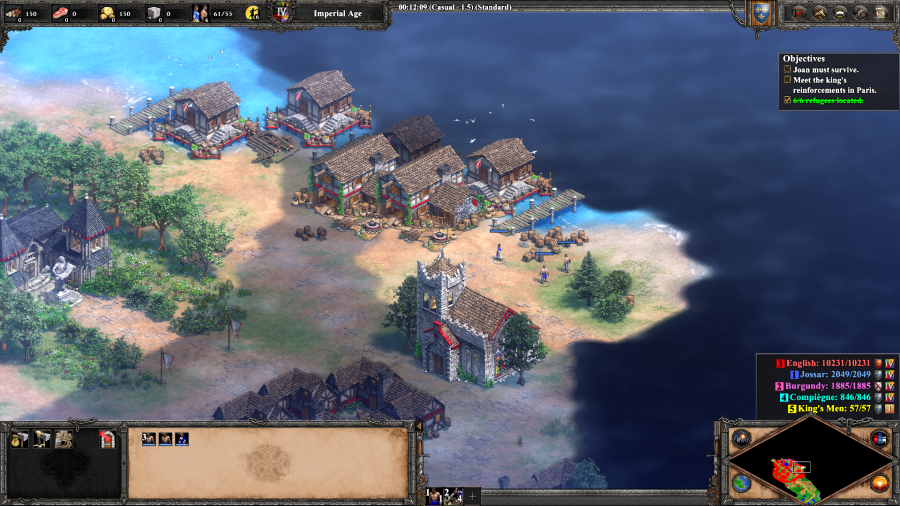 French Soldier: We have rescued the refugees! Now we should head to the bridge at the Seine River for the rendezvous with the king's men. The goal of the scenario is to get 6 refugees scattered about Paris to the fortress at Compi�gne intact. There are 10, but you have to scout the city a little bit, as the game will only give you 6 by walking through the default pathway. If you ever have less than 6 villagers from this point on, you lose, even if there are more hidden throughout the map. So you might as well just collect them all now. 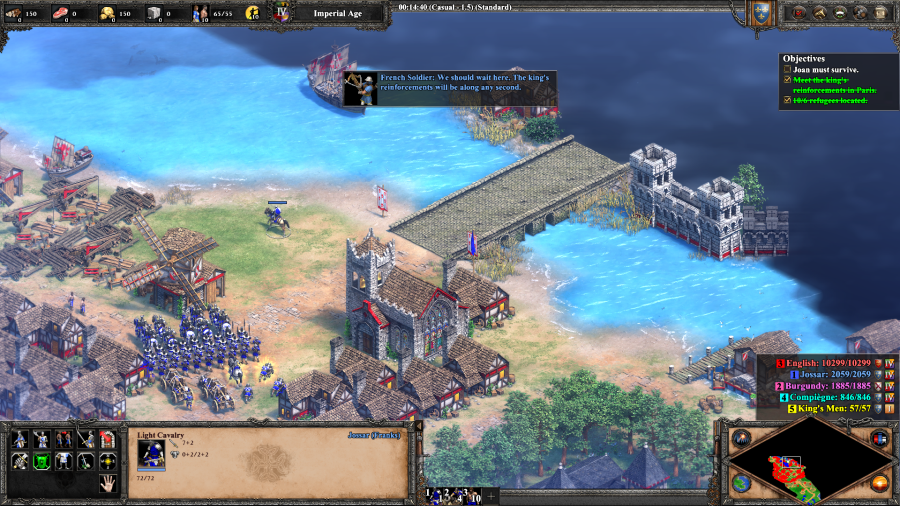 French Soldier: We should wait here. The king's reinforcements will be along any second. 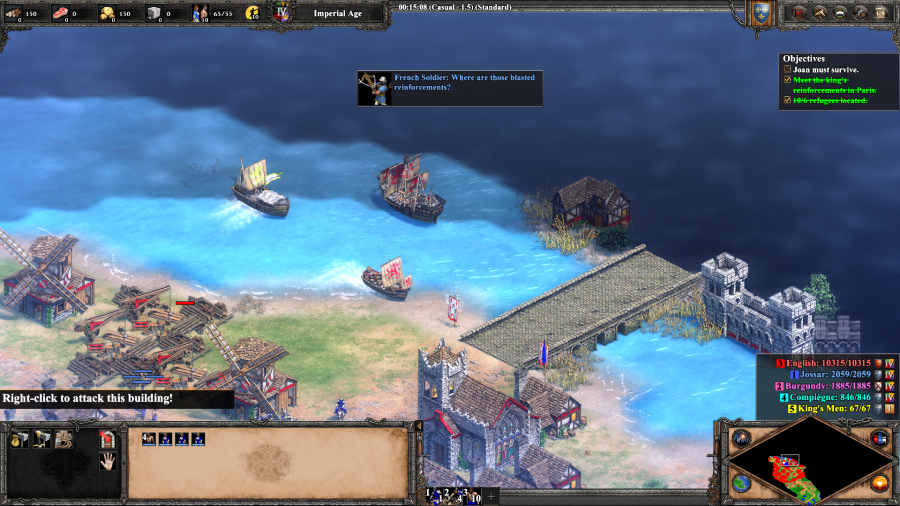 French Soldier: Where are those blasted reinforcements? 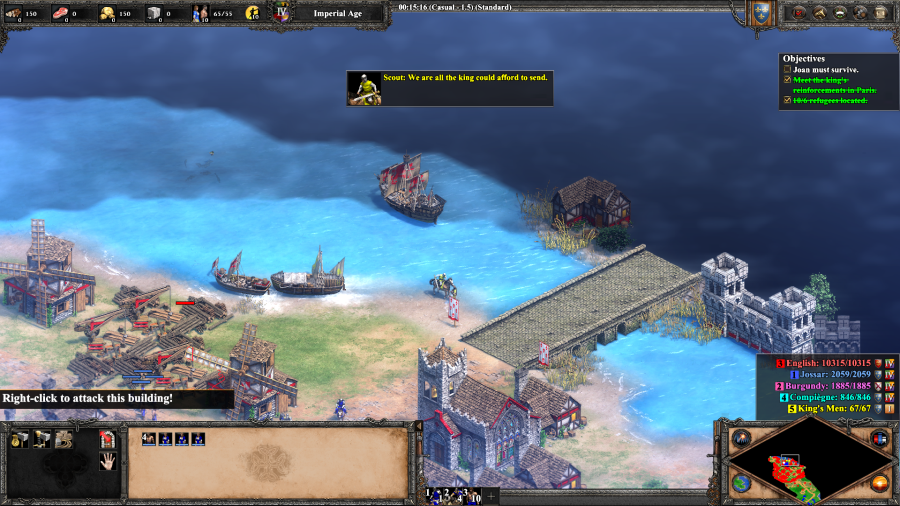 Scout: We are all the king could afford to send. French Soldier: Treachery! The king's wicked advisors want to see Joan defamed... or worse! We are on our own! We must hurry to Compi�gne! The worst thing about this sucker punch is that the two provided units aren't even Imperial Age, they're a Militia and a Scout Cav. But yeah, the rest of the scenario is basically just you trying to get out of Paris as fast as possible before you accidentally aggro too big of a force and die. 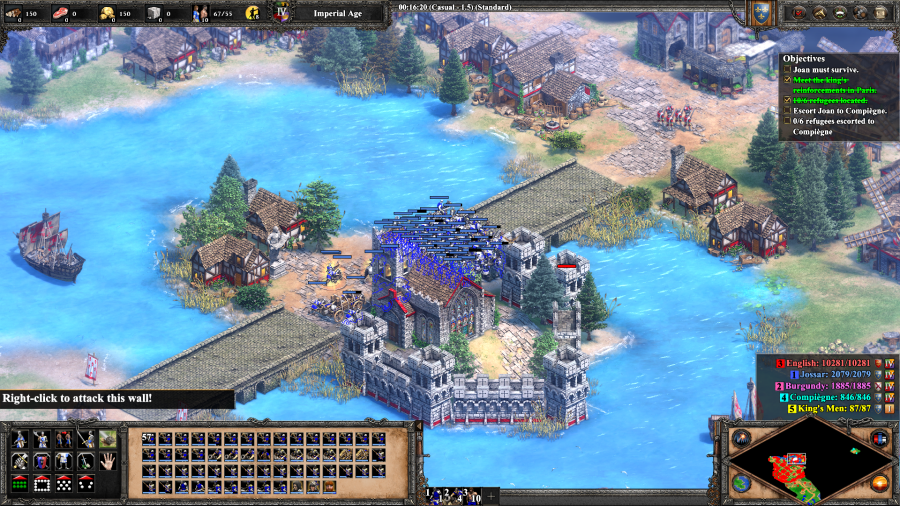 On harder difficulties, this mission is even nastier as a lot more of the city is awake by default and will try to kill you, and there are Keeps everywhere that will shoot if you just try to rush through. 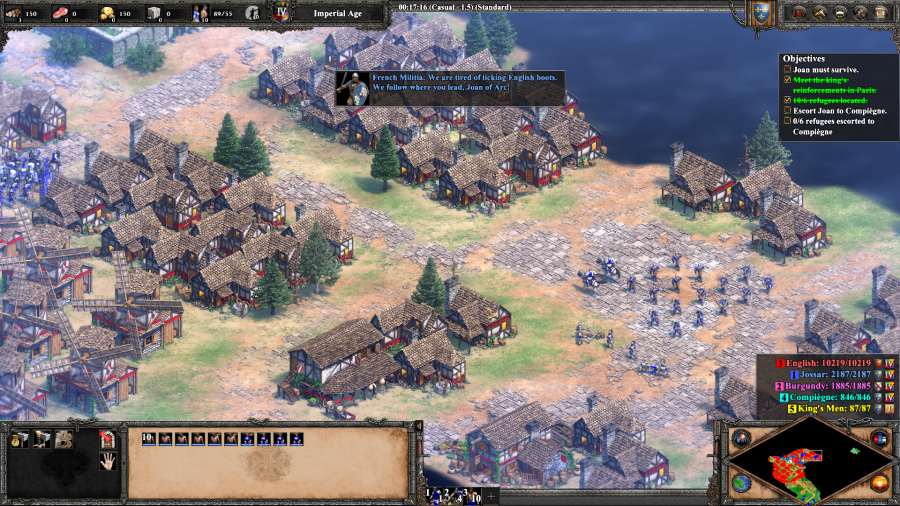 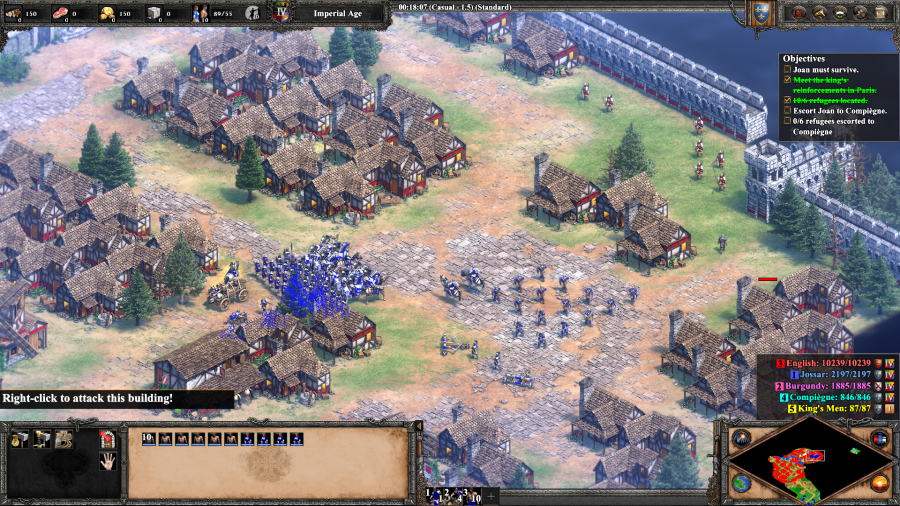 French Soldier: We are tired of licking English boots. We follow where you lead, Joan of Arc! Fortunately, you still do get a wave of reinforcements from within the city itself. This is useful because breaking out anywhere means you have to go through a whole bunch of Longbowmen. You have to be quick though, as left to their own devices the Longbowman over here will shoot most of the new reinforcements to pieces. 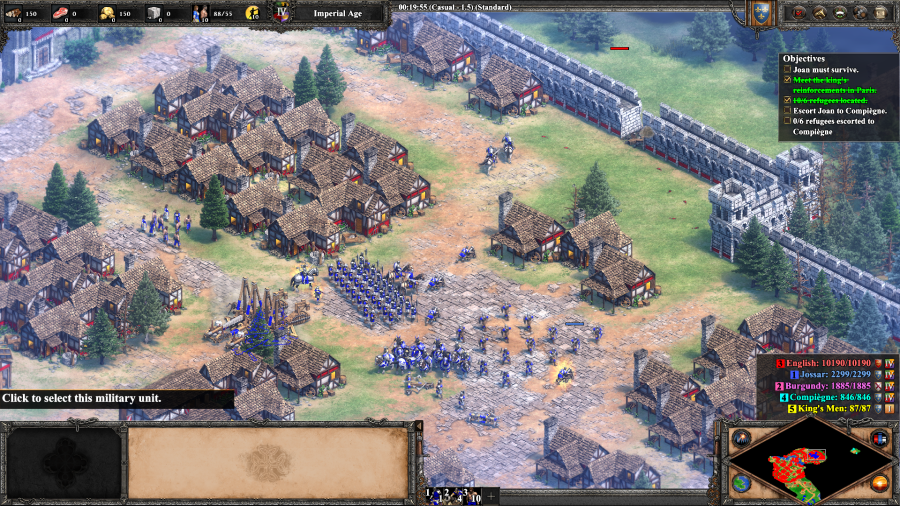 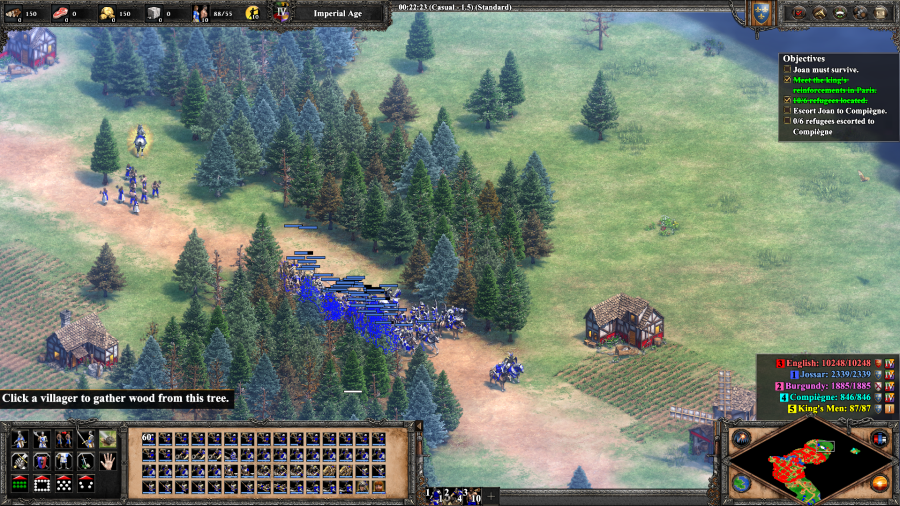 But with them out of the picture, all I need to do is break through the walls and make for the woods before I'm home free. 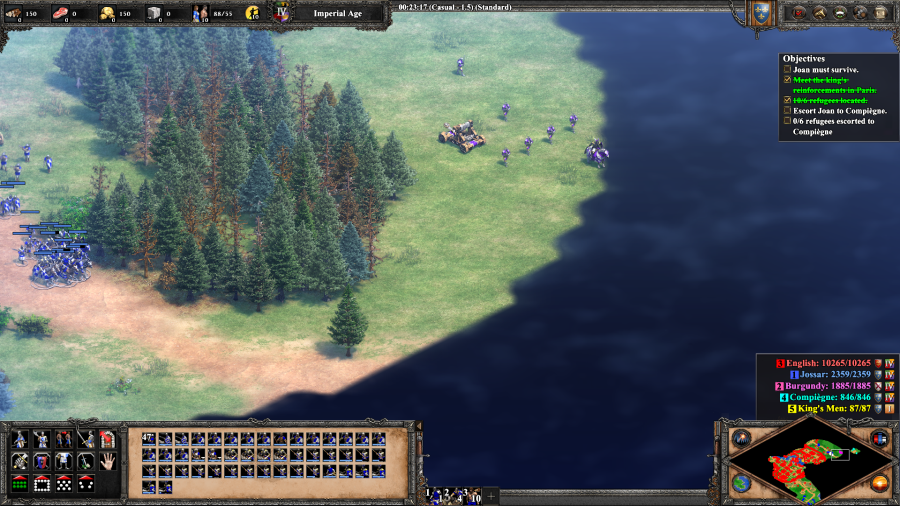 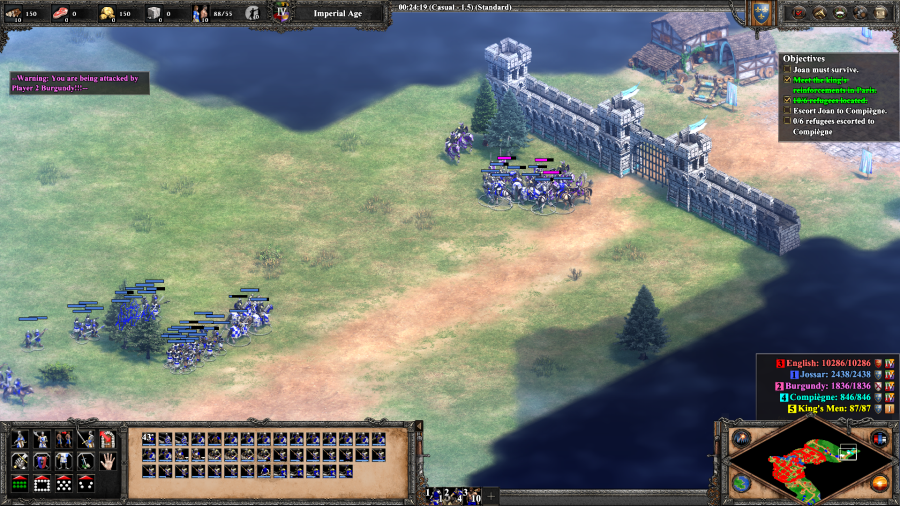 Burgundian: There she is! This time she will not escape! French Soldier: Burgundy is coming! You are vastly outnumbered! Get the refugees into the fortress! Well, not quite. There is one last Burgundian army standing outside the gates of Compi�gne. On Standard it is possible to defeat it. On harder difficulties, it is functionally an unwinnable bossfight that you have to sacrifice your army to, in order to get Joan and 6 Villagers through the gates. 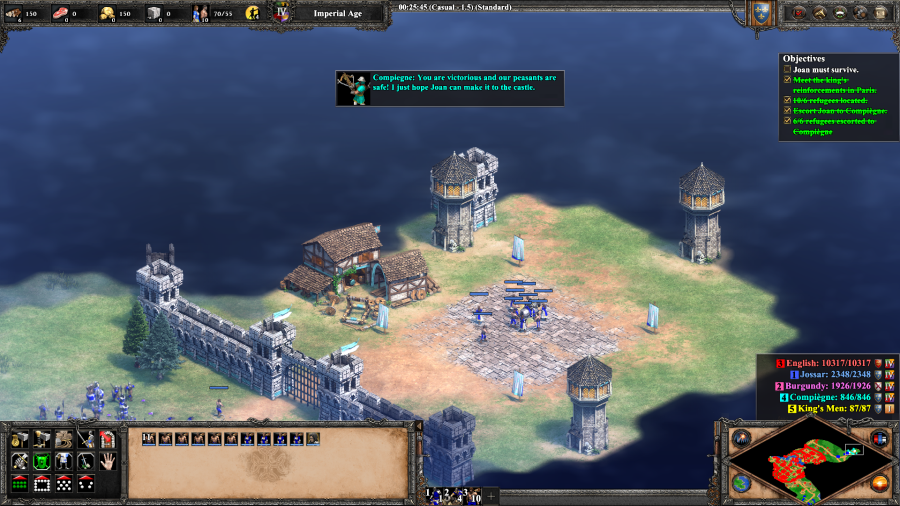 Compi�gne: You are victorious and our peasants are safe! I just hope Joan can make it to the castle. Mission 5 Ending Text "Tragedy. As the refugees fled into the Ch�teau of Compi�gne, Joan was trapped outside. Burgundian soldiers knocked her from her horse and paraded around with their prisoner. None of us can sleep, knowing that our precious Joan of Arc languishes in a Burgundian prison. The soldiers stare at the uncaring sky, condemning themselves for being unable to save her... for being unable to save France. Paris was the first major defeat ever dealt to our army. Had the King sent the promised reinforcements, we would have captured the city. Now, it is France's darkest hour." Scenarios like these are why I'm not committing to playing the game on a difficulty higher than Standard. When the game is easy, it's very easy. But when it's hard, it gets downright brutal. Extra Slides Mission 5 - Intro Slide 1 Mission 5 - Intro Slide 2 Mission 5 - Intro Slide 3 Mission 5 - Intro Slide 4 Mission 5 - End Slide 1 Mission 5 - End Slide 2 Mission 5 - End Slide 3 Mission 5 - End Slide 4
|
|
#
¿
Apr 2, 2023 13:36
|
|
|
SIGSEGV posted:It's a monastery, and yes. Funny enough, there is a Cathedral just a little bit to the north, for what is presumably a much less famous one. Joan of Arc - Part 6: A Perfect Martyr Mission 6 Starting Text "July 14, Bordeaux. No Joan of Arc. A rich world made empty and poor! The English put her on trial as a heretic. Joan's mind was as sharp as her sword, and she avoided all the cunning verbal traps of her prosecutors. In the end, Joan would not renounce her mission. The English found her guilty... and burned her at the stake. But her death is not in vain. "La Pucelle" is the rallying cry as peasant and nobleman alike take arms. My army is an army of the people, and even without the king we are poised to strike at the English stronghold of Castillon. A victory at Castillon will crush the English pretensions to France forever. Should I die in this battle, I die for the Maid of Orl�ans. I die as a patriot of France."  Josselyne: Sweet Joan... I shall avenge thee! French Soldier: Lord Josselyne, the army awaits your command. So yeah, since Joan is dead, we obviously don't get to play as her. Instead we play as the campaign's narrator, having fast forwarded 20 years to the final battle of the Hundred Years' War at Castillon (while everybody acts like this is happening just after Joan died). The goal is to get this Trade Cart containing a French flag up to the top of a hill in the heart of the English base, thus signifying that you've crushed them thoroughly enough to do so. Losing the Trade Cart fails the mission. After a short walk down the map... 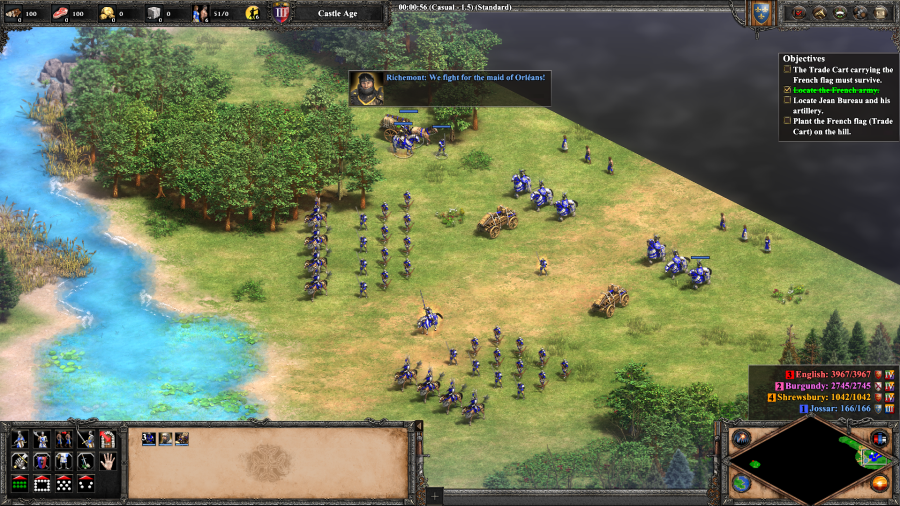 Richemont: We fight for the maid of Orl�ans! La Hire: La Hire's sword is not bloody enough. You find a large Imperial Age army, along with a couple of villagers to assist you in base building. La Hire's appearance here is notable for being the only time any hero except Joan appears multiple times in this campaign. 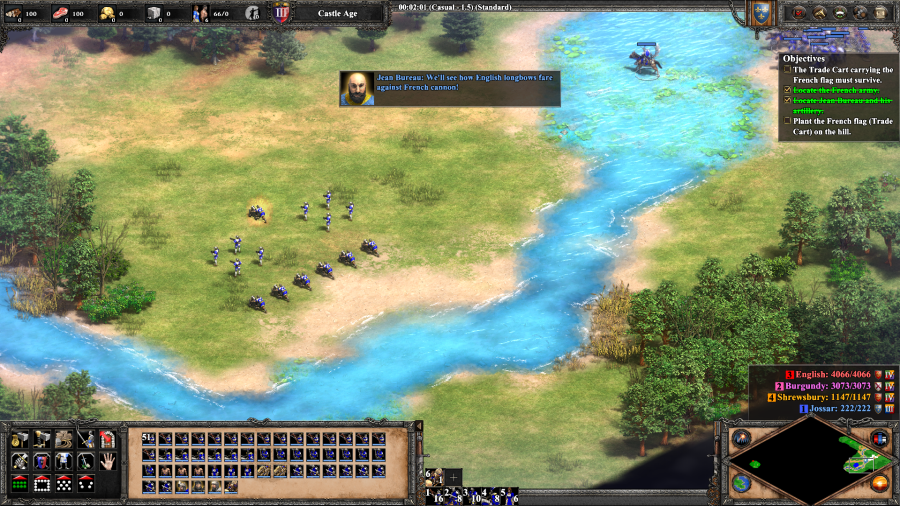 Jean Bureau: We'll see how English longbows fare against French cannon! And across the shallows of the river is the final part of your army, the gunpowder units. Jean Bureau is noticeable for being weaker than a standard Bombard Cannon, presumably because of a code error that was never fixed and, despite being discovered, got grandfathered in to later versions of the game. 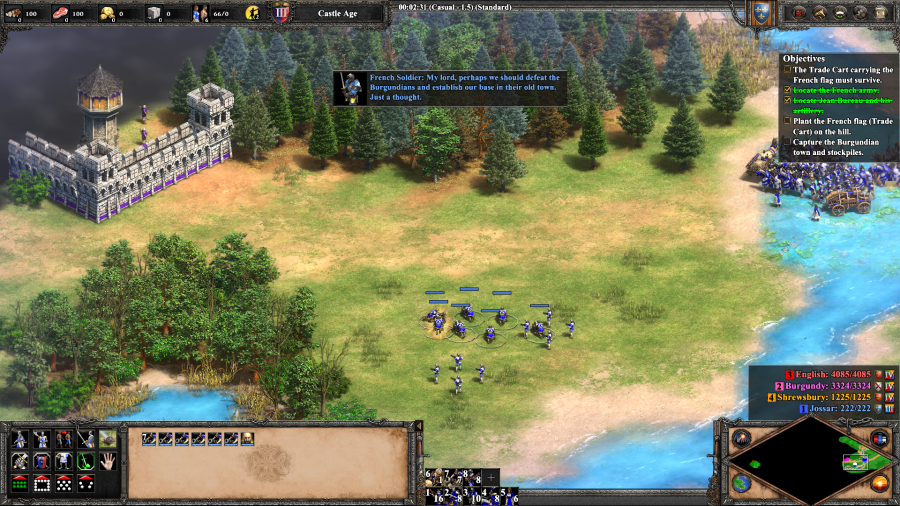 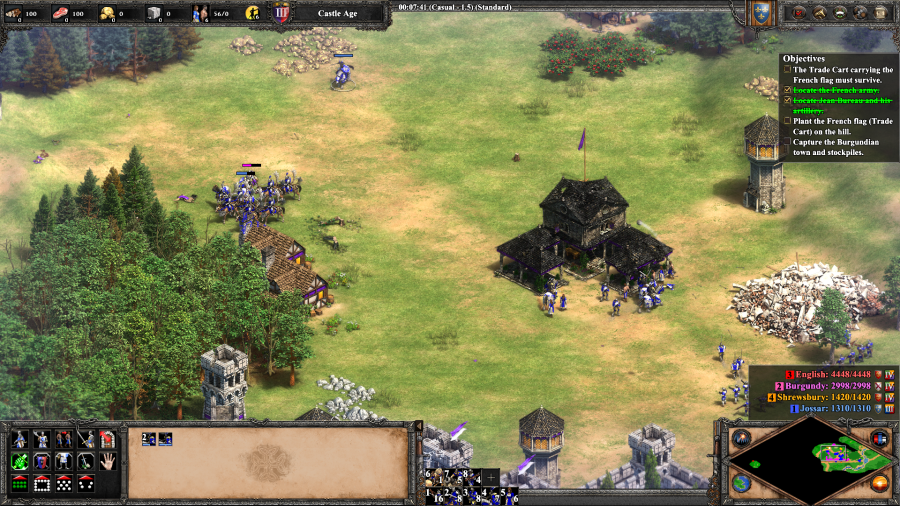 French Soldier: My lord, perhaps we should defeat the Burgundians and establish our base in their old town. Just a thought. The first objective is to capture this fortified Burgundian town. You want to try and break open a single gate and destroy the military buildings/Town Center inside, but spare the Fortified Walls and Houses, as those convert to your side when the town is taken, along with any remaining resources that the Burgundians gathered. 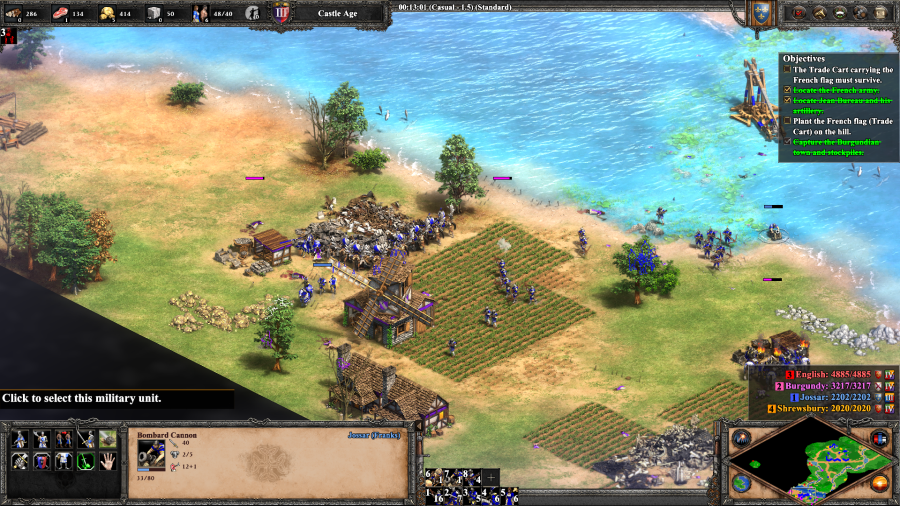 Notably, this does not actually defeat the Burgundians, who have a second town to the south. After having my Villagers build a town center and letting them auto-gather, I rush the rest of my army down here to destroy it and force the Burgundians to resign. Burgundy: Retreat! We must abandon France to the French. Failure to do so leaves an aggressive Burgundian player to your south, who will immediately pick their economy back up and start spamming Infantry units en masse to raid your base, right as you need to start worrying about the English. 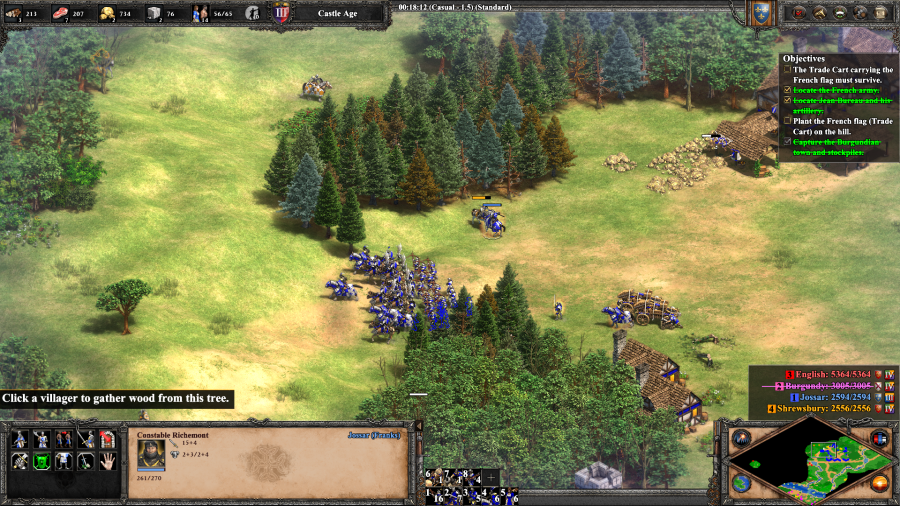 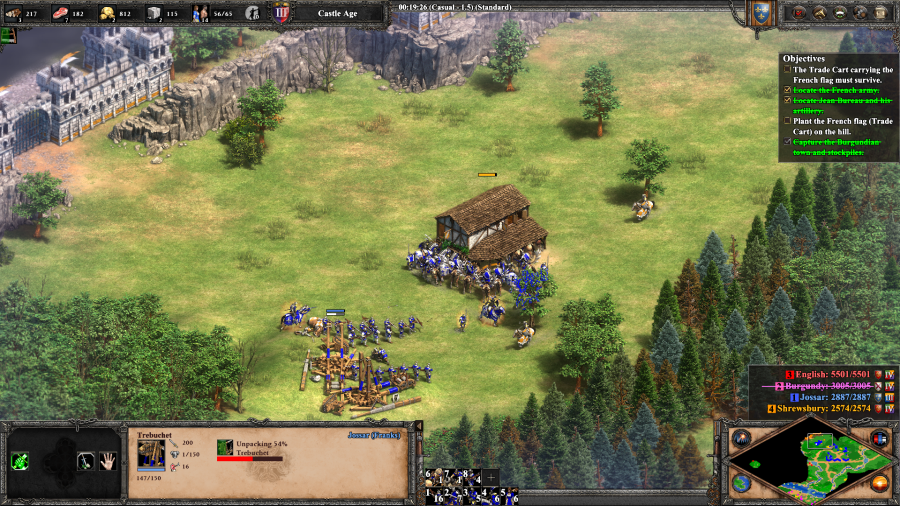 English: Where is your precious peasant general now? Meanwhile, Shrewsbury has taken the opportunity to start building extra Stables and send a few Cavaliers off raiding. This marks the point where they need to be taken out before they're allowed to develop into a problem. 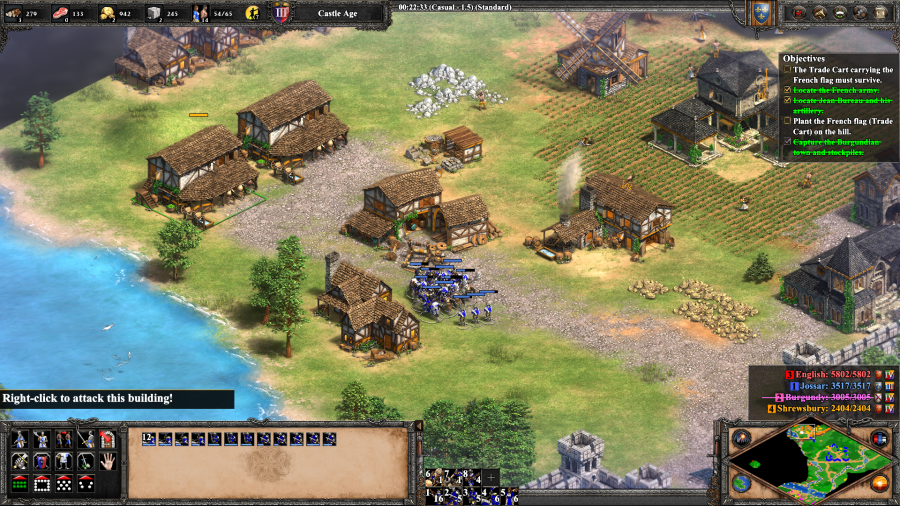 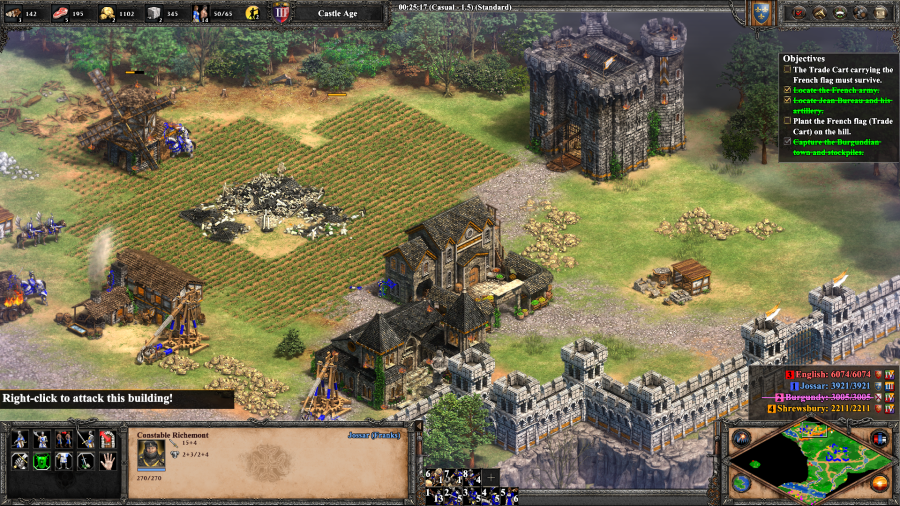 With Shrewsbury destroyed, that finishes relieving most of the early game pressure. The only opponent left is the English army, and all of their attacks have to come through the center and can be parried accordingly. 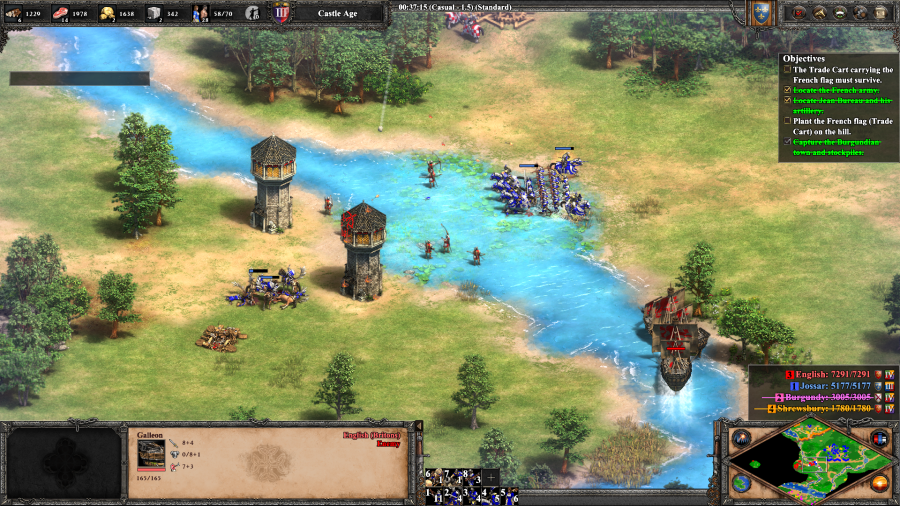 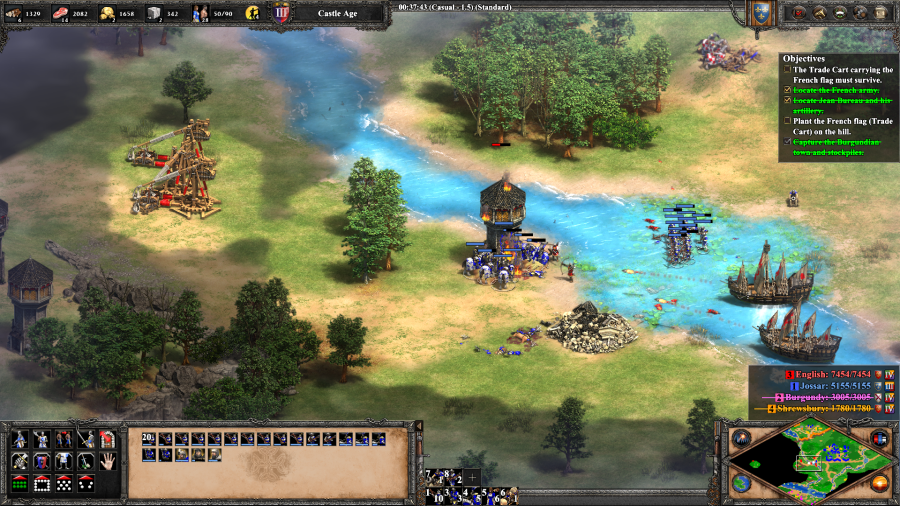 English: You are nothing without Joan. Prepare for battle. We come! At about 35 in-game minutes, the main English army decides to finally start attacking. Including having Galleons and Cannon Galleons parked in the river to shoot at you. I decide to trade most of the rest of my initial army here in order to smash not only the attacking English forces, but also the first line of their defenses. 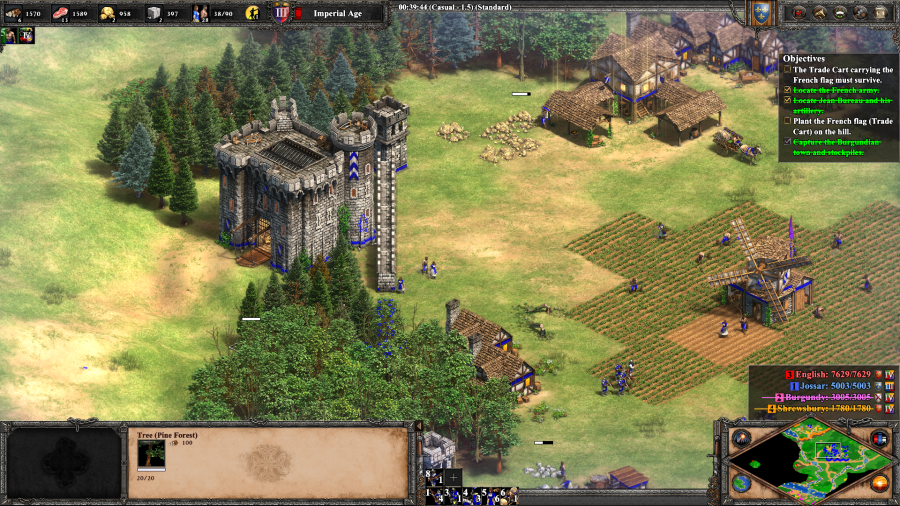 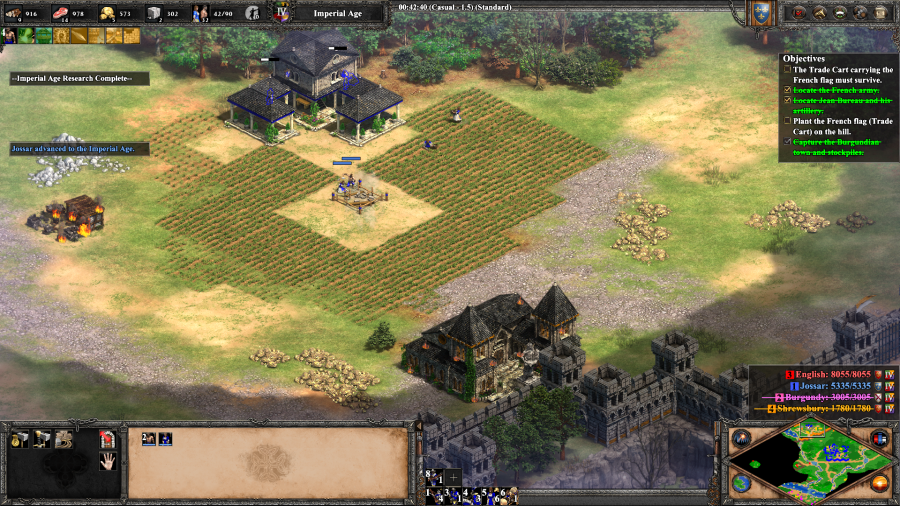 In retrospect it was kind of a dumb trade, but it also gave me the time to finish fortifying my base to prevent any raiders from sneaking through and tech up to Imperial. 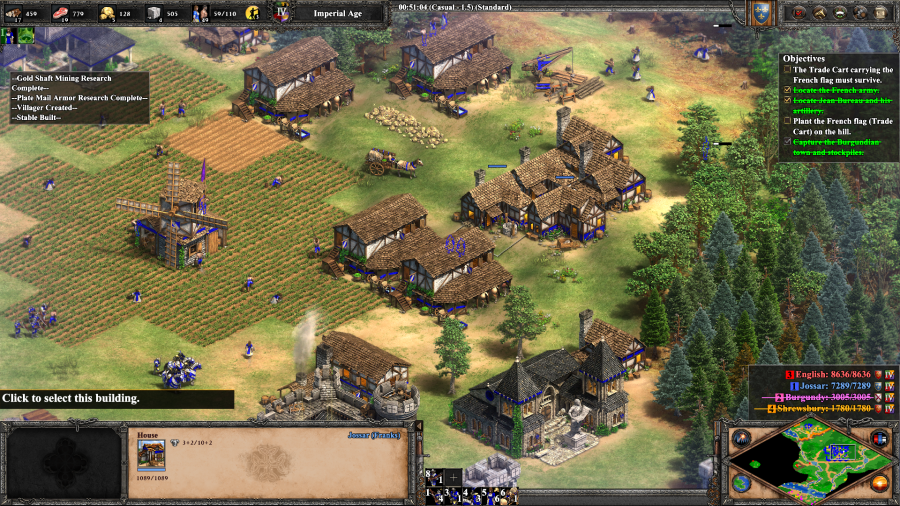 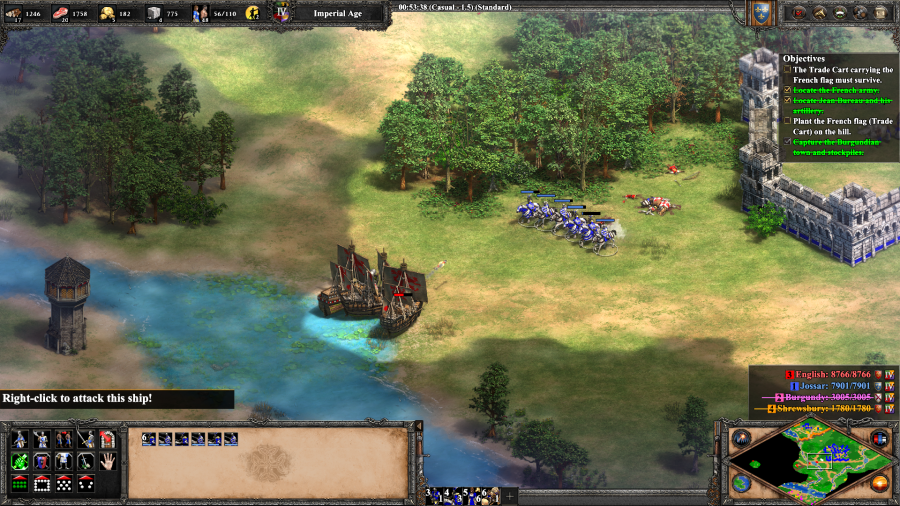 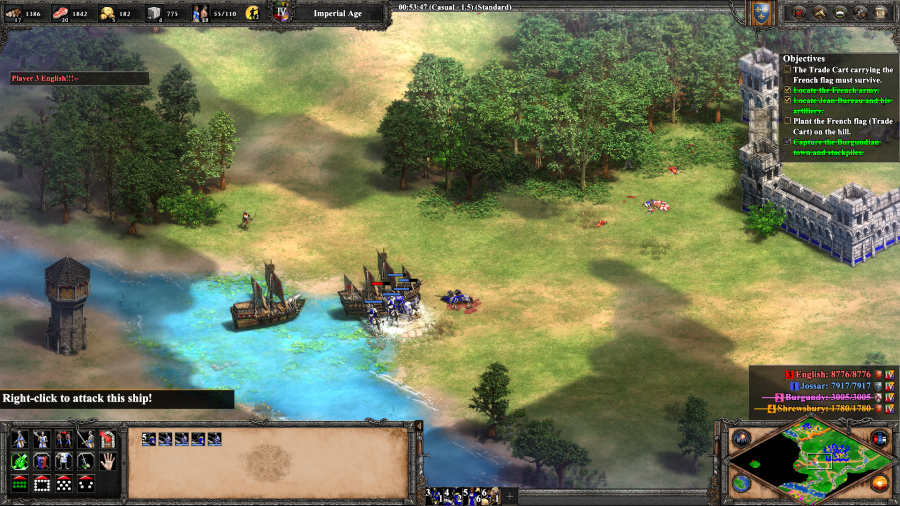 Then, you know the deal, finish researching everything and flood the map with Paladins. The English keep sending small squads of Longbowmen, Cavaliers, and Galleons/Cannon Galleons, but by this point the most they can do is scratch my outer walls. Also yes, if the river is narrow enough, melee units can attack boats. They're surprisingly effective at it, too. 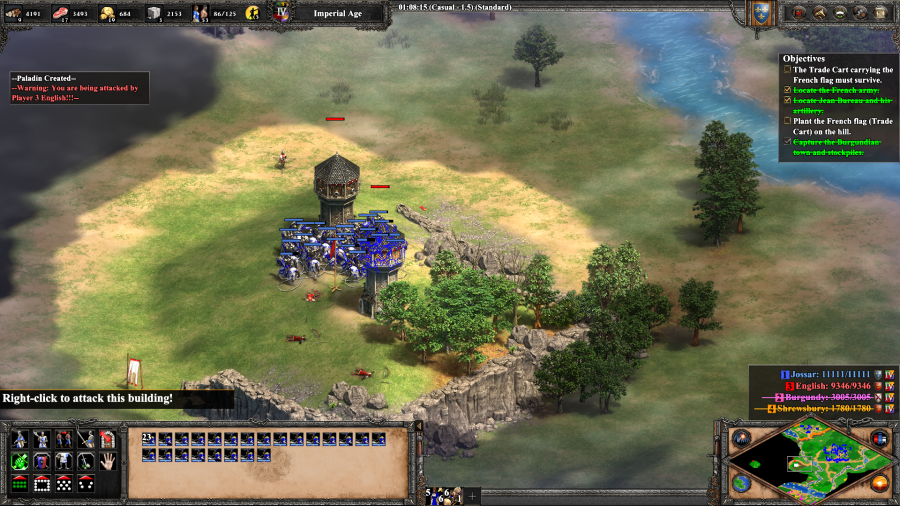 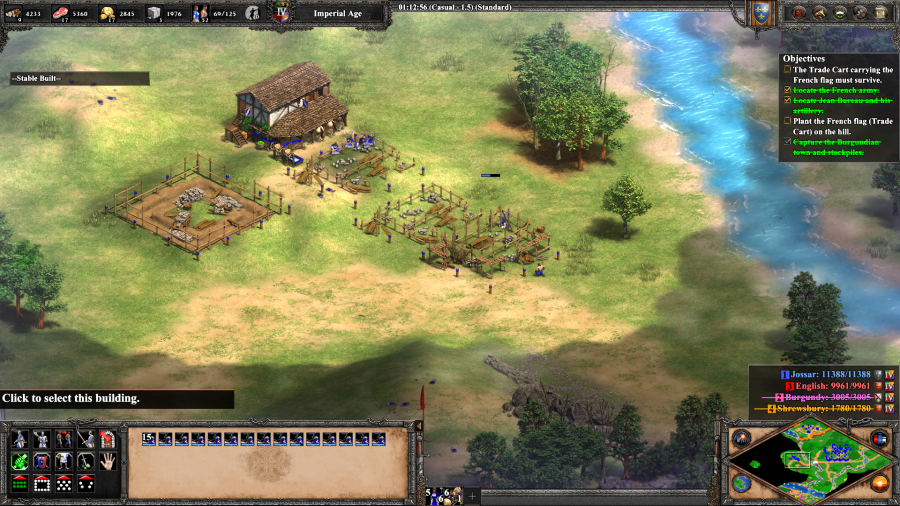 The English have a large number of static defenses on the other side of the river, including Cannon Towers, but once the tide turns against them, it's hard to stop. I build another set of military buildings on their side of the river just to keep the unit output flowing more efficiently and ensure area denial to any remaining Longbowman raiders. 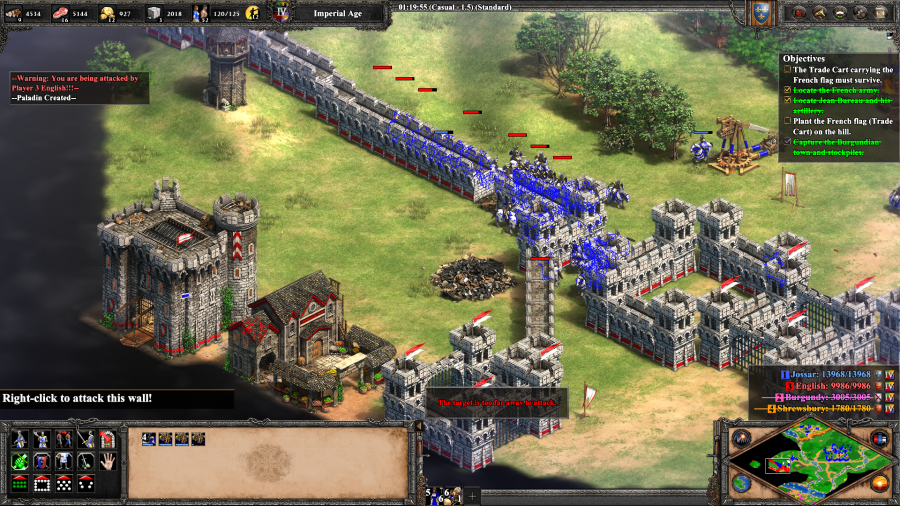 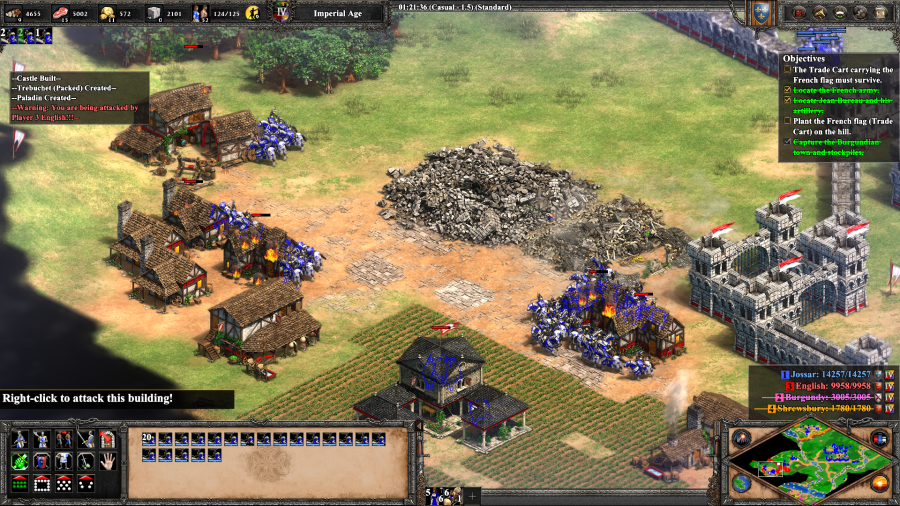 Momentum is momentarily slowed by these walls and their protected Towers, but after building a couple of Trebuchets to snipe the Towers (which they do a better job at than Bombard Cannons), it's just a matter of time. 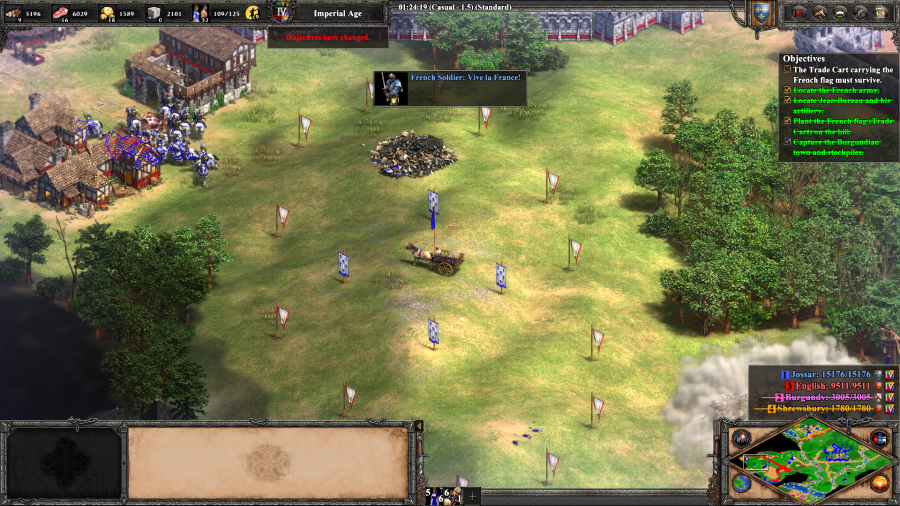 French Soldier: Vive la France! A lone trade cart slowly rolls across the now desolate battlefield, up to the top of the hill, to proclaim victory. Mission 6 Ending Text "A century of English toil, blood, and victories was reversed in a little over a year by a teenage girl. The Hundred Years War has ended. Even more importantly, Joan's acts ignited a sense of French nationalism. Peasants and nobles alike no longer belonged to lords and kings, but to France herself. We will not let Joan be forgotten. Already, statues and stained glass portraits have been commissioned in hundreds of towns and cities throughout France. Her verdict of guilt was rightfully reversed, and I expect that Joan of Arc will soon be beatified as a saint. Sometimes the outcome of history is determined by strength of arms, other times by happenstance. But in fifteenth century France, history was determined by the will of a young girl... the only person in history to command the armies of an entire nation at the age of seventeen." Keep waiting, buddy, that sainthood's gonna take a while. The final scenario has a weird difficulty curve. The first 20-30 minutes of it are intense, but once you've beaten all the flank players and turned it into a 1v1, England has basically one shot to crush you before you crush them instead. I never found the Trade Cart to be in any serious danger, but it certainly can be, if you let the Burgundians live too long. And that wraps it up for the Joan of Arc campaign! It's a nice transition away from the tutorials into something with a little bit of teeth to them, although it does feel a bit generic at times. I rushed getting the campaign done on the weekend, but in order to give weekday readers a bit of time to catch up, I will be saving the next vote for tomorrow. Extra Slides Mission 6 - Intro Slide 1 Mission 6 - Intro Slide 2 Mission 6 - Intro Slide 3 Mission 6 - Intro Slide 4 Mission 6 - Intro Slide 5 Mission 6 - Intro Slide 6 Mission 6 - Intro Slide 7 Mission 6 - End Slide 1 Mission 6 - End Slide 2 Mission 6 - End Slide 3 Mission 6 - End Slide 4 Mission 6 - End Slide 5 Mission 6 - End Slide 6 Mission 6 - End Slide 7 Jossar fucked around with this message at 17:52 on Apr 2, 2023 |
|
#
¿
Apr 2, 2023 17:46
|
|
|
Joan of Arc is significantly notable for combining the two (nobody, teenager) in one person, but we are going to find that at least a couple of the other people in these campaigns satisfy at least one of the two criteria. For instance, while Temujin Borjigin (Genghis Khan) was technically the son of a chieftain, his family was disowned by his tribe and they spent five years gathering nuts and berries, fishing, and hunting lemmings in the mountains. It's kind of a miracle he was able to survive that long, and then he sort of just... walks back into society at the age of 15 and nobody seems to question it? Jossar fucked around with this message at 03:18 on Apr 3, 2023 |
|
#
¿
Apr 3, 2023 03:14
|
|
|
Campaign Vote #2 To make things more interesting for this round of voting, I will be adding in the Age of Conquerors campaigns as possible options. I will stick with this pool for at least one more voting session after this, so don't worry if we don't get around to your campaign of choice this time. The last option is a bit special. Along with the three standard campaigns, the Age of Conquerors also came with a series of 8 individual scenarios bundled together under a single heading. So it's a vote for a more scattershot, longer experience than a regular campaign would be. A. Saladin - Saracens B. Genghis Khan - Mongols C. Barbarossa - Teutons D. Attila the Hun - Huns E. El Cid - Spanish/Saracens F. Montezuma - Aztecs G. Battles of the Conquerors - Franks/Vikings/Turks/Britons/Spanish/Japanese/Koreans Voting lasts for 24 Hours from the time of this post. In the event of a tie, I will act as the tiebreaking vote between the two tied options. Please bold your vote in order for it to be counted, as well as noting if you are changing your vote from something else. Also, I will be busy for most of the back half of this week, so I'll try to at least get the first scenario of whatever we pick out of the way, but can't promise more than that until next Monday.
|
|
#
¿
Apr 3, 2023 12:43
|
|
|
VostokProgram posted:I vote for Barbarossa because I tried to play the first level of that campaign yesterday and did not succeed Standard throughout. My goal is to do my best to make sure I get through the entirety of the game, which I believe I can do even with the increase of difficulty in later campaigns, as long as I am playing on the easiest difficulty setting. I would much rather that, than get blocked in a Rajas campaign because I was committed to playing on Hard.
|
|
#
¿
Apr 3, 2023 23:40
|
|
|
My general attitude is that while I would like to make things easier for myself, I will try, where possible, to not cheese a mission entirely. Otherwise there's some really easily breakable ones that can be beaten in 5 minutes. Anyway, vote's closed! Saladin takes it handily.
|
|
#
¿
Apr 4, 2023 12:47
|
|
|
Saladin - Part 1: An Arabian Knight Age of Empires II: Definitive Edition - Saracens Theme Very well, then let us begin, the tale of the even-handed Sultan.   Might as well show off the Africa/Middle East map while we're here. The rest of the world doesn't get nearly as many campaigns as Europe, but at least all of the African civilizations that are present get a full campaign! Portugal still managed to sneak in though, and the Persians do still need a campaign. Perhaps something for a future expansion to eventually fix.  Mission 1 Starting Text "Egypt. A month since I entered the Holy Land... I was in a foreign land. And I was dying. I wandered the cold desert for four nights before the horse archers found me. I had abandoned my mount to the vultures and my armor to the heat of day. As a knight, I was not much of a threat to them. I thought these men were Turks, come to toy with their prey. But when I could distinguish the riders from the blur of mirage, I saw that they were Saracens, the rulers of the Middle East. I had ridden to the Holy Land with the Crusaders from France and Normandy, so I was by all rights these Saracens' enemy. Yet they gave me water and a spindly horse and led me back to their leader. And that was how I met Saladin. The paintings in Europe show Saladin as demonic, barbarian. Yet he is more chivalrous than any knight I'd met before and prefers the palaces of Damascus to slaughtering Normans in the desert. I had not expected hospitality from Saracens - we Normans execute any armed Arab we capture. But Saladin left me free to explore his camp. Perhaps he wants an objective observer to chronicle the prodigious bloodshed ahead. Saladin's army is heading south to Egypt to reinforce Cairo. Egypt is a tempting prize for the Crusaders. She is fabulously wealthy, yet governed by an ineffectual fool. Before my capture, I was en route to join in the Crusaders' assault on Egypt. It is a bitter irony that now I shall view the contest from the enemy camp. So it was that I found myself less than a hundred miles from the Dead Sea, in the company of my enemies."  The Saracens are kind of the Anti-Franks. Both in the sense that they are a more flexible and technical civilization which encourages clever play rather than spamming the map with 100 Paladins, and also because they have Camels, which are an anti-Cavalry Cavalry unit. This is taken to an even further extreme by the Saracens' unique unit, the Mameluke. Which like the Throwing Axeman is a ranged Melee unit (they throw their scimitars), except instead of being the complement to their main cavalry unit serves as more of an endgame replacement for it (unless you're fighting other Camels or other specialty situations). This is good, because you'll be fighting the Franks a lot. In this case, you're given a large army and told to go beat up the Franks on the western side of the map.  Frankish Soldier: The Holy Land is ours now. And soon, Egypt will be as well! Scattered groups of Frankish soldiers patrol the desert, they're fairly easy to take down.  Egyptian Caliph: Saladin, where are you going with that great army? A little bit before you get to the Pyramids, the Egyptian Caliph starts getting nervous that you're dragging this huge army onto his front lawn. This should be your first sign that something's up.  Egyptian Caliph: Saladin, I am afraid I do not trust your motives. Turn back at once! The Caliph will chime in again once you get further down the map, usually roughly near the West Frankish camp. Of course, you can't listen to the Caliph because you need to complete your victory objective.  Egyptian Caliph: Very well. You leave me no choice. I have allied myself with the Franks. We will conspire to keep you out of Cairo! Saracen Soldier: Lord Saladin, the Egyptians are cowardly and weak. If we station troops near their main mosque, they will surely surrender. Once you reach the Nile, the Egyptians switch to being your enemy, though their troops don't leave Cairo. The new goal is to pierce through the city walls and rush to the Mosque as quickly as possible. 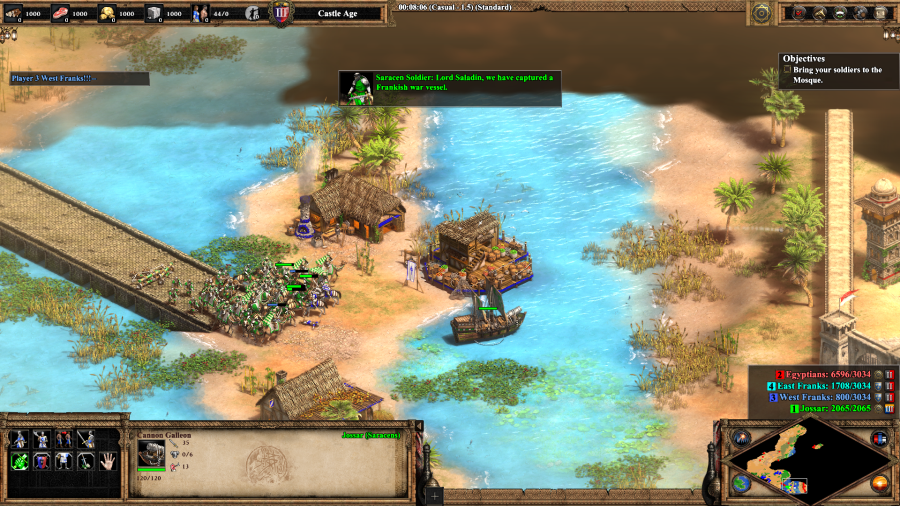 Saracen Soldier: Lord Saladin, we have captured a Frankish war vessel. (Upon destroying the Blacksmith) Lord Saladin, we have found Frankish armor in the ruins of this blacksmith! Not sure where the Franks got a Cannon Galleon, but sure, let's roll with it. This lets you break down the gates of Cairo with minimal effort. Defeating the rest of the troops on this island causes the West Franks to resign, and destroying the blacksmith gives you a free armor upgrade (Chain Barding).  Egyptian Caliph: You will not enter Cairo! This line always made me laugh as a kid - the Caliph is triggered to say it once you approach Cairo's gates, but in most cases you've already blown up them up from a distance before moving in, so he's just screaming at you in useless rage while you march into the city. There are Egyptian troops that patrol the city, but honestly with good enough micro on your Scouts, you can just outrun them and get to the gate of the Mosque without any real problems.  Egyptian Caliph: Saladin! The Franks have betrayed us! They mean to invade Cairo! We were wrong not to trust our fellow Saracens. Please! These troops are yours to command. Just defeat the treacherous Franks! And once you do, the Egyptians switch back to Ally, give you some troops and healing, and task you with the final goal of the scenario: taking out the East Franks' Town Center.   The East Franks have some Towers and a standing army on the way to the Town Center. You can skip the Towers, but make sure to take down the army and then just smash the Town Center for victory. Saracen Soldier: My lord, the Franks have been defeated! Mission 1 Ending Text "The Franks are dispersed, and the Egyptian army broken. Saladin has taken his place as governor of the Nile. Any European king would seize this opportunity to eliminate his political rivals. Saladin, however, allowed any Egyptian opposed to his rule to leave the city unharmed. Saladin has set out to win over the population. In Cairo, he built mosques and palaces, universities and hospitals. My own countrymen, the sons of Europe, showed naught but treachery, while the Saracens work to dignify their civilization. It is a troubling turn of events and I have difficulty sleeping." And there's the first Saladin scenario! Honestly, with the exception of Barbarossa, most of the first scenarios of the original Age of Kings campaigns are a limited-scope introduction to the story/civilization. I always liked this one a little bit better than Joan of Arc's though, because you were always moving forward rather than running around in circles. As previously discussed, I will be busy for the rest of the week and cannot guarantee another update until Monday, though perhaps if I'm lucky I might be able to grab some time before then. Extra Slides Mission 1 - Intro Slide 1 Mission 1 - Intro Slide 2 Mission 1 - Intro Slide 3 Mission 1 - Intro Slide 4 Mission 1 - Intro Slide 5 Mission 1 - Intro Slide 6 Mission 1 - Intro Slide 7 Mission 1 - Intro Slide 8 Mission 1 - Intro Slide 9 Mission 1 - End Slide 1 Mission 1 - End Slide 2 Jossar fucked around with this message at 03:35 on Apr 5, 2023 |
|
#
¿
Apr 5, 2023 03:28
|
|
|
Yeah, sorry I wasn't clear about indicating that Europe is the one with the most campaigns, which was the intent. I did screw up the animal thing though, probably crossed my internal wires with Age of Mythology which I also played a decent amount of, and as mentioned did have that feature. Went back and edited that out. Played through the next scenario, probably won't get it up until tomorrow as originally planned: I spent too much time chasing around non-existent bandit camps and the AI finally decided to start doing shenanigans where it hides in the fog of war to avoid surrendering, so it was a bit of a slog. Jossar fucked around with this message at 02:52 on Apr 10, 2023 |
|
#
¿
Apr 10, 2023 02:49
|
|
|
Saladin - Part 2: Lord of Arabia Mission 2 Starting Text "The Holy City of Medina. Year fifteen of my capture... Volumes have I filled with my fatigued writings. Lord Saladin reads them only rarely. He speaks of greater events yet to come. The political boundaries in this endless desert have shifted as a result of three Crusades. Four Crusader states now exist in the Holy Land. After the Saracen victory in Egypt, the Crusader leaders realized that Saladin was worthy of their concern. They were quick to suggest a treaty. I hoped that with peace at last upon us, I would be returned to my own folk, but this peace, so short-lived, is already broken. And it is not Saracen, but Crusader that has violated his word of honor. Reynald de Chatillon, a wicked French knight, has been raiding Arab territory in defiance of the treaty. He attacks trade caravans, and his pirate ships threaten the Saracen holy cities of Medina and Mecca. Saladin, in his fury, has sworn to kill Reynald with his own hands."  Trade Cart: Help us! Crusader bandits are everywhere!  Light Cavalry: We must stop these arrogant Crusader attacks on our peaceful communities. You start this map with a centralized camp and a good deal of resources, but your allies' trade routes are constantly being harassed by Reynald's Bandits. 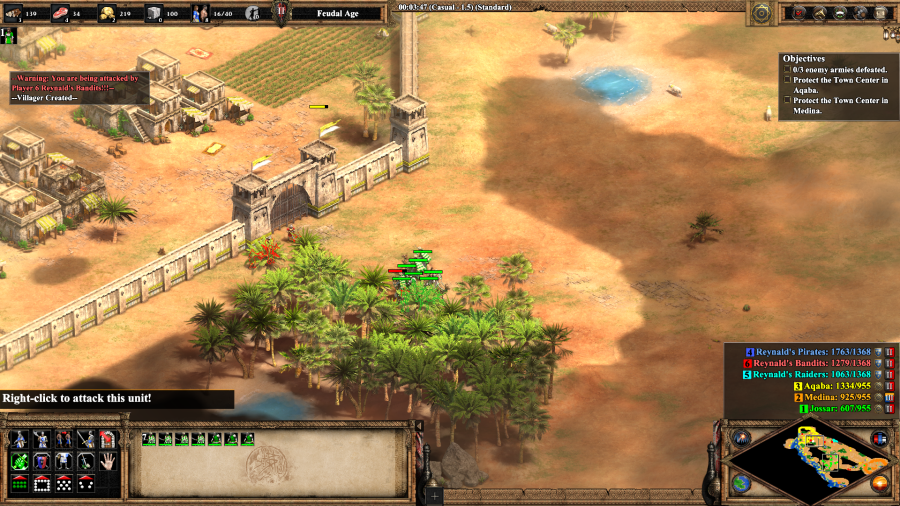 I use my initial troops to take out a large number of the static Bandit forces. This removes them as a serious threat considering that they can't build more, but also they're not what you should be worried about anyway. Taking out enough of them gets Reynald himself to remark: Reynald: I am coming for you, Saladin. Soon... He does in fact show up as a unique hero unit on the map, but I was never able to distinguish Reynald from the other units in play.  The Saracens have several unique bonuses relating to Markets, which the game tries to encourage you to use by giving you one for free (minus villager build time). In addition to the Saracens having cheaper markets in general, they also trade for resources at a much lower "tax" rate compared to other civilizations. Going all in on trading generally isn't a great long term strategy because of the increase in prices on goods, but it is great for an early game slingshot and I use it to help burst myself up to Castle Age. I also make a couple of trade carts and send them off to my allies' markets for increased gold generation. While the central gold pile lasts you for a while, when it runs out none of the other piles on the map are as sustainable, so it's good to have alternative revenue streams in place by that point.    At around 20 minutes, Reynald's Raiders will start streaming in multiple groups of Archers/Skirmishers, and the occasional Battering Ram and Mangonel. The Raiders are the scenario's main threat and can spell game over if you spend too much time booming up at the start. Notice, by the way, that the Pirates get to advance up to the Imperial Age, you however are stuck in Castle. This is kind of annoying because it means you never get really good siege and are kind of stuck with Rams. The good news about you drawing all of the aggro is that your allies tend to be safe throughout most of the scenario, at least from a mission defeat. The Raiders and Bandits will still attack their trade routes and staving that off does allow your allies to generate gold which they tribute to you, but it's more of a side goal than your main focus. You would think the Pirates, being the only faction on the map in Imperial, would be more of a threat, but if you don't build a Navy they tend to be pretty passive.  Eventually, after several waves of attacks, I get a Castle up, solidify my economy, and start pumping out Mamelukes/Elite Skirmishers/Rams. Mamelukes are great for destroying most of the enemy army, except for Archers, and they're a little too vulnerable to static defenses to use for clearing out buildings.   It's a bit of a fight to break through the Raiders' gates, but once I do so and take out their town, the rest of the scenario is basically just clean up.   I spend a lot of time trying to hunt down Bandit camps, but it turns out to be unnecessary, since they resign when the other two forces are defeated. It's still worthwhile to scour the rest of the land-accessible part of the map to eliminate this Pirate camp though.    The last part of the scenario as intended is a naval invasion, build up some transports and a couple of Fire Ships, take out some Pirate Ships and land on their western base. I build a base camp to support the flow of troops, but it's not really necessary.    One march later, and the scenario is com...   *sigh* Okay, so the Pirates refused to surrender and just started building up again near my base. One thorough sweep of their remnants later...  Reynald: I'll be back, Saracen dog! Mission 2 Ending Text "Although I am still a prisoner, Saladin and his generals dine with me. Over meals we discuss mathematics and astronomy. I never imagined a race of desert folk could be so wise. Baghdad, the Saracen capital, is the most civilized city in the world, with free hospitals, public baths, a postal service, and banks with branches as far away as China. But as we eat, talk inevitably turns to war. Reynald's pirate vessels now rot at the bottom of the Red Sea. His raids have stopped. Reynald has escaped, but I suspect Saladin shall neither forgive nor forget." I'm not sure how many of the problems were endemic to the scenario versus me playing badly because I was out of practice after a few days, but it was a slog. I definitely feel like the entire middle part of the map was pointless and could have been cut though. Extra Slides Mission 2 - Intro Slide 1 Mission 2 - Intro Slide 2 Mission 2 - Intro Slide 3 Mission 2 - Intro Slide 4 Mission 2 - Intro Slide 5 Mission 2 - Intro Slide 6 Mission 2 - Intro Slide 7 Mission 2 - End Slide 1 Mission 2 - End Slide 2 Mission 2 - End Slide 3 Jossar fucked around with this message at 01:21 on Apr 11, 2023 |
|
#
¿
Apr 11, 2023 01:09
|
|
|
I think Reynald does punch a Trade Caravan, but yeah, it's not much. Speaking of which... Saladin - Part 3: The Horns of Hattin Mission 3 Starting Text "Galilee. Year twenty of my capture. Last night, we rode into a sandstorm. The men dared not open their mouths to speak. We clung to the necks of horses or camels while waves of sand rose and fell around us. The Saracens have pursued a large force of Europeans into the desert. The Crusaders carry with them a relic - a piece of the True Cross. Capturing this artifact will deal a severe blow to the morale of Saladin's Christian foes. I asked Saladin why we were here, miles from civilization and water. He said 'to bring crimson death to the blue-eyed enemy.' The huge Crusader army has halted to make its stand beneath the two peaks called the Horns of Hattin. At the Horns is only a single pool of water, and Saladin controls it. At night, the Saracens ride out and extravagantly pour out vessels of water into the sand within sight of the thirst-crazed Europeans. It is cruelty worthy of a... Crusader." 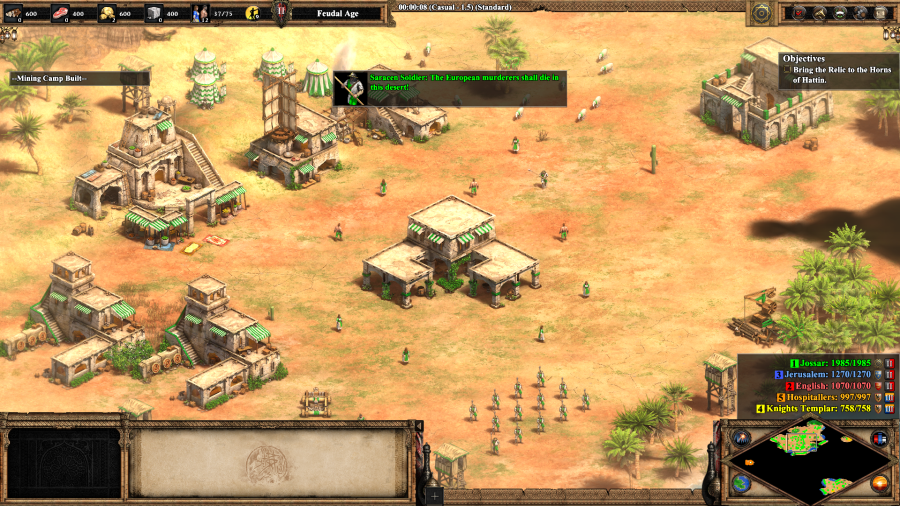  Saracen Soldier: The European murderers shall die in this desert! You start this scenario with two bases. The northern one is sort of your "real" base and contains most of the important infrastructure, while your southern one is a giant gold mine.  Let's talk about the conditions of this scenario: You have a maximum population limit of 75, which isn't a lot, although apparently Dynasties of India raised this limit. You can't build most static defenses, including Castles. But you don't have to defend anything - your only victory condition is to grab the piece of the True Cross (represented in-game as an ordinary relic) and drag it over via a Monk to a set of flags in the northern base. So what I do is sell off a bunch of my resources, tech up to Castle Age, and build a Monastery. Then I destroy a small part of the wall to let my army out.  There is a small Hospitaller/Knights Templar base in front of the True Cross, but the actual relic is just guarded by a bunch of wooden palisades and a few Monks. On Standard this location is revealed to you right from the start, but it's not too hard to spend two or three minutes scouting it out, even if you didn't know its exact location.  The Hospitallers start streaming in Teutonic Knights, the Teutons' extremely powerful, but slow, Infantry Unique Unit, which can be a threat to your starting army. But since I brought a bunch of monks to grab the relic, they can just convert enough of the Knights to mitigate the threat of the others. It's also at this time that Reynald's forces finally scout out my bases. Jerusalem Scout: Lord Reynald, we have found a Saracen camp!  Monk: The Piece of the True Cross! The Crusaders' faith will be lost! We must return it to our camp immediately! The Knights will keep wandering in, but my army has broken through to the True Cross and so its' main job is done. Now they just serve as a distraction/cannon fodder to protect the Monks while they grab the relic.   Reynald: Saladin! I believe we have some unfinished business! Reynald and a wave of his forces attack, which would be scary if I had any incentive to care, but again, I don't.  Just pick up the relic.   And move it on up. Monk: We have captured the Europeans' precious relic. My heart weeps for the Crusader infidels. Mission 3 Ending Text "The fighting was fierce - the Crusaders had to conquer or die. Mostly, they died. Saladin has treated his prisoners well, providing them with ice water from the mountains and comfortable tents. For the first time in years, I have been able to speak with fellow countrymen. But I am unsure what to say to these... invaders. Not all of the prisoners were treated so royally. Reynald de Chatillon was captured here and, fulfilling his vow, Saladin sliced off Reynald's head with his own scimitar. How ironic that it was only after the Crusaders entered their lands that the Saracens were transformed into the people that we set out to destroy." This scenario is the opposite of the last one - here you are actively rewarded for just turning the whole thing into a sub-15 minute smash and grab. This isn't even the fastest way to do it - I know it can be done in half the time, even on Hard, if you just drop a Town Center right on top of the Hospitallers as soon as possible. I'm puzzled as to whether this is supposed to be the intended solution, but it always seemed to me to be the natural one. After all, the developers could have placed the Piece of the True Cross in a Castle, or in the middle of Jerusalem's base, or something. I know the Saracens are supposed to be good at Monk rushes, so I guess this is sort of a campaign-based way to tie into that? Mystery for the ages. Extra Slides Mission 3 - Intro Slide 1 Mission 3 - Intro Slide 2 Mission 3 - Intro Slide 3 Mission 3 - Intro Slide 4 Mission 3 - Intro Slide 5 Mission 3 - Intro Slide 6 Mission 3 - End Slide 1 Mission 3 - End Slide 2 Mission 3 - End Slide 3 Jossar fucked around with this message at 01:05 on Apr 12, 2023 |
|
#
¿
Apr 12, 2023 00:42
|
|
|
The one tonally weird part is that the narration keeps going back and forth on whether the Saracens are just outright better than the Crusaders or whether the war has made them just as cruel. This scenario was about the latter, but we'll be switching to the former again soon enough.
|
|
#
¿
Apr 12, 2023 12:56
|
|
|
Saladin - Part 4: The Siege of Jerusalem Mission 4 Starting Text "Jerusalem. Twenty years have I been with the Saracens... Saladin's target is Jerusalem. The great, ancient city is sacred to Christianity, Judaism, and Islam and is the virtual capital of the Holy Land. If there can be a victor in this endless conflict, it will be the army that holds Jerusalem. To complicate matters, Saladin is determined not to harm the city itself. If a single holy shrine is damaged, the populace might well view Saladin not as a liberator but as yet another conqueror." 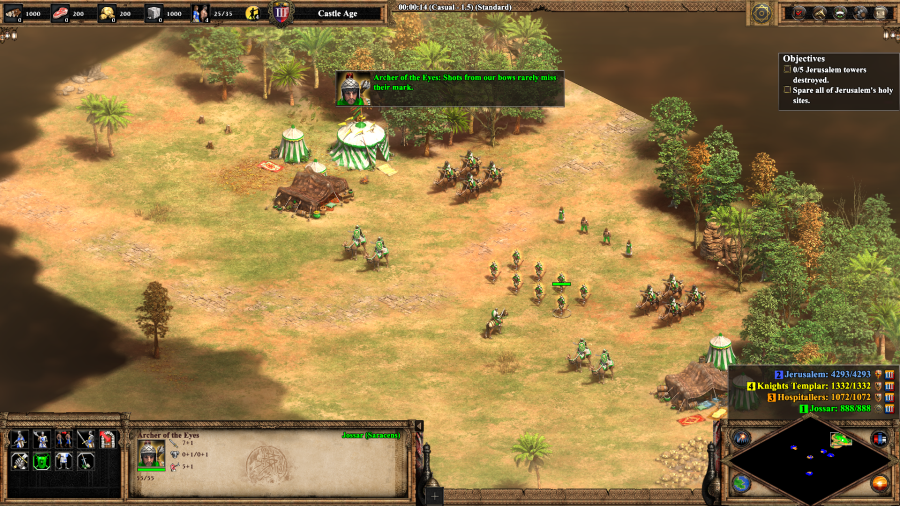 Archers of the Eyes: Shots from our bows rarely miss their mark. You start the mission off with a small army, whose real job is to defend your build up in case you manage to accidentally run into any Crusaders too early. The Archers of the Eyes are a set of hero Arbalests with 100% accuracy. They're useful to keep around, especially early on, but they're not essential.  I get to booming/building a sizable defensive encampment. Over the course of the buildup, Jerusalem repeatedly taunts you: Jerusalem: The city is ours! Your efforts are futile! (After a few more minutes) Wouldn't your kind prefer to wander in the desert rather than waste our time?  Eventually they start sending out waves of Cataphracts, the Byzantine Cavalry Unique Unit (which is resistant against normal Anti-Cavalry units and destroys Infantry), but not enough to make a serious dent in my defenses.  The defeat of their first real wave marks a good time to go out and destroy one of Jerusalem's towers, all of which you need to destroy in order to complete the scenario. Attempting a serious attack on Jerusalem kicks the AI into overdrive, as it realizes that you're trying to win. Jerusalem: Launch a counterattack!   Initially, you're just facing the army of Jerusalem itself, which is sizable, but easily defeatable. However, things start changing once the knightly orders get involved. Not this guy though, the Master of the Templar has a tendency to ride out early and die like a chump. Master of the Templar: If you strike me down, I will grow more powerful than you can possibly imagine. Your powers are weak, old man.  All of your opponents will keep streaming in troops to the fight, which eventually can wear you down. I manage to take out the second tower here, but have to retreat back to my base and build up again. I have a couple false start attacks as I try to get past the Crusader lines, but after they fail another assault on my base I have the momentum to resume the attack on Jerusalem proper. It's at this point that it sort of descends into a trash fight on my part, with plenty of Hussars and Elite Skirmishers going forward, though I probably could have found some more gold to the south if I wasn't as narrowly focused on the tactical layer.   Jerusalem's double layer of fortified walls can prove quite annoying, but once you break through your troops are free to sack all of the buildings except the Monasteries. Smash enough of the military buildings and you've functionally eliminated Jerusalem as a player. The Hospitallers are more than happy to make up for it. 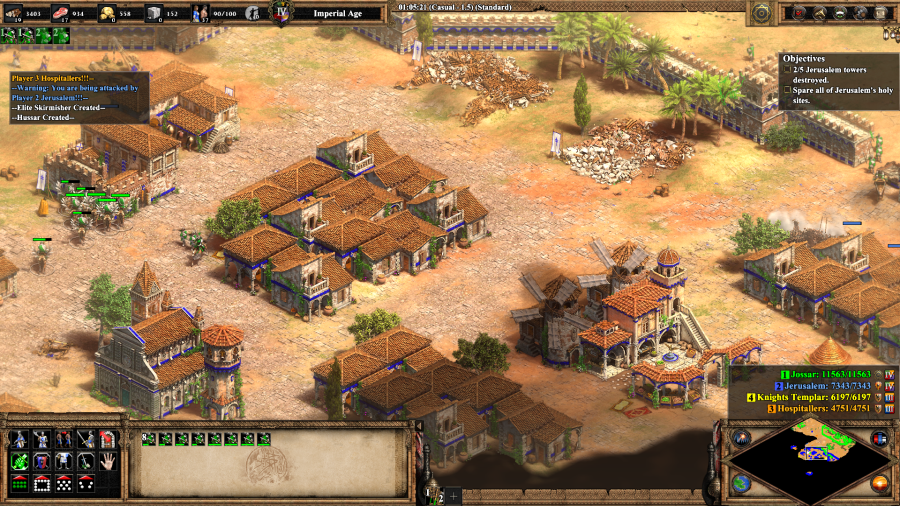 The third tower is in the center of the city, and is not particularly contested.   The last two towers are next to Knight Templar castles. The southern one happens to be next to the Al-Aqsa Mosque, which will also cause you a game over if you destroy it, even though it's not a normal Monastery.  If you haven't been thorough in rooting out the bases outside of Jerusalem proper, the Knightly orders will make this part really annoying. I slug through their troops to destroy the first castle/fourth tower because I figure that it's easier than trying to destroy the Knights Templar base.  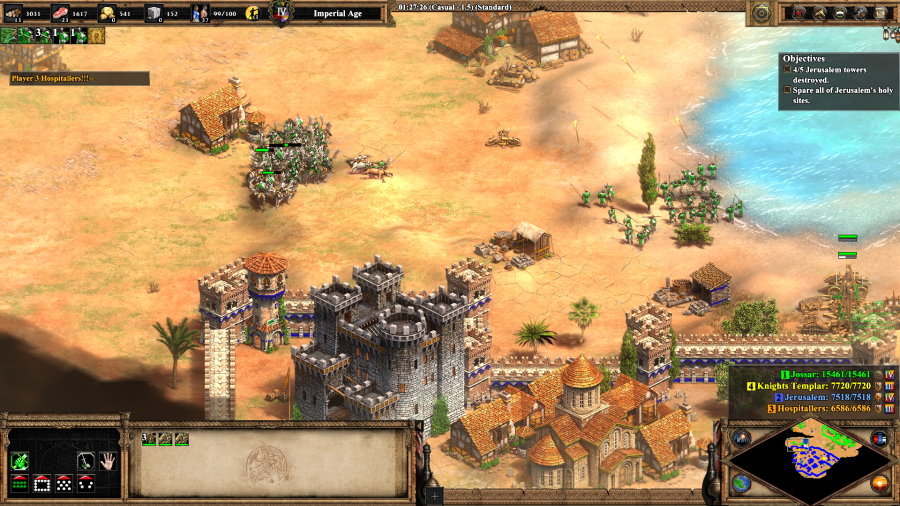  This frees me up to just go for broke on the last tower, since it doesn't matter if I attract the Hospitallers' wrath as long as I can force Jerusalem to surrender first. Saracen Fighter: All Jerusalem towers destroyed! The city is ours! Mission 4 Ending Text "The last time I entered Jerusalem, as a Crusading knight, I waded through the blood of victims. This time, not a building was looted, not a townsperson was injured. Saladin set free nearly every prisoner he took. The citizens of Jerusalem proclaimed Saladin as their savior. He offered to free me, but after 20 years in his service I have decided to see it out to the end."'' I like this scenario a lot, especially after the last two. The enemies are difficult, but not unreasonably so. You have a certain degree of flexibility on how to approach your opponents - I just focused on winning the mission directly, but there's something to be said for trying to take out the external bases to make the assault easier. You have a decent amount of resources, but not so unlimited that you can just turtle forever, especially if you want to keep on using gold-heavy units. Props to the designers on this one. Extra Slides Mission 4 - Intro Slide 1 Mission 4 - Intro Slide 2 Mission 4 - Intro Slide 3 Mission 4 - End Slide 1 Mission 4 - End Slide 2 Jossar fucked around with this message at 01:24 on Apr 13, 2023 |
|
#
¿
Apr 13, 2023 01:10
|
|
|
Saladin - Part 5: Jihad! Mission 5 Starting Text "Tiberias, twenty and a half years of bloodshed... We are far from the ocean, so the Saracens interpret the smell of salt and commotion of seabirds as signs from Heaven. I sit near Saladin's tent, watching the butchery below. Saracen horse archers sweep through yet another unorganized mob of European soldiers. The great Crusader nations have been reduced to puny city-states. Only Tiberias, Tyre, and Ascalon are still in Crusader hands. Nonetheless, these three cities are well fortified and could withstand any siege. Saladin has had many victories on the open desert, but the Crusader castles are unparalleled. If he is victorious now, the Holy Land will belong to the Saracens again. A failure could mean decades more of carnage." 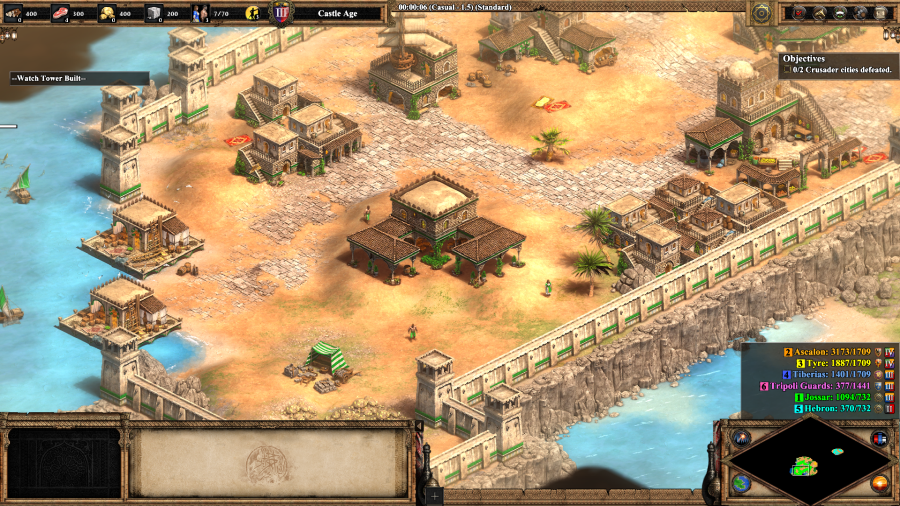 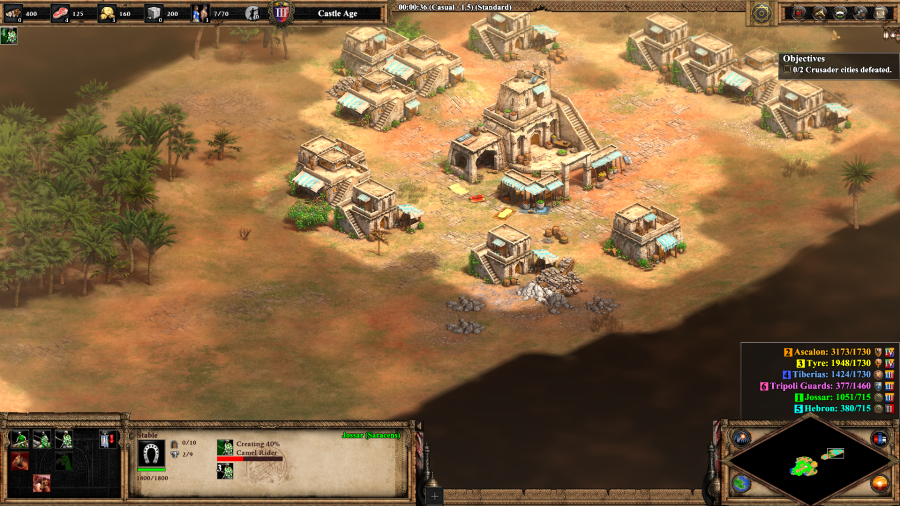 There's a little bit of time to boom before the action starts, which is good, because you start with nothing but buildings and some villagers. There is an allied village to the north, but its only real purpose is to serve as a market to trade with, and can pretty much be ignored.   Tripoli Vanguard: Charge! At about 13 minutes in, a wave of independent units attacks your city. They're easily defeated as long as you've made some kind of military, and resign immediately thereafter. They mostly exist to inform you that the other cities are about to wake up.  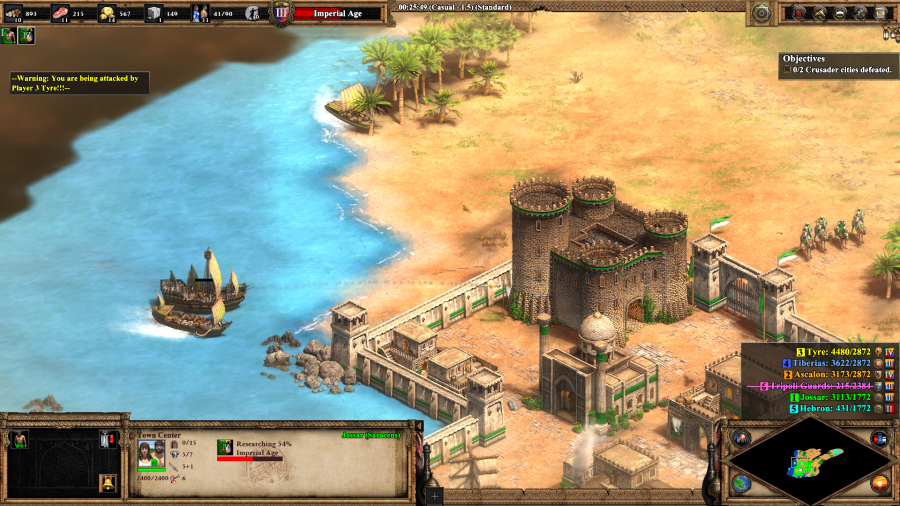 Tyre will constantly perform combined force attacks from the land and sea, consisting of Cataphracts/Mangonels and endgame ship units, and threatening the north of the city. Pretty much assume that I am always fending off a Tyrian assault of some kind offscreen, until the endgame. Tiberias mostly focuses on heavy Cavalry and attacks the south of the city. A castle can ward off most of Tyre's assaults, but it really should be a bit further north of the city to do so safely, and I will have to rebuild this one later. Tiberias only really gets one good shot in with Rams near the beginning and is otherwise mostly just splitting my attention from the Tyrian front and demanding that the occasional group of Camels come play defense.  Meanwhile, Ascalon never attacks you directly, but is relying on the other cities' assaults to turtle up and build a Wonder, to allow it to achieve an instant victory condition 350 "years" after construction. This isn't really that much of a threat because they're slow in building it (even on Hard they only start building it 15 minutes in, and with a couple of villagers), but it does make them the priority target once you're ready to go on the offense.  Tiberias: Lord Saladin, we are weary of this senseless bloodshed. Tribute to us 1,000 gold as a show of good faith and we will call a truce. At a half hour in, Tiberias launches a slightly larger attack than usual as incentive to get you to pay them a lot of gold to stop being a problem. Ignoring the offer and destroying them is the faster way to win the scenario, but it's also more annoying, so I pay up. Tiberias: Did I say 1,000 gold? I meant 2,000 gold. ...you do have to be aware though, that Tiberias is going to ask for a second payment. I have to dump most of my resources via Market to do so, but after the second payment Tiberias is as good as their word and allies with you for the rest of the scenario. They don't make any effort to attack the other two cities, but their market is more convenient to trade with than the one in the northern village and more importantly, the rest of the map is now safe.  Queue the army buildup.   Ascalon has a nasty little surprise for you, in that the most intuitive way of sieging the city also leaves you in the line of fire of their fleet.   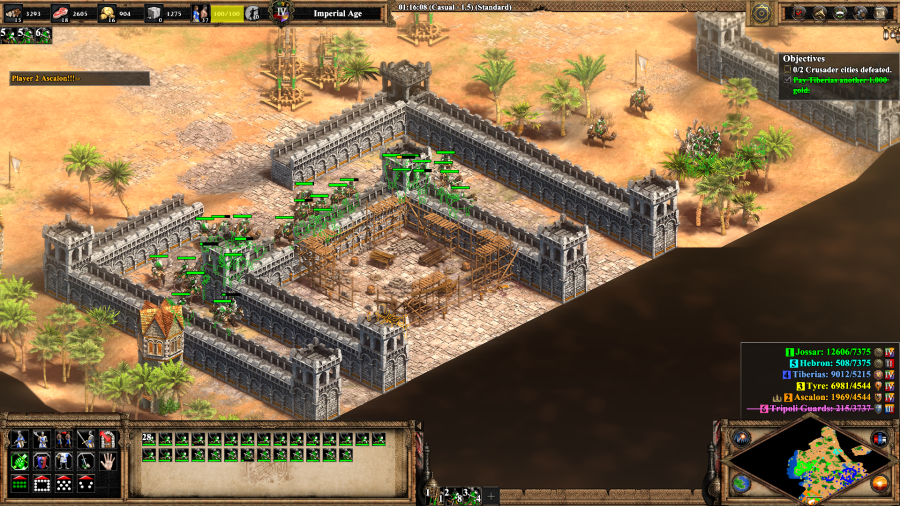 In fact, their fleet probably does a better job on defense than the rest of their army, since it can harass you at range throughout a good deal of the assault. But in the end Ascalon still goes down before their Wonder is even finished building.  Saracen Soldier My Lord, this mole was made by Alexander the Great when he lay siege to Tyre in 332 BCE. Let us hope we are more successful. Shouldn't that be in the Hijri year instead since we're playing the Saracens? Whatever. The Alexander thing sort of makes sense since his Siege of Tyre was a colossal pain in the rear, even though he eventually won. 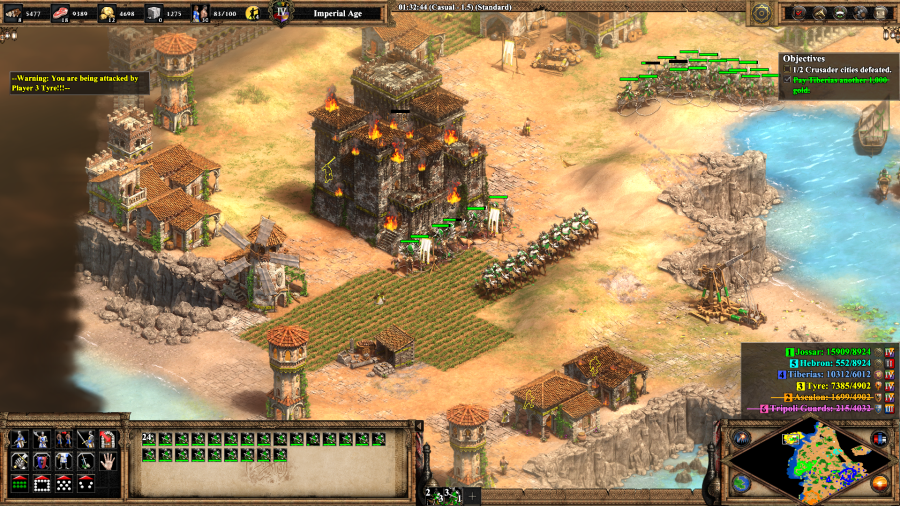  Mine won't be that difficult. Tyre can't be assaulted by land directly, but in the process of smashing Tyre's assaults, they don't really have that much left on land or sea to defend the city with, so it's just a matter of ferrying the army across with transports, destroying the Castle that serves as the linchpin of their static defenses, and going to town until they resign. Mission 5 Ending Text "Once I was amazed at the nobility of the Saracen warriors. Only a few years ago they entered battle as gentlemen, bringing with them treasure chests, wine, singing girls, and collections of doves, nightingales, and parrots. No longer. In reaction to European hostility and fanaticism, the Saracens have steadily become more resolute... more bloodthirsty. Their love of art is replaced by a love for battle. Now, in answer to the Crusade, they have adapted their principle of jihad for warfare. The result has been devastating to the Crusaders. The European presence in the Holy Land was finished. Or so everyone believed..." This scenario is perfectly ordinary, except for the excellent use of combined land/sea tactics by the enemy forces, which is pretty cool to see and puts it at above average. I went land heavy for this scenario, as I usually do, but there's definitely something to be said for trying more of a mixed approach yourself. Extra Slides Mission 5 - Intro Slide 1 Mission 5 - Intro Slide 2 Mission 5 - Intro Slide 3 Mission 5 - Intro Slide 4 Mission 5 - Intro Slide 5 Mission 5 - End Slide 1 Mission 5 - End Slide 2 Mission 5 - End Slide 3 Jossar fucked around with this message at 04:21 on Apr 15, 2023 |
|
#
¿
Apr 14, 2023 02:39
|
|
|
Saladin - Part 6: The Lion and the Demon Mission 6 Starting Text "The City of Acre. Nearly twenty-one years have I ridden with Saladin... When word of the Saracen victory at Jerusalem reached Europe, another Crusade was launched. The kings of the three most powerful nations in Europe - England, France, and the Holy Roman Empire - embarked for the Holy Land with hundreds of thousands of troops. Saladin knows that his most dangerous opponent is Richard the Lionhearted of England, a brilliant tactician who learned the art of war fighting against his own father. He builds colossal fortresses and fights always from the front lines - the ideal of a romantic warrior. Richard's army has come ashore near Acre. Much of Saladin's army is trapped in the city, while two monstrous English trebuchets pound at Acre's walls. If Richard can defeat our army here, then he can walk into Jerusalem unopposed. Saladin knows that this is the climax of his jihad. All the Crusader states have fallen. If the Saracens can hold onto Acre, then the Europeans will be forced to return home. If Acre falls, then the centuries-long nightmare of eternal war, raid, and counterraid, begin again. All Saladin's victories will be for nothing." Age of Empires II: Definitive Edition - Ride Lawrence Ride  Mameluke: Let us show the infidel dogs of the west a sight the likes of which no son of Europe has ever seen! Archer of the Eyes: We shoot to kill. The final mission of the Saladin campaign is a knock down, drag out brawl against 4 Crusader armies (well, technically 5, but you'll see), while you try to build a Wonder and play defense until the timer runs out. Both sides get some special toys for this mission, although yours are much more useful: Saladin's forces get a couple Archers of the Eyes again, but more importantly you have the Accursed Tower and the Tower of Flies. Highly effective super-towers that can mow down enemy troops with ease. Well, the Accursed Tower does at any rate. The Tower of Flies just sort of sits being useless in the bay. I make sure the Accursed Tower is fully garrisoned to max out its bonuses.  Water control south of your town is uncontested for the entirety of the scenario, so I build a bunch of Fishing Ships and Trade Cogs to generate Food and Gold. There's a Persian Outpost at the bottom of the map that's pretty much just a dock, but that's all you need as a trading partner.  All right, role call. The Franks bring some of their famous Cavalry to the fight, but it's easily shreddable. The actual danger of their forces is that they soon upgrade from using Rams to Gunpowder units, and the Bombard Cannons can very quickly overwhelm your defenses if not left unchecked. They mostly attack from the northwest. Just offscreen are the Knights Templar, who also bring Cavalry but their most annoying units are Rams and Elite Teutonic Knights. They tend to focus on being difficult to break through while the other armies are more directly causing havoc. They attack from directly north. 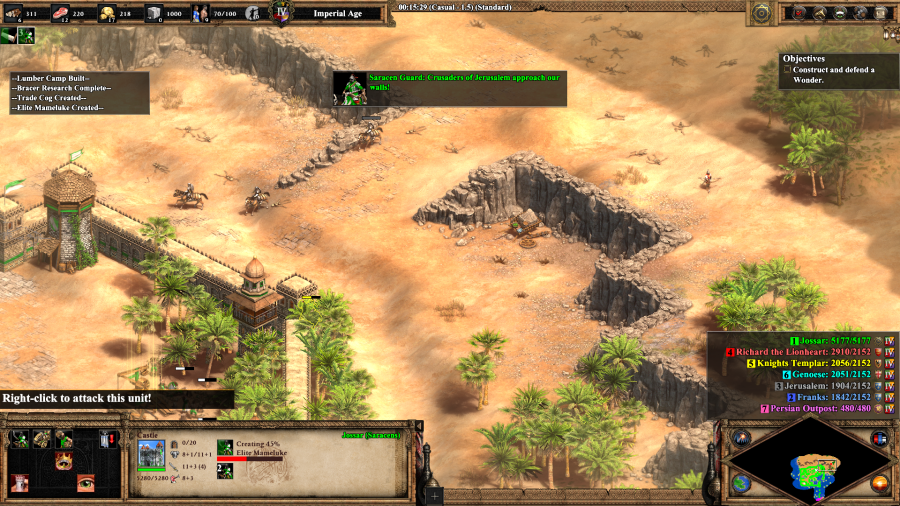 Jerusalem (I guess this is the remnants of the Kingdom of Jerusalem as we hold the city itself) throws a dash of Light Cavalry at you, a good number of Champions, and finally Onagers and Trebuchets. They attack from the east, which can sort of be distracting as nobody else attacks from that direction and your base's defenses aren't as geared towards fighting them off. Richard the Lionheart's forces include a couple of Elite Longbowmen, but mostly Siege. So much Siege, he'll repeatedly send armies made entirely out of all the conventional siege units at you. As if that wasn't enough, he also has two unique Hero Trebuchets, Bad Neighbor and God's Own Sling. He attacks from the northeast.  Finally, there's Genoa. They have all the endgame ships, but with some occasional maintenance your static defenses can hold them off, so they're pretty much nonexistent. They attack from the west.   The game seems like it wants you to build the Wonder immediately at the start, but this is a trap. The enemy forces restrict themselves to probing attacks before you start construction, so it's best to build up your economy and a full army before starting construction. Since you're not trying to blow up enemy buildings, need to rapidly respond to different parts of the siege, have pretty much infinite food and gold, and the most dangerous parts of the enemy forces are Siege/Gunpowder and Cavalry, the situation kind of encourages you to go heavy on Mamelukes rather than a balanced army composition as in most of the rest of the campaign.  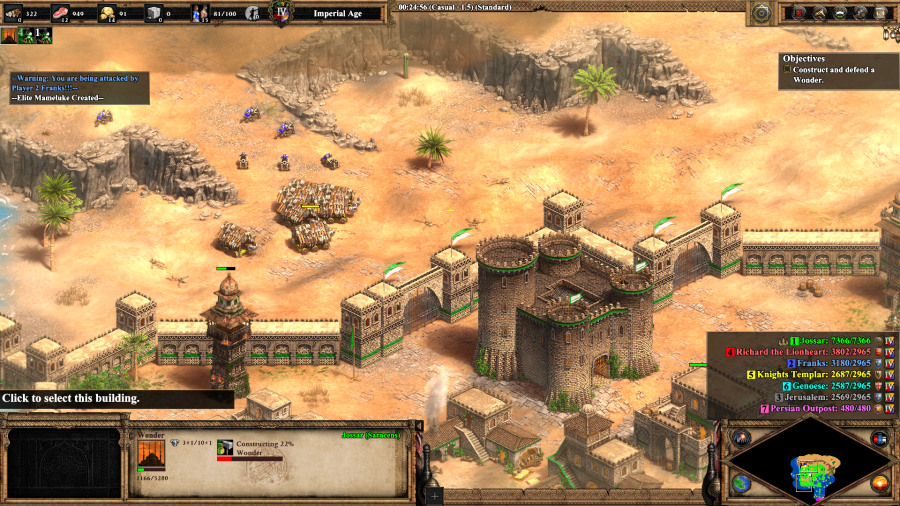 Once the wonder starts going up, the Crusader armies launch a massive coordinated assault on your position. Richard's forces are the most dangerous of these and I deal with him first, but leaving any part of this wave unattended for too long can be disastrous. The Shah of Persia sends you five Elite War Elephants (the Persian Unique Unit) at 25 minutes, but they're too slow to be of any real use for this scenario.  Up until this point, I haven't been too focused on keeping buildings up, but in this scenario I make sure to have a dedicated Repairer on hand to bring all of the defenses back to tip-top shape, especially the Accursed Tower.  Once the Wonder (the Great Mosque of Samarra) goes up, you have 300 in-game years (which is to say, 25 minutes) to defend it for victory.   The Crusader armies will continue to launch attacks, at an enhanced scale and tempo compared to before the wonder was constructed, but not unbearably so. I take advantage of the relative solidity in my defenses to build a Lumber Camp outside of the walls, to gather resources in preparation for the final assault. 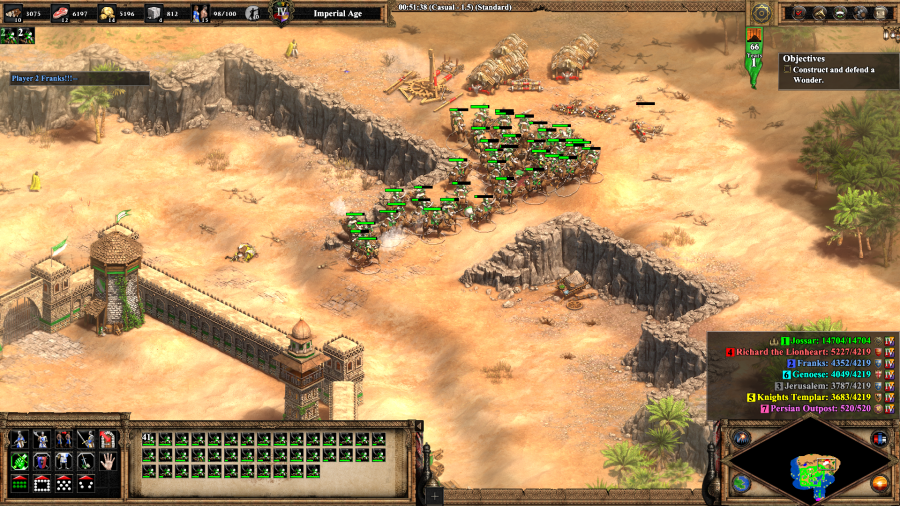   Starting at about 75 years before the completion of the timer, the Crusader forces redouble their efforts in one last attempt to prevent me from winning the scenario. This part gets pretty intense, and I lose the outermost layer of defenses including the Accursed Tower while I trade space for time, but ultimately the Crusaders' efforts are too little, too late. Mission 6 Ending Text "The first year of my freedom... The fighting is over. The fire has gone out of Richard's lust for conquest. The two respected adversaries started speaking, finally, of peace. War is not gentle with men's health. Richard fell ill with a fever. Because he respected his enemy, Saladin sent Richard fruit and mountain snow to comfort him. Soon enough, Richard boarded a ship headed back to England. The Third Crusade is over. The final treaty was signed on September 2, 1192. By its terms, Jerusalem remains in Saracen hands, but Christian pilgrims are to be allowed to visit all the holy places, freely and safely. It seems a fitting compromise to a war that has been fought over religion and land. The war is over, but I do not think I shall ever see Normandy again. I want to see the steel foundries in Damascus and the gardens of the Caliph in Baghdad. I have never seen the mighty Krak des Chevalliers, now-fallen fortress of the Knights Hospitaller. The Holy Land has many wondrous sights, and I can spend a lifetime here. It is peace in the Holy Land... for the moment. Sadly, in a land so small, home to so many different cultures, birthplace of three of the world's great religions, I suspect that blood may one day stain the sand again." Before the Definitive Edition, you used to just be able to shove your Wonder on an island to the west and cheese the scenario, but that's been patched out and now you have to fight it out. Which is good, because this is an enjoyable scenario and a nice change of pace from always being on the offense. And yes, we did just end the campaign by defeating the Britons, again. That's the last time for the original Age of Kings campaigns though. Overall the Saladin campaign, while it still has some bumps, is a further refinement of what we've seen so far, starting to show off a number of different ways to play both in terms of civilizations and scenario types. Extra Slides Mission 6 - Intro Slide 1 Mission 6 - Intro Slide 2 Mission 6 - Intro Slide 3 Mission 6 - Intro Slide 4 Mission 6 - Intro Slide 5 Mission 6 - Intro Slide 6 Mission 6 - Intro Slide 7 Mission 6 - End Slide 1 Mission 6 - End Slide 2 Mission 6 - End Slide 3 Mission 6 - End Slide 4 Mission 6 - End Slide 5 Mission 6 - End Slide 6
|
|
#
¿
Apr 15, 2023 04:35
|
|
|
Campaign Vote #3 Well, we got the two big favorites out of the way, let's see if that changes things up in the voting. A. Genghis Khan - Mongols B. Barbarossa - Teutons C. Attila the Hun - Huns D. El Cid - Spanish/Saracens E. Montezuma - Aztecs F. Battles of the Conquerors - Franks/Vikings/Turks/Britons/Spanish/Japanese/Koreans Voting lasts for 24 Hours from the time of this post. In the event of a tie, I will act as the tiebreaking vote between the two tied options. Please bold your vote in order for it to be counted, as well as noting if you are changing your vote from something else.
|
|
#
¿
Apr 15, 2023 04:39
|
|
|
Vote's closed! It got pretty close there for a bit, but Genghis Khan won out in the end.
|
|
#
¿
Apr 16, 2023 04:40
|
|
|
Genghis Khan - Part 1: Crucible Age of Empires II: Definitive Edition - Mongols Theme Very well, then let us begin, the tale of the man of iron.  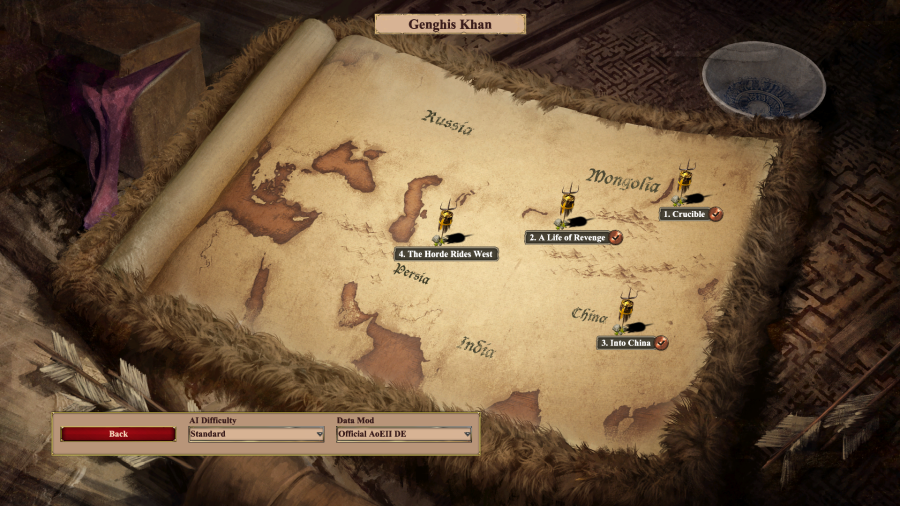 Off to Asia this time. This is also the start of the campaigns that I have not beaten fully in this version of the game, so the campaign map will not be complete, but still give a generally good idea of where the action is happening.  Mission 1 Starting Text "A blue wolf took as his spouse a fallow doe. They settled at the head of the Onon River to raise their offspring. And there were born the Mongols. So begins my life's work, 'The Secret History of the Mongols.' I have been selected to compose this epic because great events are about to take place. We are going to leave Mongolia. I have lived always on this frigid, dry, and endless steppe. The tribes here squabble like vultures fighting over the desiccated corpse of a marmot. We fight over limited resources: scarce water, few trees, sparse grass for our herds to graze on. A wise and dangerous man named Temujin means to change all this. He says that if the tribal conflict is to end, the Mongols require but two things. First, we need green pastures for our herds. With more to go around, there will be less competition among the tribes. Second, we are a nation of warriors; we need a common enemy with which to do battle. To meet both these needs, Temujin has come up with the most modest of schemes: to unite the tribes and go to war with anyone who stands in our path. 'How?' we ask him. 'How can nomadic horsemen in felt tents embark on a campaign of world conquest?' Temujin replies that we will fight not as warriors, but as a unified army. We fight not for our glory, but for the glory of Mongolia. And with those words, the name of Temujin has passed almost into obscurity. His name is replaced with a title: Great Khan. Genghis Khan."  Light Cavalry: Behold! The horde of Genghis Khan approaches. 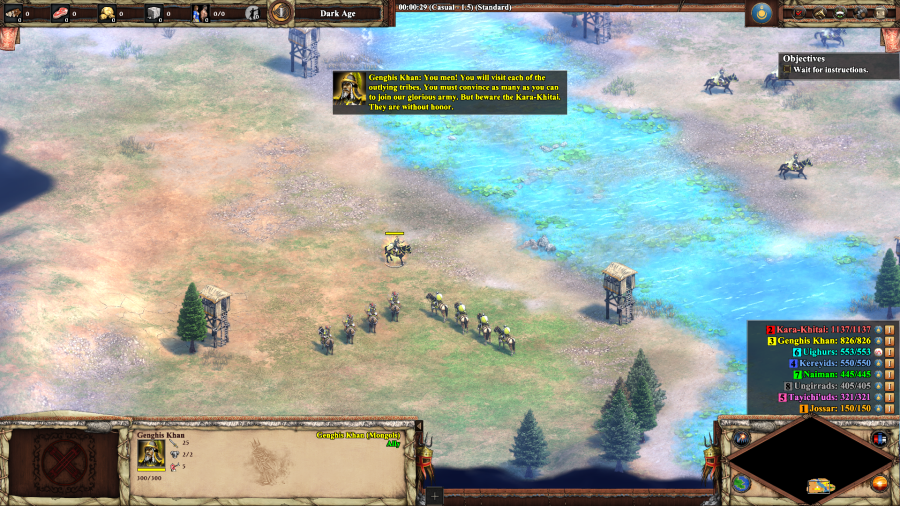 Genghis Khan: You men! You will visit each of the outlying tribes. You must convince as many as you can to join our glorious army. But beware the Kara-Khitai. They are without honor. And so Genghis Khan entrusts this task of monumental importance for the newborn Mongolian nation... to 4 Light Cavalry and 4 Cavalry Archers. The first mission of the campaign is functionally an RPG, where you run around the map completing quests for each of the tribes in order to win their support.  Ungirrads: We will follow you if you can prove to us that you are favored by the sky god. Bring to us a holy relic. Simple enough quest, albeit one that I can't complete for now as I don't have any monks. Note it down and move on.  Tayichi'uds: The Naiman are our enemy. If you drive them from the steppes, then and only then will we join you. The Naiman, of course, present the exact same proposal but flipped around. With careful micro I could just switch the Tayichi'uds to Enemy status, destroy them now and go to the Naiman, but I decide to play it safe. The Tayichi'uds are slightly easier to beat than the Naiman, but not by much.  I spot a couple of sheep while moving up to the next tribe and grab them. These are located throughout the map, and it's useful to try and pick them up when you can. 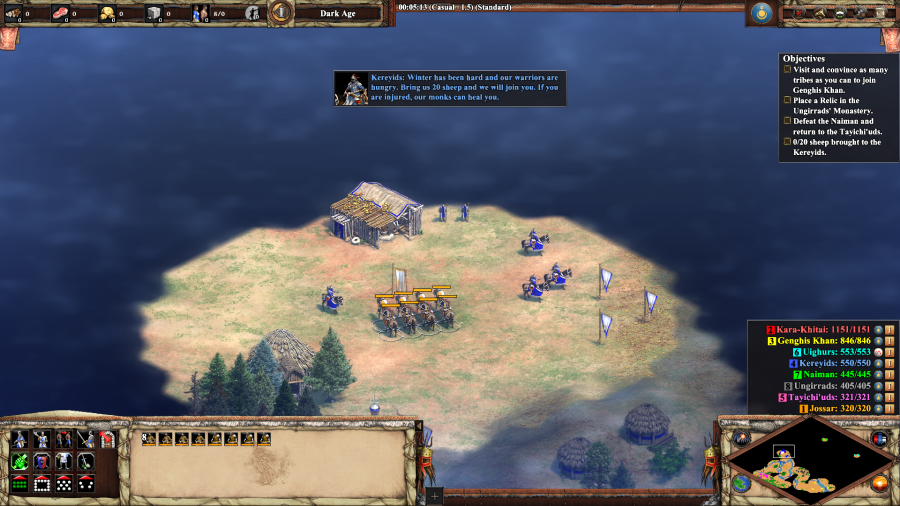 Kereyids: Winter has been hard and our warriors are hungry. Bring us 20 sheep and we will join you. If you are injured, our monks can heal you. Because the Kereyids request them for their quest. 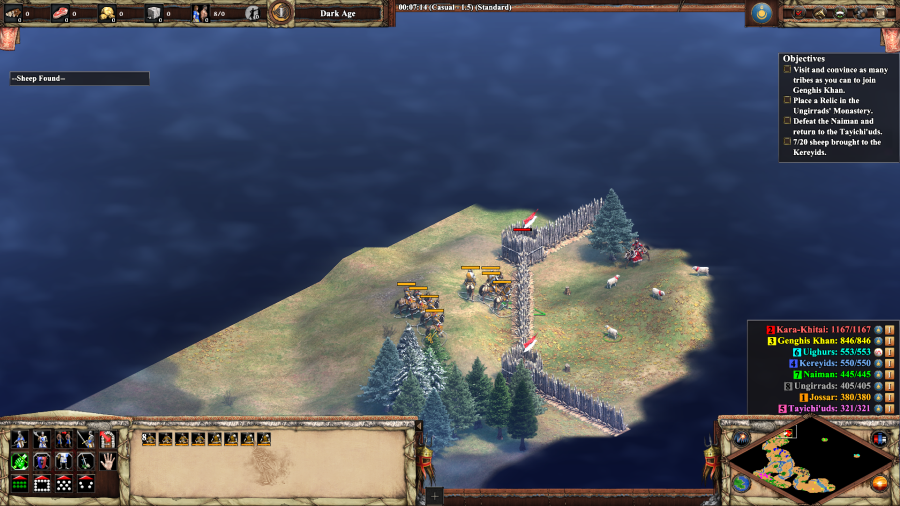  A couple more sheep can be found in the surrounding countryside, but a large number can be obtained by tearing a hole in these Wooden Palisades and killing the Kara-Khitai Cavalry Archers herding the sheep.  Kereyids: Thank you, Great Khan. We will honor our word by providing you with these soldiers. This gives you a few more Cavalry Archers and some Monks. Don't lose these Monks before completing the Ungirrad quest, as it is either very difficult or impossible to replace them, and will effectively softlock the scenario.  Just to the southwest of the Kereyids is a Kara-Khitai Monastery guarded by a couple of Cavalry Archers, some Monks, and a Mangonel. Defeating them allows you to attack the Monastery at your leisure and force it to disgorge its relic. This is notably not the only Relic on the map, but it's the most conveniently located one, if you're willing to deal with the guards.  Ungirrads: You have done well in bringing us this artifact. We will ride with the Great Khan! For your trouble, the Ungirrads give you several of the Mongols' Unique Unit, the Mangudai. They are an especially micromanagement friendly Cavalry Archer. Mongols in general are a pretty micro heavy civilization, what with their focus on speed, raiding, and Siege. It's once again a change from the previous civilizations, especially if you got used to the Saracens' fairly flexible tech tree.  The Kara-Khitai have a couple of other small bases dotted across the map, but there's no real reason to deal with them once you've retrieved the relic. Just save your strength for the important fights.  Uighurs: You must prove that our people will benefit from this alliance. There is a great wolf, Ornlu, whose pack has been attacking our flocks. Slay him and we will join your horde. The final quest is to prove that you're not afraid of the big bad wolf. Can't be that much of a problem, right?   Welp.  Honestly, Ornlu isn't that bad of a fight, even for a Hero unit, although in this case he did catch one of my Monks off guard and rip them to shreds. He's kind of a mascot for the game, and cameos in a bunch of other scenarios under different names. 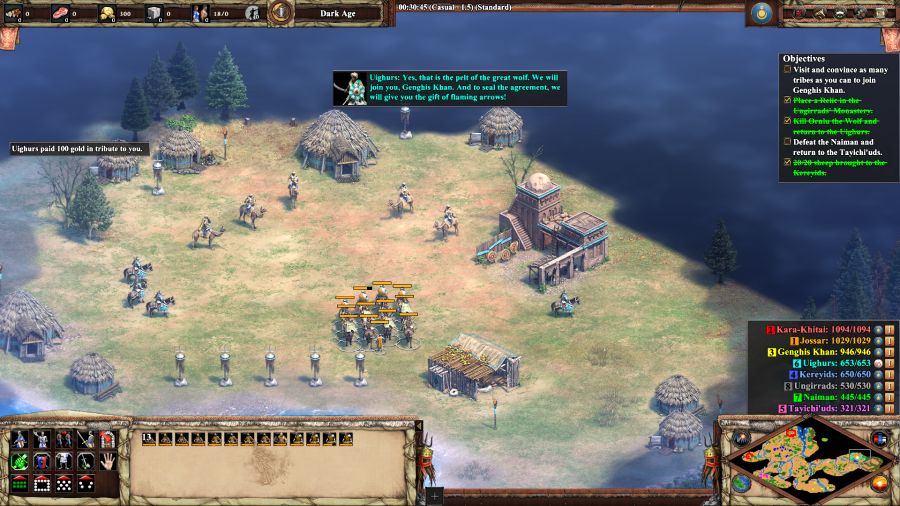 Uighurs: Yes, that is the pelt of the great wolf. We will join you, Genghis Khan. And to seal the agreement, we will give you the gift of flaming arrows! The Uighurs give you a couple of Camels and the Chemistry tech, a nice little bonus for your ranged units.  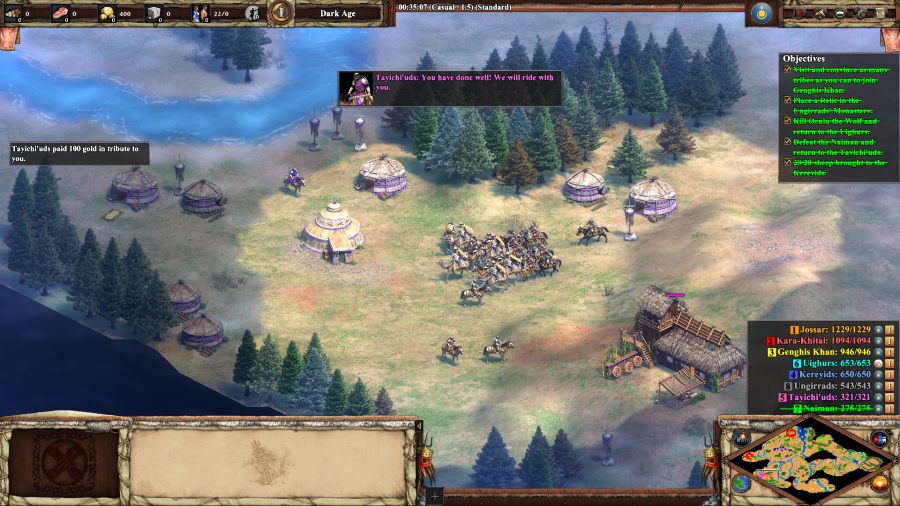 All that's left to do is destroy the Naiman and collect the pledge of the Tayichi'uds. The Tayichi'uds give you Light Cavalry, the Naiman would give you Cavalry Archers. Tayichi'uds: You have done well! We will ride with you. As this is the fourth tribe, I get a chime in from one of my troops and then the victory screen. Mongol Soldier: Four Mongol tribes now follow the banner of Genghis Khan. The rest of the world will soon know true fear. Mission 1 Ending Text "Nearly all of the Mongol tribes have united under the Great Khan. The chieftains of those tribes reluctant to join were boiled alive. Each day new faces have taken up the bow; unfamiliar hands hold the Nine Bands of yak hair that has become Genghis's standard. There are more men and horses gathered in the camp than I ever knew existed. Horse archers and lancers, men in leather cuirass and silk armor, all lift their heads upward to the platform from where Genghis speaks. The Great Khan calls himself the punishment of God. Men smile like hungry wolves. It is dawn of the first day of the Mongolian Empire." It's a lovely little scenario, possibly one of the best in the original game. It's full of character, unique, and doesn't outstay its welcome. The Ungirrads are the only tribe that has a real prerequisite to completing their quest, and the others can pretty much be completed in any order as long as you're decent at micro, which as stated above you'll need to start learning in any case if you want to play the Mongols well. Extra Slides Mission 1 - Intro Slide 1 Mission 1 - Intro Slide 2 Mission 1 - Intro Slide 3 Mission 1 - Intro Slide 4 Mission 1 - Intro Slide 5 Mission 1 - Intro Slide 6 Mission 1 - Intro Slide 7 Mission 1 - Intro Slide 8 Mission 1 - Intro Slide 9 Mission 1 - End Slide 1 Mission 1 - End Slide 2 Mission 1 - End Slide 3
|
|
#
¿
Apr 16, 2023 06:51
|
|
|
Genghis Khan - Part 2: A Life of Revenge Mission 2 Starting Text "Winter has come to the steppes. The earth is frozen hard as bone, and the only movement is steam rising from the nostrils of men and horses. Only the promise of battle brings warmth. Nearly all the tribes of Mongolia now answer to Genghis Khan. But with success, comes enemies. A man named Kushluk has challenged Genghis' right to rule. Kushluk sows discord among the Kara-Khitai tribe and means to have himself proclaimed as a rival Khan. Genghis cannot allow these transgressions to go unpunished. He needs to set an example. So we ride west, to find and slay Kushluk. If the Kara-Khitai shelter him, then their lives are forfeit as well."  Light Cavalry: I spotted a Tayichi'ud village to the north. Perhaps the inhabitants can be 'persuaded' to join us.  Tayichi'uds: Please, don't hurt us! We can aid in your blood feud! Like the last mission, you only have a couple of troops to start with. Here, you're thrown right into an assault on a small village. Make sure to kill only the enemy troops, as everything else flips to your side afterwards.   Kara-Khitai: We will destroy this great tent. Genghis Khan will sleep in the dirt with the camels. You also can't waste too much time, as the Kara-Khitai will start sending troops to attack the Tent relatively quickly. They'll focus on the surrounding yurts before the Wonder though, so there's a little bit more breathing room than you think. I'm forced to build some Spearmen and Skirmishers as a stopgap measure after repeated waves wear down my initial troops.  Eventually, I make it to the Castle Age, which is the limit for this scenario. The other notable restriction is that nobody except Kushluk can build Siege (and he only really shoves Scorpions at you), so a Castle is pretty much all the Wonder needs to protect itself from this point forward.  This just means that the Kara-Khitai redirect their efforts towards my village. But since they don't have any siege, Stone Walls are enough to keep them out until a suitable cleanup crew of Mangudai can arrive to destroy their forces.   With the construction of a second Castle, my defense is pretty much secured. Now it's time to go on the offense. 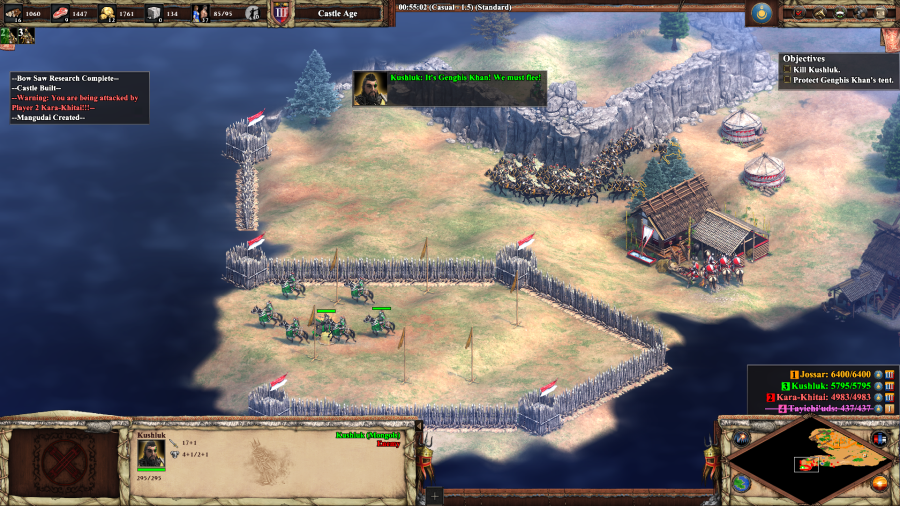 Kara-Khitai: Kushluk is our guest. It would be most rude for us to send him away... Kushluk: It's Genghis Khan! We must flee! I have my Mangudai try to snipe Kushluk, but they fail and he makes a break for it. The assassination method is possible, though it usually requires a much more specialized strategy.  Kushluk: Run away! Run away!   If Kushluk makes it over the river, you pretty much have to accept that you're going to have to do this the long way, as his base will activate and send troops to supplement those of the Kara-Khitai. My Mangudai do their best to fight their way out as I shift towards a mass production economy of regular Cavalry Archers, Mangudai, and Light Cavalry. I probably should've included some Infantry to take advantage of the tech that lets them do increased damage against buildings in the absence of Siege, but I wanted to save the gold for more Cavalry Archers instead.  Smashing the Kara-Khitai first is necessary because you don't want your offensive army to suffer attacks on multiple fronts, and they never stop streaming out troops. Their villagers will try to rebuild, but they honestly never become a really great threat after the initial destruction of their base.  Yup, there's those Scorpions in action.    Kushluk's forces are tenacious, but without the Kara-Khitai they don't have enough oomph to stop the steamroller. Kushluk himself hides in the southwestern corner of his base next to the Town Center. Kill him, and that's victory. Mongol Soldier: Such is the vengeance of the Great Khan. Mission 2 Ending Text "Genghis Khan knows that there are weapons aside from the lance and bow. He is a master of mental warfare. Just as he has made an example of Kushluk, he makes examples of enemy lands. When first we encounter a new adversary, the Great Khan spares no one. We ride to the closest town, slay every living thing, burn down the city, sow the fields with salt, and make a mountain of enemy skulls. After that, the other towns are quick to send forth their emissaries, eager to placate the ravenous Mongol hordes." This is the mission where the game starts getting mean. The Kara-Khitai troops swarm fairly hard and it's easy for an inexperienced player to get overwhelmed by them early on. After you set up your defenses you can't really lose any more, but it's certainly possible to end up in an annoying stalemate for a while, and Kushluk bolting to the other side of the map and supplementing the Kara-Khitai forces is a pretty big troll. Makes it very satisfying to plan out a way to kill him in under 20 minutes for the achievement. Extra Slides Mission 2 - Intro Slide 1 Mission 2 - Intro Slide 2 Mission 2 - Intro Slide 3 Mission 2 - End Slide 1 Mission 2 - End Slide 2 Mission 2 - End Slide 3
|
|
#
¿
Apr 16, 2023 22:37
|
|
|
Faster production time because it's easier to spam Archery Ranges than it is to spam Castles. That's about it.
|
|
#
¿
Apr 16, 2023 22:51
|
|
|
Since a couple posts asked for my opinion on stuff, I'll chime in early before playing the game some more. - I want to get through all of the campaigns before trying out custom stuff. I'm not averse to the idea generally speaking, but remember that we're only 3.33 campaigns done out of a couple dozen, and there's going to be at least one more set added before the LP is over... which also means that I'm kinda obliged to make this an AoE1 LP inside of an AoE2 LP now? I don't know too much about the mod scene though, I was never really into it, so if we get to that point I'll need to take recommendations or else you're just getting whatever random stuff I remember, like The Last Neanderthal and Gwyndlegard. - Sure, go nuts with the civ reviews. I wanted to do some myself, but just getting the updates out is turning out to be enough for me.
|
|
#
¿
Apr 17, 2023 23:30
|
|
|

|
| # ¿ May 16, 2024 13:07 |
|
|
Genghis Khan - Part 3: Into China Mission 3 Starting Text "Now all of Mongolia is in the grasp of Genghis Khan. Beyond are two vast empires: China to the east and Persia to the west. Persia is the sensible next choice of battle, since it separates us from the rich forage pastures in Europe. But first, Genghis Khan has another score to settle. After witnessing the power of our cavalry in action, the Chinese spoke of nothing but peace. They even promised support for our campaign westward. But now that we have turned away from China, they decided not to deliver the men and arms they promised Genghis. It is time for another demonstration. Persia can wait as the Horde wheels east once more, and we prepare to march into China, the largest, most advanced empire in the world." 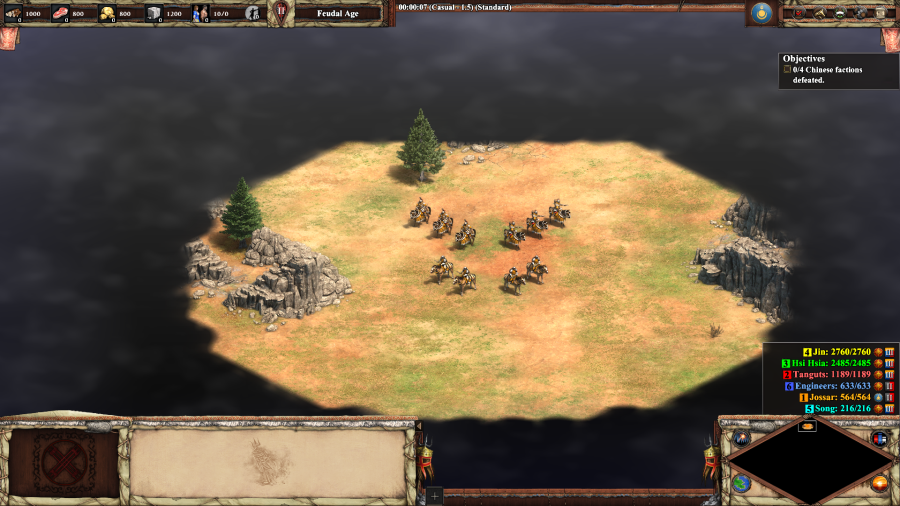 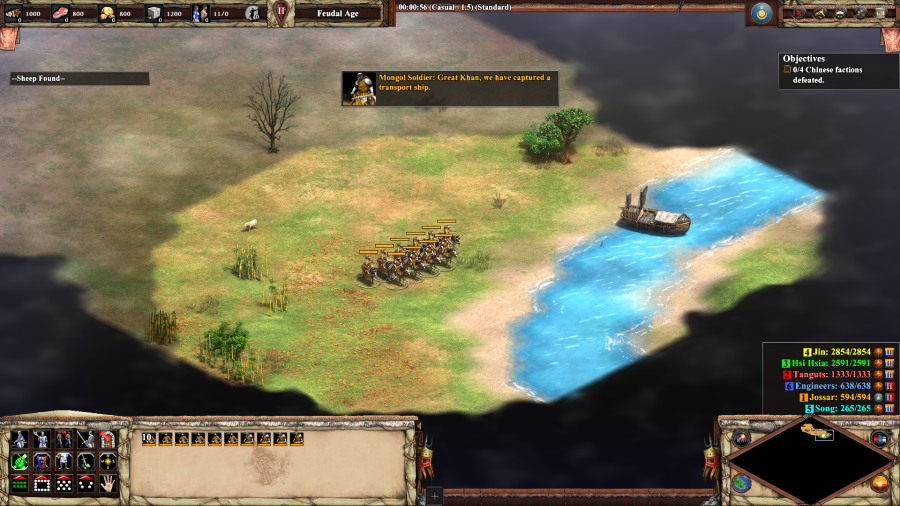 Mongol Soldier: Great Khan, we have captured a transport ship. You start with a couple of troops, but nothing to do with them. Wandering eastwards gives you this transport ship. 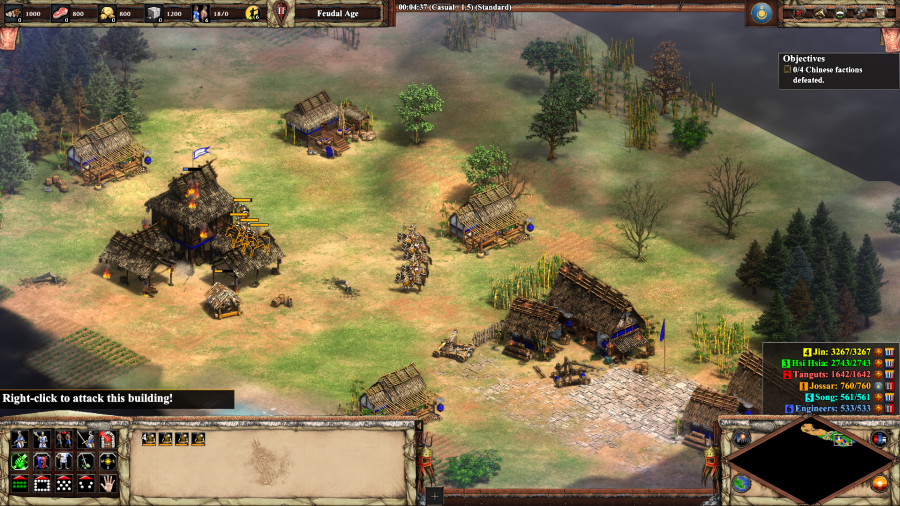 Chinese Engineer: Mongols! Run for your lives! Mongol Soldier: Great Khan, with these engineers, we can establish a stronghold in China and construct powerful engines of destruction. Hopping over the river brings you to this Engineer camp, where if you go over to the Siege Workshops you gain control of a Ram, a Mangonel, and some villagers. You can destroy the Engineers if you want, and it's worth it if you want to establish your base in their former camp.  But the downside is that there's no Gold or Stone, so I just take the villagers back to the mainland and build my base over there.  The mainland Chinese factions, particularly the Tanguts, will periodically send troops out to assault your base, but they're relatively minor raids early on and easily repulsed. 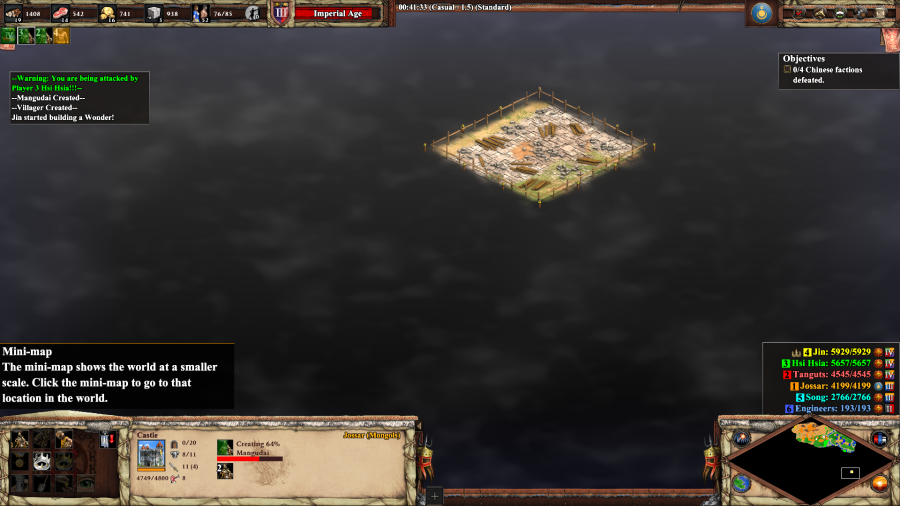 At approximately 40 minutes in, Jin, the strongest and most advanced of the Chinese factions starts building a wonder. Let it stand for 300 years and you lose.  It's also at around this time that the majority of the other Chinese forces will have upgraded their troops and started sending siege at you, but by this point I have Mangudai who can just tear them to shreds.  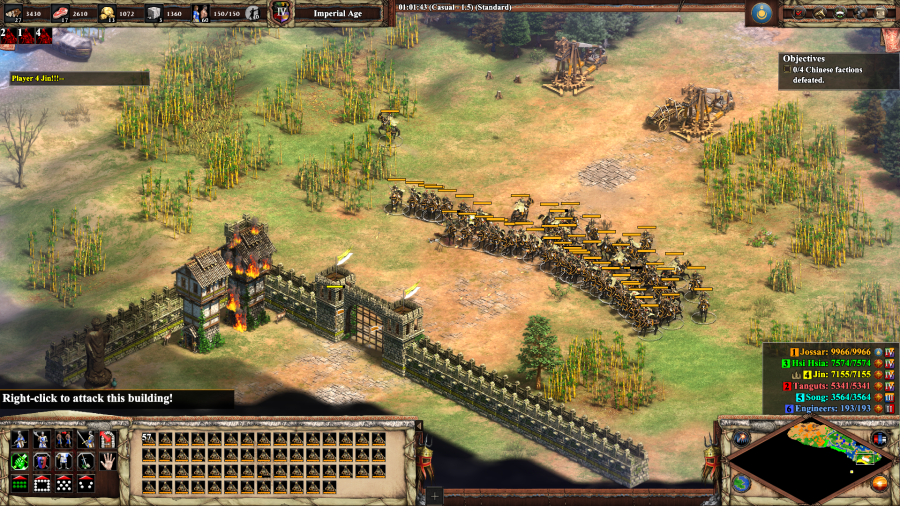 Because Jin sets a timer for the mission, it's worth taking them out first. The southern approach to their island is fairly well guarded, but the northern approach is defenseless apart from a few scattered troops.  By this point I've boomed too hard and even Jin's fully upgraded Imperial army just doesn't have an answer to dozens of my own fully upgraded Elite Mangudai and Trebuchets. Cavaliers, Chu Ko Nus (the Chinese Archer Unique Unit, fires a bunch of arrows at once) and Monks, by the way. All of the Chinese forces have Monks, so you need to be a little bit careful not to lose troops to conversion. Jin's defeat marks the end of any remaining challenge that this mission has. The other Chinese forces will never build a navy, so you have a guaranteed fall back position and no more timers, so you literally cannot lose. Additionally, Jin has a large amount of resources in the back of the island to help fund your conquest of the rest of China. For this reason, several strategies recommend building your initial base on the Jin island and then just sending back villagers to build a second camp on the mainland for Gold and Stone, before moving onto the Jin stockpile for all your lategame resource needs.  To get into China proper, you have to break through the Great Wall, a series of Fortified Walls and Keeps three rows deep. Of course, there's nothing that stops you from just pounding away at it from a distance. (...you don't really need to break through the Great Wall. Your transport fleet can just sneak your entire army around it, but I figured that I might as well show it off since it's a nice set piece.)  Once I break through the Great Wall, I send some villagers to go and build a base to harvest and extract these mineral resources as well.   Everything from this point onwards is just a rolling doomstack winding its way across the Chinese countryside. The Tanguts aren't defeated, but their main base is crushed and can no longer send forward any more offensive waves of Rams and Scorpions.   The Hsi Hsia's Onagers and Chu Ko Nus can be pretty scary, but focus fire them down and the rest of their army is no threat.  There's 6 Cannon Bombards that you can recruit for free on the Western side of the map. Great for if you're speed running. I use them as part of a pincer movement for the final part of this mission.  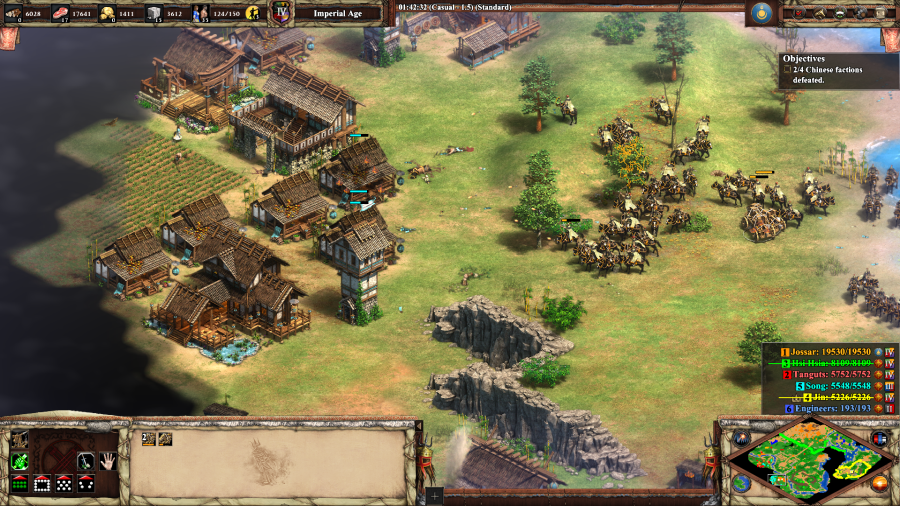 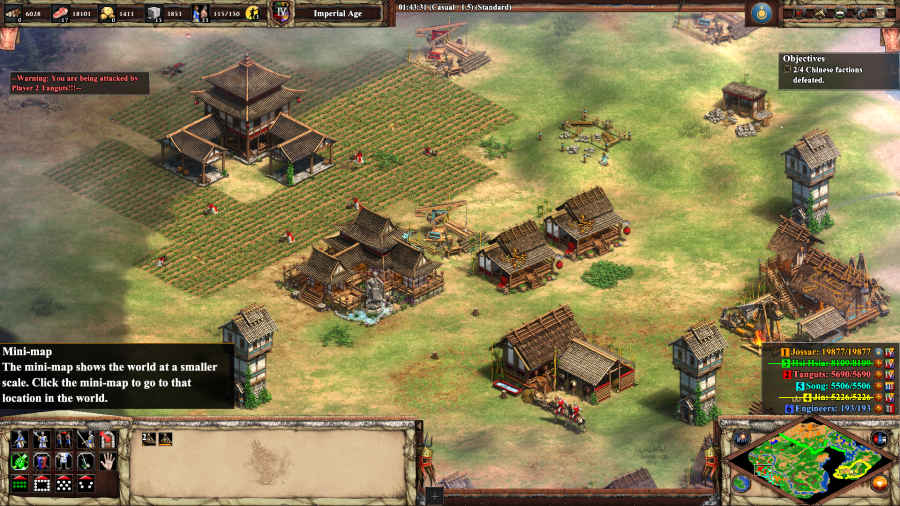 The Song have a lot of Keeps and miscellaneous conventional military units. This is also where the remaining Tanguts fled. After defeating them both, I claim victory. Mission 3 Ending Text "It was... a glorious slaughter. For years, visitors to China will be astounded by the mountain of human and horse skeletons that we have erected. The Hordes have gained one huge advantage by this invasion of China: technology. We now possess the knowledge and equipment to allow us to make siege weapons. We will crack open the Persian and European castles to reach the softer parts within. Genghis is pleased with our progress and with the legacy he leaves behind. His mother once ate wild onions and rodents to keep from starving. But the children and grandchildren of Genghis will eat off plates of Persian gold." I used to have a lot of difficulty with this scenario as a kid, but now it's kind of a snoozefest. The game feels like it's trying to encourage you to quickly destroy all of the minor Chinese factions and set Jin up to be the final boss, but because the Wonder goes up relatively early, it instead incentivizes you to figure out how to defeat the most powerful player on the map first and then all that's left is a long and pointless mop up process. Extra Slides Mission 3 - Intro Slide 1 Mission 3 - Intro Slide 2 Mission 3 - Intro Slide 3 Mission 3 - Intro Slide 4 Mission 3 - Intro Slide 5 Mission 3 - End Slide 1 Mission 3 - End Slide 2 Mission 3 - End Slide 3 Mission 3 - End Slide 4 Jossar fucked around with this message at 02:25 on Apr 18, 2023 |
|
#
¿
Apr 18, 2023 02:19
|
|