


|
 Alternate thread title: I'm Passionate About These Rhythms In 1992, Square released Romancing SaGa for the Super Famicom. Built upon the first two SaGa games (released in the U.S. as Final Fantasy Legend), it featured an open world, eight protagonists, and a host of arcane and obscure game systems. It was popular enough to spawn two sequels for the same system, and more SaGa games for the PlayStation and beyond. In 2005, Square Enix remade the game from the ground up for the PlayStation 2. Released as Romancing SaGa: Minstrel Song in Japan and simply Romancing SaGa in the U.S., it featured new graphics (a unique watercolor style that admittedly looks awkward in places), a new soundtrack, a few new systems, and more beginner-friendly (though still fairly opaque) gameplay. The remake is a special game for me. I purchased it on a lark but sunk dozens on dozens of hours into it. Although not perfect, I fell in love with its gameplay, its stellar soundtrack, and even its cheesy voice acting. I love it so much I wrote about it on these very forums. Given the game's poor reception in the West, I was as shocked as anyone when a remaster was announced for release in 2022. Shocked, but ecstatic. It's a great game, and while it isn't for everyone, more people ought to experience it. People like you. So how is this gonna work? The game has eight characters, each with their own intro. So my first order of business will be to run through those eight intros and get you acquainted with those characters, as well as the allies they can recruit along the way. Once that's done, I'm going to start taking input from my audience. You all will be responsible for choosing our protagonist, their allies, and even what tasks we undertake. This LP will therefor become your own story: not a comprehensive look at the game, but a playthrough dictated by your choices and priorities. I think it's one of the game's strengths, and the LP should reflect that. Disclaimer: I won't be using my own account when linking music. I figure stuff that's already on YouTube is fair game, but I don't wanna get in any kind of trouble for uploading something I shouldn't. If a music link is broken, that's why. You can also buy the soundtrack in various digital music stores. What's the update schedule? Whenever I can get an update done. In my previous LPs I tried to set a timetable, and in neither case did it go entirely smoothly. Given how much more complex I see this LP being, there's zero chance I'll be able to maintain a weekly schedule, and I'm not gonna try and second-guess how often I'll be able to update. Anything else? As I've mentioned a few times, I feel that Kenji Ito absolutely outdid himself with this soundtrack. Although I'm not going to share every piece (the soundtrack is enormous and I'd drive myself crazy trying to catch every single song), I will point out the ones I think are most important or excellent. https://www.youtube.com/watch?v=S3bIH77OBMw Updates Intro: Albert Game Mechanics: The Menu Screen Intro: Aisha Game Mechanics: Skills & Classes Intro: Gray Mythology of Mardias Intro: Claudia Intro: Jamil Intro: Sif Game Mechanics: Monster Types Intro: Hawke Intro: Barbara Getting Started Free the Gecklings Rapidly Changing Plans Assassination, Heresy, and Fraud Pride of the Knights The Fiends of Saoki Neville's Request A Scroll and a Scurve Treasures Great and Small Creepy Butterfly Monster of Mt. Tomae Captain Silver's Treasure Constance Kidnapped Ailing Emperor The Sword of Ice and the Serpent of Water Courier Services Missing Taralians Find the Aquamarine Isle of Evil Plant Ecology Return of the Vampires The Assassins' Guild 5-Headed Snake God fucked around with this message at 16:23 on May 6, 2024 |
 #
¿
Aug 7, 2023 22:06
#
¿
Aug 7, 2023 22:06
|
|


|

|
| # ¿ May 9, 2024 01:07 |
|
|
Dramatis Personae Protagonists Albert  "I Am Albert, Son of Rudolf, Lord of the Isthmus." Voiced by: Yuri Lowenthal Default Class: Frontier Guard Recruitment Limitations: Cannot be recruited if Diana is in the party. Other Notes: Starts with level 1 in Cosmology and the Sunray spell. Aisha  "I'm Aisha, a Taralian!" Voiced by: Carrie Savage Default Class: Herbalist Gray  "I'm Gray." Voiced By: Josh Phillips Default Class: Swordsman Claudia  "My name is Claudia." Voiced by: Karen Strassman Default Class: Ranger Jamil 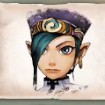 "I'm Jamil. Pleased to meet ya." Voiced by: Ted Sroka Default Class: Thief Sif  "I am Sif, a proud Valhallan." Voiced by: Megan Hollingshead Default Class: Valhallan Warrior Hawke 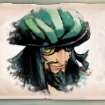 "You can call me Captain Hawke." Voiced By: Gerald C. Rivers Default Class: Pirate Barbara 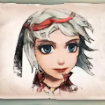 "My name's Barbara. Good to meet you!" Voiced by: Erica Shaffer Default Class: Entertainer Other Notes: Starts with level 1 in Demonology and the Energy Bolt spell. Other Characters Brau 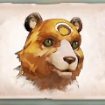 *Bear noises* Voiced by: No one Default Class: N/A Recruitment Limitations: Joins in Claudia's intro. Can't be recruited by anyone else. Other Notes: Can't take classes or skill ranks, can't Glimmer techniques, can't be removed from the party, and can't use equipment. Diana 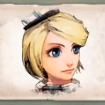 "I am Diana, Knight of the Rose and daughter of Rudolf and Mariah! Face me if you dare!" Voiced by: Michelle Ruff Default Class: Rosalian Lancer Recruitment Limitations: Cannot be recruited if Albert is in the party. Other Notes: Starts with a unique short sword, the Queen of Swords, which she cannot unequip. Dowd  "A-Are we gonna be okay?" Voiced by: Sam Riegel Default Class: Thug Recruitment Limitations: Joins in Jamil's intro. Other characters must first complete a specific early-game quest. Galahad 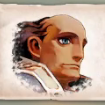 "Now I'll be able to fulfill my divine mission." Voiced By: Unknown Default Class: Rosalian Officer Gian  "The city's more dangerous than the wilderness. Trust me." Voiced by: Unknown Default Class: Imperial Knight Recruitment Limitations: Only available after completing a specific early-game quest. Guella Ha  "From now on we should walk with the Hotbloods." Voiced By: Liam O'Brien Default Class: Geckling Knight Herman 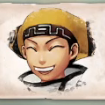 "Fighting these can be lucrative!" Voiced by: Unknown Default Class: Trader Monica 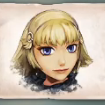 "Who sent you?" Voiced by: Unknown Default Class: Imperial Knight Recruitment Limitations: Only available after completing a specific early-game quest. Myriam 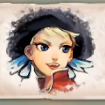 "I'll put an end to this with my magic." Voiced By: Unknown Default Class: None Other Notes: Starts with level 1 in Pyrology and the Hellfire spell. Patrick 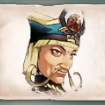 "You'll play your best game against your greatest foe! ...Me." Voiced by: Unknown Default Class: None Recruitment Limitations: Only available after completing a specific early-game quest. Sylvan  *Wolf noises* Voiced by: No one Default Class: N/A Recruitment Limitations: Joins in Claudia's intro. Can't be recruited by anyone else. Other Notes: Can't take classes or skill ranks, can't Glimmer techniques, can't be removed from the party, and can't use equipment. 5-Headed Snake God fucked around with this message at 18:48 on Jan 14, 2024 |
|
#
¿
Aug 7, 2023 22:06
|
|
|
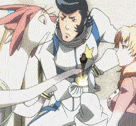
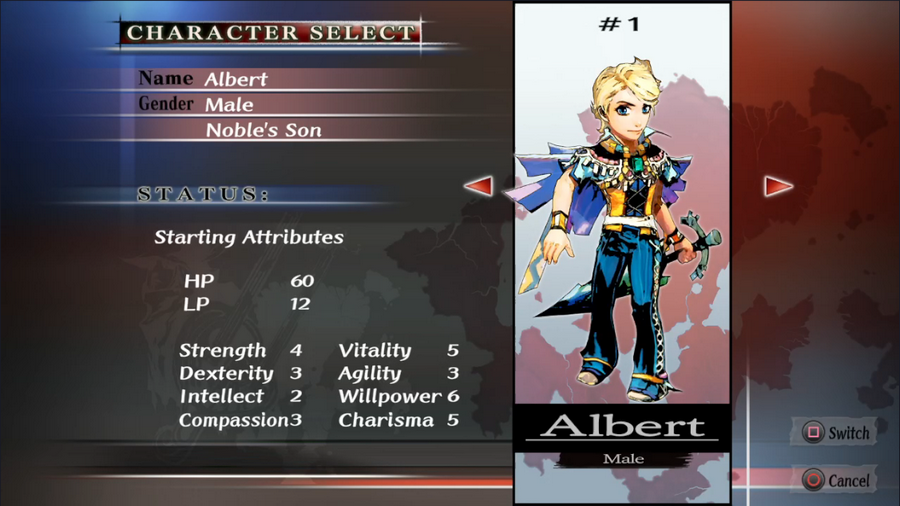 As mentioned in the OP, we're opening the game with the eight heroes' unique intros. Our first protagonist is Albert, a nobleman's son. His position as character #1 isn't a coincidence; Albert has by far the longest intro in the game, and it eases the player into the mechanics more gently than any other. 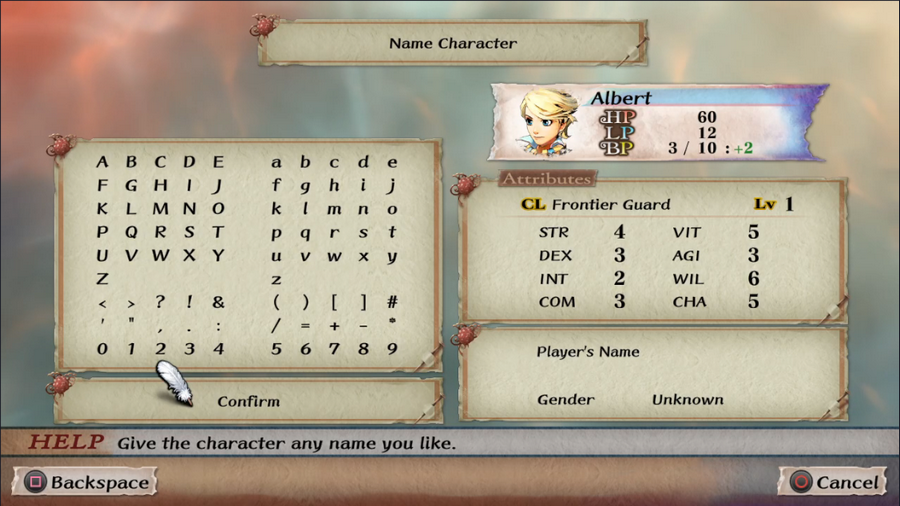 After selecting our character, we're prompted to rename them. I'll be keeping the protagonists' names as-is, since they're voice acted in-game anyway. 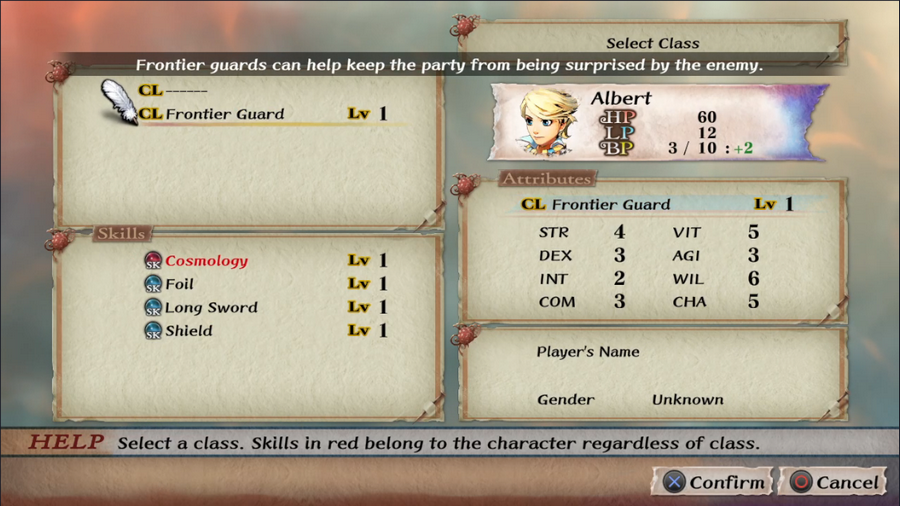 Next, we're prompted to choose our hero's class, which dictates their starting skills and affects their stats. New Game + lets you choose any class unlocked in a previous playthrough, but since this is a fresh save, we only have the default choice. In Albert's case that's Frontier Guard, a basic fighting class that sometimes mitigates enemy surprise attacks. Every class has its own special ability, and while this one isn't great, it's not terrible. Albert also starts with one level in the Cosmology skill, which gives him some magical ability. The red highlight means it's a fixed skill that he gets regardless of class. He also starts with a Cosmology spell, Sunray, though it's not really worth using in his intro. 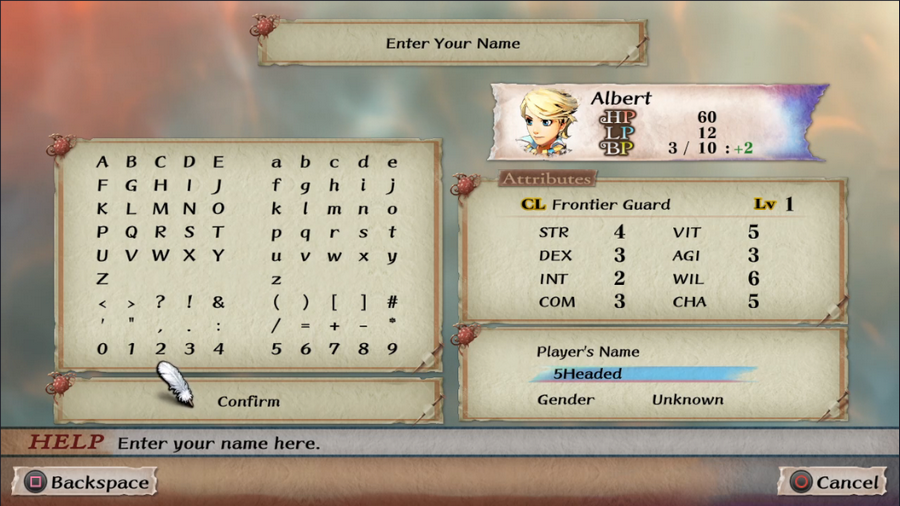  Since this is a new game, we're also prompted for a player name. Sadly, "5-Headed Snake God" doesn't fit. We're also asked for a gender; since I don't know your genders, I'm leaving it as Unknown.  Lastly, we're asked to set the strength of our controller vibration and how quickly the game's story will advance (a new option for the Remaster). I'm going for a standard new player experience, so I'm keeping the progression speed at Normal. That's all for the setup, so let's get going!  The blue region in the center of the map is highlighted, and as you can see on the right, it's Rosalia. Each character is associated with one (or sometimes two) of the game's ten regions. In this case, it's Rosalia, a powerful kingdom That won independence from the empire next door some years back, and has been at odds with them ever since. (Mardias is the name of the world, named for its creator-god, Marda.)  The intros are narrated by the game's eponymous Minstrel, who we'll eventually meet in person.   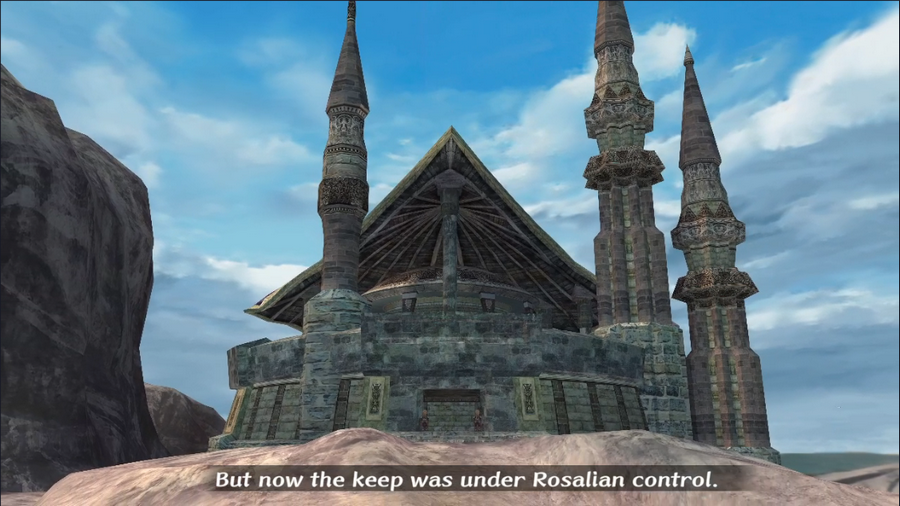 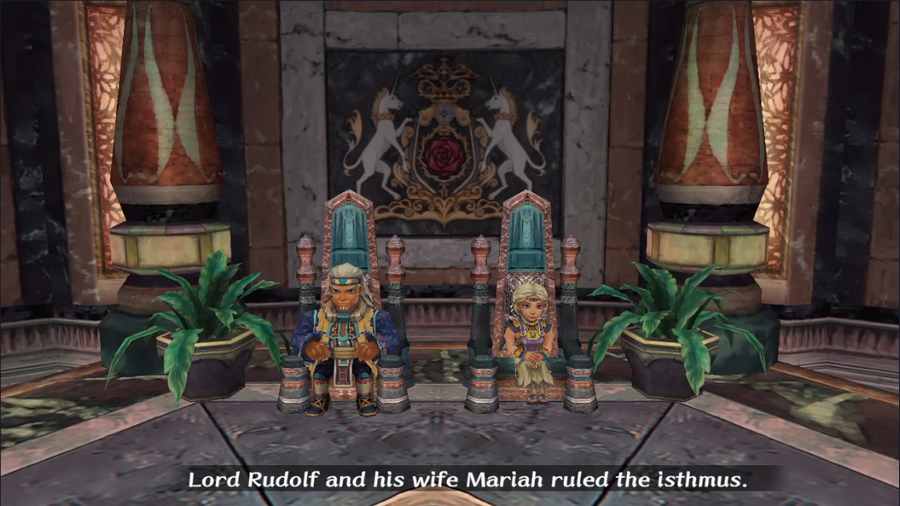   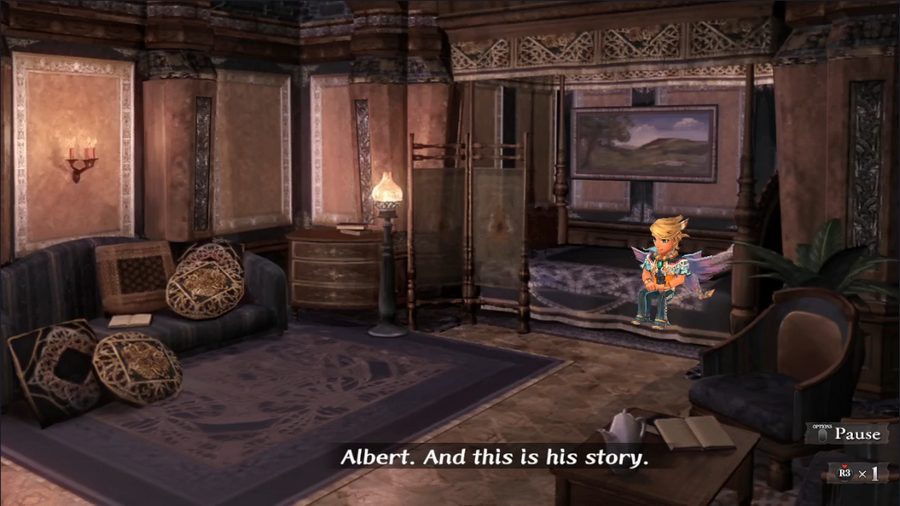 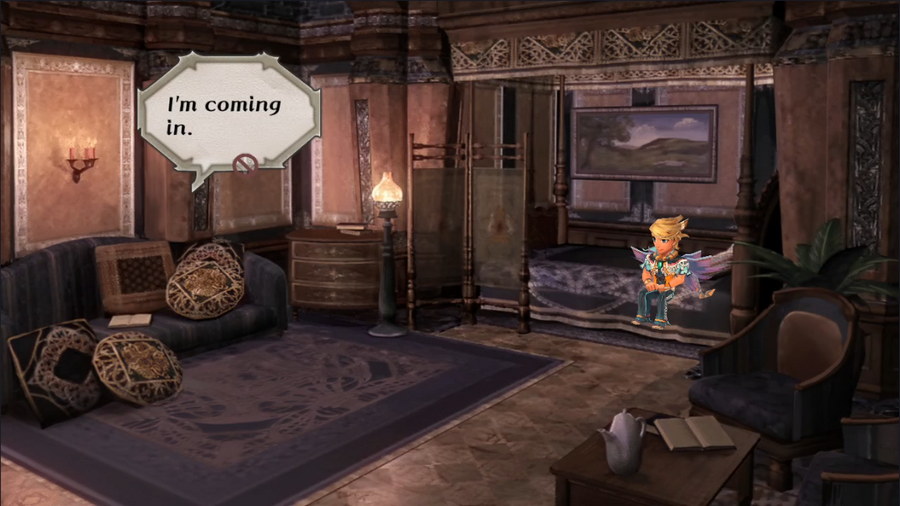   After learning a little about where and who we are, we've given control of Albert at last. You can see button prompts on the screen, which I haven't found a way to remove. You'll just have to get used to them.  Here's our party status screen. I'll go over more about what all this stuff means in another update.  Diana wasn't kidding about Albert needing to equip himself.  There are many, many groups of weapons in Minstrel Song; Albert's Frontier Guard class is skilled with two of them: Foils and Long Swords. He starts with one of the former, a Dress Sword, which is weak but serviceable for the early game. Every character also comes with a Smoke Bomb Pouch (a new item in the remaster that facilitates fleeing from battle) and a First Aid Kit (which can be used to cure poison or paralysis, or restore a small amount of HP in battle). Both can be refilled by resting at an inn. Finally, the armor and shield are basic early-game fare.  We're geared up, let's go exploring. Music Highlight: Hope for Justice/Wings of Justice (Many songs on the game's soundtrack have two translations. The first name is the unofficial literal translation, while the second is the official name from the Western release of the soundtrack.) Albert's theme is an almost martial tune that reflects both his noble blood and the fact that he's the generic RPG protagonist.  Heck yeah, forget mom and dad, let's go have an adventure!  Our plans are shot down immediately. Albert's intro cannot be skipped or subverted.  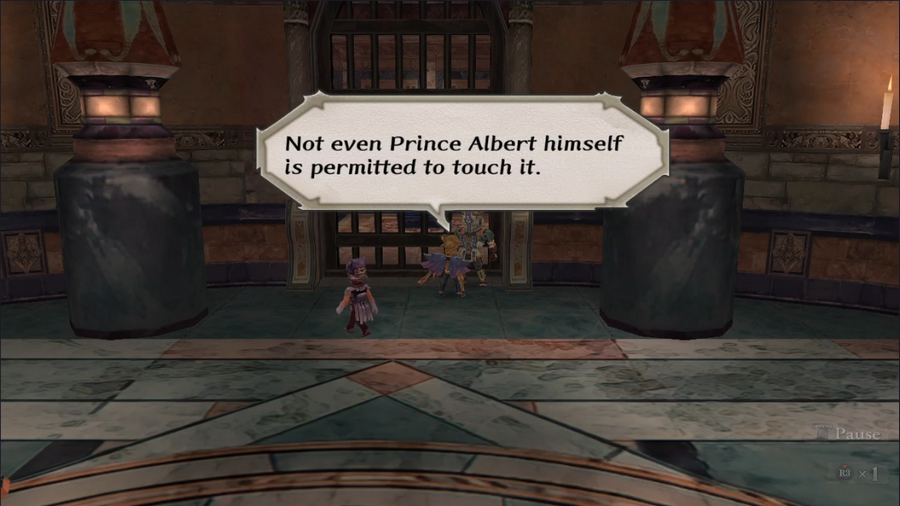 Back inside the keep, we find a locked and guarded room containing a magic staff. We might have to come back for this later. 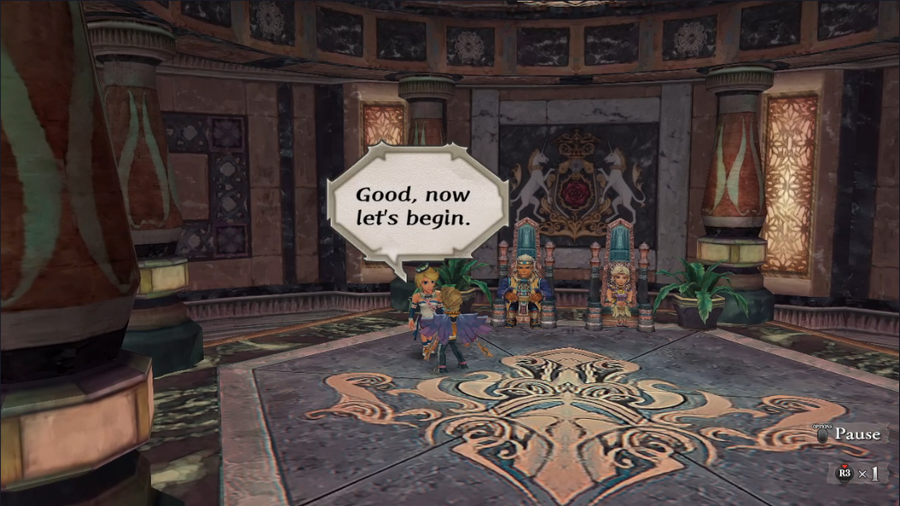 All right, let's go see the lord and lady. 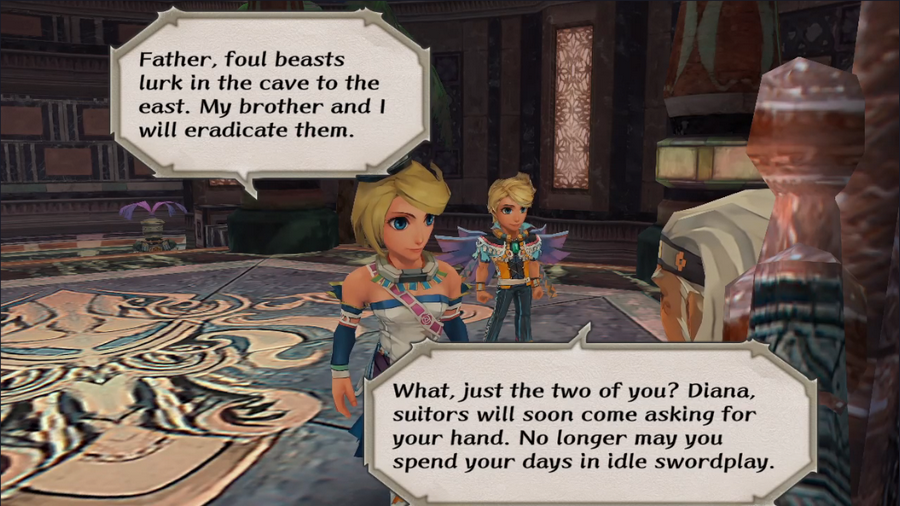 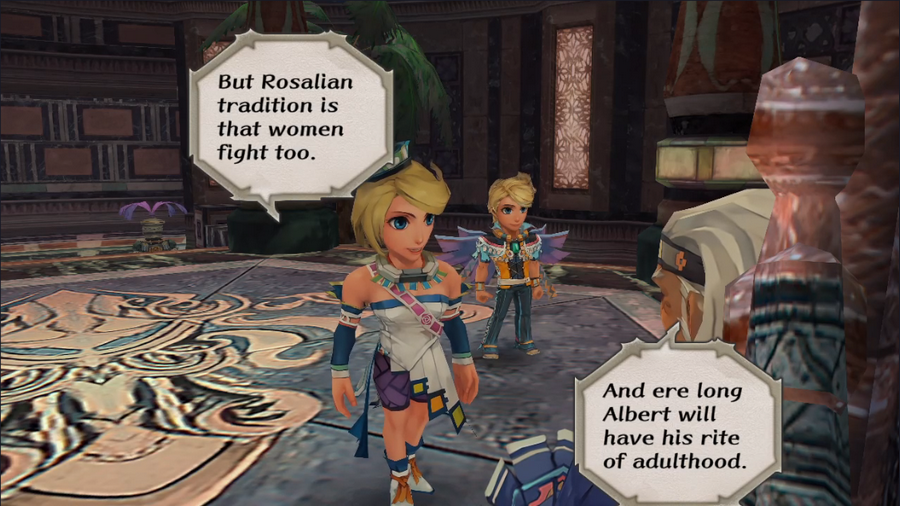 Word balloons are not always meant to be red from left to right. I respect my readers enough to believe that they can figure out the correct order.      And with that, we have our first mission and our first party. Most characters don't have three allies handed to them like this, but like I said: this intro is designed to ease us into the game.  The game constantly tracks our quests, as well as any rumors we hear. The remaster tells us outright when once of these updates.  Here's our new party. As you can see, Albert is by far the weakest person here, so Diana and the soldiers will have to carry him. 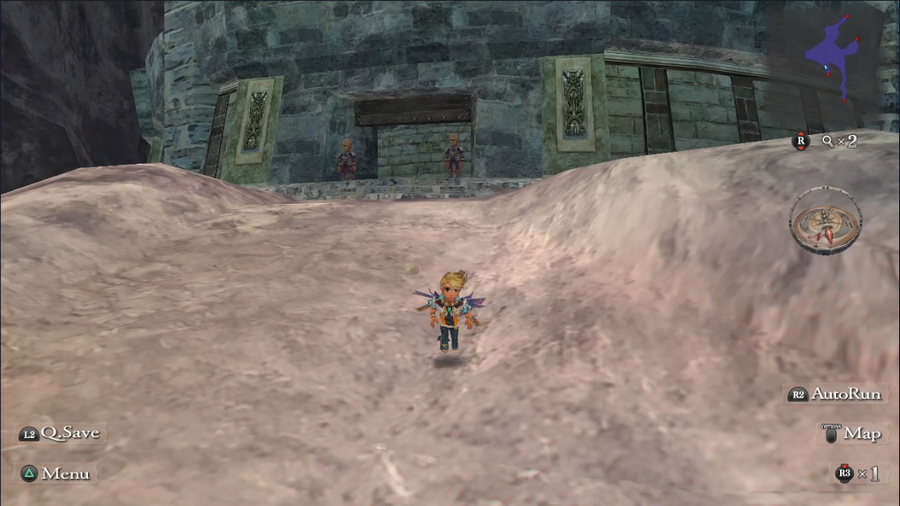 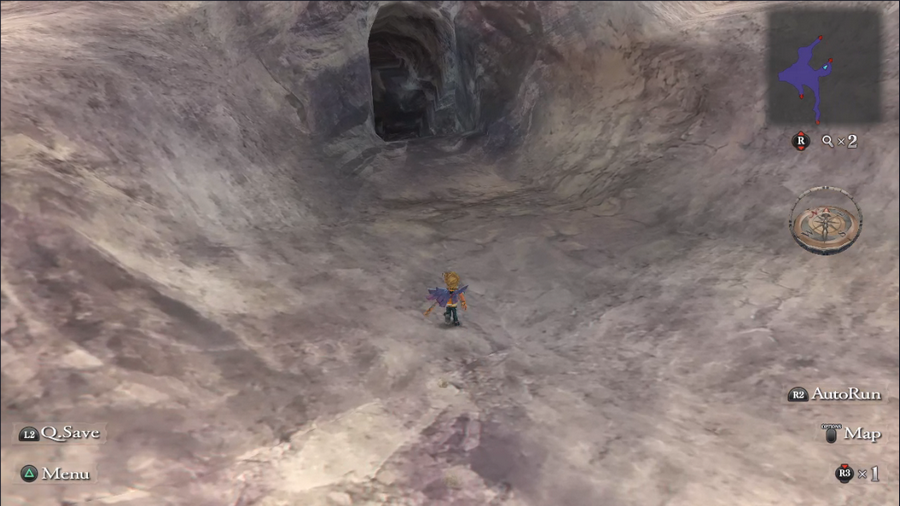 Preparations made, we head out of Isthmus Keep and toward the cave. We could take one of the other exits to the world map, but we'd have nowhere to go 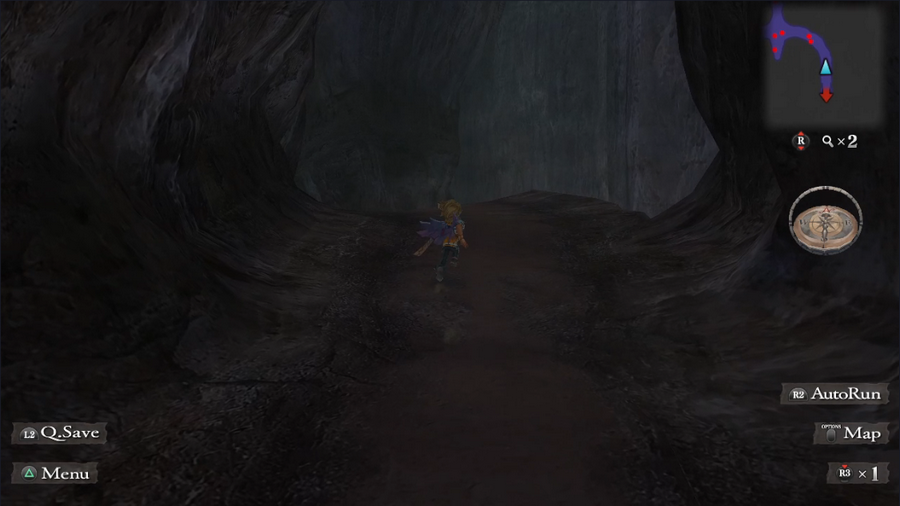 The cave is dark and ominous, but at least our minimap shows us where all the monsters are. Music Highlight: Labyrinth of Illusion/Halls of Illusion The game's most common cave music has a slow, oppressive feel that gives one a sense of danger. 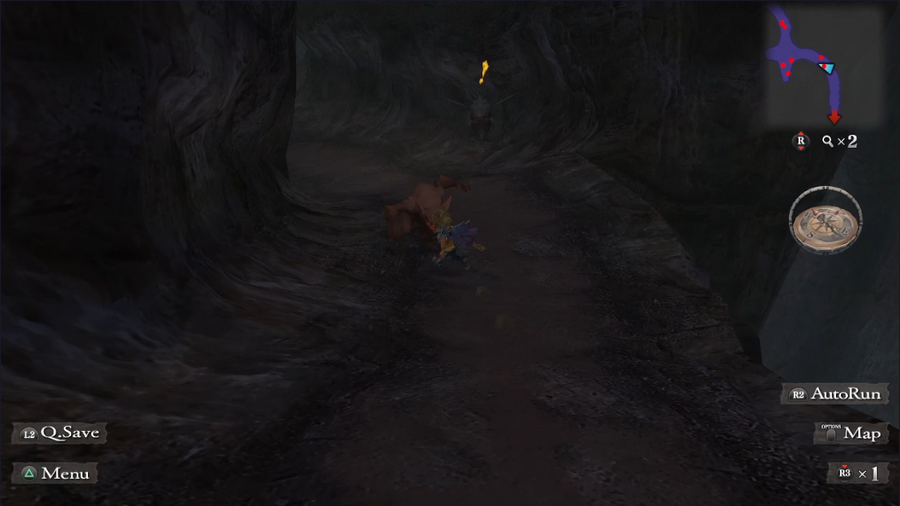 Music Highlight: Prelude of Battle/A Prelude to Bloodshed As standard battle themes go, this one is pretty solid - which is good because, as the main battle theme, it plays a lot. I think it does a solid job of keeping the player excited for the many fights they'll face. And here we run into our first monsters. Each model represents a single group of monsters, and the model indicates one monster type in that encounter. More importantly, each monster type has a different form of detection and movement. I'm not going to go into too much detail about this, but you can see that the beastman is chasing us (by the red tint), and the bug has just spotted us. The beastman uses sight to find us, which means that we could sneak by if we stayed behind him. The bug uses hearing, which doesn't depend on facing but has a much shorter range. 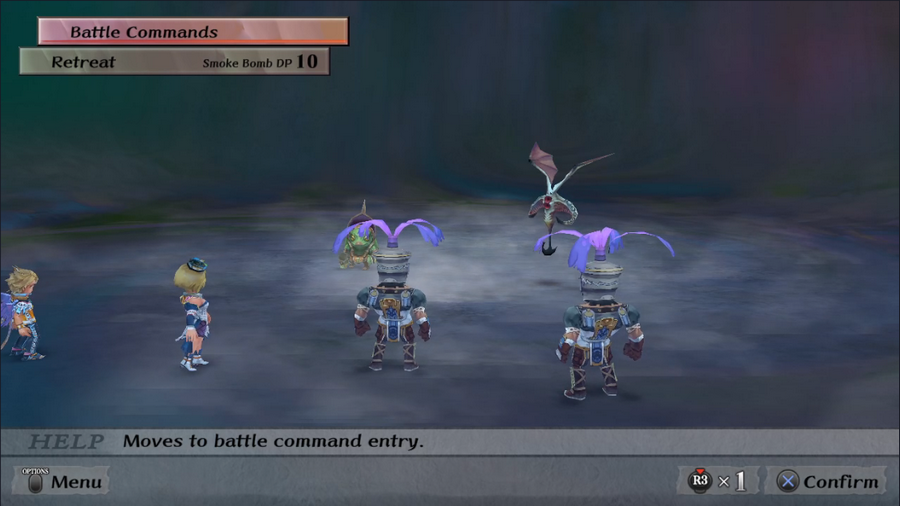 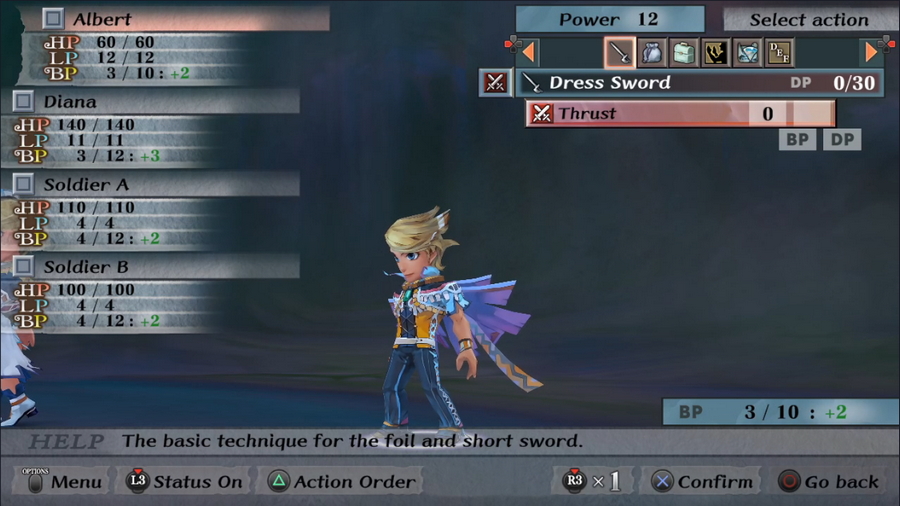 As the fight starts, we're given the option to fight or flee. Flight always succeeds (except against bosses), but eats a charge from our Smoke Bomb Kit. Once we choose to fight, we're prompted to choose actions for our party. Minstrel Song uses round-based combat, with the player selecting all characters' actions before anyone does anything. Actions are sorted by weapon or item, then martial arts (unarmed attacks), then by spell school.   We then choose targets. Enemies that have been targeted by other party members are marked with a star to keep the player from losing track.  Once the battle ends, our characters have a chance to increase their stats. Minstrel Song, like most SaGa games, eschews experience levels in favor of stat gains. What stats a character gains seems based on a mix of the character, their class, the strength of the enemies, and pure random chance. 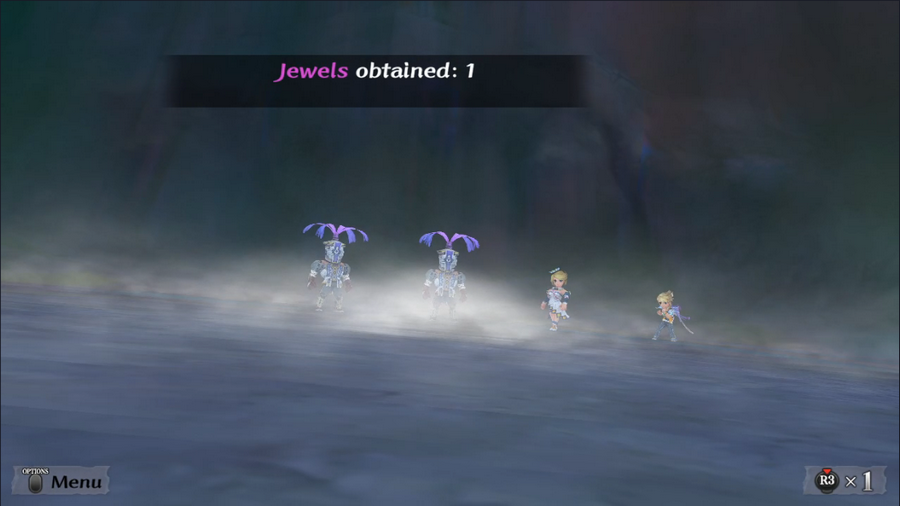 We also gain jewels, which are used for increasing a character's class level. 1 jewel is an absolutely minuscule prize. Battles do not, as a rule, give meaningful jewel rewards. 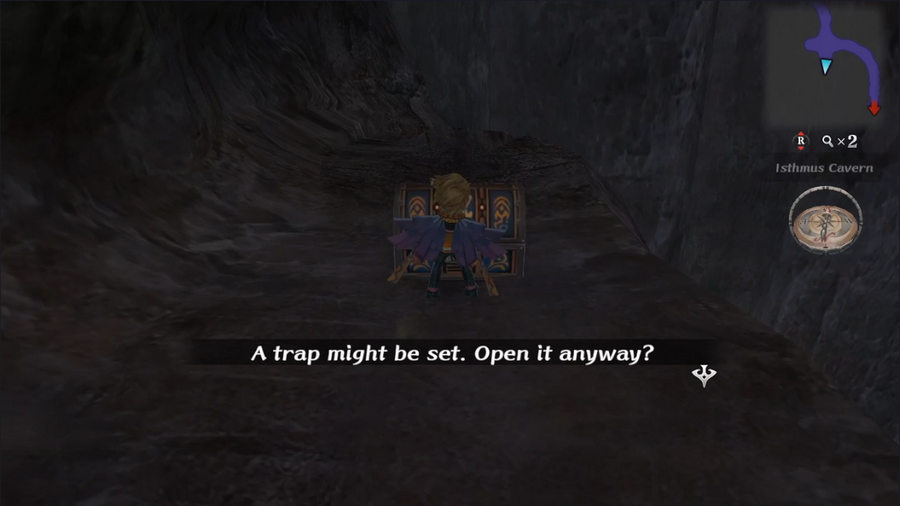 To the left of the entrance is this chest, which gives us a warning that a trap might be set. This message comes up whenever we try to open a chest without having the Find Traps proficiency equipped. I'll go over proficiencies at another time; this update is gonna be long enough as it is. 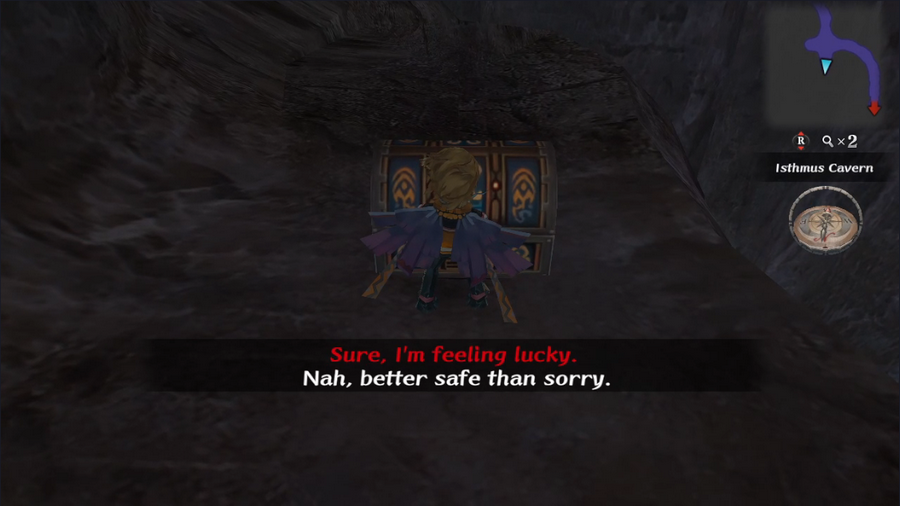 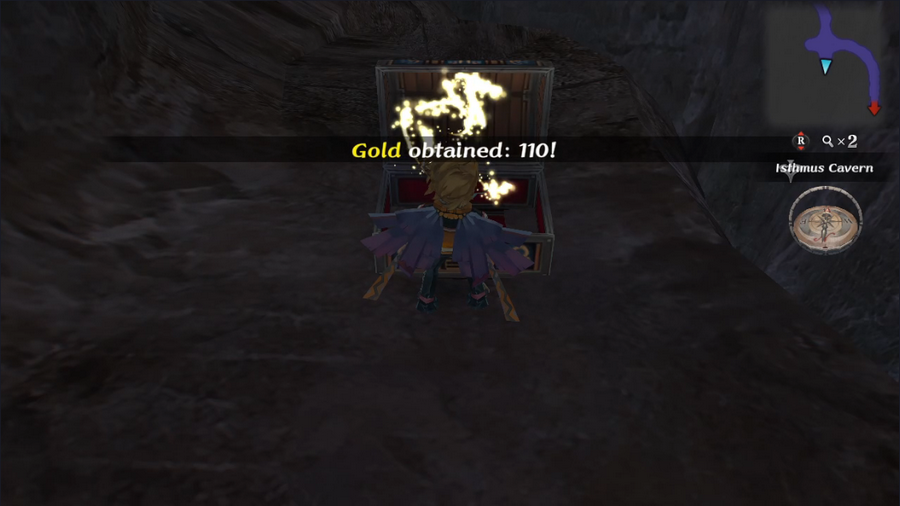 This being the beginner scenario, there is of course no trap. We get 110 gold, which isn't a lot but is better than nothing. 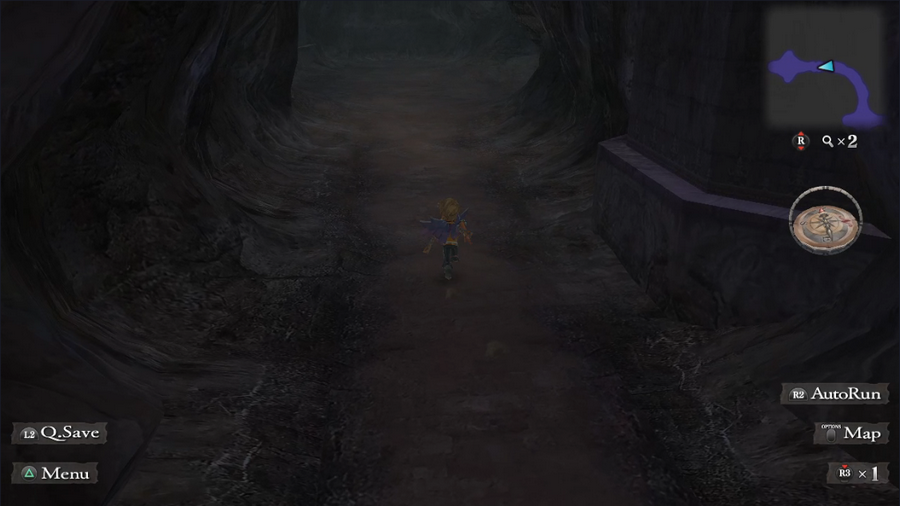 There's only one other path to take, and it leads us to a dead end. Hopefully we'll find what we're looking for here.    This is it. Let's do it! Boss Fight: Demon Scout https://www.youtube.com/watch?v=qy9gjatjzgY Music Highlight: A Piece of Courage Now this is what I'm talking about! A Piece of Courage is a rousing, bombastic piece that grabs your interest from the first notes and holds onto it for the entire fight. It isn't the best battle music in the game, but it's a quintessential example of what the game has to offer.  So here we are at our first boss fight, the Demon Scout. This isn't an especially tough fight, but Albert is basically useless and his survival is practically a miracle.    The Demon Scout opens the fight with its most impressive attack, Manipulate Gravity. It does considerable damage to the entire party, but it seems to be percentage-based, since Albert takes less damage than anyone else. 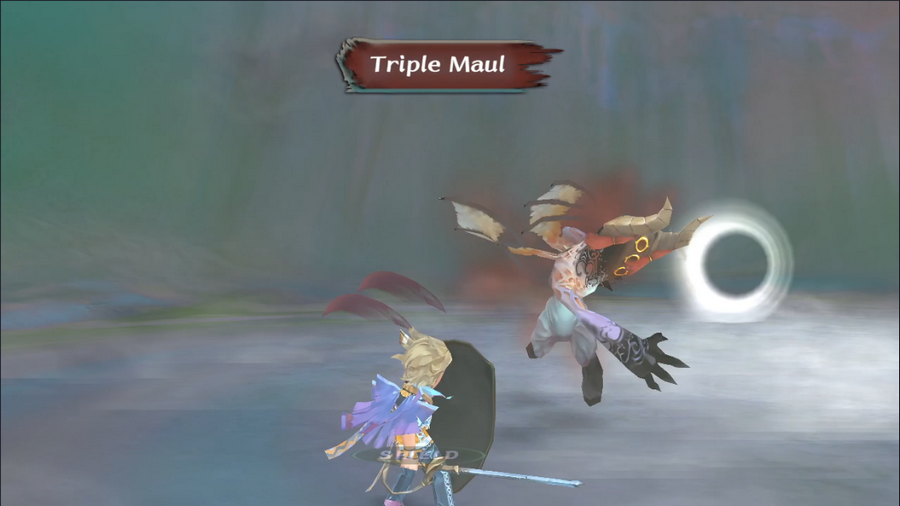  Its next attack, Triple Maul, would definitely have KOed Albert if he hadn't gotten a shield block. This was absolutely clinch. 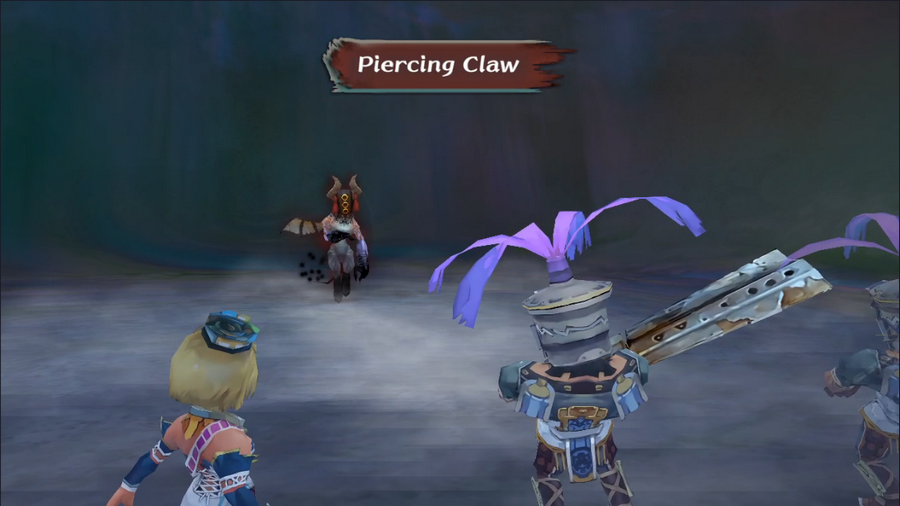 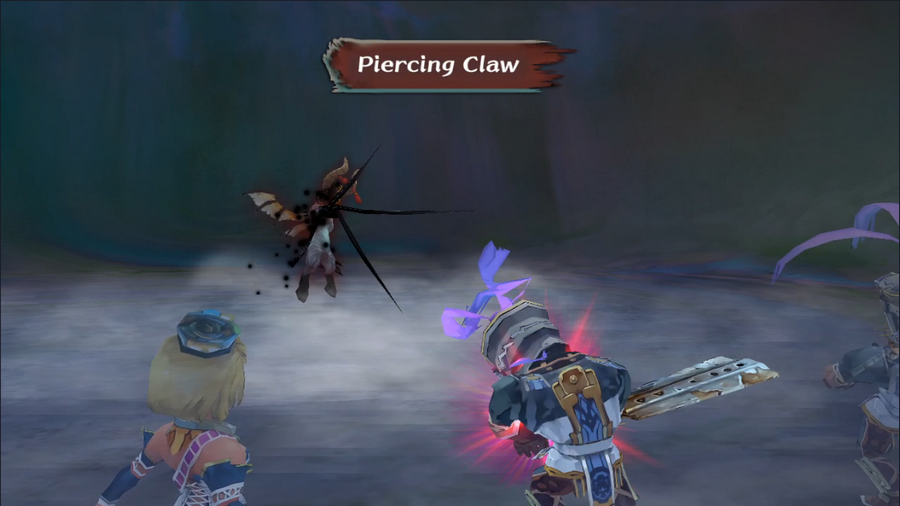 The scout has one other attack, Piercing Claw, which is its least dangerous. 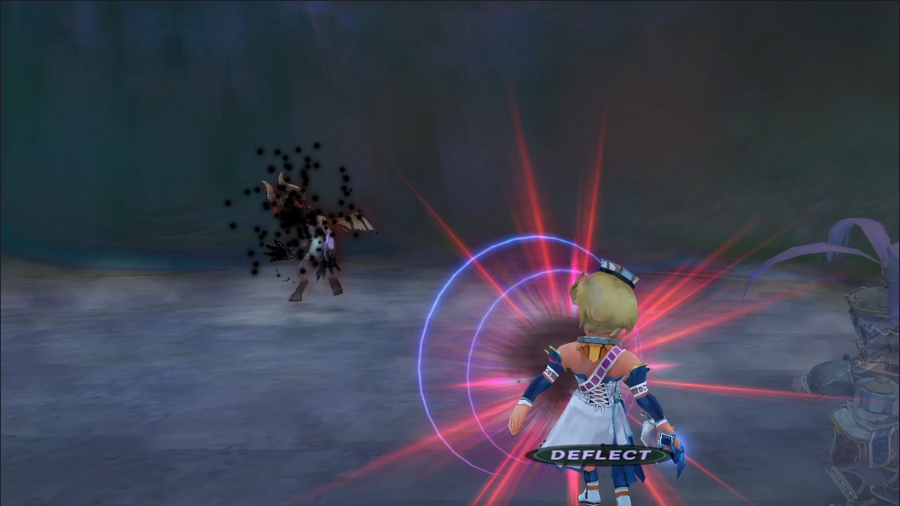 Diana manages to avoid it at one point, because besides shield blocks, characters can also deflect attacks with their weapons (though the odds are low).   This battle also sees Albert get his first Glimmer. Every weapon has a set of special attacks available with it, and Glimmering is how those techniques are learned. Glimmer rate is affected by a character's weapon skill level and the strength of the enemy they're attacking. Some techniques (mostly the stronger ones) are also harder to Glimmer than others. At a Foils skill level of 1, Albert hasn't Glimmered anything prior to the boss fight.  And even there, Paralyzing Thrust is... pretty lame.  One of the soldiers also manages to Glimmer a technique, Blunt Strike. This deals no damage but has a low chance of inflicting paralysis. Since the Demon Scout is immune to that, this is literally worse than a regular attack.  Finally, the other soldier brings it down.  Although there are only a handful of animation "sets" that characters use in combat, every character does have their own celebratory stat-up animation. 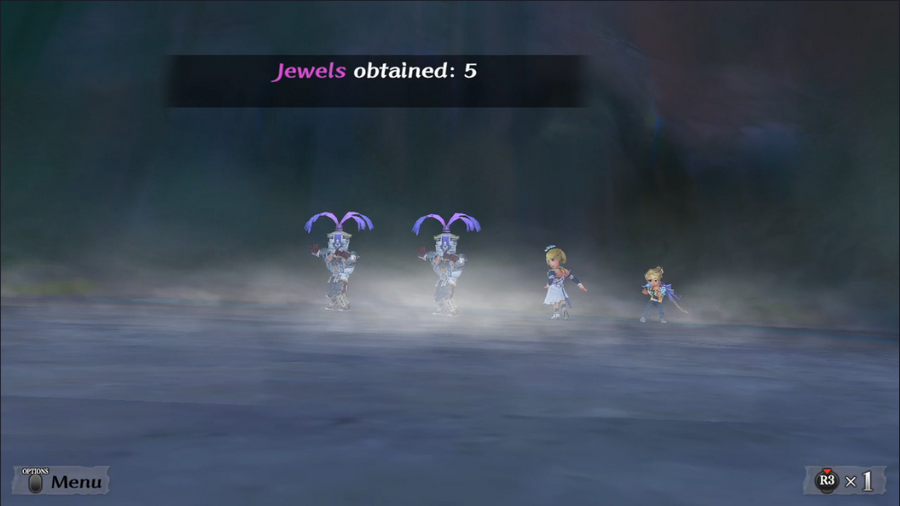 We get five times as many jewels from this fight as a regular one, and it's still a pittance.   As Diana congratulates Albert on the whole lotta nothing he did, a strange red sigil appears on the wall.    Eh, I'm sure it's nothing.  Time to head home.   Upon reporting our success, we complete the quest and receive a healthy number of jewels. Completing quests is the main way of getting them.   As Rudolf congratulates his boy on not dying, we get word that the prince of Rosalia has shown up.    He cuts an imposing figure, for sure.   This feels a bit out of nowhere, but maybe Diana has a reputation? Or maybe it's just a good match; the Isthmus is an important location and it's implied that Rudolf may have some political power.       I have to assume that this is either Neidhart flattering his fiance's family or him seeing Albert's potential, because right now he's pretty useless.    All in all, this seems like good news. But this is the intro to a JRPG. https://www.youtube.com/watch?v=ziy-AFsqYzs 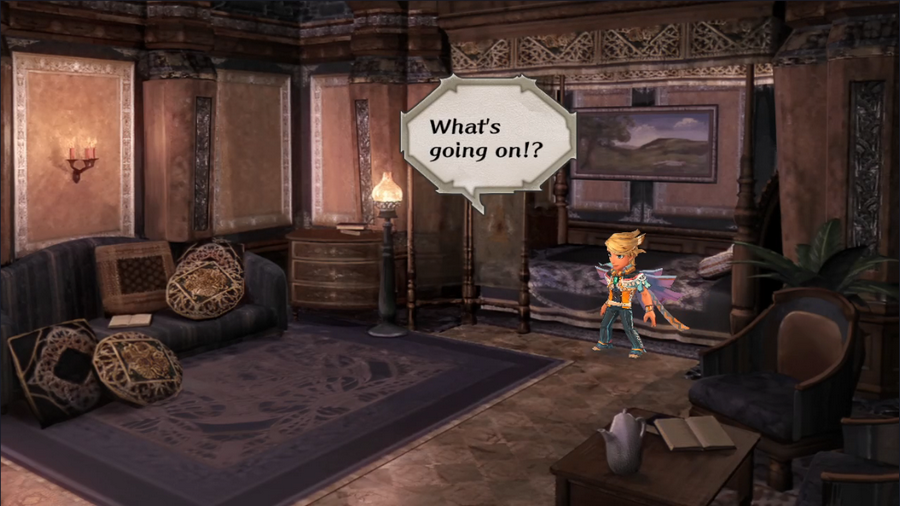  We'd better head to the throne room.    (Crystal City is Rosalia's capital, in case that wasn't clear from context.) 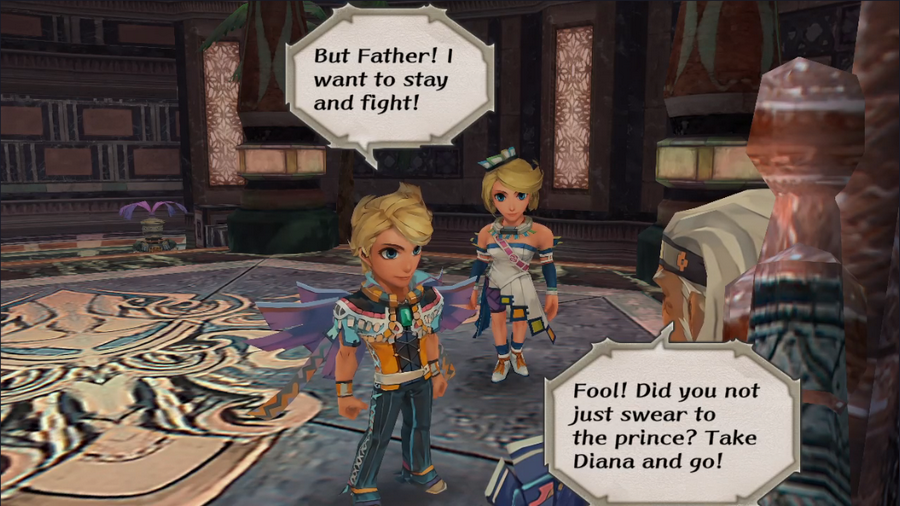 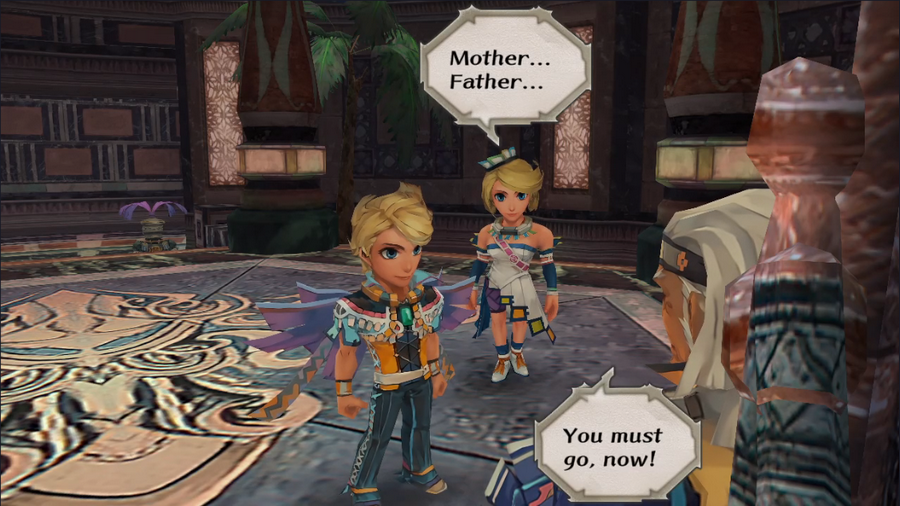 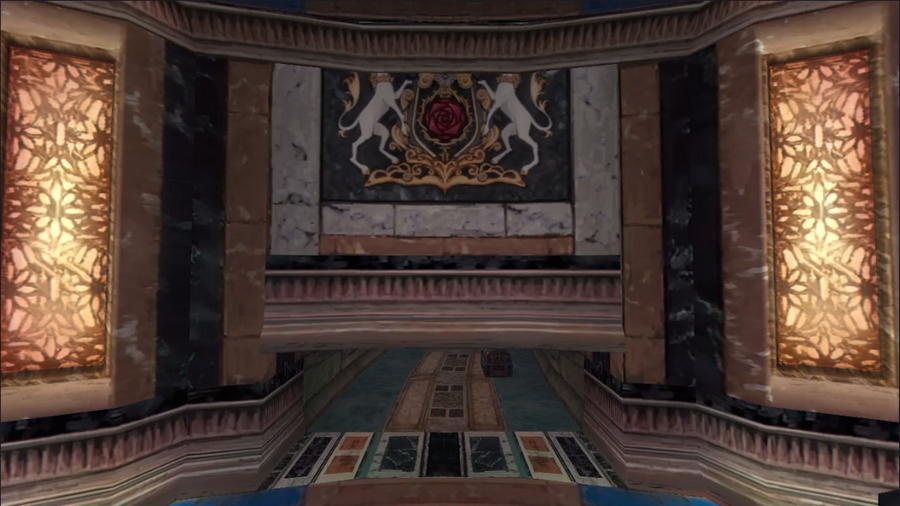 The wall behind the throne opens to reveal a secret passage. 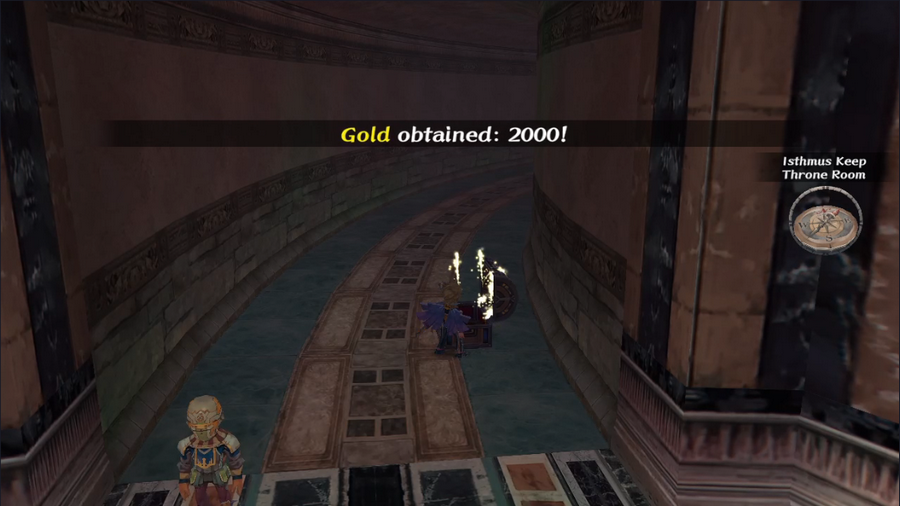 A chest inside contains a nice 2,000 gold, which should make for solid traveling money. 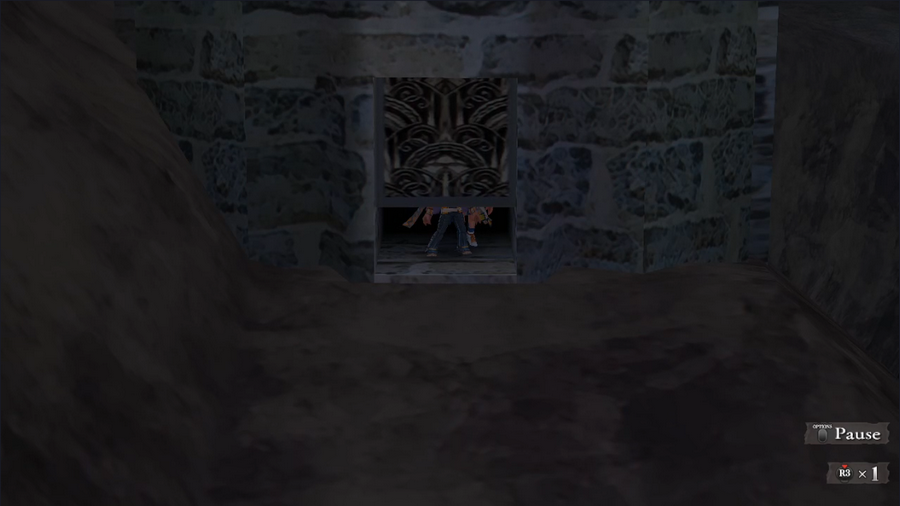 The siblings escape out of a back exit, but then... https://www.youtube.com/watch?v=Z96SgdzgRt8 Yeah, that's not good. 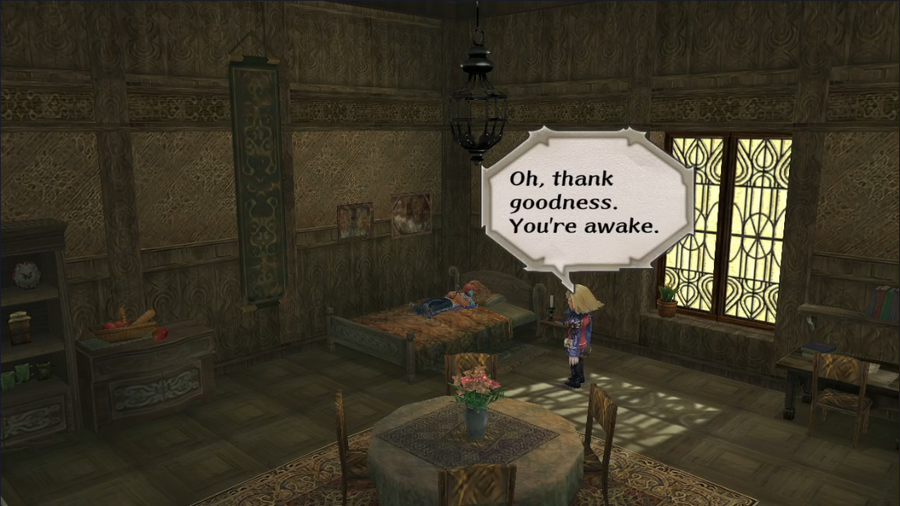 Albert awakes in a strange bed. 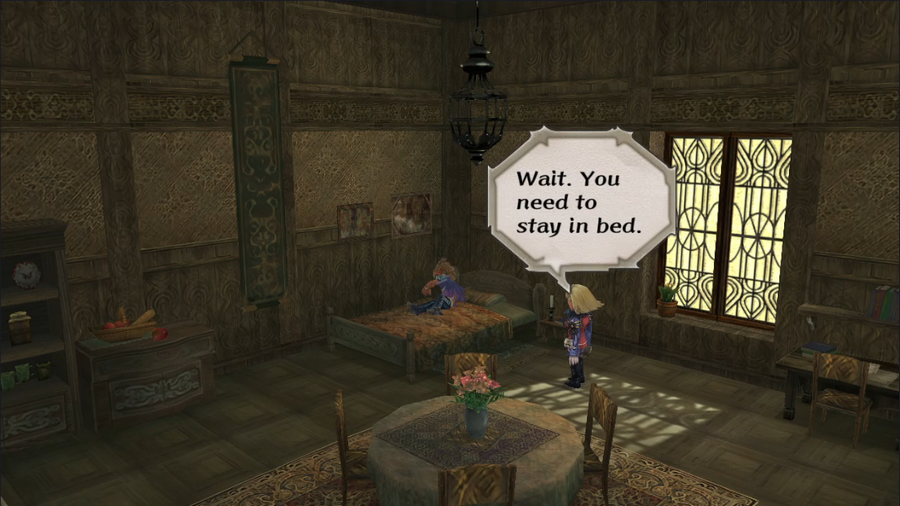 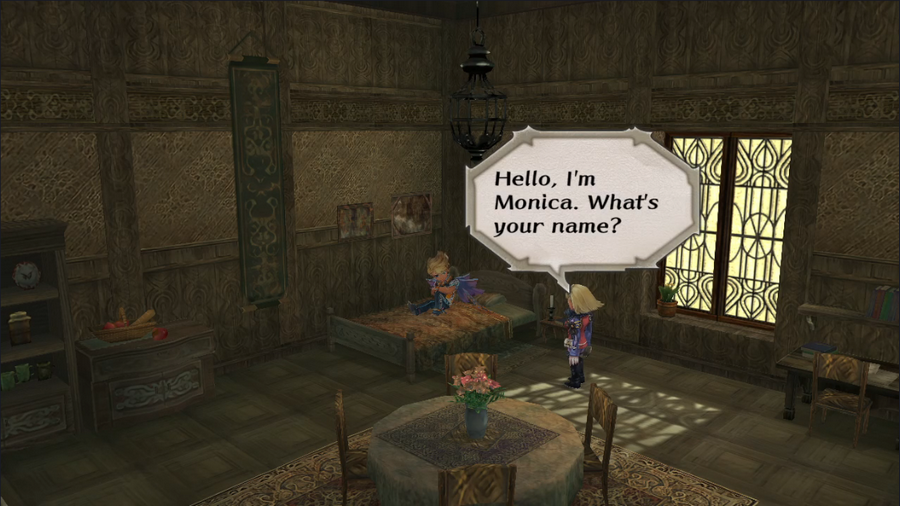    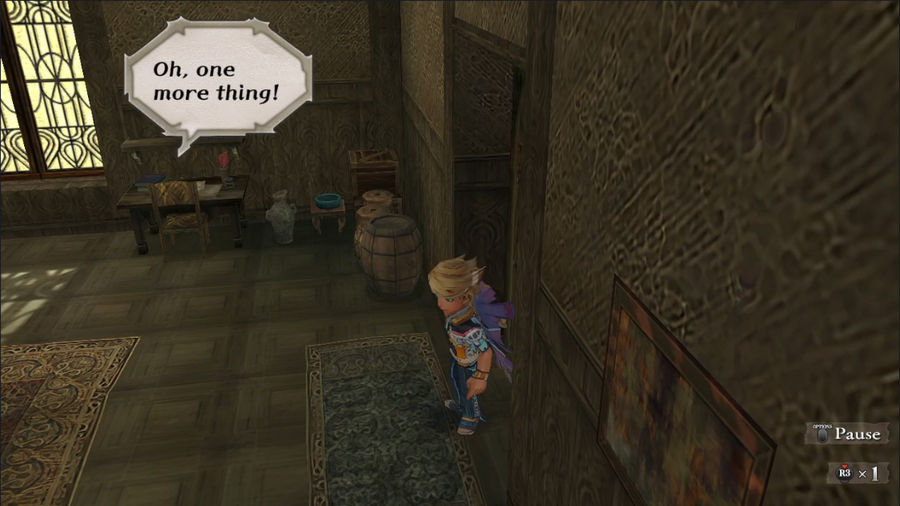 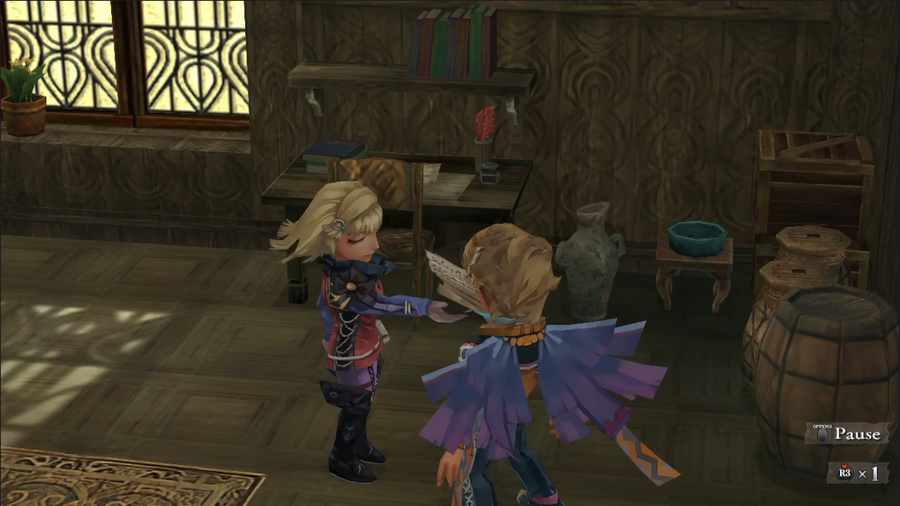 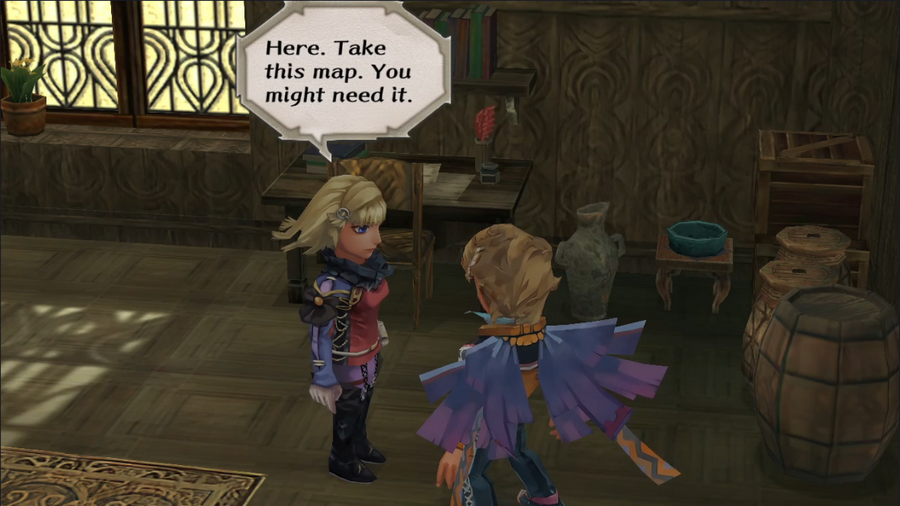 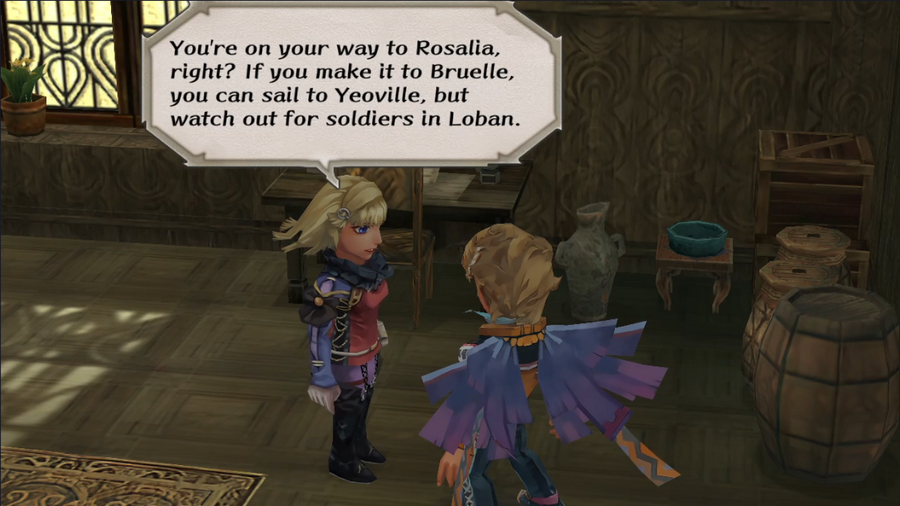 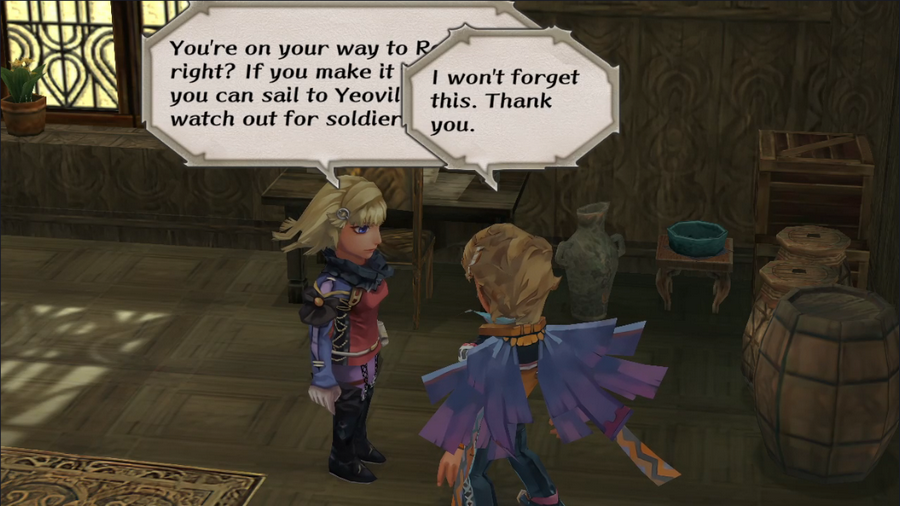 Monica is an exceedingly helpful woman. I'd be super suspicious if I hadn't played the game before. 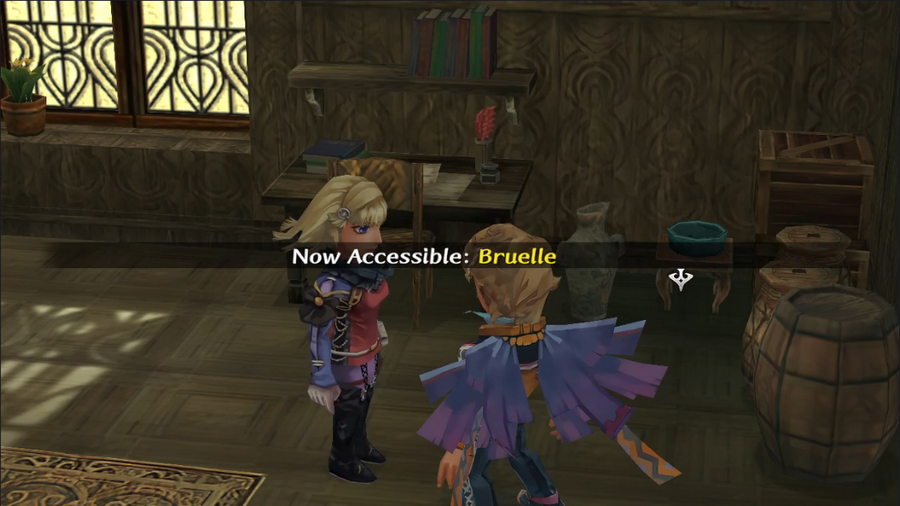 Monica's map gives us access to the town of Bruelle, which is good because we otherwise wouldn't have many places to go. 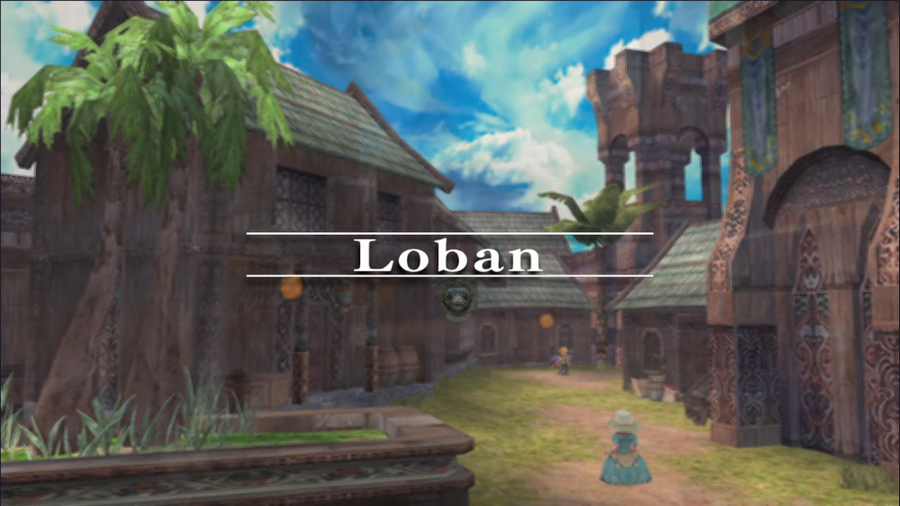 Stepping outside, we get an intro screen for the town of Loban, located in the Bafal Empire. You know, the country that Rosalia broke away from. 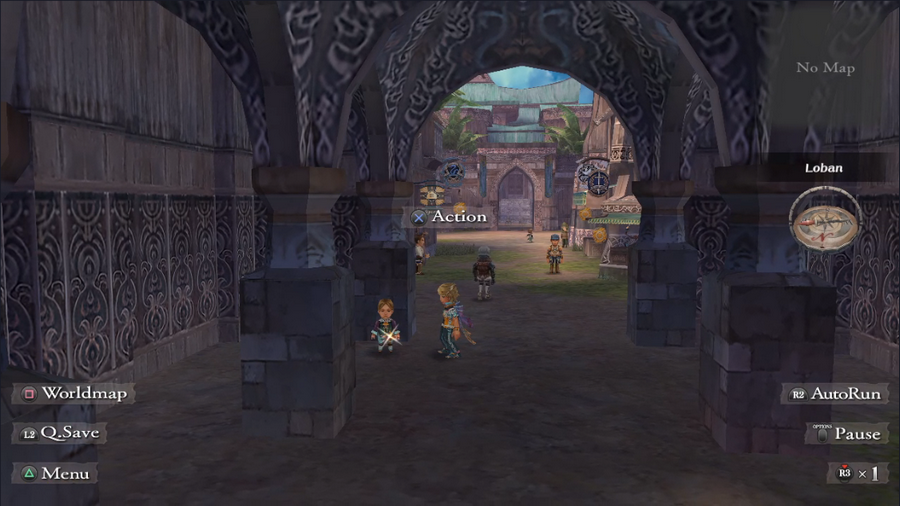 See this kid? There's one in every city and town, and they're important. You can pick them out by the sparklies on their belts.  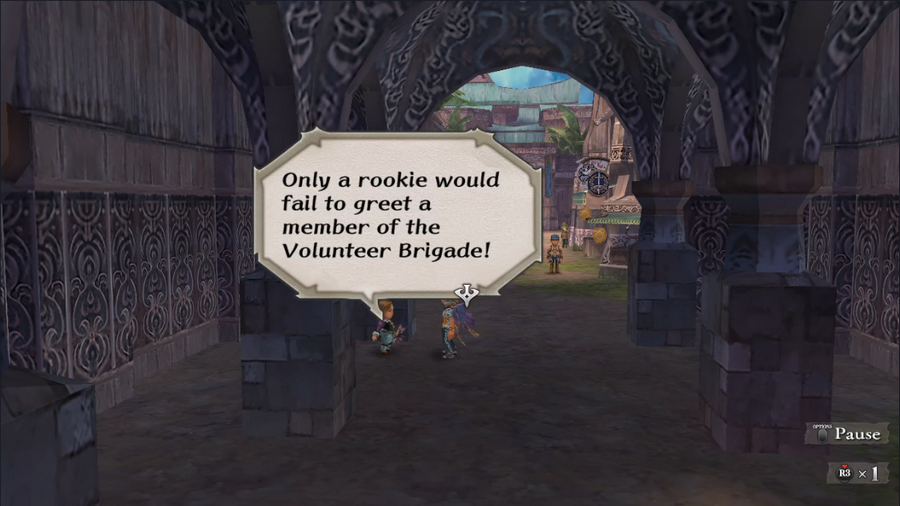 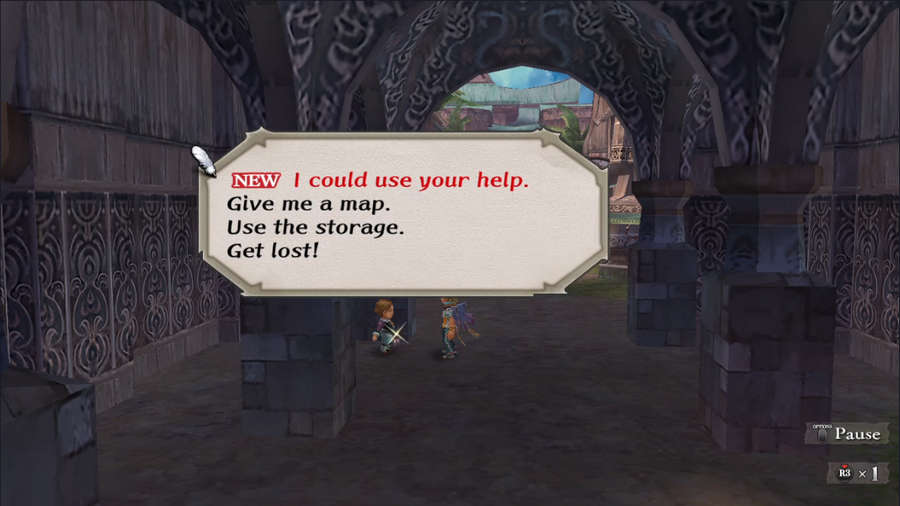 They offer town maps, access to item storage, and tips for beginners. They offer more tips as the game goes on, which in the PS2 release was how you could track your progress through the game - a topic I'll cover in another post. 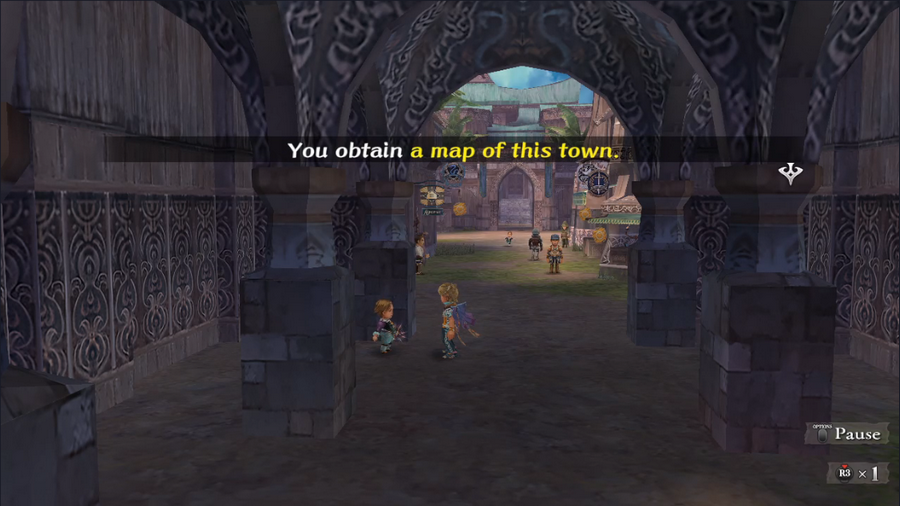 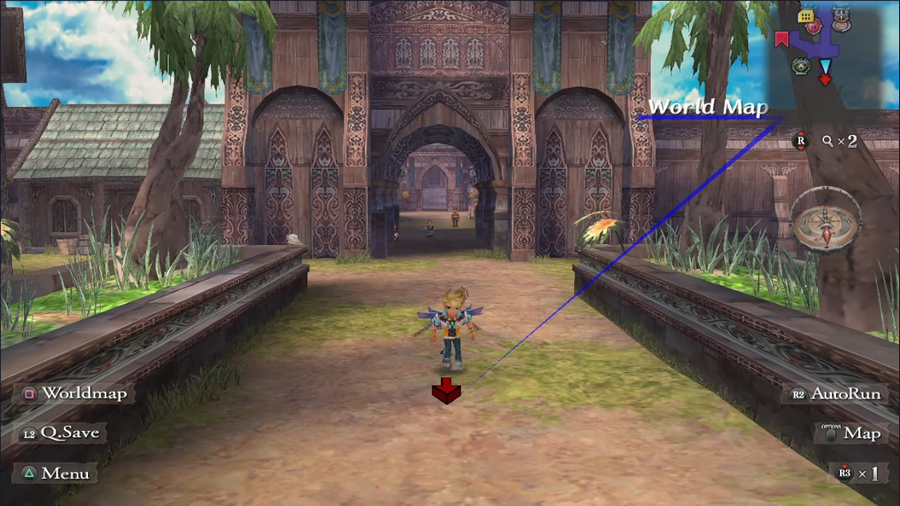 We grab a map, then head out. There's nothing here we can really buy. We can get to the world map either by walking out of the town's exit or pushing Square on the gamepad - a very convenient shortcut. 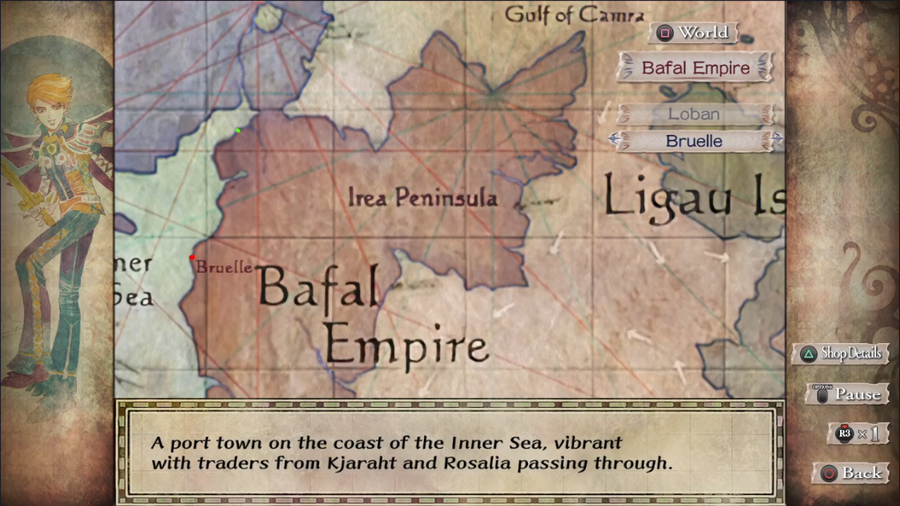 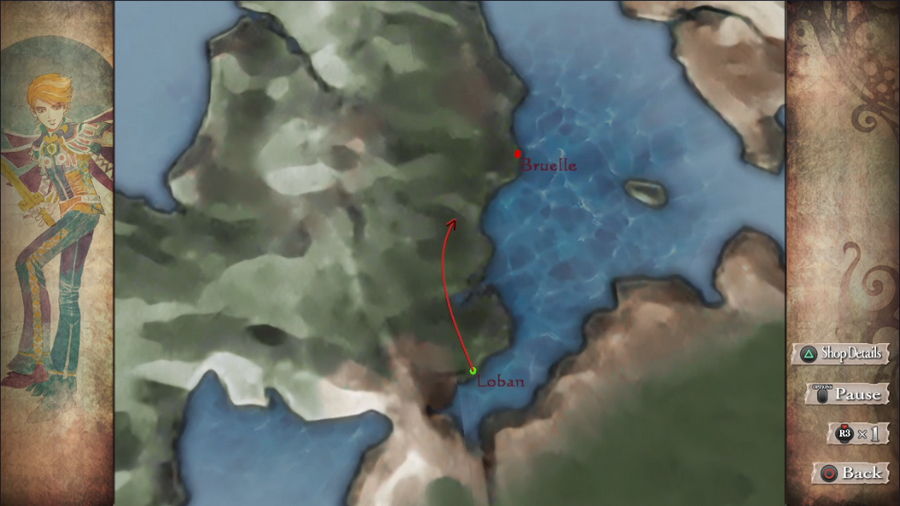 After selecting our destination, the game shows us our route. 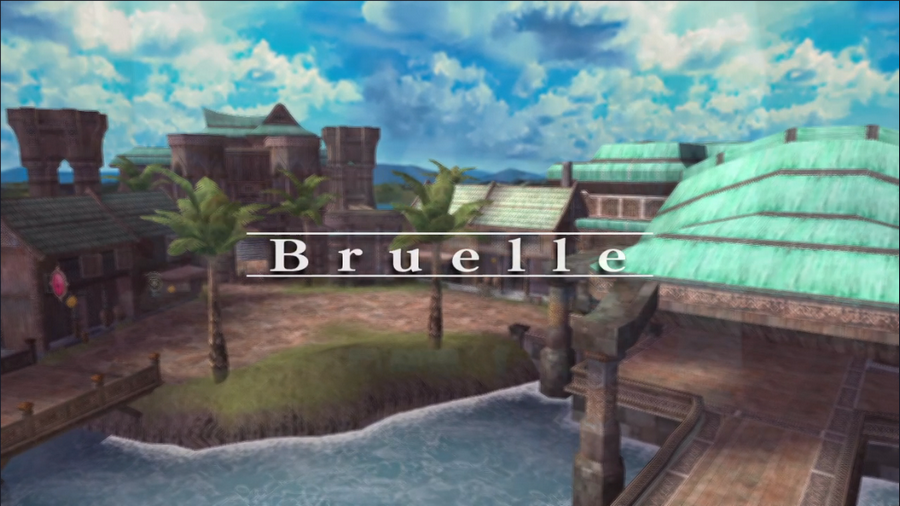 And we arrive in Bruelle.  As with Loban, there's nothing here we want to buy (that we can afford), so after grabbing a town map, we head for the docks and hire a ship.  As Albert looks across the water, he notices a man with an oddly-shaped parcel behind him.   Well, that was rude. I wonder what his deal is. Anyway, the boat ride goes 100% smoothly and ahahaha no Albert's intro is a series of misfortunes. https://www.youtube.com/watch?v=yg767ijx3fI The prerendered cut scenes look kinda bad, in my opinion. They're just not as good in motion as the actual game. 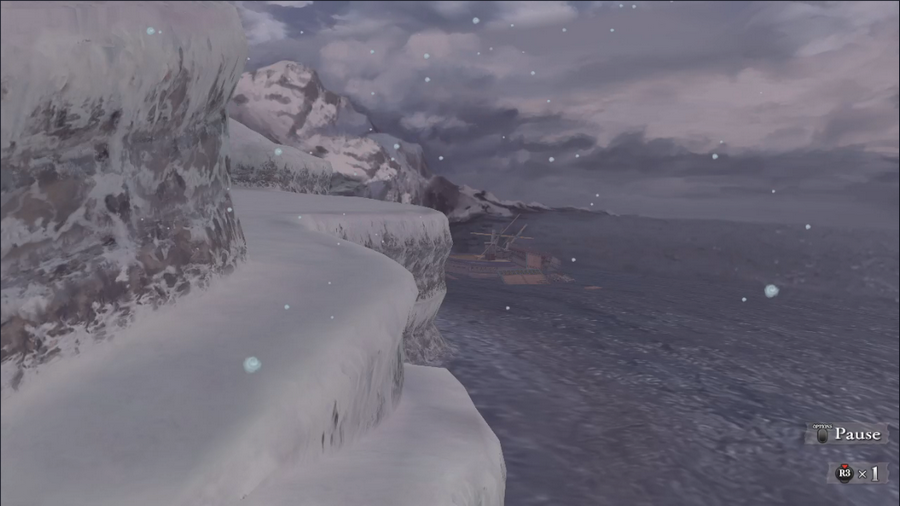 The ship wrecks in a land of ice and snow. 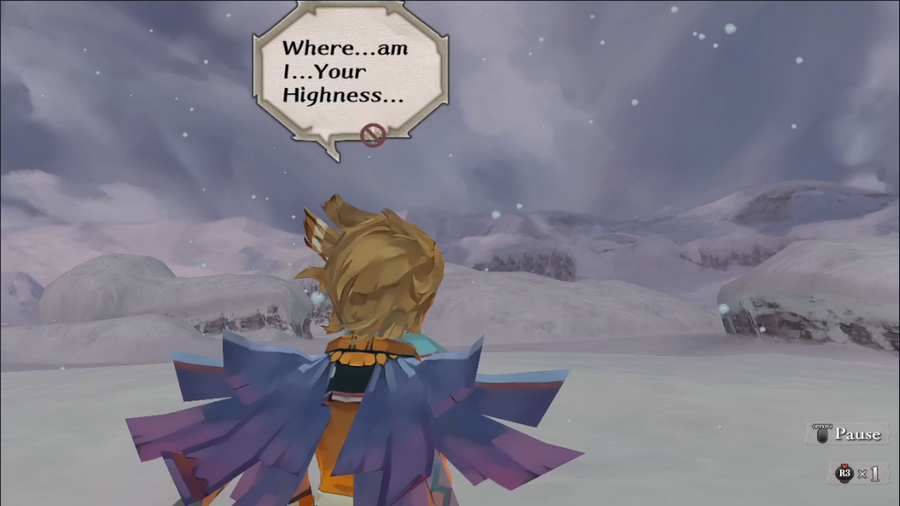   Albert passes out in the snow, his last thoughts being of his sister. Albert's intro isn't over, but I'm going to end it here. You'll see what becomes of him another time. 5-Headed Snake God fucked around with this message at 14:23 on Oct 7, 2023 |
|
#
¿
Aug 7, 2023 22:07
|
|
|
Shitenshi posted:I have a weird love/hate relationship with SaGa. Interesting conceptually in terms of story and plot, usually have great graphics and music (and this one is no exception, I heard some music samples on a website and immediately bought the OST way back when in 2005 in a time when 56k internet were the norm and Youtube music playlists had not come to be and don't regret it one bit to this day), but holy gently caress the gameplay usually turns me off in one way or another. Whether it's the extreme take on non-linearity that usually leaves you wandering without a single clue on where you're supposed to go or something else like how much of a nightmare the final boss from SaGa Frontier 2 can be if you don't come properly prepared, I always get fed up with them. Looking forward to how this one turns out. I think Minstrel Song is pretty approachable, as SaGa games go. Not to say it's friendly, but I was able to beat my first run with no outside help. (I then bought the player's guide and never regretted it.) dotchan posted:Supposedly, the lead designer of the franchise's philosophy is "surprise me". I've heard that too. Given how the games play I don't doubt it for a moment. Odd Wilson posted:Yo, SaGa! I love SaGa. Oh man but I love Last Remnant. Haven't touched it in years. Maybe I'll play it again once this LP is done.
|
|
#
¿
Aug 9, 2023 01:33
|
|

|
MagusofStars posted:Interested in this one, because I loved the FF Legend games and enjoyed RS3 on the SNES (albeit with a lovely late 90's translation), but never played the others and don't know much about them. I don't plan to explain everything in detail, partly because there's a lot to cover and partly because I'm not sure I know everything. I do intend to explain the most important stuff though. My next update is going to be a short post covering some of the more basic stuff so everyone knows what's going on in battle.
|
|
#
¿
Aug 9, 2023 02:47
|
|
|
Minstrel Song is a big, complex game. So while I can't cover everything it contains, I can go over a few of the more important details. In this mini-update I'm going to talk a bit about the menu screen, including equipment. Some of this should be pretty basic stuff for RPG veterans, but Minstrel Song has a few unique mechanics too.  Each party member has a small scroll containing their name, portrait, and three numbers. HP is Hit Points, and it's exactly what you think. If a character's HP hits zero, they go down. It's worth noting, though, that no special items or abilities are required to revive a KOed character: any healing item or spell will do the job. Characters are also restored to full HP after combat, which is why the menu screen doesn't display both current and maximum values. LP is Life Points. Every time a character loses all their HP in combat, or is struck while already down, they lose one LP. Especially powerful attacks can cost a character two LP in addition to the HP, and some other abilities can damage a character's LP directly (which may or may not also be an instant KO). A character reduced to 0 LP is permanently killed and removed from the party, unless it's the main character, in which case we get a game over instead. LP can be restored by sleeping at an inn. BP is Battle Points, which are used to fuel a character's spells and weapon techniques. A character starts each fight with BP equal to a percentage of their maximum, which varies from character to character. In Albert's case, it's 30%, which is on the low side of average. The "+2" at the end of the line indicates how many points the character gains each round, and is based on a combination of which character it is and their maximum BP. +2 is the smallest growth rate, as befits a beginner character. If you're sharp-eyed, you may have noticed that the two soldiers have far fewer LP than Albert or Diana (4 vs 12 and 11, respectively). Generic characters like the soldiers can be recruited as regular party members, but they always come with small LP pools and some fixed equipment (like terrible armor), which makes them poor choices to take into the later parts of the game.  In the bottom left corner is this clock-like... thing, which is new to the Remaster. This tracks our current Event Rank, a value which represents how far into the game we are. As ER advances, new quests open up and some others expire. (In the PS2 release, ER could only be tracked by talking to the Volunteer Brigade, who offer new tips as ER increases.) ER starts between 0 (shown here) and 2, depending on the protagonist, and goes up as we fight battles. Fighting battles also increases a second, hidden value, Battle Rank, which determines what enemies we can face in combat. The ER and BR system incentivizes avoiding enemies and, especially, not grinding for stats. Gear and class levels are very important in determining a character's power, and quests and chests are much better sources of gold and jewels. 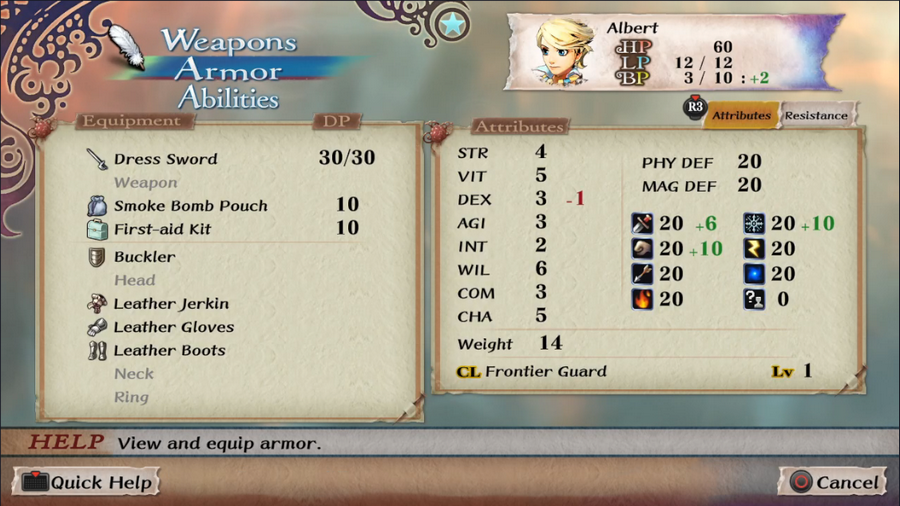 It's also worth talking about our equipment page. Weapons and armor should be fairly self-explanatory for most RPG players. Weapons and consumable items take up weapon slots, of which each character has four. In battle, a character can switch between their equipped weapons freely from round to round. 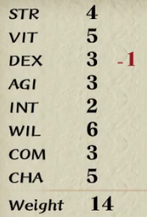 On the right, we have our core stats, as well as numbers noting how they're modified by our equipment. Strength (STR) affects the damage of most weapons. Vitality (VIT) affects physical defense and resistance to physical status effects. Dexterity (DEX) affects weapon accuracy and the damage for a few weapon types (like foils and short swords). Agility (AGI) affects turn order, physical evasion, and damage for a small number of techniques. Intelligence (INT) affects the power of most magic. Willpower (WIL) affects magic defense and resistance to mental status effects. Compassion (COM) affects the power of healing magic. Charisma (CHA) affects the damage of Illusion magic and has a tiny effect on the success of inflicting status effects. And finally, Weight affects turn order and has a minor effect on accuracy. 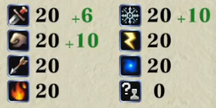 And finally, on the right, we have the character's resistance to various damage types: slashing, bashing, piercing, fire, cold, electricity, and energy, plus status effects at the end. And that's it! The next update will feature our second protagonist's intro.
|
|
#
¿
Aug 14, 2023 19:18
|
|
|
Odd Wilson posted:Didn't realize this game had permadeath. Consider me very interested now, I like to see how RPGs handle that. Don't get too excited; none of our guys are gonna be dying in this LP unless things go really wrong. The generics won't even be in the party except maybe for a little while early on.
|
|
#
¿
Aug 15, 2023 23:40
|
|

|
Zerbin7 is partially right. The Event Rank system and anti-grinding features are never explained. In fact, as far as I'm aware, the term "Event Rank" is never shown to the player anywhere in-game. That said, Minstrel Song does have some explanations, like the Glimmer tutorial the pops up the first time that happens. It's not exactly beginner friendly, but it's kinder than most games in the series.
|
|
#
¿
Aug 16, 2023 00:57
|
|
|
Welcome back, folks. Today we have our second character's intro.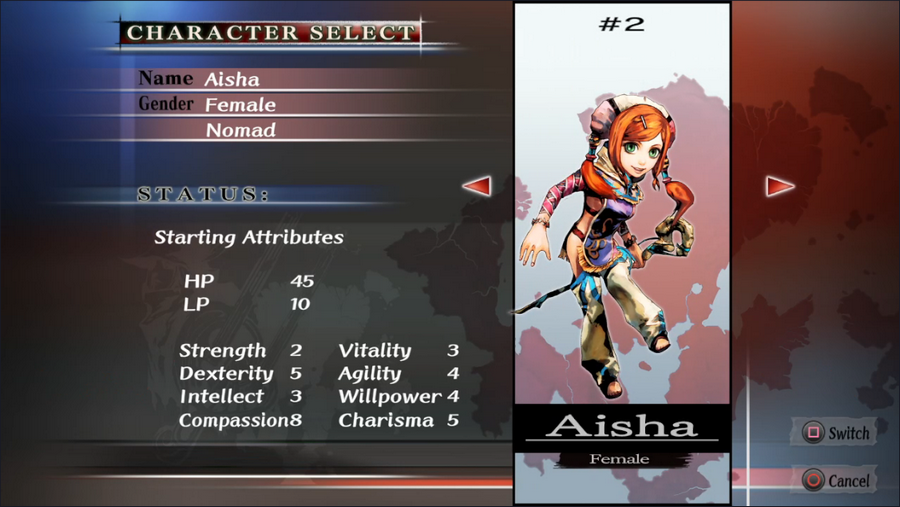 Protagonist #2 is Aisha, a nomad girl. As with Albert, I feel her placement in the character order is intentional. But while Albert is intended to teach the player how the game works, Aisha is intended to teach the player humility. 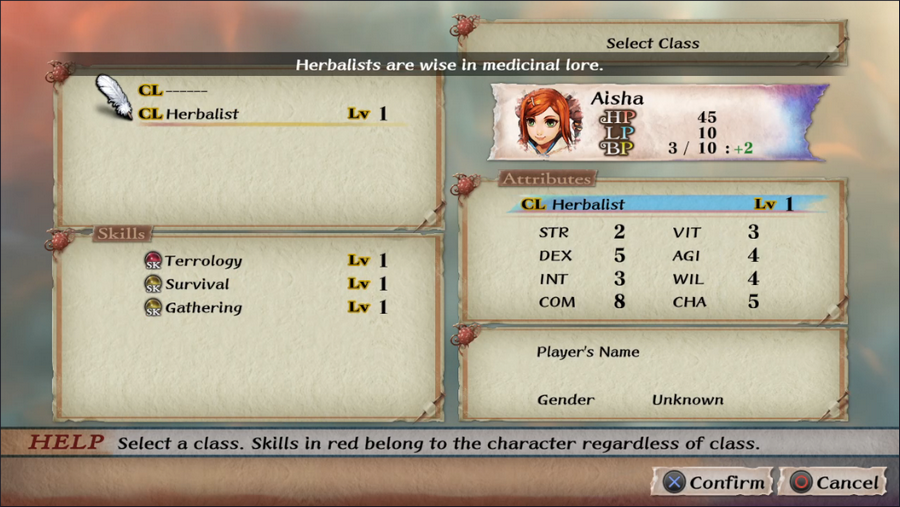 There's no nice way to say this: Aisha is, numerically, the worst of the eight protagonists. She has terrible starting stats, terrible stat growths, and low LP. As a bonus, her starting class, Herbalist, is also awful - possibly the worst in the game.  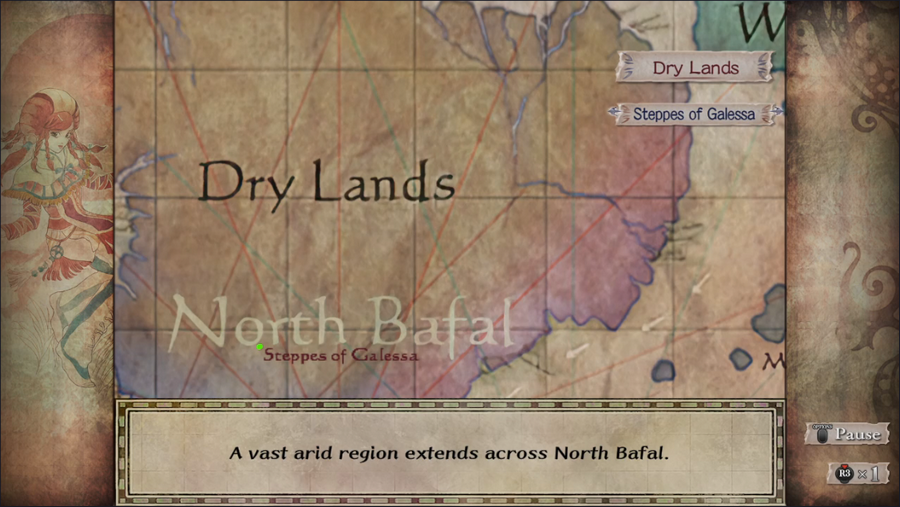 We're once again shown a map of Mardias, but this time the region we're visiting is the Dry Lands, a place of sand and scrub north of Rosalia. 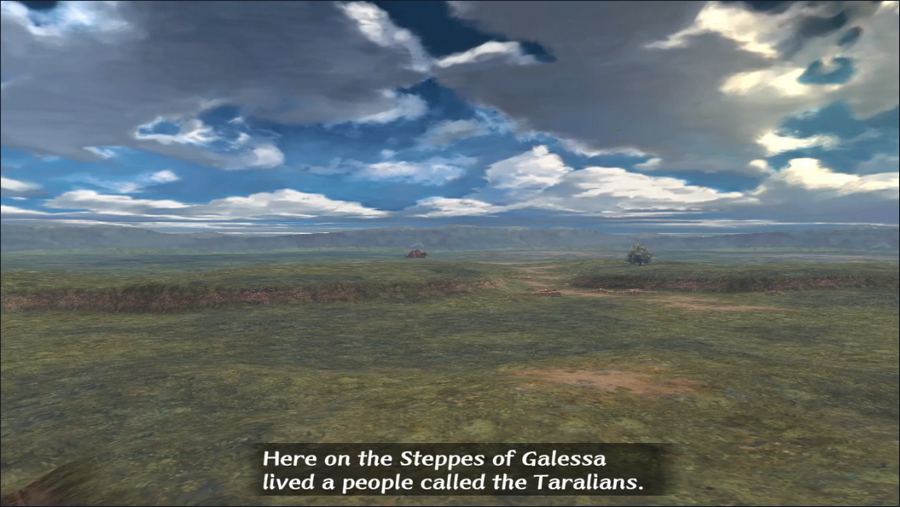 Despite looking and behaving exactly like humans, Taralians are not actually human. I may cover this in a mini-update at some point. 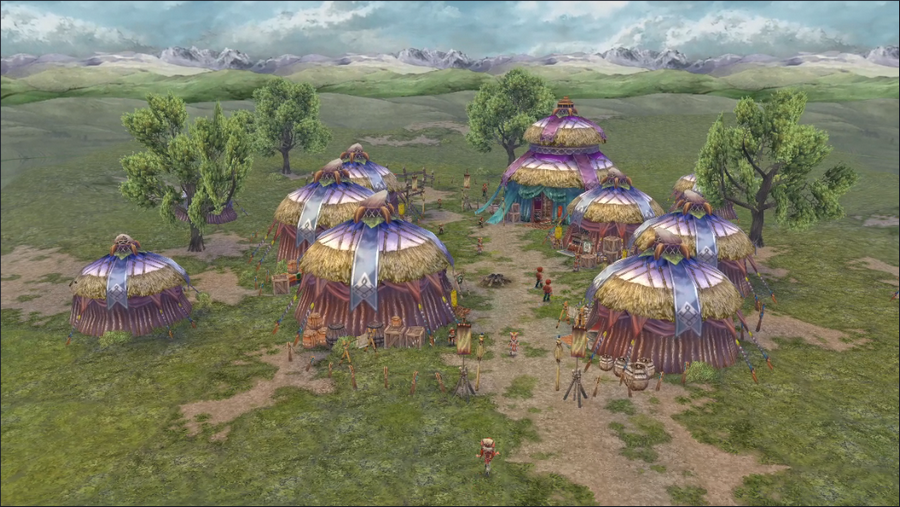 The Taralian camp is a nice-looking collection of tents - humble, but visually distinct. 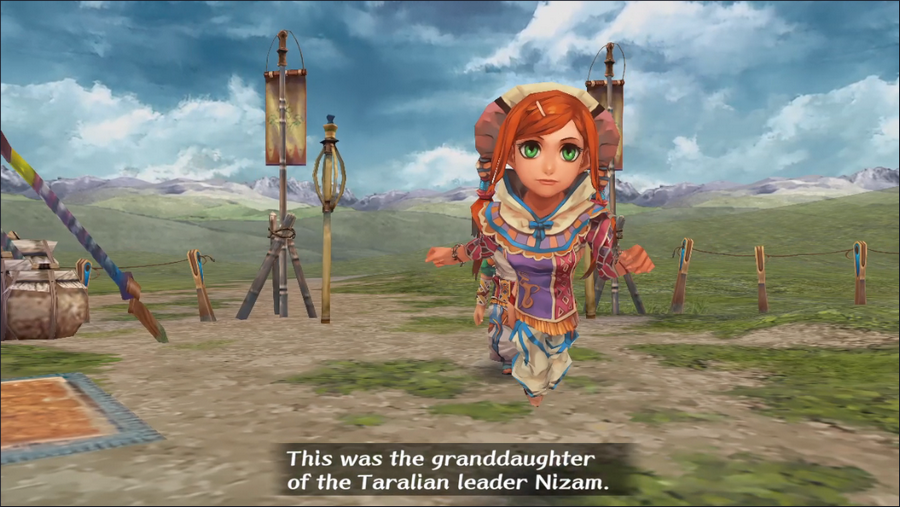 Music Highlight: Feel the Wind/The Wind's Kiss. Aisha's leitmotif is a serene, almost childlike tune. 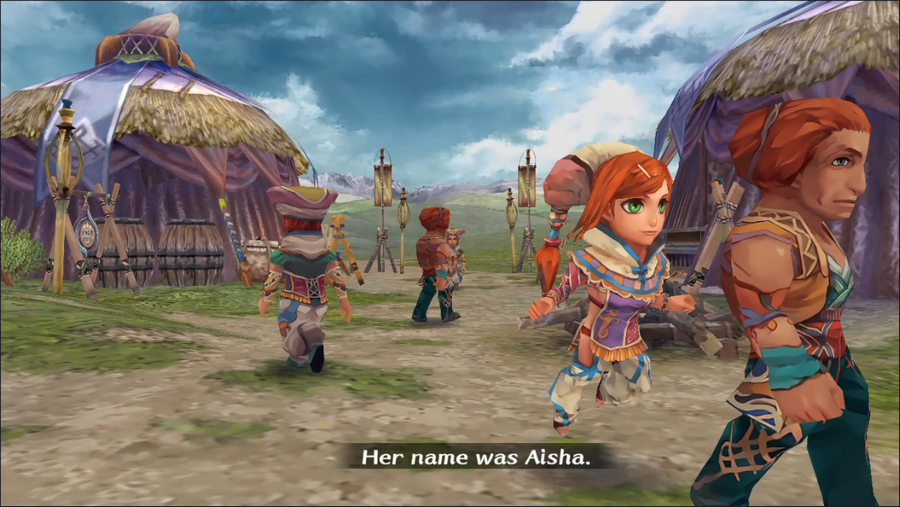 Yes, the body portion of Aisha's outfit is basically a poncho held together with a couple of leather straps on each side. It's not the only time she's sexualized, and given that she's 16, I'm not real comfortable with that. Just... try not to judge the entire game by this. 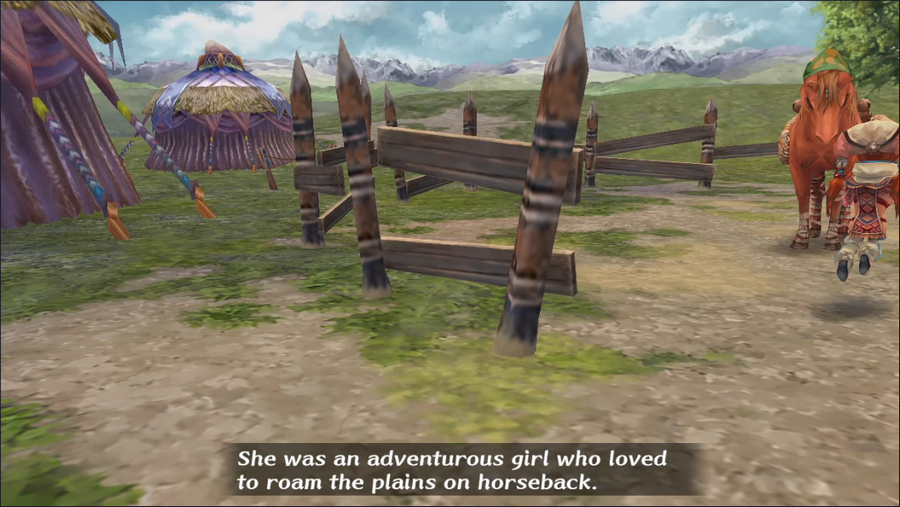 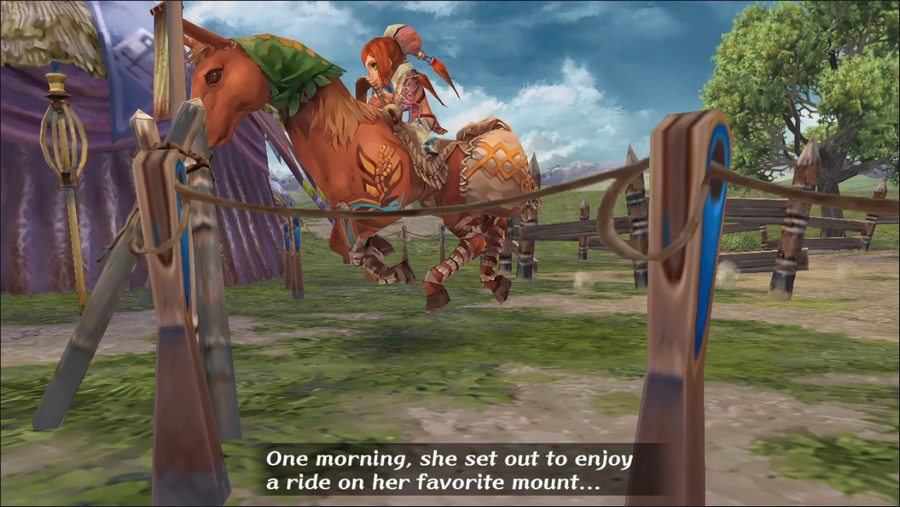 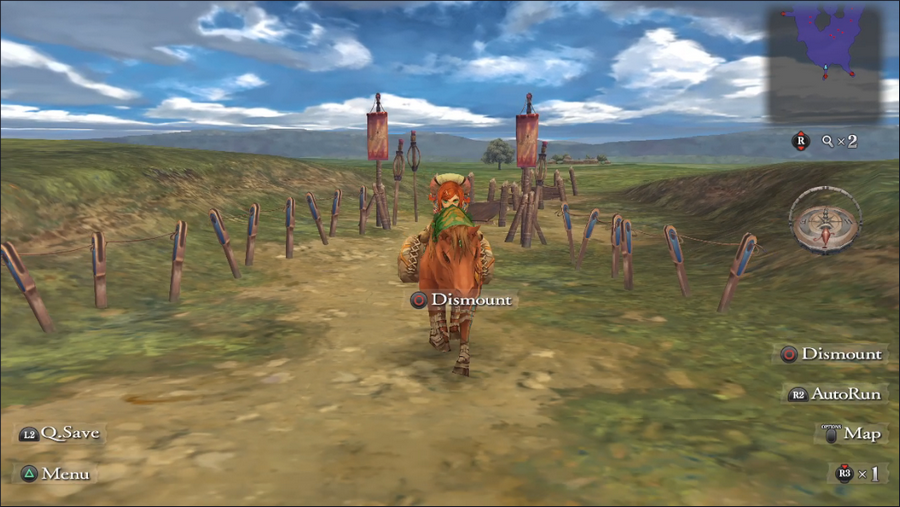 Yes, that's right: Aisha gets a horse. It's the only real perk of having her as our protagonist, and even there it's pretty lame, since it can only be ridden on the Steppes of Galessa. Still, it's a convenient way to get around that large, open area, especially since it can outrun monsters.  But who wants to do that? Let's kill something!  It's a single mamty, a bottom-tier beast enemy and about as simple as these things get. 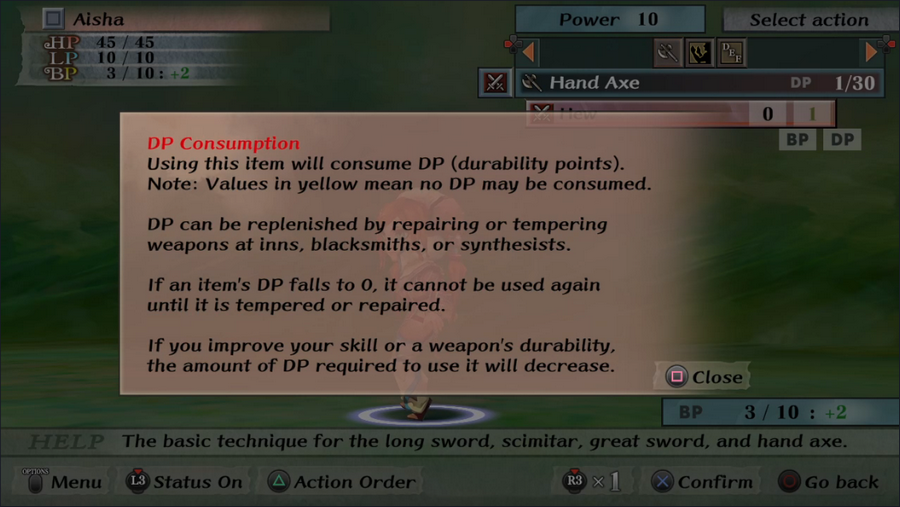 Now's as good a time as any to talk about weapon durability. In addition to BP, some techniques consume a weapon's Durability Points, or DP. Without going into too much detail, I'll just say that the higher a character's class level, the less DP they consume when using techniques for that class's weapons. A weapon's basic attack (Hew, in this case) generally doesn't consume DP, but since Aisha has no ranks in Hand Axe, it instead costs 1* (noted in-game as a "1" with a yellow highlight). This means it has about a 50/50 chance of consuming 1 DP. Aisha sucks so much she can't even use her weapon's basic attack without risking damage to it. 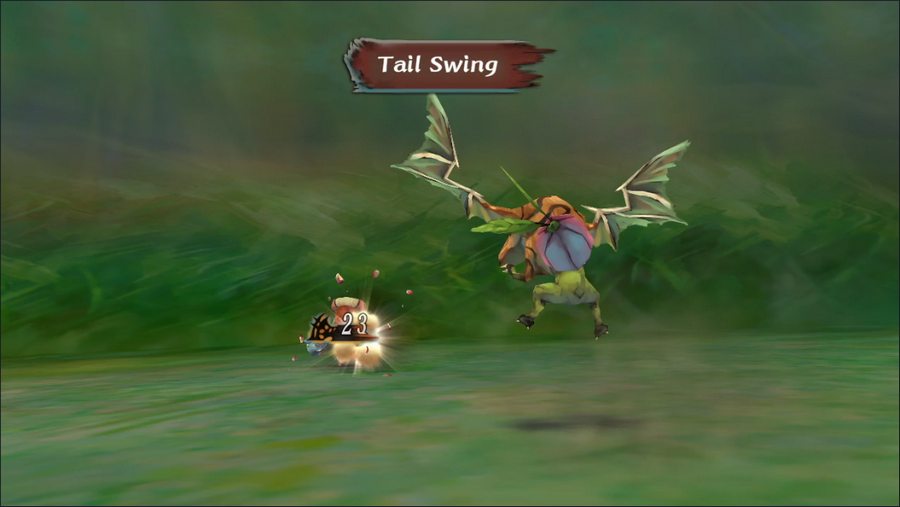 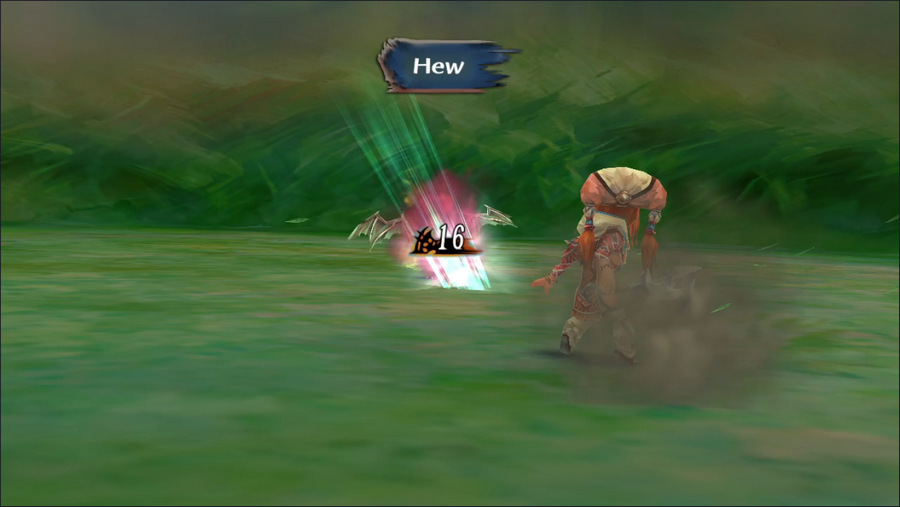 Round 1 indicates that the numbers are not in our favor here.  And there we go. Two rounds and our one party member has been defeated.  BUT WAIT  A  Okay, yeah, it's Neidhart. Luckily, the prince of Rosalia has some decent stats and gear, not to mention a cool unique weapon.  Neidhart absolutely shreds the mamty, and could have done so with his basic attack. (Neidhart can actually be recruited as a standard party member if Albert is the protagonist, but I'm not going to couch him as an option for this LP since he only becomes available about halfway through the game.) Once the fight ends, Neidhart takes Aisha to a nearby stream to tend to her wounds. https://www.youtube.com/watch?v=kuMJXO785xQ  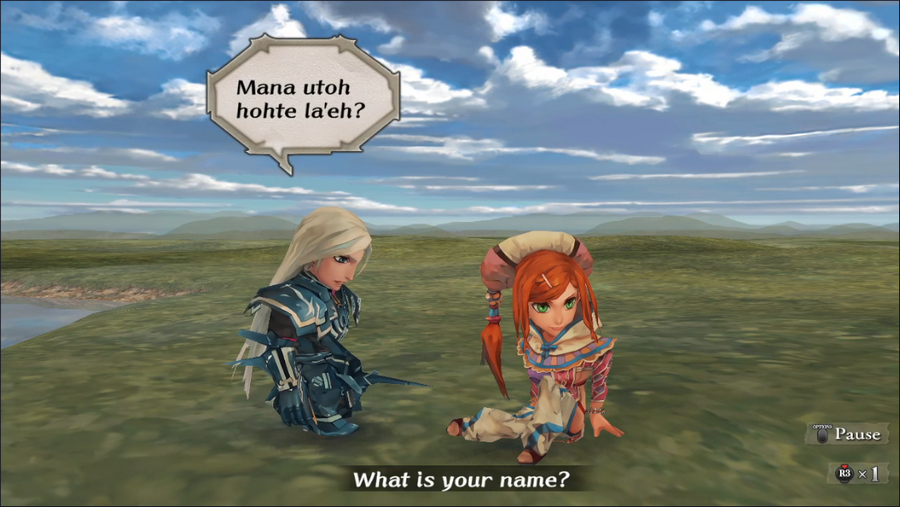 I appreciate that the Taralians have their own language. Lends an air of verisimilitude to the setting. 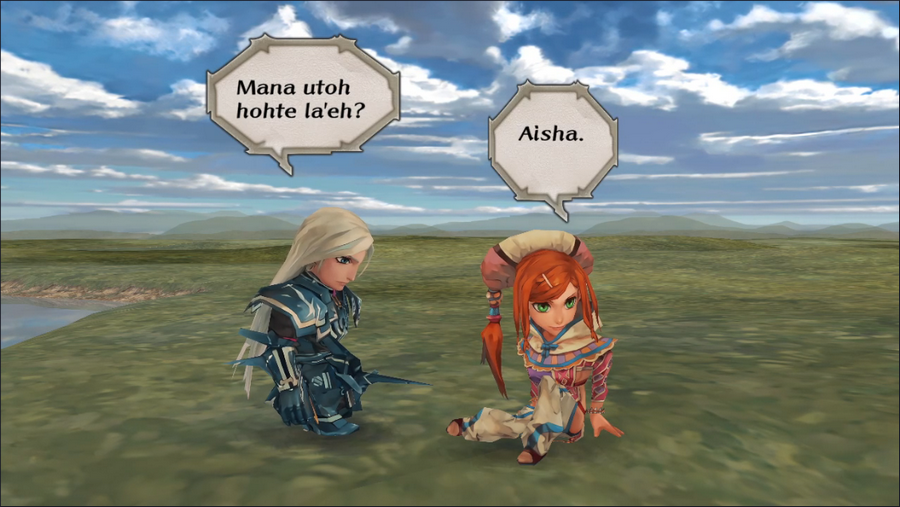 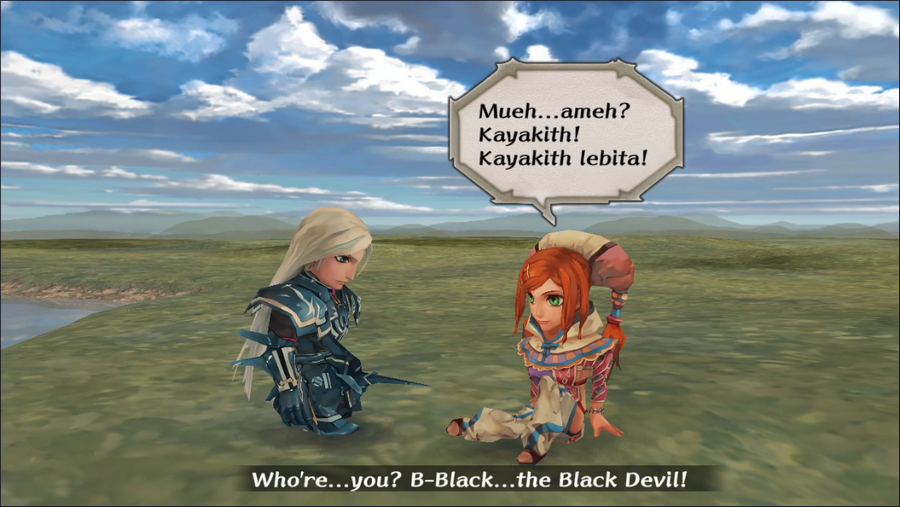 Neidhart is generally known as Neidhart the Black, but being known to a bunch of peaceful nomads as the "Black Devil" is a pretty bad look. 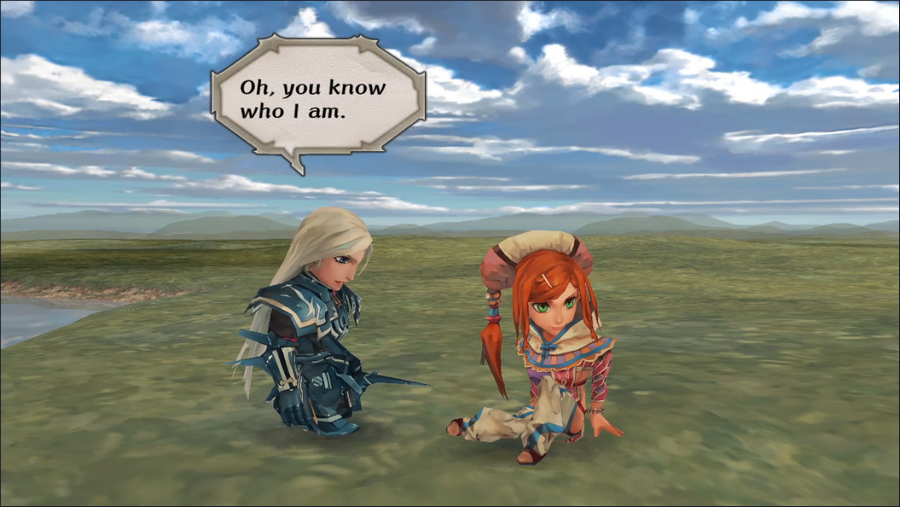 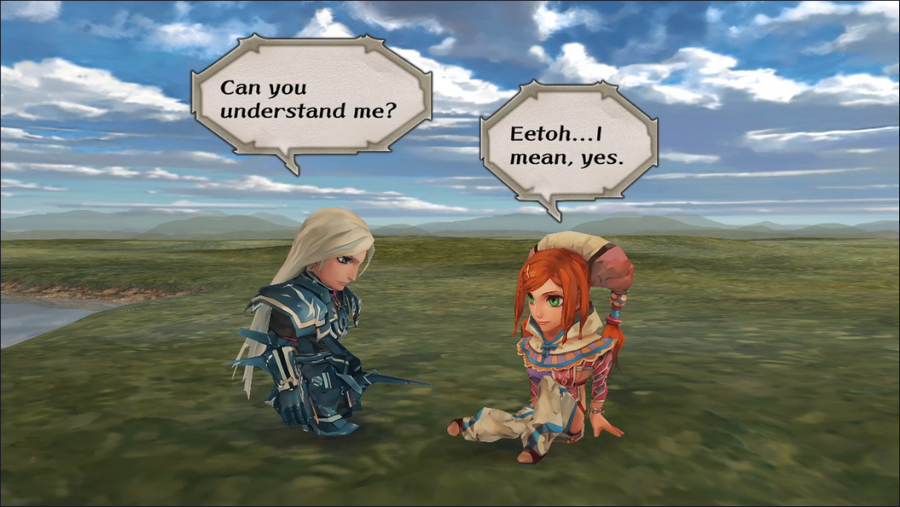   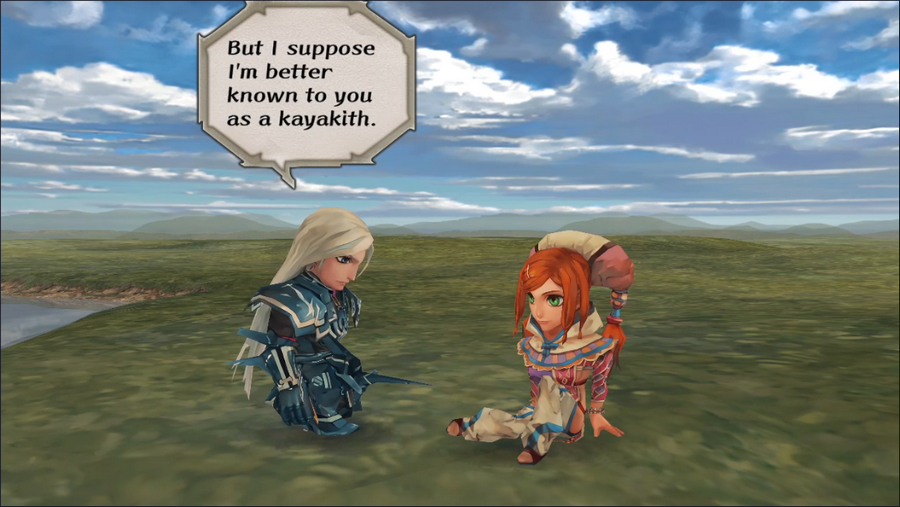 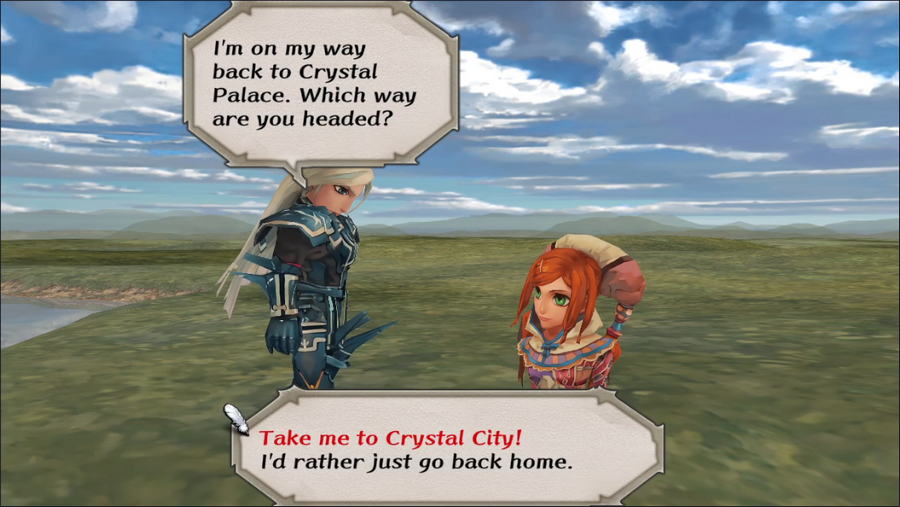 We could opt to go back to the camp immediately, which as far as I know has no effect except for skipping the next scene. But let's get some extra content in here. 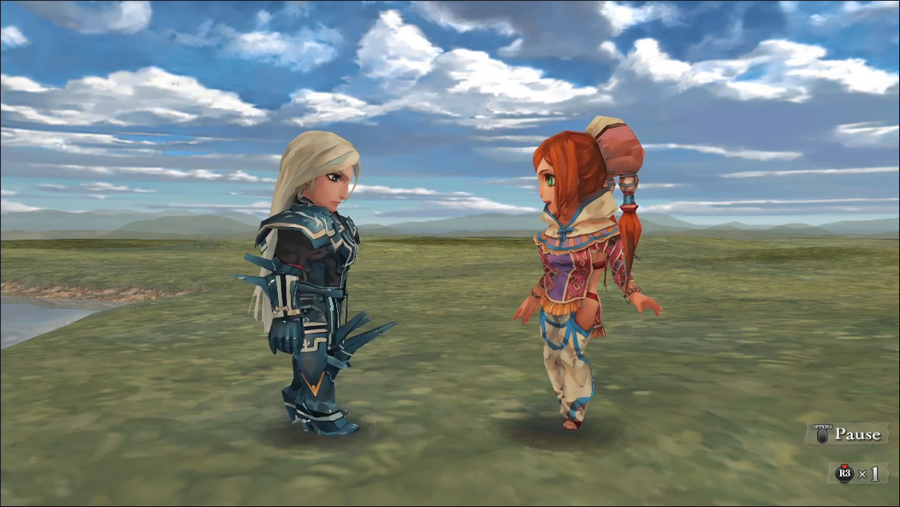 Aisha is absolutely thrilled at this opportunity. 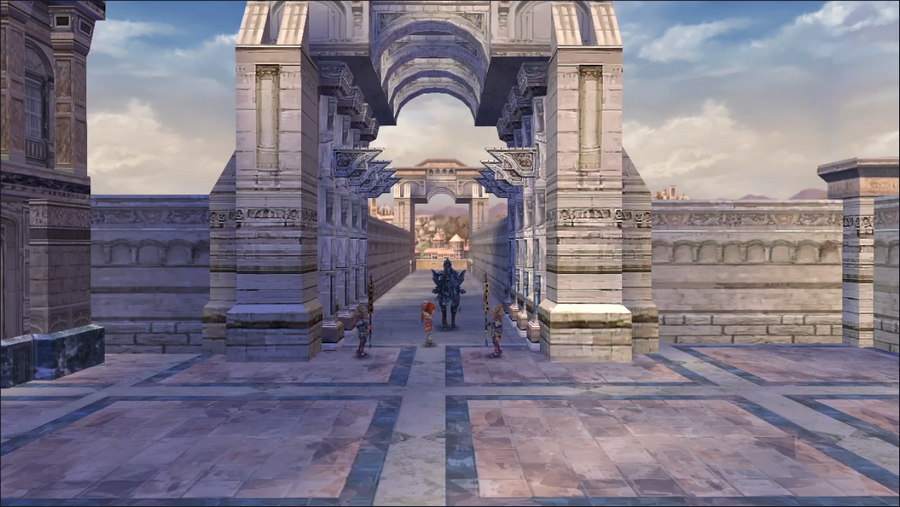 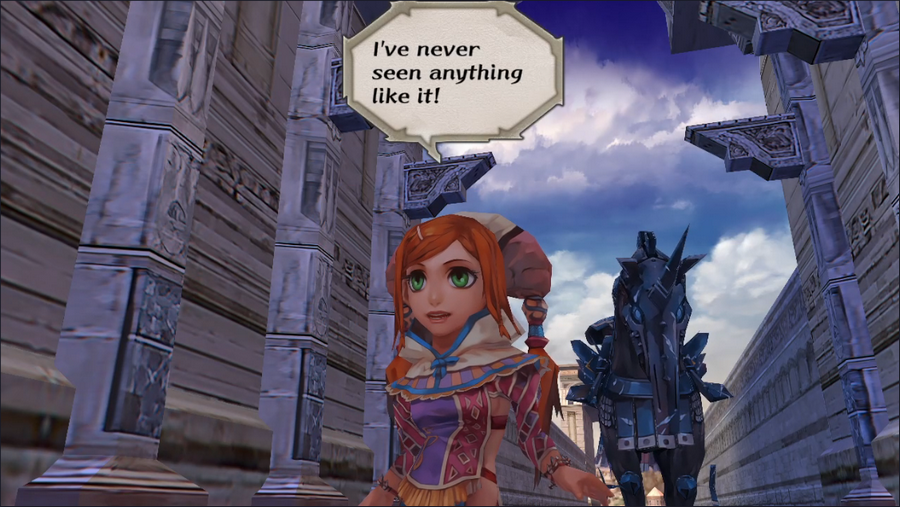 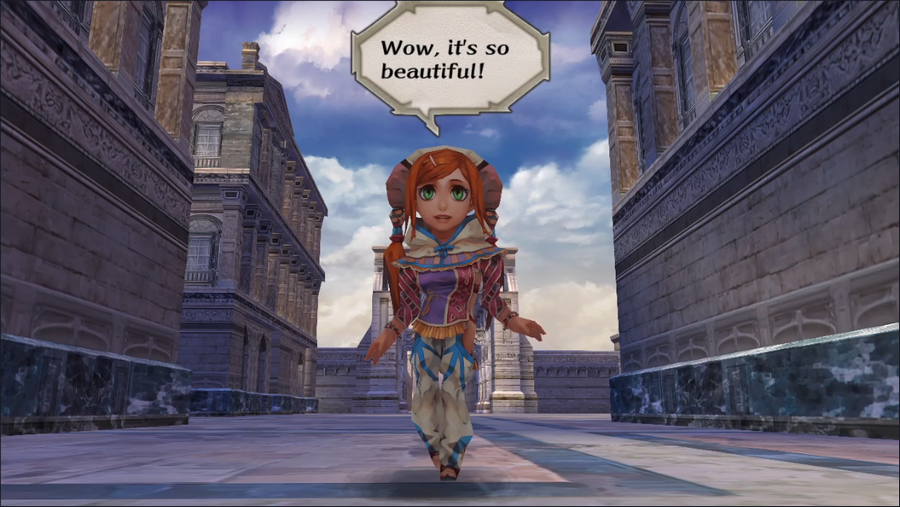 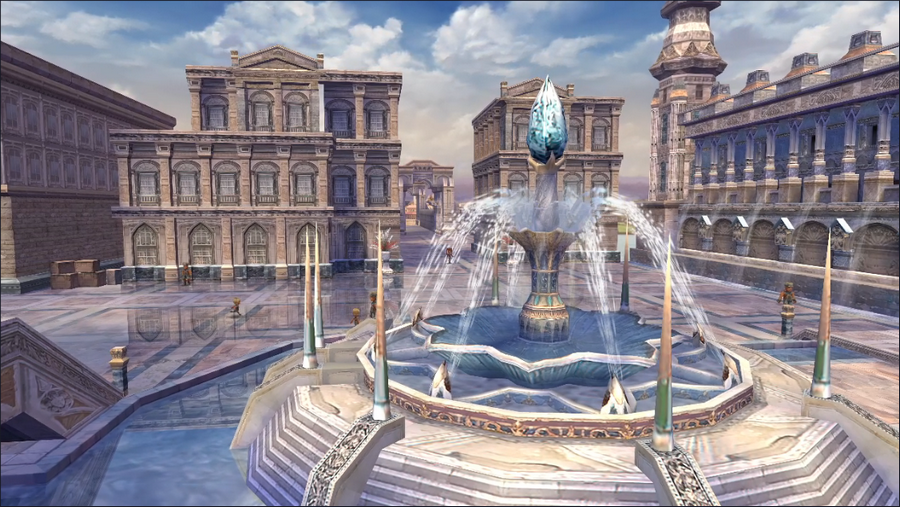 Aisha isn't kidding. Crystal City is an impressive-looking place, especially with its reflective marble streets.   The guards all offer salutations as Neidhart enters, though they don't get any dialogue boxes.     You know what this game didn't need? An entire cutscene of Aisha taking a bath. And yet... https://www.youtube.com/watch?v=RnnUm4Zv3vI I did say that her outfit wasn't the only example of Aisha being sexualized. It's not overly offensive, but it is a bit creepy. I do, at least, appreciate that Aisha keeps her goofy hat when bathing, presumably so the developers didn't have to model her hatless head. 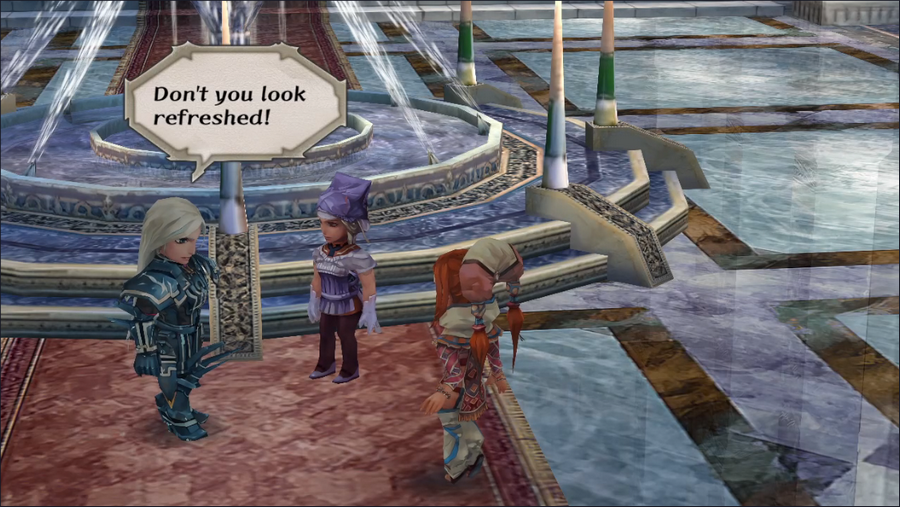 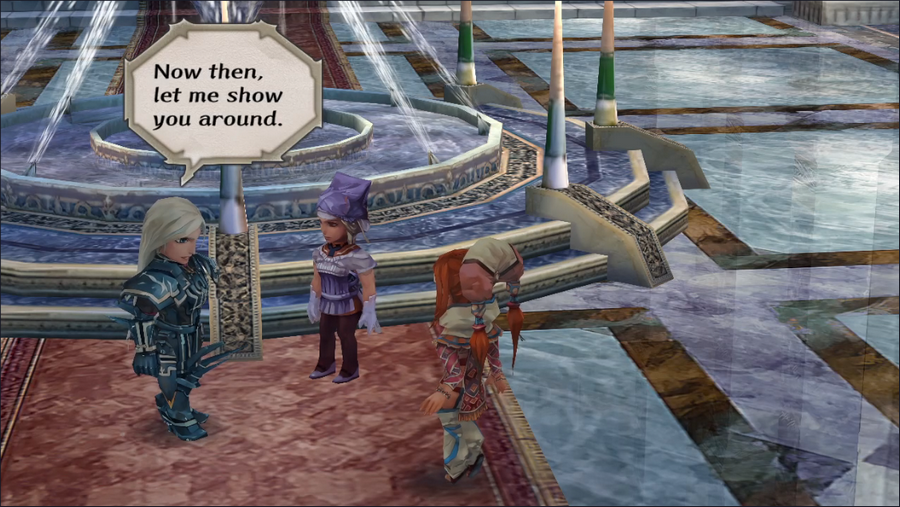 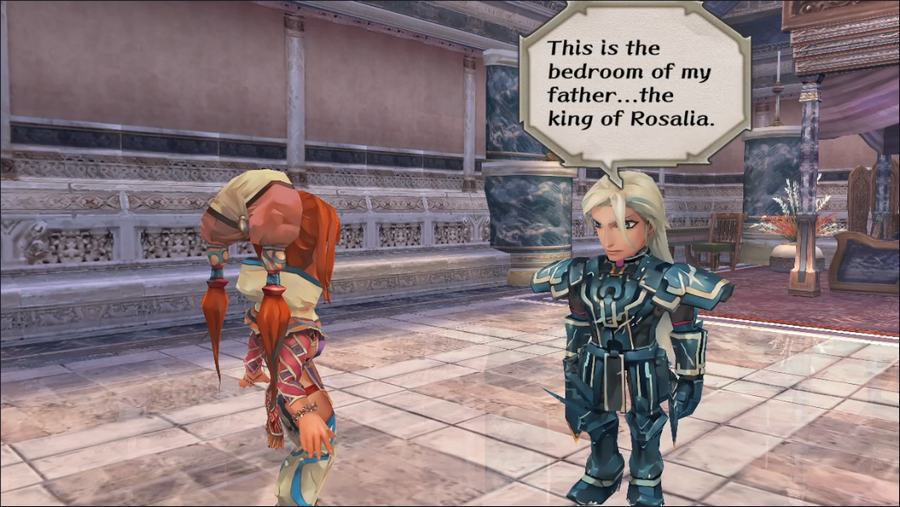 Were I a prince, I would probably not take visiting foreign teenagers on a tour that included my sick father's bedroom.   Though not technically the reigning monarch, Neidhart handles the day-to-day affairs of the kingdom while his father is indisposed.  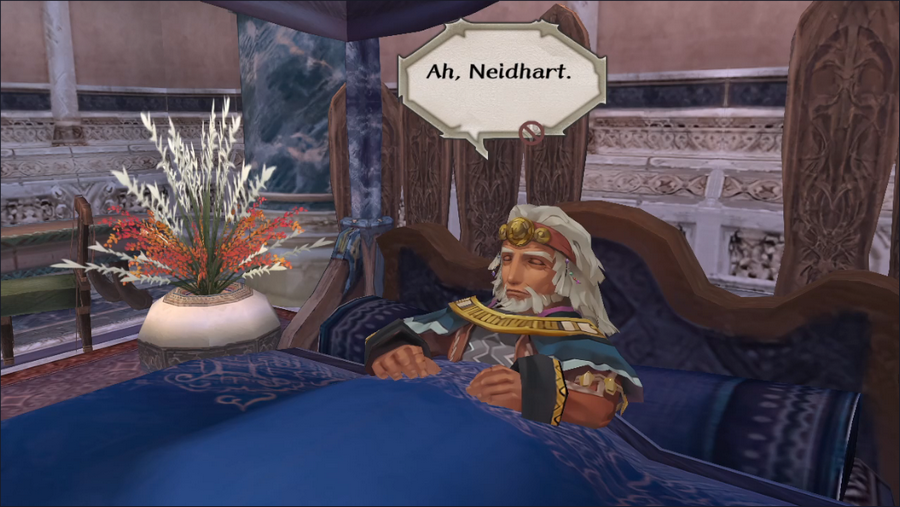   I genuinely don't know how the king can tell that Aisha is a Taralian. Maybe the clothes?      You might be thinking that this is setting up some kind of romance between Aisha and Neidhart. You'd be wrong - this is never touched on again. SaGa, everyone!          With that, our detour to Crystal City is done and we head back to the Taralian Camp.   One of Neidhart's greatest skills is that he knows how to make an entrance.  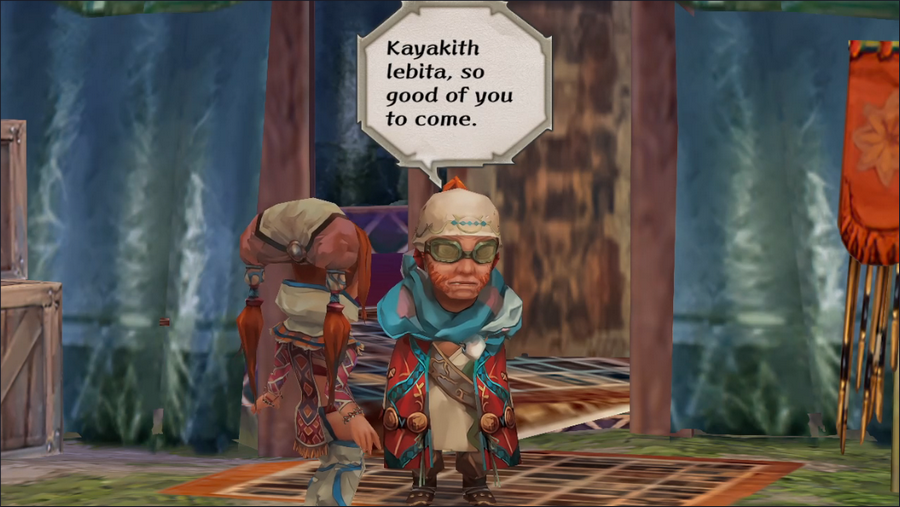 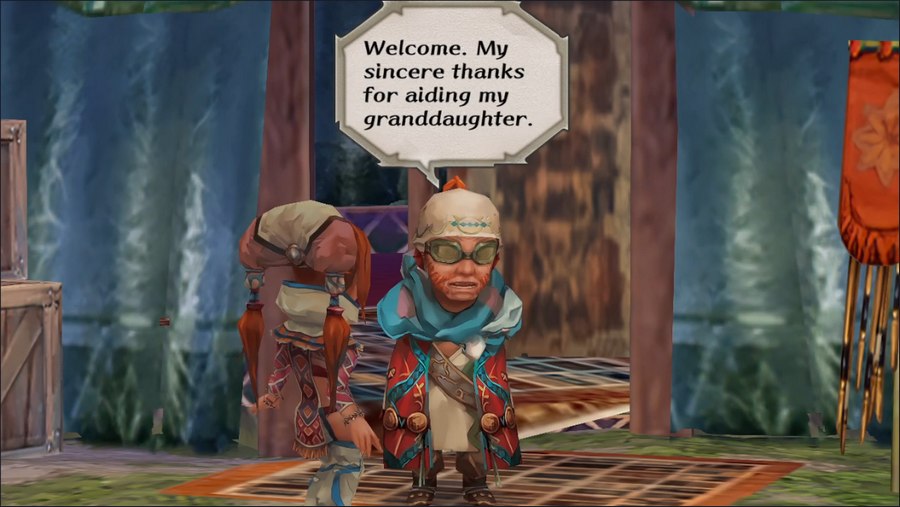 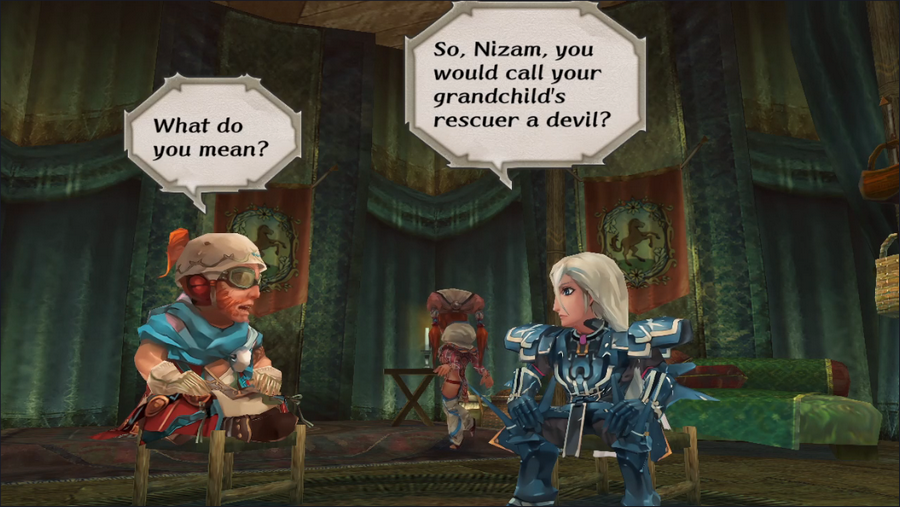 It's not clear how exactly Nizam and Neidhart know each other. 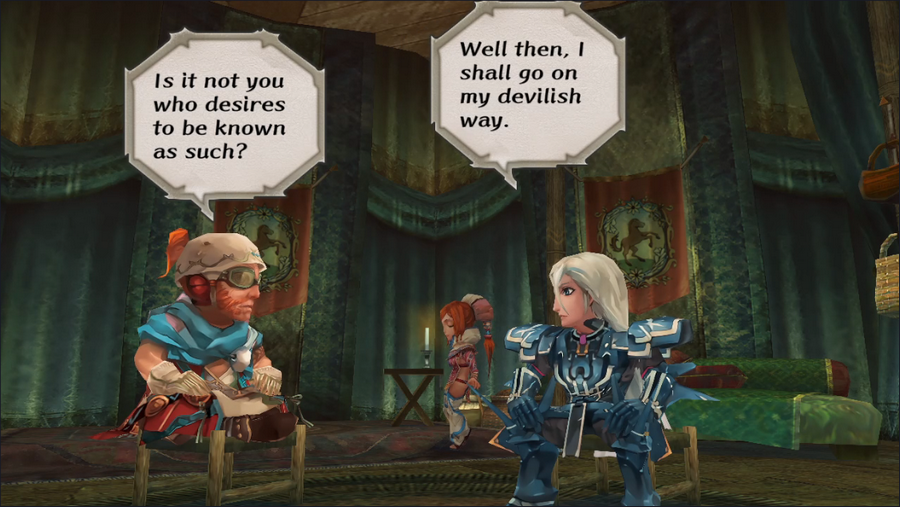     I appreciate that Aisha seems to be paying very little attention to this conversation even as Neidhart delivers thinly-veiled threats.      Everything we've seen so far raises an interesting question: what kind of man is Karl August Neidhart? On the one hand, he came out of nowhere to save the life of an injured girl, and treats her well. He's also quite well-liked by his people. On the other, he's quite willing to at least threaten overwhelming violence against a small, nonthreatening tribe of nomads. Based on what we've seen in the two intros so far and what I've seen elsewhere in the game, but take on Neidhart is that he's loyal to his country and desperately wants to protect it, but is overzealous about it. Maybe something to do with Rosalia's long history of war with Bafal. I really don't know for sure.    Aisha finally perks up at this - it seems she really likes the idea of living in Crystal City.   Likewise, she's visibly crestfallen when her grandfather flatly refuses.    With that, Neidhart leaves, and we're free to explore the camp, though there's not much to see or do. We don't have the money to buy any equipment or a spell.  Talking to Nizam triggers the next part of the story.  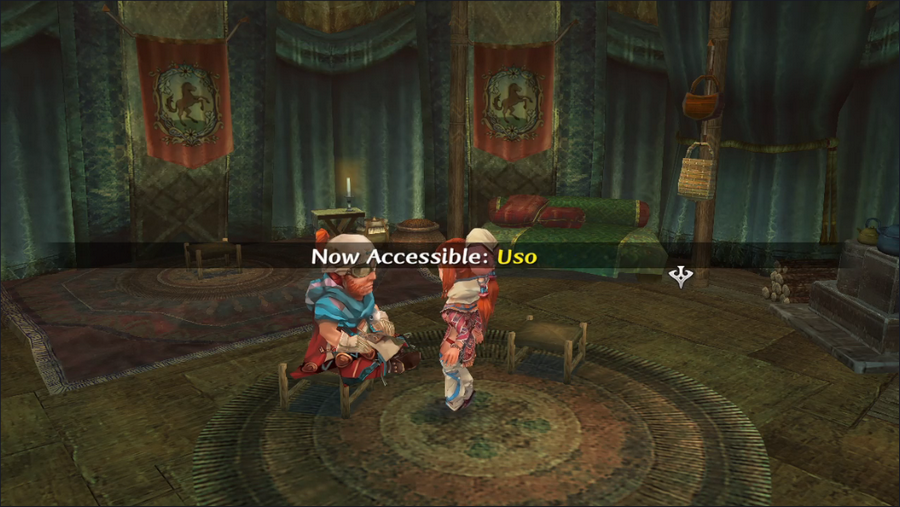 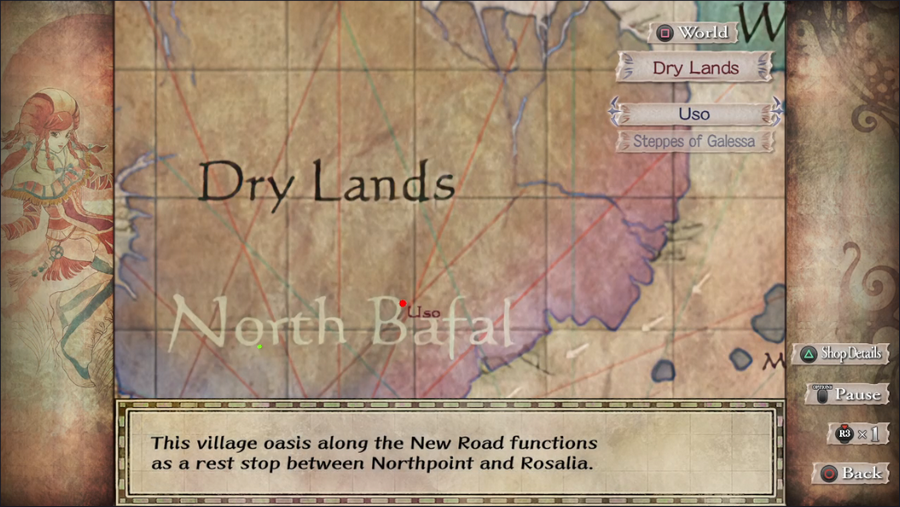 He gives us a map, and we head off to the desert town of Uso.  The Dry Lands don't have a capital city the way many of Mardias' regions do, but Uso is a rough approximation, with a high-level magic shop and stores selling strong equipment. 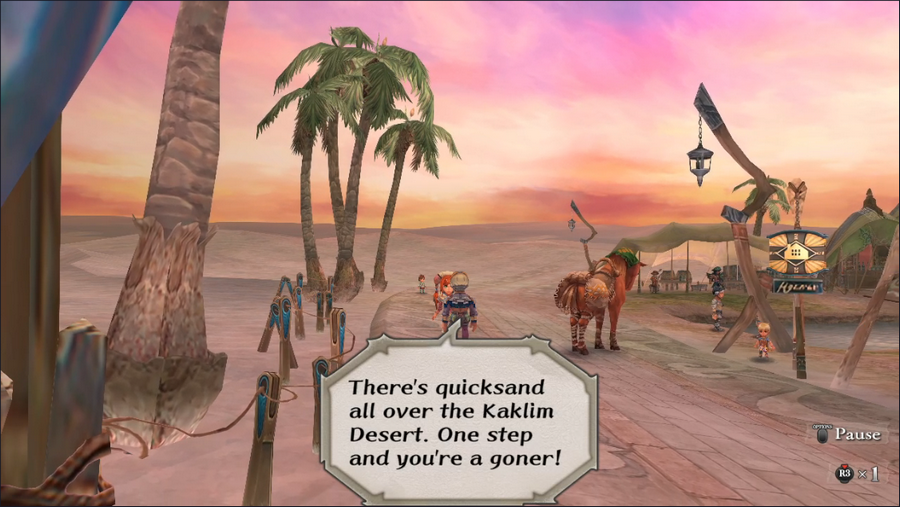 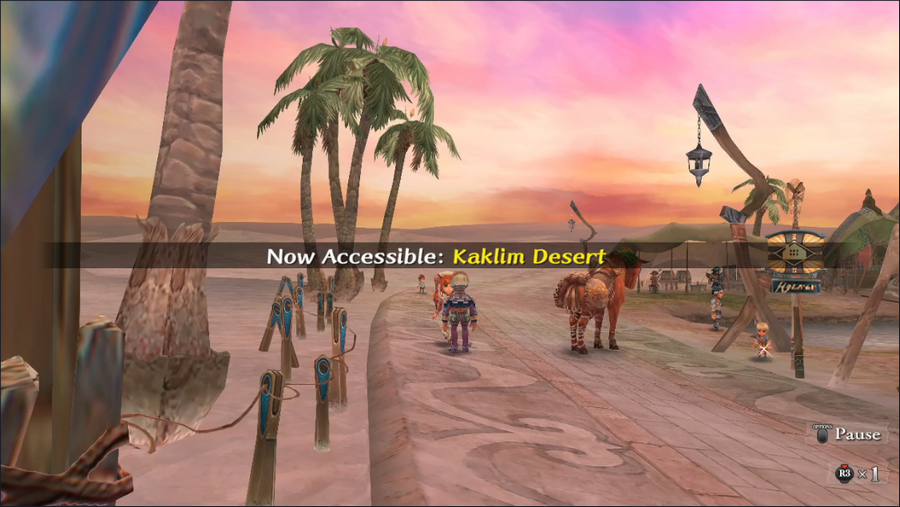 A local tells us about the treacherous Kaklim Desert. Given how badly a basic enemy destroyed us earlier, we probably shouldn't go there yet. 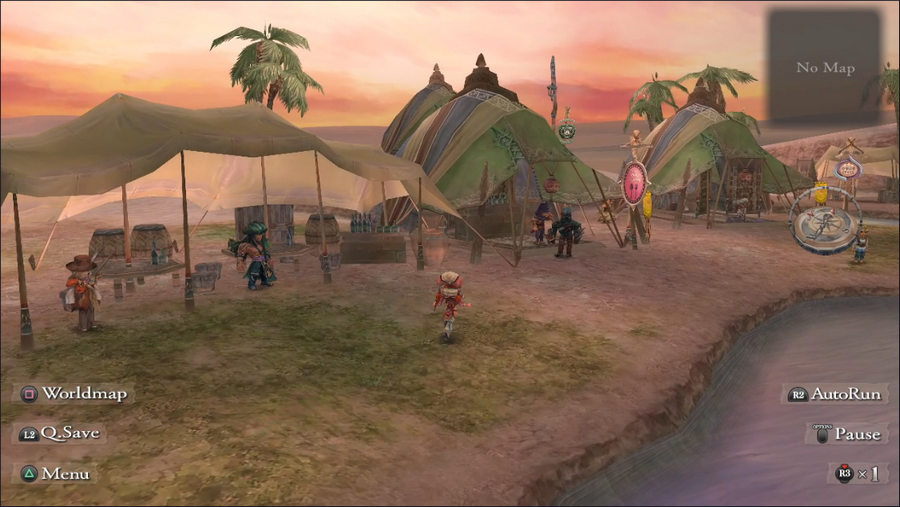 Uso has some exotic-looking people and nice shops, but we can't really do anything here right now. We may as well head back home. 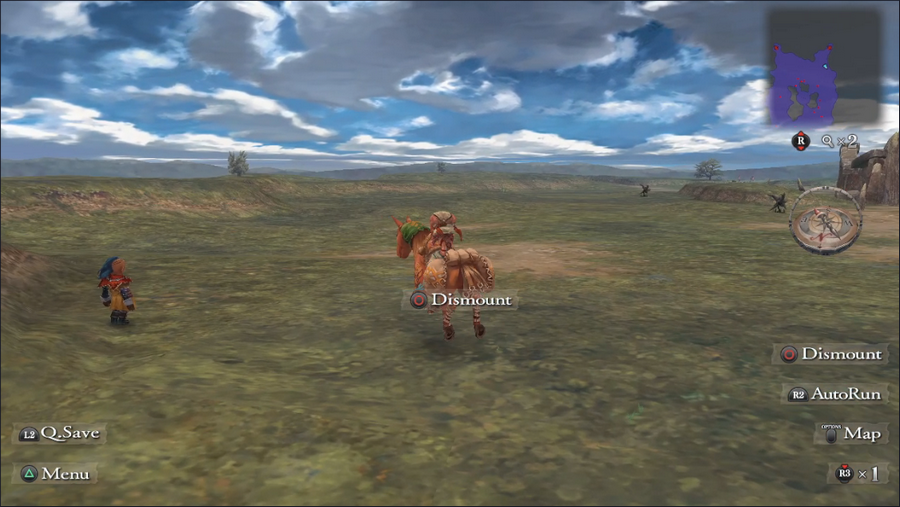 Outside the camp is this strange man. Maybe he's friendly? 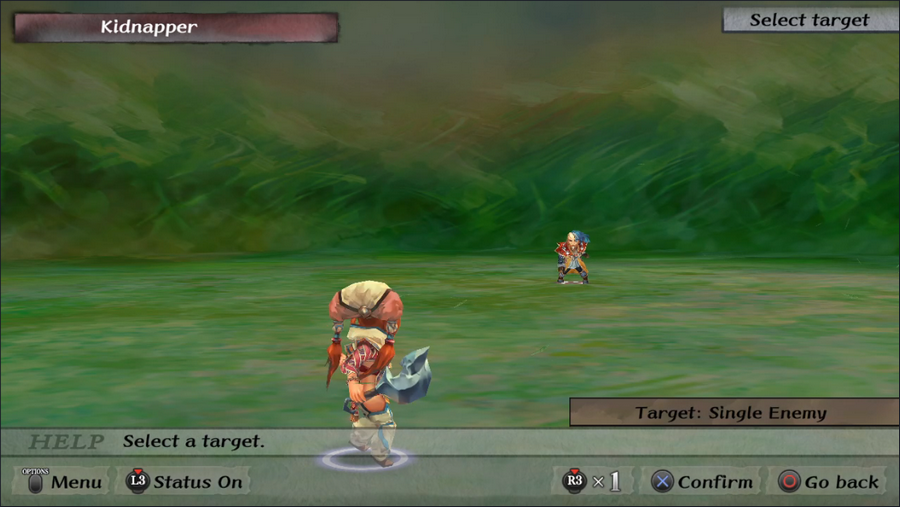 Oh. A kidnapper, huh? 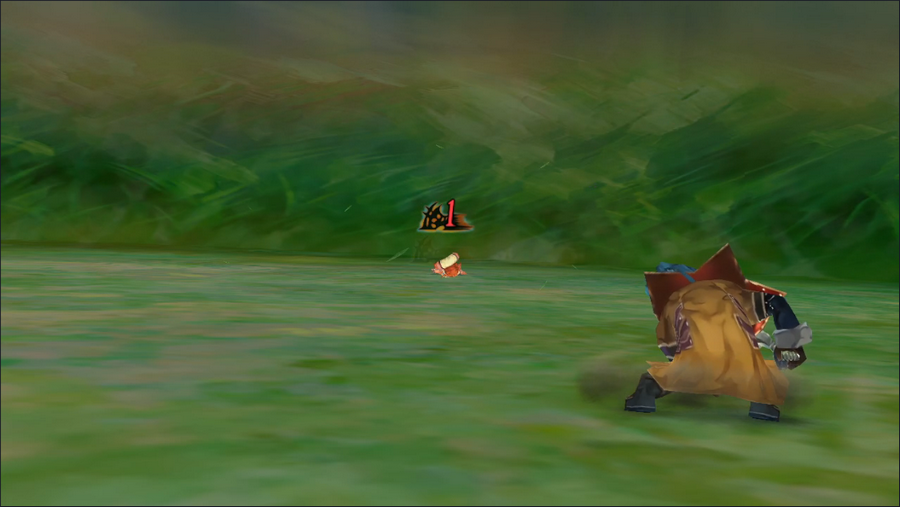  He demolishes Aisha with ease, and we get our first Game Over screen. Luckily, it's not a real Game Over.  Instead, we learn that Aisha has been, well, kidnapped, and is being sold as merchandise. But to whom, and why? These questions will be answered... another time. 5-Headed Snake God fucked around with this message at 14:25 on Oct 7, 2023 |
|
#
¿
Aug 25, 2023 04:22
|
|
|
Regallion posted:Okay, just to be clear, progressing the plot for this character requires you do deliberately go kill yourself, twice? Strictly speaking, no! In the case of the kidnapper, it's actually possible to instead recruit a couple party members in Uso, go fight some battles in the desert or on the steppes (which should be winnable with some allies), and eventually get taken elsewhere for a different end to the intro. For the first battle in which she's saved by Neidhart, I'm unsure what happens if you never lose, but it's possible, especially with the remaster's New Game + features. I went with the route I did in part because I thought it was the most interesting story-wise, and partly because I felt it's the experience a new player is most likely to see, but mostly because, well... berryjon posted:I suspect, based on the initial comments about her character stats, it's less "Deliberately" and more "a natural consequence of existing". ...of this. That first fight especially I could not have won barring insane amounts of luck, and mamties are one of the weakest enemies in the game. Aisha can develop into a decent, contributing party member, but at the outset, with her starting class, she's basically useless. 5-Headed Snake God fucked around with this message at 13:01 on Aug 25, 2023 |
|
#
¿
Aug 25, 2023 12:16
|
|
|
Now to be fair, if Albert were forced into the same situation, he'd fare just as poorly. But instead he has allies to carry him until he comes into his own, and his better growths mean he'll outclass Aisha for most of the game.
|
|
#
¿
Aug 25, 2023 16:26
|
|
|
EclecticTastes posted:Also, Kenji Ito is a drat good composer, the soundtrack for Minstrel Song is truly excellent. And on the topic of sound, the voice cast here is a real who's-who of anime/video game VAs, but before most of them had really become well-known. Along with a bunch of names that I still don't recognize, and playing Spot the Voice Actor is a hobby of mine. But yeah, I recognize a lot of the voices in Minstrel Song, which is why I'm trying to credit them in the characters post.
|
|
#
¿
Aug 28, 2023 01:30
|
|
|
jkq posted:Would it be possible to list some of their more famous roles too? It's a little outside what I want to do for the LP, but I could add IMDB links or something. And EcclecticTastes is more than welcome to chime in if he likes.
|
|
#
¿
Aug 28, 2023 12:24
|
|
|
I've brought up skills and classes a few times so far, so this seems like a good time to talk about exactly what they are and how they work. Skills Skills are a measure of a character's capabilities: the strengths they bring to the party. Skills are rated by level (0 to 5), and are broadly divided into three categories. Weapon skills cover a character's aptitude with various kinds of weapons. A character's weapon skill level is deducted from the BP cost of that weapon type's techniques, and higher skill levels increase a character's chance to Glimmer new ones. There are a staggering 16 different weapons skills: Foils, Short Swords, Long Swords, Great Swords, Scimitars, Hand Axes, Clubs, Two-Handed Swords, Katanas, Two-Handed Axes, Staves, Pole Arms, Lances, Bows, and Martial Arts (unarmed attacks), and Shields (affects shield block rate; shields don't have techniques). Not all weapon skills are created equal. There are a ton of foils in the game, including some rare specimens that are pretty easy to acquire, but finding a top-tier scimitar is an event. Magic skills cover a character's abilities with certain kinds of magic. As with weapon skills, the level of a character's magic skill is deducted from the BP cost of spells of the relevant school. Unlike weapon skills, magic skills don't affect a character's Glimmer rate, because new spells can't be Glimmered, only purchased. There are ten different magic skills, sorted into five opposed pairs: Hydrology & Pyrology, Aerology & Terrology, Illusions & Demonology, Cosmology & Sorcery, and Bewitchery & Necromancy. Not all magic schools are equally useful, but all of them have at least a few worthwhile spells. Sorcery and Necromancy, however, cannot be learned by party members, and exist solely for enemies to use. Finally, map skills cover a character's non-combat talents. There are 17 out-of-battle abilities, which the game calls proficiencies; these are sorted into six map skills: Search (finding hidden stuff), Gathering (collecting resources), Strategy (disarming traps and picking locks), Survival (athletics), Covert (stealth skills), and Trade (trading with monsters). A character's level in a map skill determines both the efficacy of their proficiencies (such as how long Stealth skills last or what level of lock they can pick) and how many proficiency uses the party gets per adventure. Trade has the potential to be quite useful at high levels but is fairly mediocre at low levels. Covert is mostly useful for evading encounters and slowing the party's Event Rank advancement. Gathering skills are situationally useful. Every other map skill is an essential part of every party's tool set. No one wants to have to leave behind good treasure because they couldn't disarm a trap. Classes There are a ton of classes in Minstrel Song, and it's not really worth the time to go over each and every one of them. Knowing the basics is still worthwhile though. A character's level in a particular class is equal to their lowest-ranked skill associated with it, and that level is subtracted from the DP and LP costs of techniques and spells that fall under those skills. (A cost of 1 reduces to 1*, which in turn reduces to 0.) Each class also has a special ability, which usually grows more powerful as the class's level increases. There are three types of classes in the game. Basic classes have three associated skills. Every protagonist's default class is a basic class. Due to this low skill count, basic classes are easiest to adopt and level up, but also tend to be on the weaker side. Aisha's Herbalist class, for example, can find rare herbs when using the Gather Herbs proficiency, which can be used to make better consumable items - but this is a lot of work for a pretty mediocre payoff. Advanced classes have five associated skills. A character must have an advanced class at level 2 before they can switch to it. Since they have more associated skills, advanced classes are harder to level up, but their special abilities tend to be better than those of basic classes. A Wizard, for example, deals extra magical damage and has a ton of magic skills, which is useful in pretty much every fight. Legendary classes have seven associated skills. Unlike basic and advanced classes, a legendary class's skills can't be trained up as a package: to take one, a character has to reach level 3 in its skills, then find the one mentor in the world that will switch them to it. This makes legendary classes difficult to adopt, never mind level up. Legendary classes all have the same special ability, which is a 2-point reduction in the DP and LP costs of techniques and spells. This is... honestly pretty lame, and advanced classes are generally a better choice. To increase a character's skills and change their class, the party has to visit a Mentor, which can be found in most towns and cities (though every mentor offers different skills and classes). Skills can be levels up by spending jewels, which are mostly earned from completing quests. Every quest completed increases the number of jewels earned from future quests, and this tally carries across multiple playthroughs. Mentors can also teach a character proficiencies for a modest gold fee. Getting a class to level 5 is nigh impossible in a fresh game, and you should expect our team in this LP to cap out at level 3 or so. 5-Headed Snake God fucked around with this message at 01:01 on Jan 20, 2024 |
|
#
¿
Aug 28, 2023 12:32
|
|
|
SIGSEGV posted:Fresh game implies some sort of New Game Plus, my experience is with The Last Remnant, I suspect it's similar? It's pretty hefty. You carry over the number of quests completed (meaning you earn more jewels), the classes unlocked by your party become available to choose as future characters' starting classes, completing certain objectives unlocks new content in future playthroughs, and there's an extra bit at the very end of the game that lets you power up the final boss to make him more of a challenge (minor spoiler for something I'll mention in the LP). In the remaster, you also have the option of carrying over any or all of your money, jewels, items, skill levels, and various character stats. There's also a bonus scene if you beat the game with all eight protagonists, which isn't really worth the time investment unless you're going to play the game that much anyway.
|
|
#
¿
Aug 28, 2023 14:52
|
|
|
EclecticTastes posted:I'll be happy to do class breakdowns, but it'll be a couple updates, since the classes we've already seen interact with mechanics you haven't shown off, and I'd hate to get ahead of the LP. I'm already planning to cover the classes that I end up using for the main party, but once we hit that point you're welcome to contribute whatever you like. jkq posted:Only if it's not too much trouble. Not at all. The characters post has been updated with links.
|
|
#
¿
Aug 28, 2023 22:38
|
|
|
Welcome back everyone. It's time for character #3's intro, and it's a bit of a departure from the first two. For one, just look at those stats. Protagonist #3, Gray, is a seasoned adventurer with some actual fighting ability. In terms of personality, he's pretty much exactly what you'd expect from a character with that name and appearance: he's soft-spoken and rarely displays any kind of emotion. He's not exactly a lone wolf or an edgelord, but he does toe the line.  Gray's starting class is Swordsman, which is decent enough but sadly, entirely inadequate for his personal quest. But I'm getting ahead of myself.  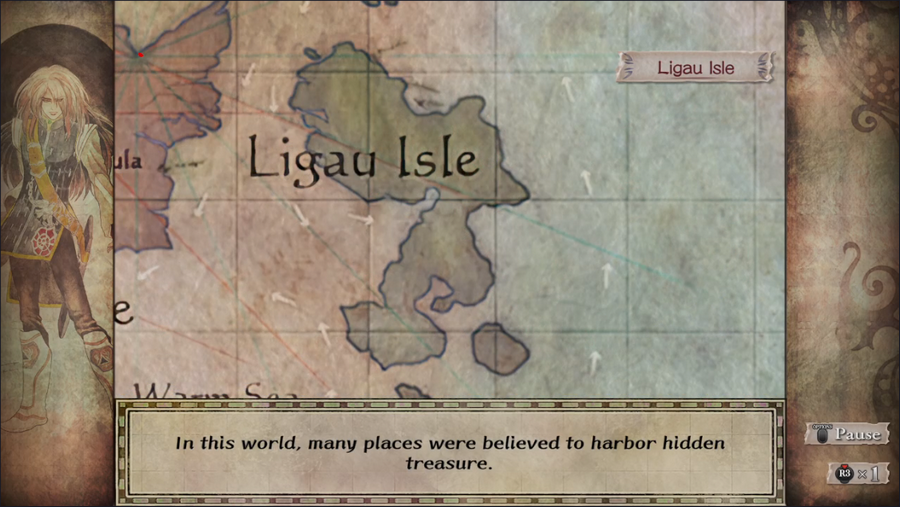 Gray is tied to Ligau Isle, in the southeast corner of the map. His connection is tenuous, in part because Ligau is tiny and has a very small number of associated quests. 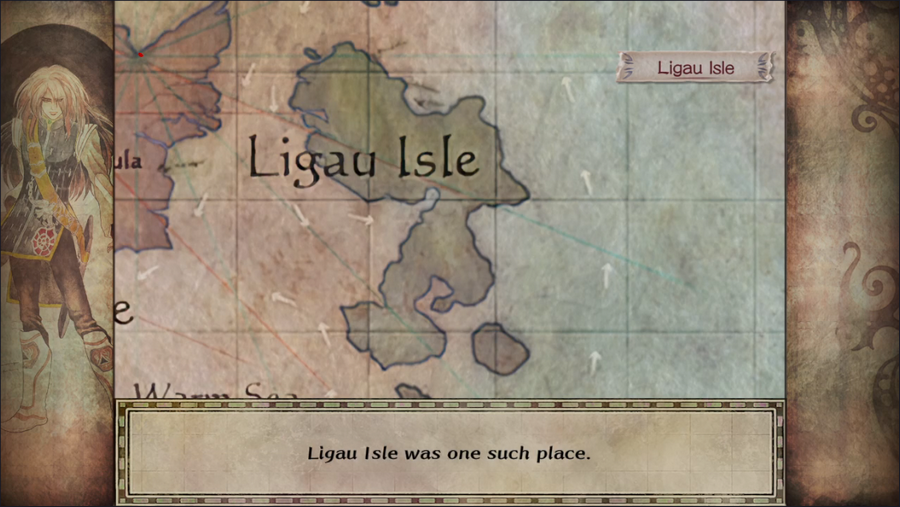     Gray starts with two allies in his party. Galahad is a sturdy swordsman and a solid warrior, while Myriam... has a magic spell. She contributes, but like most dedicated casters in Minstrel Song, she feels a bit lacking in the early game.  The party arrives in Jelton, Ligau's sole town. Music Highlight: Ligau Isle From a Window/A Window to Ligau Isle Though technically the theme for all of Ligau, this piece plays only in Jelton. It's a lazy, laid-back tune for a remote island town.  First things first: we outfit Gray with the First Aid Kit and the Smoke Bomb Pouch. The latter is going to be super important.  Galahad begins with the same weapon as Gray (a low-tier longsword), but his Gothic Armor is pretty excellent in the early game and affords him considerable protection. 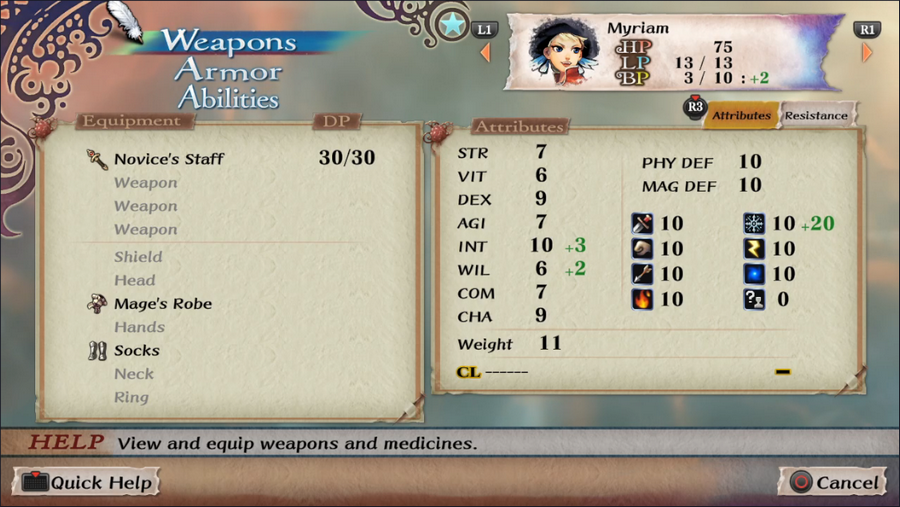 Myriam has a staff and robe that boost her Intelligence (and therefor her magic damage). She's not a capable physical fighter and spends a significant amount of time defending. 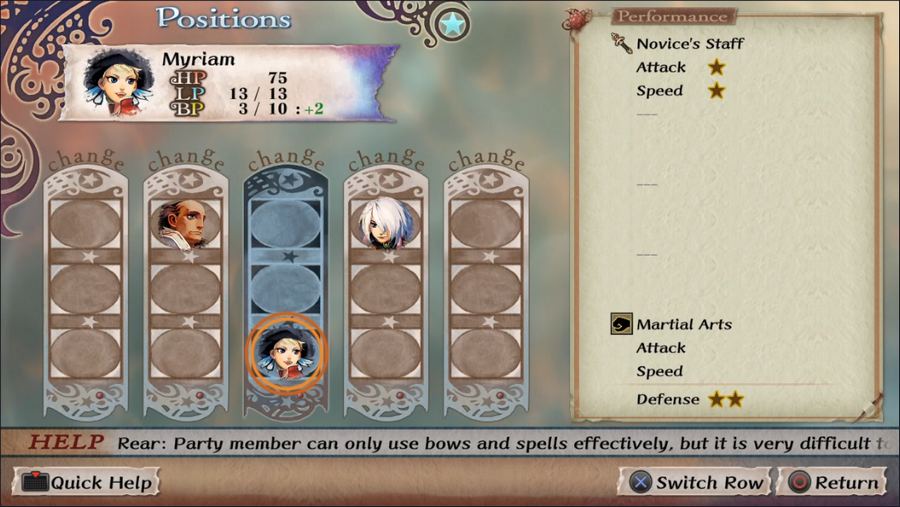 We also swap around our party members a bit and put Myriam in the back row. The stars in the box on the right indicate how the character's position affects their speed, power, and defense. Most melee weapons work best in the front row, but some, like polearms, are better in the middle row. Spellcasters usually want to be in the back row for the defense boost.  Why yes, yes we have.   We can't actually go back to the mainland until we finish our job here, but this is an interesting world-building tidbit.   Ligau is notable for being home to dinosaurs, which is cool and does help make the place noteworthy.   This is a good question and actually has a satisfying answer! 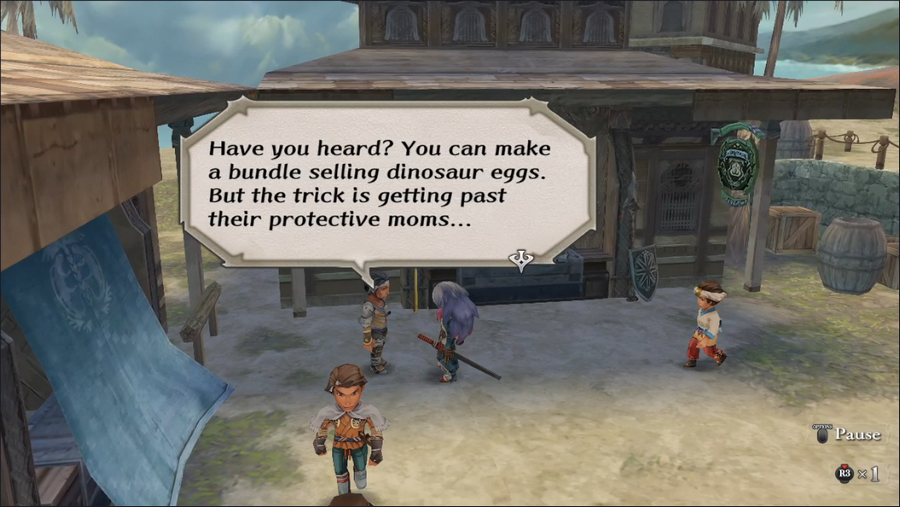 And this is it. Our heroes' goal on Ligau is to steal and sell some dinosaur eggs.  There are hints that there's traditional treasure as well.  Outside Jelton are the Plains of Ligau Isle. They're dotted with both monsters and holes. Music Highlight: Absolute Freedom/Arrant Freedom. Gray's theme is more... romantic, I guess? than you'd expect from the resident aloof guy. I like it, though; it has just a slightly exotic sound and some great strings. 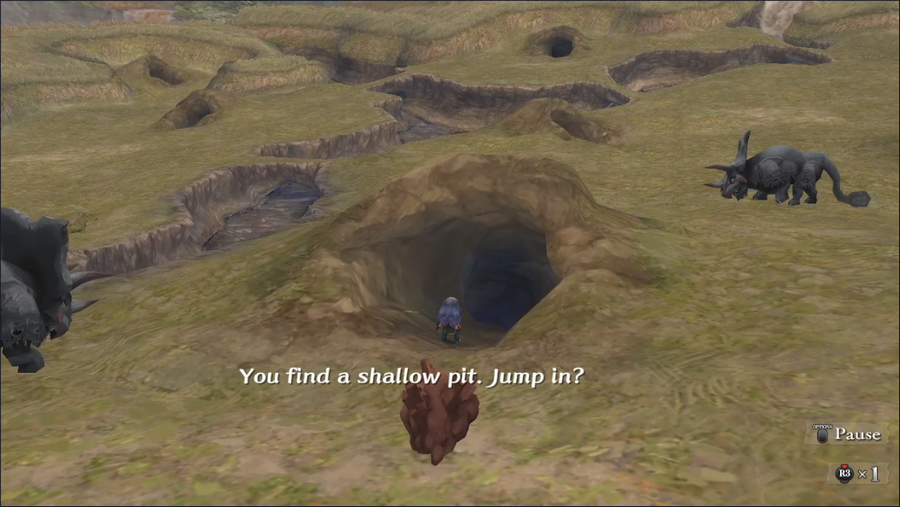 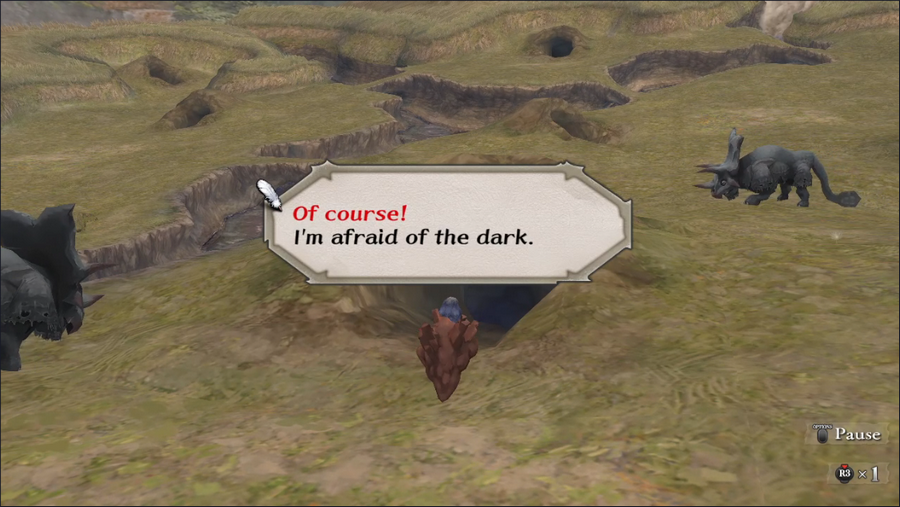 We head for the nearest hole and dive right in.  This den is filled with dinosaurs, which have a unique map model. Like other monsters, they give chase if they see the party, but they're incredibly slow and easy to dodge.  A treasure chest near the entrance contains gold. I chalk its presence up to "this is a console RPG and you shouldn't think about it too hard". It's actually where the map would be if we didn't already have it, but that's not as funny. 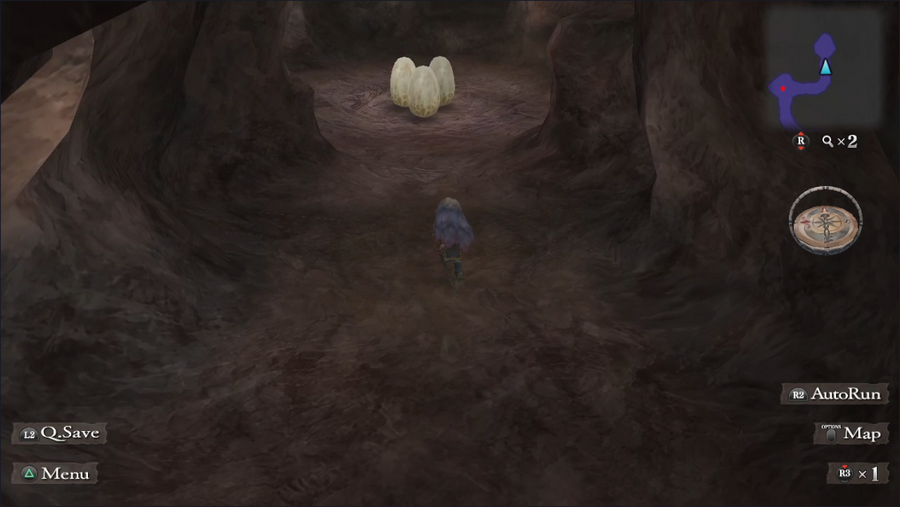 The den is a linear path, and at the back are the eggs. But there's a bit of a problem. See, having a dinosaur egg in our possession will make the dinosaurs super aggressive; they'll beeline for us at high speed, and while we can run away, this won't cause the map model to despawn as it normally does, so the battle will just restart. And at our power level, we can't beat a dinosaur in combat. So what to do? One option is to grab an egg and try to get out without engaging in combat, but that's easier said than done. We'll do something else. 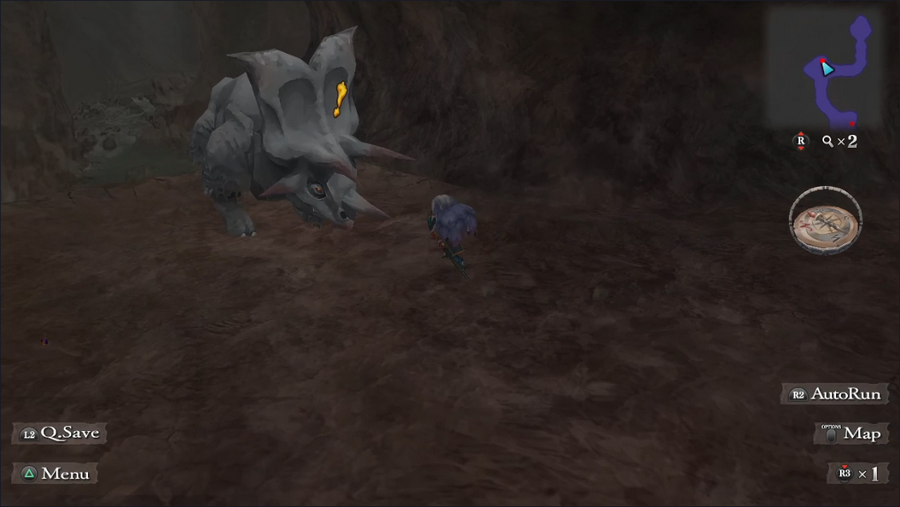 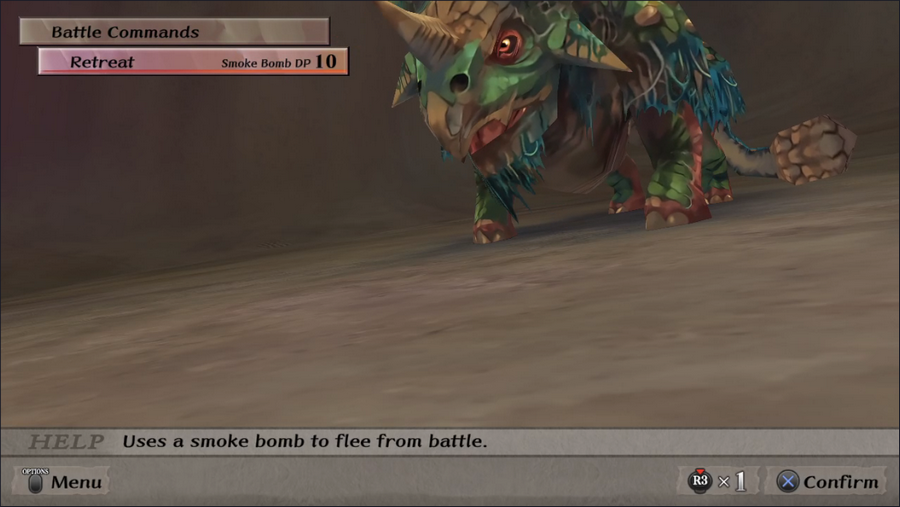 Leaving the eggs where they are, we get into combat with the dinosaurs and run away.  Since we don't have the eggs, this despawns the model, allowing us to clear the cave with ease. In the PS2 version, which doesn't have smoke bombs, this costs LP: the character who uses the flee command loses LP equal to the number of party members. Fortunately, Gray, Galahad, and Myriam have well over 12 LP between them, so the strategy still works.  With the dinosaurs gone, we grab an egg and head back to Jelton.  It's worth a ton of cash! (Please ignore the fact that we also have a Treasure Map - I'll get to that later.) This is probably as good a time as any to talk about vendors and clout. The box on the left shows icons representing the three big mercantile companies in Mardias. From top to bottom, we have the Crystal Cartel, the Draconian Merchants, and Maritime Imports. The numbers to the right of the bar represent this shop's connection to each, always totalling 300. This shop is mostly even, leaning slightly away from Draconian Merchants in favor of Maritime Imports. 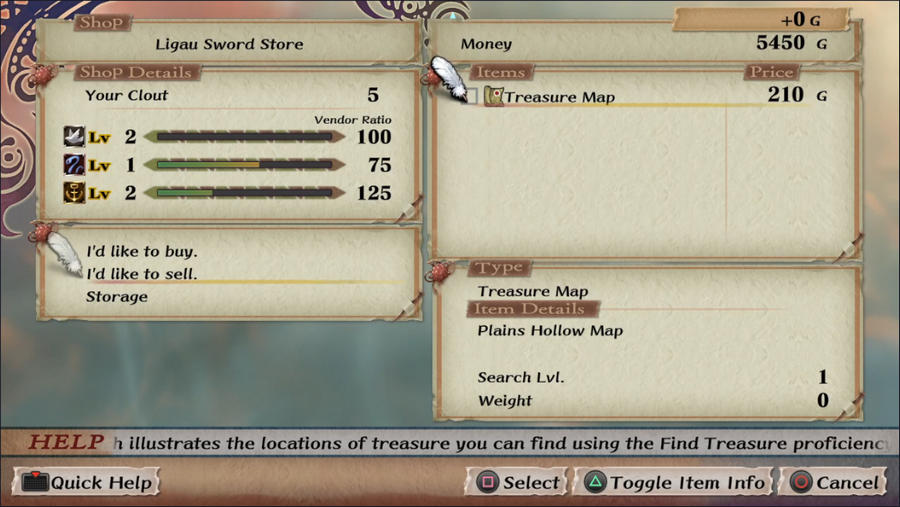 Upon buying or selling anything at a shop (the egg in this case), the bars next to these icons fill up by a certain amount, and when they reach full, we gain a level with that supplier, which applies world-wide. This represents our clout with that supplier, with higher levels unlocking new items in shops. Clout maxes out at 10 for each supplier, which typically takes two or three playthroughs. Basically, buying and selling stuff gives us a form of experience that unlocks new goods.  Since we used some smoke bombs and are flush with money, we pay for the fanciest room at the local in, which refills it and adds a bit to our First Aid Kit. Now, at this point we've finished the Plains Treasure quest and could head back to Melvir. But we're not quite done. Remember, there's supposed to be a deep cave full of loot! We've gotta have that. 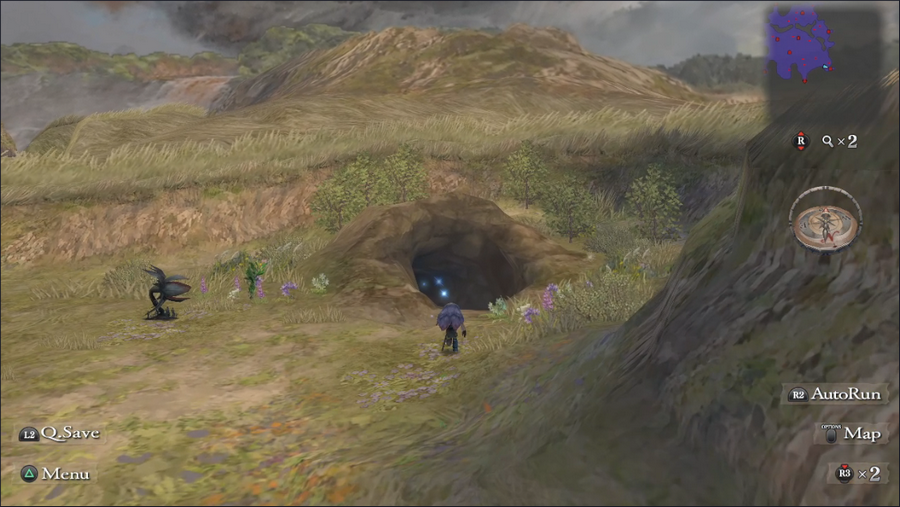 This cave at the far east end of the Plains is our target, recognizable by the flowers growing at its entrance. 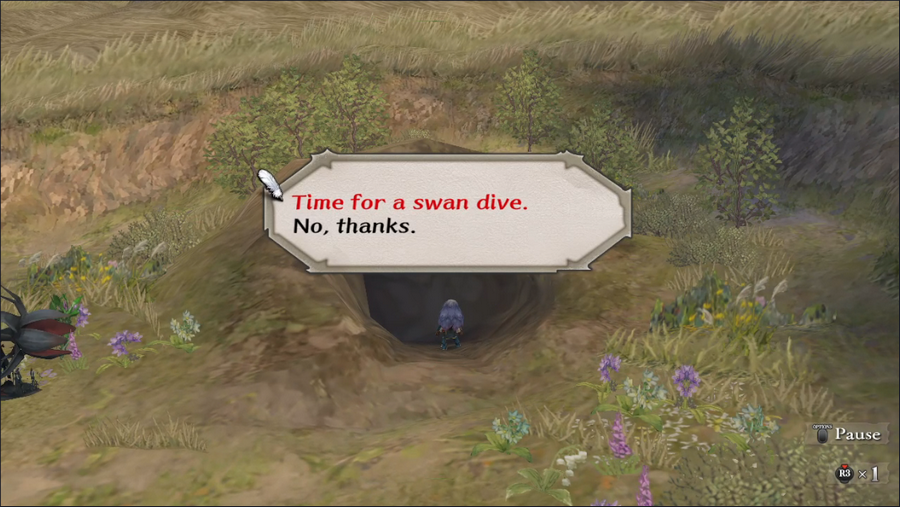 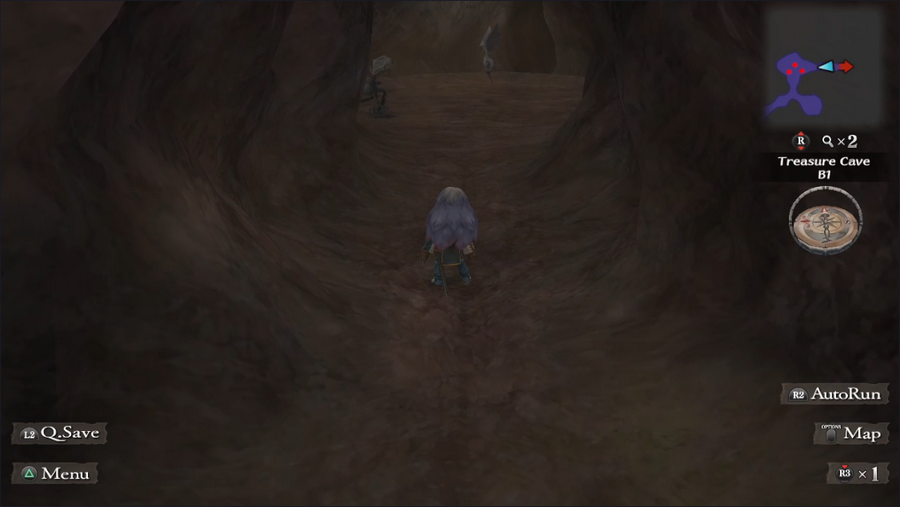 The appropriately-named Treasure Cave is a pretty linear affair, for the most part. But it's a proper dungeon, with real monsters we have to fight, so let's talk a bit about the critters we're seeing in the early game.  The windcomer (I assume it's supposed to be "windcomber"?) is a basic plant that uses physical attack for low damage, but has decent durability. Rippers are birds that use a beak attack that can blind the character they attack. Blindness isn't a major debilitation, but it's annoying for weapon users. 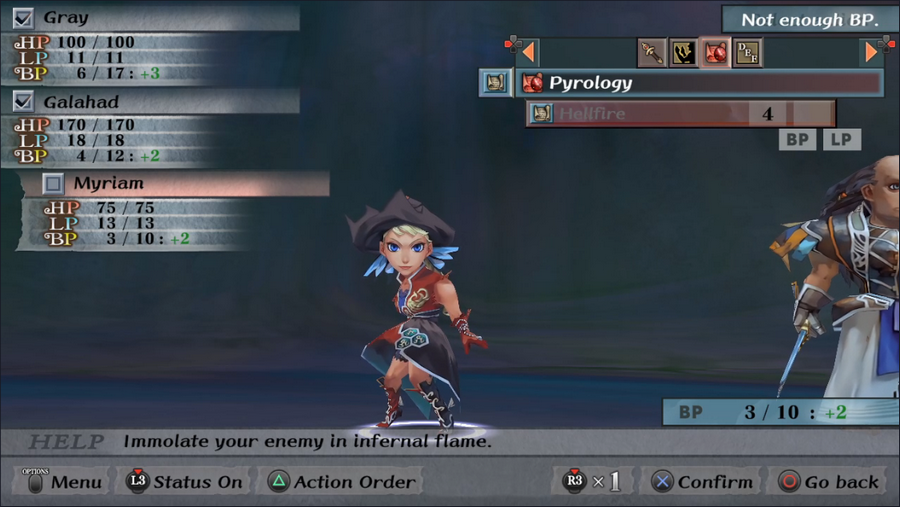 Like most plants, windcomers are weak to fire, which Myriam conveniently wields in the form of the basic Pyrology spell, Hellfire. Unfortunately, with her 3 initial BP and Hellfire's cost of 4, she has to wait until round 2 to cast it. 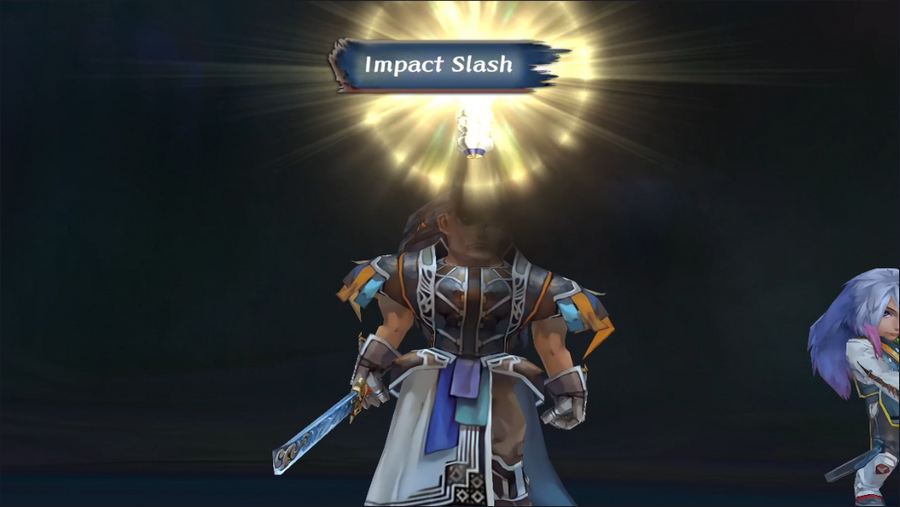 Rippers typically take a few hits from Gray and Galahad to kill, except when Galahad Glimmers Impact Slash. This is one of the best low-level techniques - it does cost a fair amount of BP and DP...  ...but it inflicts considerable damage. (The fighters' regular attacks hit for around 30-40 damage.) It also can inflict Stun, which causes the target to lose its turn if it hasn't yet acted on the current round. The DP cost means it has to be used sparingly, but it's great to have when we need it. 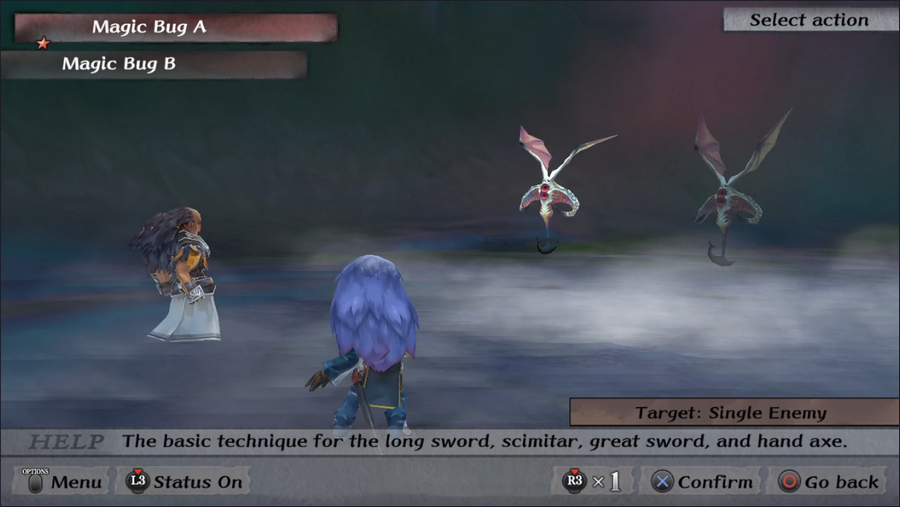 Magic bugs are low-level fiend monsters which like to cast Energy Bolt, the basic Demonology attack spell. They're not too durable, but Energy Bolt can hurt. 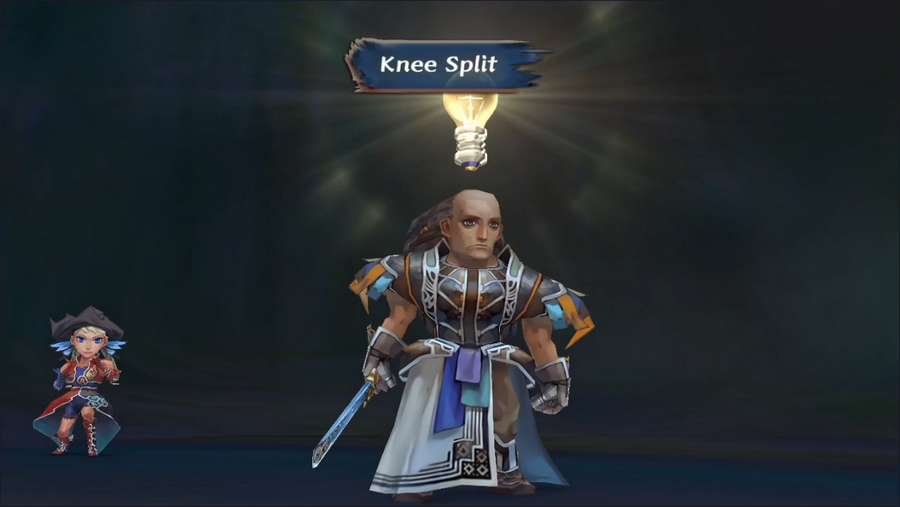  Galahad manages to Glimmer another technique against them, Knee Split. This attack has a much lower cost than Impact Slash and can still inflict Stun, but it deals far less damage. It's not terribly useful.  Spinners are the basic insect enemy type. Their special attack, Web Shot, can lower Agility, but overall they're not terribly dangerous.  Goblins and mamties are the basic beastman and beast enemies, respectively. Both stick to simple melee attacks, making them among the least dangerous enemies in the game.  Zombies, the basic undead monster, are a bit of a step up in difficulty. They can deal some decent damage with their claws and have significant durability, though they're susceptible to fire damage and the Sunray spell.  And finally, we have the slime, the basic enemy from the "unknown" monster group, which also includes elementals and rock monsters. Slimes don't have much HP, but have a very high chance to shrug off any physical damage thrown at them. Magic is the best way to deal with them, but in the meantime...  I don't want to give the impression that this is common or anything, but sometimes the RNG decides that you're gonna die. But enough about monsters, let's go deeper into this cave! 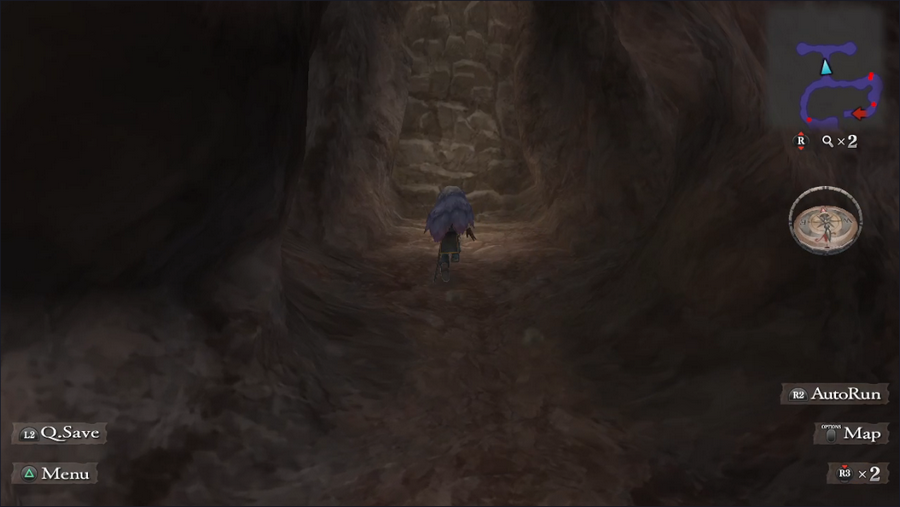 One of the side passages leads to this distinct-looking wall.  It's a climb point. Without the Climb proficiency and the Survival skill at level 3, we're not getting up here. There are a few of these walls throughout the dungeon. 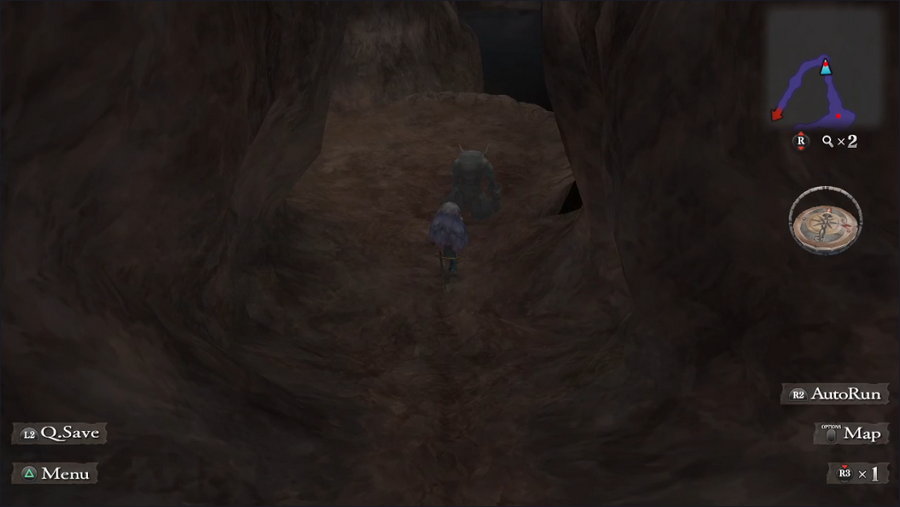 Near the end of the second floor, we happen upon a monster with its back turned, letting us sneak up on it. 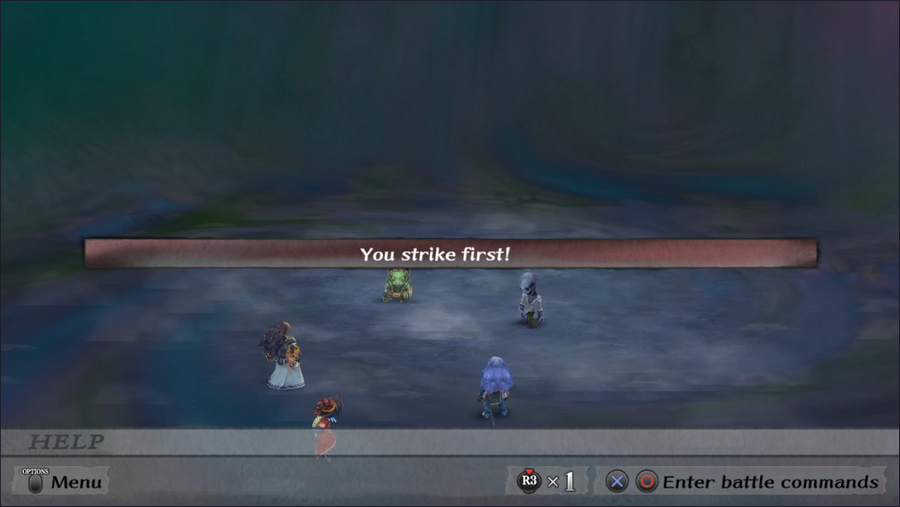 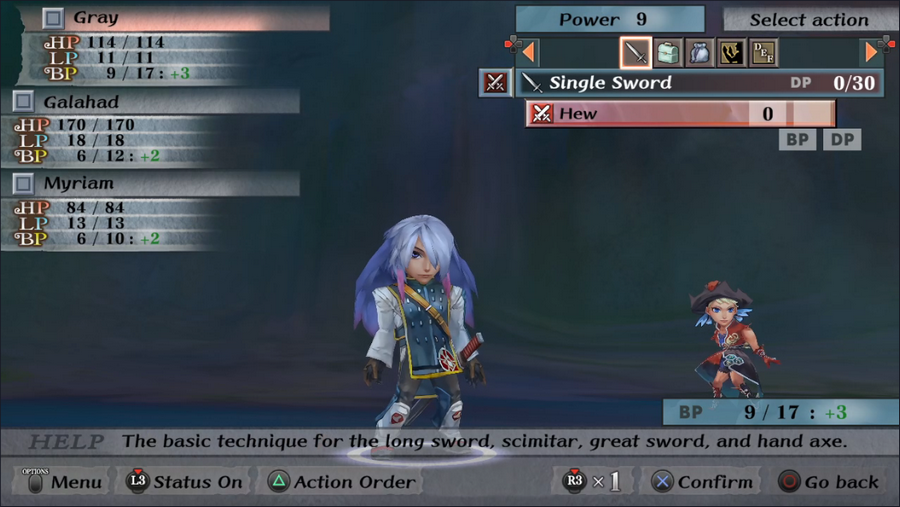 This gives us a first strike, which means we start with extra BP and are almost guaranteed to act before the monsters in the first round. Enemies can also strike us from behind for the same initiative boost. 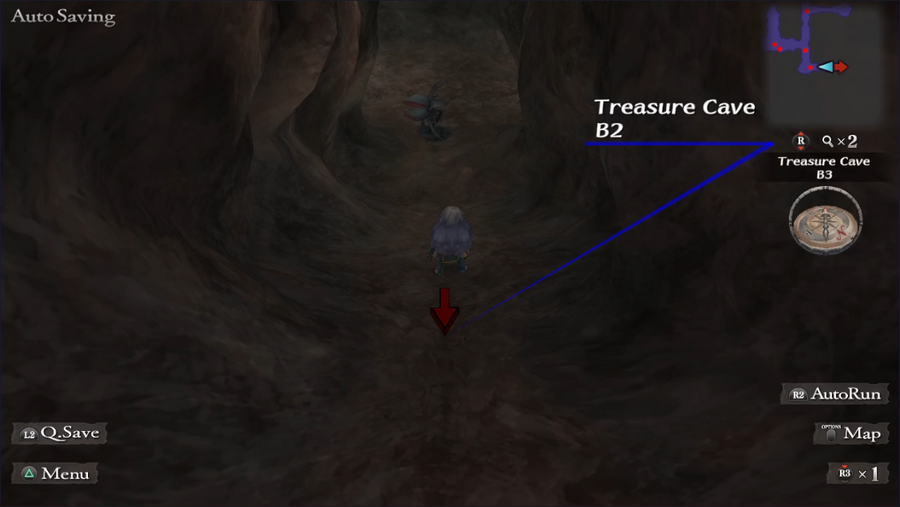 Finally, we make it to B3, the lowest floor of the cave. 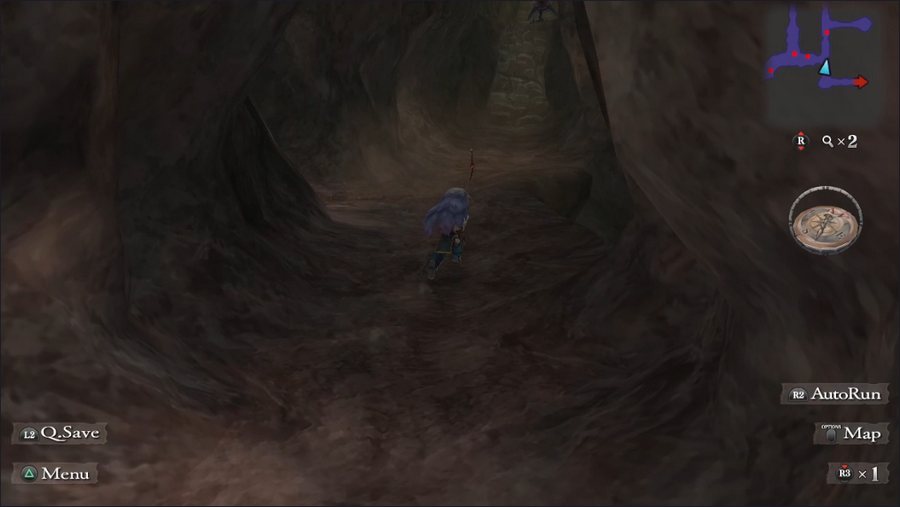 A short distance in, we spy something unusual. 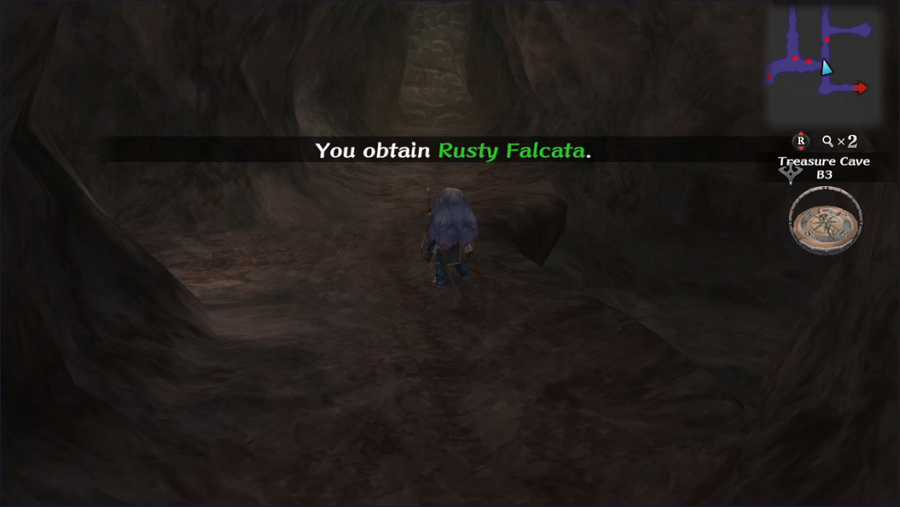 It seems like nothing more than a rusty old sword, but... https://www.youtube.com/watch?v=6oRQFeVgyfk Anyone can find the the Rusty Falcata, but only Gray gets the cutscene and the quest that results. This quest, Voice of the Blade, acts as an extended tutorial on Minstrel Song's blacksmithing system, and takes place over the course of a little over half the game. It's also why gray's starting class kinda sucks when he's the protagonist: the Falcata is a katana, and you have to use it to advance the quest, but the Swordsman class doesn't have the relevant weapon skill. If y'all choose Gray as the party leader, I'll need to change his class. 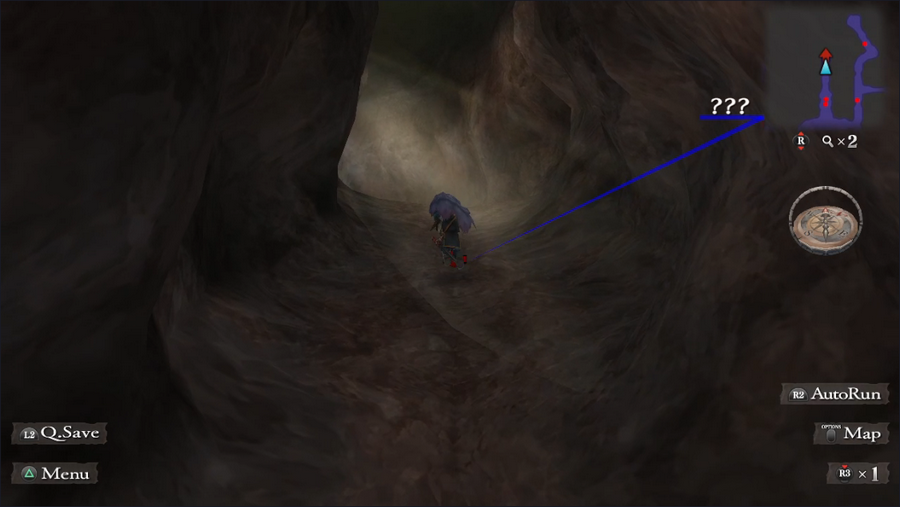 That's about all we can actually do here, so let's get out. Luckily the exit is nearby. 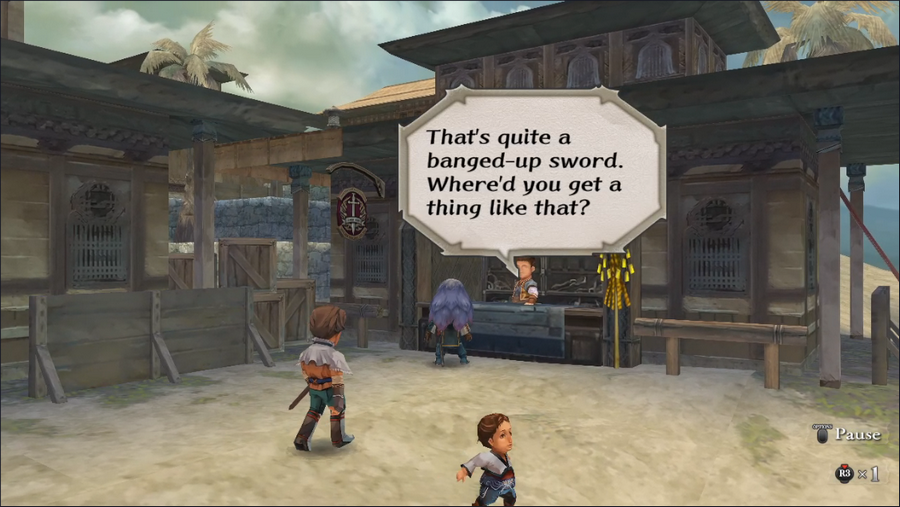 The local blacksmith is so rude to my new talking sword friend.  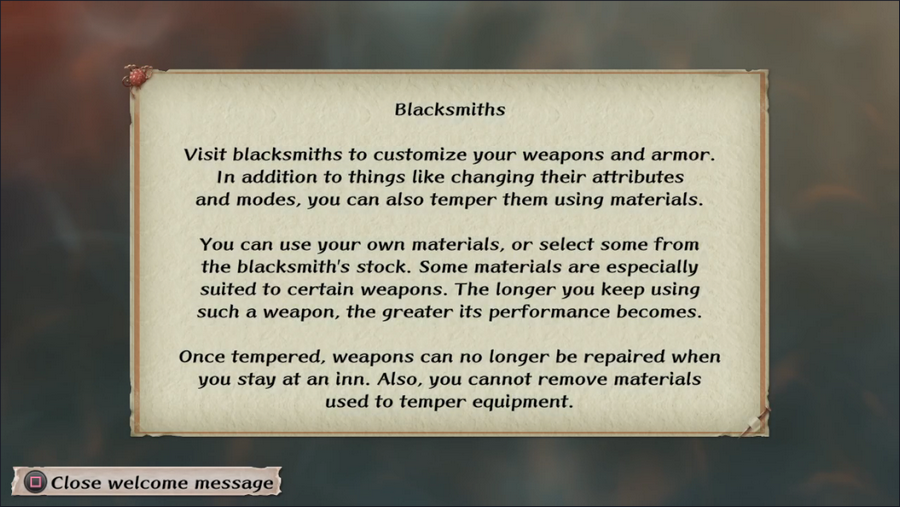 So here we are at Jelton's blacksmith. The info blurb explains the basics, but as with many tutorial popups in this game, it's woefully incomplete. Luckily, it does include that last paragraph, which is of vital importance: most weapons can have their durability recharged by staying at an inn, but tempered weapons have to be re-tempered to be repaired. It makes spending their DP much more costly unless the material is readily available. 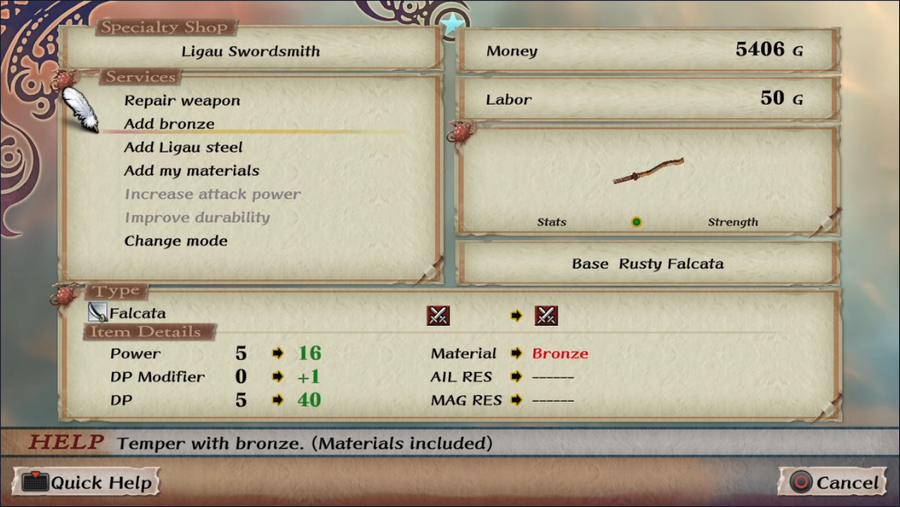 Luckily, the Ligau Swordsmith has bronze in stock, so for now we can always come back to cheaply repair it. At the bottom of the screen, you can see the weapon's stat changes after tempering: greater attack power and DP, plus a 1-point reduction in the DP costs of techniques ("DP Modifier"). To the right of that, you'll see that the material we're using, bronze, is highlighted in red. This indicates that it's a harmonic material for the weapon, which is a fancy way of saying it can be used to permanently make the weapon stronger. 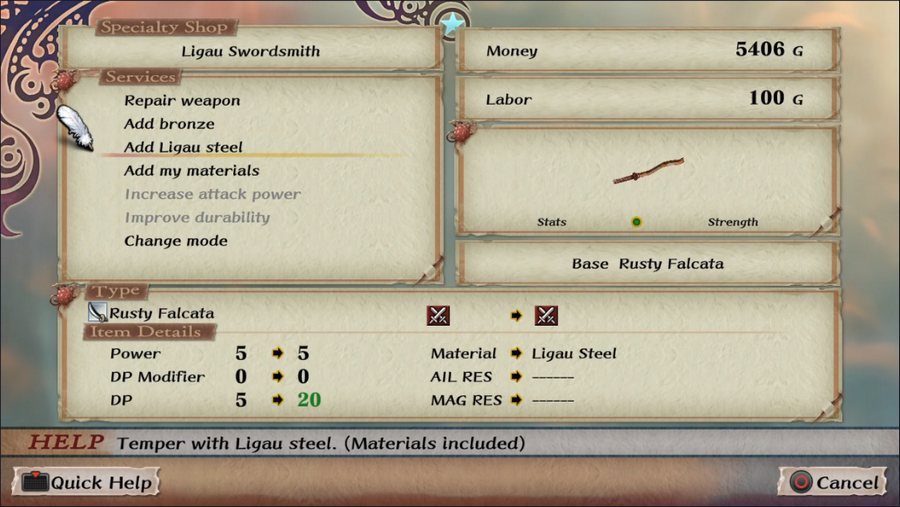 By contrast, adding Ligau steel will improve the Rusty Falcata's DP, but nothing else, and it isn't harmonic.  After adding bronze, the Rusty Falcata becomes the Falcata. Success!  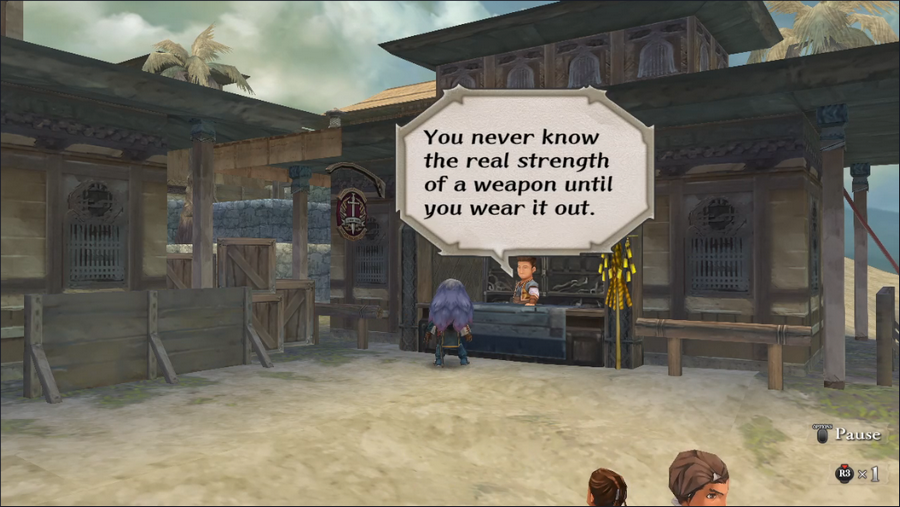 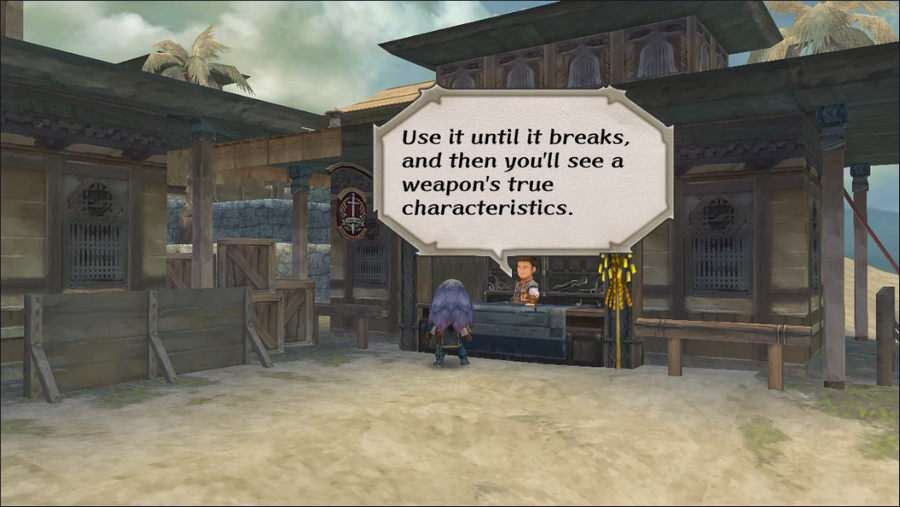 This is absolutely terrible advice. We do need to use the Falcata to make the harmonic material set in (and reach the next step in the quest), but breaking it is entirely unnecessary and will just add repair costs. 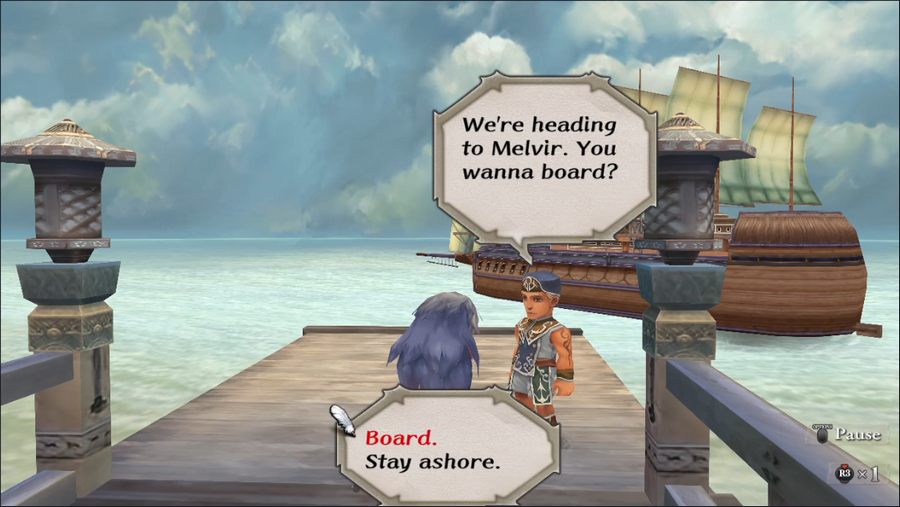 With nothing else to do here, let's head back to Melvir. 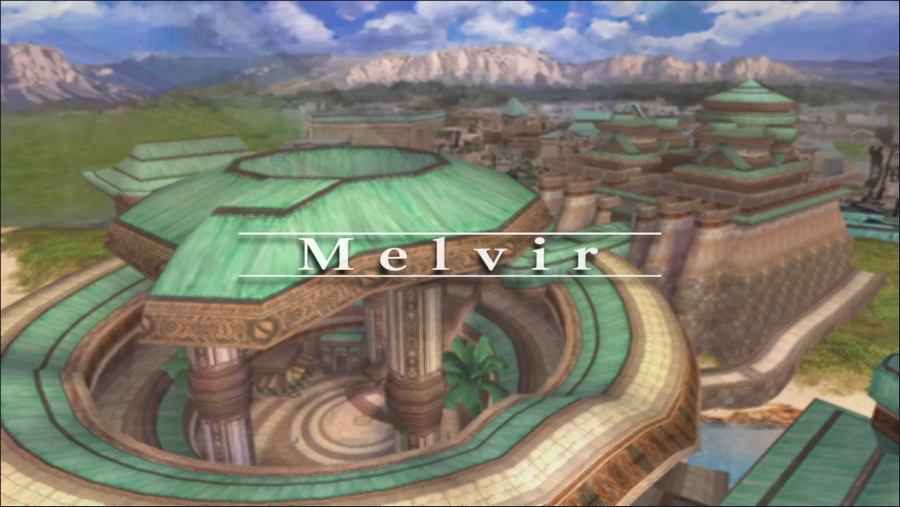 Melvir (likely a mistranslation of "Melville", a reference to its maritime traditions) is the capital of the Bafal Empire and the home of its emperor. It's one of the biggest cities in the world, right up there with Crystal City, and has numerous shops, temples, and other sites of interest.     Our companions are leaving, and we can only choose one to accompany. For now, we'll take the most Gray option and choose neither.        Although we know that Gray's heritage is that of the Ligau natives, his actual origins are never explained. 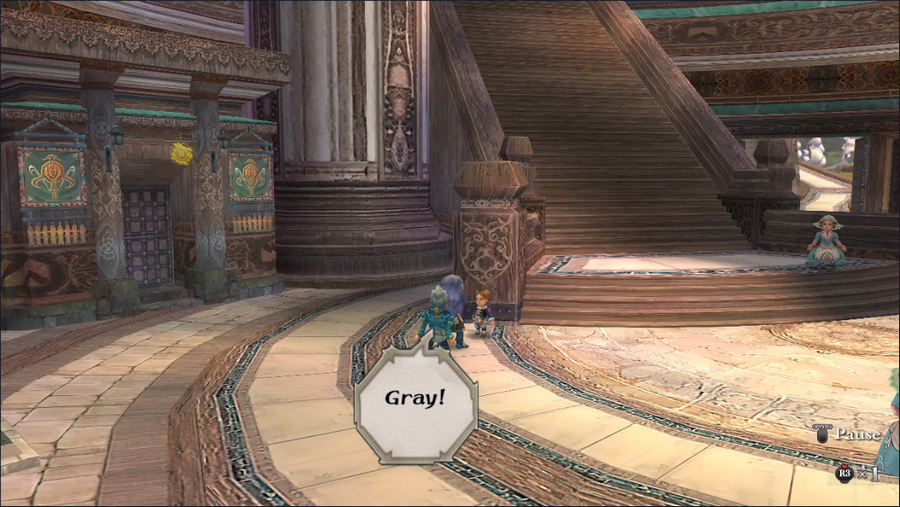 As we wander the city, we're accosted by a fellow anime protagonist. 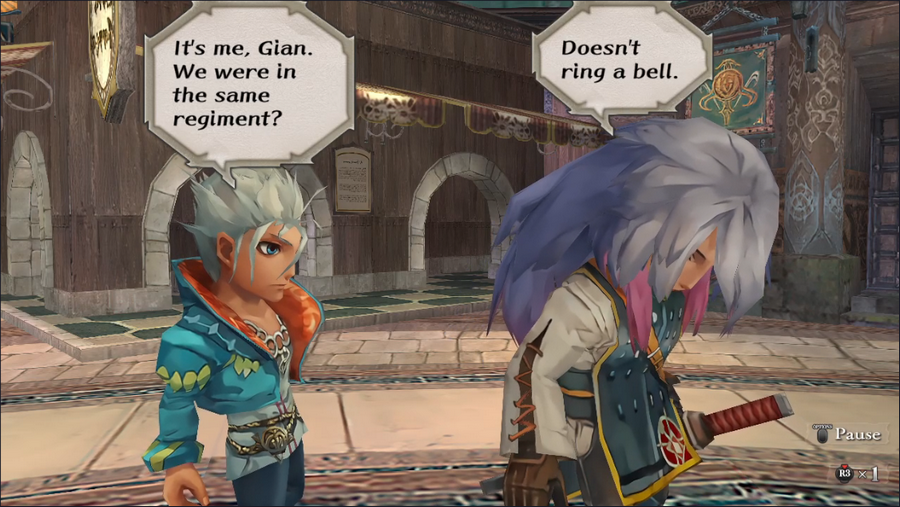 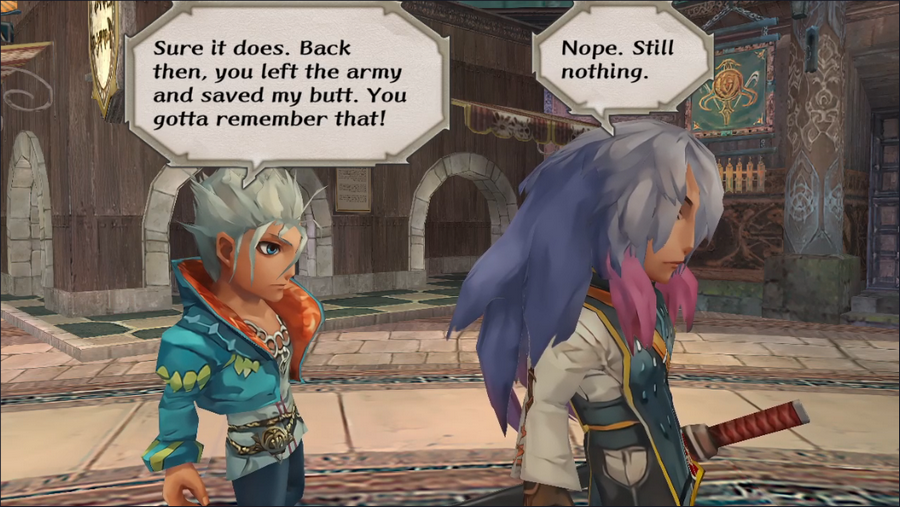 I genuinely don't know whether Gray legitimately doesn't remember Gian or if he just doesn't want anything to do with him. Either explanation is plausible. 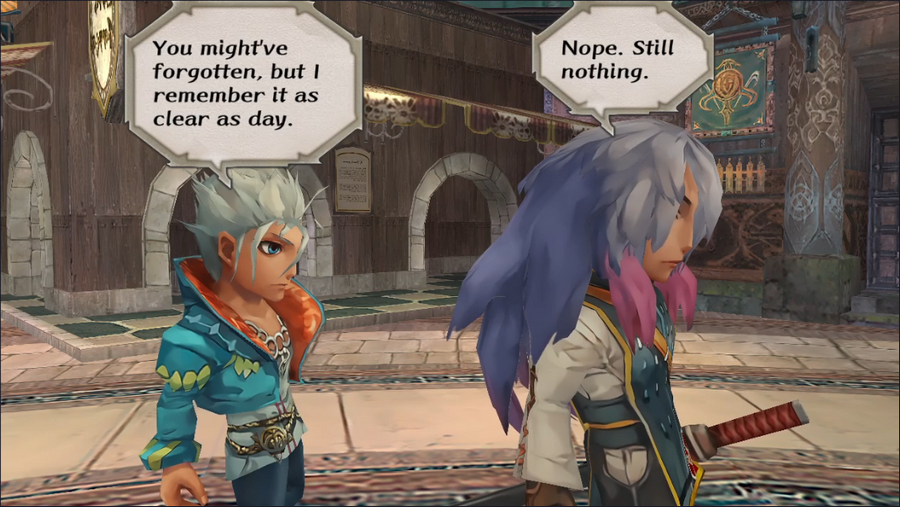 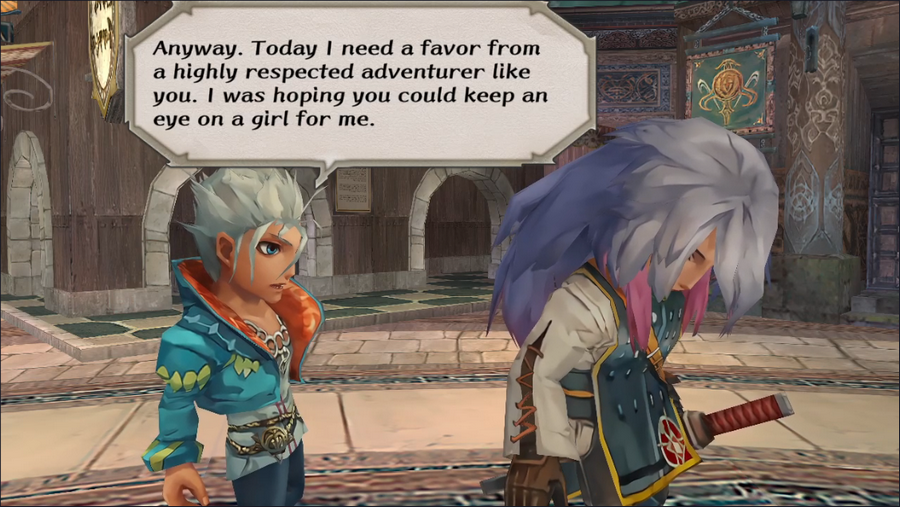 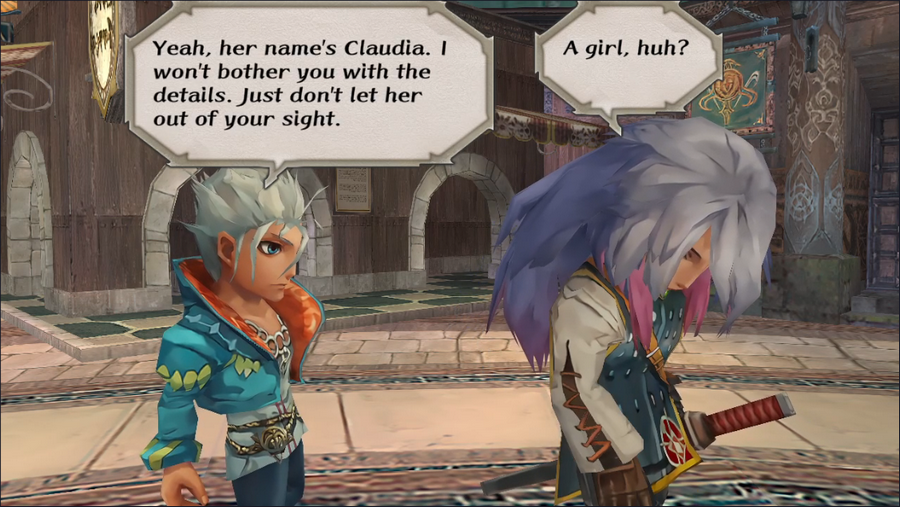 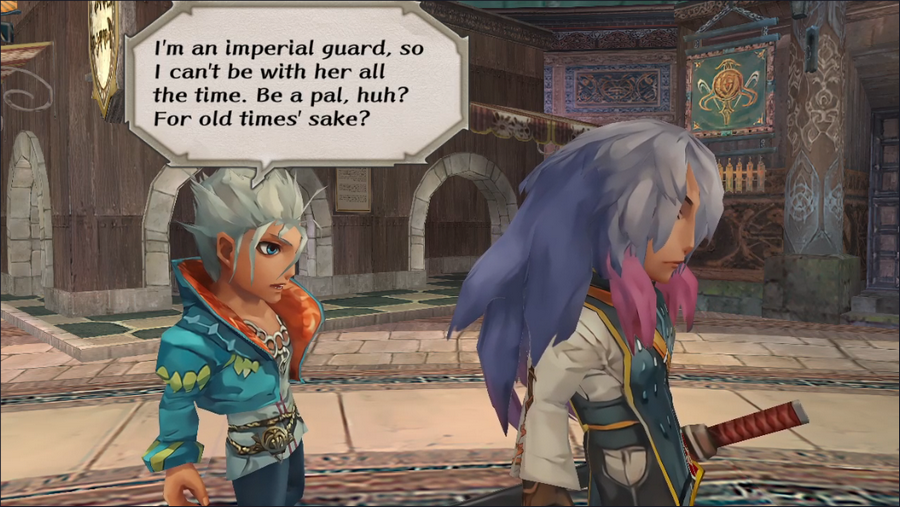 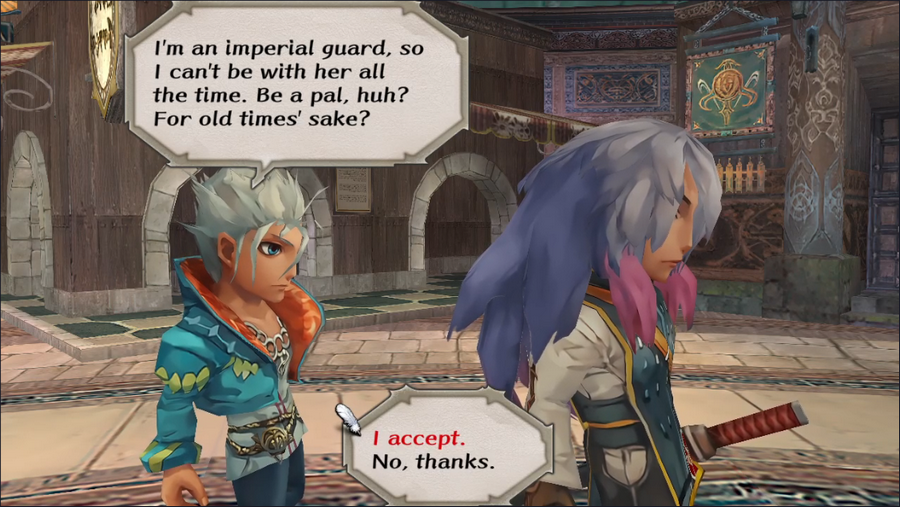 Well, that's a suspicious request. We could accept anyway, or we could just go our own way. But that's a decision for later. 5-Headed Snake God fucked around with this message at 04:08 on Oct 3, 2023 |
|
#
¿
Sep 5, 2023 00:57
|
|
|
If anyone can find me the names of the voice actors for Galahad and Myriam, you'd be my hero of the week. I don't recognize them and the information doesn't seem to be available.
|
|
#
¿
Sep 5, 2023 01:07
|
|
|
berryjon posted:Is that supposed to be there? (Also, why I put // before internal notes like this when I'm writing. Helps it stand out and easy to find in a file.) Hah, no, it was definitely not supposed to be there. 
|
|
#
¿
Sep 5, 2023 12:20
|
|
|
Shitenshi posted:I'm glad I'm reading this LP instead of playing the game because the solution to that informal puzzle with the dinosaurs sounds like the kind of thing that would make me tear my hair out and say, "Of course, it's SaGa." If I'm being honest, I cribbed that tactic from the official strategy guide published for the PS2 version. That guide has a ton of bad information, but in this case it's on point. There may be another solution, but hell if I know what it is.
|
|
#
¿
Sep 7, 2023 00:07
|
|
|
FeyerbrandX posted:Anything as bad as "you can jump through certain hoops and can get Gustaf to join in on Battle of Southmoundtop and make the nightmare of a battle into something merely scary?" bad? That's not a reference I get, so I suppose I don't know. But it does have some bad strategies and, in some case, outright false information (like claiming certain fights have fixed enemy sets when they don't).
|
|
#
¿
Sep 7, 2023 02:38
|
|
|
I've spent quite a bit of time discussing game mechanics, so how about we take a break from that and go over a bit of the world's mythology? Not a lot of this is really important to the game's story (some of these names never even show up in-game), but some of it is, and I think it's still pretty interesting. (Note that some of this information is intentionally left incomplete or inaccurate. It's meant to reflect broad strokes and the general knowledge of the inhabitants of Mardias, as well as to hide a few spoilers.) Saiva (left) and Marda (right), with Elore and Nisa (bottom) In the beginning - or at least as far back as anyone knows - there were two gods: Marda, the creator, and his wife Saiva, the destroyer. Together they rules over the world Marda had created, Mardias. At some point, for reasons unknown (possibly their opposed natures), they fell into conflict and began the War of the Gods. The two deities warred continuously with one another, creating monsters and other beings to fight on their behalf. Many of these creatures were wiped out, but a few persist today.  Saiva creates Elore Eventually, Saiva decided to create a minion above the rest: a lesser god. She hoped that in doing so, she might finally turn the tide of the war in her favor. Channeling divine power into her finger, she pricked it with a needle, and from the blood that spilled, a god was indeed born. His name was Elore. Elore's birth did change the tide of the war, though not as Saiva had hoped. Elore sided instead with Marda, and together the two were at long last able to slay Saiva. (At some point Marda also created a goddess, Nisa, though it's unclear when; she eventually became Elore's wife.) It is possible that Marda himself also died in the final battle, as he seems to have disappeared in the aftermath.  The three gods of evil rise from Saiva's remains: Death (top left), Schirach (bottom left), and Saruin (right) But while Saiva may have died, her legacy of destruction did not, as she left behind three more gods. From her bones arose Death, whose name and nature are one and the same. From her hair arose Schirach, goddess of darkness and magic. But it was her black heart that birthed the most wicked of the three: Saruin, god of evil and destruction. The peace brought about by Saiva's death was short-lived, as these three new gods banded together to conquer Mardias. Elore and Nisa, who loved the world and its creatures, moved to oppose them. This new war was long and bloody, and Saruin in particular created many terrible creatures to wage it. Some were obliterated, others were sealed away, and still more remain in the world today. Nisa, meanwhile, created two species, the Taralians and Terranites, whose names befit her role as the goddess of the earth. Inspired by these creations, Elore made beings of his own: Humans.  The warrior Mirsa and his companions. Elore eventually devised a strategy to deal with Saruin, who led the three dark gods in their war. He went to the mortal warrior Mirsa and gifted him with ten Fatestones: powerful gems that could counter Saruin's power. Alongside a group of companions (brave knights and an unknown sorceress), Mirsa fought his way to Saruin. The battle was fierce, but in the end, Mirsa emerged victorious. Unable to slay Saruin, he instead used the Fatestones to seal him away. Regrettably, his wounds were great, and he perished not long after.  Elore and Nisa devise a plan to deal with Schirach With Saruin removed from the war, Death and Schirach surrendered. They had mostly been spurred on by loyalty toward their brother, and lacked his ambition. Death retired to the Underworld, where he became the shepherd of the dead. But Schirach posed a greater problem. She was said to be even mightier than Saruin, and if left unchecked, she would wreak terrible havoc on Mardias, even without intending it. Using the power of one of the Fatestones, Elore sealed away her darkness; what became of her, no one knows.  Elore revives Mirsa and raises him to godhood With the war finally at an end, Elore and Nisa were able to settle down and oversee Mardias properly. They had several divine children, who remain worshiped by the people of the world today. Elore also rewarded Mirsa for his service by returning him to life and granting him godhood. Modern Gods of Mardias Elore: God of light, ruler and father of the gods. His temple is in Melvir, capital of Bafal. Nisa: Mother of the gods and goddess of the earth. Her temple is in Crystal City, capital of Rosalia. Yucomb: Wrathful god of the seas and bringer of storms. He has two temples, one in Melvir and the other in South Estamir, in north Kjaraht. Amut: Goddess of love and one of two moon goddesses. Her temple is in North Estamir. Eres: Goddess of beasts and the other moon goddess. Consort of Cyril. She has no temple. Cyril: God of plants. He has no temple. Mirsa: Formerly mortal god of warriors, especially knights. His temple is in Crystal City. Saruin: God of evil and destruction. Though sealed away, he still has worshipers. He has no temple - at least, not under the sun. Death: God of death, ruler of the Underworld. Doesn't seem to have many worshipers, if any at all. He has no temple. Schirach: Goddess of darkness and magic, who disappeared after Saruin's defeat. She has no temple. 5-Headed Snake God fucked around with this message at 04:18 on Oct 3, 2023 |
|
#
¿
Sep 11, 2023 13:36
|
|
|
Gilgamesh255 posted:Saiva: GO FORTH AND WRECK HAVOC IN MY NAME, CHILDREN! I love it.
|
|
#
¿
Sep 12, 2023 00:05
|
|


|
Rigged Death Trap posted:now whens this going to be mechanically relevant Mechanically? Never. But there are parts of it that get referenced in the story.
|
|
#
¿
Sep 12, 2023 00:22
|
|
|
buddychrist10 posted:The concept art for the Saga series is so good. Tomomi Kobayashi is extremely talented. Heck yeah. Half the reason I wanted to do that post was to have an excuse to show off the artwork.
|
|
#
¿
Sep 12, 2023 12:22
|
|
|
Welcome back, everyone. It's time for us to meet our fourth protagonist. Claudia's starting attributes are deceptive. She looks competent, but nothing special - certainly not as powerful as Gray. But make no mistake, Claudia is a beast. With her stat growths, BP regeneration, and absolutely outrageous 17 LP, she's not just the most powerful of the eight protagonists, but probably the single most powerful character in the entire game.  Claudia's starting class is Ranger, which is pretty decent. Bows are always a good weapon type to have, Terrology has some decent utility spells, and Search is vital to have on someone in the party. The class's passive ability of sometimes not using BP is also one of the best you can find in a basic class.  Claudia is tied to the Bafal Empire, though her actual unique interactions with its plotlines are minimal.   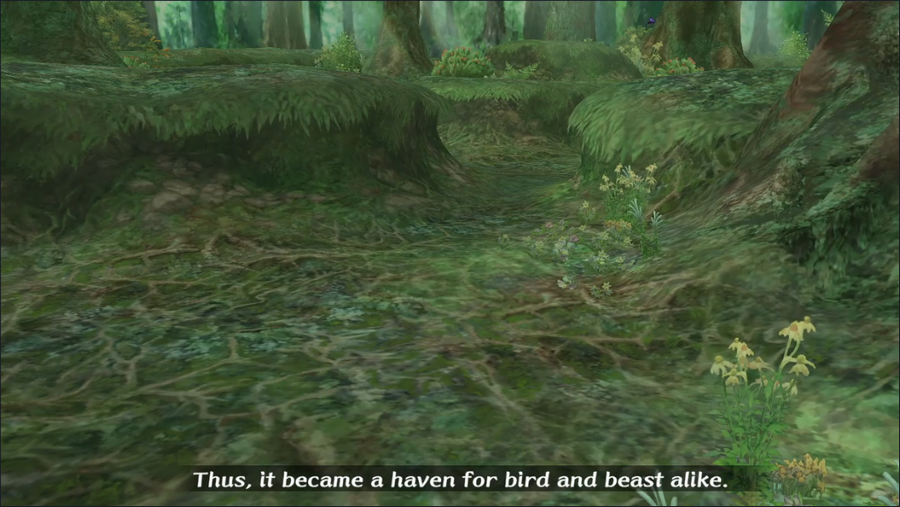 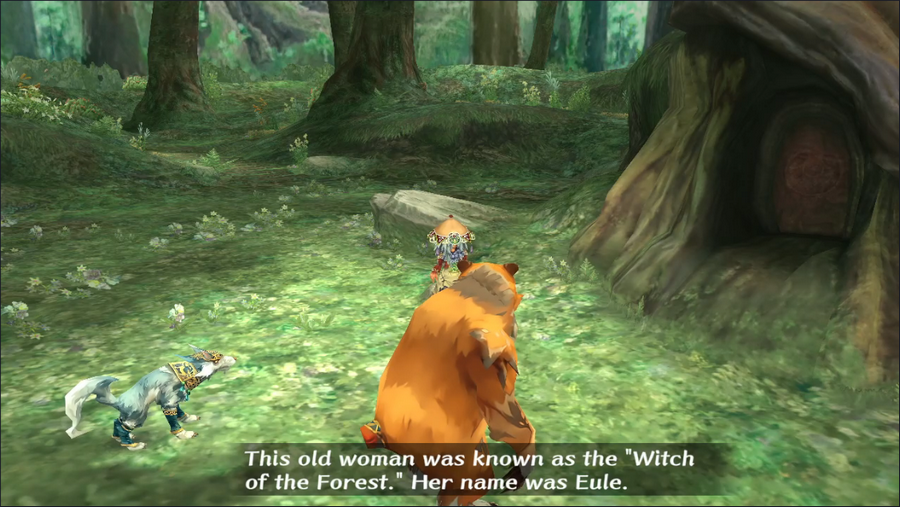 Trivia: Eule (pronounced "Oy-leh", or "Oy-lay" by the game's voice actors) is the German word for "owl". So we have three animals in this shot. 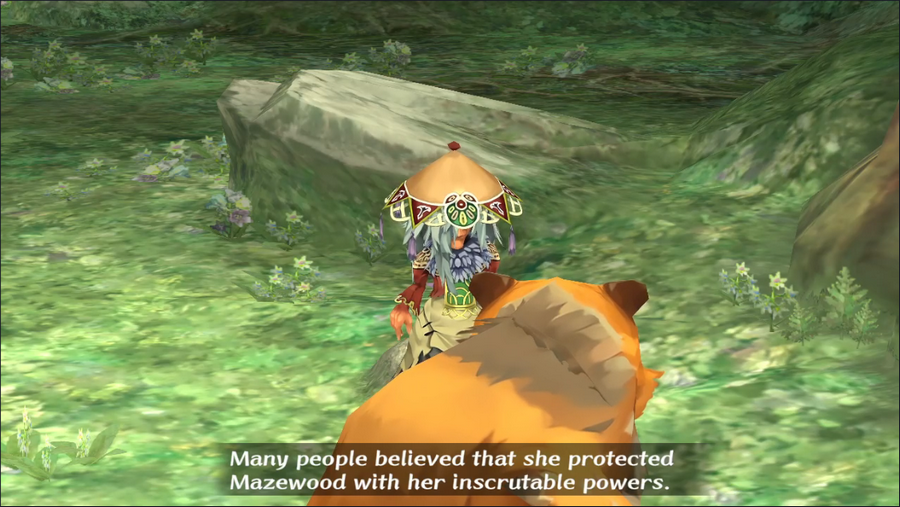 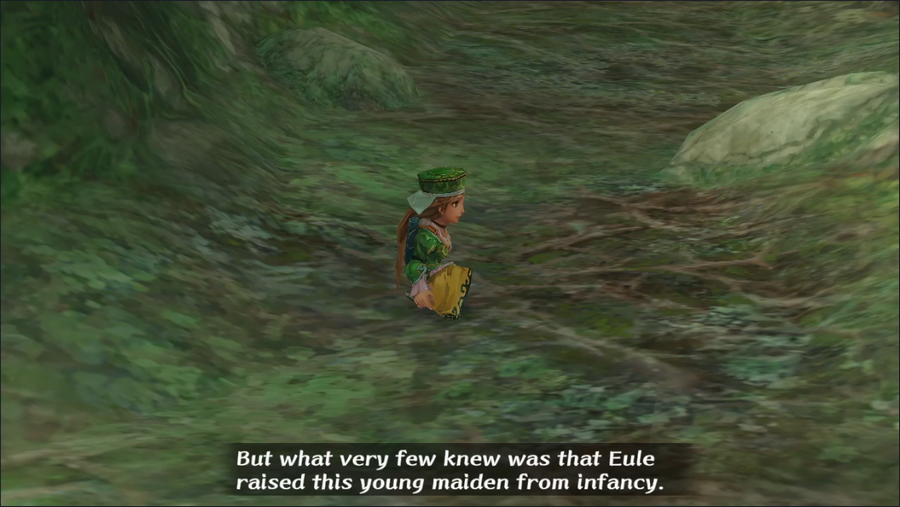 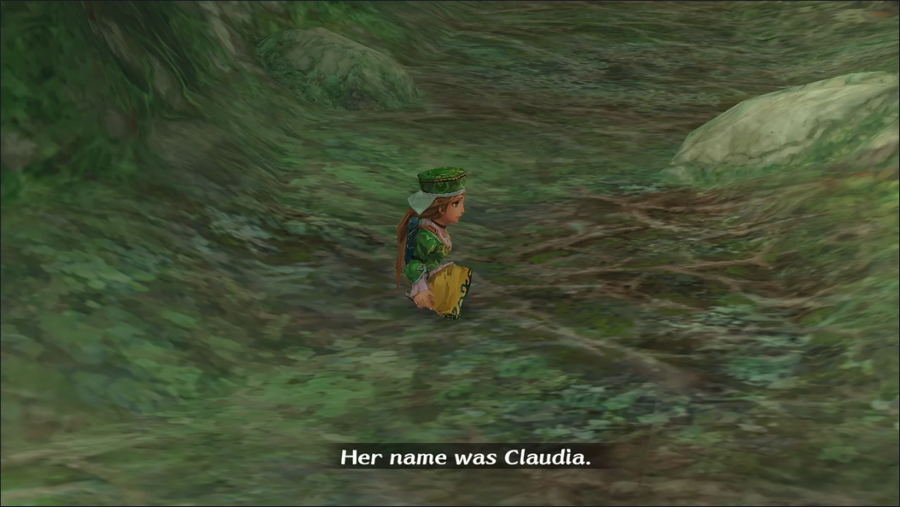 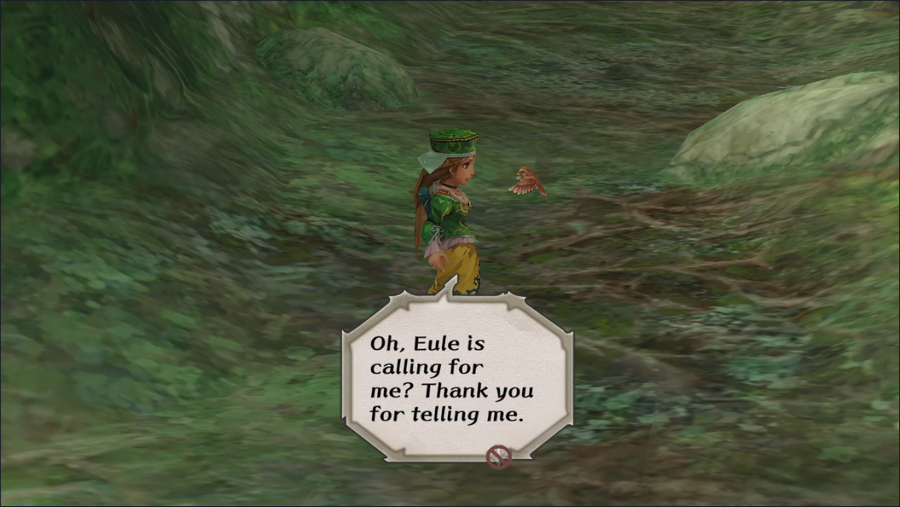 Claudia is basically a Disney princess because she seems to be able to talk to animals. 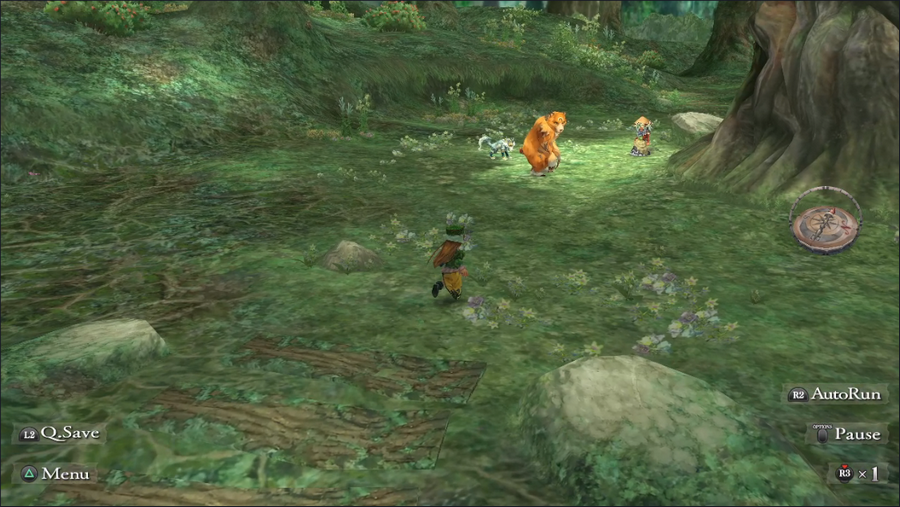 I find it mildly amusing that Eule seems to spend all her time standing outside her hut talking to a wolf and a bear.  Our first task is pretty straightforward: head to the forest's entrance and kill some monsters. 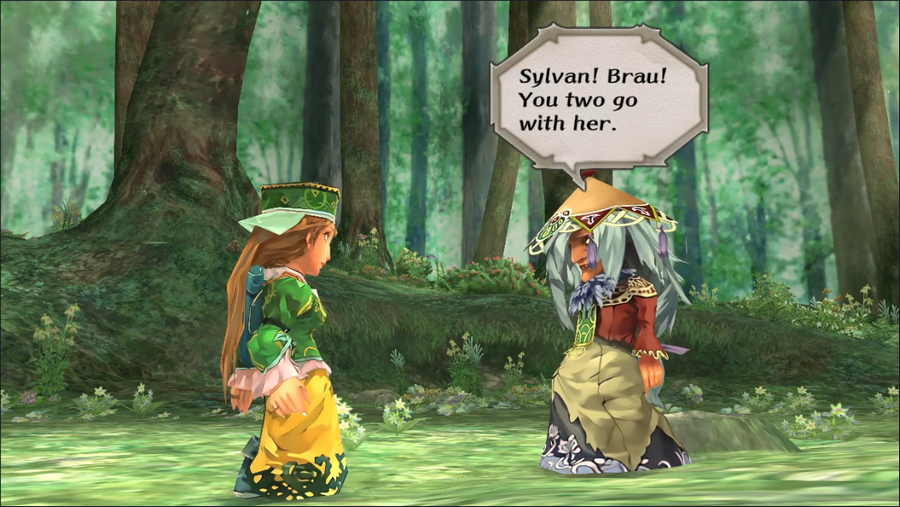 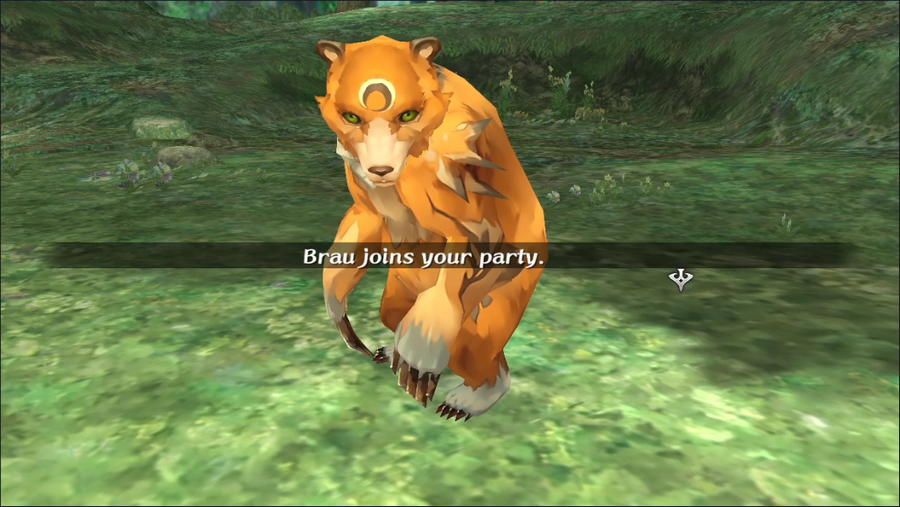 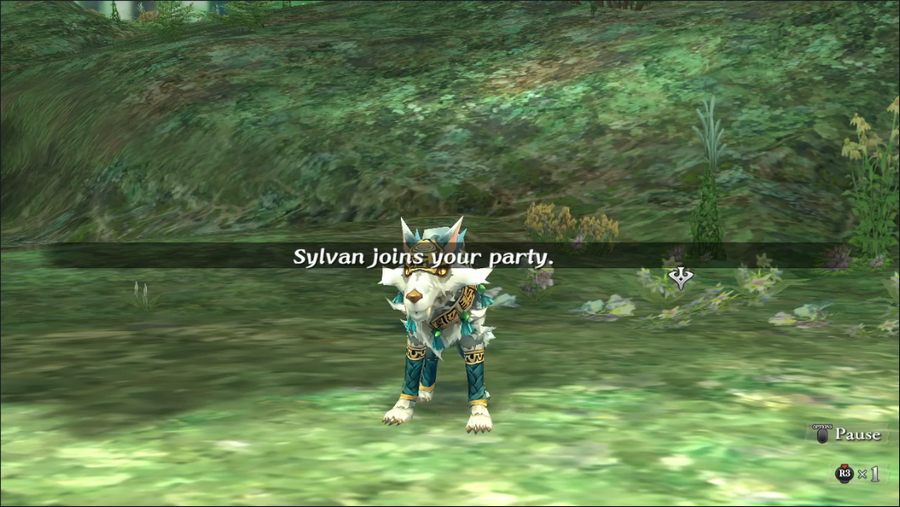 To help, we get our first two party members, Sylvan and Brau. Playing as Claudia is the only way to recruit them, and unlike other party members, they can't be manually removed from the group. They're helpful in the early game, but a lack of Glimmers and inability to use equipment makes them more of a liability as the game progresses. 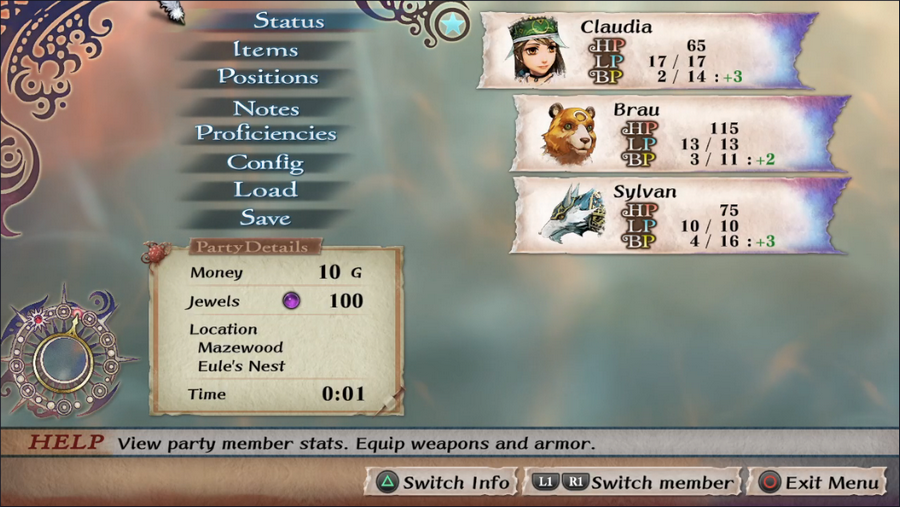 Note the Event Rank clock: Claudia begins the game at ER 1, rather than zero. Not a huge difference, but it's that much less time to mess around. 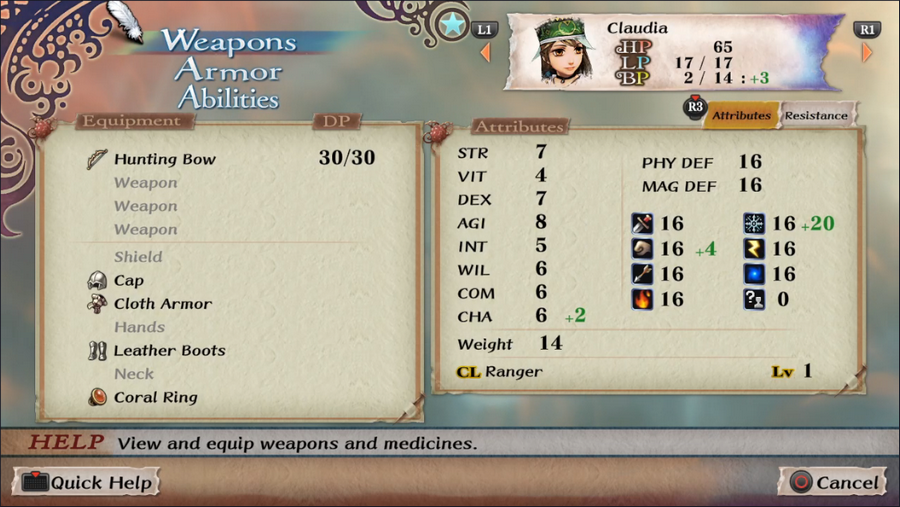 Claudia herself starts with some surprisingly decent gear for a girl raised in the woods.  Music Highlight: Pure Guardian/Innocent Warden Claudia's theme is a soft piece to reflect her gentle nature. It doesn't really feel like an exploration song, but it fits the character. Anyway, let's head for the entrance to the forest. Mazewood lives up to its name, but heading toward the camera is usually a safe bet for getting out. 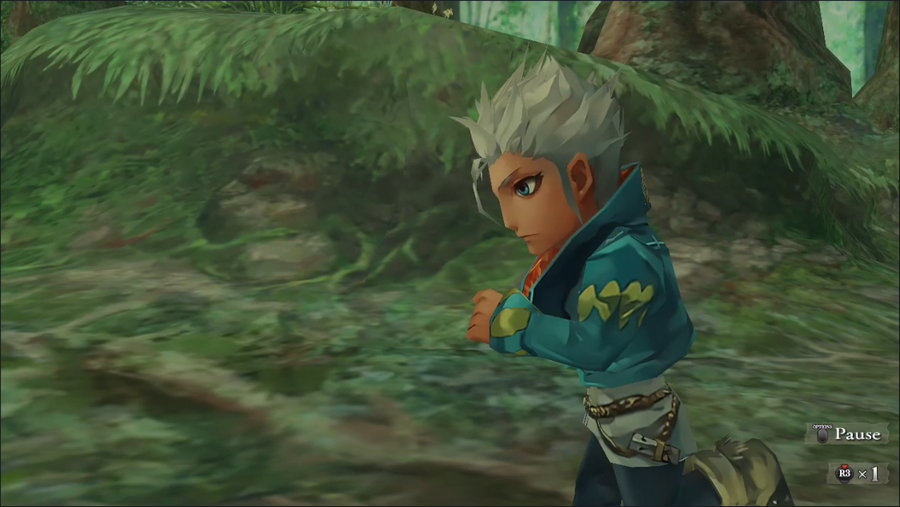 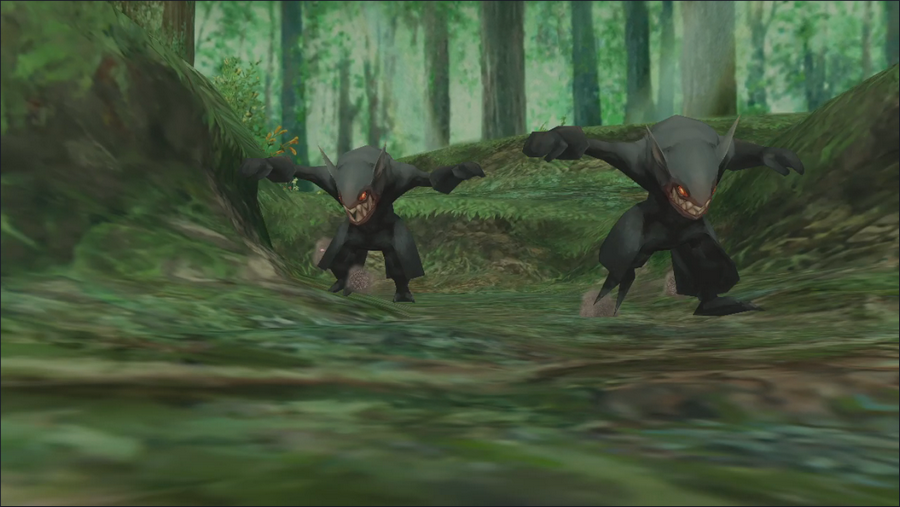 When we arrive, we find a familiar man being chased by monsters. 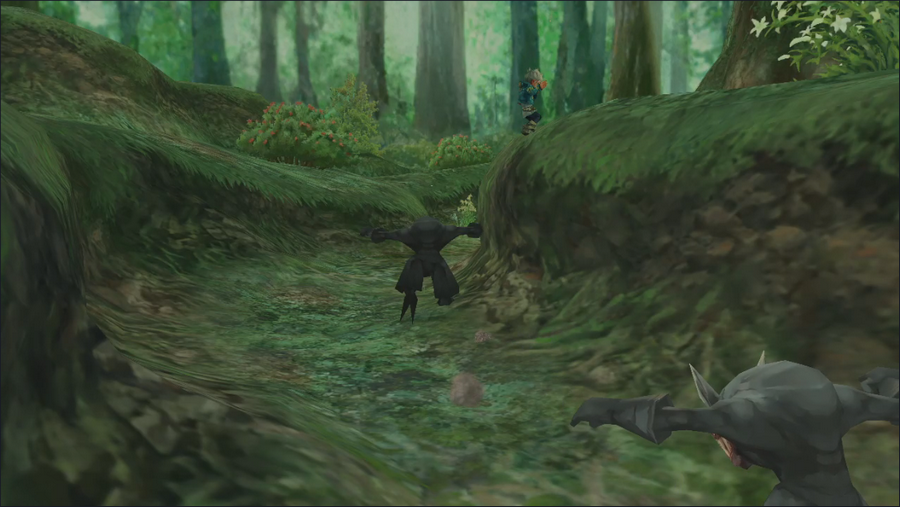 He evades them by jumping onto a high ledge, and even laughs at their inability to reach him. 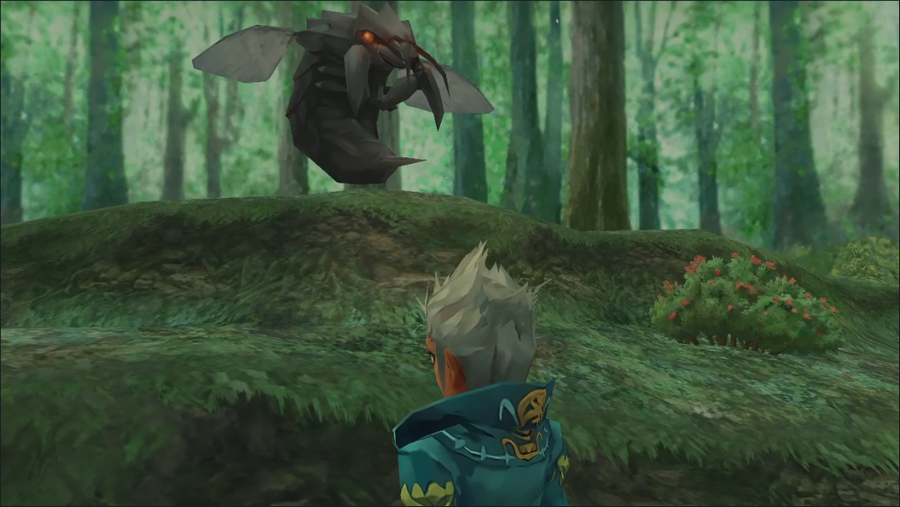 Pride goeth before the fall. 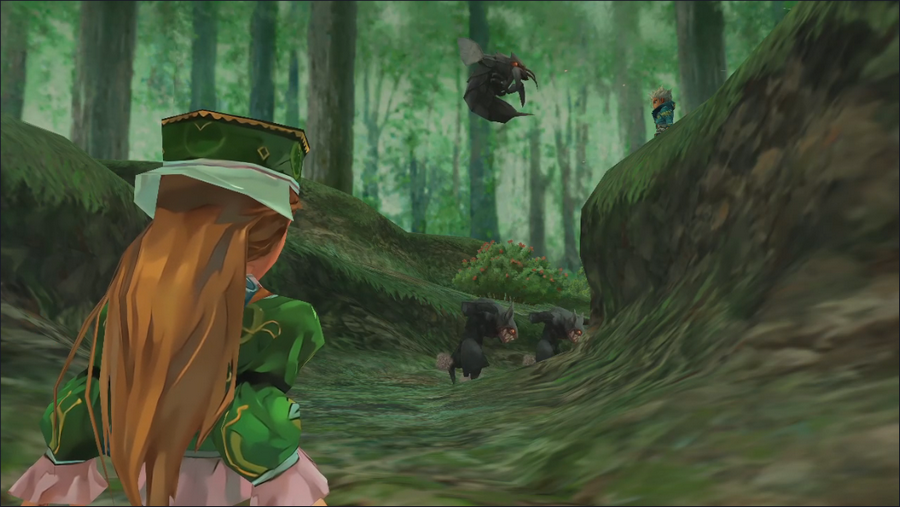 Luckily, Claudia shows up just in time.  For the first round of the fight, we have only Gian, though he isn't in much danger. He also seems to be using someone else's BP pool, if that box on the bottom right is any indication. 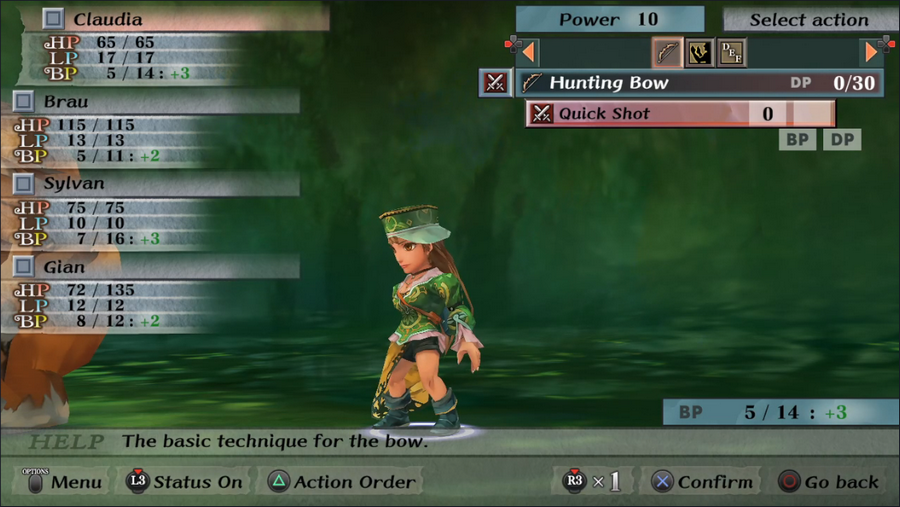 Luckily, Claudia's party shows up on round 2. 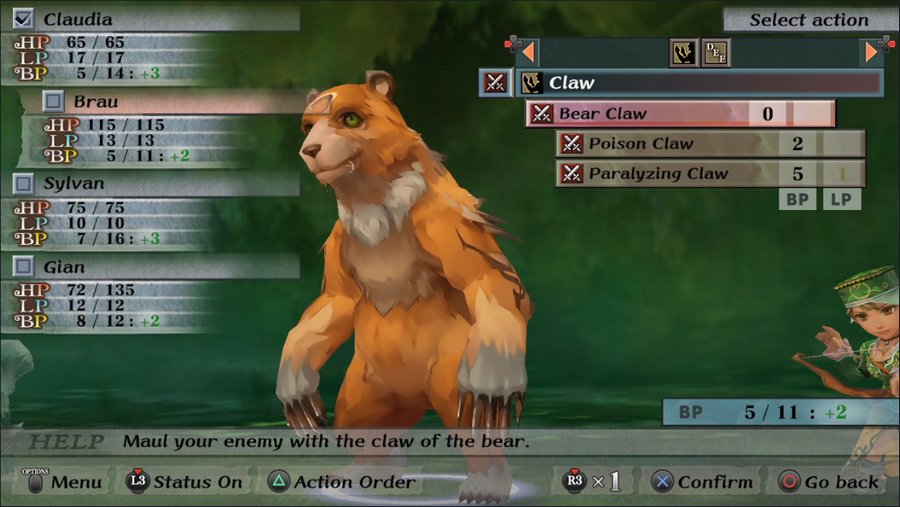 Brau is a big, strong fighter who can inflict poison and paralysis on foes, though the latter has a potential LP cost.  Sylvan focuses more on damage, though her techniques both risk a loss of LP, and she doesn't really have enough to make that risk worthwhile unless we're desperate.  Gian himself is back to using his own BP pool, but with four characters, the fight isn't much of a problem. Yeah, I know I failed to actually get a picture of the opposition. It's two goblins and a basic insect enemy. 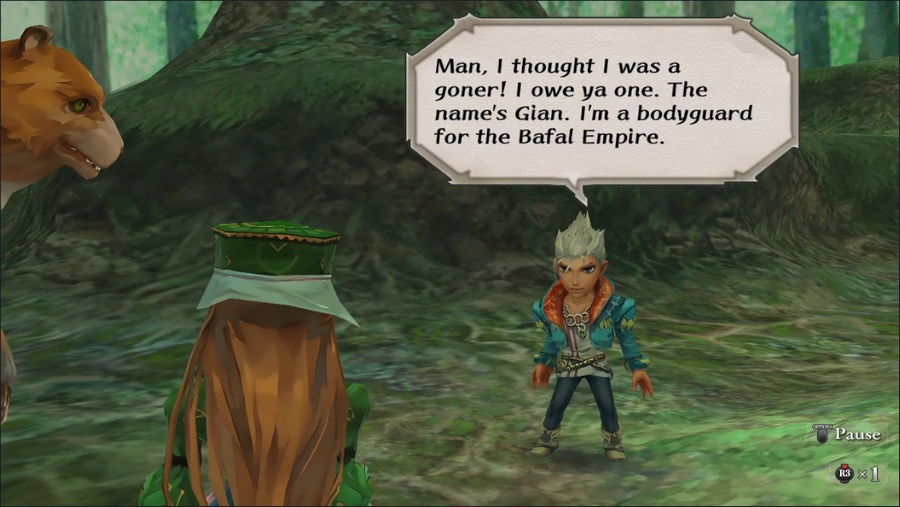    Gian seems oddly shocked at Claudia's name.  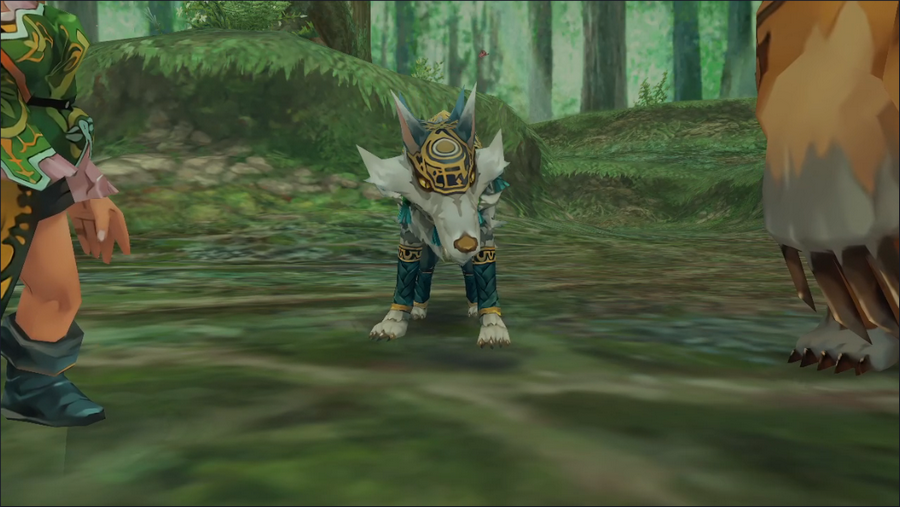 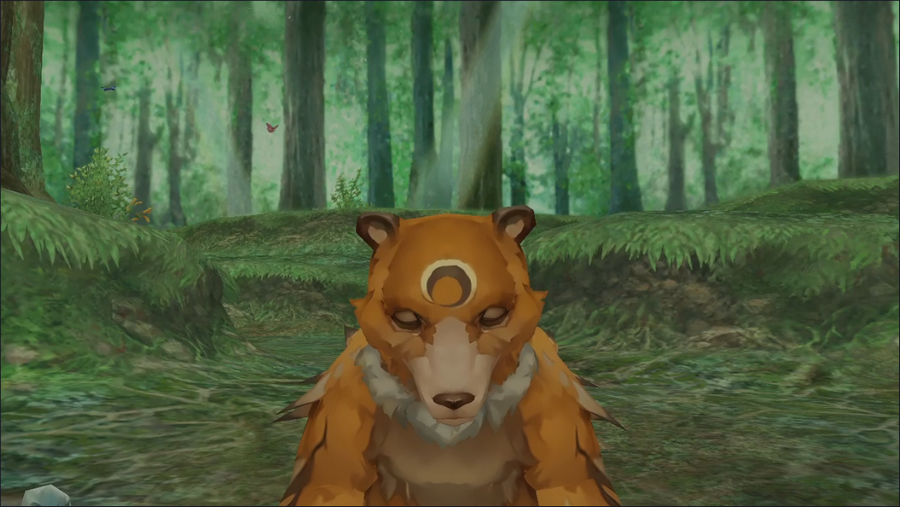 Sylvan shakes her head, but Brau gives an enthusiastic nod.  Claudia seems reluctant to have a lengthy conversation with this stranger.  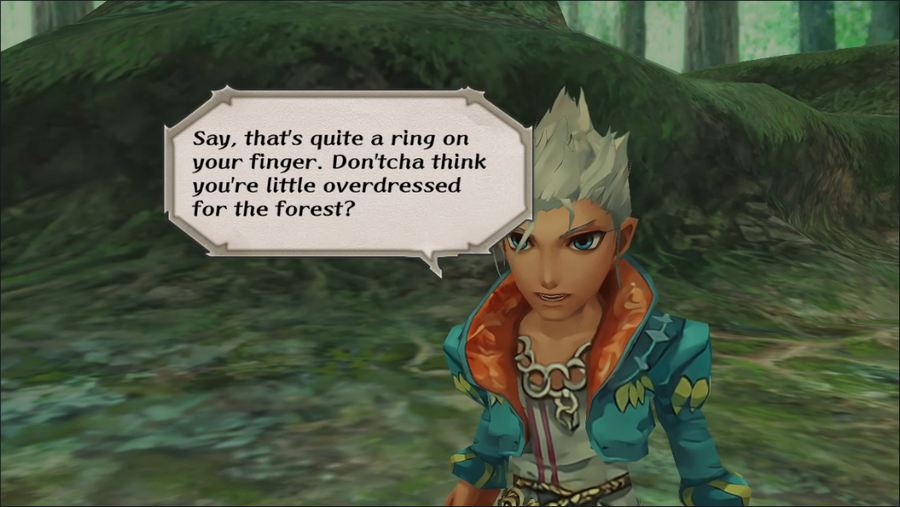 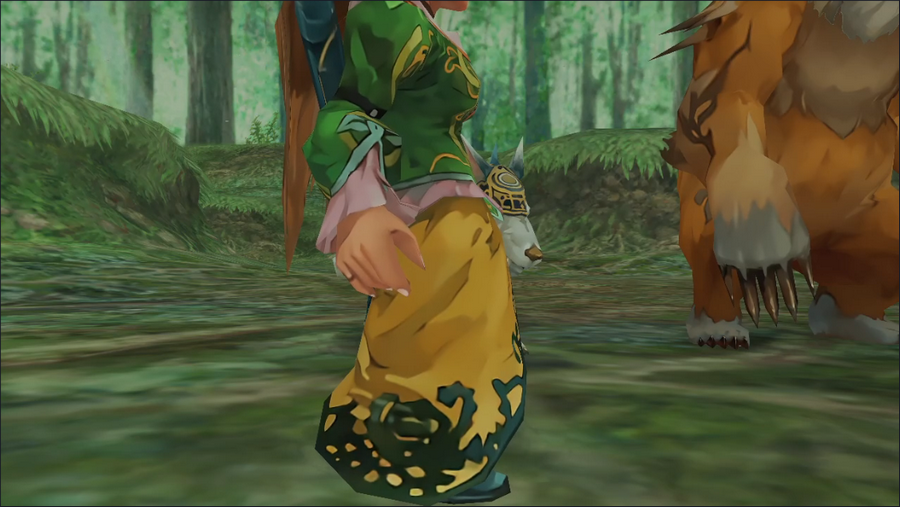 Claudia's model does have a barely-visible ring on the pinkie, and you might have noticed that she starts with a Coral Ring equipped. I appreciate little touches like that.  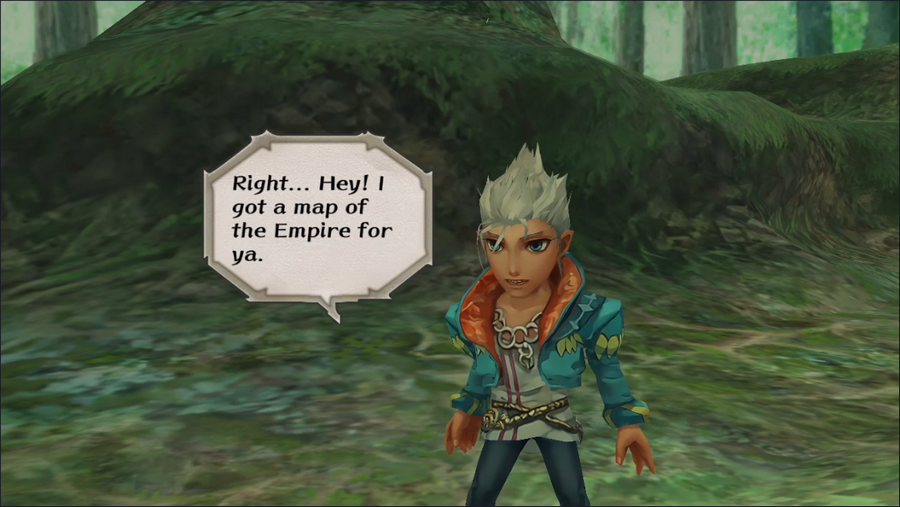 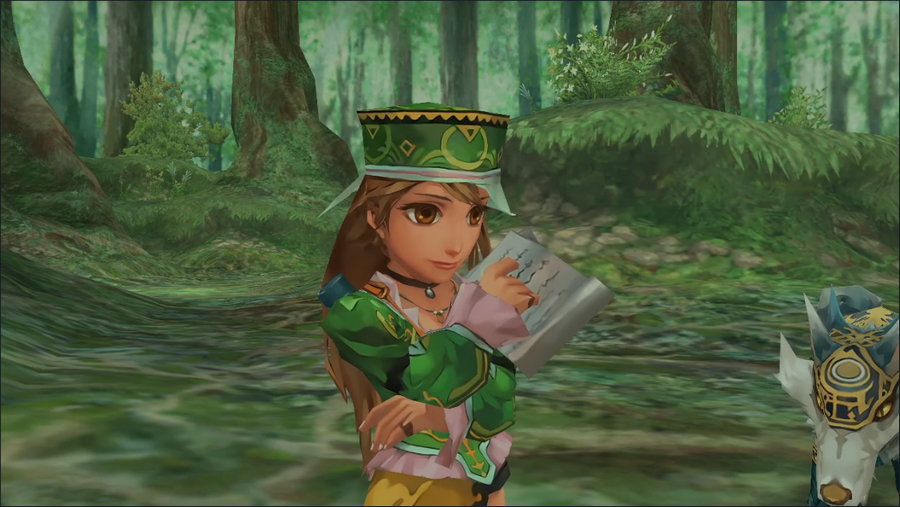 Well, that's a bit random.    And with that, Gian leaves.   It's at this point that I remember to take Claudia out of the front row, since she's an archer. Bows are unusual in that they can be optimally placed in either of two rows. The middle row offers greater power, while the back offers superior speed. I usually opt for the latter since it also comes with a defense bonus, but middle row can be a good choice if we need raw damage. 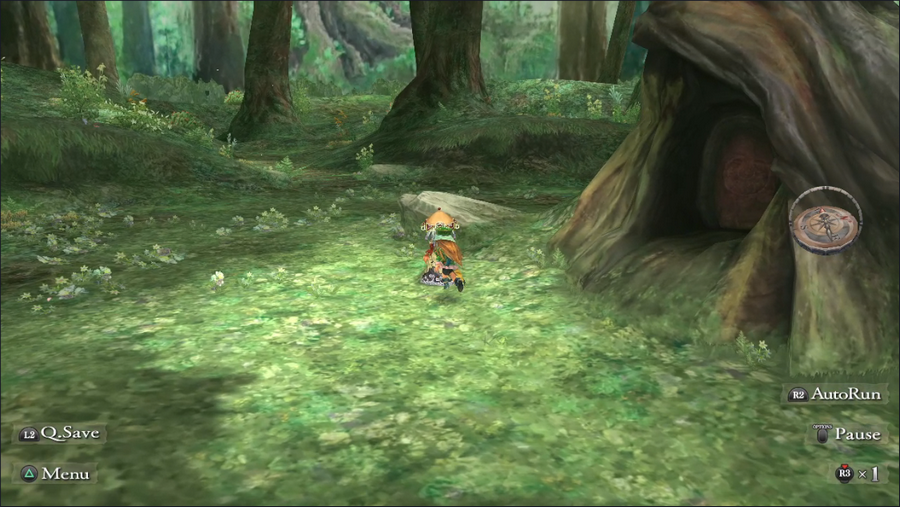 With that done, we make our way back to Eule.      Witch-mom doesn't seem to place a huge amount of value on human life.    I do appreciate that she's not an overprotective mother figure, and actually encourages her girl to go out and see the world.  If that's not foreshadowing I don't know what is.    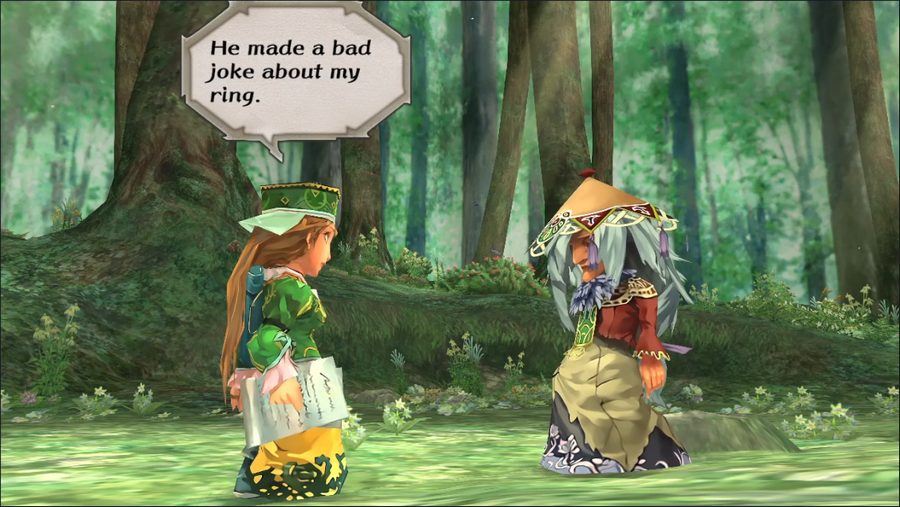 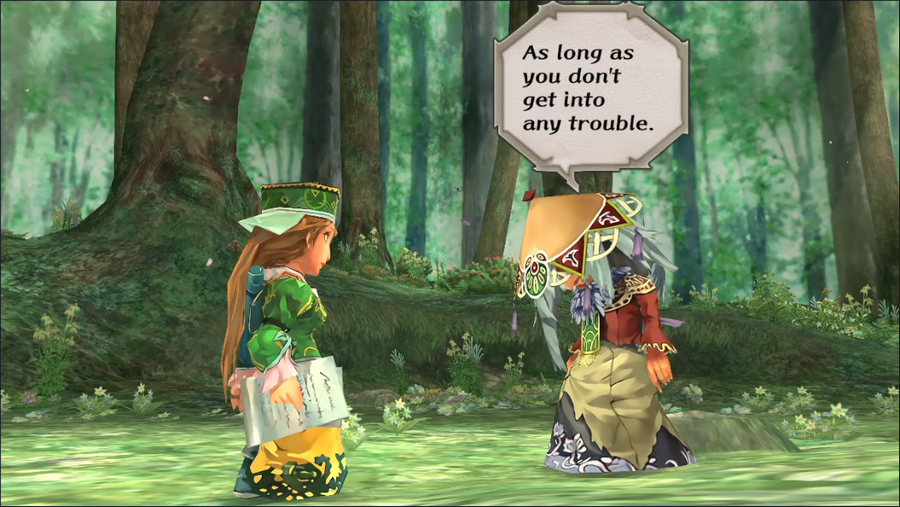 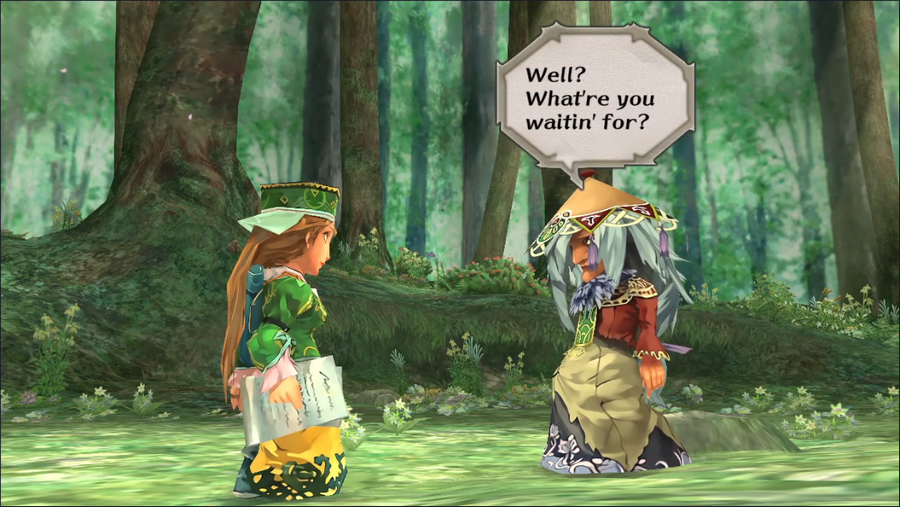 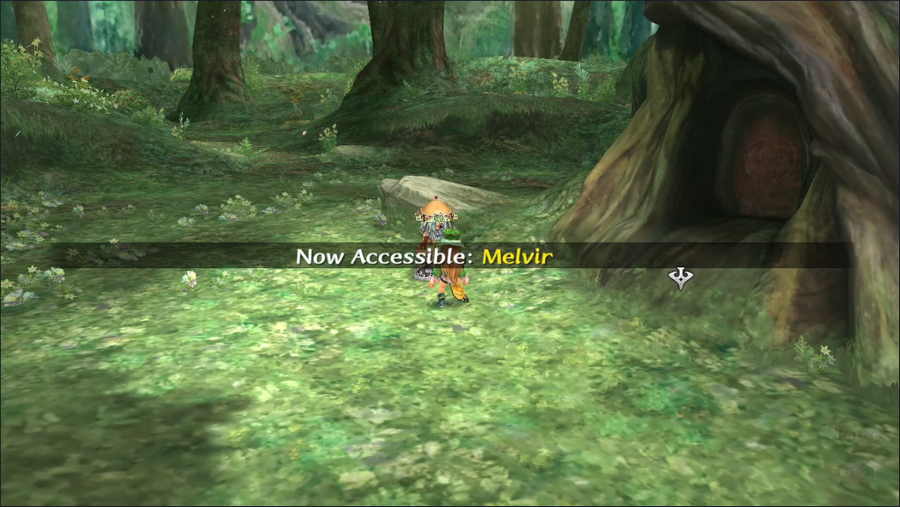  We can now leave Mazewood for either Melvir or Aurefont. At this point we could abandon the rest of the intro; NPCs in Aurefont can unlock new cities for us to explore. 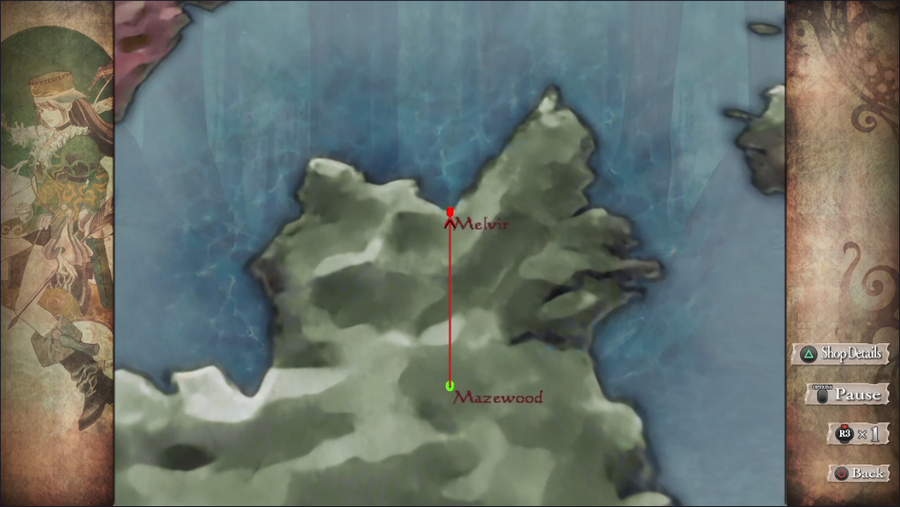 But that's way less interesting, so let's head to Melvir.  The city's main square has a set of stairs leading up. Melvir is a two-story city! (The "???" indicates that this is an area transition and we don't know where it leads. On subsequent trips it'll have the name of the area.)  Once we're there, the palace is straight ahead. 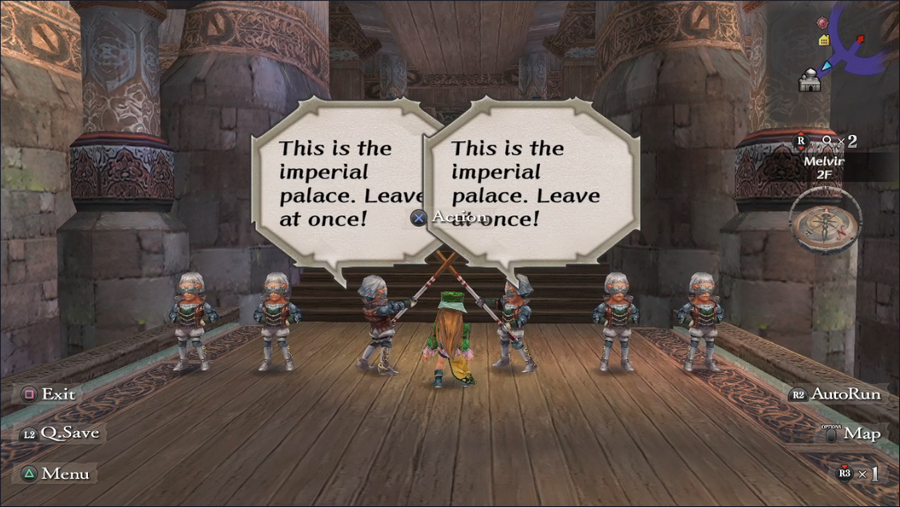  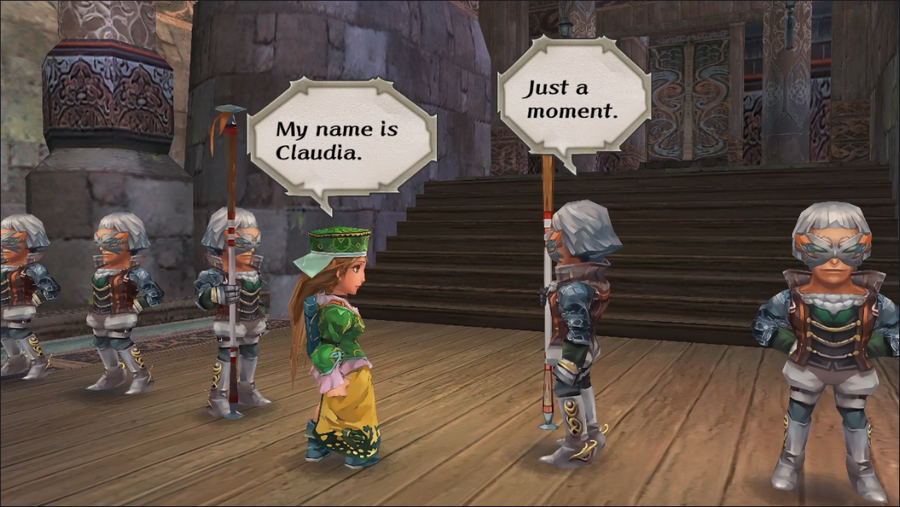 The guards are pretty competent, but luckily we're expected. 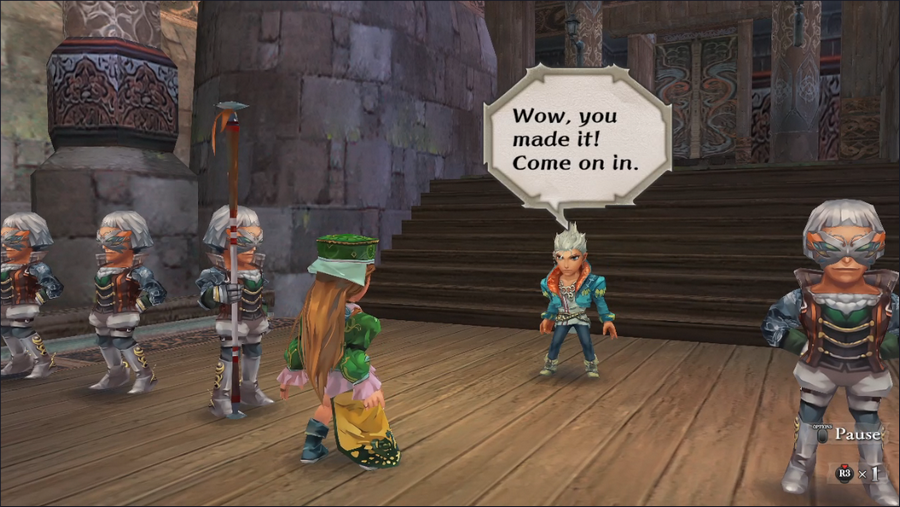 After a believable wait time, Gian runs out to welcome us. 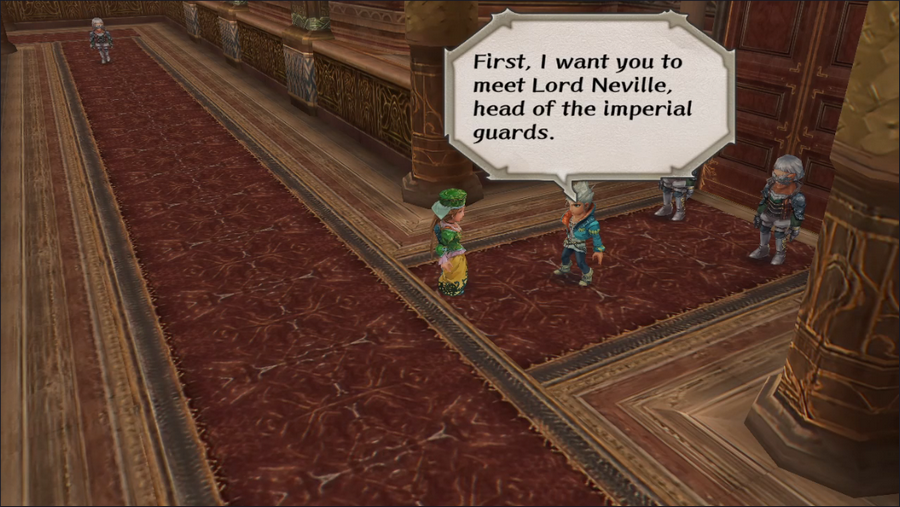 That's weird, but sure. 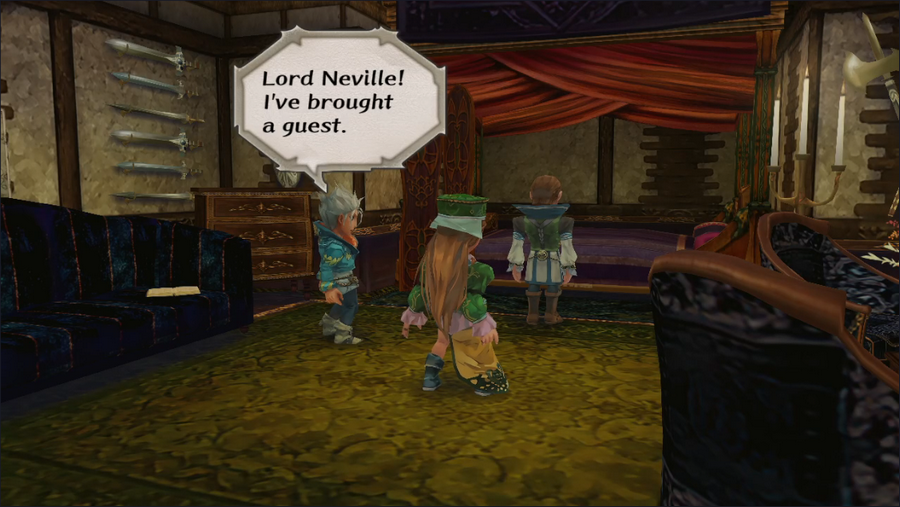 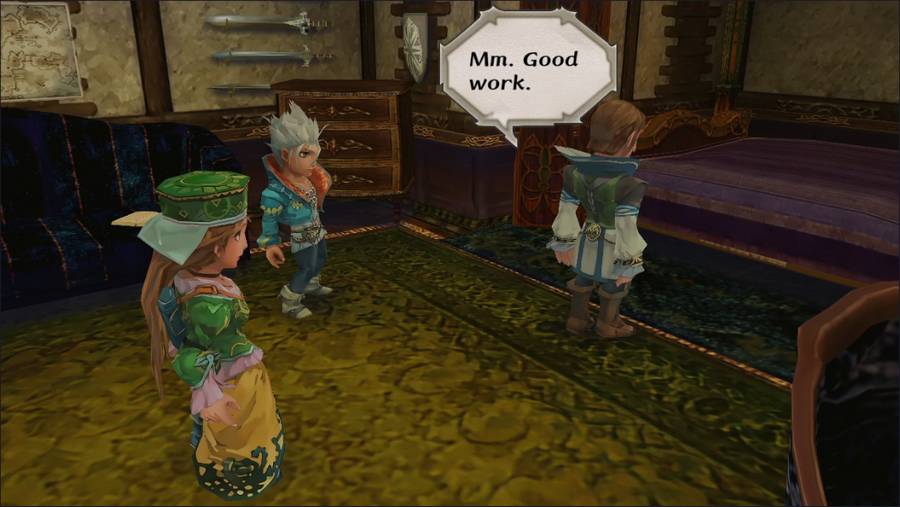  Neville has possibly the most impressive nose in the game. 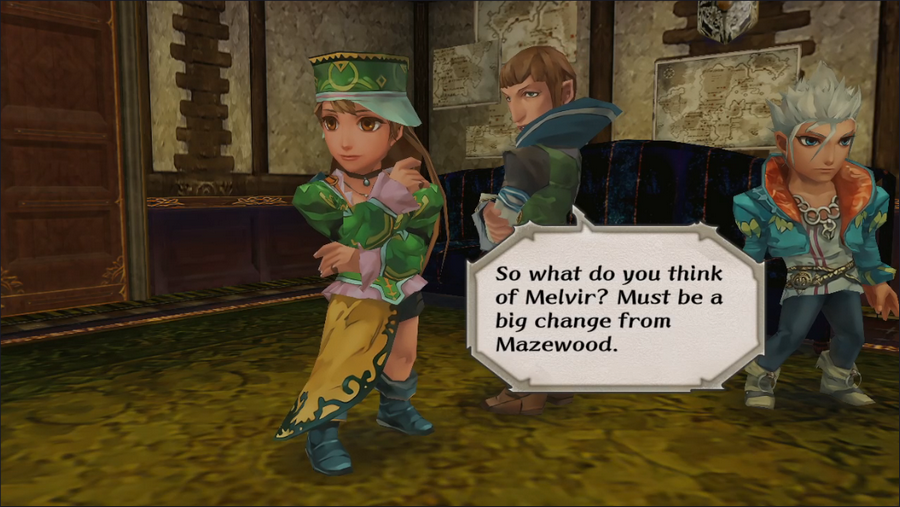   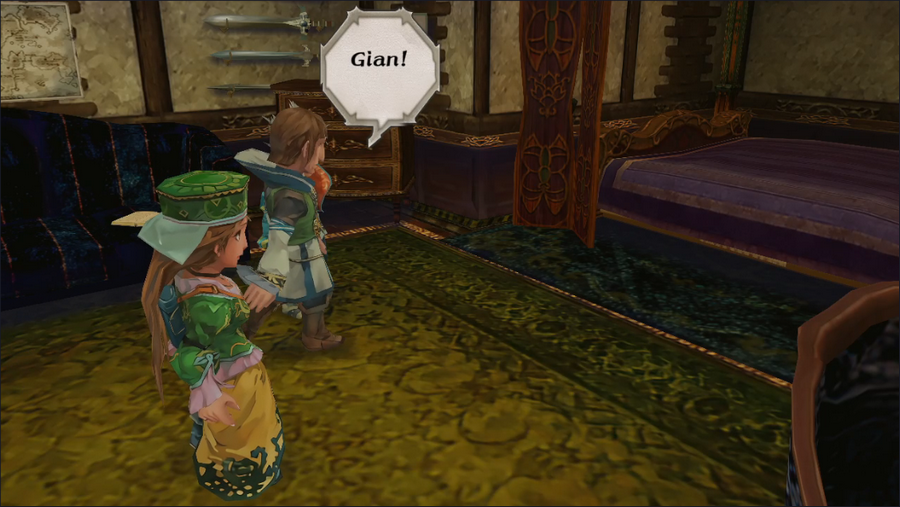 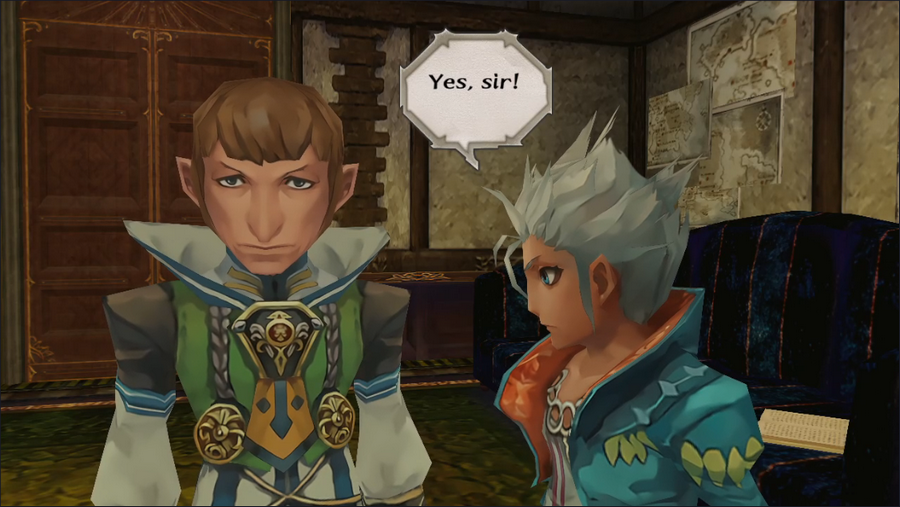 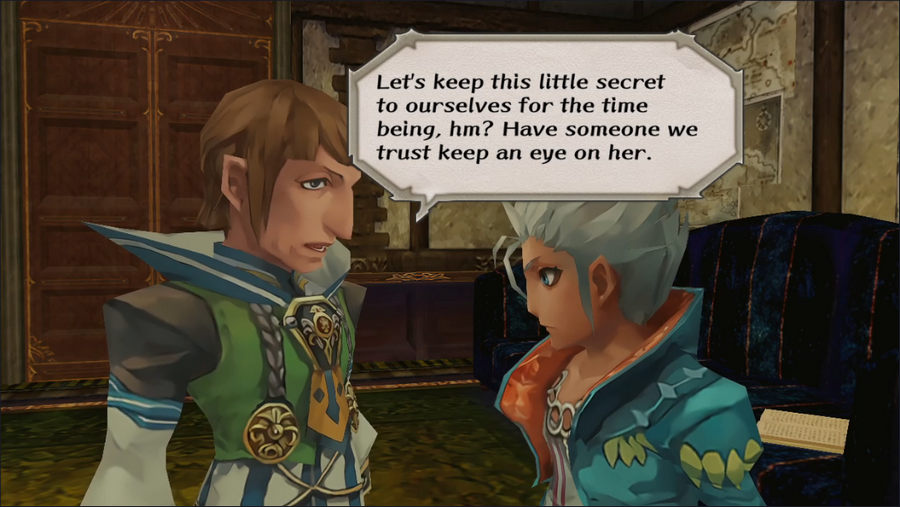 The continues to be extremely suspicious. If I didn't know better I'd think this girl raised in the forest by a witch was important somehow. 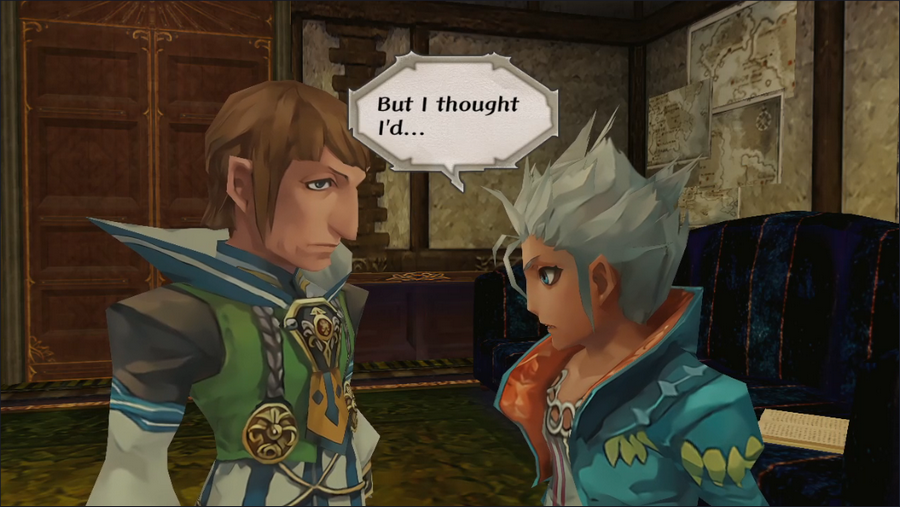  Claudia's intro is full of foreshadowing. 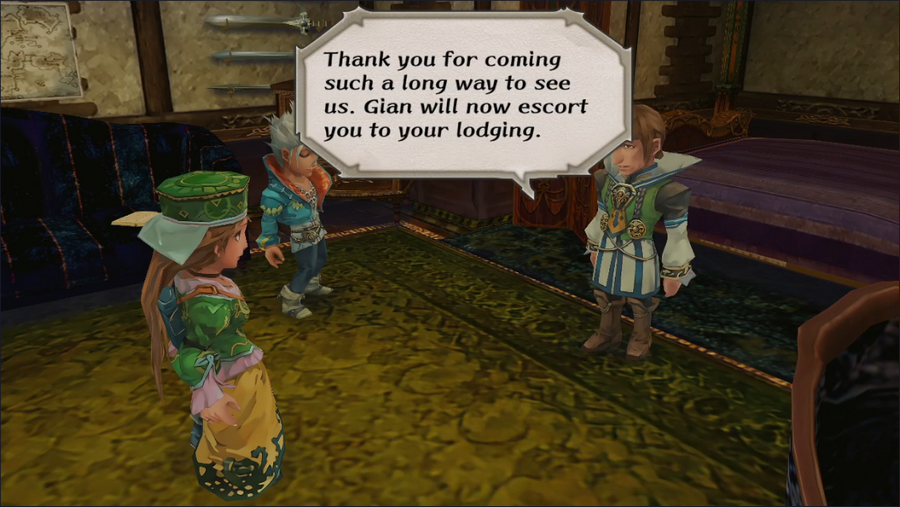 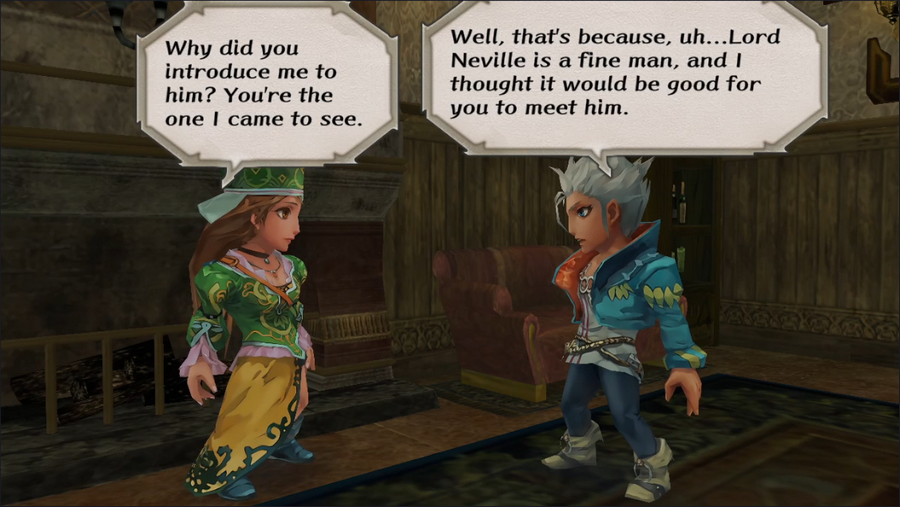 Claudia may not know much about city living, but she's smart enough to ask obvious questions. 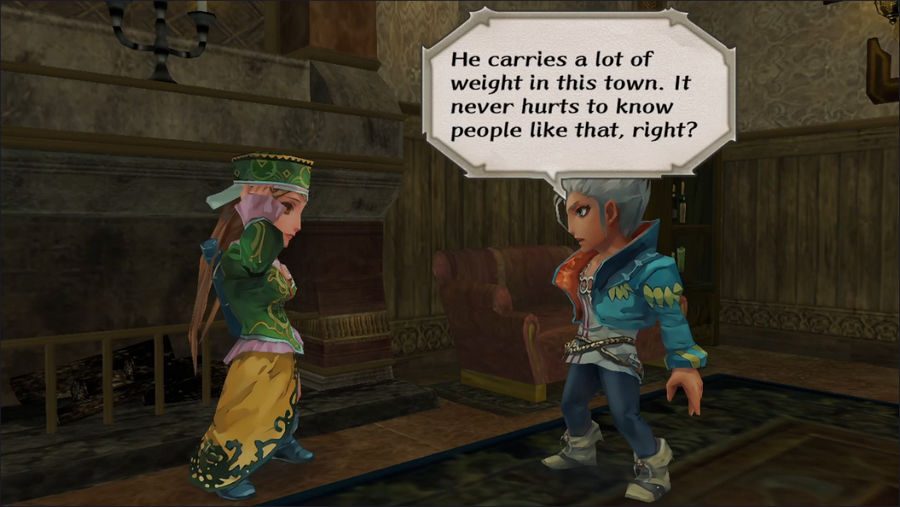   From a gameplay standpoint this isn't strictly true, but there's a fair amount of violence that can happen in the game's cities, so it's not unfair.   Unfortunately, he's an absolutely rotten guard.  Sure. "Just now." 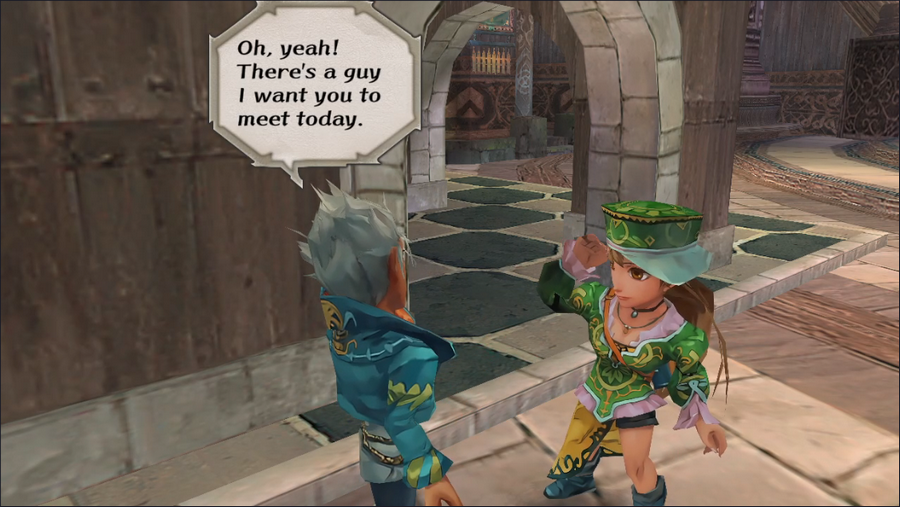 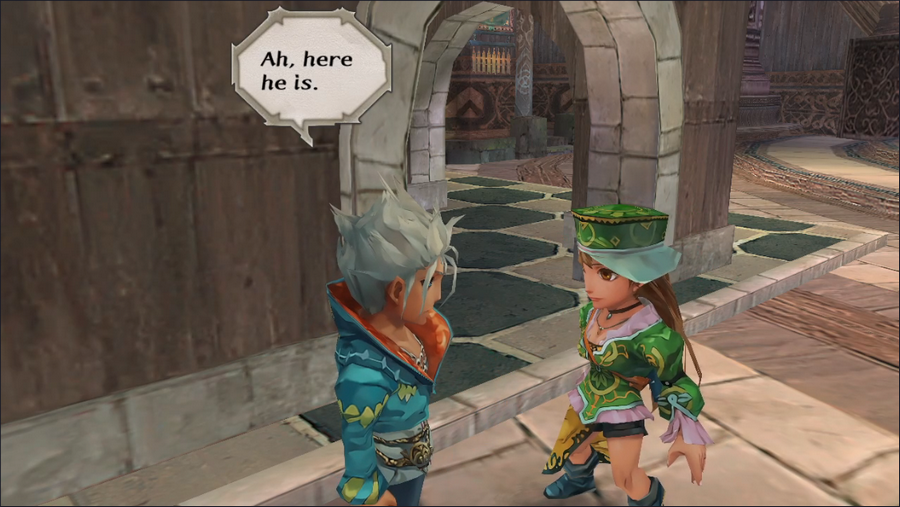 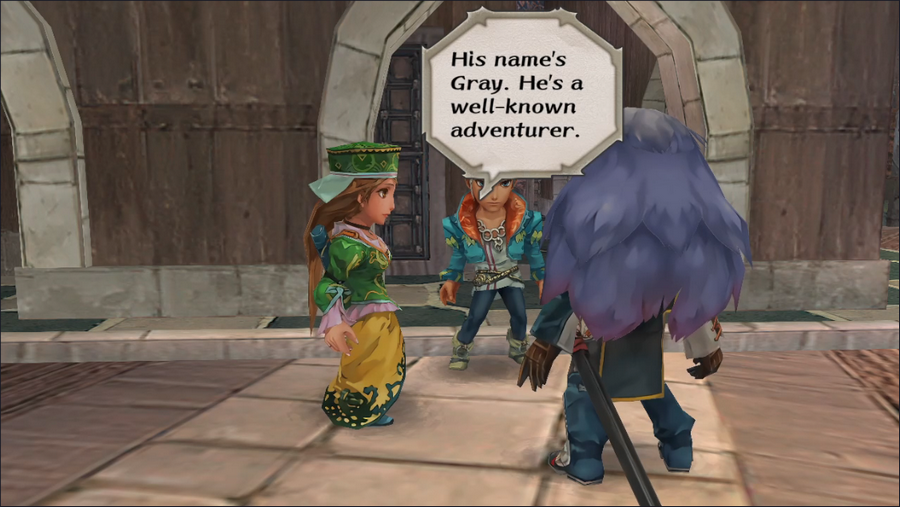 I guess Gray's default response is to accept Gian's request. 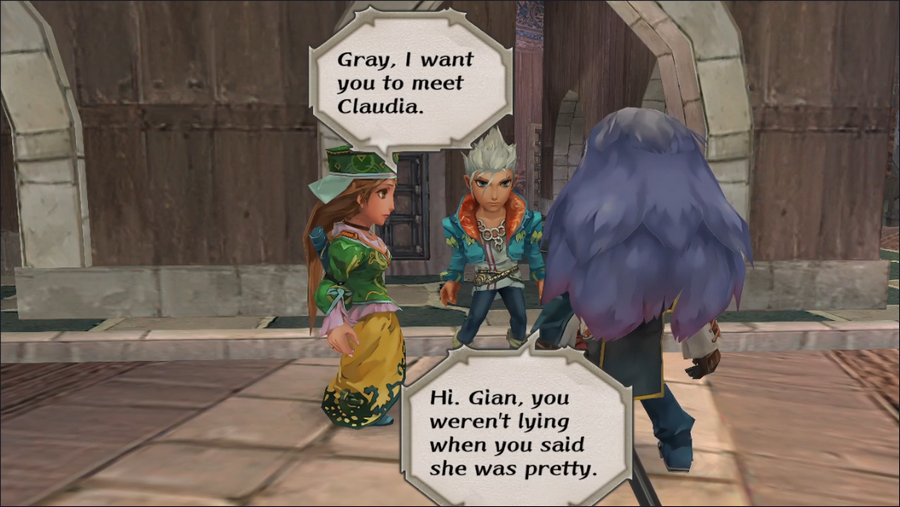 And I still can't tell whether he lacks any social grace or he just enjoys messing with Gian.  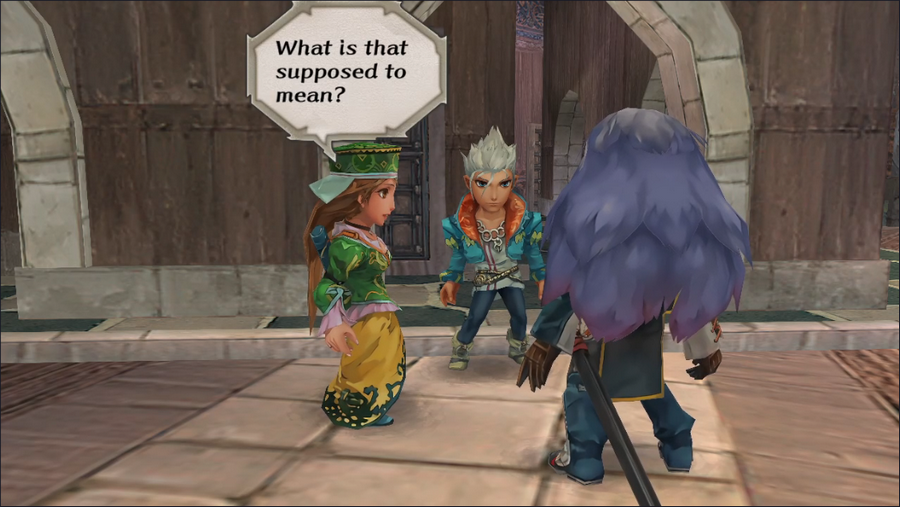      This is probably the nicest we've seen Gray so far. It's actually starting to seem like he could have genuinely made friends with Galahad and Myriam.   Having Gray join up unlocks a bunch of new locations. I'm not going to bother showing them all here, but he basically gives us access to every city in Bafal, Rosalia, the Dry Lands, Ligau, and Walon Isle, which is north of the Dry Lands.  At this point Claudia's intro is done, but let's do one more thing and head to Aurefont.  In lieu of the normal music for the town, something else is playing. Music Highlight: Omen/A Sign A basic but solid track with a real sense of urgency and danger.  Most of the townsfolk aren't on the street, but this guy is willing to stick around and tell us what's up.  This building with two unconscious guards outside is probably it.  Inside are a whole bunch of guys from Metal Gear Solid who we thankfully don't have to fight.  They barrel through us, knocking us to the back of the room, and another monster comes in to take us out. 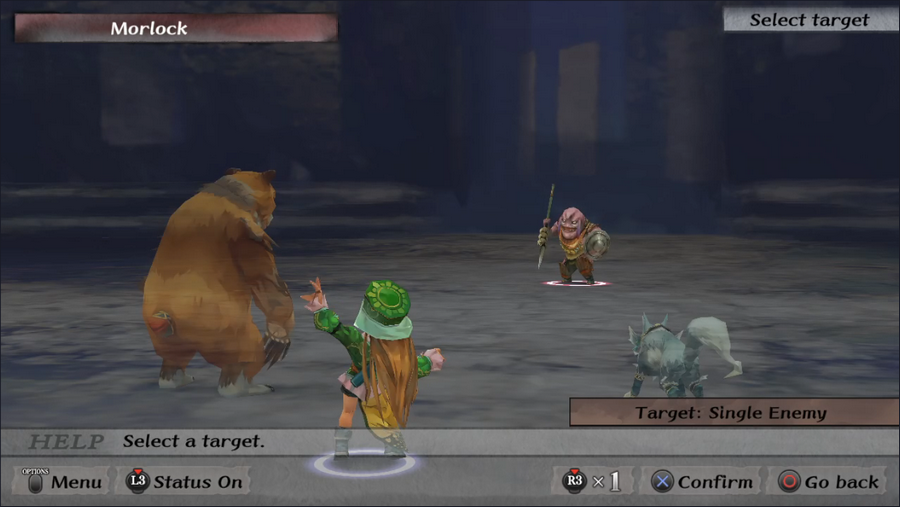 It's a morlock, with is slightly above our current Battle Rank. 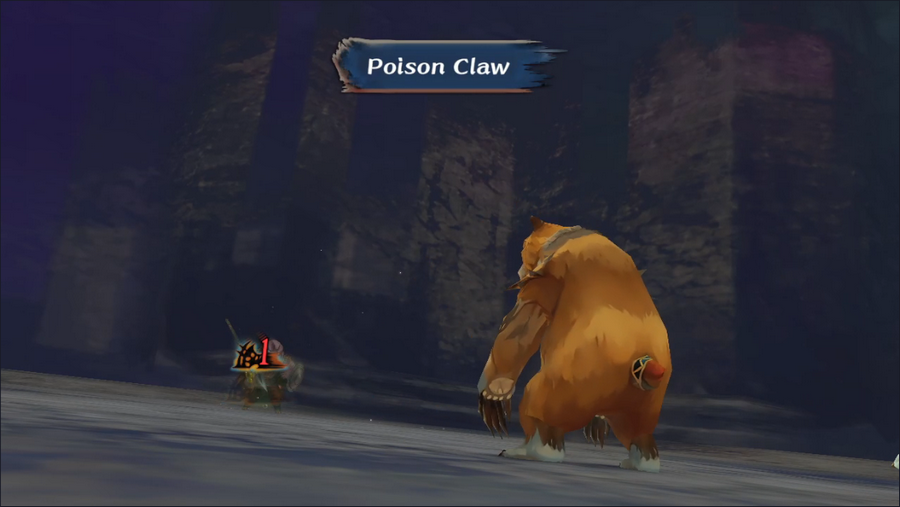 It's not terribly tough though.  We chase the thieves outside and... https://www.youtube.com/watch?v=pLf4BUSrXvQ Patrick is one of the hammiest characters in the game, and as a bonus, he has an amazing mustache.  The mystery of where the gold went and why it was stolen remains to be solved, but that's a story for another time. 5-Headed Snake God fucked around with this message at 22:23 on Sep 20, 2023 |
|
#
¿
Sep 18, 2023 13:20
|
|
|
Welcome back everyone. We're halfway through the character intros, and we're finally getting to what I think is the more interesting half of the protagonist pool. Jamil (pronounced "ja-MEEL") is a plucky thief. Despite having possibly the fanciest outfit of the eight protagonists, he's a street rat, so presumably those clothes are stolen.  Jamil's class is, appropriately, Thief. While its special ability (a chance to use a certain proficiency to reveal treasures above the skill's level) is pretty lame, its skill set is very good: Foil is always a good weapon skill, and Search and Strategy are two of the most important field skills.  Jamil is associated with Kjaraht, a once-grand empire that rivaled Bafal in power, but has been slowly falling apart in more recent years.  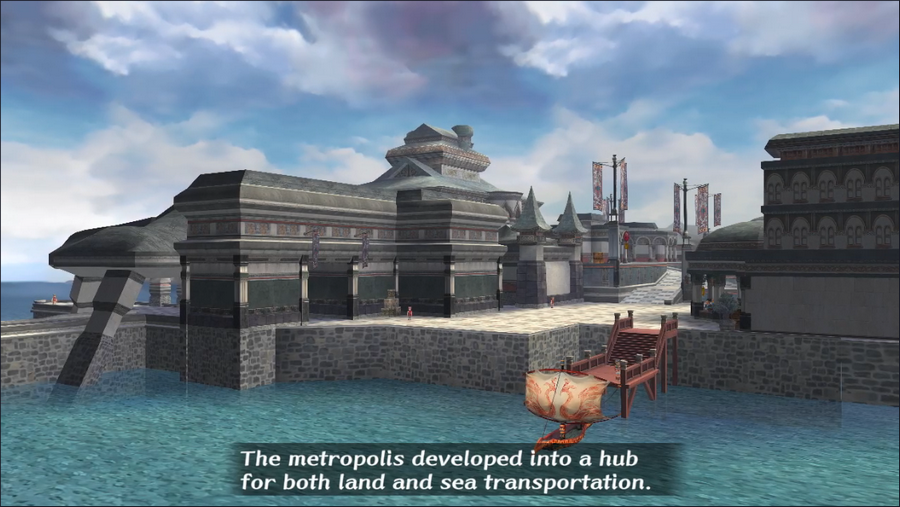 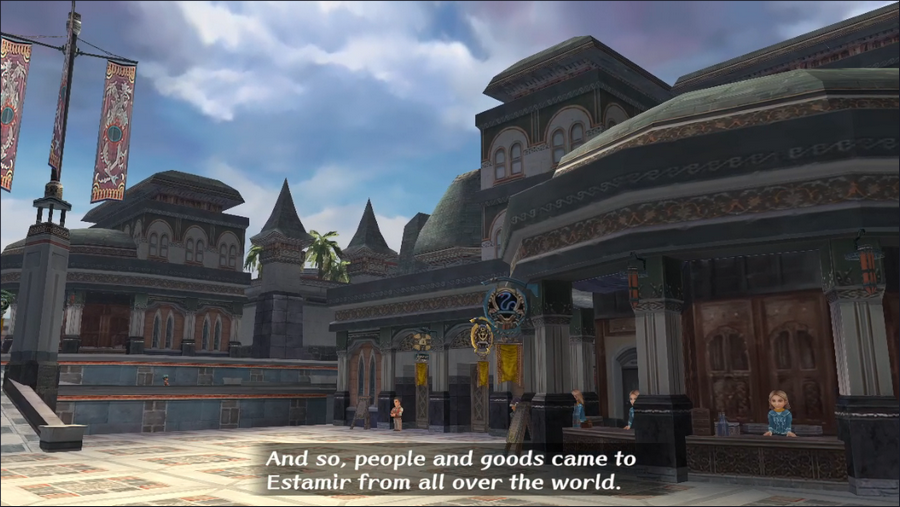 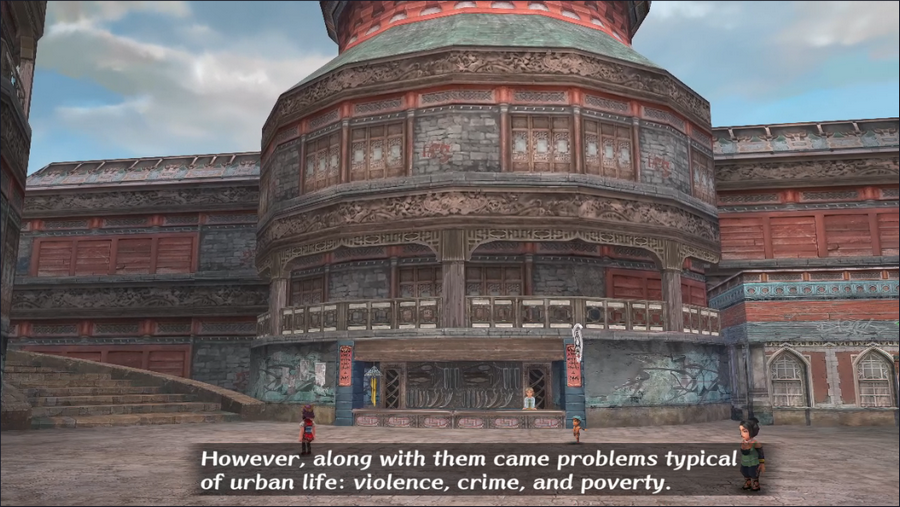 Estamir is an unusual city in that it's divided into two halves, which are considered separate cities in terms of gameplay. North Estamir is prosperous and wealthy, while South Estamir is basically a big slum.  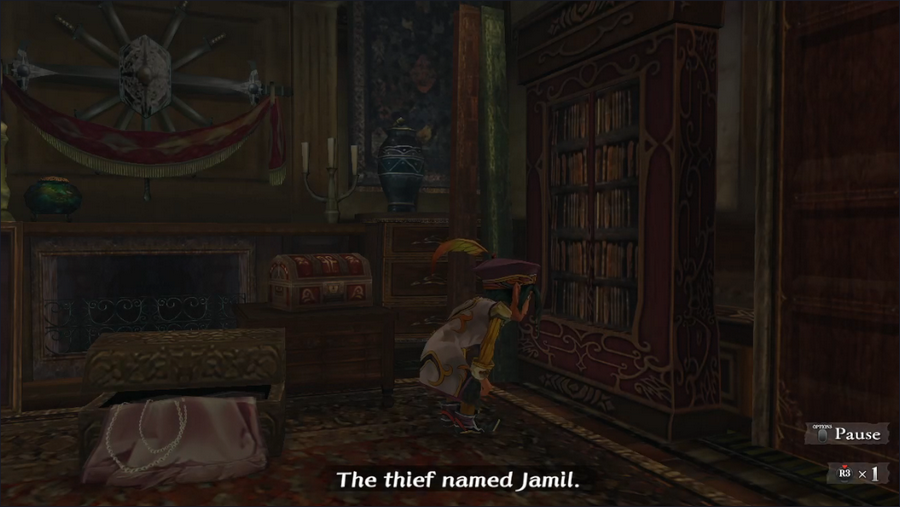 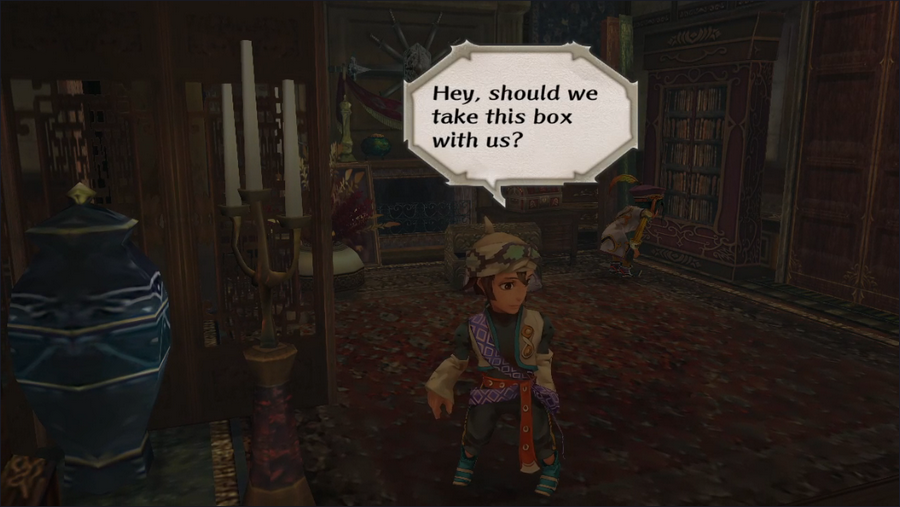 We're quickly introduced to Jamil as well as his friend and partner, Dowd.  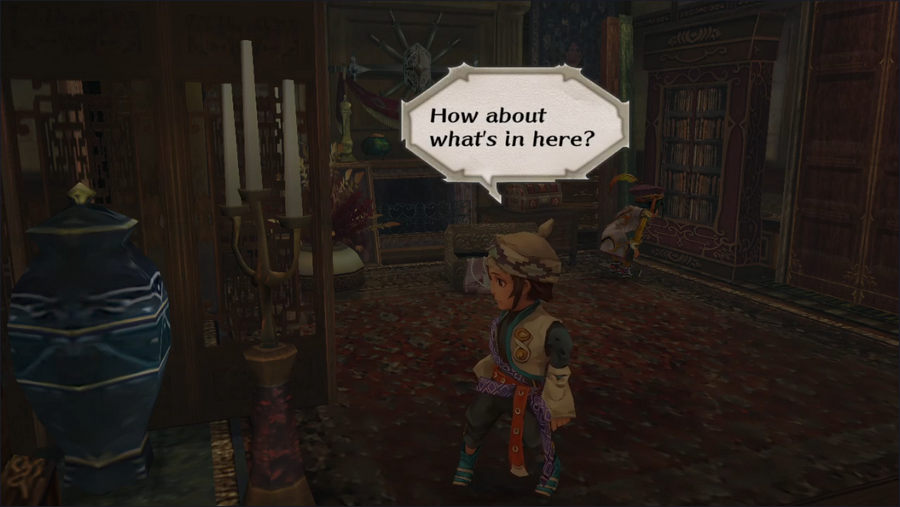 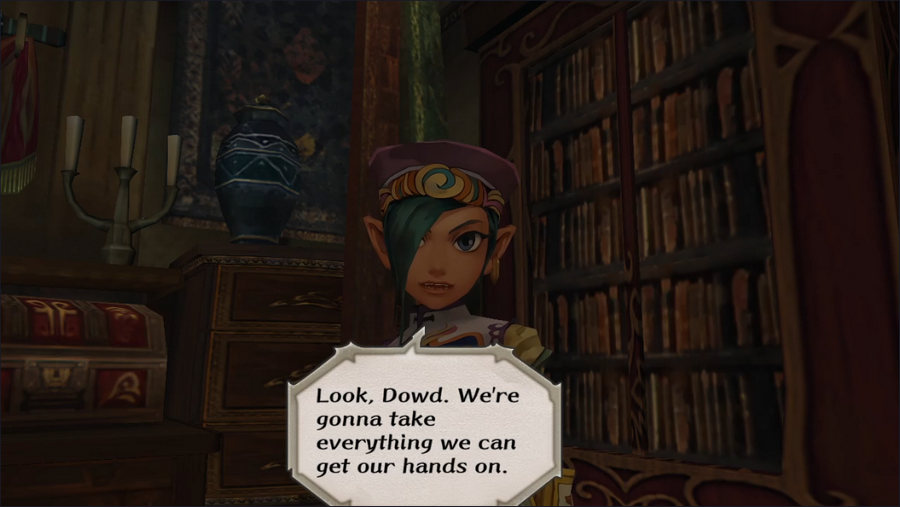 Dowd is one of those characters who lacks the confidence of his close friend. In a proper narrative he'd probably grow and develop, but this is SaGa, so he'll always be that way no matter how powerful he actually gets. 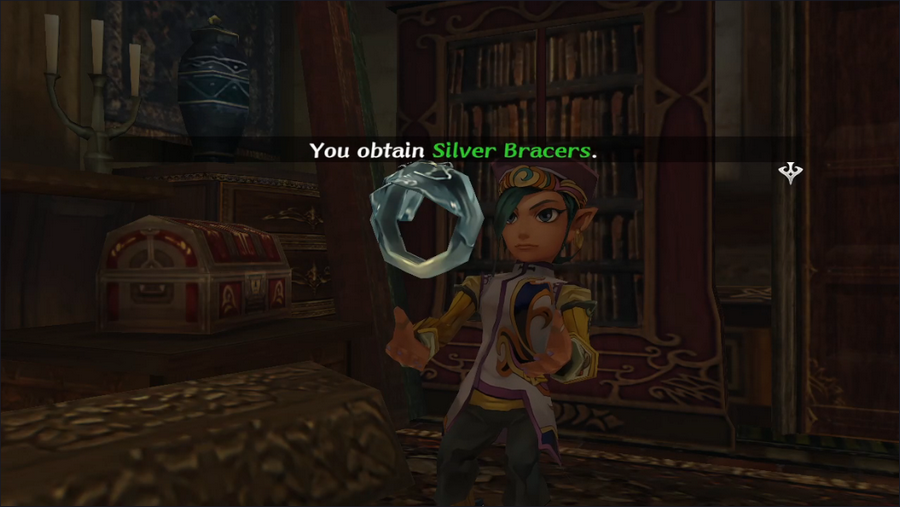 Jamil, meanwhile, has confidence enough for two and grabs a fancy set of silver bracers.  It's at this point that the pair's luck runs out and they're forced to flee. https://www.youtube.com/watch?v=vjRFPyvtl-U (There's some pretty bad audio desync in this video and I'm not sure why. I'll work on fixing it for later updates.) The fact that Jamil Naruto runs through the city sewers will never not be funny to me.  Jamil and Dowd make their escape into South Estamir.    Jamil is kind of a jackass. 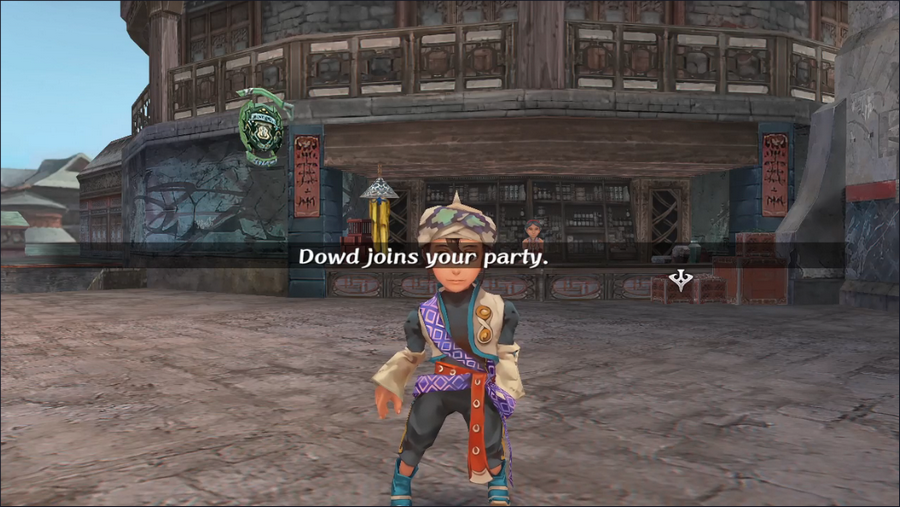 But Dowd sticks by him, ever the doormat. Music Highlight: I'll Take All the Treasure!/All the World is an Oyster Jamil's theme plays over the usual South Estamir music when he's the protagonist. It's a theme that highlights his happy-go-lucky nature. 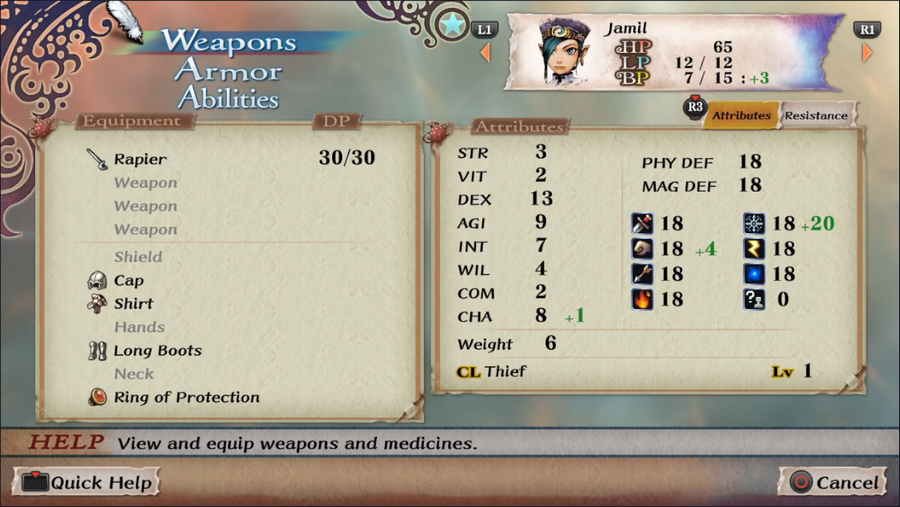 Now that we've got control, let's check out our party. Jamil has some pretty basic starting stats and gear, though his Dexterity is excellent. He also starts battles with 50% of his maximum BP - the most any character can get - and gets +3 per round even with a mere 15 maximum. This will serve him quite well as the game goes on, assuming he's in our party. 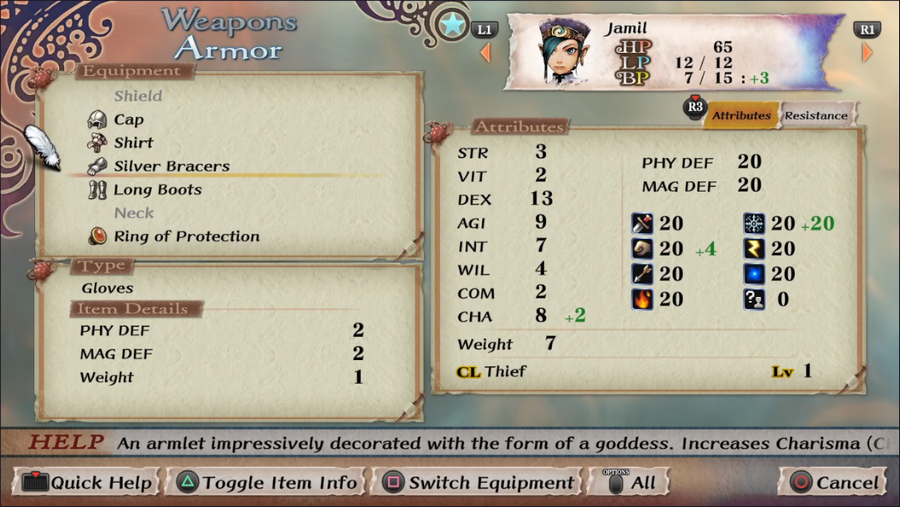 We may as well equip him with the bracers we got as well, despite their low defense.  Dowd, meanwhile, is... not great. He has a ton of LP, but that's about it. He has some bottom-of-the-barrel weapons, which are totally useless since he doesn't have any skill with them. His starting class, Thug, is actually new to the remaster (on PS2 he had no starting class), and uses Scimitars, Martial Arts, and Strategy. 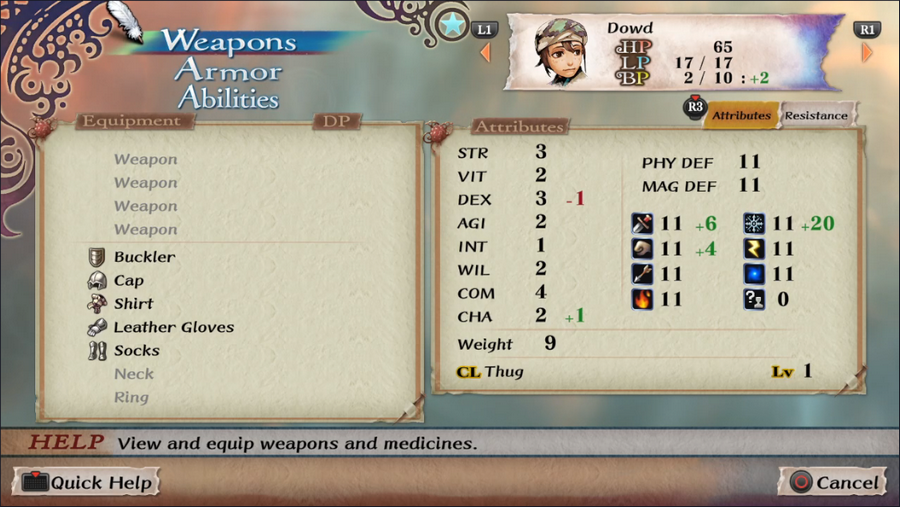 Strategy is redundant with Jamil as a Thief and we can't afford any scimitars yet, but punching things is always an option, so we may as well remove his weapons to give him a bit more speed. With that out of the way, let's take a look around the city.  She's not wrong, but I think the city being dirty is the least of its problems.   This lady obviously knows us. Since money is tight, we'll keep what we have, but if you all choose Jamil as our protagonist I'll let you dictate his behavior more closely.   The girl over here, Farah, is likewise an obvious acquaintance of Jamil's. (She's also recruitable, but like Neidhart, not until about halfway through the game, so she won't be presented as an option for our final party.)  No way, we worked hard for these!  Says the girl who stays home with her mom all day. Let's get out of here.  We are almost immediately threatened by someone who wants all our money. But to hell with that.  Dowd's low stats mean he often won't even deal damage when he hits, but Jamil can reliably one-shot muggers. 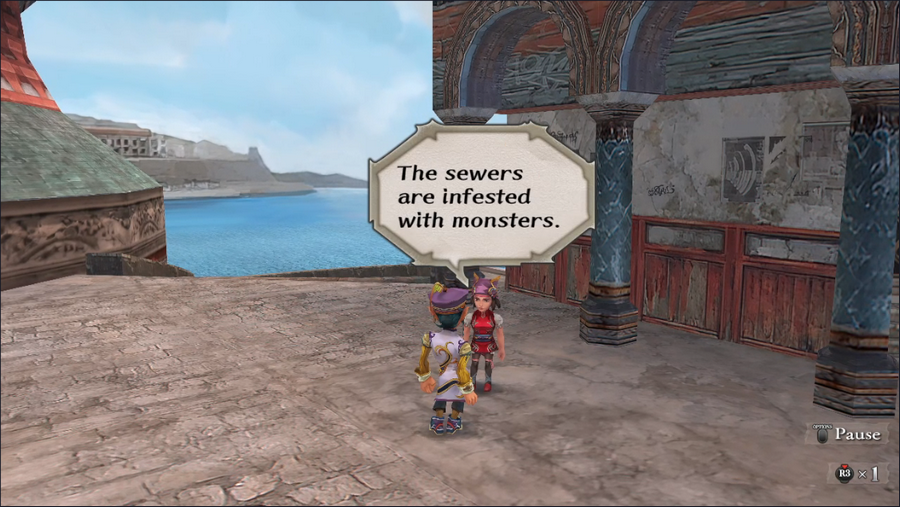 A person in town tells us that the city sewers are infested with monsters. What she doesn't mention is that they connect the north and south parts of the city. They must be pretty deep down to run under the ocean.  Besides muggers, South Estamir's streets are infested with child beggars. 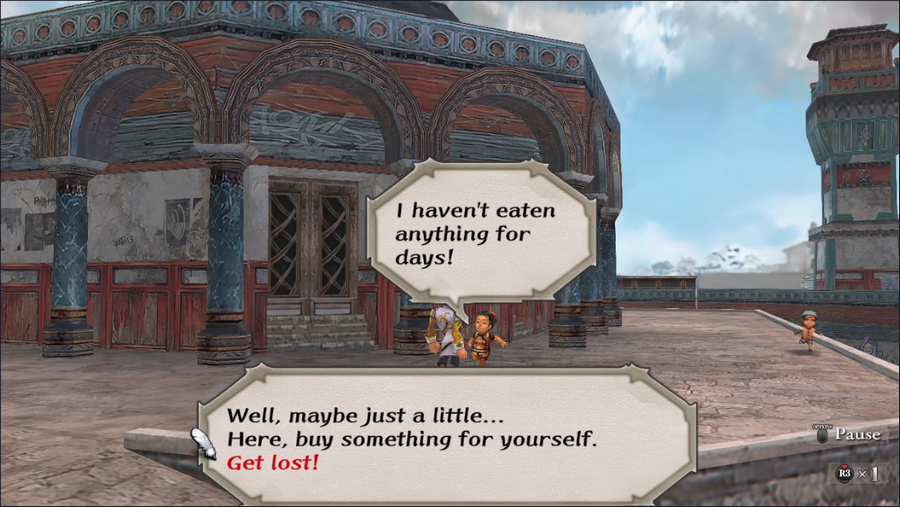 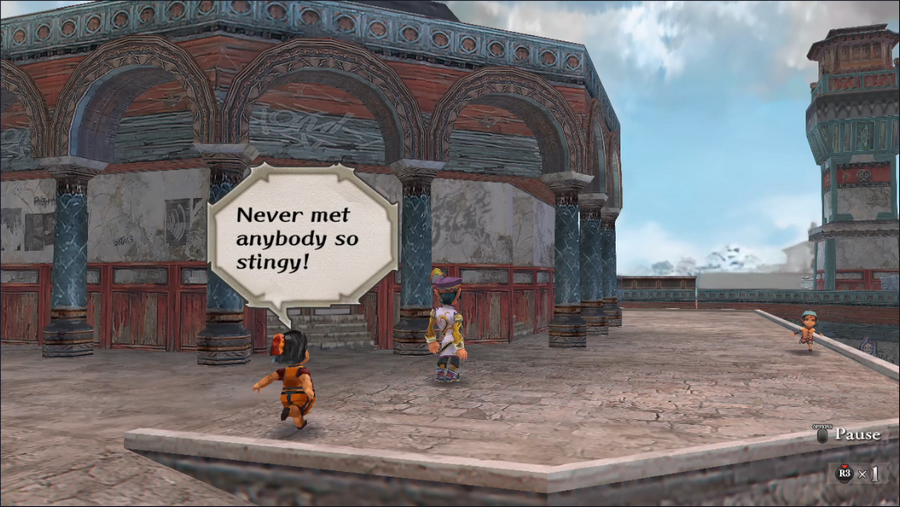 Go steal your own money, kid. 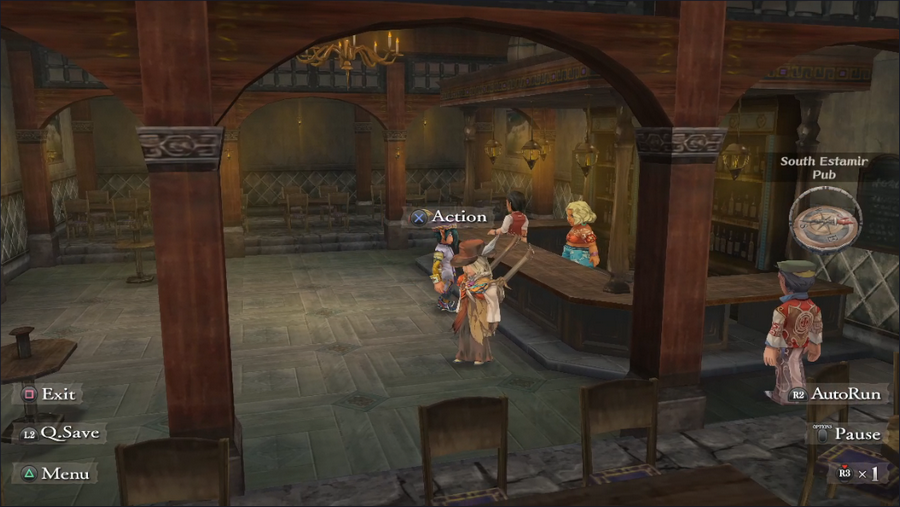 Lacking anything better to do, we head to the local pub. We'll ignore the resident musician and talk to the barkeep.   Sure, we could use some more cash.  No, not the musician. The less obvious guy.  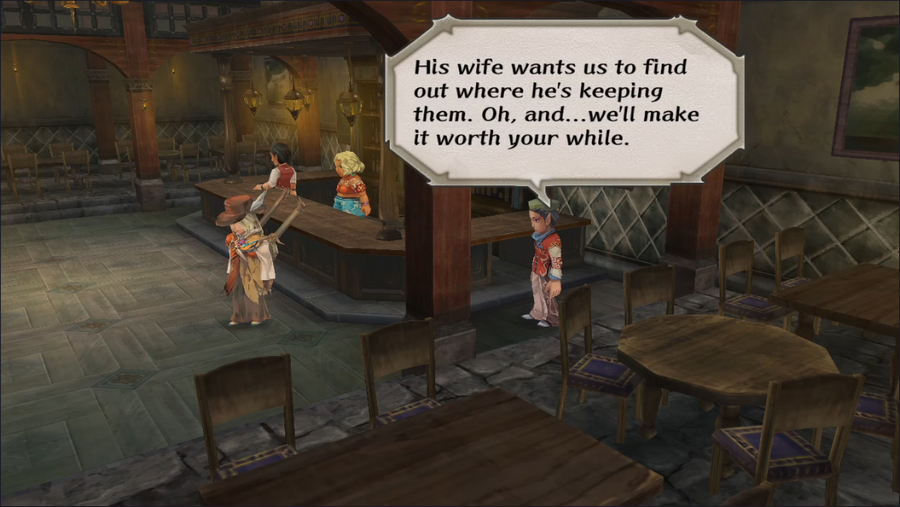 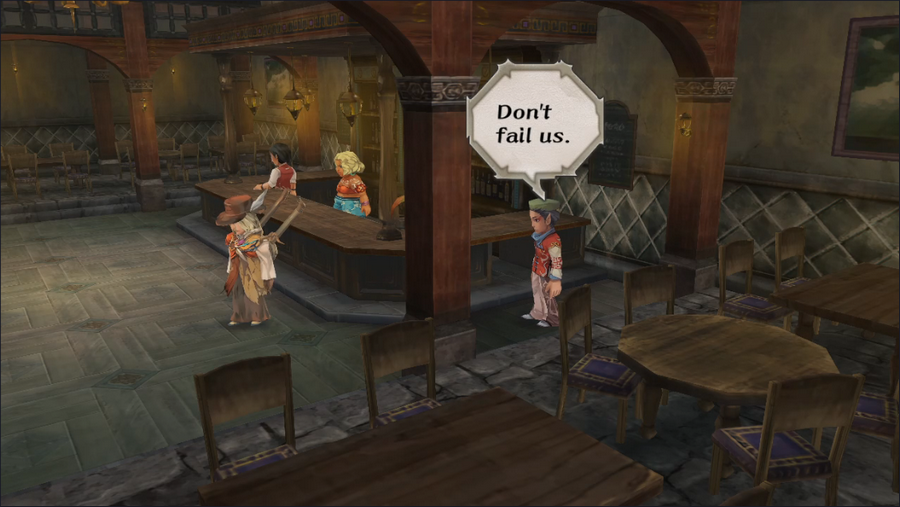 So saying, the guy disappears in a puff of smoke. 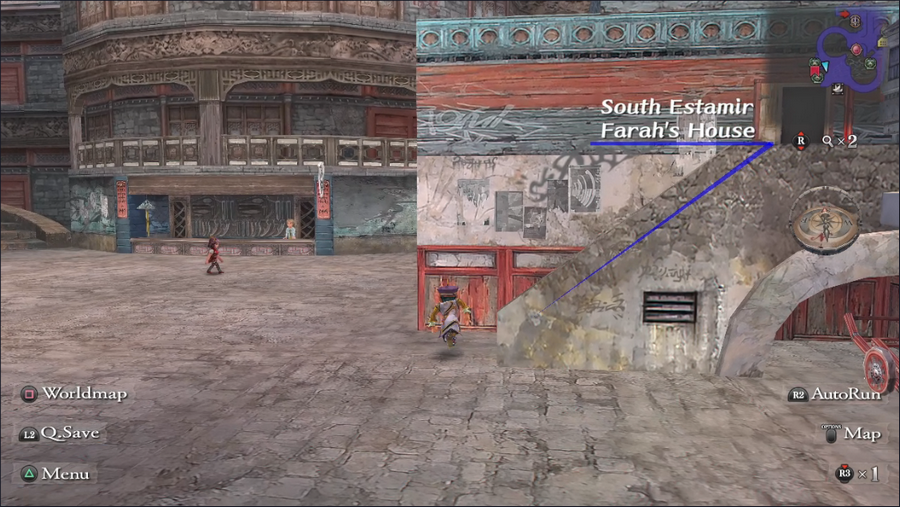 This seems like a job worth doing, but we have no idea where to start looking. But Farah's a young woman, so maybe she's heard something? 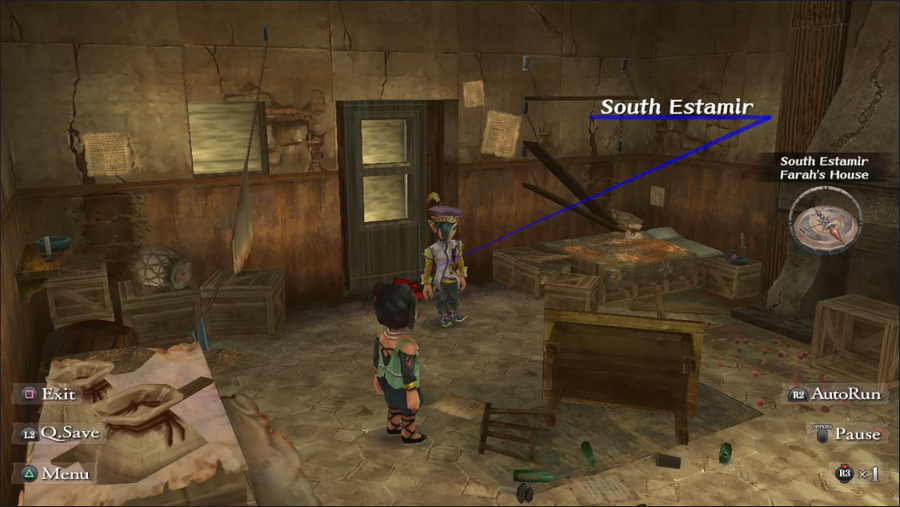 This doesn't look good. 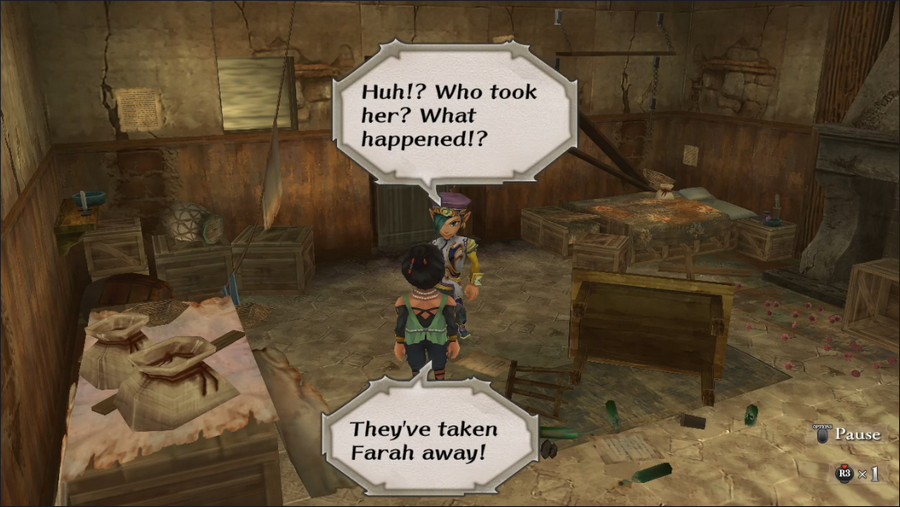 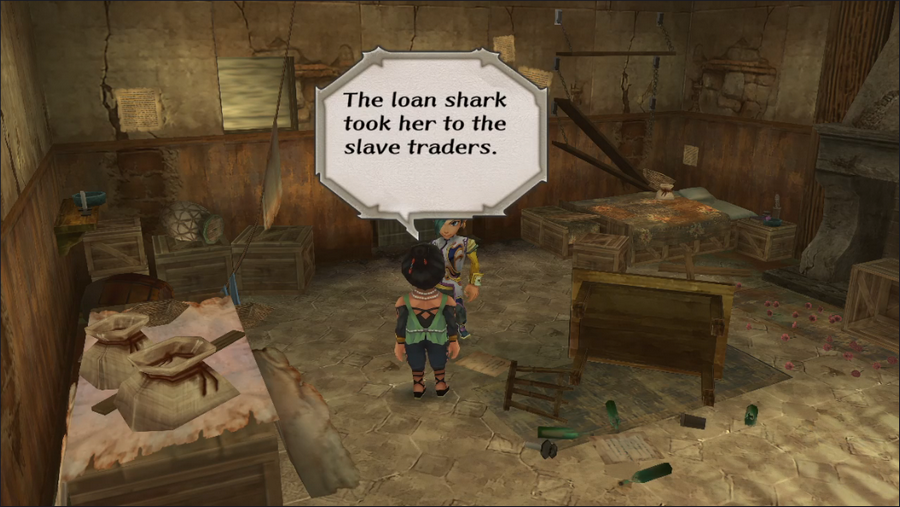  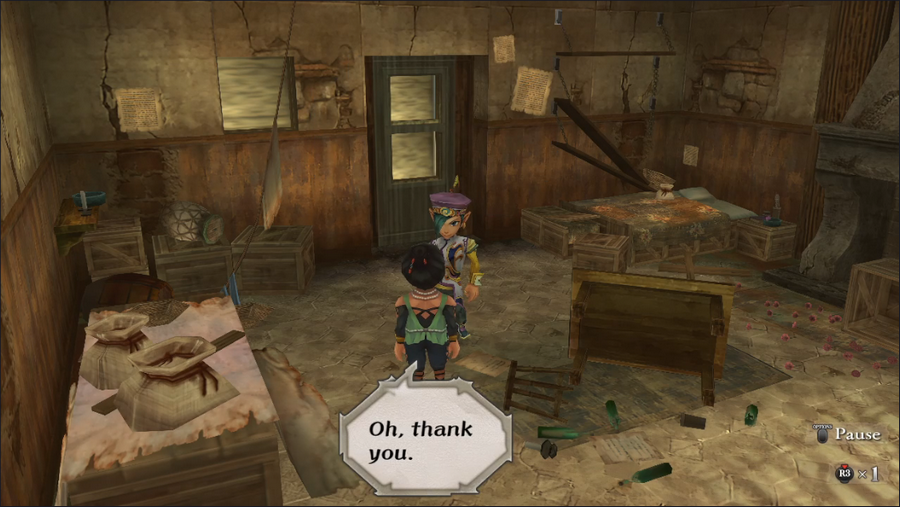 Jamil might be an rear end, but at the end of the day, he still supports his friends, and probably doesn't care for slavers. 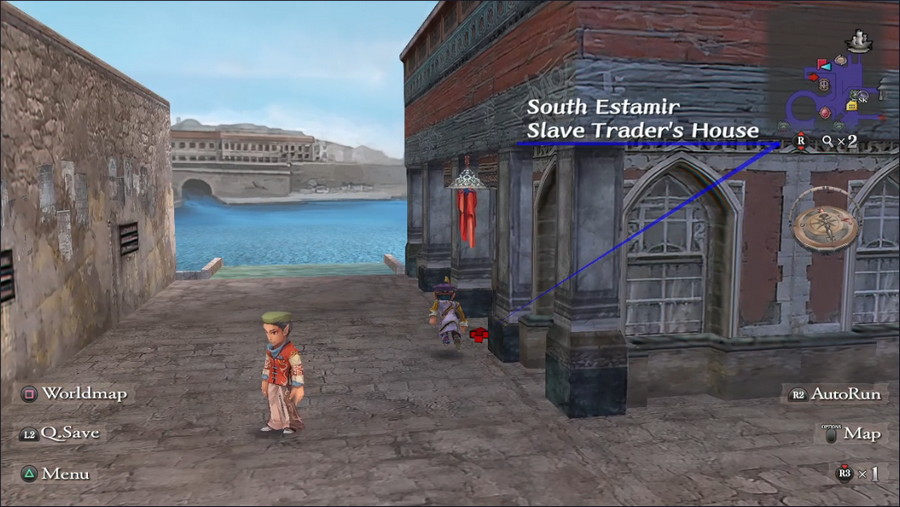 Conveniently, a house on the north end of town is labeled as belonging to the slave trader.  He's got some guards, but it should be fine. 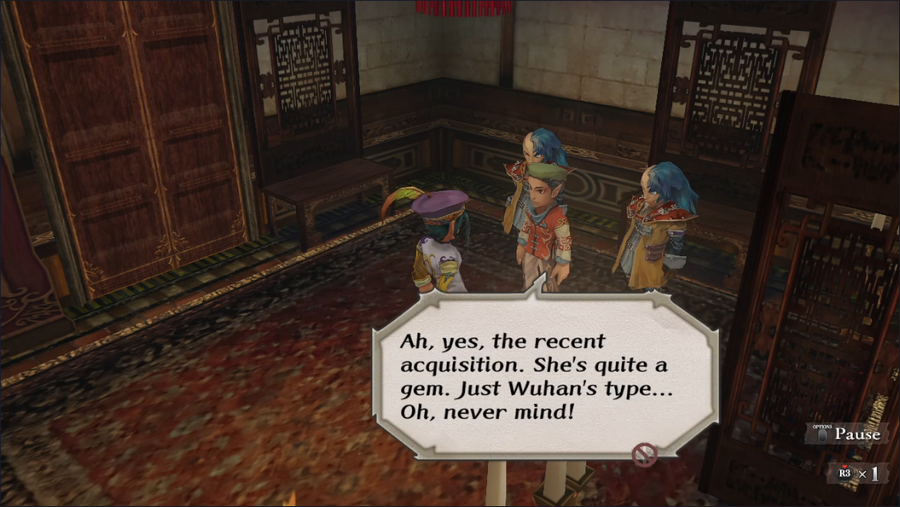 Well, we're making progress in our job, if not the way we intended.  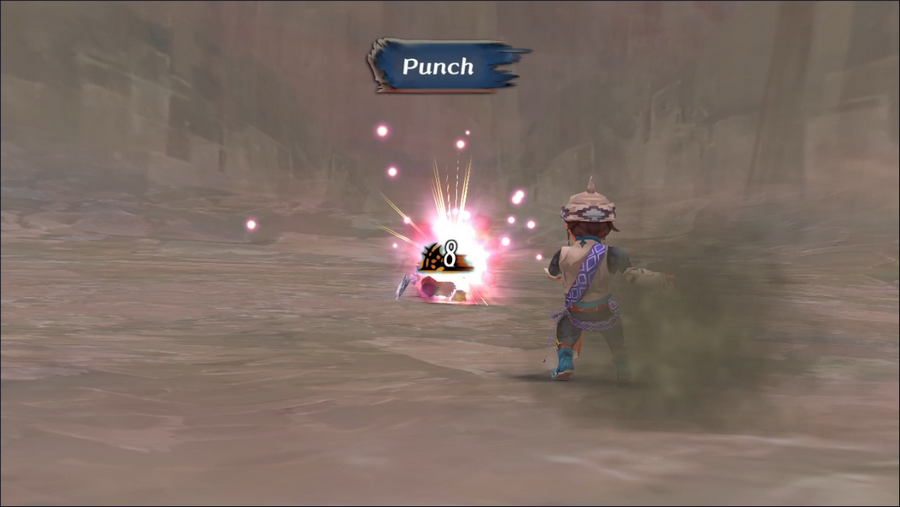 A fight ensues, and it's barely worth mentioning. It's three guys more or less identical to the mugger on the street. I've thrown in a shot of Dowd doing nearly nothing so you can see how bad he is. At least he's getting some decent stat growths, since his numbers are so low. 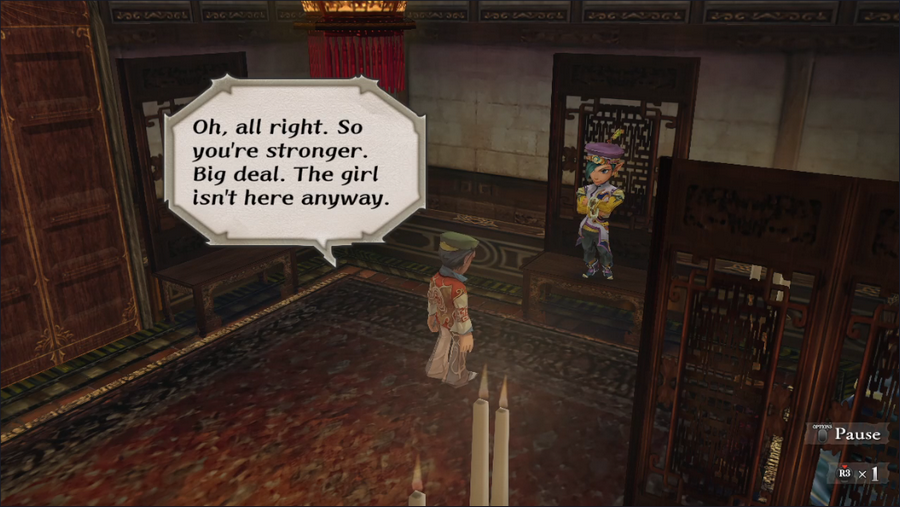  Kidnapping women and imprisoning them in the temple of the goddess of love? That's dark. 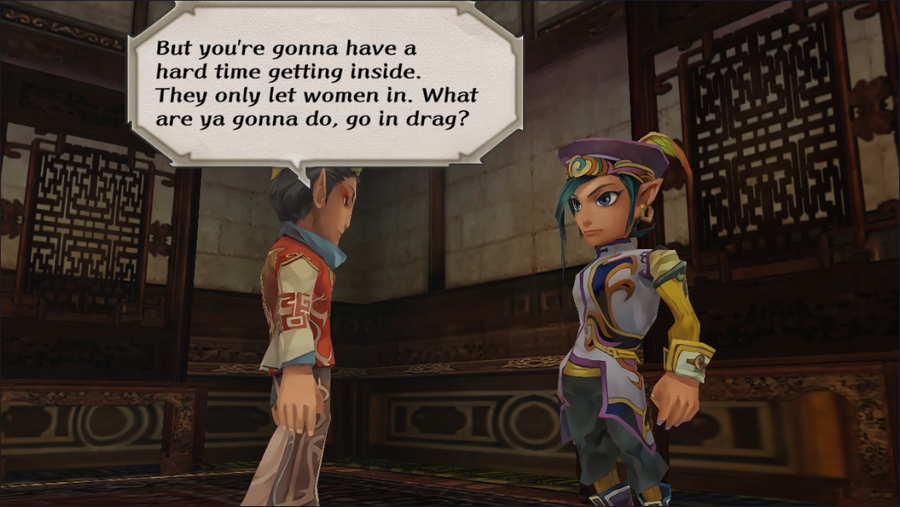  Jamil seems to be considering it. And, after some dramatic camera zooms and spins, the screen goes white...  ...and somehow he's changed clothes. I have no idea where that dress came from, but I can't deny that Jamil makes a fabulous drag queen.   Jamil himself clearly doesn't care for it, but needs must.  Jamil has a unique walk cycle for this brief period disguised as a woman, which is a bit impressive.  We could get to North Estamir via the sewers, but for now we're better off avoiding the monsters. Luckily, there's also a boat that will take us there for a pittance.  The difference in the two halves of the city are plainly visible. North Estamir actually looks really nice.  The temple is at the northwest part of the city.  The interior is the same as any other temple: a big, spacious room with stairs leading up to a dais.  The temple priests sell magic at inflated prices. However, they tend to be the only places to buy the best spells in each school, and every purchase carries an additional bonus - though we'll discuss that another time.  The temple of Amut is unusual in that it has a second set of stairs leading down from the dais.   It leads us to a door, the guard of which is all to happy to let us in. (We could also have come here without visiting the slave trader, in which case we'd have to fight our way in.)  Ugh. I generally prefer not to find a guy's secret sex dungeon. Wait, isn't that..? 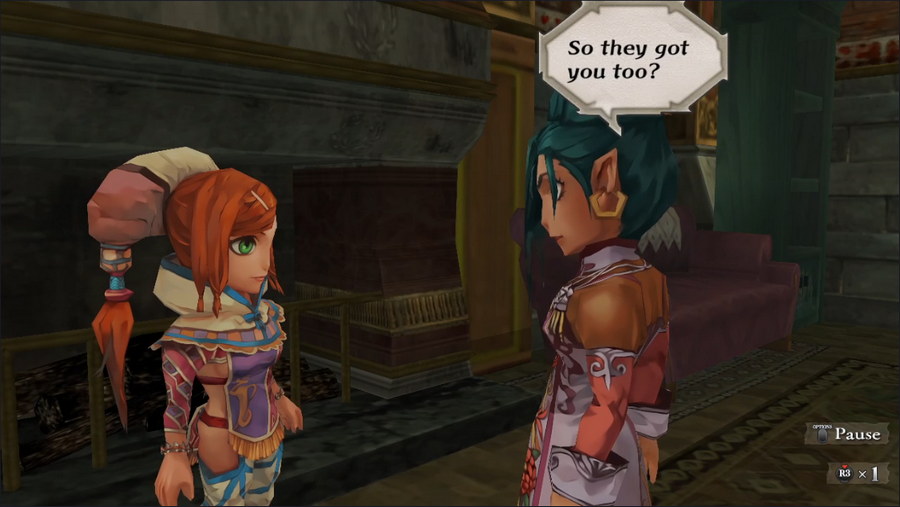 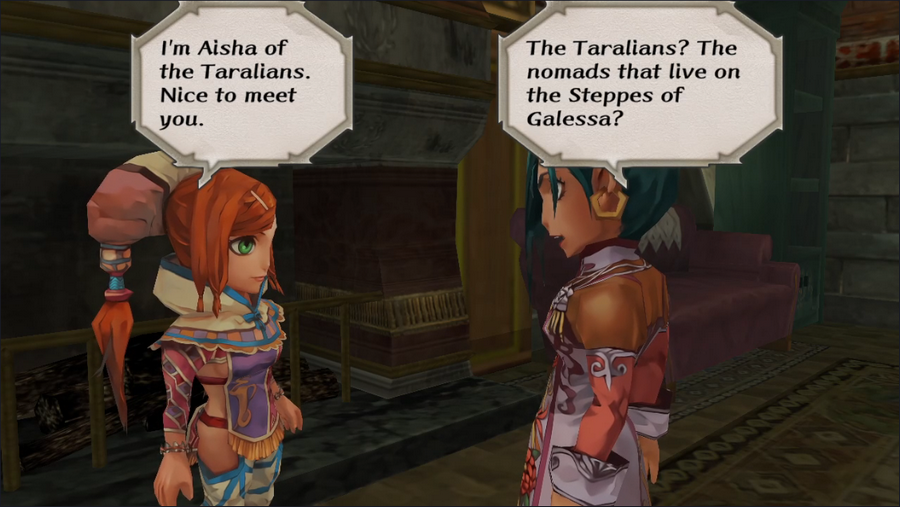 Yep, it's Aisha. This is where she ends up at the end of her own intro, assuming she loses to the Kidnapper. 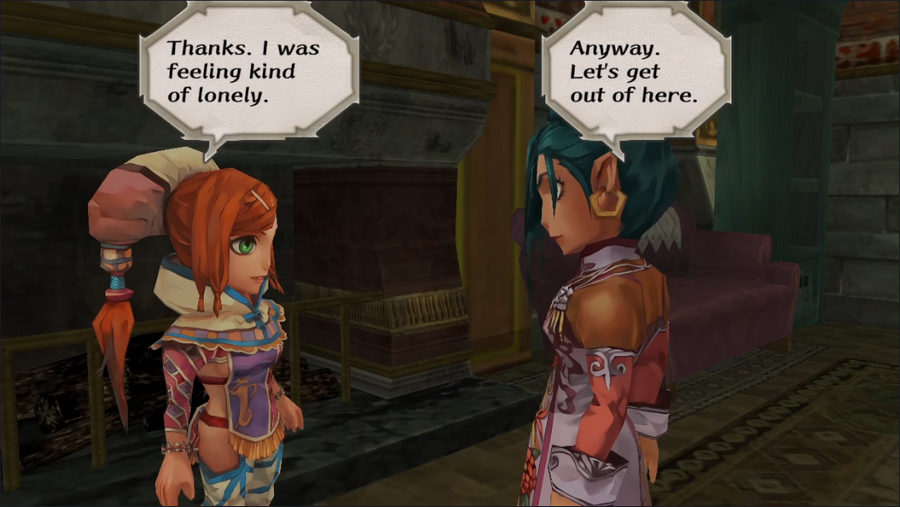 Yeah, loneliness is definitely the emotion I'd expect her to be feeling in this situation.  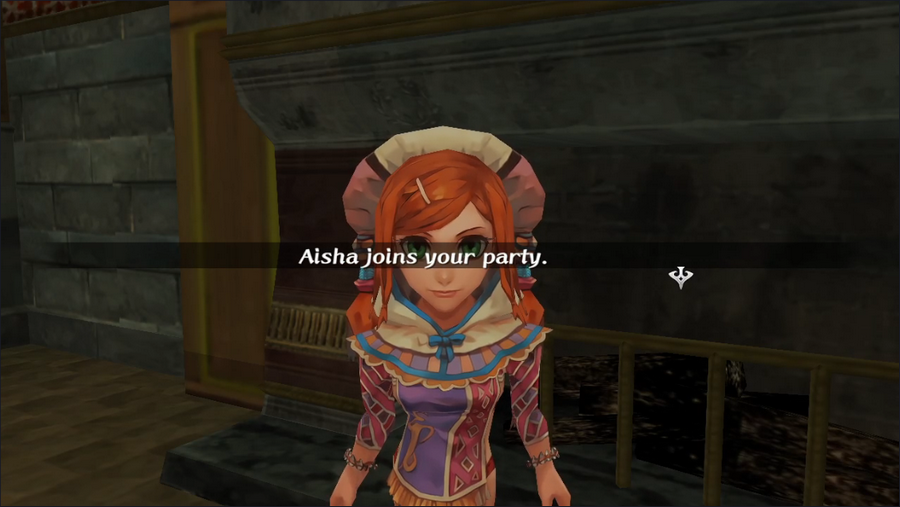 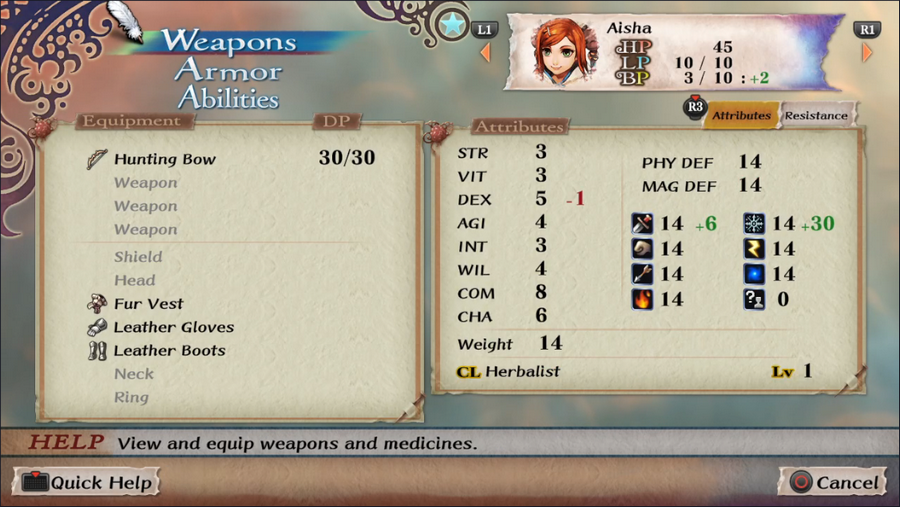 We recruit Aisha, though she's about as useful as you'd expect. We can at least give her Dowd's bow to keep her off the front lines though. 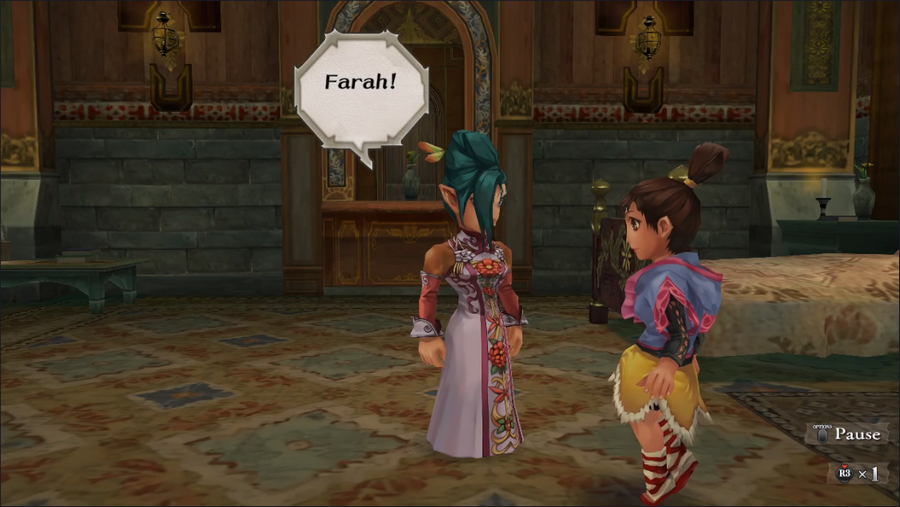 Finally, let's talk to Farah.  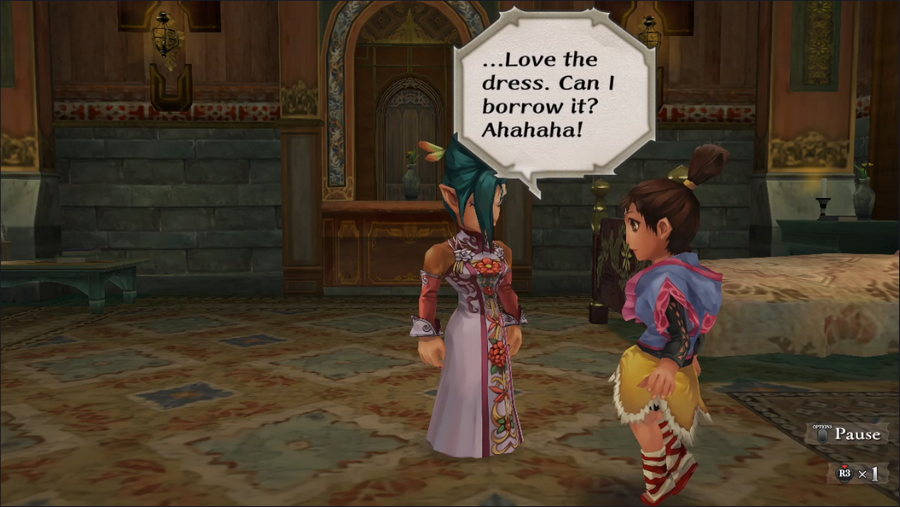 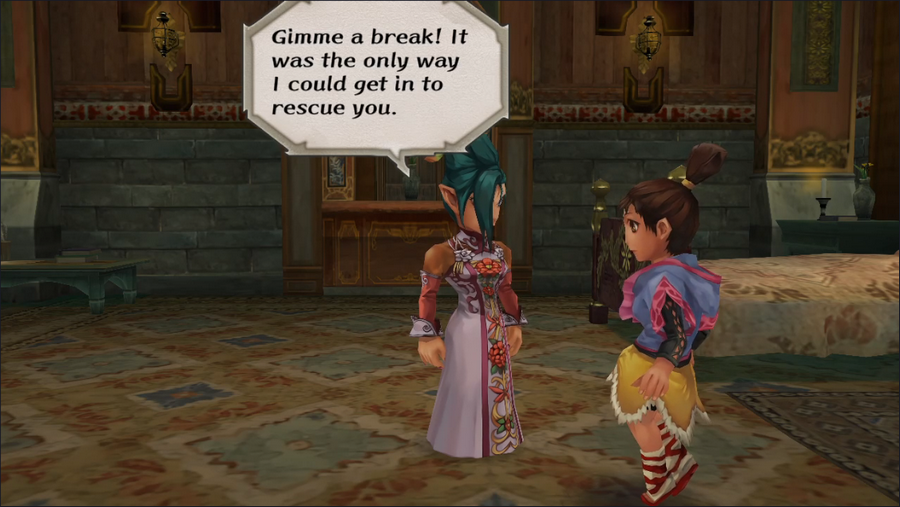 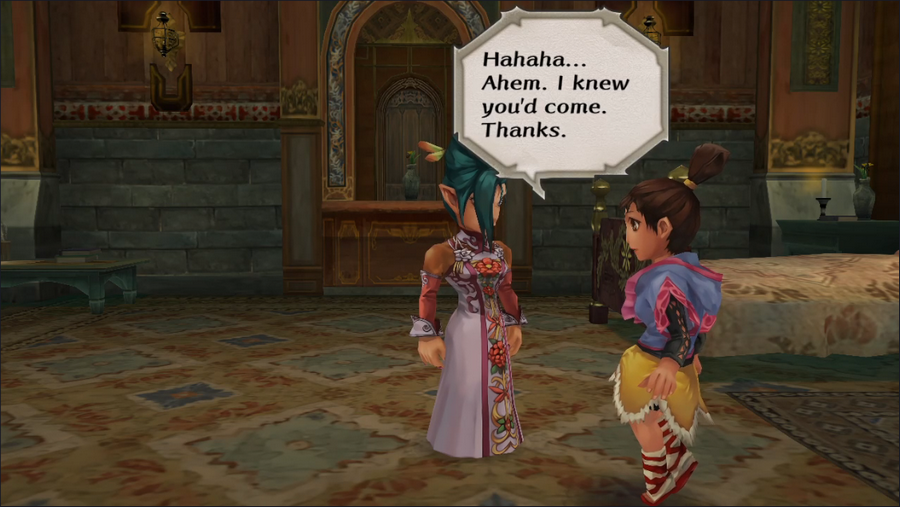 Farah's voice actress spends a good ten to fifteen seconds just laughing at Jamil. I suppose it's just vengeance for refusing to give her the bracers. 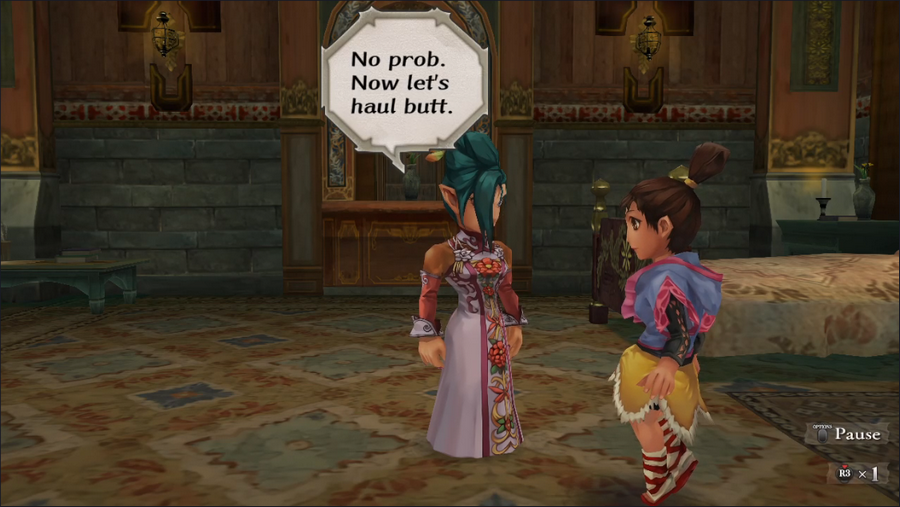 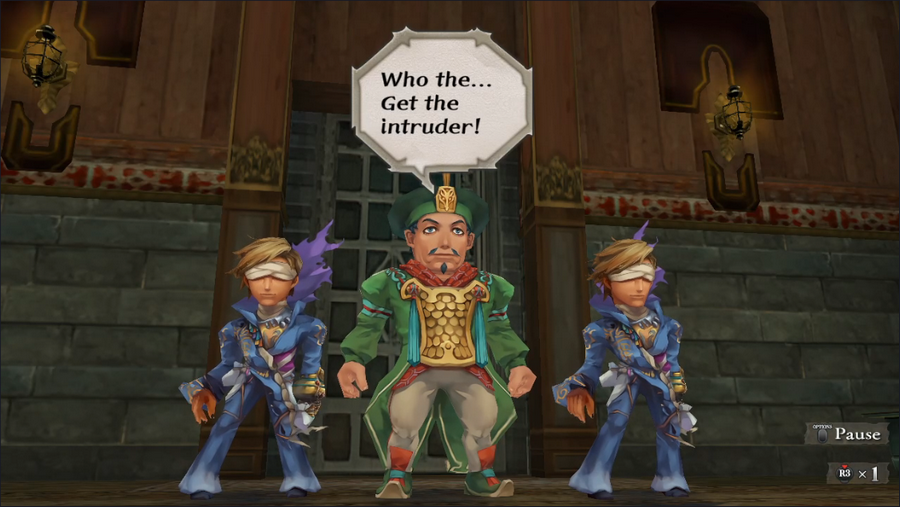 Unfortunately, we're interrupted by Wuhan himself, who sees through our disguise and sics his guards on us. 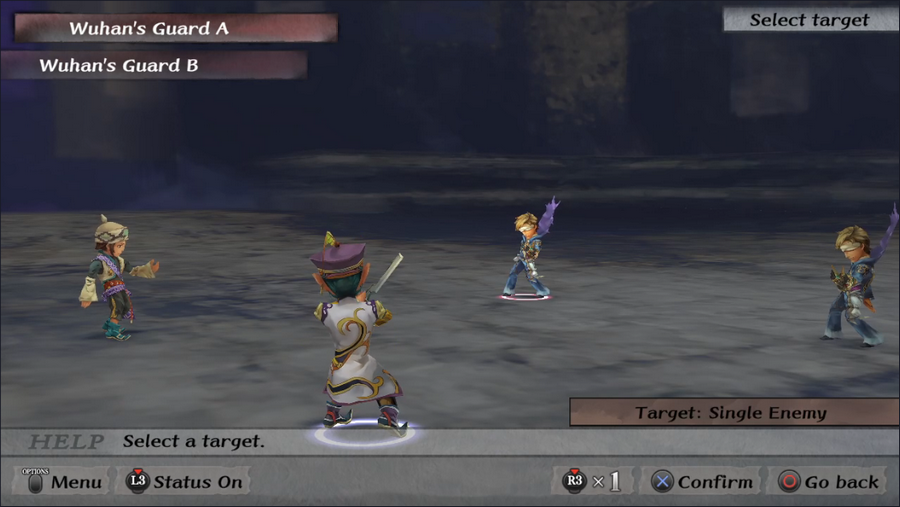 Wuhan's Guards aren't too tough, though they're a step above the guys we've fought so far. With Jamil's strength, we should be able to win in two rounds. 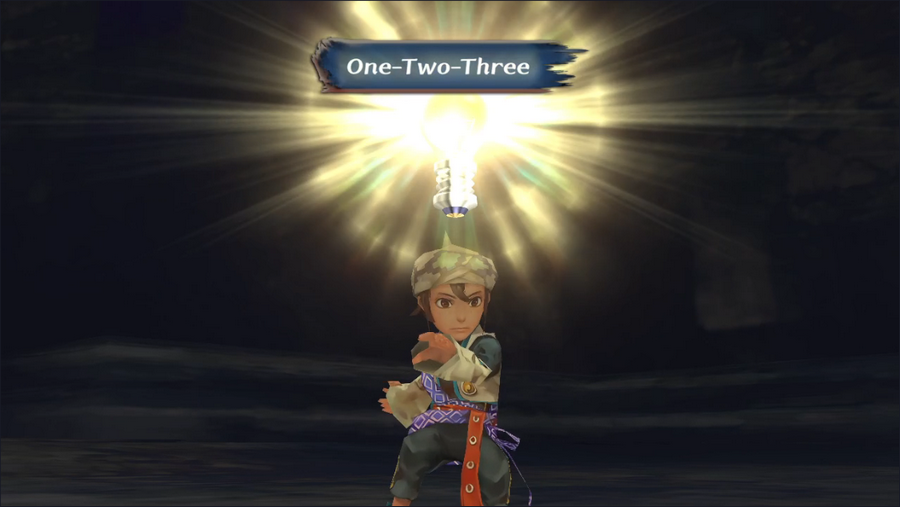 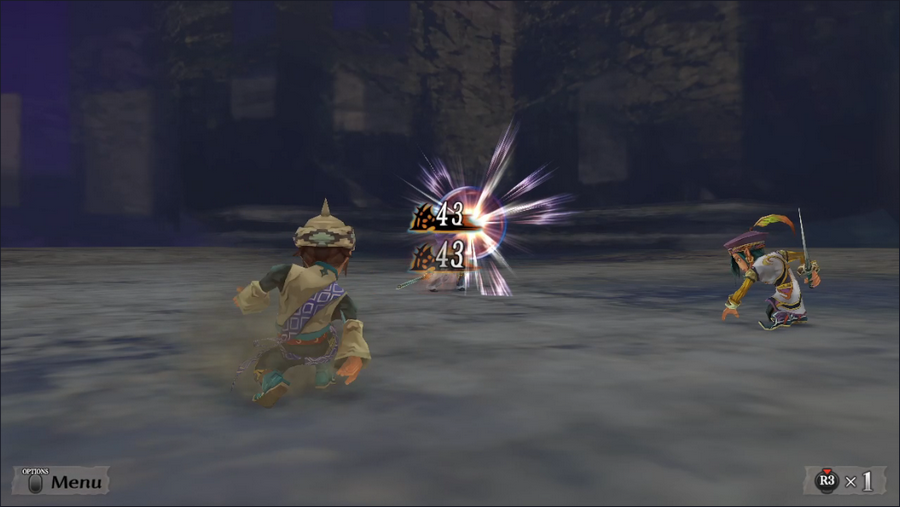 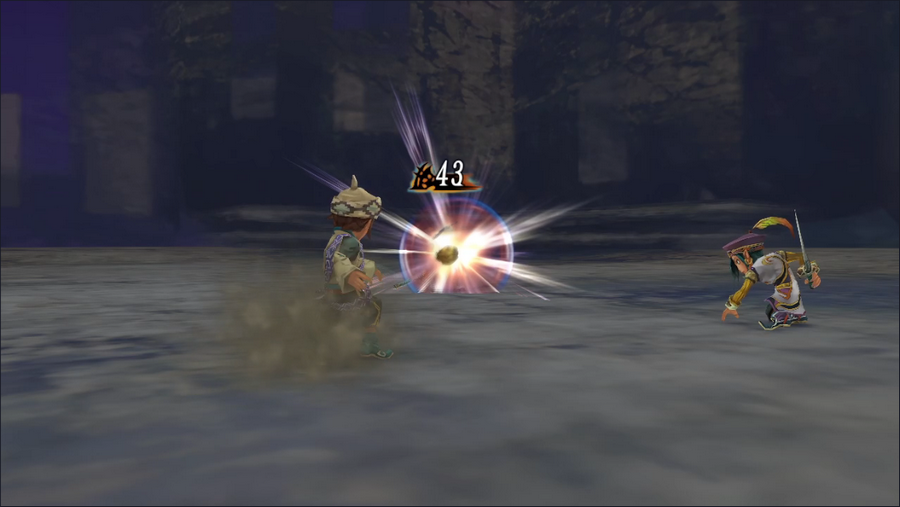 Unless, you know, Dowd Glimmers something and absolutely destroys the other one. One-Two-Three is a great early-game martial arts technique, since it has a relatively low cost and deals pretty impressive damage. 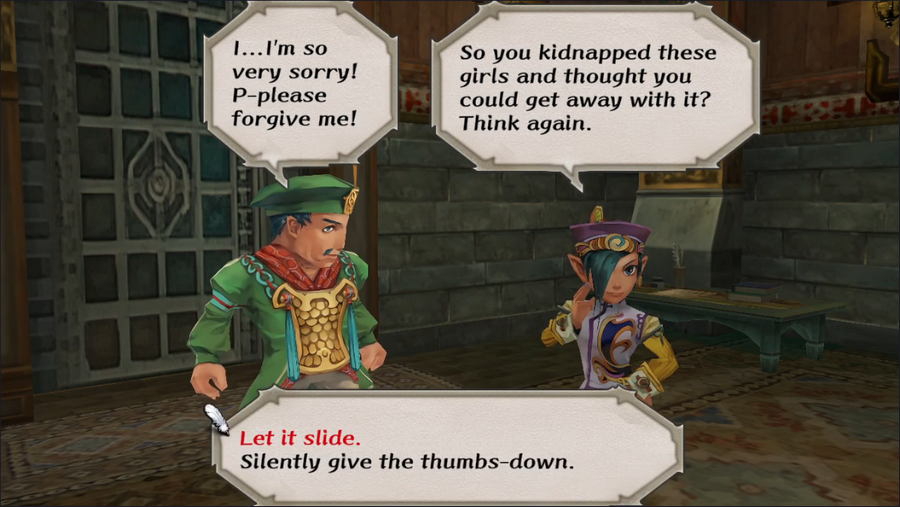 Following the fight, Wuhan begs for his miserable life. Being a miser is one thing, but murdering a man who's begging for his life is another. We'll let him go for now.  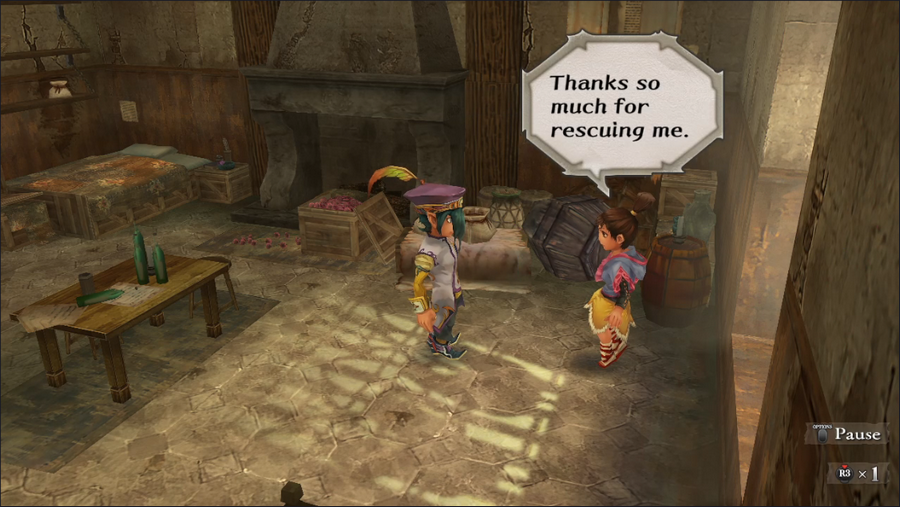 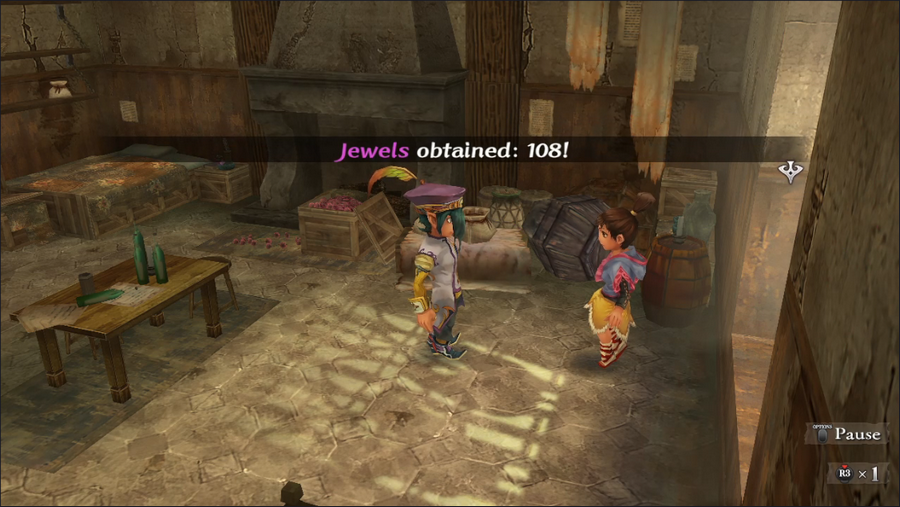 Back at Farah's house, she and her mother offer profuse thanks and a handful of jewels. 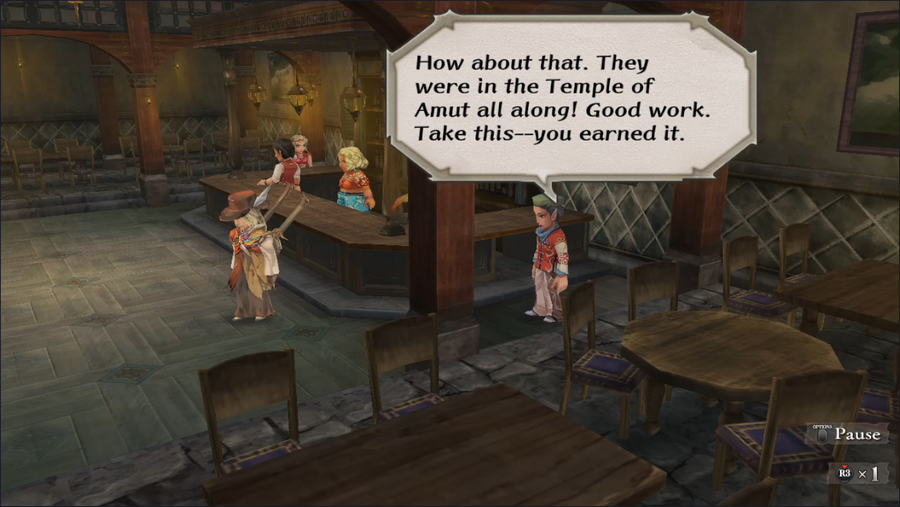 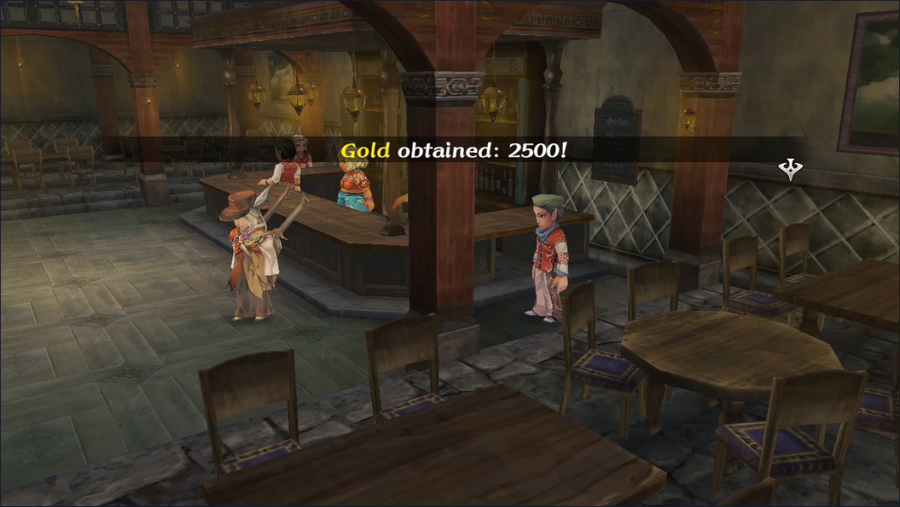 We also head back to the pub to collect our payment. I've mentioned it before, but quests really are a great source of gold. 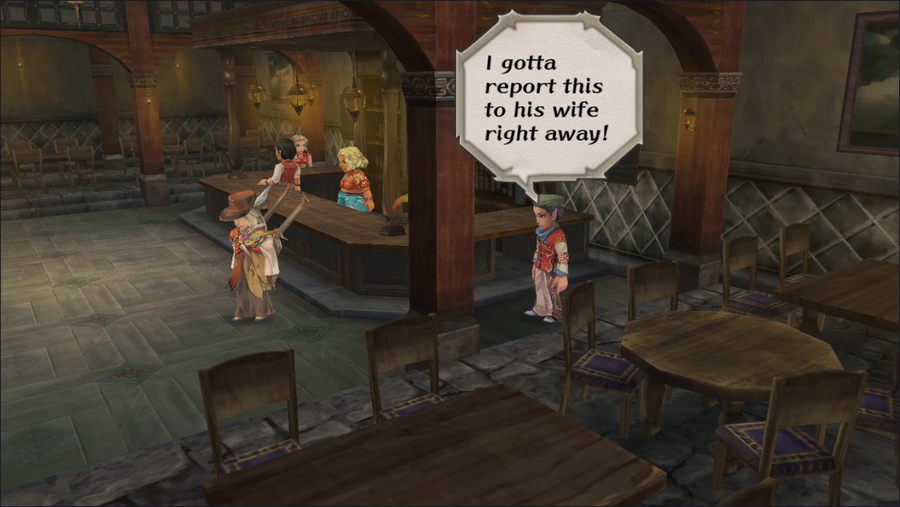 As before, our contact disappears in a puff of smoke. 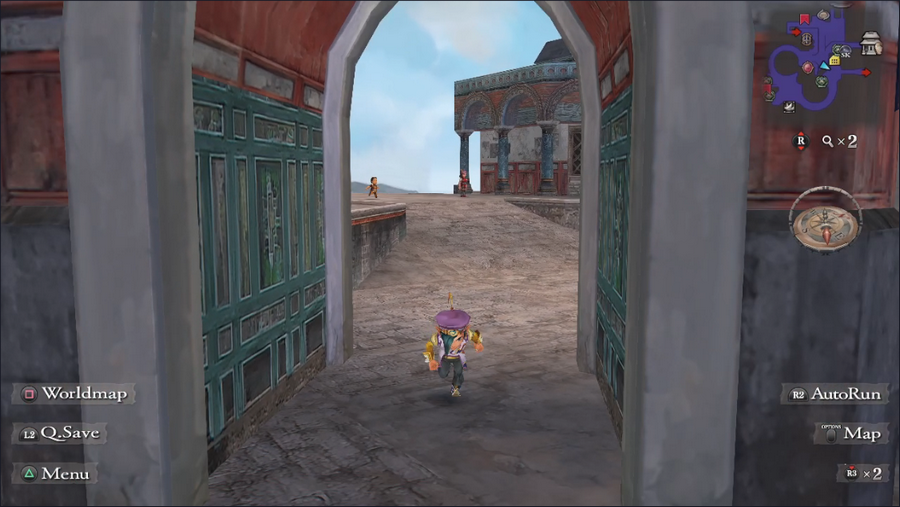 And with that, Jamil's intro is done! 5-Headed Snake God fucked around with this message at 12:34 on Sep 26, 2023 |
|
#
¿
Sep 25, 2023 21:47
|
|
|
Gilgamesh255 posted:And that leaves...two, if I'm not mistaken? Without giving too much away, one being someone who was the subject of an LP of the original Super Famicom version of this game before the writer called it quits for reasons, and the other being AWESOME, with an equally AWESOME bro. Three, but if you're talking about the one I think you are, yes, they and their bro are both still awesome.
|
|
#
¿
Sep 26, 2023 01:39
|
|
|
EclecticTastes posted:This isn't entirely true, but that's probably best discussed later on. Assuming it comes up in the LP at all, which is pretty unlikely.
|
|
#
¿
Sep 26, 2023 02:30
|
|
|
berryjon posted:It's interesting how even in these prologues, they are already working to get the various protagonists together, rather than letting happen during the 'main' plot. As you will see, there is actually no effort made to get the protagonists together during the main plot. Also there really isn't much of a main plot except in very broad strokes.
|
|
#
¿
Sep 26, 2023 03:25
|
|
|
Gilgamesh255 posted:A bit soon to discuss this, but does the new game plus function allow you to choose a new main character, or are you slated with the one you chose at the beginning? The former could allow Five Headed Snake God to explore the other characters... assuming that works that way, of course, amongst other possible factors I won't go into. No, you can and are expected to choose a new character (and eventually beat the game with all eight). I'm not gonna do that for the LP since I'd burn out way before finishing it.
|
|
#
¿
Sep 26, 2023 03:45
|
|
|
Welcome back everyone. We're moving right along to our sixth character intro.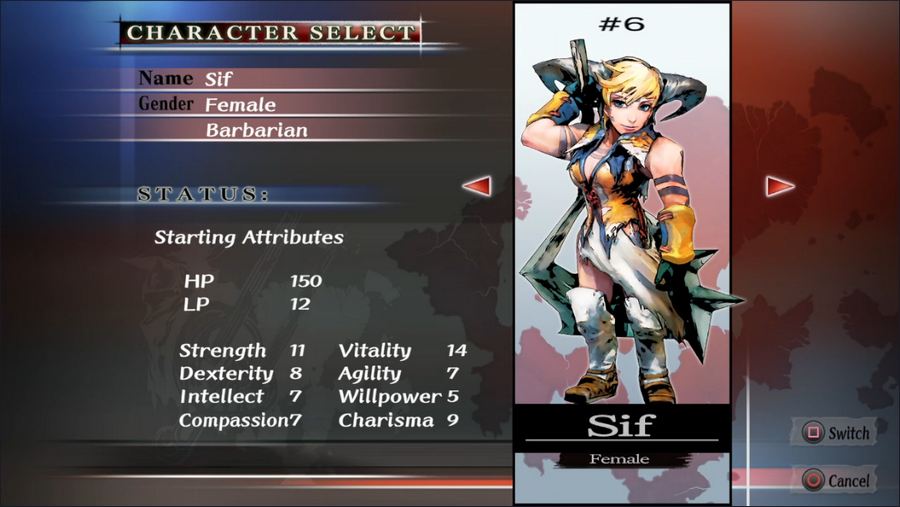 Sif is basically a Viking warrior: a blue-eyed blonde who could probably snap most men in half like a twig. That she's named for the Norse goddess of battle is not a coincidence.  Sif's starting class is Valhallan Warrior, which has an okay passive ability but a solid set of skills. Every party needs Survival, and Two-Handed Sword and Hand Axe are both good weapon types. 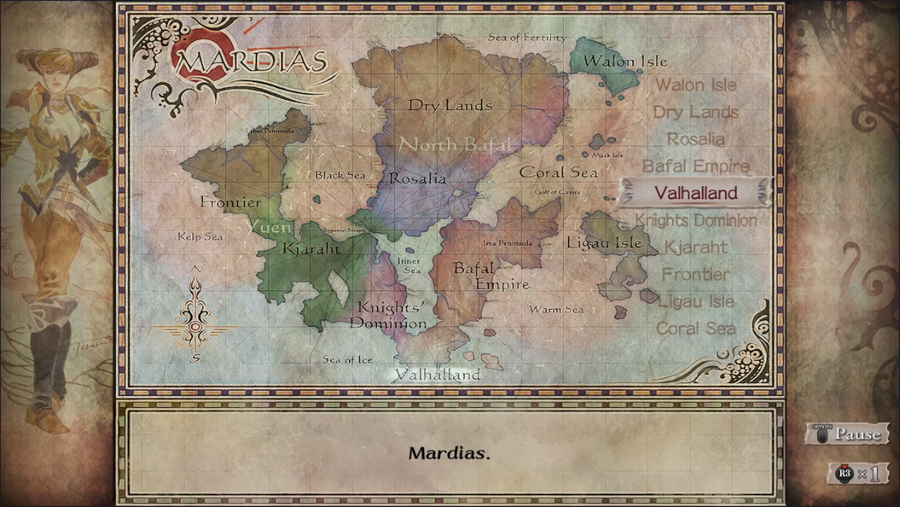 Sif is associated with the snowy region of Valhalland, which is about as good of a pun as we're going to get from the game. She's also one of the two characters associated with multiple regions, as she has a connection to the nearby Knights' Dominion as well. 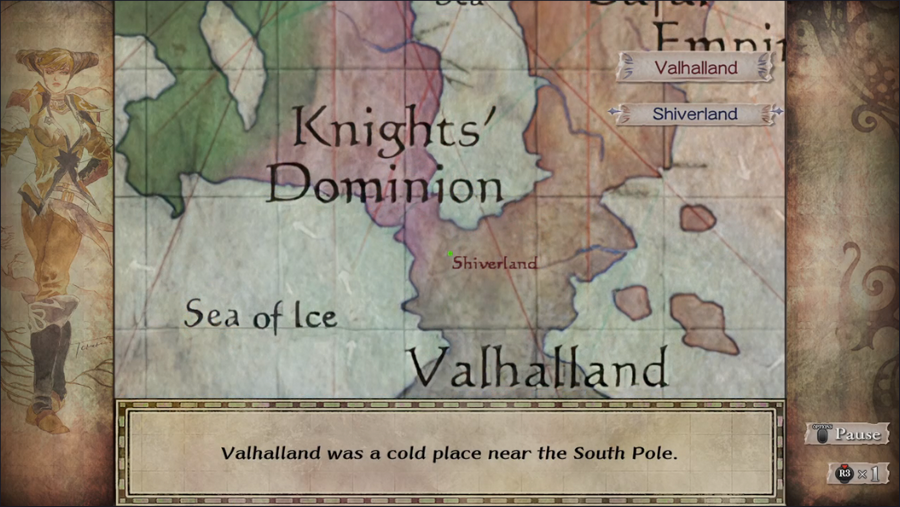 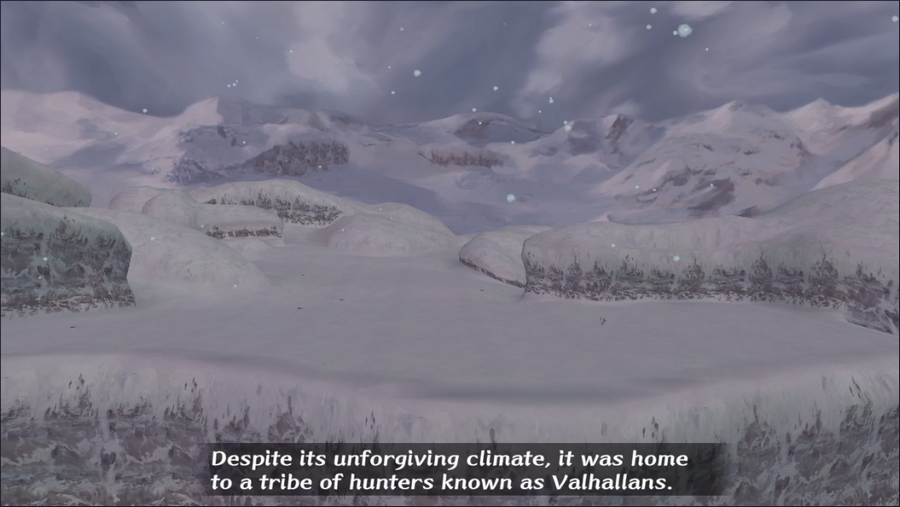 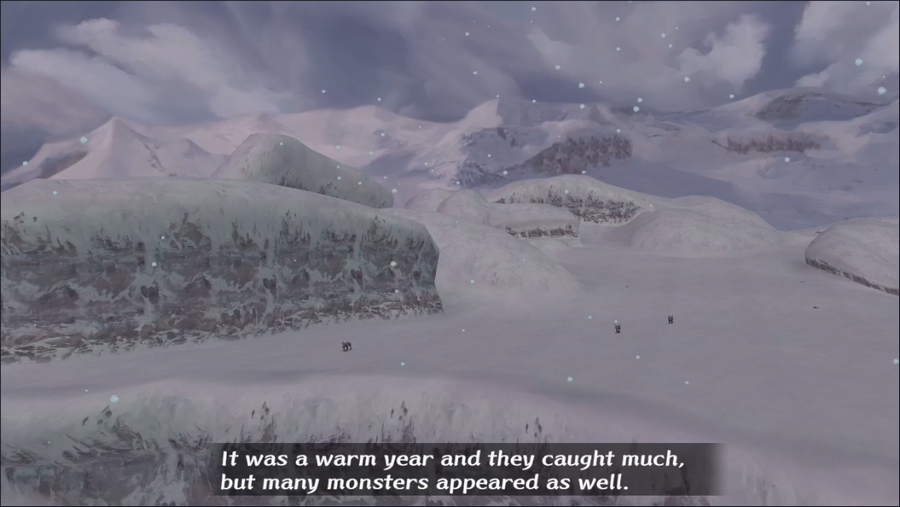 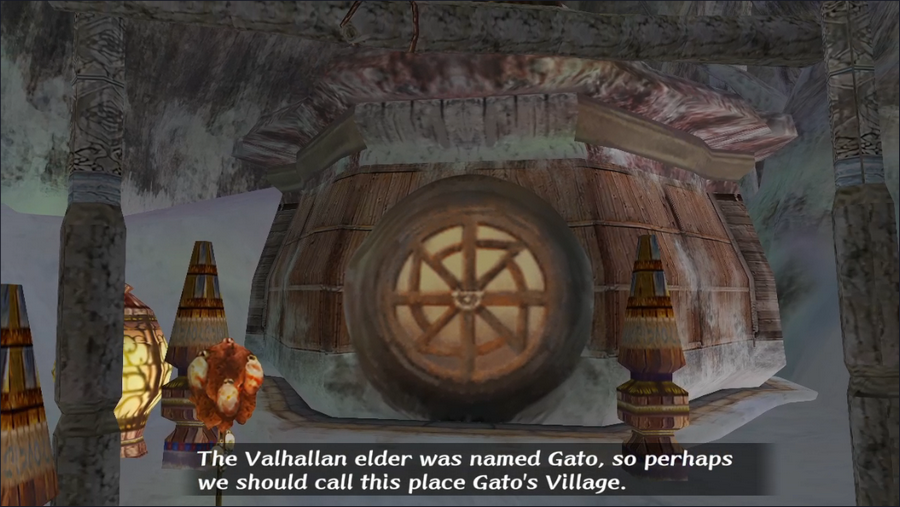 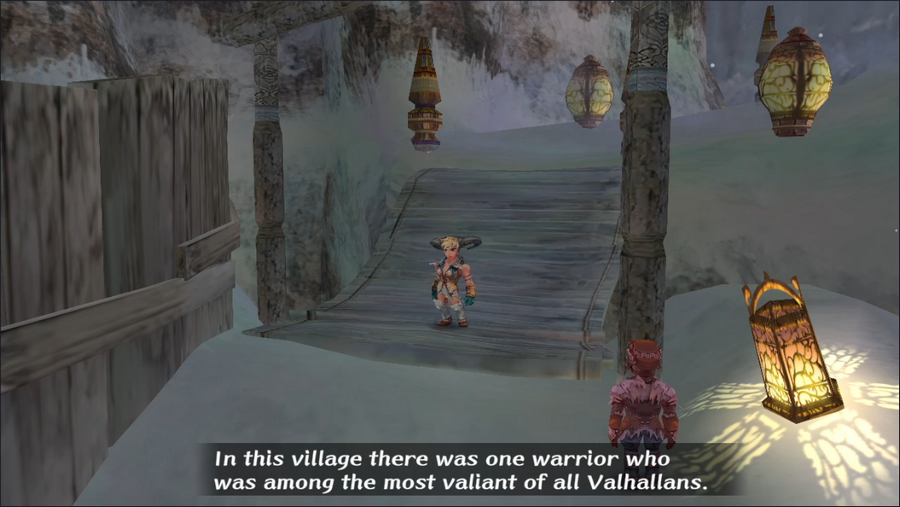 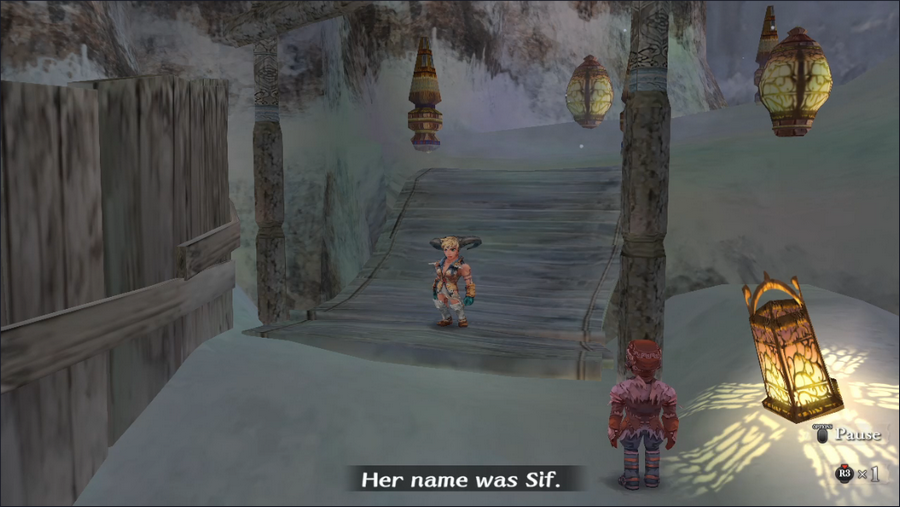 And so we get control of our heroine. Music Highlight: Resolute Bravery/Valor Unyielding Sif's theme is a strong, martial tune fit for a warrior. 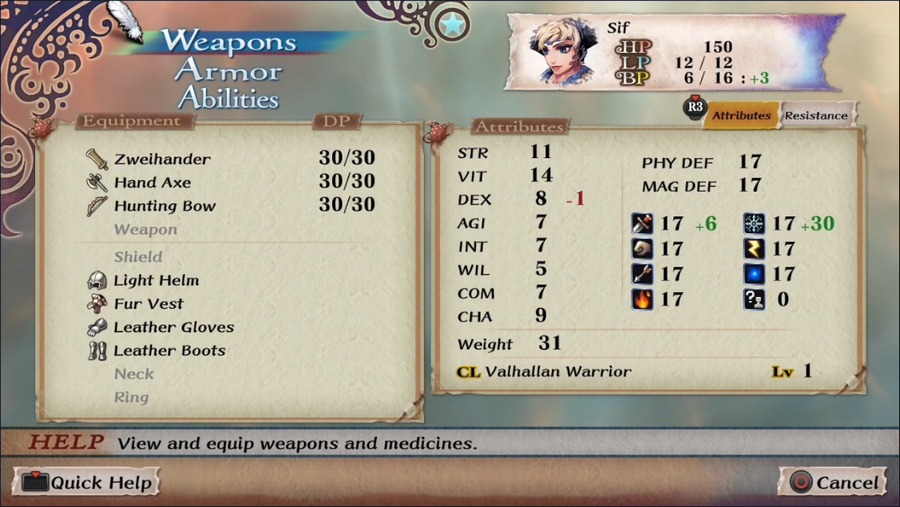 Sif comes with some strong physical stats and a surprisingly robust set of weapons and armor. We need to remove a weapon to make room for both the First Aid Kit and Smoke Bomb Pouch, but that's an easy choice since her class doesn't use bows. 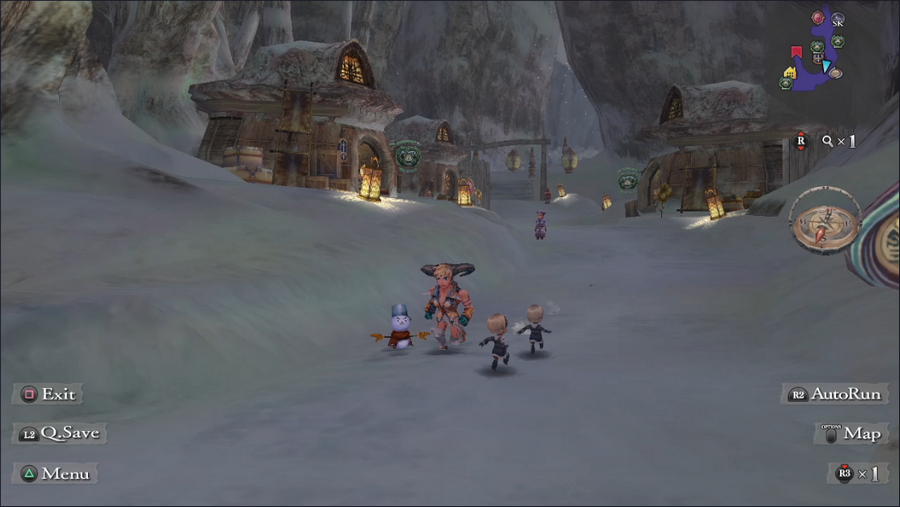 The people of Gato's Village are simple folk, but their snowmen are delightful. 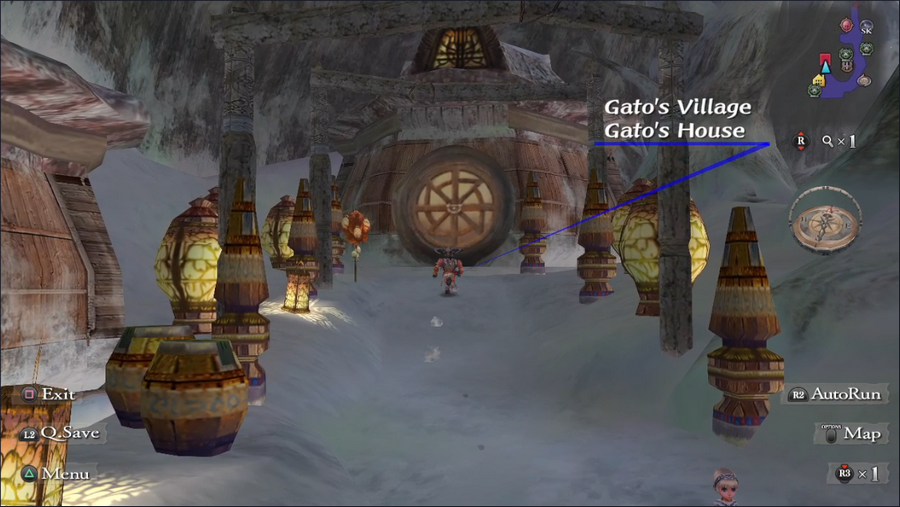 There's not much to do here, so talking to Gato is a logical first step.  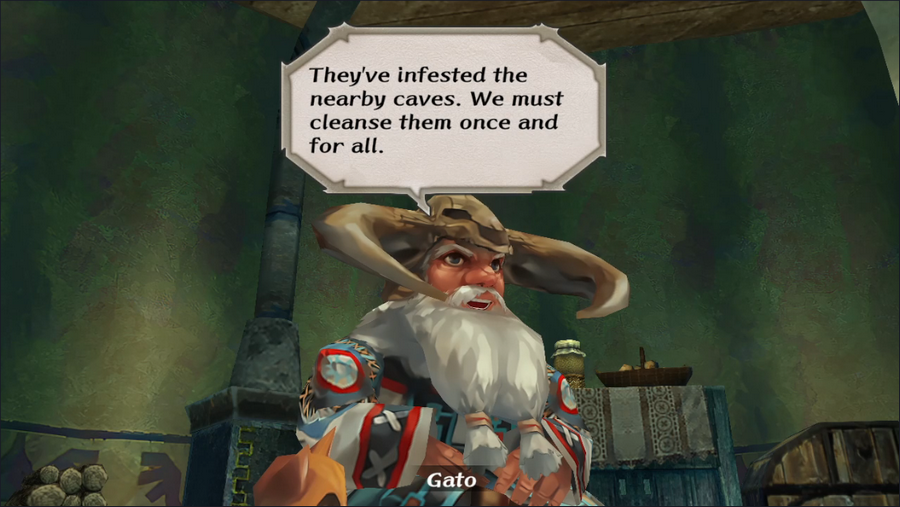 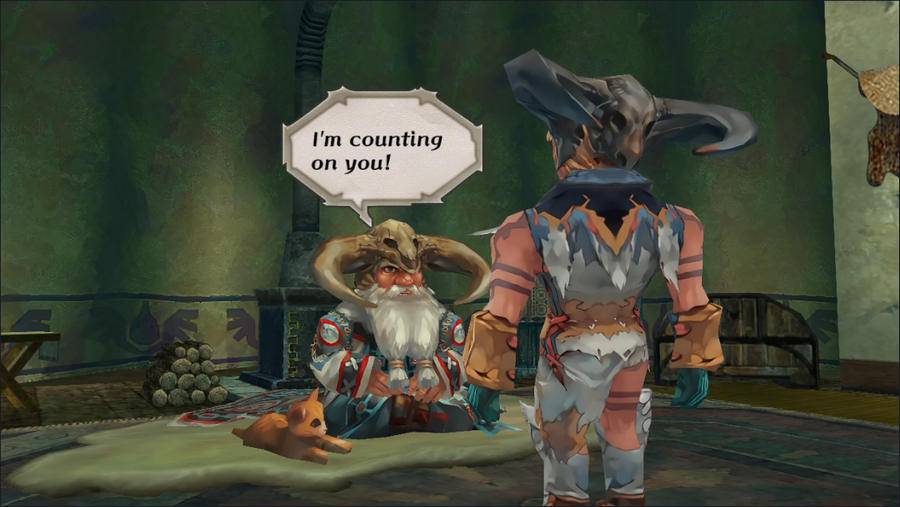 He gives us a deceptively complex task: monster killing. This is a actually a pretty involved starting quest that includes a substantial amount of fighting. It can actually take longer than Albert's intro, especially if you don't know what you're doing.  Trying to do this alone would be absolute suicide, so we'll head to the pub to get some help. 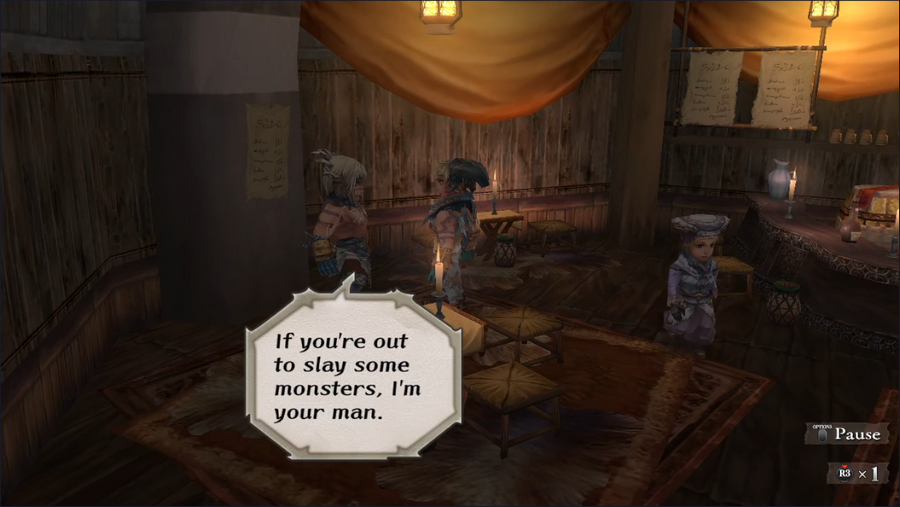  As a generic character, the Valhallan Warrior won't be in our party for long, but he'll be valuable for tacking this intro. 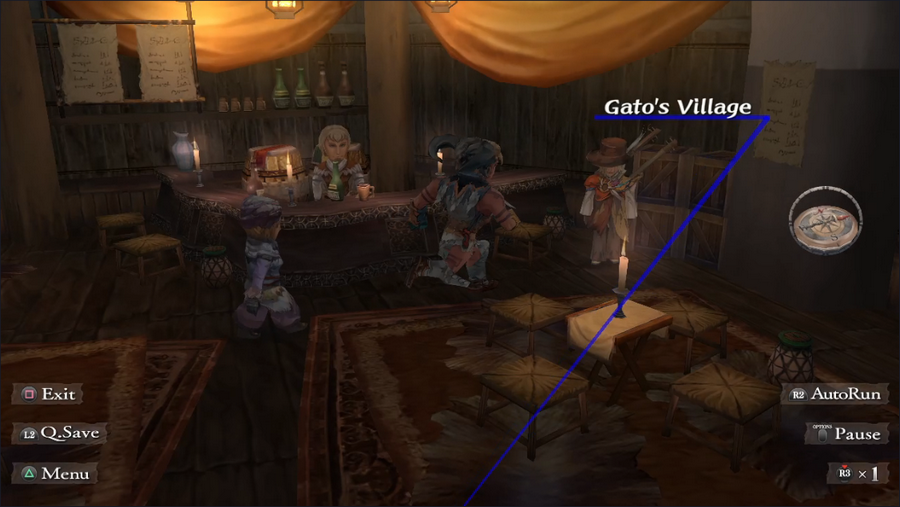 While we're here, let's talk to this sharp-dressed man. You've probably noticed him in several other intros as well. 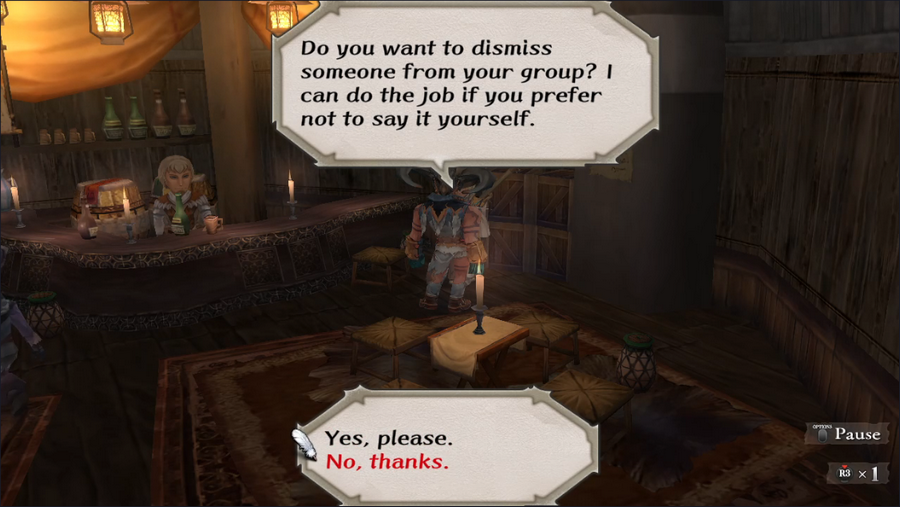 This is the titular Minstrel. He hangs out in all of the game's pubs and can be used to remove unwanted party members. 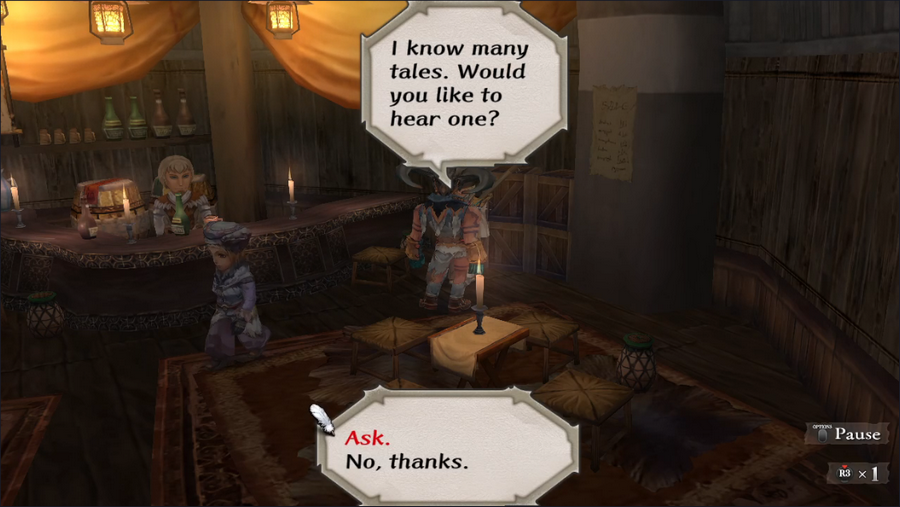 As we progress through the game or accomplish certain goals, he'll also offer to tell us new stories. This one is available right out of the gate. https://www.youtube.com/watch?v=BKfLVOANxcw 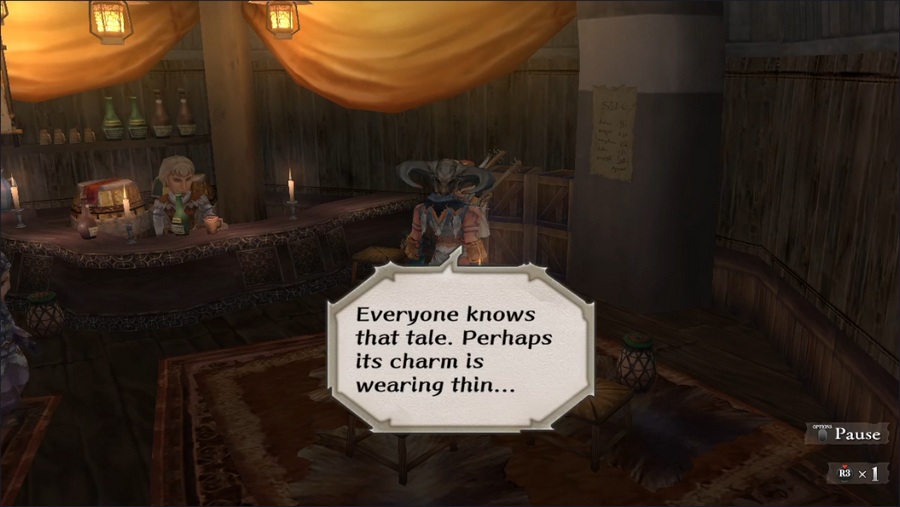 It's nothing I didn't cover in the mythology post, and even the Minstrel himself admits that he needs some new material. 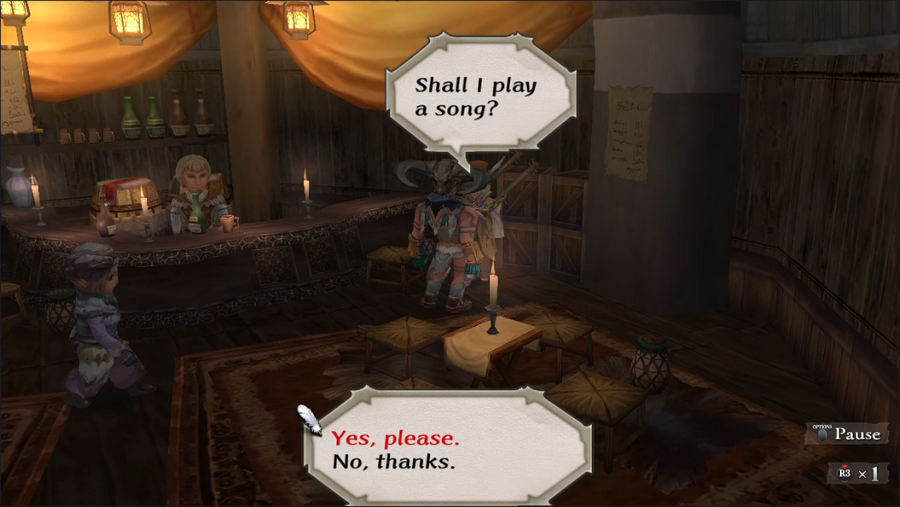 The Minstrel's third job is to act as a jukebox. If we ask him to play a song, he'll switch the background music to a random piece we've heard so far. But sometimes, he'll throw in a bonus.  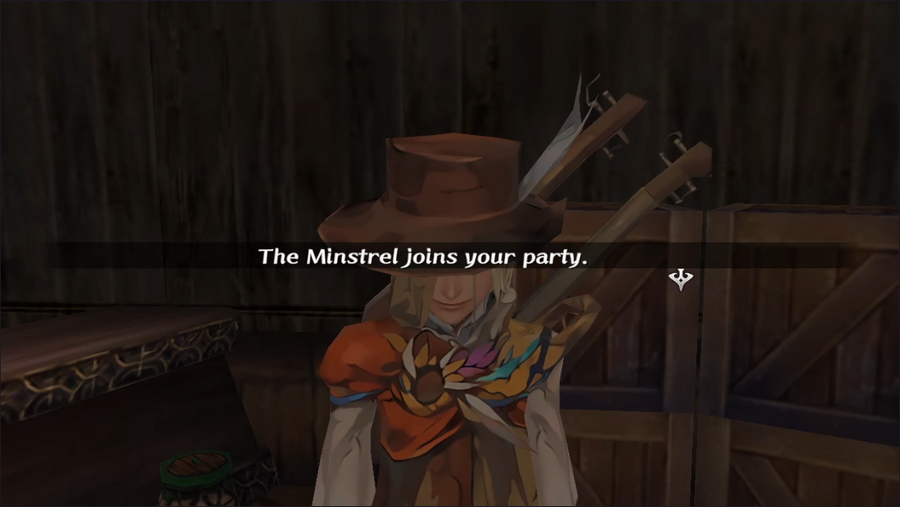 If the party isn't full, he'll join up as an ally. He'll remain with us until we enter any pub, at which point he'll return to his usual spot, though he can be recruited again. Despite being available early, I won't be offering the Minstrel as an option for our final party, for one important reason: near the end of the game, he becomes unrecruitable. We won't have the resources to carry around and upgrade a party member who can't be present for the finale. It's a pity too, as his battle lines are pretty entertaining. ("And so they strode into battle!" *guitar sting*) 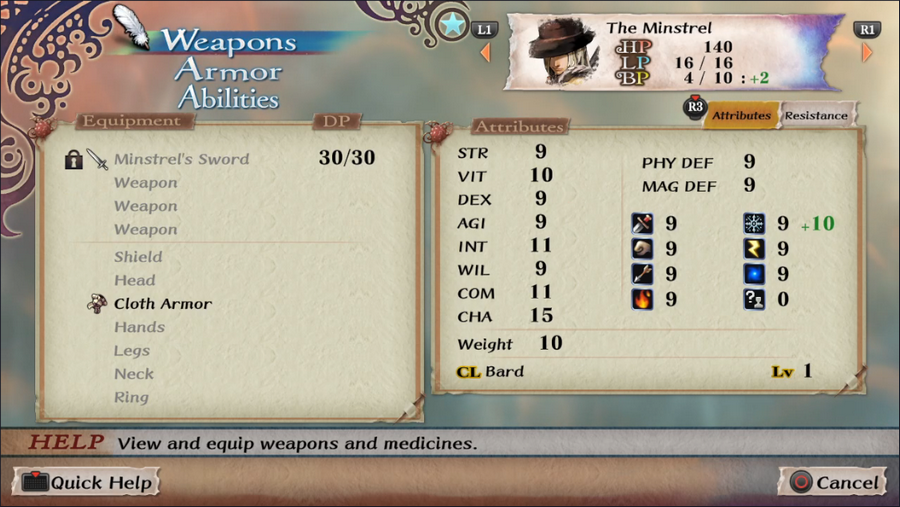 But for now, when we have literally no other options, he's a good addition to our ranks. Although his armor situation is a bit dire, he has a unique sword that's pretty decent for the early game and a strong set of stats. He's also a member of the legendary Bard class, though he doesn't gain its passive benefit since it's not at level 3. His sword also has a powerful technique associated with it, Feste d'Arme, though with a BP cost of 15, I won't be able to show it off.  The Valhallan Warrior, meanwhile, it kinda trash, being stuck with a pair of mediocre weapons and the usual 4 LP that generics have. Still, he can do some damage and take some hits, which at the end of the day is what we really need.  We're as prepared as we can get. Let's head out.  Valhalland's main overland area is Shiverland, a snowy field with numerous branches leading off of it.  Our quest notes indicate that we have to take out monsters in three of these branches: east, west, and south. The southwest branch leads to the world map, while the southeast branch leads to another area we may or may not see in this LP.   The east cave is the closest and therefor our first destination. It's also the smallest, featuring a simple chamber with a monster waiting for it.  Technically this is a boss fight, but it's not especially interesting so I'm not wasting your time with a video.  The two goblins are fodder and nothing to worry about; any of our party members can one-shot them. (I also want to point out that the hilt of the Minstrel's sword is shaped like the end of a guitar, which is a cute detail.)   The Walking Corpse, on the other hand, is a brutal foe. Its attack deal heavy damage, while our own deal very little. (Undead in general tend to have pretty high defense.)   Yeah, this is how TPKs happen.  Luckily the Minstrel glimmers Impact Slash at the last possible moment and wins the fight for us.  An ugly victory, but a victory all the same.  With the east cave down, we head to the south. 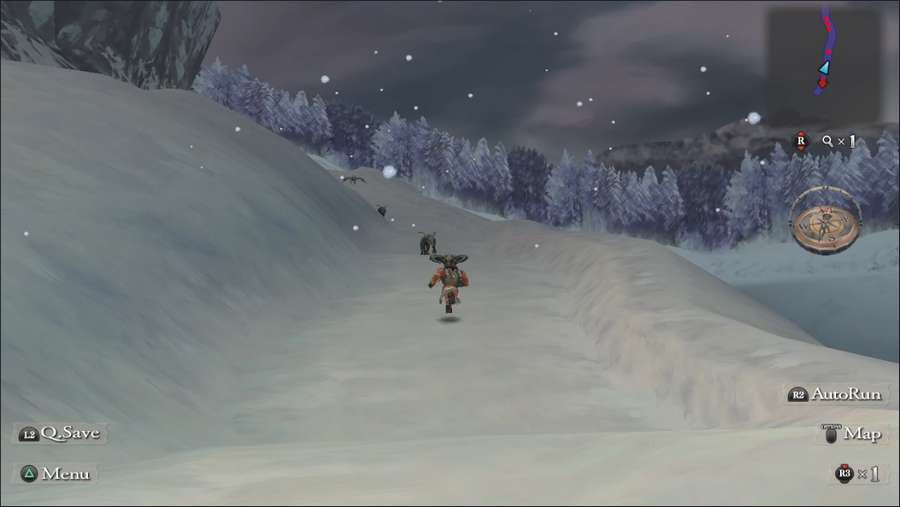 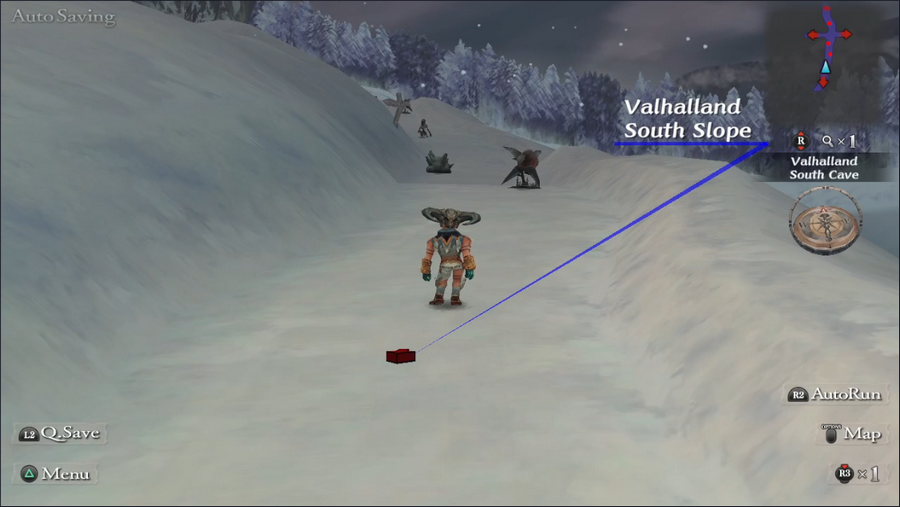 Before we can even get to the cave itself, we have to navigate some slopes. The narrow confines of these areas make avoiding fights more or less impossible. 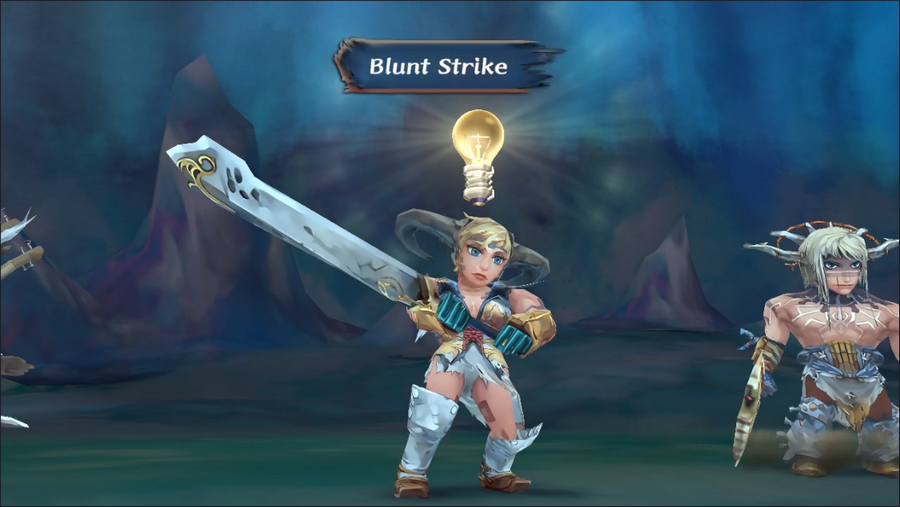 The good news is that Sif manages to Glimmer Blunt Strike during one of these fights, meaning she won't do so in a boss fight where the loss of damage would really hurt. 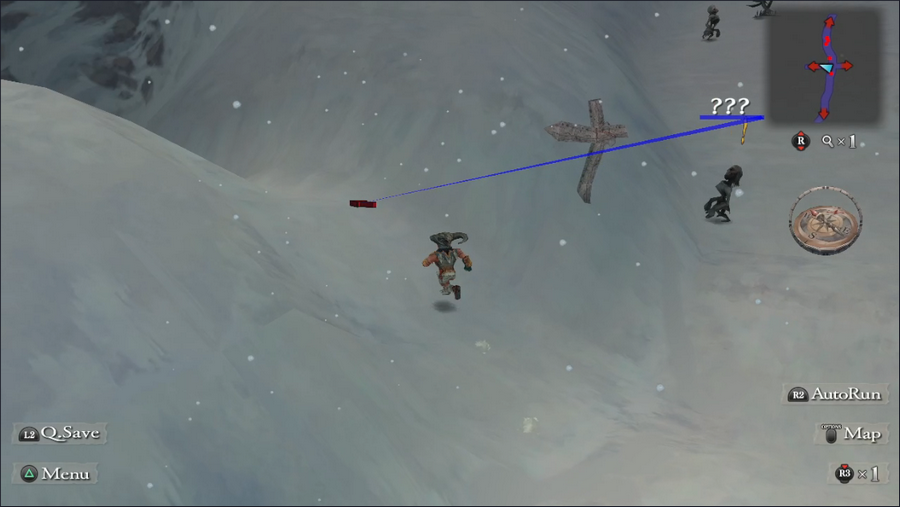 On the second slope, a branch to the west leads to our destination.  The cave itself has more narrow confines, and by God look at all those monsters. There's a reason this quest involves a ton of combat.  At least we're able to find the map in a nearby chest.  At the end of the cave is our target. Boss Fight: Valhallan Peggies https://www.youtube.com/watch?v=i6vuqgX_hh8 Music Highlight:The Soul of Fire This is probably the most "generic" of Minstrel Song's boss themes, in that it shows up a lot. It's a great piece that gets you hyped for a tough fight.  This fight is against two Valhallan Peggies (fairly low-ranked enemies) and a Peggy Chief. Boss fights against multiple regular foes are fairly common in the early game, but taper off in late-game quest as character reach the point where they need proper bosses for a challenge.  Our strategy in this fight is simple: kill off the regular peggies as quickly as possible, then attack the chief. The Minstrel's Impact Slash is great for this, as it can easily kill one of the mook in a single use. 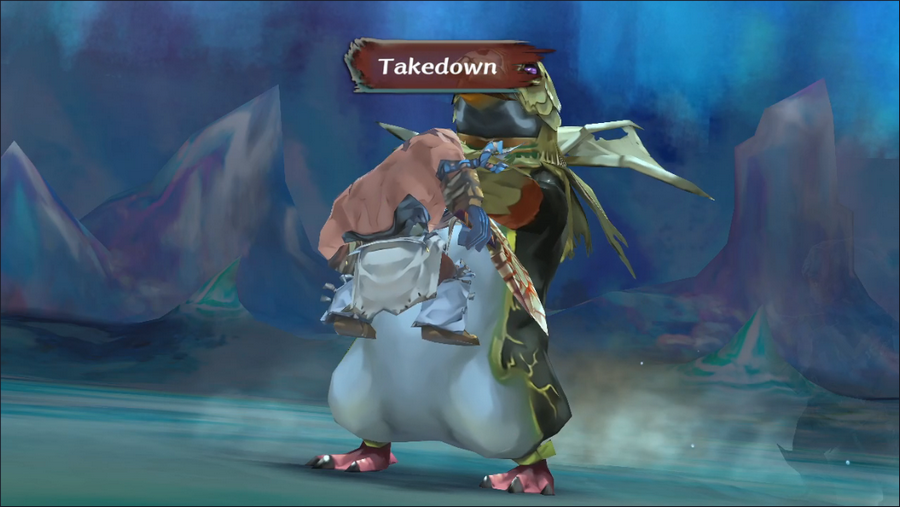 The chief has a special attack, Takedown, which can deal a fair amount of damage, but for the most part the attacks we suffer here are low-damage. The threat comes from the number of them, and our luck can swing heavily depending on how much they spread out their damage. 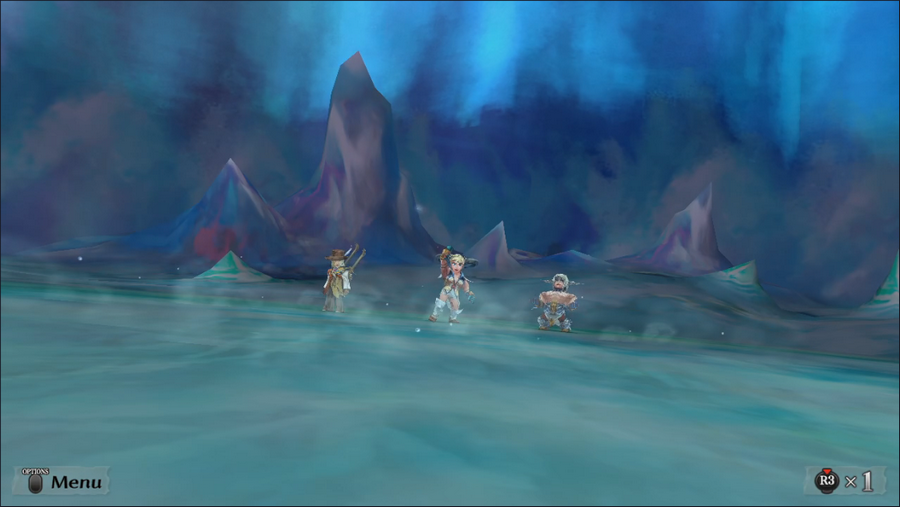 In this case, we win with everyone on their feet. 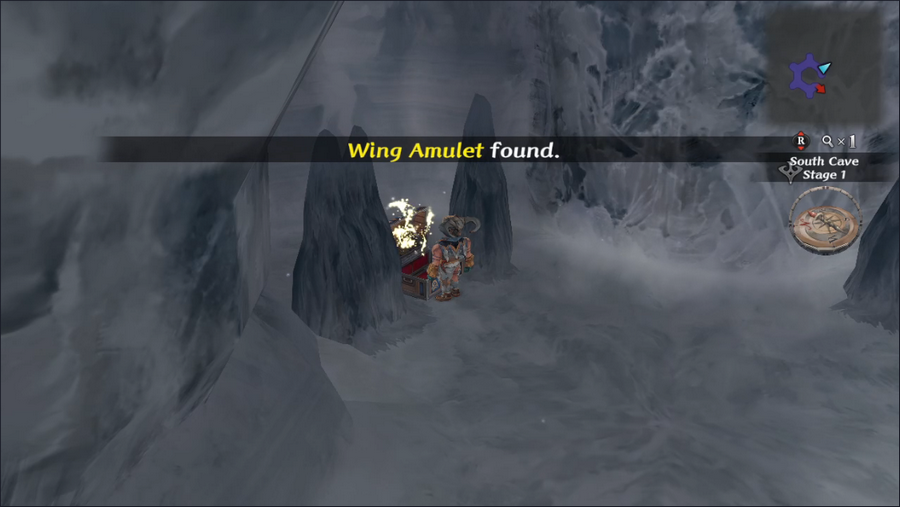 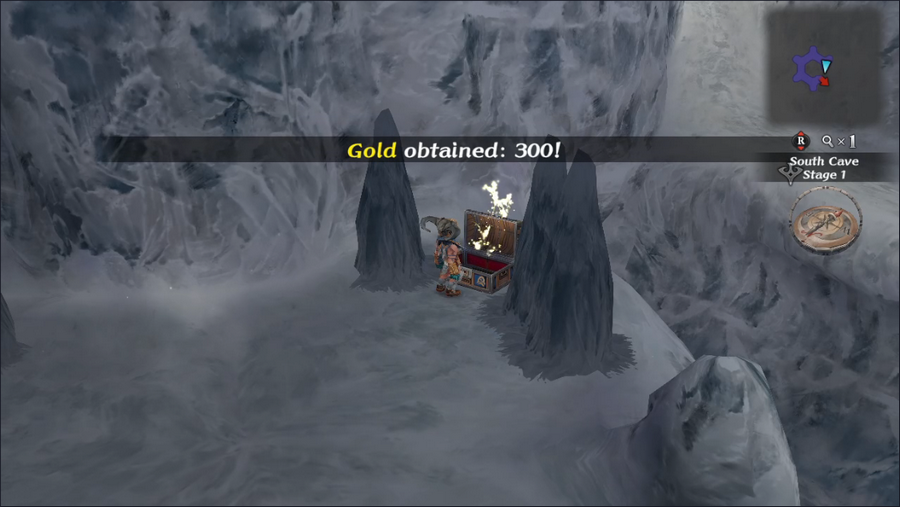  With the boss fight done, the ice nearby disappears, revealing a pair of chests. The first contains a Wing Amulet, which raises Dexterity. The other contains a bit of gold and some jewels.   As we make our way back out, the Minstrel manages to Glimmer another technique, Sonic Slash. This deals decent damage and has the "Quick Recovery" trait, which means it gives the user an initiative boost on the round it's used. It's weaker than Impact Slash despite having the same BP cost, but it doesn't require any DP, and it's handy for finishing off weakened enemies before they can act.  Our last destination is the west cave.  More narrow confines, more crowds of monsters.  One of the monsters catches us from behind, but rather than resulting in a surprise attack, we get a melee instead. This pushes all party members to the front row, which would be a real problem if we had someone anywhere else!  We also start encountering Slimes in here, and without magic we can't really deal with them.  Thank goodness for smoke bombs.   A nearby chest gives us some jewels, and then we're off to face the boss. 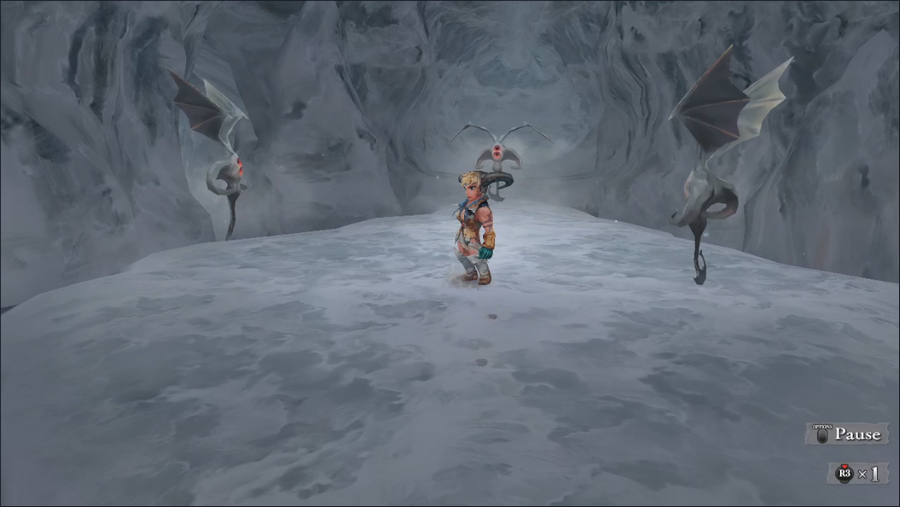 Well, bosses. 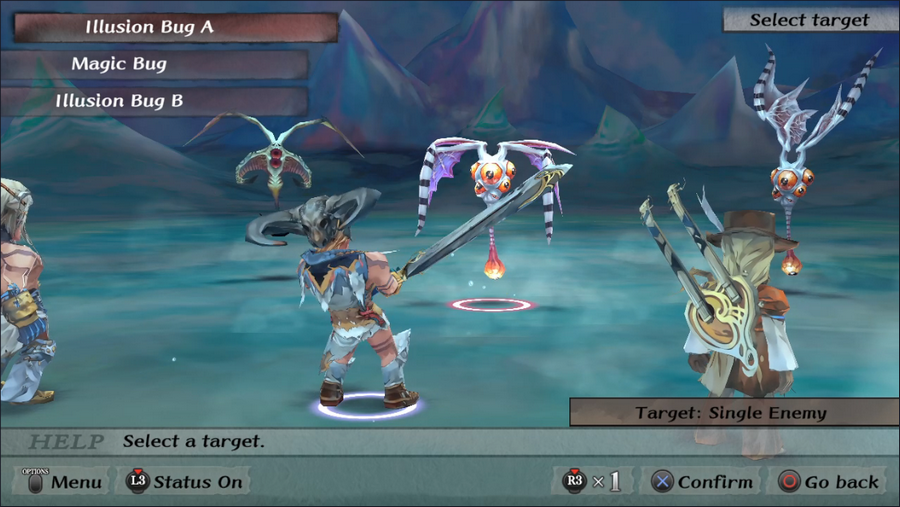 There's not much to say here. Magic Bugs and Illusion Bugs are fiends that primarily cast basic offensive spells, but have little in the way of durability. This fight is a nonissue. 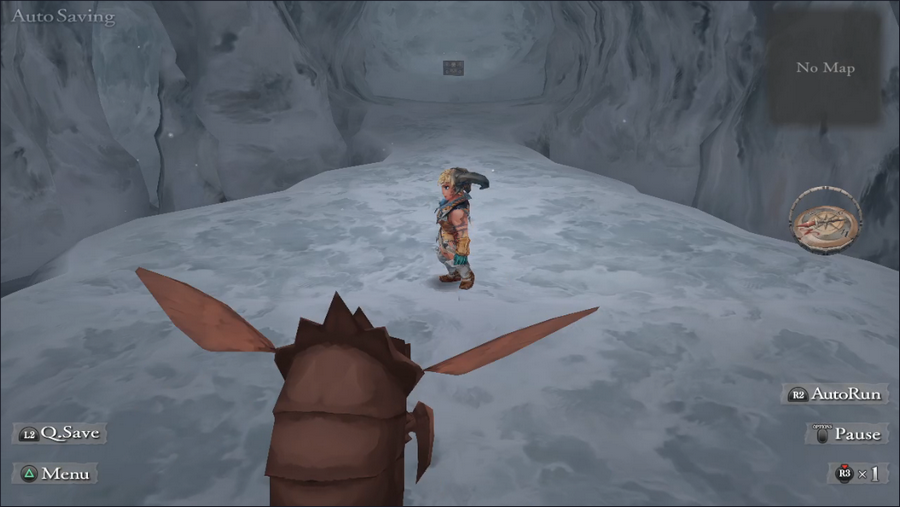 Once they're gone, we can see a treasure chest behind where they were, but there's a gap that requires the Jump proficiency to cross, and we don't have that. There are several other such gaps in the cave as well, taunting us. 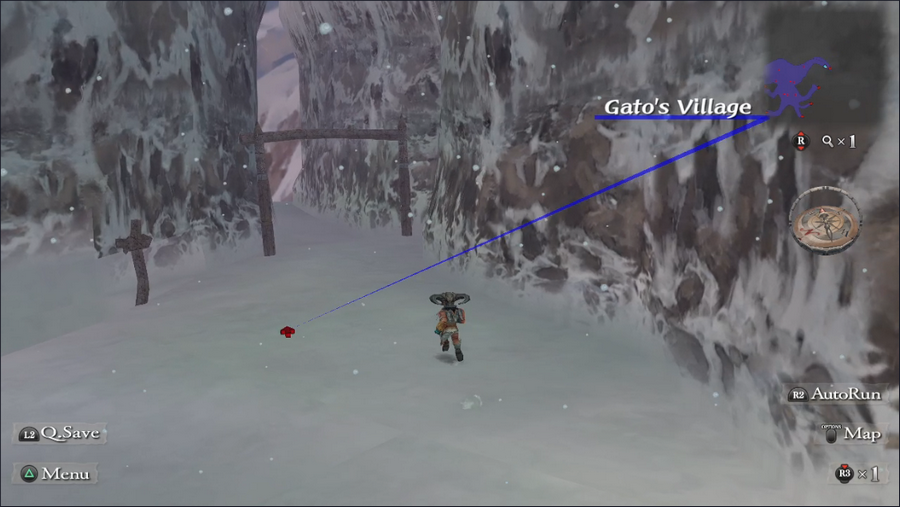 With the monsters gone, we head back to Gato's Village. 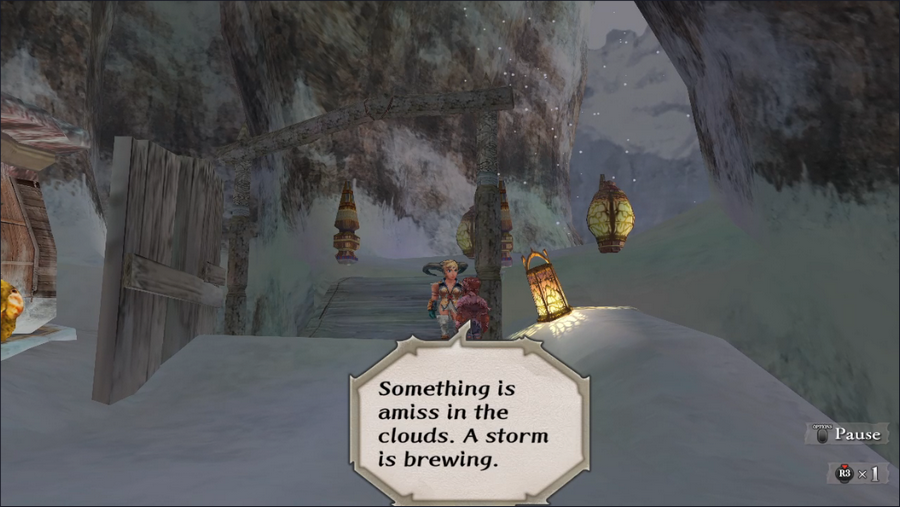 Foreshadowing!  Since we have the gems, we'll stop by the local mentor and boost Sif's class level to 2, in hopes of improving her odds of getting Glimmers. It doesn't help.  It would be nice if we could by Jump to get the treasures in the west cave, but it's not sold here. Rude.  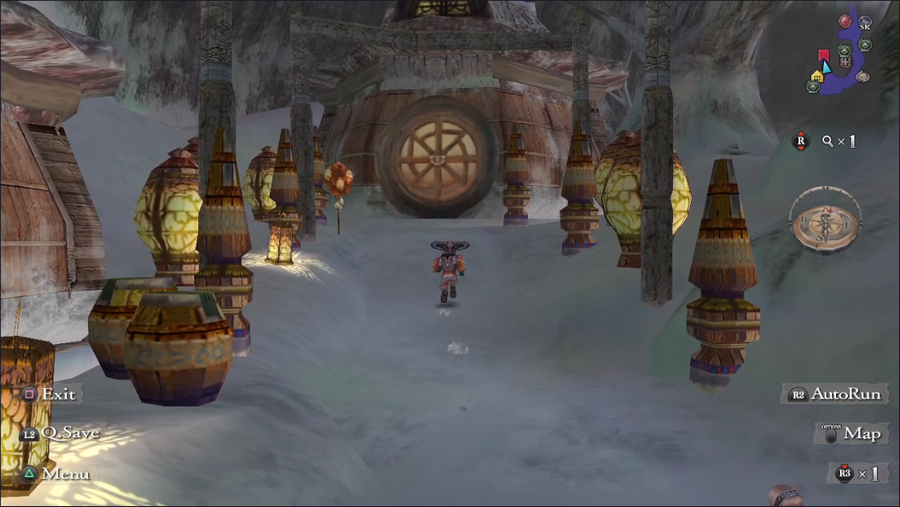 After a quick rest at the inn to refill our missing LP, we report to Gato. 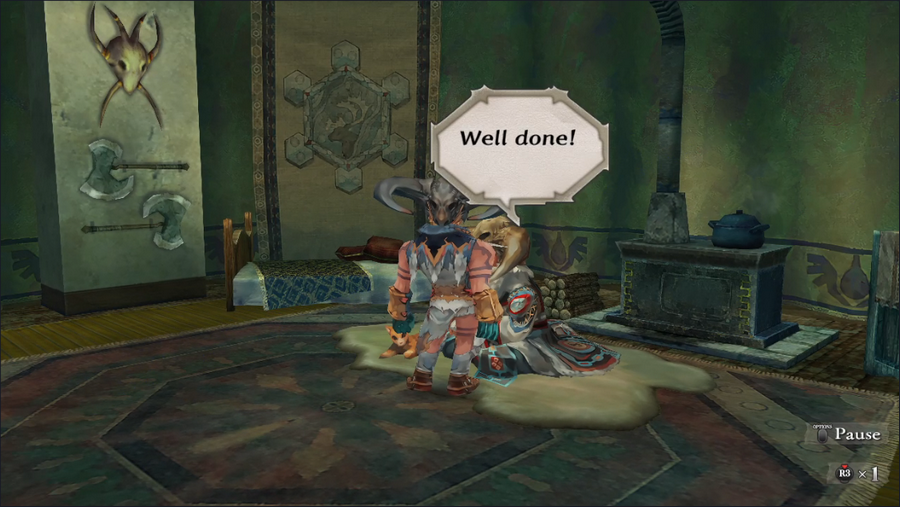 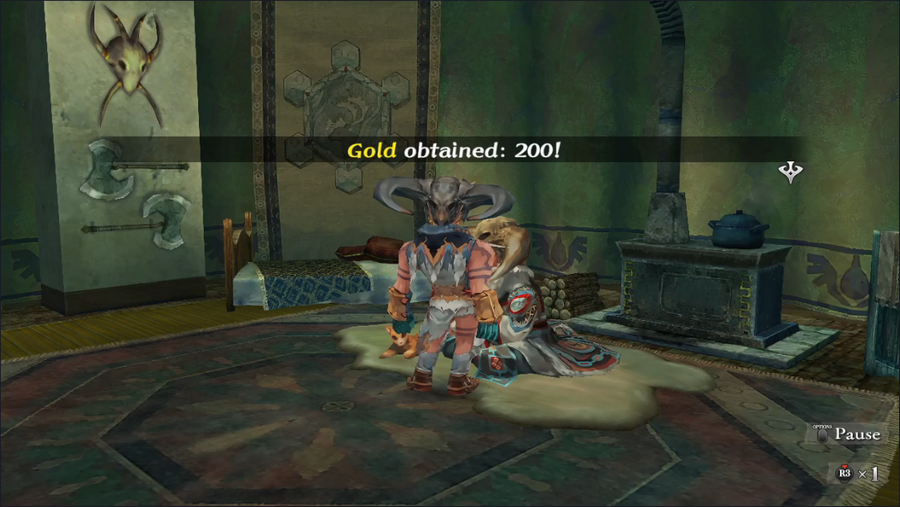 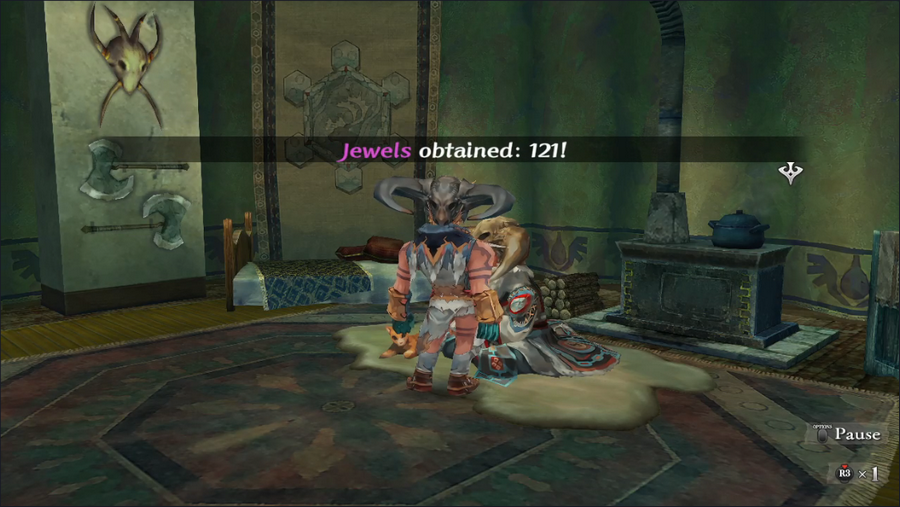 We get the usual gold and jewel rewards, and now have nothing in particular to do.  We head out of town to see if we can find something, and we immediately find something. https://www.youtube.com/watch?v=RNkU_6YvIZs If you were wondering what happened to Albert, it was this. If we were still playing as him, the game would pick up here and go more or less the same. 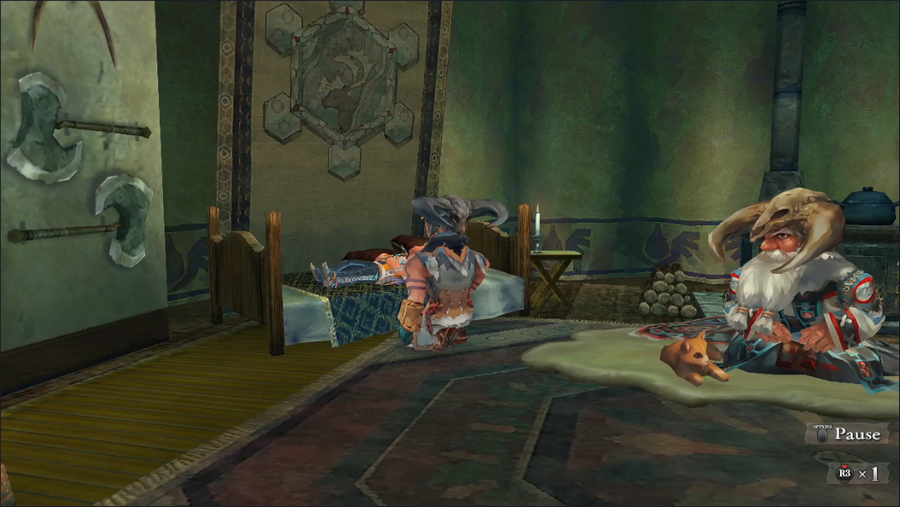 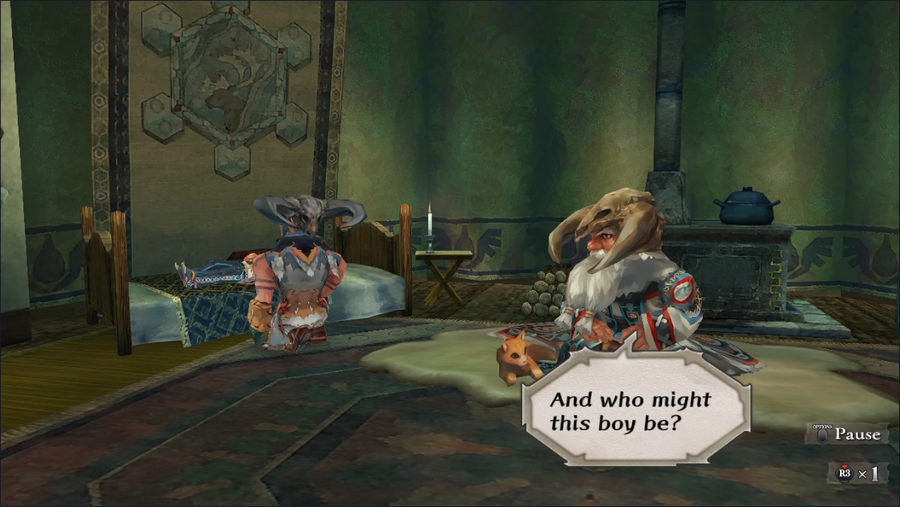 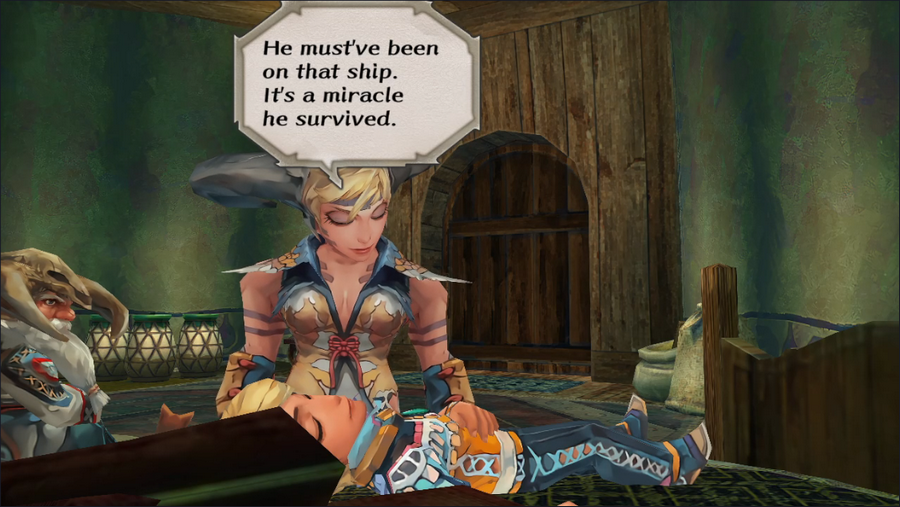 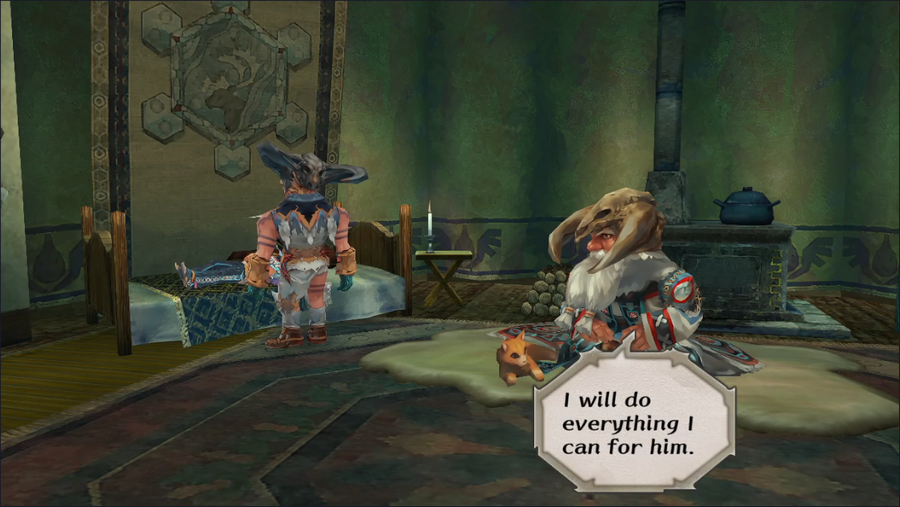 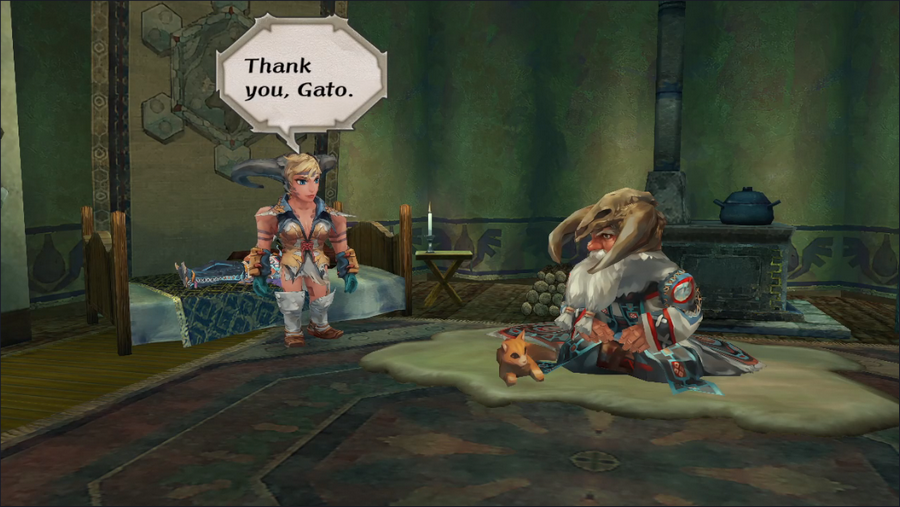 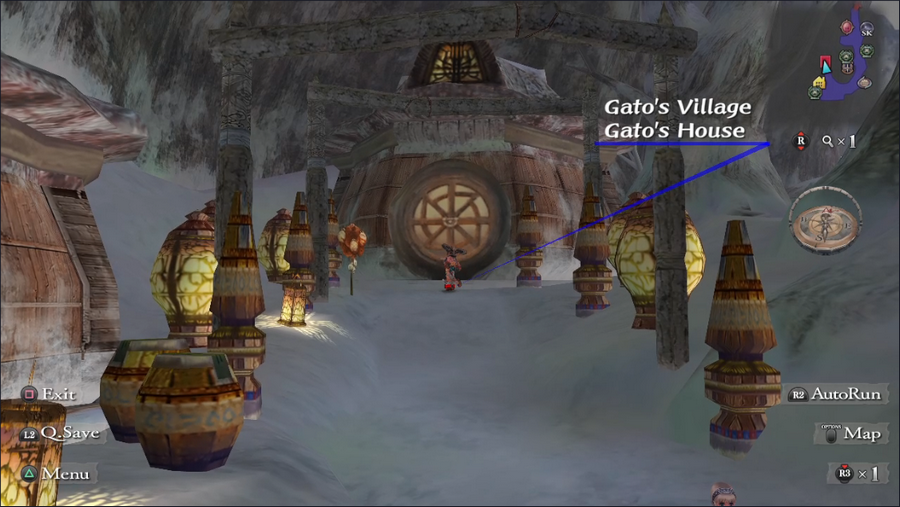 Following this exchange, we find ourselves outside and immediately head back in. 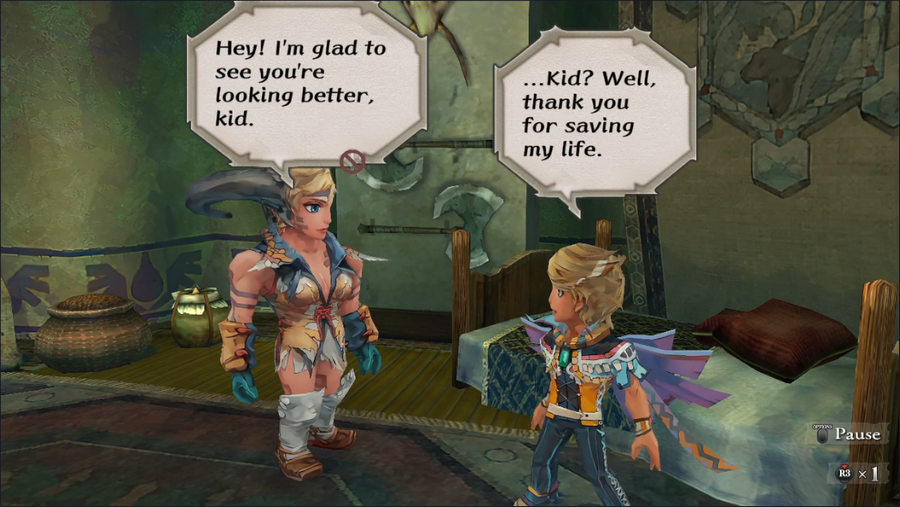 It seems Albert is a quick healer. 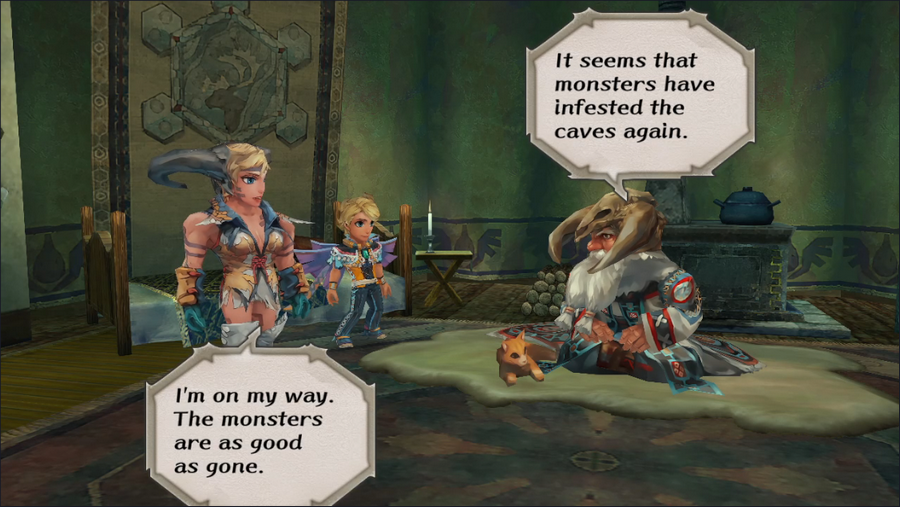  Some of the dialogue options in the game are pretty good. "I avoid hard work!" is probably my favorite, but this is good too.   Sif respects people with a spine, and however weak he might be, Albert does have guts.  The young noble has gained some stats since the start of his own intro, though he's still pretty weak.   Before we take off, we sell off some of our unneeded loot and repair the Minstrel's sword. The Worthless Clubs that Goblins sometimes drop are pretty terrible as weapons, but they sell for over 200 gold, which is impressive. 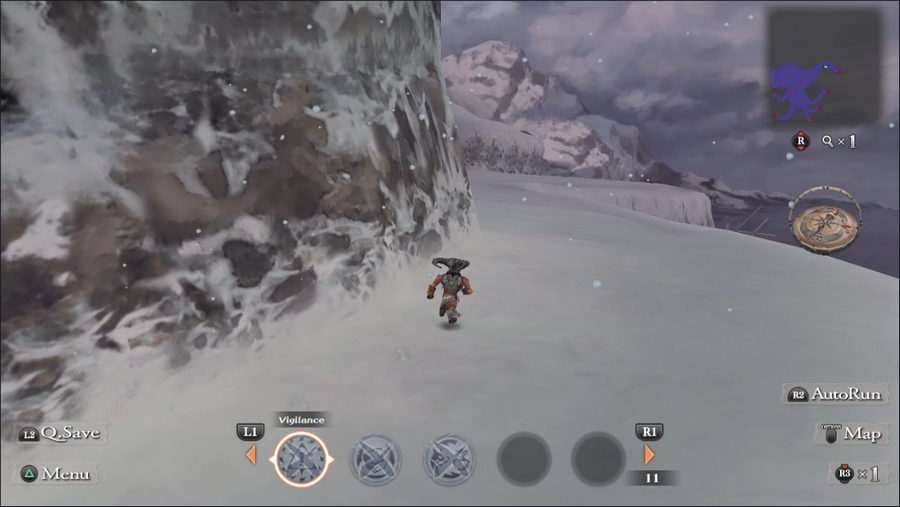 Oh, and I also remembered to equip our proficiencies: Vigilance (prevents ambushes), Trade (allows trading items with some monsters; it doesn't get used in this update), and Find Chests (reveals hidden treasure chests; also doesn't get used today). 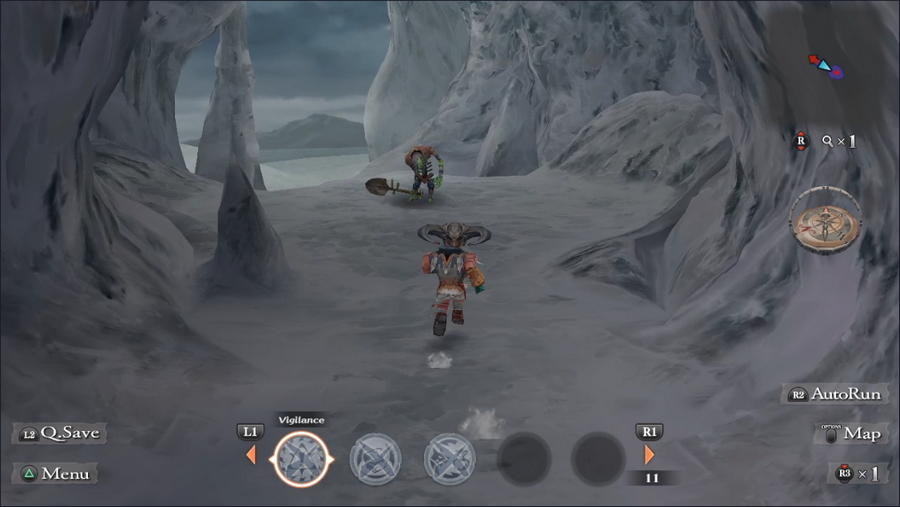 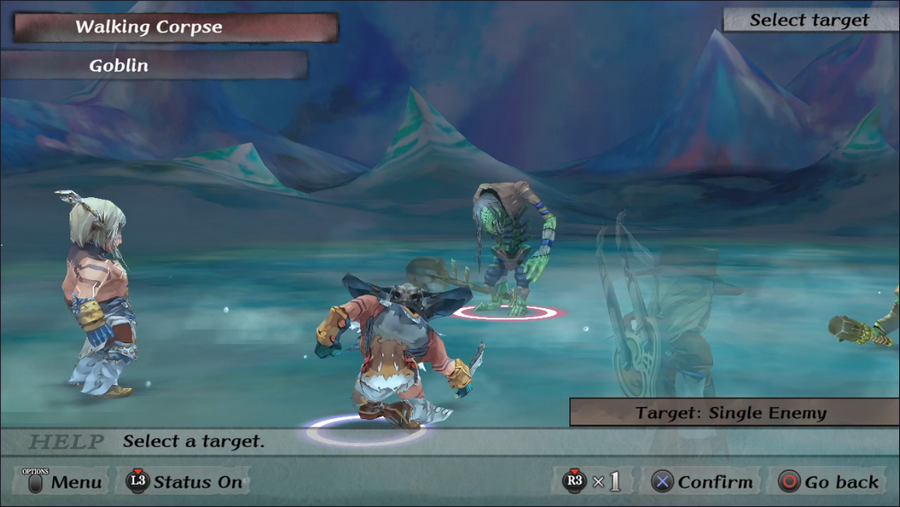 The Walking Corpse fight is actually easier than last time, both because we have an extra character and because there's only one Goblin. 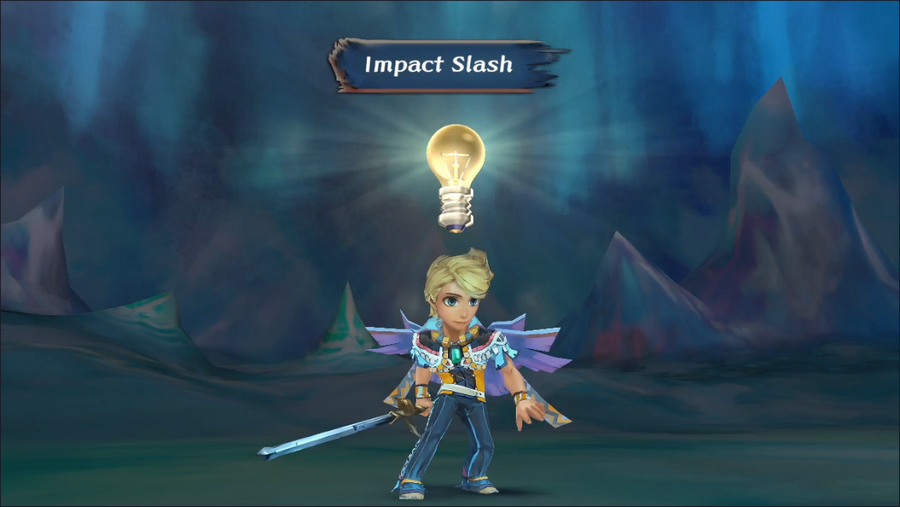 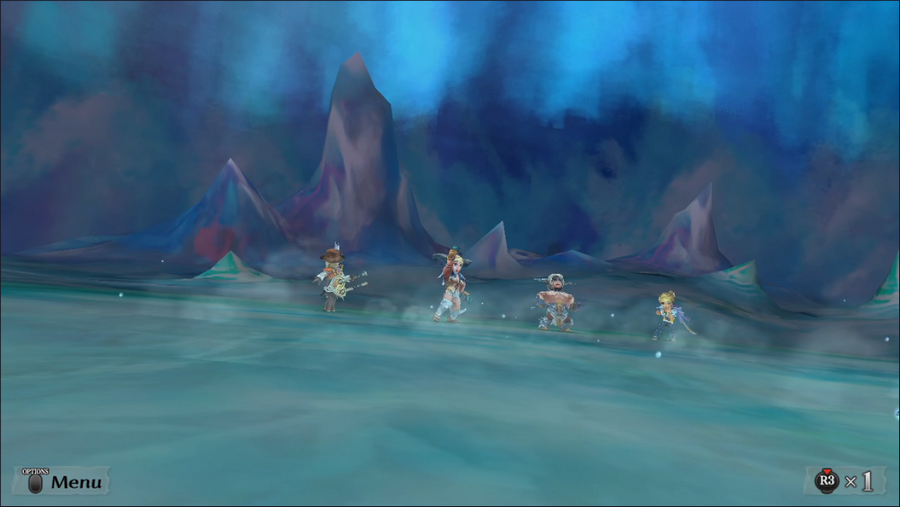 Between that and Albert Glimmering Impact Slash, we end with no casualties.   South cave is still a crowded mess. But why does the area name say "Stage 2"?   Because technically, this is a different map. At the end, where the peggies were last time, there's just a wall, and we have to head left instead. Boss Fight: Valhallan Peggies, Round 2 https://www.youtube.com/watch?v=QQ7ayOFqpMM   Oh my lord that's a lot of monsters. This is another fight that can be extremely swingy depending on how much the enemy group spreads out or concentrates its damage. Oh my lord that's a lot of monsters. This is another fight that can be extremely swingy depending on how much the enemy group spreads out or concentrates its damage.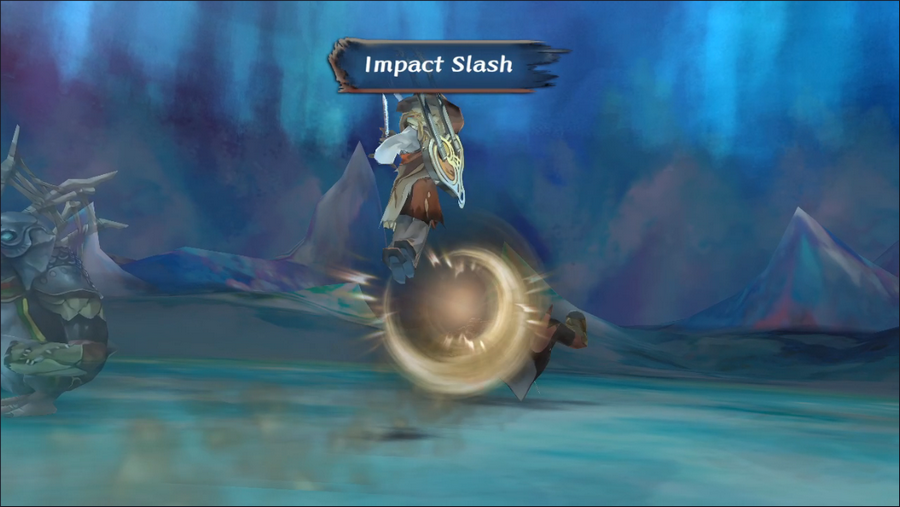 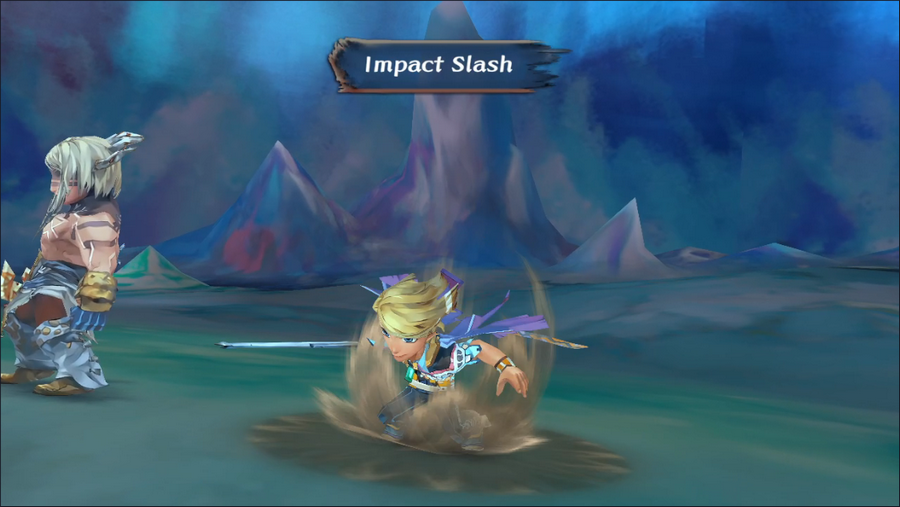 Our strategy is the same, though: take out the regular peggies first, then focus on the chief. With two characters able to use Impact Slash, this actually goes pretty quickly. 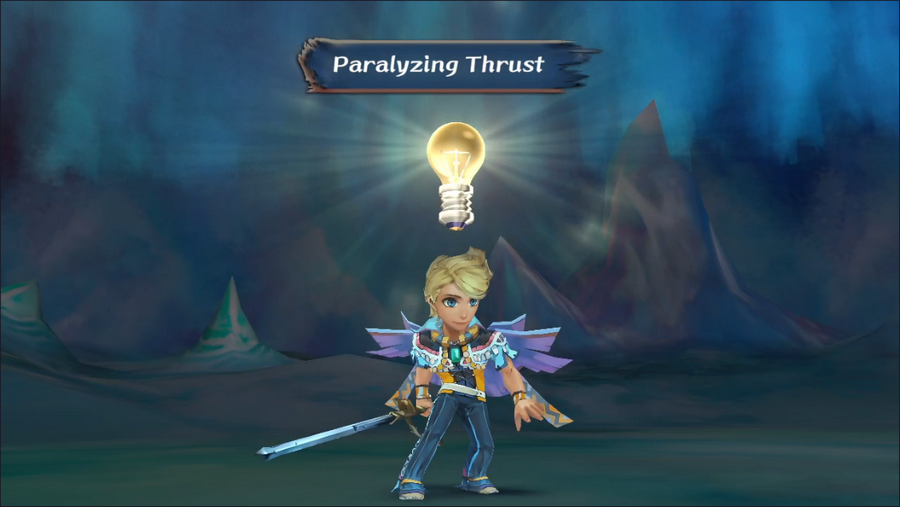 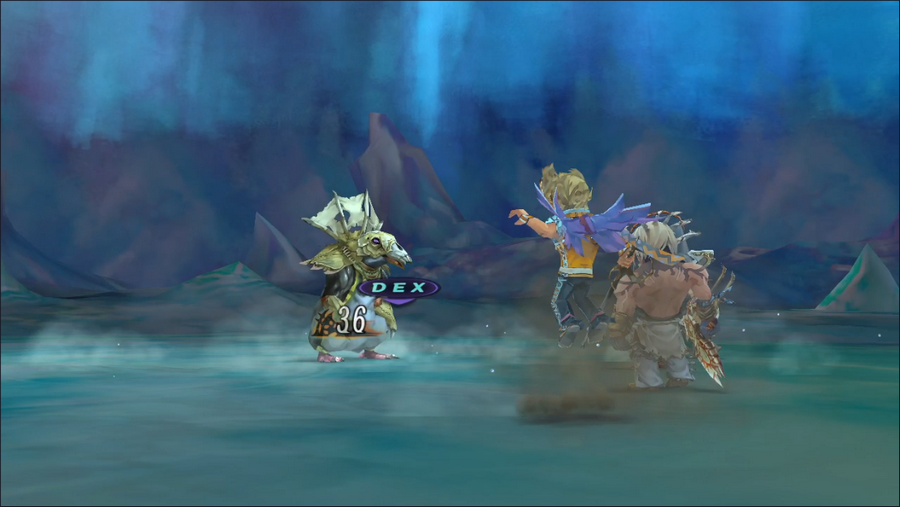 Albert also manages to Glimmer Paralyzing Thrust, an attack that lowers the target's Dexterity. It's okay, but not amazing.  The fight goes well, and we win without any casualties. 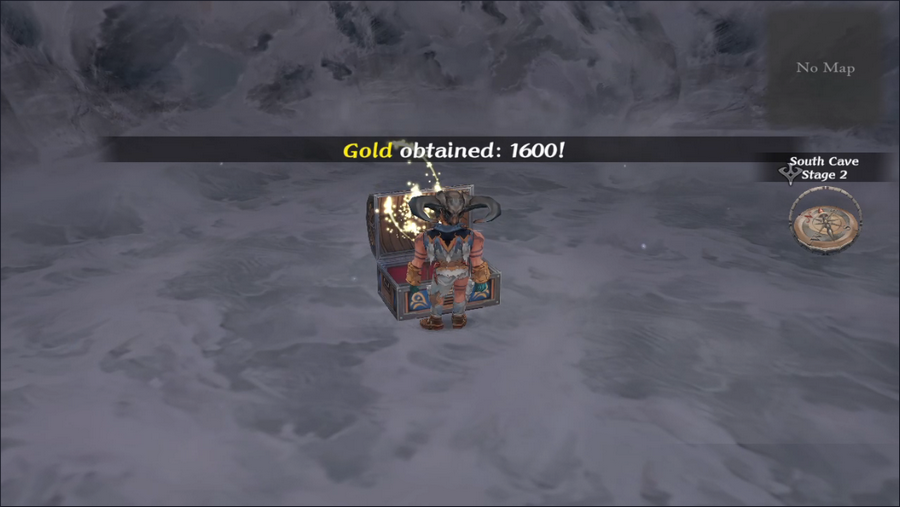 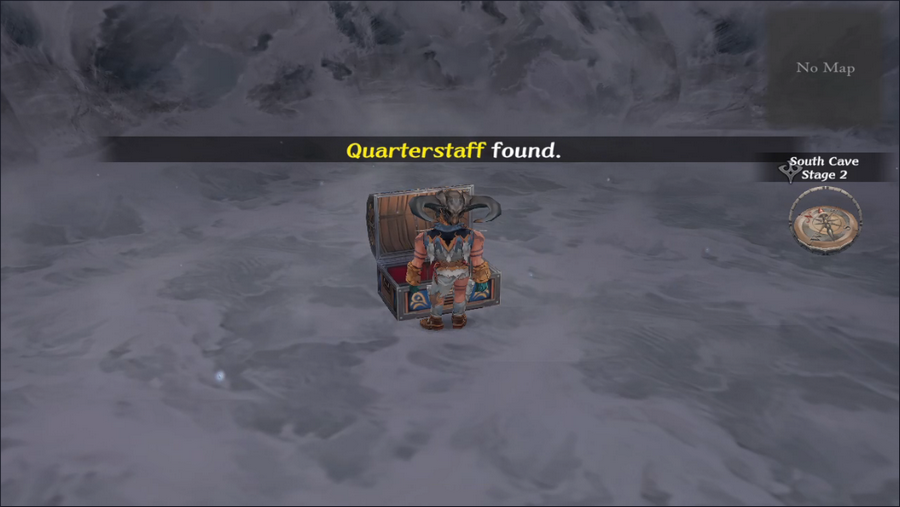 Behind the boss is a chest containing a nice bundle of gold and a Quarterstaff. If you're one of those weirdos who wants to have a character fighting with a staff, this is pretty much the best one you can get, but most staff-using classes are casters who prefer weapons that boost their Intelligence. 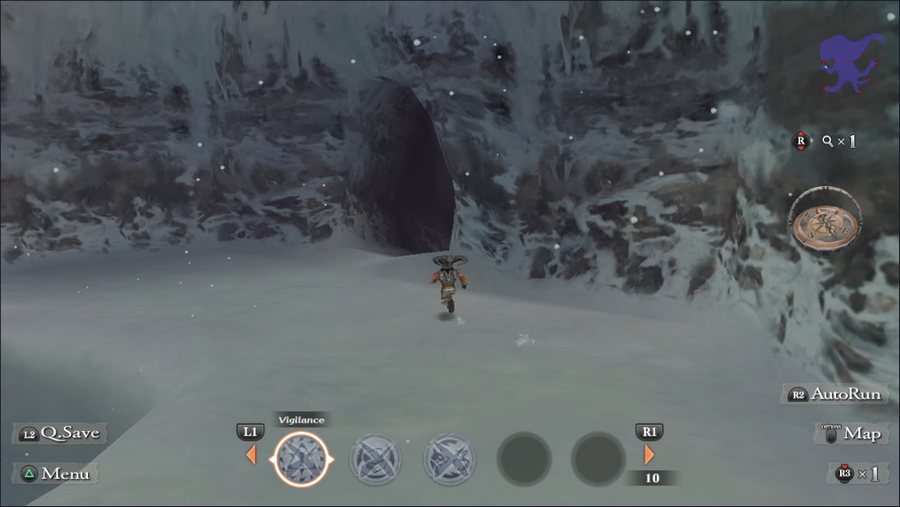 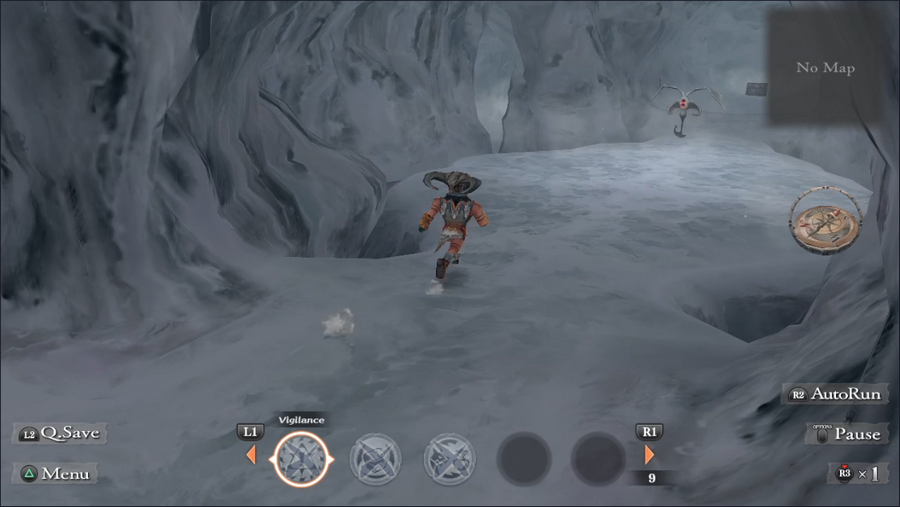  There's not much to say about the west cave. The bug fight is actually easier this time since one of the Illusion Bugs was replaced by a weaker Magic Bug. 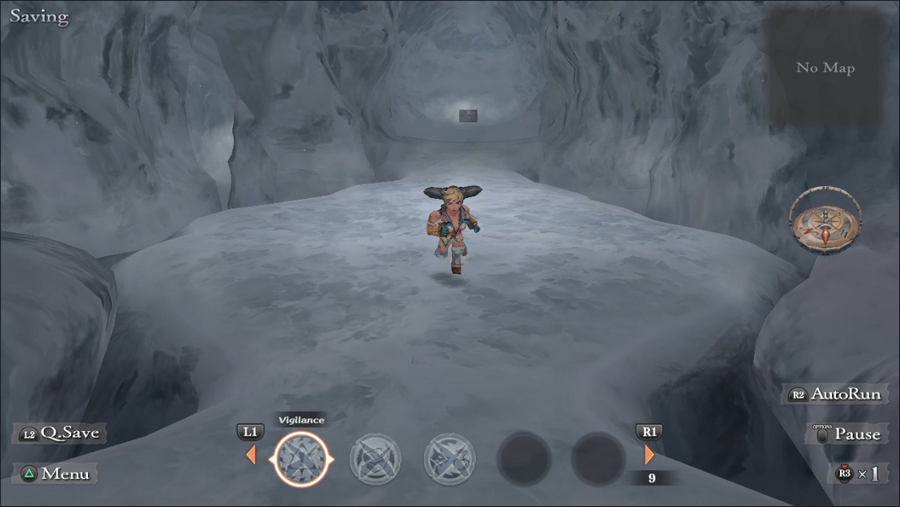 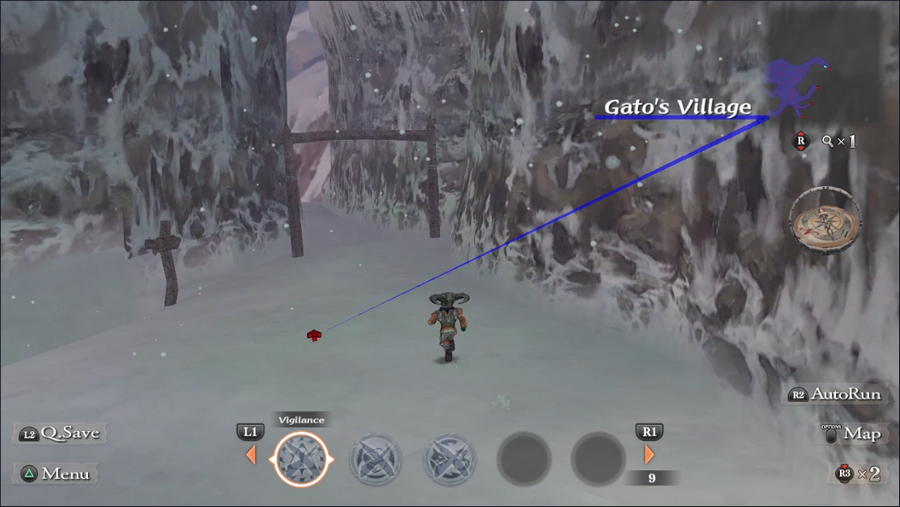 And with that, we're done. 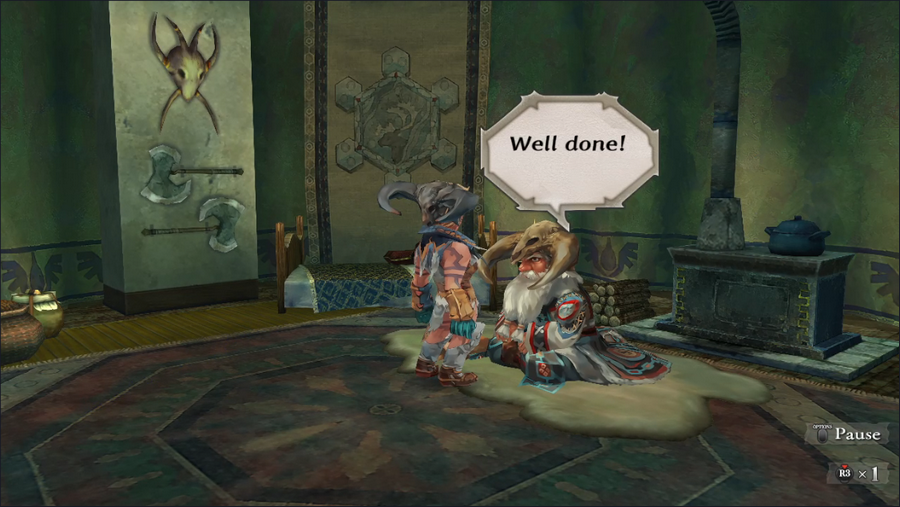 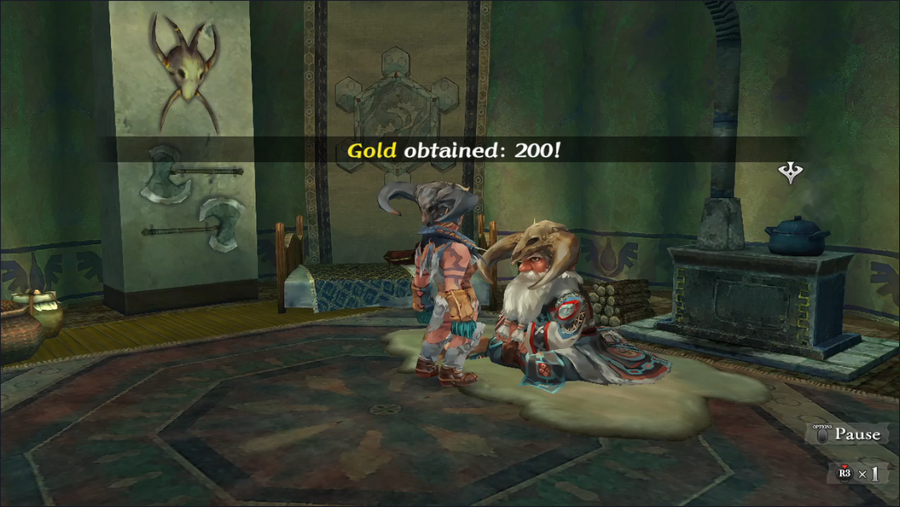 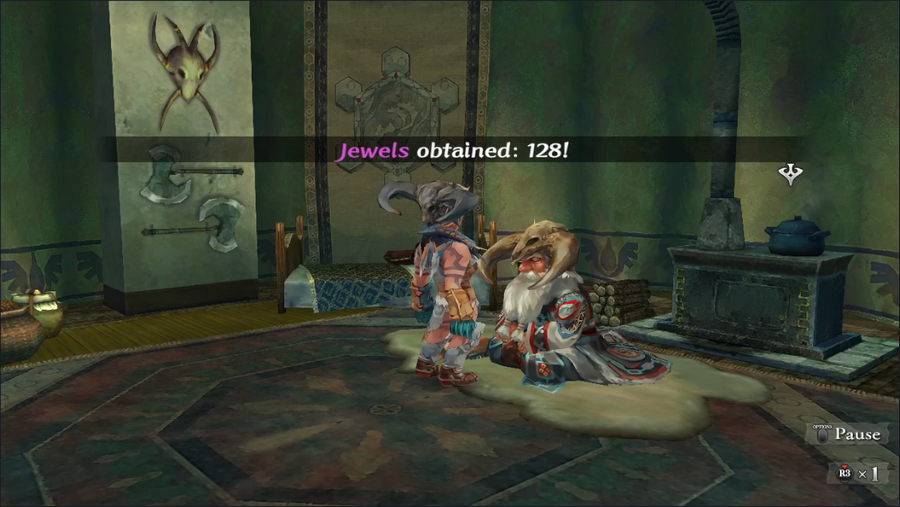 More gold and jewels. 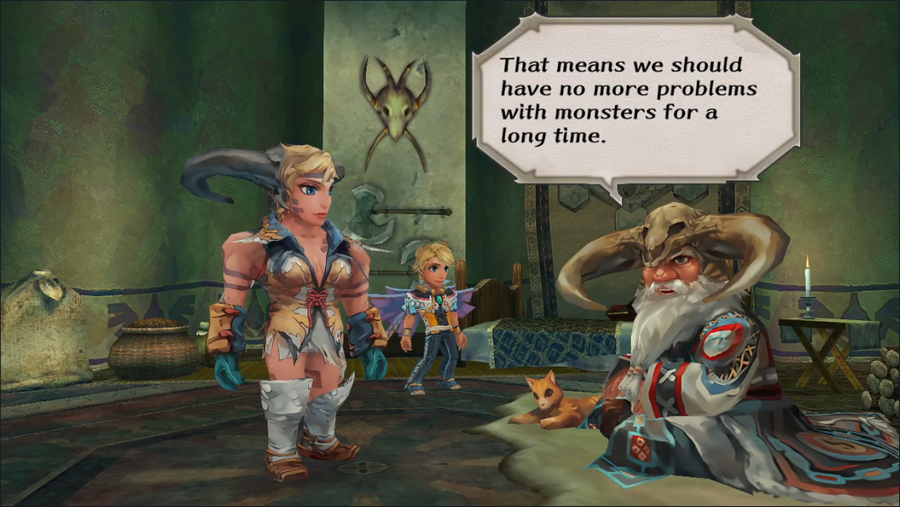 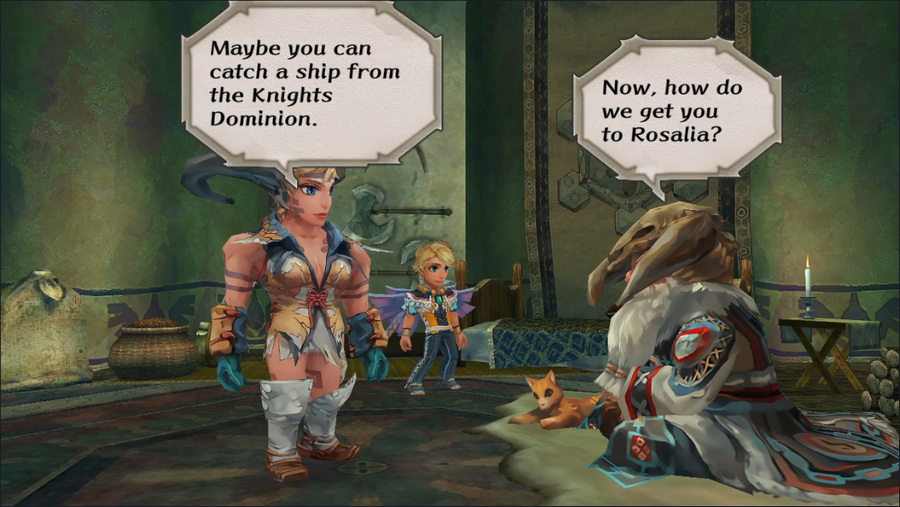 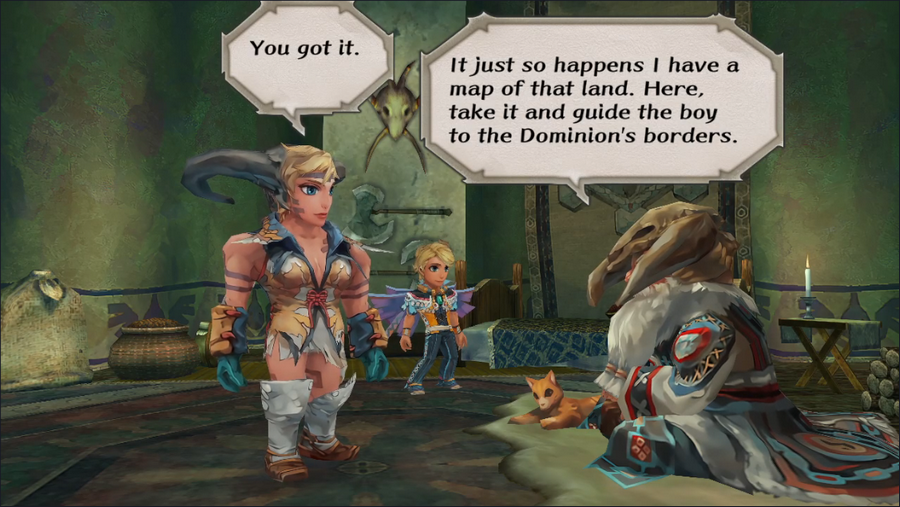  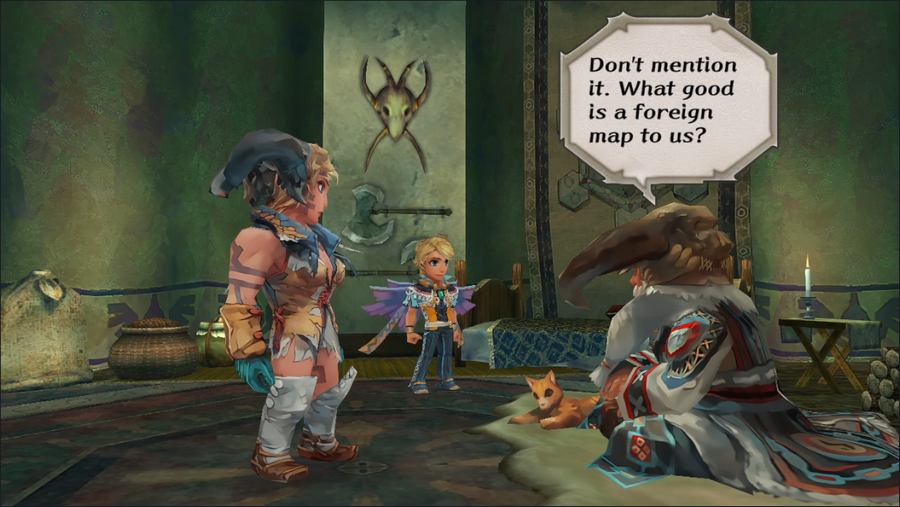 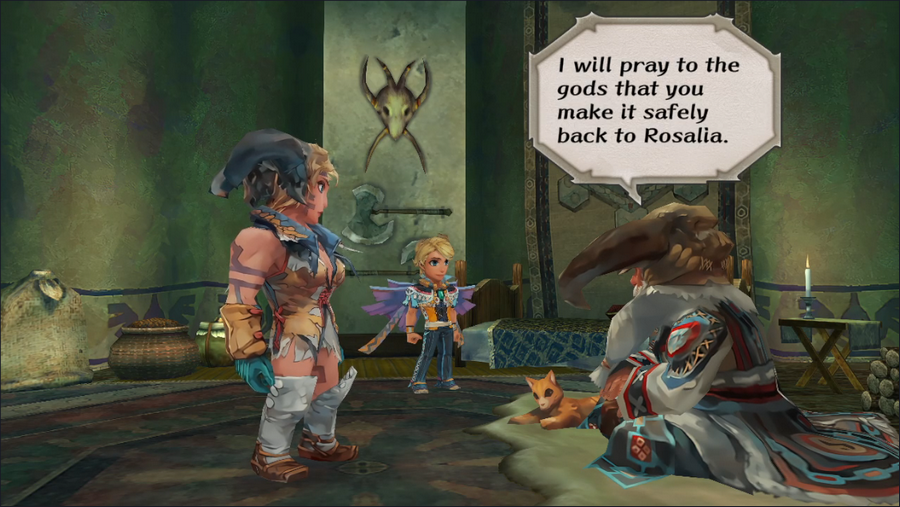 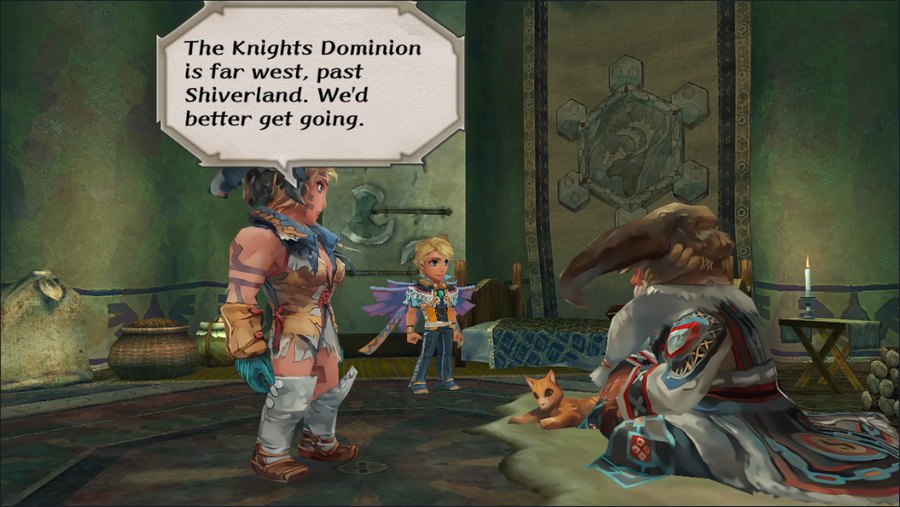 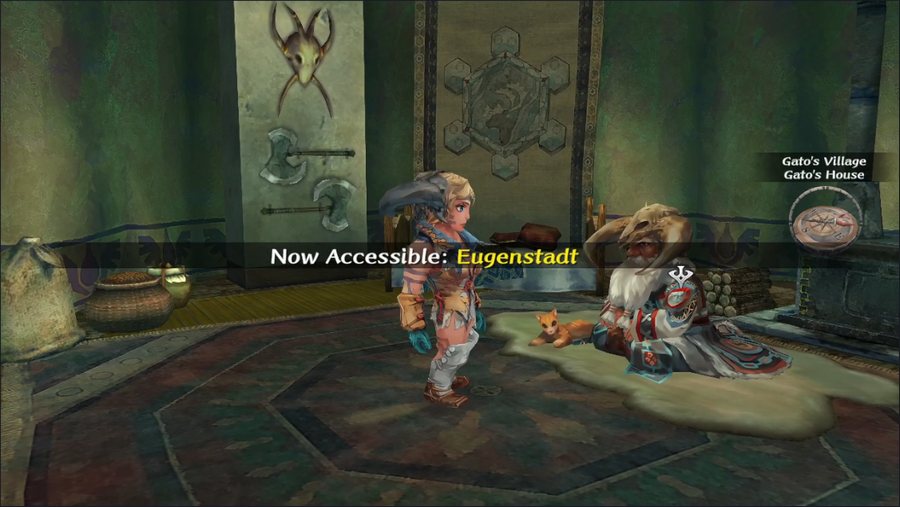 Albert is headed to Rosalia via the Knights Dominion, with Sif as a guide. We'll need to get to the world map via the southwest exit from Shiverland, and from there we can travel automatically to the nearest Dominion city, Eugenstadt (named for one of Mirsa's companions, Baron Eugen). 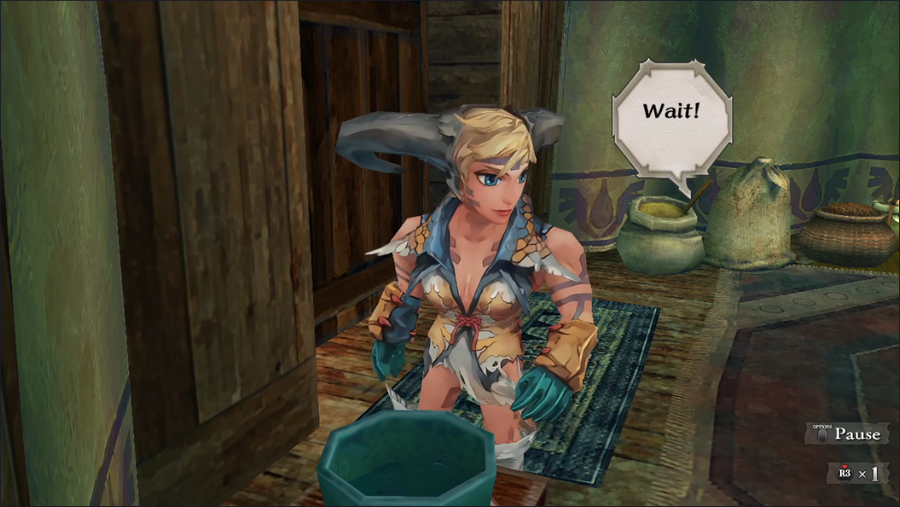 But before we can leave, Gato calls us back. 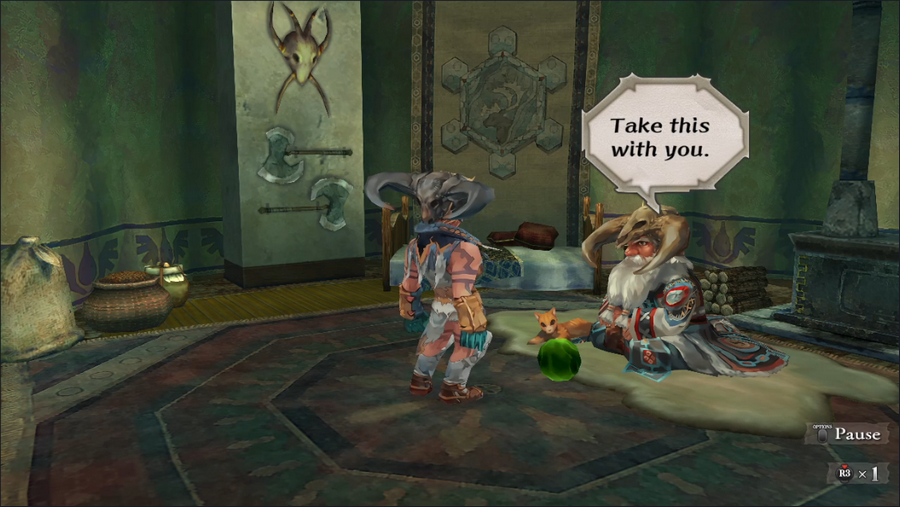 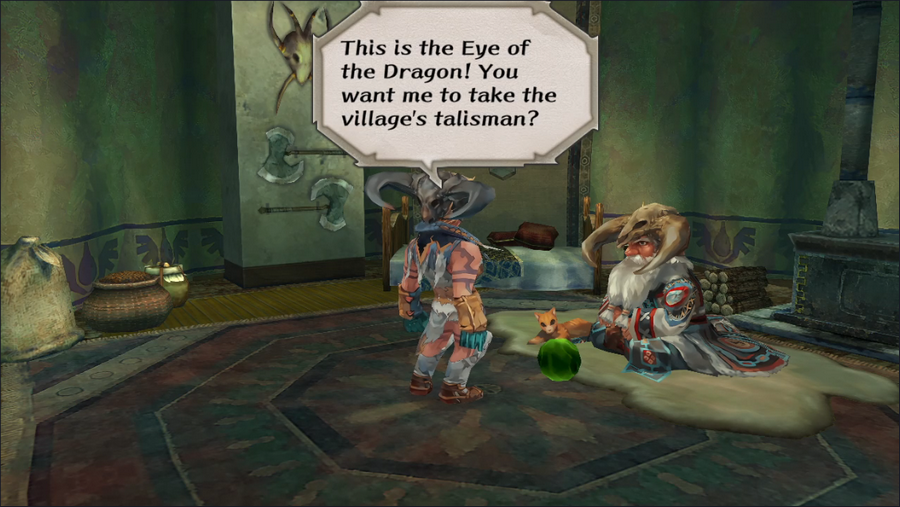  Besides being a badass warrior-woman, Sif is also descended from people who made allies of dragons.  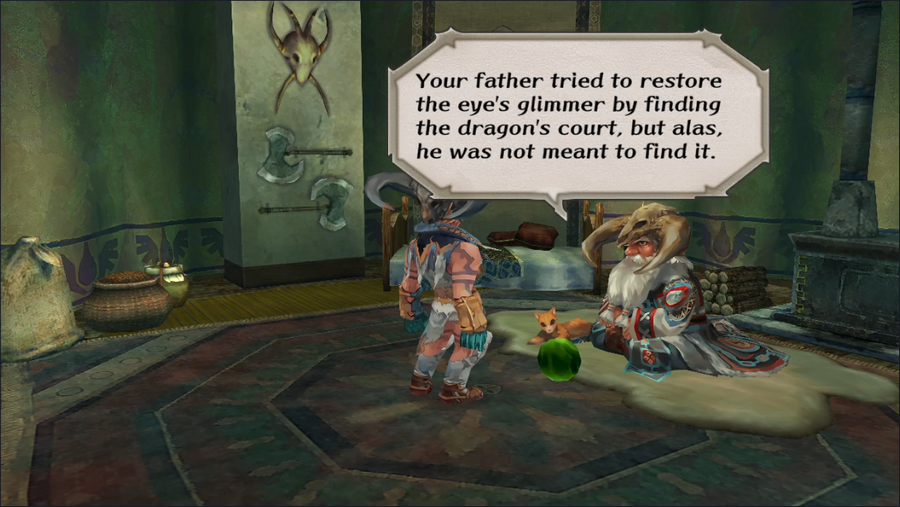   And thus we have Sif's connection to the Dominion, as well as a new piece of equipment.  The Dragon's Eye provides a host of bonuses, and only Sif can get it.  Take a look at our Event Rank clock. We started at ER 1, meaning we've gained 4 Event Ranks since the game started and we've only just finished the intro! This is the downside of choosing Sif as the main character: missing out on the quests that expire early in the game (and there are several).  As Sif prepares to leave her home, we'll like wise leave her be to meet our next protagonist. 5-Headed Snake God fucked around with this message at 15:06 on Oct 2, 2023 |
|
#
¿
Oct 1, 2023 15:19
|
|
|
berryjon posted:You mean to tell me that it's cold down south? What sort of upside down world is this!?!?  cardinale posted:Gato has a gato I suspect it's a stuffed toy since it never moves an inch. Luninareph posted:I really like SaGa games, but usually not until I read an LP of them, since they're so confusing and I need some direction on how the hell they work. I am very excited to follow this LP of a SaGa I know very little about! I'm glad! I'm hoping any technical and literary deficiencies in the LP will be made up for by my sheer enthusiasm. 
|
|
#
¿
Oct 2, 2023 02:53
|
|
")
|
MonsieurChoc posted:Funny thing about the SaGa gacha game: they seem to ship Albert the tiny noble with the Sif the big barbarian lady. "You may be a boy, but you speak like a man." 
|
|
#
¿
Oct 2, 2023 03:47
|
|
|
Since we're approaching the end of the character intros, why don't I throw in one more lesson on basic game mechanics? This post is all about monsters - specifically, the models seen when walking around. Each model represents a different monster type, and touching it will start a battle that includes (but isn't limited to) monsters of that type. Monsters move around randomly until they detect the party, at which point they'll try to move in and begin a fight, but every monster type does these things in different ways.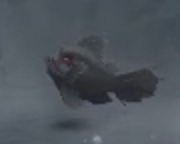 Aquatics include fish and frogmen. They detect the party by sound, and move toward it in straight lines, turning at regular intervals to face the party. They're fast and hard to avoid, but moving in a serpentine pattern can sometimes do it. 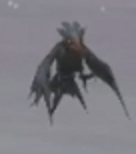 Avians include various kinds of birds. They detect the party by sight, and move toward it in a manner similar to that of aquatics, though they're easier to avoid since they turn less often. 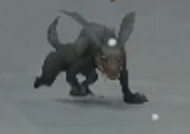 Beasts include monstrous animals and other non-sapient, land-based creatures. They detect the party by sight, and run toward it in a similar manner to avians. However, if the party gets behind them, they'll stop in their tracks, making them much easier to evade or back attack. 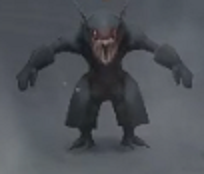 Beastmen include goblins, ogres, and other humanoids. They detect the party by sight, running toward it while turning constantly. However, after running a short distance, they briefly stop, so if they start their chase from far away they can often be avoided. 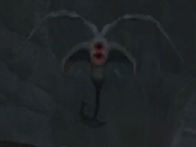 Demons include magic bugs and actual demons. They detect the party by sound, and move toward it a short distance before stopping - after which they teleport, appearing directly in front of the party. They can be avoided by turning just before they appear, which causes them to materialize outside the player's intended path, though doing this when other monsters are around is generally a challenge. 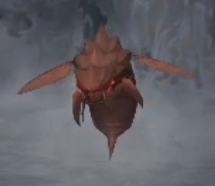 Insects include bugs of all kinds, including some scorpion-like monsters. They detect the party by sound and move toward it, turning to stay on course. When they get close, they switch to flying in circles around the party for a bit before swooping in. It's possible to catch them on walls when they're spinning, but otherwise they're hard to avoid. 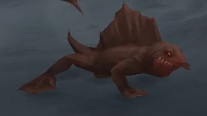 Lizards include lizardmen and more bestial reptiles. They detect the party by sight, and move directly toward it, turning as necessary. If the party is facing them when they close, they freeze for several seconds, making them one of the easiest enemy types to avoid or back attack. 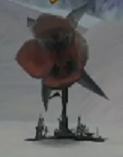 Plants include multiple kinds of, well, plants. They detect the party by sound, and move toward it in a straight line, turning twice to stay on course and gradually slowing down as they move. If they detect the party from a distance, it's often possible to avoid them, but up close it's effectively impossible. 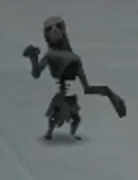 Undead include zombies and ghosts. They detect the party by sight, moving toward it unerringly but very slowly. However, they will also sink into the ground, only returning when the party gets close. They're easy to avoid unless you lose track of them, in which case they can easily take you by surprise as they come out of the ground. 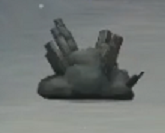 Unknowns include slimes and elementals. They have a unique detection method that involves neither sight nor sound, and thus can never be fooled. However, they have a small detection radius, move slowly, and have no special movement tricks, so they're one of the easiest enemy types to avoid. Monster types that rely on sight can detect the party from far away, but only while facing it. Monster types that use sound have a smaller detection area, but will hear characters approaching from behind. Both of these detection methods can be fooled by proficiencies in the Covert skill: Hide and Move Silently. Using one of these proficiencies makes a character effectively invisible to either sight or sound, though only one can be active at a time. Of the two, Move Silently is probably the more valuable, as monsters with sound-based detection are usually harder to avoid. There are, of course, a few more enemy types, like the dinosaurs on Ligau and the occasional human enemy, but these eight monster types represent the vast majority of opponents encountered in the game. 5-Headed Snake God fucked around with this message at 13:40 on Nov 19, 2023 |
|
#
¿
Oct 2, 2023 15:05
|
|
|
Welcome back, everyone. I've had some extra free time this week, so how about an early update? It's time to meet our seventh protagonist.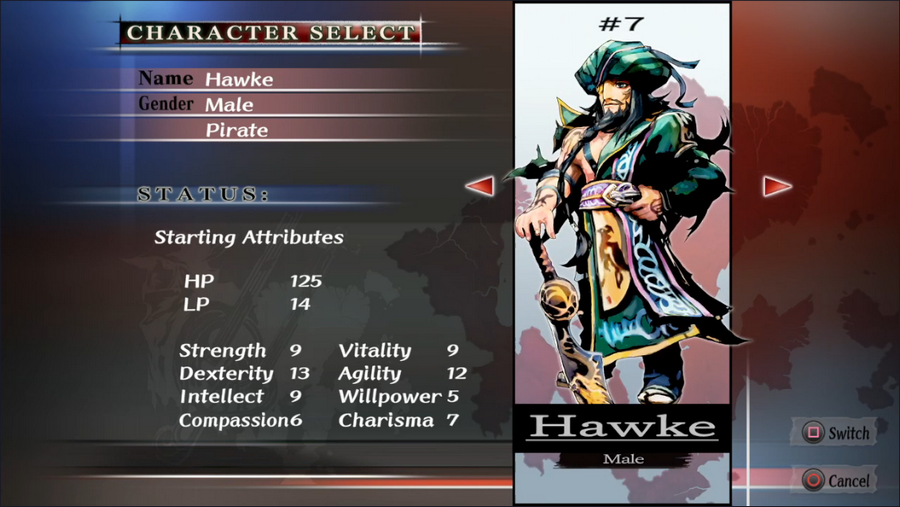 I'm not going to mince words here: Hawke is my favorite protagonist. He's a cool pirate with a fancy outfit and a great crew.  As you'd expect, Hawke's default class is Pirate. It's a good class, with three excellent skills and one of the better passive abilities found among the basic classes (an occasional initiative bonus).  It's come to my attention that Normal progression speed is actually faster than what we got in the West on the PS2. In the interest of packing more content into the LP, I'll be playing the game with Slow Progression instead. (If y'all choose Sif as our protagonist, I'll likely replay her intro to cut down on the crazy ER progression we got.) 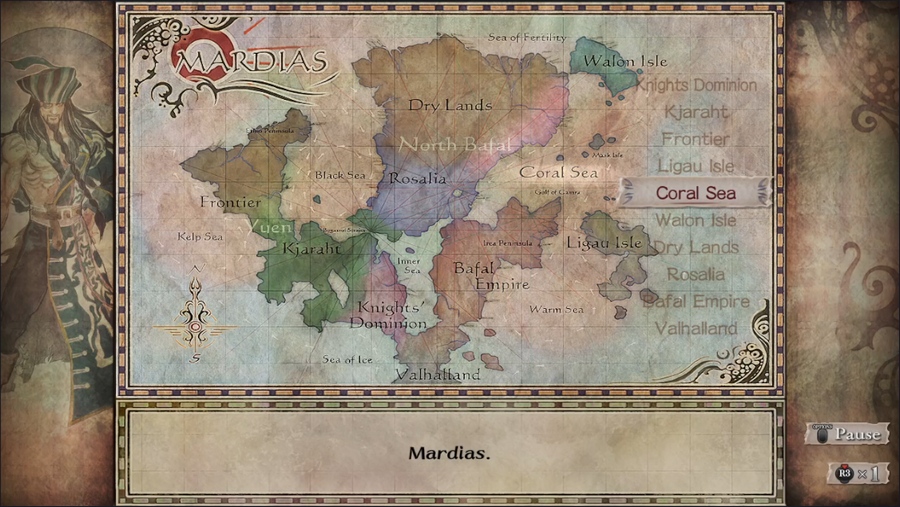 Hawke is one of many pirates who lair in the Coral Sea. This is a unique area that can't be accessed normally. Like Sif, Hawke is also linked to a second area, the tropical Walon Isle, though it's a much looser connection. 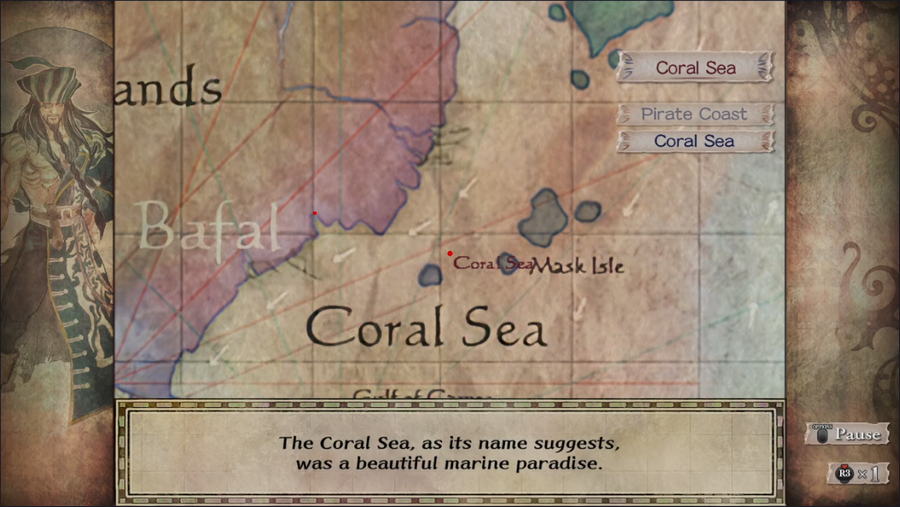 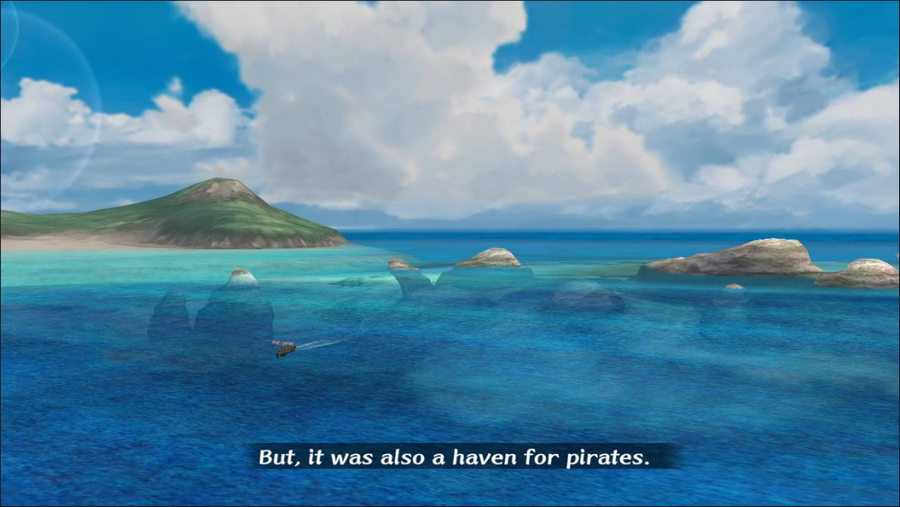 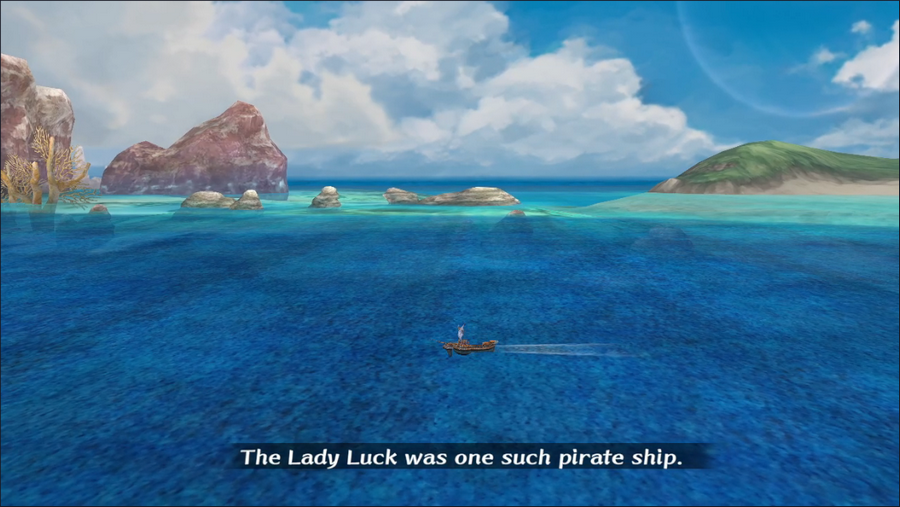 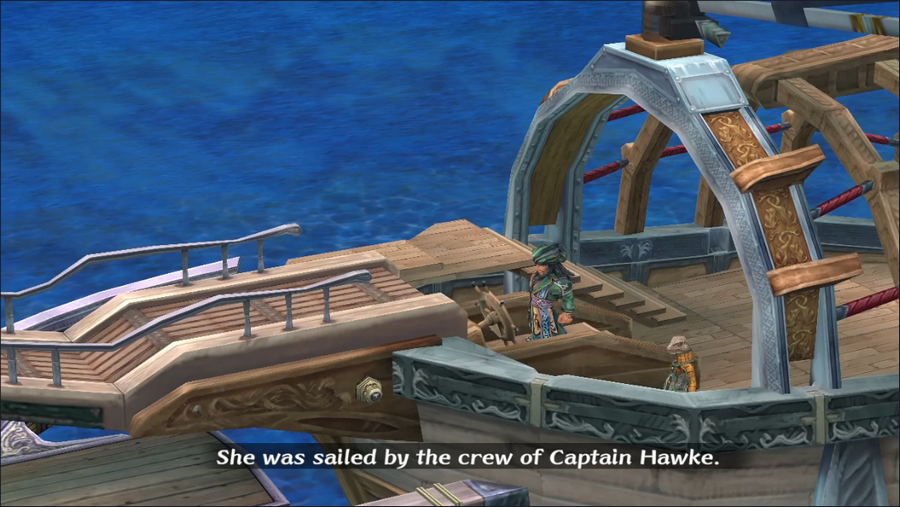 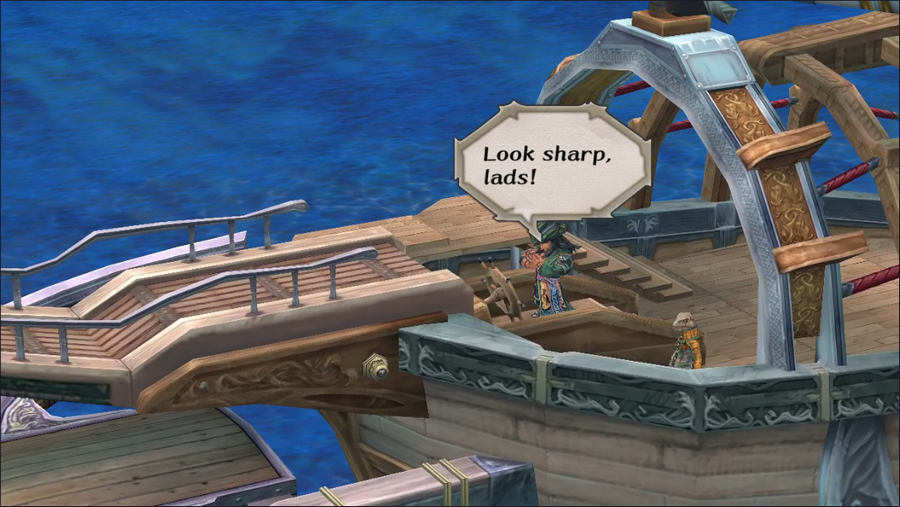  And with that, we're dumped into the Coral Sea to make our way around. Music Highlight: My Comrade-in-Arms, Ladyluck/Leaning on Lady Luck Hawk's theme is a rousing piece. It's not as pirate-y as you might expect, but I think it fits him, and it's just generally pleasant to listen to when exploring. 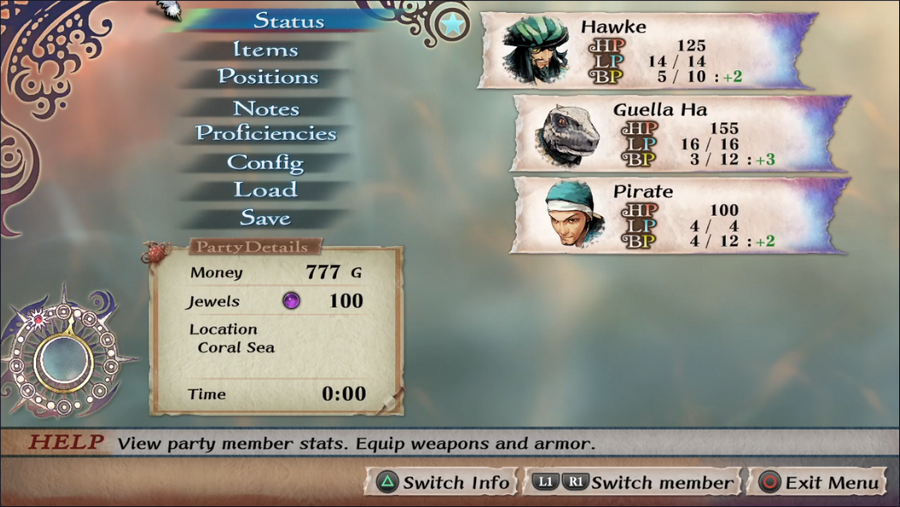 But before we get started, let's look at our party. Hawke begins with a sizable group of three characters - more than anyone else. 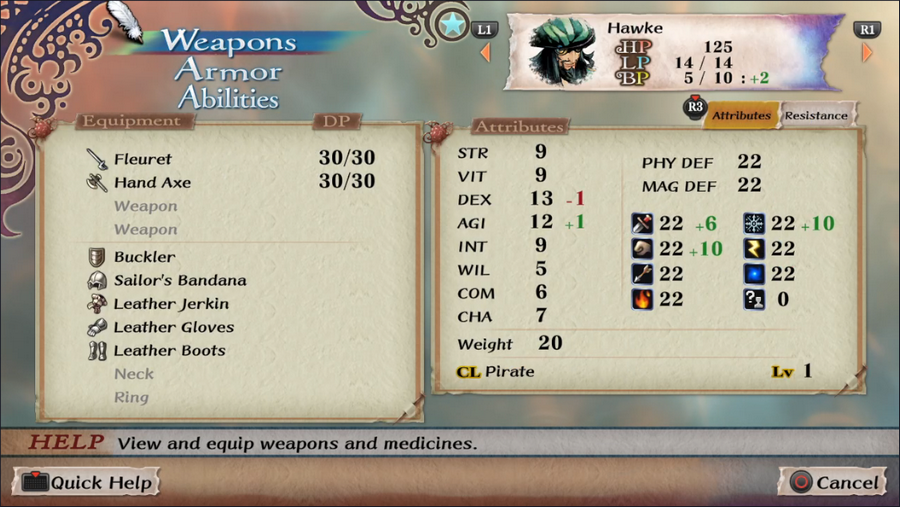 Hawke himself has some decent gear, apart from his weapons, both of which kind of suck.  His first mate, Guella Ha, is a geckling (lizard person). His armor kind of sucks, but he has the HP to compensate, especially since his spear means he functions best in the second row. (He can alternatively be placed in the front row and focus on martial arts, but for now the spear is the better option.)  And finally, we get control of a regular ol' pirate. He's nothing special, but his lack of fixed gear means he'd actually be decent to take into the late game if not for his terrible LP.  Because I'm not completely forgetful this time, I remember to sort out my combat positioning. Spears work best from the middle row, so Guella Ha moves back a bit.  Back on the map, we can see that there are five tunnels leading out of the Coral Sea. The middle one (next to an enormous growth of coral) is the one we want - the others all lead to dead ends. There are also a bunch of monsters - aquatics, avians, and insects only, since land-bound monsters can't navigate the water. 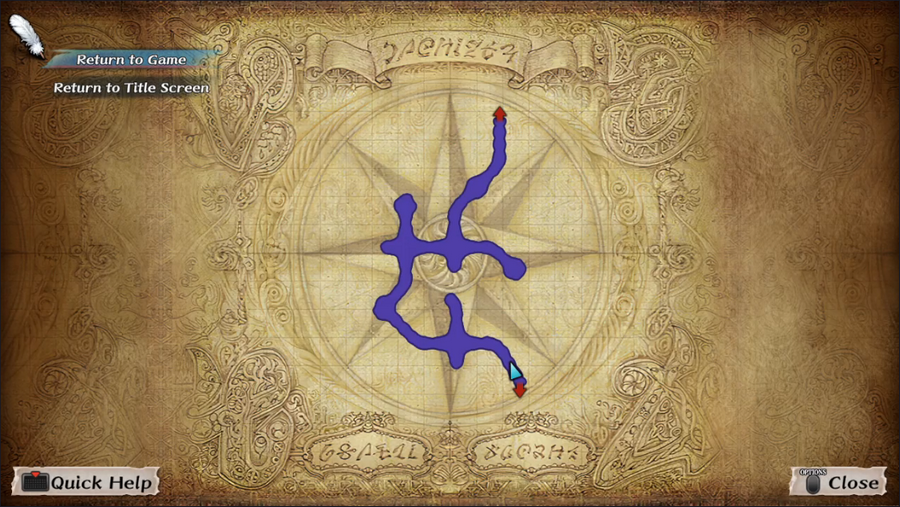 The correct cave is easily identifiable by the fact that it has an exit on the opposite end. The cave itself is also empty, so traversing it is pretty dull. This is Coastal Cave C, and by the end of the intro we will be intimately familiar with it. 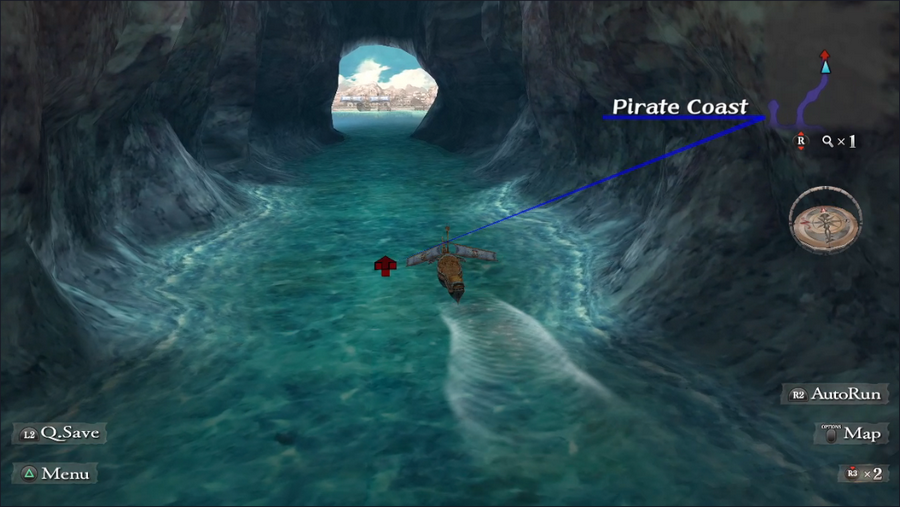 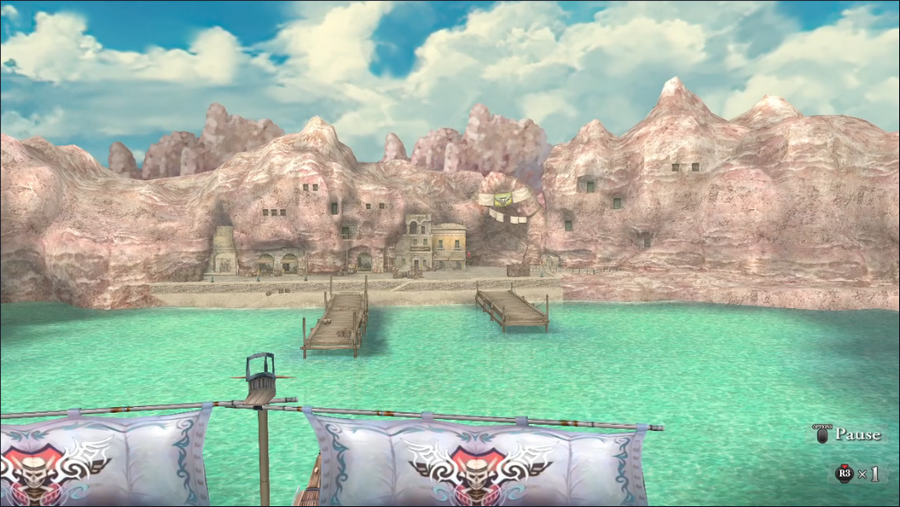 Finally, we arrive at the Pirate Coast, a haven for buccaneers of all kinds. Music Highlight: I am a Pirate/Pirates! So... Not every song can be a winner, right? This song and its companion, We Are Pirates/More Pirates!, are extremely repetitive and grating whenever they come up. (It's literally just one line - "We are pirates" - repeated ad nauseam.) They stand out as musical highlights for being just about the only bad songs on the soundtrack. 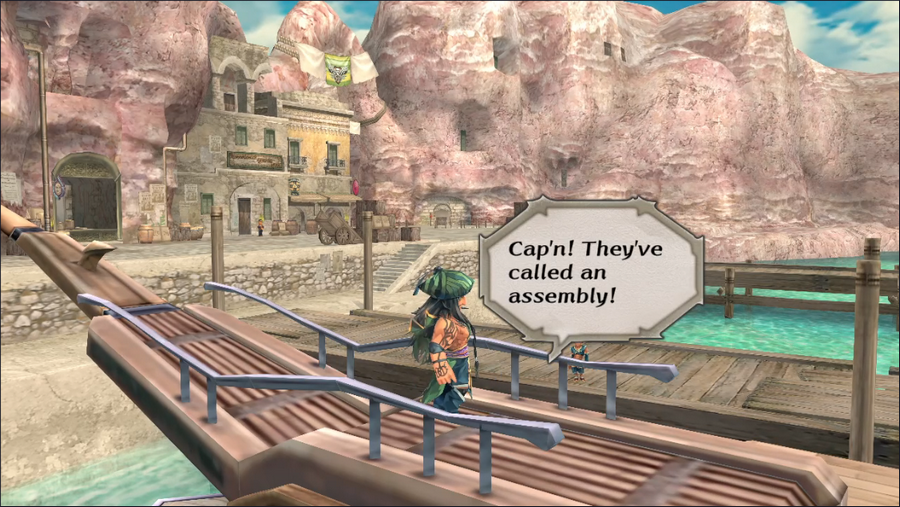 As well pull into post, a pirate runs up on the dock and informs us that there's a meeting to attend.  But first, we take a moment to check out the town. Pirate Coast has the usual amenities: a shop, an inn, and even a pub. Because it's an outdoor pub, the Minstrel can't be recruited there.  There's also a magic shop.  Since Hawke starts with a decent sum of money (777 gold) and has a level in Hydrology, we'll spring for the Healing Water spell. He'll probably never be able to restore a lot of HP with it, but it's useful for getting fallen allies back on their feet and frees up the First Aid Kit for Guella Ha.  But enough dithering, let's go to a pirate meeting. 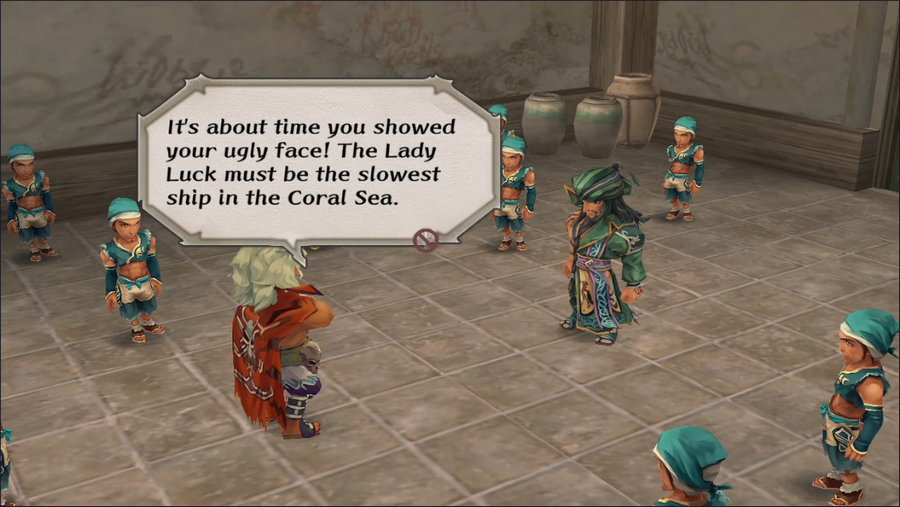 Rude. 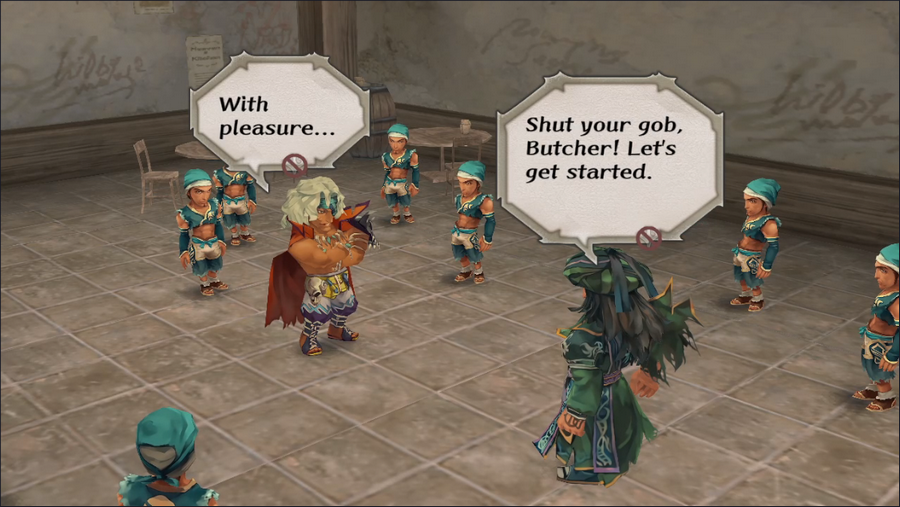 I'd make a comment about a guy named Butcher being obviously untrustworthy, but these are pirates. 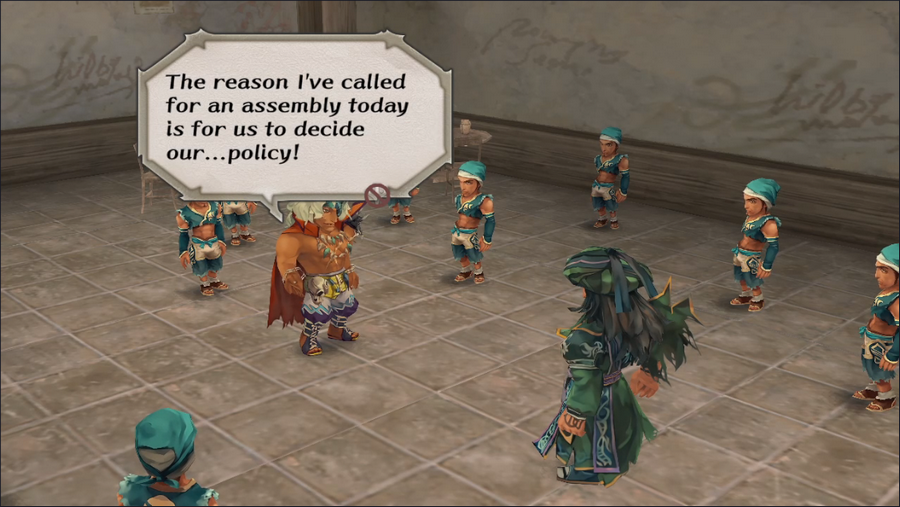 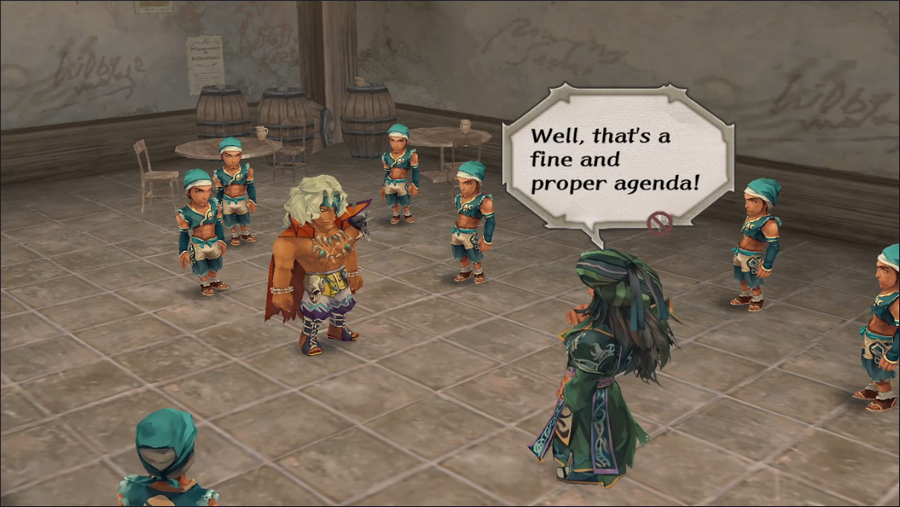     Ah, the classic move of someone with no counter-argument: changing the subject. 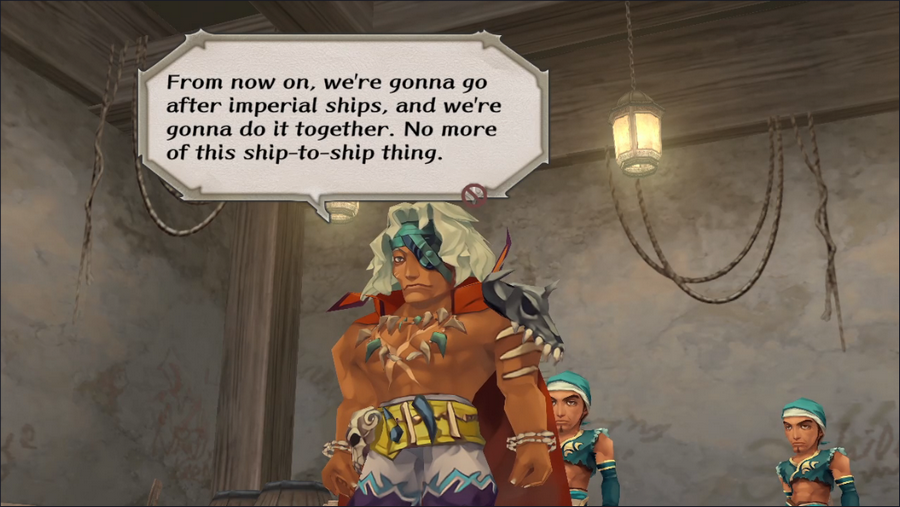 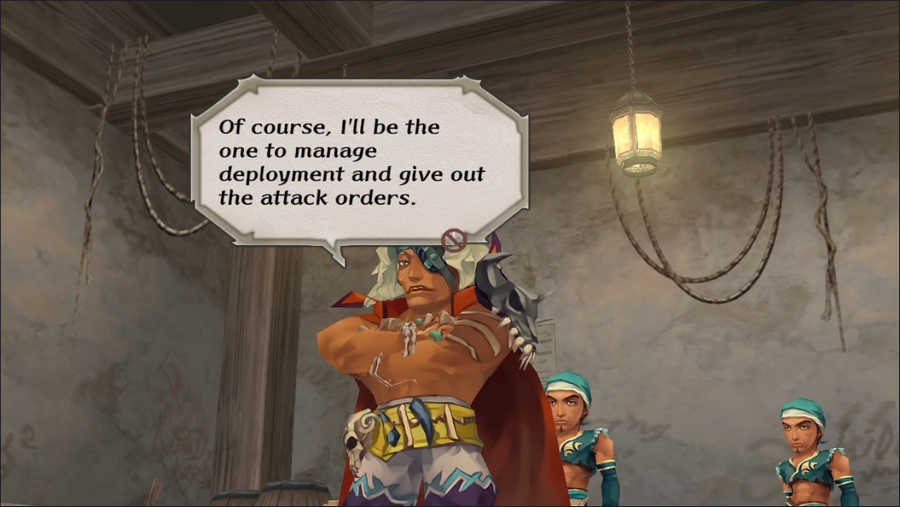 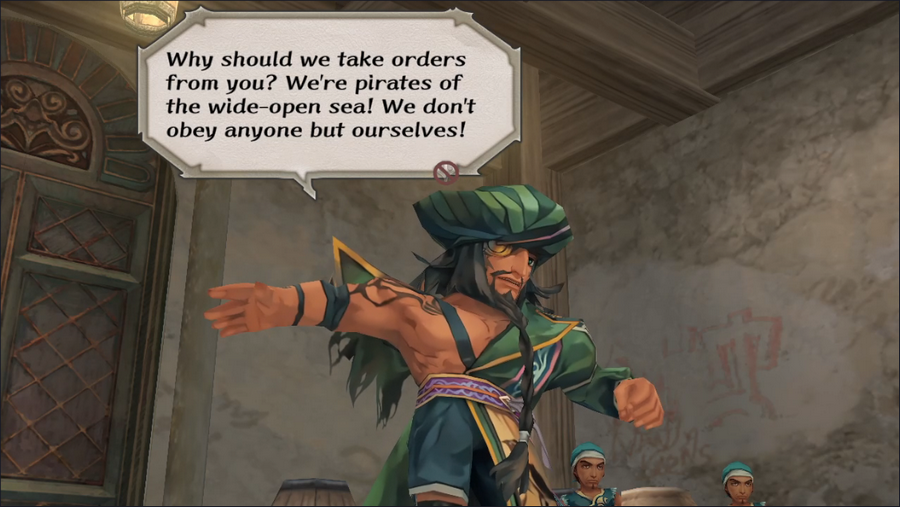 Hawke is absolutely unwilling to take any of Butcher's grandstanding and it's great. 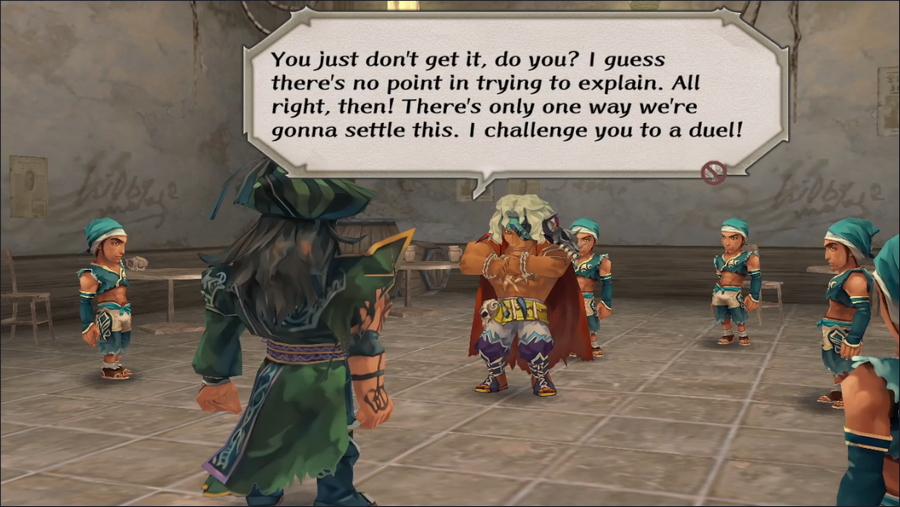 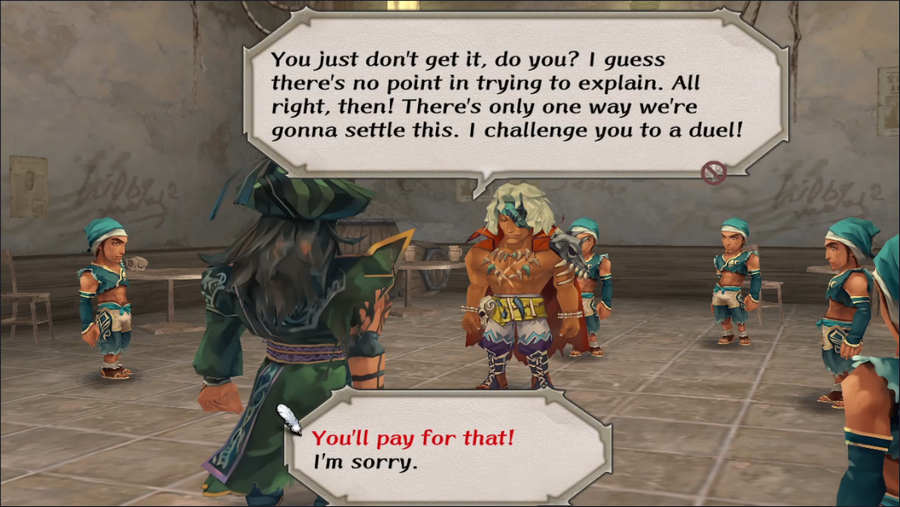 As if we'd ever back down from this. We're pirates! 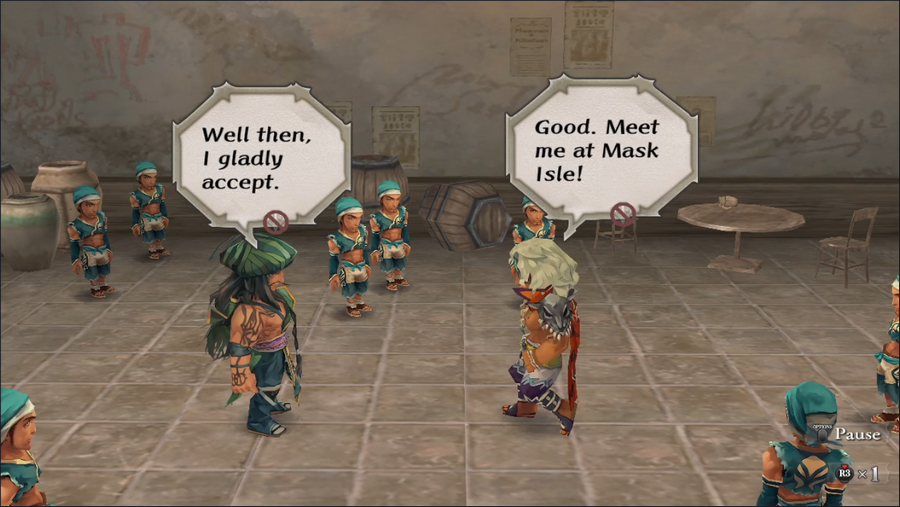 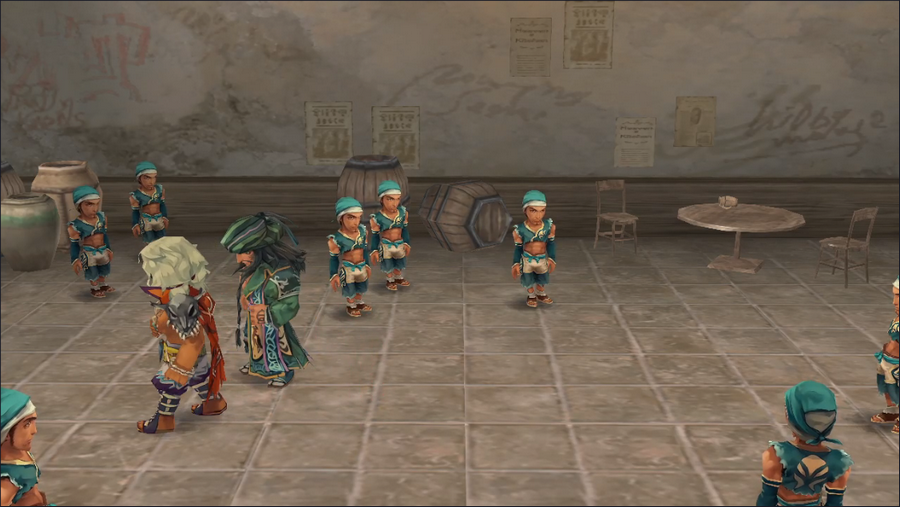 Butcher haughtily shoves Hawke out of the way as he makes his exit.  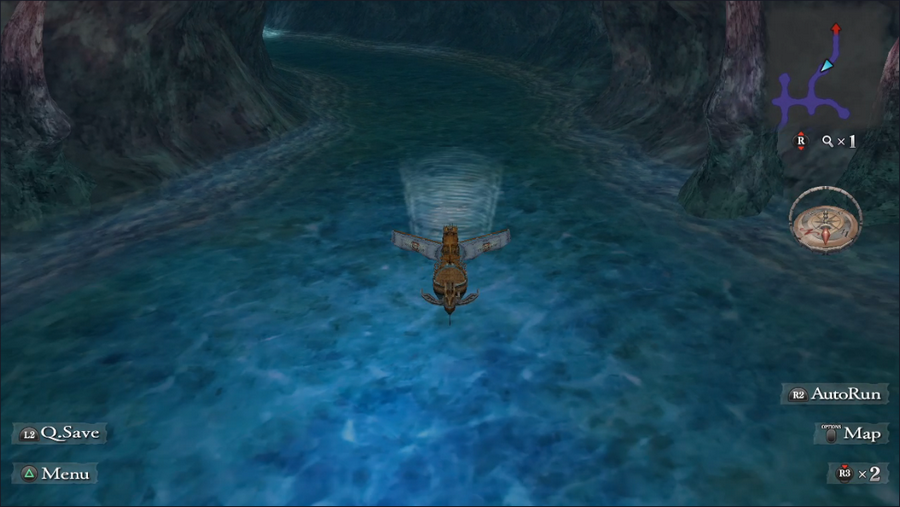 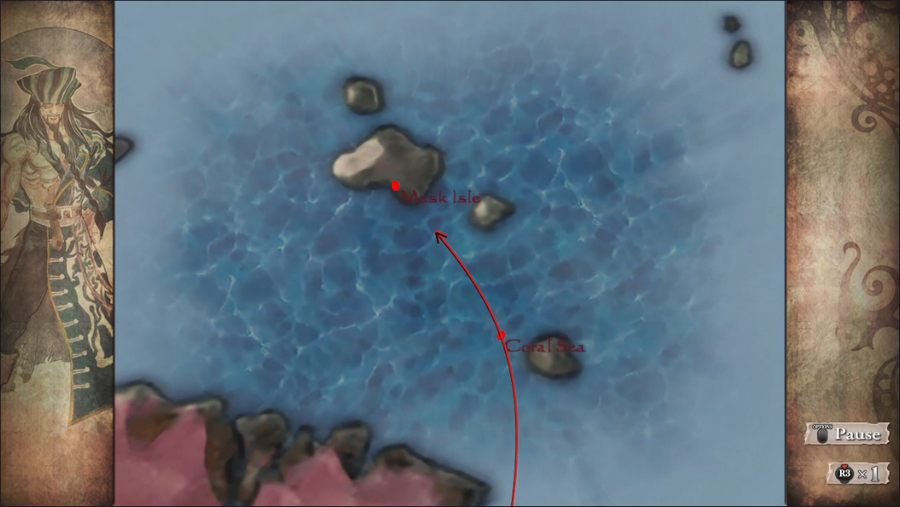 Well, we may as well get going. We take our second trip into Coastal Cave C, and at the other end we automatically travel to Mask Isle. 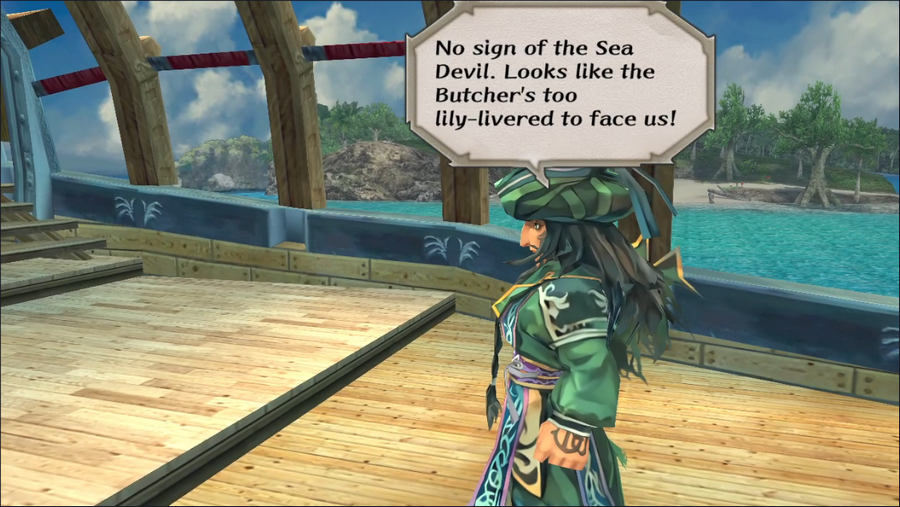 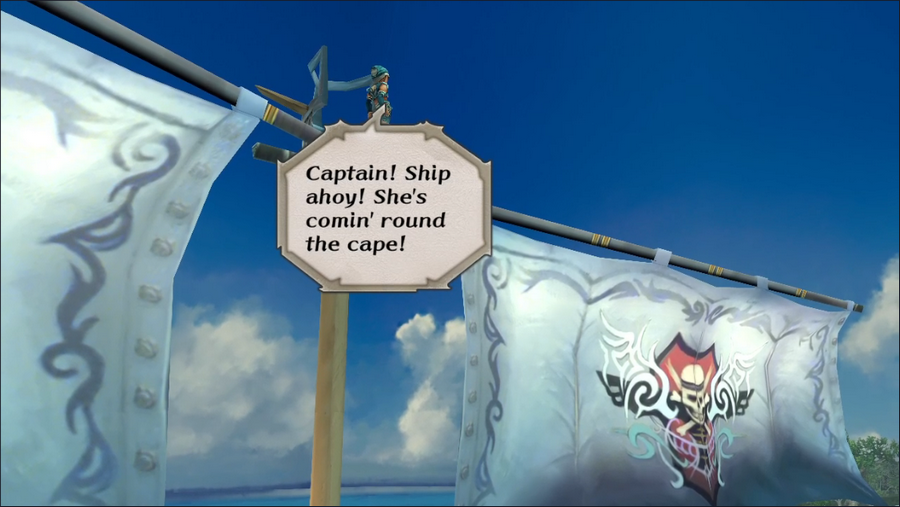  That doesn't look like a pirate ship. 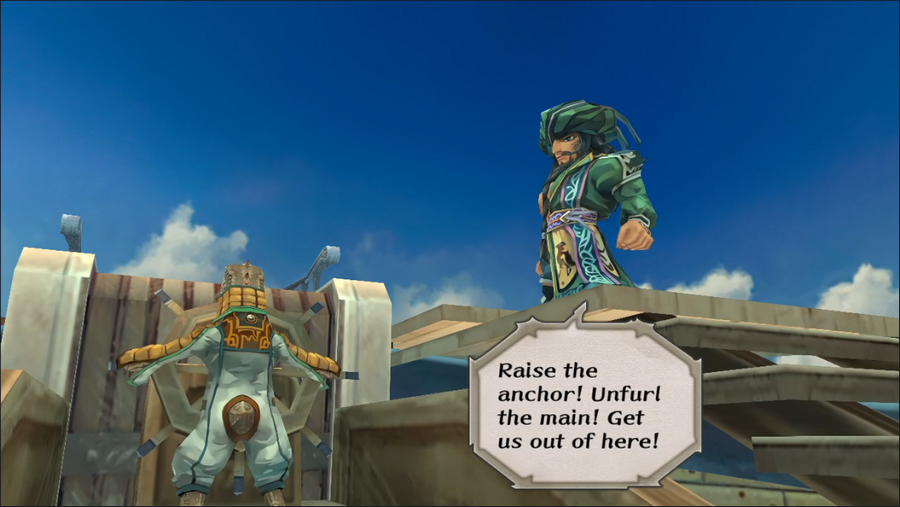 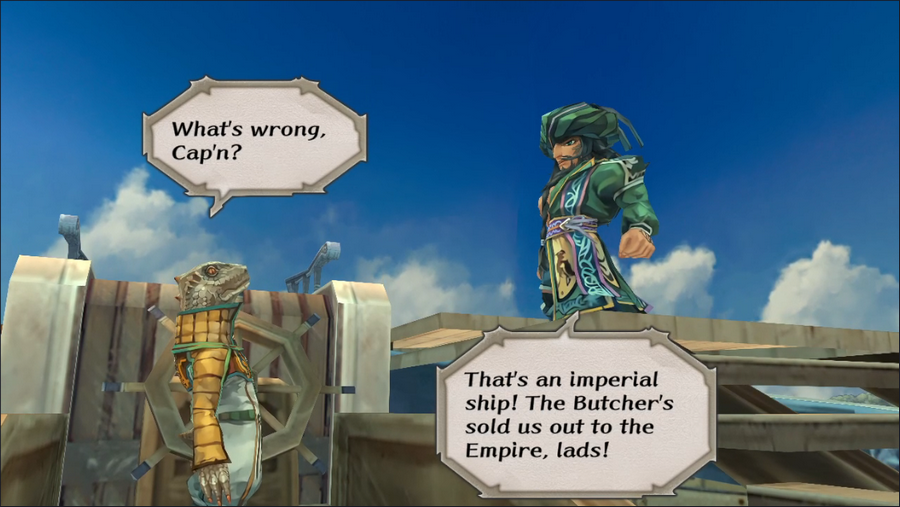 Following this, we see the imperial navy firing on the Lady Luck. https://www.youtube.com/watch?v=XdK2x8GRkhw Hawke and Guella Ha survive, but most of the crew seem to have fallen and the ship itself isn't in great shape. Hawke is justifiably furious. 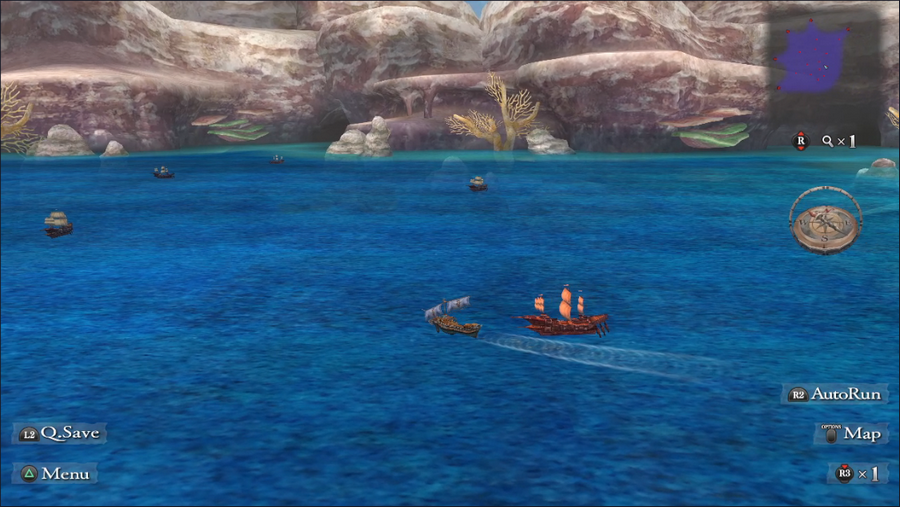 After that, we're dumped back into the Coral Sea map, but the monsters have been replaced by imperial ships. 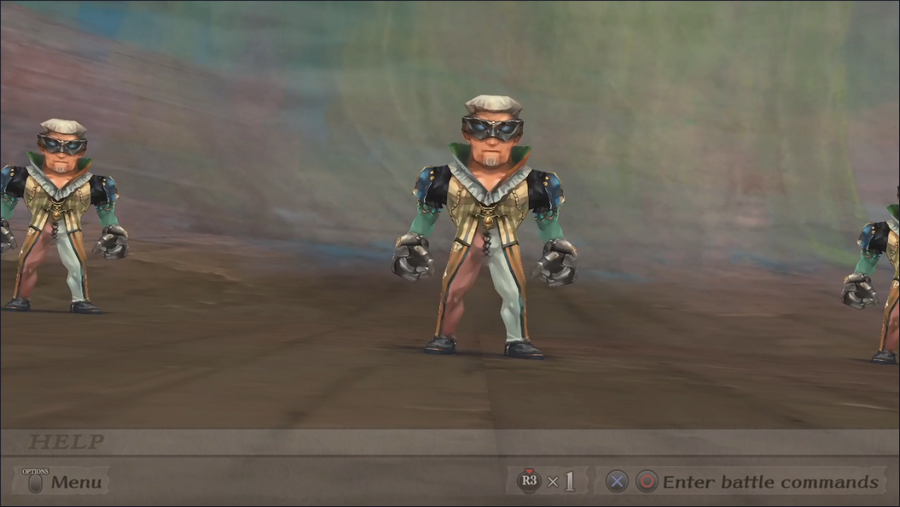 And we're in our first fight, pitted against imperial sailors. 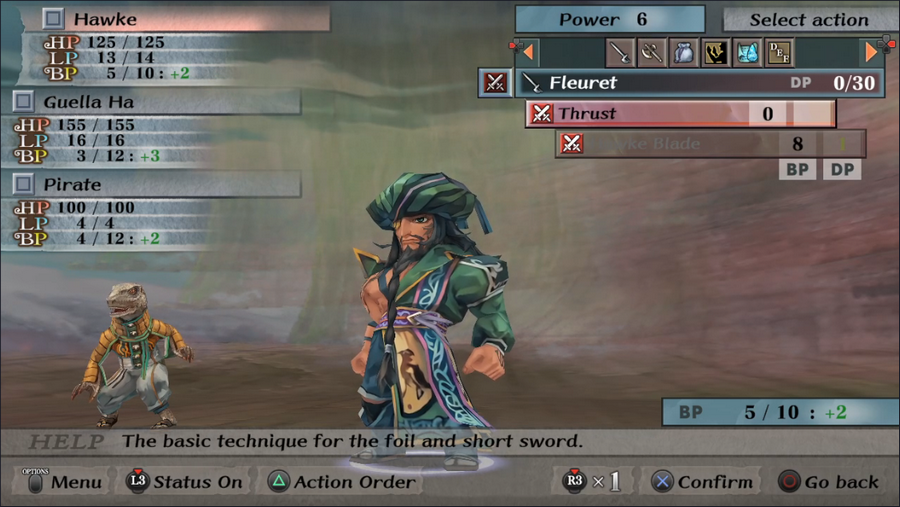 Hawke has both a foil and an axe, though neither is especially good. He also, appropriately, knows the technique Hawke Blade, though it's generally too costly to use.   Guella Ha and the pirate have nothing yet, but...   ...that is quickly remedied. Double Stab is a basic spear technique that works great for most of the game. 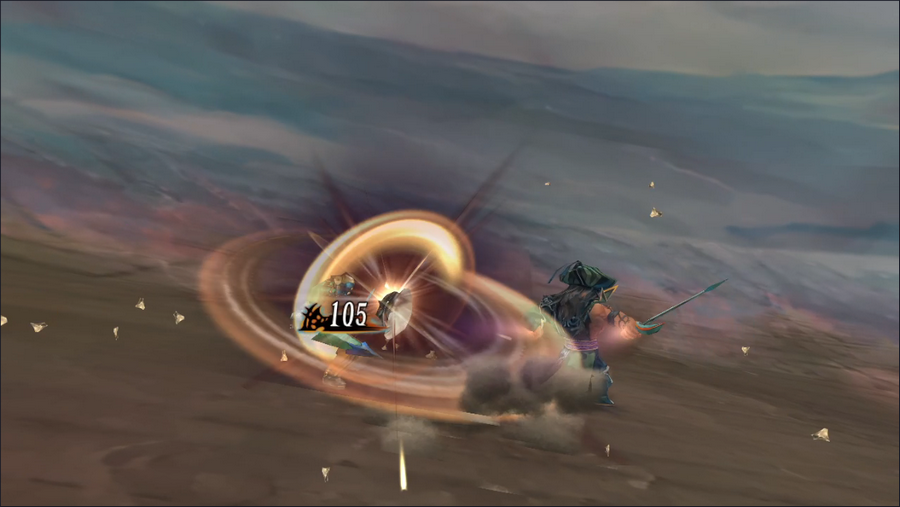 Despite the expense, Hawke has no other foil techniques, so when he's got the BP, he can get some good damage in with Hawke Blade. 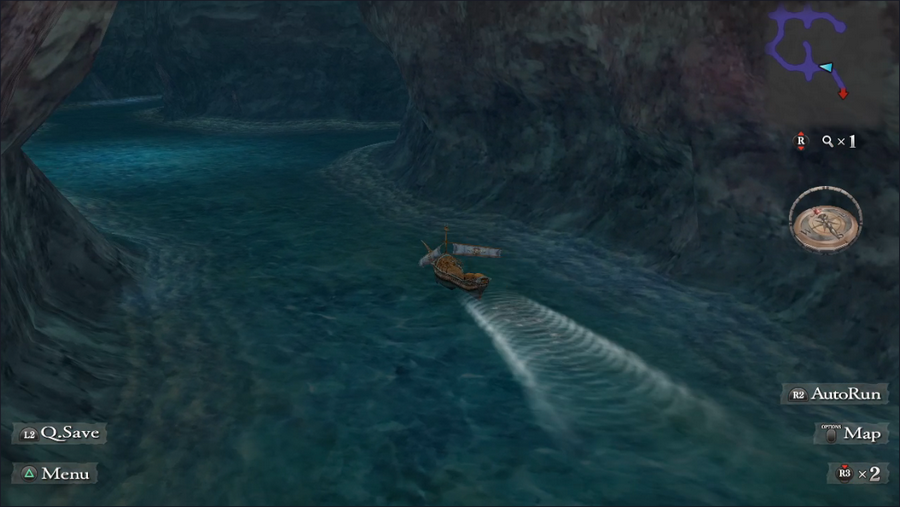 Evading the remaining ships, we make our way to Coastal Cave C and make out third trip through it. 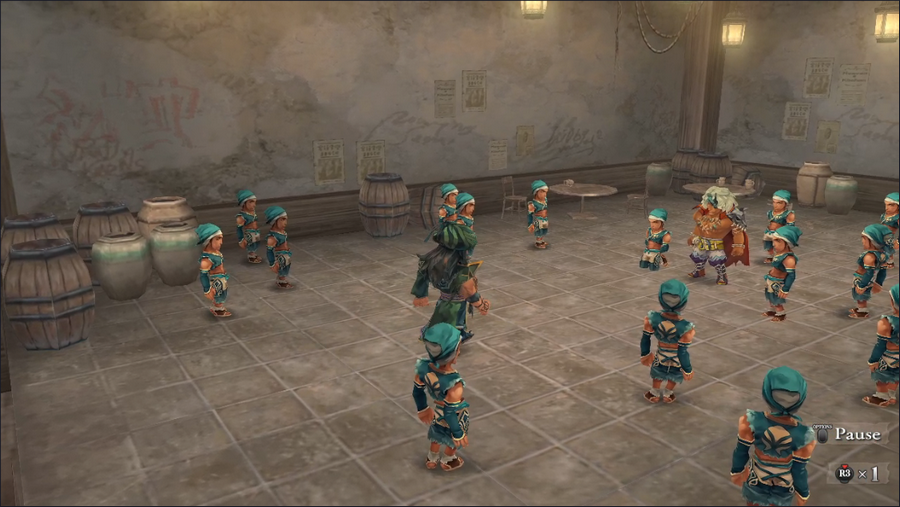 We immediately head to the hideout to confront Butcher, but things don't go as planned. https://www.youtube.com/watch?v=mNZIwx8NdUk Hawke's furious face at the end is a sight to behold. 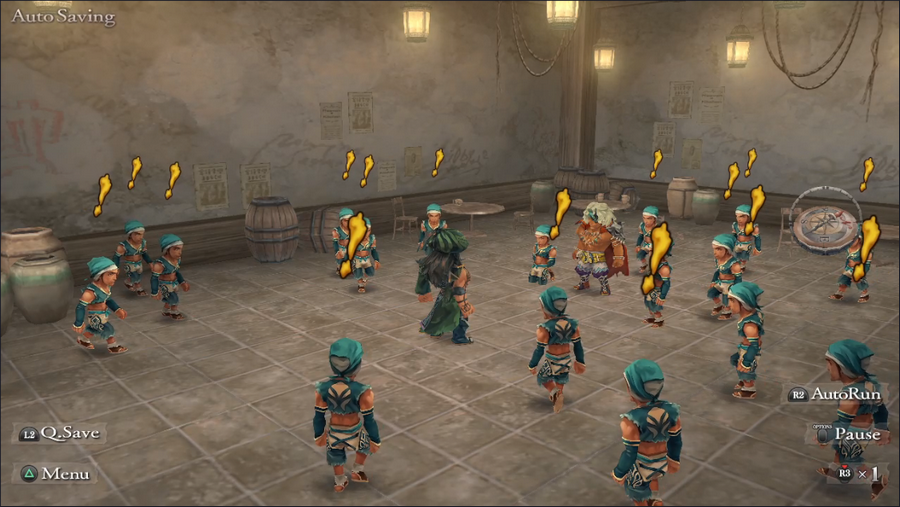 Unfortunately, Butcher's ploy works as intended, and every pirate in the room turns hostile. We have to fight a few to escape: we can't elude them all no matter how quickly we move, and we can't run from the fights. 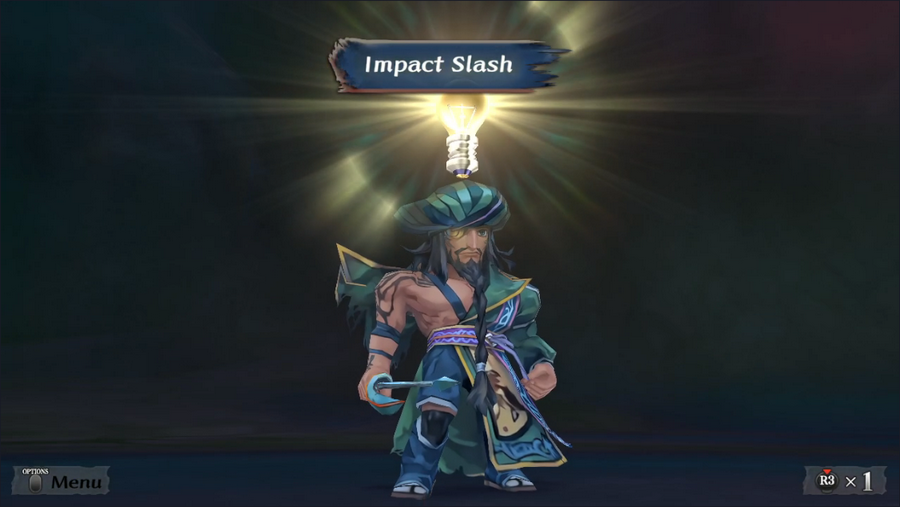 Luckily, Hawke Glimmers Impact Slash, adding to our arsenal. 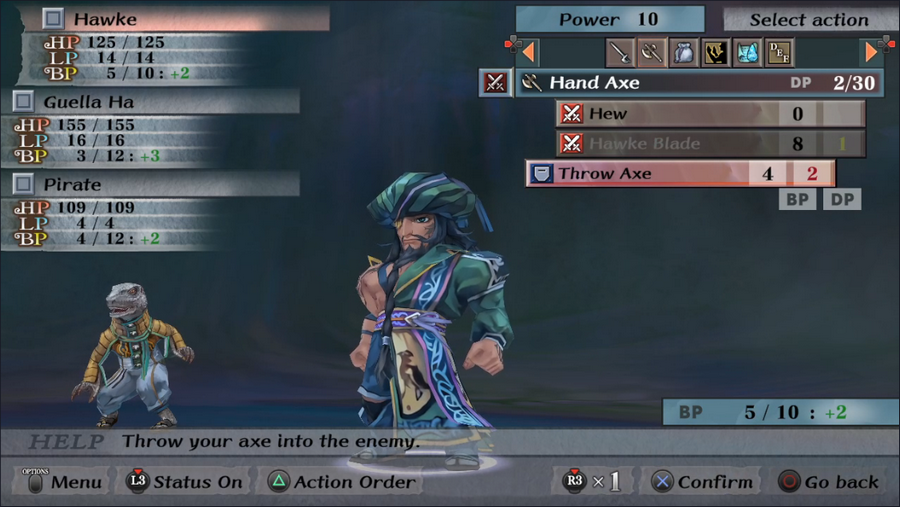 Also luckily, Hawke starts with a hand axe technique: Throw Axe. 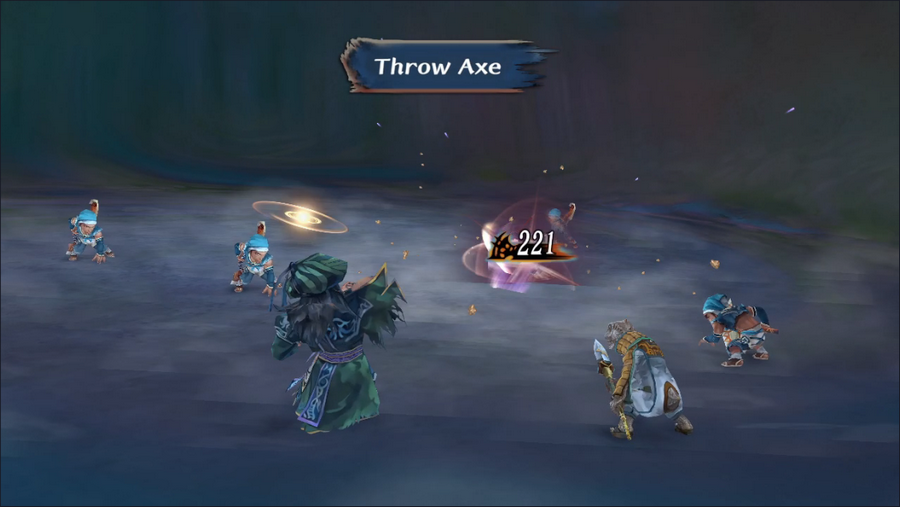 It's not fancy, but it does solid damage. It's also technically a ranged attack, which is very helpful to have in a few rare cases. 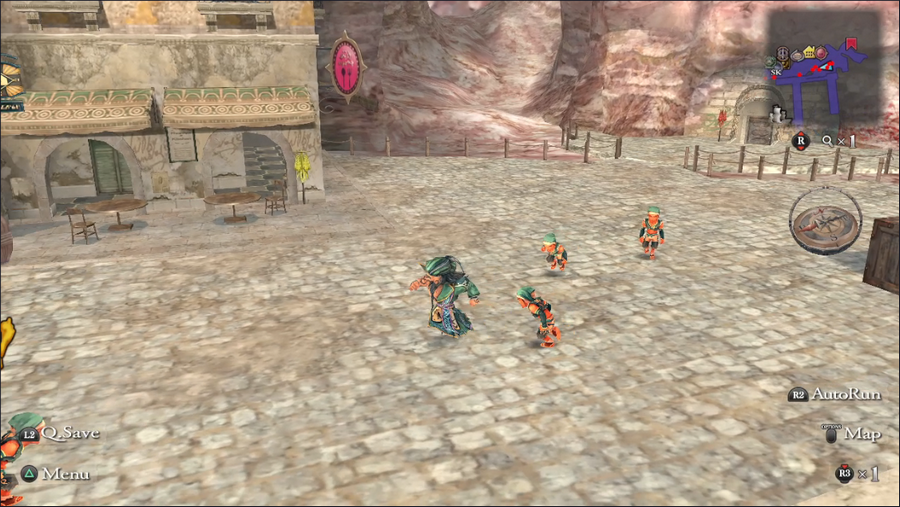 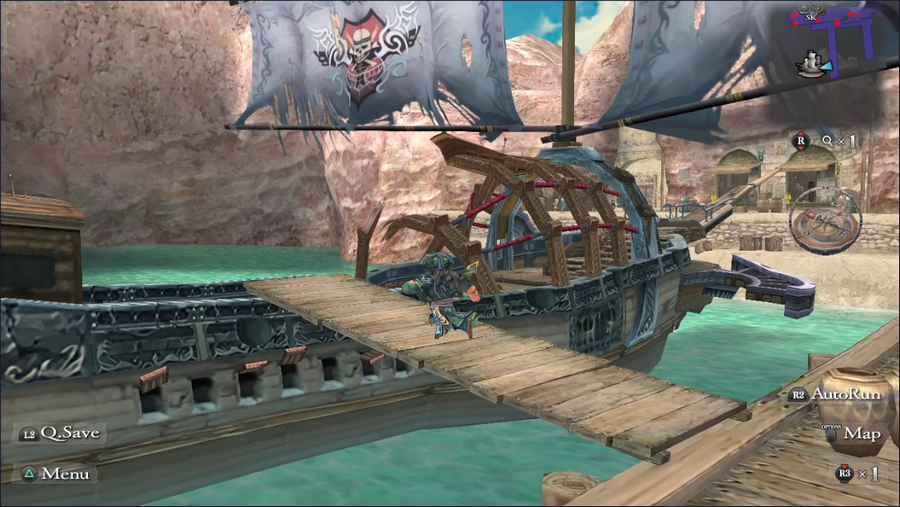 We race through the streets of Pirate's Coast, continually pursued by the pirates, and flee onto the Lady Luck.  Back to Coastal Cave C one more time as we flee the Coral Sea. 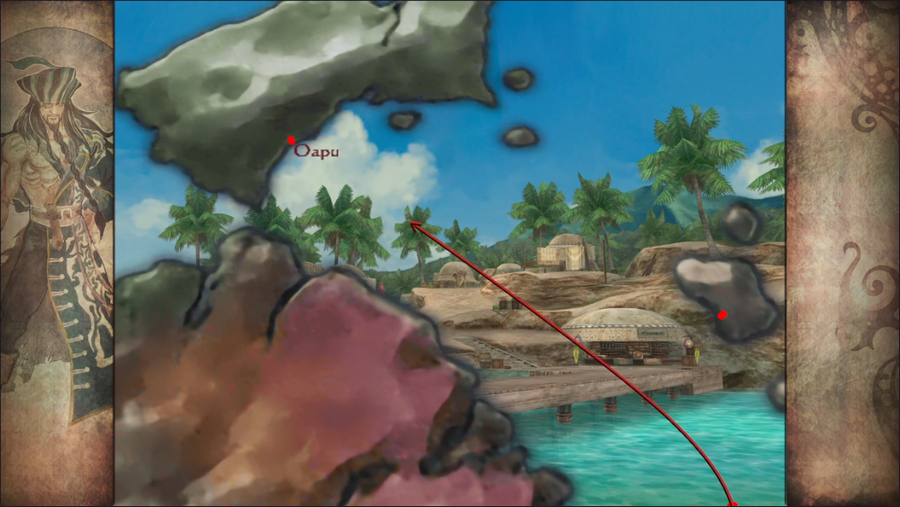 We head north for the town of Oapu on Walon Isle. 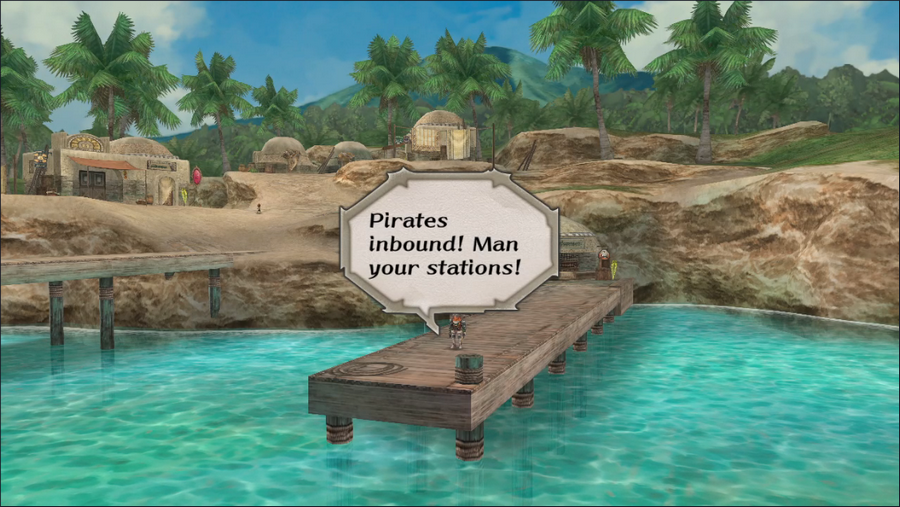 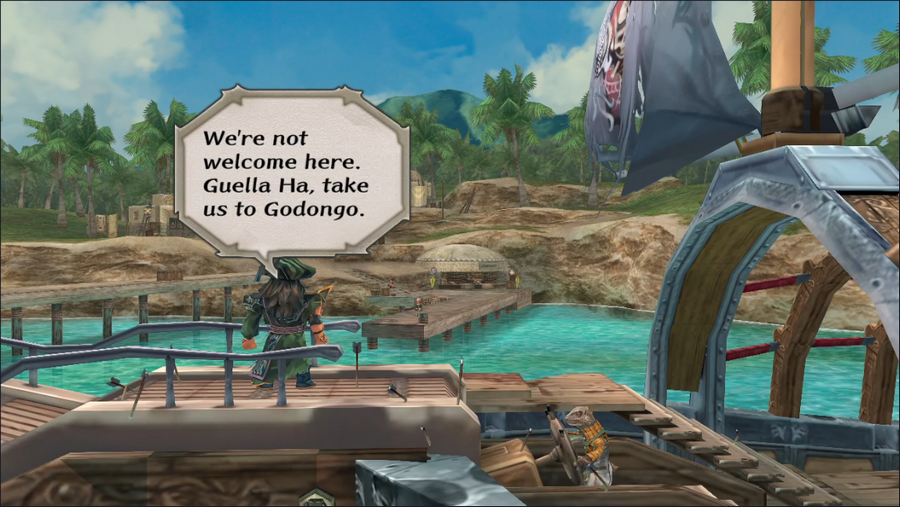 This isn't going to work out, so Hawke orders the ship to Walon's other town, Godongo.  The map, however, stops us at a spot in between... https://www.youtube.com/watch?v=_rZvacLIPkE It's never explicitly stated, but I'd bet that this is the same storm that wrecks Albert's ship.   Luckily, we do manage to reach Gondongo intact.  The Lady Luck is not so fortunate. We're a pirate without a ship.  Having made it to Walon Isle, Hawke's intro comes to an end. Just one more protagonist to go! 5-Headed Snake God fucked around with this message at 04:22 on Oct 6, 2023 |
|
#
¿
Oct 6, 2023 03:23
|
|
|
Gilgamesh255 posted:Not shown: The option to muck about and chase helpless merchant ships, kicking their butts, most likely choosing to spare their lives, and getting 100 gold in the process. And there is a fairly nice rapier in the town you could grind for if you wished to do so. The real reason I didn't do that is because I didn't know it was an option. Which makes this the first thing I've learned about the game since the LP started, but probably not the last.
|
|
#
¿
Oct 6, 2023 12:23
|
|
|
MonsieurChoc posted:Guella Ha rules. He is my friend and we have had many exciting adventures together.
|
|
#
¿
Oct 6, 2023 16:25
|
|
|
EclecticTastes posted:Also there's a song much later that more than makes up for them and is also one of the best BGMs in all of video games. We're talking "Moon level from Ducktales" good. It's a testament to the quality of the soundtrack that I can think of at least three songs that fit this description. Though I suspect I know which one you mean. It's the one referenced in my alternate thread title in the OP, isn't it?
|
|
#
¿
Oct 6, 2023 22:48
|
|
|

|
| # ¿ May 9, 2024 01:07 |
|
|
Welcome back everyone. It's time for us to meet our last protagonist. This intro isn't as long as Albert's or Sif's, but I think you'll still be surprised at its length.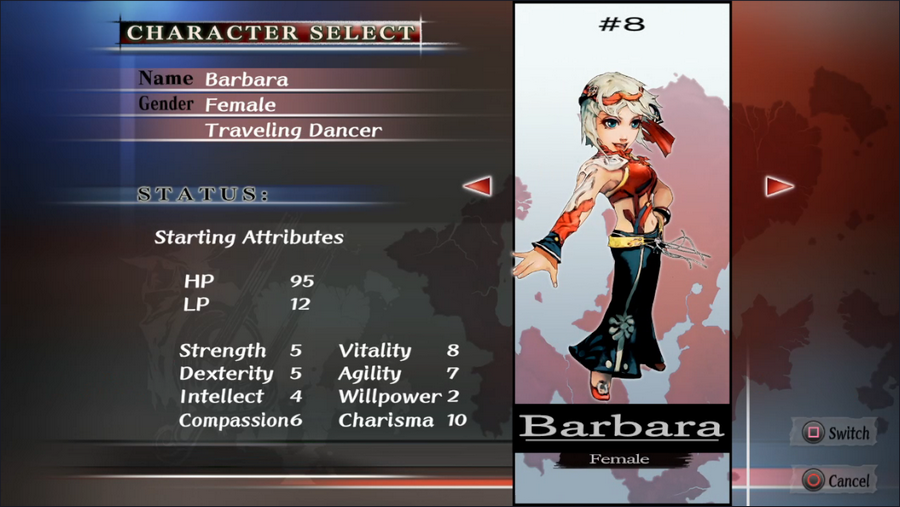 Our final character is Barbara, a traveling dancer. She's very much not the sort of person you'd expect to embark on epic, world-saving adventures. 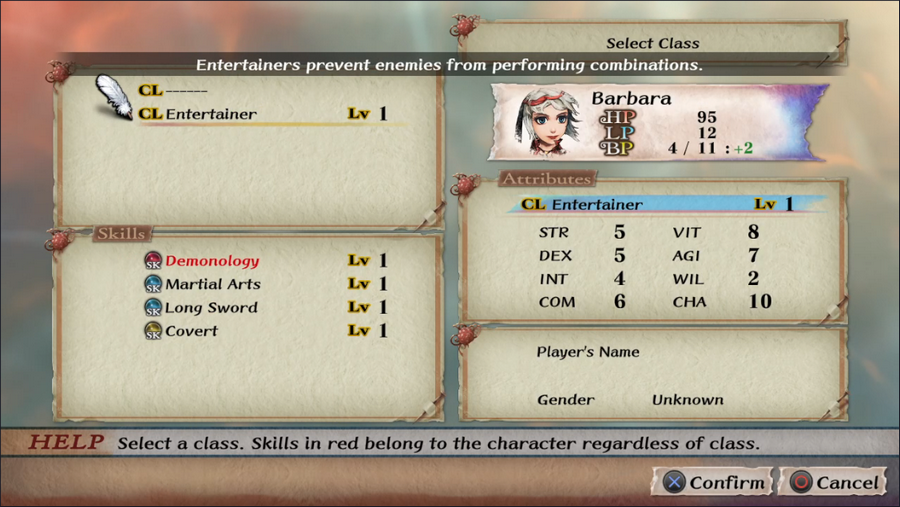 Barbara's starting class is Entertainer, which is decent. Martial Arts and Long Swords are both fine weapon skills, and Covert, while probably the least important field skill, is still useful. The passive ability is also handy, though it's hard to tell how often it's working. I haven't covered combinations yet, but it'll come up eventually. Barbara also gets a free level of the Demonology skill and its starting spell, Energy Bolt.  Barbara is primarily associated with the Frontier, to the far west. It's a set of small colonies developed by Kjaraht in an effort to compensate for the territory it's lost over the last several years. Ironically, those colonies' isolation from their homeland mean that many of them are pushing for independence.   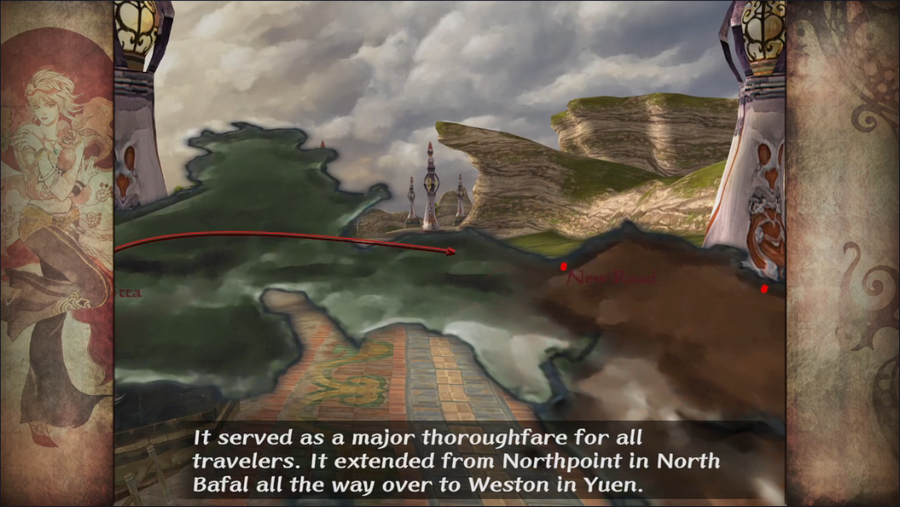 I cannot overstate just how long the New Road is. There's an actual map spot for it that separates the Frontier from the rest of the world, but the road itself runs through the Frontier, Kjaraht, Rosalia, and the Dry Lands.  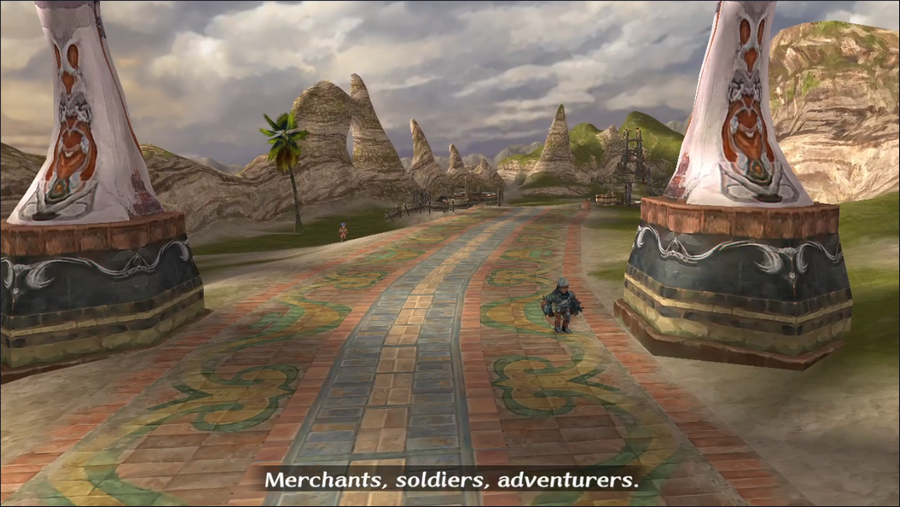 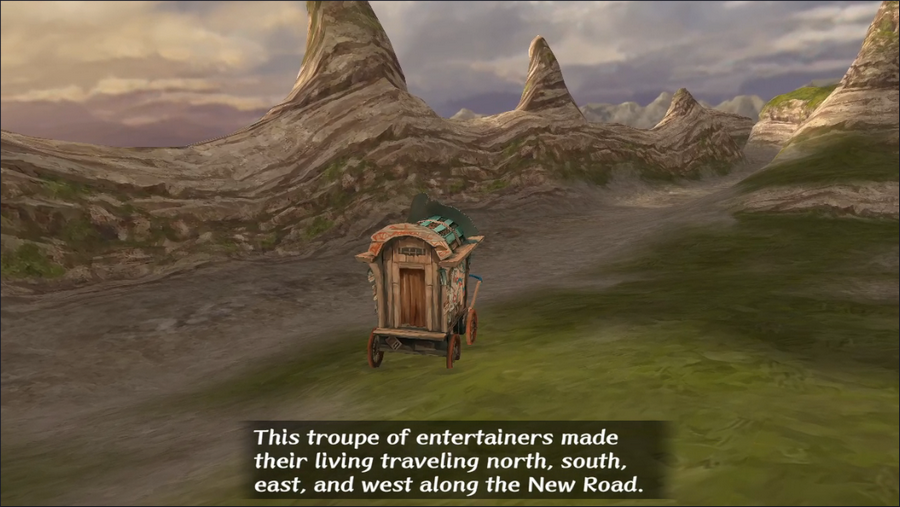 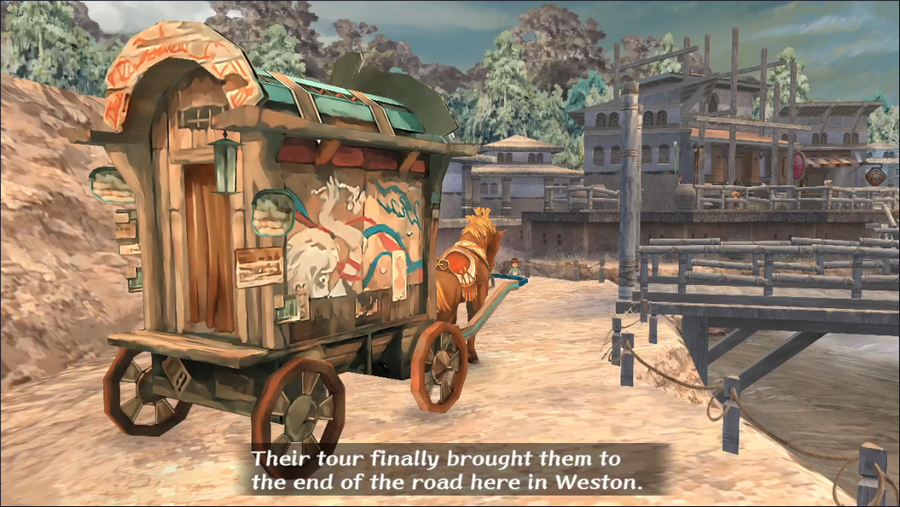  With the narration done, we're left to explore Weston. It's worth noting that Barbara's cart isn't just for show: it's a vehicle that can be taken into the New Road area and makes her party immune to monster attacks. It's by far the best mode of conveyance in the game. Music Highlight: Passionate Eyes, Captivating Dance/Passion in a Glance, Passion in a Dance Barbara's theme doesn't really embody passion or captivation, but it is a jaunty theme fit for an entertainer. Also I just dig the steel drums.  Barbara begins the game with her partner, Hermann, who is... unique. His voice sounds like a pubescent teenager, constantly cracking and trying to keep an even pitch. He doesn't have any dialogue outside his combat barks and has no in-game backstory, so he's just kinda... there.  Barbara's starting gear and stats are nothing really special, though the Glamorous Ring is nice to have.  Hermann is even worse off, especially since his starting class, Trader, rivals Aisha's Herbalist for worst in the game. It has no offensive skills whatsoever (Herbalist at least gets Terrology), but its passive ability is marginally better than Herbalist's.    A few people mention that Weston isn't the only settlement in the Frontier, and we even unlock one of the others.   Several people in town mention that monsters are dangerous, which strikes me as the most obvious advice one could give. 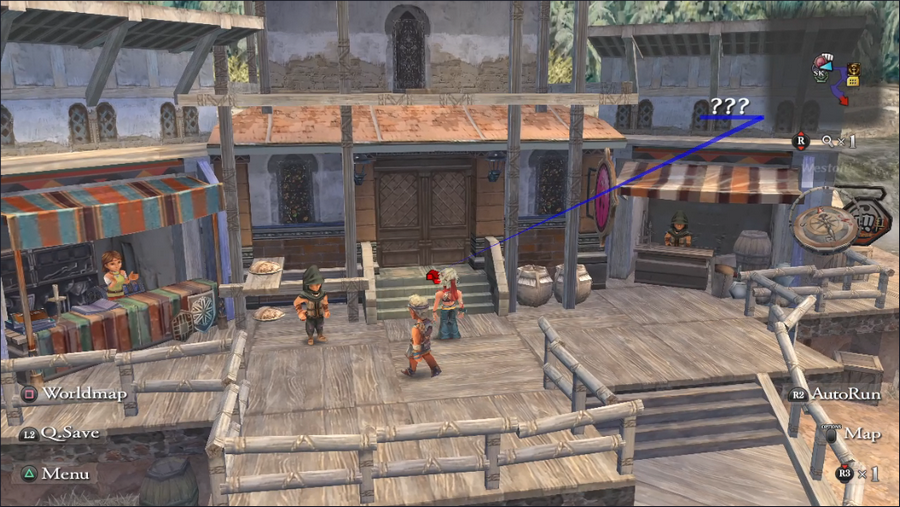 With nowhere else to go, let's check out the pub. 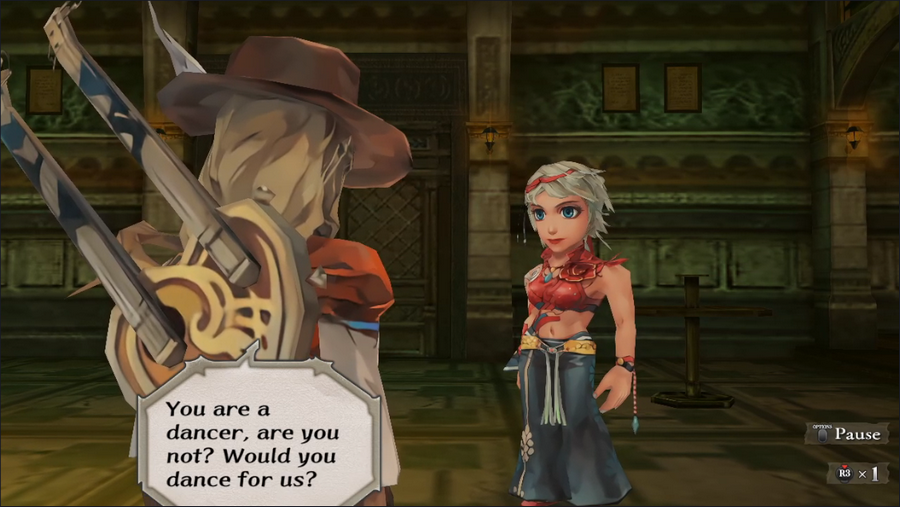 Unlike in most pubs, the Minstrel here actually has something unique to say. His request is a pretty obvious one, and Barbara readily complies. https://www.youtube.com/watch?v=n6bIeOXnJDc It's not amazing or anything, but for a game made in 2005, this really isn't bad. 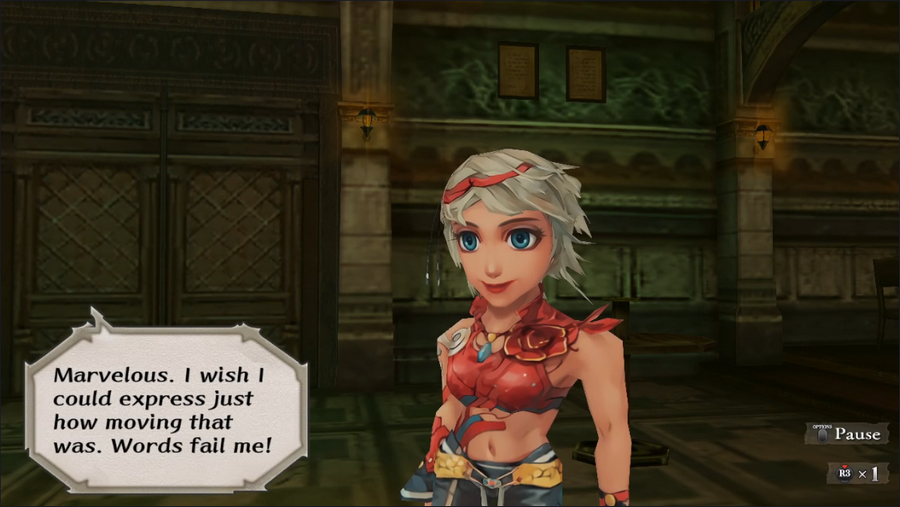 Someone's exaggerating a bit. 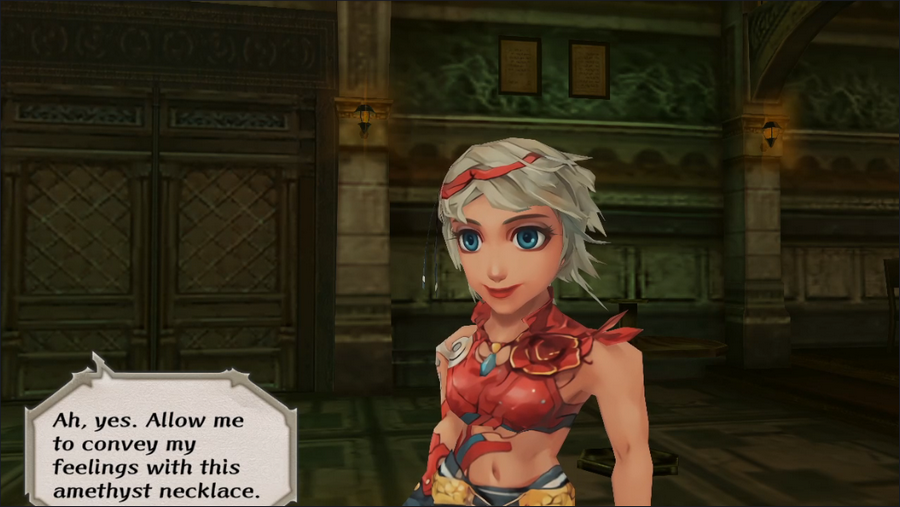 That seems... excessive.  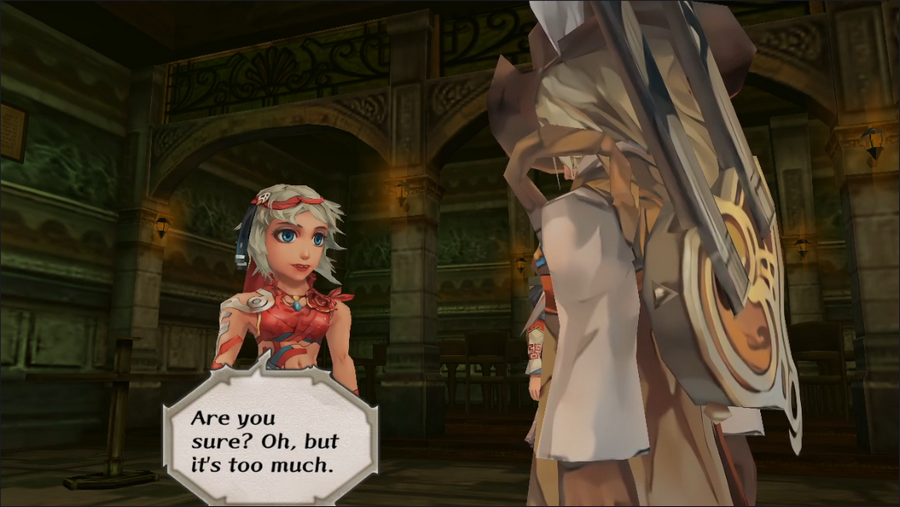 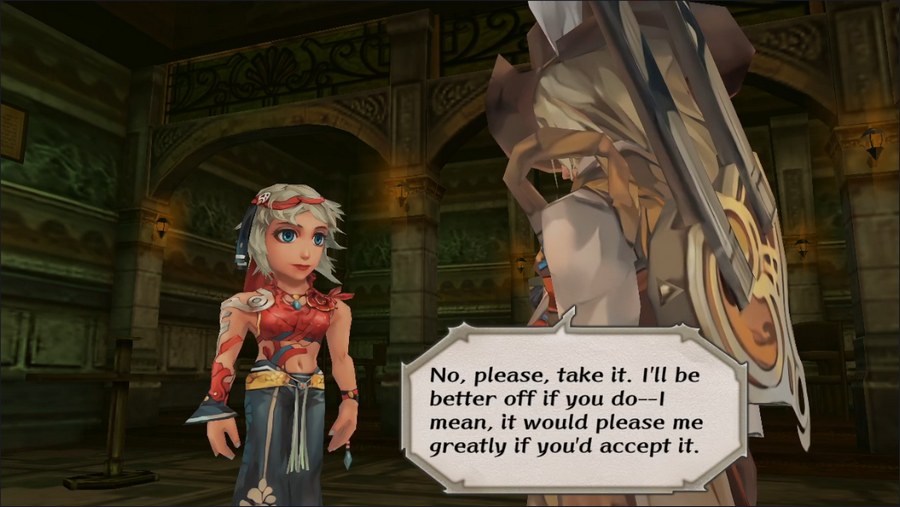 ...Did he steal this? 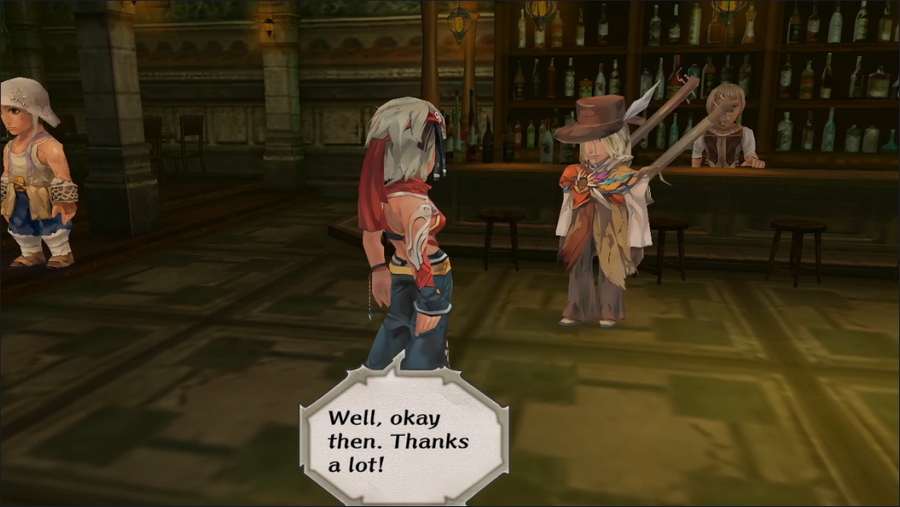 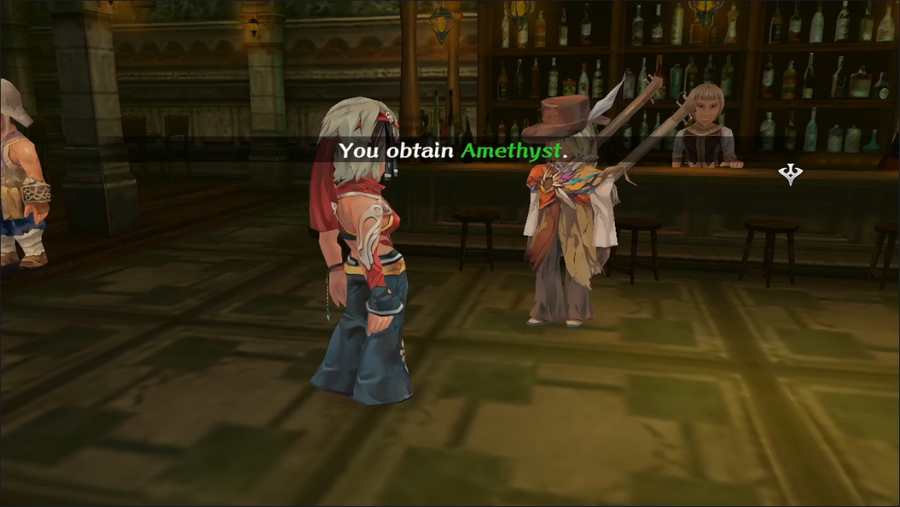   Having given away his jewelry, the Minstrel runs out of the pub at top speed.   Barbara's no fool, but there's not much she can do about it. We may as well take a look at our new necklace. 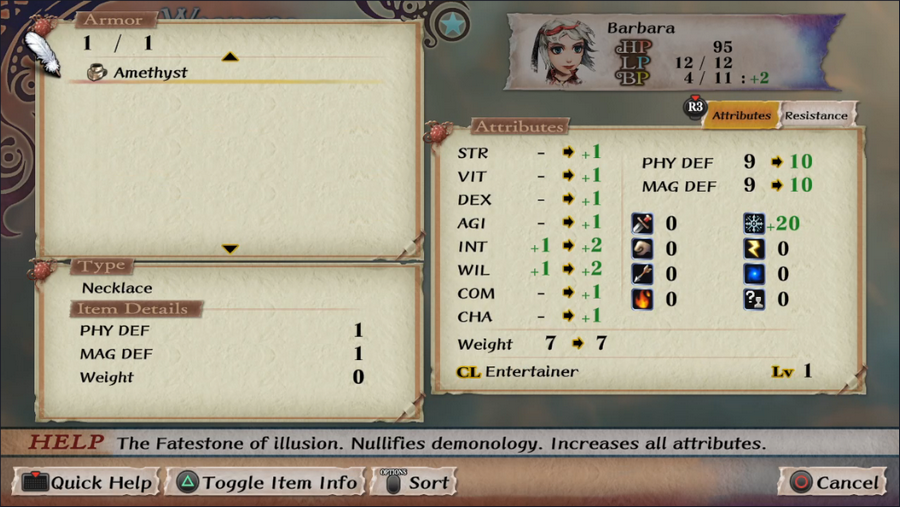 +1 to all stats and immunity to Demonology spells is good, but... Wait, what does that say?  How on Mardias did the Minstrel get a friggin' Fatestone? In any case, this is our demonstration that the ten Fatestones can be acquired in-game. They all give +1 to all stats and immunity to one school of magic. Depending on the school, this can range from entirely worthless to extremely useful.  And with that, Barbara's intro comes to a close! I told you you'd be surprised by the length. So, now that we've met all eight protagonists, it's time for you lot to cast your first vote: Which of the eight will be our lead for this LP? I'll be taking votes for party composition, classes, and a few other things as well, but for now I want to do one thing at a time. Feel free to vote for any many characters as you like - whoever has the most votes will be our party leader. I'll cast the tiebreaking vote, if required. Voting will end on 10/13. 5-Headed Snake God fucked around with this message at 16:18 on Oct 8, 2023 |
|
#
¿
Oct 8, 2023 12:13
|
|