


|
Operation Recap: 21st Army Counterattacks We won a bit early because the enemy surrendered. 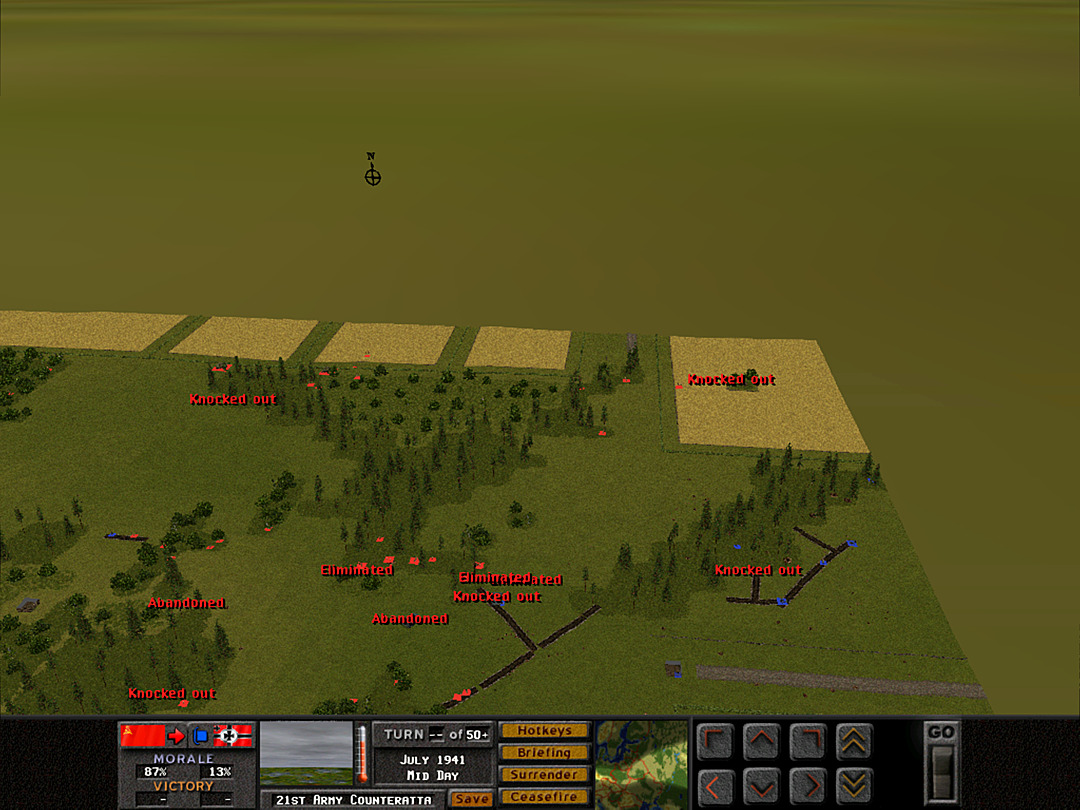 The Germans had almost no forces left; everything that remained was off in the northeast corner, with a few more units hiding in the trench than we were able to observe. 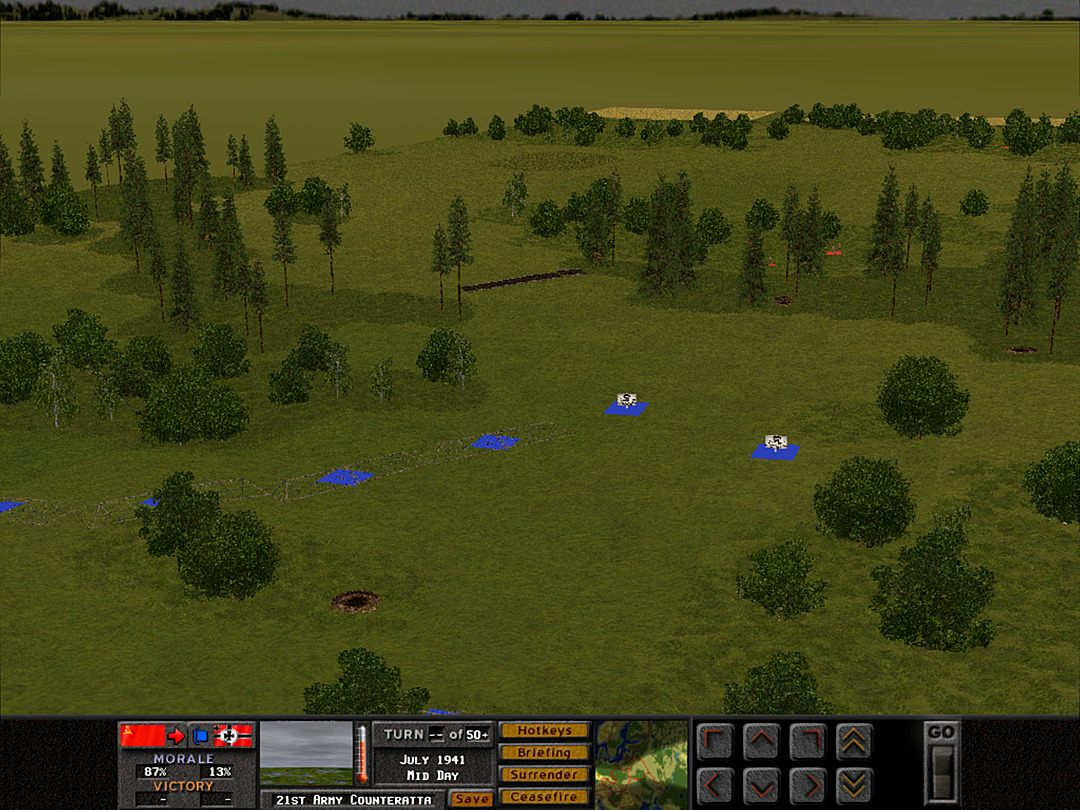 The west side was truly abandoned.  The unit hidden in this farmhouse that managed to hold off a platoon by himself was just an artillery spotter with a pistol. We actually were never able to identify that there was a unit inside, but I could see the shots coming out of it suppressing us. 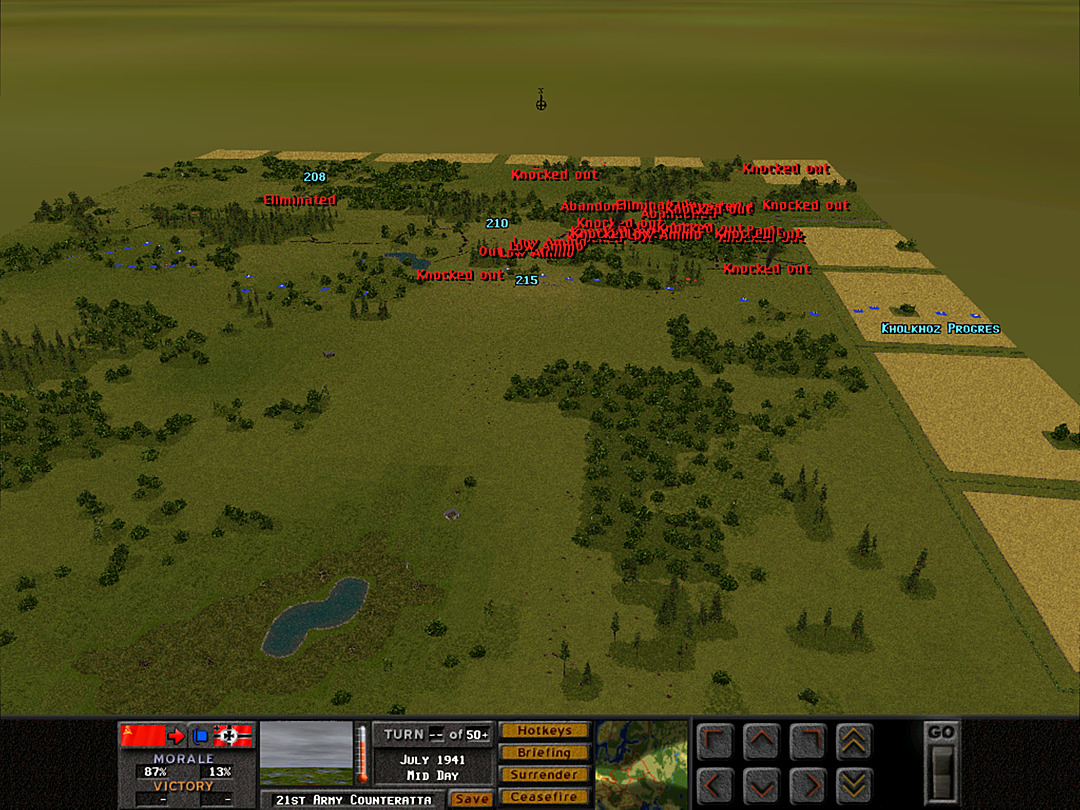 Here's the high-level view from back around where we started.  By the time we forced the enemy's surrender, we had already demolished nearly all of their forces. Notably, the fourth battle didn't have much actual combat aside from the vehicles. This operation was a success by the end of Battle 3; we just didn't know it at the time. That said, we took some tremendous casualties ourselves. If the first operation had a slightly respectable casualty total despite an operational loss, this was an abysmal amount of losses in the course of total victory. I think we'd rather not have had a victory at such a high cost, especially in the vehicle losses. Now it's time for the internal scenario details: pre:Infantry Support Vehicle Armor Artillery/Air Fortification TOTAL Axis : 929 247 0 142 641 885 2844 Allies: 1494 314 137 537 536 0 3018 Infantry here heavily favors the Soviets. The initial German force consists of a 'Light Recon' battalion with only two companies on the map initially. A third company of regular ('Rifle 41') infantry filled it out but only come in as reinforcements, and we also saw the surprise Stugs in the final battle, their other reinforcements. All troops (indeed, all units) are tagged as 'regular', so there was no concern about troop quality. The Germans had several Anti-tank and Infantry guns at their disposal, and an expected number of machine guns and mortar teams. The obvious advantage to the Soviets, of course, came with the tanks and vehicles. Without those, the battle would have been impossible to prosecute. Off-map support was about even. We both had sufficient amounts of artillery, and it was clear the AI put it to good use. Something we did not see due to poor weather were the planes. Both sides have them available on the first day. This favors the Germans a bit more since planes are more likely to spot tanks than they are infantry squads hiding in foxholes in the woods. We did end up seeing the entire map, as it just added the strip of farmland to the back after we advanced from our initial position. I'm not sure if this was an intentional design choice to trick the player into thinking they had to cover ground quickly, or if it's just the way the map worked out. I did rather like the design of the map, as it feels like a natural feature that would in fact be chosen as defensible ground suitable for setting up the trenches and minefields around, even if it held no other intrinsic strategic value. 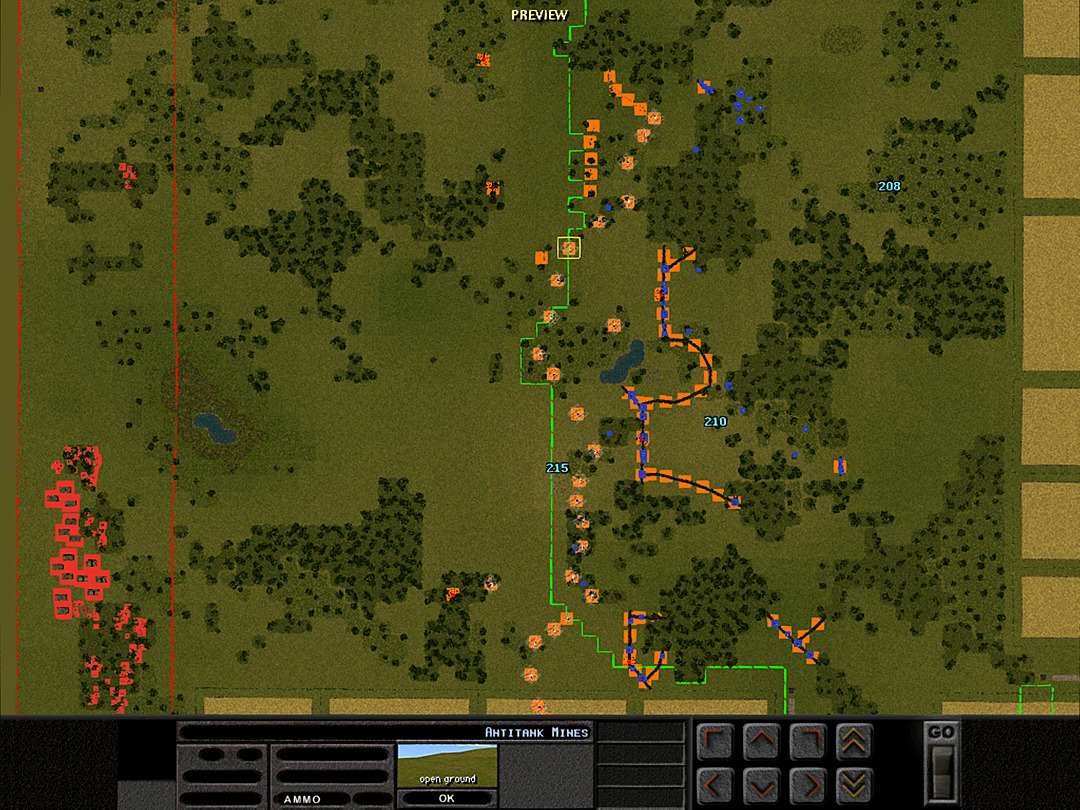 For reference, here is (nearly) the whole map, viewed from far above. These initial positions are what the scenario has set up. The extent of the minefield line is apparent. Interestingly, there is a gap on the west side (top of this image), while the mines continue into the farmland on the east. Perhaps it could be an exploitable weakness, although the player would have to commit to advancing on that side, which seems an unlikely choice for someone presented with this situation.  I wanted to highlight one thing I found on this map. This is an AT gun in a foxhole up in the woods (just beyond the main trench; we encountered a squad here during Battle 3). It's lined up just right to have a view across the open space in the center, roughly in the direction of the marshy pond in the south. It doesn't really have any ability to look to the left or right, but it does seem custom-designed to punish the player if they try to cross from one side of the field to the other. Now on to how those catastrophic losses mounted. As before, these are results from surrendering right after the 'set-up' phase for each battle. If you surrender on initial set-up: 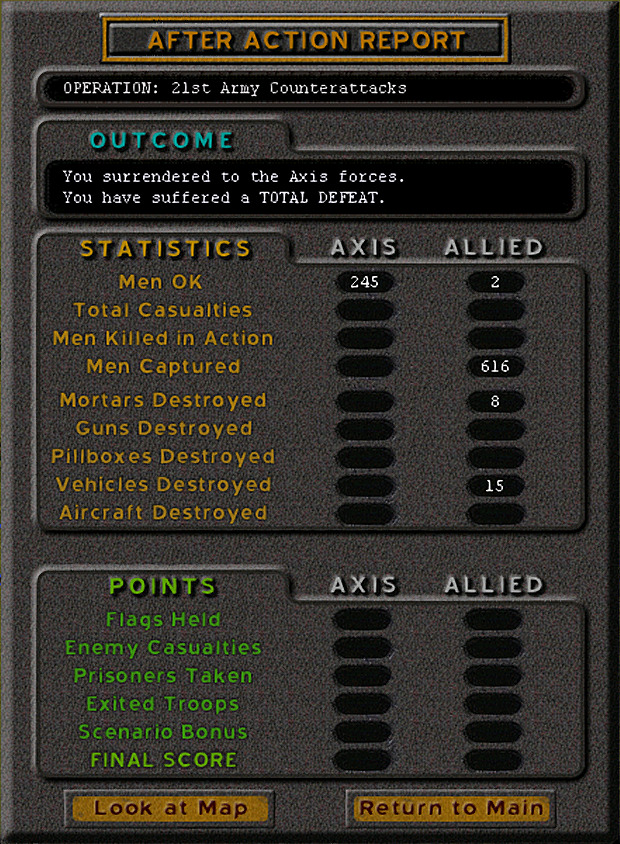 We had our (reduced-strength) battalion against their weak two-company-strong one. It's clear that if you can make a quick initial advance, the Soviets have the advantage. Battle 2:  As I imagined, we practically wiped out the company that made a poor attempt to gain territory on us. Their reinforcements only just managed to keep the manpower total at around the same as it had been initially. Battle 3: 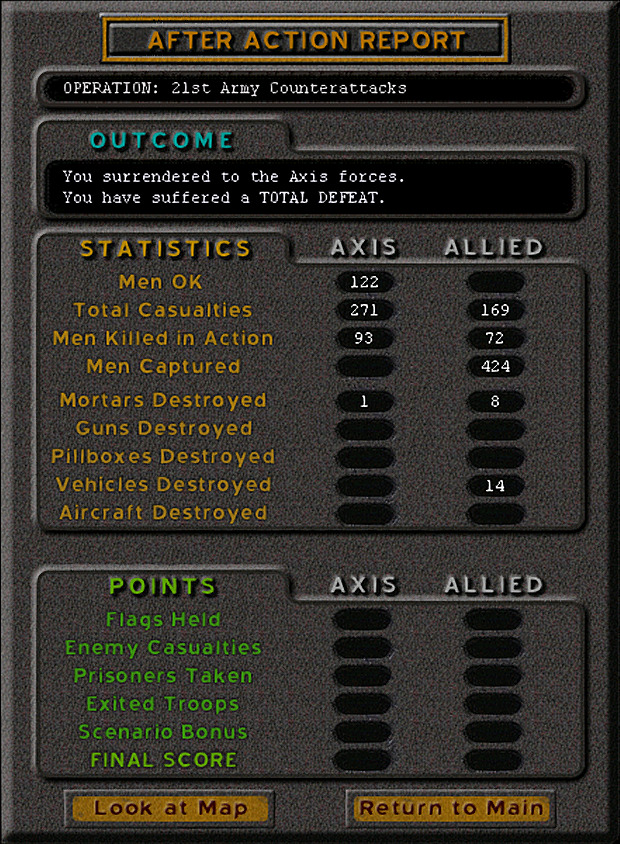 The night was brutal for both sides. By this point, we had reduced them to being unable to properly hold the ridge. They barely had a company's worth of strength, and in all likelihood these numbers spread out more to the gun crews, since we had done very little against them at that point. So realistically, they had only a few platoons of fighting infantry. Even if we had lost an entire company of our own, it was probably a done deal by this time. Battle 4: 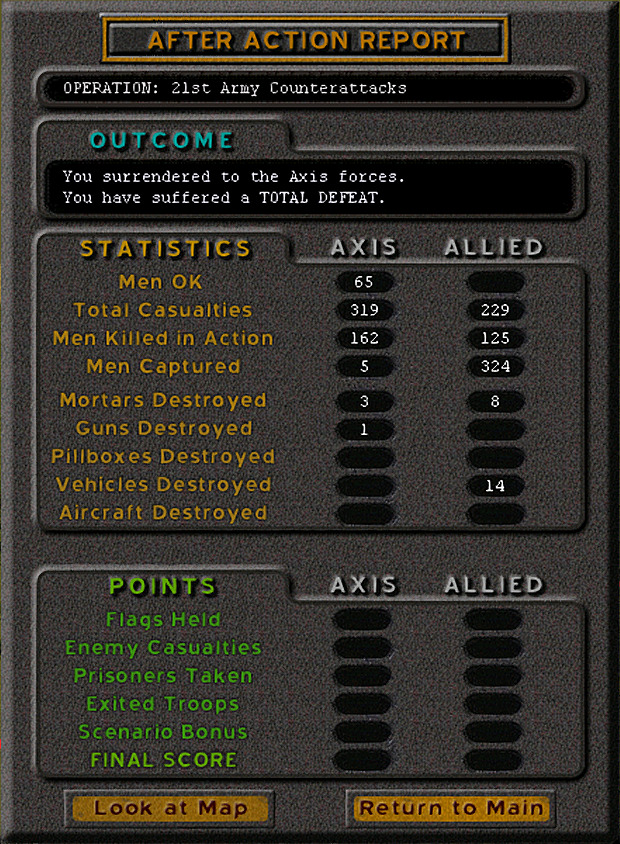 Now that we've seen how it played out, these numbers are no surprise. We had reduced their force by about half once again. The battle of attrition clearly was in our favor. By this time we outnumbered the Germans 5:1. And the final results again: The last battle really wasn't ever as close as I thought it might be. I did feel I had to stay on guard, especially with the surprise of two assault guns appearing as reinforcements. The unknown nature of the forest at least kept it a little tense. But they had nothing to stop us by then, so the fears of a counterattack were misplaced. The Stugs on their own might have held us off as long as they wanted, though. It's no surprise that the surrender came as soon as we knocked one of them out. My take on this operation: I think there are some flaws in the scenario set-up, but it still makes for an interesting fight. The player has to learn to deal with minefields, and use tanks effectively in terrain that doesn't necessarily give them room to play around. The operation feels too easy, because I feel like we shouldn't have been able to win after taking such horrible losses. I'm not sure if it would have been better or worse if the ridge were treated as an objective. It might have made the attack on it feel more important, but it also could have lost the sense of dealing with a longer, connected front that you're heading towards. As it is, the map is too short to really feel like an 'assault' operation, and is still longer than it needs to be. I think the time it took us to actually approach the defensive line led to the German forces foolishly abandoning good trenches to try and delay us in the woods; the first battle may well have decided the result. Personally, I think it might have been better with just a shortened map and battles that were just a bit shorter to even it out. The next battle will actually begin at night, with an attack across a river. Which side is ours will be up for a vote in the thread.
|
 #
?
Jan 15, 2024 22:26
#
?
Jan 15, 2024 22:26
|
|


|

|
| # ? Apr 29, 2024 16:08 |
|
|
 Voting Time Voting Time With two operations down, we've now seen the battle from both the Axis (German) and Allied (Soviet) side. I chose the sides for those as it seemed best to start off with Germany, but I don't need to choose which side for every battle we'll fight. In those cases, it will be up to you, in the thread, to decide who we play as. However, I do still want to keep it balanced between Axis & Allied operations. That does not always mean they will switch off; indeed the vote wouldn't serve a purpose if we could only alternate. In order to keep this balance, the votes will always have two options available. If one is decided for the Axis, the other will be Allied. You can indicate the preference however you like (e.g. 'do the 2nd one as Soviets'), but you cannot vote for both to be played from the same side. This vote is simply between the next two operations in chronological order. Both occur in 1941, with the second coming later in the year but before winter sets in. The first choice is Kruglowka Railway : 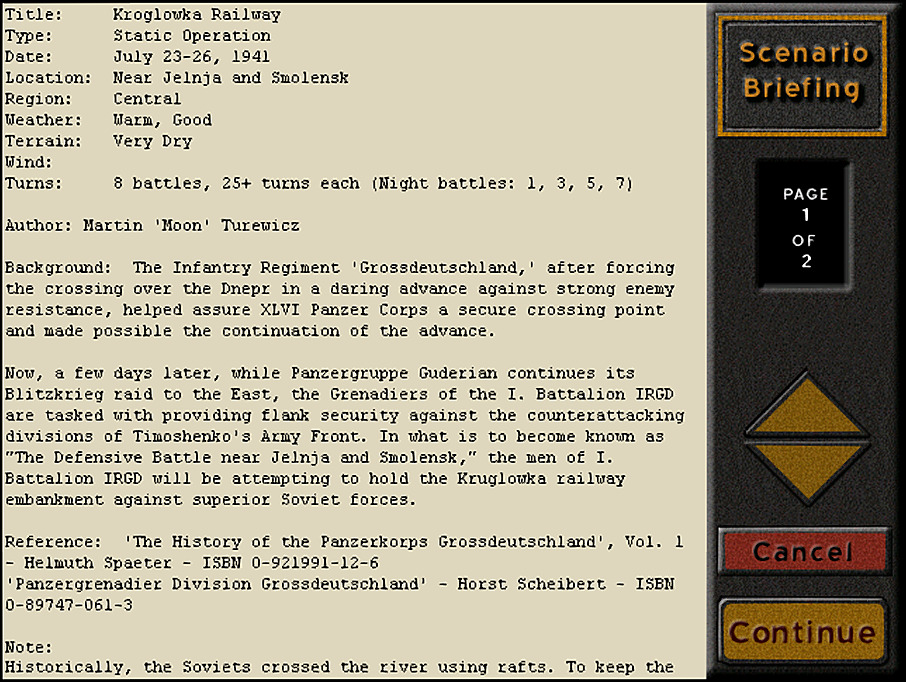 The cut-off text is just "...game playable against the AI from both sides, fords are being used instead." This one is about battalion-sized. As the Germans, we'd be trying to hold the line against the Soviets crossing the river. As the Soviets, we'd be the ones trying to make the crossing. The second is Penny Packets:  Another one that's not too large. Again the Germans are defending. Here, they're likely trying to block a more sizable Soviet force. The terrain here is going to be more rugged, and the weather colder than the first one. Vote Now for which one you want to see me play as the Axis. If you simply give the name of the operation, it will be counted as an Axis vote for that one. You can also vote by specifying an operation and a side to play as, as long as you don't vote for the same side for both. Voting will be up for about 3-5 days, at minimum until Jan 18, 2024.
|
|
#
?
Jan 16, 2024 06:21
|
|
|
First Soviet, Second Nazi
|
|
#
?
Jan 16, 2024 07:46
|
|
|
Soviet Railway, Axis Packets Attacking is generally more interesting than defending. Especially on a river.
|
|
#
?
Jan 16, 2024 08:27
|
|

|
It's decided in favor of Allies for Kruglowka Railway, and Axis for Penny Packets. The next operation will be Kruglowka Railway.
|
|
#
?
Jan 19, 2024 21:45
|
|
|
Operation 3, Battle 1 Our next operation occurs still in the early part of Barbarossa, with the Soviets attempting to slow down the German onslaught by making counterattacks at any possible weak point.  Another huge map, with a total force size a little bigger than the last one. There's a key difference here in that this is a 'static operation', which means we will have defined objectives to capture. It's also one that's more closely modeled on a historical battle, in which the Germans just barely held back the Soviets before finally retreating. The last line continues "...game playable against the AI from both sides, fords are being used instead." Notably, this is also a multi-day operation, beginning at night. Every other battle will be a night battle, and daytime fighting will be limited to one battle per day. That will make this feel like a more drawn-out affair. Battle length is 25+ turns, which is a decent middle-ground length. It's long enough to make some shifts in the battle plan as needed, but not so long that we'll be seeing serious fatigue or ammo depletion by the end of each fight. 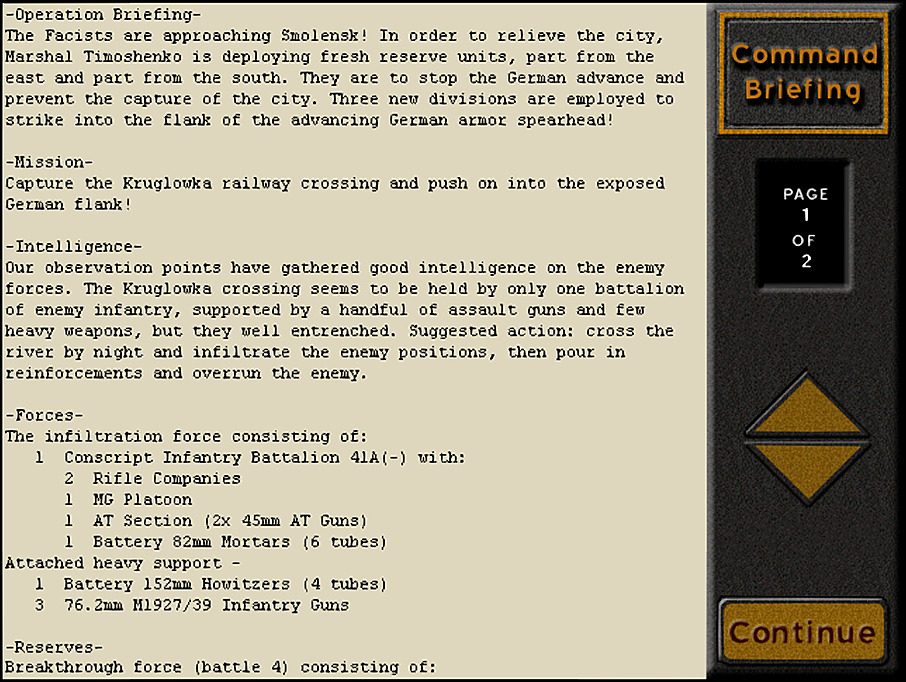 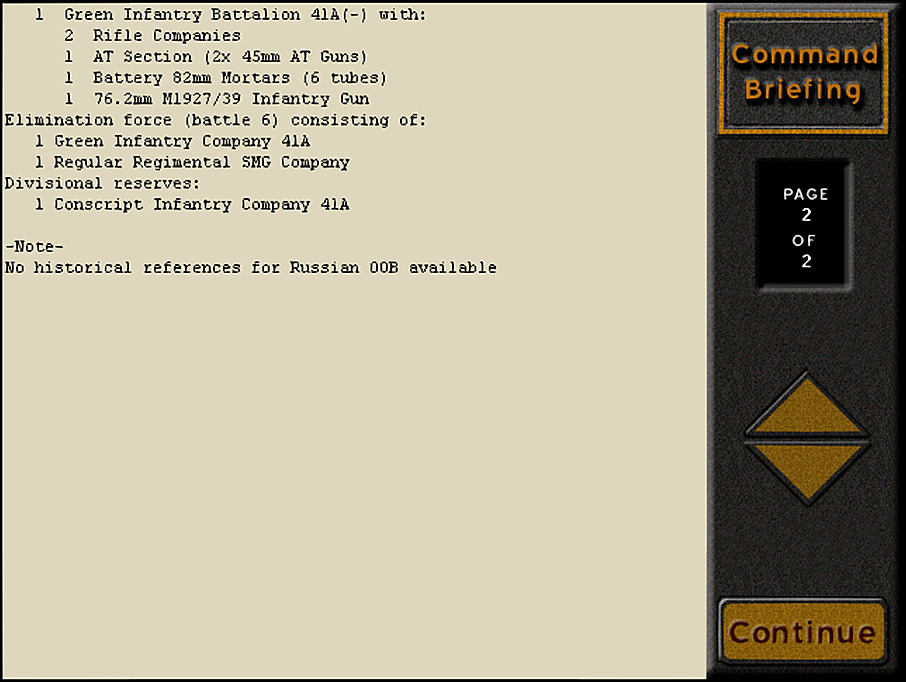 Our task is to cross the river on the first night, establish a bridgehead, and then push through once the main force arrives on Day 2 and Day 3. We don't have a significant number of men to accomplish this task; only a partial battalion of conscripts. The mention of assault guns and other heavy weapons on the German side is worrying, as while we do have decent heavy guns of our own, any one of them can be put out of action pretty easily, and we have no other means of handling enemy vehicles. Here's what we start with on the map. As in the last Soviet operation, the units begin with a few random casualties. It's not quite as much of a reduction as in Operation 2; it seems to me that they are at about 90% strength. This time, we have no vehicles at all, only infantry : pre:Battalion HQ - Major Kharitonov A Company 1 Plt - 4 x Rifle 41 + 50mm Mortar 2 Plt - 4 x Rifle 41 + 50mm Mortar 3 Plt - 4 x Rifle 41 + 50mm Mortar B Company 2 x Maxim MG Teams [BLUE] 1 Plt - 4 x Rifle 41 + 50mm Mortar 2 Plt - 4 x Rifle 41 + 50mm Mortar [BLUE] 3 Plt - 4 x Rifle 41 + 50mm Mortar C Coy 1 Plt - 4 x Maxim MG Independent (Infantry) 1 Team - 76.2mm M27/39 2 Team - 76.2mm M27/39 3 Team - 76.2mm M27/39 4 Team - 152mm 4x 5 Team - 82mm Mortar 6x 6 Team - 45mm AT Gun 7 Team - 45mm AT Gun Date: 1941-07-23 Time of Day: Night Skies: Clear Ground: Very Dry Temp: Cool Wind: Windy NW Conditions are favorable for movement at night. Visibility seems to be around 200m. 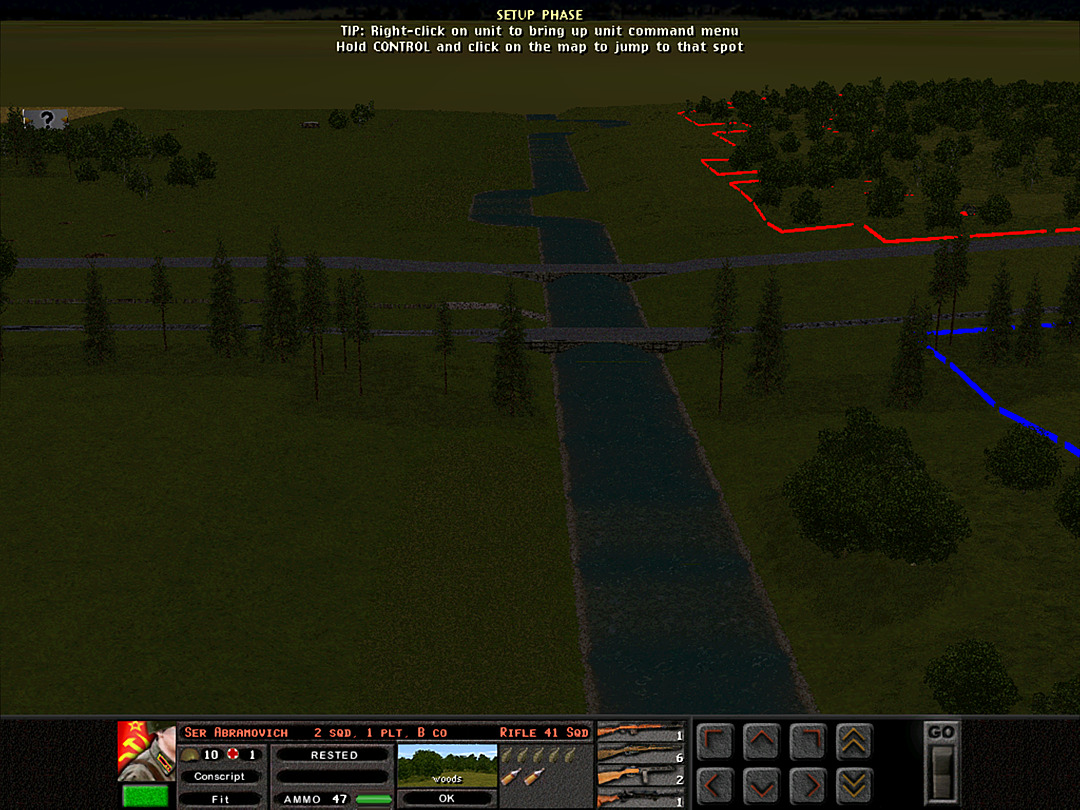 The nighttime start means the map is going to be a bit harder to make out, so I'll focus on our initial goals. Here's the view (looking westward) down the river we have to cross. There are two clear bridges in the middle, but we can also use our 'boats' to get across at many other locations. [As the briefing indicated, the boats are represented by fords every 100m or so. A couple can be just made out in this image, as slightly differently colored patches running across the blue water of the river. Generally speaking, there's a set of fords at every 'kink' in the river course, as well as a set in each straight stretch.] 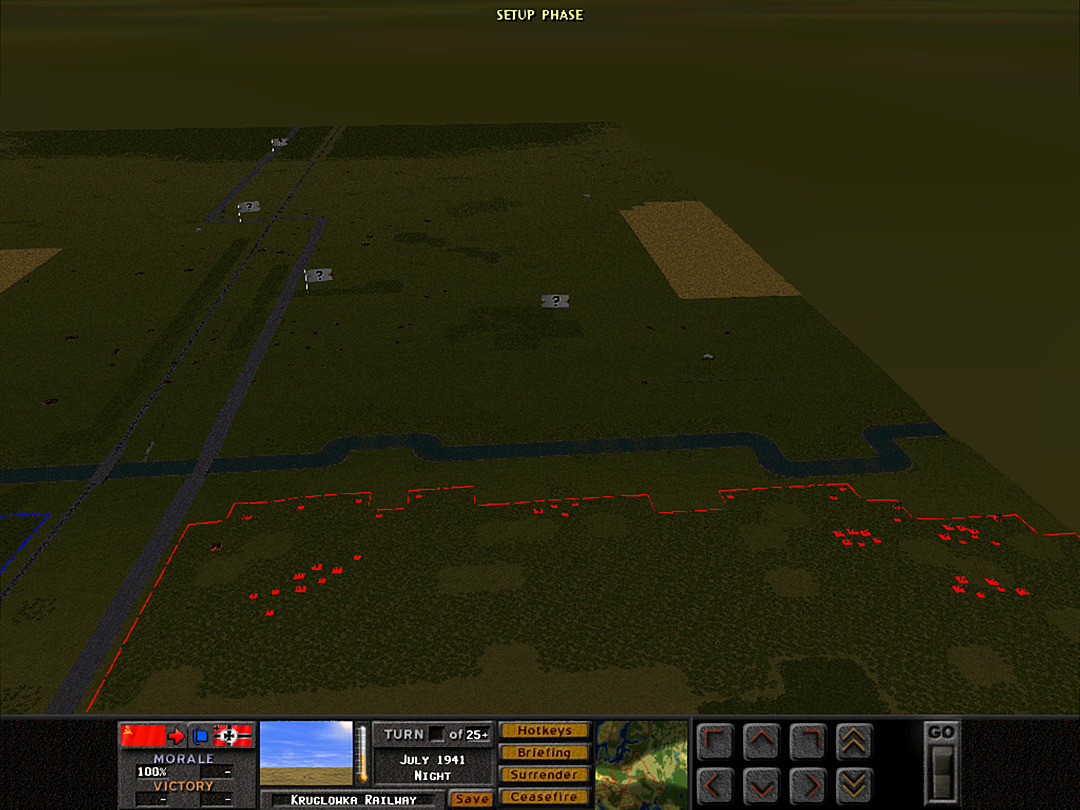 Most of our units have remained in the woods so as not to reveal our presence to the Germans. We're ready to secure a bridgehead on the rail line, but we'll need to get beyond just that once our full force is present. A Coy is set up on the far right. They'll try for a direct push across the river and to make it at least as far as the small farmhouse there. Either the Germans will need to shift away from the main bridges to deal with them, or we'll be well-positioned to take the patch of woods during the day tomorrow. The rest of our guns likely won't be able to spot any targets during the night, so they are setting up in a line to prepare for the fight in the morning. [Also visible on the map are the 'flags' indicating our objectives. We will need to control them to succeed in the operation.] 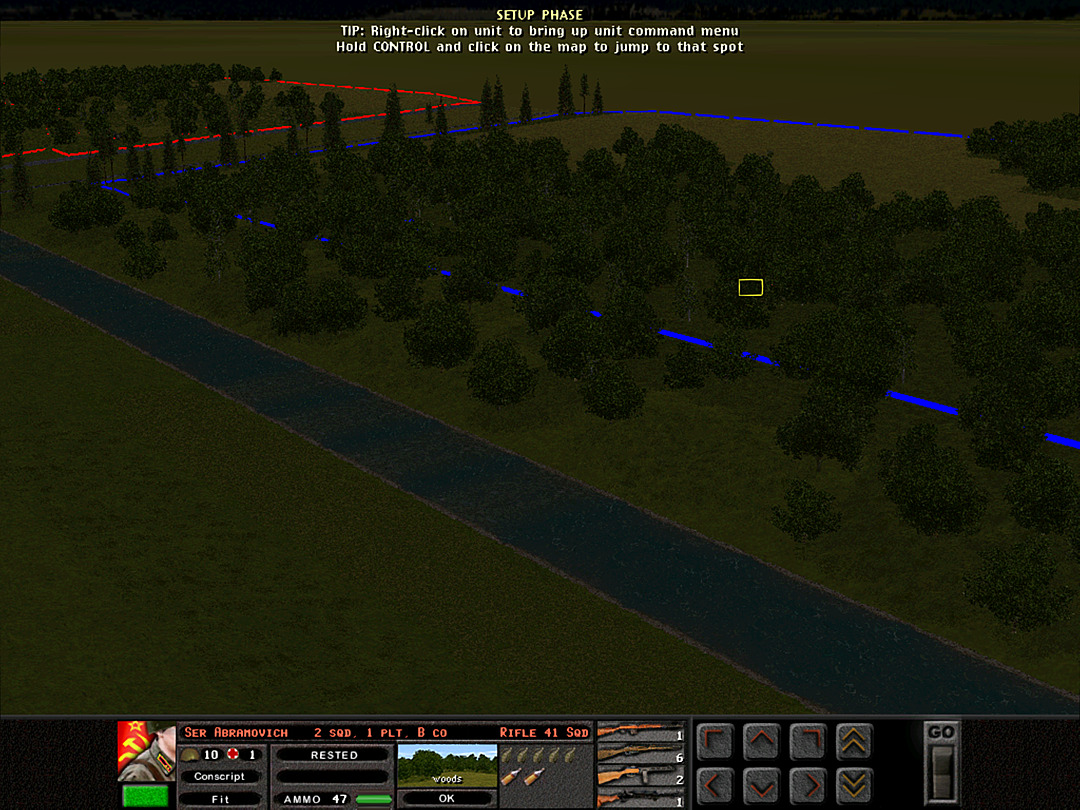 As for B Coy, two platoons will be going for a sneaky crossing off to the east. With luck, they'll be able to grab a forward position in the line of trees running by the railway. The company's captain and the third platoon remain in the western woods; if the coast is clear they may well dash to capture the bridges. [This is also the first time we've had multiple starting zones. The two platoons of B Coy in the blue zone can only deploy there; all our other units are in the red zone and can only deploy there.] 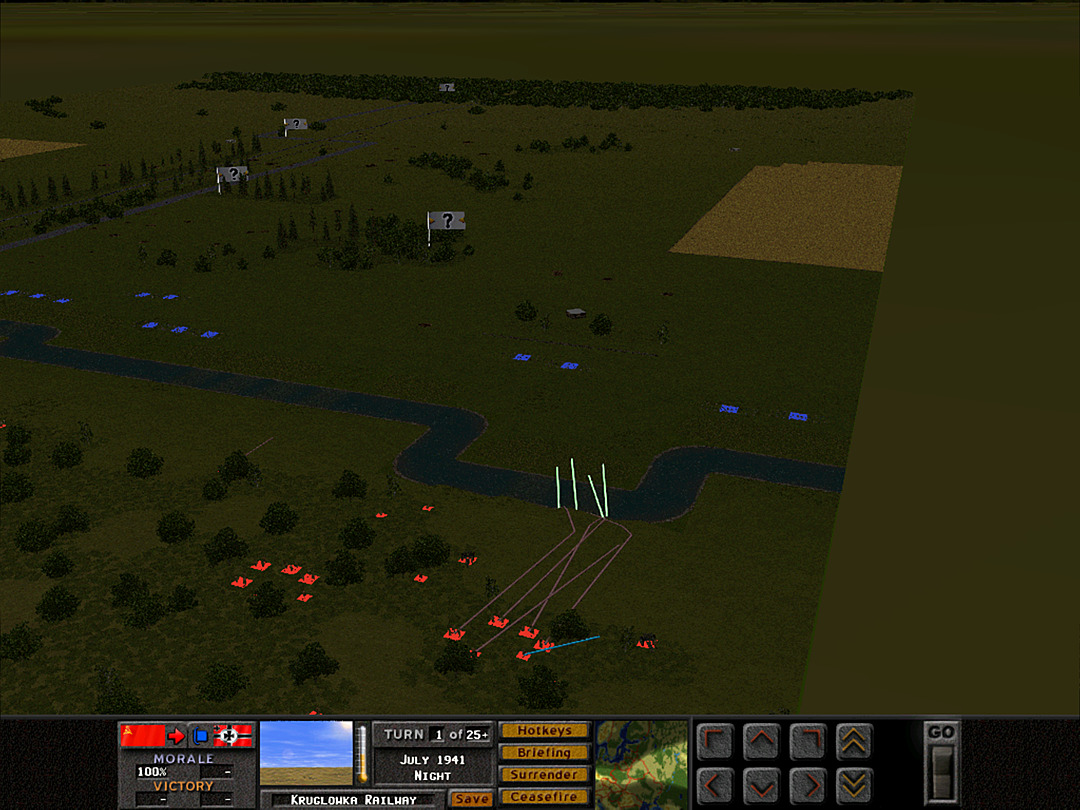 We don't know if the Germans have forward scouts, so we'll try to be as sneaky as possible until reaching the boats. A Coy, 3 Plt is the first to move. 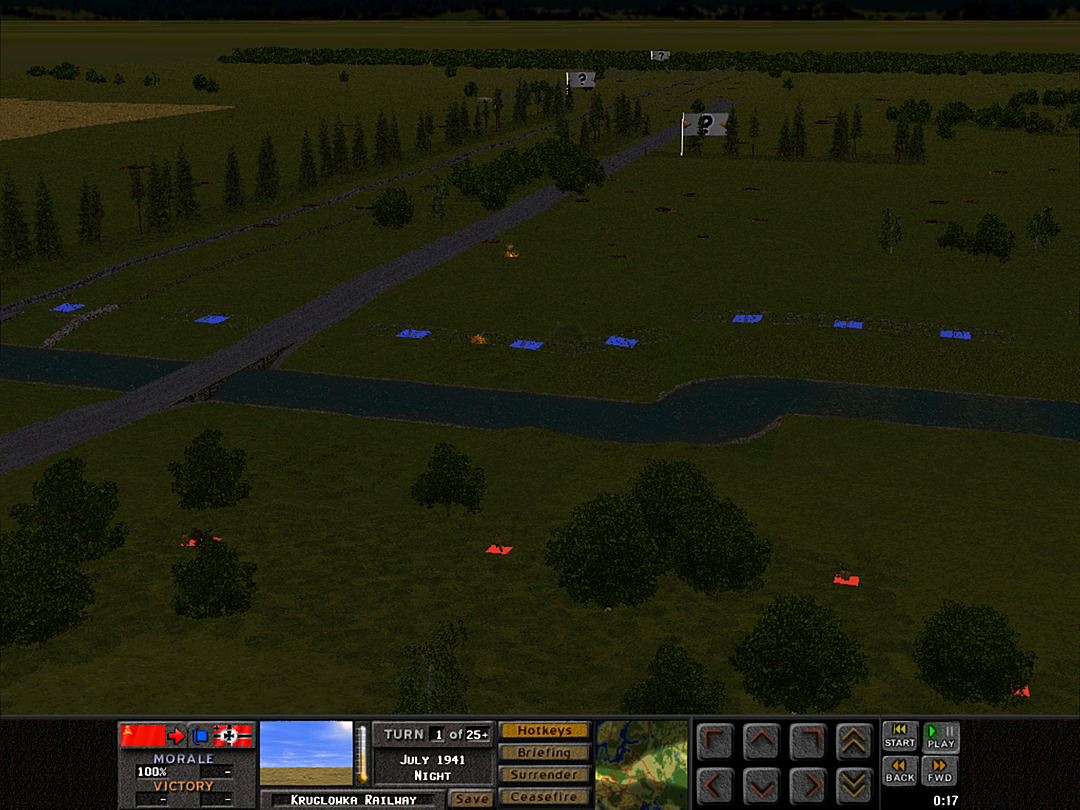 We send an artillery strike right at the far end of the bridges. This is to hopefully reduce any potential minefields placed there, and to suppress any German soldiers holding it. 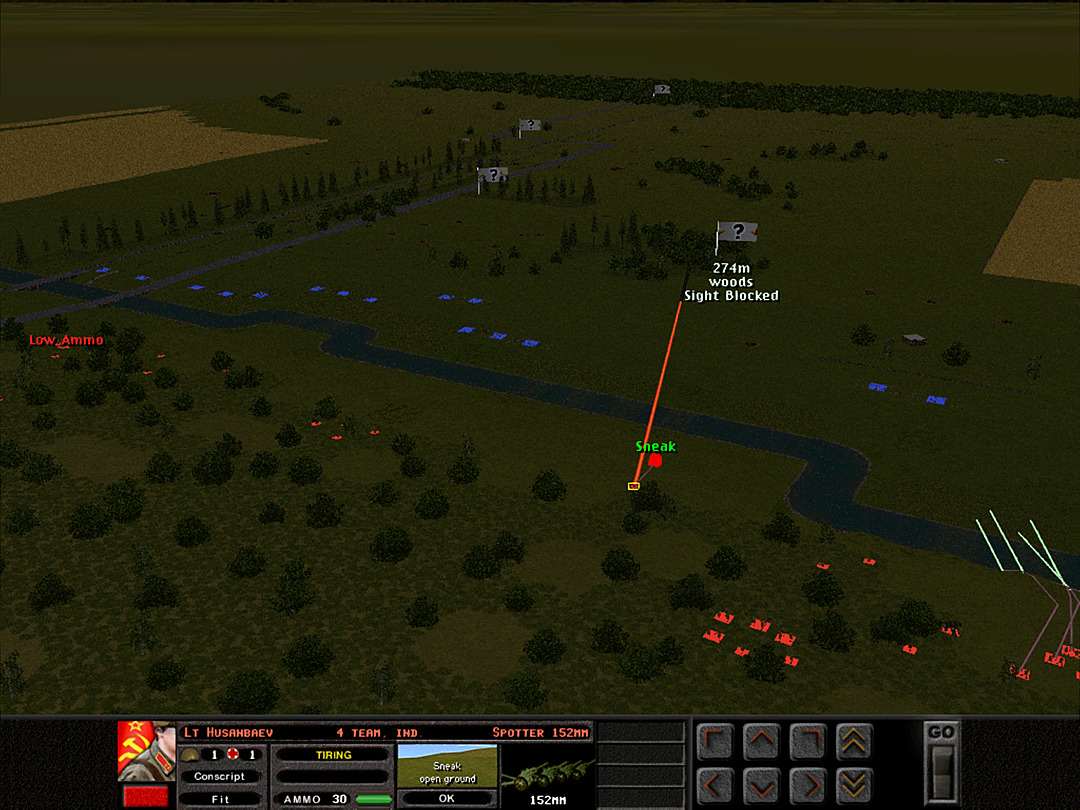 The other artillery spotter creeps forward. We'd like to suppress anything in the woods, but have to be very careful not to lose our strongest artillery asset. 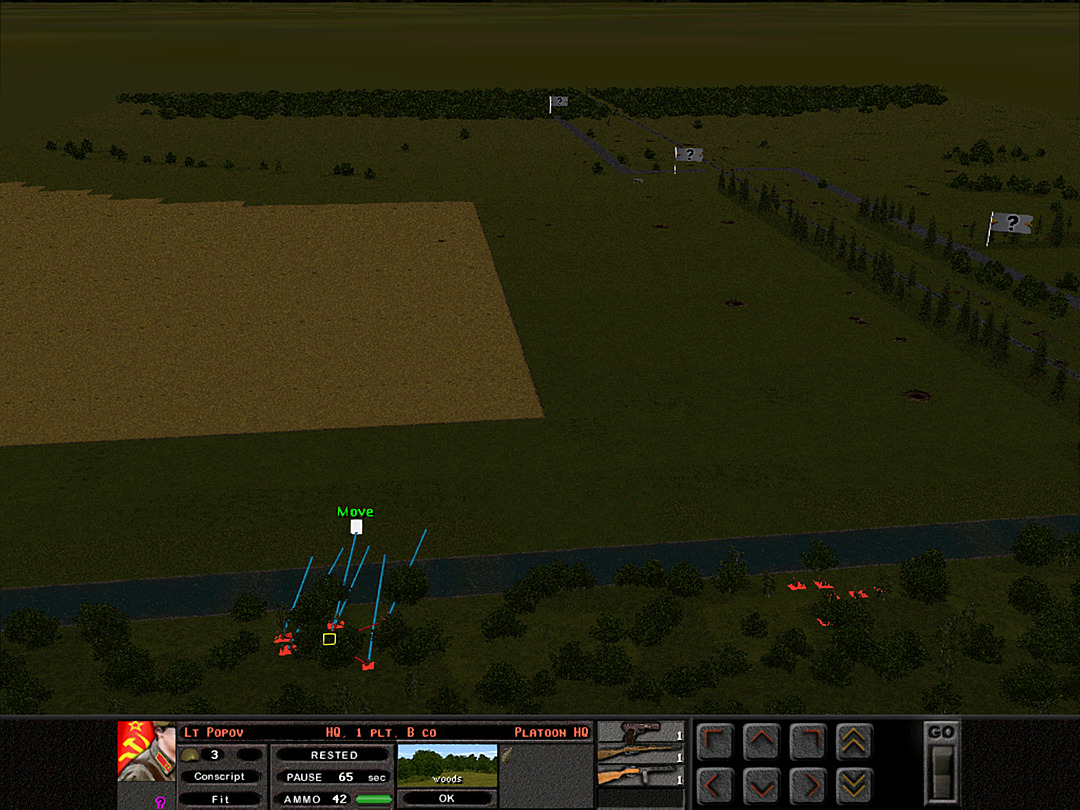 Our two platoons on the west slip into the boats and begin to make the crossing. No enemy units have been spotted so far. 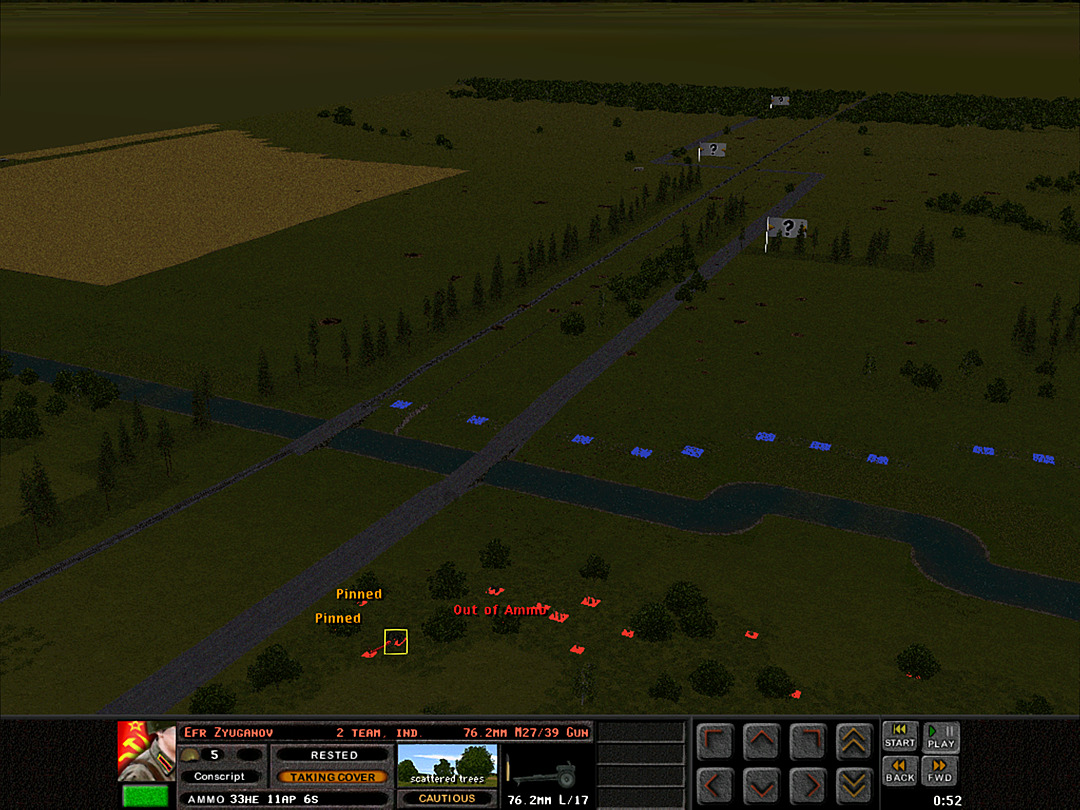 One of the mortar rounds falls short, causing B Coy, 2 Plt to hit the dirt for a minute. 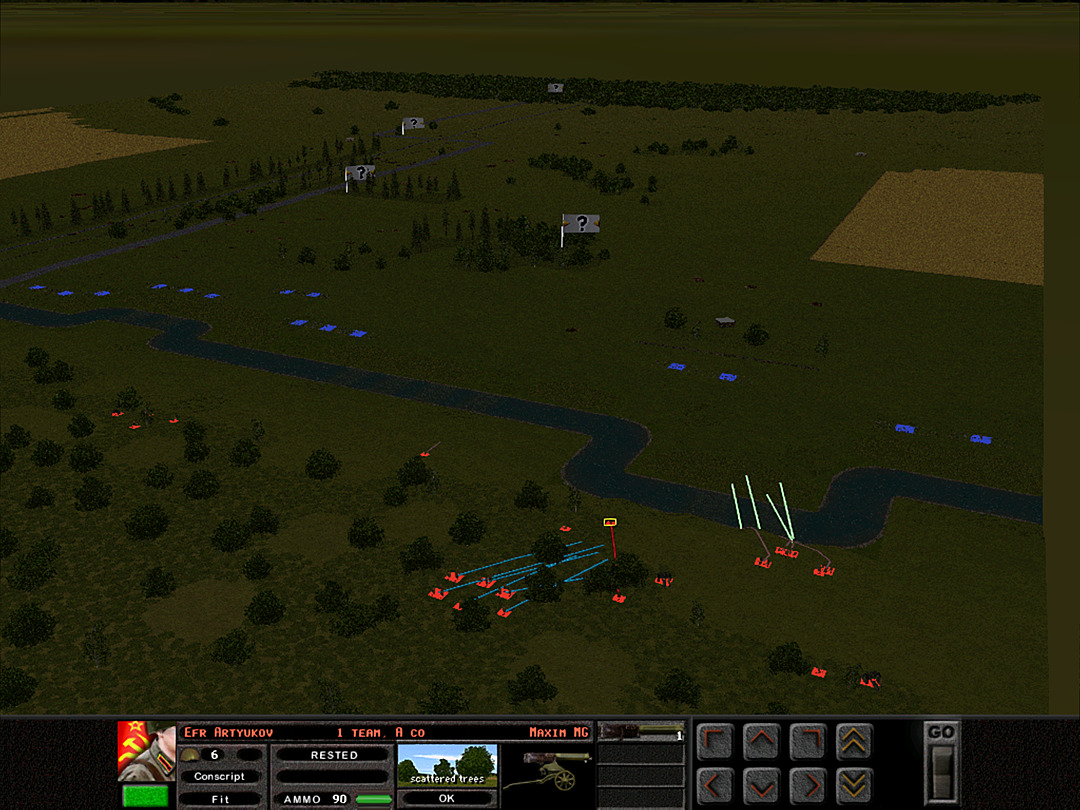 The second platoon from A Coy is sent towards the river. 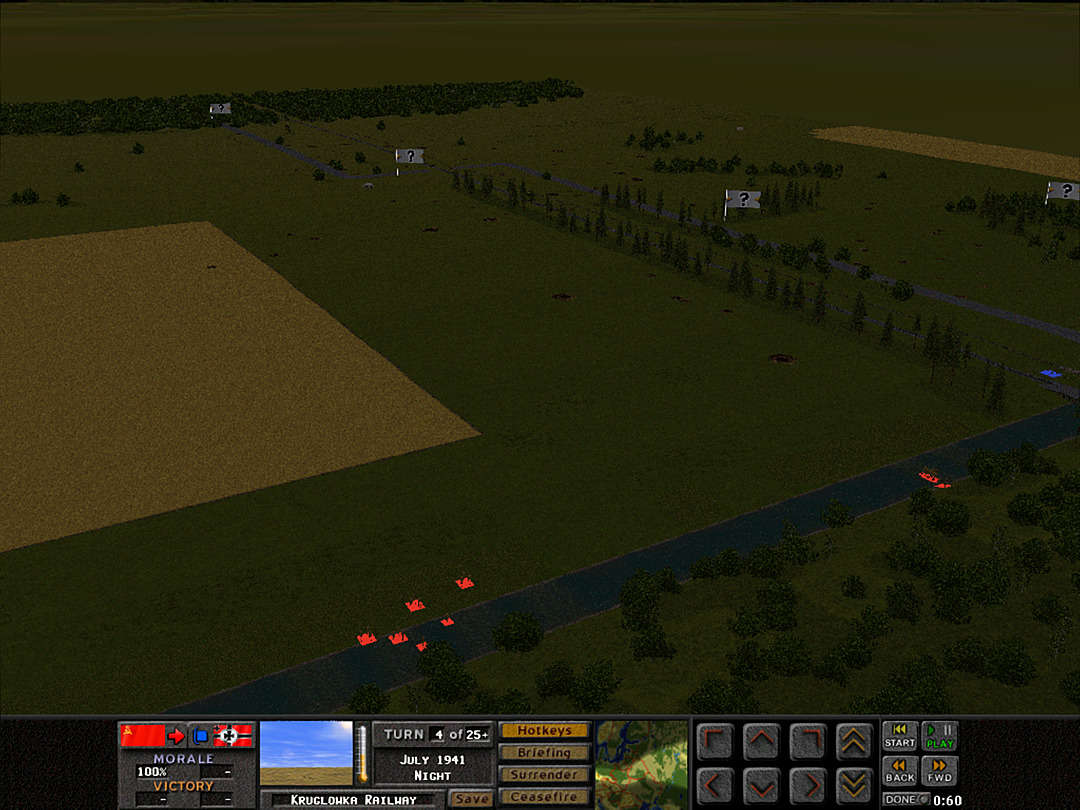 B Coy's crossings are proceeding without trouble. 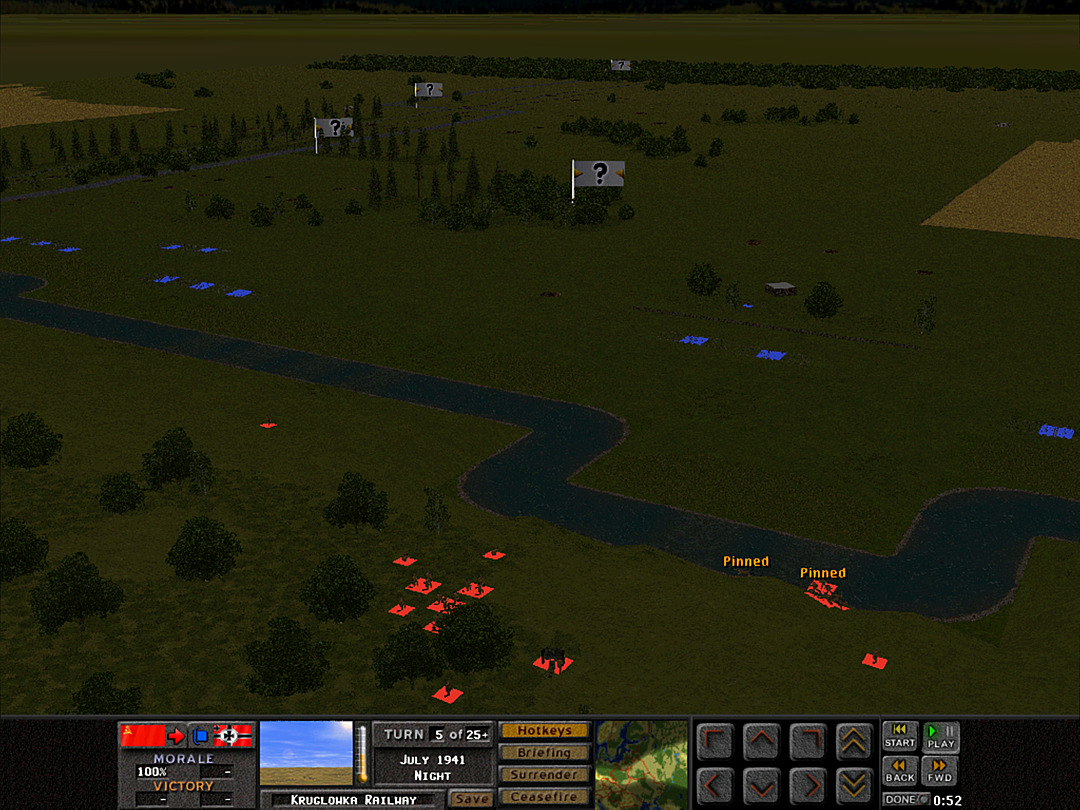 On the other side, A Coy, 3 Plt starts taking fire as they descend toward the boats, and the men freeze up. 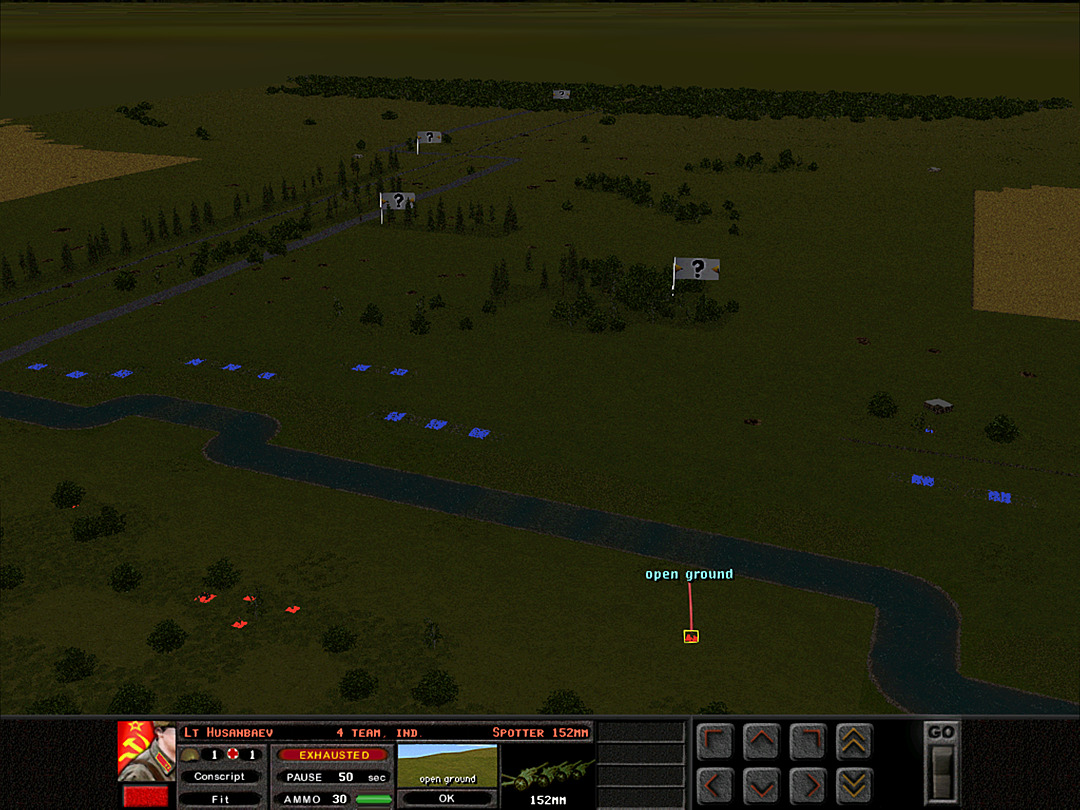 The nervous artillery spotter finds the attempt to sneak into range of the woods to be too taxing. 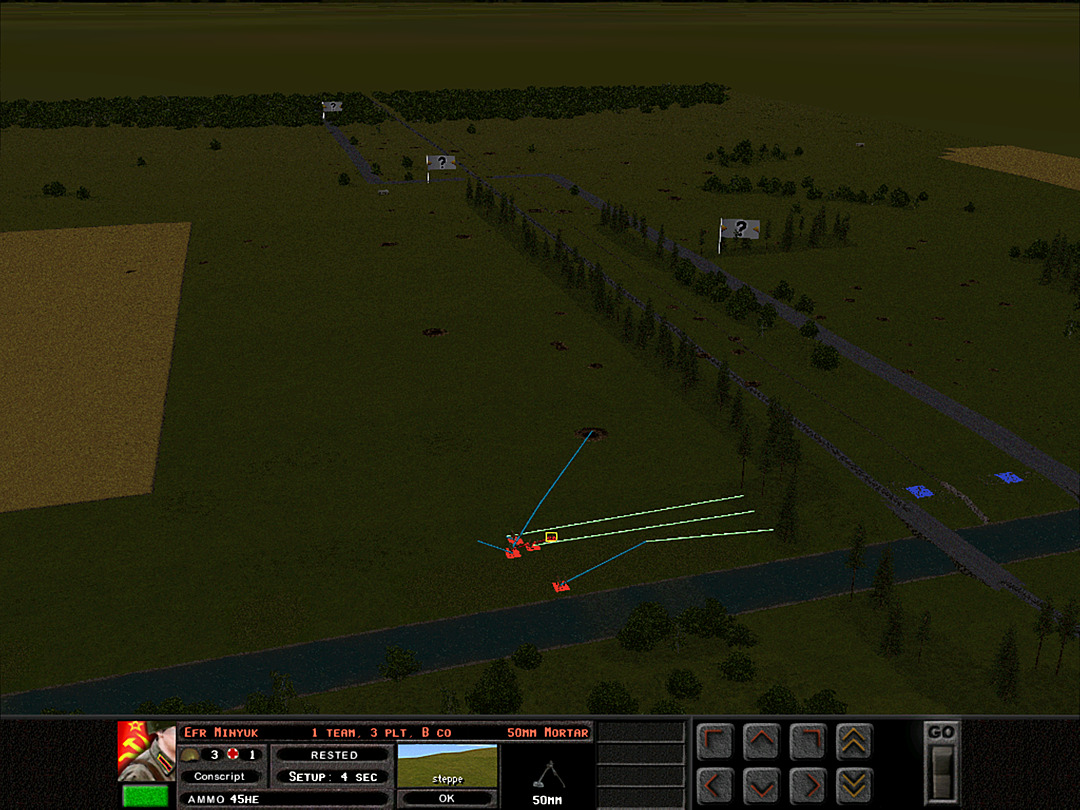 B Coy, 3 Plt gets across to dry land safely. They then make a break towards the pines.  The other platoon plans to move through the cornfield for cover.  The situation for A Coy, 3 Plt worsens as they take more incoming fire. Several squads break under the pressure, although 1 Plt is now nearing the crossing.  With the successful crossing of most of the company, B Coy, 2 Plt makes a charge directly for the bridge. If nothing else, they'll provide a distraction while the other two platoons get into position in the pines.  One of the mortars starts to hit the apparent source of the enemy gunfire. 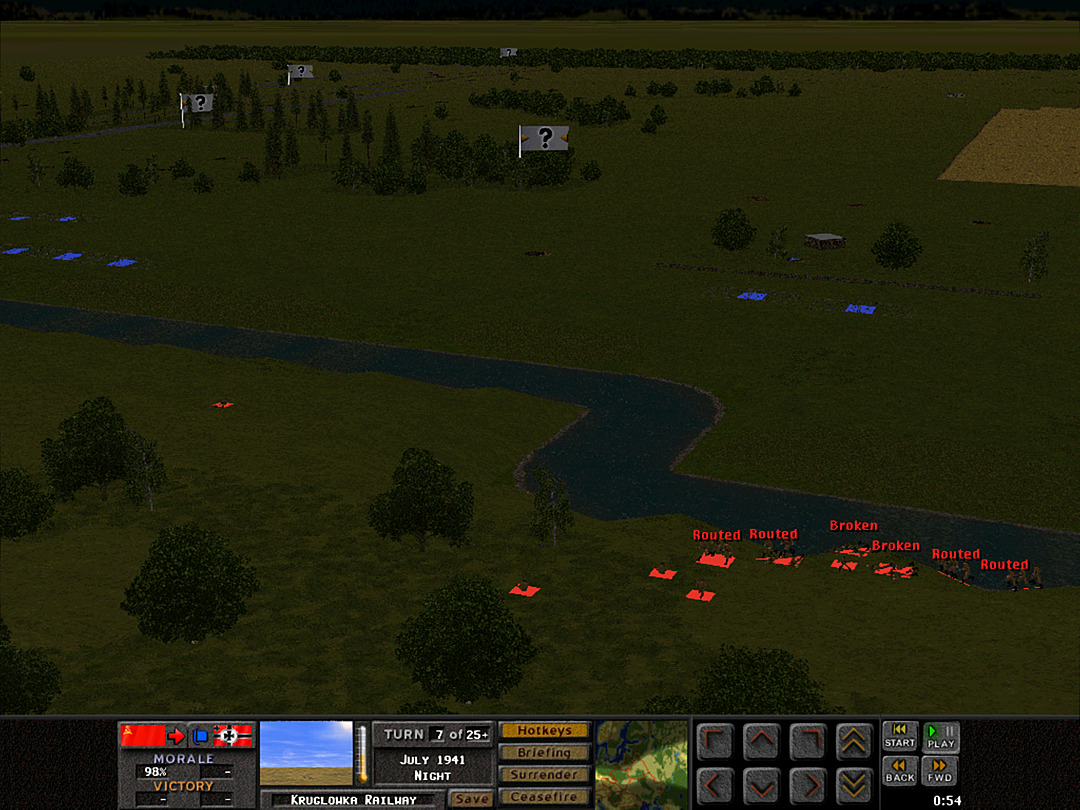 It is ineffectual, though, and 1 Plt starts to break as well. 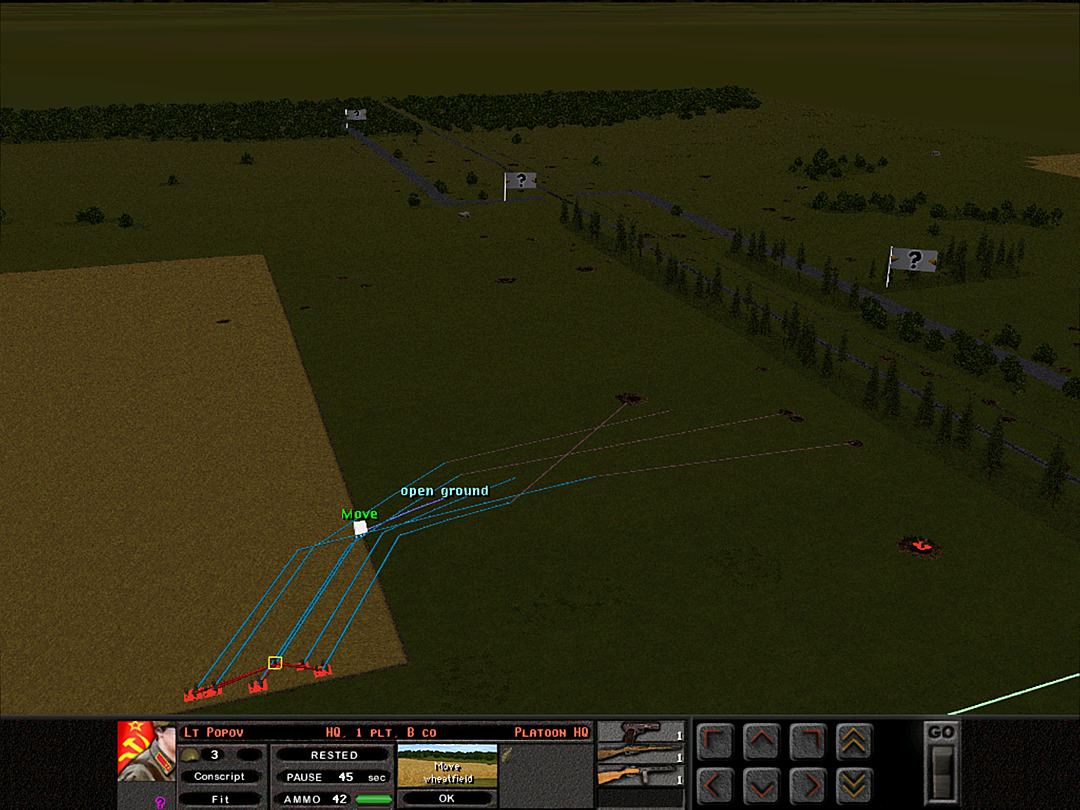 The men of B Coy, 1 Plt get to the cornfield undetected. They will use it for cover, and then be as quiet as possible while infiltrating farther back in the row of pines. 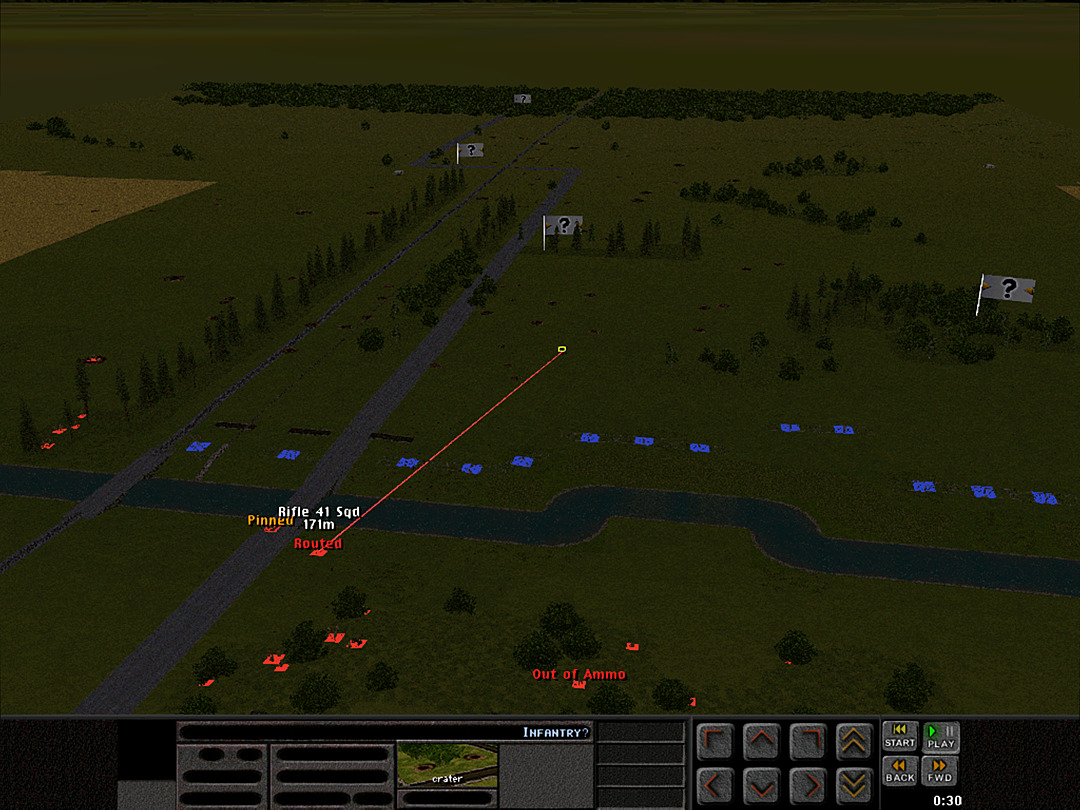 The lead squads of B Coy, 2 Plt run into trouble as soon as they get to the bridge. An enemy unit concealed in an artillery crater opens up on them. 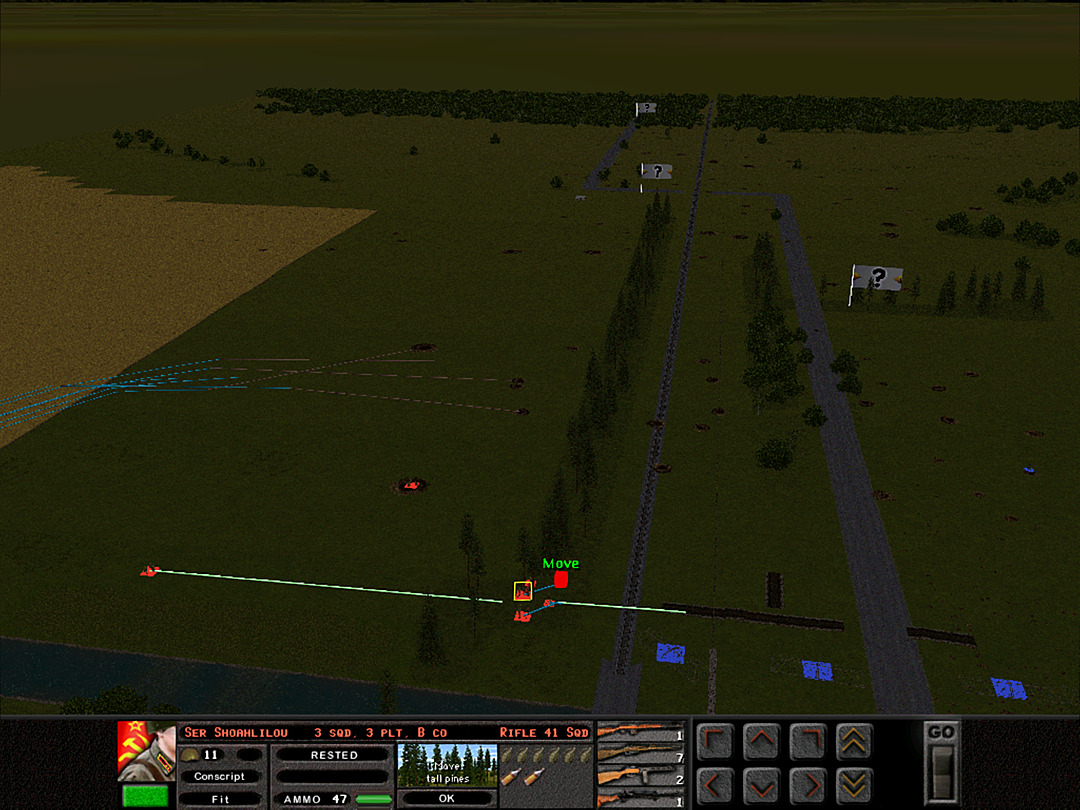 It might be enough of a distraction to allow some of 3 Plt's squads to get in the trench.  The squads of A Coy are getting nowhere, as the panicked men run back toward the woods.  The two squds of 3 Plt manage to get just to the trench before the enemy notices; they ought to be able to duck into it for safety.  Not everyone in A Coy has broken. The lieutenant of 1 Plt is the first to make it across.  With the German gunner in the crater vacillating on which unit to fire on, both 2 Plt and 3 Plt of B Coy are given a chance to recover. 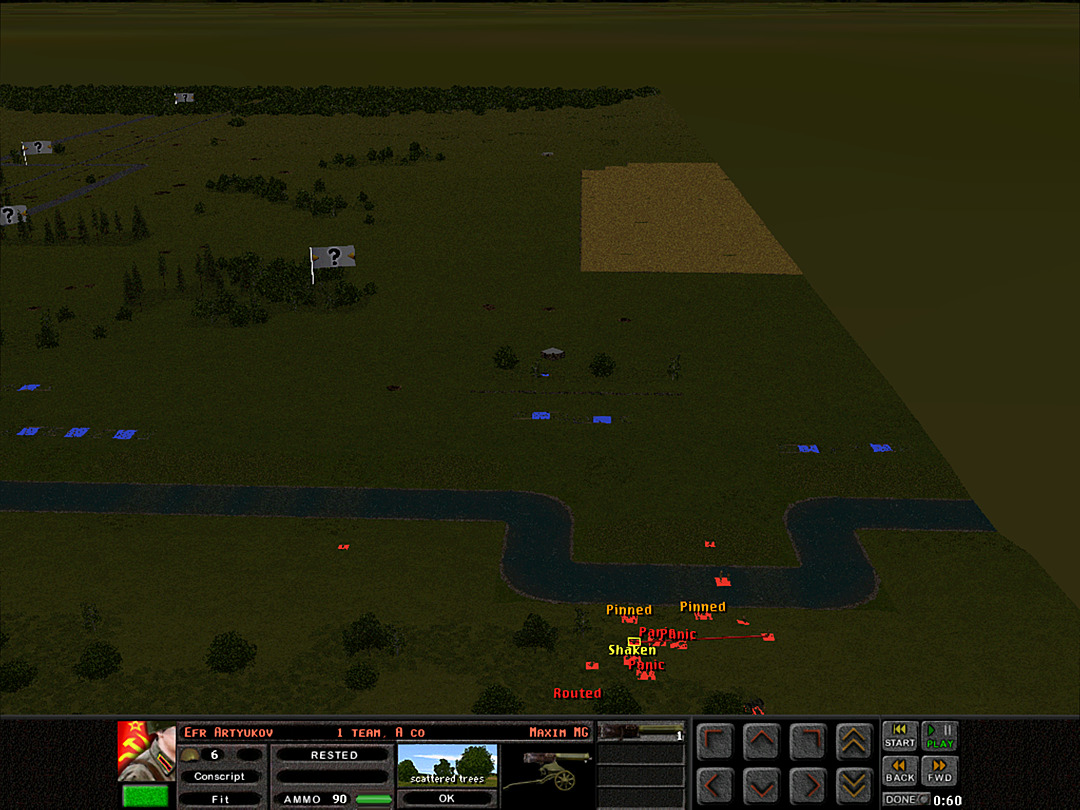 One squad of men in A Coy gets their boat to the other side behind the lieutenant. 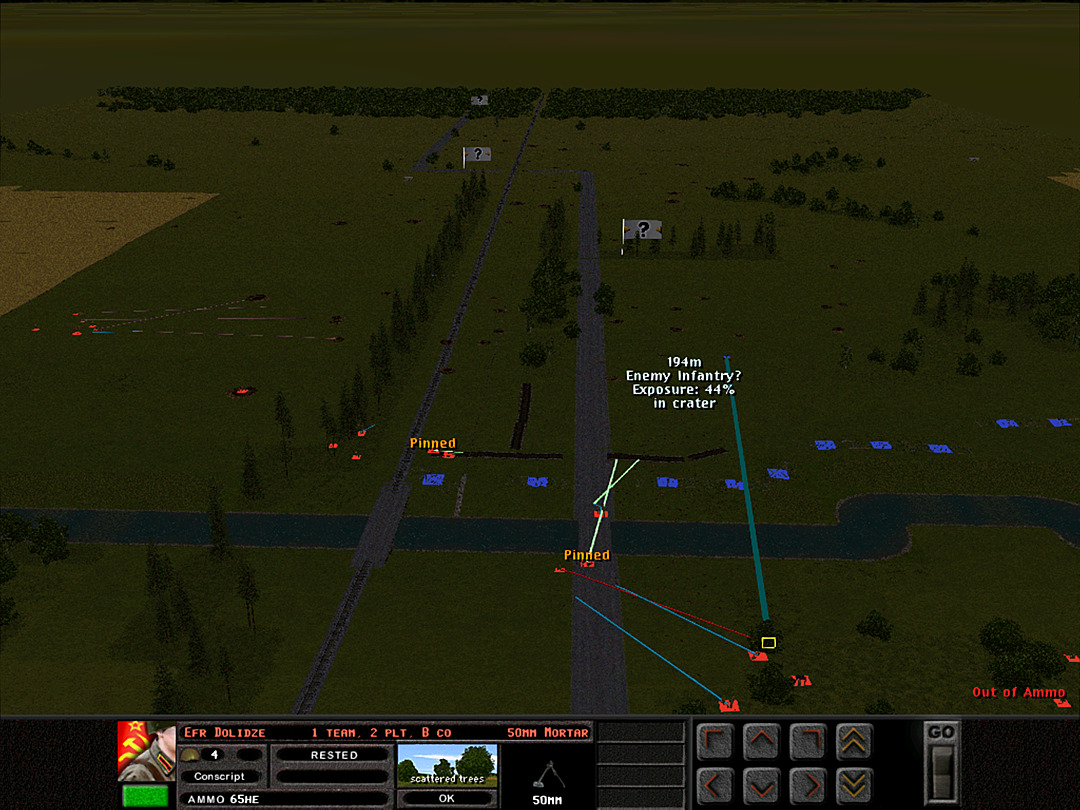 The German unit in the crater is just barely visible to B Coy, 2 Plt's mortar team, and they start lobbing shells its way. 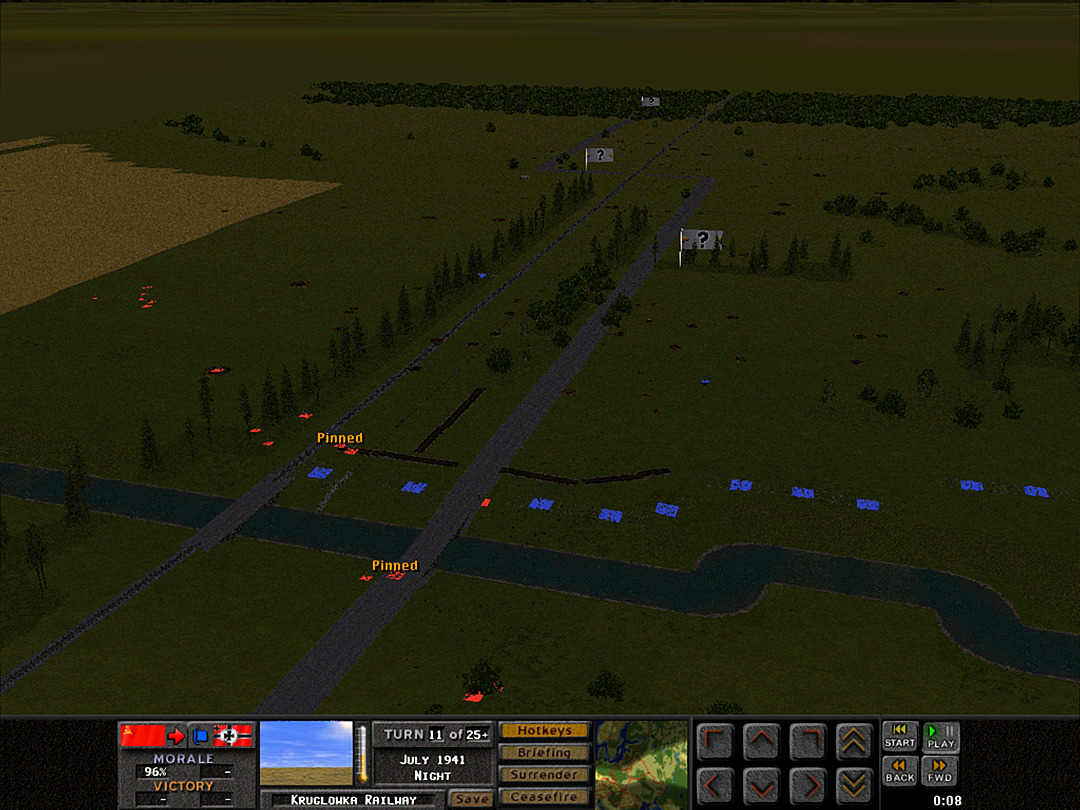 One squad from B Coy gets across the bridge, and almost reaches the trench! 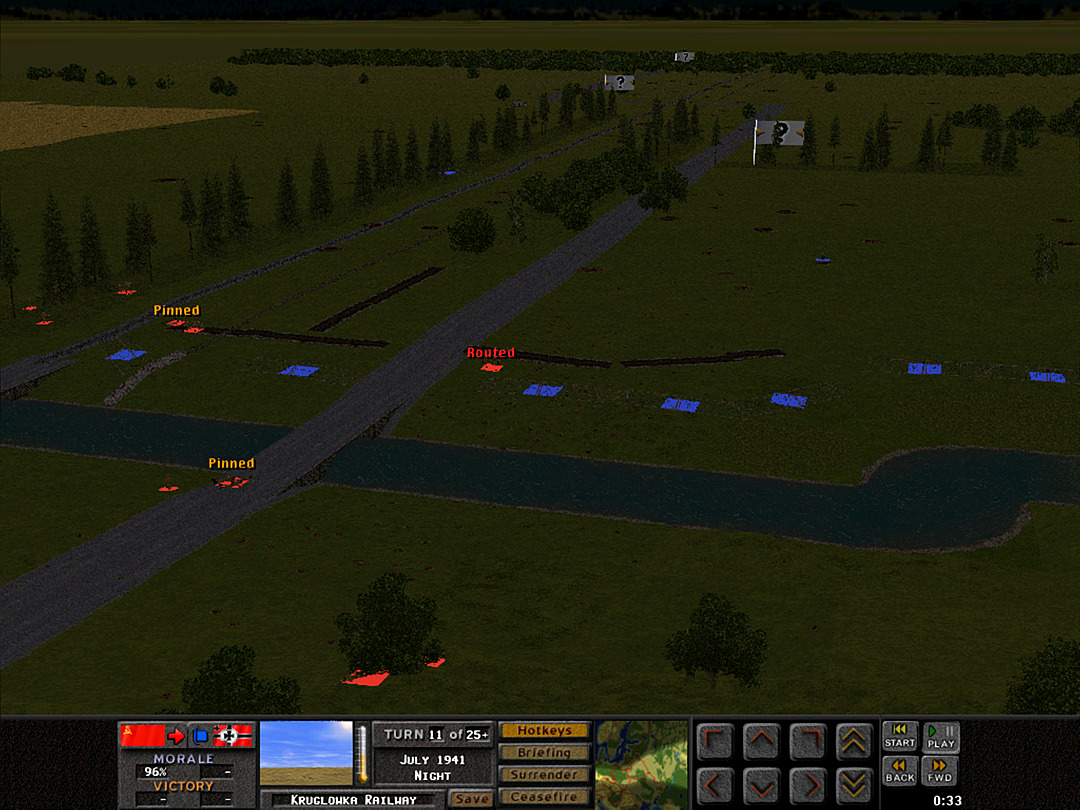 Unfortunately, they are halted just before they get there. 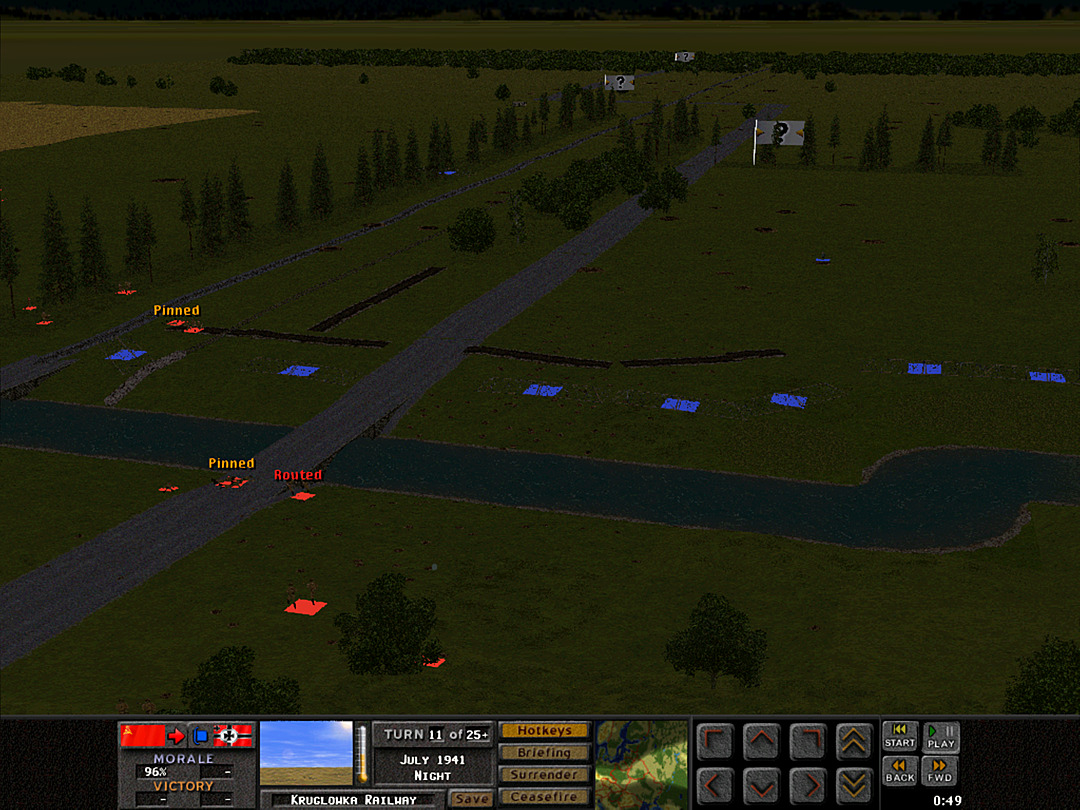 Instead of diving for the safety of the trench ahead of them, they run back across the bridge toward the woods. 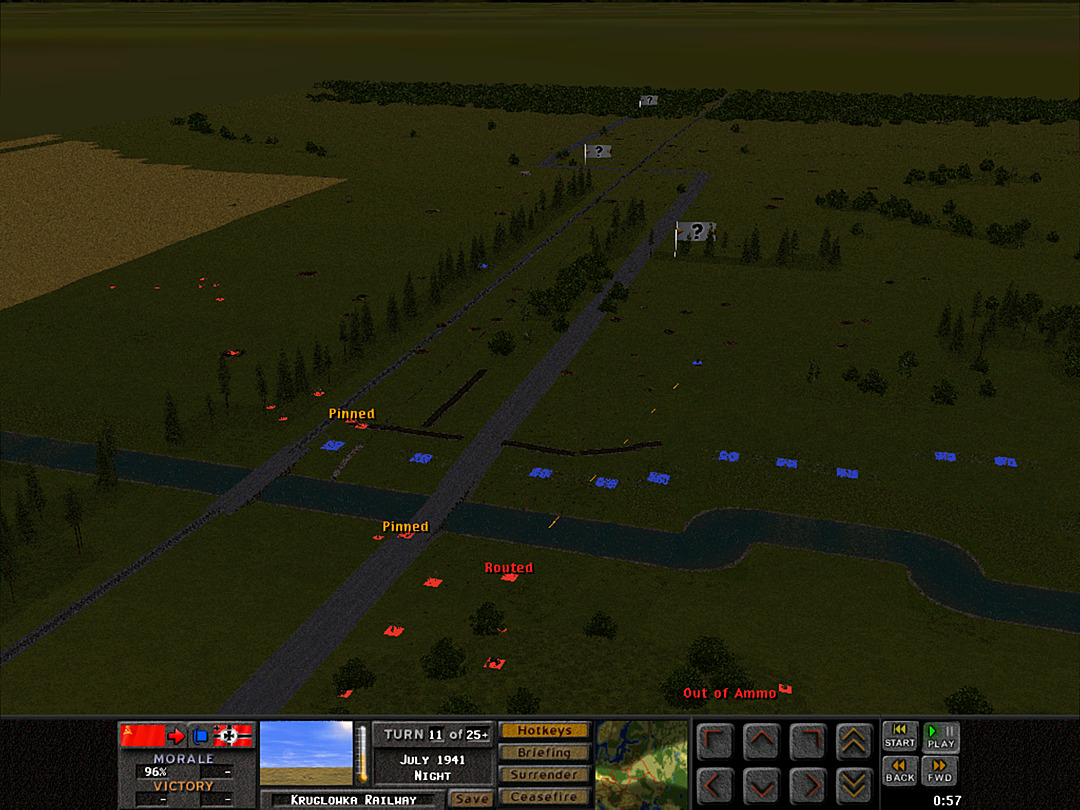 The Germans punish the squad with continued fire. 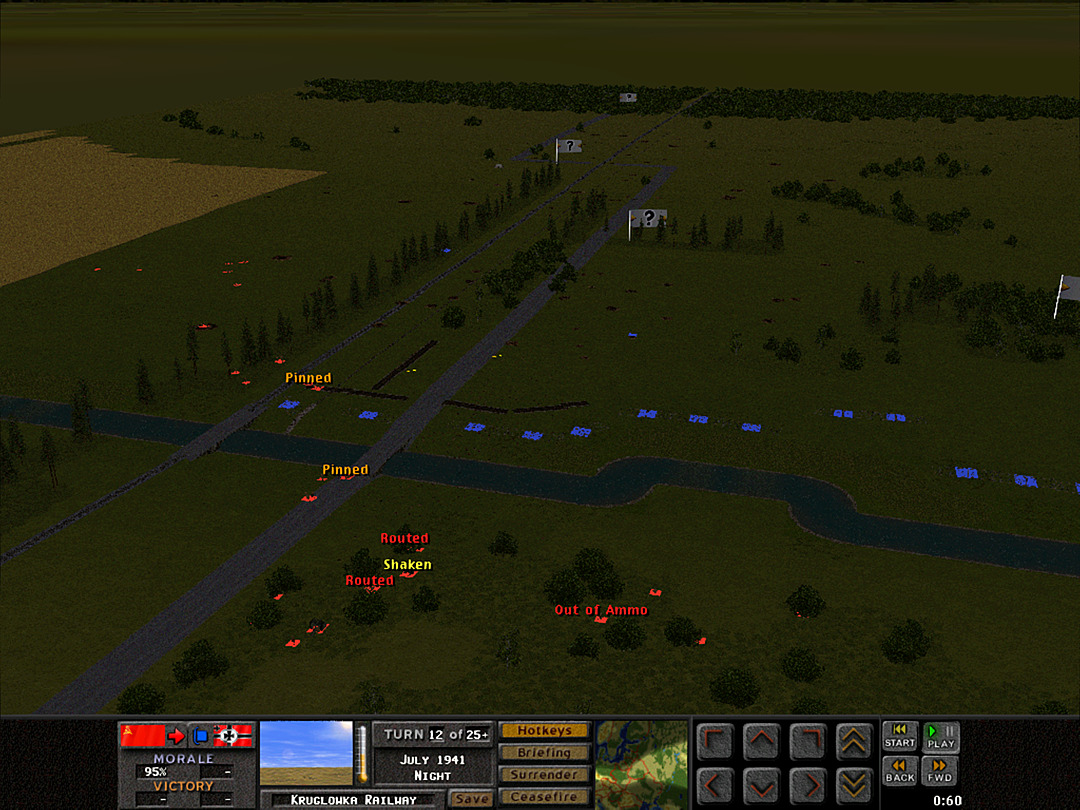 Stray fire hits the units still in the woods, and they start to duck for cover as well. Unit Highlight Rifle 41A Squad 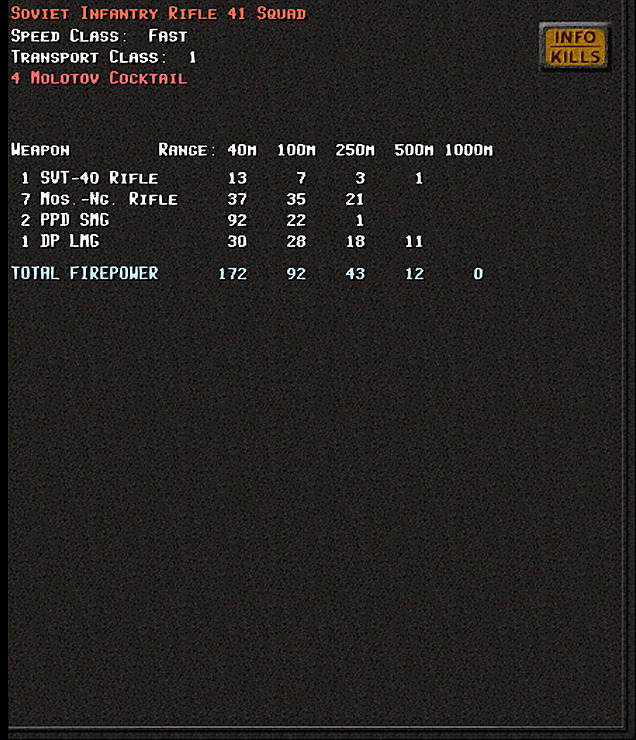  Unit Size: 11 Base Cost: 30 (Regular) Infantry units will have some randomness in their weapons, depending on the date (all of these so far are July 1941). I'll try to list the range that I've seen, although there could be some rare variation I do not spot. Molotovs carried: 1-4 Other weapons: Some units have the PPsH instead of the PPD. Since there are many infantry units, the highlight posts for them will instead go over one of the weapons they might be carrying. This one is the less-famous submachine gun, the PPD-40 The Soviet army favored the idea of arming officers who would be in combat with a decently strong weapon, and the submachine gun was chosen for that role. This weapon was designed and adopted in the 1930s, although not many were manufactured prior to the war. After the Winter War with Finland, production was ramped up. However, this gun was soon to be replaced by the PPsH and thus was only likely to be seen in combat during Barbarossa.
|
|
#
?
Jan 22, 2024 23:21
|
|
|
Operation: Kruglowka Railway, Battle 1 Battle Time: 00:13 We haven't really made good progress yet, but we are at least close to taking a good position near the rail line. On the other side, the soldiers are starting to regroup and may start actually putting pressure across the river. 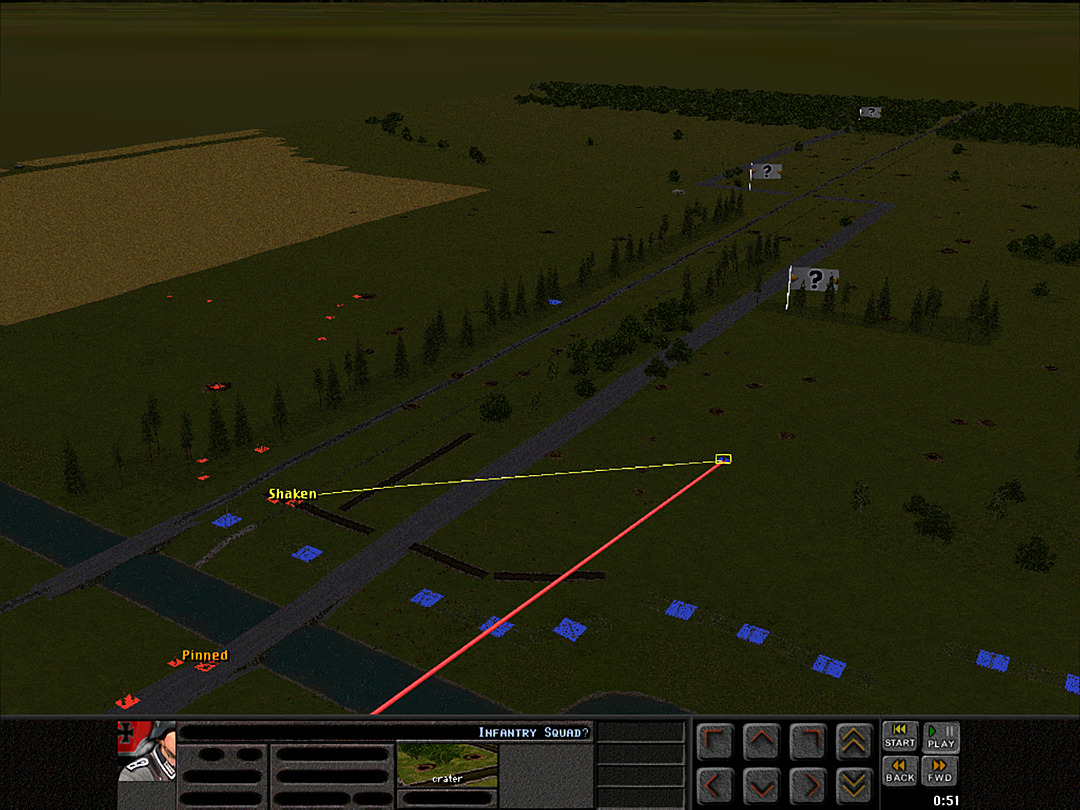 The squads that reached the trench are now able to fire back at the German in the crater. 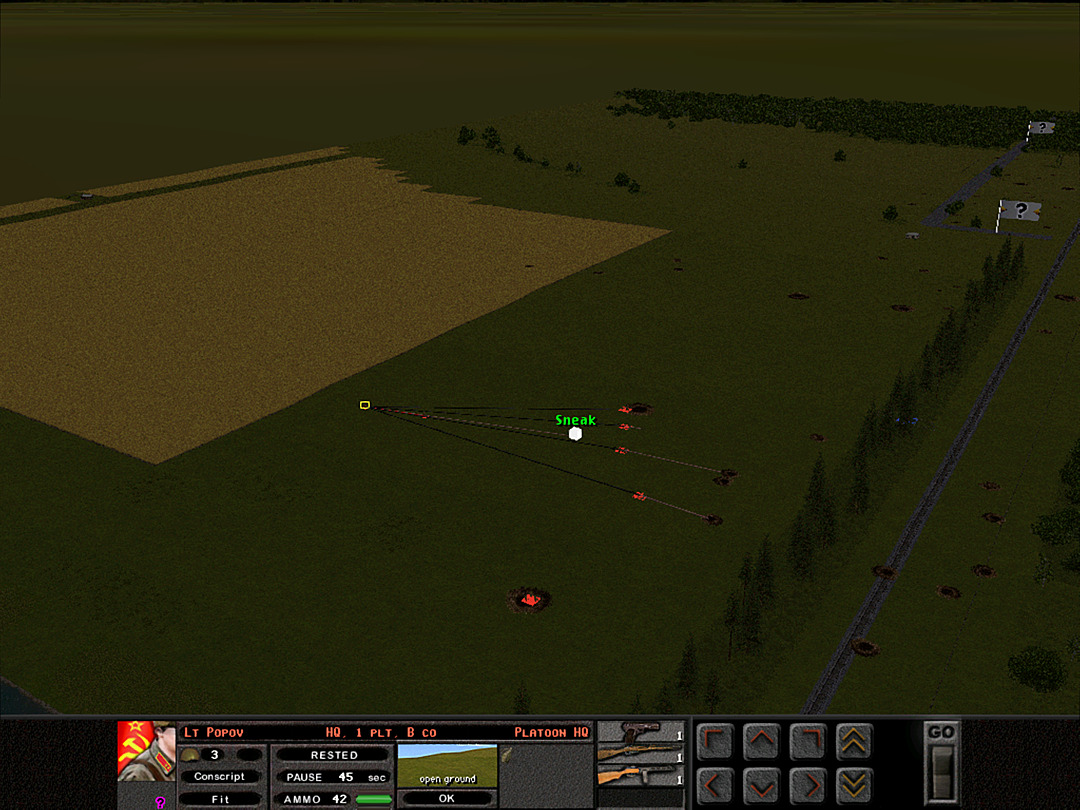 B Coy's most forward platoon has nearly reached some safer ground than in the open. They start to move more quietly and might make it to the trees undetected. 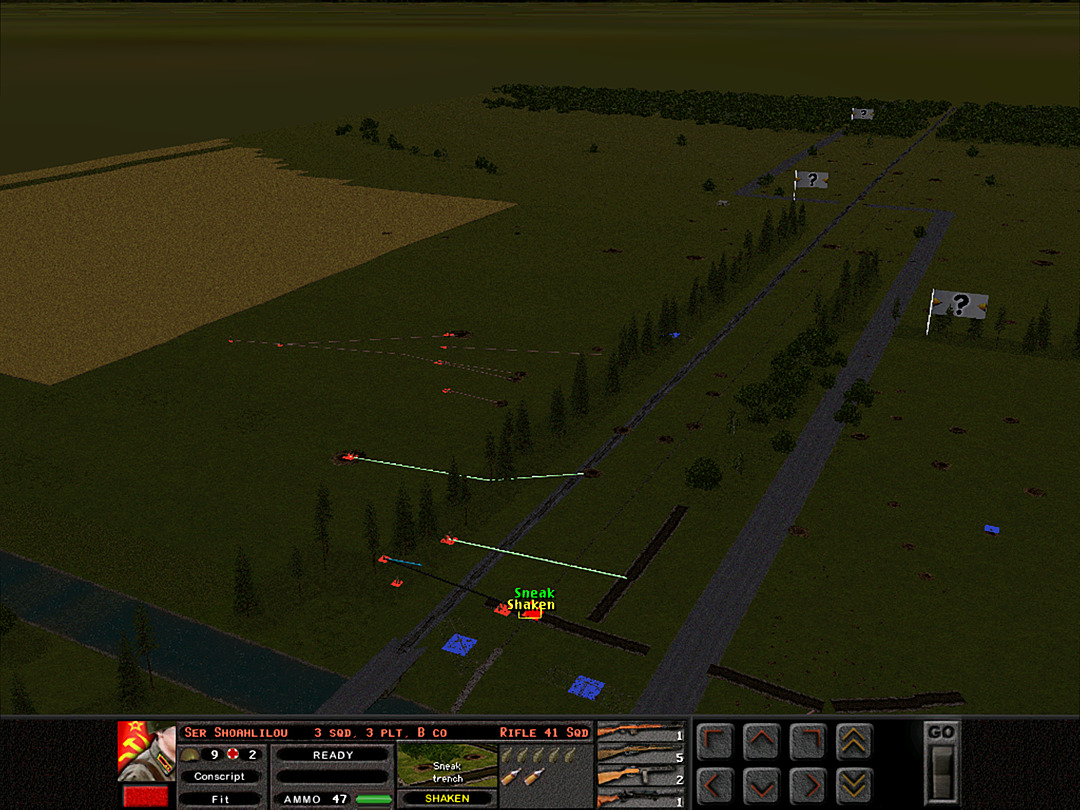 The German's trenches closest to the bridge appear to be all there for the taking.  With more pressure from our side keeping the German in the crater suppressed at least some of the time, we stand a good chance of getting B Coy, 2 Plt across the bridge. Hopefully they don't have any more units within sight of it.  A Coy almost gets another squad to make the crossing.  Another German unit is revealed when it starts shooting. If there are a lot of hidden squads, getting anyone else across the bridge might not be possible.  Now that we have a few squads across the river on the west side and they're more of a serious threat, they are drawing fire from the German position near the house.  Almost all the squads in A Coy are pulling back. One that made it across gets back in their boat and returns to our side of the river.  The artillery spotter never made it more than a few dozen meters from where he started. It's unlikely that hitting the trees would have helped us much anyway.  Most squads in B Coy, 2 Plt have now routed, and are heading back to the woods above the river.  B Coy, 3 Plt, however, is taking over the trench quite easily.  Meanwhile, 1 Plt is about to reach the pines. There's still no sign that the Germans have spotted them.  A Coy's advance is in shambles.  So far B Coy has only been engaged by two enemy units. We have claimed the trench closest to the bridge, so we're in good position to fight them.  There's still only one unit that we've found on the western side. It should be possible for some of our squads to make progress if we can keep that single unit quiet.  B Coy, 1 Plt spots an enemy trench among the pines that looks unoccupied. Taking this location would be a key forward position to hold. 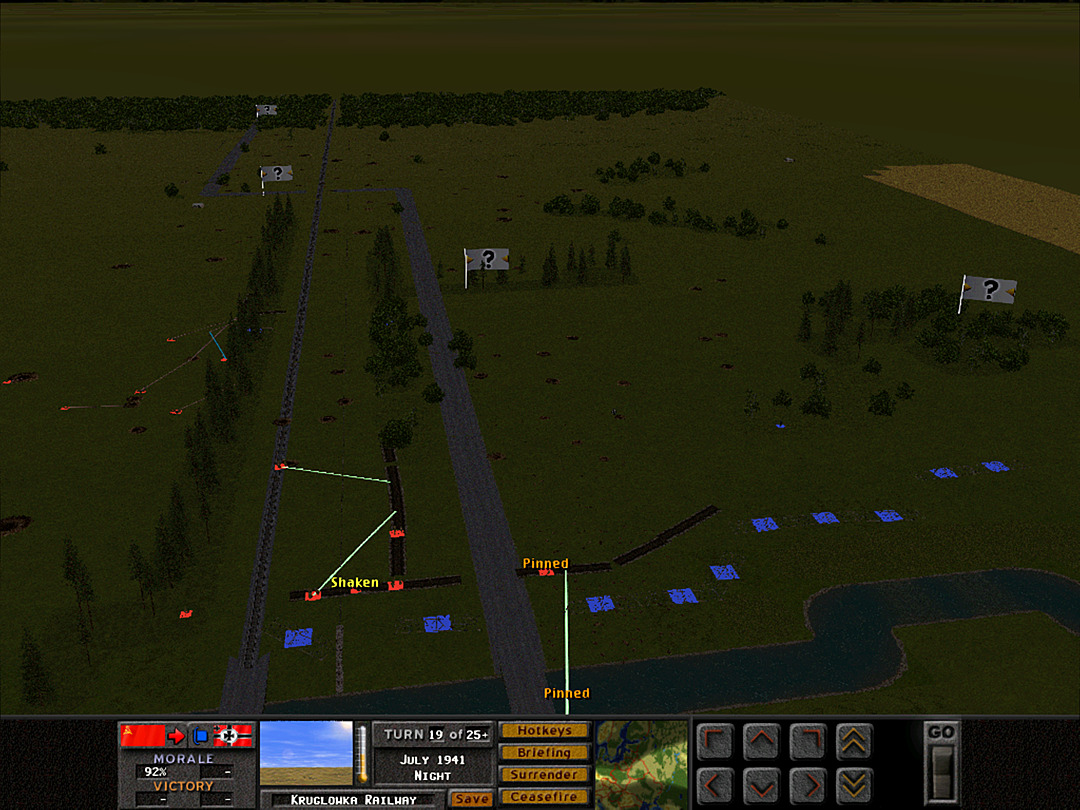 The trench that 1 Plt is heading toward is a bit far from the rest of our forces, so we'll probably want to advance B Coy, 3 Plt a bit more to connect up. 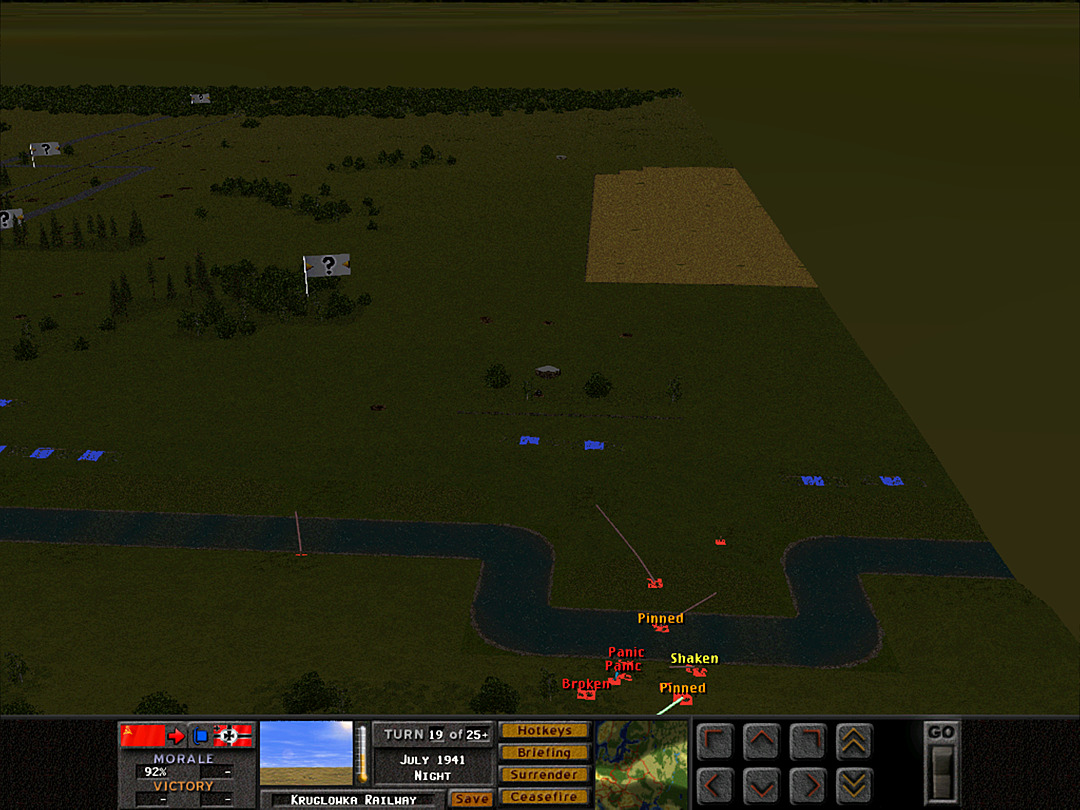 A Coy, 1 Plt might be making a bit of headway. One squad is holding on the other side, and a second is almost across. 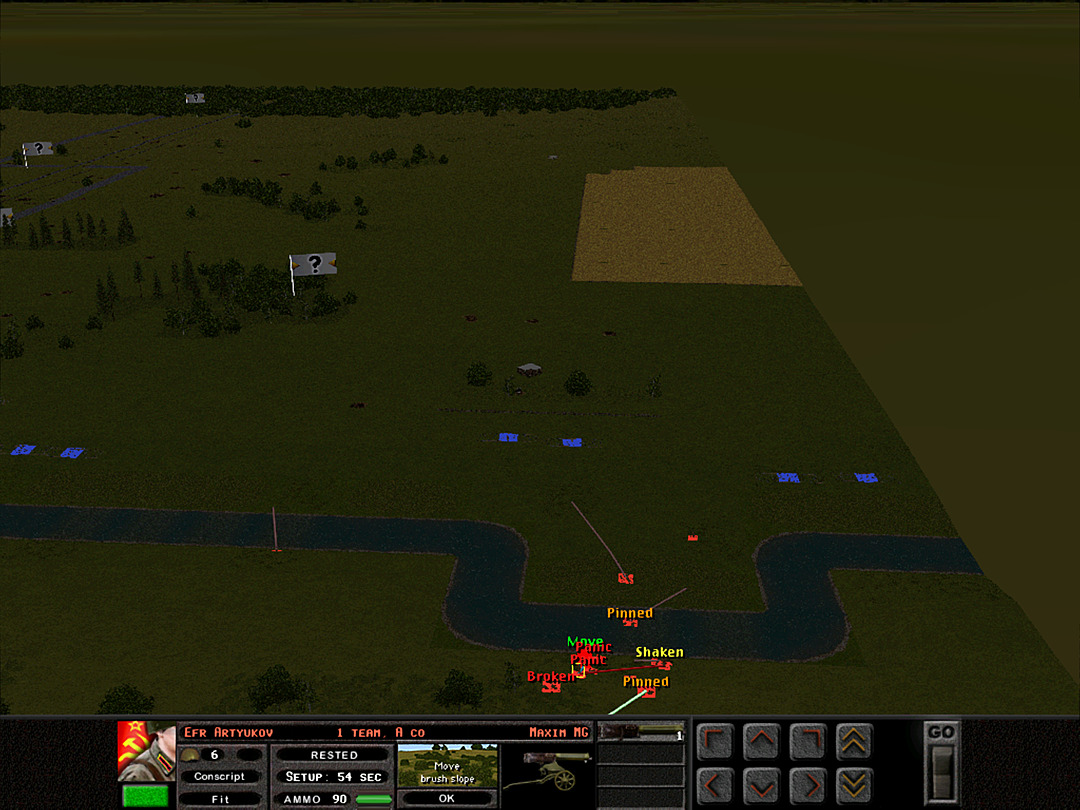 We've rolled out a Maxim gun to give support. It's a somewhat exposed location, but if nothing else, it ought to command the attention of the enemy. 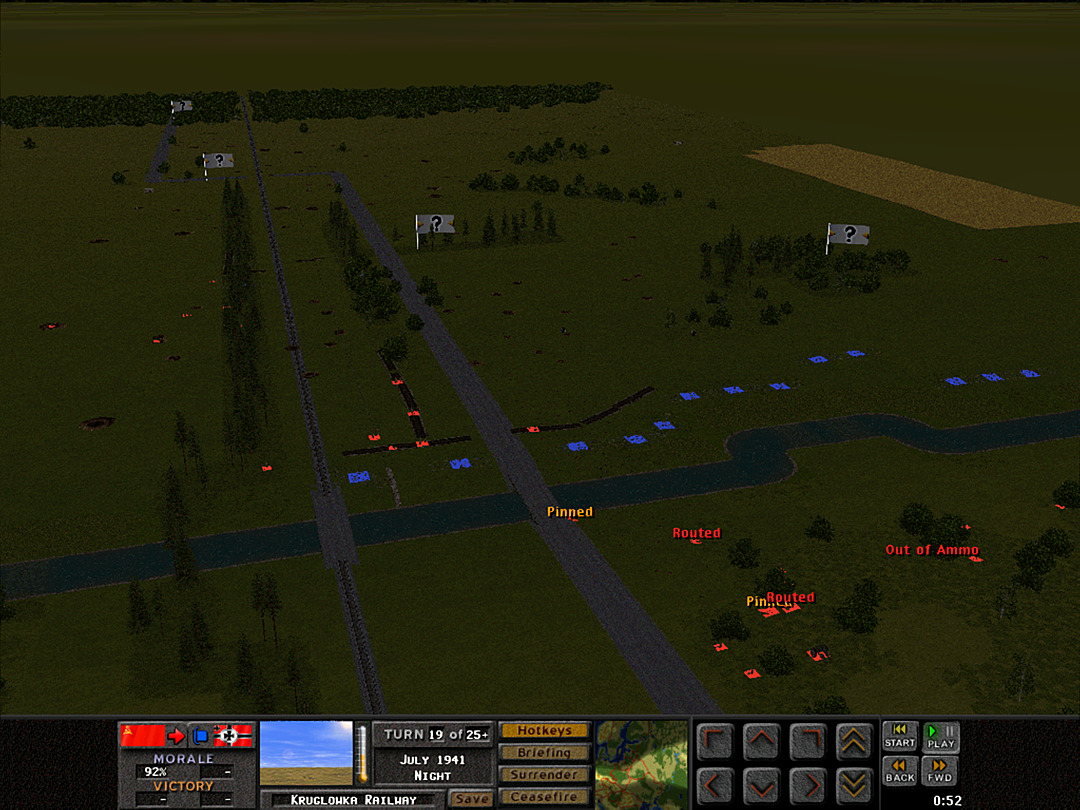 It's gone a bit quiet on the bridge side. B Coy, 2 Plt may be able to regroup. 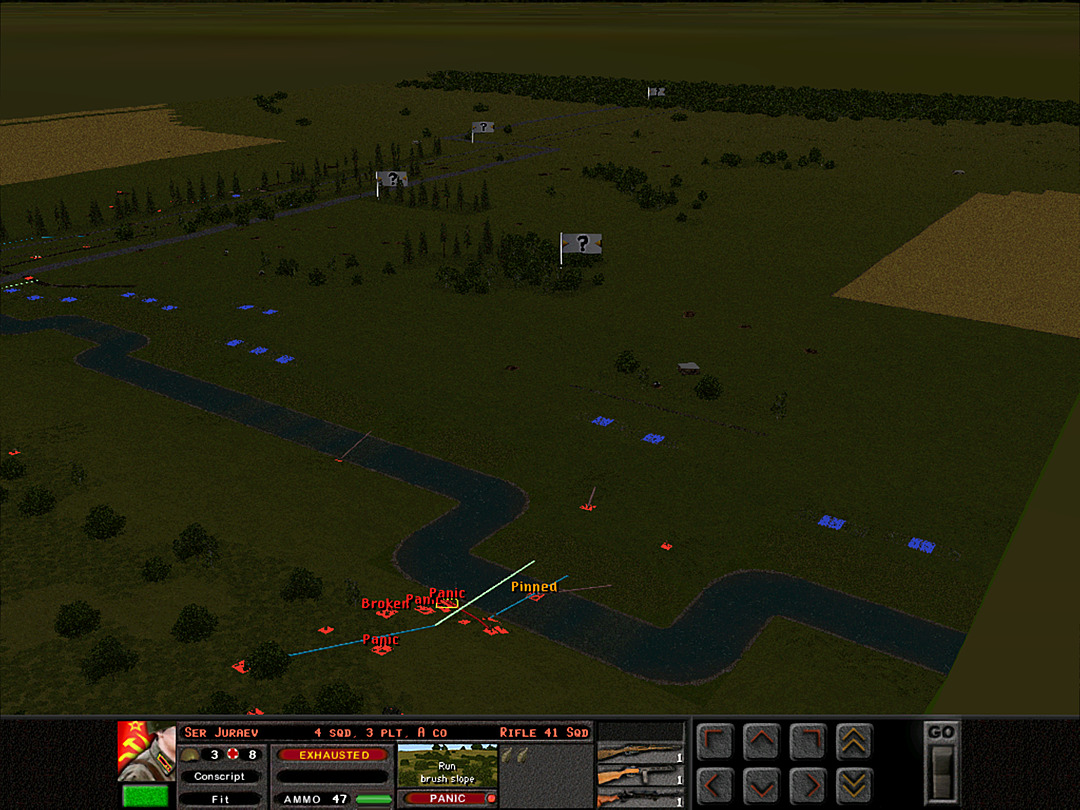 Running back and forth in a panic has left the men of A Coy, 3 Plt in a fatigued state. 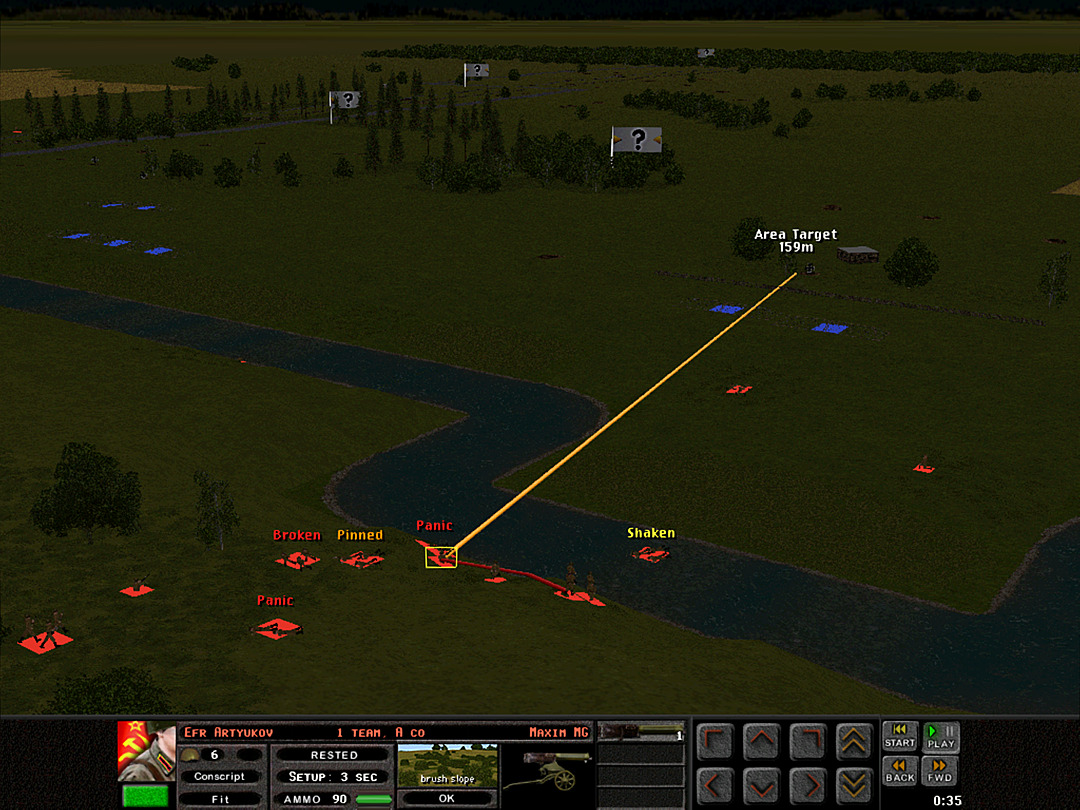 The Maxim gun has been able to set up, and is ready to lay down suppressing fire. 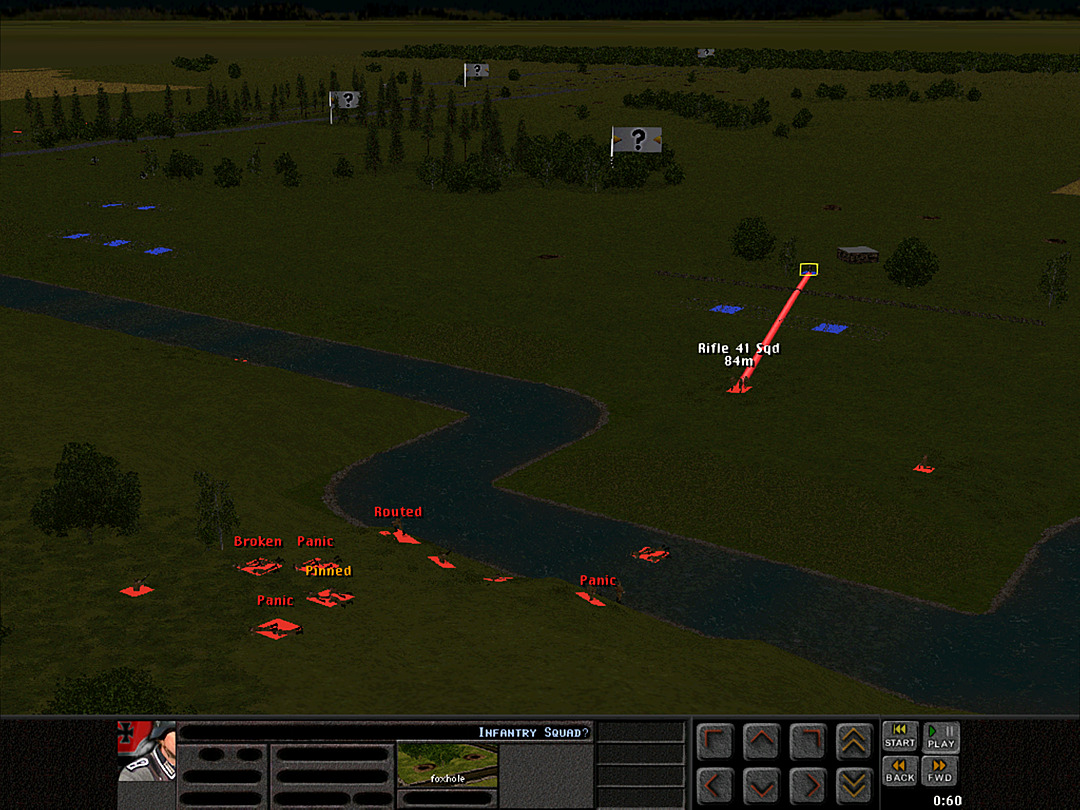 One squad from 1 Plt is getting quite close to the Germans now. Perhaps we can get them to flee.  B Coy, 1 Plt is about to take its prize. Their commanding officer is holding back for some reason, though.  With the Maxim gun firing, it looks like we're going to get another squad across the river safely!  B Coy, 2 Plt considers another attempt at the bridge crossing.  Their comrades in 3 Plt will keep the Germans busy while they make a run for it.  B Coy, 1 Plt has taken a crucial location, They decide now is the time to make some noise; it's sure to cause chaos in the enemy camp.  We're fully suppressing the German unit in the crater.  It's nearly a full platoon over the river now for A Coy, although it is a mix of squads from 1 Plt and 3 Plt.  They're going to try and rush toward a fence surrounding the farmhouse.  But the squads swiftly lose their nerve when they think they hear more enemy soldiers.  The ad-hoc platoon was able to get within sight of the farmhouse, but faltered as soon as a second enemy gun back in the clump of trees started shooting at them.  The brief charge of B Coy, 1 Plt is also broken up as it fails to have the desired effect.  Far from being surprised, the Germans start shooting almost as soon as our men made a move.  The few squads that completed the crossing rush back to the river. The captain orders the men to retreat. The crossing of A Coy has ended in failure.  The two squads in B Coy, 1 Plt that had charged ahead start to run back through the trees.  The panic is contagious, and before long half the platoon is fleeing in confusion. Several German squads were awaiting us back here, although why they let us claim the trench unopposed is a mystery.  It makes no difference, as the men decide that being in a trench isn't safe enough for them, and they run off into the open field.  One positive development has occurred, though � a second squad from 2 Plt made it across the bridge.  B Coy, 3 Plt hasn't quite linked up with 1 Plt, but by making use of craters for cover, they are advancing.  Even A Company's retreat is a difficult affair, as many men no longer even want to move. 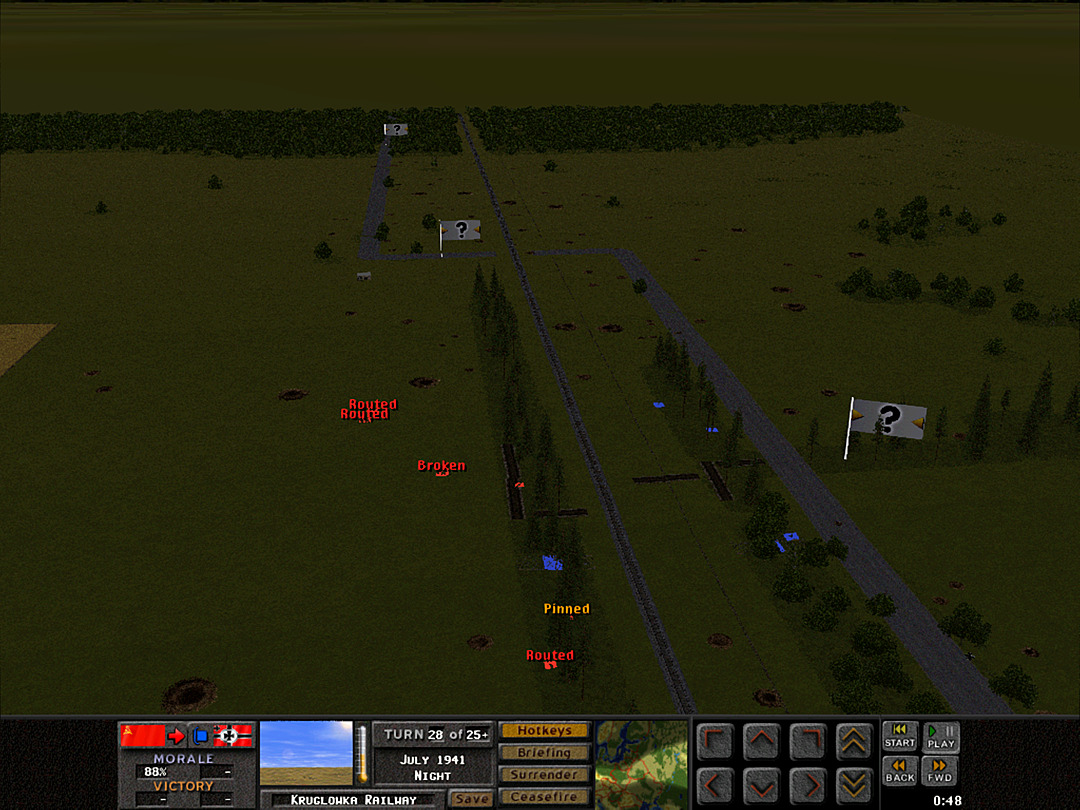 Eventually everyone but the mortar team in B Coy, 1 Plt decides to get out of the trench. 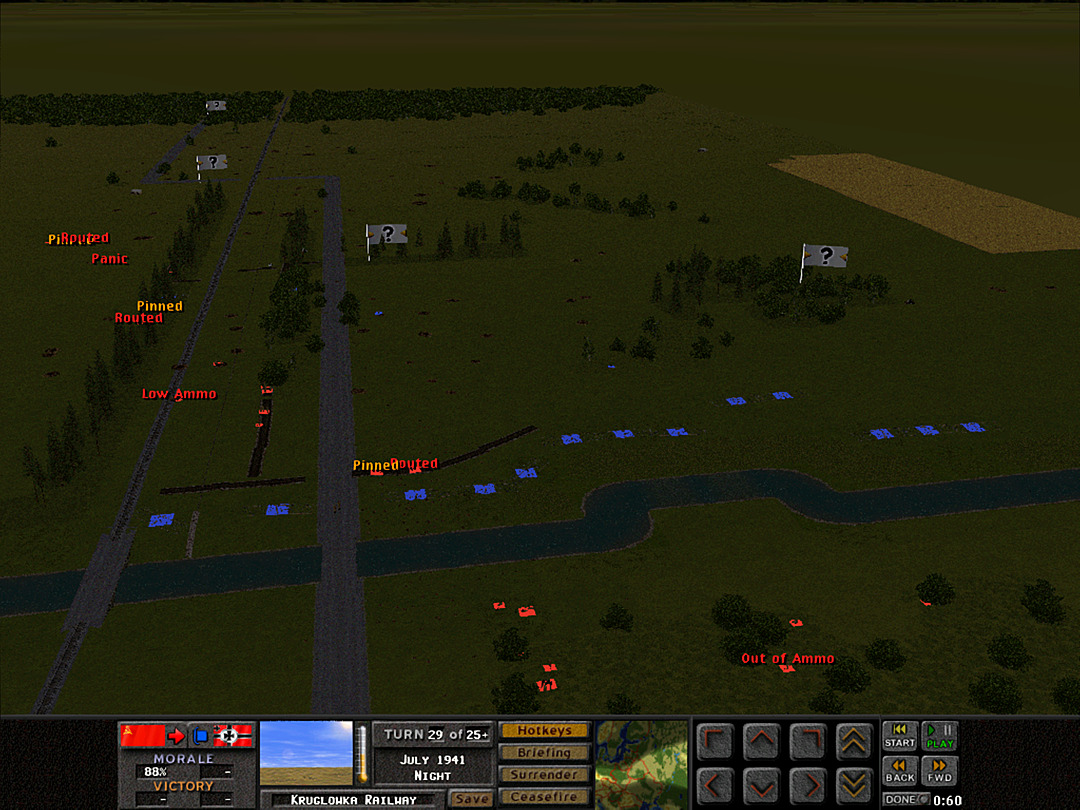 The two forward squads from B Coy, 2 Plt that reached the trench are starting to get nervous about being away from the rest of their unit, and consider running back as well.  Before they can give up the position, however, the battlefield falls silent. The fighting has stopped for the night. Unit Highlight T-40 Tankette 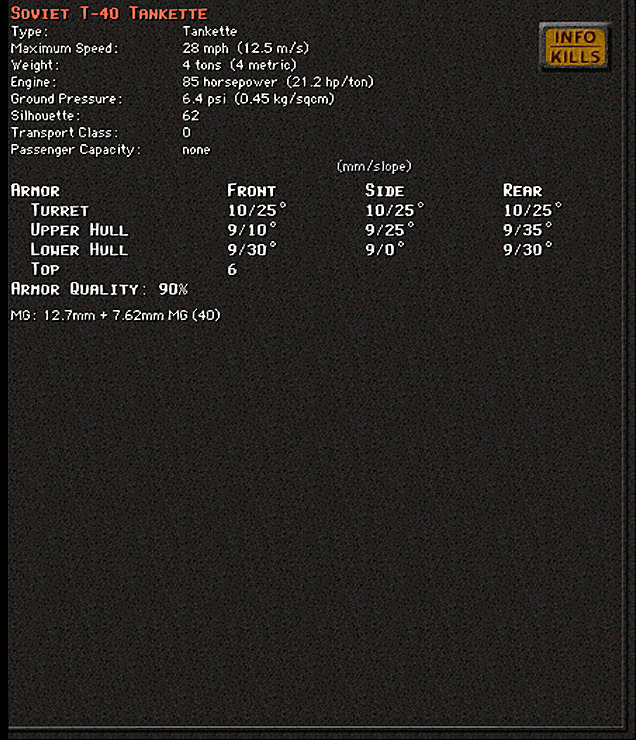 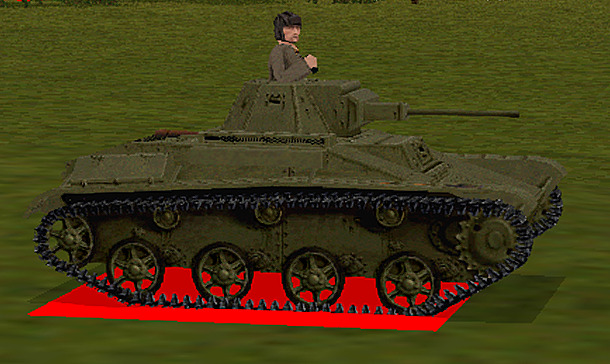 Unit Size: 2 Base Cost: 29 The last of the amphibious 'scout tanks'. Having refined the concept of the light amphibious tank in the 1930s, the Soviets finally produced the T-40, which went into production in 1940. It boasted better speed, reliability, and amphibious characteristics than the previous T-37 and T-38. Most importantly, its main weapon was a 12.7mm machine gun that could actually inflict some serious damage to opposing light vehicles. However, the invasion by the Germans in 1941 caused manufacturing to be aborted, in favor of less specialized tanks that were easier to build. The T-40 turned out to have a fairly limited usefulness, and was almost never actually used as a scout tank as intended.
|
|
#
?
Jan 25, 2024 23:37
|
|
|
Oof, hate it when morale forces you out of a good spot. Could you have just hid out across the river in order to deploy closer during the day?
|
|
#
?
Jan 27, 2024 10:01
|
|
|
habituallyred posted:Oof, hate it when morale forces you out of a good spot. Could you have just hid out across the river in order to deploy closer during the day? We probably would have been fine if they had simply snuck into the one trench and stayed put. I got greedy and paid the price. This operation is definitely going to showcase how troop quality affects performance. I have played partway through this one on the German side before, and they are able to do a lot with not much at all.
|
|
#
?
Jan 28, 2024 03:50
|
|
|
Operation 3, Battle 2 of 8 Operation: Kruglowka Railway Time: Mid-day Skies: Clear Ground: Very Dry Temp: Warm Wind: Windy N Our night attack met with some success, if not as much as we'd hoped for. Surprisingly, we made progress by heading straight across the bridges. One platoon got far into the enemy lines, only to be disrupted once they faced actual resistance. With the light of day giving the enemy a much better view of our positions, we likely need to be more cautious. A counterattack of some sort is likely, so unless we see an opportunity to advance, holding on to our gains will be the order of the day.  The failure of the night crossing on the right has resulted in A Coy being redeployed to the center, where we have our best position. B Coy, 2 Plt has fully moved up into the first trench, and one of the AT guns set up there as well. The remainder of the guns are spread out in a line in most of the woods, although one gun is guarding the large open space on the west, where our forward platoon remains.  The squads of B Coy, 1 Plt ended up scattered far from the trench. Rather than regrouping, they dug in for the night in their own separate foxholes. Their goal today is to get back into the trench. The rest of B Coy will push a bit forward to connect with them, and if it turns out to be safe, A Coy will move in to fill the trenches as well. [I am fully aware that I could have moved all of these units up to more forward locations; some of my set-up is what I feel is more 'natural' based on the flow of the operation.]  The units of B Coy were fully prepared for an artillery strike on the trench at the bridge, but it turns out the enemy is going for the smaller in number, but possibly more threatening, forward squads.  Paradoxically the barrage might end up helping us, as it is forcing the men to take action. They might well run back into the trench we want them to hold.  That still isn't particularly easy, as the enemy is taking shots at them as well. On the other hand, it's allowed the lieutenant to get back to the trench, and from there he should be better able to gather his men together. 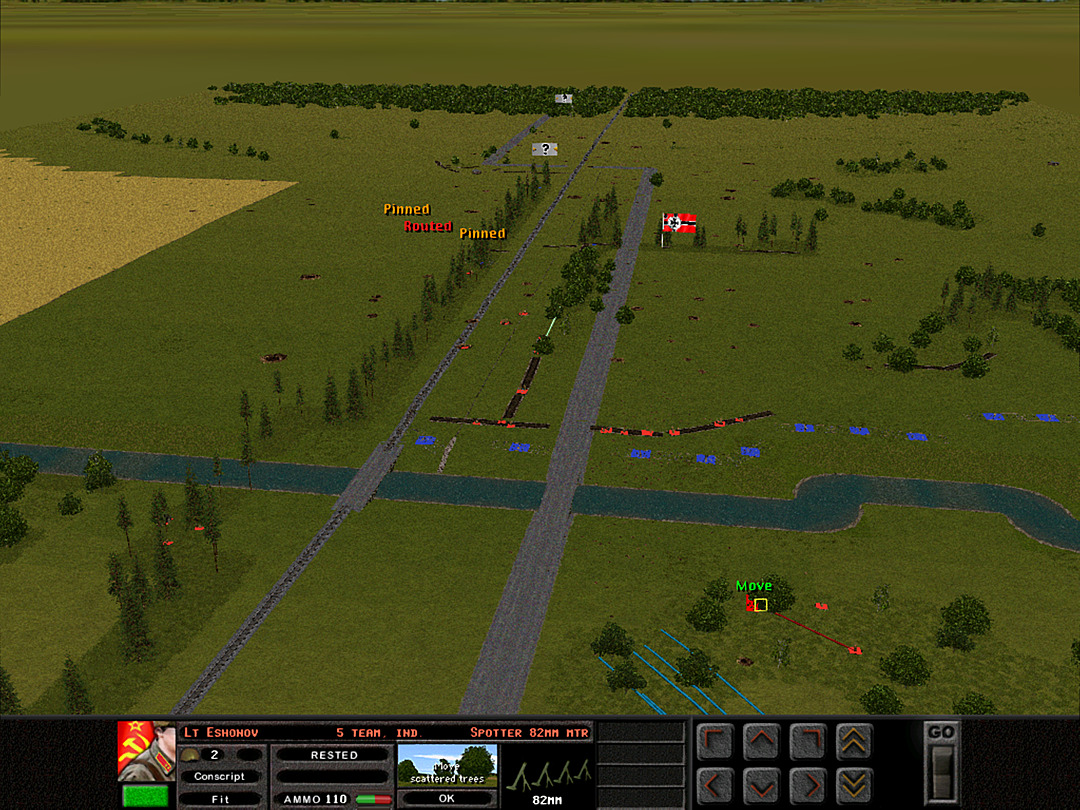 We've seen clear signs of the Germans in the middle trench. We're going to drop a smoke barrage to block their view, and that might just give us enough of a window for one or two platoons in A Coy to advance. [ The objective flag flips to German only when we are close enough to observe units near it. The other objectives are almost certainly German-controlled as well, it's just that we have not seen the units controlling them. ] 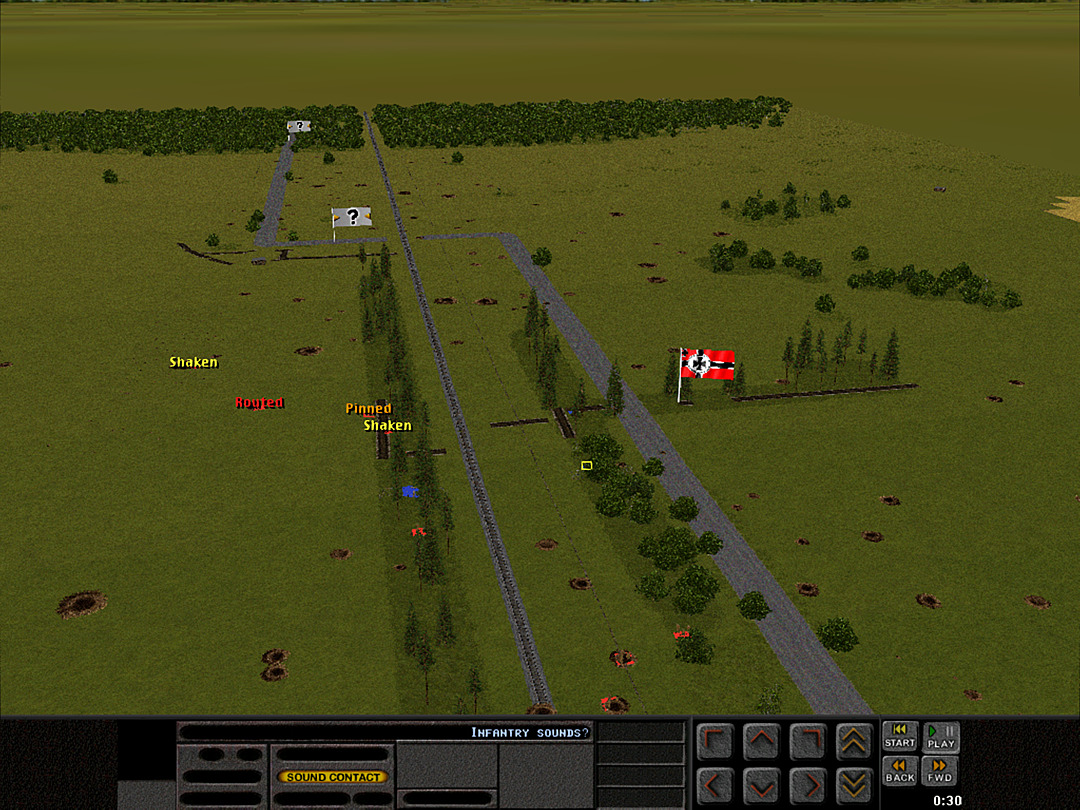 More German squads have crawled forward to halt our advance. 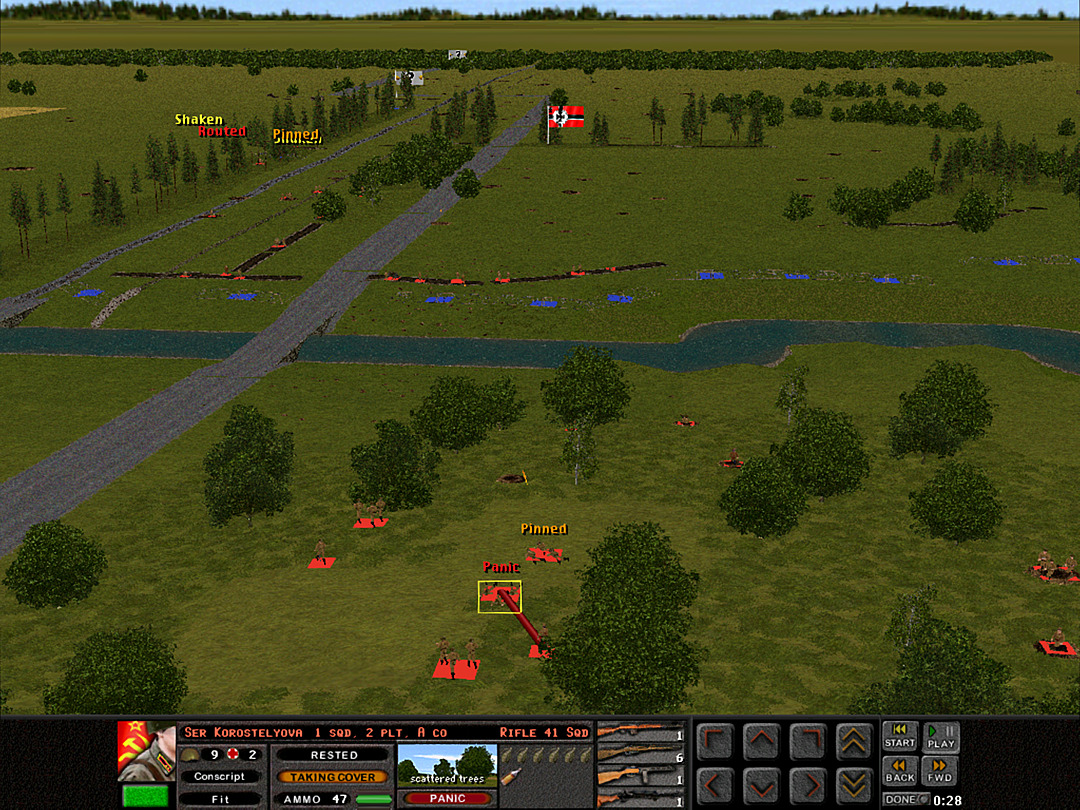 A machine gun somewhere in the German lines takes a potshot at the woods, and it causes several squads to go into a panic.  We order a strike on what is probably the most difficult concentration of enemy units. It's a bit dangerously close to our own men, but hopefully they will be able to duck down in the trench when the shells start landing.  The reconsolidation is indeed going well for B Coy, 1 Plt. Although they have to constantly dodge bullets, two squads are now back in the trench with their commanding officer, and a third has shifted to a shell crater closer to the trees.  B Coy, 3 Plt has moved forward a bit, and they too are now attracting the attention of the enemy.  A Coy prepares to cross the bridge. Hopefully the smoke does its job of blocking their move from German eyes. 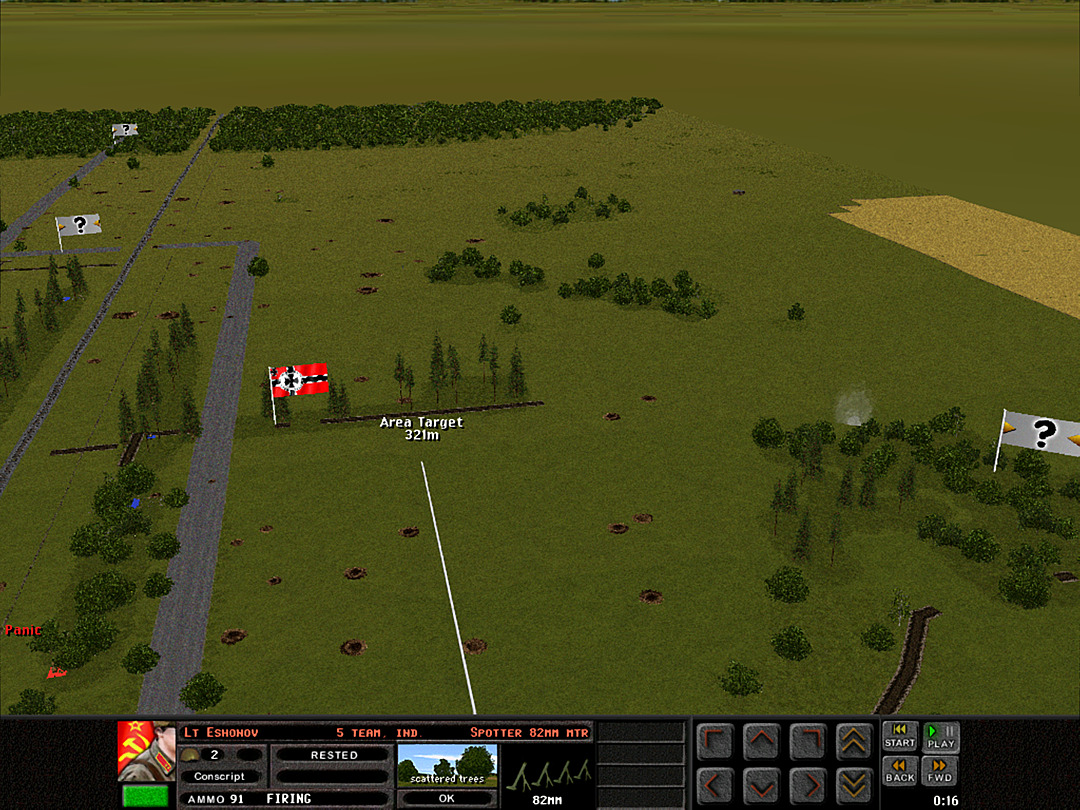 There's a slight moment of panic as the first shell lands way off target. 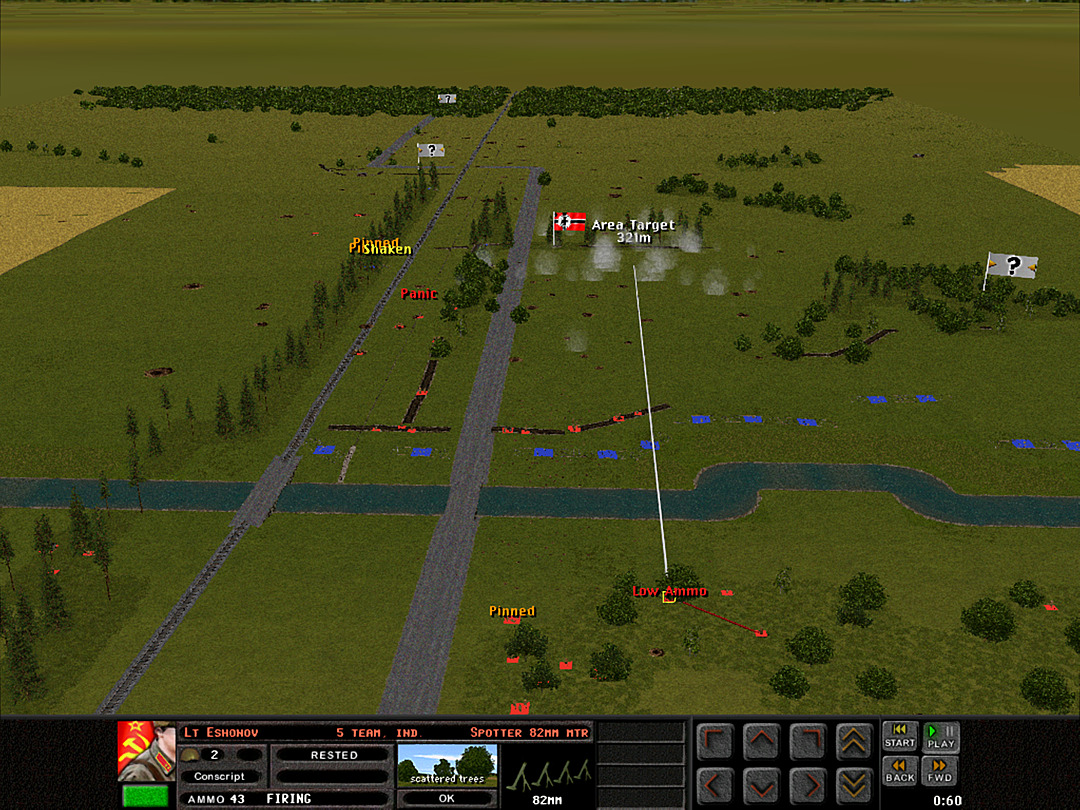 But the main strike comes in with more accuracy, and soon the trench is bathed in white smoke. 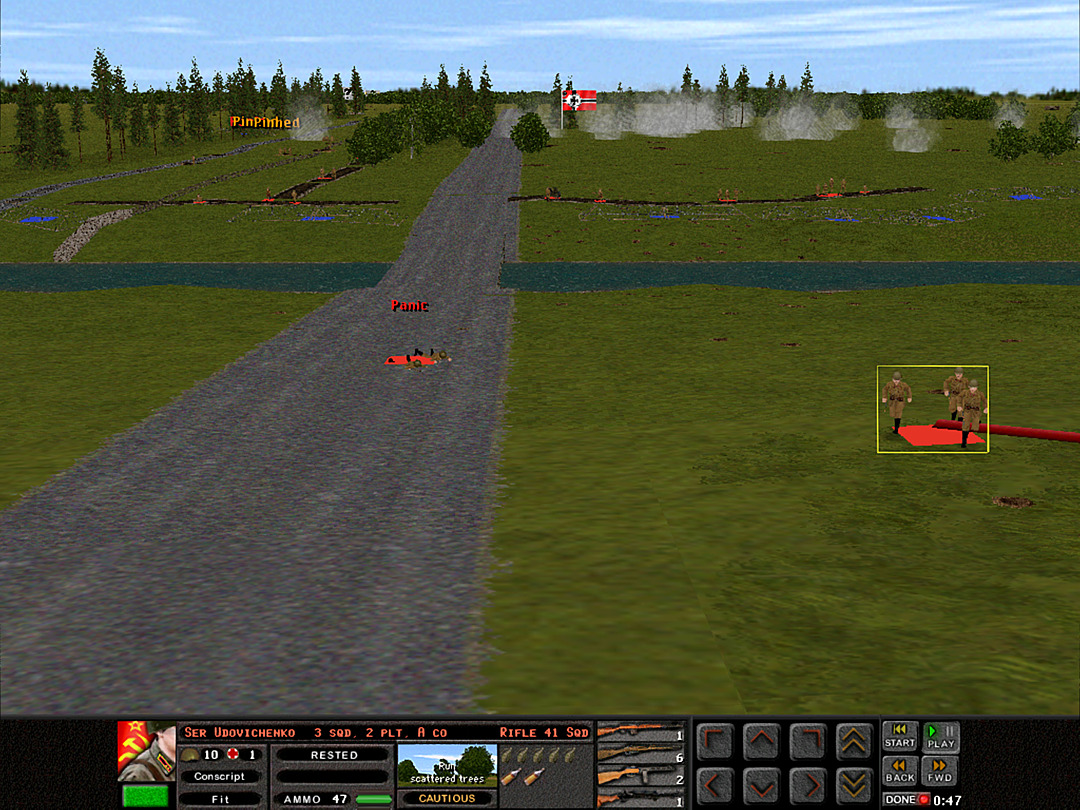 Unfortunately for A Coy, the smoke wasn't quite enough. The road is too exposed, and there are more units to spot them than just the ones in the middle trench. 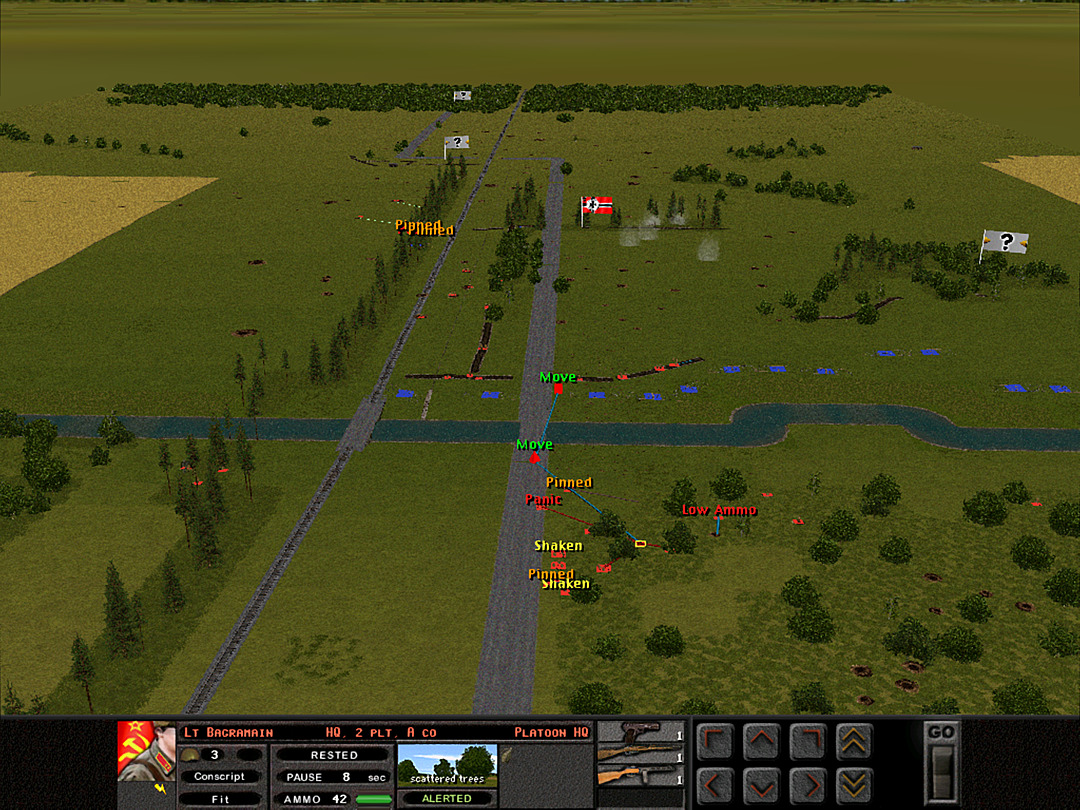 The wind clears the battlefield all too quickly, and the crossing attempt is aborted before it could really even get started. 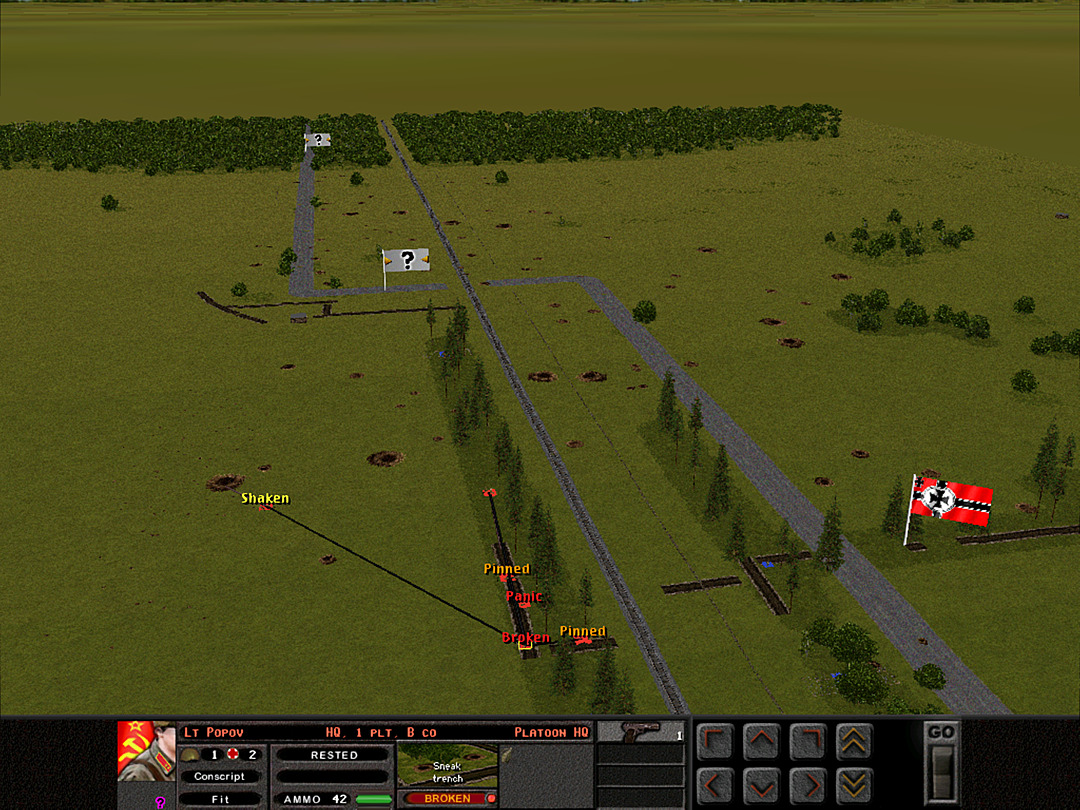 B Coy, 1 Plt has managed to pull almost all the squads together. However, their officer, Lejtenant Popov, is growing increasingly agitated by the constant enemy fire. 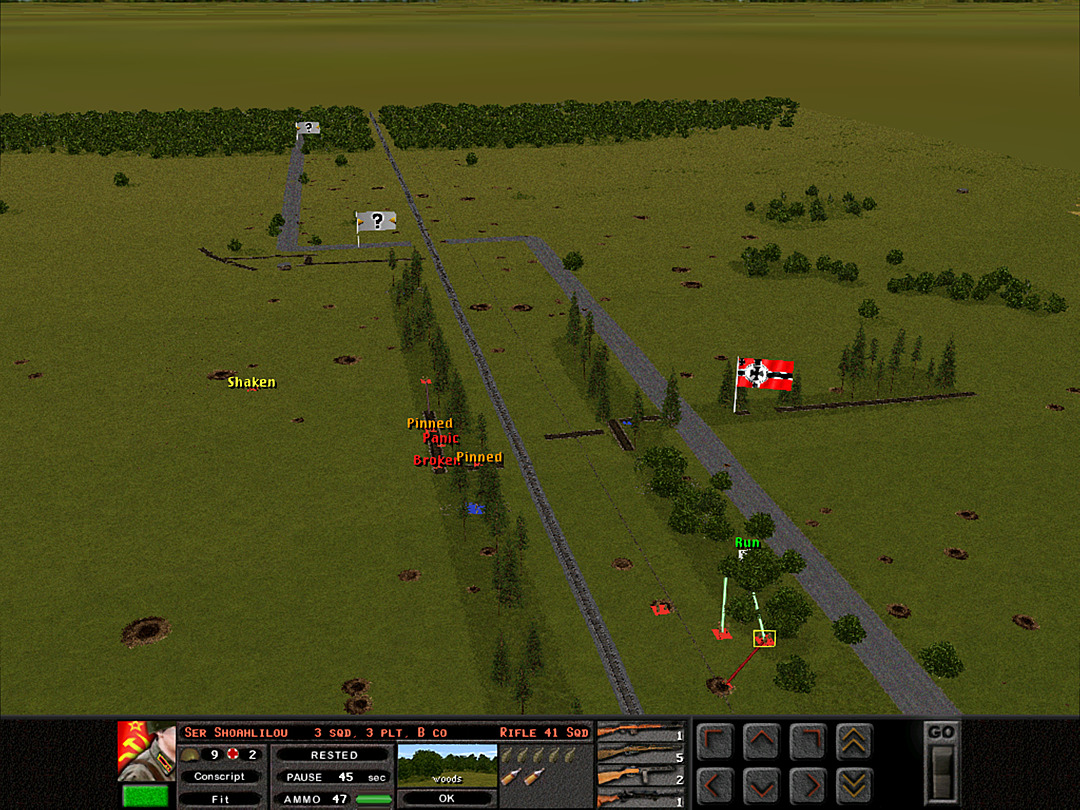 The rest of the company is still trying to get closer to them. 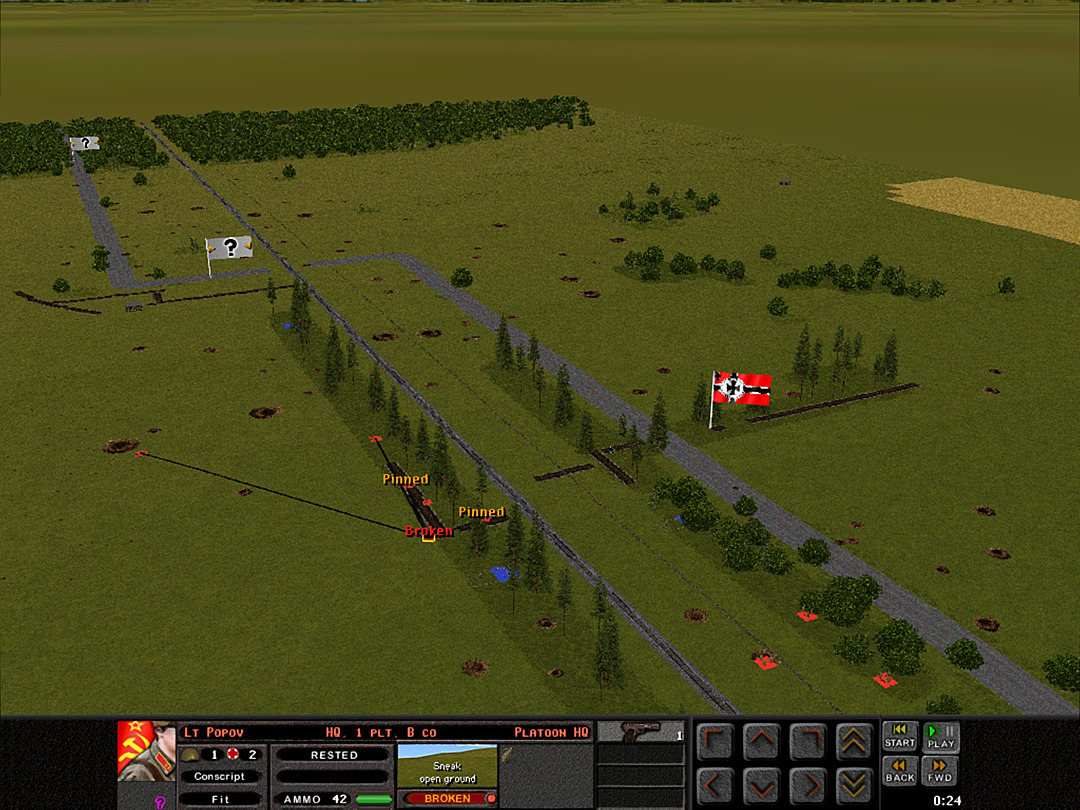 It's no good. Lejtenant Popov starts screaming and shouting for the men to fall back. He jumps out of the trench. 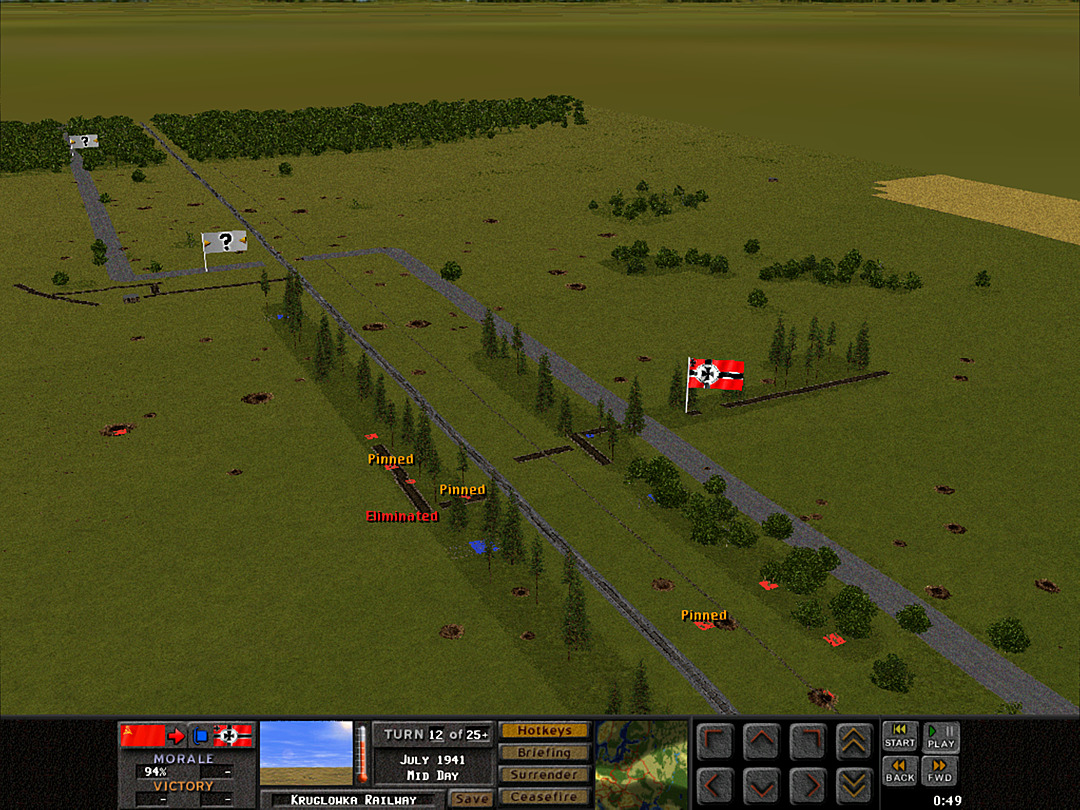 Seconds later, he is gunned down. None of the squads wish to follow his example. 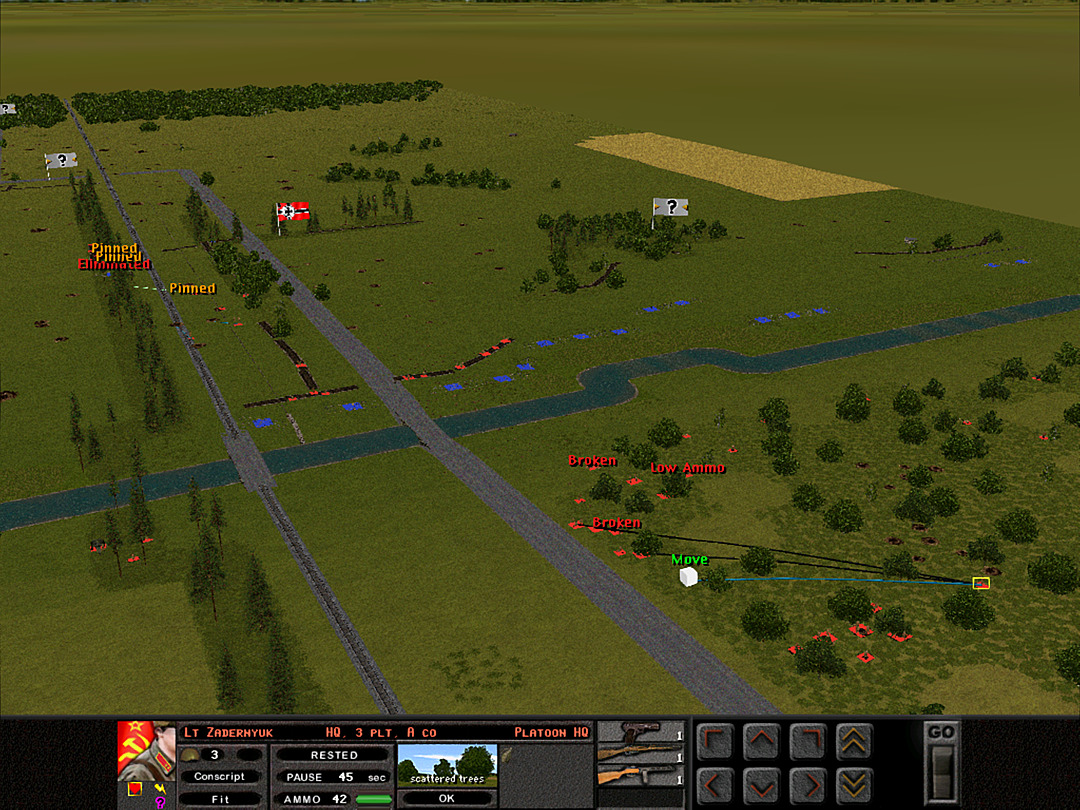 A Coy's failed attempt to cross has left the men in the forest in disarray. 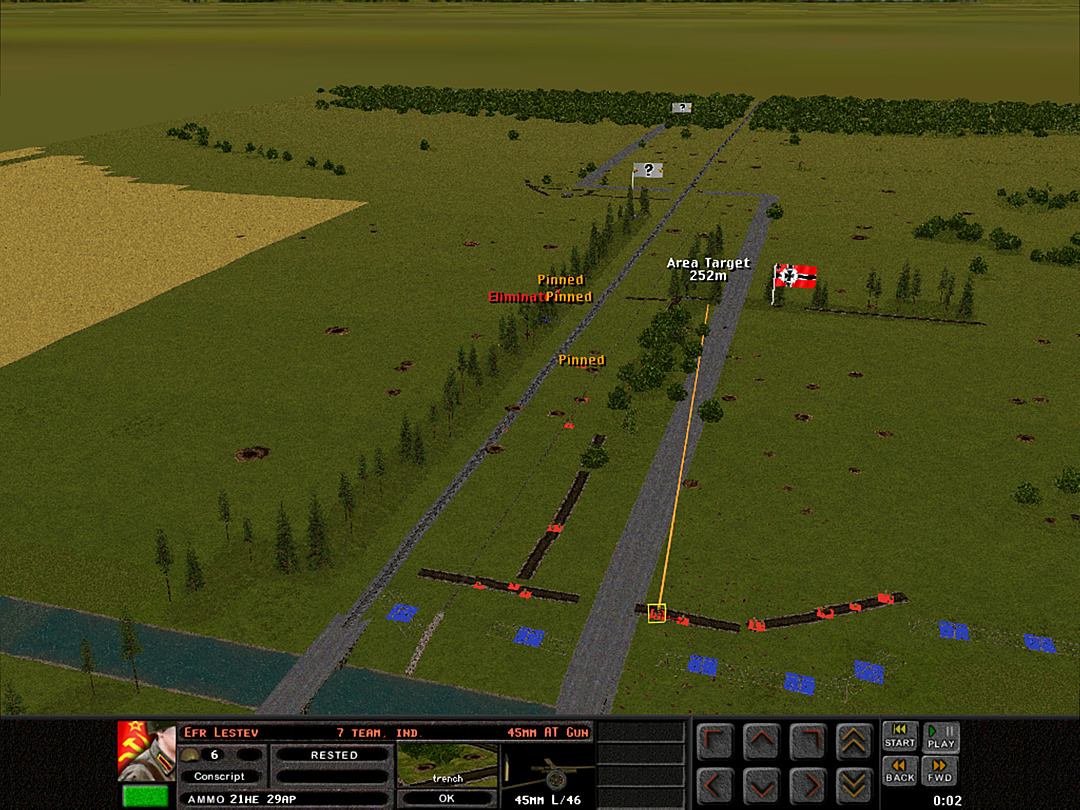 In hopes of giving the leaderless platoon over in the trench a reprieve, the AT gun in the trench begins shooting in the general vicinity of the machine gun. 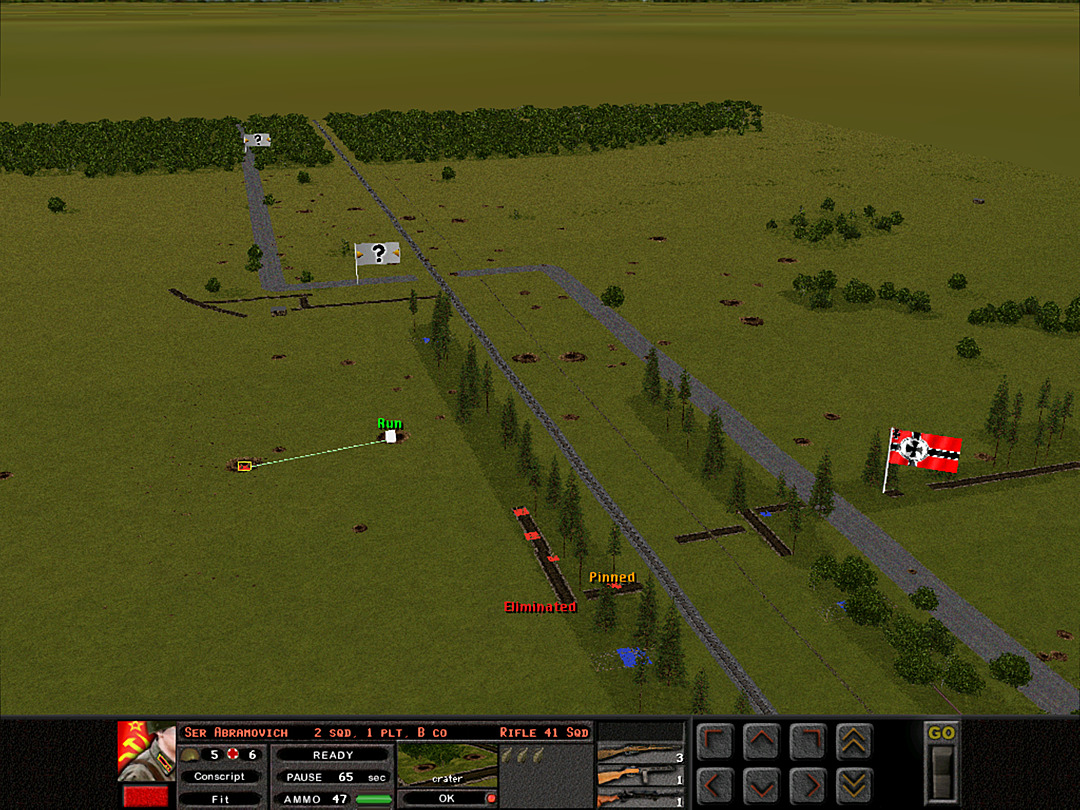 It achieves the desired effect. The last squad out in the open field may be able to get closer to the trees during the break in action. 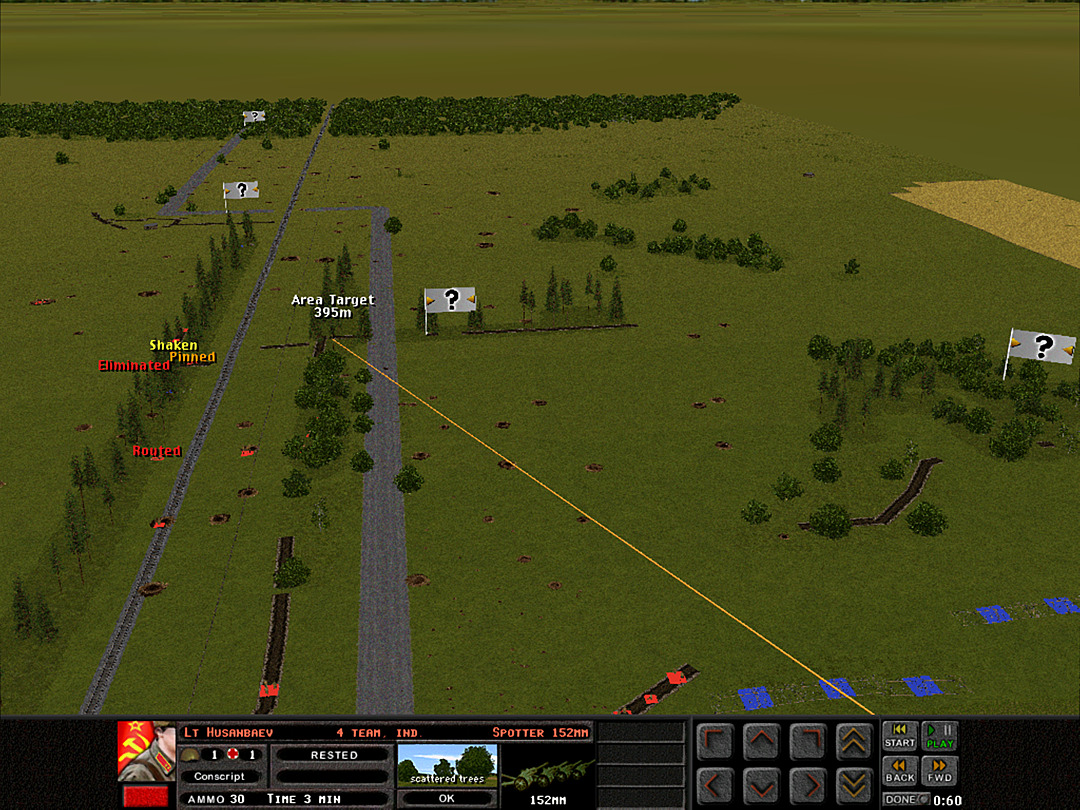 An even stronger suppression is awaited. The artillery strike is just 3 minutes out.  B Coy, 3 Plt is getting a little closer to the action. They may need to pull back once the artillery starts landing.  With the artillery hitting one area, we can likely use our Maxim guns and even the AT guns to keep the Germans in the trenches from firing on our advance. A Company is going to take another shot at crossing the river.  A few German squads are spotted farther back toward the level crossing. Perhaps they are bringing in reserves, or these are reinforcements who have just arrived.  The 152mm rounds come in right on the mark, with the first few shells blasting the road.  A Coy, 3 Plt gets most of the way to the bridge without trouble. 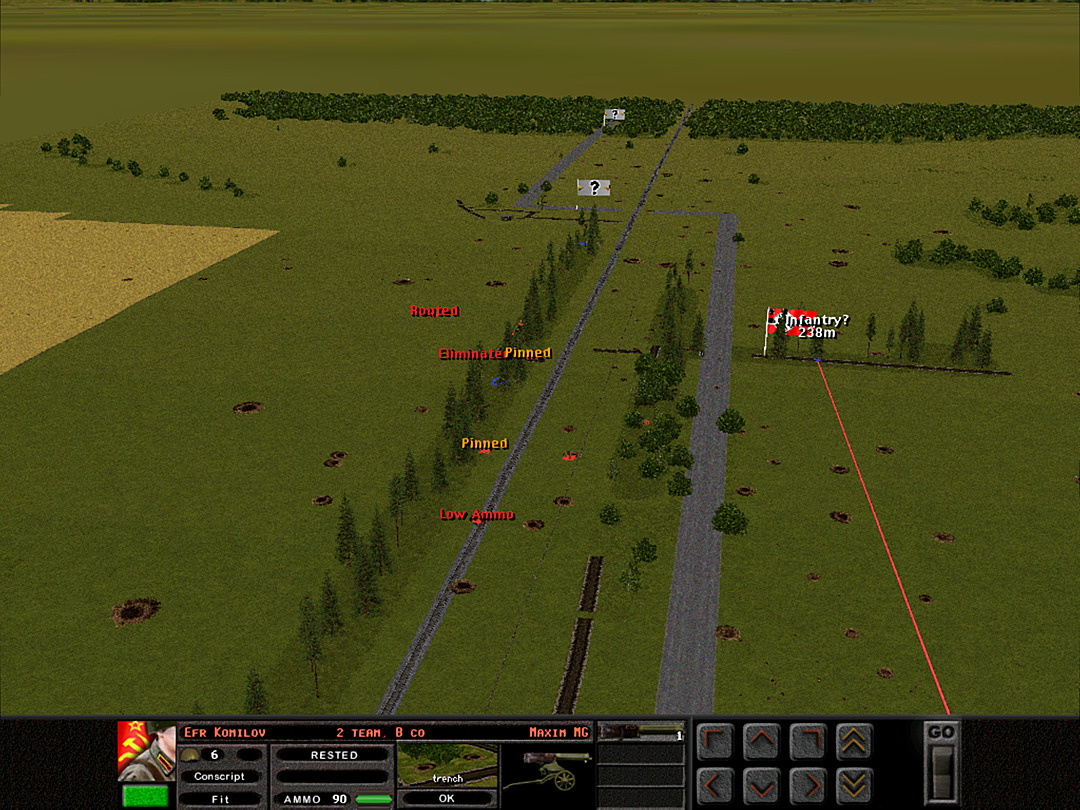 One enemy unit pops up from the trench to fire at them, and we immediately engage with the Maxim guns. 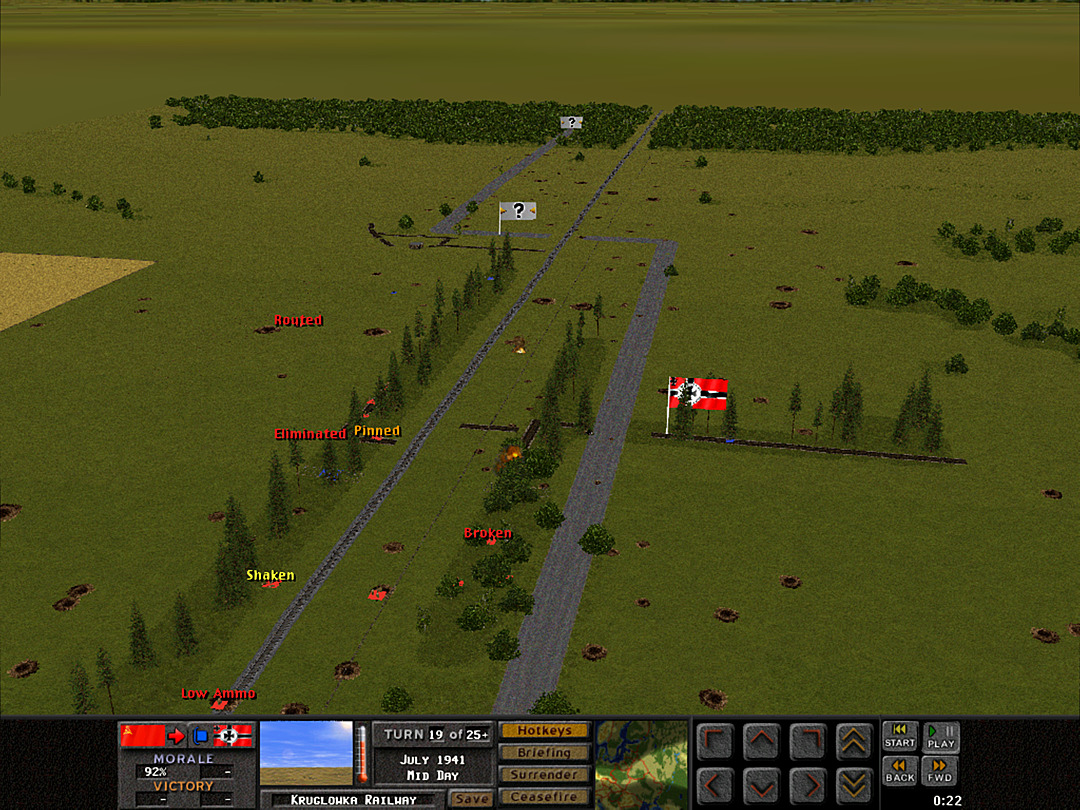 An unluckly squad from B Coy, 3 Plt didn't pull back in time, and one man is lost when an artillery shell falls short. 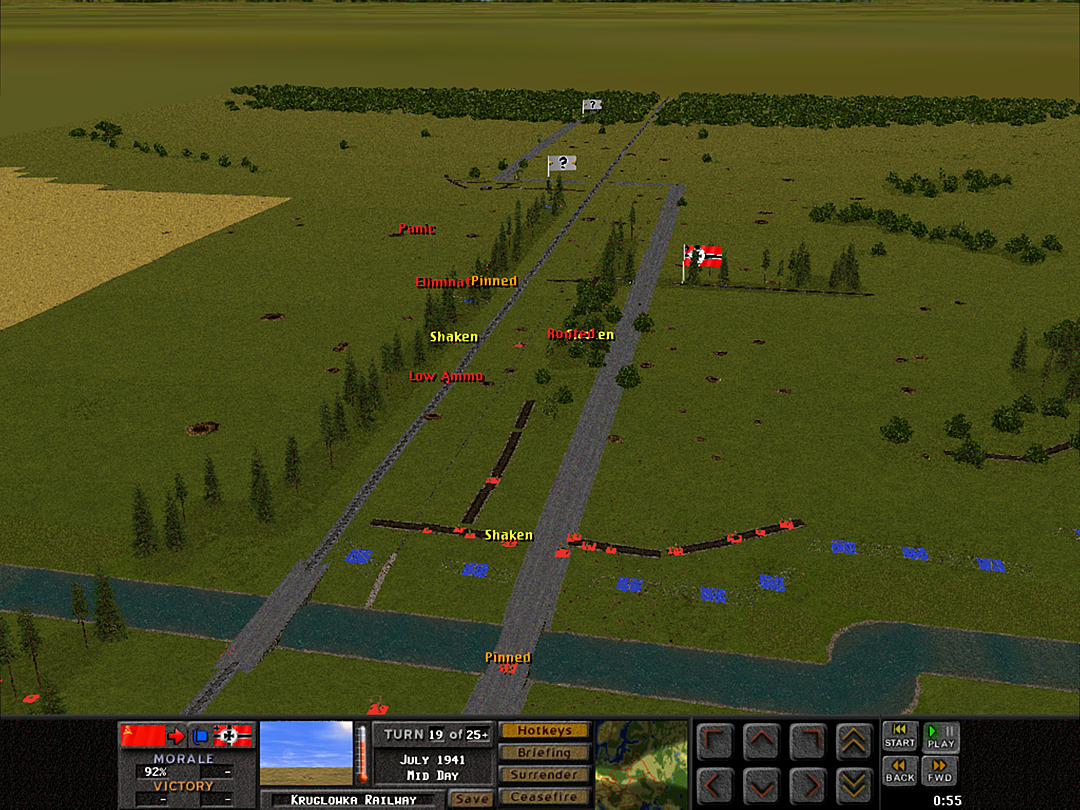 Several squads from A Coy clamber into the first trench. 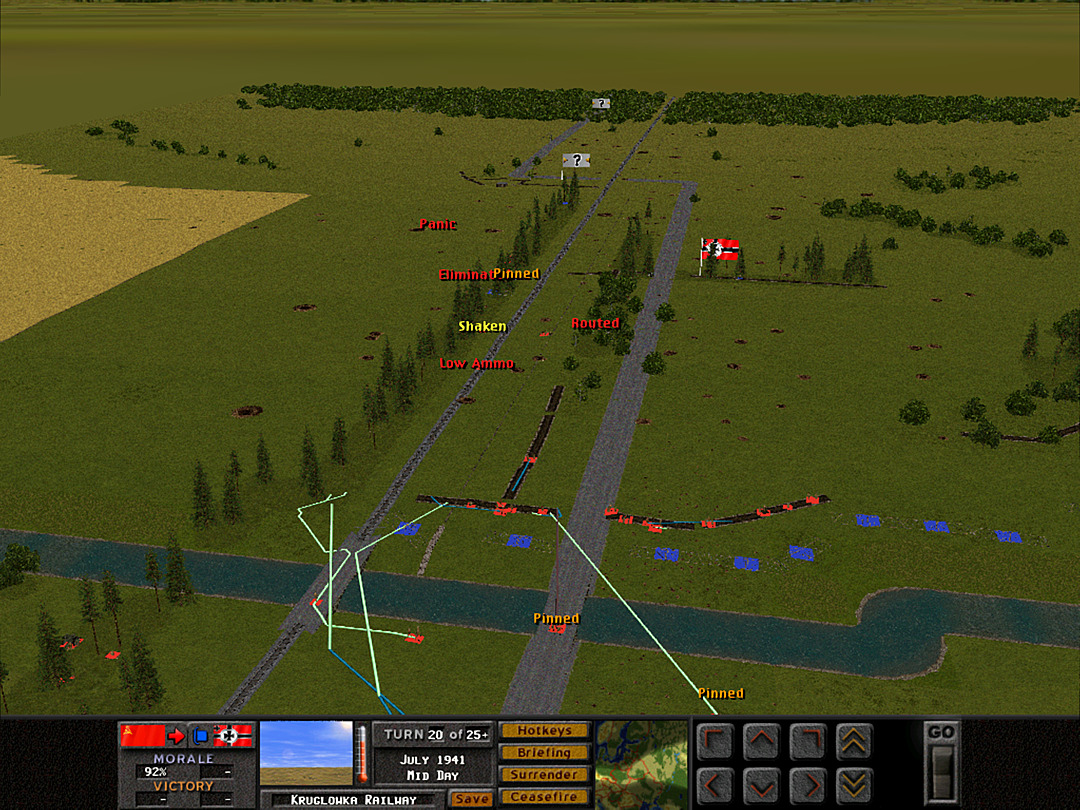 Some of the others are making for the railway bridge, as it appears to be less exposed to enemy fire. 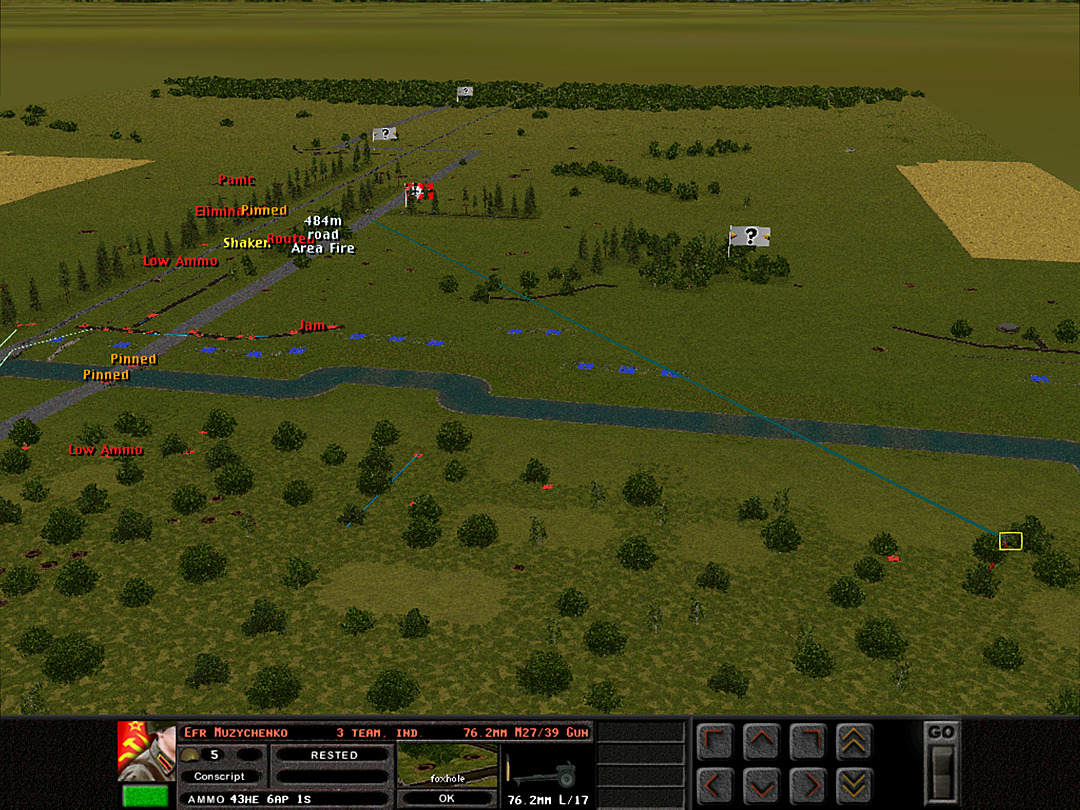 As the artillery strike winds down, we keep up the pressure on the German guns by sending more high-explosive rounds in their general area. 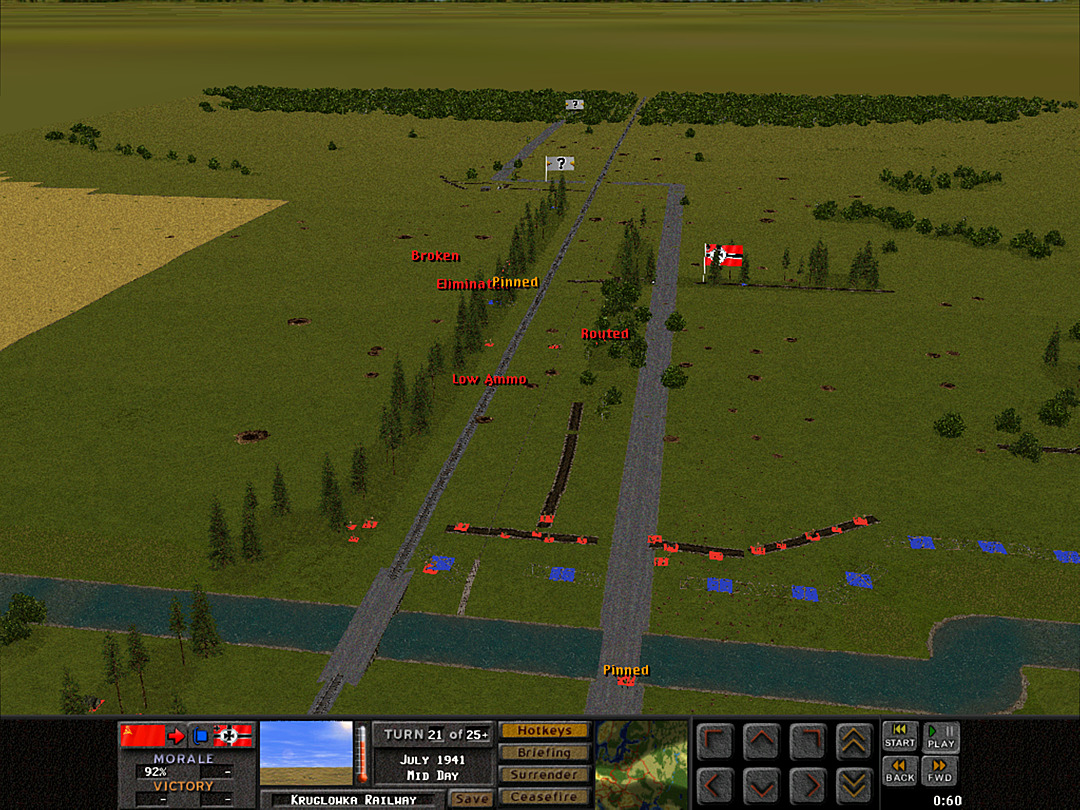 This advance of A Company has been far more successful. We nearly have two more platoons across the river. 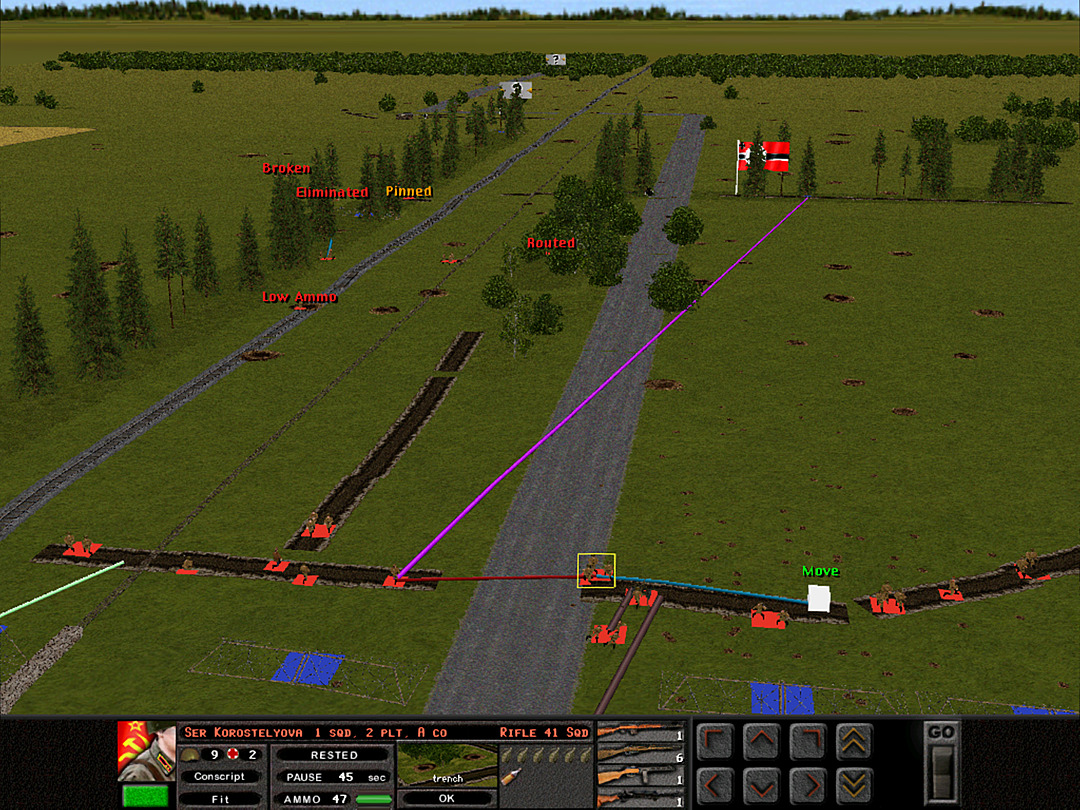 Crossing the paved road is a bit dangerous, but with all the new units rushing into the trenches, they need to reorganize and get with their officers. 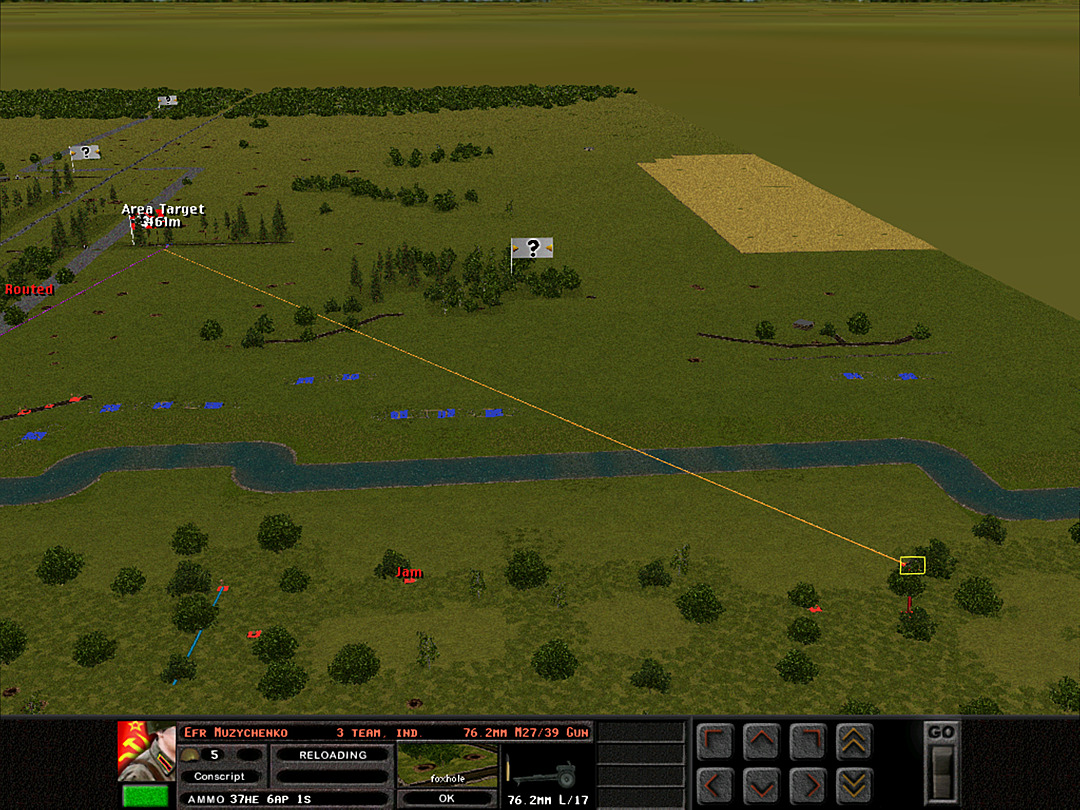 Our AT gun shifts toward the clearer target in the trench, as it seems the machine gun in the middle has gone quiet for now. 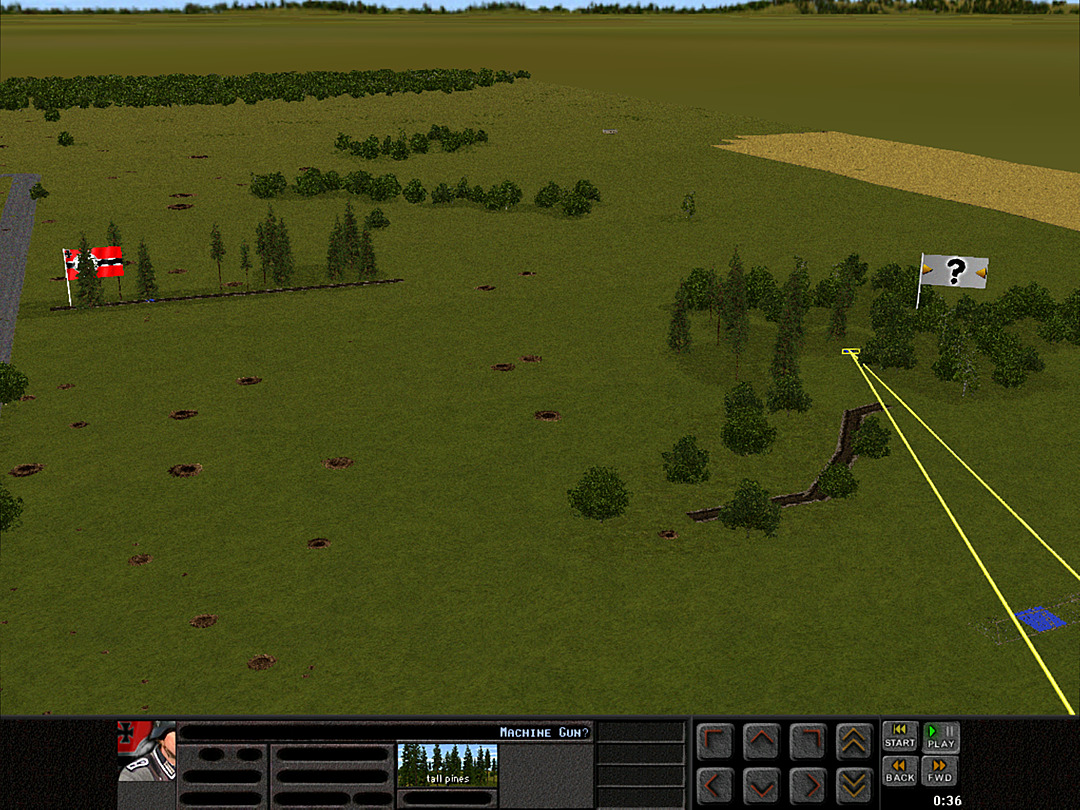 Now that we're suppressing the Germans back in the middle trench, some of the enemy units that remain more forward are revealing themselves. 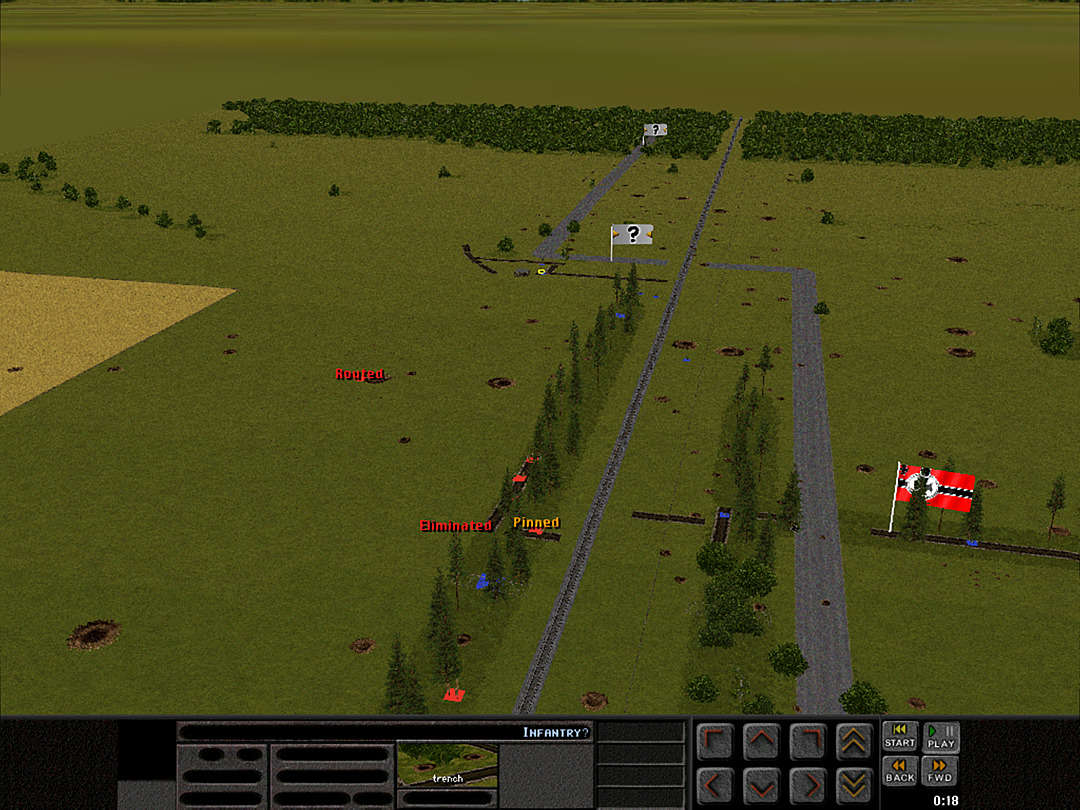 Additionally, it's clear that soldiers are coming up from near the level crossing. Some of them we are able to catch in the open, though. 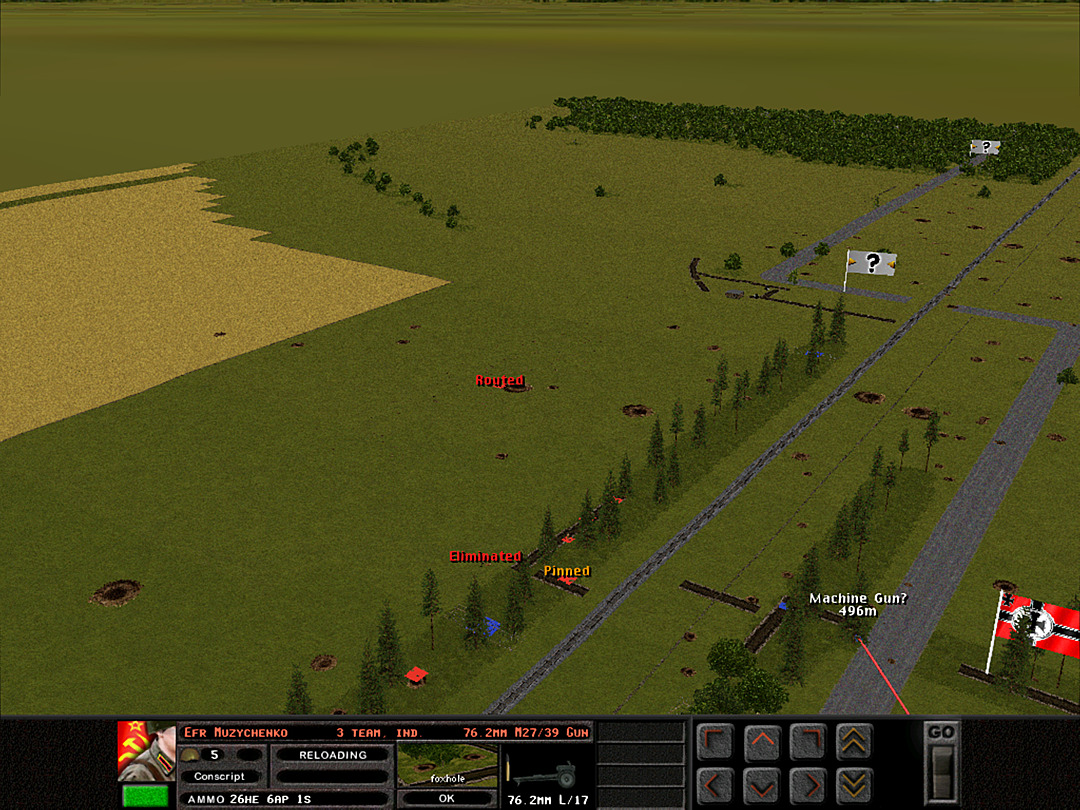 The German machine gun in the middle has recovered from the bombardment, and is not out of action yet. 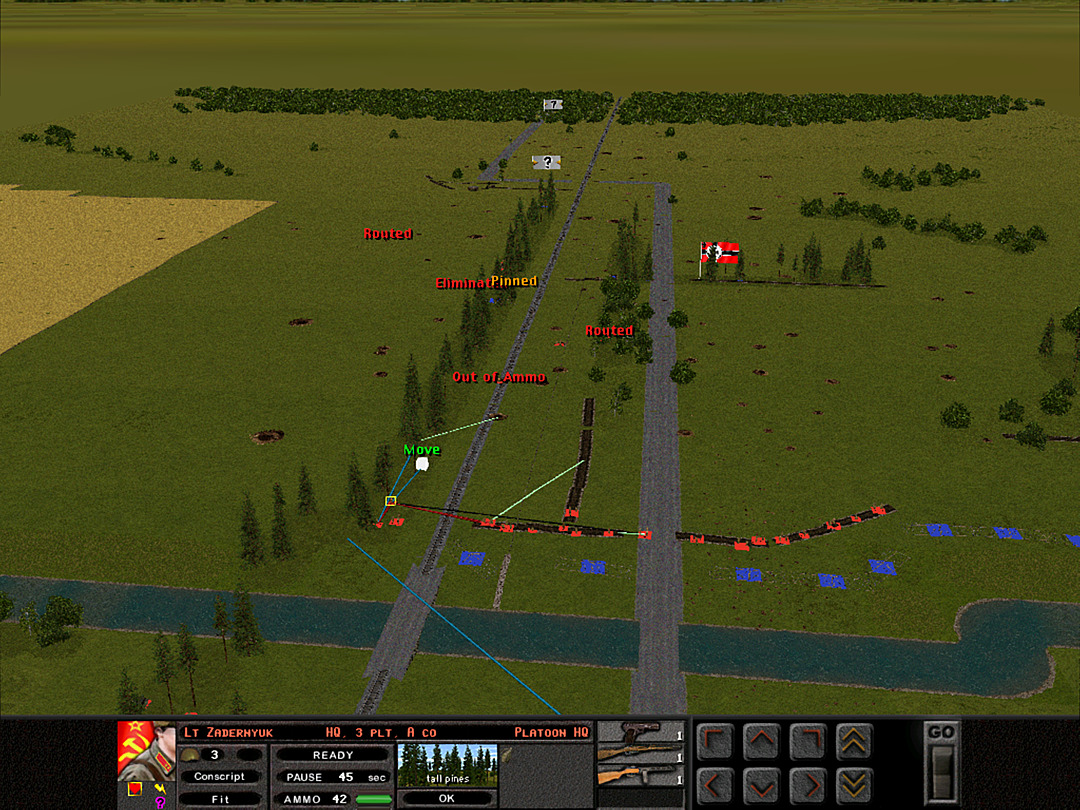 A Coy, 3 Plt is in the best position to fill in the long trench parallel to the rail line. This will give B Coy, 3 Plt a chance to move forward, and will also give us the ability to fight the Germans in the trees. 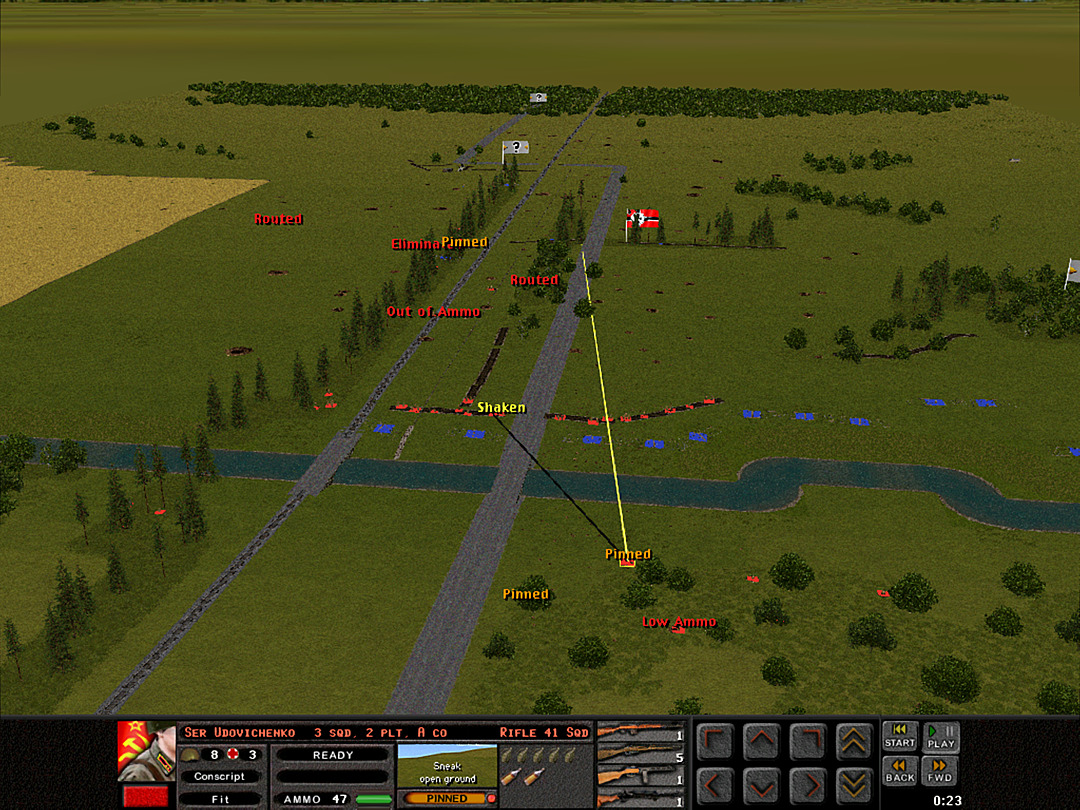 We're still trying to get the last few squads across the river, but they're also the only exposed targets for the Germans to go after. 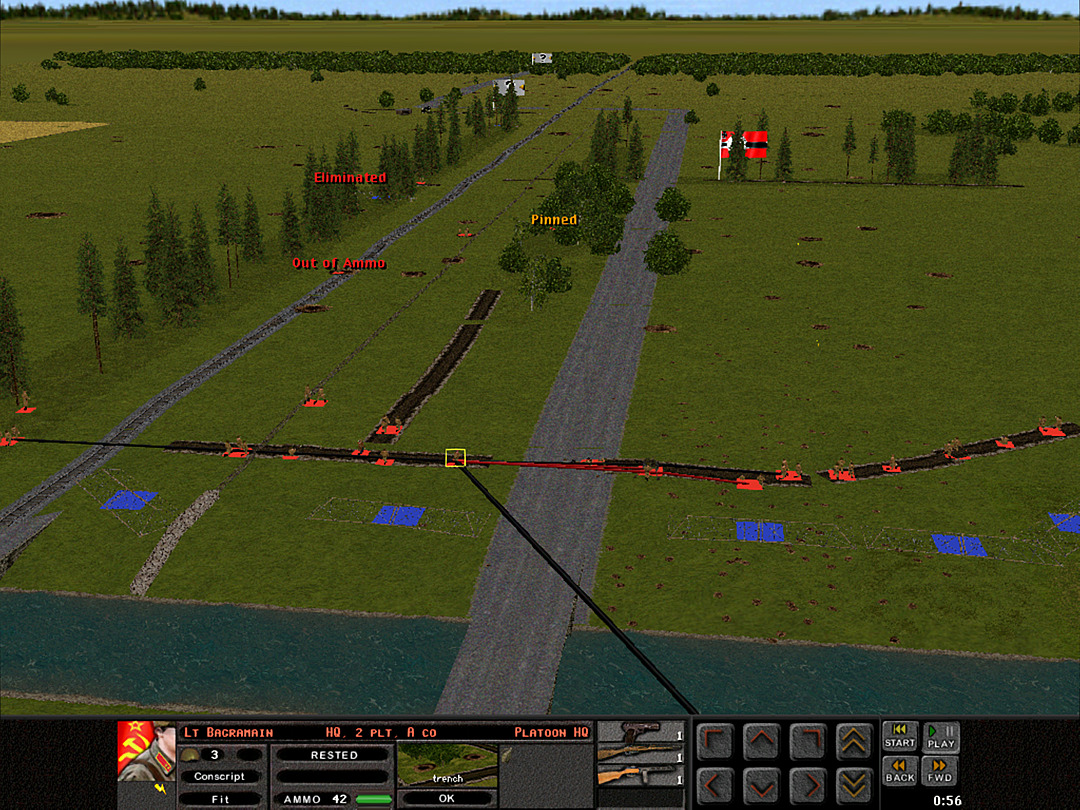 A Coy, 2 Plt will hold the trench area right around the road. B Coy, 2 Plt shifts out of the way to let them occupy it.  The last squad in B Coy, 1 Plt was never able to get into the trench. After spotting the advancing German soldiers, they ran off toward the cornfield, but only man made it there alive. 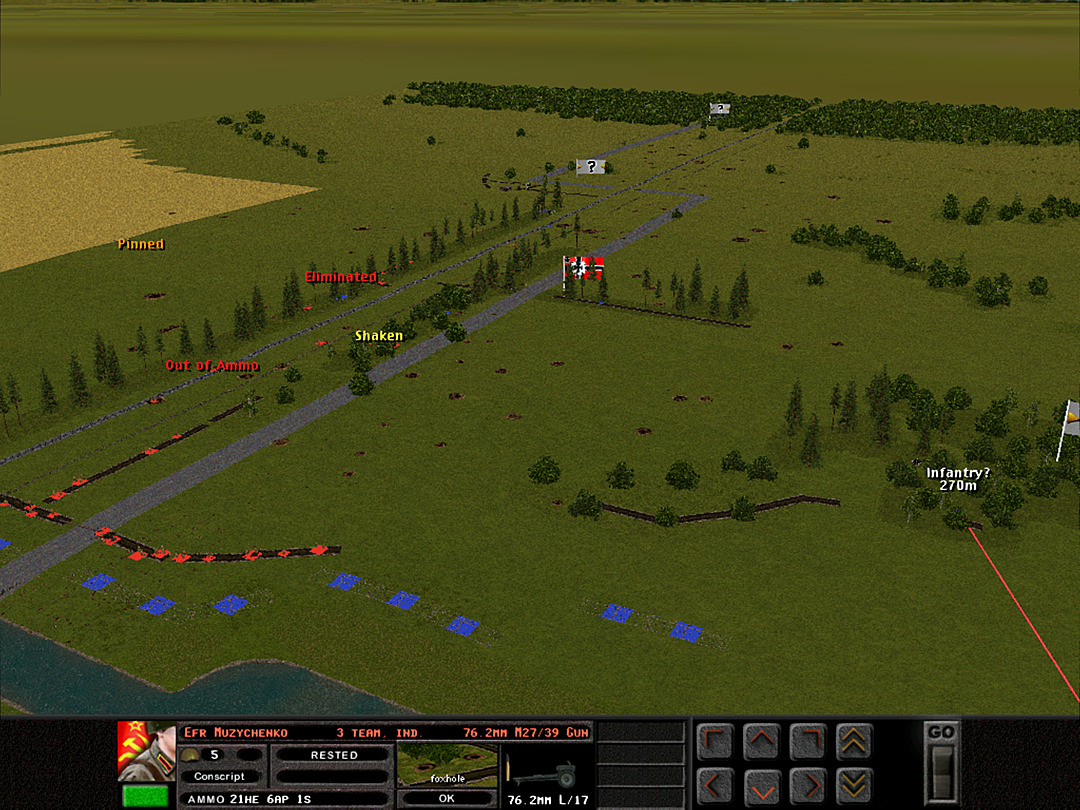 More German units in the woods reveal themselves. 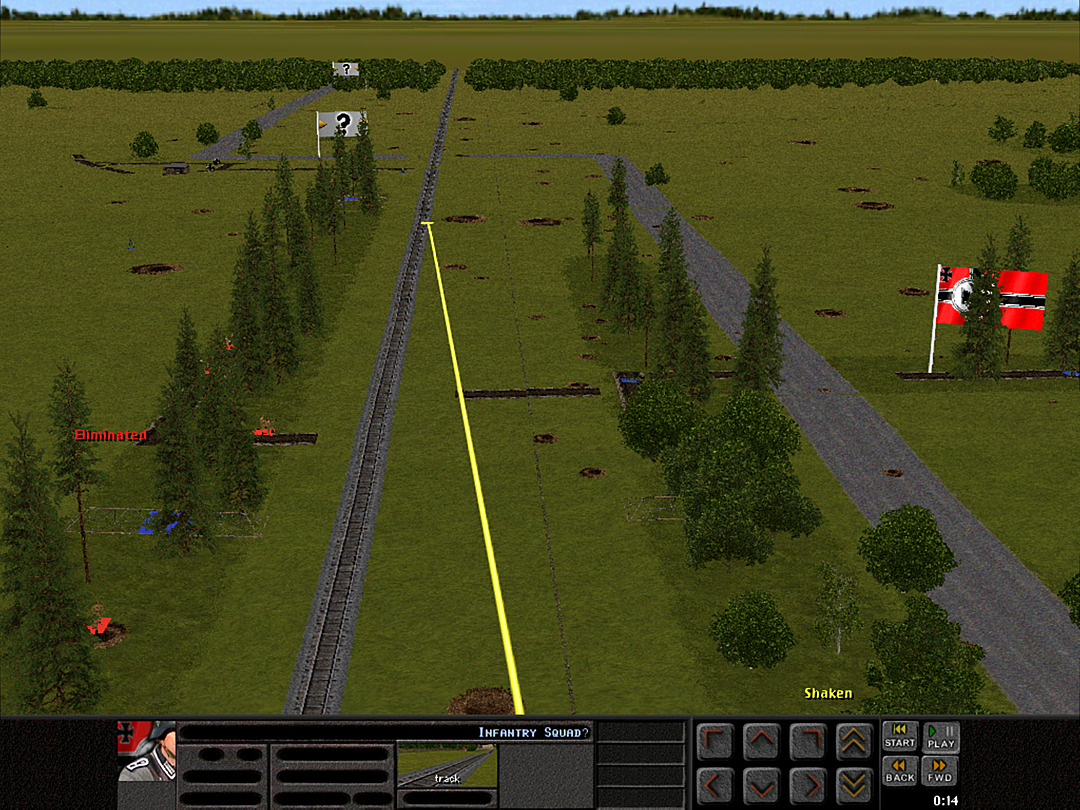 We are also seeing them attempt to advance along the rail line, but we're halting their advance. 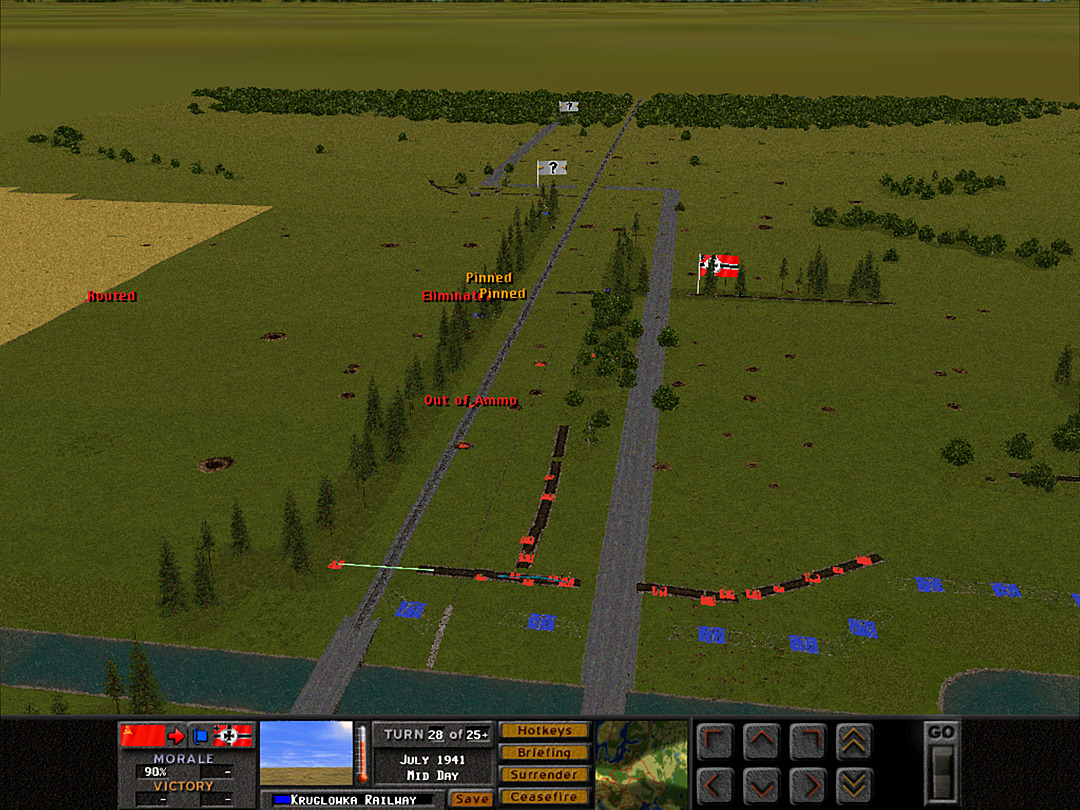 The battle is quieting down, as we have almost everyone who is likely to make it into a secure position in place now. 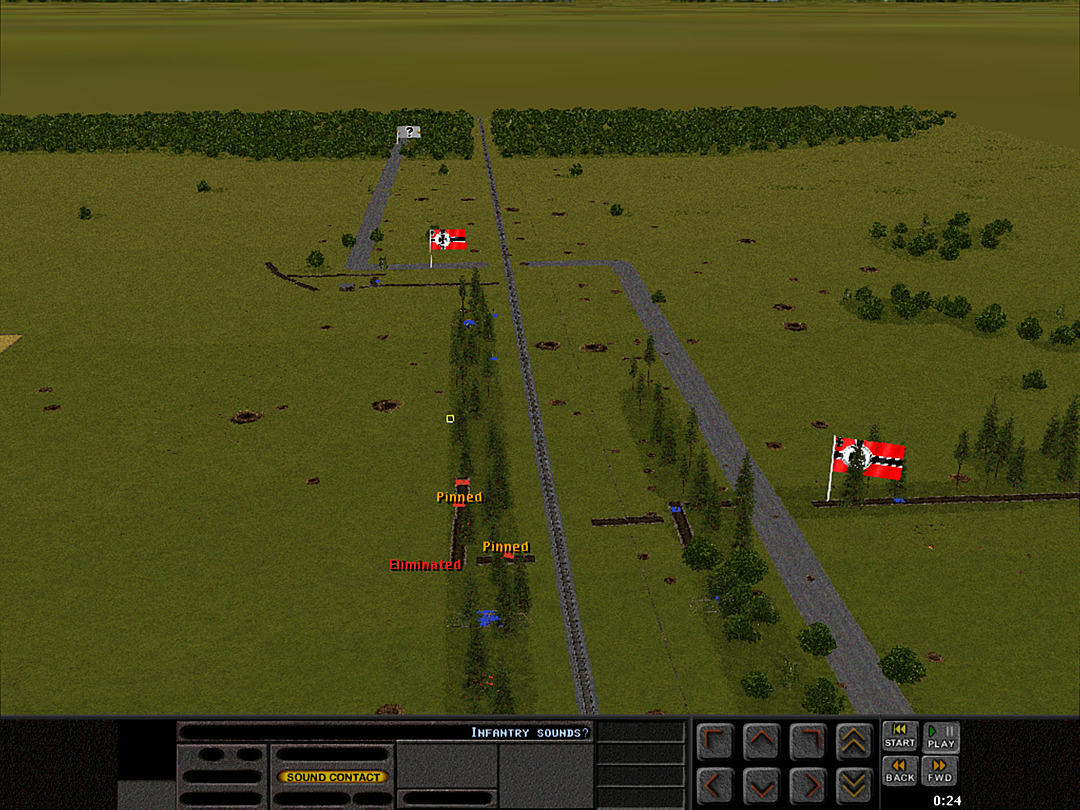 The enemy is getting closer to B Coy, 1 Plt's trench. 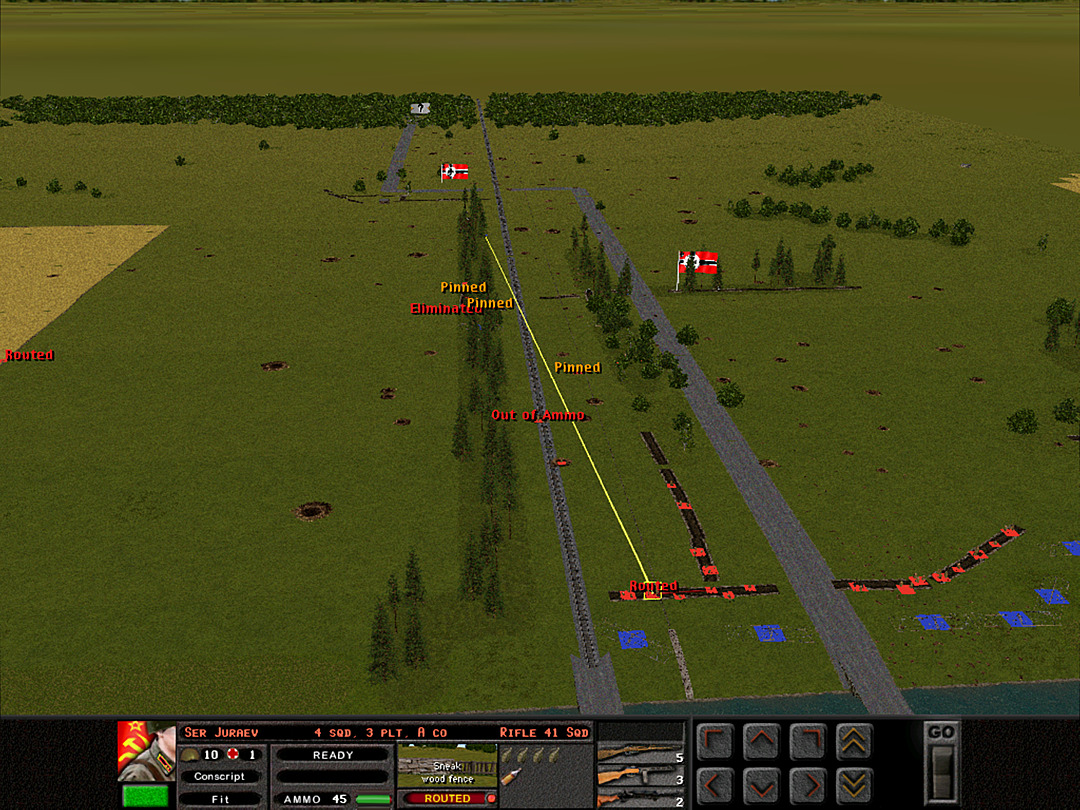 They are also starting to direct fire towards our troops. Some of the ill-trained men in the trenches are finding it hard to handle. 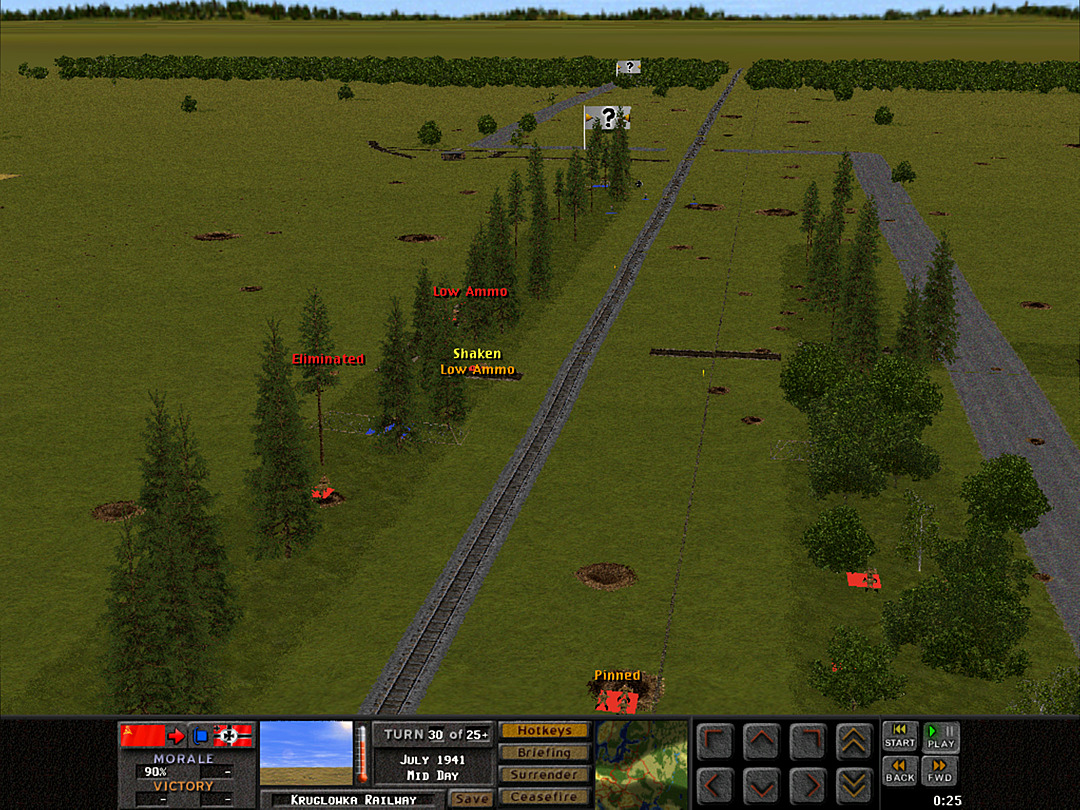 The battle-weary men of 1 Plt are holding on, but they are starting to fade as their ammo supplies run low. 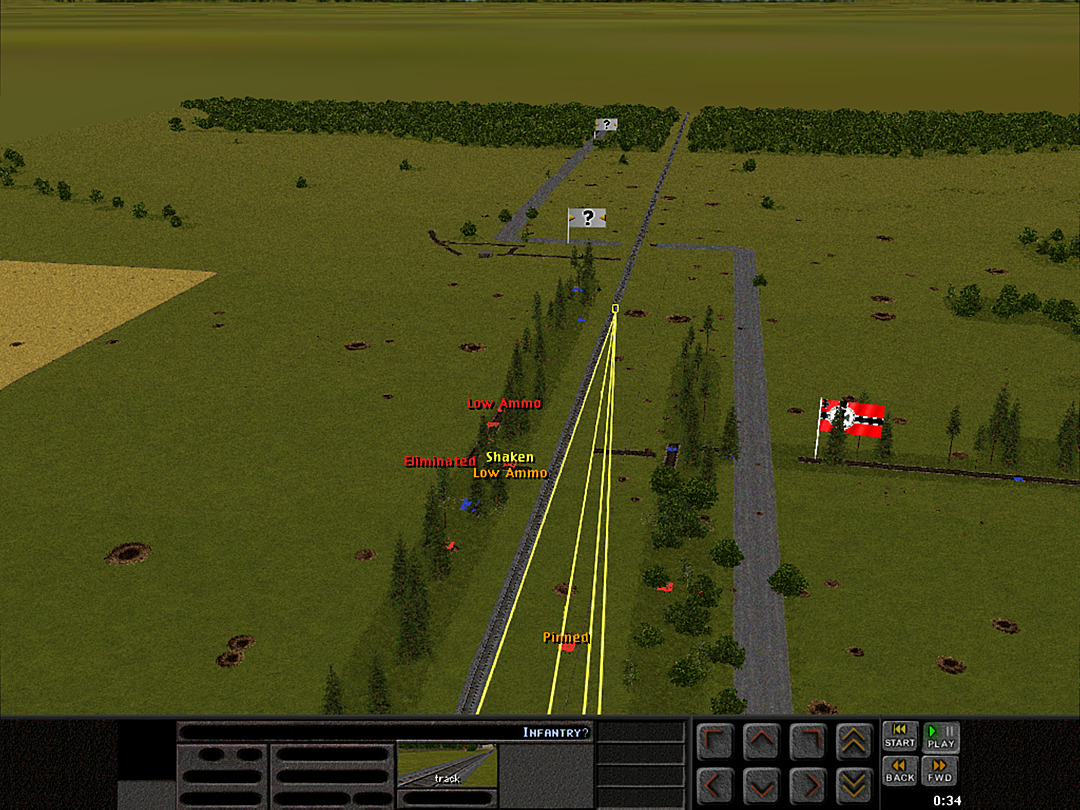 Our forces are able to direct a fair bit of fire against the units that are easy to spot. 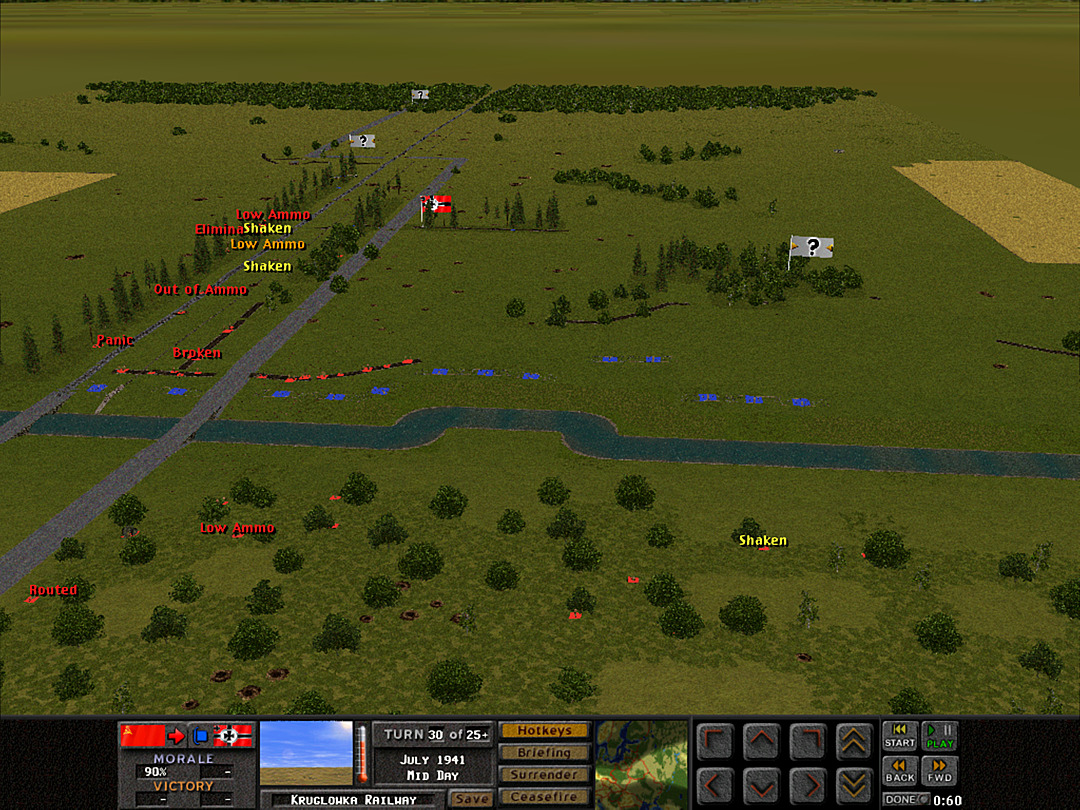 The battle ends with even some of our forces back in the trees losing their nerve under fire.  Losses were about as expected. Luckily, we did not lose any ground despite our forward squad coming under intense pressure. Unit Highlight Soviet 50mm Mortar Team 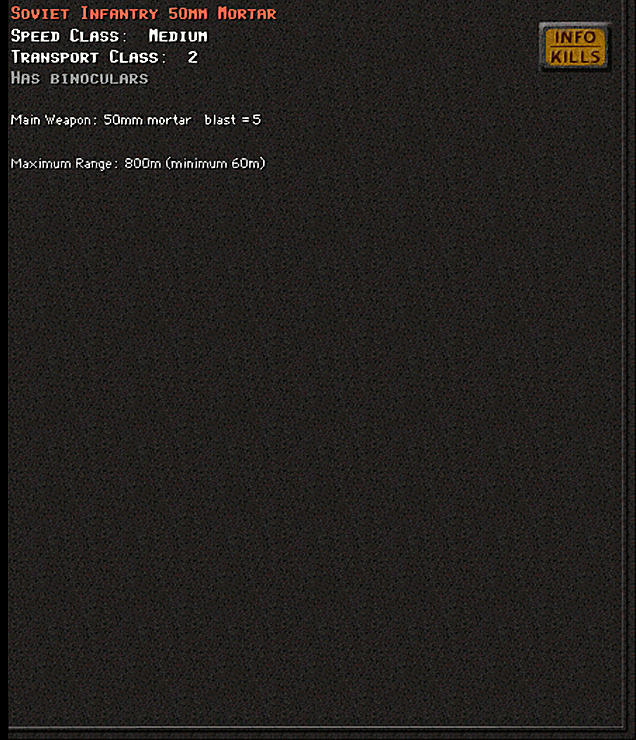  Unit Size: 4 Base Cost: 12 Most early-war mortars were based on one design. The Soviet Army made heavy use of support artillery, and that included mortars down to the size of 50mm. The weapons used were designated as 'RM', meaning 'company mortar'. The most common 50mm model at the start of Barbarossa was the RM-40. It was the last of minor variations on the RM-38, which was itself based on a British design. The mortar was decently light (12 kg) and easy to set up for the crew, and could fire out to ranges of 800m (Most sources indicate a minimum range of greater than 60m, though, depending on model). One weakness was getting an accurate shot. It had a fixed angle with movable vents at the base. Adjusting the vents released some of the explosive gases to reduce the propulsion of the shell. This was difficult to use properly, and the hot gases also posed a risk to the operator. The last 50mm mortar produced during the war was the RM-41, a new design based on captured German mortars. It used the adjustable stand method for finding the range, instead of a fixed bipod, and avoided the gas-venting issues. Eventually 50mm mortars were considered too small to be practical, and production of them stopped in 1943.
|
|
#
?
Jan 29, 2024 19:43
|
|
|
Operation 3, Battle 3 of 8 Operation: Kruglowka Railway Time: Night (*ATTEMPT TO SKIP* - NO) Skies: Clear Ground: Very Dry Temp: Cool Wind: Still Conducting night operations is a bit of a risk given how fragile unit cohesion is with our units. However, it looked in the last battle like the enemy is moving reserves towards us. If we let up, we'll risk losing a good chance to seize the middle trenches while the Germans are vulnerable. Holding them tonight will be a solid foothold for an attack on the crossing tomorrow when the breakthrough force arrives.  All that remains of B Coy, 1 Plt, is one (full) squad of men and the mortar team. They are holding the trench, but probably won't last for long without help.  The rest of B Company is in position to provide that help. They'll move up, and also attack the other trenches close by.  A Company is holding down the trench near the bridge. If all looks clear ahead of them, they'll investigate the clump of trees a bit off to the west of the road. Holding those will secure the advance of our reinforcements all the way to the middle trench.  We can't easily send down artillery strikes at night unless they are carefully calculated. Our 82mm is set to come in just behind the enemy trench line. That will slow or stop any of their reinforcements, and also ought to suppress any units still in the trenches while we advance.  B Coy, 2 Plt is going to rush around the wire toward the trench to relieve the beleaguered squad. 3 Plt is taking a more cautious approach. They also must get past a barbed-wire barricade, but they don't want to get too close to our mortar strike.  Initial indications as the shells start to land are that the trenches are actually empty, as we see no reaction to the barrage. [ Once you are close enough to an objective flag, it may flip to your side if no enemy forces are present. ]  Two squads from 2 Plt make it safely to the trench. As they arrive, they see that at least one German unit has been caught in the shelling.  As the 82mm fire lets up, 3 Plt advances, only to be shocked when the very last round falls short. One man is seriously wounded in the blast, and the squads go prone in the brush. 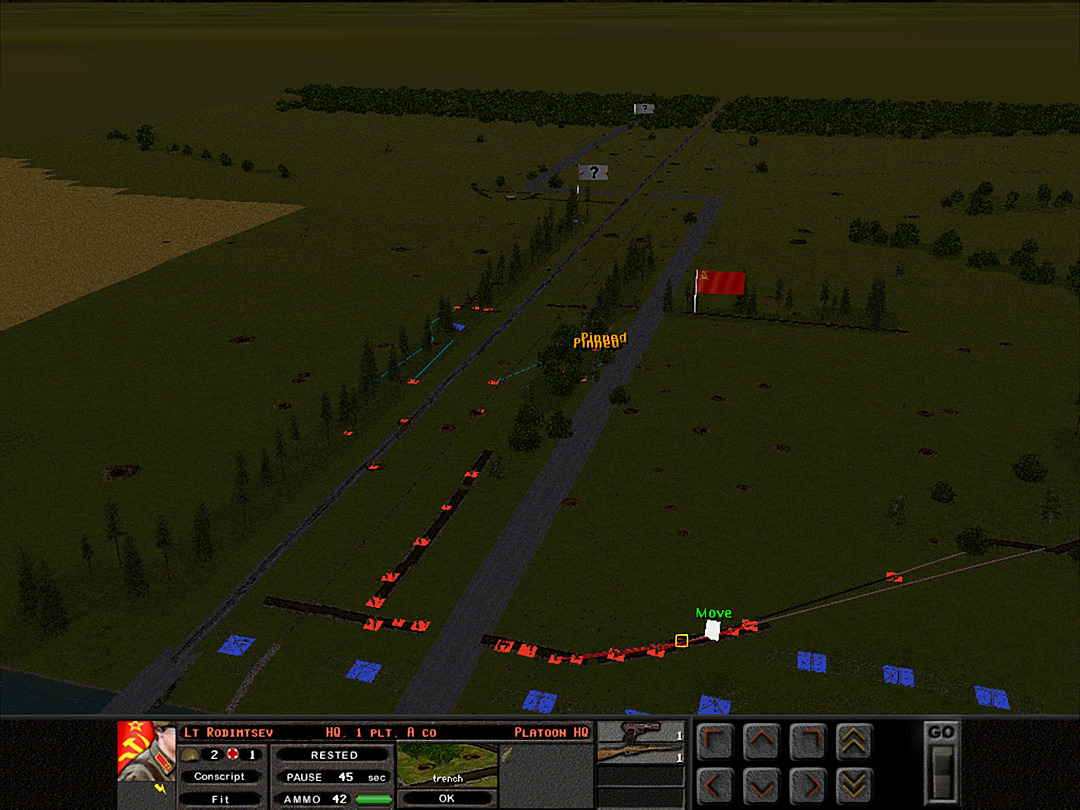 Just one platoon will be sent to check out the clump of trees. A Coy, 1 Plt is charged with the scout mission. 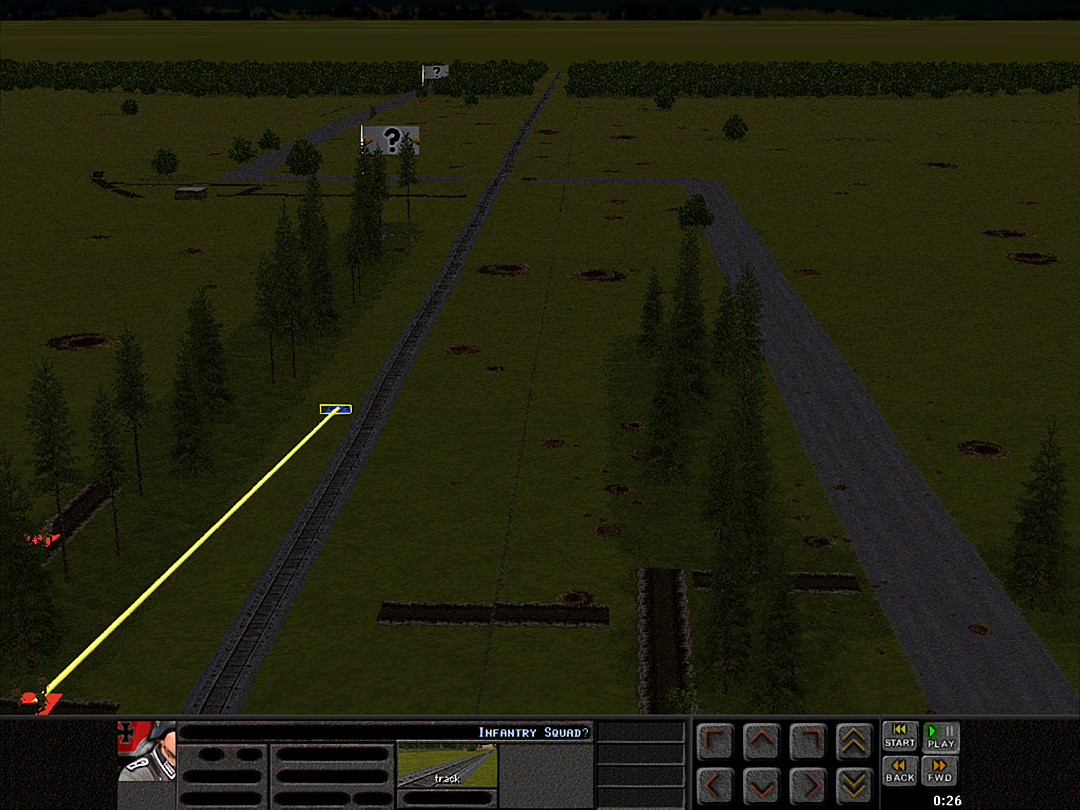 The German squad seems determined to push forward even after dodging a bunch of mortar blasts. 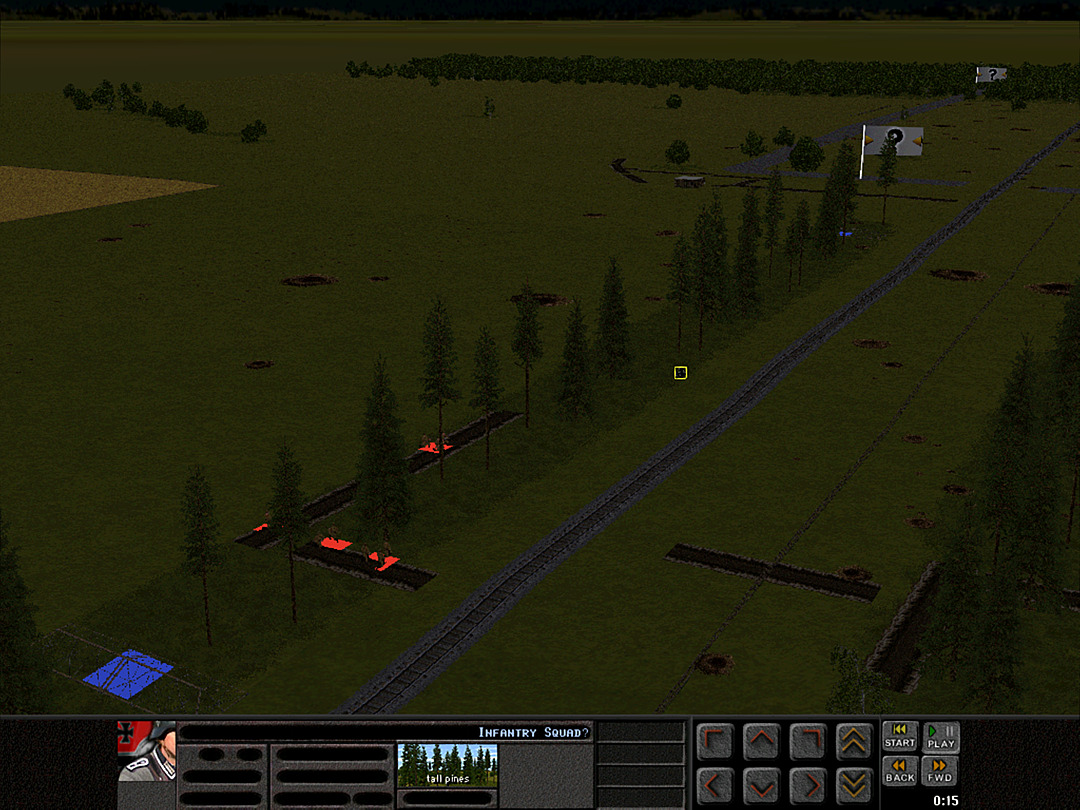 Then they seem to think better of it, and maneuver into the nearby trees. We take advantage of their hesitation to send forward more squads from 2 Plt. 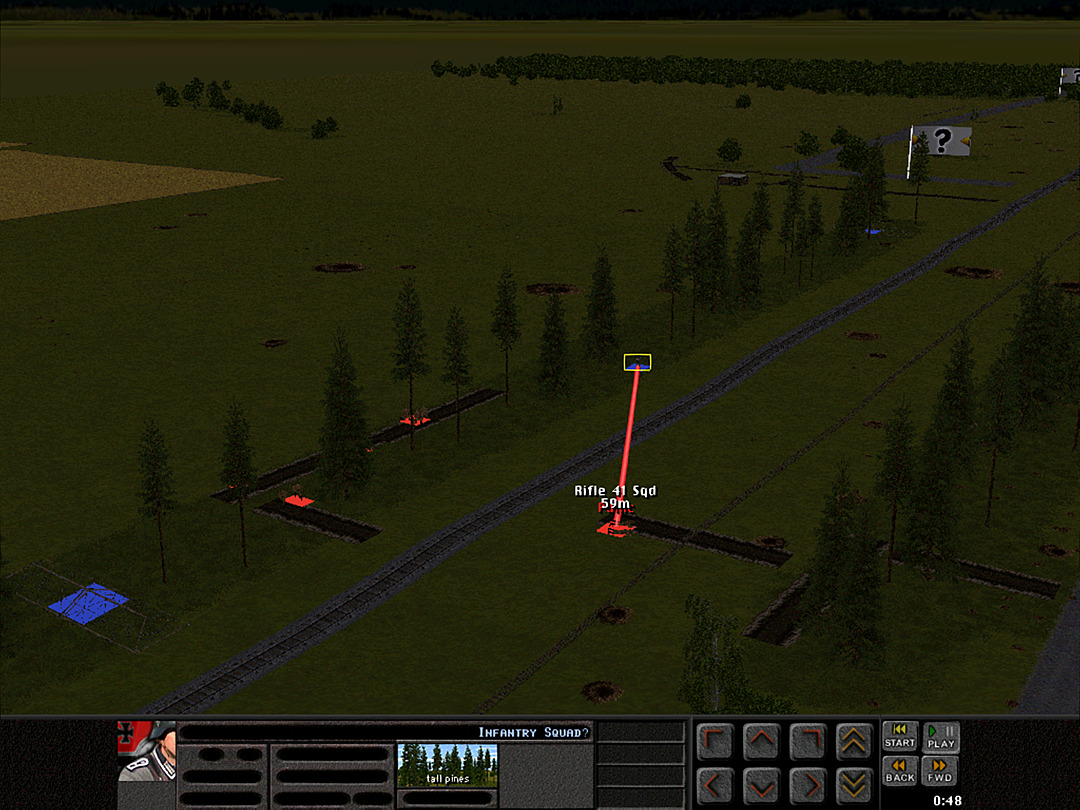 One squad makes it almost into the second trench before the Germans react.  Some men of B Coy, 3 Plt are still hung up crossing the wire, but they are able to send fire toward the enemy squad.  A second squad from 2 Plt tries to run to the second trench by moving along the fence. The Germans spot them moving, however, and open fire.  A Coy, 1 Plt has met no resistance so far.  B Coy, 3 Plt is still partly recovering from the wayward mortar shell. They will move around on the roadway to get to the trench and provide supporting fire to the other platoons. 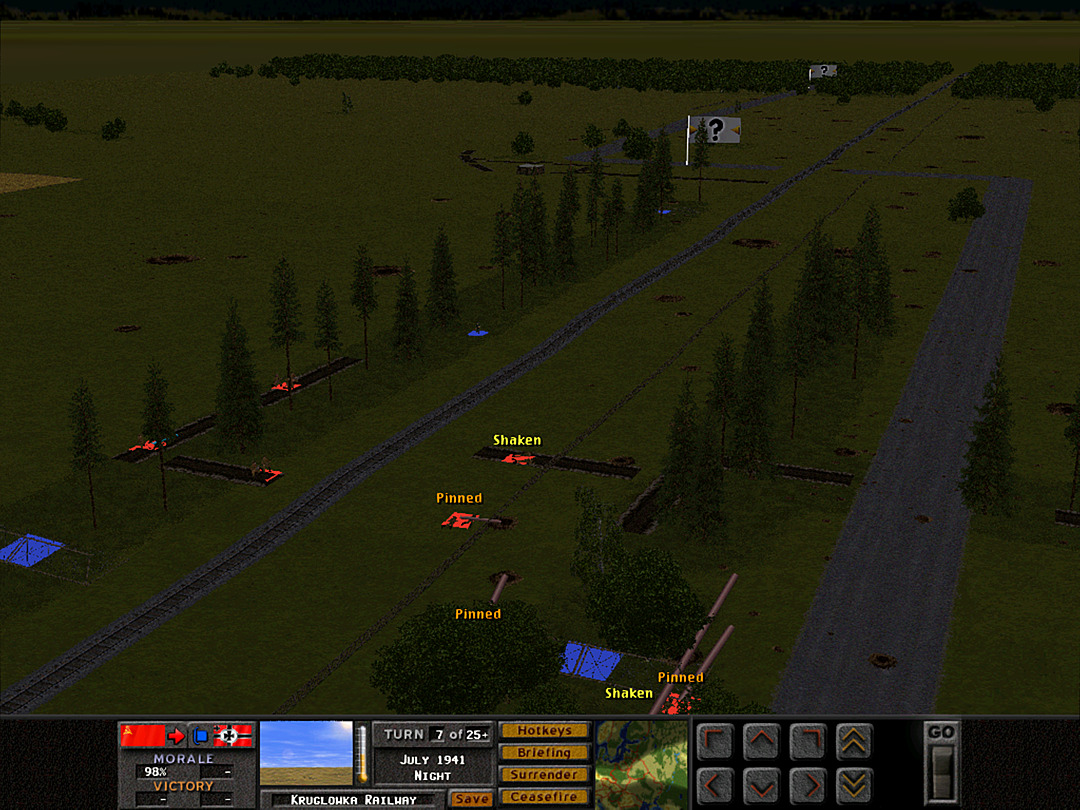 The squads that couldn't get forward to the trench look for the closest foxhole or shell crater to jump into. 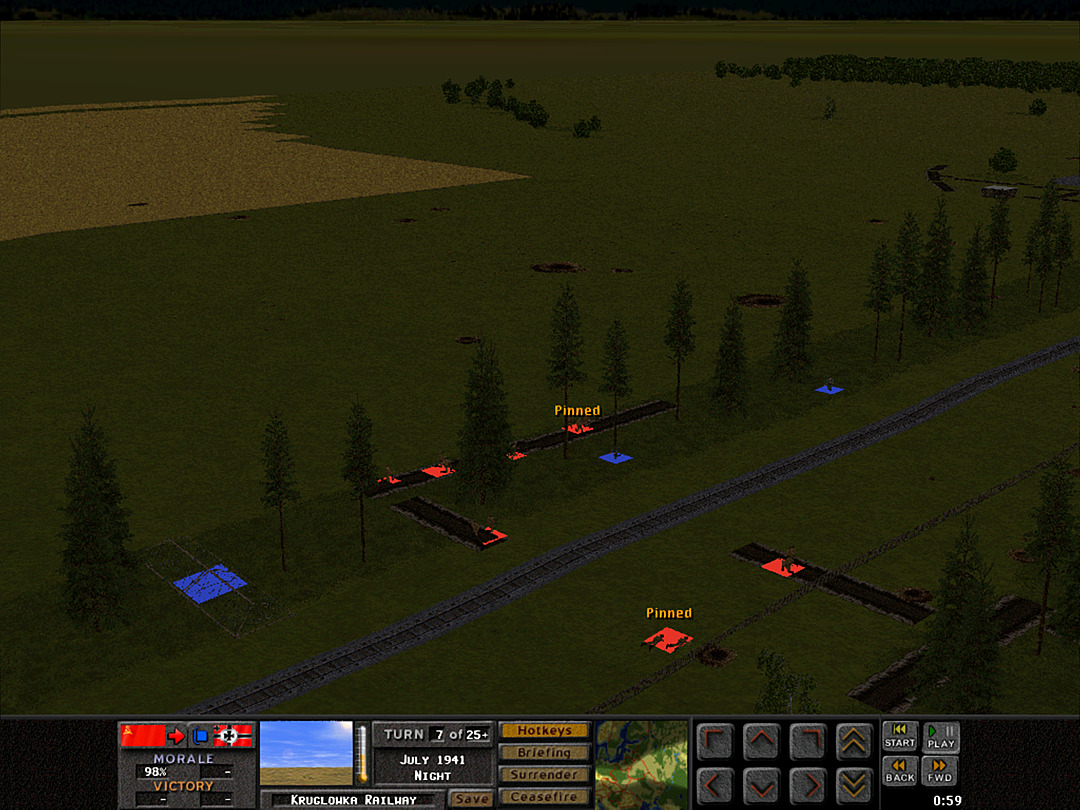 Another German squad appears close by. It seems we reached the trenches just in time to stop them. 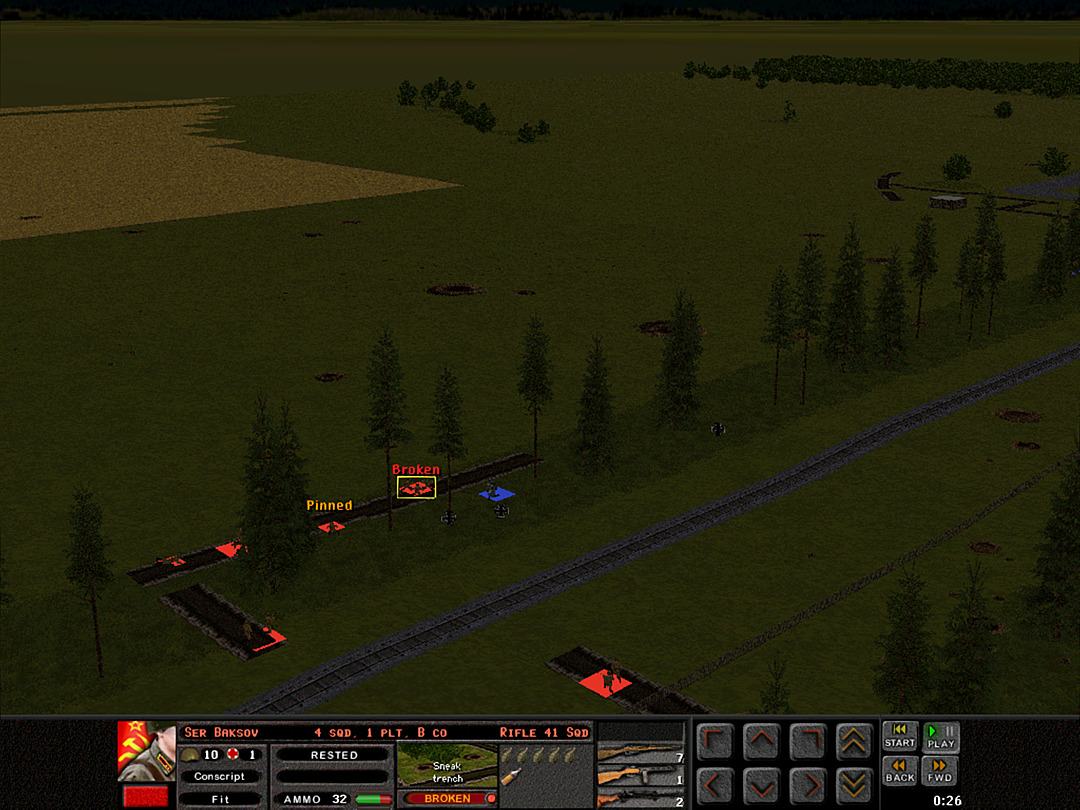 Being so close to an enemy unit causes the remnants of 1 Plt to start to panic. 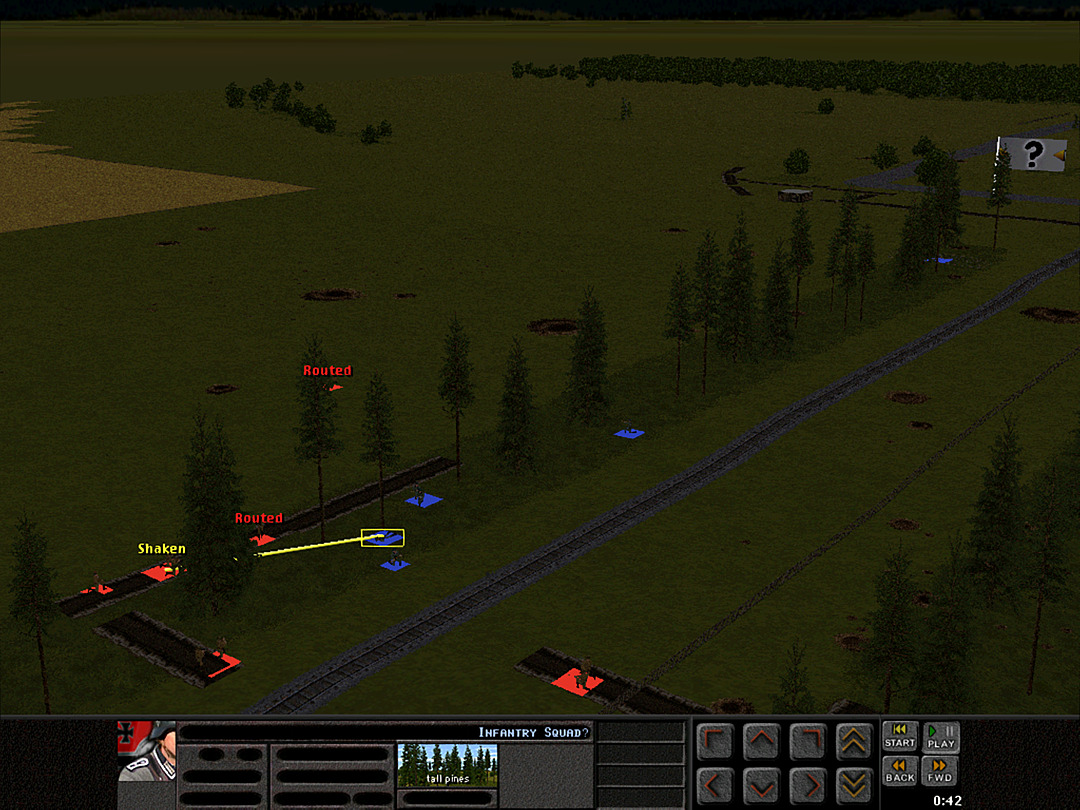 Suddenly, there are Germans everywhere! 1 Plt turns tail and flees the trench. 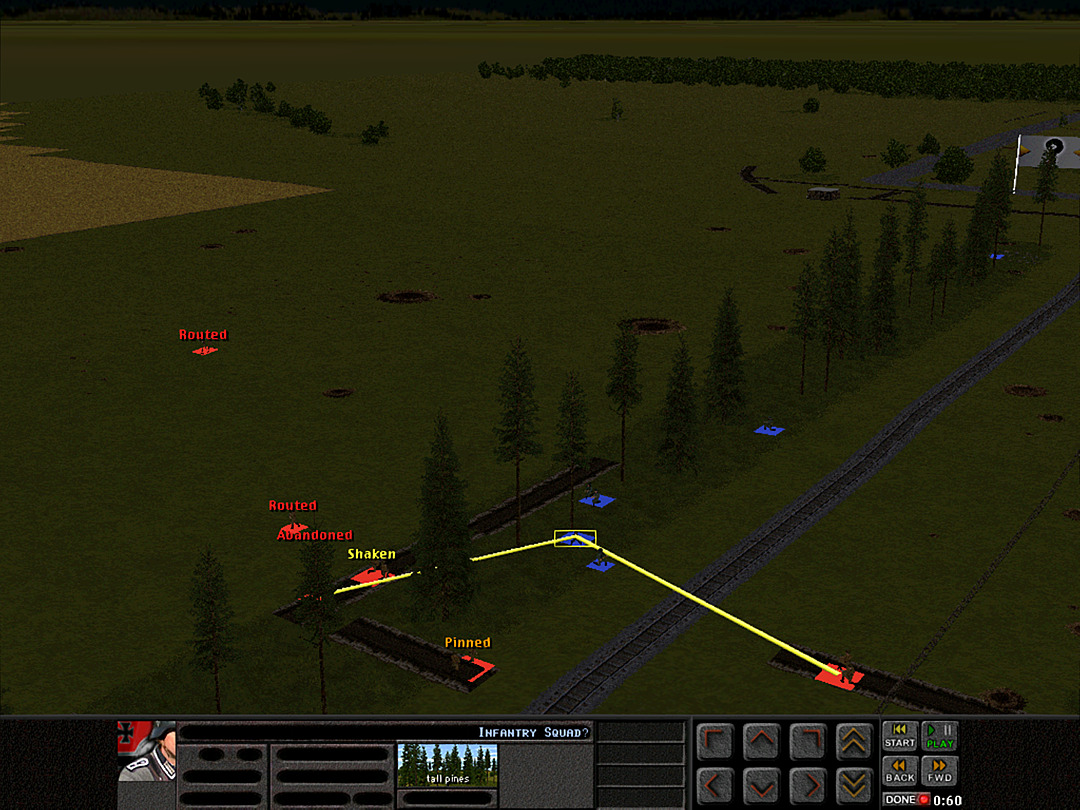 The mortar team runs off as well, leaving their weapon behind. We do have many troops in the trenches who are firing back, however. 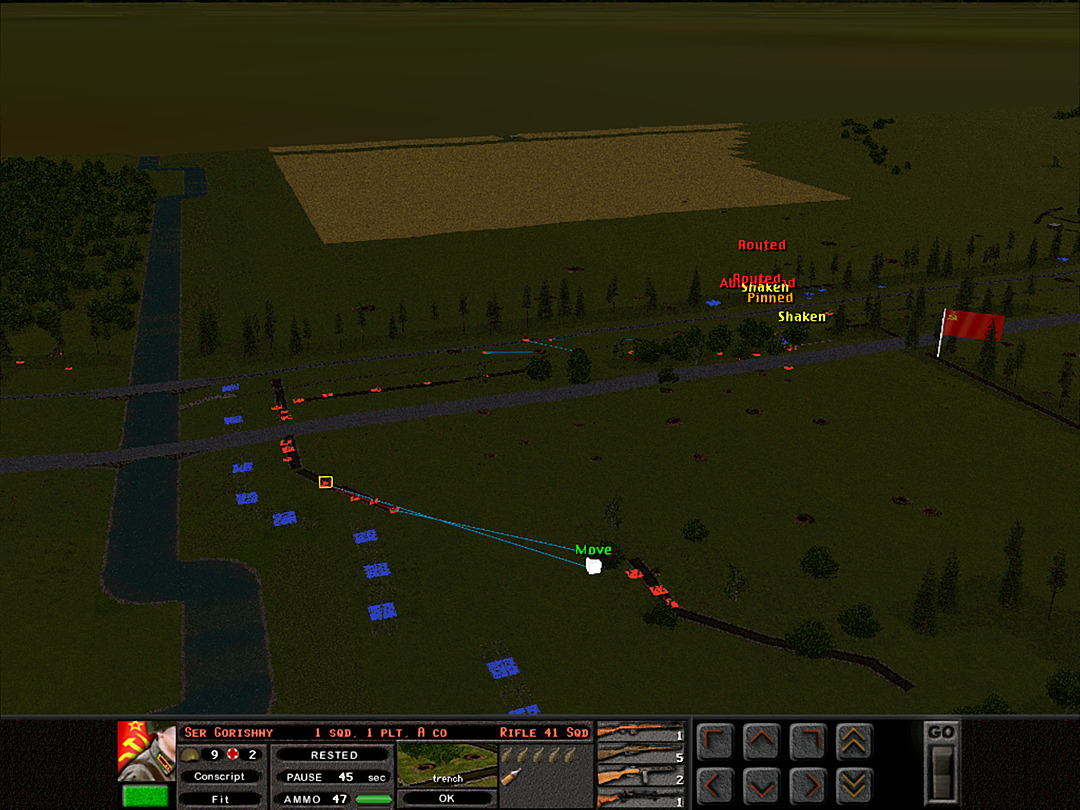 A Coy, 1 Plt finds the nearest part of the trench to be unoccupied. The woods have yet to be checked out, though. 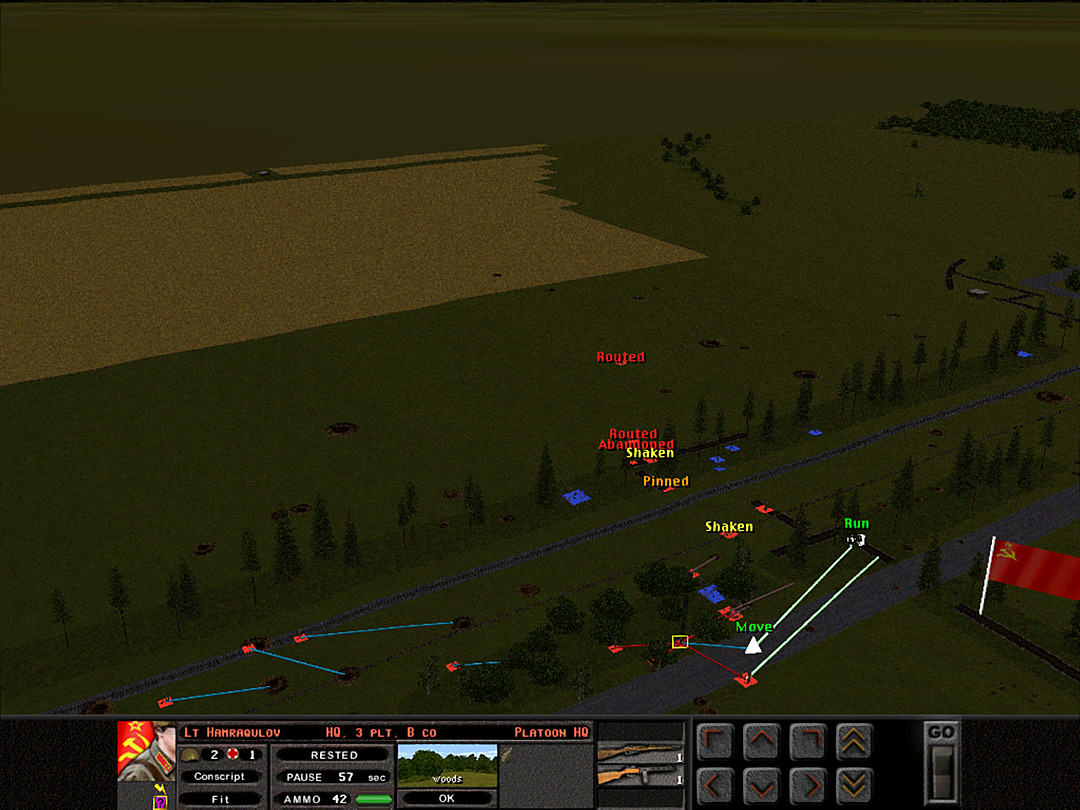 With so many enemy units coming at us, it's imperative that we take all the trenches quickly. 3 Plt is ordered to get there as fast as possible. 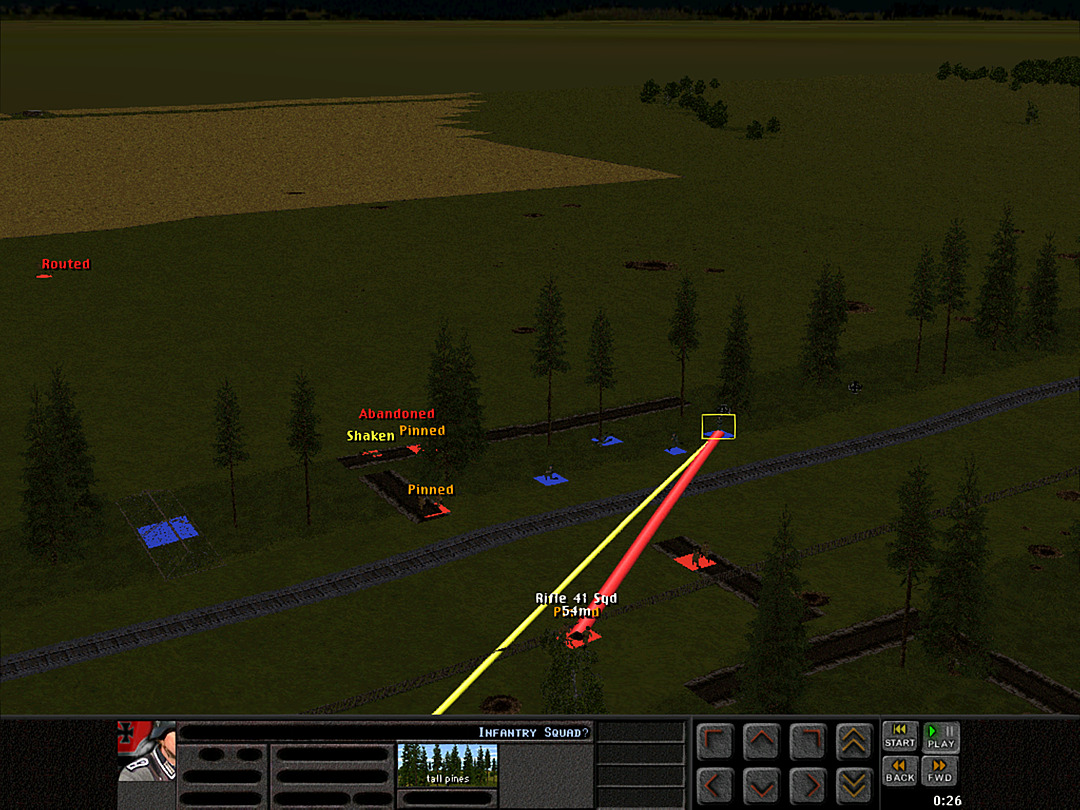 Bullets fill the air as both sides start shooting in a wild fury. Our troops are in much safer positions, though. 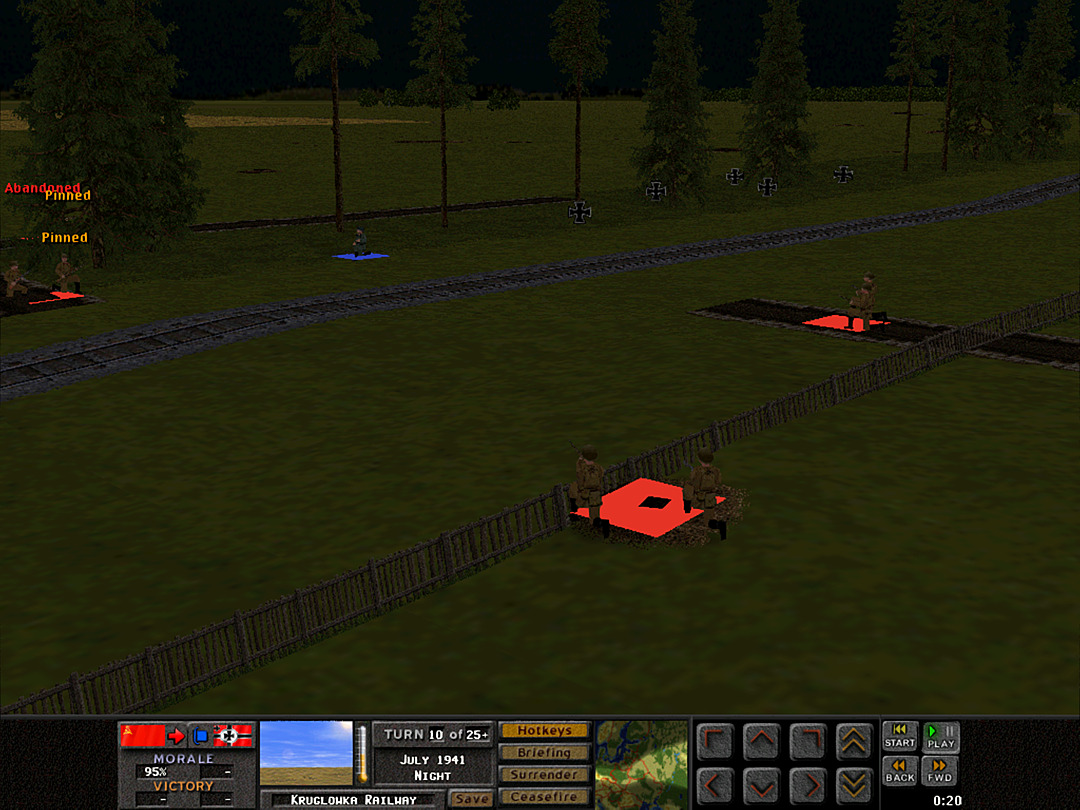 One problem we have is that the trench that 1 Plt was in is on the east side of the pines, and doesn't offer a clear shot at the oncoming Germans. Only the squads on the opposite side have a good view of the enemy. 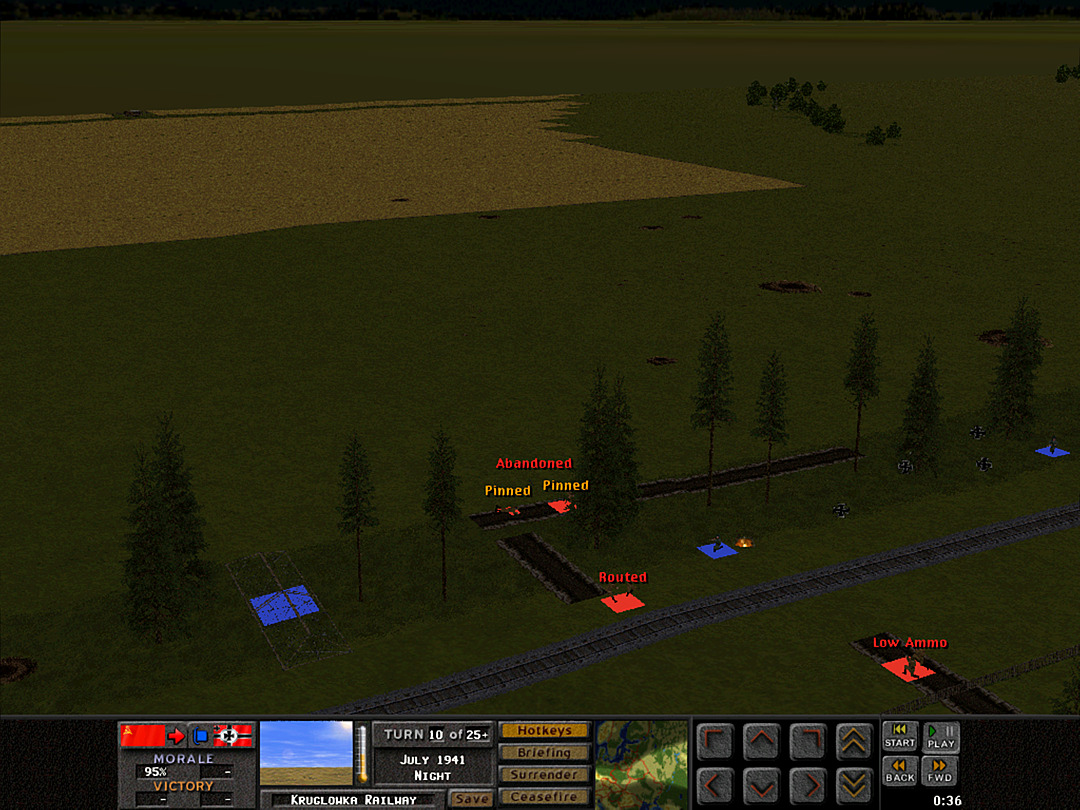 Grenades are exchanged, but it's a Soviet squad that breaks first.  A few more shots from our side, and one enemy squad is finished off. 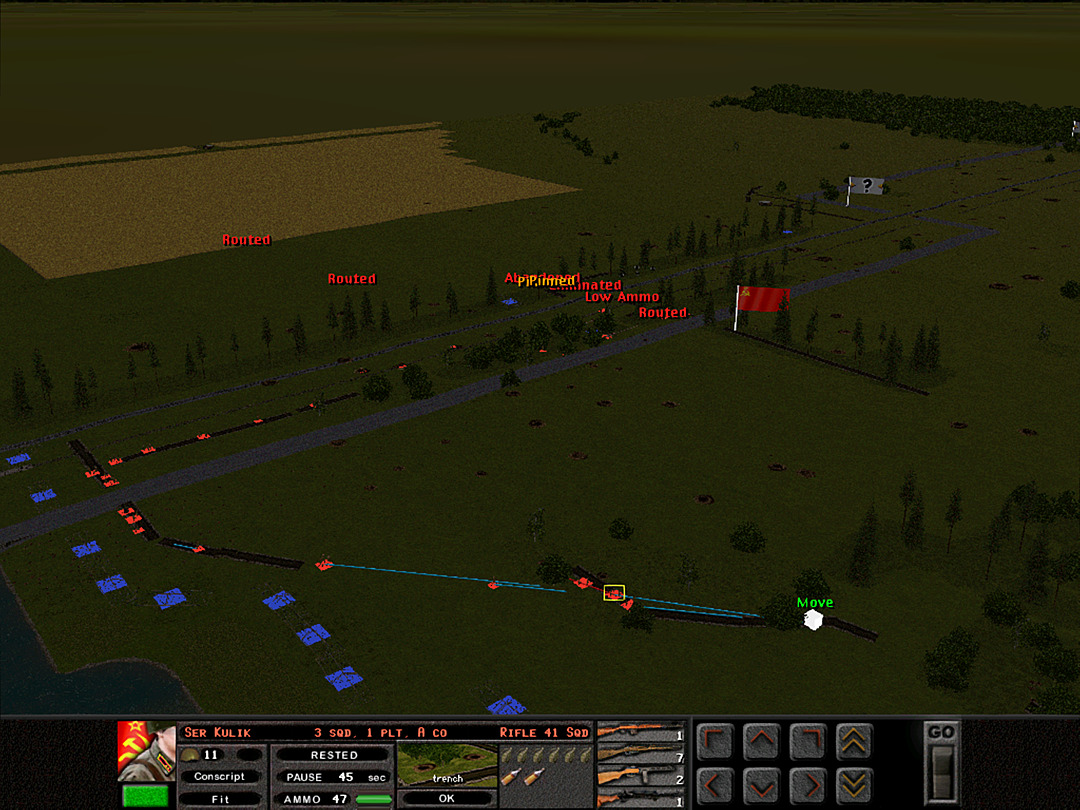 The recon group has just about searched the first line of the trench, with no sign of the enemy discovered. 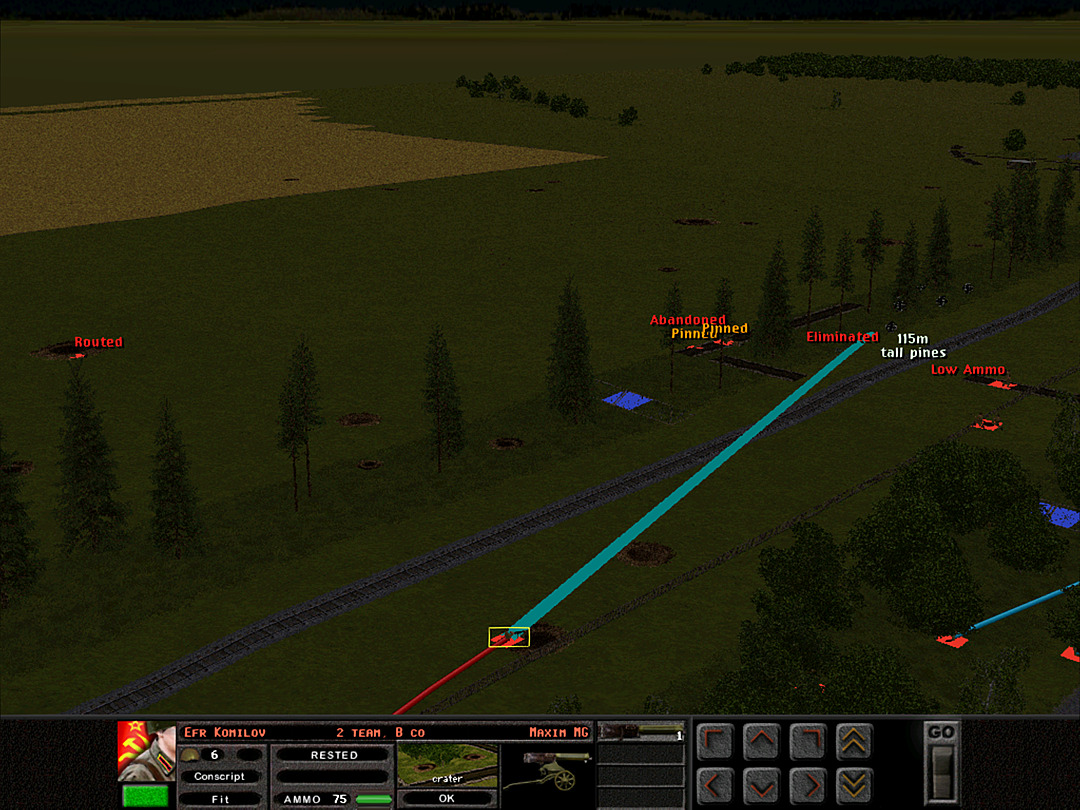 We push forward a Maxim gun to cover the terrain between the middle trenches.  After the lead squad was gunned down, the Germans stopped for a moment. We pour more fire in their direction.  B Coy, 3 Plt hasn't quite managed to get everyone into the second trench, although we have denied it to the Germans.  With our machine gun providing extra support, we're having an easier time halting the enemy.  A Coy, 1 Plt prepares to send squads around into the trees. All remains quiet over there.  A second enemy squad is knocked out, and the rest seem to be falling back. We've taken the trenches!  The original trench along the east side seems less important to control now; more troops are sent to occupy the east-west trench in the middle. Unit Highlight Soviet 45mm Model 38 AT Gun 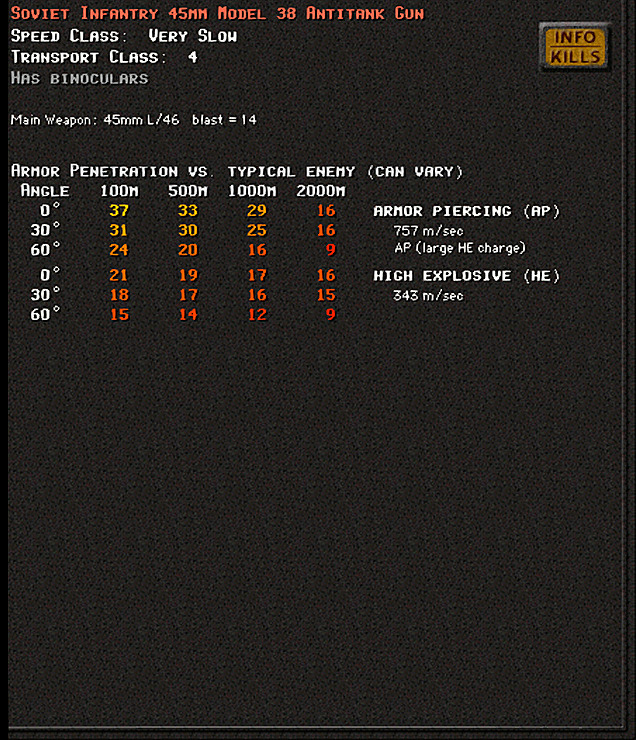  Crew: 6 Base Cost: 24 Part of a class of one of the most mass-produced anti-tank guns of the war. The Soviet Army adopted its first version of this lightweight AT gun in 1932, at which time it was more than capable of penetrating enemy armor. Various different models of the same caliber were fielded throughout the war, although they are generally grouped together simply as a '45mm gun'. In the earliest parts of World War II, especially during the Winter War, this was quite effective against most enemy tanks. It did not take long before more heavily-armored German medium tanks proved it to be outclassed. It was nevertheless fairly easy to produce, and a great number of them stayed in service, as their HE rounds could still be quite deadly to soft targets. Kangra fucked around with this message at 06:58 on Feb 2, 2024 |
|
#
?
Feb 1, 2024 23:27
|
|
|
Fixed angle mortar with adjustable vents sounds like a nightmare scenario, I struggle to imagine the constraints the design engineers were working under.
|
|
#
?
Feb 2, 2024 10:45
|
|

|
SIGSEGV posted:Fixed angle mortar with adjustable vents sounds like a nightmare scenario, I struggle to imagine the constraints the design engineers were working under. Possibly fewer moving parts - the bipod at least would be simpler. I can imagine them slapping a big warning label on it: "Stand back while firing". Naturally the fact that they saw a need to change it up speaks against its practicality.
|
|
#
?
Feb 3, 2024 03:31
|
|
|
Well the vents may not move all that much but they'll likely get eroded over time which sucks because they must be precision machined on at least some level. And yeah, the pressure of actual combat must have changed minds a bit.
|
|
#
?
Feb 4, 2024 01:08
|
|
|
Operation: Kruglowka Railway, Battle 3 Battle Time: 00:14 Our troops are in disarray. However, we have held off the German charge. All we need is a few moments to rest and recover, and we should be able to reorganize our defense. 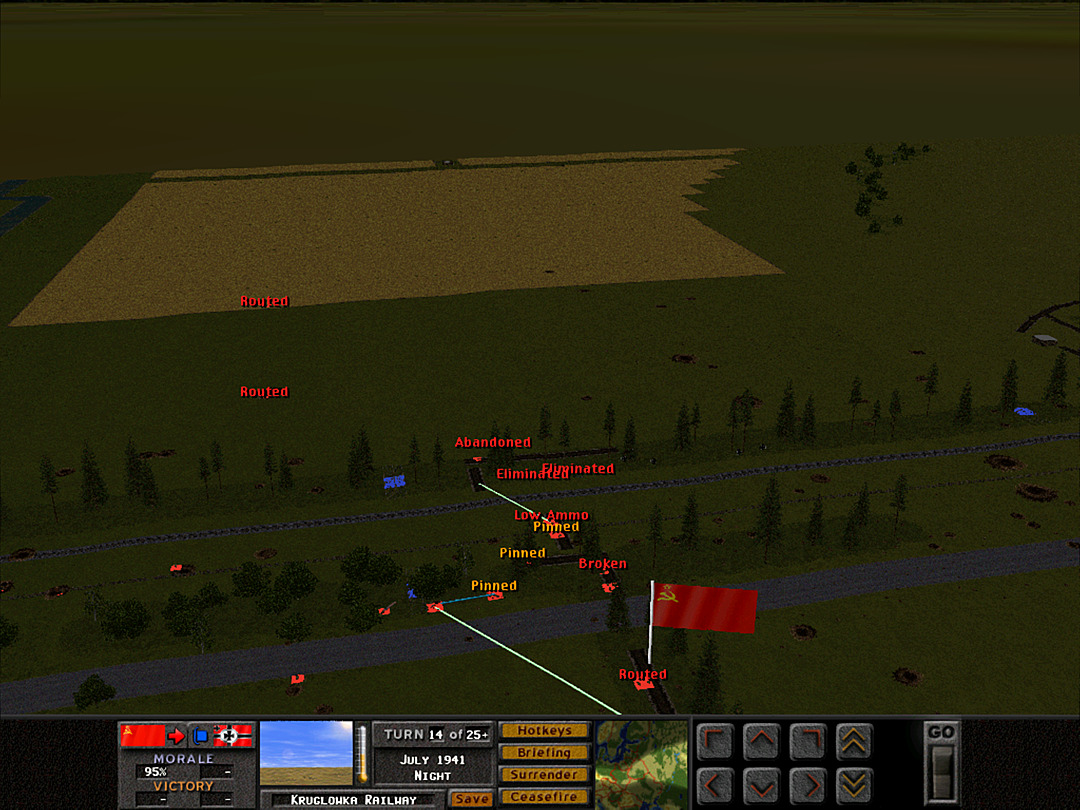 The squads are being ordered to get to better positions, but they may need a little time before they start following orders. 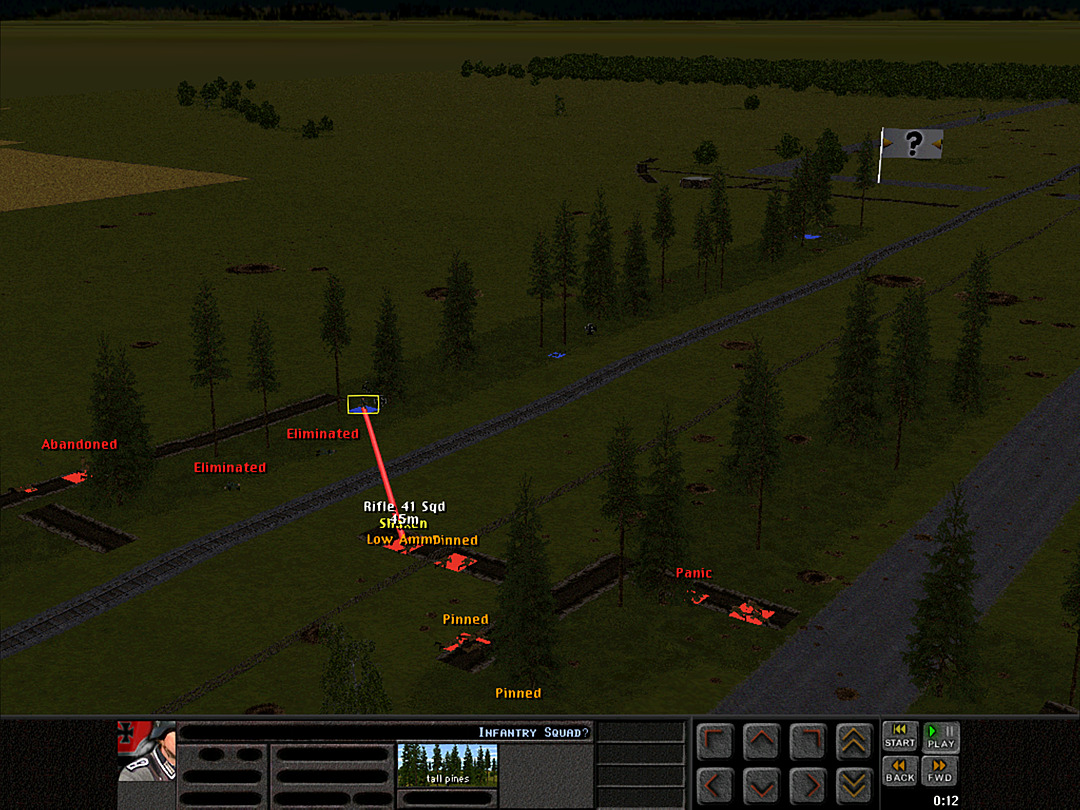 It appears we are not going to get any sort of reprieve. The Germans send fresh squads back at us. Right at the same time, a few artillery shells start to land near the middle trench. 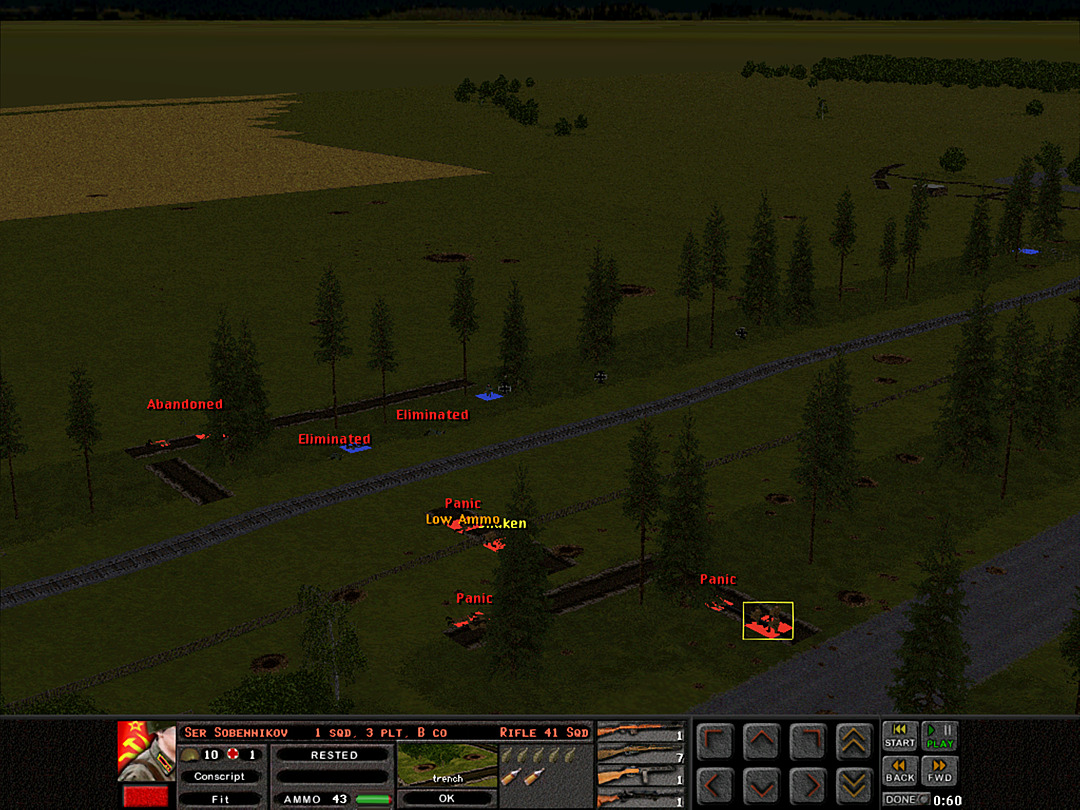 Two enemy units have nearly reached the trenches again, and our forces are having trouble firing back at them with the incoming shells. 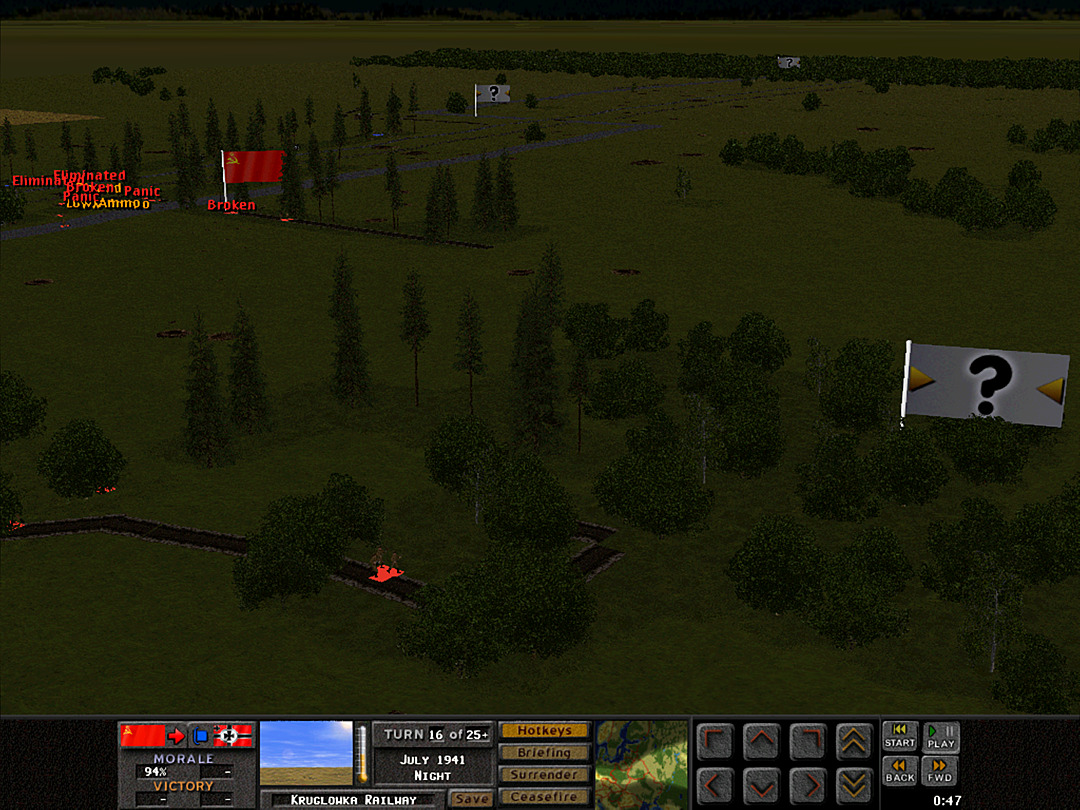 A Coy, 1 Plt continues to follow the trench as it twists and turns into the woods. Still no enemy presence sighted, but they might still be hiding back in the trees. 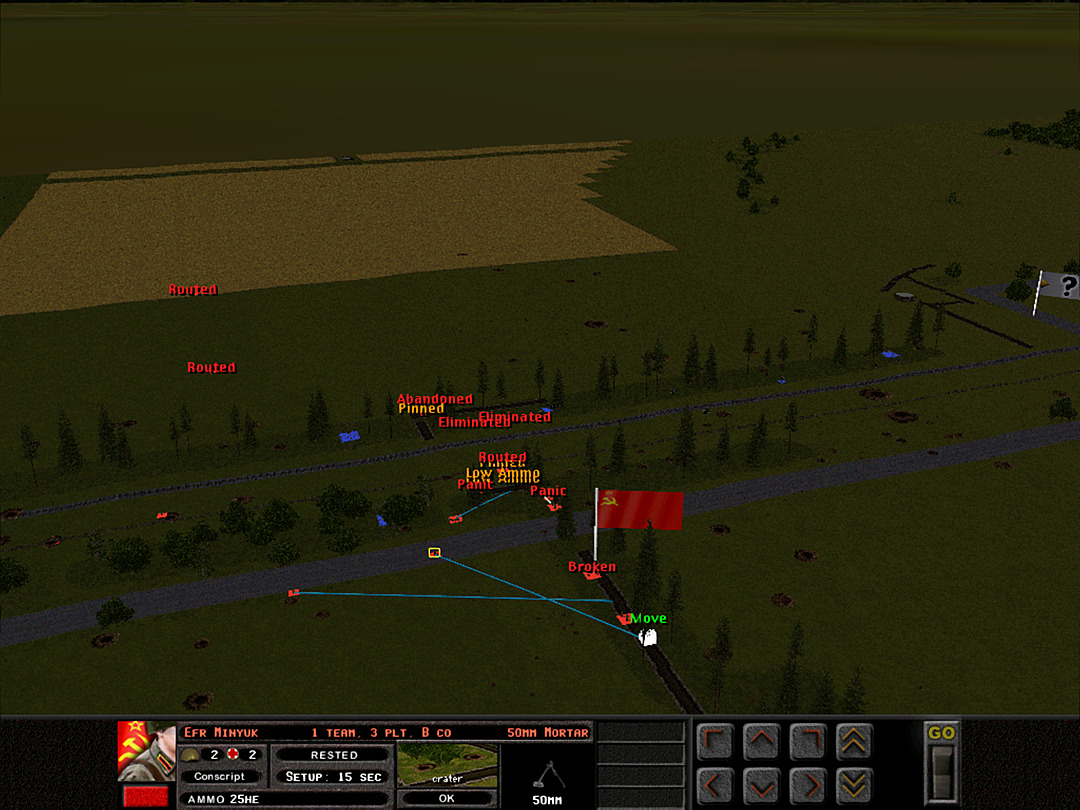 More units are sent to the longer trench. We might end up ceding the western one, but it likely won't be of much use to the Germans as long as we hold the one near the roadway. Strangely enough, the artillery stops, perhaps because they sensed a risk of hitting their own advancing force. 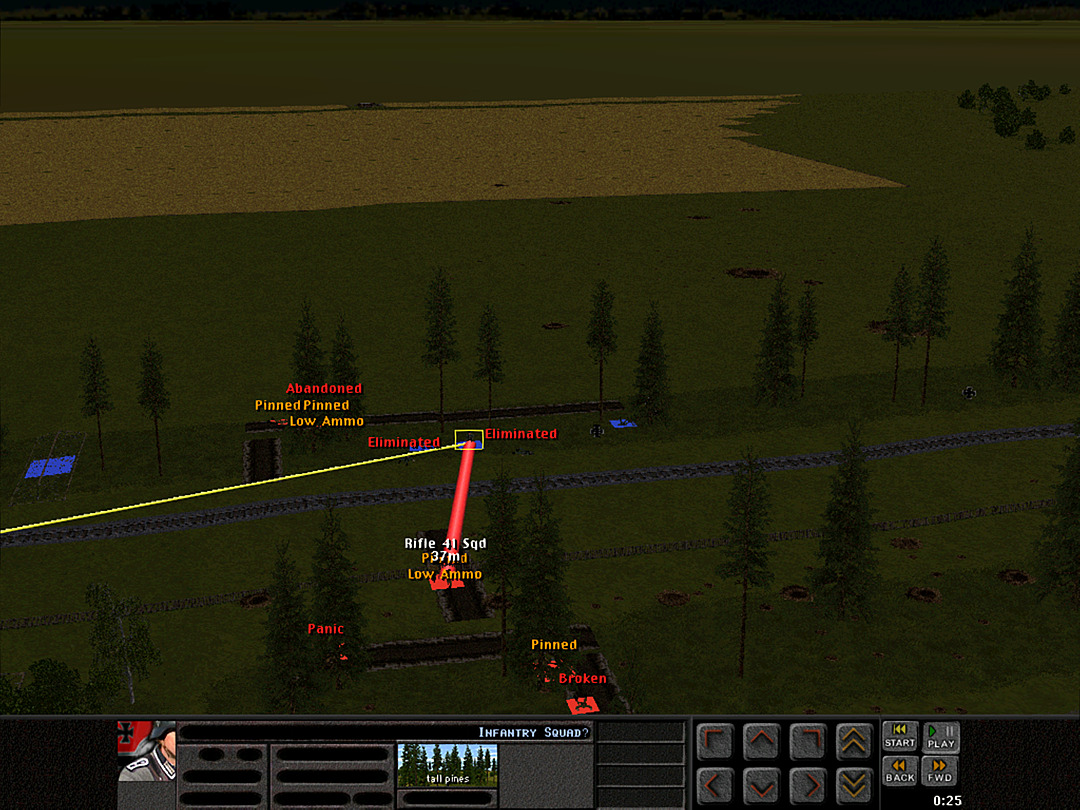 The shells may have stopped, but the enemy squads are coming fast and furious now, and we cannot hold them all back. 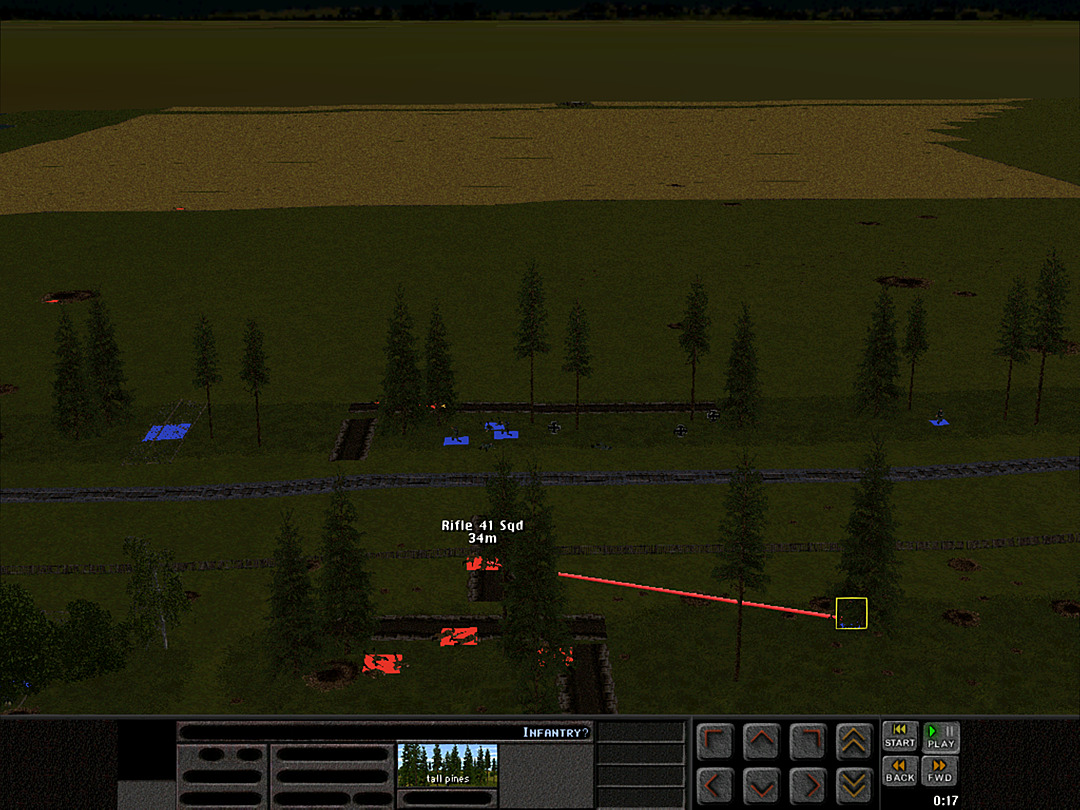 We discover even more of them just south of 3 Plt's position near the road.  It's a full-on assault, and our troops wilt under the pressure of a platoon or more of charging Panzergrenadiers.  We have lost the trench near the rail line, and are about to lose the short one near the road. Most of the fleeing men start to crowd into the long middle trench.  Even our Maxim gun can longer keep firing consistently with so many enemy units firing back.  There is one bit of good news when the scouting platoon reports that they have secured both the trench and the clump of trees.  The only remaining officer in the middle, Lejtenant Hamraqulov, desperately tries to organize the men cowering in the trench around him.  The Germans are relentless, however, and eagerly press their advantage.  B Coy, 2 Plt has now been scattered far and wide across the battlefield.  So many German squads are coming at us now that it's clear we cannot hold even the middle trench we retreated towards.  Lt. Hamraqulov has abandoned the trench and left the men in it at the mercy of the enemy.  A Maxim gun surrenders after realizing they cannot possibly reach safety.  Several squads run all the way to the far end of the trench. They might have a chance to recover and at least fight back a bit, or head to the woods across the darkened field.  Meanwhile, the Germans are threatening to push us farther back to the river. We have little to stand in their way.  Some of A Coy, 1 Plt's squads are sent to slow down the ruthless German assault.  A few units in the trench tried to make a run off to the east. Two hidden enemy units reveal themselves, and the squad is gunned down. The trench is being attacked from both sides now.  The enemy seems to be coming at us faster than we can throw men in front of them. Few of the troops are able to return fire.  The middle trench goes quiet as we lose our last men still alive in it. 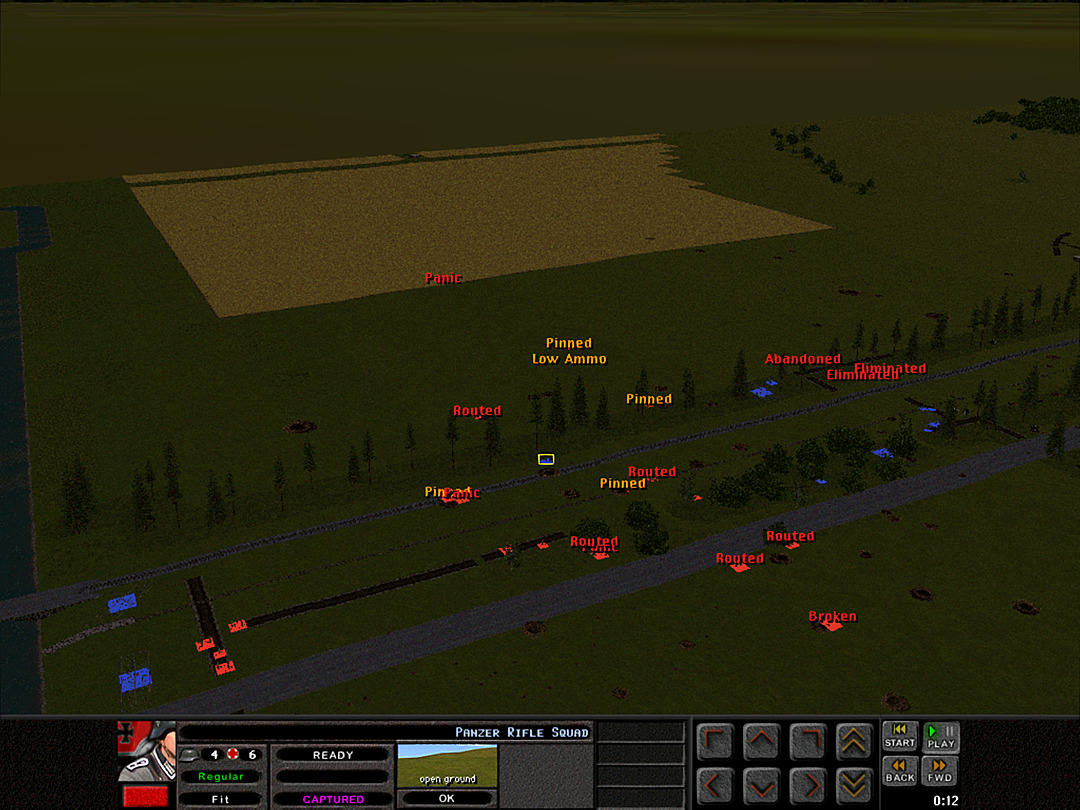 The confusion of battle yields one tiny victory. The unit that charged forward at us finds that none of their compatriots were willing to follow, and they decide to surrender before we shoot them to pieces. 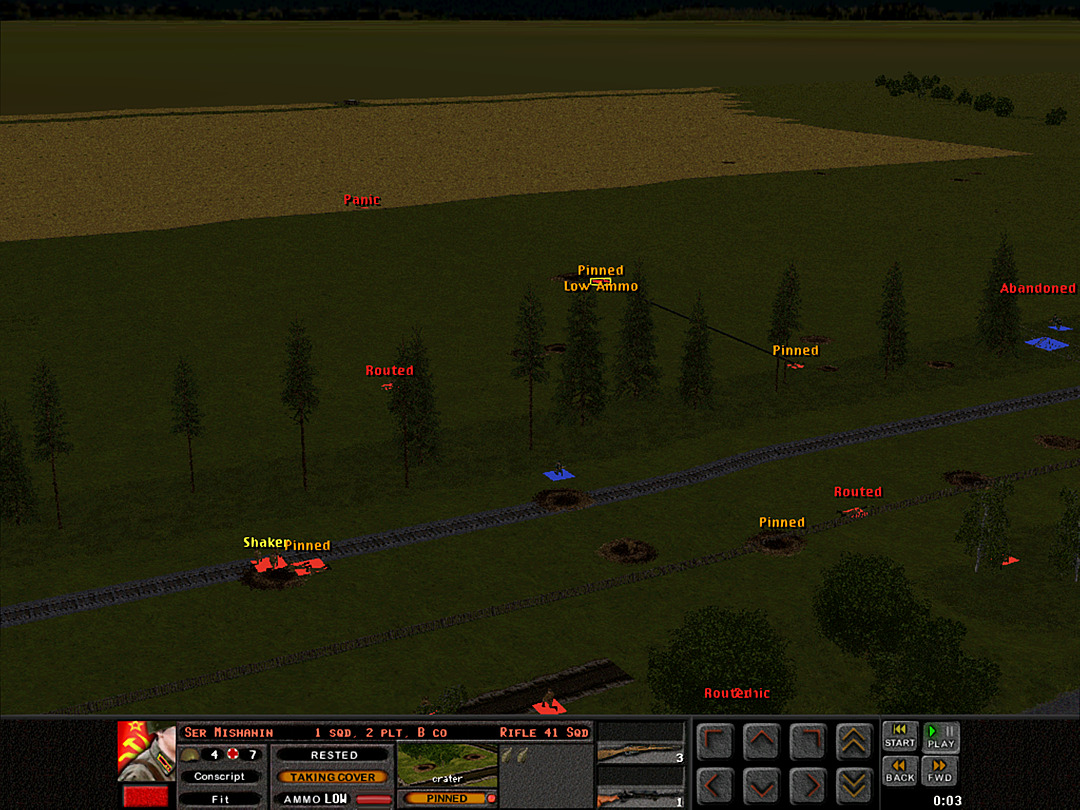 We're still taking heavy fire, however, and almost none of our soldiers are responding to orders.  However, it does appear as though the enemy is content to have re-taken the trenches. They are no longer pushing to take more ground. 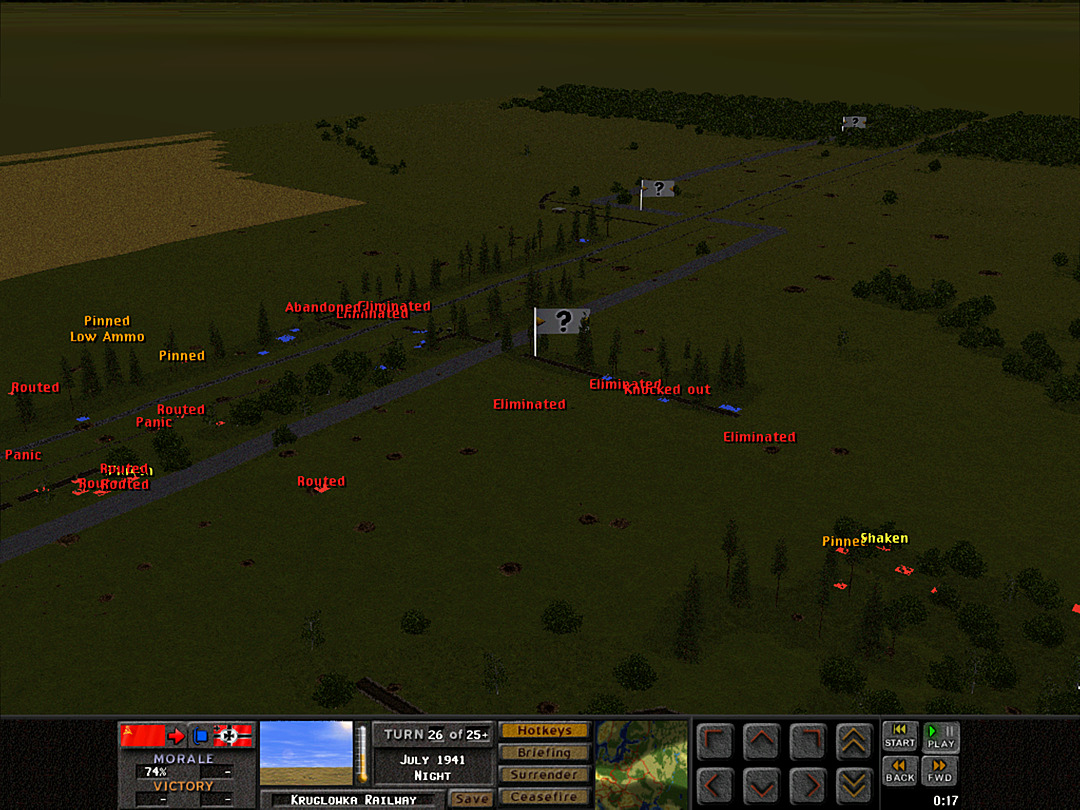 Even A Coy in the woods is now starting to come under fire. 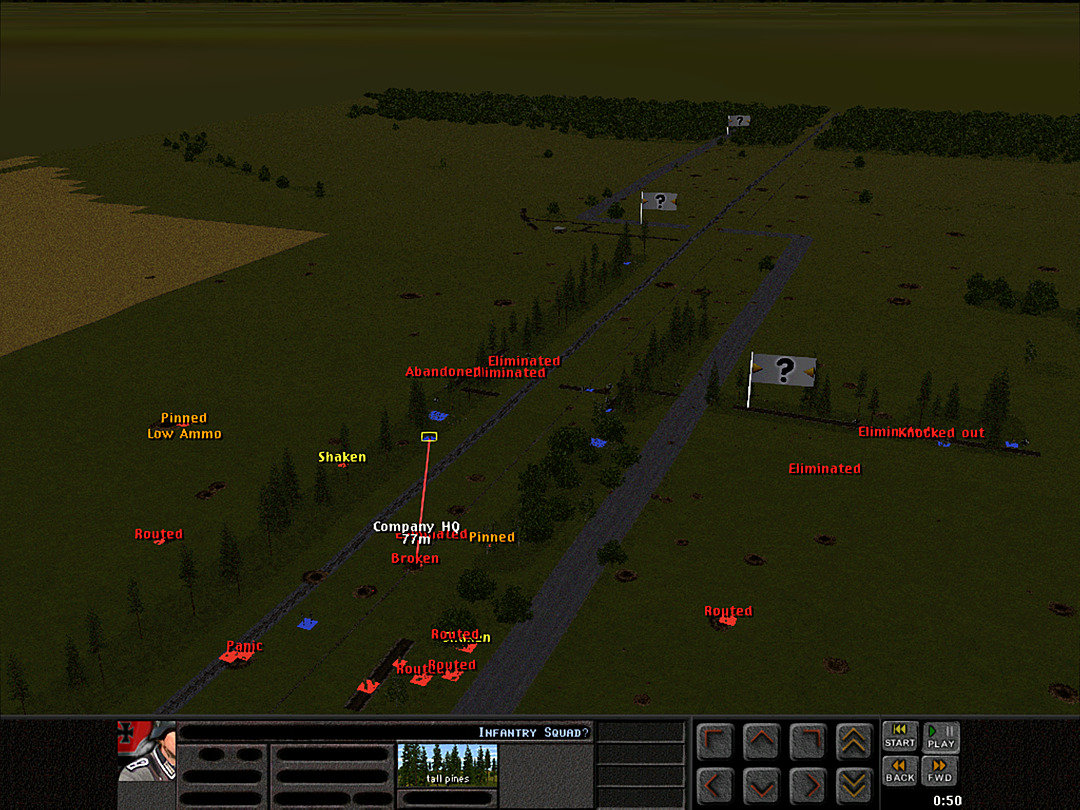 B Coy is shattered. The captain calls for all soldiers to fall back. 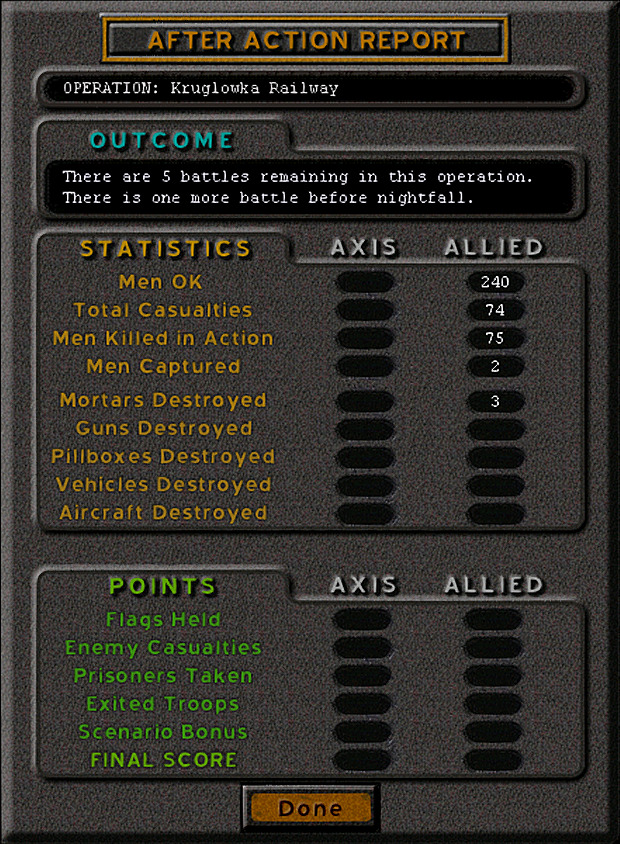 The night has been an absolute disaster. Far from achieving our goals, we have lost our forward position, and will need to fight hard just to push away from the bridges tomorrow. Unit Highlight Soviet Assault Boat 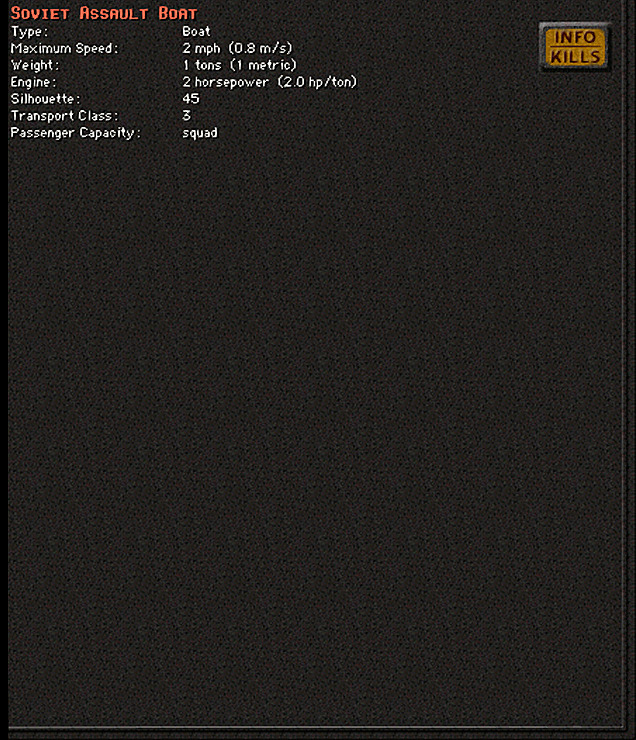 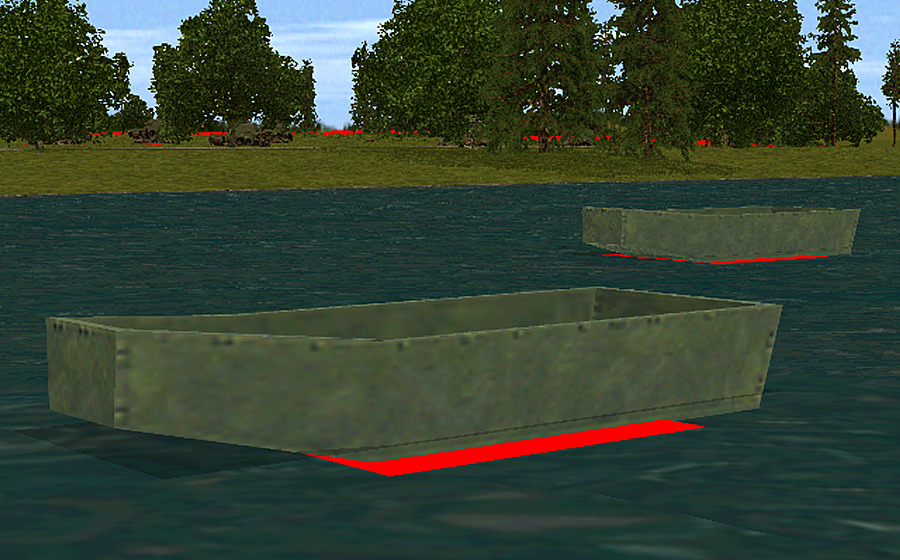 A somewhat generic unit type, though there were better real-world examples. This is a unit that appears in the game, but is of a rather generic type since it is unlikely to show up in most scenarios, or need to be modeled in detail for each country. Indeed, this seems clearly based on the American Assault Boat, a somewhat crude but reasonably portable model. It represents the sort of motorboat that would be used to cross wide rivers in the first part of an assault. There's not a whole lot of information on how commonly boats like these would have been deployed by the Soviets when crossing rivers, although the linked model (PG-117) was used by the 'Dnieper River Flotilla' in its 1940s incarnation (the name was given to a group of riverine vessels that operated throughout Russia and Eastern Europe during the war). Note that although the real-world battle this operation is based on was accomplished with boats, they would most likely have been small rowed boats for the stealth, as a motorboat would be too much noise and not really needed for a small river like the one depicted on this map.
|
|
#
?
Feb 4, 2024 05:09
|
|
|
Operation 3, Battle 4 of 8 Operation: Kruglowka Railway Time: Mid-day Skies: Clear Ground: Very Dry Temp: Warm Wind: Breeze NNW After the debacle of last night, we definitely have quite a bit of work cut out for us. Instead of holding a nice position from which to mount an attack on the crossing and push the enemy off their line, we will be fighting merely to take one more trench -- the same trench we so easily occupied yesterday. Fortunately, a battalion of fresh troops is here to lead that attack. They also have slightly more training than being told which end of the gun the bullets come out of. The battalion's still not fully arrived, with only two companies and support units present, but we're lucky to have that much to work with these days. It's adding roughly the same force size that we started with. That should be sufficient numbers to rout the Germans. Reinforcements: pre:Battalion HQ - Major Fedorov D Company 2 x Maxim MG Teams 1 Plt - 4 x Rifle 41 + 50mm Mortar 2 Plt - 4 x Rifle 41 + 50mm Mortar 3 Plt - 4 x Rifle 41 + 50mm Mortar E Company 2 x Maxim MG Teams 1 Plt - 4 x Rifle 41 + 50mm Mortar 2 Plt - 4 x Rifle 41 + 50mm Mortar 3 Plt - 4 x Rifle 41 + 50mm Mortar Independent (Infantry) 8 Team - 82mm Mortar 6x 9 Team - 45mm AT Gun 10 Team - 45mm AT Gun 11 Team - 76.2mm M27/39 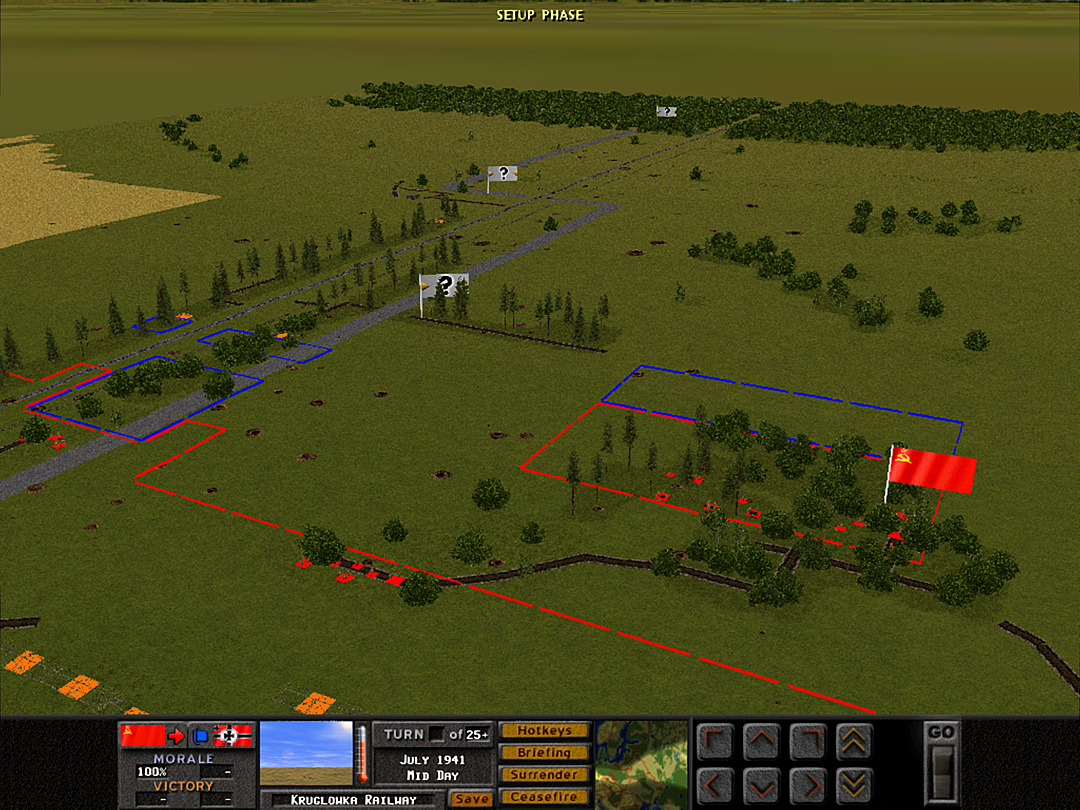 A Coy's advance into the woods was one bright spot, but even that success was marred by their failure to maintain a proper link to the rest of the line. They will occupy the woods and trenches and provide fire support as needed. If all seems clear, they may advance southward to either the middle trench or the next group of trees beyond it.  E Coy is charged with the initial assault. They will need to push as far as the two small trenches in the tree line along the railway. If this goes well, they can continue and attack into the middle trench, with either D Coy pulled forward to support, or A Coy to push from the west side at the same time.  D Coy remains in reserve across the river for now. What remains of B Coy � roughly a platoon's worth of men, with machine guns and AT guns to support, will hold the trench at the bridges. A stronger 76mm gun has been moved into the trench to support E Coy's advance.  Not everyone who fled from B Coy has deserted. Some took shelter in the cornfield last night. What they'll be able to do out here far from any proper unit remains to be seen.  As the sun rises high and we set out for battle, the Germans prove the rumors of the 'assault guns' to be truth. However, they've brought them right out into the open. Probably they thought it was a show of force since we have had most of our guns hiding until now.  It will prove an unwise move for them. Our guns are lined up and ready to take a direct shot.  Fire from multiple directions will be crucial in taking these vehicles out quickly. 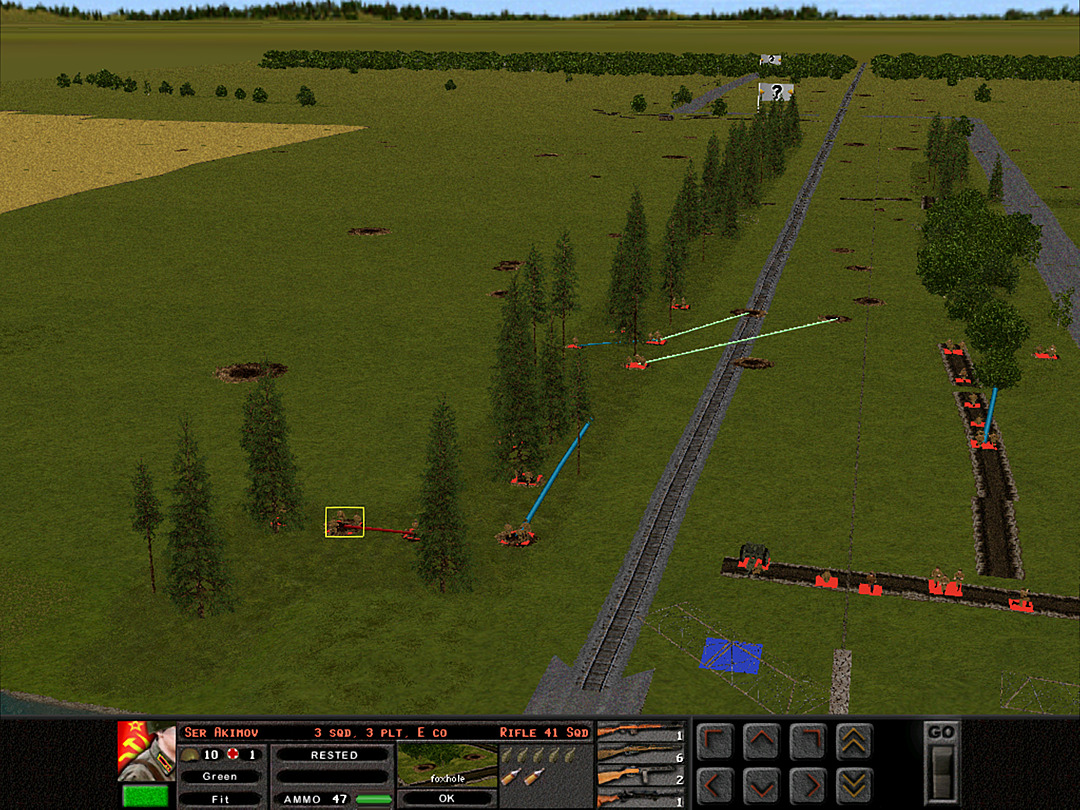 The Germans have either pulled back from where they pushed us to last night, or are hiding out for an ambush. We began the advance. 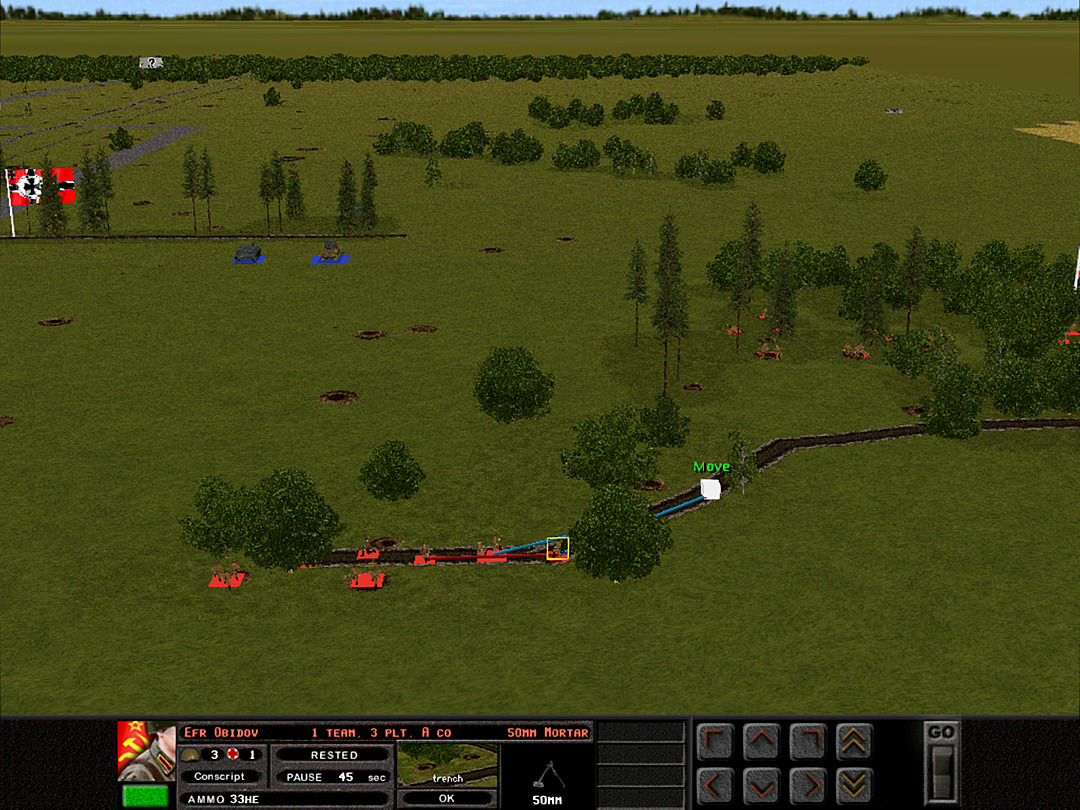 A Coy secures the trench in the woods. They have a good view of the German vehicles; one is a Stug, but the other is a lightly-armored anti-air truck.  The Flak vehicle is taken out with a few bursts of machine gun fire. The Stug's front armor will not be pierced so easily. 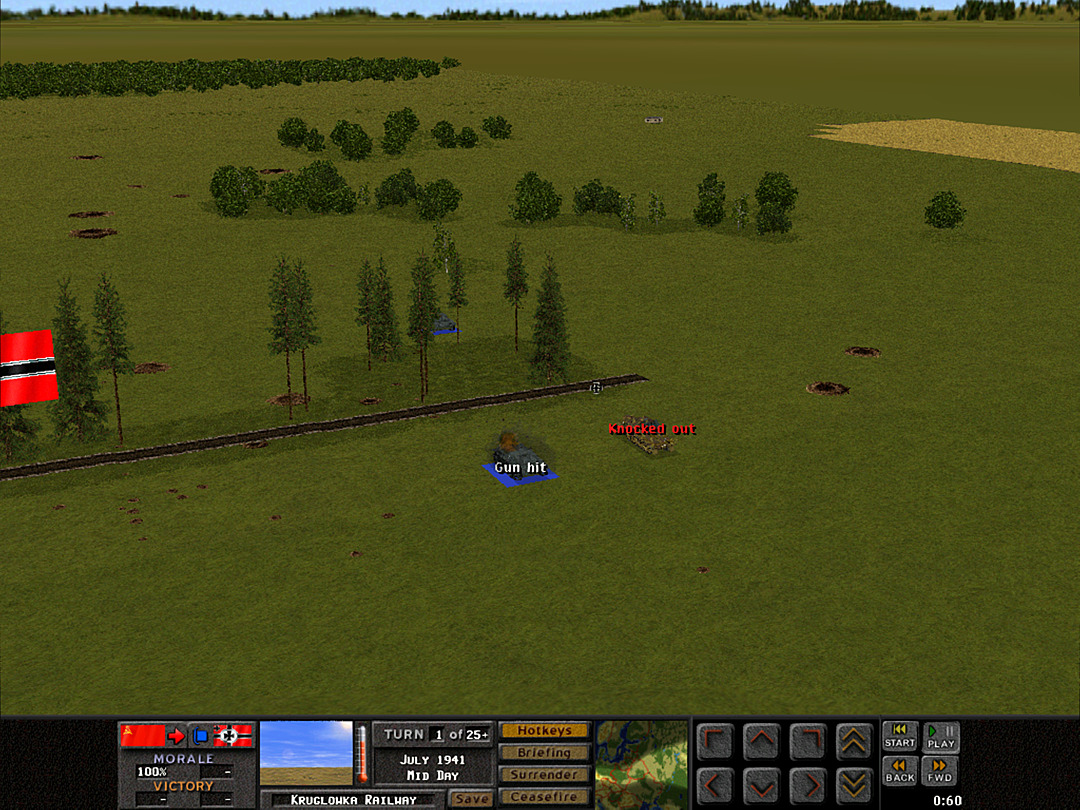 Repeated shots from our AT guns prevent it from ever being effective, though. We've essentially knocked it out without needing to penetrate it. 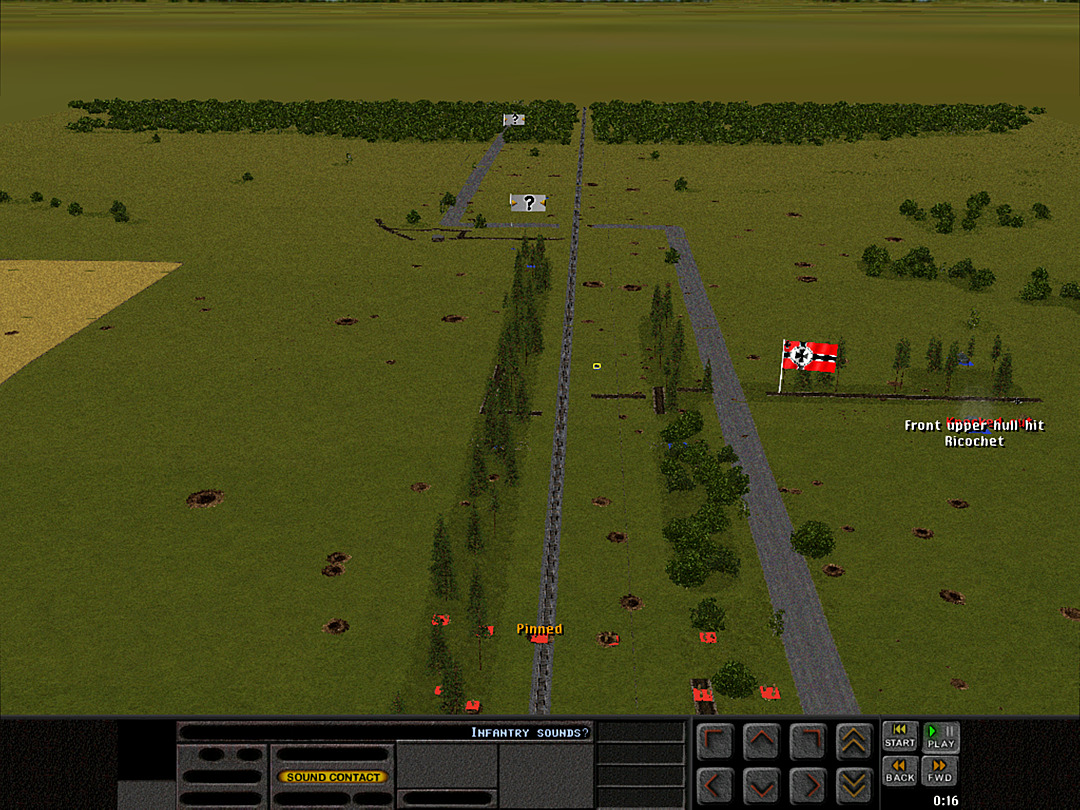 The first fire from a German squad hits E Company. It reveals that they're holding a line at the short trenches. 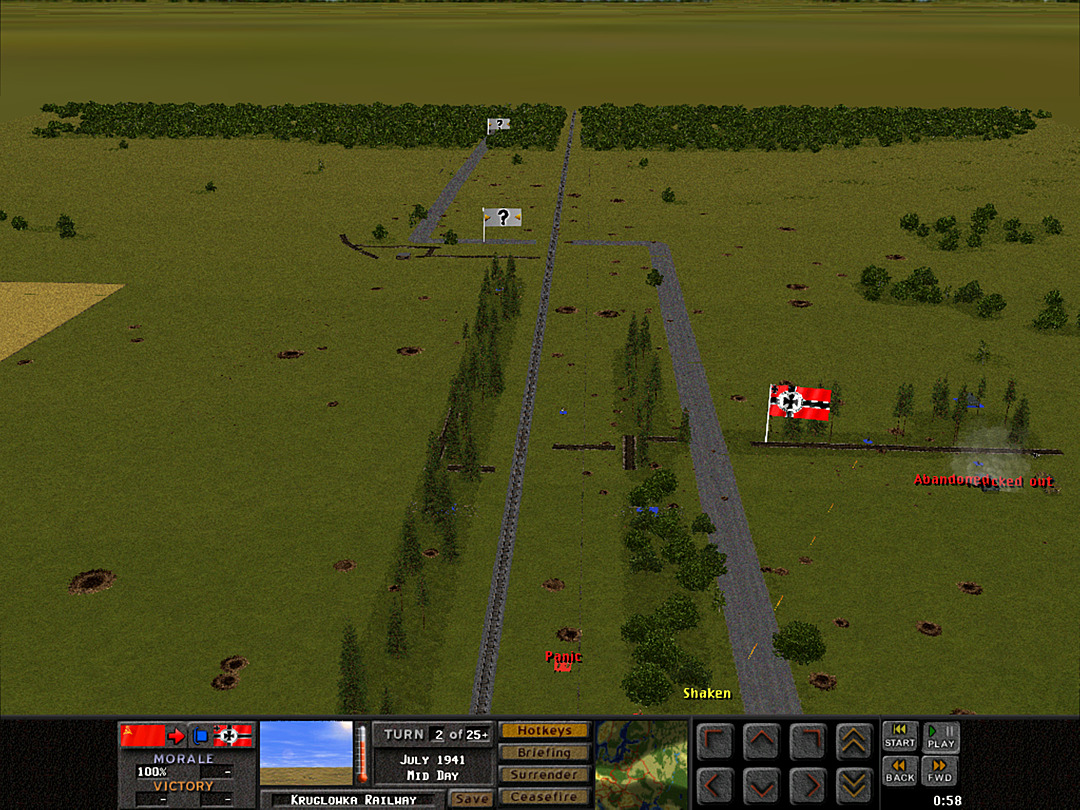 Shortly thereafter, a machine gun in the middle trench opens up. 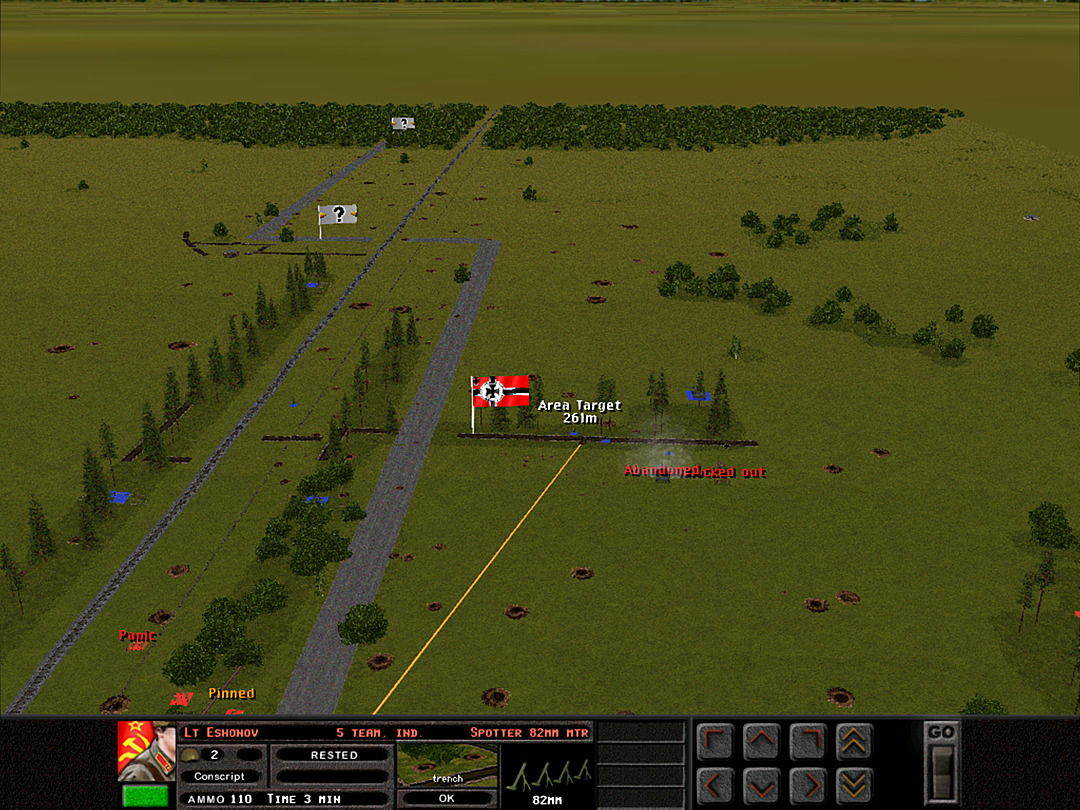 The Stug crew has abandoned its vehicle. We do spy another one still hiding behind the trees. A wide-area mortar strike is called in on the area surrounding the middle trench. 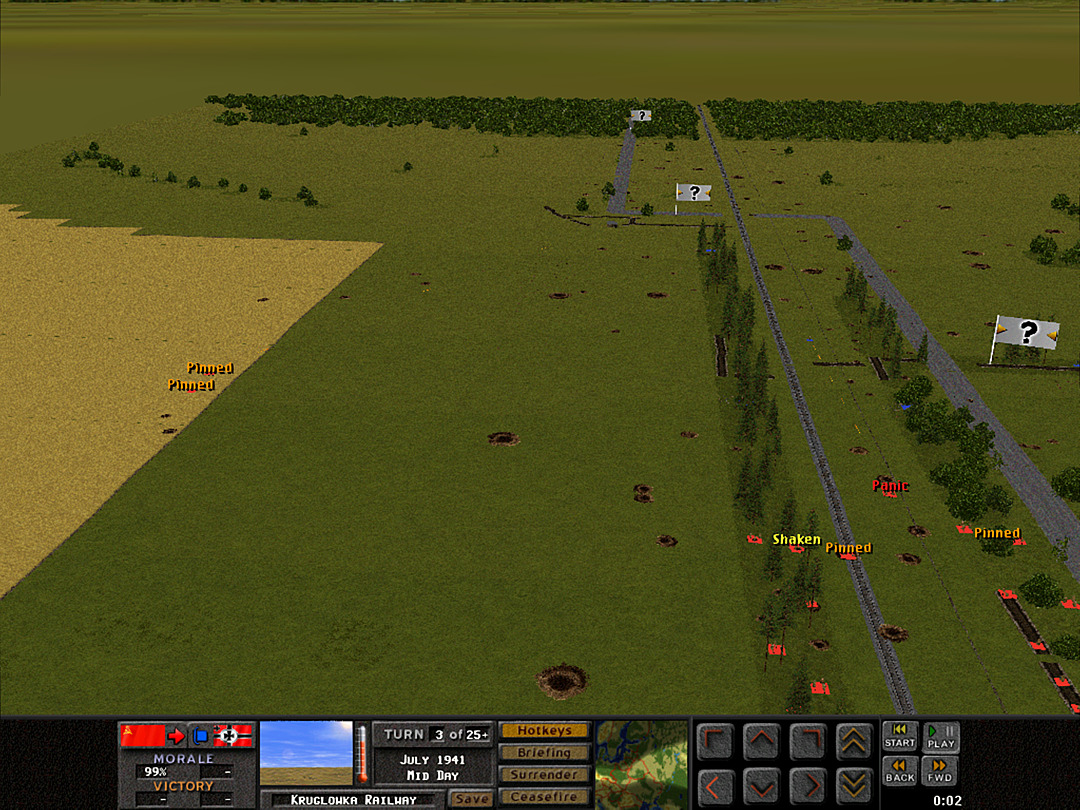 E Coy is advancing with some difficulty. Out in the fields, the 'lost' squads are attracting the attention of some Germans back along the roadway. 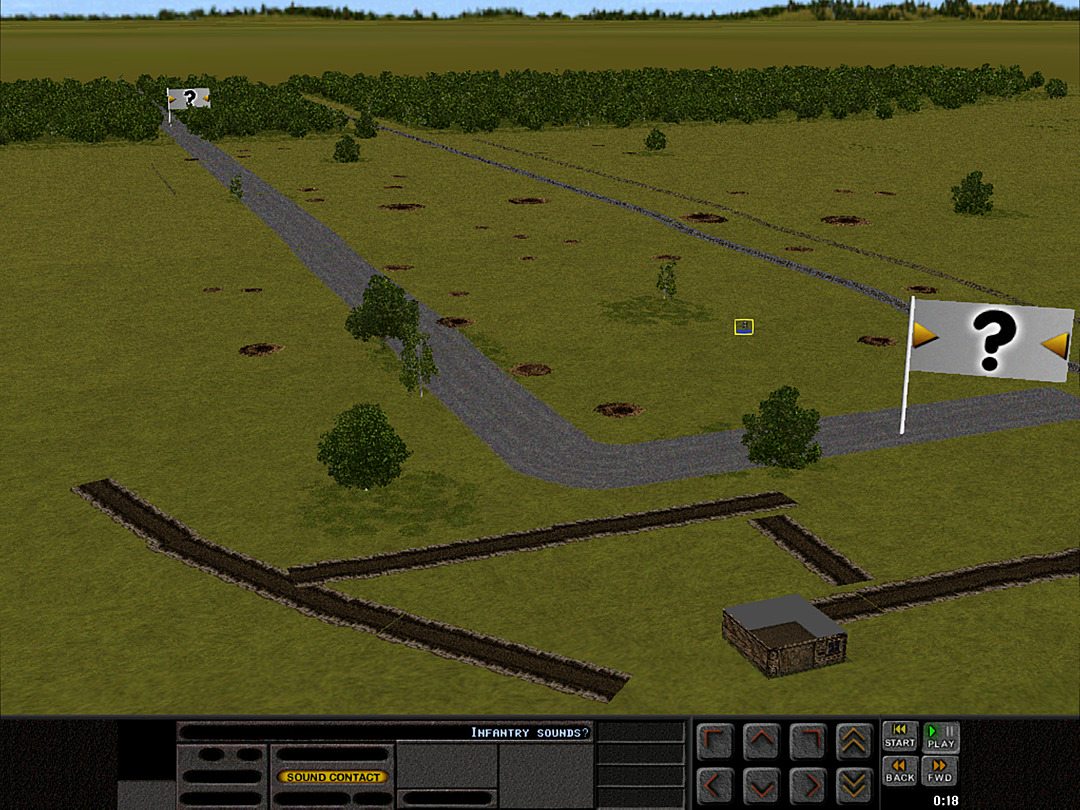 They have a strong trench structure back there as well, although the gunner seems to be set up in a foxhole south of the road. 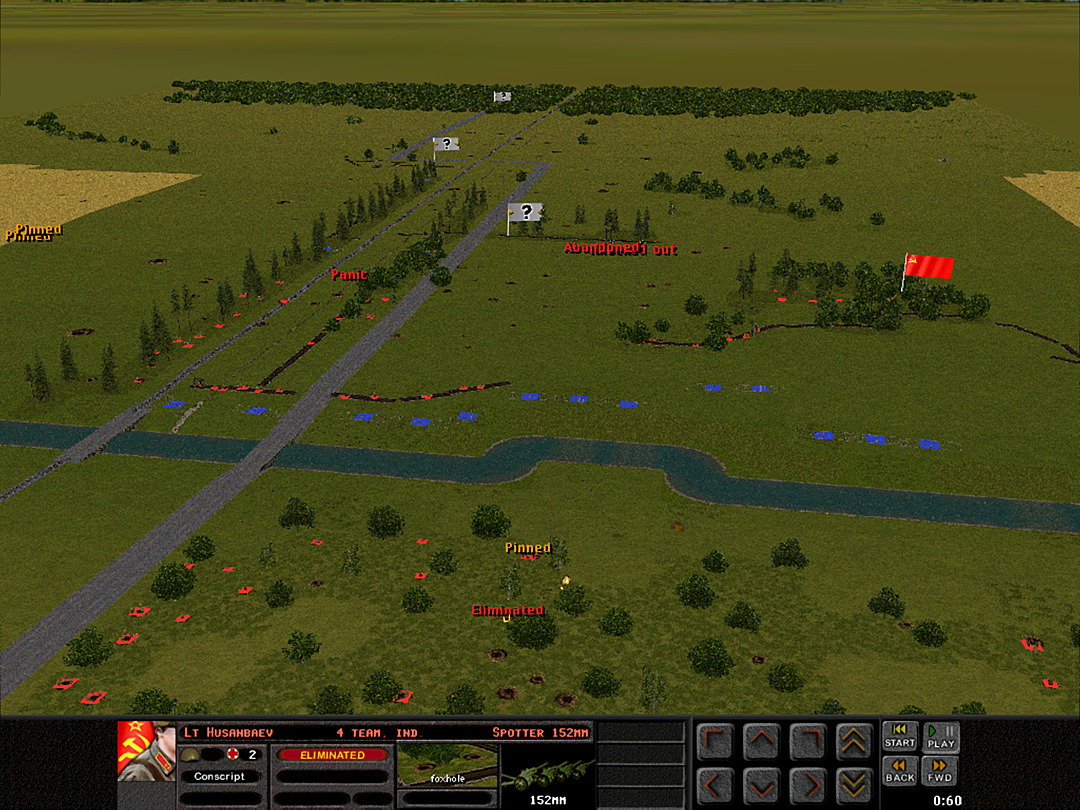 The Stug survived just long enough to identify the primary gun that was targeting it, and mortar shells start to come in. Unfortunately, one of the explosives lands deeper into the woods, and knocks out the spotter for our heavy artillery. 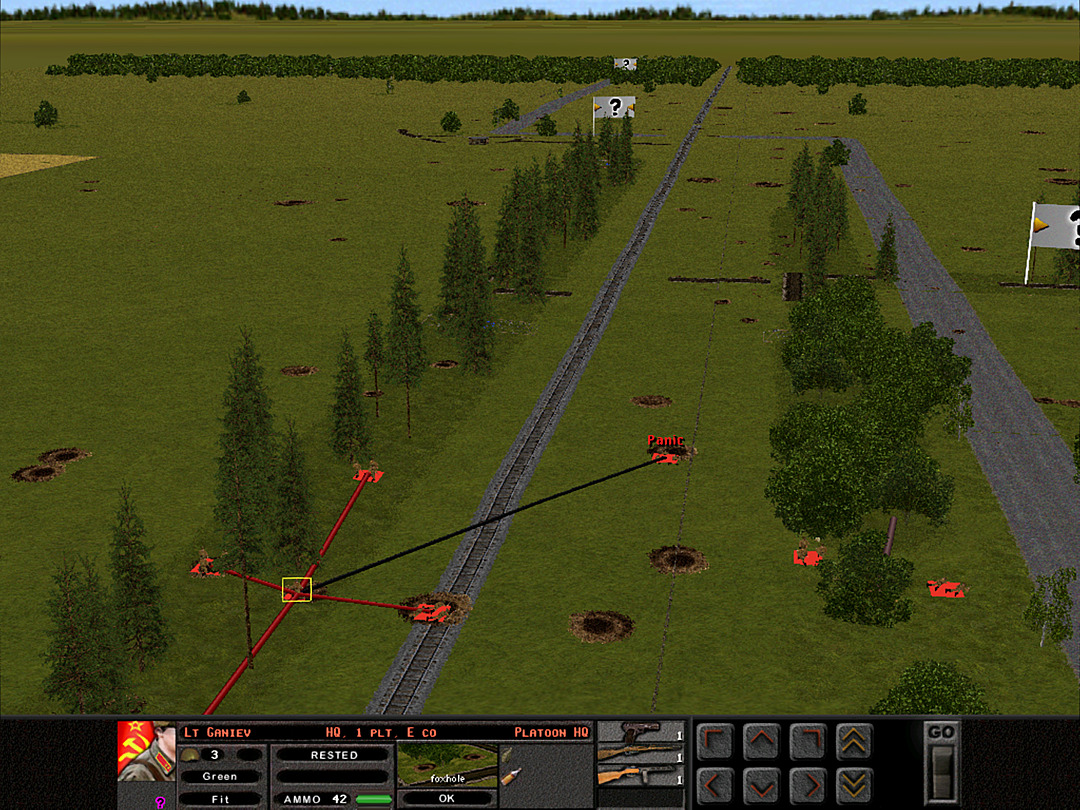 E Coy, 1 Plt is moving through the eastern line of trees. Only the squads that tried to claim the foxholes in the open ground are having trouble moving. 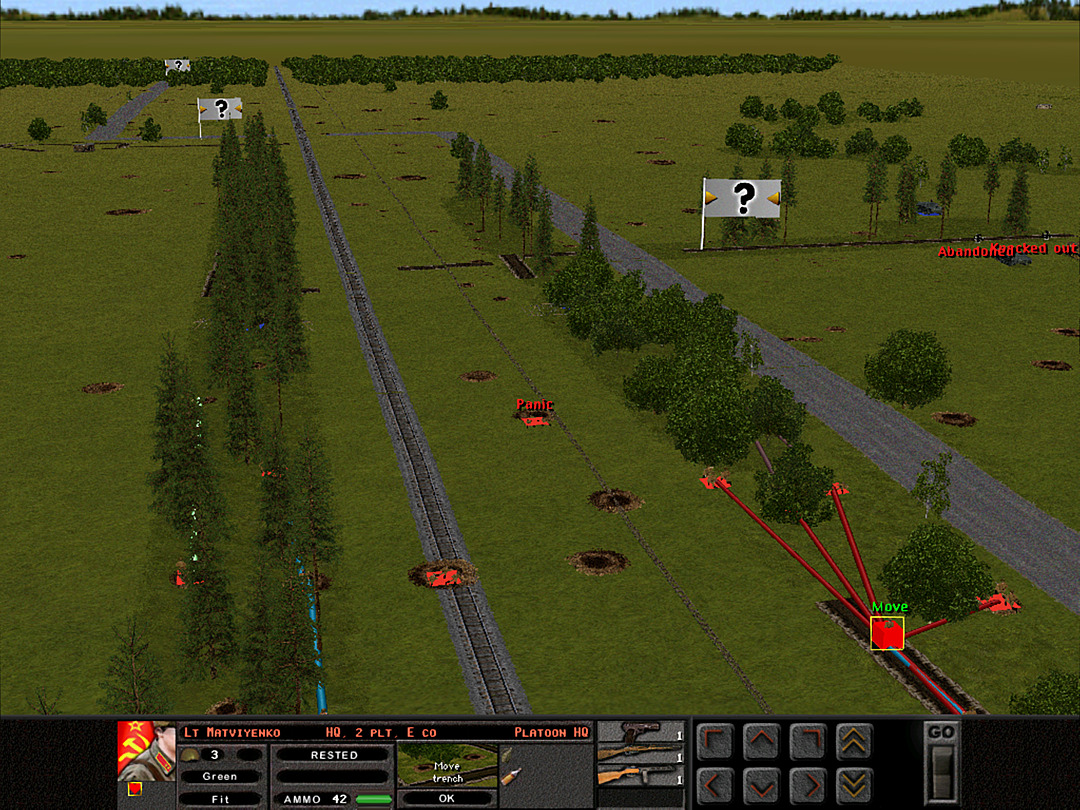 At the same time, E Coy, 2 Plt is advancing through the western line of trees. They're trying to take a more stealthy approach, as they could be exposed to fire from the middle trench as well as down the railway 'alley'. 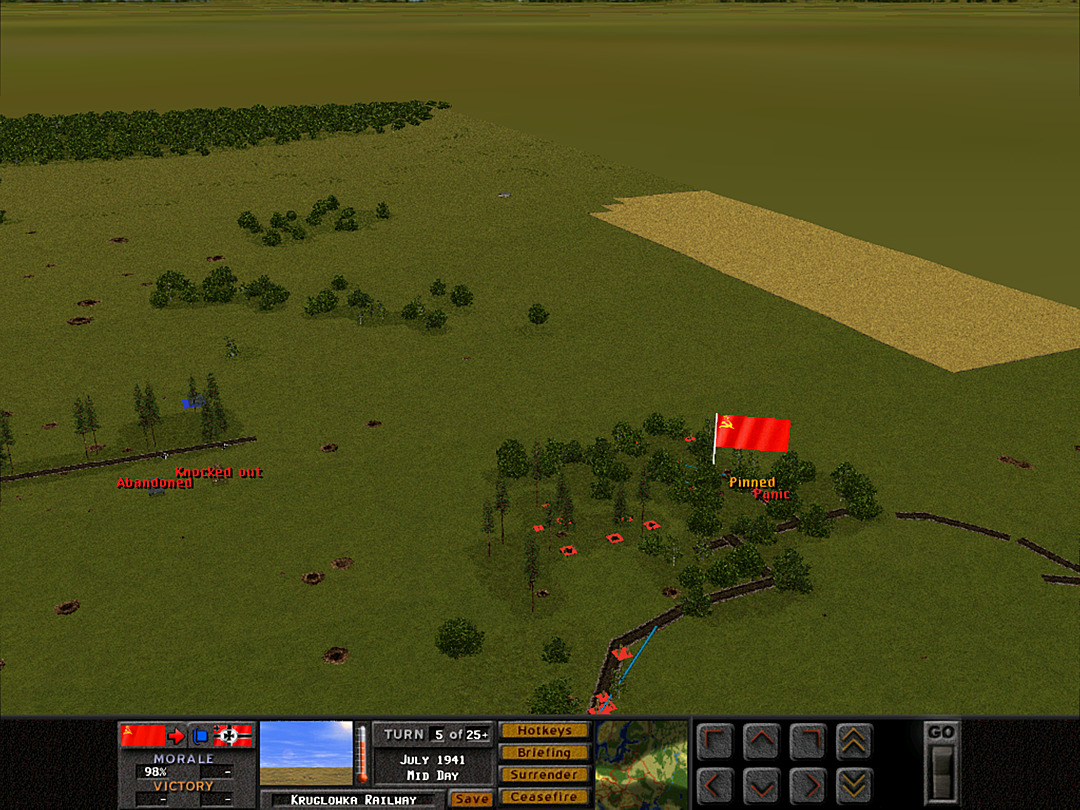 In the clump of woods on the west side, A Coy is shocked by some explosive bursts near them. This might be another artillery strike.  The other Stug that the Germans have tries to shift its position, but our AT guns are able to send some shots its way through the trees.  E Coy, 1 Plt's squads in the more open ground are under heavy fire, and end up breaking and fleeing toward the woods on either side.  One of the men in the trenches looks up and spots a deadly threat � the Germans have attack aircraft!  Now that E Coy's push forward has revealed the German defensive positions, our guns open up to suppress them. 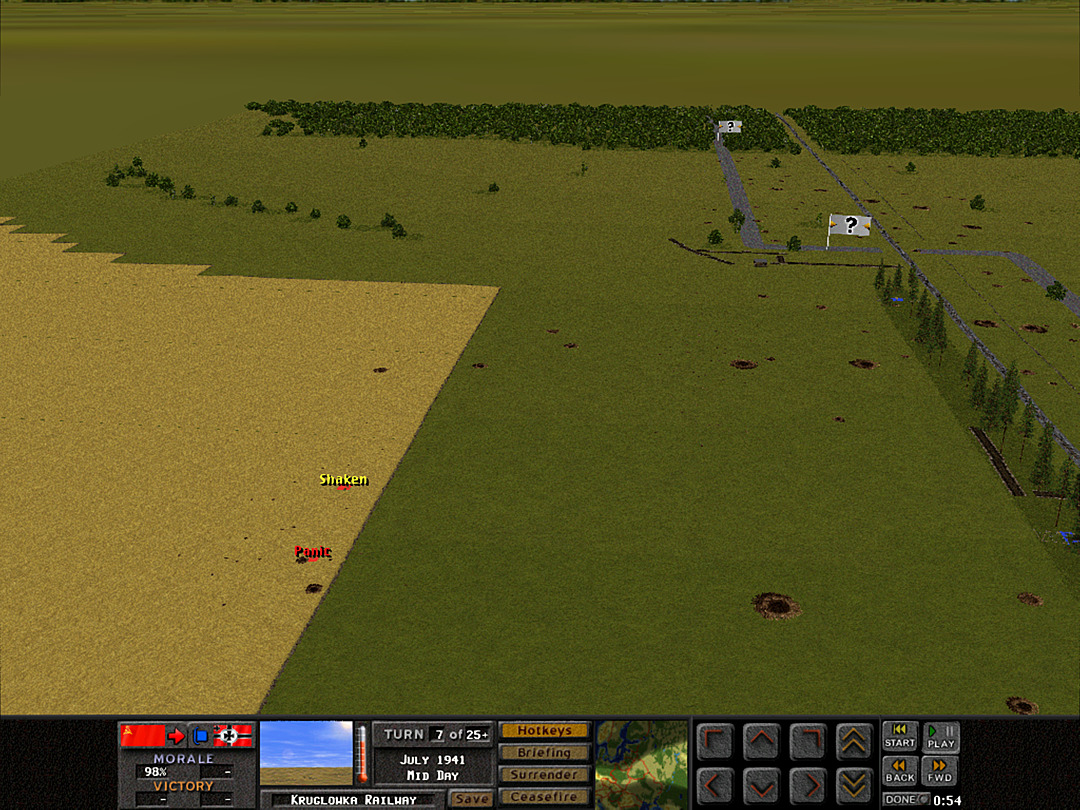 The lost squads in the cornfield come under mortar fire.  E Coy, 3 Plt tries an alternate approach. Instead of moving straight through the trees, they'll circle around along the east side and use shell craters for cover.  Our artillery is doing its job of forcing the Germans in the middle trench to keep their heads down.  It might also be what caused the Stug to try to move away. It has exposed its weaker side to our guns, though, and they keep firing away. 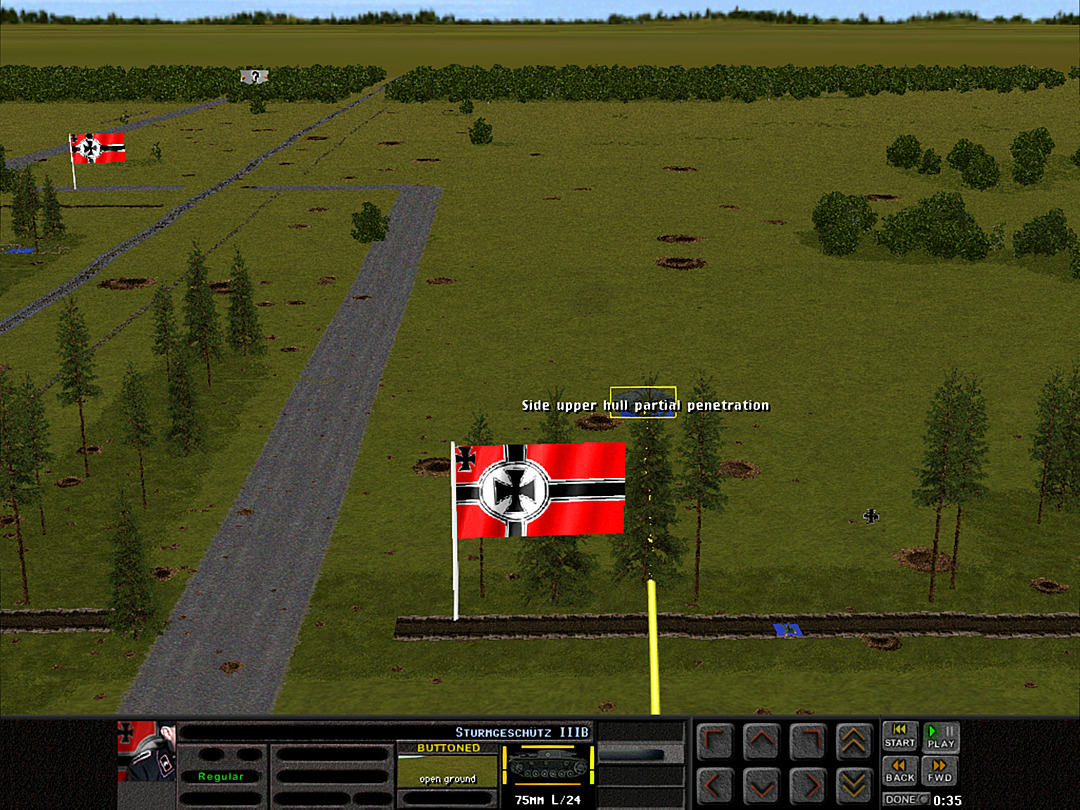 The 45mm gun finally scores a lucky shot, threading it right through the gap in some tall pines. 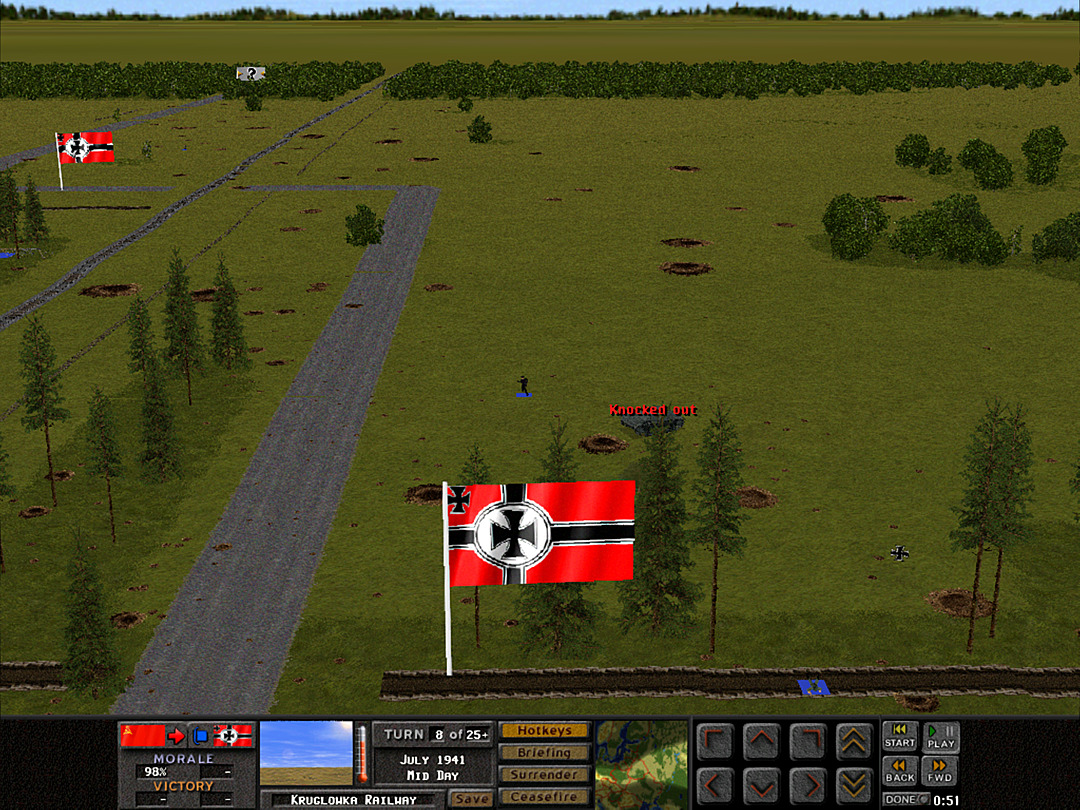 Shortly after the hit, we spot the assault gun's crew fleeing from the last few of our mortar shells. We've knocked out two vehicles with no guns of our own lost! 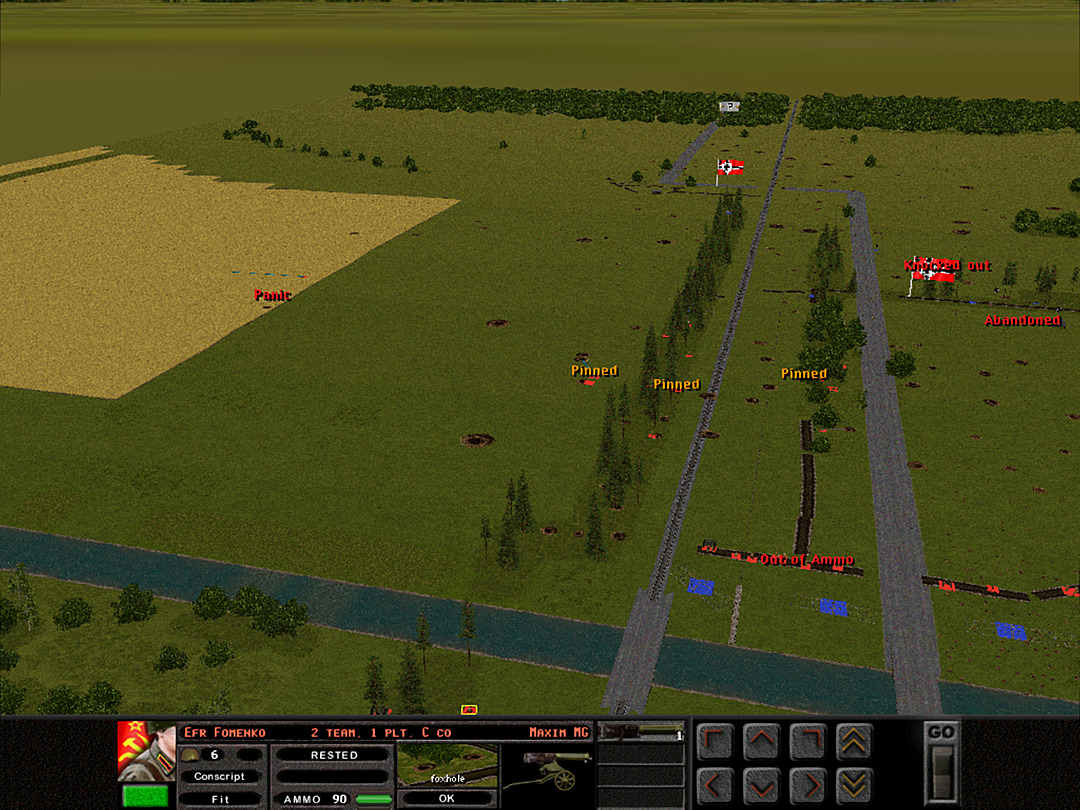 The attempt to swing around on the east side of the tree line by E Coy, 3 Plt came under fire from the trenches near the turn in the road. We have a machine gun that can try and suppress the enemy, but this will only allow the troops to get back to safety. The platoon will need to take a less exposed route forward. 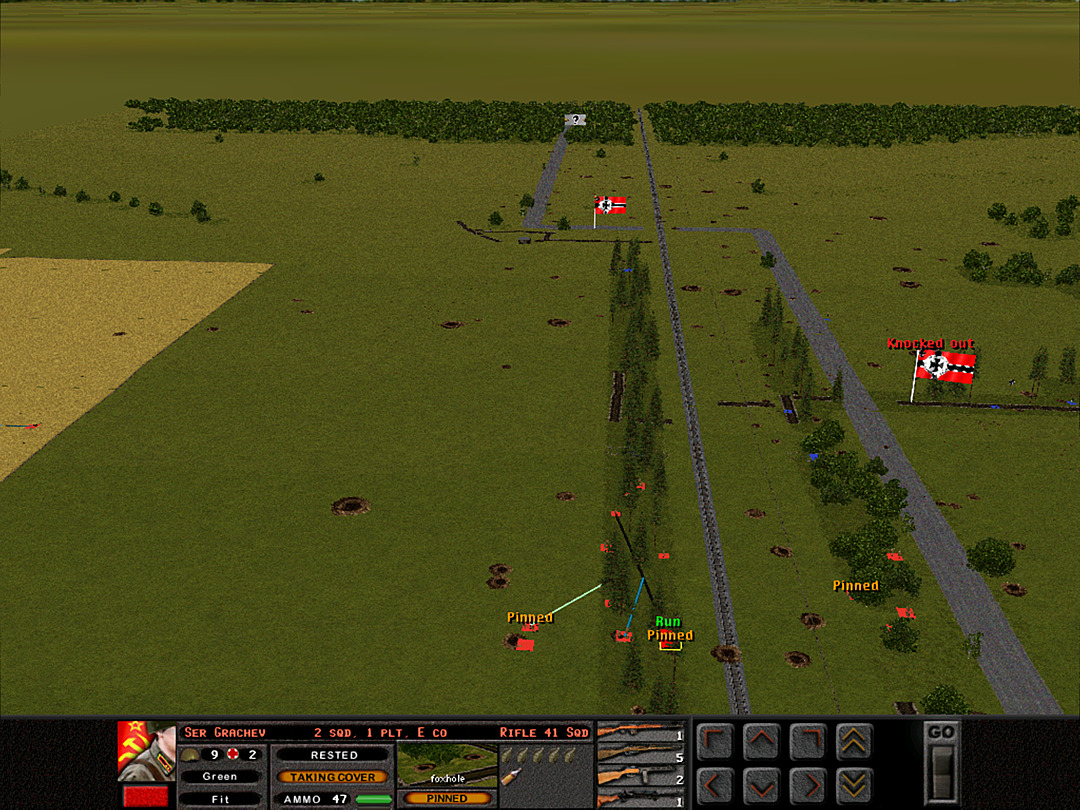 E Coy, 1 Plt is having trouble sticking together, as some of the squads held back or ran off in other directions once the Germans fired on them.  The German bombers have a fairly good idea of what trenches we own, and A Coy is now being hit. They will have to shift around to avoid being blasted.  As our own troops advance, we're able to put more firepower toward the small middle trench. It might be enough to get several squads forward for a proper assault.  The trench at the river is now being heavily bombed as well. It seems likely that there are several planes hitting us, and we have no real anti-air capability.  A more focused mortar strike is directed at the machine gun in the middle trench, as it's the primary obstacle to E Coy's advance.  E Coy, 2 Plt is slowly pushing through the trees next to the roadway. 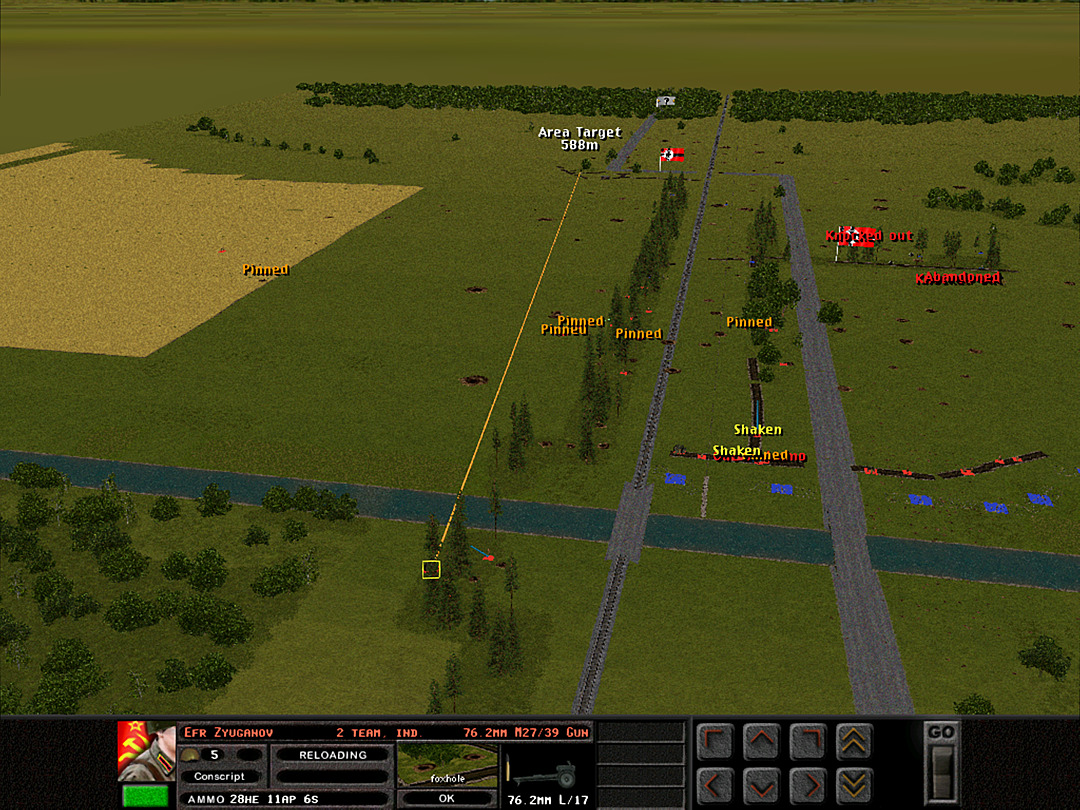 Our gun that's covering the open field takes a stab at suppressing the far trench. 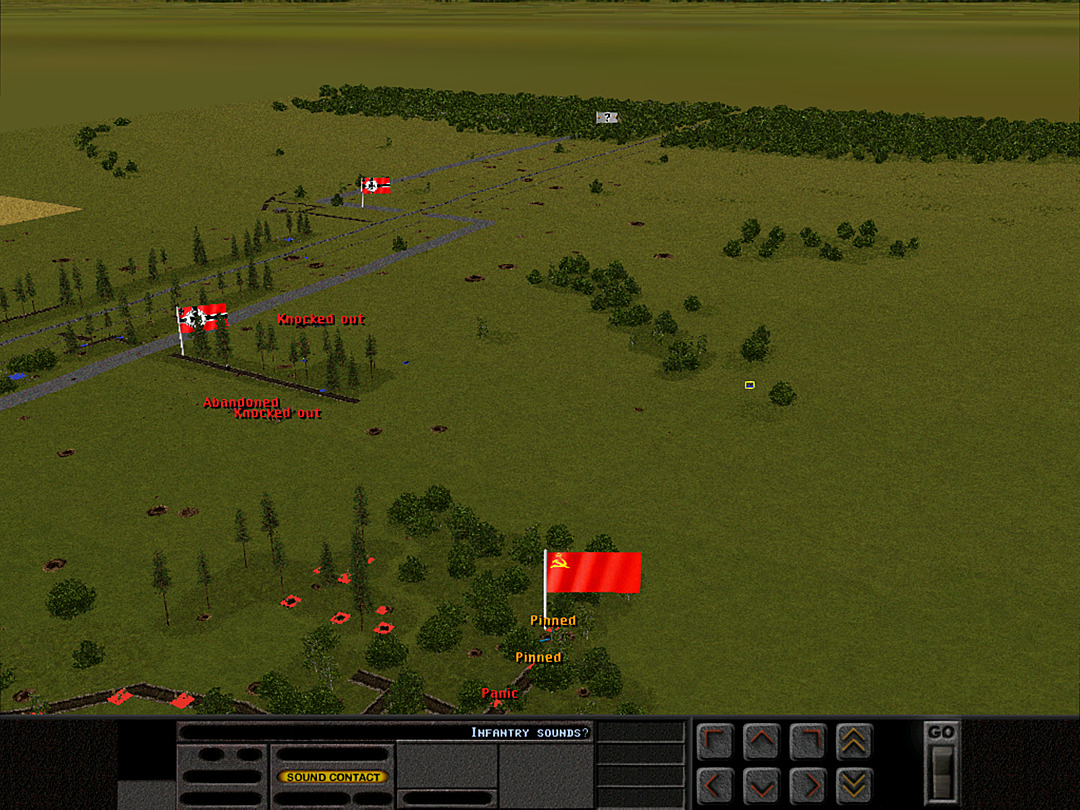 As A Coy shifts to avoid the falling bombs, they spot what might be more enemy soldiers in the next small clump of trees. 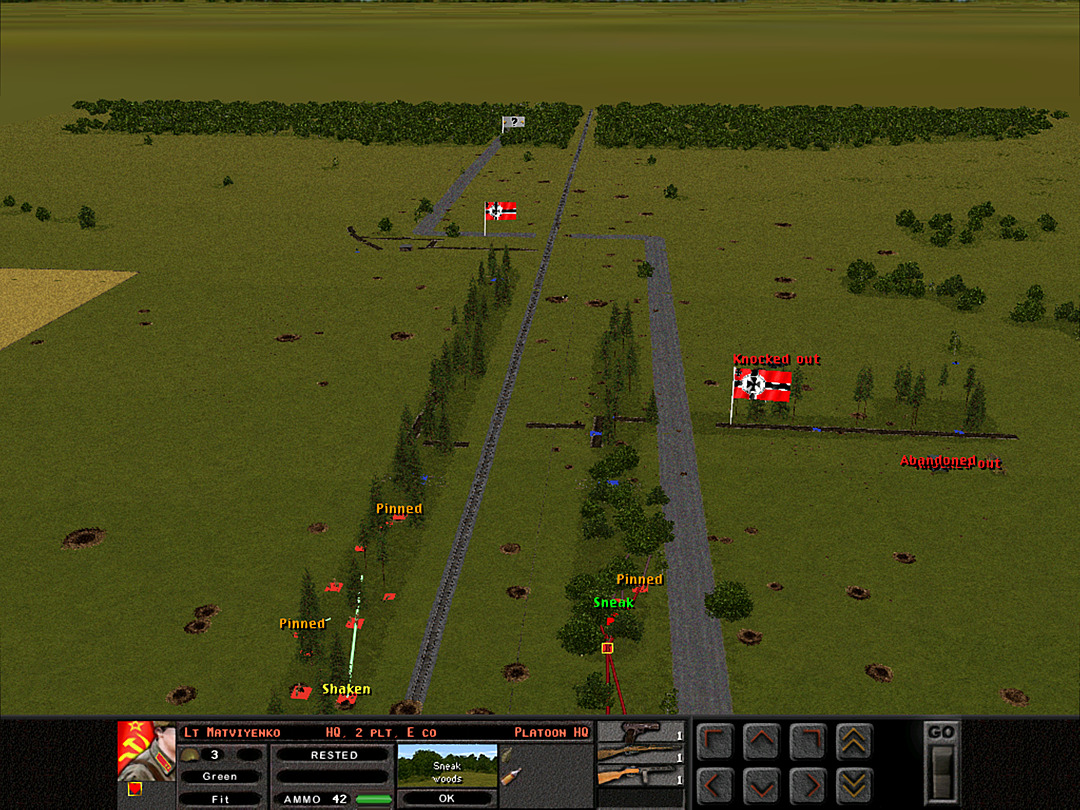 E Coy is very slowly gaining ground. 3 Plt has mostly recovered from its wrong-headed attempt to move in the open, and is now adding to the pressure on the German trenches. 2 Plt continues to creep forward. 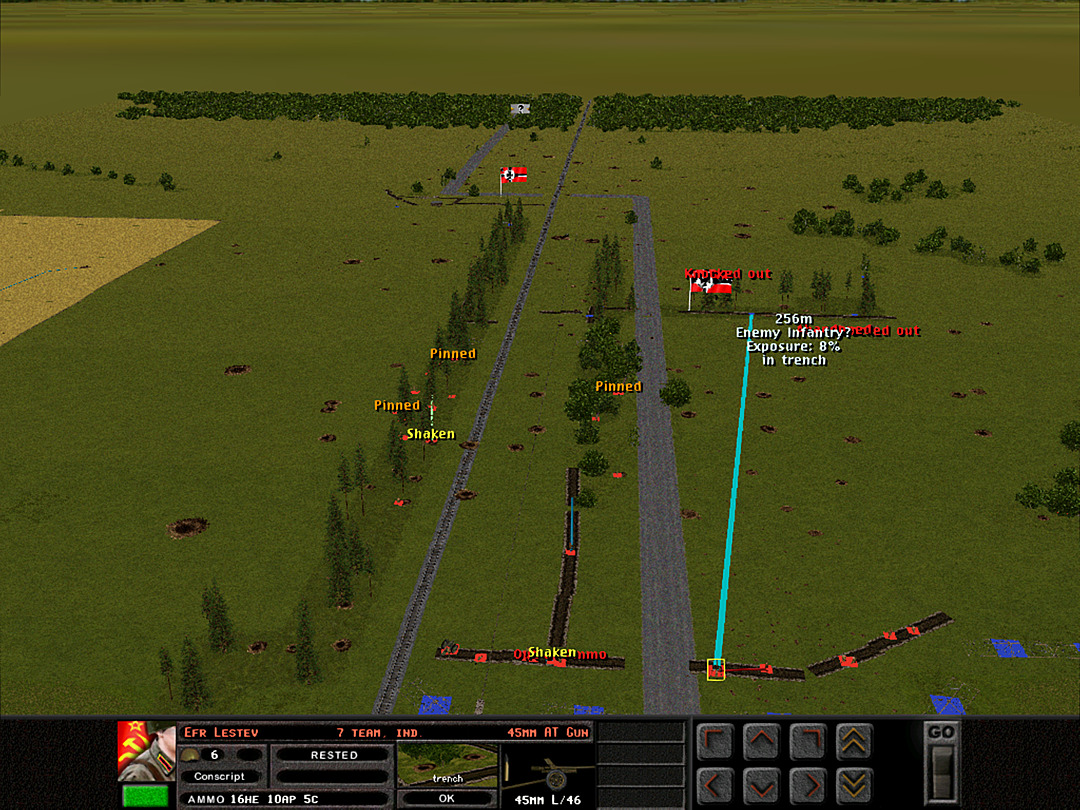 Our units back in the riverside trench do their part to protect the advance by reminding the Germans in the middle trench to stay put. 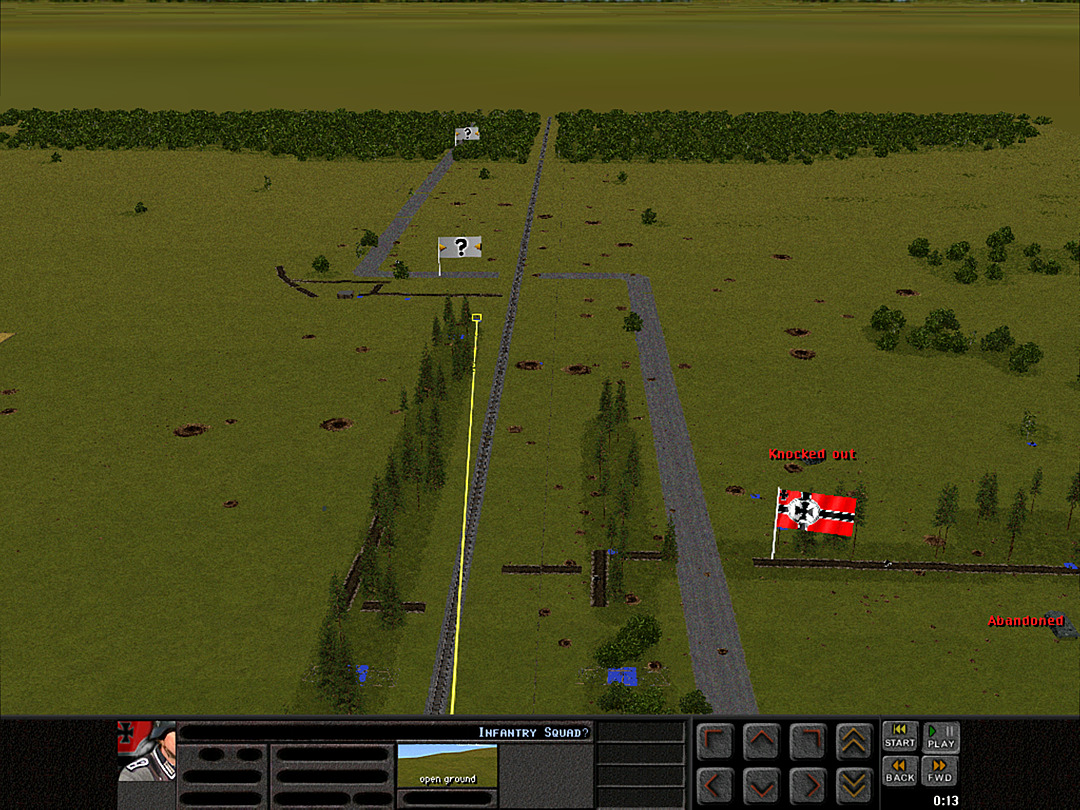 Some squads from the rear might be moving up through the 'alley', however. 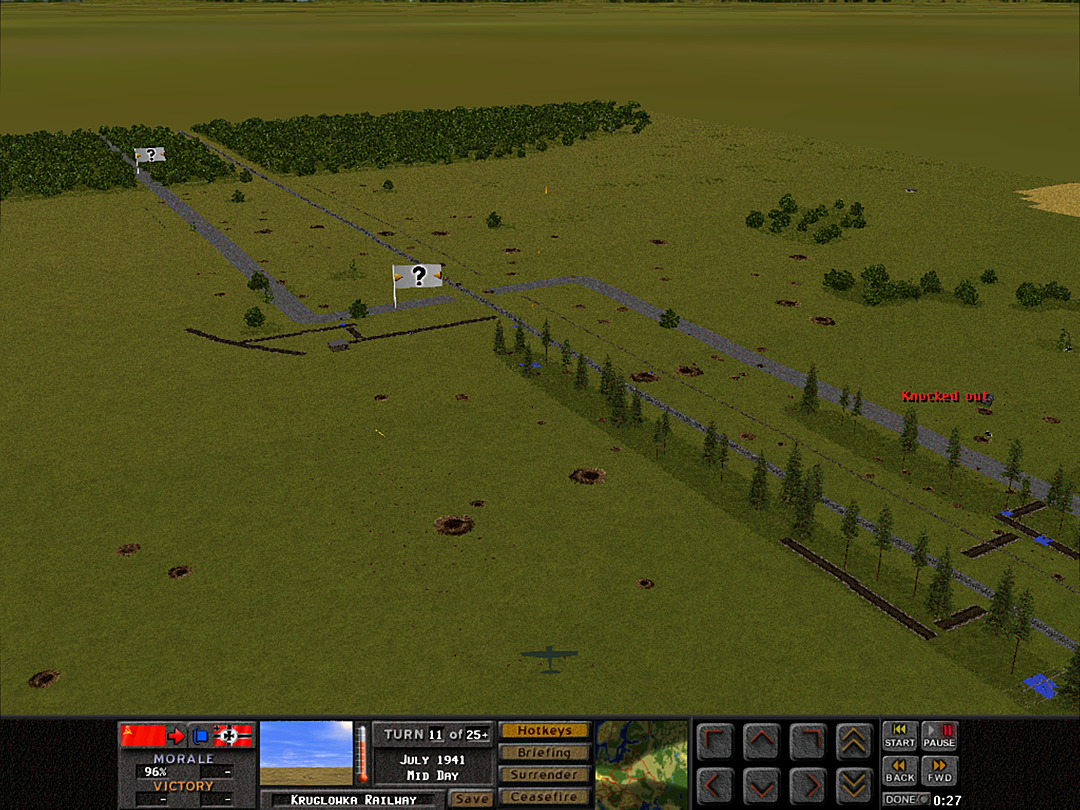 We spot a bomber displaying unusual behavior, though. It seems to be shooting down at those troops moving in the open! 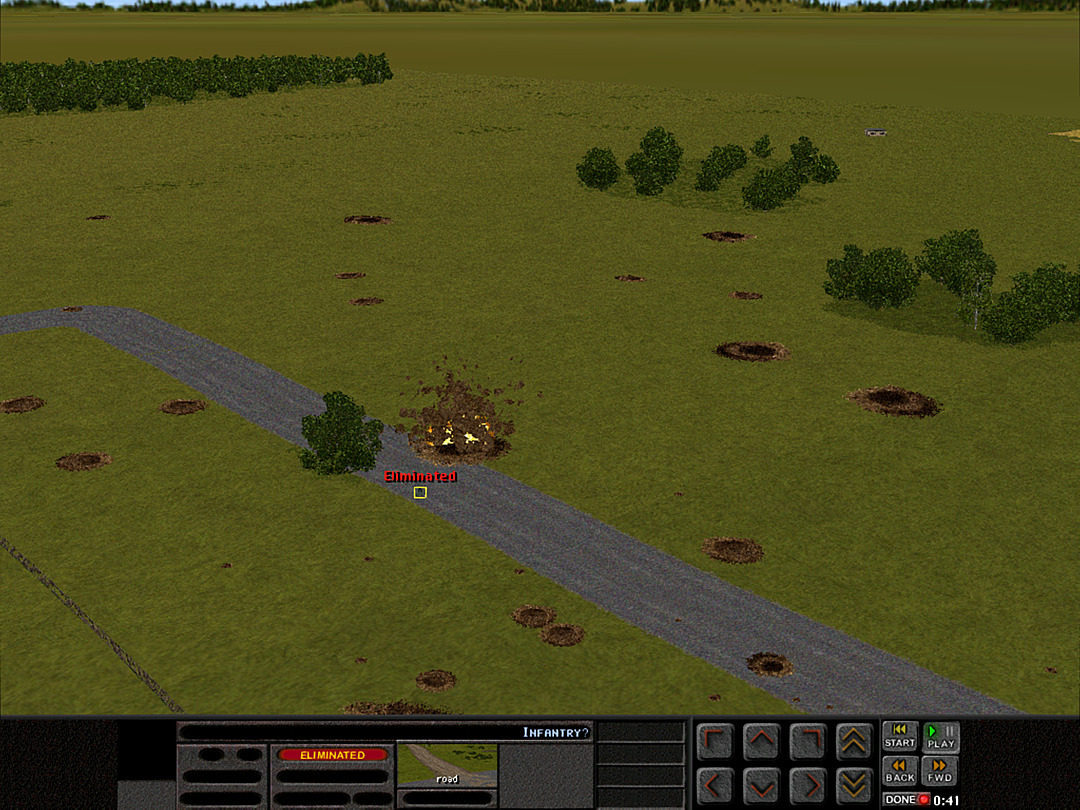 It then drops a bomb with perfect precision on its fellow countrymen. 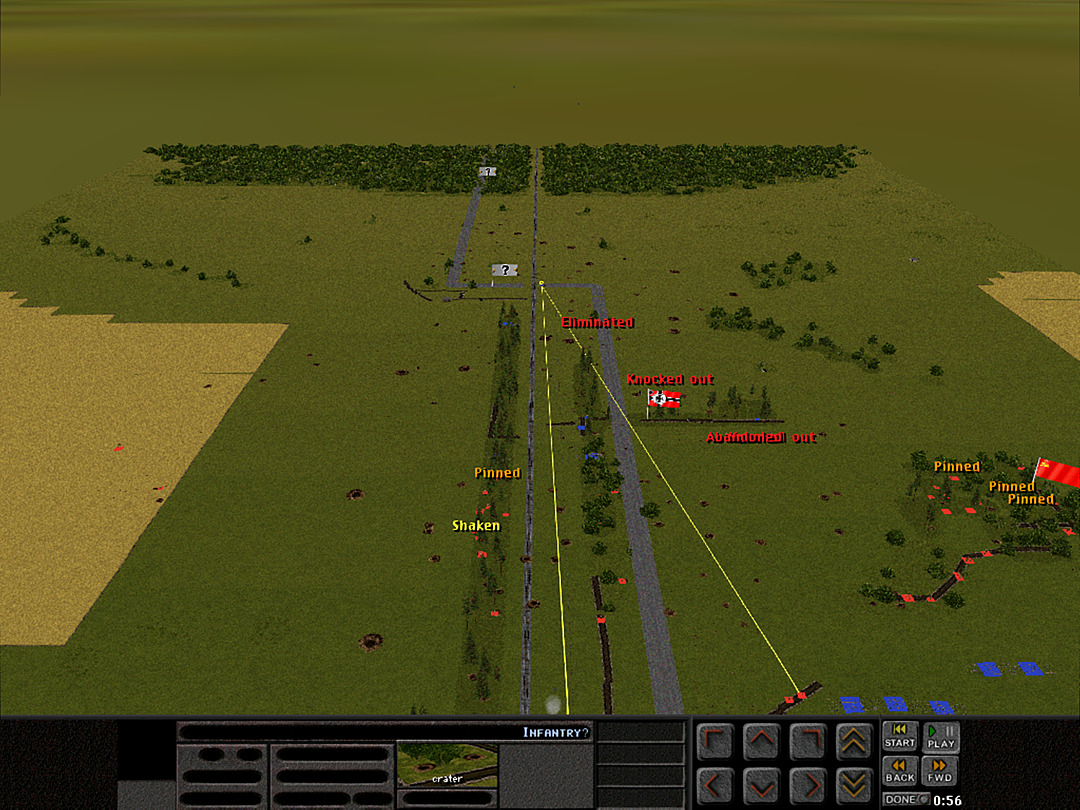 We also send some bullets of our own in the direction of those troops, to deter any and all attempts to reinforce the middle trench line. Unit Highlight T-26E Tank 'Ekranirovanniy' 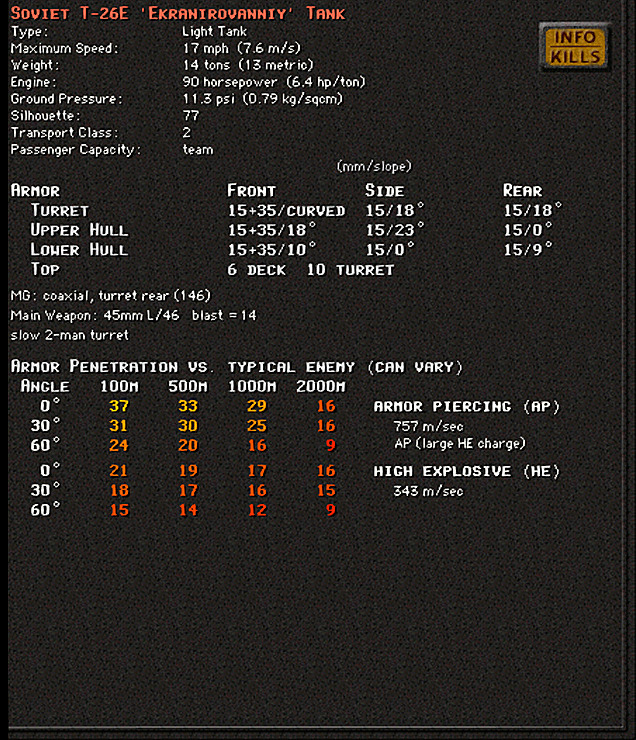 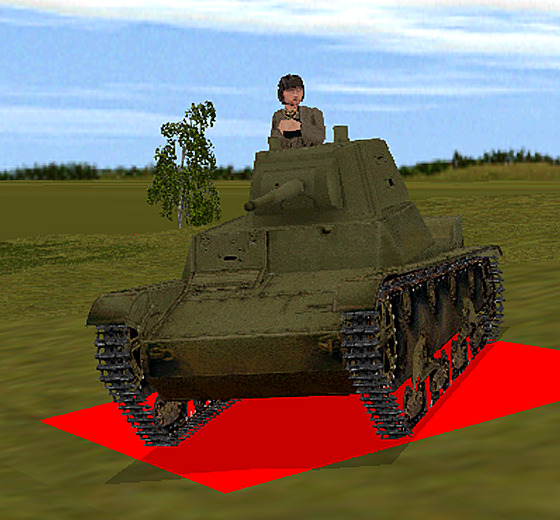 An attempt to give the tank some actual protection. This modification of the T-26, given a label meaning 'screened' in Russian, was more or less an experiment in adding to the front armor by bolting several plates. While it did prove effective at withstanding anti-tank guns during the Winter War, it also made the tank too heavy to travel at normal speed. It was arguably a waste of resources on what was by then an outdated design. Fewer than 100 tanks were modified in this fashion.
|
|
#
?
Feb 6, 2024 07:15
|
|
|
lmao nice job Ernst Rudel
|
|
#
?
Feb 6, 2024 07:21
|
|
|
Nice to see the enemy has bad luck too!
|
|
#
?
Feb 6, 2024 11:40
|
|
|
Operation: Kruglowka Railway, Battle 4 Battle Time: 00:12 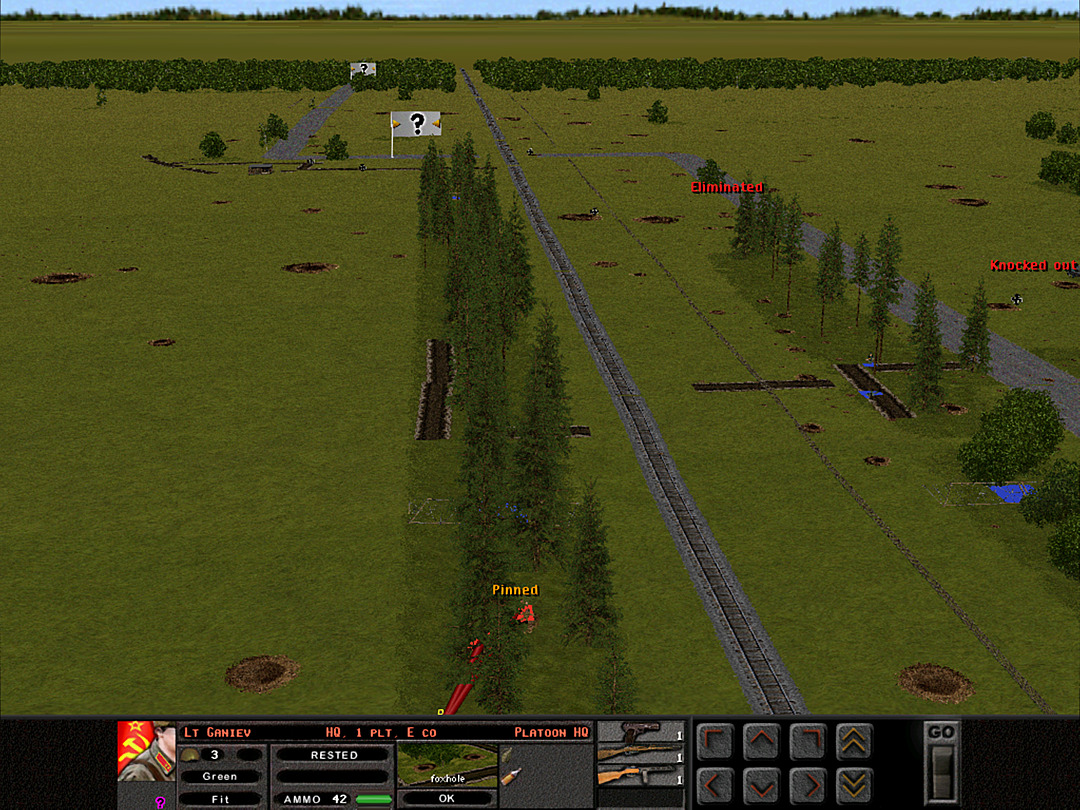 We've nearly reached the barricades placed in the tree lines. If we're going to get to the trenches, we'll need some way to get past the wire without exposing ourselves to enemy fire.  It's something we likely need to accomplish sooner rather than later, as the Germans do seem to be moving their reserves up. 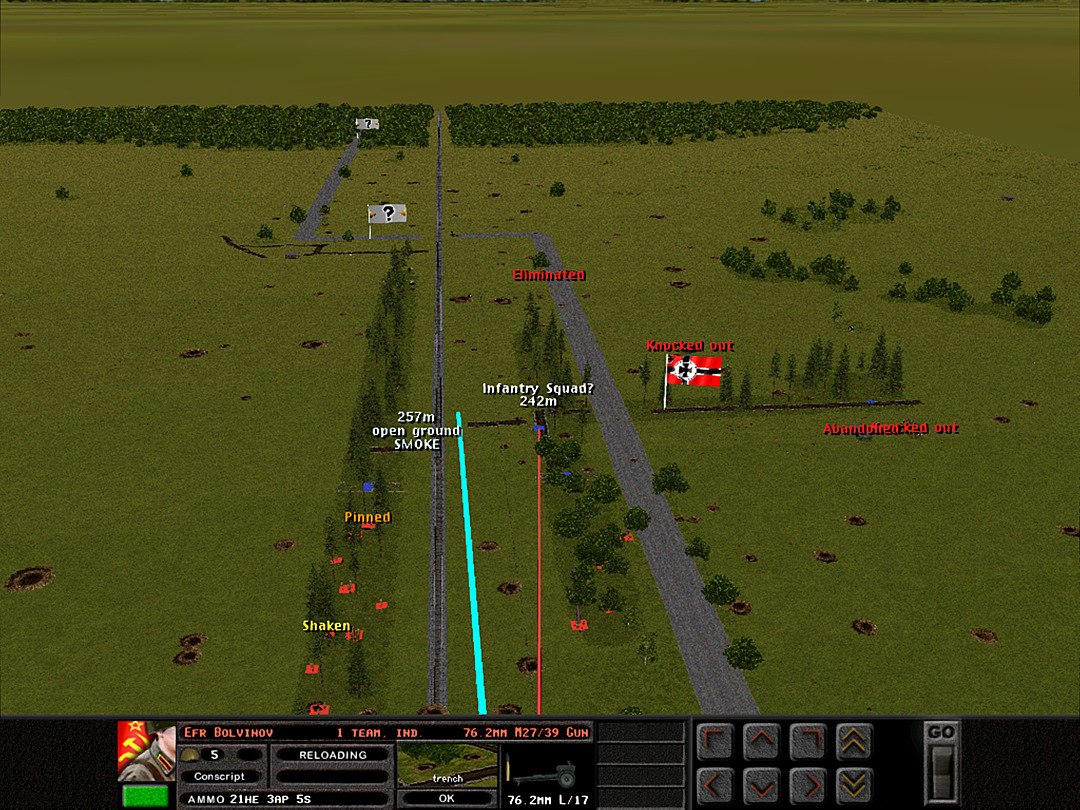 The AT guns have a few smoke rounds they can use; with the two assault guns gone, they can expend it to cover our advance. We should have enough firepower to suppress the few troops in the middle trench; the smoke ought to provide a window for several squads to reach the trench without interference from the enemy farther back. 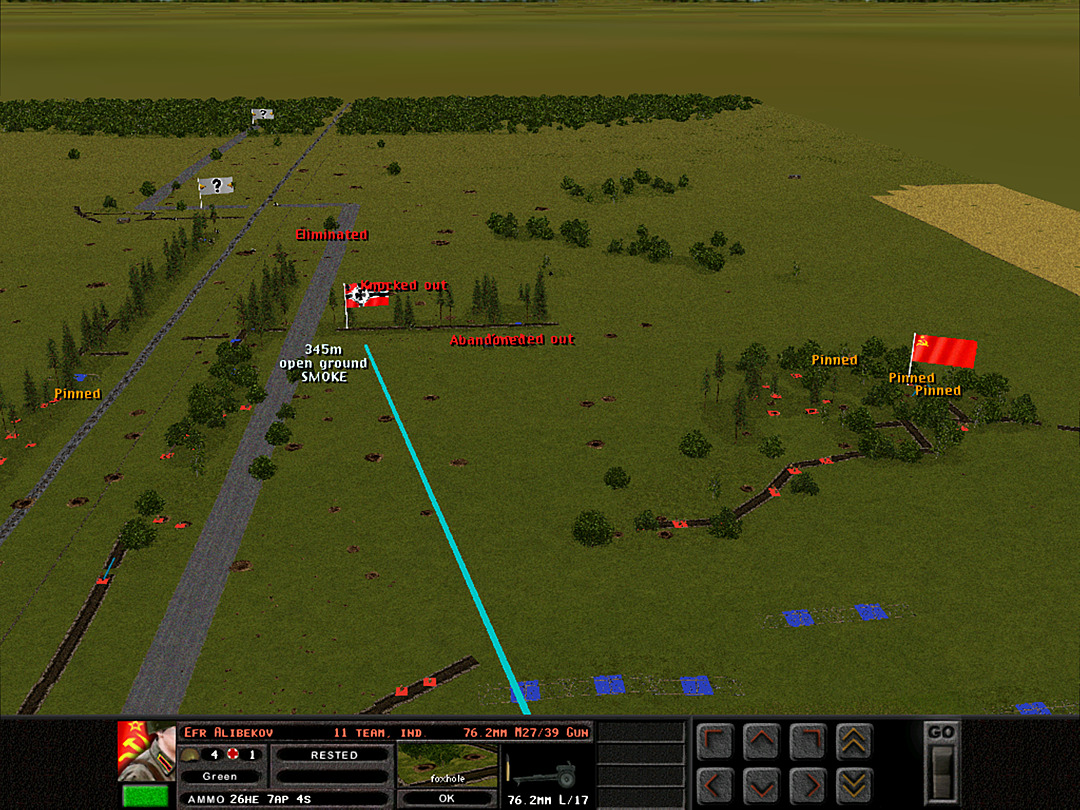 It wouldn't hurt to have a little extra screening from the middle trench, as well, so a second gun is ordered to use its smoke. 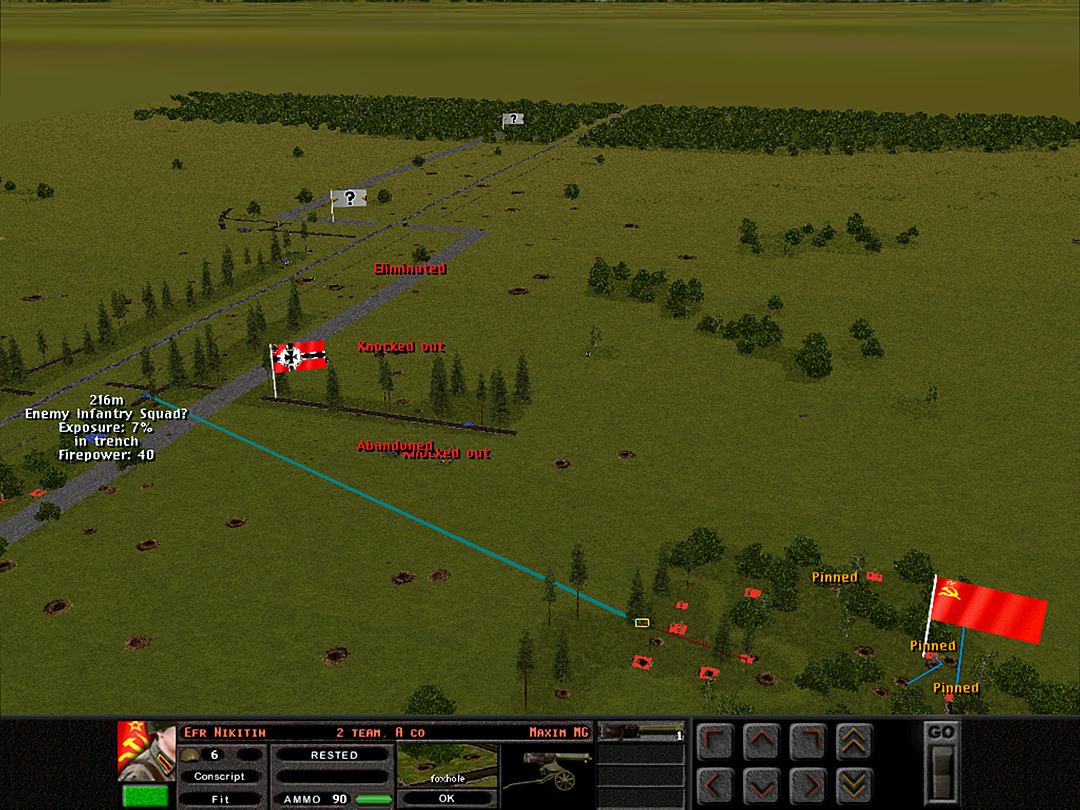 A Coy gets in on the action by sending some crossfire in the way of a Maxim gun spraying bullets toward the German position. 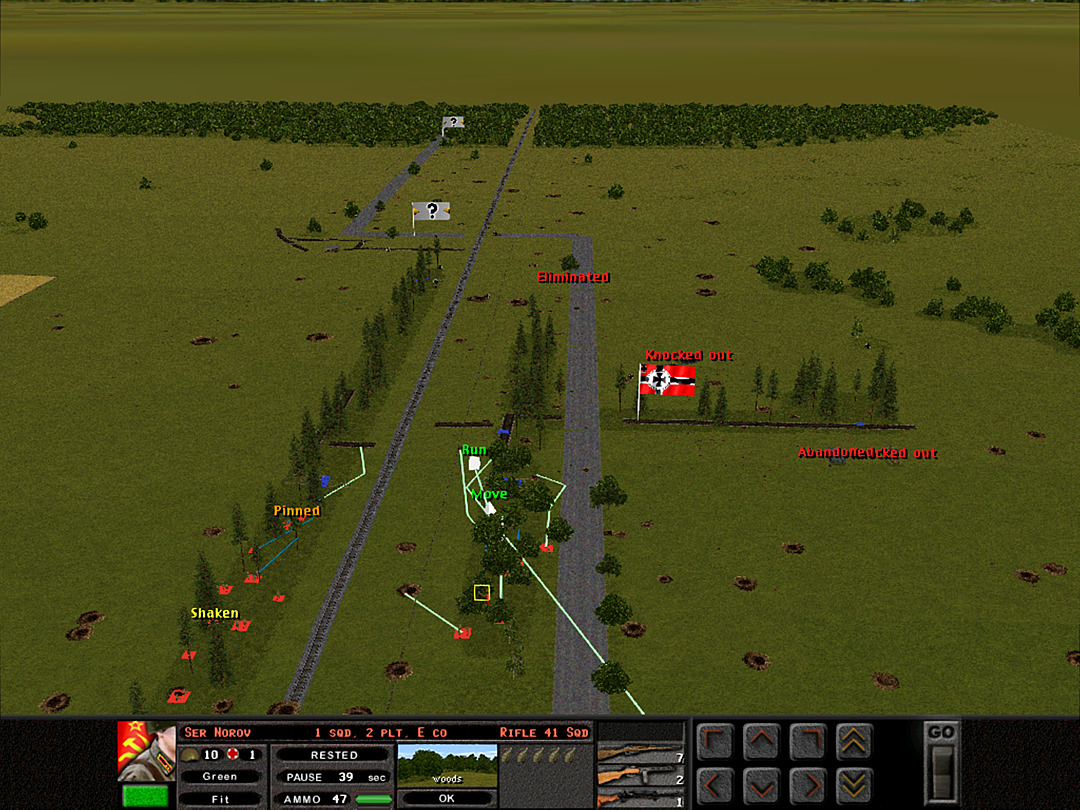 A coordinated assault from two platoons might also cause panic in the defenders. Hopefully the smoke doesn't blow off too soon. 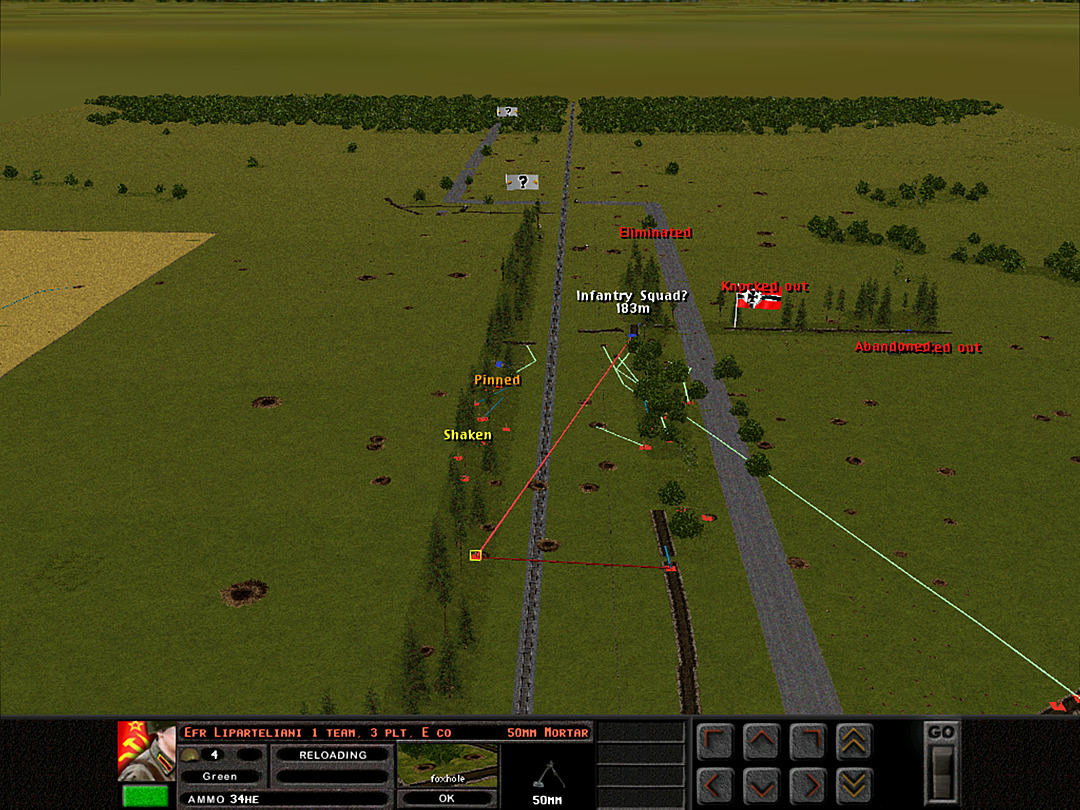 E Coy's captain has moved up in the parallel trench to personally direct the mortars and machine guns that are not part of the advance. 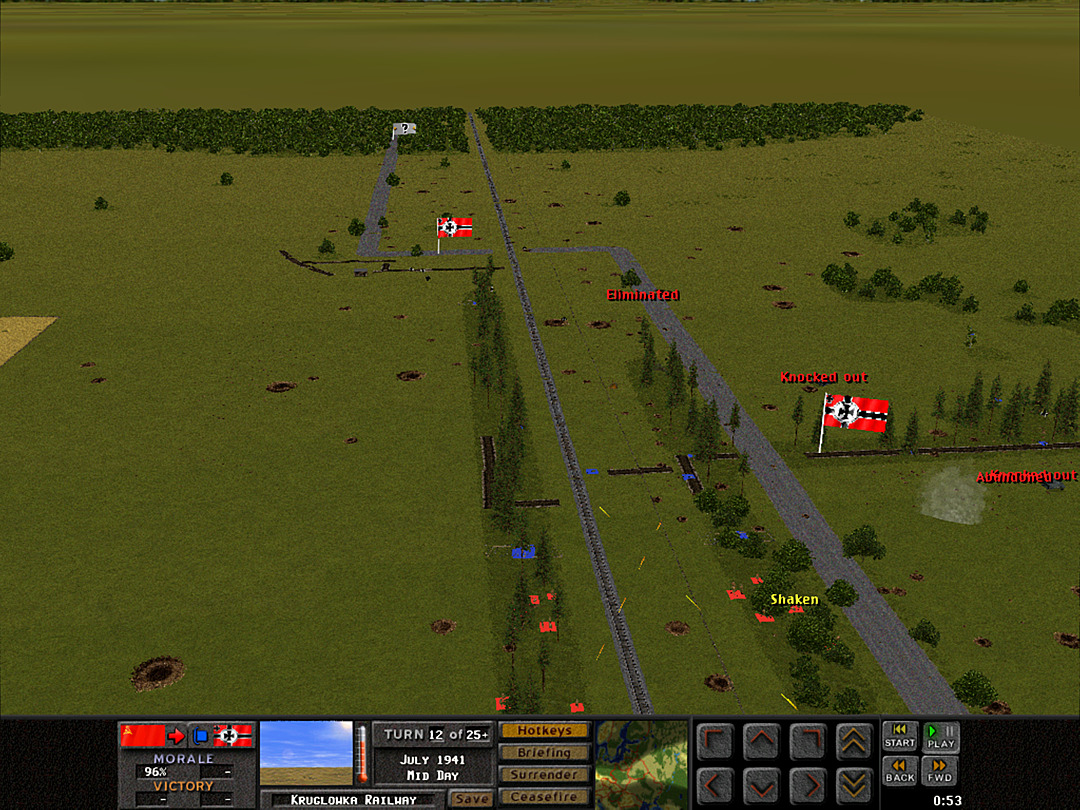 Rapid bursts of gunfire in multiple directions signal the attack. The smoke shell on the western trench hits and starts to spread. 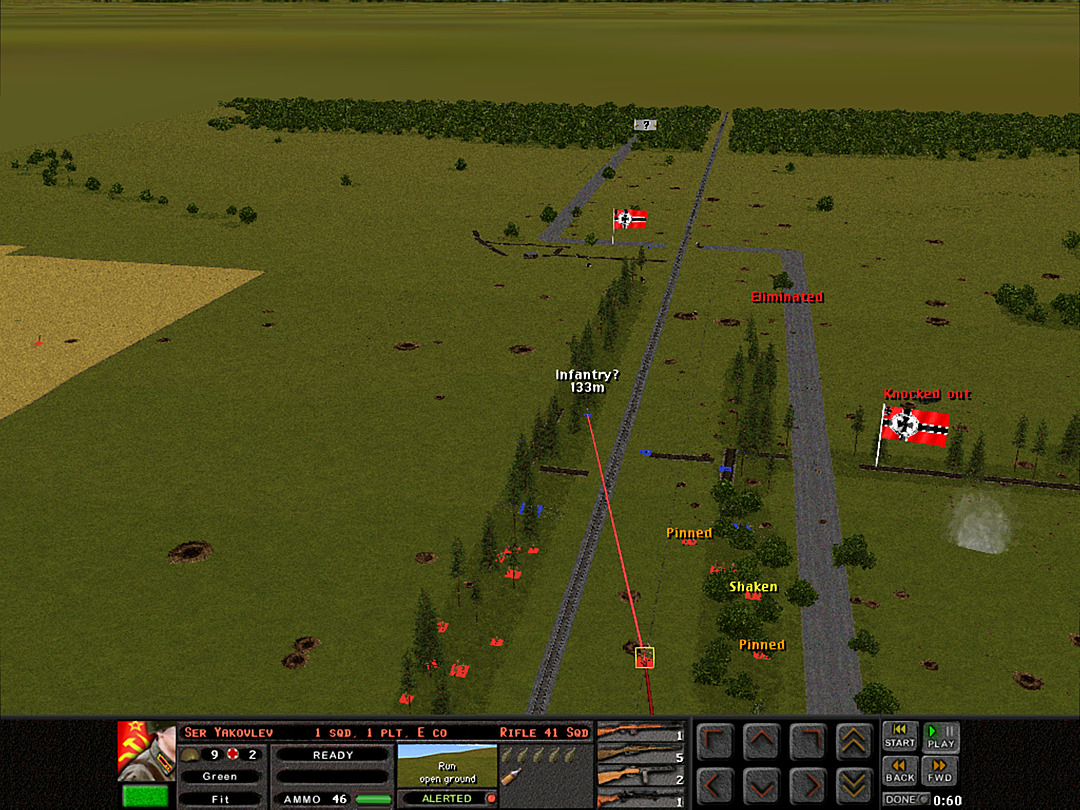 In the alley, though, the smoke does not arrive. Instead, several German squads are spotted moving on the trench. They are closer than we had thought! 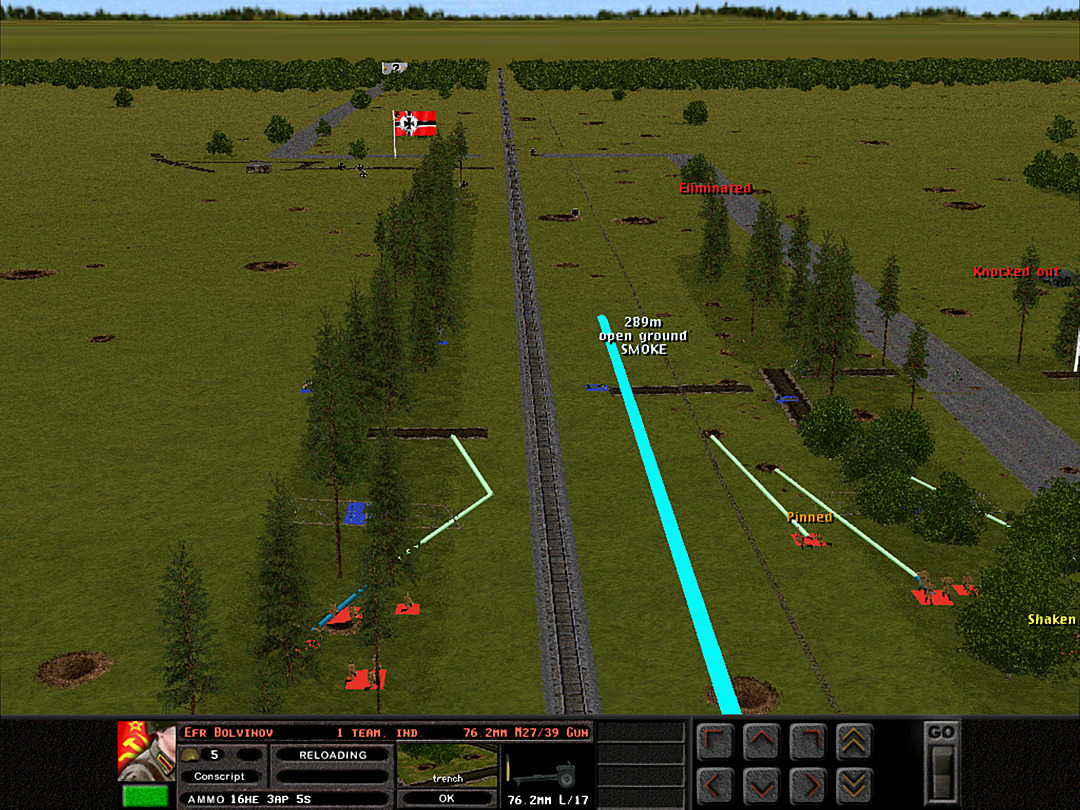 It looks like the gun is taking longer to load the smoke shell than expected. Still, it ought to arrive soon. 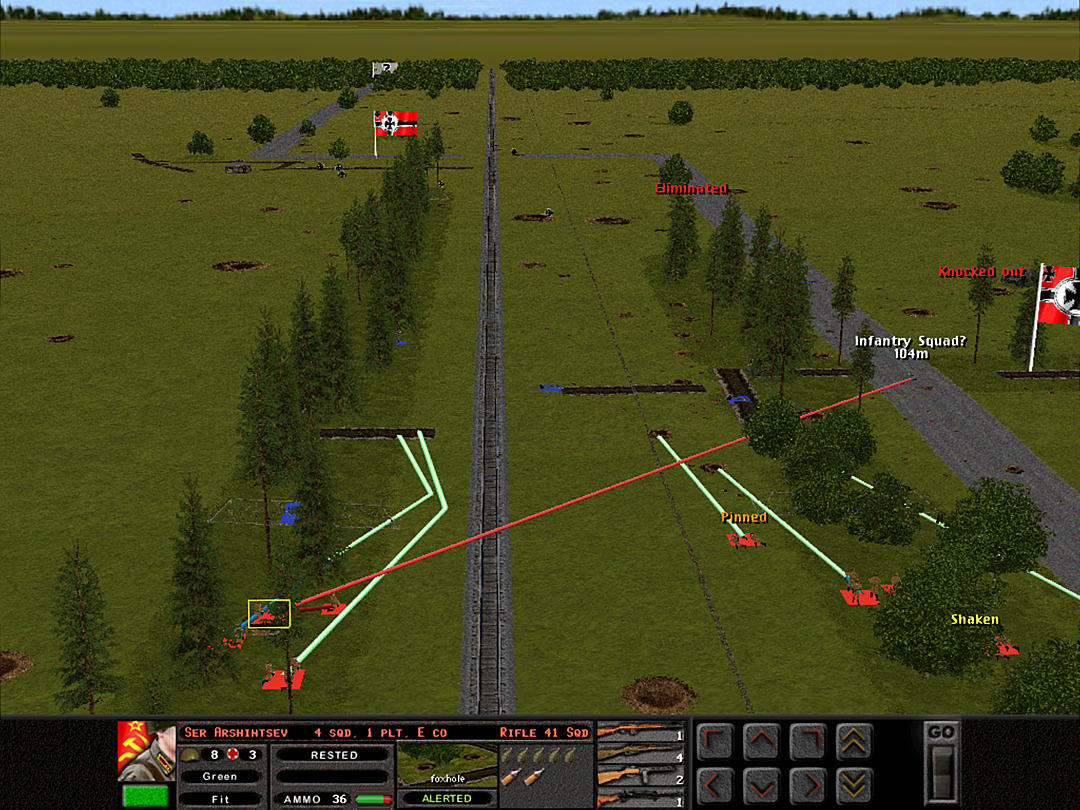 This is shaping up to be a critical point in the battle, as both sides are racing toward the trenches. 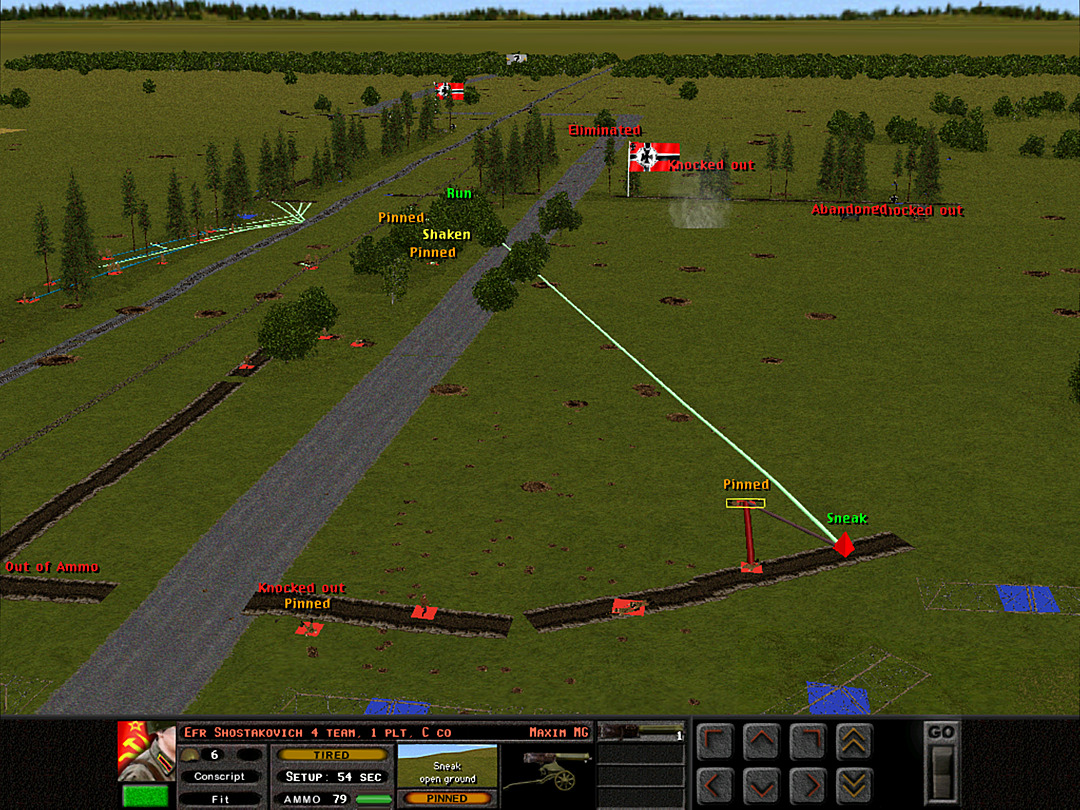 Unfortunately it's still not going well for B Coy; the bombers have not gone away, and one AT gun was lost.  In a completely different location, the 'lost' platoon finds a crater to hide in and spy on the German positions. 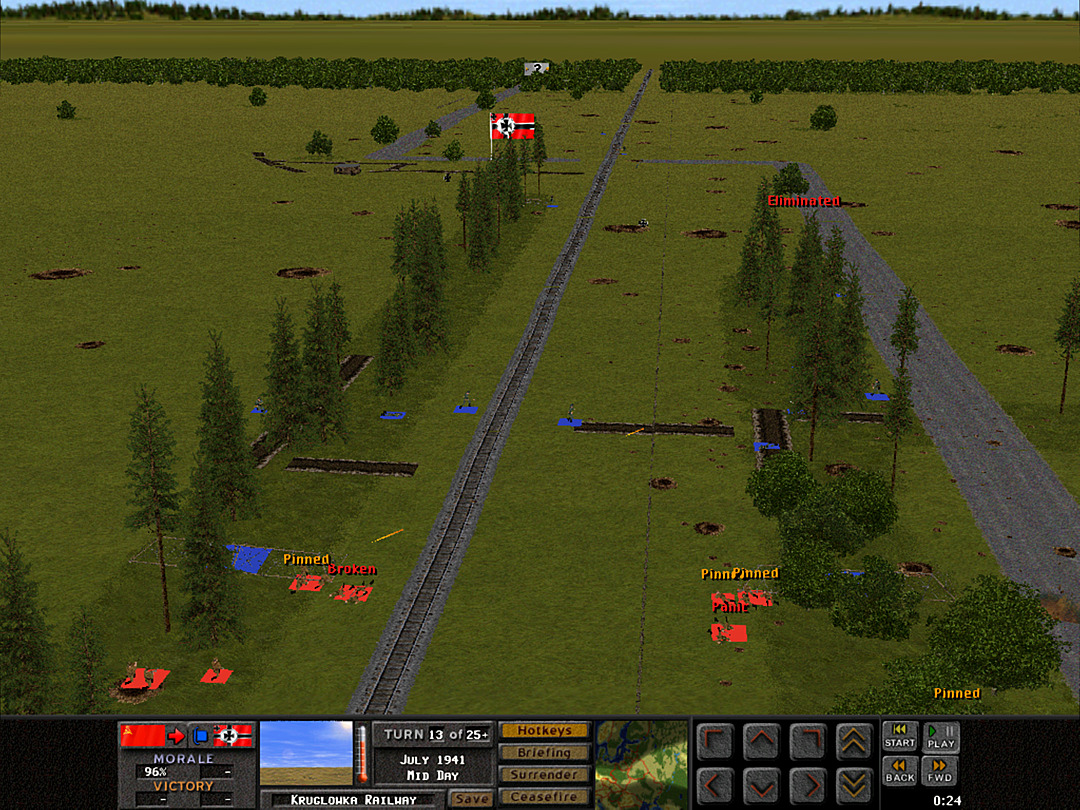 The troops have been ordered forward, and run out they do. Yet no smokescreen is in the way of the Germans. There are too many enemy squads, and the assault is stopped almost immediately.  However, we have enough guns firing into this area that we are able to take out one squad that fled the trench, and a brief mortar strike suppresses the others.  The men in the cornfield are strafed with bullets when the aircraft pass over once again.  E Coy's captain is screaming back down the trench to give the order for smoke rounds to the gun.  The mortar strike is continued just a little longer, although it's being shifted further toward the enemy's rear to avoid any friendly fire.  While the first platoon's charge was stuffed back, we might be able to send fresher men into the trench. E Coy, 3 Plt orders a full assault.  Apparently the orders to the AT gun have been misinterpreted as firing HE rounds. It helped a bit, but it's not what we wanted.  Despite the screw-up, we're able to get two squads into the trench. The German squads looking to reinforce were halted before they could get there, and we won the race.  A Coy is now involved in a firefight with whoever is hiding in the trees to the south. 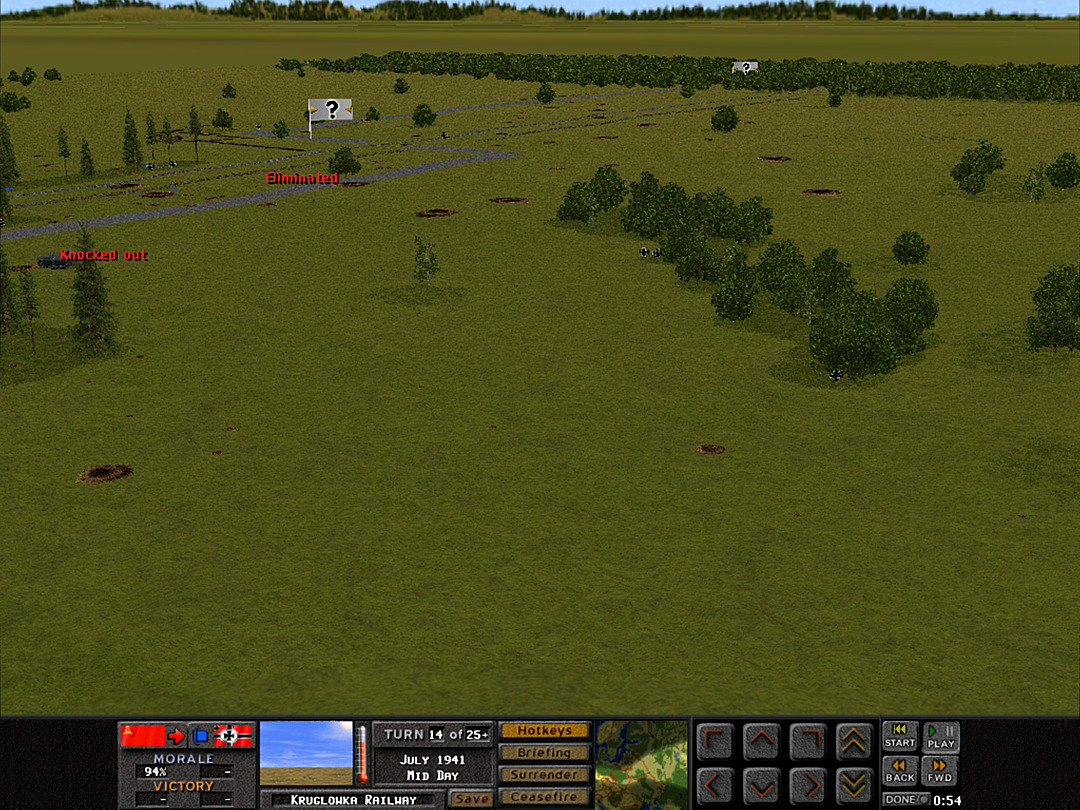 We don't have any clear indication of what they have over there, but odds are at least one machine gun is present. 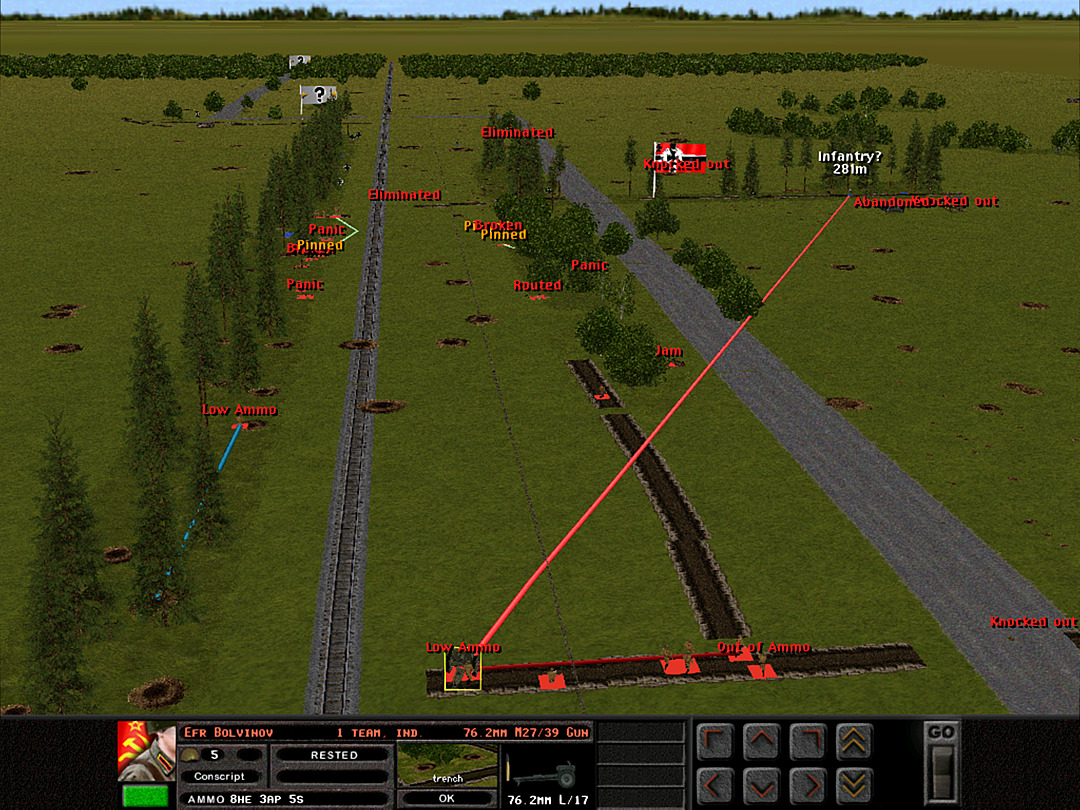 After hearing that the order to shoot HE at the trench was incorrect, the gun crew decides to shoot at a different trench entirely. 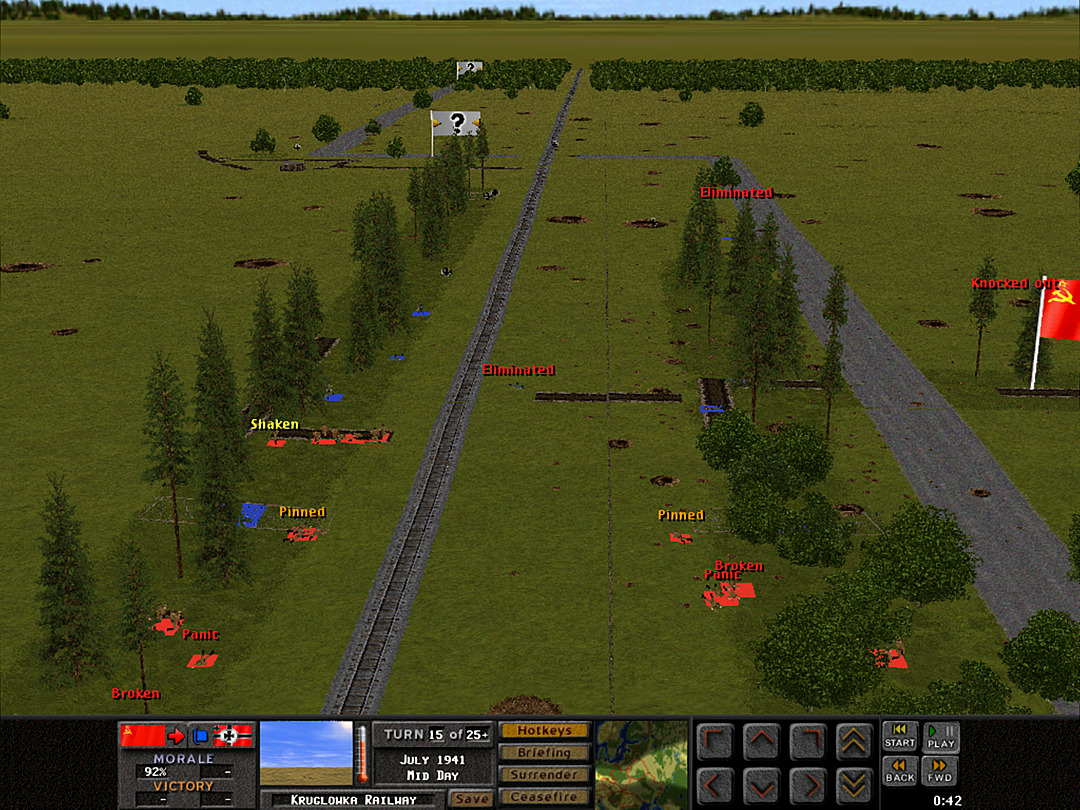 Nevertheless, E Coy, 3 Plt has been able to get almost the whole platoon into the trench. The lieutenant rushes in. 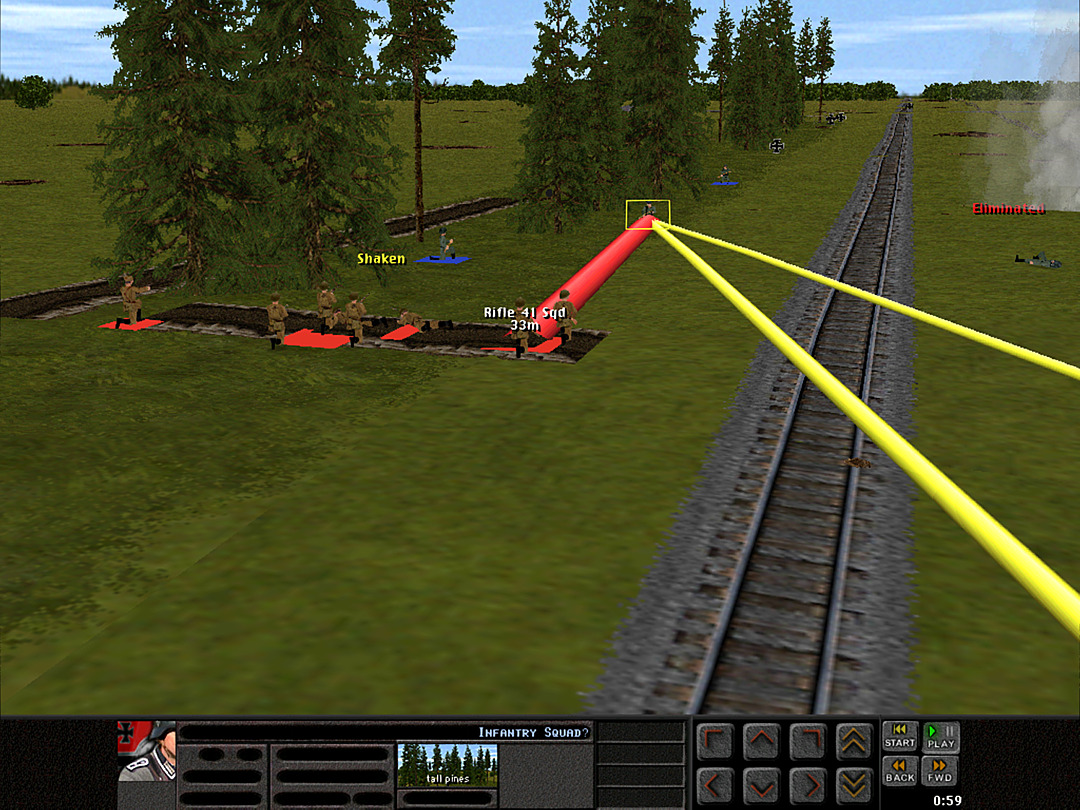 The smoke finally lands, but at this point it's not as helpful. There are German soldiers directly in front of our men.  The bombers have continued to strike the river trench. B Coy is being blasted into oblivion.  We gained the eastern trench, and it looks like the Germans have insufficient force to hold the middle trench. We might take it soon as well.  The Germans are at point-blank range, and they toss a grenade directly toward the lieutenant's end of the trench. He is killed, along with several other soldiers.  It's a blow to the men of his platoon, but they are getting fire support from the squads on the other tree line.  There are still several German squads in the main middle trench. A Coy moves more men forward to engage them.  The lost platoon isn't quite sure where to hide. They have to hope the Stukas won't consider them worth dropping their bombs on. 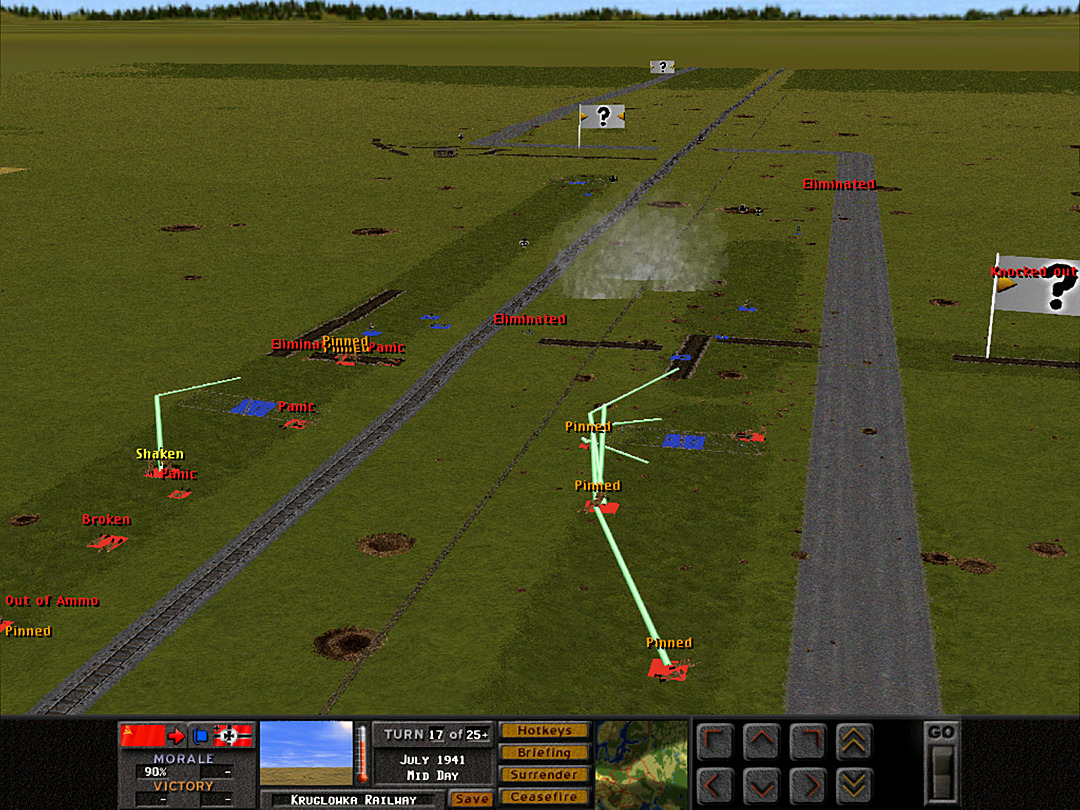 After seeing the success at the first trench, E Coy, 2 Plt desperately tries to claim a trench of its own. The one they're aiming at still has a handful of enemy troops in it, though. 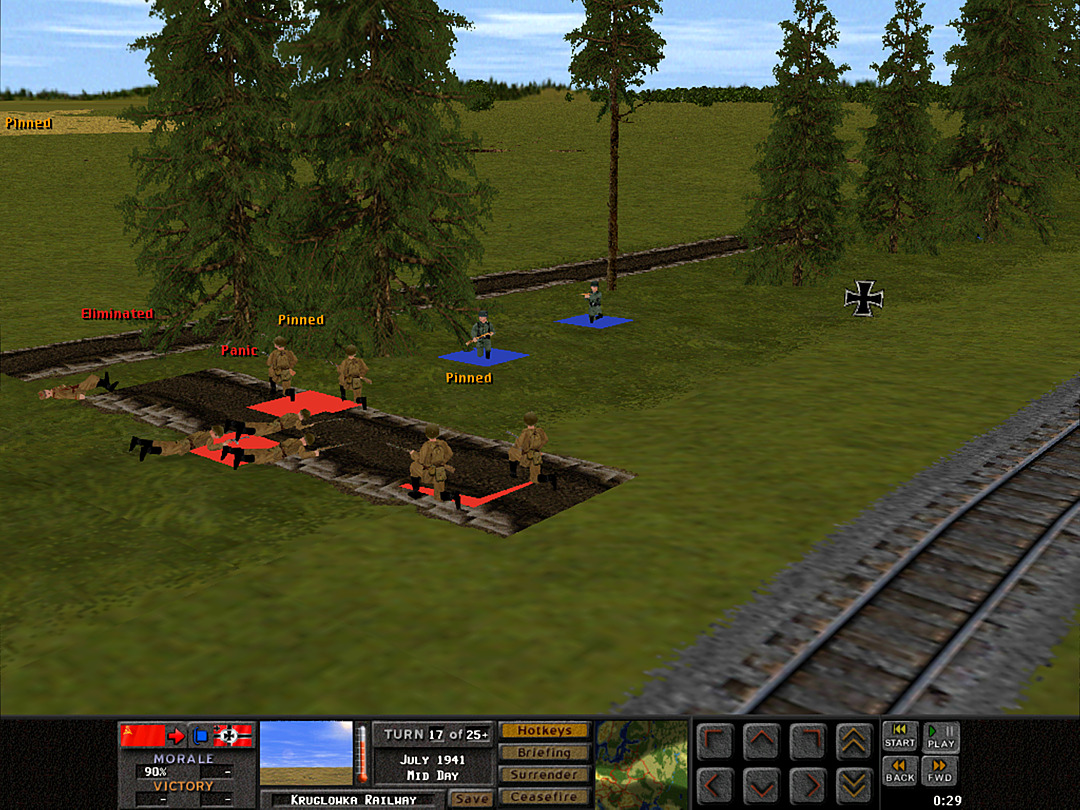 The Germans keep on moving up to the eastern trench. 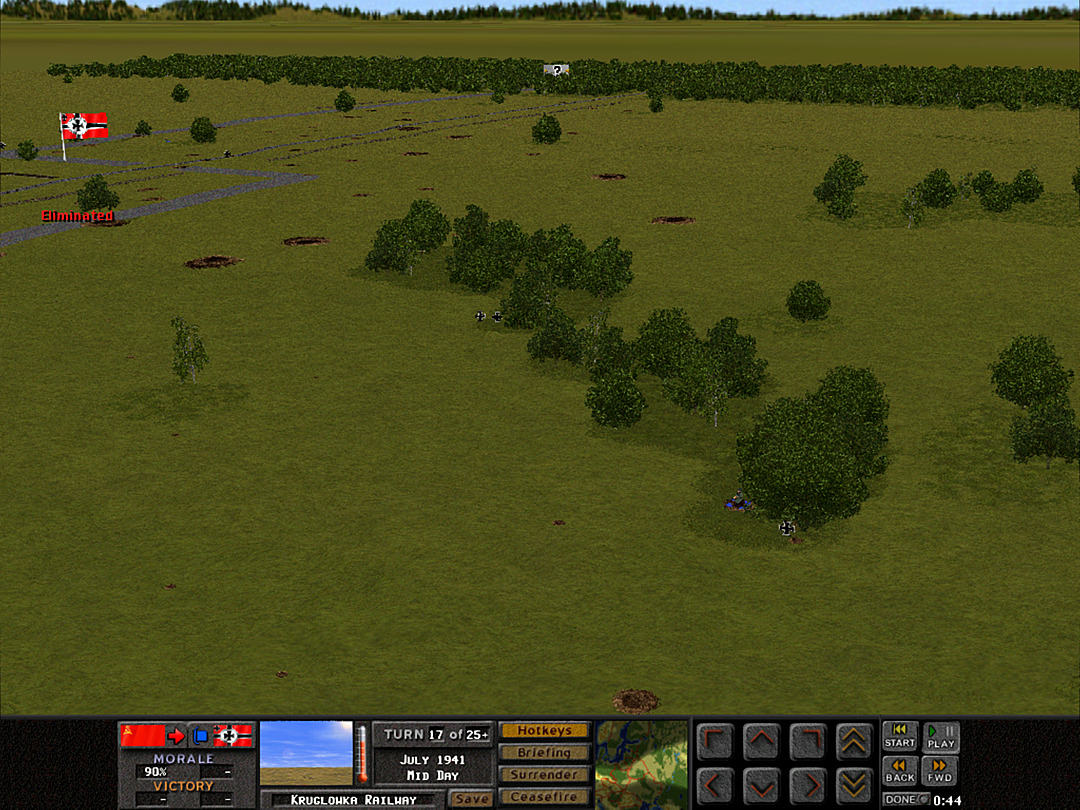 More enemy units have showed themselves in the next group of trees, but they mainly seem there to guard against any flanking maneuvers on our part. 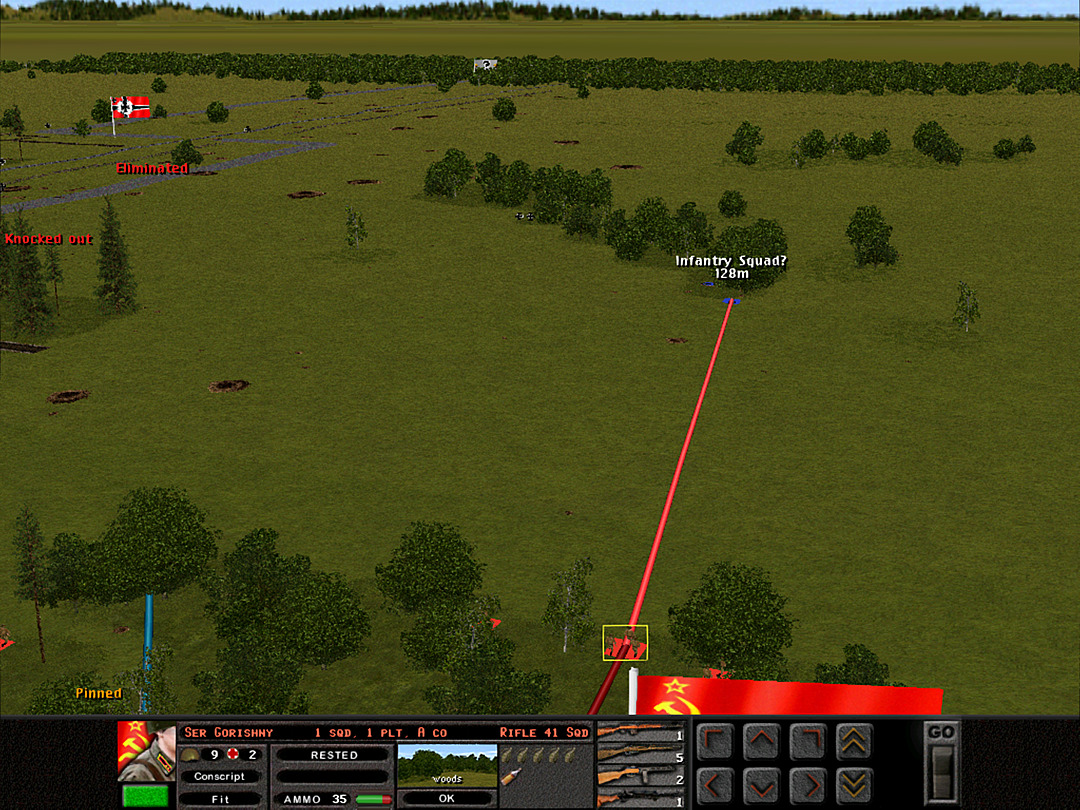 We have enough of our own forces that we can get in a firefight with them.  Somehow one of the Maxim guns that was staying in the trench with B Coy has pushed its way nearly to A Coy after fleeing from the air strikes.  One of the German squads attempting to assault our trench breaks, and is quickly reduced to a single soldier when they run off into the open.  Sadly, we lose a squad of our own; they got stuck in the wire and were unable to free themselves.  B Coy has been routed entirely. The captain is running across the battlefield in terror.  Almost no one is left alive in the bombed trench. 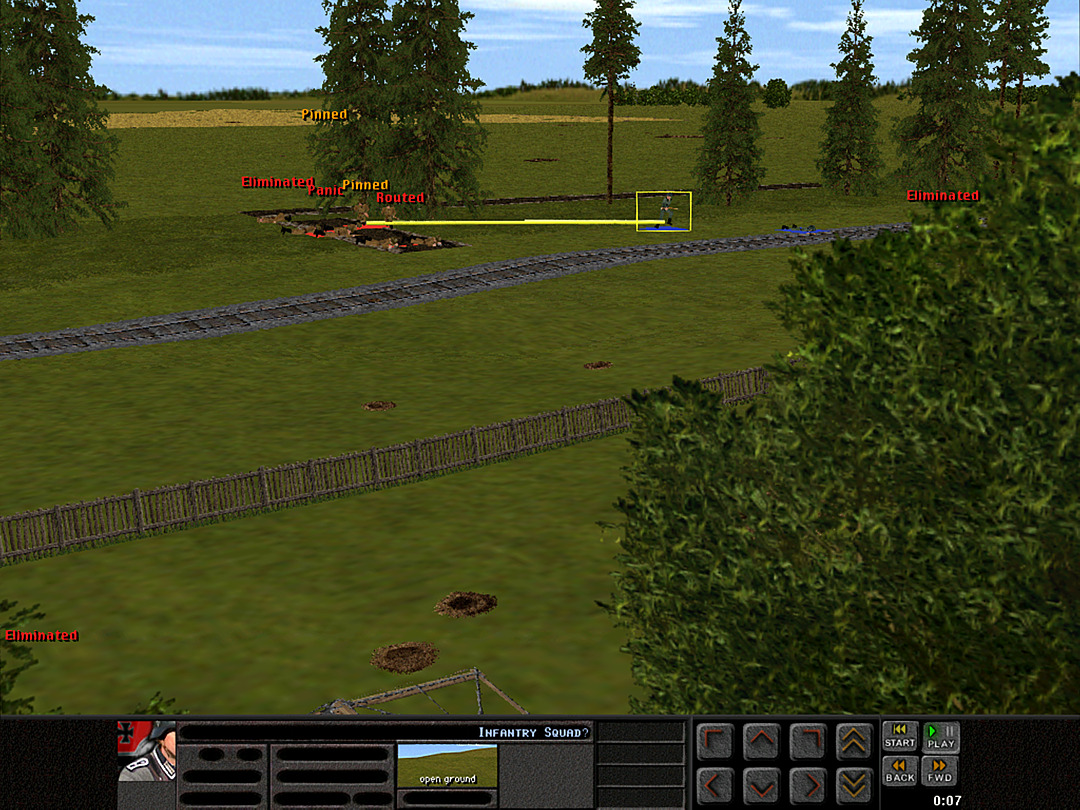 The second German squad is turned back from the eastern trench. We hold it, for now, but our own troops are near the breaking point. 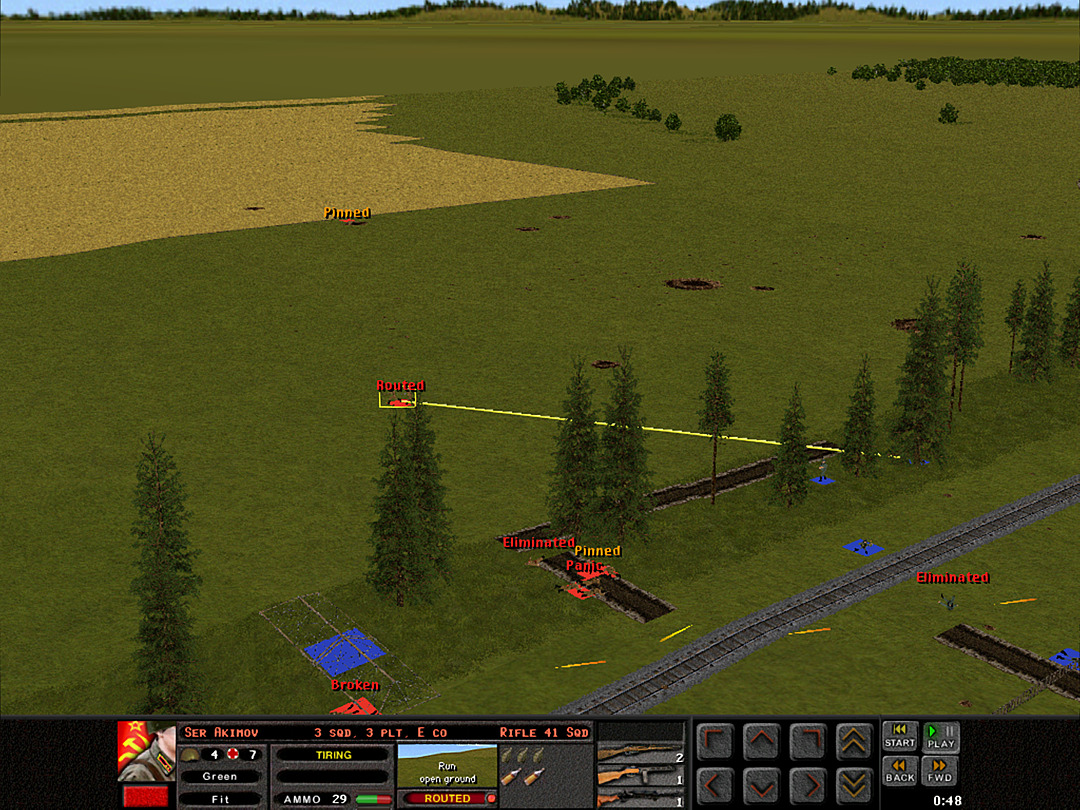 As soon as they spot another enemy platoon on its way toward them, they jump out of the trench in run off in fear. They don't even care that they've headed into the open ground. 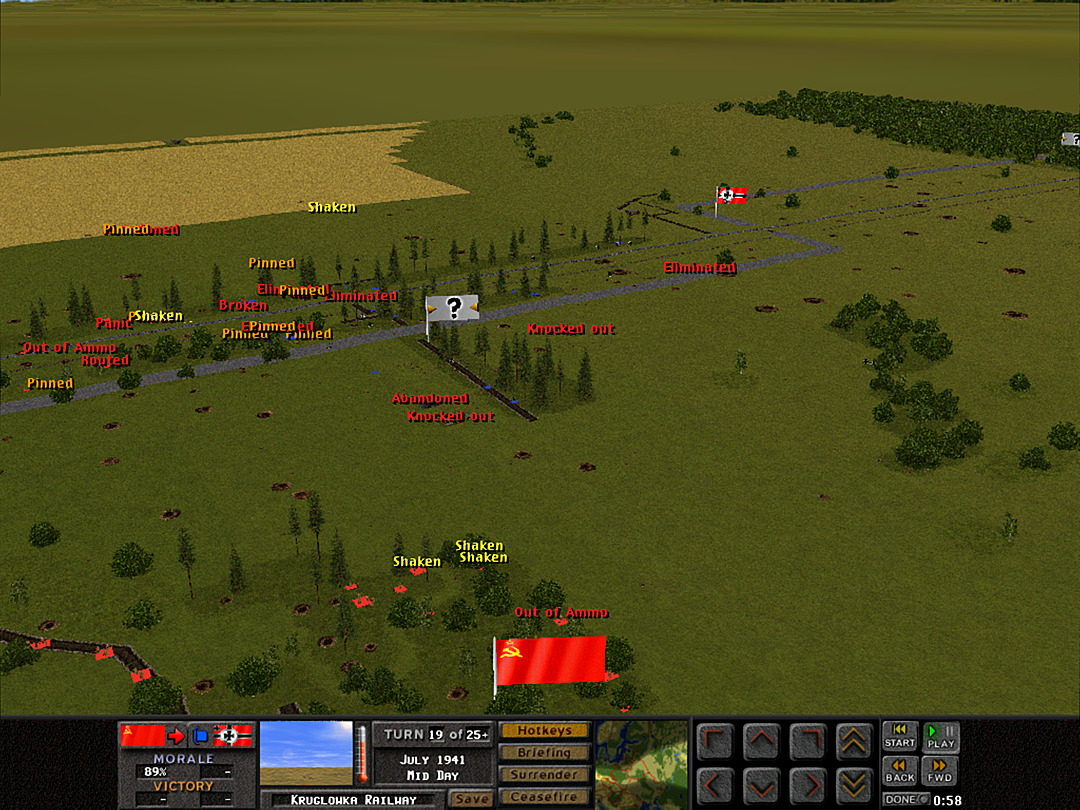 The battle is taking its toll on A Coy; they're finding it tougher to lend fire support.  E Coy, 1 Plt was stymied in its first advance, but is now pulling together. They might be able to give support to the hapless 3 Plt. 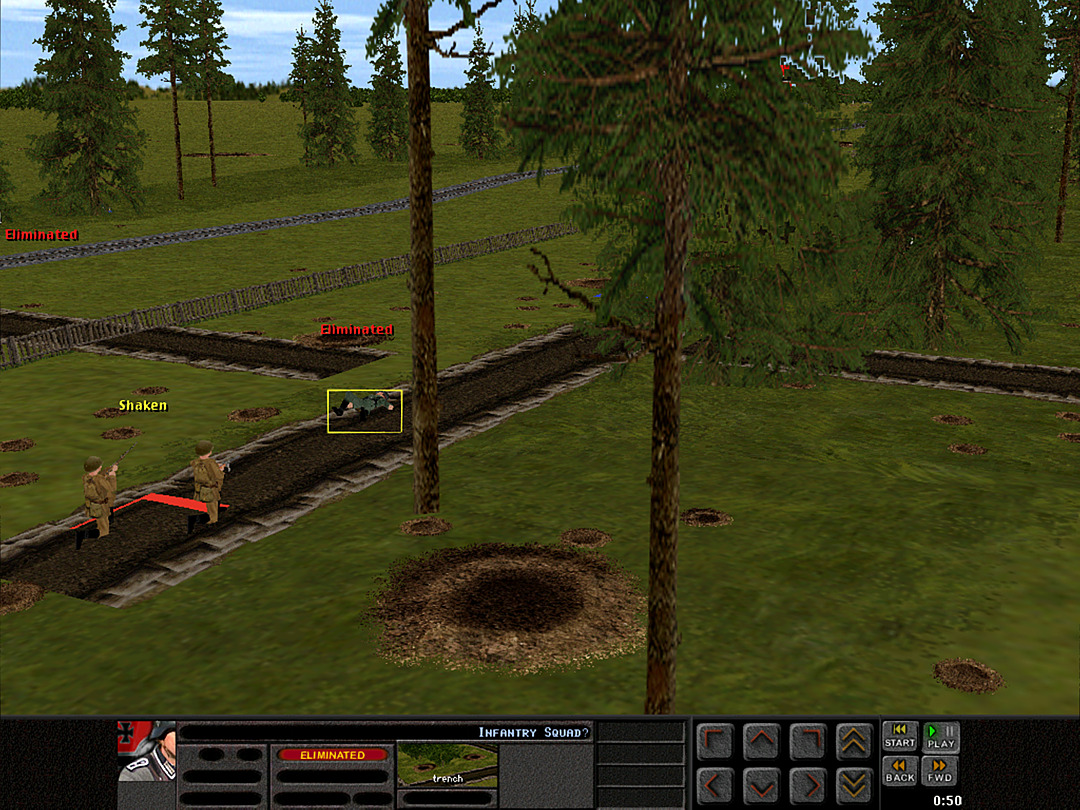 E Coy, 2 Plt finally gets someone forward, when one squad rushes the trench and kills the men occupying it. 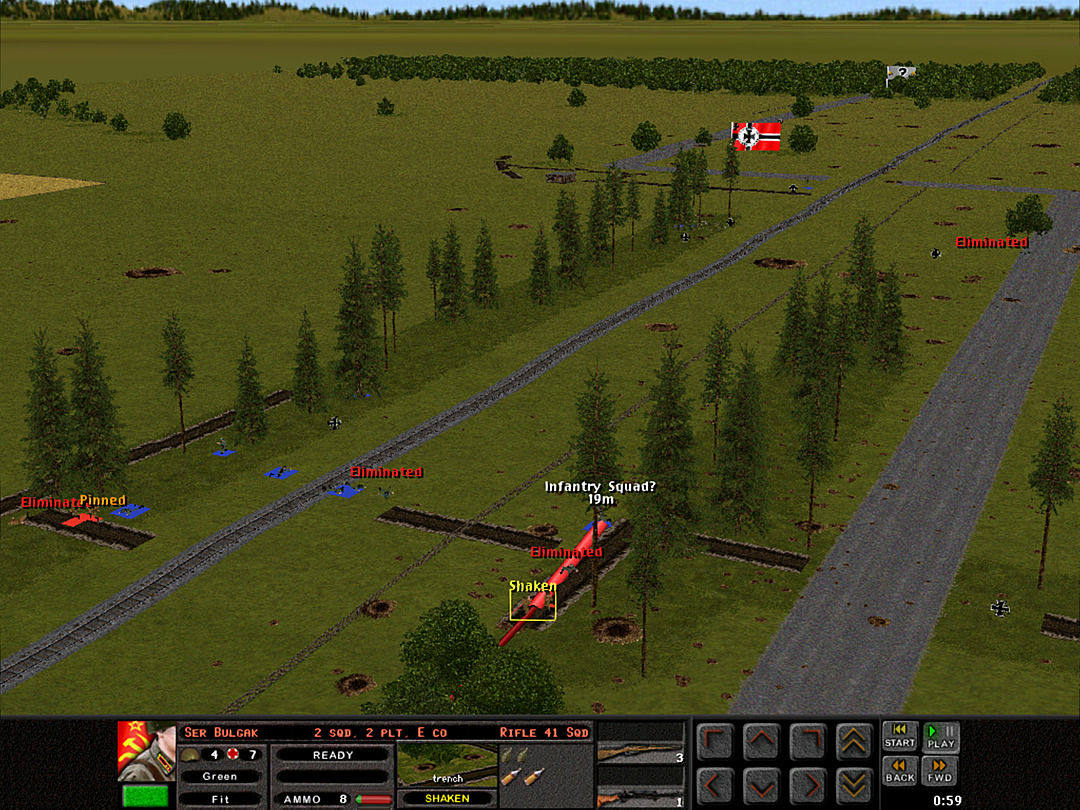 The charge might have been rather foolhardy, as they're down to half-strength, and about to confront a second German squad in the trench. 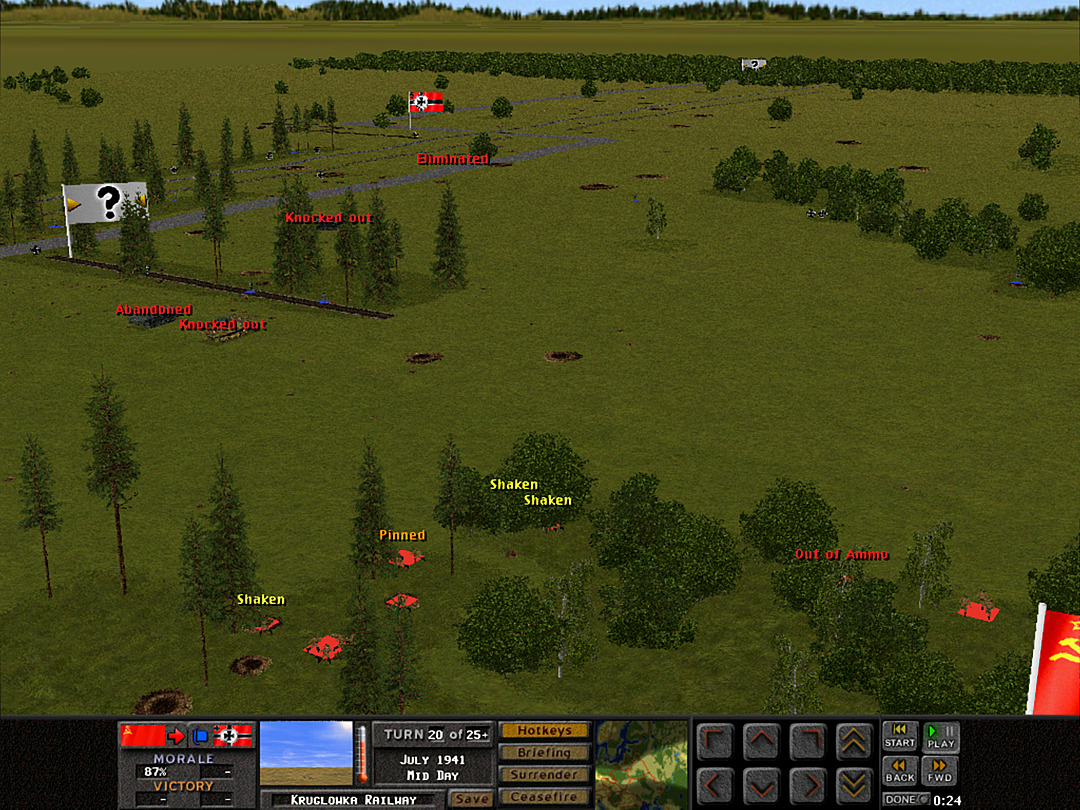 The German gunners appear to be holding steady, while A Coy is struggling to keep fighting them.  The teams that fled the trench search for a seemingly safe crater. They might end up connecting with the 'lost' men in the cornfield. 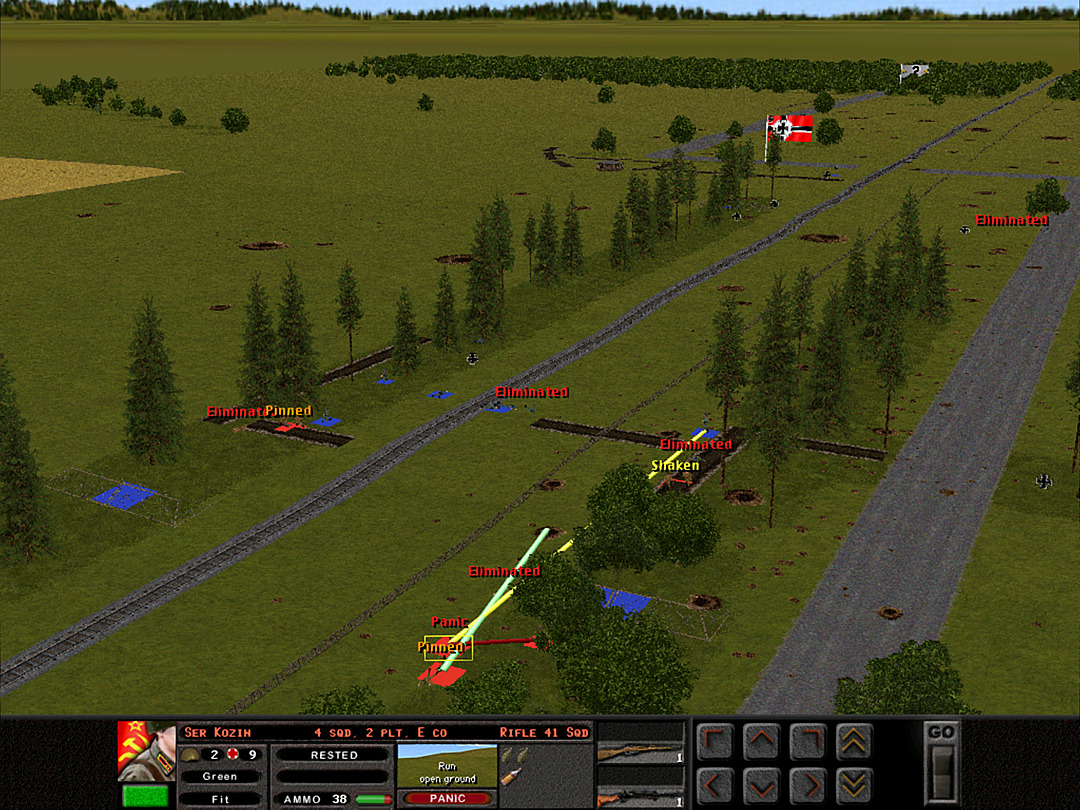 E Coy's assault is in danger of failing. There's just one squad from 1 Plt left in the trench, and no one else from 2 Plt seems to be able to reach the other trench. Meanwhile, the Germans keep coming.  A risky tactic is called for. A Coy will try to send a charge in from the right, in hopes of freeing up the pressure on E Coy, 2 Plt.  They can only hope that we'll be able to suppress the guns back in the other trees.  It might be too late; the half-squad from E Coy is about to be assaulted by at least one, if not two, enemy squads.  In a not unexpected result, the men of A Coy just aren't up to the task of running out in the face of enemy fire. They were at best a minor distraction. 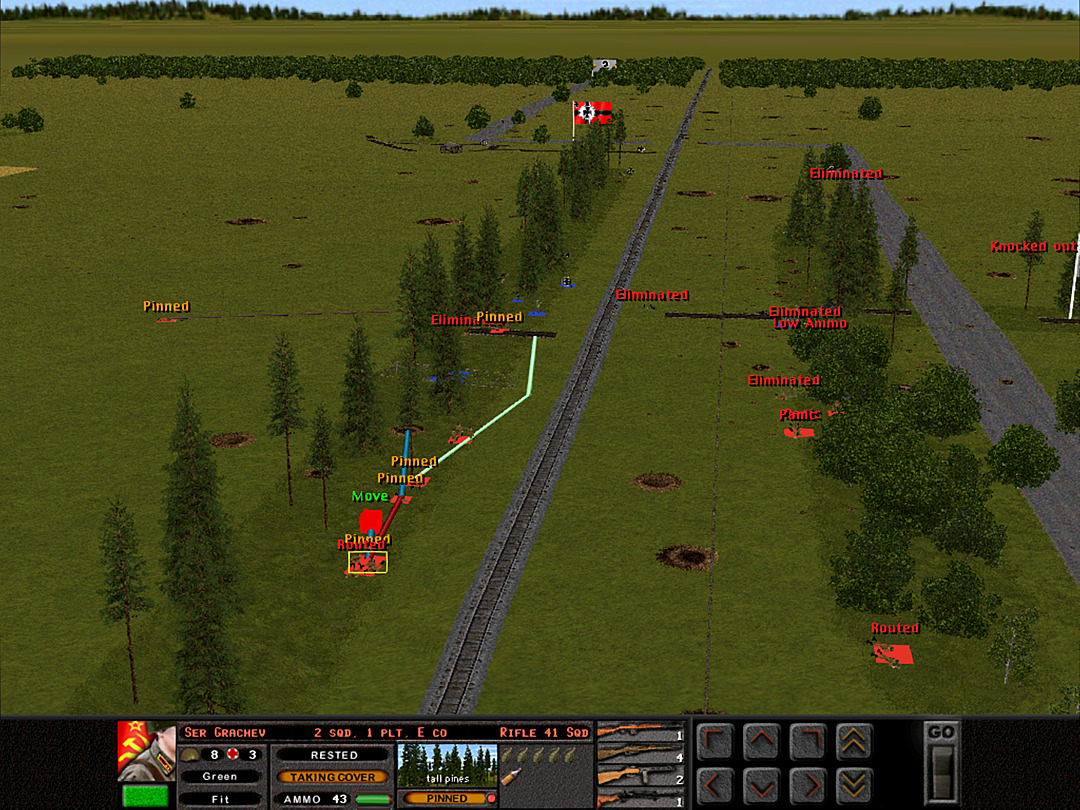 It doesn't look like E Coy, 1 Plt has enough brave men either; only one squad seems to have a chance of actually moving forward. 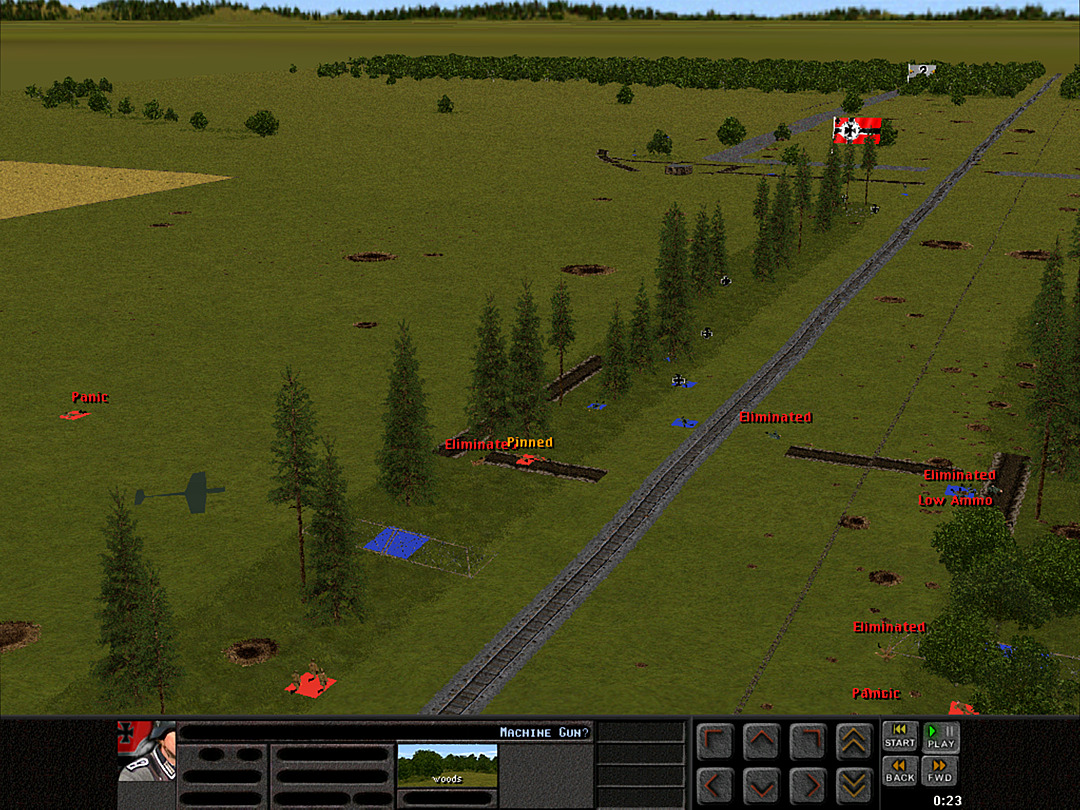 We spot the ominous shadow indicating that the German planes are still overhead as well. 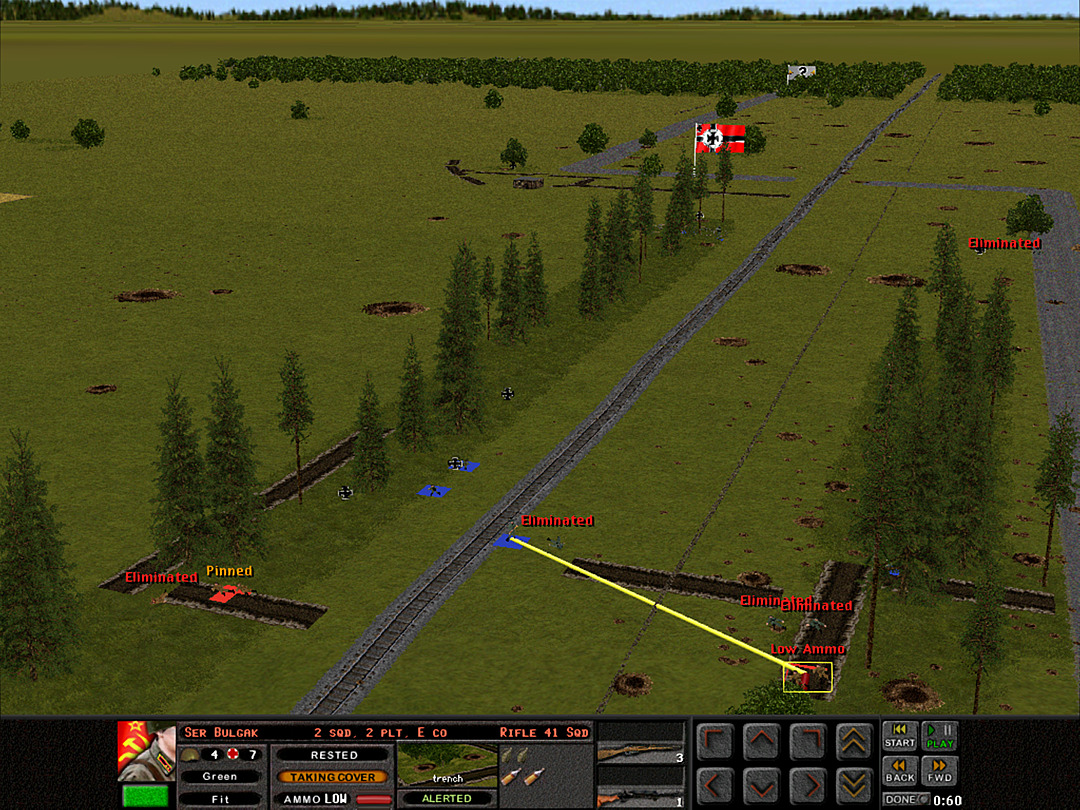 In a display of extreme valor, the half-squad of 2 Plt guns down all the men that came after it, and then engage more enemy soldiers without skipping a beat. But they're running low on ammo now. 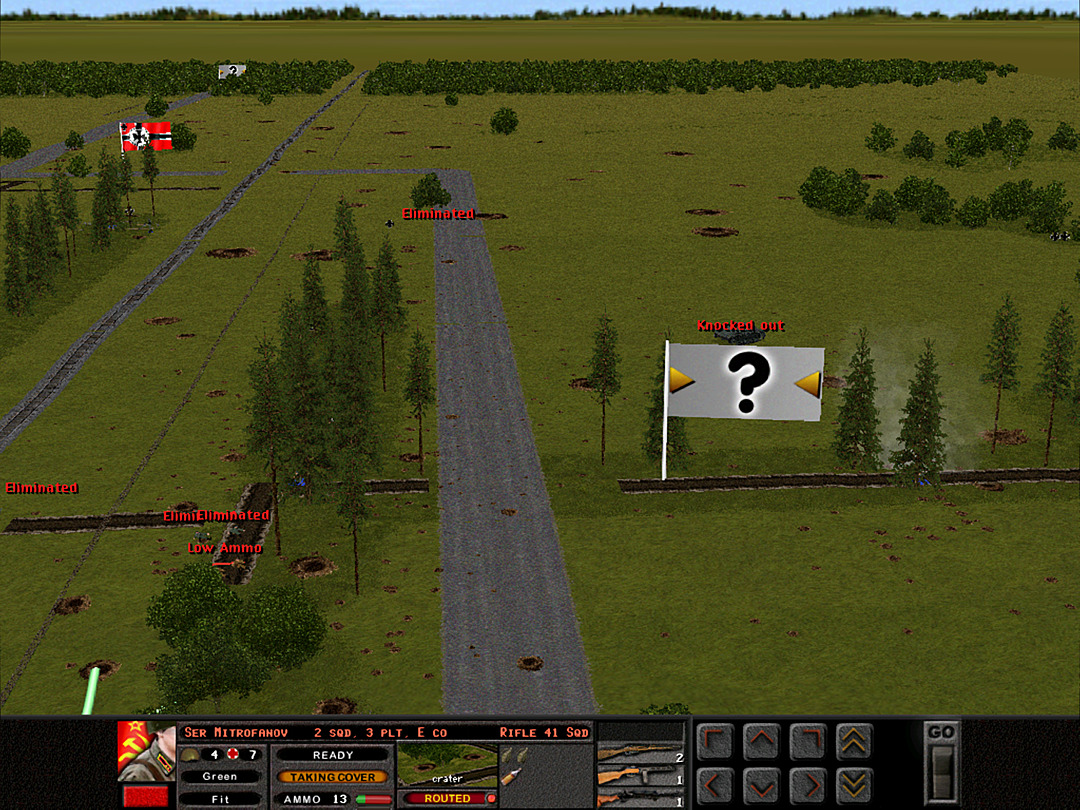 It seems the Germans might be trying to screen their own retreat, as smoke shells arrive from their side of the trench line. 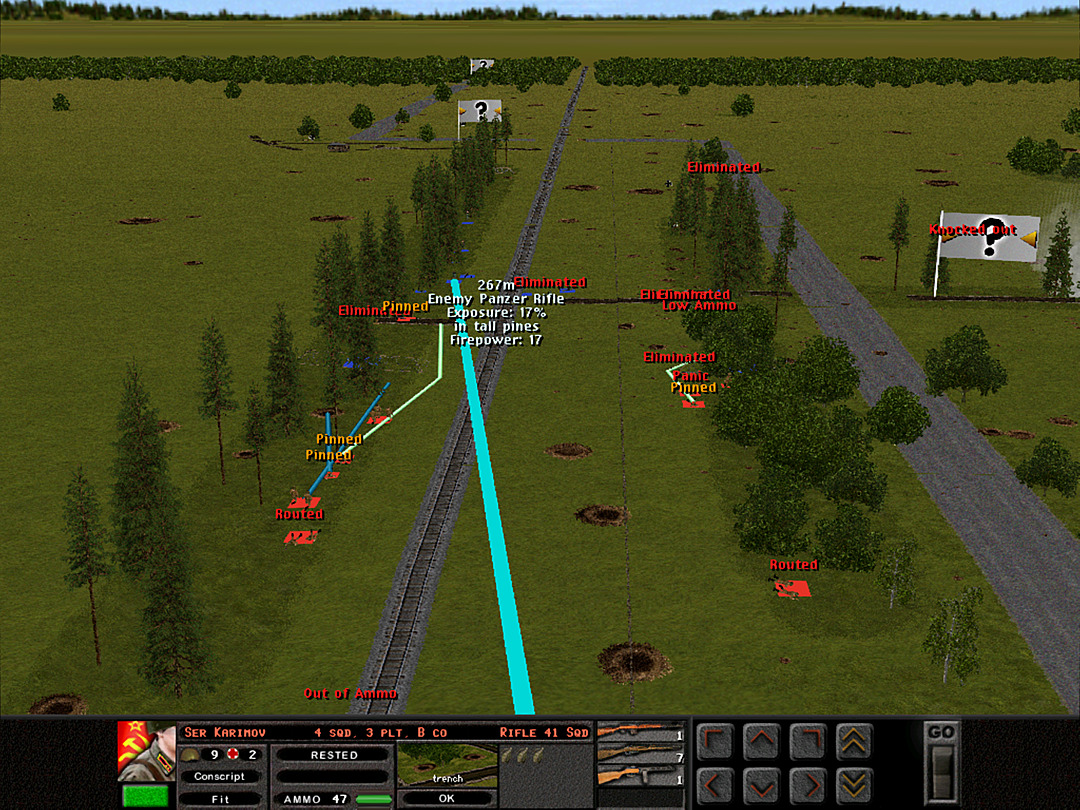 We do our utmost to preserve the toehold we have in the enemy trenches. Every available soldier is ordered to direct fire toward the Germans trying to advance on us. 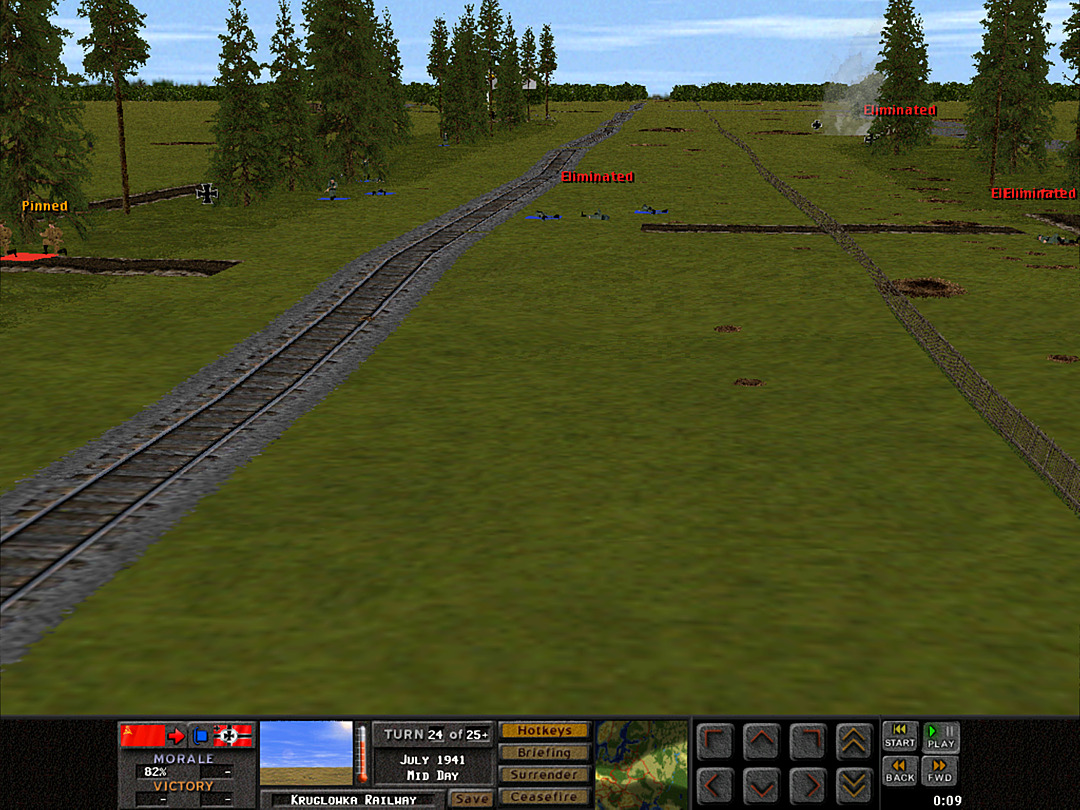 There seems to be too many of them; we'll most likely won't be able to hold them off. 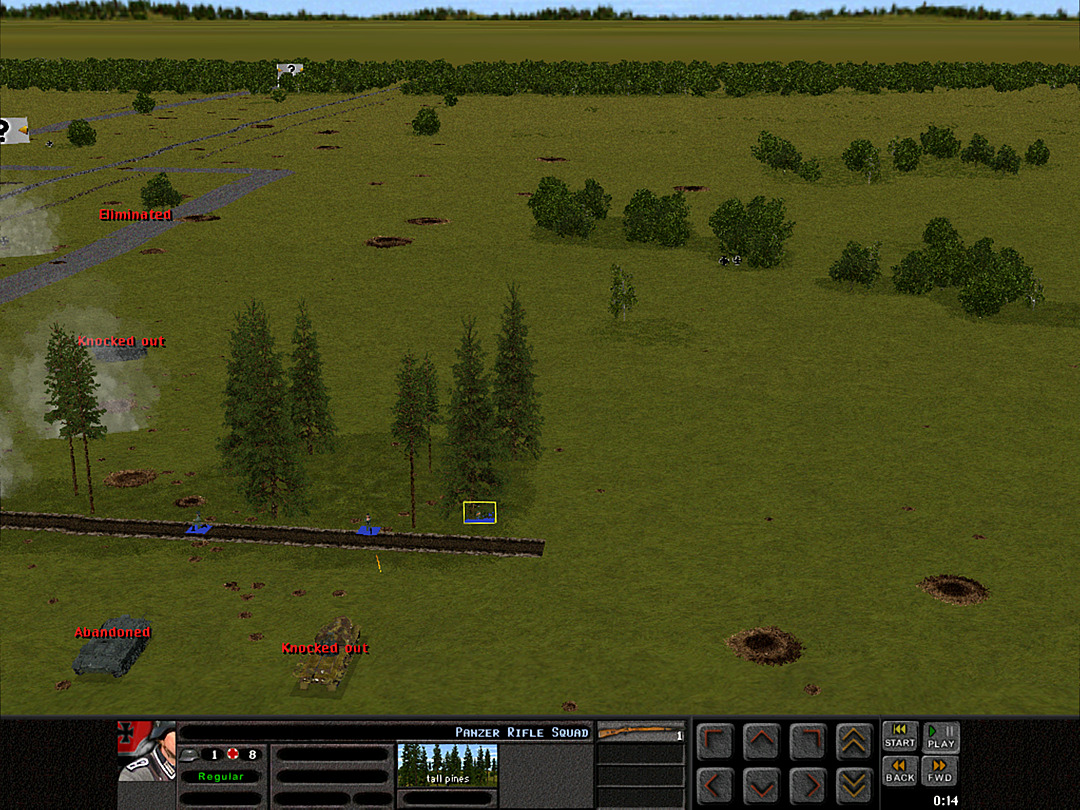 However, it does seem as if we've reduced the enemy troops in the middle trench a fair amount. Some are running away from us. 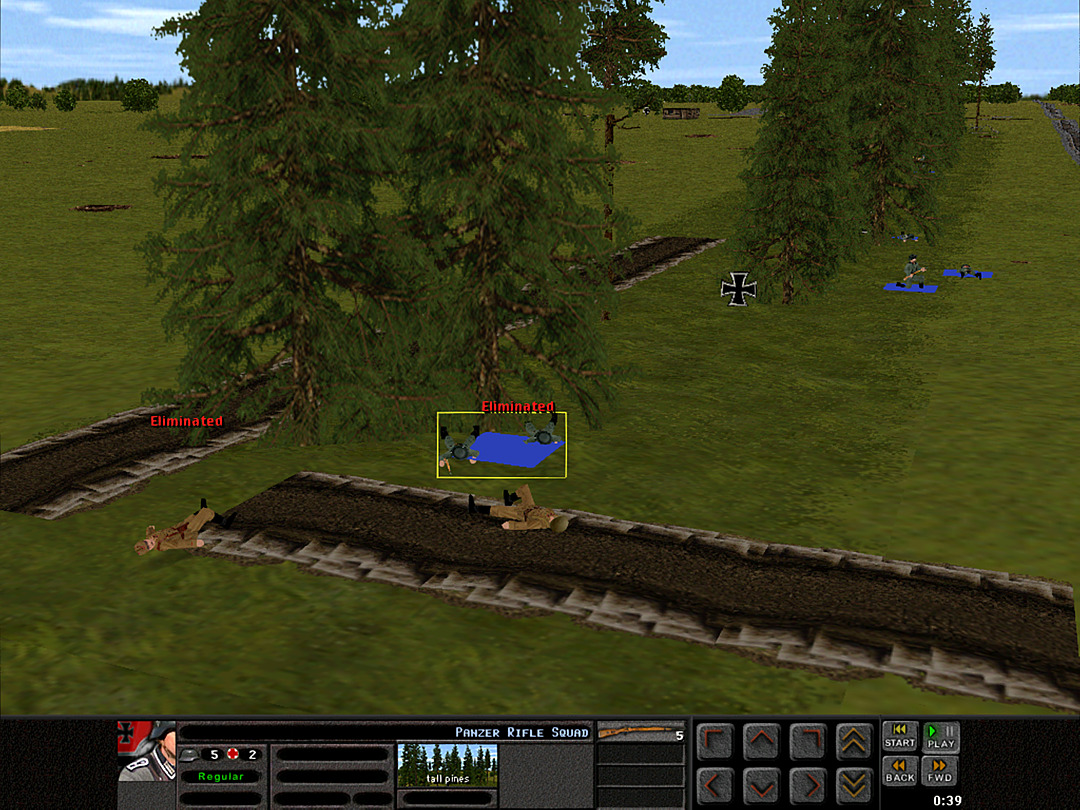 We lose the last squad holding the trench; the Germans are about to retake it before we can get anyone else there.  Even our rear trench has had to be emptied out, thanks to the Luftwaffe.  E Coy, 1 Plt did not manage to get anyone forward; all attempts were met with heavy opposing fire.  Similarly, 2 Plt couldn't push anyone else to the trench. But they have been able to keep firing, which has kept the Germans from driving us wholly out of it.  The Germans in the middle trench are finally breaking.  It's not anything we can exploit now, though. Both sides are exhausted from the sanguinary conflict of the day. Unit Highlight T-26A Artillery Tank 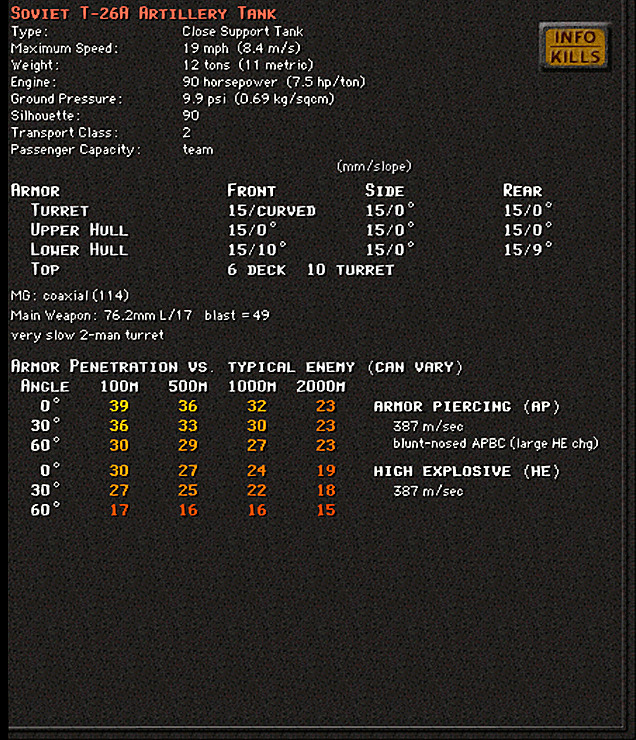 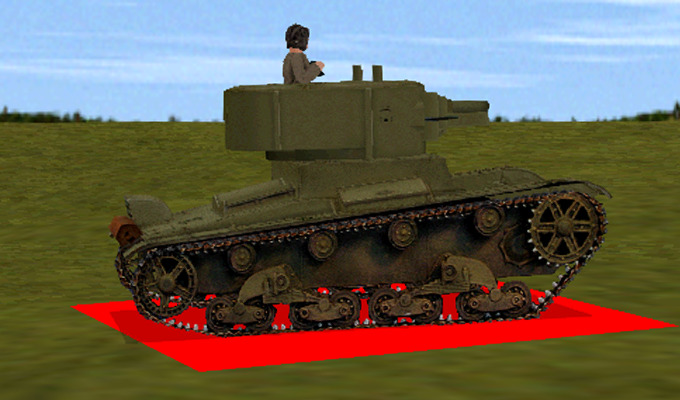 Base Cost: 45 Crew Size: 3 There's little information on this tank that never was produced except for testing. A handful of variants on the T-26 could be called 'artillery' tanks, but they were intended for direct-fire, meaning they could also be called an SPG or a tank destroyer. None of them saw combat. An early attempt to put a bigger 76mm gun on the T-26 failed due to having a too-cramped turret. This model (officially called the T-26-4) was tested out in 1934. It featured a different turret, and initial trials proved at least somewhat promising. However, the tank's inability to handle the latest 76mm gun, as well as a mishap during testing, led to the order for more being canceled. The AT-1, a different (and turretless) T-26 variant with the better gun was being proposed at the time, although it, too, never made it to large-scale production.
|
|
#
?
Feb 9, 2024 08:22
|
|
|
Ouch. I can't imagine how we are going to take 2/3 objectives much less all 3.
|
|
#
?
Feb 10, 2024 20:22
|
|
|
Simple, we're just going to need a few more Sgt. Bulgaks to clear the trenches for us. The Germans are expending a fair amount of casualties, so we will win the war of attrition if it comes to it.
|
|
#
?
Feb 11, 2024 23:02
|
|
|
Operation 3, Battle 5 of 8 Operation: Kruglowka Railway Time: Night (** Attempt to skip: NO **) Skies: Clear Ground: Very Dry Temp: Cool Wind: Windy SW Visibility is about 160m As night fell, we had a decision to make. Should we continue the fight, or wait until daylight and the hope of more reinforcements? Although the trenches had been partially occupied, and it appeared we had held off the Germans, control of the center was by no means certain. The captain of D Coy in II Btn argued that in a night raid, he could lead his men across the open ground and take the middle trench from the west. Major Fedorov demurred, saying he didn't wish to risk the only decently-strong company remaining. He went over the matter with Major Kharitonov, who wasn't particularly enthused about it either, seeing as how his companies had been wrecked by an enemy counterattack, and then decimated by the air strikes. Fedorov replied that the risk of more air strikes tomorrow might be the only thing arguing in favor of going in by night. It was at that point that the captain of A Coy nervously spoke up. His own men had not taken very high casualties, and he thought that if given the chance, they might be up to the task of taking the trench. Kharitonov was a bit skeptical, given the company's poor performance in the river crossing, but decided that they deserved a shot at it. Secretly he suspected that the Germans had been weakened enough by the day's fighting that they'd already fallen back, leaving the trench an easy conquest. Major Fedorov give his assent to the plan; D Coy would move into the woods to give support, while A Coy made the charge. 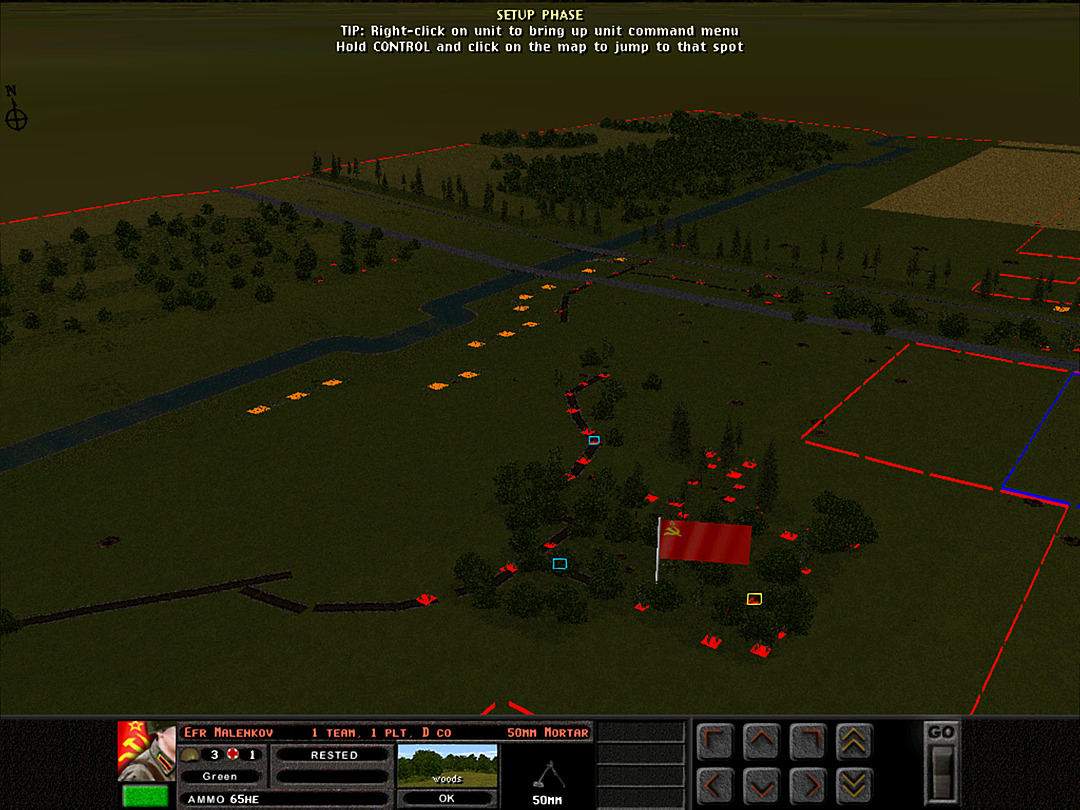 D Coy set up in the central woods. They'll bed down in the trench that runs into the trees, although they may not want to stay there come daylight if the Stukas return. 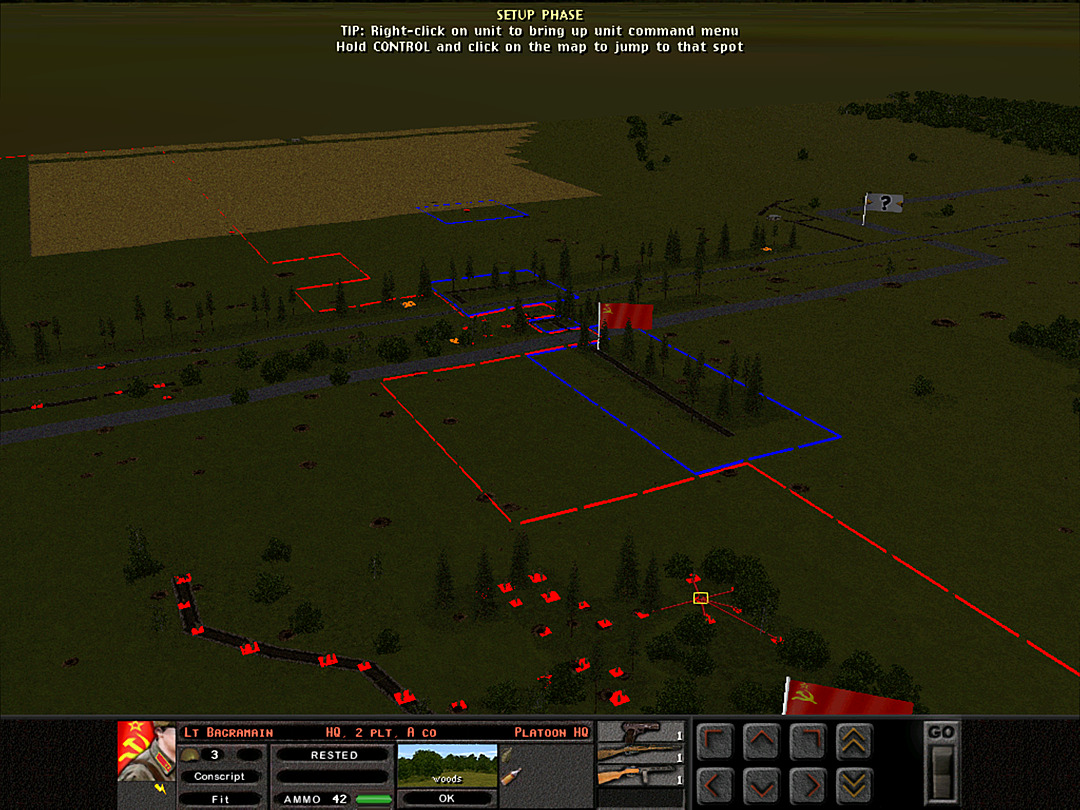 A Coy positioned itself right at the closest corner to the middle trench. 2 Plt is set to lead the charge.  E Coy refused to give up the trench it had claimed during the day. Despite being barely qualified to be called a 'company' due to heavy casualties, they will try to control the two middle trenches. All those in command agreed that the eastern trench held no tactical value, and they would not claim it unless no Germans were sighted that night.  A Coy set up a plan of attack. While 2 Plt creeps forward, 1 Plt will move toward some shell craters in the open ground. The darkness ought to keep them safe even in the open, although the idea is that even if they attract attention, it'll cover the more stealthy advance of 2 Plt.  The trenches have been quiet since sundown, so E Coy will do its best to take full control of the small middle ones by the road. If necessary, they can be a backstop for A Coy's attack.  As E Coy takes the nearby trenches, shots ring out. It's not clear where they are coming from yet.  It's not long before the source of the gunfire is spotted. A German squad is creeping through the woods. Perhaps they are trying to take the eastern trench?  A Coy's advance, meanwhile, hits a snag as soon as it sets out. The lead squads take fire from somewhere to the south, and all the men start to lose confidence.  However, A Coy, 1 Plt was able to move unimpeded in the open ground. The Germans might not have spotted them yet.  E Coy claims the trenches and tries to see if any more enemy squads are approaching. 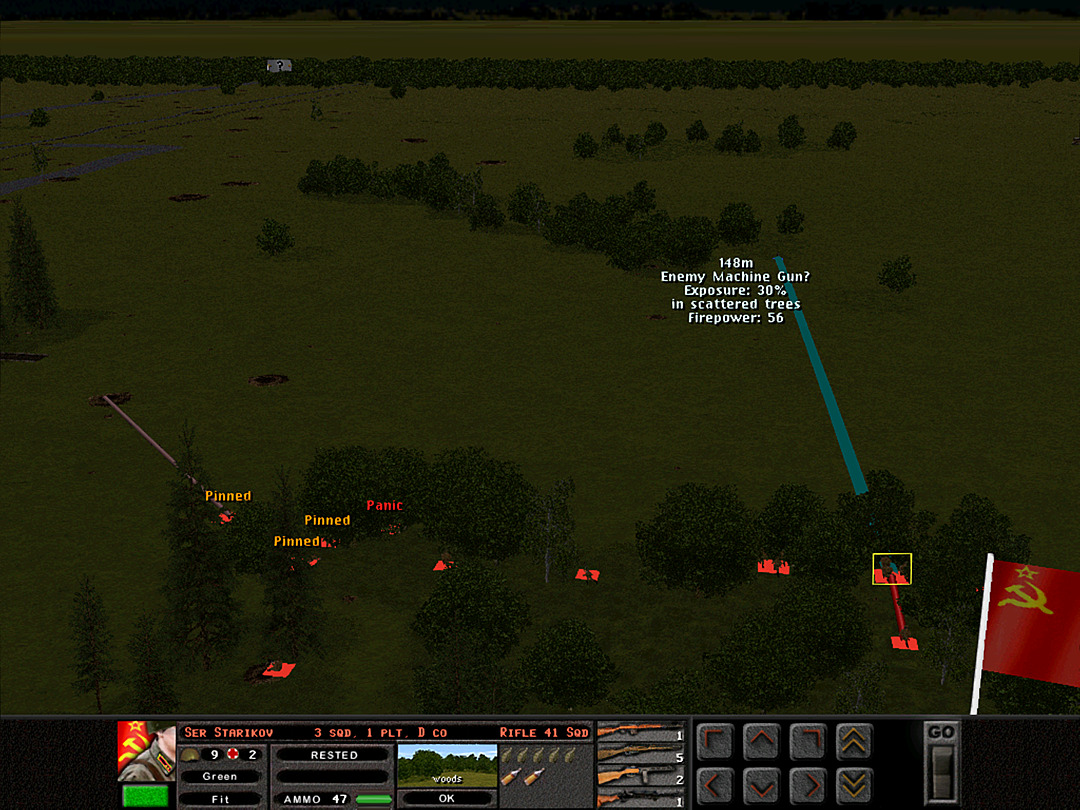 A Coy discovers the source of the fire � a machine gun set up in the woods southwest of the trench. D Coy gets ready to send suppressing fire its way. 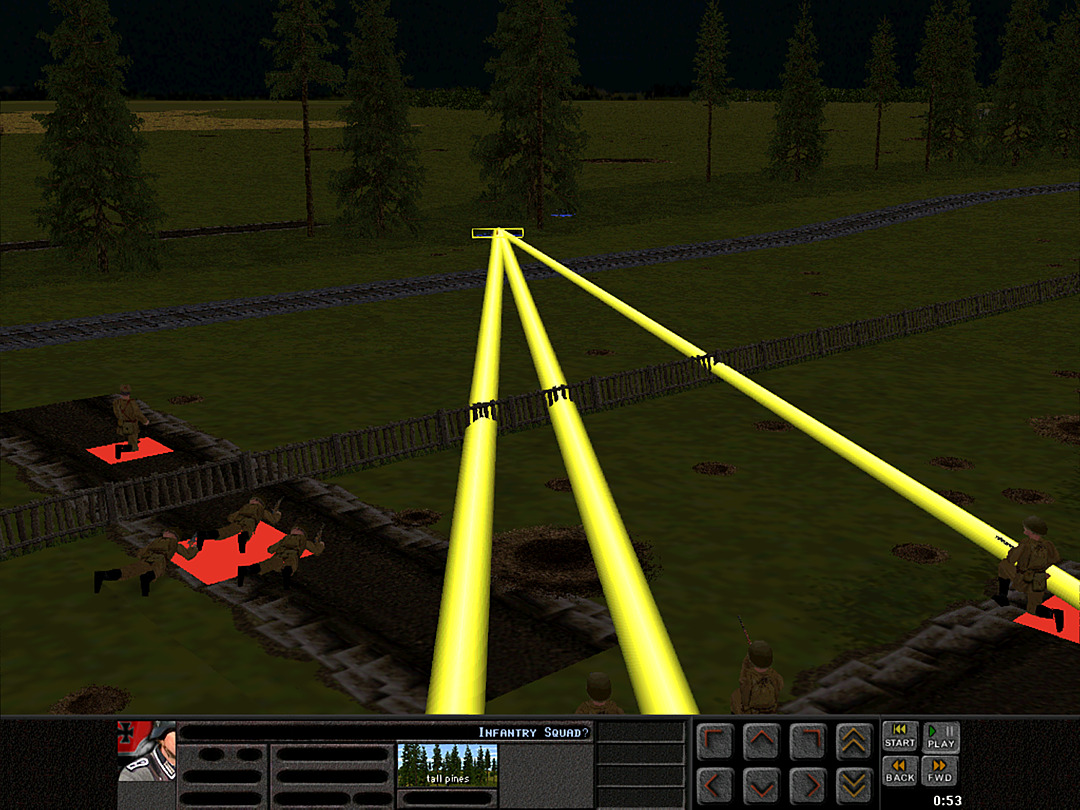 Two German squads are spotted in the line of trees across the railway, and E Coy engages. 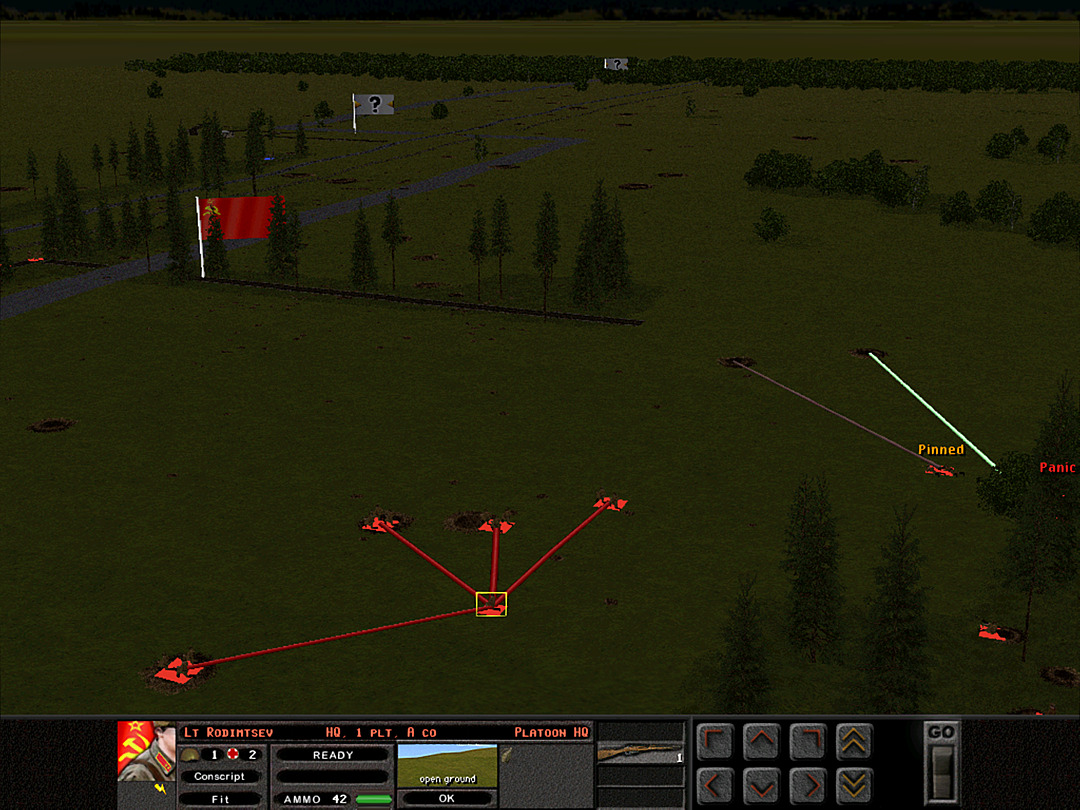 A Coy, 1 Plt has moved undetected out into the open. They're going to try and hook over into the center of the middle trench. If the Germans have an ambush prepared, this could go poorly. 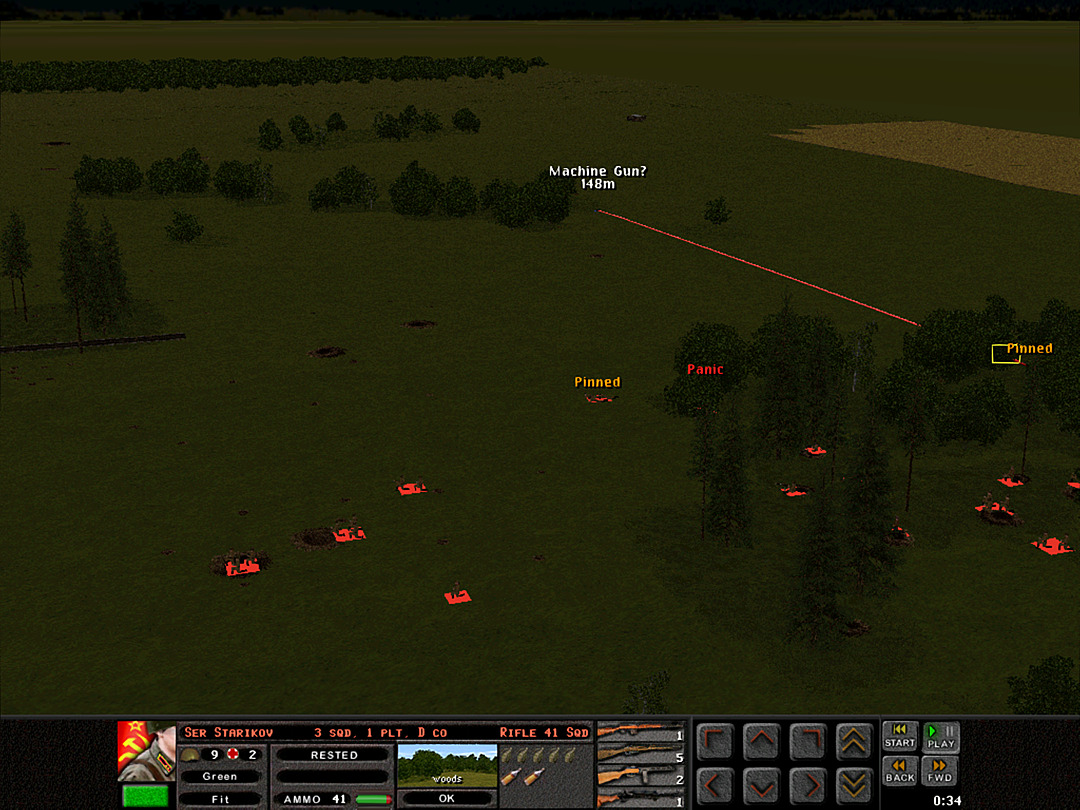 D Coy draws the fire of the machine gun off of A Coy. 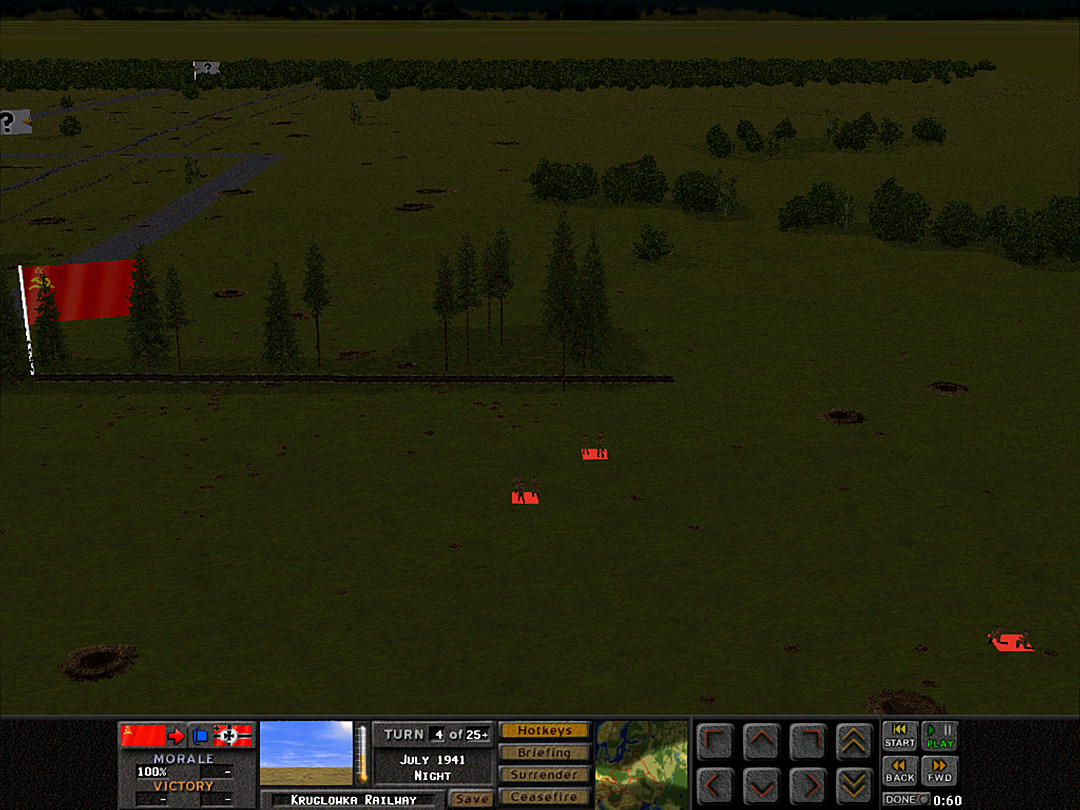 The movement of A Coy, 1 Plt appears to be wholly unnoticed by the Germans. We might be about to get the middle trench! 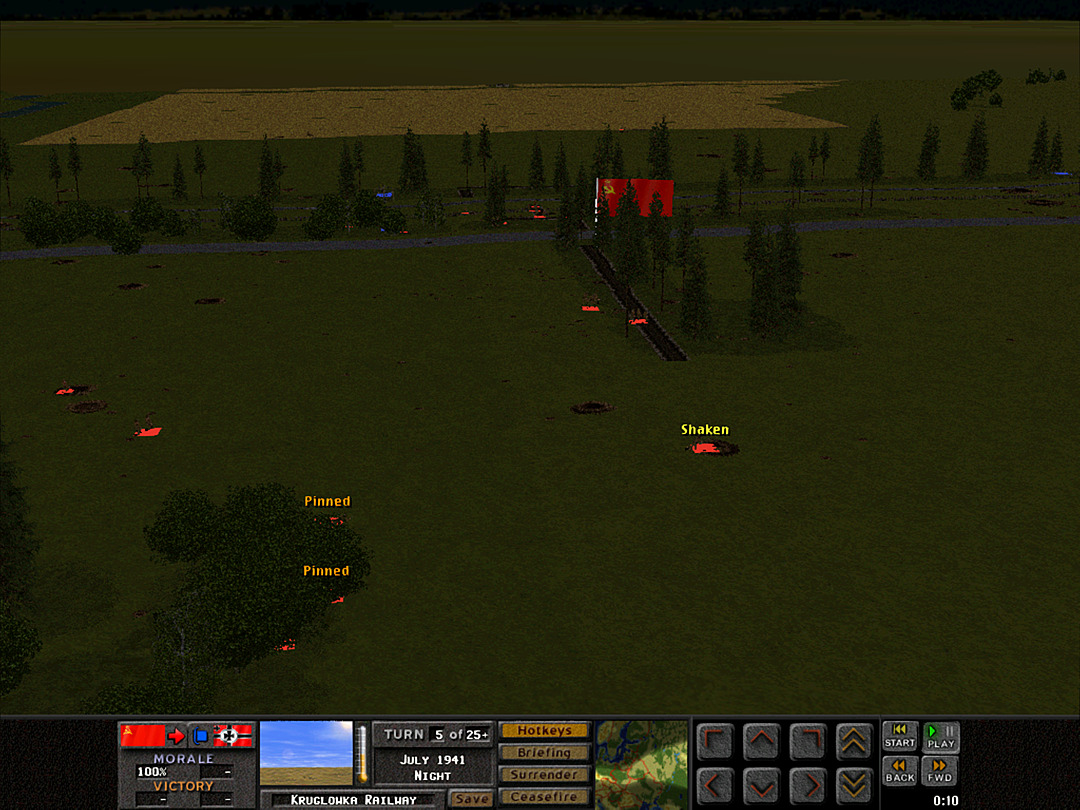 Squads from A Coy, 2 Plt are also advancing, thanks to D Coy's supporting fire.  They reveal the presence of a second unit in the woods. 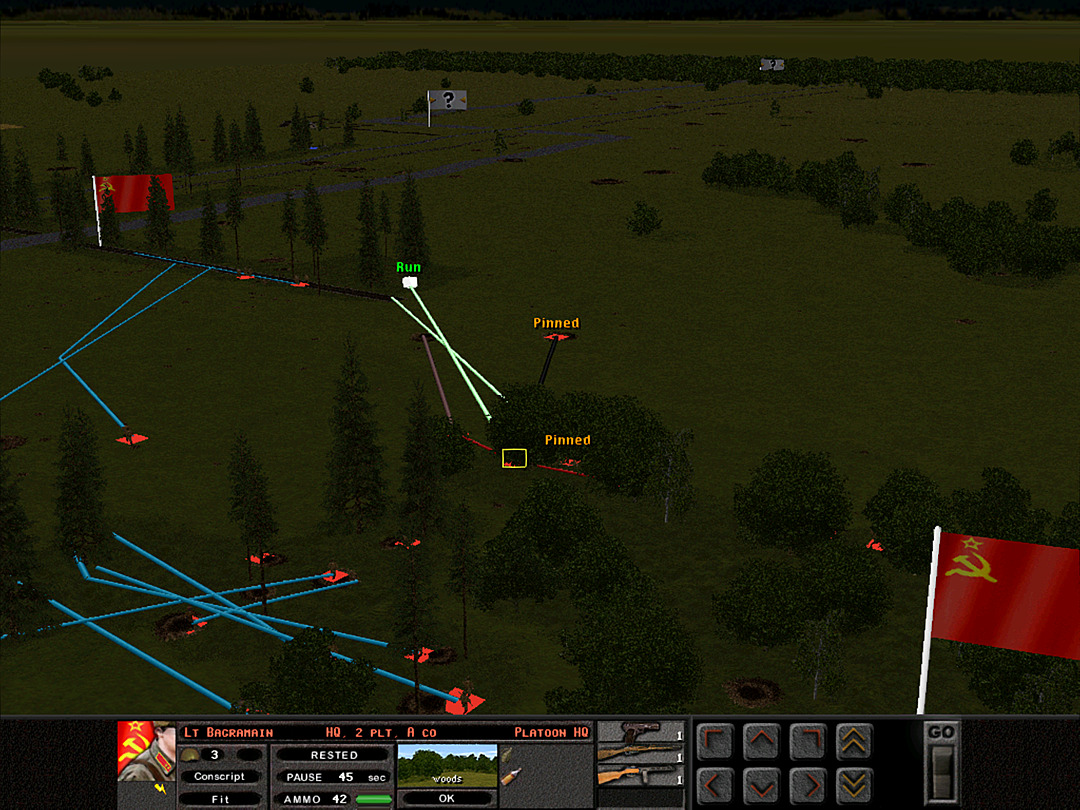 Our plan appears to be succeeding. It seems that the roundabout path to the trench is going to be the safest. A Coy, 2 Plt will now screen the advance of both 1 and 3 Plt. 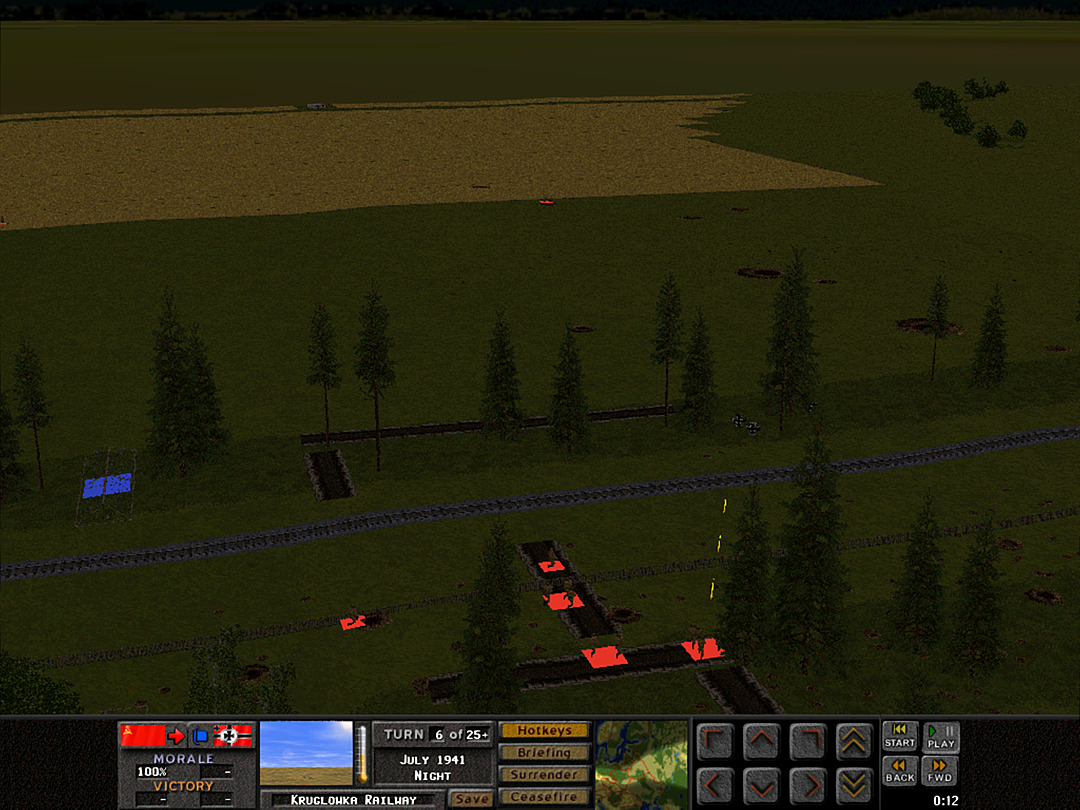 E Coy has established a fairly secure position. The Germans in the 'alley' haven't shown themselves for a bit.  As soon as they move again, we're ready to fire on them. 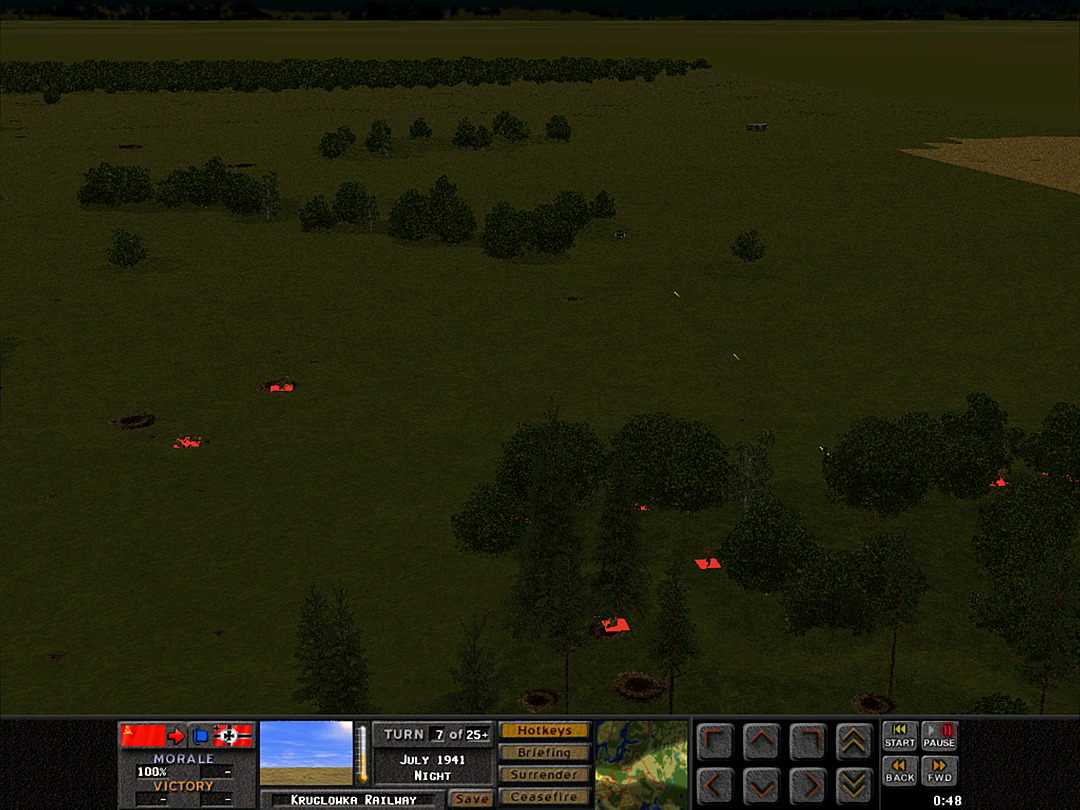 A Coy, 2 Plt gets a second squad into a safe midway point while D Coy lays down suppressing fire. 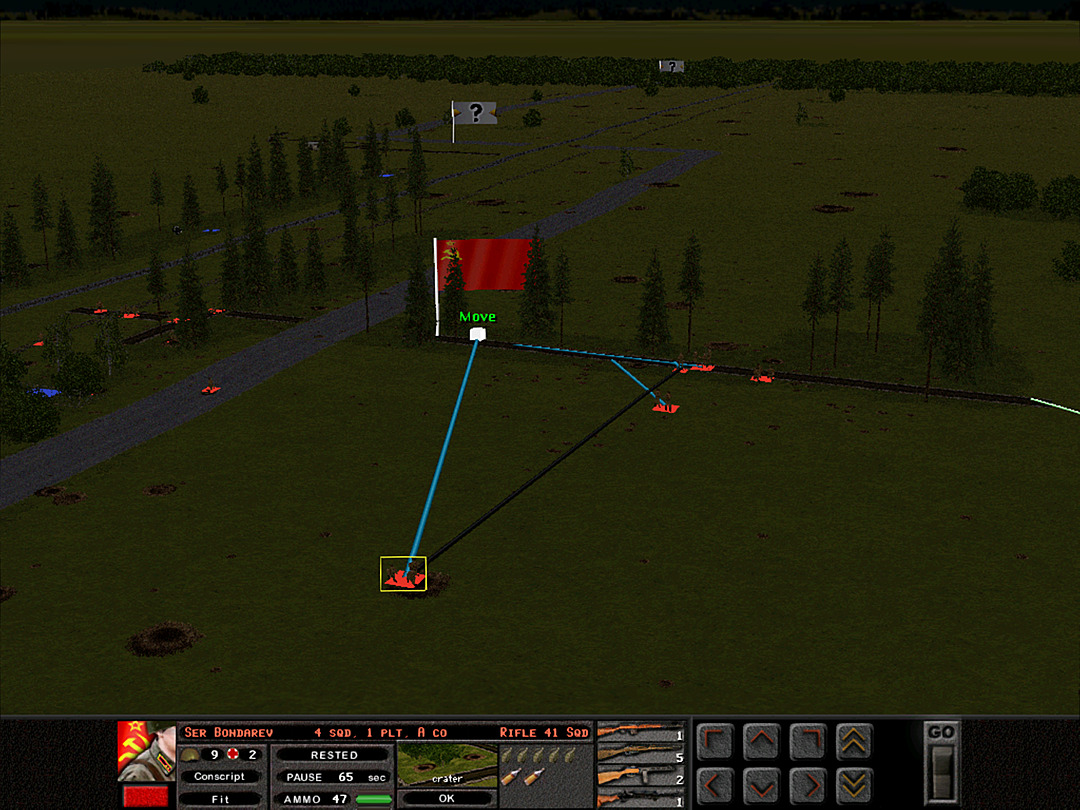 At the same time, we've nearly secured the whole of the middle trench. 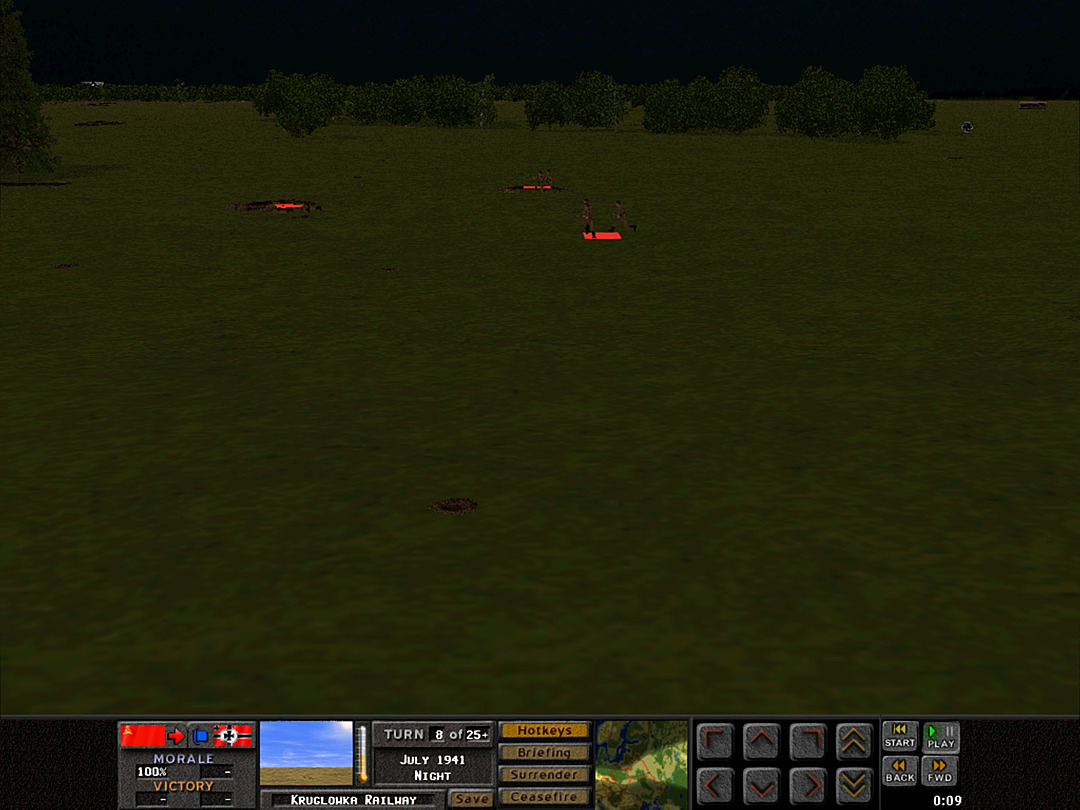 Another squad dashes across. Between D Coy's support fire and the other squads from A Coy, this one finds it easier to make the run.  A Company must be congratulated for making a successful advance. As long as there still aren't any troops hiding or preparing a counterattack, we should hold the middle trench tonight.  Our squads no longer need to stay in range of the Germans in the southern woods; if they want to keep firing on us, they'll need to come out in the open.  The mortar team from A Coy, 2 Plt was also dropping shells in the general area of the machine gun. It likely helped, but they, too, are not required to keep firing.  A Coy, 1 Plt has claimed the bulk of the middle trench. They send one squad out southward to scout the surroundings. 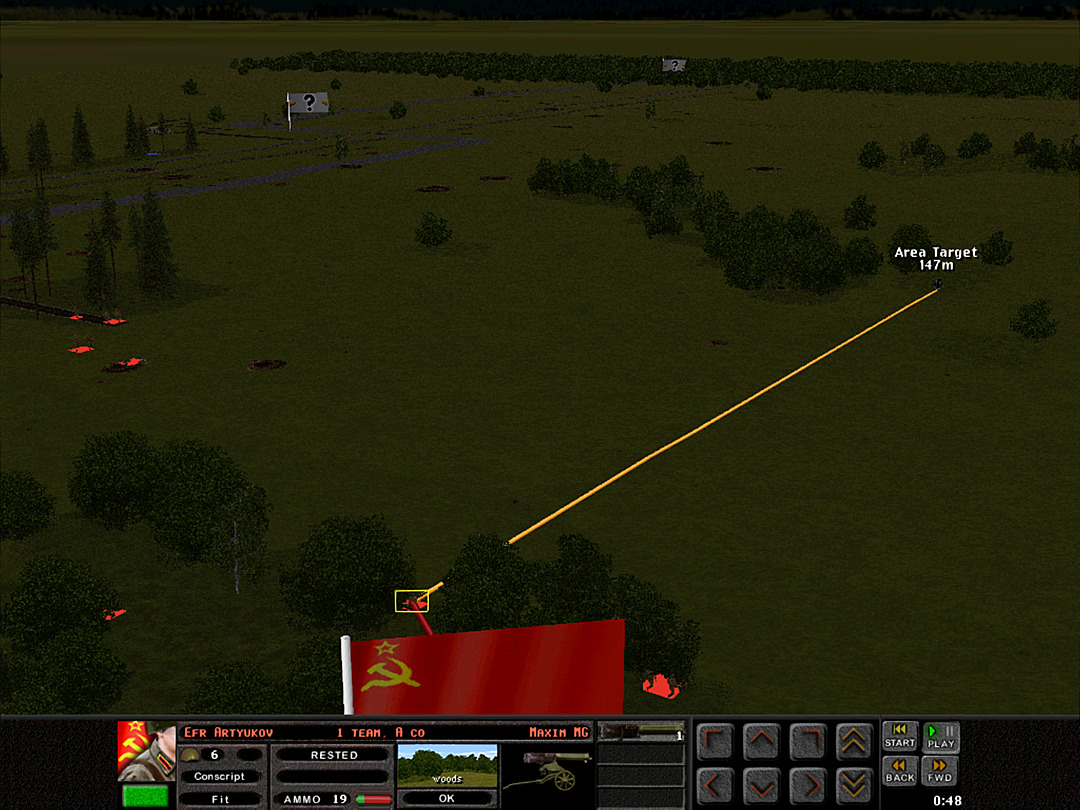 Just to secure the final movements of A Coy, one of our Maxim guns gets into a duel with the German MG. 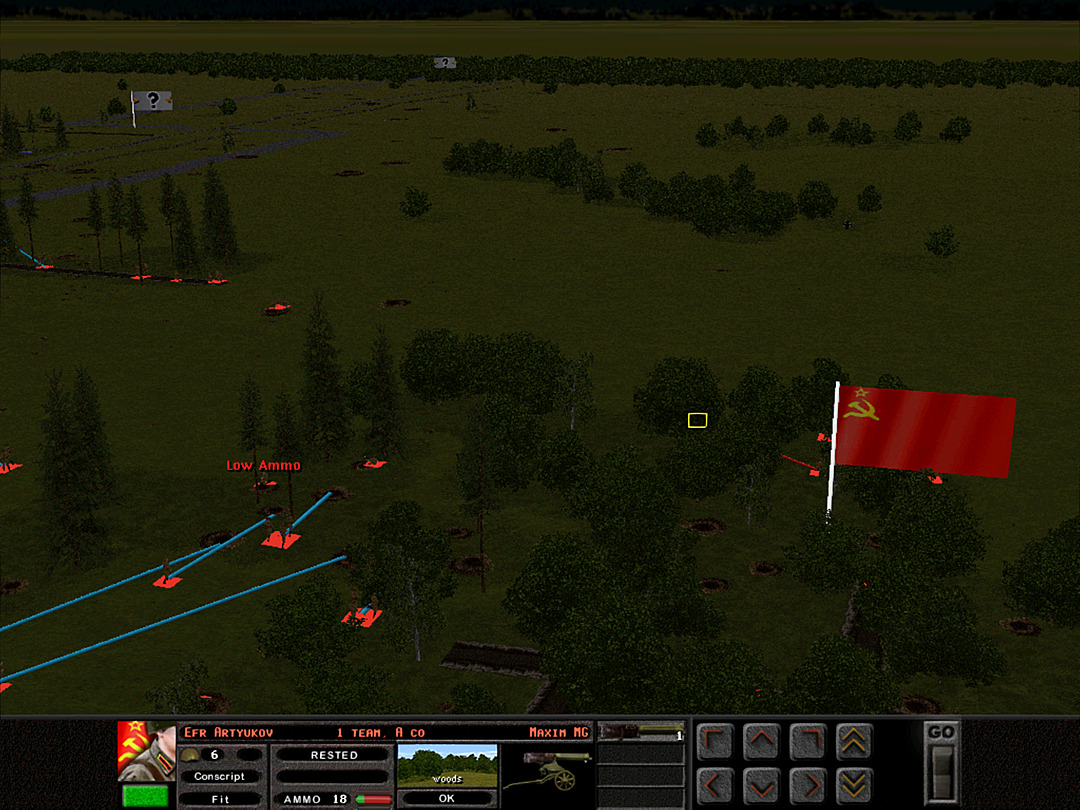 A Coy will take control of the middle and prep the trench for the morning. D Coy will set up position in the forest. 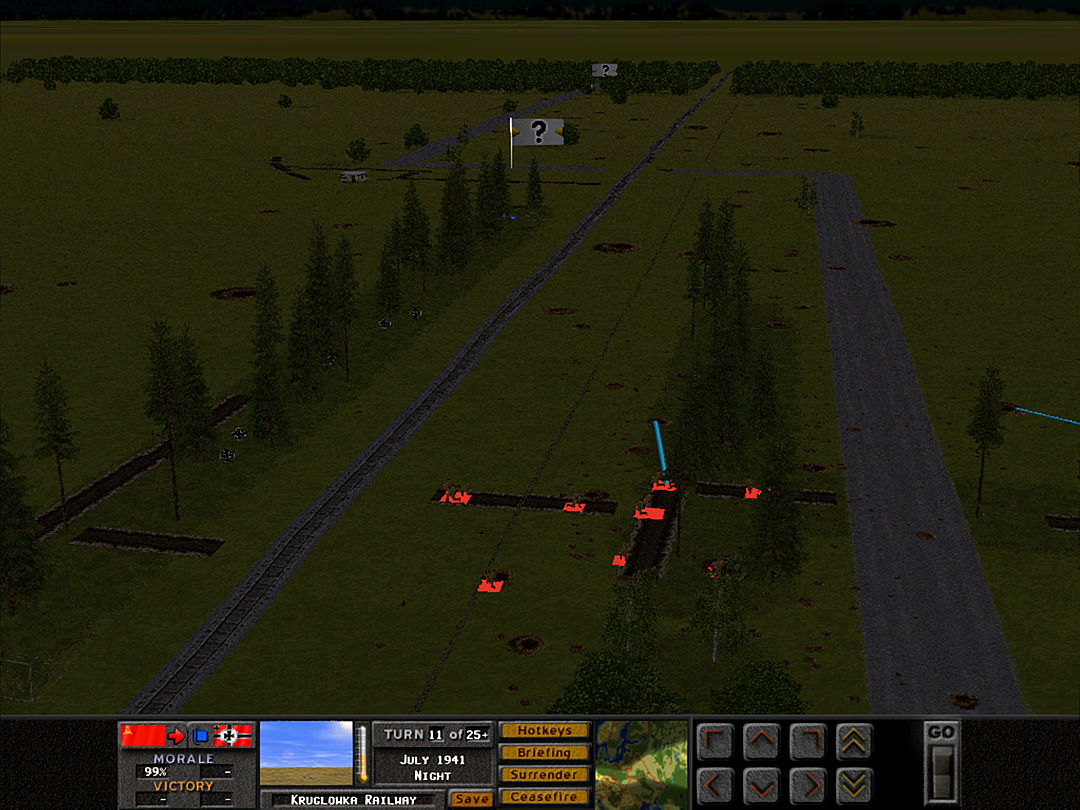 E Coy hasn't seen much sign of the Germans for a while. They send a squad to scout a bit more. 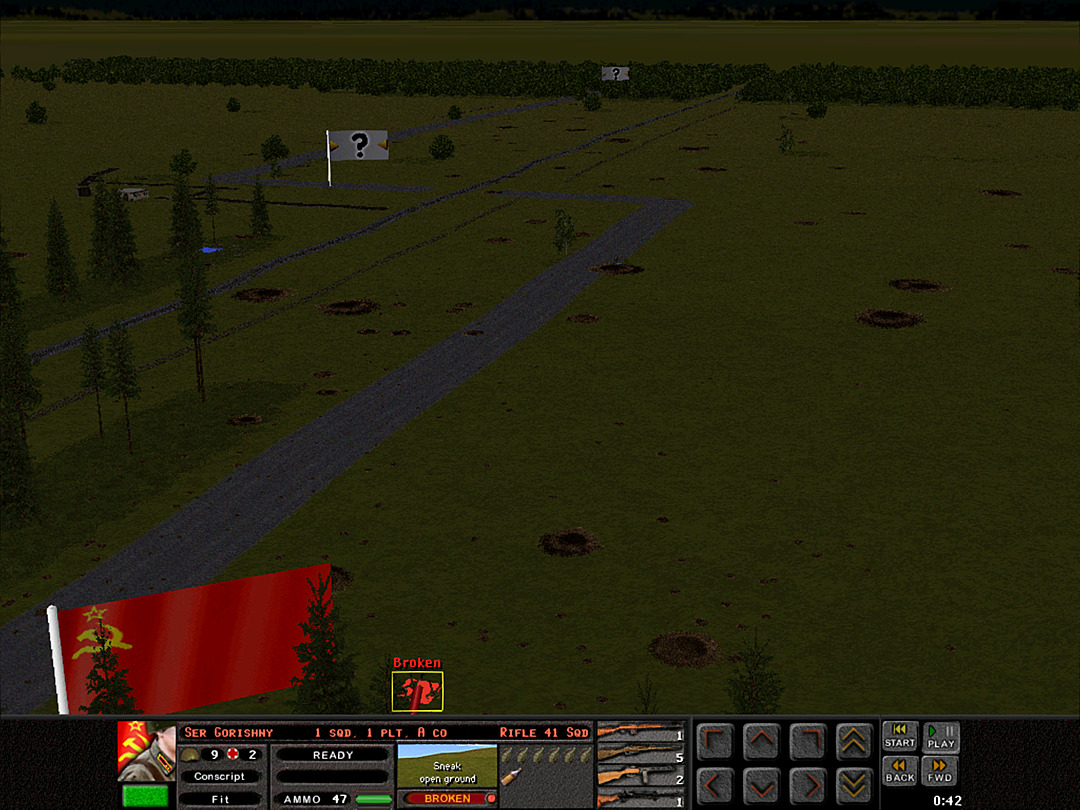 A Coy's scout draws the fire of a well-positioned enemy unit in a bomb crater. 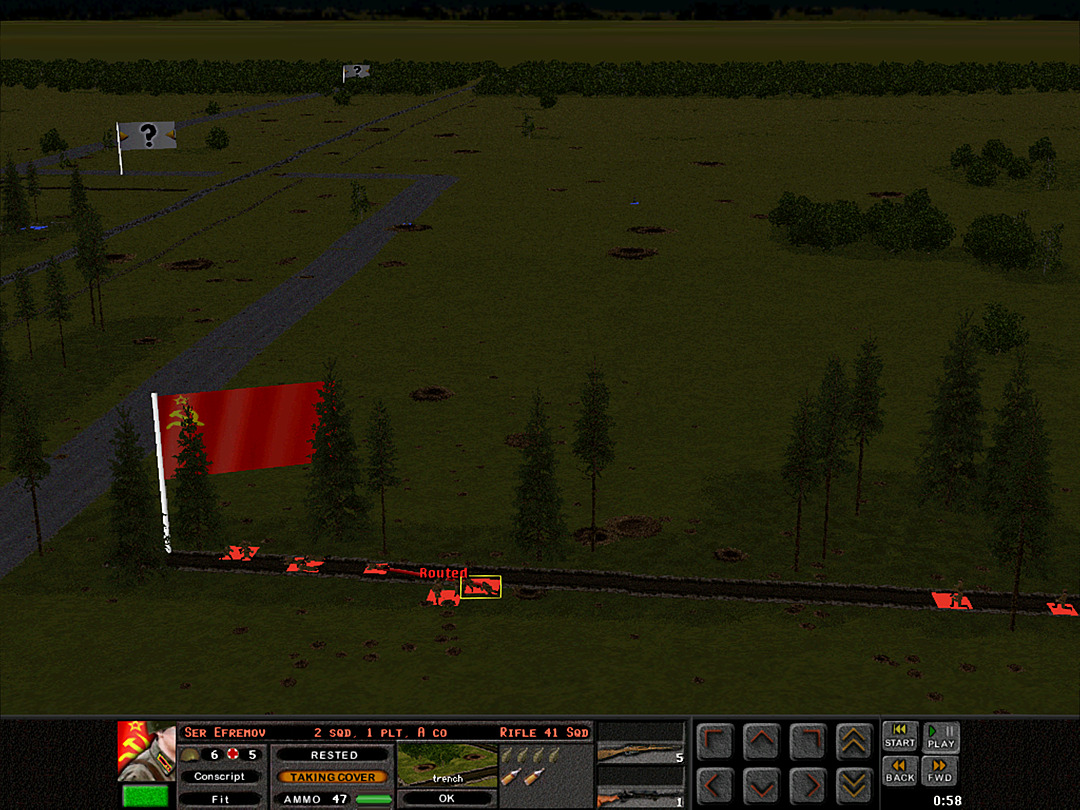 They get fired on from multiple locations, and end up racing in terror back to the trench. 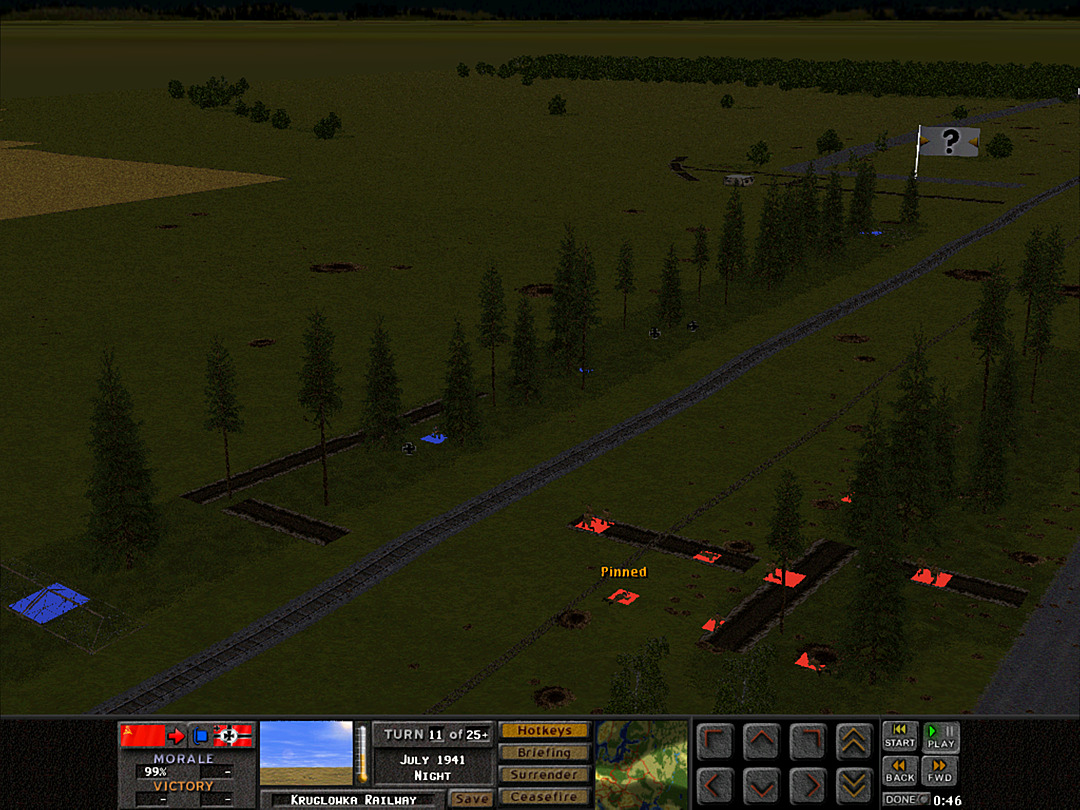 More activity is going on in the trees by E Coy. The enemy might be pushing to take the eastern trench. 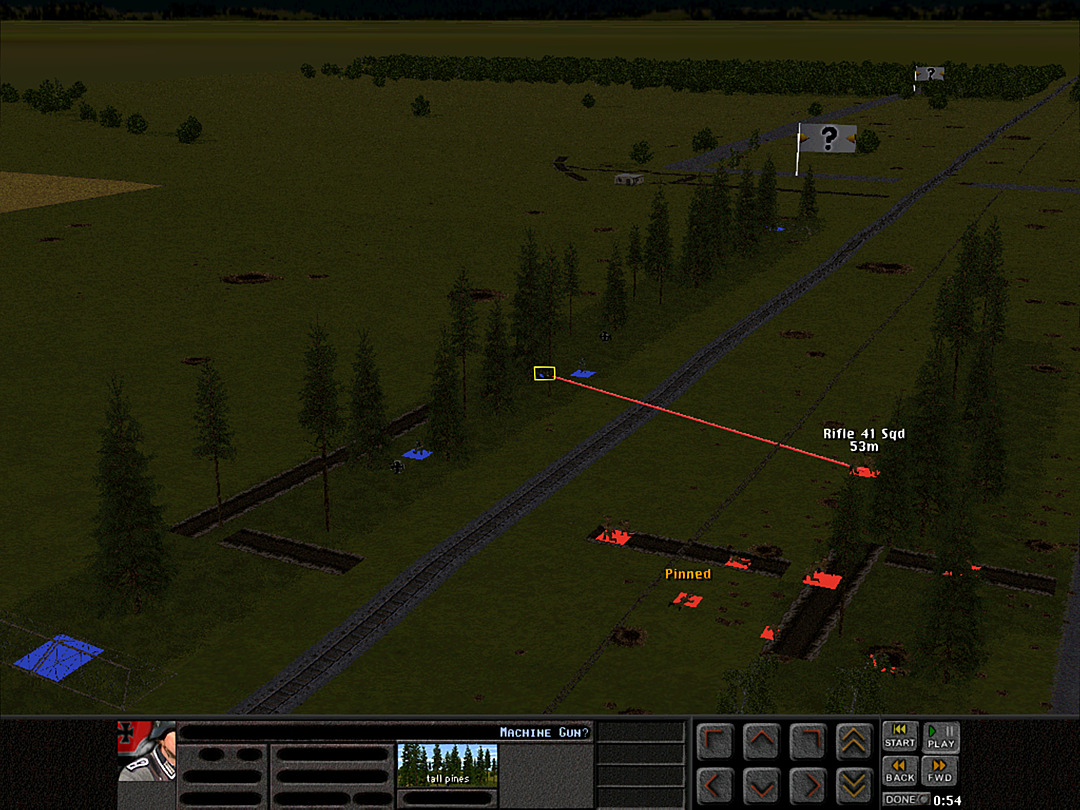 E Coy's scout squad spots a machine gunner set up in the woods. They are coming in force now. 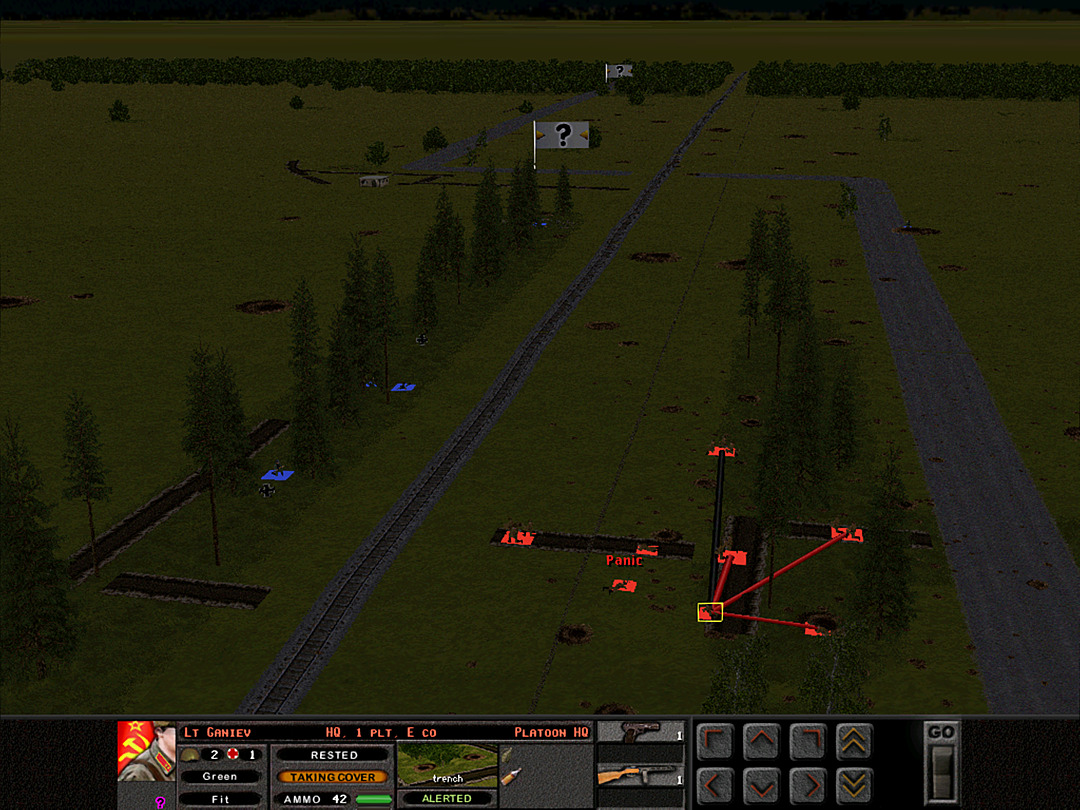 A sense of dread runs through the men. They've heard from the survivors what happened one night ago. Unit Highlight OT-130 Flamethrower Tank 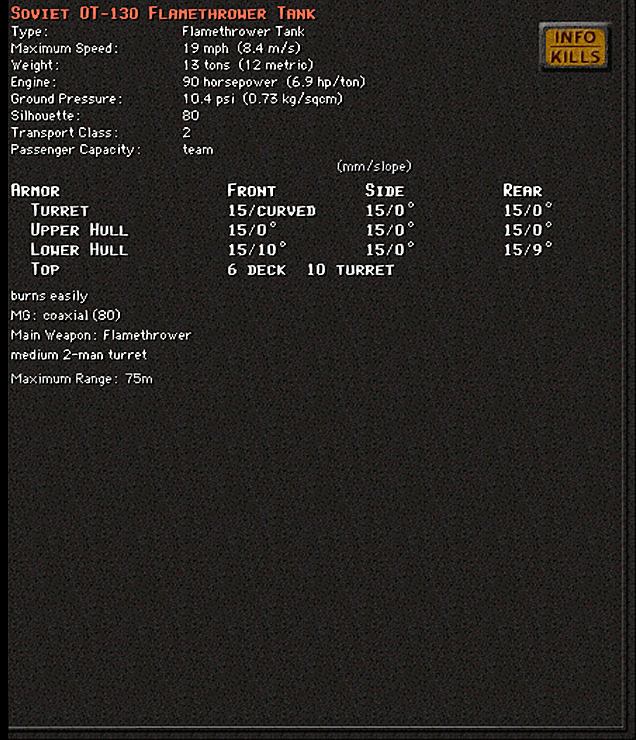 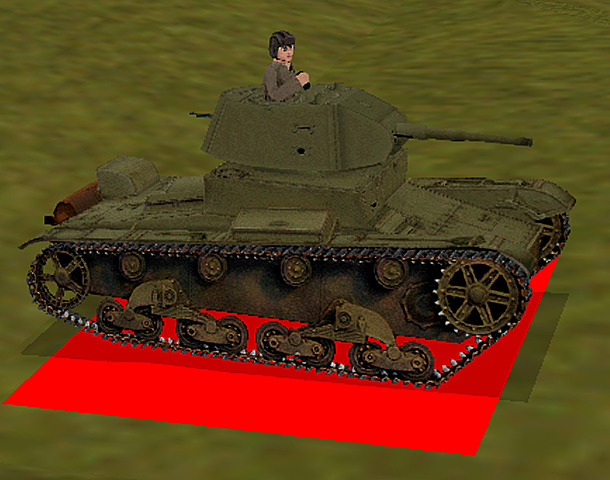 Base Cost: 55 Crew Size: 3 Yes, I know you're saying, "That's obviously the wrong picture, they must have posted the OT-133 by mistake" but no, this model shows the rear-facing machine gun of the later T-26. A different weapon but still the same old tank. Flamethrower tanks (officially designated 'Chemical tanks', as they could spray alternate substances) were also among the many variants on the T-26. The early twin-turret T-26 had been turned into one by removing a turret and installing a flamethrower in the remaining tower. The OT-130 was the first based on the single-turret (1933) design; it used the same weapon in its main turret, and retained the machine gun. Due to the lack of good armor on the vehicle, these flame tanks had reduced survivability as they tended to ignite and burn a long time if hit. A fair number of these were constructed, and they even saw action during the war with Finland.
|
|
#
?
Feb 13, 2024 06:41
|
|
|
Operation: Kruglowka Railway, Battle 5 Battle Time: 00:12 We've once again taken the trench. Yet once again, the Germans are making another attempt to evict us from it. 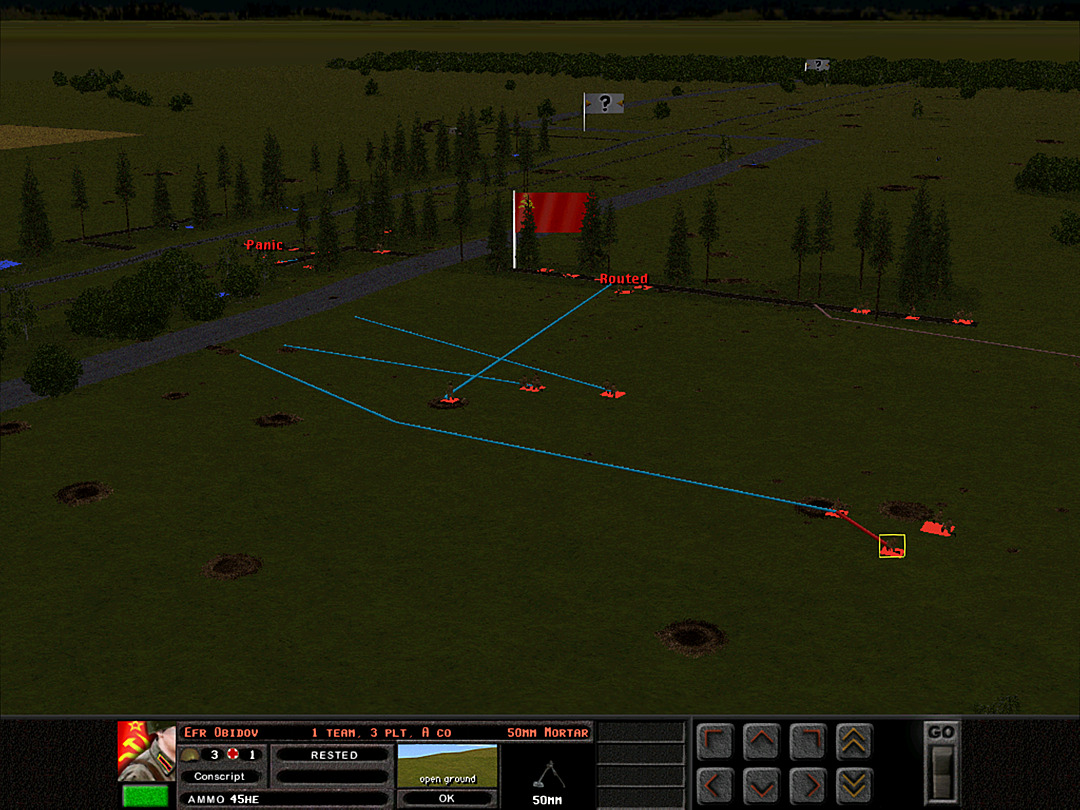 Instead of heading into the trench area, A Coy, 3 Plt is ordered to keep moving and plug the gap in the line between the river trench and E Coy. 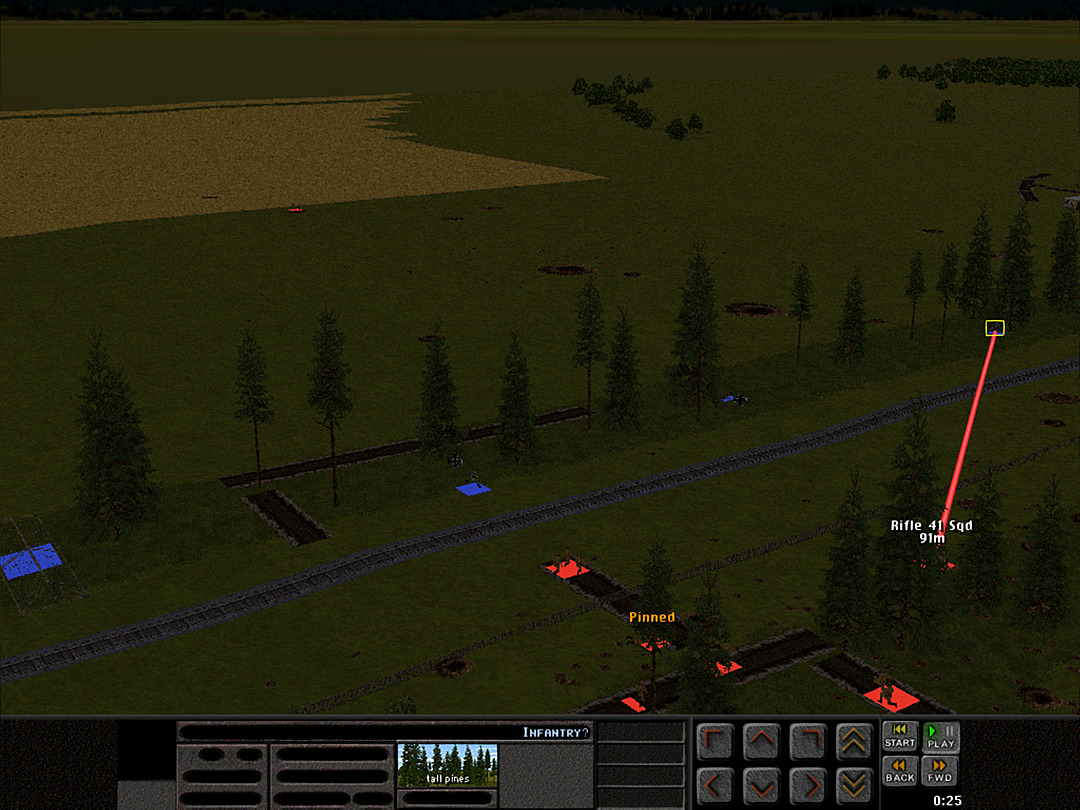 More movement is detected to the south.  The lead German squad makes a desperate charge at the trench. They are gunned down before they can make it, but the squads of E Coy are growing worried.  Some of A Coy, 3 Plt's troops are getting closer to the middle trench, where they can provide supporting fire if any more Germans try the same tactic.  Additional enemy squads continue to worm their way through the trees along the rail line.  A Coy spots a series of explosions in the open ground south of them. Either this is an errant artillery strike, or they feared that we were going to keep advancing after seizing the middle trench. 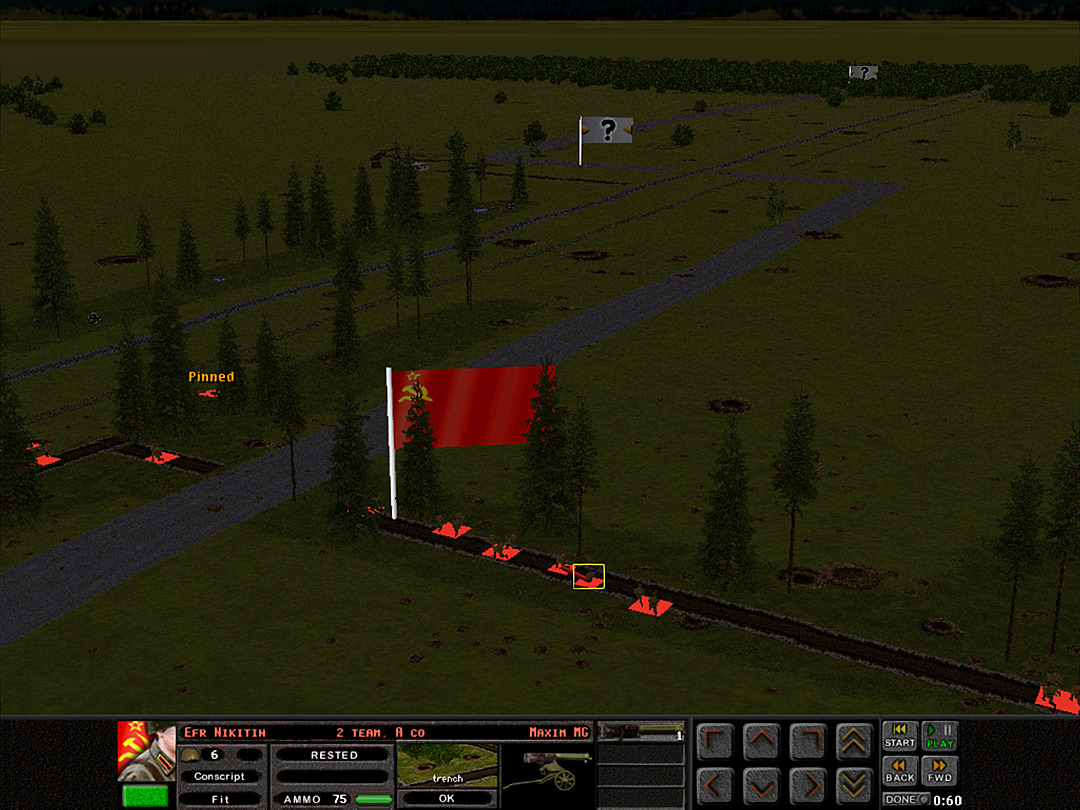 We don't plan to push forward. The squads here are ready to defend, and we have to hope that with more time to prepare, there won't be a repeat of last night. 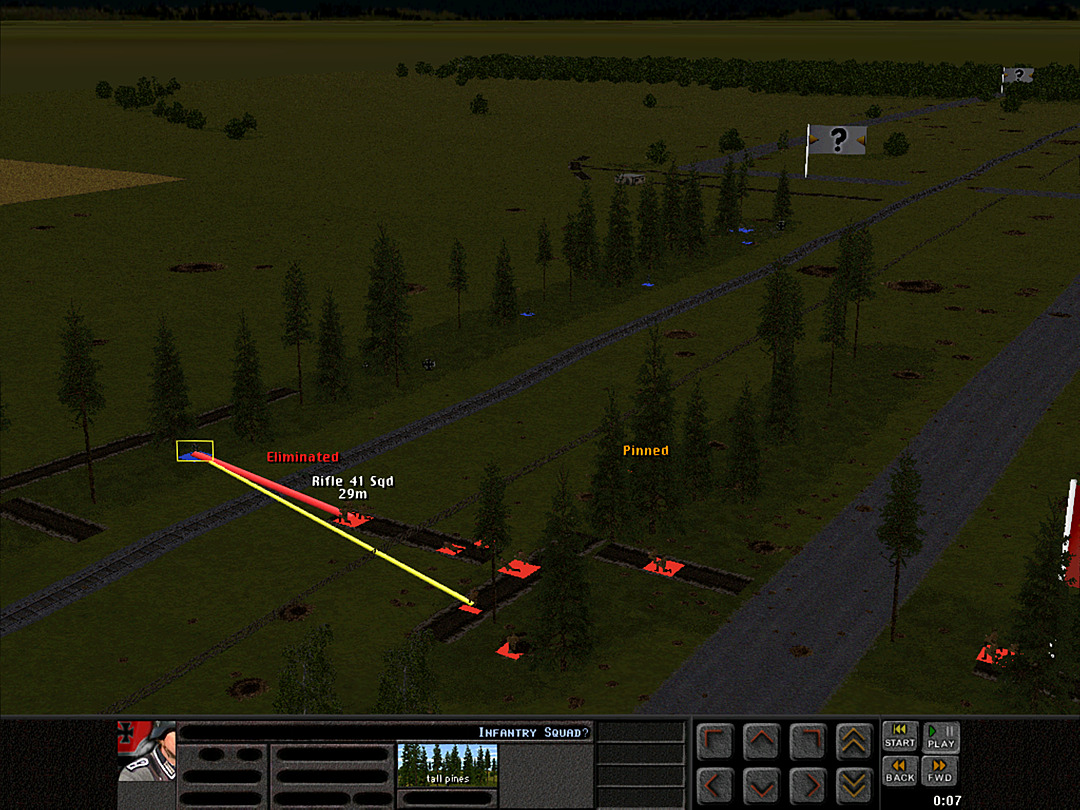 Another enemy squad gets in close, and our return fire intensifies. It seems as if they aren't necessarily going for the eastern trench; they just want to attack over into the middle one. 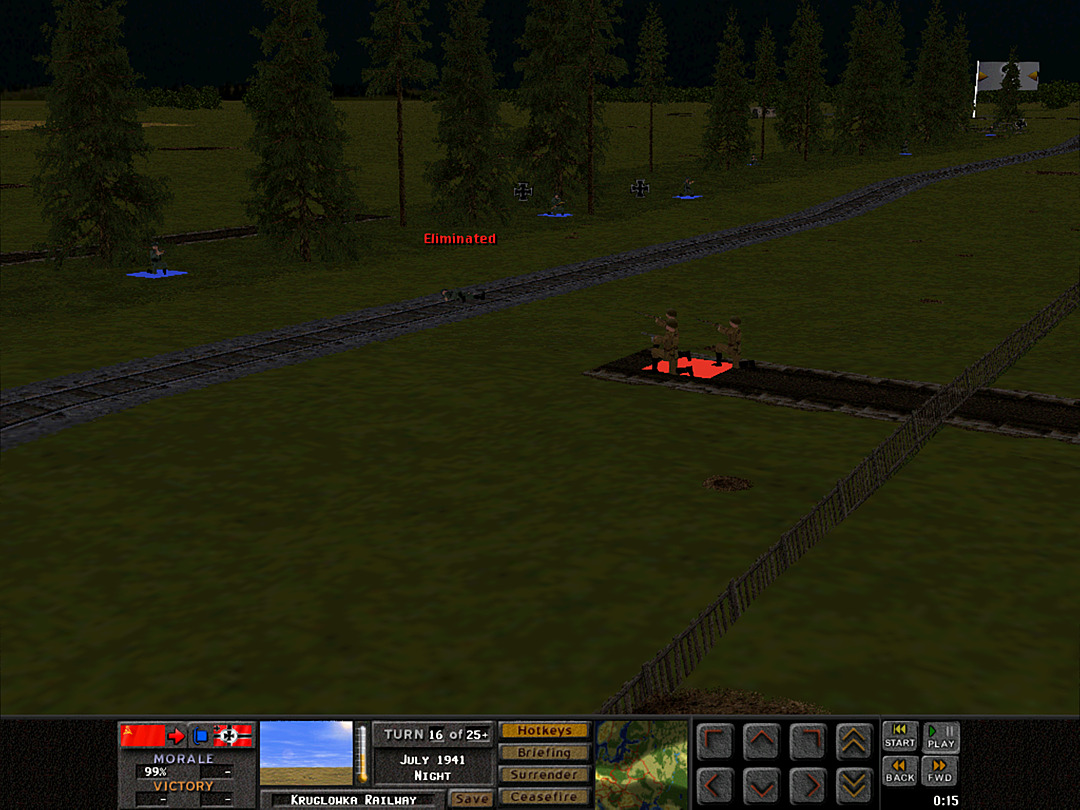 There's a line of Germans building up, seemingly all ready to come at the eastern tip of our line. The lone squad of E Coy, 2 Plt out there is feeling rather exposed right now. 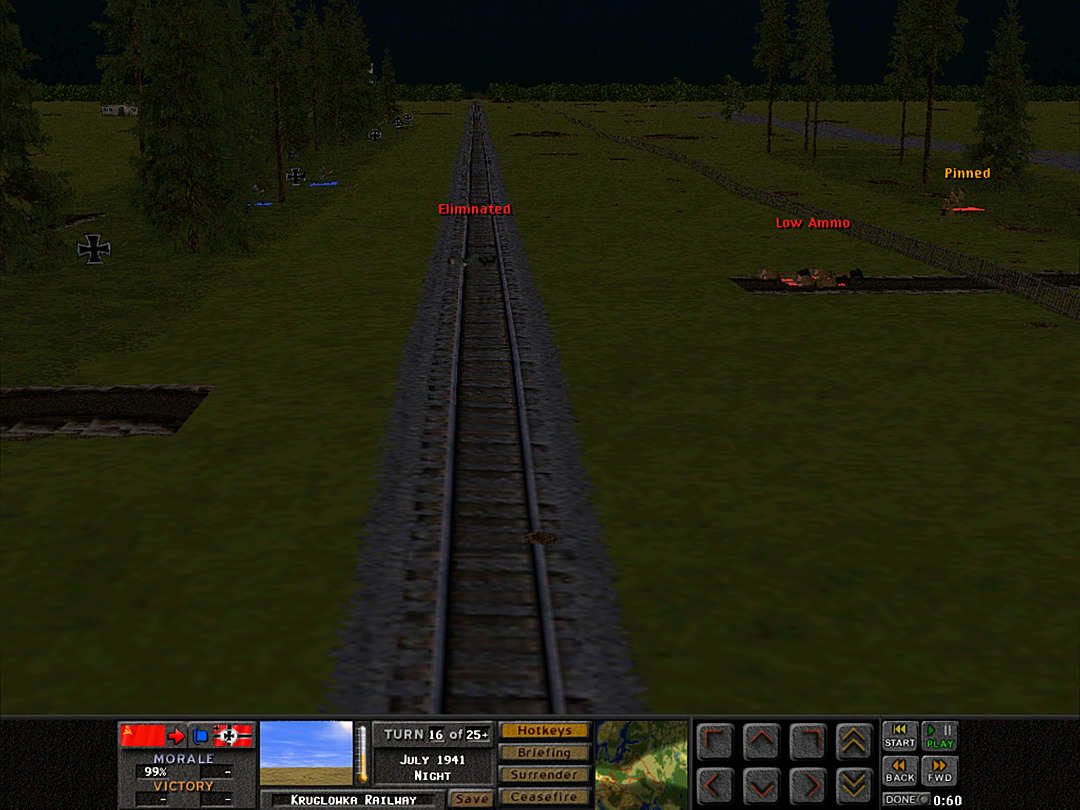 They've been in the fight for some time now, and are nearly out of ammo. They can't hold off another assault without assistance.  A Coy, 3 Plt shifts more men forward to provide that help.  The rest of A Coy is secure in the middle trench, at least for now.  The enemy troops are again massing for an assault. The firefight is non-stop, now.  A Coy's men were not prepared for the intensity of this combat.  Yet one brave squad makes for the trench.  They just manage to scramble safely inside, but it might not be enough. E Coy is reacing the breaking point. 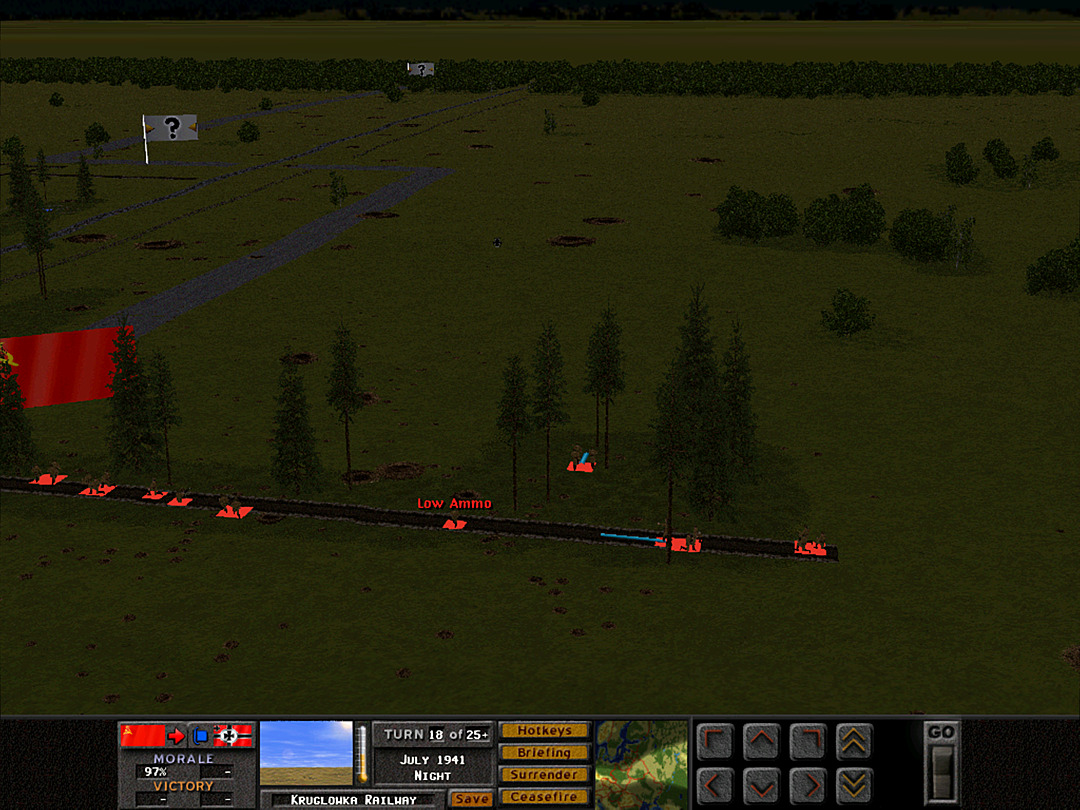 The other platoons of A Coy in the middle hold to the hope that the line can hold. They begin preparations for the morning attack. 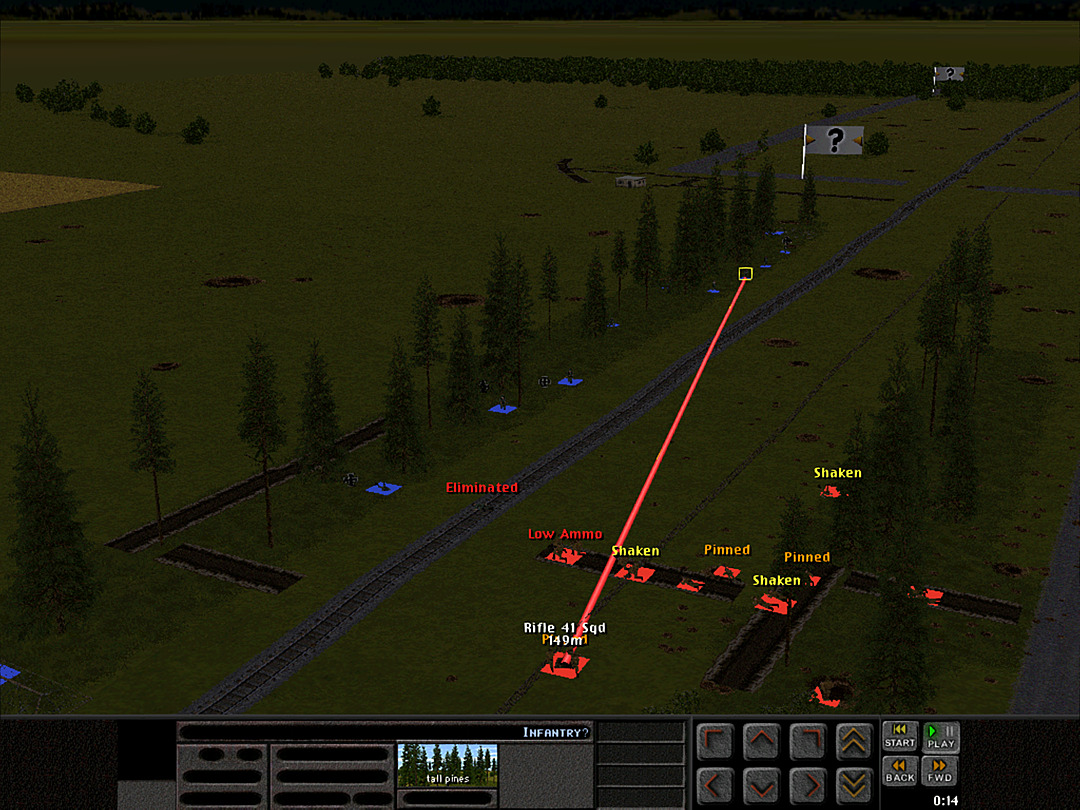 We appear to be outnumbered on the east side, however. If the Germans keep coming, we can't hold them off. 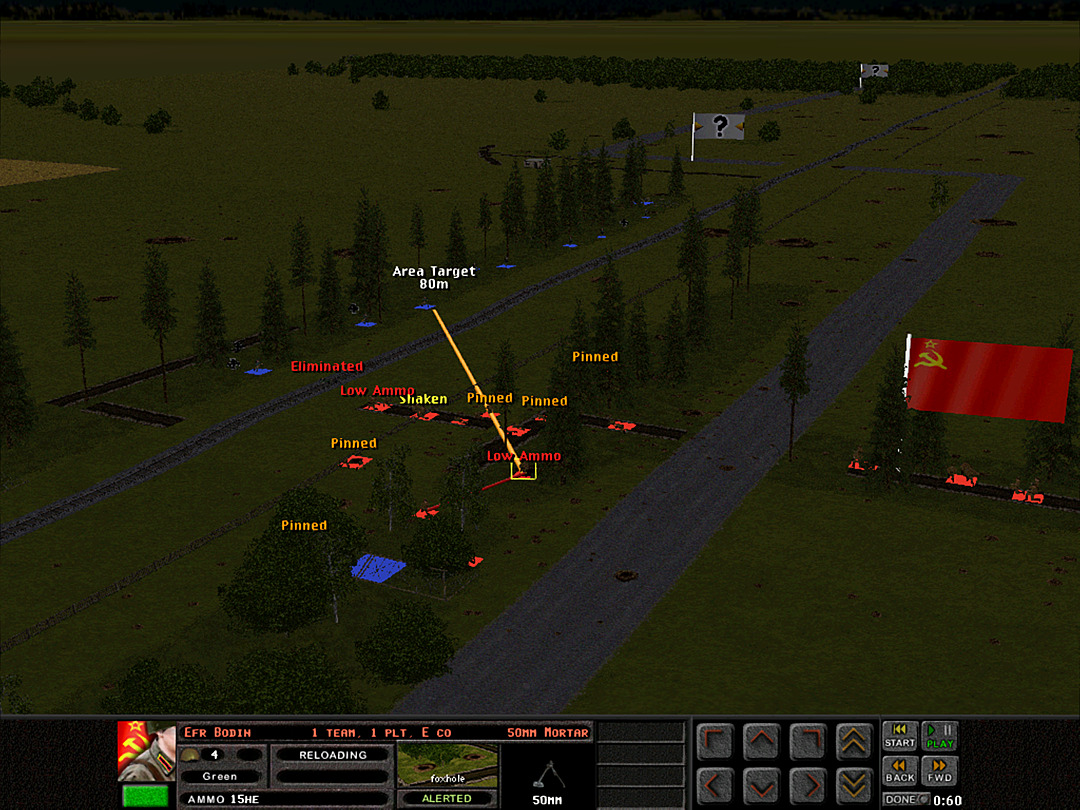 Ammunition supplies are dwindling. Our mortars have suppressed a few of the enemy squads until now, but they won't be able to keep doing so. 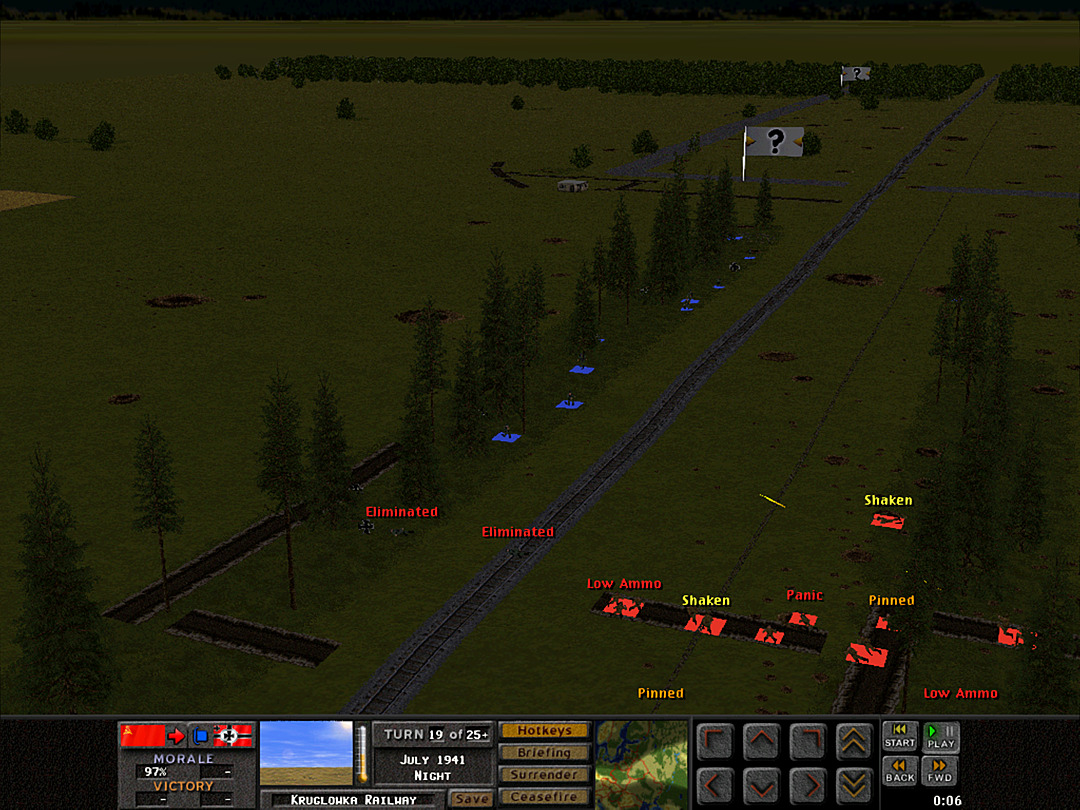 Our shots are not failing to have effect, at least. Another German squad is shot down.  We lose a mortar team in return, though. Additionally, some enemy units are now encroaching on the second tree line.  It seems like every time we take down a squad, two more pop up right behind it.  A second enemy assault through the trees directly south could spell the end of E Coy.  Our mortars are done. The troops in the trench have continued to inflict casualties on the closest enemy squads, at least.  It seems like a whole German company has been stuffed into these woods and is now firing on us.  The conscripts are fading quickly under withering enemy fire.  We are able to shift one of our Maxim guns to hit the enemy forces down along the road. It's not much, but it is some tiny relief for E Coy.  If this keeps up, we'll soon be unable to shoot back. Our men are running out of ammo.  However, it does seem as if the Germans might be having the same problem. The gunfire is lessening, even if just a little bit.  Just when we thought it was easing up, another platoon of Germans shows itself. They had only stopped shooting to get a little closer to us.  We have killed quite a lot of them, though. None so far have tried for another direct charge at our trench.  Elsewhere, it has stayed quiet. The men of D Coy have begun the work of digging foxholes in the woods.  The bodies of German soldiers lie strewn along the railway. They seem no longer willing to come at us.  The fighting ceases. The night raid has actually been a success! Even the final casualty count for tonight has been reasonably low. Unit Highlight BT-2 Fast Tank   Crew: 3 Base Cost: 43 One of the world's fastest tanks for decades. In a country the size of the Soviet Union, which in the 1920s didn't have many well-developed roads, the concept of a tank that could cover ground quickly on highways but also move off-road was an appealing one. The 'convertible' tank that could switch from wheeled road travel to tracked movement was developed by an American, Walter Christie, but was not adopted by the US Army. The Soviets took some of his tanks and developed the BT-2 at the start of the 1930s. It was more powerful and better-armored than the scouting 'tankettes', and was armed with a decently strong 37mm main gun. The slightly tougher, if much slower, T-26 was to end up becoming the mainstay of the force, but the fast tanks continued to be developed throughout the decade. The BT-2 was the earliest model, and thus wasn't a common sight by the 1940s. Nevertheless, it remained the fastest of the line, with a reputed top speed of 100 km/h for wheeled travel on good roads.
|
|
#
?
Feb 16, 2024 08:30
|
|
|
Operation 3, Battle 6 of 8 Operation: Kruglowka Railway Time: Mid-day Skies: Clear Ground: Very Dry Temp: Warm Wind: Breeze N Last night we scored a clear win by finally taking the middle trench. We can now move a lot of our force forward, off the river, and in view of taking the key level crossing. If we capture it, we'll have a real hold on both the highway and the rail line, and the defending Germans will be forced to withdraw into the forest beyond. Reinforcements: pre:F Company (Green) 2 x Maxim MG Teams 1 Plt - 4 x Rifle 41 + 50mm Mortar 2 Plt - 4 x Rifle 41 + 50mm Mortar 3 Plt - 4 x Rifle 41 + 50mm Mortar G Company (Regular) 1 Plt - 3 x SMG Sqd 2 Plt - 3 x SMG Sqd 3 Plt - 3 x SMG Sqd  The SMG company has set up in the thin line of trees. One platoon will hold the trench, just in case the Germans have something up their sleeve, while the other two will advance. More of our support units have been pushed forward to the middle trench, and they'll be better able to provide support for the assault.  D Coy is ready to move out of the trees on the west side. They have a lot of open ground to cover to get to the next group of trees, but we now have significant firepower arrayed against them. We also suspect the enemy lacks the strength to defend both here and the level crossing well. If it does turn out they have reinforced on this side, G Coy might be able to push straight onward. 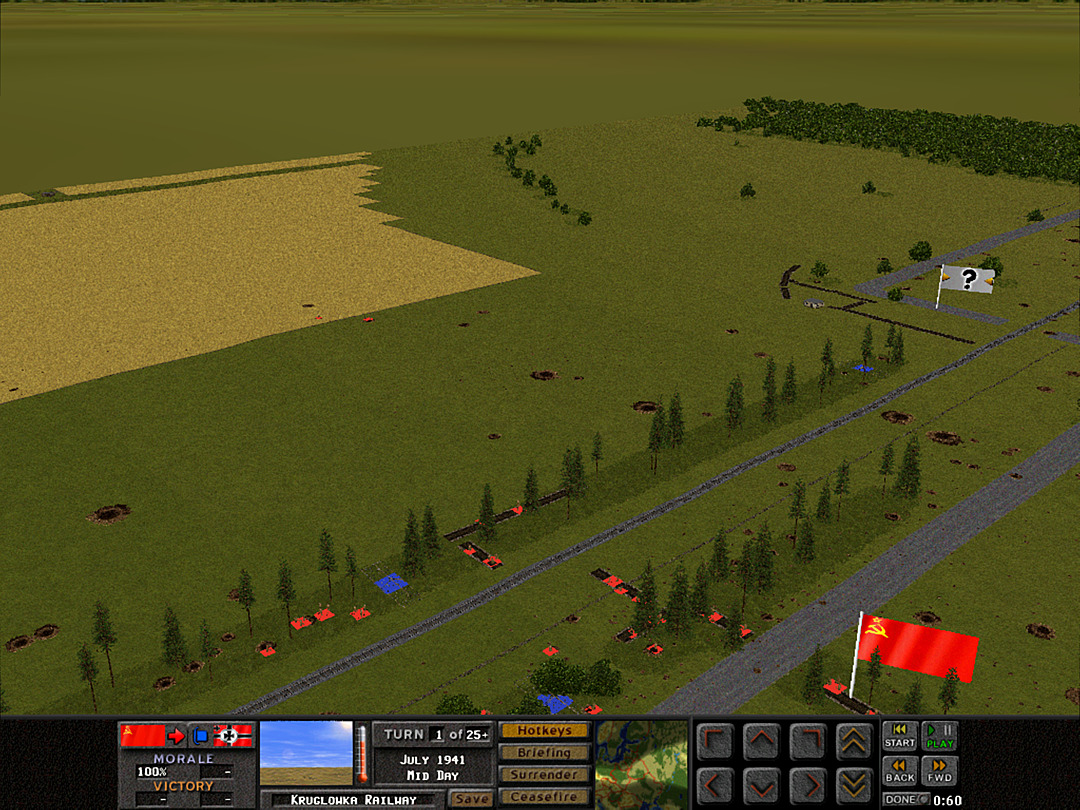 All is still as our forces get underway. G Coy ensures that the remainder of the eastern trench is clear. No enemy forces have been spotted in the tree line yet. 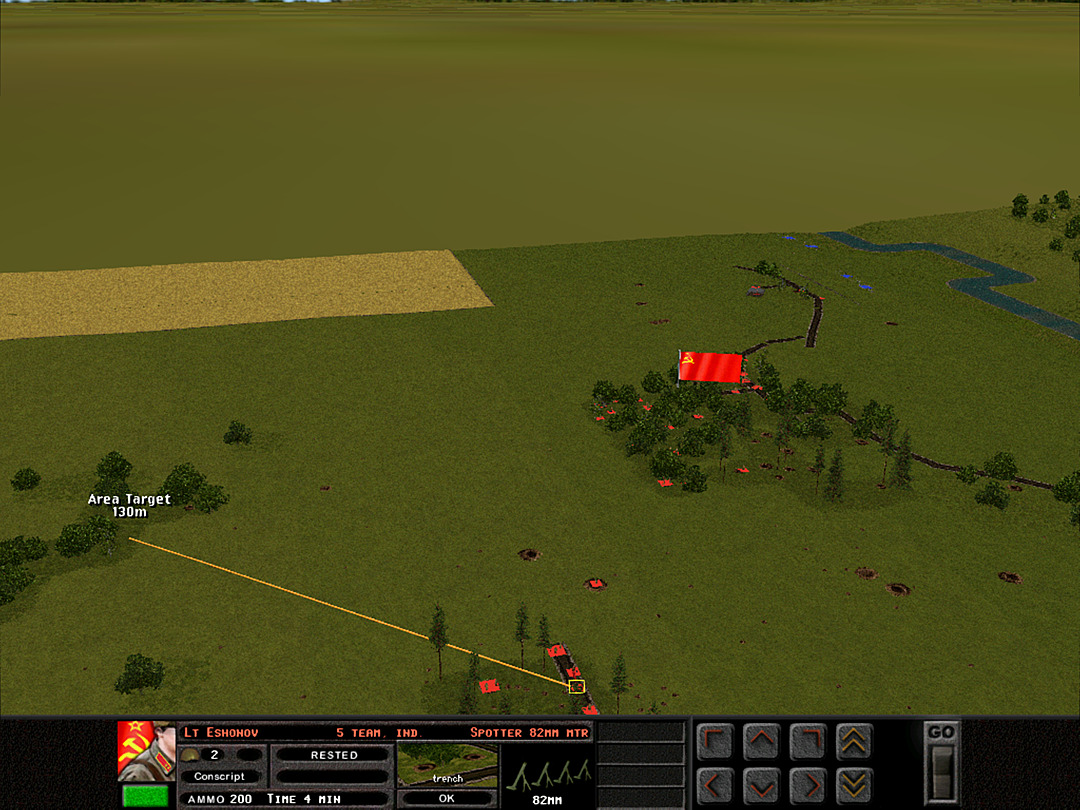 A preliminary barrage into the woods will signal the start of D Coy's attack. 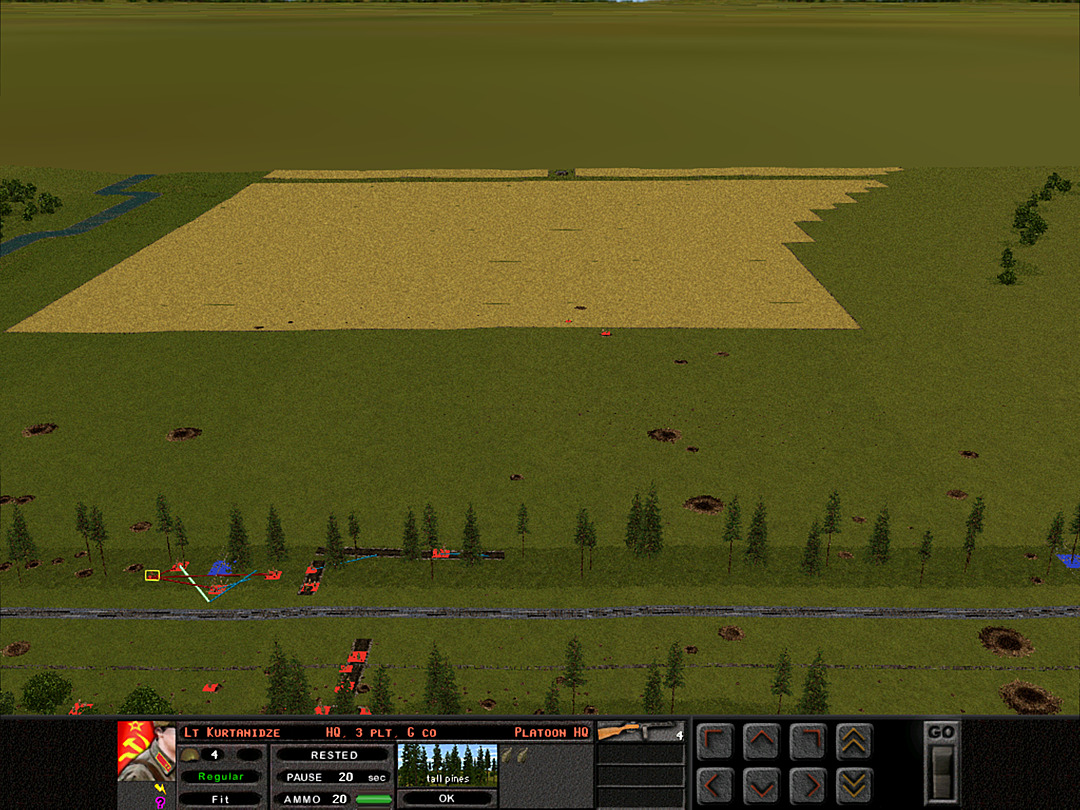 The other SMG platoons start to head forward. 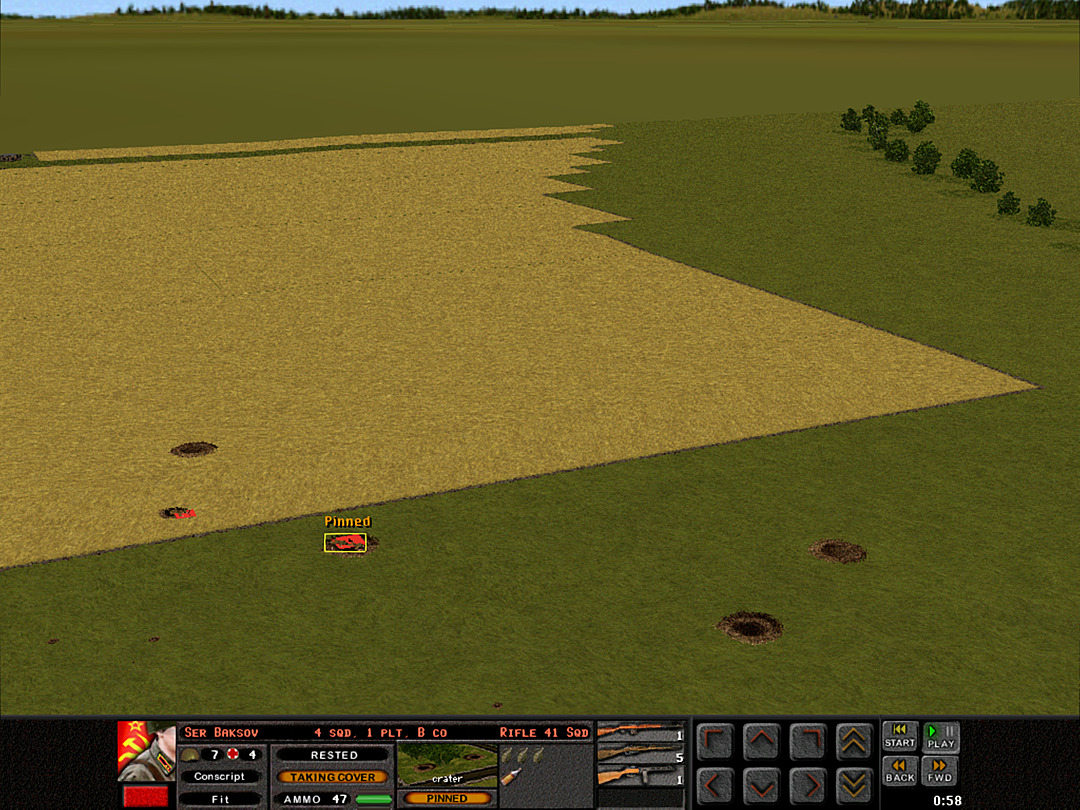 The 'lost' platoon remains out in the cornfield. They're coming under mortar fire from an unknown direction.  D Coy will get a little extra screening in the form of smoke shells near the target woods. 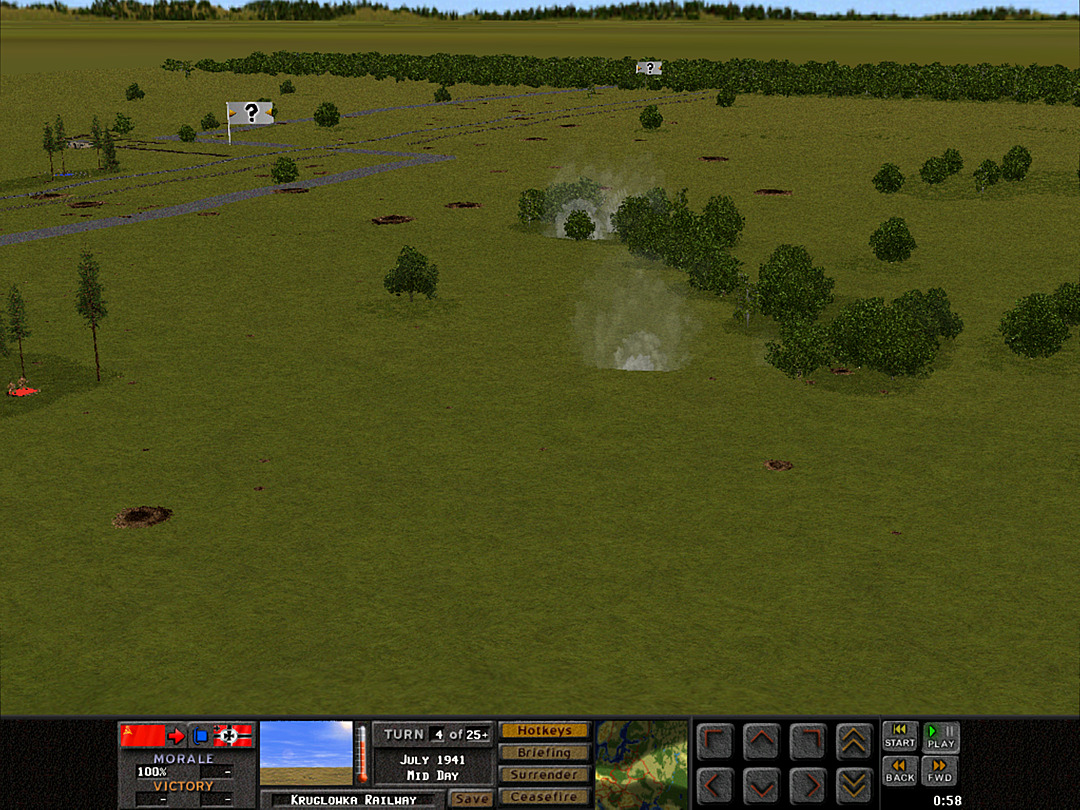 Unfortunately the first few shots go farther than expected, leaving less of screen than hoped for. 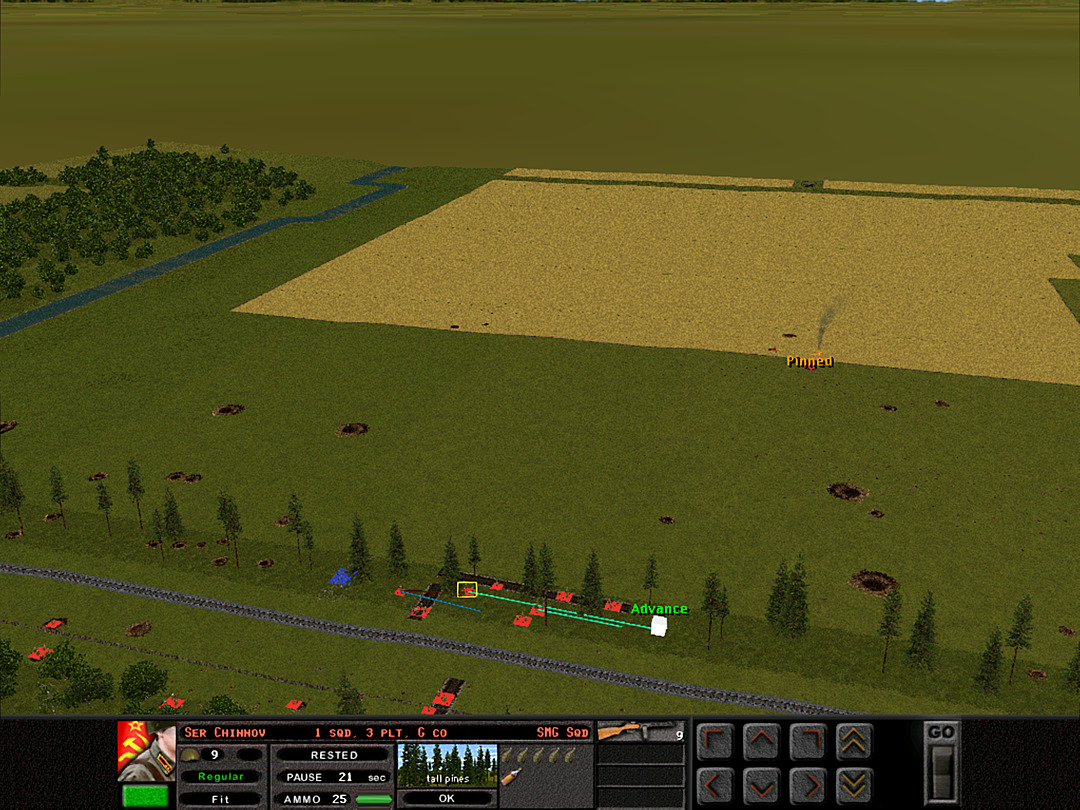 The fresh soldiers make an orderly probe into the eastern line of trees. No enemy units spotted so far. 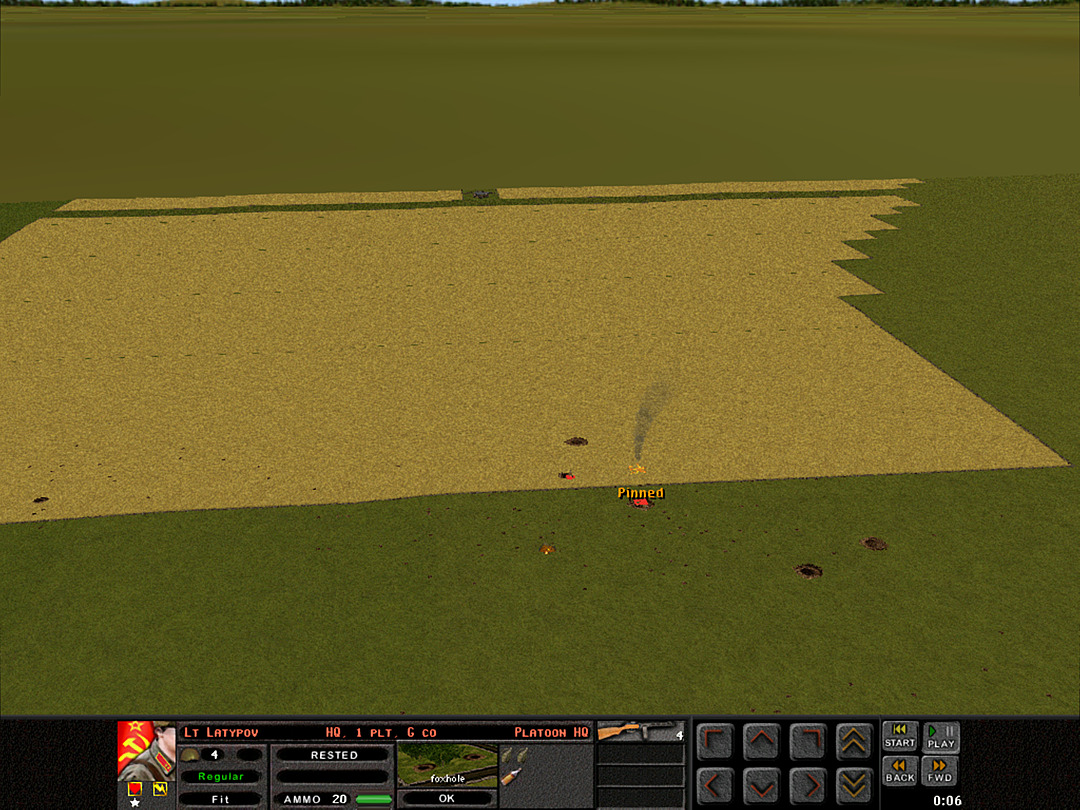 A stray mortar shell lands in the fields dried by the summer heat, and sparks a small fire.  G Coy's lead platoon detects movement in the trees ahead of them. 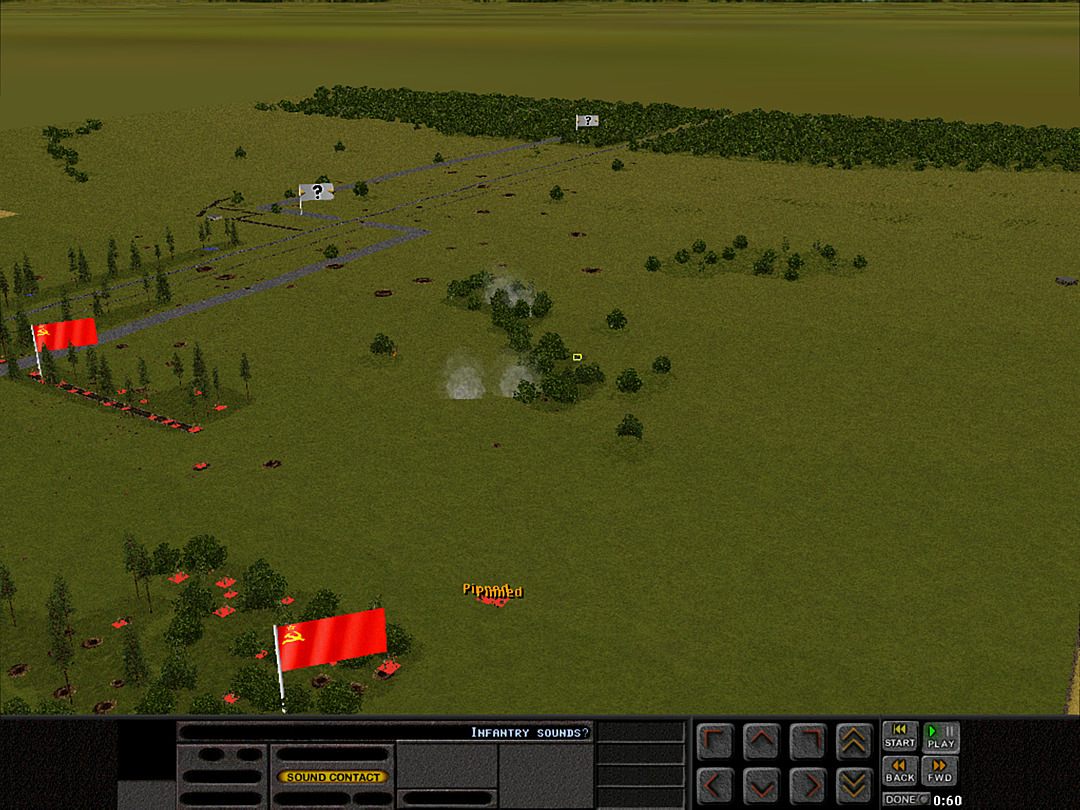 The first few squads from D Coy are held up by an enemy machine gun. 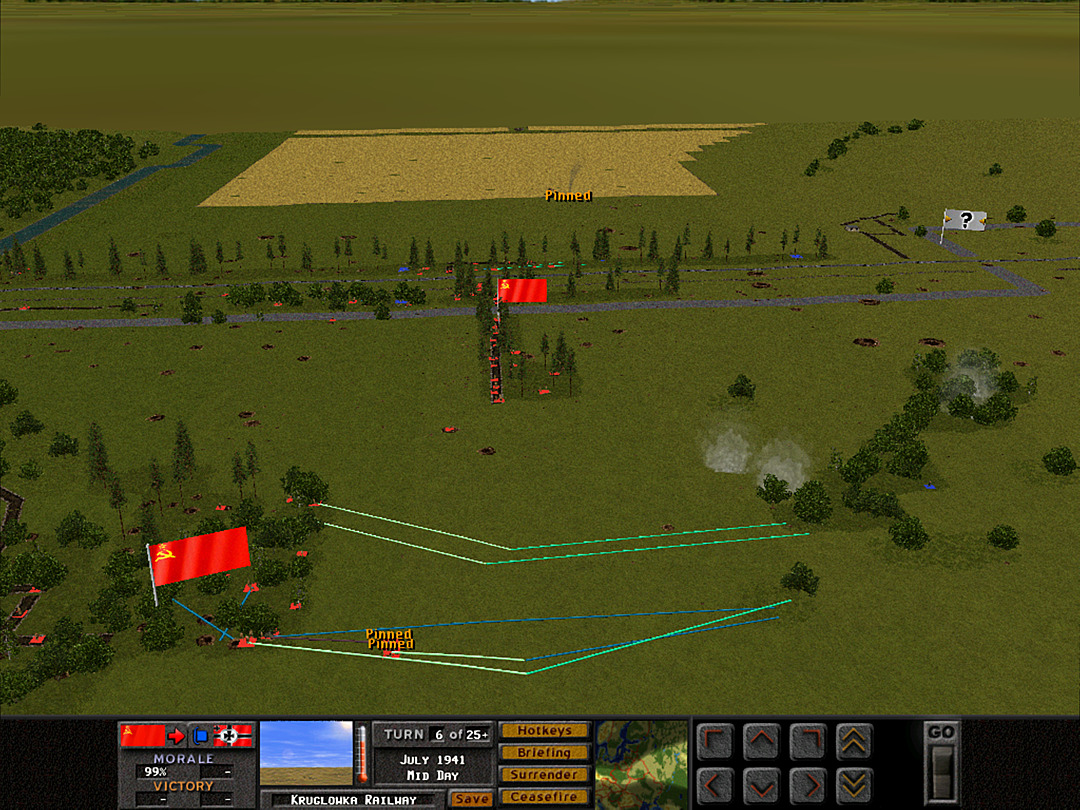 We're not seeing a heavy enemy presence, so a united assault ought to bring success for D Coy.  The first German contact turns out to be a machine gun that likely wasn't able to pull back due to a lack of team members to carry the weapon. Our forces take it out quickly.  D Coy, meanwhile, hits more resistance than expected. The first charge is rebuffed, and the squads are sent screaming back to the safety of the woods. 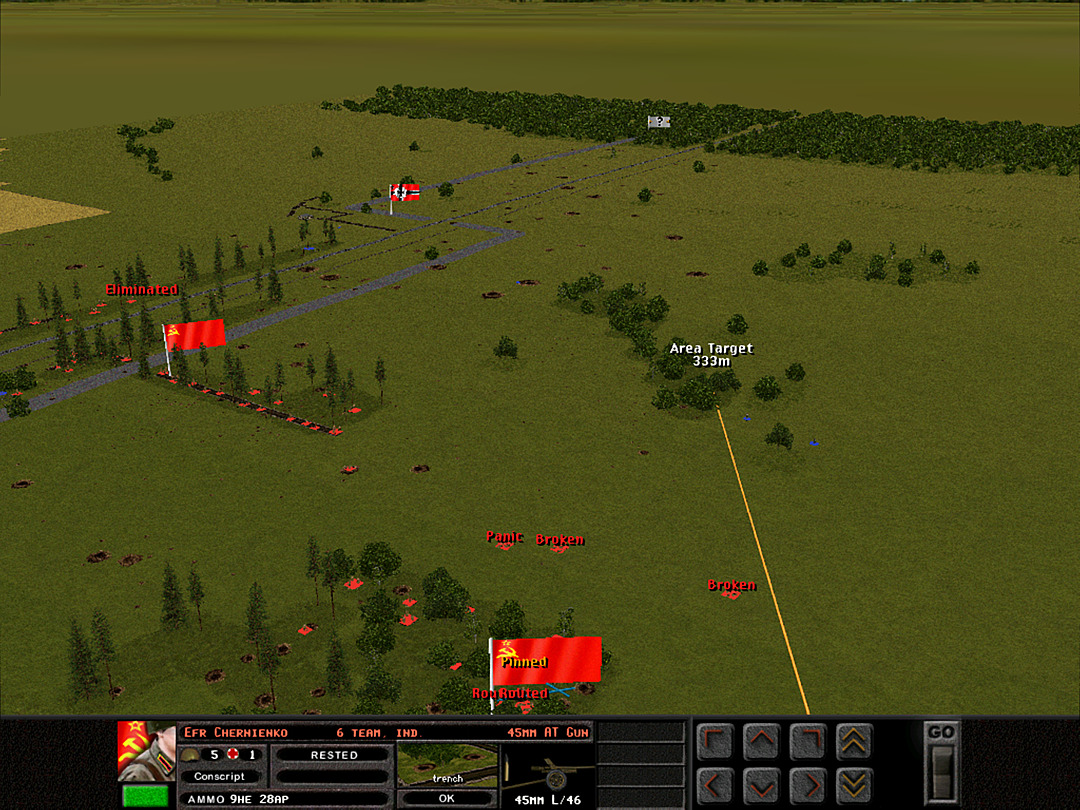 Our anti-tank guns were trying to suppress the enemy in the woods, but did not expect them to have dug in in the open ground. 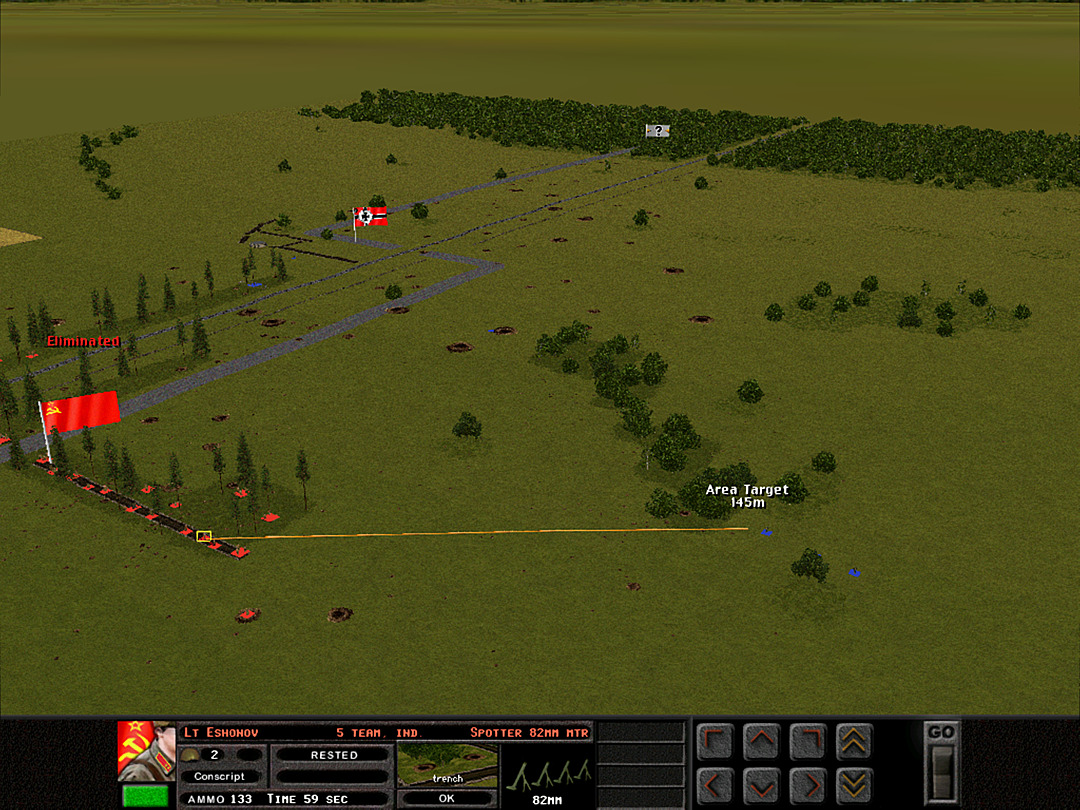 We shift the mortar strike, but for now it'll probably only provide time for the men of D Coy to pull back and regroup. 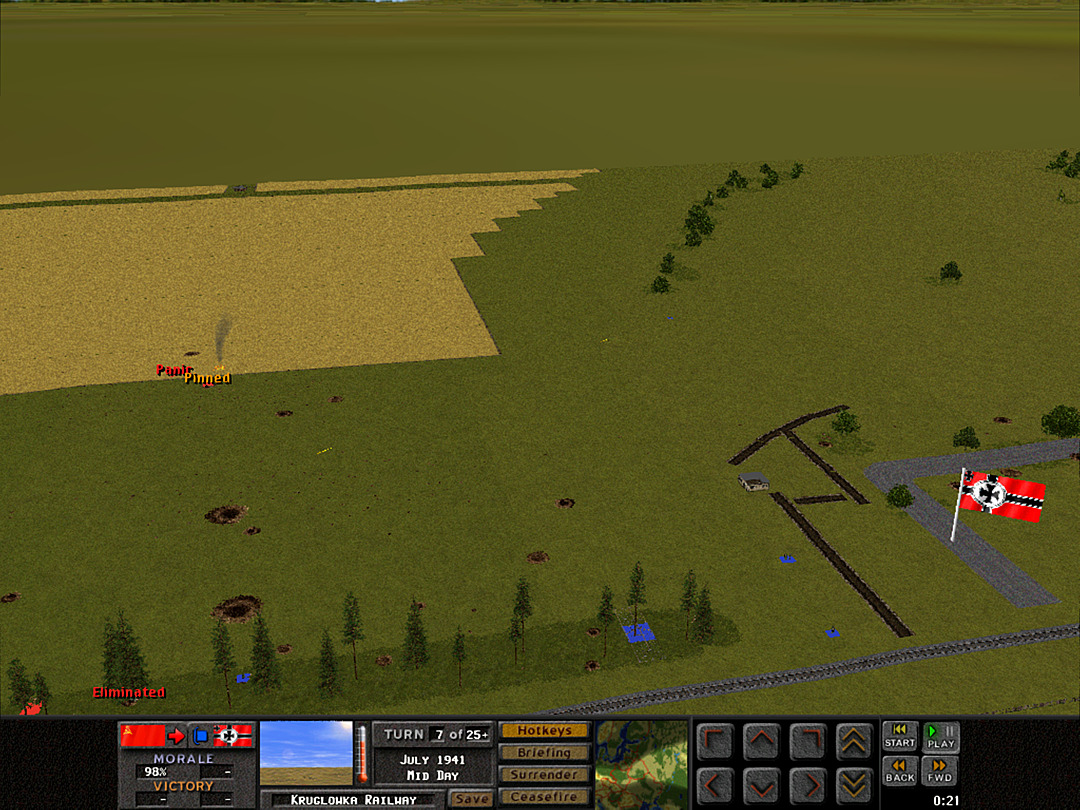 As G Coy presses forward, more German units are spotted. They appear to have set up on a broad line, perhaps due to fears of our heavy artillery. 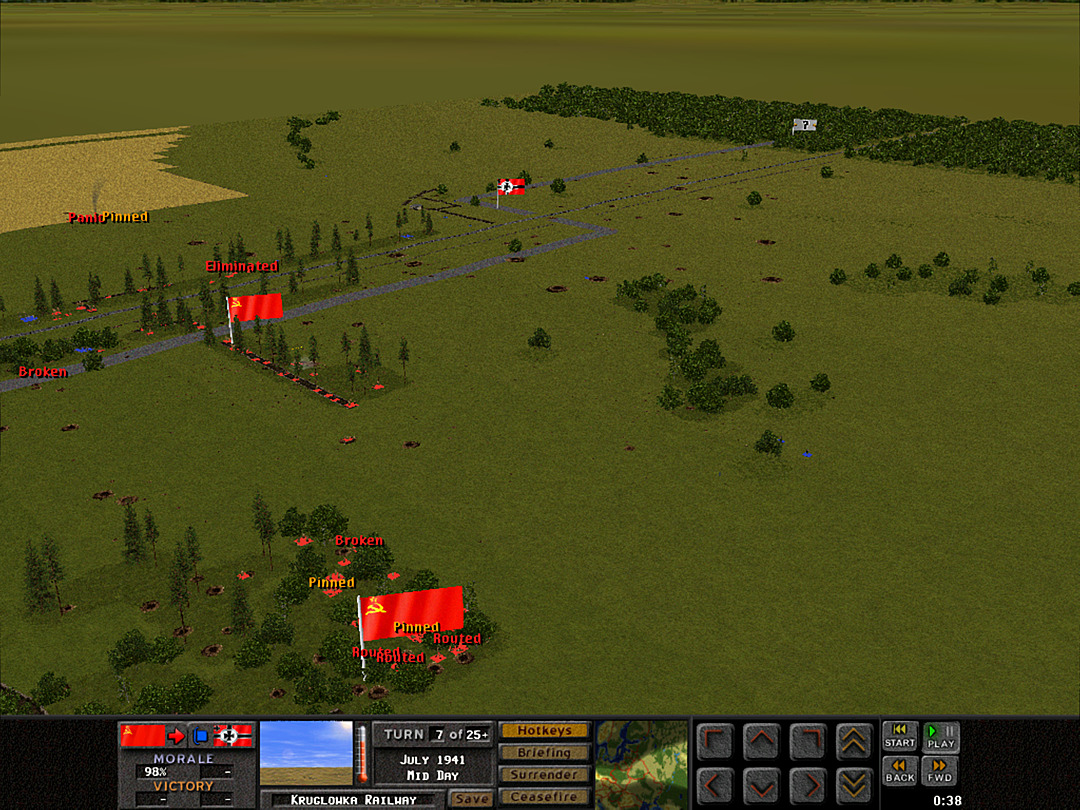 D Coy's first charge has failed. We at least have a good idea of where the opposing positions are. 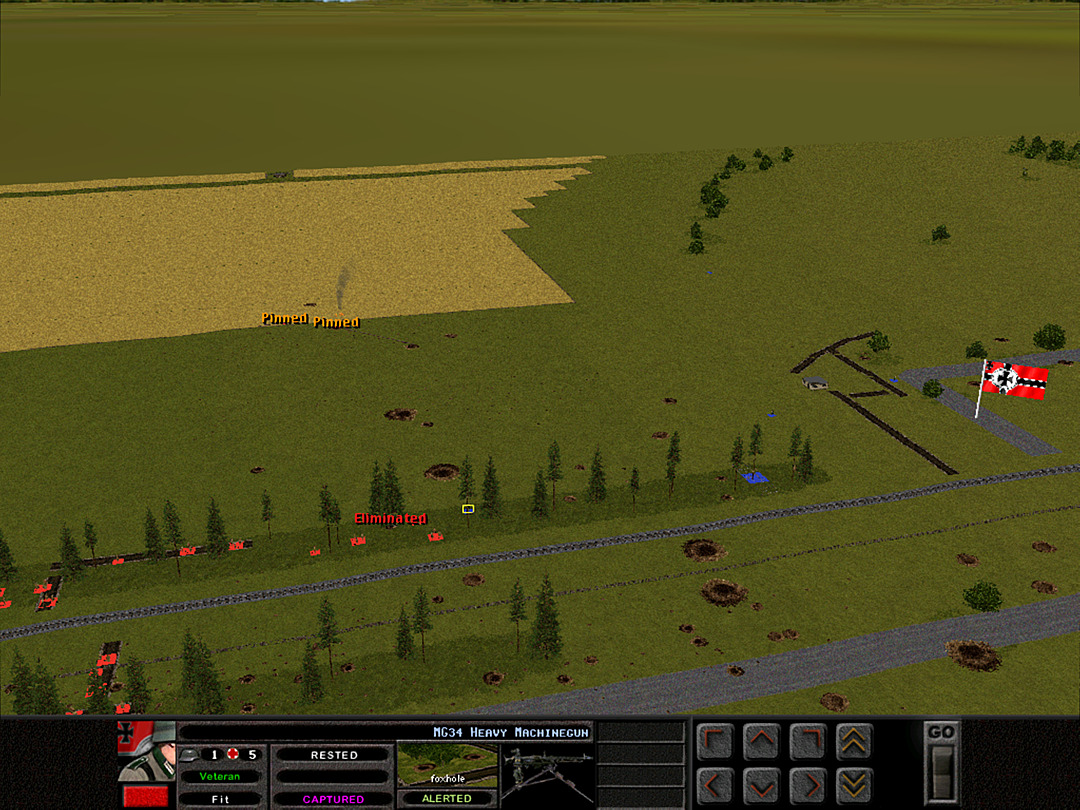 G Coy's rapid advance causes another machinegunner to surrender, lest he suffer the fate of his friend.  It seems likely that the enemy put some units out on the eastern side specifically to spot our units in the cornfield.  We also see movement far back from the front line. We're heading into more open territory now, where the Germans don't have much that can conceal their positions. Firing at distant targets is kind of a waste of ammo, but due to the lower training/quality of our troops, I can't actually restrict their targeting arc or range.  One of I Btn's Maxim guns had been set up to give close support to D Coy's assault, but now it finds itself the closest target for the enemy in the woods.  G Coy continues its push as 1 Plt gets in line to head out. 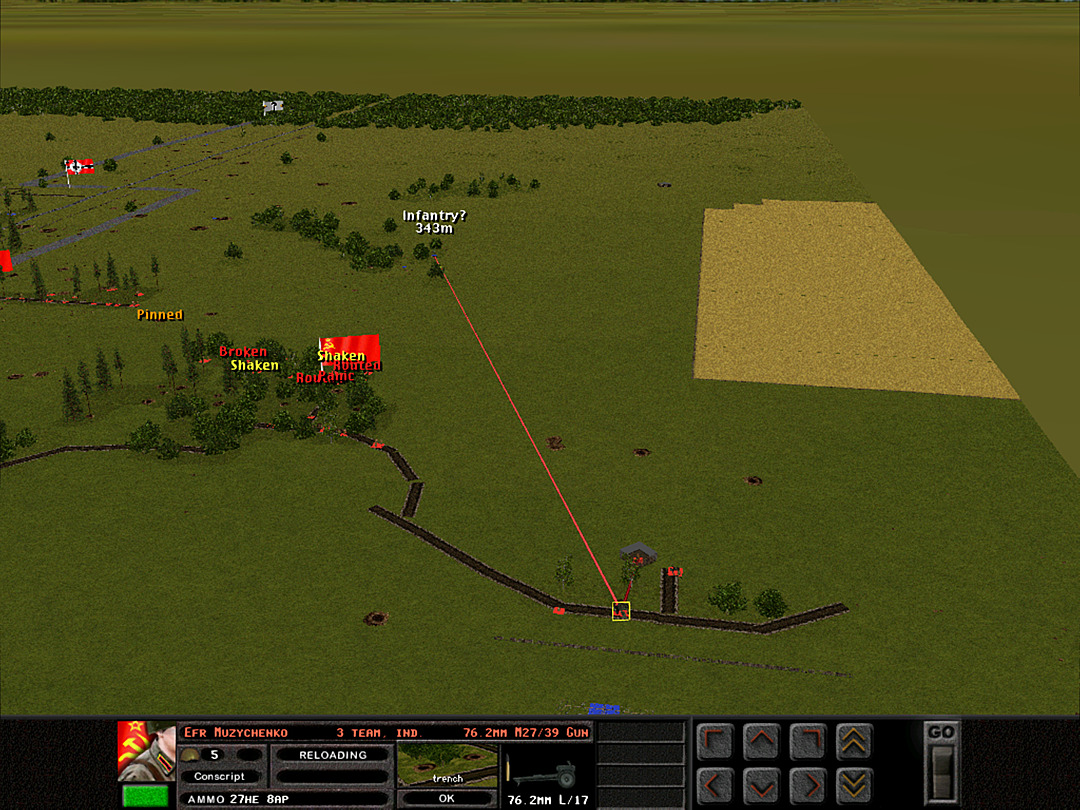 We have guns out on the right side to maintain suppression on the enemy position near the woods. 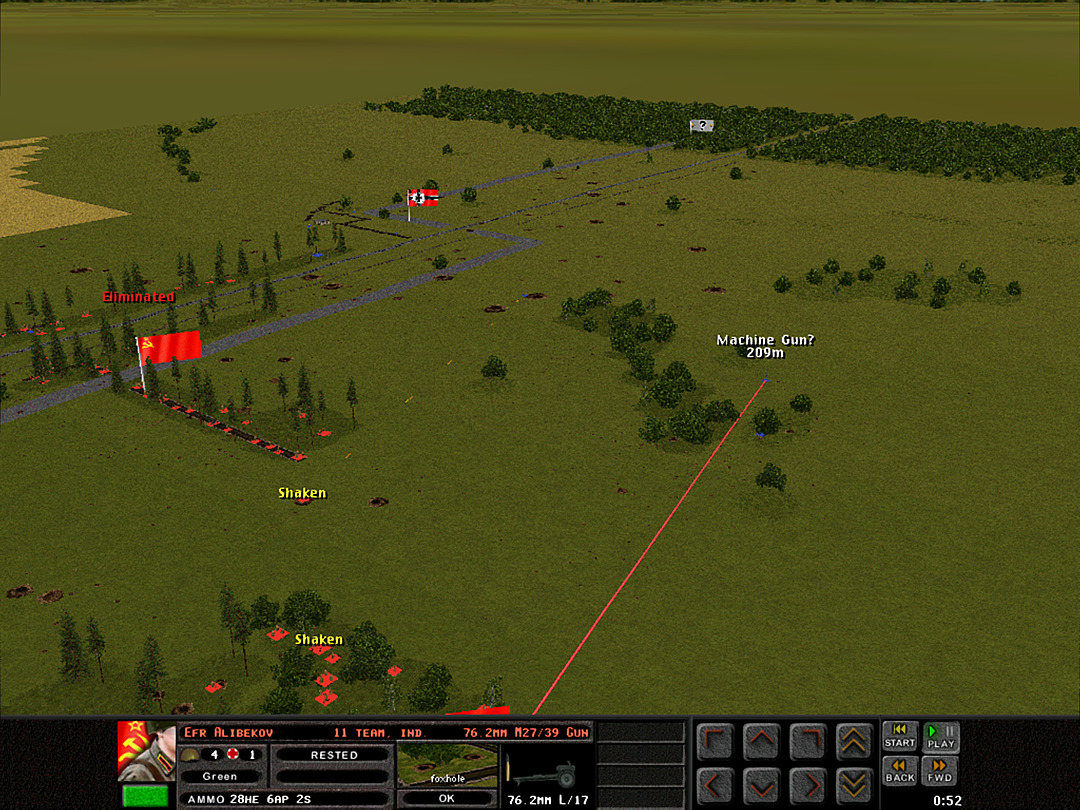 One of the enemy machine guns is forced to retreat.  G Coy is now coming under fire from the trench at the level crossing. 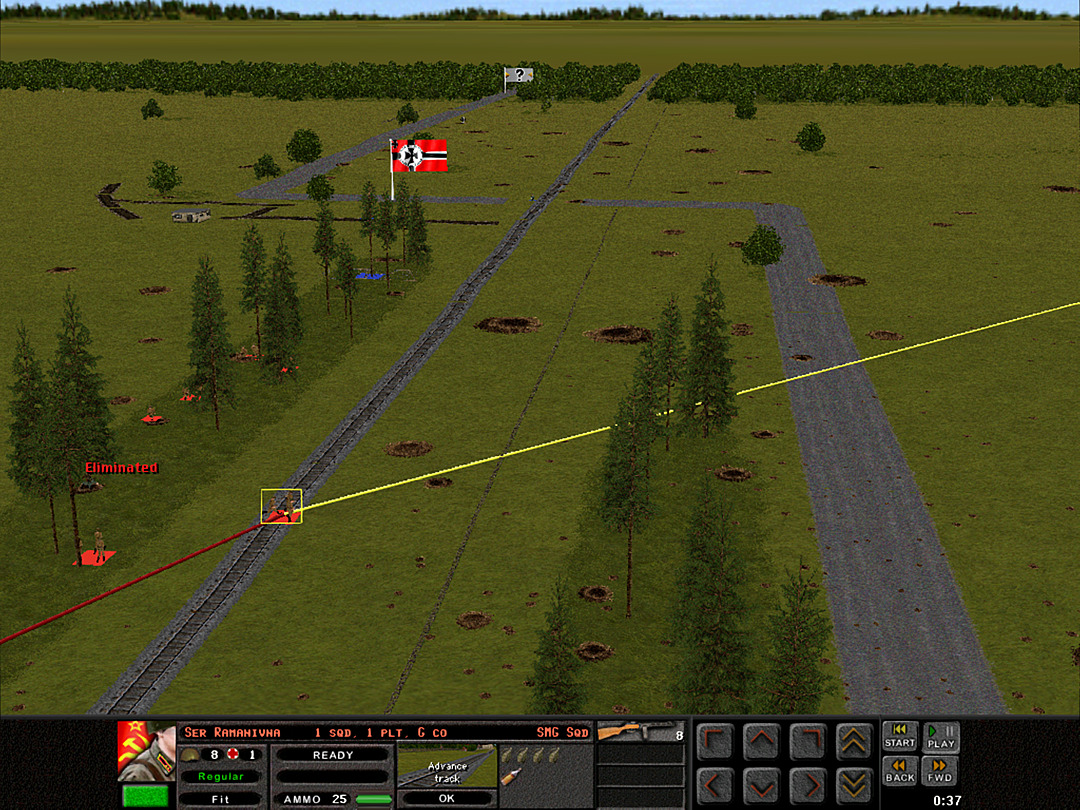 G Coy, 1 Plt tries to advance into the alley, but finds that there are also German units off to the southwest. 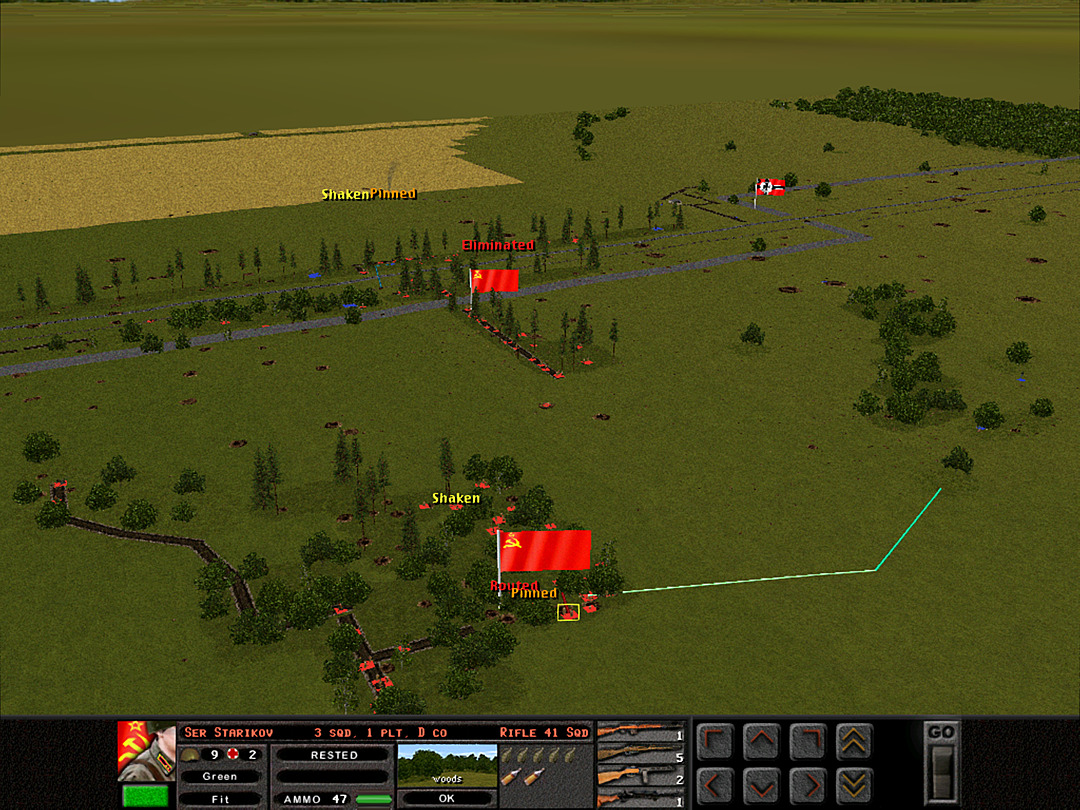 With the enemy in the woods seemingly being suppressed, D Coy is ready to try for another charge.  D Coy's second attempt is not held up immediately, but then takes fire from a more distant location once they get farther out.  A Coy responds with fire on this new spot, one of the large bomb craters.  G Coy, 1 Plt might still be able to make progress into the west line of trees.  They cover the ground, and should be able to sweep to the end of the 'alley'. 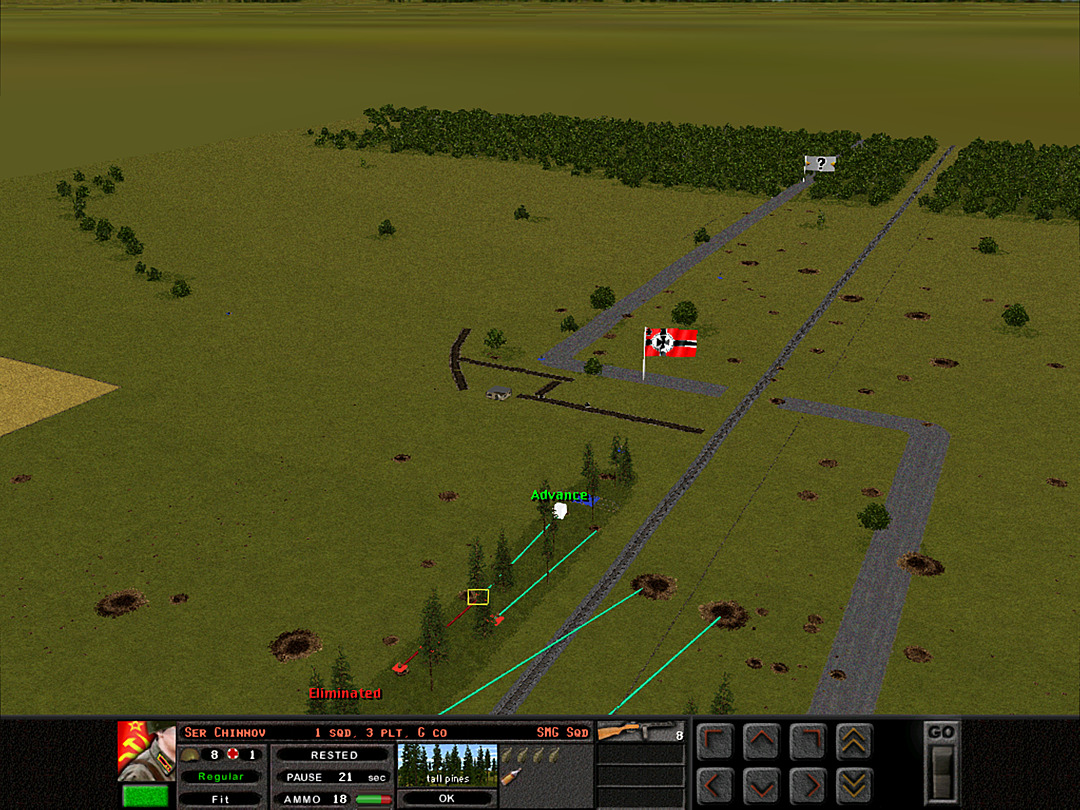 Meanwhile, the 3 Plt submachinegunners continue to take ground. 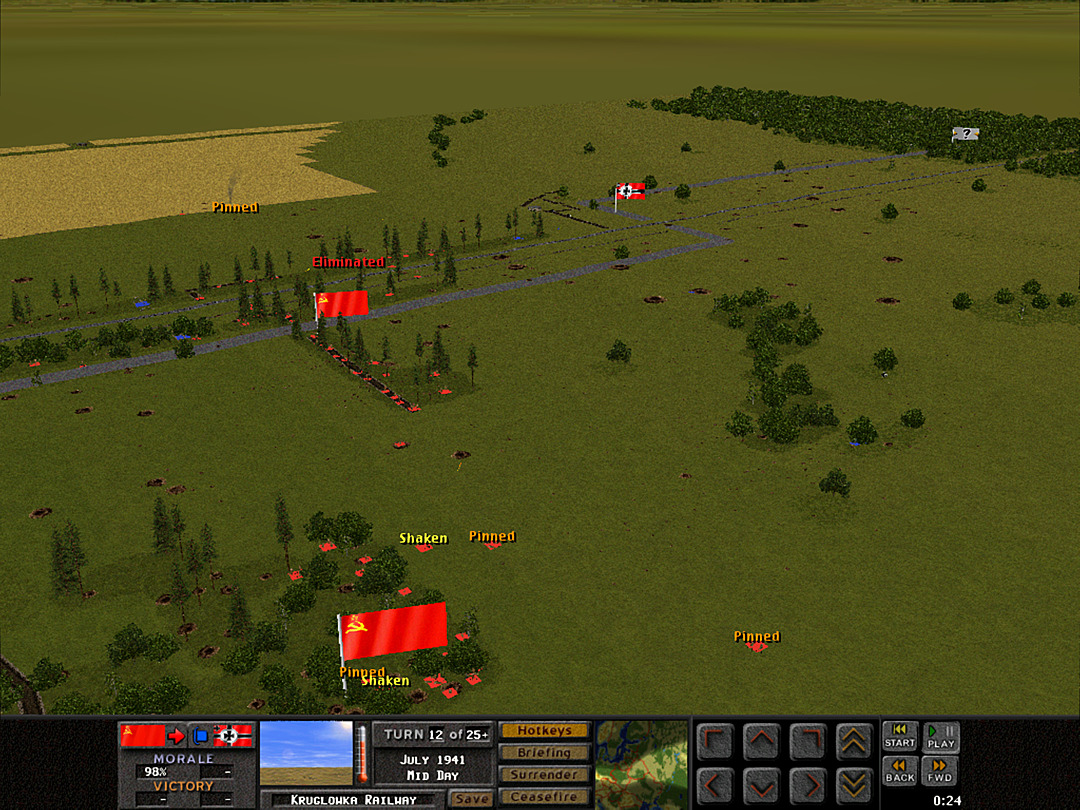 D Coy hasn't quite been halted this time. A few squads have ventured forward and are so far holding their position in the open. Unit Highlight OT-133 Flamethrower Tank  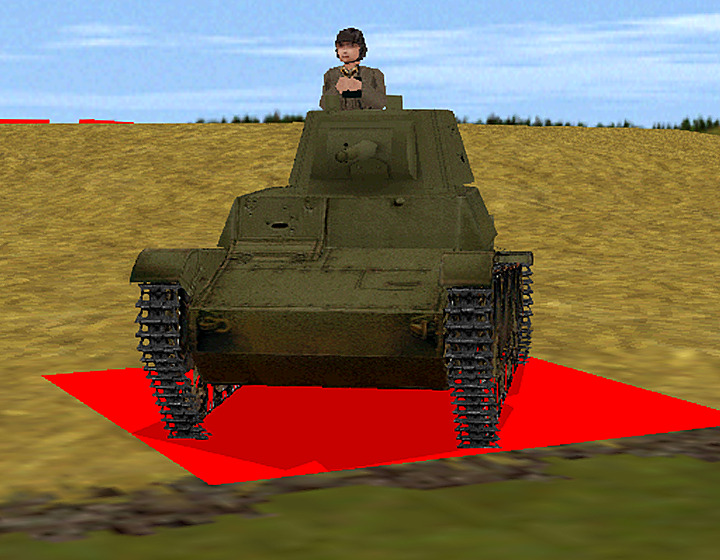 Base Cost: 55 Crew Size: 3 Only one more T-26 variant to go! As the T-26 itself was updated, so was the 'chemical' variant. When the new T-26 turret was introduced (Model 1938), variants tried to make use of it. The OT-131 was a failed attempt to keep both the 45mm tank gun and the chemical sprayer in the turret. The OT-132 switched back to a single main weapon, and the OT-133 was the one that was actually put into production, around 1940. More of these than the OT-130 likely saw combat in the war, mainly by virtue of having been produced closer to the time when hostilities broke out.
|
|
#
?
Feb 19, 2024 23:26
|
|
|
Operation: Kruglowka Railway, Battle 6 Battle Time: 00:13 Our assault on the level crossing has been slowed, but not stopped. We may yet have a chance to take the position if the Germans continue to weaken. 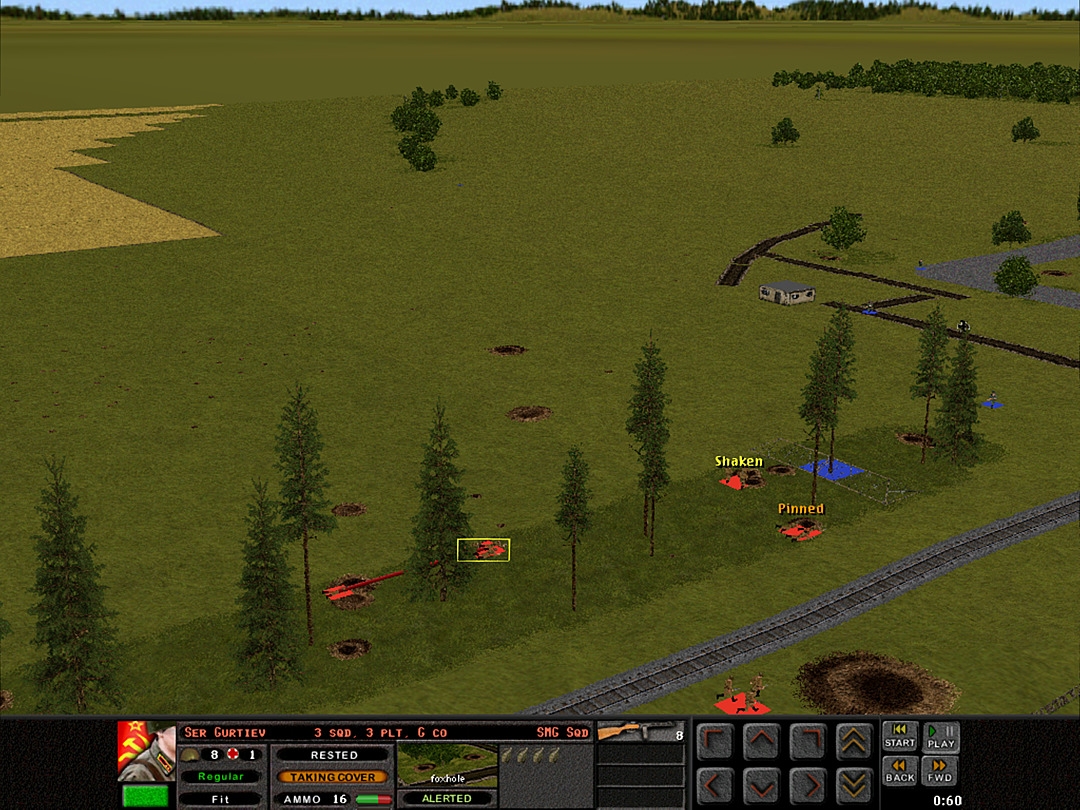 G Coy finally gets in close, and meets with more fire. However, they're able to use some of the enemy's own foxholes for cover. 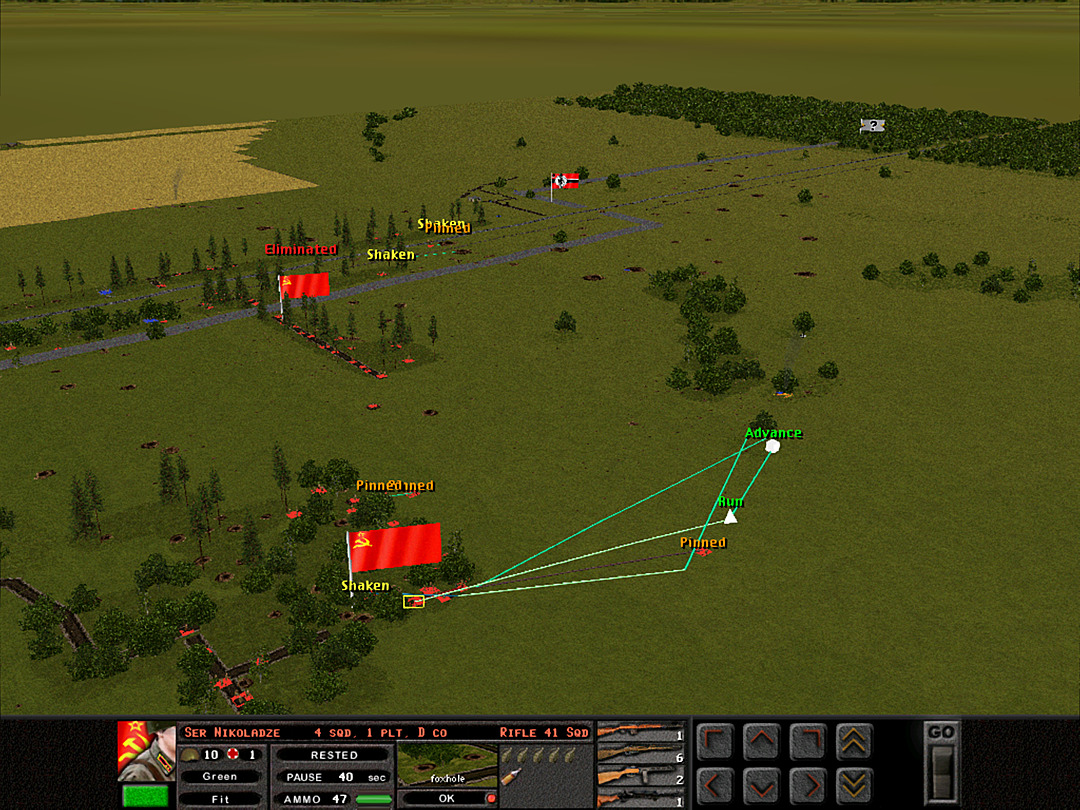 D Coy, 1 Plt readies more squads to send over to the woods. This second assault may yet succeed. 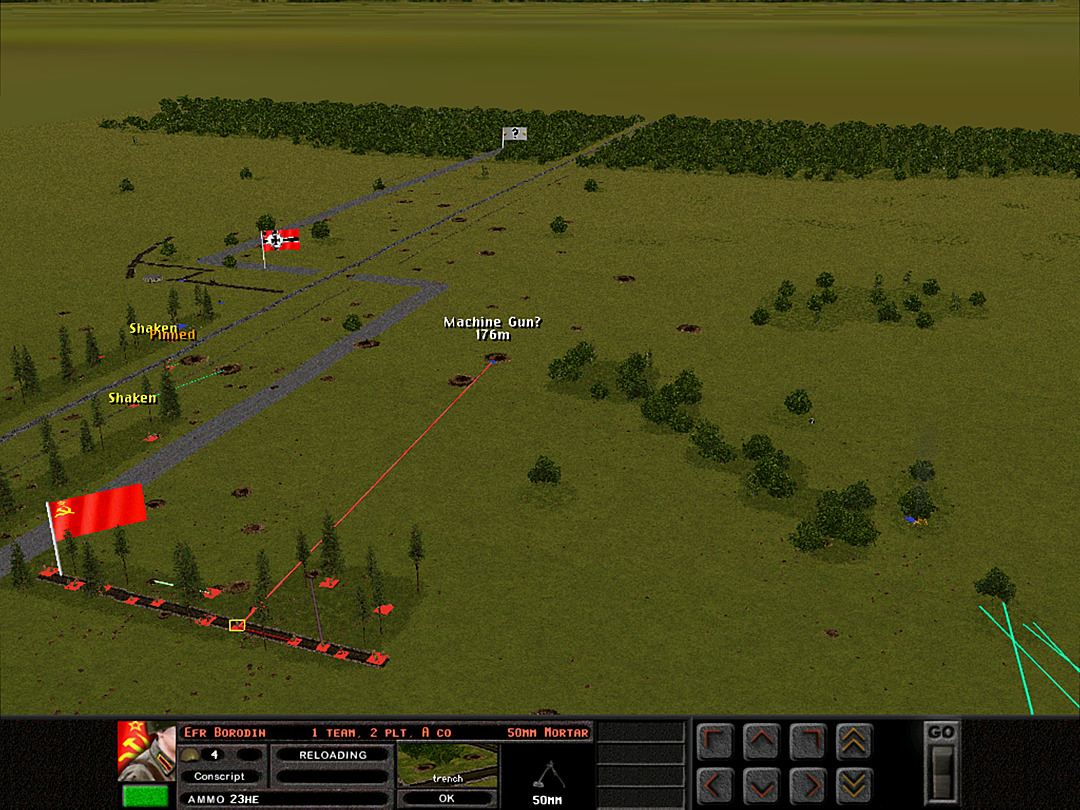 An enemy machine gun stationed in a crater near the road has a strong command of the battlefield, but we have quite a lot of power to bring to bear on it. 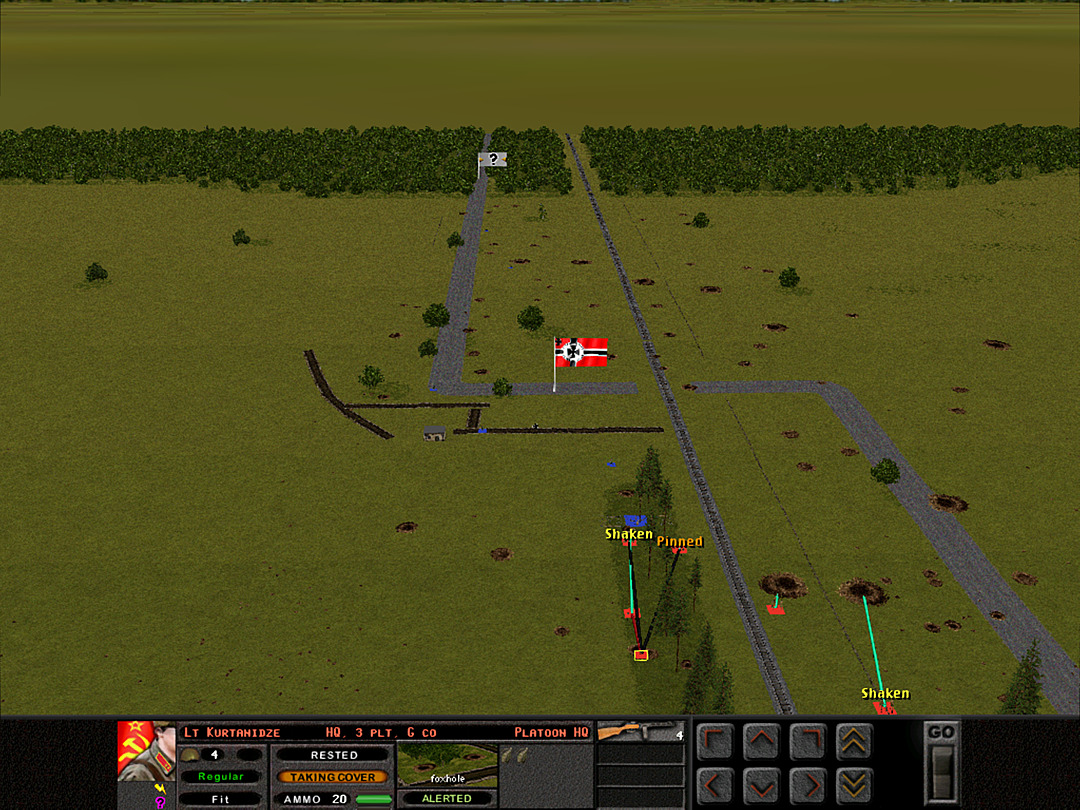 G Coy, 3 Plt needs to hold its ground until D Coy can get over. It could get dicey. 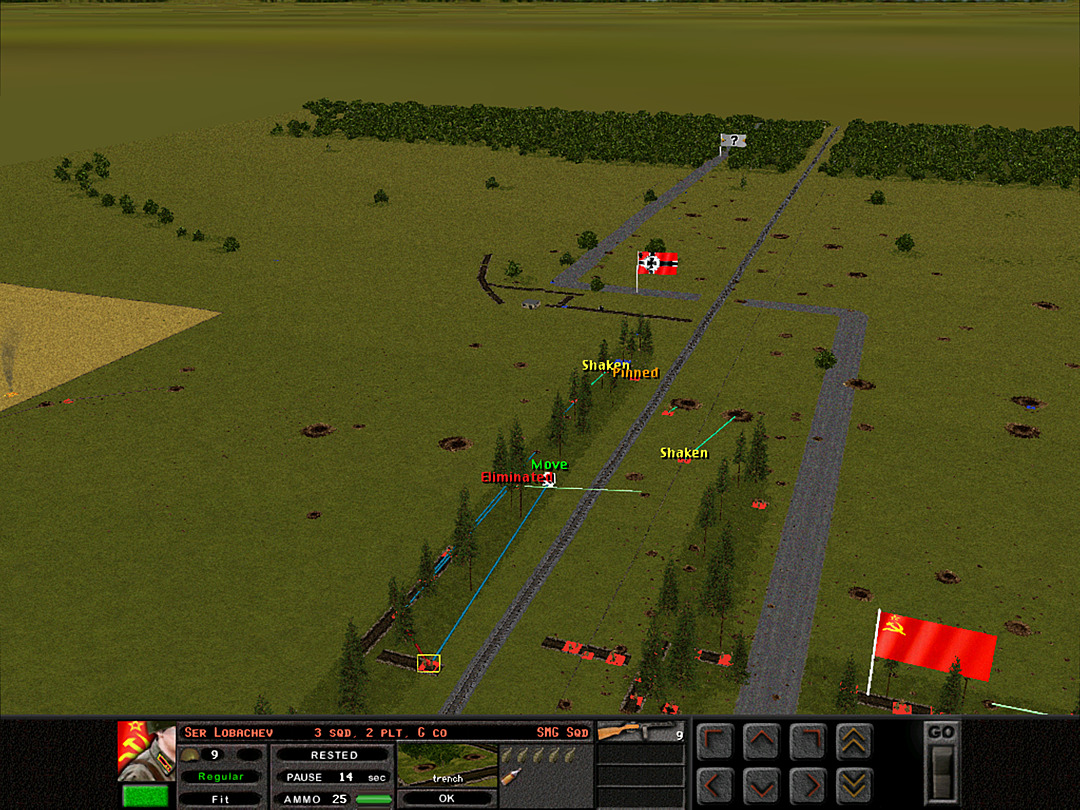 The rearmost platoon of G Coy is brought out of the trench. We need the extra firepower now. 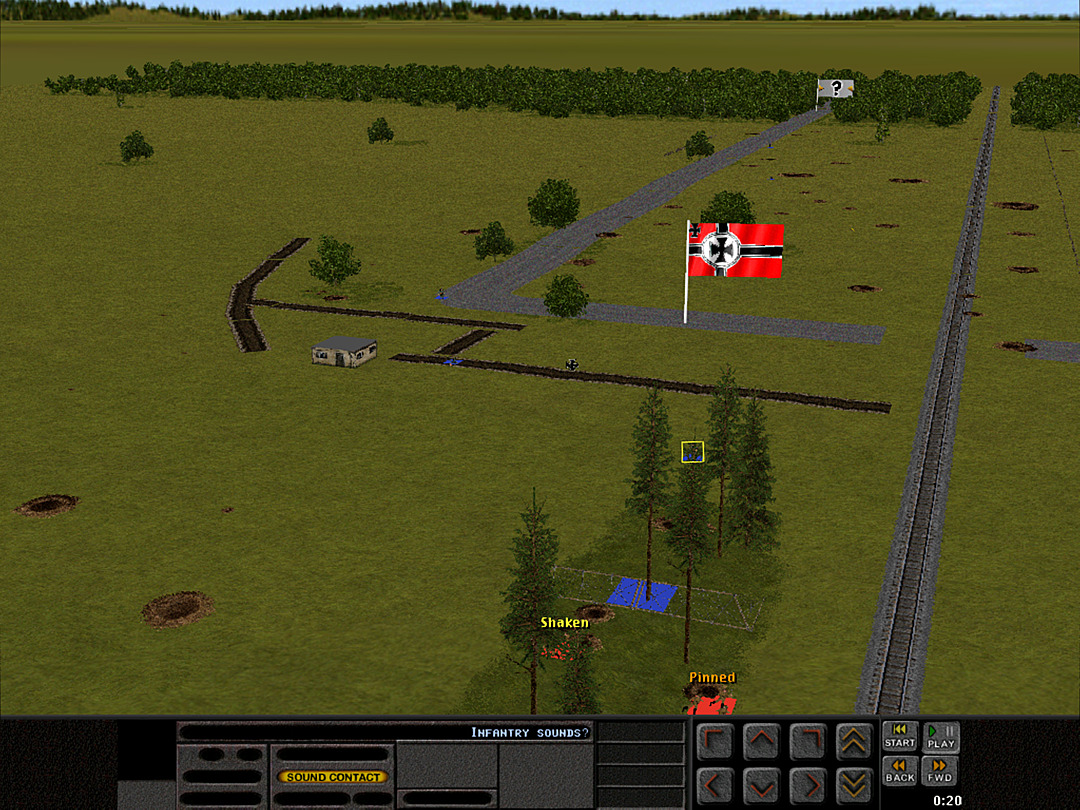 The Germans are mere meters from us, but behind another tricky barbed-wire barrier. 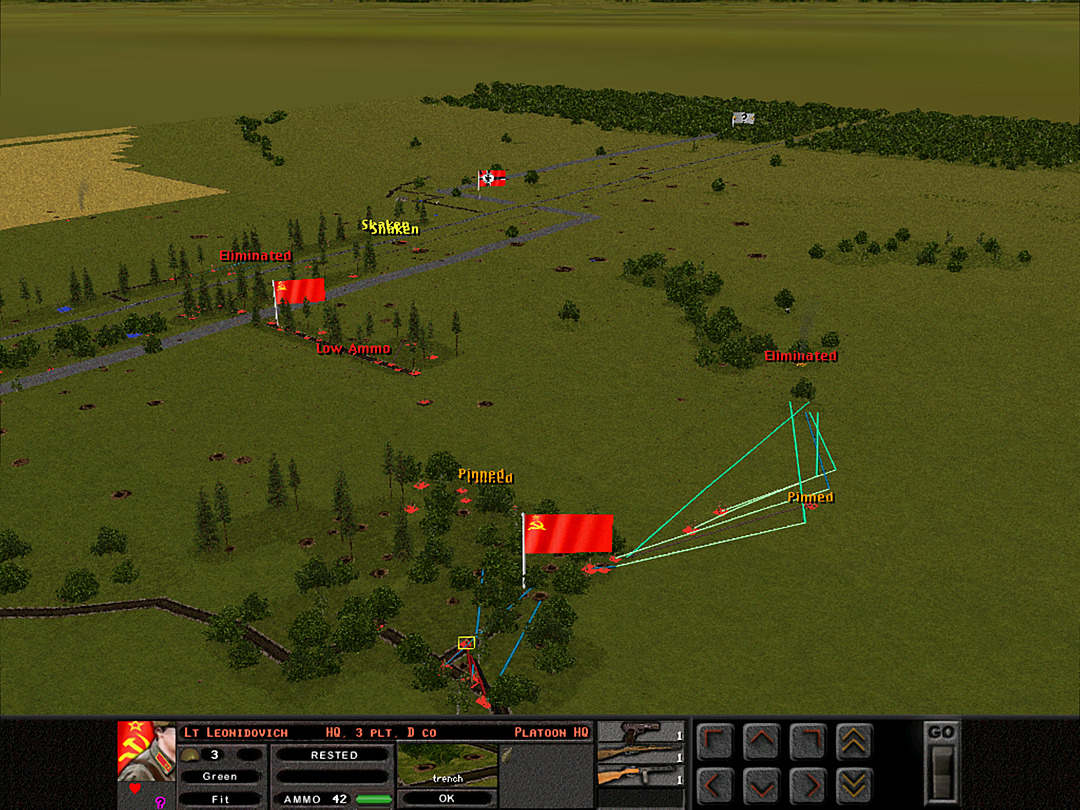 It appears that running on the west line might be a safe path for D Coy, so 3 Plt is brought out of the trench to follow 1 Plt. 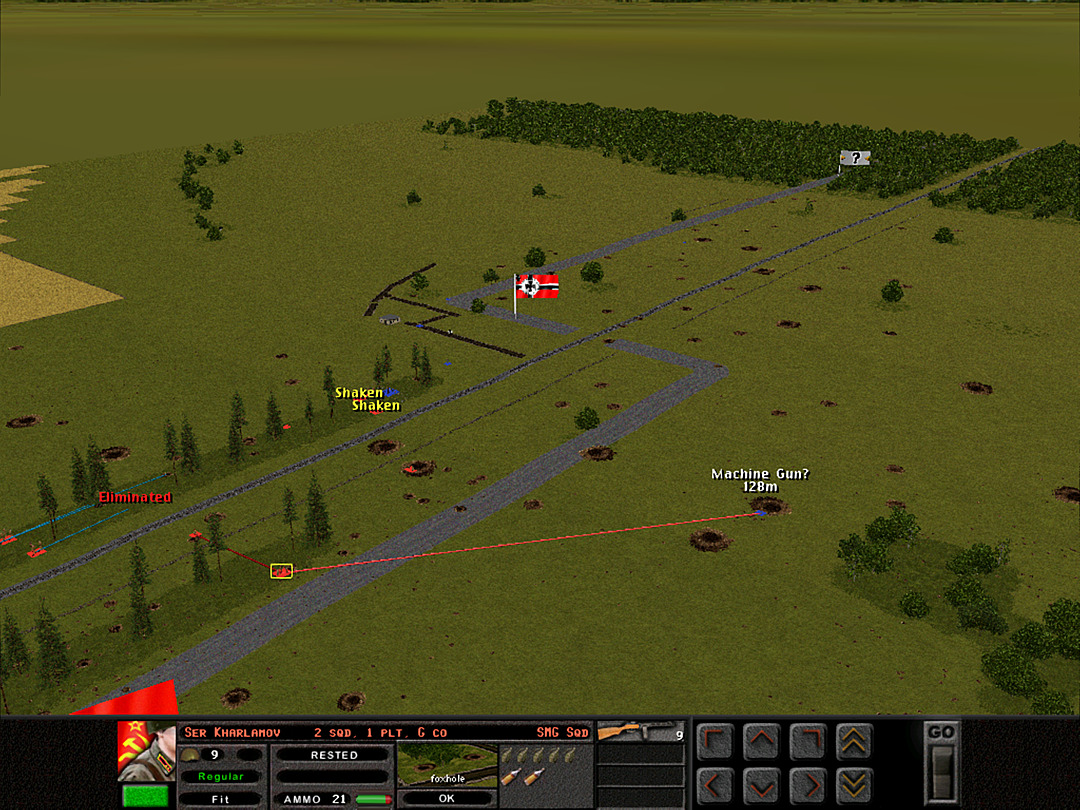 G Coy now has a solid hold on the west side of the rail line, and can engage the machine gun crater. 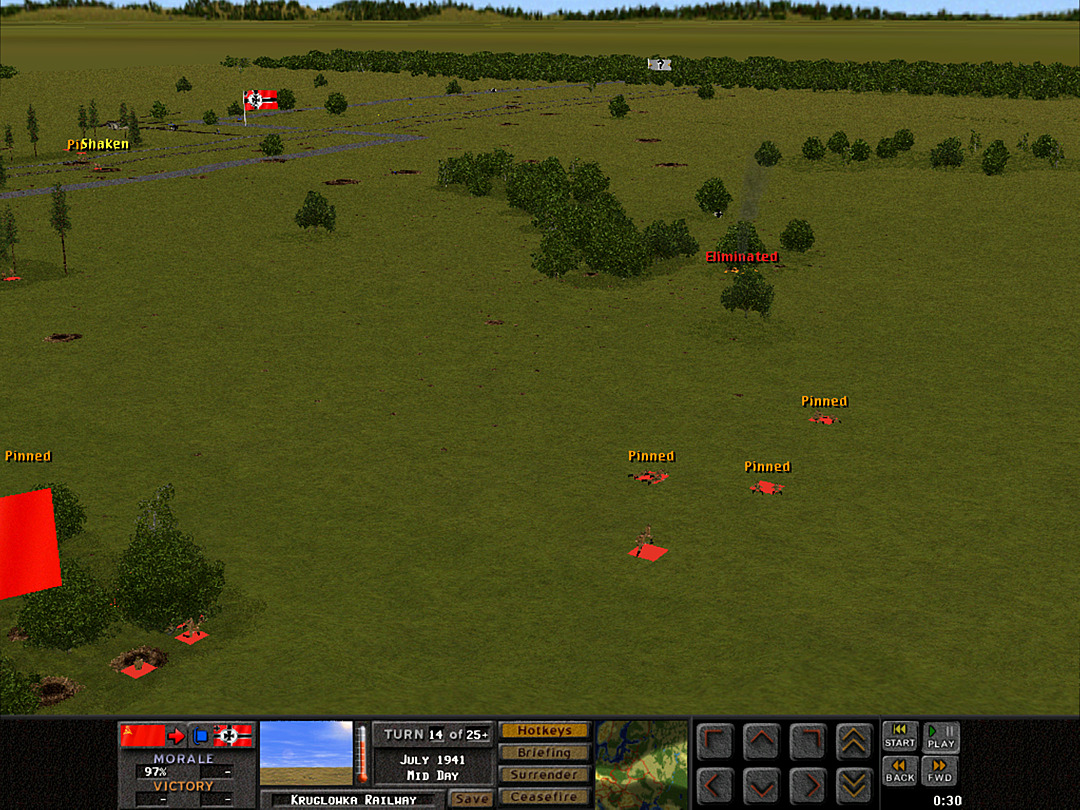 A mix of machine gun fire and high explosives has knocked out the defenders in the woods. 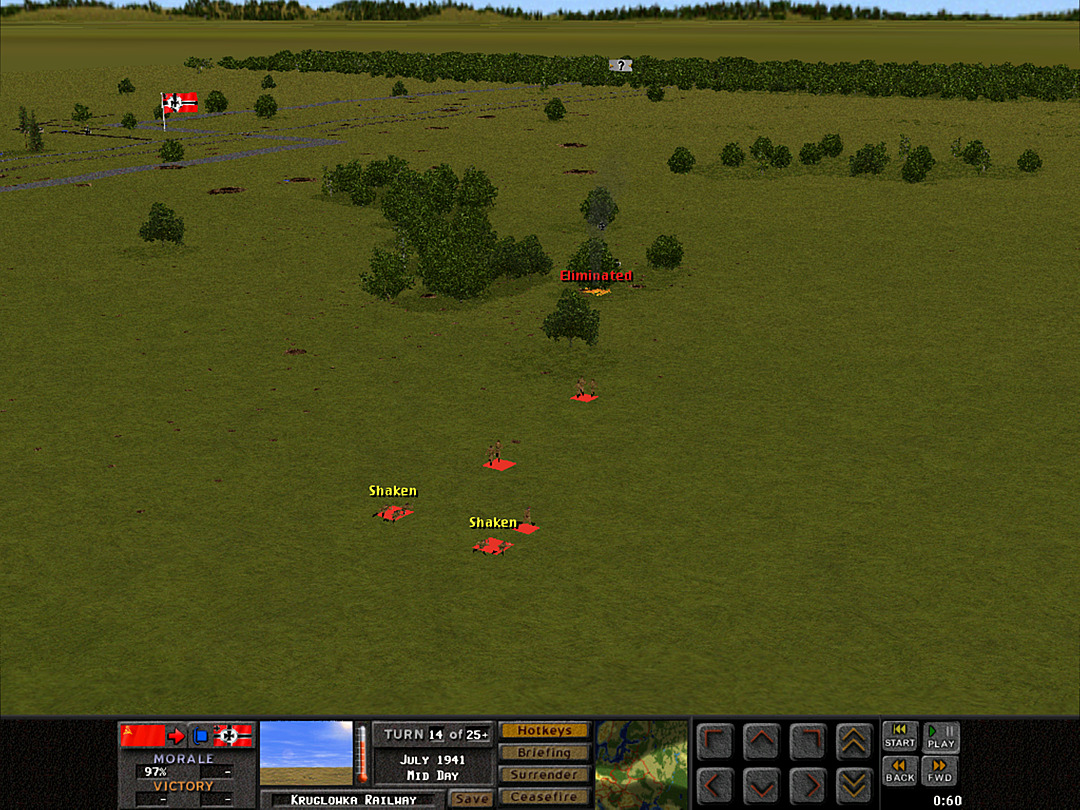 It paves the way for D Coy to get a whole platoon across the gap. 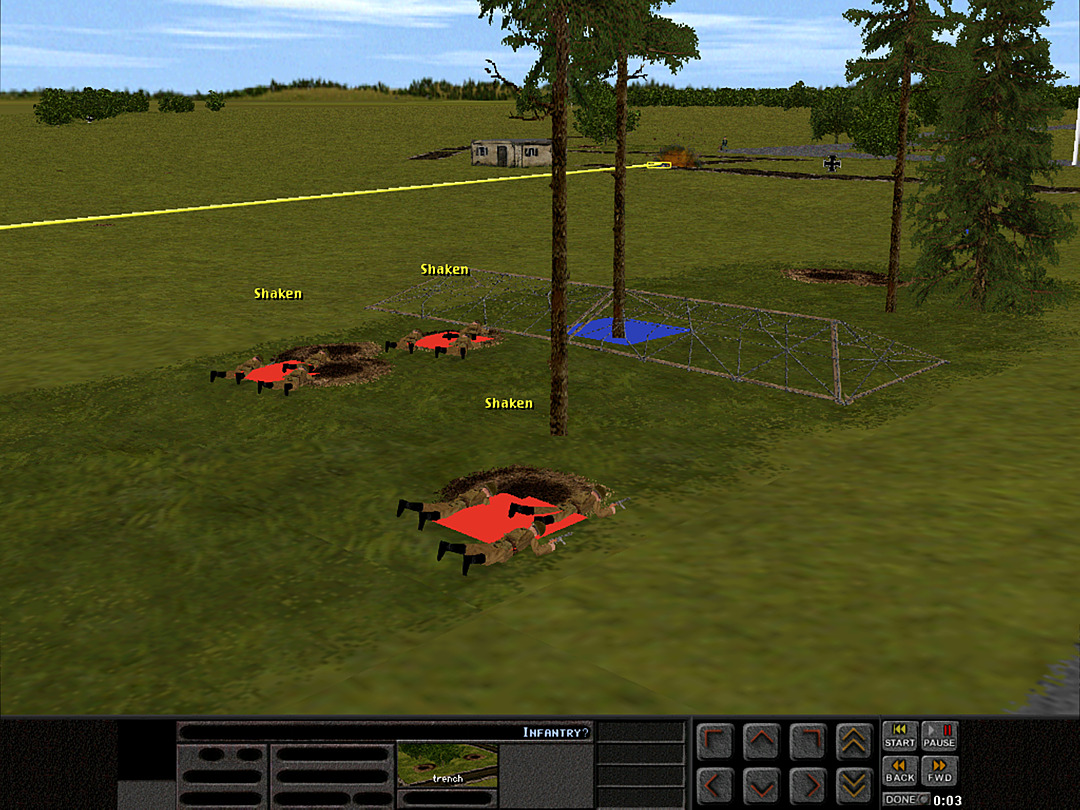 The 76mm gun way back at the river finds the range of the trench by the level crossing. 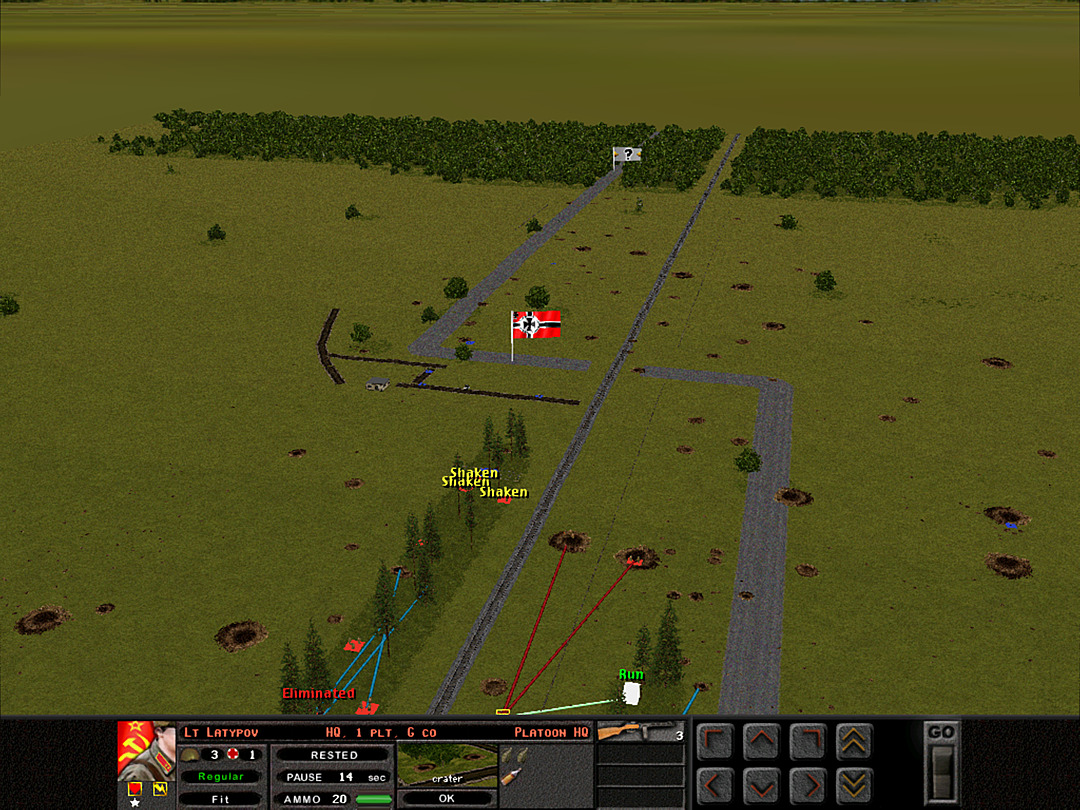 G Coy, 1 Plt has seized some sizable shell craters of their own. 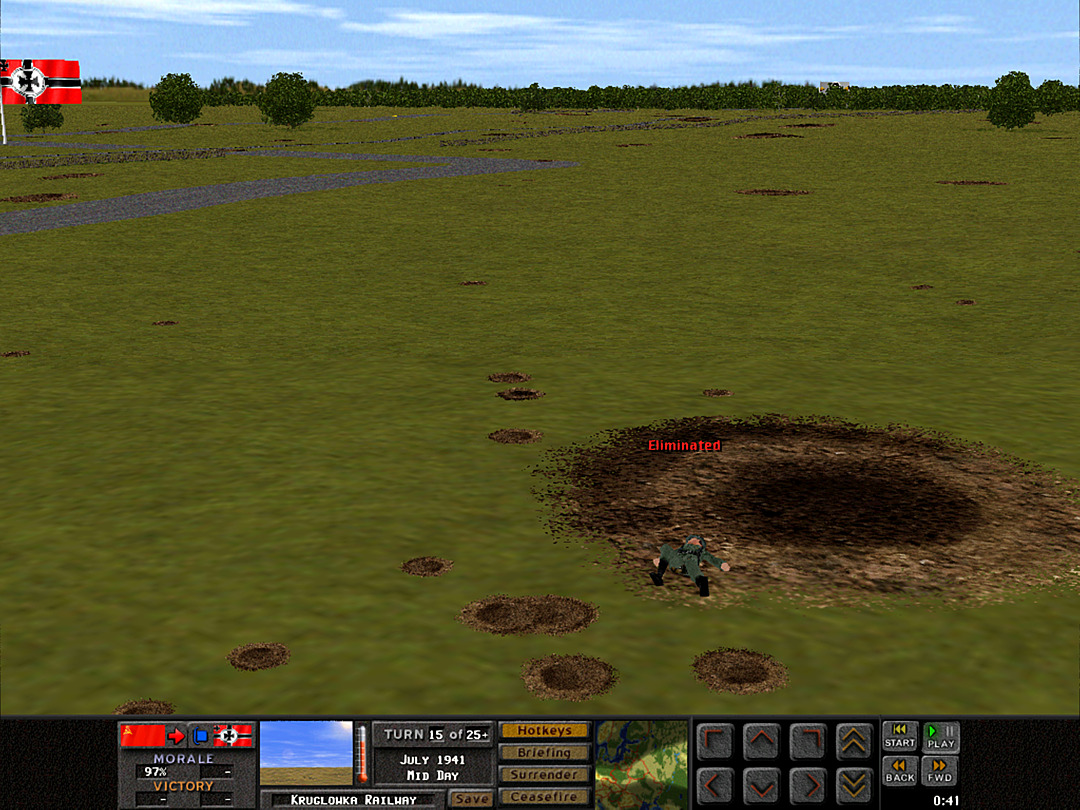 Concentrated fire has knocked out another enemy machine gun. This will clear the way for a much easier advance. 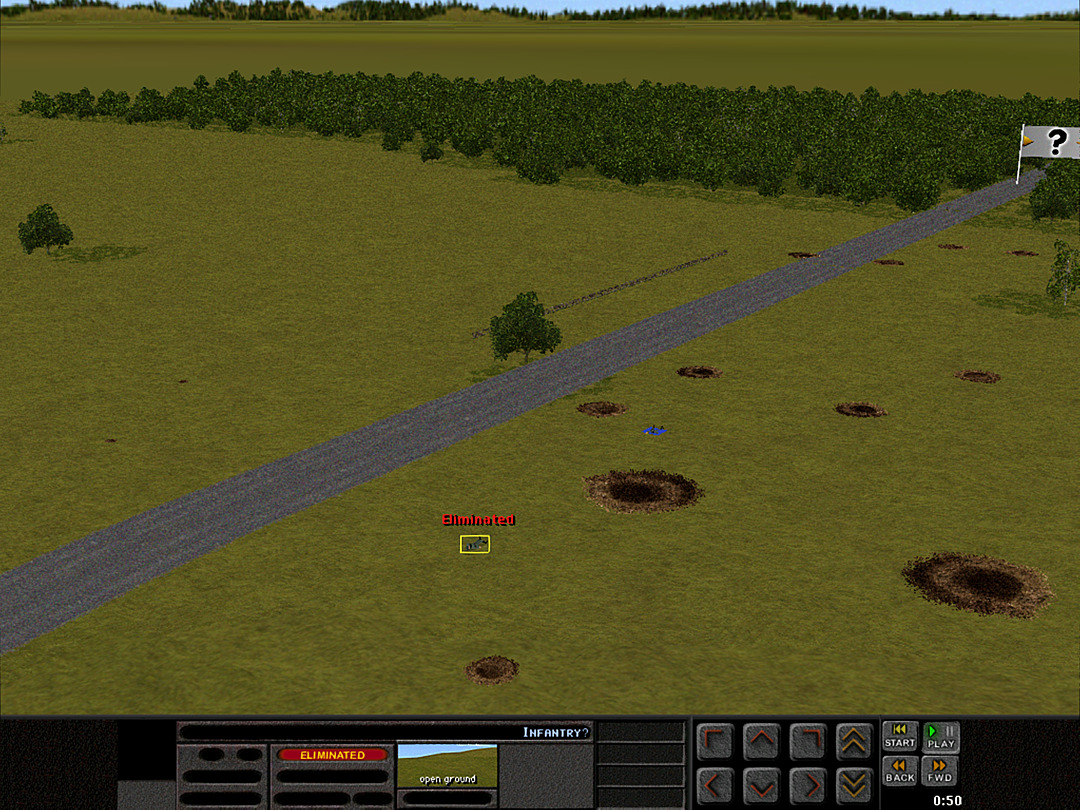 Our gunfire has also picked off some weakened units far back from the front line.  While the cornfield continues to smolder behind them, the mortar team on the east is looking for targets. 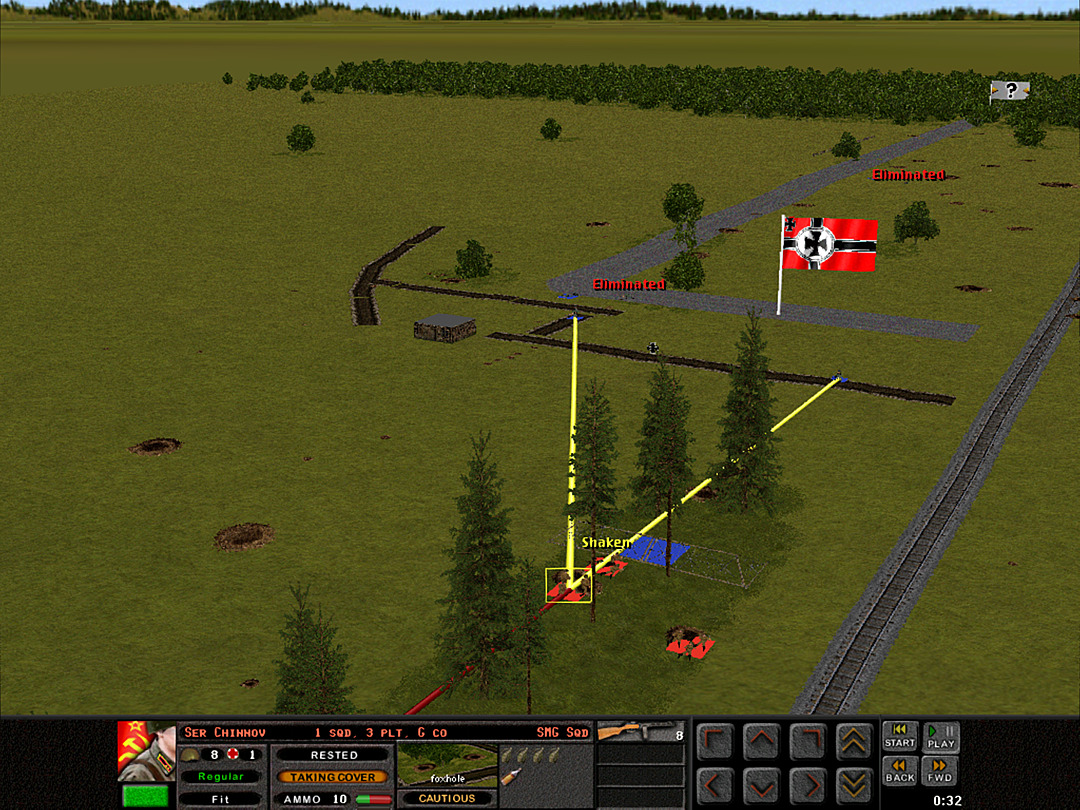 The SMG squads are taking fire, but so far, casualties have been light. 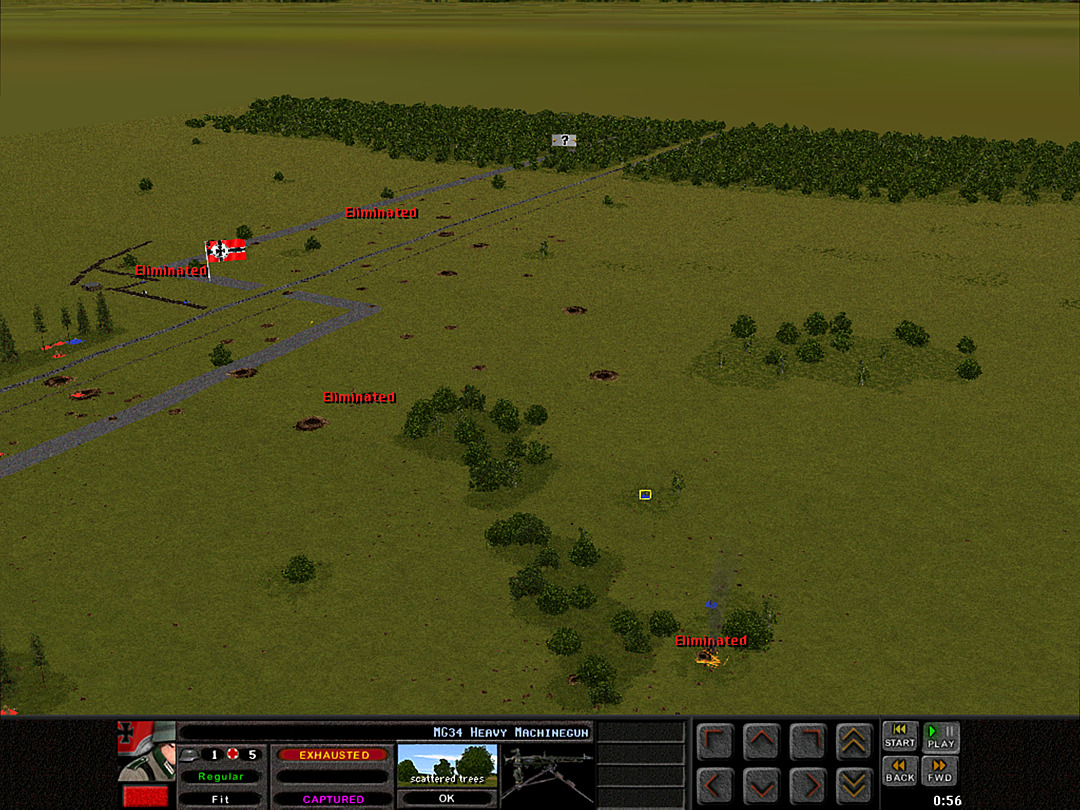 Another lone German machine gunner, exhausted at trying to drag his heavy weapon away from us, gives up. 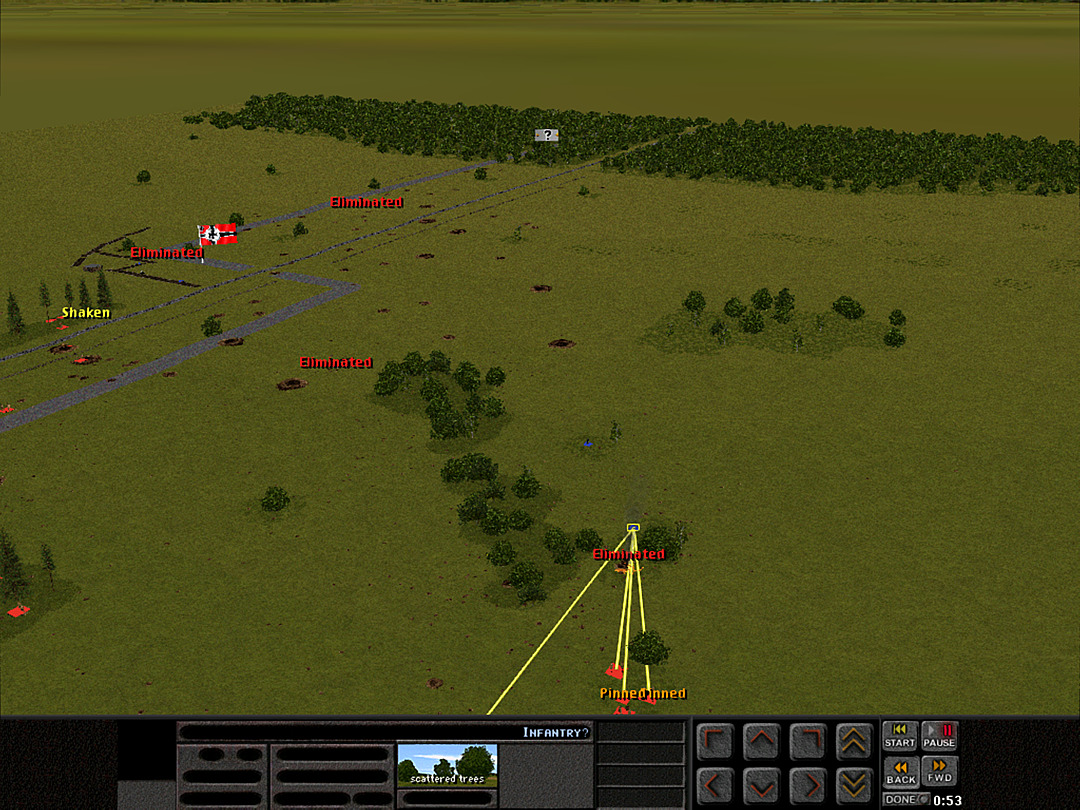 A second team is on the verge of either giving up or dying while fighting. They are perhaps only preserved from heavier fire by the smoke rising from the trees, which have caught fire from the anti-tank gun explosions. 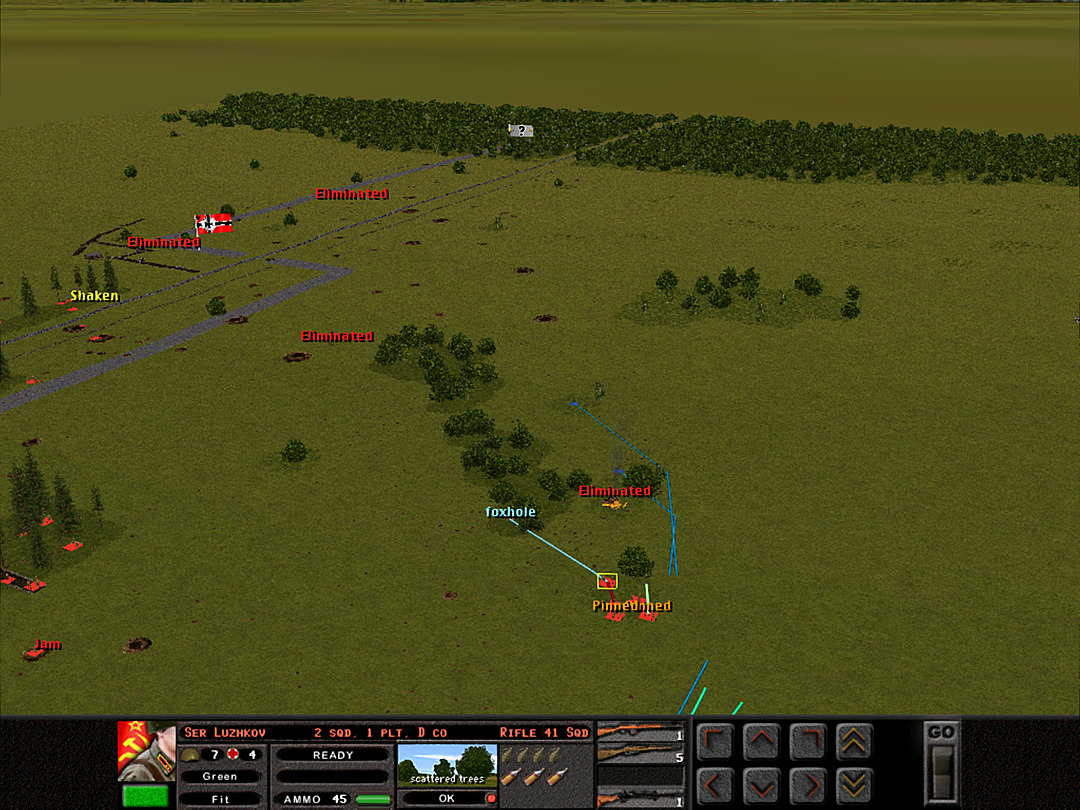 It's not long before they surrender. D Coy prepares to enter the woods themselves. 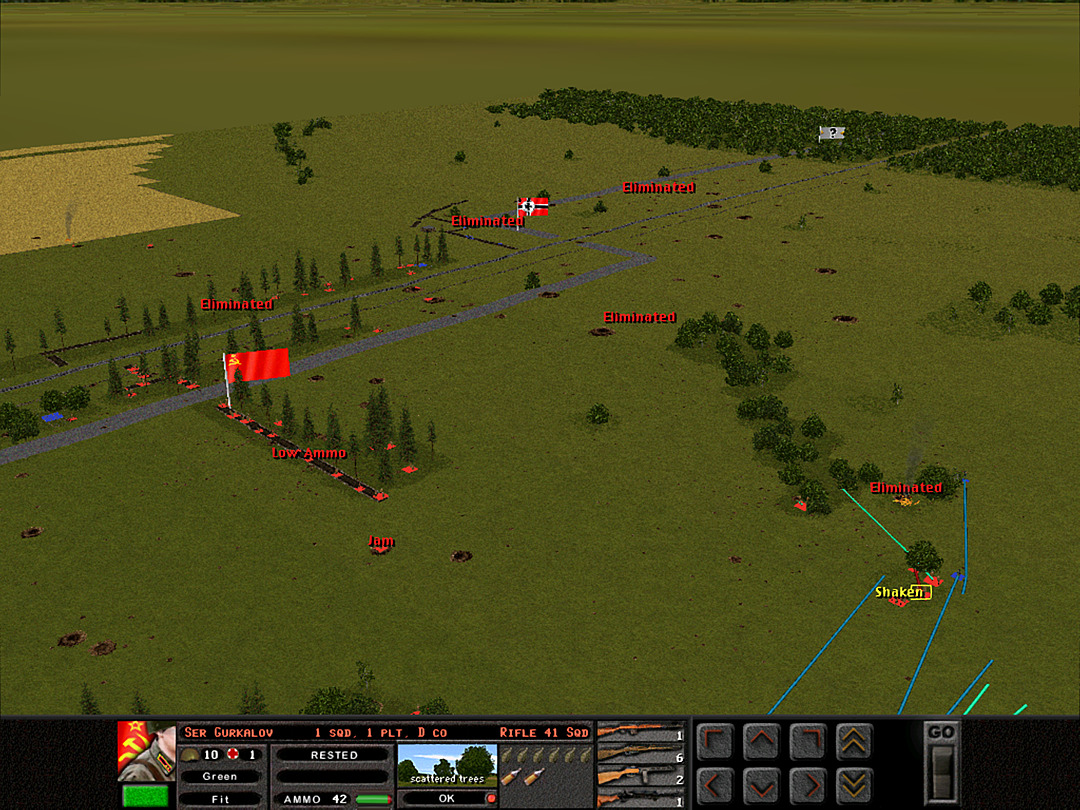 The pace of battle has slowed a bit. We're waiting on D Coy to advance, but don't want to risk being ambushed by troops hiding out in the woods. 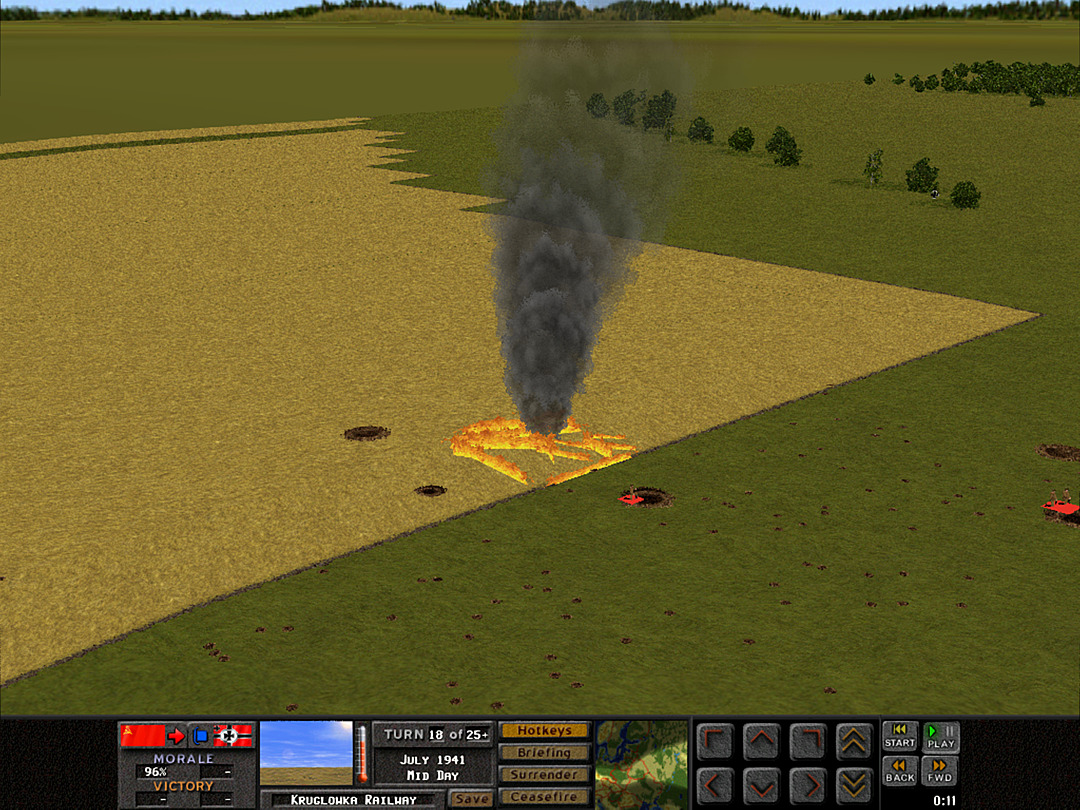 As the battle drags on, the fire in the cornfield starts to expand. The mortar team may need to flee from it. 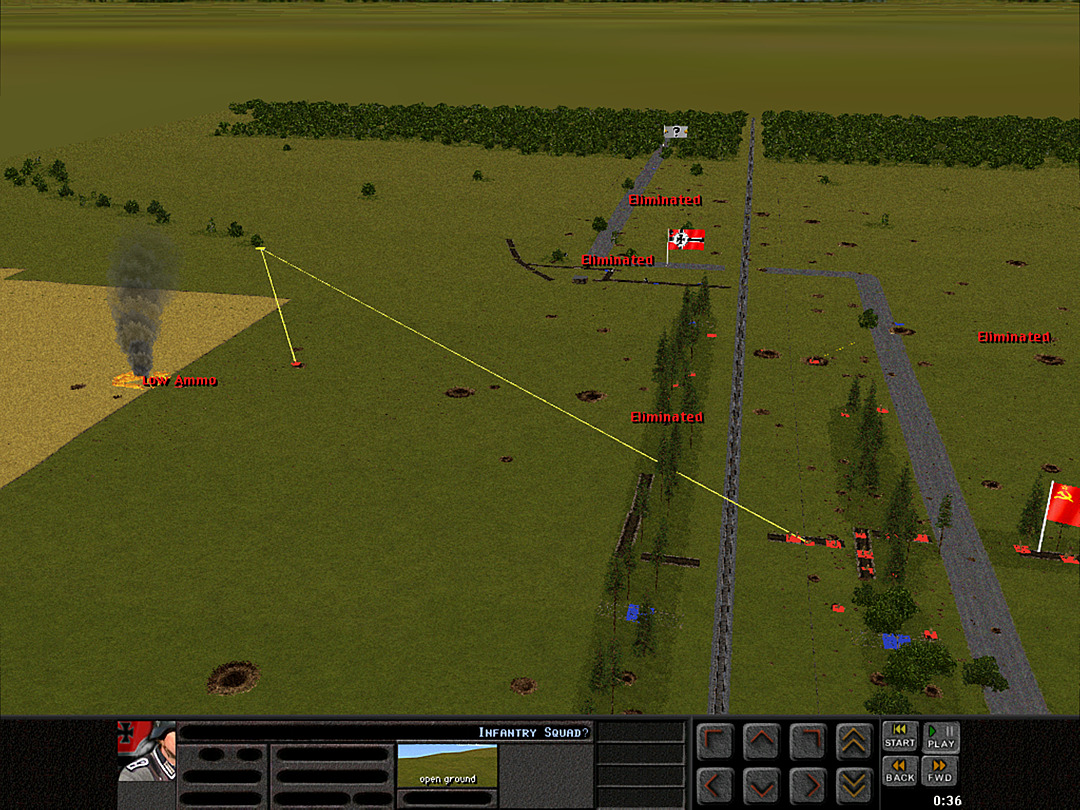 They are within range of the spread-out enemy forces, however. It's not safe to move in the open where they are.  A smattering of fire from the far trench spooks some of the men in D Coy.  We'll have two platoons over to the trees before long.  So far, the rest of the small group of trees has been emptied out.  As we get more men into view of the flanking side, we get a better indication of how many Germans are actually in the trench. It's a few more than we had thought.  One thing D Coy hasn't seen so far is any more units to the southwest of the trenches. We likely have solid control of the west side of the battlefied for now. 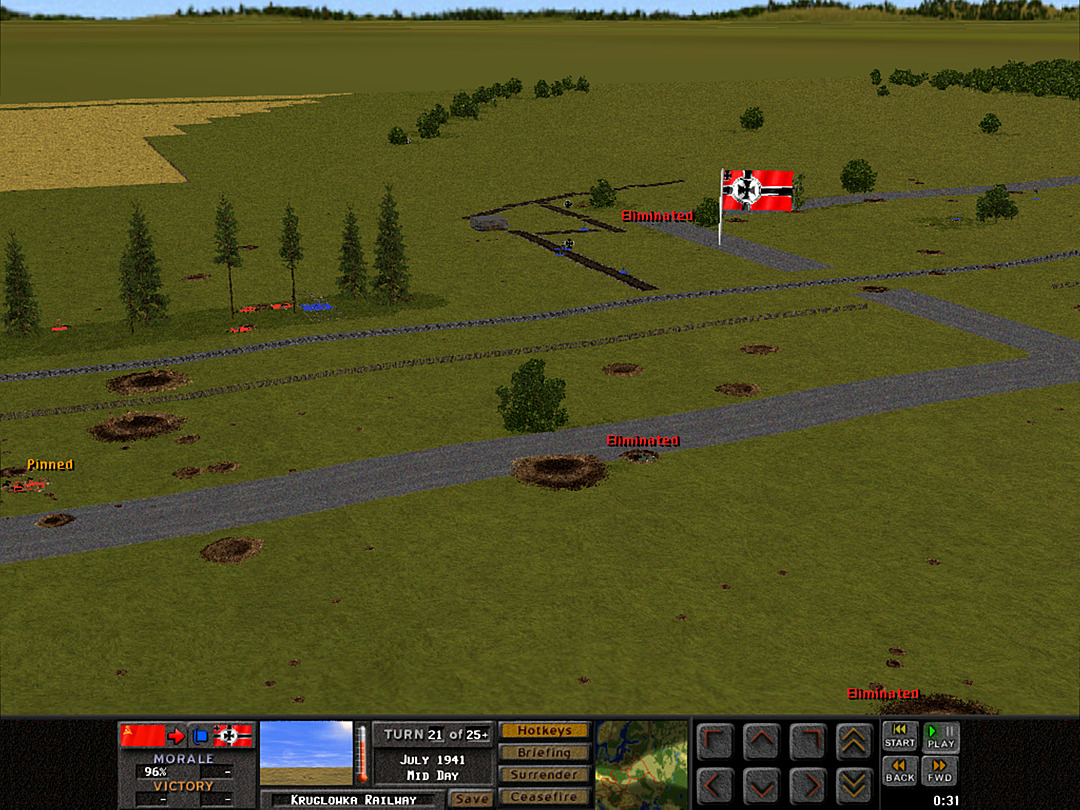 Another German squad is whittled down to nothing. 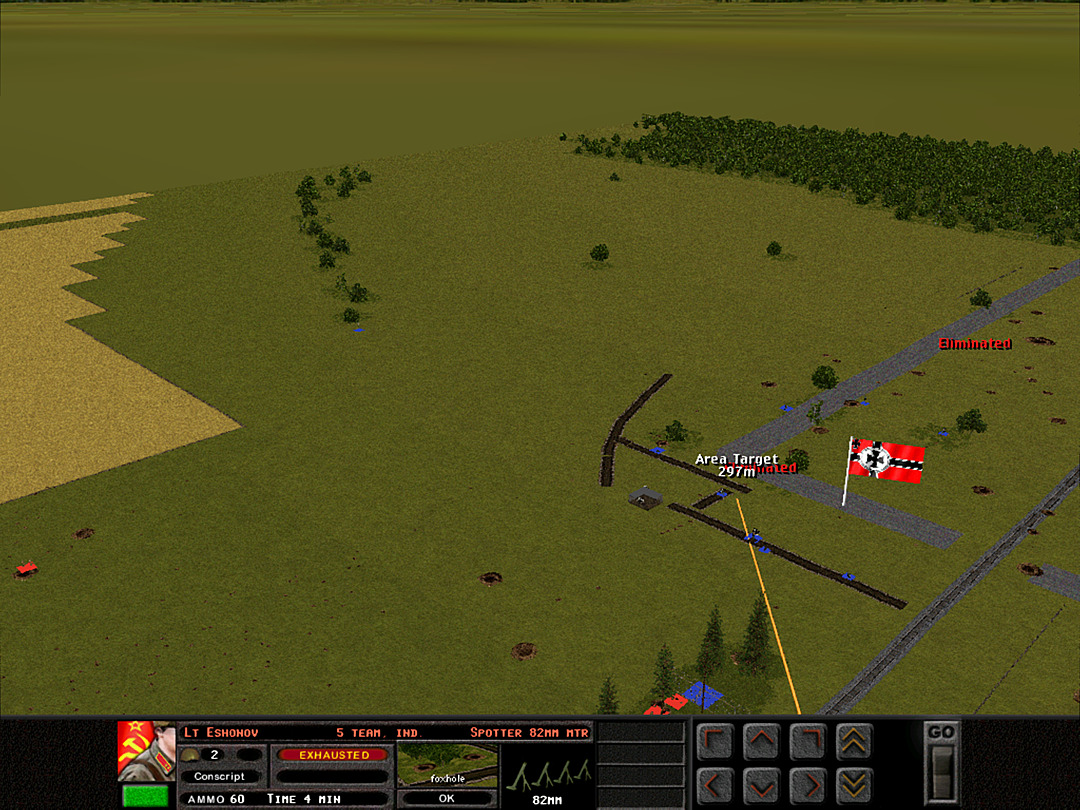 It's unfortunately likely to be too late to get in the trench today. We nevertheless send a few mortar rounds to keep their heads down while D Coy takes up positions in the woods. 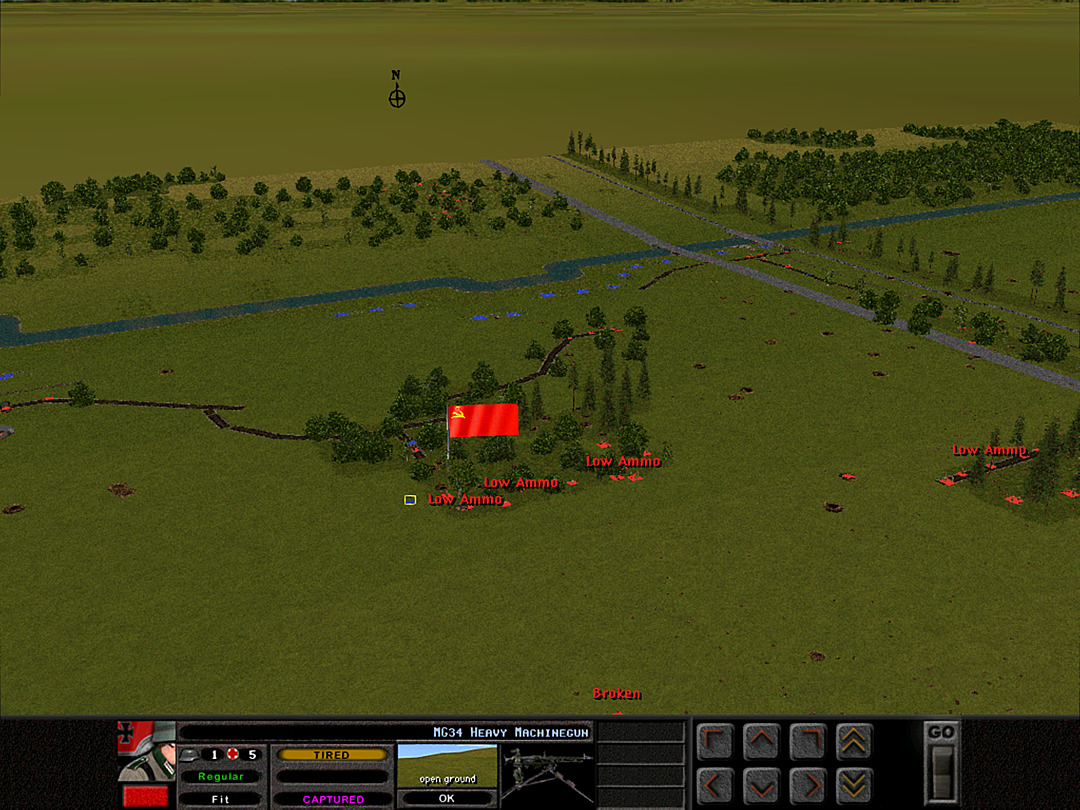 The men we've taken prisoner look beaten down. They likely haven't slept at all the last couple of days, and have given up all hope of reinforcements arriving in time to save them. 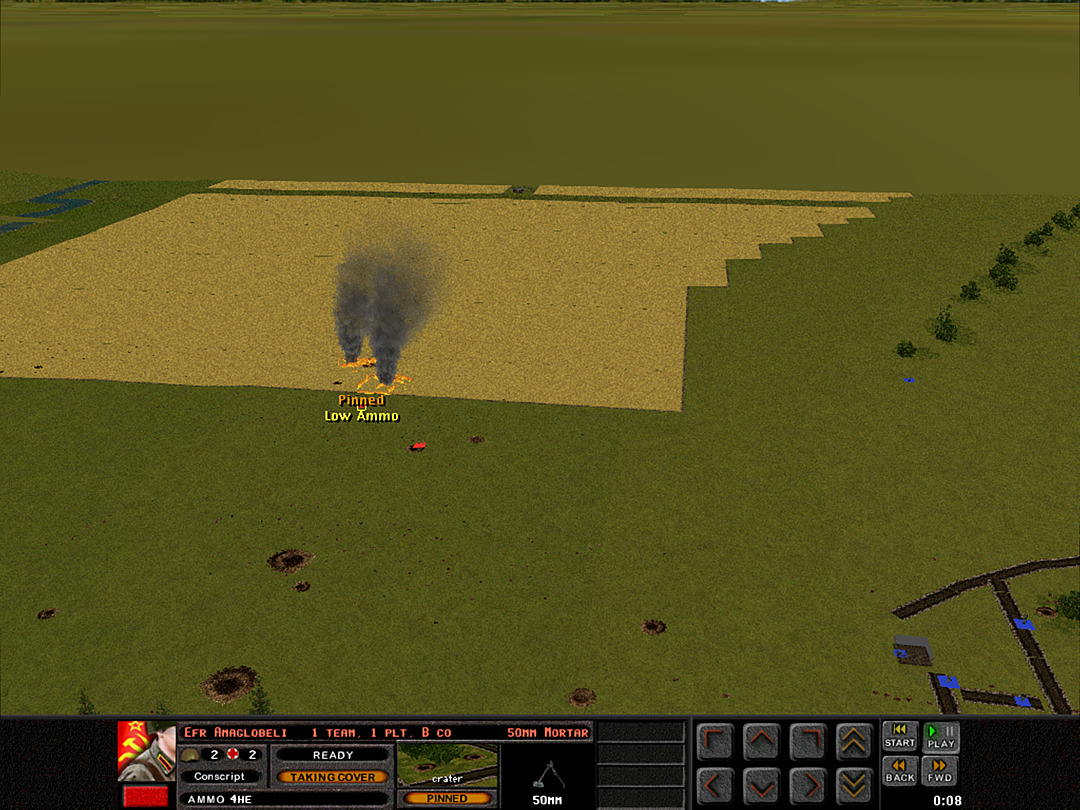 The fire in the cornfield is spreading out of control.  D Coy, 1 Plt has just about swept the woods. Nothing to be found but a few enemy foxholes.  G Coy is in a safe position. The firefight continues, but with less enthusiasm on both sides.  The platoon is cycling who is active, in order to conserve ammo.  G Coy, 1 Plt tries to take a little more ground. 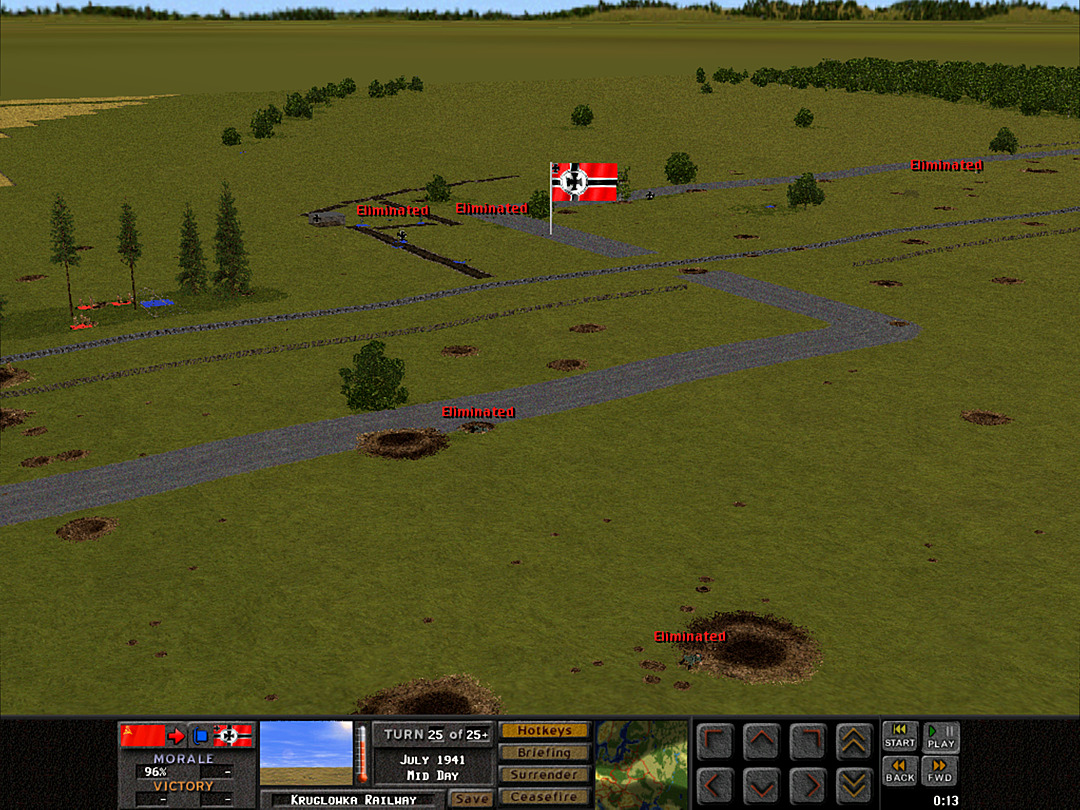 More German squads are falling. They've lost the battle, it's just not completely over yet. 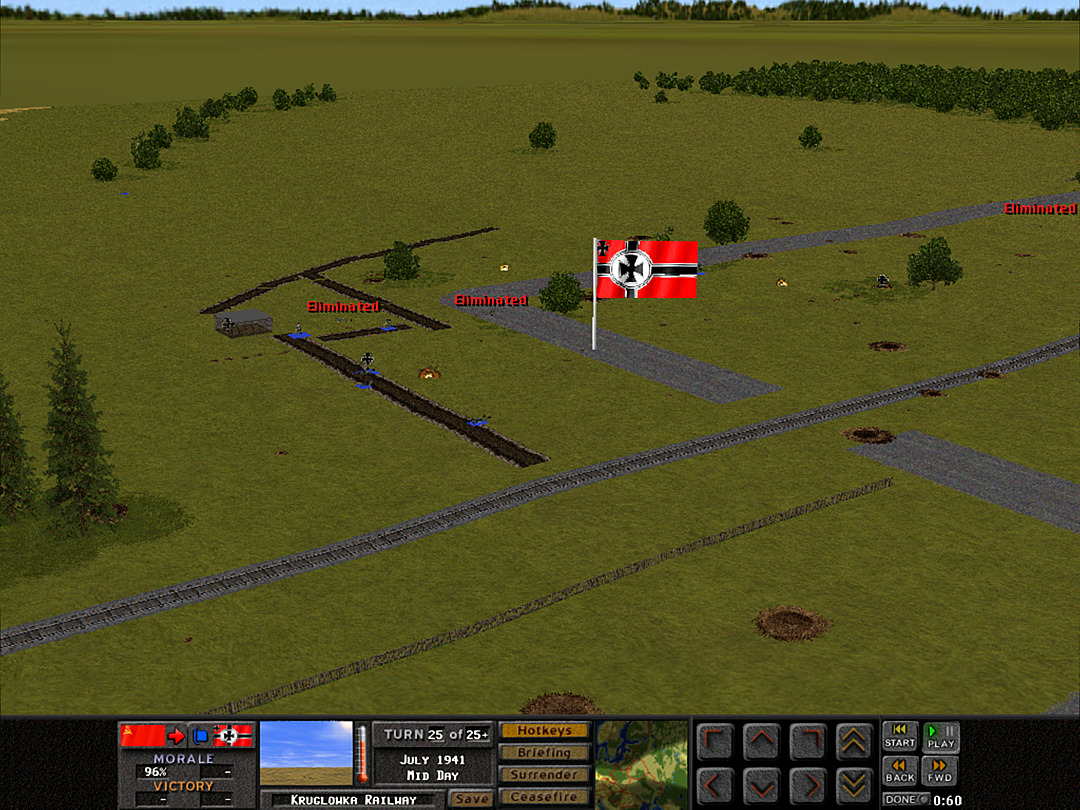 Our last barrage of the day comes in on target. 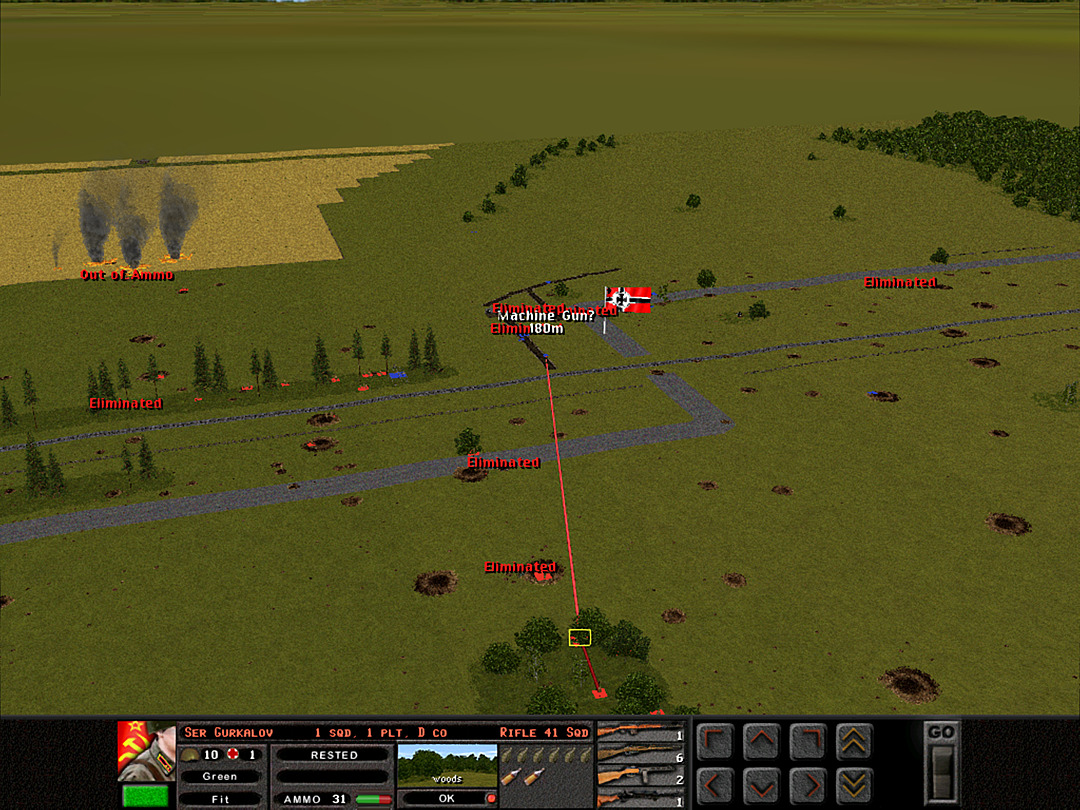 D Coy begins firing into the enemy trench from the west. 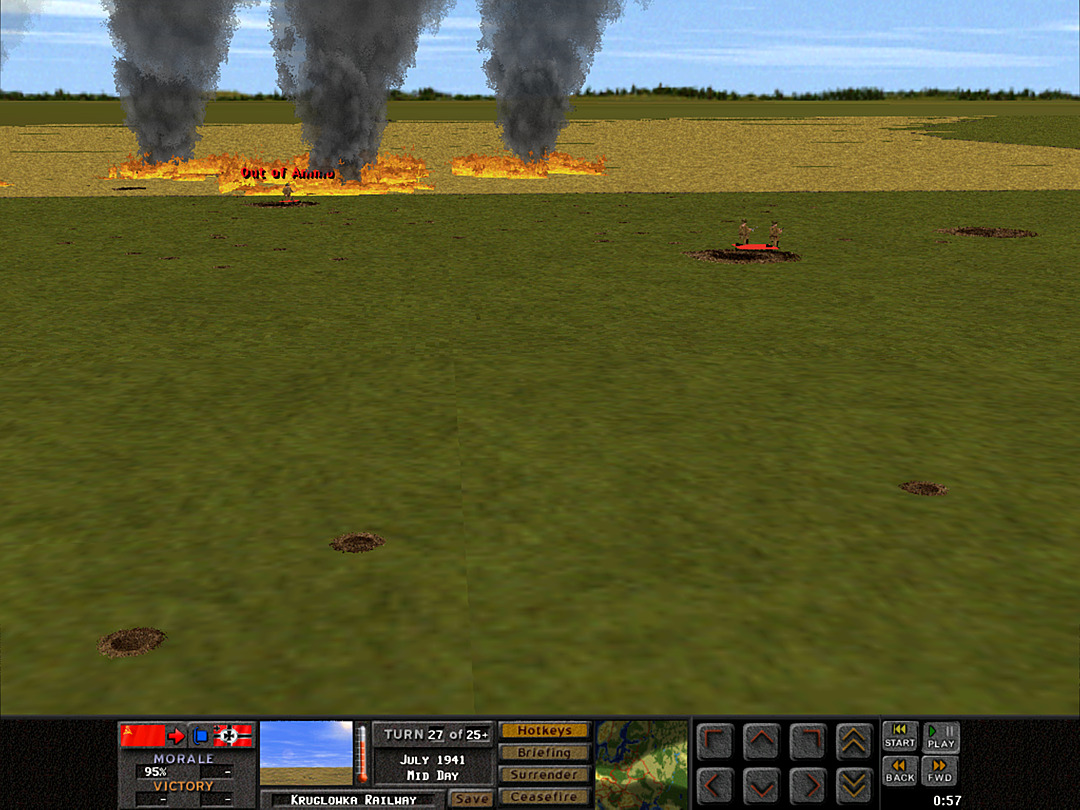 The lost squad of B Coy takes a look at the smoke clouds roiling above the inferno in the cornfield, and then, as a group, run straight into the fire. Their bodies are never recovered.  We might be able to push our luck if we wanted, but nearly all our troops are running low on ammunition, and the heat of this battle has ruined the appetite for more death today.  We doubtless will be able to take the crossing, barring the sudden arrival of another German division in this sector. Just not today. Unit Highlight Maxim Gun   Team Size: 6 Base Cost: 21 A venerable design. The Russian military had been using Hiram Maxim's well-known weapons since the late 19th Century. This one was not quite of that vintage, though. It was designed in 1910 and deployed widely during World War I and the Russian Revolution. A modernization was made in 1930, when the gun was still the main machine gun of the Soviet Army. It was by then a rather heavy design (typically using a wheeled mount on the battlefield), and it was due to be phased out in the 1940s. However, the replacement design proved to be unreliable in testing. Once the German invasion was underway, production of the old Maxim models resumed, and this gun was not superseded until 1943. Even then, it was likely the most common machine gun actually in use, as so many had already been produced. It has continued to be fielded around the world since World War II and even within the last few years, maintaining a reputation of reliability. Kangra fucked around with this message at 06:33 on Feb 27, 2024 |
|
#
?
Feb 24, 2024 07:20
|
|
|
Ah, the persistent problem is games with a morale system, having the bemoraled agents evaluate the situation and flee convincingly.
|
|
#
?
Feb 24, 2024 16:53
|
|
|
Operation 3, Battle 7 of 8 Operation: Kruglowka Railway Time: Night Skies: Clear Ground: Very Dry Temp: Cool Wind: Breeze N  Attempt to skip Night Combat: ** YES ** NIGHT COMBAT SKIPPED Even though the day's battle had not yielded any territory for us outside of the woods on the west side, it was becoming apparent that the Germans could not hold out for much longer. Once night fell, it certainly could have been possible for us to overrun their position in the trenches by sheer weight of numbers. There seemed no need to really go for it, though. We'd be charging at machine guns at night, without our heavier guns or own machine guns to provide suppressive support. It'd be handing the Germans an advantage to their defensive position for no good reason. Naturally, the Germans had no desire to keep fighting. Their supplies are doubtless dwindling. Both sides took the night to rest their troops after a hard day of combat.  Only one deserter in the night.
|
|
#
?
Feb 27, 2024 06:32
|
|
|
Operation 3, Battle 8 of 8 Operation: Kruglowka Railway Time: Mid-day Skies: Clear Ground: Very Dry Temp: Warm Wind: Strong Wind W The battle for the bridgehead seems to be all but over. The Germans have held us off for longer than expected, but they genuinely seem to be weakened to the point of failure. We stand poised to capture the level crossing, and that will give us a secure position on both the rail line and the road. The bridges will remain in our hands and we can drive the enemy back, at least for now.  After being held out in yesterday's battle, the troops of F Coy are fresh and ready to fight. They've moved up to the trees; they will be responsible for clearing the trenches by the level crossing. G Coy holds the front line and will give fire support, or lead a charge at close range if necessary.  The remainder of our force will hold position for now. D Coy will advance toward the woods if the enemy appears to be weak enough.  Unless the Germans have abandoned the trench completely, they still have men hiding there. We open the combat with a spray of machine gun fire at the frontmost line.  Some of D Coy's platoons will probe the last small patch of woods. This should give us a clear line of fire on any units hiding in the crater-pocked landscape.  The trenches are too close to our own lines to risk an artillery strike. Instead, we send a wide-area barrage to suppress any rearward enemy units.  The initial overtures prompt no reaction from the enemy trench. We add on more pressure by sending some HE rounds its way. 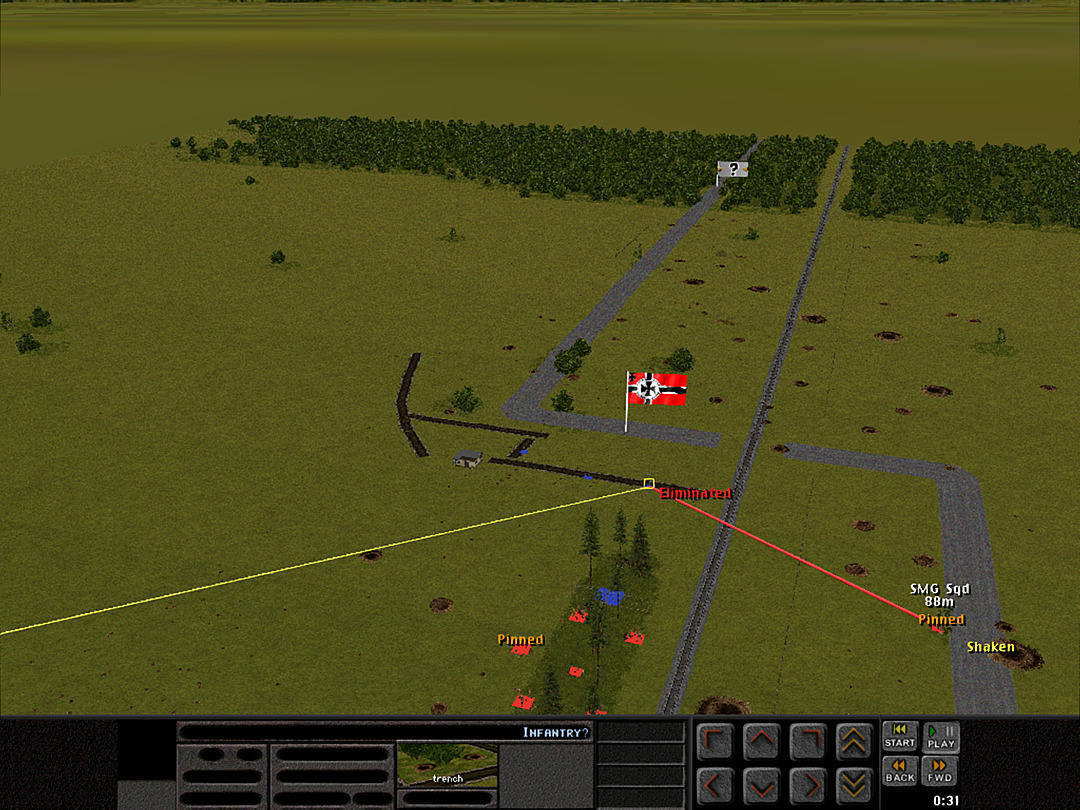 It doesn't take long before enemy soldiers finally pop up. Some tried to flee, but were cut down before they could even stand up. 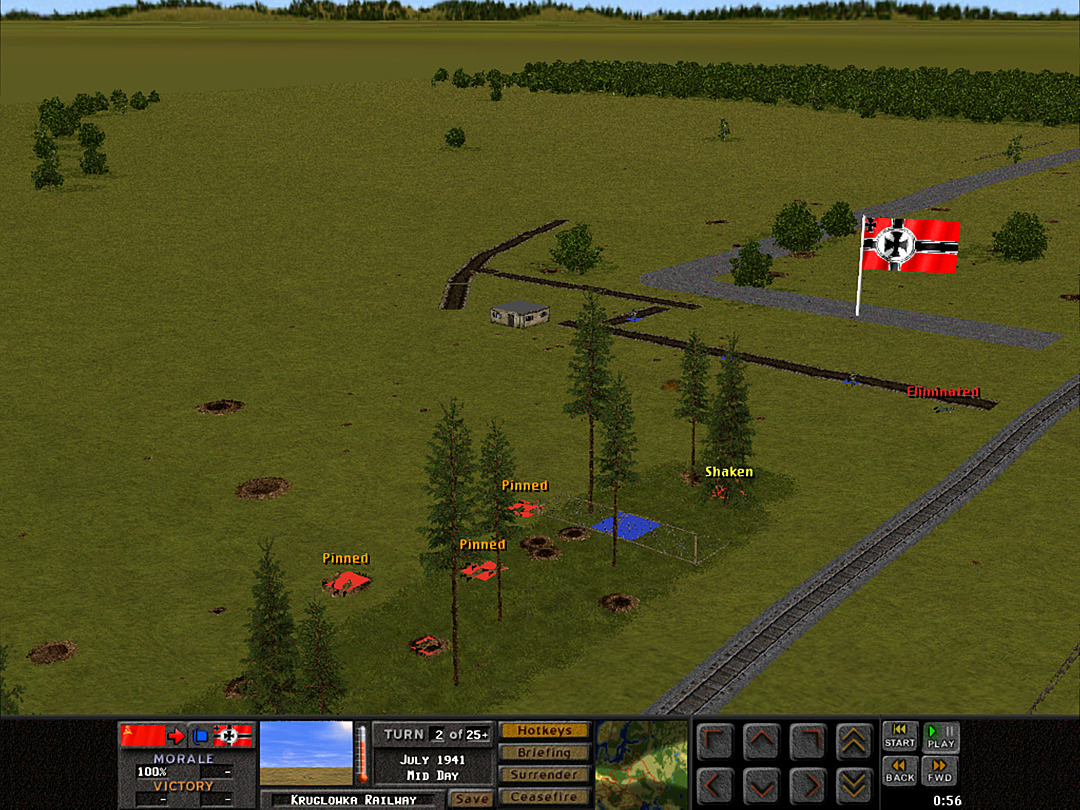 Only some of our men were able to advance, however. The rest were pinned down by enemy machine gun fire. 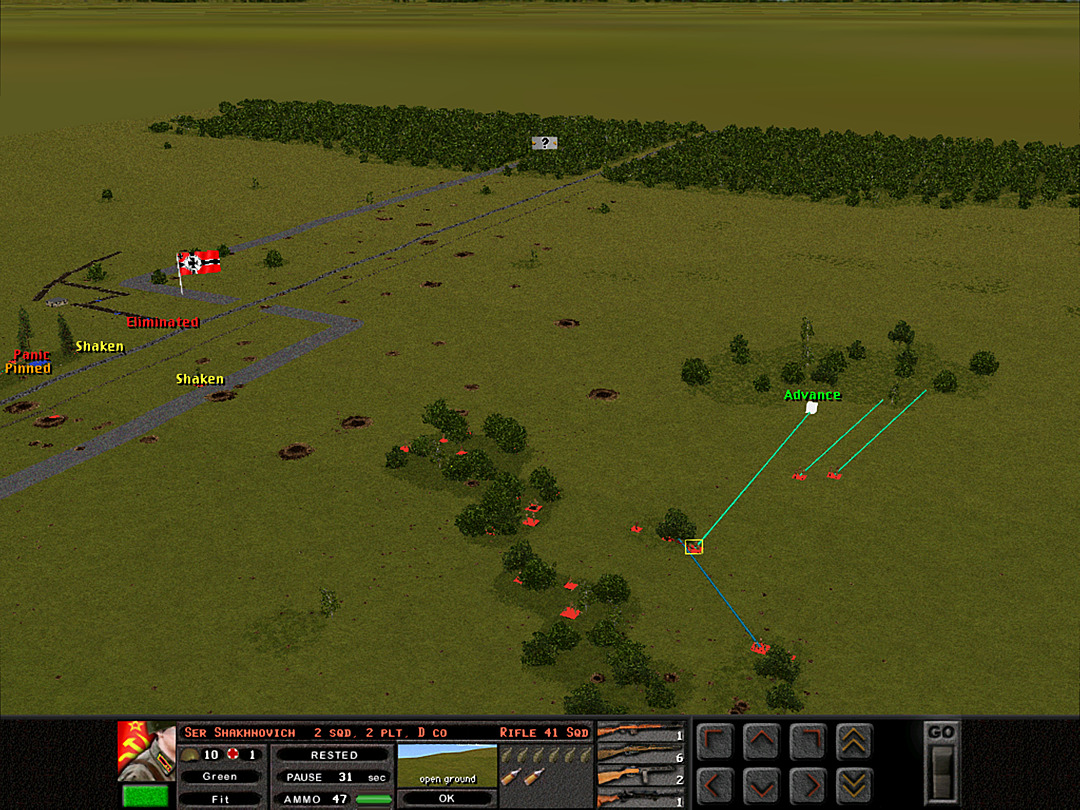 D Coy, 2 Plt, is able to freely cover the ground to the woods to their south. They are likely free of enemy forces.  F Coy tries to advance, but there are enough Germans still firing back to keep them from getting anywhere.  We're still hitting them from the west side, which ought to give us a better chance of suppressing them.  It doesn't work; F Coy's first platoon to advance is forced back.  It seems as though we can take even more territory on the west side, so a second platoon from D Coy starts to shift southward.  We are putting out a lot of lead right now. Perhaps if we just wait a little while, the Germans will break.  D Coy, 2 Plt has almost completed its movement into the last patch of woods. It area appears unoccupied.  Our inability to suppress the trench has left our troops in a bad spot. We concentrated a lot of forces here, and the enemy has called in artillery right on them!  The enemy barrage rolls up along the tree line, blasting our soldiers. One mortar is lost.  Rifle squads and submachinegunners alike have to hit the dirt.  At least three German units occupy the trench by the level crossing, but they cannot be that strong at this point. We ought to be able to deal with them, given our massive numerical advantage.  With the Soviet troops directly in front of them ducking for cover, the German guns in the trench manage to swing toward D Coy and catch a lagging mortar team in the open.  One squad from D Coy, 3 Plt did make it into a crater, however. 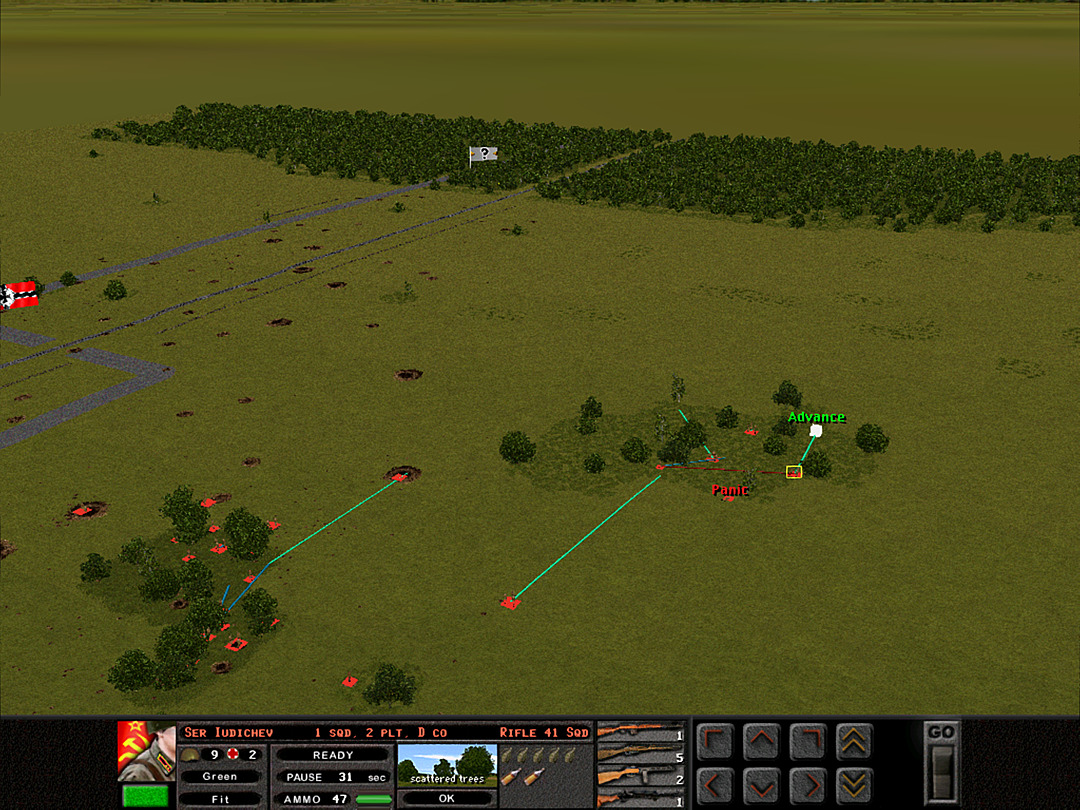 The platoon that already reached the woods will ensure that all is clear and set up to watch the far woods carefully for enemy movement. 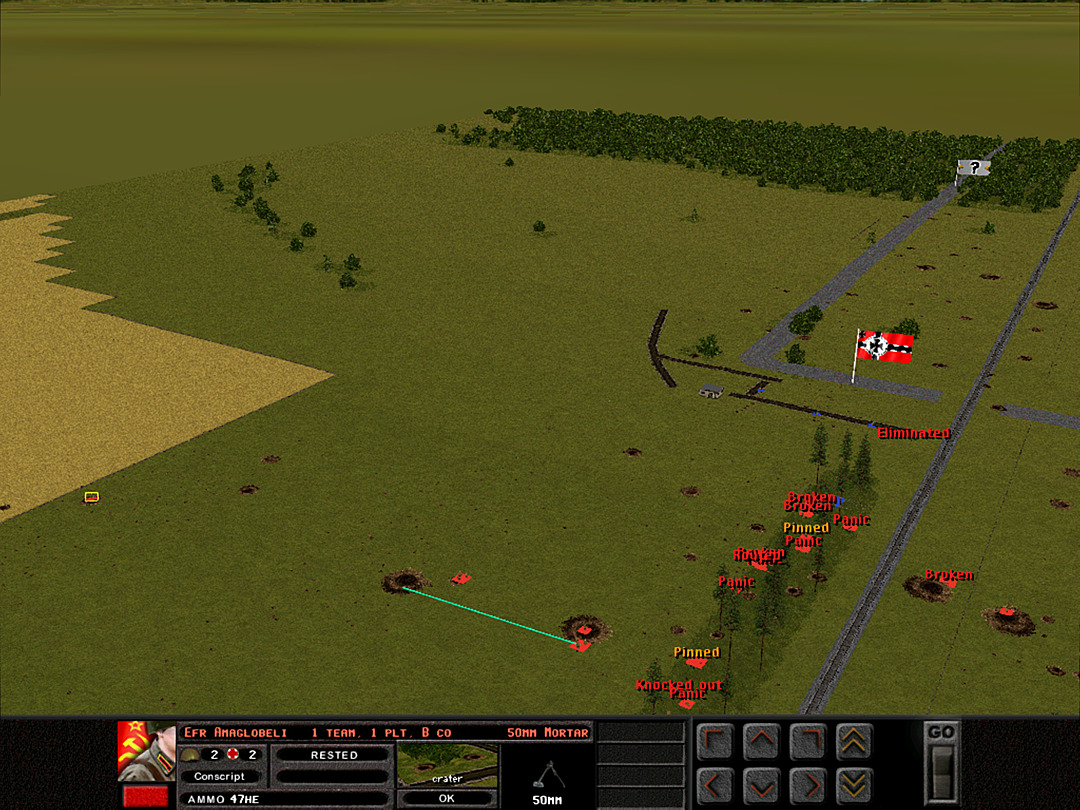 The artillery strike has left the bulk of F Coy in utter disarray. Only a few squads, who wisely set up in foxholes a little outside the tree line, are in condition to lay down fire. 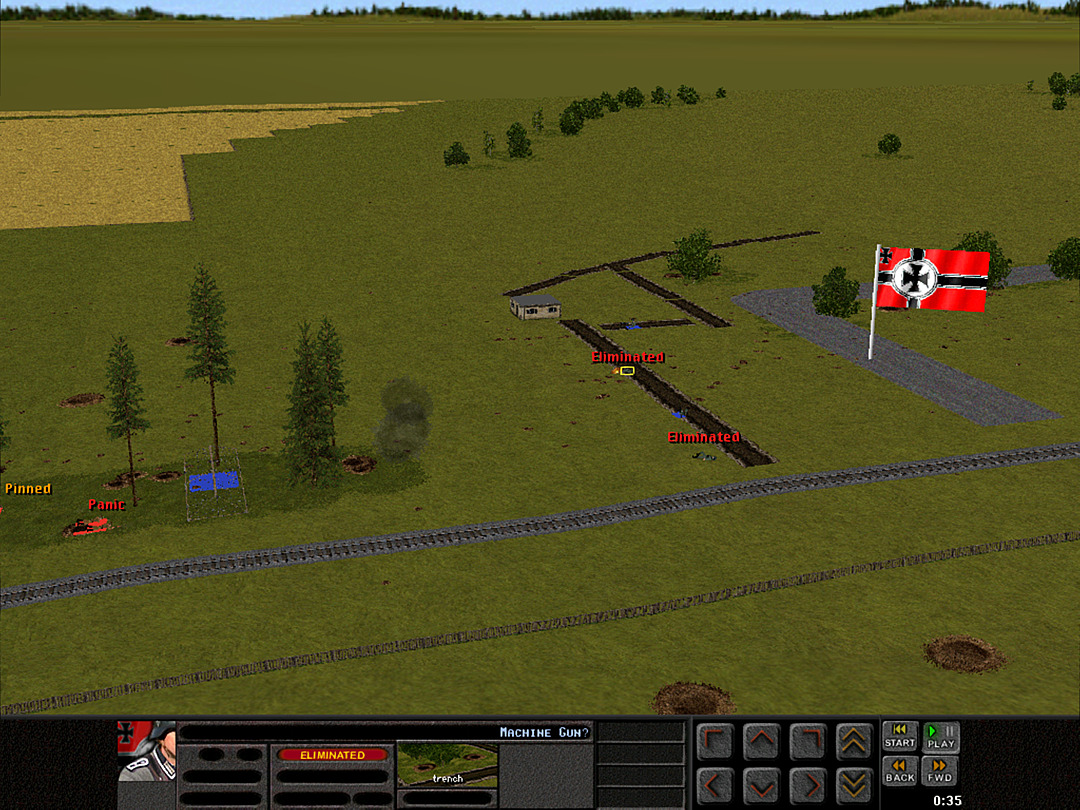 Our 76mm gun finally knocks out one of the enemy machine guns. 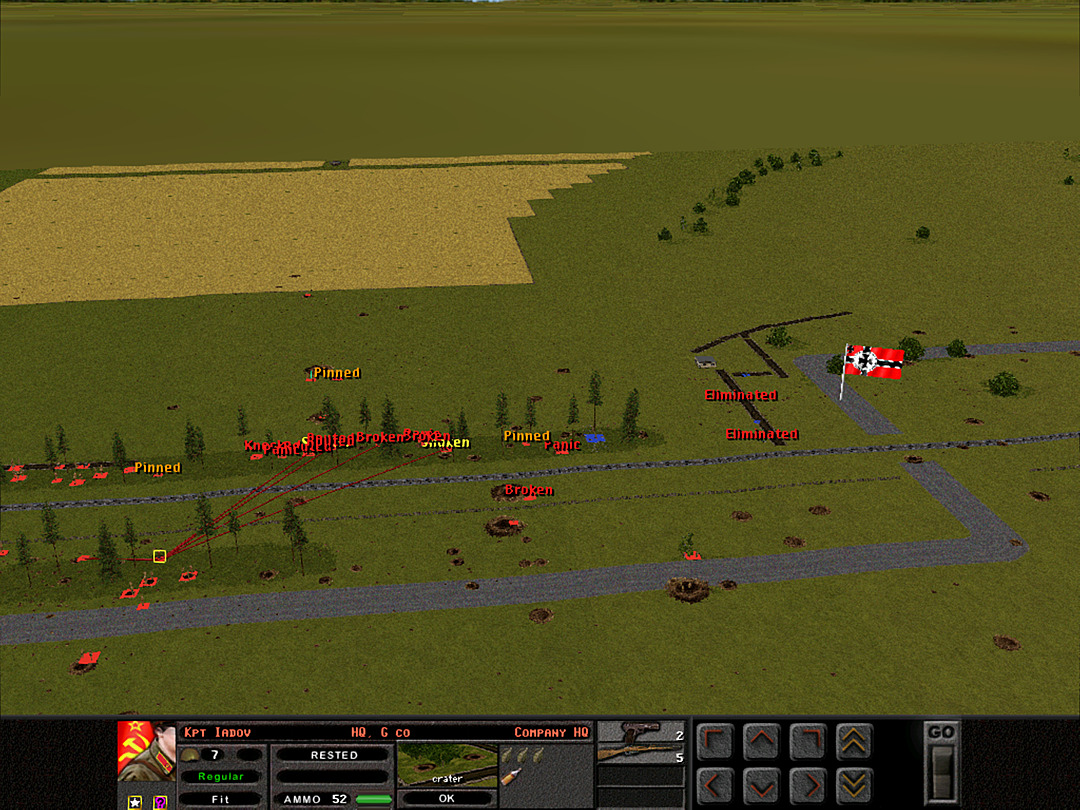 All we need to do is rally the troops for another attempt. 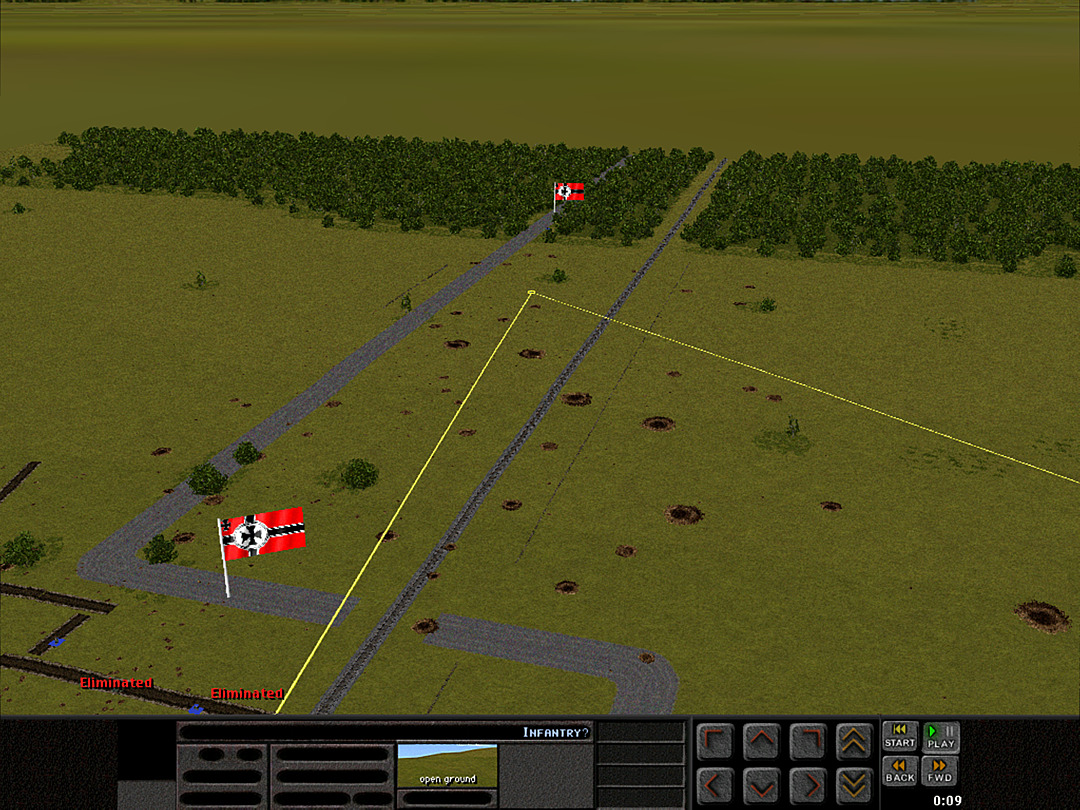 Some German units are spotted hiding out in the shell-blasted terrain.  Movement is detected way back in the woods as well. 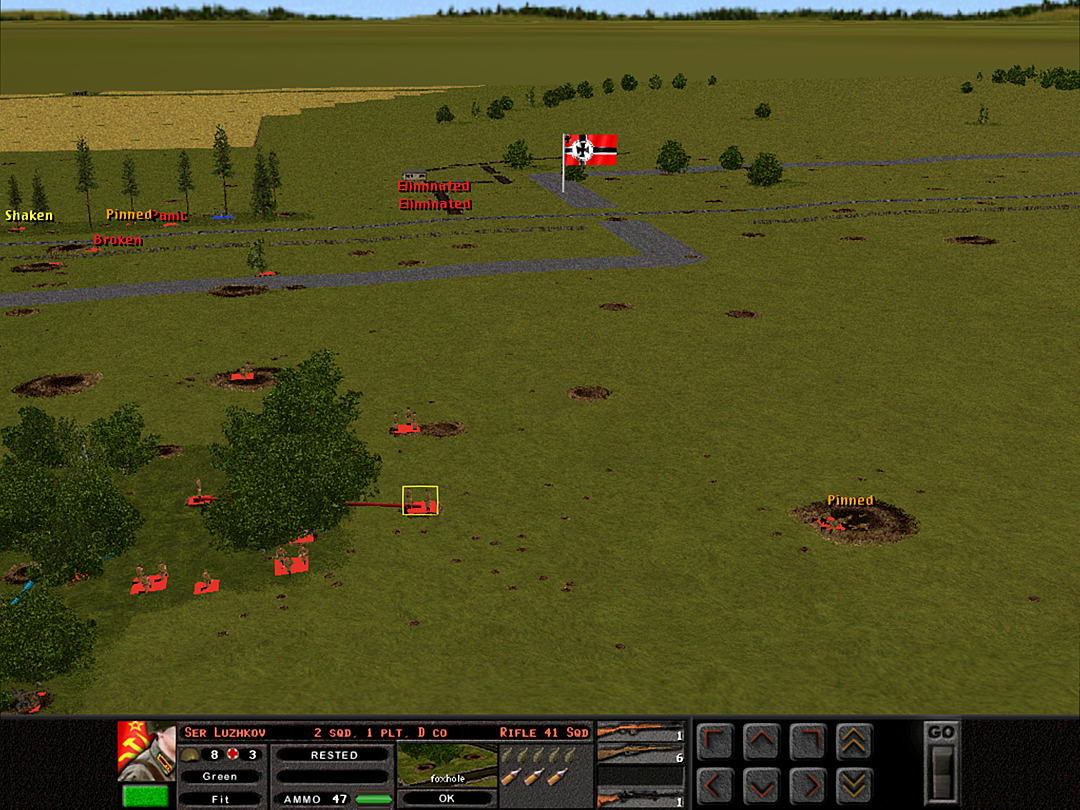 Some of D Coy's squads are having trouble making the crossing; it appears the enemy has noticed and are covering the open space now.  We have too few men who are capable of firing at the trenches now, and the Germans are able to concentrate their fire on our squads. 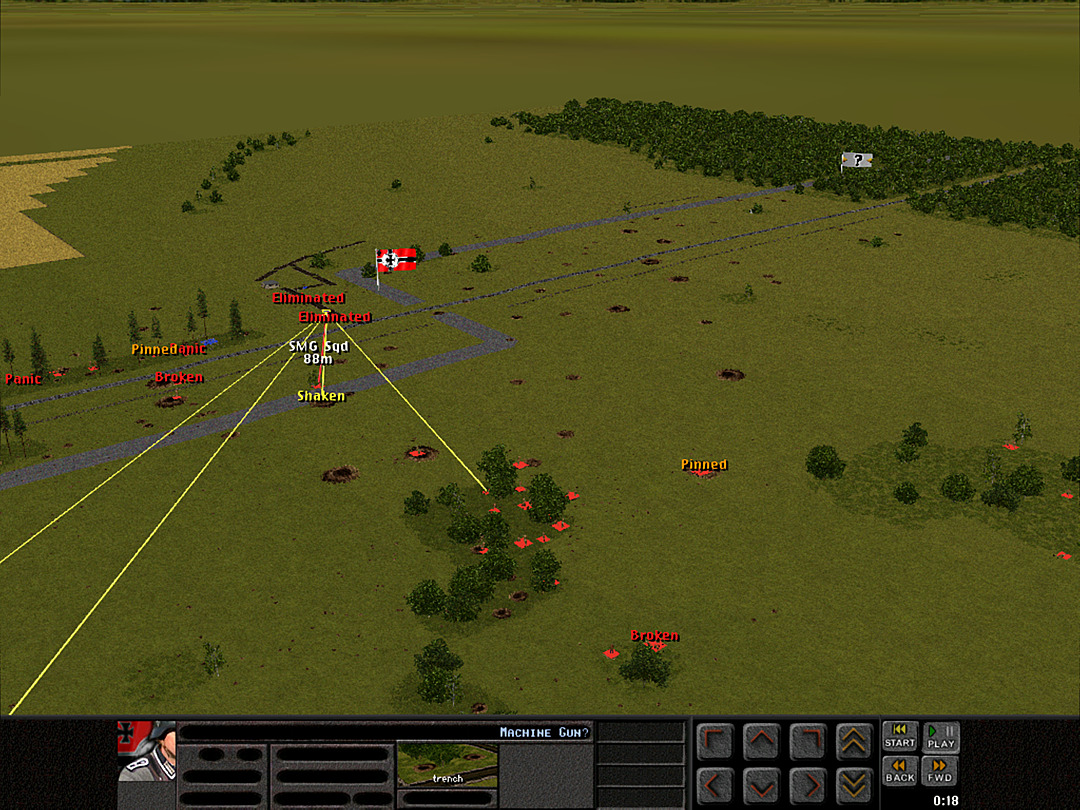 However, the western tip of the trench is exposed to a lot of our forces, and we can bring a lot to bear on it.  It seems like some of the enemy forces near the far woods are trying to get somewhere; it's hard to tell just what they're up to.  Recovery after the shelling has been slow, but the platoons are regrouping at long last. 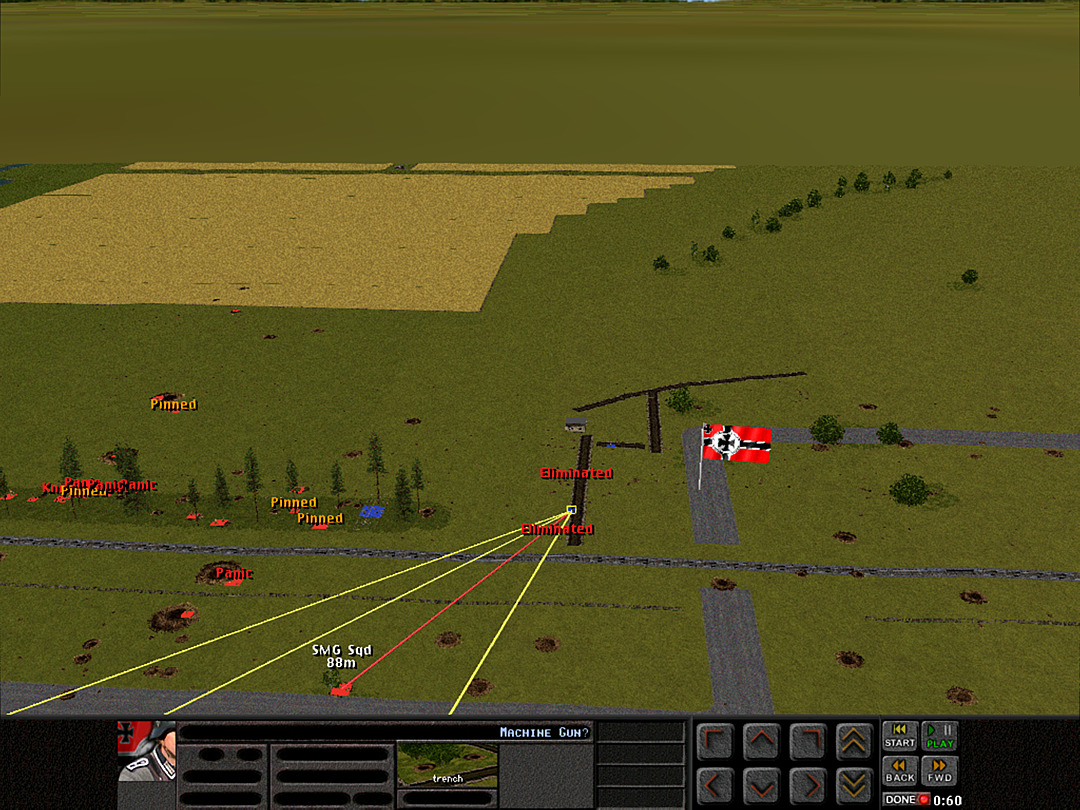 It's a bit of a stand-off. We are probably able to eventually wear them down by weight of our firepower, but at this rate, it'll take all day just to get a chance at the trench.  D Coy is trying to get more men forward on the west side, but it remains a little harder to do.  We're creeping ahead in the tree line. We might be able to launch an assault soon.  The trenches are giving the enemy awfully good protection, however.  One squad from D Coy decided to make a brave run toward another crater. They are sent diving to the ground in terror by a large explosion right next to them.  It appears the Germans have an infantry gun of their own. This could make taking the trench an even tougher proposition. Unit Highlight BT-5 Fast Tank 1933/1934 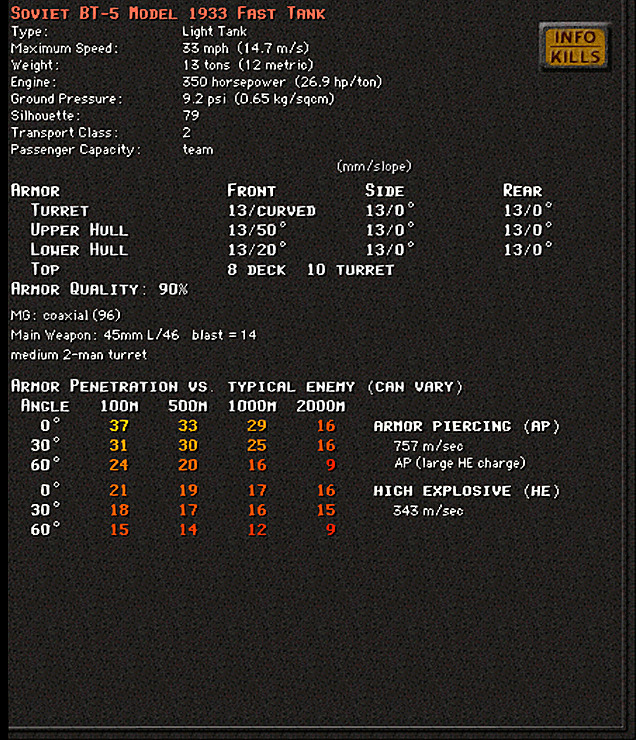 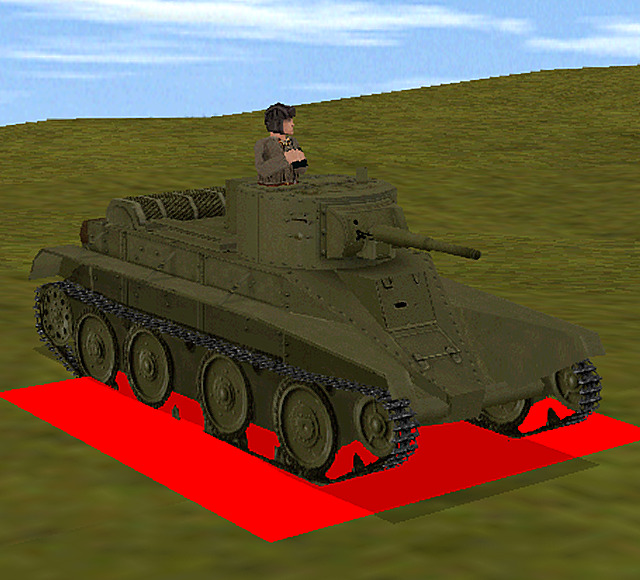 The only difference in the game's 1934 model is a higher HP engine and a little more ammunition for the machine gun. Crew Size: 3 Base Cost: 51/53 The next big production model of the fast tank. The BT-5 was the first successful iteration on the BT-2 fast tank, with other models never making it to wide production. It used the same hull and chassis as the BT-2, and retained the ability to swap from wheeled to tracked travel. The the only significant change was to the turret. The new turret, similar to the one used in the T-26, was able to mount a 45mm gun. That gave the fast tanks the ability to inflict serious damage on enemy armor of its era. However, this did add weight and correspondingly reduced the vehicle's top speed. They were in production until 1935 and a fair number of them saw action in the 1930s. Their thin armor made them very easy pickings in any straight-up tank battle by the end of the decade. Heavy losses during the war against Finland in 1940 meant that not many remained by the time of the German invasion.
|
|
#
?
Mar 2, 2024 01:59
|
|
|
Operation: Kruglowka Railway, Battle 8 Battle Time: 0:13 We're down to our last assault. If we can't take the level crossing today, the Germans will have delayed us long enough to jeopardize the whole operation. 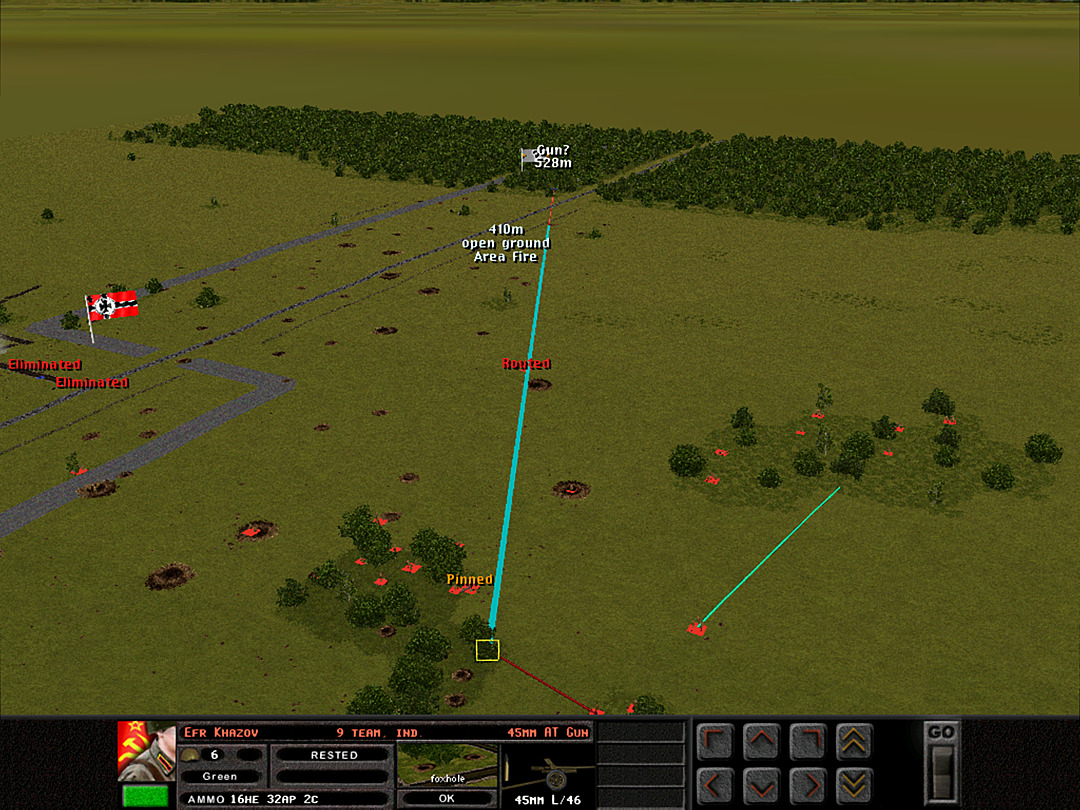 Unfortunately, our own guns can't quite find the enemy's gun. The view is obscured by low bushes and the fence along the railway. 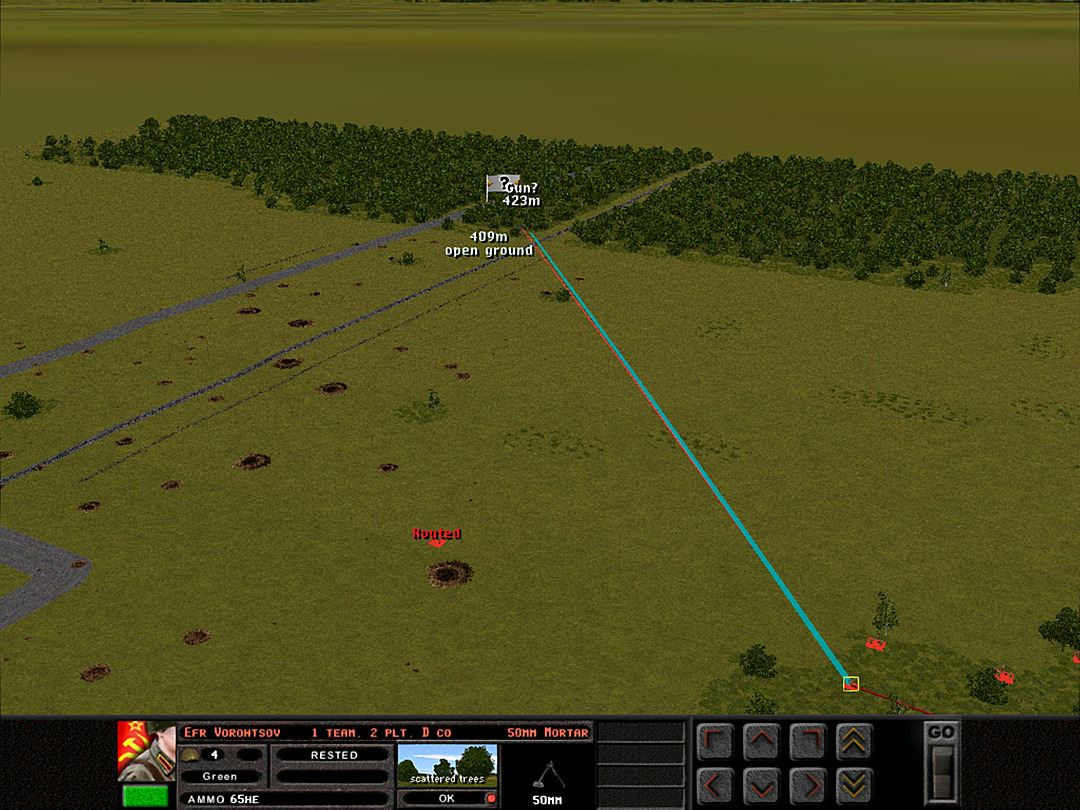 A mortar team tries to see if it can fire in the general vicinity. 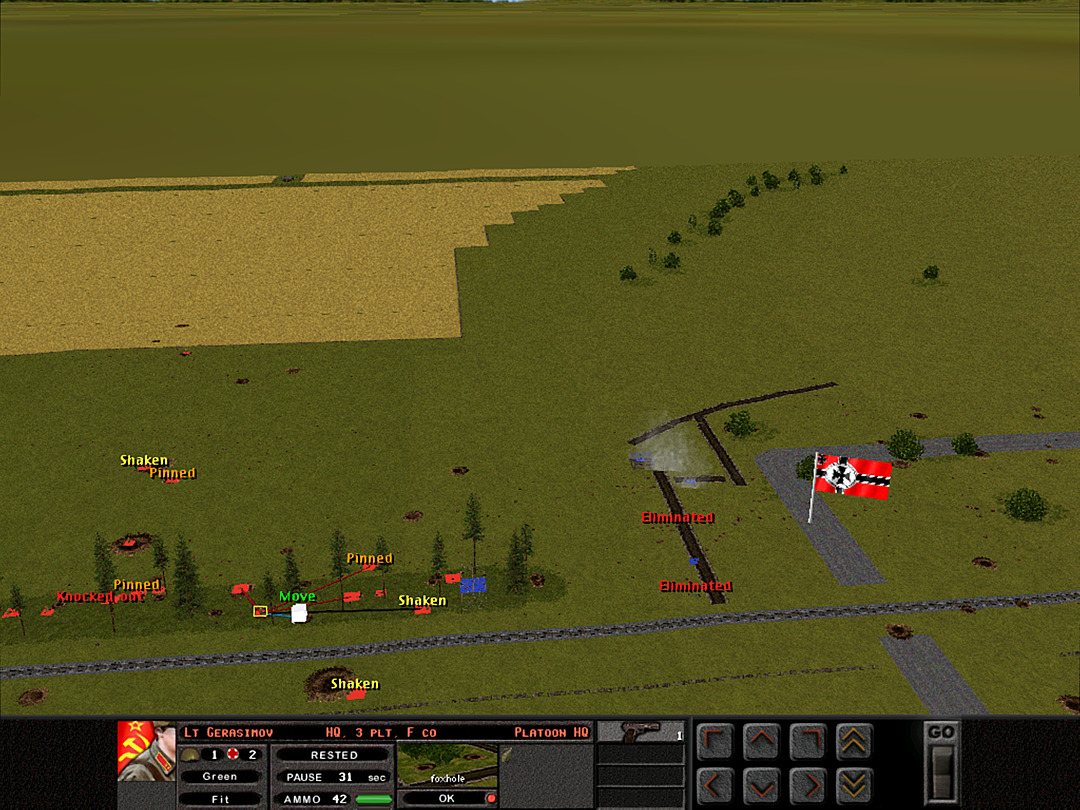 The German guns fire smoke to cover their own trenches. It seems they're hoping for a respite from our attacks. 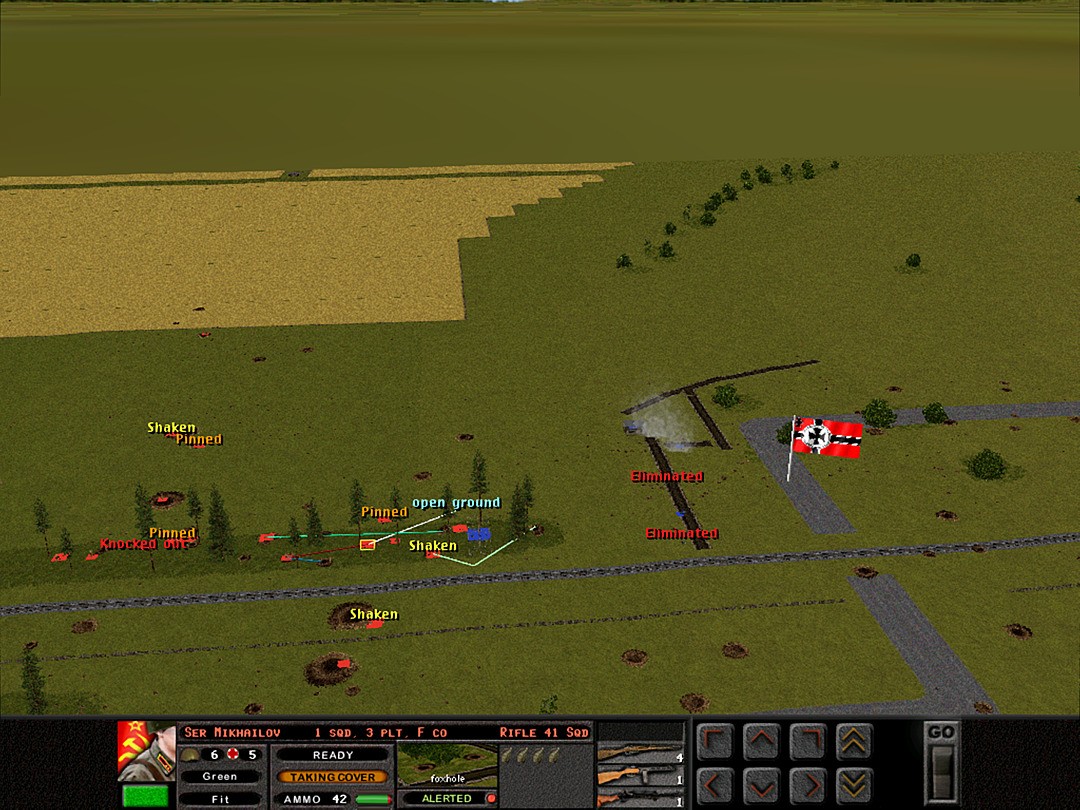 We take advantage of the lull to start our advance again. 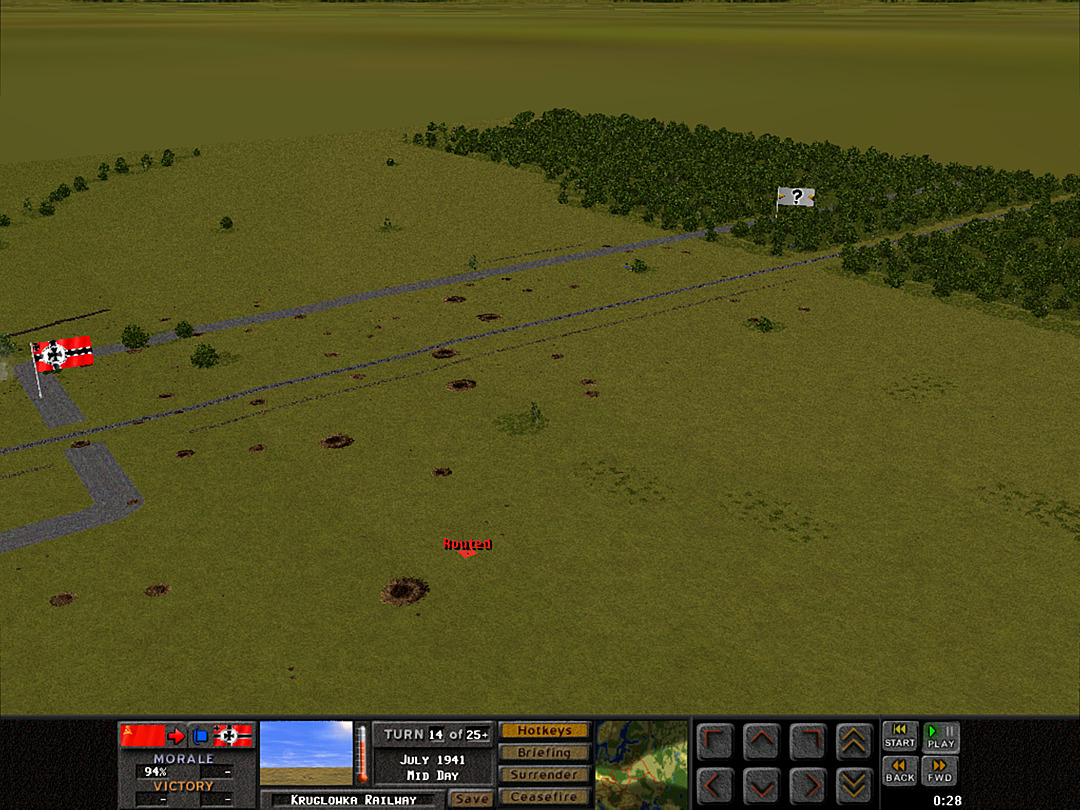 Out in the mostly-open terrain, the lone squad from D Coy is sent running back towards another crater. 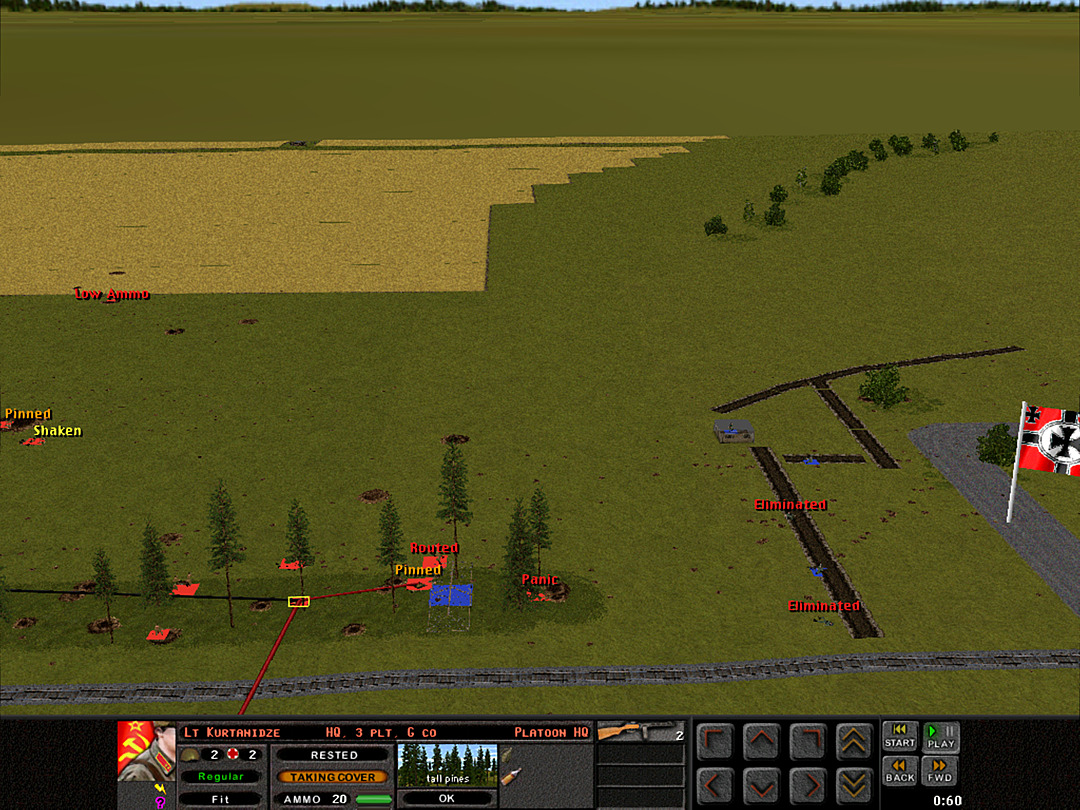 The wind blows the smoke off before we can get our forces into a better position.  It's time to throw more of our forces into the battle. The rest of F Coy is called forward.  D Coy is still trying to get more squads ahead on the flank.  The mortar team wasn't able to easily spot the enemy gun, so we adjust its target.  In a desperate attempt to force the seizure of the level crossing, the men are ordered to advance without regard for their own lives. I pretty much never use the 'Human Wave' action as I don't think it works well (not to mention its moral implications). This was kind of an experiment, and to show off for the LP why I might avoid it.  The SMG squads are held up crossing the fence on the rail line. One squad is cut down entirely before reaching the trench; the second takes casualties and halts its advance. 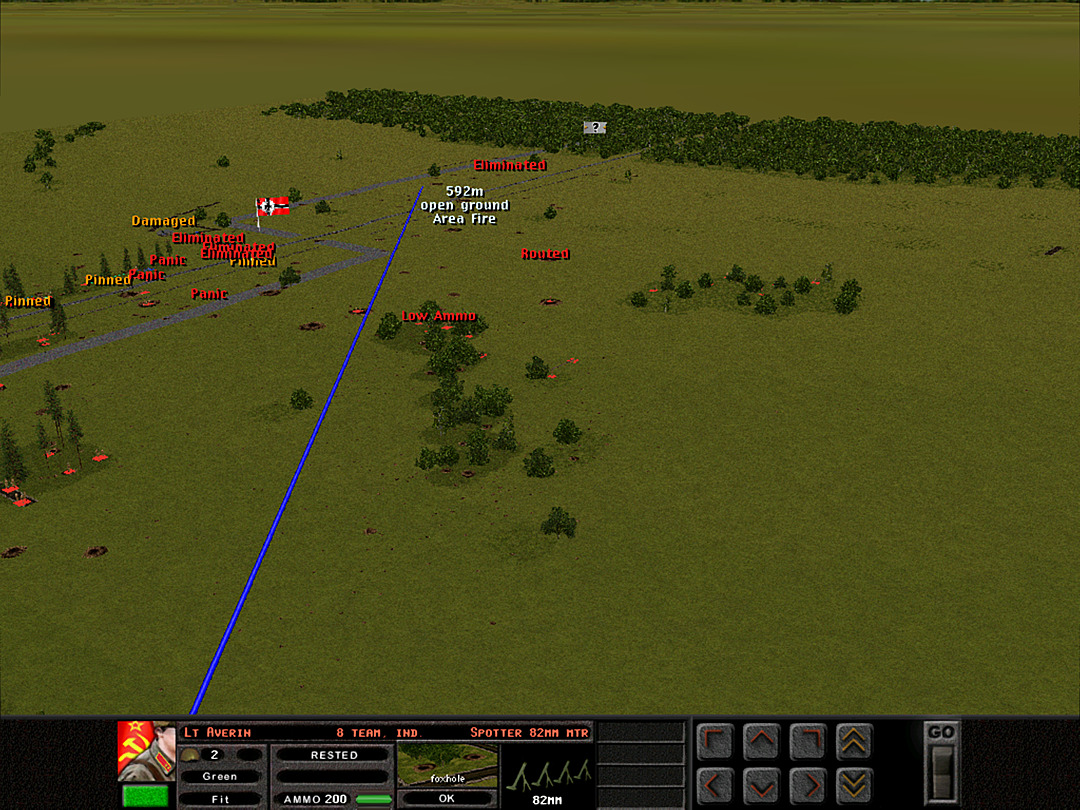 Our heavier mortars can't quite reach the woods, as the spotter can't see a target. Instead, we decide to send a few more shots near the road, to prevent any Germans from trying to make a run to reinforce the trench. 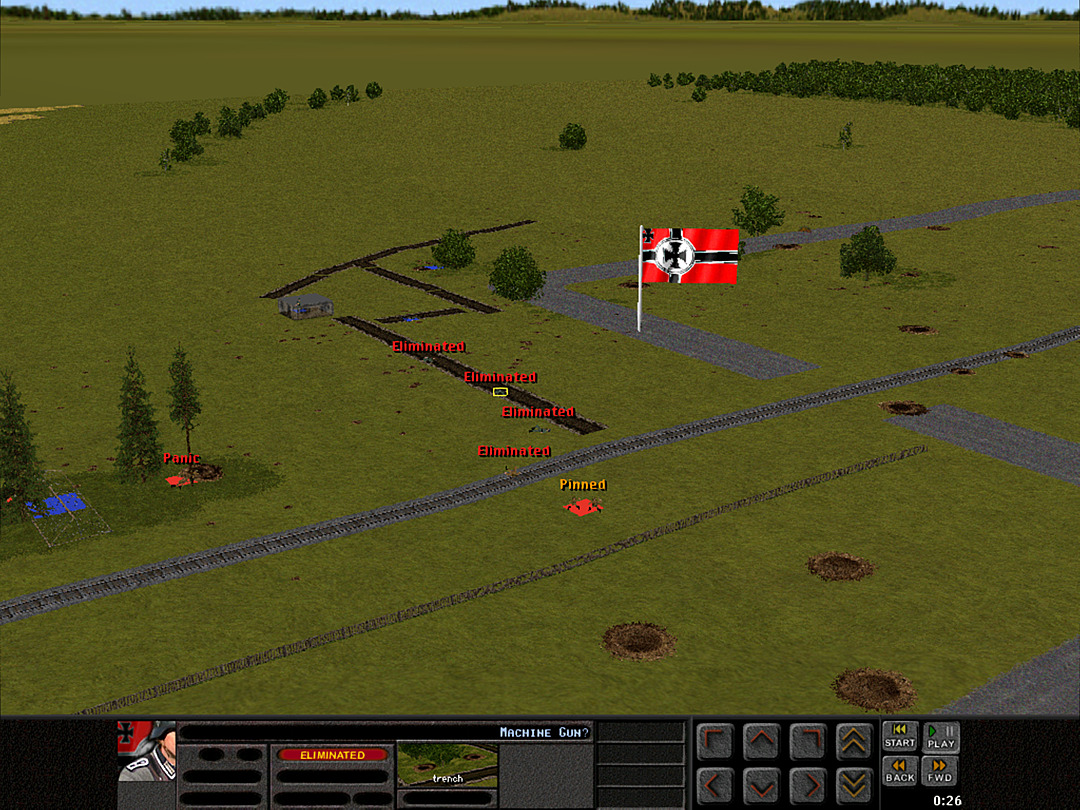 Concentrated fire knocks out the last machine gun in the frontmost trench. It might give the second SMG squad just enough time to run toward the edge. 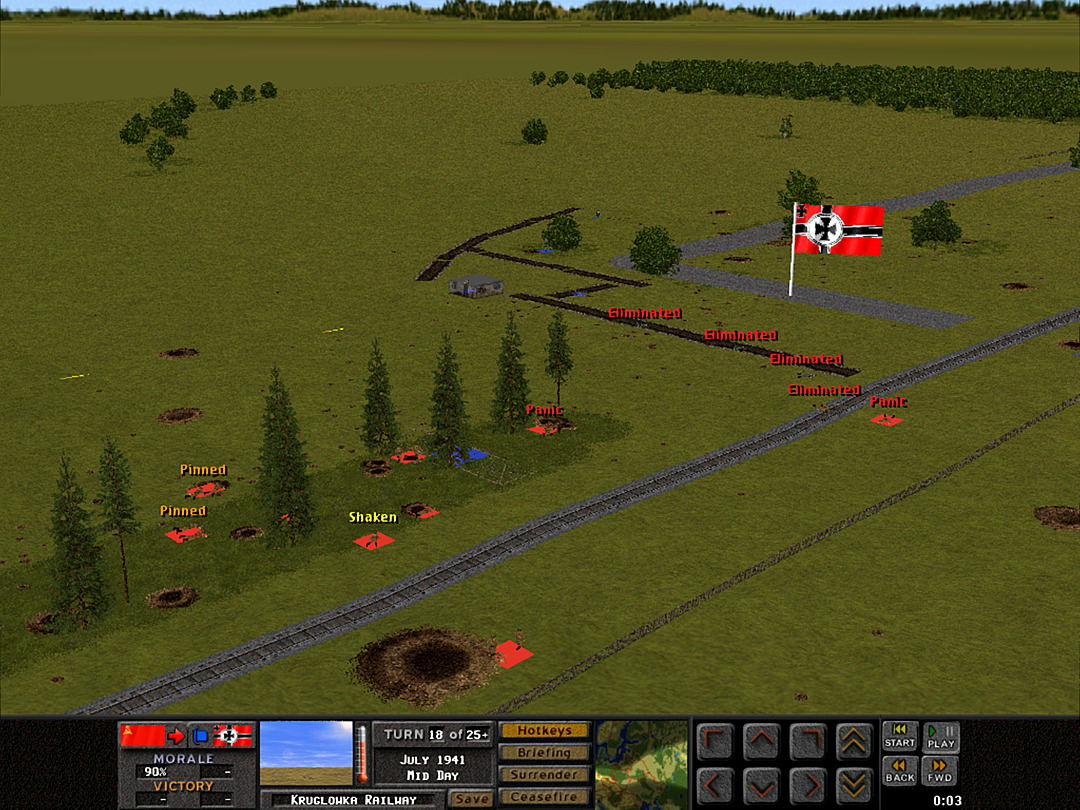 They are unable to advance, though, as more enemy squads reveal themselves. Our squad is sent running back in terror. 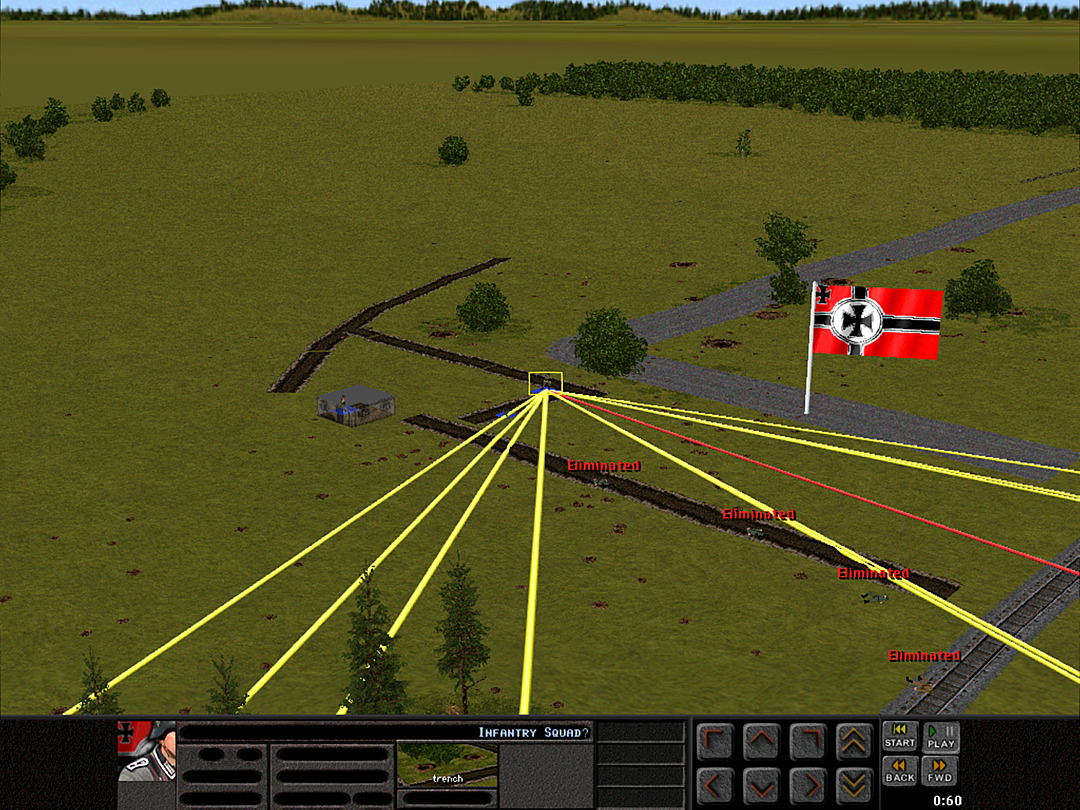 The weight of our firepower is quickly able to respond and suppress the enemy squads, though. 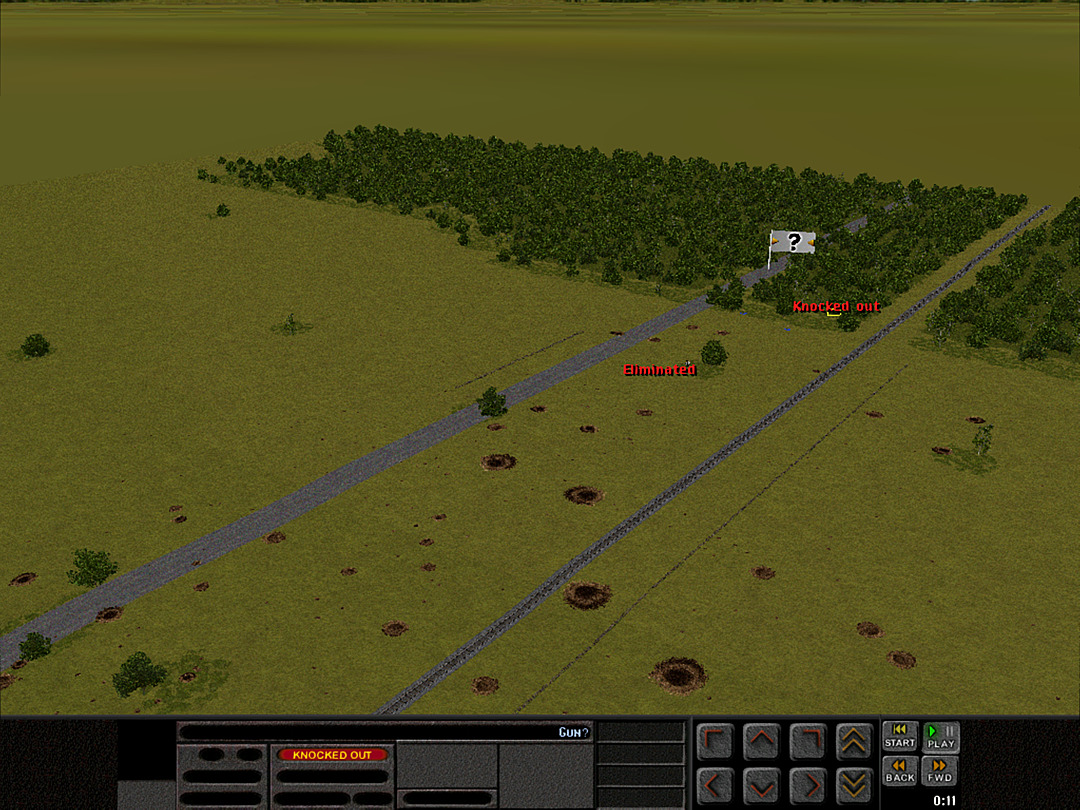 A somewhat lucky mortar shot was able to knock out the German gun in the woods. It's possible that this was an 82mm shot that went long, but most likely it was from the 50mm in D Coy. 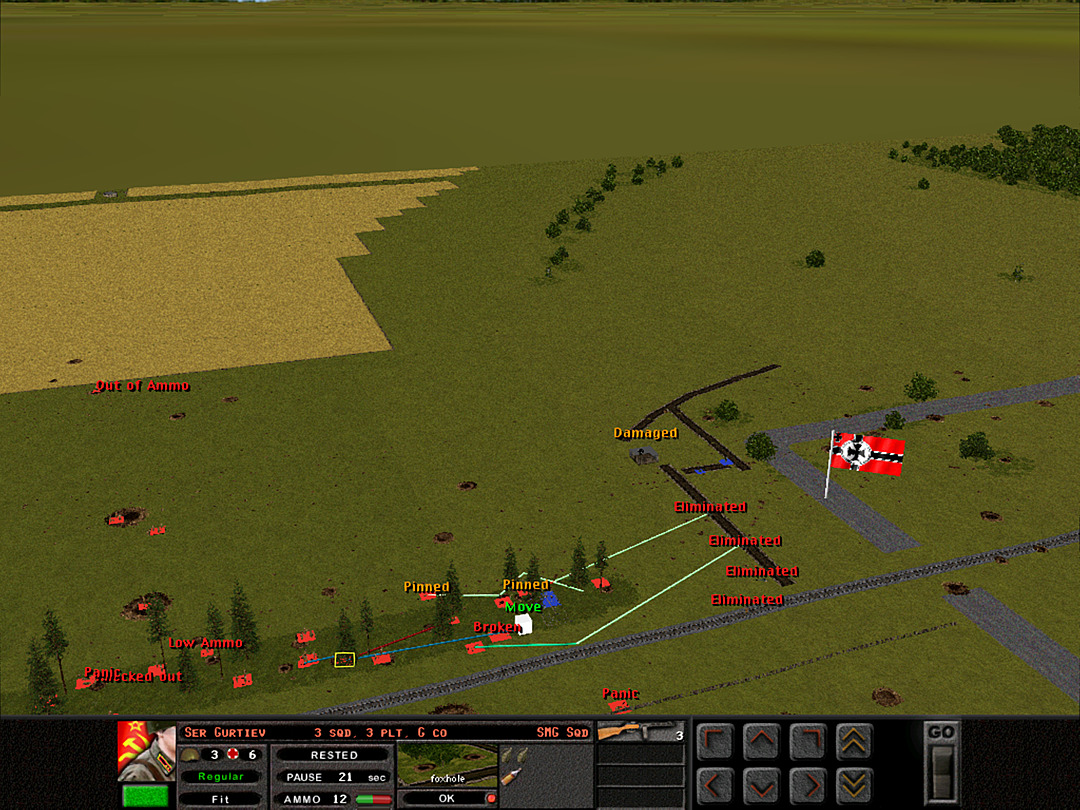 We try for a more orderly assault on the trench. 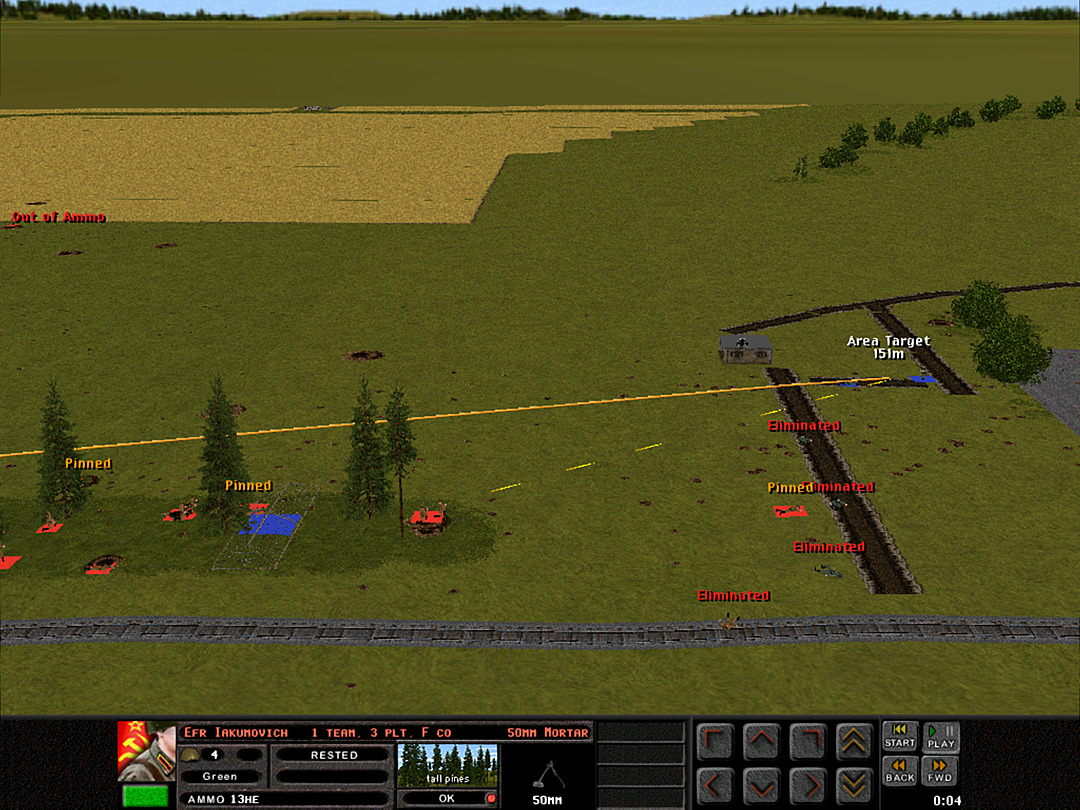 One squad gets within meters of the line. We keep up the suppressing fire from multiple angles. 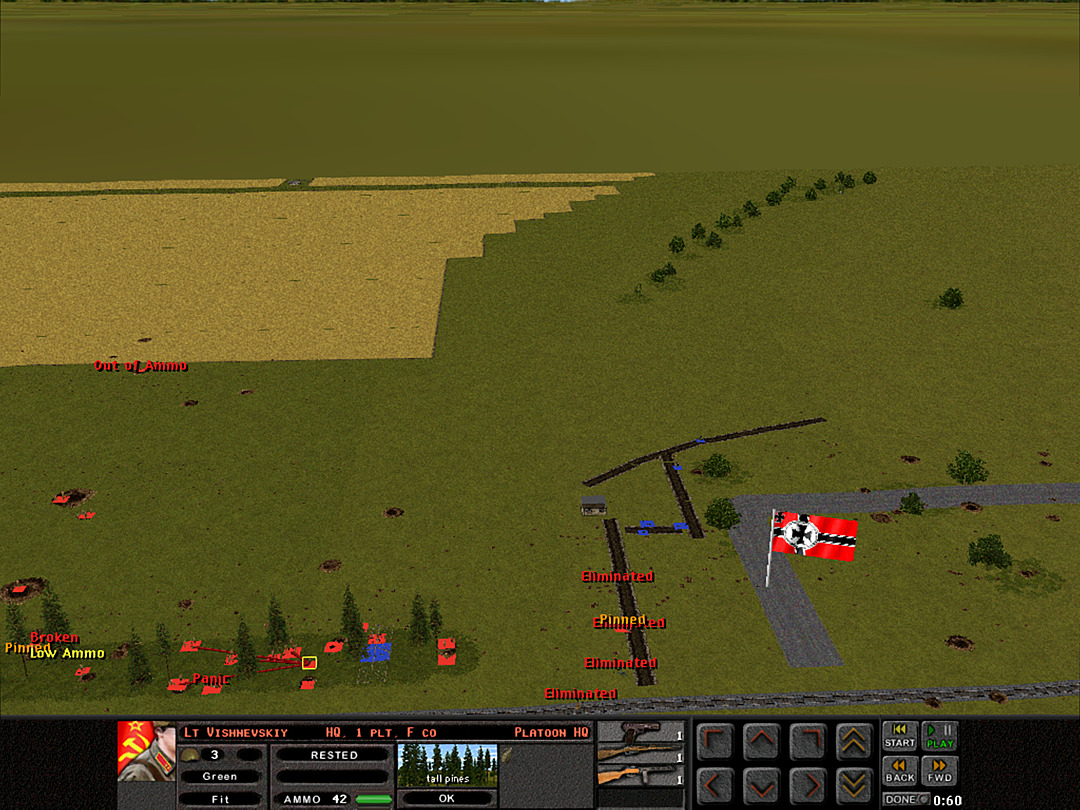 There are more enemy units hiding in this area than we thought there would be. 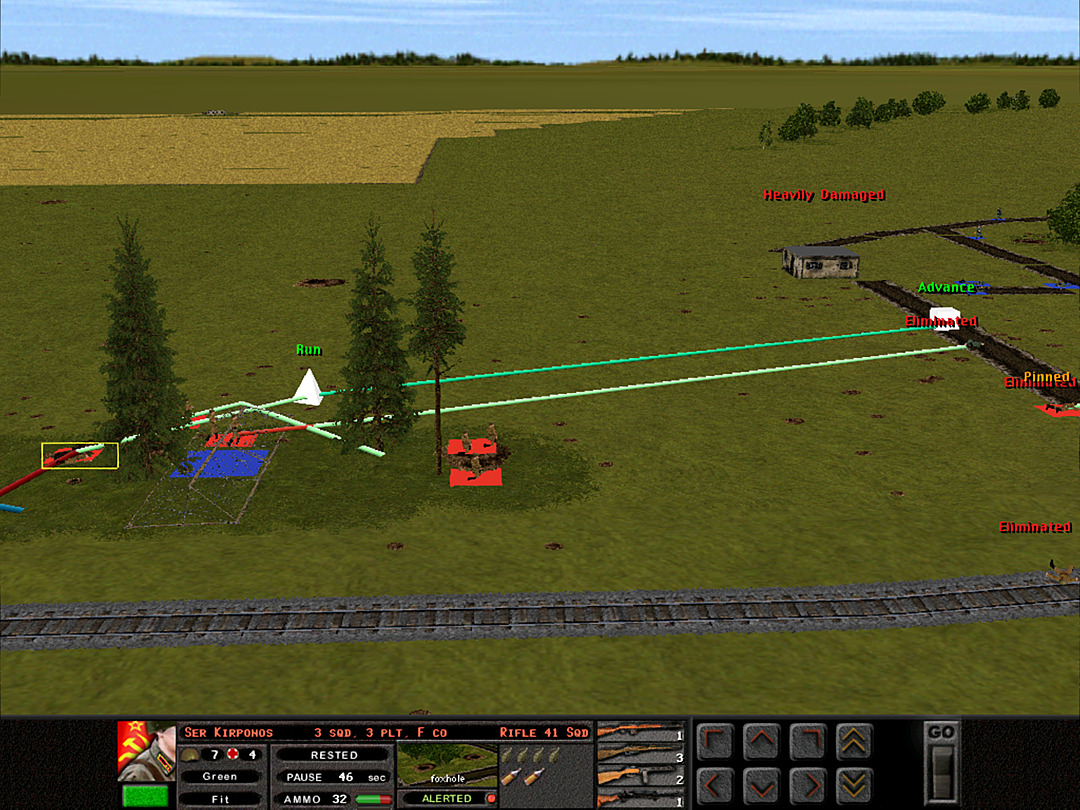 F Coy's squads ready a charge. Not shown here, but another squad was sent at the same time to attack using 'Human Wave' as another experiment. 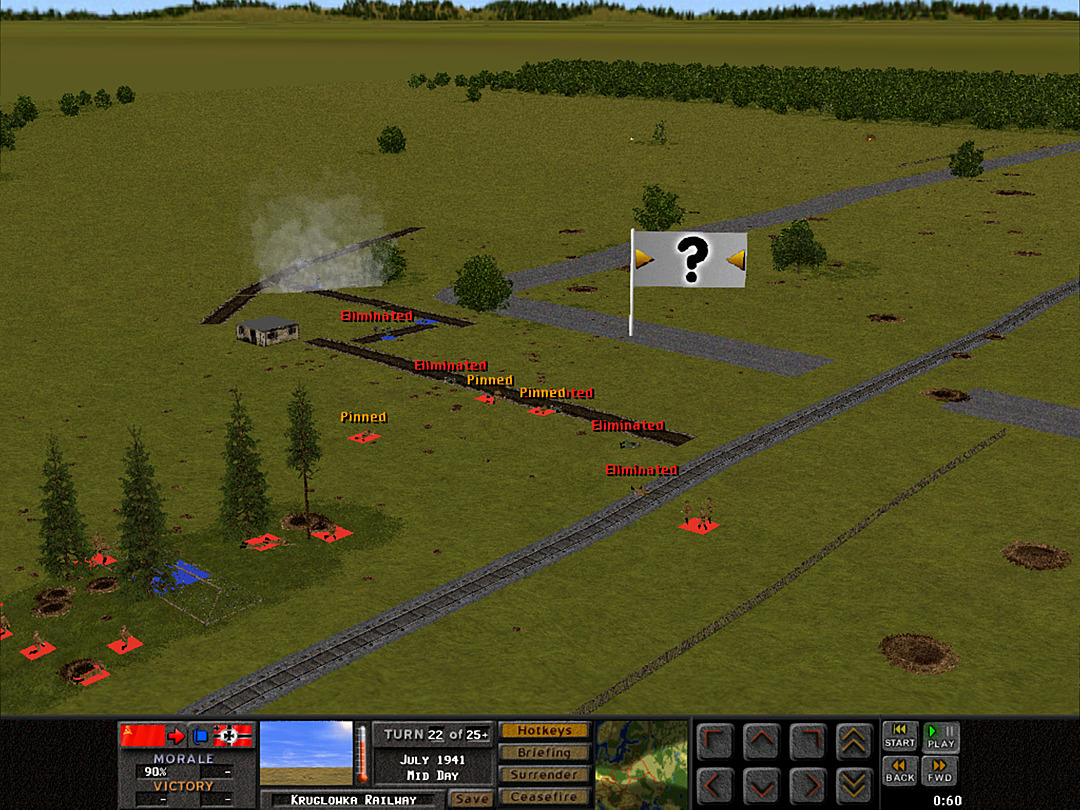 As we run toward the trench, the Germans show that they're apparently afraid of us attacking, as they send more smoke to cover their own forces. This also means some bad news for us � they must have another infantry gun to the rear. 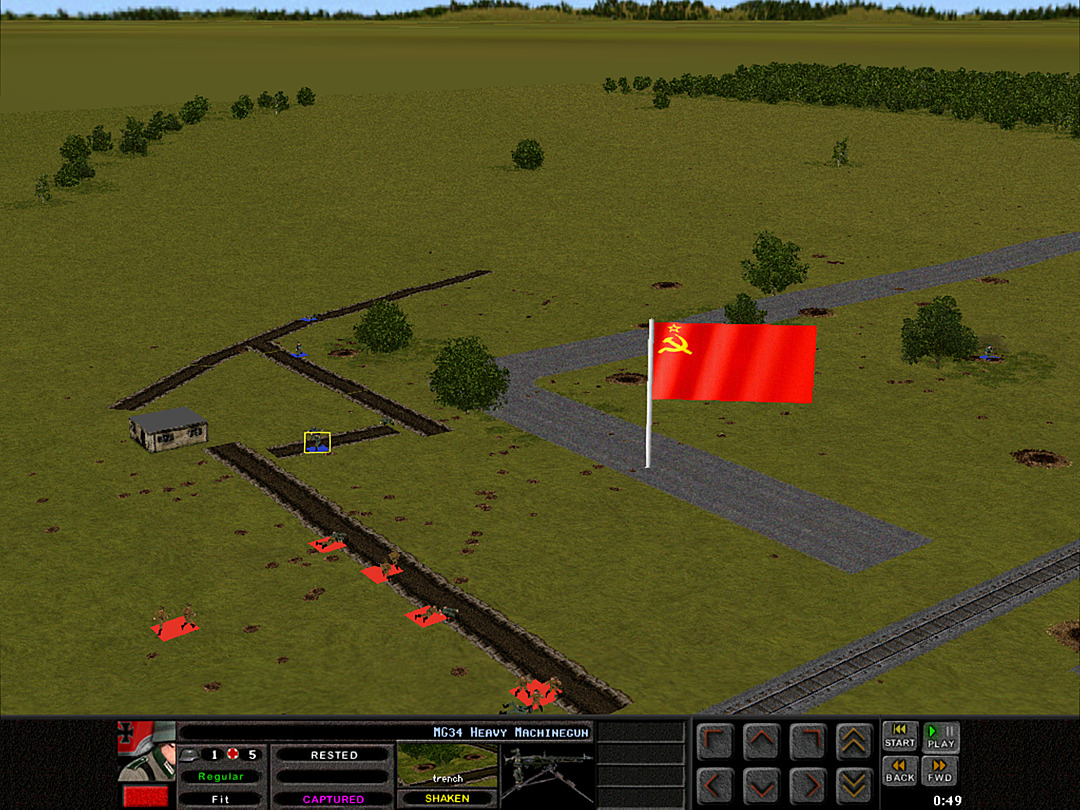 The line of screaming Soviet soldiers coming towards them terrifies the hapless Germans, smoke or no smoke. Another machine gun surrenders. Note that we now have enough troops close to the objective that it has switched to Soviet control. 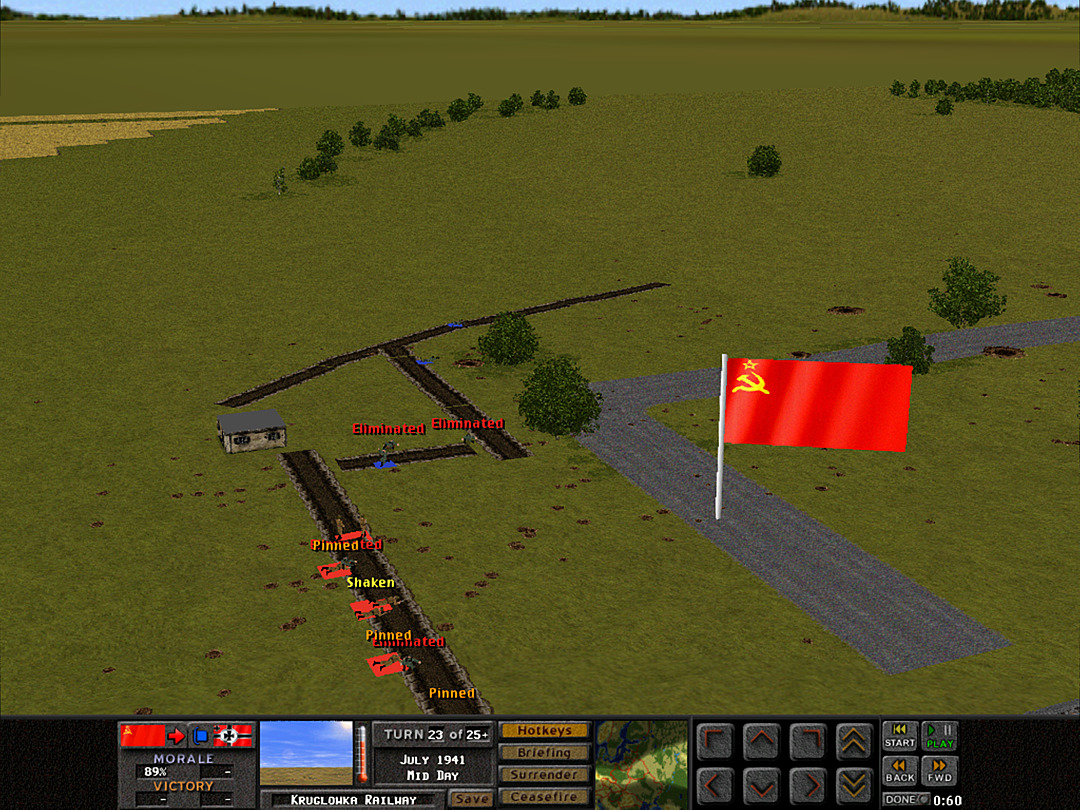 We have gained the trench! Our soldiers only barely maintained their composure, but surely this comes as a hit to the enemy's morale. We expect that whoever remains will give up soon. This more or less bears out my impresson of the 'Human Wave' action: The times when it works, it's not much better than a normal Advance action. And when it 'fails', it more likely leads to the loss of the whole squad, instead of a panic/rout result you'd get with an Advance that takes a casualty or two. The situations where it really produces a better outcome than a normal Advance seem awfully rare. I find you can even get similar results just using the 'Run' action. (To compare: Run = Move as fast as possible, do not engage the enemy. Advance = Move faster than normal, with an eye on expecting and avoiding incoming fire. Assault = like Advance, with better combat ability but increased fatigue. Human Wave = Move fast (starting normal, then run) and boosts morale, so losses tend to be shaken off. Not all options are always available; it depends on the unit and its command status.) 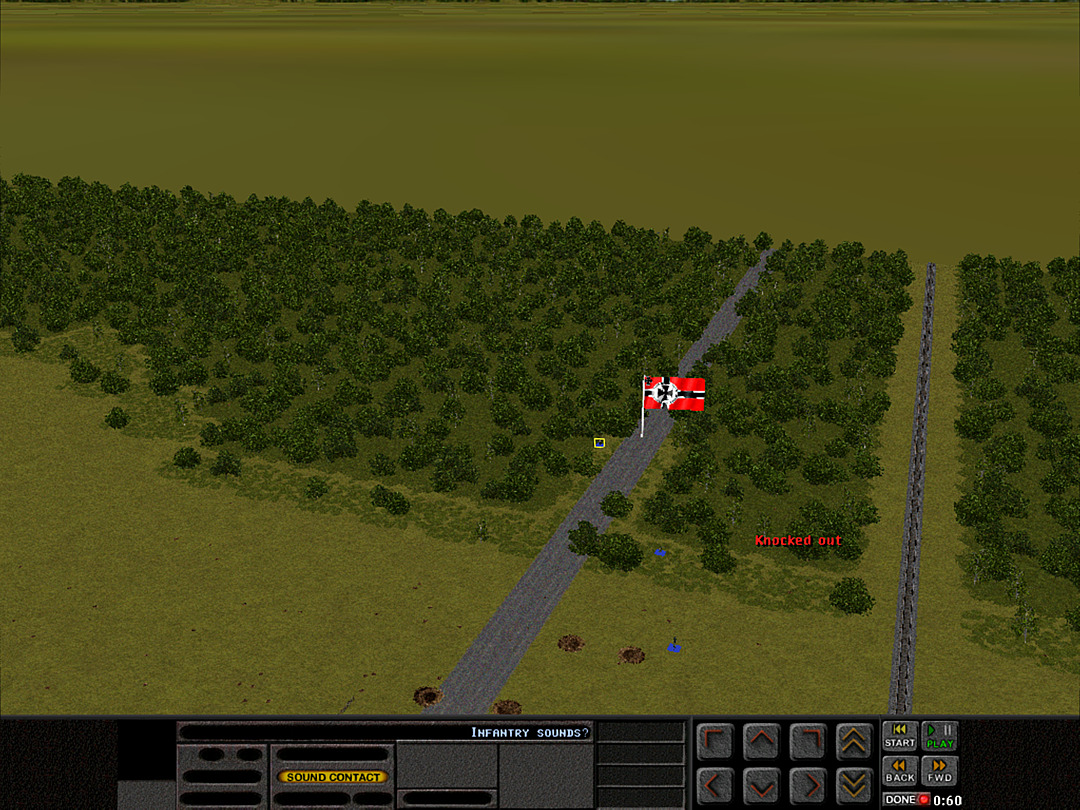 More German units are spotted back in the woods, although it's not clear how many of them there are. 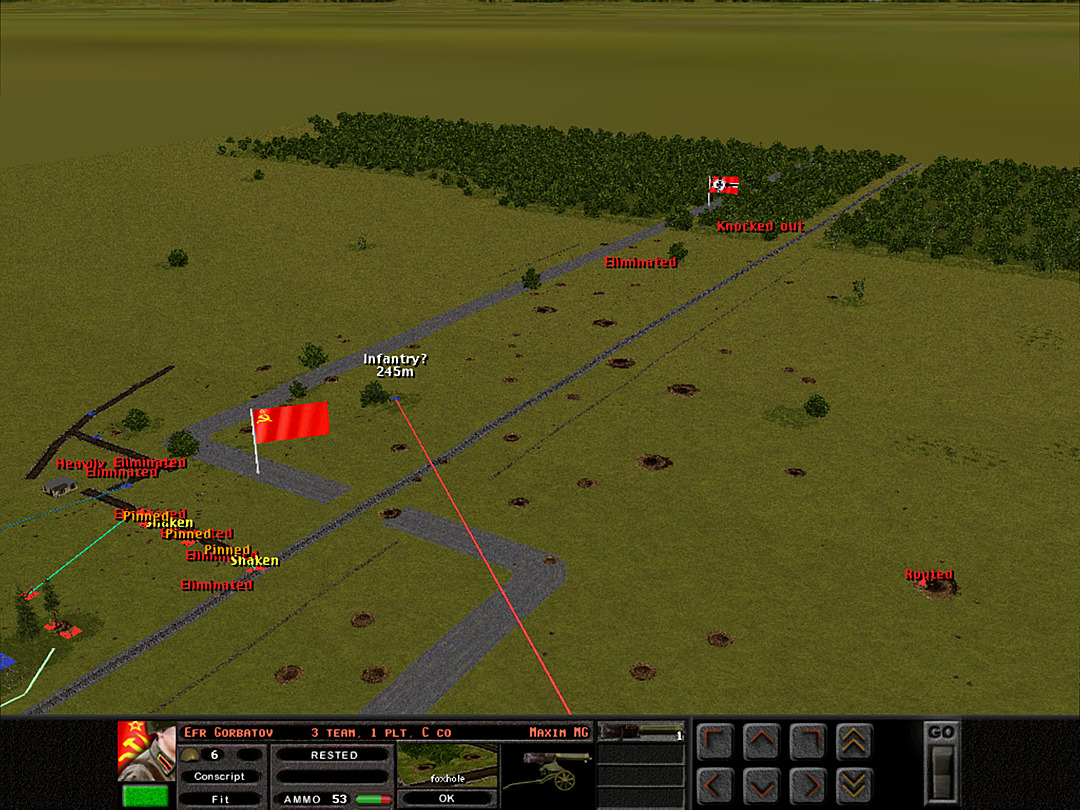 Once we reached the trench, another infantry squad revealed itself in a foxhole about 100m behind the level crossing. We aim more of our guns at the squad. 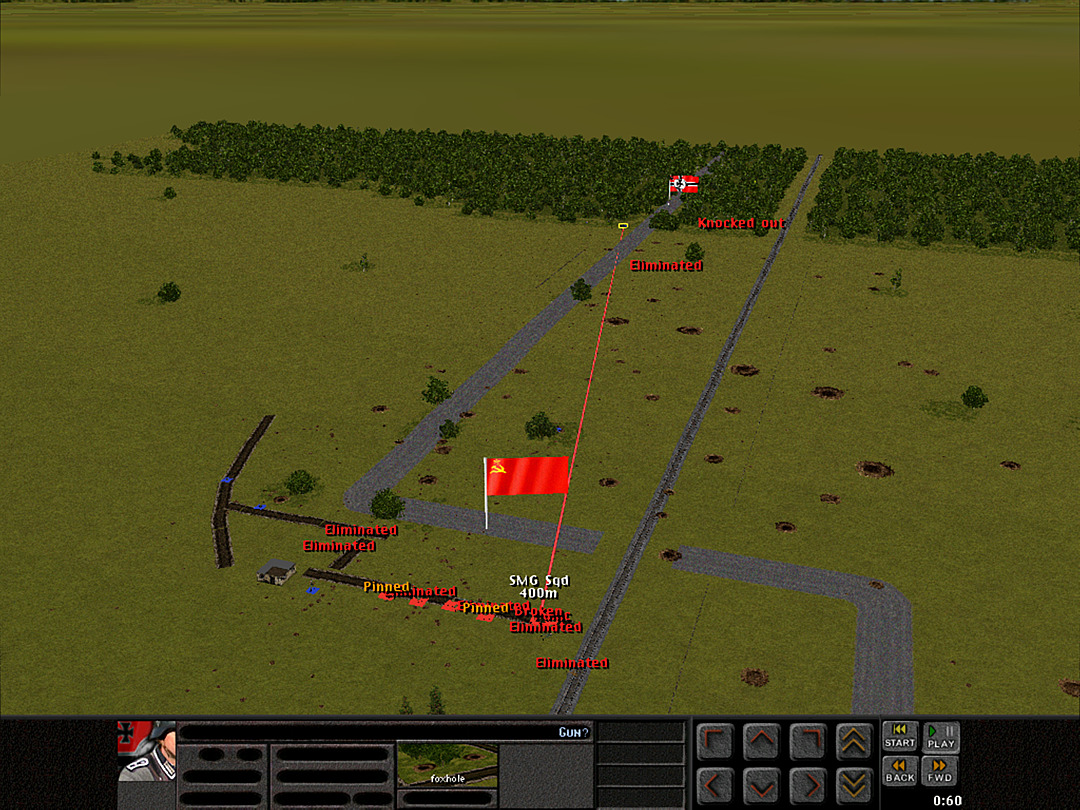 The location of the enemy's second gun is discovered when they start firing on the west end of the trench. 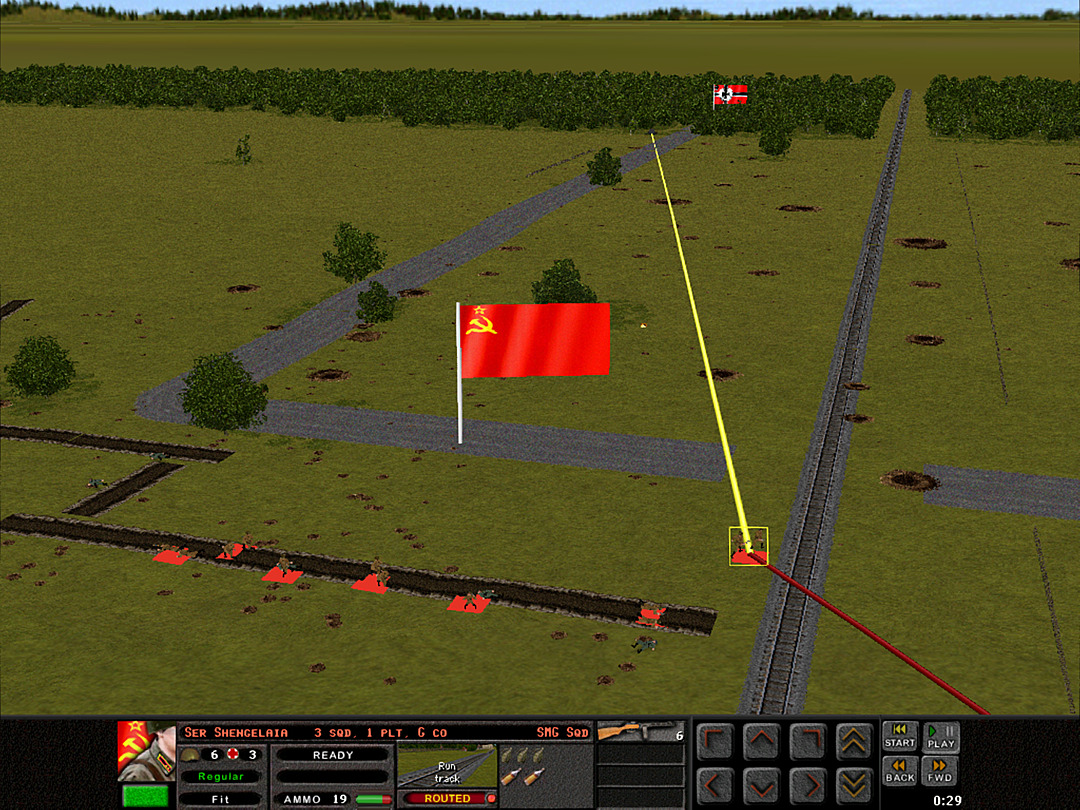 The explosions send our squad into a panic, and they end up running toward the German lines. 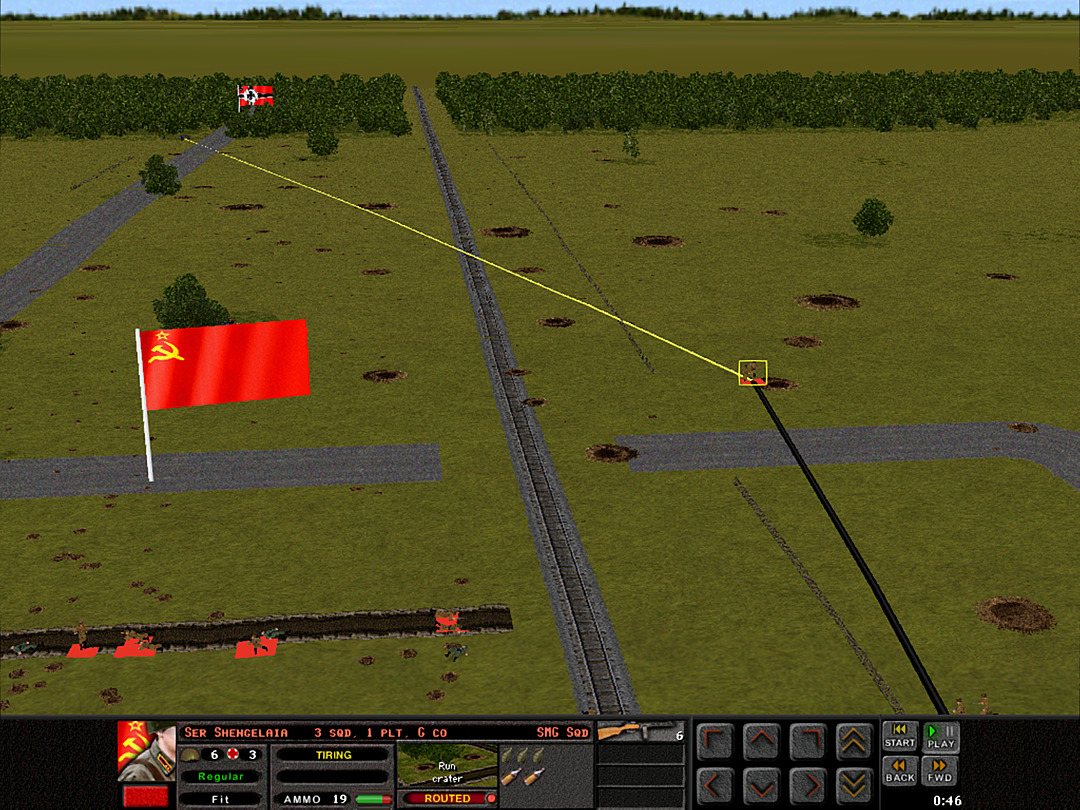 Miraculously, this action seems to have shocked the enemy, and aside from the big gun vainly trying to catch them, no other fire is directed at the routed squad. 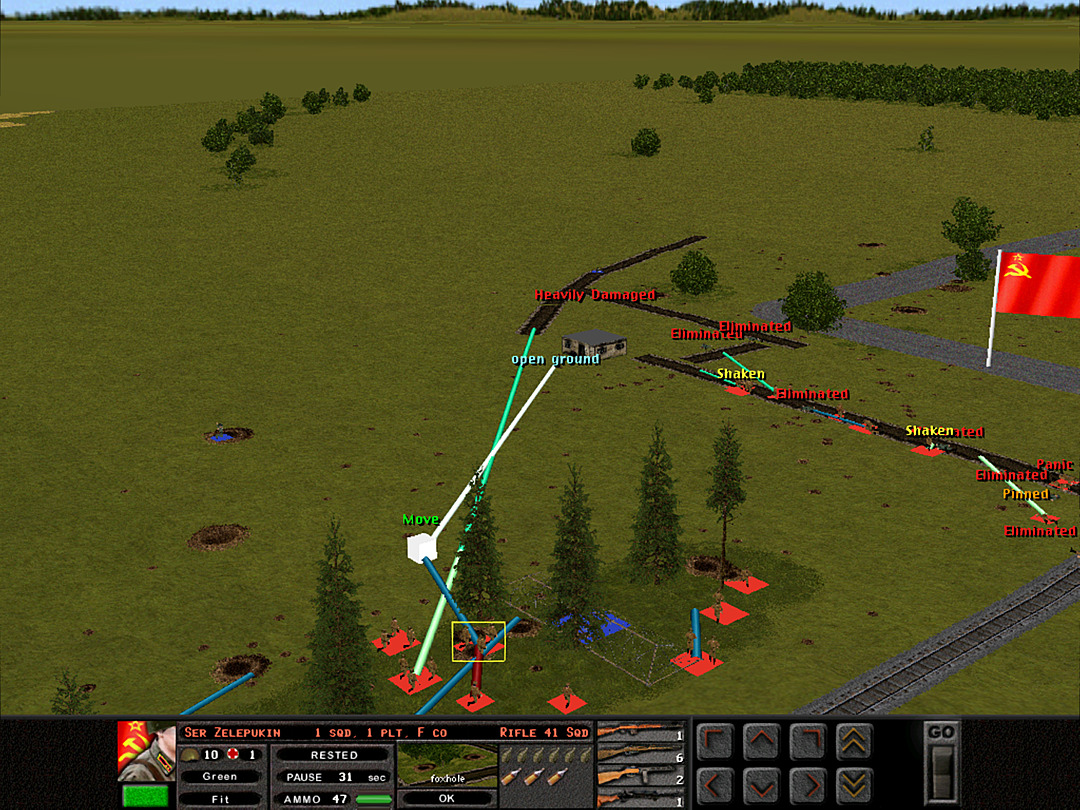 We take advantage of the distraction to send more men to secure the trenches. The German unit in the crater on the left is the captured MG34. 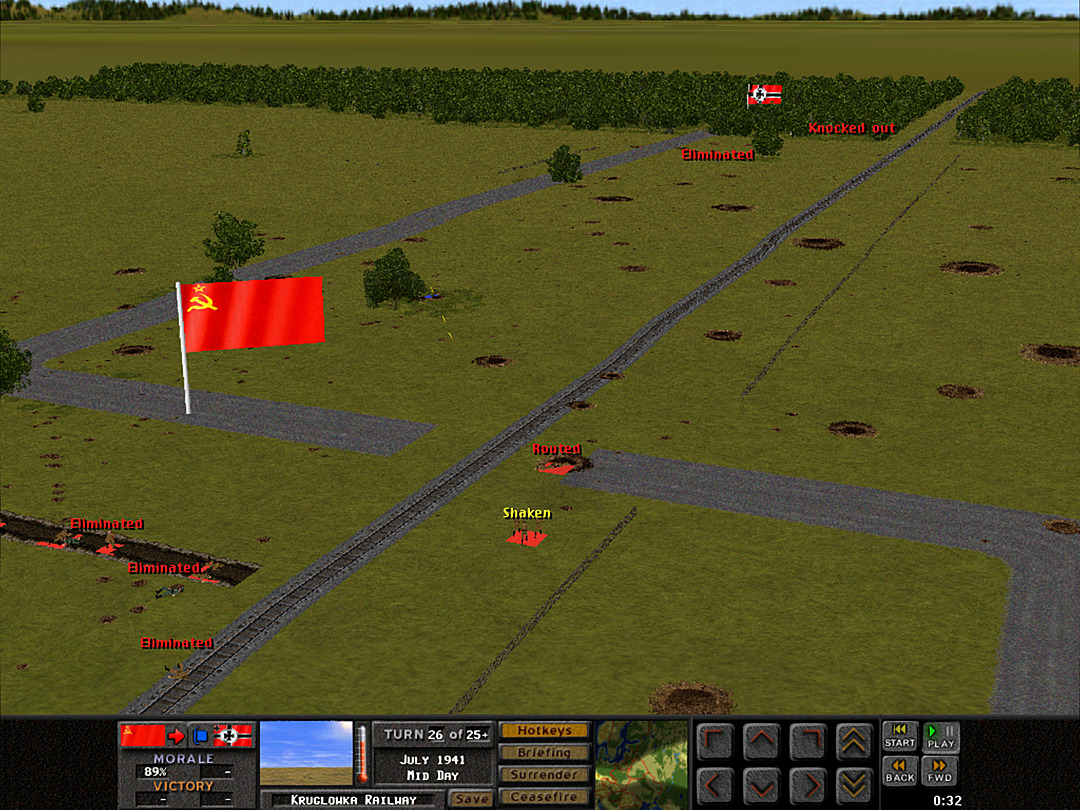 The routed squad runs back and forth on the battlefield. It's not until they reach the safety of a shell crater that the Germans finally respond with rifle fire.  D Coy's men on the west side eliminate another enemy unit that was trying to hide out in the brush. Perhaps they were trying to make it to the woods, or maybe just scouting the strength of our forces. 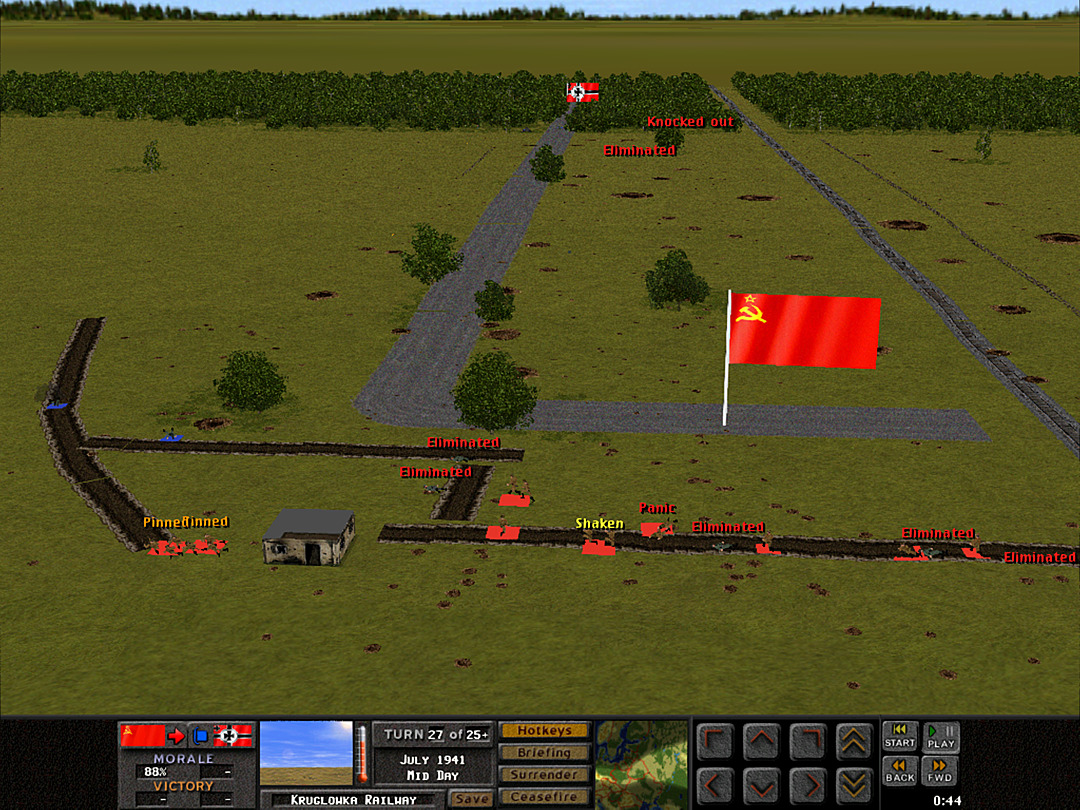 We aren't quite making it cleanly to the other trenches, but we have enough squads moving that if they get stopped on one side, the ones on the other side can advance. The infantry gun in the woods may be the only serious threat we need to watch for. 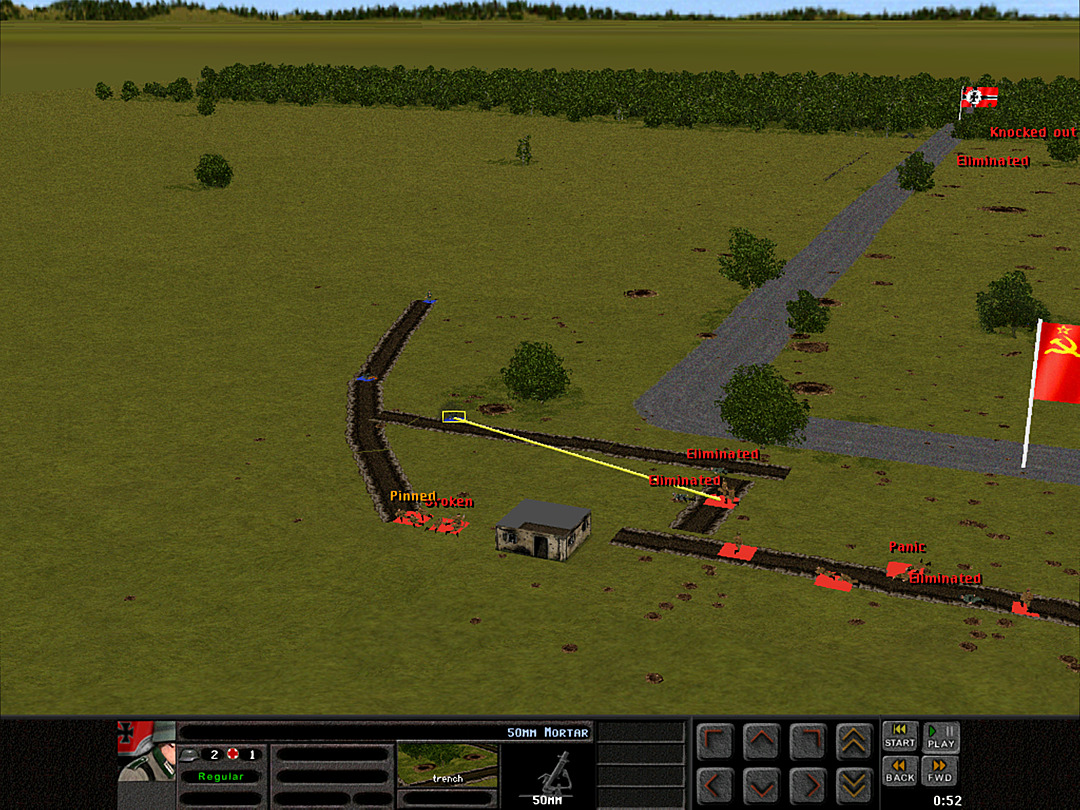 It does not seem as if we are facing any more front-line units, though. A mortar team is no match for our rifle and SMG squads in direct-fire combat. 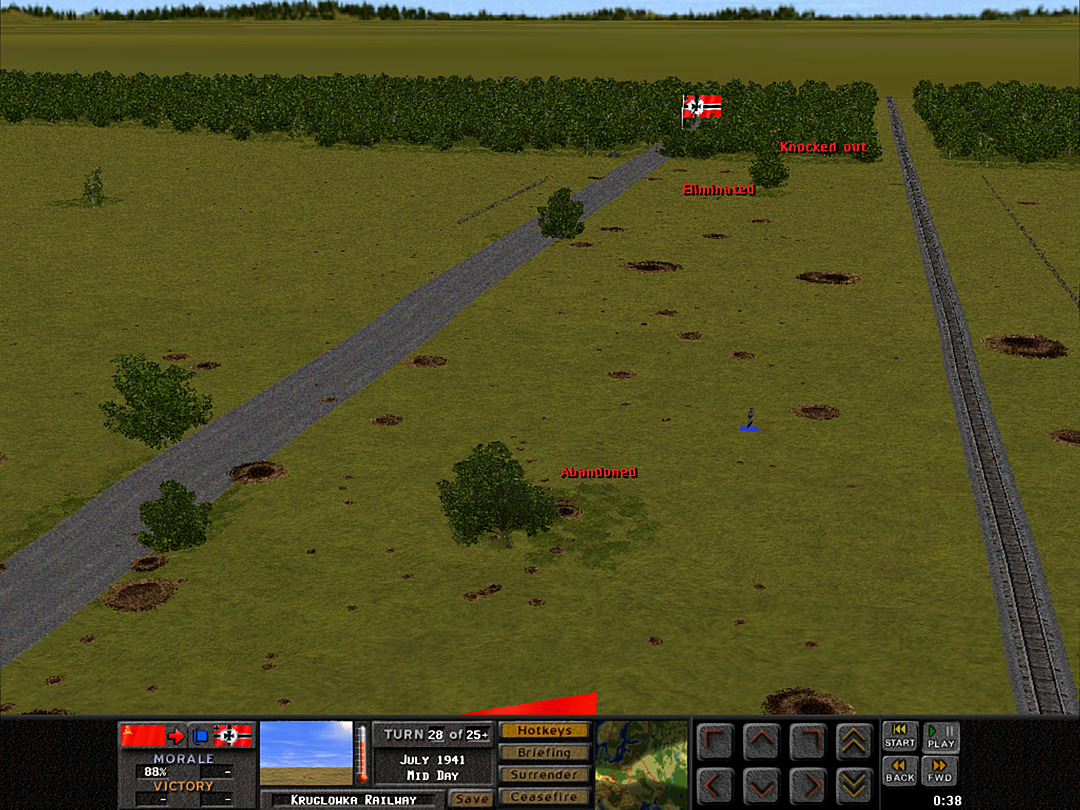 It turns out that the unit hiding out rear of the trench was also a mortar; our concentrated fire forces them to abandon their weapon and flee. They are gunned down in the open before they reach the rear woods. 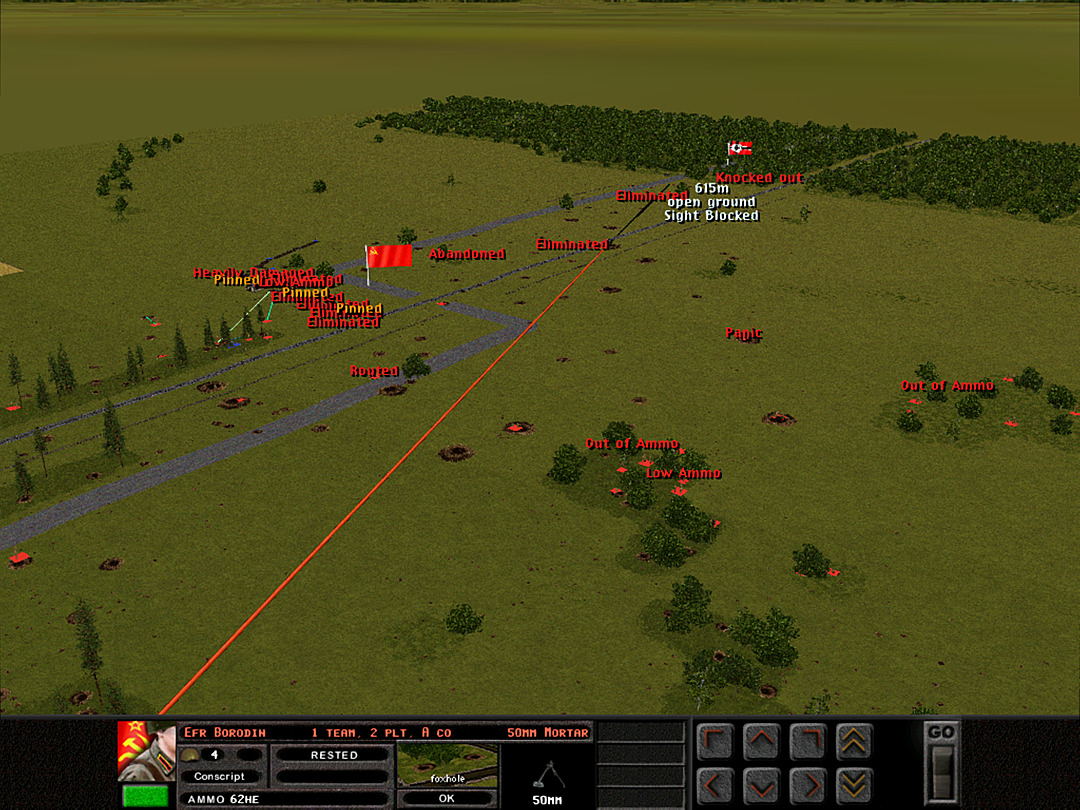 We try to target the other enemy gun in the woods with mortars, but the view is too difficult through the trees and fences. 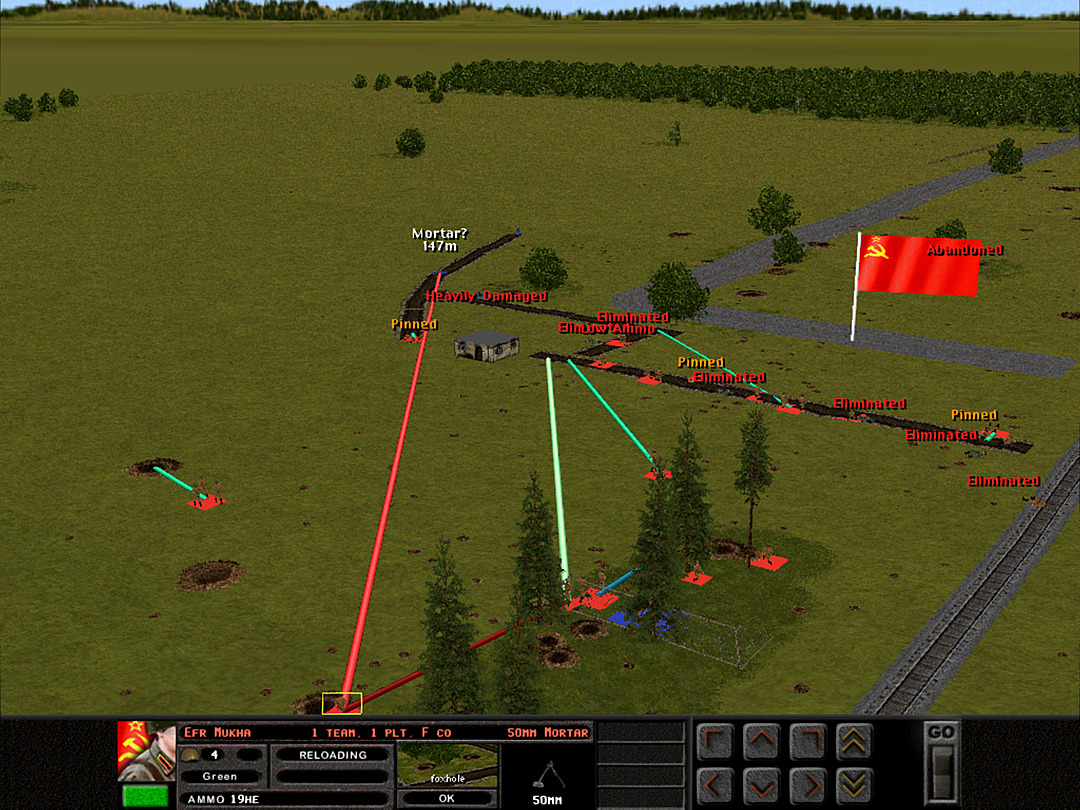 There doesn't seem to be any proper enemy squads remaining in the trenches. 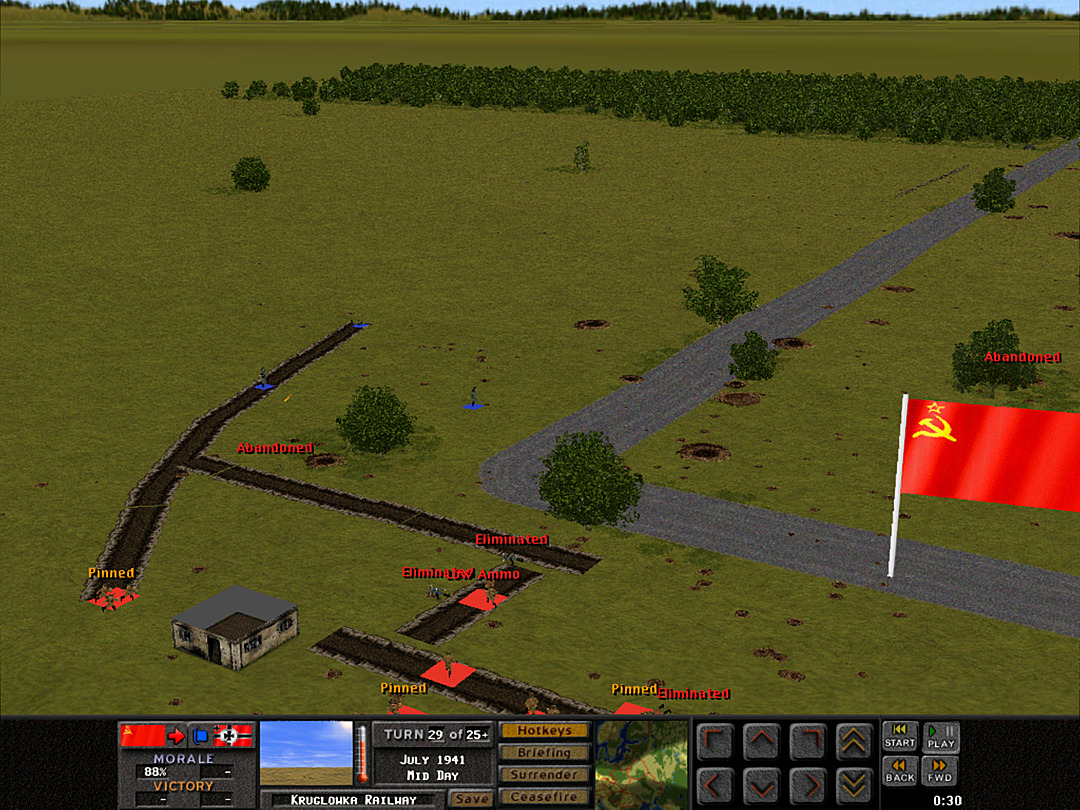 They have completely given up on holding any ground, and are simply running in panic from our charge. 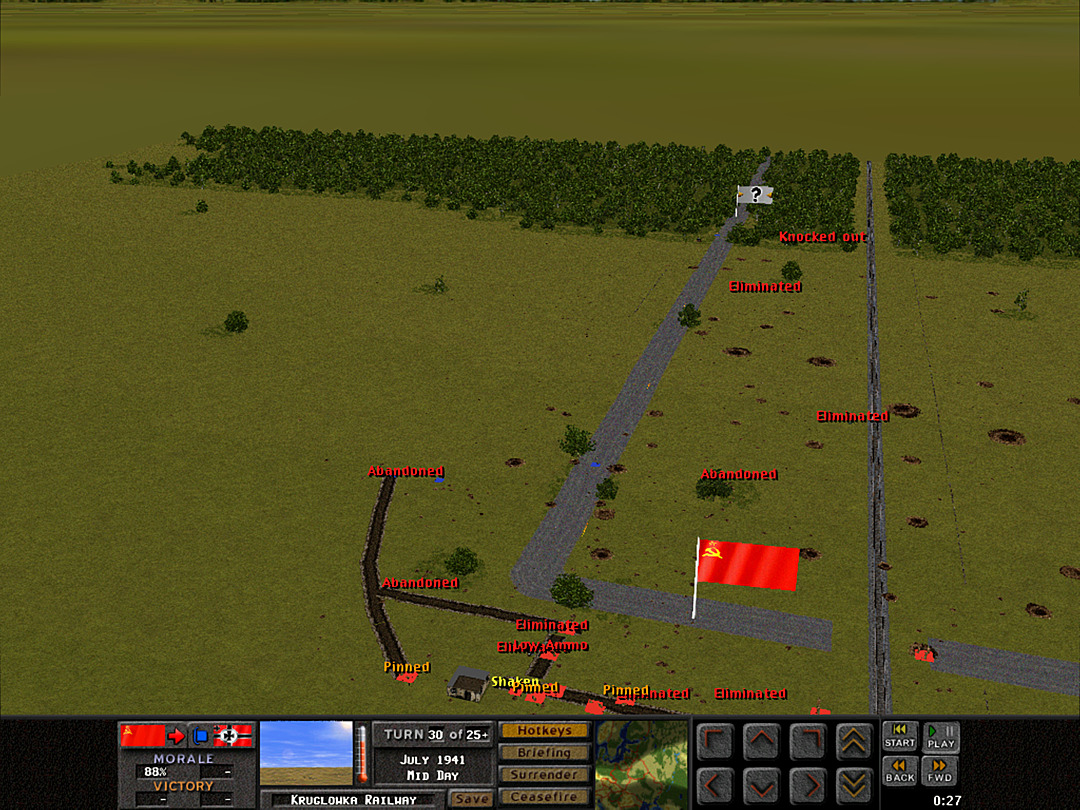 It's clear that we have full control of the level crossing. Whatever forces the Germans have left will be forced to withdraw into the forest. 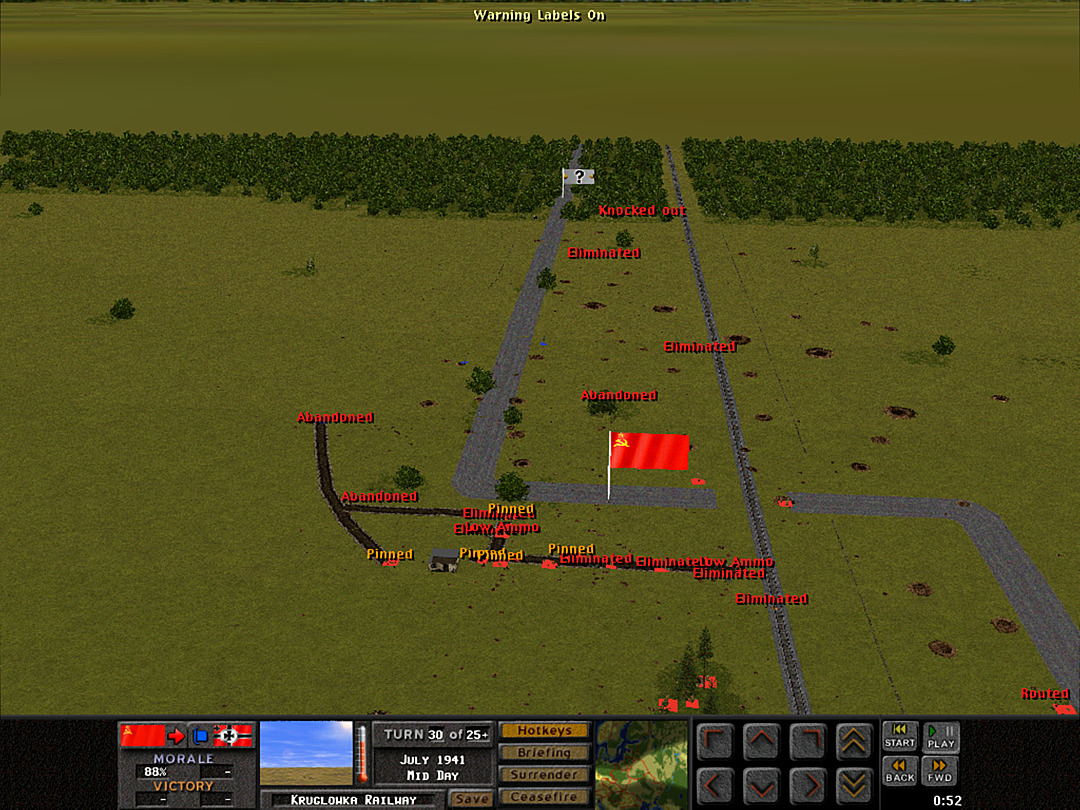 We lack the energy and firepower to pursue them all the way right now. We allow the remnant of these companies to retreat. 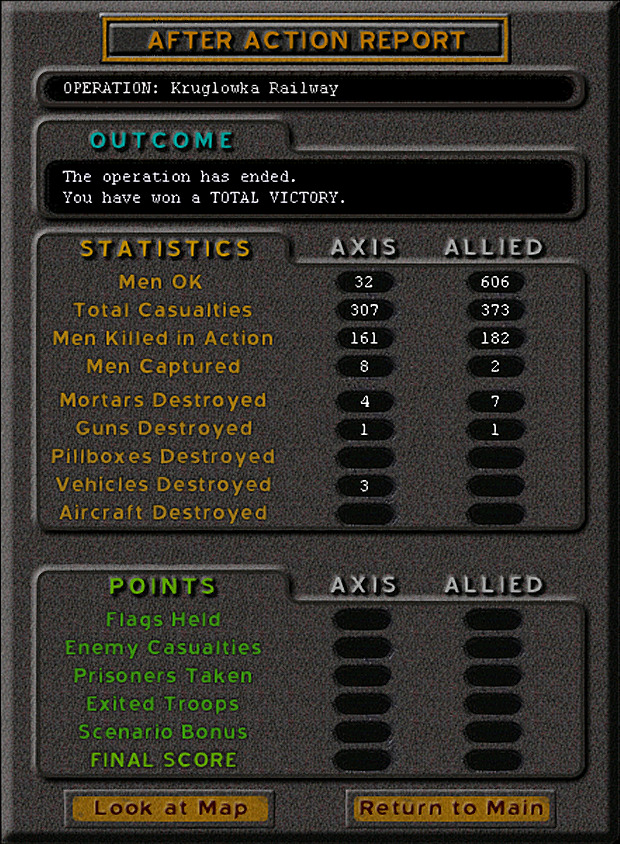 The battle has been a complete victory for our side. We have secured the rail crossing and forced the Germans to pull out. It was a tough battle, with heavy losses for our side as well as theirs, but we have prevailed. Unit Highlight OT-134 Flamethrower Tank 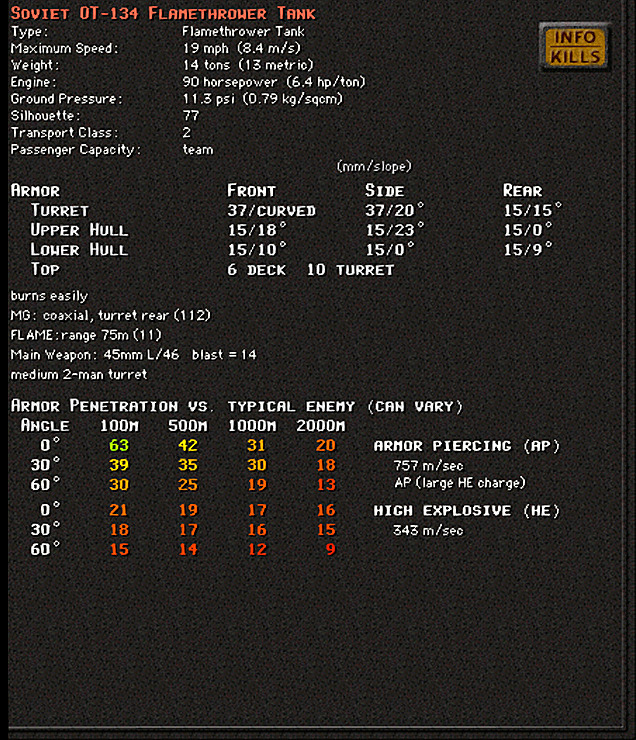 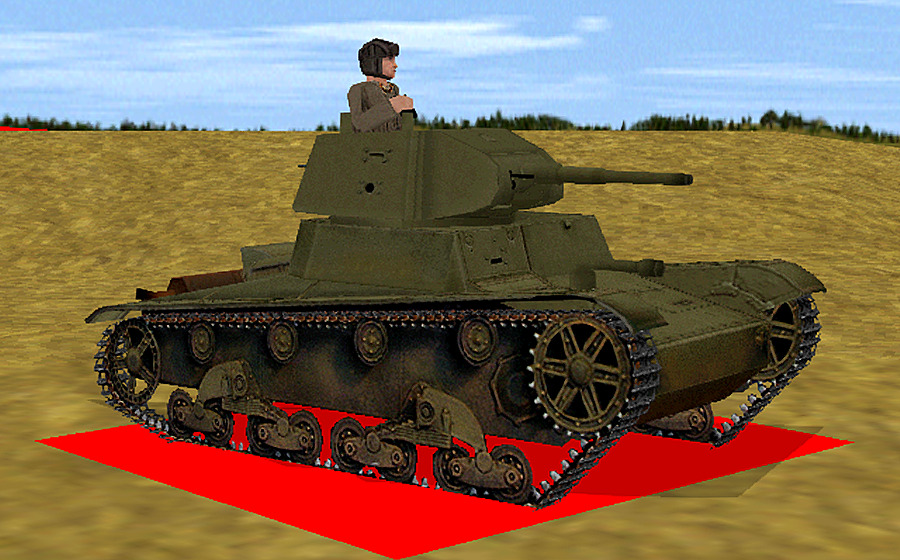 Crew: 3 Base Cost: 53 The last T-26 variant in the game. There had been an earlier attempt to make a flamethrower variant of the T-26 that also kept the main gun of the base model, but it just wasn't feasible with the turret. The OT-134 succeeded at the combination, however, by mounting the chemical sprayer in the hull. This allowed the tank to operate mostly the same as a regular T-26 when using the turret, while adding the powerful flame weapon to the mix. Of course, it was still on top of a slow tank with very thin armor, and just was unlikely to be usable in combat in the 1940s. There was a slight improvement to the armor (indicated by the stats but not visible on the model) made by bolting plates on to the turret. Not many of these were produced, although some were fielded against Finland, and a few might have stuck around at the time of Barbarossa. Kangra fucked around with this message at 19:25 on Mar 5, 2024 |
|
#
?
Mar 5, 2024 07:36
|
|
|
I'm gonna be honest, I didn't really expect that result given the grueling beginning, rocky middle and threadbare ending, it appears it was also grueling, rocky and threadbare for the Germans.
|
|
#
?
Mar 6, 2024 02:38
|
|
|
Certainly didn't feel like outnumbered them 3 to 1!
|
|
#
?
Mar 6, 2024 08:44
|
|
|
Yeah, this is a pretty exciting one, and I was kind of surprised by 'total victory' as I thought we would need to have made it all the way. I do wonder what the result would have been if we didn't capture the level crossing objective. I think it would certainly have been a win based on the casualties, but likely a more minor one. I played this one before from the German side, and it was pretty good as well. I had to give up the woods by the river, and got knocked out of the middle trench for a while. Conserving MG ammo is key for them. By Battle 6, though, I think I had inflicted around 8:1 casualties, and maybe if I tried could have knocked them back across. Though maybe not getting greedy would have been a key thing - at any rate, I had them confined to a small target and could still call in mortar strikes. The barbed wire turned out to be just as frustrating, since I was trying to come back through it the other way.
|
|
#
?
Mar 6, 2024 21:11
|
|
|
Operation: Kruglowka Railway We didn't take all the objectives by the end, but it was still a total victory. The German forces were crushed. 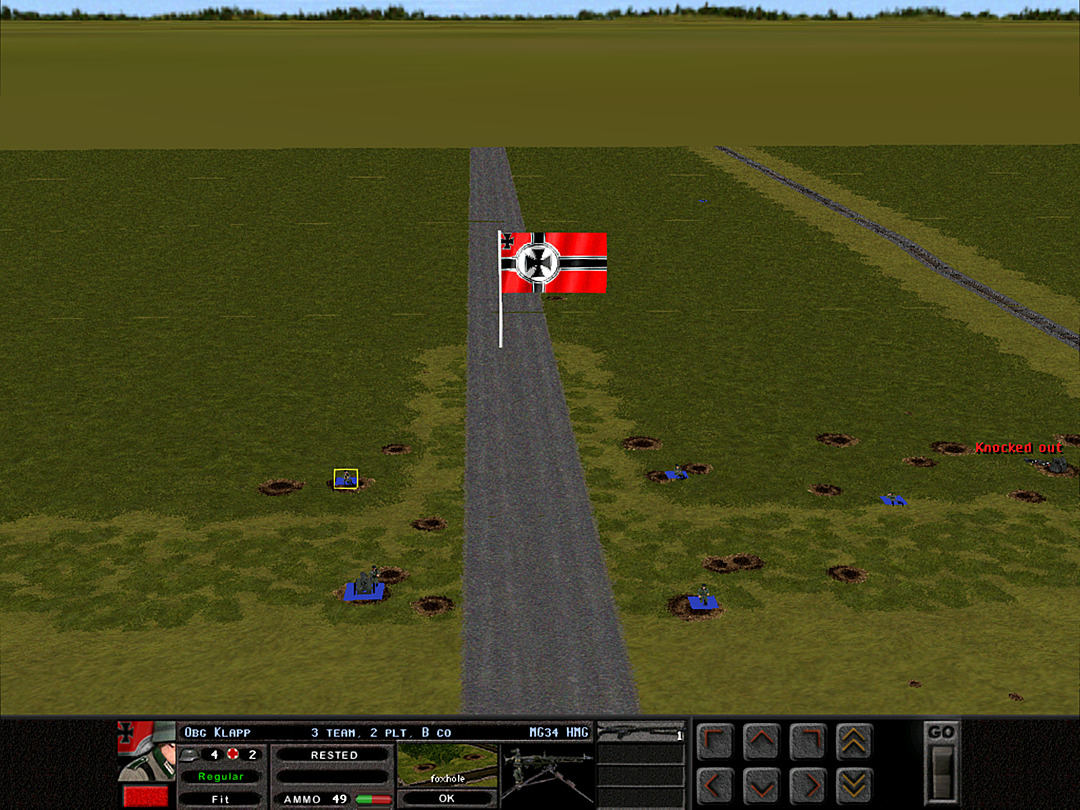 There really wasn't much even back in the woods holding the line for them. The second infantry gun can be seen here near the road, and one MG34 is practically their strongest combat squad remaining. 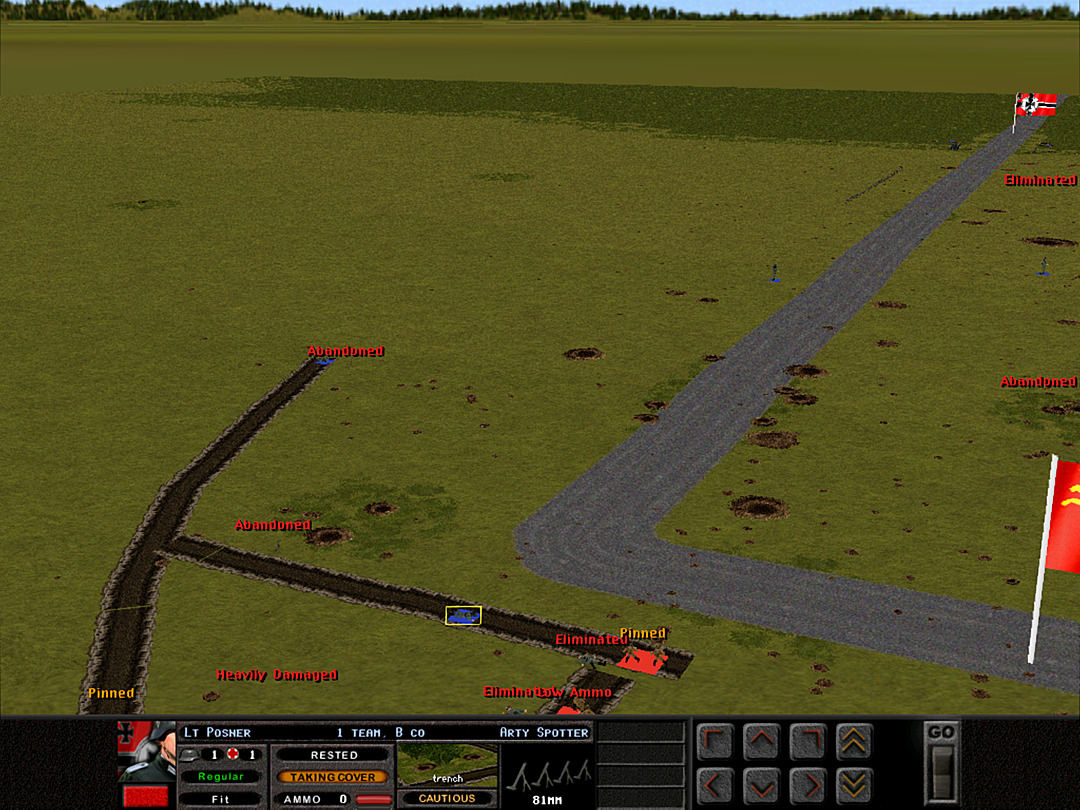 There was actually an artillery spotter still cowering in the trench. 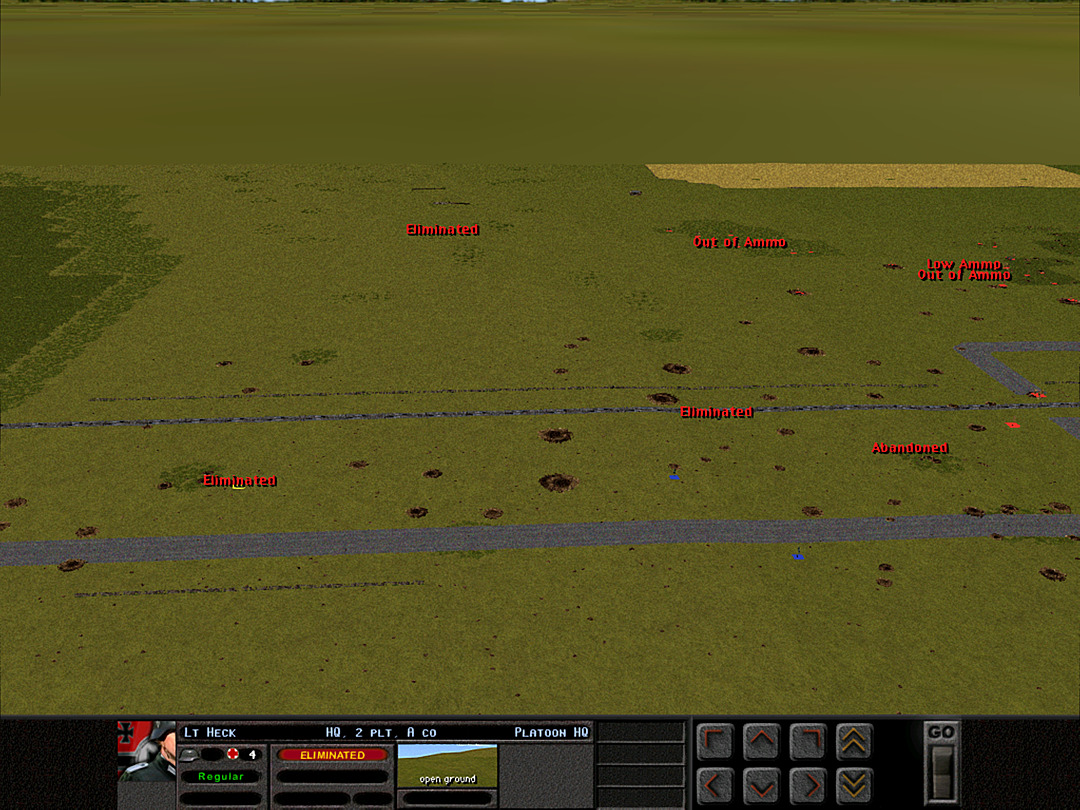 The rest of the force that was still facing us in the battle was all command squads and mortar teams. I'm pretty sure the only actual 'front-line' unit that was left at even the start of this battle was a rifle squad, and it was killed near the start (I believe it was the one that fled the trench). They were holding us off with just machine guns and occasional mortar shells by the end. 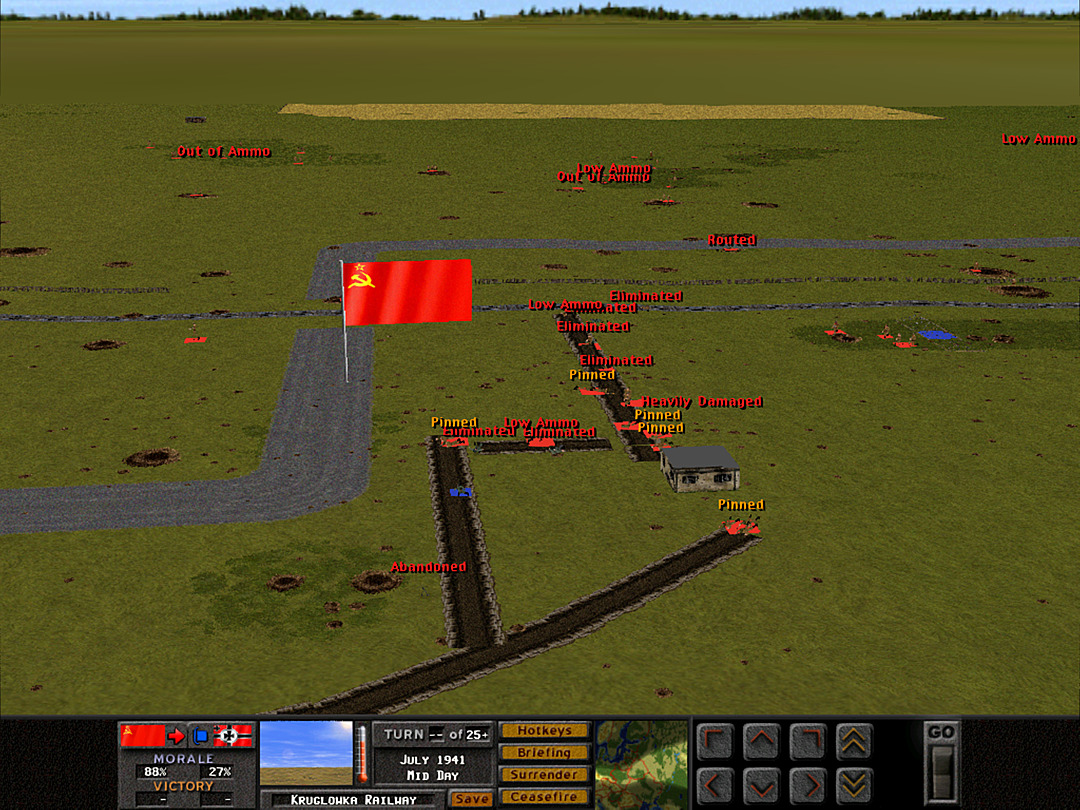 Of course, the Soviet forces are considerably the worse for wear after all of that. One imagines the German stragglers would have been free to run off wherever they liked as the Russians licked their wounds. This time, we took more losses than we gave. Now, there was a stark variation in troop quality, which somewhat accounts for how some of the extra losses. I think this operation was good at showcasing the effects of that. Still, a casualty is a casualty. We basically won this by attrition. This operation had a minor gimmick that I only recalled after I started playing it this time, although I've avoided mentioning it until now. Here's the operation parameters to explain it: 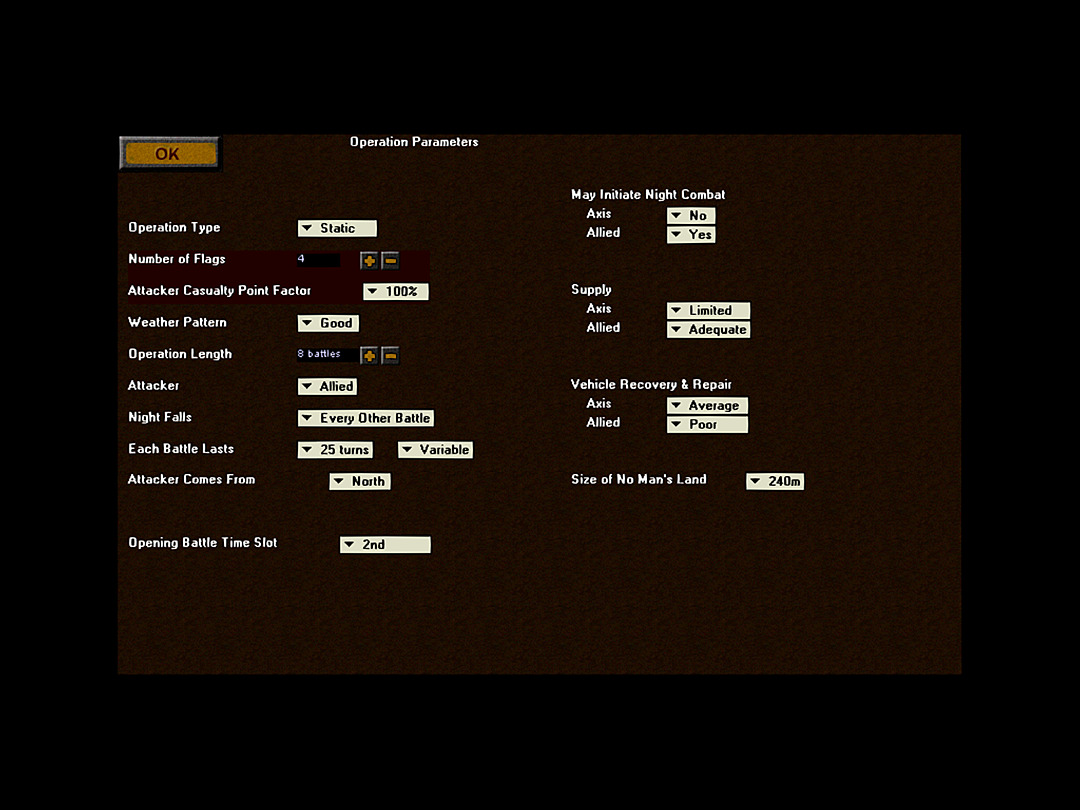 The Axis side is actually prohibited from initiating night combat. So any choice to go for it at night was always going to be solely in our hands; we were at no risk of being pushed back if we didn't allow it. It might have saved us some lives in the end if I had opted out, but on the other hand, it gave us a few more chances to wear down the German units some more. I also found in the parameters that the Germans are given a 'fanaticism' boost to reflect their willingness to hold the line. I think this ups their morale, and lowers the possibility of a surrender such as we had in the last operation. And now here's the point totals: pre:Infantry Support Vehicle Armor Artillery/Air Fortification TOTAL Axis : 803 308 26 231 662 760 2790 Allies: 1878 573 0 0 273 0 2724 It's obviously the infantry numbers that show how this was won. The Soviet soldiers may be weaker, but they outnumber the Germans so much that it almost doesn't matter. I did notice that there was also an extra reserve company of conscripts that was not released (I think it's probably there to aid the AI player), so we actually won with a bigger deficit in raw points on the field. Heavy fire support, in the form of anti-tank guns and armor, proved to be a big player here. The handful of Stugs could have been useful had the Germans not put them right up in range of our own guns. On this map, they would have done better if they'd just been treated as mobile long-range infantry guns. The Soviet AT guns were key to priming any assault, and I think once I figured that out, the battle was much easier. I'd say the off-map support favors the Soviets, despite the numbers. A lot of those points for the Germans come from the bombers, which as we saw aren't the most worthwhile support units. It's all artillery for the Allied side. In the course of the battle, we lost our best artillery to a somewhat random hit; that probably evened out the loss of the Stugs for the Germans, and kept the combat more competitive. This was our first objective-based map, so there wasn't any shifting forward with our advance. As we saw, taking objectives isn't the only way to score points. Objectives count a lot, but so do casualties. I also think it doesn't matter for an operation when or for how long you hold the objective, only whether you control it at the end of the final battle. 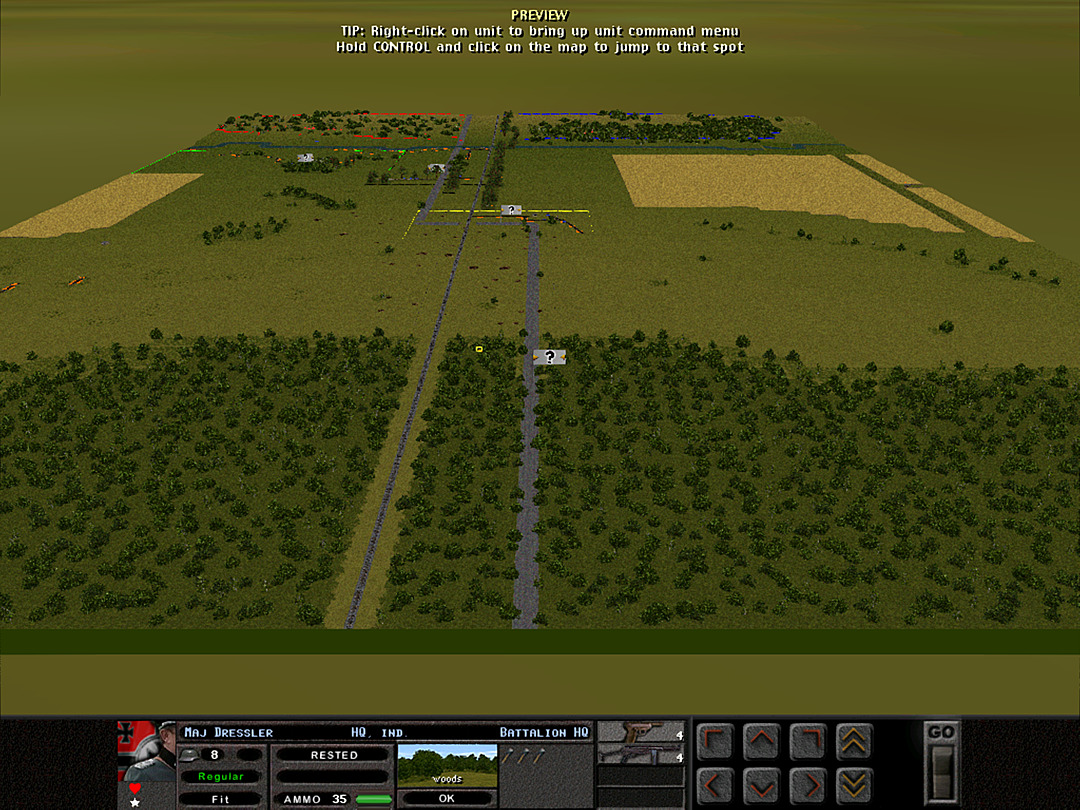 Despite not having a shifting map, there was plenty of ground to cover here. This view from the German side shows just how big the forest is. Of course, there are no objectives there, so I imagine this space is just there to have a place to hide out if the battle gets pushed back to there. 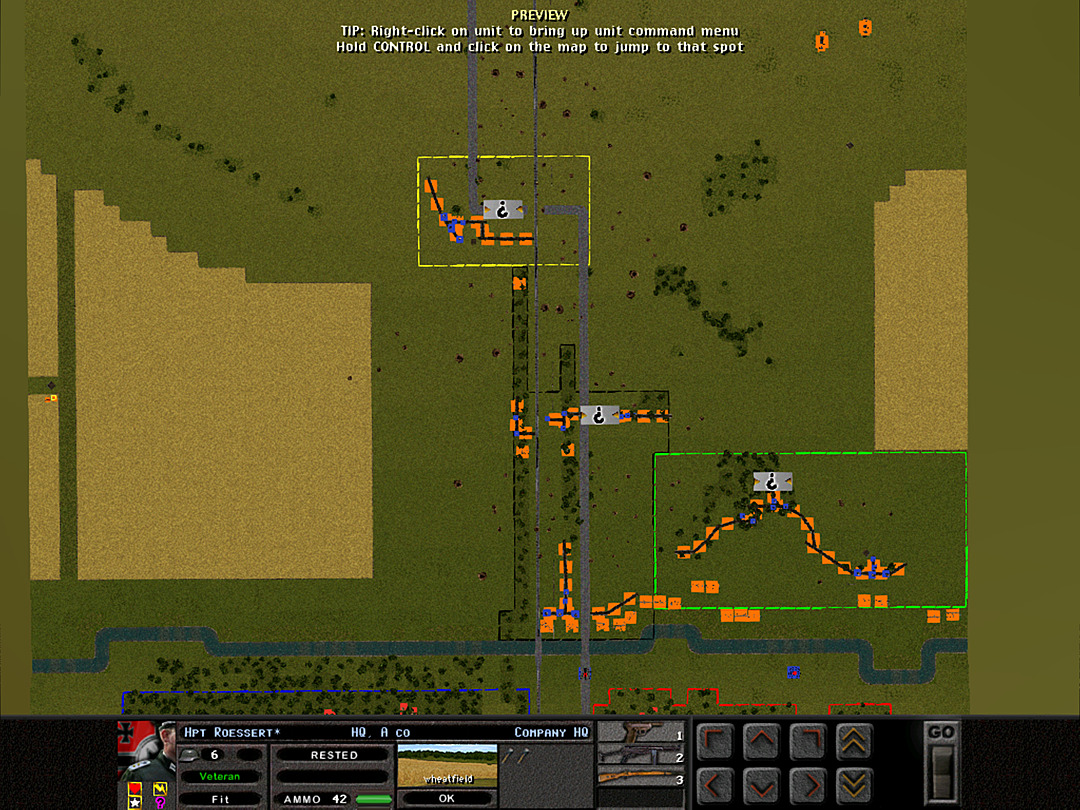 Here is the overhead map of the area just across the river. It's clear that the barbed wire and location of each trench line was well-designed to make for a tough fight, no matter which side you are on. There is a lot of open ground, but just enough cover to tempt you into trying some way to work around it. Note the 'gun pits' far back of the line as well. Something I only used a little on the map was the large field on the left. From what I've read of the real battle (which is not much) the Soviets used these nearby fields to harass the Germans. Also, as I understand it, real-life casualties were maybe a tenth of what was suffered here (and the Germans held out before tactically retreating). Naturally you want a game where something happens, not one where it's a slow grind that lasts hours, so the intensity of firefights is expected to be ramped up. Just to see how those losses developed, here's how it stacked up as the operation went on. 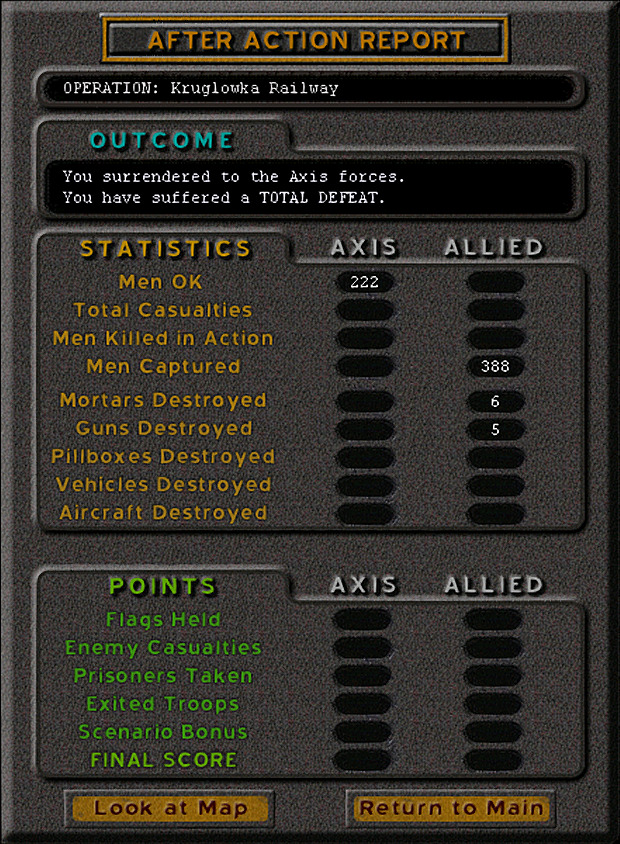 Initially, the forces have some parity. Given the lesser troop quality of the Allied attackers, it was always going to be a rough start. Battle 2:  A very good showing by the Germans here; they took low casualties and inflicted a rather high number of them. Battle 3: 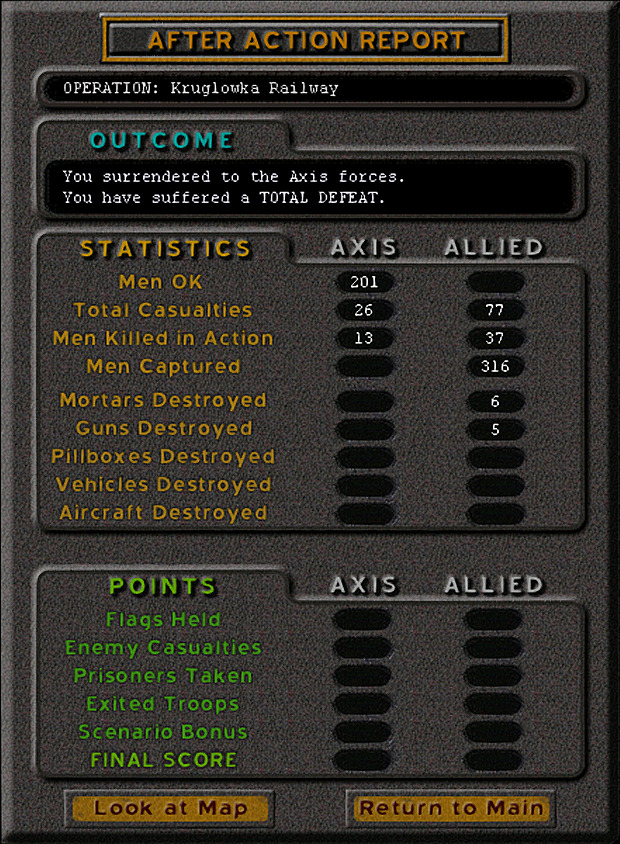 Another good result for them. We were genuinely losing the battle at this point; no objectives taken, and losses outstripping our capacity to replace them. Battle 4:  The Germans are just starting to be worn down. They were still inflicting 2:1 casualties at this point. Battle 5:  A rough day of fighting. The Allies are back to losing men too quickly, though the Germans took very heavy losses here as well. Neither side could have kept this pace up. Battle 6: 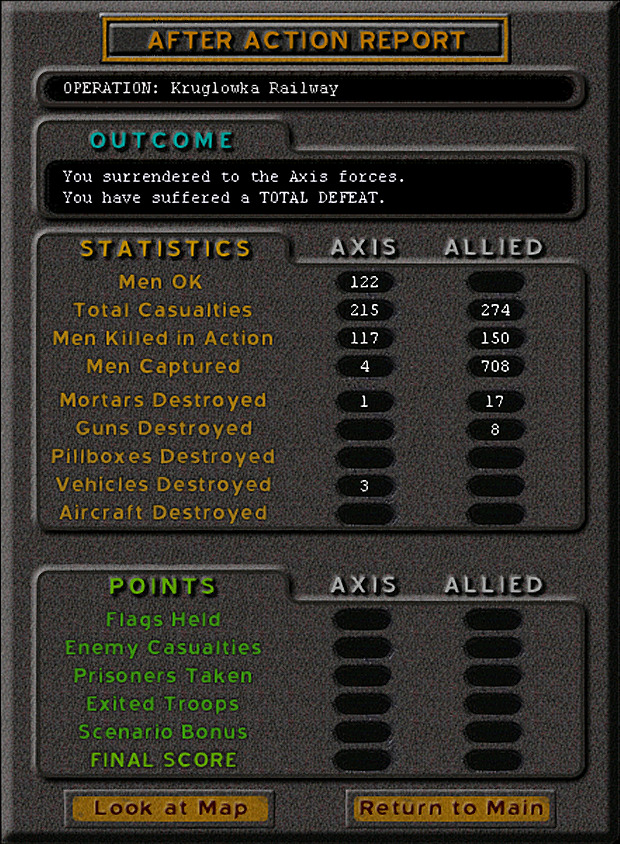 The cracks are finally showing. For the first time, the German losses were worse than the Soviet ones. Battle 7, of course, we skipped, and the Germans were not allowed to engage us. I don't think they would have wanted to at that point anyway. Battle 8:  A lot of losses on the third day meant the Germans were pretty much done at this point. I don't know exactly when they ran out of front-line squads, but the repeated assaults of the prior battles did not work out well. It's hard to say if they would have done better to just hold back and sit on the last two objectives by the third day. I think there's a chance they could have pulled it out. And the final results again: My take on this operation: I think this one is a rather well-designed map, with the layout of the trenches giving both sides some real choices. Should the Germans try to hold farther up, or fall back? The Soviets need to choose a main line of attack, whether down the rail line itself or by coming around on the left or the right. I do like how wide the map is, as it allows for a lot of freedom of movement even when the focus is on taking the objectives. I did notice that the river crossing isn't really the key element here. Initially it seems as though it might be a tough one, but the lack of German numbers allows for a relatively easy advance to at least some initial line. From there, it becomes a struggle to capture the center, although I think once that falls, it makes the capture of the crossing considerably easier. It was by no means a cake walk for us, either; it was a good way to show off a disparity in troop quality and how different levels of training can have a big effect on how to fight the battle. The next battle is kind of a similar one, except this time we're the defender (mostly). It will be in rugged terrain where the Germans try to hold off a determined Russian force, with only Penny Packets of defensive units.
|
|
#
?
Mar 7, 2024 06:29
|
|
|
Nice fight! That's pretty much one entire Axis batallion liquidated.
|
|
#
?
Mar 10, 2024 00:01
|
|
|
Operation 4, Battle 1 Operation Barbarossa is nearing a critical point as the weather starts to grow cold. This is especially true in the north, where the Germans have nearly reached Leningrad, and stand poised to surround the city. Meanwhile, gradually worsening conditions makes travel more difficult. Their supply lines are stretched thin, and they can't commit the same number of forces everywhere. The Soviets seek to break through at a weak point in the line. As the Germans, we'll have to do what we can to hold them back.  Still a huge map, though this is a static operation. Slightly smaller numbers, so we won't be seeing a ton of units clashing. The battles are quite short, but unlike Blitzkrieg, there's not a lot of movement to be expected. Since we are defending, we need to do our best to hold off just one or two assault waves, as it's unlikely that a shorter-length battle can have much more to it. 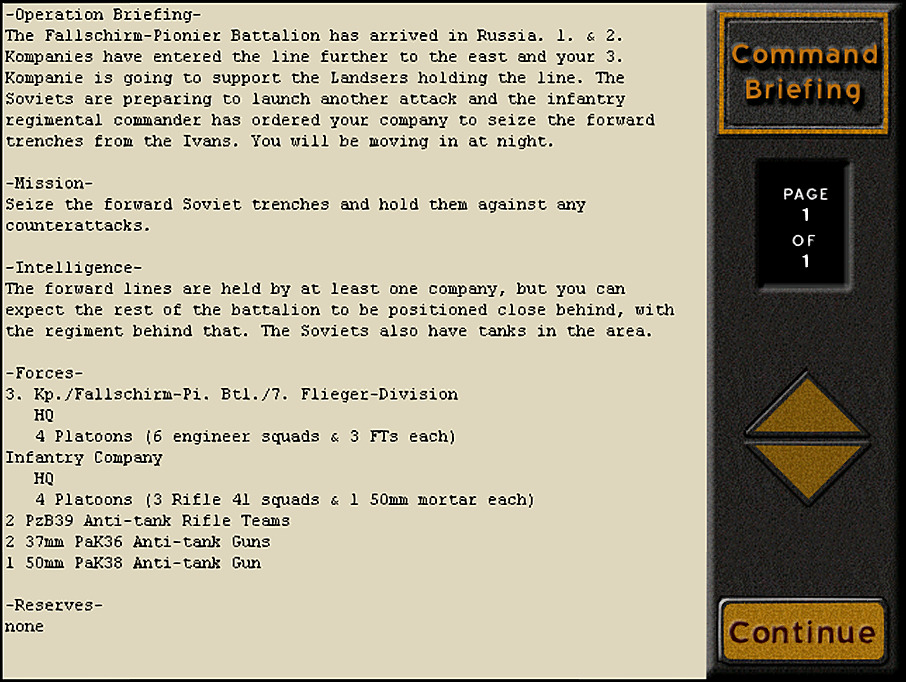 We aren't just expected to hold the line here, we're actually charged with making an assault on the enemy line before they get a chance to attack us. Presumably this gives us the advantage of shocking them before they can get their assault underway. I just hope the commanders have the right idea here. I don't like that we have to first use an understrength battalion to drive out the enemy, and then hold off an entire regiment, with only infantry and a handful of mediocre anti-tank guns. pre:A Company (Full Strength) 1 Plt - 3x Airborne Pioneer S Sqd, 3x Airborne Pioneer SL Sqd, 3x Flamethrower Team 2 Plt - 3x Airborne Pioneer S Sqd, 3x Airborne Pioneer SL Sqd, 3x Flamethrower Team 3 Plt - 3x Airborne Pioneer S Sqd, 3x Airborne Pioneer SL Sqd, 3x Flamethrower Team 4 Plt - 3x Airborne Pioneer S Sqd, 3x Airborne Pioneer SL Sqd, 3x Flamethrower Team B Company (~75% Strength) 1 Plt - 3x Rifle 41 + 50mm Mortar 2 Plt - 3x Rifle 41 + 50mm Mortar 3 Plt - 3x Rifle 41 + 50mm Mortar Independent (Infantry) 1 Team - Antitank Rifle 2 Team - Antitank Rifle 3 Team - 37mm AT Gun 4 Team - 37mm AT Gun 5 Team - 57mm AT Gun Date: 1941-10-10 Time of Day: Night Skies: Clear Ground: Damp Temp: Frozen Wind: Breeze ENE We're making our preemptive attack at night. It's bitterly cold, though at least the skies are still clear. Conditions are somewhat unpleasantly wet, with frost beginning to form in the less tree-covered parts of the terrain. 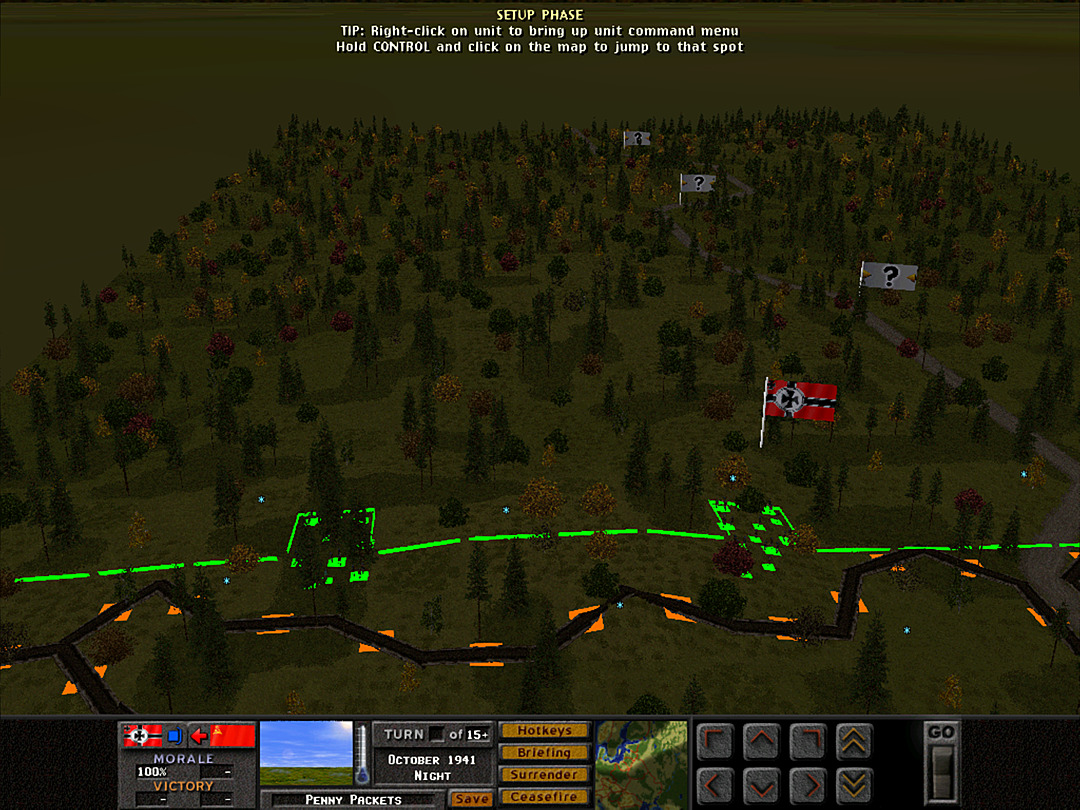 We have established a fairly extensive line up on the ridge near a bend in the only road through these woods. Our forces are charged with moving out of the trenches into the Soviet-occupied ones just in front of them. We know there's a whole forest full of Russians beyond, but we aren't going to be taking that ground. This is not how I've set up the forces for the battle; it is just the default position. Once they get into trenches, it'll be a lot harder to spot them, so I wanted to give a clearer indication of the troops we are using. The images here may also change somewhat in brightness, as during this session the game would sometimes crash and come back up looking a bit different; instead of being really dark on a night turn, it's somehow now really bright even if I turn down the game's gamma. 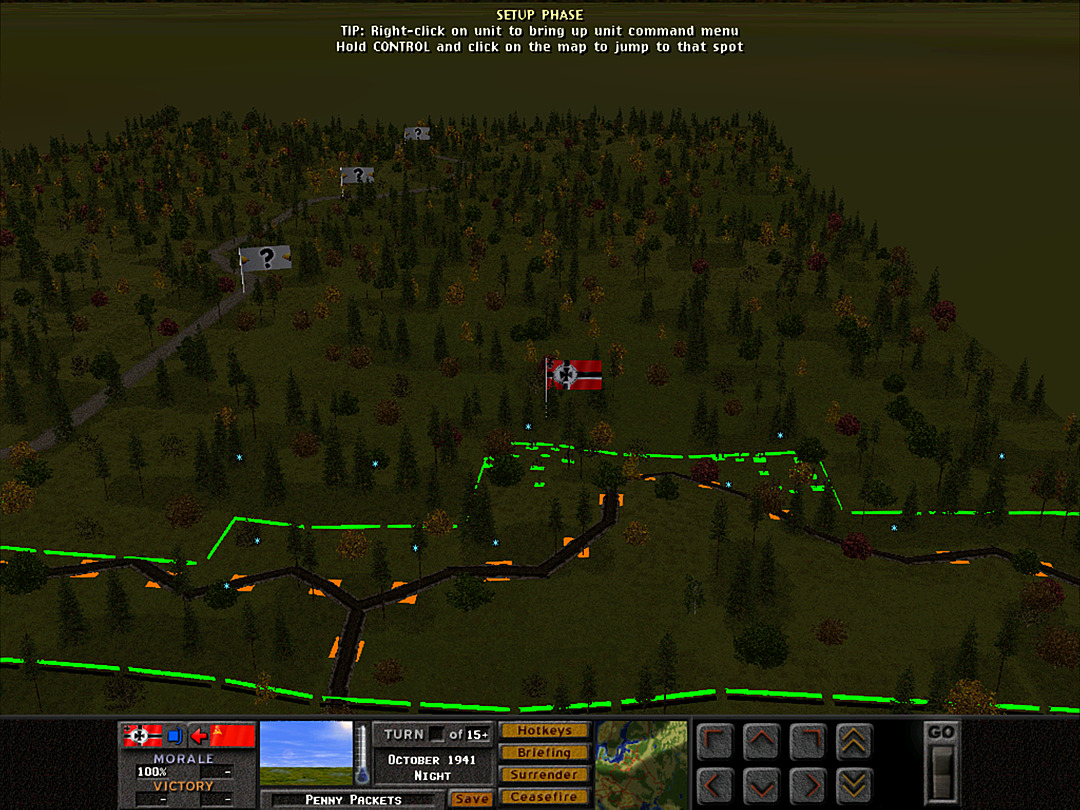 There are two key points we want to occupy in the enemy line, on either side of the road. They're less than 100m from our own line. If we attack quickly, we can grab them before morning. That'll put a significant delay in the Soviet plans. We have two elite Pioniere platoons at our disposal. The objective flags are only shown as German because we are as yet unaware of the Soviet forces holding them. I haven't mentioned it before, but the flags change based on what your side 'believes' to be true based on known enemy positions. It's entirely possible to end a scenario and discover you did not actually hold an objective you thought was yours. 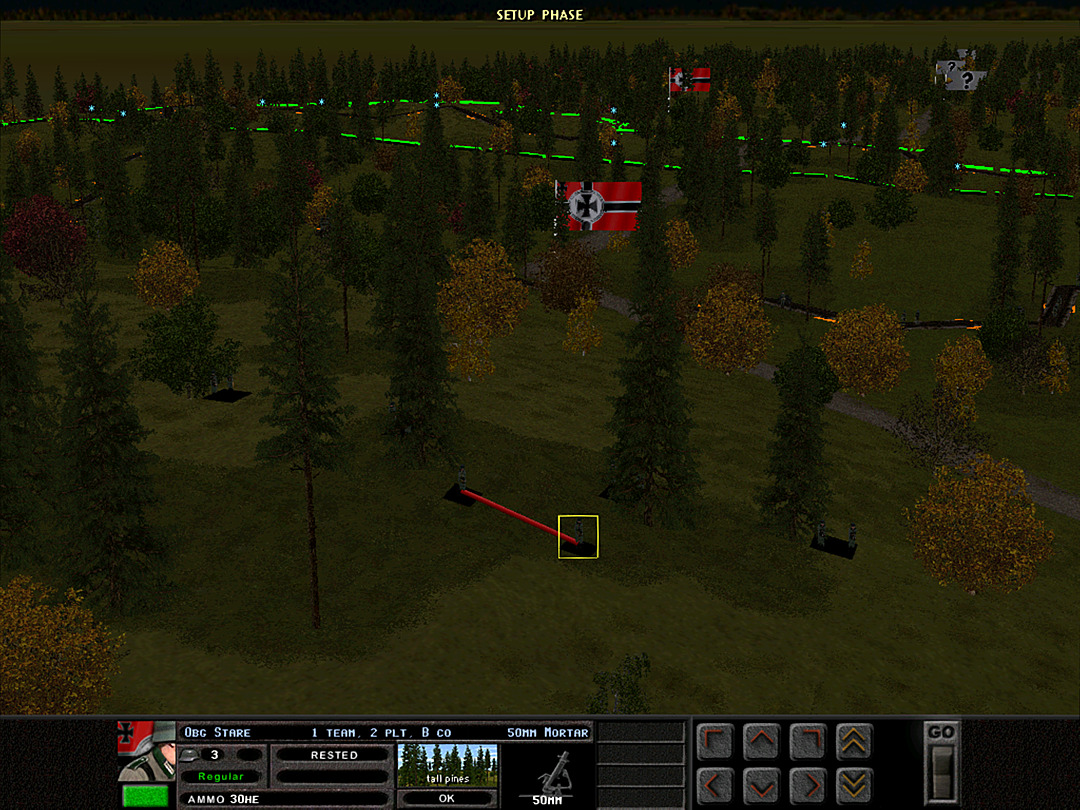 Our other forces will remain in reserve for this attack. Once we take the line, we can rotate them in and out as the defense demands. No, that's not a graphics glitch. They used a black base color to indicate these units. At night. And with most of them actually starting in a trench. It doesn't much matter for now; other than to show that these units cannot be deployed in the 'green' zone where the Pioniere are. 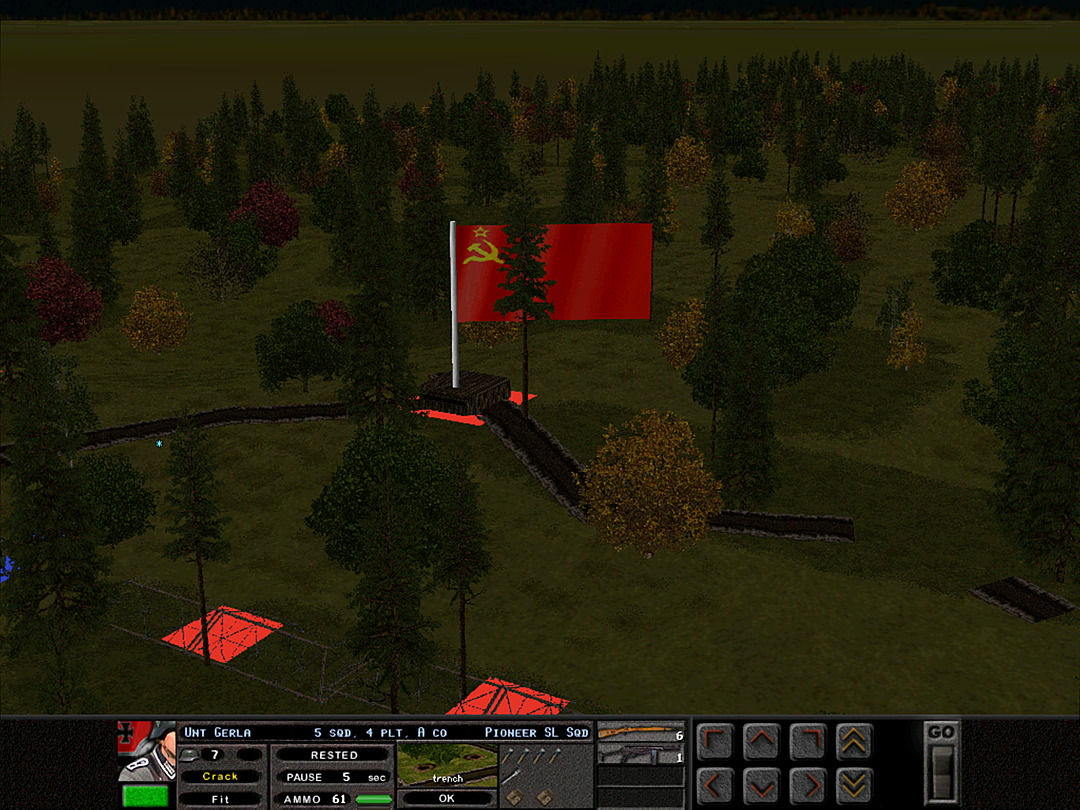 As the battle opens, we spot the enemy trench line. They have set up machine gun bunkers every so often. We'll need to clear those out to secure the trenches. 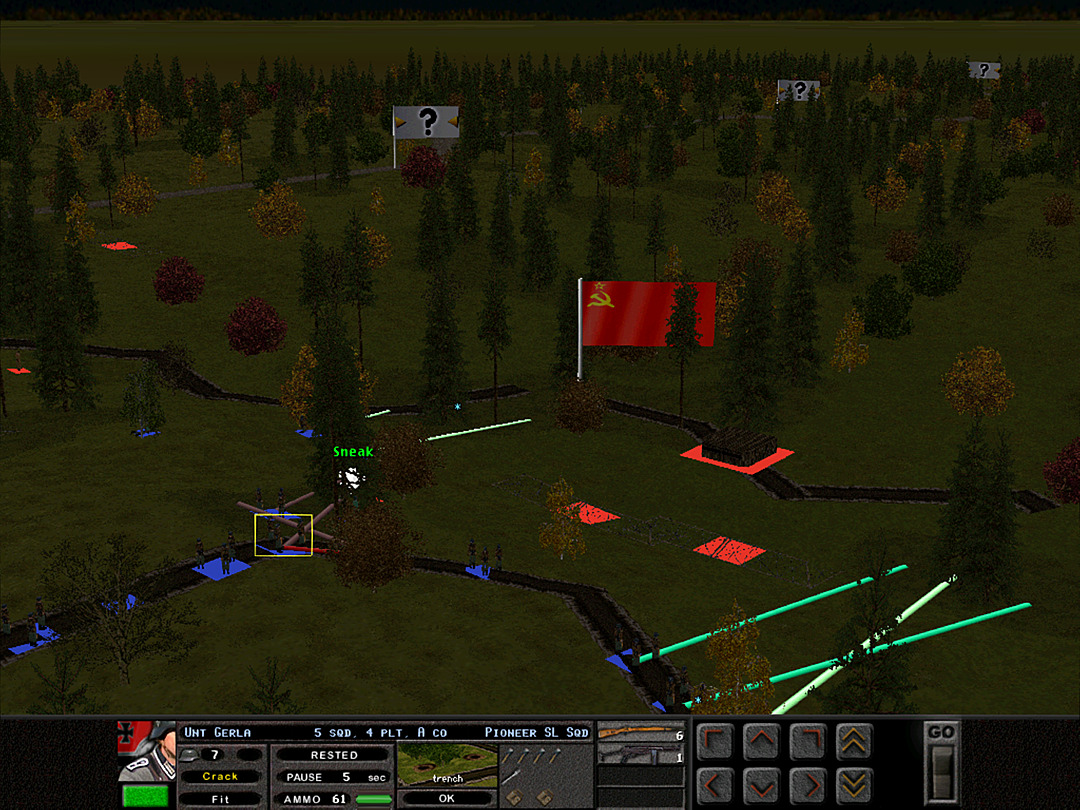 3 and 4 Plt are going to come around the wire and hit the bunker from two sides. 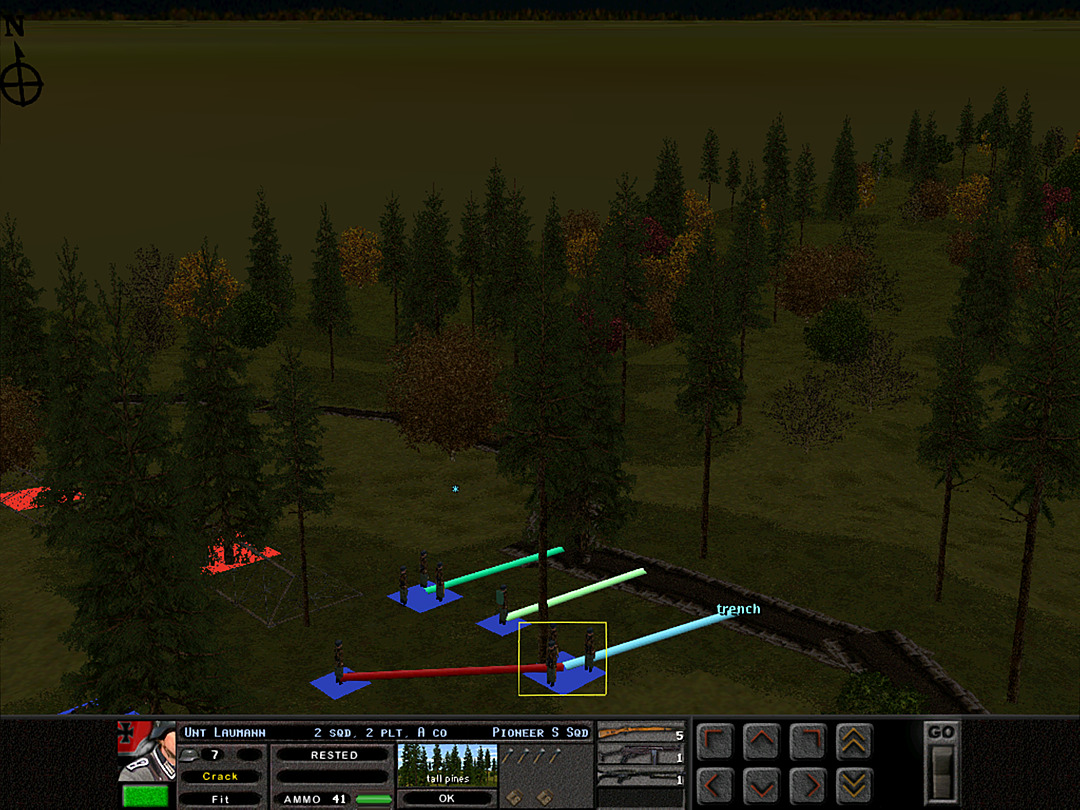 At the north end of the line, we can practically hop into the trench. 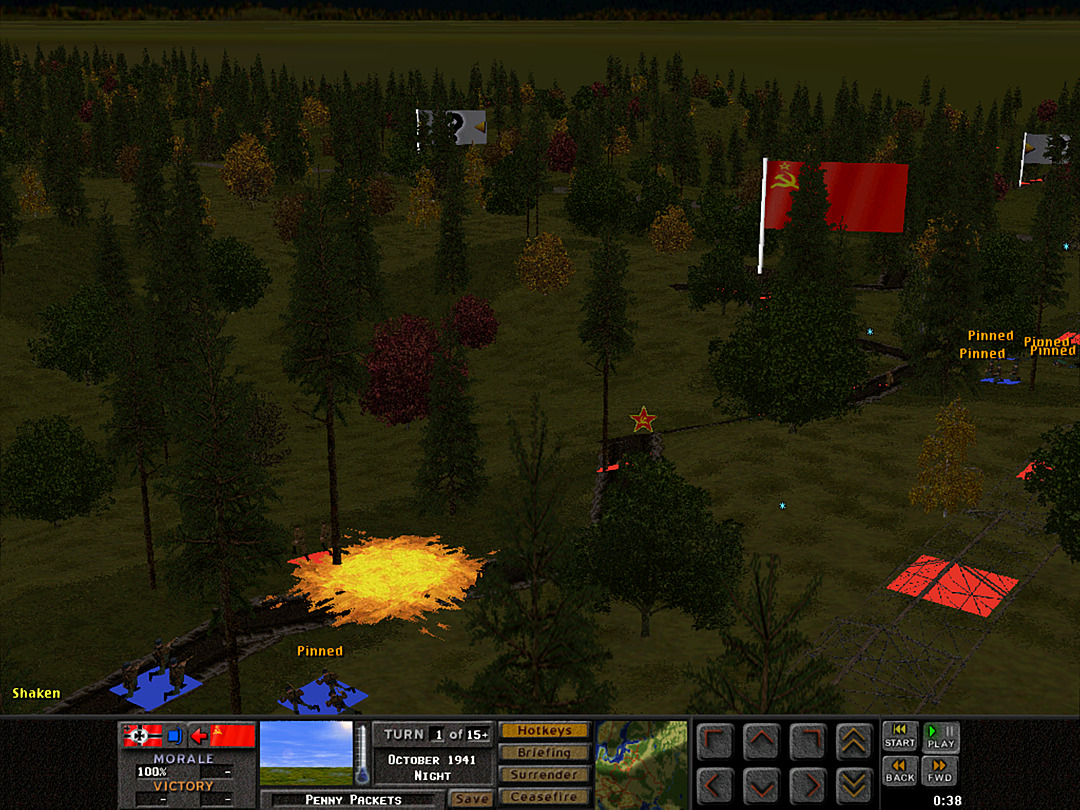 Our flamethrowers blast the line to ensure that the Soviets won't even think of fighting back when we charge. 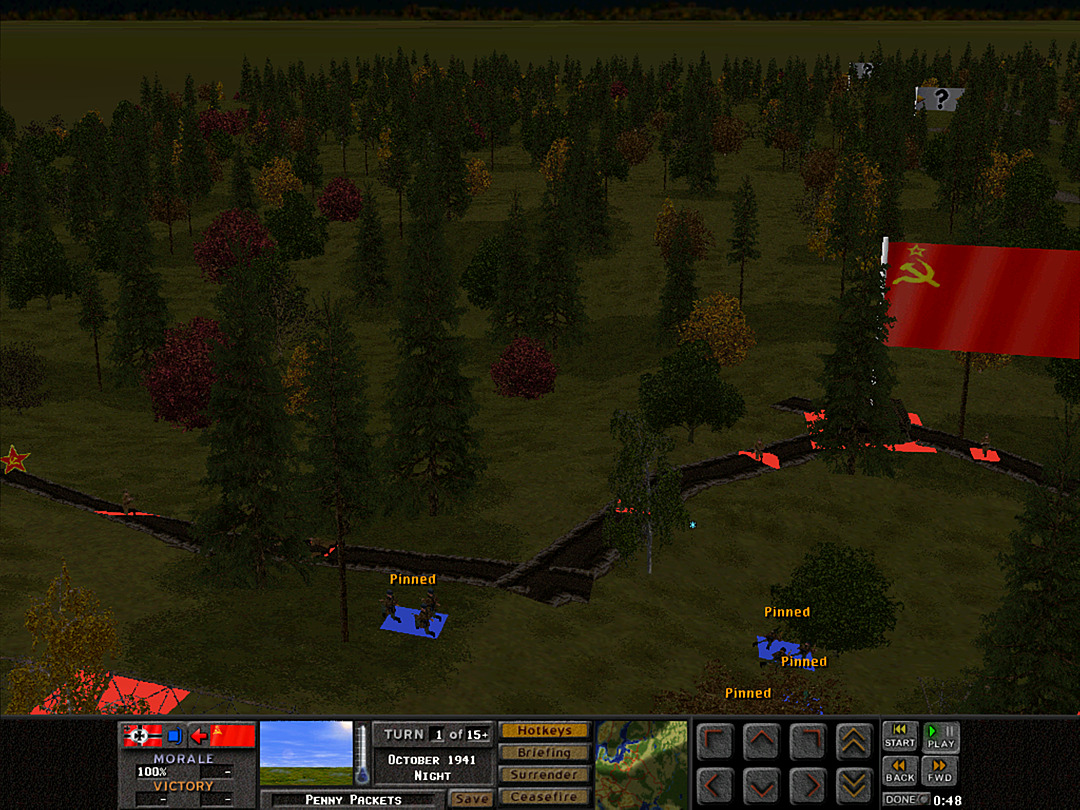 1 Plt has a little more ground to cover, and meet stiff opposition. 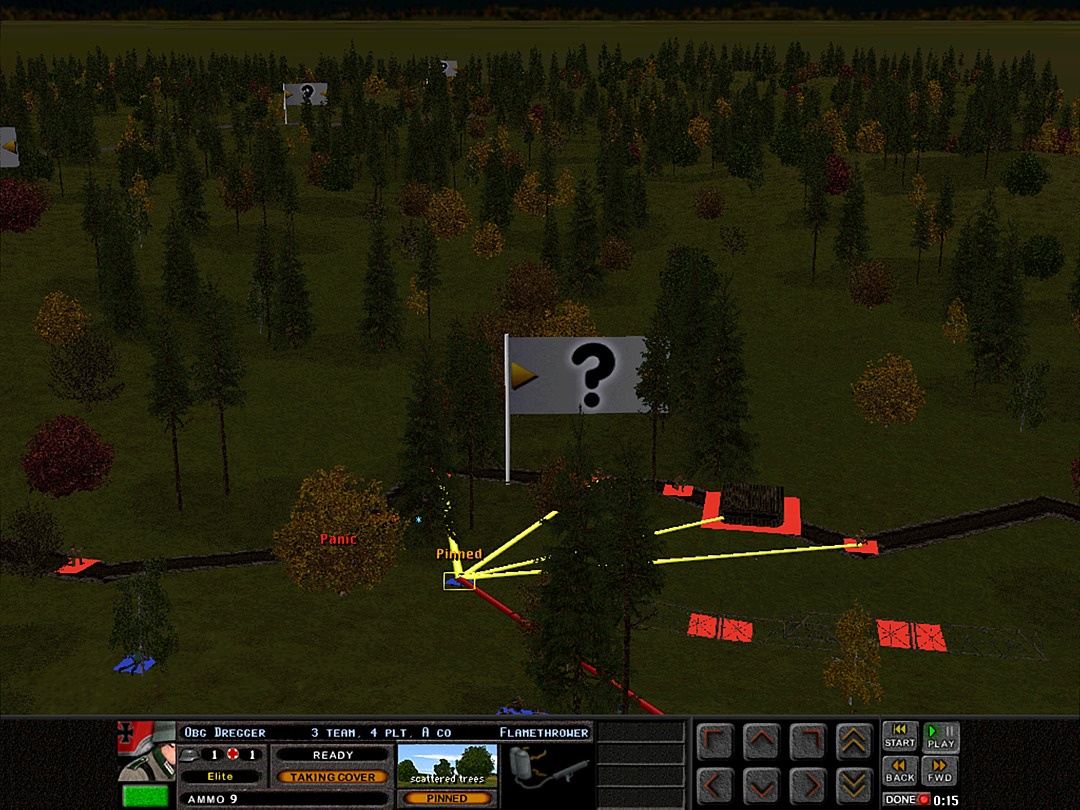 One of the flamethrower teams from 4 Plt gets in range to hit the bunker.  But enemy fire holds them back, while their comrades shoot more flames at the trench. 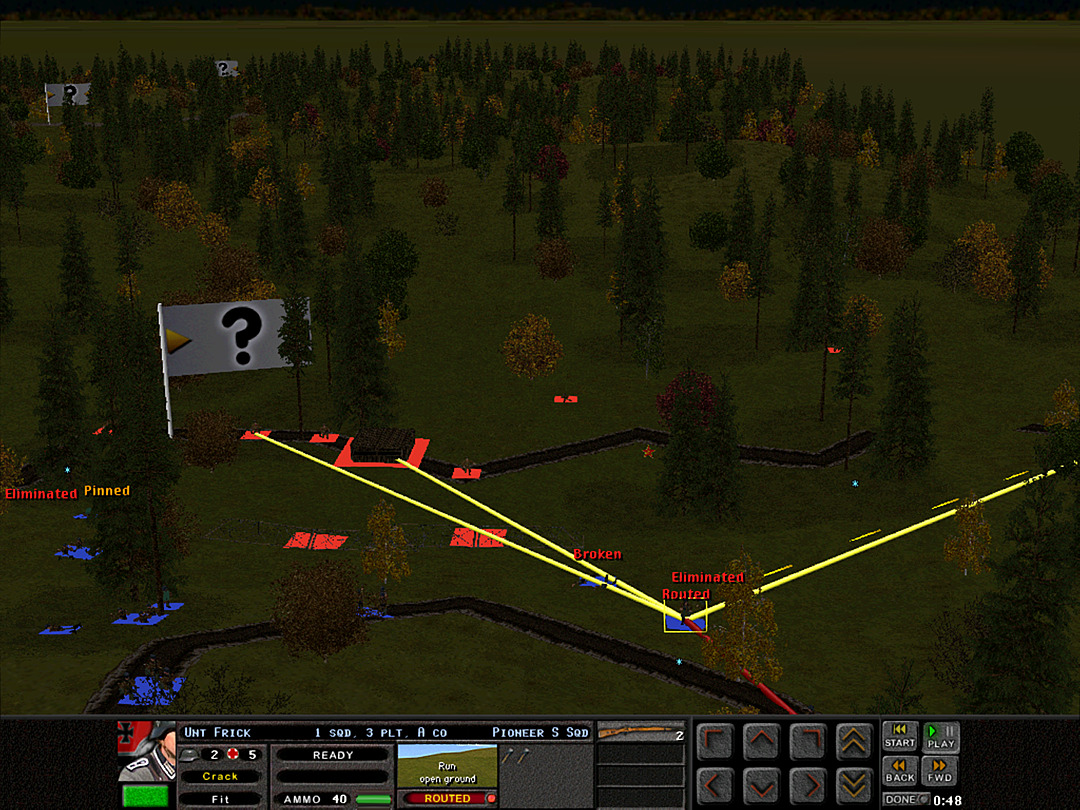 3 Plt is unable to advance as they take fire from another machine gun bunker to the south. 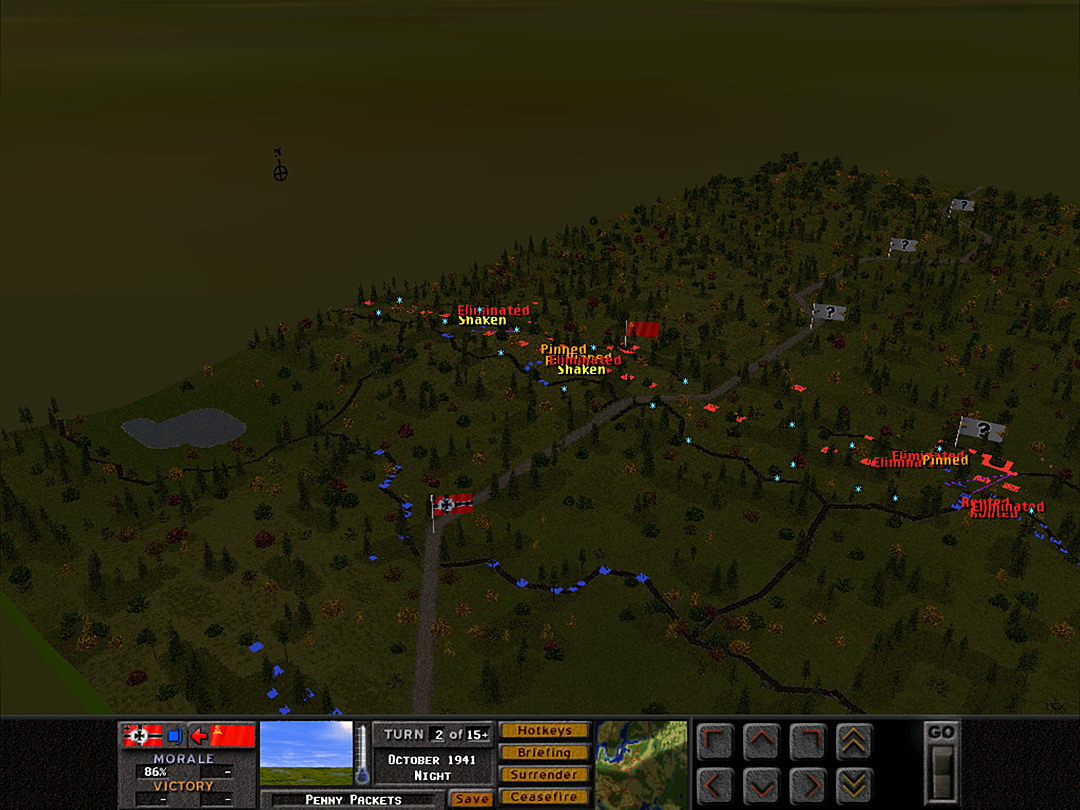 The enemy was not entirely taken by surprise. We're in for a serious fight, but we must take the trenches tonight. It's our best shot before the Soviets can reinforce them. Now that the battle's begun and we're all blue, we can see the positions of B Coy much better.  2 Plt is doing fairly well, although they discover some enemy forces stationed farther to the north.  It has gone poorly for 3 and 4 Plt. The flamethrowers were immediately targeted by the enemy, and we lost several right away.  We need to concentrate our fire and regroup before we lose the right side.  2 Plt's flamethrower teams send the Soviets fleeing into the woods.  1 Plt is taking heavy losses. The Soviets have aimed for the slow-moving flamethrower teams.  They slow their advance, and hope that 2 Plt might be able to shift over and take out the bunker on their left.  3 Plt has been knocked back. They will try to send gunfire toward the bunker, so that 4 Plt can advance.  4 Plt isn't exactly in fighting form itself, however. 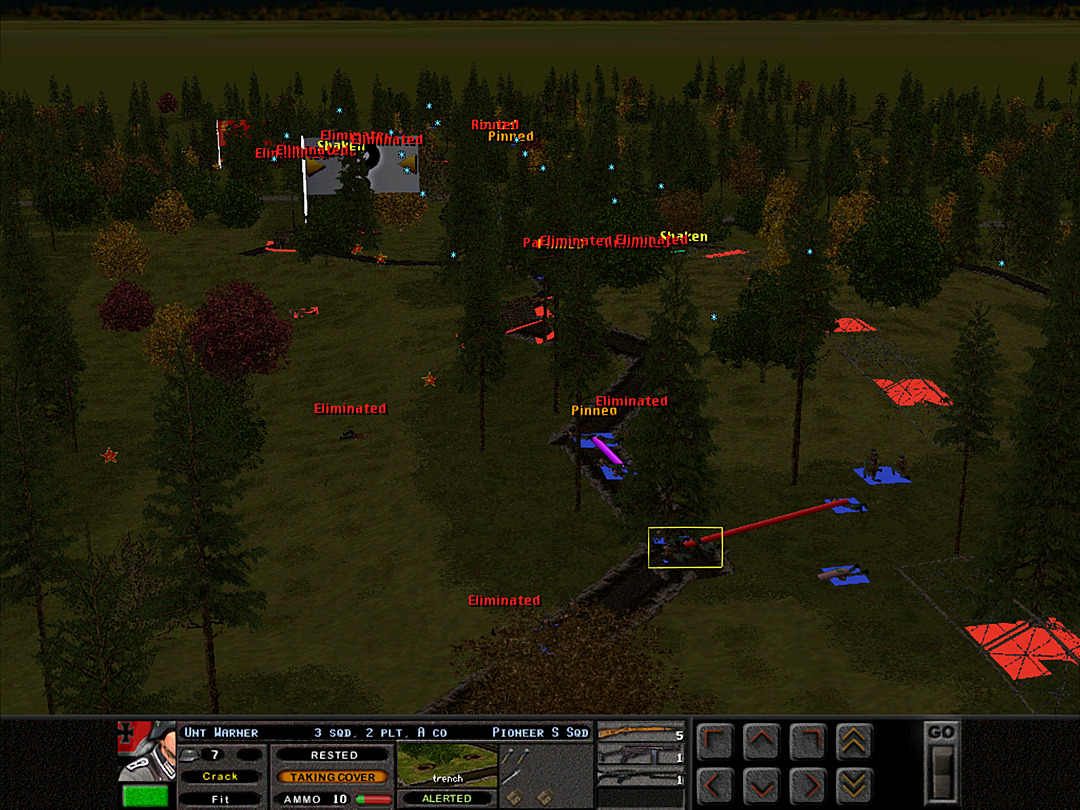 2 Plt has cleared out a number of Soviet squads, and can start moving over to help out 1 Plt. 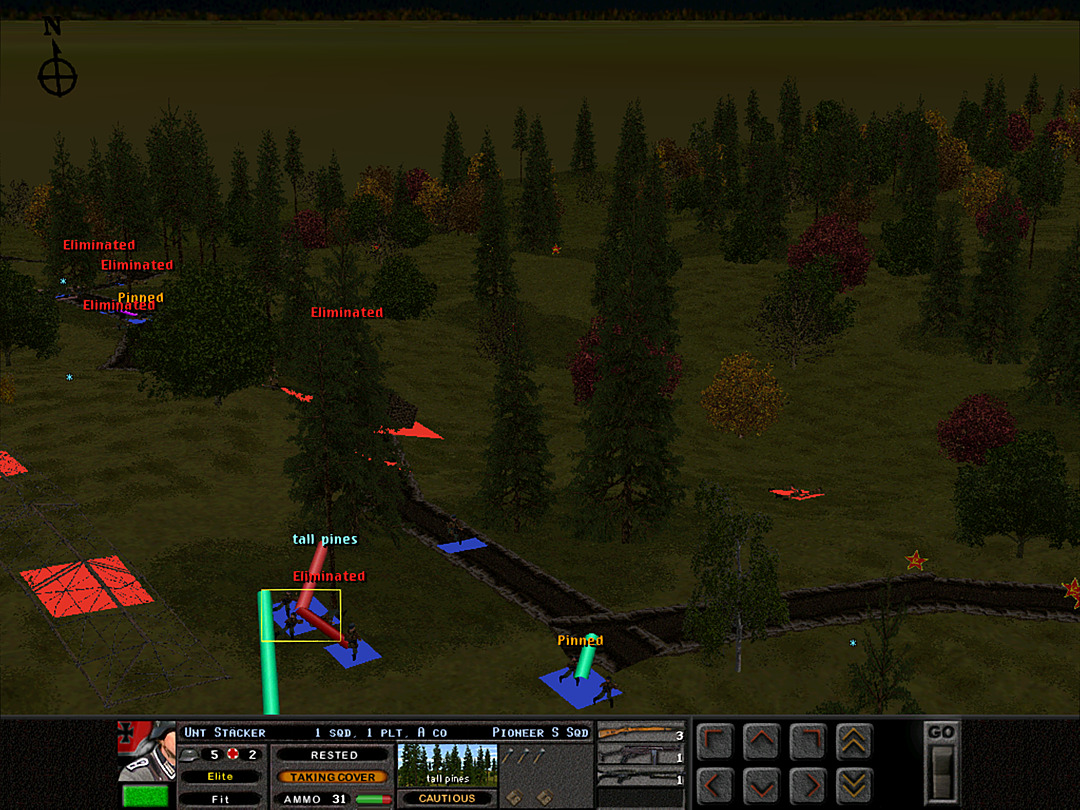 For their part, 1 Plt has finally managed to get a few men into the trench. 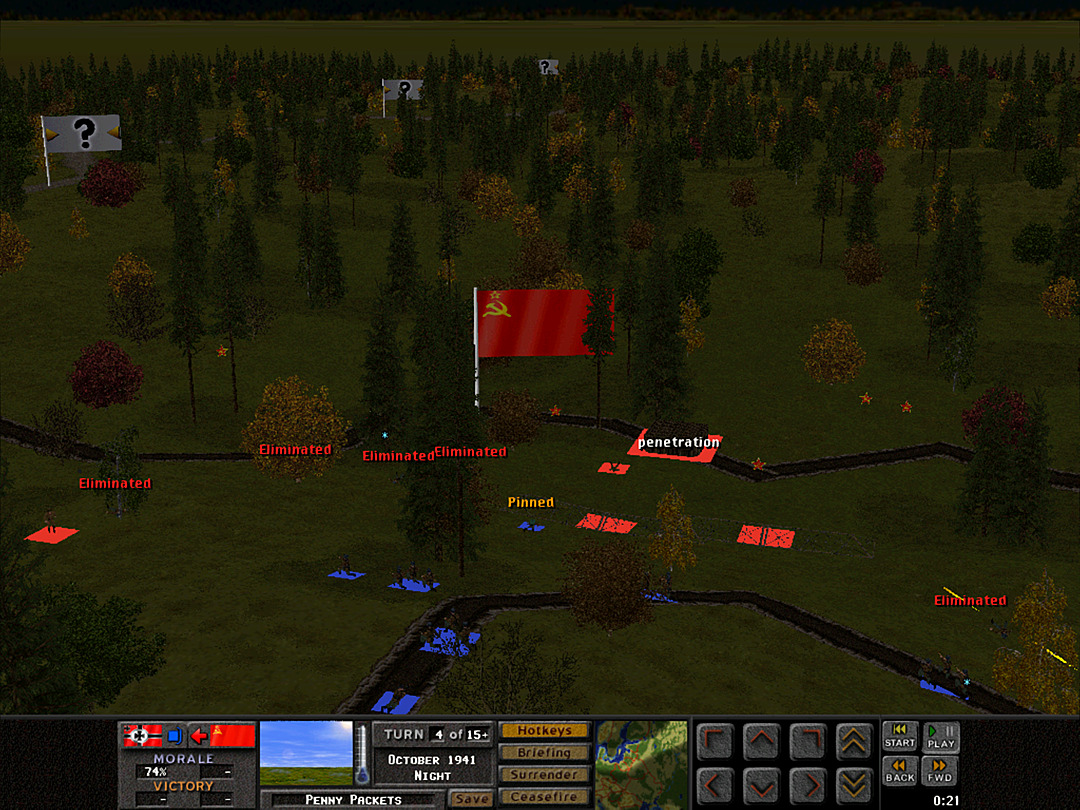 The anti-tank rifles try their hand at doing some damage to the bunker. 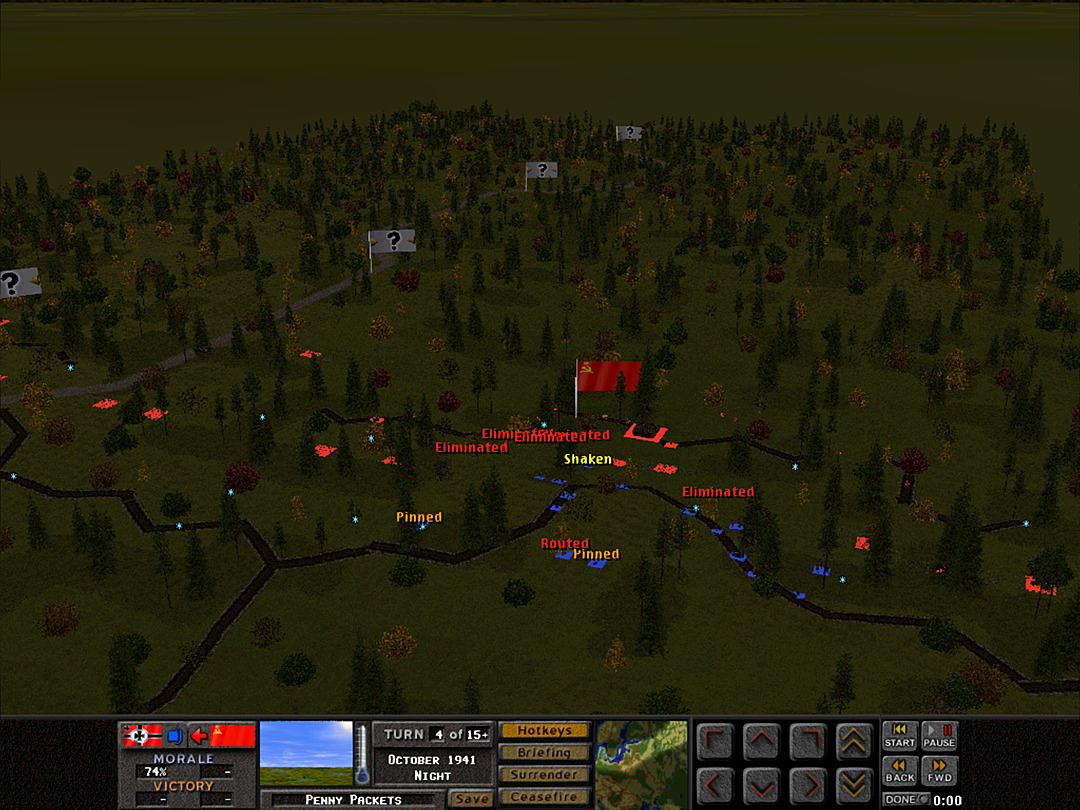 It's now 4 Plt that needs to collect itself, while 3 Plt is perhaps looking ready to attack again. 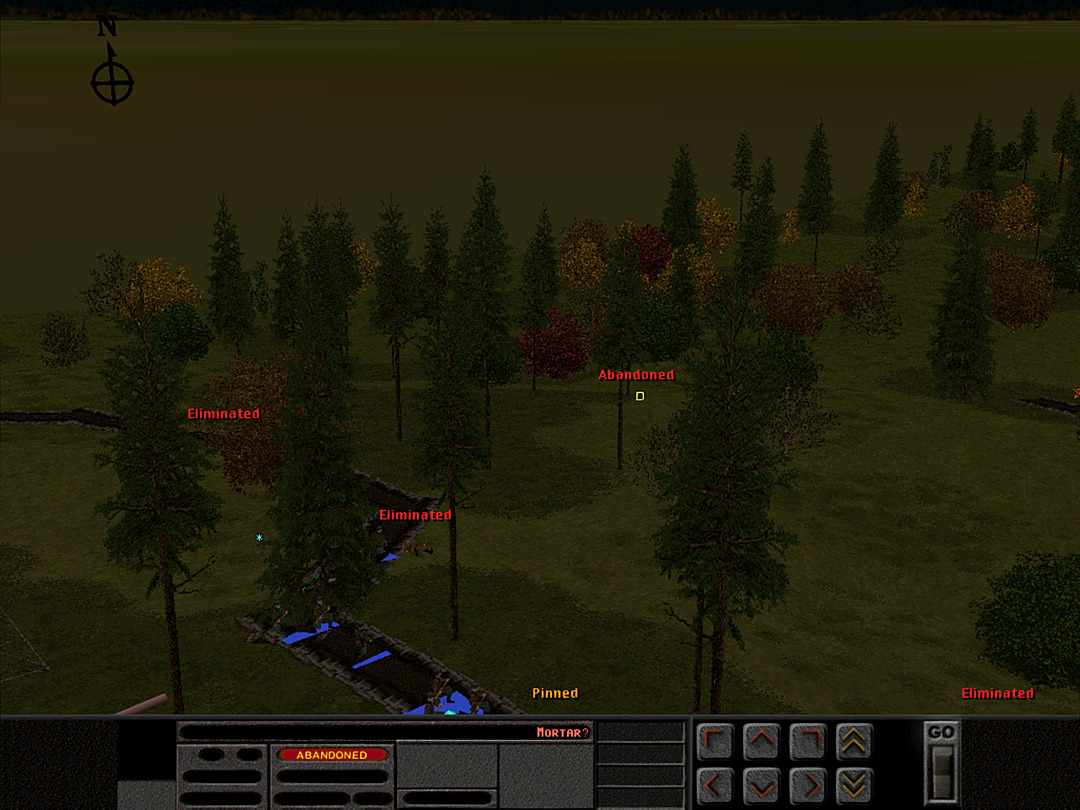 We've either killed or run off all the enemy forces on the north side that we've encountered. 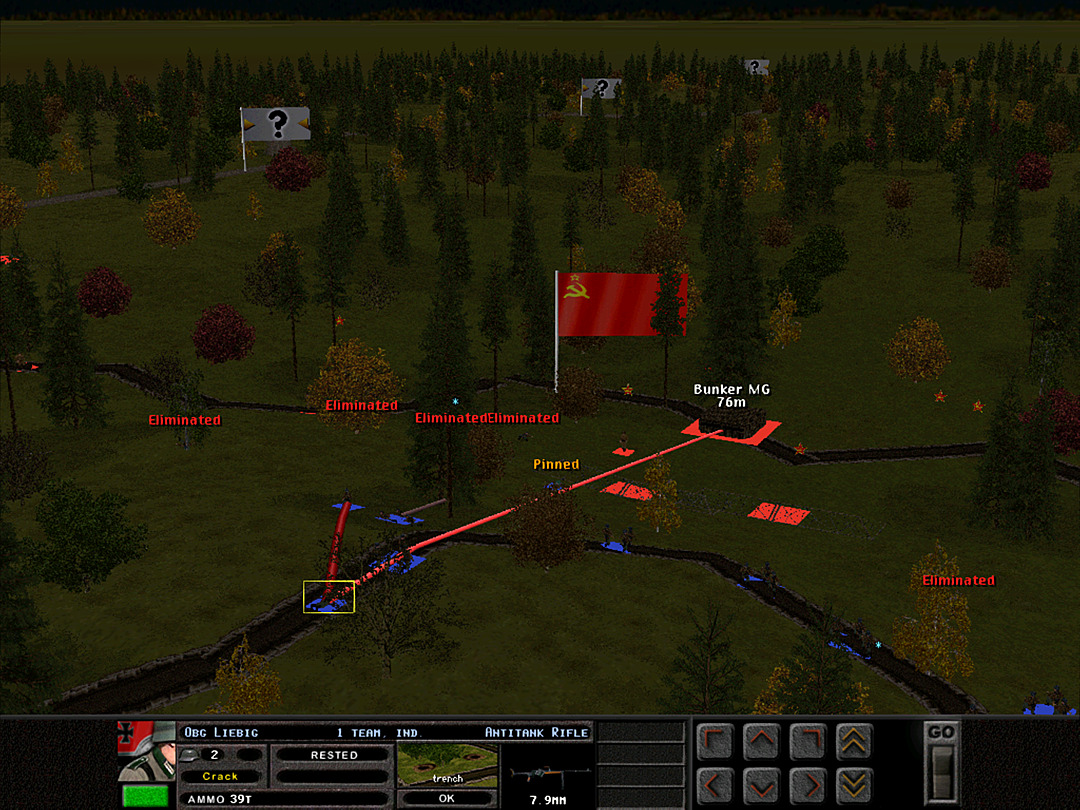 The southern bunker wants nothing to do with the anti-tank rifle, and targets it as soon as it spots it. 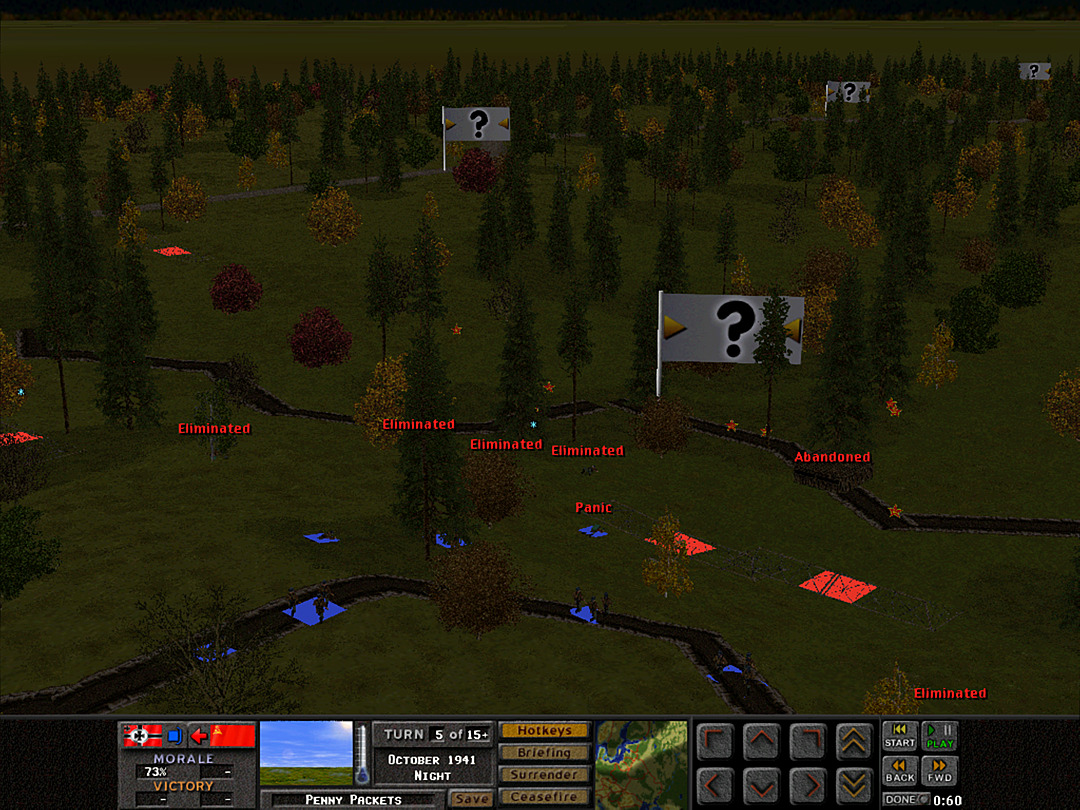 But they fear more of our forces might have the capability to knock them out, and soon they flee in cowardice. 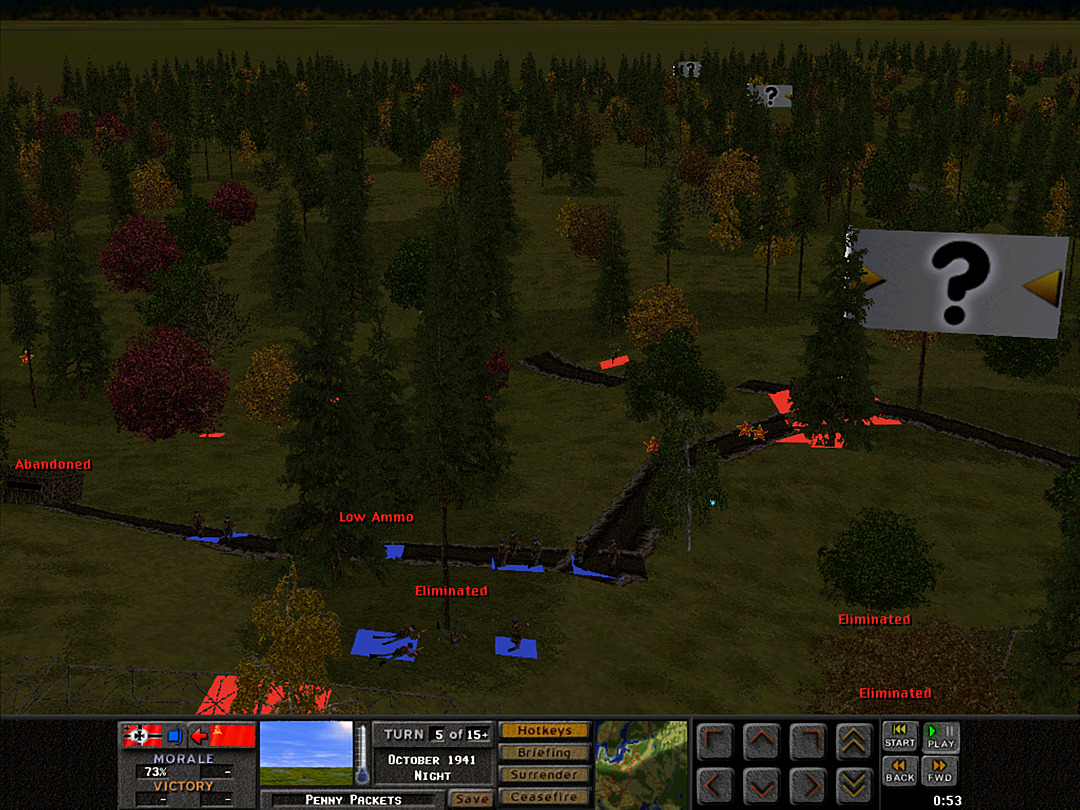 The bunker on the north side is also abandoned, and 1 Plt is getting significant numbers into the trench now. 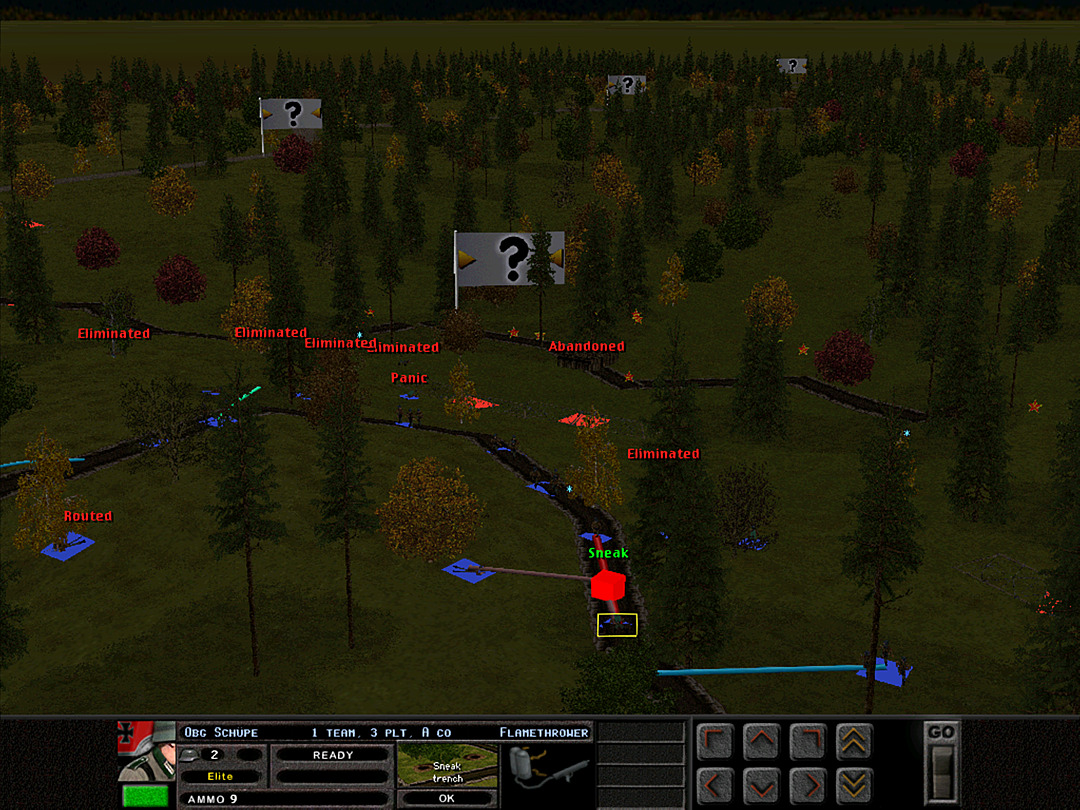 3 Plt does its best to call the squads together for another assault. 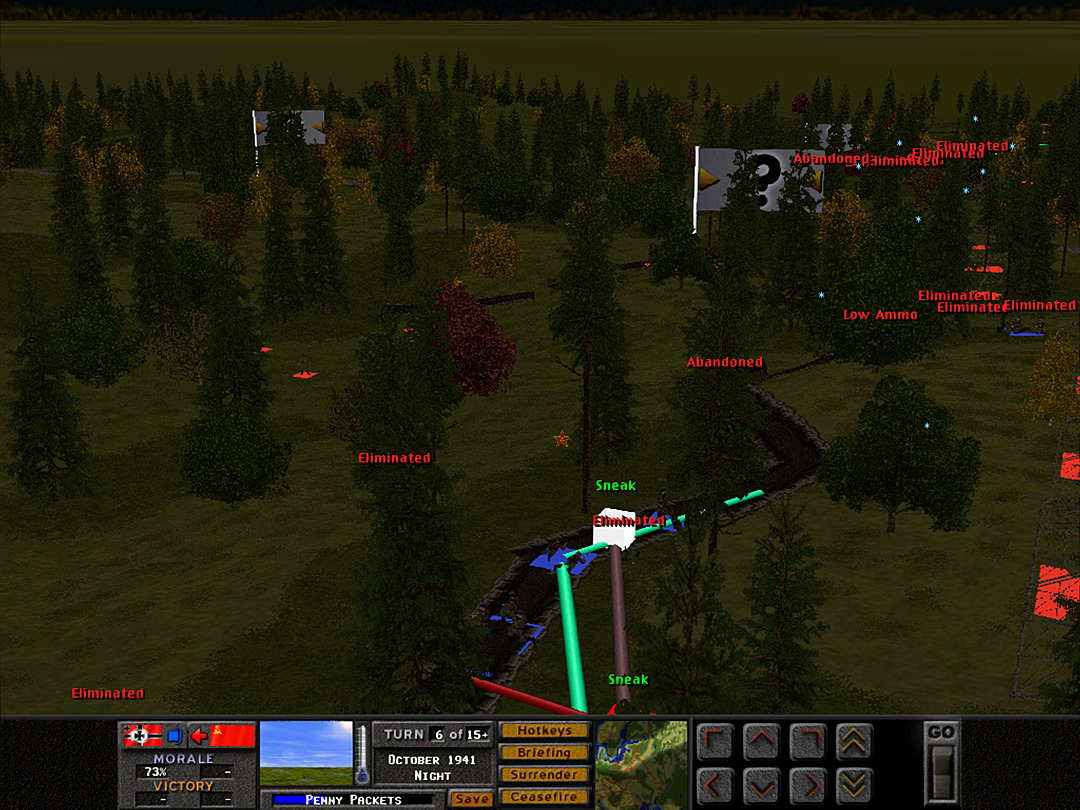 2 Plt inches southward along the trench, and clears a few more Soviet squads who were trying to hide. 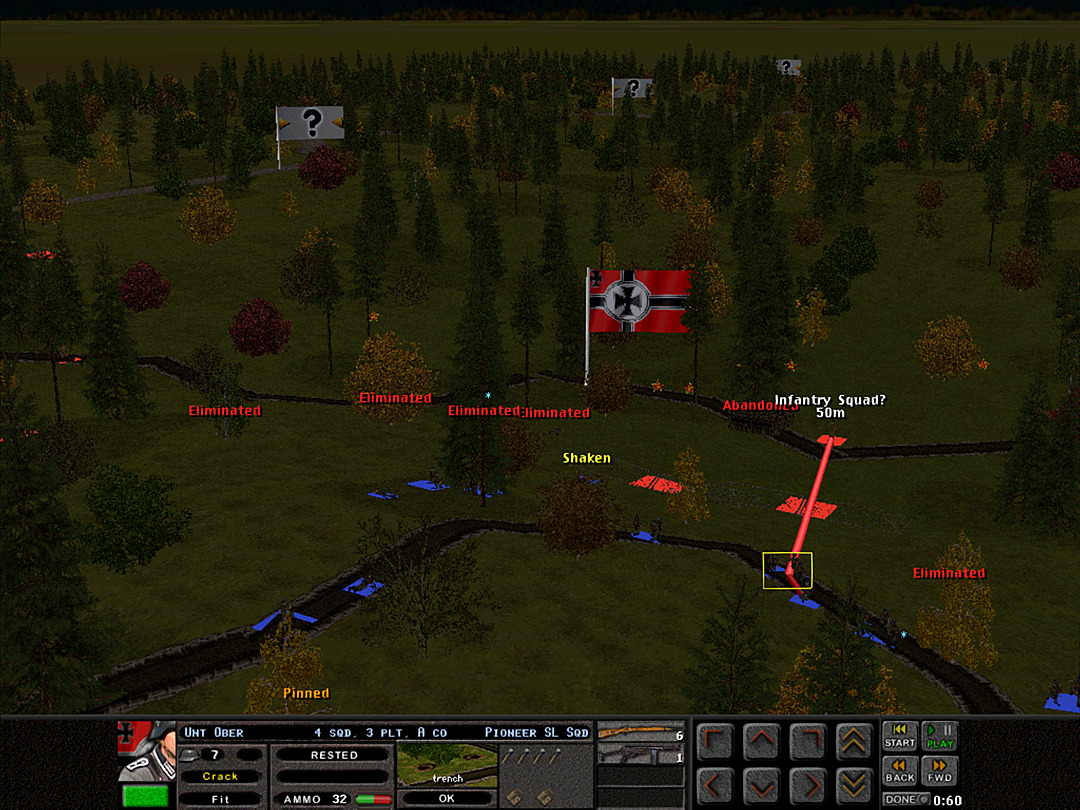 The alarm has been raised in the Soviet camp, and we're seeing fresh troops arrive at the trenches. 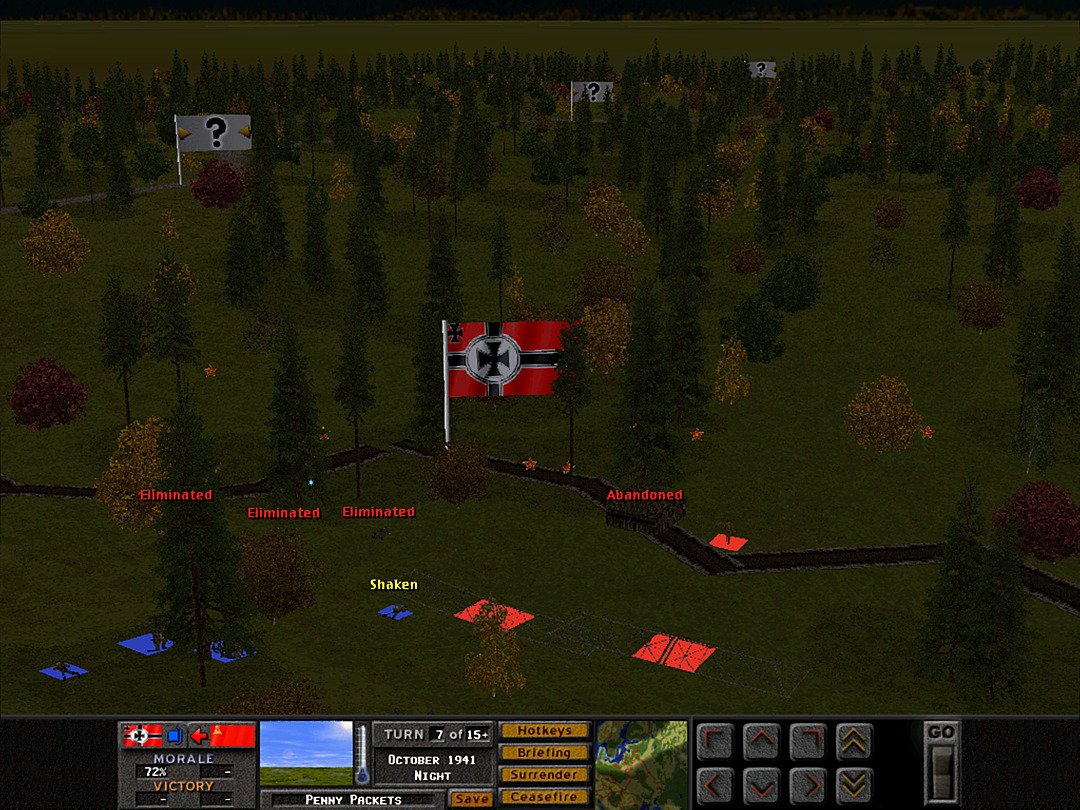 They are few in number, however, and it seems to us as if the trench is there for the taking. All we have to do is march to it. 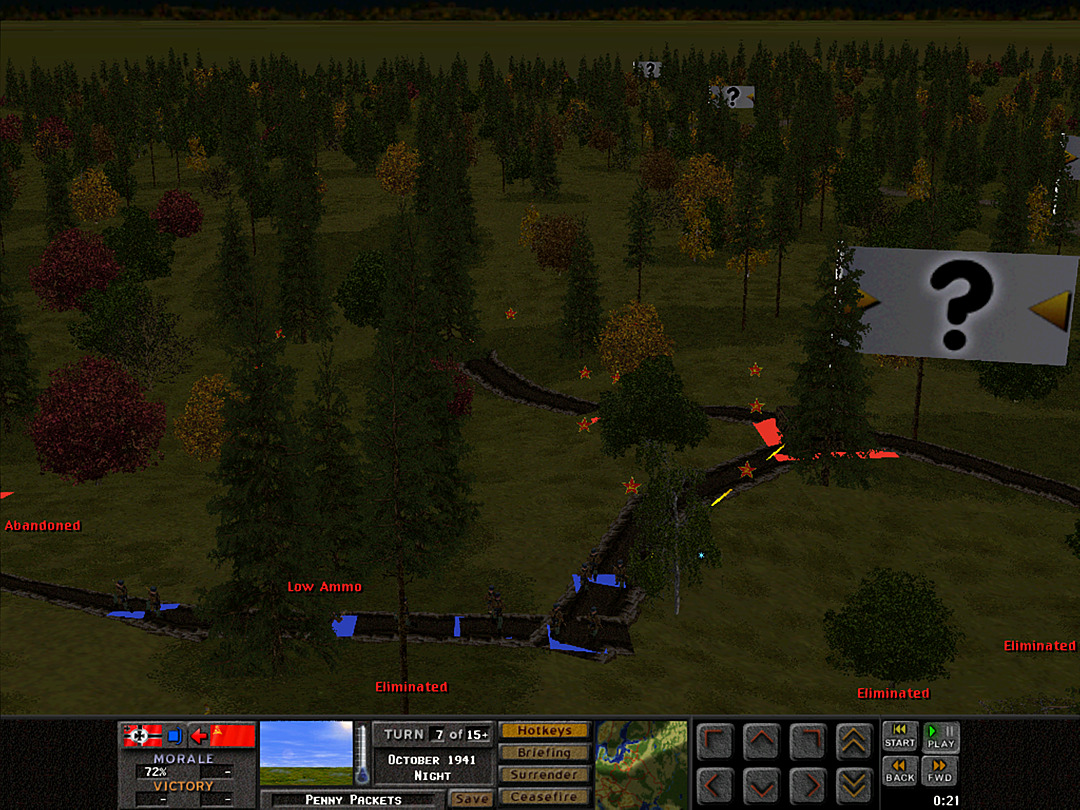 1 Plt is safe on its left flank, and they're now pushing toward the main bunker target near them. Unit Highlight PSW 221 Light Armored Car 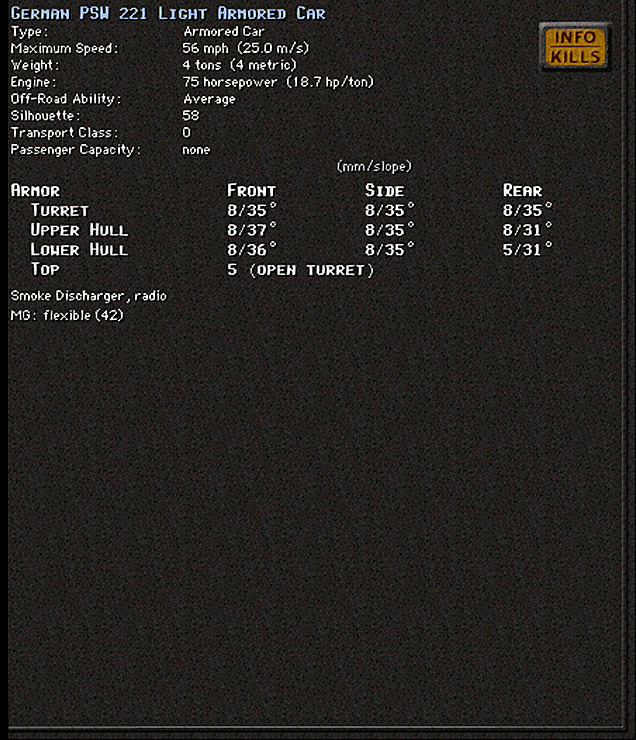 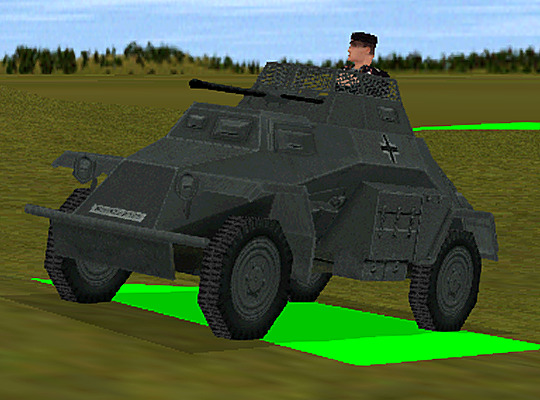 Crew: 2 Base Cost: 27 The first in a line of scout cars built on a common design. Since armored cars were one of the few combat vehicles Germany was allowed to develop in the open, this scout car design actually dates to the 1930s, and was seeking to improve on the early German models of that decade. In particular, better off-road capability was desired, and so this had a somewhat stronger chassis and suspension than its predecessors. The vehicle was clearly meant only to be used in a reconnaissance role; it had quite thin armor, and sported only one machine gun on top. It had decent top speed, though, and even in the 1940s it was more than capable of being used for scouting. Its use early in the war was more often out of necessity than by choice, as Germany hadn't yet started producing newer models in large quantity.
|
|
#
?
Mar 13, 2024 06:36
|
|
|
Operation: Penny Packets, Battle 1 Battle Time: 0:08 We're in the middle of our attempt to seize the Russian trenches prior to their own attack tomorrow. So far it's been a partial success. It looks like we have a shot to take the north side, though the fighting there is far from over. The southern platoons have struggled to make headway. However, there's a chance they might be able to push once more and take the point, as enemy resistance has seemingly lessened.  4 Plt makes a cautious attempt to take the trench again. 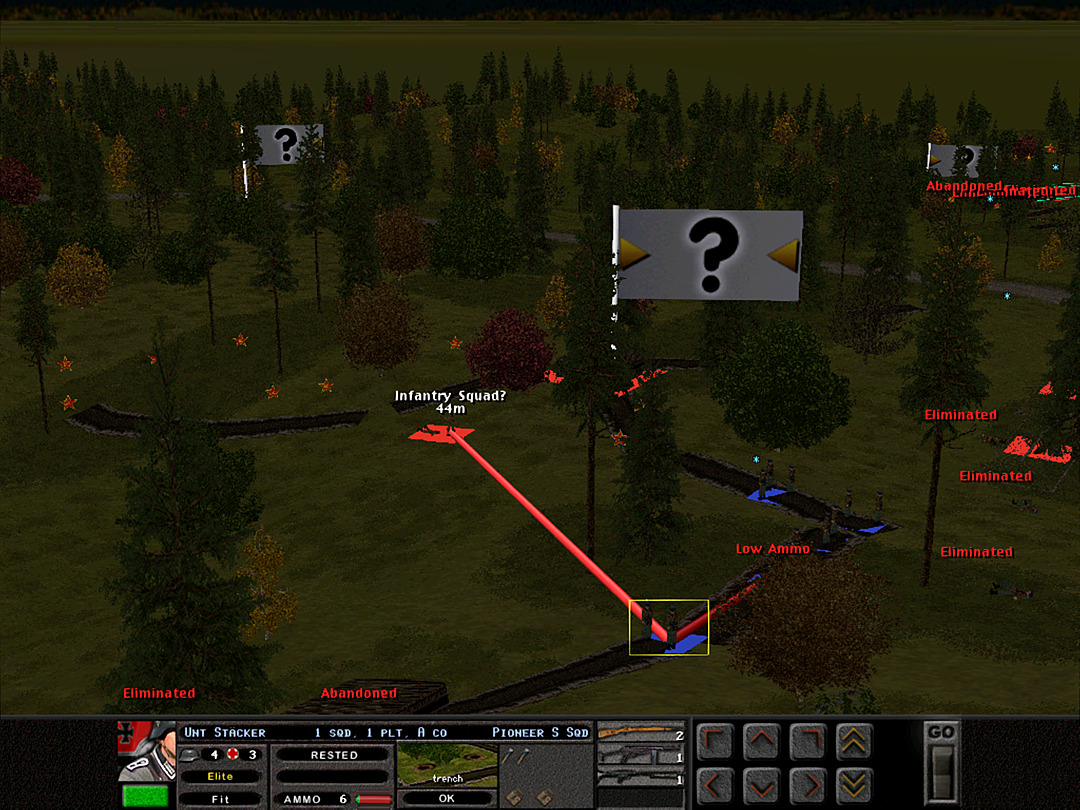 1 Plt is seeing Soviet reinforcements arriving to hold them off from securing the trench, but our troops are sending punishing amounts of gunfire back at them. 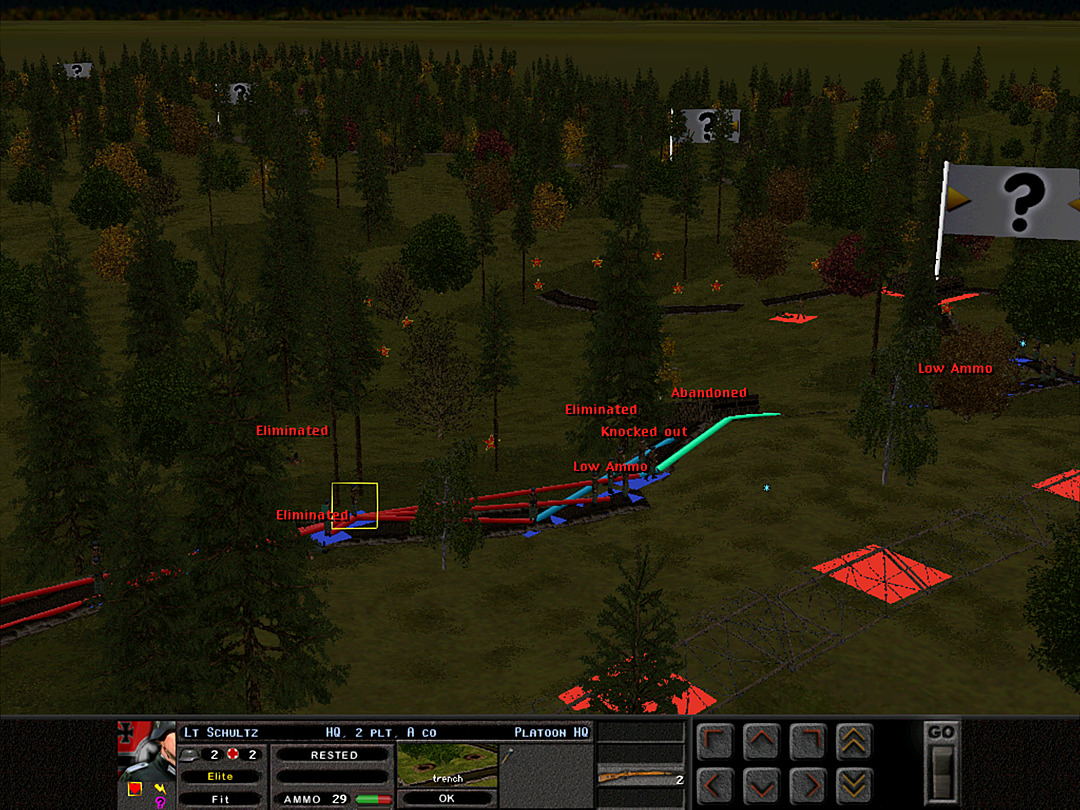 2 Plt continues to shift more forces in support of 1 Plt. 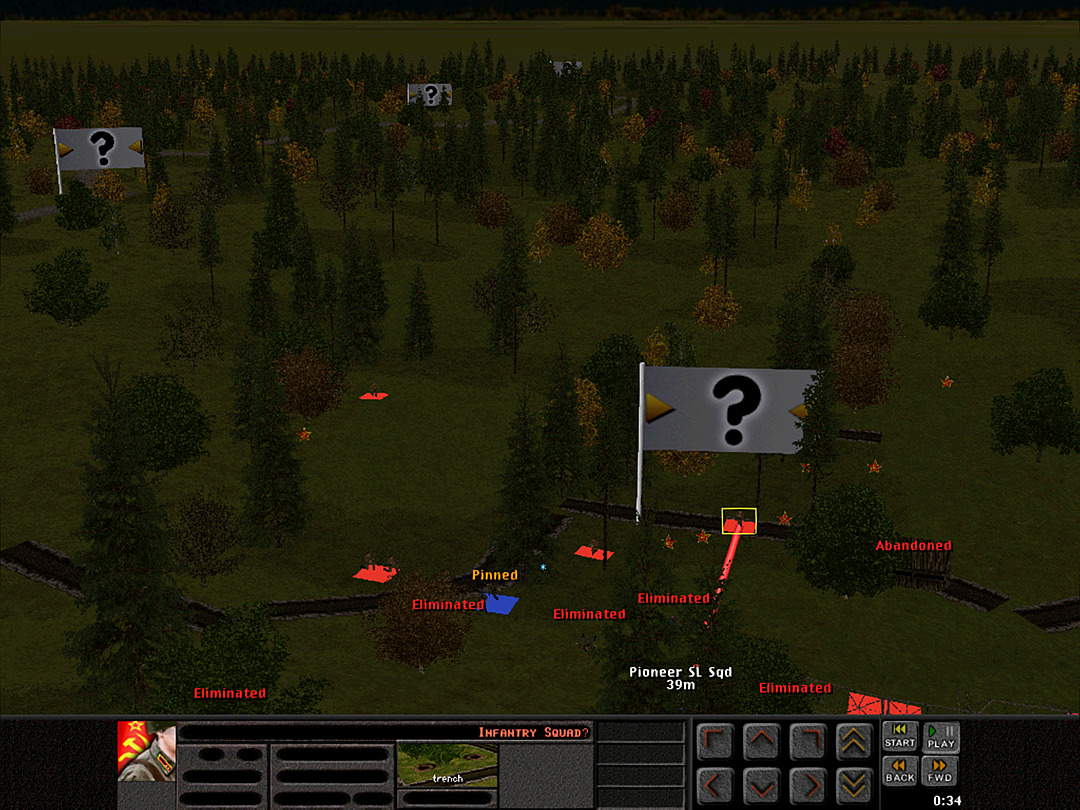 4 Plt runs into immediate trouble. It seems the Soviets were able to fill the trenches faster than expected, or perhaps there were more squads just hiding out in them. 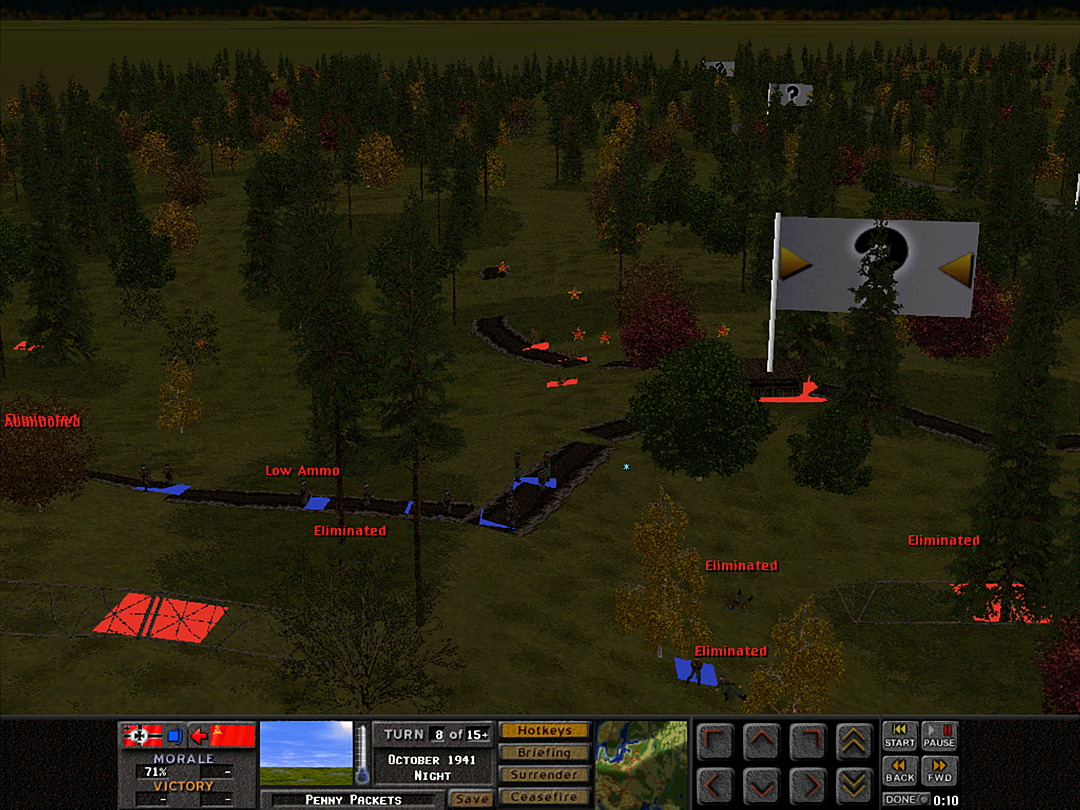 In the north, most of the enemy soldiers who were trying to rush toward the defense of the trench are sent fleeing down the hill. 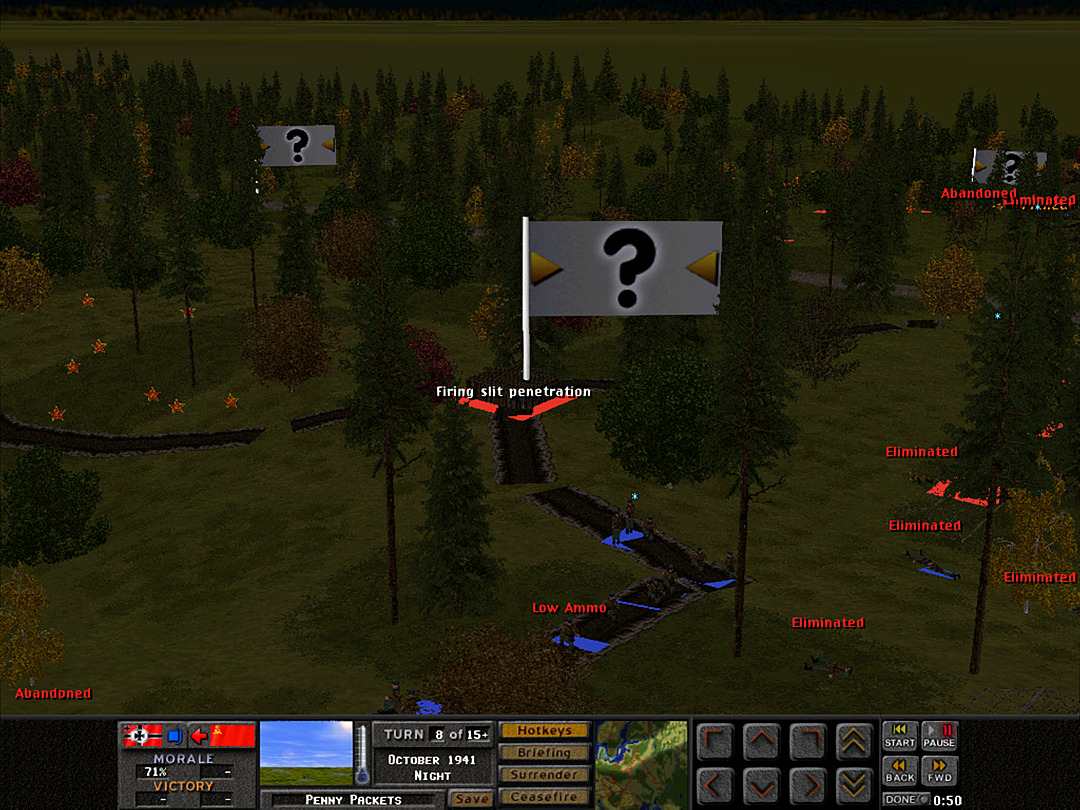 A lucky shot hits and ricochets inside the MG bunker. If nothing else, they're getting spooked in there. 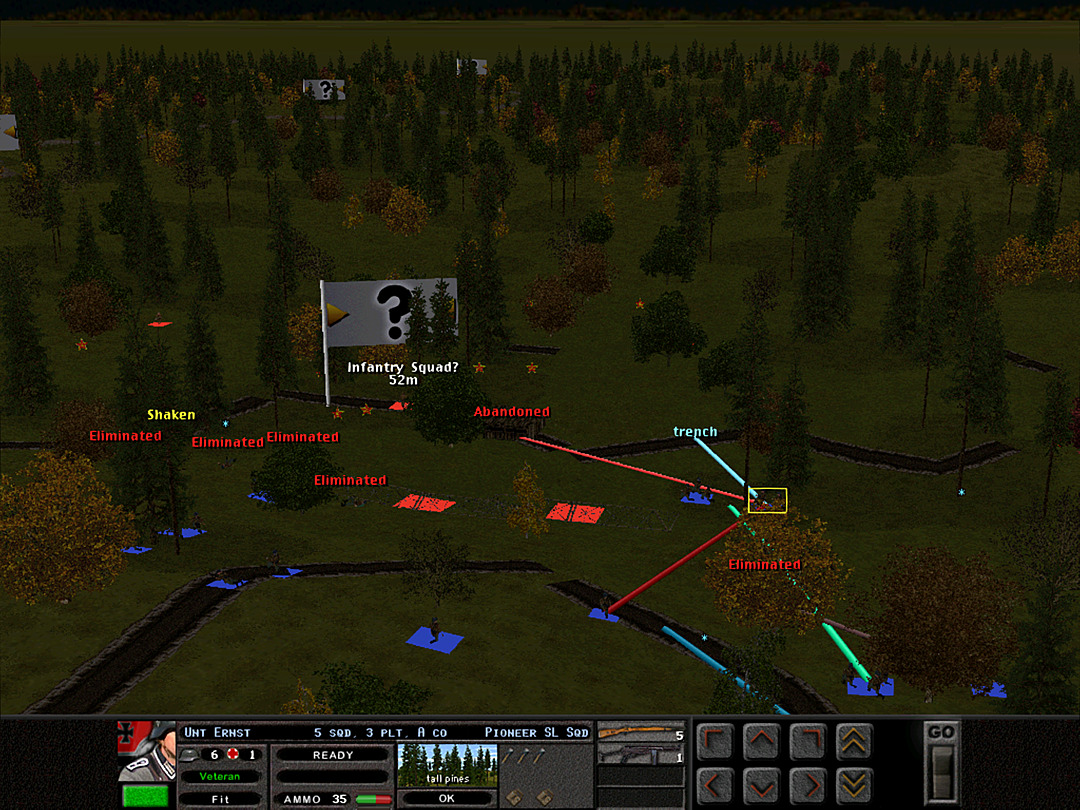 3 Plt knows it must act before 4 Plt gets wiped out. They renew their charge on the right.  Before long, the Soviets do break and scatter, and we gain the trench on the south.  The bunker that 1 Plt was assaulting gives up the fight as well. 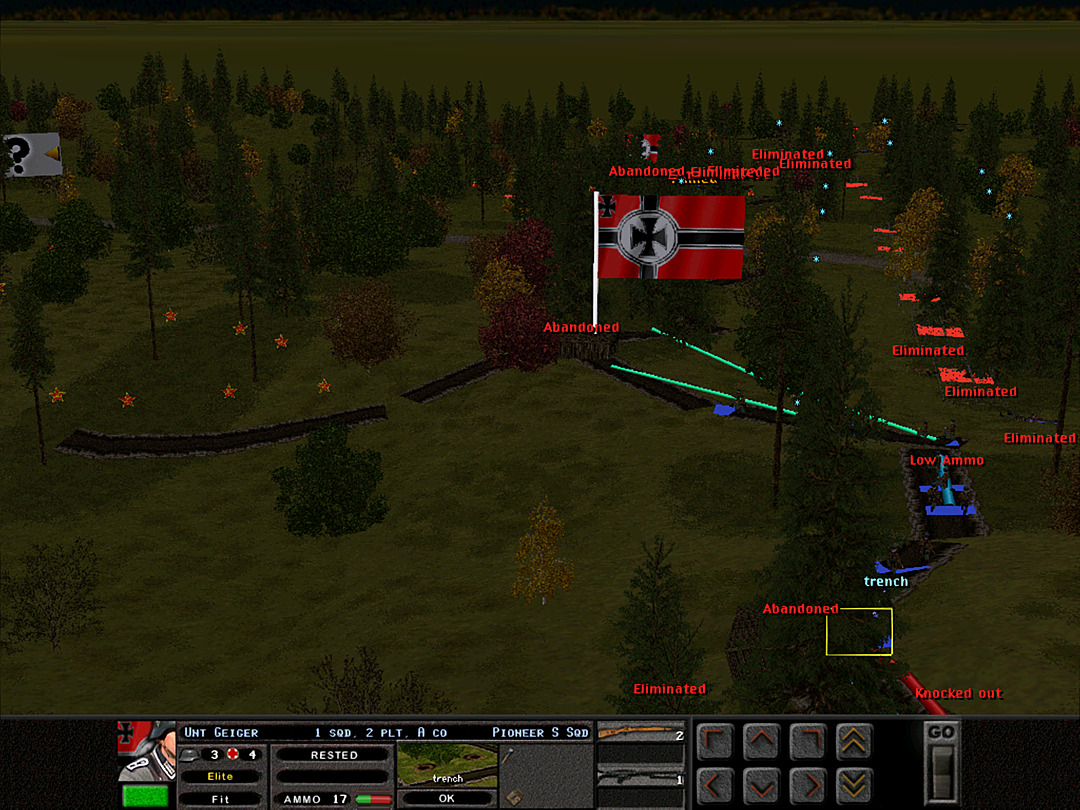 It's almost a bit quiet after our assault. 1 Plt pushes more men forward as 2 Plt pulls even closer. 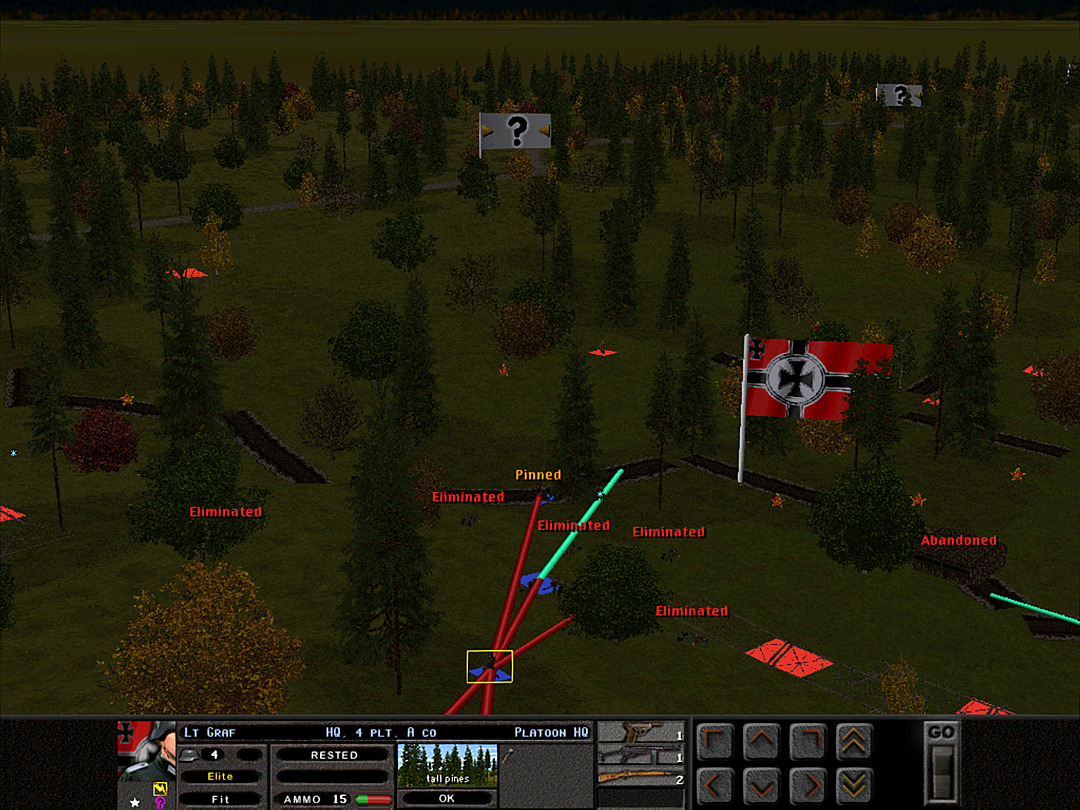 There's still significant numbers of men firing at the side of the trench 4 Plt is trying to take. They enemy has a secondary trench not far behind it. 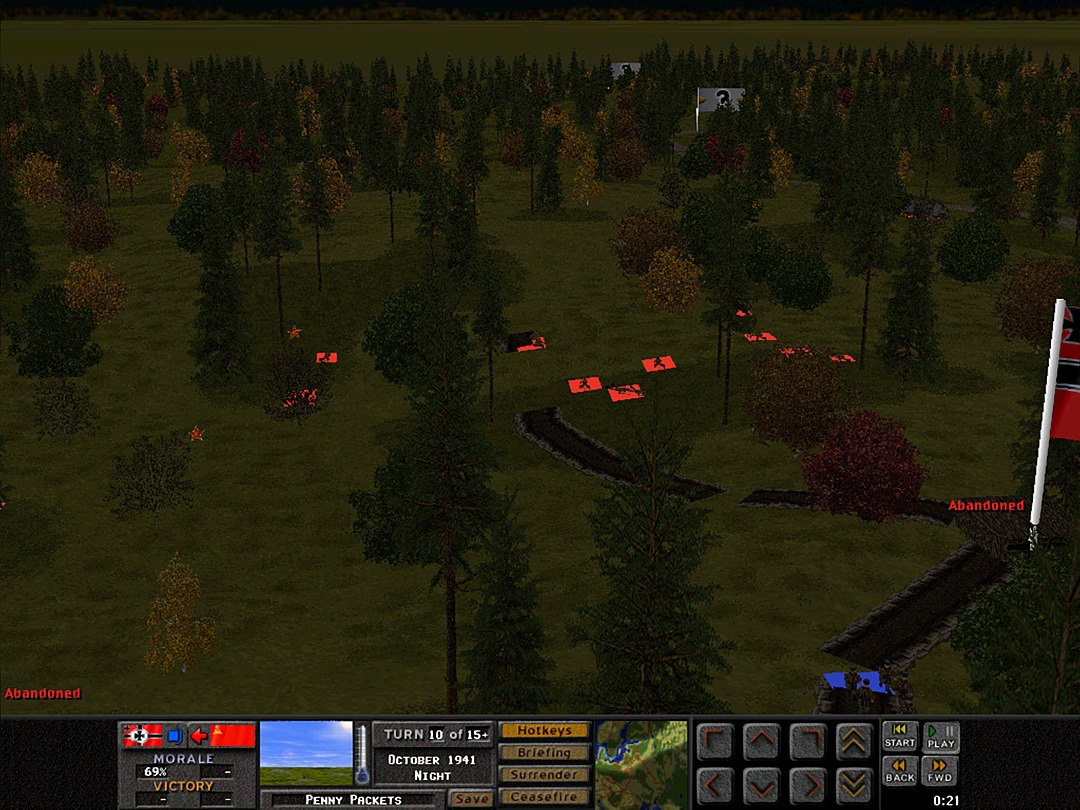 1 Plt spots a lot of movement down past the peak of the hill. It's not clear if the Soviets are running away, or massing for a counterattack.  We send some men a little north of where 4 Plt is. There've been reports of what sounds like tanks moving on the road. 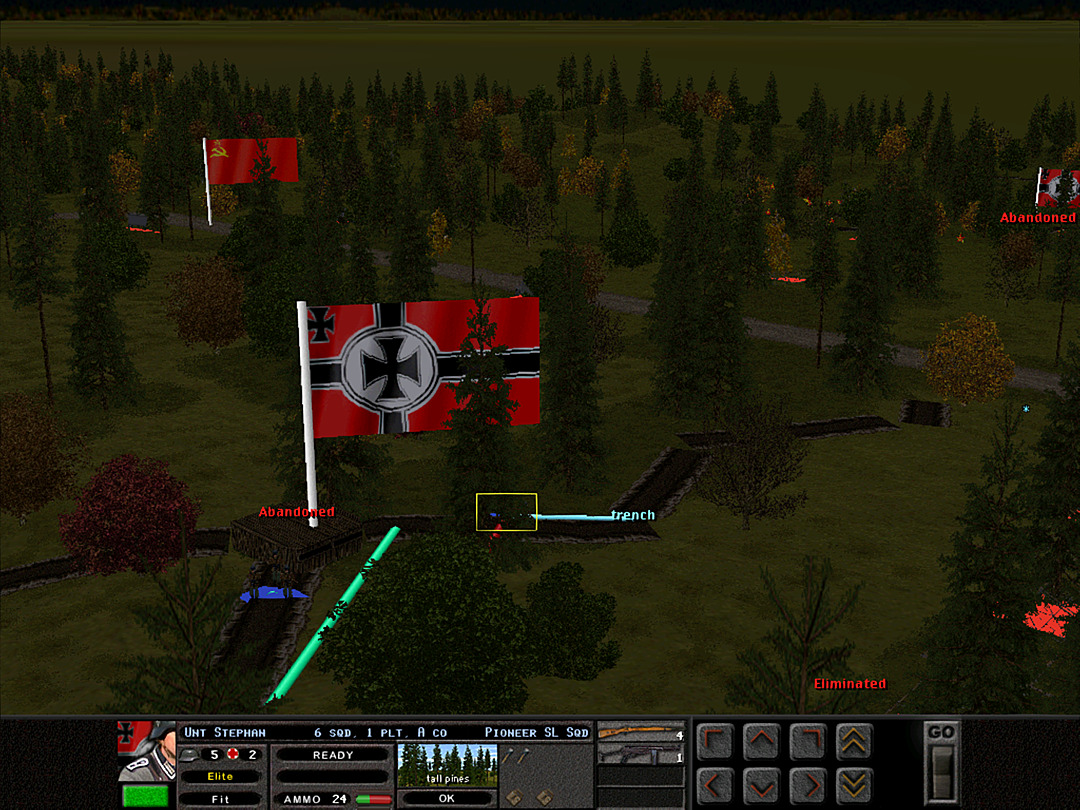 1 Plt also sends squads to investigate the road from their side. 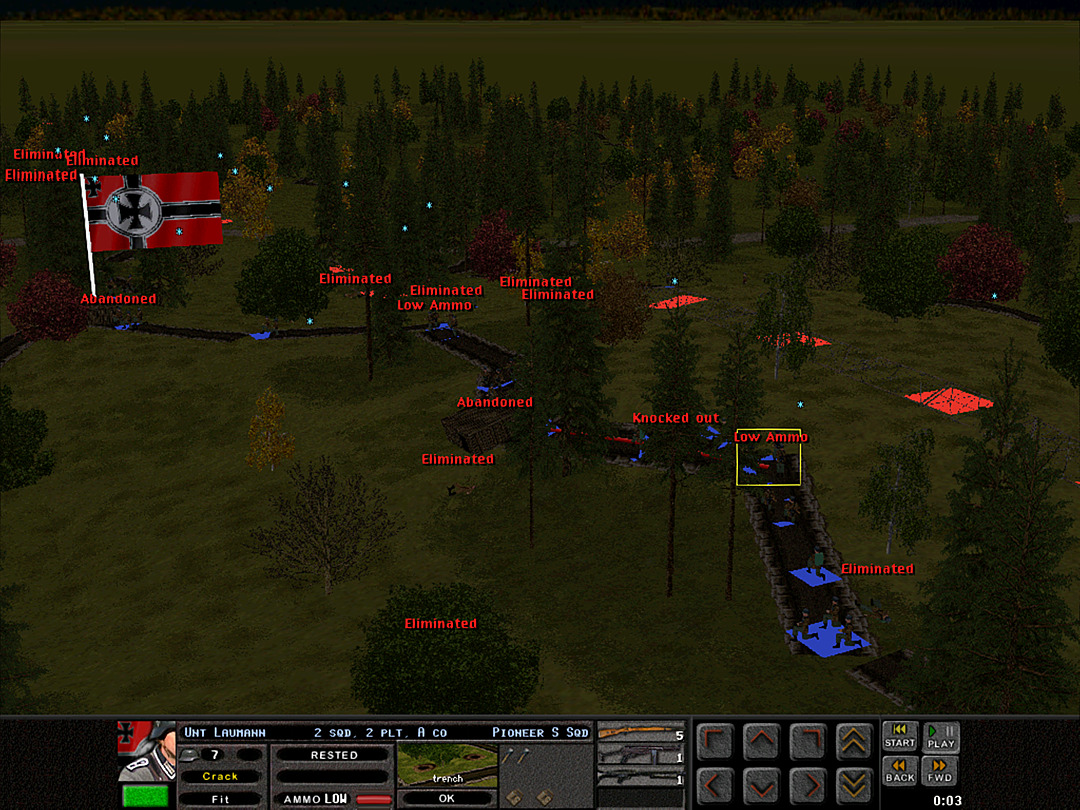 We have achieved some success, but the firefight is starting to deplete our supplies of ammunition. 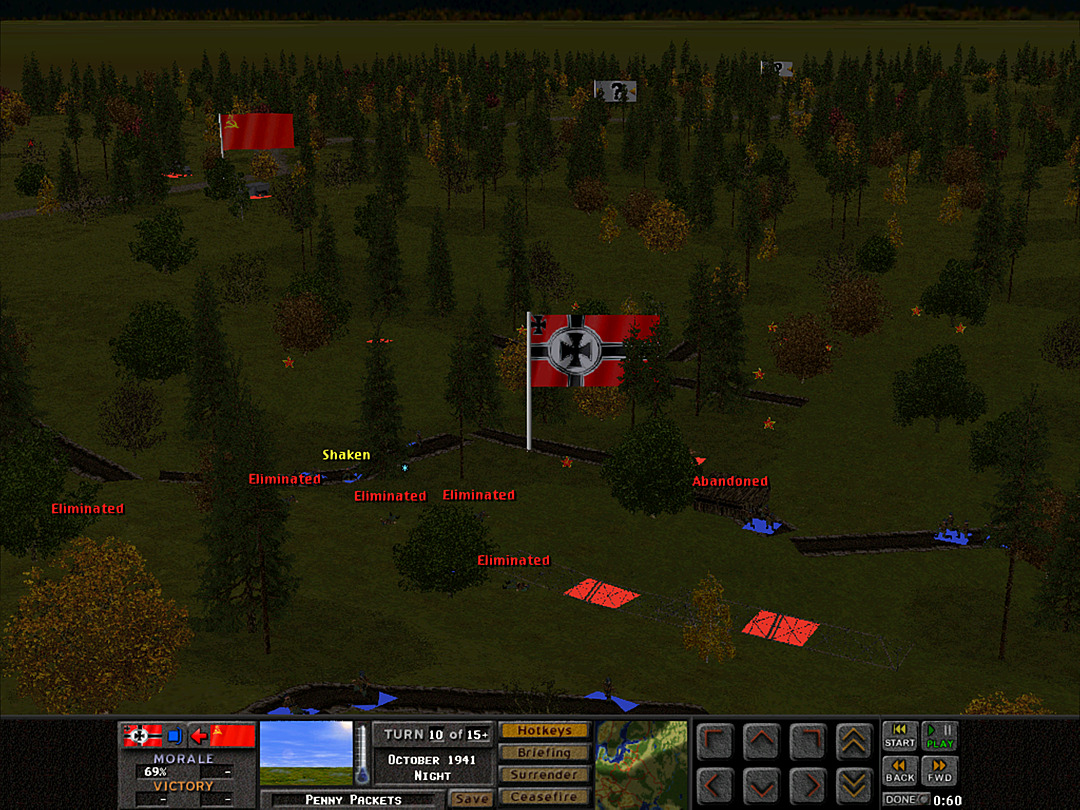 The southern trench is barely under our control. A distant noise by the road definitely signals tanks or similar vehicles. 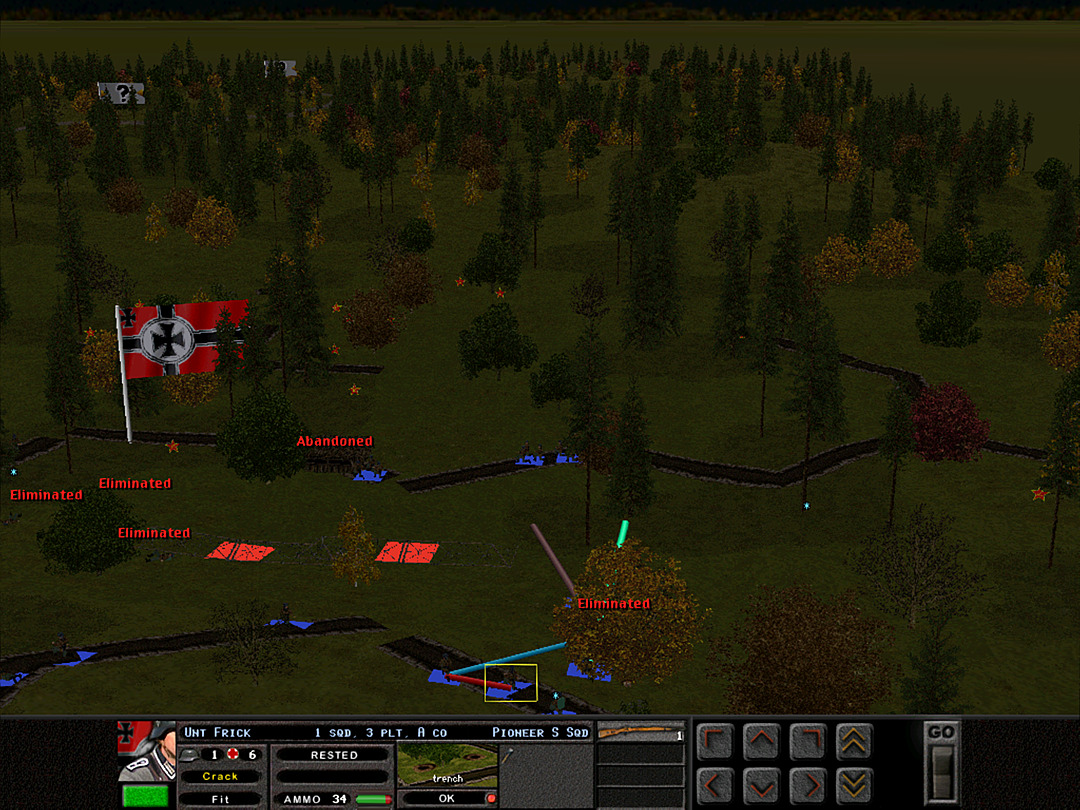 3 Plt tries to get more men in position to protect our tenuous hold on the objective.  The Soviets are getting almost on top of us now, close enough to start throwing grenades if they have them.  We do have a couple anti-tank rifle teams around. The one on the north is called forward just in case they're needed.  There are numerous enemy contacts, but it is unclear if anyone is going to actually make a move.  On the south end of the battlefield, 3 Plt spots a Soviet squad coming on the flank.  It's not safe to send any more men forward; whoever has already made it will have to do their best to keep the trench. 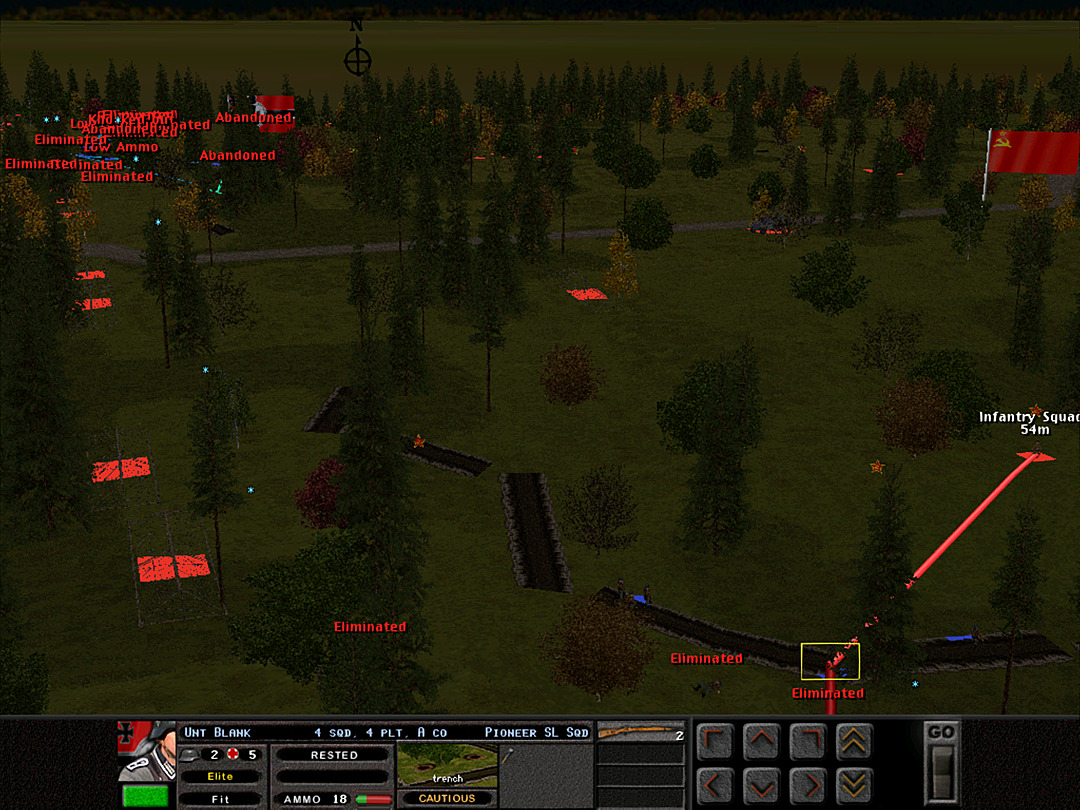 4 Plt is in the trench, but they have taken enough losses to now be at half strength.  Judging that the enemy flanking fire is going to isolate him from his squads, Lt. Machen of 3 Plt panics and loses his composure. 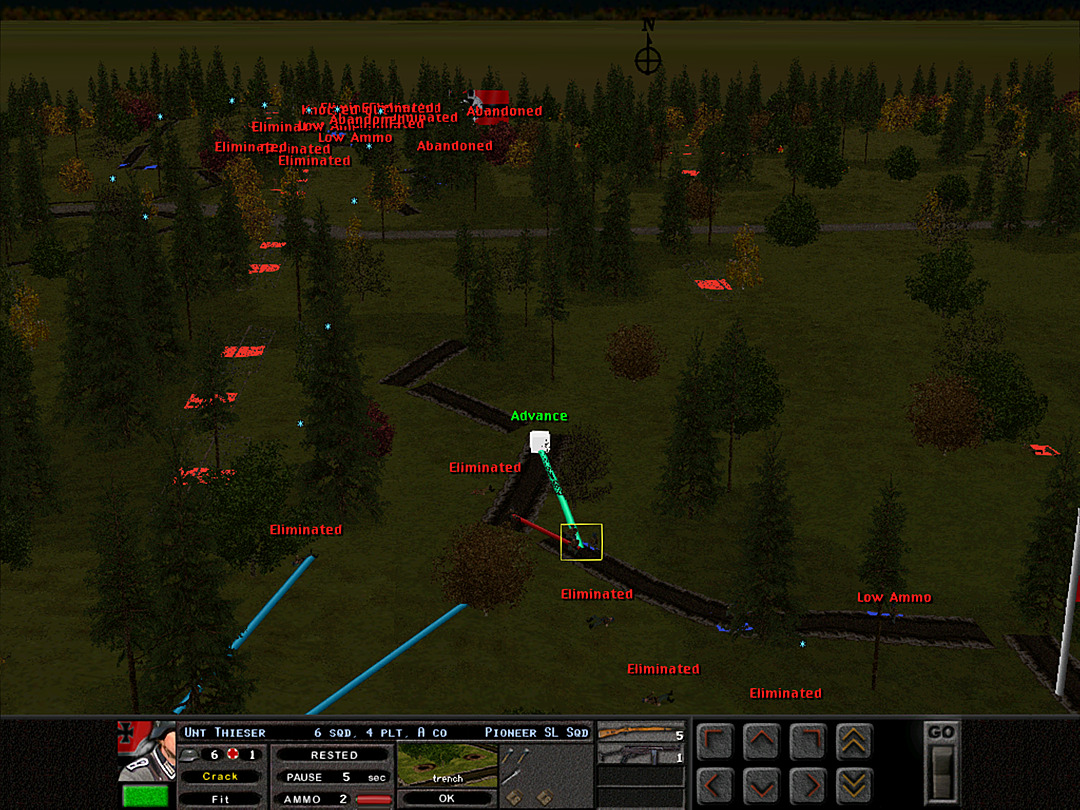 Meanwhile, 4 Plt tries to spread out and trick the Soviets into believing our force is stronger than they had thought. 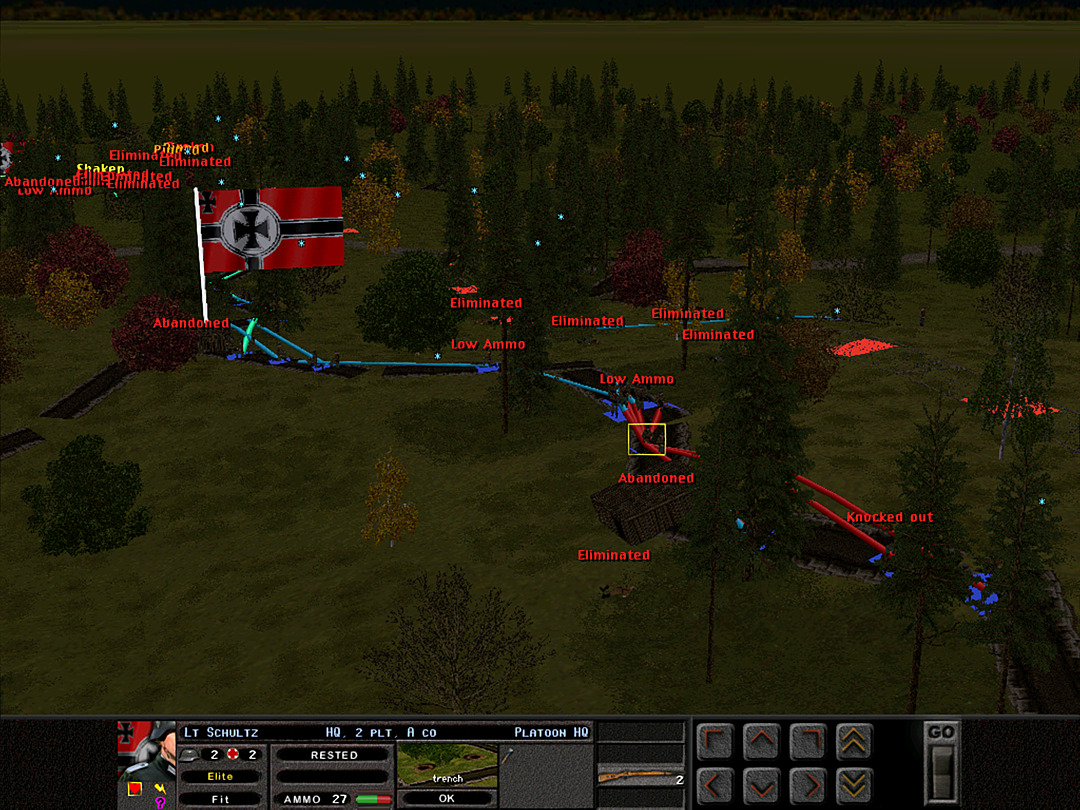 With little opposition on the north end, the two platoons will shift toward the road. 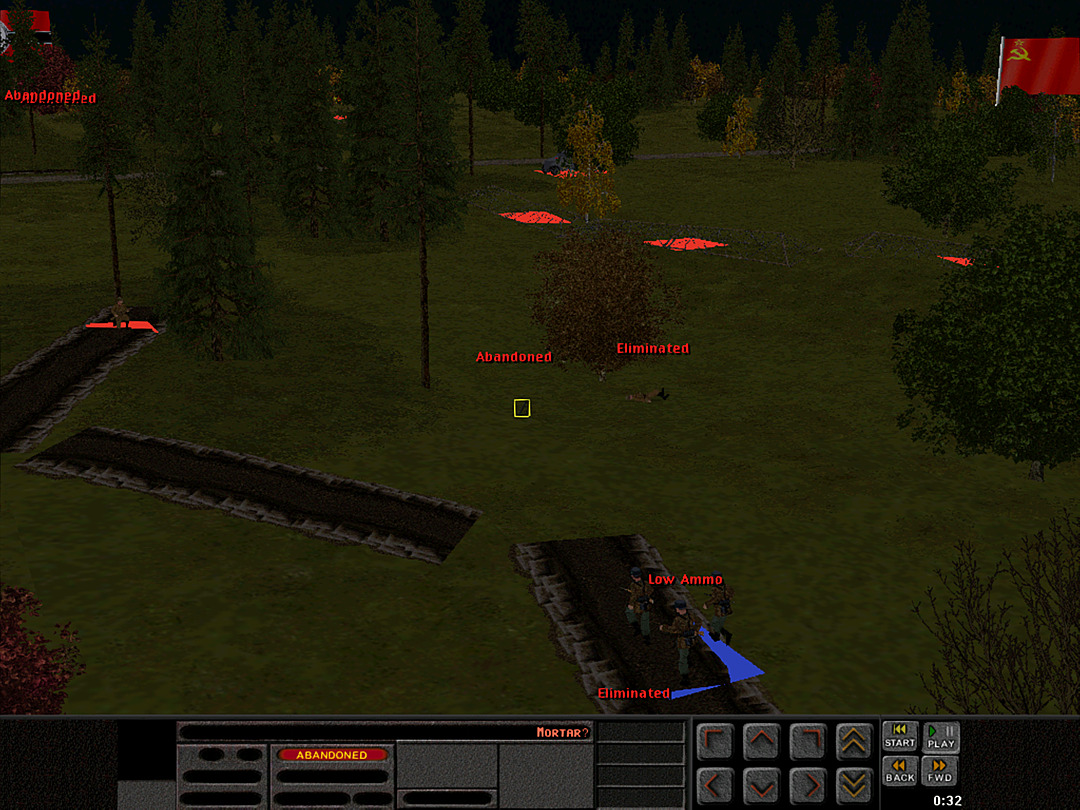 4 Plt finds that there are still some enemy forces in the trench, and they can't get any closer to see what is on the roadway. They do spot a number of eliminated Soviet squads.  A tank is spotted at the bend in the road. They had almost made the turn before anyone noticed.  These T-26's will be easy pickings; the AT rifle opens up.  3 Plt is in a bad way, as the men aren't sure if they should shift northward to support 4 Plt or hold their ground on the flank.  The tank takes a few hits but keeps moving. It does seem like the Soviet infantry have been emboldened by the tank advance, as some of them sound like they're right on top of us again. 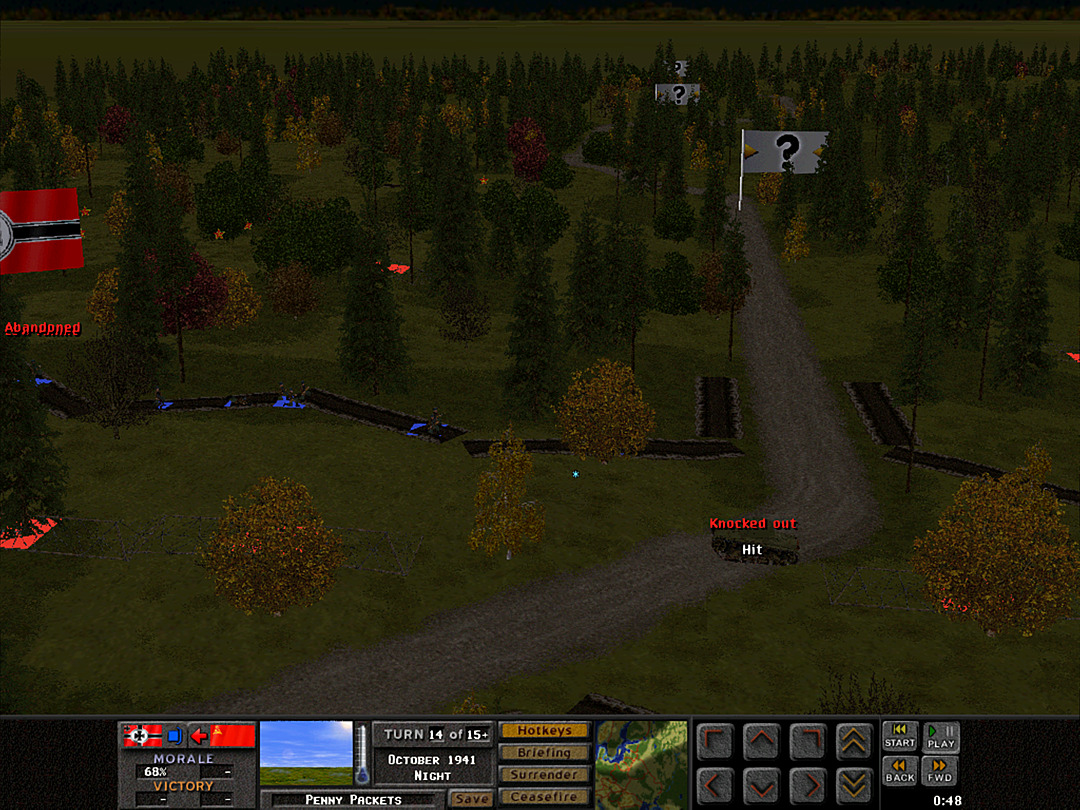 Repeated shots take out the lead tank. We expect that they will have more, but perhaps they won't be as quick to send them forward through our lines. 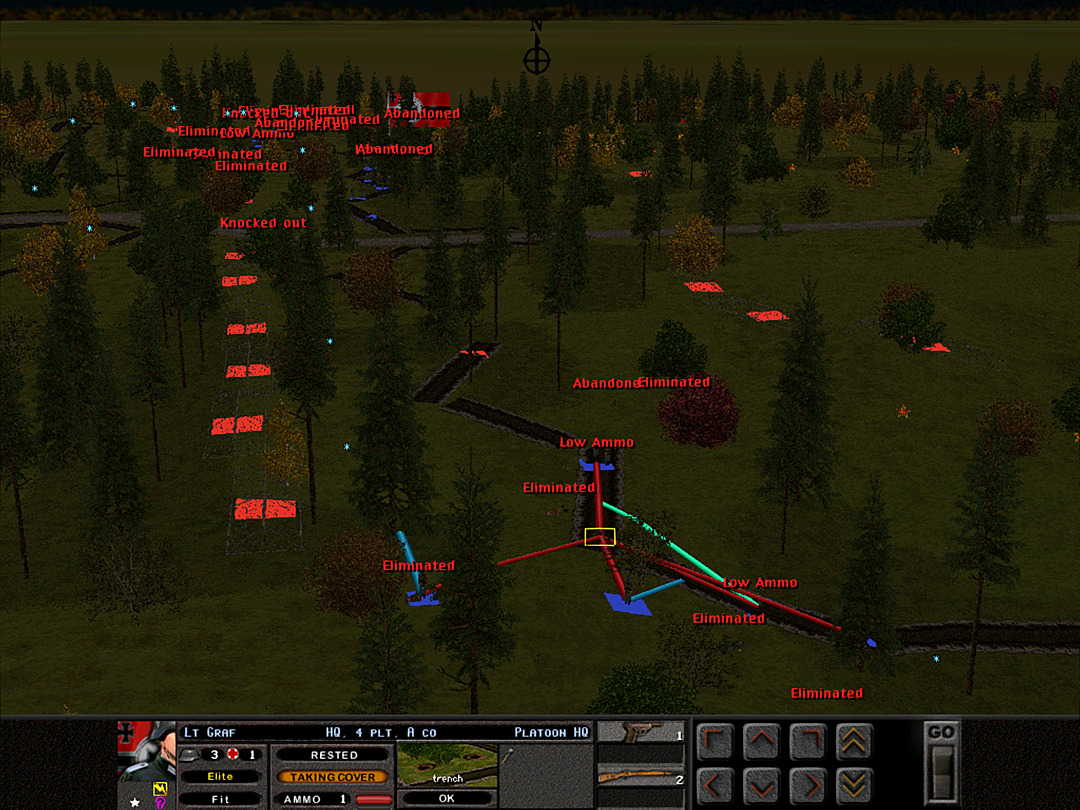 Confirmation of the tank presence spooks 4 Plt a bit, and they pull in closer to prepare a defense. 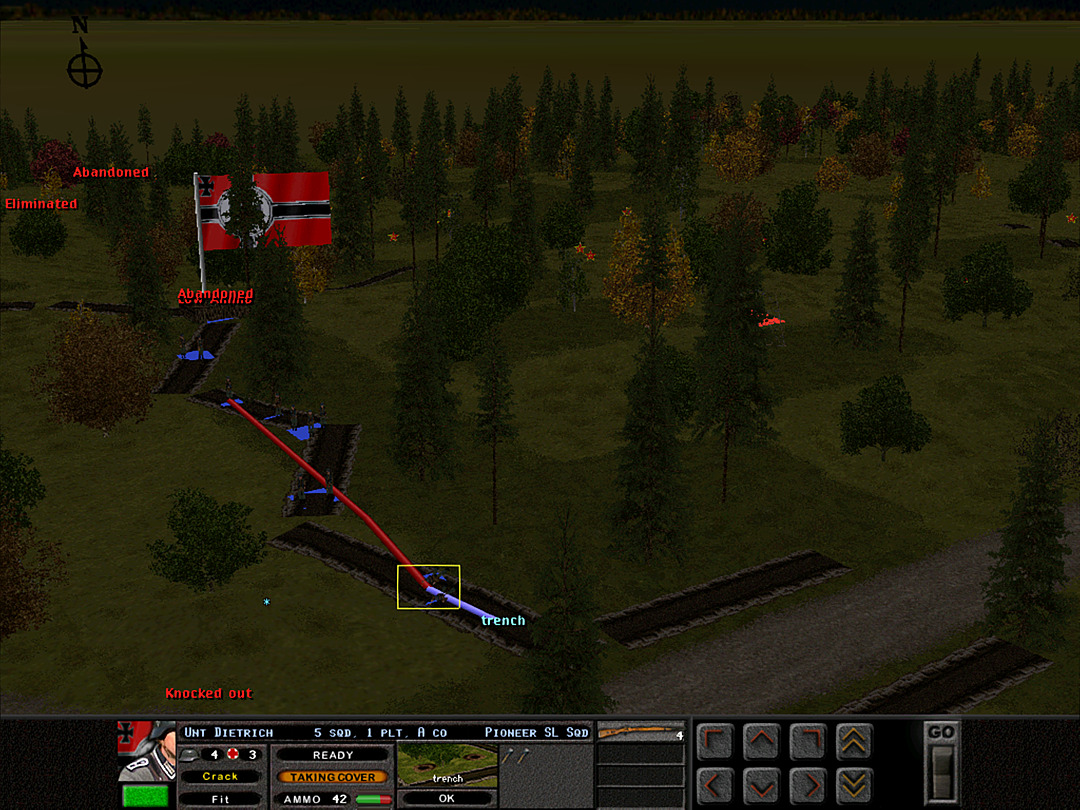 1 Plt has squads right up near the roadway now. Thankfully the trench line was clear the whole way. 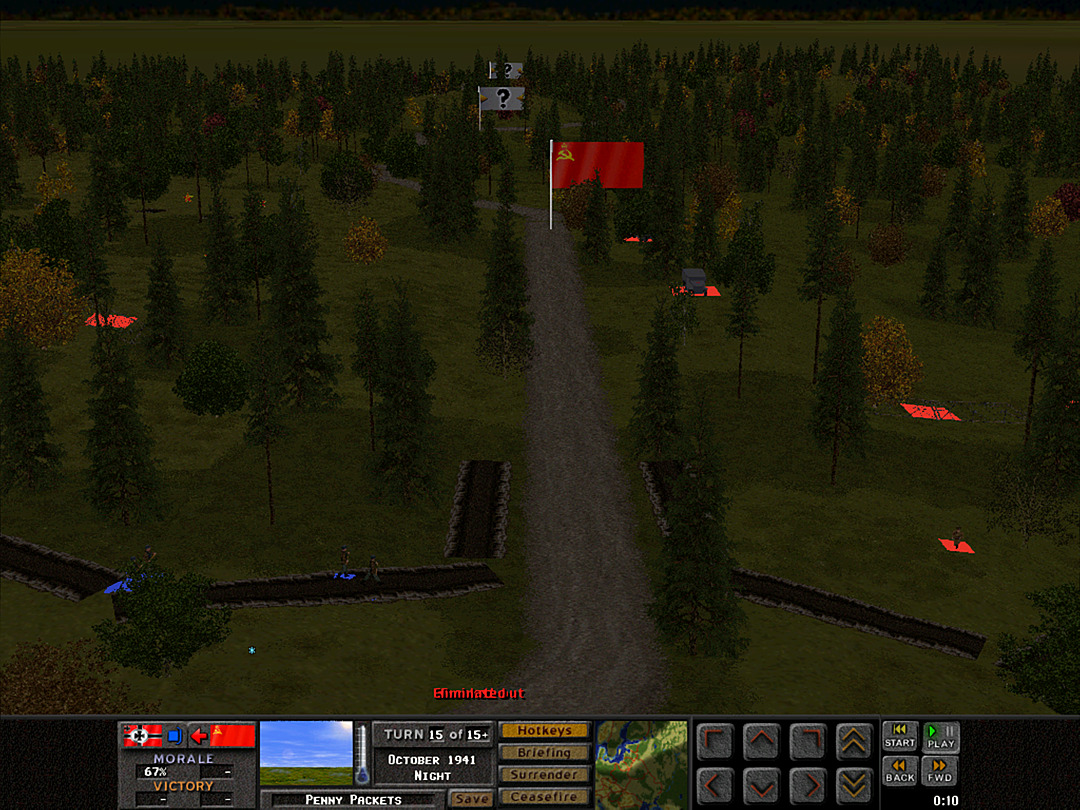 A few more vehicles are heard maneuvering through the woods. More tanks � hopefully more T-26's. 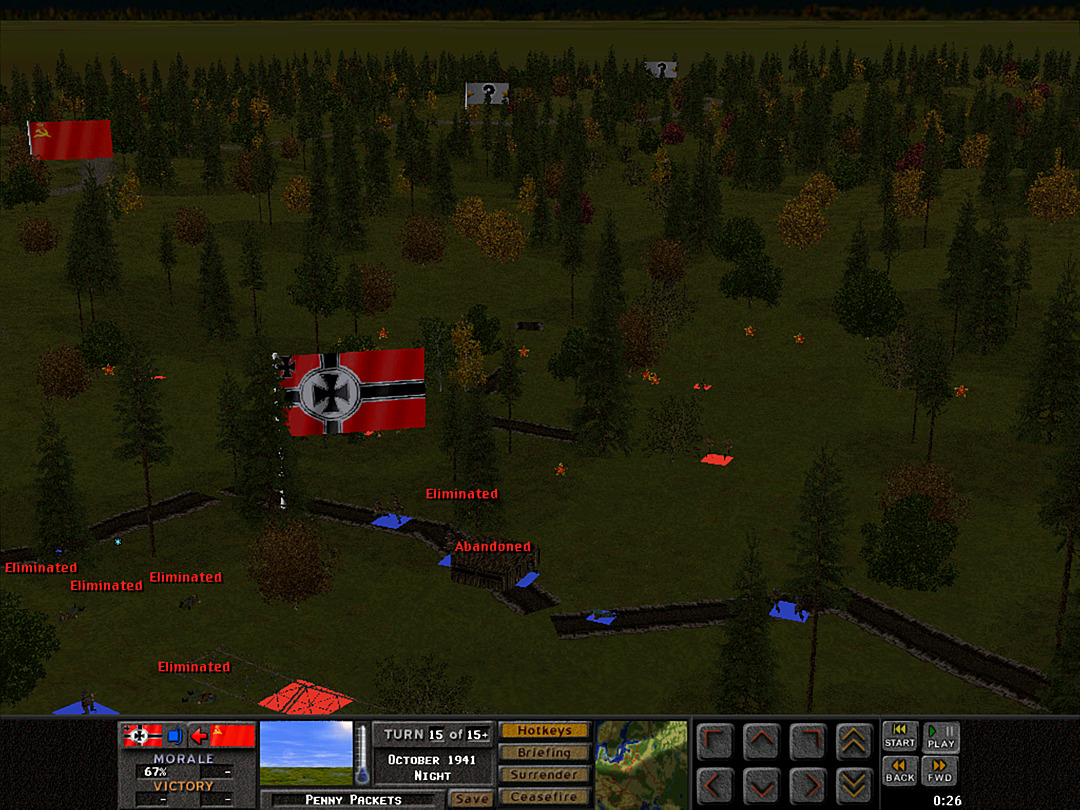 There's definitely a new attack coming on the south side, although it doesn't seem to be particularly strong. 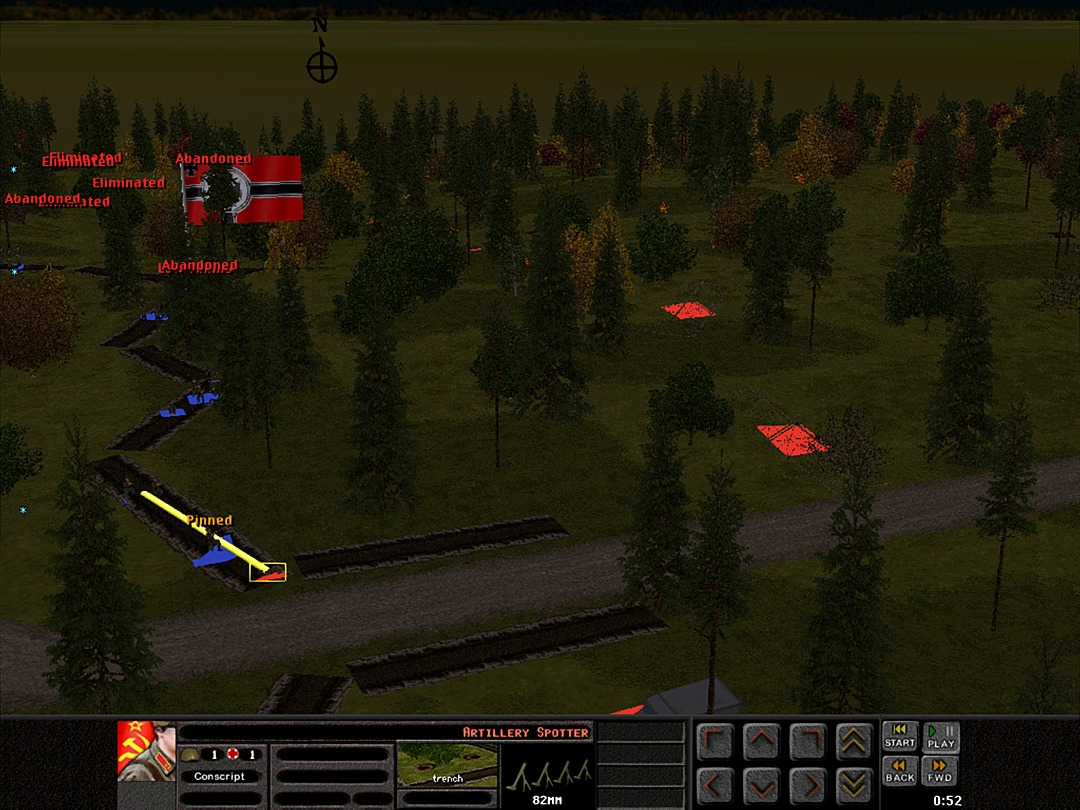 In a fantastic stroke of good luck, 1 Plt comes across an artillery radio team trying to hide in the trenches. 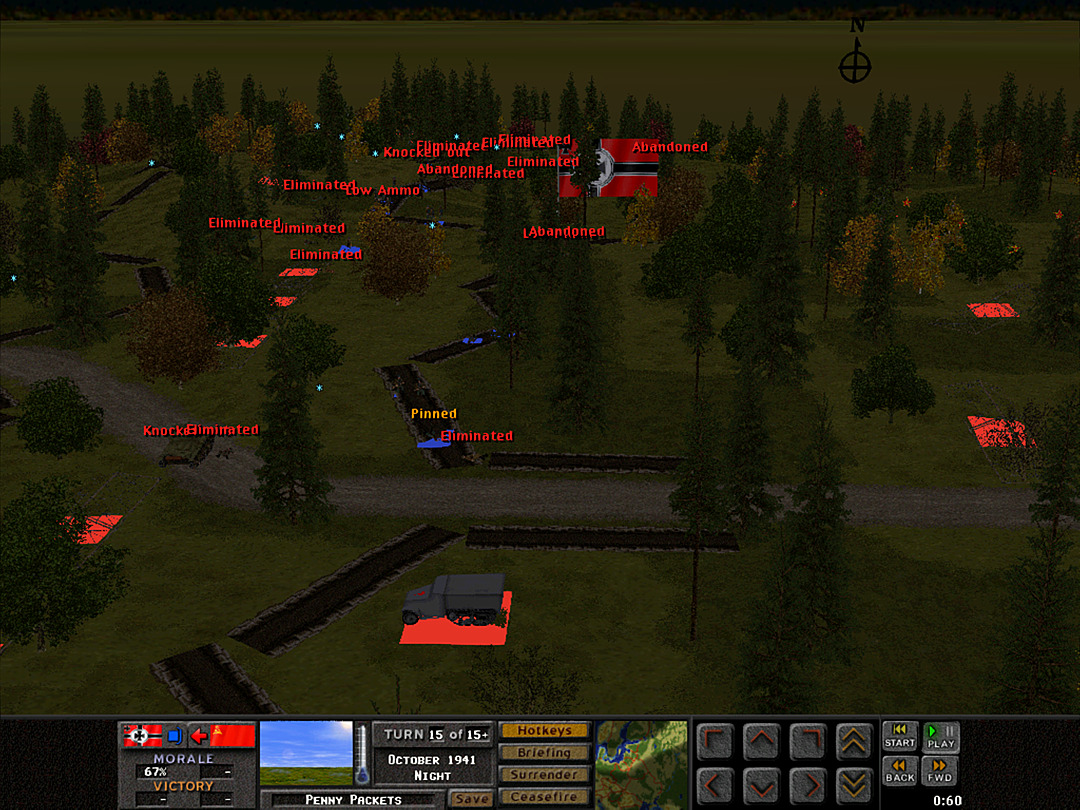 We eliminate the spotter team, and then notice that another vehicle is moving up the road, although it sounds like they're circling away from the trench we now own. 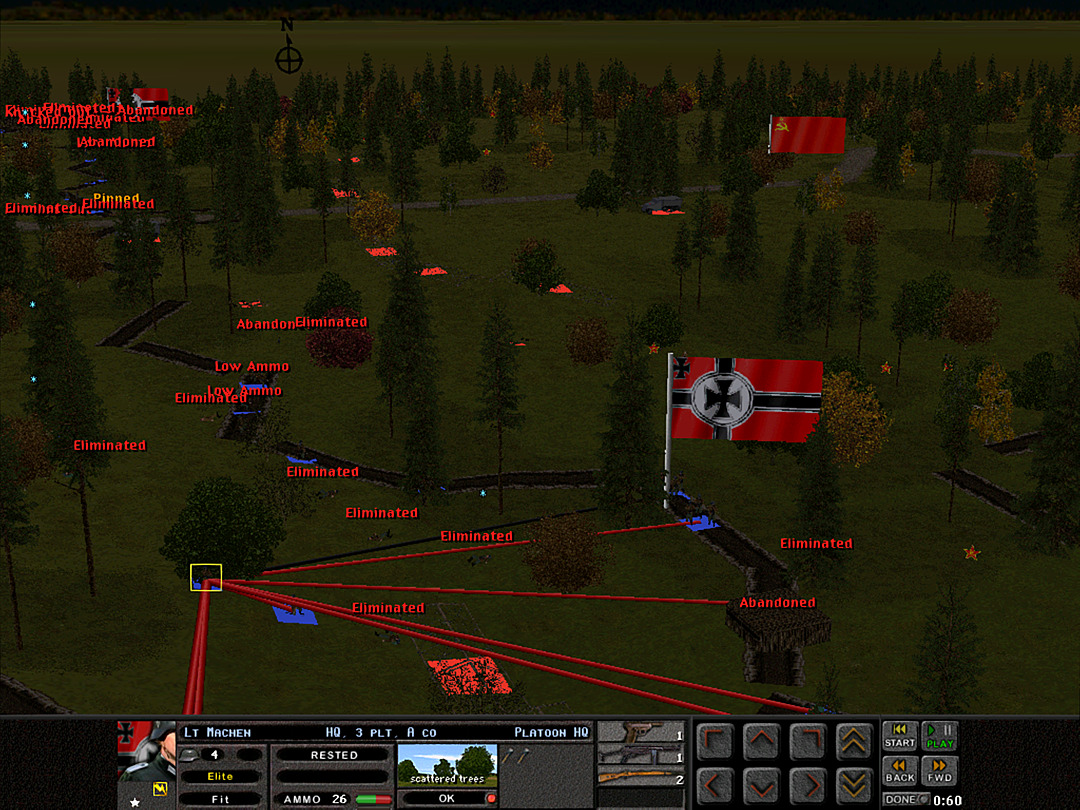 Lt. Machen regains control of 3 platoon. He orders those that are able to keep control of the critical point of the trench.  A second tank swings into view on the road. The Pioniere lob satchel charges its way.  It works! A second tank knocked out in the night battle.  Moments later, another tank blunders its way up the road. Either they didn't get the message, or they thought they could rush us.  Now that we've moved both 1 and 2 Plt a bit together near the road, the Soviets are starting to concentrate their last effort to retake the trench before dawn.  The platoons on the south seem to have halted the half-hearted counterattack.  Explosive charges don't knock out the third tank right away, but they do knock the tracks off.  4 Plt remains too far from the road to see any of the action down there, and they don't want to risk getting any closer.  We hit the paralyzed third tank a few more times.  Then it, too, succumbs to the weight of our fire. But more tanks are on the way.  The second tank platoon consists of at least one T-34.  They are not as easy for us to knock out, but it's certainly something we might manage with enough explosives. The tank wisely pulls back when it spots the wrecks of its comrades blocking the road.  On the south side, a few more Soviet squads are spotted running in the open. They don't look like they are charging; it seems more like they think we've pulled back and they can rush to retake the trench without a fight.  We just haven't been firing as much because we're short on bullets.  It doesn't take much to send them packing. That ought to be enough for them tonight. 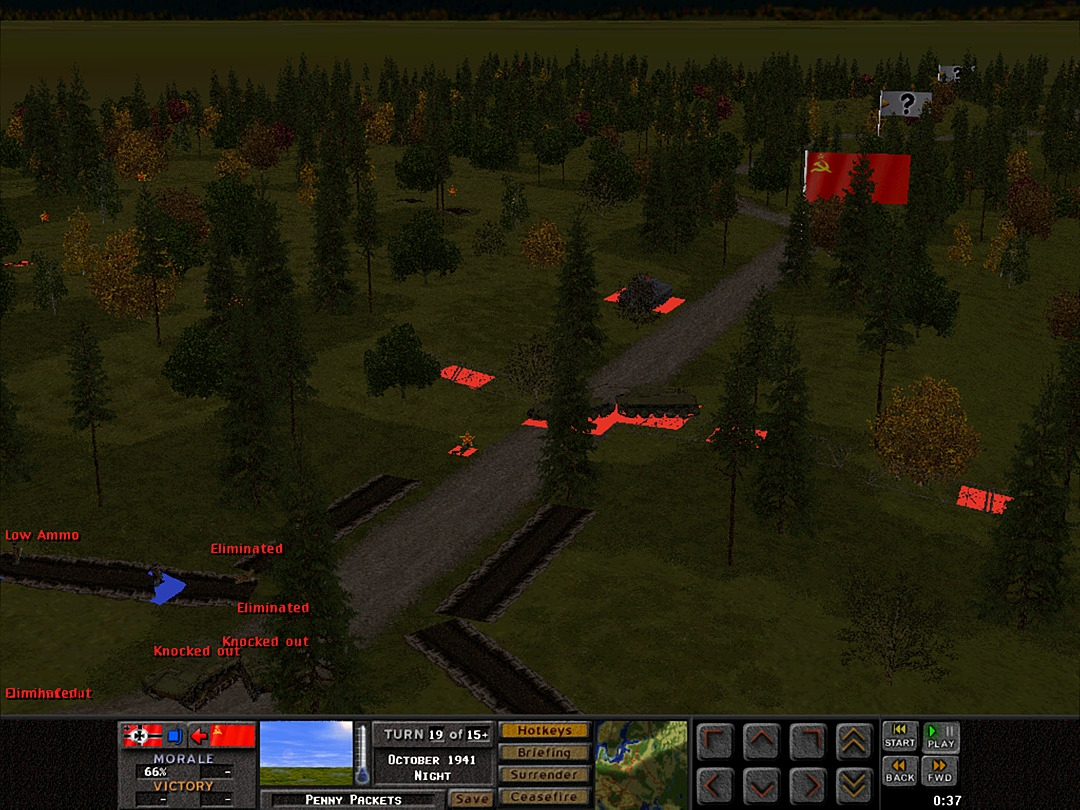 The enemy tanks don't seem to want to risk pushing ahead in the dark. 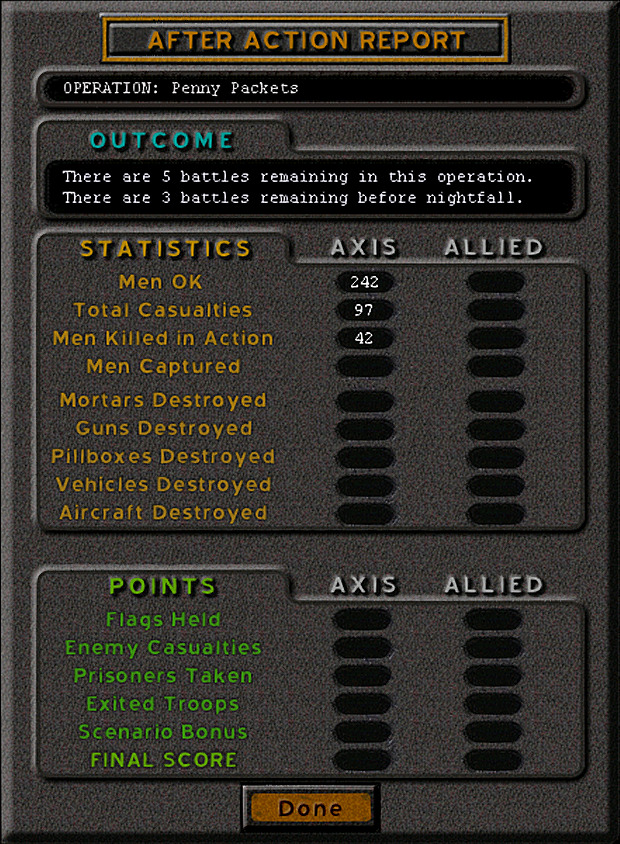 The battle dies down. We've taken the Soviet trenches, but at a terrible cost in lives and weaponry. I'm content to let this one be as it is. This is a loss that likely means the operation as a whole is a loss. I don't mind seeing it through, as we have plenty of other operations to go through, and it's worth seeing just how bad of a loss this could be. I've also already played this first battle all or partly through twice (the first time I forgot to leave the AI set-up alone, and they got rid of all the MG bunkers; the second time I forgot that the German forces are set up just out in the open). While I never lost quite as many flamethrowers, it was still pretty high casualties either way. This operation stands to be kind of a short series anyway, because after this battle, there won't be as much movement except when/if we retreat. Unit Highlight 75mm Infantry Gun 1918 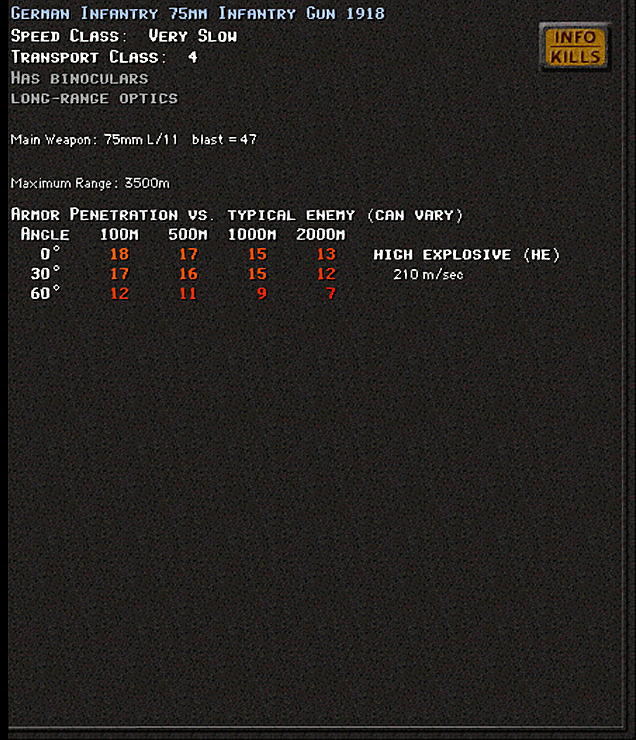 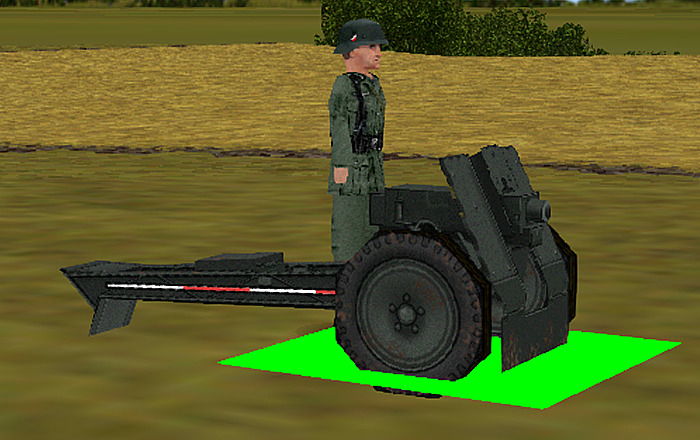 Team Size: 6 Base Cost: 19 I'm fairly sure the 1918 is a mistake; and it's probably just someone misreading IG 18, or thinking that the '18' meant the year. While (indirect) artillery in the form of mortars and moderately-sized howitzers truly ruled the battlefield in World War II, there remained the occasional need for direct-fire guns that could be rolled into action. This model, a 75mm gun with decent performance when high-explosive rounds were required, was developed in the late 1920s and fielded throughout the war in the thousands. It did have an 'anti-tank' round although it's not modeled in the game. Of course tanks were gradually taking over most direct-fire heavy gun roles, but in many cases it stayed easier and cheaper to field a wheel mounted cannon. These guns also could go into terrain forbidden to vehicles, and a 'mountain' version of this piece was also made that could more easily be disassembled for travel.
|
|
#
?
Mar 18, 2024 22:28
|
|
|
Shaping up to be at least as much about attacking as it is defending. Crazy that there are objectives all through the map.
|
|
#
?
Mar 19, 2024 09:03
|
|
|
I'm here to see dead Nazis, so I'd vote to continue playing out this loss.
|
|
#
?
Mar 19, 2024 11:44
|
|
|
Operation 4, Battle 2 of 6 Operation: Penny Packets Time: Dawn Skies: Clear Ground: Damp Temp: Cold Wind: Breeze SSW The attack last night by our airborne company did succeed in taking the Soviet trenches as ordered. However, we took heavy casualties in doing so. Moreover, we didn't quite clear out all the trenches on the south side of the road, as we were only barely able to hold the key point with our reduced-strength forces.  The trenches weren't held quite as securely as we thought, as it proved impossible to fully keep them resupplied without enemy interference. We pulled 3 Plt back into its original trench; they'll be kept in reserve. 4 Plt will stay forward, but mostly used to scout the enemy and ensure they don't sneak through the middle to get our AT guns. B Coy, 2 Plt is tasked with securing the trench. Even though we had forces in the trench, they ended up in "no-man's land" and thus the territory is not counted as controlled by us. As a result, 3 Plt did not get proper supply, which is why several squads start out already at 'Low Ammo'.  North of the road, 1 and 2 Plt have mostly stayed as they were last night. We don't need to hold the line all the way out very far, so our forces will be concentrated here. We do want to stay close by the road, since we know that tanks will be trying to push their way through again. Unfortunately, we also know that they have T-34's in their arsenal. Our weaker AT guns can barely scratch those, so they will hold their fire unless sure of a kill, or if any lighter tanks make a run for it.  The one and only asset we have that can score a clean kill on a T-34 is our 50mm PaK38. We have to hold it far back or risk losing it and the battle. Meanwhile, another platoon from B Coy will guard the north flank in our own original trench line, and the last platoon will stay in reserve. We'll likely need to rotate them into the line by later today or tomorrow.  As the autumn sun rises, we discover that they don't intend to force their tanks up the road. Instead they've forced them entirely off the road, through rough ground and into position to assault our trenches.  We cannot afford to poke our heads up in the face of these monsters. But we can still try to shift our forces to ensure the trench stays in German hands. The men are ordered to move as stealthily as possible.  Our position is betrayed immediately by a charge of Russian soldiers from the southwest.  We drive the closest units back with bursts of fire, but the mass of tanks coming towards us is worrying.  The north side doesn't have as many tanks opposing them, but these do seem mostly to be heavier models than our AT rifle can deal with.  A Coy, 3 Plt is able to give support from behind to push back the first infantry assault.  Sounds of more tanks on the north side cause consternation among the airborne troops of 1 and 2 Plt.  There is a T-26 in amongst the Soviet armored platoons, and our AT rifle accompanying 4 Plt takes the risk of firing at it.  They not only have strong medium tanks, but it seems there's at least one heavy KV-1 around. Even our Pak38 will have a tough time punching a hole through that.  The sound of rolling tank treads gets closer, but no one dares peek out to see just what it is that approaches.  Our AT guns might have had a shot at some of these if they were just a little higher up, or if there were fewer trees. But with so many targets, it would be only a matter of time before they found our guns and silenced them.  A Coy, 4 Plt can't hope to fight off these tanks; the best we can do is hope for an orderly withdrawal.  B Coy, 1 Plt hasn't been able to move very far up the trench. They are still embroiled in the first enemy attempt on our lines. We are in a the defensive position, however, and should be able to withstand the assault. 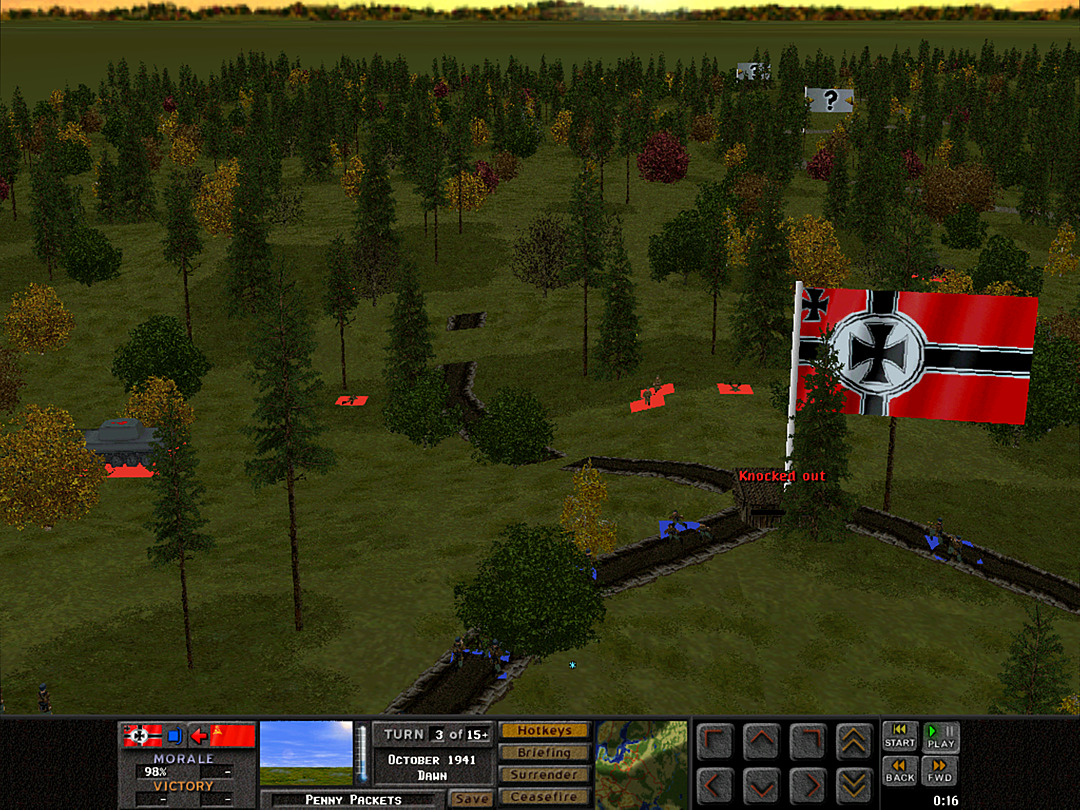 Our men did not respond when the tank rolled by, but now the Soviet infantry have begun a charge on the north line. A few of our squads open fire. 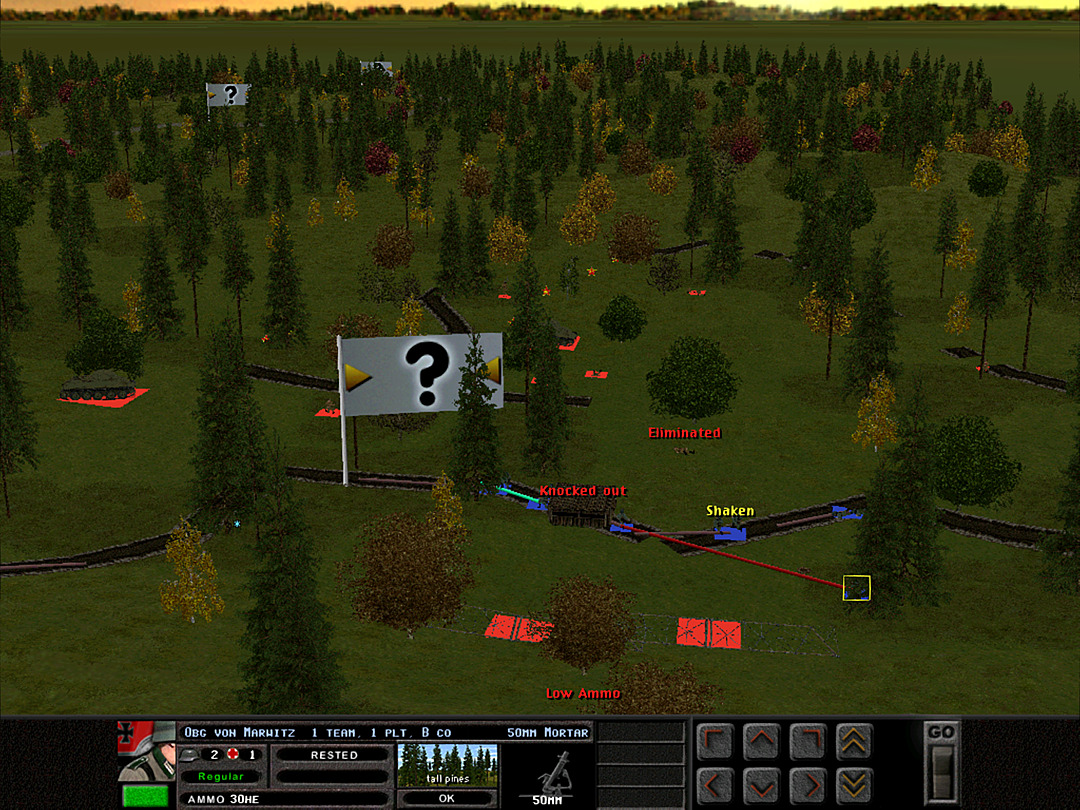 It does appear that they have another tank coming up on the south side. Apparently they don't mind driving through the dense woods to get a chance to push us out of the trenches. 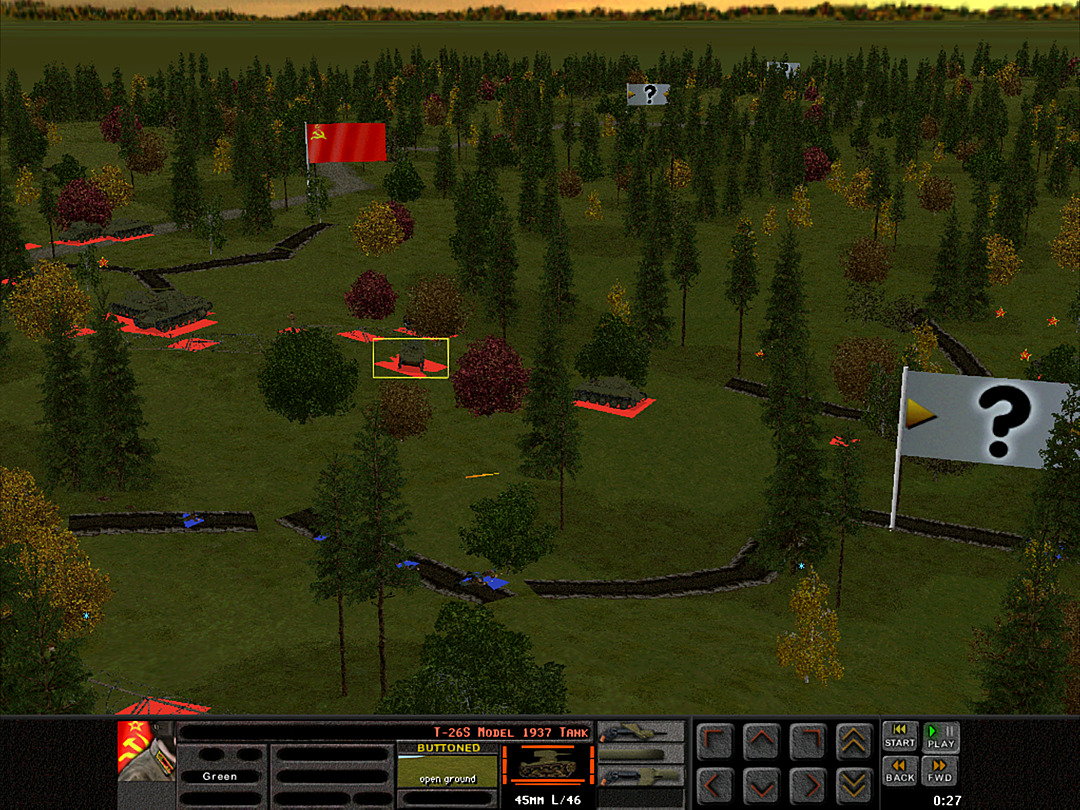 The T-26 is able to survive because it has so many friends around it pouring fire at our trench. We can't really do much but duck. 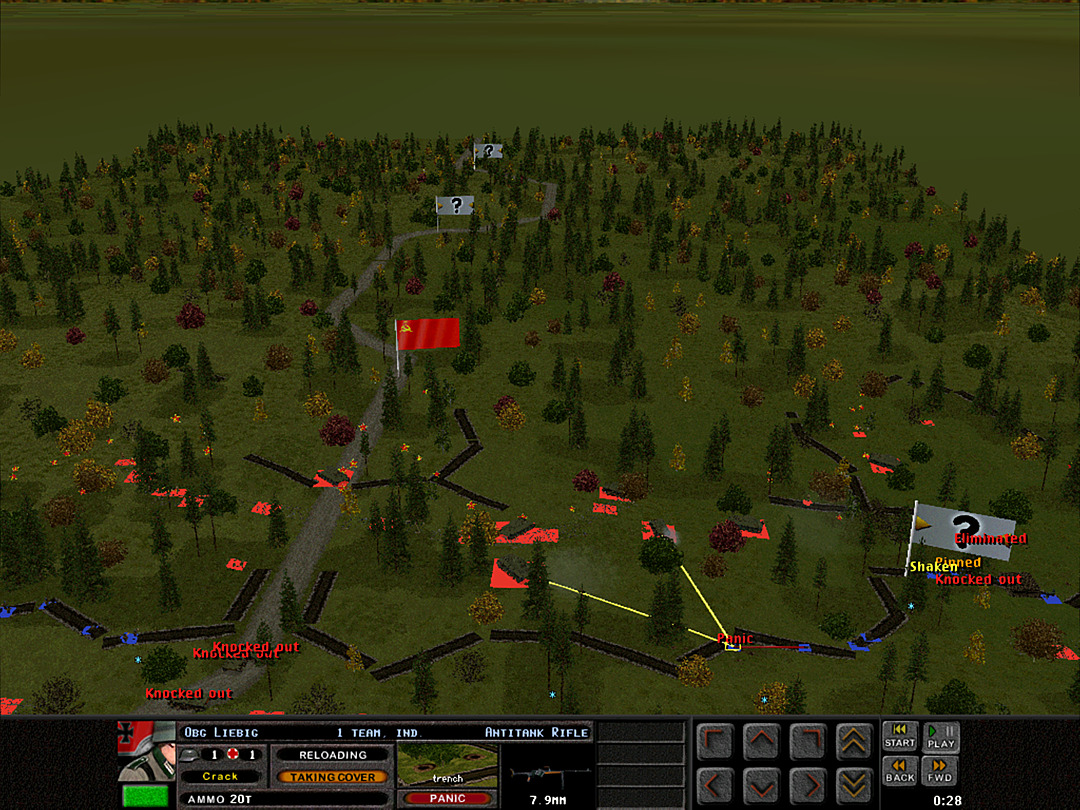 Three or four tanks just keep shooting at the AT rifle, and not unexpectedly, the team routs in panic.  The Soviet infantry charges seem utterly disorganized, and our men are having no difficulty holding on the north side.  Indeed, one of our soldiers claims he can spot a man in a major's uniform lying fallen on the ground, but that seems a bit too good to be true. As far as I know, kills are actually positively identified and accurate, so this is legit.  With the enemy tanks putting out a punishing amount of suppressing fire, the Soviets on the south side are able to bring a machine gun to bear.  Though that's not any worse than the constant barrage of HE fire from the tanks. 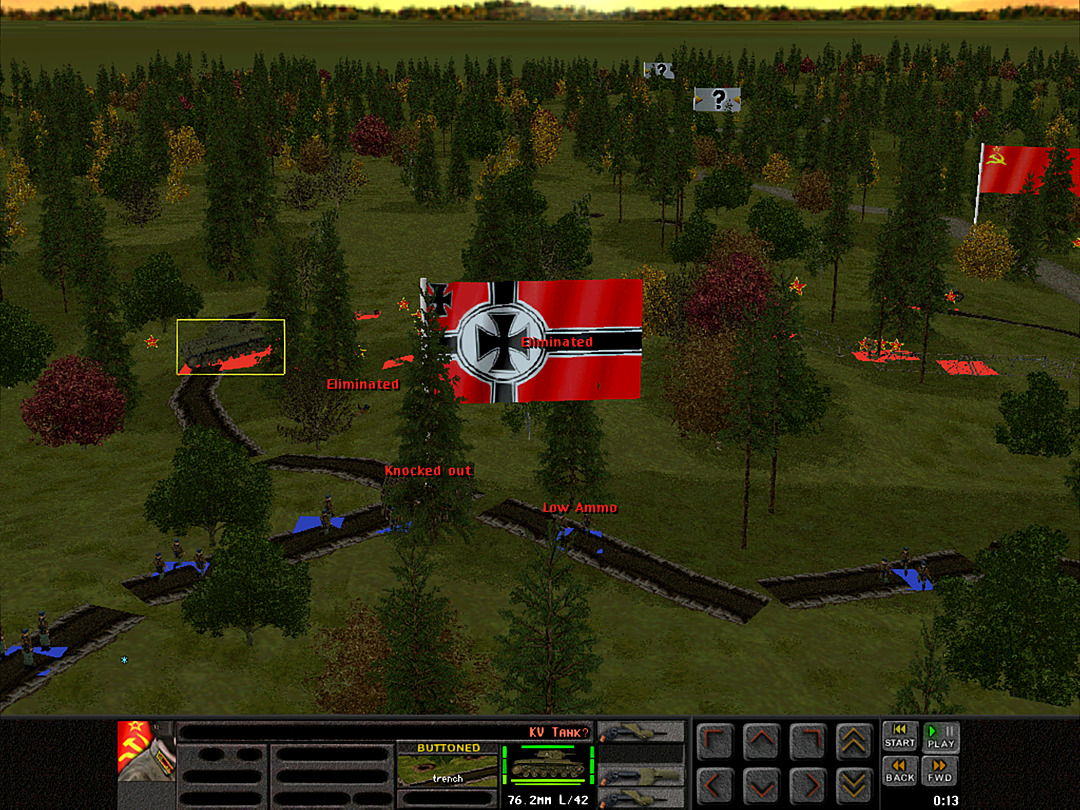 The tank on the north side might turn out to be a heavy KV-1. 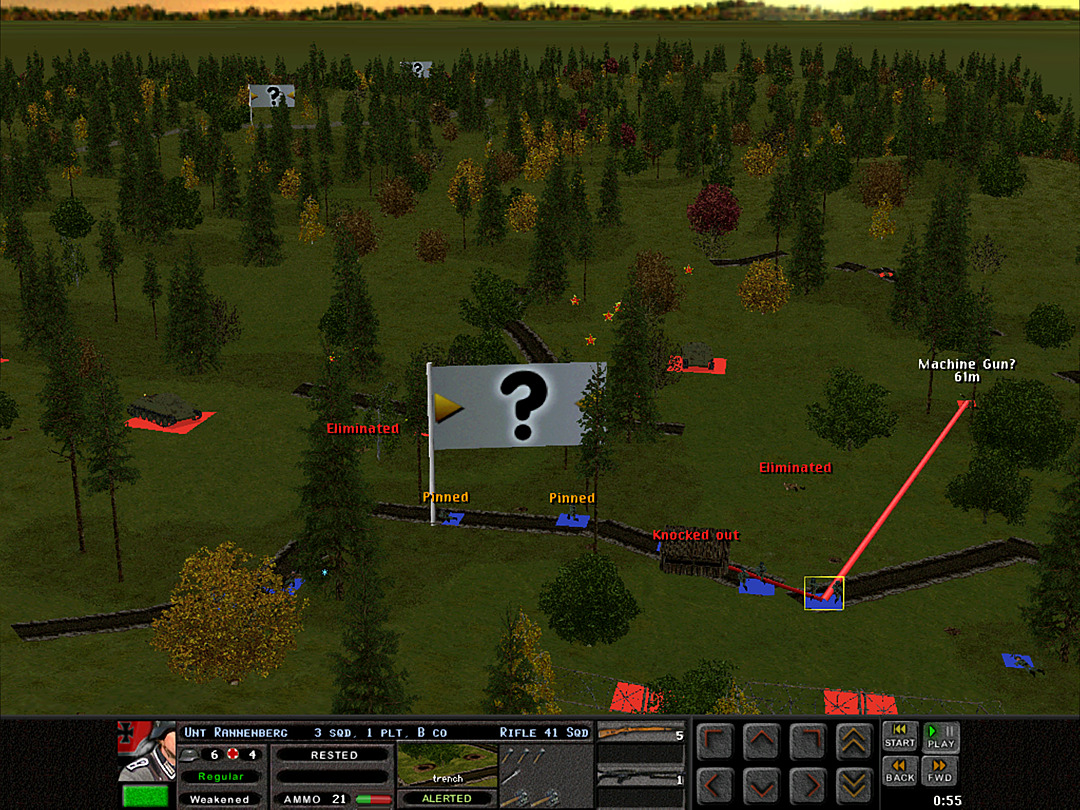 Although B Coy, 1 Plt halted the disjointed first assault, it's clear that they won't be able to hold off another one. Between the tank rounds and the Maxim guns, we'll be dodging too much lead to fire back when they cross toward the trench again. 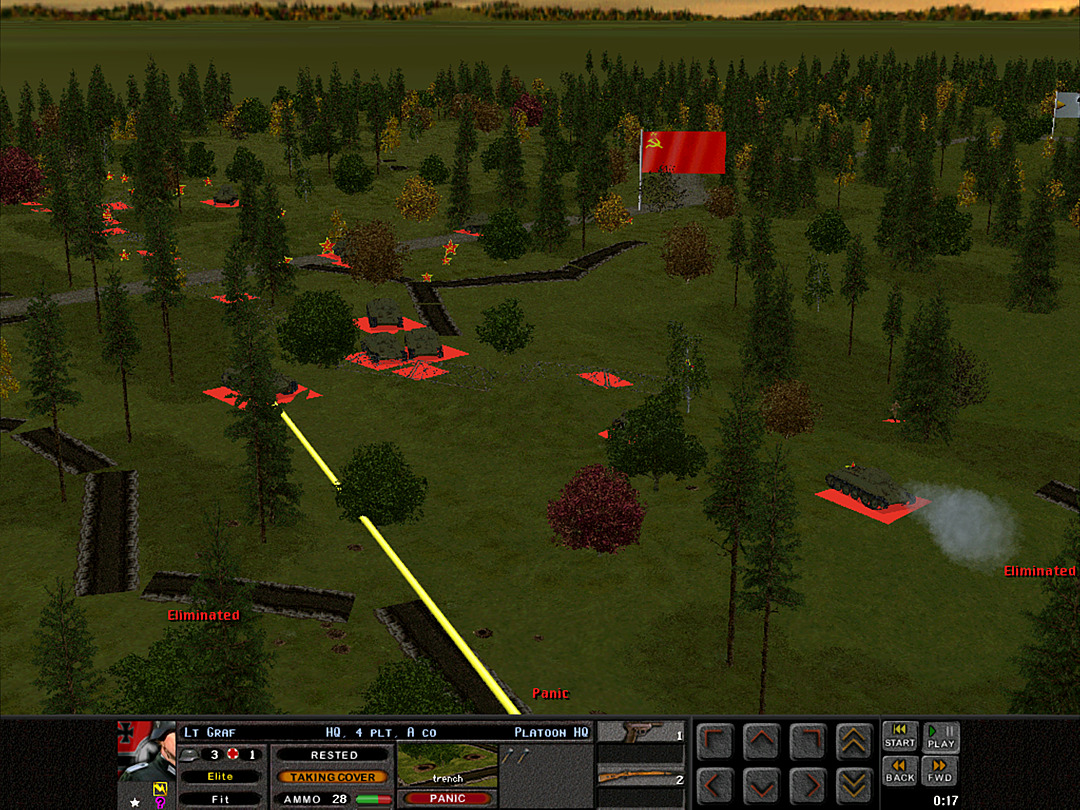 It seems there are around half a dozen tanks firing on the southern trench, and Lt. Graf of A Coy, 4 Plt cracks under the pressure of the unending explosions. 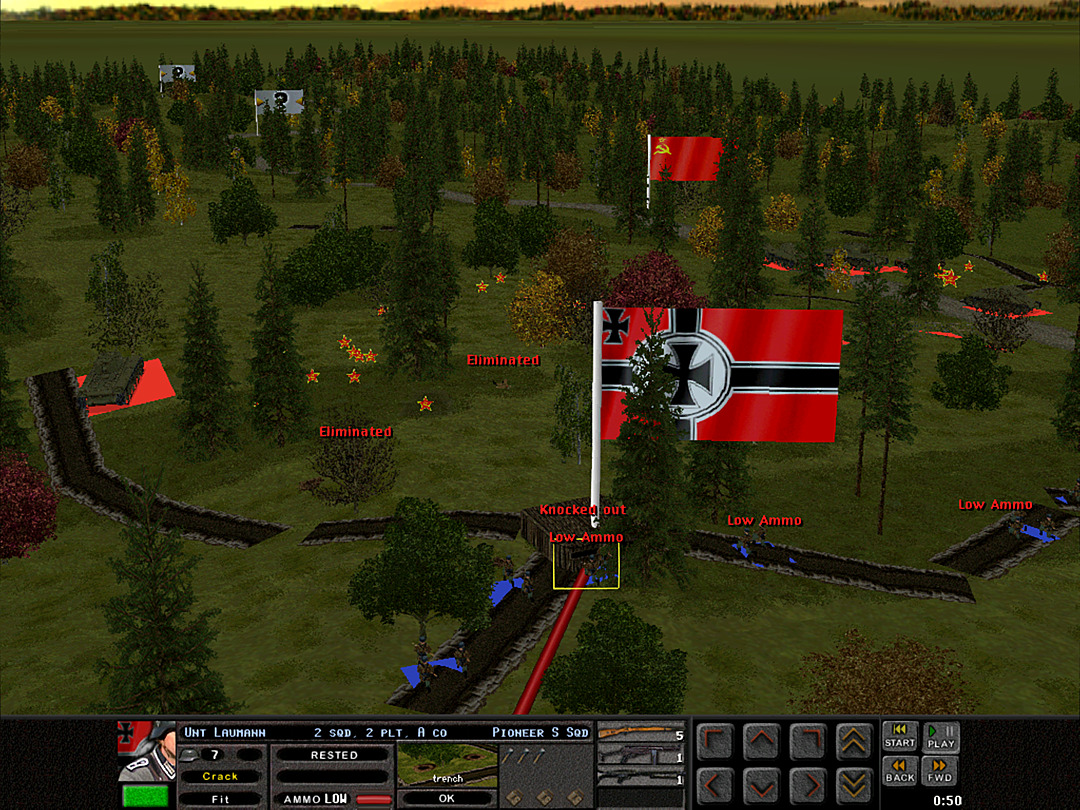 The north trench is holding firm; it seems as if the tanks can't find a clear path to attack us there, fortunately.  There isn't really anywhere we can move on the south side, however. If we exit the trench, we'll be gunned down in seconds. The best we can do is try to shift around so the tanks have to switch their aim.  One squad from B Coy, 1 Plt has been wiped out.  The AT Rifle team on the north side takes some potshots at a tank near the road. This is only like to aggravate the Soviets, however.  We can't simply sit here in the trenches while the enemy blasts away at us. We'll have to retreat on the south side. It's not going to be easy to get out of the trench, but there really isn't much of an alternative.  Lt. Graf of A Coy, 4 Plt gets free into the woods. It's not clear if any of B Coy can get out, but at least these men are only dodging tanks, who don't have a very clear view towards the line.  Some of the enemy tanks might be starting to advance through the middle. Our AT guns prepare to respond if necessary.  On the north side, the Soviet infantry is making a determined effort to take the tip of the trench. We're doing our best to hold them back, but can't keep shooting if they keep coming.  We take a big blow when 1 Plt's commanding officer is sniped trying to gauge the strength of the enemy. 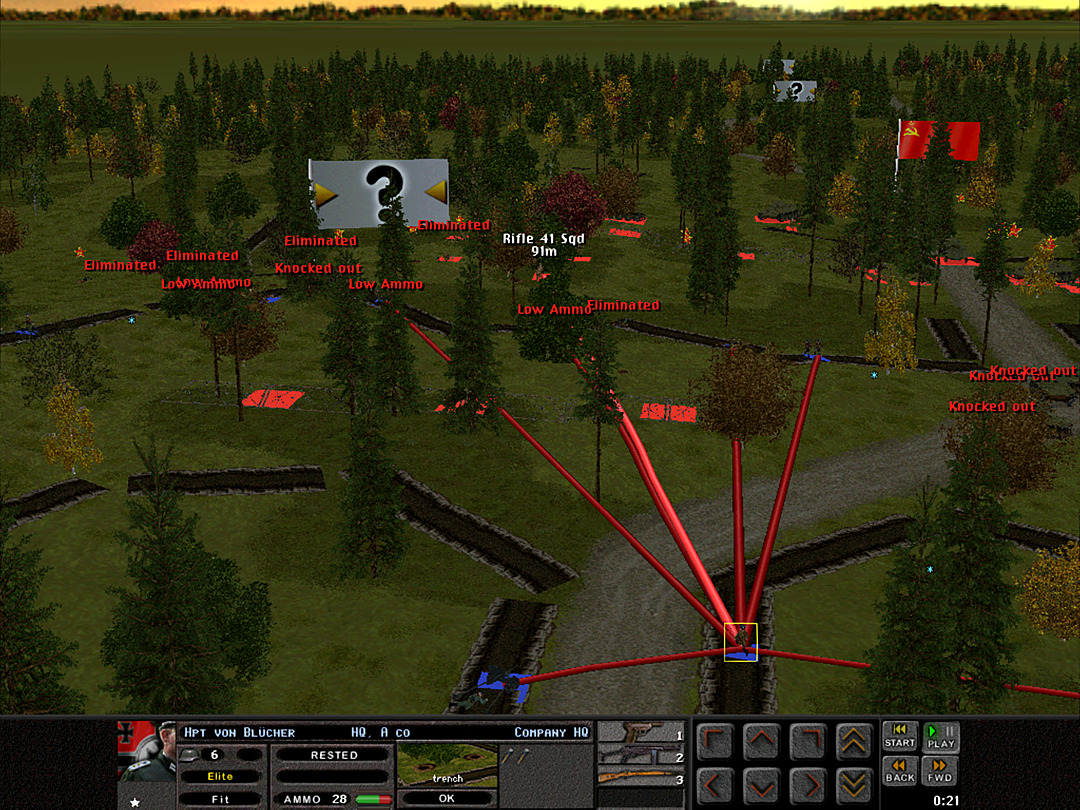 The airborne troops maintain their composure, and the captain keeps the line secure for now. 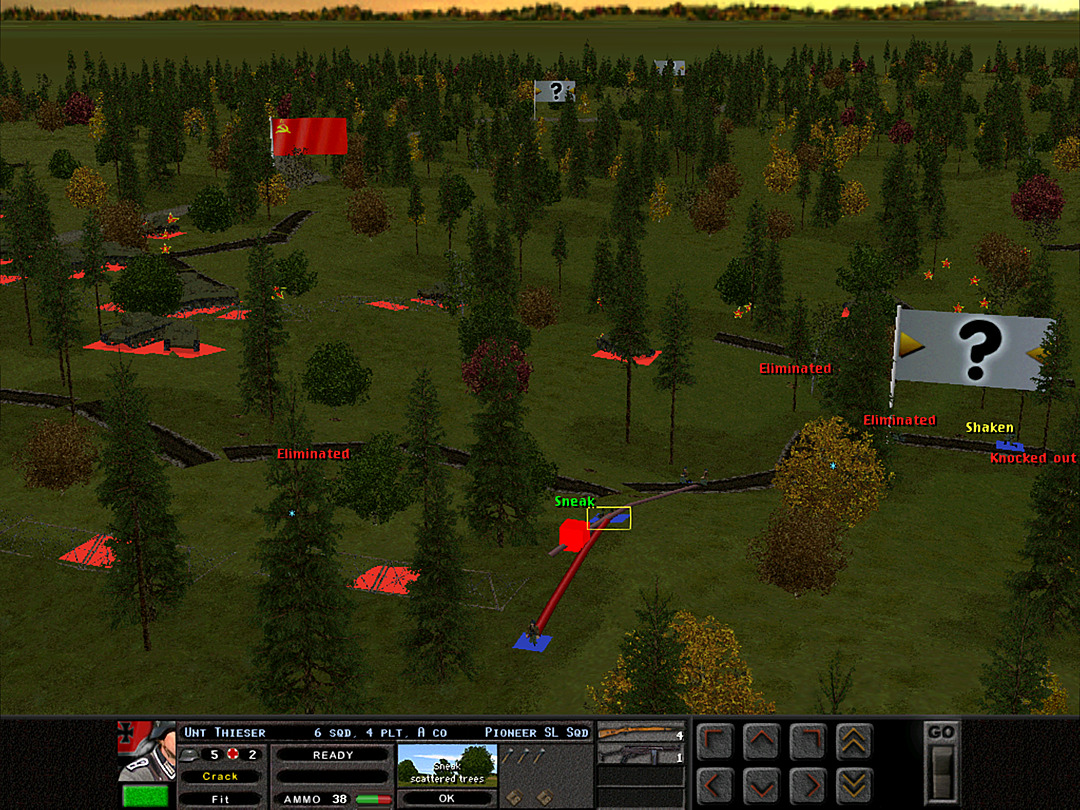 A Coy, 4 Plt, at least what's left of it, appears to be safely exiting the trench. 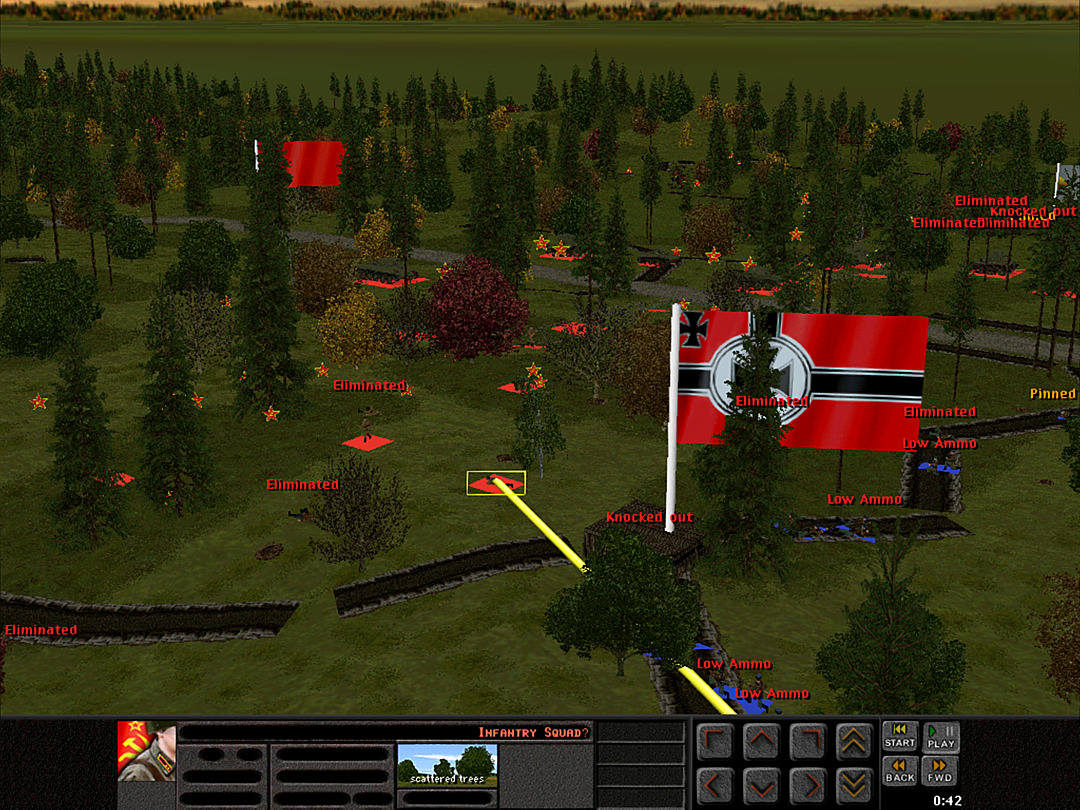 The Soviets have been stopped on the north side; we retain solid control of the trench. 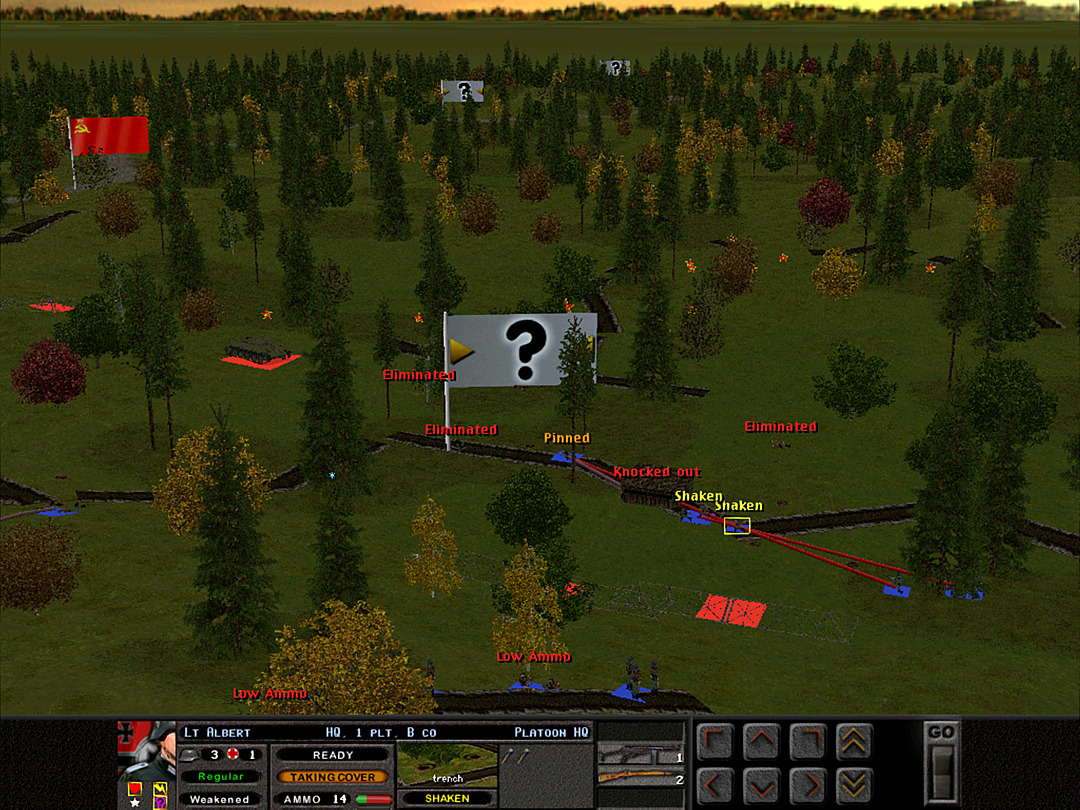 B Coy, 1 Plt is doing its best to retreat. They continue to take casualties.  The charge on the north side appears to have a second wave trying to come in behind it, but it has been disrupted enough by our defensive fire that they aren't sure of who is advancing or who is retreating. 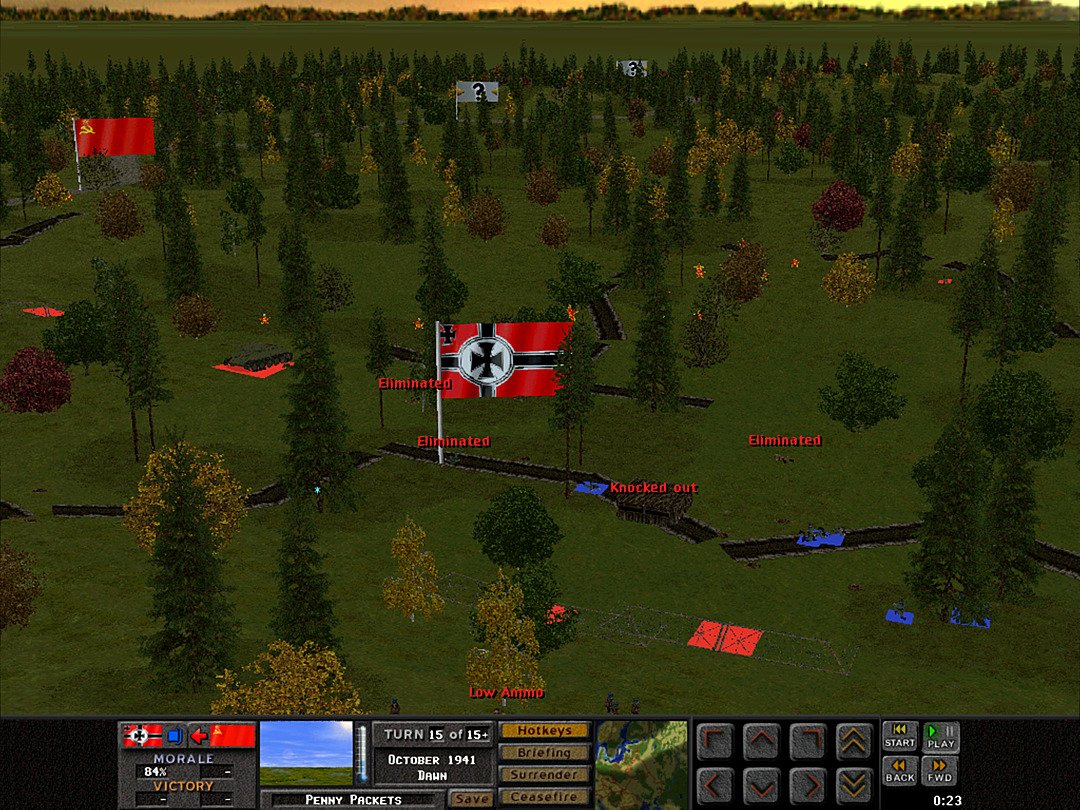 Somewhat surprisingly, the enemy isn't taking advantage of our retreat on the south. Perhaps they haven't committed many forces here, or they are worried that we are baiting them into an attack. 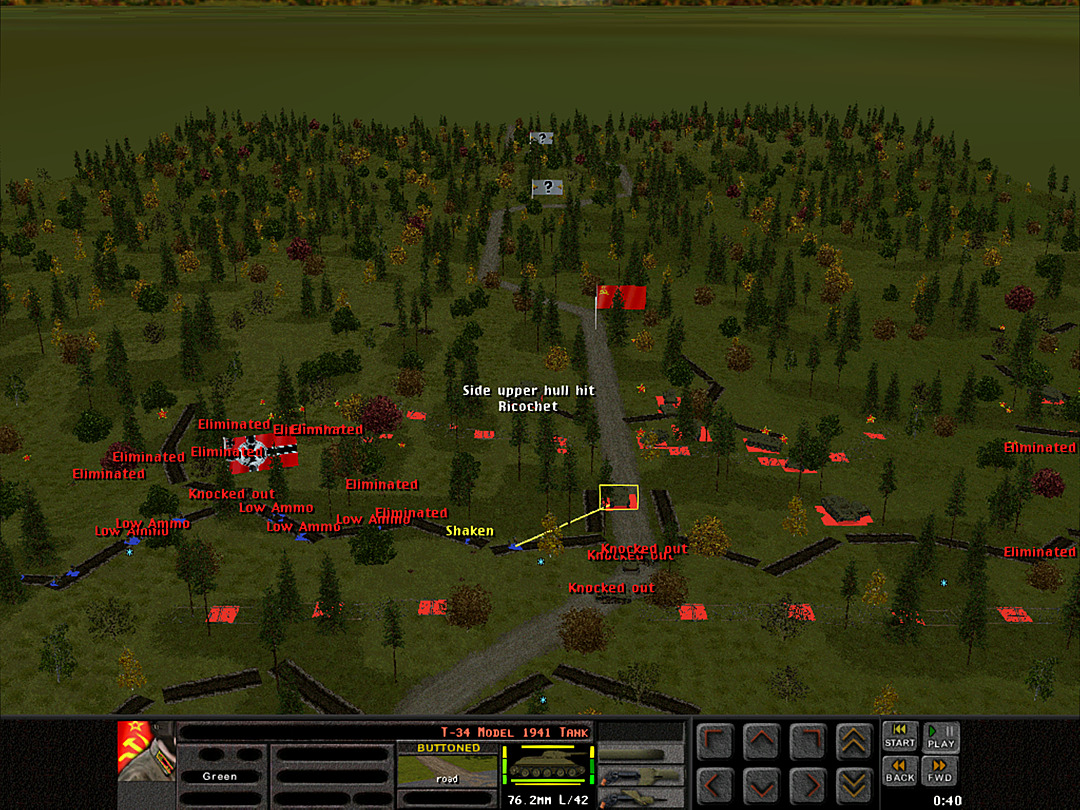 As the AT Rifle continues to try to poke holes in the lighter tank, a T-34 rumbles up the road. This spells trouble. 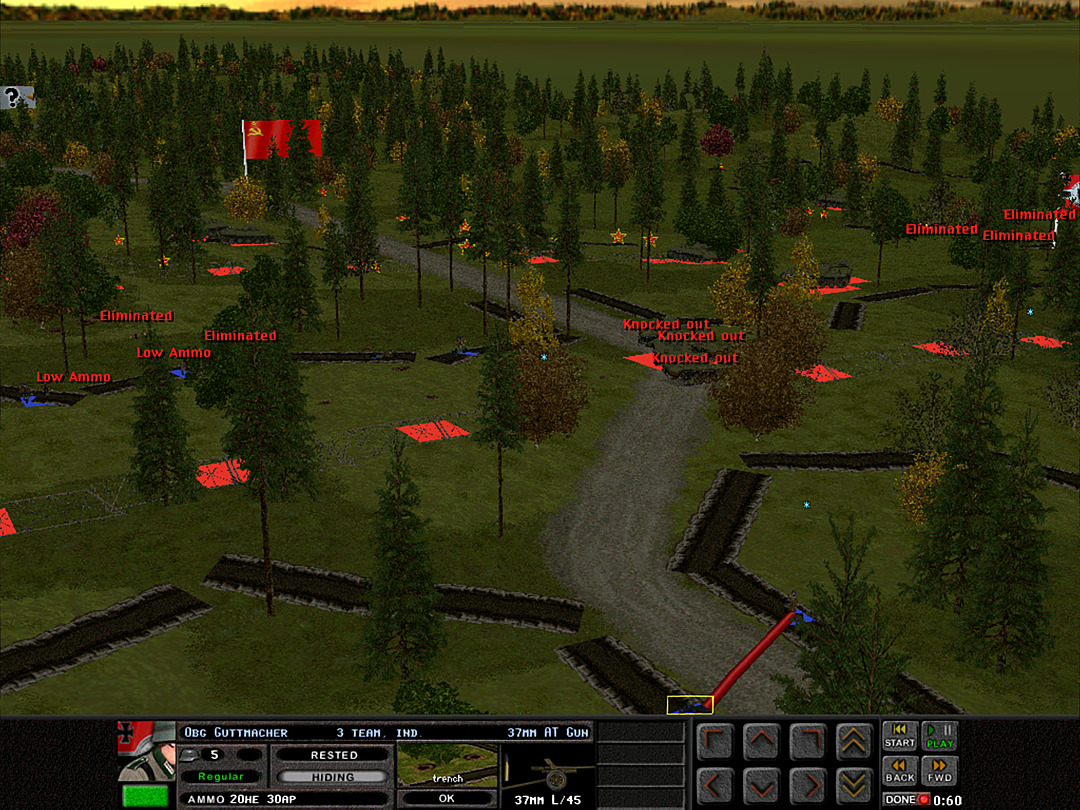 Instead of lining up along the trench, it actually pushes past it and pushes around the wrecks of the tanks that were hit last night.  Our AT guns might not be able to knock it out, even at this range. However, it's positioned in such a way that we can pummel it from at least two angles. It should be enough to shock the crew, and maybe make the bail out.  Several rounds hit the tank, while the infantry pelt it with fire as well. No shots penetrate, but we've thrown its tracks off. Undoubtedly the crew won't want to stick around inside it for long.  Indeed, they bail out mere moments later.  The AT crew had a tense moment when they attracted the T-34's fire, but they fortunately took no casualties.  The infantry attack on the north has died down. 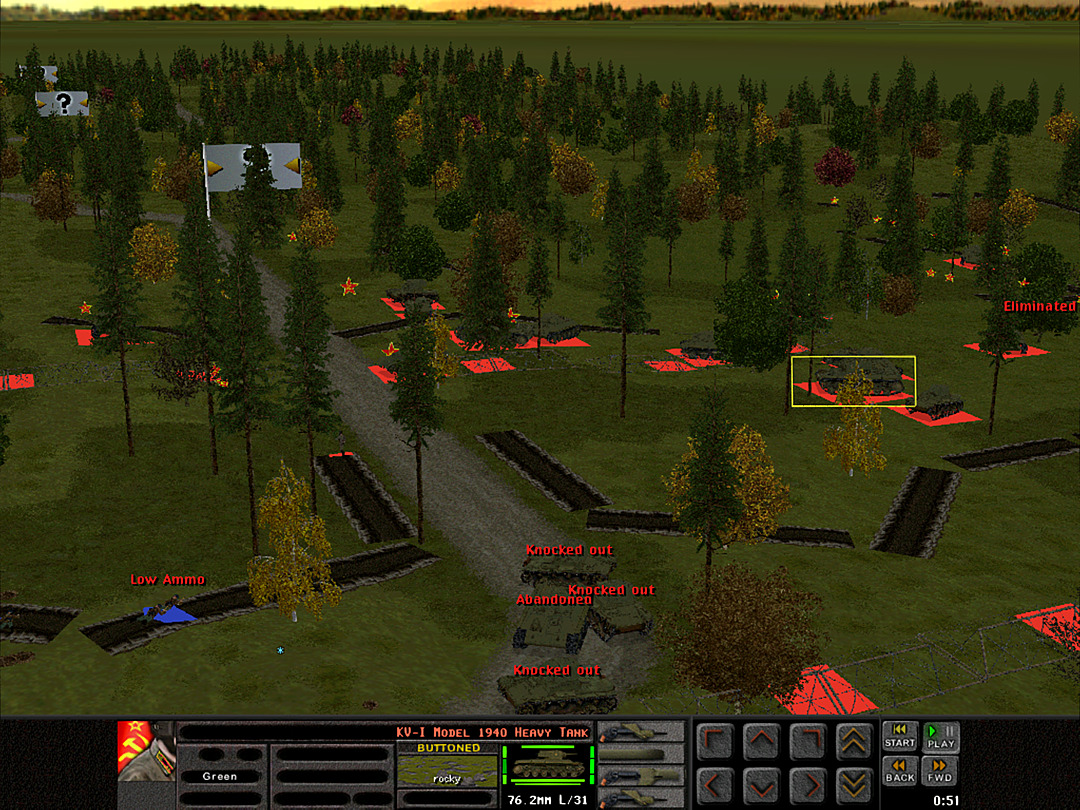 After the loss of a better-quality vehicle, the enemy tanks in the center seem a little unsure of which direction they should head. 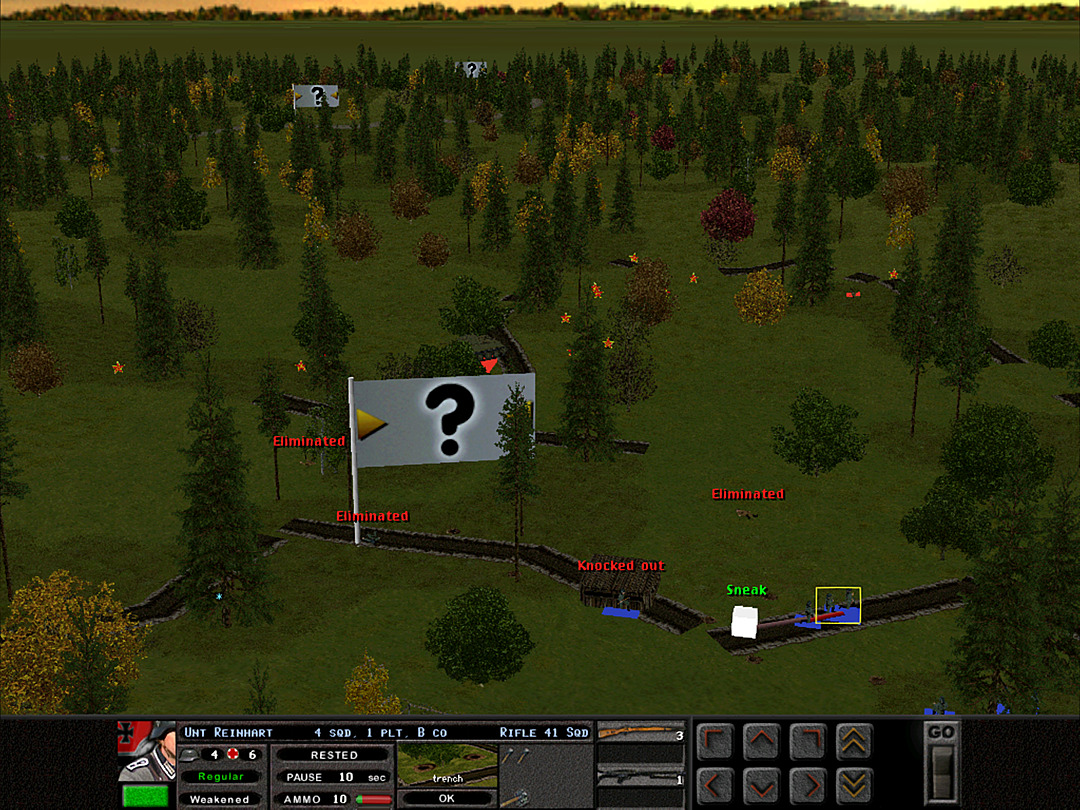 It seems as though B Coy, 1 Plt will be able to hold for a bit and retreat during a lull in the action. 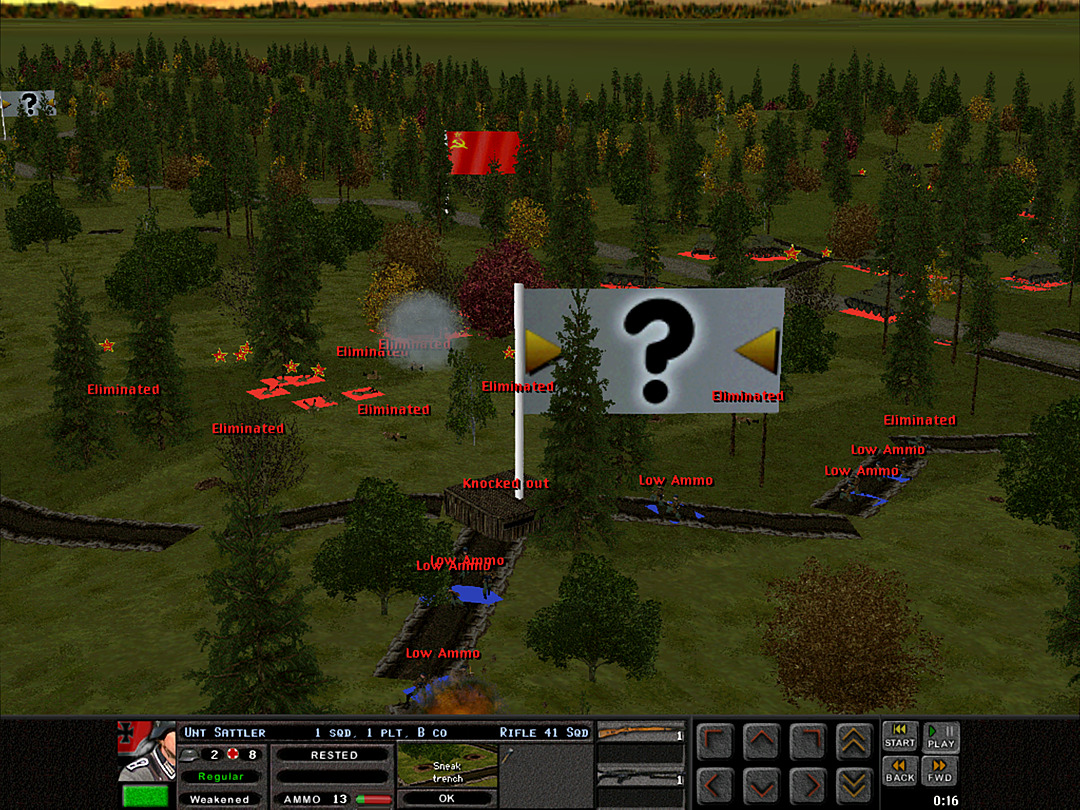 The Soviets might be trying for one more infantry charge on the north. We would have trouble holding them off if they do come. 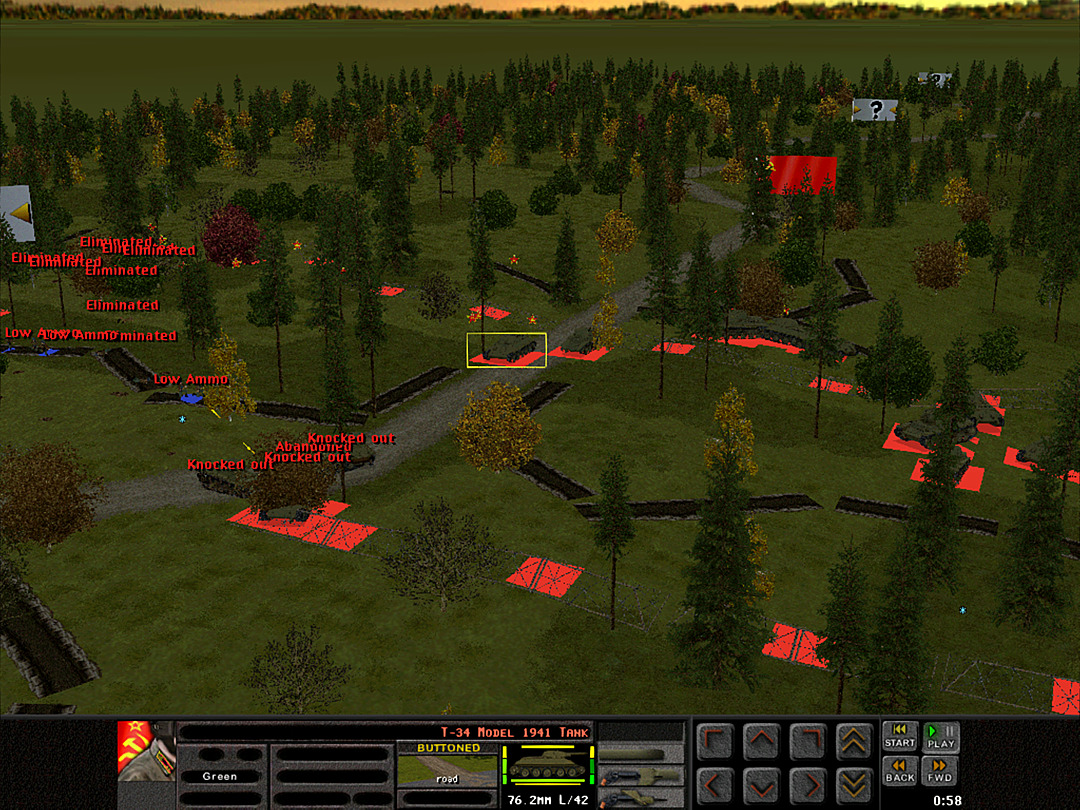 A second tank cautiously approaches the bend.  But instead the enemy holds up to regroup and make a more orderly assault. The morning's fighting is over. Unit Highlight Panzer IIC 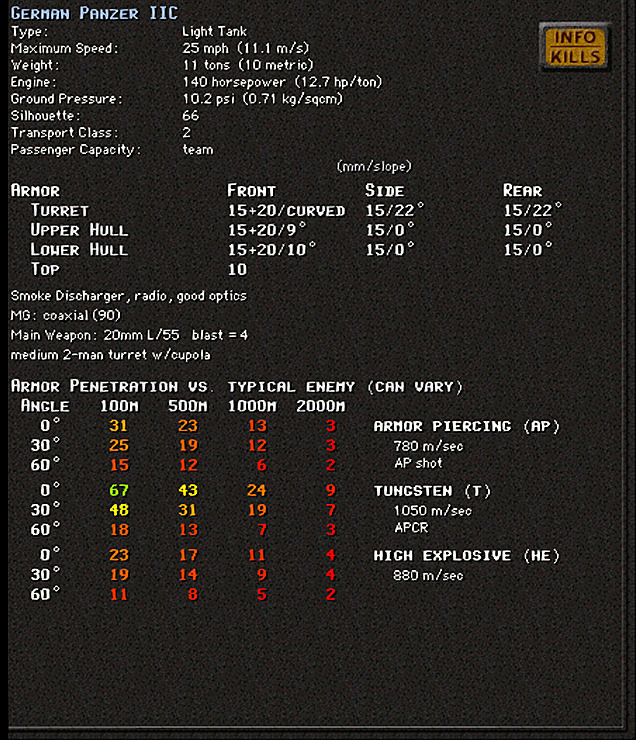 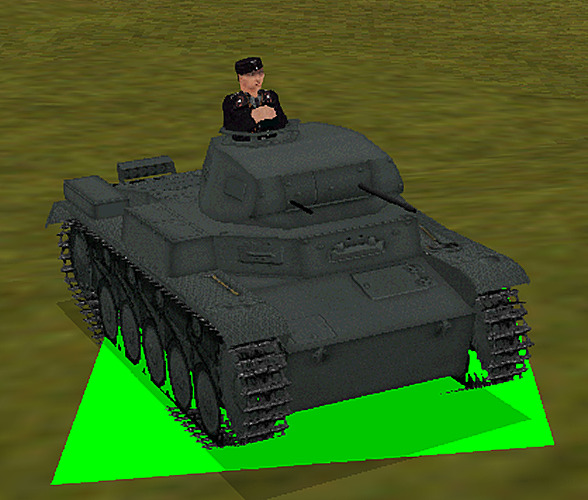 Crew: 3 Base Cost: 46 The second German-designed tank of the era. The Panzer I wasn't a particularly good design, and it was clear a better tank was needed for the German army if they wanted to go to war. The Panzer III and IV would eventually come along, but in between, there came the Panzer II. It was a slightly bigger than the Panzer I, with more space, a slight bit more armor, and a better engine. Most importantly, its main weapon was an adapted anti-aircraft cannon, capable of penetrating at least a few tanks of the 1930s at moderate range. The early models were made in the late 1930s, and first saw action in the invasion of Poland. At that time they made up nearly half of available German armor. In France they not very effective against the stronger opposition, but could serve as infantry-support light tanks. Armored plates were typically added on to the front by the time of Barbarossa, as depicted in this model. The first few mainline production versions (not to be confused with the earliest ones designated with lower case letters) did not differ much, so the IIC could stand in for any of those. Kangra fucked around with this message at 00:16 on Apr 29, 2024 |
|
#
?
Mar 23, 2024 05:13
|
|
|

|
| # ? Apr 29, 2024 16:08 |
|
|
habituallyred posted:Shaping up to be at least as much about attacking as it is defending. Crazy that there are objectives all through the map. It looks to me like those are there to enforce the initial attack. You don't need to control all the objectives to win, but if you just sit on what you have, there's a good chance you lose. If you can take and hold the Soviet trench, each side has three, so it's decided by casualties. WhiskeyWhiskers posted:I'm here to see dead Nazis, so I'd vote to continue playing out this loss. We're doing a good job of it so far, although I'm not actively trying to lose on whatever side I'm playing. We've just had harder battles on the German side so far.
|
|
#
?
Mar 23, 2024 05:16
|
|