


|
  ~SquareSoft!~ The Game Released for the Super Famicom in 1994, LIVE A LIVE is one of many in the deluge of classic RPGs for the SFC/SNES that never made it out of Japan but was blessed with an excellent fan translation by a dedicated group of fans when emulation was beginning to take off. If you were an avid watcher of Youtube LP videos in the late 00's early 10's, you might have come across this game and were intrigued enough by it to check it out for yourself. LIVE A LIVE is a chapter based RPG with each chapter focusing on a different protagonist in a different time period. In addition to giving the game a wide variety of set pieces and uniquely toned story beats, each chapter takes the opportunity to shake up the core game formula, resulting in a constantly morphing experience that I've yet to really see in any other RPG quite the same way. While LIVE A LIVE is not the most mechanically engaging RPG in terms of its combat, the quirky plot threads, variable mix of game styles and the way these things all come together in the end has resulted in one of the premier cult classics for the SFC/SNES. It's perhaps due to its unique nature and fond recollection by the classic RPG crowd that SquareEnix opted to give it the HD2D treatment popularized by Octopath Traveler in 2022. The Let's Play This LP will be primarily focused on the 2022 Remaster of the game, with occasional cuts to the SFC to comment on or demonstrate differences between the two versions that I feel are notable enough. The HD version is a very faithful remake in most regards (which is why I usually call it a Remaster instead), so much we flip between the two versions will depend on which chapter we are doing. For the SFC version, I will be playing using the 2.0 version of the Aeon Genesis Translation Project patch, an extremely high quality fan effort that I actually feel does a better job of translating the game in several areas compared to the official English release. I'll be playing that version on ZSNES for that crunchy mid 2000's emulation feel. For the games as a whole, I'll be going over every notable sidequest and secret as best I can, so you can consider this LP as a completionist effort as well. With all that established, The Videos Prehistory Chapter Part 1, Before Comedy Part 2, Boy Meets Girl Part 3, Lost and Found Part 4, Kings and Monsters Imperial China Chapter Part 5, Old Master Part 6, New Master Twilight of Edo Japan Chapter Part 7, Ninja Gaiden Part 8, Castle Crashers Part 9, Rising Sun Wild West Chapter Part 10, The Town With A Name Present Day Chapter Part 11, World Warrior Near Future Chapter Part 12, Head Games Part 13, Praise Steel Titan Part 14, Corporate Crusaders Part 15, Go, Steel Titan! Distant Future Chapter Part 16, In Space Part 17, No On Can Hear You Scream Part 18, Game Over Man Bonus Part, Captain Square The Middle Ages Chapter Part 19, Might & Magic Part 20, For Auld Lang Syne Part 21, Devil's Due Part 22, All Falls Down Dominion of Hate Part 23, No More Heroes Part 24, Lost in Time Full LP Playlist If you're a fan of quirky RPGS with non-standard gameplay elements, you may like my LP's of Omori or the decidedly less wholesome Fear & Hunger. CullenDaGaDee fucked around with this message at 14:57 on May 12, 2024 |
 #
¿
Mar 24, 2024 22:55
#
¿
Mar 24, 2024 22:55
|
|


|

|
| # ¿ May 16, 2024 20:44 |
|
|
https://www.youtube.com/watch?v=AX7keL0y6_w Part 1, where we start our journey across the ages from the very beginning! The Prehistory chapter is the closest in structure to a standard RPG, but even then we get some of the more unique aspects of LIVE A LIVE on full display. In particular, there are no formal stores and equipment is earned purely through crafting, the battle system is a mix of turn based and action elements with an emphasis on positioning while having all attacks be abilities with no MP system, and rather than random encounters this chapter has invisible enemy sprites wandering the field areas that trigger a fight when you collide with them. This chapter starts pretty slow, but it will pick up in due time. Extra Notes -We have two characters to start, Pogo the protagonist and his erstwhile but semi-hostile ape companion Gori. Pogo is very strong, with high HP and physical stats and a good spread of attacks once he gets some levels. Additionally we can kit him out with some really good gear right away and utterly demolish anything we come across. Gori has much more limited options and falls behind pretty quickly due to his almost complete inability to equip anything, but he does pick up a lot more AOE and status based attacks as he levels, several of which will be very important for some secret fights later. -It's not necessary to play the mini games for resources, but it's a good idea to because it's actually pretty slow and difficult to get the materials for crafting the best items just from battles, and we have a limited time to engage with these mini games. For the SFC mini game, one thing you can do that I didn't demonstrate in the video is remain in the doorway after all the cavemen filter out of the room. The initial caveman will not be able to walk through you to return to the room, so you can talk to him 18 times, move so the cavemen filter in, block the doorway again and talk to whoever gets close, and then catch the final caveman as he enters. -I went a little overboard on getting materials, for all the worthwhile stuff you only need to play the SFC mini game 13 times as opposed to the 20 I went with. 15 should be more than adequate for the HD version. -Anything I didn't bother to craft is either just weaker than what I did make or is just not all that useful. If you're interested in seeing some of the items that can be used in battle that I passed on, just let me know. -One of the more minor things to note is that attack properties are slightly different between the two versions of the game. In particular, Bang Bash is much stronger in SFC while Pow Kick is much weaker. In general, attacks have become weaker in the transition to HD, though some of the crappier moves have been buffed. This doesn't affect Pogo too much, but certain characters are considerably better or considerably worse between the two games, and I'll be sure to note those overt discrepancies.
|
|
#
¿
Mar 24, 2024 22:56
|
|
|
https://www.youtube.com/watch?v=4EeDruEELMk Part 2 is out! With all our crafting for the chapter done in the previous part, we're all set to advance the plot of this particular story. The establishing scene comes back into play, and we get our very first boss fight! Extra Notes -We get our next party member, Beru! Beru is actually crazy strong if you crafted her best gear, the Wildheart Sack in particular is crazy strong and lets her pack a real wallop. The downside is that she is ridiculously fragile compared to Pogo, even with her best armor. All that said, don't get too used to her. Even more tragically, she's unable to participate in the fights where it would be really nice to have her. -The Fertility Charm is a fantastic item when used in battle, and I'd highly recommend crafting two of them. Its healing is just as good as Beru's, and the stats buffs it gives are amazingly helpful. The only downside is the lengthy charge time, but that is pretty easy to work around. As an added bonus, it's infinite use! Contrary to what you might read online, this item functions the same way in the SFC version, though the buffs it provides are slightly different. As an actual piece of equipment, it's nothing to write home about. -You can spend a lot of time hunting before advancing the plot, and Pogo will quickly rocket past any mandatory encounter the game throws at you. He's by far one of the strongest protagonists in the game, and he has a decently varied move stats that takes advantage of most of his stats. -The special interaction for giving Beru the Wildheart Dress in the SFC version is... not quite as coy. We'll see it in the next video. -If you want to see Beru really mess some stuff up, get her to level 6 in the HD version and level 7 in the SFC version. At those levels, she learns her ultimate attack, which can completely trivialize a certain encounter later on. Sadly, it cannot be used in the difficult optional boss fight of the chapter.
|
|
#
¿
Mar 26, 2024 04:06
|
|
|
I plan on holding a vote for the star pupil of the Imperial China chapter, with the second place winner being the star pupil for the SFC version. Whoever goes unchosen, I'll just do a super cut of anything unique regarding them in the chapter itself. I knew the encounters scaled for the overworld in the Near Future chapter, but I didn't actually know that was the case for Prehistory! I'll be sure to mention that within the LP itself. I should have the spare materials to craft the items with the usable effects, so I'll be sure to grab some of those in the next part. Sleep Trick is decently consistent, but I never found it to be too necessary to focus on disables for the vast majority of the fights in the game. Raw damage is usually enough, though if it works on the Secret boss of the Prehistory chapter, that might be something to try.
|
|
#
¿
Mar 27, 2024 01:25
|
|
|
I plan to do pacifist for the HD version and 100 kills for SFC. I've also kept a back up save handy for the very small variation that happens at the end of 100 kills in the HD version, though it's not all that interesting so it was probably unnecessary to do so. To be completely honest, I don't really find one route to be more beneficial than the other since there's not really any reward for 100 kills beyond saying you were able to do it. The absolute best rewards for the chapter can be gotten without too much murder, so I won't be missing out on too much in HD.
|
|
#
¿
Mar 27, 2024 02:09
|
|
|
I remember way back in the day I was first made aware of the game by Frankomatic and ChazDragoon doing videos on it. I didn't check it out at the time, but I was aware enough to hear when AGTP released the 2.0 version of their translation. I fired that sucker up and had an absolute blast. I don't know if I'd call it one of the best RPG's of its era, but it's definitely one of the most unique and I'm glad it gets more recognition these days.
|
|
#
¿
Mar 27, 2024 03:24
|
|
|
https://www.youtube.com/watch?v=GD6hn819dls Part 3 is out! Unfortunately for Pogo and the gang, they quickly run into trouble after being exiled. Sadly Beru's shiny new skill just can't help us in this situation, and we'll have to directly take the fight to the Kuu tribe. Extra Notes -Beru's Sing Hurt ability is completely unnecessary to learn and I mostly just got it for demonstrative purposes. While it is pretty much one of the strongest skills in the game, it is only available to use for one serious fight. It does turn said fight into a joke at least. -Tragically, you cannot fight the Bonus Boss of the chapter with Beru in the party. It is not available to fight until well after she is indisposed. -You can endlessly fight Kuu warriors in their encampment if you so desire, though the EXP they give quickly dives off a cliff. The fight can be won in a single turn once Pogo knows Big Shout at least. -The two cavemen in the cavern leading to the Kuu encampment are actually father and son. They are the first in a continuous gag family seen throughout the game, though it is awhile before the clan is named properly. -I'll be sure to show this off, but the Rock of Rocks can be used as an item in battle, dealing light damage (both in terms of element and numbers, ho ho ho) and inflicting heavy debuffs on whatever it hits. -An important note for the SFC version, any really valuable accessory you get should be equipped onto the main character of whatever chapter you are playing. I'll elaborate more on this later, but not equipping them to the MC of each chapter will ultimately defeat the point of collecting them. This is not a concern in the HD version, which handles the inventories of each character in every chapter differently.
|
|
#
¿
Mar 28, 2024 03:49
|
|
|
ManSedan posted:I pronounce it "live a live" fwiw. My only long term goal for this LP is that I pronounce the title in a different way every single time I say it.
|
|
#
¿
Mar 28, 2024 15:06
|
|
|
CptWedgie posted:...Come to think of it, can't you use the Rock of Rocks for something? I'll demonstrate in the next video, but it replicates an Akira skill when used in battle. It's nothing too special, but it is a little interesting.
|
|
#
¿
Mar 28, 2024 18:23
|
|
|
https://www.youtube.com/watch?v=OEWvm6J5OeQ Only 4 videos, and Pogo's journey has come to an end! The individual chapters of LIVE A LIVE are fairly short, this being one of the longer ones in the game. Don't be surprised if some of these stories only last 1-2 videos. That aside, we gather up all the special accessories in the chapter an forge onward into the Kuu encampment. We also get to hear the major boss theme 3 times, also something to celebrate! Unfortunately, there will be a pause in videos for a week. I put in some extra time today to get this video ready, since I'm going on a vacation starting tomorrow. We'll resume with the Imperial China chapter on April 8th. Fortunately that chapter is about as simple as it gets in LIVE A LIVE, so it's not like I'll be jumping back in at the deep end. Extra Notes -There are a couple other things you can use on the Mammoth King in the HD version to try to make the fight more consistent, but they're really not much more viable than spamming Sleep Trick and the Fertility Charm. Scare Face and the Thump Drum can lower his evasion, but not only are these just as likely to miss as Sleep Trick, the debuff can still fail to stick even if they do hit. Even worse, the debuff doesn't even guarantee attacks will go through even if it does stick, and it can wear off after a single attack. -The Rock of Rocks can reasonably often Leg Bind the Mammoth King to keep him out of direct eruption range, but like every other attack it just misses way too often to be worth going for. Equipping it on Pogo to bolster the chip damage Sleep Trick does is the better option in my opinion. -Debuffs are way more consistent in SFC, Sleep Trick and Poke Bind work 100% of the time on the Mammoth King. While Sleep Trick doesn't do any damage in this version, I'll gladly take the consistency any day. This does result in the fight being kind of a joke if you just Sleep Trick>Poke Bind>Poke Bind>Sleep Trick, but given how much of a hassle it is to even get into the fight in this version, I think that's fair. -The Mammoth King is much more threatening in terms of raw damage from his skills in SFC. In exchange for the Fire Field tiles not restoring a quarter of his health, all of his attacks hit about twice as hard. Definitely make sure you have a few large haunches at the ready if the ailment loop is broken. -The Cola bottle is often mistakenly identified as a one-use item in the SFC version, but thankfully this is not the case. You can use it as much as you like, and it is quite overwhelming in standard encounters. I actually have yet to test it in the final chapter of the HD version to see if it's still overpowered there, so something to check out later in the LP! -I mention this in the video proper, but make sure all your best accessories are on Pogo before engaging in the final boss fight of the chapter in the SFC version. You will be very sad otherwise. This is not a concern in the HD version, so feel free to Cola Bottle the final boss to death. -Again, it's kind of funny how a chapter with no dialogue manages to slide in a couple of questionable translation choices. -Bringing it back to the Rock of Rocks, as we saw in the SFC version it is a way to actually see enemy HP values. There are a few abilities that do this in the SFC version, all of them retooled in HD due to HP being on display at all times for enemies.
|
|
#
¿
Mar 29, 2024 04:41
|
|
|
I really think Aieeee line was just serendipity. They opted to use the Japanese language track for the Prehistory chapter since it otherwise didn't matter, and this was an unfortunate casualty of that decision. I can just appreciate the comedy of the fact that an otherwise good localization has a couple blunders in an almost wordless chapter. The only other thing I've seen people critique is the prose for the Medieval chapter. Definitely a decision where your mileage may vary on whether it was a good idea or not.
|
|
#
¿
Mar 29, 2024 15:30
|
|
|
As far as I know, there is no benefit to power leveling the non-protagonist party members in individual chapters. Honestly in the context of Pogo�s chapter, there isn�t much reason to level Beru for Sing Hurt since it can only be used on Odo anyway. And it�s been nerfed into the ground in the HD version.
|
|
#
¿
Mar 29, 2024 20:53
|
|
|
CptWedgie posted:Protagonists, meanwhile, tend to learn new skills every level until around level 16, I think, at which point all future levels are, again, purely stat boosts. (That said, Pogo's the only protagonist with any real chance of getting that high in his chapter...) Oboromaru has the potential to reach level 16 if you spend time fighting ghosts in the storehouse. If I remember correctly, Akira can get up to level 14 but literally ceases to gain experience at that point, at least in the SFC version. Everyone else either doesn�t gain exp within their chapters, or they have a set maximum potential (Imperial China). That said, levels past 16 don�t contribute all that much, as the game has very low caps. No stat can exceed 99 via leveling, and the max they can reach with equipment is 150.
|
|
#
¿
Mar 29, 2024 21:03
|
|
|
I did only say there was the potential after all. For what it�s worth, if you�re on a 100 kills run and defeat the bonus bosses, you do end off around level 14. It�d probably take 40 minutes of ghost busting per level, but I�ve come across worse grinds. Definitely not worth going for on a pacifist run, it�d take around 6 hours I imagine.
|
|
#
¿
Mar 30, 2024 00:11
|
|
|
I mentioned it a couple times, on vacation currently. I�ll be back at my home on Sunday and will likely resume updates same day, the King Fu chapter is one of the less demanding sections of the game.
|
|
#
¿
Apr 5, 2024 17:58
|
|
|
No worries friend, it's a good motivator to know someone cares! I'm eager to resume the LP, the upcoming chapter will have one of the few bits of community participation I can muster for a game like this.
|
|
#
¿
Apr 6, 2024 02:18
|
|
|
Just giving everyone a heads up regular updates will resume tomorrow! I had planned on making a video today, but I ended up getting sick yesterday and had an hour long flight delay to deal with today, so my energy just isn't there. Ideally I won't be coughing up my lungs when I hit record tomorrow.
|
|
#
¿
Apr 8, 2024 00:43
|
|
|
https://www.youtube.com/watch?v=smrrLOXPSK8 After a brief delay, part 5 is out! We begin the Imperial China chapter, which is much more story driven. This is a good example of how each chapter mixes up the gameplay a little, as this chapter lacks any kind of store or crafting system, and its main protagonist is incapable of gaining experience. Our plucky pupils are more than capable of growing, but that matters less than you'd think for reasons that will be made apparent next time. We get quite the party in this chapter, with The Earthen Heart Shifu being evasive with tremendous special attack but no further room to grow, Lei/Li Kugo with her incredible speed and decent physical prowess, Yun Jou with his well rounded stats and high special attack, and finally Hong/Sammo Hakka who is an absolute unit of HP and physical prowess but slow charging unique attacks. Extra Notes -Most of the equipment you collect will ultimately not matter as it's fairly weak. Be sure to scavenge for as many healing items as possible though, they will be much more important later. -Something I'd like to praise the fan translation for is its unique idea for distinguishing the different chapters. Each chapter has a unique font in the AGTP translation, keep a close eye on how it looks between each chapter! -Once you have your pupils, you can go murder tigers for a bit if you'd like to level them up, but this not at all helpful. It's arguably detrimental, as their stats are directly translated onto their enemy versions in the training battles we will be engaging in. -While it might seem like a good idea to spread the training around, you really want to pick a star pupil and funnel all your training into them, as whoever gets trained the most influences the direction of the plot. That's not all! I'm holding a poll for who our star pupil will be! The #1 pick will be the star in the HD version, while #2 will get to star in the SFC version. #3 in the poll will have their differences within the Imperial China chapter covered, though we will not see what impact them being the star would have on the rest of the game. (As it is beyond minimal.) Vote at the link below! https://www.youtube.com/post/Ugkxx6brwYen58Y5Cq7yxqf3tQmGD4_A6tqq EDIT: Poll is finished, link is dead. Thanks to all who voted! CullenDaGaDee fucked around with this message at 00:43 on Apr 11, 2024 |
|
#
¿
Apr 9, 2024 03:32
|
|
|
I�ll have to wind back a little bit and check that out, I always get Hong last and speed back to the dojo so I never really thought to explore the market much. Admittedly, I didn�t want to video to run too long so that was also a reason I bolted out of there.
|
|
#
¿
Apr 9, 2024 11:07
|
|
|
It won�t be too much of a hassle to check, I can just load my back up save and skip cutscenes until I recruit Hong. There�s a couple things I want to double back for in SFC anyway so it�ll bulk up the opening montage.
|
|
#
¿
Apr 9, 2024 20:51
|
|
|
Poll update! Perhaps unsurprisingly, Lei is absolutely dominating with 70% of the votes. Second place is in favor of Yun currently, at 20% of the votes. Sadly for the big man Hong, he only has 10% of the votes, though with the low number of votes so far he can easily swing back! I'll only be running the poll until about 6 PM CST tomorrow, so if you've been following the thread but haven't voted, let your voice be heard before it's too late. https://www.youtube.com/post/Ugkxx6brwYen58Y5Cq7yxqf3tQmGD4_A6tqq
|
|
#
¿
Apr 10, 2024 00:22
|
|
|
Honestly it'll depend on how I feel in about 12 hours. A coin flip would be the fair thing to do, but I do kind of feel like just giving it to Hong in the event of a tie since he is easily the least popular choice of the 3 pupils for most players.
|
|
#
¿
Apr 10, 2024 12:07
|
|
|
Poll has been closed! Perhaps unsurprisingly, Lei absolutely dominated the poll and will be our voice acted starlet for the HD version. Hong and Yun were neck and neck, but Hong managed to pull ahead with one vote just this morning. He will be our pixel crunchy and chonky star in the SFC version. For those who voted for Yun, fear not! We will be seeing his side of the story still, just not what impact he'd have once said story concludes. For those who voted against him, you will feel ashamed of your words & deeds. 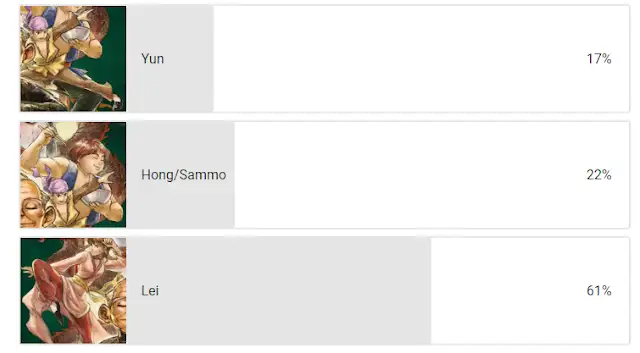 I'll be working on getting all the footage for the next part recorded once I do my workout for the evening. I should be able to get the rest of the chapter recorded for tonight, but we'll see if I can manage to render out and upload the video before the night is out.
|
|
#
¿
Apr 10, 2024 23:36
|
|
|
I do think it's slightly ironic that as unique as this game is among SNES RPG's, it is one of the bigger sausage fests out of them. Aside from Lei, the only other major female character who actually becomes a party member is Beru, and she is Beru-ly in her chapter. I guess it's a casualty of trying to make each story fit into a distinct archetype. Unfortunately, I won't be able to get the video ready tonight cause as it turns out recording the second half of this chapter 3 times in a row takes awhile, even with frame skip for the SFC version. I've got two thirds of the segments I need recorded done, and I'll try my best to get the remaining segment done tomorrow. The video may very well not materialize until Friday since my weekly schedule is pretty crowded.
|
|
#
¿
Apr 11, 2024 02:50
|
|
|
I did briefly consider testing splitting the trainings evenly to see what happens but it'd have been an extra 20 minutes of fight grinding just to find out something that ultimately doesn't matter for a practical playthrough anyway. Whoever ends up being the highest level seems to be to most reasonable explanation, Yun has the lowest level by default so if he isn't given extra attention he will absolutely be behind everyone.
|
|
#
¿
Apr 11, 2024 12:10
|
|
|
Finally got all the footage and commentary recorded for the rest of the chapter. Having some editing struggles tonight, so I'll have the video done and uploaded tomorrow evening. Sorry for the delay!
|
|
#
¿
Apr 12, 2024 03:38
|
|
|
I can see why the put him on this chapter, he's got the kung fu poses downpat.
|
|
#
¿
Apr 12, 2024 23:45
|
|
|
https://www.youtube.com/watch?v=Pr-Y2eJX4pI Part 6 is finally out, and it is practically a feature length Kung Fu movie! Truthfully I could have probably split this into two videos, but I felt one would have been better for the pacing regardless of how long it ended up being. Videos going forward should hopefully be much shorter. Super satisfied with how this turned out though, and this chapter really hits some emotional highs for the story so I hope you all enjoy it too. Now onto the chapter that will be the biggest pain to edit! yayyyyyyy Extra Notes -For training, you only really need to train your preferred pupil at least twice per session. The only exception is Hong, who is the highest level and can still be your star pupil with less than that. That being said, there really is no good reason to train anyone but your preferred pupil. Nothing is gained or unlocked by spreading the training around. -By and large Lion's Dismissal and Wise Fox's Grace are the only moves you should bother teaching to your pupils. The others are just too weak or unreliable with their secondary effects and all the pupils have their own signature moves they learn that outclass them heavily. I did my best to get as many as possible onto Lei and Hong for flavor, though to my knowledge there is no way for them to learn Unseen Bow's Arrow. In the HD version at least, Yun gets that move at level 9. -The accessories you pick up from the market are extremely helpful. Each pupil essentially has a set maximum potential, and these accessories are the only way to get any more real power onto them before the final boss. This playthrough is totally not the first time I thought to slow down and actually talk to people there to see if they gave me anything. -Hopefully you didn't equip anything good onto your non-star pupils! Those items can be lost, though fortunately nothing important is gained before the story diverging point. -The Indominable Fist fortress is only really tricky if Hong is your star pupil as he joins in very late. It's not super difficult, but be cautious with bigger encounters as the Shifu can be dogpiled if you aren't careful. -Speaking of Hong, he definitely has the roughest time here as none of the Earthen Heart skills are really all that great in his hands and he doesn't really get any great unique skills within this chapter either. Definitely keep your hands on your healing items for emergencies with him. Appropriate given his gluttony I suppose. -For the equipment that you can get from the mini boss rush, be sure to equip it on your pupil in the SFC version! It is lost forever otherwise, which is really unfortunate for the armor you get from the sisters. -It's up to you if you want to use Heavenly Peaks Descent as a finisher or opener, either way is a valid use. Finisher is probably smarter though since you can close out the fight when Ou Di is around 250 HP with all the pupils and spare yourself anymore risk at that point.
|
|
#
¿
Apr 13, 2024 05:32
|
|
|
At the very least, Lei is the only one who unambiguously survives the Indomitable Fist attack due to resilience. Yun and Hong completely to mostly survive due to cowardice.
|
|
#
¿
Apr 13, 2024 14:45
|
|
|
CptWedgie posted:Teaching as many different moves to your pupil as possible is generally a good idea, if only to cover weaknesses. Don't worry if you can't teach something to one of them, though; they all eventually learn everything by leveling up (and I'm pretty sure this holds true in SFC too). I would think this but honestly so many of them are just too weak for me to really care about, and the secondary effects go off so rarely (Also for Hong most of them key off of his worst stats). I was kind of surprised comparing and contrasting the HD and SFC version, because while they are very similar on the whole, I've noticed disable moves are much more consistent and useful in the SFC version. Just compare the Mammoth King fights I had. I'm more used to remakes buffing moves with secondary effects to encourage using them, but the HD version has actually made many moves a lot weaker.
|
|
#
¿
Apr 13, 2024 17:27
|
|
|
https://www.youtube.com/watch?v=QjEXjxbJbUA Part 7 is out! We begin the Twilight of Edo Japan chapter, and in contrast to the extremely straightforward Imperial China Chapter this one has an extreme number of variations on how it can play out. For this LP, we'll be taking a look at the two paths through it that are polar opposites: 0 kills and 100 kills. Most of the video will follow the pacifistic playthrough in the HD version, but there will be cut aways or cut ins to the SFC version where I will be going for a full 100 kill playthrough. I'll fully admit I wasn't quite sure how I'd meld the two playthroughs together, so the commentary on the videos sometimes doesn't fully jive with the implementation I ultimately went with. This should be less of a problem in future videos where the playthroughs start to diverge a lot more heavily and I'll be doing for more proper cuts into the 100 kills playthrough. Apologies if it's a little hard to follow what is going on in the SFC version. Extra Notes -For a 0 kills playthrough, it isn't too big a deal if you get into an encounter since you can just choose to flee the battle. That being said, there are some battles that cannot be run from that do result in a kill count, so be sure to save frequently and reload if you get caught in such a battle. -For a full 100 kills playthrough, there are a number of enemies that you either outright need to spare for a time to get another encounter to happen, or should avoid for a bit until you are strong enough to take them on. This is easily one of the most counter-intuitive aspects of going for 100 kills, the most notable being you can't kill any female NPCs in the castle until a certain point. Literally right at the end of the castle, there is a scene with an NPC that only triggers if you haven't killed any women and it is necessary to kill the person in this scene for all 100 kills. -The password system can be a bit of a pain in the SFC version since Oboromaru doesn't personally keep track of it, and the way to remember it is a bit out of the way. I'd recommend saving before any password checks just in case you've lost track of what the password actually is. Obviously not an issue in a kills playthrough since you only need to know the password once. -For the most part there's not really any reason to go for 0 kills or 100 kills aside from the accomplishment. There is a reward for 0 kills but an identical reward can be gotten easily in a kills playthrough and only with some issue in a pacifist playthrough. And there straight up isn't a reward for 100 kills, in either version of the game. The most practical approach to this chapter is just kill anything that gets in your way for EXP and ease. This will get you enough EXP to take on the chapter's bonus bosses organically, and the only real fringe rewards from a pacifist run are what you get for not killing women, which obviously can be gotten no problem in a less-than-100 kills run. -I neglect to comment too much on it, but the thieves in the residential manor are the first time we've had a guaranteed appearance of the running gag Wantanabe clan. This appearance can easily be the first time you come across them, and it can actually be awhile before you notice this is a running gag since the name gets morphed to fit the setting of the chapter and some of their appearances are optional. -For the handful of Kobans we will collect throughout the chapter, we will need 4 all together and they all must be used at a specific spot. You will never be able to guess what we are to do with these. -For the storehouse spirits, they will get you up to level 7 pretty quickly before the EXP they give slows down immensely. You can continue to grind them until level 9 relatively quickly, but I settled for 8 since that's more than enough for the mandatory fights of the chapter. It's pretty much necessary to grind on these guys for a bit in a 0 kills run, since you have extremely limited avenues to power up for the handful of boss fights you must deal with otherwise.
|
|
#
¿
Apr 14, 2024 13:43
|
|
|
CptWedgie posted:...I hear there's a minor difference in the "abandon the mission" game over if you save the Watanabe duo first; if you decide to show what happens if you manage to kill those hunters, maybe you could throw that in as a side-bonus. I'll keep that in mind! Shouldn't be too hard to make a throw away run for that. I knew Oboromaru's SFC portrait looked familiar to me for some reason, wild to find out it was made by the guy behind Detective Conan. I apologize for not getting a video out yesterday, it was a scorcher compared to recent weather and my exercise left me completely drained. I've gotten the video and commentary for part 8 recorded, but it's a pretty hefty 2 hours of raw footage to cut down so it's doubtful I'll have the video out tonight. I knew this chapter was going to be a headache to cover, but thankfully the LP should become much simpler going forward. The editing will also be a lot less weird for this one since the playthroughs diverge enough at this point that I can just treat them as completely separate entities now. EDIT: After some slight editing snafus, I've got the video cut down to a more reasonable size with all the fat cut and it is rendering now. Should be able to upload it in the morning. CullenDaGaDee fucked around with this message at 04:07 on Apr 16, 2024 |
|
#
¿
Apr 16, 2024 03:08
|
|
|
https://www.youtube.com/watch?v=pXqQUgMQCCg Part 8 is out! It's at this point in the Ninja chapter that a 0 Kills and Full Kills playthrough will diverge pretty heavily as we'll want to take different routes into the castle for both purposes. As well, quite a bit of the castle can be ignored on a 0 Kills playthrough. While this adds a huge layer of complexity and variability in how the chapter can play out, it's much simpler from a recording perspective as I can now more easily meld the two playthroughs at the point where they split. We accomplish most of our goals, and are pretty much set to close out the 0 kills playthrough. For the kills playthrough, I'll need to do some work to build up our entourage, as we have some difficult bonus bosses to deal with before finishing our killing spree. Extra Notes -You can enter the castle through the moat on a No Kills playthrough, but it's very annoying to avoid the moat ninjas so I wouldn't really recommend it. Also the bonus boss located there can easily ruin your day if you're not careful. -Infiltration can be made much simpler if you secure all the hook and rope sets. There's not much use for those after the castle traps are disabled though, so don't go back for them if you missed them earlier. -It's at this point that I feel it's worthwhile to note the SFC version of this chapter is actually quite a bit more difficult. Oboromaru is both more frail and doesn't hit as hard with most of his moves, making the kills playthrough a bit more perilous. Amakusa Shiro Tokisada is of little difficulty in the HD version, but is a much more threatening opponent in SFC. He's also less tedious to deal with as there are far few lost souls to dispatch. -Ryoma is another good example of why playing pragmatically in this chapter is for the best. He's a huge help, but getting him now prevents a 0 Kills run. It's one of the numerous counter-intuitive aspects of the two major routes you can take through this chapter. -The Relentless Maid can be pretty good for leveling even in a 0 Kills playthrough. She has a pretty high EXP yield and can survive a significant number of fights before croaking. (It's 16 fights in SFC, but I think it might be slightly less in HD) We'll see her eventually when we need to kill her in SFC, I don't need her in HD because of the Lost Soul grinding I did. -The man with the Oni mask is another moment where you can permanently lose out on kills and fail the 100 Kill playthrough. Be quick when he appears! -You can defeat Puppetmaster Gennai without taking out his puppets in the battle, but this will deny you the Mainspring. I've also read the Mainspring has an RNG component to dropping, so be sure to save before the fight. Gennai is easily the least threatening boss in the chapter of either version, so don't worry too much about him. -Goemon is extremely helpful and is another reason why playing pragmatically is the smart choice. If you let him go and get all the treasure in the castle refilled, you can have a hefty amount of healing for the bonus bosses and have duplicates of the best equipment to make sure everyone in your party is defensively solid. -Mimic Mammet/O-Robo has two other things to be mindful of besides from falling in pits. One is that he is not waterproof, so taking him into the moat can destroy him in short order. He sinks almost immediately in the HD version, but if you're quick you can get him to help out with the moat bonus boss in SFC. The other thing he needs to be mindful of is Mice. They cause him to freak out and trigger a battle with you, though fortunately he is not destroyed from this. This is mostly a concern in a kills playthrough, none of this will be a factor in 0 kills.
|
|
#
¿
Apr 16, 2024 12:15
|
|
|
CullenDaGaDee posted:I did only say there was the potential after all. For what it�s worth, if you�re on a 100 kills run and defeat the bonus bosses, you do end off around level 14. It�d probably take 40 minutes of ghost busting per level, but I�ve come across worse grinds. Definitely not worth going for on a pacifist run, it�d take around 6 hours I imagine. So following up on this, I was doing some grinding to get ready for the bonus bosses in the SFC version, and as it turns out it's a bit more tolerable to do this there. Lost souls give much less experience at lower levels, but the scaling stops them at giving 4 exp per kill, so you ultimately only need to kill 25 of them per level up. Still pretty slow without using frame skip, but getting to 16 is much more doable and probably necessary if you want defeat the bonus bosses without O-Robo. If you have O-Robo though, just get him to the level where he learns Fuma Shuriken and have him spam the hell out of that.
|
|
#
¿
Apr 17, 2024 03:14
|
|
|
CptWedgie posted:That pot that wants Koban? Feed it enough (at once?) and it'll teach you attacks. One of those attacks being Oboromaru's (and Mimic Mammet's, if present) ultimate, so it's probably worth doing. I did get a comment explaining that, which I do mention in the next video. I'm not sure how practical it is though, even with Goemon's refill there is only about 10 Koban exactly in the castle (IF you're doing kills, and in the SFC version the Koban from the merchants you kill is based on RNG to drop). You can't use it at all in a 0 kills run since you won't have enough Koban to feed it period, and using any on it will lock you out of the Mimic Mammet, while on a pragmatic playthrough you need to be very particular about your routing to make sure you spring Goemon at the right time to get all the chest Koban back. It's not usable in a 100 kill run either since of course you have to kill Goemon and can't get the chest Koban back.
|
|
#
¿
Apr 18, 2024 11:47
|
|
|
https://www.youtube.com/watch?v=XcSsVJWxQ8E Part 9 is out! I'm glad to finally be done with this chapter, it was a headache to cover a lot of the weird bits about it and there's still some stuff I want to double back for. We'll press on for now and I can take care of that when I have some more free time. Regardless, Oboromaru finishes this chapter with two flavors of completionist and some considerable power at his disposal in either case. Extra Notes -It is possible to win against Hayate, but it results in a game over anyway. I was kind of rushing to get this video made so I wasn't able to get a winning fight against him in time for this recording. I'll keep the file tucked away for later when I can commit to preparing Oboromaru for the fight. -Once you recruit Ryoma, you can no longer abandon the mission as he'll always stop you when you attempt to leave. -Something that slipped my mind to mention in the video, if you kill the 3 guards that MM/O-Robo blows up on before activating him, then MM/O-Robo just disappears from the game entirely and can�t be used at all. -If you want to fight Majin Ryunosuke in a 0 kills run, you'll absolutely want to do it before you blow up the Mimic Mammet. This means you'll have to fight him without Ryoma, which makes the battle a bit more precarious with less options for drawing his fire. The basic approach to it is still the same though. -For Lord Iwama, you can come back for him after Ryoma joins you on 0 kills since the Mimic Mammet is less crucial for this fight and in the HD version he sinks in the moat way before you even have a chance of reaching Iwama. -It's much easier to prepare for these fights in the SFC version as Lost Souls will never give you less than 4 exp per kill while in the HD version their yield drops to 1 around level 11 or so. You can still grind on them, but it is much slower and more annoying, so I can't imagine most wanting to go past level 12 just off the experience they yield. You can battle the Relentless Maid for a better payout, but you can only battle her so many times before you notch a kill. -As far as I know, killing Yodogimi earlier doesn't really affect anything with her boss fight aside from changing the dialogue slightly when she reveals herself. -The Medicine Box is the biggest thing you miss out on going for 100 kills, as it is a very powerful accessory. It's one of the big reasons a pragmatic playthrough is better than either extreme, since you can still kill plenty and still get it at the end of the run. -In the HD version, the background in the credits changes depending on your kill count. The sun immediately gets blotted out by a severe rainstorm if you have 100 kills. CullenDaGaDee fucked around with this message at 17:08 on Apr 18, 2024 |
|
#
¿
Apr 18, 2024 12:10
|
|
|
I�ll be sure to keep it in mind! Once I have some free time I probably will round up the full Genji set and grind a couple more levels. Defeating Hayate mostly is just a matter of hitting him with enough Phantom Butterflies, but his damage is so high without good armor that a single mistake will end the fight.
|
|
#
¿
Apr 18, 2024 16:27
|
|
|
https://www.youtube.com/watch?v=-axIgqzM9Ig Part 10 is out! Truthfully, I probably could have split this into two videos but in my head one video seemed just right for such a short chapter. It would have been mostly cutscenes for the first video if I had split it, so maybe this is for the best. Anyway, it's the Wild West chapter, one that is light on combat and revolves around a gimmick of making the final battle as hard as you want it to be. Or if you were like me as a dumb teenager, you could fail to realize you could even set traps and do the most difficult final boss as a matter of course. Thankfully, the HD version makes this much less likely to happen with its signposting, though it does fail to indicate that setting repeat traps is a waste of time. Extra Notes Actually there's not really much to say about this chapter that wasn't covered in the video. It's about as straightforward as it gets. There's a number of variations for the final battle depending on how many traps you set, though this has little bearing on anything but the battle itself. About the only notable thing is that the HD version is both harder and easier if you eschew traps. Harder because most of your moves are nerfed while Dio has a more generous range for his Gatling Gun attack, and easier because the healing items don't debuff you anymore with drunkeness and Texas Jitterbug is a hell of a lot stronger for Mad Dog. (Interesting, because most multi-hit moves like all of Sundown's got heavily nerfed in the HD version) There's a lot more to say about the next chapter even though it's even shorter, funnily enough.
|
|
#
¿
Apr 20, 2024 05:34
|
|
|
The best evidence that it's after the Edo chapter is that the historical Sakamoto Ryoma was assassinated in 1867 and this chapter is implied to be taking place at least a little bit after the American Civil War rather than concurrently with it, though without any set dates it's not impossible they're happening around the same time.
|
|
#
¿
Apr 20, 2024 20:17
|
|
|

|
| # ¿ May 16, 2024 20:44 |
|
|
The classics of the Spaghetti Western genre are famously just setting changes for classic samurai films, so this all tracks.
|
|
#
¿
Apr 20, 2024 23:16
|
|