


|
insta posted:magic, got it. But is it wizard magic or Satan's magic?
|
 #
?
Feb 7, 2022 03:09
#
?
Feb 7, 2022 03:09
|
|


|

|
| # ? May 31, 2024 06:44 |
|
|
PleasantDirge posted:But is it wizard magic or Satan's magic? Yes
|
|
#
?
Feb 7, 2022 04:13
|
|


|
Combat Pretzel posted:The step pulses are generated in software, because kinematics are relatively dynamic. If your 3D printer controller is also busy with SD card I/O, G-Code parsing and kinematics calculations, while it also needing to generate those pulses, it doesn't always manage to do it on time. While on average it achieves the desired pulse rate to say move at a constant speed, the timing between the pulses varies, which creates noises in various frequencies in the stepper motors. Sounds like he got too obsessed with on-the-wire efficiency. As it is, it's stupid efficient across the wire to the MCU, chasing a few more didn't seem to be all that sensible unless it was chasing some form of concurrency. I was reading just today on Klipper the relative efficiencies of the various interconnects. CANBus being the slowest at 18k events per second, and the high end Octopus (via USB) and RPi2040 boards doing nearly a million events across the wire a second.
|
|
#
?
Feb 7, 2022 04:59
|
|

|
The issue seems more bandwidth over certain links between the RPi and the MCU. Some controllers use stupid poo poo like a CP2102 USB-to-serial chip or an ATMega32 to do the same job, so you have to account for that, because then the actual MCU communicates over proper serial instead of USB. Also, bandwidth will probably fairly high to begin with when you're running fast speeds. Because how I understand it, he collects and sends the timings for each individual step. This is necessary for fancy kinematics, including previous experiments with S-curves, the current input shaper, and anything else that doesn't generate linear ramps (e.g. deltas). He seems a pretty smart dude, so I figure he's got a pretty good reason to do this.
|
|
#
?
Feb 7, 2022 10:26
|
|

|
My printer has pretty much been standing still for a month ever since this  happened to my Dragon HF back in december due to using a nozzle with too short a thread when I was printing sparkly christmas gifts  . I tried replacing the heat break with the original spare part . I tried replacing the heat break with the original spare part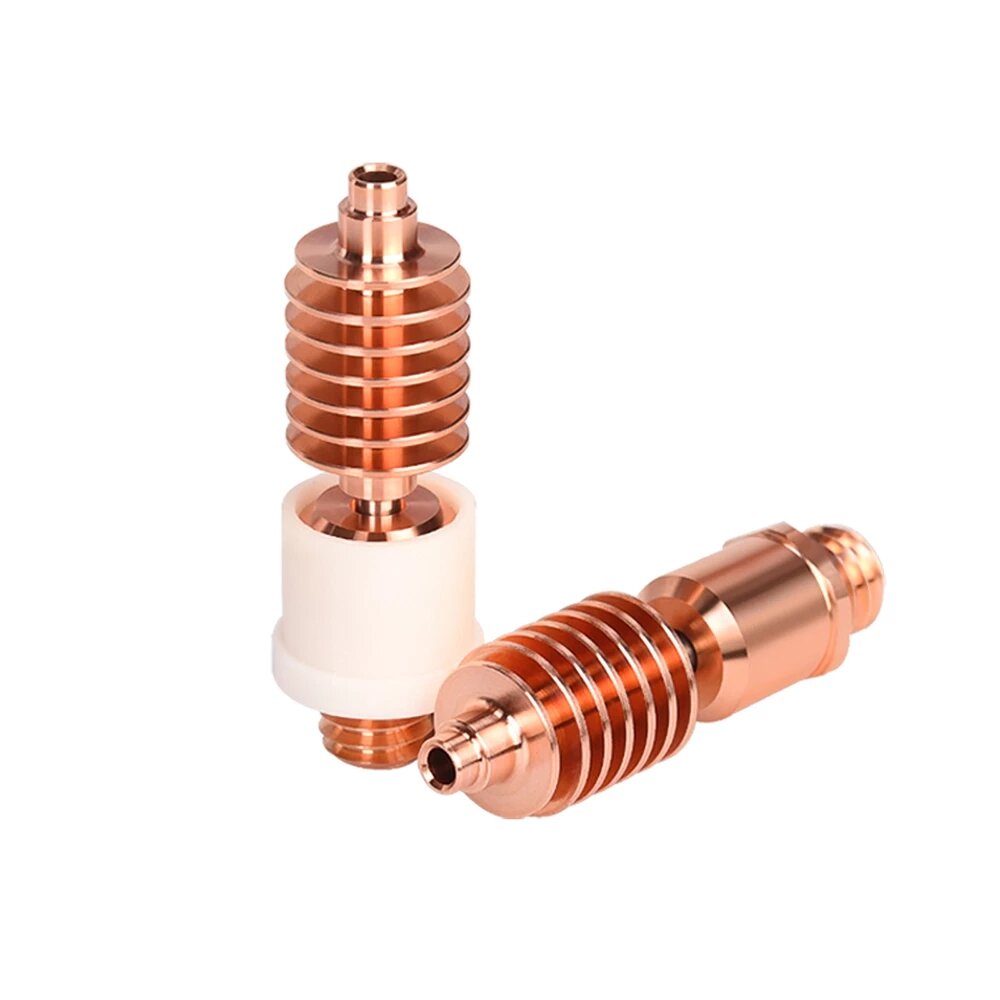 but I keep getting jams some time into my prints. It's not a real jam, as reversing the filament out works fine most of the time. Straight up extrusion, e.g. when purging during a filament change works fine to start with and I get pretty high volumetric flow with a newly changed filament, which leads me to believe it's heat creep and retraction related. I cleaned the threads of the heat block pretty throughly with a round steel brush and had no trouble screwing in both nozzle and heat break most of the way cold. Perhaps something is still affecting heat transfer between the block and heat break though?
|
|
#
?
Feb 7, 2022 12:20
|
|


|
MustardFacial posted:Here is a better picture of what's going on with the Y: I didn't see this mentioned in the thread but when I posted similar artifacts on my Y axis  some people in the CR-6 discord pointed me to vertical fine artifacts https://forum.prusaprinters.org/for...fine-artifacts/ which basically can only be overcome with a swap to a 0.9 degree stepper motor. 
|
|
#
?
Feb 7, 2022 12:29
|
|

|
Is the cr-30 the only belt printer out there? Would love to build something and it would be nice to soup one up for a print farm
|
|
#
?
Feb 7, 2022 16:22
|
|


|
w00tmonger posted:Is the cr-30 the only belt printer out there? Would love to build something and it would be nice to soup one up for a print farm No, but it's probably one of the cheapest. Here's a dumb article about them that lists some I've never heard of: https://www.3dsourced.com/3d-printers/conveyor-belt-3d-printer/ They have some pretty hilarious limitations on them though where the cons outweigh the pros to me unless I had the money for one in addition to my more traditional machines and I only intended to use it to print long parts that the setup was ideal for (and do other FDM stuff on my traditional cartesian machines). There are also projects like this one that are just part-removal systems: https://www.patreon.com/PrintShift Some Pinko Commie fucked around with this message at 16:30 on Feb 7, 2022 |
|
#
?
Feb 7, 2022 16:27
|
|

|
Anyone have recs for sanding printed objects other than a piece of sandpaper? I'd kill for some kind of 400 grit flexible puff that you can put on a power drill at low speed in order to smooth out a part. My Dremel and some abrasive pads do a pretty good job at small scale but are no good for larger pieces or areas. My usual process is just sandpaper - 400 grit, 600, 800, 1000, 1500, then buffing with steel wool if the need arises.
|
|
#
?
Feb 7, 2022 20:12
|
|


|
MJP posted:Anyone have recs for sanding printed objects other than a piece of sandpaper? I'd kill for some kind of 400 grit flexible puff that you can put on a power drill at low speed in order to smooth out a part. My Dremel and some abrasive pads do a pretty good job at small scale but are no good for larger pieces or areas. i keep meaning to buy a sanding head for my oscillating multi tool
|
|
#
?
Feb 7, 2022 20:19
|
|


|
MJP posted:Anyone have recs for sanding printed objects other than a piece of sandpaper? I'd kill for some kind of 400 grit flexible puff that you can put on a power drill at low speed in order to smooth out a part. My Dremel and some abrasive pads do a pretty good job at small scale but are no good for larger pieces or areas. I use "radial bristle discs" and some similar things on a flex-shaft tool for silver jewelry polishing. I've never thought to use them for 3d printed stuff, but they might serve your purposes if you can find ones with the grit you need. Edit: Oh I see you want bigger options. You can maybe use an aggressive polishing compound on a cloth polishing wheel.
|
|
#
?
Feb 7, 2022 20:23
|
|

|
Just be careful with those, they're flat and stiff - they won't conform to curves. Also IIRC most of the pads for oscillating multitools, pad sanders, orbital sanders, etc. are somewhat coarse. 180 grit flap sander wheels at low speed in my regular power drill have been as gritty as I felt safe on a rounded part, and even then the flap wheel was fairly stiff. I was experimenting on Steelfill parts and wasn't happy about how they looked at large sizes, so I'm just gonna resin smooth 'em if I can, but I just wish there was some kind of sanding tool for printed parts rather than my hand and sandpaper.
|
|
#
?
Feb 7, 2022 20:24
|
|
|
MJP posted:Just be careful with those, they're flat and stiff - they won't conform to curves. Also IIRC most of the pads for oscillating multitools, pad sanders, orbital sanders, etc. are somewhat coarse. 180 grit flap sander wheels at low speed in my regular power drill have been as gritty as I felt safe on a rounded part, and even then the flap wheel was fairly stiff. I have some radial bristle discs that are pretty soft and conform well to curves. There's a million flavors of these things out there.
|
|
#
?
Feb 7, 2022 20:25
|
|
|
armorer posted:I use "radial bristle discs" and some similar things on a flex-shaft tool for silver jewelry polishing. I've never thought to use them for 3d printed stuff, but they might serve your purposes if you can find ones with the grit you need. These? https://www.3m.com/3M/en_US/company-us/all-3m-products/?N=5002385+3292908964&rt=rud They make 3" options, which might be perfect for my needs.
|
|
#
?
Feb 7, 2022 20:26
|
|
|
MJP posted:These? https://www.3m.com/3M/en_US/company-us/all-3m-products/?N=5002385+3292908964&rt=rud They make 3" options, which might be perfect for my needs. Yup, although I have a different brand of them. You can use one disc or make a stack of them to get a thicker wheel. I'm really not sure which ones you would need to use for different plastics though, I've only ever used them on sterling silver.
|
|
#
?
Feb 7, 2022 20:28
|
|
|
MJP posted:Anyone have recs for sanding printed objects other than a piece of sandpaper? I'd kill for some kind of 400 grit flexible puff that you can put on a power drill at low speed in order to smooth out a part. My Dremel and some abrasive pads do a pretty good job at small scale but are no good for larger pieces or areas. You can probably find an extra large sanding drum for a Dremel and if that isn't big enough I know you can get big rear end ones that attach to a drill.
|
|
#
?
Feb 7, 2022 20:30
|
|


|
D-Pad posted:You can probably find an extra large sanding drum for a Dremel and if that isn't big enough I know you can get big rear end ones that attach to a drill. The other thing I mention would be something like this https://www.grainger.com/product/GRAINGER-APPROVED-Buffing-Wheel-12U107 which you use with a plastic polishing compound like https://www.eastwood.com/plastic-buffing-compound.html. I use these with jewelers rogue for polishing silver and it works great.
|
|
#
?
Feb 7, 2022 20:34
|
|
|
D-Pad posted:You can probably find an extra large sanding drum for a Dremel and if that isn't big enough I know you can get big rear end ones that attach to a drill. Aren't the drums all rigid, though? Great for flat parts but not so much for round. armorer posted:Yup, although I have a different brand of them. You can use one disc or make a stack of them to get a thicker wheel. I'm really not sure which ones you would need to use for different plastics though, I've only ever used them on sterling silver. What brand and where do you normally buy from? If they make a mandrel or such to use on a power drill I'll definitely buy a few to try.
|
|
#
?
Feb 7, 2022 20:35
|
|
|
armorer posted:The other thing I mention would be something like this https://www.grainger.com/product/GRAINGER-APPROVED-Buffing-Wheel-12U107 which you use with a plastic polishing compound like https://www.eastwood.com/plastic-buffing-compound.html. I actually have what I think is one of these, meant for aluminum polishing. I have a dumbass question, though - how do I actually get the compound on the wheel? Do I just like spin it at high speed and rub it onto the compound stick?
|
|
#
?
Feb 7, 2022 20:45
|
|
|
MJP posted:I actually have what I think is one of these, meant for aluminum polishing. I have a dumbass question, though - how do I actually get the compound on the wheel? Do I just like spin it at high speed and rub it onto the compound stick? Yep, the compound is generally embedded in a waxy block, and you rub that against the wheel while it's spinning so the wheel picks up some compound. You periodically re-apply it as needed. Be careful with these though because the wheel can grab whatever it is you are polishing and pull it out of your hands. The bristle discs I have are these ones https://www.riogrande.com/product/dedeco-sunburst-7-8-radial-disc-kit/326024
|
|
#
?
Feb 7, 2022 21:00
|
|
|
I first got into 3D printing 5 years ago, with the Makerfarm Pegasus (I got it with the "all metal" upgrade). Two years ago a coworker gave me his Ender 3 for free. Over the years I've peaked and waned in the hobby, but the fire recently got lit for me again. And with that, I've decided it's time to replace the Pegasus. This will be replacing the Makerfarm, which I am going to give to my brother. I'm going to stream the build of this on Twitch tomorrow. I'm going to wait on building the MMU though, as I want to get a Lack enclosure built first. I also want to print a couple MMU replacement parts befoehand. Any recommendations for printable upgrades/accessories? This is what I've bookmarked so far: MK3S+ Prusa Enclosure V2 - MMU2S Tension Meter for the GT2 belts of i3 MK3S+ or Prusa MINI+ P.I.N.D.A A.D.J.U.S.T.A - The perfect tool to get your Pinda Probe to the right level Prusa MK3 / MK3S / MK3S+ - SideBoxes for some Tools (NEW VERSION!) SquashBall MK3s/MK3s+ Vibration Damper V3.0 OR Anti-vibration feet for Prusa MK3 and Prusa Mini MMU2S MMU Slot buffer Prusa MMU2 Selector with magnet and opened FINDA canal ver. E2 - stock magnet 2�6�10 mm MMU2 Selector Plate with integrated tapered thread PTFE coupler + passthrough cover plates Prusa MMU2 PTFE Holder M10 Passthrough Adapter Ptfe holder and organizer for MMU
|
|
#
?
Feb 7, 2022 21:04
|
|

|
I would have waited a few months and got the XL with toolchanger, myself, for the money you just dropped.
|
|
#
?
Feb 7, 2022 21:09
|
|
|
He spent about $1000 on the pictured stuff, and the single-extruder version of the XL is $2000. If you want 5 toolheads it's $3500. And it's not going to be available for at least another couple of months, and there's a waiting list. I don't think someone who self-describes as a semi-committed hobbyist needs to spend $3500 on a printer.
|
|
#
?
Feb 7, 2022 21:19
|
|


|
those squashball feet just make it wobble even more
|
|
#
?
Feb 7, 2022 21:30
|
|


|
Revol posted:I first got into 3D printing 5 years ago, with the Makerfarm Pegasus (I got it with the "all metal" upgrade). Two years ago a coworker gave me his Ender 3 for free. Over the years I've peaked and waned in the hobby, but the fire recently got lit for me again. And with that, I've decided it's time to replace the Pegasus. Highly recommend this light bar: https://www.etsy.com/listing/679440408/led-light-bar-prusa-i3-mk2mk3-please Also get a raspberry pi and set up Octoprint, I literally cannot recommend it enough, it�s a total game changer,
|
|
#
?
Feb 7, 2022 22:24
|
|

|
Hello 3d printing thread, I was told this was the place to have my benchy ripped apart and suggest ideas to make the printer print better. I'm using a taz 5 with esun pla+ for this one. It was printing like trash and I last week re-squared all the joints and releveled the bed. https://imgur.com/a/5YC5Fob Besides the obvious that I need to raise my z offset slightly because the bottom layer is too squished are there any other things anyone sees as obvious problems? Printed at .25mm layer heights.
|
|
#
?
Feb 7, 2022 23:20
|
|
|
MJP posted:Anyone have recs for sanding printed objects other than a piece of sandpaper? I'd kill for some kind of 400 grit flexible puff that you can put on a power drill at low speed in order to smooth out a part. My Dremel and some abrasive pads do a pretty good job at small scale but are no good for larger pieces or areas. 3D print a bunch of wheels that would fit into a drill with different radius' to meet your requirements. Then glue sandpaper to the edges of the wheel. You stated you only need low speed so a 3D printed parts should be fine with this, print them out of TPU if you want them to be a bit squishy/deformable.
|
|
#
?
Feb 7, 2022 23:24
|
|
|
biracial bear for uncut posted:I would have waited a
|
|
#
?
Feb 7, 2022 23:28
|
|


|
Electrophotonic posted:My printer has pretty much been standing still for a month ever since this Sounds like it may be heat creep if it happens some time into the print. Usually this is due to some part of the heater block touching something besides the tube (and possibly other supports if your printer has them) and causing it to heat the hotend assembly more than normal. This sends heat up into where the filament feeds so it melts too early and clogs. It can be easy to mess up if you've recently reassembled the whole hotend. On my Maker Select v2 the heater block is suspended below the heatbreak tube entirely by the tube itself. You screw the tube into the block and the nozzle into the block, and they meet inside. One time on reassembly I put the tube a few turns too far into the block and the nozzle stuck out more than normal. This meant the block sat higher and was heating the steel mount above it, causing the whole assembly to heat up during printing. About 40 minutes into every print it would clog up high in the tube. I don't know much about the dragon hf hotend but from pictures it looks like the aluminum support has some screws into the heat block. I'd make sure that the spacing is what it's supposed to be so it's not touching directly if you think it could be heat creep. That's not the only possibility but it's what I'd look at first since it should be something that you can spot. It could also be retraction settings causing melted filament to clog up high if you pull it too far back too often.
|
|
#
?
Feb 7, 2022 23:33
|
|

|
Sagebrush posted:He spent about $1000 on the pictured stuff, and the single-extruder version of the XL is $2000. If you want 5 toolheads it's $3500. And it's not going to be available for at least another couple of months, and there's a waiting list. Yeah, while that sounds really amazing, and I could afford it no problem... just don't think my engagement in the hobby meets that level quite yet. I might upgrade this to E3D Revo, if their nozzle prices can be lowered, because they're pretty crazy at the moment. Talorat posted:Highly recommend this light bar: Agreed, I've had Octoprint on the Makerfarm since day one I believe. I eventually upgraded to Klipper firmware, which means I can't salvage the Pi from that printer and reuse it here. I didn't realize until a week ago that Pi was hit with such bad stock issues. Thankfully, somebody in the Prusa discord remembered me talking about trying to find one, and pinged me when Adafruit refreshed their stock. Managed to get order a Pi4 2GB. (And checking my tracking, it just arrived in my mailbox today!) I actually was looking into running Octoprint off a spare Android tablet I have lying around, but I couldn't get the install to complete. I assume it's because that Dell Venue is running an x86 Intel chip. L0cke17 posted:Hello 3d printing thread, I was told this was the place to have my benchy ripped apart and suggest ideas to make the printer print better. The first picture has some red flags, layers are messier than I'd like them to be. Two possibilities come to mind; the Z axis or the extruder. Either one may need better calibrating. Beyond that, I recommend you get your slicer to automatically handle the z seam, instead of having it random like it is now. I prefer a single seam to all these random splots. Besides, sometimes the slicer can hide the seams in the geometry, like in corners.
|
|
#
?
Feb 8, 2022 00:37
|
|
|
Consider a pi zero 2w. I have been getting a few of them from makerbright (OOS now) , but they are a great, usually findable alternative to rpi 3/4 that is even more unobtainium One is driving my ender as is via USB, the other is driving the voron via btt octopus via uaet pins for power and data. The other two I still need to make a pi hole and the other a robot. And I still need a home automation hub, so looking for more in stock
|
|
#
?
Feb 8, 2022 02:28
|
|
|
Roundboy posted:Consider a pi zero 2w. I have been getting a few of them from makerbright (OOS now) , but they are a great, usually findable alternative to rpi 3/4 that is even more unobtainium Or the Rock Pi stuff, https://rockpi.org/. I get the stuff shipped to Australia in a week from Allnet, and it's actually available too. I often drive printers from a Rock Pi S, and that they run in 500mA is great while still being a 1.4-1.6GHz quad core ARM.
|
|
#
?
Feb 8, 2022 02:55
|
|
|
Is there a way to get a tiny bit more height on the Ender 3 V2? The specs list it as 220x220x250mm. I've got something that needs to be ~253mm high. I know you can get kits to raise the height quite a bit, but I'm not interested in doing that. If I need to I can print this object 250mm high then print something 3mm and put it on top (this is literally just going to be a cylinder to support something) to hit the exact measurement I'm going for but I'm curious if there is a trick or something to squeeze a few extra mm out? Is there any gotchas to watch out for when printing something that is exactly the max height at 250mm?
|
|
#
?
Feb 8, 2022 04:23
|
|
|
D-Pad posted:Is there a way to get a tiny bit more height on the Ender 3 V2? The specs list it as 220x220x250mm. I've got something that needs to be ~253mm high. I know you can get kits to raise the height quite a bit, but I'm not interested in doing that. If I need to I can print this object 250mm high then print something 3mm and put it on top (this is literally just going to be a cylinder to support something) to hit the exact measurement I'm going for but I'm curious if there is a trick or something to squeeze a few extra mm out? Is there any gotchas to watch out for when printing something that is exactly the max height at 250mm? Maybe if you crank down the bed leveling springs?
|
|
#
?
Feb 8, 2022 04:46
|
|

|
Two (126.5mm?) halves will be faster and easier than trying to hamfist an extra 3mm out of the machine, even in a best case scenario where that works and you don't break something in the attempt
|
|
#
?
Feb 8, 2022 05:30
|
|


|
Javid posted:Two (126.5mm?) halves will be faster and easier than trying to hamfist an extra 3mm out of the machine, even in a best case scenario where that works and you don't break something in the attempt Yeah, although trying to squeeze extra performance out of a machine is (at least for me) a big part of the fun of 3D printing, this seems like about the least-fun project imaginable because the only way to find out you've hosed it up is printing a few thousand layers each time you want to test an idea.
|
|
#
?
Feb 8, 2022 10:43
|
|

|
Having issued the sensible adult answer, I DO also have a pretty great bad idea for accomplishing this task! 1. modify a spare nozzle to be 3mm shorter 2. slice your cylinder @ 250mm high 3. open up your gcode in a text editor, add a pause at the end, then paste in the last 3mm of layers a second time after the pause 4. start the print with the normal nozzle, then swap in the shortened nozzle at your pause, effectively printing the last 3mm of layers at a -3mm offset So, precision lathe work on a tiny brass nozzle, manually edit gcode without making any mistakes, swap parts on the machine mid print without bumping anything out of alignment. Oh, if you have any kind of bed probe or extended fan shroud, you'll probably have to remove them to make this work. This is a terrible idea and you shouldn't do it, but if you do it you should post lots of photos e: this excludes additional exact max height considerations, which I have not messed with and don't know. also anything simple and structural that big I would be strongly considering just hacking out of a 2x4 or something that isn't going to be a solid workweek of printer time Javid fucked around with this message at 13:23 on Feb 8, 2022 |
|
#
?
Feb 8, 2022 13:17
|
|
|
D-Pad posted:Is there any gotchas to watch out for when printing something that is exactly the max height at 250mm? The biggest gotcha is that getting even a full 250mm of usable Z print height is really pushing it for an Ender 3. You also have to account for the fact that when the print is done, the machine is going to want to lift the nozzle a few mm to clear the object before it homes the carriages. You can change that lift distance in the slicer's end gcode, but there's going to be a really fine line between how tall you can print and how much room there is left for the nozzle to not scrape across the top of it when it's done. Javid's got the correct answer. The other way to reliably print taller stuff is to get a bigger printer.
|
|
#
?
Feb 8, 2022 14:23
|
|

|
https://twitch.tv/pixillated_ I'll be streaming my build of the MK3S+ kit today.
|
|
#
?
Feb 8, 2022 14:45
|
|
|
|
| # ? May 31, 2024 06:44 |
|
|
Revol posted:https://twitch.tv/pixillated_  Are you building it in a hot tub?
|
|
#
?
Feb 8, 2022 16:07
|
|