|
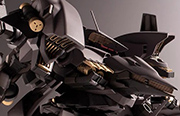
Generally speaking, anything with a visible cockpit interior gets a pilot, or something approximating one. I guess the thought is that these new metalized canopies are fairly opaque when they're in place, so you can't see anything anyway? Still, it bugs.
|
 #
?
Jan 15, 2024 13:42
#
?
Jan 15, 2024 13:42
|
|


|

|
| # ? May 25, 2024 13:11 |
|
|
https://x.com/wolvy20/status/1746733273324335446?s=46 �American Gunpla builder emphasizes that �posing is important!�� 
|
|
#
?
Jan 15, 2024 16:51
|
|

|
My first Gundam of the year complete! I hosed up the transfers a bit but whatever
|
|
#
?
Jan 15, 2024 19:21
|
|

|
Could be the lighting but that Blood Angel termie looks like more of a Blood Magpie waiting to "acquire" the guncannon.
|
|
#
?
Jan 15, 2024 19:44
|
|

|
Nuebot posted:It was a fun and easy build, except it really struggles to stand up? Maybe it's just mine, but the feet can't really bend forward much at all to offset the weight of the torso and the toes are extremely loose so the instant it's set down anywhere it just starts falling over. The rest of the joints are really sturdy though, so if the feet were just like. Less loose it'd be fine, but then the backpack is added and it can not stand up at all so here it is leaning against the psycho gundam for support, unable to be posed at all. I guess I'll have to start investing in stands to get some of these kits in the air Clear nail polish is the fix for loose joints. Put on a layer, let it dry, and test fit. Repeat until satisfied.
|
|
#
?
Jan 15, 2024 19:55
|
|


|
Nuebot posted:Also I'm running into the same problem I did with the Psycho Gundam where since everything slides together, sometimes one side just doesn't want to go in flush and even when pressing it in just pops out slightly and that's kind of frustrating. Oh thank god I�m not alone. I�ve been building a Psycho Gundam recently and the right side of the torso isn�t flush, and the right shoulder flap didn�t seem perfectly seated either, and I couldn�t really figure it out. The Psycho Gundam�s from 2004, it�s basically screaming for a 2.0.
|
|
#
?
Jan 16, 2024 15:51
|
|

X-Ray Pecs posted:Oh thank god I�m not alone. I�ve been building a Psycho Gundam recently and the right side of the torso isn�t flush, and the right shoulder flap didn�t seem perfectly seated either, and I couldn�t really figure it out. The Psycho Gundam�s from 2004, it�s basically screaming for a 2.0. I'd have to take mine off the shelf to check but I'm pretty sure it was the right side with mine as well. Everything works fine, nothing seemed off at all. It just didn't want to fully press together and stay there. The shoulder flaps are fiddly too, for sure. At this point though, I think they'd be better off just making a psycho gundam MK2 kit.
|
|
|
#
?
Jan 16, 2024 16:13
|
|

|
Gripweed posted:My first Gundam of the year complete! I hosed up the transfers a bit but whatever
|
|
#
?
Jan 16, 2024 16:13
|
|


|
Pierson posted:What's that giant terminator? I used to play WH40k as a kid and I had to stop but Space Hulk will always be the poo poo and if there's a giant terminator model I may be compelled. It's not a model kit, it's a action figure https://www.bigbadtoystore.com/Product/VariationDetails/241113?o=4 A really high quality one too. They've done a ton of Space Marine figures, of several different Chapters. And a few Xenos guys too
|
|
#
?
Jan 16, 2024 16:19
|
|
|
The Joytoy 40K figures jumped on the wagon after the Bandai Primaris Marine got the train rolling.
|
|
#
?
Jan 16, 2024 16:25
|
|
|
Arc Hammer posted:The Joytoy 40K figures jumped on the wagon after the Bandai Primaris Marine got the train rolling. You can not call that getting the train rolling. They made 1 figure, that cost 100 dollars, was pre-order only, had almost no paint apps, and was an Ultramarine with armor decorations that were not Codex Compliant. And then like a year later they made two recolors of it that were also 100 dollars and preorder only. I got so excited when they announced Bandai was going to be doing Warhammer figures, but what they actually did was insanely disappointing. edit: I mean seriously, compare the Bandai Ultramarines Intercessor Sergeant(?) to the Joytoy Ultramarines Intercessor Sergeant. All accessories for both are pictured.  
Gripweed fucked around with this message at 16:37 on Jan 16, 2024 |
|
#
?
Jan 16, 2024 16:33
|
|
|
Bandai pulled a Bandai, Joy Toy looked at it and realized they could jump in and do a lot more and faster. The Joy Toy figures are also way cheaper than that Bandai Primaris.
|
|
#
?
Jan 16, 2024 16:40
|
|
|
Gripweed posted:It's not a model kit, it's a action figure I will just click through and see if they have any battle sis- 
|
|
#
?
Jan 16, 2024 16:43
|
|


|
  First clear color!  Sorta want to get a clear color MG and try my hand at custom LEDs now.
|
|
#
?
Jan 16, 2024 17:24
|
|


|
JoyToy also makes some absolutely incredible looking mecha figures with the Steel Bone stuff. Would really like to pick one up but they are also real expensive
|
|
#
?
Jan 16, 2024 19:52
|
|


|
me: i should pack for my trip also me: hmm, i could bring him in pieces and do some panel lining on the plane.
|
|
#
?
Jan 16, 2024 22:05
|
|
|
Anyone have any tips for how I should approach this kit? It's Kotobukiya's Aaliyah-Supplice from the Armored Core series. It will be the first one I'll be doing a proper paint job on. There are so many parts! 27 runners with an average of 20 pieces, each. While doing research for general processes for gunpla / plamo that will be painted, I've found that some people: A : Cut, prep and paint every single piece. Store in groups by runner. Assemble. B : Cut runner pieces and separate by body part. Do full process of prepping and painting before assembly, one limb at a time. C : Build piece by piece just like the manual says (while sanding + cleanup), and then disassemble and tackle each limb individually. Method A just seems like setting myself up for a nightmare considering the sheer quantity of parts. Method B seems like a slightly less risky version. For B and C, I'm a little worried about not having the same density of paint applied if I'm doing multiple different paint sessions for each body part. I would of course pre-mix the colors and pull from the same jars, but am still concerned about things like one arm being darker then the other. Also, this kit has some nasty seamlines out of the box that will further complicate things as some of the parts that will need seamline removal are intended to be directly wrapped around other pieces. The shoulders are the biggest offender, with an OOB kit having big nasty seamlines right down the tops of the shoulders. In that particular case, I'm thinking: paint the interior parts, insert into outer shell, remove seamlines of outer shell, mask interiors and paint exterior? I am leaning towards Method B, but any advice that could be shared would be greatly appreciated. 
|
|
#
?
Jan 18, 2024 16:48
|
|
|
Big Bizness posted:Anyone have any tips for how I should approach this kit? It's Kotobukiya's Aaliyah-Supplice from the Armored Core series. It will be the first one I'll be doing a proper paint job on. There are so many parts! 27 runners with an average of 20 pieces, each. While doing research for general processes for gunpla / plamo that will be painted, I've found that some people: I do method C. You definitely want to have a parts separator/spudger handy, and fit the draft assembly loosely where you can. I then take it apart and sort them into sub assemblies in one of those divider thread/bead/hobby boxes. With regards to the paint mixing... in my experience you've got some wiggle room to be not-quite-right and still never notice it. My Messer uses two different mixtures and brands of red, and even when I'm looking at it knowing what pieces used which formula, I have to admit that my eyes can't tell the difference.
|
|
#
?
Jan 18, 2024 22:58
|
|


|
I also use method C but instead of putting them in separate little compartments I just put em right on the alligator clips when taking them apart. I do try to organize them by color on the little holders but sometimes I run out of space, lol. If you go this route try to either mask off the connection pegs or sand the paint off them when you�re done cuz it can cause some fit issues when putting the kit back together.
|
|
#
?
Jan 18, 2024 23:29
|
|

|
After reviewing the manual and doing some serious brainstorming about this I've decided to go with Method A for this project. Separation by runner seems less intimidating in comparison now that Ive gone through and counted the amount of pieces going into each limb. Separating by limb (Method B) would mean huge bags full of mixed color parts and would lead to at least seven paint sessions that would involve loading three different paint mixtures each time. Separating limbs into further subsections would only exacerbate this paint issue. Method C would be more straightforward but I think would ultimately take up a lot more total time in this particular project because of the multiple reassemblies, and the volume of the pieces. To reduce the amount of individual pieces I'll have to paint, I went through the manual and made a list of every pair of pieces that can be combined and painted before full assembly without interfering with anything else. This reduces the total number of things to paint by 36, which isn't huge but is still an appreciable subtraction from the grand total of 473 pieces plus polycaps. Now to just pick an airbrush and whatnot. This should be a little less complicated hopefully!
|
|
#
?
Jan 19, 2024 02:22
|
|
|
Antoine Silvere posted:mask off the connection pegs or sand the paint off them when you’re done cuz it can cause some fit issues when putting the kit back together. This is a great tip, thank you!
|
|
#
?
Jan 19, 2024 02:23
|
|
|
I like building everything then popping the joints apart to paint if nothing else because if I get an uneven paintjob it'll match across the assembly and look like I did it on purpose.
|
|
#
?
Jan 19, 2024 03:38
|
|


|
Cat Hatter posted:I like building everything then popping the joints apart to paint if nothing else because if I get an uneven paintjob it'll match across the assembly and look like I did it on purpose. "I meant to do that" is a valid reason.
|
|
#
?
Jan 19, 2024 08:01
|
|
|
Warmachine posted:"I meant to do that" is a valid reason. Honestly I sometimez leave some of the painted parts on my models a little imperfect rather than fix them because it creates a bit of a worn and weathered look.
|
|
#
?
Jan 19, 2024 08:14
|
|

|
Looking at the extent of the HG Rising Freedom�s sticker sheet, I am honestly wondering if WfM kits really were the exception and if IBO kits really were the sticker norms all along
|
|
#
?
Jan 19, 2024 14:56
|
|

|
MechaX posted:Looking at the extent of the HG Rising Freedom�s sticker sheet, I am honestly wondering if WfM kits really were the exception and if IBO kits really were the sticker norms all along A lot of the Zeon grunt suits in UC have minimal stickers, too.
|
|
#
?
Jan 19, 2024 15:17
|
|

|
 Fun kit, but has a lot of color separation stickers and the spikes on the shoulders makes it a bit awkward to pose the arms.  Isn't AGDQ so nice for burning through your backlog? Def an older kit. Some of the pipes on the legs just hangs completely free, and one even popped out entirely when assembling the full body. The weapons also don't firmly fit into the hands, and just sorta wobble around when I move the suit.
|
|
#
?
Jan 19, 2024 17:55
|
|
|
I don’t mind polycaps in general but the last few 30mm kits I've bought I really don't like the way they're used. The leg assemblies that use a rod and polycap ending to connect the thighs to the hips make everything feel so loose.
|
|
#
?
Jan 19, 2024 18:14
|
|
|
BisbyWorl posted:
Ah The O that is Big, but not Big O- that's different Are the green vents on the skirt color separation or paint/stickers? Also how does the yellow look in person? All the photos I see of it make it look a little pale and it might be what actually gets me to paint something Monkey Fracas fucked around with this message at 19:17 on Jan 19, 2024 |
|
#
?
Jan 19, 2024 19:15
|
|

|
Monkey Fracas posted:Ah The O that is Big, but not Big O- that's different That green is color separation. From what I understand, all the vents/jets on this suit should be that green color but only those two on the front are colored accurately. Yes, the yellow is rather pale. It's a tiny bit darker than in that pic, but still very pale.
|
|
#
?
Jan 19, 2024 20:03
|
|
|
Kibner posted:A lot of the Zeon grunt suits in UC have minimal stickers, too. Heck, so do a lot of IBO grunts. The Graze, the Rodi, the Rginlaze, the Shiden... Stickers only really got bad with some of the Gundams.
|
|
#
?
Jan 19, 2024 21:32
|
|


|
Which HGUC version of the Zeta Gundam swapped out the red stickers for parts separation?
|
|
#
?
Jan 19, 2024 21:43
|
|
|
i just built the HGUC revive zeta and it still has red stickers but only on the waverider
|
|
#
?
Jan 19, 2024 21:47
|
|
|
The P-Bandai 0088 version doesn't use stickers for the red on the waverider, and is designed after the ZZ version of the Zeta You can see it compared to the standard HGUC Revive here https://schizophonic9.com/re4/hguc_zuc0088.html
|
|
#
?
Jan 19, 2024 21:55
|
|

|
Chunky Zaku has blessed this thread with a hug
|
|
#
?
Jan 19, 2024 23:16
|
|
|
Did someone set that model to the wrong aspect ratio?
|
|
#
?
Jan 20, 2024 01:29
|
|
|
Yes, the 80s.
|
|
#
?
Jan 20, 2024 01:52
|
|

|
Tin Tim posted:Chunky Zaku has blessed this thread with a hug I love it! But I love pretty much every Zaku, so grain of salt I guess.
|
|
#
?
Jan 20, 2024 03:29
|
|

|
 One last kit before AGDQ ends. The arm joints feel really loose, and some of the armor needed to be held in place while connecting joints or else they'd fall out.  But it finally gives Wufei someone to high five, so it ain't all bad.
|
|
#
?
Jan 20, 2024 09:14
|
|
|

|
| # ? May 25, 2024 13:11 |
|
|
https://www.youtube.com/watch?v=2XQYaBvgSR8 So forget MG 2.0 - this is more MGEX.
|
|
#
?
Jan 20, 2024 19:07
|
|