|
finished: progress photos:  Bathroom redecoration: installed some 12v IP65 downlighters replaced shelves various fixture changes repaint much brighter now ")
|
 #
?
Feb 23, 2010 00:52
#
?
Feb 23, 2010 00:52
|
|


|

|
| # ? May 21, 2024 21:46 |
|
|
Good job man. It's amazing the difference those new lights have made.
|
|
#
?
Feb 23, 2010 15:44
|
|

|
Went & got a higher res pic of the zombie box I made for someone a while back.
|
|
#
?
Feb 24, 2010 18:30
|
|


|
A few years ago I put together a potato gun and really wanted to build something a bit bigger. I finally got all my parts together and finally got to shoot it this weekend. It uses 2 rainbird sprinkler valves, 2" air chamber, and a 2" barrel. I haven't gotten to fully power it up because the crappy air compressor I had dies at 60psi and the valves are rated to 125psi. I'll put up some more videos when we shoot it again.  Click here for the full 1241x882 image. https://www.youtube.com/watch?v=PeT9k2-fPkQ
|
|
#
?
Mar 1, 2010 17:00
|
|

|
Dobermaniac posted:A few years ago I put together a potato gun and really wanted to build something a bit bigger. I finally got all my parts together and finally got to shoot it this weekend. It uses 2 rainbird sprinkler valves, 2" air chamber, and a 2" barrel. I haven't gotten to fully power it up because the crappy air compressor I had dies at 60psi and the valves are rated to 125psi. I'll put up some more videos when we shoot it again. Be careful not to exceed the maximum pressure limit on the PVC. explosive brittle fracture is a nasty thing when its right next to your face.
|
|
#
?
Mar 3, 2010 04:24
|
|


|
Well the max pressure limit on the pipes and fittings are 280psi and the valves are 125. I haven't used anything above 75 and it'll throw a potato pretty far so I'm not too worried or want to go over 100psi anytime.
|
|
#
?
Mar 3, 2010 04:28
|
|
|
Howdy folks... I have been working on my ANH Obi-Wan Lightsaber for about 3 years now, off and on, a piece here, a piece there, but one thing I have always wondered was how to get my nice shiny brass windvane to darken up a bit.  One day last week while I was working on restoring some guns for a client, I noticed I had in the chemicals shelf among my gun bluing stuff was a small bottle of Birchwood Casey Brass Black. Well, I chucked up my grenade and windvane into the lathe and spun it, polishing what little oxidation was already on the brass off with some 1000 grit sandpaper, until there was a nice clean shine. Then I dunked the windvane into a shotglass full of the brass black to experiment, it came out NICE. So I polished up the fan part and set it in a seperate glass container, and it also turned out well. Here are pics of the result, I think I will use some Birchwood Casey bluing chemical on the grenade, plus maybe some plum brown, see what I get.    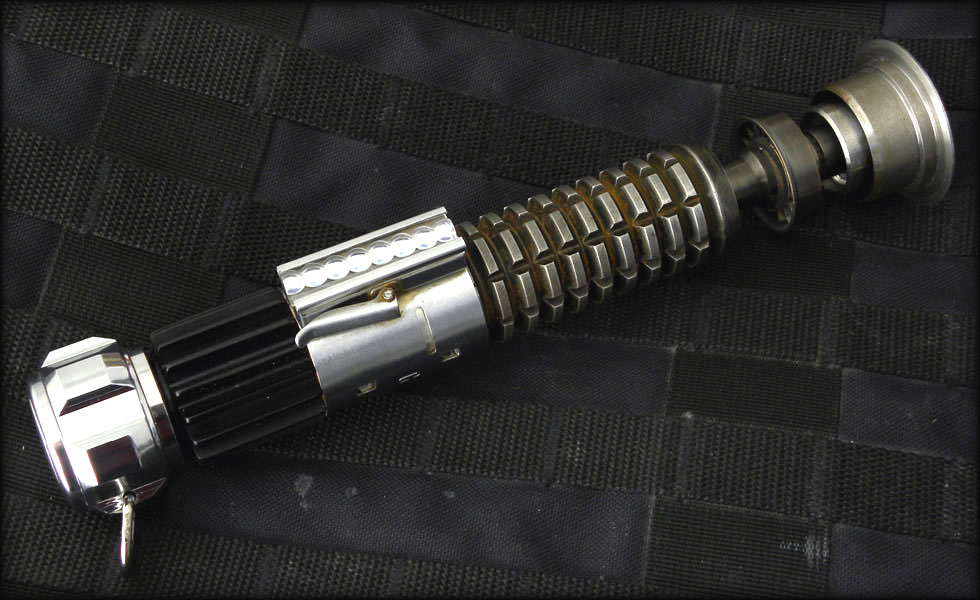 Also, on a seperate ANM2 Booster piece (not pictured) I used Aluminum Black from the same company and got good results, but boy did it stink, meaning, BEWARE the gases coming off this if you try it. Make sure it's in a well ventilated area. I have a couple more parts to track down, but it's getting close to being finished.
|
|
#
?
Mar 3, 2010 21:45
|
|

|
That is really  . Do you have any more pics of the construction phase? . Do you have any more pics of the construction phase?Also, I enjoyed the pic with the 1911.
|
|
#
?
Mar 3, 2010 21:52
|
|

|
nonentity posted:How did you build the fan part? Is it two pieces? I have been working on a jet turbine for way to long and need to make a similar part out of stainless, but it's a bitch and I'm kind of stuck.
|
|
#
?
Mar 4, 2010 00:59
|
|

|
nonentity posted:Howdy folks... I'd love to see more pics and hear more details as well. I'm not obsessed with lightsabers, exactly, but rather the ability to make nice finished metal projects like this. I'd appreciate hearing more about this project, so that i can apply the reasoning to some of my unrelated projects.
|
|
#
?
Mar 4, 2010 06:54
|
|

|
dv6speed posted:That is really Thanks! I'll look to see if I have pics of the construction, but I don't know if I do, A lot of the parts are found items, machined by other folks and modified/weathered by me, etc. Audiot posted:How did you build the fan part? Is it two pieces? I have been working on a jet turbine for way to long and need to make a similar part out of stainless, but it's a bitch and I'm kind of stuck. The fan part was made by a prop replica guy on his CNC machine, but I suspect I could *maybe* do it by creating an angled jig for a part of brass to rotate on, and go against a fixed dremel or cutting wheel. You'd have to index it properly, so it turns the same amount every time, but that's how I'd imagine I'd do it. Cinnamon Bastard posted:I'd love to see more pics and hear more details as well. I'm not obsessed with lightsabers, exactly, but rather the ability to make nice finished metal projects like this. I'd appreciate hearing more about this project, so that i can apply the reasoning to some of my unrelated projects. The main part of this project is the assembly and weathering. Most of what I machine on the lathe for this is the internal spacers and things to keep it together and tight. I have a bunch more other machined step by step photos at my site, https://www.nonentity.com  I dunked my emitter into the Brass Black for a bit last night, letting the middle part of the emitter sit in there for several hours, then tossing it into the fireplace.. 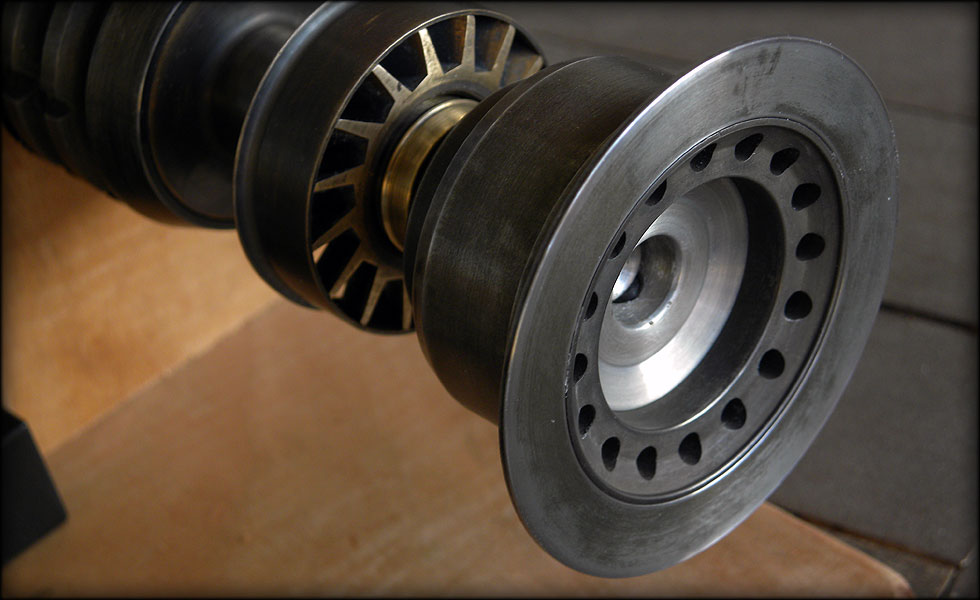 Then I chucked it up in the lathe and spun it against some 2000 grit sandpaper to throw a little polish against the sharper edges. The darker middle section at the back, I love. The front with the holes isn't quite dark enough, but it's a lot less shiny, so in certain angles it looks quite darker than the surrounding emitter shroud. The calculator bubble is a bit loose at the moment, which is why it's slid a bit forward. I also polished some of the tarnish off the front of the neck, between the windvane and the emitter, and off the front end of the fan blades. 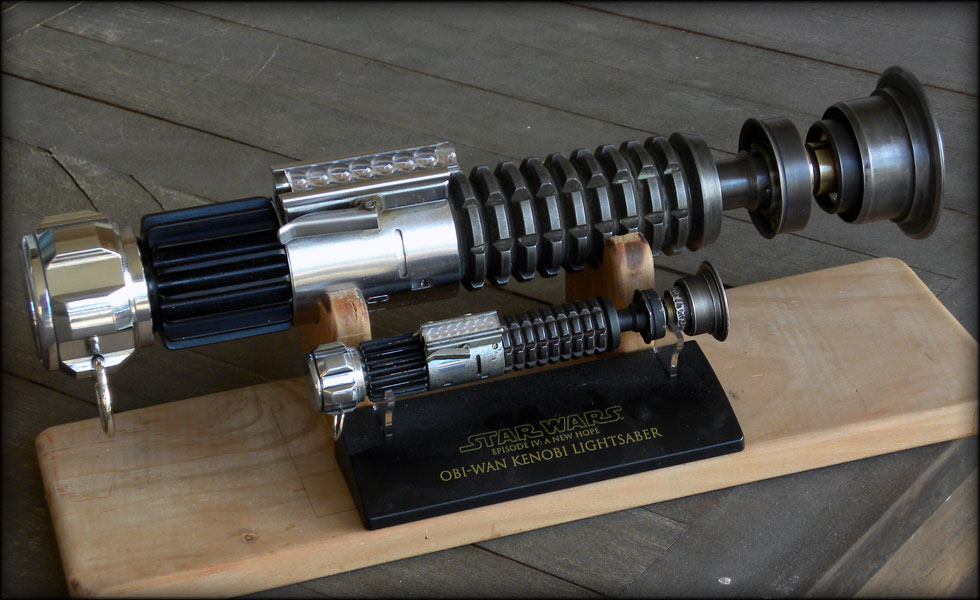 The stand is made of cherry, and once I get my spacing right so the transistors don't interfere, I'll glue it down, sand and coat it. The next step after I finish the emitter is to weather the back end.
|
|
#
?
Mar 4, 2010 15:25
|
|
|
Sure, but when are you going to add the laser?
|
|
#
?
Mar 6, 2010 07:48
|
|

|
Another bit of DIY/decorating... retrofitting lots of network cables & redecorating 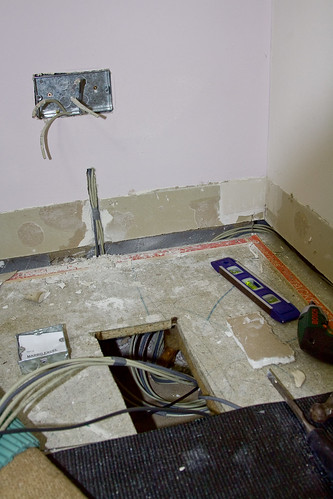 Complete... 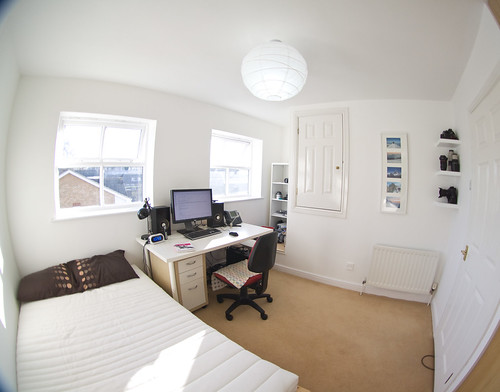 From..  just a couple of blinds to arrive, then done
|
|
#
?
Mar 6, 2010 20:53
|
|
|
easyjo posted:Complete... Looks good. What's that little door halfway up the wall?
|
|
#
?
Mar 7, 2010 06:13
|
|

|
Slung Blade posted:Looks good. What's that little door halfway up the wall? the airing cupboard, which was also fitted with a couple of network cables for some temp/hot water sensing
|
|
#
?
Mar 7, 2010 16:13
|
|
|
one sexy loser posted:Sure, but when are you going to add the laser? 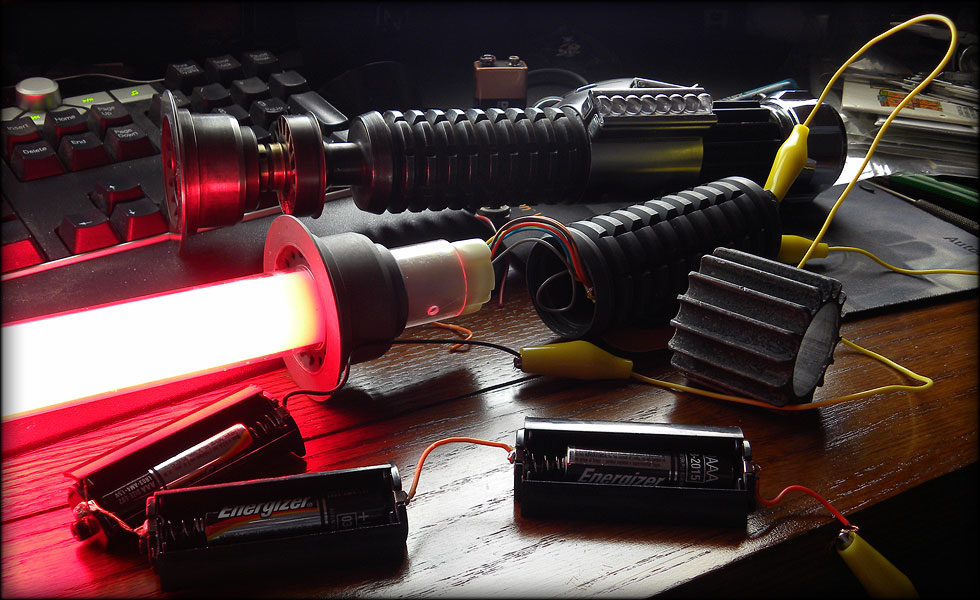
|
|
#
?
Mar 16, 2010 02:15
|
|
|
You magnificent bastard!! That looks fantastic.
|
|
#
?
Mar 16, 2010 15:19
|
|

|
My girlfriend and I built a working loom out of dollar store items for a project of hers. http://www.craftster.org/forum/index.php?topic=342216.0    The tools we used: -Dremel -Drill -Miter saw -various files and sandpaper -Small torch -hot glue gun The dollar store parts: -shopping cart -tons of wooden plungers -paint rollers -masonry drill bits -plastic rope -twine -plastic knives -window curtain bars -wood screws -ratcheting strap
|
|
#
?
Mar 24, 2010 05:34
|
|

|
Dobermaniac posted:A few years ago I put together a potato gun and really wanted to build something a bit bigger. I finally got all my parts together and finally got to shoot it this weekend. It uses 2 rainbird sprinkler valves, 2" air chamber, and a 2" barrel. I haven't gotten to fully power it up because the crappy air compressor I had dies at 60psi and the valves are rated to 125psi. I'll put up some more videos when we shoot it again. From the sounds of it, you're still using the electric release for those rainbird valves. Consider modifying them for a pneumatic release. They'll open quicker and won't make that annoying honk: http://tinyurl.com/yz86mzz
|
|
#
?
Mar 24, 2010 12:29
|
|

|
I had seen a video on youtube about converting it, but wanted to test it out electrically first. I didn't know if it was going to explode in my face the first time I shot it so I used the batteries and a looooooonnng wire so open the valves. These videos were after we were semi-certain it would explode and cut the wire down. I'll probably convert it over as soon as I can get a good air compressor.
|
|
#
?
Mar 24, 2010 14:36
|
|
|
SpartanIV posted:My girlfriend and I built a working loom out of dollar store items for a project of hers. I also have to admit, that I'm genuinely curious how one legally obtains a shopping cart. Did you just buy an old beat up cart from a store or something, and if so how much $ was it?
|
|
#
?
Mar 24, 2010 14:56
|
|
|
It's a little mini cart that they sell at dollar stores. My girlfriend weaves. She started with a backstrap loom then found a tabletop loom and has since moved on to a full sized loom that she bought from a retirement home.
|
|
#
?
Mar 24, 2010 16:34
|
|

|
dv6speed posted:That is rather interesting actually. Well I never said we obtained it legally.  We did look at buying one though, but everything we found either had to be bought in bulk, or looked like it had been stolen from a store.
|
|
#
?
Mar 24, 2010 22:06
|
|
|
I don't have any pictures yet, but I'll update this post soon with them (once the project is slightly more underway.) I'm in the very beginning stages of a new project: trying to make a little wood lathe out of pieces and parts I can find. The main part of the lathe will be served by a fan motor, and I'll throw together a wooden stand to hold it soon. But I've totally liberated the motor from the fan (which my neighbors threw away in the dumpster) and I'm still trying to figure out how I'm going to make a chuck for it to hold the wood. Any obvious ideas? Here's a picture from GIS that looks a lot like my motor: 
|
|
#
?
Mar 28, 2010 07:52
|
|
|
shirtninjas posted:Here's a picture from GIS that looks a lot like my motor: Oh, and the chuck? Harbor Freight. Although that motor is likely a bit underpowered for what you are doing, unless you are talking about pieces under a half-inch in diameter. Hell, I am not sure that motor will spin the chuck I linked.
|
|
#
?
Mar 28, 2010 08:28
|
|

|
Just plugging in my glove-control project: The main code runs on a Virtex II FPGA. The wireless glove was hacked together with some AVR controllers & RF transreceivers from sparkfun. Youtube: http://www.youtube.com/watch?v=TfMm_7B9QCo Website: http://web.mit.edu/kimt/glovemouse
|
|
#
?
Mar 31, 2010 03:33
|
|
|
Fire Storm posted:Speaking of which, where can I get a fan motor like that? I have a fan that it's old motor is all gunked up and I am tired of the 1-2 minute spool up. Hey thanks. I'm not sure where you can get a fan motor, I found mine in the trash. I agree that it's probably underpowered as well, but hopefully I'll be able to cut dowels and small stuff with it, I'm just making it to play around. And if it doesn't work, maybe I can throw on a small voltage amplifier. 
|
|
#
?
Mar 31, 2010 22:27
|
|
|
Just finished renovating my half bath. I gutted everything except the drywall and the light/fan (already replaced those when I first moved in). New door, floor, toilet, molding, sink, and I built a new vanity and mirror from scratch (used bamboo plywood for the vanity top and towel rack - really cool stuff). Here are a couple before/after shots: Click here for the full 1280x853 image.  Click here for the full 1280x853 image. And some closer pics of the vanity:  Click here for the full 1280x569 image.
|
|
#
?
Apr 1, 2010 00:41
|
|

|
Almasy posted:Just plugging in my glove-control project: That's really freakin cool, man, i ran across that on one of my news feeds or something. Well done.
|
|
#
?
Apr 1, 2010 03:39
|
|
|
shirtninjas posted:I'm still trying to figure out how I'm going to make a chuck for it to hold the wood. Any obvious ideas?  You will not want that motor driving the spindle directly. You'll want to rig up some pulley/belt system for speed reduction. Also you'll have to design a spindle that can accept the taper on the centers. Do you have access to a metal lathe and basic metal working tools? Without those I would have to label this project as un-doable. I don't want to discourage you or anything, but I strongly urge you to reconsider this project. Craigslist often has wood lathes between $75-175. That's really cheap in the big scheme of things. If your goal is to use a wood lathe, I'd just buy one. If your just want to make a wood lathe for the 'hell of it, then have fun.
|
|
#
?
Apr 1, 2010 13:34
|
|
|
JohnnySmitch posted:
This looks great. I hate those bowl sinks but it looks pretty good in that bathroom.
|
|
#
?
Apr 1, 2010 16:59
|
|

|
JohnnySmitch posted:Just finished renovating my half bath. I gutted everything except the drywall and the light/fan (already replaced those when I first moved in). New door, floor, toilet, molding, sink, and I built a new vanity and mirror from scratch (used bamboo plywood for the vanity top and towel rack - really cool stuff). Here are a couple before/after shots: That vanity looks amazing! I also hate bowl sinks but it looks great on that thing. Bravo. Now I shall double post.
|
|
#
?
Apr 2, 2010 08:48
|
|

|
So I decided to make myself some contemporary wall art to decorate a wall in my soon to be home theater room. I started with a photoshop mockup of the design.  I got a bunch of cheap wood from Home Depot, measured it out and cut it on the ol'miter saw.  Corner clamped those puppies together and finish nailed them. I was worried the wood would split but it didn't happen so I guess I lucked out. Glue would have taken forever.  I finished all the frames before moving on. I had to redo one frame because the wood was really warped. I guess thats cheap wood for you.  I covered the top of each frame in cardboard to support the batting and fabric that would cover the top.  Next I applied batting on top of the cardboard and around the edges then trimmed the excess.  Next I cut out the fabric and stapled it tight around the frame.  I literally used somewhere around 1000 staples to finish the whole project. My stapler got a workout.  I laid everything out on the floor to get some final measurements before mounting it all to the wall.  Here is the finished product mounted to the wall. I'm very happy with the way it turned out. Didn't cost that much (about $65 or so, mostly fabric) and didn't take that long either (bout 4-5 hours of labor). 
|
|
#
?
Apr 2, 2010 08:56
|
|
|
^ That's a pretty cool idea! You can always tell people that the fabric improves the acoustic space of the theater room too (mostly bullshit). If you're looking to do any similar projects, I suggest checking out a Menards if there's one nearby for the wood - they've got 'quality' named pine boards that are very cheap for their quality; I've built a bunch of furniture out of them (see the vanity above) and they're usually very straight and have very few knots/imperfections.
|
|
#
?
Apr 2, 2010 17:30
|
|
|
Decided to make a longboard. Started almost a year ago with the press, just managed to finish that up now. Not totally happy with it, there's definitely some issues that need to be worked out with it. As far as a quick and dirty press goes though, it did alright:  Click here for the full 800x536 image. This is the first board so far:  Click here for the full 800x918 image. Two 3mm birch plywood panels held together with epoxy. It's alright, the curves didn't work out 100% but that's mostly due to my poor sanding skills.
|
|
#
?
Apr 2, 2010 19:32
|
|

|
How's the two ply/3mm work out? That seems like it'd be extremely flexy and not support too much weight. I love the press you made! I make longboards for a living.
|
|
#
?
Apr 3, 2010 04:04
|
|
|
LEDS! I came up with a place that offers extremely bright blue LEDs to replace the red ones in the old saber blade. 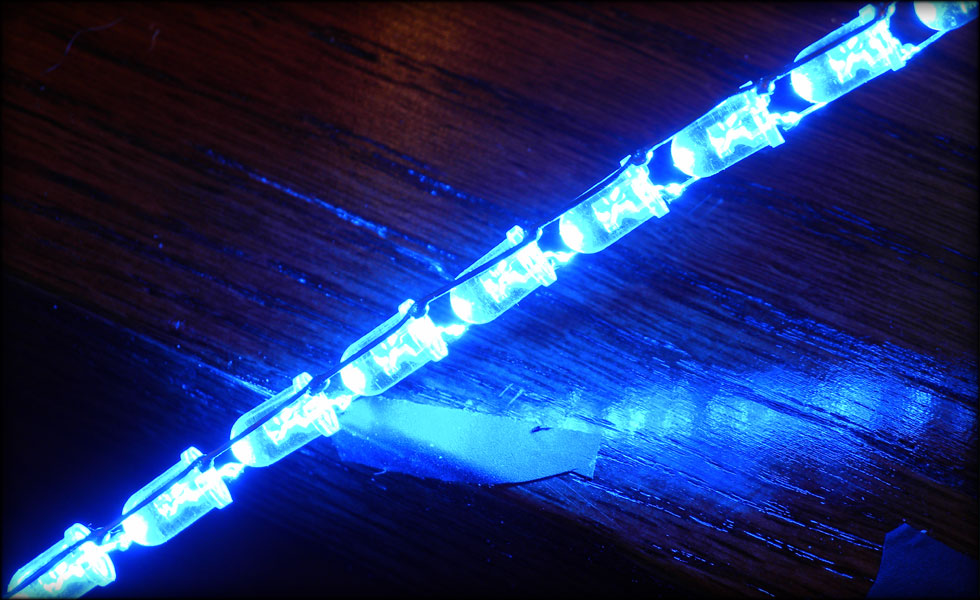 The first ten LEDs in the ladder string soldered. That was tedious.  A closeup of the soldering job. I bent the leads over the next LED in the chain, crimped, and snipped the excess, then a very small bead of solder to secure it together, while keeping everything as straight as I could. 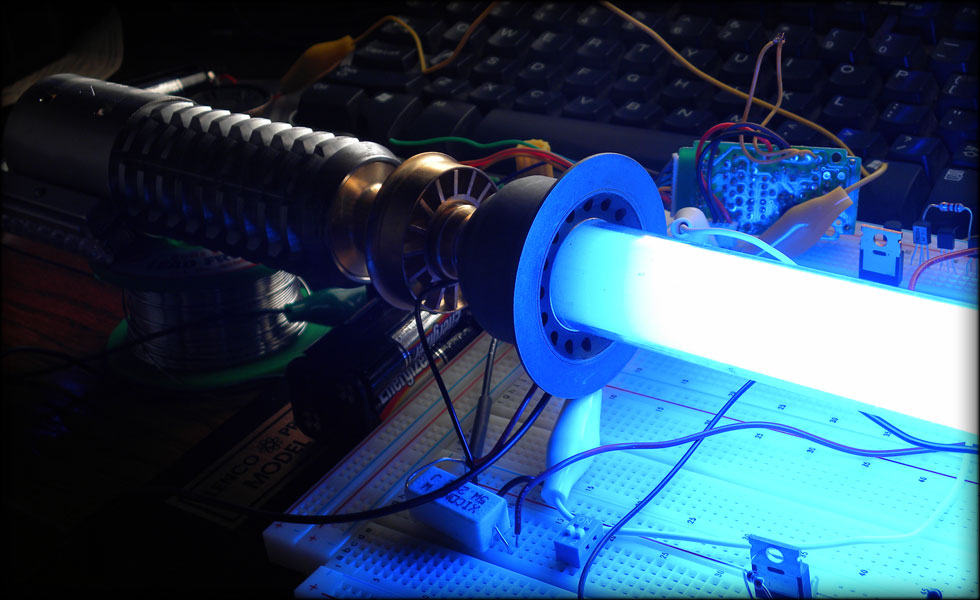 Preassembled for wire length and fit, and just so I could see what it looked like lit up. I think once I get the LED string moved a bit closer to the emitter to get rid of that slightly dim spot at the base, and the other 54 LEDs soldered up, this saber is going to be one I am very happy with.
|
|
#
?
Apr 3, 2010 15:03
|
|
|
Mr.Wizard posted:How's the two ply/3mm work out? That seems like it'd be extremely flexy and not support too much weight. I love the press you made! I make longboards for a living. thanks! I got the press plans from toothless longboards (http://users.telenet.be/Toothless/) It seems to be holding out okay so far, I'll know for sure when my trucks come in though. If you wouldn't mind sharing, I'd love to know what materials/techniques you use.
|
|
#
?
Apr 4, 2010 01:03
|
|
|
These are two of my recent project that I have given away as gifts. The first is a box for my sisters birthday, and was my first really jump in to freehand-cut dovetails. It came together quite well I think.   The second is a bowl I turned and a spoon I carved for my girlfriend parents. They do historical reenacting as a hobby and pa out big money for the "camp" stuff like bowls and plates. This was my first time ever using a lathe, or carving, so it would make a great gift.  
|
|
#
?
Apr 9, 2010 02:53
|
|

|

|
| # ? May 21, 2024 21:46 |
|
|
This is a simple interior paint job, but I'm proud of it. I was able to paint really distinct, straight masked lines on knockdown texture without any bleedunder. More pics if you click through. This room will eventually be my office. I'm decorating with an eye toward "90's .com. " Finishing will have to wait 6 months though, until I can get to an IKEA (closest one is > 400 miles away).
|
|
#
?
Apr 13, 2010 21:34
|
|