|
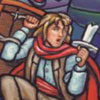
triplexpac posted:Maybe it's just my screen, but the image looks a little blue , especially in the hair on the right side. Not sure if you want it looking cool, but I think it could be warmed up a touch. Thanks, warmed it up a bit. I totally reworked it thanks to some tips from 1st AD! edit: I tried messing with the blue levels, think fixed that corner. 
Google Butt fucked around with this message at 02:58 on Oct 15, 2012 |
 #
?
Oct 15, 2012 02:39
#
?
Oct 15, 2012 02:39
|
|


|

|
| # ? Jun 7, 2024 00:49 |
|
|
ScooterMcTiny posted:Any thoughts on Lynda vs. MacProVideo? I have never used MacProVideo before but a quick glance at what they offer it seems that Lynda has a lot more tutorials covering a broader range subjects for software like PS. I am always impressed with the bottomless subject matter Lynda covers but never using MacProVideo I can't tell you which is better.
|
|
#
?
Oct 15, 2012 04:52
|
|

|
Google Butt posted:Thanks, warmed it up a bit. I totally reworked it thanks to some tips from 1st AD! Looks like there is some purple on that side now.
|
|
#
?
Oct 15, 2012 05:03
|
|
|
The image definitely looks on the cool side, and I'd probably bring up some more contrast. It seems a bit bland now. Quick curves adjustment example:  Obviously how warm you want it to look is a matter of personal preference. I also decreased the blue midtones a bit. Leshy fucked around with this message at 08:07 on Oct 15, 2012 |
|
#
?
Oct 15, 2012 08:03
|
|
|
Leshy posted:The image definitely looks on the cool side, and I'd probably bring up some more contrast. It seems a bit bland now. Thanks! I didn't really see how cool it was until you pointed it out.. 
|
|
#
?
Oct 15, 2012 08:30
|
|
|
That's definitely looking better. To me, the image still seems like it has a bit of a dark cast overall. I generally like images bright and poppy though, it's not for everyone. I lightened the image a bit overall, moreso on the right side, quickly so you can see what I mean. I'm blowing out the highlights on the left now that I look at it closer, I'd probably mask that down more if I had more than 30 seconds to spend on this.
|
|
#
?
Oct 15, 2012 14:48
|
|

|
Is there a way to export a photo from Lightroom with the edits off? This would be to show a before and after of a edited image.
|
|
#
?
Oct 16, 2012 11:20
|
|

|
Gravitom posted:Is there a way to export a photo from Lightroom with the edits off? This would be to show a before and after of a edited image. create a virtual copy of the image, reset the adjustments, and export that
|
|
#
?
Oct 16, 2012 11:41
|
|

|
Is there a way to save a preset for export? I frequently use 2 types of settings when I export, and rather than changing all the settings each time, it'd be nice to just click a checkbox or something.
|
|
#
?
Oct 18, 2012 03:43
|
|

|
You mean like user export...presets? e: now with helpfulness 
|
|
#
?
Oct 18, 2012 12:25
|
|

|
once you can do that you just right click on pictures in your library and export them from there!
|
|
#
?
Oct 18, 2012 12:33
|
|
|
Haha doh. Thanks guys!
|
|
#
?
Oct 18, 2012 14:19
|
|
|
I really like the PP on this picture, but I'm finding it very tough to achieve anything similar. I appreciate that the light is good in the first place and the brownish earthy tones of the location help... Any ideas?
|
|
#
?
Oct 23, 2012 11:35
|
|
|
it is probably a lot of selective adjustments of individual components. Car retouching is almost as involved as people retouching.
|
|
#
?
Oct 23, 2012 11:50
|
|
|
JuanChai posted:I really like the PP on this picture, but I'm finding it very tough to achieve anything similar. I appreciate that the light is good in the first place and the brownish earthy tones of the location help... what is that huge brush stroke going from the right side of the image and across the car? It looks super odd and I can't believe the guy didn't notice before uploading it online
|
|
#
?
Oct 23, 2012 12:55
|
|

|
KingColliwog posted:what is that huge brush stroke going from the right side of the image and across the car? It looks super odd and I can't believe the guy didn't notice before uploading it online Now that's all I can see in that photo. I hadn't noticed it before you mentioned it. It looks like either a spastic brush stroke from photoshop or there was a twig or similar object close to the lens.
|
|
#
?
Oct 23, 2012 14:44
|
|
|
I think the lighting has really helped but for starters I think it's something like this: Contrast down. Mid pull. Blacks up. Whites down. Warmth up. Saturation down (Except on the reds maybe?)
|
|
#
?
Oct 23, 2012 15:23
|
|


|
Yes the lighting helps and it does look look like the retoucher had a spasm while making a window reflection. I would have shot at least 3-8 different exposures for the shot. One base capture with mid tones properly exposed Highlight layer(s) with bounce moved between shots to get each highlight I wanted including on windows Added fill for wheel wells and grill. Mask all the captures together to get a cool image. Start masking curves, color layers and retouching to massage it into a final image. Beyond what was done I would've cleaned up areas circled (removed plate, tower growing out of the roof, other car reflection in bumper) Then again I work in advertising. 
|
|
#
?
Oct 24, 2012 06:26
|
|
|
You do automotive stuff, raggedphoto? If so, got any examples of your work?
|
|
#
?
Oct 24, 2012 12:01
|
|
|
ash with a five posted:You do automotive stuff, raggedphoto? I haven't shot many cars and none of them are portfolio worthy. The studio I retouch at mainly shoots athletic apparel, mostly shoes. We work creative directors on ad campaigns so its a lot more involved then catalog work. My take on cars is with something that has so many different angles and textures you have to shoot for individual assets and assemble the image in post. On a image like that car total time in post could easily be 8-10 hours Edit; It honestly doesn't look like the photographer spent that much time on shooting or in post on the image. I am just explaining what my process would have been. It looks cool but feels a bit rushed and unfinished to me. raggedphoto fucked around with this message at 20:45 on Oct 24, 2012 |
|
#
?
Oct 24, 2012 20:38
|
|
|
raggedphoto posted:I haven't shot many cars and none of them are portfolio worthy. The studio I retouch at mainly shoots athletic apparel, mostly shoes. We work creative directors on ad campaigns so its a lot more involved then catalog work. I'm curious about what kind of stuff. I shoot launch shots instead of advertising and we do very little post but I've always been pretty fascinated by it. Would love to try my hand and building something ad worthy for my portfolio. If you get 10 mins could you PM me a shot from anyone you feel is good and how you would have gone about creating it? No problem if not, I'd just love a genuine insight.
|
|
#
?
Oct 24, 2012 22:27
|
|
|
I'd like to see that in the thread if raggedphoto is willing.
|
|
#
?
Oct 24, 2012 23:00
|
|
|
Here's an awesome behind-the-scenes video of doing composite lighting on a car shoot: http://blog.aesonica.com/archives/2011/composite-lighting-photography/
|
|
#
?
Oct 25, 2012 18:40
|
|
|
KingColliwog posted:what is that huge brush stroke going from the right side of the image and across the car? It looks super odd and I can't believe the guy didn't notice before uploading it online Oh god, now I'm having flashbacks to a job I did, where I send a file to print with a big chunk masked out of a guys neck. I must have had a brush slip on a mask layer or something, it was the worst
|
|
#
?
Oct 25, 2012 18:54
|
|
|
I meant to take a screen grab of the file structure of this shoe but I don't want to cause problems with work and reveling to the world our exact workflow so this will have to do. Once the photographer establishes a good base capture, he will use light modifiers like gradient cards and mirrors, even add/move the strobes to light various areas. These areas are either feathered or pathed onto the base capture. If the job calls for a Digi-tech I will assemble the image on set otherwise it's after the shoot. The captures for this shoe break down to the areas I circled.  -Light wraps for the toe and heel. -Mid and upper sole for fill and highlights (I even faked some highlights to make them carry further) -Swoosh capture for texture -Cage glow, plus a glow capture for the diamonds on the toe -Tongue tag recovery -Reflection capture The glow elements coming through the midsole are all done in post using light assets we shot on black backgrounds (flare, gradients). Adding flare and glow over white is a total pain. From there it gets a few hours of clone stamping, color correcting, at least 20 different adjustment layers to dial in the look. Once we feel it's in a good place we send proofs off the art director in charge of the project for feedback. We make changes accordingly and deliver final files. Sometimes there can be a few days of changes depending on the complexity of the image. Some projects offer lots of creative input on the photographers and retouchers end while others are clearly planned out by the art director. All in all I send a ton of time retouching shoes and apparel to make it look perfect which can be boring at times but I still love it.
|
|
#
?
Oct 29, 2012 04:08
|
|
|
Nice! that's cool to see. I think I'd go insane shooting product.
|
|
#
?
Oct 29, 2012 04:19
|
|
|
Paragon8 posted:Nice! that's cool to see. I never planned on being a retoucher when I went school but I found it to be just as stimulating as shooting, the only downside is sitting on my rear end for 10+ hours a day staring at a screen. I did however want to shoot product ever since I first stepped into a studio. Being able to control every aspect of the image has always appealed to me.
|
|
#
?
Oct 29, 2012 05:04
|
|
|
If anyone is interested here is the studio I work at (please don't stalk me) https://www.swansonstudio.us
|
|
#
?
Oct 29, 2012 05:09
|
|
|
raggedphoto posted:I never planned on being a retoucher when I went school but I found it to be just as stimulating as shooting, the only downside is sitting on my rear end for 10+ hours a day staring at a screen. I did however want to shoot product ever since I first stepped into a studio. Being able to control every aspect of the image has always appealed to me. Yeah, it takes me a while to get to the right mindset to retouch but when I do time just disappears and I come out of it 10 hours later as if from a fugue state and have a bunch of retouched images,
|
|
#
?
Oct 29, 2012 10:54
|
|
|
Raggedphoto, can you expand on combining the different captures together? Do you just set up a mask layer and paint in the area to replace? That seems too simple to work.
|
|
#
?
Oct 29, 2012 15:36
|
|


|
taqueso posted:Raggedphoto, can you expand on combining the different captures together? Do you just set up a mask layer and paint in the area to replace? That seems too simple to work. As long as nothing moved and I mean nothing it really is that easy. The best way to do it is to path along dividing lines, like with shoes, change in materials or color. You get a nice dividing line without the risk of soft areas from any shifts between shots. Masking by brush is a bit tricky, you have to watch the hardness and opacity of your brush and how its effecting the pixels along the edge of the brush. If say there was a slight shift in the captures (which there almost always is) the two overlapping points of both captures might become soft which is more prominent when the gradient of the brushed masked if there is too much feathering. Plus everything has to make sense in the grand lighting scheme, final look and background plate. So here is some quick mock-ups of what I am talking about. Pathed and masked upper mid  Heel light wrap brushed in  Here is how I build out all my images. Folders with masks applied to main elements makes keeping things organized so much easier plus keeps a single clean mask vs dozens of masks doing the same thing.  Hope that helps, honestly I am not the best at describing how I work in PS. Its all so autopilot for me now, at least I get to be creative and have fun with looks, backgrounds and illustrations! I do love Photoshop....
|
|
#
?
Oct 31, 2012 06:44
|
|
|
Color management is hard  I finally bit the bullet and got the X-Rite i1Display Pro, and went to work calibrating my 27" iMac and my 15" MacBook Pro, expecting images to look the same on both displays after calibration. They don't. Even though I selected the same settings (120cd, D65 white point), the MBP is noticeably warmer and brighter. Of course, I can adjust the brightness down on the MBP, but how do I know which brigthness setting is correct? The software should have adjusted it for me. Any ideas what I'm doing wrong? Edit - manually adjusted the brightness on both displays to 120cd. A bit better, but the MBP is still much warmer than the iMac. Mathturbator fucked around with this message at 20:30 on Nov 1, 2012 |
|
#
?
Nov 1, 2012 20:16
|
|
|
Mathturbator posted:Color management is hard Manually adjusting as much as you can helps a lot. I am not sure why the MBP is a lot warmer but keep in mind that the two monitors will probably never look exactly the same since the color gamut will be different. Check to make sure the color space is set to RGB1998, that could be causing some issues.
|
|
#
?
Nov 2, 2012 04:00
|
|
|
Don't go too insane trying to match everything perfectly. You'll never get it perfect unless you're in a light controlled environment.
|
|
#
?
Nov 2, 2012 14:58
|
|
|
Yeah but... They should be able to display the same grey in the OSX interface, right? I'm not even comparing pictures yet, just the white and grey of my browser. Edit: There's definitely a problem with the MBP calibration. Everytime I start the calibration, I get a different brightness reading (automatic brightness adjustment is off, I didn't touch anything) Even more edit: I ran the uniformity test on the MBP, and it shows white points ranging from 6151K to 6648K, and luminance levels ranging from 101cd to 123 cd. Is that normal? Mathturbator fucked around with this message at 20:25 on Nov 2, 2012 |
|
#
?
Nov 2, 2012 20:04
|
|
|
Not sure which thread this would be best in  For UK goons, these guys: http://www.yfcanvas.com/PhotoUpload.aspx have a 75% off code for all their canvas prints: nov75a I've had a couple done in the past and they came out really nice... I know you're buying sight-unseen/uncorrected, but my canvasses came out OK, maybe just a hair dark.
|
|
#
?
Nov 5, 2012 19:45
|
|


|
This calibration thing is really driving me nuts. The iMac is now calibrated to a whitepoint of 6225K, while the MBP is at 6180K. They're not even in the same ballpark. I'm beginning to think the calibration unit (X-rite i1 Display Pro) is broken, because if the displays really were at the whitepoints it says, I shouldn't see such a huge difference. I've already contacted the X-Rite support, but they haven't returned my email. Help?
|
|
#
?
Nov 7, 2012 17:34
|
|
|
Thinking about spending some $$ on Photoshop/Lightroom plugins (just for fun)- any opinions between these guys? http://gettotallyrad.com/store/products.php?product=RadLab http://www.alienskin.com/exposure/whats-new.aspx http://visualsupply.co/film
|
|
#
?
Nov 8, 2012 13:20
|
|
|
Buy a lens or a book instead.
|
|
#
?
Nov 8, 2012 13:41
|
|
|

|
| # ? Jun 7, 2024 00:49 |
|
|
Zurich posted:Thinking about spending some $$ on Photoshop/Lightroom plugins (just for fun)- any opinions between these guys? I've used alienskin and personally found it pretty blah. I know a really amazing fashion photographer who knows Photoshop inside and out and has published a couple retouching ebooks and has an actual book coming out in December who swears by RadLab, and it couldn't hurt to download the trial. Never heard of the last one.
|
|
#
?
Nov 8, 2012 14:13
|
|