


|
I want to make a skull type thing and I figure I could make the shape in metal wire and slather papier-mache on top of that, but does anyone know how I could get a finish that is suitably bone-looking?
|
 #
?
Mar 23, 2013 23:38
#
?
Mar 23, 2013 23:38
|
|


|

|
| # ? Jun 5, 2024 05:35 |
|
|
I think I want to make a black mage from final fantasy now. Don't have a reason to make it, I just kind of want to.
|
|
#
?
Mar 23, 2013 23:52
|
|

|
Rufus En Fuego posted:Suitability, accuracy, and interest. That's good to hear, as that's basically what I've been doing. Now I can't wait for my swatches to arrive! The down side of needing a particular shade of gold. Ah well.
|
|
#
?
Mar 23, 2013 23:54
|
|

|
my next project This is what I have so far:   (obviously refs on the left, my models on the right). The character uses small animals as crossbow ammunition rather than bolts. These have been done for ages awaiting the improvement of my skillset to the point I can tackle the costume proper. I now think I know enough to at least have a go.
|
|
#
?
Mar 25, 2013 11:54
|
|

|
Oh my god they're so cute/scary....cuary??? Anyway, awesome work.
|
|
#
?
Mar 25, 2013 18:03
|
|

|
Killer_Frost posted:Oh my god they're so cute/scary....cuary??? Anyway, awesome work. Thanks They were pretty fun to make. The round bases are those large containers you get in those toy-dispenser machines in some arcades, the western style ones rather than Japanese style gachapons so they're about 4 inches across. The faces were cast from latex, since that's the best way to make sure they're durable and won't just shatter if one gets dropped, though the teeth are modelling putty which isn't quite so bullet proof.
|
|
#
?
Mar 25, 2013 18:21
|
|
|
Wow. They're incredible. I'll admit when I saw that first picture I thought "well that could look like a fun fur nightmare." but then I saw your little ammo guys and it completely changed my mind. I can't wait to see what you do with the rest of it if those are your details. ") I have a feeling it'll be amazing. I have a feeling it'll be amazing.
|
|
#
?
Mar 25, 2013 18:56
|
|
|
So, fatkraken mentioned this thread, I'll post up my current project and my last one... This is what I'm currently working on. Having some tech issues with the eyes, but I'm hoping I've solved that today... 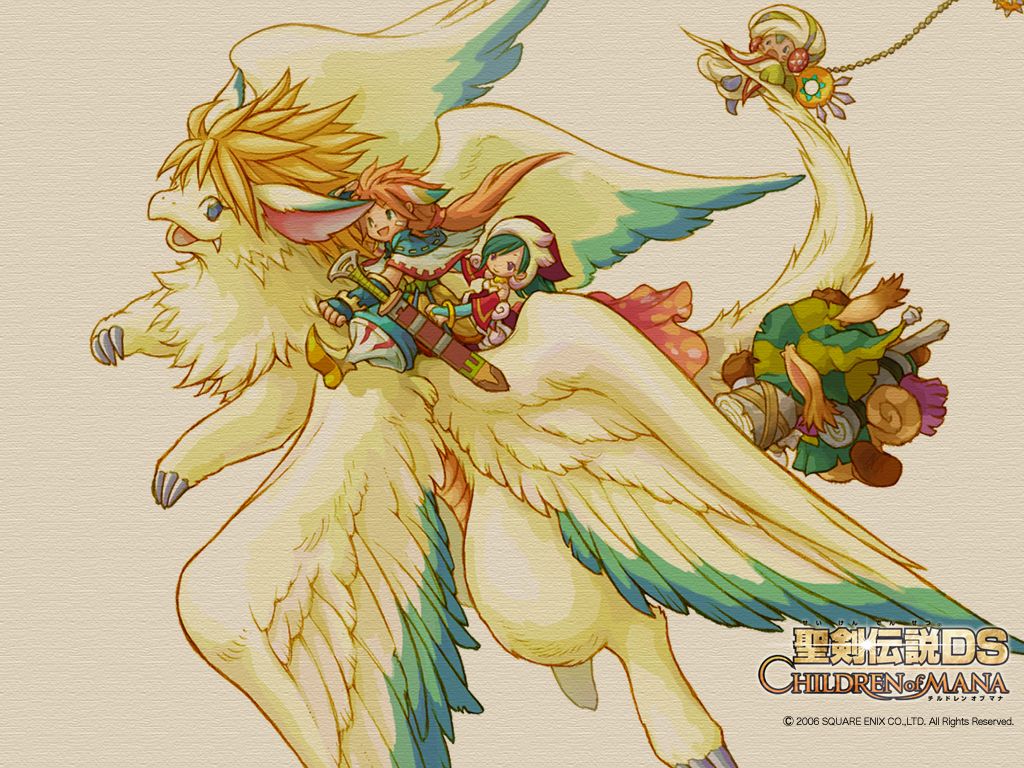 And for anyone thinking it's an ambitious project, this was my last one, which won the 2011 eurocosplay championships... 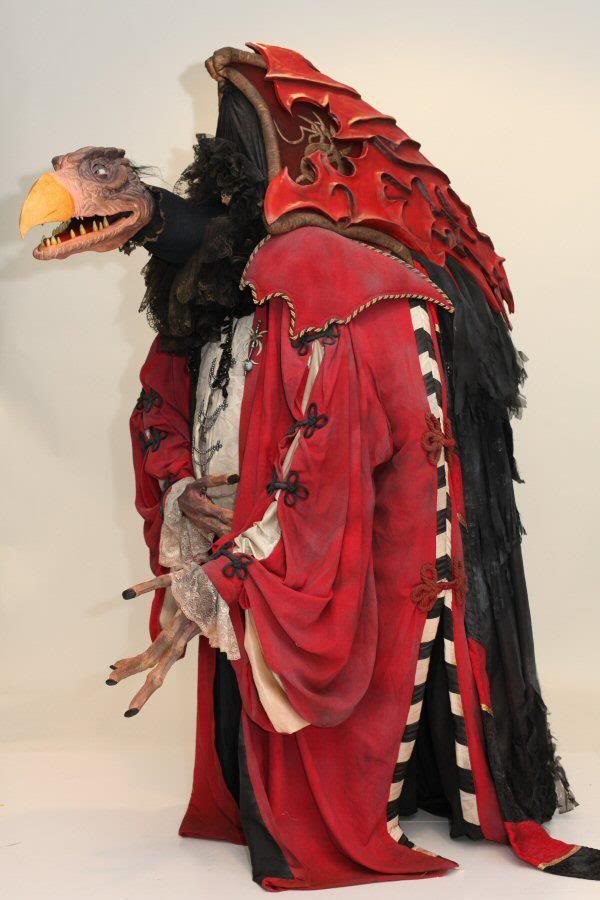
|
|
#
?
Mar 25, 2013 19:20
|
|


|
Fatkraken posted:my next project Xaerael posted:So, fatkraken mentioned this thread, I'll post up my current project and my last one... Holy poo poo O___O Please post any progress shots you two take of your projects!! I am staring at the pictures in these two posts with my mouth hanging open. Amazing work. Holy balls.
|
|
#
?
Mar 25, 2013 21:12
|
|

|
Is there any news on the Tuned Alita project?
|
|
#
?
Mar 25, 2013 21:19
|
|
|
MARRY ME  That's badass. I love you. I love Dark Crystal. I love that costume. Holy heck.
|
|
#
?
Mar 26, 2013 02:02
|
|

|
Killer_Frost posted:Oh my god they're so cute/scary....cuary??? "adorrifying"
|
|
#
?
Mar 26, 2013 02:17
|
|

|
THIZZFACE KILLA posted:Holy poo poo O___O If the link works (sorry, facebook link), here's an older video of the wing mech. The second array is mounted now, and the hand controls have been remade from scratch. http://www.facebook.com/photo.php?v=3782701374525&l=8394943162520008983
|
|
#
?
Mar 26, 2013 02:35
|
|
|
wheatpuppy posted:"adorrifying" PERFECT! I need to rub up against these guys at a con and hope their talent rubs off on me.
|
|
#
?
Mar 26, 2013 03:33
|
|
|
Holy poo poo! Where are your arms? Please tell me it's a puppet head.
|
|
#
?
Mar 28, 2013 11:23
|
|

|
Mecha Neko posted:Holy poo poo! I can shed some light on this, since I was the official "dresser" for this costume (it took about an hour and a half for us to get him into it, and we developed our own patois of terms for various parts of the costumes and processes to get them on. Also several new swear words) The head is indeed puppeted, as is the left hand. The right hand is "dead" and just attaches to the belly, but the left has a full skeleton and is on cables to the performers left hand, with the weight being supported by strapping on the forearm. The right hand, as you guessed, is in the head, which has a mobile mouth and animatronic blinking eyes controlled by a switch on the rig for the LEFT hand (there's a lot of wiring inside this thing). The head ended up very heavy, so there is a sling under the performers forearm which hangs off the metal internal structure of the costume, which is itself attached to a large rucksack which serves as a harness and also supports the back of the carapace. Vision is through video goggles and a small camera mounted at the top of the carapace.
|
|
#
?
Mar 28, 2013 16:18
|
|
|
Please tell me there's video of this thing.
|
|
#
?
Mar 28, 2013 16:28
|
|

|
Rubber Slug posted:Please tell me there's video of this thing. https://www.youtube.com/watch?v=0rg6SorEj_k
|
|
#
?
Mar 28, 2013 16:43
|
|
|
Fatkraken posted:I can shed some light on this, since I was the official "dresser" for this costume (it took about an hour and a half for us to get him into it, and we developed our own patois of terms for various parts of the costumes and processes to get them on. Also several new swear words) If it's any consolation, all of your blood, sweat and tears were absolutely worth it because that thing is completely jaw-droppingly amazeballs. 
|
|
#
?
Mar 28, 2013 18:45
|
|

|
Well, now I feel awkward posting this here. Work in progress of my first costume, a SHIELD agent. Still need to do the belt and patches before it's presentable, but it's getting there. Also goddamn, my thighs are massive in this thing. A few questions for the experts in the thread: 1: Can I just glue poo poo onto the zentai suit or is there a better way of attaching things? 2: Any tips on doing SHIELD patches? I was thinking felt cut out and stuck together, but I'm open to ideas.
|
|
#
?
Mar 28, 2013 19:43
|
|

|
Captain Hats posted:Well, now I feel awkward posting this here. Would something like this work for you? http://www.ebay.com/itm/AVENGERS-Mo...=item19d61230ee
|
|
#
?
Mar 29, 2013 00:24
|
|
|
I know he's not a SHIELD agent, but you're a dead ringer for Grenn from Game of Thrones (http://i.imgur.com/B6TqUcf.jpg[])
|
|
#
?
Mar 29, 2013 01:30
|
|
|
I've kinda put the Terminator project on hold for now. My brother and I are on a huge marvel kick so I decided I wanted to do a super hero. But a less common one. Beta Ray Bill checks all the boxes: obscure but some people should still recognize him, looks badass, hides my face, I should be the only one at even a large convention dressed as him. And if I gently caress up the mask really bad I'll have 90% of a good Thor costume. Preliminary rough sketch, using duct and foil tape to hash out how this will sit on my face.  The few attempts I've seen at this character result in huge, oversize mascot heads. I really want to avoid that. I was watching Face Off (awesome show if you want to learn about make up effects with a small side of costuming and character design) and they did an episode where the contestants had to do werewolves. One of the judges mentioned that you can't add a huge snout to a human skull, it never looks right. I kept that in mind and used a 'less is more' approach. I am using wonderflex for the mask and likely the armor later on. Here is what I have so far. 
|
|
#
?
Mar 29, 2013 21:05
|
|

|
Flanker posted:I've kinda put the Terminator project on hold for now. Wow, that looks great so far! How easy is wonderflex to work with?
|
|
#
?
Mar 30, 2013 18:29
|
|
|
Admiral Goodenough posted:Wow, that looks great so far! How easy is wonderflex to work with? Super easy. I find it's best to work with little patches at a time. Firing a heat gun a wide surface area can lead to buckling so when I do large armor pieces I'll keep my distance and be more patient. When it heats up it's like duct tape. You can roll it into shapes, it sticks to itself. It's forgiving too, if you gently caress something up you can heat it back up, it loosens and you can reshape or remove parts if you have to. Cuts easily with good scissors.
|
|
#
?
Mar 31, 2013 01:23
|
|
|
Xaerael posted:So, fatkraken mentioned this thread, I'll post up my current project and my last one... I love it, I love it so much I almost made girly noises. Did you have your hand in the head?
|
|
#
?
Apr 1, 2013 22:08
|
|
|
Am I the only one who's stoked about the Flammie cosplay? More progress shots, please!
|
|
#
?
Apr 2, 2013 02:24
|
|


|
Yeti Fiasco posted:mmmmMMMMMMMMmmmnnn! Yeah, the head's pretty much a hyper complex 3.5kg silicone skin over polyurethane skull hand puppet. I swear I had a video online somewhere of it without the skin, but I'm stumped where I uploaded it to. Have some old WIP piccies. 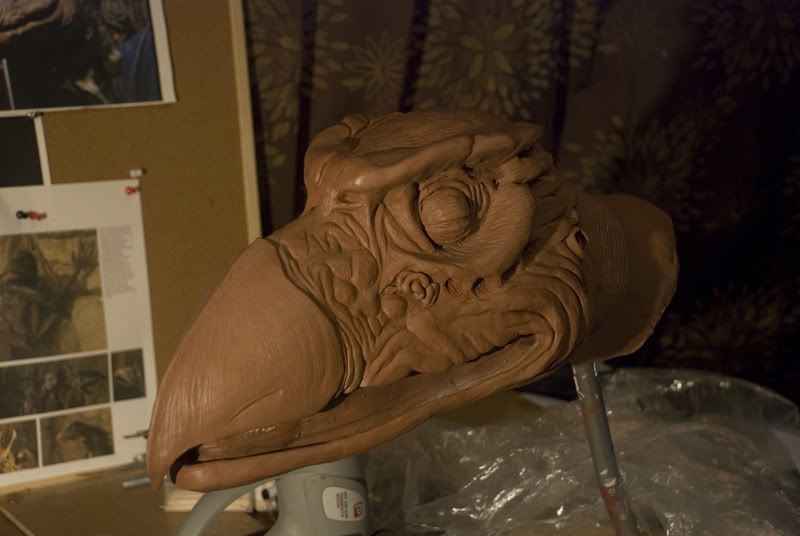 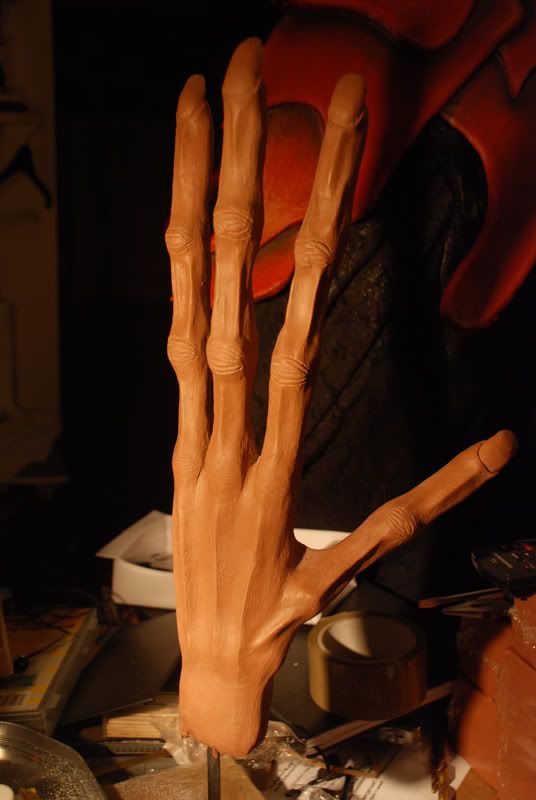  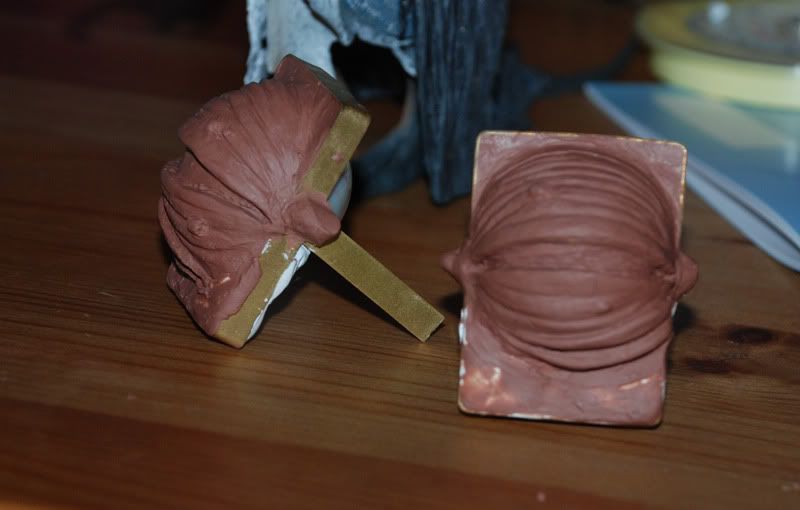 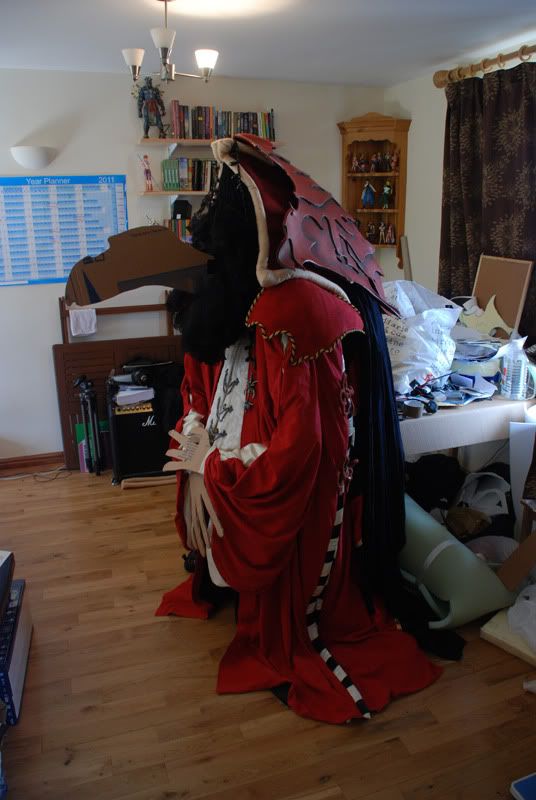 And for anyone wondering, this is pretty much where I am in the costume... 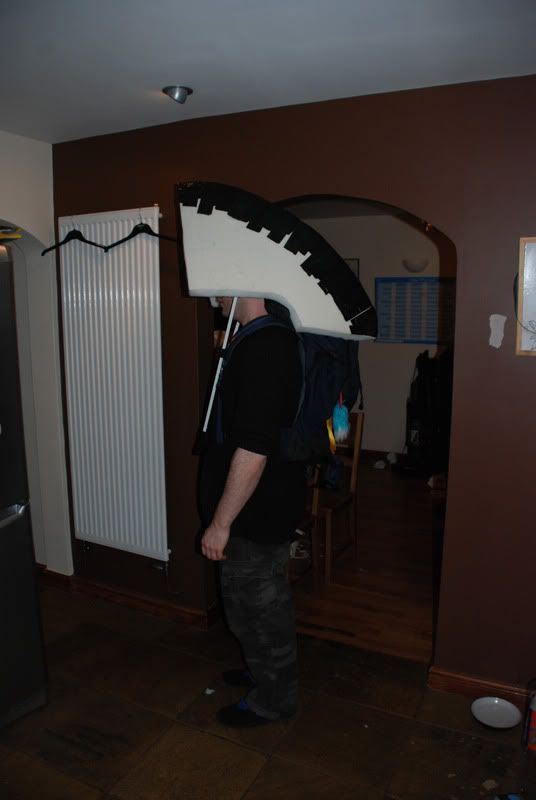 Anoia posted:Am I the only one who's stoked about the Flammie cosplay? Flammie's been on my cards as a competitive costume for about 3 years+. This year a bunch of convention friends are doing the Secret of Mana heroes, so that persuaded me to pull out the WIPs and get him/her (who knows?!) finished. I finally got one of the eyes done without significant flaws after 3 R&D attempts which generally ended in the resin eating the painted iris and pupil, I'll post up a photo or two tomorrow. Doing the animatronic rig to make these bad boys blink is going to be tricky! 105mm diameter polyester hemispheres that are prone to scratches. That's a good point actually, if you're going to coat something with clear polyester resin, and you don't want the resin to attack any finishes on your subject matter, coat your original with thin, water thinned layers of PVA glue. I used about 7. Polyester will eat almost any plastics, but will leave Vinyl based materal alone.
|
|
#
?
Apr 6, 2013 02:04
|
|
|
Xaerael posted:Super awesome stuff and useful info... Seriously, holy crap. Every time I see it I'm convinced it was stolen from the Creature Shop then I remind myself it was just the labor of love of a guy in his house... Which makes it even more impressive. I didn't know that about polyester though, not sure if I'll ever need it but I've filed that bit of knowledge away for future reference. thanks for sharing it, I can't wait to see more progress pics.
|
|
#
?
Apr 6, 2013 05:21
|
|
|
So I'll be heading to my first SupaNova this year, Australia's mini comicon eqsue thing. Anyhow I plan on going as Deadpool (like everyone else) but with a small twist. I'm getting a special effects makeup artist to make my head all gross like his, so I can take my mask off. I'll post pictures as it happens, but I need help in his gear. What the hell do you call the belt and sword holders he uses? I've tried searching ebay but I'm stumped on what to search for.
|
|
#
?
Apr 8, 2013 04:34
|
|

|
ExplodingSquidx2 posted:So I'll be heading to my first SupaNova this year, Australia's mini comicon eqsue thing. Technical term is scabbards. Depending on your cons weapons policies you may be allowed to walk around with china town cheap rear end swords and airsoft guns. For the gear, the military term is webbing with ammo pouches, more modern is called a battle belt with H Harness. Nobody does cancerface Deadpool so tip of that hat to you! edit: internet says metal swords and airsoft is a no go. You might be best off just fabricating scabbards with dummy sword handles sticking out. Flanker fucked around with this message at 20:02 on Apr 8, 2013 |
|
#
?
Apr 8, 2013 19:58
|
|
|
The thing you actually put the sword in is, as mentioned above, called a scabbard. The thing you use to attach the sword to yourself is often called a baldric (when it goes from shoulder to waist) or frog (when it attaches to a regular belt). You can pretty much make one yourself by buying a bunch of cheap belts from a thrift store and putting them together.
|
|
#
?
Apr 8, 2013 20:12
|
|


|
How do people weather fabric to make it look dirty and used without using dirt and messing up the piece? I also kind of like this look, are the black details drawn on with sharpie?
|
|
#
?
Apr 8, 2013 21:14
|
|
|
Reformed Tomboy posted:How do people weather fabric to make it look dirty and used without using dirt and messing up the piece? Watered-down acrylic paint is great for this. Here's a shirt I recently made to look old and nasty, it started out as plain white canvas. I just laid it down in the bathtub and dribbled watery black/brown paint over it, let that dry, then added more layers. I stained it with some tea, too, though I think that may have mostly come out when I washed the shirt after wearing it. 
|
|
#
?
Apr 8, 2013 21:49
|
|
|
Argh all those awesome Borderlands costumes make me really want to do a Tannis, but I already have like four half-finished costume projects waiting for me back in the States and I won't even get to work on those until December or so... :cries:
|
|
#
?
Apr 9, 2013 12:12
|
|


|
Posted this in the sewing thread, but it may be more applicable here: I'm doing a costume for a convention - I've never sewn before, so I'm pretty much learning as I go along and doing (so far) alright. Got some questions that I can't seem to answer online, though. Here's what I'm looking to dress up as:  Two questions so far: 1) Those cuffs are sort of hourglass-shaped; can I just use a regular large cuff pattern (the one I'm looking at now is from a pirate's overcoat) and make the cuff sort of hourglass-shaped to get that sort of shape on the arm? Is there anything else different I should be doing to it? 2) I'm wondering how I can create the holes in the lighter shirt to add those rings in there. The rings I have now can just be clipped in once I've made the hole, but I'm not sure how to do it. Will making a circular hole, then reinforcing it similar to a button hole do the trick? Grommets were recommended, but I'm worried about the additional weight that'll put on the fabric, and the clinking noises that would result. (working with cotton fabric in both cases)
|
|
#
?
Apr 9, 2013 17:49
|
|
|
Morpheus posted:Posted this in the sewing thread, but it may be more applicable here: 1. You could cut it with a slight hourglass shape or you could just hand stitch a bit on the seam to make it fold a bit and lay bigger at the bottom of the cuff. 2. As was mentioned in the sewing thread I would suggest grommets. You could also do a hand bound button hole if you were concerned about adding too much weight.
|
|
#
?
Apr 9, 2013 18:12
|
|

|
Funhilde posted:1. You could cut it with a slight hourglass shape or you could just hand stitch a bit on the seam to make it fold a bit and lay bigger at the bottom of the cuff. Could you elaborate on that second recommendation? Do you mean hand-stitching at the seam where I join the two halves of the cuff together? Funhilde posted:2. [...] You could also do a hand bound button hole if you were concerned about adding too much weight. This is what i'm considering, and now that I look up 'making grommet holes', I'm finding information about it. Would it just be a matter of making a circular hole (as opposed to cutting a line for a regular button hole) and then reinforcing it like you would a button hole?
|
|
#
?
Apr 9, 2013 18:57
|
|
|
I would recommend testing the buttonhole idea before you do it on the actual coat, I suspect it might not be as clean as it could be. I think a grommet wouldn't add significant weight over what the rings themselves will add. For the cuff, I had thought maybe you could use shaped soft foam (like you'd have for a mattress pad) as an internal structure and cover it in stretch fabric to make that really exaggerated shape. I don't think fabric does that naturally in real life and to get that exaggerated of a shape you may have to use non-traditional means.
|
|
#
?
Apr 9, 2013 19:08
|
|

|

|
| # ? Jun 5, 2024 05:35 |
|
|
How big are those rings (as in, how thick is the wire, not the diameter of the loop)? If possible, I would recommend not cutting a hole, but using something pokey like an awl to push through the fabric and then progressively widen it to fit. You can still reinforce this like you would a buttonhole, but by pushing the threads rather than cutting them, you reduce the risks of fraying and increase the overall strength of the area. One of the reasons I would suggest grommets is that you can often install them without punching holes in the fabric, but by pushing them into the weave.
|
|
#
?
Apr 9, 2013 19:13
|
|