


|
Today I stacked up the stuff I've been accumulating for the 990: 2x Rigid D2 LED driving lights and high fender mount (aka the deer-finders) PIAA light wiring and switch kit ADVRally 2 gallon aux tank (fits where the left muffler used to be) New, non-bent handlebars New cargo rack Hepco-Becker crash bars (to replace the ones I crashed last year) The RAM ball and finger mount from my Alaska bike In-dash digital voltmeter to show me how many of those delicious extra volts I'm wasting. This weekend will be the beginning of some extensive bolt-off/on work. I don't know how I'm going to fit any more wiring behind that headlight than what's already behind there with aftermarket headlights, heated grips, gear power leads, and other crap I've added. She's going to be down for a while as I send my, once again, bent front rim off to be straightened. I'm debating replacing it with the narrower DID Dirtstar 1.85" from the 950SE for less bendy-times. Apparently slamming into rock stairs with a 500lb bike is not great for the 2.15" front. It's held together for a few thousand miles but I'm beginning to lose confidence in the very shaky setup. Once payday hits I'm gonna get a new front scorpion for street times and save my new TKC-80, a new clutch lever (since I broke the adjuster on my last one and now it only works at full extension with a really narrow friction zone), and start looking at suspension options.
|
 #
?
Nov 8, 2013 01:32
#
?
Nov 8, 2013 01:32
|
|

|

|
| # ? May 4, 2024 00:57 |
|
|
Xovaan posted:Nice bike $1200 bucks for a b12. Kill me, a completely hosed one here costs $2500 minimum. Also it occurs to me that you could have tried just blocking off the vacuum line to the petcock and running the bike on PRI for a while to see if it fixed the problem.
|
|
#
?
Nov 8, 2013 04:38
|
|


|
Slavvy posted:I'm just hoping he screws all the settings back to how I had them, I had it set up so well but forgot to write anything down, because I am a dumbass.
|
|
#
?
Nov 8, 2013 04:41
|
|

|
Slavvy posted:$1200 bucks for a b12. Kill me, a completely hosed one here costs $2500 minimum. D'oh. Should have tried that, yeah. Oh well-- I'm fine just throwing money at it at this point since there isn't much else to go wrong.  $1200 for a B12 with new chain and clutch, to boot. Not including all the Holeshot sparklies, too. Move to Cali with Z3n and you'll be taken care of, bro 
|
|
#
?
Nov 8, 2013 04:43
|
|

|
BlackMK4 posted:Settings will need to change with new fork oil / internals anyway. No new internals, just seals and fluid. Despite this, you're more right than you could possibly know. The guy said the old fluid was 'like treacle' and chucked in 2.5w which is apparently close to the unicorn semen Kawi recommend. Guess this weekend is testing time  Xovaan posted:D'oh. Should have tried that, yeah. Oh well-- I'm fine just throwing money at it at this point since there isn't much else to go wrong. Sadly I don't live anywhere near 'murica. Z3n will forever be an ephemeral internet hero to me 
|
|
#
?
Nov 8, 2013 08:25
|
|
|
So a couple weeks ago my 954 blew a spark plug or partially blew a sparkplug out of the #2 cylinder, halfway to work. Upon getting it home and pulling the plugs (the #2 was a bitch to get out) I found out the previous owner(s) had somehow not installed the spark plug correctly or under/over torqued it. The #2 spark plug hole threads were pretty screwed, I hope no one here ever has to do a timesert repair but I ordered the kit (120$) 10x1mm and a couple inserts 3-4$ each to match the threads of the hole and spark plug. So the way it works is that you get a 2 stage tap, the initial part of the tap follows and chases the original spark plug hole, while the larger part of the tap cuts a slightly bigger hole, you then use a countersink thats included with the kit to cut a clean surface for the sparkplug and insert. The kit then comes with a special tool that looks like a slightly squared off tap to install the insert. Once you screw the tool + insert, the insert bottoms out and you screw the tool and it causes the insert to expand slightly to fill in the space and you have new threads to accept the original spark plug size and should be stronger than the original threads because they're steel instead of aluminum. I took my time a bit, took a few tries to get the tap started, there was some gunk on the threads, used a bit of grease on the tap to catch metal shavings, also blew compressed air with a hose and blowgun to blow out any shavings. Again I hope no one ever has to do this repair. Went smoothly for me for the most part, just took my time and followed the instructions as carefully as I could.  1: insert installation tool. 2: 2 stage tap 3: tool used to turn the tap/installation tool 4: Handle that attaches to tool above, due to sportbike clearance issues had to use an 11mm socket to turn the tap/insert tool 5: Right side = inserts + countersink tool  Bought a very very handy inspection camera to check the hole, this is my stripped hole.  insert:  tap + countersinking tool  sparkplug + insert: sparkplug doesn't thread all the way until the insert is expanded in the tapped hole.  Insert installation tool with insert:  repaired hole with insert installed:  Spark plug in repaired hole:  Forgot to take pictures of the tap in the hole but it's a weird feeling cutting a bigger hole in the spark plug threads while hearing the tap cut its way through and hoping to god you did everything right when you try to install the insert and didn't fuxor the head.
|
|
#
?
Nov 8, 2013 12:08
|
|

|
That's about the proest thread repair I've seen. Know what I did once? Broke off a an NGK B plug in a head, drilled and tapped what was left of the B plug and installed a D plug.
|
|
#
?
Nov 8, 2013 14:23
|
|

|
Never done those on an engine and I hope to never but nice work and documentation. Fun fact - we use those all the time in the field to fix hosed threads on supercomputers. We had some temps help with some work one time...I got to do around 13 of those one day and that temp wasn't called back.
|
|
#
?
Nov 8, 2013 15:33
|
|


|
Rev. Dr. Moses P. Lester posted:That's about the proest thread repair I've seen. Seriously, excellent work. I don't think I'd have the balls.
|
|
#
?
Nov 8, 2013 19:27
|
|

|
Well...now you can be the guinea pig - do a compression test in some miles and let's see how it compares given that you didn't pull the head. Slavvy posted:No new internals, just seals and fluid. Despite this, you're more right than you could possibly know. The guy said the old fluid was 'like treacle' and chucked in 2.5w which is apparently close to the unicorn semen Kawi recommend. Guess this weekend is testing time 2.5w seems REALLY light. Like, stupid light. And I promise I'm much more substantive and less heroic in person. Z3n fucked around with this message at 23:01 on Nov 8, 2013 |
|
#
?
Nov 8, 2013 19:51
|
|

|
Z3n posted:Well...now you can be the guinea pig - do a compression test in some miles and let's see how it compares given that you didn't pull the head. The guy seemed pretty insistent. It seems light to me too but it's almost impossible to find anything on the net for the first gen so I can't confirm. edit: found a factory workshop manual, it's meant to be 10w. gently caress's sake I don't need this poo poo. Slavvy fucked around with this message at 21:49 on Nov 9, 2013 |
|
#
?
Nov 9, 2013 21:34
|
|
|
Today I changed the oil, cleaned and lubed the chain, and washed the bike. Now it's stored for winter  . Goodnight sweet prince. See you in May. . Goodnight sweet prince. See you in May.
|
|
#
?
Nov 9, 2013 22:03
|
|


|
Took it in for winter storage, see ya in April, Bandit!
|
|
#
?
Nov 9, 2013 23:10
|
|


|
Finally decided to lower my bike a couple inches and replaced the rear brake pads, which were squealing like mad and definitely well past the point of "time to replace your brake pads." Thanks for that Previous Owner. He'd also apparently tried to put some lowering links on there, but as far as I can tell hadn't actually used them to lower the bike at all, and they were poorly made so the holes weren't the right size to fit the bolts so they were a bitch and a half to actually get off the bike and replace with proper ones. Bike feels a lot better now that it's lower though. Now I just need to adjust the sag back to where it's appropriate for my weight instead of at the minimum pre-set and it should be good to go.
|
|
#
?
Nov 10, 2013 01:29
|
|


|
Put 'er in storage. 'Sposed to be in the twenties (F) here, for highs, all next week :-(
|
|
#
?
Nov 10, 2013 04:30
|
|
|
Guys stahp, you're making me sad.
|
|
#
?
Nov 10, 2013 05:45
|
|

|
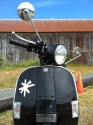
Cross posting from the Sumo thread. I stripped off the spraypaint that the PO put on the front fender, and I'll eventually get around to stripping off the paint he put on the back plastics. It turns out a can of Goof Off will strip spray paint like nothing. I also put on the fork guard decals and have some factory stickers to put on the tank plastics, but they're being shipped from Austria. The graphics go a long way in making the bike look less junky.    \/\/\/\/\/\/ Mazdaspeed3, thank you very much. 
MetaJew fucked around with this message at 08:11 on Nov 10, 2013 |
|
#
?
Nov 10, 2013 07:23
|
|
|
Mazda3 AND a KTM AND an expensive looking pushbike? You're like an AI/CA grand master 
|
|
#
?
Nov 10, 2013 07:48
|
|
|
What did i do to my ride today? hosed it up because of my stupidity. Fitted the Fat Duc O2 Emulator after a lot of loving around finding the right connector, re-fitted my belly-pan intending to zip-tie the connector to the standoff for the pan... and forgot to do that one thing. Naturally the connector floating around loose found the worst possible place to end up - right against the exhaust downpipe, melting it and killing the bike with an ECU Disconnected error. I'm hoping against hope that the error is purely because of a short in the melted connector and I haven't just fried the ECU by dumping 12v into it. Got it recovered home but have decided not to try and bodge a fix myself, I'll have to have it picked up tomorrow. Yay. FWIW the 10 minutes running I got up to that point suggested that the Duc did exactly as advertised - the annoying stutter and surging at 3-4k rpm was gone, and the whole thing was a lot smoother.
|
|
#
?
Nov 10, 2013 15:13
|
|

|
I went and picked up another container of Goof Off and stripped off the last of the spray paint on my bike's rear fender. I think it looks a whole lot better, but now the black plastics on the headlight look a little out of place. Oh well.  Now, I'm trying to figure out if the rear tail graphics that are marketed for the SXC and other models of various years will fit on my plastics... Decisions.
|
|
#
?
Nov 11, 2013 05:31
|
|
|
goddamnedtwisto posted:Trials, more than any other sport, is just one long sustained "gently caress You" to the laws of physics. https://www.youtube.com/watch?v=AP4yJDGHZBc&t=36s
|
|
#
?
Nov 11, 2013 14:11
|
|


|
Yesterday, I finally fixed the shift lever on my bike. Apparently parts for the Honda Nighthawk CB450 are pretty exotic, and, as I found out, are not completely interchangeable with the Nighthawk 650. The cheapest replacement shifter I found was from a local dealer claiming to have them in stock, and he wanted fifty bucks for a stinkin lever. At this point the thought occurred to me that it wouldn't be that much more expensive to just buy a MIG welder and fix the old lever myself. So, I just welded a couple of sockets together, welded that to the lever, and cleaned up the excess splatter with my bench grinder.  I'm pretty proud of myself--even though it's a crappy beginners weld, my test sockets held up to impacts from a dead blow hammer in a vise. I even heated up and bent the lever out a tad, so it no longer knocks against the side of the transmission cover, which has made shifting into second a lot smoother than ever before.
|
|
#
?
Nov 11, 2013 16:59
|
|


|
Encountered some bizarre and sudden power loss the other night, where the bike dropped at least 2 cylinders and wanted to die in neutral. I limped her off the quasi-highway (Lake Shore Drive - limited access, 4-lanes each way, but 40 MPH limit). After several blocks of struggling, she began to recover but only at higher revs (4,000 - 5,000 RPM), a few minutes later, she regained her composure completely AFAICT. The sudden onset made me think it was electrical, but then it sorted itself out, which electrical never does.  Nerobro suggested that perhaps it flooded, but the plugs looked pretty tan and showed no signs of fouling. Half-expected the charging system to be the culprit, since the engine seemed to kick in at higher revs, about where the R/R puts out a lot of juice. But when I got the bike back expecting a drained battery, it was fine. Voltage at the coils showed a 2 volt drop from the battery, and that's with a coil relay mod!  Couldn't find any obvious corrosion, etc., but I replaced the wiring to the coils anyway. Finally, while tearing into things, I checked my valve clearances, and they needed no adjustments. W00t!
|
|
#
?
Nov 11, 2013 18:28
|
|

|
Today, I learned how to get a sta-bil container cap out of the fuel tank. e: I must have left a little bit of gas on the paint too long. The paint is flaking off. gently caress.
M42 fucked around with this message at 01:33 on Nov 12, 2013 |
|
#
?
Nov 12, 2013 00:36
|
|

|
That's drat awesome. What mig welder did you pick up?
|
|
#
?
Nov 12, 2013 01:59
|
|

|
(It rained, so ignore the dirt spatter) TANK DECALS  NEW  (The Honda)  DRILL WEEKEND gently caress   (Driving to Florence in a humvee at  55 mph sucks) 55 mph sucks)
|
|
#
?
Nov 12, 2013 03:46
|
|
|
Coredump posted:That's drat awesome. What mig welder did you pick up? Initially I picked up the cheapest one I could find at Harbor Freight... Then promptly returned it for a lower amp unit when I realized my house doesn't actually have any 240V outlets, and wiring one in would require me loving with the breaker box 
|
|
#
?
Nov 12, 2013 03:46
|
|
|
Finally finished a project I've been working on for some time. So I like the look of those rubber knee grips that a lot of older motorcycles had, and which are still around on modern Triumphs and Enfields and such.  The very earliest versions of my bike, a Honda CL350, and its precedessor, the 305, came with rubber knee grips like those above. The 1971 model has a differently shaped tank and did not come with grips. When I look on eBay, I can find lots of grips for different models (tons for the S90 for instance), which wouldn't fit, and a few NOS grips from things like CB450s that might fit okay but they aren't really designed for my tank shape and they're usually $150+ a set. There are also generic ones available, but they're usually pretty ugly or designed for a peanut tank; and finally there are zillions of types of grip that say Triumph or Norton or whatever on them but I can't do that, can I So I decided to make my own. 1: doodle some concepts and lay out the general design on a photo of the side of the gas tank.  2 (not shown): print out the drawing at various scales, cut out paper representations of the grip, and figure out the proper size, since you don't know if what you're drawing will actually look right in real life. Record the scale factors you need to use when modeling the part. 3: import concept to CAD program of your choice and, using the concept drawing for scale, model the actual part in three dimensions.  4: invert this 3D model, creating negative geometry that can be used as a mold.  5: cut this mold (and a mirrored version for the other side of the tank) on your CNC machine. Make the logo insert with your laser cutter because you haven't got an end mill small enough to cut all the details you need.   6: clean and prepare mold with releasing agents.  7: fill with 2-part liquid urethane rubber  8: after 16 hours, demold parts  9: wash off all curing oils and traces of releasing agents  10: nice rubber parts!  11: clean gas tank and attach parts with heavy-duty silicone glue, apply moderate clamping force for 24 hours  12: done  Now you have the only rubber knee grips designed specifically for a 1971 CL350 in the entire world!
|
|
#
?
Nov 12, 2013 04:49
|
|

|
Last night I was able to get ahead on some of my 990 Adventure work. In the general effort of converting the beautiful machine full of considered, well-balanced compromises that KTM sold me into a farkled out adventure commuter carrying its weight in aftermarket poo poo I've hung two Rigid D2 LED driving lights off the front. The BDCW bracket seems stout but I need to do a lot more work aiming them, and I'm not convinced that the mounting system included with the lights will survive any amount of offroad. It's pretty funny how wimpy the U-brackets are from the factory, since the lights themselves look bomb proof. The light set comes with a wiring harness that is long in all the wrong places for my bike, so after some alterations I dismounted the left side tank and bodywork and snaked the battery leads from the airbox space (where I mounted the relay) down past the engine to the battery box. I tapped the relay trigger line into the highbeam power wire on the bike's harness so they'll pop on with the high beam. Short video: https://www.youtube.com/watch?v=SEZU2sML_bs
|
|
#
?
Nov 12, 2013 04:52
|
|
|
Sagebrush posted:12: done This is rad. Cool process. Looks great, great job.
|
|
#
?
Nov 12, 2013 05:45
|
|
|
Sagebrush posted:Finally finished a project I've been working on for some time.  My god. Most heroic thing I've seen in quite some time. Also probably the most disproportionate effort:bike ratio I've ever seen but whatever floats your boat My god. Most heroic thing I've seen in quite some time. Also probably the most disproportionate effort:bike ratio I've ever seen but whatever floats your boat ")
|
|
#
?
Nov 12, 2013 06:19
|
|
|
Sagebrush posted:Finally finished a project I've been working on for some time. SO FUCKIN BAD rear end
|
|
#
?
Nov 12, 2013 06:35
|
|
|
Goddamn, Sagebrush. Goddamn. I wish I knew how to do that. Looks awesome!
|
|
#
?
Nov 12, 2013 06:44
|
|

|
Where is the like button or up boats? We have those now right? Either way very impressive Sagebrush.
|
|
#
?
Nov 12, 2013 06:52
|
|
|
Sell the pads on ebay, or sell the molds to me 
|
|
#
?
Nov 12, 2013 10:51
|
|
|
That's cool dude! Hope they keep sticking for the next number of years.
|
|
#
?
Nov 12, 2013 11:00
|
|

|
Yup that's real nice.
|
|
#
?
Nov 12, 2013 11:51
|
|
|
Sagebrush posted:Finally finished a project I've been working on for some time.  Neat!! Where'd you get access to a CNC router? This really makes me want a 3d printer...
|
|
#
?
Nov 12, 2013 13:27
|
|
|
Sagebrush posted:12: done At some point in this process, did it occur to you that you put more effort and skill into some rubber knee grips than the average rider will apply to their entire bike? Great job.
|
|
#
?
Nov 12, 2013 15:38
|
|
|

|
| # ? May 4, 2024 00:57 |
|
|
Sagebrush posted:Finally finished a project I've been working on for some time.
|
|
#
?
Nov 12, 2013 16:25
|
|