

|
SUPER NEAT TOY posted:Anyone? Sample a, I don't think a halved top and quartered front quite go together
|
 #
?
Mar 12, 2014 06:15
#
?
Mar 12, 2014 06:15
|
|


|

|
| # ? Jun 8, 2024 09:05 |
|
|
Soldering does not create a blended metal weld, it only melts the tin/lead filler rod medium. When two pieces are put close together with molten material placed between them, they are joined when the solder cools and solidifies.  AndyElusive posted:These last couple of posts reminds me that I have a couple of staves for Necrons that I need to fix. Very thick poles can be drilled into and pinned together, or the pole ends to the clenched fist. Thinner poles, or characters with large fists can take advantage of an even more durable method: find a drill bit that matches the diameter of the pole and use it to drill a hole through the fist. The weapon or banner then becomes the pin itself. Dab with super glue and never worry about it snapping again (especially with older white metal minis).
|
|
#
?
Mar 12, 2014 06:30
|
|
|
I forgot how great chestnut ink smells.  Yes, this means progress is finally happening! Did the GW washes change when they became known as shades? I feel like my new agrax earthshade is spreading better than my old devlan mud, but I can't tell if that's just because the devlan mud was bought like 3 years ago. edit: VVVVVVV That owns, dude. Keep up the good work! VVVVVVV Fake James fucked around with this message at 06:40 on Mar 12, 2014 |
|
#
?
Mar 12, 2014 06:33
|
|
|
Hey guys I worked all day on this plague marine, it's my first time with green stuff and plague dudes, the base and backpack are uncompleted though. If anyone has any criticism, that'd be cool yo.
Lord Humongus fucked around with this message at 06:42 on Mar 12, 2014 |
|
#
?
Mar 12, 2014 06:36
|
|


|
Your advice about Screamer Pink was spot on, cheers.
|
|
#
?
Mar 12, 2014 07:48
|
|

|
Dr. Lenin posted:I forgot how great chestnut ink smells. The washes were improved massively when they turned to shades. They no longer stink of vomit and actually flow over your model much better. Rapey Joe Stalin posted:Your advice about Screamer Pink was spot on, cheers. 
|
|
#
?
Mar 12, 2014 09:28
|
|

|
AndyElusive posted:Super glue has been a nightmare and isn't working. Dr. Lenin posted:I forgot how great chestnut ink smells. 
|
|
#
?
Mar 12, 2014 10:33
|
|
|
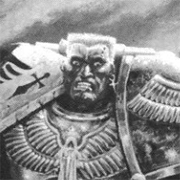
Pierzak posted:CA glue tends to decay. If you glue is older than 2 months, you may want to get a new tube. Huh, didn't know that about CA glue. I've been using a bottle I've had for 5-6 months now and it seems to be fine, but when binding larger plastic pieces it's hard to tell if the quality is slipping. Any quality loss over time when it's dry? Does it become more brittle as it ages? Also, this is the first time I've been happy with how my marines' eyes (visors? view holes?) have come out:  Usually I just left them black or unintentionally made them look like  . .
|
|
#
?
Mar 12, 2014 15:23
|
|
|
Dr. Lenin posted:Huh, didn't know that about CA glue. I've been using a bottle I've had for 5-6 months now and it seems to be fine, but when binding larger plastic pieces it's hard to tell if the quality is slipping. Any quality loss over time when it's dry? Does it become more brittle as it ages?
|
|
#
?
Mar 12, 2014 15:35
|
|
|
Dr. Lenin posted:Huh, didn't know that about CA glue. I've been using a bottle I've had for 5-6 months now and it seems to be fine, but when binding larger plastic pieces it's hard to tell if the quality is slipping. Any quality loss over time when it's dry? Does it become more brittle as it ages?
|
|
#
?
Mar 12, 2014 15:52
|
|
|
Anyone have experience painting minis with oils, or oils over acrylic basecoats? Not simple washes, I mean actual oil blending and such. I've watched a few videos and I'm fascinated, it seems so intuitive and easy to get nice blends.
|
|
#
?
Mar 12, 2014 16:07
|
|

|
Dr. Lenin posted:Huh, didn't know that about CA glue. I've been using a bottle I've had for 5-6 months now and it seems to be fine, but when binding larger plastic pieces it's hard to tell if the quality is slipping. Any quality loss over time when it's dry? Does it become more brittle as it ages? That looks super sweet, I really like the pallid armor with the bright flesh, reminds me a bit of this guy: 
|
|
#
?
Mar 12, 2014 16:14
|
|
|
Apollodorus posted:Hm, that sounds like a better option than green stuff, but on the other hand I don't want to support Hobby Lobby's regressive anti-employee healthcare policies. Yes. That's the stuff. Works great. Dries super fast, once it's sanded the seam is completely gone.
|
|
#
?
Mar 12, 2014 17:02
|
|


|
JoshTheStampede posted:Anyone have experience painting minis with oils, or oils over acrylic basecoats? Not simple washes, I mean actual oil blending and such. I've watched a few videos and I'm fascinated, it seems so intuitive and easy to get nice blends. Make sure you cover the mini with a good coat of varnish before you work with oils over acrylic otherwise it will screw up the basecoat. I use glosscoat, then do the oil work, then dullcote or satin to take the shine off.
|
|
#
?
Mar 12, 2014 17:04
|
|
|
Verdugo posted:Yes. That's the stuff. Works great. Dries super fast, once it's sanded the seam is completely gone. I bought a bottle of Vallejo Plastic Putty a while ago which is pretty much the same thing and it's worked pretty great as well if you're looking for options.
|
|
#
?
Mar 12, 2014 17:11
|
|
|
Awesome, much cheaper than the Golden Paste stuff. You use very fine sandpaper, right? Like, 1000 grit?
|
|
#
?
Mar 12, 2014 17:56
|
|


|
Painting light time. I've been painting my Escher gang up - I paint under a cheapo magnifying lamp using a 75 watt blue daylight bulb. When I was spraying the models with Dullcote though, I noticed that the flesh transitions didn't look right. I thought I was getting frosting with the Dullcote, but the rest of the model seemed ok. I stepped outside to look at the models under natural light, and the transitions were really, really bad looking. Inside though, the models look fine. What the hell is going on? Is my daylight bulb getting washed out by the room lights? Do I need to invest in something better than a single bulb? Has anyone else had this issue? Granted, it isn't a huge deal, since it isn't like I'll be gaming outside, but it does bug me and I'd like to figure out what's happening.
|
|
#
?
Mar 12, 2014 18:30
|
|
|
My stuff tends to look like poo poo in natural daylight but I don't care since I don't game or display minis outside. I do carry stuff around from the desk daylight bulb to the overhead room light to the bathroom flourescent to make sure it's ok though.
|
|
#
?
Mar 12, 2014 19:49
|
|
|
Is it viable to paint details with an airbrush. I wouldn't mind doing a bit more to my gators outside of just basing them with it, but I'm uncertain how I can take things further. Is it possible to apply washes etc with one? or should I just be brushing it on? Edit: These are the models. They are 40mm across at the base. I have a couple slightly larger ones as well, but I assume you would use the same sort of techniques. 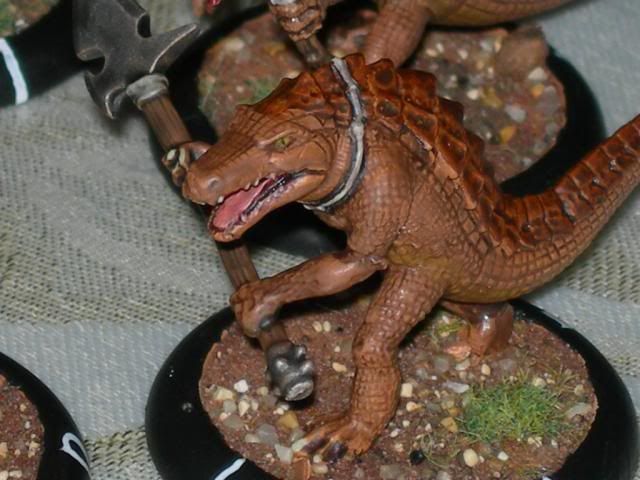 This is the paint scheme I was thinking of working towards, but if there's anything I can do to pull ahead using an airbrush then that would be ideal. Hand Cannon Guide w00tmonger fucked around with this message at 23:12 on Mar 12, 2014 |
|
#
?
Mar 12, 2014 20:01
|
|


|
w00tmonger posted:Is it viable to paint details with an airbrush. I wouldn't mind doing a bit more to my gators outside of just basing them with it, but I'm uncertain how I can take things further. It really depends on what the details are, your airbrush needle size and the size of the models. I've never done washes through an airbrush but I really don't think it would work well (which is why I haven't done it). The wash will atomize and then dry in the air so the wash would hit the model and just stick where it lands. Also trying to airbrush wash into crevices would be an absolute nightmare, better to just brush it on. There's better ways of getting doing shading with an airbrush. I have no idea what these gator models are but if you post a picture I could see if airbrushing them would be viable.
|
|
#
?
Mar 12, 2014 22:37
|
|

|
w00tmonger posted:Is it viable to paint details with an airbrush. I wouldn't mind doing a bit more to my gators outside of just basing them with it, but I'm uncertain how I can take things further. With a good enough airbrush and practice, you can do some pretty nice details with an airbrush. It's not gonna 100% eliminate brush painting but you can definitely get to a point where you're doing the majority of it. It's just a different skill set to learn from brush painting. You can do washes with it but it's not really any easier than washes with a brush. It basically comes down to how often you're willing to clean your brush. I won't pull out the airbrush for something that would only take me 5 minutes with a brush anyway. 90% of what I use my airbrush for is priming, basecoating and varnishing, but it was worth the price of admission just for that. I figure anything else I do with it is gravy. Do not airbrush gravy though.
|
|
#
?
Mar 13, 2014 03:46
|
|
|
w00tmonger posted:Is it viable to paint details with an airbrush. I wouldn't mind doing a bit more to my gators outside of just basing them with it, but I'm uncertain how I can take things further. An airbrush could be helpful for doing a reptile belly gradient on their undersides but it might be too late in the painting process to do that. Other than that there's not a whole lot, at least with my skills, that I could do with these models and an airbrush unless you wanted to do their back scales with multiple colors, like transitioning from a lighter color on the outside scales to a darker color on the inner scales. These look good for a more realistic reptile scheme. Alligators are pretty much dark color on top, lighter color on the underside and you hit the those details well.
|
|
#
?
Mar 13, 2014 04:10
|
|
|
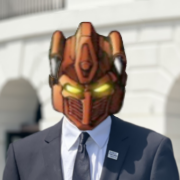
First time ever freehanding a symbol. My hands are too shaky for this. Now it's time to paint a backpack and some arms!   I'm not too happy with how the head came out, but I'm not sure what to do at this point. There's already a good amount of layers and I don't want to strip him just to fix one small detail. Any recommendations?
|
|
#
?
Mar 13, 2014 05:54
|
|
|
Head looks fine mate, don't get obsessively held up on one model. Finish the guy up and paint on! You'll get an idea or once he's got his arms and a base, it'll look better for you.
|
|
#
?
Mar 13, 2014 06:35
|
|

|
Dr. Lenin posted:Any recommendations? I got one. 
|
|
#
?
Mar 13, 2014 10:26
|
|


|
Someone needs to make it an emoticon 
|
|
#
?
Mar 13, 2014 10:38
|
|
|
http://www.graffiticreator.net/ I couldn't design it well enough to make something like CyberLord CyberLord XP posted:Cross post from the minatures thread: Maybe people could print up decals with this design tool? Transfers? Or just on thin enough paper to mould onto a surface.
|
|
#
?
Mar 13, 2014 11:32
|
|

|
Dr. Lenin posted:First time ever freehanding a symbol. My hands are too shaky for this. Now it's time to paint a backpack and some arms! This looks great, stop being overly critical of your work. Definitely don't try and go back and "fix" the head. If you do that there's a 95% chance you really will mess it up, it's one of those certainties. Finish that one and move on to the next one and don't stop until you have an entire unit completely finished. Then you can take the time to analyze your work as a whole both up close and from table top distance. If you really don't like the skin tone don't try and strip it or paint over it. Go dig up some spare heads from your bitz and practice on those. This is what I did for my Tyranids to get the skin color and carapace color I liked; I did some quick jobs on some spare Scything Talon bits until I perfected the scheme. 30 minutes of work beforehand saved me potentially hours of work down the line. Pacheeco fucked around with this message at 14:27 on Mar 13, 2014 |
|
#
?
Mar 13, 2014 11:44
|
|
|
Pilgrimski posted:http://www.graffiticreator.net/ Holy crap this is useful, I may experiment with printing out graffiti and gluing it to flat terrain surfaces.
|
|
#
?
Mar 13, 2014 12:48
|
|
|
serious gaylord posted:How much you willing to spend? Not really sure as I have no idea how these things are usually priced, but probably not too far into the double digits. ijyt fucked around with this message at 13:44 on Mar 13, 2014 |
|
#
?
Mar 13, 2014 13:40
|
|

|
Pacheeco posted:This looks great, stop being overly critical of your work. Definitely don't try and go back and "fix" the head. If you do that there's a 95% chance you really will mess it up, it's one of those certainties. Finish that one and move on to the next one and don't stop until you have an entire unit completely finished. I've really got to get better at this. I spent so much more time painting single models in the past that I keep forgetting I have a whole army ahead of me to paint. I really should think more about just getting it all to tabletop quality and save the better work for individual characters. Gravitas Shortfall posted:I got one. I should probably buy this as an emote for you guys when I'm all done.
|
|
#
?
Mar 13, 2014 14:53
|
|
|
I started painting my 40k tau guns again and I forgot how boring they look when you paint them a uniform black. I saw this which makes it look more interesting. Anyone have more examples of playing around with gun colors in this way? It still gives it an overall black and cool feel without looking too crazy. How would I go about making a warmer gun? Brown stock and/or NMM bronze?
|
|
#
?
Mar 13, 2014 15:18
|
|


|
I paint the barrel covers and sights on my Tau guns the same color as the armor, including an accent color (my squads are color-coded) along the top of the barrel. The remainder (stock, trigger guard, receiver[?], etc.) is black.
|
|
#
?
Mar 13, 2014 15:21
|
|
|
Dr. Lenin posted:I've really got to get better at this. I spent so much more time painting single models in the past that I keep forgetting I have a whole army ahead of me to paint. I really should think more about just getting it all to tabletop quality and save the better work for individual characters. It really is a psychological shift. It's very much like writing - nothing is ever done, you just get tired of improving it and call it "sufficient." It's a game I play in my head but I say to myself "okay this is good enough for now - I will apply what I learned to the next one and I can come back to this later." And of course I never come back to it.
|
|
#
?
Mar 13, 2014 15:26
|
|

|
Apollodorus posted:I paint the barrel covers and sights on my Tau guns the same color as the armor, including an accent color (my squads are color-coded) along the top of the barrel. The remainder (stock, trigger guard, receiver[?], etc.) is black. I always paint by lasguns Castellan Green regardless of how my uniforms are painted and then the magazine, barrel and aquila on the side are metallic while stock and trigger is left black. Those things are mass produced so they might as well look the part and I kinda like the classic green lasgun that's in the older codex.
|
|
#
?
Mar 13, 2014 15:31
|
|
|
Apollodorus posted:I paint the barrel covers and sights on my Tau guns the same color as the armor, including an accent color (my squads are color-coded) along the top of the barrel. The remainder (stock, trigger guard, receiver[?], etc.) is black. That's what I'm trying to avoid. I did that on my old group of tau because I never saw an example like the one I linked that made the gun look interesting while maintaining it's "blackness." I always thought it looked tacky but did it anyway so it wouldn't look boring. Now that I see how you can make interesting guns without resorting to that, I'd prefer to do it that way. It's the same thing with stealth suits. A lot of people will paint them these weird colors just so they pop but if you look at metal gear and splinter cell concept art they manage to make it look interesting while maintaining the cohesive stealthy look and having a nice (green, red, blue) accent.
|
|
#
?
Mar 13, 2014 15:43
|
|
|
Dr. Lenin posted:I've really got to get better at this. I spent so much more time painting single models in the past that I keep forgetting I have a whole army ahead of me to paint. I really should think more about just getting it all to tabletop quality and save the better work for individual characters. It is hard because you simultaneously want to practice and get better on models you don't care about but also don't want to waste time painting models you don't care about. Paint the stuff you are excited about. Don't rush it, but just loving paint it. You can always strip and repaint down the road if you're really embarassed, but since you get better with every model you'll unavoidably have a bunch of models you think you could do better now. It's all just time management, would you rather go back and paint marine number 5 to your new standard or just paint new ones?
|
|
#
?
Mar 13, 2014 16:01
|
|
|
Fox of Stone posted:That's what I'm trying to avoid. I did that on my old group of tau because I never saw an example like the one I linked that made the gun look interesting while maintaining it's "blackness." I always thought it looked tacky but did it anyway so it wouldn't look boring. Now that I see how you can make interesting guns without resorting to that, I'd prefer to do it that way. It's the same thing with stealth suits. A lot of people will paint them these weird colors just so they pop but if you look at metal gear and splinter cell concept art they manage to make it look interesting while maintaining the cohesive stealthy look and having a nice (green, red, blue) accent. From what I can tell from the picture you've linked, they've just highlighted the black of the guns with a blue-grey rather than a neutral grey, maybe tried for a NMM look. It really shouldn't be that hard.
|
|
#
?
Mar 13, 2014 16:02
|
|
|
Doctor Zero posted:It's a game I play in my head but I say to myself "okay this is good enough for now - I will apply what I learned to the next one and I can come back to this later." And of course I never come back to it. This is also my experience. It's also tremendously helpful to tell yourself that you're painting a squad, not a dozen individuals. Judge your work by how the group looks as a whole, not any individual. Get the squad done to an acceptable level, and then go back to obsess over all the pouch straps, buttons, and eyebrows. You may not even care to after you see the group as a whole. This also gives a more uniform appearance, since there is no doubt you're using the same colors and techniques on each individual. The Oath thread has really helped me get over painting one at a time. Setting a deadline was invaluable. Now I feel like it's a waste of time to do one guy's boot laces when nine other figures don't even have painted boots yet. I can get them afterward if I need to, and usually I don't need to.
|
|
#
?
Mar 13, 2014 16:02
|
|

|

|
| # ? Jun 8, 2024 09:05 |
|
|
Dr. Lenin posted:I should probably buy this as an emote for you guys when I'm all done.
|
|
#
?
Mar 13, 2014 16:34
|
|
