


|
Kasan posted:tl;dr How r muscle work? The real answer is you need to get in a gym and start doing some lifting. If your right-arm hammer work is the only exercise you're getting, naturally you'll only build muscle there. If it's just one part of your regular routine, you can get ripped and shed those pounds, etc. note: do as I say, not as I do
|
 #
?
Apr 10, 2014 22:10
#
?
Apr 10, 2014 22:10
|
|


|

|
| # ? May 24, 2024 20:22 |
|
|
Start working on cars, the manufacturers do a drat good job of hiding bolts in the rear end end of nowhere such that you have to exercise both arms about equally getting to them. Oh, and cut/split the wood for your forge by hand. Switch off hands when using the splitting maul.
|
|
#
?
Apr 10, 2014 22:41
|
|

|
I do my forming with my right hand, and my planishing with my left. When I am repairing musical instruments, I do all of my hammering with my left hand because I write left handed and have good control of it. My right arm is much stronger though, so any smashy smashy is done with my right arm.
|
|
#
?
Apr 11, 2014 00:13
|
|
|
Just got my first lathe: used Harbor freight 7x10 from craigslist. It is model #33684, the red version, with no guards. It comes with a 3 jaw chuck and 2MT live center installed. The seller also threw in his 5pc indexable carbide tool set and these two accessories untouched in box: 3� 4 jaw chuck - model �K72-80�, HF item #43581 6 1/4� faceplate - HF item #43582 The seller said he barely used the thing and it does look that way. I paid $300 for it all which seemed like a good deal to me. These cutters that came with it are 1/4" and don't seem to even fit in the tool post, screwing the bolts down all the way doesn't reach the bit. I guess the tool post is for 3/8"+ bits and I need some little spacers/shims or something? I'm debating whether I should get a quick change tool post right off the bat, was looking at some options but don't really know what the differences are. I'm putting together a shopping list to order a bunch of things at once from little machine shop. So far I've got this: 2MT dead center for tailstock 3MT dead center for headstock center drills parting tool & holder work light full metal gear set (I didn't get the change gears with the lathe, so gonna need gears anyways, figured I might as well upgrade them all to metal while I'm at it, though I might hold off on this for a while.) Oh and I already got this tailstock chuck and a dial indicator but haven't picked a holder for it yet Any recommendations on this stuff? peepsalot fucked around with this message at 09:30 on Apr 11, 2014 |
|
#
?
Apr 11, 2014 09:21
|
|


|
peepsalot posted:These cutters that came with it are 1/4" and don't seem to even fit in the tool post, screwing the bolts down all the way doesn't reach the bit. I guess the tool post is for 3/8"+ bits and I need some little spacers/shims or something? I'm debating whether I should get a quick change tool post right off the bat, was looking at some options but don't really know what the differences are. Yes. More important than the size of the tool holder post is the height of the tool's point, relative to the center line of the part you're cutting. You'll need to shim the tool in the holder in order to get the point of your cutter centered. It's a lot easier to do this with a quick change tool post, but if you're buying a starter lathe for cheap then you think about how much money you want to add onto the cost of that machine. I'm using the A2Z CNC quick change tool post, purchased from LMS and it works just fine. You'll probably want a 2MT LIVE center for the tailstock - not a dead center. That way you can drive your part in the chuck or with a lathe dog. You can also make your own dead center for the chuck. Just stick some round bar stock (or turn your own) in the chuck, set your compound for 30 degrees, and cut away. Voila, 60-degree dead center, that's already centered with your lathe.
|
|
#
?
Apr 11, 2014 16:50
|
|


|
Does anybody have any experience with those little Micromark/Proxxon benchtop bandsaws? I've been thinking of getting a bandsaw for a while now, but I don't have any real need atm for your typical full-sized 4x6, and those wouldn't offer me the precision or cut radius I need, I don't think. But a scrollsaw won't cut it for some of the heavier stuff I'd wanna cut. Mostly I'm looking for something that can cut reasonably small-radiused patterns in sheet-metal and thin plate and do limited slitting work in small stock. Take the role of a beefier/bigger-scale powered jeweller's saw that can go toe-to-toe with >3/16" steel plate or 1/4" rod on occasion, basically. Am I looking at the right kind of tool for that application?
Ambrose Burnside fucked around with this message at 19:50 on Apr 11, 2014 |
|
#
?
Apr 11, 2014 18:03
|
|

|
CrazyLittle posted:Yes. More important than the size of the tool holder post is the height of the tool's point, relative to the center line of the part you're cutting. You'll need to shim the tool in the holder in order to get the point of your cutter centered. It's a lot easier to do this with a quick change tool post, but if you're buying a starter lathe for cheap then you think about how much money you want to add onto the cost of that machine. I'm using the A2Z CNC quick change tool post, purchased from LMS and it works just fine. For the QCTP I saw LMS comparison chart and was wondering about the difference between A2Z and the 0XA. It says that A2Z is piston action while the others are wedge but I didnt really understand the significance of that.
|
|
#
?
Apr 11, 2014 18:45
|
|
|
peepsalot posted:Yeah the lathe already comes with a live center. My reasoning with the dead centers was that I figured they would be better for checking overall alignment of the lathe, and they are cheap enough that it didnt seem like a big deal. Wedge is going to be more stable since it puts pressure across more of the dovetail ways pulling inwards, where a piston is just pushing the tool holder out away from the dovetail. However wedge tool posts are more expensive, and I haven't had any significant issues with the A2Z piston that weren't user error (parting too fast, getting impatient... and it was the tool holder that failed)
|
|
#
?
Apr 11, 2014 22:57
|
|
|
I have an A2Z piston style qctp for my Sherline lathe and I love it. I got my Sherline Mill today. I did a test cut on some steel and some brass with my fly cutter. It is insane how good the finish looks. I can't believe how shiny and swirl-free it is. The mill is basically in brand new condition. The guy who owned it took very good care of it and only used it for plastics. I am going to go to the tool store tomorrow and pick up some stuff. Right now I only have a drill chuck, vise, fly cutter, and end mill holder. What is essential to get next? I am thinking a dial indicator, parallels, some end mills, and some counter sink drills. Also, I want to cut some t-slots with very small dimensions, maybe .200" at the largest. Do they make t slot cutters like that, or is there some sort of other cutting tool that I can get. I want to make a sliding rail part, so I would cut a male and female T.
|
|
#
?
Apr 11, 2014 23:20
|
|
|
Brekelefuw posted:I have an A2Z piston style qctp for my Sherline lathe and I love it. I use a dial test indicator (with a waggly arm that measures perpendicularly) way, way more than the dial indicator (with the plunger). Also in the same genre, a e: edge not center im dumb King of Gulps fucked around with this message at 02:17 on Apr 13, 2014 |
|
#
?
Apr 12, 2014 01:43
|
|

|
Awww hell yeah, time for some new toys. 
|
|
#
?
Apr 12, 2014 05:15
|
|


|
What hoods are welding people using for say MIG with 10-20 gauge steel? I've been borrowing an auto-darkening hood at the local maker space but would like to buy one of my own. Are grinding shields/modes worth the extra bucks? Two/three/four arc sensors matter? So many options... 
|
|
#
?
Apr 13, 2014 19:25
|
|

|
I've never understood why people would use welding helmets for grinding. The point of wearing a face shield while grinding or cutting is to prevent sparks and (potentially) debris from hitting you in the face. Why risk damaging your expensive welding helmet if something flies off whatever you're working on? Yes it's convenient to not have to switch to a face shield, but face shields are 10 bucks and designed to have stuff hit them.
|
|
#
?
Apr 13, 2014 19:54
|
|


|
So I did a little test cut on my mill today. I only have a fly cutter so I used that. I had never used a fly cutter before, but I like it.  I cut the face and the flat on the round side. Very smooth finish. I have been reading about milling and am wondering if I really should take the time to tram the mill. It seems a bit of a painful process to go through. I still have to get a dial indicator. I was in a hurry at the tool store and was only able to buy some hold downs and a chuck to t-slot adaptor. This week I will grab some end mills and some aluminum stock to start messing with. I don't think I need to make my tools in steel, because I am not doing anything crazy. I have a list of about 8 tools to make including a low profile vise, a radius turning attachment for my lathe, some more hold downs, and some specialty tools for my job. Speaking of my job, I thought I would post a before and after photo of a Euphonium that I worked on.  Before. Smashed up bottom bow and 1st branch.  After. Unsoldered the bow and removed the dents and then resoldered. Thankfully there was no burnt lacquer at the joint. Sometimes the removal or reassembly requires more heat than it should. There are scars in the lacquer near the bow-branch ferrule because the dents were deep enough to damage the lacquer. If I removed the lacquer and buffed it up it would be almost invisible. My shadow on the bow guard near the bottom of the picture makes it look like there is a still a dent in the guard, but there isn't.
|
|
#
?
Apr 13, 2014 20:07
|
|
|
Definitely tram it. The more square the better the accuracy. Dial in your vise while you're at it. Properly trammed, the fly cutter should leave a fine cross hatch. It's even prettier than the single side.
|
|
#
?
Apr 13, 2014 20:54
|
|

|
Do I need to buy two dial indicators and a sheet of glass? Or is that just one way to do it?
|
|
#
?
Apr 13, 2014 23:52
|
|
|
Tramming your mill doesn't take long at all, especially after you've gone through the process a few times. It also gives you a good excuse to learn how to adjust a bunch of the parts of your mill, which you will want to know how to do anyway. A single indicator and a tramming bar (not difficult to make) may be easier to use than two indicators, and certainly less expensive if your indicators are any good. A nice thick, flat glass plate is quite useful in a number of other situations around the shop so it would be worth picking one up eventually, but any precision surface will work. I've seen 1-2-3 blocks used for the purpose, or if you don't have your vise in the way you can just use the mill table itself. A cursory google search got this, which has quite a bit of good info: http://www.cnccookbook.com/CCMillTramming.html
|
|
#
?
Apr 14, 2014 02:30
|
|
|
In researching tramming my Sherline specifically, I found this. http://www.eztram.com/product_results.asp?ID=26 Not sure if I want to pay that much right now (because there are other things that I need t buy,) but it could save me some time.
|
|
#
?
Apr 14, 2014 02:46
|
|
|
Turns out that Harbor Freight doesn't carry the mini mill in the stores. gently caress 'em. If I have to have something shipped anyway, I'm going to wait for a while and save a little extra money for the LMS solid column and the tool kit. That's assuming I don't find something locally in the meantime, might throw out a couple of "wanted" ads and see if anything pops up. Thanks again for all the input!
|
|
#
?
Apr 14, 2014 22:50
|
|

|
Brekelefuw posted:
You're a wizard. I'd really like to see more of the process. There must be more to it than just waving a wand.
|
|
#
?
Apr 15, 2014 00:14
|
|
|
Sir Cornelius posted:You're a wizard. Seriosuly. That's amazing. The dent removal I can understand. Desoldering with no visible laquer damage is wizardry to me. (can I send you my baritone sax?)
|
|
#
?
Apr 15, 2014 00:33
|
|

|
I am likely doing another one of those horns tomorrow. If I do I will take some more photos of the process. That horn is a Yamaha, and their lacquer is the best. It is really hard to burn their lacquer. Other brands burn is you even look at them wrong. You get to know which brands behave, and which don't. Sometimes you just have to accept that the horn is going to require more cleanup and buffing than you want to do.
|
|
#
?
Apr 15, 2014 01:23
|
|
|
Brekelefuw posted:In researching tramming my Sherline specifically, I found this. Definitely don't buy anything fancy like that. Waste of money for minimal time savings. Get a decent test indicator and holder and do like the tubalcain video. Once you've done it a few times it goes really fast. Unless you're moving the head a lot or crashing it you shouldn't have to do more than double check it.
|
|
#
?
Apr 15, 2014 03:09
|
|
|
ah, heat straightening works wonders I've done it to repair some stringer flanges damaged during demo for bridge deck replacement with great results   gigantic hydraulic c-clamps helped it along quite a bit, time is money
|
|
#
?
Apr 15, 2014 03:24
|
|

|
 i wish tubalcain was my grampa i wish tubalcain was my grampa also: i'm glad to see my cheap bent rod tramming setup is tubalcain-endorsed
|
|
#
?
Apr 15, 2014 06:35
|
|

|
djent posted:ah, heat straightening works wonders If that's a hobby you've got some issues.
|
|
#
?
Apr 15, 2014 13:09
|
|
|
it's not a hobby, it's a job I get that it's the metalwork thread but where else am I supposed to post my about my ironwork?
|
|
#
?
Apr 15, 2014 15:29
|
|
|
djent posted:it's not a hobby, it's a job You're in the right place, lots of us post about work.
|
|
#
?
Apr 15, 2014 15:54
|
|


|
Sir Cornelius posted:If that's a hobby you've got some issues. If that's a hobby, sign me the gently caress up. I love stuff like that, but getting a job doing it would mean having to do things other than apply large amounts of meltiness to metal.
|
|
#
?
Apr 15, 2014 20:45
|
|
|
I just want to say that using a mill well is a lot harder than using a lathe well.
|
|
#
?
Apr 18, 2014 15:37
|
|
|

|
|
#
?
Apr 18, 2014 16:47
|
|
|
http://imgur.com/gallery/ezYU3 I see that and raise you elephant armour, and other insane ancient metalwork (and artifacts.)
|
|
#
?
Apr 19, 2014 05:16
|
|
|
Brekelefuw posted:http://imgur.com/gallery/ezYU3  This one's blowing my freakin mind
|
|
#
?
Apr 19, 2014 18:14
|
|
|
Jesus christ, wouldn't that gently caress up your hand something fierce if you tried to swing it? Also what's the deal with those awesome helmets? Fancy construction hardhats? They're gorgeous.
|
|
#
?
Apr 19, 2014 20:32
|
|
|
I get the feeling that that sword was the slammed Escalade or gold-plated AK-47 of its day. Meant to show off to the bustas, not to be used in any situation where suitability for its intended purpose actually matters. e: and the hardhats are something that oil workers or miners would do in their spare time, I think. There's a whole community built up around them, like hobos carving nickels or whatever Sagebrush fucked around with this message at 22:34 on Apr 19, 2014 |
|
#
?
Apr 19, 2014 22:32
|
|


|
Made a second pair of tongs. Made from the U clamps that hold leaf springs. They're goofy looking, but much more solid than my previous pair. Didn't follow any plan or anything, just eye-balled it because it was a spur of the moment thing. Still want to grind/hammer away the thread because it's a bit uncomfortable. The weird-rear end handle is actually pretty comfortable to grip (thread excepted). I also started working on a knife today... Might be a bit ambitious but gently caress it.  This is as far as I got today.  It started as a ~2 1/2" length of leaf spring. Managed to thin it by about half, still need to do that again to get the thickness I want. It's a slow process for me because I'm learning as I go. I'm about 80% certain it will end up in failure, but I'm having a blast doing it.
|
|
#
?
Apr 19, 2014 22:38
|
|

|
Ambrose Burnside posted:
Yep. To do all of that lapidary work on the turquoise(?) without a set of diamond tools is just silly. Not to mention all the rest of that stuff. I started my first mill project today. I am making a slim profile vise.  I have to make one or two more pieces for it. A piece like the one on the right, but with a bolt hole going through the side to push the moving jaw in to position, and possibly a wedge shaped piece to help distribute the load of the bolt doing the pushing. After it is done I can hold things much better, and combine it with my hold down set for maximum hold power! I also milled a parallel in to the jaws to hold smaller things. I don't own a set of parallels yet. After this project is done, I get started on my radius turning attachment. It will do concave, and balls.
|
|
#
?
Apr 19, 2014 22:46
|
|
|
AFAIK the hardhats are engravings done on common stamped aluminium hardhats either by the guys who wore 'em or commissioned from local artisans when working contracts in far-away places. I ran into them after finding some examples of the same kind of thing done by the woman I bought my chaser's pitch from, just repousse instead of engraving. I wouldnt think of a hardhat as a blank for metalworking, but if it's aluminium it's plenty soft enough for all sorts of artsy stuff so why not?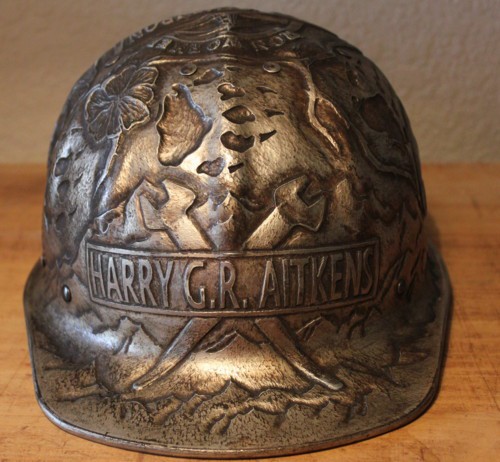
|
|
#
?
Apr 19, 2014 23:46
|
|
|
Made a ring with some triangle wire I bought a little while ago. Turned out okay, except for the joint (which you can't see here) being silver because I accidentally overheated the ostensibly-colour-matched copper hard solder and burned the copper out of it. 
|
|
#
?
Apr 20, 2014 01:06
|
|
|

|
| # ? May 24, 2024 20:22 |
|
|
Brekelefuw posted:Yep. To do all of that lapidary work on the turquoise(?) without a set of diamond tools is just silly. Not to mention all the rest of that stuff. Are you going to put in an angle to keep the mobile jaw from lifting or rocking? If you look at the guts of mill vises you'll see they are all pushing on an angle to force the jaw down. If it rocks you lose most of your clamping force.  If it were me I'd make something more like an edge clamp. Not as strong as a vise, but way low profile. I've used those up against an 1/8" tall stop to mill a thin floor part. Their big weakness is they aren't good at holding side to side motion so you need to clamp all four sides or be very careful about cutting direction. http://www.mscdirect.com/product/73153579 edit: Buy these, http://www.ebay.com/itm/J-S-Style-T...=item2ed103452b
|
|
#
?
Apr 20, 2014 03:41
|
|