|
Crosspost from the oath thread Tyrant Xerxis  Preatorian Swordsmen + Unit Attachement 
|
 #
?
Jun 15, 2014 06:11
#
?
Jun 15, 2014 06:11
|
|


|

|
| # ? Jun 3, 2024 09:12 |
|
|
parabolic posted:I have a problem with my airbrush compressor. I was given this compressor as a gift. It's worked fine for maybe 3-4 hours over a handful of short sessions. Now, there's a persistent leak from the screw in the bottom of the tank. If you call Paasche they might have a replacement part you can buy, if not any small screw with a rubber o-ring washer that fits should work. That screw is for draining the excess moisture out of your air tank which you should do somewhat frequently. My TC-20T has a similar screw but it doesn't have a hole or a valve or anything on it. It's just a screw with a very small thread shaft that is purely for blocking the drain opening. Don't unscrew the screw to release the excess pressure unless you want nasty rear end rust water shooting everywhere! Just unhook your airbrush from the hose so the excess air can release (I think this might cause moisture to build up on the hose) if your hose is permanently attached to the compressor or just unhook the entire hose from the compressor and let all the air blow out.
|
|
#
?
Jun 15, 2014 06:31
|
|


|
Pacheeco posted:If you call Paasche they might have a replacement part you can buy, if not any small screw with a rubber o-ring washer that fits should work. That screw is for draining the excess moisture out of your air tank which you should do somewhat frequently. My TC-20T has a similar screw but it doesn't have a hole or a valve or anything on it. It's just a screw with a very small thread shaft that is purely for blocking the drain opening. It's for draining water? I thought water ended up, for the most part, in the moisture trap. I could have sworn it's supposed to dump the tank if it hits too high a pressure; that's what keeps me from simply replacing the screw. If I'm missing an O-ring, then it's one that needs to cover the entire hole, higher up on the screw, making it much bigger than I would have anticipated. It's frustrating, because even my cheap Chinese airbrush comes with an exploded diagram of all the parts/gaskets and this ostensibly higher end compressor does not. And on removing the hose to drain the tank, I already have to use thread tape to prevent leaks, and I don't want to have to replace it every time. Should I just push in the button on the bottom of the moisture trap, I guess?
|
|
#
?
Jun 15, 2014 07:28
|
|


|
parabolic posted:It's for draining water? I thought water ended up, for the most part, in the moisture trap. I could have sworn it's supposed to dump the tank if it hits too high a pressure; that's what keeps me from simply replacing the screw. If I'm missing an O-ring, then it's one that needs to cover the entire hole, higher up on the screw, making it much bigger than I would have anticipated. It's frustrating, because even my cheap Chinese airbrush comes with an exploded diagram of all the parts/gaskets and this ostensibly higher end compressor does not. I pulled the screw out of my TC-20T and it has a rubber gasket at the very end of the screw. There's also pre-drilled holes that I can definitely see light through as well so that's normal. It looks like you lost your gasket somewhere. The gasket pushes against a lip on the inside of the screw hole creating a seal in front of the little holes in the screw. Check and see if it got stuck to the inside of the screw hole. If it did it's probably trashed though and you'll need a new one. Moisture ends up in the trap and you can drain that by releasing the valve on the bottom of the trap because if you don't eventually it will end up getting in your hose. Moisture also builds up in the actual tank over time (due to pressure and temperature differences between the tank and the outside air afaik) which needs to be drained out regularly by releasing all the air from the tank, taking that screw out and then turning the compressor on so the air blows out all the excess water. This can be REALLY MESSY though so do it outside or something. I always just release all the air from the tank by disconnecting my airbrush and then using the hose and excess air to blow all the dust and plastic shavings off my desk. If any moisture makes it past the trap, doesn't get evacuated from the air shooting out, and ends up just sitting in the hose, it will just get blown out the next time you go to use your airbrush or it will evaporate as long as you keep your airbrush and hose disconnected. You could press the moisture trap valve in until you hit 0 PSI but that's kind of annoying. There's also the pressure release valve (the red cap thing with the key ring on it) which opens if the compressor's auto-shutoff stops working. If you pull the ring the air will dump. It's good to check that occasionally just to make sure it works as it's a safety valve but I wouldn't use it to evacuate the tank all the time. I mean you can just loosen the screw at the bottom of the tank every time you are done using your airbrush but that seems like a huge hassle and if there's any rust build up (which will happen eventually) it will end up making a giant mess every time you're done painting. Pacheeco fucked around with this message at 08:45 on Jun 15, 2014 |
|
#
?
Jun 15, 2014 08:03
|
|
|
If your compressor has a tank, it should have a pressure release that's not removing hoses or unscrewing hose fittings. Quick releases are great, but they'd be less great if you had to undo the hose part just to release air pressure, and then re-tape the threads to ensure an airtight seal. On the TC-20T (or the many rebrands of it) there is a metal ring like from a keychain found where the red bit of plastic is. Pull on this to release the air in the tank (just don't burn yourself on the compressor). As for water in the tank, this is going to happen and the tank is, in a way, the first moisture trap. Do unscrew this plug every so often to drain all the water out if you don't want to replace the whole thing because it has rusted through. As someone else said, don't do this with a full tank if you don't want dirty water everywhere and probably hearing damage from the sudden very loud noise. Edit: Ball valves are also useful. You could put one between the regulator and the pressure gauge, or you could replace the tank drain with a simple setup like this person has here. I might throw one on my regulator actually, it's a drat sight more convenient than the standard option. Danoss fucked around with this message at 10:46 on Jun 15, 2014 |
|
#
?
Jun 15, 2014 10:27
|
|

|
Danoss posted:(just don't burn yourself on the compressor)
|
|
#
?
Jun 15, 2014 13:13
|
|
|
My Skorne test models that I posted a while back kicked off a discussion about dipping. As I said back then, I decided to paint the next ones without dip, and I'm quite satisfied: They're brighter and a little more pronounced, but painting them took quite a while longer. I'm debating wether or not to go even lighter with the red, using the current highlight colour (which you barely see) as a base after washing, and then highlighting with orange. What do you think?
|
|
#
?
Jun 15, 2014 14:47
|
|

|
Not a viking posted:What are some good battle mat alternatives? I've heard of the zuzzy ones and the kickstartered ones from frontline gaming. What are people's experiences with them? Pricing and shipping to Norway? Other alternatives? The frontline gaming mats are really really nice but a 4'x4' mousepad is actually much more bulky and difficult to store than I planned on. I had to buy a couple art storage tubes for mine. They come with a terribly low-quality bag that I accidentally ripped just trying to get the pad back inside.
|
|
#
?
Jun 15, 2014 15:13
|
|

|
signalnoise posted:The frontline gaming mats are really really nice but a 4'x4' mousepad is actually much more bulky and difficult to store than I planned on. I had to buy a couple art storage tubes for mine. They come with a terribly low-quality bag that I accidentally ripped just trying to get the pad back inside. My bags are still okay, but I throw them back in the long cardboard boxes they came in. They lean up against the wall nicely like that. At least there's no extra effort to make these mats look great other than putting then on the table. I'd still like to get some Zuzzy mats in the future, as when they've been painted and such, they look really nice.
|
|
#
?
Jun 15, 2014 15:36
|
|
|
Pacheeco posted:[Great airbrush advice] Thanks for the insight. I don't think I've built up enough water yet but I guarantee you saved me a ton of pain down the line. Appreciate it. Danoss posted:Ball valves are also useful. You could put one between the regulator and the pressure gauge, or you could replace the tank drain with a simple setup like this person has here. I might throw one on my regulator actually, it's a drat sight more convenient than the standard option. That's awesome, I think I'll just try to put that together. Any idea what size screw fits the tank normally (I'll probably just go to a hardware store to check the fit manually)?
|
|
#
?
Jun 15, 2014 16:33
|
|
|
Hey gang, here are some lovely out of focus pics of some of the stuff I'm working on. I'm really digging the Battle for Armageddon thing I've got going on with my armies now. I'm thinking about having the Blood Angels allies for my Steel Legion being an all drop pod army. I've got an old metal dread, two plasma tac squads and a melta toting assault squad. All I need is 3 pods and I'll have a pretty slick army.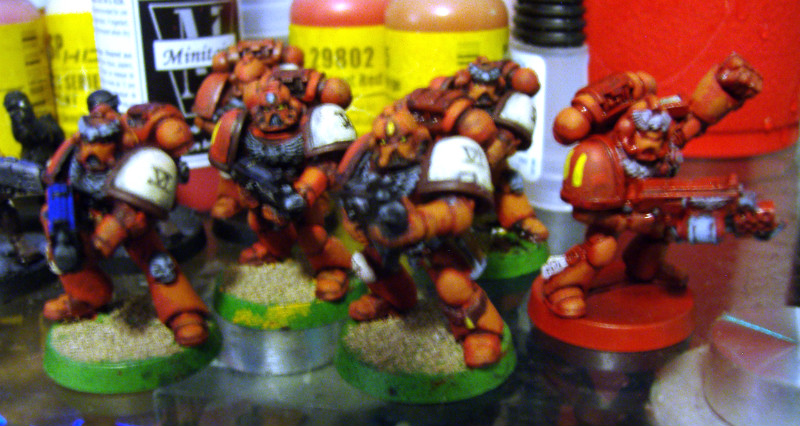  
|
|
#
?
Jun 15, 2014 20:40
|
|
|
(zenithal) Primed, based, painted and washed 60 Termigants last night for the Oath Thread. Holy poo poo.  the priming took maybe a total of 30 seconds each (black then grey), another 15 seconds or so for the Minitaire ancient bone base, 2 minutes each for the green & oil discharge Ghost Tint, then about a minute (?) for the dark sepia flesh wash. 60! omg My biggest lot of painting ever, so far.
|
|
#
?
Jun 15, 2014 21:39
|
|

|
Haven't posted in this thread for ages. I finally found myself a job, which has also given me the motivation to paint more frequently. Here's my really vibrant Salamanders that seem to earn me a lot of hate for being "too bright".  The flames and skulls are Anarchy stencils, I picked them up at Salute and they're rad as hell.      
|
|
#
?
Jun 15, 2014 21:42
|
|
|
Yeti Fiasco posted:Haven't posted in this thread for ages. Anybody who hates on these is dumb and wrong. These look baller as hell. Pacheeco fucked around with this message at 21:58 on Jun 15, 2014 |
|
#
?
Jun 15, 2014 21:53
|
|
|
Yeti Fiasco posted:I finally found myself a job, which has also given me the motivation to paint more frequently. Here's my really vibrant Salamanders that seem to earn me a lot of hate for being "too bright". I on the other hand am really curios about what paints you used.
|
|
#
?
Jun 15, 2014 22:06
|
|


|
Yeti Fiasco posted:Haven't posted in this thread for ages. Wow that green. 
|
|
#
?
Jun 15, 2014 22:31
|
|

|
I am moving flat and have a few models to give away to anyone in the UK who can pony up for P&P! The only thing I have photos of so far is the Ork bommer I paint ages ago;  So if anyone wants a fully painted one with a base for their army send me a pm and I'll sort it out.
|
|
#
?
Jun 15, 2014 22:39
|
|

|
Reaper Hydra, from the to do pile:  
|
|
#
?
Jun 15, 2014 22:44
|
|

|
Weirdo posted:I on the other hand am really curios about what paints you used. Base: Base is Vallejo Air Olive Green. I then spray a 3:2 mix of V.Air Olive Green and V. Game Colour goblin green at 90*, leaving the olive green on the underside. Thinned V. Game Colour gob green is then sprayed at 45*. Thinned V. Game Colour scorp green is sprayed from directly above and on the back of the legs to to finish the base. The whole lot then gets a wash of neat Windsor & Newton Brilliant Green Ink, making sure it doesn't pool on any of the flat surfaces, this is what makes the green so stupidly vibrant. The black is Vallejo Air Black, it's the only black I have used for 5 years and I will never switch unless its replacement gives handjobs as well as being amazing to paint with. Highlights: Green: V. Game Colour scorp green Black: V. Air light grey Gold: GW shining gold (must find a replacement, my pots been thinned to death) Army Painter dark tone Scrolls: V. Game Colour bonewhite GW gryphon sepia More bonewhite 0.05 micron pen for the squiggles and lettering Red: V. Air scarlet Windsor & Newton Vermillion Tank Flames: V. Air yellow V. Game Colour bloody red EDIT: Inkwashing tanks is poo poo, I found that P3's Scorp green looks almost the same as the inkwashed base coat, so I used that. Yeti Fiasco fucked around with this message at 22:49 on Jun 15, 2014 |
|
#
?
Jun 15, 2014 22:44
|
|
|
Lethemonster posted:I am moving flat and have a few models to give away to anyone in the UK who can pony up for P&P! The only thing I have photos of so far is the Ork bommer I paint ages ago; I'll do it! I'll snap em all up, I've been after orks for so long. EDIT: I am also really interested in how you did the weathering and paint chips. Yeti Fiasco fucked around with this message at 23:09 on Jun 15, 2014 |
|
#
?
Jun 15, 2014 22:57
|
|
|
This turned out far more adorable than I thought it would.   Also, 2/11ths of my sister's birthday present:  I'm having to be creative about painting extra leggings and poo poo on some of these figures, though, because no one in their right mind is doing derby in a bikini anymore. 
|
|
#
?
Jun 15, 2014 23:53
|
|

|
Does anyone know how to fix a fuzzy priming job? After taking a week to put a base together for my oath thanks to a destructive and resourceful cat, I finally got to prime a Tyranid Warrior today only to have the primer fuzz out. How do people deal with this beyond dunking it and starting over?
|
|
#
?
Jun 16, 2014 00:01
|
|

|
Dr. Red Ranger posted:Does anyone know how to fix a fuzzy priming job? After taking a week to put a base together for my oath thanks to a destructive and resourceful cat, I finally got to prime a Tyranid Warrior today only to have the primer fuzz out. How do people deal with this beyond dunking it and starting over? Sadly there is no other way, the paint has cured while it was too hot/cold/humid/dry, you could try filing down the worst spots with microfiles, but it would be easier to just strip and start again to be honest.
|
|
#
?
Jun 16, 2014 00:05
|
|
|
Yeti Fiasco posted:I'll do it! I'll snap em all up, I've been after orks for so long. Someone PMed me before you posted but when I did out my other ork stuff / if I ever find them in this mess I'll give you first pass on them. I will be painting up at baneblade as a commission soon and hopefully doing some photos of it. My painting standard is much better than the bomber now. Lots of stippling on damage with dried out, clumpy sponges to start with though.
|
|
#
?
Jun 16, 2014 00:32
|
|
|
parabolic posted:That's awesome, I think I'll just try to put that together. Any idea what size screw fits the tank normally (I'll probably just go to a hardware store to check the fit manually)? Having a quick look, it appears to be a 1/4" BSP thread. Matching the thread in-store is always the best way to be 100% sure (yours might be NPT instead of BSP for example). Danoss fucked around with this message at 15:07 on Jun 16, 2014 |
|
#
?
Jun 16, 2014 15:03
|
|
|
Danoss posted:Having a quick look, it appears to be a 1/4" BSP thread. Matching the thread in-store is always the best way to be 100% sure (yours might be NPT instead of BSP for example). Once it's in use, there still might be casting differences that create leaks. Someone here says blue loctite might work: http://www.airbrushforum.org/threads/help-with-tc-20t-compressor.3165/ Though I kind of lost track of whether you guys were talking about a quick disconnect or just a self-sealing valve.
|
|
#
?
Jun 16, 2014 16:27
|
|

|
Danoss posted:Having a quick look, it appears to be a 1/4" BSP thread. Matching the thread in-store is always the best way to be 100% sure (yours might be NPT instead of BSP for example). Thanks for checking. I took my screw with me to OSH and actually cooked up something that works but is kind of wonky looking. I have a 1/8'' elbow that leads out under the tank, where I have a join that steps it up from 1/8'' to a 1/4'' ball valve (which was the smallest ball valve they had; I tried a needle valve in 1/8'' first that just leaked), leading to a vinyl hose. With a fair amount of thread tape, the whole thing is airtight, and I can now purge the entire tank quite quickly and directly into the sink if need be. Can post pictures if anyone's interested. Appreciate the advice. parabolic fucked around with this message at 18:02 on Jun 16, 2014 |
|
#
?
Jun 16, 2014 17:43
|
|
|
Yeti Fiasco posted:The whole lot then gets a wash of neat Windsor & Newton Brilliant Green Ink, making sure it doesn't pool on any of the flat surfaces, this is what makes the green so stupidly vibrant. Great stuff, it really dazzles. Dr. Red Ranger posted:Does anyone know how to fix a fuzzy priming job? After taking a week to put a base together for my oath thanks to a destructive and resourceful cat, I finally got to prime a Tyranid Warrior today only to have the primer fuzz out. How do people deal with this beyond dunking it and starting over? I did try using a rough toothbrush on a set of orcs that had a thick fuzzy coat of primer, and that seemed to work well enough that it didn't affect the final product, but your mileage may vary. Iris of Ether posted:Also, 2/11ths of my sister's birthday present: Aww, that's really sweet
|
|
#
?
Jun 16, 2014 17:47
|
|
|
Weirdo posted:Aww, that's really sweet I managed to finish everything but base cleanup and sealing last night, so they'll even be able to ship in time. One of them even looks like her.  I'm way too scrawny for sports, so go forth and body check, Sis. Do me proud. 
|
|
#
?
Jun 16, 2014 18:31
|
|
|
Hey, guys, I've got a couple of requests for you all on behalf of the painting Oath Thread: Airbrushes.com will be providing a Grand Prize and 4 Quarterly Prizes, so if you're in the UK and want airbrush equipment, weathering powders, compressors, etc. from them, PLEASE PLEASE use the 'SA Oath Thread' marketing code - this tells them who referred them to the site! And also, if you order from ANY of our prize sponsors (especially KR Multicase, who haven't committed yet for this year), please mention the 'Something Awful Oath Thread Painting Competition' - it helps everyone out by telling the companies that we are pushing sales to them! Other prize sponsors include Badger (US and UK), Wayland Games, The Troll Trader, Springer-Pinsel brushes, Games & Gears, Warpath Games, and Dragon Forge Designs! krushgroove fucked around with this message at 19:27 on Jun 16, 2014 |
|
#
?
Jun 16, 2014 19:22
|
|
|
Slimnoid posted:Quick air compressor question: I just got this yesterday as a gift from a friend, and I'd like to have a hose going from the compressor to the air trap/regulator. I'm unsure of what size fittings I'd need, so if anyone has an idea it'd be super helpful. Even better, if someone could point me to a hose I could buy just for that purpose. Found the answer to my question today. Turns out they're 1/4", with the regulator being FIP and the tank being MIP. So I need to either find a hose with 1/4" ends that are male and female, or retro-fit the extra 1/8" hose with some 1/8" to 1/4" adapters. Oi. This poo poo is never easy.
|
|
#
?
Jun 16, 2014 22:27
|
|

|
Airline fittings can be a huge pain in the rear end. I had to bring my hose to an air compressor specialist to get a longer hose - I probably paid way more than I needed but I got all the connections I'll ever need. There are ebay sellers that sell a bunch of airbrush-specific fittings in a single pack, though - that should be enough to convert and connect whatever most people have.
|
|
#
?
Jun 16, 2014 22:47
|
|
|
Yeti Fiasco posted:Haven't posted in this thread for ages. drat son, these are sharp as gently caress. Those stencils look great too. I got around to painting some of the Space Hulk set that my dad bought in 1989: 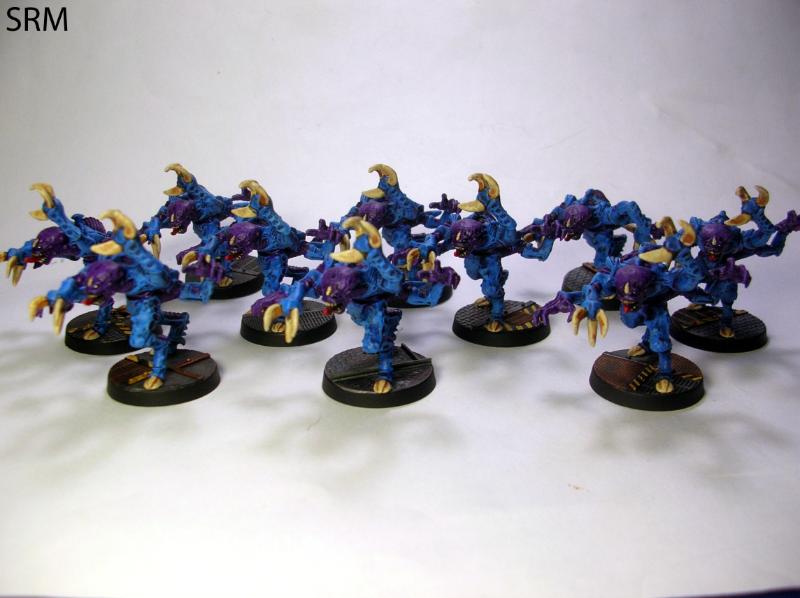 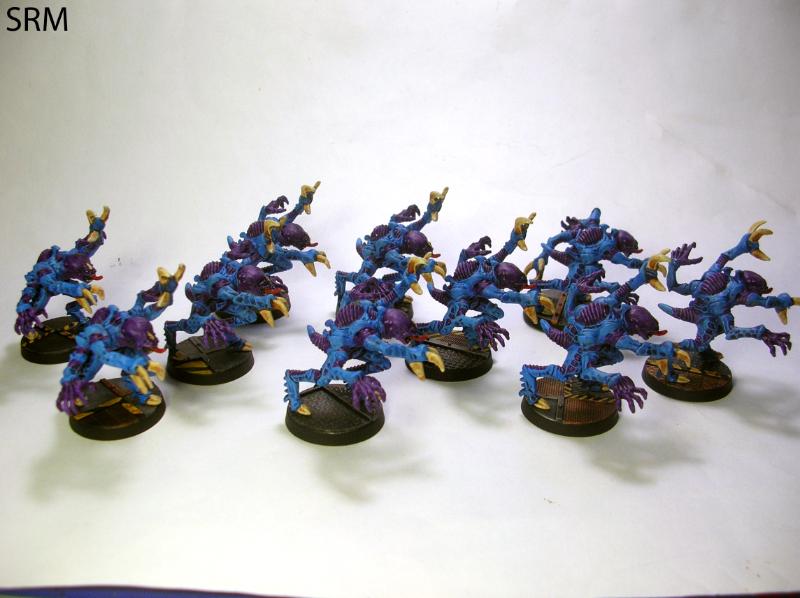 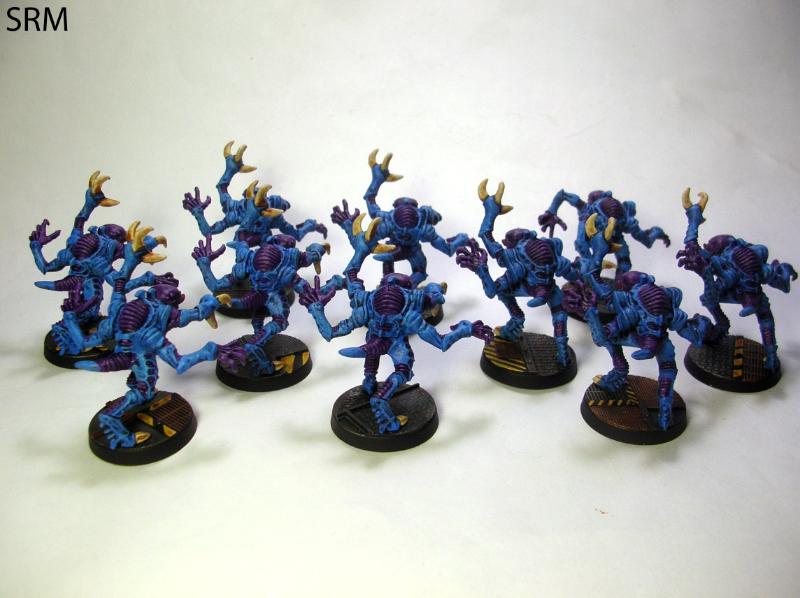 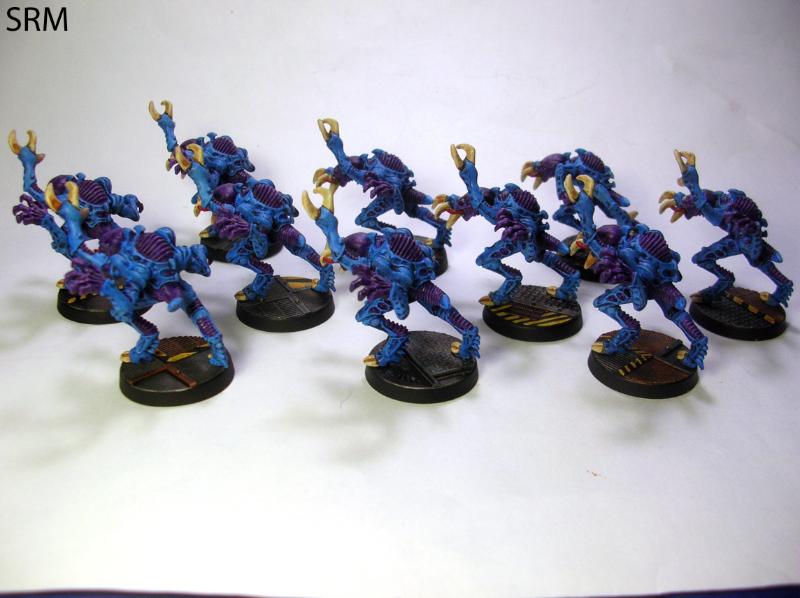 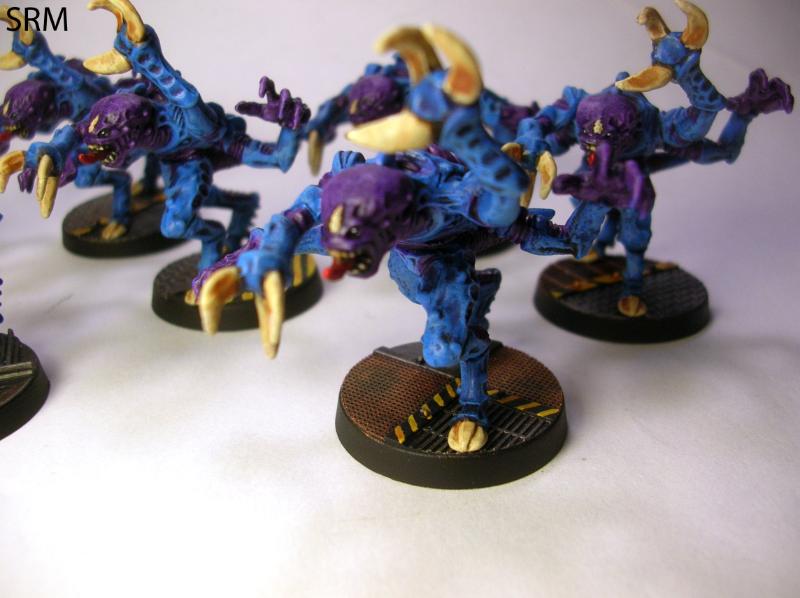 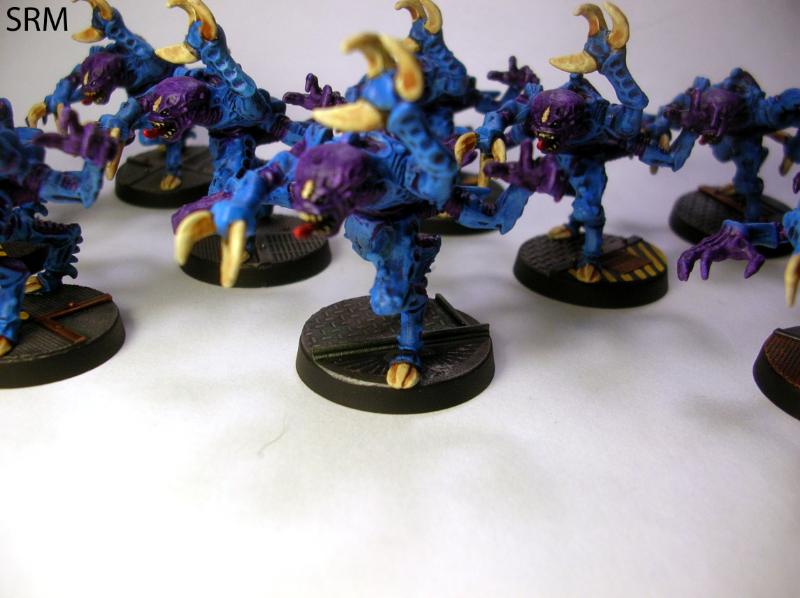  It was really refreshing to do simple drybrushing and washing instead of edge highlights and extreme edges and layering and decals and all the other stuff I do for my Ultramarines.
|
|
#
?
Jun 16, 2014 23:14
|
|

|
Yeti Fiasco posted:Haven't posted in this thread for ages. Yeah I don't play 40k but to hell with 'too bright'. Some bright colours instead of everything looking grimy and dull is awesome, and that paintjob is wicked.
|
|
#
?
Jun 17, 2014 01:49
|
|

|
TheCosmicMuffet posted:Once it's in use, there still might be casting differences that create leaks. Someone here says blue loctite might work: http://www.airbrushforum.org/threads/help-with-tc-20t-compressor.3165/ It's for using a ball valve to replace the tank drain. Fix the problem of a missing o-ring, a better/more convenient tank pressure release, and an improved tank drain all-in-one. Essentially, this. Loctite is designed as a threadlocker, but some people use it as a way to seal threads. Blue and, in some cases, purple Loctite would do this job if this is the preferred method. I'm partial to PTFE/teflon/plumbers tape for this purpose�some don't like it because it can be finicky to work with, but it's great once you get used to it. parabolic posted:Thanks for checking. I took my screw with me to OSH and actually cooked up something that works but is kind of wonky looking. I have a 1/8'' elbow that leads out under the tank, where I have a join that steps it up from 1/8'' to a 1/4'' ball valve (which was the smallest ball valve they had; I tried a needle valve in 1/8'' first that just leaked), leading to a vinyl hose. With a fair amount of thread tape, the whole thing is airtight, and I can now purge the entire tank quite quickly and directly into the sink if need be. Can post pictures if anyone's interested. Appreciate the advice. Nice one! Mine was 1/8" too. I was pretty tired when I looked, but every fitting is 1/8" on that compressor so I have no excuse, really. I'm glad you've got something that's working and you're happy with. If you want to tidy it up a bit, you should be able to find a 1/8" to 1/4" elbow and remove the adaptor. I can't imagine it looking too bad and it's not going to operate any differently. Some 1/8" fittings are challenging to find, and it seems that ball valves are one of them. The only ones I've found are like this one. It's neater, but I quite like the bigger levers seen on the 1/4" valves and above.
|
|
#
?
Jun 17, 2014 02:28
|
|
|
Okay, gotten a bit further along. �  � I went around the lips with a little MSP Fresh Blood, then touched it up a bit with the Pure White and Sea Foam again. �The shirt was done up with MSP Palomino Gold and Sun Yellow. �I didn't realize until after finishing that he was wearing a waistcoat. � �  � Here he is with the waistcoat and tie colored. �The tie is done with Vallejo Model Air Blue. �It was a nice vibrant tone. �It was much more fluid than I expected and I overthinned. �However, that helped it look nicely shaded with no additional work, so that was nice. �The waistcoat is done with MSP Jade Green and Moth Green to highlight. �At this stage, I've also started deepening the shadows using a mix of the original GW Genestealer Purple and some MSP Dark Elf Shadow, using various mixes. �I also colored the shoes and the belt with some walnut brown. � �  � Here he is as he stands now. �Getting close to done. �The bag was done with MSP Lonestar Leather, CDA Leather Tan, and some GW Agrax Earthshade to help blend and shade. �The suit's had some Lonestar Leather and Walnut Brown on the handle, and then the gun itself done with Vallejo Model Color Gunmetal with GW Nuln Oil to bring out the details. �It'll get a touch-up with a brighter metallic before I'm done. �The artifact in his other hand I did with some sea foam and then palomino gold. �Not sure where I was going with that, except that I felt like playing with the colors a bit, and since it's supposed to be an eldritch artifact, I didn't care too much for logic. �I may eventually lop off that hand for something a bit more appropriate. �I've also given the suit a highlight, with some MSP Ghost White mixed in with the Genestealer Purple. �I wanted to push the shadows a bit deeper and highlights a bit higher than I usually would. �It's not perfect, but I feel like I'm starting to get there. � Now he really just needs a few touch-ups here and there and he'll be done, at least with the painting portion. �Still have to decide how I'm going to base this clown.
|
|
#
?
Jun 17, 2014 06:43
|
|

|
I recently unearthed my 3rd edition WH40K starter set that I never really opened other than to flip through the books. I want to start building and painting the models. Any recommendations on specific paints to buy for dark eldar and space marines? I don't have any paint yet but would like to order some before I finish building these guys.
|
|
#
?
Jun 17, 2014 08:00
|
|

|
Helmholz posted:Any recommendations on specific paints to buy for dark eldar and space marines? I don't have any paint yet but would like to order some before I finish building these guys. Basically it comes down to two questions: 1. what brand (Citadel/GW, Vallejo, Badger Minitaire, Reaper, Formula P3) can you find locally, or are you happy to order online? 2. what colors do you like? For the Marines, pick a chapter you like the look of (blue, red, yellow, white, black, etc.) and find a Youtube guide by searching there for 'how to paint _____ chapter' or '_____ space marine tutorial'. For Dark Eldar (my first army) I went with priming black and then painting the edges red, so the armor fades up to red from black, ending with a bright red/orange edge highlight. (edit: or any color, red and green are really popular for DE) There's a million ways to pick a scheme, so the overwhelming choice of picking the colors you like can be quite daunting. I like to recommend the various color scheme designer web sites like this one: http://colorschemedesigner.com/ Just pick a pain color and it gives you complimentary colors that 'just look right' so there's very little guesswork you need to do, then get the paints to match the colors. THEN you have to decide if you want to paint the helmets, kneepads, shoulder pads, etc. the contrasting colors, or what. Do a few test models before painting a whole unit. Post here for comments and friendly critiques. krushgroove fucked around with this message at 14:55 on Jun 17, 2014 |
|
#
?
Jun 17, 2014 13:00
|
|
|
krushgroove posted:Just pick a pain color
|
|
#
?
Jun 17, 2014 14:18
|
|
|

|
| # ? Jun 3, 2024 09:12 |
|
|
krushgroove posted:For Dark Eldar (my first army) I went with priming black and then painting the edges red, so the armor fades up to red from black, ending with a bright red/orange edge highlight. This is what I'd do but probably with green instead. I love bright green.
|
|
#
?
Jun 17, 2014 14:50
|
|