


|
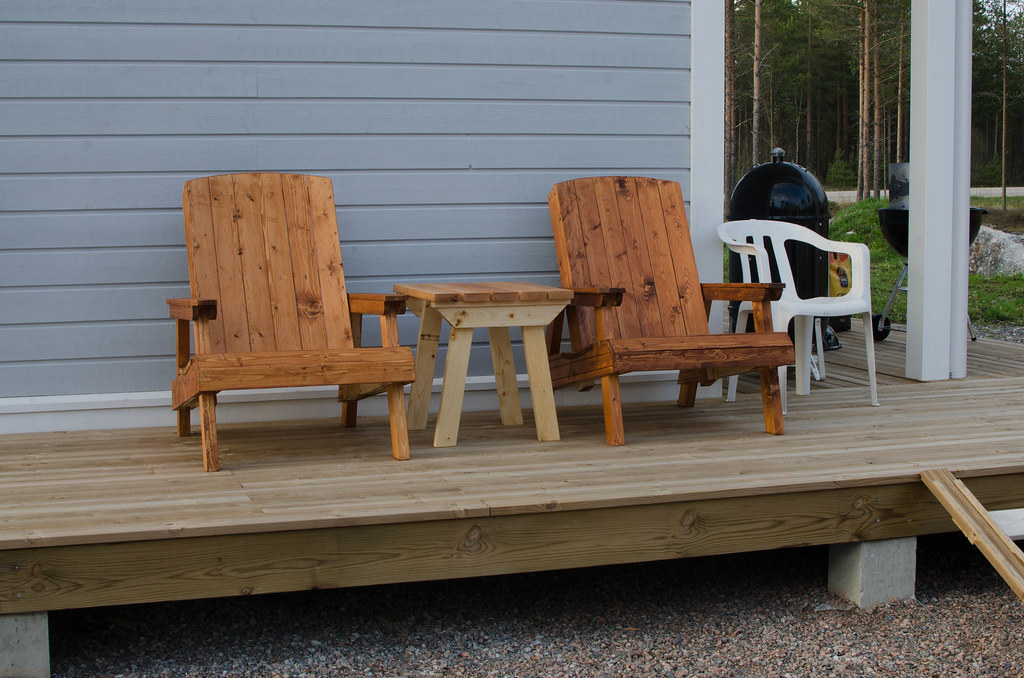
His Divine Shadow posted:Well I had use for it today so I am using it as is for now. Also some stain to match the rest of the furniture and so it doesn't scream "framing lumber"
|
 #
?
May 8, 2015 19:53
#
?
May 8, 2015 19:53
|
|


|

|
| # ? May 16, 2024 21:54 |
|
|
What plans and tools did you use for the chairs? I'm in need of some good chairs for on my back porch since the plastic dry rotted out on my old ones.
|
|
#
?
May 8, 2015 19:58
|
|

|
These where the plans I used, I used my table saw, band saw and jointer/planer to mill the lumber. But you can get away with less than that. https://www.woodgears.ca/lawn_chairs/plans/index.html
|
|
#
?
May 8, 2015 20:29
|
|

|
I have a pretty newbie finishing question. My wife bought me a DIY ukulele kit that I have put together and stained. I put tape over where the bridge is to be glued on so I wouldn't have to sand the stain off later. I picked up some lacquer to use over the stain. Do I leave the tape on and lacquer over top it? I'm not sure what the process is for this part as far as the tape and bridge are concerned.
|
|
#
?
May 8, 2015 22:54
|
|

|
Koth posted:I have a pretty newbie finishing question. My wife bought me a DIY ukulele kit that I have put together and stained. I put tape over where the bridge is to be glued on so I wouldn't have to sand the stain off later. With guitars, you can either finish over the tape or finish without tape and scrape away the finish. If you finish over the tape, you want the tape to be slightly smaller (1mm inside in all directions, maybe) than the bridge. You still need to scrape the edge just a bit, and there will be a little ridge this way. If you finish without tape, it may be easier to get a perfect finish across the whole top. You also can place the bridge wherever you want, instead of being bound to the tape area (but that shouldn't be an issue). This means more scraping, but most luthiers who make really nice instruments go this route, for many reasons. Edit: SCRAPE do not sand. DO NOT score deeply across the grain with a blade.
|
|
#
?
May 8, 2015 23:04
|
|
|
It looks fine in this picture, just stain to match and don't worry about it. I made one very similar a couple years ago and I think it's hideous (definitely worse than yours) but other people like it. Gaze upon mine and feel better. In my defense, someone gave me one leftover deck board and I decided to make something from it.
|
|
#
?
May 9, 2015 05:18
|
|

|
Not exactly a woodworking question, but here goes. I'm in a mens slowpitch softball league and we have to provide our own home plate (a 2 foot x 3 foot plywood board). To jazz things up I decided to get our logo printed on vinyl to give us a nice fancy plate (and crush our enemies spirits who just have plain plywood plates). I'm wondering the best way to apply it and make sure it stays strong. The plate will have softballs dropping on it all game long, so it needs to stand up to that abuse. Runners don't run on the plate so there is no cleat risk, but the balls will still be hitting decently hard. The vinyl is a big sticker. I figure I need to add a strong clear coat overtop both it and the board. What would be the bext product to use? I was thinking epoxy, but that seems expensive. A guy on reddit suggested spar urethane but the board is painted white, would that still work? The container says to use on wood without paint or finish.
|
|
#
?
May 9, 2015 19:05
|
|


|
BUGS OF SPRING posted:Not exactly a woodworking question, but here goes. Several layer of spray clear coat?
|
|
#
?
May 9, 2015 19:10
|
|
|
BUGS OF SPRING posted:Not exactly a woodworking question, but here goes. Any sort of outdoor polyurethane finish would probably do. Depending on the logo, though, you might look at making a new board and taking it to be laser engraved at your local hackspace; that will be much more durable.
|
|
#
?
May 9, 2015 19:44
|
|

|
BUGS OF SPRING posted:Not exactly a woodworking question, but here goes. I own carnival games and I just put a new floor in my mini basketball game. I put a vinyl sticker on laminate flooring and used polyurethane to cover it. The poly is most definitely not supposed to be used on the laminate flooring but it turned out fine. I tried posting a picture but it keeps failing because I'm on my phone.
|
|
#
?
May 9, 2015 20:43
|
|
|
The '2k' two-part clear coats are supposed to be the strongest. You can get them in a spray can like this. I haven't used it yet, but it's what I'm planning on trying for clearcoat on my subwoofer.
|
|
#
?
May 9, 2015 21:23
|
|


|
My workshop project has now reached the point where I can start working on the roof framing. There are two main tricky bits, as I see it. The first is getting the first few rafters up, which will require temporarily supporting the ridge beam somehow. I'll start at the gable end, since those rafters are also supported by studs. Then either I need to put in some kind of "shelf" off of the gable wall to support the ridge beam, or else build a column out of scrap 2x4s to support it while I get a second pair of rafters up. After there's two rafter pairs, I think that portion of the ridge beam should be self-supporting, and the next portion should be supportable off of the first one (the beam consists of two 10' boards and one 8' board, 28' total length). The second tricky bit, though, is simply getting the rafters cut properly:  If this were just a matter of copying distances off of the plans and cutting the beams, there'd be no real problem, but my walls aren't perfectly parallel to the ridge beam, with variations of I'd guess up to half or three quarters of an inch. So if I just blindly applied cuts, I'd end up with poorly-fitted beams. By my reading, I need to vary the depth of the notch (where the rafter rests on the wall) depending on how far the wall is from the ridge. Any advice or tricks for doing this? Or do I just run a measuring tape from the wall to the ridge and do my best to get that hypotenuse measured? Maneuvering 2x8 rafter boards to test for fit is going to be a pain and a half, and of course it'd be relatively easy to screw up a cut and waste a board. Actually marking and cutting the boards shouldn't be a problem, once I know what distances to use. I just want to have as little swearing involved in the process as possible.
|
|
#
?
May 12, 2015 03:11
|
|

|
TooMuchAbstraction posted:My workshop project has now reached the point where I can start working on the roof framing. I just watched this video about using one of those squares to make rafters the other week, maybe it can be of help? https://youtu.be/yPL6jOa6AH8
|
|
#
?
May 12, 2015 03:41
|
|

|
Squibbles posted:I just watched this video about using one of those squares to make rafters the other week, maybe it can be of help? Yeah, that's basically similar to the method I was planning to use to mark the lines for the cuts; the problem is positioning those lines along the length of the rafter, since the positions (and the depth of the birdsmouth notch / seat cut) are going to vary depending on exactly how far out the wall is from the ridge.
|
|
#
?
May 12, 2015 05:03
|
|
|
Just some musings on workshop design.... This time last year, I really thought I would've had a traditional workbench by now. It seems though I need it less and less, after I got my improvised workbench fitted with a leg vise, it's done almost everything I need. Now I am going to go buy two old 50's era interior doors and make them into tops for some more simple workbenches. What I constantly need more of are drawers. Putting drawers in every bench and space I can find! Don't got no cabinets either, only drawers, much easier to find what you want that way.
|
|
#
?
May 12, 2015 10:39
|
|
|
TooMuchAbstraction posted:My workshop project has now reached the point where I can start working on the roof framing. I'm missing something re: your problem. You've got the walls up, and are now ready to cut in a ridge pole and rafters to that, right? Is the ridge not going to be centered? Typically you start a a ridge pole with long temporary crutches, and it really helps to have a helper, even if they know nothing about it. You cut all the rafters the same with a speed square like the picture, and, with persuasion, they will even up your wall top plates. Do not take the temporaries out until you have cross bracing or decking holding the roof structure secure to itself, obviously. Or is the issue something else I'm not reading? (meantime, catching up on this wonderful thread)
|
|
#
?
May 12, 2015 15:31
|
|


|
TooMuchAbstraction posted:My workshop project has now reached the point where I can start working on the roof framing. I'm plugging this video again, because Larry Haun https://m.youtube.com/watch?v=IKmM_rMlYtU
|
|
#
?
May 12, 2015 16:10
|
|
|
Mr. Mambold posted:I'm missing something re: your problem. You've got the walls up, and are now ready to cut in a ridge pole and rafters to that, right? Is the ridge not going to be centered? Typically you start a a ridge pole with long temporary crutches, and it really helps to have a helper, even if they know nothing about it. You cut all the rafters the same with a speed square like the picture, and, with persuasion, they will even up your wall top plates. Do not take the temporaries out until you have cross bracing or decking holding the roof structure secure to itself, obviously. The issue was that I hadn't considered using the rafters to force the wall plates into alignment, and assumed instead that the walls were fixed and the rafters needed to be cut to match them, with subtle variations that would be a pain to measure properly. How do you apply the "persuasion" needed to get everything lined up? Seems like you wouldn't have all that much leverage. Ehh, maybe it'll be all right in any case. I've never done a project like this before, so I'm trying to imagine things that could go wrong and that I need to account for. iv46vi posted:I'm plugging this video again, because Larry Haun Thanks, will take a look after work. And yeah, I'm assuming that roofs are like walls in that they can easily fall out of square with each other until you get some sheet material on there to cross-brace the rafters.
|
|
#
?
May 12, 2015 16:34
|
|
|
TooMuchAbstraction posted:The issue was that I hadn't considered using the rafters to force the wall plates into alignment, and assumed instead that the walls were fixed and the rafters needed to be cut to match them, with subtle variations that would be a pain to measure properly. How do you apply the "persuasion" needed to get everything lined up? Seems like you wouldn't have all that much leverage. Did I see you're using 2x6 walls? A bit less cooperative, but once you've driven down secure through the birds mouth into the plate, you can tack blocks to the rafters and use a bar clamp to pull snug if you need them.
|
|
#
?
May 12, 2015 18:34
|
|
|
Mr. Mambold posted:Did I see you're using 2x6 walls? A bit less cooperative, but once you've driven down secure through the birds mouth into the plate, you can tack blocks to the rafters and use a bar clamp to pull snug if you need them. Yes, 2x6 walls. And I think I understand what you're saying, but to be clear: tack a block to each rafter in the pair, near the ridge beam, then use a bar clamp on the blocks to pull the rafters close together? Or I guess if they're too close, you could reverse the clamp to turn it into a pusher and spread the rafters further apart. Makes sense; thanks for the help.
|
|
#
?
May 12, 2015 19:19
|
|
|
TooMuchAbstraction posted:Yes, 2x6 walls. And I think I understand what you're saying, but to be clear: tack a block to each rafter in the pair, near the ridge beam, then use a bar clamp on the blocks to pull the rafters close together? Or I guess if they're too close, you could reverse the clamp to turn it into a pusher and spread the rafters further apart. You don't have to clamp each and every rafter, or maybe any. If you're going 2' on center, start at the ends, then roughly center, work from there, etc. A big hammer is very persuasive too.
|
|
#
?
May 12, 2015 20:20
|
|
|
iv46vi posted:I'm plugging this video again, because Larry Haun I love these videos, I remember binge watching the foundation framing videos and thinking, "I should have been a carpenter/I need a Stiletto"
|
|
#
?
May 13, 2015 06:10
|
|

|
I had my first kick back experience on the table saw today. I realised after it happened part of why it happened. A the timber was pretty warped and b the saw blade was not as far out of the table as it could have been. Essentially I got to the end of a piece then it launched backwards out of the saw before hitting the door just below the rather large pane of glass in it. My head teacher came down to investigate but decided it wasn't anything major when I was still working when he peered through the window. I'm just glad I always stand roughly side on to the saw cause otherwise that would have been a full launch nut hit.
|
|
#
?
May 13, 2015 11:36
|
|
|
Having a new saw with a riving knife has solved all my kickback problems, and it even came with one of those fancy kick back guards that hover above but I never use it. And making sure everything is aligned and not cutting things that aren't square on the fence.
|
|
#
?
May 13, 2015 12:37
|
|


|
Short fence addition for ripping things like that if you don't have a riving knife.
|
|
#
?
May 13, 2015 12:54
|
|
|
I'd like to make a wooden bath mat of sorts, actually shelves to match as well but that's a different post. Here's what I plan on doing (the ends are meant to be fully rounded over, just couldn't figure out how to do that in sketchup yet.) The plan was to buy 1x6s, rip them into two wide inch strips on a table saw, round over the edges with a router and then cut to length with a chop saw. The pieces in contact with the floor would be a two inch strip with .5" deep dados started on the table saw then finished on a band saw or with a chisel, then ripped in half. I was hoping I could hold it all together with just glue. This is all just theory and sounds simple in my head but I haven't done anything like this before. Does my plan seem to be missing anything? Will glue be enough to hold it all together? Is teak going to be my only real option as this will be exposed to lots of moisture or are there other woods worth looking at?
|
|
#
?
May 15, 2015 00:08
|
|
|
Crimpanzee posted:
Looks reasonable to me; the only things that strike me as potentially iffy are: * moisture getting stuck between the edge boards and the ground. Which is a problem with all bathmats, really. * People standing in the middle of the mat and putting all their weight on it. Easily fixed by adding a third "rail" down the middle.
|
|
#
?
May 15, 2015 01:28
|
|
|
Also, add rubber strips to the bottom to prevent the while thing sliding around.
|
|
#
?
May 15, 2015 02:20
|
|


|
I'm trying out a new philosophy in my shop, "Everything must have a home". I think it's zen or something. So I finally started something I've wanted to do for awhile, tool wall right above my bench.  This weekend I may even have something resembling clamp storage, pretty excited about that.
|
|
#
?
May 15, 2015 14:48
|
|
|
Clamp storage and plane storage are my two big to-dos right now. Unfortunately, they've been my two big to-dos for like 6 months and I don't see any sign of that changing.
|
|
#
?
May 15, 2015 15:04
|
|


|
bimmian posted:I'm trying out a new philosophy in my shop, "Everything must have a home". I think it's zen or something. So I finally started something I've wanted to do for awhile, tool wall right above my bench. I did that in January and it is so convenient to always know where everything is. Also lets you see all of your tools so you can pare down any doubles. I couldn't believe how many screwdrivers I found in random places.
|
|
#
?
May 15, 2015 16:22
|
|

|
I am so very looking forward to having my garage completed. My basement is just too cramped, I can't organize anything which makes it hard to keep it clean. I'm getting tired of shooing brown recluses away from anything that's been sitting for more than a few days.
|
|
#
?
May 15, 2015 17:07
|
|
|
Crimpanzee posted:
What you have in that picture, looks mildly uncomfortable to me. Strips too far apart and rounded inside. I would leave the inside edges square and test the spacing before fixing it together. Teak, mahogany, walnut, ipe, cumaru, lots of wood options.
|
|
#
?
May 15, 2015 17:53
|
|
|
swampface posted:I did that in January and it is so convenient to always know where everything is. Also lets you see all of your tools so you can pare down any doubles. I couldn't believe how many screwdrivers I found in random places. Hah, I'm discovering the same thing... "where the hell did all these screwdrivers come from??" Do you have a picture of yours by chance?
|
|
#
?
May 15, 2015 17:53
|
|
|
bimmian posted:Hah, I'm discovering the same thing... "where the hell did all these screwdrivers come from??" Better that than the alternative, which I am perpetually suffering: "Where the hell did all those screwdrivers go?!"
|
|
#
?
May 15, 2015 17:55
|
|
|
Bad Munki posted:Better that than the alternative, which I am perpetually suffering: "Where the hell did all those screwdrivers go?!" Oh yea, like I said, I'm 'discovering' them. I should really keep track of how many times I say "Oh there it is" this weekend.
|
|
#
?
May 15, 2015 18:01
|
|
|
I have two screwdriver sets, and then I have a cheap set of screwdriver bits and one of those ratcheting handle things. Turns out that I can use that latter set for basically everything except prying staples out of wood.
|
|
#
?
May 15, 2015 18:03
|
|
|
bimmian posted:This weekend I may even have something resembling clamp storage, pretty excited about that. I'll never quite understand, I don't think, the concept of clamp storage. Isn't clamp storage just a shelf you clamp your clamps to?
|
|
#
?
May 15, 2015 18:12
|
|
|
thespaceinvader posted:I'll never quite understand, I don't think, the concept of clamp storage. Isn't clamp storage just a shelf you clamp your clamps to? For me at least, it is more about space efficiency and consolidation. Right now I've got all my bar clamps and c-clamps on a hanging shelf, spring clamps kinda wherever, wooden screw clamps (especially the big ones) wherever I have space to stack them, corner clamps in a drawer somewhere... etc. My shop is pretty small and all my walls are old old cinderblock, so to mount anything involves hanging 2x4s and plywood. I'd love to frame the whole place but <reasons>. Big difference between a basic shelf and something like this 
|
|
#
?
May 15, 2015 18:26
|
|
|

|
| # ? May 16, 2024 21:54 |
|
|
I wish someday I'll be able to say I don't have enough clamps and be talking about a setup like that instead of what I currently have.
|
|
#
?
May 15, 2015 18:33
|
|