|
Can't wait to (hopefully) see Alice murder some fools again. Edit: Eh, it was someone from another Atlus game. Just thought I'd ask since I wasn't sure whether or not it was a reference. Blueberry Pancakes fucked around with this message at 02:08 on Dec 27, 2015 |
 #
?
Dec 27, 2015 01:34
#
?
Dec 27, 2015 01:34
|
|


|

|
| # ? May 30, 2024 16:47 |
|
|
I have no idea who that is or what this has to do with any of the Etrian Odyssey games.
|
|
#
?
Dec 27, 2015 02:05
|
|

|
cdyoung posted:Alice, Akatsuki, Asteria Yeah, Team 
|
|
#
?
Dec 27, 2015 02:26
|
|

|
Cassandra, Asteria, Faye
|
|
#
?
Dec 27, 2015 13:11
|
|

|
Charlotte, Alice, Akatsuki:
|
|
#
?
Dec 27, 2015 15:49
|
|
|
VOTING IS CLOSED! Final results: Alice: 20 Fang: 11 Cassandra: 10 Asteria: 10 Akatsuki: 10 Sidney: 9 Charlotte: 9 Faye: 7 Scott: 4 Susan: 3 Rose: 3 And the final team is Cassandra, Alice, Fang, Akatsuki, and Asteria! 5 supports and no damage dealers whatsoever. This should be fun. 
|
|
#
?
Dec 27, 2015 20:20
|
|
|
I am sorry I only wanted to see the cool ailment combo I did not mean for this to happen. 
Theantero fucked around with this message at 21:44 on Dec 27, 2015 |
|
#
?
Dec 27, 2015 21:26
|
|

|
Oh geeze and you got both party members that use the sixth party member slot as well.
|
|
#
?
Dec 27, 2015 21:33
|
|
|
I feel like vote results like this are what balance out Dr. Fetus' absurdly good luck.
|
|
#
?
Dec 27, 2015 21:44
|
|
|
Rawkking posted:Oh geeze and you got
|
|
#
?
Dec 27, 2015 21:55
|
|
|
Dr. Fetus posted:VOTING IS CLOSED! Final results: hey, asteria is sorta a damage dealer.
|
|
#
?
Dec 27, 2015 22:51
|
|
|
Now this is why I wanted Sidney. But since you have Cassandra, you at least won't die. It's just, it might take a while for battles to finish. You'll be fiiiiiiiiine!
|
|
#
?
Dec 27, 2015 22:55
|
|

|
Dr. Fetus posted:VOTING IS CLOSED! Final results: i promise i will endeavor to prevent these tragedious outcomes in the future by always voting Rose into the party
|
|
#
?
Dec 27, 2015 23:02
|
|


|
cdyoung posted:hey, asteria is sorta a damage dealer. Unfortunately with the way I've built her, she's stopped being a real class at this point. She needs to get Meteor to start dealing damage again. Which won't be for 13 more levels. And she needs to get Charge and Berserker Vow to really deal damage, which is an additional 21 levels, but will cause her to ram face first into the level cap before she even gets all that. And I highly doubt this playthough will even get to that point. But I'm sure I'll be fine.  Maybe.
|
|
#
?
Dec 27, 2015 23:21
|
|
|
Good luck.
|
|
#
?
Dec 27, 2015 23:33
|
|


|
I tried to get a healer into your group Fetus...I tried...oh god I tried...I knew where the voting was going...but seriously, if you have trouble, I'm sure we can all deal with you taking the "executive" decision to over-ride a choice.
|
|
#
?
Dec 28, 2015 08:52
|
|

|
Well I mean it'd help if he didn't fight 3 FOEs at once.
|
|
#
?
Dec 29, 2015 12:55
|
|
|
McFrugal posted:Well I mean it'd help if he didn't fight 3 FOEs at once. That wouldn't be as much fun, though.
|
|
#
?
Dec 29, 2015 14:08
|
|

|
I'm having flashbacks to when Gilbert and Maverick face-tanked part of the 4th Stratum in the EO2 LP. 
|
|
#
?
Dec 30, 2015 06:54
|
|
|
Huh. Okay, that's a pretty interesting dungeon level. That last bit - I imagine misstepping and fighting one FOE while three others chase you down is the deathest of sentences? Must have been tense.
|
|
#
?
Dec 31, 2015 04:29
|
|


|
Class Showcase: Farmer They were still known as Farmers in Japan. Anyways, Farmers specialize in field support, making your journey through the Labyrinth easier, while not being able to do much in battle. If you want to know how to utilize this class effectively, here's what you need to do. Make a team of 5 Farmers and use them as your Farmbot team. And then throw them out for Ninja/Farmers once you unlock subclassing. Oh wait, you want to know how to use them in your main party? Well, I'll just say that's a very bad idea because Farmers are designed to be dead weight in combat. Their main purpose are to be field supports, while lacking heavily in damage and in battle support. They come with absolutely no damage skills, and their stat spread is really terrible, so they can't really fill a lot of roles effectively, even with subclassing. You're better off going with another class for your main party. The reason I don't really recommend using a Farmer in your main party is mainly because field skills tend to not really be worth it in the Etrian Odyssey series. Yes they can be helpful, but they're not vital to have. Investing in them takes up valuable skill points, and you don't need them to get through the Labyrinth. Battles are a big part of the series, and field skills don't really help much with those. The only field skill that I would say is genuinely worth it is Monarch March, and another class has access to that. Still, if you insist on using a Farmer in your main party, it's doable. Etrian Odyssey III is a really easy game after all. Almost anything works here. Equipment: Weapons: Farmer only weapons, Daggers, and Books. Armor: Light Armor, Clothes, Gloves, Boots, Helmets, and Accessories. Farmers are a bit different than in what they can equip. They have a couple of weapons that they, and only they are capable of equipping. Those weapons do not have an action speed bonus or penalty attached to them (+0). The weapons are as follows: 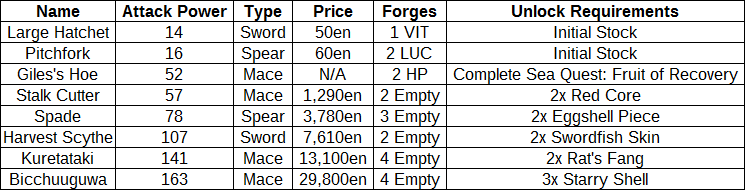 Stats Level 1 HP: 36 TP: 15 STR: 3 VIT: 5 AGI: 6 LUC: 12 TEC: 3 Level 35 HP: 169 TP: 97 STR: 15 VIT: 23 AGI: 25 LUC: 41 TEC: 17 Level 70 HP: 305 TP: 181 STR: 28 VIT: 42 AGI: 45 LUC: 71 TEC: 31 Level 99 HP: 390 TP: 233 STR: 36 VIT: 54 AGI: 57 LUC: 89 TEC: 39 Farmers have the worst STR and TEC stats in the game, so they're pretty terrible physical and elemental attackers. Their low TEC stat also makes it so that they can't really take hits from elemental attacks. Their VIT and AGI are fairly decent, though nothing too special. On the other hand, they have the highest LUC stat in the game. Now that doesn't mean that they're the best at inflicting ailments, as the Wildling is still the best class for that job. Their LUC stat may be lower, but their TEC is high enough to offset that small difference. The Farmer's high LUC does enable them to deal critical hits most often out of all of the classes, which is useless thanks to their low STR stat. But what their high LUC really does for them is increase their evasion. Combine with their decent AGI, Farmers are actually the best at evading attacks out of all the classes. They're even better at it than the Ninja, if you don't take their skills into account. But other than that, they don't really have much going for them. Earth's Bounty Skill Type: Class Skill Maximum Level: 10 Stats Used: N/A Prerequisites: N/A This Class Skill passively increases the amount of exp the entire party gets from a battle as long as the Farmer is alive at the end of it. Increasing the skill level increases the exp gain. Stacks additively with other Farmers with this skill. 1: 10% exp boost. 2: 12% exp boost. 3: 14% exp boost. 4: 16% exp boost. 5: 18% exp boost. 6: 20% exp boost. 7: 22% exp boost. 8: 24% exp boost. 9: 27% exp boost. 10: 30% exp boost. If you're using a Farmbot team, don't bother having any of your Farmers invest in this, as you don't want them engaging in combat at all. It doesn't even work with Combat Study if you're making use of that. If you're actually using a Farmer in your main party, this is pretty much a must have skill. Farmers really don't contribute much in battle, so you're essentially fighting with a 4-man party if you're making use of one. This skill essentially gives everyone what a 4-man party would be getting in exp (25%) and increases everyone's exp gain to 26% at max level in a 5-man party. While Earth's Bounty does stack with other Farmers who have this skill (which increases the exp gain to 250% if you're using a team of 5 Farmers), why would you be using more than 1 Farmer in your main party!? Brave Heart Skill Type: Passive Maximum Level: 5 Stats Used: N/A Prerequisites: Sympathy Pain � Level 5 This passive allows the Farmer to recover some TP at the end of the turn as long as their HP is full. Increasing the level increases the amount of TP recovered. 1: Restores 1 TP. 2: Restores 2 TP. 3: Restores 3 TP. 4: Restores 4 TP. 5: Restores 5 TP. This can be handy to alleviate the TP costs of skills. And unlike Royal Veil, this is actually pretty easy to maintain since Farmers have a low HP pool, which makes them unlikely to be targeted by enemies. And Farmers have the best evasion in the game, so they might avoid some attacks that come their way. With that said, Amritas become available in the 2nd Stratum, and they're pretty easy to farm for, so investing in this may be a bit questionable depending on how you like to go about things. Persistance Skill Type: Passive Maximum Level: 10 Stats Used: N/A Prerequisites: Play Possum � Level 5, Strange Seeds � Level 3 Once per battle, the Farmer has a chance to automatically revive if they're dead. Increasing the skill level increases the chance for the skill to activate. The Farmer will always revive at 20 HP, no matter how high the skill level is. 1: 16% activation rate. 2: 18% activation rate. 3: 20% activation rate. 4: 22% activation rate. 5: 24% activation rate. 6: 27% activation rate. 7: 30% activation rate. 8: 33% activation rate. 9: 36% activation rate. 10: 40% activation rate. Whether you take this or not is up to you, but it could be handy if you're having issues with your Farmer being taken out constantly. But ideally, you don't want them dying often. Waste Not Skill Type: Passive Maximum Level: 5 Stats Used: N/A Prerequisites: N/A Increases the drop rate of items acquired from battle. Higher levels increase the drop rate. Stacks additively with other characters with Waste Not. 1: Increases drop rate by 1%. 2: Increases drop rate by 2%. 3: Increases drop rate by 3%. 4: Increases drop rate by 4%. 5: Increases drop rate by 5%. For those of you that have played EO2, remember how broken Scavenge was? Yeah, it pretty much got nerfed big time (It increased the drop rate by 41% at max level in that game.) While it stacks additively with other party members who have this skill, the drop rate would only be increased by 25%, and you would either have a team of 5 Farmers, 5 party members who have a Farmer subclass, or some combination of the two in the party and that would heavily hamper your party's effectiveness. Not to mention that this skill is completely outclassed by Formaldehydes and Lucky Hammer, which guarantees drops when used at the right times. Take it if you want, but I don't think it's really worth it compared to other options. Keen Nose Skill Type: Passive Maximum Level: 10 Stats Used: N/A Prerequisites: Harvestry � Level 3 When gathering skills at an item point, this skill gives the Farmer a chance to find a rare item through common gathering periods. Stacks additively with other characters with this skill. 1: Increases the chance of finding rare items by 1%. 2: Increases the chance of finding rare items by 2%. 3: Increases the chance of finding rare items by 3%. 4: Increases the chance of finding rare items by 4%. 5: Increases the chance of finding rare items by 5%. 6: Increases the chance of finding rare items by 6%. 7: Increases the chance of finding rare items by 7%. 8: Increases the chance of finding rare items by 8%. 9: Increases the chance of finding rare items by 9%. 10: Increases the chance of finding rare items by 10%. So while gathering materials at an Item Point, sometimes a prompt pops up asking you if you want to risk getting a rare item at the chance of getting into a battle. This skill lets you gather rare items outside of those times. When someone in the party knows this skill while gathering, the game checks to see if you get a rare item first, and then goes on to see which of the common items you'll get if that check fails. I wouldn't recommend getting this on a Farmer in your main party, but for a Farmbot team? Well I would recommend that 2 or 3 of them max out this skill. Ironically, if all 5 Farmers max out this skill, it'll be hard to gather the common materials from an Item Point. Still, this skill can let your Farmbot team safely ignore any rare gather period prompts and avoid getting into any fights altogether. Camp Mastery Skill Type: Passive Maximum Level: 10 Stats Used: N/A Prerequisites: Sword Mastery � Level 1 This skill enables Tents to cure Petrification and revive dead party members, as well as increasing the amount of HP and TP recovered at campsites. The amount of HP and TP recovered increases with higher skill levels. Stacks additively with other characters with Camp Mastery. 1: Increases HP recovery by 40 and TP recovery by 10. 2: Increases HP recovery by 80 and TP recovery by 20. 3: Increases HP recovery by 120 and TP recovery by 30. 4: Increases HP recovery by 160 and TP recovery by 40. 5: Increases HP recovery by 200 and TP recovery by 50. 6: Increases HP recovery by 240 and TP recovery by 60. 7: Increases HP recovery by 280 and TP recovery by 70. 8: Increases HP recovery by 320 and TP recovery by 80. 9: Increases HP recovery by 360 and TP recovery by 90. 10: Increases HP recovery by 500 and TP recovery by 125. Not something that you would take on a Farmbot team, but for a Farmer in the main party, it could make campsites more effective and make tents somewhat worth it past the 1st Stratum. Even at level 1, it can prevent you from ending Labyrinth trips prematurely because someone died or got Petrified. Lullaby (Animation) Skill Type: Active Maximum Level: 10 Equipment Needed: N/A Body Part: Head Stats Used: LUC, TEC Target Type: AOE Action Speed: +0 Prerequisites: N/A The Farmer sings a lullaby, in an attempt to put all enemies to Sleep. Unfortunately, they're also put to Sleep in the process. Higher levels increases the infliction rate. The Farmer will always be put to Sleep upon casting, even if they are immune to the ailment. 1: 15% infliction rate. Costs 2 TP. 2: 20% infliction rate. Costs 3 TP. 3: 25% infliction rate. Costs 4 TP. 4: 30% infliction rate. Costs 5 TP. 5: 35% infliction rate. Costs 6 TP. 6: 40% infliction rate. Costs 7 TP. 7: 45% infliction rate. Costs 8 TP. 8: 50% infliction rate. Costs 9 TP. 9: 55% infliction rate. Costs 10 TP. 10: 60% infliction rate. Costs 10 TP. So this is one of the few ways Farmers can actually contribute to a fight. It's actually the strongest Sleep inducing skill in the game since it has the highest infliction rate. Unfortunately, it can't be cast continuously outside of waking up the Farmer constantly, or using Regroup Tactic. If you need something for your Farmer to do in battle, this is probably their best skill to do that with. Just be aware that this may cause a sticky situation by putting your Farmer out of commission on a turn that they need to do something else. Play Possum Skill Type: Active Maximum Level: 10 Equipment Needed: N/A Body Part: Head Stats Used: N/A Target Type: Self Action Speed: +6 Prerequisites: Lullaby � Level 1 The Farmer plays dead in an attempt to get the enemy to ignore them, and makes them less likely to be targeted for 4 turns. Increasing the level increases the maximum aggro value. The minimum aggro value for all skill levels is -3 and cannot be raised. Only works on single (also includes attacks that deal splash damage) and random target skills. Does not work on row target, multi-target, or AOE attacks. 1: Maximum aggro value of -5. Costs 3 TP. 2: Maximum aggro value of -6. Costs 3 TP. 3: Maximum aggro value of -7. Costs 4 TP. 4: Maximum aggro value of -8. Costs 4 TP. 5: Maximum aggro value of -9. Costs 5 TP. 6: Maximum aggro value of -10. Costs 5 TP. 7: Maximum aggro value of -12. Costs 6 TP. 8: Maximum aggro value of -14. Costs 6 TP. 9: Maximum aggro value of -16. Costs 7 TP. 10: Maximum aggro value of -20. Costs 7 TP. I wouldn't consider investing in this skill to be a good usage of skill points. Farmers are already less likely to be targeted due to their low HP pool. And in cases where the enemy decides to target them, this skill may not be enough to deter them. Besides, depending on the role you give them, there could be better things that they could be doing in a fight. Strange Seeds Skill Type: Active Maximum Level: 10 Equipment Needed: N/A Body Part: Arm Stats Used: LUC, TEC Target Type: AOE Action Speed: End of the turn Prerequisites: Lullaby � Level 3 At the start of the turn, the Farmer scatters seeds around the enemies. At the end of the turn, the seeds will sprout, applying random binds to each enemy. Increasing the skill level increases the infliction rate. Randomly selects 0 to 3 binds to be applied to each enemy. 1: 20% infliction rate. Costs 3 TP. 2: 24% infliction rate. Costs 4 TP. 3: 28% infliction rate. Costs 4 TP. 4: 32% infliction rate. Costs 5 TP. 5: 36% infliction rate. Costs 5 TP. 6: 40% infliction rate. Costs 6 TP. 7: 44% infliction rate. Costs 6 TP. 8: 48% infliction rate. Costs 7 TP. 9: 52% infliction rate. Costs 7 TP. 10: 60% infliction rate. Costs 8 TP. This skill is awful. While binds can be useful, you need to know which binds to use to lock down an enemy, and Strange Seeds just applies random ones. Even if the binding is successful, it could do something like apply arm binds to an enemy who primarily uses elemental attacks. Or you could get unlucky and the seeds won't apply any binds at all. Unfortunately, it's one of the few ways the Farmer can actually contribute to a fight outside of a subclass. So whether you take this or not is up to you. Rotten Egg (Animation) Skill Type: Active Maximum Level: 10 Equipment Needed: N/A Body Part: Arm Stats Used: N/A Target Type: AOE Action Speed: +3 Prerequisites: Lullaby � Level 3 The Farmer tosses a rotten egg at all enemies, lowering their offense for 4 turns. If the targets are inflicted with an ailment, their offense is decreased even further. Higher skill levels increase the damage reduction. Affects all damage types, including Almighty. The bonus effect isn't applied if the target only has binds. 1: Reduces damage by 5%. 20% if the target has an ailment. Costs 5 TP. 2: Reduces damage by 5%. 23% if the target has an ailment. Costs 5 TP. 3: Reduces damage by 6%. 26% if the target has an ailment. Costs 6 TP. 4: Reduces damage by 6%. 29% if the target has an ailment. Costs 6 TP. 5: Reduces damage by 6%. 32% if the target has an ailment. Costs 7 TP. 6: Reduces damage by 7%. 35% if the target has an ailment. Costs 7 TP. 7: Reduces damage by 7%. 38% if the target has an ailment. Costs 8 TP. 8: Reduces damage by 8%. 42% if the target has an ailment. Costs 8 TP. 9: Reduces damage by 8%. 46% if the target has an ailment. Costs 9 TP. 10: Reduces damage by 10%. 50% if the target has an ailment. Costs 9 TP. Well, here's the last of the Farmer's in battle support skills. It's basically the defensive version of Wolf Howl. The damage reduction is pathetic if you aren't making use of ailments. If you are using ailments, it could utterly cripple an enemy's offense, especially since it works on all damage types. It's a powerful, but a very situational debuff due to how ailments aren't so good in this game. Sympathy Pain Skill Type: Active Maximum Level: 10 Equipment Needed: N/A Body Part: Arm Stats Used: LUC, TEC Target Type: Single Action Speed: +3 Prerequisites: Rotton Egg � Level 3 If the Farmer is inflicted with an ailment, this skill gives them a chance to transfer that ailment to an enemy, and dispels it from the Farmer. Increasing the skill level increases the infliction rate. The ailment is not dispelled if the skill fails to inflict the ailment. Poison and Plague damage are also transferred if the Farmer inflicts those ailments. Does not work with binds. 1: 60% infliction rate. Costs 3 TP. 2: 63% infliction rate. Costs 3 TP. 3: 66% infliction rate. Costs 4 TP. 4: 70% infliction rate. Costs 4 TP. 5: 74% infliction rate. Costs 5 TP. 6: 78% infliction rate. Costs 6 TP. 7: 82% infliction rate. Costs 7 TP. 8: 86% infliction rate. Costs 8 TP. 9: 90% infliction rate. Costs 9 TP. 10: 999% infliction rate. Costs 10 TP. That last number is not a typo. The infliction rate is genuinely that high. So it can be useful for locking down certain enemy types and giving them a taste of their own medicine as long as they aren't completely immune to the ailment. However, since the Farmer has to use this skill to inflict the ailment, this means that they can't transfer Paralysis (if the effect activates on their turn), Sleep, Confusion, or Petrification. So it's kind of a worse version of Suikyou in that regard. Still, it can be useful as a self-dispel in some cases. Slap Awake Skill Type: Active, Field Skill Maximum Level: 10 Equipment Needed: N/A Body Part: N/A Stats Used: N/A Target Type: Single Action Speed: +6 Prerequisites: Camp Mastery � Level 5 This skill enables the Farmer to slap any dead party members back to life outside of battle. Increasing the skill level increases the amount of HP recovered upon revival. Cannot be used in battle. 1: Restores 1 HP. Costs 5 TP. 2: Restores 30 HP. Costs 5 TP. 3: Restores 60 HP. Costs 5 TP. 4: Restores 100 HP. Costs 5 TP. 5: Restores 140 HP. Costs 5 TP. 6: Restores 180 HP. Costs 5 TP. 7: Restores 220 HP. Costs 5 TP. 8: Restores 260 HP. Costs 5 TP. 9: Restores 300 HP. Costs 5 TP. 10: Restores 500 HP. Costs 5 TP. Well it's one of the few ways to revive your party members outside of using Nectars. Unfortunately, it can't be used in battle, but it's a fairly cheap skill, and can keep your party going if you happen to run out of them. And yes, this skill has an action speed value, even though it can't be used in battle. It was probably intended for that at some point before they realized that would make the Farmer somewhat useful, and we can't have that now, can we? Harvestry Skill Type: Passive Maximum Level: 5 Stats Used: N/A Prerequisites: N/A This passive enables the Farmer to gather from Take, Chop, and Mine Points all at once. Increasing the skill level increases the number of gathering attempts allowed. Stacks additively with other party members with this skill, and with Take, Chop, and Mine. 1: Allows 1 Take, Chop, and Mine attempt for the day. 2: Allows 2 Take, Chop, and Mine attempts for the day. 3: Allows 3 Take, Chop, and Mine attempts for the day. 4: Allows 4 Take, Chop, and Mine attempts for the day. 5: Allows 5 Take, Chop, and Mine attempts for the day. So you know how Take, Chop, and Mine are common skills that all classes can invest in? This skill is why those skills are nothing but a waste of skill points. Harvestry is far more efficient than investing in Take, Chop, and Mine all at once. If you leveled up those skills to 5, that would take up a total of 15 skill points. Where maxing out Harvestry would only take 5, and still have the same effect. Yes Harvestry does cap out at 5, but a Farmbot team won't need much more than that. Speaking of which, you definitely want this skill to be the first thing that all members of a Farmbot team to master. That will give you 25 gathering attempts for each different gathering point. Just ignore the Take, Chop, and Mine skills entirely. For a Farmer in the main party, well it's up to you if you want to take this skill or not. Though having a Farmer with this skill can cause your inventory to get more full sooner than most parties would. Double Crop Skill Type: Active, Field Skill Maximum Level: 10 Equipment Needed: N/A Body Part: N/A Stats Used: N/A Target Type: N/A Action Speed: N/A Prerequisites: Harvestry � Level 5 This skill enables the Farmer to gather even more materials from Item Points by restoring the number of gathering attempts allowed. Higher levels increases the number of gather attempts restored. Can only be used out in the field. 1: Restores 1 Take, Chop, and Mine attempt. Costs 10 TP. 2: Restores 2 Take, Chop, and Mine attempts. Costs 15 TP. 3: Restores 3 Take, Chop, and Mine attempts. Costs 20 TP. 4: Restores 4 Take, Chop, and Mine attempts. Costs 25 TP. 5: Restores 5 Take, Chop, and Mine attempts. Costs 30 TP. 6: Restores 6 Take, Chop, and Mine attempts. Costs 35 TP. 7: Restores 7 Take, Chop, and Mine attempts. Costs 40 TP. 8: Restores 8 Take, Chop, and Mine attempts. Costs 45 TP. 9: Restores 9 Take, Chop, and Mine attempts. Costs 50 TP. 10: Restores 10 Take, Chop, and Mine attempts. Costs 55 TP. This is not something I would recommend that you take on a Farmer in your main party. I mean just look at that TP cost. That will run your Farmer dry just because you wanted to get more stuff from an Item Point. Take this on your Farmbot team instead. Double Crop can extend any farming trips for them, especially if you're trying to hunt for specific materials. And it's not like they're going to use their TP pool for much else. Keen Eye Skill Type: Active, Field Skill Maximum Level: 10 Equipment Needed: N/A Body Part: N/A Stats Used: N/A Target Type: N/A Action Speed: N/A Prerequisites: N/A This skill enables you see all FOEs on the map for a certain number of steps. Leveling up the skill increases the duration. 1: Lasts for 5 steps. Costs 6 TP. 2: Lasts for 10 steps. Costs 6 TP. 3: Lasts for 15 steps. Costs 7 TP. 4: Lasts for 20 steps. Costs 7 TP. 5: Lasts for 25 steps. Costs 8 TP. 6: Lasts for 30 steps. Costs 8 TP. 7: Lasts for 35 steps. Costs 9 TP. 8: Lasts for 40 steps. Costs 9 TP. 9: Lasts for 50 steps. Costs 10 TP. 10: Lasts for 60 steps. Costs 10 TP. Unlike the Zodiac's Horoscope, the range on this skill isn't limited. Still I don't really recommend investing a lot into this unless you really want to know FOE movement patterns or something. Besides, once you reveal enough of the map, this becomes redundant. Though it can come in handy if you wish to hunt for Pasarans. To Market Skill Type: Active, Field Skill Maximum Level: 1 Equipment Needed: N/A Body Part: N/A Stats Used: N/A Target Type: N/A Action Speed: N/A Prerequisites: Keen Eye � Level 1 When this skill is cast, the entire party will warp back to town. Has the same effect as an Ariadne Thread. 1: Costs 13 TP. While this skill costs quite a bit of TP to use, it's essentially an on demand Ariadne Thread. So if you happen to forget the Ariadne Thread, you can just use this skill instead. Which will stop most scenarios of waiting for an FOE to inevitably kill you because you made a misstep and got cornered. It's a must have skill, whether you're using a Farmbot team (to save money) or a Farmer in your main party. Rain or Shine Skill Type: Active, Field Skill Maximum Level: 10 Equipment Needed: N/A Body Part: N/A Stats Used: N/A Target Type: N/A Action Speed: N/A Prerequisites: Keen Eye � Level 3 This skill nullifies the effects of damage and mud tiles for a certain amount of time. Leveling up the skill increases the duration. Has no effect on slippery or spinner tiles. 1: Lasts for 10 steps. Costs 10 TP. 2: Lasts for 15 steps. Costs 10 TP. 3: Lasts for 20 steps. Costs 11 TP. 4: Lasts for 25 steps. Costs 11 TP. 5: Lasts for 30 steps. Costs 12 TP. 6: Lasts for 35 steps. Costs 12 TP. 7: Lasts for 40 steps. Costs 13 TP. 8: Lasts for 50 steps. Costs 13 TP. 9: Lasts for 60 steps. Costs 14 TP. 10: Lasts for 70 steps. Costs 14 TP. A handy field skill, especially since unlike the Monk's Fire Walk, it actually nullifies damage from damage tiles instead of simply reducing it, and it lets you walk through mud tiles without any trouble. While it's a handy skill, maxing it out may be overkill, and not all Strata have damage and mud tiles, meaning that this skill is useless on certain floors. Mud tiles are found in the 1st and 5th Strata, while damage tiles are found in the 3rd and 6th Strata. Outside of those situations, this skill is completely useless. Safe Stroll Skill Type: Active, Field Skill Maximum Level: 5 Equipment Needed: N/A Body Part: N/A Stats Used: N/A Target Type: N/A Action Speed: N/A Prerequisites: Keen Eye � Level 5 This skill nullifies random encounters for a certain number of steps. Increasing the level increases the duration of the skill. 1: Lasts for 15 steps. Costs 12 TP. 2: Lasts for 20 steps. Costs 12 TP. 3: Lasts for 25 steps. Costs 13 TP. 4: Lasts for 30 steps. Costs 13 TP. 5: Lasts for 40 steps. Costs 14 TP. So remember Stalker from EO2 and how absurdly powerful it was? (It lasted for 250 steps at max level.) Boy did it get nerfed. Still, it's useful if you want to reach certain spots in the Labyrinth without getting into fights. I don't recommend taking this for your main party since no encounters will leave your party starved for exp and severely underleveled. But for a Farmbot team? Definitely have at least one person max this out, since you don't want them getting into any fights. That will let them reach Item Points far more safely. Horseplay Skill Type: Active, Field Skill Maximum Level: 1 Equipment Needed: N/A Body Part: N/A Stats Used: N/A Target Type: N/A Action Speed: N/A Prerequisites: N/A The Farmer wastes some time, which moves the clock ahead by 1 hour. 1: Costs 2 TP. When the skill is cast, flavor text describing what your Farmer did to pass the time will pop up, though in most cases you'll see the first bit. Possible Flavor Text posted:[CHR.A] stood there and Notes: -This skill can replenish your gathering attempts if it causes the clock to go to 00 AM. -Can also cause FOEs to respawn if the clock goes to 00 AM on the right day. -Can change FOE behavior patterns if they change depending on the time of day. -Does not count as spending a turn. -FOEs will not move when this skill is used. -Cannot force Pasarans to spawn. -Cannot replenish any fish in the sea. If you were looking at this skill and tried to find any clever uses for it, well I hate to disappoint you, but the devs pretty much made this only useful for like passing the time in order to replenish any gathering attempts. And for a Farmbot team, you're better off using Double Crop or resting at the inn to do that. But this skill can be useful in one specific situation. If you have a Shogun in the party and they are making use of Myoujou or Magatoki (Not and. Otherwise you may as well simply switch between the two skills instead of doing what I'm about to suggest), then you can use this skill to ensure that your party can always explore at day or night without having to go back to the inn to change the clock to get the most damage out of those skills. Subclasses: If you're making use of a Farmbot team, just give them any subclass and call it a day. They're not gonna be making use of the subclass' skills, and just want the 5 extra skill points. Prince/ss: Well this could be a decent subclass for a Farmer since most of their skillset is pretty stat independent. Though in most cases, you're better of with a mainclass Prince/ss or a different class using this as a sub. Still, it's one of the few ways to ensure that a Farmer can actually contribute something to a fight. Gladiator: Since Farmers have the lowest STR stat in the game, they would make for terrible damage dealers. However, the Gladiator class does have a few support skills handy that the Farmer could make use of. Wolf Howl could fit well with the Farmer's toolkit, as the stronger debuff effect synergizes nicely with them. And while the Gladiator's damage skills won't deal much damage in their case, Crushing Blow and Arm Breaker inflicts their ailments a decent amount of the time thanks to the Farmer's high LUC. And Stun Attack could be a decent passive for them as well if you take that into consideration. Hoplite: Most of the Hoplite's skillset is also fairly stat independent, so having a Farmer sub Hoplite is another option. But Hoplites themselves are far more likely to live longer than a Farmer. Especially considering that they have the highest VIT stat in the game, and their TEC isn't too bad. Not to mention that they have the ability to wear Heavy Armor. Still, Parry and Magic Parry can lengthen a Farmer's lifespan in battle if that's an issue. Buccaneer: Buccaneers do have a somewhat decent skillset a Farmer could make use of, as Eagle Eye is a very useful debuff. Lights Out and Hanging can inflict Blind and Head binds fairly often thanks to the Farmer's high LUC, though they won't deal much damage thanks to their terrible STR. Lady Luck does increase the Farmer's already high critical hit rate, which could work well with Swashbuckling. And Limit Boost is a pretty decent passive to have as well. Ninja: If you insist on using a Farmer in your main party, then this subclass is probably the best one for them. The Ninja's skillset plays nicely with the Farmer's strengths. Farmers are the best at evading attacks, which Senpuku (and maybe Kumogakure) works nicely with. And Karuwaza gives them a nice form of TP recovery because of their high evasion. And the Farmer's stat spread actually makes it so that they're better at inflicting ailments than Ninjas. So they can make use of skills like Fukubari, Kagenui, and Suikyou. Not only that, Kubikiri can also make it so that they can instantly kill random encounters instantly and prevent your team from having to deal with them. And if that doesn't work out, they can switch to Izuna, which does the same thing but has a much higher success rate. And Farmers actually have slightly more HP and far higher VIT than Ninjas, and can actually wear Light Armor instead of being stuck with Clothes. So they can take physical hits far more easily. However, it's not all sunshine and rainbows here. Farmers have much lower TEC, so elemental attacks will take them out very easily, whereas a Ninja can easily take a hit from those. The Farmer's low STR means that they can't make good use of the Ninja's damage skills such as Takanoha and Tagen Battou, and a Ninja mainclass can sub Gladiator to increase the damage on those skills. So that's another disadvantage for the Farmer. And since Farmers don't have access to Keburi no Sue, the TP cost of the Ninja's skills are pretty high for them. So it's a tradeoff in that skills that inflict ailments can't be used nearly as often, but have a higher success rate when used by the Farmer. Which is definitely something to keep in mind. Monk: Since Farmers have the worst TEC stat in the game, they make for very terrible healers. And their terrible STR makes Punch Monk not a viable option for them. Fire Walk is completely redundant when they already have Rain or Shine. But they can at least make use of Unbind and Refresh, since those skills are stat independent. And the Farmer's high LUC enables them to inflict Paralysis from Kikouken fairly often. I don't suggest going for Darkness Fist, since Curse is a pretty bad ailment. Zodiac: The Farmers have abysmal TEC, which makes them terrible wizards. They already have Keen Eye, which outclasses Horoscope. If you're looking for someone to spam Dark Ether, there are far better classes for that. Wildling: This is a class combination that would be far better the other way around. Wildlings actually are the best at inflicting ailments, and their stat spread benefits the animals more. Still, there's Primal Drums and Beast Roar to make use of, which can help out your party. Arbalist: The only usable skills on this subclass are Ambush, Pop Flares, and Smoke Grenade. The barrages are normally good encounter clearers, except the Farmer has the worst STR stat in the game, and lack Giant Kill. Pop Flares could be nice as an actual support skill since it boosts your party's accuracy, and Ambush is an okay field skill. Smoke Grenade would probably be the most useful one, as it will enable the Farmer to Blind all enemies. Shogun: The Shogun does have a decent amount of support skills, so you could use this as a subclass to make your Farmer into a decent support. Not only that, their high LUC can cause Hilt Strike to inflict Stuns often. There's also a pretty neat synergy between the Shogun's skillset and the Farmer's skillset that you can take advantage of. Kaishaku is normally a pretty risky passive to learn, and Lullaby isn't a super great skill because it always puts the Farmer to sleep when cast. But if you don't want Kaishaku to activate and kill a party member at an inopportune time, you can have a Farmer cast Lullaby in order to put themselves to Sleep, which will prevent that passive from activating. And then you can wake up the Farmer when you're ready to make use of Kaishaku. Farmers make for good field supports, but their abilities in combat are very lacking. Without the proper subclass to give them a meaningful role in your main party, you're better off using a different class. Or you can make a party of 5 Farmers for a Farmbot team. But it's not like using one in your main party is pressing an automatic I lose button. You can use one in your main party if you really want to. And they're at least good at the role they were designed for, unlike one unlockable class in this game. Araxxor fucked around with this message at 07:30 on Jan 24, 2016 |
|
#
?
Jan 5, 2016 09:00
|
|
|
Oh, and I decided to add in a little something to any future Class Showcases. The skill animations in EO3 are a bit more flashy than the skills in EO1 and 2, so I decided to add in some GIFs to these (as links, so the page won't get bogged down trying to load them if a class has a lot of animations for their skilsl.) If a skill has an animation, there will be a link next to it that you can click on if you want to see it. I'll add them in to the past showcases eventually.
Araxxor fucked around with this message at 09:04 on Jan 5, 2016 |
|
#
?
Jan 5, 2016 09:00
|
|
|
Sorry, but I'm afraid that I don't have time for this anymore. Consider this abandoned.
|
|
#
?
Jan 12, 2016 17:23
|
|
|
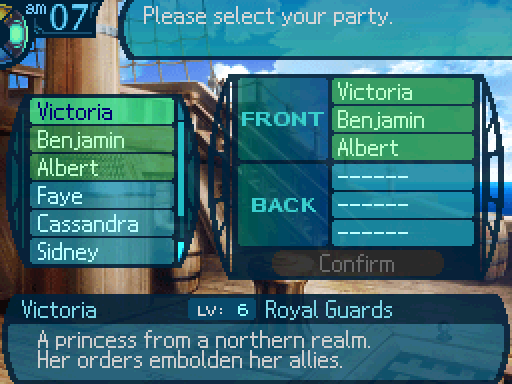
Update 56: Amarantos Of course things just had to get worse. Of course things just had to get worse.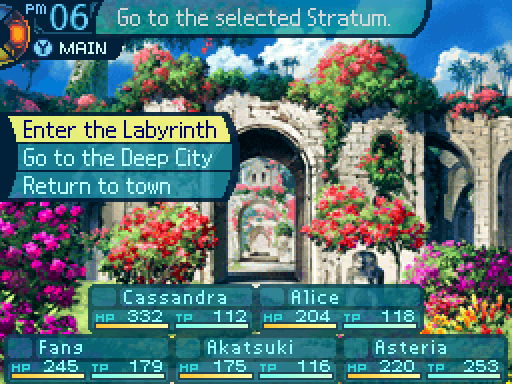 So. This was the party that was voted in. I have no damage dealers, and all 3 party members that use the 6th slot. This is going to be fun.  DS Version DS Version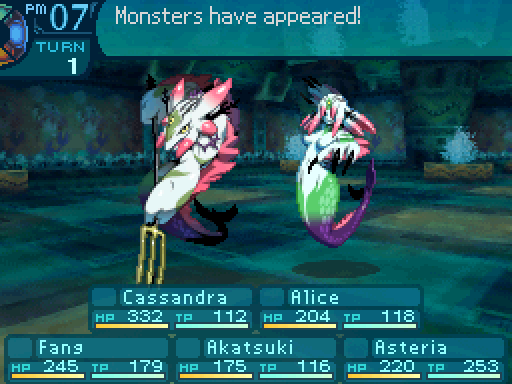 Okay, so the reason this party was voted in was because people wanted to see the synergy between Fang and Alice. Or more specifically, seeing Suikyou in action. 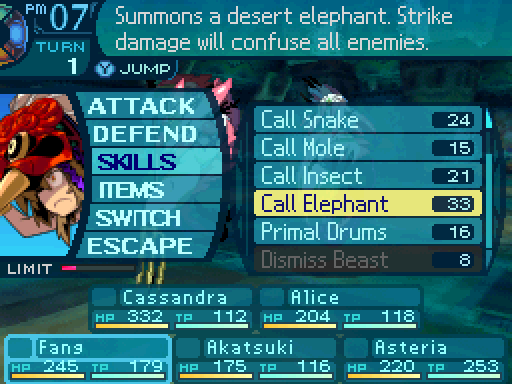 First things first, let's confuse the enemy. 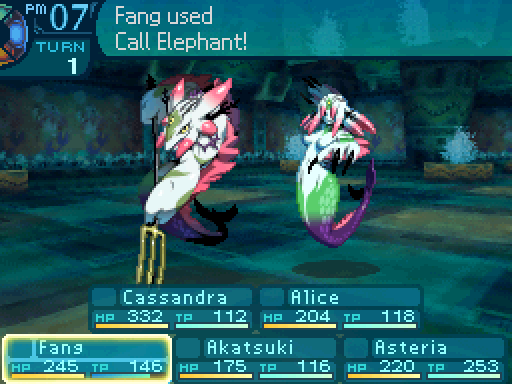   Here boy! Here boy!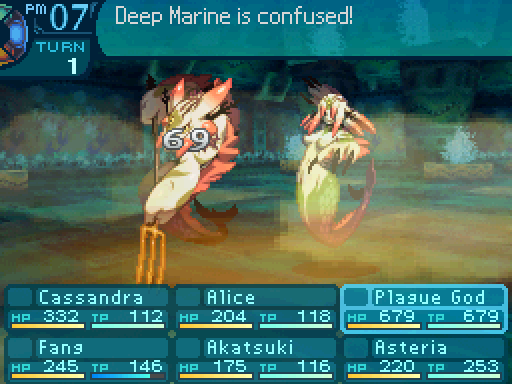 Okay, so we got one of them confused. 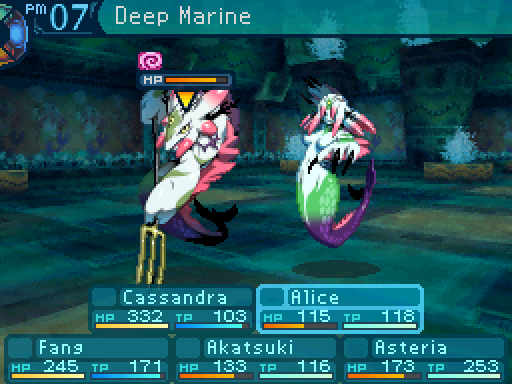   And now let's show off Suikyou.   Moonlight's glimmer! Moonlight's glimmer!What Suikyou does is when you pick one enemy that's suffering from an ailment, it'll try to inflict that ailment on all the other enemies in the battle. And since Suikyou has a 999% success rate at level 10, it practically guarantees that all enemies will be locked down with the right ailments. The problem is that you also need something to capitalize on the lockdown. Which this party does not have. Oh well.  Cassandra got a level up out of that.  Sturdy and evasive! A deadly combination. Sturdy and evasive! A deadly combination.I decided to start turning Cassandra into a dodgetank. Making her even more durable. 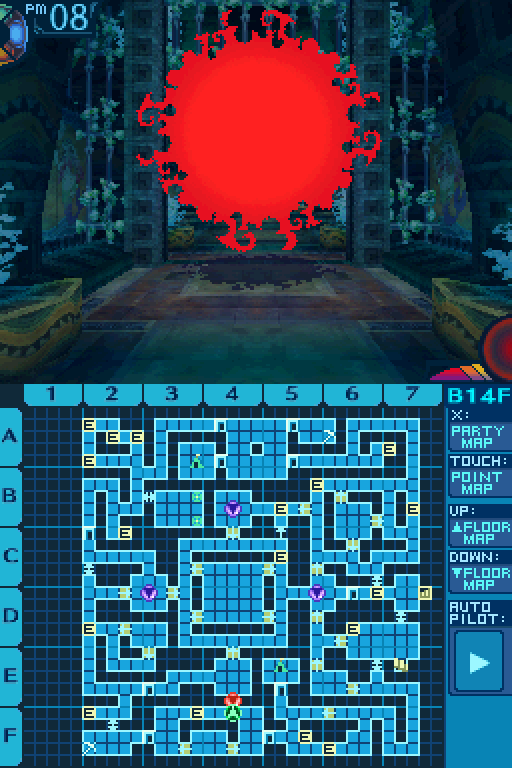 Anyways, there's an FOE we didn't get to fight, so let's take care of that.  DS Version DS Version  Deep Prelate Behavior: Chases after you if the gates are open. Gives up if they can't get to you. Aggressive: Yes. HP: 2512 STR: 44 VIT: 43 AGI: 41 LUC: 42 TEC: 53 Attack Type: Slash Exp: 18120 Item Drops: -Drop 1: Staff Stone - 75% Drop Rate. 1 needed for Abramelin (Book. Must be restocked.) --Has the power to analyze the Labyrinth�s monsters. -Drop 2: Queen's Bulla - 10% Drop Rate. 1 needed for Bikini Armor (Clothes? Must be restocked.) --Deep One�s chest protector that spawned many tall tales. -Gold: N/A Description: An otherworldly maiden with natural gifts. It uses ambient spirits to cast ruinous spells. Damage Resistances: Slash: 100% Strike: 100% Pierce: 100% Fire: 50% Ice: 50% Volt: 50% Ailment Resistances: Sleep: 150% Confusion: 10% Plague: 10% Poison: 10% Blind: 10% Curse: 10% Paralysis: 10% Bind Resistances: Head: 25% Arm: 150% Leg: 150% Other Resistances: Death: IMMUNE Petrification: 10% Stun: 50% Skills: Zone Thunder: Uses the Head. Deals 60% Volt damage to the entire party. Zone Blaze: Uses the Head. Deals 60% Fire damage to the entire party. Zone Icicle: Uses the Head. Deals 50% Ice damage to the entire party. Deep Prelates are the elemental counterpart to Deep Coistrels. They have very hard hitting elemental attacks. All of which are AOEs. You mainly want to use physicals since they're resistant to elemental attacks themselves. I suggest bringing some mists for this fight to take the sting out of her attacks. A Hoplite with the Anti-elementals at a decent level are good too.  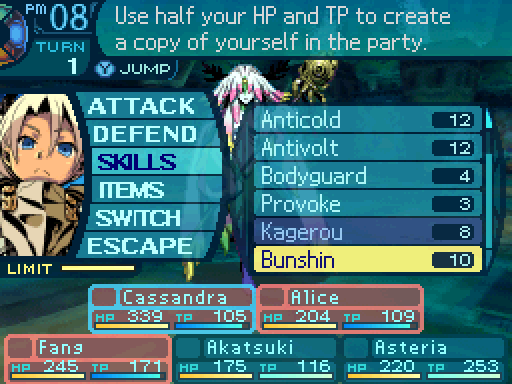 First things first, setting up. I'm using Aegis Barrier to block any elementals so I can get out a clone easily. 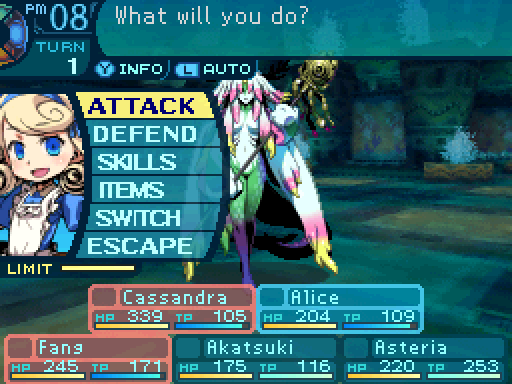 I'm just gonna hope that Alice gets an Instant Death proc. That's pretty much gonna be her main contribution for this fight. 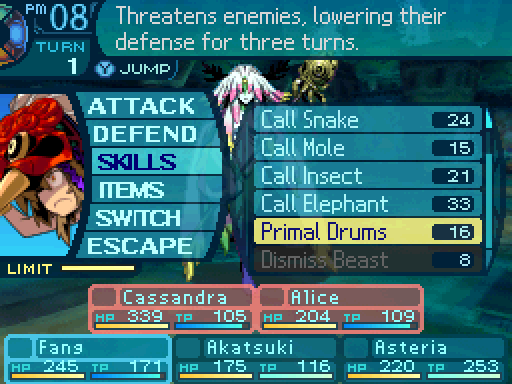 I don't like the chances of landing Confusion, and I find that a 2nd Cassandra would work far better than an elephant.  I doubt I'll get a petrify, but the skill itself deals decent damage anyway. 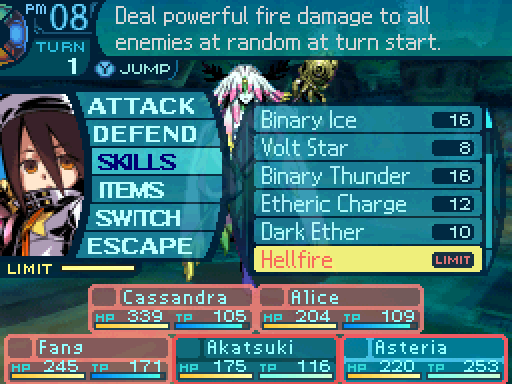  And the classic burn down most of their HP strat.  Defensive formation! Defensive formation!   YEEAARR-oh forget it. YEEAARR-oh forget it.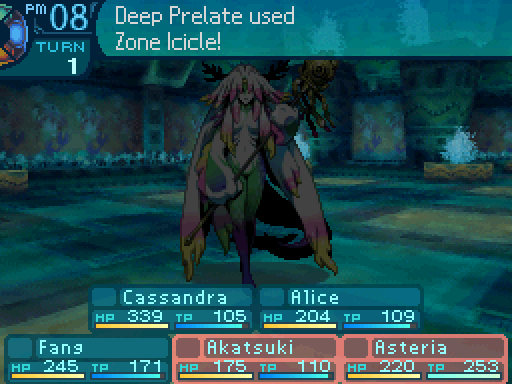  Not going to happen! Not going to happen! Aww... Aww... 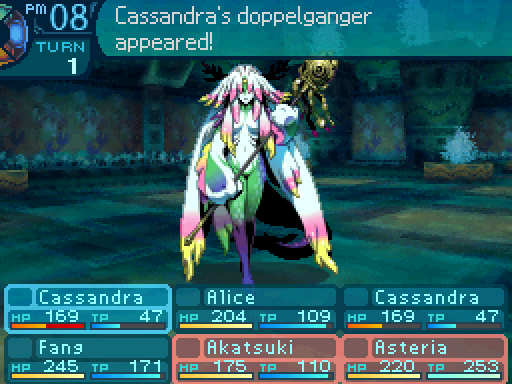 Two Cassandras are better than one! Not that Faye would agree. Two Cassandras are better than one! Not that Faye would agree.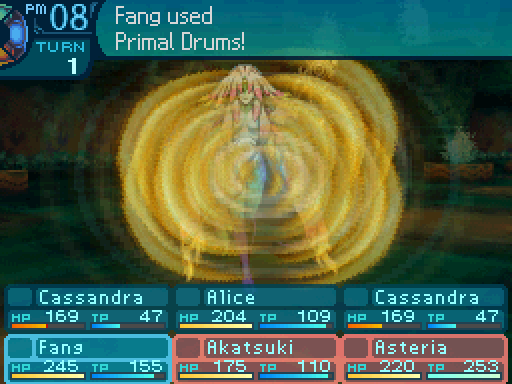 I'm helping! I think. I'm helping! I think.   Hell sends its greetings! Hell sends its greetings!  ...Or not. ...Or not.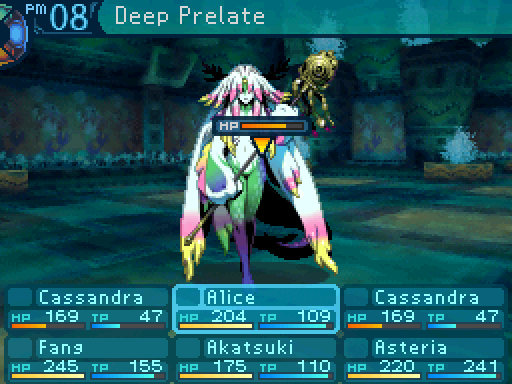 Yeah, that barely did anything. For the record, Asteria is probably the best damage dealer in this party. 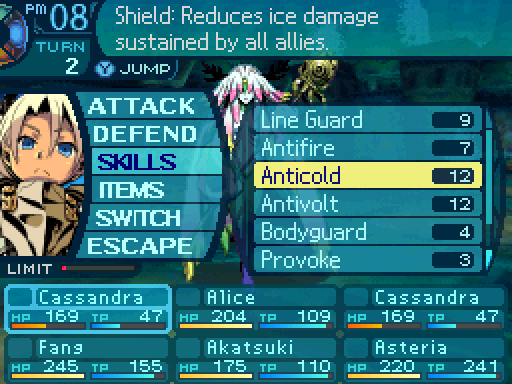 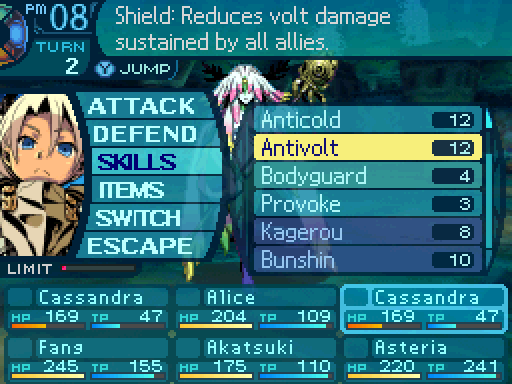 So here's another thing a Hoplite/Ninja lets you do. Bunshin gives you two Hoplites to use against enemies that use more than one kind of elemental attack. So I can have Cassandra nullify both Ice and Volt attacks and only have to worry about Fire attacks.  Fang will heal up the clones. 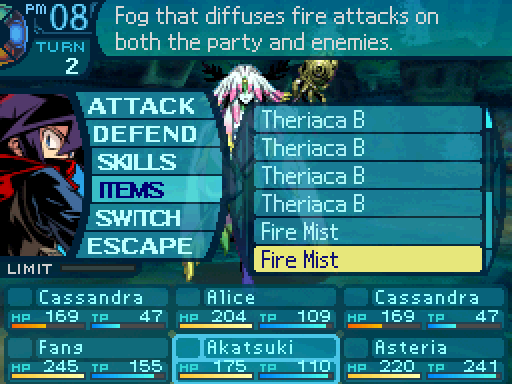 And the lack of Fire protection will be handled by a Fire Mist, which will make this FOE mostly harmless.   A perfect defense! A perfect defense! The mist should protect us. Um, I think you spilled some on her too. The mist should protect us. Um, I think you spilled some on her too.Because people kept overusing mists in EO2, they got nerfed in that the enemy benefits from them as well. This nerf got undone in EOU. 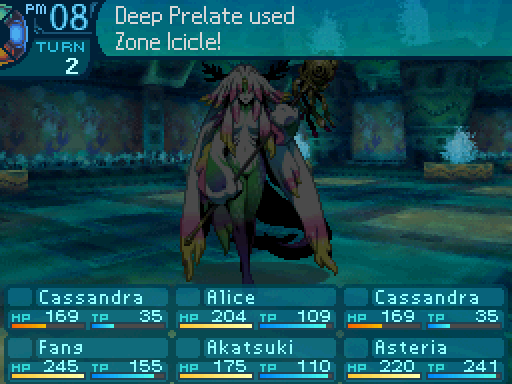  Not even magic will get past me! Not even magic will get past me!This is one of the reasons why the Anti skills are so strong in this game.  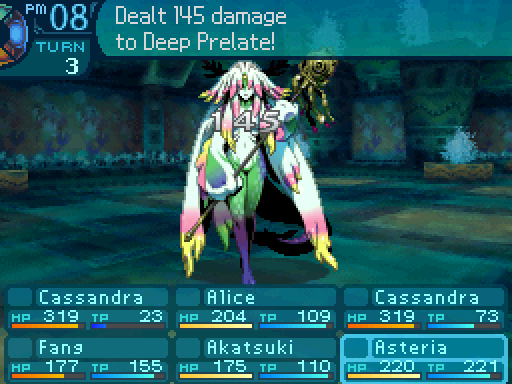 Hmm. I may need to find a new form of offense. Hmm. I may need to find a new form of offense.This is gonna be a long fight. 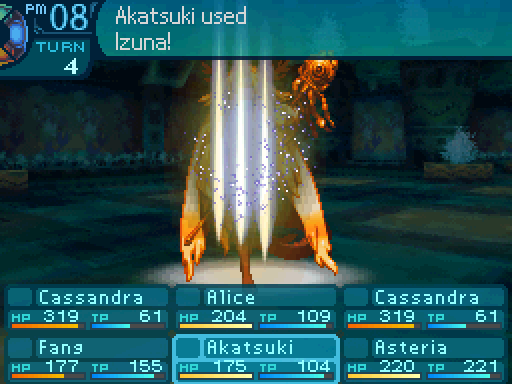  YEEEAAARR-oh wow, I wasn't expecting that to work. YEEEAAARR-oh wow, I wasn't expecting that to work. DS Version DS Version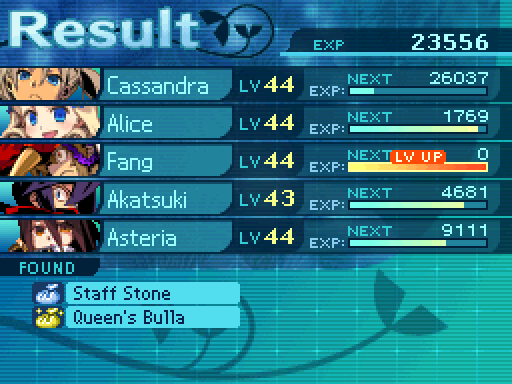 Or not. And I got the rare drop too. Talk about getting lucky.  The snake now has a base HP of 84, deals 120% damage on the initial attack, 110% damage on its AI attacks, and has a 47% chance to inflict Arm bind. Oh by the way, there's one more skill I didn't show off here. If you're battling a Deep Prelate and let a Deep Coistrel join in, or vice versa, this happens: 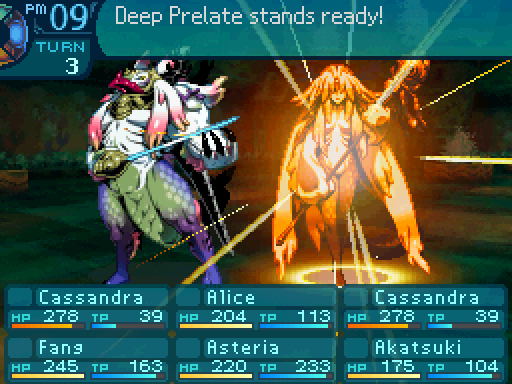   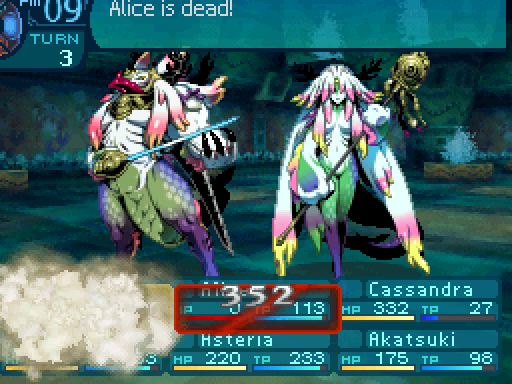 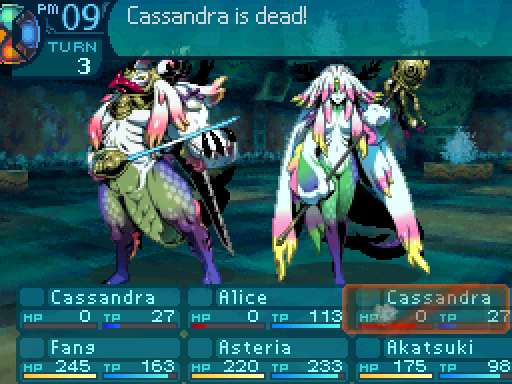 Sea Guillotine: Limit Skill. Requires a Deep Coistrel and Deep Prelate. Uses the Arms. A Slash attack that deals 180% damage to a row, and has a 20% chance to inflict Instant Death. So don't let that happen. Anyways, I head back to town to sell off the drops I got. 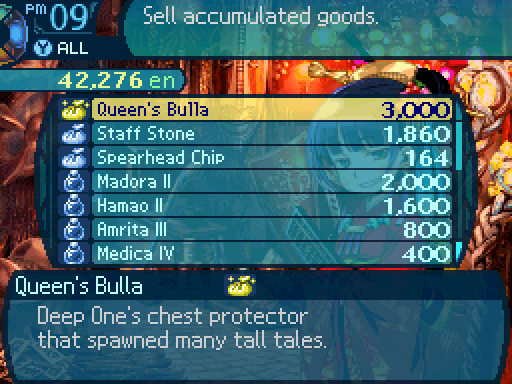 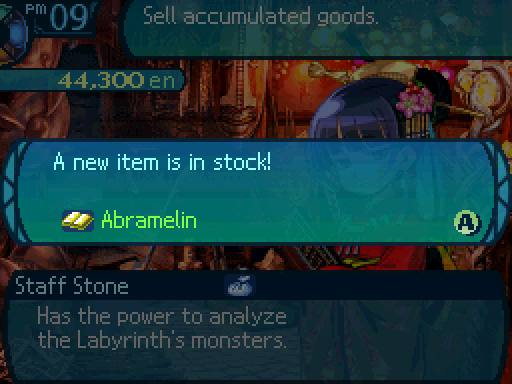 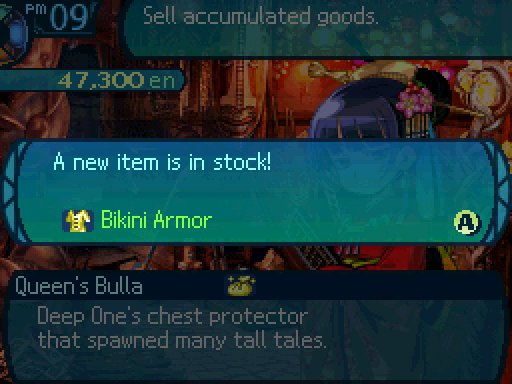 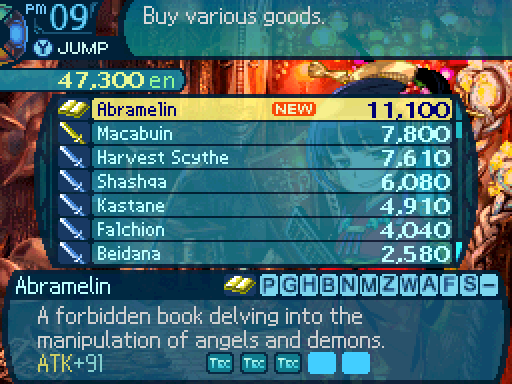 The Abramelin could be a decent upgrade from Pollux's Records, but you can't put in TP forges yourself, so I'll still keep them. Anyways, onto the next item. 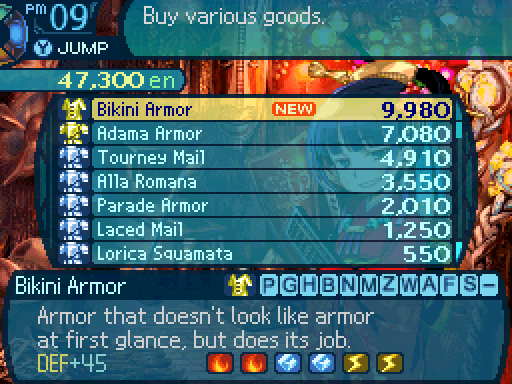 Uhhh... There's a big hole in it. Or rather, it's not covering up much... How in the world does that count as armor!? Maybe it's magic! Fang, I don't think there's such a thing as a magic biki- Uhhh... There's a big hole in it. Or rather, it's not covering up much... How in the world does that count as armor!? Maybe it's magic! Fang, I don't think there's such a thing as a magic biki- I'll buy them for everyone in my guild! When did you get here!? I'll buy them for everyone in my guild! When did you get here!?The Bikini Armor is a special piece of equipment. First of all, it provides a 20% resistance to every element, which is nice. However, what it also does is boost a character's action speed by a whopping +10! All other pieces of Clothing only gives a boost of +2. It can be pretty good on a support, like a Monk. I buy this for Alice since she has the worst TEC stat in the party. And if you're wondering, the portrait you chose for your character doesn't matter. Man or woman, anyone can equip this.  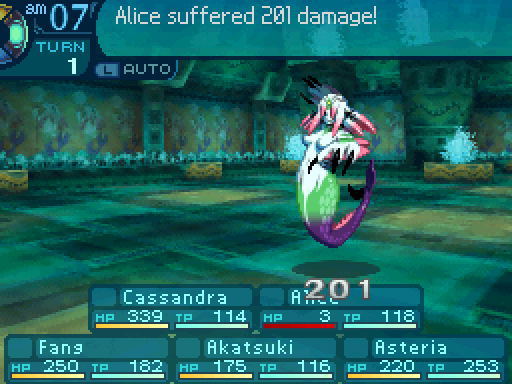 And the Bikini Armor ended up saving Alice's butt in this case.  DS Version DS Version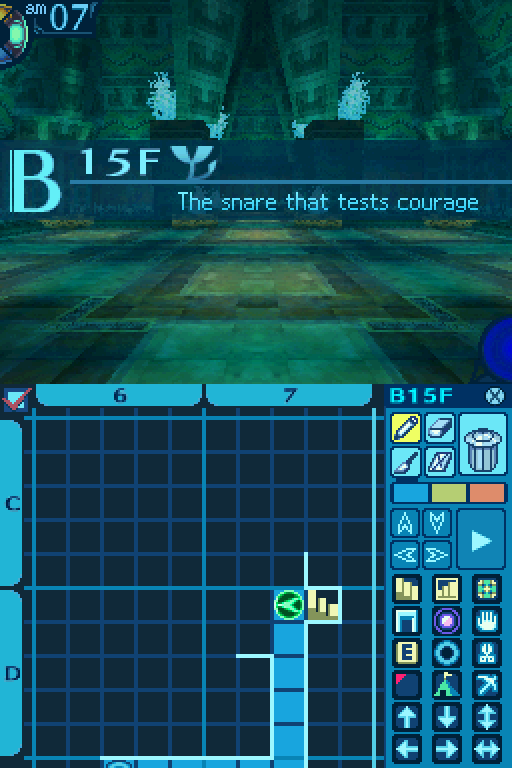 Let's get to exploring the 16th floor now. 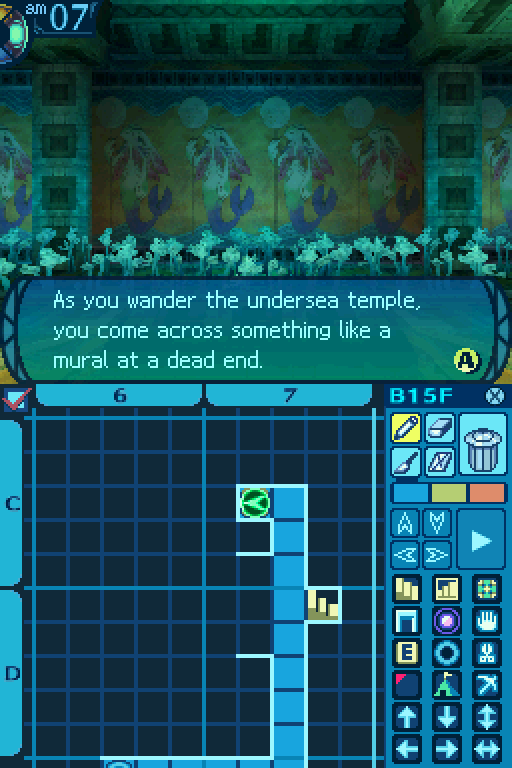 Two of the three motifs in the shape of an equilateral triangle are too faded to make out.  Remember this for later.  A level up for Alice.  Just leveling up Kagenui so she can get Izuna.  Should... we jump into that pit? Might as well. I don't too many other ways forward. Should... we jump into that pit? Might as well. I don't too many other ways forward. GERONIMOOOO! GERONIMOOOO!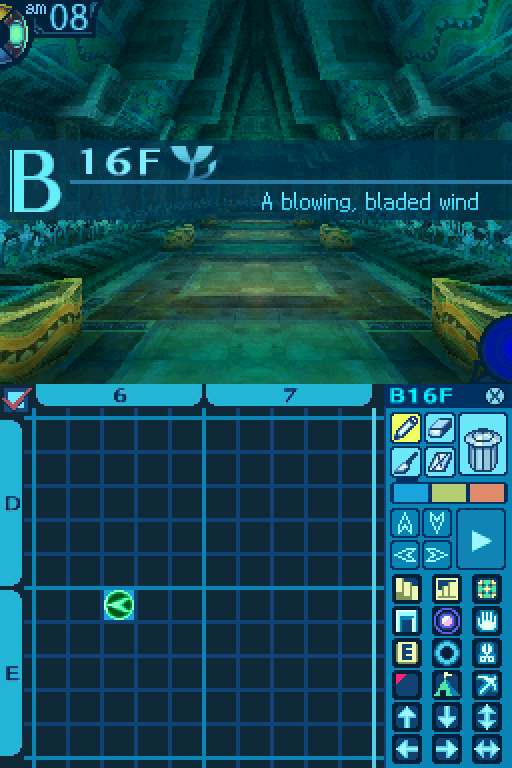  Well, that's the wrong way. 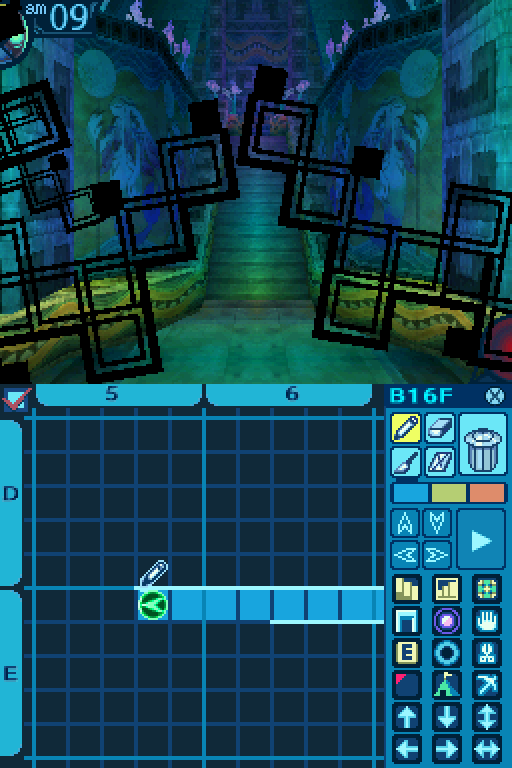 Really? DS Version  Cursed Knight HP: 562 STR: 47 VIT: 42 AGI: 29 LUC: 32 TEC: 29 Attack Type: Slash Exp: 1666 Item Drops: -Drop 1: Ebony Shard - 30% Drop Rate. 1 needed for Winged Spear (Spear), Apollo's Bow (Crossbow. Must be restocked), Book of the Dead (Book. Must be restocked), and Shadow Piercer (Gun. Must be restocked.) 2 needed for Kaminari Otoshi (Katana. Must be restocked.) 3 needed for Rainbow Shield (Shield.) 5 needed for Vital Belt (Accessory.) --Broken portion of a black knight�s horned helm. -Drop 2: Magic Shard - 10% Drop Rate. 1 needed for Wyrmhunter (Gun.) 5 needed for Warabite (Katana.) --Sword fragment containing the regrets of its prey. -Gold: N/A Description: A knight�s ghost that still roams the Shrine�s halls. It now holds nothing but hatred. Damage Resistances: Slash: 75% Strike: 75% Pierce: 75% Fire: 150% Ice: 150% Volt: 150% Ailment Resistances: Sleep: 100% Confusion: 150% Plague: 100% Poison: 50% Blind: 100% Curse: 50% Paralysis: 100% Bind Resistances: Head: 100% Arm: 100% Leg: 100% Other Resistances: Death: IMMUNE Petrification: 100% Stun: 100% Skills: Gale Blade: Uses the Arms. Deals 130% Slash damage to a single target. Has an action speed of +10. Cursed Knights are really hard hitting enemies. They deal a lot of physical damage, and Gale Blade is a fast acting attack that can kill a party member before they get to act. However their attacks are only single target. 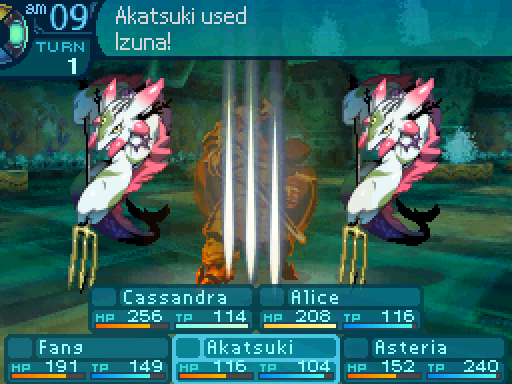  Hmm. So ghosts can be turned into statues. That has rather horrifying implications. Hmm. So ghosts can be turned into statues. That has rather horrifying implications.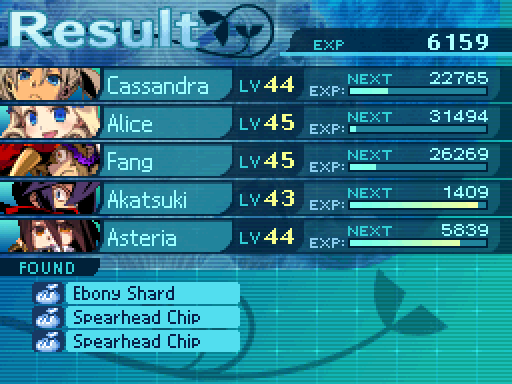 The rest of the battle went pretty smoothly.  Anyway, let's move on.   I realized that I actually took the way forward when I meant to explore the place before moving on. Whoops.  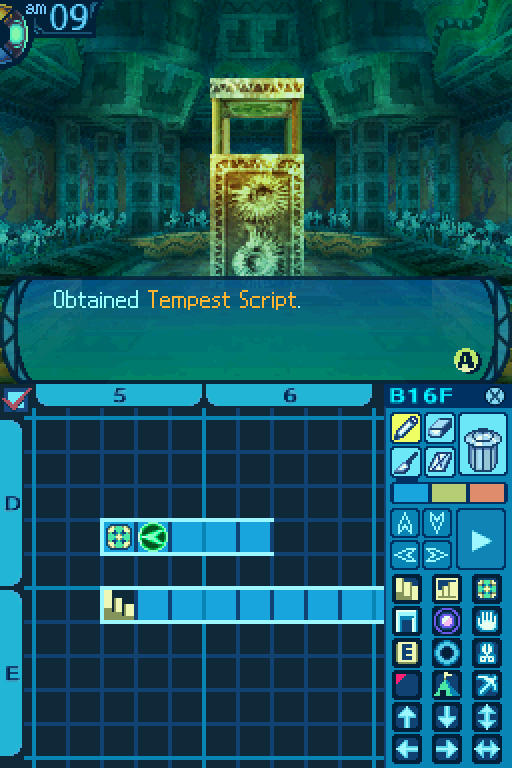 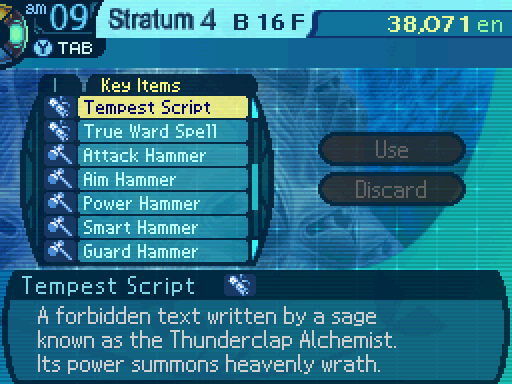 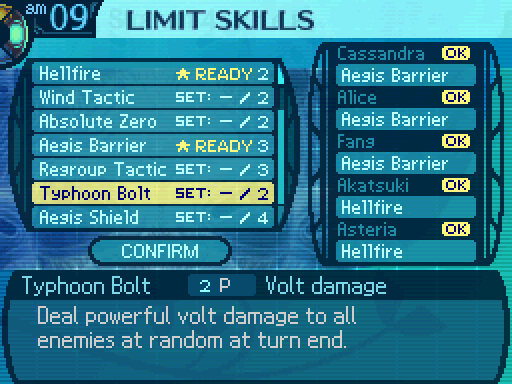 And here's the last of the elemental Limits. Typhoon Bolt is a Volt attack that randomly attacks all enemies 3 to 5 times, and deals 65% damage with each hit.  Again? 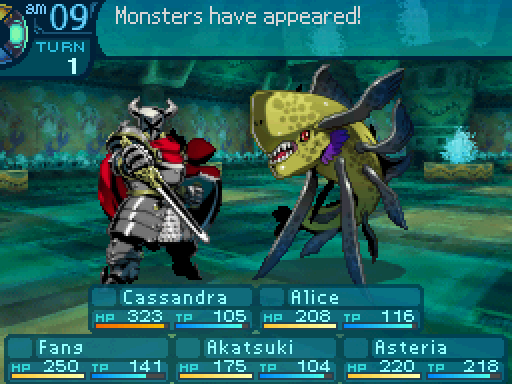 Oh you have got to be kidding me! 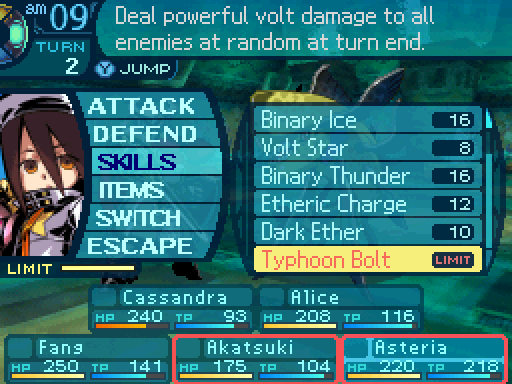 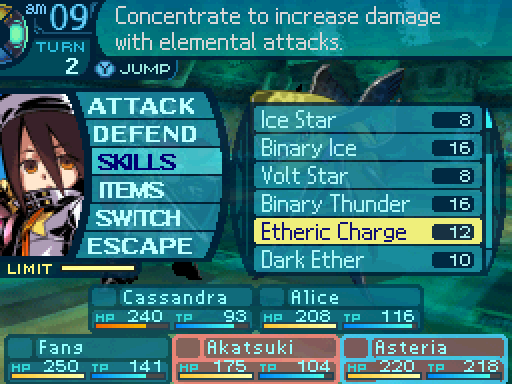 Yeah, you know what? Screw this.  Storm warning! Storm warning! Okay I guess Asteria is still a bit useful. Maybe I should change her skillset around a bit.  Going up! 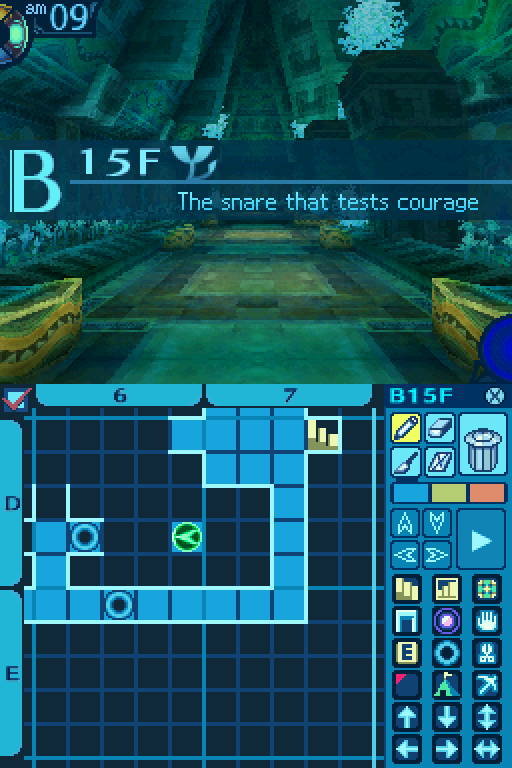 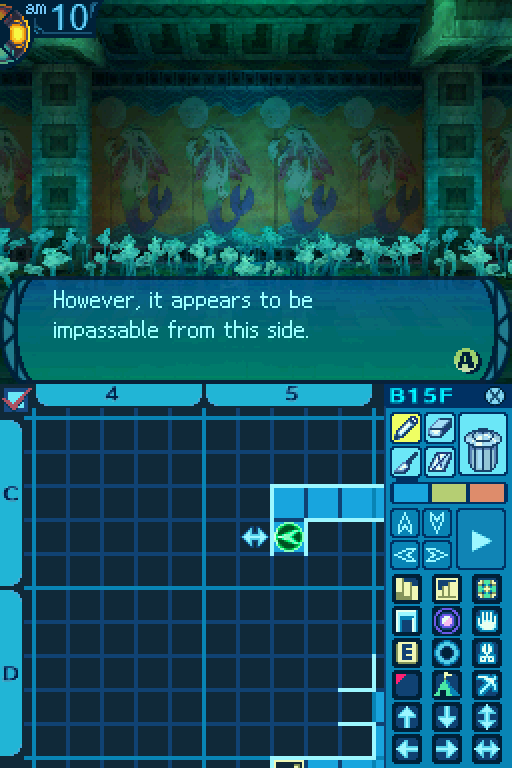 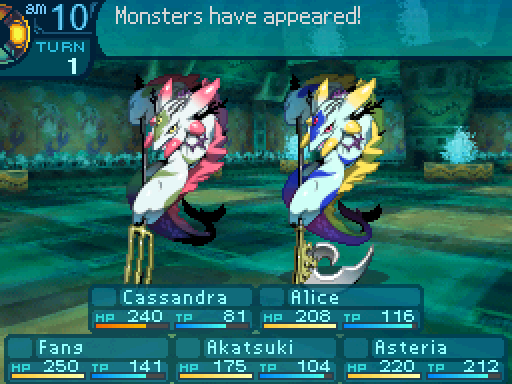 Hmm, that's one of the Deep Ones we fought back on the 10th floor. I don't think we have too much to worry about there. That Deep One looks weaker than the one we've fought before. Hmm, that's one of the Deep Ones we fought back on the 10th floor. I don't think we have too much to worry about there. That Deep One looks weaker than the one we've fought before. Deep Raider HP: 538 STR: 44 VIT: 40 AGI: 32 LUC:29 TEC: 37 Attack Type: Slash Exp: 1617 Item Drops: -Drop 1: Cast-iron Hilt - 30% Drop Rate. 1 needed for Verdun (Rapier.) 2 needed for War Pick (Mace.) 4 needed for Plate Coat (Heavy Armor.) 5 needed for Partizan (Spear), and Uchigatana (Katana.) 7 needed for Strength Ring (Accessory.) --Hilt that is strong and light, and thus easy to handle. -Drop 2: N/A -Gold: Damascus Edge - Kill with Strike. 80% Drop Rate. 1 needed for Schiavona (Sword.) 1 needed for the quest An artisan's choice. --An axe blade made from an extremely rare steel. Description: A Deep One soldier posted to the Shrine. It wields an ice axe in concert with its allies� spells. Damage Resistances: Slash: 75% Strike: 75% Pierce: 75% Fire: 125% Ice: 125% Volt: 125% Ailment Resistances: Sleep: 100% Confusion: 100% Plague: 100% Poison: 100% Blind: 100% Curse: 100% Paralysis: 150% Bind Resistances: Head: 50% Arm: 50% Leg: 50% Other Resistances: Death: 100% Petrification: 100% Stun: 100% Skills: Cover: Does not use a body part. Protects an ally and takes damage in their place. Has an action speed of +20. Leaping Slash: Uses the Arms. Deals 80% Slash damage to the front row. Crystal Edge: Uses the Legs. Chaser skill. Deals 80% Slash damage to anyone that got hit by an Ice attack. Has an action speed of +60. Oh hey, Deep Raiders are basically weaker versions of the Deep One that we had to fight on the 10th floor. They pretty much operate in the exact same way, only they're a bit weaker in terms of durability. Watch out if they're paired up with Aplysiomorphas, as Crystal Edge can deal a lot of damage in that case. And even if you block any Ice attacks with a max level Anticold, Crystal Edge will still perform the chases, dealing quite a bit of damage.   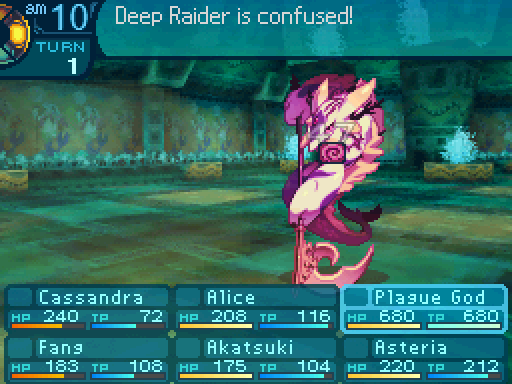 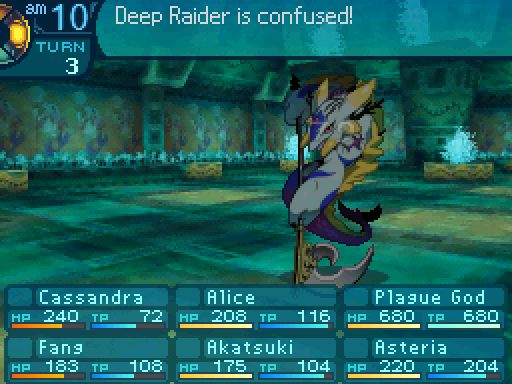 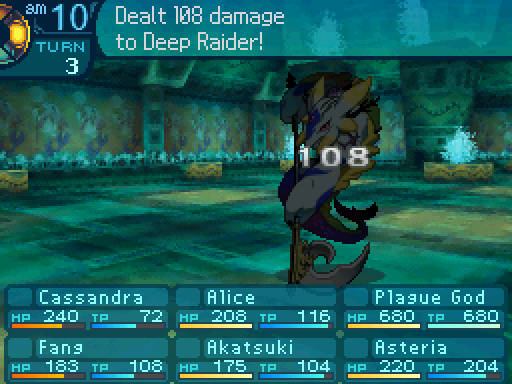 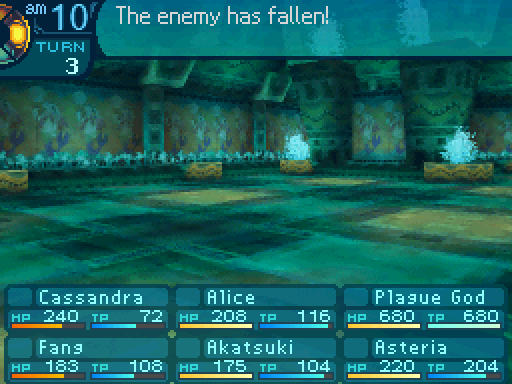  The fight was uneventful since Alice killed the Deep Marine, Fang's elephant stomped on the Deep Raider, and it killed itself as a result. Which is what I didn't want, because I was hoping the elephant would get me the kill, which would have gotten me its conditional drop. At least Akatsuki got a level up.  Takanoha now deals 110% damage per hit while hitting 3 to 4 times for an average of 385% damage.   Deep Maiden HP: 508 STR: 37 VIT: 36 AGI: 31 LUC: 34 TEC: 41 Attack Type: Pierce Exp: 1602 Item Drops: -Drop 1: Castor's Eye - 30% Drop Rate. 1 needed for Sage's Book (Book), and Wisdom Earring (Accessory.) 2 needed for Barrel Helm (Helmet.) 3 needed for Lorica Hamata (Light Armor.) --Its intense aura symbolizes the Deep Ones� power. -Drop 2: N/A -Gold: Wheel Blade - Kill while arms are bound. 95% Drop Rate. 1 needed for Ballock Knife (Dagger.) --Piece of a strange weapon that gains power when spun. Description: A mage of the Deep Ones which employs advanced cooperative tactics in casting its spells. Damage Resistances: Slash: 125% Strike: 125% Pierce: 125% Fire: 75% Ice: 75% Volt: 75% Ailment Resistances: Sleep: 100% Confusion: 100% Plague: 100% Poison: 100% Blind: 100% Curse: 100% Paralysis: 50% Bind Resistances: Head: 150% Arm: 150% Leg: 150% Other Resistances: Death: 100% Petrification: 100% Stun: 150% Skills: Dis-element: Uses the Head. Increases all enemies' resistances to elemental attacks by 50% for 4 turns. Zone Icicle: Uses the Head. Deals 50% Ice damage to the entire party. Like with the Deep Raiders, Deep Maidens are weaker counterparts of the Deep Lady that we fought back on the 10th floor. They'll make life more difficult for elemental attackers by raising their allies' elemental defense, and can hit pretty hard with Zone Icicle. And if they're paired up with Otherspawns or Deep Raiders, you better watch out since the former can help Zone Icicle hit harder with Ice Burn, and the latter can capitalize on it with Crystal Edge. 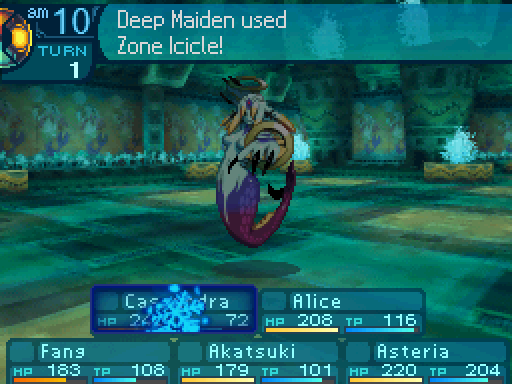   Wrap around! Wrap around!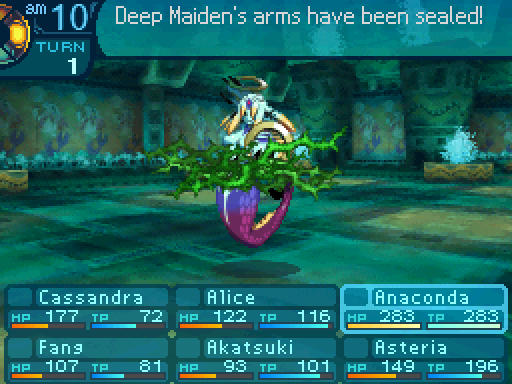 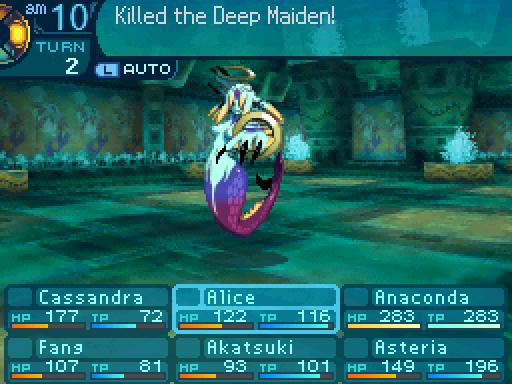  And I managed to get her conditional drop there. Nice.  Let's check out this pit since it's the last one here.  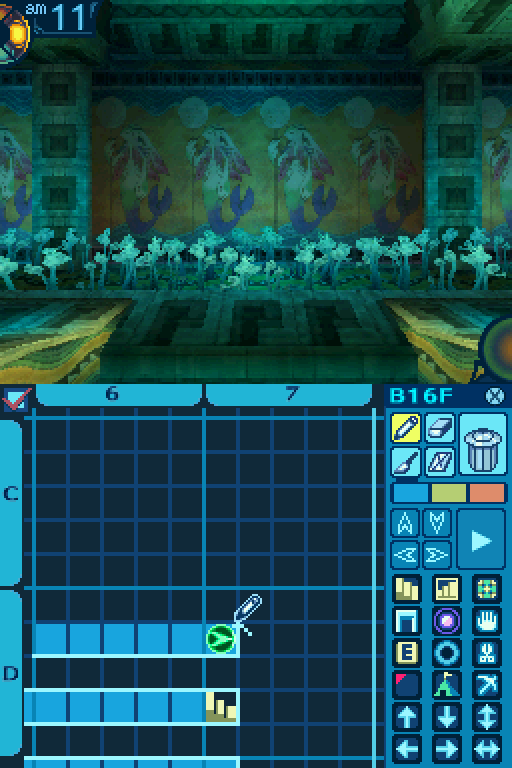 So what was the point of all this? I just wanted to know what was down here. An incomplete map kind of bothers me. So what was the point of all this? I just wanted to know what was down here. An incomplete map kind of bothers me.  Okay let's actually go further into this floor now. 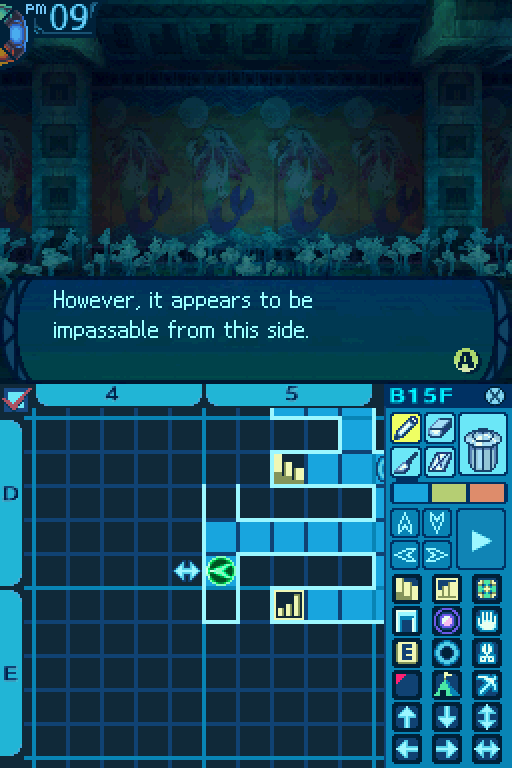  In its center is a ring-shaped depression. It seems as though something fell from here... You think back, trying to remember if you picked up a ring that might match this indentation... What in the world is this for? Ooh! We got a ring from a bunch of fish people on the last floor! Maybe it goes in here! You apply the silver ring you picked up previously into the depression in the wall. The silver ring slips into the recessed area as if being sucked inside, completing the artwork. Just then, the bottom of the wall opens like a drawer, revealing a piece of equipment inside!   This increases a character's TEC stat by 5. I put it on Asteria.  And Asteria gets a level up.  Horoscope now has a 6-tile sight radius while lasting for 50 steps.  Are those the giant walruses you told us about? Yeah, but the ones we saw were in cages. Hmm, it doesn't look like we'll have to fight it. We could just run away from it.DS Version Are those the giant walruses you told us about? Yeah, but the ones we saw were in cages. Hmm, it doesn't look like we'll have to fight it. We could just run away from it.DS Version ...Or that could happen. Sure, why not? ...Or that could happen. Sure, why not?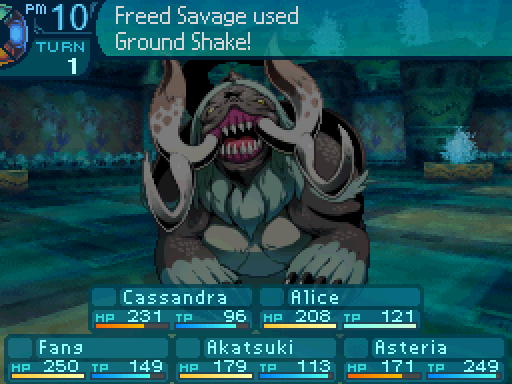 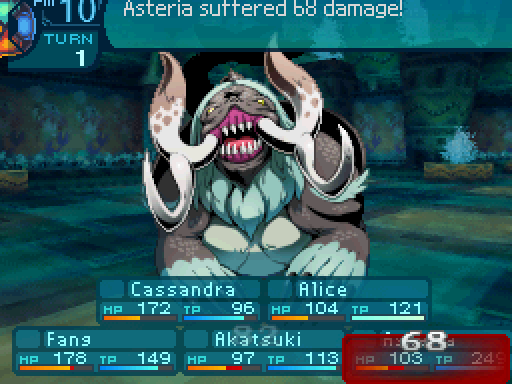 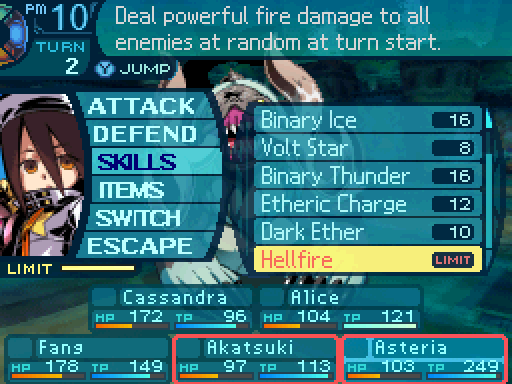  One Hellfire should kill it. 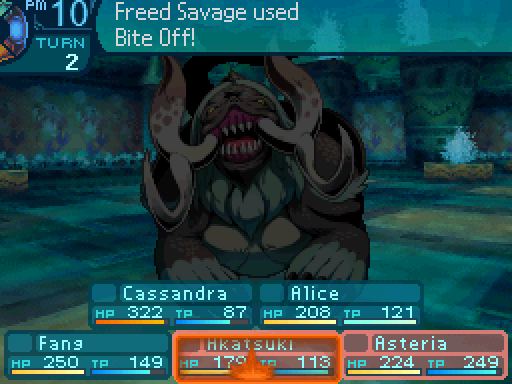  OH GOD THE TEETH! OH GOD THE TEETH!  Unfortunately, Ninjas are the most fragile class in the game. 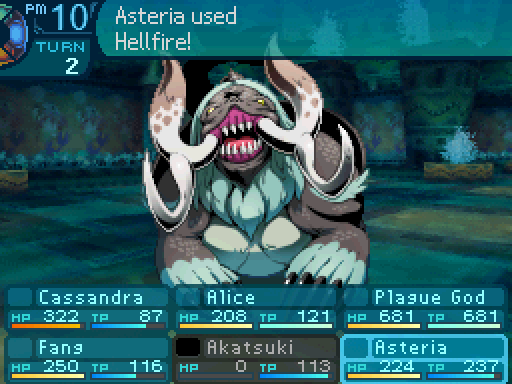 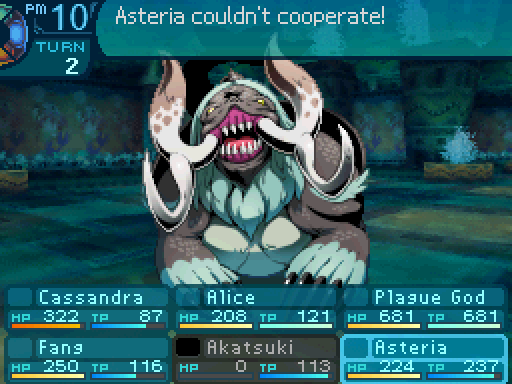 Errr... Fizzled out... Errr... Fizzled out...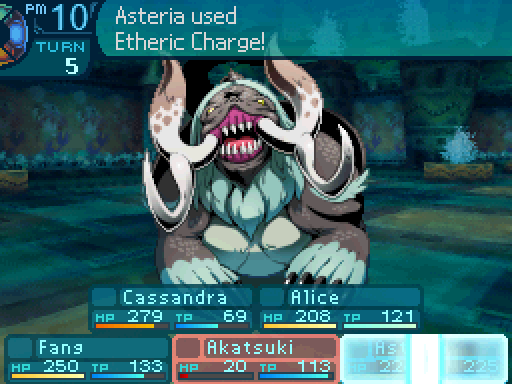  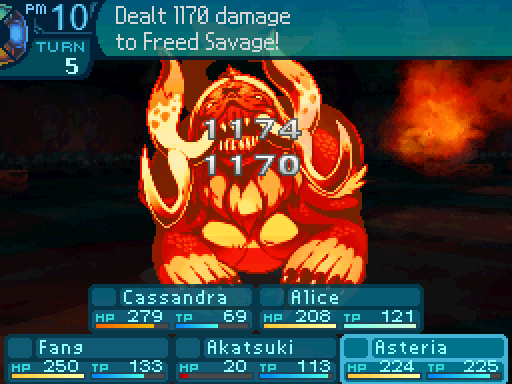 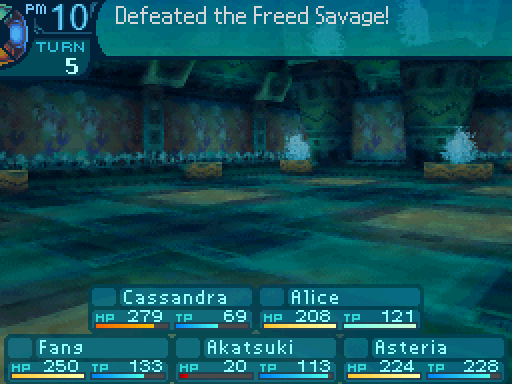 Much better. Anyone up for a crispy serving of walrus? Much better. Anyone up for a crispy serving of walrus?    Something smells good! There's a bunch of flowers at the back wall. I think the scent is coming from there. Maybe one of those is the Amarantos. Something smells good! There's a bunch of flowers at the back wall. I think the scent is coming from there. Maybe one of those is the Amarantos.It seems the Amarantos you�ve been searching for is near the room�s rear wall. It would be prudent to investigate the hall�s interior in your search for the flower. 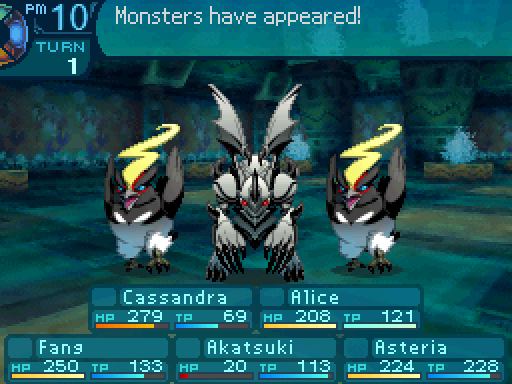  Eerie Statue HP: 544 STR: 40 VIT: 43 AGI: 28 LUC: 31 TEC: 40 Attack Type: Strike Exp: 1595 Item Drops: -Drop 1: Broken Rock. - 25% Drop Rate. 1 needed for Ward Chime (Item.) 2 needed for Plate Coat (Heavy Armor.) 3 needed for Ribaulequin (Crossbow.) --Fine piece of a shattered, strange stone statue. -Drop 2: Corundum - 20% Drop Rate. See 3rd Stratum Mine Point info for more details. -Gold: Holed Rock - Kill with Pierce. 80% Drop Rate. Prevents the 1st drop. 1 needed for Firm Book (Book.) --Piece of rock with a hole pierced through it. Description: An eerie statue set up inside the Shrine. Exactly what powers it is yet unknown. Damage Resistances: Slash: 50% Strike: 150% Pierce: 50% Fire: 100% Ice: 150% Volt: 100% Ailment Resistances: Sleep: 25% Confusion: 100% Plague: IMMUNE Poison: IMMUNE Blind: 100% Curse: 100% Paralysis: 100% Bind Resistances: Head: 150% Arm: 150% Leg: 150% Other Resistances: Death: 100% Petrification: IMMUNE Stun: 50% Skills: Fireball: Uses the Head. Deals 100% Fire damage to a single target. Eerie Statues are pretty hard hitting enemies. Not only do their physical attacks hurt, but their elemental attack deals a lot of damage. Binds can shut them down, especially since they're really weak to them. Use Strike or Ice attacks for the best results. Also, this monster is a bit weird in that getting its conditional drop blocks off the first drop, but not the 2nd drop.   Good Ninjas never die... they just fade away... Good Ninjas never die... they just fade away...Oops. Forgot to heal Akatsuki up from the last battle. 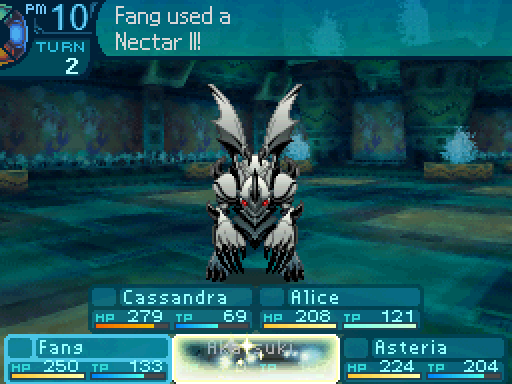  Wake up, Mr. Ninja! Wake up, Mr. Ninja! 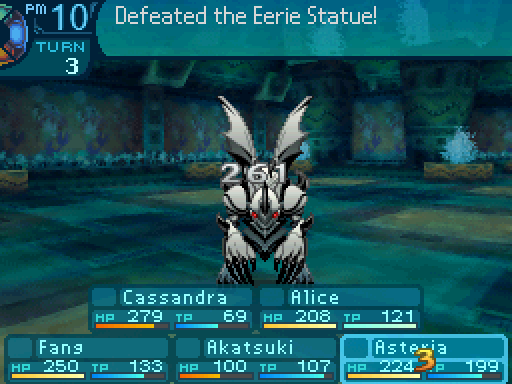  And aside from that, nothing much else happened. DS Version But there is nothing that could fit the bill here. You elect to check elsewhere. They all look like regular flowers to me. Maybe it's somewhere else? Maybe it's not here after all. Let's just go on. 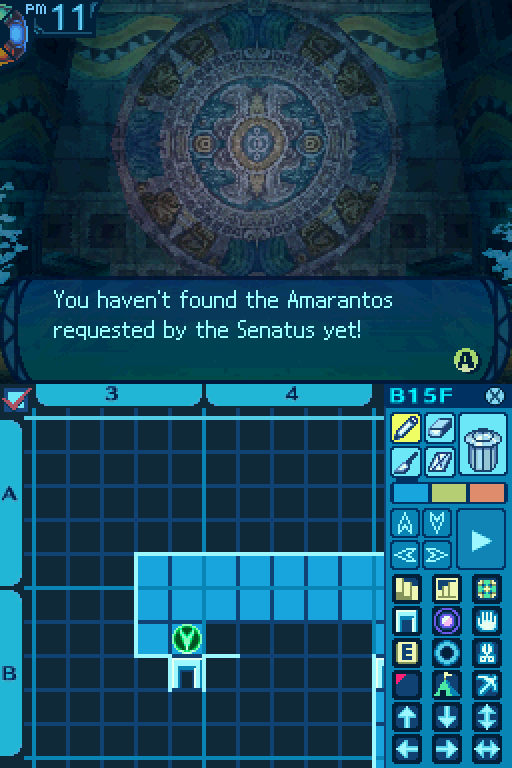  Fine, game. Have it your way.  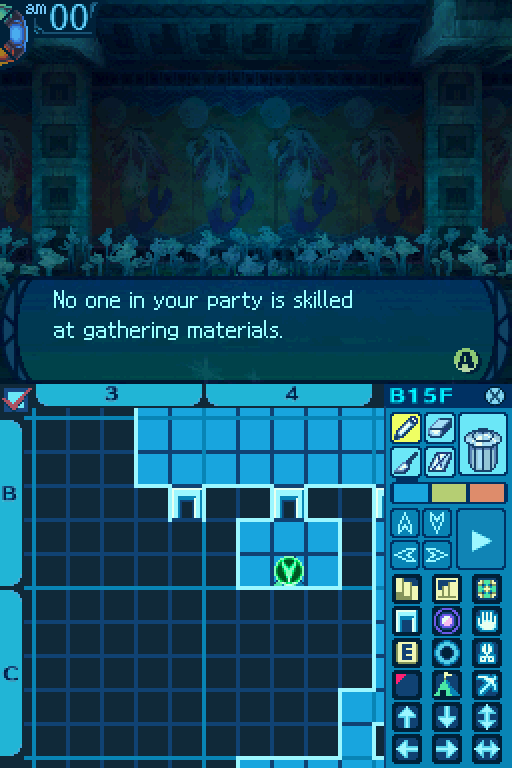 B4 Take Point: Crabapple: 50% Gather Rate. 1 needed for Nectar II (Item. Must be restocked.) -Red fruit with a sweet scent. Hyacinth Petal: 50% Gather Rate. 1 needed for Unihorn (Item.) -They look most beautiful when floating in water. Waterlily Leaf: Rare. 1 needed for Flame Jar (Item. Must be restocked), Frost Jar (Item. Must be restocked), and Storm Jar (Item. Must be restocked.) -Plant�s leaf that is said to be blessed by a water goddess. Common Gather Periods: 2 to 15. Rare Gather Periods: 1 to 4. The Take Points in this Stratum are pretty important. They give you Nectar IIs, and if you like using the elemental jars, you can farm for the AOE versions here.  Could this be it? Wow. I've never seen that kind of flower before! That's probably the Amarantos. Could this be it? Wow. I've never seen that kind of flower before! That's probably the Amarantos.And that is when you notice one flower�s fragrance is considerably stronger than the others. You surmise that this is most likely the Amarantos requested by the Princess. You delicately pluck it and put it away so that it doesn�t fall apart. Your duty to the Princess has been discharged! Return to Armoroad and deliver her flower. 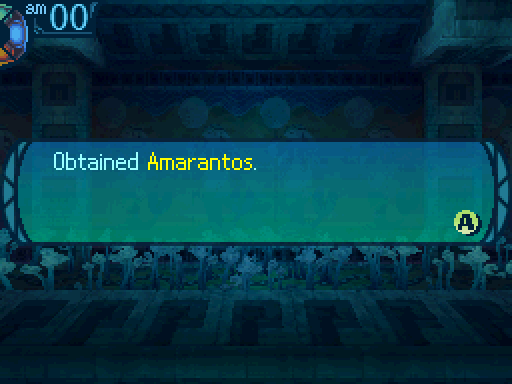 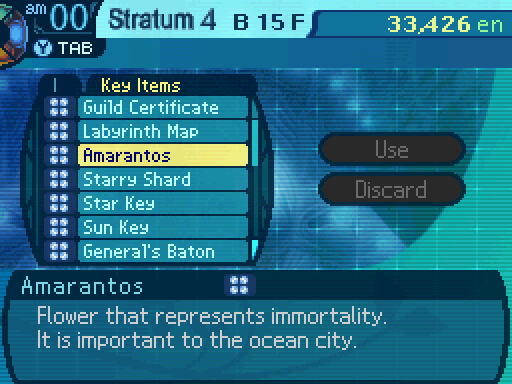 Okay, now let's report back to the Senatus. After getting all the dialogue for the 16th floor.  DS Version DS Version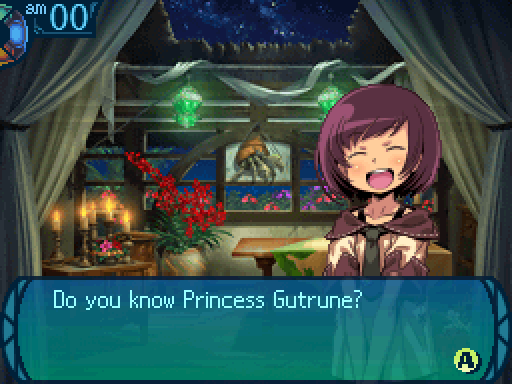 We've met with her a few times. We've met with her a few times. I happened to see her on the outskirts of town when I was coming back from the shopping! She was surrounded by guards, so I think she was headed to the royal forest. I hear she�s sick. Hopefully she�ll take good care of herself and get better soon! I happened to see her on the outskirts of town when I was coming back from the shopping! She was surrounded by guards, so I think she was headed to the royal forest. I hear she�s sick. Hopefully she�ll take good care of herself and get better soon! DS Version DS Version Um, sorry about that. Hey, what's that? Um, sorry about that. Hey, what's that? What, this? It�s called an abacus. It�s a tool for doing figures in my home country. Ooh, could you use that to massage your neck? Or your shoulders? ...What? It looks like an effective balm for stiff necks? I should try rolling it on my shoulders...? What absolute bunk... Er. Hm. Now that I try it... This could prove to be a real moneyspinner! I�ll have my craftsmen start mass production! Bless you for the idea! What, this? It�s called an abacus. It�s a tool for doing figures in my home country. Ooh, could you use that to massage your neck? Or your shoulders? ...What? It looks like an effective balm for stiff necks? I should try rolling it on my shoulders...? What absolute bunk... Er. Hm. Now that I try it... This could prove to be a real moneyspinner! I�ll have my craftsmen start mass production! Bless you for the idea!Let's see what equipment we've unlocked this time.  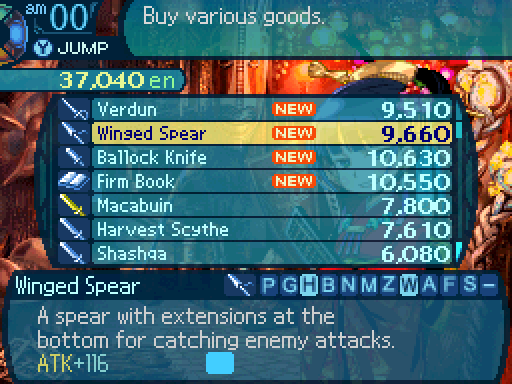   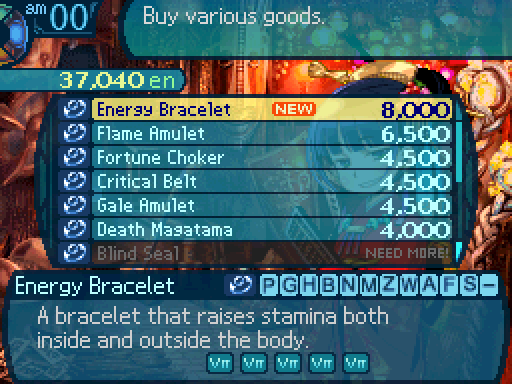 Nothing too interesting here. The rapier is still outclassed by the Jolly Roger. 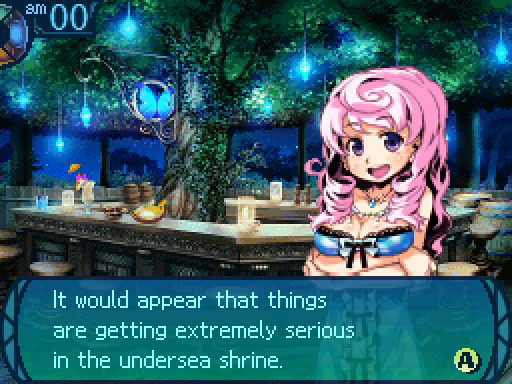  Of course, you know what that means... A huge fight�s coming up in the near future! At least, that is how things usually go in this world... You�d better be prepared. Of course, you know what that means... A huge fight�s coming up in the near future! At least, that is how things usually go in this world... You�d better be prepared.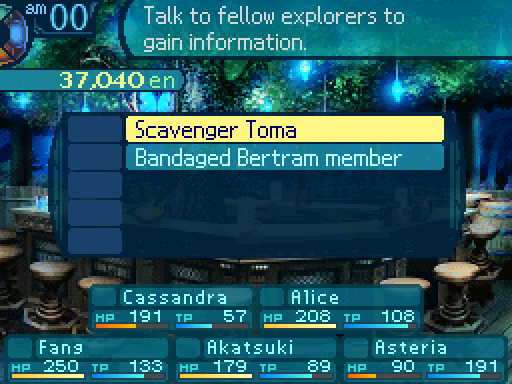  You�re amazing! Ya go in and out of the undersea temple like it�s nothing. Ya even buy me drinks! You�re amazing! Ya go in and out of the undersea temple like it�s nothing. Ya even buy me drinks! ...Ahhhh! Go for the gold, Tidehunt! Keep at it, Tidehunt! ...Ahhhh! Go for the gold, Tidehunt! Keep at it, Tidehunt! I�ve had all types of rum in my day, but rum made from Armoroad molasses is the champ! Now the treasure ya�ve been waiting for! This�s a Holed Rock--I see ya through the hole! Getting this took some doing. Ya gotta skewer that Eerie Statue. I can�t count the number of spears I wasted getting this thing... Hey! Ya better not tell anyone, okay? It�s a secret between us two and ONLY us two! I�ve had all types of rum in my day, but rum made from Armoroad molasses is the champ! Now the treasure ya�ve been waiting for! This�s a Holed Rock--I see ya through the hole! Getting this took some doing. Ya gotta skewer that Eerie Statue. I can�t count the number of spears I wasted getting this thing... Hey! Ya better not tell anyone, okay? It�s a secret between us two and ONLY us two!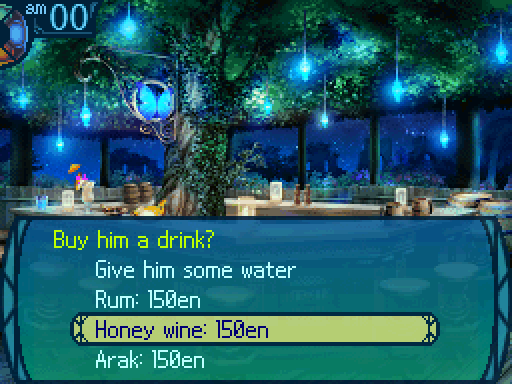 This wine was distilled from a Honey Ant�s honey, eh...? Hrm! What a mellow taste! This is called a Wheel Blade. I got mine when I defeated a Deep Maiden after binding her arm. Too bad we only get the blade and not the whole wheel, eh? Heheheh! But listen, don�t go blabbing about this, you hear me!? This wine was distilled from a Honey Ant�s honey, eh...? Hrm! What a mellow taste! This is called a Wheel Blade. I got mine when I defeated a Deep Maiden after binding her arm. Too bad we only get the blade and not the whole wheel, eh? Heheheh! But listen, don�t go blabbing about this, you hear me!? This is made from coconuts, right? The drinks are my favorite part of the thriving sea trade! So here, feast your eyes on this. It�s a Cursed Talon. The trick is to burn down a Dementia Owl... But every time I used a Flame Jar, it put me to sleep or confused me! Just warning ya... ...Whoa, but that�s a secret! You�re not to repeat that, got it? This is made from coconuts, right? The drinks are my favorite part of the thriving sea trade! So here, feast your eyes on this. It�s a Cursed Talon. The trick is to burn down a Dementia Owl... But every time I used a Flame Jar, it put me to sleep or confused me! Just warning ya... ...Whoa, but that�s a secret! You�re not to repeat that, got it?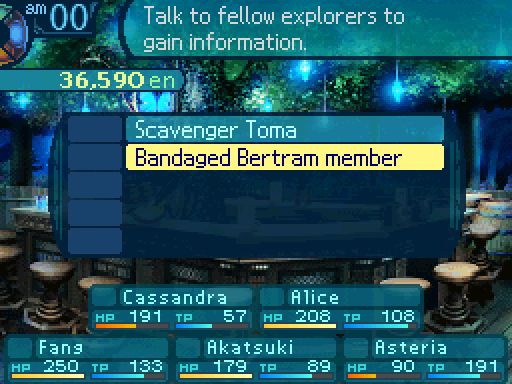  What an ordeal! Whoa! What happened to you? Huh...? Can�t you tell by looking at me? Pitfalls, dammit, pitfalls! We fell through a pit trap on B15F and on the ground below was an insanely strong knight-thing! It wiped out our whole party, lickety-split. Talk about rubbing salt into the wound! You guys better watch out too. If you fall down a pit, you better jet before the knight finds you! What an ordeal! Whoa! What happened to you? Huh...? Can�t you tell by looking at me? Pitfalls, dammit, pitfalls! We fell through a pit trap on B15F and on the ground below was an insanely strong knight-thing! It wiped out our whole party, lickety-split. Talk about rubbing salt into the wound! You guys better watch out too. If you fall down a pit, you better jet before the knight finds you!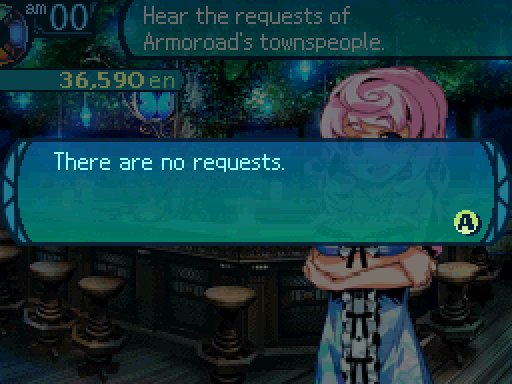 And for some reason, no quests are available yet.  DS Version DS Version  I�ve heard monsters called Deep Ones call those ruins home... You figure monsters that live underwater will be weak to fire, right? Hmm... too late now. I just dropped off one of my favorite weapons, the Firebrand, to get it sharpened. I thought about lending it to you, since it leaves a flame trail in the wake of its swing... Oh well. I�ve heard monsters called Deep Ones call those ruins home... You figure monsters that live underwater will be weak to fire, right? Hmm... too late now. I just dropped off one of my favorite weapons, the Firebrand, to get it sharpened. I thought about lending it to you, since it leaves a flame trail in the wake of its swing... Oh well. DS Version DS Version I don't think so, though Scott may have. I don't think so, though Scott may have. It�s called Pendra, and it�s a notorious demon that has sunk scores of ships. It was over ten years ago when I first heard its name... I haven�t heard anything on it in a while, so maybe it�s dead... But there is the occasional rumor... Just be careful out there. Then again, I suppose you�re all quite used to fighting monsters... It�s called Pendra, and it�s a notorious demon that has sunk scores of ships. It was over ten years ago when I first heard its name... I haven�t heard anything on it in a while, so maybe it�s dead... But there is the occasional rumor... Just be careful out there. Then again, I suppose you�re all quite used to fighting monsters...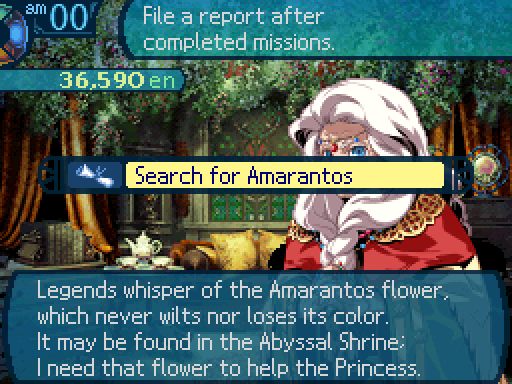 Time to hand in our mission report.  DS Version DS Version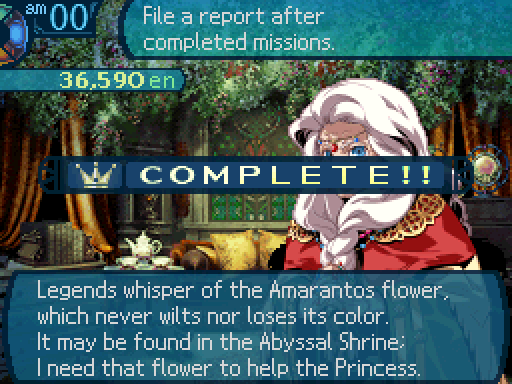  DS Version DS Version I believe this is it. I believe this is it.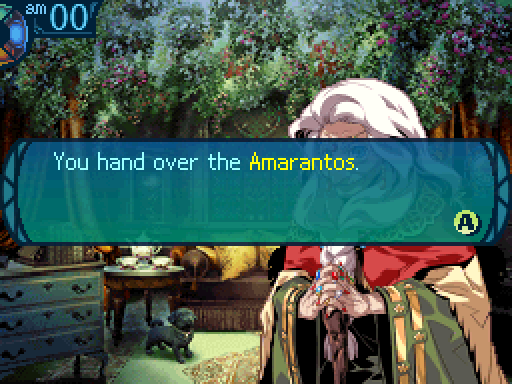  Yes... Yes, this is it! The Amarantos, that immortal blossom which never perishes... Well done. Before we go on, I have a reward for your hard work. Yes... Yes, this is it! The Amarantos, that immortal blossom which never perishes... Well done. Before we go on, I have a reward for your hard work. DS Version DS Version Unfortunately, I forget to spend my skill points for the rest of this update.   Fade to black.   My heart swells with gratitude at your delivery of the Amarantos. I feel much better with it. In light of your devoted service to the crown, I believe it is time I revealed everything. My heart swells with gratitude at your delivery of the Amarantos. I feel much better with it. In light of your devoted service to the crown, I believe it is time I revealed everything. DS Version This Amarantos is used to brew a certain poultice that prolongs my life. Indeed, since the Calamity, I have employed various methods to increase my longevity. I defy nature thus because I wish to save my brother, who vanished these 100 years ago! I... see... So, what happened to him? My brother... believed it was his duty to seal the evil threatening Armoroad. He descended into the ocean to fight it. But 100 years have passed, and the evil remains. As for my brother, he is amnesiac due to Yggdrasil�s control, and no longer remembers me either... I wish to rescue my brother from his pitiful state... He was so kind to me, and now...! DS Version This Amarantos is used to brew a certain poultice that prolongs my life. Indeed, since the Calamity, I have employed various methods to increase my longevity. I defy nature thus because I wish to save my brother, who vanished these 100 years ago! I... see... So, what happened to him? My brother... believed it was his duty to seal the evil threatening Armoroad. He descended into the ocean to fight it. But 100 years have passed, and the evil remains. As for my brother, he is amnesiac due to Yggdrasil�s control, and no longer remembers me either... I wish to rescue my brother from his pitiful state... He was so kind to me, and now...! Music cuts out and the screen fades to black. 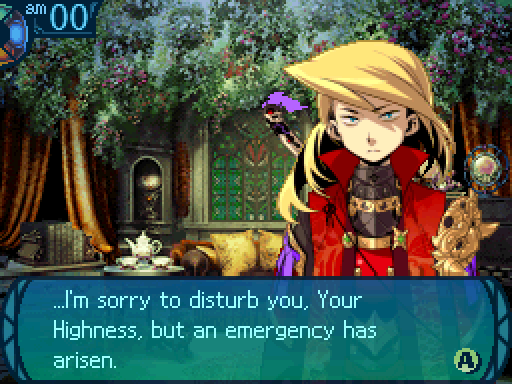  The Abyssal King and his close advisor are leading a horde into the undersea shrine. I�ve done some probing into their actions, and they seem to be after a teleportation device... In any event, their movements were so extraordinary that I felt I had to report. My liege. The Abyssal King and his close advisor are leading a horde into the undersea shrine. I�ve done some probing into their actions, and they seem to be after a teleportation device... In any event, their movements were so extraordinary that I felt I had to report. My liege.Kujura leaves. DS Version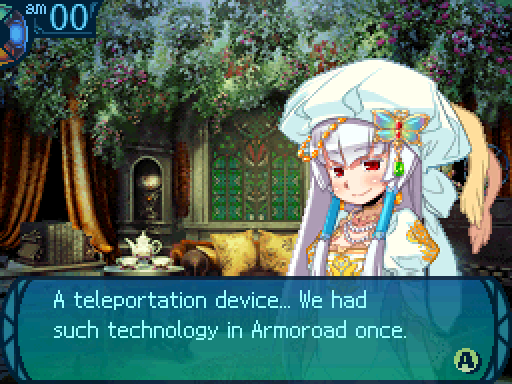 If worse comes to worst and one remains active in the abyss, it could be very troublesome for us. If you are willing to work on our behalf once more, please come back to hear our plea. If worse comes to worst and one remains active in the abyss, it could be very troublesome for us. If you are willing to work on our behalf once more, please come back to hear our plea.    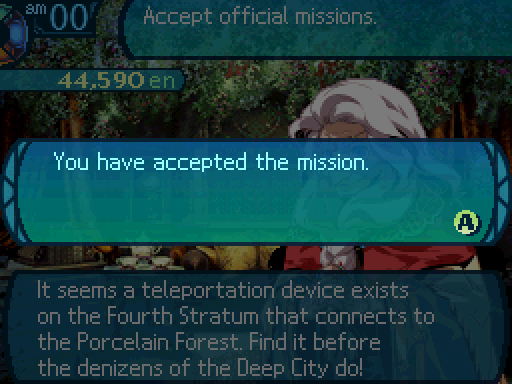 I guess we don't have much choice but to accept. I guess we don't have much choice but to accept. I�ll go fetch the Princess. I�ll go fetch the Princess. I should inform you of the particulars of this mission. It concerns the teleportation device I mentioned previously. I�d like for you to find it. ...In truth, there seems to be one such device in the Porcelain Forest where I convalesce. What should be a peaceful, holy sanctuary is now infested with hitherto unseen monsters. If by some chance the device in the abyss should be connected to the Porcelain Forest... I am greatly concerned... about this, and what my Yggdrasil-possessed brother may do. Thus, you must find for me the teleportation device before those from the Deep City control it. You will face not only the Deep Ones, but also those of the Deep City... The risks will be steep. But I believe that it is within your power to accomplish this. For my part, I have no power... I can only trust in your skill. Please, return safely! I should inform you of the particulars of this mission. It concerns the teleportation device I mentioned previously. I�d like for you to find it. ...In truth, there seems to be one such device in the Porcelain Forest where I convalesce. What should be a peaceful, holy sanctuary is now infested with hitherto unseen monsters. If by some chance the device in the abyss should be connected to the Porcelain Forest... I am greatly concerned... about this, and what my Yggdrasil-possessed brother may do. Thus, you must find for me the teleportation device before those from the Deep City control it. You will face not only the Deep Ones, but also those of the Deep City... The risks will be steep. But I believe that it is within your power to accomplish this. For my part, I have no power... I can only trust in your skill. Please, return safely! No one knows what may lurk in the shrine�s depths. You�d best be on your toes! And remember the secondary mission objective: Come back safely! Understood!? Oh boy... What did we just get into? Her brother... You don't think she was talking about the Abyssal King, do you? He's the only one that fits that description. But, what are we going to do about him? I don't think there's much we can do other than to carry out this mission. No one knows what may lurk in the shrine�s depths. You�d best be on your toes! And remember the secondary mission objective: Come back safely! Understood!? Oh boy... What did we just get into? Her brother... You don't think she was talking about the Abyssal King, do you? He's the only one that fits that description. But, what are we going to do about him? I don't think there's much we can do other than to carry out this mission.Let's see what she has to say normally.  It�s such a fantastical story that no one would believe it now... But you�re different. You�ll see it with your own eyes in the depths of the abyss. Just you wait. It�s such a fantastical story that no one would believe it now... But you�re different. You�ll see it with your own eyes in the depths of the abyss. Just you wait. DS Version DS Version  Since you came here from Armoroad, tell me... do you trust the Senatus? I... No one has mankind�s interests at heart more than the Abyssal King. Be sure to keep that in mind when choosing sides. Since you came here from Armoroad, tell me... do you trust the Senatus? I... No one has mankind�s interests at heart more than the Abyssal King. Be sure to keep that in mind when choosing sides.You can't change sides after choosing in the 3rd Stratum. This dialogue may be misplaced or something.  DS Version DS Version  All the materials you brought back have led to a real improvement in both offices of Napier�s Firm. I bet my sister�s pleased. This�ll lead to higher profits, and there�s nothing she loves more. ...I wish she could find something besides money that would make her happy. All the materials you brought back have led to a real improvement in both offices of Napier�s Firm. I bet my sister�s pleased. This�ll lead to higher profits, and there�s nothing she loves more. ...I wish she could find something besides money that would make her happy. DS Version DS Version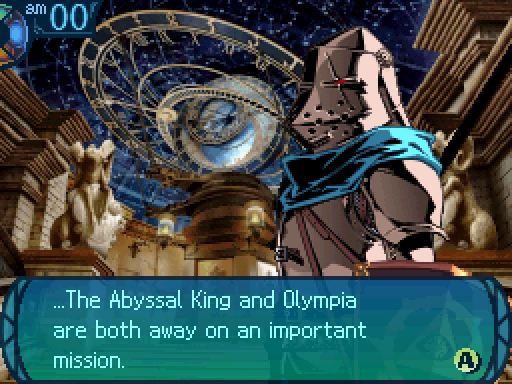  The grand plan to save Armoroad--and all mankind--is about to begin! Somehow, I don't like the sound of that. The grand plan to save Armoroad--and all mankind--is about to begin! Somehow, I don't like the sound of that.
Araxxor fucked around with this message at 00:06 on Feb 21, 2016 |
|
#
?
Jan 18, 2016 05:12
|
|
|
Also some other corrections that I now have to apply and edit according in every single update. I've actually got my hands on the EO3 game data this time instead of reading about it secondhand. There is no such thing as a TP stat. That's actually the location ID that somehow got confused for one. (It comes way before HP in the enemy data, so I dunno what happened there.) Also any values I put as 122 are actually 150. The place I was using somehow misread a hex value of 96 (which translates to 150, mind you) as 22. I don't know how that even happened. Also, RIP EO1 LP. That seems to have died completely. 
Araxxor fucked around with this message at 05:15 on Jan 18, 2016 |
|
#
?
Jan 18, 2016 05:12
|
|
|
Well, I'm glad this LP hasn't died. Welcome back, Doc.
|
|
#
?
Jan 18, 2016 06:45
|
|
|
This truly is Schrodinger's LP; it is alive and yet it is dead at the same time.
|
|
#
?
Jan 18, 2016 06:54
|
|

|
Son Ryo posted:Well, I'm glad this LP hasn't died. Welcome back, Doc. I, on the other hand, am sorry you have to go through the entire LP to correct it for errors. Though I share Son Ryo's original sentiment.
|
|
#
?
Jan 18, 2016 09:01
|
|
|
It's back 
|
|
#
?
Jan 18, 2016 16:35
|
|
|
Dr. Fetus posted:Also some other corrections that I now have to apply and edit according in every single update. Having to update everything must suck, but I'm glad you re-opened. I read through your other LP and just caught up with this one recently, and it's excellent! Thank you for continuing to update Dr. Fetus! 
|
|
#
?
Jan 18, 2016 17:20
|
|


|
Huh. Well, okay, that explains the Deep King, I guess? Generally pulling out someone who's stuck his thumb in the dike of madness is not a wise move.
|
|
#
?
Jan 19, 2016 04:21
|
|
|
You gave me a real scare there Fetus. I thought you actually abandoned this thread because of all the really lovely luck you've had in the run of it.
|
|
#
?
Jan 23, 2016 05:33
|
|
|
cdyoung posted:You gave me a real scare there Fetus. It was a combination of doing this LP, the EO2U Story LP, and data mining EO4. Doing all that at once kind of burned me out on EO for a while. I got done with the last thing, so I decided to reopen the LP. Next update is probably gonna take a bit longer to come out. I am now digging through the EO3 files and found the data for the Sea Quest NPCs. I now have even more corrections to do. (Hey Tyty, if you get back to that EO4 LP, the data for NPCs is in the Event folder, file name: npc_char.tbl)
|
|
#
?
Jan 23, 2016 05:54
|
|
|
I've marathoned your EO2 thread and this one for the past few weeks and of course the thread got locked as soon as I was done catching up.  I'll say that I greatly appreciate the thorough research and analysis you've put into both these LPs. Add to that the pleasant writing, lengthy updates, and even some cool experimenting moments (Fists of Fire Faye or the pure magic that was Ur-Child stand out the most to me). Even the threads have been cool and pushing for varied teams. All that to say this is awesome and I'm glad it's still a thing. ")
Miacis fucked around with this message at 21:45 on Jan 23, 2016 |
|
#
?
Jan 23, 2016 21:41
|
|

|
Miacis posted:I've marathoned your EO2 thread and this one for the past few weeks and of course the thread got locked as soon as I was done catching up. Well, thank you. Started working on reformatting Sea Quest NPC details. You'll be seeing much more detailed Sea Quest writeups from now on. Like so: Dr. Fetus posted:
Much more detailed and should probably give people a better idea on how they operate. Funnily enough, this was one of the few things about the game not data-mined, for some odd reason. I couldn't find info on the NPCs anywhere and had to dig it out myself. And I have to do this for every Sea Quest NPC now. Also started added in some new info to boss statistics. Dr. Fetus posted:
Now that I know how Lethal Resistance properly works, I'll add in that info where applicable. Oh and as for the actual mechanics, I updated the Ailments writeup to give more details on that. Dr. Fetus posted:Now there's another multiplier that gets applied, but only in a few select cases. This multiplier is called Lethal Resistance, and it's applied only when trying to inflict Instant Death and Petrification on a boss or most enemies that have a 1% resistance to those. Now it's completely impossible to inflict Petrification on a boss, but Instant Death is a different story. The Wildling's Wild Mastery normally ignores resistances, so if they used Call Tiger, they would have a 15% chance to kill their target thanks to Wild Mastery. If it weren't for Lethal Resistance anyway. The Lethal Resistance multiplier is actually applied to the bonus chance that Wild Mastery provides, and there's 4 different values it can have. Listed below are those values, and what they reduce Wild Mastery's success rate to: So yeah, that's what LR - #% means. Took out the 1% info since that's redundant. Also funny story. I started data mining Persona Q (I'd describe it as a ROM hack of EO4 from what I've seen in the data. It's practically the same format) and found out that Impure Reach is a twice as powerful Wild Mastery. It's a 30% boost to ailment and instant death infliction rates that ignores any resistances entirely! 
Araxxor fucked around with this message at 06:36 on Jan 24, 2016 |
|
#
?
Jan 24, 2016 02:44
|
|

|
Dr. Fetus posted:Also funny story. I started data mining Persona Q (I'd describe it as a ROM hack of EO4 from what I've seen in the data. It's practically the same format) and found out that Impure Reach is a twice as powerful Wild Mastery. It's a 30% boost to ailment and instant death infliction rates that ignores any resistances entirely! Everyone knew that already, which is why Naoto is a required party member when you get the ability to add skills to persona. her Hama and mudo skills were already obscene, and Impure reach made her a screen clearing monster.
|
|
#
?
Jan 24, 2016 08:17
|
|
|
So I started making preps for the next Stratum boss (that'll probably be coming after the next update, assuming I don't have to split it up) and I was debating on a little something something. Namely, Rose's skillset.   There's her normal skillset.   And her Might Makes Right skillset. (points in White Flame are in there by accident. )Should I switch to her new skillset, or stick with the normal one? Araxxor fucked around with this message at 20:17 on Jan 28, 2016 |
|
#
?
Jan 28, 2016 18:27
|
|
|
Let's see the new skillset.
|
|
#
?
Jan 28, 2016 18:37
|
|


|
Oh, it's time 
|
|
#
?
Jan 28, 2016 18:42
|
|

|

|
| # ? May 30, 2024 16:47 |
|
|
Let's see something new
|
|
#
?
Jan 28, 2016 18:51
|
|