


|
Painted up some Pelegrath Bloodhowls from Wrath of Kings. The miniatures are fairly unique, and more importantly they are cheap. Unfortunately I found out that you do get what you pay for. The fine details on the plastic models is pretty muddy, and in some places non-existent. The big details like muscle definition was fantastic, but the little hard details like buckles, shield straps and sword hilts were pretty poor. Their parts splits meant little to no gap-filling required, but the mold lines running over the organic details were a pain to clean up. Painted quick and dirty to a tabletop standard. The skin was about 60:40 airbrushed with hand-finished highlights. Bases were made with Fimo and the textured rolling pins from http://www.greenstuffworld.com/en/ 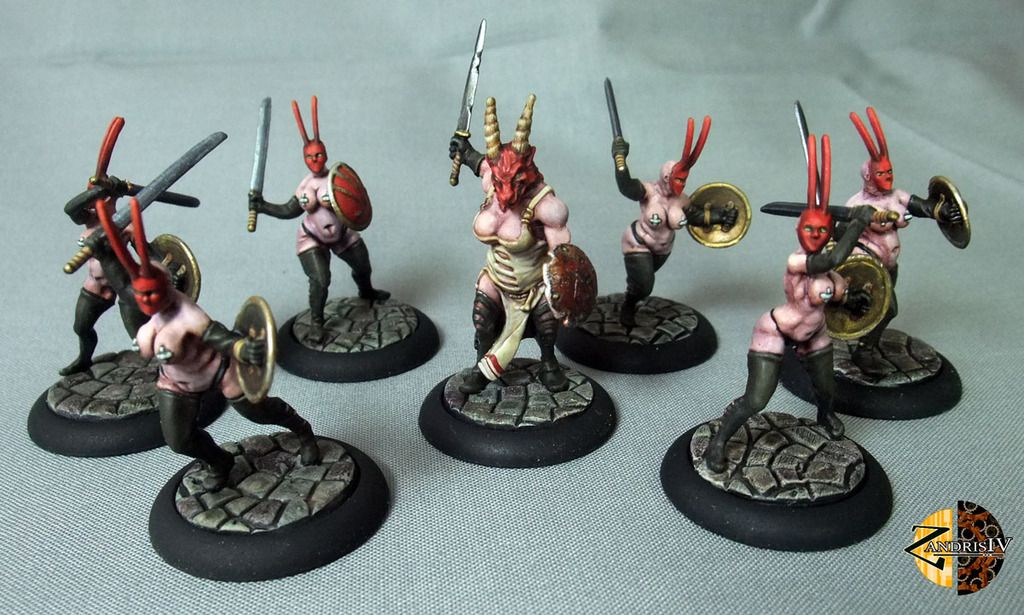
|
 #
?
Jul 4, 2016 13:11
#
?
Jul 4, 2016 13:11
|
|


|

|
| # ? May 9, 2024 19:21 |
|
|
Well now 
|
|
#
?
Jul 4, 2016 15:26
|
|


|
Finally finished my Riptide. Not super happy to be honest but it's been on the go for months now and I just wanted it done.    
|
|
#
?
Jul 4, 2016 15:52
|
|

|
I like it - the colours are very clean but there's enough detail (e.g. on the gun barrel) to stop it from looking cartoony. The cyan on the missiles and lenses really help them pop too.
|
|
#
?
Jul 4, 2016 16:04
|
|

|
Is there any secret to blackened steel? Many of the paintings of the medieval period show dark metal: 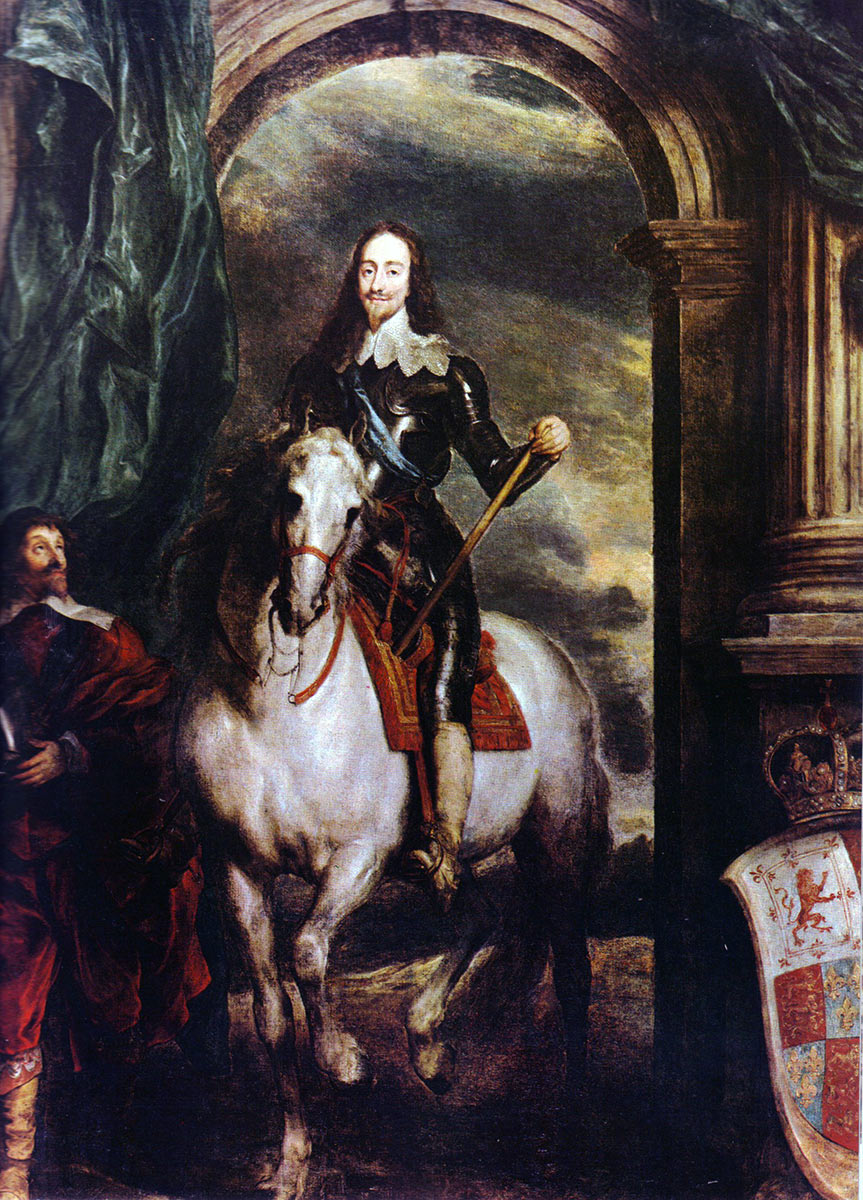  And I'd like to try to replicate that to contrast against the bright heraldry.
|
|
#
?
Jul 4, 2016 19:44
|
|

|
Southern Heel posted:Is there any secret to blackened steel? Many of the paintings of the medieval period show dark metal: Start from a black metallic base and highlight in progressively lighter metals. Something like this for example. 
|
|
#
?
Jul 4, 2016 19:54
|
|
|
I want to paint my Deadzone terrain but apparently the spraypaint I wanted to use has some kind of weather resistance or something that makes water-based acrylics and VSP pool on it, so I can't really prime or anything. It's like I covered the poo poo in oil. So, 2 part question. 1- What can I put on water-resistant paint that will make it accept my acrylics? 1B- If nothing can be done, what's the best paint for the money to use in an airbrush?
|
|
#
?
Jul 4, 2016 22:05
|
|

|
signalnoise posted:I want to paint my Deadzone terrain but apparently the spraypaint I wanted to use has some kind of weather resistance or something that makes water-based acrylics and VSP pool on it, so I can't really prime or anything. It's like I covered the poo poo in oil. So, 2 part question. Try spray varnish? Matte varnish might give it some tooth for other acrylics to bind to it. Alternatively try a different type of paint? Spray enamels at it and see if they bind? I wonder if the weather resistance is because of some hydrophobic component that repels water, if so all our water-based acrylics aren't going to work. Enamels use an organic solvent so they might stick.
|
|
#
?
Jul 5, 2016 00:42
|
|
|
Z the IVth posted:Try spray varnish? Matte varnish might give it some tooth for other acrylics to bind to it. Alternatively try a different type of paint? Spray enamels at it and see if they bind? I wonder if the weather resistance is because of some hydrophobic component that repels water, if so all our water-based acrylics aren't going to work. Enamels use an organic solvent so they might stick. Spray varnish did the trick! Thanks
|
|
#
?
Jul 5, 2016 03:54
|
|
|
Speaking of which, would spray varnish be a good way of "priming" clear resin? I want to do some translucent effects on it, so regular primer is obviously a no go.
|
|
#
?
Jul 5, 2016 06:26
|
|

|
Avenging Dentist posted:Speaking of which, would spray varnish be a good way of "priming" clear resin? I want to do some translucent effects on it, so regular primer is obviously a no go. You run the risk of fogging it up, depending on the varnish. Matte will most likely do this, but gloss would probably be safe. However, if you have any Future/Pledge, you can safely dip the clear resin into it and it'll actually come out shinier and prettier-looking.
|
|
#
?
Jul 5, 2016 12:31
|
|

|
Avenging Dentist posted:Speaking of which, would spray varnish be a good way of "priming" clear resin? I want to do some translucent effects on it, so regular primer is obviously a no go. Spray the effects onto bare resin and then future floor wax it afterwards?
|
|
#
?
Jul 5, 2016 13:07
|
|
|
Perry Miniatures figures, Vallejo colour paint set, Daylight lamp, W&N brush set - all delivered via Amazon Prime to my office today. I've came home early and didn't bring them. 
|
|
#
?
Jul 5, 2016 13:39
|
|
|
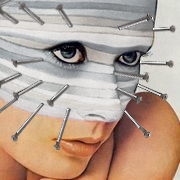
Slimnoid posted:You run the risk of fogging it up, depending on the varnish. Matte will most likely do this, but gloss would probably be safe. However, if you have any Future/Pledge, you can safely dip the clear resin into it and it'll actually come out shinier and prettier-looking. Would "matte varnish, paint some of the bits, and then gloss varnish" work? I'm not actually sure I want the bit to be shiny, but that might be cool. If it helps, it's a little transparent skull that shoots lasers out of its eye sockets or something (its ranged attack is called "Skull Gaze"). My goal is to use some transparent paints to make his eyes glowing red and to do a little shading, but make it look overall like a crystal skull. Here's some pictures (not mine) of the guy:    I welcome any alternative suggestions as well.
|
|
#
?
Jul 5, 2016 17:36
|
|
|
Avenging Dentist posted:Would "matte varnish, paint some of the bits, and then gloss varnish" work? I'm not actually sure I want the bit to be shiny, but that might be cool. Cast the skull with some sort of clear resin and embed a rad LED light inside it
|
|
#
?
Jul 5, 2016 17:41
|
|


|
w00tmonger posted:Cast the skull with some sort of clear resin and embed a rad LED light inside it It already is clear resin (see the second pic). While I like the look of LED lights in models, I'd rather do this purely with paint, just for stylistic reasons. e: Maybe a very-transparent sky blue all over, some shading, and then a transparent red glow around the eyes/nose, which would be a more-opaque orange-white? Avenging Dentist fucked around with this message at 17:55 on Jul 5, 2016 |
|
#
?
Jul 5, 2016 17:47
|
|
|
How would you do the pearlescent effect on that last pic?
|
|
#
?
Jul 5, 2016 18:25
|
|

|
lemonadesweetheart posted:How would you do the pearlescent effect on that last pic? I dunno if I'm even going to try for that, but Scale75's "alchemy" paints might give a good pearlescent effect. I wanted to make it look more like a crystal skull, but with some better definition of the details (actual crystal skulls are hard to "read"). Avenging Dentist fucked around with this message at 18:33 on Jul 5, 2016 |
|
#
?
Jul 5, 2016 18:31
|
|
|
lemonadesweetheart posted:How would you do the pearlescent effect on that last pic? Is put some off whites, yellows, greens, blues, and purple on my palette and start mixing and laying down dots.
|
|
#
?
Jul 5, 2016 18:54
|
|


|
Avenging Dentist posted:Would "matte varnish, paint some of the bits, and then gloss varnish" work? I'm not actually sure I want the bit to be shiny, but that might be cool. It might be better just to layer down paint first. I've done that with canopies for vehicles before and it wasn't a problem, and that's basically the same thing as what you're going to be working with. I'm not sure how this following part would work, but glazes might be what you want to work with. They're transparent (to a point) and would do better with 'staining' the skull to give the impression of color, and work well for glowing eyes and the like.
|
|
#
?
Jul 5, 2016 19:14
|
|
|
Slimnoid posted:It might be better just to layer down paint first. I've done that with canopies for vehicles before and it wasn't a problem, and that's basically the same thing as what you're going to be working with. Yeah, I was thinking that maybe just mixing in a sufficient amount of medium into my paints to make them translucent (and/or using clear paints to begin with) might be sufficient. Maybe I can find a cheap kit with clear resin to test some ideas out on so I can see how the paint works. e: One last question about this: any thoughts on using clear paints vs "traditional" paints? I already have Tamiya Clear Red and could grab a couple more colors to use for this guy. Avenging Dentist fucked around with this message at 19:50 on Jul 5, 2016 |
|
#
?
Jul 5, 2016 19:45
|
|
|
Avenging Dentist posted:Yeah, I was thinking that maybe just mixing in a sufficient amount of medium into my paints to make them translucent (and/or using clear paints to begin with) might be sufficient. Maybe I can find a cheap kit with clear resin to test some ideas out on so I can see how the paint works. The bonus to clear paints* is that it's already mixed to the ratio you'd need for what you want to do. There won't be any guess-work or trial and error to go through, and you can get to work immediately. You CAN get the same (or very similar) results by mixing traditional paints with medium, but it requires more work and experimentation to get the right ratio. If you're a DIY kind of painter then you'll be just fine with this option, and you should probably learn how to do this at some point anyway, but if you want a consistent, known result then you might want to grab some clear paints. * Do note that the Tamiya Clear line is an ether-based mix, rather than something like GW glazes, so they work differently. I honestly don't know how you'd be able to use medium with trad paint to get the same result as you would with Tamiya; they have a very specific effect that I find hard to replicate using glazes or washes.
|
|
#
?
Jul 5, 2016 20:02
|
|
|
Well, any excuse to buy more paints, I say! I found some clear resin air elementals and I'll fart around with getting a sick translucent blue effect on them. Maybe I'll actually post pics too! (I'll at least post some pics of the cleanup I've been doing on some of my other Dark Age guys, even though that's more "assembly" than "painting".)
|
|
#
?
Jul 5, 2016 20:14
|
|
|
Avenging Dentist posted:Well, any excuse to buy more paints, I say! I found some clear resin air elementals and I'll fart around with getting a sick translucent blue effect on them. Maybe I'll actually post pics too! (I'll at least post some pics of the cleanup I've been doing on some of my other Dark Age guys, even though that's more "assembly" than "painting".) Yeah, I generally err on the side of pre-mixed clear/translucent paints. At least for bulk painting, anyway; if I'm doing a one-off figure I'll mix up my own glaze for a particular shade of paint, but if I'm doing 20-30 guys at a whack it's simply less of a hassle to drop a few bucks for someone else to do the annoying work.
|
|
#
?
Jul 5, 2016 20:42
|
|
|
Just dumped a pile of eBay wins into a bucket of simple green pro HD (it is purple and not at all green?). Will this melt my toys?
|
|
#
?
Jul 5, 2016 20:44
|
|

|
Quasi-related to resin priming, I was considering spraying some MDF terrain I have with Liquitex matte varnish as "primer" (the pieces have some fairly intricate lines traced on many of the surfaces, and I didn't want to chance losing that detail by applying something like auto filler primer like I've seen suggested elsewhere). I might try it on a test piece first to make sure I'm not doing it all dumb. Speaking of dumb: I've recently eBay- rescued a GW Dreadstone Blight kit, and when it arrived it was of course partially glued together. Badly. Like, the first-floor wall looked like it was twisted, it won't sit straight on the base, etc. The wall is about 3/16" thick GW hard plastic. Would it be safe to put that into a quick boiling-water bath to reshape it, followed by ice water, or should I try some other method to straighten it? Or am I just boned and stuck with a messed-up kit?
|
|
#
?
Jul 5, 2016 20:48
|
|


|
Nichol posted:Just dumped a pile of eBay wins into a bucket of simple green pro HD (it is purple and not at all green?). No. Dr. Gargunza posted:Speaking of dumb: I've recently eBay- rescued a GW Dreadstone Blight kit, and when it arrived it was of course partially glued together. Badly. Like, the first-floor wall looked like it was twisted, it won't sit straight on the base, etc. The wall is about 3/16" thick GW hard plastic. Would it be safe to put that into a quick boiling-water bath to reshape it, followed by ice water, or should I try some other method to straighten it? Or am I just boned and stuck with a messed-up kit?
|
|
#
?
Jul 5, 2016 20:48
|
|
|
Gareth Gobulcoque posted:Is put some off whites, yellows, greens, blues, and purple on my palette and start mixing and laying down dots. This technique sounds interesting - care to elaborate?
|
|
#
?
Jul 5, 2016 20:53
|
|
|
Something I painted quickly for use in Warmahordes and Confrontation because I don't play AoS but some of the terrain is nice. 
|
|
#
?
Jul 5, 2016 23:30
|
|

|
dr_ether posted:Something I painted quickly for use in Warmahordes and Confrontation because I don't play AoS but some of the terrain is nice. Nice! I'm really digging the glow on those spooky braziers. (Is that the Eternity Stair? It always bothered me that something called an "Eternity Stair" isn't taller.) berzerkmonkey posted:The plastic probably won't bend with a hot water bath - that really only works with resin and cheap game plastics. Try a heat gun. You'll have to be careful, as you're really softening the plastic, but once you reposition it, it won't be going anywhere. Thanks, I'll give that a shot. Do you still need to quench in cold water after reshaping the plastic, or is it better to just let it cool off? (Also, can I get the same effect from a regular hair dryer, or would that take the rest of my life? )
|
|
#
?
Jul 6, 2016 00:00
|
|
|
Dr. Gargunza posted:Nice! I'm really digging the glow on those spooky braziers. (Is that the Eternity Stair? It always bothered me that something called an "Eternity Stair" isn't taller.) It's the AoS Dragonfate Dias.
|
|
#
?
Jul 6, 2016 00:12
|
|
|
Z the IVth posted:This technique sounds interesting - care to elaborate? Ha there's not much to it. You're just starting with a pale yellow and mixing various greens, blues, purples, skin tones also good in small batches or just grabbing other colors and putting little dots down in a semi random/ semi radiating pattern. You want them to blend into each other a little, but remain as distinct patches. If you thin your paints it'll take a long time to build up the layers and give you a lot of depth. If you don't thin it'll look more painterly but go really quick. Dots and lines are useful things for building up textures and unusual surfaces like pearl or that �ther effect in this case or just mundane leather.
|
|
#
?
Jul 6, 2016 00:50
|
|
|
Probably a dumb question, but do I need to thin liquitex matte varnish before I shoot it through my airbrush? If so, with what? Relatedly, I've been using some stuff sold as "airbrush cleaner" to clean my brush, but I imagine there's something cheaper to use. Any suggestions?
|
|
#
?
Jul 6, 2016 03:09
|
|


|
Hopefully an airbrush expert can help me out. Recently, when I have been airbrushing with white and I am getting a lot of speckles of white paint around the stream. I have been able to get smooth blends before, but for some reason it is spattering slightly now. This seems to be an issue with whites specifically. I have tried with P3 white, Vallejo white, and for good measure Vallejo Air white as well. I am using a Sotar 20/20 and am thinning with a mix of distilled water, matte medium, and fluid retarder.
|
|
#
?
Jul 6, 2016 03:28
|
|

|
Swagger Dagger posted:Probably a dumb question, but do I need to thin liquitex matte varnish before I shoot it through my airbrush? If so, with what? I don't thin liquitrex and it shoots just fine. Window cleaner works as cheap airbrushing cleaner.
|
|
#
?
Jul 6, 2016 03:52
|
|

|
Red Shoe posted:Hopefully an airbrush expert can help me out. Recently, when I have been airbrushing with white and I am getting a lot of speckles of white paint around the stream. I have been able to get smooth blends before, but for some reason it is spattering slightly now. This seems to be an issue with whites specifically. Adjust your air pressure, if its splattering that typically means its getting 'stuck' in the system, either from being too thick, or having insufficient force to project it smoothly. Also, check that you don't have paint building up around the nozzle guard that could be adding to it.
|
|
#
?
Jul 6, 2016 03:53
|
|

|
Slimnoid posted:A cheap way to get the shape of the tip back is using conditioner--like what you use in your hair. I don't know how well this would work on synthetics. Cat Face Joe posted:I'll try it this weekend and report back. poasting to confirm this did not work. Tip is still hosed.
|
|
#
?
Jul 6, 2016 18:42
|
|


|
Cat Face Joe posted:poasting to confirm this did not work. Tip is still hosed. I've got a blue bottle of "Brush Restorer" by Vallejo (~$10) which has helped me reshape a few points on my brushes.
|
|
#
?
Jul 6, 2016 19:22
|
|


|
Weirdo posted:I've got a blue bottle of "Brush Restorer" by Vallejo (~$10) which has helped me reshape a few points on my brushes. I plan on investing in the real deal soon so I will keep this in mind.
|
|
#
?
Jul 6, 2016 20:13
|
|
|

|
| # ? May 9, 2024 19:21 |
|
|
Dr. Gargunza posted:Nice! I'm really digging the glow on those spooky braziers. (Is that the Eternity Stair? It always bothered me that something called an "Eternity Stair" isn't taller.) Dr. Gargunza posted:Thanks, I'll give that a shot. Do you still need to quench in cold water after reshaping the plastic, or is it better to just let it cool off? (Also, can I get the same effect from a regular hair dryer, or would that take the rest of my life? ) You can probably let it cool naturally - plastic is pretty resilient and cools quickly. A hair dryer will probably not get hot enough, but you will certainly eventually burn it out. Harbor Freight sells heat guns for like $15. Just be careful - you can melt your model into goo if you aren't conservative.
|
|
#
?
Jul 6, 2016 20:47
|
|