


|
Can't tell if you're serious. The mention of "fill select" suggests not. Either way, I've just been reading a bunch of stuff about the production of Guardians of the Galaxy. They say that set of Knowhere was about 1.2 billion polygons. How do you even model something like that? Everything in parts and then assemble it by using proxies or what?
|
 #
?
Oct 31, 2016 03:26
#
?
Oct 31, 2016 03:26
|
|


|

|
| # ? May 31, 2024 03:51 |
|
|
It's usually a combination of sculpted assets (super high res), procedural modeling, hero props, instancing (hundreds of copies of an asset) etc.
|
|
#
?
Oct 31, 2016 03:33
|
|


|
mutata posted:It's usually a combination of sculpted assets (super high res), procedural modeling, hero props, instancing (hundreds of copies of an asset) etc. Check your PMs, sent you a couple.
|
|
#
?
Oct 31, 2016 15:13
|
|

|
Do feature films use sculpted assets imported as is from Z-Brush or do they always bake detail into displacement maps before putting them in a scene? I work in TV so the most advanced we ever get is making bump maps. Woo.
|
|
#
?
Nov 2, 2016 04:13
|
|


|
Ccs posted:Do feature films use sculpted assets imported as is from Z-Brush or do they always bake detail into displacement maps before putting them in a scene? On environment assets we would decimate high res sculpts and then use proxies in the scene to render. Pretty much only baked displacements for characters or geo that FX needed for destruction or deformation in some way.
|
|
#
?
Nov 2, 2016 04:25
|
|

|
Ccs posted:Do feature films use sculpted assets imported as is from Z-Brush or do they always bake detail into displacement maps before putting them in a scene? They usually get remeshed, and optimized a fair bit. Ideally in maps. Depends on the company and how the pipeline is setup.
|
|
#
?
Nov 2, 2016 06:05
|
|


|
render them onto flat 2d planes with baked lighting and let z sort em out
|
|
#
?
Nov 2, 2016 08:50
|
|


|
Combat Pretzel posted:OK, I found out where to actually see the coordinates of CVs of NURBS curves. It's in the channel box when editing the vertices, do the deed on "CVs (click to show)". Why does everything have to be so complicated with Maya, why not have a simple optional overlay like Max has for transform, rotation and poo poo. Says Maya is overly complicated, and then references Max as the more-intuitive easier alternative. Am I in bizzaro land??
|
|
#
?
Nov 3, 2016 07:28
|
|

|
Synthbuttrange posted:render them onto flat 2d planes with baked lighting and let z sort em out Why isn't this done more? What is the point of rendering an entire scene over and over again unless the camera moves? Doredrin fucked around with this message at 15:54 on Nov 3, 2016 |
|
#
?
Nov 3, 2016 14:45
|
|

|
Combat Pretzel posted:Can't tell if you're serious. The mention of "fill select" suggests not. That's not too impressive honestly. They may be counting the number of subdivisions the model gets at render time. ILM is pretty crazy on modeling detail. I had to work on film with a big thing in it and the big thing required the IT department to switch workstations so I could load and work with the thing... 128GB of ram, that was few years ago. I had to make my own proxies and "deal with it" on a shot by shot basis. I've seen models that were bid 6 man months to a man year of labor and at times they were sectioned off and dealt with piece by piece by 1-3 artists. I worked on a few projects at Rhythm where I spent 2 full months as an FX guy just breaking down a model for a destruction sequence [large mechanical things, ships, etc] with the modeling team [2 other guys working on the model], just carving up hulls, grouping structural components, etc. Stuff would go back and forth for retexturing as we cut through things, running it through a shot and deciding what needed additional detail or what needed to be broken apart. Big K of Justice fucked around with this message at 17:30 on Nov 3, 2016 |
|
#
?
Nov 3, 2016 17:22
|
|
|
 i decided to try my hand at sculpting some bone/antler along with flint/obsidian materials in mudbox. view it in 3d on my artstation lol
|
|
#
?
Nov 3, 2016 18:24
|
|

|
SVU Fan posted:Says Maya is overly complicated, and then references Max as the more-intuitive easier alternative. Am I in bizzaro land??
|
|
#
?
Nov 3, 2016 19:36
|
|
|
No no all you have to do is hold down the spacebar and it's RIGHT THERE 
|
|
#
?
Nov 3, 2016 19:42
|
|
|
Don't forget right click context menus, and their modifiers too! 
|
|
#
?
Nov 4, 2016 02:31
|
|

|
Combat Pretzel posted:What I meant is that in Max, a right-click on the manipulation buttons opens up a dialog where I can numerically transform/rotate/scale the selected object, of any type. In Maya I have to hunt the respective option all over the place, depending on object type. That's actually more sane in Max than Maya. I'm the last person to say Maya is intuitive or logical in its default workflows, picking up new software is an uphill slug too, but the thing you were looking for was 7 pixels below where you edit every other transform in Maya. The channel box is even loaded on the default interface. It's the least complicated thing I can think of in Maya. Why are you complaining about this? Stick to Max.
|
|
#
?
Nov 4, 2016 09:13
|
|

|
Are we still talking about this? ... 12 years later ... Well, I mean I joined in 04. Maybe you guys were arguing about this before then too. I don't know. Traditionally Maya has been better for animation and Max better for modeling. These days however, they have been under the same company for so long ... It's basically just a matter or preference, or which one you started with first.
|
|
#
?
Nov 4, 2016 09:46
|
|


|
I don't think there's many animators arguing for Max over Maya though. Not that I'm animator or anything but they always complain about max
|
|
#
?
Nov 4, 2016 09:55
|
|
|
Modo's come a long way for modeling and rendering too. Of course the VJ's I know use Cinema 4d and the hardcore VFX people use Houdini. I gotta say, watching this video kinda made me want to use Max again. Sorta. FFW to the 41 min mark for the workflow tips. https://www.youtube.com/watch?v=gKz8-1fXmnw sigma 6 fucked around with this message at 10:28 on Nov 4, 2016 |
|
#
?
Nov 4, 2016 10:16
|
|
|
sigma 6 posted:Traditionally Maya has been better for animation and Max better for modeling. These days however, they have been under the same company for so long ... It's basically just a matter or preference, or which one you started with first.
|
|
#
?
Nov 4, 2016 13:18
|
|
|
I haven't followed that very closely but they already did that with Softimage XSI right?
|
|
#
?
Nov 4, 2016 22:15
|
|
|
Flesh Forge posted:I haven't followed that very closely but they already did that with Softimage XSI right? As far as I know - yes. A lot of people were very upset about it. I think Mudbox will probably be the next to go.
|
|
#
?
Nov 4, 2016 23:26
|
|
|
I have a question about subtools in zbrush. If I make several subtools, and then want to merge them into one so that I can export all the geometry as an .obj, then I can't have separate textures and UVs for each subtool right? They're lost during the merge operation when I use subtool master. Is there any trick that would let me save the texturing that I do on each subtool after the merge?
|
|
#
?
Nov 4, 2016 23:25
|
|

|
I thought you didn't have to use subtool master to merge subtools. You can do it in the normal subtool palette. I don't see why it would change uvs but I've never really checked. You can't have separate textures by poly group in zbrush though.
|
|
#
?
Nov 5, 2016 02:05
|
|
|
Yeah you'll need to use a separate tool to break out the uv layers again.
|
|
#
?
Nov 5, 2016 02:08
|
|
|
 Something new i'm working on! Just learned the basics of zbrush map exporting and photoshop compositing which is cool and good. Any critique is good.
|
|
#
?
Nov 5, 2016 07:14
|
|

|
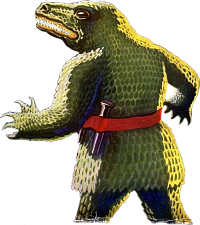
Eastdrom posted:
What is going on with the second pair of arms? It is very unclear.
|
|
#
?
Nov 5, 2016 08:45
|
|
|
He's supposed to be shaving with a straight razor. I'll have to fix that, or re-do the prop to make it more obvious somehow.
|
|
#
?
Nov 5, 2016 08:55
|
|
|
It took me a moment to get that myself, but then I noticed the towel around his waist and it all clicked.
|
|
#
?
Nov 5, 2016 16:23
|
|

|
Eastdrom posted:He's supposed to be shaving with a straight razor. I'll have to fix that, or re-do the prop to make it more obvious somehow. The confusion is mostly the angle of the camera, the second pair of arms blend right into the first pair. I didn't even see that they were there at first. A different camera angle or a shadow cast could help bring them out. Some shaving cream would also make his shaving more clear.
|
|
#
?
Nov 5, 2016 16:30
|
|


|
 working on an obsidian dagger with an antler handle
|
|
#
?
Nov 5, 2016 16:52
|
|
|
Listerine posted:I have a question about subtools in zbrush. If I make several subtools, and then want to merge them into one so that I can export all the geometry as an .obj, then I can't have separate textures and UVs for each subtool right? They're lost during the merge operation when I use subtool master. Is there any trick that would let me save the texturing that I do on each subtool after the merge? go to subtool->merge visible- and make sure "Uv" is turned on. this will merge all of your subtools to one object and keep the uvs. then you have to go to your texture palette and hit "new texture from polypaint". you need to make sure your uvs aren't overlapping tho or it wont work Eastdrom posted:He's supposed to be shaving with a straight razor. I'll have to fix that, or re-do the prop to make it more obvious somehow. you want might to give him some type of facial hair? i get the concept, but it gets confusing that he is shaving with nothing to shave here's a new thing for me. gonna get back into some of the traditional techniques and maybe do some more of those daily sculpts i was posting earlier  
|
|
#
?
Nov 5, 2016 18:30
|
|
|
SVU Fan posted:
I love this.
|
|
#
?
Nov 5, 2016 19:16
|
|
|
SVU Fan posted:go to subtool->merge visible- and make sure "Uv" is turned on. this will merge all of your subtools to one object and keep the uvs. then you have to go to your texture palette and hit "new texture from polypaint". you need to make sure your uvs aren't overlapping tho or it wont work So when you create UVs via the UV map palette, it's only creating one UV space that gets shared across all subtools, as opposed to creating a separate UV space per subtool?
|
|
#
?
Nov 6, 2016 00:53
|
|
|
Yup, zbrush doesnt handle that.
|
|
#
?
Nov 6, 2016 00:53
|
|
|
How do Cinema's sculpting tools compare to Zbrush, if anyone's familiar with both? I've owned Zbrush for many years now and it just kind of sits there and baffles me, but I recently upgraded my version of Cinema and the sculpting tools look pretty baller.
|
|
#
?
Nov 6, 2016 01:25
|
|
|
I want to get into sculpting, but the first steps have been pretty overwhelming. Feel like a 2 year old with PlayDo. In terms of skills, that is.
|
|
#
?
Nov 6, 2016 03:24
|
|
|
Combat Pretzel posted:I want to get into sculpting, but the first steps have been pretty overwhelming. Feel like a 2 year old with PlayDo. In terms of skills, that is. Sculpt a head from a sphere. Always a good way to start IMO. Kind of like starting with a circle / oval to begin learning how to draw a head.
|
|
#
?
Nov 6, 2016 14:09
|
|
|
I think what bugs me the most is the canvas stuff in ZBrush. As soon you add a new object, say a bunch of (placeholder) eyes to fill out the eye sockets, the initial sculpt is hosed and uneditable. Seeing a bunch of ZBrush speed sculpts on Youtube, the problem seems to be me, but I can't figure it out. Googling for it tells me that's the way it is, then what I see in Youtube suggests the opposite. I just don't get ZBrush. It is pretty powerful and easy to get some sort of result quickly, but then it screws you with absolutely weird UIX. --edit: Nevermind, I think I need these subtools. --edit2: Also, it likes to crash a lot it seems. --edit3: This is hard. Combat Pretzel fucked around with this message at 17:02 on Nov 6, 2016 |
|
#
?
Nov 6, 2016 15:15
|
|
|
Yeah my brain utterly balks on Zbrush  I am too old/dumb. I am too old/dumb.
|
|
#
?
Nov 6, 2016 20:51
|
|
|

|
| # ? May 31, 2024 03:51 |
|
|
SVU Fan posted:go to subtool->merge visible- and make sure "Uv" is turned on. this will merge all of your subtools to one object and keep the uvs. then you have to go to your texture palette and hit "new texture from polypaint". you need to make sure your uvs aren't overlapping tho or it wont work Thanks for the help, but when I try this I end up getting the color from just one subtool applied to every subtool. Is that because the UVs are overlapping? I don't mind the fact that Zbrush has a unique interface, my biggest complaint is that it's hard to find things like a UV viewer in the interface. I know it's there somewhere.
|
|
#
?
Nov 6, 2016 22:06
|
|