


|
Skippy Granola posted:Maybe the secret is to quit being so precious about all this woodworking junk and just build a thing that's a little better than the last one I built. I mean, I could talk trash... but you prefaced your post with "This is terrible" and if you're anything like me, disappointment from strangers feels bad, but nothing can feel as bad as you feeling crushing disappointment in yourself.
|
 #
?
Jan 7, 2017 01:18
#
?
Jan 7, 2017 01:18
|
|


|

|
| # ? Jun 8, 2024 00:36 |
|
|
Magres posted:I've seen stuff about alternating end grains in a couple of the books I've picked up, but I'm not super confident on what's going on - it looks like the end grain rings are all facing up on the surface of the table, which makes them all bow the same direct and can mess things up? The theory behind alternating grain is that it will limit the amount of cupping that can happen, basically worst case scenario with alternating grain is a washboard surface. There is some disagreement that tables actually cup the way theory would predict. I can tell you from experience that it's much easier to repair a table that uniformly cups by kerfing the bottom and bending it back in shape. If it washboards, you have to plane down the undulations and refinish. Most woodworkers arrange the grain to whatever looks best because if you use dry wood and finish both sides equally it greatly reduces the chances of any cupping.
|
|
#
?
Jan 7, 2017 01:48
|
|

|
Someone loaned me Tage Frid's books a while back and I started reading them after people were talking about them. He said that newer growth rings on boards will shrink more than older growth, and you should try laminating new growth to new growth and old growth to old growth rings. If you do new to old growth, there might be a step from the new growth shrinking more than old growth as it loses moisture. New growth rings being closer to the outside of the tree and old growth being toward the center. Also, another source said you should wait for glue to fully dry on a lamination before planing it, since the water in the glue will cause the wood to swell. If you plane it before that swelling disappears, then the wood will shrink past that level surface. edit: As for vises, I have the lee valley steel quick release bench vise medium size. I don't really like it...it only loosens it's hold and disengages the screw when you unwind it, ie. it doesn't back up, and it's a little hard to pull backwards sometimes. I think Eclipse might be a good vise but I haven't used it. There are other modern vises... Vintage Record quick release vises are good if you can find one. Not entirely sure what the debate is between flush vs. not flush with the face, but I think it has to do with being able to use the rest of the bench siding to hold your workpiece if you use a flush vise via bench dogs, holdfasts, etc. I find my vise can hold whatever I've used on it by itself without other aid, but whatever. Flattened Spoon fucked around with this message at 02:21 on Jan 7, 2017 |
|
#
?
Jan 7, 2017 02:12
|
|

|
Flattened Spoon posted:
This is one that gets repeated a TON and I've never seen it happen, neither with PVA or hide glues.
|
|
#
?
Jan 7, 2017 02:15
|
|

|
GEMorris posted:This is one that gets repeated a TON and I've never seen it happen, neither with PVA or hide glues. I'm trying to remember where I read it...it was either the flexner finishing book or understanding wood I think. I rented the flexner book from the library though so I can't look it up. edit: it was from understanding wood.
|
|
#
?
Jan 7, 2017 02:24
|
|
|
How much glue would you have to use before that altered the woods dimensions more than natural variation due to humidity?
|
|
#
?
Jan 7, 2017 02:25
|
|


|
GEMorris posted:This is one that gets repeated a TON and I've never seen it happen, neither with PVA or hide glues. Same NPR Journalizard posted:How much glue would you have to use before that altered the woods dimensions more than natural variation due to humidity? The excess is gonna squeeze out.
|
|
#
?
Jan 7, 2017 02:30
|
|


|
NPR Journalizard posted:How much glue would you have to use before that altered the woods dimensions more than natural variation due to humidity? Dunno...it only says that if the surface is planed while the glue line is still swollen from the glue, before the moisture is evenly distributed, then it'll leave a sunken joint. 
|
|
#
?
Jan 7, 2017 02:32
|
|
|
Mr. Mambold posted:The excess is gonna squeeze out. Sort of the point I was trying to make. Surely the amount of water in the glue thats left between the joint is going to be so minor that any evaporation is going to be negligible. Maybe this was a thing back in ye olde tymes when glue technology wasnt as good?
|
|
#
?
Jan 7, 2017 03:05
|
|
|
NPR Journalizard posted:Sort of the point I was trying to make. Surely the amount of water in the glue thats left between the joint is going to be so minor that any evaporation is going to be negligible. Maybe this was a thing back in ye olde tymes when glue technology wasnt as good? Hide glue would be even less susceptible to this as I believe it has an even lower water content than more modern PVA glues. Woodworking is really rife with these "common knowledge" things that get repeated over and over and that sound logical at first glance, but just don't come to pass in practice.
|
|
#
?
Jan 7, 2017 03:23
|
|
|
PYF hacked together problem-solving garbage from this evening's woodworking: This works ridiculously well for setting precise blade heights that are registered off the table instead of questionably-level insert place  Also I CA glued some scraps onto more scraps because I needed a really small planing stop for fitting splines. I've always just struggled with recutting on the tablesaw to get them to fit, but getting them close and fitting each one turned out to actually be faster.  Also mid-project shop disaster.
|
|
#
?
Jan 7, 2017 05:48
|
|


|
That looks clean to me.
|
|
#
?
Jan 7, 2017 06:26
|
|
|
Like how do you ever find your clamps when they're all hiding on the wall like that
|
|
#
?
Jan 7, 2017 06:49
|
|


|
Hypnolobster: Are you building a box joint jig?
|
|
#
?
Jan 7, 2017 12:49
|
|

|
Hypnolobster posted:PYF hacked together problem-solving garbage from this evening's woodworking: I don't see a disaster. We don't have disasters. All I see is a happy little non-accident. An opportunity. It's your world.
|
|
#
?
Jan 7, 2017 16:16
|
|
|
I stumbled across this seemingly in-depth newbie buying guide: http://woodandshop.com/which-hand-tools-do-you-need-for-traditional-woodworking/ Curious to hear if anyone has any thoughts
|
|
#
?
Jan 7, 2017 16:40
|
|

|
His Divine Shadow posted:Hypnolobster: Are you building a box joint jig? Yep! I built the John Heisz jig (the one that increments on 1" -8 threaded rod), but I want a more versatile jig. Also I want to do more Matthias builds and this seemed surprisingly simple. I'm going to do the quickset tenon jig next.
|
|
#
?
Jan 7, 2017 17:48
|
|
|
There is no waste or fluff on that list, but I don't agree with the order due to both usefulness or cost, and the list is missing a router plane. My order: 1. Fore plane - you can buy used or new, I have a personal affinity for the veritas no6 fore plane as I've found I can do almost everything with it. You can go a long long way without owning another bench plane. 2. Set of bench chisels - 1/4", 1/2", 1" are IMO the critical ones, and I think the Stanley sweethearts are the best bang for the buck today 3. Hardware store saw - it'll be crosscut and likely induction hardened, you don't have to buy a $100+ saw. Or get a Ryoba saw if you are going down the Japanese path 4. Router plane - critical for creating and cleaning up joinery. This tool can take you a long way as well before you need to get more joinery planes 5. 12" combination square - eventually you'll want a 12 and a 6, but the 12 is more versatile if you can only have one 6. A way of drilling smaller holes - if you are going hand tool only then get an eggbeater drill, if you don't mind electrons get a cordless drill. Getting some good Brad point bits, and some spade bits, can get you a long way. 7. A hammer - Schwarz is a good resource for what to look for here. But 12-16oz and a claw for pulling nails rather than demolition are the key attributes. 8. A mallet - I prefer the veritas Cabinetmakers Mallet as it serves as both my assembly hammer and my chisel Mallet. 9. Marking knife - spear point, but not expensive, the veritas $13 one is the ticket. 10. Sharpening stuff - quality PSA backed sandpaper, a granite tile from home depot, and a $12 sharpening jig is both the cheapest entry point and has the least to learn. Get some mineral oil for both sharpening lubrication and for keeping your tools rust free. 11. Some clamps - for clamps 12" and shorter the light f-style are fine, for 24" the heavy f-style are great, and for 36"+ pipe clamps will do the job fine. Stop here and make the next items: 12. A pair of sawbenches - if you don't already own some 5-gallon buckets, get two, so you can use them as sawbenches to make the real sawbenches 13. Winding sticks - or buy some aluminum angle from home depot to do the same job. At this point you need to decide if you are going to have any stationery power tools or not. If the answer is yes, I'd get the following first: 14. A power planer - 12-13" lunchbox type. The DeWalt 735 is very popular but by no means the only good option, the Ridgid is quite capable for less $. 15. A used bandsaw - 14" or larger, old deltas are great, newer steel framed 14" saws are mostly good. If you don't have the room, desire, money, or philosophical bent to have stationary power tools, but don't mind using electrons, then I'd get: 14. A track saw - it doesn't have to be a festool 15. A lighter weight thickness planer - something lighter than the DeWalt 735 so you can pull it out when you need it and stow it away when you don't. If you are opposed to using electrons at all then you'll need the following: 14. A dedicated rip handsaw 15. A second blade for your fore plane - you may want this anyway but not having a power planer will make this critical. You'll need one blade with a 8-10" camber for rapid stock removal and one blade with a very slight camber for normal straightening and smoothing work. At this point you have what you need to build a workbench. 16. Build a workbench - Nicholson ( knockdown or not) is my personal recommendation, due to difficulty level and tools required. This is a minefield of opinions in the woodworking field. To get the most out of your bench you'll need to buy: 17. An auger bit that matches the size of your holdfasts - 3/4" for gramercy, 1" for crucible. 17b. If you didn't get a power drill earlier, and don't want to use electrons, you'll need a 10" brace here to use the auger bit. 18. Holdfasts - the grammercy ones are the gold standard for usefulness and frugality. 19. Vise hardware, if any - tail vises are useful but in no way necessary (I rarely ever use mine anymore) but a face vise can be incredibly useful. I'm partial to leg vises for the face vise position ( you don't have to buy expensive hardware here). Once you have the bench you'll need to build some very useful bench appliances: 20. Bench hook 21. Shooting board 22. A couple of does feet of varying sizes While I could stop here, there are four layout tools you haven't yet purchases but that you will want when you begin making furniture: 23. A bevel gauge - the shinwa is really good and really cheap 24. A cutting gauge - tite-mark is the gold standard here, but there are cheaper veritas options 25. A panel gauge - Lie-Nielsen is pretty much the only game in town for quality and budget 26. Dividers You can stop here, just start making furniture, pick up other tools as you see a need for them. Things you are going to want: 27. mortise chisel - Just one can be sufficient, personally I'd get a 1/4" one 28. dovetail saw 29. carcass saw 30. tenon saw 31. Coping saw 32. Shoulder plane 33. Plow plane 34. Rabbet plane / Fillister plane 35. Rasps 36. Spokeshave GEMorris fucked around with this message at 18:20 on Jan 7, 2017 |
|
#
?
Jan 7, 2017 18:10
|
|
|
Hubis posted:I stumbled across this seemingly in-depth newbie buying guide: http://woodandshop.com/which-hand-tools-do-you-need-for-traditional-woodworking/ I'm still new but it looks like fairly standard advice from what I've seen. I'd recommend the router and plow planes over the shoulder plane though. I also still want to get a block plane, but haven't decided between the veritas or lie nielsen or an old stanley. You can make a wooden mallet, winding sticks (move this to the must have...used for checking for twist in wood and stupid easy to make), wooden plane for rebates, bow saws (which can replace panel saws and dovetail/tenon saws and also cut metal by using either bandsaw blades or more dedicated framesaw blades, though I have not used a frame saw so take that with a grain of salt. Smaller frame saws can replace coping saws...I've made the grammercy 12" frame saw and it was a really fun project), spokeshave using the lee valley kit (another fun project). Uhh...it's a really broad subject...did you have a specific question? It's a large list of tools and going through it will take some time.
|
|
#
?
Jan 7, 2017 18:16
|
|
|
My swedish #4 is back together with the new chip breaker:  Got the wrong lever cap on it, accidentally took the one from my no 5.
|
|
#
?
Jan 7, 2017 19:03
|
|
|
Hubis posted:I stumbled across this seemingly in-depth newbie buying guide: http://woodandshop.com/which-hand-tools-do-you-need-for-traditional-woodworking/ I really like that series of articles, it was my main resource when deciding what to buy. I actually wrote up a huge post a few days ago about the tools I've bought, why I bought them, and about how much they cost: http://www.smokingonabike.com/2017/01/01/hand-tools-for-a-newbie-woodworker/
|
|
#
?
Jan 8, 2017 01:22
|
|

|
ColdPie posted:I really like that series of articles, it was my main resource when deciding what to buy. I actually wrote up a huge post a few days ago about the tools I've bought, why I bought them, and about how much they cost: http://www.smokingonabike.com/2017/01/01/hand-tools-for-a-newbie-woodworker/ That's a nice write-up, great info, It looks like you made a lot less tool purchase mis-steps than I did when I was getting started. My only quibble is the implication that you need an apron to do workholding on the front of the bench. On the Roubo you just use the sliding Deadman at the end of your piece that isn't held in your vise. If the piece is long enough to reach the far leg you just use a holdfast in the leg.
|
|
#
?
Jan 8, 2017 01:47
|
|
|
Thanks! Yeah, I don't actually know how Roubo benches work. I should go learn about them.
|
|
#
?
Jan 8, 2017 02:45
|
|
|
Hello, my name is Super Waffle and I am a woodaholic. Been raiding the exotic scrap bin at the local Woodcraft for a few weekends now, they got a managers special $2/lb. Looks like my wand display stand has proven fairly popular, I have orders for two more  . If this keeps up I may try my hand at opening an Etsy shop for these ridiculous things, pull in a little bit of extra tool money. . If this keeps up I may try my hand at opening an Etsy shop for these ridiculous things, pull in a little bit of extra tool money.
|
|
#
?
Jan 8, 2017 04:11
|
|

|
Now's the time while Harry Potter is all the rage again. Will you make more of ebony or whatever fancy wood was in the last one?
|
|
#
?
Jan 8, 2017 05:49
|
|
|
Super Waffle posted:Hello, my name is Super Waffle and I am a woodaholic. Where is your local woodcraft? For $2 a lb I would be all over that.
|
|
#
?
Jan 8, 2017 06:12
|
|

|
Got some Queensland walnut when I was back in my home state for Christmas, and had it shipped across the country. It's so nice to work with, quite hard and very crisp. Takes to end grain planing incredibly well. Went from rough sawn to perfectly flat and square in an afternoon, with a #5 and #4. It had to eventually stop when I kept dripping sweat all over the workpiece. Also the toe of my #5 got incredibly hot after a while, even though I keep it fairly well lubricated with mineral oil. Is that something to be concerned about?   Pile of shavings after, with thong for scale
|
|
#
?
Jan 8, 2017 13:59
|
|

|
wormil posted:Now's the time while Harry Potter is all the rage again. Will you make more of ebony or whatever fancy wood was in the last one? There's a spell for that in Fine Wood Witchcraft
|
|
#
?
Jan 8, 2017 16:24
|
|
|
While we're sitting here mocking him, forums user superwaffle is going to make a fortune with his wand stands.
|
|
#
?
Jan 8, 2017 16:31
|
|
|
wormil posted:Now's the time while Harry Potter is all the rage again. Will you make more of ebony or whatever fancy wood was in the last one? My sister took her wand display to work for her desk, and her boss has insisted on my making another one just like, no matter the cost. I might have just enough of that B&W ebony left for another one, I'm just not sure how much I should charge. Since its apparently such an expensive wood, I was thinking in the $75-$100 range? Checking Etsy for wand stands yields $30-$50 for stained plywood and 2x4 versions so I don't think thats too outrageous of a price to ask. Thoughts? Atticus_1354 posted:Where is your local woodcraft? For $2 a lb I would be all over that. The Orlando location. Pretty sure they're just trying to clear out whats left, I imagine they'll have a new crate pretty soon. Mr. Mambold posted:While we're sitting here mocking him, forums user superwaffle is going to make a fortune with his wand stands. I forget that not everyone lives in Orlando with two HP theme parks where flimsy resin wands sell for $60 and a robe will run you $200. People are indeed still god drat crazy for HP and will shell out assloads for anything related to it.
|
|
#
?
Jan 8, 2017 16:52
|
|
|
I have some douglas fir boards I intended to use for part of my aviary project, but now I notice some of them are bleeding sticky sap. Which could be really bad health-wise for my birds. My understanding is that the only real way to prevent sappy wood from bleeding further is heat treatment, forcing the resin to set, or is there some other way that doesn't require a kiln/large oven?
|
|
#
?
Jan 8, 2017 16:56
|
|


|
Super Waffle posted:My sister took her wand display to work for her desk, and her boss has insisted on my making another one just like, no matter the cost. I might have just enough of that B&W ebony left for another one, I'm just not sure how much I should charge. Since its apparently such an expensive wood, I was thinking in the $75-$100 range? Checking Etsy for wand stands yields $30-$50 for stained plywood and 2x4 versions so I don't think thats too outrageous of a price to ask. Thoughts? Dude, seriously if you enjoy it keep cranking up prototypes and jigs and maybe someday get licensing- goonbuxx ensue
|
|
#
?
Jan 8, 2017 17:02
|
|
|
duplicate apparently
His Divine Shadow fucked around with this message at 19:24 on Jan 8, 2017 |
|
#
?
Jan 8, 2017 17:19
|
|
|
I dropped a glass lid for a sauce pan onto our kitchen floor today, given we have a tiled floor it was only the heroic self-sacrifice of the plastic knob that prevented the glas from exploding. I turned a new knob from a piece of oak, good thing I got sharp turning chisels now.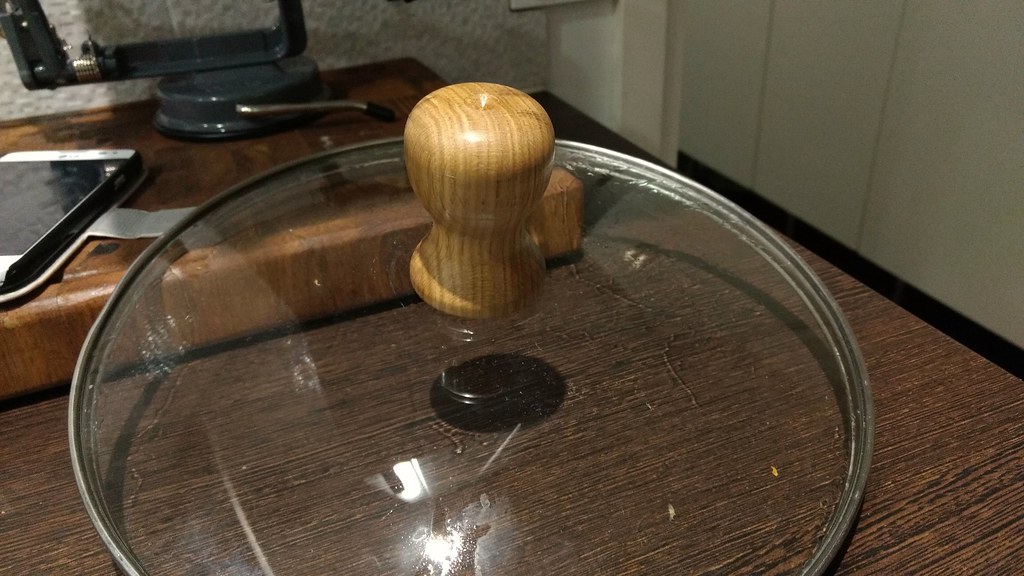
|
|
#
?
Jan 8, 2017 17:19
|
|
|
His Divine Shadow posted:I dropped a glass lid for a sauce pan onto our kitchen floor today, given we have a tiled floor it was only the heroic self-sacrifice of the plastic knob that prevented the glas from exploding. I turned a new knob from a piece of oak, good thing I got sharp turning chisels now. Nice, my staked legs are the first turning I've done in wood, and I'm just getting into the mindset of "oh hey I could just make that" when it comes to round things. I really need to get a chuck for my lathe I guess.
|
|
#
?
Jan 8, 2017 18:27
|
|
|
Yeah I'm looking for a chuck too. I'm looking tt the nova g3 https://www.amazon.com/NOVA-48202-Turning-Chuck-Insert/dp/B0064JJ52U/ref=cm_cr_arp_d_product_top?ie=UTF8 and the shopsmith insert. I know if it would be worth it to get a bigger chuck right now.
|
|
#
?
Jan 8, 2017 19:06
|
|

|
GEMorris posted:Nice, my staked legs are the first turning I've done in wood, and I'm just getting into the mindset of "oh hey I could just make that" when it comes to round things. I really need to get a chuck for my lathe I guess. I could use a chuck too, would make things a lot simpler. The reason there's a dimple in the top of the knob is to cover the mark from the jabby pointy thing (forgot what it's called).
|
|
#
?
Jan 8, 2017 19:23
|
|
|
Hubis posted:I stumbled across this seemingly in-depth newbie buying guide: http://woodandshop.com/which-hand-tools-do-you-need-for-traditional-woodworking/ GEMorris posted:There is no waste or fluff on that list, but I don't agree with the order due to both usefulness or cost, and the list is missing a router plane. ColdPie posted:I really like that series of articles, it was my main resource when deciding what to buy. I actually wrote up a huge post a few days ago about the tools I've bought, why I bought them, and about how much they cost: http://www.smokingonabike.com/2017/01/01/hand-tools-for-a-newbie-woodworker/ These are great starting resources - thank you all. ColdPie, I'd be very interested in seeing more posts like that, never stop posting.
|
|
#
?
Jan 8, 2017 19:42
|
|

|
I also do not have a chuck, but here's a little tip for making knobs that I used yesterday. Start them as a spindle then finish them on a drill press, you're limited by the size of the drill press chuck however. 
|
|
#
?
Jan 8, 2017 20:07
|
|
|

|
| # ? Jun 8, 2024 00:36 |
|
|
Re: chuck talk, I have a Nova G3 and like it. The only thing I can compare it to is a Nova midi which is also good but has Tommy bars. There are a couple versions of the G3, insert type, and two reversible versions with 1-8 threads. One is designed for the Comet II, the other for he Delta midi lathe, but they will work on any 1-8 spindle.
|
|
#
?
Jan 8, 2017 20:26
|
|