


|
large oblate cat posted:Have you heard of Krita? I used Paint tool Sai for regular digital drawing and switched to Krita when it supported graphic tablets but it has some features that might help you. For example, its wrap-around mode tiles the drawing so you can see if the texture is seamless on the fly. It's free and open too. I have it, but I've yet to really mess with it much. it's hard to wanna swap because I've got SAI tricked out for everything, but i definitely need to switch to SOMETHING. SAI 2 is gonna be a long ways out before it's out of beta. Well, also, I often just export texture stuff to PSD so I can check errors in photoshop and make adjustments when needed.
|
 #
?
Mar 3, 2017 04:14
#
?
Mar 3, 2017 04:14
|
|

|

|
| # ? May 29, 2024 18:01 |
|
|
I suppose the good thing about putting light in the textures is the ability to export videos from playblast.
|
|
#
?
Mar 3, 2017 04:16
|
|

|
It also saves on lighting rendering! Wow style where all the occlusion/self shadowing is painted in and active lighting is just an overlay color on the general area. Dem mobile strategies tho.
|
|
#
?
Mar 3, 2017 04:38
|
|


|
mutata posted:Dear god, the dopamine hits from "likes" on Instagram should be federally regulated. edit: holy cow I thought this was the last comment in the thread but no, it's 4 pages ago. magnificent7 fucked around with this message at 19:51 on Mar 3, 2017 |
|
#
?
Mar 3, 2017 19:16
|
|


|
large oblate cat posted:Have you heard of Krita? I used Paint tool Sai for regular digital drawing and switched to Krita when it supported graphic tablets but it has some features that might help you. For example, its wrap-around mode tiles the drawing so you can see if the texture is seamless on the fly. It's free and open too. Holy poo poo, thank you for this. It looks like every photoshop thing I use in a simpler package.
|
|
#
?
Mar 3, 2017 20:21
|
|

|
  https://dl.dropboxusercontent.com/u/107511/CatWindowExt/dragonfruit.mp4 Dragonfruit photoscan! 198 photos masked photos of the subject on a turntable. 1.2 million poly scan down-rezed to ~6k tris and three 2k maps (albedo, normal, roughness) rendered in Unreal Engine 4. The petals were screwing up the scan, so I had to cut all of them off and label the stumps so I could hand-model them and stitch them back on later. https://instagram.com/mutatedjellyfish/
|
|
#
?
Mar 3, 2017 22:52
|
|
|
mutata posted:The petals were screwing up the scan, so I had to cut all of them off and label the stumps so I could hand-model them and stitch them back on later. drat. That's one solution. You photographed the petals separately?
|
|
#
?
Mar 3, 2017 23:02
|
|
|
Elsa posted:drat. That's one solution. You photographed the petals separately? Yeah, photographed, but not photoscanned. I just took a single photo, modeled them by hand, and used the photo as their texture.
|
|
#
?
Mar 3, 2017 23:06
|
|
|
Oh so hey... I might be a bit premature in this as I haven't even heard of it or watched the video until this very second but apparently Maya 2017 Update 3 includes "After Effects Live Link" If this does what I think it does.... edit: It's actually better. Literally "live links" (aka you don't have to save and export scenes) into AE. http://lesterbanks.com/2017/03/look-new-effects-live-link-maya/ I loving hate... HATE HATE HATE the AE camera system so even the ability to use Maya 2017 to setup camera moves for AE is huge. BonoMan fucked around with this message at 23:19 on Mar 3, 2017 |
|
#
?
Mar 3, 2017 23:11
|
|

|
mutata posted:The petals were screwing up the scan, so I had to cut all of them off and label the stumps so I could hand-model them and stitch them back on later. holy poo poo lol. solid dedication to getting the job done. nice work!
|
|
#
?
Mar 3, 2017 23:11
|
|

|
Haha, I would've let it slide but this IS intended for a larger scene where they appear live and growing, so I couldn't really have still-growing fruit missing a bunch of bits. :P
|
|
#
?
Mar 3, 2017 23:17
|
|
|
What are y'alls favorite tool for retopology?
|
|
#
?
Mar 6, 2017 07:34
|
|

|
Zremesher in ZBrush and the ones that come in 3dsMax
|
|
#
?
Mar 6, 2017 07:46
|
|

|
Depends on the model but topogun is pretty neat. I haven't had a chance to mess with 3dcoats retopo but I hear it's equally as good.
|
|
#
?
Mar 6, 2017 08:05
|
|

|
i actually *almost* had fun retopoing a head with the maya 2017 tools a week or two ago. almost. i used to only use zremesher + topogun but retopoing in the new maya was actually a breeze
|
|
#
?
Mar 6, 2017 21:41
|
|

|
the 3ds max retopo tools are pretty dang good imo
|
|
#
?
Mar 7, 2017 02:47
|
|

|
Kanine posted:the 3ds max retopo tools are pretty dang good imo the conform brushes are really good now I've had to retop a fair few cars from CAD data lately and they're very handy
|
|
#
?
Mar 7, 2017 03:42
|
|
|
This morning we covered projection painting in Substance Painter. I applied it to my side project model and the result left me floating on air. As hasty as it was. I only needed a few brush strokes to see its potential. You know how every once in a while you learn a new tool that fills you with hope? That was Substance Painter today. This is a poo poo texture job but this is huge to me. Substance Painter is magic and here are pictures. The target, the projection painting experiment, and the bare mesh.     My sculpt isn't as accurate as it can be, but the texture still takes it further. This opens up new problems like finding good diffuse reference images and replacing the ramp shader irises but thank god. 3D has been hitting me with so many lefts I'm begging for a right. After this week we learn joint-based expressions and other new skinning tricks. That's going to be awesome too. I'm still getting the hang of thinking of textures as separate maps. If I can get them looking nice and good and then make them talk after learning joint-based rigging there's a good chance I might run away and make machinima the rest of my life.
|
|
#
?
Mar 7, 2017 03:48
|
|
|
Okay it definitely sucks now. The feeling was fun while it lasted. I can't wait to get a moment to try tackling pores.
|
|
#
?
Mar 7, 2017 14:04
|
|
|
So I don't want to jump too far ahead since it looks like they're teaching you a specific structure and flow to Painter (which is good, there's a lot you can do and learning on your own means missing cool stuff), but regarding pores: Since at least Painter 2.0, Allegorithmic has included a number of skin textures/normals (though with the shelf change with 2.5 I can't recall if the skin normals are under the hard surfaces tab or somewhere else now), and thanks to the wonders of this program, you have a couple ways of utilizing just the height/normal data from those materials. First is my go-to method, as it's entirely non-destructive and avoids the pain of having to redo a bunch when you need a different scale or color. Grab one of the skin materials (let's say forehead) and drag it to the layers panel. It'll add the skin as a fill layer, which allows you to adjust everything as you need. First, turn off color, rough, and metal, leaving just height and normal, then increase/decrease tiling until the pores look like you want for the forehead. Once that's good, add a black mask to that fill layer, and then add a paint layer to that mask (I do this to keep every task isolated, so nothing destructive happens to base layers/masks). Pick a soft brush, then paint where you want those forehead pores to be! Rinse and repeat for cheeks, nose, chin, etc, and everything should come together nicely. It'll take a little bit more than just painting the normals directly onto a paint layer, but I think it's worth it - the magic about this technique is you can then adjust the scale, check triplanar mapping to see how it looks, see if the pores work better with roughness enabled, even switch out the skin material you used, and since every piece is independent, you don't have to redo a bunch of work each time. The second method is the standard painting one: add a paint layer, click on one of the skin textures to enable it, turn off everything but height and normal for the material on the brush, then paint it on the area you want. Repeat for all the different pore variations, and use the height/normal layer intensities to fine-tune (easier than trying to do it on the brush itself). As you can tell, I try to avoid this as the main technique - but the great thing is both techniques can be combined, so any areas that the fill layer doesn't work as well for (maybe nose pores and lip lines/cracks) can be touched up by hand, which means much much less work to redo if something ends up not looking great. E: I wasn't super clear on it, but the fill layer/mask technique for materials can be used for anything, not just adding bumps to something. I use it as the core technique for nearly everything I paint, and the amount of stress it's prevented just from being able to virtually instantly tackle notes has been great. There's nothing like a client saying "hey, change the color over here and the density of the bumps, and I want a different roughness pattern", and being done 20 minutes later, while the coworker who hand-painted all his stuff is looking at 3 hours of work. Yeah, his first pass may have popped a little more, but the first pass is never the final, so I'd rather get close to what they want as fast as I can, then I can spend time hand-touching it up to give it that last bit of magic. The Gasmask fucked around with this message at 17:37 on Mar 7, 2017 |
|
#
?
Mar 7, 2017 17:28
|
|

|
THANK YOU I take advantage of non-destructive layering when I can. In Photoshop as well, with masks. It gets heavy sometimes because I have to duplicate and flatten the whole project to get the mask simplicity I want, but yeah. I hear that. Thanks! The scaling attribute on repeating textures is great. So if I'm going to use tri-planar that probably means the scale will need to be a bit bigger to account for overlapping... right? The different pore areas is a good point. I'll look out for that. Do you ever make your own pore textures? Pores seem to have a curve to their shoulders, and I'm wondering if I could let the renderer handle the transition with solid dots or if I need to make it manually in zBrush or Photoshop. I'm thinking if I make the normal map myself I could blur the dots a bit and use it as a reverse mask for the specular map. Thanks!
|
|
#
?
Mar 7, 2017 19:41
|
|
|
Triplanar mapping generally seems to need a larger scale value, I think because of how it works, but it's a lifesaver when you have UVs that aren't the best and you need something going across different islands. Regardless, I'm a fan of experimentation, and I'll always try triplanar even if I know UV mapping looks fine, just to see if by chance it looks better or gives an effect that I can use for something. There's been so many times I've stumbled across really cool looking effects from experimentation like this, and even if it doesn't work out, it's no big loss. I don't generally make my own pore maps because I have a large set of existing texture sets (photo scans) which have worked so far, but if I were to do it, I'd probably try a voronoi pattern first, since with some warping and tweaking I feel like it could create a non-uniform set of dimples that could then be modified to make a specular/roughness map. This seems like a situation where Substance Designer would excel and would be my first choice, as it would be easy to create a material with enough exposed parameters that I could generate any style of pore I needed, all while having the ability both use it as a procedural in Painter and the ability to export tileable maps in case I wanted to use them outside of the Allegorithmic ecosystem. This is where things start to become an "addiction", and I'm sure mutata can comment on that ") . You start to be able to visualize what node trees would work, and eventually you get to the point where you can practically create cool materials in your head, knowing that the actual results will be pretty drat close. . You start to be able to visualize what node trees would work, and eventually you get to the point where you can practically create cool materials in your head, knowing that the actual results will be pretty drat close.
|
|
#
?
Mar 7, 2017 20:19
|
|
|
Guys I'm losing my mind over the loving bend tool... I bent a plane into a "curb", which is good for a straight wall. Now I need to bend it again to make it curve for a corner wall.  So I collapsed my bend and now I apply a new one to this shape, but it's all loving stupid no matter what axis I'm using :  This is the closest I can get to what I need, but it's all wonky, not flat on the "floor" and the edges are straight (as to make a seamless arena). Any tips on the best way to go about making a loving rocket league style arena? I thought for sure bending planes would be the best route, as I've tried a few different other methods that all left me having to re-do the whole thing for one reason or another. Rocket League Arena : 
|
|
#
?
Mar 7, 2017 21:35
|
|


|
RizieN posted:Any tips on the best way to go about making a loving rocket league style arena? I thought for sure bending planes would be the best route, as I've tried a few different other methods that all left me having to re-do the whole thing for one reason or another. There are a couple tools to make bending easier, but i feel like you're trying to do too much with all that geometry from the get go. You'd really want to make that with a lower polygon shape then subdivide up. from there it would be trivial to match the sections. As for tools, there's Bend of Brothers and Tycoon that can help wrangle the bend modifier into a usable state. E: Almost forgot, I made a thing  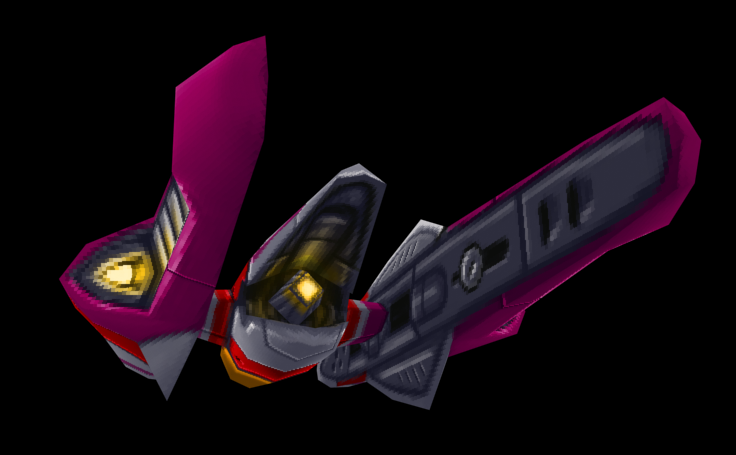 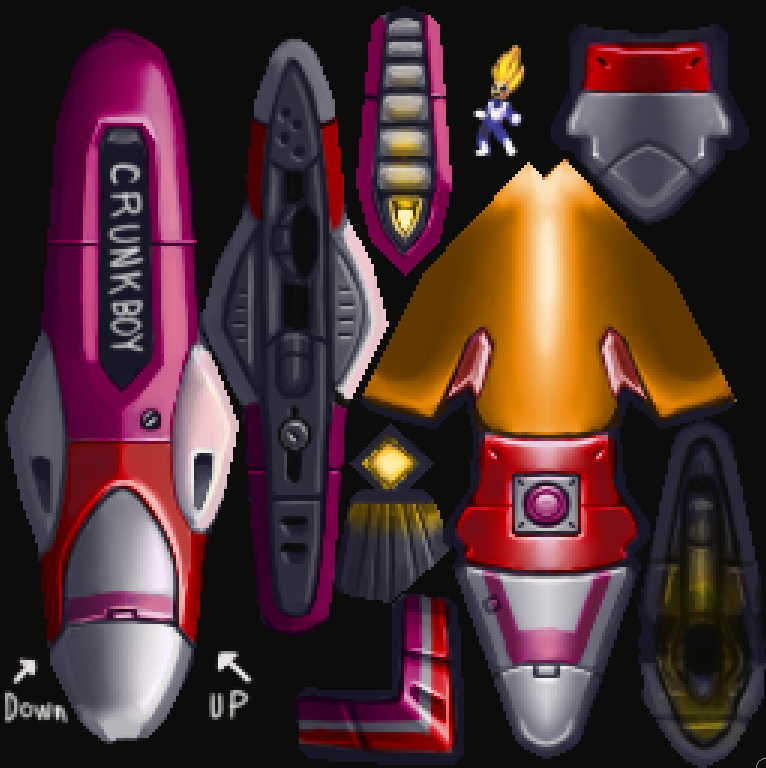 BallisticNG is a fun game for modding, and i haven't done truly low poly in a very long time. Diabetes Forecast fucked around with this message at 22:23 on Mar 7, 2017 |
|
#
?
Mar 7, 2017 22:20
|
|
|
RizieN posted:Any tips on the best way to go about making a loving rocket league style arena? I thought for sure bending planes would be the best route, as I've tried a few different other methods that all left me having to re-do the whole thing for one reason or another. I use Maya, but I would make that structure in that screenshot with right angles and then when I was done do some XTREEM bevels to get that roundness.
|
|
#
?
Mar 7, 2017 22:30
|
|
|
Ahhhh.... why didn't I think of bevels! Thanks mutata! Oh and thanks Diabetes, I may try that if Bevel doesn't work, but bevel seems simpler.
RizieN fucked around with this message at 23:02 on Mar 7, 2017 |
|
#
?
Mar 7, 2017 23:00
|
|
|
Works fine here - I think your pivot point is doing something weird. How come you are collapsing too? you can just stack the bend modifiers  edit: i'd also not do it either of these ways - i'd draw a curve for the section profile & use sweep on a rectangle with filleted corners. you can then use both those splines as references to generate a ton of new geometry and keep it semi parametric. like this:  all of those angles & fillet radius's can still be edited. cubicle gangster fucked around with this message at 23:53 on Mar 7, 2017 |
|
#
?
Mar 7, 2017 23:37
|
|
|
How did you make your plane? Side not; I can't get anything to bend in the z-axis, no matter what I try. When I had my original curve working I had to make a flat plane and then rotate it to get it to bend properly.  If I make the plane flat on the "floor" (XY plane?) I get this:  Ideally I'd like to have what you've got going on Cubicle... the beveled(chamfered) cube has some wonky geometry... edit, gently caress the above, your spline sweep seems perfect!
|
|
#
?
Mar 7, 2017 23:56
|
|
|
so now that you've got that - rotate the object 135 degrees to the right in your front view, then add another bend modifier set to bend 90 degrees in the y axis - the open the bend modifiers gizmo and rotate that 45 degrees. that'll get you a 90 x 90 degree arc. then top view and rotate that 45 degrees gets you it all lined up nice.
|
|
#
?
Mar 8, 2017 00:00
|
|
|
That's a good shout, I always forget about modeling with curves until I need to extrude a pipe or wire. There's so much more that you can do with em.
|
|
#
?
Mar 8, 2017 00:29
|
|
|
I was always taught to never start modeling with solid surfaces until the silhouettes and complete form was blocked out with basic splines. having them there always helps to see where they can be used in the model and to plan things like edge flow. I also find it's important to make modeling just that, instead of trying to model at the same time as solving design problems. Here's an example of a chair I made recently - top one is the silhouette after refining into it's final spline. spent almost as long getting this perfect as the rest of the entire model. Below is the finished one - every single piece of geometry used that first spline as it's starting point, including the stitching (but it's almost too small to see that). keeps the edge flow across different panels & pieces super clean & helped me plan how many vertices were needed so everything would connect & close up.  Massive benefit to using splines and sweep before putting an edit poly on top is that if you keep just a tiny thin strip of polys from the original sweep and extrude everything from that, the sweep generates mapping coordinates and you can use that as a guide to unwrap should the map need to flow across the surface. cubicle gangster fucked around with this message at 00:49 on Mar 8, 2017 |
|
#
?
Mar 8, 2017 00:46
|
|
|
cubicle gangster posted:I was always taught to never start modeling with solid surfaces until the silhouettes and complete form was blocked out with basic splines. having them there always helps to see where they can be used in the model and to plan things like edge flow. I also find it's important to make modeling just that, instead of trying to model at the same time as solving design problems. That's cool, I use sweeps a bit but not for anything like that
|
|
#
?
Mar 8, 2017 00:52
|
|
|
cubicle gangster posted:I was always taught to never start modeling with solid surfaces until the silhouettes and complete form was blocked out with basic splines. having them there always helps to see where they can be used in the model and to plan things like edge flow. I also find it's important to make modeling just that, instead of trying to model at the same time as solving design problems. That looks like a nice process. Blocking and proportions is a huge block of work and it would be a nice alternative to polygon primitives. Makes me want to mess with Blender and start that years-long process.
|
|
#
?
Mar 8, 2017 00:58
|
|
|
holyshit https://www.youtube.com/watch?v=6f2-CZHp-_M I was looking for the pelting relax features from 3DS Max and they weren't in the video. I'll have to look. Either way this is coooollll
|
|
#
?
Mar 8, 2017 08:01
|
|
|
cubicle gangster posted:wisdom You've saved me so much time! I've been fussing with 3DS trying to make things the way I need them or see them in my head, and this is the perfect way to get started on a project. You've helped me greatly in the last 24 hours!
|
|
#
?
Mar 8, 2017 18:10
|
|
|
https://twitter.com/Patorama/status/839159386555756544?ref_src=twsrc%5Etfw
|
|
#
?
Mar 9, 2017 00:51
|
|


|
I'm having trouble getting displacement maps out of zbrush and into sketchfab where I'm hosting my anatomy models. I'm attaching a screenshot of the problem. Basically, applying the displacement map explodes the geometry in proportion to how much I apply it inside sketchfab's settings. I thought a displacement map is supposed to replicate the appearance of more geometry when applied to a low poly mesh, but instead of getting that kind of effect I'm just getting the existing polygons pushed apart. I've double checked that my UV map and displacement maps are of the same resolution. I thought this might be due to the midpoint setting in the Displacement map creation settings in Zbrush (in the attached screenshot, I have it applied about 5% to my model, going to 100 blows the whole thing up), but neither changing the mid value to 0 or to 1 fixes the issue, it just blows up the mesh in different ways. I was hoping someone here would be able to see right away what error I'm making. Sketchfab's "how to" for zbrush is loving terrible, the author literally just says "Go to the �Displacement Map� panel and click �Create Dispmap�. And that's it!". -edit- I did one more google search and found a little more information hidden in a different part of Sketchfab's online docs that I hadn't found before: "A grayscale depth map to displace a model's vertices. The model must be subdivided as needed before uploading because we cannot generate new vertices in real time." So this seems to explain my problem- I would need more subdivisions in my base mesh. Question though, why is the displacement map creating holes in my mesh as if polygons are not attached to each other, as opposed to just inflating the mesh? And what's the point in having an option for a displacement map when you already have to subdivide the model to the resolution that you were hoping to simulate? Listerine fucked around with this message at 08:51 on Mar 10, 2017 |
|
#
?
Mar 10, 2017 08:36
|
|
|
^^^^^ have you tried the displacement map on that mesh in any other software? curious if it's working in other softwares and it's only a sketchfab specific problem, or if it's the map itselfRizieN posted:You have an artstation or image gallery somewhere I can look at all of them? you can find most of those pieces between these two pages: https://www.instagram.com/robertborashan/ https://www.artstation.com/artist/polaroid I generally like autodesk UIs, so Recap should be awesome. Gearman posted:Howdy, I built Rockstar's facial scanning rig, along with five or six other photogrammetry rigs at this point. Scanning people with a single camera is challenging, but doable. Feel free to hit me up in PM's; I'm more than happy help get you prepared for this. i'm a no PM having noob. mind if i shoot you an email, or whatever else is convenient for you? this would actually be super helpful is anybody going to be at the san diego comic con? i'm going as a professional this year and it would be cool to goon hang or w/e
|
|
#
?
Mar 10, 2017 08:56
|
|
|
SVU Fan posted:^^^^^ have you tried the displacement map on that mesh in any other software? curious if it's working in other softwares and it's only a sketchfab specific problem, or if it's the map itself I'll see what shakes out in Houdini tomorrow when I've had more sleep and report back, if I can figure out how to work with displacement maps in Houdini in a short amount of time.
|
|
#
?
Mar 10, 2017 09:29
|
|
|

|
| # ? May 29, 2024 18:01 |
|
|
SVU Fan posted:
Yeah no problem, shoot me an email at: pgclark@gmail.com
|
|
#
?
Mar 10, 2017 16:18
|
|
