


|
(Last) update on the Blender add-on blender_lifting I was working. My extra free time is coming to an end as I am happily about to start a substantial freelance job, but as a result I won't be able to work on it much further. You can download the add-on here. I've also released the code in a git repository and if you're familiar with git and Python, feel free to fork it and make pull requests! You can also view the README, which includes installation procedures, in a pretty formatted version on this page. https://github.com/Fragrag/blender_lifting
|
 #
?
Sep 26, 2019 07:43
#
?
Sep 26, 2019 07:43
|
|

|

|
| # ? May 30, 2024 06:58 |
|
|
cubicle gangster posted:Reasonable, but my comment was more on your drive by 'dump a tweet and leave everyone else to talk about' style of posting. I find that kind of thing on discussion boards frustrating, it's nothing to do with the content. The juniors straight from places like gnomon or gobelins bristle at this. I�ve already dealt with a lesser version of it for years in tv animation so it was like �okay, well I guess this is what a larger budget buys them�. Instead of 5 hours on a shot to then change most of it in tv, it�s 40. Seems inefficient but it�s the clients money to spend
|
|
#
?
Sep 30, 2019 03:53
|
|


|
Hey does anyone have any experience selling assets on the ue4 marketplace? If so I was wondering if you had any tips or advice?
|
|
#
?
Oct 1, 2019 05:19
|
|

|
My entry for the artdome theme "repetition":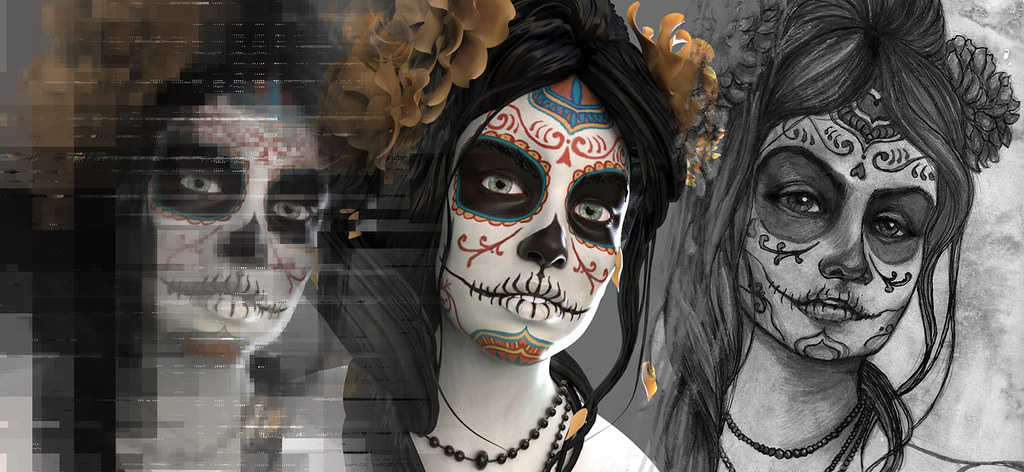 Raw keyshot render here.  The zbrush summit was inspiring but also makes me realize how much harder I need to push myself. Didn't even get this artdome entry as far as I wanted but I am out of time and Inktober calls.
|
|
#
?
Oct 3, 2019 08:09
|
|


|
Congrats on finishing. The materials are looking very plasticy though!
|
|
#
?
Oct 3, 2019 08:11
|
|


|
Synthbuttrange posted:Congrats on finishing. The materials are looking very plasticy though! Yeah - I was especially unhappy with the hair. I wanted to do it in fibremesh but... time... ugh  At least I got some fine detail in the skin. Even if I spent a very short amount of time on the materials. I might pick it up again. At least I got some fine detail in the skin. Even if I spent a very short amount of time on the materials. I might pick it up again.
|
|
#
?
Oct 3, 2019 08:21
|
|
|
Here's some spoopy renders I did for a studio halloween contest. Would've liked to have another 5-10 hours to work on it, but ran out of time and had to submit. Think I spent around 8-10 hours total on the scene. Also used this as a chance to get more familiar with Houdini, and to mess with Arnold further. Nowhere near as crazy or complex as my client work, but was a nice change of pace. Software used: Modeling - Blender Unwrapping - RizomUV Texturing - Substance Painter Layout/Lighting - Houdini Rendering - Arnold Compositing - Fusion Editing - Photoshop Things I would've done with that extra time: - figure out why displacement wasn't effecting the flat porch railing boards like I wanted - More props inside - skeleton hands going over the two pumpkins - leaves on the deck and vines on the railings/house - some additional rim lighting - ground fog pass - Higher res/sample render First image is my submission, second image is an earlier version I decided wasn't working as well.  
|
|
#
?
Oct 4, 2019 20:14
|
|
|
Inktober "Build" Inktober "Circle" 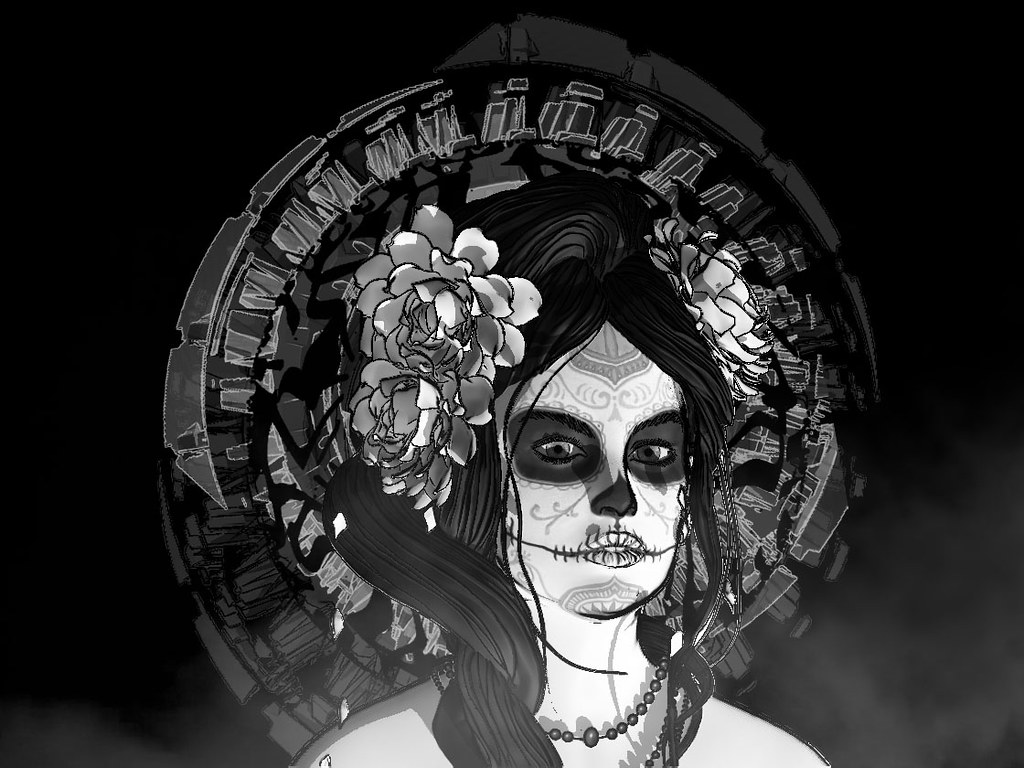
sigma 6 fucked around with this message at 09:48 on Oct 10, 2019 |
|
#
?
Oct 10, 2019 05:32
|
|
|
Haha nice, Build is great, love the expression and rendering.
|
|
#
?
Oct 14, 2019 04:02
|
|
|
I'm making my very first normal-mapped objects for my game, based on this tutorial. I started with a crate, and I noticed what looks like Z-fighting going on between the low- and high-poly meshes when I try to bake the normal map: I was able to fix this by scaling the low-poly mesh to be very slightly larger than the high-poly mesh. Is this a common problem, and is that the recommended solution? I don't really know how baking normal maps works from a technical perspective, which makes it hard to know what the best practices are. I did get an OK-looking crate though: 
|
|
#
?
Oct 16, 2019 19:24
|
|

|
TooMuchAbstraction posted:I'm making my very first normal-mapped objects for my game, based on this tutorial. I started with a crate, and I noticed what looks like Z-fighting going on between the low- and high-poly meshes when I try to bake the normal map: Were both your lowpoly and hipoly being evaluated to get baked to the lowpoly?
|
|
#
?
Oct 16, 2019 23:04
|
|
|
Odddzy posted:Were both your lowpoly and hipoly being evaluated to get baked to the lowpoly? The tutorial I followed has you select the highpoly then the lowpoly mesh, and then click the bake button. I assume that this is some mechanism so Blender knows how to arrange the normal map on the texture that you render the normals to. I honestly have no idea how it works though. 
|
|
#
?
Oct 16, 2019 23:06
|
|
|
You might have the ray distance set too low, so it's casting rays starting on the surface and sometimes not detecting an intersection. Look in the Cycles render settings under the "Bake" section. Under "Selected to Active" there's an option for "Ray Distance" that controls how far each ray starts from the mesh.
|
|
#
?
Oct 16, 2019 23:21
|
|

|
Aha! Yep, that was set to 0. Setting it to .1 got rid of the obvious artifacts. Thank you! What's interesting is that it gives significantly different results from the "scale the lowpoly mesh up by 1%" image though: Nonzero ray length:  Upscaled lowpoly mesh:  But it looks fine when used in Unity, so
|
|
#
?
Oct 16, 2019 23:55
|
|
|
Yeah typically you want your low poly to be either really close to your high poly or overlapping (overlapping is usually ideal)
|
|
|
#
?
Oct 17, 2019 04:06
|
|
|
First real modeling attempt in awhile that's not just one off props or piddly poo poo. Following a youtube tutorial to get familiar with Blender 2.8's new stuff.    Not done yet, needs more props and I need fix some stuff like the metal roof parts.
|
|
#
?
Oct 20, 2019 04:56
|
|

|
thats fuckin' sweet man
|
|
#
?
Oct 20, 2019 05:06
|
|

|
I kinda want to redo the lower deck because it being so clean compared to the top deck looks weird to me.
|
|
#
?
Oct 20, 2019 05:11
|
|
|
I don't have a model to go along with it (yet), but the past few weeks I've been hammering away on an uber shader for toon rendering in Blender/Eevee. Other than a few compromises (and no Cycles support, sadly) it came out surprisingly well for my first complicated node setup. Not the most original idea, but I did take a kind of novel approach I feel. Here's the node group, it has a ton of options  It uses multiple colored lights as input, with each (R, B, or G) value separated and creating fills that can blend and overlay with each other. This currently, to my knowledge, does make it impossible to use in a normal scene setup. When we can filter lights to only interact with whitelisted objects/materials this material will be a lot more useful. Unless that's an option already, in which case nevermind. See, it takes this diffuse  And spits out this (by default)  You can then paint with textures or vertex colors to add/sub from the lighting, allowing things like... Whatever this is  as an example. as an example.I want to make something really complicated to explore what you could make with this and then release it.
|
|
#
?
Oct 20, 2019 06:15
|
|

|
Where I'm at with the model right now. https://i.imgur.com/61uKy3u.mp4 Added some props, figured out some materials settings, still not happy with the pixelation on the water but that seems to be a limitation of Eevee.
|
|
#
?
Oct 20, 2019 19:15
|
|
|
UnintelGen posted:I don't have a model to go along with it (yet), but the past few weeks I've been hammering away on an uber shader for toon rendering in Blender/Eevee. Other than a few compromises (and no Cycles support, sadly) it came out surprisingly well for my first complicated node setup. Not the most original idea, but I did take a kind of novel approach I feel. I love it! Have you seen the guilty gear shader demo? There�s also a new anime called Beastars that has amazing toon rendering.
|
|
#
?
Oct 20, 2019 23:46
|
|
|
Ccs posted:I love it! Have you seen the guilty gear shader demo? There�s also a new anime called Beastars that has amazing toon rendering. Not gonna lie, there's a reason the blend file's name is "arc-shaderworks2.0.blend"... So, yeah, I might be aware. I'm pretty sure most people have been taking notes on Arc and Studio Orange (Like the Spiderverse team did) for NPR rendering workflows. Meant to watch it for awhile now, but I am finally almost done with Lustrous and will spring Beastars from Netflix Jail soon enough. (Netflix  ) I don't want to say anime (or CG anime) had a direct influence on the shader... but, yeah, it probably did. To some extent, anyway. ) I don't want to say anime (or CG anime) had a direct influence on the shader... but, yeah, it probably did. To some extent, anyway.Crain posted:Where I'm at with the model right now. That looks great! Loving the coloring/shading and the modeling of the planks. Not the biggest fan of the rendering of the sheet metal for some reason, but other than that I love it.
|
|
#
?
Oct 21, 2019 03:35
|
|
|
UnintelGen posted:Not gonna lie, there's a reason the blend file's name is "arc-shaderworks2.0.blend"... So, yeah, I might be aware. I'm pretty sure most people have been taking notes on Arc and Studio Orange (Like the Spiderverse team did) for NPR rendering workflows. Meant to watch it for awhile now, but I am finally almost done with Lustrous and will spring Beastars from Netflix Jail soon enough. (Netflix The materials are all super basic. Just principled bsdf. Which is why the metal looks odd. Doesn�t match the rest of the scene.
|
|
#
?
Oct 21, 2019 11:49
|
|
|
I saw Detective Pikachu a few weeks ago and got inspired to make some fan art. I'm not even a big Pok�mon fan but I think the character design works really well in 3D, so I made this in Blender: https://www.youtube.com/watch?v=WXr2uYqjNMk I think I'm getting better at rigging characters. Here's some behind-the-scenes stuff:  using Blender annotations to draw the storyboard directly into 3D space As I was making the sculpture I had the idea to make this grid material, which I think is really useful for visualizing the shape of the surface:  Pikachu has really short arms, so rigging the model to have a wide range of motion is harder than it might seem. My solution was to sculpt it with the arms facing forward diagonally, then add a bunch of helper bones on the skin surface.   I think this would work well for characters that squash & stretch a lot. Anyway, that's my Pikachu. Maybe not quite as good as the movie version but it was fun to make.
|
|
#
?
Oct 22, 2019 05:59
|
|
|
Your animation and framing could use some work but that looks awesome!
|
|
|
#
?
Oct 29, 2019 03:55
|
|
|
I've noticed an interesting phenomenon with 3D animations...sometimes it can look perfectly normal in a preview window, but then when I watch the final render it looks a lot floatier and everything accelerates too smoothly. I think it's easier to notice when the momentum is off when everything has proper shadows and motion blur. With my last animation I redid some of the animation after watching the rendered version. For the Pikachu animation I noticed some flaws (his eyes are also too dark) but it took a week to render and by that point I was too lazy to re-render everything. Maybe next time I'll have more patience.
|
|
#
?
Oct 30, 2019 22:06
|
|
Maya has playblasts for that reason, might be worth looking into what the equivalent is in Blender ") Keep up the good work man, remember you can only get better!
|
|
|
#
?
Oct 31, 2019 01:23
|
|
|
Komojo posted:I've noticed an interesting phenomenon with 3D animations...sometimes it can look perfectly normal in a preview window, but then when I watch the final render it looks a lot floatier and everything accelerates too smoothly. I think it's easier to notice when the momentum is off when everything has proper shadows and motion blur. Why does it take a week to render? What renderer are you using? I only ask because I�ve recently started using Octane and it�s changed my life. Before that I was using Mental Ray and waiting 5 mins to see a still frame of what my scene even looked like. But with Octane I can get a preview of my scene in seconds, and I can render a high resolution 30-second animation over night.
|
|
#
?
Nov 2, 2019 06:29
|
|

|
Komojo posted:I've noticed an interesting phenomenon with 3D animations...sometimes it can look perfectly normal in a preview window, but then when I watch the final render it looks a lot floatier and everything accelerates too smoothly. I think it's easier to notice when the momentum is off when everything has proper shadows and motion blur. Since you are using Blender, use Eevee. It should give you a good indication about timing and stuff and is almost realtime.
|
|
#
?
Nov 2, 2019 08:50
|
|

|
 So I'm working on this, and I'm not sure what the best way of turning those glowing screens into holographic screens while keeping the illumination. make the image then follow a hologpahic tutorial from youtube?
|
|
#
?
Nov 2, 2019 10:08
|
|
|
Can you render a black and white video of computer code typing out, and use that as an alpha mask for the luminance? you can cut each screen into a few layers and have them offset in Z a little bit.
|
|
#
?
Nov 2, 2019 10:12
|
|

|
You can set an object to cast illumination but not show up on camera.
|
|
#
?
Nov 2, 2019 10:28
|
|
|
 I went with glare in compositor to add the bloom. I'm liking what I've got. I'm wondering about adding some background detail to the room, but I'm worried it will detract from the main figure. No sure whats causing that weird pixelating in the bottom right....
|
|
#
?
Nov 3, 2019 08:31
|
|
|
I would definitely add a rim/accent light to help silouette the chair and the character. It could be a lowish light set kinda orange that's pointing at a 3/4ths angle either from behind or in front.
|
|
|
#
?
Nov 3, 2019 21:56
|
|
|
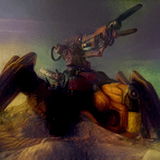
So after being inspired by this thread I started playing around with Blender 2.8 along with a Udemy course. I'm about an hour into the course and things just kind of clicked and I came up with this in about five hours just by adding shapes together today:   I still have a long way to go, but I found the process super fun so far. I used some truck manuals to come up with rough real word specs of the truck for size and kinda eyeballed details like the exhaust.
|
|
#
?
Nov 4, 2019 02:53
|
|

|
Looks like a truck to me. Nice work! Something that can be really handy for modeling from reference material is that you can drag an image from your filesystem into Blender, then model by "tracing" it. For example, drop this image into Blender, scale it up until the cargo box is 20 or 40 feet long (for a standard cargo container; I just googled the dimensions), hit 'z4' to switch to wireframe rendering, and now you can model by just dragging vertices around the edges of the diagram. I've done that a lot for the ships and guns I'm making for my game: 
|
|
#
?
Nov 4, 2019 03:11
|
|
|
TooMuchAbstraction posted:Looks like a truck to me. Nice work! Thanks for the tip! I see this technique mentioned in my guide, definitely going to be a handy way to start modeling things with better ease and accuracy.
|
|
#
?
Nov 4, 2019 04:31
|
|
|
ceebee posted:I would definitely add a rim/accent light to help silouette the chair and the character. It could be a lowish light set kinda orange that's pointing at a 3/4ths angle either from behind or in front. Thanks. I got another comment to light the face a bit more, so this is the current set - I'll try the rim lighting tonight.  about 6 months into learning this stuff, and I'm rapidly learning that the modelleing is the "easy" bit - in reailty, its like 20% modelling, 40% textures and 40% lighting. The latter is where I really need to up my game. which is part of why I'm doing such a low lit scene.
|
|
#
?
Nov 4, 2019 10:26
|
|
|
Supersonic posted:So after being inspired by this thread I started playing around with Blender 2.8 along with a Udemy course. I'm about an hour into the course and things just kind of clicked and I came up with this in about five hours just by adding shapes together today: looks like the cover page of a school textbook, good start. Grey Hunter posted:Thanks. I got another comment to light the face a bit more, so this is the current set - I'll try the rim lighting tonight. Maybe you already have it and it's subtle but the skin texture is really uniform, and it might looks nice if it had a slight texture on the bump channel to break up some of the reflected light hitting the creature. Or maybe just the spec/reflection channels OR if it is completely smooth and uniformly shiny, maybe make it a semi transparent sort of goop with subsurface scattering, so you can see the light from the screens through it. Just something to give the light more to do than fall off in a smooth gradient.
|
|
#
?
Nov 4, 2019 11:25
|
|
|

|
| # ? May 30, 2024 06:58 |
|
|
Grey Hunter posted:Thanks. I got another comment to light the face a bit more, so this is the current set - I'll try the rim lighting tonight. Besides the subsurface mentioned above, if you're using an ubershader (Principled BSDF, disney shader, AiStandardSurface, etc depending on program), the sheen setting can help greatly with a rim effect. It generally mimics the fresnel effect caused by tiny hairs in fabric/skin, where the IOR is changed based on surface angle to camera angle (iirc). Here's the arnold doc on it, principles/look should be similar (though not as crisp) in Cycles: https://docs.arnoldrenderer.com/display/A5AFMUG/Sheen?desktop=true¯oName=center
|
|
#
?
Nov 4, 2019 18:26
|
|