


|
Raskolnikov38 posted:a clamp Ha, silly there is no such thing as "a" clamp. (Or enough clamps either for that matter)
|
 #
?
Mar 6, 2020 04:10
#
?
Mar 6, 2020 04:10
|
|


|

|
| # ? May 16, 2024 17:56 |
|
|
I was also just intending this to be a practice kit, so I'm prolly never gonna truly finish it. I've never done surface prep before so I'm trying to get good with putty and retaining detail. I went down to the garage and got some real sandpaper, 800 grit, 1500 grit, and 2000 grit and went berserk. I think I sanded away the excess putty, and everything feels smooth. I just have to figure out how to do the horizontal stabilizers and where the wing meets the fuselage. Also the wings don't go together well, gotta figure that out too. Phi230 fucked around with this message at 04:25 on Mar 6, 2020 |
|
#
?
Mar 6, 2020 04:19
|
|

|
Phi230 posted:I was also just intending this to be a practice kit, so I'm prolly never gonna truly finish it. So with a kit like that, where you know there will be gaps, it helps not to prime before trying to fill with tamiya putty. That way you can use thinner or alcohol to wipe away the excess after it dries. This works better than sanding if you want to preserve detail. You can also try epoxy type putty, like apoxie sculpt, to fill those gaps. Its water soluble so you can wipe away the excess with a damp qtip before it cures. It's also sandable once dry.
|
|
#
?
Mar 6, 2020 04:33
|
|


|
Symetrique posted:So with a kit like that, where you know there will be gaps, it helps not to prime before trying to fill with tamiya putty. That way you can use thinner or alcohol to wipe away the excess after it dries. This works better than sanding if you want to preserve detail. You can still wipe away tamiya white putty with lacquer thinner after its dry?
|
|
#
?
Mar 6, 2020 04:55
|
|
|
Arquinsiel posted:Sorry, should have been clear. This is not a modelling project, this is a hypothetical plasma engine project, assuming such could ever be done in the home. what
|
|
#
?
Mar 6, 2020 04:58
|
|


|
If you use a fast setting glue, you can get away without clamping. I have been using Tamiya Extra Thin and it works great on the fuselage seams and the seams where the upper and lower wing halves meet. Just work your way along the seam in small increments by holding the gap closed, then dabbing a bit of cement on the seam line. Hold it for a few seconds, then move an inch or so and do it again. Repeat until the whole part is cemented. Be very careful not to get any cement on your clamping had or you will end up with thumb print impressions all over your model. It's much easier that way than to try to glue up the whole thing at once and clamp it using a million rubber bands or clothes pins. Mr. Hobby also makes extra thin cement (Mr. Cement S) which is supposed to dry faster, but I haven't personally tried it yet.
|
|
#
?
Mar 6, 2020 05:06
|
|


|
Cool suggestions for mold materials, thanks everyone! (I've been looking for blue stuff/oyumaru for a while and haven't been able to find it, so I've kind of given up, but the Smooth-on and TAP seem more like what I'm after.)
|
|
#
?
Mar 6, 2020 05:46
|
|


|
Phi230 posted:You can still wipe away tamiya white putty with lacquer thinner after its dry? Yes. It takes a bit more effort but it will come off if you use a damp qtip. Just make sure the lacquer thinner you're using doesnt harm plastic. Isopropyl alcohol will also work, but not as fast.
|
|
#
?
Mar 6, 2020 06:10
|
|
|
Midjack posted:what
|
|
#
?
Mar 6, 2020 11:40
|
|

|
yaffle posted:Ha, silly there is no such thing as "a" clamp. (Or enough clamps either for that matter) I'm definitely at a point where I need some hobby clamps, so if you have some recommendations, I'm all ears.
|
|
#
?
Mar 6, 2020 14:30
|
|

|
Phi230 posted:I've never done surface prep before so I'm trying to get good with putty and retaining detail.
|
|
#
?
Mar 6, 2020 15:37
|
|

|
grassy gnoll posted:I'm definitely at a point where I need some hobby clamps, so if you have some recommendations, I'm all ears. Same. My clamps are either too much pressure, or they slip off, are not senstitive enough, or just suck in general. I've been using a combination of clothes pins, blue tape, squishy foam with a hand clamp, and a rock.
|
|
#
?
Mar 6, 2020 16:40
|
|


|
Yooper posted:Same. My clamps are either too much pressure, or they slip off, are not senstitive enough, or just suck in general. I've been using a combination of clothes pins, blue tape, squishy foam with a hand clamp, and a rock. I have an elaborate system of wooden cantilevers, liquor bottles, and sometimes string. And a couple of these things. They work ok.
|
|
#
?
Mar 6, 2020 20:44
|
|

|
So let�s say you have a washer and a drier in a basement and the drier vents outside. Would setting up a vapor hood so you could airbrush indoors (acrillics only, and no spraypaint) that uses the same vent a good idea or did I just literally invent homemade fuel-air explosives?
|
|
#
?
Mar 8, 2020 01:21
|
|
|
It fine. It's just acrylics, you couldn't get them to explode even if you wanted to. You don't even need to vent it outside if it's just acrylics.
|
|
#
?
Mar 8, 2020 01:43
|
|

|
got my replacement patriot in, and hoooh boy, it's a notable improvement.i think i hadn't been cleaning paint out of my old one well enough, because this thing sprays like a dream. part of it might be switching to stynylrez, which doesnt want to stick to the inside of the brush at all--insanely easier to clean than vallejo primer
|
|
#
?
Mar 8, 2020 02:53
|
|

|
Schadenboner posted:So let�s say you have a washer and a drier in a basement and the drier vents outside. Would setting up a vapor hood so you could airbrush indoors (acrillics only, and no spraypaint) that uses the same vent a good idea or did I just literally invent homemade fuel-air explosives? I've got the same situation, but I was thinking about setting up a blast gate section so I could keep the fumes from back-washing into the dryer. My hesitation in doing it is actually from reading about the bad stuff that can happen if you have a low pressure area in your basement and it pulls the (gas) hot water heater's combustion fumes back down instead of them going up the flue. I don't know how much air I have to move to make that happen, and if you ask on an HVAC forum the blessed guild members all freak out and tell you that your house will burn down if an unlicensed human even glances at your furnace.
|
|
#
?
Mar 9, 2020 17:48
|
|
|
Finished a MIG tanker torso. I like how the shading on the body turned out, but it's going to be mostly inside a tank turret anyway. The face turned out okay, but the eyes aren't very defined. 
|
|
#
?
Mar 10, 2020 03:26
|
|

|
And here he is in his place! Overall I'm pretty proud of how this kit turned out.    Full album: https://imgur.com/a/98qBOej
|
|
#
?
Mar 11, 2020 01:42
|
|
|
Looks fantastic. I really want to dip my toes into an armor model, my tastes have outgrown Japanese robots that brought me into the hobby.
|
|
#
?
Mar 11, 2020 02:57
|
|
|
Ensign Expendable, your improvement in paintinf has been one of the most satisfying things to witness in this thread. I would wash a little dark blue grey in the tank dudes eyes and around the nose to give a more life like skin tone.
|
|
#
?
Mar 11, 2020 11:36
|
|
|
That's a really great looking tank, excellent work.
|
|
#
?
Mar 11, 2020 12:23
|
|
|
I just grabbed a cheap Alumilite starter so whatever's in there is what I'm going to use. I've been watching the Crafsman videos a lot and he does a ton of moldmaking. It is 2-part silicon rubber though.
|
|
#
?
Mar 11, 2020 17:09
|
|

|
Big Willy Style posted:Ensign Expendable, your improvement in paintinf has been one of the most satisfying things to witness in this thread. Hmm, good idea. I was thinking of how to make his eyes stand out more. Edit: speaking of improvements, I took this photo a few days back. I think it shows 6 years of progress pretty well. 
|
|
#
?
Mar 11, 2020 23:31
|
|
|
Those are really smart mate, nicely done.
|
|
#
?
Mar 12, 2020 10:27
|
|


|
I got nostalgia'd into breaking my rule about no new kits until I'd finished some of my old ones last night. Though "new" is a generous interpretation for a kit that stopped being made in 1985.  It's a Tamiya RVZ500R and the reason I bought it is because my dad made one for me and gave it to me as a kid. It lasted a surprisingly long time before succumbing to inevitable destruction. I bought it on implies because it was being sold for half what other sellers were offering it for. Assuming I didn't just give $100 to a Russian scammer, I fully expect the decals to be completely shagged. What's the best option for getting decals printed? For reference it should look like this when done: 
Carth Dookie fucked around with this message at 23:45 on Mar 12, 2020 |
|
#
?
Mar 12, 2020 23:42
|
|


|
Carth Dookie posted:I got nostalgia'd into breaking my rule about no new kits until I'd finished some of my old ones last night. Though "new" is a generous interpretation for a kit that stopped being made in 1985. I haven't really run across anyone who does decals for motorbikes as replacements because I normally build cars but Pattos place is based in Australia and may be able to help you out. The only real downside is they print their decals on decal paper so you have to cut closely around the decals when applying to make sure they don't look lovely. Indycals is another site but I don't know if they do custom stuff and they're in america.
|
|
#
?
Mar 13, 2020 07:45
|
|
|
Thanks for the tip. I suspect I'm going to have to use the existing decals as templates for masking and use paint instead for the major stuff, but we shall see.
|
|
#
?
Mar 13, 2020 10:19
|
|
|
Carth Dookie posted:Thanks for the tip. You may also luck out and the decals are workable. I kind regret getting the replacement decals I got for my XJR9 from the early 90's because the decals in the kit where in heaps better nick and easier to work with than the replacments.
|
|
#
?
Mar 13, 2020 10:26
|
|
|
Does anyone here watch the scalemodeling channel on YouTube? He does 100% car/motorcycle models. Most builds he does he paints with Zero paints in an airbrush and he gets amazingly smooth results. I never see him having to do any kind of wet sanding or polishing of any kind he just sprays the color, sprays the clear and let's it dry and always gets a glassy, wet like look from it just like a real car. So my question is, is this normal for airbrushes? I have only been Tamiya spray cans and have been getting horrible, orange peely results.
|
|
#
?
Mar 13, 2020 18:00
|
|
|
Airbrushes give you a lot more control over the composition of the paint and how it's applied. It's a lot easier to get good results if you build up several thin layers that dry instantly than one thick one from a can.
|
|
#
?
Mar 13, 2020 18:19
|
|
|
Charliegrs posted:Does anyone here watch the scalemodeling channel on YouTube? He does 100% car/motorcycle models. Most builds he does he paints with Zero paints in an airbrush and he gets amazingly smooth results. I never see him having to do any kind of wet sanding or polishing of any kind he just sprays the color, sprays the clear and let's it dry and always gets a glassy, wet like look from it just like a real car. While I havent worked with them extensively myself, it has been explained to me Tamiya cans are extremely sensitive to humidity and temperature. Many of the posters on another model page I follow are in SE Asia and say with their humidity there is a very small window for ideal results so perhaps this is your issue? Additionally, I've seen it suggested that letting the can sit in a bucket of warm water before spraying to ensure the insides of the can are up to ideal temp.
|
|
#
?
Mar 13, 2020 21:06
|
|

|
Charliegrs posted:Does anyone here watch the scalemodeling channel on YouTube? He does 100% car/motorcycle models. Most builds he does he paints with Zero paints in an airbrush and he gets amazingly smooth results. I never see him having to do any kind of wet sanding or polishing of any kind he just sprays the color, sprays the clear and let's it dry and always gets a glassy, wet like look from it just like a real car. I�ve watched a fair number of his videos and I think it�s a combination of the control he has with the airbrush and also the paint. I�m not far off doing my second build with zero paints for the bodywork and they work differently to the tamiya sprays even when decanted. They�re quite a hot paint that will craze the plastic if you build the layers too quickly so slow and steady wins the race.
|
|
#
?
Mar 13, 2020 22:51
|
|
|
Gay Weed Dad posted:While I havent worked with them extensively myself, it has been explained to me Tamiya cans are extremely sensitive to humidity and temperature. Many of the posters on another model page I follow are in SE Asia and say with their humidity there is a very small window for ideal results so perhaps this is your issue? Additionally, I've seen it suggested that letting the can sit in a bucket of warm water before spraying to ensure the insides of the can are up to ideal temp. The warm water bucket is good advice for any spray can. I warm them up, shake them up, and get to spraying. Putting them back in warm water after a few minutes of use or when you switch to a different can also warms them back up from the pressure drop of spraying them so you can keep going longer before your cans freeze up entirely.
|
|
#
?
Mar 14, 2020 23:43
|
|
|
Currently doing a deep dive to find reference images for the Porsche 956 that I've started building. I wouldn't have thought finding images of the engine would be quite so difficult but a large number are trapped on pinterest where they can't be blown up size wise. I think I have enough images for now though because the detail is a little soft and I want to do it in a similar fashion to my jaguar xjr-9
|
|
#
?
Mar 15, 2020 03:23
|
|
|
Dr. Garbanzo posted:Currently doing a deep dive to find reference images for the Porsche 956 that I've started building. I wouldn't have thought finding images of the engine would be quite so difficult but a large number are trapped on pinterest where they can't be blown up size wise. I think I have enough images for now though because the detail is a little soft and I want to do it in a similar fashion to my jaguar xjr-9
|
|
#
?
Mar 15, 2020 03:28
|
|

|
 Looks like I'm all set for a weekend self-isolation ")
|
|
#
?
Mar 15, 2020 11:16
|
|

|
Those are good looking figures. Where they from?
|
|
#
?
Mar 15, 2020 14:43
|
|


|
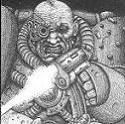
The first two are resin figure by The Bodi (TB-35031) with a replacement head from Hornet, third figure is from Verlinden with a Hornet head and the last one is cobbled together from spares and some putty. Figures 12 and 4 are going in a scene with a Universal Carrier while the Nazi pilot is just practise really...
|
|
#
?
Mar 15, 2020 16:19
|
|
|

|
| # ? May 16, 2024 17:56 |
|
|
I found a cool place in the Ukraine to order models. Looks like most stuff is made every few weeks. I've got a pair of BTR's coming and a Mig27. The order process is a bit lol though. You place an order then they send you an invoice a couple days later then you Paypal them the money. Website is hobby.dn.ua. One manufacturer, AModel, has all sorts of crazy poo poo.
|
|
#
?
Mar 16, 2020 13:44
|
|