|
w00tmonger posted:Anything I need to know going into putting together an old Warhammer black coach? Pin that thing everywhere you think it'll need it and then a few places you don't.
|
 #
?
Aug 23, 2020 03:12
#
?
Aug 23, 2020 03:12
|
|


|

|
| # ? May 9, 2024 22:43 |
|
|
richyp posted:My second airbrush attempt and my 2nd tank in the last 20 or so years (and this week). This is excellent.
|
|
#
?
Aug 23, 2020 03:16
|
|


|
Magnetized fighty robit.   
|
|
#
?
Aug 23, 2020 03:50
|
|


|
w00tmonger posted:Anything I need to know going into putting together an old Warhammer black coach? I'm pretty sure that thing was infamously crap to build, so uh... have fun  Like moths said it'll probably be more pin than metal by the time you get it to stick together.
|
|
#
?
Aug 23, 2020 13:41
|
|

|
I�m moving soon and need something to transport my plastic toys in. The biggest and most fragile mini I have is Arkhan the Black model, so it needs to be able to at least hold him safely in place. Any recommendations?
|
|
#
?
Aug 23, 2020 14:51
|
|


|
so i'm painting these tiny wood elves from Forest Dragon. (the prints are from Printing in Detail, and are extremely excellent)  random thoughts and questions: 1. Does this paint scheme work? I like but I don't want them to look like dark elves 2. I need to improve my brush control for these. They are a challenge to paint! 3. I don't like my base. The sculpting sand is too organic looking next to the ultra smooth, detailed printed minis. I wish these minis had some printed bases they could insert to with details in the same style. Maybe I can make some greenstuff grass rims or something?
|
|
#
?
Aug 23, 2020 15:15
|
|

|
 My first attempt at a marine. I can see why people like airbrushing for these, getting flat panels to look nice is hard. Also, unfortunately, I wasn't the freehand prodigy that I'd hoped (it's supposed to be an hourglass ) and my edge highlighting needs work, but it was good practice.
|
|
#
?
Aug 23, 2020 15:52
|
|

|
looks like an hourglass to me tbh
|
|
#
?
Aug 23, 2020 16:02
|
|


|
jesus WEP posted:looks like an hourglass to me tbh Thanks, I think I might just be a bit annoyed with the proportions. Think I'll try to make it a bit more slender next time.
|
|
#
?
Aug 23, 2020 16:06
|
|
|
I may have already asked about this, but is there a good way to make power swords using the following range of blues and whites? Thousand Sons Blue Ahriman Blue Temple Guard Blue Baharroth Blue Calgar Blue Macragge Blue Fenrisian Grey Ulthuan Grey White Scar I feel like I bought all the ingredients for blue-ish power weapons but don't know how to put them together...
|
|
#
?
Aug 23, 2020 16:22
|
|
|
Nebalebadingdong posted:1. Does this paint scheme work? I like but I don't want them to look like dark elves 1) I know cameras can change the colors slightly, but it looks like you're using purple and teal? What you've got looks nice so if you're happy with it I'd keep it; but if you're not you might want to darken the purple cloaks, or maybe switch to a dark blue cape instead, or possibly even switch the purple to a reddish plum color like the one on my Atlas's shoulder pads?  3) I use green stuff for basing all the time (lay some down pretty thin, use a tinfoil ball or a clean rock to give it texture), but I've never done minis that small so I'm not sure if the same techniques would work. Here are some things that might be worth trying: 3a) You could make your own texture paste with baking soda and (I believe) PVA. There're tutorials for it on the internet, and I imagine you could control how thick and gritty it is by limiting how much baking soda you use. 3b) You could also try laying down some smooth green stuff. After it dries, add a couple of blobs of super glue to the surface and then roll a wet toothpick over the glue to harden it. By using a rolling motion you'll stretch and pull the surface of the super glue as it hardens, but that might make a 'bigger' texture than you're wanting. I used that technique to make the rust on this gaslands car:  3c) Lay down your green stuff, smooth it out, and once it dries spread a little PVA over the surface. Carve little channels into it with a toothpick and the PVA dries it will spread out a bit and form little bumps and ridges conforming to those channels. Go back in and reinforce some of the channels you carved as the glue spreads out and you'll get some nice, subtle surface variations that won't look gritty at all. The only issue is with PVA is it will be very thin which means the surface can be a bit brittle, if it peels or cracks you may need to try to get a drop of super glue under it. If any superglue squeezes out use the 3b method and roll it out and nobody but you will ever notice! All three bases use the 3c method. The Catapult (painted guy)'s base is very subtle, but you can see where the higher ridges picked up my I threw down some agrax to make the texture more visible: 
PoptartsNinja fucked around with this message at 17:11 on Aug 23, 2020 |
|
#
?
Aug 23, 2020 16:56
|
|


|
Still got the sorcerer to finish but fancy a break from marines and will paint my demons for a bit. 
|
|
#
?
Aug 23, 2020 16:57
|
|


|
Professor Shark posted:I may have already asked about this, but is there a good way to make power swords using the following range of blues and whites? Skim a few tutorial videos but I think the main idea is that you want the core to be the brighter hotter color and then it darkens as the edges go out? I know some people also paint alternating lights and darks to give it the idea of pulsing.
|
|
#
?
Aug 23, 2020 16:59
|
|


|
Nebalebadingdong posted:so i'm painting these tiny wood elves from Forest Dragon. (the prints are from Printing in Detail, and are extremely excellent) 1. The paint scheme rules. Keep it, all of it, and please show more. 2. While not wrong, I think the way you've painted them works. At a distance people will be able to make out colors and details, and at that scale its the most important thing to keep in mind. 3. I mean, I like the way it looks, but I get'cha. Maybe some flock over it instead of sculpting?
|
|
#
?
Aug 23, 2020 17:04
|
|

|
Professor Shark posted:I may have already asked about this, but is there a good way to make power swords using the following range of blues and whites? Do the sword like normal, grey base, shade in all the dark bits, lighter grey and white highlights. Basic glow effect is to take the darkest blue you want for it and paint the desired glow area then take the next lighter blue and paint a smaller area within it then keep going in a smaller area until you hit your desired max brightness. With a power sword you generally don't want to go all the way to white except for some very small bits because they tend to have a more ethereal pale glow than being a lightsaber but it's your model you can do it however subtle or bright as you want!
|
|
#
?
Aug 23, 2020 17:15
|
|
|
Professor Shark posted:I may have already asked about this, but is there a good way to make power swords using the following range of blues and whites?
|
|
#
?
Aug 23, 2020 17:49
|
|
|
PoptartsNinja posted:1) I know cameras can change the colors slightly, but it looks like you're using purple and teal? What you've got looks nice so if you're happy with it I'd keep it; but if you're not you might want to darken the purple cloaks, or maybe switch to a dark blue cape instead, or possibly even switch the purple to a reddish plum color like the one on my Atlas's shoulder pads? i really want to avoid grit/noise for this minis. i made this:   its not cured yet so im smoothing and picking at it. i feel like i should make a mold of it instead of making a new base for each stand. something like this would probably better of being printed tho
|
|
#
?
Aug 23, 2020 20:14
|
|
|
More tiny map-scale robits! And tiny map-scale lighting effects!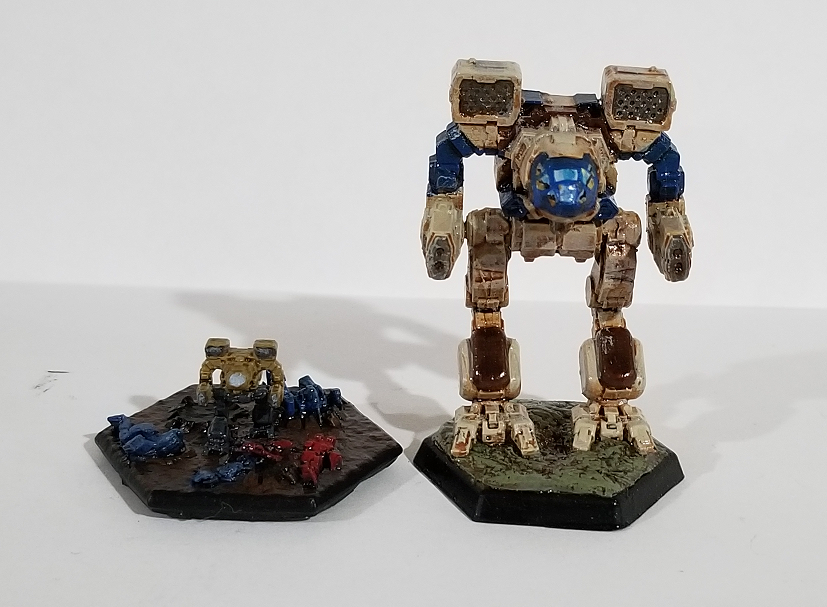 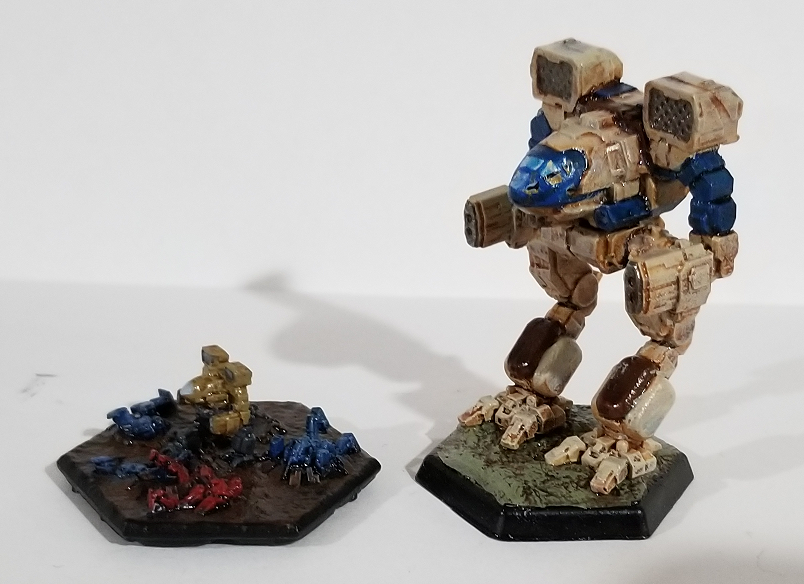 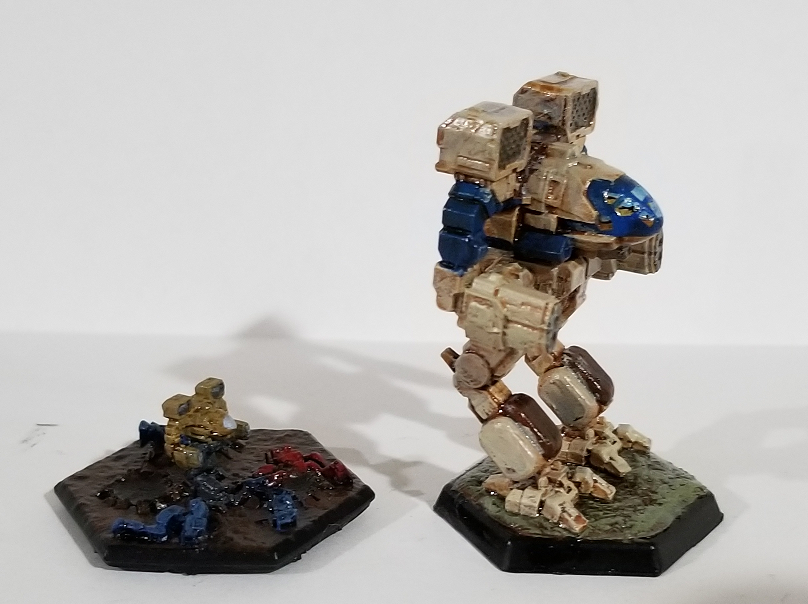 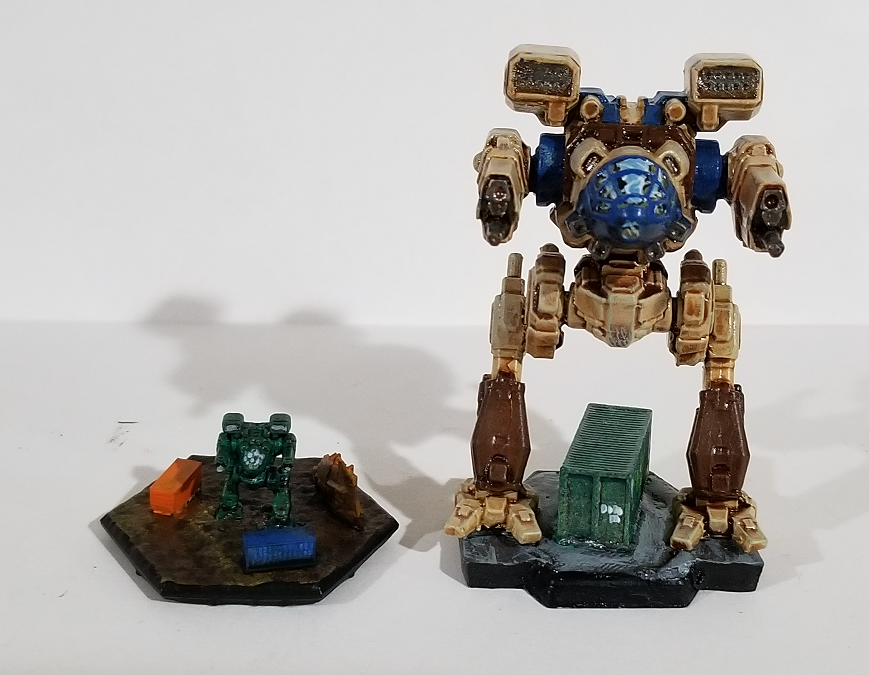 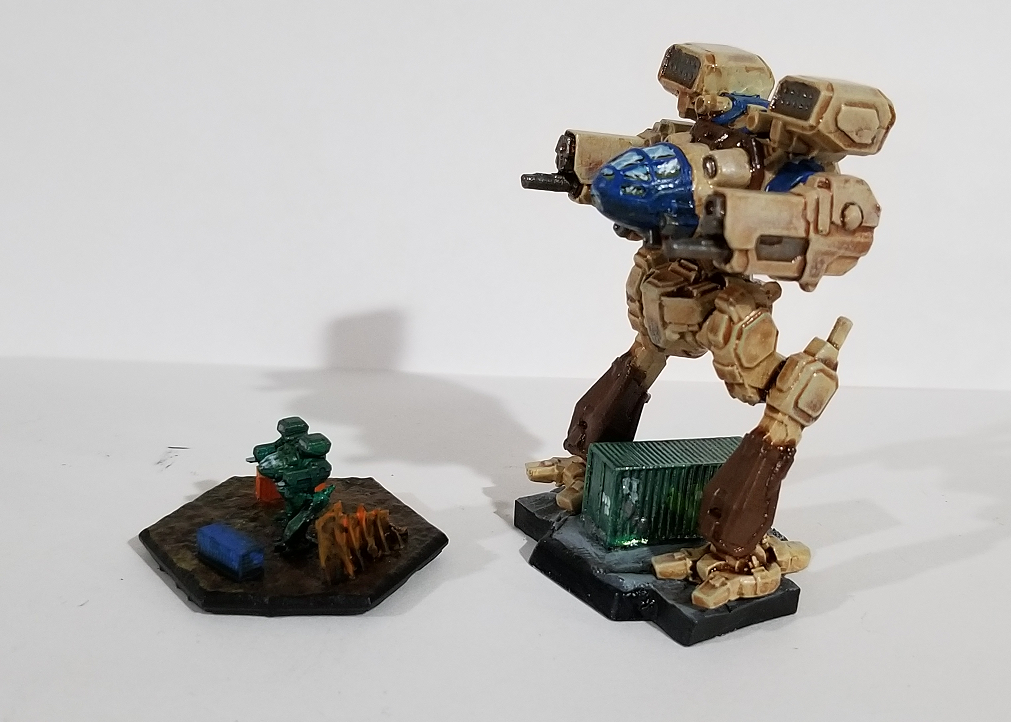 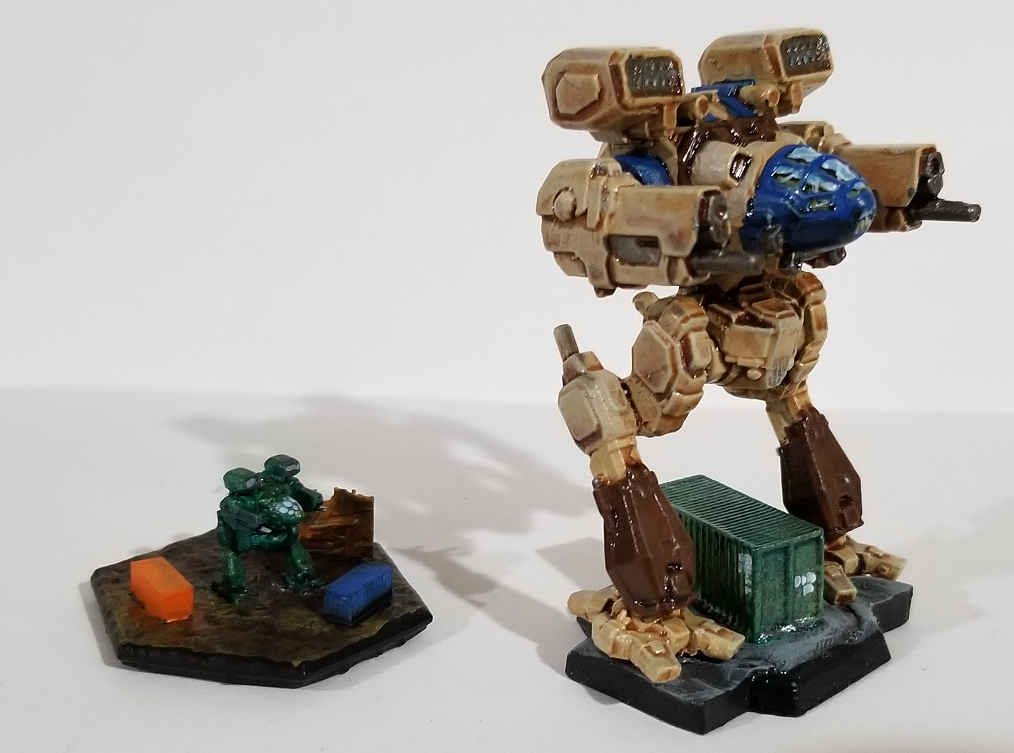 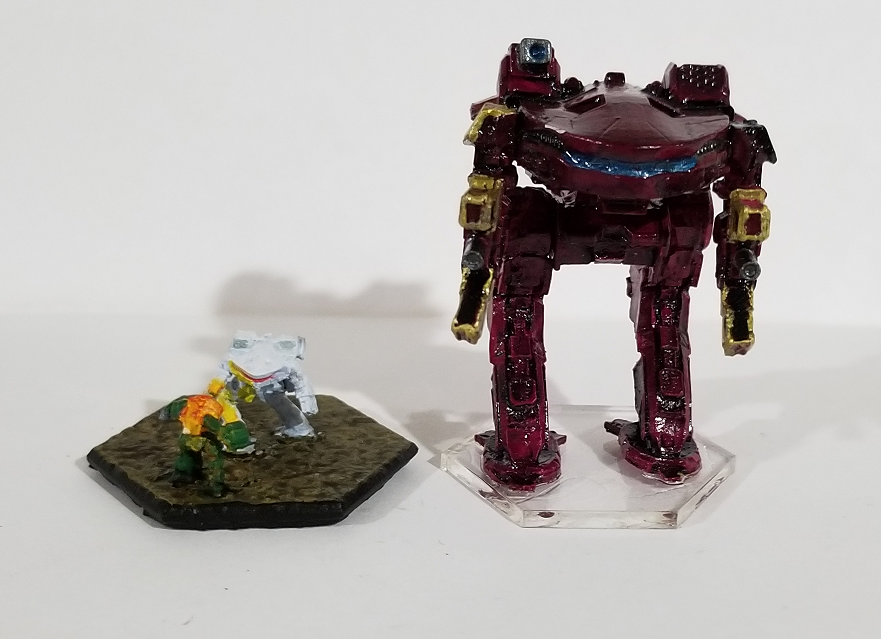 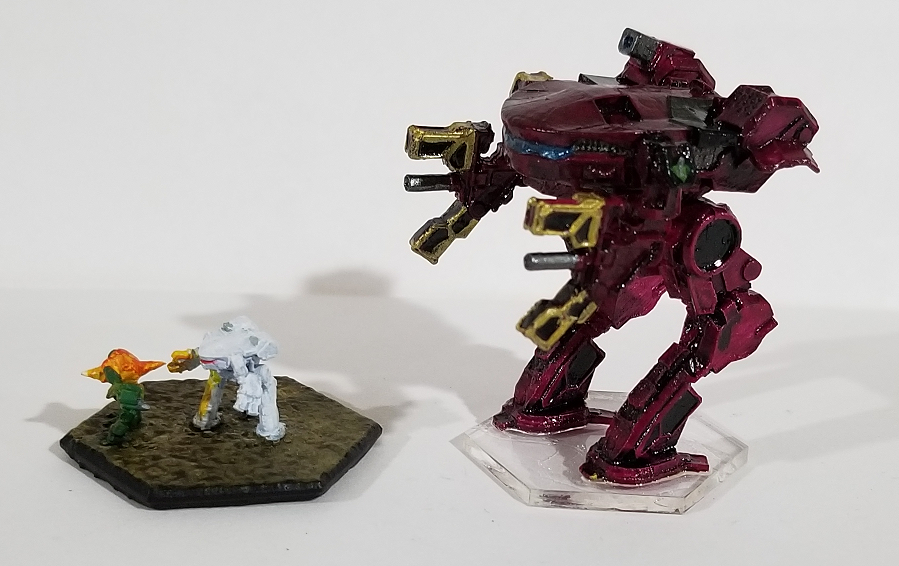 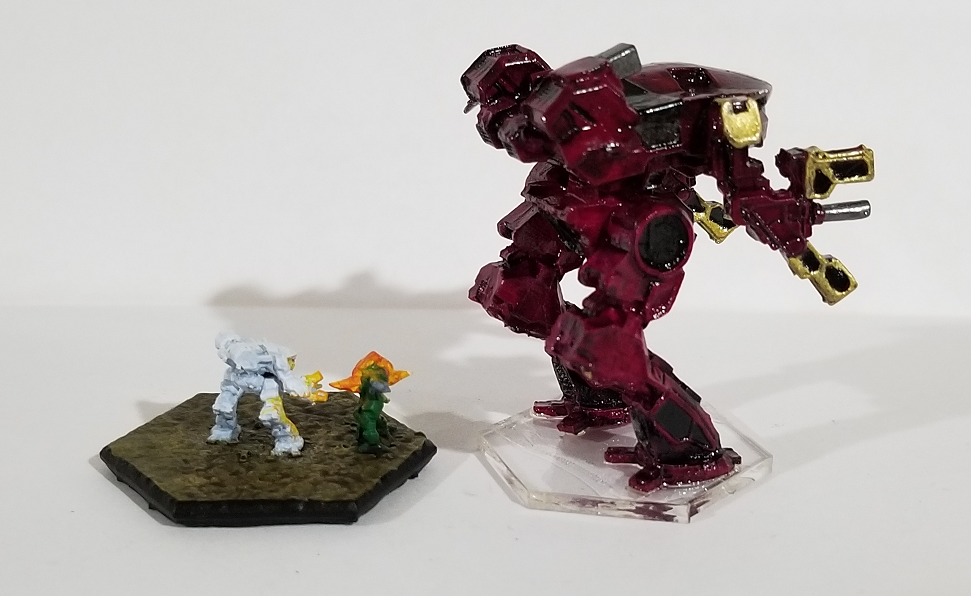 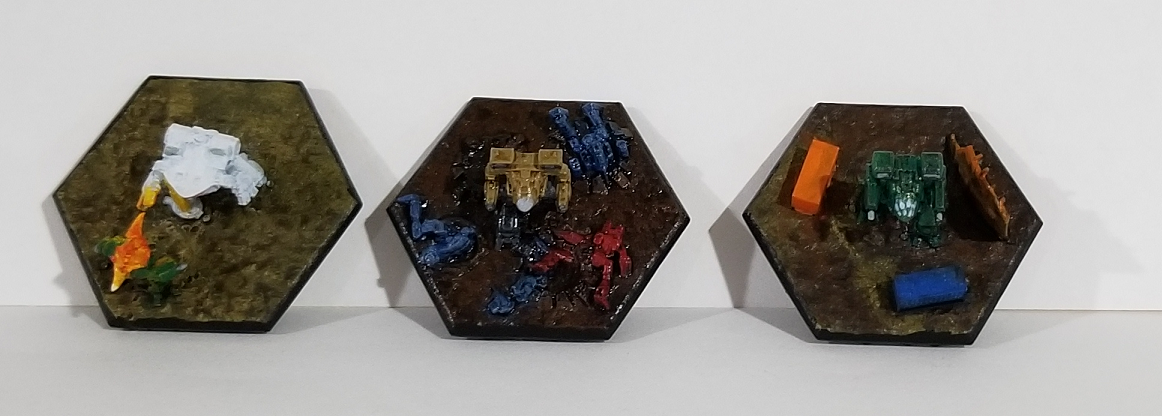
|
|
#
?
Aug 24, 2020 02:06
|
|
|
w00tmonger posted:Anything I need to know going into putting together an old Warhammer black coach? I built one last fall, and happened to take some pics. This one is a little small, but there is a bit with the wraith and chair all pinned together  Then this is how I constructed the coach itself. I'd suggest putting the four coach parts together with rubber bands, then drill the holes up through the bottom into the walls.  This was my subassemblies for painting. Notice the hole in the front middle of the coach- that is where I drilled for the driver/chair to slot in. The horses are pinned to the yoke, and a pin from the yoke to the bar is helpful too. I used pins in the bottom of the wheels and a couple of the horse feet to attach it all to the base. The top was simply glued on. I also glued the coffin into the back, but left the lid loose.  Feel free to ask any questions. That thing was a pain in the rear end but worth the effort. Skails posted:
|
|
#
?
Aug 24, 2020 04:21
|
|


|
Is there a goon-approved Best Way of dealing with Space Marine shoulder pads when airbrushing? I get the impression that if I glue them on before priming, as a newbie I'm going to inevitably end up spraying the shoulder color on other things later (particularly backpacks that I've already glued on on all of my current models  ). Conversely, I expect I'm gonna have a bad time matching the zenithal highlights of the model if I keep the shoulder pads separate until the end. ). Conversely, I expect I'm gonna have a bad time matching the zenithal highlights of the model if I keep the shoulder pads separate until the end.Spelling it out like that, I guess for future builds leaving the backpacks off, putting the shoulder pads on for priming and highlighting and then rigorously masking everything around the shoulder when layering them is the most sensible solution?
|
|
#
?
Aug 24, 2020 11:57
|
|


|
Mask with Silly Putty is probably the easiest way to do it.
|
|
#
?
Aug 24, 2020 13:46
|
|
|
Badly Jester posted:Is there a goon-approved Best Way of dealing with Space Marine shoulder pads when airbrushing? I get the impression that if I glue them on before priming, as a newbie I'm going to inevitably end up spraying the shoulder color on other things later (particularly backpacks that I've already glued on on all of my current models Check this guy's channel, he doesn't have nearly enough views on his videos: https://www.youtube.com/watch?v=ezj-8jFpVwc
|
|
#
?
Aug 24, 2020 13:58
|
|

|
Considering how many annoying tiny details are on this guy, I'm not mad at how this commissar turned out edit-- man these things look so much worse zoomed in compared to holding it in my hand Count Thrashula fucked around with this message at 16:41 on Aug 24, 2020 |
|
#
?
Aug 24, 2020 16:39
|
|

|
I like the comissar, just finish the face a bit more and he is perfect. I always find it hard to do colors from the same scale and have it be distinctly different like red and pink and yellow and gold.
|
|
#
?
Aug 24, 2020 19:35
|
|
|
I'm sure everyone is pretty sick of Indomitus models by now, but they sure are fun to paint.
|
|
#
?
Aug 24, 2020 20:14
|
|

|
Crossposting form the oath thread. Painted one of my favorite sculpts! Was sort of a practice/experiment with painting different textures.  
|
|
#
?
Aug 24, 2020 20:20
|
|


|
Badly Jester posted:Is there a goon-approved Best Way of dealing with Space Marine shoulder pads when airbrushing? I get the impression that if I glue them on before priming, as a newbie I'm going to inevitably end up spraying the shoulder color on other things later (particularly backpacks that I've already glued on on all of my current models If I have the option I do the backpack, both arms, and the head of Space Marines by themselves and assemble after painting. To keep the highlights lined up, just do a test assembly to identify the direction you're going to zenithal from then take them back apart. You could also just use a tiny bit of blue tack to put the parts in generally the right spot while you zenithal, either way works. This isn't always possible though especially with the monopose stuff from the big box sets. Shoulderpads are often connected to the main body, but thankfully it's not that hard to stay close while spraying and always consider the angle you're spraying from. The way they are designed on most Marines you really don't have to worry about hitting any of the rest of the model if you're just a little careful. But like mentioned, some silly putty or masking tape is a pretty easy solution and it shouldn't take much to protect the part you're worried about. I have not had to do it on any of mine yet though, even using black and red on pads/body. I do the body first and completely finish the red, then I come back and do the pads with the airbrush, and the ridges on the pads with a normal brush. Paddyo posted:I'm sure everyone is pretty sick of Indomitus models by now, but they sure are fun to paint. Never get sick of seeing awesome models painted well! with a rebel yell she QQd posted:Crossposting form the oath thread. Painted one of my favorite sculpts! That red is wonderful.
|
|
#
?
Aug 24, 2020 21:33
|
|
|
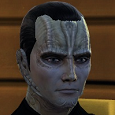
Test scheme, missing a blue crystal on the base and a fade blade. I think it needs something to break up the gun or body more but I don't know what to do.
|
|
#
?
Aug 24, 2020 22:09
|
|
|
MRLOLAST posted:I like the comissar, just finish the face a bit more and he is perfect. I always find it hard to do colors from the same scale and have it be distinctly different like red and pink and yellow and gold. "Finished" the face and base and redid the plasma coils. And tweaked a little of the highlighting. Pretty darn happy with this guy all things considered. 
|
|
#
?
Aug 24, 2020 22:14
|
|
|
goodness posted:Test scheme, missing a blue crystal on the base and a fade blade. I think it needs something to break up the gun or body more but I don't know what to do. Maybe extent that bone color to that middle chest plate? I like the scheme though! For the gun you could maybe add another splash of color with some brass / copper accents on the gun - maybe the exposed tubing bit in the front / ribbed tubing in the back or that threaded piece at the back of the barrel?
|
|
#
?
Aug 24, 2020 22:28
|
|


|
NUMBER 1 FULCI FAN posted:"Finished" the face and base and redid the plasma coils. And tweaked a little of the highlighting. Pretty darn happy with this guy all things considered. Looking good! The uniform especially came out really tight.
|
|
#
?
Aug 24, 2020 22:32
|
|
|
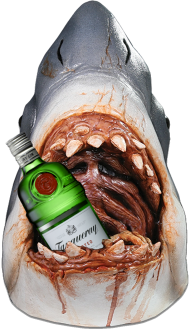
tangy yet delightful posted:Got my Spiritstone Red paint in end of last week and last night finished up my first paint scheme model for my new army. Now to crank on 4 more of these for a full unit in the worlds smallest assembly line.
|
|
#
?
Aug 25, 2020 00:34
|
|


|
Paddyo posted:I'm sure everyone is pretty sick of Indomitus models by now, but they sure are fun to paint. Looks amazing! I refuse to be sick of Indomitus until mine hits and I get to paint some.
|
|
#
?
Aug 25, 2020 02:29
|
|
|
Zarbag's Gitz, 4/9 done!
|
|
#
?
Aug 25, 2020 03:02
|
|

|
I painted a bunch of stuff for Riot Quest, a game I've never gotten to play thanks to the end of the world and all:        Also a couple of regular WMH models:   I reshot my MCP stuff, along with a bunch of new MCP, but I'll save that for another day I suppose. Did enough image spam already.
|
|
#
?
Aug 25, 2020 04:53
|
|

|
tangy yet delightful posted:Cross-postin' here, thanks for all the inspiration, this thread has put out some awesome work lately. Did you prime white for that? That smooth coverage on the head is really nice. Digging those gems too.
|
|
#
?
Aug 25, 2020 04:59
|
|
|
Grizzled Patriarch posted:Did you prime white for that? That smooth coverage on the head is really nice. Digging those gems too. It's gray primer with a bunch of thin coats of wraithbone over it, I tried to take another pic to show there is some texture there but for brush-on I think it's pretty decent.  And thanks, a youtube video said to put silver and then the Spiritstone red but I tried that versus a Mephiston red base coat and went with the red, seems to be more gem like to me.
|
|
#
?
Aug 25, 2020 05:13
|
|
|
goodness posted:Test scheme, missing a blue crystal on the base and a fade blade. I think it needs something to break up the gun or body more but I don't know what to do. The gun definitely needs to be a different color from the warrior's body. Even a neutral grey or something might do the trick. Can't remember if I've posted in this thread before, but I wanted to start sharing some stuff I've been doing because this thread is really cool and full of great paint jobs. First is this Phobos Captain I painted up. The original idea was for him to be named special character, which is why I made a few customizations.     I also just painted this single ork in a sudden urge to resume work on my deathskulls. Tried out a few new tricks on him to help speed up my process, so it takes me only 3 hours now to paint a single boy instead of, uh, like 6 or something.  
|
|
#
?
Aug 25, 2020 10:17
|
|


|
Thanks for the advice, everyone.Furism posted:Check this guy's channel, he doesn't have nearly enough views on his videos: https://www.youtube.com/watch?v=ezj-8jFpVwc Yeah, there's some good stuff on that channel. His first video was uploaded only four months ago, though. Maybe he'll reach critical mass eventually.
|
|
#
?
Aug 25, 2020 10:44
|
|
|

|
| # ? May 9, 2024 22:43 |
|
|
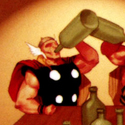
Very much a work in progress, trying out a new brand of metallics that my LGS just stocked:   I'm really happy with the transition between the red-bronze and the gold on the body, but it's extremely hard to see that the wings are actually green. With my LED lamps shining directly on it in person you can see it, but in any other light they just look black. I was thinking of adding some thin coats of a Createx Auto-Air Pearl Green that I bought and have't yet used, but color theory ain't my bag and I'm not sure how good green-gold-red will even work? I guess it'd be a metallic rasta dragon Also what's a black that coats really well? I bought some Army Painter black and it's so thin it doesn't cover well at all. I think I've heard the new Abaddon Black from GW is also not as good as whatever their old black used to be called?
|
|
#
?
Aug 25, 2020 15:02
|
|