


|
Some progress, since I worked from home on Thursday, and slipped out into the garage Turned out I bought some of the mylar-backed foam for the AE86, so I have extra of that if I need it.  I bought a roll from China last week, it just needs to get here. Stuff that I pulled out to work on:   These are the panels that the radiator mounts to, and they attach to the engine side of the core support. The GSL-SE ones are different in that one has bolt holes for the third mount for the airbox, and a hole for said airbox to get cold air from inside of the nose of the car (basically, replacing the airbox is dumb, because it's factory cold air,) and the other has slightly different reliefs for the oil cooler hoses, due to a different oil cooler location. Battery tray:   Bit of a rust through in one corner. The "AWE" is a marking from Awesome Auto Parts, a local you-pull-it yard. My original battery tray was swiss cheese, and I replaced it years ago with this one. I repainted the top (with Plastidip,) but the underside is OEM paint! This is the third airbox mount I was talking about above, which also serves as an overflow bottle mount. The overflow bottle mount on the original radiator side piece is just welded to the panel.   ECU and mount:   This goes under the carpet on the passenger side, so is victim to any moisture that gets under there. Fortunately just a little bit of rust. The plating did it's job for the most part. The panel that goes over the ECU, same comments apply.   And here's the 3 plated parts after a trip through the blaster:   I basically only hit the areas that were rusty on the ECU parts, working on the theory that they aren't passivated. The airbox bracket I blasted wholesale, at least enough to remove the passivate layer. Bit of pitting on the floor plate, but no throughs. The floor plate didn't fit in my tank, but thankfully I only needed to get the edges, so...  Just to be thorough, I did all four edges:   I actually went back and blasted the pitting a second time after the first round of plating. There appeared to be some schmutz in the pits, which usually mean s I didn't get everything clean enough. Looks like the second time around was adequate. Polished:   Passivated (blue. I wanted that extra durability the chromate provides):   Did the ECU bracket pretty much the same way, but it actually fit in the tank (barely,) so it got done in one go:   After polish and passivate:   I didn't get too involved as far as prettying them up, with either of those pieces, since they're both under the carpet. Just a good functional protective coating is all I'm looking for. They actually came out pretty nice anyway. I mean, I did knock down the dull grey finish they come out of the tank with. I have some On that note, I need some more "fine" steel wool. The ECU bracket fresh out of the tank:   (It's a little polished from a mid-plate shine-up.) That took a little creative positioning of the anodes to get inside the boxed section, and under the overhangs, but it seems to have done OK. This part is on full view in the engine bay, so got a little more car. Polished up:   Aaaaaand:   Not bad! This motherfucker took forever to blast.   The paint came off easily enough, and even the rust wasn't really difficult, but the Plastidip, while not impossible, took at least twice as long as the paint, due to the media loving to just bounce off of it. The dip was compromised in places, so I was able to get under it, but it was still slower. Discovered a few more pinholes:   Cut out the bad stuff.  Patch from a remaining piece of the HF tabletop blaster I modified.   I used a lot of that piece of steel in the rust repairs in the cowl, you may recall. Let's glue it in!    Well, it's not terrible. I guess. Of course, I blew through in a few places when I attempted to smooth it out.  I should have started with a larger patch to begin with (how many times has that been said? All of them?) Better:  Coloration is from grinding down the welds on the other side a bit:  A trip through the blaster revealed a little more work to be done:  Good enough:   Not only will the battery be covering it, but a plastic tray as well, so it definitely doesn't need to be perfect. Not to mention pitting elsewhere. Paint:    See what I mean? It blends right in! Ran out of time to get to the radiator panels. That will be next time. I did a lot of blasting this session, and the humidity was pretty bas. Not for me so much, but the air compressor. This is from the moisture trap drain, just one session of about 15-20 minutes:   That poor little thing isn't up to the humidity. I'm also draining moisture in the tank, and a seperate line drop before the trap each time. Thankfully, cola slag isn't very picky, but glass bead or walnut shells would probably have a poo poo fit. Any recommendations for a good, relatively inexpensive dryer/moisture trap? I may need to be educated on what "inexpensive" is in this space. I don't really know. A brief look seemed pretty pricey. I'm thinking maybe a desiccant system, as long as I can recycle desiccant via a trip through the oven, or the desiccant is just cheap, and I'll move this little guy to just before the blaster as a secondary, or just after the dryer. edit: I should have taken pictures of the puddles I was able to make with the blow gun nozzle... Darchangel fucked around with this message at 20:18 on Jul 30, 2021 |
 #
?
Jul 30, 2021 20:16
#
?
Jul 30, 2021 20:16
|
|


|

|
| # ? May 24, 2024 22:10 |
|
|
kastein posted:You start by overlaying a few wraps - it's like cling film and sticks to itself under a little tension - and then keep it under tension while wrapping it, then finish off with glue, tesa tape or electrical tape. OK, thanks. That was pretty much how I was envisioning it.
|
|
#
?
Jul 30, 2021 20:17
|
|
|
Perhaps see if you can get something like this in the US? https://www.princessauto.com/en/air-dryer/product/PA0008055757 I used one for years after my moisture separator like you have. you fill it up with these large desiccant pucks which slowly dissolve. Worked very well, but you do need a filter afterwards for any small particles. For an idea of size... Though you would only need one. 
|
|
#
?
Jul 31, 2021 04:00
|
|

|
Sgt Fox posted:Perhaps see if you can get something like this in the US? https://www.princessauto.com/en/air-dryer/product/PA0008055757 I'm jealous of that rig. Especially the air cooler behind the compressor - that helps a lot with moisture extraction as well. So, yeah, it looks like I need to readjust my expectations of "cheap" for what I need. Poked at the RX-7 a bit after mowing the lawn on Saturday. I slapped the ECU assembly back together, after replating the tab for the relay pack at the lower left, and the nut that goes with it. A little rust had developed between the nut and tab. Fortunately, the tab was easily removable from the relay. Then I started on other things that needed attention. Motor mounts:     edit: I guess I should explain for those that have never seen first-gen rotary engine mounts. The cups go over the smaller end, then the assembly goes between the engine plate at the front and the crossmember. The cups are for heat protection. The left one tends to tear apart, even with the miniscule rotary torque. People often use hockey pucks with a bolt through them as replacements. I happen to have two good ones - one from the '79, and one from the '84 parts car, most likely both from the right side. Those radiator side panels pictured previously. First I had to remove and take a reference photo for reassembly of a little skirt seal (that seals the area around the oil cooler hoses going forward to the cooler in front of the radiator):  Blasted:   Everything painted:   This is where the engine mounts go, by the way, between the folded ends and the crossmember:  (and that desperately needs to be blasted and painted, too.) Sunday had family stuff to do, so only got a few minutes out in the garage. I elected to start prepping the airbox:     That all sits up in the right front corner of the engine bay, and breathes through the oval opening in the radiator side panel I just painted above. As you can see, the air flow meter is attached, so that had to come off, as well as any hardware and the rubber air duct. No problem:  Reference photo for me, after I plate all this hardware with all the *other* hardware, and mix them up.  Still need that dryer:  The shelf 'o stuff:  Or one of them, anyway. Stay tuned for the dash pad refurbish. That will be fun, and probably messy, involving Bondo, fiberglass, fleece, and bedliner. For reference: https://www.youtube.com/watch?v=05XrGq734u0 I love this guy's work. He does good work, in a basic garage, with cheap(er) materials accessible to mere mortals. edit: Harbor Freight seems to have a couple of decent desiccant dryers, one of which is literally identical to a DeWalt unit, for half the cost. Reviews are good, mostly. That and a little inline desiccant dryer should do the deed, at least for now. If nothing else, the desiccant turning pink will let me know it's time to stop for a bit. Darchangel fucked around with this message at 21:36 on Aug 2, 2021 |
|
#
?
Aug 2, 2021 21:27
|
|
|
Just make sure the harbour freight ones are large enough. I tried one of those desicant ones with a cartridge of balls about the size of a film canister, they turned pink within minutes. This was on a 20gal compressor, with little humidity in the air.
|
|
#
?
Aug 3, 2021 02:45
|
|
|
This is giving me an optical illusion of those being columns coming out of the plate.
|
|
#
?
Aug 3, 2021 18:36
|
|


|
Sgt Fox posted:Just make sure the harbour freight ones are large enough. I tried one of those desicant ones with a cartridge of balls about the size of a film canister, they turned pink within minutes. This was on a 20gal compressor, with little humidity in the air. The inline one looks to be about the size of a film canister. The wall mounted unit is larger:  or this one:  Those are 3/8" NPT fittings, for reference. The black one is the one that looks identical to the DeWalt (which is what their "compare to" price is for): 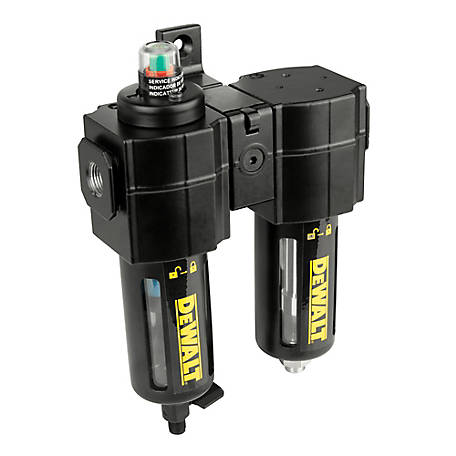 Oh, hey, there's a coupon that makes it $59.99 instead of $69.99, for Inside Track members. I think I'm still current. Otherwise, the beige one is $45. Minnesota Mixup posted:This is giving me an optical illusion of those being columns coming out of the plate. They are - if you flip it over.  But yeah, the absence of other shadows gives that impression.
|
|
#
?
Aug 3, 2021 21:31
|
|
|
CV roof leak sorted for the time being: Then I had to empty and clean the lens - the water brought in rust from the plug/roof:  Thankfully, it hadn't stained:  Since it was just sitting there, I blasted the adapter from the air flow meter to the airbox:   It was pretty crusty, as you may recall: The AFM is going to be a little more difficult, with the connector, plastic cover, and the air door. There's crust on the inside, and the actual flapper, too, though it seems to move fine. I'll see what carb cleaner takes off on the inside first. Don't want to damage any of the actual mechanism or electronics.
|
|
#
?
Aug 3, 2021 21:46
|
|
|
Oh, look! A mysterious box has arrived! It seems to be a shiny thing!  It IS a shiny thing!  It got a little banged in shipping, but not critically:  The lower neck on these sticks way the heck out thanks to the heater hose nipple location. It doesn't appear to have deformed the actual hose bead, or the pipe beyond that. That tube is also plenty thick! Old and busted versus new hotness:  safety-toe, uh, toes. I'm working from home - I don't have to wear shoes. gently caress off. The new one is taller because the original radiator setup placed the oil cooler below the radiator, and the GSL-SE setup (which the new rad is intended for) places the oil cooler in front of the radiator. The non-GSL-SE applications use the same "tall" radiator, but use a "beehive" water-cooled oil cooler between the oil filter and the pedestal the filter mounts to in earlier applications. The air-cooled setup is generally preferred - confirmed when Mazda went back to it on the higher HP GSL-SE, and all subsequent RX-7 models. The only advantage to the beehive cooler is the lack of external oil hoses. My battery tray and Tesa tape also showed up shortly after the radiator:  Just a hair bigger than the original:  (OEM battery is Group 35, tray is Group 24, mostly a difference in height.) Yeah, looks like it'll fit fine after I trim those mounting tabs.  I won't need those. I have the original battery hold-down to keep in place. The tray is mostly to contain any leakage and protect the steel tray, as original.  Yeah, fits great! $8 versus $40 and up for an original NLA part, of which I found 2 on eBay.
|
|
#
?
Aug 3, 2021 22:33
|
|
|
Hit up Harbor Freight for the dryer. I went with the newer, more expensive model (the black one). It was a tad larger than the outgoing model that was on clearance (the tan one): The haul. Grabbed a regulator, also on clearance, since the one I have is dinky (and I thought it was integrated into the swirl dryer I had, which is incorrect.)  Nifty modular air gun and a stubby 3/8" ratchet, because I didn't have one. I renewed my Inside Track account for $20 to get $10 off the dryer. Hopefully I'll buy more stuff in future to justify it. At least you don't need the coupons anymore. It's all automatic, like a grocery-store shopper card. Turns out my old dryer is identical to the pre-stage of the new one, with the exception that mine uses a hard filter, while the new one appears to use foam or something similar.  The regulator is a smaller 1/4" fitting. The new one was $13 on clearance, so I'm happy about that. All mounted up:  This thing came with no instructions at all. Thankfully, it's obvious to me where the desiccant beads go. Also the description on the web page for it says "durable brass drain valve that stands up to daily shop use", which is, as you can see, incorrect. I just looked up the manual for the equivalent DeWalt DXCM019-0338, and I did it right. I also discovered that the filter in the left unit is replaceable, and, in fact,can't be cleaned. It *has* to be replaced when the indicator on top pops up. Guess I will need to source that. The blow gun is nifty. In one configuration it's very similar to the OSHA blow gun I have:  But you also get an open blow tip, and a non-safety rubber tip, plus the two barrel extensions, so realistically, this can take the place of my safety gun, the old-school rubber tip blowgun I have, and my long one.  Nice lightweight aluminum, too. HF has moved into *large* toolboxes:  That's $6900 (nice) of toolbox right there. The center section, with the large open cabinet on top, is 73" wide. The center lower box is $3K by itself, The "work center hutch" is $1200, The 28" left end locker is $1500, and the 22" right end drawers are $1200. Ah, now that I'm looking, it's actually more. I didn't add in the stainless top on the center 73" box. That $500, so $7400. That's a lot of money. OIF course, I understand that this setup from Snap-On would be, what? $30K? I'd probably replace that hutch with an actual top box of drawers at $2200, since I have a workbench. The hutch is nice for storing power tools and chargers, though. Fakeedit: yeah. HF claims the equivalent Snap-On to the 73" base unit is over $14K! Jesus. Anyway. All I actually did on the care today was put the painted bits on the shelf, after they've been hanging outside drying for a week. Engine mounts, assembled:  (this is upside-down to their installed orientation, BTW.) And radiator side panels, with the rubber bit reinstalled:  I'll probably bolt those radiator panels on this weekend, so I can throw the radiator in there to start figuring out placement and mounting for an aftermarket high-efficiency condenser. The original is an inefficient serpentine-flow design, and was marginal with R-12 when the car was new. The one I have is also clogged up, which is a thing when you only have one path for flow. I discovered that when I retrofitted it to the car over a decade ago, and blew the high-side hose on my gauges because of it. At least I learned that the compressor was working, and working well...
|
|
#
?
Aug 5, 2021 21:34
|
|
|
I've definitely considered upgrading to part of that toolbox. The depth alone was impressive. Sadly the geometry of my garage has eliminated it as a viable option, or maybe more correctly the size of my project has eliminated it, as well as my wife's insistence that she park in the garage as well.
|
|
#
?
Aug 5, 2021 21:49
|
|

|
Well, they do make 36� and 56� versions, too! Or is it the depth that�s the issue? My Kirkland box is ~42� x 19�, 5� tall. I really like it, especially since it was $400 on clearance, but those Icons are nice.
|
|
#
?
Aug 5, 2021 23:13
|
|
|
Depth. Our garage has a bump out in the back for my fireplace, which is where I put the toolbox, and it's centered in the garage. With the Galaxie in there I can open the drawers all the way only if I stand on the side. And it can't go on the side wall or its hard to open doors.
|
|
#
?
Aug 5, 2021 23:30
|
|
|
StormDrain posted:Depth. Our garage has a bump out in the back for my fireplace, which is where I put the toolbox, and it's centered in the garage. With the Galaxie in there I can open the drawers all the way only if I stand on the side. And it can't go on the side wall or its hard to open doors. You can get a car in your garage, and not just a car, but a big one. I don't want to hear about it. :P Braided split loom showed up. It's nice.   Dug out another bag or two of hardware from the storage tubs:   Reference pic after removing rubber bits from steel bits:  Reference for replacing broken hardware:  The plan was to get all that cleaned and plated, since the bolts I need to mount the radiator panels and the rad are in there, or in the bowl of hardware from previous bags waiting for enough stuff to run the barrel. I ran them through my ultrasonic tank first:  I decided to try skipping a step and go straight to the polishing tumbler, rather than blasting first. So while the hardware was tumbling in batches, I worked on the wee screws for the VIN plate:  And the duct for the airbox still needed some cleaning:   Got the metal reinforcement off of that so I could soak it in purple cleaner (which can and will strip paint after a bit.)  While I was cleaning the duct, I also hit the rubber and plastic stuff from the underhood hardware. Mainly just wiping off remaining schmutz from the ultrasonic cleaning.  A couple of these things I won't be using, but cleaned them up for storage anyway. The bumpers with the castellated top and cuts along the body are screw-in adjustable bump stops from a BMW, which I replaced with red polyurethane in an earlier post. The barbed bumpers next to them should be the original non-adjustable bumpers, unless I see otherwise later. The little round ones on the lower right came off of the adjustment stoppers for the pop-up headlights, and the remaining single bumper is a hood bumper on one side, passenger as I recall. No idea why there aren't two. It's been that way since I got it, though I know it has had front end sheetmetal work, so one may be lost. Got the duct reasonably nice looking. For whatever reason, it has some variations in sheen, but I can live with that.   May hit it with some back-to-black or detail spray and see how it looks. There were a few light to medium scratches in the side marker lenses, so I sanded and polished them:   Not bad for 42 years old. Some of the hardware out of the polisher:  Not bad, but, I should probably blast anything that's rusty or painted first. I had to take a bunch of the hardware to the wire wheel to remove remaining paint and bits of rust. Mostly just a little cleanup, so not terrible, but not really any less time consuming than blasting first.  The little pile in the upper right (and the wire bails for the airbox) are what I *didn't* need to take to the wire wheel. After wheeling:  All rust, paint, and corrosion is gone. What's left is just discoloration. Should plate OK. If not, it gets blasted and I try again. In that batch were the screws for the VIN plate. They cleaned up fine, except for inside the phillips head recess, two of which were noticeably rusty. Zinc won't plate over rust, so I was trying to figure out how to get in those little recesses when I remembered I had acquired this a bit back: It was rescued from a fire. I had to dig into my stash and fabricobble a hose for it - I don't even know what size the fitting it (airbrushes are a world unto themselves) but I had the nut and barb, some hose I had from rebuilding airbrush hoses for my mother in law's T-shirt painting venture, and a few fittings left over from that as well, which got me 1/8 FIP on the other end. A 1/8"-1/4" adapter, and I had a standard 1/4" air fitting, and a functioning tiny media blaster. It worked great on those little recesses. Plated and polished:  Passivated (blue):  I also drug out the headlight assemblies while I was digging in the tubs, with the intent of getting to the, as well, but that didn't happen this weekend.  Slowly, so slowly... Darchangel fucked around with this message at 17:22 on Aug 9, 2021 |
|
#
?
Aug 9, 2021 17:16
|
|
|
Decided to blast and re-tumble the more egregious hardware, especially since the final batch contained some fairly rusty stuff that even 90 minutes in the polisher didn't completely take care of. It still did a pretty good job, all things considered. It's not really designed for taking things from "absolutely crap" to "sheeeeeen!", just the final step, and it's really designed for jewelry. I may still pony up for a viratory tumbler. I also wanted to make sure the recesses in phillips screws, and some of the other recessed-head bolts were properly cleaned. Thankfully, I remembered to replace the broken bolts and nuts:  Though I think one of those nuts was a captive nut. Blasted those as well, and into the tumbler they went:  I think I need to glue a square bar across the ends to prevent washers from doing that. I think this is acrylic... Anyway, while that was processing, I was blasting the bag of fasteners to be passivated black, kept separate because of that. Mostly phillips screws, probably #8 and #10 sized. This stuff, and some others:  Kind of a pain, because I didn't want to lose them down the grating in the blaster, and they're difficult to handle with the gloves, but it was going fine. ...until the air line decided I was done for the day.    Well, OK, then. I guess there was a weak spot from a kink or something, there. I'll go pick up a couple of push-connect couplers and splice a new bit of tubing in there. Almost regretting not getting the pricier 3/4" HDPE/aluminum line. It was $210, though - this kit was $90, rated for garage duty, and realistically, it's been fine. Northern Tool has a house-brand version of the RapidAir 3/4" kit that's $40 cheaper, though... I only got about 2/3 the way through the pile of black hardware (it's not a large pile,) but oh, well. It was 9PM, anyway. At least it didn't pop up in the attic where it'll be 400F.
|
|
#
?
Aug 10, 2021 16:54
|
|
|
Parts came out of the tumbler nice: Plating barrel went to work:  First round wasn't fantastic:  Lots of not-plated there. Some spots I clearly missed while blasting.  So I hit those with the wire brush and ramped up the amperage. Like maxed it out - actually, it hit max voltage (30V) before it hit max amps (10A.) It was running around 8A. It varies, of course, since everything is tumbling around, making and breaking contact. Much better.  The bolts with captive washers didn't want to plate the bolt shaft occluded by the washer. I tried them individually, and at least got more of the washers themselves plated:  So here's a comparison. Left to right: plated out of tank, wire brushed, polished with steel wool.  Tried walnut shell in the tumbler immediately out of the plating tank.  Meh. Tried glass:   Meh, plus. Another comparison:  The tumbler is clearly not providing enough action for the walnut and glass.   (rear row is control, from the previous walnut tumble.) OK, maybe shorter, slower sessions with the stainless steel shot.  Promising, but another 10 minutes was too much:  Those will need to be replated. So I hit up Harbor Freight today.  (The Rust Cutter abrasive I already had - I used to have one of these, but it was stolen, along with a bunch of other power tools.) We'll see how a pile of hardware with walnut shell works in this. I threw in the two lines of hardware from the previous walnut and glass, plus some that had been past the wire brush but not steel wool. Starting with 30 minutes. Also fixed the air line. Blowed up:  Bought an assortment of Chinese fittings from Amazon for less than two RapidAir butt connectors, delivered same day:  Actually replaced the entire section of line from the split to the compressor, because I noted a kink right at the push fitting at the valve as well:  No problem! Line is rated for 150 PSI, so I double checked what the cutoff was set to.  120 PSI, so shouldn't be an issue. Desiccant is already done:   Microwave fixed that: 
|
|
#
?
Aug 13, 2021 00:12
|
|
|
Meh.  Longer? That 3+ hours. Is the zinc too hard for the walnut shell? Maybe my walnut shell is worn out? I didn't buy this new - I picked it up with my media blaster, which was used (and smoke- and heat-damaged.) The instructions for the device suggest a "small amount of commercial metal polish", but I'm concerned that will interfere with the passivating afterward. Guess I'll try the "polishing" media I bought and see what happens.
|
|
#
?
Aug 13, 2021 16:49
|
|
|
Hmmm. A little diggin on ye olde internette tells me maybe a quick dip in the muriatic acid after the zinc strike might help, and to buff rather than polish. I was already thinking about buying the little HF 3" grinder/polisher with the flex-shaft. Guess I'll do that, and use the little buffing wheel. It's got speed control, which should keep it from flinging things across the garage. Of course then I need to wonder about compound remaining on the part for passivating. Ugh. Yes, I justify the tool purchases for this buy reasoning that I'll use them again, later, for something else. Why do you ask?
|
|
#
?
Aug 13, 2021 17:42
|
|
|
Darchangel posted:Yes, I justify the tool purchases for this buy reasoning that I'll use them again, later, for something else. Why do you ask? I can stop any time I want But I don't want to
|
|
#
?
Aug 13, 2021 17:49
|
|


|
IOwnCalculus posted:I can stop any time I want Tools are never an unnecessary purchase.
|
|
#
?
Aug 13, 2021 18:59
|
|
|
That hose probably failed due to heat. If you're running the compressor a ton, the air output gets super hot. If that's a permanent install (and it looks like it is), you should put a cooler on the output. I had a couple pieces of 3/4" copper pipe of mine in the garage, and it made a huge difference. I connected it to the compressor with a piece of 3/4" hydraulic line which absorbed the vibration and could handle the heat.
|
|
#
?
Aug 13, 2021 19:31
|
|


|
This is a possibility. It�s in a hutch outside the garage, and it�s been plenty hot here in TX. I have shutoffs on all the outlets, so at least the compressor typically only runs when it�s being used. Though one would think it�s even hotter on the attic, where the lines run before dropping down the wall to the outlet points. Might be s combo of heat plus vibration just in that spot. I could certainly run a 3/8� npt hose whip (the fittings out of the tank are 3/8� reduced to 1/4�) to the one side of the shed where the line goes up into the soffit, and secure that, before transitioning to the nylon tubing. I already secured the tubing to that side while doing the repair.
|
|
#
?
Aug 13, 2021 20:36
|
|
|
Every time I see a plating post I wonder when Bad Obsession Motorsport moved to Texas  Wish I had the focus to do that. I end up either just brakleening off my factory fasteners, getting them at the junkyard, or buying something that fits online even though it's not OEM correct. Tools are always a good idea. For example I've used my HF 96718 hydraulic knockout punch twice in 3 years for what it's designed for, but I've used it probably a dozen times on cars, pulling and pressing things into place.
|
|
#
?
Aug 13, 2021 20:53
|
|

|
I was doing it before they were. One thing to realize is that this is my project car, that I want to make nice. Well, one of them, the other being my '70 Cutlass, which will get the same treatment. Previously, I was painting fasteners, and that was unsatisfactory from both a corrosion prevention standpoint, and cosmetics (though more cosmetics, since this is North Texas.) If I were doing it strictly for rust prevention, I'd probably not bother to polish afterward. Protection is the same, and really, the matte finish isn't terrible. The black chromate tends to come out like that anyway, it seems.
|
|
#
?
Aug 13, 2021 21:16
|
|
|
On your air line, get a short whip like this: https://www.amazon.com/Flexzilla-Swivel-Lightweight-Hybrid-ZillaGreen/dp/B00JUGT7ZY Connect it to the compressor and to a wall block with the hard line terminated. Otherwise it's only a matter of time until the vibration will split the hard line again. Just like with a cars oil cooler (think FB), a hardline will eventually fracture the aluminum due to the motor movement - hence the short rubber section. the spyder fucked around with this message at 00:42 on Aug 14, 2021 |
|
#
?
Aug 14, 2021 00:23
|
|
|
Yeah, that�s what I meant above. I actually have a spare whip, but it�s 1/4� npt fittings, 3/8� line, not that it would hurt volume too much.
|
|
#
?
Aug 14, 2021 01:34
|
|
|
Tried the "ceramic polishing abrasive":  After washing them off:  Meh. How about the "rust cutting media":   Not a lot going on there. I bought a min-bench grinder/polisher at HF. Typical HF quality - the attachment point for the rest on the grinder side hadn't been threaded:  It is now:  Got some polishing compound and a wheel for the big grinder, while I was at it. Though I think I might have a wheel hiding out somewhere in the garage already. I don't know where it is, anyway, and this was $7. Then I cut the mandrel off of a 3" brass wire brush wheel, and enlarged the hole to fit it in place of the grinding wheel on the mini grinder:  It works nicely. A lot less likely to throw parts across the room, given the speed control, small size, and a tool rest (I need to make one for the big grinder, on both sides...) This is after wire brush (left) and 0000 steel wool (right):  Steel wool methodology:  Tried adding some Blue Magic polish to the walnut shell:  It helped a little but not much. Tried 8 goddamned hours of walnut shell (no polish):  (I threw some copper and brass bits in there to see if they worked any better, to sort of gauge the hardness of the zinc.) Still seems really (forgive the pun) lackluster. This is the coil of tubing the test bit of copper came from, and it's not a lot of difference:  The 9mm casings also don't differ a lot ("polished" on the bottom)  OK, fine. How about glass?  During this test, I had to deal with the wing nut backing off. The lid rattling around was stupid loud, and wallered out the hole:     Smooth, but not particularly shiny. I got annoyed at all of this and started polishing by hand.   (second with flash) Literally. The hardware on the right is finished with steel wool. Good, but on the right, polished with Blue Magic, basically doing the same as with the steel wool using the drill press. Nuts go on a length of threaded rod:  Same comparison with some bolts:  A study in various finishes:  (polished ones upper right.) I had some "fine blasting media" as I labeled it, because I have no idea what it actually is, and gave that a try.  The polished hardware passivated pretty nicely, except for three random ones, for some reason:  Another comparison:   raw plated, wire wheel, steel wool, and Blue Magic, without and with flash. I finally ended up just using a nylon locking nut, and a powered screwdriver. It *still* has to be tightened down pretty good or it'll back off.  The fine media didn't do a lot. And it darkened the copper for some reason.  I polished a few more bolts and threw them in the chromate. Not bad:  The second batch, mostly on the left, was slightly unsatisfactory, so I dropped them in the passivate a second time... and ruined them. Dunking them into the acid to remove the passivate and trying again also sucked, so those will probably need to be replated, which is fine, since I already had some other hardware that needed to be done. Two steps forward, only one back. I guess I'll just be doing the polishing by hand. I'm not sure how much I actually have left - probably not enough to be worth figuring it out. I was hoping the tumblers would provide a better finish than I could get by hand, even if it took longer.
|
|
#
?
Aug 16, 2021 20:03
|
|
|
Pile of stuff to go in the barrel. Background is the pile to be re-plated after messing it up. Foreground is all stuff to be passivated black - interior screws, mostly. All nicely plated. I swiped half of the big washer and the head of one course screw with steel wool, and the plating with corn syrup in it is now plating smoothly enough that actually works. Wire brushing not really needed. I did throw a few of these in one or two at a time to touch up, but I think what I was seeing wass not bare steel, but even nicer zinc. I was worried that "not primer grey" = "not plated" though. I should have polished a sample and popped it in the passivate to test, I suppose. Nothing wasted but a little time. Last ditch: I bought some different walnut shell:  It's definitely courser than what I had:  (new stuff in the drum.) edit: lookit dat meaty paw. After 12+ hours  I'm not impressed. These are all the same ones I've been using as a test, plus I chucked in the one big washer I half polished from above, and the countersunk hood bumper bolt beside it. You can still see the difference between the polished and not-polished sides. After 12+ hours. The parts are smooth, but far from polished. Starting to think maybe HF tumbler is crap? Running it with the lid off, it's definitely moving the media, though it seems like all the hardware stays out of sight at the bottom. Oh, well. I chucked all the hardware that I just did in while I'm at work to see if volume makes any difference. While blasting the to-be-black hardware, I noted that the window on the blaster needed it's liner replaced.   It's like dirty glasses - sometimes you don't even notice until you take them off. I have a roll of Lexan sheet I got from Grainger that I just cut into the right size - it's slightly too narrow, but I just use packing tape to seal those edges. I also have some shields intended for some other blaster - they're also about 2-3" too narrow, and about 1/2" too tall. Same thing - packing tape on the edges, and trim the other edges with a razor knife. I bought the specific-purpose shields because I forgot I had a the roll of Lexan, or forgot where I put it at some point, but neither was particularly expensive. I also seem to have worn through one of the gloves:  It wasn't letting much if any grit in, but I could feel a breeze as I handled the individual screws to get into the Phillips recess, etc. I have another set of gloves, but I'd prefer to use these until I can't, basically. So...   Let's see how the Gorilla outdoor repair tape holds up. As you can see, I've used most of the roll, and it's done well elsewhere. It actually *is* water resistant, if not proof. That's it. That's all I got right now. It's been a busy week at work. I'm tired. Darchangel fucked around with this message at 18:05 on Aug 20, 2021 |
|
#
?
Aug 19, 2021 20:16
|
|
|
Oh, almost forgot. I've got a small blaster, the type you're just supposed to stick the feed in a bucket and go. I think I'll see if I can't make a small cabinet to do glass beads or walnut in, just to try it. I'd use my pressure blaster, but I loaned it out and it hasn't come back. Buddy is having trouble making it work. I'd help, but he's almost an hour away.
|
|
#
?
Aug 19, 2021 20:21
|
|
|
Hey, how's everyone today? So last episode, I chucked all the remaining hardware in the hopper. I let that run while I was at work, about 9 hours:  It's... actually doing something. While I was at work I Googled around a bit and noted that, basically, this poo poo takes a long time. Not just walnut shell, but vibe tumblers in general. Times like "24 hours" came up. Adding liquid apparently can help, but a lot of tumblers, like this one, specify they are supposed to be used dry. Folks have successfully done it with the HF, though, and the Eastwood, which looks identical, can be used wet. Reloaders like to add a bit of polish to the walnut for brass (they like Nu Finish car polish for a cheap option.) I played with that earlier by adding a bit of Blue Magic (I ended up with a box of the stuff some time ago - it's been handy,) but a) I didn't add enough, and b) I didn't let it run long enough, I think. So I took the same walnut shell i had added polish to earlier, and added *more*, probably 3 tablespoons' worth, and then let it run overnight. Here's a sample I pulled out:   OK, then! Much better.  I've got some stuff to do before I can get out in the garage, like my job, so I plopped some more stuff in there, and I'll look at it later in the day. 
|
|
#
?
Aug 20, 2021 18:24
|
|
|
Texas Tofu Delivery - My Nuts Are Cleaner Than Yours
|
|
#
?
Aug 21, 2021 17:08
|
|
|
Minnesota Mixup posted:Texas Tofu Delivery - My Nuts Are Cleaner Than Yours mods, mods! 
|
|
#
?
Aug 21, 2021 19:17
|
|

|
Heh!
|
|
#
?
Aug 22, 2021 00:46
|
|
|
Some success, some not so much. walnut + Blue Magic does a lovely job. I did have to disassemble the air coupler because a bunch of walnut dust packed up in the collar and kept it from working, but that's not unreasonable.  Plated parts looked great! Until...  That's not promising. Passivate is hit or miss. Dunked the remaining hardware in Simple Green to get any of the polish and any other oils off.  Meh.  Some looked OK-ish (the difference in tone is that I left one batch in longer to attempt more coverage,) but a lot of the edges didn't convert. I got a little bit of rust after letting them sit a day, so I think I let them run too long and polished through the plating. One way or another they needed another go. <sigh> The pile of pointy screws in the rear are destined to be black, BTW, hence the separation. The bails for the air box came out nicely. Fresh yellow chromate also helped. Back to the old methods. I fabbed up a hanger to make it easier to do a bunch of parts at a time.   and just used my peanut butter jar tank. The solution is fresher and easier to control in the smaller volume. Seems to be working well:  Another batch ready to go:  A mixed bag:  All the hardware that will be black is plated. You can see a sample already passivated in the rear, some wire brushed in the front (not going to steel wool or polish, since these will be black,) and a few of the larger parts done in gold already. The plating coming out now takes minimal effort to shine up. The brass wire brush on the little 3" grinder from HF is perfect for this. Most of the parts just going straight to steel wool works fine. I just run into issues scaling up, or trying to automate, so I guess I won't do that for now. I don't have *that* much hardware left. Realistically, after buying all this junk, I probably could have sourced new hardware for the more common bits, and I still may do some of the more visible fasteners in stainless, but that wouldn't have been near as satisfying. I've got a jones to tinker and fiddle, so this is just situation normal for me. I get the rest of that hardware done, and I can put more of the engine compartment together. I need to disassemble the headlight mechanisms and paint those, clean and paint the steering center and end links, and idler arm, and clean and pain the air box, among other things. Guess I should clean and re-loom the wiring harness, too - probably going to need to get that in and routed before some of the other stuff goes in. Maybe side step over for a change and make the dash pad not broken. I'll keep doing this until I can afford wood to do some stuff on the house, I guess.
|
|
#
?
Aug 23, 2021 19:27
|
|
|
Hey, look, not-plating stuff! (reference shot)   (measurement just in case I need to take the end links apart.)  reference for reassembling the idler, because I *am* taking it apart.  See? Bushings are still good - I did them not long before it got taken off the road. I have a spare set in polyurethane if I needed them. Moog makes a heavy-duty model that has the same joint at the top and bottom as this one has at just the bottom, but it's significantly more expensive that the stock unit, and *way* more expensive than replacement bushings, since this one is rebuildable. The flip side is that the Moog heavy duty unit basically never wears out in this application.  All disassembled. The tie rod ends are still fresh, too, so those will just get cleaned and painted, whole the center link and idler will get blasted, as well. And of course the nuts and hardware will get plated!    Literally just degreased them, dunked them in acid (removes any remaining passivate and plating, as well as oils, etc.) and plated them as they were, since there was no rust. They came out nice. The picture just doesn't show the iridescence of the passivate. Tie rod ends turned out to be Made In Japan Three-Fives:  So did the idler, BTW, so I guess it's been fully replaced at least once. All masked up for paint, no need to disassemble.  I'll still need alignment, of course, since everything has been apart, and bushings replaced, but it will be closer, and probably drivable. Went with cast-iron grey for these, for a little contrast to all the black.  Center link and idler blasted:  and painted with epoxy black:  Speaking of blasting, I refreshed the desiccant in the microwave before I started blasting. This is after:  Water up to the fogged line, there, and the desiccant is already saturated again. Maybe an hour blasting? Yeah, it's a bit humid. The drier assembly is working well, though. The media blaster is happy. Got all the to-be-black hardware wire brushed and ready to passivate:  You can tell on some of them where part way through I realized that brushing the threads was a waste of time. Then I dunked them.  A few went weird:  The bad: most of those turned a lot more brownish as they dried, so something went wrong. I redid the ones where the chromate didn't take for some reason, and they came out better (didn't get a picture, I was too annoyed that it f-d up.) I may have to do all of these again, or I may just paint the drat heads with satin black. They're protected just fine, but ugly, and most of these are interior screws that can be seen (otherwise I'd go with gold. It would stand out badly against the black interior, though.)
|
|
#
?
Aug 25, 2021 18:32
|
|
|
Since this is more of a restoration, it probably will not apply. However, the center link is made of cheese, and even with stickier tires at stock sizes it might be enough to deform it. So sleeving it or re-enforcing it in some form might be a good idea. Otherwise: 
|
|
#
?
Aug 25, 2021 18:39
|
|

|
McTinkerson posted:Since this is more of a restoration, it probably will not apply. However, the center link is made of cheese, and even with stickier tires at stock sizes it might be enough to deform it. So sleeving it or re-enforcing it in some form might be a good idea. That's honestly the first I've ever heard of that, though the most I've ever down is autocross on street tires. It's still very likely that an FC subframe is going under it. It really kind of depends on how bad the GSL-SE steering box is, since rebuilds and replacements are unobtainium. Why Mazda went with a recirculating ball, I'll never understand. Yes, it was 1978, but the Z had a rack and pinion... Hell, my AE86 has a rack and pinion, and it's tough to find a cheaper car that it was at the time.
|
|
#
?
Aug 25, 2021 20:36
|
|
|
Just jumping in to say I love the plating content. It's so satisfying, like watching some silent French dude on Youtube fixing old farm / wine equipment.
|
|
#
?
Aug 25, 2021 23:49
|
|


|
Commodore_64 posted:Just jumping in to say I love the plating content. It's so satisfying, like watching some silent French dude on Youtube fixing old farm / wine equipment. We need RADL berets. Specifically, Darchangel needs a RADL beret.
|
|
#
?
Aug 26, 2021 00:30
|
|
|

|
| # ? May 24, 2024 22:10 |
|
|
Wouldn't a fedora be more appropriate for a goon?
|
|
#
?
Aug 26, 2021 16:24
|
|