


|
Bari - Part 1: Arrival at Bari Age of Empires II: Definitive Edition - Byzantines Theme Very well, then let us begin, the tale of the house of the Romans. 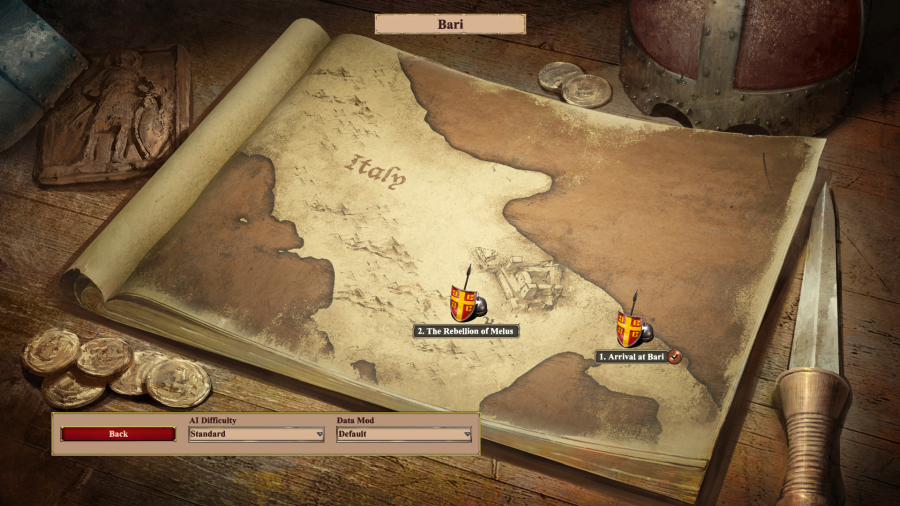  Mission 1 Starting Text "I left the walls drenched in the sweat and blood of the tenacious Norman besiegers. My comrades and I usually would rush straight to the inn after a fight�but not today. My father, the heroic Michael Nautikos, savior of Bari, awaited me. I found the wizened old man staring out the window towards the enemy camp. 'Foul, treacherous mercenary scum! Son, the inhabitants of this peninsula have courted mercenaries for centuries. Not one bit of good it did them!' Weary of discussing Normans, whose nature I knew all too well, I inquired about our rich family heritage. I asked my father instead to tell me of our ancestor Panos. My father spun around, his eyes gleaming. 'You wish to hear the story of the family? Our Greek blood runs back generations! Nautikos, our surname�it is so because we came as sailors. In the year 869, the knight Panos Nautikos answered the summons of his Byzantine liege, Emperor Basil II. He was to lead a force by sea to aid our ally Louis II, the Frankish king, against the Emirate of Bari.'"  Louis II: Panos Nautikos! My forces will keep the Saracens defending Bari occupied, but you and your Byzantines must ensure that the enemy cannot threaten us from the rear!  Byzantine Soldier: Our scouts have located the enemy positions! If we catch them unprepared, our swift victory will be certain! This mission has a number of different objectives: you want to make sure that the armies of King Louis II are well defended, but your personal mission is to destroy the four Saracen army camps as well as the four Docks of the Emirate of Bari. You start the mission with a small number of troops, including Panos Nautikos, an Infantry Hero unit similar to a champion (although his survival is not necessary to win the scenario), and some villagers to engage in base-building.  For some strange reason, there are also a bunch of extra troops and villagers that never leave the boats and just eat up your pop cap space. I have no idea what's up with this.  Byzantine Soldier: Commander, does God kindle this fire in our hearts, or does the fatal desire of each man become divine to him? My mind has long urged me to charge into battle! So like any good Byzantines player, I sit and boom. It's a pretty good map for using Fishing Boats too, you're right on the water and the Emirate of Bari never attacks you by sea. Once you reach Castle Age, this guy poetically encourages you to stop booming and get on with the game already.  Louis II: Saracen riders sally forth, screaming and beating their scimitars upon their shields! Defend the camp! Protect our siege engines!  To further encourage you to get off your rear, after about 20 minutes the Saracen Army (actually Berbers) will start attacking Louis II's lines every few minutes. He can handle the first wave or two by himself, but you really need to eventually put at least a Castle or two up, or else the Saracen Army will overrun him and make you fail the mission.   Emirate of Bari: Greek fools! You were lucky enough to destroy one of our camps, but our swift horsemen will soon ride you down into the dust.  After sufficient preparation I begin my assault on the enemy camps. Now you'd think that being Byzantines, the play here would be to mass Cataphracts, and I do use a decent number of them. But the Saracen Army trains a lot of Cavalry Archers, Pikemen, and Camel Riders and because they're playing Berbers they win at the cost efficiency game. So like the Saracens (as in the civ) the name of the game trying to keep a flexible army that can handle whatever the enemy throws at you rather than just relying on the Cataphract's bonuses to save the day.  Emirate of Bari: We hold Oria with an iron fist. If the Lombards failed to wrest it from us, how will you ever succeed?  Byzantine Soldier: The boasts of the infidel curs were empty! In their gratitude, the noble of Oria have thrown their support behind us! About halfway through the camps, I assault Oria to free it from the Emirate of Bari (playing actual Saracens). Defeating all of their troops gives you control of any remaining static defenses in the city, and Oria will occasionally tribute resources to you.   Louis II: By God, you Byzantines are efficient. The Saracen cavalry flee your spears like rats from prowling cats! If you can defeat the first couple of camps, the last two are just more of the same. At this point the Saracen Army is defeated. I could move onto the next part of the mission, but...  Emirate of Bari: Matera is ours, Byzantines. Turn back now or be hurled from its battlements!  Louis II: The patricians in Matera come to me begging for mercy. Their tribute alone will be enough to pay my knights for months! I figure that I might as well complete the other secondary objective. Matera defends itself with its own forces comprised of Italian unique units. Take down the Castle and they switch to Ally, and occasionally tribute you resources. Not that they're really needed by this point of the scenario.  Emirate of Bari: Our warships will send any vessels that approach our harbor to the bottom of the sea!  Byzantine Soldier: The emir's galleys may as well have been piles of tinder! Our dromons siphoned enough Greek fire to keep the harbor in Bari aflame for days! Bari's docks cannot be reached by land. The only way to destroy them is by mounting a naval expedition. But it's the Castle Age and you're playing Byzantines so there's nothing really to it other than just massing up a bunch of Fire Ships and lighting the whole place on fire. The following cutscene plays, and then the mission draws to a close:  Byzantine Soldier: Fortune smiles upon us - our sappers have undermined the city walls and opened a breach! Louis II: Bari cannot withstand us now. Fell deeds and eternal glory await us! In the name of God, attack! Mission 1 Ending Text "'Panos was offered lordship of Bari after his victory, but he declined, wishing to live out his days in peace. Having brought glory to his house, he settled down and started a family.' The old man mused for a while, his memory slowed by wine. 'Louis, on the other hand, ran into trouble with the Lombards. They were not fond of yet another Frankish conqueror treading on their soil.' Suddenly, a bell rang, signaling an attack and calling the city to arms. I donned my armor and rushed out the door, leaving my father to his thoughts." As a stand alone mission, it's about average. Maybe a little above average. But it also serves as a good tutorial scenario on how to play the Byzantines. It recognizes what your instinctive reactions to picking up the civilization are going to be, and gently encourages you to develop positive habits like measured aggression and flexibility instead of just booming for an hour and spamming the map with Cataphracts. Extra Slides Mission 1 - Intro Slide 1 Mission 1 - Intro Slide 2 Mission 1 - Intro Slide 3 Mission 1 - Intro Slide 4 Mission 1 - Intro Slide 5 Mission 1 - End Slide 1 Mission 1 - End Slide 2 Mission 1 - End Slide 3
|
 #
?
Jun 17, 2023 04:13
#
?
Jun 17, 2023 04:13
|
|


|

|
| # ? Jun 5, 2024 19:04 |
|
|
Transports controlled by your allies seem to have a lot of issues with actually doing what they're supposed to do, I can think of atleast two more missions where this crops up.
|
|
#
?
Jun 17, 2023 11:57
|
|

|
Bari - Part 2: The Rebellion of Melus Age of Empires II: Definitive Edition - Bass Bag Mission 2 Starting Text "I walked downstairs the next morning in a daze. The battle of the previous night was fresh in my mind, and it chilled my blood. I whirled around, and found myself staring straight into my father's eyes. 'Nothing shakes the ghosts of battle like a fine story, son. Come, sit down to a meal, and I shall tell you of the rebellion of Melus!' The sun shone onto my father's gaunt face. He had a head of thick grey hair and his limbs remained strong from years as a sailor and a soldier. 'I have donned mail since the year 1005, when I was but a lad in the service of Melus, the highest-ranking nobleman in the city. Ambitious and eager to prove myself, I soon became his best man. Melus was passionate, but his withdrawn, stealthy manner began to stir my distrust. When he invited all manner of mercenary troops into our beautiful city, I began to fear the worst.'"  Byzantine Soldier: Captain Nautikos! Melus' mercenaries have seized the city and slain the garrison! We should flee west to our allies and prepare a counterattack!  Melus: Bari is mine now! Kill all of the Byzantine scum! This mission starts with you having control of a small group of soldiers, including Michael Nautikos (another Infantry Hero unit). Bari initially starts out friendly, but mid-escape the Towers will start shooting at you, so you want to get out of the city as quickly as possible.  Melus: Send out scouting parties and find Michael Nautikos! I want him alive! Just outside the city is a larger group of troops which forms the basis of your army for the rest of the first part of the scenario. Your goal now is to successfully avoid Melus' forces and escape to one of the two cities to the west.   Either way you go about it, you want to tiptoe around the large Lombard bases as much as possible. With stealth you can avoid a number of Melus' Scouts as well, but with only a mix of light/heavy Cavalry it's easy to just feed any that you can't avoid to your Pikemen and continue onwards.  Byzantine Soldier: The people of Potenza have thrown in their lot with us! Let us strike out at the enemy! Melus: You think that your allies will keep you safe? My men will fall on you like lions on sheep! Byzantine Soldier: Captain! Our scouts report that Melus' mercenaries have seized the town of Capua! (after a few seconds) We must reclaim it, and swiftly, lest we be surrounded by foes on all sides! Of the two cities, Capua is easier to reach but has the worse strategic position, it's kind of hard to position yourself in a way where you don't have to take out two of the enemy forts to proceed without your supply lines being harried, unlike Potenza, where you only really need to go through one. Potenza also gives you a relic and more resources for taking it, as compensation for being more difficult/taking longer to reach. Generally speaking, unless you're really worried that you're going to screw up the initial section and/or just want to get to base-building, taking the slightly longer/stealthier route to Potenza is the better play. The city you don't take gets captured by Melus instead. The narration exaggerates a little: it doesn't become an active ally of his, it's just denied to you. You can go and free it if you want, but it's really only useful as a trading partner. I found it to be unnecessary: the scenario is fairly generous with resources as is, and it's too much of an effort to free relative to the natural path of the scenario once you're in your chosen route.   Melus is fairly quick about sending his forces after you, although in the first case it was really more of me expanding outwards and the two of us meeting in the middle. Unlike the last scenario where Cataphracts were merely moderately useful, this scenario is all about spamming Cataphracts and Halberdiers to take out enemy Huskarls and Cavaliers respectively.   My expansion so naturally lines up with the closest Lombard base, that I sort of just fall into destroying the camp near me, and getting a solid siege position to take out the first of Melus' four castles. Once you do so, Melus shouts: Melus: You fool! You will never drive my mercenaries from Bari!   From there, I was able to gain solid purchase on breaking through Bari's gates, although I did have to temporarily funnel troop production to contend with Melus sending another army down via the Capua route to attack my base.  Once in the city proper, I just had to fend off Melus' forces while my Trebuchets worked on tearing down all of his Castles. With the second down, Melus continues to rage: Melus: Feel the wrath of my hardy Lombard warriors!  Byzantine Soldier: The Byzantine general Basil Boioannes has landed in Apulia to help quell the rebellion. He sends legates to us with additional provisions and gold to fill our coffers! At about 50 minutes in, you get reinforcements from the Byzantines and 2000 gold, but they're not even going to make it to the city before Melus is defeated. Oh well, we'll be seeing Basil again soon enough.  Byzantine Soldier: Bari is ours, Captain, but Melus is nowhere to be found. A glorious victory, nevertheless! Mission 2 Ending Text "My father stood up to tend the fire. '1011. It had been 2 years since I had stood in the courtyard of Melus' castle in Bari. With the rebel garrison defeated, Bari was once again in Byzantine hands. Unsurprisingly, the local catepan, or lord, asked me to remain at the head of the force that I had recruited. Most of Melus' family was captured and imprisoned, but Melus and his brother, Dattus, were still at large in the countryside. The rebellion was far from over.'" I think they should have given you more of an incentive to free the other town or made Basil's army a little more timely, but otherwise this mission accomplishes what it sets out to do very well. The stealth section is exactly as difficult as it needs to be, the enemies are fairly smart but not oppressively so, and you get to really enjoy the toys that you were missing from the last mission. Extra Slides Mission 2 - Intro Slide 1 Mission 2 - Intro Slide 2 Mission 2 - Intro Slide 3 Mission 2 - Intro Slide 4 Mission 2 - Intro Slide 5 Mission 2 - End Slide 1 Mission 2 - End Slide 2 Mission 2 - End Slide 3
|
|
#
?
Jun 17, 2023 16:29
|
|
|
Bari - Part 3: Loose Ends Mission 3 Starting Text "My father coughed and took another draught of wine. 'Melus sought aid from Salerno, while Dattus fortified a tower on the Garigliano River. From there, they gathered support and renewed their strength. Melus reached far for help. Lombards, Germans, and Apulians answered the call, eager for glory and plunder. But there was one more group whose help Melus enlisted! A new generation of Norman adventurers, forebears of the scum who attack our city as we speak. It is because of Melus that this new menace is upon us. In response, the Byzantine Emperor sent the general Basil Boioannes and an elite force of the fabled Varangian Guard to meet Melus in the field and crush the rebellion for good. The armies drew up near the River Ofanto, not far from where the Romans had clashed with Hannibal of Carthage some twelve centuries earlier. The fate of the Mezzogiorno was about to be decided...'"  Byzantine Soldier: Commander Boioannes! Melus and his allies ready their forces across the river. Lead us to a swift victory and end the terror that they have brought to Apulia! 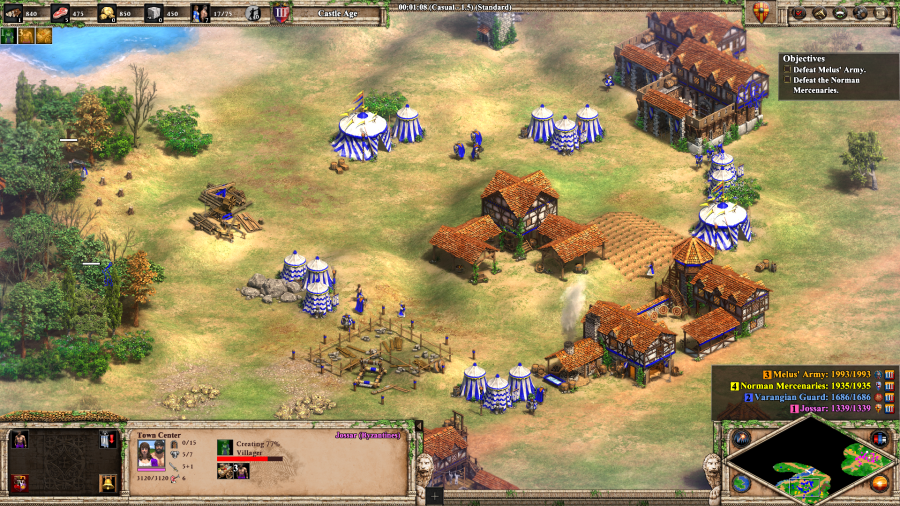 Varangian Guard: It is a fine day to grind an axe. We will lay your enemies low or die trying! Welcome to the return of 2v2 missions. This one is you (Byzantines) and the Varangian Guard (Vikings) versus Melus (Goths) and his Norman Mercenaries (Sicilians). 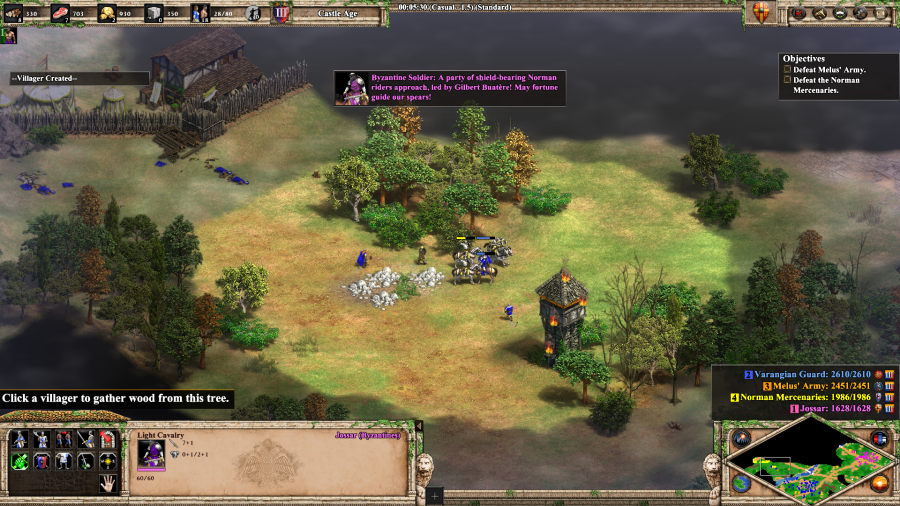 Byzantine Soldier: A party of shield-bearing Norman riders approach lead by Gilbert Buat�re! May fortune guide our spears!  Melus: Let us now see whose blades are sharper! My men will cut through your ranks like a scythe through grain! Melus and the Normans only manage to get a couple of villager-raiding groups going before I manage to shove an army into the former's base.  Melus: Boioannes' forces threaten our camp! Send forth all reserves!  Byzantine Soldier: Twelve centuries ago, a barbarian horde massacred our Roman forebears on this very field. Now it is the barbarians who lie slain beyond count! Hannibal Barca, this guy is not. The Varangians keep Melus' army locked down, while I tear the place asunder.   Byzantine Soldier: Gilbert Buat�re has fallen and his Norman knights take to flight! Fortune is with us, Commander! The Normans have a whole lot of Stables, but without Melus to back them up are no real threat, especially once their Castle goes down. Their defeat marks the end of the scenario. Mission 3 Ending Text "'Not unlike its predecessor, the Second Battle of Cannae was a massacre. The Lombards and their Norman allies were no match for Boioannes' strategic prowess and the ferocity of his Varangian troops. Melus fled the field and sought refuge with the Pope, which sent him to the court of the Holy Roman Emperor. He gradually poisoned the minds of several influential courtiers and, eventually, the Emperor himself. Melus died in exile, but the effects of his political machinations were soon to be felt throughout Italy.'" Game, we've reached the point where a perfectly bog-standard, normal 2v2 is no longer interesting material, either to play or to show off. Especially one as easy as this. Please give me a little more to work with here. Extra Slides Mission 3 - Intro Slide 1 Mission 3 - Intro Slide 2 Mission 3 - Intro Slide 3 Mission 3 - Intro Slide 4 Mission 3 - Intro Slide 5 Mission 3 - End Slide 1 Mission 3 - End Slide 2 Mission 3 - End Slide 3 Jossar fucked around with this message at 21:57 on Jun 18, 2023 |
|
#
?
Jun 18, 2023 21:53
|
|
|
despite completing every campaign and campaign achievement, i somehow have absolutely no memory of any of the bari campaign whatsoever
|
|
#
?
Jun 19, 2023 03:52
|
|
|
Cuck Fiend posted:despite completing every campaign and campaign achievement, i somehow have absolutely no memory of any of the bari campaign whatsoever I felt the same about pacahuti. I do remember Bari's last two missions because they are among the harder ones imo
|
|
#
?
Jun 19, 2023 07:27
|
|

|
Bari - Part 4: The Best Laid Plans Mission 4 Starting Text "'The rebellion was over, but Boioannes still had a difficult task before him. The once-rich province of Apulia lay in tatters, and the hostility of its northern neighbors did not bode well for the future. Melus' brother Dattus still preyed on the surrounding lands from his lair on the Garigliano. Additionally, rumor quickly spread of Holy Roman armies massing in the north. Boioannes was not about to let his hard-earned gains slip away like a fish from the net. The odds were against him, but he had a loyal army and a plan. The Apennine pass was the gateway to southern Italy, and Boioannes intended to fortify it. Thousands of soldiers and masons followed him to the ruins of Aecae, an ancient Roman city near the mountains, and began construction of a citadel named Troia. Boioannes would restore the grandeur of Byzantine power in Italy, or die in the effort.'"  Byzantine Soldier: The fortress at Troia is complete! Now all that remains is to defend it from enemy attacks. The primary goal of this mission is to defend the Castle at Troia for an hour, or defeat the HRE and Papal States (either first or if the Castle falls before an hour). You cannot replace the Castle or build any others.  Byzantine Soldier: Our allies in Capua will assist us, but we must ensure that their city remains safe. We cannot afford to be outflanked! Capua starts this mission as your ally. If you play on any difficulty other than Standard, then 6 to 9 minutes in, they're captured by the HRE and become an enemy unless you can destroy their Castle, at which point they turn back to being your ally and stay that way for good. They're not really that helpful, but it's one less opponent you have arrayed against you.  Dattus: Boioannes! You may have defeated my brother Melus, but my men and I still carry on the fight! You will rue the day that you set foot in Apulia! Byzantine Soldier: Dattus is valiant of tongue, but has a cold hand for battle. We should tear down his tower on the Garigliano and put an end to his rebellion! Dattus and his rebels are another group of bodies, but fortunately they're only a minor threat. He has a Tower somewhere, and all you need to do to force him to resign is destroy it.   Holy Roman Empire: The pope and I have agreed that God does not wish for you Byzantines to hold land in Italy. We will install our vassal Melus as Duke of Apulia. (That is an in-game text error, and really should be Dattus instead.) The HRE and the Papal States are the primary threats in this mission. Especially the HRE, which loves repeatedly sending groups of Teutonic Knights, Paladins, Halberdiers, and Battering Rams at you. I spend most of this mission panicking and doing my best to fend them off from the Castle itself.  Byzantine Soldier: Commander, our scouts report that the Holy Roman Empire and Papal forces are exchanging supplies via a pass through the Apennines to the north. We should put an end to this immediately! After this point, the game starts handing out some side quests so you can regain control of the situation. Mining all of the stone above this pass causes a rockslide that cuts off trade between the HRE and Papal States.  Norman Mercenary: Hail, Basil Boioannes! We once stood on opposite sides of the battlefield, but for a small price my men and I are willing to bury the past and help you defend Troia. (after paying 1000 gold) Splendid! Our chevaliers will prove their worth ten times over against the Holy Roman forces. Montjoie! In the center of the map, this friendly fellow will sell his allegiance for 1000 gold. Make sure to do so quickly once the event pops up, wait too long and the HRE and Papal States will buy him out instead, and that's one more enemy you have to deal with.  Byzantine Soldier: Commander! Dattus lies in irons, his tower a smoking ruin. He requests a remarkable death - might I suggest the poena cullei? The Normans take out Dattus by themselves, and that alone secures their weight in gold. From that point on they will harry all mobile enemy forces, although when they have nothing better to do, they just start randomly marching off in small groups to die against the HRE base.  I finish building the walls surrounding the Troia Castle and turn it into a proper fortress, from which I pop out to destroy combined HRE/Papal offenses. Eventually, I manage to get enough of a critical mass of troops to break out and go on the offensive myself.  Byzantine Soldier: The Benedictine monks at Montecassino have been funding our foes for months! Just give the command, and I will tear their abbey down brick by brick!  Byzantine Soldier: Marvel at the gold and relics of Montecassino, comrades. Have you ever seen such riches? The Abbey of Montecassino lies in between your base and the HRE's base. Tear it down and you get access to their Relics and 1000 gold.  Byzantine Soldier: Hah! Not even the hand of God could open that mountain pass again. Just like Caesar, we shall divide and conquer our enemies! I close off the pass to deny the HRE and Papal States additional gold while I assault their bases.  Holy Roman Empire: Your efforts are admirable, but they are futile. Italy will soon be ours! Well, he's half right...    The HRE's base is just too big and well defended for me to eliminate them in the time I have left. I'm able to make good progress in doing so, even with the Papal States flanking my army, but ultimately the buzzer sounds first. Mission 4 Ending Text "'The Holy Roman Empire was no trifling opponent. Many good men fell parrying the assaults on Troia. Boioannes' forces struck out at Dattus' tower on the Garigliano and dragged him from it. Following the ancient Roman custom, Dattus was confined in a leather sack with a rooster, a monkey, and a viper, and cast into the sea. Byzantine Italy flourished under Boioannes' tenure as catepan. Alas that the incompetence of his successors have brought us to this dreadful pass...'" A difficult but fun mission, especially welcome after the last one. I'm left to wonder how much Capua turning traitor would have mattered on Standard in the end, given that even with the other enemy armies available, this really was the HRE and Papal States' show. Extra Slides Mission 4 - Intro Slide 1 Mission 4 - Intro Slide 2 Mission 4 - Intro Slide 3 Mission 4 - Intro Slide 4 Mission 4 - Intro Slide 5 Mission 4 - End Slide 1 Mission 4 - End Slide 2 Mission 4 - End Slide 3
|
|
#
?
Jun 20, 2023 03:03
|
|
|
Jossar posted:Byzantine Soldier: Commander! Dattus lies in irons, his tower a smoking ruin. He requests a remarkable death - might I suggest the poena cullei?
|
|
#
?
Jun 20, 2023 10:32
|
|


|
worse than being broken upon the wheel? or the brazen bull? or being drawn and quartered? or hanged to death via gibbet?
|
|
#
?
Jun 20, 2023 14:16
|
|


|
Bari - Part 5: The Onrushing Tide Age of Empires II: Definitive Edition - Main Theme (Extended Mix) - If any mission deserves to have a soundtrack, it's this one, and this is a really great rendition of the game's main theme. Age of Empires II: Definitive Edition - Main Theme (Extended Mix) - If any mission deserves to have a soundtrack, it's this one, and this is a really great rendition of the game's main theme.Mission 5 Starting Text "Young men seek renown on the battlefield, thinking war a noble affair. Little do they know that their quarries are in vain. There is nothing but chaos, the screams of dying men, and the stench of death. I long for peace and cheer. I can hardly remember the sound of music in the streets and the noises of a bustling city on market day. They have been replaced by the din of battle, the whistling of rocks hurled by Norman catapults, and the solemn evening tales in the taverns told by those who cannot forget the carnage of each day. My father approached, holding a sword and his old helm, breastplate, faulds, and greaves. 'They are yours now. For 200 years, our family has proudly served this city, but today you must leave this place. I am too old for the journey, but if you live, my death will not be in vain. Someday, you will tell your son this story with the same pride as I have. Fight well today, escape, and secure yourself that future.'"  Stephanos Pateranos: Captain Nautikos! Our situation is dire, but hope yet remains if we can hold back the Norman tide until reinforcements arrive to break the siege. The Normans surround us, but fortune favors the bold. We must strike them when and where they least expect us! I will see to it that any Norman assaults on the city walls are parried. I am placing you in charge of operations beyond the city walls. You must not fail me! You start this mission with a moderate size army under the command of Andreas Nautikos, a Cavalry Hero and the narrator of our story. Unlike the rest of the missions in the Bari campaign, you have to keep Andreas alive. He has to make it out to tell the tale, after all. Stephanos Pateranos, the newly appointed Catepan of the city gives you your marching orders: do whatever it takes to wreck the Normans' supply lines in an attempt to buy Bari time to get reinforcements from the rest of the Byzantine Empire. Because you're in charge of Andreas' strike force, this mission is military only. You get production facilities and opportunities to collect resources, but for a lot of this mission you are going to be stuck trying to maximize use of your existing resources via micro and Monks.  The first thing I do is send out my forces to scout out Bari's Mills to drag all possible grain back into the city. These are all guarded by Norman Besieger raiding parties. Reaching a Mill spawns an Ox Cart, which you have to be careful to make sure doesn't get damaged in the crossfire.  Stephanos Pateranos: This food will go a long way in nourishing our hardy defenders. You have done well, Captain Nautikos! For every Ox Cart you get back to Bari's Castle, you get 1000 Food, so it's important to make sure that they all make it back in one piece.  For the first part of this mission, you don't have access to your own Monks, but fortunately Bari has a Monk that can heal you in between assaults on Norman positions.   After the second Mill, I switch to attacking the Norman resources. I have Andreas run ahead to aggro the Besieger forces and bring them back to a hillside where my Cataphracts can stomp them into the ground using the terrain advantage. Note: Be careful with your starting Cataphracts in this mission, you won't be getting more for a long time.  Byzantine Soldier: The Normans are mounting another attack! The Catepan implores you to send what men you can to aid in the defense!  The main Norman Army sends waves of forces to attack the city, consisting of Knights, Pikemen, Crossbowmen, Battering Rams, and Serjeants (Sicilians Unique Unit, heavily armored Infantry. Can construct and repair Donjons, a unique Sicilian building which is a sort of hybrid Barracks/Tower.) These are relentless, and a serious threat: I rush back my troops to repel the first wave from the gates, only to find myself catching the second one on my way back out.  To try and assist you in defending the city, you are given some resources and control of a number of buildings, not just Military production ones either, but a fairly good mix of research ones too. Do note that you are stuck in the Castle Age for the entirety of the scenario, so some techs will never be available to you no matter what.  Byzantine Soldier: I am uneasy about looting a house of God, but in dire times each man must be his own hope. After repelling the second wave of Normans, I get back to the mission objectives. Tearing down the Monastery gets you 1200 gold, and this is the part where I start producing a bunch of Monks as I figure that I'm going to need them desperately for the rest of the scenario.  Byzantine Soldier: Captain, we have recovered a store of Norman arms from this blacksmith! Destroying each of the three Blacksmiths that the Norman Besiegers have in their camps grants you Imperial Age Blacksmith techs. This one grants Bracer and Chemistry. Destroying them isn't a mandatory objective, but they're adjacent to all of the required ones anyway. This also serves as foreshadowing that the Normans have some more advanced technology in reserve...   While I'm pushing my way towards the third Mill, the Normans break through the walls of Bari. I rush back to repel them before properly capturing the Mill, but at this point my lines are being stretched extremely thin trying to simultaneously maintain the assault and defend the city.   At 45 minutes in, the Normans start adding in the occasional set of Imperial Age troops to their waves. At this point, I make the call that the situation is untenable: I have my mission to complete, and the allied AI will simply have to fight a delaying action in Bari, street by street, for as long as possible. (This was also the part where I started getting really emotionally invested in the scenario. It was distressing to have to leave the city to its fate, felt like I was abandoning Bari in its hour of need.)  Byzantine Soldier: The Norman lumberyard was the machine driving their siege. Better times may yet be upon us! Destroying the Trade Workshop in the center of the Norman Besiegers' lumber camp completes the mission objective and grants you 2400 wood.  Byzantine Soldier: These ashen ruins are all that remain of the dread Norman tower! Look at how the hooves of the fleeing Norman horses rattle and shake the rotten ground! From this point on, all of the remaining mission objectives are just that and nothing more. No additional resources beyond those described above will be forthcoming, until you complete the current set of objectives. Although while I took out the Tower, I did also made sure to grab the last Mill and destroy the second Norman Besieger Blacksmith. This one grants Plate Barding Armor.  I was also seriously concerned that with the main Norman Army flattening all of my troop production facilities in Bari itself, I wouldn't have anywhere to build up additional troops, so I made sure to save the enemy troop production facilities for conversion by my Monks.  Norman Knight: The Byzantines are attacking our siege engines! Aux armes! Byzantine Soldier: With these siege weapons destroyed, the Norman assaults will be weaker for certain! Finally, there's the assault on the Norman Besiegers' siege units. The last Besieger Blacksmith contains Plate Mail Armor and Ring Archer Armor.   Norman Knight: Enough of this foolishness! I will see my flag planted atop the walls of Bari this day! Montjoie! Complete all of the mission objectives and the Normans have a narratively-appropriate dramatic breakdown before going turbo-murder mode. All their troop production facilities convert to the more active Norman Army players, and their Imperial Age reserve forces are let loose to try and tear Bari to the ground. A 20 minute timer starts counting down, reflecting how long the Normans can keep this up for now that their resources and logistical support are exhausted. But it would help if, y'know, my army wasn't on the other side of the map... Stephanos Pateranos: Thus one passion grips all: to decide matters with the sword. To the defense!  Stephanos Pateranos: It is not gods who press us so hard today, but mere mortals like ourselves! Hold them back!  Stephanos Pateranos: Life is brief, and all men are fated to die. Valor's task is but to lengthen fame through deeds! Okay, so what's supposed to happen here is that the last parts you need to complete your troop production, including the Castle, swap to your side for the final stage of the defense. Every time the Catepan gives a speech, you get a bunch of additional resources to help build up an army capable of fighting off the technologically superior Normans. All of this does, in fact, happen.   But in this case, because I had to give up on the defense of Bari entirely, this sequence now takes the form of the Catepan commanding the last-ditch defense of the city to buy me the time I need to get my preexisting army back to Bari to meet up with all of the Cataphracts currently training at the Castle. 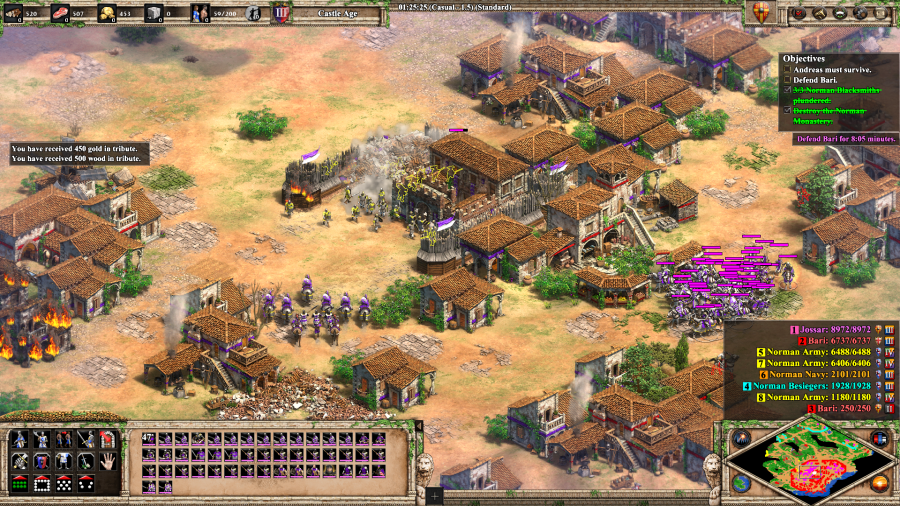  The two meet up to crush the Normans in a big, decisive battle in the center of the city, and that's that.   Norman Knight: The defenders fight like lions! Fall back to the camp! There's a few more raiders floating around the outskirts, but they only finish destroying all of those buildings I converted right before the timer hits zero. Once it does so, all Norman Army forces retreat, and Bari is saved. For now, at least.  Stephanos Pateranos: We cannot hold much longer without aid. Take command of what remains of my fleet, Captain Nautikos, and clear the seas of Norman vessels!  Norman Knight: Now the Byzantines assault our shipyards! Defend them at all costs!  The mission does have one more section before it ends, but it's just a formality. The Normans don't have any significant naval presence and the ships that you're given should be more than enough to scour the seas. One nice touch here is that shallows exist at the edges of both of the Norman shipyards, so you can bring over your land army with Transports to assist, if you should so desire. A few last lines from the Catepan, and the scenario and campaign come to a close. Stephanos Pateranos: Well done, Captain Nautikos! You are truly forever worthy of your great father's fame. Let there be no delay in what I ask. Sail east to Byzantium and bear our plight to the ears of the emperor! Mission 5 Ending Text "The morning sun shone on the shores of the Aegean. I was speaking to a miller when I heard shouts from the harbor. Racing to the docks, I recognized several Barians disembarking from a battered vessel. The tidings were grim: Bari was in Norman hands and my father had fallen valiantly along with it. I thought of his parting words, but I doubt that I will ever don his armaments again. Like my ancestor Panos, I have seen enough battle for ten lifetimes. I think I shall travel the Empire from Thessaly to Anatolia, seeking work as I go. With all luck, I will earn enough wealth to buy a house in the countryside, and raise miles of vineyards on the hillside. Perhaps, one day, when I recount the tale of my family to my children and grandchildren, I will be able to conclude it with how we have found peace at last." Were it not difficult for me to cry in general, I would have been in tears by the end of this scenario. Maybe if I'd played it perfectly, it wouldn't have had such an emotional impact, but the overall quality of the scenario as filtered through the particular experience that I had made it extremely moving. The Bari campaign is pretty good overall (except for Mission 3, which is the world's most generic 2v2), but I'm going to be thinking about this last bit for a long, long time. Extra Slides Mission 5 - Intro Slide 1 Mission 5 - Intro Slide 2 Mission 5 - Intro Slide 3 Mission 5 - Intro Slide 4 Mission 5 - Intro Slide 5 Mission 5 - End Slide 1 Mission 5 - End Slide 2 Mission 5 - End Slide 3 Mission 5 - End Slide 4 Jossar fucked around with this message at 05:59 on Jun 21, 2023 |
|
#
?
Jun 21, 2023 05:48
|
|
|
Campaign Vote #13 A. Sforza - Italians B. Prithviraj - Gurjaras C. Battles of the Forgotten - Persians/Mayans/Vikings/Magyars/Chinese/Japanese/Britons/Turks D. Tariq ibn Ziyad - Berbers E. Sundjata - Malians F. Francisco de Almeida - Portuguese G. Yodit - Ethiopians Voting lasts for 24 Hours from the time of this post. In the event of a tie, I will act as the tiebreaking vote between the two tied options. Please bold your vote in order for it to be counted, as well as noting if you are changing your vote from something else.
|
|
#
?
Jun 21, 2023 05:53
|
|
|
Let's just rip the bandage off and get this poo poo out of the way early: D. Tariq ibn Ziyad
|
|
#
?
Jun 21, 2023 08:50
|
|
|
Back to ItaliA
|
|
#
?
Jun 21, 2023 17:17
|
|
|
We haven't had an African civ yet so I'd vote E. Mali.
|
|
#
?
Jun 21, 2023 17:39
|
|
|
B. Prithviraj
|
|
#
?
Jun 21, 2023 17:48
|
|
|
B. Prithviraj
|
|
#
?
Jun 21, 2023 18:48
|
|

|
B. Prithviraj. The campaign was changed a bit for Dynasties of India (More than just a basic civ swap at least), and I think the current version of the campaign is a big improvement. I really enjoyed the Bari campaign when I played it, 4 out of 5 levels are all very good. The final 2 in particular are excellent. The 2v2 isn't bad, there are a lot of levels that are worse elsewhere in the game, but its a step down from the rest of the campaign.
|
|
#
?
Jun 22, 2023 00:01
|
|
|
I bless the rains down in E. Mali
|
|
#
?
Jun 22, 2023 01:24
|
|


|
B. Prithviraj
|
|
#
?
Jun 22, 2023 02:03
|
|


|
Vote's closed! We're off to India, to visit the legendary Gurjaran king, Prithviraj.
|
|
#
?
Jun 22, 2023 12:30
|
|
|
Prithviraj - Part 1: Born of Fire Age of Empires II: Definitive Edition - Gurjaras Theme Very well, then let us begin, the tale of the flame-touched raja.   Mission 1 Starting Text "Long ago, a great and wise sage climbed the holy peak of Mount Abu. He sought the favor of the gods to protect the people of the earth, but he was descended upon by Rakshasas, man-eating demons with flame-red eyes and fangs like steel. But though the demons neared, the sage was as immovable as the mountain itself. Though he felt the heat of the demons' breath on his bare shoulder, the sage was resolute - making the offering of fire to the gods and asking for their protection. From the flames of his offering spawned the Rajput clans, born of fire and smoke. Their heroes fought the Rakshasas, but though much blood was shed, the demon menace continued to darken Mount Abu. The sage dug a new fire pit, deeper into the mountain earth, and again made the offering. From this pit came Chauhan, weapons in his four arms. He slew the Rakshasas and from his loins came the mightiest of the Rajput clans. From this clan came my king. I am Chand Bardai, poet of the raja's court. I will tell you the story of a great king, but this story, much like life itself, must start from the beginning. My king, Prithviraj, was not always a great raja. Once, he was a young king of Ajmer challenged by his own cousin for the rule of the Chauhan clan."  Kaimbasa: My raja, the villages are being attacked, but we only have enough men to save one of them!   Kaimbasa: (after saving one village) The village is safe, but Nagarjuna has slipped across the Luni River beyond the lands of the Rajputs. I will help you hunt him down to the setting sun. (after saving both villages) With such speed, our enemies will think we ride upon Garuda himself! You are truly blessed by Rama, my raja! This scenario starts with two villages being attacked by enemy forces, and you having control of a small number of forces lead by Prithviraj (a mounted archer Hero unit). The game only requires you to save one of the two villages to continue, but if you're fast enough or have very good micro you can save them both, and have a much better economy going forward throughout the rest of the mission. Managing to save both villages while playing the mission on Hard gets you an achievement. After coming to a final resolution on the fate of the villages one way or another, Kaimbasa (Prithviraj's minister, but here he's just taking the form of a generic Camel Rider) will further remark: Kaimbasa: A wise king unites a splintered people with shared traditions. Recover the lost relics and the gods will remove your obstacles, my raja, and restore Nagarjuna's loyalty. At this point you now have your choice of ways on how to complete the scenario - either kill Prithviraj's rebellious cousin Nagarjuna in his base to the west or gather three Relics scattered around the map. It's more a matter of preference than anything else: by the time you have a force capable of assaulting the individual towns to grab the Relics, it should also be large enough to crack open Nagarjuna's base and kill him.  I send out an early raid to probe Chandelas for weakness. I lose Prithviraj (who's not mission critical) but manage to kill a few villagers in the process. I learn enough to know that these guys will be bulldozed pretty easily if/when necessary.  Chand Bardai is a Hero Priest (like a Monk, but can only heal) sitting at a shrine in the middle of the eastern side of the map who joins you once you find him. He also reveals all relics on the map that are sitting inside enemy Monasteries.  I've seen a bit of conflicting information on how the Relics work, so here's my understanding, though with the warning that this may be inaccurate: one Relic is always guaranteed to spawn under a Fortified Tower to the south. One Relic always shows right next to a random town's Monastery, and one Relic pops up on the map somewhere at random (though still near one of the towns). In this case, the two non-static Relics showed up in Bhadanakas territory. Since Bhadanakas is a relatively close-by opponent, I decide that it's going to be easier to beat them up and grab the Relics rather than mount a full scale assault on Nagarjuna's base for the assassination victory.  First things first, I take out Chandelas. They're in the middle of all the places where I want to go, and I don't want to have to worry about them getting in my way or mounting a surprise attack on my base in the interim. The various Indian civilizations have a bunch of differences compared to the "standard" civilizations: They don't get the Knight line, Dravidians and Bengalis get Battle Elephants instead (but it's not really a replacement unit, and the Dravidians don't even get the upgrade to Elite), the Gurjaras get a unique unit which kind of fulfills the same role (the Shrivamsha Rider, created at the Stables, which gets a regenerating bar health bar that lets it dodge enemy projectiles), and the Hindustanis get nothing. All of them get Elephant Archers, except again the Hindustanis (although they do get Cav Archers). All of them, including the Hindustanis this time, replace their Battering Rams with an Armored Elephant unit which is more of a dedicated anti-Building Cavalry unit than a siege unit. On top of this, the Gurjaras add another two unique units: the Chakram Thrower (ranged anti-Infantry Infantry unit) and the Camel Scout (trained at the Stables, automatically upgrades into Camel Rider once you hit Castle Age, anti-Scout/Skirmisher... sort of.) This makes them feel weird to play, but in the end, it resolves fairly simply as in most cases: Mass 2-3 of the unit of your choice and bring a lot of Armored Elephants to take down buildings, a few more than you would if you were bringing Battering Rams. As the Gurjaras I'm choosing to bring a lot of Shrivamsha Riders and Camel Riders. I probably should have brought some Chakram Throwers too, but I didn't have a lot of fights against sizable amounts of Infantry this scenario.  Bhadanakas takes this opportunity to attack my northern base by river, but most of my crucial infrastructure has been moved further in-land and they don't press too hard in any event.   The Fortified Tower to the south is contested, with Nagarjuna sending a bunch of Light Cavalry and Shrivamshas to ward off my assault on the Tower. The Ghaznavid Raiders also take the opportunity to plink away at me with some Cavalry Archers and Camel Riders, but do not heavily contest my retrieval of the Relic. The game gives you a free Monastery right next to the Relic, but don't keep anything of value here: it's not easily defended, especially as the Ghaznavids will send a couple of raiders to attack every so often.    With that, all that's left is my assault on Bhadanakas. They have a bunch of Towers and some Spearmen, but nothing too threatening, as long as you focus the annoying troops/buildings down. I grab the relics and bring them back to my primary Monastery in my military production complex for victory.  Kaimbasa: Vijay! Victory! All of the Chauhan bow to you, my raja! It is time to look outward - all of India awaits! Mission 1 Ending Text "In those days, the Rajput clans raided and warred with one another. They were Kshatriya - warriors from birth. A young Rajput like Prithviraj was headstrong and brave - but to be a wise king would take more than courage. From his minister Kaimbasa, Prithviraj learned wisdom and how to rule. But the spirit of the Kshatriya would never leave him; my raja longed for new victories and lands to conquer." The beginning of this mission is harrowing, but it quickly settles down to being a mostly-standard build and destroy scenario. The choice in how to pursue your victory is a neat idea at least, and it's nice to not have things be too complicated while getting used to the Gurjara tech tree. Extra Slides Mission 1 - Intro Slide 1 Mission 1 - Intro Slide 2 Mission 1 - Intro Slide 3 Mission 1 - Intro Slide 4 Mission 1 - Intro Slide 5 Mission 1 - End Slide 1 Mission 1 - End Slide 2 Jossar fucked around with this message at 18:21 on Jun 24, 2023 |
|
#
?
Jun 24, 2023 18:11
|
|
|
this mission got a few changes with Dynasties in addition to the civ change- namely reducing the pop limit from 200 to 125, and going from a Castle start, Imp max to Feudal start/Castle max. I think a good set of changes for the first mission of a campaign
|
|
#
?
Jun 25, 2023 02:41
|
|
|
The indian civs were originally just one civ, called the Indians. They had no knights, and instead had improved camels (extra pierce armor, access to the Imperial camel upgrade, which is now exclusive to the Hindustanis). Siege Elephants didn't exist yet, and the Elephant Archer was their unique unit, instead of being a cavalry archer replacement at the Archery Range. Some other interesting things about Siege elephants: unlike rams, they get a single upgrade to armored Elephants, which is slightly cheaper than the Siege Ram upgrade. You can't garrison units in the elephant, naturally, and they take bonus damage from pikes and camels like cavalry units. They are slightly less sturdy than rams in general, but like them are basically immune to archers. They are also the only unit produced from the siege workshop that can be healed by monks. The gurjaras also have a damage bonus for mounted units, which applies to Siege Elephants as well. They also cost food instead of wood. cncgnxcg fucked around with this message at 15:42 on Jun 25, 2023 |
|
#
?
Jun 25, 2023 15:38
|
|
|
Prithviraj - Part 2: The Digvijaya Mission 2 Starting Text "Rajasthan is a harsh land: a desolate desert snaked by the winding fingers of the Ganga river. The Rajput clans who rule here are as tough as the desert soil and as passionate and unpredictable as the river's flows. The name Rajasthan means 'the land of the kings,' and from this land come India's greatest warriors and rajas. In keeping with the ancient traditions, Jayachandra ordered a ritual signifying his authority. A mare was released into Rajasthan and pursued by the king's warriors. Wherever the horse went, the ruler of that land would either accept Jayachandra's authority or challenge it by fighting the warriors. As Prithviraj hunted tigers in the forest, he discovered how quickly the hunter could himself become the hunted."  Kaimbasa: Follow the animal bones, my raja, and you will find your prey. Be careful. Not even a raja can stand toe-to-toe with the mighty tiger. (after killing the tiger) Ha ha! A successful hunt! Let us return quickly to Ajmer, my raja. Your rivals are themselves hunting, but princes instead of tigers. This scenario begins with an unmounted Prithviraj standing off in the woods and following animal bones to this clearing in order to hunt a tiger. Make sure to get a few shots in before it closes the distance and you'll win, but it can very well maul Prithviraj to death here if you're not careful. This segment is a remnant of the original Forgotten version of this scenario that never quite got expunged, where this was a much more drawn out segment and Prithviraj had to escape from a bunch of people who lived in the jungle after killing the tiger. As it is, once the tiger is dead, the game moves on to the base-building portion.  Kaimbasa: Ah... it is good to be back in Ajmer. But I will not sit idle while my king does not rule Rajasthan. I saved this gold in the treasury just for this occassion [sic]. I spend a lot more effort hunting/using herdables this mission than I usually do. Wood isn't scarce per se, but the area surrounding your camp is dangerous enough that it's worth trying to avoid expanding until you have to, and that slows down the farms a bit. Hmm... what's that in the corner there?   Yeah, the enemies in this mission like to raid you, especially Jayachandra and Chaulukya, though all of your designated rivals will take the opportunity to do so. Jayachandra sends the largest groups and is generally the biggest threat for the rest of the mission, though I do manage to mostly contain him by building a Castle in the northeast of my base. The rest of your enemies can be distracted by each other's presence, and very often go haring off after each other rather than committing to attacking you.   The Dacoits are two separate forces - the nomads dwelling in all these individual camps surrounding your base, and an occupying force that has taken control of the Paramara base to the southeast. You want to clear them out when possible, as otherwise you'll run out of mineral resources fairly quickly. This particular Dacoit camp gives you a free Dock, but unless you try to go for water control right away, it's not worth holding onto: Soomra will take most of the water if left unchecked.  After clearing out most of the important Dacoit camps, I start the march to free Paramara. You also find Chand Bardai here, right at the beginning of the area.    Kaimbasa: Begone, serpents! Slither back into your holes! Freeing the Paramara gives you a bunch of units, including these Urumi Swordsmen (Dravidians Unique Unit, Infantry with a charge attack that also deals splash damage). They also give you their mines, which frees you up from any remaining concerns about exhausting resource piles for the rest of the scenario.   Chaulukya: We lay our swords before the Chauhan clan. May word of our friendship spread by sea throughout the world! From this point onwards, your mission is simple - slay each of the rajas of the three non-Jayachandra main opponents. Every time you slay a raja, that faction stops being your enemy and becomes your ally instead. Chaulukya is the highest priority to take out, because they have the theoretical capacity to raid the Paramara base via the river, and are otherwise the most aggressive of the three raja factions. Smash their Town Center and the Raja pops out, ready to be hacked to pieces.   Soomra: We bow to you Raja, but I must warn you. There are enemies to the west that look enviously upon you. Soomra is pretty much the same process, although they had nearly managed to get a Castle up next to their Town Center, which would have made the process a lot more difficult. That ominous foreshadowing is going to take a couple of missions to resolve.  It's at this point that Jayachandra starts sending actual armies against my base rather than raiding forces. My Castle is still able to repel them, but he's going to start sending Armored Elephants soon. Fortunately, you don't need to beat Jayachandra to win - you just need to hold out against his forces long enough to complete your conquest of the other three factions.   Lohara: We bow to you, son of Chauhan! May this alliance stand firm and timeless as the mountains of the Himalaya! Lohara mixes things up a bit by having their Raja just stand out in the open on this bridge, but unlike the other two factions, you have to break down a set of gates to reach him rather than just freely walking up to the Town Center and knocking it over. Getting the third faction to ally with you causes Jayachandra to resign, and the mission is won. Kaimbasa will comment: Kaimbasa: Look at Jayachandra running back to Kannauj like a chastened child! Raja, your Digvijaya will be sung by the poets for centuries! Mission 2 Ending Text "All of India heard tales of Prithviraj's digvijaya - his conquest of all directions. The Rajput princes submitted to him and word of his victories spread far. Princes came from all lands to congratulate the young raja. But far greater than any princely gift was the love of a princess. In Kannauj, in the very court of his rival Jayachandra, Prithviraj caught the eye of Sanyogita, a headstrong Rajput princess with bewitching beauty. The young king fell in love with Jayachandra's own daughter." The liberation of the Paramara isn't necessary if you're really quick on the draw with securing mining camps from the Dacoits, but it's also the only thing that really makes this mission stand out, so why would you ever not do that? This mission is really good at balancing the enemy keeping pressure on you without being overwhelming, though. Extra Slides Mission 2 - Intro Slide 1 Mission 2 - Intro Slide 2 Mission 2 - Intro Slide 3 Mission 2 - Intro Slide 4 Mission 2 - End Slide 1 Mission 2 - End Slide 2
|
|
#
?
Jun 25, 2023 23:03
|
|
|
Prithviraj - Part 3: Hand of a Princess Mission 3 Starting Text "My king was in love with Sanyogita. The two would sneak away from their courts to meet in border towns and wooded groves, where they would embrace under the bright light of the moon. But for all their secrecy, their romance could not be hidden from the powerful Jayachandra and his army of spies. The mighty king would never approve of his daughter marrying his own rival. Instead, he ordered a swayamvara - a ceremony where Sanyogita would choose her husband from the men invited by her father. Jayachandra invited all the princes and kings of India to the ceremony, except for one. Almost one. In mockery of Prithviraj, Jayachandra had a clay statue made in the young king's image to serve as the doorman to his court."  Kaimbasa: Many dangers await you, my raja, but love will conquer all. Though there are many paths on your journey, a king makes his own way. You start the mission with Prithviraj and a small army in the western corner of the map, your goal being to rescue Sanyogita in the eastern corner of the map and bring her to an allied Wonder in the northern corner of the map. On Standard you have 60 minutes to do so or else it fails the mission, on Moderate, 45 minutes, and on Hard, 30 minutes.   Throughout the map, you are hindered by tigers, a series of blockades points established by Jayachandra, and having to fight your way through towns belonging to the Yadavas, who are allied with Jayachandra. For some reason, Jayachandra uses a lot of scenario-only Eastern Swordsmen to man the blockades points.   The map is also full of recruitable units just lying around. The first set is particularly notable because of the Siege Onager. Per Kaimbasa's words you can use it to make your own way through the jungle, if you know what you're doing.  The secret to this map is to always be moving. It doesn't matter if Jayachandra has a whole base sitting around, just beat as many troops as you need to in order to break free, and move on.  This base is particularly annoying because you have to break through at least one of the buildings here in order to continue.    The game gives you some capacity to construct an economy and additional troops, but this isn't really a build up mission. Maybe buy a few upgrades from the Blacksmith, but that's about all you can really afford without slowing down.  No matter which way you go you will eventually gain the capacity to get a Transport. Either by taking control of a dock along the river and building one, or finding one for free on the shores of this Yandavas village.   Guide the ship down the river while being shot at by various Yandavas Towers until you make it to the landing zone near Kannauj.   Kaimbasa: She is as beautiful as the lotus flowering from a midnight pond. Protect her well, my raja. Supposedly there's a way to sneak into the city, but if so it's less efficient than just barging your way in through the front door and grabbing Sanyogita before hightailing it back to the Transport. Sanyogita is a reskinned/renamed Queen unit, which doesn't show up in anything except scenarios but is meant to be analogous to the fast-moving King unit you see in Regicide games.    Kaimbasa: So quick! I did not have enough time to prepare! Fetch the musicians! Jaldee karo! Our raja will be wed! Once you retrieve Sanyogita and hop across the river again (but this time in a slightly more northerly direction), you just have to fight your way through a few more camps before making it to Lal Kot. Once Sanyogita makes it to the city's Wonder, victory is yours. Mission 3 Ending Text "Sanyogita was as headstrong as she was beautiful. With the infinite courage of a Rajput princess, she walked through the royal court carrying the ceremonial garland and ignoring the expectant gazes of her suitors. Coming to the door, she defiantly laid the garland around the neck of the clay statue of Prithviraj, declaring him her husband. To her surprise, the young raja had braved the dangers of his rival's kingdom to slip into the ceremony. Emerging from behind the statue, Prithviraj embraced Sanyogita. The two rode to Ajmer as the furious Jayachandra vowed that his revenge would be felt to the ends of the earth." You get an achievement for completing the scenario with 12 minutes left on the clock. On Standard and Moderate this isn't too bad, but on Hard you really have to gun it in order to make the deadline. That also demonstrates my one big problem with this scenario: Kaimbasa seems to imply that there are a lot of different ways to approach the scenario, and there are... if you're willing to go slower than you otherwise would have. But you're incentivized to run through it as quickly as possible, which narrows down your options, although I didn't pick all of the best of them here. From the perspective of the scenario being intended as a time trial though, it's a blast. Extra Slides Mission 3 - Intro Slide 1 Mission 3 - Intro Slide 2 Mission 3 - Intro Slide 3 Mission 3 - Intro Slide 4 Mission 3 - End Slide 1 Mission 3 - End Slide 2 Jossar fucked around with this message at 00:42 on Jun 27, 2023 |
|
#
?
Jun 27, 2023 00:14
|
|
|
I've never done this scenario this way, I used the sneaky route. You can use the Siege Onager to cut through the jungle south of the first red camp and make your way to another transport ship on the east edge of the map. There's a very deliberate gap in the wall of the purple city on the east edge that you can sneak Prithviraj through and get Sanyogita back out. Then its just sail as far up the river as you can and getting to the Wonder. Its slower at the start, but overall takes roughly the same amount of time as the combat route. I got the achievement of moderate, with about 10 minutes to spare, but it would probably be fairly straightforward to do the entire thing deathless on hard and still get the achievement.
|
|
#
?
Jun 27, 2023 14:21
|
|
|
Prithviraj - Part 4: The Fate of India Age of Empires II: Definitive Edition - Neep Ninny Bod v2 Mission 4 Starting Text "Without his daughter, Jayachandra became a stampeding elephant - no one was safe from his overflowing rage. But anger alone could not win a war and Jayachandra would not have been a threat to my raja had it not been for the jealousy and cunning of a once loyal subject. Oh Kaimbasa! How love and jealousy made him betray his master! The minister who had advised my king since he was a boy, and whom Prithviraj honored like a beloved uncle, sought the one woman he could not have - Kaimbasa fell in love with Sanyogita. His jealousy drove him to Jayachandra's court to betray his own king. Whispering in Jayahandra's ear, Kaimbasa gave direction and purpose to the king's anger. He urged Jayachandra to send an ambassador to the Afghan hills to find Muhammad Ghori, a brutal warlord said to command a slave army numbering in the thousands. The messenger would regale the Turk with tales of the riches of Prithviraj's kingdom and whisper to him how the young king was too smitten with his bride to defend his lands. Then, Kaimbasa promised the vengeful king Prithviraj would be defeated and Jayachandra would rule Rajasthan. Unknown to the two men, their fateful scheme would jeopardize all of India."  Govind Tai: The invaders defile our holiest symbols, my raja! Our people will lose all hope if we do not stop them! You start this mission with a large base - an economy section on the eastern side of a river which is mostly unassailable and a military production section on the western side of that river, which is most assuredly not. You're given a moderate size army including Govind Tai, Prithviraj's brother and a Camel Rider hero unit. You're also given Deathmatch level resources, but it sure isn't going to be enough to win without a burgeoning economy of your own. Muhammad Ghori starts with all the Relics on the map and is counting down to a Relic victory. Every time you destroy a Monastery you reset the timer, but all the relics will immediately move to the next Monastery on the map. Destroy all three Monasteries to win the mission. You can cheese this by almost, but not quite destroying a Monastery which dumps out the relics and stops the timer without starting another count, but you need to destroy all three Monasteries to win anyway, and you really don't want to make this mission take any longer than it has to.  Govind Tai: My raja, some Buddhist monks to the north wish to speak with you. Buddhist Monk: Namaste. Our brothers were traveling with ancient relics, but they have not arrived. Bring the relic carts safely to our Monastery and you will be rewarded.  Okay, so here's the deal with this side-quest: Three relic carts are scattered around the map. Chand Bardai and one of the relic carts are in your eastern base, the second is located on the battlefield on your way to the yellow Ghorids player, and the last is located in what is technically on the battlefield near the green Ghorids player, but in practice requires you to be pretty far into their base. Deliver all three Relic Carts to the temple of the Buddhist Monks in the north, and they give you Atheism for free. Now, +100 years for Relic victories seems pretty good on paper (and yes, it does apply to each individual reset of the counter), but I found that in practice trying to secure the relic carts was as much, if not more, of an effort as just satisfying the mission objective of destroying the Monasteries.  My remaining prep for the build up part of the mission involved surrounding my base with a ring of Castles and securing access to the gold mine here. Otherwise, just building a ton of Elite Shrivamshas, Heavy Camel Riders, Monks, and Trebuchets.  Govind Tai: My raja - my dear brother - we must hurry! The Ghorids are defiling our sacred murti.  Govind Tai: We have saved these murti from the Ghorid fire, but we must hurry to save others! Eventually I can delay no longer and the attack begins. I found the yellow Ghorids' base to be slightly easier for the initial assault - they're Tatars and train Keshiks (Tatars Unique Unit, Cavalry raider that generates gold when it attacks enemy units), Cavalry Archers, Scorpions, and Trebuchets. As is going to be the case for all of these bases, the main strategy is to defeat the initial wave out in front of their base, then have everything hold back and protect the Trebuchets while they take out the Monastery.    You want to hold off on the initial assault for as long as you can because once you attack, the Ghorids' AI goes murder mode, and will not stop swarming you until you win the mission or die. The most trouble I had came from the green Ghorids, who play Persians and train Paladins, War Elephants, and Mangonels. They quickly manage to tear down one of my defensive Castles and I had to rush my army back to defend my base before it fell.  Govind Tai: We are nearly victorious, my raja! Let us call upon the gods and charge once more into the fray!  Fortunately, this meant that I had destroyed enough of the green Ghorids' army to get just enough time to destroy the second Monastery before they started spamming War Elephants again.  Eventually, I was able to mass up a large enough army for one final ride across the map into the heart of the Ghorids' last base. The red Ghorids, playing Hindustanis, train Cavalry Archers and Hussars. They, alongside the yellow Ghorids' Cavalry Archers, did their best to try and harass my army as it worked its way across the map.   This culminated in a massive mess of a 2v1 battle outside the red Ghorids' base which I eventually managed to slog through in order to set up a siege on the third and final Monastery. Destruction of the last Monastery means victory. Govind Tai: Vijay! We have driven the Ghorids from our lands, my brother! Go to Sanyogita and celebrate! The poets will sing your praises for centuries! Mission 4 Ending Text "Thousands of Turkish horsemen - the slave soldiers of a savage warlord - descended from the Afghan hills to the plain at Tarain. Great clouds of dust rose in their wake, obstructing the vision of the Rajput Kshtriya. The Turkish cavalry unleashed a shower of arrows on the Rajputs. The Indian warriors, facing an enemy they could not see, could only weather the blows against them. With the battle hanging in the balance, Govind Tai, brother of my king, rode alone into the dusty fray, challenging the Turkish warlord to single combat. He struck Muhammad Ghori from his horse and wounded him. The warlord's slaves encircled their master and carried him off the field as the Turkish trumpets bleated a retreat."  This mission is a really nasty difficulty spike, even on Standard. The rest of the Prithviraj campaign had conditioned me to accept a default campaign difficulty of "relatively, but not unreasonably challenging" and then I got sucker punched in the face. If you don't win this quickly, you'll run out of resources and the Ghorids will burn most of your western base to the ground, making victory from that point onwards very difficult. Extra Slides Mission 4 - Intro Slide 1 Mission 4 - Intro Slide 2 Mission 4 - Intro Slide 3 Mission 4 - Intro Slide 4 Mission 4 - Intro Slide 5 Mission 4 - Intro Slide 6 Mission 4 - End Slide 1 Mission 4 - End Slide 2 Jossar fucked around with this message at 02:08 on Jun 28, 2023 |
|
#
?
Jun 28, 2023 02:03
|
|
|
This mission is just hectic. The fact that you are under constant pressure of that ticking clock combined with the aggression of the AIs is a harsh dose of intimidation.
|
|
#
?
Jun 28, 2023 02:12
|
|
|
I like that the Buddhist monks give you Atheism if you do that sidequest for them. They don't seem to be very good monks then!
|
|
#
?
Jun 28, 2023 03:01
|
|


|
C-Euro posted:I like that the Buddhist monks give you Atheism if you do that sidequest for them. They don't seem to be very good monks then! On the contrary, having realized that the gods are merely a distraction from the true nature of reality, they are now free to pursue enlightenment unobstructed! 
|
|
#
?
Jun 28, 2023 03:40
|
|
|
i mean it makes sense considering Buddhism rejects the idea of a deity
|
|
#
?
Jun 28, 2023 05:01
|
|
|
There's also a way to kind of cheese this mission: you can build a wonder, and for whatever reason, wonder victory isn't disabled in this mission. So you build your wonder, destroy a monastery afterwards, and then you just have to wait for the timer to run out. By building the wonder on the eastern side of the river, you are basically guaranteed to win.
|
|
#
?
Jun 28, 2023 06:06
|
|
|
Prithviraj - Part 5: The Legend of Prithviraj Mission 5 Starting Text "Prithviraj's victory over Muhammad Ghori proved to be a curse. Believing that the Turk would not return, my raja took to revelry and the company of Sanyogita, leaving the defenses to rot. It is here that I, Chand Bardai, enter the story and make my mark on my king's legend. I warned my raja that nothing would stop the Turk. The warlord had come down from the barren Afghan mountains to gaze upon the wealth of India and would return with a larger army. My raja was wise and he listened to me. He sent messengers to the other Rajput princes, calling them to war. But few listened. Laughing, the princes told the messengers that surely the Turks would not return so soon after being bloodied by Rajput Kshatriya. The princes of Rajasthan sent only token forces to aid my raja's defense. As my king marched once again to war, I feared that he would not return. I began to write this tale and shared it with the other poets. Even if my king did not survive the battle, his legend would live on throughout all of India. I would make sure of it."  Chand Bardai: Poets have reached the courts of four great dynasties. To whom shall we tell our tale to first? Whoever we choose will help us carry Prithviraj's legend throughout India!  Chand Bardai: Success! Our words have softened the raja's heart. Whoever wrote them must have been quite talented, don't you think? Don't flatter yourself, buddy. The final scenario starts with you being in control of four Poets (renamed Priests) at the courts of four different rajas. Convert each raja (who are decent hero units) in order to obtain their base and some resources. In addition, the first raja converted gives you a number of technologies, and all future rajas give you +25 pop cap (you start at 125 and go up to 200) and in the following order: the Castle Age unique tech, the Imperial age unique tech, and the ability to build Castles. Technically you're only supposed to be able to convert one raja at the start, but if you're quick enough on the draw you can grab anywhere between two and all four.  Chand Bardai: Now that we have a city, we must go forth and spread the legend of Prithviraj. But beware! The Yadava, Chola, and Pagan will stifle our efforts and must be defeated.  If you don't grab all the cities at once, you've got some work to do. You'll have some number of starting forces and a single Poet. Attack each city in turn, endeavoring to distract its armed forces while the Poet converts the raja. Try to minimize any and all damage, as that's more effort that you'll have to expend in rebuilding the base once it flips to your side.   This mission is more about getting all of India to appreciate Prithviraj's last stand than actually facing the Ghorids themselves. The main Ghorids' force has a large base to the north, but will never attack you directly. Instead, every couple of minutes (20 on Standard, 15 on Moderate, 10 on Hard) an allied group of raiders spawns in and tries to defeat you. This is the most active enemy on the map and the most dangerous, but can eventually be driven off after repelling enough raids (4 on Standard, 5 on Moderate, 7 on Hard). It is technically possible to defeat the raiders by destroying the main Ghorids' base first, but it's kind of like fighting an optional superboss. Converting all the rajas before the first Ghorid Raiders show up on Hard gets you an achievement. My chosen solution to the Raiders is building a wall and funneling them all into a series of killing fields. It mostly works, although at the beginning and end the raiders nearly manage to break through into my economy anyway.  Although the Raiders are the primary threat for most of the mission, the other enemies will still try to attack you, especially Yadava and Chola. Fortunately, they're nowhere near as dangerous on offense.   With my defenses against the Ghorid Raiders complete, I am free to switch my focus to the primary goal of this scenario, defeating the three surrounding static enemy factions undermining the spread of Prithviraj's legend. All three have sizable and well defended bases.   Yadava plays Gurjaras and is pretty much a mirror match, although they prefer more Elephant Archers and Chakram Warriors compared to my preference for Shrivamshas. But if I don't bring any Infantry to the fight and use Shrivamshas to eat up arrow-fire, I'm getting the best of the matchup.    Chola plays Dravidians and uses all of the Infantry types including Urumi Swordsmen, as well as Elephant Archers and Trebuchets. Probably the one opponent in this campaign that made me use Chakram Throwers in a serious way, because they kept spamming Halberdiers.  I let my defensive line fray a little too much while defeating the Chola, but in the end it was good enough to hold and the Ghorid Raiders have been neutralized as a threat for the rest of the scenario.    Pagan plays Burmese, and are probably the most conceptually interesting opponent of this scenario. In addition to throwing Battle Elephants, Infantry, and Arambai (Burmese Unique Unit - ranged cavalry with a strong attack and terrible accuracy) at you, you'll also see a number of Galleons and Fire Ships defending their waterways. They have the best defense of any of the main enemy factions, but are also much less aggressive, though they will support the other enemies' economies through trading.   But on their own, Pagan will eventually crumble. Make sure to destroy this Wonder here, as they won't surrender until it's destroyed as well. Once enough of Pagan's infrastructure is in ruins, they surrender, bringing the campaign to a close. Chand Bardai: No matter what happens against the Turks, Prithviraj will be remembered for centuries! Now, I must hurry to find my raja and help him complete his destiny... Mission 5 Ending Text "Prithviraj's heroism could not overcome his delay. He was defeated and taken to the Turkish warlord's castle in the Afghan mountains. There, my king was cruelly blinded and imprisoned. I followed my raja in his captivity. When I came to the Turkish court, I regaled the warlord with the same tales and feats that I have told you. Surely, I persuaded him, a generous warlord would treat such a heroic raja as a companion and vassal, not as a prisoner condemned to a sullen dungeon. But Muhammad's heart was cruel and though he brought my raja from his prison, he mocked Prithviraj for his blindness. In ridicule, he threw a bow and a single arrow at my raja's feet and dared him to strike at him. Prithviraj drew the bow. Though he could not see, the sound of the Turk's sneering laughter made his aim true. He released the arrow, striking Muhammad Ghori. The guards fell upon Prithviraj and slew him. In Ajmer, Sanyogita was stricken with grief. So strong was her love that she could not bear to live another day without her Prithviraj. In honor of her husband, and defiant to the end, she took her life by throwing herself into a fire. Thus, my story ends where it began - with a legend born of fire." I'm glad they toned things back down a little for the finale, though mostly just because the last mission was way too hard. Apart from that, I don't have much else to say about the Prithviraj campaign that hasn't been discussed already. Fun experience which serves as a good introduction to the various Indian civilizations. Except the Bengalis, I guess, but they'll show up eventually. Extra Slides Mission 5 - Intro Slide 1 Mission 5 - Intro Slide 2 Mission 5 - Intro Slide 3 Mission 5 - Intro Slide 4 Mission 5 - Intro Slide 5 Mission 5 - Intro Slide 6 Mission 5 - End Slide 1 Mission 5 - End Slide 2 Mission 5 - End Slide 3 Mission 5 - End Slide 4 Mission 5 - End Slide 5 Mission 5 - End Slide 6 Jossar fucked around with this message at 03:13 on Jun 29, 2023 |
|
#
?
Jun 29, 2023 03:03
|
|
|
Campaign Vote #14 A. Sforza - Italians B. Battles of the Forgotten - Persians/Mayans/Vikings/Magyars/Chinese/Japanese/Britons/Turks C. Tariq ibn Ziyad - Berbers D. Sundjata - Malians E. Francisco de Almeida - Portuguese F. Yodit - Ethiopians Voting lasts for 24 Hours from the time of this post. In the event of a tie, I will act as the tiebreaking vote between the two tied options. Please bold your vote in order for it to be counted, as well as noting if you are changing your vote from something else.
|
|
#
?
Jun 29, 2023 03:04
|
|
|
C. Tariq ibn Ziyad
|
|
#
?
Jun 29, 2023 03:39
|
|
|
B. Forgotten Battle Extravaganza
|
|
#
?
Jun 29, 2023 03:52
|
|
|
F. Yodit.
|
|
#
?
Jun 29, 2023 04:28
|
|

|
B. Battles of the Forgotten
|
|
#
?
Jun 29, 2023 04:36
|
|
|
B. Battles of the Forgotten. May as well get what might be the worst two scenarios in the game (Dos Pilas and Lake Poyang) over with. At least the Turk and Magyar missions are fun.
|
|
#
?
Jun 29, 2023 23:15
|
|
|
|
| # ? Jun 5, 2024 19:04 |
|
|
Vote's closed! These Battles... will no longer be Forgotten.
|
|
#
?
Jun 30, 2023 03:07
|
|