


|
Silhouette posted:You walk the path of madness and disappointment, because your models will never look "good enough" if you're trying to replicate box art paint jobs. Experiment with color schemes and do your own thing, you'll be happier and much more satisfied with your models when you do. Oh, yeah. I am definitely trying to find the balance between coming close to the original artist's vision for the model, but also putting my own twist on it. I made the mistake of starting with the new Saurus Warrior models from AoS, but the blend required to make the underbelly/skin look good with the scales is unfortunately out of my reach as a painter for now. They still look passable, and I did learn a lot about painting with contrast so I don't think it was a total loss.
|
 #
?
Nov 5, 2023 20:37
#
?
Nov 5, 2023 20:37
|
|


|

|
| # ? May 10, 2024 05:15 |
|
|
Ominous Jazz posted:painted my second mini today!! I use craft paint for my mini painting too. Well, I did buy some army painter paints recently I need to try but yeah. Some tips Shake the every-living bejeesus out of the primer. Once your arm gets tired, switch to your other arm and keep shaking lol. It should be at least 2-3 minutes of vigorous shaking Do several light coats of primer Shake the devil out of the craft paint bottles too Use a wet palette! You don't need to buy one, you can make one from non-waxed parchment paper, one of those longer and flatter takeout /meal planning containers, and some paper towel for a sponge. Or you can use a "swedish sponge cloth", they work better. Cut your sponge/folded up paper towels to match the base of the container, then cut the parchment paper to match too. Pour some water in, let it soak up, and then dump the excess, and you have a wet palette! Thin your craft paint right out, and mix it well too, on your new wet palette. Look up some YouTube videos from the big channels on how to use the craft paints. They'll have lots of other little tips and visual feedback on what to look for. Just search YouTube for "mini painting craft dollar store paint" or something and you'll find a bunch of videos Use a wash, and then finish with a dry brush. It'll add some easy lowlights and highlights and add so much more depth. Finish with a matte/satin brush on or spray topcoat if you find it's too dull.
|
|
#
?
Nov 5, 2023 20:58
|
|

 it looks bad!!

|
Cannot stress enough that using the "correct" paints for the job will be so much better in the long run. You'll be far more likely to produce something you're happy with without a huge amount of preparation and therefore far more likely to stick with it and see genuine improvement.
|
|
#
?
Nov 5, 2023 21:58
|
|

|
plus it can be really fun to nerd out and find cool fun paints across different ranges and its a lot easier to justify buying a few paints than a fancy kit.
|
|
#
?
Nov 5, 2023 21:59
|
|

|
If you're in America and don't mind ordering online, I feel Reaper paints can't be beaten for their price point. They're comparable to Vallejo but about half the price. They just don't have a contrast equivalent.
|
|
#
?
Nov 5, 2023 22:17
|
|


|
PoptartsNinja posted:If you're in America and don't mind ordering online, I feel Reaper paints can't be beaten for their price point. They're comparable to Vallejo but about half the price. They just don't have a contrast equivalent. I�d also recommend Reaper to new painters. I think Vallejo are better in the end but when I started it was great to work with paints that didn�t really need thinning.
|
|
#
?
Nov 5, 2023 23:02
|
|
|
Ominous Jazz posted:painted my second mini today!! In addition to what everyone else has said, these look like terrible miniatures to start with. A good painter can make any misshapen lump of pvc from China look like a work of art, but of you're starting off it really helps if the subject you're painting has a nice, clean sculpt with clearly defined details. Some suggestions for cheap stuff to practice with 1. GW Infernus Marines are deeply unloved and there's a surplus of them from Leviathan boxes. They're some of GW's newest sculpts and are as good as you can get for the price (~£1-2/ea). Downside is they only teach you how to paint hard armour which is not a particularly useful skill if you plan to paint mostly fantasy stuff. 2. Frostgrave/Stargrave miniatures - simple but clean hard plastic sculpts with great variety for both Sci-fi and Fantasy settings - £1/ea 3. Reaper Bones - huge variety and very affordable but unfortunately the cheapest parts of the range tend to be the most poorly sculpted. Avoid board game minis if you can. They may be cheap but they're universally sub-Bones tier quality.
|
|
#
?
Nov 5, 2023 23:27
|
|

|
I'll always be banging the drum for the Victrix dark age miniatures, they're great sculpts and they're great value for money.
|
|
#
?
Nov 5, 2023 23:43
|
|

|
In addition to all the everything, consider using colours that are not yellow and pink, those are both translucent by nature and require a bunch of extra work to get good coverage. Try colours like greens, blues and browns, and you might get wildly better results much easier. Also in addition to that, when you thin your pants enough, you'll sometimes overdo it and dump watery paint all over the miniature. To prevent this, after you've picked up some paint on your brush, touch the tip to a paper towel and let the excess water wick out. Makes life so much easier. And clean your brush before you pick up more paint!
|
|
#
?
Nov 6, 2023 07:32
|
|


|
Any tips / guides on painting hazard stripes?
|
|
#
?
Nov 6, 2023 15:10
|
|

|
Toebone posted:Any tips / guides on painting hazard stripes? Paint the whole thing yellow then paint it black
|
|
#
?
Nov 6, 2023 15:13
|
|

|
Toebone posted:Any tips / guides on painting hazard stripes? What Spanish Manlove said is very, very important. Yellow will not go over black without a lot of headache, if it goes over at all. Other than that - I believe Tamiya sells masking tape that's the proper width for hazard stripes on miniatures, if you don't want to trust it to freehand.
|
|
#
?
Nov 6, 2023 15:31
|
|

|
Picked up some Speedpaint 2.0s and thought I'd try them out on my new OBR dudes. I'm happy with them! I don't totally feel a difference from the 1.0 paints, but I liked those as well so I figured I'd like these.
|
|
#
?
Nov 6, 2023 16:34
|
|

|
Spanish Manlove posted:Paint the whole thing yellow then paint it black Start with a thin black line in the middle of the yellow. Then a line in the middle of each the resulting two halves. Then keep dividing the sections until you have as many lines as you want. Then go back and widen each of the lines by the same amount from the same direction; instead of trying to go down the center of your original thin black line, leave the line as is and fill in by a brush width or whatever on one side or the other, and do the same for every line. That will help keep your stripes parallel and evenly spaced. Then go back and touch up with black or yellow as needed to straighten everything out.
|
|
#
?
Nov 6, 2023 16:36
|
|


|
Freehand wasn�t cutting it and I didn�t want to go buy tiny masking tape I�d use exactly once, so I 3d printed a little template for sketching the lines in
|
|
#
?
Nov 6, 2023 17:08
|
|
|
In the past I've used an exacto knife and a ruler to create thinner strips of tape out of normal blue painters tape. Worked pretty well.
|
|
#
?
Nov 6, 2023 17:48
|
|


|
The real trick for me has been: a) having my black and yellow both on the palette so I can loop through correcting one side, thinking about it, then correcting the other side endlessly b) playing orks so I can eventually convince myself that any remaining off angles are thematic
|
|
#
?
Nov 6, 2023 18:23
|
|

|
if you just cant straighten out that one line, put some battle damage there.
|
|
#
?
Nov 6, 2023 19:21
|
|

|
Question for any sculptors. I've recently bought a new batch of Greenstuff which came as a ribbon (RIP my old tube from 2005) and I'm noticing the outside of the yellow portion appears to have gone dry, even the bits in contact with the plastic. The blue is fine. When I mix it the yellow doesn't mix in evenly and there are little lumps everywhere in the mixture. I can solve it by peeling the dry bits off but this is leading to a lot of waste. Anyone noticed this before? Is there a fix or did I just get a dud batch.My Spirit Otter posted:if you just cant straighten out that one line, put some battle damage there. Or even better. Just get the lines "good enough" and then sponge chip the hell out of it. It looks good and will hide any irregularities.
|
|
#
?
Nov 6, 2023 19:46
|
|
|
Z the IVth posted:Question for any sculptors. I've recently bought a new batch of Greenstuff which came as a ribbon (RIP my old tube from 2005) and I'm noticing the outside of the yellow portion appears to have gone dry, even the bits in contact with the plastic. The blue is fine. When I mix it the yellow doesn't mix in evenly and there are little lumps everywhere in the mixture. I can solve it by peeling the dry bits off but this is leading to a lot of waste. Anyone noticed this before? Is there a fix or did I just get a dud batch. are you cutting out the center line where the blue and yellow touch? that is the number one cause of bad mixing and little hard lumps like you're describing. cosmetic changes generally don't mean much. I know this is a "did you plug it in"-grade question but just to get it out of the way. if you're doing that and still getting lumps, the main causes are extremely old putty or being stored in overly cold conditions. ideal temperatures are above 15�C, basically room temp or hotter. see if warming it up in your hands helps. on the shelf, extreme cold can artificially age it but heat is rarely a problem. (green stuff can withstand more heat than you can.) unless you've been storing it somewhere below freezing or for years, you should take it back where you bought it if it's still a problem. last resort is dunking it in hot water then mixing it while wet. this really speeds up the curing process too and changes the consistency somewhat, but it can save it from going in the trash.
|
|
#
?
Nov 6, 2023 20:12
|
|
|
Here's a greenstuff video to go along with the above post: https://www.youtube.com/watch?v=viR9zd1Qzpk
|
|
#
?
Nov 6, 2023 20:40
|
|
|
finished this atlas     i think its just okay. i like the purple metal i came up with, and i like the purple red shading, but the mini feels merely like the sum of its parts. its too busy or something. oh well
|
|
#
?
Nov 6, 2023 20:40
|
|

|
Re: hazard lines, I also found I got a lot of bleeding under my masking tape at first and had limited success by (1) watering my top color a little less so it wouldn't bleed through as much, (2) applying less paint on the successive top coats so there wasn't as much water floating around, and (3) doing the underlying color, tape, then another coat of the underlying color before starting on the top color.
|
|
#
?
Nov 6, 2023 20:54
|
|

|
Arcturas posted:Re: hazard lines, I also found I got a lot of bleeding under my masking tape at first and had limited success by (1) watering my top color a little less so it wouldn't bleed through as much, (2) applying less paint on the successive top coats so there wasn't as much water floating around, and (3) doing the underlying color, tape, then another coat of the underlying color before starting on the top color. I saw a tip about this - do a matte clearcoat over the masking tape before the actual colour. The varnish will seal any leaks in the tape. It actually works very well. Cease to Hope posted:are you cutting out the center line where the blue and yellow touch? that is the number one cause of bad mixing and little hard lumps like you're describing. cosmetic changes generally don't mean much. I know this is a "did you plug it in"-grade question but just to get it out of the way. I'm doing all the usual stuff like cutting out the contact point but seeing that video where the guy just digs out the innards of the tubes I think I'm SOL and I'll just have to put up with losing about 20-30% of the putty from trimming off the unusable bits. Thankfully it's a big lot, not too expensive and I don't use huge amounts these days.
|
|
#
?
Nov 6, 2023 21:05
|
|
|
Busy day in the ol' bone factory today. 
|
|
#
?
Nov 6, 2023 22:11
|
|
|
Z the IVth posted:I saw a tip about this - do a matte clearcoat over the masking tape before the actual colour. The varnish will seal any leaks in the tape. It actually works very well. Or just base color, mask, base color to seal, top color One less paint change
|
|
#
?
Nov 7, 2023 00:09
|
|


|
I always liked Duncan�s downward stroke suggestion.
|
|
#
?
Nov 7, 2023 00:25
|
|
|
Just a lil ol xpost if'n ye don't mind.Major Spag posted:Only in Death does Mini-painting ends
|
|
#
?
Nov 7, 2023 02:17
|
|


|
update time i'm on 'bold number 2 now. my paint to water ratio seems whack. but it's doing better I think? I need more layers.  
|
|
#
?
Nov 7, 2023 02:27
|
|

|
I've been painting with a pinkish wash. This is hard.
|
|
#
?
Nov 7, 2023 03:52
|
|
|
Ominous Jazz posted:I've been painting with a pinkish wash. This is hard. If it�s any consolation, I have miniature paints in pink skin tones that do that same thing.  Just gotta keep drying that brush. Just gotta keep drying that brush. When you're working with poorly covering colours like that, do your best to let each layer dry before you go to add the next. It�s so easy to come in with too wet a brush and turn a layer into a wash or just wipe it clean off. Working on two or three minis at the same time helps.
|
|
#
?
Nov 7, 2023 06:10
|
|
|
 Finished up the first Sternguard from the Leviathan box this evening! Finished up the first Sternguard from the Leviathan box this evening!      
|
|
#
?
Nov 7, 2023 06:42
|
|

|
AndyElusive posted:
|
|
#
?
Nov 7, 2023 08:37
|
|


|
Z the IVth posted:
Yes. Green stuff goes bad (or rather, cures) over time, and especially the yellow part. The more of it is exposed to air, the worse. So rods are better than strips for that reason. I've had worse luck with some brands, Greenstuffworld sometimes sent me almost pre-cured crap strips that were impossible to work with. Once the yellow part starts getting a "skin" it's just a matter of time before you have to use it or lose it. You can try to peel off the skin of the part you're going to use with a blade, but you'll most likely end up with small bits of cured yellow plastic in your mix that you'll need to fish out. It sucks. It sucks really bad. I've started to buy smaller strips, even if it is not cost effective, just to be able to more easily use it up in time.
|
|
#
?
Nov 7, 2023 09:17
|
|

|
I gave up on green stuff long ago, I use Magic Sculpt. The resin and hardener come in separate tubs, and it lasts a long, long time. Also cheap as hell, they sell five pounds for thirty bucks. (Smaller amounts are available! I just do a lot of sculpting so five pounds lasts me about a year.) It is a little different than greenstuff, it has no memory and cures harder. I personally prefer the lack of memory, but it can be jarring going from greenstuff to it. It also is a bit firmer, so for sure I recommend both firm and soft clay shapers, but if you only get one go with firmer.
|
|
#
?
Nov 7, 2023 10:52
|
|
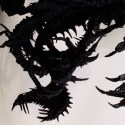 Their flashing tongues, spitting out blood and poison.
|
Magic sculpt (or apoxie, or milliput) mixed into green stuff is my go-to right now. You get some of the best aspects of each putty if you mix them. I did pick up beesputty too with the aim to try it out, but that''s very much more purely for sculpting, not the kind of multi-purpose tool that an epoxy putty is. But yeah, pretty much every putty out there I've tried stores better than green stuff. My apoxie pack is several years old now, and works well still.
|
|
#
?
Nov 7, 2023 11:13
|
|
|
Professor Shark posted:I always liked Duncan’s downward stroke suggestion. Yeah this is what has worked for me, along with realizing that it doesn't matter as much that the lines are perfectly straight as it matters that they are of uniform thickness. Unless the surface is flat and very large, loving with masking tape has always taken way too long and never given me good results. Example of one of my stripey boys. This is all freehand. Just do your best with a straight line, then tidy it up with the black afterwards. 
|
|
#
?
Nov 7, 2023 12:51
|
|

|
Siivola posted:If it’s any consolation, I have miniature paints in pink skin tones that do that same thing. That's why you glaze with those colors, where you thin it just slightly more than a wash and wick away as much moisture onto a paper towel. Then apply a few layers of extremely thin paint in successively small layers to either build up a gradient or add a subtle shadow. A pink glaze is a very easy way to make a face look alive, particularly of you apply it to their cheeks like a blush.
|
|
#
?
Nov 7, 2023 13:07
|
|
|
Ominous Jazz posted:update time Can you post an actual unpainted mini because I have feeling its your model that is trash, not your painting. Jonny Nox posted:Or just base color, mask, base color to seal, top color You're a braver Goon than me to mask so quickly after laying down a coat. lilljonas posted:Yes. Green stuff goes bad (or rather, cures) over time, and especially the yellow part. The more of it is exposed to air, the worse. So rods are better than strips for that reason. I've had worse luck with some brands, Greenstuffworld sometimes sent me almost pre-cured crap strips that were impossible to work with. Yeah the really old rod I got was purchased directly from the Kneadatite manufacturer. The newer stuff is from Wayland and repackaged so quality is garbage. So far removing the skin hasn't been too bad beyond the waste so I'll keep at it. I do use Magic Sculpt as well and I have a preference for a Magic Sculpt/Greenstuff mix. For complex organic curves I have found having some Greenstuff in the mix makes it a lot easier to work with. Pure Magic Sculpt isn't as stretchy and doesn't like to curve as nicely.
|
|
#
?
Nov 7, 2023 13:13
|
|
|

|
| # ? May 10, 2024 05:15 |
|
|
Z the IVth posted:Can you post an actual unpainted mini because I have feeling its your model that is trash, not your painting. Another thing I like about green stuff is that it is stickier than any other epoxy putty I've tried. Sometimes you just really want your putty to stick well to a previous layer or armature. Pure magic sculpt, apoxie or milliput has, in my experience, an annoying tendency to just fall off.
|
|
#
?
Nov 7, 2023 13:16
|
|