


|
bolind posted:Explain automatic bed levelers to me. Do they compensate for a slightly off bed, or do they help you achieve a perfectly level bed (with manual adjustments?) Fully automatic ones have a sensor that can be used to read the height of the bed in multiple places, and do compensation based on those readings. You can also do manual bed compensation, where you have the printer move to a grid of positions, move the nozzle up and down to set the heights. The printer will still compensate for bed warping, it just can't generate the offsets in the first place. In addition to the above, you it's also helpful to move the nozzle around at z=0 and adjust the bed thumbscrews up to meet the nozzle, as this gets the bed as close to level as possible. This is purely a physical adjustment that the printer itself isn't aware of. There are files to assist you with this by moving the nozzel to set places and then pausing it and then pausing it to give you a point to adjust it to.
|
 #
?
Jan 7, 2019 03:51
#
?
Jan 7, 2019 03:51
|
|


|

|
| # ? Jun 11, 2024 02:13 |
|
|
Just to add to the bed leveling stuff, it moves Z up and down to follow the curves of the bed, keeping the nozzle height/gap consistent. Automatic bed level compensation might be a more accurate term. I don't think any printers in the consumer market physically adjust the bed based off the probe. Usually there is also an option to fade out the compensation. So while the bottom of the print will only be as flat as the bed, The top can be "perfectly" flat. Personally I aim to get the bed within +/- 0.05mm with the thumbscrews and a dial indicator over 4 points. Then get to +/- 0.03 over a 9 point mesh, by manually measuring single layer test prints with calipers. The 0.2mm initial layers I usually use have no trouble sticking at that accuracy, and I've gone down to 0.08 as well.
|
|
#
?
Jan 7, 2019 16:58
|
|
|
Picked up a second hand, factory assembled, Prusa Mk3 with the powder coated bed for 480 bucks. I didn�t really need it but no regrets. It�s stupidly quiet.
|
|
#
?
Jan 7, 2019 19:35
|
|
|
Rapulum_Dei posted:Picked up a second hand, factory assembled, Prusa Mk3 with the powder coated bed for 480 bucks. where's this at and do they have more? also, is the prusa still the gold standard? or would I buy something else if i had a few hundo to blow today? Deviant fucked around with this message at 19:39 on Jan 7, 2019 |
|
#
?
Jan 7, 2019 19:36
|
|


|
I think this roll of PLA is bad, basically no layer adhesion. The gyroid infill is spaghetti and I can pull it apart easily. This is sky blue from Ziro, which no longer has an amazon listing. I was able to print other objects with it so I'm wondering if there's some weird temperature range it likes (since 205C seemed to work better than 215C despite the roll saying 190-220).
|
|
#
?
Jan 7, 2019 20:47
|
|

|
The walls look OK, but the bottom/top layers look under extruded. What's the print speed on top/bottom layer and infill vs wall print speed? I'd try bumping flow rate by 5-10%, or slowing infill print speed by 20%, see if either help.
|
|
#
?
Jan 7, 2019 22:23
|
|
|
Or, replace the nozzle. Just for a lark. I have a feeling
|
|
#
?
Jan 7, 2019 22:26
|
|

|
Queen Combat posted:Or, replace the nozzle. Just for a lark. That's actually a new nozzle, I replaced it on Thursday. There could be a partial clog, I was printing with PETG before and I assume it was all purged but maybe not.
|
|
#
?
Jan 7, 2019 23:50
|
|
|
Give it a shot, keep the old one. They're cheap, and reduce potential failures.
|
|
#
?
Jan 8, 2019 00:09
|
|
|
Did you measure the new filament's thickness? If it's too narrow it would underextrude.
|
|
#
?
Jan 8, 2019 00:13
|
|

|
I have literally over 100 nozzles of various sizes and threads in my work area. They're small, cheap, and disposable. If I even suspect a nozzle clog, I give it a quick ream. If it keeps happening, I toss it.
|
|
#
?
Jan 8, 2019 01:32
|
|

|
Nevets posted:Did you measure the new filament's thickness? If it's too narrow it would underextrude. I think that's actually the issue, it's measuring as thin as 1.71 just where I'm grabbing it. Not seeing it over 1.75 at all. I'm having similar issues with it on my other printer.
|
|
#
?
Jan 8, 2019 01:40
|
|
|
AlexDeGruven posted:I have literally over 100 nozzles of various sizes and threads in my work area. They're small, cheap, and disposable. If I even suspect a nozzle clog, I give it a quick ream. If it keeps happening, I toss it. I buy nozzles in packs of 20. Sometimes I've had two bad ones in a row. Rare, but has happened. I put them aside into a "maybe ream these, later" pile.
|
|
#
?
Jan 8, 2019 02:51
|
|
|
How fast do nozzles wear? I've still got the first .4 nozzle on my Ender 3. About halfway through a 1kg roll of PLA without doing any swaps.
|
|
#
?
Jan 8, 2019 03:41
|
|


|
They clog before they wear, if you're using normal plastics. Figure about one nozzle per two rolls of plastic, and be happy when they last longer than that.
|
|
#
?
Jan 8, 2019 03:52
|
|
|
Rexxed posted:I think that's actually the issue, it's measuring as thin as 1.71 just where I'm grabbing it. Not seeing it over 1.75 at all. I'm having similar issues with it on my other printer. 103% flow rate allowed the part to finish and not have layer issues. It feels a little weird on the top so I should probably have gone 105% or a little more but it's good to know what the issue was at least. The part is just to hold a 2.5" SSD into a 3.5" HD bay slot. Usually I'd use 3M removable adhesive squares or just let it hang, but it's for a friend's dad's all-in-one PC, and who knows what it'll have to contend with so I'm gonna secure it. The part doesn't have to be super strong but not literally falling apart in my hands is not quite strong enough. As an aside (well, I just printed one to give to someone) this is a nice little configurable case for SD and MicroSD cards. I've got a dozen of them around in RPis, earning program phones, mp3 players and cameras so it's good to have a repository for those and the adapters. The threads work better than some of the other models I've used and being able to configure it with OpenSCAD is nice: https://www.thingiverse.com/thing:2939459
|
|
#
?
Jan 8, 2019 04:08
|
|
|
Glad to hear you got it sorted. I used to think you could keep flow rate at 100% if the filament was consistent diameter, and you had the extruder e-steps right. But I've found if you want to get really accurate dimensions for holes, or parts that fit together, you have to start playing with the flow rate after, measuring single wall prints with calipers (cube with 0 infill, 0 top layers). 80-105% is what I usually get to have 0.45mm lines actually measure to 0.44-0.47mm thick walls.
|
|
#
?
Jan 8, 2019 04:26
|
|
|
bolind posted:Explain automatic bed levelers to me. Do they compensate for a slightly off bed, or do they help you achieve a perfectly level bed (with manual adjustments?) we need to put this into the OP already. or maybe I'll just put it in my signature https://forums.somethingawful.com/showthread.php?threadid=3365193&pagenumber=345&perpage=40#post488825135 Sagebrush posted:Oh, and forgot to respond to this. This should probably be in the OP or something because it comes up all the time:
|
|
#
?
Jan 8, 2019 07:09
|
|

|
insta posted:They clog before they wear, if you're using normal plastics. Figure about one nozzle per two rolls of plastic, and be happy when they last longer than that. Wow, that seems like a crazy rate. I print 1/2 to 1 roll a week in my Prusa and haven't had to replace the nozzle since July of 2017. The stock Prusa nozzle got pooped up and I replaced it with a Matterhackers CleanTip Brass nozzle.
|
|
#
?
Jan 8, 2019 14:18
|
|


|
Mine last forever too, but at 12 cents for a Chinese nozzle in a 20 pack, it's best (imo) to encourage newbies to just discard and replace at the hint of a clog. Nozzles for me are more consumable than bed surfaces, which are both way LESS consumable than plastic. (I don't actually discard, I use MakerGears so my nozzles are $12 each, so I save the clogged ones and blowtorch them all clean once a month)
|
|
#
?
Jan 8, 2019 15:50
|
|
|
Right, having what my wife calls "an addiction to making cubes" (look, its not my fault that they are the only thing I can fit on the warped bed, and the glass one is still in the post.) I gave finally dialed my settings in to almost smooth sides. I even managed to get the speed up again and halve the print time! All I'm left with is this, where i can see the top and bottom layers at the sides. http://imgur.com/a/gNExygv (Note to self. I dont think i need that many top layers.) I'm using cura, any idea what could be causing this? I can live with it i guess, but i know im doing something stupid.
|
|
#
?
Jan 9, 2019 18:35
|
|

|
Might probably want to fiddle with the linear/pressure advance setting off your firmware to make those corners nicer.
|
|
#
?
Jan 9, 2019 18:52
|
|

|
What might be the culprit to cause the little holes at the corner and by the circles? There are similar holes for the same structures on the opposite side of the piece. Otherwise the piece looks pretty good. The overhangs I can understand because there's no cooling. Printing 0.25mm layer heights with ABS on a Taz 6.
|
|
#
?
Jan 10, 2019 02:00
|
|


|
Are you by chance using Simplify3D and have coasting enabled?
|
|
#
?
Jan 10, 2019 02:32
|
|
|
Combat Pretzel posted:Are you by chance using Simplify3D and have coasting enabled? Using Cura LE, and coasting is not enabled on it. I've thought about trying Simplify3D, but that's a steep price when every other option is free.
|
|
#
?
Jan 10, 2019 04:22
|
|
|
What's your reaction set to? On a Taz, it should be like .5mm. You can also bump the nozzle temp higher. ABS should always be run hotter. No exceptions.
|
|
#
?
Jan 10, 2019 06:42
|
|
|
So, uh, if you have one of them Ender 3s you might wanna check on that XT60 connector that connects the power supply. Cause that fucker is melting:  The plug ist starting to discolor and its at about 80C.
|
|
#
?
Jan 10, 2019 08:24
|
|

|
It takes a lot to do that to a XT-60. Wonder if it's a cheap copy? I mean, how many amps is the PS on that thing?
|
|
#
?
Jan 10, 2019 08:52
|
|

|
I just got my ender 3 pro kit last week and now I'm hearing about all these overheating and fire hazard issues from potential knockoffs. I'd assumed it was just idiots on youtube leaving the thing printing for a week solid at slow speeds for some reason but now I'm feeling a bit cautious. https://www.amazon.co.uk/gp/product/B07J64F5LY/ Is the legit one in the UK right? Seller info from Amazon. Business Name:SHENZHEN CREALITY3D TECHNOLOGY LTD Business Type:Ltd Trade Register Number:91440300094231378E VAT Number:GB286408182 Business Address: 12th Floor, 3rd building,Jincheng Industry area 19 huafan road, Dalang Street, Longhua district Shenzhen Guangdong 518109 CN Also assuming it's legit and safe, what's needed if I wanted to print more than just PLA? Specifically woodfill, TPU, and maybe PETG? I'm guessing a glass bed for the PETG and larger nozzles for the woodfill and flexible filaments to avoid clogs?
|
|
#
?
Jan 10, 2019 09:03
|
|
|
I mean the "legit" one is still made in china from the cheapest possible components
|
|
#
?
Jan 10, 2019 09:06
|
|


|
insta posted:What's your reaction set to? On a Taz, it should be like .5mm. You can also bump the nozzle temp higher. ABS should always be run hotter. No exceptions. Retraction? It's at 1mm right now, the default for the ABS profile. Also printing at 250C right now, will probably experiment with a bit higher yet. The hotend on this is good to 300C. Shai-Hulud posted:So, uh, if you have one of them Ender 3s you might wanna check on that XT60 connector that connects the power supply. Might not be crimped right and is causing high resistance. I've had that develop in a 2 gauge Anderson connector that forklifts use for their bigass batteries, one started to kinda flow off the cable ends once it heated up to about 300 degrees while charging. Cut it off, recrimped the cables with a new plug. BMan posted:I mean the "legit" one is still made in china from the cheapest possible components True, but maybe the real one vs a counterfeit uses the appropriate plastic at least and not just "yellow"
|
|
#
?
Jan 10, 2019 09:34
|
|
|
PirateDentist posted:
I might just cut it off and solder the wires back together. I don't really need a plug there anyway. If i want to take of the power supply for some reason i can just unscrew the cables directly.
|
|
#
?
Jan 10, 2019 10:04
|
|
|
PirateDentist posted:I've thought about trying Simplify3D, but that's a steep price when every other option is free.
|
|
#
?
Jan 10, 2019 14:49
|
|
|
Am I doing something wrong, or does Slic3r 1.3 not allow you to control the 3d printer itself? you can just import an object, slice it? I was hoping it could replace RepetierHost/CuraEngine but not if I cant move the hotend around when I want to EDIT: Whats the new hotness for a Host/Slicer combo these days??
|
|
#
?
Jan 10, 2019 15:13
|
|

|
Shai-Hulud posted:I might just cut it off and solder the wires back together. I don't really need a plug there anyway. If i want to take of the power supply for some reason i can just unscrew the cables directly. I'm thinking it more likely a bad solder job. If it was the actual connector failing, I'd expect the same melting at the other side as well.
|
|
#
?
Jan 10, 2019 15:25
|
|
|
Golluk posted:I'm thinking it more likely a bad solder job. If it was the actual connector failing, I'd expect the same melting at the other side as well. Usually those aren't soldered, the pins are mechanically crimped around the wire. Bad crimp = higher resistance = that spot gets hot. It pretty much has to be that or the device is consuming way more power than it should.
|
|
#
?
Jan 10, 2019 15:36
|
|


|
taqueso posted:Usually those aren't soldered, the pins are mechanically crimped around the wire. Bad crimp = higher resistance = that spot gets hot. It pretty much has to be that or the device is consuming way more power than it should. Huh, I could see the one end being possible to crimp. But the other side isn't much more than a spherical divot for the wire.
|
|
#
?
Jan 10, 2019 16:04
|
|
|
Golluk posted:Huh, I could see the one end being possible to crimp. But the other side isn't much more than a spherical divot for the wire. Sorry, I am totally wrong, those connectors are solder cups: 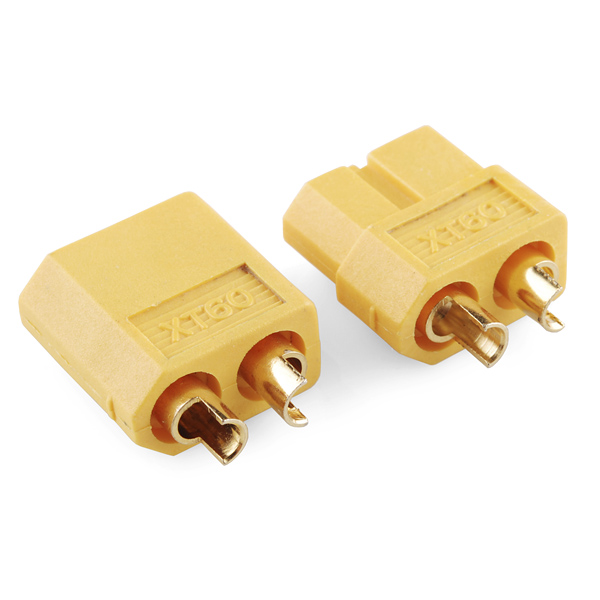
|
|
#
?
Jan 10, 2019 16:06
|
|
|
bring back old gbs posted:Am I doing something wrong, or does Slic3r 1.3 not allow you to control the 3d printer itself? you can just import an object, slice it? Octoprint for the host, PrusaSlic3r for the slicer. I haven't tried PrusaControl (and so don't know if it can be configured for any printer, or just Prusas) but I like their software in general. Give it a shot. I still use Repetier for the cases when I need to be directly connected. It's kinda janky but it does the job.
|
|
#
?
Jan 10, 2019 16:47
|
|
|

|
| # ? Jun 11, 2024 02:13 |
|
|
taqueso posted:Sorry, I am totally wrong, those connectors are solder cups: You'd think so but these are special chinese XT60 plugs! All crimping all the way: 
|
|
#
?
Jan 10, 2019 19:54
|
|