


|
Stephenls posted:
Goddrat your Raven Guard look good. This guy is especially dope.
|
 #
?
Apr 19, 2019 11:26
#
?
Apr 19, 2019 11:26
|
|


|

|
| # ? Jun 11, 2024 00:55 |
|
|
Stephenls posted:
poo poo, what�s your secret? I�ve got a Reiver squad on my worktable and I�d love to hive them some weathering like this.
|
|
#
?
Apr 19, 2019 12:26
|
|


|
I'm so jealous of that scheme.
|
|
#
?
Apr 19, 2019 13:05
|
|
|
Alternative pants posted:poo poo, what�s your secret? I�ve got a Reiver squad on my worktable and I�d love to hive them some weathering like this. The edge highlighting here is in two stages. After the airbrush pass but befor the washes or anything like that I do a simple edge highlight of Vallejo Model Color Neutral Grey on only the upward-facing edges; this gets dulled down by the all-over wash of 1:1 Army Painter Dark Tone/Army Painter Quickshade Mixing Medium I do after the metallics and decals and such. The main work is Scalecolor Graphite, a grey that�s slightly brighter than the Neutral Grey, applied with light pointallistic dabbing with a size 0 brush with the help of Windsor & Newton Flow Improver, and then a much lighter application over it with Vallejo Game Effects Rotten White, which is a weirdly good white paint. The trick is to ensure there�s not a lot of paint on the brush and that it�s flowy enough that it sticks to the model with the lightest of touches but not so flowy that it runs on to the model and covers a wider area than the brush touches, which is tricky and takes practice�if you scroll up a bit you can see another one wher I messed that up and applied the weathering too generously on the legs. This is my reference image; I try to ensure the weathering is applied at about the same density visible there. Here�s the artist�s video tutorial for achieving that look. I believe I�m on the edge of finding a replacement technique that�s faster to do and looks even better, courtesy of a Lil Legend Studios Patreon video, which exploits the properties of metallic pigment to produce a micro-pointallistic stippling effect. But I need to acquire a spare high quality Kolinski sable brush to cut into a rough stippling brush first.
|
|
#
?
Apr 19, 2019 16:45
|
|
|
Basecoated three diffrent types of tanks from All Quiet on the Martian Front. Also a mini experiment on using gesso primer on plastic, metal, and resin. https://imgur.com/gallery/85B7yHe I still need to weather them and stuff, but progress!
|
|
#
?
Apr 19, 2019 21:29
|
|
|
    And there's all the edge weathering done on all five Dark Imperium Hellblasters. Next steps: 1) OSL on the left arms and shoulders and also above and below the eyes and around the lenses on the recon guy. 2) Basing. 3) Testors Dullcote varnish application. 4) Final post-dullcote metallic highlights. 5) (Much later) Oil paint weathering. I'm not even starting on this until I've done the whole Dark Imperium Space Marines set and possibly some other stuff as well. Bonus picture with Lego minifig for scale (it's not clear from the heights, but the minifig is the same distance from the camera as the sergeant):  It's so weird how much bigger these things get in my mind while I'm working on them; I could swear they're at least as big as action figures while I'm painting them. Anybody else get that?
|
|
#
?
Apr 20, 2019 06:57
|
|
|
Stephenls posted:It's so weird how much bigger these things get in my mind while I'm working on them; I could swear they're at least as big as action figures while I'm painting them. Anybody else get that? Considering my particular drug of choice these days is 10mm Warmaster, those guys look absolutely giant compared to what I'm working with. Even still, I can see where you're coming from. I think it's that you've been holding them closer to your face than normal to get a good eye or two on the detail, and because you've done so many in a short amount of time, our stupid monkey brains begin to associate them as being bigger than they are. Like, we know that's supposed to be a dude, they're carrying guns fairly large in comparison to themselves, and it's only a short leap to having them seem like they're leaning more towards the 32-36mm scale of things. To actually be on topic, though, I finally got all my stuff unpacked and set up after moving over the last week, and I hope to get back into the swing of painting. Also hope to hit up the local library's makerspace and get some waystones for terrain 3d printed, see how they turn out.
|
|
#
?
Apr 20, 2019 07:53
|
|


|
Stephenls posted:
I get this as well, particularly primaris. The vanguard models look huge to me.
|
|
#
?
Apr 20, 2019 15:54
|
|
|
Stephenls posted:
Yep, this happens to me too. I have spent the last two nights working on heads for a Kill Team and when I'm really in the groove I can pick out details as small as the eyebrows...then when I go back and look at my work in the morning its astounding how tiny those features actually are. I also find that I can't just pick up and start seeing and painting things that small immediately. I have to start with something slightly bigger until I'm focused enough to hone in.
|
|
#
?
Apr 20, 2019 19:22
|
|

|
 The foundations for my OSL, applied via airbrush. From here on -- doing the blues -- I'll have to use regular brushes. I think I may have screwed myself over a bit. Because the highlights on the rest of the models go all the way up to white, it's going to be difficult to make the OSL-ed areas of the models look anything but darker than the the rest of them, which will be... bad. Could be a flaw in my basic black workup. (Good thing I'm I'm pretty sure I'm this >.< close to figuring out a better one....) I'll do what I can, anyway. Rather than using 10:1 Water/Inktense Violet, this time I used something like 3:2:2:2:1 Lahmian Medium/Thinner/Flow Improver/Druschii Violet/Water., which gave me a thinly pigmented airbrush spray that actually dried on contact with the mini and that I could build up over a bunch of layers without it spiderwebbing everywhere. In retrospect I could have done with more thinner and less flow improver, since it was still not quite drying the moment it hit the model. Stephenls fucked around with this message at 06:20 on Apr 22, 2019 |
|
#
?
Apr 22, 2019 06:02
|
|
|
    So here's the OSL effects done; I'm not super happy with it. Part of the problem is I've done spot highlights on this black armor all the way up to white, and OSL needs to be brighter than its surroundings but darker than its light source, and white tinted with any color is darker than the pure white I used for the spot highlights, so... this was kind of doomed from the beginning. Also I had trouble maintaining good paint consistency even with the wet palette and as a result the paint probably went on too thick. I'm fine with it being imperfect; in a year or two I'll be able to compare it to other OSLed models and feel like I've improved.
|
|
#
?
Apr 23, 2019 08:28
|
|
|
Got gifted a Typhus model over the weekend. I really like the design of this model.
|
|
#
?
Apr 23, 2019 12:42
|
|
|
  Filled the batch painting board up again.
|
|
#
?
Apr 23, 2019 13:24
|
|

|
dexefiend posted:
Glad to see you back at it. The banner bearers looks like they're trying to keep the skins out of their faces, and I love it.
|
|
#
?
Apr 24, 2019 01:45
|
|
|
Zuul the Cat posted:
Convenient jerky for the long battles ahead
|
|
#
?
Apr 24, 2019 01:46
|
|

|
In my quest to paint 2000 points of orks before May 19th, i have completed some gretchin and this big mek with Kustom Force Field. From this, i have learned that i really dislike painting metal models! But given my dislike, i'm pretty happy with him. Now to go back to line painting gretchin. The Jumpoff fucked around with this message at 04:00 on Apr 24, 2019 |
|
#
?
Apr 24, 2019 02:56
|
|
|
Started in on my certusian charnel guard over the weekend. Finished bodies on these two last night. Done and ready to base so far: 
|
|
#
?
Apr 24, 2019 12:31
|
|

|
That's dope and I hope you don't mind me stealing it for my SL vets.
|
|
#
?
Apr 24, 2019 12:36
|
|


|
Oh poo poo, my thoughts as well. I remember seeing that idea in Codex Armageddon like what 15 years ago, never saw anyone actually paint it. Great job.
|
|
#
?
Apr 24, 2019 13:01
|
|
|
Yeah, it would be a great way to make vets stand out. That picture in the Armageddon codex was part of the inspiration for this project. I think it was the first mention of Death Korp of Krieg- which was just a SL trooper with brown and black fatigues and a skull painted on his mask. These Certusian Charnel guard are a regiment from a Ministorum cemetery world.
|
|
#
?
Apr 24, 2019 13:47
|
|
|
  I love this part. There's something about zenithal priming on a well-textured base that just feels like promise.
|
|
#
?
Apr 24, 2019 18:40
|
|
|
Skails posted:Done and ready to base so far: God, I love that old missile launcher design. Stephenls posted:
The labels on your cork are making me feel much better about the time I drew out a labeled grid on some paper while working on a handful of Skitarii.
|
|
#
?
Apr 24, 2019 20:29
|
|

|
Inspector_666 posted:God, I love that old missile launcher design. Well, the pinning holes in the cork are per-model, and the zenithal highlight favours the directions the models are facing, so I gotta keep �em straight somehow!
|
|
#
?
Apr 24, 2019 21:39
|
|
|
Skails posted:
That�s some awesome lore.
|
|
#
?
Apr 24, 2019 23:02
|
|
|
    My concerns about the quality of the OSL aside, I'm quite happy with how these guys turned out, and unless I decide to try to touch the OSL up, they're done-for-now until I apply the varnish, which... will be a while because I'll probably wait until all the Dark Imperium units are done and varnish them all at once, to save on dullcote. Or at the very least wait until I've done the edge weathering on the Inceptors that have languished in an unfinished state for months.
|
|
#
?
Apr 25, 2019 08:04
|
|
|
Skails posted:Started in on my certusian charnel guard over the weekend. Finished bodies on these two last night. I got super inspired from your paint job so I'm trying it too for my vets. Man, those teeth are not terribly large.   
|
|
#
?
Apr 25, 2019 09:59
|
|
|
Yeast posted:I got super inspired from your paint job so I'm trying it too for my vets. Awesome, that looks good. When I started I was worried about setting myself up for an unending task by painting the skulls, but it goes surprisingly quick and gives a strong result. So tiny! What color & brand of paints are you using? 
|
|
#
?
Apr 25, 2019 12:35
|
|
|
Skails posted:Awesome, that looks good. Thanks man! Yeah, I actually really enjoyed painting that, it's a nice break from the rest of the more conveyor belt style painting I'm doing at the moment. I'm using Scale 75, their browns/off whites are one of their strong points I think. Based with Dubai Brown, then Arabic Shadow, then mixed in some Birch, and then a 50/50 of birch and white. A tiny glaze of pure white and picking out the teeth ends (gently caress this was hard) with pure white. I'm going to keep playing around with the shape of the skulls, mine feels really amateur, but free handing is probably my weakest skill. Thanks again man ")
|
|
#
?
Apr 25, 2019 22:53
|
|
|
Yeast posted:I'm going to keep playing around with the shape of the skulls, mine feels really amateur, but free handing is probably my weakest skill. Thanks again man Honestly, freehanding poo poo looks tough from the get-go but is (for the most part) easier than you'd think. There's a bit more planning out that needs to happen before you put paint on the mini than with decals or sculpted details, but a good amount of it is just realizing you can always clean up any mistakes with the base color, and trial-and-error. For example, right now I'm doing a bunch of spearmen with shields in the style of Lothern Sea Guard (since there were never any official Warmaster models for them). A lot of the shields have the image of Amanar, the Sea Dragon (i.e. a red sea serpent, guardian of Lothern and fairly important in the heraldry), rising out of waves. Now, if I were just using decals and transfers (that would end up being homemade anyway), I could stick with the typical "ccc" style waves. However, since I'm doing everything by hand, and also almost a third the size of the models that those painting techniques were meant for, I've abstracted it into more of a "⸝⸝⸝" style of wave, just doing small slashes instead of the larger curves. Not only do they take less space, but at the smaller scale your brain just kinda does the work to make it seem like they're the traditional c-style waves.  If you look at the white shield on the left, you can see exactly what I'm talking about, compared to the blue shield on the right. The right shield I'd done first, and it looks like straight trash compared to the shield on the left (in this photo anyway, I've since gone back and fixed it). All of this is just simple trial and error, taking a brush with a nice tip, some paint, and patience. There's one shield I'd painted for a hero stand with a hand on it, and let me just say, gently caress painting hands. Also, it took me some time to make it look right, with constantly going back and forth between the white of the hand and the black of the shield to adjust little bits as I went along. Not super proud, but it looks dece from an arm's length, and that's all I really care about. What I can recommend is - Plan out what you want the final design to be before even getting your paints ready. Have a reference image handy, if possible. - Figure out the basic shapes you can block the design in to, as well as determine which areas are going to be a pain in the rear end to get right. - Start with the difficult poo poo first, get that out of the way, then go back and do the easy poo poo. - Don't be afraid to gently caress up, and have some of the basecoat paint handy to tighten up outlines/fix huge mistakes. - Don't think you need to bang out everything in one sitting; you can always set poo poo aside, catch your breath, refocus, do other poo poo in the meantime, and come back to finish when you're mentally refreshed. Edit: VVV That is also  as gently caress, keep doing more of that. as gently caress, keep doing more of that.
Aniodia fucked around with this message at 15:35 on Apr 26, 2019 |
|
#
?
Apr 26, 2019 03:59
|
|
|
A visual reference is great. I pop open google images and look up 'skull anatomy' when doing these. Luckily this Sgt was holding an additional reference. He has an inspirational relic to motivate his troopers. Put a little more effort into him. Might go back and paint a Ministorum symbol on the skull he's holding. Need to clean up/prime 3 more guys to finish this squad. Then basing.
|
|
#
?
Apr 26, 2019 06:02
|
|
|
Stephenls posted:
I think you would be better off keeping the glow effect to the weapon, and maybe subtly adding some purple to the edge weathering facing the gun if you want. Since the armor is matte black it's not going to reflect the light anyway, especially since you're super sneaky Raven Guard.
|
|
#
?
Apr 26, 2019 21:36
|
|
|
Beer4TheBeerGod posted:I think you would be better off keeping the glow effect to the weapon, and maybe subtly adding some purple to the edge weathering facing the gun if you want. Since the armor is matte black it's not going to reflect the light anyway, especially since you're super sneaky Raven Guard. Something like that. I wanted to give the impression that it was reflecting more off the armor chips than off the matte layer over top, but it didn't work. ... Anyway!     New black workup test, with the goal of replacing the arduous final edge weathering stage with an earlier metallic micro-stippling stage that will bring my Raven Guard more in line with ForgeWorld-style semi-realism while being faster and easier to apply. For this model I've also replaced my usual bottle of "Vallejo-Model-Color-Black-Grey-with-two-drops-of-Conrad-Kurze-Citadel-Artisan-blue-pigment" with plain Formula P3 Coal Black, which... I am not happy with because my other goal with this workup is to see if I can make a more, for lack of a better term, colorful black by pushing the midtone highlights colder and the midtone shadows warmer, but the turquoise of Coal Black is a warmer shade than my usual midtone, and making my midtone highlights warmer is opposite of my goal! Should have seen that coming. I may just take that bottle of Black Grey and add more Conrad Kurze to it instead. Technique is based on the two microstippling tutorials from the Lil Legend Studio patreon, which obviously I can't link to, but the summary is: 1) Prime Badger Stynylrez Black (Iwata HP-CS) 2) Base Minitaire Raven Black (Iwata HP-CS) 3) Midtone Formula P3 Coal Black (Badger SOTAR 20/20) 4) Highlight Vallejo Mecha Color Grey Z (Badger SOTAR 20/20) 5) Stipple Vallejo Metal Color Steel (Windsor & Newton Series 7 Size 1 with bad haircut) 6) Stipple highlight Vallejo Model Color Silver (Windsor & Newton Series 7 Size 0 with bad haircut) 7) Tint Army Painter Dark Tone (Badger SOTAR 20/20) 8) Re-apply thinned midtone (Badger SOTAR 20/20) 9) Re-apply thinned highlight (Badger SOTAR 20/20) 10 Re-apply stippled Steel and Silver (Windsor & Newton Series 7 Size 0 with bad haircuts) Next will be pure metallics on metallic areas, gloss coat, decals, more gloss, all-over wash, etc. as usual. Initial thoughts: -Stippling is applied too heavily! -Probably need to go darker with the base stippling, down to Metal Color Magnesium or something, and brighter with the highlight stippling, all the way up to Model Color Chrome. -I like the idea of establishing more texture by applying the stippling, fading it out with a tint and re-application of the highlights, and then re-applying it to create the illusion of layered damage, but it doesn't seem to be working well here. Need to experiment further. Also, behold the terrible price of this technique:  That's a pair of Windsor and Newton Series 7 brushes, a Size 0 and a Size 1, that I've horribly mutilated with a pair of scissors to make into stippling brushes. The Lil Legend patreon is really good, y'all.
|
|
#
?
Apr 28, 2019 01:38
|
|
|
Stephenls posted:
You do know that you can just buy stippling brushes from Dick Blick and not destroy expensive brushes right?
|
|
#
?
Apr 28, 2019 06:39
|
|

|
Aniodia posted:Lots of really interesting, helpful information This is great, thanks!
|
|
#
?
Apr 28, 2019 06:44
|
|
|
Bucnasti posted:You do know that you can just buy stippling brushes from Dick Blick and not destroy expensive brushes right? This technique requires really soft bristles on the stippling brush. Otherwise they don't splay out enough and the dots they leave aren't small enough. Also all the stippling brushes I've seen available in local stores are cheap synthetic bullshit and Blick shipping to Canada is annoyingly long, and I've been itching to test this. ...     Gloss, decals, more gloss, 1:1 Dark Tone/AP Mixing Medium as normal, and then I went back with the smaller stippling brush and added a few touches of Vallejo Metal Color Chrome to places I felt needed some more edge definition. And filled in some panel lines with black where silver had gotten into 'em. I think it's working. I've still got more to do -- eyes, leather, company marking trim, highlights on the metal surfaces -- but I think I've got a new black workup that's way faster and, while I'm not sure it looks strictly better (there's something to be said for that highlighted-up-to-white edge contrast), is arguably just as good albeit different, and much closer to what I wanted in the first place anyway. Stephenls fucked around with this message at 06:49 on Apr 28, 2019 |
|
#
?
Apr 28, 2019 06:44
|
|
|
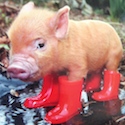
 I just finished painting this guy for a D&D campaign - the figurine is called Unthar Godshand by the manufacturer. This is my first time trying NMM and I'm quite happy with the way the armor turned out and ok with the mace. But I'm completely unhappy with the two gold brooches and will probably try to fix them. They're just so drat small it's terribly difficult to get paint on only part of the detail 
|
|
#
?
Apr 28, 2019 14:21
|
|
|
Was never a fan of the Kataphron model, but building and painting a unit of them has changed my mind. I'm really digging these guys. Now to paint the 24 weapons included with this set of three models.
|
|
#
?
Apr 29, 2019 07:55
|
|

|
    Black workup 3 test 1 complete-ish for now, barring basing, which will wait because ennhhhh. It's been educational! Even the part where I hosed up the OSL on the eyes was educational; I think this has finally driven home for me that the "dot of white above and below the eye, then yellow ink over that" thing I've been doing just doesn't work. On the docket for test 2 is adding some FW White ink to the Vallejo Model Air Chrome during the stippling highlights, to see if I can get back some of that lighter edge definition this technique loses, and also skipping the whole "Do the stippling then go back to the airbrush" step to see if that can be easily omitted without losing anything important. Also also trying to exert better brush control. (Also also also maybe I'll try weathering the edge of the green trim next time finally. As my weathering gets more realistic the lack of it on that trim becomes more conspicuous.)
|
|
#
?
Apr 29, 2019 08:24
|
|
|
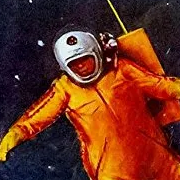
 This dude has been sitting primed in a box in my garage for over ten years. Now he's got some basecoating on him.
|
|
#
?
Apr 29, 2019 10:28
|
|

|

|
| # ? Jun 11, 2024 00:55 |
|
|
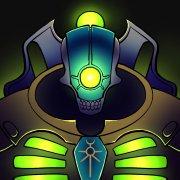
 I got this guy basecoated red today, and started on the gold basecoat. The actual Shokk Attak Gun part was mostly done yesterday, just need to pick out details.  Things left to do: details on the Big Mek's body, the skin portions, weapon details, some highlighting, a dark red wash, a dark tone wash, and then to further highlight certain spots. The Jumpoff fucked around with this message at 04:57 on Apr 30, 2019 |
|
#
?
Apr 30, 2019 04:52
|
|