

|
 Back in 1979, husband and wife team Ken and Roberta Williams founded a company called On-Line Systems. The company was renamed to Sierra On-Line in the early '80s, and the company then started producing adventure games. In 1984, Sierra released a game that would revolutionize the adventure game genre and usher in a new golden era, paving the way for studios like Lucasarts to follow later on. That game was King's Quest I: Quest for the Crown. The game was such a success that it received a makeover in 1990, fixing problems that many people had with the game and making the graphics look more modern. Eleven years later, some independent developers with the blessing of the Williamses and presmably Activision, released another update. This time bringing King's Quest I into the "modern" era with VGA graphics and an interface similar to later games in the series. Which brings me to... About the LP This is going to be a short screenshot LP where I take you all through the game and get all possible points. And I mean short, too. The game itself only lasts approximately an hour if you know what you're doing. So sit back, relax, and enjoy a classic adventure game that I'm pretty sure is older than most of us. Oh and there's gonna be puns. If there's one thing this game loves more than dumb puzzles and death, it's puns. The Updates #1 - Introduction and Orientation #2 - Looting the Realm #3 - Bad Puns #4 - Trolls, Goats, and Bad Puzzles #5 - Graham and the Beanstalk #6 - Bad Rats Other King's Quest Titles King's Quest II - Romancing the Throne King's Quest III - To Heir is to Human King's Quest IV - The Perils of Rosella King's Quest V - Absence Makes the Heart go Yonder King's Quest VI - Heir Today Gone Tomorrow DoubleNegative fucked around with this message at 22:59 on Oct 29, 2017 |
 #
¿
Jun 6, 2017 13:21
#
¿
Jun 6, 2017 13:21
|
|


|

|
| # ¿ Apr 27, 2024 14:53 |
|
|
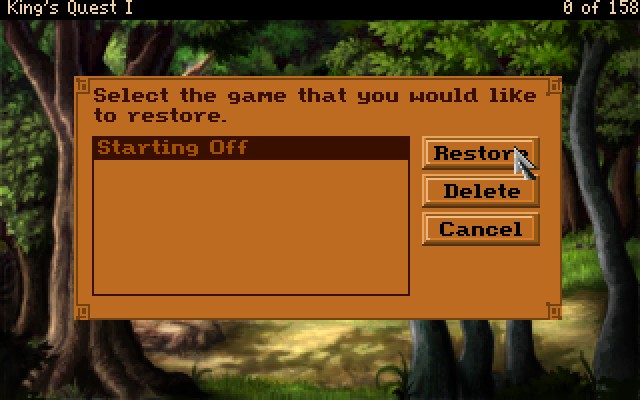
 Welcome, everyone, to King's Quest I: Quest for the Crown. This is the SCI version from 1990. The game originally was released in 1984, but it had that Atari look about it. 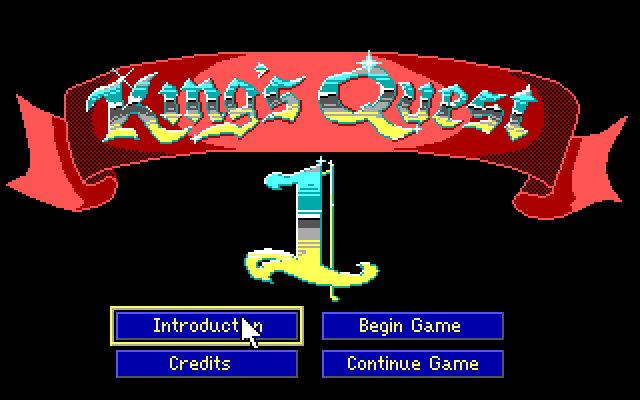 Let's get things started by jumping right into the action. There's an introduction that explains the plot, but I'll cover that later. For now, all you need to know is we're Graham, and we're on a quest. A quest from our king. A King's Quest, you might say.  So here's the game's screen. We're the fellow with the blue hat in the middle of the screen, and we're outside the king's castle. 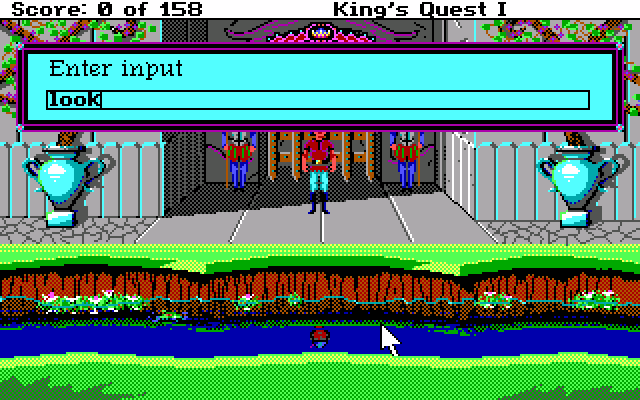 ...and to get anything done we have to literally type in commands into a built-in text parser. No, no, no, no, no. gently caress that. gently caress this. We're gonna restart the game and we're gonna do this all over again, the right way.  Much better.  The menu screen is still much the same, but the underlying game has changed quite a bit. So let's actually hit that Introduction button and get going. 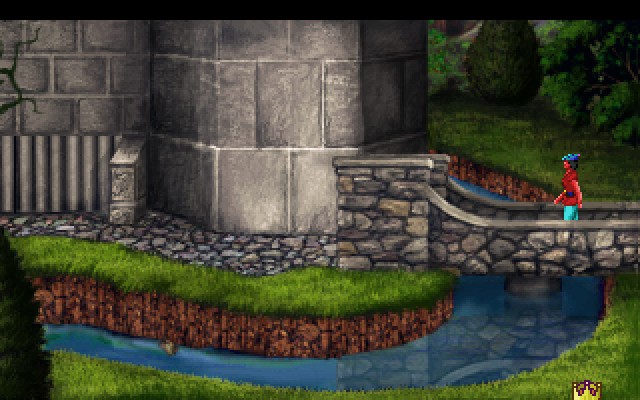 You probably noticed that things look distinctly less crappy. Welcome to the Sierra VGA engine, as seen in such hit titles as King's Quest V, and King's Quest VI. (You know, the two good ones in the series.) The little crown in the bottom right corner is my mouse cursor. If a cutscene is happening, I try to relocate it down there to get it out of the way.  : This is Sir Graham, the bravest and most honorable knight in the troubled realm of Daventry.: The feathered hat's kind of dumb, I know.: King Edward the Benevolent, aged ruler of Daventry, has summoned him to the castle for reasons unknown. : This is Sir Graham, the bravest and most honorable knight in the troubled realm of Daventry.: The feathered hat's kind of dumb, I know.: King Edward the Benevolent, aged ruler of Daventry, has summoned him to the castle for reasons unknown.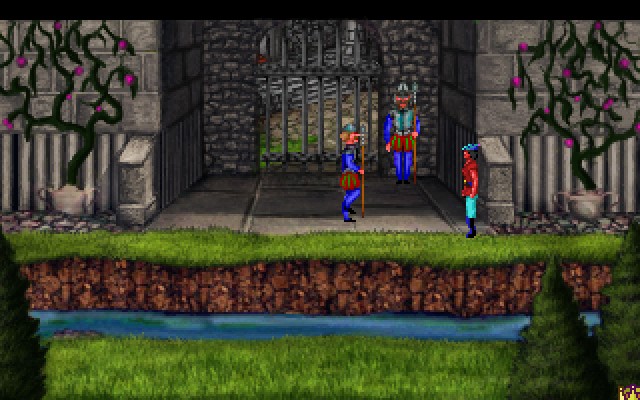  : Greetings, Sir Graham. The King is expecting you. Allow me to escort you to His Majesty's throne room. : Greetings, Sir Graham. The King is expecting you. Allow me to escort you to His Majesty's throne room. : Thank you, Sir Knight. : Thank you, Sir Knight.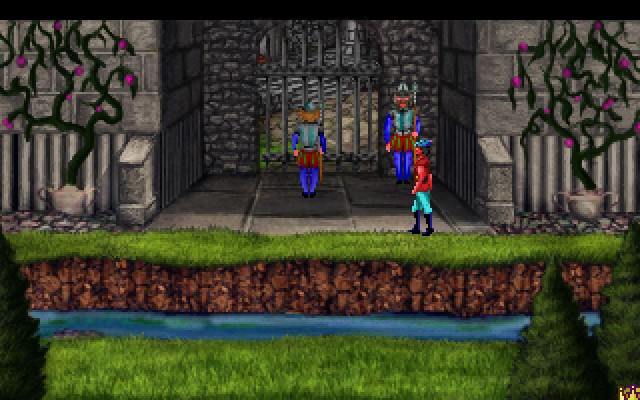 : Raise the portcullis! : Raise the portcullis!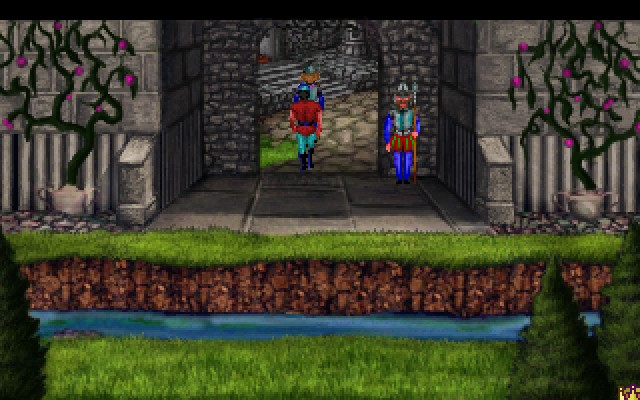 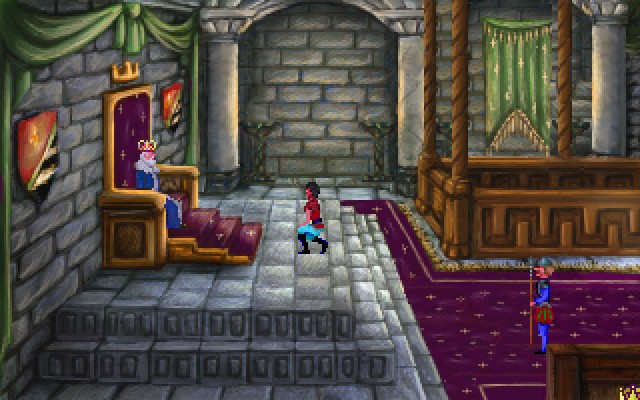 : Graham walks up to the King and removes his hat as a sign of respect.: I am at your service, my King. : Graham walks up to the King and removes his hat as a sign of respect.: I am at your service, my King. : I am an old man, Sir Graham. Perhaps too old to carry the weight of this crown. My bones ache, my hands tremble. I'm afraid my time on earth grows short.: Your Majesty, you still have many happy years ahead of you.: Please don't say that. My kingdom is in shambles and I don't have enough money to pay the guards this week. If I'm lucky I'll die today and it will no longer be my problem.: But enough about me. Great misfortunes have befallen Daventry since the loss, years ago, of the three magical treasures. I have chosen you, the finest knight in all of Daventry, to search for these lost treasures. Only then can this kingdom be restored to its former glory. And only then may I rest with the knowledge that my people are safe. : I am an old man, Sir Graham. Perhaps too old to carry the weight of this crown. My bones ache, my hands tremble. I'm afraid my time on earth grows short.: Your Majesty, you still have many happy years ahead of you.: Please don't say that. My kingdom is in shambles and I don't have enough money to pay the guards this week. If I'm lucky I'll die today and it will no longer be my problem.: But enough about me. Great misfortunes have befallen Daventry since the loss, years ago, of the three magical treasures. I have chosen you, the finest knight in all of Daventry, to search for these lost treasures. Only then can this kingdom be restored to its former glory. And only then may I rest with the knowledge that my people are safe. : The first treasure is a magic mirror that foretells the future.: Funny how it never mentioned all of this when I used to look into its surface... : The first treasure is a magic mirror that foretells the future.: Funny how it never mentioned all of this when I used to look into its surface... : The second is a magical shield that protects the bearer from all mortal harm.: Even if you have it, you can still get sick, or trip and fall, or choke on a turkey leg. I also believe you need to actually be holding it for it to do anything. : The second is a magical shield that protects the bearer from all mortal harm.: Even if you have it, you can still get sick, or trip and fall, or choke on a turkey leg. I also believe you need to actually be holding it for it to do anything. : The third and last is an enchanted chest that is forever filled with gold.: That sounds like it would cause an economic crisis the likes of which the realm has never before seen. Is that the reason why we've had such a lasting problem with inflation for decades?: An eco-what now? And what's this about balloons?: Graham wisely decides to keep his mouth shut and let the king continue talking.: What? No I'm not. I have many more--: I said Graham wisely keeps his mouth shut and lets the king finish.: I know that what I ask is difficult... nay, perhaps impossible. The dangers are many. But you are brave and pure of heart. That is why I chose you to volunteer. If you succeed, you will inherit my crown, and rule the Realm of Daventry as her rightful king. Go, Sir Graham and know that the fate of Daventry lies in your hands.: Take heart, my King. I shall not fail you. : The third and last is an enchanted chest that is forever filled with gold.: That sounds like it would cause an economic crisis the likes of which the realm has never before seen. Is that the reason why we've had such a lasting problem with inflation for decades?: An eco-what now? And what's this about balloons?: Graham wisely decides to keep his mouth shut and let the king continue talking.: What? No I'm not. I have many more--: I said Graham wisely keeps his mouth shut and lets the king finish.: I know that what I ask is difficult... nay, perhaps impossible. The dangers are many. But you are brave and pure of heart. That is why I chose you to volunteer. If you succeed, you will inherit my crown, and rule the Realm of Daventry as her rightful king. Go, Sir Graham and know that the fate of Daventry lies in your hands.: Take heart, my King. I shall not fail you.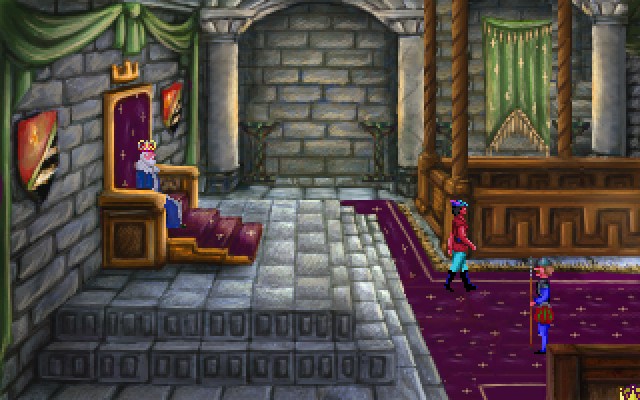 : Graham rises, puts his cap back on, and struts out of the palace like he owns the place. : Graham rises, puts his cap back on, and struts out of the palace like he owns the place.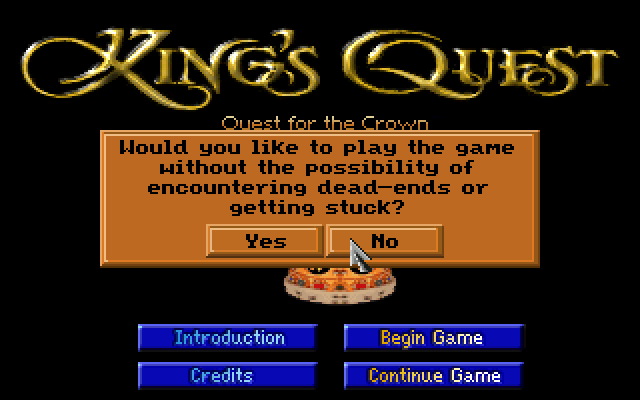 So let's get started. When you hit "Begin Game" in this version, you're asked an extremely important question. Sierra games were, at the best of times, considered notoriously hard. There are plenty of ways to gently caress up progression by doing, or in many cases not doing, something. This text box is, essentially, asking if we want the game to take mercy on us, or if we want the original experience. Because I played through this somewhere on the order of 5 times to prepare for this LP, I'm playing with dead ends enabled. When you select no, the game says... : You have selected to play with dead-ends enabled. The game will play exactly the same way as the EGA version of King's Quest I: Quest for the Crown.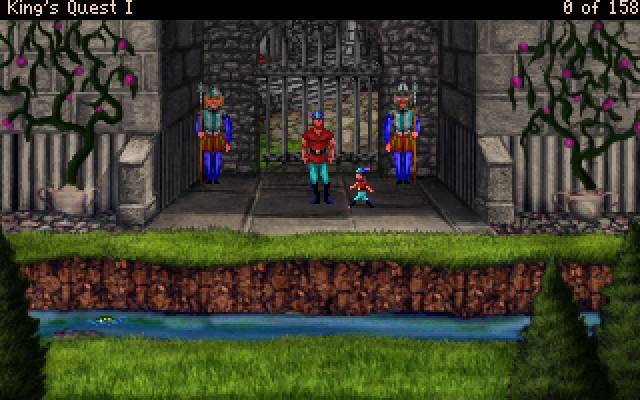 And so finally, we're back here on this screen. Quite the difference, isn't it? In fact, let's take a quick look at the SCI version side by side with this one. The only detail they didn't catch was Graham's reflection in the water. But that's nitpicking. Anyway, unlike the SCI version, we have some options for controlling Graham here. You can use the cursor and the little walking icon to move him around the screen, or you can also use the arrow keys. Like... 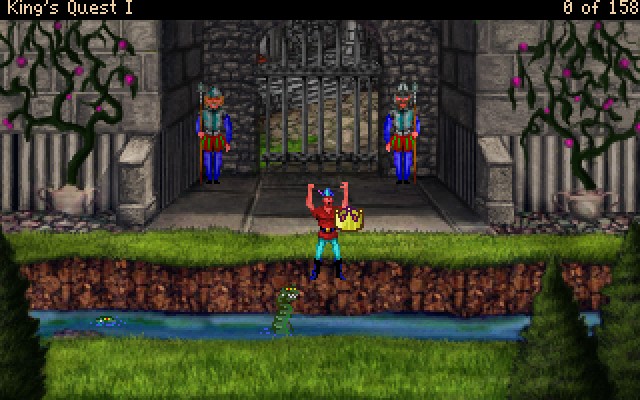 Whoops! 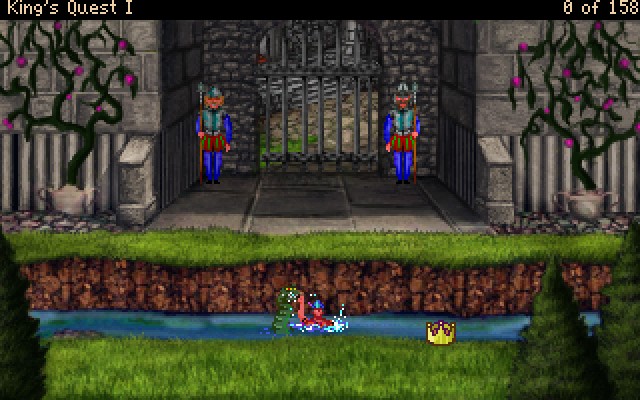 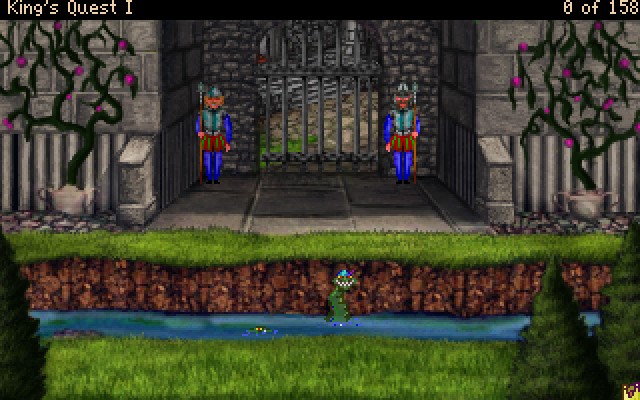 This is actually one of the deaths with a unique little animation after you die. Oh yes, by the way, you can die in this game. Quite easily, in fact. Anyway, the moat is filled with serpents, and walking into it causes them to eat Graham.  Here's the little animation that plays in the SCI version. This is the only such gif that I have, and it took me a very long time to make because I had to do it manually. So enjoy it while it lasts! 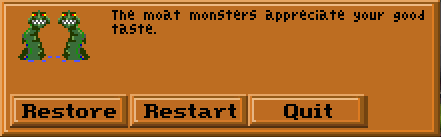 When you die, your nominal punishment is that you have to reload your last saved game. In the case you haven't saved, you have to restart the entire game from the beginning. In reality, though, your punishment is having to suffer through the awful, horrible puns the narrator comes up with. 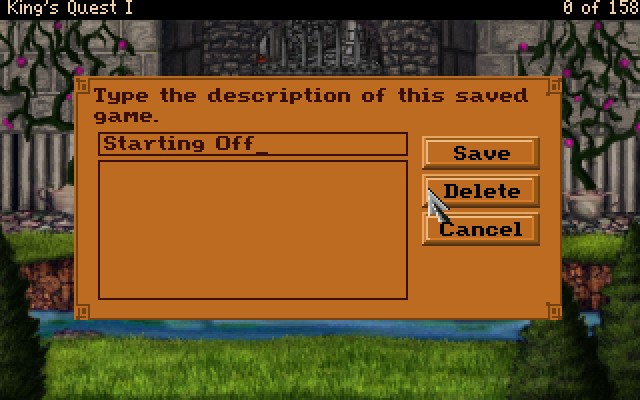 So, I'm going to religiously save the game. While I may know 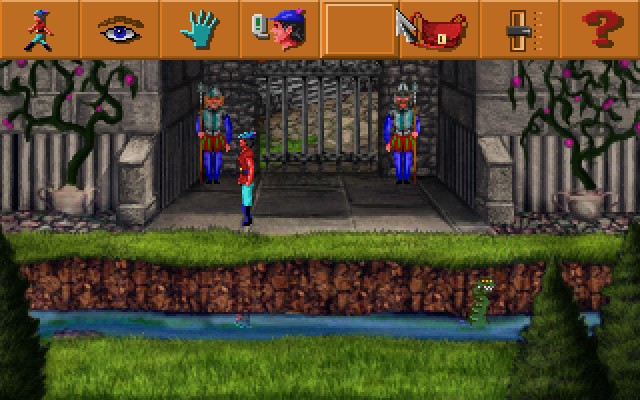 So, before we really get started, let me take some time to explain the VGA interface. Starting from the left...  : Moves Graham around the screen. He can maneuver around solid objects, but will blithely step off to his death if given half the chance. : Moves Graham around the screen. He can maneuver around solid objects, but will blithely step off to his death if given half the chance. : Lets you look at anything you can click on. Useful for finding several optional items that don't exist until you first look at their hiding spot. : Lets you look at anything you can click on. Useful for finding several optional items that don't exist until you first look at their hiding spot. : Use, or generally interact with, something you can click on. This is how you pick up all those wonderful items you need to solve the puzzles the designers came up with. : Use, or generally interact with, something you can click on. This is how you pick up all those wonderful items you need to solve the puzzles the designers came up with. : Talk to someone nearby. This is used in exactly two, maybe three, puzzles in the entire game. : Talk to someone nearby. This is used in exactly two, maybe three, puzzles in the entire game. : This blank spot in the middle, minus the part of the cursor I accidentally captured, is where you can quick select the last item you were using. Like the talk command, it's more useful in later VGA titles. : This blank spot in the middle, minus the part of the cursor I accidentally captured, is where you can quick select the last item you were using. Like the talk command, it's more useful in later VGA titles. : This bag is how you look at, and interact with, your entire inventory. : This bag is how you look at, and interact with, your entire inventory. : Save your game, load your game, change volume, change walking speed, and quit: this is the options menu. : Save your game, load your game, change volume, change walking speed, and quit: this is the options menu. : Explains all of this again. : Explains all of this again.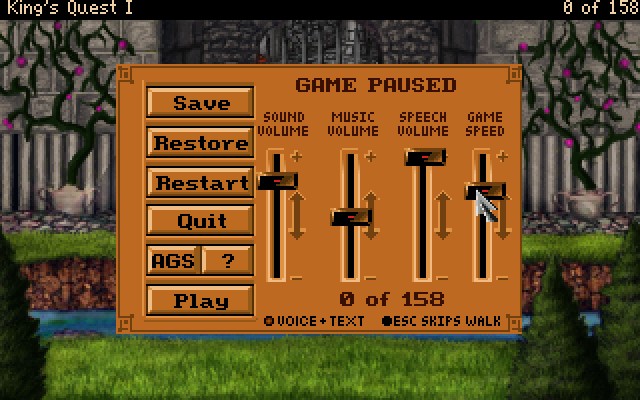 This is the options menu. You generally want to keep walking speed somewhere between 75% and 100%, as Graham moves at a snail's pace otherwise. There's also one puzzle that's made infinitely easier by changing walking speed. Finally, below the sliders, and in the top right corner, we can see our points display. You can tell this is a short game, because it only has 158 points at maximum. Some later Sierra adventure titles have 999 or more!  Anyway, let's get moving. You can leave the previous screen by either the left or right sides, but I always go left first. There's several easy puzzles over this way, and no nasty surprises. Also, this bridge. This bridge didn't exist in the initial EGA version of the game. In that version, it was a single plank that you had to successfully navigate Graham across. Let's just say that enough people fed the moat snakes in the EGA version to make Sierra add in guard rails for the SCI port. AGDI, the company that produced this VGA port, based it on the SCI version. Thus, the bridge has guard rails. Don't worry if all of that went over your head. Just remember this: King's Quest I got less and less bullshit with each different port it received. 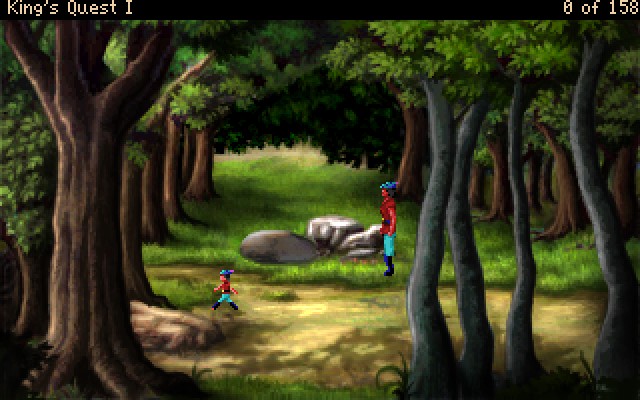 This screen has a nice easy puzzle to start us off with. There's two rocks, one of which is shaded differently enough to make it pop out. So let's investigate... : The rock on the right is less distinctive than the one next to it.: You see a large gray rock on the left.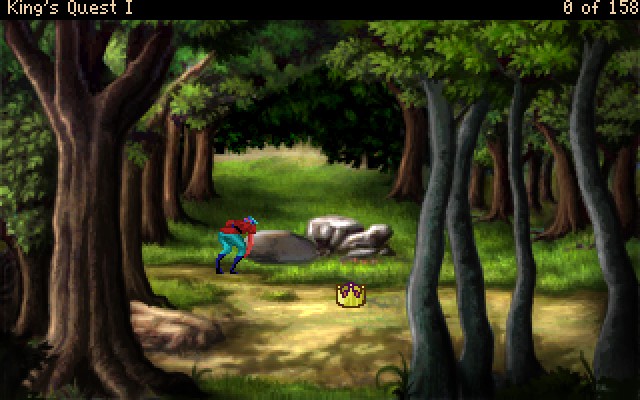 : Graham stands in front of the rock and rolls it out of place. : Graham stands in front of the rock and rolls it out of place.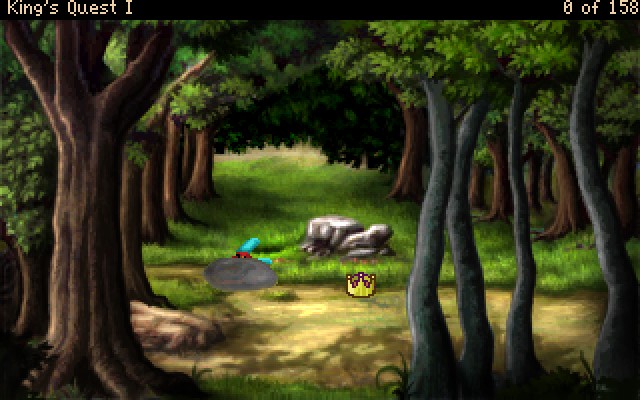 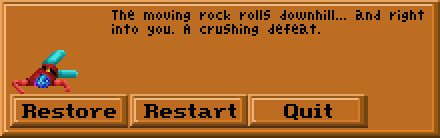 Never forget that King's Quest I is a spiteful game and something as simple as being on the wrong side of an interactable object will kill you. Anyway, that's enough for this first update. NEXT TIME: Treasure hunting and exploring the realm. List of Points Nothing yet! Register of Deaths Drowned in a moat Crushed by a rock
|
|
#
¿
Jun 6, 2017 13:21
|
|
|
mateo360 posted:This remake I am fine with. It's the next games remake I have... issues with. Yeah, very much same here. The team took a few too many creative liberties with the KQ2 remake, to the point where it felt like I was playing through a King's Quest fanfiction instead. Tiggum posted:Honestly, that counts as one of the less dickish things this game (and series) will subject you to. Yeeep. In this game and the next one there are screens where you have a random chance to die just for walking onto them. It's something I'm going to cover a little more in the next update, which I'll be posting on Thursday. I also have an entire rant prepared for that puzzle, the one that routinely tops "worst puzzles in adventure games" lists.
|
|
#
¿
Jun 6, 2017 16:07
|
|
|
So here's some weird timing. GoG's summer sale started recently, and the entire original King's Quest series-- the first 7 games plus the... eighth... are all on sale for $10. https://www.gog.com/game/kings_quest_1_2_3 Alternatively, if you want to try King's Quest 1 VGA and play along with the LP, it's also available for free through AGDI. http://agdinteractive.com/games/kq1/ The screenshots on GoG make it look like it's the EGA version of KQ1, so be aware that if you buy the bundle it'll be the most bullshit version of the game.
|
|
#
¿
Jun 6, 2017 19:16
|
|
|
OAquinas posted:
 Whaaaat the fuuuuck Whaaaat the fuuuuck
|
|
#
¿
Jun 7, 2017 01:13
|
|

|
Zeniel posted:^^^^ Oh no, you can absolutely end up in an unwinnable state for the very reason that you mentioned. KQ7 is the only one in the series I never finished(apart from 8 which I've only played the demo of), the reason being I got really far into the game and ended up with some lit dynamite in my inventory that would kill me and then the game would just reset with the lit dynamite still in my inventory, utter garbage. That puzzle is the worst point of an already bad game. Rather than do something intelligent like create a timer for the firecracker, they tied its fuse to your processor clock speed. The Lone Badger posted:I think I actually prefer the EGA graphics. The VGA ones are a bit... drab.  Here's a comparison of the three different graphics for KQ1. Minor spoilers, I guess, for a location in the game. EGA on the bottom, SCI in the middle, VGA on top. Assuming you meant the SCI graphics look nicer, I do have to agree with you there. They look both detailed and colorful, making it quite easy to see what's going on. The EGA on the bottom, however, are a mix between bad MSPaint drawing and Atari. And, yes, Graham is Simpsons yellow in the original release of the game. Honestly, this LP was very nearly done with the SCI version. I ran into a bug at the very tail end of the game that killed that idea dead, though.
|
|
#
¿
Jun 7, 2017 13:54
|
|
|
 Let's try that again. I won't be showing every time I save or reload my game, because there are some parts of the game where you'd see the save dialog eight or nine times in a two minute stretch. All the same, I may show off my save names every once in a while.  Last time, we were crushed to death because we stood in front of a rock and pulled it downhill. So instead, let's stand behind it. Also worth pointing out with this particular version of the VGA engine, the important part of the mouse cursor has a red dot on it. So just line up the red fingernail with the rock and...  : With a small shove, Graham manages to push the rock a few feet... revealing a shallow hole underneath. : With a small shove, Graham manages to push the rock a few feet... revealing a shallow hole underneath.And if we look inside... : There is an intricately carved dagger in the hole.A dagger, huh? Let's get that poo poo. : Graham reaches into the hole and grasps the dagger, being careful not to cut himself.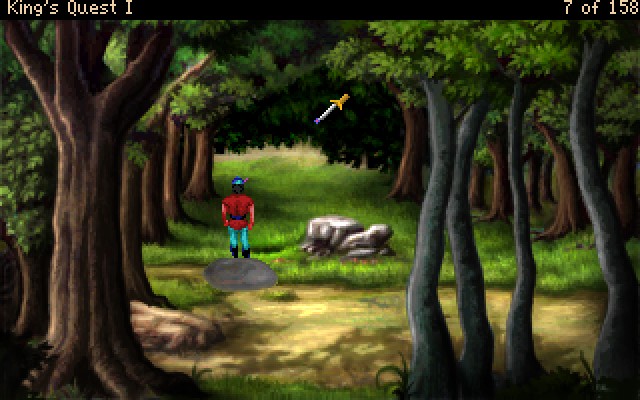 Although it's admittedly been a few years since I last played a game in the VGA engine, I'm pretty sure the Sierra one didn't automatically select the item to use for you. So that's a neat difference between this VGA remake and later VGA titles. 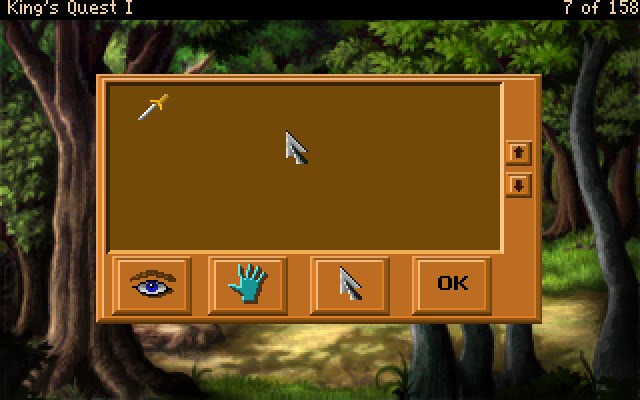 And now that we have an item, let's take a quick look at our inventory. The buttons at the bottom let you further examine and prod the stuff you find.  : This is a fine silver dagger, with a very sharp edge! Graham can't read the runes on the blade, but it appears to be an elvish dagger of great antiquity. : This is a fine silver dagger, with a very sharp edge! Graham can't read the runes on the blade, but it appears to be an elvish dagger of great antiquity. : Be careful, Graham! That blade is very sharp. : Be careful, Graham! That blade is very sharp.I'll be periodically checking my inventory and going over the various look/touch interactions. 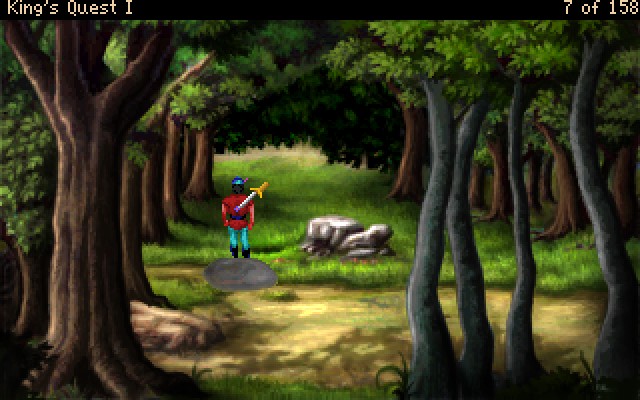 And because I know someone's going to ask... : Be careful, Sir Graham! You might cut yourself.No taking the quick way out of this quest. If Graham wants to die, he'll have to find another way to do it.  The game overworld fits on an 8x6 grid. There's a few maps out there, but I'm going to be referencing the map AGDI has on their site when I'm referring to locations. The left exit from the castle, that we took last time, is located at A-2. The rock where we started this update is H-2, and we're currently at H-1, the Oak Tree. The map wraps both horizontally and vertically, so it can be easy to get lost. Anyway, the huge tree is the sole feature of this screen, so let's look closer... : This is the biggest oak tree Graham has ever seen. Its trunk seems to be about ten feet around, and the thick, sturdy branches look like they could hold many times his weight.: If I didn't know any better, I'd say you were trying to get me to climb the tree.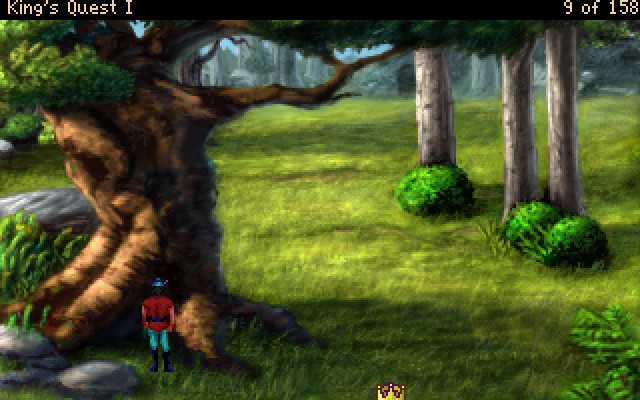 : Well, I was going to climb it anyway!: Finding plenty of footholds in the coarse bark of the tree, Graham easily clambers up the trunk to the branches above. : Well, I was going to climb it anyway!: Finding plenty of footholds in the coarse bark of the tree, Graham easily clambers up the trunk to the branches above.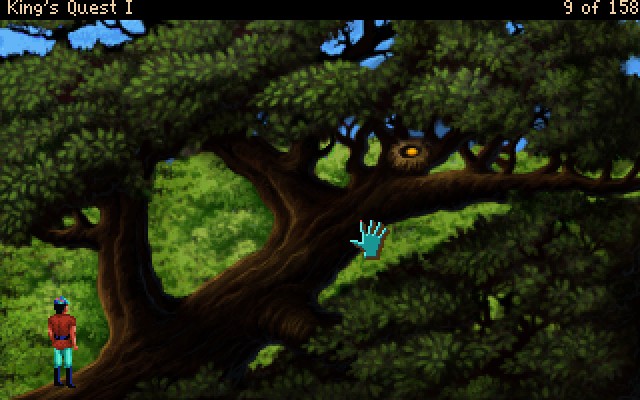 The branches of the oak tree are one of many sub-areas in the game. It's also our first introduction to the game's "platforming" challenges. There's something in the nest, but first we have to carefully walk across the branch to get there. Seems simple enough right? 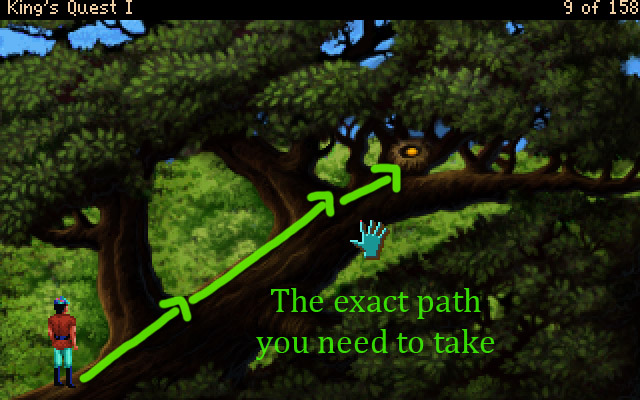 The arrows outline the only path you can take to reach the egg at the end. Anything else results in you falling off the branch and having to try again. Once we get close to the nest, we can look at it to see... : There is a perfect, shimmering golden egg lying in the nest. Graham carefully lifts it out.Score! I also went ahead and combined the narration for looking and taking, because there's no way in hell we're leaving a solid 24 karat golden egg behind. : Graham is holding a lovely golden egg.: This is one egg that definitely won't be so easy to crack!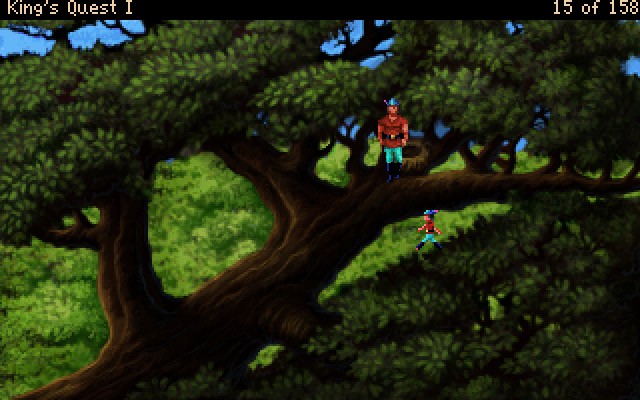 Now that we have our prize, let's take a shortcut. 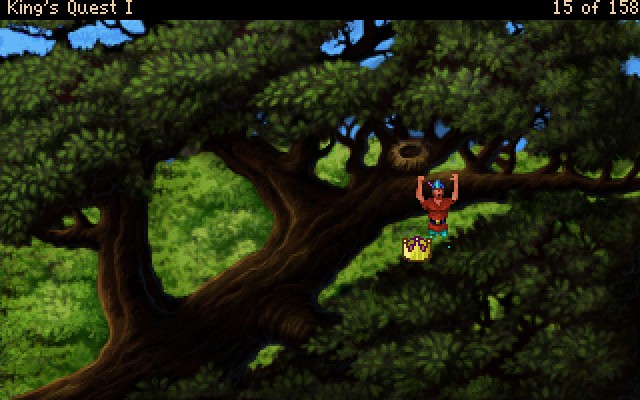 By which I mean, let's jump out of the tree.  Each time you fall out of the tree, there's a several second long unskippable animation of Graham falling, landing, and standing back up. It's kind of obnoxious if you're trying to walk across the tree limb. 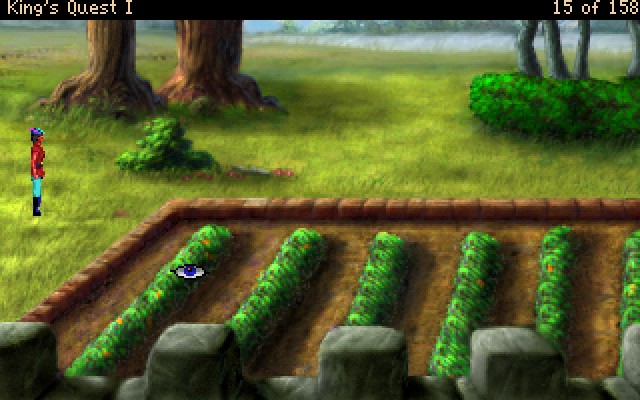 Moving on, we're now on screen A-1. : This is a well-tended carrot patch. The carrots look tempting to a hungry traveler.: How did that old rhyme go? 'See a carrot, pick it up, then all day you'll have good luck?' Well, I can use all the luck I can get.: I don't think that's how it goes, but...: Graham plucks a plump, orange carrot from the ground.Your standard adventure game rules apply here. If it's not nailed down, take it. If it's nailed down, find a way to remove the nails. 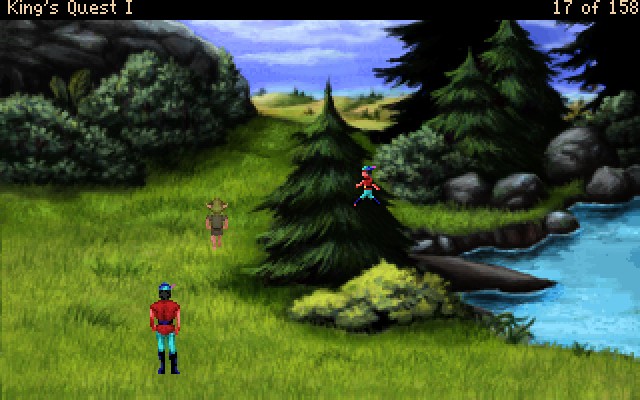 On screen A-6, there's an event that randomly triggers. If the screen is empty, then leave and return until it happens. : Wandering along the banks of the beautiful lake, you see a cute little elf.Wait until the elf is nearby, and try talking to him. : Excuse me, little elf? Hi, my name is Graham and...: The elf is impressed by Graham's friendliness and responds by handing him an elegant little ring. : I've had me eye on ye, Sir Graham. Methinks you might enjoy this little trinket. For just a wee bit o' time, it has the power to make ye invisible.: Well, thank you! That's awfully generous of you.: May it give ye as much entertainment as ye has given me this day!: With that, the elf vanishes.: Graham's hand tingles slightly as he looks at this jeweled ring. : I've had me eye on ye, Sir Graham. Methinks you might enjoy this little trinket. For just a wee bit o' time, it has the power to make ye invisible.: Well, thank you! That's awfully generous of you.: May it give ye as much entertainment as ye has given me this day!: With that, the elf vanishes.: Graham's hand tingles slightly as he looks at this jeweled ring.Using the hand icon on the ring makes Graham put it on. We want to save this until we really need it, so we won't be doing that. 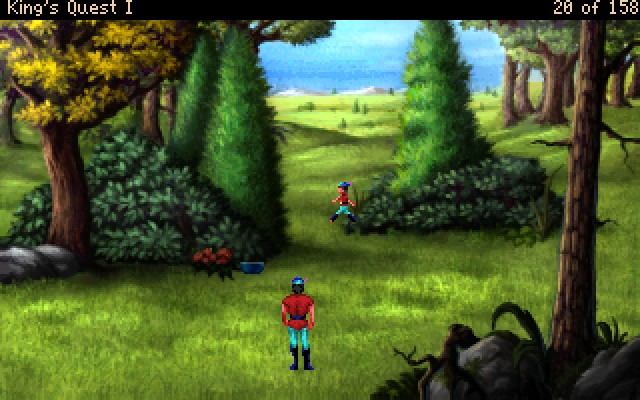 : There appears to be some sort of bowl sitting next to the tree. Graham picks it up.: Maybe someone lost this bowl. I should try to return it to them... : There appears to be some sort of bowl sitting next to the tree. Graham picks it up.: Maybe someone lost this bowl. I should try to return it to them...A-5 is one of many screens in the game that only serves to give you an item. Unlike most of the items in the game, this one is actually useful for something.  Jumping a few screens, this is H-4, also known as the Gloomy Clearing. H-3 and H-4 are two of the five "dangerous" screens in the game. The other three screens to watch out for are G-5, F-6, and G-1. Basically just avoid "Gloomy Clearing," "Dark Forest," or the "Wolf" screens unless you absolutely can't help it. So what makes H-4 particularly dangerous? : There is a small dwarf right nearby. Be careful, this sly little chap is trouble.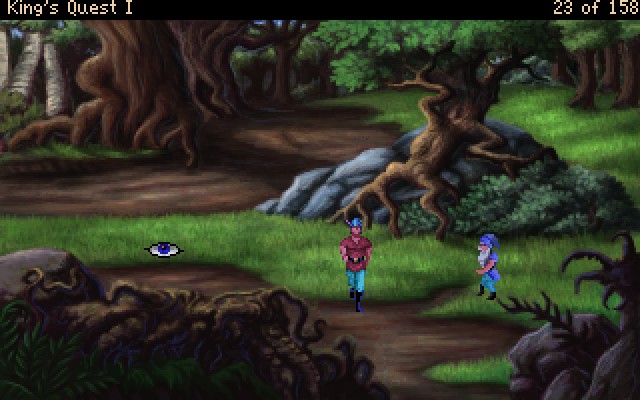 A few seconds after entering a "dangerous" screen, the game has a chance to spawn an enemy. Graham is not Nike von Slartibartfast, so he can't defend himself very well. So if an enemy shows up, the only recourse is to get offscreen ASAP.  The Dwarf is the only enemy that won't kill you outright. Instead, he does something much more sinister. : The sneaky little dwarf caught Graham by surprise. Did he steal anything?The narration is a hint to check your pockets immediately. 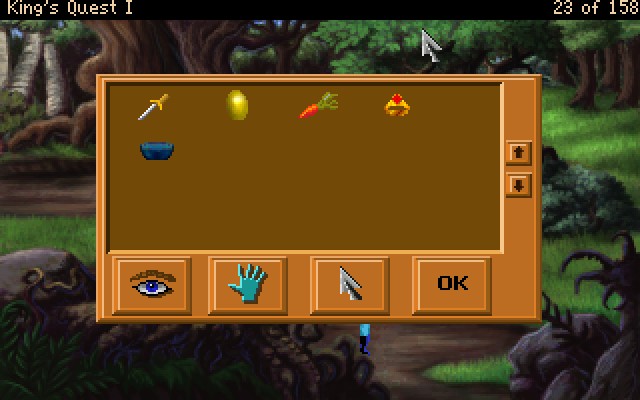 We're incredibly lucky here. The Dwarf didn't steal anything! If he catches you, then he can steal anything out of your pockets, and I mean anything. Once the item is gone, then there's no way to get it back. So if he happens to steal one of the items you need to beat the game? Well, sucks to be you in which case. Guess you should have known that the RNG would decide to gently caress you over completely at random. 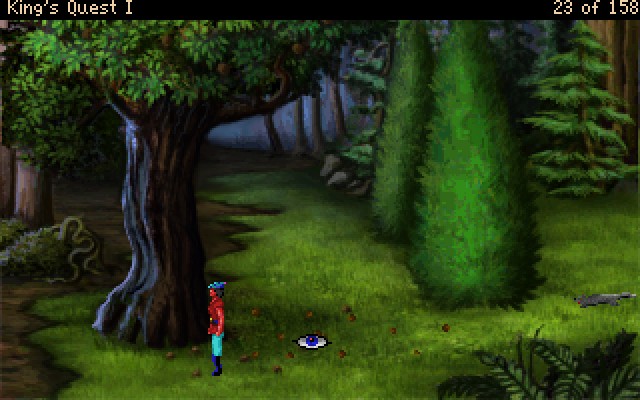 One screen to the south is the Walnut Tree. (H-5) : There is a large walnut tree surrounded by several pine trees.: It looks like a walnut of some sort.: Gee, who would have thought you'd find walnuts underneath a walnut tree?I'm gonna be honest, walnuts don't fall like that unless it's in the autumn months. They have these big green casings that are stuffed full of fibrous material, and once that cracks open, you can finally get at the walnuts within. The green casings stain the hell out of your hands if you touch them. The fiber inside also leaves black stains on everything but grass. What I'm getting at here is that this game is set in the springtime, so there's no way there'd be fresh walnuts on the ground at this time of year, at this time of day, in this part of the country, localized entirely within this one screen. : Graham chooses a big, meaty-looking walnut from the bunch scattered around.: Mmm, out of season walnuts...: Graham is holding an ordinary walnut.: When Graham opens the walnut, he discovers that the nut inside is pure gold!So here's another change from the SCI and EGA versions. In those, it was up to random chance if you got gold out of a walnut. In this VGA port, every time I've checked a walnut, it has had gold inside. Since we're here, let's check some other items... : Inscribed on the inside of this empty ceramic bowl is the word 'Fill'.: To Graham's astonishment, something begins to bubble up from the bottom of the bowl. Within moments, the bowl is filled with a hot savory stew.Using the hand on the bowl implies Graham is saying "fill" to the bowl, which fills it up. It's a nice change from the old versions where you had to actually type "say fill" to fill the bowl. 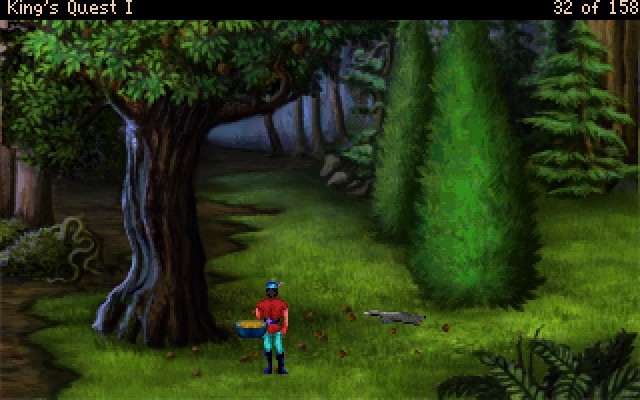 : Graham eats every bite of the delicious stew. : Graham eats every bite of the delicious stew.You can eat the stew from the bowl as well. Though doing so removes the points you gained from filling the bowl.  I think that's enough for now. Like I said last time, King's Quest I is a very short game. My recording for the entire game is 01:00:24 long. That's 1 hour, 0 minutes, and 24 seconds. This is just a little over 11 minutes in, so we're about 1/6 of the way done give or take. Seems like a good point to call things for now, right? NEXT TIME: We make some progress! List of Points +2 - Rolled the Rock +5 - Took the Dagger +2 - Climbed the Tree +6 - Took the Golden Egg +2 - Took a Carrot "for luck" +3 - Got a ring from an elf +3 - Picked up a bowl +3 - Picked up a walnut +3 - Found gold in walnut +1 - Read bowl inscription +2 - Filled bowl with stew -2 - Ate the stew Total: 30/158 Register of Deaths None this time!
|
|
#
¿
Jun 8, 2017 15:19
|
|
|
Comrade Koba posted:OP, will you be continuing with the other games once you finish this one? At some point, yes. I want to do
|
|
#
¿
Jun 8, 2017 15:25
|
|
|
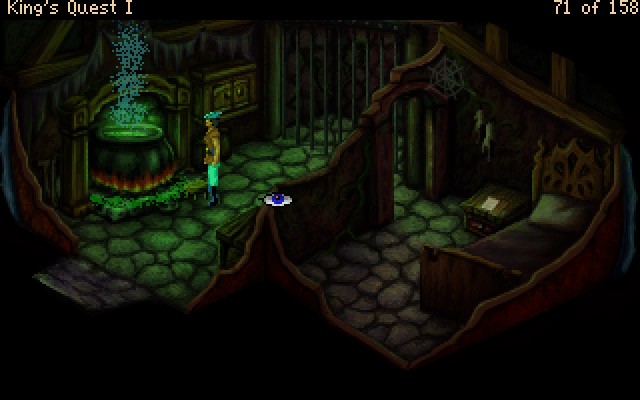
Welcome back everyone. Last time, we left off outside of this intriguing looking house in the middle of the dark, foreboding woods. This gingerbread house is on F-5, two screens west of the walnut tree. The screens immediately east and south of this house are the "Dark Forest" tiles on the map, and should be considered dangerous. 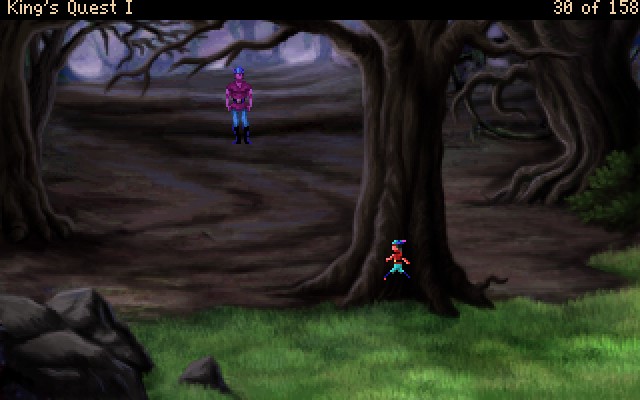 How dangerous? Well, there's a random chance while on the dark forest tiles that you'll hear a high pitched cackling followed by dangerous music. : With a screech and a cackle, a witch swoops down from the skies above. Look out! She dips and turns and tries to catch Graham.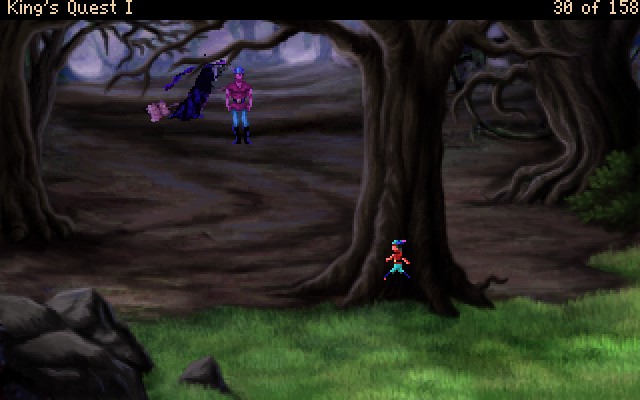 : She's got him! She grabs Graham by the neck with an iron grip, and carries him off to her cottage deep in the forest. : She's got him! She grabs Graham by the neck with an iron grip, and carries him off to her cottage deep in the forest.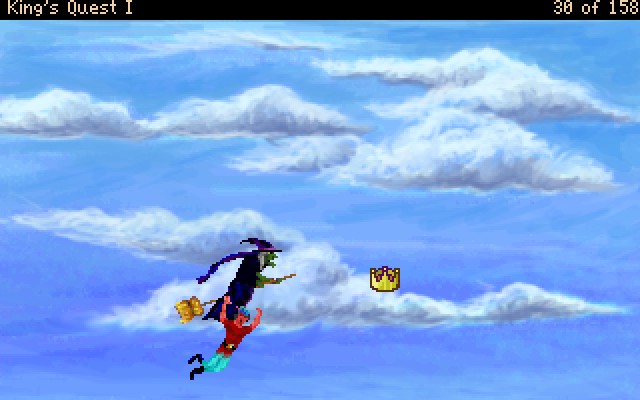 By the way, from the second the witch touches you, you're locked into an extended death sequence. 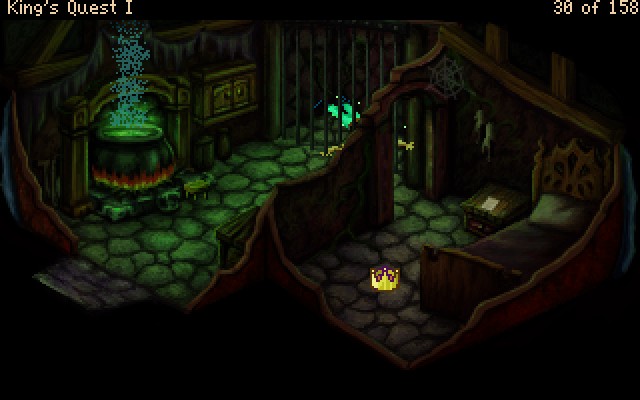 : Ouch!: As the wicked witch flew over her cottage, she dropped Graham straight through the roof and into her cage. Who knows what sinister plans she has in store for him? : Ouch!: As the wicked witch flew over her cottage, she dropped Graham straight through the roof and into her cage. Who knows what sinister plans she has in store for him?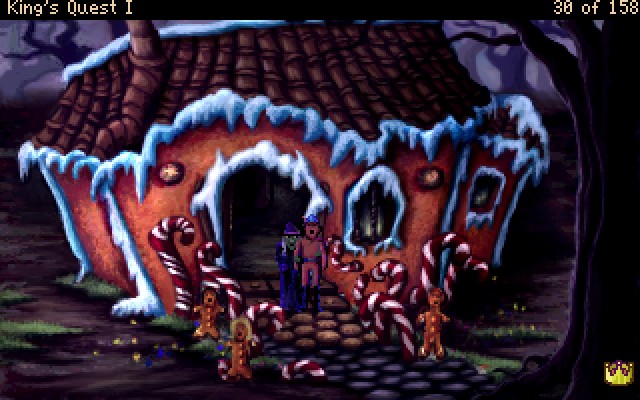 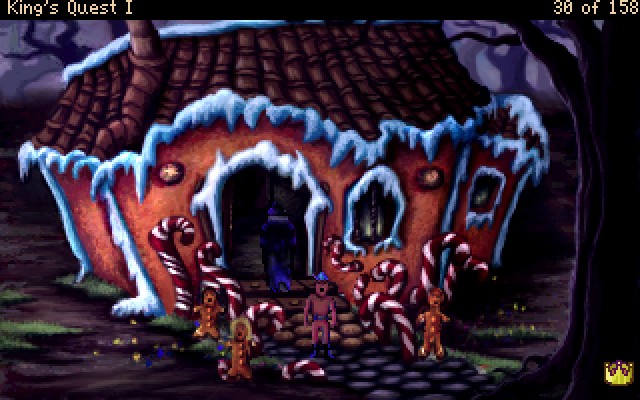 We just got added to the witch's collection. 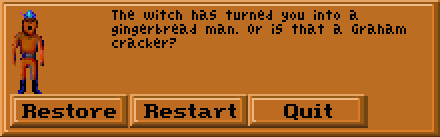 God DAMMIT. Not from the death, no. That's to be expected in a King's Quest title. That pun. Oh my god, that pun. That was physically painful. 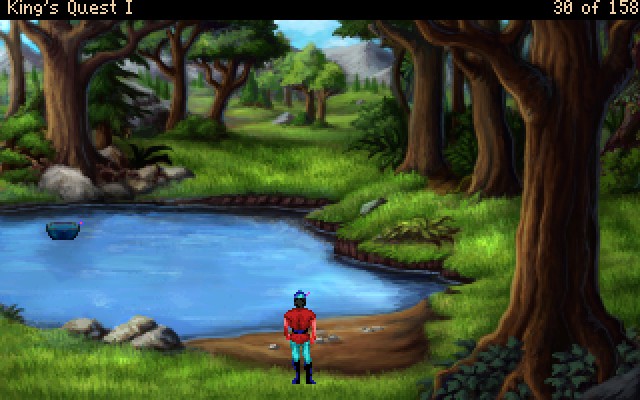 Let's move on. This lake is found at G-2, just one screen west of the screen where we found the dagger. : On the beach are some smooth, round pebbles. Graham grabs some and pockets them.: What can I say, it seems like everything you pick up in this kingdom is made of gold in some fashion. I'm just hedging my bets. If nothing else I can throw them at that sneak thief of a dwarf if I see him again.Like the carrots before them, the pebbles on this screen are available in infinite quantities. You can only ever have one set of pebbles in your inventory, but if you run out you can get more without fear of running out. 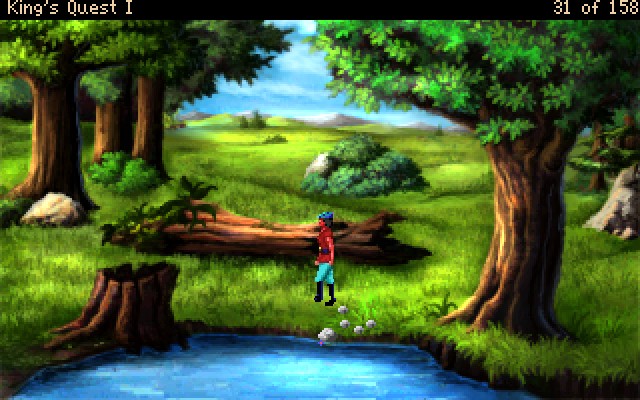 Two screens west, on E-2 we can find this seemingly empty screen. While you might initially think the fallen log has treasure, it's just a red herring. : Inside the rotting stump Graham notices a small leather pouch. As he lifts it out, he can feel the contents shifting inside.: When Graham peeks inside the leather pouch he discovers it is filled with diamonds!: Cautiously, Graham opens the pouch and sees many sparkling and flashing diamonds! Quickly, he closes it again so as not to lose any.: Do you see what I mean? Priceless valuables just left discarded in a rotting tree stump within sight of the castle. I'm pretty sure this alone justifies me picking up anything I can lay my hands on.: Graham is carrying 5 smooth, rounded pebbles.: They feel rock solid.  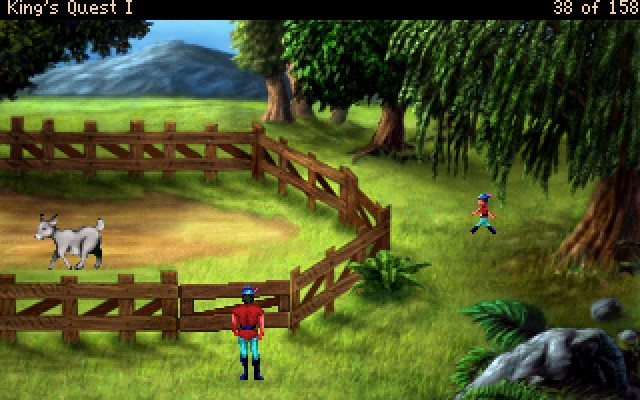 Just north of the diamond-filled tree stump, we find a little goat pen. (E-1) This is a dick move by the game waiting to happen. For the love of all that is good and holy, do not open the gate and leave the screen. If you do, you are no longer able to get the maximum number of points. We'll just leave the goat alone for now. 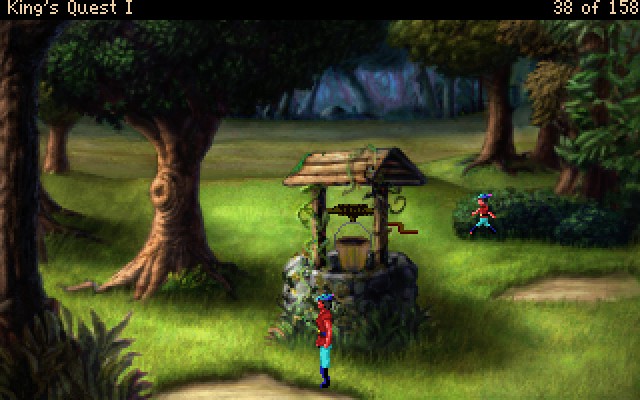 The well is one screen east of the goat pen, and is one of the most important locations in the game. First off, that bucket and the crank both stand out like a sore thumb. : This weathered old bucket has served the kingdom for years and years. It still holds water as well as it did on the day it was made. This is something I didn't even realize you could do until I tried it. 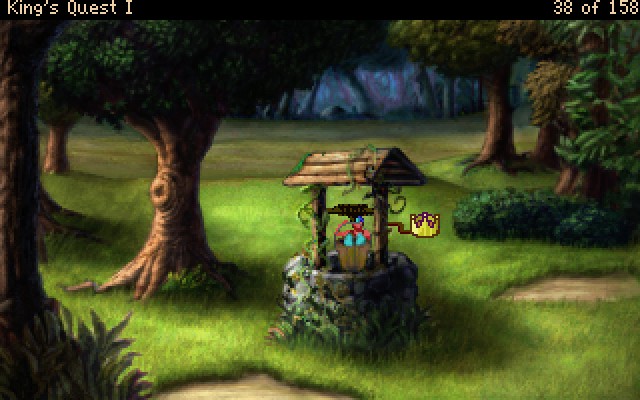 Either that bucket is massive or Graham is a tiny man. : Graham climbs into the bucket. His weight causes it to slowly descend.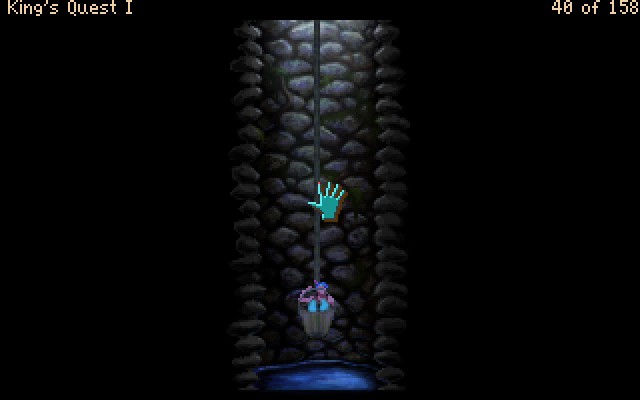 While we ultimately want to take a swim in this underwater reservoir, we need the bucket for something in a moment. We can simply climb the rope and leave the well that way. : Graham climbs up the rope and out of the well. Once back out, he turns the crank to return the bucket to the surface. Kids used to call riding the bucket a Daventry Joyride. Guess Graham was reliving his youth.Once more with feeling! : Graham cuts the rope using the dagger. He takes the old bucket.Now we can lower the rope with the crank again...  This time we're hanging onto the rope, so we can more easily drop into the water below. 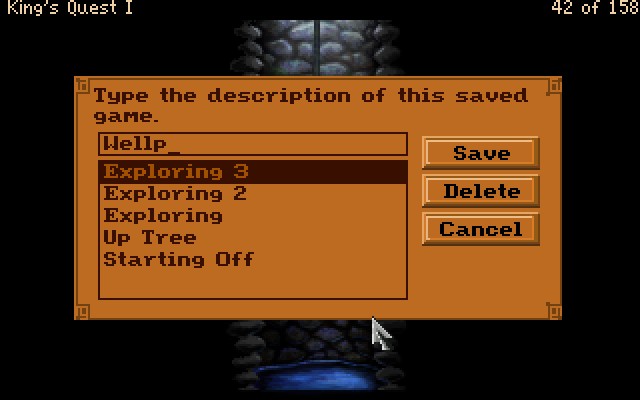 I also wanted to show my saves off, mostly to prove that for all my complaining, I'm just as bad as the narrator. 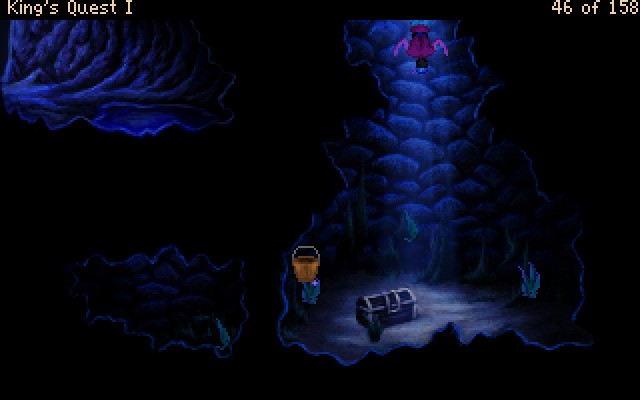 : Graham lets go of the rope and lands in the water below with a splash. He takes a moment to prepare, then takes a deep breath. Finally, he dives into the darkness below. : Graham lets go of the rope and lands in the water below with a splash. He takes a moment to prepare, then takes a deep breath. Finally, he dives into the darkness below.Alright, so this screen is there just for a transition between this area and the next. The chest looks tempting, but... : It looks like this chest has been buried here for a very long time. It isn't the chest Graham is looking for.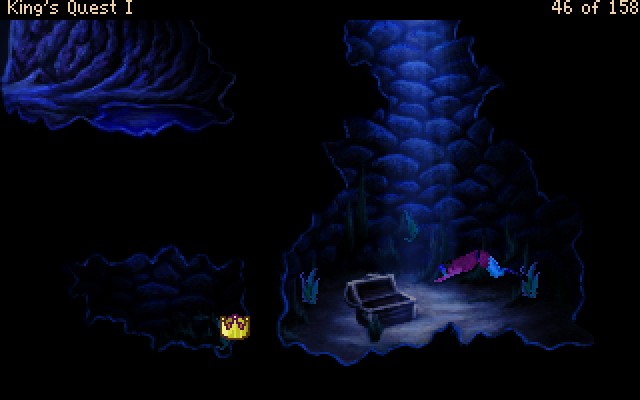 It is possible to drown, but it takes almost 19 seconds before Graham suddenly keels over. So unless you have your speed all the way at the lowest for some reason, you have plenty of time to swim all the way over to the small passage in the upper left corner of the shot. 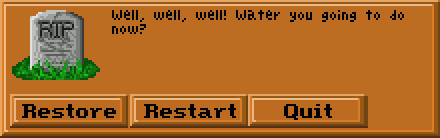  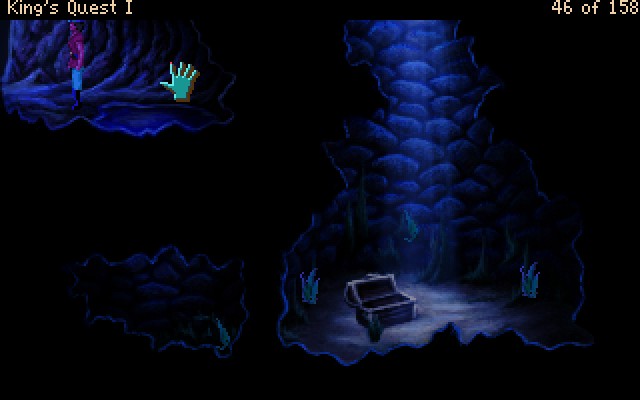 : Graham kneels down and fills the bucket with the cool water.: I can feel the heat coming from farther on in the cave. Something tells me I'm going to need this. : Graham kneels down and fills the bucket with the cool water.: I can feel the heat coming from farther on in the cave. Something tells me I'm going to need this.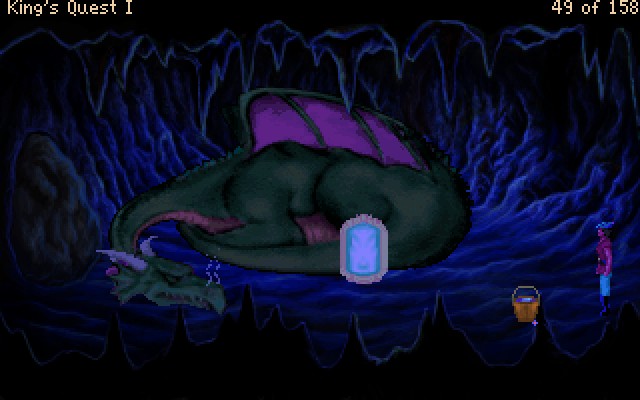 : Green and scaly, the dragon is massive and muscular. Serrated armor stretches from his tail to his neck, his leathery wings are folded against his sides, and his webbed claws look sharp and deadly.: The ferocious fire-breathing dragon is protecting the magic mirror, which shimmers with its own magical light. : Green and scaly, the dragon is massive and muscular. Serrated armor stretches from his tail to his neck, his leathery wings are folded against his sides, and his webbed claws look sharp and deadly.: The ferocious fire-breathing dragon is protecting the magic mirror, which shimmers with its own magical light.So this is the first of the three treasures we were sent out to find. We can't steal the mirror while the dragon is still there, and he's guarding the only way out of the cave. 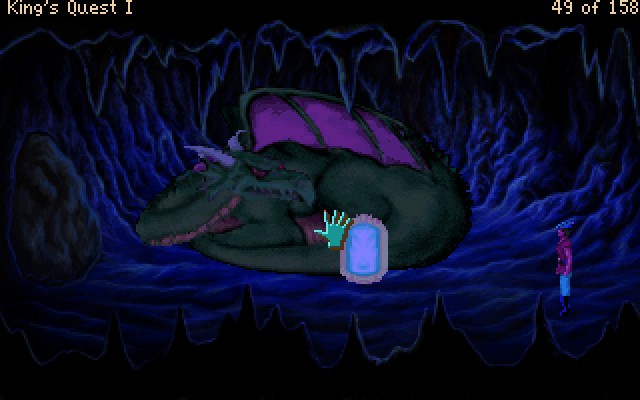 Get close and the dragon wakes up to see what you want. : Hello the--: Think again. When this dragon talks, things have a tendency to catch fire.: Uhh, sorry to bother you.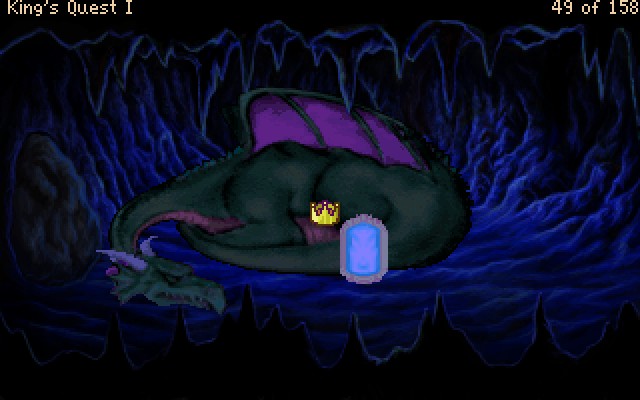 So the dragon doesn't appear to give a poo poo that we're there. So what happens if we try and get close.   Correction. The dragon doesn't give a poo poo as long as we don't get close. Also that pun. gently caress. 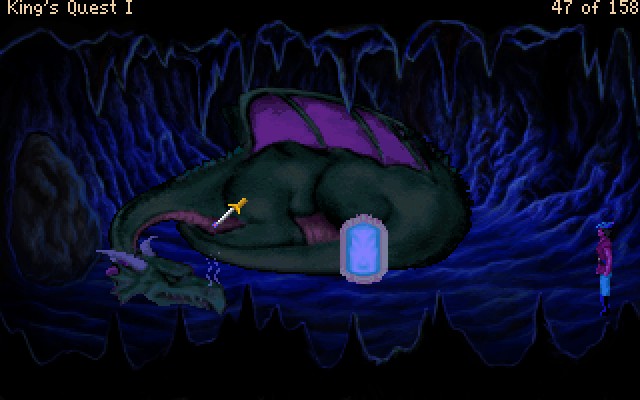 So let's try this instead...  : With unerring aim, the dagger spins through the air and pierces the soft, unprotected skin under the dragon's throat. The Beast convulses for a moment, then crashes, lifeless, to the hard cavern floor. : With unerring aim, the dagger spins through the air and pierces the soft, unprotected skin under the dragon's throat. The Beast convulses for a moment, then crashes, lifeless, to the hard cavern floor.Hmm. That's both unsatisfying and cruel. It also only got us 3 points. So maybe there's a better way... Let's try that once more, and do it right this time. : Hey dragon! SUITON-NO-JUTSU!: Did you just quote Naruto?: This is the greatest moment of my life so far. Let me have this. : Good shot! The water hits the dragon square in the face, dousing his fire. : Good shot! The water hits the dragon square in the face, dousing his fire.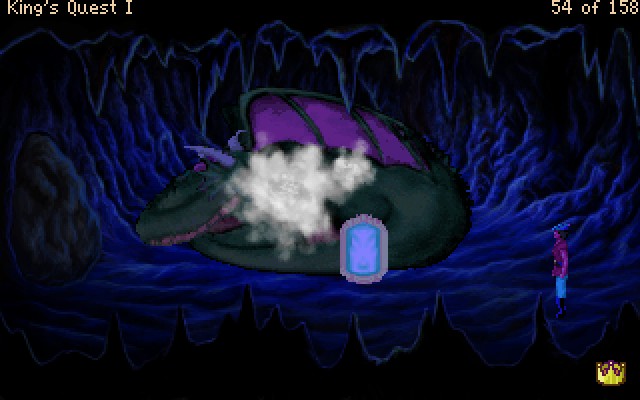  : Unable to defend himself with anything more than harmless clouds of steam, the dragon rolls aside the granite boulder and slinks off in shame, leaving the mirror behind. : Unable to defend himself with anything more than harmless clouds of steam, the dragon rolls aside the granite boulder and slinks off in shame, leaving the mirror behind.  : Graham takes the magic mirror! Congratulations! : Graham takes the magic mirror! Congratulations! Between "slaying" the dragon and recovering the treasure, we got 13 additional points, as opposed to the 11 we'd have gotten for actually killing it. While 2 measly points may not sound like much, I am going for full points here. Between "slaying" the dragon and recovering the treasure, we got 13 additional points, as opposed to the 11 we'd have gotten for actually killing it. While 2 measly points may not sound like much, I am going for full points here.Let's also take a look at our inventory. There's a few items we haven't yet looked at. : Graham is holding an empty wooden bucket.[narratpr] : The old bucket has seen many years of use, and is beginning to fall apart. Graham decides not to touch it and make its condition worse.: It was looking a lot better before someone climbed into it and took it for a ride. Not naming any names...: This is the magic mirror, one of the three treasures of Daventry.: The magic mirror's surface is smooth to the touch.As a bonus, if you use the mirror on Graham... : As he gazes into the magic mirror, Graham sees a reflection of himself as King of this land of Daventry.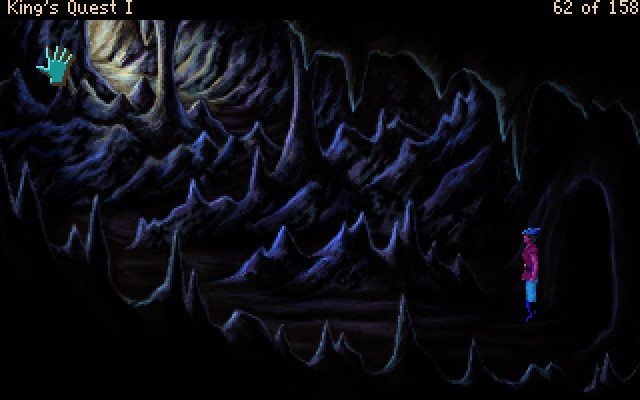 Let's move on. There's an exit to the cave over here. We could have come in this way earlier, but the boulder would have blocked our way into the dragon's lair. 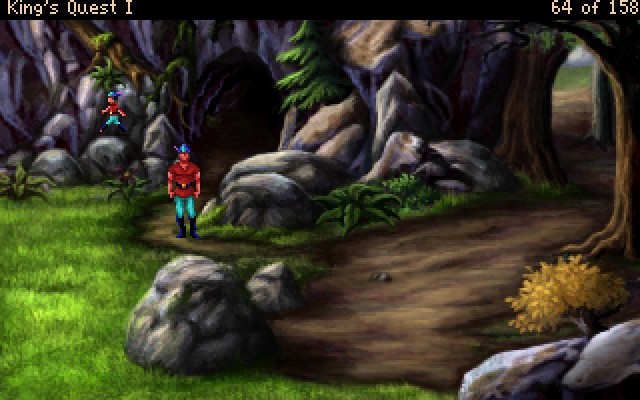 This cave exit is on screen E-6. We're just one screen north of the goat pen. This screen is also incredibly important a little bit later in the game, so just keep it in mind until then. 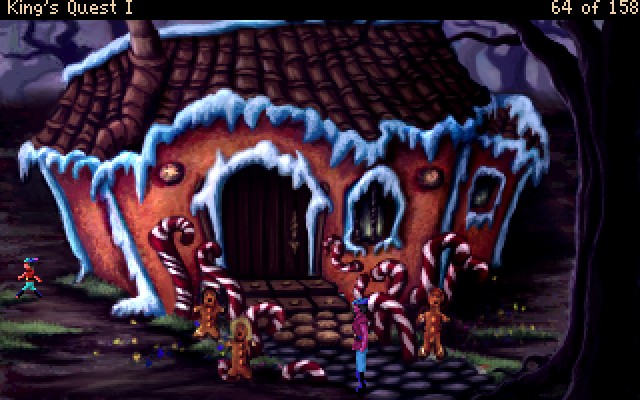 We're back at the gingerbread house, just one screen north and one screen east of the cave exit. Let's take revenge on that mean old witch... 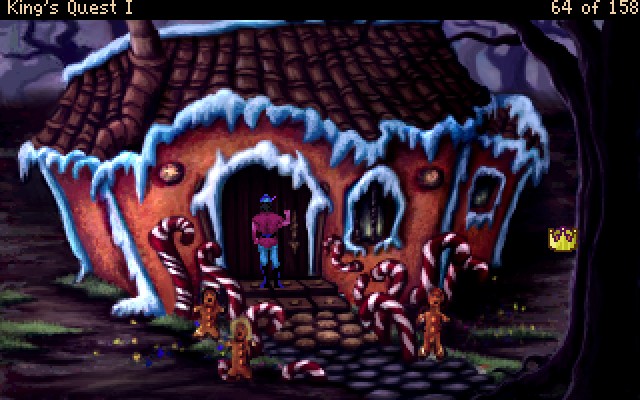 : Graham, what are you doing?: I'm knocking on her door so I can give her a stern talking to.: Well, lucky for you...: There is no answer from inside the house. : Graham, what are you doing?: I'm knocking on her door so I can give her a stern talking to.: Well, lucky for you...: There is no answer from inside the house.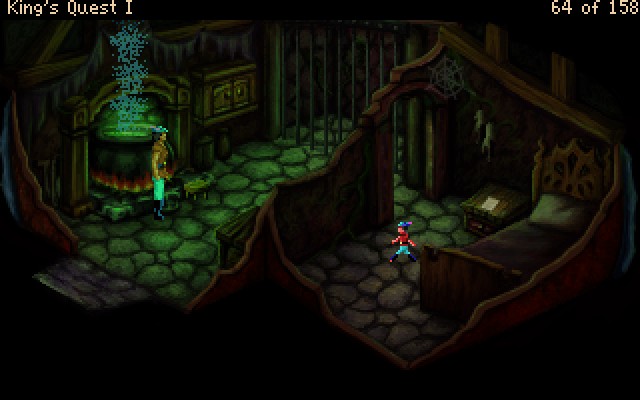 Once inside the house, you're on a strict time limit. You need to hide in the witch's bedroom quickly. 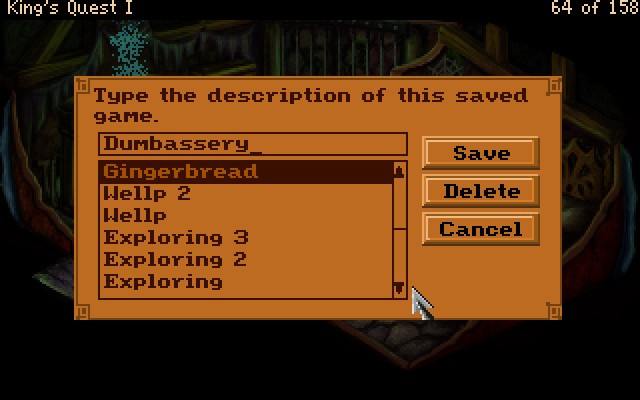 I also have a pretty apt save name for doing stupid poo poo like this. "Dumbassery" sums it up about perfectly, because no sane individual would think to do it. : From off in the distance, Graham hears a high, squeaky voice. : I can smell someone tasty in my house. : I can smell someone tasty in my house.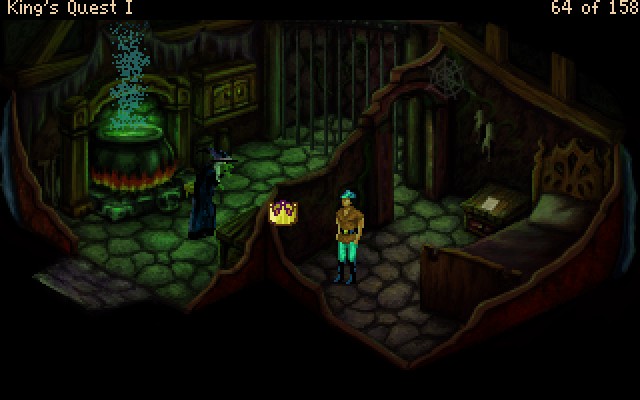 : *whispering* Graham creeps up on the witch, all sneaky-like. : *whispering* Graham creeps up on the witch, all sneaky-like.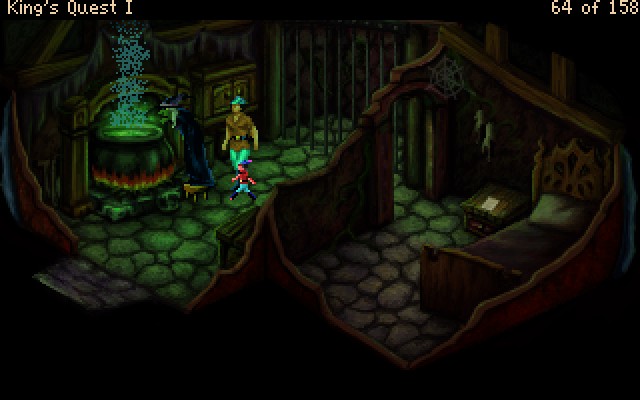 : I am going to get my cauldron ready to cook someone for dinner. (yum): After I get the cauldron nice and hot, I will be ready to have someone for dinner. (cackle) : I am going to get my cauldron ready to cook someone for dinner. (yum): After I get the cauldron nice and hot, I will be ready to have someone for dinner. (cackle)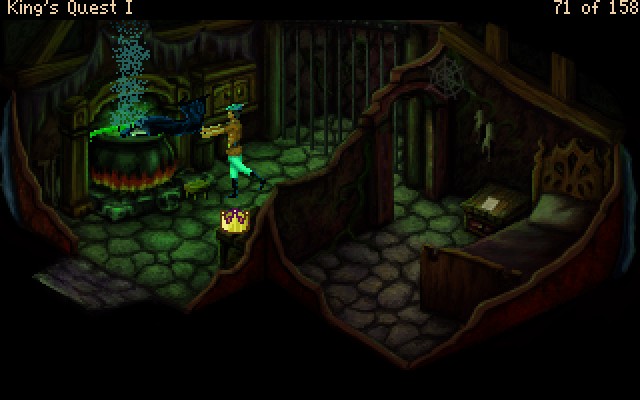 : Oh no you won't, you evil cannibal!: With a mighty shove, Graham courageously pushes the wicked witch into the pot. Her wild screams are suddenly cut off as she melts away into the oily green slime. Congratulations! : Oh no you won't, you evil cannibal!: With a mighty shove, Graham courageously pushes the wicked witch into the pot. Her wild screams are suddenly cut off as she melts away into the oily green slime. Congratulations!And with that one act, the witch will no longer harass us on the Dark Forest screens. Other hazards can still pop up, but we've removed one of the fastest ones. And with that act of revenge, I'm also going to end this update here. NEXT TIME: That puzzle. You know the one. List of Points +2 - Picked up pebbles +3 - Found a pouch +3 - It was full of diamonds +2 - Apparently riding the bucket down the well +2 - Destruction of public property (taking the bucket) +4 - Cave diving +2 - Filling the bucket +1 - Discovering the dragon +5 - Dragon "slaying" +8 - Got the Magic Mirror +2 - Leaving the cave +7 - Murdering the witch Total: 71/158 Register of Deaths Captured by witch --The Graham cracker pun Drowning --The well pun Dragonfire --The ash pun I'm making special note of puns so bad that they "count" as an extra death.
|
|
#
¿
Jun 10, 2017 17:01
|
|
|
Since there's a lot of discussion about all sorts of adventure game titles, would other people be interested in doing LPs of those if I turned this into a general adventure games megathread?
|
|
#
¿
Jun 10, 2017 17:06
|
|
|
 Hello everyone and welcome back to King's Quest I. Last time we pushed a cannibal witch into her boiling pot and watched her die in shrieking agony. Graham is not a nice dude. Anyway, now that she's dead, let's loot the place. : Graham opens the cabinet and peers inside. All he finds is some ripe cheese.: Yoink!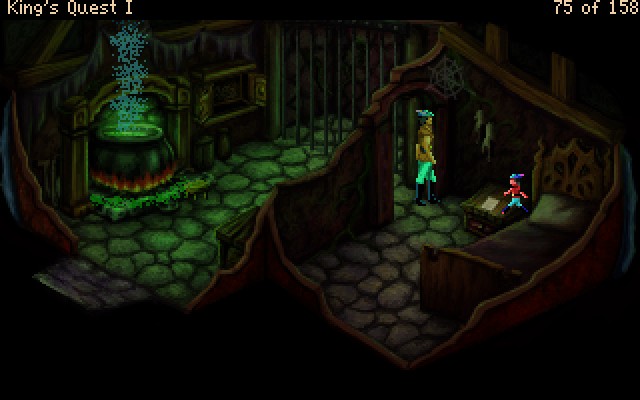 : In the witch's bedroom, all Graham finds is a note.: Taking that too!: Aren't you the least bit worried about invading someone's privacy?: Oh please. She's dead. She doesn't care about privacy any more.: Whatever. Graham takes the note from the table. : In the witch's bedroom, all Graham finds is a note.: Taking that too!: Aren't you the least bit worried about invading someone's privacy?: Oh please. She's dead. She doesn't care about privacy any more.: Whatever. Graham takes the note from the table.New items means new item descriptions! : This is an extremely fragrant piece of Swiss cheese.: The cheese has enough holes already without you poking more into it!: There is a message written on the note: 'Sometimes it is wise to think backwards.'Now let's jump a few minutes back in time, back to before the witch died. We got lucky in the last update in that she wasn't home on our first attempt at entering. Let's see what happens if she is home... 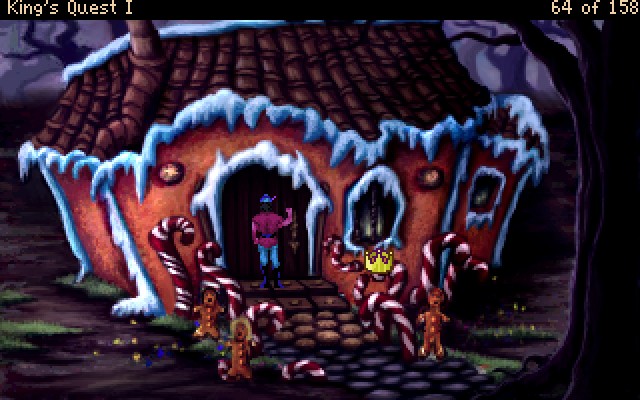 : As Graham knocks on the chocolate door, a squeaky voice from inside the house answers...: Who is there? I love visitors, especially young, tender ones! Come in, come in! : As Graham knocks on the chocolate door, a squeaky voice from inside the house answers...: Who is there? I love visitors, especially young, tender ones! Come in, come in!From there, if you're dumb enough to enter, things play out much the same as they did when the witch stole Graham from the forest. You get the same "Graham cracker" game over pun and everything. Hardly exciting, but chances are pretty good she'll be home when you go to boil her alive. So it pays to know what happens if she is. Also, while we're here let's take a look at the house. : This is the most marvelous house Graham has ever seen! It seems like it's made out of a huge gingerbread cupcake, with frosting for a roof. The chimney is made of gummy bricks, the door is made of chocolate, the fence is made of candy canes, and sourball stones and gumdrops are scattered around the yard. The path to the front door is lined with little gingerbread boys and girls. Poor kids. But that description made me hungry. Poor kids. But that description made me hungry. : Yum! The house tastes even better than it looks! : Yum! The house tastes even better than it looks!This is something you can only do if the witch is not home. Otherwise she calls you on it and invites you inside. 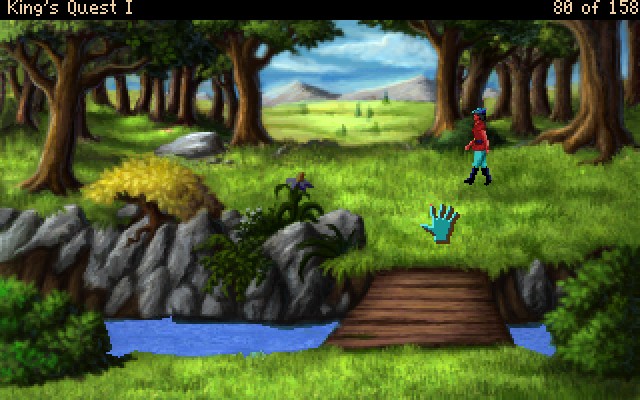 Let's move on. This little bridge is on screen C-3. If we'd gone right instead of left at the start of the adventure, and then gone down, this would be the screen we'd have arrived on. 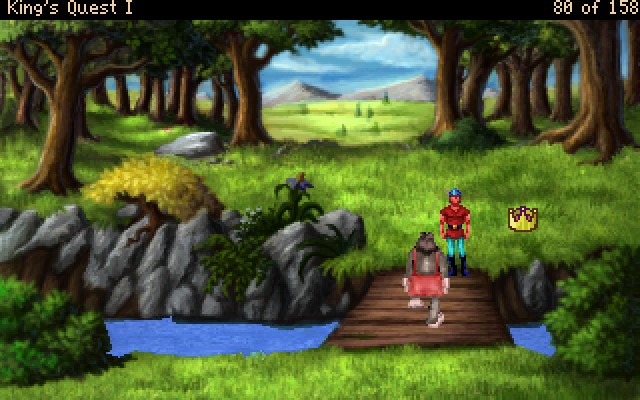 : As Graham starts to cross the bridge, a huge, hulking troll stomps into view and blocks his way. It's the ugliest, meanest, nastiest troll that Graham has ever seen, and he doesn't look like he's about to let anybody cross his bridge. : As Graham starts to cross the bridge, a huge, hulking troll stomps into view and blocks his way. It's the ugliest, meanest, nastiest troll that Graham has ever seen, and he doesn't look like he's about to let anybody cross his bridge.Let's try reasoning with him. : I say, would you mind awfully... getting out of the way? : You think yer gonna cross my bridge do you? Not for FREE, you ain't.: A toll? What toll?: Yer quite the little chatterbox, aintcha? Well, lemme warn ya, these bridges have been in my family for years and years.: I'm not paying any toll! This bridge is on the King's land. Now let me pass.: Nobody, especially not a puny little knight like yerself, has ever passed across one of our bridges without payin' our Troll Toll.: This is the King's bridge. That's his castle right over there.: Quit gabbin'. Are you plannin' on paying my toll, or does I hafta get tough? : You think yer gonna cross my bridge do you? Not for FREE, you ain't.: A toll? What toll?: Yer quite the little chatterbox, aintcha? Well, lemme warn ya, these bridges have been in my family for years and years.: I'm not paying any toll! This bridge is on the King's land. Now let me pass.: Nobody, especially not a puny little knight like yerself, has ever passed across one of our bridges without payin' our Troll Toll.: This is the King's bridge. That's his castle right over there.: Quit gabbin'. Are you plannin' on paying my toll, or does I hafta get tough? Now, we've picked up a lot of treasure in our journey. We could easily pay his toll. But it's the principle of the matter. You see, you have to pay him for each crossing and gently caress that noise. At minimum we need to cross twice. Plus, the single most infamous puzzle in the entire drat game, if not the series, is on the other side. So we're not paying. Maybe we can shove our way past him. We are a knight of King Edward, after all. : Graham pushes the troll as hard as he can. Unfortunately, the troll doesn't budge an inch. : Screw it. I don't have to take this kind of shabby treatment.: You'll be back. They always are. : Screw it. I don't have to take this kind of shabby treatment.: You'll be back. They always are.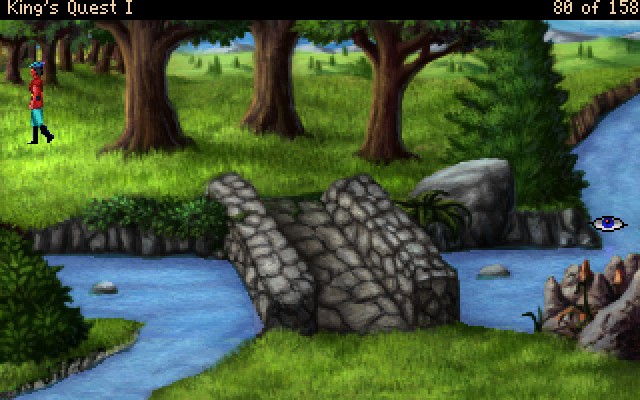 : Hey wait a second. I have a weapon! Why am I running away? : Hey wait a second. I have a weapon! Why am I running away?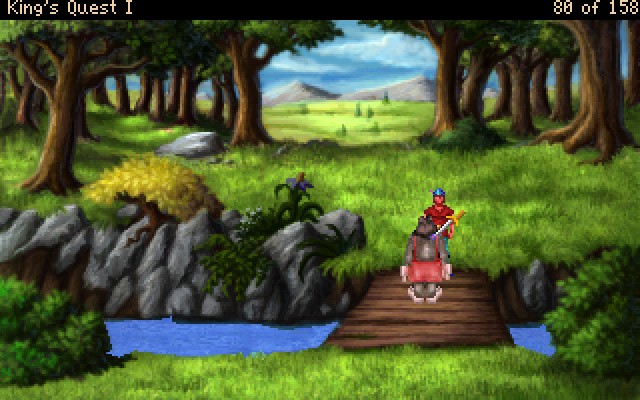 : Back already? Are ya ready to pay my toll?: The troll is much bigger than Graham, stronger, and much, MUCH meaner. Better not even try it.: Uh, nevermind. Sorry to have bothered you.: You're holding a dagger, you idiot. Did you really think that would work?: Uhh... maybe? : Back already? Are ya ready to pay my toll?: The troll is much bigger than Graham, stronger, and much, MUCH meaner. Better not even try it.: Uh, nevermind. Sorry to have bothered you.: You're holding a dagger, you idiot. Did you really think that would work?: Uhh... maybe?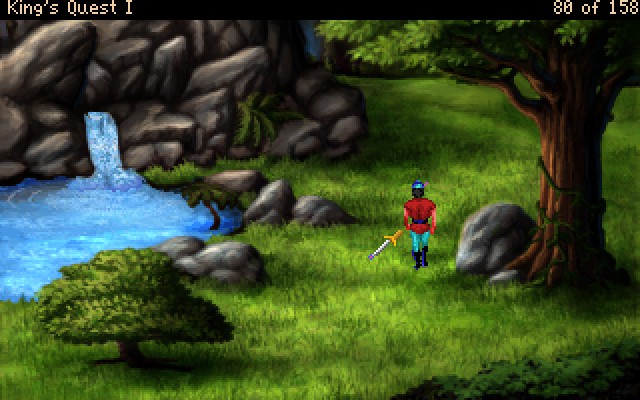 : How did that old nursery rhyme go? There was a troll, a bridge and... : How did that old nursery rhyme go? There was a troll, a bridge and...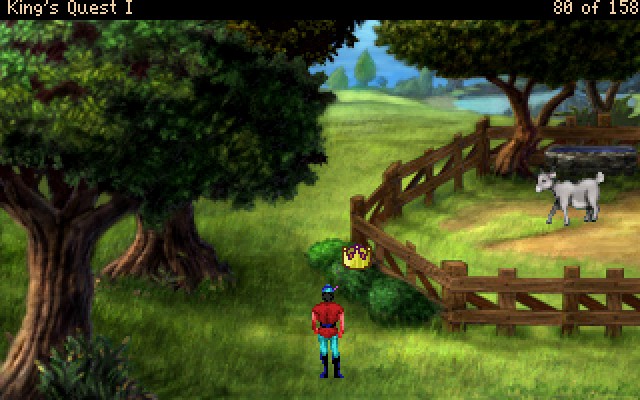 : A goat! : A goat!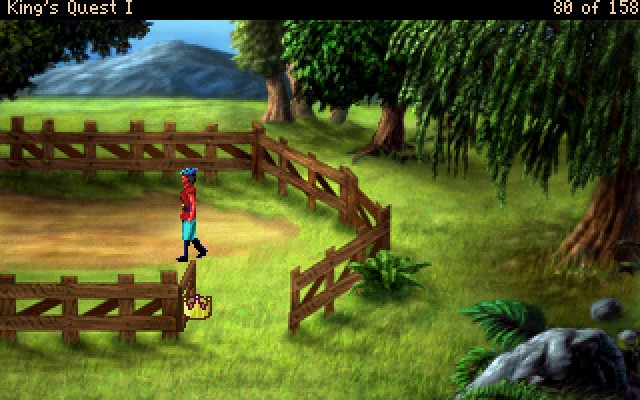 So here's another one of those "gently caress you" puzzles. The goat randomly wanders around in its pen, going back and forth between D-1 and E-1. If you're playing with dead ends enabled, it is absolutely critical that you Close The Goddamned Gate. 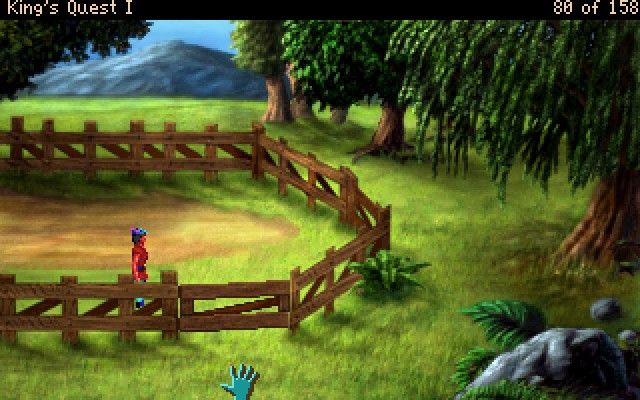 Like so. You see, if the goat leaves the screen that Graham is on, and the pen is open, then he's gone, and you're locked out of maximum points. You not only don't get the points you would have gotten for doing the puzzle this way, you also lose points for paying the Troll Toll. 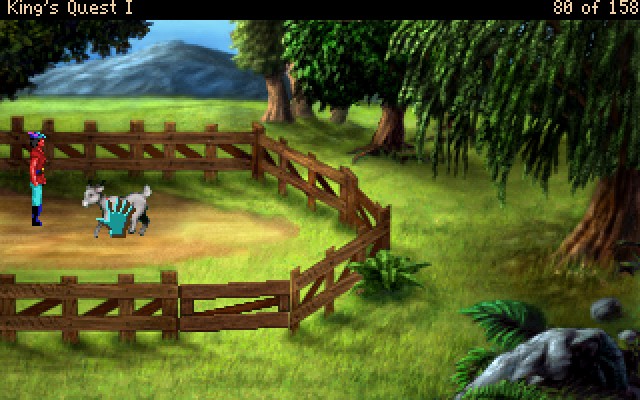 : I wonder how much a goat even weighs... I bet I could carry it around.: You wouldn't get very far carrying a goat. Perhaps you can get him to follow you if you'd like to take him somewhere.: Hint. HINT.: Oh, I get it. Hey, Mr. Goat would you...: Goats can't talk, Graham... : I wonder how much a goat even weighs... I bet I could carry it around.: You wouldn't get very far carrying a goat. Perhaps you can get him to follow you if you'd like to take him somewhere.: Hint. HINT.: Oh, I get it. Hey, Mr. Goat would you...: Goats can't talk, Graham...Goats like vegetables, right? Well just use the carrot on him! 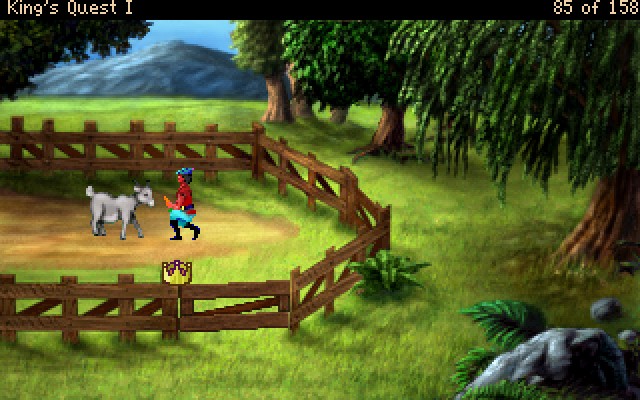 : Graham shows the goat the carrot. The goat starts following after him. : Graham shows the goat the carrot. The goat starts following after him.So here's another difference from the SCI version to the VGA version. In the SCI version, because you had a text parser, you had a little more fine control over exactly what Graham did. So you had to actually type "show carrot to goat" to get it to follow you. If you gave the goat the carrot, it would take it and you'd have to go get another one to try again. 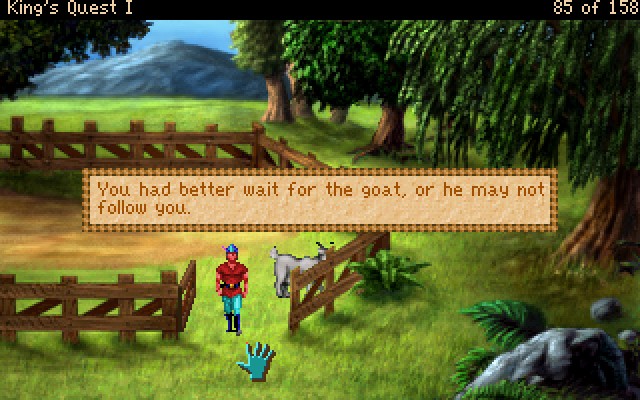 The game is nice enough to give you a warning. The goat is following you, but kind of lazily. So just wait for it to be vaguely nearby before you leave the screen and it'll follow. If you get too far ahead, the goat pulls a Houdini and is gone from the game. 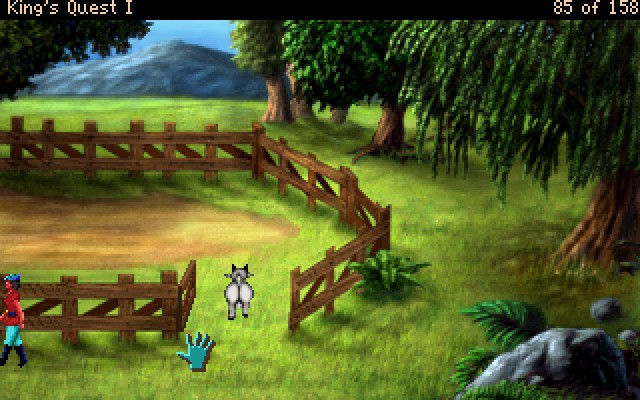 You really have to be trying to get that to happen, though. Here the goat is heading back into the pen, and Graham is leaving the screen. 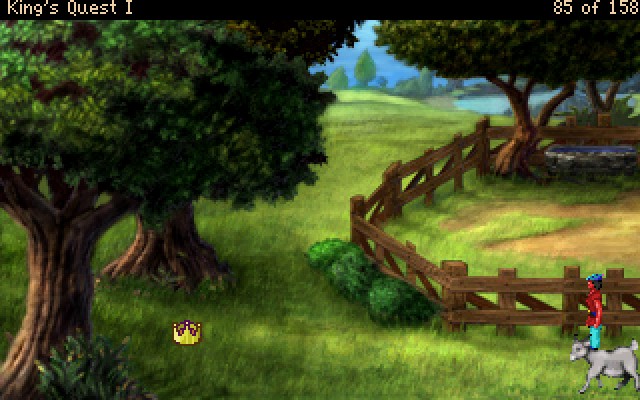 Despite that, it still counted as close enough. You'd have to purposely get the goat stuck on terrain clear across the screen before you lose it. 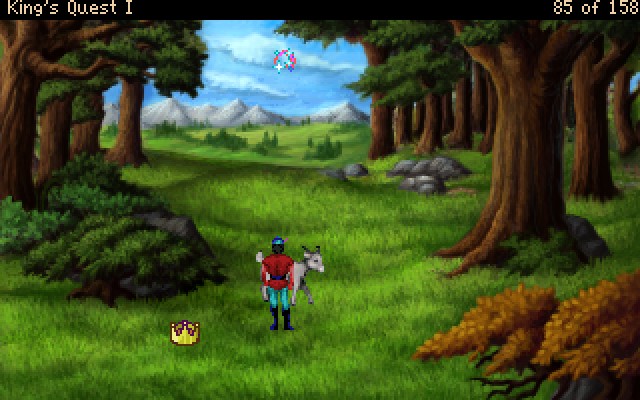 Anyway, while leading the goat around, a random event happens. This is on C-1, just one screen west of the goat pen. 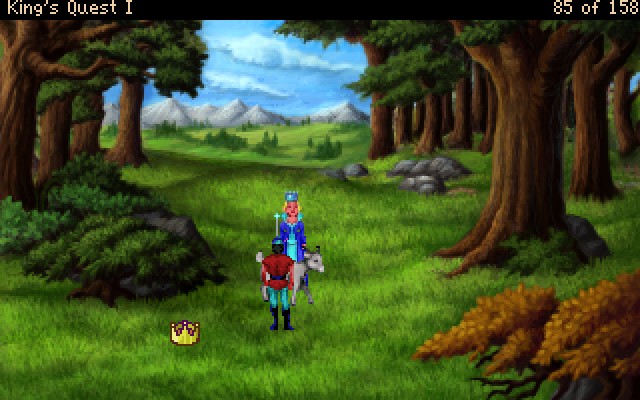 Now, there have been some bad portraits in this game. The witch was one, and the troll was another. But this lady here takes the cake. She's easily the most DeviantArt of all of the portraits. Here's all three next to each other. I want you all to take in the awfulness. 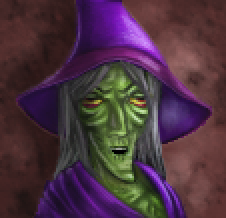   What's sad is the art got a million times better in KQ2 VGA, but the game itself is awful. So, no, I'm not going to be doing King's Quest 2 VGA edition. Anyway, this... abomination... has something she wants to say.  : Gentle Sir Graham, I am your fairy godmother.: : Gentle Sir Graham, I am your fairy godmother.:  : Your quest is indeed noble. What little aid I can offer you is this protective magic spell, effective for but a short while.: : Your quest is indeed noble. What little aid I can offer you is this protective magic spell, effective for but a short while.:  : I shall be watching over you, Sir Graham.: The fairy turns into a swirling ball of light and flies off just as quickly as she came.: *to the goat* Can you believe the crap I have to put up with?: The goat nudges Graham's hand and bleats, while trying to sneakily take a bite of the carrot. : I shall be watching over you, Sir Graham.: The fairy turns into a swirling ball of light and flies off just as quickly as she came.: *to the goat* Can you believe the crap I have to put up with?: The goat nudges Graham's hand and bleats, while trying to sneakily take a bite of the carrot.The protective spell the Fairy Godmother gives us lasts 60 seconds and will prevent Graham from dying due to random encounters and "bosses." He can still die from his own stupidity or clumsiness. For what it's worth, that 60 seconds only ticks down if you're not in a conversation or a menu. So for us it'll last for the next 7 and a half minutes real-time. We'll see next update just where "60 seconds" of protection took us.  : Hey ugly McButtFace, I'm back!: The troll stomps into view again and sighs.: Are ya gonna pay up this time, puny?: It is a well known fact that goats hate trolls intensely. Graham moves aside and watches the troll and goat meet, smirking the whole time. : Hey ugly McButtFace, I'm back!: The troll stomps into view again and sighs.: Are ya gonna pay up this time, puny?: It is a well known fact that goats hate trolls intensely. Graham moves aside and watches the troll and goat meet, smirking the whole time. : The goat lowers his head and runs straight for the troll, butting him right off the bridge and into the river below. : The goat lowers his head and runs straight for the troll, butting him right off the bridge and into the river below.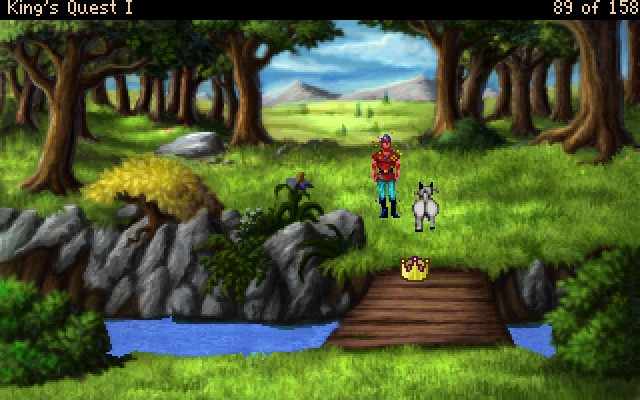 : Graham gives the goat the carrot, and the goat walks off happily, chewing on its well-deserved reward. : Graham gives the goat the carrot, and the goat walks off happily, chewing on its well-deserved reward.Okay that doesn't actually happen. In reality the goat gets tempted by the carrot and then wanders off after defeating the troll. : This looks like an ordinary carrot.: The carrot feels hard. It would be very crisp to eat.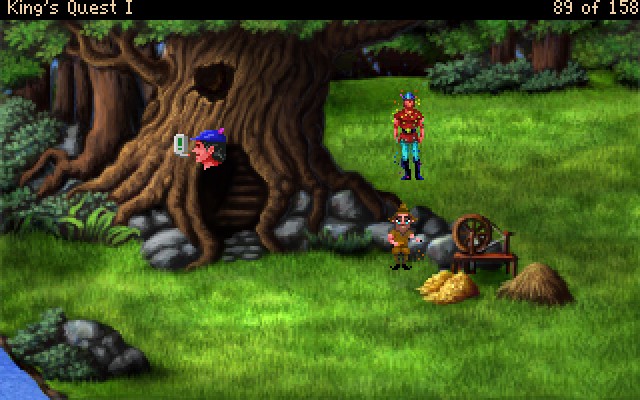 Down on screen C-4, we come across yet another fairy tale. Let's just start from the left and go to the right... : The gnome's house is carved right into the side of the tree.: Graham sees a wizened old gnome sitting in front of his house, whittling.: This is the gnome's spinning wheel.: There is a small pile of straw here.: This is a pile of gold.Welcome, folks, to the puzzle. If you know only one thing about King's Quest I, there's almost a 100% chance it will be this loving puzzle. So without further ado...  : Welcome, Sir Graham. I have been expecting you. I have something that will be of great use to you. But first, Sir Graham, you must answer this riddle.: I'll give you three guesses. What is my name? : Welcome, Sir Graham. I have been expecting you. I have something that will be of great use to you. But first, Sir Graham, you must answer this riddle.: I'll give you three guesses. What is my name? Let's get the obvious out of the way... : Rumplestiltskin?: Ooooh, very close, very close! But not quite right!So, remember that note from the witch's house? "Sometimes it is wise to think backwards." That's your only hint for this puzzle. So... : Nikstlitselpmur? Wait, no, that can't be right.: Are you suuuure?: Yeah, give me a minute.: The gnome rolls his eyes and shakes his head, sighing.: Graham borrows a quill from the gnome and scribbles some letters on the back of the hint note.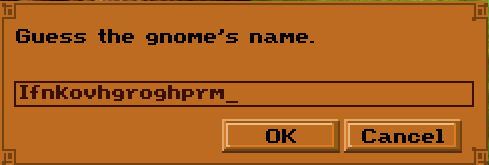 : That's stupid. You already had the corr--: That's right! Outstanding! I didn't think you were THAT clever.: : That's stupid. You already had the corr--: That's right! Outstanding! I didn't think you were THAT clever.:  How... how... HOW?: I'll explain in a minute. How... how... HOW?: I'll explain in a minute.Before I continue, allow me to quote Ben Croshaw. "Zero Punctuation, the Walking Dead posted:First, think of a problem that the player has to get around... like, say, helping a cat down from a tree. Then, think of how a normal, sensible person would solve the issue with the objects that would be close at hand. Then seal your head inside of a half-full vat of boiling chlorine for about twenty minutes, and write down another way you'd solve the problem that at that moment makes perfect sense to your probably fatally poisoned mind. Repeat this process until you have discovered the most circuitous possible solution. In the original EGA version of the game, the one that came out in 1984, this was the solution to the puzzle. You see, to a normal human brain the hint "Sometimes it's wise to think backwards." means to spell Rumplestiltskin backwards, thus "Nikstlitselpmur". Roberta Williams took "thinking backwards" to mean something entirely different. She, instead, intended for you to sit down and create an atbash cipher, where you replace all the letters with their reverse. So A=Z, B=Y, C=X, and so on. Spelling Rumplestiltskin through that cipher would get you to the eventual letter jumble "Ifnkovhgroghprm". Even in 1984, people rightly called bullshit on that. So in the 1990 SCI remake, the game no longer accepted Ifnkovhgroghprm as a valid answer, and only took Nikstlitselpmur or Nikstlitslepmur. Sierra was nice enough, you see, to allow for the E and L to be transposed. So that's my long-winded explanation for this single dumbest loving puzzle in this game. For what it's worth, the VGA version accepts either response as the correct one. In any of the three versions, if you fail this puzzle, you're not locked out of beating the game. You instead have to do things the hard way. I don't have failure dialogue on hand for that, as I've never actually failed this puzzle. Thanks to cultural osmosis, I've known the answer for longer than I've been playing this game. Now back to the LP update already in progress... : As a reward for your sharp intellect, here are some beans. They're no ordinary beans, but it's up to you to find out why. Somebody as smart as yourself should have problem at all.: The gnome hands Graham some beans and goes into his house. Graham can hear the sound of locks clicking.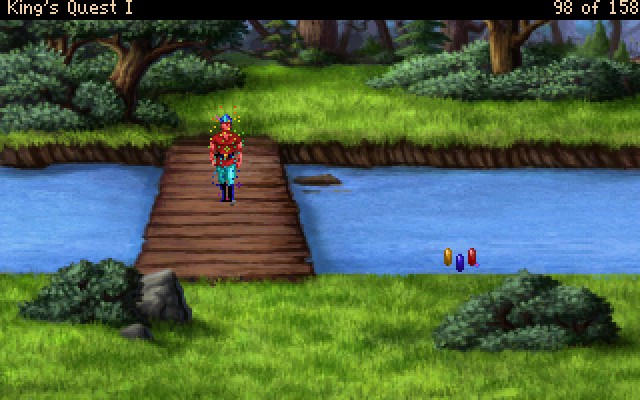 : Well?: Well what?: Care to explain how you came up with that incomprehensible gibberish?: You've never heard of an atbash cipher?: No.: It's the world's easiest cipher to break. It was used in biblical times, for crying out loud.: And what made your mind jump to an atbash cipher first, instead of spelling Rumplestiltskin backwards?: Because Nikstlitselpmur was too easy of an answer. So it had to be an atbash cipher. It's the same reason I threw that bucket of water at the dragon instead of killing it. Gotta take the hard road for the best outcome.: That's... that's the dumbest thing you've ever said. : Well?: Well what?: Care to explain how you came up with that incomprehensible gibberish?: You've never heard of an atbash cipher?: No.: It's the world's easiest cipher to break. It was used in biblical times, for crying out loud.: And what made your mind jump to an atbash cipher first, instead of spelling Rumplestiltskin backwards?: Because Nikstlitselpmur was too easy of an answer. So it had to be an atbash cipher. It's the same reason I threw that bucket of water at the dragon instead of killing it. Gotta take the hard road for the best outcome.: That's... that's the dumbest thing you've ever said.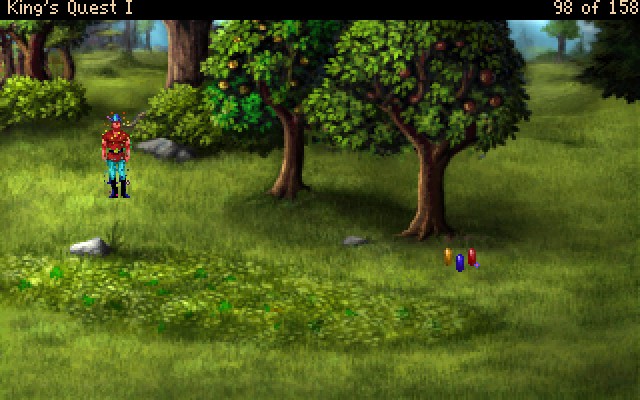 Two screens south of the gnome, on C-6 we find a patch of clover surrounded by fruit trees. : An unusual clover glistens in the middle of the field. Graham carefully picks it and discovers that it's a four-leaf clover!Anyway, this is one of two locations we can do this puzzle at. The other is a flowery meadow at E-4, which is two screens to the east from the gnome. The flowery meadow has a lot of wildflowers growing there, and this little clover patch is full of greenery. : The clover patch is thick with small three-leaf clovers, and lovely fruit trees have blossomed early this year.Those are pretty much your only hints for the puzzle. You just have to find fertile soil and plant the beans there. You all know what's coming... : Graham is holding a handful of small beans.: When Graham touches the magical beans, his hands take on a tingling sensation.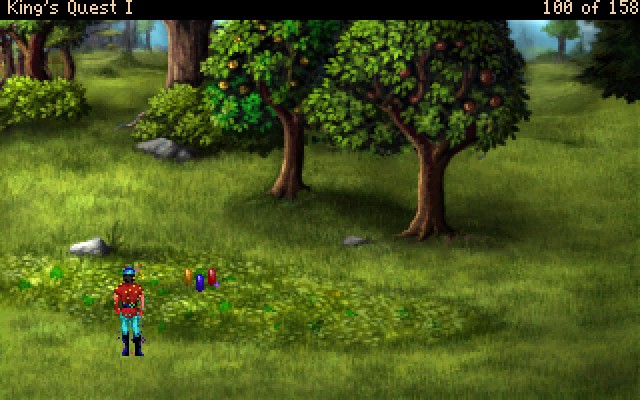 : Graham plants the magical beans in the fertile soil. Suddenly, something incredible begins to happen! : Graham plants the magical beans in the fertile soil. Suddenly, something incredible begins to happen!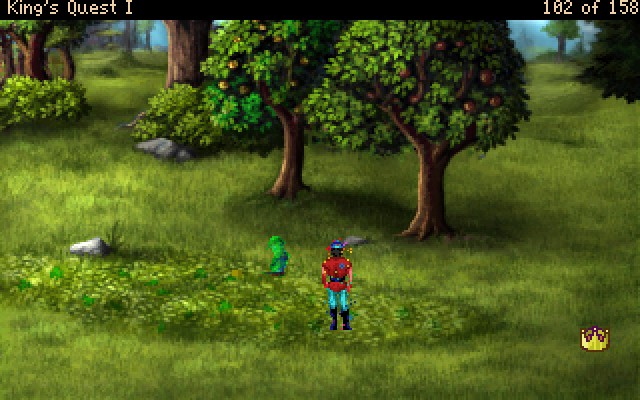 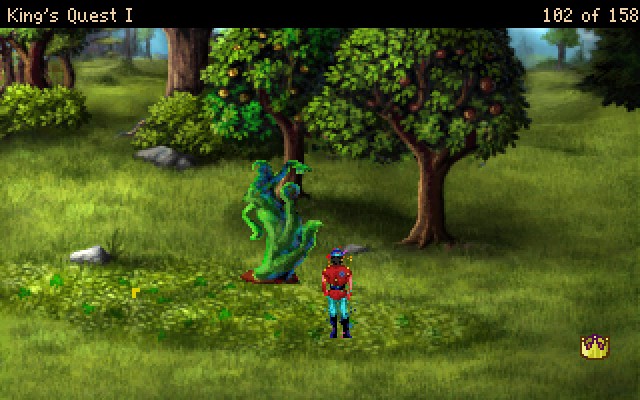 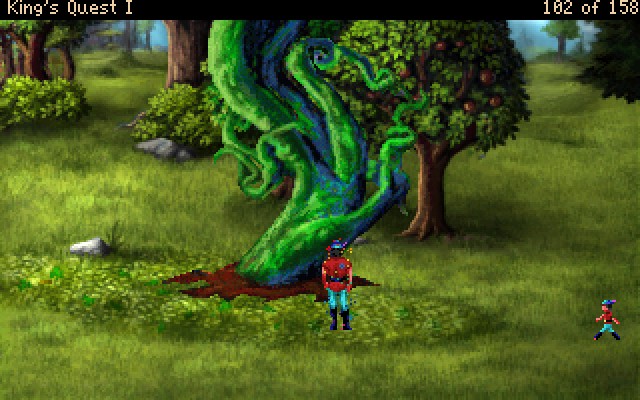 I tried to create a gif, but it was 14 MB because the screen was shaking. Anyway, that's enough of this for now. NEXT TIME: We climb the beanstalk. List of Points: +2 - Opening the Cabinet +2 - Taking the Cheese +1 - Taking the Note +2 - Reading the Note +2 - Eating the witch out of house and home +5 - The taming of the goat +4 - Goats hate trolls +9 - Ifnkovhgroghprm +2 - Four-leaf clover +2 - Graham and the beanstalk Total: 102/158 Register of Deaths None this time, despite trying to provoke the troll.
|
|
#
¿
Jun 12, 2017 18:46
|
|
|
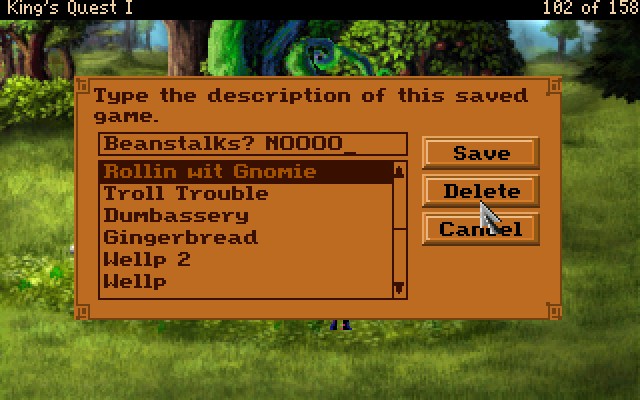 Hello everyone, and welcome back to King's Quest I. I think my newest save adequately describes how I feel about this upcoming segment. I also apologize for my lovely save names. They limit space or I would have used "Rolling with the Gnomie." Yes, I'm aware that doesn't make it any better. : This mighty beanstalk stretches up so high, it vanishes into the clouds above.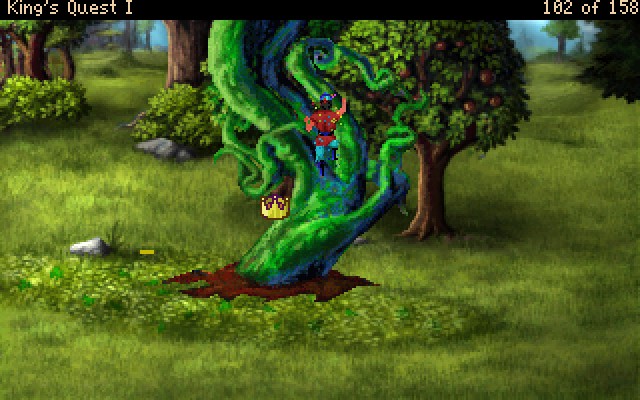 Merely clicking your hand icon on the beanstalk will get Graham started. He climbs up the first bit by himself, to lull you into a false sense of security.  There's only a casual relationship with Graham's position and staying on the beanstalk. Because of this fact, I'm going to save scum it. For what it's worth, if you try to use the hand icon on the second screen... : Graham is already climbing the beanstalk. Be careful!To move around now, you need to navigate with the walk icon.  In this shot, Graham is perfectly safe despite doing his best hoverhands with the beanstalk. 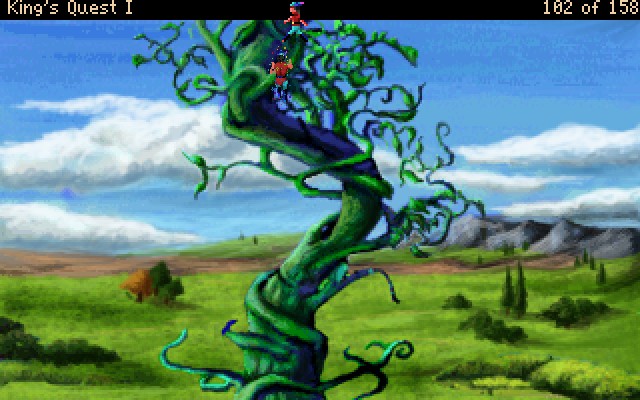 In this shot, Graham is also safe. Seems logical right? There's a problem. If he moves up one more pixel, he's in a kill zone. Don't believe me?  Why did he die? King's Quest I is loving spiteful. 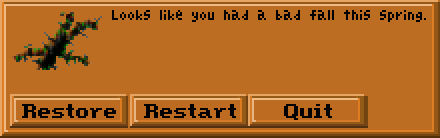 I give it a 6/10 on the Geop scale. A decent pun, but not one of the awful groaners. 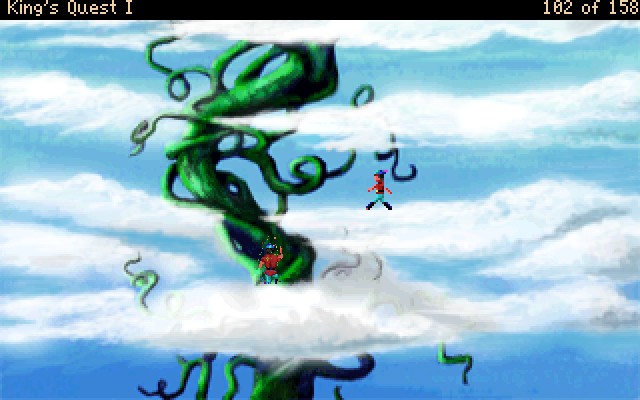 Moving on to the next screen, the beanstalk winds around again. So just imagine more carefully moving by inches and saving constantly. 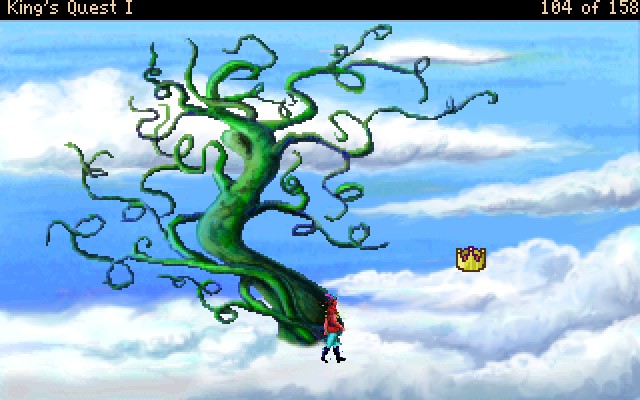 : At long last, Graham sees the tip of the beanstalk, thinning and curling as it emerges from the cloud layer below. : At long last, Graham sees the tip of the beanstalk, thinning and curling as it emerges from the cloud layer below.Finally, on the third vertical screen, the beanstalk ends and we're allowed to walk on... clouds. As long as you walk to the right in a straight line, you'll be fine. Veer up, down, or left, and you go tumbling. : What a beautiful sight! The clouds stretch out in every direction. Near the beanstalk, they even seem thick enough to stand on.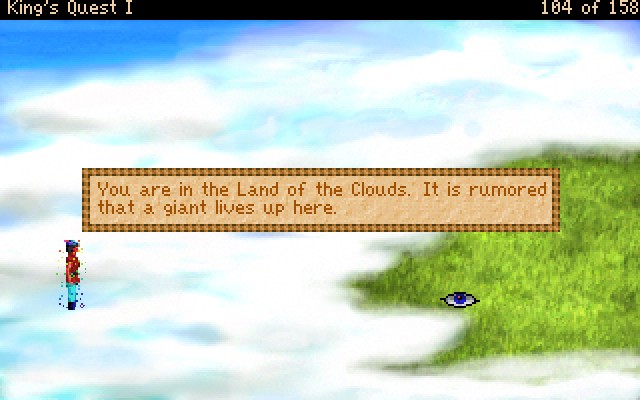 One screen west... : Graham finds himself in the Land of the Clouds. It is rumored that a giant lives up here.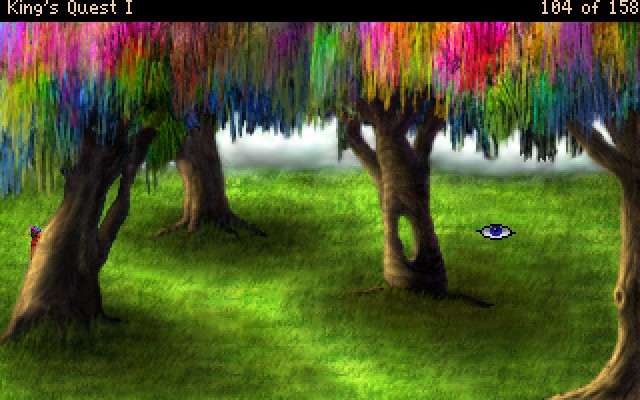 Now that we're in the rainbow forest, we're in a smaller open world area. There's two rows of three screens making up Cloudland, and only three of them have anything worthwhile. : The weirdly-shaped trees tower over Graham.: Ye best be careful, young Graham. The mystic protective spell of mine has weakened and departed.So yeah, the spell lasted from before we did the Rumplestiltskin riddle until now. Ironically we're only one screen away from where it would have actually been useful. 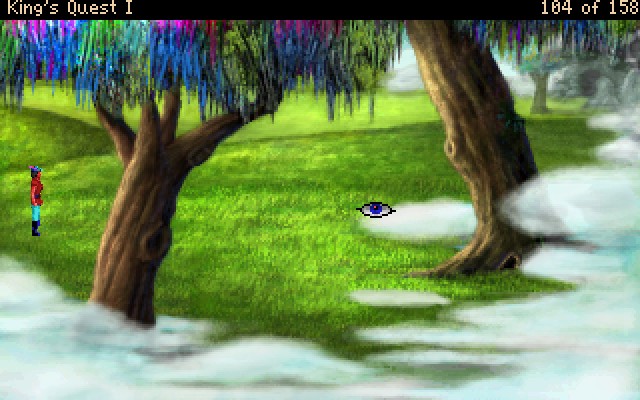 : The clouds drift over the edge of the land here, making it impossible to see where the land ends! Though the clouds look very thick, it would be unwise to venture toof ar out into them. : The clouds drift over the edge of the land here, making it impossible to see where the land ends! Though the clouds look very thick, it would be unwise to venture toof ar out into them.We started in the upper left corner of the 2x3 grid of screens. We're now in the lower right corner by way of down around the outside edge. There's a "boss" encounter in the upper middle screen, you see. Anyway, you see that little hole in the tree? Let's investigate. : There is a small, dark hole in the base of this tree. But Graham need to get closer for a better look.: Twist my arm, why don't you?: Graham reaches into the hole and finds a leather slingshot.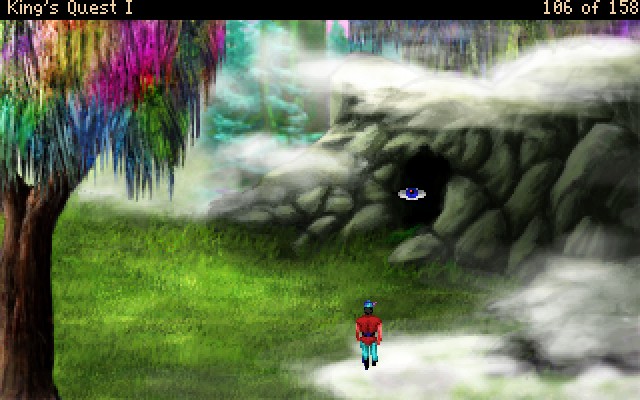 So do you remember last time when I was discussing failing the gnome's riddle? Well in the event you fail to correctly guess Nikstlitselpmur inside of three chances, you are instead given a small golden key. That key unlocks a door on screen H-6, one screen north of the oak tree. I'll show the inside of the cave off in a few minutes, but all you need to know for now is that the door on H-6 dumps you out here. Anyway, time to fight the only real "boss" in the game. The dragon hardly counts, and the guardian of the third treasure is a minor puzzle instead. 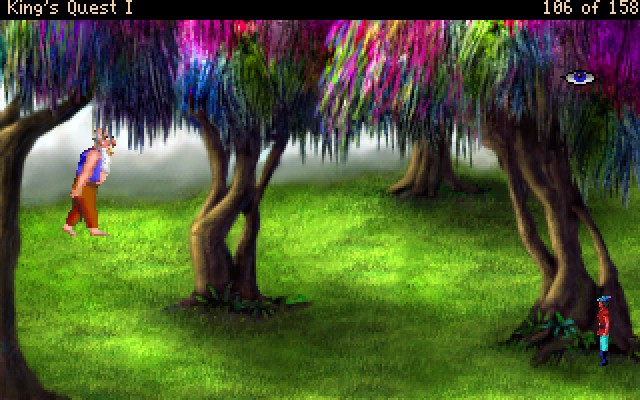 This is the giant that lives up here in Cloudland. 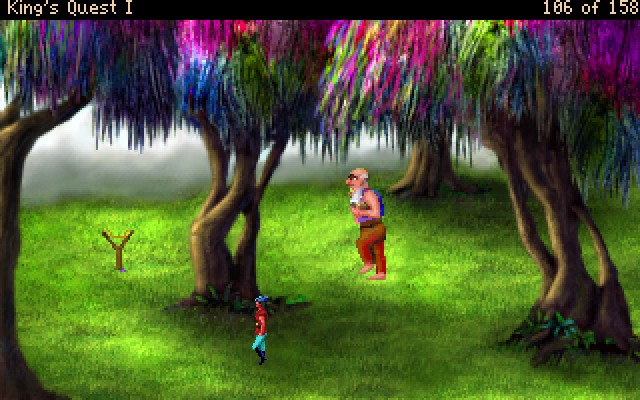 And he's holding the enchanted chest that is always filled with coins. 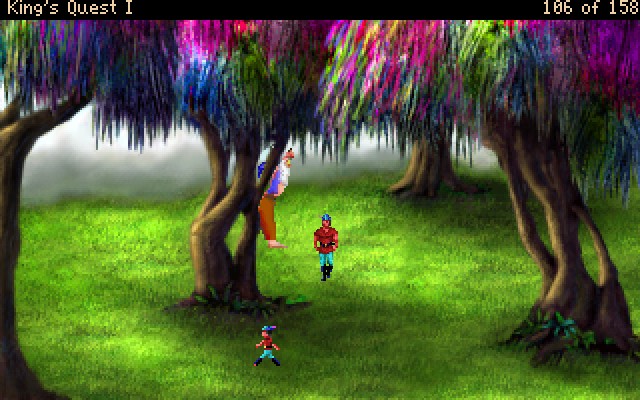 : Graham, what are you doing?: What does it look like?: It looks like you're running in circles around a tree.: *slightly winded* Well you've got the right of it...: Some knight you are. : Graham, what are you doing?: What does it look like?: It looks like you're running in circles around a tree.: *slightly winded* Well you've got the right of it...: Some knight you are. So in the likely event you let the giant catch up to you, he's not kind.   Let's be honest here, it's really hard to to Graham cracker. Anyway, what you're supposed to do here is play ring-round-the-rosie for 20 seconds. : The giant is getting tired of looking for Graham. Seems like he may be getting ready to take a nap.Once you get this message, you only need to run for a few seconds more.  : Good job! The huge giant, tuckered out from stomping around, has fallen fast asleep.: Graham, you are the worst knight.: Yes, but I'm alive.: Slowly, carefully, Graham takes the chest without waking the giant. : Good job! The huge giant, tuckered out from stomping around, has fallen fast asleep.: Graham, you are the worst knight.: Yes, but I'm alive.: Slowly, carefully, Graham takes the chest without waking the giant.This is actually a kindness in the VGA remake. In the EGA and SCI versions, you had to run from or hide from the giant for almost a full minute. In my test run in the SCI version, I got caught and "killed" at the last second. Once the giant finished stomping on Graham, he walked over and instantly fell asleep, leaving me in control of Graham's squished sprite. I really wish I had recorded it, because it was pretty drat funny. Oh and here's some item descriptions... : This is a small, but sturdy slingshot.: Graham gives the sling's band a few flicks to test its durability. It still feels usable.: This magic chest, one of the three lost treasures of Daventry, is always filled with gold coins.: Graham is dazzled by the countless supply of gold coins spilling from the magic chest. He quickly closes the lid.Once the giant is asleep, you can do anything and he won't wake up. You can also use the elf's ring to get the same outcome, but without the chance of dying. There's a third method to kill the giant, but it gets you less points. So let's review...  We're back before the giant fight, and the solution is already on screen. We got the slingshot up here, and I'm sure you remember the rocks we found on the lake shore.  It's that easy. No fanfare, no muss, no fuss. You also only get 3 points instead of 7 for killing the giant. You also have to be careful where you kill the giant, because if the treasure drops behind a tree, then it is permanently unrecoverable.  Anyway, we climbed up the beanstalk, so let's return by way of the cavern system. 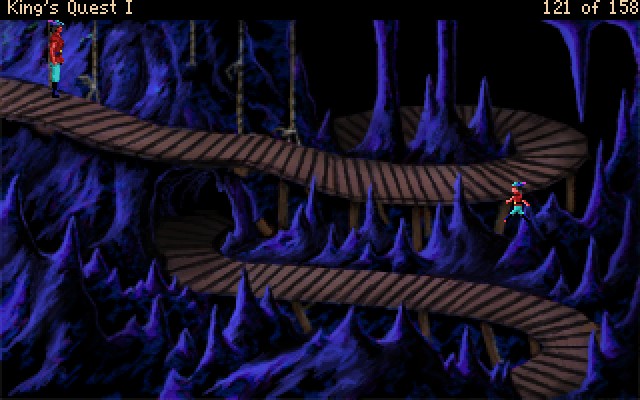 There are three "platforming" screens like this, where Graham has to navigate around these precarious platforms. If you tell him to walk a long distance, the chances of him walking right off the edge and to his death shoot up to almost 100%. Like the oak tree branch and the beanstalk before, this is a trip best taken in short distances. Oh and for an extra dose of "gently caress you" the Dwarf can appear on these screens. The chances of him appearing increase the longer you linger on them. So you need to be both careful and fast. You see, if the Dwarf appears, your only recourse is to leave the screen to despawn him. Or, if you have the magic ring, you can put it on to make him go away. But like the fairy's protection, the ring only lasts 60 seconds. So you best make them count. You can, at least, take the ring off when you don't need it. 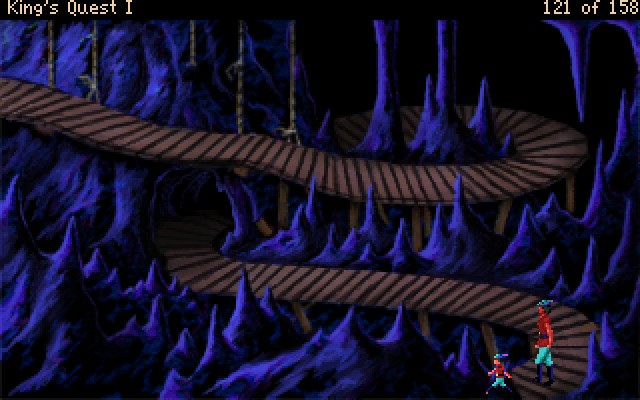 Like I said, short distances and you'll get through in no time. 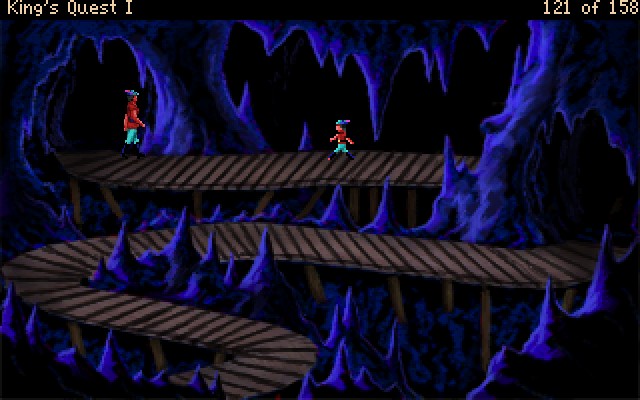 This second screen is where the caves really get going. There's a pretty good chance that the Dwarf will dart out of the dark hallway directly in front of Graham when you enter this screen. 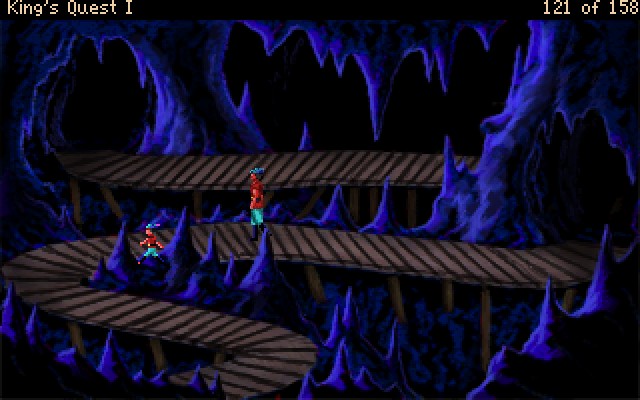 Second verse, same as the first really. 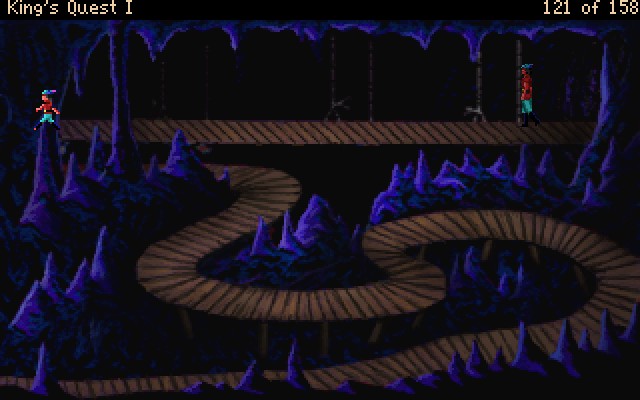 The penultimate screen is where I always seem to have the most trouble. It's the winding bit in the middle that always throws me off.  Here's a nice timelapse of walking across the screen. Each time Graham seems to jump forward is the gif skipping 50 frames of animation. 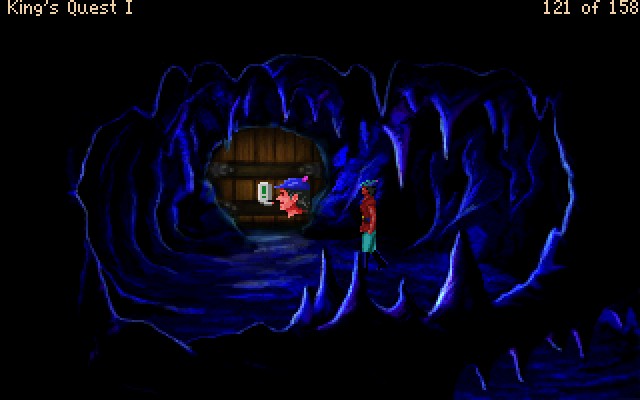 I don't know why I have the talk icon selected. Anyway, before we leave the cave, let's discuss how this was different in the EGA version of the game. In the 1984 release, the caves weren't a stupid platforming segment. They were, instead, just a couple screens where Graham had to walk up a staircase in the mountain. The Dwarf could still ambush you, but it was a lot harder to fall down. For some unknown reason, Sierra decided to make it so that the staircase became a platforming challenge in the 1990 SCI version and AGDI copied the change because it's a direct port. Anyway, the way out is this door up here. I mentioned it was locked, but Sierra can be kind developers too. : As Graham reaches out to touch the door... 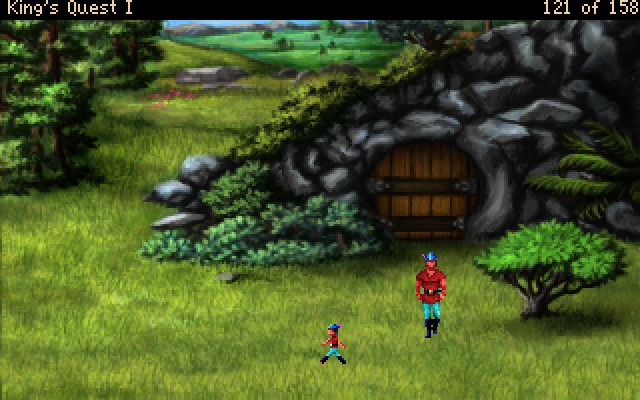 So here we are, back on solid ground, on screen H-6. We only have one more major puzzle to solve before we're at the end of the game. So let's go take care of that quickly.  This little run-down hut is on F-3, two screens north of the Gingerbread House, and two screens south of the Old Well. The front door here is more-or-less as close to the middle of the map as you can get. 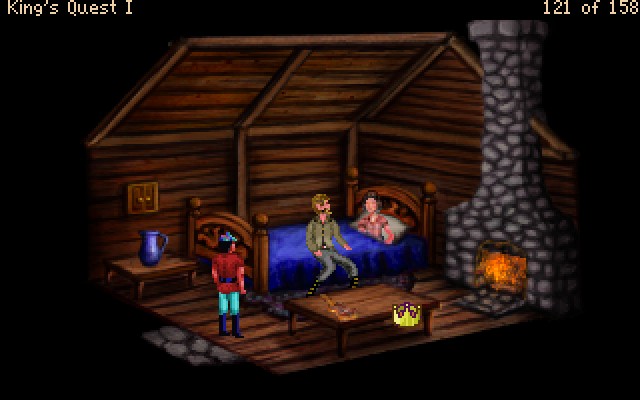 : The woodcutter speaks to you, his voice broken with sorrow. : The woodcutter speaks to you, his voice broken with sorrow. : Who are you, good sir?: I'm Graham, a knight of the realm.: We would welcome you to our home, Sir Knight, but we have had no food for so long, my beautiful wife cannot even rise from her bed. I fear she may die soon.: That's awful. I'm so sorry!: The woodcutter, still gazing at his wife's pale face, does not seem to hear Graham. : Who are you, good sir?: I'm Graham, a knight of the realm.: We would welcome you to our home, Sir Knight, but we have had no food for so long, my beautiful wife cannot even rise from her bed. I fear she may die soon.: That's awful. I'm so sorry!: The woodcutter, still gazing at his wife's pale face, does not seem to hear Graham.So, if you think back several updates, you may remember we got an enchanted bowl. : Graham retrieves the enchanted bowl from his pack, catches the woodcutter's attention and holds it out.: Fill.: To the woodcutter's astonishment, a hot savory stew begins to bubble up from the bottom of the bowl. Within moments, it is full.: You have more need of this than I do. This bowl will fill with food whenever you tell it to.: The woodcutter is overwhelmed with joy.: Thank you, thank you, Sir Knight! We shall never forget your kindness and generosity. Please, take my fiddle as a small token of our thanks.: Graham takes the fiddle and leaves to give the woodcutter and his wife some privacy.And with that quest out of the way, we are now fully equipped to beat this game with maximum points. So let's set out to get that third treasure. 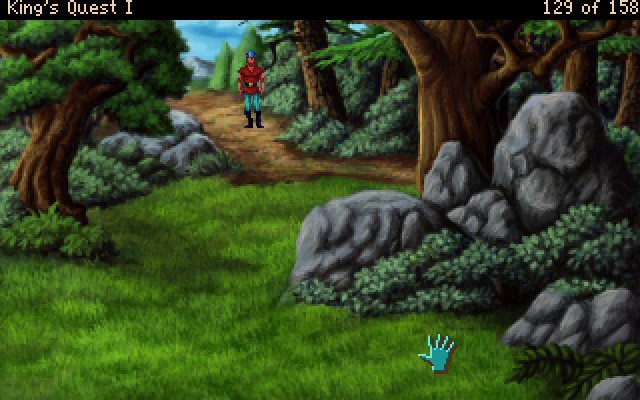 Despite playing the game half a dozen times, I immediately get lost looking for the one screen that will let me progress. But it does let me show off the last dangerous screen. This is G-1, directly to the west of the oak tree. The map simply describes this screen as "wolf". : Without warning, a wolf darts out of the bushes and runs straight for Graham. Look out! Don't let him catch you! This wolf moves incredibly fast, and if you aren't on the edge of the screen when it shows up, then you probably are going to die. There is never any need to be on screen G-1, so it's quite easy to avoid dying in this fashion.  Here's the flower filled meadow I mentioned in the last update. This is screen E-4, and it's two screens east of the gnome's house, or three screens south (or north!) of the goat pen. 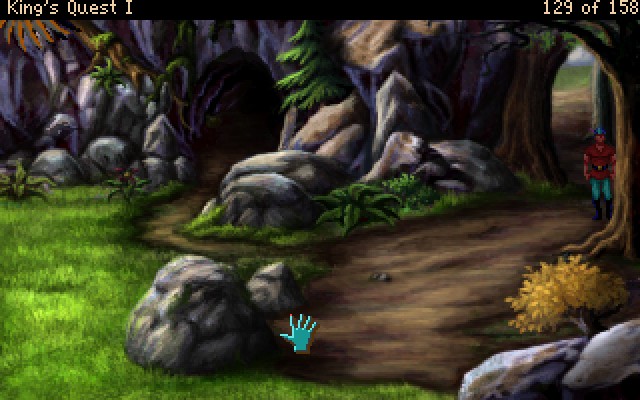 I wandered around aimlessly for 5 straight minutes looking for this one screen. This is E-6, one screen north of the goat pen, or two south of the flowery meadow. We've been here before. This is the exit of the cave connected to the well.  See that condor? That's our ticket to the end of the game. We have to click on him just before he passes overhead. This condor's move speed is connected to Graham's walking speed. So, for best results crank that slider all the way to minimum. Next, you're going to want to stand on those pebbles. You see them in the middle of the screen? Yeah, stand there. Then you just have to click on the condor when he's roughly at the spot he's at in the screenshot.  : With a mighty leap, Graham grabs hold of the condor's talons. : With a mighty leap, Graham grabs hold of the condor's talons.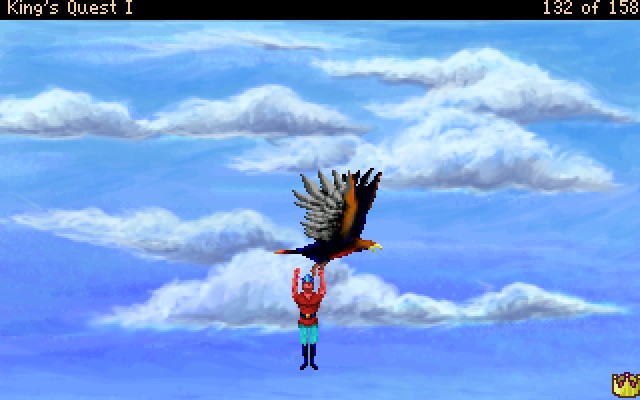   That will be enough for now. NEXT TIME: We finish King's Quest I. I told you it was short. Oh, and the woodcutter scene was all heartwarming and junk right? Well, take a look at his portrait when he's talking...  The portraits in this game... he's got a serious case of meth mouth. The portraits in this game... he's got a serious case of meth mouth.List of Points +2 - Climbing the Beanstalk +2 - Finding a slingshot +7 - Graham the Coward +8 - Got the enchanted chest +2 - Filled the bowl (again) +3 - Fed a starving couple +3 - Got the fiddle +3 - Condor taxi ride Total: 132/158 Register of Deaths Graham vs Gravity - x2 Goomba Stomped
|
|
#
¿
Jun 14, 2017 19:26
|
|
|
MagusofStars posted:Are you going to post the map before closing the game out? This one doesn't seem to have any one-way twisty passages but it'd be nice to see where we've been. I linked to it in the second update, but here it is again. 
|
|
#
¿
Jun 15, 2017 03:23
|
|
|
Hello everyone, and welcome back to King's Quest I. In spite of everything going against us, we've finally reached the endgame. Only three puzzles stand between us and becoming King Graham. First of all, let's get our bearings. We're on screen B-3, which is directly south from the castle. The bridge where the goat knocked the troll into the river is directly to the east, but the way is blocked by some rocks.  : A large bulbous mushroom grows in the meadow. : A large bulbous mushroom grows in the meadow.This is of crucial importance. Here on screen A-3 is a single mushroom. Do not enter that hole on the previous screen without this mushroom. It is the game's final "gently caress you" in that this item is 100% necessary to win. 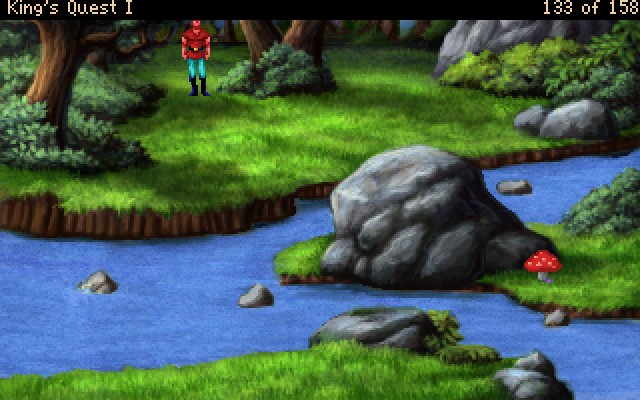 I don't believe I've ever looked at this screen before, but this is directly south of the clearing on B-3. You could conceivably approach from the south, but there's never a need to do so. 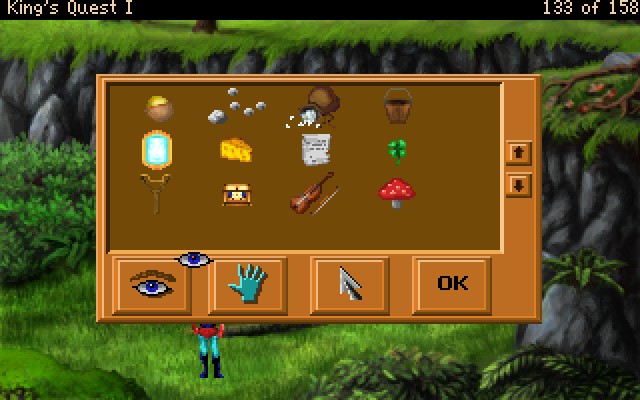 Here's a look at our inventory. I mostly want to show the mushroom, as it's red with speckles on top. Unless I'm mistaken, that usually indicates a fly agaric. This will come into play later. : This is the woodcutter's old fiddle.: The fine old fiddle has been beautifully carved.: This is a small, unusual-looking mushroom.: Careful! You do not wish to damage the delicate mushroom.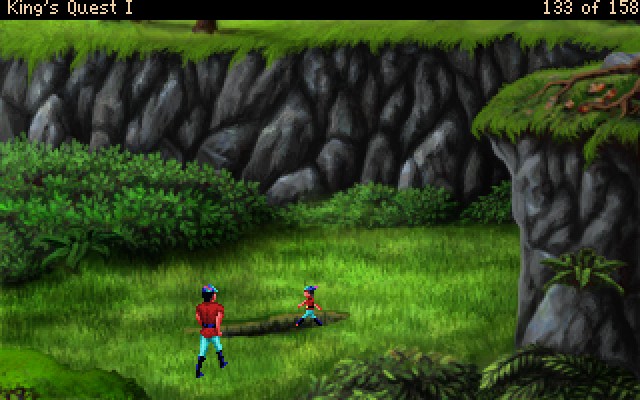 With that business out of the way, let's drop into the hole in the ground.  This small cave system is a straight shot to the goal, so there's no getting lost. 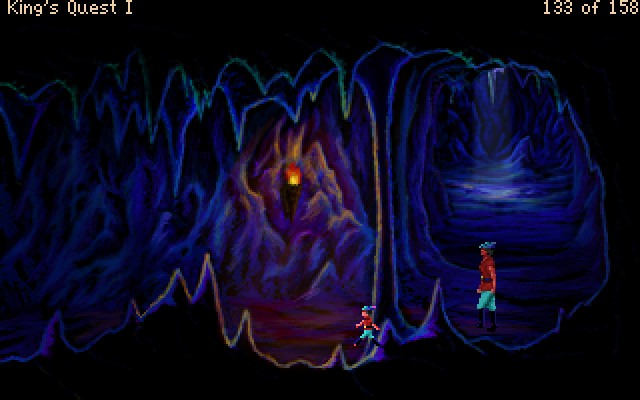 One screen down...  And one screen west.  Yeah, I went there. : The rat grins crookedly, his long, pointed fangs glistening in the torchlight. : That's right, mister, just walk a little closer...: Hell there, my friend. You looking for anything in particular? You wanna pass through my little door here, right? Well, maybe we can work somethin' out. What's it worth to you?: Keeping in mind the rat's remarkable agility and even more remarkable fangs, Graham decides not to risk an attack. : That's right, mister, just walk a little closer...: Hell there, my friend. You looking for anything in particular? You wanna pass through my little door here, right? Well, maybe we can work somethin' out. What's it worth to you?: Keeping in mind the rat's remarkable agility and even more remarkable fangs, Graham decides not to risk an attack.The narrator says this if you use your hand icon on the rat, if you use the dagger on the rat, or if you try to shoot the rat with the slingshot. Violence is not the answer here. Maybe we can just slide past him...   Or not. Maybe we can sneak by instead with the elf's invisbility ring... : Graham places the shimering ring upon his finger. As he rubs it, he turns invisible! Graham is transparent beneath the speak icon. That's how you know he's invisible. : Using his sense of smell to guide him, the rat attacks Graham. In the scuffle, the ring falls off, making him visible again.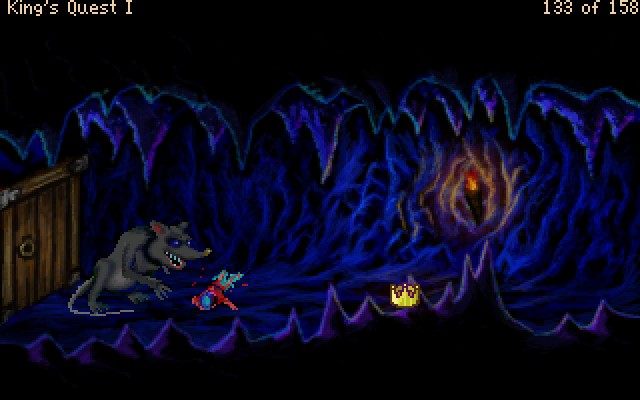 And from there it's the same death again. 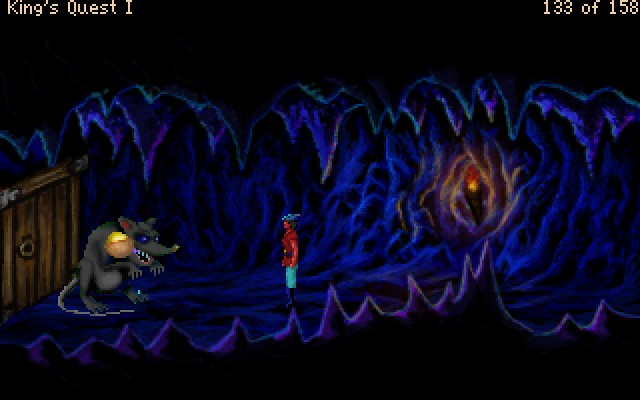 Bribery does work. In this case we're giving him a golden walnut. : Some sort of treasure? Now you're talkin', mister. Lemme see some of that treasure.: The rat takes the treasure from Graham's hand.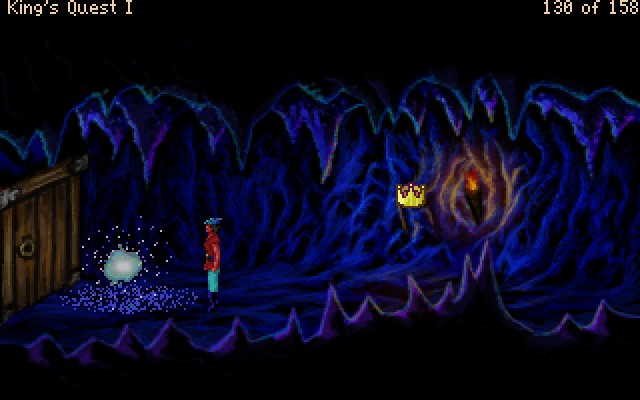 And then the rat poofs out of existence. Seems all well and good, except giving away our treasure made us lose three points. So instead of losing points, here's the actual solution. : Graham offers the rat a piece of cheese.: Cheese? Well, yeah, now that you mention it, I guess I am kinda hungry...: The rat drools at the sight of the cheese, and snatches it from Graham. You might want to count your fingers... In this one case, there's special dialogue for using the eye icon on yourself... : One, two, three, four...: Amazingly enough, Graham still has all his fingers!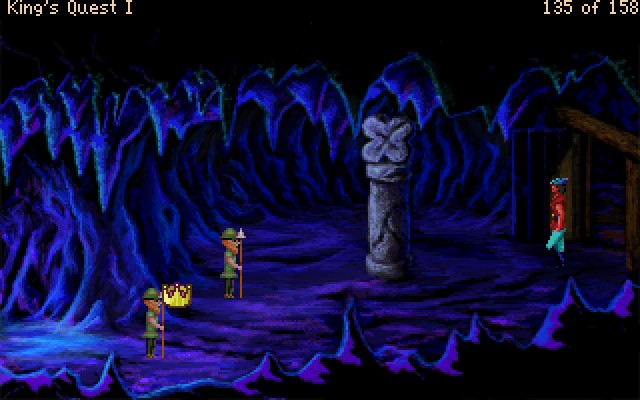 That's one puzzle down, and we're immediately thrust into the second. Like the rat, there's an easy way to solve this puzzle. : Oh no! There are leprechaun guards here... and they don't look pleased to see Graham at all. What is he going to do now?If you try using a weapon on them... : Don't even try it. They're more agile than Graham, and they outnumber him.: The leprechaun king's magic does not permit Graham to use weapons in the throne room. Thus, while the sling is still in his pocket, he finds himself entirely unable to put it in his hand.So what's the easy solution?  : With a genuine four-leaf clover in his possession, the leprechauns fear and respect Graham. Rather than risk offending him, they decide to leave him entirely alone. : With a genuine four-leaf clover in his possession, the leprechauns fear and respect Graham. Rather than risk offending him, they decide to leave him entirely alone.Yeah. If you thought to search the clover patch and pick the clover from it, you can simply stroll through the penultimate puzzle in the game and suffer no consequences. I don't have a recording of it because it would take too long to get. But if you don't have a clover and you come to the endgame, you get a game over where Graham spends the rest of his days peeling potatoes. 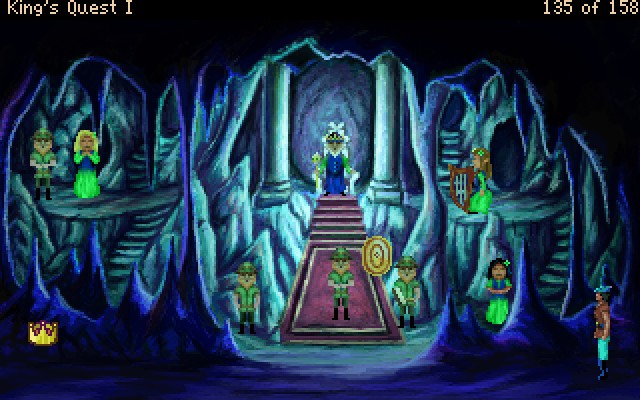 : The leprechauns, sensing the power of the four-leaf clover, begin to vanish. : The leprechauns, sensing the power of the four-leaf clover, begin to vanish.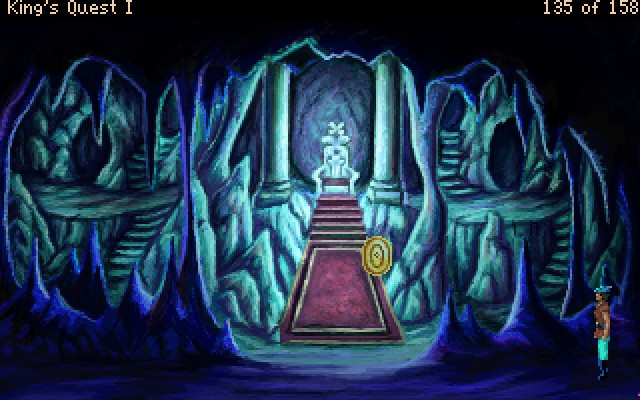 And then you're free to pick up the shield. The simple act of doing nothing gets you no points. But that's not satisfying at all is it? So let's reload one last time and do it right. 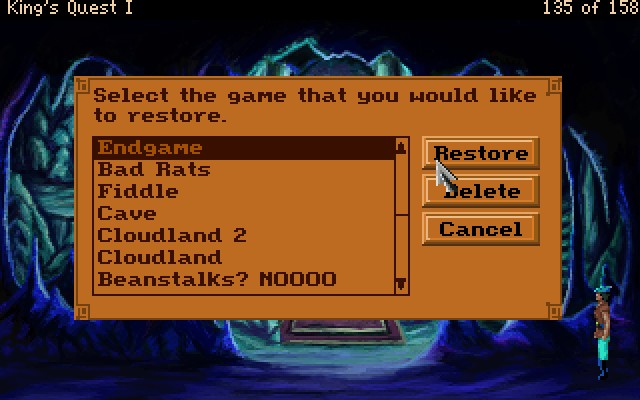 Last save of the game right here.  The leprechaun guards stare menacingly at you for a long time before they decide to attack. So you have plenty of time to try literally everything in your inventory. In this case, the correct answer is to use the fiddle. : Wonderful job! Leprechauns find fiddle music irresistible. The moment they hear the music, they begin dancing a frenzied jig. Graham continues playing for a while here, with the guards dancing the whole time. Incidentally, this scene is why I'm doing a LP of the VGA version. I got to this point in the SCI version and the game bugged out and refused to fire the next script once I started playing the fiddle, leaving Graham playing indefinitely. : Hearing the fiddle music Graham played in the hallway, the leprechauns have begun to dance! As they do, they pop away in a fit of merry making. The leprechauns all individually disappear, except for the king.  The king dances out of the hall instead. 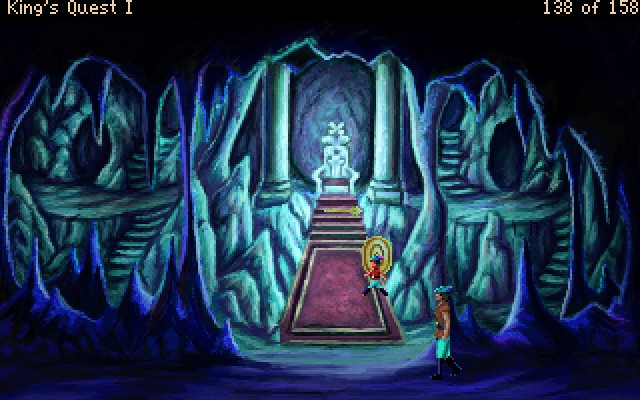 However, more importantly, the king will leave behind his scepter when he dances out of the hall. If you walk through with the clover, he takes it with him. : This is a rather simple stone throne, upon which sits the leprechaun king's jeweled scepter.: The scepter is fashioned from gold and silver, and accented with emeralds.: The shield is made of titanium and is rimmed with jewels.: Please don't move the carpet. It hides the dandelion wine stains on the floor.So yeah, let's claim our prizes and get the hell out of here. : Graham takes both the leprechaun king's scepter and the magic shield.: This jeweled scepter belongs to the king of the leprechauns.: It's long. It's hard. And it feels exactly the same way.: This is the magic shield, one of the three treasures of Daventry.: The magic shield of Daventry is incredibly light. You could easily forget that you were carrying it.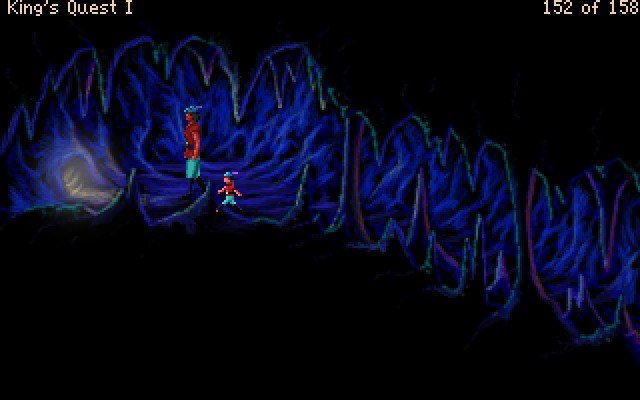 So let's move on to the final puzzle. : This small hole leads to the outside world. Graham is much too big to fit through it.You remember the mushroom? The fly agaric? Well... : Graham eats the mushroom. Fly agaric is a hallucinogenic. So in reality, Graham would now be tripping balls. But because this is fantasy land, there are no adverse side effects. : Congratulations! Graham now has all three of Daventry's lost treasures! Now don't waste any time. Bring the treasures straight back to King Edward before it's too late. We emerge on screen G-4, what the map calls "Boulders". From here, we simply need to make our way over to the castle on B-2. The simmplest way is probably to go East 1, North 2, East 1. 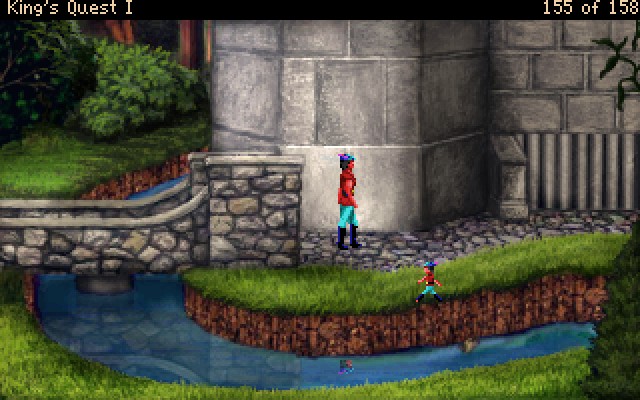 : I shouldn't have eaten that mushroom... : I shouldn't have eaten that mushroom...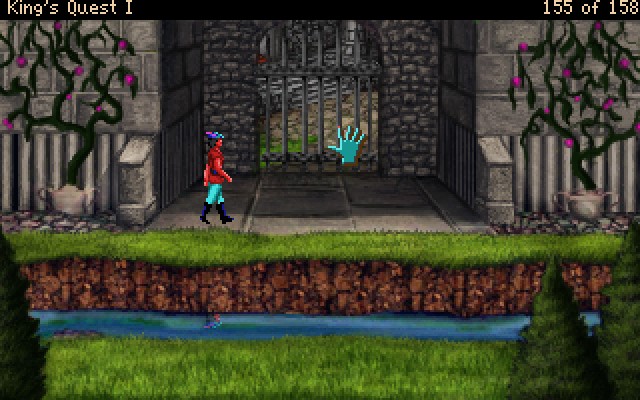 We end the game where we started it. Once we use the hand icon on the portcullis, we've won! : That's odd. Why aren't the guards at their posts? : This courtyard is deserted. Where are all the Lords and Ladies of King Edward's court? Something's not right here.. : This courtyard is deserted. Where are all the Lords and Ladies of King Edward's court? Something's not right here..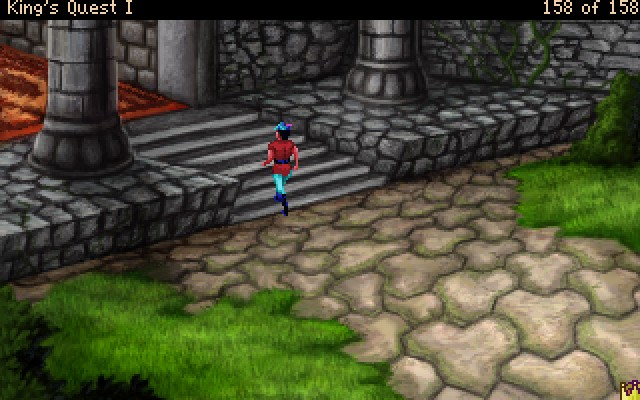 : Oh crap! The king!: Graham can faintly hear a commotion to the King's Chamber to the west. He rushes into the throne room. : Oh crap! The king!: Graham can faintly hear a commotion to the King's Chamber to the west. He rushes into the throne room.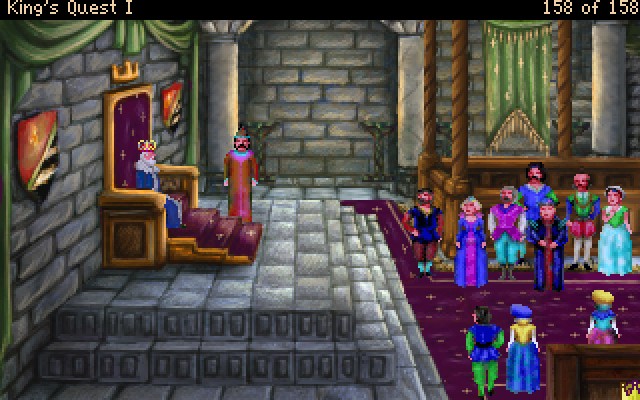  : There is nothing to be done. Our King's melancholy is too much for his heart to bear. If only Sir Graham had returned with the three lost treasures of Daventry... : There is nothing to be done. Our King's melancholy is too much for his heart to bear. If only Sir Graham had returned with the three lost treasures of Daventry... : The nobles gasp and murmur amongst themselves as Graham strides to the throne with purpose in his steps.: Your Highness, I am at your service.: Did... did you succeed in your quest?: I did, your Majesty... Here, as you commanded... : The nobles gasp and murmur amongst themselves as Graham strides to the throne with purpose in his steps.: Your Highness, I am at your service.: Did... did you succeed in your quest?: I did, your Majesty... Here, as you commanded... : The magic mirror... the magic shield... and the magic chest. : The magic mirror... the magic shield... and the magic chest. : I... I am afraid it is a little too late for me. But you have done superbly, my Knight. As I promised, the crown is yours.: My King, I was gone for a few hours at the most. Surely your melancholy is not so great as to claim your life in so short a time.: I saw you wandering around on your quest and... I apologize, but you know how I worry. It just grew too burdensome to bear...: I know you will serve this kingdom well. : I... I am afraid it is a little too late for me. But you have done superbly, my Knight. As I promised, the crown is yours.: My King, I was gone for a few hours at the most. Surely your melancholy is not so great as to claim your life in so short a time.: I saw you wandering around on your quest and... I apologize, but you know how I worry. It just grew too burdensome to bear...: I know you will serve this kingdom well.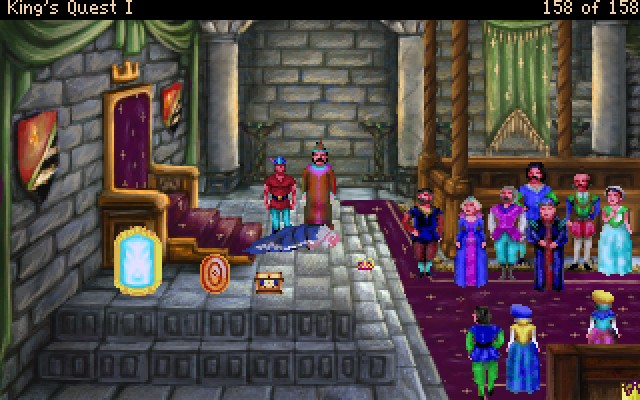 : The king is dead. : The king is dead. : Long live the King!: You were really broken up about it, weren't you?: We knew it was coming soon. I'm just relieved that he chose an heir. The last thing Daventry needs is a succession crisis. : Long live the King!: You were really broken up about it, weren't you?: We knew it was coming soon. I'm just relieved that he chose an heir. The last thing Daventry needs is a succession crisis. : And thus ended Sir Graham's quest for the lost treasures of Daventry. Despite the loss of their beloved King Edward, the people of Daventry grew happy and prosperous for years to come.: And whenever King Graham looked into his magic mirror, he saw visions of adventures yet to come... for him, for his children, and for Daventry, the land he loved so much. : And thus ended Sir Graham's quest for the lost treasures of Daventry. Despite the loss of their beloved King Edward, the people of Daventry grew happy and prosperous for years to come.: And whenever King Graham looked into his magic mirror, he saw visions of adventures yet to come... for him, for his children, and for Daventry, the land he loved so much. : Congratulations! You scored the full 158 points! Thanks for playing. We hope you enjoyed King's Quest I VGA. : Congratulations! You scored the full 158 points! Thanks for playing. We hope you enjoyed King's Quest I VGA.Well, I know I did. I've loved this series since I was a child, and it was fun to revisit a classic. Hopefully you all enjoyed reading it as well. Before we leave, let's take a look at our stats. Total List of Points +2 - Rolled the Rock +5 - Took the Dagger +2 - Climbed the Tree +6 - Robbed the nest +2 - Took a Carrot "for luck" +3 - Got a ring from an elf +3 - Picked up a bowl +3 - Picked up a walnut +3 - Found gold in walnut +1 - Read bowl inscription +2 - Filled bowl with stew -2 - Ate the stew +2 - Picked up pebbles +3 - Found a pouch +3 - It was full of diamonds +2 - Riding a bucket +2 - Grand theft bucket +4 - Cave diving +2 - Filling the bucket +1 - Discovering the dragon +5 - Dragon "slaying" +8 - Got the Magic Mirror +2 - Leaving the cave +7 - Murdering the witch +2 - Opening the Cabinet +2 - Taking the Cheese +1 - Taking the Note +2 - Reading the Note +2 - Eating the witch out of house and home +5 - The taming of the goat +4 - Goats hate trolls +9 - Ifnkovhgroghprm +2 - Four-leaf clover +2 - Graham and the beanstalk +2 - Climbing the Beanstalk +2 - Finding a slingshot +7 - Graham the Coward +8 - Got the enchanted chest +2 - Filled the bowl (again) +3 - Fed a starving couple +3 - Got the fiddle +3 - Condor taxi ride +1 - Picking a mushroom +2 - Fed a rat +3 - Graham the musician +6 - Took the scepter +8 - Took the magic shield +3 - Took mushrooms +3 - Raise the portcullis! Final Total: 158/158 Points Total Register of Deaths Drowned in a moat Crushed by a rock Captured by witch --The Graham cracker pun Drowning --The well pun Dragonfire --The ash pun Graham vs Gravity - x2 Goomba Stomped Mauled by a rat - x2 Final Total 10 Deaths, 3 Bad Puns And with those stats, we're done with King's Quest I. Take it easy guys!
|
|
#
¿
Jun 16, 2017 22:29
|
|
|
Item Getter posted:Thanks for showing off the game, There is voice acting! If you have 50 spare minutes, there's a longplay you can watch on youtube. KQ1 VGA Longplay Part 1/5 They even managed to get Josh Mandel in to reprise his role as Graham, though his audio quality is not great. Epsilon Moonshade posted:are you going to move on to other KQ games, or is this it? I want to do the other 6 eventually, but I won't be moving on to them immediately. I have something else in the works that is taking a lot of attention currently.
|
|
#
¿
Jun 17, 2017 08:56
|
|
|
mauman posted:I wonder if you're going to do the 2nd fan-remake. Nope. The AGDI remake of 2 is bad and I don't like it. Also... https://lparchive.org/Kings-Quest-I/ My other LP plans fell through for reasons related to E3 week. So I'm moving up the timetable on the rest of this silly series. What does that mean? Next week I'm moving on to KQ2. Then 3, 4, 5, 6, and 7 after. So watch this space, 'cause we ain't done yet.
|
|
#
¿
Jun 22, 2017 05:20
|
|
|
 The 1987 sequel to the hit game from 1984, King's Quest 2... really didn't improve on the original in many ways, if at all. This game is a direct sequel to the first King's Quest game, set a few months later. King Graham is lonely and wants a wife, so the magic mirror shows him a beautiful woman locked in a tower. He sets out to find this woman. That's seriously the plot. Believe it or not, but this game is shorter than the first. About the LP My LP of the first King's Quest game was done in a VGA remake. While such a remake exists for this game, I don't think it's very good at all. It stripped away most of the puzzles from the original version and left only the basic framework. The AGDI team then filled in the blanks with their terrible King's Quest fanfiction. They tried, badly, to link this game to later games in the series instead of letting it stand on its own. This is all a very roundabout way to say that this LP, if you couldn't guess from the neat gif above, will be done in the original AGI version of the game. We're firmly in the land of text parsers and 1980s Sierra Bullshit, folks. The Updates #1 - Welcome to Kolyma #2 - Robbing the Dwarf #3 - Getting the Story Going #4 - A Poiiiisonous Snake #5 - This Game Has A Lot of Poison #6 - Vampire Killer #7 - Tower on the Island #8 - Bonus! Stuff I missed! Killing EVERYTHING DoubleNegative fucked around with this message at 11:07 on Jul 14, 2017 |
|
#
¿
Jun 26, 2017 17:05
|
|
|
 Hello everyone, welcome to King's Quest II. I'm going to leave things in the capable hands of the game's narrator for the intro. So just kick back, relax, and be thankful I didn't include a video. Because the world's most ear splitting pc speaker rendition of Greensleeves is playing over the whole thing.  : Good day! So you want to hear another story about Graham, eh? Did I ever tell you about the time he journeyed to the land of Kolyma in search of a lovely young woman? No? Well in that case, stay a while, and listen... : Good day! So you want to hear another story about Graham, eh? Did I ever tell you about the time he journeyed to the land of Kolyma in search of a lovely young woman? No? Well in that case, stay a while, and listen... : Sir Graham is now King of Daventry. Under his wise rule, Daventry is properous. He is loved by his people. Unfortunately, there is a problem. King Graham needs a queen for companionship and to provide an heir to the throne. He has searched high and low for the right maiden, but he remains alone. : Sir Graham is now King of Daventry. Under his wise rule, Daventry is properous. He is loved by his people. Unfortunately, there is a problem. King Graham needs a queen for companionship and to provide an heir to the throne. He has searched high and low for the right maiden, but he remains alone. : An idea comes to him! He goes to the magic mirror and looks into its depths. : An idea comes to him! He goes to the magic mirror and looks into its depths. : He sees a vision of a quartz tower. To reach it he must pass through a magic door in the nearby land of Kolyma. : He sees a vision of a quartz tower. To reach it he must pass through a magic door in the nearby land of Kolyma. : The scene then changes to show a beautiful girl locked within the tower! Graham now knows what to do. : The scene then changes to show a beautiful girl locked within the tower! Graham now knows what to do. : Bravely, he sets off to find the land of Kolyma and the beautiful maiden. : Bravely, he sets off to find the land of Kolyma and the beautiful maiden.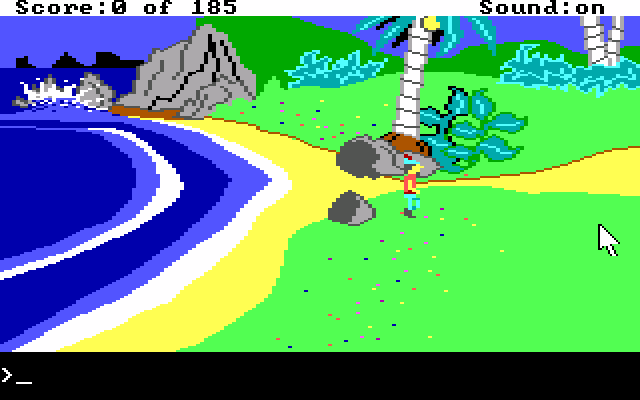 This is most likely y'alls first look at the classic AGI interface. Graham has an unfortunate case of jaundice, or secretly lives in Springfield. I'm not sure which is more likely. The AGI engine has a text parser constantly at the bottom of the screen. 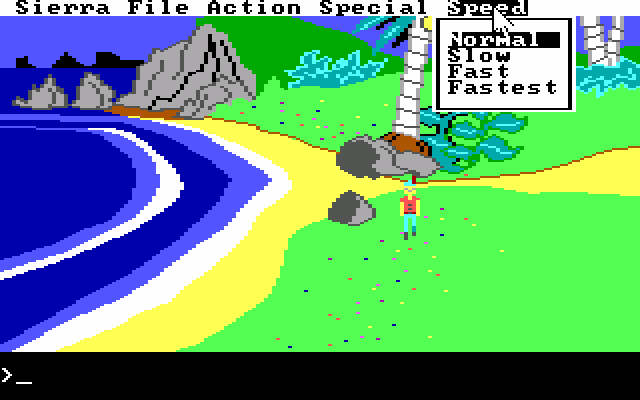 There's also a menu up top if you hit Escape. The Sierra menu shows you "About KQ2" and "Help". About tells you that "King's Quest ][ was Designed by Roberta Williams" while Help shows you a list of hotkeys the game uses. File lets you do the usual Save (F5), Restore (F7), Restart (F9), Quit (Alt-Z) functions. Even in 1987, games were using F5 as the quicksave hotkey.  The Action menu tells Graham to swim if he enters water (=), Look at Objects in his Inventory (F4), and look at his inventory (Tab). Yes, F4 and Tab both do functionally the same thing. Special lets you turn sound on/off (F2), use a joystick (Ctrl-J), and pause the game (Esc). For the love of god, if you turn up the game speed, turn the sound off. KQ2 was before the era of midi sound, and all the game's sound effects are PC Speaker. For the non-technically minded out there, this is the speaker that sits on your motherboard and is used to typically announce problems with your PC during boot up. Here's a PC SPeaker version of Vampire Killer. Yeah. So, please, do your ears a favor if you play this and turn sound off. The only menu we really need to concern ourselves with is the Speed function. This control's the game's speed, not Graham's. In the DOSBox version of the game, setting it to Fastest will make Graham move at your processor's clock speed. I'm not playing in DOSBox. Instead, I'm playing this series in ScummVM, which is a little nicer with regards to speed emulation. I've also made some gifs of Graham's various walking speeds.  Slow. As agonizing as it is to watch, believe me, it's worse to play with.  Normal is a little better. This is the game's default speed. It's still way too slow for my tastes.  Fast is what most people play it on thanks to the aforementioned DOSBox emulation. It's decent, but let's crank this bad boy all the way up to 11.  Look at Graham go! This is the speed I'm going to be doing this LP on. For reasons that I'm sure are entirely unrelated, my total recording time for this game was only 34 minutes. I should also take this time to mention that in the SCI and AGI engines, Graham starts walking when you hit an arrow key, and only stops when you hit it again. This game also has more precarious platforming than the first, so bear that in mind with some of the bullshit we'll have to pull coming up.  So before we get started, here's a TIMG version of the game map. The main game is technically larger than KQ1, by one map square. The first game was an 8x6 grid, while this one is 7x7. There are also a few more indoor squares to explore. We start off on A1 and we need stuff from all over. So let's get to wandering!  : It's been a while since my last adventure. Need to remember the basics...: Just wander around lost until you stumble across something on the ground, and then pick it up.: Thanks disembodied narrator voice! : It's been a while since my last adventure. Need to remember the basics...: Just wander around lost until you stumble across something on the ground, and then pick it up.: Thanks disembodied narrator voice!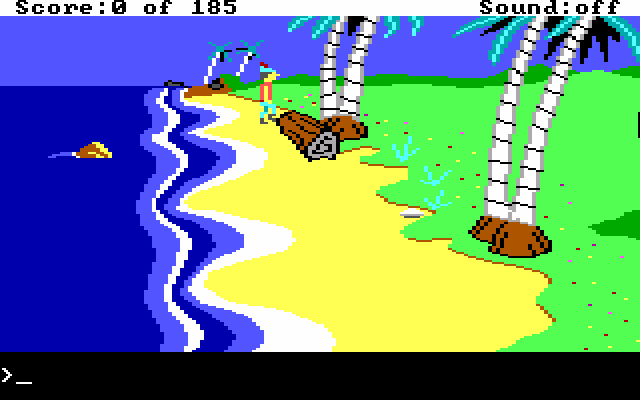 We're 3 screens south of starting, on D1. In spite of looking suspicious, the log is just random scenery.  : Graham notices a pretty clamshell lying on the sandy beach. When he picks it up, he sees that there was a sparkling sapphire and diamond bracelet under it! : Graham notices a pretty clamshell lying on the sandy beach. When he picks it up, he sees that there was a sparkling sapphire and diamond bracelet under it!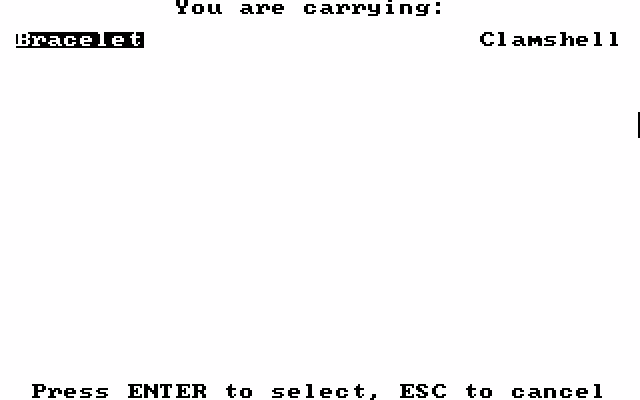 The inventory screen is just a white page with a list of all the items we're carrying. If we hit F4 and select an item, we get a neat little picture of it.  : The bracelet looks like it would fit a small wrist. It is a circlet of diamons surrounded by beautiful blue sapphires. : The bracelet looks like it would fit a small wrist. It is a circlet of diamons surrounded by beautiful blue sapphires. : This is just an ordinary clamshell. There doesn't seem to be anything special about it.: Graham opens the clamshell and discovers that it is empty. There is nothing special about it. : This is just an ordinary clamshell. There doesn't seem to be anything special about it.: Graham opens the clamshell and discovers that it is empty. There is nothing special about it.What a pity. Feels like there should have been something inside, you know? The sprite doesn't even change if you open it. Oh well, let's move on. 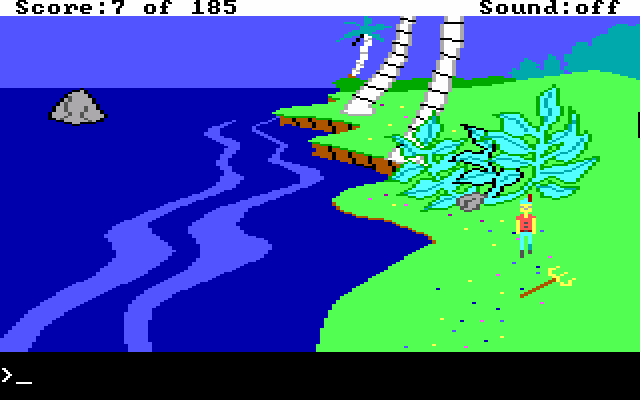 : Graham notices a rusty trident lying in the grass. He picks it up and carries it with him. : Graham notices a rusty trident lying in the grass. He picks it up and carries it with him. : The trident is rusty and corroded. It looks somewhat like a pitchfork. : The trident is rusty and corroded. It looks somewhat like a pitchfork.We're on screen F1, two south of the clamshell, or two north from where we started. The world of King's Quest II loops around north to south like the first one. 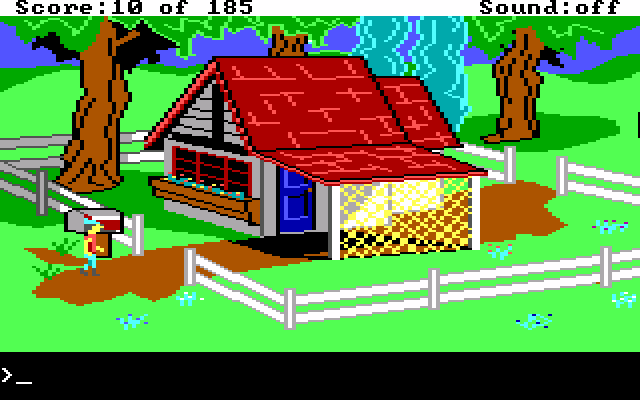 Over on screen A3 we find a cute little cottage. : The mailbox has the words Grandma's House on it.Let's loot it! : Lo and behold, when Graham opens the mailbox, he sees a basket of goodies.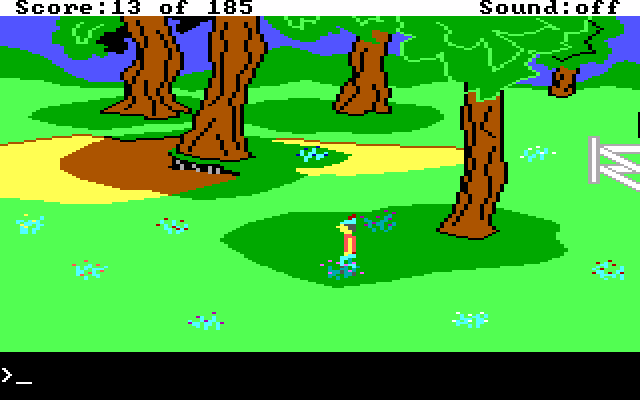 Over one screen to the west, we have a small waiting game. The basket of goodies is part one of those puzzles you just need to know is there. You're more likely to find the person we're waiting on before you find the basket. 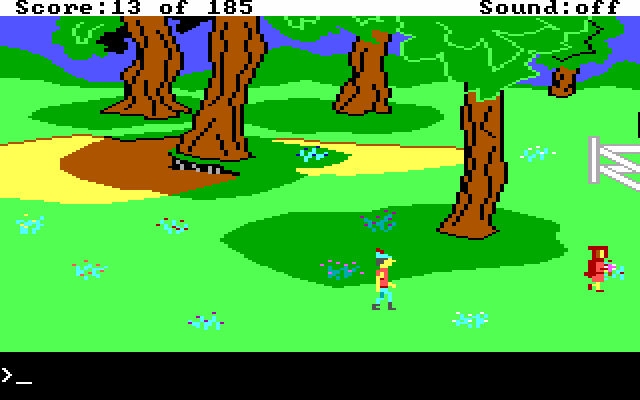 After a minute of hanging around... : It appears that Graham has run into Little Red Riding Hood! She looks a little troubled.: Excuse me, miss. Is everything alright? You look troubled.: Little Red Riding Hood starts sobbing. : I was out picking some flowers, and someone stole my basket. Please help me get it back, mister! My grandma is very sick and the basket was for her.: Is this your basket? I found it hidden not too far from here.: Gratefully, Little Red Riding Hood accepts the basket of goodies.: Oh thank you so much, mister! Here, you can have these flowers I was picking. I can always pick more.: Little Red Riding Hood happily skips off toward Grandma's house. : I was out picking some flowers, and someone stole my basket. Please help me get it back, mister! My grandma is very sick and the basket was for her.: Is this your basket? I found it hidden not too far from here.: Gratefully, Little Red Riding Hood accepts the basket of goodies.: Oh thank you so much, mister! Here, you can have these flowers I was picking. I can always pick more.: Little Red Riding Hood happily skips off toward Grandma's house. She'll bounce around like that as long as you stay on the screen with her.  : The bouquet of wild flowers is very pretty. The sweet scent is delightful. : The bouquet of wild flowers is very pretty. The sweet scent is delightful. It's going to be pretty likely that you accidentally wander into a body of water while exploring Kolyma. You can press the = key to make Graham start swimming. I assume you can also type "swim" into the text parser to get the same result. It's only ever required once in the game, but it's handy to know just in case. 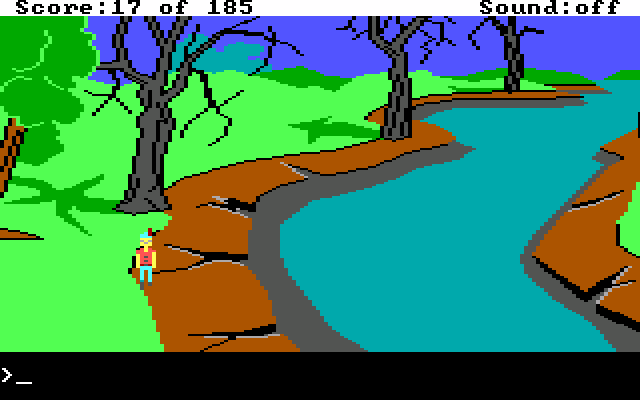 Anyway, if you remember the map I posted up above, you'll recall that there was a lake in the middle surrounded by dead trees. It's hard to miss, as it takes up the 12 middle tiles in a 7x7 grid. 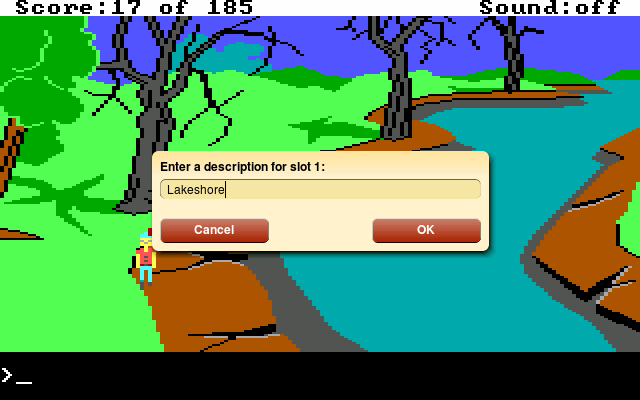 So I'm going to save really quick. You shouldn't swim in this lake. I know I just got done telling you how to do just that, but... 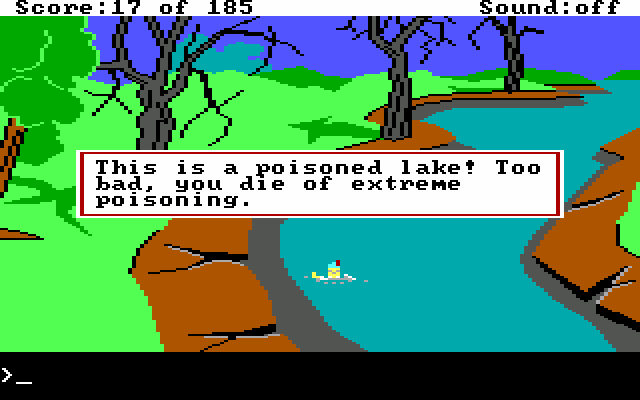 So 10 of the tiles in the middle of the map are completely impassable for now. 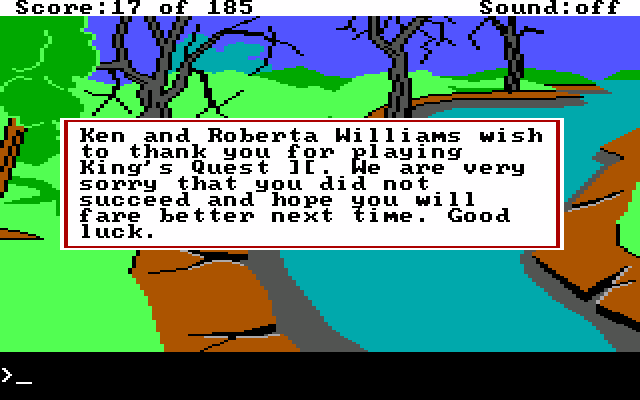 To close out this first update, here's the death message for King's Quest II. Sadly, we're still 3 games out from the puns starting. They only became a staple with King's Quest V. So don't expect to see very many deaths beyond some really stupid poo poo you can do. NEXT TIME: Robbling Kolyma Blind. List of Points +0 - Free clamshell +7 - Gaudy bracelet +3 - Rusty trident on the beach +1 - Checked the mail +2 - Mail fraud +4 - Traded basket for flowers Total: 17/185 Register of Deaths Swimming in Poison DoubleNegative fucked around with this message at 01:46 on Jun 29, 2017 |
|
#
¿
Jun 26, 2017 17:05
|
|
|
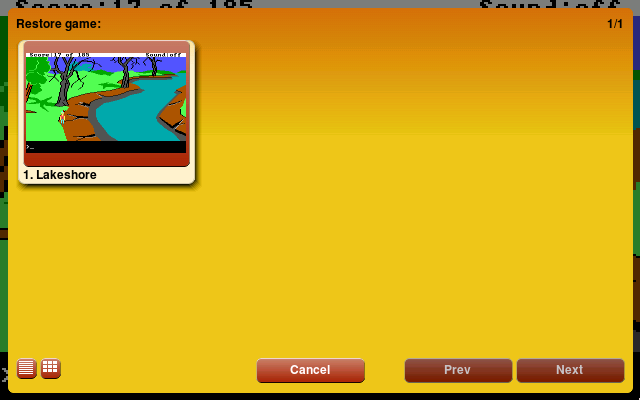 Hello everyone and welcome back to King's Quest II. Now that we've got the first death out of the way, let's continue on and see what we can't accomplish. 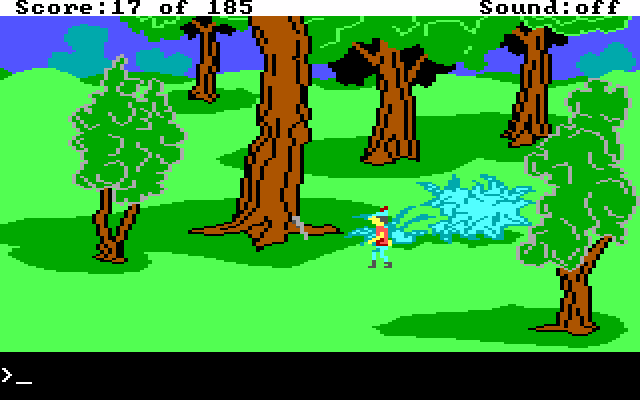 : There is a stake leaning against a tree. : There is a stake leaning against a tree. : It appears to be an ordinary tent stake. : It appears to be an ordinary tent stake.This will come into play toward the end of the game. Try and guess how! If you already know, then no cheating. This is screen D2 by the way. 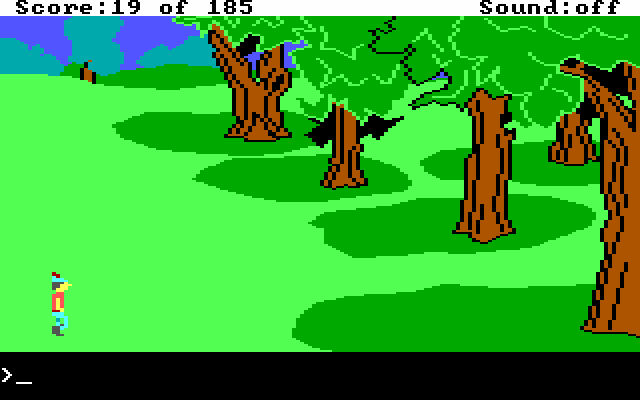 Unlike the first game where only a set number of screens were dangerous, this time most of them are. The thieving dwarf is back from the first game, as well as the enchanter (that I never showed off), and rounding out the enemies is the local witch. They can pop up on most of the screens. So if you're making your way around, it's best to play things safe and stick to the outer edges of the screen when possible. : The old hag, Hagatha, is nearby! You can hear her cackling and smacking her gums as she comes closer. She would love to have you for dinner, and I don't mean as a guest!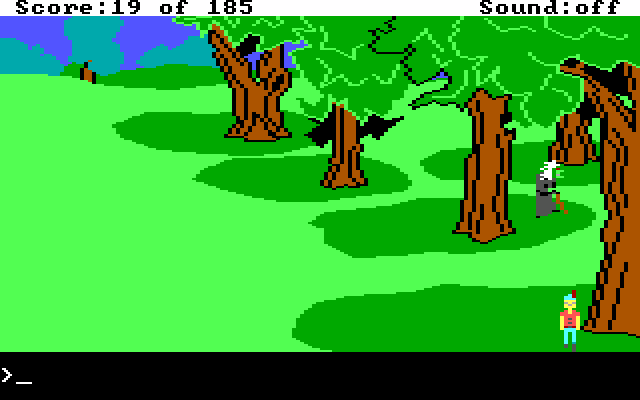 Case in point. Hagatha appeared out of nowhere from the top part of the screen, and is beelining straight for King Graham. Unlike the first game, we can't kill her. So we just need to continue Graham's proud tradition and run away. 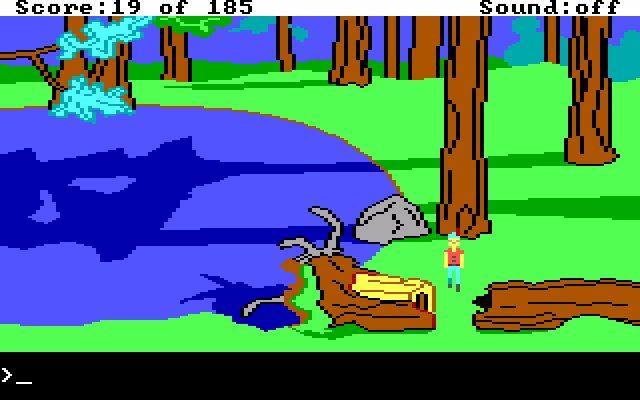 Down on F3, we find a collapsed tree. : I wonder if there's anything inside...: When Graham peers into the old hollow log, he sees a flashing necklace of diamonds and sapphires! : The chain of the beautiful necklace is fashioned of many sparking diamonds and sapphires. In the center of the pendant is a large, glittering sapphire.: I though Daventry was rich with its golden walnuts, but Kolyma seems to be infested with diamond and sapphire jewelry. : The chain of the beautiful necklace is fashioned of many sparking diamonds and sapphires. In the center of the pendant is a large, glittering sapphire.: I though Daventry was rich with its golden walnuts, but Kolyma seems to be infested with diamond and sapphire jewelry.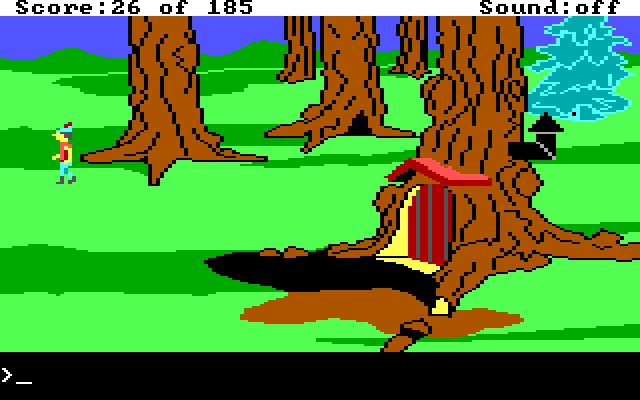 Down on screen G4 is this little tree house where the Dwarf lives. We'll duck into his house later on and rob him blind for a change. Right now we're still out exploring the land. 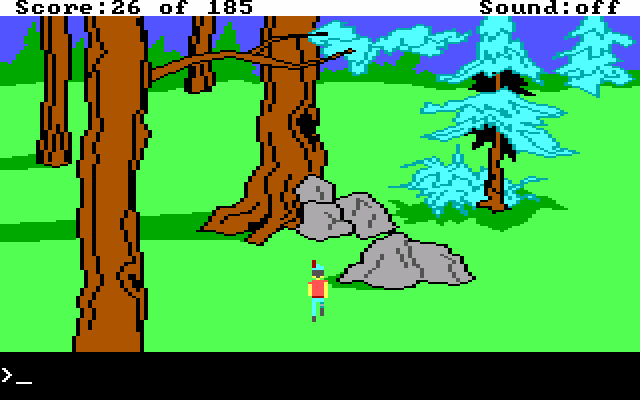 Here on screen F5 is this lone tree with some rocks piled up next to it. : Graham climbs up onto the rocks and peers into the hole. Inside, he can see a mallet. : The head of the mallet is made of iron. It has a long, wooden handle. : The head of the mallet is made of iron. It has a long, wooden handle.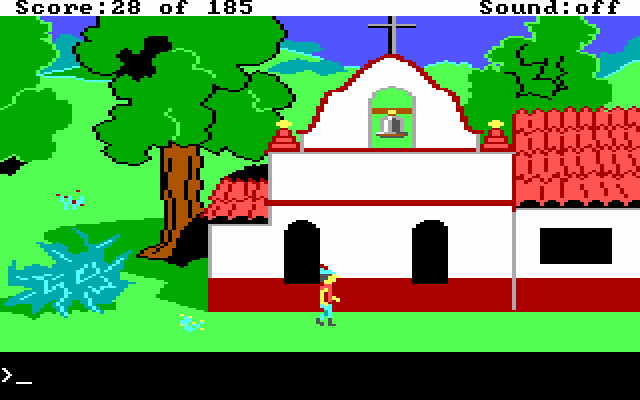 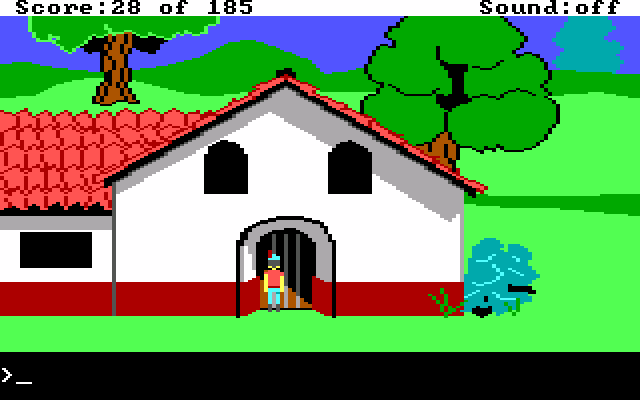 Screens A5 and A6 are home to a little spanish style mission. There's even a neat message if you knock on the door. : It is not neessary to knock at a church door. All are welcome.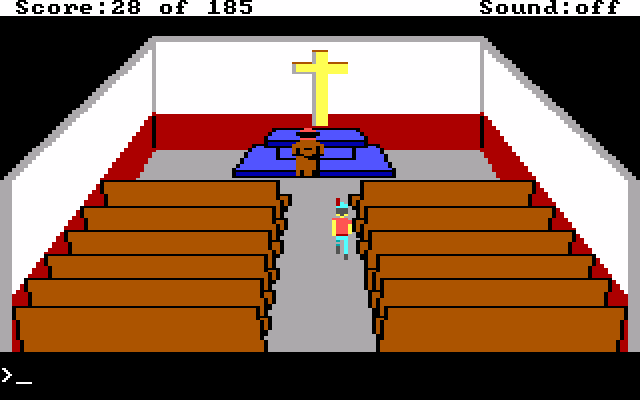 : Excuse me...: The praying monk does not respond. He seems deep in worship.: Graham kneels down and prays at the altar with the monk. : Excuse me...: The praying monk does not respond. He seems deep in worship.: Graham kneels down and prays at the altar with the monk. : The plump monk lifts his head from prayer and seems to notice Graham for the first time. He stands up. : The plump monk lifts his head from prayer and seems to notice Graham for the first time. He stands up. : What is your name, my child?: My name is Graham. : What is your name, my child?: My name is Graham.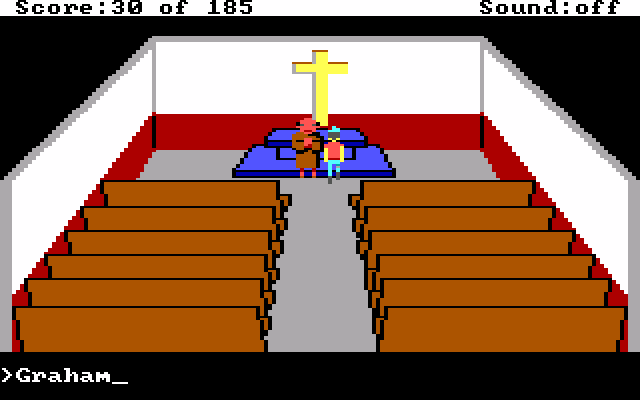 You actually have to type "Graham" into the text parser. : I know of your quest, King Graham. I wish I could offer you aid, but all I have to give is this cross.: I would be honored to accept your cross.: It is blessed, and will protect you from evil. May it serve you well.: The monk bows to Graham and then resumes his prayers. : The shiny cross and its chain are both made from silver. : The shiny cross and its chain are both made from silver.This next step is something that you may not think to do, but is incredibly important all the same. : Graham places the silver cross and chain around his neck, wearing it as a necklace.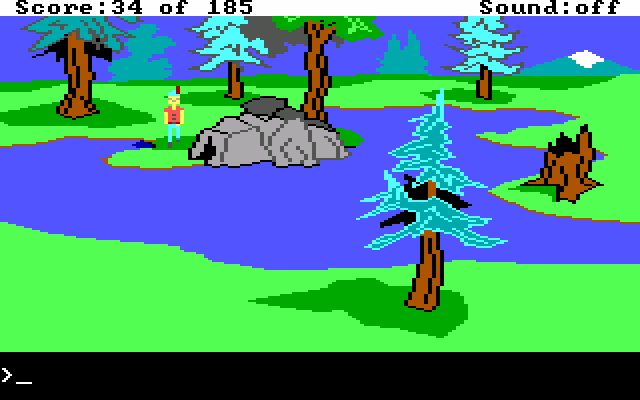 One screen down from the mission, is this pond. The small hole in the rock sticks out like a sore thumb, so let's investigate. : A glint from between the rocks catches Graham's eye. He gets closer and sees a glittering diamond and sapphire brooch lying on the ground. : The brooch has an enormous sapphire encircled by two rows of glittering diamonds. : The brooch has an enormous sapphire encircled by two rows of glittering diamonds.I'm starting to notice a diamond and sapphire theme. 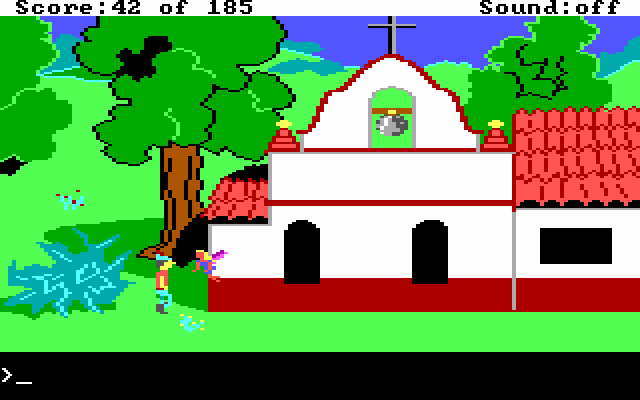 Back up on A5, just randomly wandering around looking for treasure, and a random event happens. : A beautiful fairy floats down from the sky! She sprinkles fairy dust on Graham. : Good King Graham, I am here to help you. I give you a protective spell against certain evil elements; but beware, for it lasts only a short time. : Good King Graham, I am here to help you. I give you a protective spell against certain evil elements; but beware, for it lasts only a short time.The fairy's protection is exactly like the fairy godmother from the first game, except you can get it multiple times. 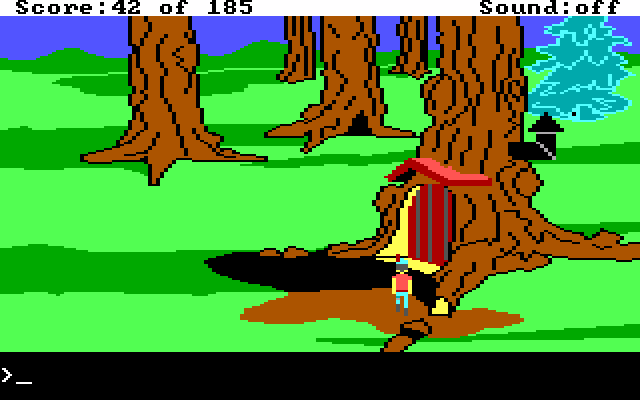 So now fortified with protection, let's end this update by exploring the dwarf's house.  Graham doesn't climb ladders well. He attaches to them fine, but you have to use the rather imprecise start-and-stop movement to get down.  Someone smarter than I am would find this is an excellent time to return the game speed to normal, or at least fast. Otherwise you can't really fine tune your movement. 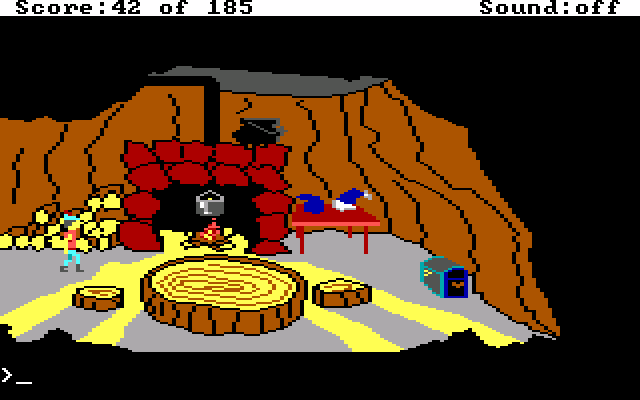 : It seems Graham has entered the underground home of the litte dwarf. It is cozy, with a fire crackling in the hearth. There is a trunk tucked away in the corner. : It seems Graham has entered the underground home of the litte dwarf. It is cozy, with a fire crackling in the hearth. There is a trunk tucked away in the corner.The dwarf has a chance to be home when you enter this screen. If he catches you in his house, and you don't have fairy protection, he'll kick you out and you have to try again. Anyway, there's only two things worth doing on this screen. First, we need to get close to the fire. : OUCH!!!! This fire is HOT! You're going to burn yourself.The flavor message lets you know you're close enough to get the item. : Graham grabs the wooden handle of the bubbling pot of chicken soup. He takes the pot with him.Next after the pot, the chest that the look command pointed out... : Graham opens the chest and looks inside. There are a pair of earrings inside.Three guesses what the earrings are made of.  : The pot contains hot, bubbling chicken soup. : The pot contains hot, bubbling chicken soup. : The diamond and sapphire earrings are very delicate. Each earring has a large sapphire surrounded by glittering diamonds. : The diamond and sapphire earrings are very delicate. Each earring has a large sapphire surrounded by glittering diamonds.Anyway, that's going to do it for the main part of the update. But I have some bonus content as well!  First off, you can indeed type "swim" in order to start swimming. Poil asked if typing drown into the parser did anything while swimming.  Sadly no.  MagusofStars and Jabor wanted to know about swimming into the ocean.  So no swimming across the ocean back to Daventry, either. Let me know if there's more stuff you guys want me to show off. The game world is so small that it takes basically no time at all to do something weird. I also have all my saves still, so I can load any point from the start to the finish in an instant. NEXT TIME: This game has a plot. We should actually attend to that. List of Points +2 - Raising the Stakes +7 - Priceless jewelry in the fallen tree +2 - Mallet in the tree +2 - Praying +2 - Holy Cross +2 - Wearing the cross +1 - Looking in a dark hole +7 - More priceless jewlery in a mundane location +2 - Stealing supper +7 - Yet more priceless jewelry Total: 51/185 Register of Deaths Drowning in the Ocean
|
|
#
¿
Jun 29, 2017 01:58
|
|
|
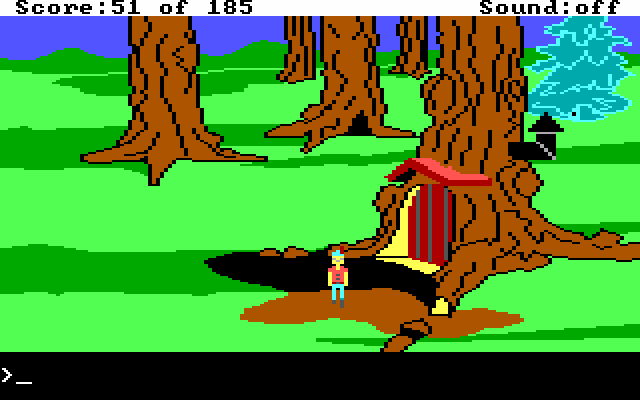 Hello everyone, and welcome back to King's Quest II. We rejoin Graham outside of the dwarf's house. Now that we've robbed the dwarf, we can finish the second half of the fairy tale from the first update. Well, kinda.  In spite of the various violent ways that Sierra protagonists can kick the bucket, King's Quest is ultimately not a violent series. 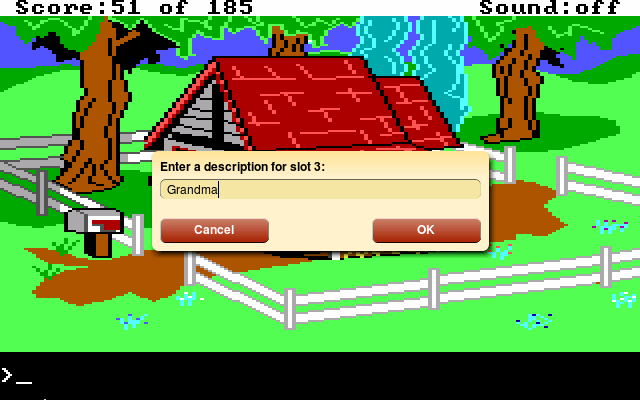 So while we're going to somewhat re-enact Little Red Riding Hood, we're not going to be dealing with the Big Bad Wolf. The wolf, in fact, doesn't even have to show up. : Graham knocks on the door loudly. From inside he can hear a muffled voice saying "come in."Unlike with the witch from the first game, there's not even a way to tell if the house is safe or not. : Oh dear! A wolf in grandma's clothing is in the bed! Get out of there, fast! : The wolf pounces on Graham! My, what big TEETH he has! Good enough to eat you with, my dear. : The wolf pounces on Graham! My, what big TEETH he has! Good enough to eat you with, my dear.It's up to pure, blind chance if the little house is safe or not. I deliberately left and re-entered until the wolf was there in place of grandma. To get the house to be unsafe, it took about five tries. If you're unlucky, you also have plenty of time to leave. As you can see in the gif above, it took the wolf a little better than a second to notice that Graham was there and get out of bed. I also cut out the narration up above, which pops up on top of the screen before anything else does. So basically in order to get this death, you need to go out of your way to trigger it.  Normally, Grandma's house looks like this. : Hello ma'am. : Good day, kind sir. I would like to offer you a cup of tea, but as you can see, I am ailing.: I have some soup, if you like. Maybe it will help you feel better...: Graham feeds the hot chicken soup to ailing Grandma. : Good day, kind sir. I would like to offer you a cup of tea, but as you can see, I am ailing.: I have some soup, if you like. Maybe it will help you feel better...: Graham feeds the hot chicken soup to ailing Grandma. : I feel much better. In return for your kindness, I have something for you. Look under the bed.: Graham kneels down and peers under the bed. Folded neatly, back against the wall, he finds a large ruby ring and a black cloak. He carefully takes both. : I feel much better. In return for your kindness, I have something for you. Look under the bed.: Graham kneels down and peers under the bed. Folded neatly, back against the wall, he finds a large ruby ring and a black cloak. He carefully takes both. : The black cloak would better fit a man taller than you. Red satin lines the inside. : The black cloak would better fit a man taller than you. Red satin lines the inside. : The ring is gold with an enormous red ruby. The initials 'C.D' are engraved inside the gold band. : The ring is gold with an enormous red ruby. The initials 'C.D' are engraved inside the gold band.A red and black cape, a gold ring engraved with the initials C.D., a mallet, and a stake? : With a flourish, Graham flings the black cloak around his neck and fastens it. He then slips the beautiful ruby ring on his finger.You can put them on at any time after getting them, and failing to do so will eventually kill us. So just put them on now and forget about them. 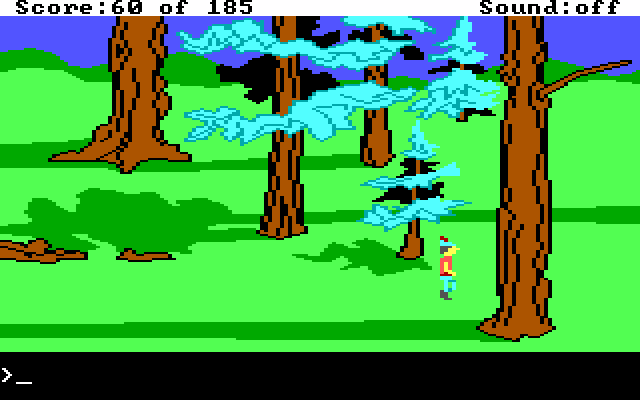 We're behind the dwarf's house, still wandering around aimlessly, when... : You have come upon a quick little dwarf! Dwarves have a bad reputation for stealing treasure. This is why you stay on the outside edge of the screen. Thankfully treasure that's stolen in this game isn't gone permanently. Instead, you just have to go back to the dwarf's house to get it back. Although... : The dwarf seems to have left you alone, thanks to your protective spell!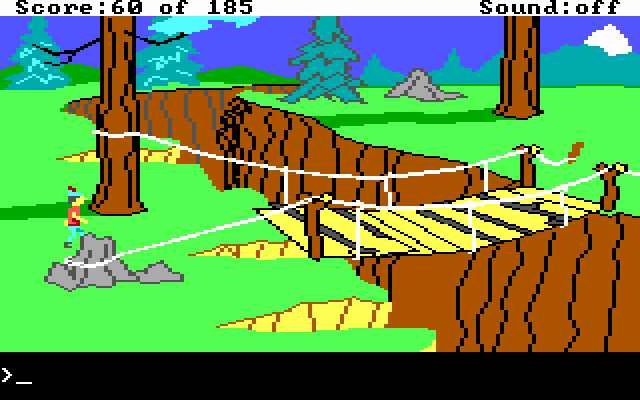 Soo... this bridge. Thiiiis bridge. We're on screen G6, just above the mission. Now I want you to watch this next gif carefully.  You may have noticed something at the end there. Watch it again if you didn't get it. Still stumped? We got a single point for crossing the bridge. This is your only indication that this bridge is important. I'll cover exactly why the bridge is important later, but for right now know that we're going to get a single point each time we cross it. It's another one of those patented Bullshit Sierra Scenarios.  Screen F7 has this door to nowhere on a bit of land completely surrounded by mountains and a ravine, with the only way to access it being that bridge I mentioned before. There's a pretty good chance that it's important. So let's take a look. : This is a magical door! If you can open it, the door will lead you to your heart's desire. There is an inscription on the door.: The inscription on the door reads: Whosoever chooses to seek the key for this door will undoubtedly make a splash.That's the only hint you get. So it's time to get back to wandering around. And by wandering I mean I'm going right for our destination. 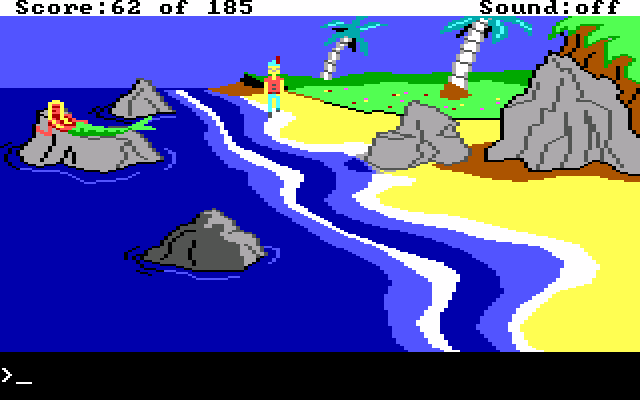 Clear on the other side of the map, on screen C1, a mermaid has now appeared. : The mermaid has long flowing hair covering most of her upper body. The green scales on her fish tail are sparkling like emeralds as she slowly waves it back and forth. She beckons with her hand.: Hello, miss mermaid. Um... nice day out, isn't it?: The mermaid does not reply. She gives Graham a qizzical look and continues waving her fish tail.: You're very beautiful, and I was wondering if you would like these flowers...: Graham graciously offers the beautiful bouquet of wildflowers to the mermaid. She loves the flowers! She then summons forth a magic seahorse and gestures.: You want me to ride this? Okay...: Quick as a flash, it glides under the water with you on its back! 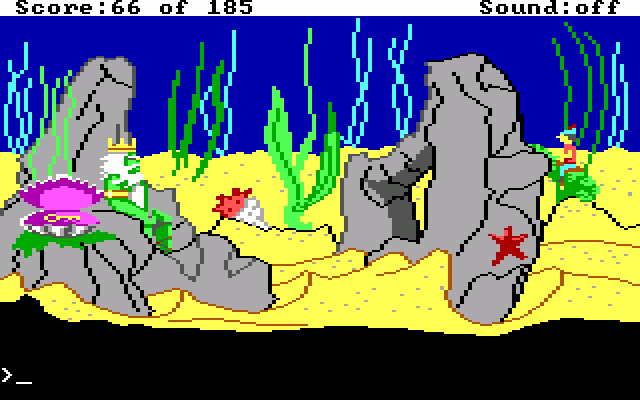 Well, we made a splash, and there's our key. Let's see what this king has to say for himself. : Glub, glub, glub, glub....... !!!!!!No really, the game says that if you try to talk to him. So let's try to do this nonverbally. If I'm being honest, that was probably his trident we found on the beach, meaning we have the power of Neptune in our hands. So let's have a little fun... >wave trident : Graham waves the crusty trident in front of the immense clam and slowly it opens... revealing a large golden key! Graham smirks and hands the trident to Neptune. With a cold look in his eye, King Neptune takes the rusty trident and points it at Graham, who feels a powerful surge of electricity and then... nothing. He dies at the bottom of the ocean.So obviously that was the wrong thing to do, but it was fun to show off. Now let's rewind and try again. : Graham hands the rusty trident to the mermaid. Oh, no! She dives into the water and disappears with it! Now she's gone.You might think this is a dead man walking scenario, and you're partially right. You can leave the screen and return, and the mermaid is back. From there, things proceed as before. >give flowers to mermaid >ride seahorse Then we arrive back at Neptune's lair. 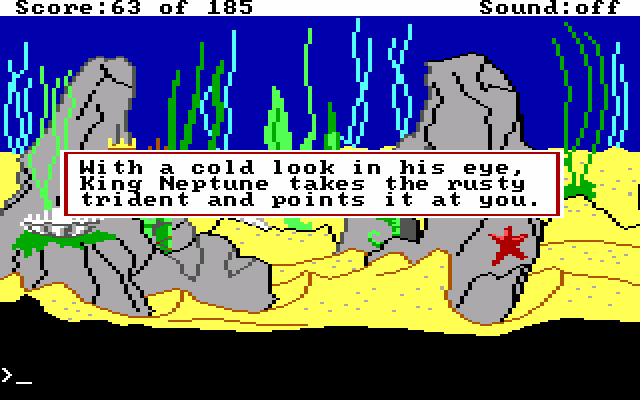 Where he instantly kills you for no particularly good reason. This is one of those deaths you have to work for, but is pretty funny all the same. So let's restore again and do it right. : The bottom of the sea is teeming with fish and plant life. King Neptune rules this mighty underwater empire.We're back in front of Neptune, he's not pissed off, and Graham has the trident. : Graham holds the trident out to King Neptune. Reverently, the King accepts his lost trident. He gives Graham a bottle, then waves the trident in front of the huge clam, which opens and reveals... a large golden key! Graham takes it. : It is a shiny gold key. : It is a shiny gold key.Once we have the key, we're done underwater. So just leave the way you came and...  We're back on solid land no worse for the wear. That's enough for now. NEXT TIME: A special cameo or two. List of Points +2 - Chicken soup for Grandma +4 - Gifts from Grandma +3 - 1 Ring for a mortal man doomed to die +1 - Crossing the bridge +1 - Crossing the bridge again +2 - Graham's got a mermaid girlfriend +2 - Seahorse rodeo +4 - Neptune has his trident +5 - Neptune's golden key Total: 75/185 Register of Deaths My, what big teeth you have Tumbling off the cliffs Pissing off Neptune x2 DoubleNegative fucked around with this message at 22:31 on Jul 1, 2017 |
|
#
¿
Jun 30, 2017 22:51
|
|
|
Jabor posted:That's not the only tumble in the past couple of updates that wasn't shown... I didn't tumble off that ladder... from a fatal height.  Robindaybird posted:given the text also describes Graham as smirking after opening the shell with the trident, Neptune probably felt insulted that some mortal is lording over him. The smirk was a bit of a creative addition on my part, but this is my best guess for the death. mateo360 posted:I had to go back and read it again. The first part about him waving the trident is what was throwing me off as I though Graham was waving it to show Neptune he had it and was trying to give it back. I'll edit the update to make things more clear. I'll also include the ">text parser" command I used. DoubleNegative fucked around with this message at 22:33 on Jul 1, 2017 |
|
#
¿
Jul 1, 2017 22:29
|
|
|
Hello everyone, and welcome back to King's Quest II. Things should start moving more smoothly from here on out, as we've covered most of the overworld at this point. So let's get started! Last time we returned the trident to King Neptune in exchange for a golden key. That would certainly qualify as "making a splash" so I think the first door riddle has been solved.  This next bit we can technically do at any point after we return from the sea floor. This group of rocks is down on screen G1, and mostly serves to highlight one of the few terrain features we haven't seen yet.  Over on G2 is this sinister cave. It's got a nasty bat emblem above the door and two skulls lining the entrance. This is the cave where Hagatha, the local witch, lives. But if you didn't know she lived here, you might call it the bat cave due to the emblem. Wait a second... bat cave. Bat. Cave. BatCave!  Yeah, they went there. A not bad PCSpeaker version of this also plays. : He must have gotten lost, I don't believe he belongs in this story.Anyway, before we enter the cave, there's something we need to do. If you remember the text from last time, Neptune gave us a bottle. >look bottle  : There is a large cloth in the glass bottle. : There is a large cloth in the glass bottle.This is the only hint you have to the existence of the cloth, which is the only purpose for the bottle. We need the cloth to not die horribly in about 45 seconds. Also... : Graham pulls a large piece of cloth out of the bottle. : It is a large sheet of cloth. : It is a large sheet of cloth. There's a random chance when you enter the witch's cave if she'll be home or not. If she's home, you need to leave and try again until she's not here. : Graham looks around this dreary cave. Fear grips him as he notices human skulls lining the wall. A cauldron with a bubbling brew fills the cave with a putrid aroma. On the far wall, he can see a nightingale in a gilded cage.>look cauldron : The iron cauldron is bubbling with a nasty smelling brew. A hot fire burns underneath.>look skulls : There are many human skulls in Hagatha's cave. She has a taste for human flesh.The nightingale cage is the only thing we can meaningfully interact with in here. >put cloth on cage : Graham drapes the cloth over the birdcage. Hopefully, this will keep the nightingale quiet. Quietly, Graham picks up the covered birdcage with the nightingale. To his relief, the bird remains silent.This is why you need the cloth. If the bird is awake when you take the cage, you will die because Hagatha will hear it singing and come investigate.  Graham is not a smart man. Not pictured in the gif is more pcspeaker noises, this time approximating a nightingale's song. Again, it's completely random if Hagatha will show up after you leave the cave, so if you don't have the fairy's protection, it's time to save scum.  : As you look at the bird it begins to sing merrily. : As you look at the bird it begins to sing merrily.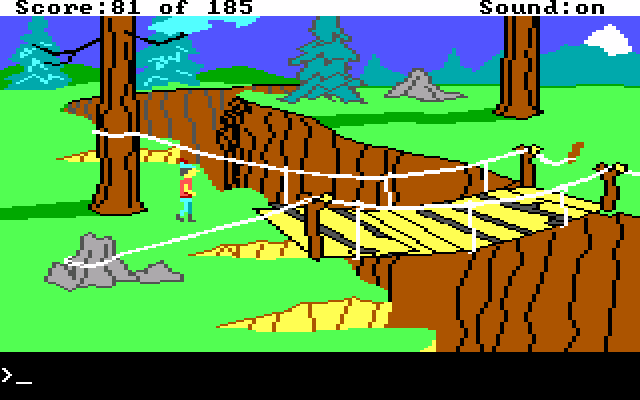 Anyway, after dodging the witch and dwarf several times, we're back here at the bridge.  >unlock door : The key to the first door fits easily into the keyhole. Graham turns the key and, PRESTO, the door opens, and the key disappears... revealing a second door with another inscription. >read door : The inscription reads: Whosoever chooses to seek the key for this door should set their sights high. This is over on screen C6, just two south of the mission. It looks like a little store. >look sign : The sign says closed.>knock on door : Graham raps loudly on the door and hears a cheery, "Come on in."  : How may I help you?: Hello. I saw your shop and had to stop in. I love looking at antiques.: That's nice of you to say. We just got an oil lamp in this morning. Maybe you would be interested in it?: The shopkeeper points at the oil lamp sitting on a table against the wall.: That lamp looks perfect. I would like to buy it!: The oil lamp is expensive, young man. It will cost you two treasures. There is an alternative, though. The old hag, Hagatha, stole my precious nightingale. If you can return it to me, I will give you the oil lamp.: You mean this nightingale right here?: Graham hands the birdcage with the nightingale to the little old lady.: My precious!: The little old lady tears up and hands Graham the oil lamp. She then ushers him out of the shop and closes and locks the door. : How may I help you?: Hello. I saw your shop and had to stop in. I love looking at antiques.: That's nice of you to say. We just got an oil lamp in this morning. Maybe you would be interested in it?: The shopkeeper points at the oil lamp sitting on a table against the wall.: That lamp looks perfect. I would like to buy it!: The oil lamp is expensive, young man. It will cost you two treasures. There is an alternative, though. The old hag, Hagatha, stole my precious nightingale. If you can return it to me, I will give you the oil lamp.: You mean this nightingale right here?: Graham hands the birdcage with the nightingale to the little old lady.: My precious!: The little old lady tears up and hands Graham the oil lamp. She then ushers him out of the shop and closes and locks the door.  : The old oil lamp is fashioned of brass that has been tarnished. There is a spout at one end, and a round handle at the other. The lamp is empty inside. : The old oil lamp is fashioned of brass that has been tarnished. There is a spout at one end, and a round handle at the other. The lamp is empty inside.Yeah. The game is gonna go there. Your first thought regarding the lamp is correct. : The lamp looks a little dirty. I wonder if I can...: Graham polishes the old ramp with his sleeve. When he does so, the lamp rumbles and shakes, and with a POOOOFF, a genie appears! : Master, I leave a gift for you. A magic carpet!: The genie poofs back into the lamp. : Master, I leave a gift for you. A magic carpet!: The genie poofs back into the lamp. This is the evil enchanter. He appeared in the first game too, but thanks to random luck we never ran into him. In this game, he'll turn you into an animal if he catches you and you aren't protected by the fairy's spell. This is the first and only time we'll run into him in the entire series, but it won't be the last time we hear from him. But that won't be for a long time to come. So for now wave hello and goodbye to an annoying random encounter.  It's also taken this long for the fairy's spell to wear off. So it lasts for an incredibly long time, and is pretty easy to make happen. All you have to do is wander back and forth west of the mission. So basically never be without a fairy spell. Anyway, we had to dodge the drat enchanter, but we're not done with the lamp yet. >rub lamp : Master, I leave a gift for you. A beautiful sword!And a third time... >rub lamp : Master, I leave a gift for you. A leather bridle!: As the genie disappears back into the lamp for the third time, the lamp rumbles and shakes and disappears out of Graham's hands. : The leather bridle is studded with silver rivets, and a silver bit. : The leather bridle is studded with silver rivets, and a silver bit. : The shining sword is not incredibly large, but is very sharp! IT has a snake carved into the bronze handle. : The shining sword is not incredibly large, but is very sharp! IT has a snake carved into the bronze handle. : The magic carpet is a beautifully woven persian rug with a colorful fringe on the ends. : The magic carpet is a beautifully woven persian rug with a colorful fringe on the ends.So that's our haul from meeting a genie. What do you say we put this carpet to work? >ride carpet   : Look out! There is a poisonous viper blocking your path!: Venomous.: What?: Venomous. Snakes inject venom with their fangs. It would be a poisonous viper if I had to drink its venom.: Nobody likes a pedant, Graham. : Look out! There is a poisonous viper blocking your path!: Venomous.: What?: Venomous. Snakes inject venom with their fangs. It would be a poisonous viper if I had to drink its venom.: Nobody likes a pedant, Graham. First we need to be poisoned.  Then we need to go base jumping. Gotta get the basics out of the way. Now for the elephant in the room... The clifftop area is only four screens long, but is incredibly infamous all the same. You may remember may rant from the previous game, about the atbash cipher. While it was stupid as hell you could at least somewhat follow the logic involved. The upcoming puzzle doesn't even have that benefit. There is no basis in objective reality for the solution to this puzzle. It's literally "try everything in your inventory on the viper until something works." Even better, there are multiple ways to solve the puzzle, but only one strictly "correct" way to do it. If you solve the puzzle the "obvious" way, then the game becomes nearly impossible to finish. I'll point out later where that happens. So without further ado... 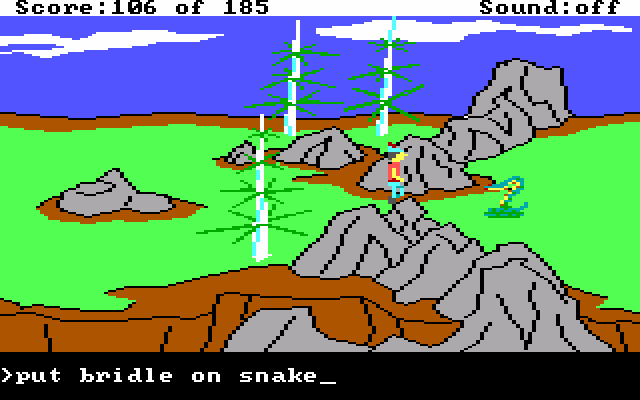 I'm not typing that out. I'm including a screenshot so you can drink in the stupidity. Look at those four words, roll them around in your mind. I want you to really look at them and understand what they're saying. The correct solution to this puzzle is to use an otherwise unenchanted item on a snake that only gives you one clue it's enchanted. You need to talk to the snake first and it will warn you to stay away. That is literally the only clue you get to this puzzle. You then have to intuit that this non magical bridle will somehow dispel the enchantment that you don't even know exists in the first place.  The snake's warning, by the way. Like I said above, this is your only clue to the puzzle.  You can also solve puzzle this way, by just typing "kill snake". In fact, you can kill a lot of things in this game. I'll show off everything you can murder in a bonus update. But for now... let's grit our teeth and do this properly. >put bridle on snake : Graham tosses the leather bridle onto the coiled snake. Instantly, there stands before him not a snake, but a beautiful winged horse wearing the bridle!  : Thank you, kind sir, for saving me. An evil enchanter turned me into a snake when I refused to be his steed. To repay you, here is a magic sugar cube that will guard against poisonous brambles.: Before Graham can respond, the pegasus flies off. : Thank you, kind sir, for saving me. An evil enchanter turned me into a snake when I refused to be his steed. To repay you, here is a magic sugar cube that will guard against poisonous brambles.: Before Graham can respond, the pegasus flies off. : It looks like a normal sugar cube. It does have a bit of a sparkle, though. : It looks like a normal sugar cube. It does have a bit of a sparkle, though. So, with the bullshit puzzle behind us, let's have a little fun. This screen is otherwise worthless, except for a little hole in the rock. >look in hole : Oh No! This is as bad as bad can be! Upon looking into the hole, you believe you see an incredibly blatant plug for another Sierra 3-D Animated Adventure. Hang On!Click This For Soundtrack You can watch the plug in Sierra or AGDI versions. I highly recommend you watch both, as they're entertaining in their own ways. Especially the AGDI version, as it will have the only pun in the entire game. If you're curious about Quest for Glory or Space Quest, the Archive has you covered.  >look : Graham sees a large golden key lying on a rock in the damp cave!Anyway, let's finish this update out. Now that we're past the... snake... and the shameless plugs, let's grab the key and get the hell out of here. The second key has the exact same look and description as the first one. 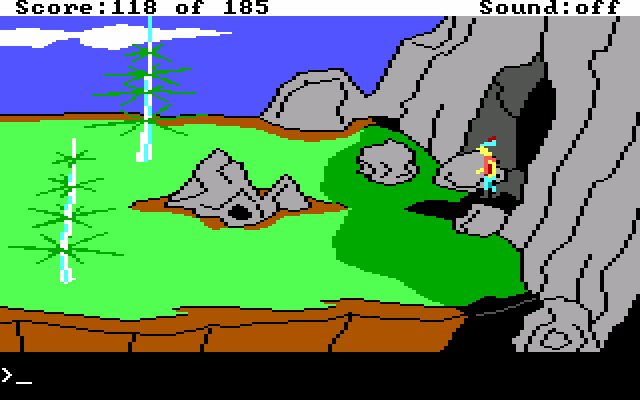 Now for the last thing I want to show off today. You have to be standing in the mouth of this cave to get this little message to appear. >ride carpet : It wouldn't be safe to ride the carpet until you are all the way out of the cave. Only weird QA types do that.Anyway, that's enough for now. NEXT TIME: Toccata and Fugue in D-minor List of Points +2 - Cloth in a bottle +2 - Bedtime for birdie +2 - Stealing from the Hag +1 - Crossing the bridge +7 - Unlocking the first door +1 - Crossing the bridge yet again +6 - Trading bird for lamp +2 - Genie's first wish +2 - Genie's second wish +2 - Graham wastes his third wish +4 - Magic carpet ride +5 - The bridle +2 - Sugar cube +5 - Second key Total: 118/185 Register of Deaths Snakebite Cliff diving x2 (The AGDI video counts!)
|
|
#
¿
Jul 3, 2017 20:15
|
|
|
I don't mind discussing stuff about the series, as there is a lot to stare aghast at. But can we please not preemptively reveal things I'm going to show off in the game currently being LPed? Just keep your shirt on. I'll get there before too long. Update coming later today, too.
|
|
#
¿
Jul 5, 2017 18:28
|
|
|
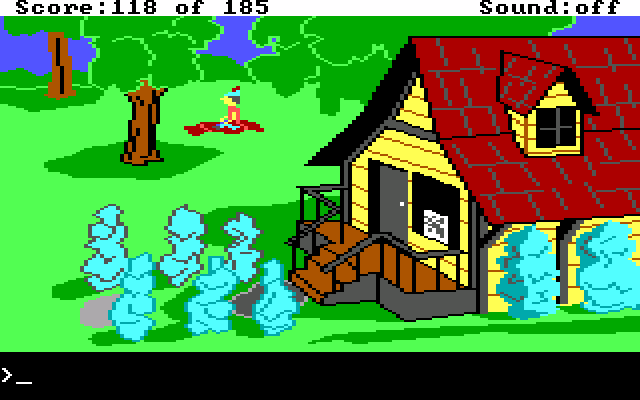 Hello everyone, and welcome back to King's Quest II. We rejoin Graham as the carpet drops him off outside of the antique shop. With two out of three keys accounted for, let's not waste any time. Off to the bridge!  You probably shouldn't approach the bridge from the south side. In my test run for the game, I died probably five or six times alone doing this.  For those of you keeping track at home, this is the fifth crossing of the bridge.  >unlock door : The key to the second door fits easily into the keyhole. Graham turns the key and, SHAZAM, the door opens, and the second gold key disappears... revealing a third door with yet another inscription! These doors are getting awfully small. >read door : Whosoever chooses to seek the last key must have a stout heart. Six times now. What the game never points out is that the bridge is held up by silly string. The bridge can support Graham's weight seven times in total. Take a wild guess how many times you need to cross it. So yeah, hope you wrote those clues down because you have exactly as many crossings as it takes to do everything perfectly. Sierra caught a lot of poo poo for this, and rightfully so. They also have a sense of humor about it, as every time you have to cross a bridge in future titles of theirs, they call back to this bridge here. We'll be seeing a few instances of that in this thread here.  Screen E4 is the bottom middle edge of the lake. I haven't really shown it off, because until this moment there's been nothing worth showing here.  This is what the screen looked like in the middle of the last update. Anyway, this is the point where you need to be wearing both the ring and cloak from Grandma's house, as well as the silver cross from the monk. >climb in boat : The shrouded ghoul looks at the ruby ring on Graham's finger and the black cloak around his neck. It motions for him to enter the boat, which he does. Graham must have fooled it into think he was someone else. The boat man doesn't care if Graham is wearing the cloak and ring or not. Though wearing them both is a hint that they're important.  >leave boat This screen looks nice and foreboding, doesn't it? The scraggly plants look like they might hurt if they brush past you, so let's be extra careful...  So remember last update when I mentioned that failing to guess the "bridle on a snake" puzzle would make your life harder in the near future? Welcome to exactly why. These thorny bushes are all poisonous, or venomous, or whatever. The point being just one bite, one scratch is sufficient. So how do you get past? There's two options. One is to be extremely specific in how you walk past the brambles, in what I hope wasn't a prototype for Space Quest II's maze of death. The other? quote:
>eat sugar : After swallowing the magic sugar cube, Graham gets a feeling of invincibility.We're now completely immune to poisonous brambles. We can walk as closely to them as we like and we won't so much as slow down.  To the north we come to the castle gates. There's a few ghosts hanging out. : There are two spooky ghosts guarding the door of the gloomy castle. This situation looks bad.And if you approach them.. : The two spirits are fooled by the black cloak and large ruby ring that Graham is wearing. They slowly float away... maybe he reminds them of someone else.Alternatively, if you aren't wearing the ring and cloak... : The two spirits are afraid of the silver cross that Graham is wearing around his neck. They slowly float away and disappear.So as long as you have the ring and cloak, or the cross, you're safe here. The ghosts are one-time guards. But what happens if you aren't wearing any protective equipment and you approach them? : Oh, no! The two spooks float toward Graham and enter his body. In a trance, he walks toward the thorn covered brambles.A beat later... : Graham feels a sudden tingling sensation. Could it be that the effects of the sugar cube have worn off? While it's not unlikely you'll see this death, you do have to somewhat go out of your way to get it. I do like that possessed Graham turns zombie green. 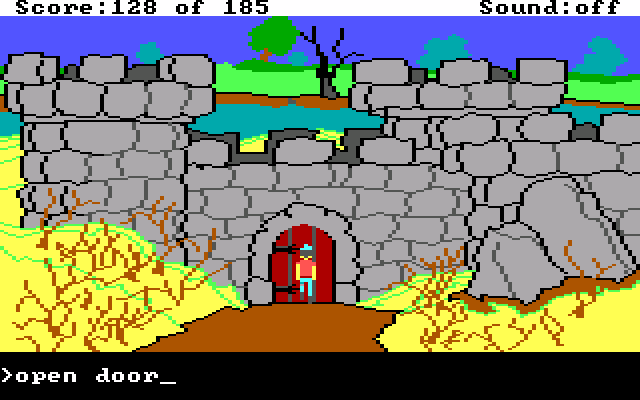 Anyway, back in the world where we didn't die a horrible death...  Welcome to yet another reason why you play with the sound off. Do you know the famous tune, Toccata and Fugue in D-minor? The answer should probably be yes. If you think "generic halloween music" or "generic spooky music" it's the first tune to come to mind. Anyway, imagine that famous piece of organ music, but in "glorious" PCSpeaker. And it's just the opening bit over and over. So yes, for the thousandth time, let me reiterate: do not play this game with sound on. Anyway, we want to go to the left first. Despite the giant bookshelf in the middle looking important, it's just scenery. So let's throw on some more appropriate music and get to investigating.  So, think back to one of the first things I said in this LP. About how Graham moves. He keeps moving until either he collides with a solid object, falls off of something, or you press the same direction in which he's already moving.  Early Sierra games were absolutely lousy with precision movements for some entirely unknowable reason. Mercifully, if you turn off NumLock, you can use the numpad to move Graham around the screen. 7, 9, 1, and 3 can be used to make Graham walk diagonally. There's only a handful of places in the game where it's useful to do so, but it's good to keep in mind regardless. Almost every place where it's useful to walk diagonally is here in the second half of the game.  Anyway, the reason we need to go left first in this castle, is the drawer in this tower has something useful. >open drawer : There is a candle lying in the drawer of the old dresser. Graham picks it up and carries it with himThat's it. That's all we needed from over here. Now we need to walk back down the spiral staircase.  I can't tell you how easy using diagonal movement makes this.   Over to the right, we come across a massive dining room. Graham is not a short man, and the table is taller than he is. >look : This is the dingy dining room of the drafty old castle. Ants crawl among old bits of food. Dust covers a dilapidated table top. A delicious-looking smoked ham is on the table. Graham takes it.We'll need this ham in a while.  Continuing to the right, the light runs out.  It's fully possible to get down these stairs without the benefit of light. It's simply nearly impossible to get back out.  I'm going to leave here for now. Next time, we'll illuminate these stairs and finish our business in the castle. After that, it's to the endgame. List of Points +1 - Crossing the bridge +7 - Unlocking the second door +1 - Crossing the bridge yet again +1 - Graham has a sweet tooth +2 - Getting a candle +2 - Handling the ham Total: 132/185 Register of Deaths Falling into the chasm Poisonous brambles x2 Who needs handrails... or light? x2
|
|
#
¿
Jul 6, 2017 02:48
|
|
|
 Hello everyone, and welcome back to King's Quest II. Let's just restore our game and not descend into a pitch black maze of stairs. 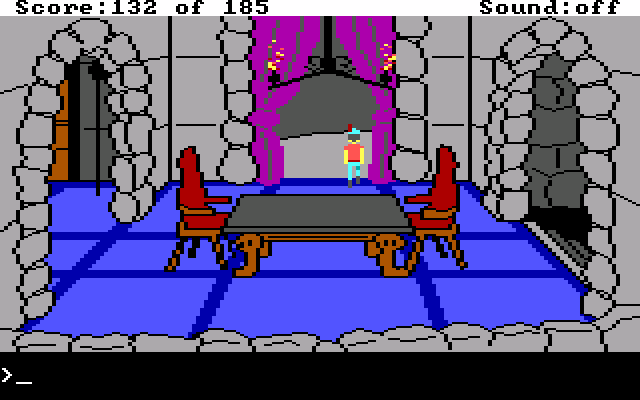 We need to leave the dining room to the north first. This particular part coming up is a bit of a pain in the rear end to do.  You see, we need to climb this staircase here. But not all the way. We need to go halfway up.  To about here. Next we need to do something not immediately obvious. >look torch : The torch lends the only warmth to this dreary castle.>light candle : Graham holds his candle up to the blazing torch. It catches! His candle is now lit.This is the only lit torch that's at approximately Graham's height. So in order to light our candle, we need to stand next to it. The reason I say this part is a pain in the rear end is because climbing twisting staircases in this series is a hazardous thing to do even in the best of times. We need to successfully climb up to the torch, light the candle, descend down again, and complete our business in the basement. Only once we finish our business donwstairs can we climb to the room at the top of this staircase So, back into the dark basement...  The candle projects its light rather well, doesn't it? Don't get used to it. There will be a time in the not too distant future when a light source won't illuminate anything for poo poo.  This screen is why I restored the game at the start of the update. There's almost no chance anyone could get out of this screen in the pitch black, with only Graham's eyes to guide them. >look : Narrow, slippery stairs descend into this empty room. Graham's nose detects a foul odor coming from the doorway to the west.>look rat : Graham doesn't see a rat, but he hears scurrying sounds coming from the cracks in the wall. : The rat darts nervously across the floor. : The rat darts nervously across the floor. This little creepy room is our ultimate goal. If the coffin is open, we want to leave the room and return.  First, let's do something completely stupid. >take off cross >open coffin : With trepidation, Graham lifts the heavy lid of the beautifully carved coffin. His heart beats wildly when he sees a vampire lying asleep within it. It must be Count Dracula!>wake dracula : That was truly a dumb thing to do! Run before he catches you! So let's do it the right way now. This is one of the only aggressive things Graham will ever do in his life, by the way.  : Graham places the pointed stake on Count Dracula's chest. Quickly, using the mallet, he pounds the stake through the vampire's heart. Dracula disintegrates into a pile of dust. A small silver key is left behind in the coffin. Graham takes it. : Graham places the pointed stake on Count Dracula's chest. Quickly, using the mallet, he pounds the stake through the vampire's heart. Dracula disintegrates into a pile of dust. A small silver key is left behind in the coffin. Graham takes it.>look coffin : Trembling with fear, Graham peers into the ornate coffin. Finding it unoccupied, Graham sees the interior is lined with shiny red satin. A red satin pillow lies at one end.>get pillow : Graham removes the shiny red pillow from the coffin. Lo and behold, a large gold key was under the pillow!While we're here, let's take a look at the new inventory items we got. 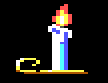 : The wax candle burns brightly. Ouch! Hot wax dripped on your finger. : The wax candle burns brightly. Ouch! Hot wax dripped on your finger.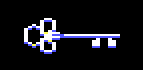 : It is a shiny silver key. : It is a shiny silver key. : The smoked ham has a wonderful, savory smell. It's hard to resist tasting it. It looks as though someone has taken a bit out of it. : The smoked ham has a wonderful, savory smell. It's hard to resist tasting it. It looks as though someone has taken a bit out of it. : The pillow is small, and made of shiny red satin. : The pillow is small, and made of shiny red satin.As usual, the gold key looks the same as it ever does and its description hasn't changed.  So let's keep going. Now back to that spiral staircase from the start of the update.  For some reason, the perspective in these spiral staircase rooms makes it really hard to actually get on the stairs. You wouldn't think it would be so difficult, and then you wind up accidentally walking out the door three or four times.  You can't even diagonal walk up the part of the staircase that may as well be 2D. There's still depth where there shouldn't be any. So you have to awkwardly stutter step the whole way.   So finally in the room at the top of the stairs, and all that's up here is a chest in the corner. >open chest : The old chest is locked shut. You need to unlock it.>unlock chest : With hands trembling, Graham fits the little silver key into the lock. Slowly, he turns it until he hears a click. The old chest is now unlocked.>open chest >look in chest Yes. You have to type the two commands separately. : With a creak and a groan, the old lid opens, dragging cobwebs with it. Looking into the interior of the musty chest, Graham sees a dazzling diamond and sapphire tiara. He takes it. : This tiara is stunning! It is encrusted with diamonds from the back to the front, progressively getting larger. The center stone in the front is a dazzling sapphire.: Okay, that does it. When I get back to Daventry, I'm gonna see about annexing Kolyma. We need those diamond and sapphire mines. : This tiara is stunning! It is encrusted with diamonds from the back to the front, progressively getting larger. The center stone in the front is a dazzling sapphire.: Okay, that does it. When I get back to Daventry, I'm gonna see about annexing Kolyma. We need those diamond and sapphire mines.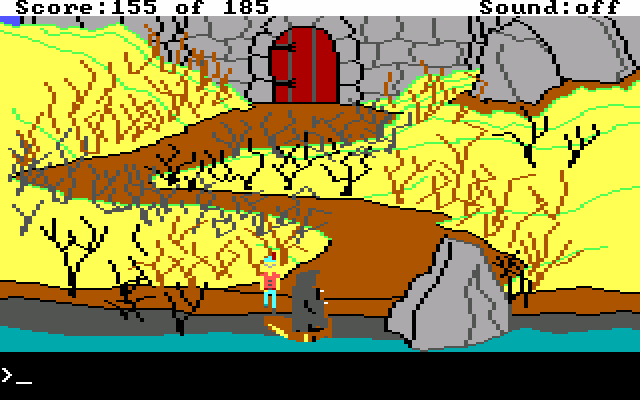 Let's get the hell out of here. We have a ham, we have enough jewelry to start a collection, and we have a completely useless pillow. Most importantly though, we can unlock the last door and get to the end of the game. >enter boat : Graham climbs into the decrepit rowboat, and the shrouded fiend paddles across the toxic lake to the shore. See you guys at the bridge!  Here we are at the bridge for the final time.  That's it. No fanfare, no dramatic collapse. But we've used up all of our crossings. But try to go across an eighth time and...  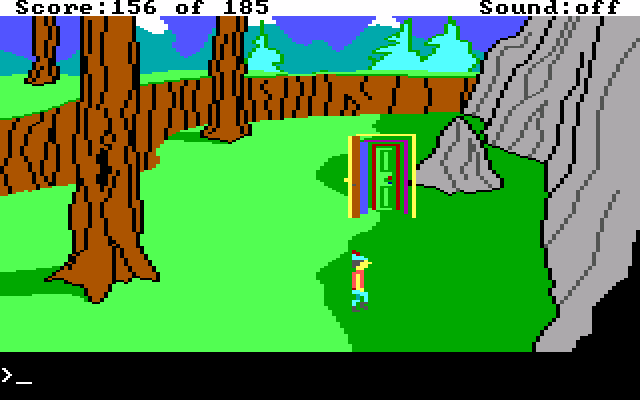 So let's unlock the third door and get our reward. >unlock door : The key to the third door fits easily into the keyhole. Graham turns the key and, PRESTO, the door opens, and again the key disappears... revealing a world unlike any he's ever seen before!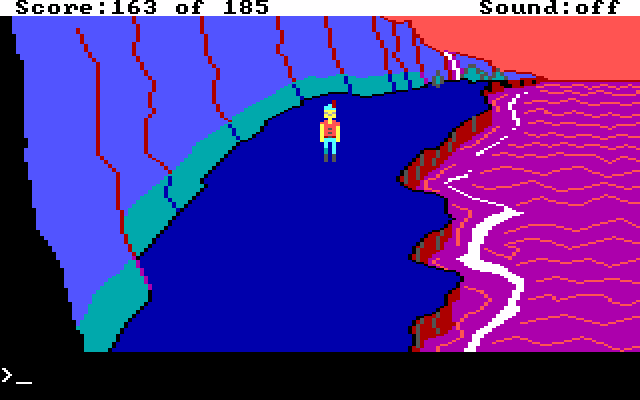 And THAT is where we're going to leave off for this time. NEXT TIME: The end of the game List of Points +1 - Lighting the Candle +7 - Graham Belmont +2 - Dracula's silver key +5 - Third gold key +1 - Unlocking the old chest +7 - Yet more gaudy jewelry +1 - Crossing the bridge the seventh time +7 - Entering the third door Total: 163/185 Register of Deaths Fangs for waking Dracula up Falling off the stairs x2 Crossing the bridge an eighth time DoubleNegative fucked around with this message at 21:10 on Jul 7, 2017 |
|
#
¿
Jul 7, 2017 20:45
|
|
|
mauman posted:Speaking of KQ3 though, if we're going there I recommend the Infamous Adventures remake. They wisely kept the original plot entirely intact, and from what I recall it was very well done. KQ3 will be done with the original engine. After a taste of VGA for the first, it's nice to see the series advance back to that point. Also some jokes in later titles will not make sense if we don't see proper, non remake, context.
|
|
#
¿
Jul 9, 2017 03:59
|
|
|
Discendo Vox posted:>use bridle on self "I don't understand self." >use bridle on Graham "You can't do that... at least not yet!" >use bridle on enchanter
|
|
#
¿
Jul 9, 2017 19:01
|
|
|
Hello everyone and welcome to the final story update for King's Quest II. After this there's going to be a bonus update showing some fun interactions, but as far as the main game goes, this is it. When we left off, Graham was now on the far side of a mountain range in a very colorful environment. So let's not waste any time, shall we?  To start off, we want to go north from the starting point. This little shore area is only 3 screens long, and we need the net up here. Speaking of which... >look : The sand on the sparkling beach is a deep blue. The bright sunlight, from a gorgeous pink sky, dances across it. Cliffs tower above the beach. There is a fishing net in a pile on the beach. Graham takes it. : The fishing net is fashioned from a material that is unfamiliar to you. It is smooth and tangle-proof. : The fishing net is fashioned from a material that is unfamiliar to you. It is smooth and tangle-proof. With our net, we can now go to the southern end of the beach. Right now it looks like we're trapped here, as that seawater looks awful rough. So let's try fishing to pass the time... >fish : Graham fishes, and he fishes, and he fishes some more... However, no matter how hard he tries, he doesn't seem to be able to catch anything.You need to be patient. It's completely up to the RNG here. So keep typing >fish until... : Graham casts the fishing net into the wild sea. Upon retrieving it, he sees he has caught a large golden fish! It falls from the net and flops helplessly on the beach. Well, if I remember my fables right... >talk to fish : The gasping fish is unable to utter a sound.>get fish : Graham grabs the flopping fish. Its mouth is wide open and its gills are extended. With difficulty, Graham holds the fish as it twists and turns in his hands.>throw fish back : Graham throws the poor gasping fish back into the iridescent water. Gratefully, it calls to him. : In return for saving my life, I wish to offer you a ride across this ocean.: That's very generous of you, mister fish. Thank you. : In return for saving my life, I wish to offer you a ride across this ocean.: That's very generous of you, mister fish. Thank you.>ride fish  This ride is pretty funny at maximum speed. Really gives you the feeling that the fish is bitter that Graham caught it in the first place.  Anyway, this little island here is only a handful of screens and is actually the site of the end of the game. So let's get to exploring. 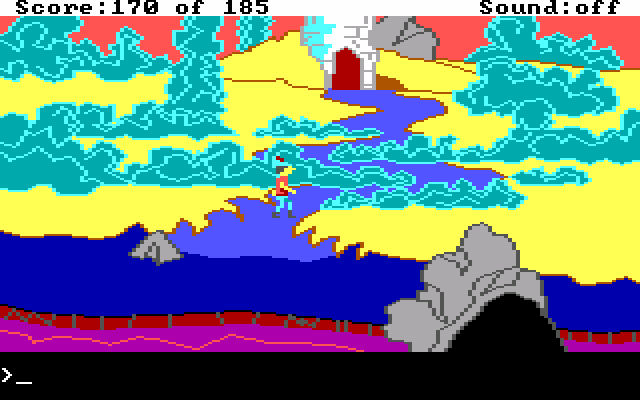 You can see our tower destination in the background there. But before we head inside, there's something we need to do here on the island proper. 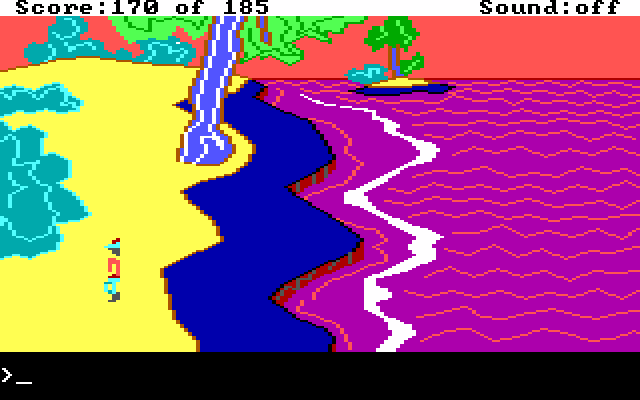 The island itself is a 3x3 grid, and the only things of importance are in the top middle and center screens. Everything else is just pretty scenery.  : A glint of metal catches Graham's eye. He looks toward the direction of the glint and sees an amulet lying on the ground. : A glint of metal catches Graham's eye. He looks toward the direction of the glint and sees an amulet lying on the ground.The little bit of narration appears as soon as you enter the top middle screen. This amulet is incredibly important so even 1987 Sierra didn't want you to miss it. >get amulet  : You examine the amulet. It is made of bronze that has tarnished with age. A Tiger's Eye stone is imbedded into the front. You turn the amulet over, and see the word 'HOME' engraved on the back. : You examine the amulet. It is made of bronze that has tarnished with age. A Tiger's Eye stone is imbedded into the front. You turn the amulet over, and see the word 'HOME' engraved on the back."Imbedded" is a typo actually in the game. Anyway, what's so important about >home : Graham murmurs the word home. A tingling sensation envelops his body. He blacks out for a second... when he comes to, he sees he is somewhere else! So that amulet is a one way ticket back home. That technically, I guess, counts as a legitimate ending for the game. The credits roll and everything. But let's do it the right way, eh?  This big tower in the middle is our ultimate goal. >open door  Of course it would be a spiral staircase. For some reason, I found this one incredibly hard to get on. So it takes a few false starts...  Yep. Even better, the tower is 3 screens tall. And it abruptly shifts perspective at the top of the first screen. Mercifully, Graham stops walking on screen transition.    Thankfully we only fall off twice on the climb up. : Be careful!!! There is a huge lion with dripping fangs at the top of the stairs. He has a hungry look in his eye!: Nice kitty. Good kitty. Down boy...Well... we have to. There's no way around it.  There's two solutions to this puzzle. >kill lion : With one mighty heave of his sword, Graham fatally wounds the large lion. It slumps to the floor.This method only gets you 2 points. >feed lion : Hungrily, the lion gobbles down the smoked ham and then falls fast asleep. >open door  : Graham has found her! The girl in the magic mirror! She is even more beautiful than he had imagined! : Graham has found her! The girl in the magic mirror! She is even more beautiful than he had imagined! : Hi... : Hi... : My name is Valanice, what is your name?: I... um... I'm Graham: Oh, Graham, I am forever grateful to you! : My name is Valanice, what is your name?: I... um... I'm Graham: Oh, Graham, I am forever grateful to you!>kiss girl : Come closer, kind sir. : Graham tentatively embraces the beautiful gir. His lips meet hers, and they are both in ecstasy. This was well worth playing the game for!: Hold on tight... Home!: Valanice holds Graham's hand tightly as the world fades around them. In an instant, they are both standing somewhere else! : Graham tentatively embraces the beautiful gir. His lips meet hers, and they are both in ecstasy. This was well worth playing the game for!: Hold on tight... Home!: Valanice holds Graham's hand tightly as the world fades around them. In an instant, they are both standing somewhere else! Allow me to interrupt the ending really quick. Look at the wedding guests. It's practically the entire cast from both the previous game and this one. : Congratulations, King Graham! You have won the hand of the beautiful Valanice. May you two live happily ever after! : If you have enjoyed this game, please ask your LPer about the availability of King's Quest III -- To Heir is to Human.: Thank you from the King's Quest development team: Ken, Roberta, Sol, Jeff, Chris, Scott, Doug, Mark, Al, Dale, and Emo.: Thank you from the King's Quest quality assurance team: Larry, Susan, Russ, Bob, and Kim. : If you have enjoyed this game, please ask your LPer about the availability of King's Quest III -- To Heir is to Human.: Thank you from the King's Quest development team: Ken, Roberta, Sol, Jeff, Chris, Scott, Doug, Mark, Al, Dale, and Emo.: Thank you from the King's Quest quality assurance team: Larry, Susan, Russ, Bob, and Kim.And that's the end of King's Quest II. NEXT TIME: Bonus round! Fun interactions! Killing the whole world! Stuff I missed! Total List of Points +0 - Free clamshell +7 - Gaudy bracelet +3 - Rusty trident on the beach +1 - Checked the mail +2 - Mail fraud +4 - Traded basket for flowers +2 - Raising the Stakes +7 - Priceless jewelry in the fallen tree +2 - Mallet in the tree +2 - Praying +2 - Holy Cross +2 - Wearing the cross +1 - Looking in a dark hole +7 - More priceless jewlery in a mundane location +2 - Stealing supper +7 - Yet more priceless jewelry +2 - Chicken soup for Grandma +4 - Gifts from Grandma +3 - 1 Ring for a mortal man doomed to die +1 - Crossing the bridge +1 - Crossing the bridge again +2 - Graham's got a mermaid girlfriend +2 - Seahorse rodeo +4 - Neptune has his trident +5 - Neptune's golden key +2 - Cloth in a bottle +2 - Bedtime for birdie +2 - Stealing from the Hag +1 - Crossing the bridge +7 - Unlocking the first door +1 - Crossing the bridge yet again +6 - Trading bird for lamp +2 - Genie's first wish +2 - Genie's second wish +2 - Graham wastes his third wish +4 - Magic carpet ride +5 - The bridle +2 - Sugar cube +5 - Second key +1 - Crossing the bridge +7 - Unlocking the second door +1 - Crossing the bridge yet again +1 - Graham has a sweet tooth +2 - Getting a candle +2 - Handling the ham +1 - Lighting the Candle +7 - Graham Belmont +2 - Dracula's silver key +0 - Red Satin Pillow +5 - Third gold key +1 - Unlocking the old chest +7 - Yet more gaudy jewelry +1 - Crossing the bridge the seventh time +7 - Entering the third door +1 - A nice net +2 - Fishing in the sea +3 - Throwing the fish back +1 - Riding the fish +3 - The amulet the game pointed out +4 - Lions like smoked ham +5 - Girl in the tower +3 - The end! Final Total: 185/185 Points Total Register of Deaths Swimming in poison Drowning in the ocean My, what big teeth you have Tumbling off the cliffs Pissing off Neptune x2 Snakebite Cliff diving x2 (The AGDI video counts!) Falling into the chasm Poisonous brambles x2 Who needs handrails... or light? x2 Fangs for waking Dracula up Falling off the stairs x2 Crossing the bridge an eighth time --Forgot the princess. You dumbass Fell off the narrow stairs x2 That cat is dangerous. I'm not lion! Final Total: 21 Deaths, 1 Bad Ending
|
|
#
¿
Jul 9, 2017 22:56
|
|
|
Alright, so for the bonus update, I've got some stuff I want to capture footage of. But now that you've seen the entire game, are there any interactions you want me to try out? Beyond apparently using the bridle on literally everything.
|
|
#
¿
Jul 9, 2017 22:58
|
|
|
Hello everyone, and welcome to the bonus update for King's Quest II. This isn't necessarily going to be very long, but it should cover some of the things that I missed. I won't claim all, because some stuff requires playing through the game and not doing certain things. Also, I'm going to break the storytelling convention I've been using for the past two games for this update, as it's not part of the main story proper. So expect to see a lot of second person pronouns being thrown around. I asked you all what interactions you wanted to see me try. So here's a list of what I went through the game doing... Buy solutions with treasure Kiss everybody Kill everybody Swim in the neon ocean Try to give Valanice treasure 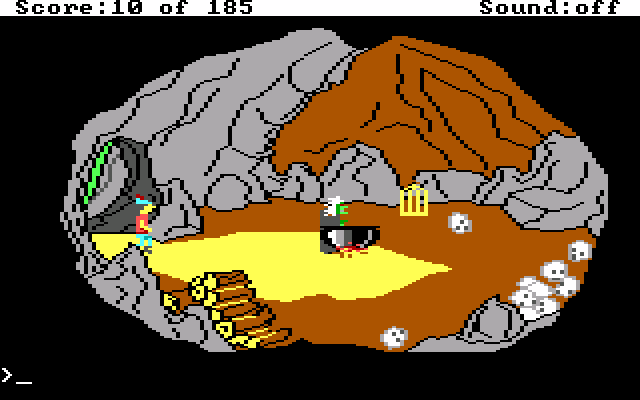 So let's start with Hagatha's cave. I believe I mentioned it at the time, but she randomly will be in here when you enter. First off... >push hagatha in cauldron >kill hagatha : The old hag is stronger than she looks. You shouldn't try it.You get the same response for trying either option. So there's no solving this the King's Quest I way. >kiss hagatha : Smack, hug, woopie!, yuck, barf, gag.I have no idea. I guess Hagatha liked it?  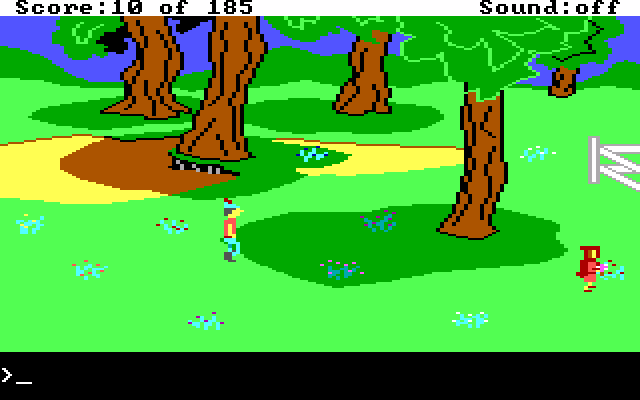 Moving on, let's get Graham added to some government watch lists. >kill girl : That would be incredibly nasty!>kiss girl : You don't need to be kissing little girls.I feel dirty having tried that. 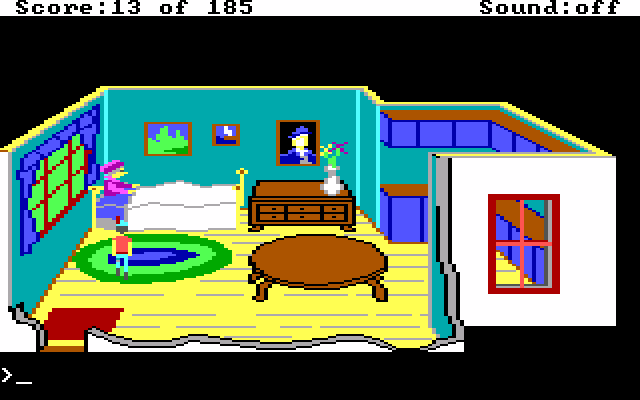 Right next to where Little Red Riding Hood appears is Grandma and the Wolf. >kill grandma : You are supposed to be the good guy. Good guys don't kill kindly little old grandmas.>kiss grandma : Watch it! Whatever she has might be catching.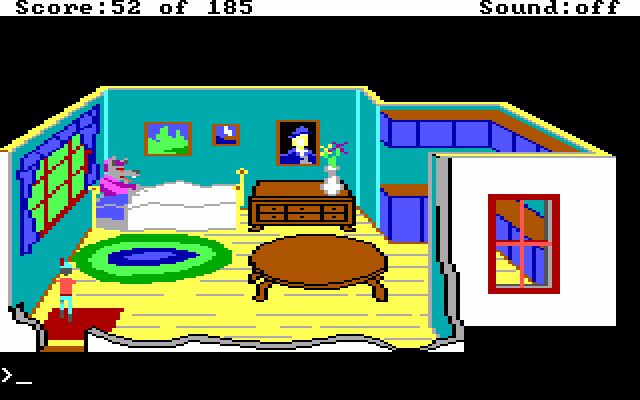 With the villainous characters, there's a bit of a trend going with the kill and kiss commands. >kill wolf : You can't do that -- at least not now!>kiss wolf : Not right now!The trend being that neither works. The Big Bad Wolf is alone in there being no programmed response to either. Anyway, from here on most characters don't have a specific reaction to Graham taking Love Potion #9. So I'll just omit kiss reactions unless it's funny.  It took me a surprisingly long time to find the dwarf. I had to wander around for several minutes with the command typed before he showed up. >kill dwarf : The dwarf is too fast on his feet. You could never catch him.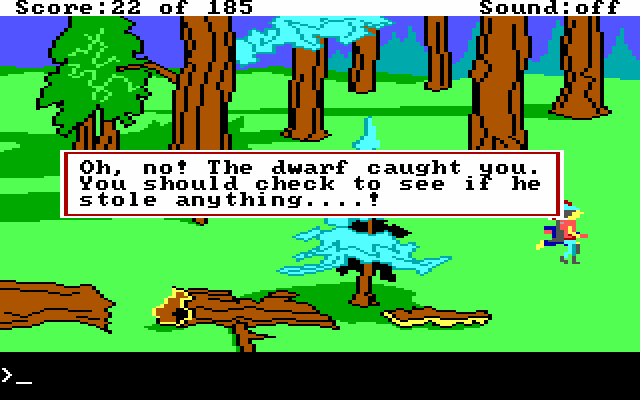 If you get caught by the dwarf, this is what pops up. So let's go get our treasure back. 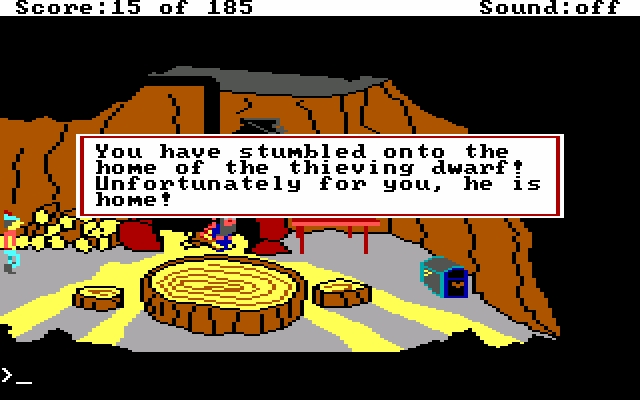 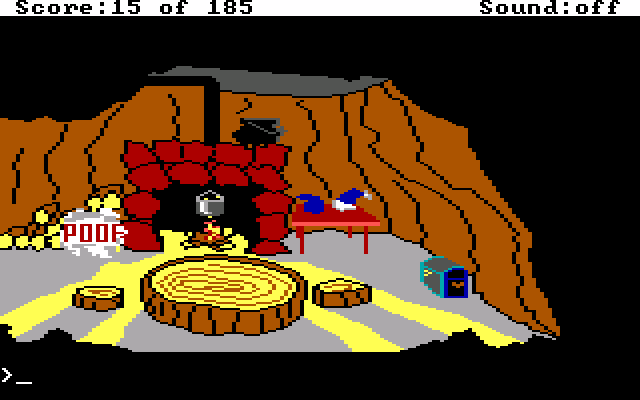 : He has caught you and thrown you out! Instantly, you find yourself outside the treehouse. : He has caught you and thrown you out! Instantly, you find yourself outside the treehouse.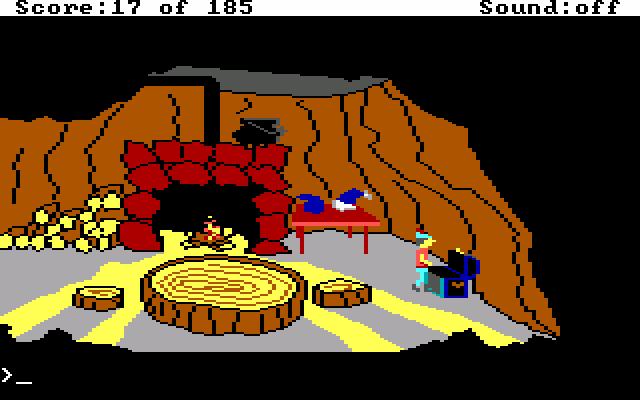 Skipping ahead... >look in chest : You look inside and notice... earrings, necklace.Apparently when the dwarf collided with us earlier, he stole the diamond and sapphire necklace. 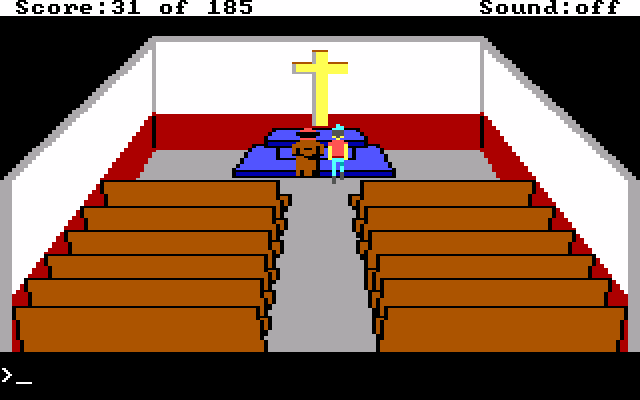 Next we find ourselves in the mission. This is one of the more infamous reactions in the game. >kill monk : Anyone who would kill a man of the cloth doesn't deserve to play this game. Therefore, we will end it.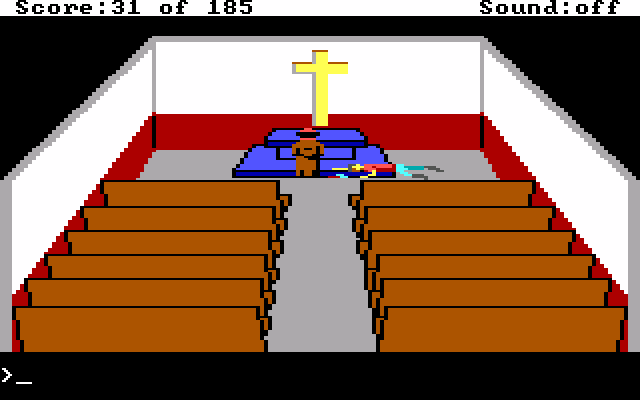 Yep. The game will straight up kill you for trying to murder the monk. The remake turns this on its ear by making the monk evil... and a werewolf. 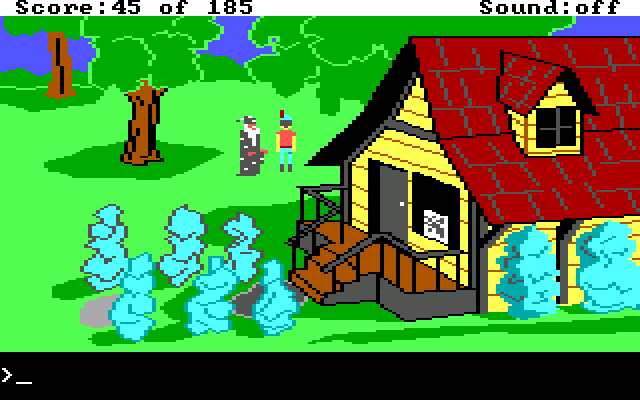 Moving on again, we stumbled across the enchanter.  : Poooooof! The evil enchanter has turned you into a cute little froggy. Ribbit, ribbit! : Poooooof! The evil enchanter has turned you into a cute little froggy. Ribbit, ribbit!In the first game, the enchanter just stunned you for like 20 seconds. While you were stunned, the game could decide to gently caress you over by randomly spawning something else to actually kill you. Speaking of which... >kill enchanter : The evil enchanter is magic! There is nothing you can do!Also... >open door : The antique store is closed. You cannot enter it.This game makes heavy use of plot flags. The mermaid doesn't show up until you've read the first door inscription. The antique shop doesn't unlock until you've read the second door. Finally, the ghoul on the poisonous lake doesn't appear until you read the last inscription. So let's fast forward a bit...  >kiss mermaid : Don't get too close! You might frighten her.>kill mermaid : Wrong move! You frightened the poor mermaid. She dives into the water and disappears.You just have to leave the screen and return to make her reappear. So let's give her a treasure instead of Little Red Riding Hood's flowers... >give necklace to mermaid : The mermaid gladly takes you treasure. In return, she summons forth from the sea a magic seahorse! Maybe you could ride it.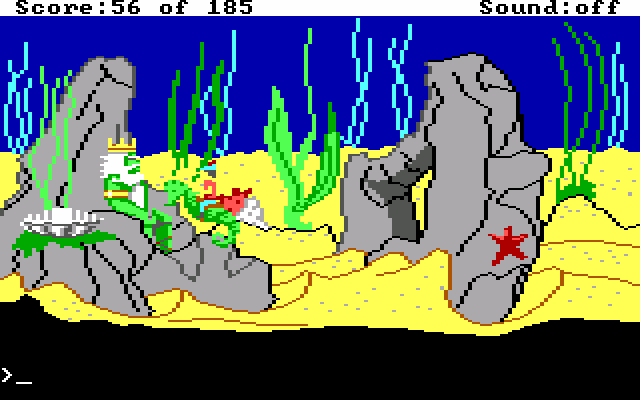 >kill neptune : Hurting King Neptune would not be a wise thing to do. If he doesn't get you, then his fish will. Skipping ahead some more... Let's buy that lamp. If you remember, she wanted either her nightingale back, or two priceless diamond and sapphire studded treasures. >give brooch to lady : The little old lady gladly takes your offered treasure.: That is one treasure. I need one more for the oil lamp.>give earrings to lady : The little old lady takes the second treasure. She motions for you to take the old oil lmap, which you do.: May it bring you good luck!: She then hustles you out the door.Oh, and... >kill lady : A good chap like you doesn't do things like that. Sorry if this is a tad disjointed. There's really no easy way to connect these disparate parts of the game. Anyway... >kiss snake : SSSsssssss! SSssstay away or I will ssssssstrike!>kill snake I showed this off in the main run, but for the sake of completion... : Brandishing the sharp sword, you quickly slash the viper into ribbons. >kill horse : Why would you want to kill a beautiful horse like that? Jumping ahead even more... >kill ghoul : You can't kill something that is already dead.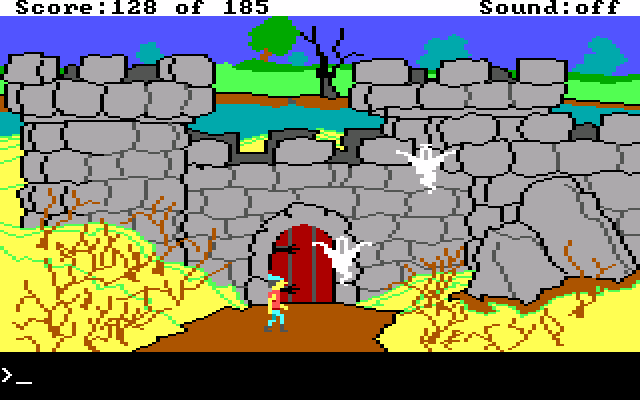 >talk to ghost : When you speak to the ghosts, they utter a mournful wail.>kill ghost : Don't you know that spooks are already dead?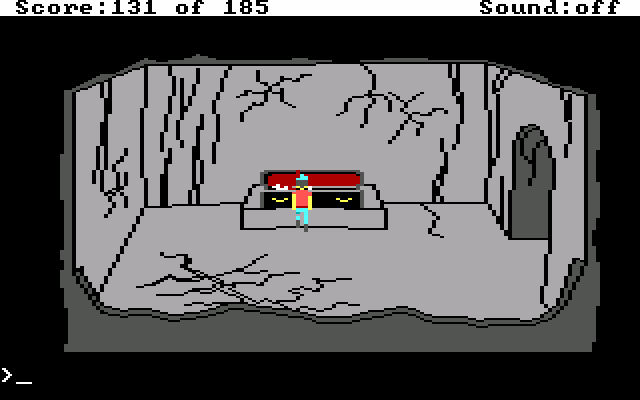 Someone in the thread wanted me to try and kill Dracula without the mallet or stake, and I realized super late in the game that you can't drop either. I'm also unwilling to play through 75% of the game again, while missing two items just for some failure dialogue. So apologies (not really) for not showing that off. Otherwise, there's nothing funny to do with Dracula. Though there is a reaction if you're wearing the silver cross and he wakes up. : Count Dracula is awake! Run before it's too late!: You are caught in Dracula's grasp! Saliva drips off the end of his sharp fangs.: Suddenly, he is aware of the silver cross you are wearing around your neck!: Count Dracula is terrified of the cross. He turns into a bat and flies away.Note that by doing this, he leaves and takes the silver key with him. So you can't get maximum points.  So here we are in the final part of the game.  The sea is 100% instantly lethal. So no exploring here! 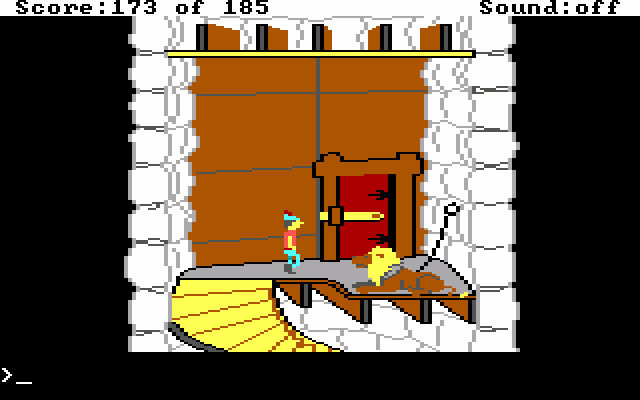 The penultimate screen... >kiss lion : That would be a wrong move!>kill lion : With one mighty heave of your sword, you fatally wound the large lion. He slumps to the floor. >give brooch to girl : You can't do that.Sadly there's no way to give Valanice any of the treasure we've collected along the way. So how do we end this update and King's Quest II as a whole? >kill girl : ARE YOU OUT OF YOUR GOURD???? I thought you wanted to win this game! Don't ever try something like that again!: That's it. I quit. I'm out. I'm done. Hey, do you want a job? : Yes. I will take over your narration duties. : Yes. I will take over your narration duties.See you guys for King's Quest III, starting Monday.
|
|
#
¿
Jul 14, 2017 11:06
|
|
|
Chuu posted:What is LP in this context? The original line was "software dealer" but I think LPer fits better in this case.
|
|
#
¿
Jul 15, 2017 04:09
|
|
|
 In the last game, King Graham got the girl and returned from Kolyma with enough diamond and sapphire studded jewelry to start a collection. By all accounts, he earned his happy ending. So instead of being a direct sequel to the aforementioned happy ending, King's Quest III is set many years down the road and stars Gwydion a teenage boy enslaved to a powerful wizard named Manannan. The game still uses the AGI text parser engine, Spoilers Unlike the first two games, this one actually has a plot that unfolds as we progress. So for the sake of those who have not played this before, please don't be a dick y'all. Use spoiler tags if you absolutely have to talk about something that we haven't seen yet. The Updates #1 - Cleaning the Kitchen #2 - Copy Protection and Being Wrong #3 - The Infinite Desiccation #4 - The Day the Teddy Bears Have Their Picnic #5 - Let's go Shopping #6 - Casting Spells #7 - This Game Has a Plot? #8 - Leaving Llewdor #9 - The Boat Sequence #10 - Gwydion the Mountain Man #11 - Mooning the Princess DoubleNegative fucked around with this message at 01:08 on Aug 8, 2017 |
|
#
¿
Jul 17, 2017 18:22
|
|
|
  Hello everyone and welcome to King's Quest III. Like before, I'm going to let the narrator handle things for the intro, and I'll see you all on the other side.  : You wish to hear another story of Daventry? Very well. Then I shall tell you the tale of Gwydion, the poor slave boy with a grand destiny... : You wish to hear another story of Daventry? Very well. Then I shall tell you the tale of Gwydion, the poor slave boy with a grand destiny...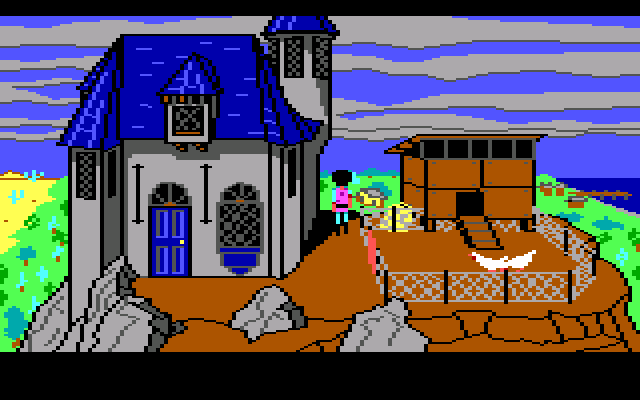 : Gwydion is a lonely lad of seventeen who has lived for as long as he can remember with an evil and cruel wizard, by the name of Manannan. Gwydion gazes upon the countryside of Llewdor with longing, wishing he were free to leave. But, alas, such is not the case.: Manannan treats the poor boy like his slave; ordering him about, constantly threatening him, and refusing to ever let him leave the premises. Often, Gwydion wonders who he really is, and how he came to live with the old wizard. But, Manannan offers no help in that area. : Gwydion is a lonely lad of seventeen who has lived for as long as he can remember with an evil and cruel wizard, by the name of Manannan. Gwydion gazes upon the countryside of Llewdor with longing, wishing he were free to leave. But, alas, such is not the case.: Manannan treats the poor boy like his slave; ordering him about, constantly threatening him, and refusing to ever let him leave the premises. Often, Gwydion wonders who he really is, and how he came to live with the old wizard. But, Manannan offers no help in that area. : Suddenly, the front door opens and out stalks Manannan, the wizard! : Suddenly, the front door opens and out stalks Manannan, the wizard! : Gwydion!: Gwydion rushes to his side, afraid he may be in trouble.: Why are you not WORKING, boy? : Gwydion!: Gwydion rushes to his side, afraid he may be in trouble.: Why are you not WORKING, boy? : Sorry I...: The kitchen floor is FILTHY! Go sweep it, NOW!!: The wizard turns and re-enters the house, slamming the door behind him.: Such is the story of young Gwydion's life to this point. What's a poor boy to do? Oh well. In resignation, Gwydion obediently follows Manannan into the house. : Sorry I...: The kitchen floor is FILTHY! Go sweep it, NOW!!: The wizard turns and re-enters the house, slamming the door behind him.: Such is the story of young Gwydion's life to this point. What's a poor boy to do? Oh well. In resignation, Gwydion obediently follows Manannan into the house.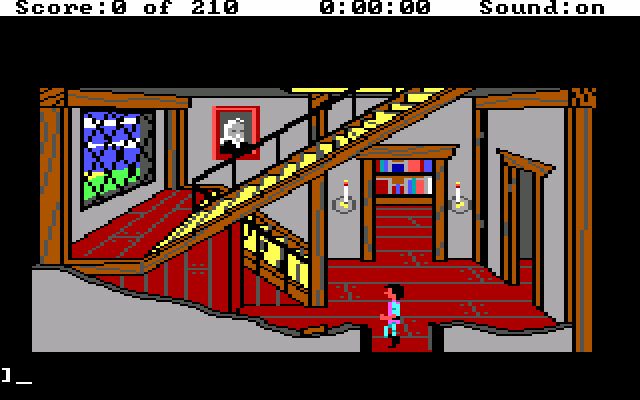 So, the UI is much the same for this game. However, there's one incredibly important addition to the top middle of the screen. That there is a timer. King's Quest III is a highly scripted game. Events happen based on the timer up above, with or without Gwydion being there to observe them. For the most part, these events involve Manannan and his capricious whims. So let's get started.  >talk to wizard : Don't bother me, boy. I've got important things to think about. Also, that kitchen is filthy! Go clean it, now!You ever work a job where you had an overbearing boss who liked to micromanage you? That's Manannan. This guy is an rear end in a top hat with a capital A. I should also point out that if you watch the intro, Manannan doesn't appear here. When the game starts, he gives you one of four chores to complete. If you watch the intro, he gives it to you there. Here, we're being asked to clean the kitchen. Just as well, because we need stuff from in there anyway. For what it's worth, Manannan could also ask us to dust his study, feed the chickens outside, or empty his chamber pot. Anyway, the house has safe and dangerous rooms. The study to the north is a dangerous zone. If you haven't been told to go in there, then Manannan will kill you if he finds you inside. Same deal with his bedroom and the top floor as well. The kitchen, the dining room, the entrance, the upstairs hallway, and Gwydion's bedroom are all safe rooms. Let's get started... 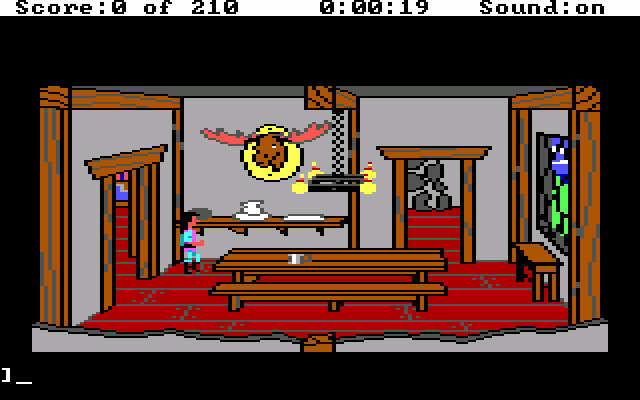 The dining room is sparse and for some reason Manannan has a picnic table to dine on. I guess he's living the dream. >look table : The large dining table is made of pine planking. Matching benches run its length on both sides. The table is big enough to seat at least ten people. There is a little metal cup on the table. Gwydion picks it up and carries it with him.We'll need this cup in the future. It's one of four items from the kitchen and dining room area that we'll need for certain.  The kitchen is Gwydion's office, for lack of a better term. Manannan never pokes his head in here as far as I can tell. His cat, though, is a different story. >look cat That detestable pet of Manannan's is a constant annoyance. >kick cat  : Screeeeeeeeeeeeech!!!!!!!!: Heh, heh, heh... : Screeeeeeeeeeeeech!!!!!!!!: Heh, heh, heh...While it seems mean, the stupid cat will move around while it's on screen with you. Also Gwydion is a jerk. Anyway... >get broom  That's a 25 second GIF that's only 200KB. The good thing about the timer is that you can see just how long these animations take. While we're here, let's loot the poo poo out of the kitchen so we never have to return again. >look shelf : The kitchen shelf holds many ingredients and kitchen implements for cooking. One useful item that catches Gwydion's eye is the clay bowl he uses for all of his mixing. He retrieves it from the shelf.>look rack : There is an iron rack hanging on the wall by the fireplace. Gwydion's trusty knife and wooden serving spoon are both hanging on the rack. He retrieves both objects.>look table : Gwydion uses the heavy oak table when he prepares food for the wizard. Right now, there is a loaf of bread, some fruit, and a mutton chop on the table. He takes all three food items as well.Now that we've got all we need from the kitchen, let's be a bit daring... >get cat : Nimbly, Gwydion grabs the nasty cat by the scruff of its neck, avoiding its needle-sharp claws.: Now that you have it, what are you going to do with it?>get hair : Screeeeeeeeeeeeech!!!!!!!!: Gwydion manages to pluck some fur before the cat viciously scratches, and then leaps from his arms, snarling and screeching. With grim satisfaction, Gwydion surveys his wounds.: Stupid cat, whether you know it or not, you just helped me.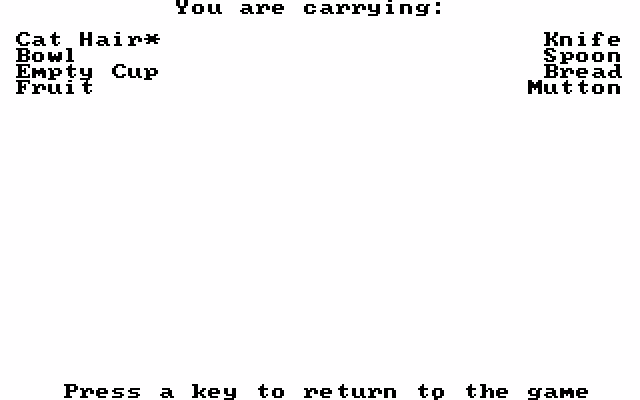 Here's the inventory screen. Fairly standard, except for the cat hair. That, you might notice, has an asterisk next to it. Any items marked as such are dangerous. If Manannan catches you with such an item in your possession, he will kill you straight out. Now that we're holding a bunch of items, let's take a look...  : You hold a small ball of black cat fur in your hand. : You hold a small ball of black cat fur in your hand. : The knife is big enough (and sharp enough) to carve a large roast. : The knife is big enough (and sharp enough) to carve a large roast. : The clay bowl has been your favorite bowl for years. : The clay bowl has been your favorite bowl for years. : This is a wooden kitchen spoon. : This is a wooden kitchen spoon. : This is just a simple metal cup with a handle. : This is just a simple metal cup with a handle. : Mmmmmmm! You love the smell of freshly baked bread. : Mmmmmmm! You love the smell of freshly baked bread. : This is a leftover mutton chop that the old wizard hadn't finished. It still looks appetizing, though. : This is a leftover mutton chop that the old wizard hadn't finished. It still looks appetizing, though. : The fruit consists of an apple and some grapes. They look sweet, fresh, and juicy. : The fruit consists of an apple and some grapes. They look sweet, fresh, and juicy. We need to book it. The timer is 02:10, which means we have a minute to get upstairs and hide the cat hair before Manannan kills us for possessing it. This is harder than it sounds. The stairs in this house were designed by an rear end in a top hat. You can walk diagonally on them, but they're angled in just such a way that you have to keep adjusting Gwydion up or down as he travels.  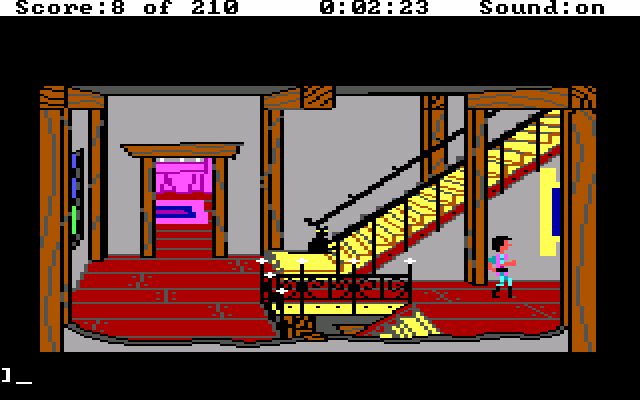 Manannan's house is pretty small. The second floor only has two rooms. The wizard's bedroom is to the north, while Gwydion's is to the east. The top floor is only a single room. We'll see it next time. 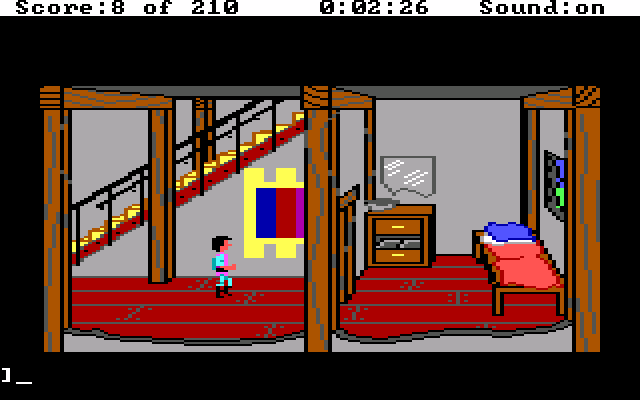 Gwydion has a tiny bedroom, but it's safe from the wizard. While we're here, let's look at a neat little easter egg... >look behind tapestry : Gwydion lifts the bottom of the tapestry and peers behind it. The wall is filled with cracks. He can see why Manannan would hang a tapestry here.: There are also dozens of charcoal-scribbled drawings, diagrams, maps, and notes to programmers, with the legend "King's Quest IV," but Gwydion is uninterested in this, since he presently has his hands full with "King's Quest III. He lowers the tapestry and smooths out the wrinkles.>look bed : The bed is nothing more than a cot, hard and cold, and is difficult to sleep on. Gwydion's pillow is small, flat, and made of old rags.My neck hurts thinking about that. Anyway, this next command is something the game never explicitly tells you, and the manual makes no mention of. You just kind of have to intuit this, I guess? >drop all  : Gwydion gets on his hands and knees and quickly shoves all his possessions under the bed. They will be safe from the wizard's sharp eyes there. : Gwydion gets on his hands and knees and quickly shoves all his possessions under the bed. They will be safe from the wizard's sharp eyes there.Now that we've hidden the stuff, I'm going to show off what happens if the wizard catches you with something you shouldn't have. >get cat fur : Dropping to his hands and knees, Gwydion reaches under the bed and retrieves it.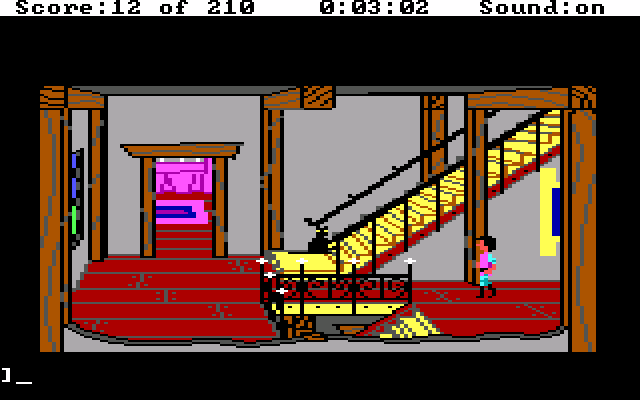 Sometime around the three minute mark, Manannan will come check up on Gwydion to see if he actually did the chore that he was assigned.  He errs on the side of being late, in spite of what Gandalf claims. In a game as heavily time based as this, any delay is annoying. I'll have much more to say about this late in the LP. : The hateful wizard growls and snatches the cat hair away from his slave.: You'll create no magic around me, Gwydion. : Thanks for playing King's Quest III... next time, be more careful! : Thanks for playing King's Quest III... next time, be more careful!The "zap into nonexistence" death is a catchall death for pissing the wizard off in general. It's the same for if you're caught with an asterisk item, for trying to escape the house, for being caught having successfully escaped, for being caught in a forbidden room, and for not feeding the wizard when he demands it. Also, like the previous game, there are almost no death puns. There are one or two lurking around, and there are more creative messages than "be more careful!" Anyway, that's enough for now. NEXT TIME: Glorious copy protection List of Points +1 - Clearing the Table +1 - Mixing bowl +1 - Trusty knife +1 - Serving spoon +1 - I am Bread +1 - Do you want a banana? +1 - Mutton chops! +1 - Fistful of cat fur +4 - >drop all Total: 12/210 Register of Deaths Pissed off Manannan DoubleNegative fucked around with this message at 15:16 on Aug 20, 2017 |
|
#
¿
Jul 17, 2017 18:23
|
|
|
Lucas Archer posted:Is there anything in the documentation that explains what the asterisk means, or is that something you have to divine after dying x times to manny? Nooooope. The manual only has the game's backstory (which Bloops Crusts gave the cliff notes version above) and like 4-5 pages of copy protection. You just have to intuit that items marked with a * mean something special, and that you will get killed if caught while holding them. Also looks like I'm going to have to do a bonus update on trying to intentionally piss off Manannan, just to show how far you can press his buttons before he nukes you into dust. So look for that as part of the next update.
|
|
#
¿
Jul 18, 2017 03:38
|
|
|
 Welcome back to King's Quest III. So let's do that again, this time without pissing off the wizard.  I lied, by the way. I'm deliberately trying to provoke him here. This is Manannan's room. By all accounts he should have appeared by now, but he hasn't.  It took him a full extra minute to appear and glower at Gwydion. Seriously, that's all he does here. He doesn't even acknowledge that you did the chore. He just poofs into the room and stares at you for like 4 seconds. At this point we may as well wait the next minute out. As a whole, I'm not fond of the timer mechanic. There are five items we could be getting right now. We could be progressing the story, such as it is. We could be engaging with the copy protection, for that matter. Instead, we're stuck wandering back and forth in a tiny hallway waiting for the 0:05:00 marker.  Manannan is punctual when it comes to this matter. : Gwydion, I have decided to take a journey.We now are free to loot the poo poo out of everything for the next 25 minutes. Manannan will return from his journey at the 0:30:00 mark, and we have a lot to do between now and then. : Gwydion, Manannan is not appearing on sensors. You are safe for the time being. I will let you know when he is close to returning.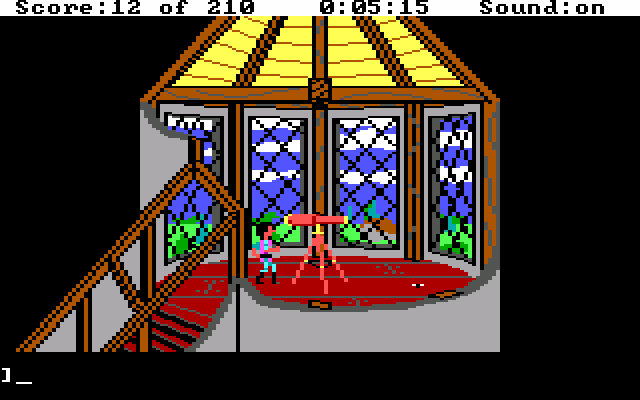 First things first, the third floor. You can kinda see a few pixels on the ground, as well as the telescope centerpiece. So let's take a closer look... >look telescope : Manannan has the brass telescope pointed out a window. It is well polished. He uses the telescope to keep tabs on the citizenry of Llewdor.>look floor : There is nothing on the dusty floor but a dead fly. Gwydion picks it up and drops it into his hand with no small amount of disgust. He carefully removes the wings and discards the body.: Carrying around a dead fly is disgusting. The wings, though, could come in handy. : The fly wings are remarkably beautiful for having come from such a disagreeable insect. : The fly wings are remarkably beautiful for having come from such a disagreeable insect.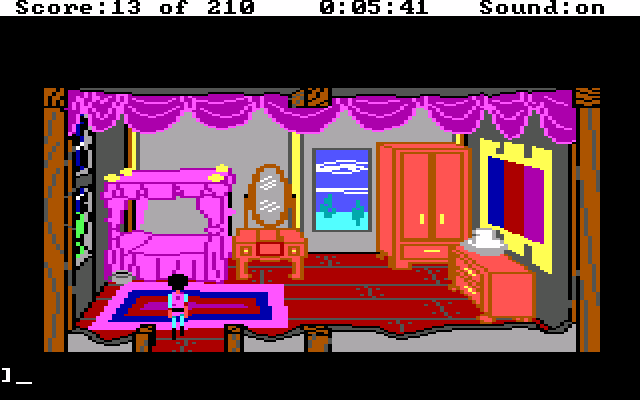 Next, we need to loot the hell out of Manannan's room. >open drawer (while in front of the nightstand) : In the vanity drawer are many uninteresting items, although the wizard's hand mirror may come in handy. Gwydion grabs it and closes the drawer.>open drawer (while in front of the dresser) : Gwydion finds baubles and trinkets which do not interest him. Suddenly, his eye falls on something that does... a vial labeled "Rose Petal Essence," which he eagerly takes.Alternatively if you stand too close to the dresser... >open drawer : Gwydion bangs the drawer against his shins repeatedly. Try backing up!>open cabinet 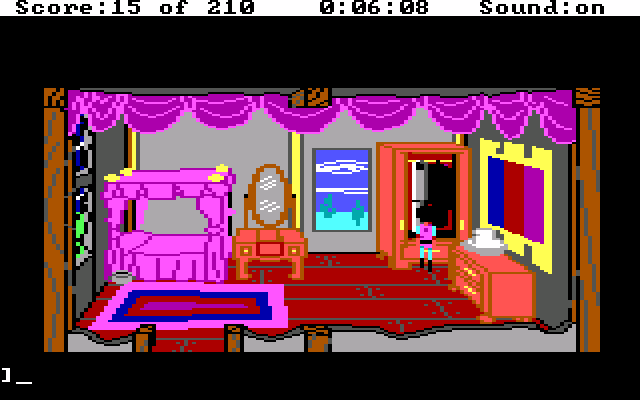 >look in cabinet : In the cabinet there are voluminous velvet robes, satin slippers, peaked hats, and soft linen gowns.>search cabinet : Gwydion is startled to discover an ancient parchment scroll. Its ink has faded, but it seems to be a map. He takes the treasure and leaves everything else exactly as it was.This next item is unncessarily hard to find for no particularly good reason. >close cabinet >look on top of cabinet : Gwydion runs a hand along the top of the closet. Suddenly, he touches something metallic. Grabbing it, he discovers a small brass key! What could it unlock?We're going to need this in a minute.  : The mirror is set in a round, oak frame with a long handle. You peer into it and see your rather dirty, but handsome, face. : The mirror is set in a round, oak frame with a long handle. You peer into it and see your rather dirty, but handsome, face.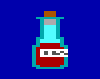 : The little vial of rose petal essence has a delicate, sweet aroma. : The little vial of rose petal essence has a delicate, sweet aroma. : The small brass key is brightly polished. : The small brass key is brightly polished.Finally, rather than show a picture of the map...  This is map of Llewdor, which gets filled out as we explore the land.  It's also a magic map that can teleport you to any map square you've visited previously. Naturally, this comes with significant limitations that I'll cover several updates from now.  We're down in Manannan's study. On the way down, I stopped by Gwydion's room to grab all the stuff from under his bed. Now, the little cabinet in the bottom left corner is incredibly important. It's locked, and we just so happen to have found the key. >unlock cabinet : Gwydion unlocks the oaken cabinet with the brass key. Inside he finds the wizard's magic wand. He takes it, knowing that it will mean his death if the wizard finds it missing. After closing the door, he carefully relocks the cabinet.Gwydion is smart enough to cover his tracks in this one case. Now for the next part... >look bookshelf : So many books line the bookshelf, that you wonder when Manannan has time to read them all. Titles cover many subjects: from "Ancient Arabic Mythology," to "A Study of the Heavens," to "The Philosophies of Socrates.">get book : Gwydion glances at the titles of the books, but none of them interest him. Wait... was that a glint of metal behind one large book?: This bears further investigating...>move books : Gwydion pushes the large book aside, revealing a metal lever attached to the back of the bookshelf.>pull lever  : A trapdoor opens, revealing steep stone steps leading into darkness. : A trapdoor opens, revealing steep stone steps leading into darkness.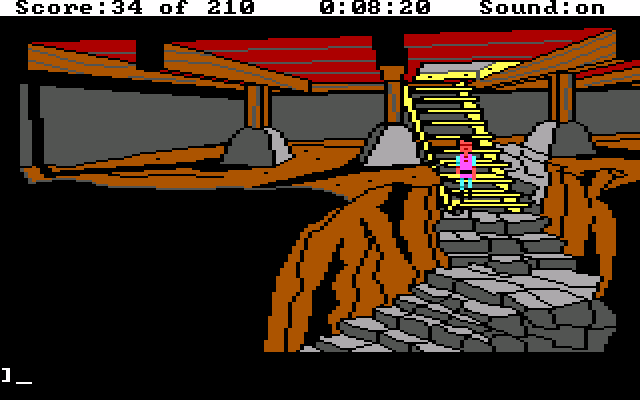 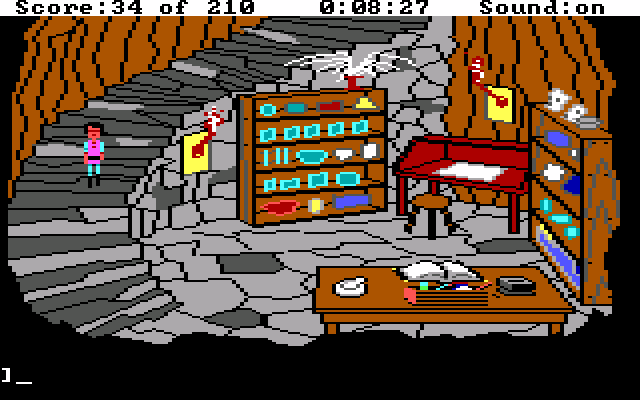 Ahh, the copy protection room. This next bit doesn't happen in the game, but makes sense narratively... : On the large preparation table, Gwydion finds a series of recipe cards. The recipes, however, call for all sorts of ingredients, some of which are decidedly sinister sounding. He collects the cards. One in particular stands out. So this is the copy protection, more or less. A lot of the crap you collect in this game is used for casting magic spells, thus why Manannan freaked out at finding Gwydion in possession of cat fur. There are seven spells in the game, and we're going to use all seven of them in the course of this playthrough. I've deliberately slapped the copy protection together in a facsimilie of a recipe card, because that's all it is. The exotic ingredients like Saffron can almost all be found on Manannan's shelf in the background. So in order to prepare this first spell, all we had to do was find the rose petal essence and the magic wand. So to that end... >get saffron : Gwydion searches the shelves for the jar labeled "Saffron" and removes it to carry with him. : Inside the jar, you see the saffron, an orange-yellow, powdery substance. : Inside the jar, you see the saffron, an orange-yellow, powdery substance.While standing in front of the table... >turn to page iv : With trembling hands, Gwydion turns the pages of "The Sorcery of Old," and prepares to follow its instructions precisely.Precisely is right, too. The instructions on that little recipe card I made are almost the literal string you need to type into the game.  >put saffron in essence : Gwydion carefully sprinkles the precious saffron into the vial of rose petal essence. Here's the copy protection bit. Magic needs an incantation to work properly, and we have to type it in. One option is to type it with the exact punctuation the manual has.  It's a lot easier to just shitpost the incantation. >wave wand : Gwydion waves the magic wand over the vial of rose petal essence. Having successfully completed the spell, he looks again at the wizard's laboratory. We're done with the copy protection for now. I'm refusing to call it spellcasting. It's the principle of the matter. Anyway, let's get the hell out of here. We've wasted nearly 5 minutes of our precious free time, and we have so much to do yet...  Yeah, that's enough for now.  Now let's enter the bonus zone. Here we're going to try and deliberately piss of Manannan until he kills us.  The easiest way to do so is to try and leave the mountain.  Manannan will always catch you at around this point. : Manannan's eyes narrow to slits.: Gwydion!! You are forbidden to be here! I've a good mind to...: HIs face softens as he continues.: Well maybe next time. For now... GO HOME! First time is a warning and you get sent back to the dining room.  Second time... I fall to my death. Whoops! Let's try that again. : You are forbidden to be here!: The old wizard's voice is a hiss. His face is stony, emotionless, and cold.: Try hanging around in the kitchen a while, Gwydion. : You feel the blood rushing to your head as you realize that you are upside-down. Straining to look up, you notice your feet have been magically attached to a kitchen rafter. You struggle, but can't release yourself. What a vexing situation. : You feel the blood rushing to your head as you realize that you are upside-down. Straining to look up, you notice your feet have been magically attached to a kitchen rafter. You struggle, but can't release yourself. What a vexing situation.The narrator by default uses second person pronouns for protagonists, and since this is non canon with the actual LP run, it's as good a time as any to use them. Anyway, we're now stuck hanging on the ceiling for a full realtime minute. Typing any command has the narrator acting weird. : .won taht od t'nac uoY : You feel dizzy and anuseated at the sudden changes in body position. It's at least some consolation to find yourself on the floor again. : You feel dizzy and anuseated at the sudden changes in body position. It's at least some consolation to find yourself on the floor again.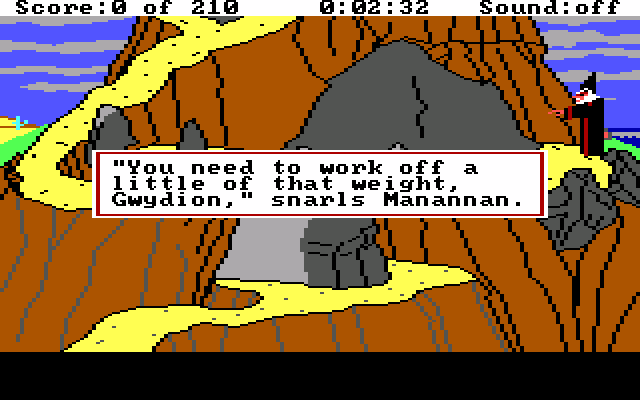 So the third time's not the charm. : Boy, do you hate these little sessions. But, "No pain, no magic." Another minute of varied exercises. It was at this point that I was beginning to realize that it was impossible to piss Manannan off enough to die at the start of the game.  But becauses Manannan suspended us from the ceiling and made us do exercises, we've missed our deadline on completing the chore. : Gwydion! You were assigned a chore. You know what happens to lazy boys!: Manannan shakes his head in disgust.: The kitchen is still dirty. When will you learn to OBEY!: Up goes the dreaded finger. And we're back here. Manannan has four punishments, and I was super unlucky because I kept getting hanging out in the kitchen.  We're past 5 minutes. He should have left on his journey at this point. But nope, here he is making life difficult. And we're hanging like a bat for a third time. So that's four punishments in five minutes and he has yet to kill us. So I'm going to call the experiment a failure here. I tried this process several more times, and all I ever got was hanging from the ceiling and rarely the exercises. Never once did I manage to piss the wizard off enough to warrant death. So I was completely wrong about everything in the first update. Piss the wizard off as much as you like. If you do things correctly, it will not matter an iota. For the record, I'm unwilling to wait around for the 30 minute mark to try my luck some more. The emulator I'm running this on, ScummVM, forces the game to run in realtime regardless of speed setting. I would have to literally sit around for 25 real time minutes in order to get a single chance to piss the wizard off. NEXT TIME: We actually leave the old house. List of Points +1 - Fly wings +1 - Gwydion the vain +1 - Rose petal perfume +7 - The faded map +3 - The small brass key +4 - Stealing the wand +5 - Finding the hidden lever +1 - Raiding Manannan's spice rack +10 - Yer a wizard, Gwydion Total: 45/210 Register of Deaths Tripped by the loving cat x2 DoubleNegative fucked around with this message at 19:14 on Jul 21, 2017 |
|
#
¿
Jul 19, 2017 15:14
|
|
|
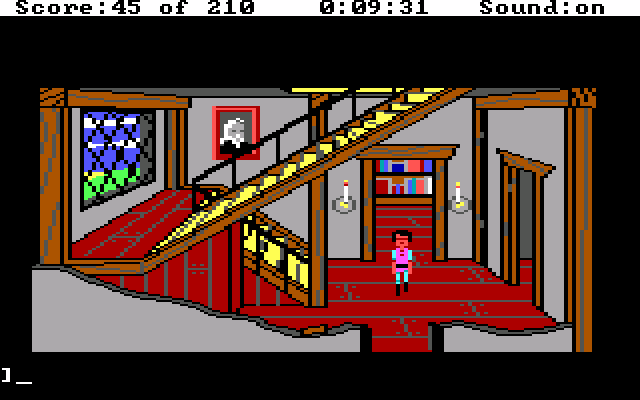 Hello everyone, welcome back to King's Quest III. Judging by the timer at the top of the screen, we now have 20 minutes and 29 seconds to walk down the mountain, loot Llewdor, walk back up the mountain, engage with copy protection some more, and then cover our tracks thoroughly. Manannan will not be happy if we're not at the house when he returns. He'd also catch us with an inventory full of asterisk items, so we need to hoof it.  If you look at the background, you can see some of the destinations we'll be off to. On the right is a small town. There's a lone house in the middle, and the American Southwest is off to the left. So let's get to it! >open gate  In the first update when I pulled a fistful of fur out of the cat, we were actually pretty lucky, as evidenced by the chicken here. When you go to pick up either the cat or the chicken, there's a chance that the animal will dart out of your grasp and run away. If the RNG doesn't like you, then you may have to try several times. Luckily you can mash F3 to recall the last typed command.  Some fried chicken would taste pretty good, not gonna lie. I bet we can... >eat chicken : Sorry, Colonel; they're not even dead yet!Bah! Fine, let's just get what we need and be on with it. >get feather : Tucking the chicken firmly under one arm, Gwydion gently plucks a small feather, then lets the bird go. : The chicken feather is small and light, no more than a piece of fluff. : The chicken feather is small and light, no more than a piece of fluff. Onward, to victory!  I showed this off briefly at the end of the last update, but here it is again. The path down the mountain is yet another Sierra winding path, because I guess they were contractually obligated to make getting around as annoying as possible.  I love these little timelapse gifs. 30 seconds of annoying tightrope walking condensed to a fraction of the time. 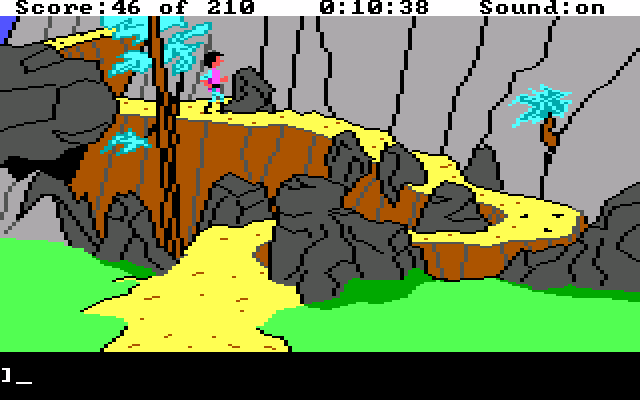 Believe it or not, but this screen has killed me more times than the preceding one. You see the little canyon just below Gwydion? It's a deadly fall.  This screen here is the closest thing to a crossroads. In every direction there's stuff worth doing. But first, we're going west.  Those little brown and yellow pixel blobs on the ground are fallen acorns. One of our >get acorns : Gwydion picks and pokes among the fallen acorns looking for dried ones. He doesn't find any; these are all newly fallen.Repeat command 3 more times : Gwydion picks and pokes among the fallen acorns looking for dried ones. He eventually finds three dried ones and takes them with him.If you're unlucky, this is one of the places the game can really troll you. I've had it take upwards of 11 tries before.  : The three acorns are dried and brittle. : The three acorns are dried and brittle. : The magic wand is cool and smooth to the touch, and creamy-white in color. You think it might be made from ivory. : The magic wand is cool and smooth to the touch, and creamy-white in color. You think it might be made from ivory.Anyway, we're going into the desert first.  King's Quest III doesn't have as many random encounters. In fact, there are only two in the game. Sierra, by this point, was starting to realize that people don't like randomly dodging death and theft every two screens. The screen we're on is one of the exceptions. While the random encounter can happen on any desert screen, every time I've come onto this screen, it has appeared 100% of the time. So we'll just chill for a moment... : The most hideous-looking being has made its appearance! It's Medusa! This is one of those encounters that can trip you up if you're not prepared. You have to walk onto the screen and immediately face to the right to avoid instant death when Medusa appears. Once you're in position just.... >show mirror to medusa  : Averting his eyes, Gwydion aims the wizard's hand mirror at Medusa's face. A scream pierces the air as she beholds her own hideous reflection... then... nothing. He dares to look. Medusa has turned herself to stone! : Averting his eyes, Gwydion aims the wizard's hand mirror at Medusa's face. A scream pierces the air as she beholds her own hideous reflection... then... nothing. He dares to look. Medusa has turned herself to stone!Gwydion may be a jerk, but he is kind of a badass. Just like that we've neutered one of the game's two random encounters altogether! So let's move on.  ... ... ... Oh fine.   : Gwydion's eyes fall upon a face so hideous, so gruesome, that the horror of it is beyond description. People who look upon the face of Medusa, with her hair of writhing, live snakes, turn intantly to stone. Suddenly, his body feels cold and stiffens hard as a rock.: You make a nice statue, Gwydion. : Gwydion's eyes fall upon a face so hideous, so gruesome, that the horror of it is beyond description. People who look upon the face of Medusa, with her hair of writhing, live snakes, turn intantly to stone. Suddenly, his body feels cold and stiffens hard as a rock.: You make a nice statue, Gwydion. Happy now? Alright, let's get a move on. >look statue : Even as a statue, Medusa is indescribably ugly.>look : Gwydion notices an unusual little cactus beside that large rock. He walks over and carefully picks it up. One screen south of Medusa's statue, and there's nothing down here. We'll keep going south.  >look ground : The parched sands of the desert seem to reach forever westward. Gwydion notices a dried snake skin lying on the hot ground.>get skin : Gwydion retrieves the dried snake skin from the hot desert sand. It is delicate and could easily crumble.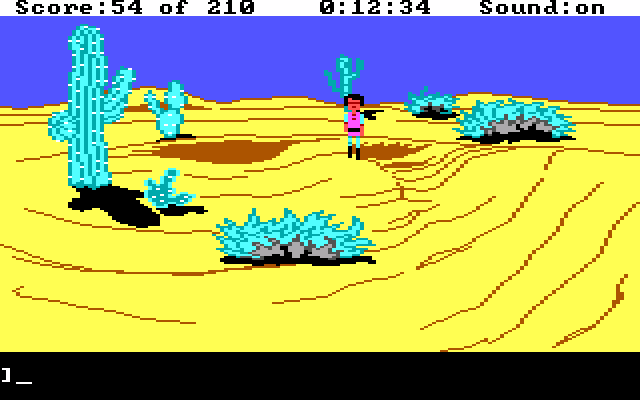 South again, and there's nothing down here. Going south again will put us on Medusa's screen. So, our next order of business is to see just how wide this desert is. Take special note of the time: we've been playing for 12 minutes and 34 seconds.  I'm not going to screenshot every screen we cross, as that would bloat the update's size needlessly. >look : You have entered a great desert.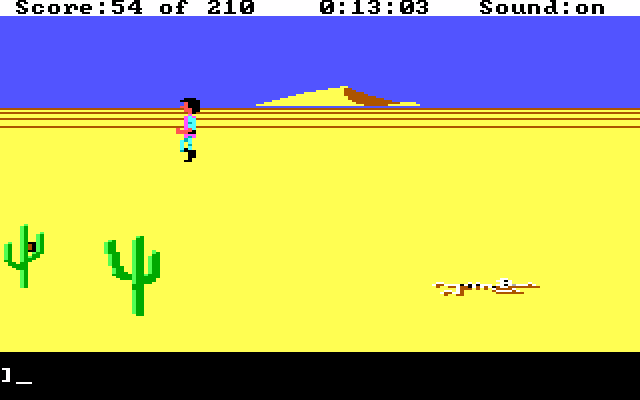 13 minutes.  14 minutes.  14:22 and a dumb idea occurs to me. >gently caress : Obviously, you were raised by a naughty wizard! The heat's starting to get to me. : Once you tasted it, you wouldn't want it! At this point we've crossed somewhere between 8 and 10 screens, and wasted the better part of 2 minutes. I'm not gonna make a definite claim, but I suspect that if we continue any farther we will not be able to make it back to safety. You see, this isn't a kind game. This was made by 1980s Sierra. If you were dumb enough to walk your idiot rear end out into the desert, then you're man enough to walk your dumb rear end back out for exactly as many screens as you walked out.  : Gwydion can't take the relentless sun anymore, and collapses from heat stroke. Miserably, he dies in this dreadful desert. : Gwydion can't take the relentless sun anymore, and collapses from heat stroke. Miserably, he dies in this dreadful desert.So finally after just over 3 minutes of aimlessly wandering through the stupid desert, at 15 minutes and 43 seconds in, Gwydion dies of heat stroke. Oh, and you want to hear the best part? This endless sea of sand is a trap. The only two things you need are the small cactus and the snake skin. The only thing out in the desert proper is death and wasted time.  NEXT TIME: The Bee Threars Hived in a Louse Out in the Widdle of the Moods List of Points +2 - Dried acorns +5 - Doing Perseus' job +1 - Harvesting peyote +1 - Gwydion the skin collector Total: 54/210 Register of Deaths Getting stoned in the desert Getting lost in the endless desert DoubleNegative fucked around with this message at 20:56 on Jul 21, 2017 |
|
#
¿
Jul 21, 2017 19:35
|
|
|
 Hello everyone, and welcome back to King's Quest III. We're going to have to break with LP tradition with this update. What tradition, you may ask? Well, in the first two games, the fourth update had a  level puzzle with some good old fashioned Sierra moon logic. This one doesn't. We're still just gonna be wandering around looting the poo poo out of Llewdor for the most part. level puzzle with some good old fashioned Sierra moon logic. This one doesn't. We're still just gonna be wandering around looting the poo poo out of Llewdor for the most part.Before we get started, let's take a look at our handy dandy magic map. >look map  : The magic map's faded ink has brightened, but only in those places where you have been! : The magic map's faded ink has brightened, but only in those places where you have been!So we're on screen B1 it looks like. Llewdor is small enough that you really don't need a map, and very few screens are completely devoid of anything worthwhile.  So here's screen D2, just one south of the tree with all the fallen acorns. It's one of the very few completely empty screens.  Yeah. Say hello to the other random encounter. Llewdor has something of a bandit problem. These two assholes can randomly jump out of scenery at you on most of the wilderness screens. They behave exactly like the dwarf from the first two games. : After recovering from a whack on the head at the hands of the bandits, Gwydion stands unsteadily. He takes stock of his pockets, discovering that everything he was holding has been stolen! There is a way to get your stuff back, but it requires a little sequence breaking. We'll get to that momentarily, but first there's another fairy tale to shamelessly recreate...  : What's this? Three clothed bears? : What's this? Three clothed bears? : What a beautiful day for a stroll through the forest. : What a beautiful day for a stroll through the forest.As my not-so-subtle teaser for this update may have clued you in to, we're about to reenact Goldilocks and the Three Bears. This is the first screen we're visiting today where the RNG can be a fickle bastard. We got lucky here, as the bears were leaving on our first try. If they aren't leaving when you enter the scren, you need to leave and return until they are. This process can take some time.  >eat porridge (in front of big bowl) : Gwydion tastes the porridge and decides that this bowl is much too hot.>sit chair (next to big chair) : Gwydion feels very small and uncomfortable in this big chair. It is much too hard.>eat porridge (in front of medium bowl) : This bowl of porridge is much too cold.>sit chair (next to plush armchair) : Gwydion sinks deeply into the overstuffed chair... too deeply! This chair is much too soft.Now this next part is particularly important... >get porridge (in front of small bowl) : This bowl of porridge is just right! So, Gwydion takes it with him.>sit chair (the tiny chair in front) : This chair feels just right. I really wish I knew why people at Sierra thought it was "oh, oh" instead of "uh oh". Anyway, we need to head upstairs.  Well... we gotta. >lay on bed (next to the biggest bed) : Gwydion flops onto the biggest (and hardest!) bed. This bed is MUCH too hard!>lay on bed (next to the super plush bed) : Gwydion jumps onto the medium-sized bed and sinks deep into its fluffy depths. This bed is MUCH too soft!>lay on bed (next to the smallest bed) : Gwydion lies upon the smallest bed, and snuggles down into the pillow. Ahhhh! This bed is just right. Before too long, Gwydion has fallen asleep. Of course, falling asleep is an incredibly dumb idea, so let's pretend that didn't happen. Instead... >open drawer (next to the chest of drawers) : Gwydion opens the drawer, and among the clothes, he sees a pretty silver thimble, which he takes. Back outside, there's another item to get here, but you somewhat have to know it's here. >look flowers : Gwydion carefully peeks into the pretty flowers of the flower garden. Drops of glistening dew have gathered within their soft petals.>get dew : Holding the silver thimble beneath a dew-filled flower, Gwydion gently tips the flower so its drew runs into the thimble. He moves from flower to flower, repeating the process until his thimble is brimming with dew.Are thimbles even watertight? They don't seem like they would be.  Anyway, we're back here now. I mentioned above that there was a way to get our stuff back. It's on this screen, but we technically don't know how to do it yet. There are points associated with learning how to do this very thing, so please excuse me as I sequence break so I can actually complete the game. We also needed to do this as part of the preparations I wanted to complete before Manannan returned. >reach in hole  : Gwydion lies down on the ground and reaches into the small hole. He feels around inside the hollow tree and discovers a rope, stretching up into the tree. He pulls it and (to his amazement) a rope ladder falls from the branches above. : Gwydion lies down on the ground and reaches into the small hole. He feels around inside the hollow tree and discovers a rope, stretching up into the tree. He pulls it and (to his amazement) a rope ladder falls from the branches above. Alright, so this is another one of the places where the RNG can troll you super hard.  >look in house : There seems to be somebody moving around inside the treehouse.If there's someone moving around inside, we need to leave the screen and try again. Repeat Two More Times  My test run before the LP, I was trolled by this guy refusing to go to sleep. I seriously tried for a minute and a half straight before catching a lucky break. 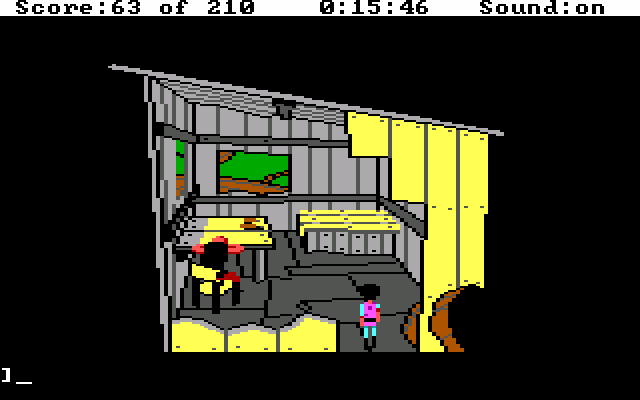 : Gwydion has entered the bandits' hideout; one of them is sleeping at a small table.: Gwydion, I need you to get inside the bandit storage chest and retrieve mission critical equipment. : Gwydion has entered the bandits' hideout; one of them is sleeping at a small table.: Gwydion, I need you to get inside the bandit storage chest and retrieve mission critical equipment.>look table : There is a leather coin purse lying on top of a wobbly table. Gwydion carefully lifts it off the table; practically out from under the sleeping bandit's nose!>open bin >look in bin >get all : Gwydion slowly lifts the lid, and hopes the squeaky hinges do not wake the bandit. This must be where the bandits store all their loot. All of Gwydion's stolen possessions are inside the bin. : Excellent work. A clean extraction with no alarms. : Excellent work. A clean extraction with no alarms. Whoops. Let's try that again... 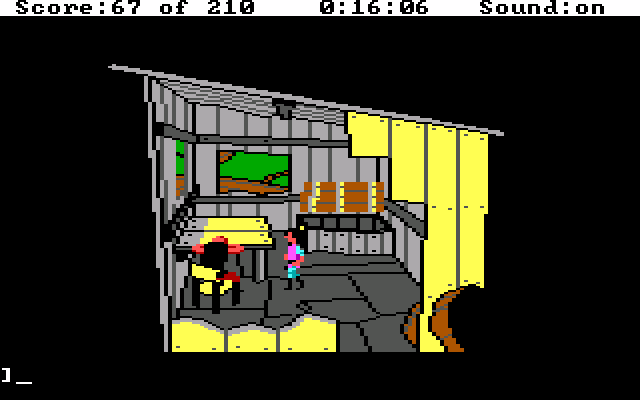 >wake bandit : The bandit opens his eyes and sees Gwydion in his hideout. He jumps up from the chair and gives chase.: Alarms have been triggered, you need to extract now. That's a good place to call it for now. NEXT TIME: We finish our business below and return to the mountain to engage in Jolly Copy Protection. List of Points +2 - This porridge is juuuust right +1 - Stealing a thimble +1 - Getting dew +3 - Hidden ladder +2 - A treefort! +4 - Stealing from bandits Total: 67/210 Register of Deaths Falling from the Tree Fort Being thrown from the tree fort DoubleNegative fucked around with this message at 00:19 on Jul 25, 2017 |
|
#
¿
Jul 23, 2017 12:20
|
|
|
 Welcome back to King's Quest III. Let's do things the right way this time. No more falling off of high ledges... on this set of screens.  Random encounters in King's Quest games are something I'm glad died a much deserved death after this game. King's Quest IV has a lone, notorious, exception. However it's limited to like... six screens in the entire game? My point is, Sierra had started to realize literally nobody likes random unpreventable deaths. They wouldn't internalize the lesson for two more games, and wouldn't take the lesson to heart for three more titles. This tangent also made me realize that King's Quest V is fast approaching and, not gonna lie, I'm not looking forward to that particular bundle of bullshit. Anyway, reloading here because I don't want to deal with robbing these idiots again.  Good lord, this is some bad luck happening right here. Once you've stolen from the bandits, in a well designed game, they would disappear from the game world from shame or some such. Instead, these assholes are gonna be haunting us until we can escape from Llewdor. 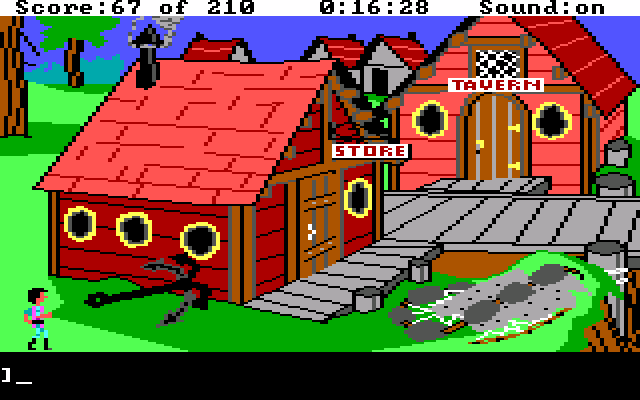 Anyway, here's the small little port town we saw from the mountaintop. The store has a bunch of items we need to loot now that we have some money. Speaking of which...  : You eagerly peek inside the soft leather coin purse and discover it contains some shiny gold coins. You may want to count them. : You eagerly peek inside the soft leather coin purse and discover it contains some shiny gold coins. You may want to count them.>count coins : Gwydion has eight gold coins.So that's good to know. But before we go spending all our money in one place, there's some other items I want to grab from Llewdor first.  We're directly south of the town. >look tree : One of the trees has a light-green colored plant growing upon it. On closer inspection, Gwydion sees that it's mistletoe. He searches among the hanging mistletoe until he finds a sprig that has dried. Upon finding some, he breaks it off and carries it with him. South of the mistletoe trees, we find this spooky spiderweb cave. >look web : It's the largest web Gwydion has ever seen! He can't help but wonder about the spider which could create such a web. : As Gwydion touches the sticky web, a giant spider drops dowm from her lair in the tree above. Gwydion attempts to escape, but the spider's sticky web holds him fast! : As Gwydion touches the sticky web, a giant spider drops dowm from her lair in the tree above. Gwydion attempts to escape, but the spider's sticky web holds him fast! So let's not investigate the giant spiderweb. 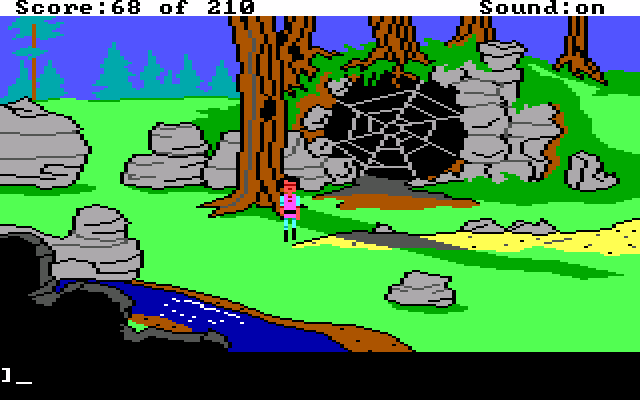 Instead, we need some of this riverbank mud. >get mud : With the wooden spoon, Gwydion kneels and scoops a spoonful of wet mud from the stream's bank. And one screen to the east, we need some of this too. >get ocean water : Gwydion fills his cup with ocean water.My test run through the game, I forgot to get the spoon from the rack back in the kitchen in Manannan's house. It turns out you not only need the spoon to get that mud, but to Please don't misunderstand me, I'm fine with copy protection as long as it's done well. I just think another Sierra title did this game's copy protection better in every way. I also played that other game first. Yes I will be covering it. Alright, so we got a bunch of items the past several updates. So let's take some time to look at those.  : The dry, thin snake skin is extremely fragile. : The dry, thin snake skin is extremely fragile. : The dried sprig of mistletoe is a thick, greyish-green, with remnants of little berries still attached. It is not a pretty plant. : The dried sprig of mistletoe is a thick, greyish-green, with remnants of little berries still attached. It is not a pretty plant. : The warm porridge is in a pretty blue ceramic bowl. Its aroma wafts up to, and tantalizes, your nose. : The warm porridge is in a pretty blue ceramic bowl. Its aroma wafts up to, and tantalizes, your nose. : The metal cup has ocean water in it. : The metal cup has ocean water in it. : The little thimble is fashioned of bright gleaming silver. : The little thimble is fashioned of bright gleaming silver. : The dew sparkles within the little silver thimble. : The dew sparkles within the little silver thimble. : The spoonful of mud has already dried. : The spoonful of mud has already dried. : The eagle's tail feather makes you wonder what it would be like to soar among the clouds. : The eagle's tail feather makes you wonder what it would be like to soar among the clouds. : The greenish-gray cactus is small, plump, and fleshy. : The greenish-gray cactus is small, plump, and fleshy. We've now been pretty much everywhere and gotten everything. So with only 12 minutes left on our free time clock, let's go shopping.   : Good day to you, young man. What can I do for you?: Just a moment. I need to pet your dog.: Feel free. He likes attention. : Good day to you, young man. What can I do for you?: Just a moment. I need to pet your dog.: Feel free. He likes attention.Aww, look at the dog. Let's pet him. >pet dog : As Gwydion pets him, Kenny, licks his hand and thumps his tail in appreciation. A small wad of dog fur collects in Gwydion's hand, and he tucks it into his pocket for later use.: Sorry about that. I need to buy some necessities. I need some... salt, some fish oil, some lard, and a pouch.: That's one heck of a list, son.: The pantry is running low and we need to restock.: Well, you came to the right place. : Your total comes to four gold coins, young man.: Gwydion pays his bill and exits the store with a smile. : Your total comes to four gold coins, young man.: Gwydion pays his bill and exits the store with a smile. : Looking inside the salt bag, you see the coarse grains of salt. : Looking inside the salt bag, you see the coarse grains of salt. : There's nothing very interesting about this jar of whitish, thick lard. : There's nothing very interesting about this jar of whitish, thick lard. : A strong, fishy smell emanates from the glass jar. : A strong, fishy smell emanates from the glass jar. : This is a plain leather pouch, useful for storing liquid or dry ingredients. Right now, it is empty. : This is a plain leather pouch, useful for storing liquid or dry ingredients. Right now, it is empty. : The wad of dog hair is dirty-white and brown. : The wad of dog hair is dirty-white and brown. We've been to all the important screens. So time to show off just what the magic map can do.  It's a little more impressive when you're not teleporting a single screen to the north, to be fair. But we do have in our possession actual fast travel.   And that's every screen in Llewdor. In spite of the limited, MSPaint-like color palatte, the artists made some very pretty scenery.  Of course, it was still 1980s Sierra. So in spite of having actual fast travel, there was a contractual obligation to prevent things from being too convenient. So every time we want to travel back to Manannan's house, we need to walk back up the path.  What makes you think it annoys me?  Guess what I forgot to do? So I think that's a good point to call this update. NEXT TIME: Spell casting bonanza. List of Points +1 - Mistletoe +1 - Streamside mud +1 - Salt water +1 - Pet the dog! +1 - Bought salt +1 - Bought fish oil +1 - Bought lard +1 - Bought pouch Total: 75/210 Register of Deaths Fell off the mountain path. Again.
|
|
#
¿
Jul 25, 2017 14:48
|
|
|
HomestarCanter posted:I don't suppose you'd be interested in showing off my favorite King's Quest parody, Peasant's Quest? I don't have any plans to, no. But if you want to LP it in the thread, be my guest. I'll link to your table of contents in the OP with the rest of mine.
|
|
#
¿
Jul 25, 2017 22:29
|
|
|

|
| # ¿ Apr 27, 2024 14:53 |
|
|
 Hello everyone and welcome back to King's Quest III. We're down on the ground here at the start for a very important reason. Do you see that eagle that's flying by?  >get feather It drops the other half of that flying spell we cast several updates ago. With that tail feather, we can now turn ourselves into an eagle as well. Anyway, that's the only new thing that happened. So join me now 3 minutes in the future...  Alright, so the vast majority of today's update is going to be dealing with casting more spells. We technically only need to cast one before Manannan returns around the 30 minute mark. But as you can see, we have 10 minutes free still. We made remarkably good time down below. >get mandrake root : Gwydion removes the jar labeled "Mandrake Root Powder" from the laboratory shelf and carries it with him. : The glass jar of mandrake root powder has an earthy, bitter smell to it. : The glass jar of mandrake root powder has an earthy, bitter smell to it.Alright, so this is the only spell we absolutely need to have cast before Manannan returns.  This is why Manannan was not happy to find Gwydion in possession of cat fur, and understandably so. >put mandrake root powder in bowl >put cat hair in bowl >put two spoons of fish oil in bowl : Gwydion pours the fish oil into the bowl and keeps the empty jar.There's narrator reactions to each step, but I'm only showing the interesting or pertinent ones. >stir mixture with spoon : Gwydion mixes the ingredients together. THe mixture turns into an oily, disagreeable dough with cat hairs sticking out of it.>put dough on table >pat dough into cookie  >wave wand : Gwydion waves the wand over the cookie, then takes it with him. Finished with his spell, he looks up from the book and at the laboratory once more.Now that we're finished, let's rewind time a bit and try something stupid. By the way, this update is going to bloat our death counter.  >turn to page xxv >eat cat hair : A strange feeling comes over Gwydion. He wonders if he could have made a mistake! : That was a-mew-sing Gwydion. : That was a-mew-sing Gwydion.It's like a soothing balm. An infuriating, awful, terrible soothing balm. And now it's time to rewind four updates. >turn to page iv >eat saffron : A strange feeling comes over Gwydion. He wonders if he could have made a mistake!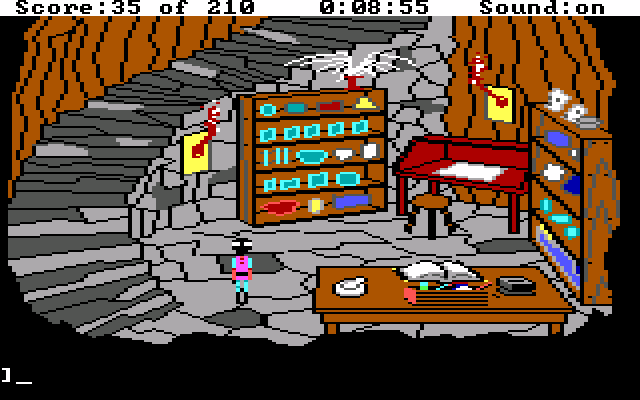 : Oooooooh, Gwydion. What big eyes you have!! : Oooooooh, Gwydion. What big eyes you have!! >get fish bone : Gwydion removes the jar labeled "Powdered Fish Bone" from the laboratory shelf and carries it with him. : Within the glass jar, you see your white fish bone powder. It emites a faint, fishy smell. : Within the glass jar, you see your white fish bone powder. It emites a faint, fishy smell.Nothing like the smell of a cracker barrel on Friday.  : The only resemblance to a real cookie is its flat, round shape. It is hard, and has cat hair sticking out of it. Definitely non-appetizing. : The only resemblance to a real cookie is its flat, round shape. It is hard, and has cat hair sticking out of it. Definitely non-appetizing.Let's continue on and not dwell on the fact that somewhere Gordon Ramsay is having a conniption. >turn to page ii >eat feather : A strange feeling comes over Gwydion. He wonders if he could have made a mistake!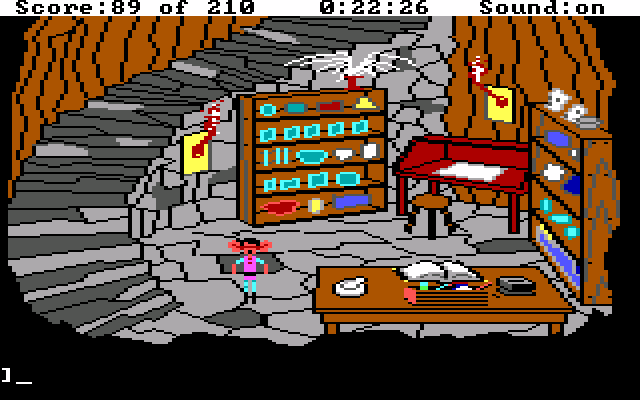 : You're all ears now, Gwydion! : You're all ears now, Gwydion!Amusing death aside, let's take a look at our recipe card.  You could also use the cat hair to cast this spell, but if you do it becomes impossible to finish the game. This spell is technically completely optional, as it only unlocks bonus dialogue and some optional points super late in the game. >put small feather in bowl >put dog fur in bowl >put snake skin in bowl >add spoonful of powdered fish bone >add dew to bowl mix with hands : Gwydion kneads the ingredients in the clay bowl with his hands. It turns into a stiff, dough-like substance.>separate the mixture into two pieces >put dough in ears : Gwydion VERY gently places the two pieces of dough in his ears and pulls his hair down over them. He prepares to recite the magical incantation. >wave wand : Gwydion waves the magic wand over his dough-filled ears. In an inventory full of asterisk items, the dough filled ears are actually one of the few safe items in the game. Also take note that salt, despite being a food additive likely found in Manannan's pantry, it's marked with an asterisk. : It's difficult to look inside your own ears! But, as best you remember, the pieces of dough have tiny bits of feather, snake scales, and fur sticking out of them.>get nightshade juice : Gwydion removes the jar of "Nightshade Juice" from the laboratory shelf and carries it with him. : The nightshade juice sloshes around inside the glass jar. : The nightshade juice sloshes around inside the glass jar.>turn to page xiv >eat bowl : A strange feeling comes over Gwydion. He wonders if he could have made a mistake! : Night-night, Gwydion. : Night-night, Gwydion. So here's our next spell. We'll use this much later on, but I'm not 100% certain it's necessary. We get points for preparing it though, so why not? >turn to page xiv >grind acorns in mortar >put acorn powder in bowl >put nightshade juice in bowl >stir mixture with spoon >light brazier : Making sure there is fresh charcoal in the brazier, Gwydion lights it with the flint. Soon, the brazier is hot.>heat mixture on brazier : Gwydion gingerly places the bowl of ugly brown liquid on the charcoal brazier. Soon, the hot brazier brings the mixture to a bubble, then a boil, releasing a bitter smelling steam. He lets the mixture boil until the nightshade juice is nearly gone, then he removes it from the brazier.>spread mixture on table : Gwydion pours the bowl's contents onto the oaken table, then spreads the hot sticky mixture over the table top. In a few minutes, it has dried to a very crumbly, coarse sleeping powder. >wave wand >put sleep powder in pouch It's incredibly important you type sleep powder. I don't want to recount how many times I died in my test run because I typed sleeping powder. The copy protection in this game being such a just-so process is why I have so many frustrations with it. : Gwydion unties the small leather pouch, scoops the powder from the table, and places it within. He now has a pouch full of sleep powder. : The leather pouch is securely tied, and filled with the coarse, brown sleep powder you so proudly manufactured. : The leather pouch is securely tied, and filled with the coarse, brown sleep powder you so proudly manufactured. While we've got plenty of time to cast one last spell, for some reason here I decided that 5 minutes was going to cut it kind of close. So instead let's just head back up and hang out for a bit.  But first, allow me to show this death off again...  : OH, OH!! That darn cat really did it to Gwydion this time! Tripping over the cat, he falls to his death.: You look mighty funny falling down those stairs, Gwydion. : OH, OH!! That darn cat really did it to Gwydion this time! Tripping over the cat, he falls to his death.: You look mighty funny falling down those stairs, Gwydion. Anyway, let's cover our tracks. >pull lever >move books : Gwydion moves the big book back where he found it so it again conceals the metal lever. He doesn't want the old wizard growing suspicious of his activities.>unlock cabinet : Gwydion carefully replaces the magic wand exactly as he found it. After closing the door, he carefully relocks it. With our tracks mostly covered, all we have to do is slide our crap under the bed. But you know what? Casting all those spells is hungry-making work. That hair filled cookie is looking awfully tasty... >eat cookie  : Gwydion purrs contentedly, enjoying his new life as a cat! : Gwydion purrs contentedly, enjoying his new life as a cat!So it looks like our cookie works! That's good news. So we'll just reload and... >drop all >get porridge  So we're just going to wait here for 4 minutes. See you all on the other side!  Oh! Something to show off... >kick cat : Ow! I'll get you for that, Gwydion!>talk to cat : Get lost, Gwydion, you creep!>kill cat : Good idea, but how? As much as he would love to, Gwydion hasn't the heart to do it.Anyway, now for real see you all at the 30 minute mark.  Surprisingly punctual for Manannan. : I have returned, Gwydion, and am ready to eat.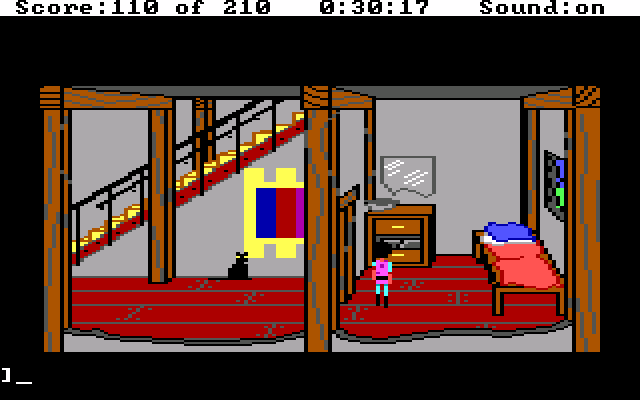 We'll just run in here to make this faster and... >get cookie  : Manannan is impatiently waiting for his food! His stomach rumbles as he drums his gnarled fingers on the table. Gwydion had better feed him quickly, or dire consequences may result. : Manannan is impatiently waiting for his food! His stomach rumbles as he drums his gnarled fingers on the table. Gwydion had better feed him quickly, or dire consequences may result.So, when people say this game has a hard time limit, this is the reason why. Manannan has a strict schedule, where he will always assign you a chore at xx:00:00, check in on the chore at xx:03:00, and leave on a journey at xx:05:00. He'll return from his journey at xx:30:00, and will have to be fed by xx:33:00, I want to say. At xx:35:00, he'll take a 25 minute nap, and wake up at the top of the hour. At which point, the entire schedule repeats. There are only four food items in the game. Three of them can be found in the kitchen at the start of the game, and we're carrying the fourth with us now, the porridge. So if you take as much time as possible, you had best know exactly what you're supposed to do after you feed Manannan at 2:30:00. It is possible to stretch the game out to the 4:30:00 mark. But that also leaves you playing for a full hour in a dead man walking scenario. So functionally, the hard time limit for dealing with the wizard is 3:33:00. The first part of the game has two goals, the first is to deal with Manannan. The second is to escape from Llewdor and go literally anywhere else. In the next few updates, we'll cover just what leaving Llewdor entails, but not one iota of it will matter if we don't deal with the wizard first. So... : I have a cookie for you, my lord.: You've discovered the secrets of 'The Secrets of Old." Never again will you disobey me, Gwydion!!  So let's do it right, instead. >put cookie in porridge : The porridge conceals the crumbled cookie; it still looks as appetizing as ever. : You were careful when you crumbled the cat cookie in the porridge... it looks just like a plain bowl of porridge! : You were careful when you crumbled the cat cookie in the porridge... it looks just like a plain bowl of porridge!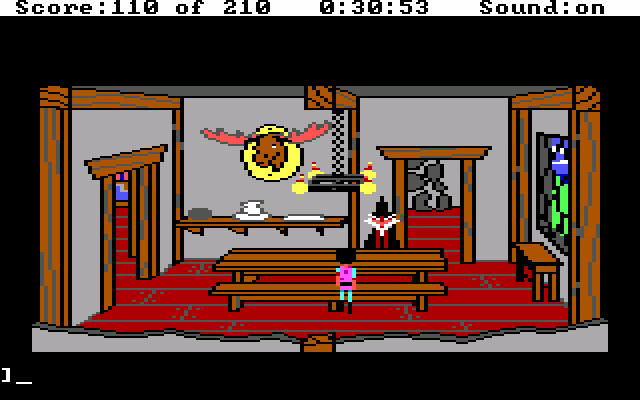 >give wizard porridge : Gwydion places the food on the dining table before the hungry wizard. Ravenously, he devours every bit of it. : Gwydion fooled him! Manannan didn't realize the porridge was tainted, and ate the whole bowl! : Gwydion fooled him! Manannan didn't realize the porridge was tainted, and ate the whole bowl!I cut out 10 seconds of the wizard slowly eating in there. 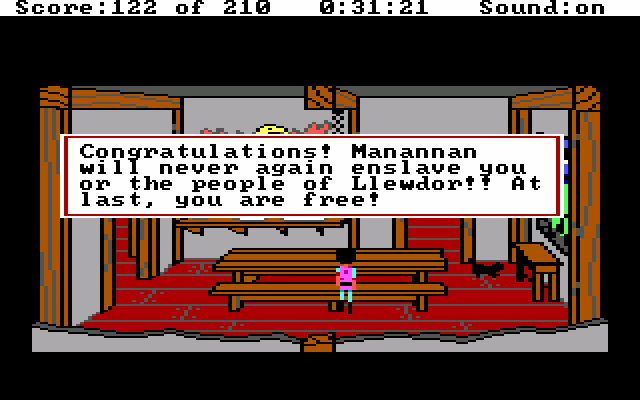 Normally I'd transcribe the message, but this is one of those super important ones. We did it, guys.  NEXT TIME: As master of his own destiny, Gwydion does whatever the gently caress he wants for the first time in his life. List of Points +2 - Tail Feather +1 - Mandrake root essence +10 - The world's most disgusting cookie +1 - Powdered fish bone +10 - WHAT? I CAN'T HEAR YOU +1 - Deadly nightshade +10 - Patented sleep powder +12 - We beat the wizard! Total: 122/210 Register of Deaths That was a-mew-sing Gwydion sees all The better to hear you with, my dear Eternal slumber Amused the cat Meow meow meow meow Pissed off the wizard. Again.
|
|
#
¿
Jul 27, 2017 17:05
|
|