


|
TheLastRoboKy posted:Unlike everyone on Mars. This plot point gets totally cut in the Nadesico stuff for T, which has interesting consequences. The Prince of Darkness story in T has most of the cast wondering why Akito and Yurika were kidnapped, since there's, like, millions of potential Boson jumpers, including some of the Gun X Sword characters on the ship. The final boss even casually reveals that he's a jumper. It's just a thing some people can do, and it's only exceptional cases where people take note, like a mech teleporting on its own to another galaxy.
|
 #
?
Apr 29, 2019 09:49
#
?
Apr 29, 2019 09:49
|
|


|

|
| # ? May 4, 2024 14:15 |
|
|
Mission 6 done - 48 turns. Finally got a new unit with the Archangel. Easy stuff again with the Nadesico and Calvina destroying everything. Unfortunately a lucky crit from Creuzet downed Calvina, giving me my first destroyed unit and loss of money.
|
|
#
?
Apr 29, 2019 16:22
|
|


|
chiasaur11 posted:This plot point gets totally cut in the Nadesico stuff for T, which has interesting consequences. T also does a lot of fun stuff with the Martian Civilization and Boson Jumping in general, like bringing up the idea that Dann of Thursday Boson Jumps in to justify being able to use it wherever the action takes place. Spoilering this only as a matter of courtesy because they bring it up in like mission 10, of 54
|
|
#
?
Apr 29, 2019 17:02
|
|


|
humans on mars as a concept is a colossally terrible idea anyway so arguably we were doing them a big favor by making it quick
|
|
#
?
Apr 29, 2019 17:55
|
|
|
Stage 7: 4/28 turns Nadesico now has 2 Boosters Layzner has 2 HE Radars   Start of the stage. Everyone but Kira jump into the Nadesico, which then gets an accel and moves north.   The SEED crowd is also here to help.  Turn 2. Nadesico moves, then things start to unload.  Eiji moves here. He'll deal with the Nazca-class.  Calvina moves here, she'll be grabbing a few kills.  The others unload as well, most of them setting up to intercept the reinforcements when they arrive.  Archangel moving along.  Start of turn 3. The X-numbers and some reinforcements spawned in on enemy phase. They retreat at ~10% hp I think, and forcing their retreat or destroying them ends the stage. Nadesico pops a Propellant Tank, and a Vigor.  Roanne attacks the Nazca, then moves to the west. He'll attack the north western Nazca next turn, setting up the kill.  Layzner moves up to deal with the North Western Nazca-class. Having double HE radars allowed him to counter the Nazca on enemy phase, which in the long run sets up the kill.    People start hitting the Nazca-class, setting it up for the kill.  Calvina casts Focus, Snipe and Bless, then sends this Nazca-class off.  Nadesico moves here and attacks the Duel. The X-numbers will start moving on enemy phase, and they're kind of erratic, so it took some finaggling to find a spot where they'd all attack Nadesico. Not shown on the screenshots; David moves next to the Nadesico, it'll resupply it next turn. Archangel moves north.  Start of turn 4. Nichol got damaged and retreated on enemy phase, denying me the kill.   Archangel does some damage, then Calvina offs this Nazca-class.   Roanne and Eiji send the last Nazca-class off.     I forgot to write down exactly who got Cheered, but suffice it to say, the remaining X-numbers were cleaned up. EDIT: I realized after the fact that Nichol gives a support attack +1 item on destruction, so I went and redid the latter part of the stage to get it. Dance Officer fucked around with this message at 13:41 on Apr 30, 2019 |
|
#
?
Apr 29, 2019 19:47
|
|

|
Super RoboKy Draft Wars Episode 4: The Villains Managed One Whole Mission Before Backstabbing Turns out Mars sucks and now we need to leave, but the Nadesico needs some replacement parts so we're off to a Nergal research facility. What were they researching? They're sure as heck not going to tell us till way later! Of course this corporation had an ulterior motive to their Mars rescue mission, but they did try to do the rescuing first before everyone died. 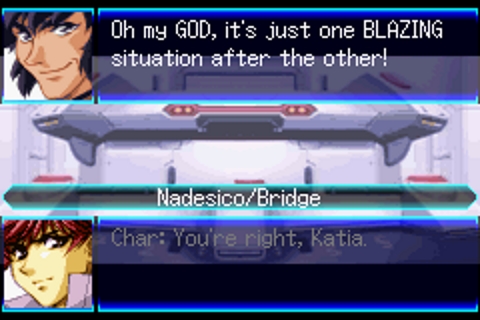  Char gets really upset about the thought he might die, Gai does weed to take the edge off. Koji is just like �Yeah honestly this happens to me weekly�  I warned you. TIME FOR BATTLE I take Katia as my co-pilot for this one cause the game tells me it's my choice. The enemy make-up is pretty similar to before, some Skullgunners and Battas together, Bravers with the two characters Karla and Gale, and two battleships. 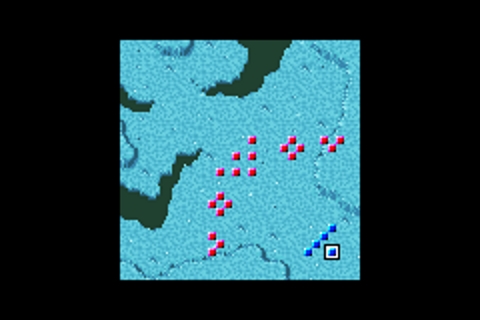 Turn 1 Begin the smoosh of heroes and villains towards each other! I stick Koji waaaaay out in front this time because I'm tired of everyone dinging up my battleship. Enemy phase time and Combattler V takes down two enemies and Char takes down one as they retaliate enemy attacks in the enemy phase. Mazinger takes some licks but manages to harm a good number of enemies. Turn 2 I more or less hold position here, and all our units manage to take down a single enemy each. Even Sayaka! Char hits level 7. Enemy phase the next wave moves in, and Mazinger Z and the Nadesico trade fire with the enemy battleships, and the enemy lose a lot of their guys to retaliation from my super robots. Even Sayaka is holding her own pretty well! I'm genuinely shocked. Karla hits Char and takes off half his health but he does the same in return. Turn 3 Okay time to take care of some busines! Sayaka repairs Char, we focus down a Battleship, and then I have Char pop Focus to try to take down Karla. I forgot to use Bless or Cheer though so we get a modest amount of exp and cash, but a shitload of parts and modules. Chobham armour! That's going to be nice. 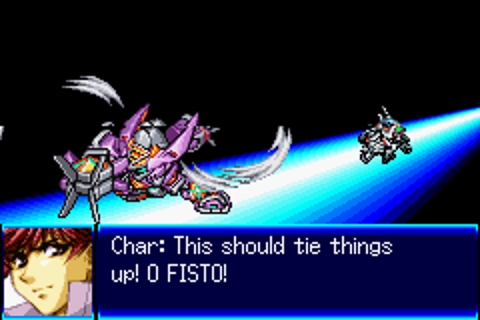 I did it. At last. Enemy phase and the enemy actually goes for Sayaka, and she hits level 7. I'm not sure why but they're seriously ignoring the Nadesico this time, maybe I hung it just far enough back because they're going for my super robots who basically clean house. Mazinger has his Mazinpower up so they're not going to be surviving much of what he does. Certainly, he hits level 8 off the back of one-shotting one with a rocket punch. Combattler V gets in some good counter-damage too. Gale joins the fight, and even though it was a 12% hit chance Koji still tags him with a Rust Hurricane. KOJI IS A GODDAMN BEAST drat YOUR STATISTICS. Turn 4 We destroy everything except Gale, hoping this means he'll attack someone who can hit him and die. I have Sayaka pop Alert sand repair Koji and pop Wall on him just in case because even though Mazinger Z is tough enough to shrug off mook attacks, Gale can do some decent damage even against the Potential. I also suspect he might go for Sayaka. I'm 100% right and Sayaka dodges an attack that would have probably hurt a lot. Time to pummel Gale! Turn 5 This time I remember to Bless and Gain Combattler V, and with Strike on he's guaranteed to hit Gale with his best attack. It's a ridiculous amount of overkill and Hyoma gets 900 exp, hits level 9, and gains the spirit Luck (It's Bless but cast on the caster and no one else) to its bag of tricks. Gale drops and we enter part 2 of our adventure. Gale is immediately betrayed by Gosterro and turns into a yellow unit on the map. Yellow units are a third side in the battle, often allies you can't control or enemies that will attack both sides. In this case he's an objective to protect. We can choose to approve or disapprove personally which is normally part of the secret but eh I usually approve so here we go let's make things a little harder on ourselves. Greimkaiser has literally 10 hp so our best thing to do is just surge straight at the enemy and not give them a chance to fight. Luckily he also drops right where we fought him so hanging back a little paid off. Time for wave 2 pretty much the same as the first one, and also the last mission too! Don't think I don't see you padding this poo poo out, Banpresto. 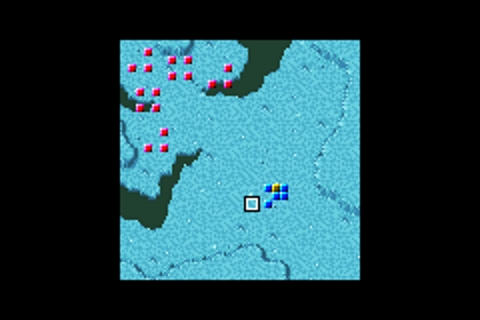 Enemy phase pushes on and yup same as before, mooks move and slightly tougher dudes hang back. 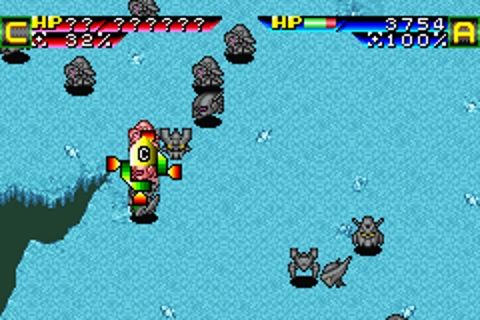 Turn 6 Mazinger Z and Char are the fastest so they're already able to wade in deep. I fire off a combo attack with Char to weaken more dudes, hurting one and killing another. Combo attacks are great. They're melee attacks that can be used to hit multiple enemies in a line, with the higher your pilot's Combo level the more enemies you can hit in sequence. Combo level 1 just lets us hit two, but as I said before those two got their butts beaten inwards. Enemy phase and the enemy gets to moving the rest of their clowns up, everyone attacking Koji and generally getting their faces smacked because of it. Koji hits level 9 and his Potential level hits 4, so he's even tankier now. At his current low health the enemies can only do about 10 damage to him, the absolute minimum amount of damage possible. He also runs himself out of energy but I had a Propellant unit on him for a reason and can get that back up again. Turn 7 Sayaka's repair festival hits her up to level 8, as Koji restores all his health and energy in preparation for fighting more battleships and probably Gosterro again. Enemy phase and Koji just outright one-shots two Bravers with his Rocket Punch attack. Turn 8 Gosterro and the two battleships are all that's left, so we get to work wounding one of them. Enemy phase and the Nadesico returns fire on the wounded battleship and kills it, while winging the other one. Gosterro tags Koji and avoids the retaliation. Turn 9 Oh god I hit turn 9 my perfect 8s record is ruined. Anyway the Nadesico and Koji down the battleship, and I set up to beat the beans out of Gosterro with Combattler V again. Only 300 exp this time but it's still a one-shot and Hyoma hits level 10. More sexy parts to use! Actual stat-influencing ones! Gosterro cries that he'll be back, and Gale thanks us by giving us the chance to surrender peacefully and then gives us 10 minutes before he sends all his units at us to kill us. Thanks a lot rear end in a top hat. Luckily for us a character I won't be using dies, as does some other side-character from Nadesico, and we flee into a Tulip. What's a Tulip? It's a weird ship-like thing that can act like a portable wormhole. Go in one, come out another. The Jovians use them to send unmanned units at Earth, because as far as we're aware the warping process just annihilates all human beings. Wait hold on a sec- Turn count: 33
|
|
#
?
Apr 30, 2019 07:55
|
|
|
Stage 8: 3/31 turns Nadesico now has an Apogee motor and two boosters, Ruri got a support attack +1 part. Layzner now has +5 weapons. Belzelute now has +6 weapons. Izumi and Akatsuki deploy in the Artillery Frame.   Start of turn 1. Once again a map a significant distance between ourselves and the opposition. This is a constant throughout the game, and what makes movement boosters on your battle taxis so valuable. Everyone loads into the Nadesico.  The battleships move here.  Start of turn 2.      Nadesico moves up, people start to unload. Roanne and David attack on Zaku to make room for Calvina. Eiji heads to the north to deal with enemies there.  Turn 3. Lots of things died on enemy phase. Calvina needed one more rank of weapons upgrades to clear all the enemies attacking her, Eiji needed to be a weapons +5.  David takes a Cheer and offs Dearka.    Izumi and Roanna damage the Nazca in a support attack chain, Calvina Blesses herself and sends it off.   Kira and Cheered Eiji paste Yzak.    Nadesico pops a propellant tank, and sets itself up for the Le Creuset kill on enemy phase. Akatsuki finally pops out to damage Le Creuset a bit further. End turn.  Enemy phase, Le Creuset gets pasted. Not pictured; lots of mooks dying.
|
|
#
?
Apr 30, 2019 18:06
|
|
|
TheLastRoboKy posted:
 It's beautiful.
|
|
#
?
May 1, 2019 02:16
|
|
|
Super RoboKy Draft Wars Episode 5: No One Can Defeat My TIME-SKIP At no point in this mission will any destinies change. Oh right we jumped through a gate that killed everyone else who jumped through it let's see how it goes. 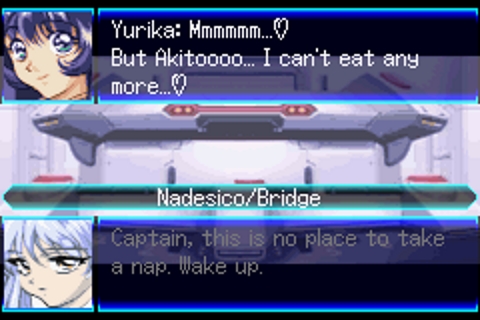 Apparently the jump through the Tulip made everyone sleepy. Some more embarrassingly than others. No sooner is everyone awake than they're excited we're getting to go to Earth, and then we're under attack by angry organic lifeforms in space. Good times. 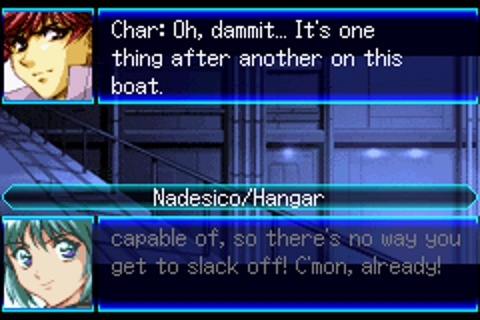 I mean he's not wrong. Akito is super upset that Gai is dead and no one cares. We don't care because we can't field him as a unit shove OFF you dingaling.  Good advice. 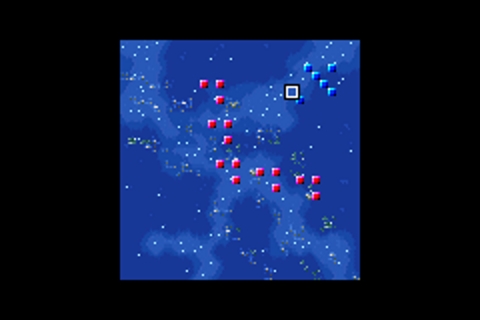 Turn 1 Akito is a forced deploy so we stuff him inside the Nadeisco. We move our awesome foursome forward as a DEFENCE CUBE. 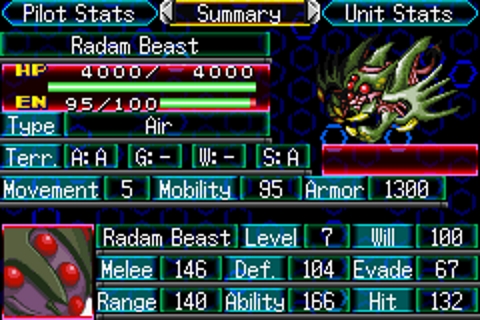 Radam have HP and EN regen at L which means they regen everything pretty rapidly, but they're pretty squishy so it's not nearly as worrying as you think. There's actually two kinds but I guess I forgot to screenshot them both. Don't worry they'll be back again very shortly for us to look at. The one I didn't screenshot has a tentacle attack that lowers your movement, which is very relevant for my dudes since they have no capacity to dodge so they're going to be moving pretty slow. Enemy Phase Sayaka defends Koji from some tentacles, the rest move up on us. Turn 2 The Nadesico makes use of a support attack from Char to kill one Radam. This causes Akito to a meltdown, leave the Nadesico and slide down to the corner of the screen in the middle of the enemy. Then he's rescued by another pilot who joins us and puts Akito back in his box, but he isn't on my list so he can go into the Nadesico too. Back to combat, Sayaka kills the Radam that Koji weakened, while Char, Koji and Hyoma weaken some other Radam. I have Char moved ahead just to try to dodge tank the Radam due to the whole armour and movement dropping attacks we get stuck with. Enemy phase is a lot of retaliation. The Nadesico gets a kill during this, and the Radam continue to swarm us. Char levels up to 9! Lots of enemies attack Char from just outside his range, which is a bit of a heart-breaker since our sub-pilot was already increasing our range. Turn 3 Everyone but Koji gets a kill each, Char gets two from a combo attack. Enemy phase and we keep our retaliating going, and Ruri warns us another wave is coming. This is SRWJ, there's ALWAYS another wave coming. Turn 4 We clean up the last Radam of the first wave, Sayaka doing some repair work to hit level 9 and get Support Attack level 2. This playthrough might actually make me like her, partially because I can't put her in a hole and bury her forever. The second wave spawns and it's another giant wall of Radam! But don't worry, we've got help! 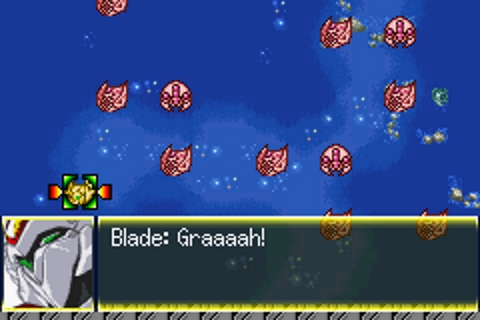 Good advice. 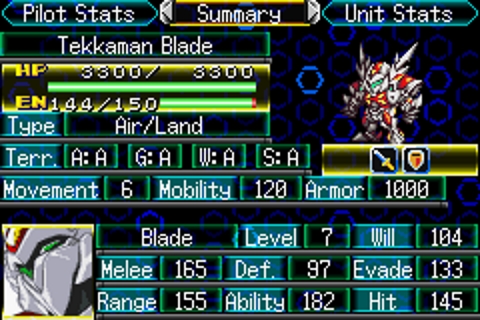 Honestly this is the guy I'm the saddest about not getting to use due to this draft, and he kills three of the one million Radam for us via PLOT. That said he's a neutral in this one and honestly the Radam are going to beat the piss out of him very quickly and probably regen through all the damage he did. Nominally he's incredibly dodgy and small, hits like a truck, and dies to a gentle breeze. 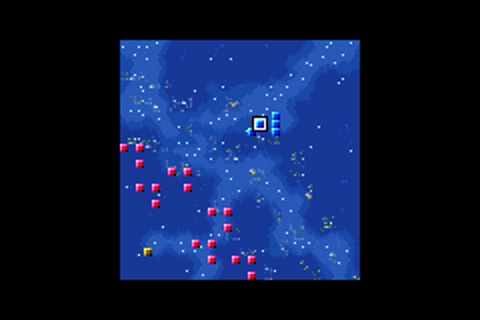 Enemy phase and the Radam swarm our new arrival, only two coming to face us. Bit rude. Neutral Phase Blade bops a Radam and dodges the return attack. Turn 5 We destroy the two Radam that charged us, but goddamn the other ones are way too far away. 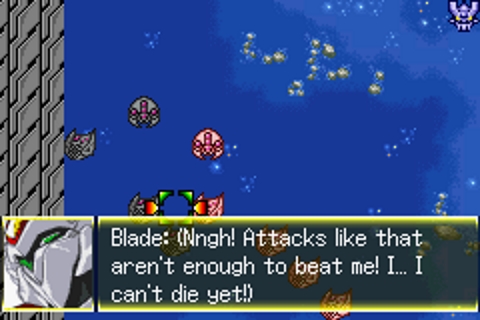 Enemy phase It takes five attempts but the Radam manage to get the two hits required to take out Blade. He drops out of the fight having wounded four Radam for us and we promise to pick him up after the fight. This means the other Radam come running for us! In a big, combo blob. If they move into the right position I might even be able to MAP them but we'll see. Turn 6 We throw Guard on Combattler V and send it ahead for MAP luring purposes, and everyone else just starts working on the big blob. Koji and Char get a kill. Enemy phase � The MAP might be necessary, since Combattler V's return fire shots kill a lot of enemies, as does the Nadesico and Yurika and co get level 9 Turn 7 We make sure every Radam is wounded, because we need those sweet sweet retaliation kills in the enemy phase. Enemy phase maddeningly one of the Radam lives, taking us to Turn 8 and ensuring my turn number remains odd numbered from the previous 9 failure. Turn 8 I throw Cheer and Bless on Sayaka to get the job done and she hits level 9. Afterwards we learn we've been gone for 8 months. That's a little longer than we thought we were gone, because travelling through the wormhole and actually living seems to have done a little WARP TIME on us. They decide to call what we did BOSON JUMPING. In even better news the Radam have been seeding weird loving trees all over Earth and in spite of the fact we have TWO alien invasions now the UEFA and ZAFT are still fighting. At least we can tell them about the fact there's a larger and more murderous army behind the Jovian Lizards coming to fight. Also now we're working for the UEFA and are heading off to a �neutral� space colony to try to repair, and Char learns he can't just go hide somewhere from the military once they get there, so he's safest sticking with the Nadesico as a Nergal employee. But still, after a long period of conflict the crew get to hang out, relax and recover. What could possibly go wrong?  Oh, the start of a Gundam story could happen I guess. Next time on Super Robot Wars J! I hope you didn't like that space colony. Turn Count: 41
|
|
#
?
May 1, 2019 05:18
|
|
|
TheLastRoboKy posted:Turns out Mars sucks and now we need to leave, but the Nadesico needs some replacement parts so we're off to a Nergal research facility. Mars sucking is, perhaps, the least surprising thing in any mecha setting. You have better odds of Jupiter's residents making an honest deal with you than you do of finding a nice Mars. Martians can be cool, but Mars itself? Shithole. You'd probably be better off living in Australia.
|
|
#
?
May 1, 2019 07:57
|
|
|
Mission 6 - 52 turns. Calvina died again. I need to upgrade her.
|
|
#
?
May 1, 2019 19:10
|
|
|
chiasaur11 posted:You'd probably be better off living in Australia. HEY all my stuff is there.
|
|
#
?
May 2, 2019 02:52
|
|
|
TheLastRoboKy posted:HEY all my stuff is there. Yes. Also, pretty much as soon as someone invents giant robots, a very large hole. Australia is the least safe place to be in the event of robowar. Studies show it.
|
|
#
?
May 2, 2019 03:34
|
|
|
Super RoboKy Draft Wars Episode 6 � Guys this colony isn't a Drive-Thru These next two missions are my favourite in the game because we're going to watch a space colony get destroyed and it's not going to fall on my house. 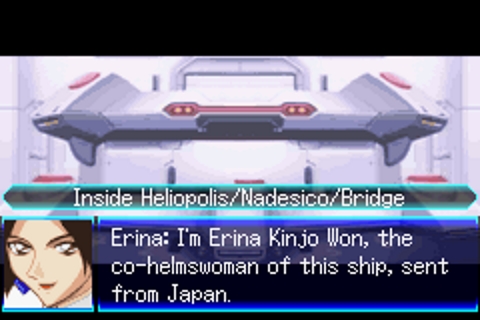 The Nadesico gets a no-fun-allowed co-helmswoman who used to be the President of Nergal's Personal Assistant. Who is the president? Eh we can't field him who cares. Anyway she ruins Yurika's plans to go on a date with Akito instead of doing her job, because we're on a neutral space colony not affiliated with the war what could possibly go wrong? So here's just something to slap in right now, Gundam SEED follows a lot of the beats of the original Mobile Suit Gundam's story but does its own thing with them for good or ill. In particular the �neutral colony is being used to secretly develop the Federation's answer to the superior mobile suits of the enemy space colony people that are loving owning them� and that's exactly what this colony is doing! Where it changes up however is that there's not just one Gundam, there's five of them. They also just call them �G� units gently caress that they're Gundams. A group of young men infiltrate the colony with the purpose of taking those machines, under the cover of an attack by Gundam SEED's Char equivalent. This attack has the immediate affect on the stability of a space colony that you'd expect. 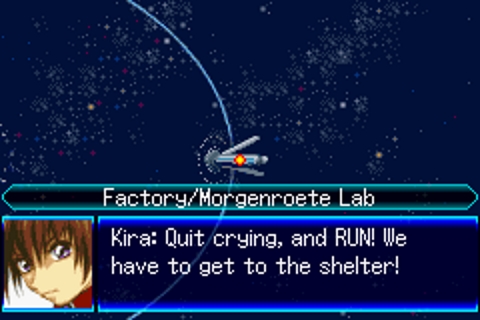 The protagonist of SEED is Kira, and he ends up in the cockpit of the only Gundam that doesn't get gotten by the ZAFT boys. He's a Coordinator which means he's been genetically modified as a baby to be super excellent at everything, which comes in handy in making the operating system for the machine he's in actually work. Contrary to what he says here he'll be finding the time to cry a LOT. 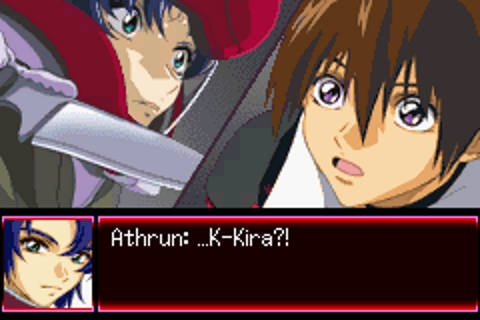 Oh and one of the people who took the Gundams was his best friend who he'd fallen out of contact with. Look at those faces hahahaha. Okay time for battle. 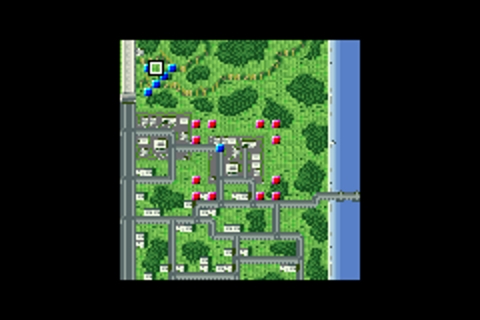 This battlefield is a lot more cluttered than previous ones, which can influence the movement of both your units and the enemy units. The enemy units are all exactly the same unit, so let's take a look at it. 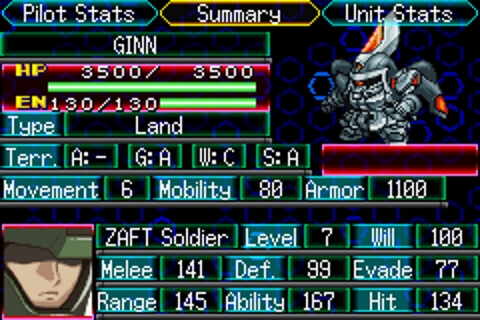  GINN units are more or less what you expect from early mook units of average size with no particular gimmicks to them. Miguel is barely better as a pilot because honestly he's even less of a character than the Gradosians. Those guys have conflicts and character, I've not watched much of SEED but generally speaking I know no one ever talks about Miguel. Gundam series often times just have a named pilot that sticks around for a little bit and then dies so the larger villains can get mad or sad, which makes the fact a kid named Rusty got loving shot dead in the intro to SEED as part of the infiltration team and this game doesn't even waste a pixel on a portrait even though he was right in one of the scenes that happens. RIP Rusty. Oh right video game let's go. Turn 1 We need to get Kira out of there because we don't want him fighting. That's a penalty if he does fight but it's also a little tricky trying to get down there cause my units aren't the fastest and the ground-based Mazinger troops will struggle to move through cliffs and forests. Combattler V goes tearing in with accel, with my hope being I can just sorta bait them on Hyoma instead. Combattler softens one up and Char finishes it off, levels up to 10 and has his Potential hit level 2. I have Kira pop accel and just run off in the hopes no one attacks him. Enemy Phase it actually works and the enemies all go for Combattler, who responds by crotch-nuking one enemy unit and reducing another two to almost no health for the clean-up that's coming. Turn 2 Kira accels his way into the Nadesico, and I start working my way downwards with my team. Char combos two enemies out of existence, the Nadesico softens another up and Koji kills it to hit level 10 and learn Strike. THIS is a game changer. Mazinger Z can now hit dodgy bosses. Fantastic. Sayaka repairs Combattler who softens up another GINN. EXP is definitely giving diminishing returns now, though obviously not for Sayaka who is getting good exp from healing equal-or-higher level friends. Enemy phase the GINNs keep coming and keep bouncing off our boys. Sayaka actually dodges an attack. This is incredible believe me. It turns out all I needed was Turn 3 We get closer to Miguel and Koji gives a GINN in some good cover a biff, everyone else gets ready to retaliate against whatever ZAFT throws at us while cleaning up more GINNs. It's not a hard fight. Enemy phase another GINN falls but Miguel hangs out at long range to just be annoying. Turn 4 We wipe out the first wave, with Koji doing the honors on Miguel. This gives us another Battleship! Yeah this is the other Battleship of the game, the Archangel. We also have another ally arrive that we also cannot use. Get used to this we're going to be seeing a lot of that for a lot of time. Kira leaps out in his freshly kitted out machine and I stuff him back in the Archangel, who moves to meet up with my mighty blob. Char heads out in front to try to dodge-tank everything. 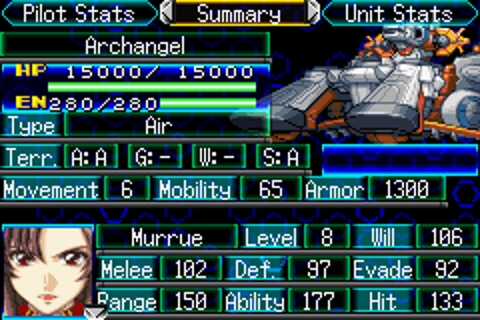 Since we can't put the battleships inside of other battleships we have to use the Archangel! In terms of general strength I'd say the Archangel isn't nearly as strong as the Nadesico largely because it lacks the all-encompassing barrier and instead has something called Laminate Armour, that reduces the damage of beam attacks at the cost of 10 EN. It does come packing more attacks than the Nadesico, and more armour so it's still pretty tanky. Like the Nadesico you have a choice of two pilots, though in this case there's almost no good reason to change because there's very little difference between them stat-wise. Right now there's only one pilot and one sub-pilot but that will change, and they give us access to the spirits Wall, Focus, Break and Guard. Both Murrue and Natarle have Potential and Commander skills at level 1 which further reinforces how very much nothing your option for Captain is.  Here's how our enemies have arrayed themselves for the second wave. 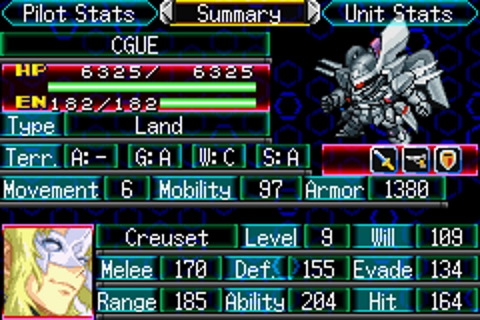 Here's a more appropriate boss! Rau Le Creuset in his CGUE can do some decent damage and some pretty crazy range on him too. He also has Hit and Run which means he can damage us from far away, and then move in afterwards which robs us of our important counter-attacks and counter-kills that we need so much for faster turns as though I've actually been playing these turns fast or something. Enemy Phase has most enemies go for Char, but Combattler V and the Archangel are just far enough forwards for a few enemies to bother them. The Archangel outright annihilates the one that dared to look sideways at it, which is nice. Turn 5 We get that extra unit who is named Mu, into the Nadesico for safe keeping, and kick off our fight against the ZAFT boys. Mazinpower kicks in, and I realise I've parked my troops on a location with 30% defense and massive HP and EN boosts so I just aim to put my battleships there while the rest of my team moves up since the GINN boys are actually pretty nippy and not blocked by terrain to get near us. Enemy phase the Nadesico counter-kills a GINN and its crew hits level 10. Yurika learns Daunt. This is a big deal! Daunt lowers the hit-rates of all enemies on the map for one turn. Creuset bashes up Koji from extreme range but then moves up to say hello up close to our everybody. Thanks, IDIOT. Turn 6 sees us kill everyone else and wound the Char-wannabe with Koji. Time to see who he'll bounce off and die against on his turn. Enemy phase Creuset chooses Koji and eats BREASTO FIRE to the teeth. 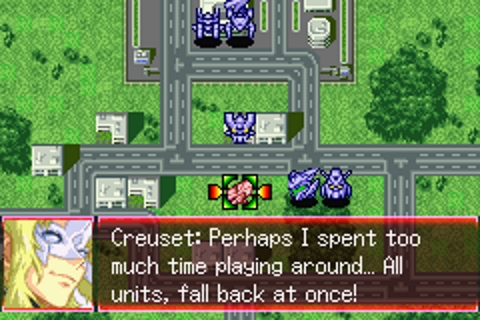 So we see off our enemies for now but the Nadesico and Archangel crews agree to team up because IT'S NOT OVER YET. Turn Count: 47 Next time on Super Robot Wars J: A Four-G Network.
|
|
#
?
May 3, 2019 06:16
|
|
|
Super RoboKy Draft Wars Episode 7: Kira me a river More like Heliflopios Space Colony! poo poo's gotten real and straight after our initial fight we're aware that the ZAFT forces are more than willing to go to some extreme lengths to wipe us out due to how potentially strong a resource we are for the UEFA. 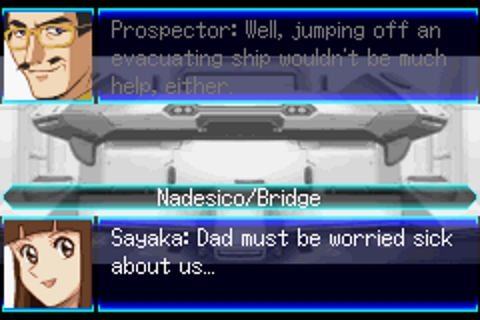 Your father sent you off to Mars to die, Sayaka. Everyone also talks about Kira's debut battle and how he managed to operate a special unit from the get-go with no prior experiences. Koji reminisces about a certain someone else who got into a robot and screamed a lot. 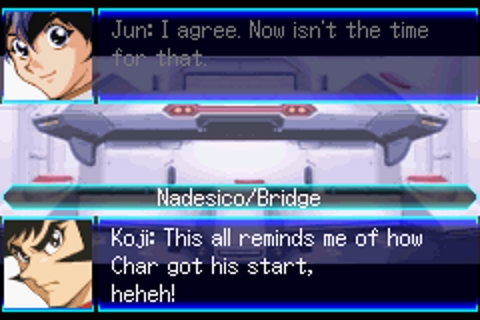 The weird part for everyone is that event wasn't too long ago for them but they went into a wormhole so that happened like 9 months ago do their birthdays have to get rearranged this is complicated. On the Archangel Natarle immediately catches a bad case of the SEEDs and starts wanting to lock up half their fighting force (you know, because they only have TWO PILOTS) and refuses to believe Yurika is a good commander. Boo this woman! Boo her!  Hyoma is such a great character for someone with such little plot relevance. TIME FOR BATTLE. We get a shitload of the GINNs, Miguel is back again to get his butt kicked, and now we actually have another enemy battleship! 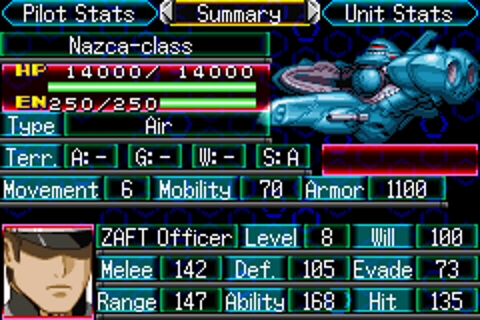 Nazca-class! Not really a fitting name but hey, you can name your ship designs off-of things from Peru it's cool it's fine. These guys are beefier in health than the Jovian Lizard stuff due to a lack of field, but will still take just about as long to shoot down. I did forget to mention that almost all ZAFT forces actually do have a special trait to them, they have Coordinator (because that's what they all are) and what that does is enhance a unit's stats the higher their will. Worth noting. For this next mission Kira and Mu are forced deployments. 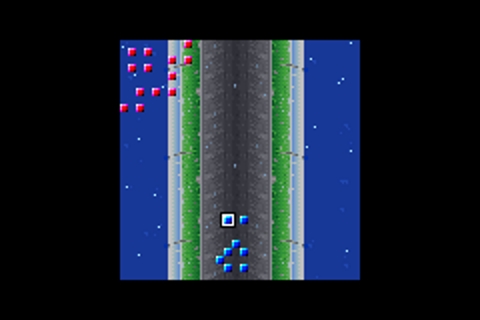 Turn 1 We load Kira and Mu back into my battleships and off we go surging forwards. Enemy phase some enemies approach, some stay. The usual. Turn 2 Mazinger leads, everyone else follows, the enemy is still out of range. Enemy phase the enemy finally gets themselves in range. Most attack Koji in his range and get bopped. The rest just move up. Turn 3 Now we move in and clock everyone Koji clipped. Pretty simple, lots of kills, and Ruri warns us another wave of reinforcements will arrive when we take some more units out. Koji remains ahead to attact all the attention. Enemy phase is just how it always is, and Mazinpower activates. Some other enemies attack the Archangel and it is support defended by nearby allies, murdering things in retaliation and hitting level 9! For some reason an event happens where Koji makes sure to let Kira know he really appreciates his help. This triggers another wave of enemies to arrive which is kinda nice I had been expecting that to happen once I'd wiped everyone in the first wave out. Within this wave we get four little boss boys in the form of the four stolen G Units, and two Nazcas along with the GINNs. I didn't bother posting another map, they've deployed in the top right of the map, a map with no defining features basically. Another little thing between Kira and Athrun happens. It's a lot of melodrama. Back into it and Miguel attacks Koji and the second wave moves in apart from the G UNITS. 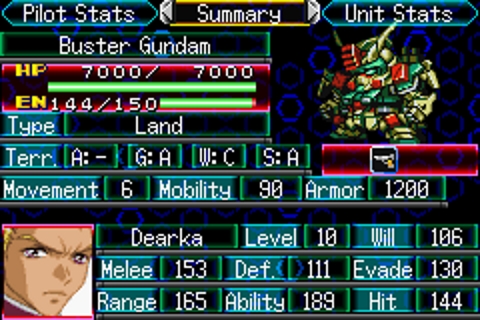 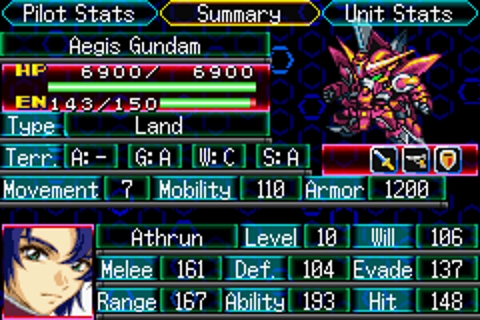 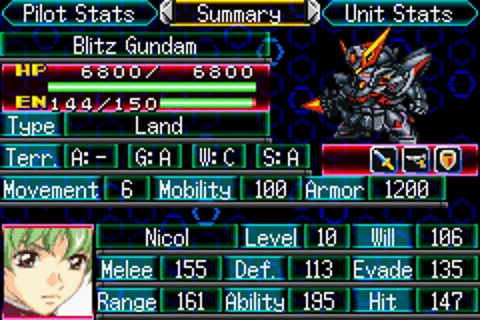 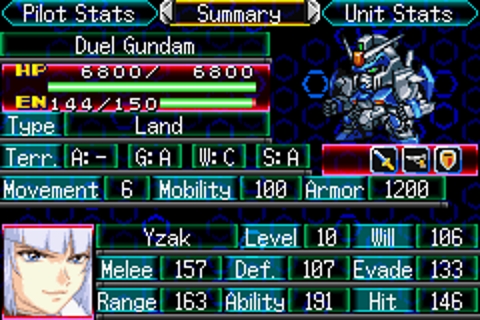 So we've got ourselves a bit of a rogue's gallery here. I like the idea about the G units and how they were produced, each taking different ideas down different paths. Kira got the unit that has modular parts for different functions. Athrun got a transforming suit (I think it turns into a claw?). Yzak got the basic model and will get a gimmick later. Dearka has the long-range unit with big beamu attacks. Nicol likes to play the piano-I mean Nicol has a unit with stealth functions for ambush tactics. All of them have special armour that helps mitigate damage, Athrun, Yzak and Nicol have a chance of taking out a shield to mitigate some damage, and Nicol has special ability on his G that lets him just flat avoid an attack regardless of your hit rate on him should it activate on a 50% chance (if his Will is high enough). I hate it. Turn 4 The battleships claim some kills and Sayaka tops up Koji's health a little, bringing her to level 11. I think that makes her the highest level unit in the game right now? Kinda weird. We whittle down the battleship and then get ready to get slammed into by the second wave. Enemy phase the enemy battleship uses a MAP attack! It's basically an attack that hits tiles in a certain pattern specific to the weapons. This shot targets Char and Hyoma, and only lightly tickles Hyoma because Char can dodge. Miguel tries to attack the Archangel but fails because the Nadesico support defends and completely nullifies all damage. Turn 5 Next turn we're gonna get slapped with a real big wave of enemies, so I figure the best thing I can do is just Daunt and lower their capacity to do anything. I have Combattler V buff up and take out Miguel, pushing us to level 11. The Combattler crew learn the spirit Assault which makes all weapons post-movement (can be fired after moving). 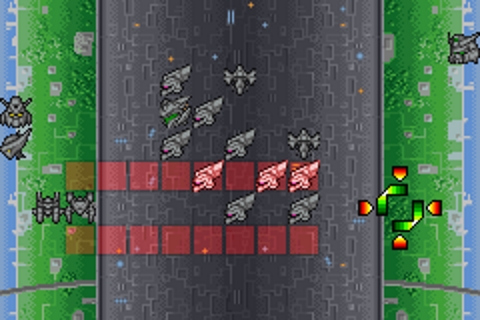 That's what a MAP attack looks like! We wound two enemies and kill a third. Sadly the Nadesico hasn't got enough Will to do theirs or we could clean up some more so we just use its missile to get the job done. Enemy phase and the Archangel is targeted by anyone that can aim at it, which is fine because it needs to catch up on levels. Speaking of which, it hits level 10 and Murrue learns the Guts spirit and Support Defence level 1. The Nadesico pops a few, I Gravity Wave Blast quite freely here since we have EN to spare right now. Turn 6 We destroy one of the two battleships and then wound the other one as best we can. Our lack of numbers kind of hurts us against meatier targets. Enemy phase and the battleship MAPs us. The enemy moves in and Gs attack. Yzak goes for the PunchBot, but misses and Char hits him, then also hits level 11. Buster Gundam goes for Combattler and takes a rocket to the face for his trouble. Nicol misses but his complete rear end bullshit mirage colloid protects him from retaliation. Athrun attacks and fails to do much of note and that's it! Turn 7 The battleships combine to wipe out the enemy battleship, which leaves us with four units and four Gs. Sayaka the Duel almost down with help from Char, and he bails. Ultimate sad face. Char combos both the Buster and Aegis. Koji busts the Buster and hits level 11. Combattler V chases Athrun off. Enemy phase this leaves Nicol, and he attacks the Nadesico and takes a little damage. Turn 8 Nicol's ability to just dodge crap means we drop him to retreat level as fast as we can, just to see him off. Kind of a relief.  The colony collapses. Good times. Natarle tries to win a prize for being the absolute worst human being possible by wanting to refuse anyone helping a busted escape pod, and everyone on the Nadesico is super nice to Kira, he hates it. They find a girl named Flay and Koji hits on her in front of Sayaka. A TRUE HERO. Turn Count: 55 Next time on Super Robot Wars J! Natarle saves the day but we all still hate her. 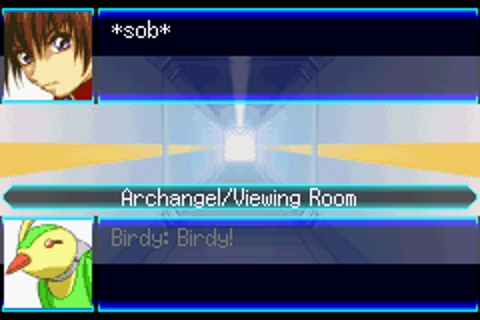 Kira's crying sounds like a whale dying of dysentry.
|
|
#
?
May 4, 2019 13:44
|
|
|
You are having way too much fun with this RoboKy, and it's great.
|
|
#
?
May 4, 2019 15:37
|
|


|
Stage 9: 4/35 turns Nadesico has a Booster, EN Chip, Solar Panel, Propellant Tank. Layzner has Booster, Apogee Motor, HE Radar. Belzelute has Propellant Tank. Strike Gundam has Servo Motor and HE Radar.  Start of stage 9. Not sure what happened to Izumi, but she was deployed. In any case, Izumi, Akatsuki and Calvina load into the Nadesico. Baybull and Buldy go into the Archangel.  Both Layzner and Nadesico cast Accel and head over to the left side. The undrafted units load into the Nadesico.  Kira heads over here with an Accel and Focus. He'll face a pretty scary enemy phase full of ~40% hit chances against him, but such is life. Not pictured, Archangel also moves toward the group on the right.   Start of turn 2.     On the right side, Archangel arrives and folks unload. All enemies on this side will be mopped up on enemy phase.     Over on the left, Nadesico Accels and moves up. The Aesties unload, Calvina and Eiji move north; they'll be intercepting the reinforcements.  Start of turn 3. Lots of things died on enemy phase, and the reinforcements spawned in.     The situation on the right side; mop up. Archangel gets a Luck'd grunt kill, it's the only thing it can reach.    Nadesico pops a propellant tank and moves. Akatsuki gets a Cheer and a kill. I want him at level 8 already, as he gets support defend then.   Calvina and Eiji busy themselves with Dagger. End turn.  Start of turn 4. Only Dagger remains.   David and Roanne get some repairing and resupplying done for experience. David hits level 10 and gets Accel. This should be important in a few stages.   Eiji and Calvina busy themselves with offing Dagger, Calvina gets the Cheered & Blessed kill.
|
|
#
?
May 4, 2019 16:10
|
|
|

|
|
#
?
May 4, 2019 17:49
|
|
|
Hunter Noventa posted:You are having way too much fun with this RoboKy, and it's great. Thank you! I always enjoy playing J, and while I consider an actual SRW LP to be more work than I have the time to put out, this little thing is a nice approximation where I only explain like a third of what's going on and post funny pictures. With Assault, Hyoma can now very aggressively pelvic thrust.
|
|
#
?
May 5, 2019 00:29
|
|
|
TheLastRoboKy posted:Thank you! I always enjoy playing J, and while I consider an actual SRW LP to be more work than I have the time to put out, this little thing is a nice approximation where I only explain like a third of what's going on and post funny pictures. I had J on my modded PSP, so I played it a LOT before I got the likes of Z2 on there too.
|
|
#
?
May 5, 2019 00:51
|
|
|
Super RoboKy Draft Wars Episode 8: We did Natarle see this coming, did we? Oh good another two-parter. The last one ended in a space colony exploding. While pursuing us to kill us, Creuset lets Athrun know that a bunch of people doing a memorial for that one PLANT colony that got nuked were attacked, and Athrun's wife-to-be was there. Athrun wants to stay with the pursuit but Creuset tells him the decision is out of their hands, the order came from Athrun's father, who is in charge of ZAFT forces. 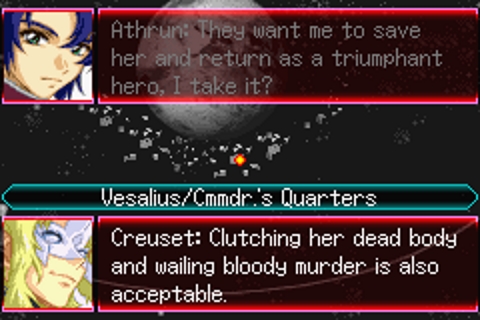 Creuset is a bit of a dick sometimes but he's not wrong. Meanwhile by pure coincidence our cast of heroes are out in a massive debris field full of dead things, trying to get all the salvage they can because they need more supplies. It's hard to get your luggage when the space colony is exploding, you see. Wouldn't you know it, they find a PLANT escape pod! 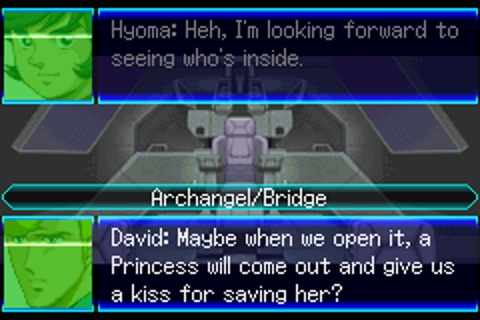 Hah hah! As if that would ever happen! Oh that wacky David, he's dying alone for sure! Kira takes the pod to the Archangel and... 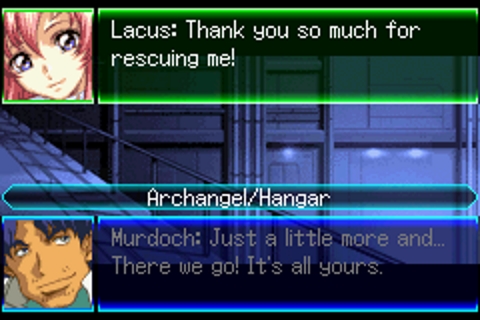 Put it back. 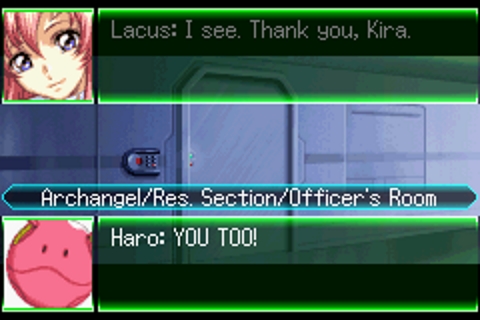 PUT IT BACK Anyway that's Lacus Clyne! She's the daughter of the guy in charge of the PLANTs! Which is different to ZAFT I need to remind you all. Everyone ruminates on how they lucked into a VIP that might help prevent them getting into more trouble, but plenty of folks baulk at the idea of treating her like a hostage. Anyway Lacus meets Flay who has a racist explosion about Coordinators and sympathises with the non-genetically enhanced supremacist group, and we learn a bunch of UEFA dudes including Flay's father are coming to help crew the Archangel and resupply it. Apparently Flay's father was in charge of the entire G unit project! Everyone important in the world can be found in space life-pods I guess. 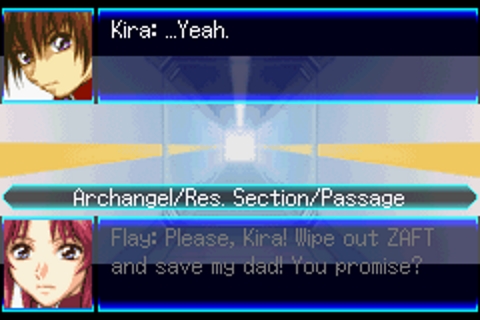 Oh and Flay's dad is under attack now so she asks Kira to save him. The only reason anyone even goes to help is because Yurika declares the Nadesico will go do it even if the Archangel doesn't, because Natarle believes the best thing to do is to leave them to occupy Creuset and his hunting team and retreat as far away as possible. Yurika is a good person. Natarle blames Murrue for this for some reason? Thanks to a pep talk from Koji that I didn't mention. the Archangel has four more crew members with spirit pools now in the form of Kira's four friends. This is the Archangel at its strongest and we're going to watch it get weaker as time goes on. The spirits added to our pool are Scan, Accel, Alert, Cheer, Trust and Luck. Actually a really good collection. Enemy composition is a bunch of GINNS, Miguel, the Duel and the Buster Gundams, and a battleship. Kira and Mu are force deploys. 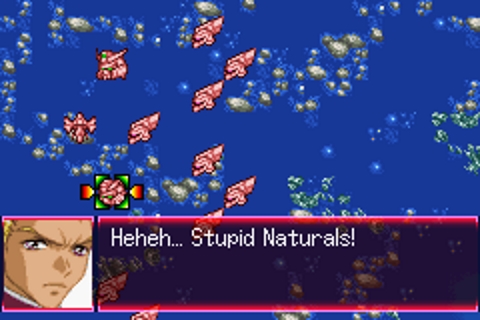 This is most of Dearka's characterisation by the way. He thinks all non-Coordinators sit around all day sniffing their own gonads. When really it's just David.  Turn 1 We load Kira and Mu back into the goddamn ships and off we go. This map is heavily filled with debris but we try to push forwards as best we can. Enemy phase they head off same as always and struggle to get anywhere too. Turn 2 Combattler is the only unit to get close enough to dish out some damage, and expecting him to take a lot too I throw on Guard to mitigate the damage. Enemy phase Zaft mostly opens fire on the Combattler crew and get dusted up for their trouble. The Gs start to move in after that. Turn 3 Moving in, our hero crew wipes out about five enemy units and awaits enemy retaliation. Enemy phase sees the Nadesico get some attention, and the small exp gained is enough to send the crew to level 11 which throws Trust into their spirit pool. All three of our named enemies go for the Archangel, and due to their dodginess they only manage to wing the Buster, but it's a hell of a wing-job. 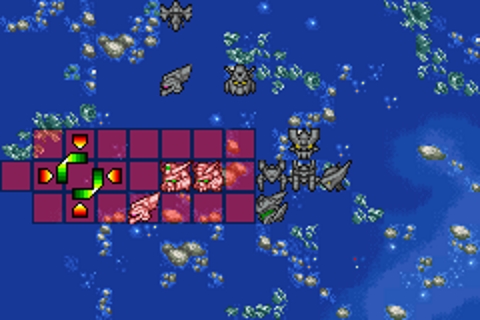 Turn 4 HELLO THIS IS NADESICO MAP ATTACK SPEAKING and it manages to kill the mook there and almost kill the Buster. The Duel continues to dodge really well. Char combos through the Buster and taps the Duel as well. I have the Archangel buff itself up as best it can, but the Duel survives the big shot that comes its way largely because it put up a shield to defend itself. Ruri warns us we need to go faster to rescue everyone but that's not possible. 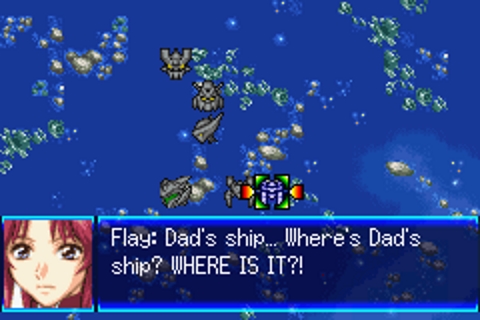 Uh but don't tell her that. Enemy Phase the enemy battleship continues to pick a fight with the Nadesico's Gravity Wave that it cannot win. Yzak uses a repair kit on himself, the huge rear end, and takes a licking from the Archangel AGAIN. Miguel is not so lucky and the Archangel sends him packing, and all the newbies in the ship hit level 9. We get Vigor as a spirit from that. Turn 5 Sayaka does some healing and hits level 12, and learns Strike! Koji wipes out the battleship, and Char sends the Duel packing to hit level 12. 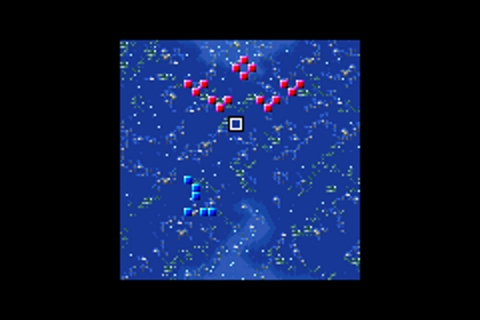 Creuset is part of Wave 2 come to ruin our day. Nicol is around but apparently hidden, and Athrun says he's on his way back to come fight. So this second wave is Creuset, a big bunch of GINNs and a battleship for now. I finish my turn by refuelling the Archangel with Propellant and let the enemy start zooming towards me. Enemy Phase Yeah they zooming. Turn 6 Char is actually the best ranged unit right now and hits a GINN, Koji follows up to tag another, and also activates Mazinpower. Nice. The Archangel I have hold its ground and ranged tag the enemy, and I keep the Combattler back cause my hope is to have Char and Koji do the necessary enemy attraction since they saw less abuse in the first wave. Enemy Phase has my plan mostly start working, Koji bounces to level 12 as a result. Thing is the GINNs have a really respectable long range attack, so the Archangel still has some fighting to do, and Murrue and Natarle hit level 12. Murrue gets Potential Level 2 and Natarle gets Support Defense level 1 which means suddenly the two commanders actually have some measure of difference between them. A little further combat and the kids of the Archangel hit level 10 but don't give us anything new to play with. Turn 7 we don't really do too much damage. Koji keeps ahead but I can't quite get Char into a combo position because of the space debris slowing him down. Enemy phase and the Archangel just starts wasting the enemy. It has quite a few nice ammo based attacks that do respectable damage and that's how we lessen the number of foes on the field. Creuset bullies Koji a bit but it's fine. Turn 8 Koji gets repaired and I move to try to put my battleships in a position to entice the enemy into engaging them. Works a treat. Creuset attacks Sayaka which is surprising but I'm okay with it. Then much to my surprise my almost killing the battleship triggers the event that ends the stage, so I get no bonus cash or items from either it or Creuset. That's what I get for having a rusty memory and forgetting this stage ends when one or the other is beaten or reduced to retreat-level! Then again it kept the turn count down didn't it? I suppose I can't complain. Athrun turns up and Nicol appears much where you'd expect him to, nearby and pointing a big gun at the bridge of the Archangel asking everyone to surrender or he'll shoot. Everyone has a nice lengthy exposition about how the Blitz has the ability to avoid visual and radar detection. 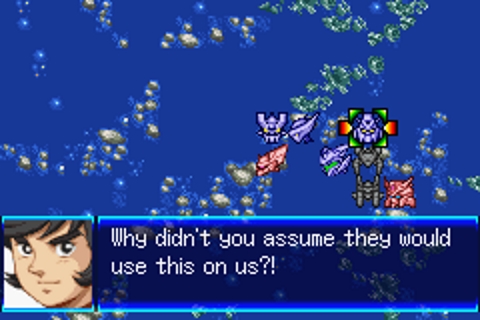 Thank you, Hyoma. Natarle politely informs the ZAFT forces that our heroes have Lacus. Attacking the Archangel essentially would mean �We cannot guarantee her safety� which is a nice vague space between �If you blow us up she might die� and �If you blow us up she will definitely die� that Natarle follows up by saying �If you attack us we will loving kill her� which probably crossed the line a little. 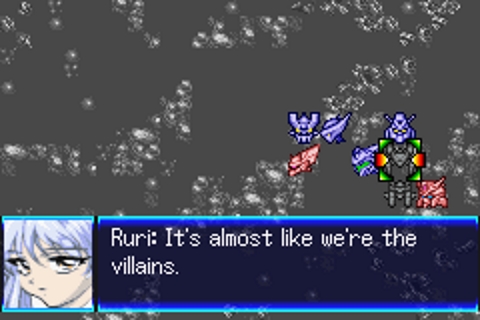 Yeah I hear ya Ruri, let me put on my cap with the creepy metal skull on it. Creuset sees the writing on the wall and orders a retreat, though his inner monologue suggests he doesn't really care for holding back just because of one person. Athrun gets to sound like a hero and tells Kira he WILL rescue his wife-to-be. 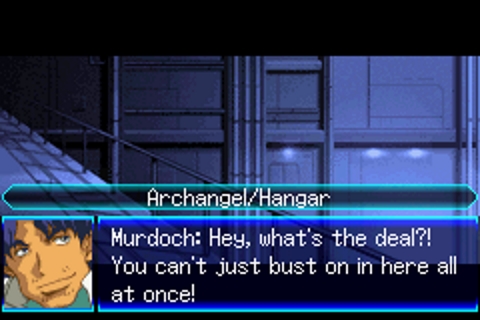 Everyone with a soul storms aboard the Archangel angrily, and Natarle doesn't bother to try to explain her actions, leaving it to Mu who does rightly point out that it was a very us versus them situation. No one's happy and it's a moral stalemate 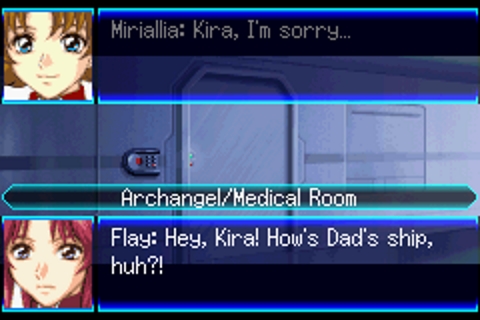 Flay is taking it well at least. I like to imagine she just sort of swaggered up to Kira and shoved him when she said this. Then she starts calling Coordinators mutants and Kira just walks out having probably had the worst day of his life capped off with a mourning girl screaming in his face about how he let her dad die. 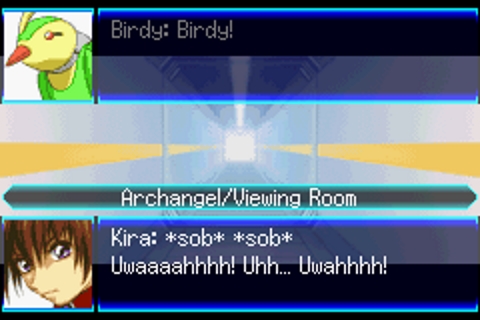 Seriously it's like the sound you'd get if you fed a whale a vindaloo plankton or something if you lowered the pitch on it and added some creaking noises it would be a dead ringer for the Titanic sinking or something. Did I mention Birdy is a little robot bird friend that Athrun made for him? Athrun also made the Haro that Lacus keeps around. Lacus sort of pops out and talks to Kira. Apparently her Haro can just unlock doors and whatnot, which tells me that Athrun was at one point way too competent to be in SEED. She drops the whole �Oh yeah your probably former best friend and I are betrothed� thing on Kira and the episode ends. Turn Count: 64 Next Time of Super Robot Wars J: Kira was right and Natarle hates it.
|
|
#
?
May 7, 2019 13:05
|
|
|
I like TheLastRoboKy's updates because they feel like an abridged series
|
|
#
?
May 8, 2019 09:01
|
|
|
Super Roboky Draft Wars Episode 9: Kira-ing me softly Oh boy it's time for part two! Also for hitting save-state instead of screen capture. Still less of a terrible mistake than SEED Destiny! Anyway our journey across SPACE AND MORE SPACE has the crew being hunted by Creuset who is still debating the whole �Kill Lacus and save the timeline� thing he has going. We're almost to Earth! Kira's friends talk about how they overheard Kira and Lacus talking about Athrun and are worried about how Kira is handling it. They also realise they probably shouldn't tell Flay on account of her currently not coping and screaming about space mutants. 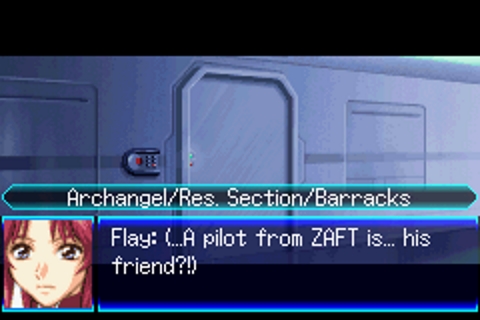 EVERYONE'S REALLY BAD AT TALKING QUIETLY. 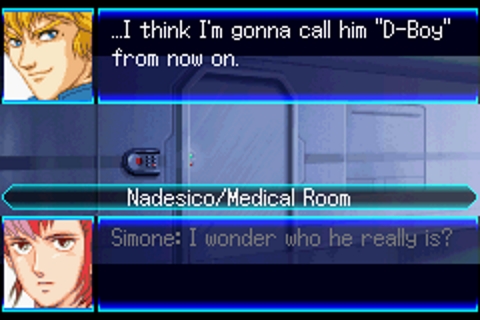 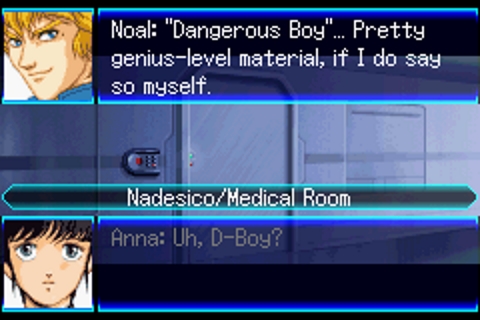 Hey remember that guy we picked up who was screaming in space and got his rear end kicked? He wakes up, claims he has amnesia and literally no one believes him, then passes out again. We've got a nickname for him now thanks to Noel, a character I haven't mentioned till now because I can't use him and also he's had pretty much no relevancy to the story at any time till now. Fun fact! In the english dub of Tekkaman Blade (which was called Teknoman) Noel's name was Ringo. His combat-buddy Aki was named Star. That was probably the first time in my life I realised people just sometimes made nonsensical references to things. I still loving loved that show. Back with Kira, he decides he isn't down for this whole hostage thing and plans to give Lacus back to the ZAFT and hope they just kindly gently caress off. Before they get far, they're confronted by Koji and Hyoma who were informed by Kira's friends how he was acting, and that they figured this would happen- 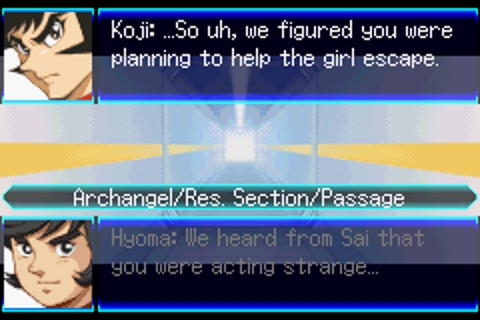 -and that they completely agree with him and going to help because THAT'S WHAT HEROES DO. Akito and Char are waiting in the hangar bay with Kira's friends and help them escape. Security realises what's happening but it's too late and they set off to make the trade. Natarle flails wildly on the bridge screaming about how we need to shoot everyone now and Yurika's response reinforces that she's the best character in the show.  Kira and Athrun talk again and Kira reiterates that this whole time he's been protecting his friends who are stuck on the Archangel, and Athrun reiterates that he has to take down the Archangel and will fight Kira if he has to. To the surprise of no one Creuset goes �Well no more hostage let's just kill them all� and ZAFT reinforcements pop out ready to go.  Lots of people don't like Lacus but I like her in J. She very politely hauls Creuset up by his underpants and tells him to not gently caress things up right now. So ends this particular pursuit. 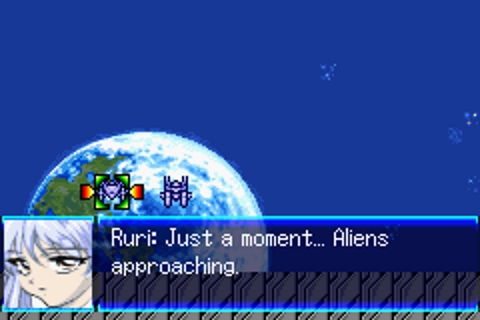 So begins the next one. 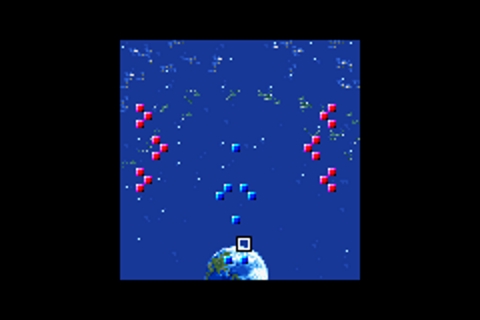 Mazinger Z, Combattler V, Punchbot, Strike Gundam and Akito Aestivalis are all forced deploys, which means only Sayaka has to be deployed and we have to stuff those two idgits back in their box. 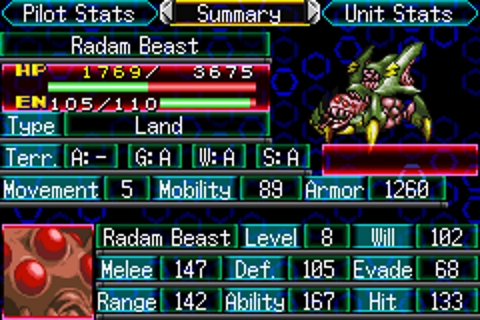 Here's that one Radam type I hadn't screenshot the first time, the one with the movement lowering tentacle attack. Turn 1 We send Char out east (space-east) to dodge-tank, and Koji out west (space-west) to face-tank. Enemy phase has some foes get tickled and that's about it! Turn 2 Archangel and Combattler to back up Char, Nadesico and Sayaka to back up Koji! Split lines are inefficient but eyyy whatever. Sayaka repairs Mazinger and hits level 13. Some Radam die and no one cares. Enemy Phase Mazinpower activates and Mazinger Z starts massacring Radam. Combattler V does a fair bit of that on its end too. Turn 3 I have to be careful here, because I'm poised to wipe out the enemy on their turn, but if I do I think Tekkaman Blade enters the field and I don't want him getting attacked. Enemy phase the Radam spawn in before the first wave is dead, which actually kind of surprises me. I really haven't played this game in ages and my memory keeps loving me. Luckily Blade appears next to the Nadesico which is a fancier target so I can tuck him into the battleship next turn.   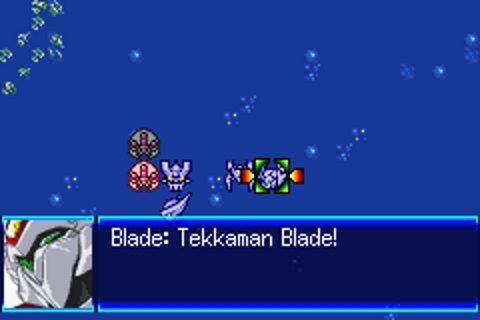 I just like Tekkaman Blade okay let me have this moment if I can't have the unit. Oh and we apparently never told the Archangel crew about D-Boy so I guess we need to give them a sit-rep. 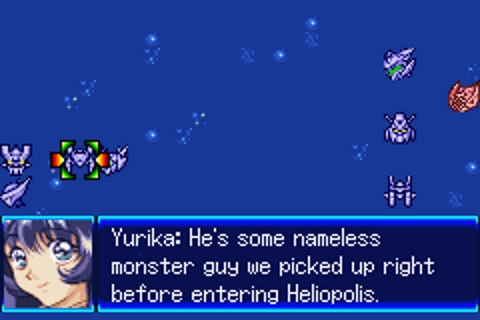 Thanks, Yurika! 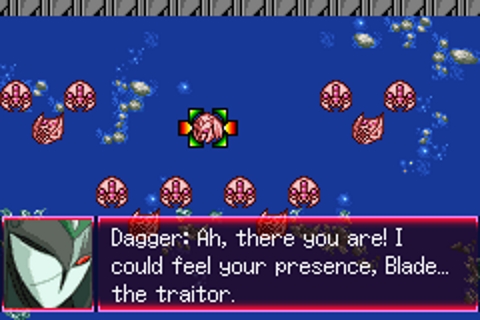 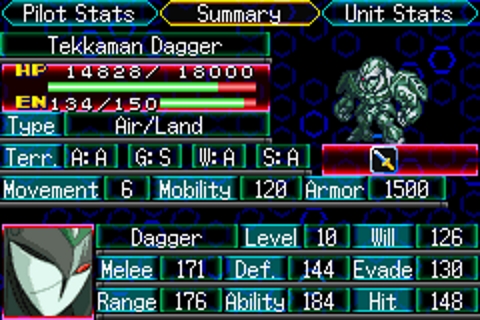 With the enemy we also have a boss! Tekkaman Dagger! Much the same as Blade, he's a glass cannon with small hp regen and huge en regen. He's got lots of other stuff too like Potential, Command and Hit and Run but in all honesty the big thing with him is he's hard to hit so bring Strike because Focus likely won't cut it. Turn 4 After stuffing Blade back into the Nadesico we surge forth to fight THE ENEMY. That's about it. Enemy phase the enemy die in droves atop the Nadesico and Combattler V. It's good bug destruction! Dagger goes for Char, who even with Focus cast only has a 78% chance to hit him. Turn 5 The last of the Radam are wiped out, leaving Dagger to mess with us. But we've got lots of Strike to play with but even tapping him like this he's going to regen a little. Enemy Phase Koji takes some murder to the face but manages to hit Dagger on a 33% chance. Turn 6 Koji and Char team up to lower Dagger's health, then I buff up the Combattler V crew to finish the job. This pushes them to level 12, and nets us a LOT of items. Dagger was loving loaded. 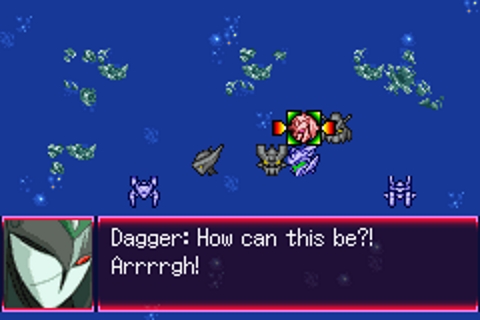 We win but now the Jovian Lizards are bearing down on us. Earth is kinda hosed huh? Realising we can't beat the enemy everyone resolves to just try to get down to Earth via re-entry. This of course means that when the team enters the stratosphere more Radam will attack. The Archangel is harassed into landing in Africa, and the Nadesico proves the UEFA guys wrong and moves to protect them AGAIN rather than abandoning them to the wind like they keep saying will happen. Morons.  Lacus just fails to take any of this melodrama seriously while her Haro hurls abuse at its own creator, and Flay comes to the internal decision that Kira's resolve is wavering and she has to do something about it or she'll never get revenge for her father. While we won't see her solution just yet, it's going to be precisely the same solution suggested by everyone when dealing with young men piloting robots and having an emotional crisis in the process. Turn Count: 70 Next time on Super Robot Wars J!
|
|
#
?
May 9, 2019 06:03
|
|
|
TheLastRoboKy posted:Lacus just fails to take any of this melodrama seriously while her Haro hurls abuse at its own creator, and Flay comes to the internal decision that Kira's resolve is wavering and she has to do something about it or she'll never get revenge for her father. While we won't see her solution just yet, it's going to be precisely the same solution suggested by everyone when dealing with young men piloting robots and having an emotional crisis in the process. Threesomes? No, wait. I'm pretty sure that's just Atra Mixtra's suggested solution for things. So, we're down to sex, slaps to the face, or both.
|
|
#
?
May 9, 2019 07:07
|
|
|
TheLastRoboKy posted:Lacus just fails to take any of this melodrama seriously while her Haro hurls abuse at its own creator, and Flay comes to the internal decision that Kira's resolve is wavering and she has to do something about it or she'll never get revenge for her father. While we won't see her solution just yet, it's going to be precisely the same solution suggested by everyone when dealing with young men piloting robots and having an emotional crisis in the process. So, brig them or send them to the chaplain to have a word about how it's okay to kill people in war?? Or perhaps flay them? Dance Officer fucked around with this message at 07:37 on May 9, 2019 |
|
#
?
May 9, 2019 07:33
|
|
|
Oh yeah, I got distracted by getting a shiny new second-hand Wii U with Breath of the Wild and forgot I was making this happen. Let's do one more mission. Mission 9 cleared. 70 turns. Nothing much to say: I'm still stuck with Ryoko, Calvina and the two battleships soloing everything. This time I amnage to keep everyone alive so that's a plus.
|
|
#
?
May 9, 2019 17:02
|
|
|
Hmm, I've fallen behind while I was distracted. Time to start fixing that. I finish giving the Nadesico 10 pips of energy upgrades, and 1 in HP, so it'll take priority over the Archangel. And of course, the Aesties go back into 0G frames. Because of plot deploys, I can't check to see whether or not I can switch Kira into the Moebius yet. Episode 7: Collapsing Land - Part 2 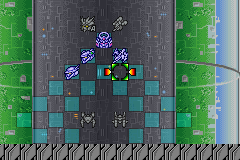 My deployment slots are very slowly starting to fill out. Turn 1 Kira ducks back into the Archangel. While Natarle and Murrue would rather not depend on the Nadesico forces for everything, the fact is that Kira's participation isn't necessary even if we we weren't doing a challenge run. 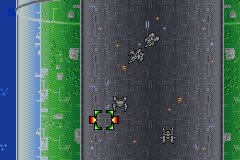 Moebius and Blue Earth head forward as far as they can, as does the Nadesico, after Hikaru jumps inside. Granteed and Akito can't make it much further than the Nadesico either, so they join Hikaru for a Capship slingshot in the future. The Archangel trails behind, but will hopefully regroup with Blue Earth and Moebius later. Enemy phase, the mooks start approaching, while the boss and his entourage stay behind. Turn 2: 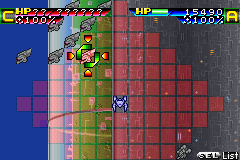 The enemy is still pretty far away, so the Nadesico Accels forward and fires missiles at the only thing it can reach. 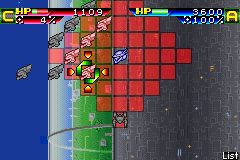 Akito jumps off the Nadesico and finishes off the weakened GINN. Calvina gets right in the middle of the GINN swarm and attacks a distant one - might have been a mistake. Hikaru weakens a closer one. Blue Earth and Moebius Zero can't get in range to attack this turn, but I move them ahead along the middle of the field anyway. Enemy Phase: 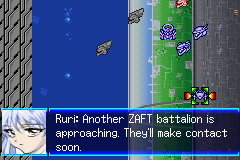 The first two enemies to attack Calvina survive because she doesn't have good morale yet. But between the Nadesico being in range of some of the GINN's long range attacks, enough get blown up for Ruri to warn about reinforcements. And of course, the bosses have started moving. Turn 3: 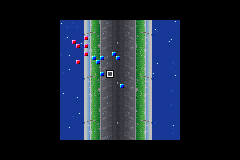 I want to finish off the first wave on this turn. 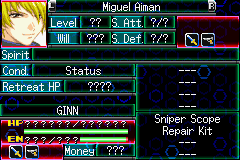 Miguel has items he drops. I'm prioritising them. 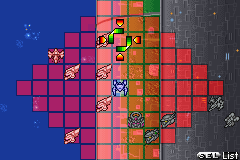 Not hard to get everyone in range of the Nadesico's missiles. Ruri severely weakens Miguel. 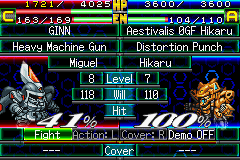 Hikaru casts Luck and finishes him off. 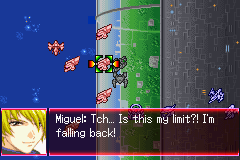 Canonically, you died last episode Miguel, so you've already broken your limits. 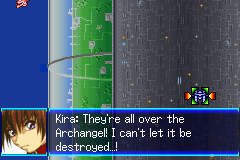 And as Miguel runs away in his exploding mech, Kira is starting to suffer from hallucinations. Poor guy. Kouji tries to cheer him up a bit. 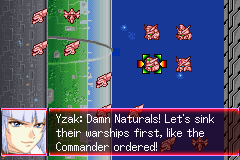 And then the full ZAFT miniboss team show up. They could be a serious threat if not for 2 things: they're cocky rookies who don't know how to apply themselves, and Selena Recital isn't around to tell them to actually use those Spirit commands of theirs. I'm not worried. 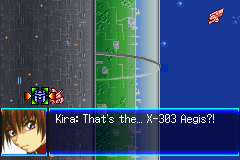 Athrun attacking the Archangel directly might be a problem though. Fortunately it's a fakeout and he retreats back to his starting position. To win now, I need to defeat the X-Number Gundams. Time I stopped fooling around. 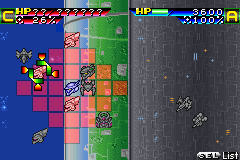 That said, I'm having Akito clean up the west side, since he 's less effective away from the Nadesico. 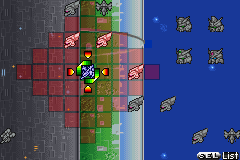 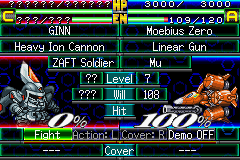 Blue Earth and Moebius Zero are going to start taking on the East side. Hopefully their defensive commands hold out long enough for my other units to back them up. I actually put Blue earth in a spot where it can hit 4 enemies.  Granteed and Archangel might catch up to them soon, though. Enemy Phase: 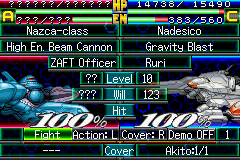 The Nazca from the first wave exchanges fire with the Nadesico. Unsurprisingly, everything else on that front dies. 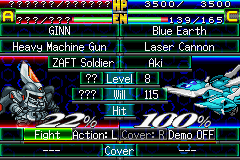 The eastern front, on the other hand...  Several units just ignore my planes, and the Gundams hang back. Turn 4: Hikaru and Akito try to doubleteam the western Nazca, while the Nadesico ditches them to head towards the Eastern front. They'll be fine. 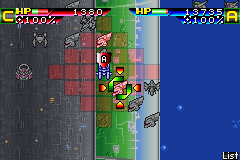 Murrue casts Focus, just to be safe, and heads into range of more enemies. Calvina, while approaching the ZAFT gundams, takes a shot at another Nazca. 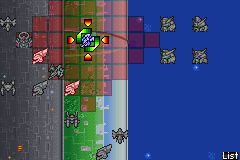 And the Moebius decides to lure in the Gundams while finishing off another minion. We'll see how that goes. Blue Earth goes to support the Archangel, because it can. Enemy phase: 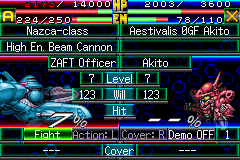 The western Nazca avoids being killed on a counterattack by pulling out a MapW. And so does the Northmost one on the East. I need to watch out for those. On the other hand, all the GINNs happily commit suicide on one battleship or another. 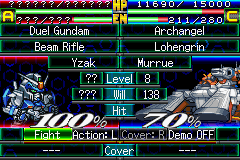 Yzak goes right for the Archangel. While he loses the trade, the Duel's beam coat prevents it from being a 2HKO. (Double checking, he doesn't have it innately, that's just what it's holding as loot.)   Dearka heads for the Moebius. He misses, but the Moebius can't do much through Buster's Phase Shift armor. (And the Archangel has Laminate armor. Is it any wonder I always forget what SEED unit weaknesses are supposed to be?) 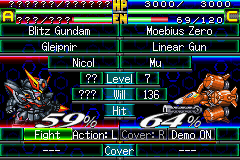 Nicol goes for the Moebius as well (I'm starting to think this was a bad plan). It's not all bad, no one's even hit the plane this turn so far. 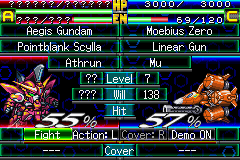 And Athrun is also lured in. 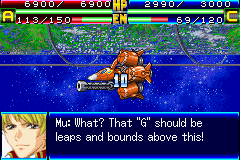 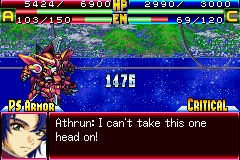 Hah, I had Wall cast this entire time! Turn 5: Akito starts off this turn by finishing off a Nazca, while Hikaru starts heading back towards the Nadesico. The Nadesico Scans all the gundams, readies itself to Break through their defenses, and... 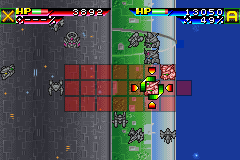 Haha, actually no. MapW-ing them might not be a good idea, considering they're Reals with decent pilots and the Nadesico has no Accuracy-raising spirits. Instead I just have it blast Yzak normally. 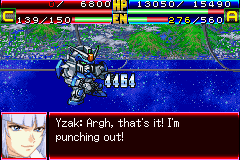 That went well. Next I'm gunning for Nicol. With Murrue's Focus, I manage to hit. I could finish him off here, but if I work this right, I might be able to finish everything off on EP. Aki casts Alert and takes a shot at Buster Gundam. 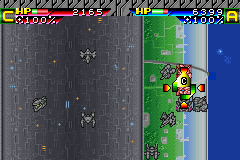 Calvina sees an opportunity and Combos the Blitz and Aigis, finishing Nicol off. In retrospect, I should have done this from north of Athrun... Mobius Zero takes a potshot at Dearka to ensure a safer kill on EP. Mu casts defensive spirits first, of course. The chip EXP gives Mu a level up and Potential 2. Enemy Phase: The Battleships fire at each other. Dearka takes a shot at the Archangel instead of Granteed, while Athrun focuses on the Mobius Zero. Darn. I finish off Dearka by switching to the Archangel's strongest weapon, but the Moebius' melee range gun can't possibly get the Aigis' HP to 0. It does, however, convince Athrun to retreat. 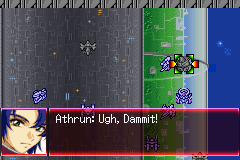 5 Turns, Total 33 (+4 penalty from last episode for 37.) MightyPretenders fucked around with this message at 05:49 on May 10, 2019 |
|
#
?
May 9, 2019 23:15
|
|

|
Let's Play Super RoboKy Draft Wars Episode 10: This Sand of Mine is Burning Rash You can't gather darkness ya idjits it's not a thing you can put in a box. Also this update is going to be pretty big cause a lot more happens this time.  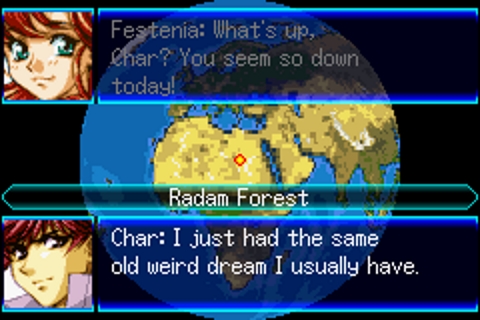 We check the Radam trees and Char talks about how he's had that weird princess dream again. It makes his head hurt apparently. His head. The Archangel is hosed by the way, heavily damaged and sitting in ZAFT held territory in Africa. Luckily the Nadesico has several people who can just look at a piece of technology and fix that poo poo right up. Good on them! Natarle is worried they'll see some SECRET TECH and it's like lady their ship has an energy barrier and shoots loving gravity your stanky legged ship has �laminate� plate or something. 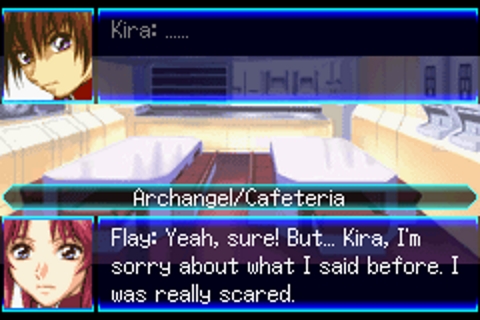 Flay begins the first step of �Operation: Get Kira to Kill All Coordinators� by apologising and telling Kira she hates war but also needs revenge. Kira's not exactly so sure how he feels about this but eh he's heard worse. Thanks to help from the Nadesico nerds the Archangel now has access to special atmospheric fighter craft that can use the same special combat packs as the Strike Gundam. This would be awesome if we had access to them because you can put the sword pack on them and you get a plane with a giant loving sword on it.  Akatsuki likes tits. Actually he just wants to know how things went with Kira and co running off with Lacus. Apparently the fact Kira and his friends are civilians and everyone else were Nadesico crew members means Natarle can eat poo poo. They got sternly told off, that's about it. 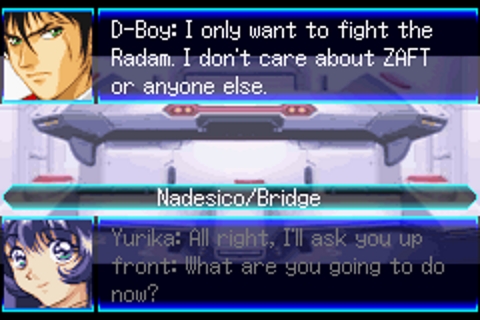 Yurika grills our D-Boy about what he wants to do, and all he wants to do is punch the Radam. He's not really down for anything else. Everyone is annoyed with how rude he is about it, not realising that they're about to get someone who makes D-Boy's manners look like motherfucking A+ etiquette exam results.  The Combattler crew are really good at zingers. Everyone makes a good case for D-Boy sticking around to help them and he even offers to let them look at his transformation crystal, voicing disappointment when the brains trust of the Nadesico can't figure it out. The amnesia thing might be bullshit but there's a lot D-Boy clearly doesn't know outside of �I want to made the Radam die� The conversation is interrupted. Jovian Lizards are nearby being assaulted by an unknown force, and Koji tells Char to join him on a scouting mission. I'm assuming Mazinger Z is going to uproot some Radam Trees and hold them in front of him as camo. Akito, Ryoko (yes another character I never introduced) and Mu decide to come along too. 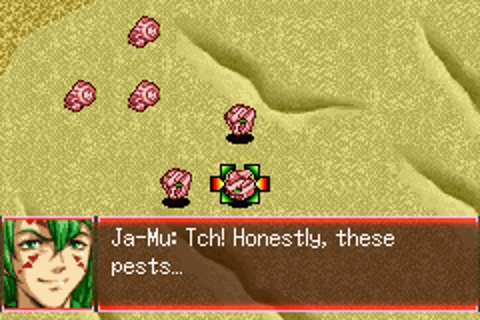 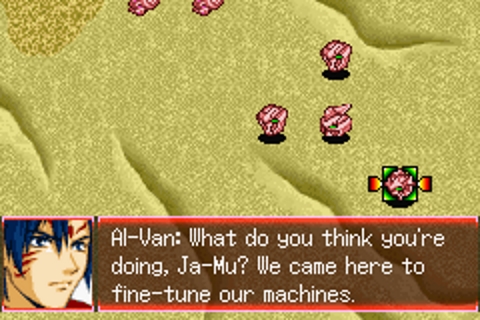 Oh no! It's the face of the villains that were pursuing the punchbot in the very first episode! They're wiping the floor with the unmanned Jovian units, and they're joined by a superior we hadn't met before who chides them for getting into battle while they were supposed to be doing test-runs on their machines. They're finishing off the Jovians when our scouting crew arrives, and the immediately recognise the Punchbot. These unknown foes immediately go for what they used to finish off the enemy before.  ZA WORLDO. All the good guys are frozen in place except the Punchbot. The Punchbot almost immediately retorts almost on its own by un-stopping time, unfreezing all our allied units. The enemy can't figure it out, and decide to attack anyway, and it turns out they outclass our dudes a fair bit. Akito, Koji and Char all take damage, and when Mu goes for the command unit his attacks are simply blocked outright. Things look dire! 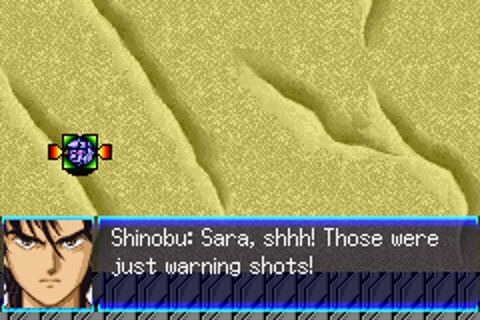 A new ally arrives, hitting absolutely no one but hitting in an extremely large area. Ja-Mu runs to engage and walks straight into a trap that damages his unit, care of the weird girl with the blonde hair that was on board Heliopolis that Kira yelled at that one time to get to shelter. Her name is Cagalli! Small world! Al-Van tells Ja-Mu to retreat and they all bail, leaving us feeling silly but at least alive. 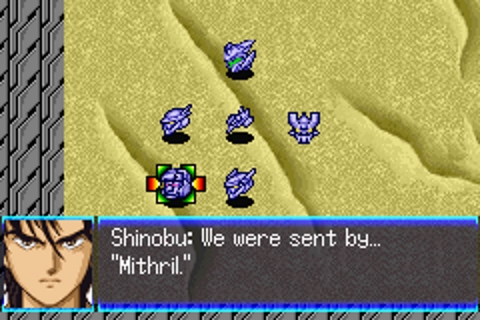 Small chat tells us that these folks are part of the anti-ZAFT resistance, the big giant combiner robot in particular a part of some weird secret paramilitary force for justice called Mithril. Our chat is cut short though, as the Nadesico arrives and announces �RADAM�, and both Kira and Blade deploy on their own, and I put out Combattler V and Aphrodite A to join the party. 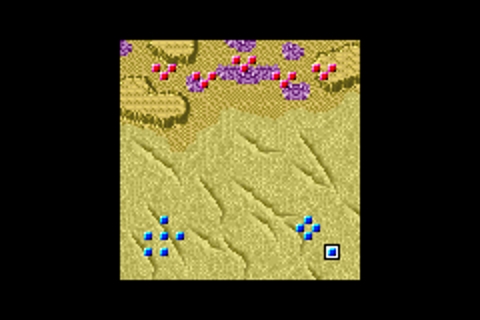 Turn 1 We've got quite a few units we're going to have to stuff into the Nadesico on this one, and one thing worth noting is all the damage we took in the premission thing sticks, so Char and Koji are starting out with winged units. Both have Potential though so it's less of a problem especially against the Radam. Big issue with this map is mostly going to be navigating the dunes, since they act as rougher terrain to move though and provide a little bonus defence as a result. It also doesn't help the map is so huge! We're going to have the added problem of forging north right till something appears in the south. Enemy phase and the Radam do this weird thing where the ground-based ones move off but the flying ones stay in place. Needless to say I think the turn number is going to be huge. Turn 2 The Nadesico scoops up all our non-draft members that were on patrol. It's a bit of a clown car right now isn't it? Combattler V and Mazinger Z are able to get into combat range, so at the very least there'll be a boshing coming. Enemy phase and Combattler V drops the hurt on everyone who looks at it funny care of the crotch rocket. Turn 3 I put a combo module on Hyoma before this battle so hey hey, now we can do even more combos! Combos are good, always do combos. Char does combos! Enemy phase we have Mazinger Z activate Mazinpower after taking some licks, and a lot of Radam die. Turn 4 Has almost all the Radam dead, and there's only three left standing after we do some sweeping. Enemy phase two of the Radam go down, and we wound the third. Turn 5 We get ready and kill that last Radam, and now... 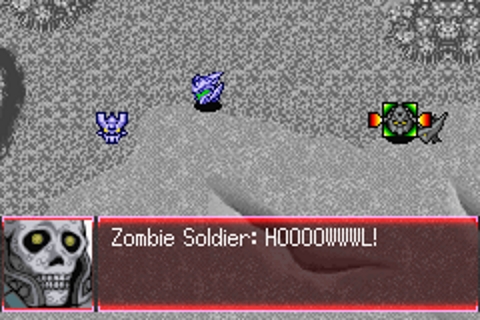 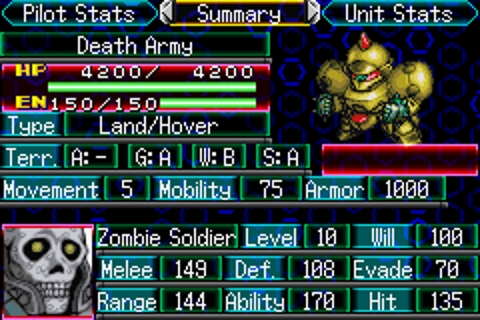 The Death Army units are here and honestly? Not much to them. They have DG Cells which means they regenerate pretty rapidly, but they're kinda garbage aside from that. Enemy phase Our new friends come zooming in from both the east and west sides of the map and two of them just plain suicide on Mazinger Z. Turn 6 The Nadesico is pretty nicely placed to hit three jerks with a MAP, and Sayaka does some healing to hit level 14. Char and Koji are on the west side doing what they can, Combattler does some effective murderation. Enemy Phase and the entire west flank just outright DIES smashing ineffectually against Koji. I've given him a part I earned previously that restores 10% of his EN every turn so his sustain is way too good now. We're a little too efficient now though, and we run into a bit of a problem. 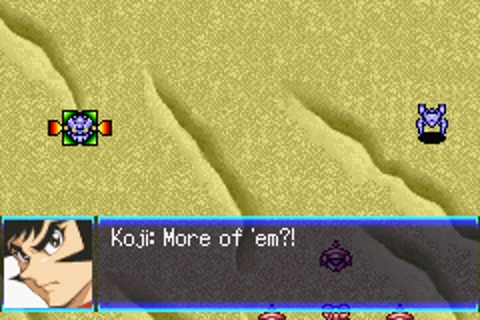 Five enemy units arrive and one of them is very, very big. 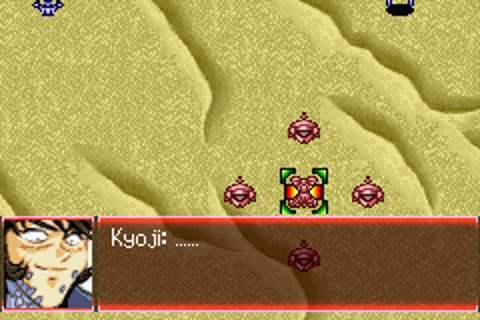  AND HIS NAME IS KYOJIIIIIIII open office now autocompletes adding all the extra i's to the kyoji it's great. Then as you probably expected Domon turns up in his Gundam and angrily goes Super Mode to gently caress some poo poo up. Domon takes out one of the Death Army units that spawned in a scripted battle and immediately tells everyone to gently caress off and stay out of his way or he'll kick their rear end. Our rear end-kickers respond how you'd imagine they would. 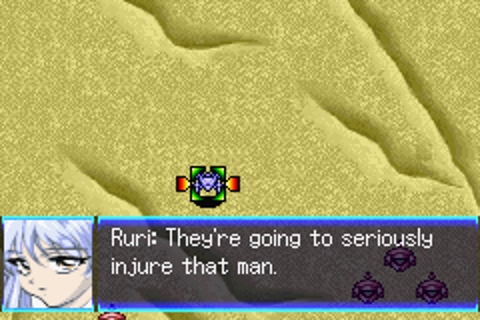 Thank you, Ruri. 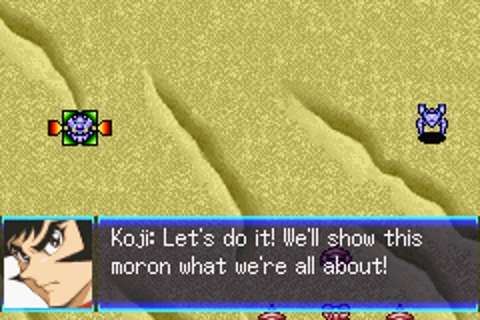 Thank you, Koji. Who is not KYOJIIIIIIIIIIIIII The enemy phase continues and I tell Domon to evade everything, since I can't use him to fight and I need to get him to a battleship asap. It's kind of annoying but event-forced deployments are like that. 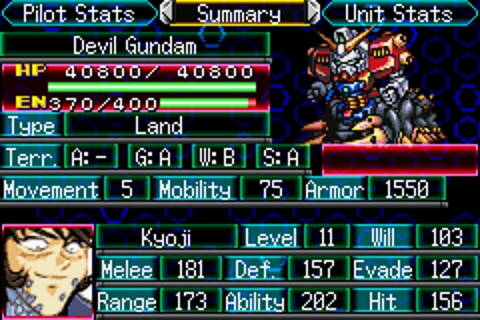 The Devil Gundam is the first real �Boss� Boss of SRWJ. All the other guys have had somewhat reasonable health bars on par with battleships while being slightly squishier. Not so in the case of the Devil Gundam. It has a huge amount of health, and regenerates it at a pretty sizeable amount, tending to wipe about 4000 or so damage you did in the previous turn off the board. On one hand I don't have a huge number of units to use to throw damage on this guy, but on the other hand I can throw a lot of damage care of all but one of the units I can use being strong. Turn 7 There's not many enemies left, but the Devil Gundam will be a fair bit of work, and we're slowly converging. I'm not expecting a Turn 8 ending here. Enemy Phase there's not really that much to say at this point, we're just whittling down the enemy. Turn 8 The Nadesico does its job and MAPs its way to level 12, adding another instance of Alert to the pool. Koji trades fire with the Devil Gundam and hits level 13. Enemy phase and Kyoji hits us with a MAP of his own. Bloody rude that is. No one dies, just a lot of damage goes around. Turn 9 Here comes the least fun part of our journey. The Devil Gundam is a ginormous meat-wall that regenerates drastically. It's going to take a few turns to drag this guy down with our small numbers. Combattler V hits level 13 Enemy phase and we get MAP'd again. Turn 10 We fail to drag this giant blob of regenerating health down, but we're getting there. Enemy phase MAP Turn 11 At last we bring the big boy down, and it takes everything we have to do it. Char gets the final blow with the last of his EN, and- 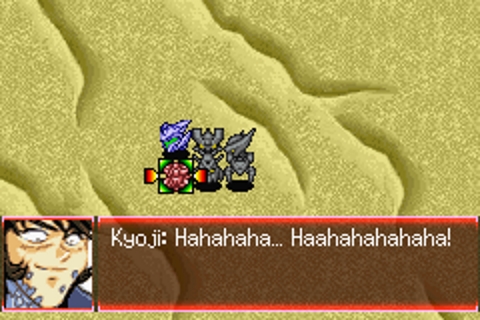 Yeah I think we all thought that would happen. The Devil Gundam restores all its health to full, and then runs off giggling over the horizon. Rain acts to reign in Domon and encourages him to be nicer. It doesn't take. Aboard the vessel we welcome the Dancouga crew and also ask Domon the most important of questions. 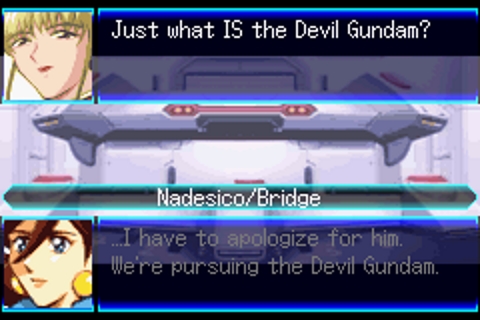 We get the usual explanation. Big weird and ugly was built to try to fix up planet Earth, but in an act blamed on Domon's Kyoji the Gundam was hijacked, their mother was killed, and the authorities locked Domon's dad into suspended animation as they blamed much of it on him. 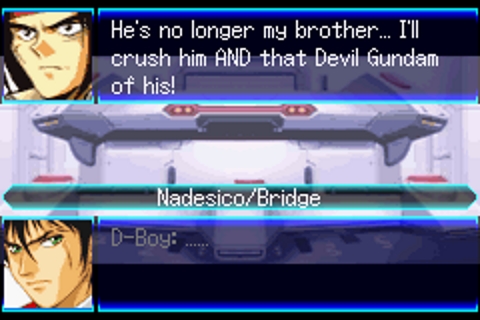 Haha yeah D-Boy imagine having to fight your own family that'd be hosed up huh?  An olive branch is extended to Domon to join us, we help keep him supplied and he fights alongside us while we travel and hopefully track down our buddy the Devil Gundam as we go. Everyone marvels at how Yurika seems so willing to take lots of weirdos on, she retorts that having more weirdos means more friends to help out when poo poo gets hosed. Mu admits the military mindset is more or less the opposite, but doesn't note that this has resulted in everyone who matters wanting to live on the Nadesico instead of the Archangel because Natarle is a giant loving idiot. 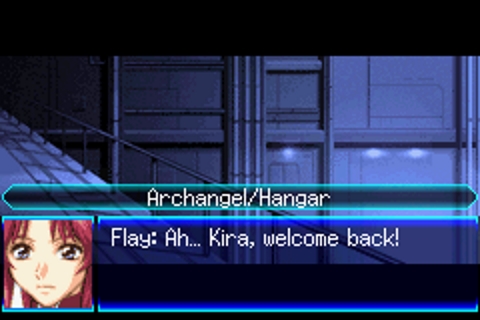 Kira returns and Flay is waiting for him. She cares a lot about her personal Coordinator-killing machine after all. This is just step two of her plan. Step three is a bit of an escalation that is going to happen on the path split that's coming soon but it's mostly going to involve horizontal nude folk-dancing which makes things a bit awkward since you know, that guy Sai that's one of Kira's friends was her boyfriend. Was.  Cagalli and Kira meet again. Cagalli decks Kira. I guess she remembered him! All the commanders get together and start discussing what they should do next. Africa belongs to ZAFT... well the bits that don't belong to the big wormhole Tulips spitting out Jovian Lizard attack drones, and the Radam all hanging around making trees and eating people. But the rest is totally ZAFT's! 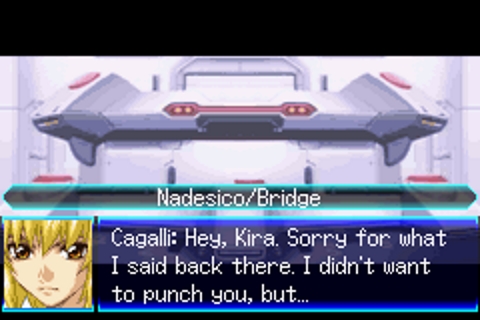 She's lying Kira she totally wanted to do it. Apparently she was really worried about him after he got her to safety, and the idea he was piloting a Gundam only seemed to upset her more at the time so she just wanted to loving punch him. Everyone else works on a plan. The Archangel needs to work its way to the UEFA base in Alaska via the Indian Ocean, so the Nadesico offers to go decoy and sail really obviously to the north to go decoy, then swerve off to Japan once they're all clear.  I like that blind faith! Yurika also answers the obvious question regarding splitting their battleships, and divides our forces up for the journey. Natarle hates this idea because OH MY GOD SHUT UP NATARLE. 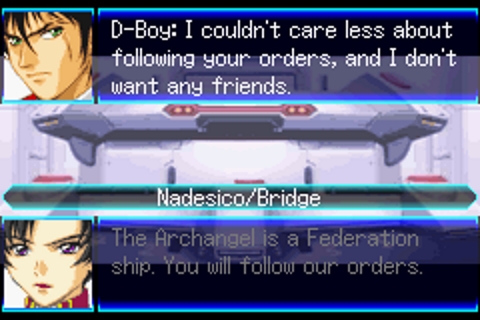 Thank you, D-Boy. 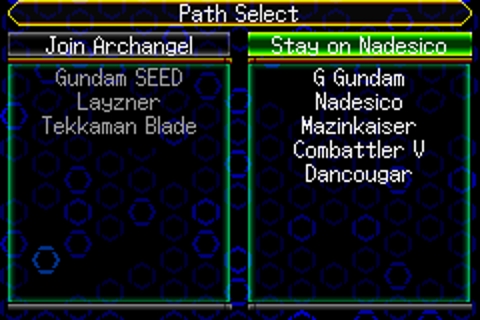 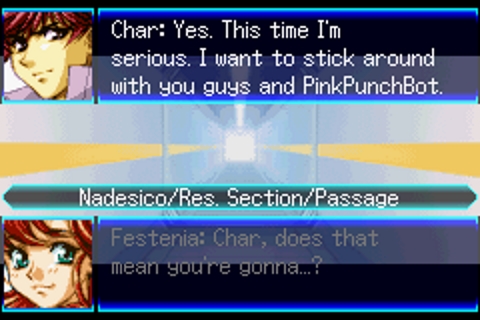 Now comes the important part of any SRW game. We've got a choice to make and we have to send Char to either the Archangel or the Nadesico. If we go with the Archangel we will have literally none of the units in our draft so we don't really have an illusion of choice here. Char has a moment where he talks about fighting to protect your blah blah blah we know it's all so we don't have to put up with Natarle.  We will never see anything happen involving this guy until like 100 missions from now. 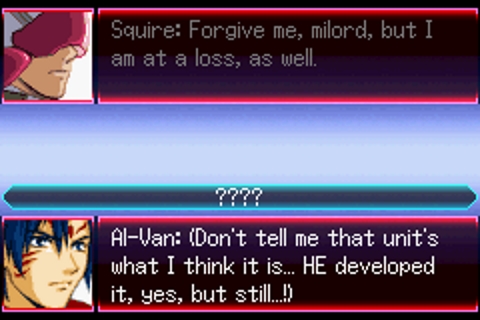 Also our enemies are horrified their super secret weapon has already been sent to the own zone. Did you try stopping time and starting it again? Turn Count 81 Next time on Super Robot Wars J! The crew are grounded.
|
|
#
?
May 10, 2019 05:41
|
|
|
Yurika's a brilliant commander and I will have none of this "she used the Nadesico to break up a date and ended up getting everyone on Mars killed" bullshit, her record is spotless. Also, looking forward to Mithril & all those that come with it.
|
|
#
?
May 11, 2019 02:49
|
|
|
Stage 10: 6/41 turns So, stage 10. The first proper bossfight of the game, and in a previous draft I got a 5 turn on it, when I had Mazinger drafted. I spent some time trying to line up everything just right to see if I could match it, but I ended up 4-5k damage short of forcing the retreat. It'll have to be a 6 turner. Parts and things: Belzelute: High-Efficiency OS, Dustproof. Nadesico: Booster, Booster, Apogee Motor, Prop tank. Support attack +1, Hit & Away Layzner: HE Radar. Counter Strike Gundam: HE Radar, Servo Motor. Evade +5, SP +10 No new upgrades  Start of the stage. As others have discussed, a bunch of units start in the bottom left part of the map, the Nadesico and deployables start in the bottom right. The undrafted forced deploys are going to head to the middle of the map where they'll be picked up eventually.  Most units jump into the Nadesico.   People move.  Start of turn 2. Nadesico casts Accel and Alert, moves here.       People deploy and damage stuff.   Calvina casts Focus and Snipe, attacks and moves. The placement is pretty important.   Start of turn 3. Calvina attacks and moves. The remaining enemy needs to be able to attack her on enemy phase, to spawn the reinforcement wave.  Dancouga casts Guard and Focus, moves here. Reinforcements will spawn on enemy phase, and they'll go after the Dancouga. Dan will clear most of them.      Over on the other side, the Radam are cleared up and the Nadesico moves to catch the reinforcements on the right side. Not shown, but David and Roanne move into the Nadesico.    Turn 4. Nadesico MAPs a chunk of the enemies remaining on the right, and moves. Calvina attacks and moves as well. I make sure to get her and Dan next to each other. Clearing out all but... 3? enemies spawns the boss, Devil Gundam.   The Aesties get a few kills.      People move in and set up to start unloading damage on Devil Gundam next turn. Domon runs away.  Turn 5. Everyone unloads on the Devil Gundam. Kira moves one tile left to get a support attack off. I didn't bother taking screenshots of the attacks themselves, but I got him down to 8.5k hp or so.  Akatsuki grabs a mook kill with a Cheer.   Turn 6. Some people do some damage to the Devil, then Dancouga gets a Luck and Gain and offs it.
|
|
#
?
May 11, 2019 20:28
|
|
|
Before the mission, I give Nadesico another pip in HP and max out the Archangel's energy. That still leaves some money to spare, but I'm not sure what should be my next priority. When the route splits, my lineup gets split in half, so I should focus my upgrades on the ones I'll have with me. (Nadesico route has new draftees show up for a chapter each, but apparently has a pretty crazy finale under this challenge's conditions.) I put both Boosters on the Nadesico now, instead of splitting them up. Mission 8 Turn 1: 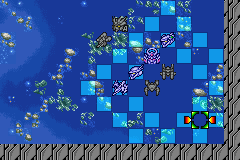 Kira is still an event unit for this chapter, though it's simple enough to stick him in a ship. This isn't my final starting formation, but it won't matter much, since I'm relying on more Cap-slingshot strategies.  Yzack and Dearka (and Miguel) are in the initial enemy lineup, but I still need to wipe out everything. 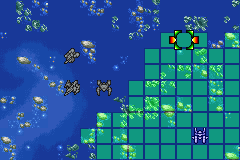 I shove most of my units in the Nadesico and send them northwest towards the enemy. The Archangel, on the other hand, is going north to intercept the second wave. Enemy phase, the minions start moving to intercept, but the boss squad holds back. Turn 2: 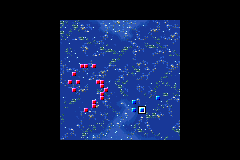 I can move my units into attacking range now. 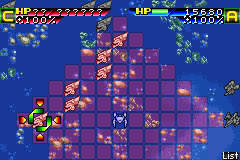 Nadesico can't get into range of the bosses yet, but can get close enough for most of the other enemies. I decide to put it a bit up and to the right compared to this picture. 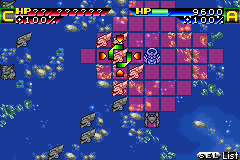 Calvina heads north to give more enemies an attractive target. (Doesn't work. The enemies too far north to reach the Nadesico don't have a good post-move to hit Calvina with either.) 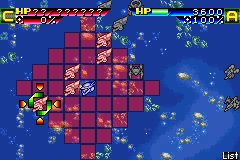 Akito attacks the lowermost enemy and gets a level-up and Support Attack out of it. 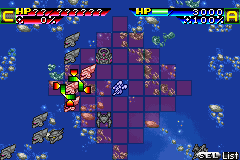 Moebius Zero fits in a potshot. 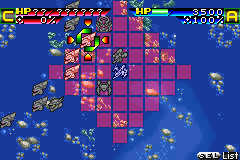 As does Blue Earth. 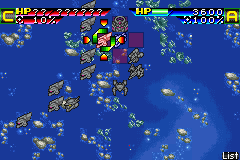 Hikaru decides to head north to support Calvina. If she stayed in the South with Akito, I thought she might block off an attack on Nadesico. (I probably didn't need to worry about that, but I do need to keep heading North.) 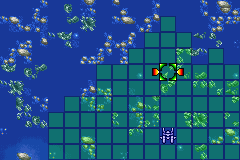 The Archangel heads as far north as possible. Enemy phase, the Nadesico takes heavy damage from the enemy GINNs' Heavy Ion cannons, but survives the turn. Akito counterkills the one enemy I didn't think could reach the Nadesico. 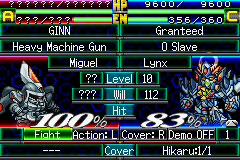 And the bosses start approaching, with Miguel taking a shot at Calvina. She oneshots him on the counter. Turn 3: 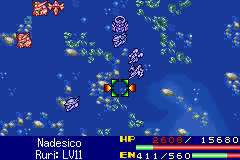 I want these guys to take out the bosses while moving north. But first things first: I heal the Nadesico with Jun's Vigor. 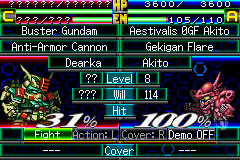 Akito takes a shot at Dearka, but only does about 1/3 of his health. 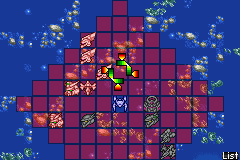 The Nadesico can easily get in range of all the remaining enemies. But Ruri Scans the enemy Gundam pilots first. Ruri decides to fire a missile barrage at the Nazca. 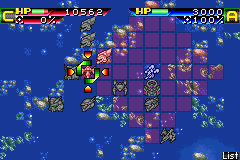 Moebius Zero gets a Support Attack from Calvina while whittling down the Nazca. It leaves the battleship at critical health, so I think it will go down on enemy phase. 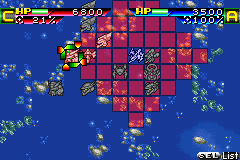 Aki takes a potshot at Yzak, just because she can. 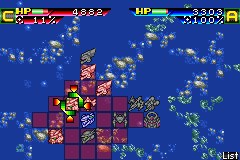 Kikaru moves next to Akito and attacks Yzack. 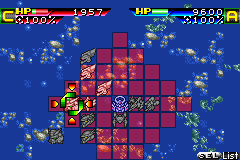 Calvina decides to finish off Yzak, since she has a clear shot. Also, the Nadesico could use a Support Defender. Letting it be destroyed would be an epic failure. 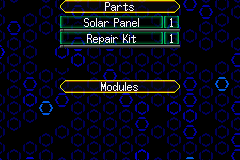 That Solar Panel is going to be very useful... 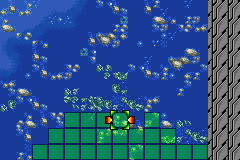 And the Archangel gets very close to the top-right corner of the map. In retrospect, I should have put it further west... Enemy phase, the Nazca uses its MAPW to avoid being countered. The Nadesico kills everything else except Dearka. Turn 4: 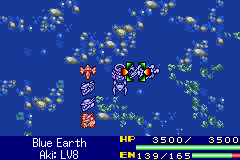 I can kill off both enemies this turn, but things get more complicated after that. Blue Earth provides an opening for Calvina to destroy the Nazca with a support attack.  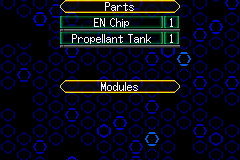 And Mobius Zero finishes off Dearka. The EN Chip he was holding will also be useful. 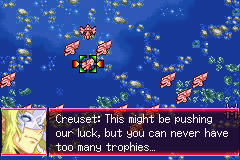 It turns out I should have been dragging the Archangel to the Center-north. Now the mission becomes an assassination of Le Creuset or the Capital ship. Creuset is holding a Large Generator and an SP+10 while the Nazca only has consumables, so the choice is obvious. 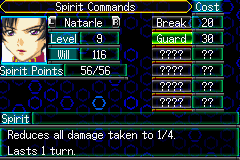 Pictured: Why I thought the Archangel, with no defense upgrades, can take on the entire rest of the map. 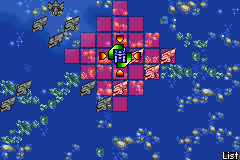 Sadly, I can't get the Archangel in range to start on Creuset. 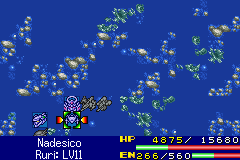 Melua Trusts that the Nadesico won't just get popped like a balloon if it dashes up to continue the fight. I'm glad someone does. 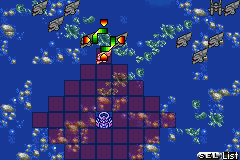 Calvina takes out a minion. 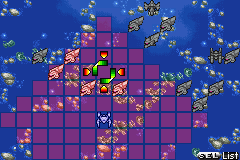 Nadesico uses all it's defensive spirits and dashes up, after Akito and Hikaru get on board. Enemy phase, almost nothing can get through the Nadesico and Archangel's barriers. 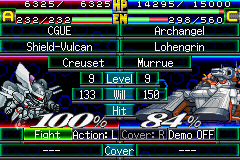 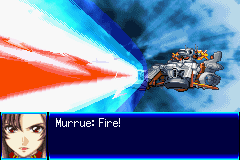 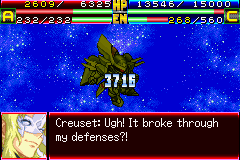 I didn't expect Creuset to go down easily. Turn 5: 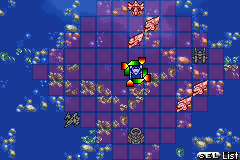 Time to wrap things up. Nadesico's odds of finishing off Creuset don't look good, so it finishes off a GINN instead. 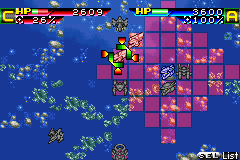 Akito and Hikaru finish off the last two GINNs. I could have had one of them beat Creuset with a support from the Archangel, but I decided against it. 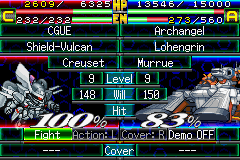 Who says Focus on a capital ship isn't good? 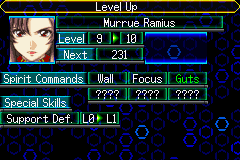 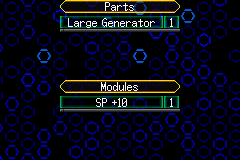 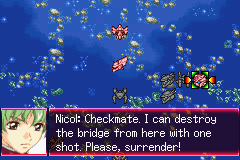 Creuset is defeated, but he's had us outflanked since he showed up. The Super squad is not impressed that Natarle forgot to mention the Blitz had 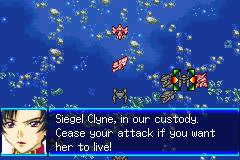 To make up for that tactical error which following military regulations about secrecy led to, Murrue points out that we have Lacus on board, so destroying the Archangel isn't the best course of action for ZAFT. Then she threatens Lacus herself to force ZAFT to stand down. 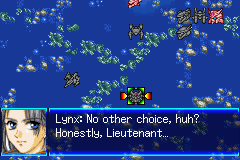 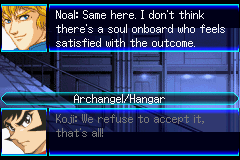 For some reason, this doesn't improve anyone's opinion of her. (5 turns, MightyPretenders fucked around with this message at 15:59 on May 13, 2019 |
|
#
?
May 12, 2019 19:27
|
|
|
Stage 11A: 3/44 turns Going Archangel route. AA route is the faster one to my knowledge, even if you're going in with very few units. You can do this stage with just your Original and Archangel in the same turncount, no problem. Parts and such: Belzelute: Dustproof Layzner: Servo Motor, HE Radar Archangel: booster, booster, apogee motor, High-efficiency OS, support attack +1 Strike Gundam gets the Launcher pack.  Deployment.  David, Roanne and Kira jump into the AA. Everyone moves.   Turn 2. Calvina casts Snipe and Focus, attacks and moves. When all but 4? of the initial enemies are gone, reinforcements spawn in to the south. The AA and company head down there to intercept them.  Like so.  Start of turn 3. I had originally set up the AA to MAP both bosses, but it needs either the Dustproof or weapon upgrades to get enough damage. I could take it off Calvina but then she'd need further upgrades as well.   Fine, whatever. I'll just take the Lesseps-class. it's more money and the Hyper Sensor isn't super important to me.   The Layzner boys get some kills because why not.  I took a screenshot of AA offing the Lesseps with support from Roanne, but in the final run I opt for Roanne to deliver the final blow with a Bless and Cheer.
|
|
#
?
May 13, 2019 15:42
|
|
|
Stage 10 I take this stage pretty slow so I don't have to repair any more of my tissue-paper reals, but finally getting some new units is getting me back into the spirit of this thing. Okay, it's just a Skygrasper, but finally getting a support unit makes things a lot easier. I manage to give Mu some levels too, since he's pretty far behind. Somehow I manage to finish the battle at a wopping 88 turns with only the Nadesico left standing. Jesus.
|
|
#
?
May 16, 2019 19:21
|
|
|
Super RoboKy Draft Wars Episode 11: STOP SPAWNING DEATH ARMY I BEG YOU This was an actual episode in MSD, but it's going to get very very weird for us. Anyway a whole lot of stuff happened and- 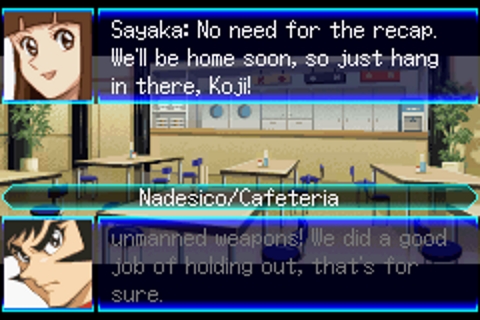 -I... can't we? 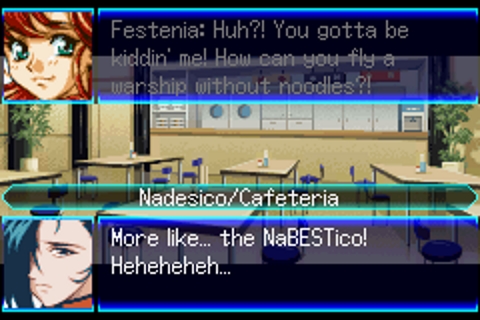 Fun fact: English translators dread Izumi because almost everything she says is a pun, and Japanese puns are translator kryptonite. 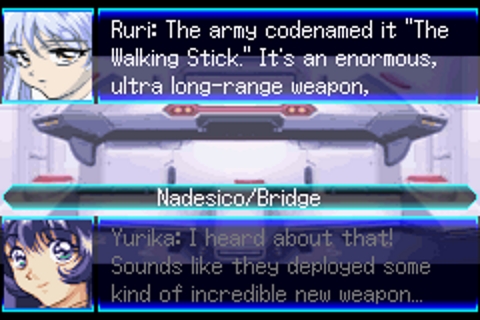 Okay so the mission we have here is apparently the Gridosians/Jovian Lizards have set up a giant motherfucking railgun or something in an old military base the UEFA have lost and this thing is blasting literally everything out of the sky that looks at them funny. We need to go in and beat it up. Also they called it the �Walking Stick� presumably because it looks like a giant stick, and you can't approach it from the air so you're going to be walking to it. 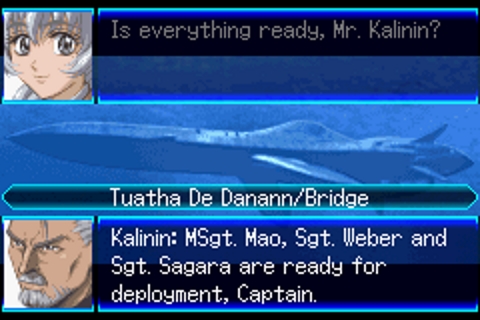 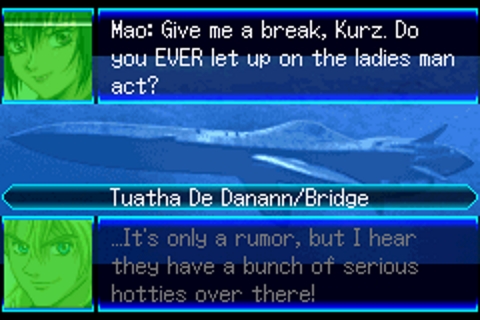 Remember Mithril? Well they have a super submarine commanded by a teenage girl, and they've decided to send us some help because the Walking Stick might be too much for us or something. Only three people though, and one of them is a giant pervert. Seriously Kurz is a shiver looking for a spine to crawl up. 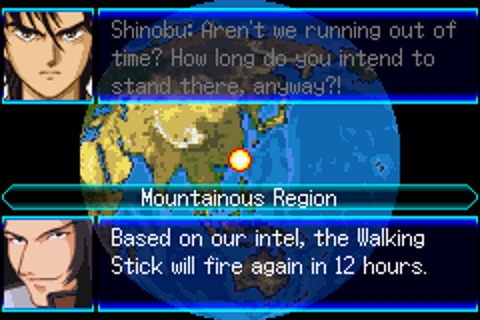 The Nadesico is grounded off screen and our team has to hoof it via foot to the big angry gun, though apparently it can fire again soon so I'm not sure why we can't keep flying I forget how this is reasoned whatever it's no big deal we can get there without problem. The Mithril crew are actually really professional, catching a Death Army ambush before it lands on everyone but ultimately being helped by someone else. 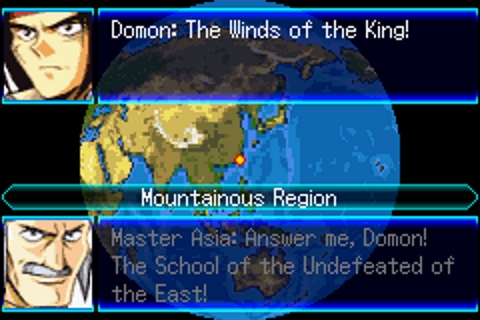 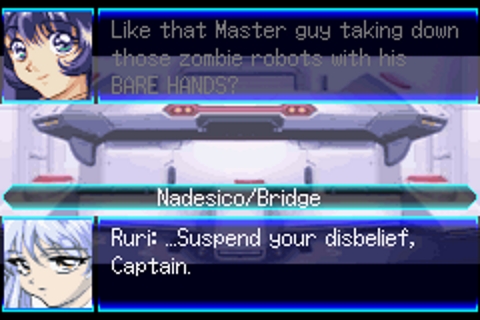 Oh goddamnit we're getting trolled aren't we? Oh well, time to kick it off and take that gun down. Master Asia decides he'll try to take down the Walking Stick himself. He's going to troll the gently caress out of us I just played SRWT I can't handle this. 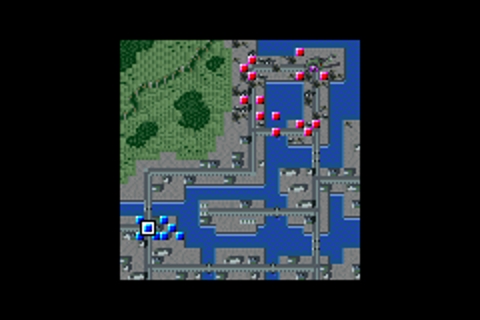 This map has a little bit of everything huh? It also has a gimmick, you can't fly during it or your unit asplode. Luckily for us most of our units are great on the ground anyway. Also we don't have access to the Nadesico so the forced deployments can be used by us according to the rules since I can't get them off the field and lots of enemies will be gunning for them by default. The way this map works for the start is the north-east is where the walking stick is. We need to either get a unit to the Walking Stick or wipe out all the enemies. 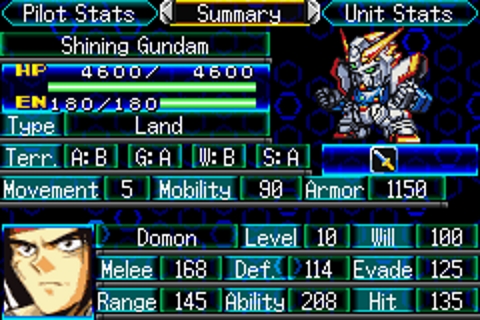 Domon is a forced deploy so let's talk about him for a moment. The Shining Gundam is a bit arse, can fly but fights absolutely atrociously in it. It also has pretty much no moves at first. When Domon's will goes up enough he hits SUPER MODE and then his stats go up a bit and unlocks much more powerful moves. He's going to be a massive liability all mission because I don't want to use him, he has no synergy with anyone else on the field, and I haven't spent any money on upgrading him or given him any parts or modules. For traits he has Counter (lets him attack first if his Ability stat is sufficiently higher than an enemy's during their attack phase) and Potential Level 2. For spirits he has Guts and Focus, which makes him a bit more able to survive but hasn't exactly got the SP to go on things much. 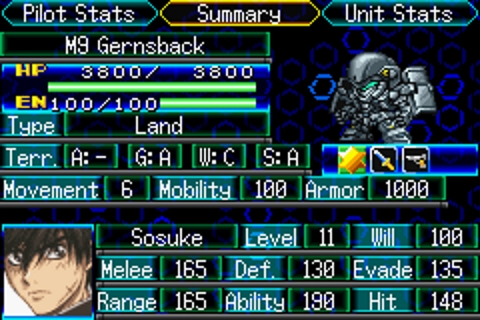 Sosuke is one of the units I got in the draft, currently here in his M9 Gernsbeck which unless I'm misremembering will be the only time we see him in it. Gernsbecks are great little units. They're pretty much all ammo-based, and have the ECS ability that after you hit the Will threshold gives them an outright 50% chance to avoid an attack. Remember how annoying Mirage Colloid was for us? Well we have that now with three units. Sosuke is very balanced with good stats across the board. He's only going to get better as time goes on. He comes packing Potential level 2 and Support Defence Level 1. For supports he has Alert, Focus and Strike. So he's going to be able to mash his way through mooks and bosses quite nicely. Unlike the other two, he has a shotgun too which is a pretty nice gun. 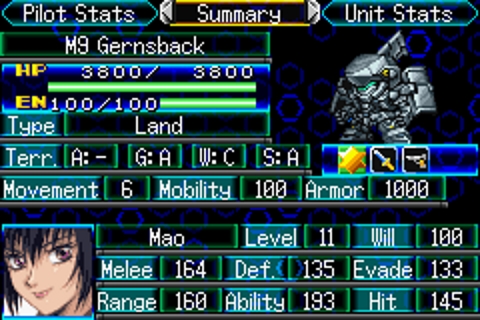 Mao is in charge and the one I didn't get in the draft, which is really unfortunate because she is an excellent inclusion in the line-up. She comes with Commander Level 1, Potential Level 1, Support Attack level 1, Support Defence Level 2, and Counter. That's an extremely impressive set of skills there and a mobile command aura on a regular unit is nothing to be sneezed at. She also has the spirits Guard, Focus and Strike. Again, she can hit stuff, and she can take a hit if need be (though ECS is a great support defence soak too). 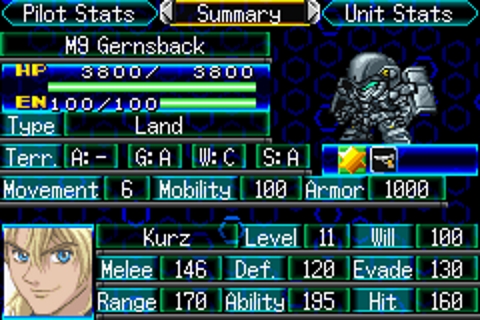 The last of the crew whom I also got in the draft, and he's our sniper archetype. Range is his bread and butter and his M9 comes packing two sniper rifle options that can hit most distant enemies. Kurz comes with Hit & Away, Potential Level 1, Support Attack Level 1 and Support Defence Level 1. For spirits we have Snipe (adds +2 to all non-melee attack ranges) and Focus. So the more astute amongst you have probably already realised that these three come packing a LOT of support skills. Mao buffs everyone around her, and anyone in contact with any of these three can expect support attacks and support defence. They get friendship bonuses from being near each other too (and Kurz has a one-sided romance buff with Mao). But that's not all these three come packing! Have these three together and you can use a Combination Attack. Combination Attacks are tricky to position and while every member of the Combination can initiate the attack each use of it drains the corresponding EN from all involved units. All these guys come with 100 EN, and the Urz strike these three can do means they can do it three times total for now. So the best way to move this mob is to have Kurz snipe and move to the next position, have Mao move next to him and attack if able, and Sosuke follow up last to take advantage of the Command aura if possible. If you don't need to move them all the better, cause they can form an amazing support attack and defence ball to keep everyone safe. THAT WAS A LOT OF WORDS time to fight. Turn 1 WE WALK Enemy phase they also walk. Some of them. Most stay still. Turn 2 MORE WALK Enemy phase the fighting finally starts. Combattler V kills most of the approaching Batta with counter-attacks. Most of the others remain not moving. Turn 3 We push on with the remaining Batta of the initial charge gone. Enemy phase no enemies move in at us. THANKS GUYS. Turn 4 Combattler V and Koji hit the east and north trios respectively, Koji killing one of his targets. Enemy phase Combattler V wipes out all three of its foes, Koji only damages his two because they're at extreme range so only rust hurricane hits and it just barely misses killing them. Turn 5 We're almost to the walking stick, and both our big boys pop a Batta each at the walking stick. Everyone else moves in to clean up the two Koji left behind. This leaves one Batta left and when it dies so does the walking stick. Enemy phase Dead batta! We take down the Walking Stick via enemy annihilation and then open fire on it! 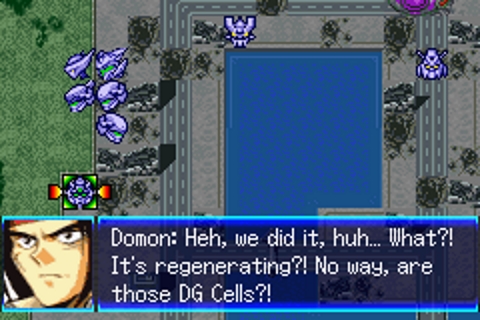 Sadly the Walking Stick regenerates all of it and Domon immediately notices that yes, it has DG Cells! 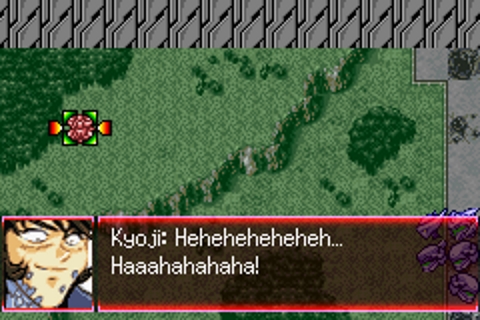 KYOJIIIIIIIIIIIIIIIIIIIIIIIIIIIIIII Oh and then Master Asia appears and trolls us into oblivion and I cry into a sandwich. Domon is unable to accept that his master has allied with his brother, and Master Asia attempts to use ancient martial arts convince Domon to come over and get riddled with DG Cells. 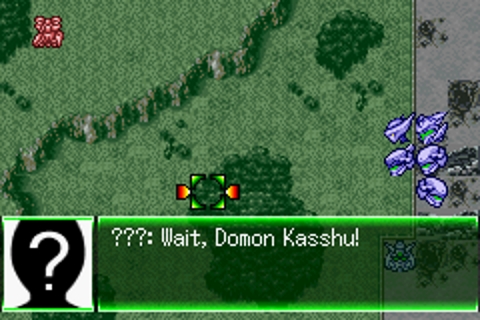 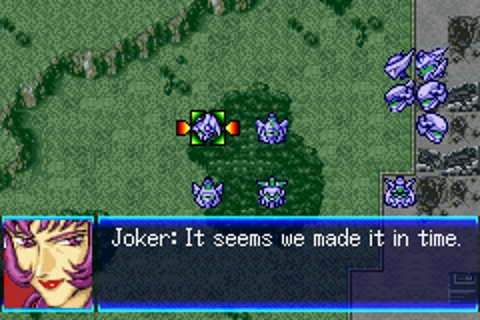 The Shuffle Alliance turn up and swear to beat the piss out of Master Asia. For some reason Domon tells them that no, they'll take care of the enemy ourselves. So the Shuffle Alliance leave to let us do it. 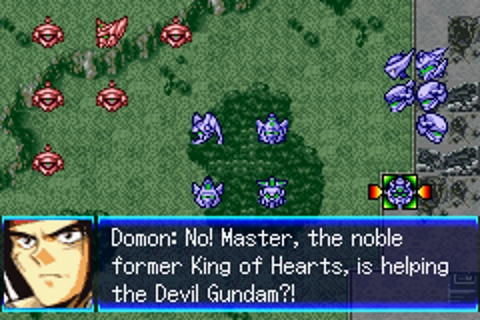 Domon still doesn't believe it's his master though, leading to the likely scenario of us getting trolled again. Forever. Oh hey the enemy turn is still going! All the freshly spawned Death Army units make a move in on our dudes, and Sayaka is defended by various allies and damages some Death Army units in retort. 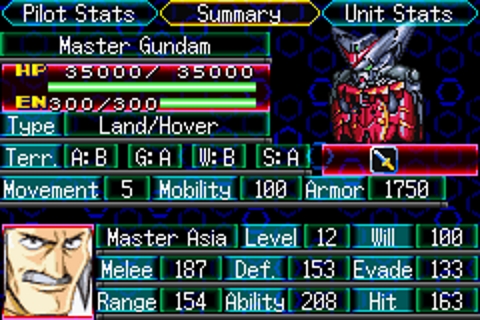 So for this map to finish we have to defeat either Master Asia or the Devil Gundam. As you can imagine I don't much want to have to fight the giant regenerating HP blob again, but the risk of fighting the Master Gundam is that the damage output is much more severe. He has a much more narrow MAP attack but due to his combat ability it's more likely to hit. It is possible to take out both of them at once if you have a unit with a MAP attack of your own but we don't, and that's kind of a time investment. Turn 6 We start rolling into our enemy. Combattler V did most of the work on the way so now it's time to let the others do some leg-work. Char combos through two, Mao and Sosuke claim one each. Sayaka stands with Koji and weakens another. Domon I hang back a little cause I don't want to use him much except to soften up targets. Enemy phase the defensive support of the Mithril trio keeps anyone from taking much of any damage, and in retort they damage a lot of the enemy. Master Asia drop a huge hit on Sayaka from a significant distance but she defends. Turn 7 Combattler V catches up and damages an enemy, Char combos through another pair of enemies to level himself up to 13 and learns Support Defense Level 2! Katia learns Snipe! We continue to work together to clean up the enemy and soon there's only one Death Army mook, Master Gundam and Devil Gundam left. Enemy phase Mao uses her ECS system to dodge the heck out of the mook, Devil Gundam dings Char as he support defends Combattler V, and Master Asia MAPs all our super robots. Easy! Turn 8 I have Sayaka kill the mook, cause now it's time to just bop Master Asia with everything we have. Domon almost dies which would have failed the mission. I use Trust to push him back up to respectable health. In spite of all these attacks, and managing to pull off three team attacks with the Urz Strike in one turn on Master Asia he's still kicking. Enemy phase No one really takes any damage because Devil Gundam attacks from extreme range, and Master Asia's MAP doesn't do much. Turn 9 It doesn't take much more, we push Master Asia's health to zero and both he and the Devil Gundam retreat. Thank goodness. 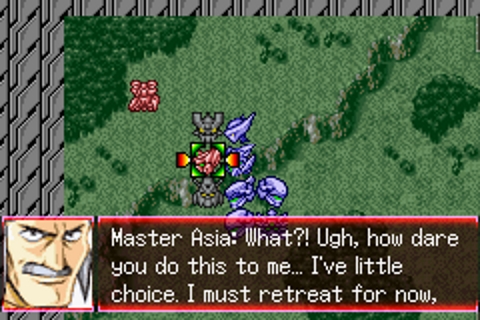 With Master Asia taken care of both he and KYOJIIIIIIIIIIII retreat, which is a bit of a relief except-  Yeah I forgot about this. All of Domon's friends turn up infested by DG Cells, and then they gently caress off leaving us with some more Death Army mooks to fight. THANKS A LOT GUYS WE ALMOST HAD A SINGLE DIGIT TURN COUNT. Enemy phase All but one of the enemies comes in and gets banged up, so we can kill most of them by the end I hope. Turn 10 We mop up the rest, Mao hitting 12 for what that's worth. 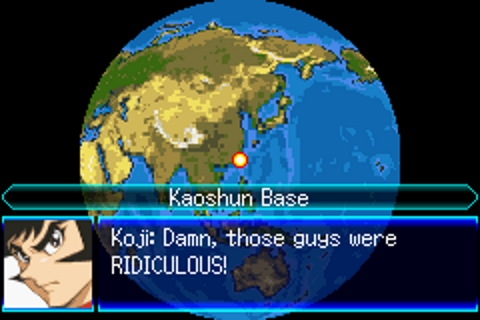 That was a bit of a long one huh? Everyone says their goodbyes and shunts off, the Mithril trio don't join us. We'll get them later, they have a job to do and so do our protags but at least we got through it all. 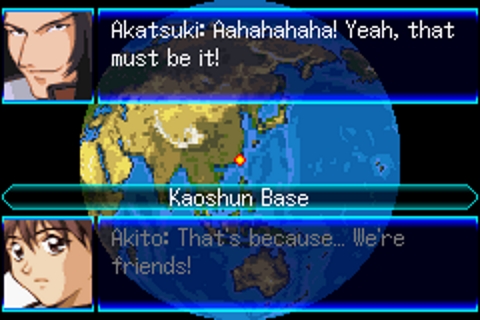 Everyone just dunks on one another so hard in this game I love it. 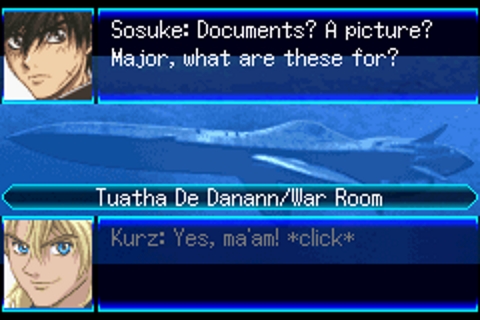 Then Mithril decides to send Sosuke undercover to high school to protect a VIP. Up to this point, Sosuke comes across as a very quiet, somewhat dull but professional young soldier who gets the job done. He's definitely not ready for school, but school is definitely not ready for him. Turn Count: 91 Next time on Super Robot Wars J: KOJI DIES
|
|
#
?
May 17, 2019 06:03
|
|
|
TheLastRoboKy posted:Next time on Super Robot Wars J: KOJI DIES In Lava?
|
|
#
?
May 17, 2019 16:06
|
|
|
Stage 12A: 5/49 turns Upgrades and equips: Belzelute: Support attack +1, Large Generator, Sniper Scope, Weapons +2(8 total) Layzner: Booster, HE Radar, Weapons +3(8 total) Blue Earth: Apogee Motor, Servo Motor x2 Archangel: Booster, Dustproof, Multi Lock-On SYS, Propellant tank, Hit rate +5, Range +5 x2 Layzner and Belzelute both get weapons upgrades to one-shot grunts in this stage.  So, stage 12A. You need to hit 4 tiles, two of which you can see at the top of the screen. I'm going to use Layzner and Blue Earth for this. Both have a move +1 part to be able to reach the other two tiles on turn 2.      Turn 1 in it's entirety. Layzner and Blue Earth cast Accel to get to their spots.   Start of turn 2. Layzner and Earth hit their second tile.    This spawns a bunch of enemy and player reinforcements. Since I have the Archangel on map now, Blue Earth can't be attacked anymore. Luckily for me, having the parts equipped that it does, enemies will opt to target other people.    In any case, these reinforcements now have to be dealt with. David and Roanne use Calvina for support attacks. Calvina then attacks a mook herself and moves into position. In hindsight I should have attacked Dagger here, it would have saved me some pain on the next turn.   Kira and AA move up, Blade jumps inside. End turn.  Turn 3. Time to send Dagger and friends packing.    Dagger gets Scanned. Kira clears a spot for the Layzner boys, who then move in to get support attacks off Calvina. Calvina needs to crit once to facilitate the kill, unfortunately, which is pretty unreliable. Like I said, had I attacked Dagger last turn, this wouldn't have been an issue.  In any case, Archangel casts Luck, Focus, Cheers itself and attacks, getting the kill.   Calvina and Eiji both attack some things, Calvina moves into position to intercept the reinforcements. The last Radam will suicide on my units on enemy phase and spawn them in. Somewhere in all this Blue Earth moves away.  Turn 4. The Lesseps-class gonna get it.   David support attacks off Calvina, who then casts Bless on herself and offs it. This spawns the next boss.   Eiji and Roanne attack for a bit.  Meanwhile on the southern end of the map, Kira jumps into the Archangel, which casts Focus, Guard and Accels here. The SEED bosses will ignore the AA and go for Kira otherwise. It needs the Dustproof and range parts to fairly reliably off all the SEED grunts on enemy phase.   Turn 5.   Up north, Calvina offs Waltfeld and gets resupplied for exp.    On the southern side, Archangel pops a propellant tank.(it actually doesn't need it) Kira pops out and offs Miguel, then gets a Cheer for enemy phase. Archangel offs Dearka.  On enemy phase the Blitz attacks Kira and gets sent off.
|
|
#
?
May 19, 2019 17:58
|
|
|
Stage 13A: 5/54 turns Upgrades and equipment: Layzner: Mega Booster, Booster, Apogee Motor, Hit Rate +5 x2, Weapons +2(10) Belzelute: Booster Aile Strike Gundam: HE Radar, HE Thruster Layzner gets all S ranks for it's weapons full upgrade bonus. It's needed to deal with the bosses. I have to sell some items to get enough money for it.    Turn 1. Yuu and Hime dive into the water and move down.   Turn 2. The Brains go after Kanan, Yuu's positioning is important because it'll allow Gran Chers to attack him on enemy phase. I believe Kanan, Sheila and at least one Gran Cher need to be destroyed for the stage to progress to the next phase.   Turn 3. Kanan was sent off on enemy phase, now it's Sheila's turn. At least one Gran Cher will die on enemy phase, which causes enemy and player reinforcements to spawn in.   Turn 4. Reinforcements spawned in on enemy phase. I deployed everyone I had but really only Calvina, Layzner and Kira are of any sort of relevance.    Layzner gets +4 movement from parts, and +3 from accel. He needs all of it to get to Jonathan and Edgar on turn 5 to get the kills. Calvina will clean up most of the Gran Chers, and it's important that they go after her instead of Eiji.  Yuu and Hime stay where they were. I tried moving them around here and there, but it seems the bosses don't always feel like moving if I do. This works, I'm using it.  Turn 5.  Layzner moves here. He needs to get a crit to get the kill on enemy phase.  Calvina attacks and moves to the right. I forgot to take a screenshot of it, apparently. Hime and Yuu also retreat up to the north west.   Enemy phase. Layzner needs to crit both to get the kills. This isn't very likely at all, but I wanted to show off that it's possible. If not, a 6 turn on this map is very doable.
|
|
#
?
May 20, 2019 18:20
|
|
|
I somehow managed to finish Stage 11 using only Calvina and Ryoko. I curse my draft choices more every day. I'm at 103 turns now.
|
|
#
?
May 20, 2019 19:50
|
|
|
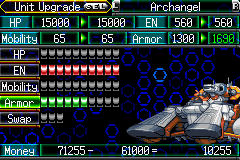 Since I'm leaning towards the Archangel route (As should anyone who's actually using the Strike, Strike Rouge, or Skygraspers), I upgrade its armor a bit. I also pass around the modules and parts I got last chapter (Murrue gets Counter, the various EN-related parts go to whoever has space and uses EN). Scenario 9: 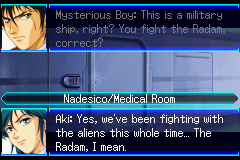 Tekkaman Blade finally wakes up, and comes across as a loose cannon who's more a threat to the doctors than to the Radam.  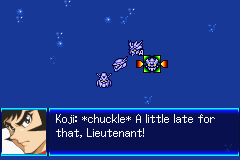 Meanwhile, most of our Super Squad, including Akito, decides to take a stand on the SEED plot, helping Kira run away to hand Lacus back over to ZAFT. 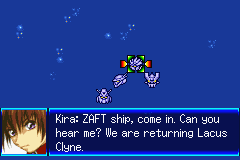 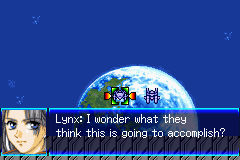 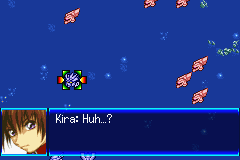 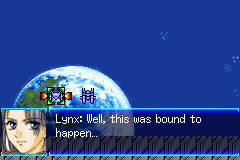 Naturally, Creuset wants to return the favor with an all out attack, but since he forgot to get Lacus off the battlefield first, she's able to short-circuit that with her own connections. Creuset figures he doesn't need the bad publicity right now and withdraws his forces. 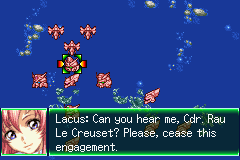 Since we need to have a battle anyway, a swarm of Radam show up. 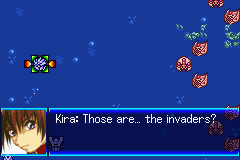 Turn 1: 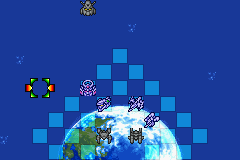 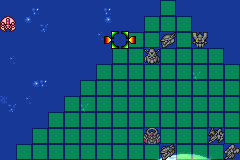 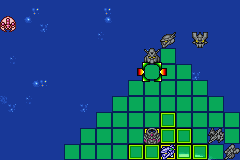 The Nadesico won't have too much trouble approaching the battlefield, and Akito is already ready to get into the thick of things. I could probably have positioned Hikaru better, though... Strike, Mazinger, and Combattler all board the Nadesico. 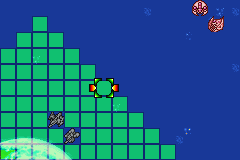 Archangel, Blue Earth, and Moebius Zero will take on the other side of the map. 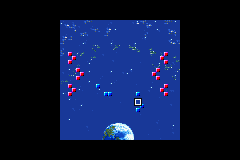 Enemy phase: Akito gets hit with a tentacle, but weakens two enemies on the counter. Aki weakens one enemy on her side. Turn 2: On the Nadesico side, Calvina teams up with Akito for a kill. 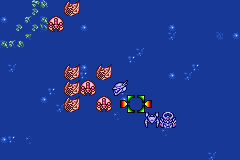 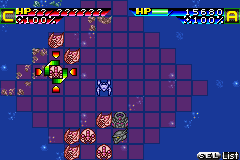 Then the Nadesico moves into range of all of the Radam and weakens one to the north. Akito moves next to the Nadesico with his crippled movement rate and finishes off one of his earlier opponents.  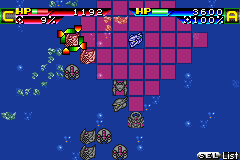 Hikaru disembarks and heads north, finishing off the Nadesico's target on the way. 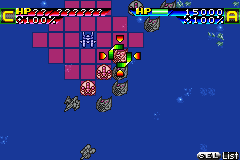 On the Archangel side, Natarle casts Guard and heads north, blasting a Radam on the way - A shame Laminate Armor doesn't work on physical attacks like tentacles. Mu heads after them to steal a kill. Blue Earth heads past them to weaken another one. 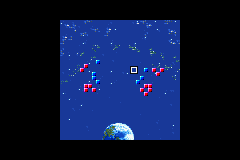 Enemy Phase: Ruri's morale isn't high enough to kill the first Radam that attacks her, but all the rest die. On the Archangel side, Blue Earth takes fire from one enemy, but the rest can focus on the Archangel (that Counter module comes in handy here). All but two die. And with three enemies remaining, the plot starts happening.  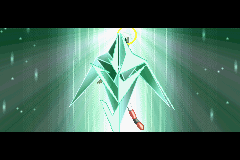 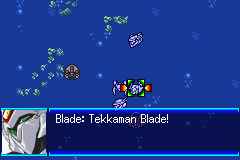 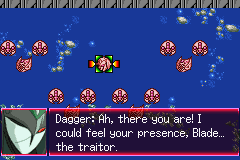 Tekkaman Blade fields himself at last. The new wave of enemies start closing in. Hikaru starts taking fire. The first one gets its tentacles knocked away by her knife and OHK'd in return. Not bad. The next one is luckier. Turn 3: 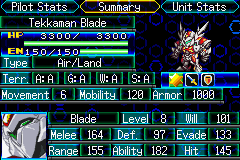 Tekkaman Blade might be the best Real-type in the game, with his competition coming from other main characters getting their upgrades - which Blade gets as well. His main weakness is that he's very expensive to rebuild if he's shot down (since, you know, the tekkaman armor is alien biotech that the mechanics have no way to understand if they had decades to look at it, and it makes even less sense for the "pilot" to survive its destruction than in every other case). You should never let that happen anyway. 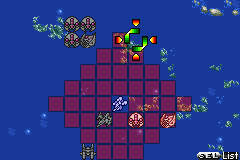 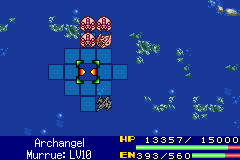 Back on the Archangel side, Mu and Aki steal some kills while the Archangel heads north. 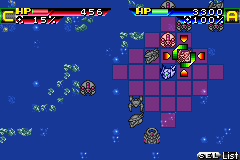 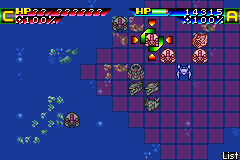 On the Nadesico side, Blade snipes a weakened Radam, while staying in range of the straggler from earlier. Akito gets a kill, Calvina doesn't, Nadesico moves into the thick of things again... 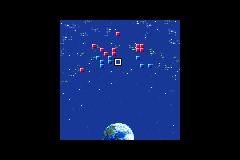 I should be able to take out the boss next turn easily. Enemy phase: 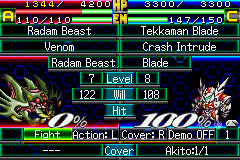 As expected, Blade finishes off this one with a Crash Intrude. Everything else goes after bulkier prey. A single enemy survives, because it attacked the Archangel from 2 spaces away while at full health. 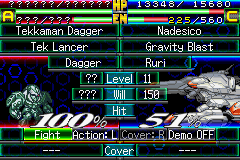 Even the boss joins in. 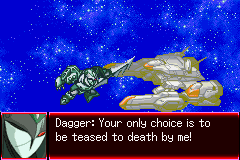 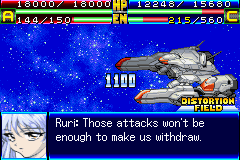 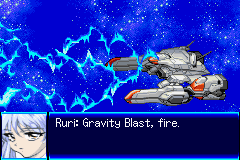 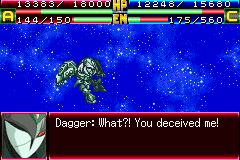 Turn 4: 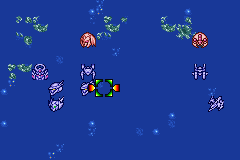 This might be trickier than I thought. First thing's first though, I Scan Tekkaman Dagger to make him easier to hit, and everyone who can casts Focus. First, Akito fires his Rifle, with Calvina backing him up. 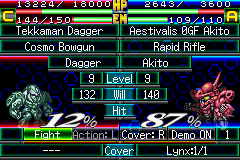 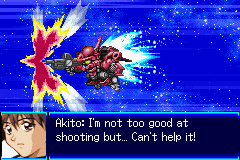 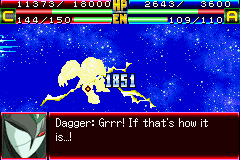  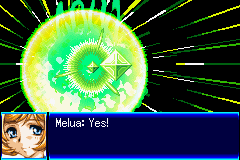 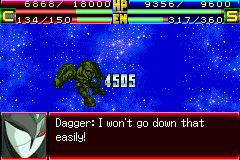 Looking Good. Now, let's see if the Nadesico can follow up. Dagger doesn't have a retreat threshold listed, but the game's lied about that before... 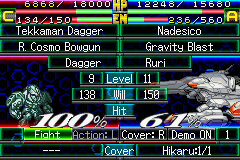 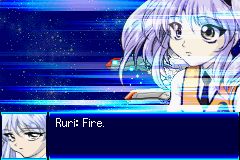 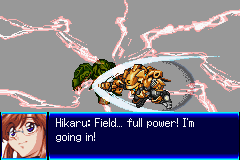 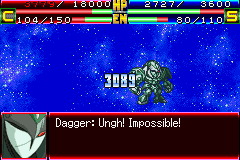 The Nadesico misses, But Hikaru is more accurate. 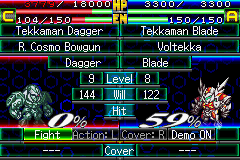 It's a shame that Blade isn't more accurate. 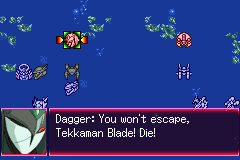 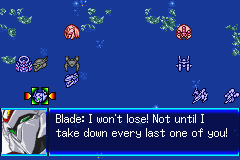   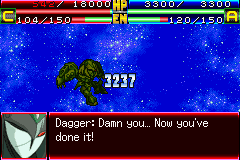 Not enough to finish him off. Well, I have an idea for that. 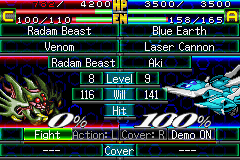 But first, Aki finishes off this last minion. 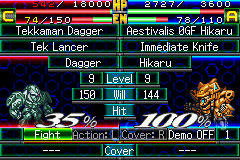 For the sake of better accuracy, Hikaru goes in close with her knife. 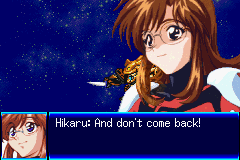 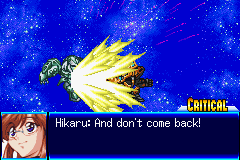 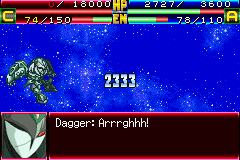  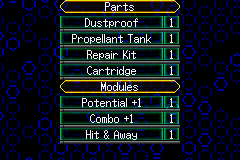 Quite a nice haul. And that's it. In the wake of the battle, our forces are forced to land in ZAFT/Radam Forest territory on Earth... 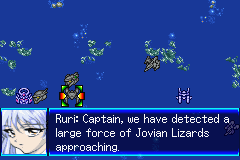 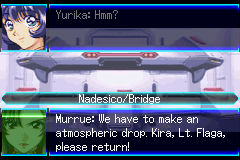 4 turns,
|
|
#
?
May 20, 2019 22:56
|
|
|

|
| # ? May 4, 2024 14:15 |
|
|
MonsieurChoc posted:I somehow managed to finish Stage 11 using only Calvina and Ryoko. I curse my draft choices more every day. I'm at 103 turns now. I'm surprised you didn't go Archangel route. You can copy what I did on stage 11 and do stage 12 with a small adjustment. And you'd be getting both skygraspers, and they're nifty little things. Full weapons upgrades only costs 130k, put in Kira and boom, excellent early to midgame unit.
|
|
#
?
May 20, 2019 23:50
|
|