


|
Dance Officer posted:I'm surprised you didn't go Archangel route. You can copy what I did on stage 11 and do stage 12 with a small adjustment. And you'd be getting both skygraspers, and they're nifty little things. Full weapons upgrades only costs 130k, put in Kira and boom, excellent early to midgame unit. Yes, that would be the smart thing to do. Instead I'm gunning for the Great Zeorymer.
|
 #
?
May 21, 2019 02:14
#
?
May 21, 2019 02:14
|
|


|

|
| # ? May 4, 2024 07:15 |
|
|
Wow, okay. Good luck!
|
|
#
?
May 21, 2019 09:22
|
|

|
Stage 14A: 5/59 turns Upgrades and equipment: Layzner: Apogee Motor, HE Thrusters, HE Radar Belzelute: Water Jet, Propellant Tank, EN +5 (5) Archangel: Mega Booster, Booster, Flight Unit, Cartridge, Hit Rate +5 x2, Support Attack +1 Lasse Brain: Servo Motor, Servo Motor, Apogee Motor, Evade +5 x2 Lasse needs the evasion to keep from being targeted at the end of the stage.   Start of the stage. I deploy everyone, and everyone but Kira and David at least get to do something. Everyone but Layzner and Calvina retreat.    Archangel and Eiji cast Accel, everyone moves.  Turn 2. Eiji casts Accel and Focus, then moves here. When all but one or two Gradosian mooks are dead, the reinforcement wave will spawn.  Calvina moves here  Archangel casts Focus and Guard, moves here.  The grunts die, and the reinforcements spawn in. Base Archangel with S sky ranks for all weapons cleanly one hits all grunts.  I need to make this hit to trigger the plot advancement.  So, turn 3. Gale and Eiji had their little murderous get together on enemy phase, and V-MAX was unlocked. With his new V-MAX attack he can kill Katonbo's in two hits if they both crit.    In Archangel's vicinity, Karla has cast a bunch of spirits. Nanga casts Guard, jumps out and attacks. After that, Archangel casts Focus and finishes her off. I did try to feed the kill to Kira for exp, but it seems to mess with the Katonbo's AI and makes them move instead of suicide on Layzner.  Calvina moves one tile right.  Turn 4. The remaining grunts suicided on Archangel on enemy phase. One Katonbo did the same on Eiji, the other put itself in one hit kill range. Eiji moves below the remaining Katonbo and sends it off.   This causes the final plot advancement to happen, and a bunch of ZAFT troops spawn in. By event, Layzner goes down and Archangel moves to his spot to pick him up.    Archangel casts Focus, Guard, Assault and uses the Cartridge, then moves next to and attacks the Vosgulov-class. Lasse and Roanne jump out and do the same.  Calvina casts Focus and MAPs the Duel and Blitz. End turn.  With Water S ranks from the Water Jet, Calvina can two shot the Vosgulov-class if they're crits. Most mooks die in one shot to her strongest attack, but I opt to save EN for the Duel.     Miguel and Nicol are sent packing. Duel loses the AS parts.   Start of turn 5.  Calvina pops her propellant tank and casts focus, Lasse casts focus and accels next to her, then attacks the Duel. With all the evasion parts he's got he won't be targeted on enemy phase and the enemies will go for Calvina, who can actually kill them.  Calvina gets a Bless and sends the Vosgulov off.  Roanne gets the other Bless and sends the other one off. I make sure the Archangel doesn't use the Valiant for the support attack.  And casts Luck and offs this unit. Everything else dies on enemy phase.
|
|
#
?
May 21, 2019 17:48
|
|
|
Stage 12 This one is actually super easy. Mazinger is good that even with no upgrade and underlevelled I have no trouble clearing the part where I�m forced to use it. Then Calvina and Ryoko destroy everything with some help from Ruri. I gave Ryoko the combo+1 module but the enemies keep having empty squares between them.  114 turns Next stage I finally get Zeorymer and my first secret trigger.
|
|
#
?
May 21, 2019 17:53
|
|
|
Stage 13: Zeorymer Awakens! https://www.youtube.com/watch?v=P8pFD8_-dRw The Stage is fairly easy thanks to my brand new weapon of mass destruction and the Photon Power Lab squares giving huge defense boosts and regen. Thanks to endless reinforcements and me taking way too long to bring Mazinkaiser under control without killing it I end up at 133 turns.
|
|
#
?
May 21, 2019 18:57
|
|
|
Let's Play Super Roboy Draft Wars Episode 12: Well, that's just Great I'm sure it's fine. 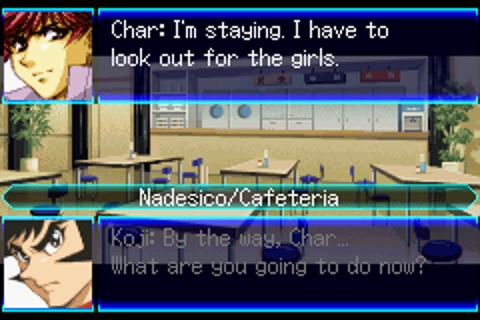 The Nadesico finally returns to Japan! Some people are leaving, some people are sticking around. Char is sticking with the girls on the Nadesico and everyone gets a bit sappy about it, Ruri opens up that she was kinda raised in a lab so the Nadesico is the first REAL home she's ever had. 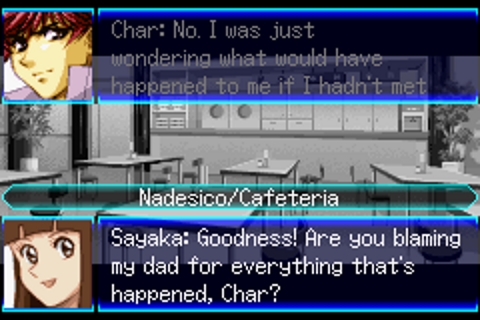 Yes.  I only included this screenshot because I have no idea if the Combattler team's robot is being sarcastic or not on account of how sarcastic all the Combattler team are about the plot of this game. 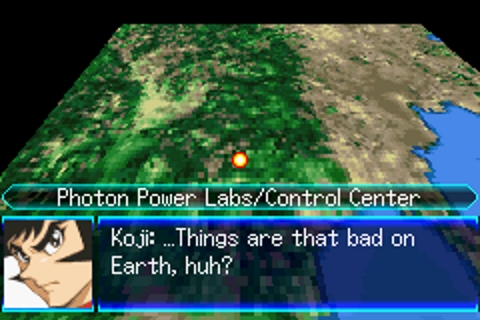 Returning to the Photo Power Research Laboratory Koji and Sayaka get the low-down on how terrible the planet currently is even though honestly we've seen it all anyway. Dr. Hell has been using the chaos to get more nasty but Great Mazinger and crew have been holding them at bay for now. 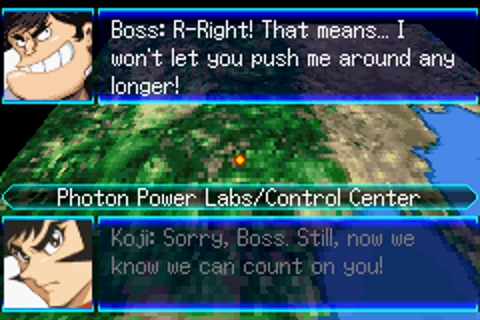 Boss missed us! Apparently he's been working pretty hard too, probably helping to fix things that Dr. Hell knocks over. Koji says he can probably help us now. I sincerely doubt that. We have a bit of a time-skip and after visiting the Nadesico Koji is told Dr. Hell and his dudes are back to kick up a fuss! Great is in maintenance so Koji, Sayaka and Boss head out to bop some Mechabeasts. 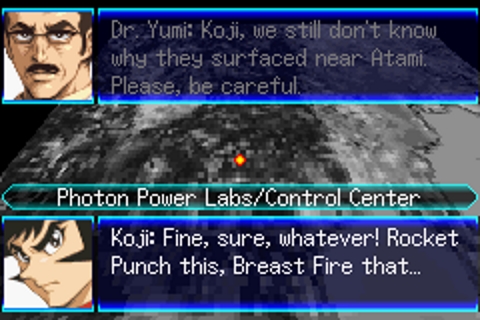 Koji sums up my battle plan. 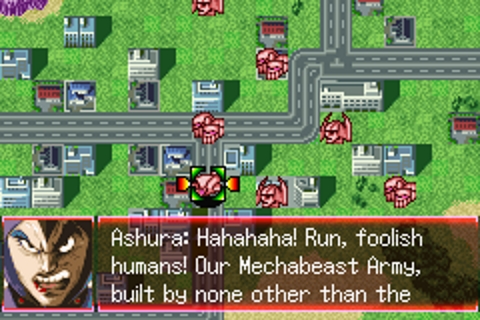 It's time for my favourite mook! Baron Ashura! They've got a flair for the dramatic so their dialogue will almost never take up just one dialogue box. They tells Koji they're going to take his life, and Koji retorts by telling them that's not what he means when he always tells them to get a life. They have the best banter. 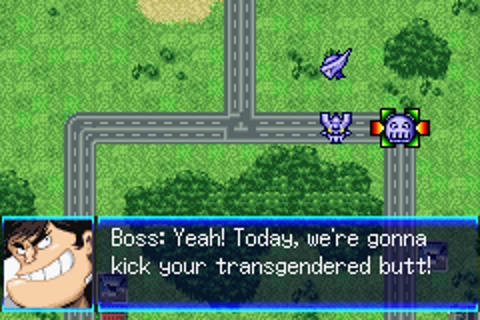 Man what the gently caress Boss, Ashura is two people sewn together you rude dumb inconsiderate chin. They even talk in two goddamn voices simultaneously. Ashura ignores Boss which honestly is the appropriate thing to do in these circumstances holy poo poo dude we were having some nice banter and you had to go and do that who drafted me this motherfucker I'll have their head. Ashura and Yurika have a dialogue in a later mission which is 100% the most precious thing and I look forwards to showing it. 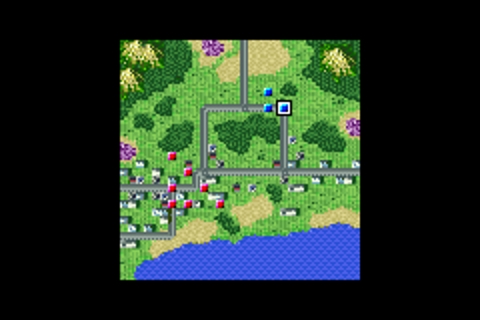 So all troops on both sides bar one are ground troops, and there's a big forest in the middle of the map. THANKS GAME. But we have a new unit to play with and it's one from my draft pool! But it's the Boss Borot! THANKS GAME. 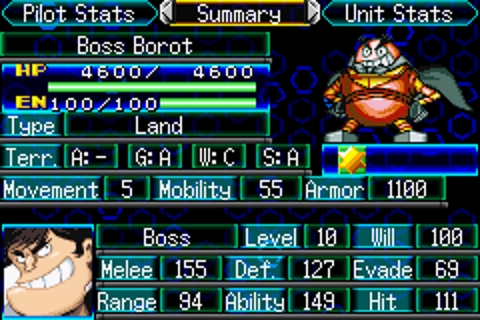 Okay so let's just get this out of the way. The Boss Borot is a ramshackle junk-pile that by all accounts should not function yet somehow does. It is a super robot that is somehow less durable than the Aphrodite A and currently slow as molasses. The flip side is in terms of support the Boss Borot comes with both a Repair Module and a Support Module. The Support Module allows Boss to replenish someone's ammo and energy, so long as they start the turn next to one another. You can't use the Support Module post-movement, and anyone who gets resupplied will lose 10 Will to represent them getting a little unhyped from stopping and getting juiced back up. Boss' other real strength is that he has two co-pilots, Mucha and Nuka who act as Spirit batteries. So Boss comes with Potential Level 1 and Support Defence Level 1. With their powers combined their Spirit abilities are Guts, Fury, Wall, Trust, Cheer, Alert, Scan and Vigor. Not a bad collection if not a little selfish. Boss is not going to be too much help here, particularly because of how this scenario goes. 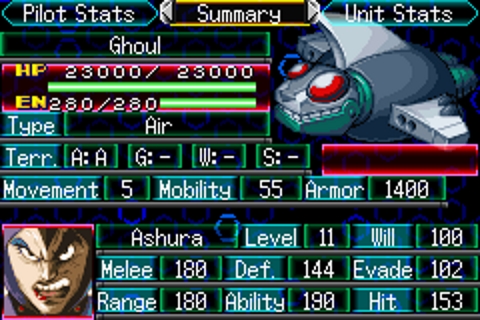 Baron Ashura is flying his Ghoul, a big flying blob that can hit hard-ish but is overally pretty non-threatening and is a non-issue in this mission anyway. Turn 1 We advance, they advance. THANKS FOREST. Turn 2 Mazinger and Sayaka team up and wound a mechabeast and that's about it. Boss is too slow to get in just yet. Enemy phase The enemy attack Koji and after killing the wounded mechabeast he harms anyone who comes near him. Turn 3 Boss kills a wounded mechabeast and so does Sayaka, this activates Mazinpower and Koji wounds another mechabeast. Enemy phase Koji kills all but one Mechabeast in retorts, wounding the survivor. Turn 4 Boss takes out the survivor, I do a little repair for exp and then Koji attacks Ashura. This triggers the event. 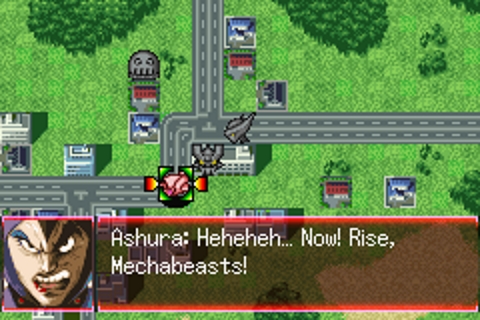 A single goddamn Mechabeast turns up, and Sayaka turns back to take it out. Honestly with how she's upgraded and performing right now she could actually take it. But this is a �cutscene� so another Mechabeast appears from nowhere. 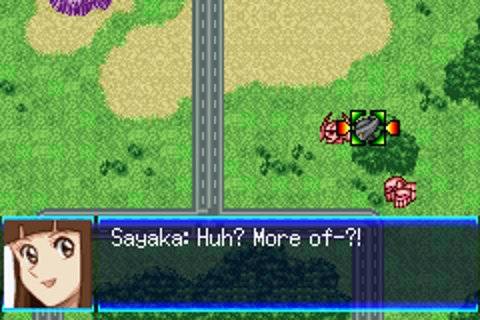 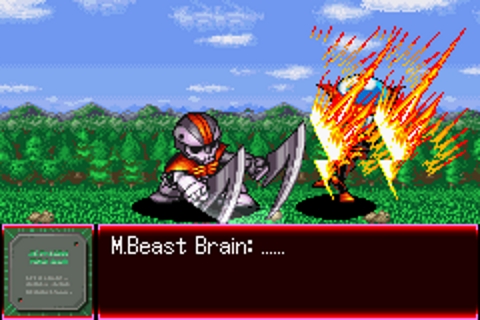 Sayaka is taken hostage, and so Koji allows himself to be taken prisoner along with Mazinger Z. Ashura's about to kill Sayaka anyway in spite of this compliance because that's how Dr. Hell minions roll BUT 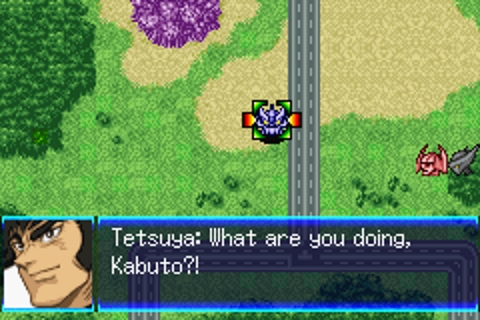 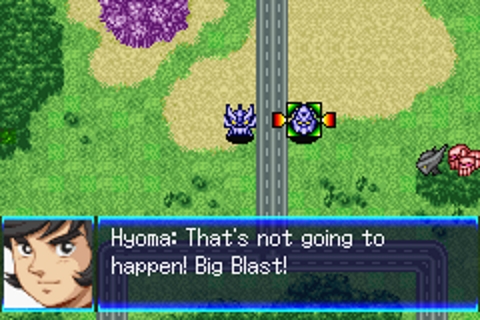 Reinforcements take out both Mechabeasts, and then even more reinforcements arrive in the Nadesico! Ready the Gravity Blast! 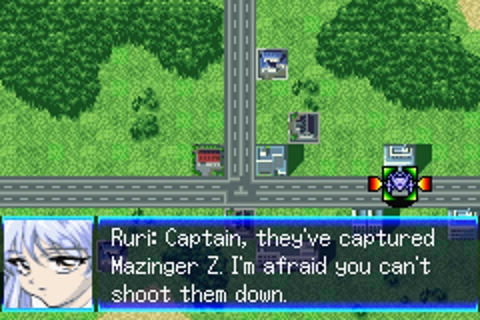 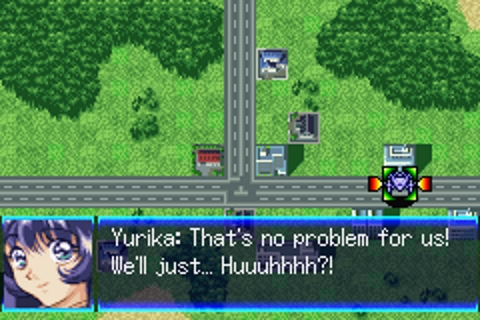 I hear ya Yurika, I hear ya. We pick up Sayaka because her unit is trashed, and away we go! 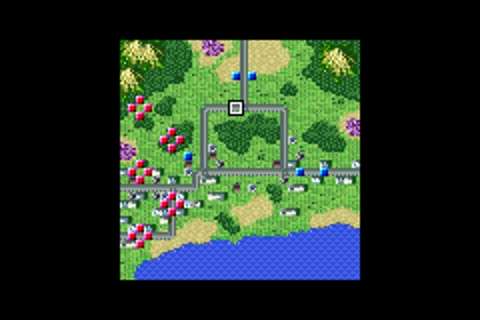 Yeah Boss is hosed. 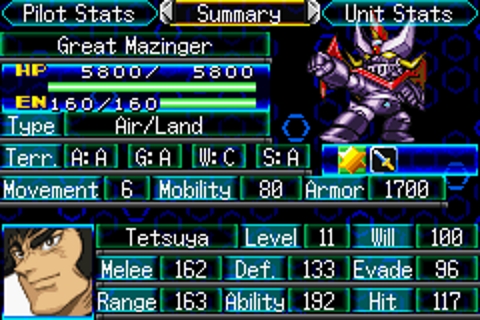 Great Mazinger is Mazinger Z but better in every way. Well, better than baseline Mazinger Z because our upgraded Z was better, and the Great we have now is actually inferior till we likewise throw some upgrades on it. Still, it's a very strong unit that can fly, boasts some really strong attacks and unlike Mazinger Z actually has access to a 0 EN cost attack with a sword. It also has Mazinpower just like Z did, so it gets stronger at a higher Will. Tetsuya is a solid pilot too, and comes packing Potential Level 3 that will be fantastic once we put some more health and armour on him. His spirits are Accel, Wall and Strike so he can get into the fight fast and dodgy bosses won't cause him too much of a problem. The big issue is he has no way of restoring his own health like Koji can, and my only unit really close enough to do repairs right now is about to die. Our turn resumes and we accel everyone who can and run towards Boss. It really doesn't matter. Enemy phase Tetsuya trades shots with some enemies, and Boss dies. Don't worry, I'll show you why it doesn't matter in a moment. Turn 5 Everyone just goes in deep. Tetsuya up north, Combattler moving more south with Guard up, Nadesico and Char in the middle. Enemy phase Tetsuya almost dies just fighting up top, he's a lot squishier than Mazinger Z due to a lack of upgrades. Turn 6 I have Yurika throw out Daunt, halving all hit rates and then I start swinging, a MAP wiping out three Mechabeasts before I move the Nadesico to line up hopefully for another one. Char moves in to bop a Mechabeast, Tetsuya (that I healed with lots of Trust) swings and wounds another Mechabeast, and Combattler V drops another and hits level 14. Enemy phase and Tetsuya starts the killing by taking down three in retaliation, activating Mazinpower and hitting level 12 in the process. The Nadesico wounds and wipes several mechabeasts, hitting level 13! We get the Luck spirit out of it. Turn 7 And we fire off another MAP, and with Tetsuya and Combattler V taking care of the last of their mechabeasts we've got two wounded ones left. We get told that Baron Ashura's Ghoul was attacked on the way out, and Koji's Pilder might have gotten away. Char finishes off another one and that leaves one very wounded one left. Enemy phase To my surprise the enemy attacks Combattler V. Still dies anyway! 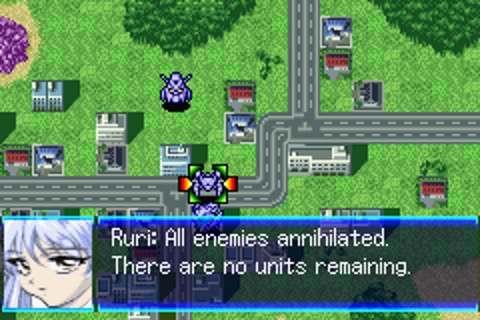 Oh boy! So we lost two units and gained two units, though this is only a temporary loss obviously. Boss Borot was destroyed and this lets me show you the screen where the game punishes you for losing units, by taking some of your money as costs for repairing the unit in time for the next mission. Generally speaking the more powerful a unit is the more it's going to cost you if you somehow lose it, with the costs starting in the thousands and working their way up from there. 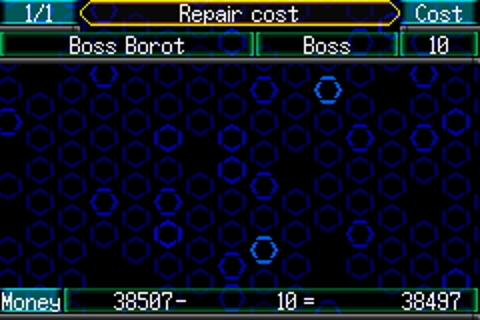 The Boss Borot is made out of literal scrap. 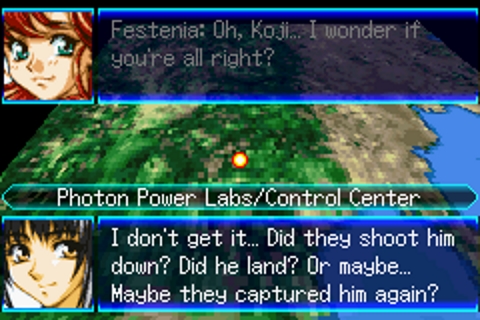 Everyone is super anxious about Koji being missing, with everyone who can basically going out on long-rear end patrols trying to find him. Char and the Nadesico crew have to go back home unfortunately, but come on, there's no way Koji could just DIE is there?! 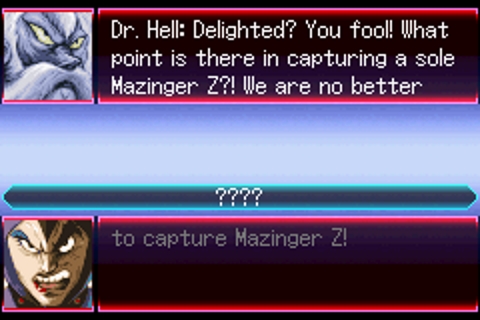 Baron Ashura returns in triumph to Dr. Hell because hey, they have Mazinger Z! Dr. Hell isn't happy with this because for the last 8 months there hasn't been a Mazinger Z on planet Earth so wow Ashura good job! Naturally Ashura grovels and begs for another chance, and Dr. Hell gives an ominous instruction to contact another group and hire their services. 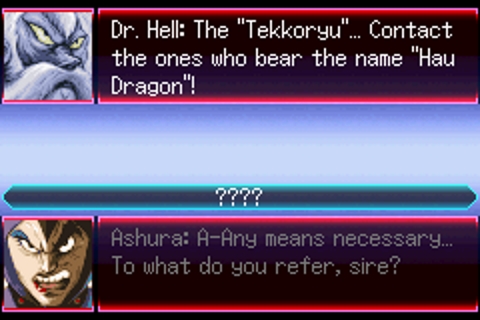 I'm sure this won't IMMEDIATELY become relevant next mission. Also Dr. Hell is great because he looks like he's 90% beard but when he actually pulls his cloak back the dude is loving JACKED. 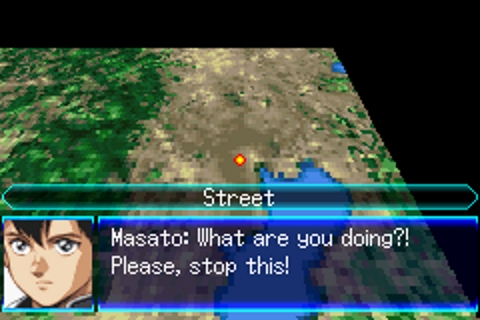 Then to close off the episode we go to Street so watch this kid's life gets ruined forever in an event in no way related to the dun dun duuuuuun Dr. Hell just dropped out of his beard. Turn count: 98 Next time on Super Robot Wars J! Hau low can we go?!
|
|
#
?
May 22, 2019 02:58
|
|
|
TheLastRoboKy please do us all a favor and have Boss die in every mission you can manage, tia
|
|
#
?
May 22, 2019 05:04
|
|

|
TheLastRoboKy posted:
I have on good authority that Koji can only die in lava. He should be fine.
|
|
#
?
May 22, 2019 06:48
|
|


|
Stage 14 I get overconfident and somehow, SOMEHOW, I manage to get Zeorymer shot down. Goodbye my money. Anyway I�m at 141 turns now.
|
|
#
?
May 23, 2019 17:32
|
|
|
Eopia posted:TheLastRoboKy please do us all a favor and have Boss kill the final boss of the game, tia
|
|
#
?
May 23, 2019 22:51
|
|
|
Boss Borot can't even self-destruct in J IIRC, which is a huge pity. Daily reminder that a high level strategy for late game in Super Robot Wars Impact was to do Self-Destruct shenanigans. It turns out that the combination of the Spirit Commands Self-Destruct, Revive, Move Again, Awaken, Multi-seat units, and the fact Revive brought people back with full SP let you do
|
|
#
?
May 24, 2019 03:05
|
|


|
Stage 15A: 4/63 turns Upgrades and equipment: Belzelute: Mobility +2(2), weapons +2(10), Booster, Apogee motor, evade +5 x2 Layzner: Mobility +2(2), Mega Booster, Booster, Apogee motor, +5 range x2 Archangel: HE Radar x2, Flight unit, Booster, Hit&away, support attack +1, hit rate +5 x2 Belzelute gets all S ranks as her full weapons upgrade bonus. I decided to invest in some mobility upgrades, because the mooks were pulling ~30% hit rates on Layzner and Belzelute, and this was higher than I was willing to accept.  Start of the stage. Strike and a Skygrasper also next to the Archangel as you start it, but I didn't take a screenshot of it. For the record, if anyone is seeing combat, you can assume they've got Focus up.  Layzner and Calvina move to deal with the initial wave of enemies, and their placement is important. They're scripted to rush to the bottom right part of the map, and so will only attack post movement. Their only post movement attack is range 1.  All the other folks head up north, they'll be dealing with reinforcements as they arrive.   Start of turn 2. The enemy reinforcements spawn when 4? of the initial wave are destroyed, and they behave the same way as the last. Tekkaman Dagger is also here, and he gets scanned.   Calvina moves here.  Eiji moves here; a group of enemies will suicide on him on enemy phase.     The others deal with some other group. Not pictured; Archangel moves one tile left after attacking.  Dagger attacks Calvina on enemy phase. It doesn't matter if he hits her, but she has to hit him.  Turn 3. Clean up and boss kill. Dagger gets scanned again, Calvina gets a Cheer from the Archangel.     Clean up.    Boss kill. Calvina blesses herself, and moves to intercept the second and final wave of reinforcements.  Turn 4. Karla needs to bite the dust for the stage to end, and Calvina is well in place to do just that. Karla gets Scanned, Calvina gets a Cheer.      The people who can reach get a few kills for money and exp.  And Calvina sends Karla packing, ending the stage. This ends the first route split for me. I was very strong on this route, though you really only need to draft Layzner to be super strong here. If you draft just one of Strike Gundam or the skygraspers I think you could do very well here, as well.
|
|
#
?
May 24, 2019 12:17
|
|
|
Well, I've stalled long enough.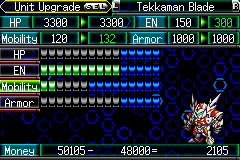 I give Blade 10 pips in EN because of course I do, then put the leftovers in Mobility. Might be about time to think about improving weapons instead. I thought about upgrading the Moebius, but Mu has conspiciously vacated its pilot seat for a unit which is not listed on my list and can't be moved back into it because he's an event deploy. That'll wait until next time. (Kira is also still an event deploy in the Strike. On the other hand, The Archangel will not be appearing at all today.) I hand Ruri a Hit and Away, Counter, and the Dustproof. The Aesties are put in Ground Frames, except Ryoko, who gets an Air frame to run away faster. (While almost everything in this mission is groundbound, I might have been better of leaving them in Air or even 0G frames...) Akito was my second choice for the Dustproof, but I give him the Solar Panels instead. 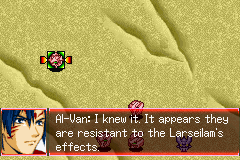 As the map starts, we see Ja-Mu and Al-Van killing some Radam, and then trying to pull a Coldsteel the Hedgehog on us. Why does anyone think this guy's cool again? 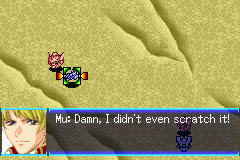 They follow up by cutting a bunch of our mech's HP in half while having barriers that our fighter plane can't break through. Then Dancouger shows up to distract them with artillery fire and lure Ja-Mu into a trap. Since he's supposed to be in a prototype they can't afford to lose, this is enough to force a retreat.  Moon Dwellers makes some parts of the Larsellium Canceller and Man-made Vorlent plot points feel odd. (Here, even Al-Van seems to have no idea the canceller exists until later, wheras in Moon Dwellers, a new character makes sure to break it while Granteed is escaping in the first place). Okay, Mission 10 Starts for real.    The scouting party and Dancouger have moved to the southwest corner of the map for some reason, while the Nadesico and her deploys are over to the southeast corner. 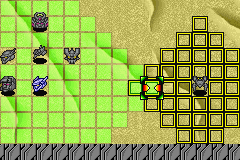 First, I load Kira onto the Nadesico and move her over to the west at full speed to intercept the other Force-deploys I want off the field.  Everyone else moves up as far as they can. Enemy Phase: No one gets into range. Turn 2: Everyone who needs to gets into the Nadesico. 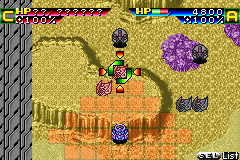 Granteed gets in range to start Cleaving space bugs. They do double digit damage, so I'm not too worried. 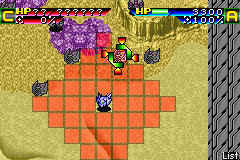 Blade also gets into range to get started on things. 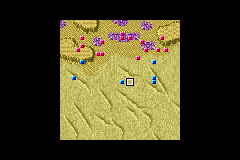 The Nadesico also heads north. Blue Earth stays back to avoid drawing fire from Blade. Enemy Phase: Granteed clears out most of the enemies in range. One survives because she didn't have the morale for O-Slave yet. Another was moving into range. On Blades end, he has a harder time landing killshots and can only Voltekka the last one. Turn 3: Granteed takes out the full-health enemy, leaving just one to die on Enemy Phase. 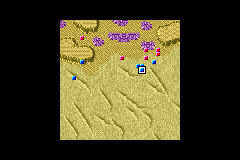 Nadesico snipes one enemy who was still close to the center-top of the map, then moves to join Blade in the more populated corner of the map. Blade destroys a full-health enemy. Hikaru moves next to the Nadesico and snipes a weakened Radam with a Wired Fist. Blue Earth moves next to Hikaru, for lack of anything better to do. 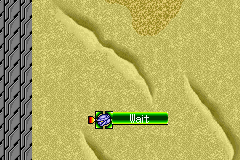 Akito, on the other hand, casts focus and starts heading South... Enemy Phase: All but one enemy dies - the survivor somehow withstood a Voltekka. Turn 4: This is going on longer than I hoped. Ruri takes out the last Radam, then prepares to move south... 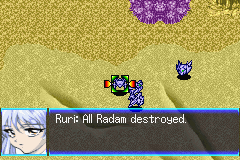 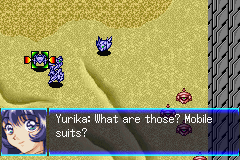 Which causes the Death Army to spawn before she can. 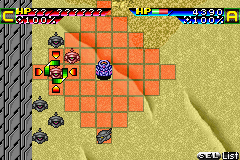 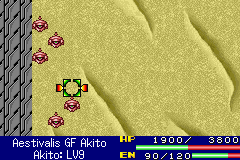 Granteed starts heading south, taking out an enemy on the way. Akito too. 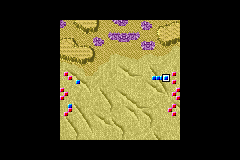 And Blade, Hikaru, and Aki. Enemy Phase: Granteed takes out a few enemies, but a lot of them decide to go after Akito instead. But even after blowing all his energy, he still has his Immediate Knife to fall back on. Three survive on that front. On the other side, Everything that can reach the Nadesico dies, three more trade fire with Blue Earth instead, and one can't get in range of anybody. Turn 5: 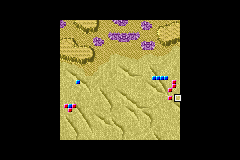 Seven enemies left. Let's do this. 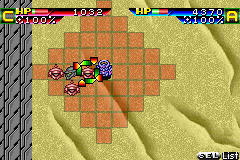 Granteed clears a path for Akito to run away. 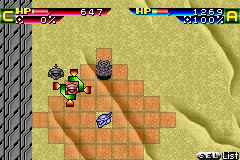 Akito makes it a fighting retreat with his rifle. 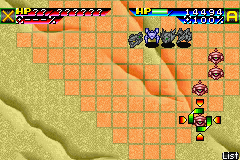  The Nadesico aims for the most distant, highest health enemy, then heads south under Accel. 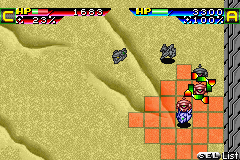 Blade takes out one more, and... 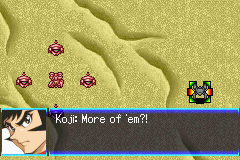 Time for a boss to show up. 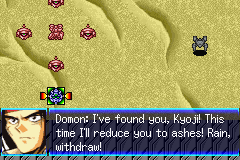 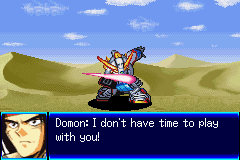 And a new ally. (Of course, since we've already seen Blade, everyone has this guy's number already.) 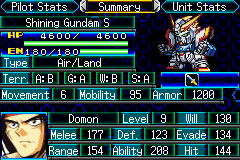 Domon and the Shining Gundam are kind of a hybrid of Super and Real. In this game, that means they're unimpressive at first, but at the top of the heap once fully upgraded. With his Super Mode, he can deal a lot of damage once his morale is high enough. 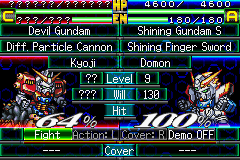 But his odds against the hardest boss we've seen so far do not look good. I don't waste the energy for a Shining Finger Sword and do a plain Beam Sword attack on one of its flunkies instead. Enemy Phase: Domon somehow manages to survive. Turn 6: Everyone approaches the boss as best they can. The Nadesico fires a missile from max range. Enemy Phase: Domon dodges an attack. Turn 7: A lot of units can get into range to hit the Devil Gundam, but not a lot of them can take a hit in return. 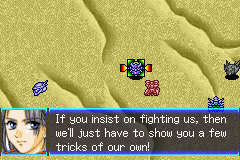 Granteed can, of course. 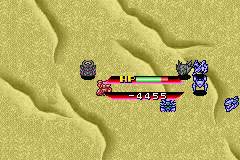 And the Nadesico. But the real issue is that I want to set up for Support attacks on the next turn. 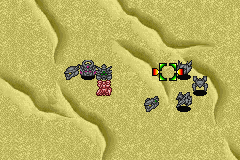 This will have to do. Enemy Phase: 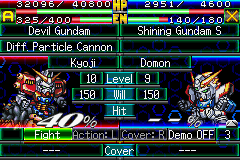 Of course, that puts lots of my units in range of a MAPW. I just need to accept the coinflip odds. Turn 8: Here we go. 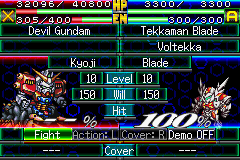 Starting with a Voltekka and Gravity Blast... Follow up with Domon starting a chain with Calvina... 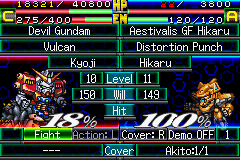 Hikaru and Akito come in from the other direction... 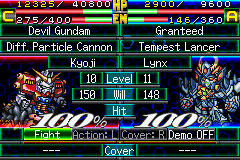 Shuffle Granteed around for a Tempest Lancer.  It's not down yet, but if I survive, that'll happen next turn. Enemy Phase: Domon survives a MAPW hit because I repaired him with the Blue Earth last turn. Turn 9: Now I can actually think about setting up a finishing blow that doesn't let him get away. Voltekka and Gravity blast bring him close (From around 12000 to 4900)...  For the heck of it, Blue Earth creates the opening for Calvina's Tempest Lancer finisher.   Mission Complete! Unfortunately, it shows off its super regeneration and runs away to fight another day. 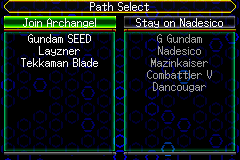 And the routes split. It seems I'm better off going with the Archangel. (It seems Calvina is developing a dislike of Natarle. I didn't quite expect that, though perhaps I should have seen the signs. If you look back, Calvina's reaction to holding Lacus hostage was a "...Really? That's the best thing you can come up with?") 9 turns,
|
|
#
?
May 25, 2019 03:16
|
|

|
 Ladies and gentlemen, and ladies and gentlemen that are sewn together, this one's going to be rough. 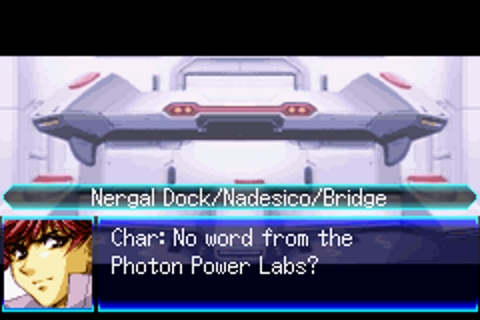 Koji's still missing, and everyone's pretty shaken up about it. Even worse, they haven't even found a trace of him. Not even his Pilder! �What's a Pilder?� you ask? Mazinger Z and Great are operated by a docked flying machine in their heads. That was the part Koji got free before he vanished. Also apparently someone attacked the corporate headquarters of some Nergal rival, who had been up to some shady stuff. Shadier than even Nergal! 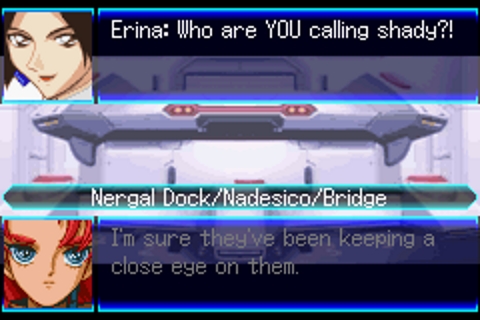 It's you Erina. Turns out Mithril is pretty switched on regarding everyone's dirty laundry, and has been hearing whispers about some old group of the past coming back up again. But is it true? Would it existing ruin some random kid's life? 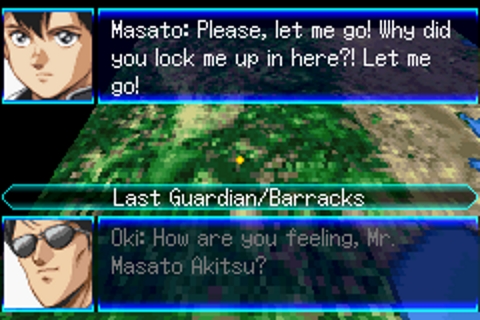 YOU BETTER BELIEVE IT 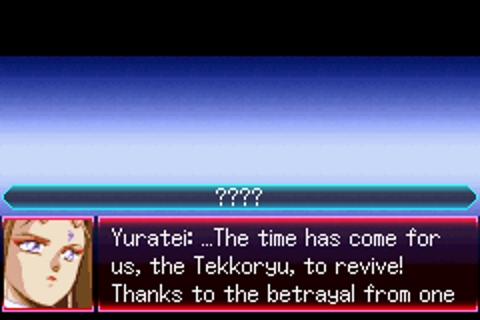 15 years ago an evil organisation poised to take over the world was betrayed by one of their own, but now they're back and holy poo poo you have no idea how hilarious the villains of Zeorymer are. Like I'm going to hold back on saying what's up just for now but let's just say the phrase �set up to fail� is a motherfucking understatement. The leader of Hau Dragon sends the man she loves to assist Dr. Hell in attacking the Photon Power Research Laboratory, as apparently Dr. Yumi knows the location of where their big bad missing Zeorymer is. Dr. Yumi is goddamn well connected.  This might seem rude of Saiga to say, but don't worry about it he has chronic backstabber syndrome in his genes. He's also totally right we're going to dust off that other idiot. I don't even remember his name, I won't remember it till I see the screenshots I took. I'm not even going to go back and edit this to put his name in. 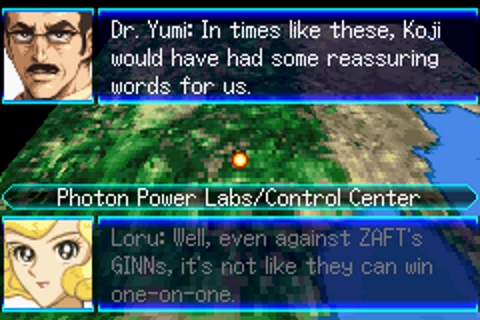 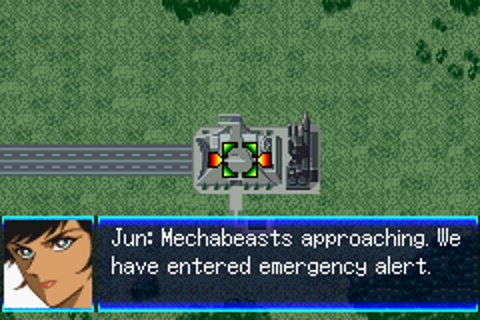 Another horde of Mechabeasts is coming and the UEFA's attempt to stall them failed utterly, so it's up to Great Mazinger to hold out till reinforcements come, because even the Boss Borot is out searching for Koji right now.  The Photon Power Research Laboratory is a powerful defensive position, but also regenerates health and energy by about 20% so if you were just playing casually you could park Great on the corner there and let them come to you. We're not going to do that. Turn 1 We accel and move in to tag a mechabeast. Enemy phase the enemy attack but this time Tetsuya can take a hit! 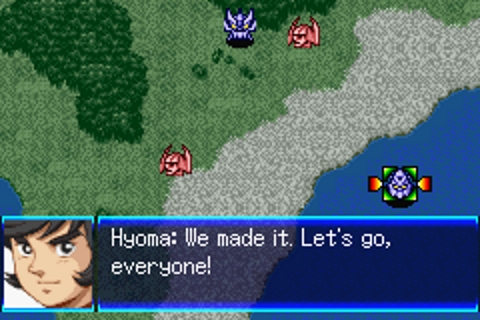 Turn 2 Combattler V arrives right close by, which is good. They take out a mechabeast and then so does Tetsuya, leaving one left. Enemy phase the mechabeast attacks Combattler V and gets destroyed. 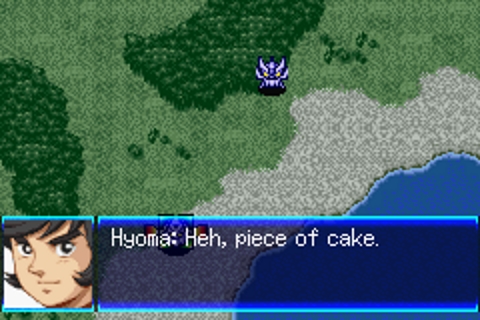 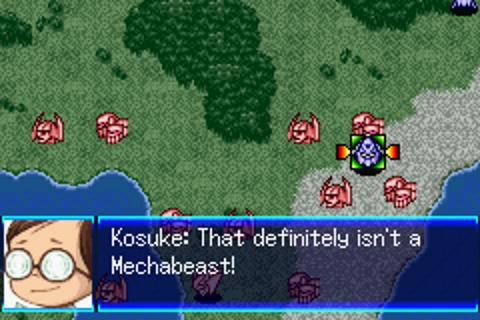 Heck yeah we did that in an actual reasonable amount of time, which means it's time to get totally hosed. More mechabeasts are here and their reinforcement buddy from the SECRET ORGANISATION is here. He wastes no time and moves in on Dr. Yumi, demanding he reveal his secrets, and Dr. Yumi more or less shows he's got no poker face and reveals he definitely knows something. 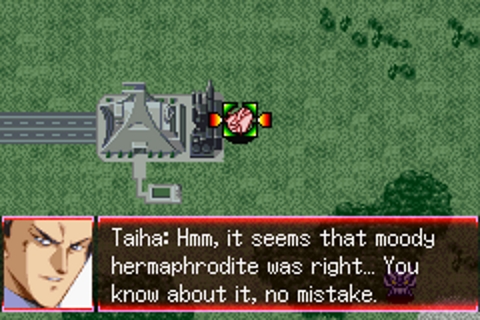 Can you guys NOT, they're TWO PEOPLE SEWN TOGETHER. It's not that difficult to figure out. Being Baron Ashura is putting up with some goddamn bullshit. 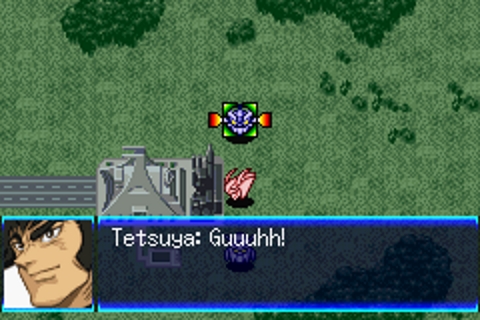 Oh and you know what would make this fight more fun? Yeah if we took cutscene damage on all our units. Lots of it. They're going all out to make Taiha not look like a complete jobber. 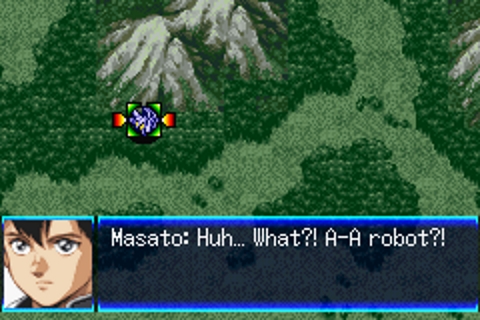 Oh thank god an ally I can't use. Taiha recognises it and is like �I HAVE TO KILL IT� and goes in for the kill, or at least to ruin the kid's life. 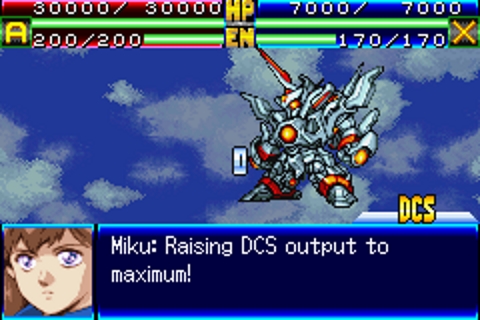 Zeorymer is broken by the way. 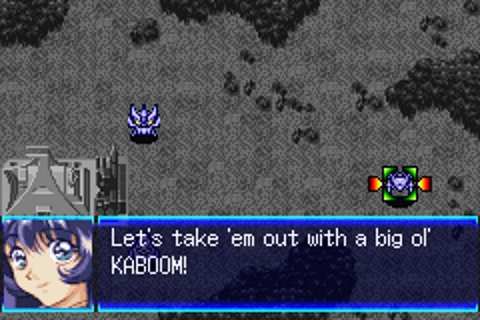 At last, some broken poo poo I can use. We throw Char out to fight and get ready to store the horrendously imbalanced unit that would make our lives easier inside the Nadesico. Also, it's still the enemy's turn so they advance on our unfortunately damaged heroes Turn 3 We move to get stuck in, the Nadesico and Char move in and attack, and Char combos a wounded mechabeast out of existence. I move Tetsuya up just enough so he can get some health and energy regen from the Power Labs, and pop Vigor on Combattler so hopefully that's the wounded dudes made up for. I also throw Guard on Combattler V and send it in deep and do a Combo on a pair of mechabeasts to soften them up. Zeorymer I send towards the Nadesico with infinite sadness. Enemy phase some of the mechabeasts suicide themselves on the Combattler, and two throw themselves to death on a Gravity Blast. Some mechabeasts fire at Combattler at extreme range, which is annoying! COME AND FIGHT LIKE MOOKS. Turn 4 We keep moving up with the Nadesico and a more-healed Tetsuya (I threw Trust on him as well just to speed things up) taking a kill a piece. Combattler V moves up to the long ranging cowards and picks a fight with one of them. That's about it for that one. Enemy phase Tetsuya uses Counter to hit a mechabeast before it can hit him and kills it. The rest commit Combattlercide. The Lanstar goes for Char! And misses. We rough him up a little for it. 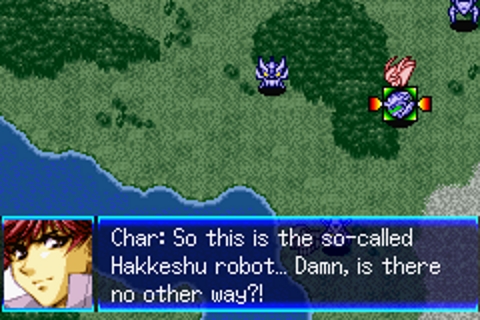 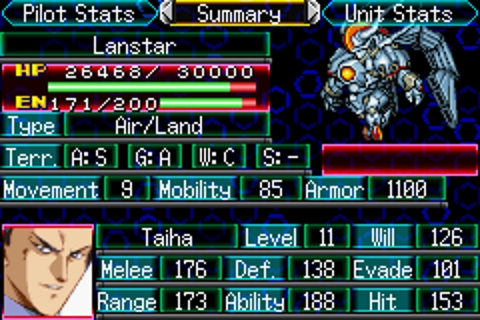 I suppose we should talk about Lanstar of the Wind now. He's not even remotely as scary as he seemed after beating the piss out of Great and Combattler just now, but that's the power of cutscenes. Even with the small number of people we've got right now, we can wear him down pretty fast and tank most of his damage one way or another. Turn 5 At this point it's time to ignore that last mechabeast and hope for a chance to counter, because we need to take Lanstar out. I also kind of want to draw him north as we chip away at him, for reasons involving more loving reinforcements. Enemy phase Tetsuya pops that last mechabeast, and the Lanstar almost takes out Tetsuya. Turn 6 We pop Tetsuya back on the Photon Power Research Laboratory and then oops the Nadesico kills the Lanstar. 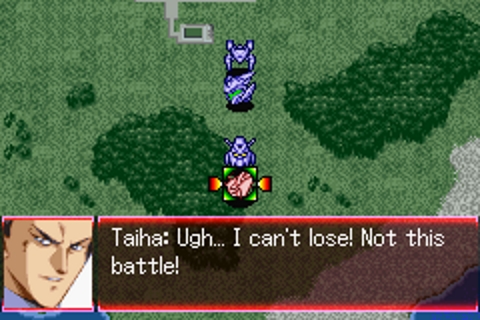 Taiha dies. Yeah that's it. He turns up for one fight, clowns on us, then gets clowned on. It was the weirdest circus that ever came to town and it's loving done. But you know who's not done? 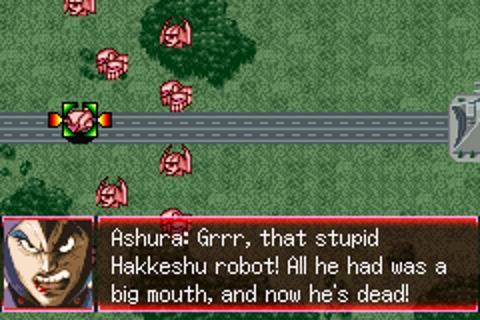 Us. We move everyone else onto the labs as well, just for the little boost because Ashura has a pretty mean trick in store for us. But then again that's kind of their thing so you go Baron Ashura, I'm on your side. Only four of the eight mechabeasts move in, Ashura holds their ground. Turn 7 I have the Nadesico use a repair kit on poor Tetsuya cause he just needs to get back out there. I have Combattler V use a support attack with Char to wipe out on Mechabeast, and then the Nadesico and Tetsuya pick on some mechabeasts of their own, with Char finishing one of them off because honestly I think he needs the exp a bit. Enemy phase Tetsuya hits level 13 off the back of killing a mechabeast. The rest of them are moving way too slow in getting towards us. Turn 8 We sally forth again to smite our foes. Or something. The Nadesico murderates one fool, and Char gets another. Enemy phase a few more mechabeasts die, the Ghoul trades fire with the Nadesico. Turn 9 Wiping out the last of the Mechabeasts we pop the Ghoul with what we have, Combattler V doesn't take it so well in retort. Enemy phase Combattler V's health is put down pretty hard, but the Ghoul hasn't got much left in its tank. Turn 10 We pop the Combattler into the Nadesico and with a Char support attack we Gravity Beam it down. The Nadesico hits level 14, with Yurika learning Support Defence Level 2, and the spirit Guard being added to the pool. 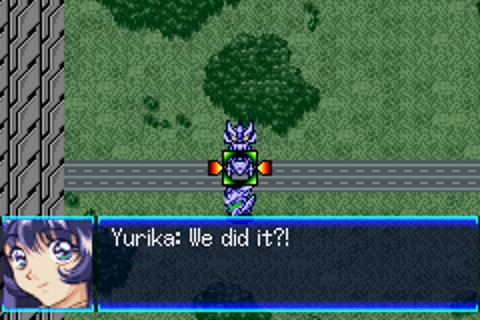 So we've just fought a lot of super-type enemies and two bosses in two waves, so we should be done right? 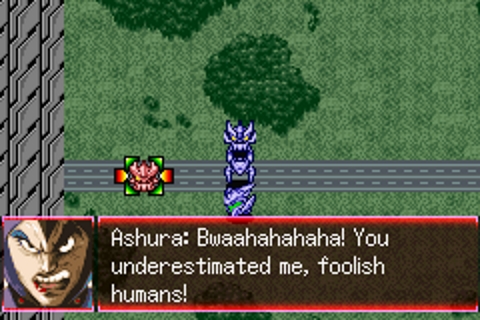 IT'S NOT OVER YET. Holy poo poo if this isn't one of the most heartbreaking things you'll see in your life. The original Mazinger Z converted into a weapon of evil, with Baron Ashura at the helm. Everyone hates this. 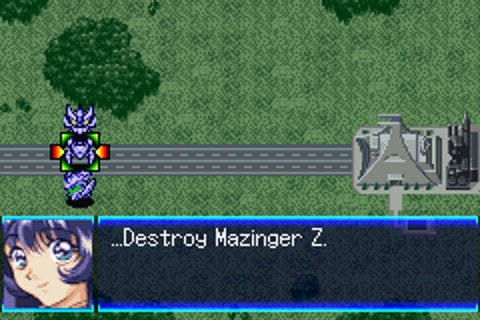 Everyone really hates this. It's like having to fight your dad when he's being mind-controlled by Dr. Hell or something. But that's still not all. 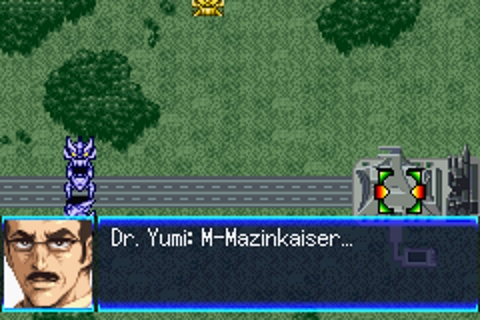 Something very big and very imposing just turned up. And it's yellow on the map. Baron Ashura is having none of this, and sends one of his emergency ambush Mechabeasts out to take care of business. 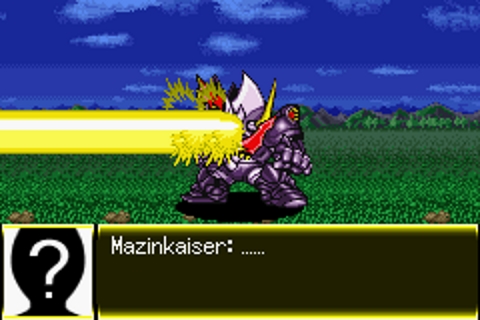 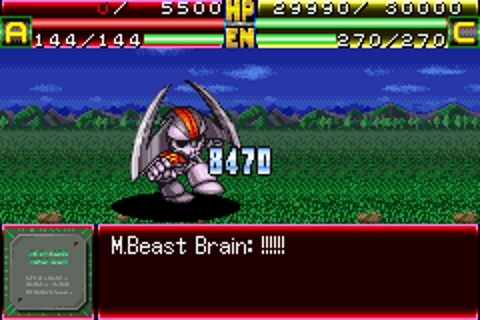 Yeah. That's kind of intimidating for a �weakest attack in the movelist�. But at the same time Mazinkaiser runs over to the Power Labs and starts to rampage.  Oh look who turned up! THANKS BOSS. Sayaka's with them and they tell us Koji is inside of that thing, which upsets everyone and Domon just automatically assumes DG Cells are at work. GOD Domon not everything is about you. In fact most of this route split is nothing about you. 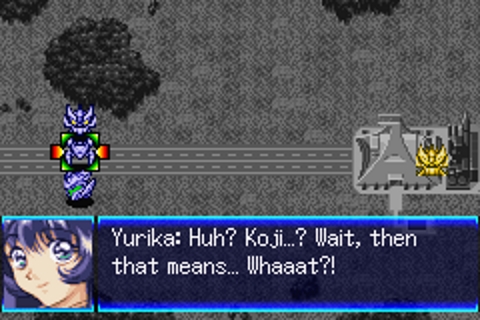 I hear ya, Yurika. 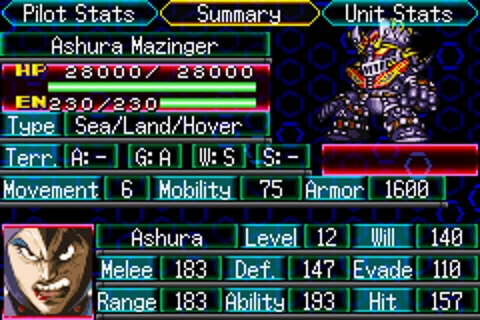 Okay with that out of the way let us take a look at Ashura Mazinger who is clearly in the wrong map the leather club is two blocks down. They're a goddamn tanky unit and Ashura's got some decent stats to them. But they're a super and we have all supers, and they can't cast Spirits. So we can just beatstick him down pretty hard as we want to. 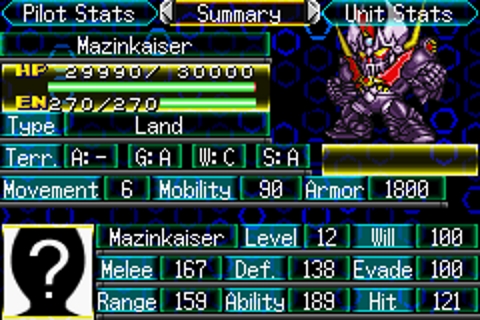 Mazinkaiser is a different kettle of fish. Stat-wise our masked Koji is not nearly as strong as Ashura is right now, but has way more armour and its weapons are way stronger to boot so it actually comes out ahead in terms of power. Mazinkaiser needs to be approached carefully too, since the objective of this stage involves reducing Mazinkaiser down to 10% or less of its health and destroying it is game over. It's also a neutral unit so it's entirely possible Ashura Mazinger and Mazinkaiser could attack one another, but it's not going to come to that. Great and Char take swings at Ashura Mazinger to round off the turn. Enemy phase Ashura tries to Breast Fire Char, but he's a bit too mook for that. Ashura I mean. Char' not a mook. Neutral phase Mazinkaiser leaves his punch-hole and starts gunning for us, which is good cause he's off the regen tiles now. Turn 11 We creep towards the power lab, while working Ashura down to almost nothing, so I sneak out Combattler V and have it finish the job. 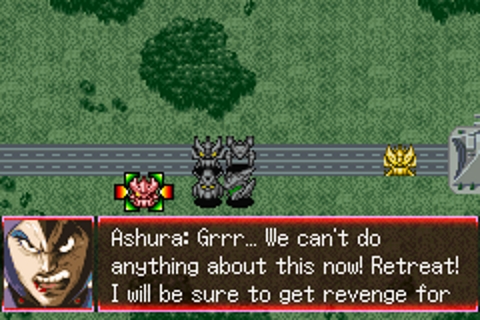 Ashura runs off after his usual swearing of revenge which takes like 10 dialogue windows to get through, which leaves... oh boy. Boss moves down to assist. We're going to need it this time for sure. Neutral phase and Mazinkaiser pops at the Nadesico but Char takes the hit. Turn 12 Boss runs down and repairs Char, and hits level 11 because of it. I use a propellant tank on Char as well since he was pretty low on energy, and a cartridge on Great to give him back his one ammo shot best attack I never mentioned until now. IT'S FINE. Yurika uses Daunt just to give me a little room to not die, and everyone who can pops Wall. We surround Mazinkaiser and bring it down to about 7000 hp. We need it down to about 3000 to pull this off. Neutral phase the Nadesico gets it down to just shy of what we need to end the stage. Turn 13 With a gentle tap of its missiles the Nadesico crosses the threshold and whew, stage over. 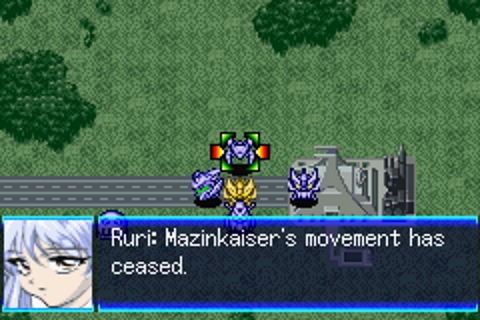 Thank goodness. Four goddamn bosses. FOUR. Koji, what the gently caress do you think about that? 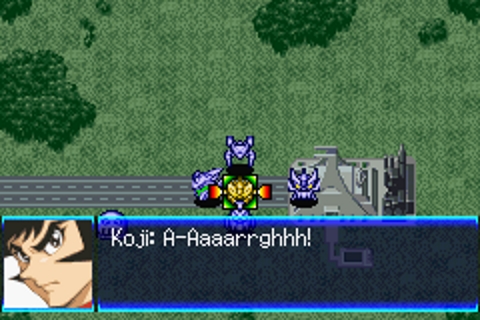 That's my boy. 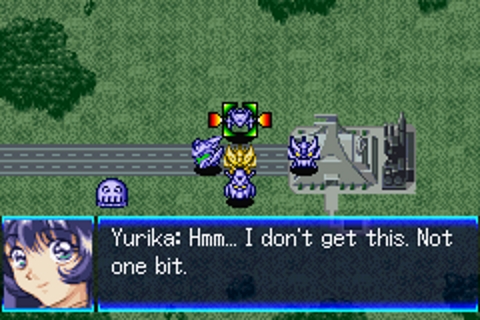 That's my girl. 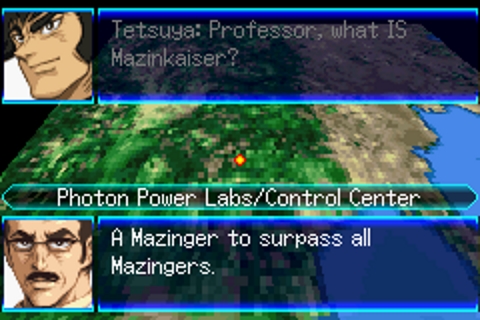 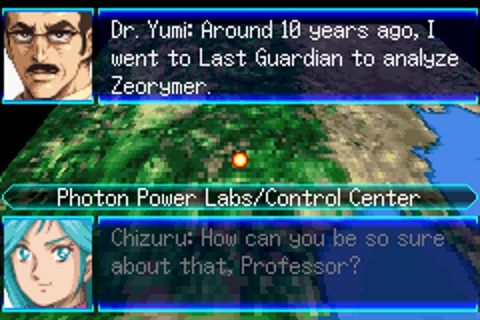 Dr. Yumi basically explains that Mazinkaiser was a concept Koji's grandpa came up with, but had no idea had actually been finished somehow at some point. As for Zeorymer (which is being sent to join us) apparently Dr. Yumi knows it exists because a few years back he was sent to take a look at it, and couldn't figure any of it out because it's loving nuts. But that's fine I know exactly how it works. 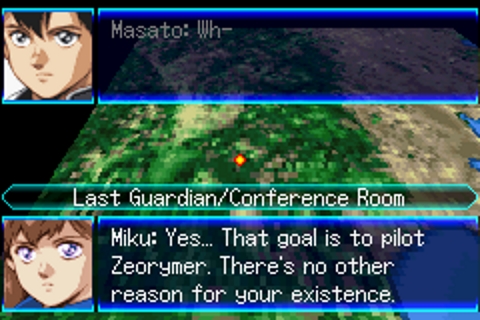 Zeorymer runs on the latent energy produced by ruining this kid's life. Turn Count: 111 Next time on Super Robot Wars J: The Boaz are back in town.
|
|
#
?
May 26, 2019 08:40
|
|
|
Stage 15 After putting a fee points into armor, Zeorymer becomes indestructible. Damaga is just not a thing it has to deal with anymore. It�s almost disgusting. Of course since I�m going for Great Zeorymer, I won�t get to use it as often as I like. 152 turns. https://youtu.be/aWxBrI0g1kE
|
|
#
?
May 27, 2019 07:24
|
|
|
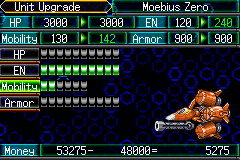 Before starting mission 11, I upgrade the Moebius Zero finally. I finally can check whether people besides Mu can pilot it. Turns out the answer is yes, but only he can use the Wire Guided Gunbarrels attack (Which logically should be the case, according to Seed Background material. But there's no real indication of this condition in the game, besides the attack disappearing if Mu isn't in the machine.) This means the EN upgrades won't do much good later on, but they're cheap so I'll cope. Mission 11: The Dessert Tiger It turns out that the one person the Nadesico was supposed to distract didn't take the bait. Fortunately, this is a short mission.   As usual, the enemy starts a good distance from us. Turn 1: The Archangel accels ahead as far as it can due west, but first I have Blade, Calvina, and Mu dock for future use. Aki stays out for now. Enemy Phase: Some of the enemies move towards us. Turn 2: 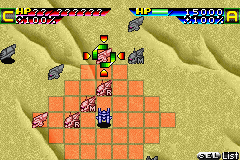 Well, The Archangel can make it into the fray now. I have Natarle cast Guard, just in case. Though I probably won't need it. 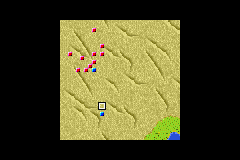 Aki decides to head south. Enemy Phase: Everything that can attacks the Archangel. A few of them turn out to be too close for the Archangel to use its best weapons on, but by the end all but four enemies die. However, the last enemy to die was the last enemy who could move, which might have stalled out the next wave a bit by overriding the trigger with the turn change. Turn 3: The Archangel finishes off a weakened enemy, planning to Hit and Away to the south.  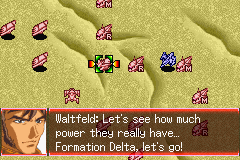 It works. The map just changed into an assassination mission. 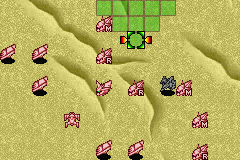 The Archangel moves down, ready to send out all my mechs to dogpile Waltfield. 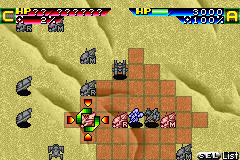 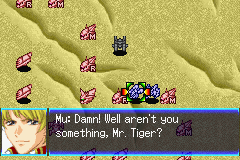 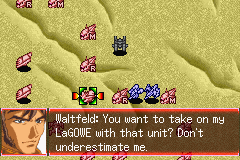 First is Mu, snagging a Support from Aki. 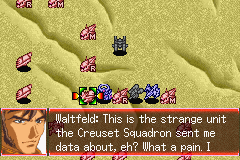 Calvina reduces him to critical HP. 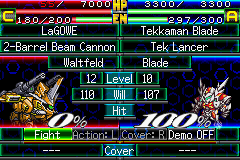 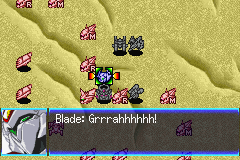     Aki repairs the Archangel for extra exp, then Tekkaman Blade emerges to finish off Waltfield.   And that ends the mission. It's a shame Waltfield is so outclassed, actually. He's the most entertaining villain we've seen so far. (And not just because a bunch of the pilots I'm not using run into him on a shopping trip after the map ends.) 3 turns, ...And Mu gets locked into the Skygrasper next mission because everyone is marked as an event deploy. Not again... MightyPretenders fucked around with this message at 00:56 on May 29, 2019 |
|
#
?
May 29, 2019 00:53
|
|
|
Super Roboky Draft Wars Episode 14 � Boazing me to death This is where the fun goes to die. 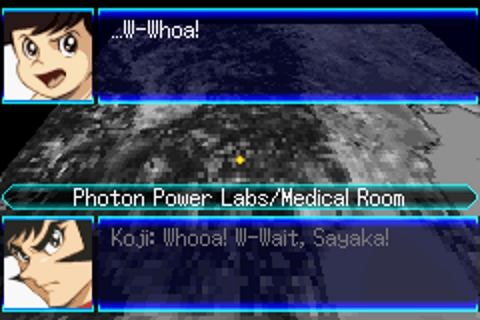 Koji wakes up and Sayaka throws herself at him, which of course according to the rules of anime results in like most of the cast walking in together at the same time and thinking they're about to start shagging. Koji's little brother Shiro thinks it's funny, Boss is super upset because he still somehow thinks he has a chance. 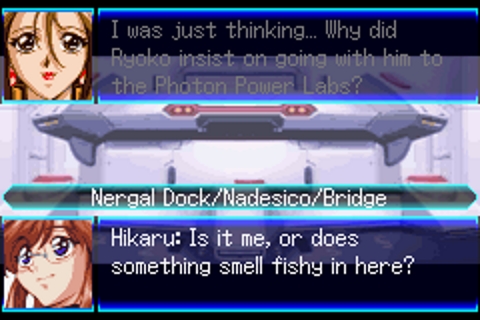 Back at the Nadesico Yurika is upset that she didn't get to go see Koji, and also that one of the female Nadesico characters went instead. It's sort of a running thing in Martian Successor Nadesico that Akito somehow manages to keep attracting all these women towards him, when he's just mostly running away from committing to his childhood love (Yurika). It's a lot less Harm-y than it sounds. Everyone also talks about the Hau Dragons and how (hau) it's very likely that tech corp that got blowed up by them was actually them covering their tracks, and the corp's tech is used ubiquitously throughout Earth and Space so if they want to just ruin everyone's life they can do it. Luckily Inez has a solution. 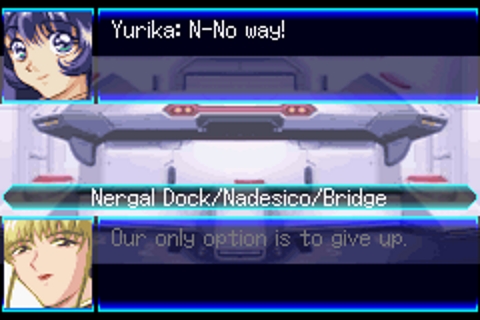 I swear to god if they don't throw her off the ship in the next five- 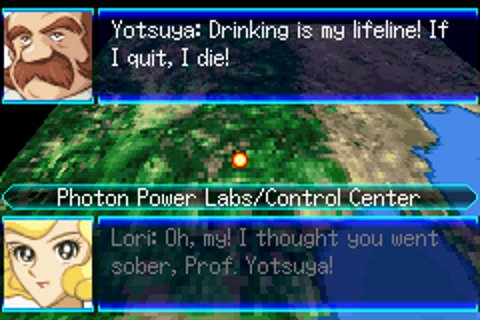 Meanwhile back at the labs, Mazinkaiser is so amazing the dude in charge of maintaining the Combattler V machines slips back into alcoholism. Just kidding he never stopped. There's a bit of a conversation about the plans to build another ELECTROMAGNETIC SUPER ROBOT by the UEFA, apparently as part of a plan established by Professor Nanbara, the now deceased guy who made Combattler V. Dead scientists giving kids their robots is kind of a 70s thing don't worry about it, Japan just had a more robust economy back then. 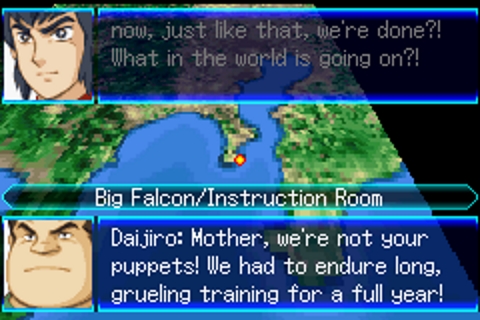 MEANWHILE at BIG FALCON HQ the team for a new robot has been assembled after a gruelling series of training exercises that included fighting a shark. No I'm not kidding. Three of the five pilots are the children of the woman in charge, another dude is a cowboy or a racing car driver or something he has a bullwhip I don't loving know, and the last one is a ninja because OF COURSE. The kids get mad at their mom because instead of having childhoods they had shark-fights. To shut them up she shows them their new ride. 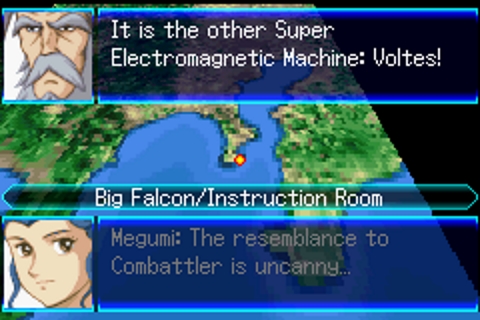 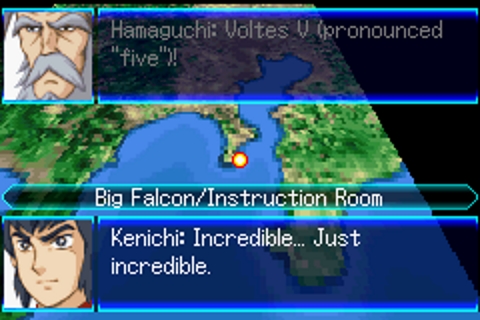 Translator's note: I forgot they tell you about how to pronounce it and spat up coffee on myself playing through this again. But there's no time to marvel at the pronunciations of roman numerals! An enemy force is attacking! A new one! 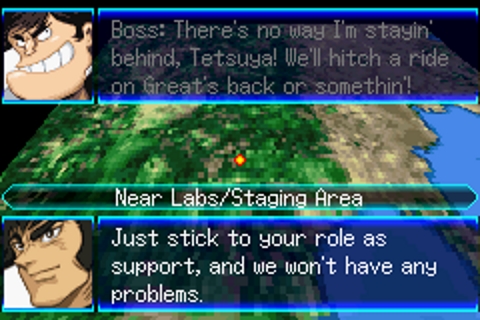 This new warning interrupt's Koji's training time and the usual suspect mobilize to go engage the invaders, Koji and Sayaka left behind because Koji's still not got Mazinkaiser under control and Sayaka's new ride isn't finished. But it's okay guys we've got Boss and he's had sensitivity training so he won't say anything loving horrible this time I'm sure.  Yeah I know you guys have been learning how to pilot these things for all of like one scene transition but it's time to fight. Don't worry about it. Also don't question it or you'll have to fight TWO sharks. I'm STILL not kidding about the shark fighting.  Behold the enemy, the Boazonians who have very large buffalo-style horns on the sides of their heads and you will never ever see them because of the portraits. They have a caste system where those without horns are considered lessers in society so expect lots of horn-based racism against humans. That guy is the leader of the invasion, but he leaves the actual fight to some other guy and goes off to relax after a long space journey. 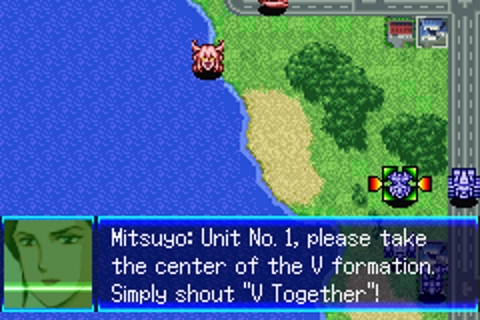 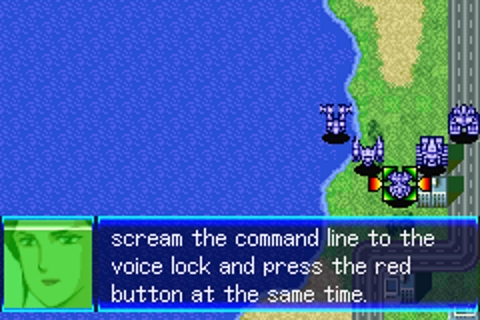 Yelling-based technology folks, don't forget to SHOUT IT OUT. 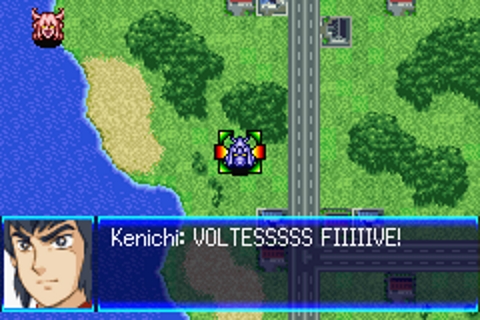 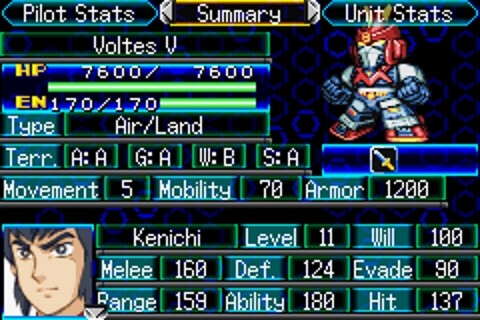 So here's our boy Voltes V. Not one of my draft picks but I have no other unit on the field so I can use him for a bit. It's basically Combattler V all over again, a slightly fragile combiner with some effective attacks. We won't be using this lot for very long. Keichi is the main pilot and comes with Potential Level 3. The spirits our crew has is very spread out, so we get Strike, Snipe, Wall, Focus, Accel, Fury, Guts, Gain, Spirit, Tire, Trust, Luck, Alert, Scan and Break. I forget if we've seen Spirit and Tire before so I'll just repeat them. Spirit buffs your Will by 10 and Tire lower and enemy unit's Will by 10 with each cast. Kinda handy!  Well as you can see we've got two units to immediately tangle with and everyone else is a fair bit back. They're going to take their time coming down to us, but if we entice them into the middle-ish of the map everyone who reinforces us will be relatively close by. Relatively. 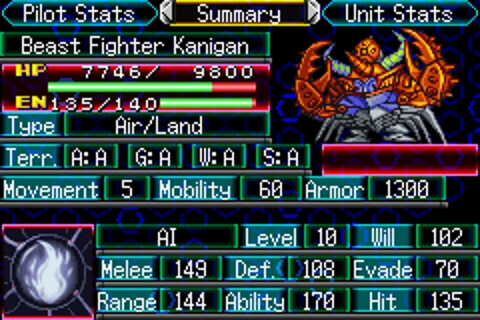  So here's the two Boaz units we're going to be facing today. There's also a boss unit but I forget to screencap it till later and he's moving last so gently caress iiiiit. These guys are probably the most dangerous units to face at this point in the game. They're big super units that hit hard and have a decent health pool. They also tend to come in generous numbers and they can combo too. I'd say they're probably the first time you'll come in real danger of losing units when they choose to dog-pile your combiners, because SRWJ enemies tend to prioritise things they can hit that have less chance of enduring their attacks so combiners almost always eat it the worst. Time to murderize some Murder Beasts! Turn 1 � We land Voltes V in the forest and throw on some Spirits and park it in a forest. Since we're going to be putting it in the Nadesico as soon as it arrives we can just go nuts with SP here. Enemy phase the enemy takes some shots. Our retaliations do very little damage though. Those enemies who want to come down to say hell, do. Turn 2 � We take another pop at the humanoid enemy robot and we're wearing it down a little! Enemy phase � A few more back and forths between Voltes and co with no one dying. Uneventful but the end of Turn 2 means we get some allies!   Just Char and the Nadesico, the other guys are coming from the labs so we won't see them for a little bit yet. Izumi sums up my feelings on the last level and its constant reinforcements and bosses. Turn 3 � We try to rush to the enemy and rush Voltes V back towards the Nadesico. GOOD TIMES. This is going to be a long mission. Enemy phase almost all the enemies are moving now. Combat might actually join soon who knows?!  Speaking of joining combat. Turn 4 � Combattler V, Great, Boss and Zeorymer all deploy up in the north-eastern part of the map, so at the very least I have some units that can fight back (and one that can just get in the goddamn ship). We move everyone in as fast as they can, largely thanks to Accel, and the Nadesico gets into a CRAB BATTLE. Char almost finishes it off. Still, at least we've got some progress. Enemy phase the Nadesico wipes out both enemies with counter-attacks, with Char taking the hits from both with support defence. A giant blob of angry alien super robots is coming and I'm scared a little when I probably shouldn't be. Turn 5 � Yurika pops daunt to lower everyone's hit rates, and I get my big boys to start wading in. The Nadesico, Char and Great soften up one guy, and I throw literally all my defensive spirits on Combattler V and wade it right into the middle of the enemy so it can start kicking rear end. Enemy phase and Combattler V gets literally surrounded, and beats the every-loving hell out of everyone who even looks at it funny. That's the power of Guard ladies and gentlemen. One unlucky Boaz even gets destroyed. Turn 6 � I pool my attacks to drop another two Boaz, and send Combattler V in even deeper with Guard on again, because there's no good reason not to do it to be honest. I have Boss top off the health of the Nadesico and he hits level 12, learning Support Attack which will come in handy, and Accel which will mean he can mostly keep up in a fight to actually support. The Nadesico I have perched in a position to just start MAPing all these idiots. Enemy phase they just SURROUND Combattler V. Which is exactly what I wanted. It also totals quite a few more Boaz units leaving them on precarious amounts of health. Even the boss got in on it, for all the good it did him. 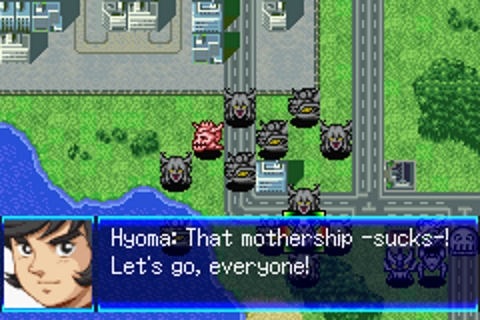 I love Hyoma so much. Turn 7 � Char drops a Boaz and hit level 14, Great pops the one Boaz unit that isn't in the MAP field, and I get ready to do some real time damage. I throw Alert on Combattler V, some exp and money buffs on the Nadesico and go to town. At the end of that MAP shot there is only the Skull Fortress left. Combattler V starts drilling into him. 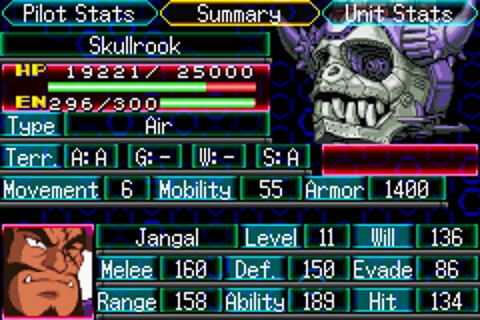 Jangal is the big dumb �I AM HONORABLE AND CARE ABOUT MY LORD AND AM ALSO A SPEEDBUMP� archetype we'll be facing, though every single named Boazonian is going to be coming at us riding in one of these giant flying angry skulls. I guess Dr. Wily had a bulk sale offer?! Big dumb walls of HP with some big attacks you should be able to avoid taking much damage from if you use your spirits. Enemy phase � Jangal takes even more damage, and wow I can't recall the last time I chewed through this enemy so fast. Turn 8 � We chip Jangal down and sadly don't do enough damage to kill him and he flees. But still I'm genuinely shocked I beat it that quickly considering how rear end this entire mission always was in my memory. Usually this feels like the worst kind of slog. Then again that MAP attack kind of dealt with things pretty well. 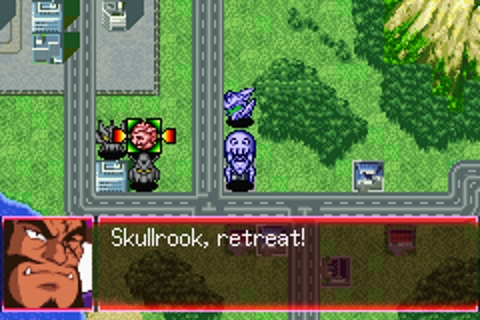 Just call it a Skull Fortress dude you're fooling NO ONE. 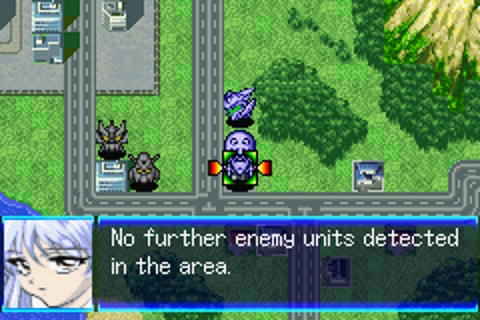 A genuine miracle. 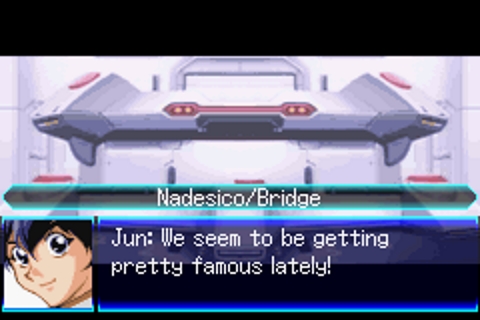 Everyone discusses how the conflict has become a supreme clusterfuck, and the UEFA is thinking of forming a giant-rear end super unit made up of all the fantastic survivors we've gathered up in our time in space and on Earth. 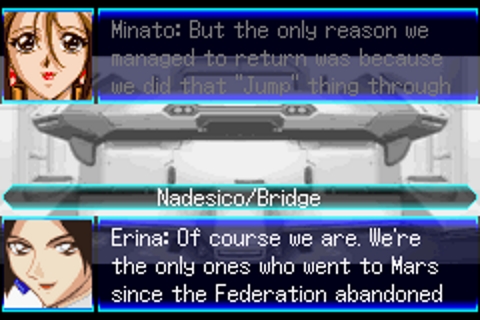 Hold on a second here Erina you weren't even there you joined later don't you steal my Valor I need that to do double damage! 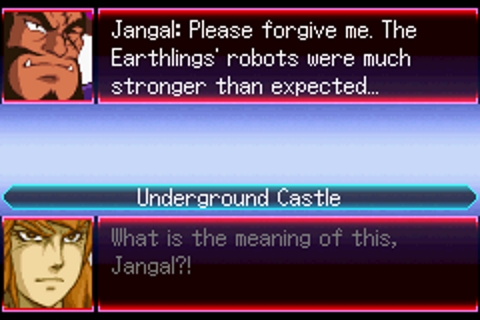 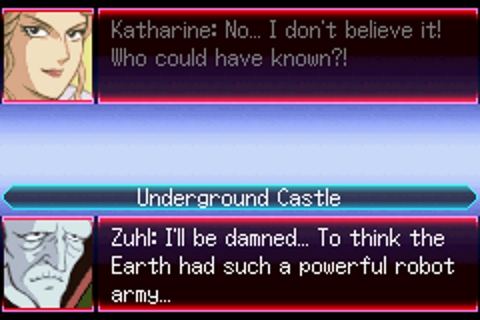 Jangal is almost executed for incompetency but his computer's battle recordings show that a whole bunch of super robots turned up and kicked his poo poo in when everyone else went to nap. The Boazonians did their homework but this is the one time you probably should have waited till the last second to work on your assignment, dudes. 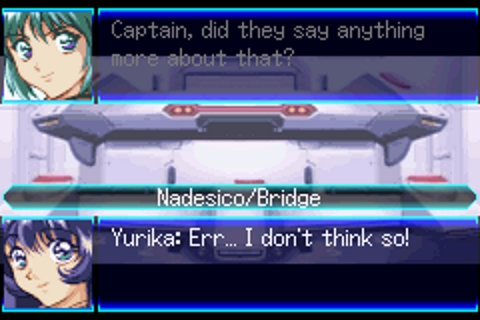 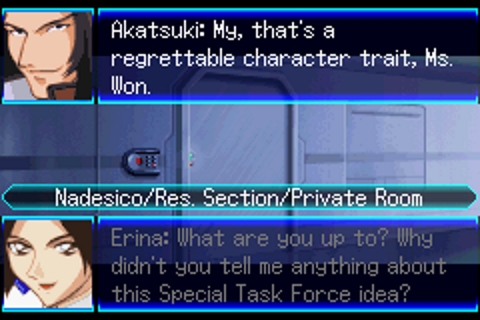 The Nadesico is sent off on a new mission to help out the UEFA in dealing with some stuff, while the information about everyone being thrown into one big group continues to get bandied around. Akatsuki secretly reveals to the audience he's a lot more than just some dude with hair that tells people to stop complaining all the time and all but confirms the big group thing is going to happen, albeit with the Nadesico being granted a fair bit of autonomy in the matter. Turn Count: 119 Honestly I expected that fight to obliterate me in terms of the sheer amount of HP I would have to chew through, but then they all lined themselves up perfectly for a MAP while trying to mob Combattler V. Pronounced �vee�. Next time on Super Robot Wars J! When the Fire gets a little too Friendly.
|
|
#
?
Jun 1, 2019 05:45
|
|
|
Stage 16: 5/68 turns Upgrades and equipment: Belzelute: Mega Booster, Apogee Motor, Support Attack +1 Layzner: HE Radar x2, High-eff OS Aile Strike; Servo motor, HE Radar Archangel: Booster x2, Apogee Motor, Dustproof Lasse Brain: Booster Buldy: HE thrusters, Stable OS x2, Sniper Scope Belzelute gets Festenia as sub-pilot, I switch Natarle into the main pilot spot for Archangel. Archangel needs a support attack, and Natarle provides. I switch Simone into Buldy.  Start of the stage. There's a bunch of Gran Chers at the bottom left of the map, and they need to be destroyed to advance the plot.  Calvina, Lasse and Hime move here. Lasse needed the Booster to reach. Nanga heads straight east, Yuu heads north.  Start of turn 2.     Hime gives Calvina a Cheer and Bless now that she's still free. The Gran Chers that are 6 tiles away from her and Lasse will attack them on enemy phase, so they support attack off Calvina, then Calvina offs the third and moves.  Killing the third Gran Cher spawns us our battleships. Dancouga gets +5 EN, a repair kit, propellant tank, and hit&away in the deployment screen, and the Aesties switch into Air Frame.  Everyone but Kira and Eiji then load into the Archangel, and everyone moves with Accel.  On enemy phase, Shiela attacks Calvina and is sent off.  Start of turn 3. Only Jonathan left.  Jonathan gets Scanned. Calvina casts Focus, Snipe and Fury, and oneshots him. Festenia is needed to get enough damage. The other option for a oneshot is 11 weapons upgrades with Break from Katia, I would've had to sell items to afford it.  In any case, Jonathan does his screaming about his hand, and the G Gundam reinforcements spawn in.  Archangel casts Accel and Assault, and moves in.  Dancouga pops out, casts Strike, Guard and Accel, and moves in. It will be taking the brunt of the attacks on enemy phase, and it's gotta keep 150 EN to fire off it's strongest attack on all G Fighters that attack him.     Some other folks move. Buldy's position is fairly important; it needs to be in range to attack both Argo and Master Asia when he shows up.  Turn 4. Dancouga chunked all the Gundams that attacked him pretty hard, so now it's mop up. Kira gets a Cheer and offs Dragon Gundam.  Nanga offs George. The reason I had him attack George last turn was that I'd lack the damage otherwise.  Eiji gets a Cheer and offs Chibodee.    Lasse, Simone and Dan roll up Argo, finally. Dan pops his propellant tank and repair kit before attacking. David pops out to clear the tile above Simone, for Dan to move into. Oh, and Calvina moves closer as well.    Finishing the G Fighters spawns the final reinforcements. Sending Master Asia packing ends the stage, so I focus fire on him.  Turn 5. Time to send Master Asia on his way.  First, though, Nadesico casts Gain and fires off it's map attack for a decent chunk of exp.          And then everyone unloads. Dancouga gets the kill with a Luck and a Cheer.
|
|
#
?
Jun 1, 2019 16:47
|
|
|
Stage 17: 8/76 turns Upgrades and equipment: Belzelute: Mega Booster, Apogee Motor, support attack +1 Nadesico: Dustproof, Water Jet, Solar Panel Layzner: High-Eff OS, HE Radar, Servo motor Archangel: Booster x3, Apogee motor, hit & away, hit rate +5 x2 Dancouga: Repair kit, propellant tank, Weapons +6(6) Buldy: HE thrusters, Stable OS x2, Sniper Scope Katia returns as subpilot of Belzelute, Murrue returns as captain of the Archangel.  Start of the stage. Nothing much going on here.   All units except for Calvina jump into the Archangel, movement happens.  Start of turn 2.  Nadesico moves up and attacks something    Archangel and Calvina both attack and move.  Dancouga jumps out with Focus, Guard and Spirit up, and hurts Duel Gundam.    A few others jump out and churn through Duel's first form.  David pops out and sets up to resupply Dan next turn. This is not needed, obviously, but I do it anyway for exp.  Simone also shows up.  I forgot to take a shot of the start of the turn so this will have to do. Miguel got done in by Dancouga (I think) on enemy phase. RIP him, lasted longer than in the show. Lasse hurts Duel Gundam for a bit.  Dan gets a resupply, then MAPs Duel and Buster with Cheer and Luck.  Archangel casts luck, snipe and gain, and sends Aegis off.   Kira flies in and hits the Vosgulov, which is then offed by Calvina with Bless up.  And finally, Eiji sends Blitz packing.  It doesn't come out in the shot, but Nadesico MAPs 5-6 enemies with Gain up.   Simone and Nanga clean the the last enemies.  This causes the second wave of enemies to drop in. Baron Ashura shows up and there's something or other about some hostages and Mithril rescuing them, and now I have to sit still till turn 8.  So I'm just going to skip that bit, because it's not at all interesting. You can kill a number of enemies before you fail the stage for plot reasons, and you can even attack Ashura's sub. So I spend the next turns resupplying, repairing, and setting up for turn 8. First order of business, send off Ashura. Dan has Bless up.  Nadesico MAPs some grunts with Gain.    Setting up some exp for the support bots. After this, there's like two enemies left, and Layzner and Nanga deal with them. This wraps up one of the few long stages in the game.
|
|
#
?
Jun 2, 2019 17:00
|
|
|
Time for mission 12. Urg, this is going to be exhausting... Before starting though, I mirror Dance Officer and put a booster and lots of evasion parts on the Layzner, and another booster on the Blue Earth. I don't have enough money to do much upgrading. 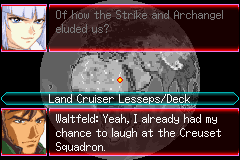 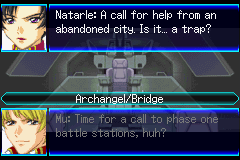 The Creuset Squad jokers have been passed along to Waltfield, except Athrun who is absent for reasons the game will not go into. Meanwhile, the Archangel gets a distress call from a Radam-infested city. Aki and the Layzner characters, as the most inclined to humanitarian behavior, insist on heading out to see what's up. 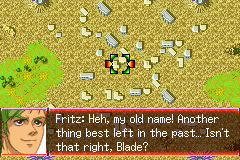 It turns out to be a trap set up by Tekkaman Dagger. After tek-setting himself, he activates an interference device to stop D-Boy from following suit. This is the other way that Blade is balanced out - he keeps being taken away by the plot. 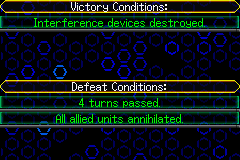 According to the conditions screen, we lose at the end of Turn 4 as Dagger corners and kills D-boy. It's lying though: that happens at the beginning of turn 4. Turn 1: 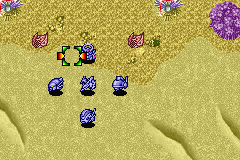 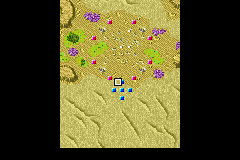 First thing's first. Layzner and Blue Earth will Accel and take out two of the interference devices on the first turn, taking potshots where they can. The first wave of Radam is completely immobile, so we need to be proactive in killing them. 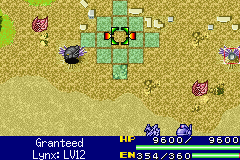 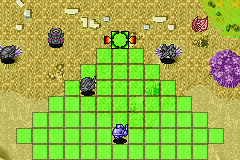 This also means I'll want to have the undrafted Baybull and Buldy participate. The Archangel won't arrive until the second wave. Buldy and Baybull team up on the Right side, while Granteed OHKs the one on the left. 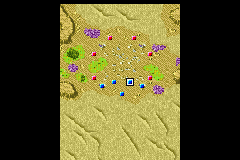 Two devices and two Radam down. Next turn things get dicey. Enemy Phase: Granteed finishes off the next Radam on the Left side. Blue Earth does the same on the Right. Turn 2: 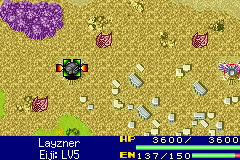 Layzner moves up to take the third device, taking a potshot at the Top enemy. 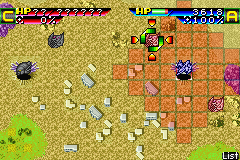 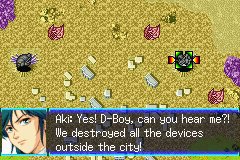 Blue Earth does the same on the Right side. One Aki finishes her turn on this space, the next phase of the fight starts. 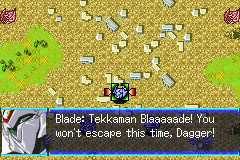 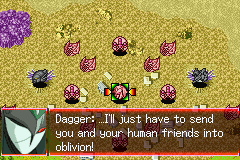 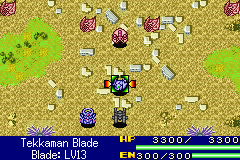 Dagger, another swarm, and the Archangel (Plus Strike and Skygrasper) spawn in. I promptly have the Archangel head north as far as possible, with Kira, Mu, Buldy, and Baybull hiding inside.  Granteed heads north to reinforce Layzner, followed by Blade.  Time to see if this works out. Enemy Phase: Fortunately, Granteed was just able to get in range to draw fire away from Layzner. Granteed counterkills most of the left side (Though it suffers a Movement Down from a tentacle attack), with Blue Earth and Archangel also drawing fire. 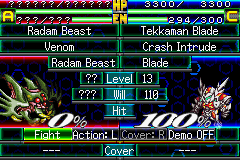 This was the last enemy that had a chance to attack Layzner. 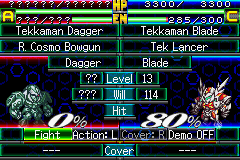 Well, technically this was. Turn 3: 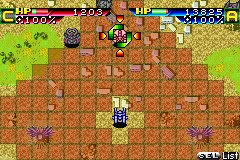 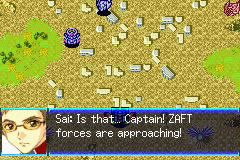 Archangel finishes off a Radam that attacked it last turn, then moves up again. This triggers a warning about the next wave. Not all the way up, though, just enough for Layzner to take cover. I want Granteed to take most of the fire if possible. 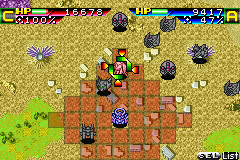 Ultimately though, Granteed has nothing better to do than take a shot at Dagger. She misses, but it won't matter much. 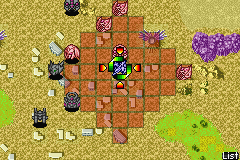 Blue Earth moves here and finishes off another Radam. She's in range to finish off more during the enemy phase. 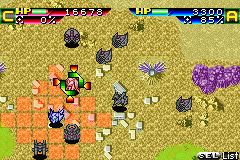 Blade moves down slightly to put Dagger in range of a Voltekka next turn. Enemy Phase: Blue Earth and Granteed finish off all the minions. Tekkaman Blade manages to clip Dagger with a Voltekka. Turn 4: Everyone who has it uses Focus. 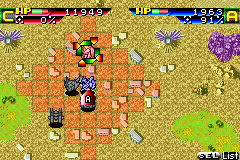 Aki gets a support from Calvina. Both hit, bringing Dagger down to 5700.  Calvina Attacks from here. It's a hit.   And Blade finishes off Dagger with a Tek Lancer.  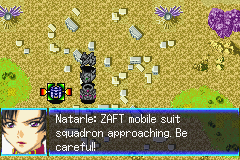  Now we have Waltfield to deal with. The Archangel heads up to deal with him.  Enemy Phase:  The Archangel finishes off all but three flying minions, and trades fire with the Lesseps. Turn 5:  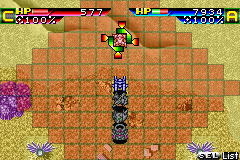 The Archangel attacks the Lesseps again, then moves up a bit to make room for the others to approach as well. Aki repairs the Archangel a bit. Enemy Phase: Archangel finishes off the flying DINNs, and barely allows the Lesseps to live. Turn 6: 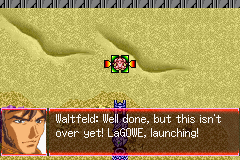 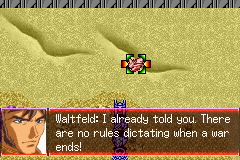 Archangel finishes off the Lesseps with Luck cast on it, triggering the plot. By the end of the sequence, Archangel has taken another hit, Cagalli and the Skygrasper 2 have been added to the roster (but not my list), and Yzak runs away bleeding before he can even participate in the real fight. After all that, the Archangel heads south as far as possible to intercept the ZAFT forces to the south. 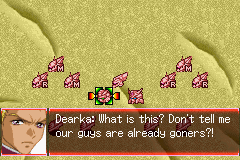   [img]https://lpix.org/3462724/GBA%20-%20Super%20Robot%20Wars%20J_54.png[img] Kira and Cagalli trail after it to stay out of Watfield's range. Blade defeats Watfield with a critical assist from Calvina. Blue Earth heads south to repair the Archangel, Calvina heads south as far as she can - which turns out to take her into the Archangel.  Enemy Phase: All the enemies move closer. Turn 7:   Cagalli gets into the Archangel. The Archangel has Focus, Guard, and Accel cast on it, snipes at Dearka, then heads down into the fray. Calvina jumps off the Archangel to try hitting Nicol early. She lands a Finger Crusher. Aki Accels south and repairs the Archangel. She may need to resupply it next turn. Oh and Blade tries to follow, but is so far behind he might as well not bother. Enemy Phase: Lots of stuff dies. what more can I really say? Turn 8: Blade makes it far enough down to finish off Dearka. Melua learned focus last turn, so I use that to help ensure a kill on Nicol. The Archangel finishes off Miguel, who hasn't had a line in a while. Aki repairs the Archangel for EXP. Enemy Phase: The last minion is counterkilled.   And as Blade returns to human form, his transformation trinket, still damaged from the resonance devices from earlier, shatters completely, rendering him unable to transform again. (While Blade is still on the unit list, both he and the Blue Earth will leave during the intro conversation for the next mission.) 8 turns. 66 total
|
|
#
?
Jun 2, 2019 22:15
|
|
|
Stage 18: 6/82 turns Upgrades and equipment: Belzelute: Mega Booster, Apogee Motor, support attack +1 Layzner: High-Eff OS, HE Radar 2x Dancouga: Dustproof, Hit & Away, EN +5(10), Weapons +2(8) Launch Strike Gundam: Dustproof Buldy: HE thrusters, Stable OS x2, Sniper Scope Baybull: Hyper Sensor, Booster Nanga Brain: Booster Lasse Brain: support defend +1 Roanne takes the Buldy this stage, Simone takes Baybull. Dancouga gets some EN and weapons.   Start of the stage. Nothing interesting, just Kurz and Mao versus a bunch of trash units. Just assume that focus is up any time they face combat. Plot will happen on turn 3, I'm going to move them into a position where they'll be useful.    Turn 2. Nothing much going on.  Start of turn 3. My reinforcements spawn in, Ashura shows up in a fake Mazinger with a bunch of grunts at his side. No battleships, so Kurz and Mao remain free.    The main actors move. Calvina's exp has to be managed closely. She's level 17 now, she needs to stay 70 exp or less from leveling up, but must not level up.       The supporting cast makes its play.   Kurz hits & aways, Mao follows.   Turn 4. Mao and Kurz did a bit of damage to the Mazinger mobs, in the south the FMP mooks got offed by Layzner and Dancouga.  Dancouga gets a heal.   The main actors move. Dancouga has Guard up as they'll be facing a bit of combat on enemy phase.  Simone gets a bit of exp. She learns Bless at level 18, I'm trying to push her to get to 18 next map.   Kurz attacks, Mao parks next to Simone. She's out of ammo, will get a resupply next turn, and Simone some exp.   Kira attacks someone. Everyone else moves up. Calvina doesn't attack.  Turn 5. It's time now to clean Ashura's clock     Clock status: thoroughly cleaned. Dancouga heals itself with a Trust, casts, Gain, Luck, Focus and Accel, and deals the finishing blow. I forgot to take a screenshot, unfortunately.  Simone resupplies Mao and hit level 17.      And work begins on the Ghoul. Calvina can damage the Ghoul without a problem. Eiji needs to be able to reach left or above Calvina on the next turn.  Turn 6. Ghoul mop up.  Simone gets a Bless, lands and attack with support from Mao.  And the final wave spawns in, as do the battleships.  Eiji attacks the boss with a Cheer.  Kira finishes a grunt with a Cheer.  Calvina gets a Bless and Cheer, and finishes off the Boss, Zaied.  This is good, very good. The Original characters learn Valor at level 20, way before almost everyone else. Except for Kira, he also learns it at level 20.  Dan casts Guard, accel and focus, and moves here.    A few others grab some exp, I end the turn, everything dies to Dancouga on enemy phase.
|
|
#
?
Jun 4, 2019 22:53
|
|
|
Just for the record, that translator's note on the pronunciation of Voltes V being "Voltes Five" actually does relate to the fact that Combattler V is "Combattler V", not "Combattler Five".
|
|
#
?
Jun 5, 2019 12:41
|
|

|
Reiska posted:Just for the record, that translator's note on the pronunciation of Voltes V being "Voltes Five" actually does relate to the fact that Combattler V is "Combattler V", not "Combattler Five". I can't believe this thread just got translator noted.
|
|
#
?
Jun 5, 2019 13:03
|
|
|
Super RoboKy Draft Wars Episode 15: Yellow on Blue Violence Oh this mission is unforgettable that's for sure. This episode starts us out where we left off, the team on a special mission to help out the UEFA in dealing with some problems in the Pacific region. 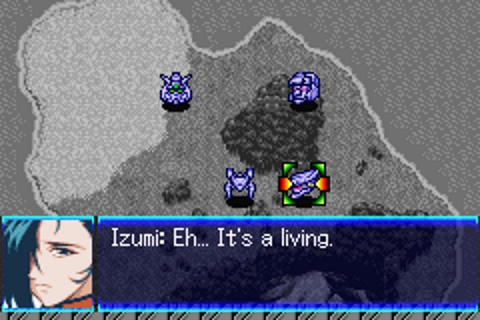 I hear ya. Of course nothing can ever be so simple, and the targeting systems for the Nadesico and the Aestivalis start going wonky! 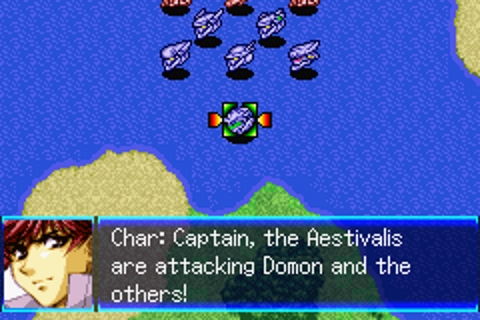 Yurika mostly just goes �HUH?!� and �W-WHAAAAAT?� a lot it's great. 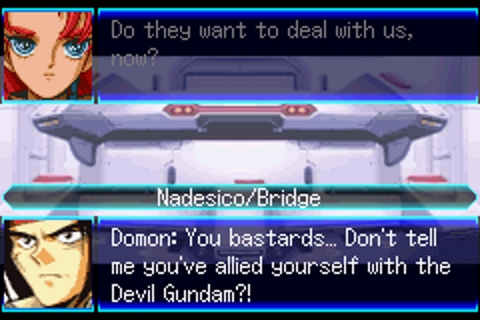 Domon I swear to God Gundam not everything is about the loving Devil Gundam just CALM DOWN.  Well we can rule out mechanical failure on the Aestivalis no one admits that kind of thing unless they're confident. Anyway the UEFA are sending some inspectors to come figure things out, so as long as nothing goes wrong in the meantime we should be able to figure this out. 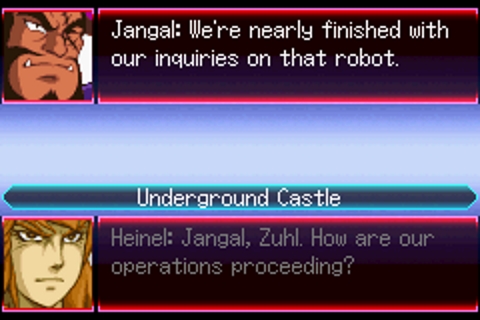 Goddamnit. Mind you the idea of some huge dude with giant horns walking around door-knocking with a photo of Voltes V is pretty great. 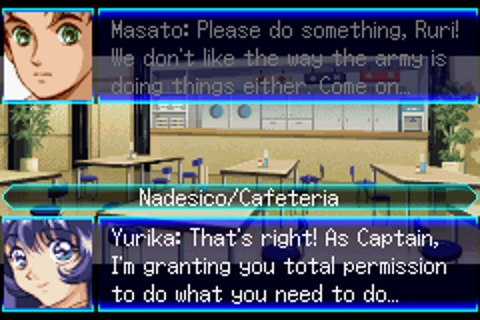 Oh heck, apparently the problem with the Nadesico is its special on-board computer Omoikane, which has learning capacity to deal with any autonomous decisions it can make as part of its function. Apparently that big fight with the UEFA at the beginning of our journey to Mars made a big impression that is bad. The UEFA wants to do a total delete, and Ruri is understandably upset because the thing is simultaneously her child and closest friend. In spite of the fact the computer tried to shoot them up the Dancouga team offer to call in some Mithril help, and Yurika gives them approval-but-not-Nergal-approval to try to help. 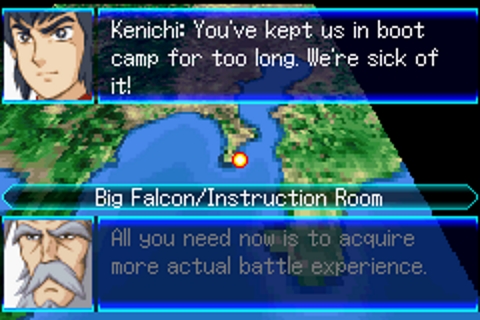 Goddamn the Voltes people are so goddamn grumpy about everything. Why can't they be more like the Combattler team and just say smarmy poo poo all the time. Their mother also strongly suggests in a monologue that the three Voltes boys might be part alien cause her husband apparently returned to the Boazonian planet to deal with its systematic horn-based class-ism and hasn't said a word since. 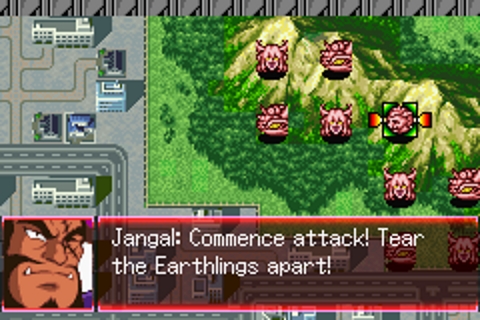 Oh hey Jangal how's it going is it time to fight? Can't hold off for a bit while we solve our technical difficulties? This is the failure of computers being programmed by people without giant horns you say? You're kind of rude dude.  Fun fact for this mission, the game force deploys everyone who is with the Nadesico team on the map. That's not ominous. Turn 1 � I load everyone into the Nadesico and start rushing forwards on Accel. Enemy Phase the enemy start moving towards us in their stupid slow waves, but that's par for the course here.  The Voltes V team arrive, but immediately learn that in their absence their home base of BIG FALCON is under attack and their mother has been wounded. Yurika gives them permission to return because Kenichi is really conflicted on what to do due to their mother training them to be killing machines but only halfway so they're still conflicted about it and Jangal engages his smuggery over their super amazing plan. Turn 2 � We get the Nadesico closer, throw out Char focus on cause he's all we can use, and love-tap a crab. Enemy phase Char retaliates against some enemies who can't hit him. Neat! 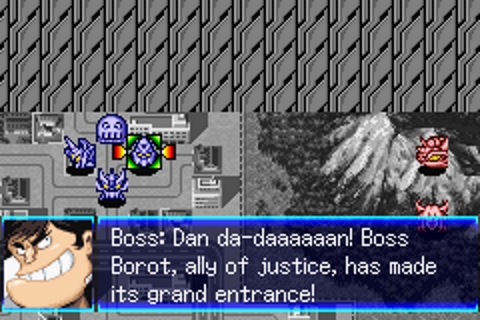 Okay this time the reinforcements are here to stay, and the enemy are a lot fewer than that first time we had to deal with them so this should be a pretty easy-no wait no sorry the Nadesico just went haywire. 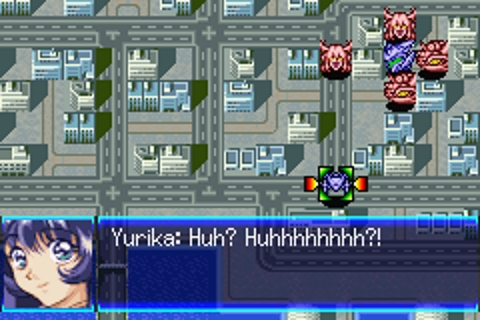 Yurika accurately depicts the response of every first time SRWJ player's experience, I swear. So yeah the Nadesico just yacks up all the units it was carrying out onto the field, and it and the Aestivalis all turn into Neutrals hostile to literally everyone else on the field except for Char and the Combattler crew. Probably. So what this means is we have no battleship to put our units into. This means we can field them! It's a complete mixed bag of good and bad because we're kinda playing for speed but if these guys kill anything that's wasted exp, but not wasted money. But if the Nadesico dudes kill anything? Well that's straight up a complete loss of exp and money. Anyway here's the units we haven't looked at that we can use right now. 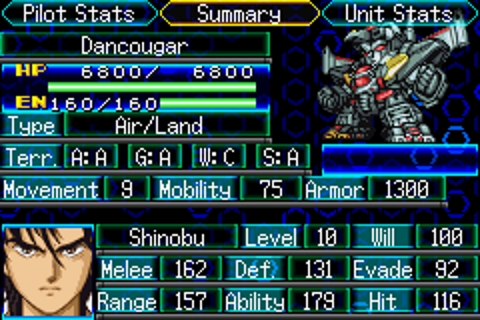 The Dancouga is like the Electromagentic boys. It's a combiner so it's a little weaker in armour but higher in hit points, and usually ends up being prioritised by enemies because of it. The big feature of Dancouga is it has its own version of Mazinpower called �Instinct� that boosts damage when they have enough Will. It comes packing Potential Level 3, and for spirits it rocks Guts, Wall, Accel, Trust, Focus, Gain Strike, Luck and Guard. 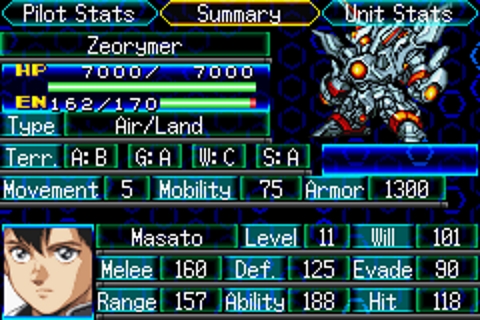 Here's the broke boy himself, Zeorymer. What makes this fellow so goddamn broken is the Dimensional Coupling System (DCS). Once that Will kicks in high enough it's a strong barrier that negates damage, it's a 50% chance to outright dodge an enemy attack, and instead of conventional movement that can be obstructed Zeorymer can just plain teleport wherever its movement range allows. Also Zeorymer just has a lot of strong attacks and regens HP and EN every turn, and has two pilots for spirits.. For skills the Zeorymer rocks Potential Level 2, and packs for spirits Wall, Break, Strike, Accel and Trust. STRONG. But what about our allies turned semi-hostile Neutrals? Well let's take a look! 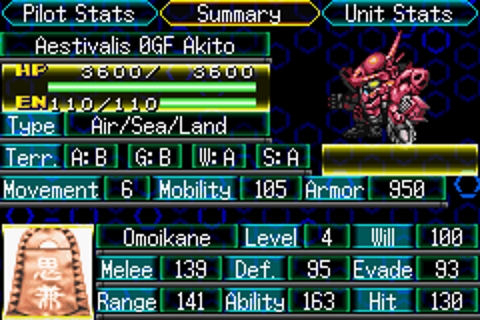 Yeah basically everyone's still the levels they were when they joined, so we're not in too much danger. Hell they're still in their Space Frames (Aestivalis have modular frames that have different stats) so their combat potential blows. Turn 3 � After that lengthy introduction I move everyone in and we take down one of the enemies. Enemy phase Dancouga hits Instinct and takes down two enemies, Combattler V fights up north and does some good damage. Jengal engages Combattler V which is good. Neutral phase the Aestivalis attack everyone they can, dinging Dancouga a bit but also roughing up all the nearby enemies. The Nadesico kills a Boazonian denying us all some exp and money but it's fine.  Tessa arrives to help! Sort of. She's going to try to get our rogue computer under control externally.  Ah yes that thing that worked out for them so well last time. Turn 4 - I pop Guts and Guard on Dancouga to get it up in health and also deal with the fact I think all the yellow guys are going to try to kill him next turn. Char and Domon tickle two well armoured Boazonians and get dinged up in return. Up north the boys chip down some enemies for good measure, there's only four enemies left and one is Jangal. Enemy phase crippled by insanity the Boaz units attack the Nadesico and die horribly YOU GET TO BURNING. Jangal trades fire with Great, it's fine. Neutral phase Domon and Dancouga do some dodging and defending, and the Nadesico MAPS both Combattler V and Jangal. That was actually kind of helpful! Turn 5 - Everyone pops violence up on Jangal that can, and I share some healing out from Boss to keep everyone going. Boss levels up to 13 healing Combattler V. We manage to love-tap Jangal enough to force him to retreat. 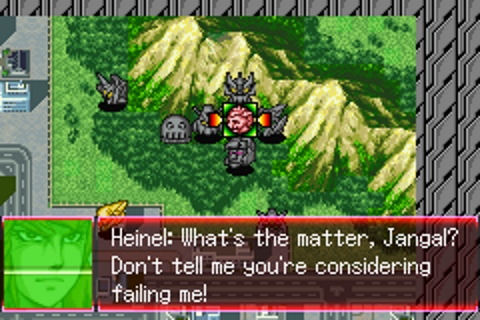 Jangal begs for forgiveness, but if the other attack on Big Falcon screws up I think Jangal's in some deep poo poo. But hey! Mission accomplished! 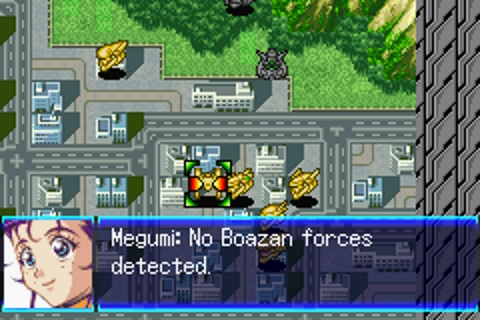 See? Now we just need to deal with the Nadesico preparing to Gravity Wave a Federation base. poo poo. If only we had some other target turn up we could blow up and distract the Nadesico with it. 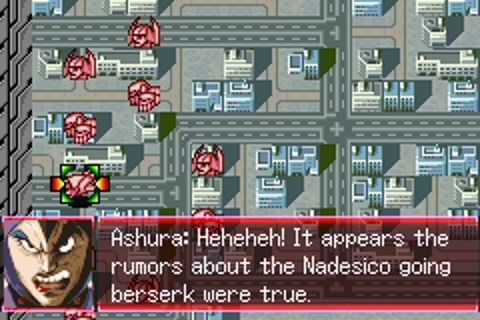 Oh thank god you're hear Baron Ashura you will not believe the day we've had. But uh... Look my friend. I'm sorry. I'm really sorry but- 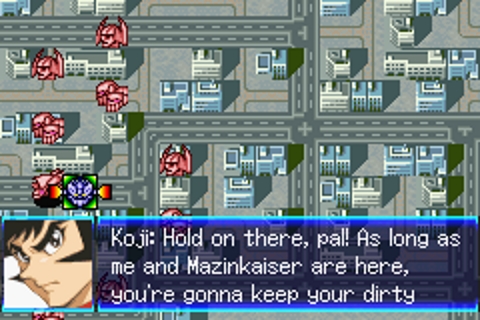 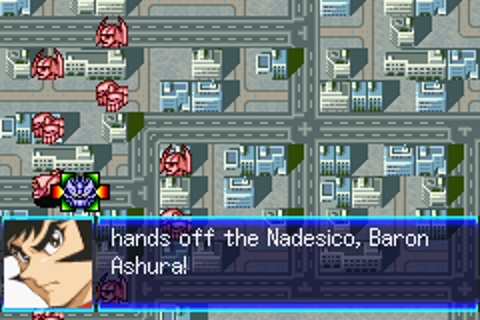 It's Kaiser time. 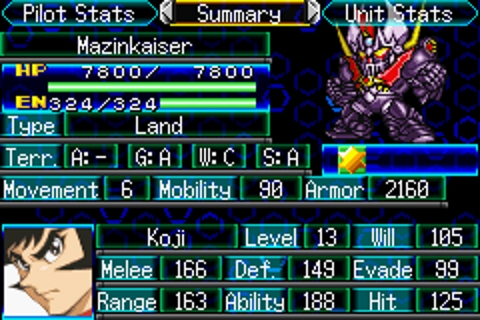 And all the upgrades to Mazinger Z carried over. 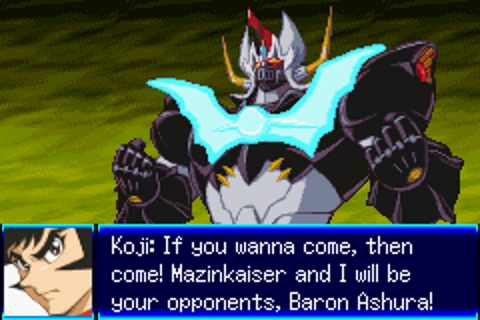 And it's still my turn. Don't wanna know why, everybody ready get it on!  Kazashita kobushi wa don't give up! Yuruginaki chikara wo tataeta saikyou no soldier  Kakageta flag wa EX-danger! Kami sae mo osorenu yatsura ni gokujou no violence Yami wo harai hitobito no nageki no koe ni Sono ude wo sashidase! Turn 6 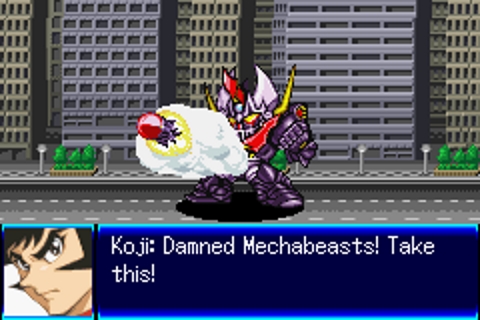 In the fire! Break it down! Hametsu he no kane ga hibiku yo Owari no nai eien no wargame 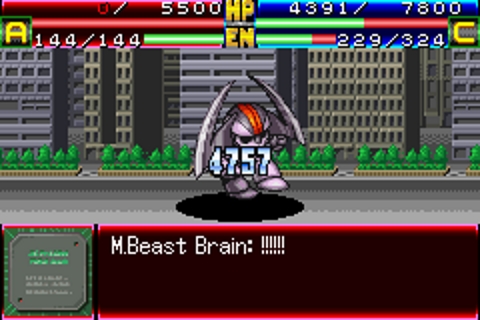 In the fire! Crush on crush! Oroka na jidai no matsuro ni saa keikoku shiyou Don't wanna know why, everybody ready get it on! 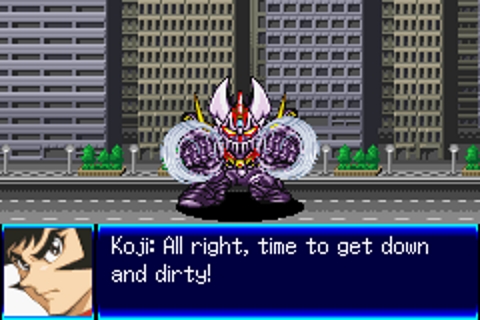 Ikari no gong wa so warning! Chinurareta chijou ni mezameta saikyou no soldier Jigen no tobira wa EX-danger! 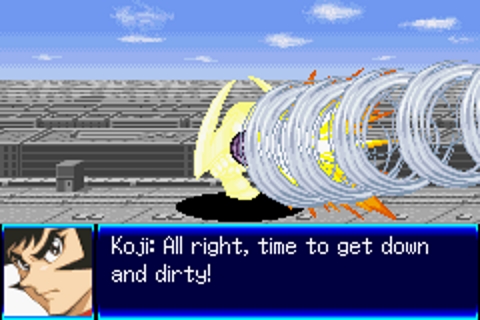 Osoi kuru jaaku na yatsura ni let's vibration! Sora ga moeru kaze ga naku daichi ga hoeru Ima sekai ga sakebu! 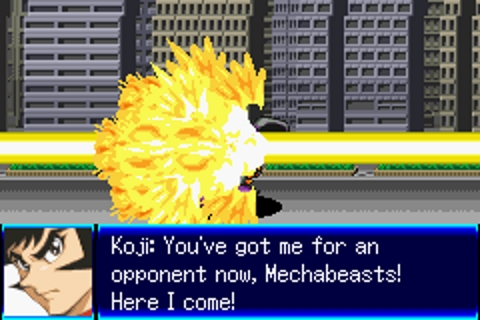 In the fire! Break it down! Miwatasu chihei no kanata ni Asu wo egaku koutetsu no dreamer In the fire! Crush on crush! Kurutta jidai no meirou de saa keikoku shiyou Don't wanna know why, everybody ready get it on! 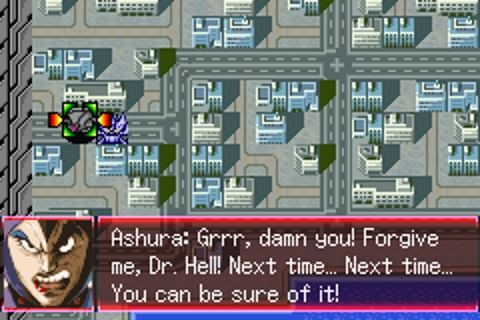 Yami wo harai hitobito no nageki no koe ni Sono ude wo sashidase! In the fire! Break it down! Hametsu he no kane ga hibiku yo Owari no nai eien no wargame 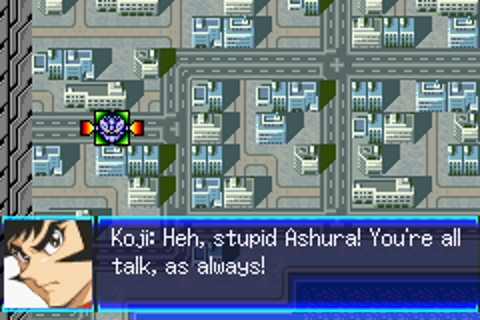 In the fire! Crush on crush! Oroka na jidai no matsuro ni saa keikoku shiyou Don't wanna know why, everybody ready get it on! Yes. Mazinkaiser did in fact solo every single one of those Mechabeasts and solo killed Ashura in the Ghoul within two turns. How was your day? Mine was good. You know how I talked about how Mazinger Z's biggest problem is the fact that it gobbles EN in literally every attack it does? Mazinkaiser has a range 7 missile attack that has an ammo count of about 99. It still gets Mazinpower. It's biggest problem right now is just that its still stuck on the ground. That issue will not persist throughout Mazinkaiser's life. Mazinkaiser is here to mess some people up and it is glorious. 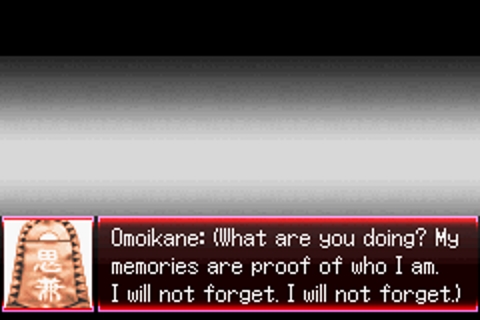  Tessa and Ruri finally get Omoikane under control, sealing some of its memories away as a temporary solution to the problem. It may yet remember again someday, but it might also have learned enough to get past it by that point.  Ruri's entire story in Martian Successor Nadesico is very melancholy but later she grows up and becomes an excellent adult thanks to those that care for her. So all's well that ends well, right?   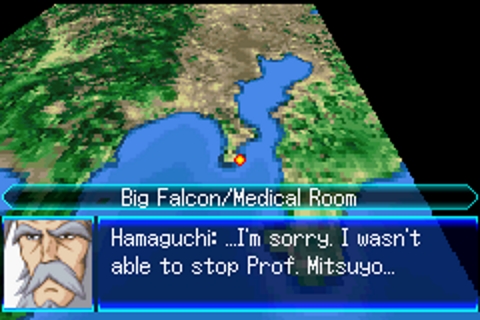 We would like to announce that Shark Tank Training has been postponed indefinitely. 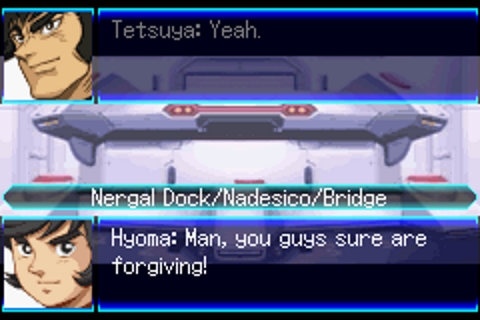 Man Hyoma they were never going to fire on you stop being a whiner. Good news everyone! The Archangel and everyone who was on it are coming to join us! We're going to be a big super-team! Except I can't use any of those units just the Archangel. But everyone's happy to see everyone else once they all get back together. 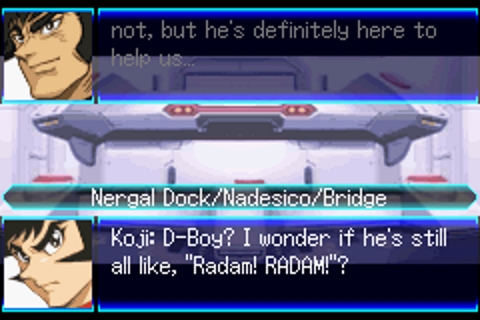 Koji Kabuto dies in laughter.  Back aboard the super Mithril submarine Tessa talks to her XO, and drops the finest vague infobomb she can. Ruri isn't a �Whispered� but... what is a Whispered?! Oh I'm sorry I didn't know this was a library I'll use my inside voice next time. Turn Count: 125 Next Time in Super Robot Wars J! An Alliance gets Reshuffled!
|
|
#
?
Jun 6, 2019 08:24
|
|
|
Sweet jesus Koji leave some for the rest of the team.
|
|
#
?
Jun 7, 2019 01:50
|
|
|
Shei-kun posted:Sweet jesus Koji leave some for the rest of the team. The most amazing part is how he arrives. He sort of appears as a blip on the eastern side of the map, and then the map just loving zoooooooooms to the west side and deploys Mazinkaiser right in front of Ashura. I can only imagine this giant terrifying blur of black and red just hurtles across the sky and smashes down right in front of the enemies.
|
|
#
?
Jun 7, 2019 02:40
|
|
|
I'd always wanted to play SRW games, and now I want to play them even more.
|
|
#
?
Jun 7, 2019 06:15
|
|
|
Shei-kun posted:I'd always wanted to play SRW games, and now I want to play them even more. Do it, they're pretty great!
|
|
#
?
Jun 7, 2019 06:41
|
|
|
Shei-kun posted:I'd always wanted to play SRW games, and now I want to play them even more. SRW T is out for Switch and PS4. Full English text in the SEA release, and it's a pretty good one. Lots of hot blood, lots of mech pilots old enough to drink, and lots of crossover between serieses, all in HD. No region lock, so it's easy enough to just start playing. V's also an option for PS4 with the same advantages, so if you prefer Yamato to Harlock and Bebop, you have an alternative. (There's also X, but it's generally taken as a bit of a step down in comparison to the other two.)
|
|
#
?
Jun 7, 2019 07:41
|
|
|
Shei-kun posted:Sweet jesus Koji leave some for the rest of the team. in my playthrough of J, Mazinkaiser is straight up my demonic saviour, its shocking how little damage the mazinkaiser takes from mooks, especially with armor upgrades, and then they eat a turbo smasher to the face and just DIE it RULES. It's very telling that not only is Koji my first double ace, hes ahead of the next highest killcount by a good 46-47 kills. I park him somewhere and he just racks up the kills its great.
|
|
#
?
Jun 9, 2019 20:12
|
|


|
Gotta stay in the game. I�m already being a lazy bastard by not taking any screenshots, can�t also fall behind. Stage 16. I get a whole bunch of new units to play with this time, which compensates a bit for not being able to use Zeorymer this time. I get Yu and Hime Brain, and later I get Kira and Cagalli in the Skygraspers. The Brain Powerd enemies are super annoying, as they have Barriers, regen and high evade. I use focus every turn. 166 turns.
|
|
#
?
Jun 10, 2019 04:31
|
|
|
Super RoboKy Draft Wars Episode 16: Someone Get This Old Guy Off Me A term never used to describe me. 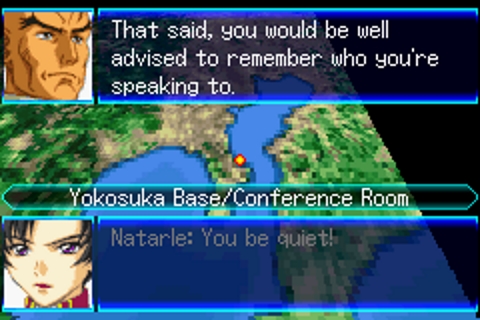 We enter our adventures with the Archangel people being told by the finest example of Federation incompetence about how they all work for him and he's going to make them follow his every whim. He also rags endlessly on the fact they have three people who aren't regular humans helping out because he's that special kind of idiot who shits on his allies. D-Boy just calls him incompetent to his face but Corbett still thinks he has the upper hand in this deal. 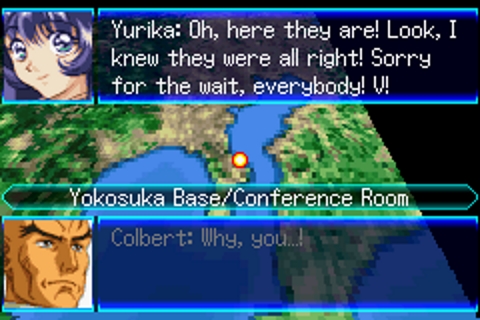  Luckily the heroes of our story branch arrive and remind the big boss that hey, the arrangement isn't nearly as one-sided as he thinks with the Nergal negotiations giving them a strong veto power on orders. No one expects them to actually use these powers but Yurika basically dumpstered this guy's victory dance pretty hard to the point people consider she might not be insane. 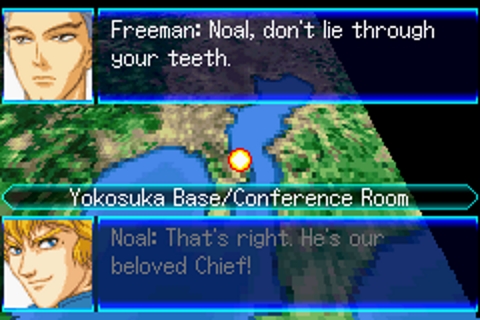 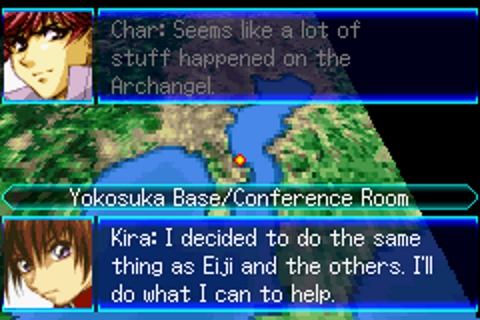 We're introduced to Freeman, the guy in charge of stuff relating to Tekkaman and also who helps out with the Layzer stuff. All stuff we have absolutely nothing to do with us so we're out have fun guys. Also Kira's still around and everyone's noticed he seems different now. They attribute it to time spent piloting his Strike but honestly he got laid.  Thanks for jinxing us you idgit. 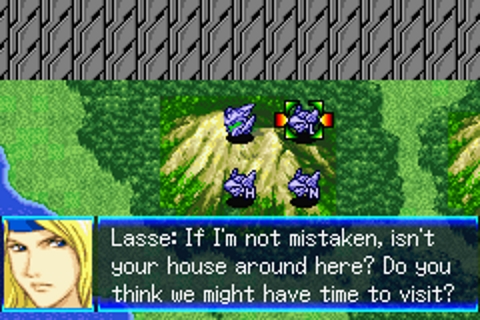 Anyway on the Archangel route we were introduced to people that fly in weird things called �Brains� from the weird anime with the screaming lady intro. Apparently the giant organic thing that lives under the ocean launched some plates and the crazy people that live inside of it came out and got them, so Char has headed out with the BRAIN TEAM to go bop some villains. They also run into Yuu, a guy who used to live unda da sea but now has his own Brain and doesn't really like anyone here, rebuffing attempts to recruit him to help out. 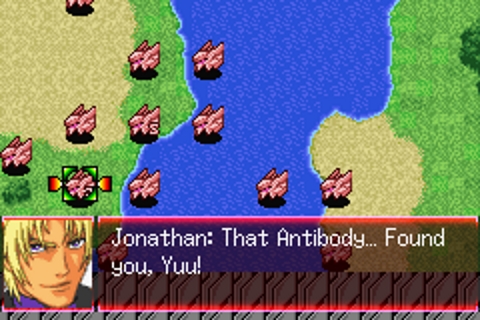 Suddenly some of the still unda da sea people come tooting along and they want a biff-fight. Yuu decides to help out for lack of anything better to do with his time. I will admit I mostly just took this screenshot because of the �you� and �Yuu� thing. MISSION BEGIN but first let's look at the four units we have with us. 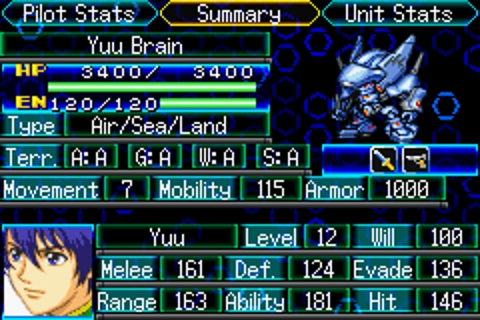 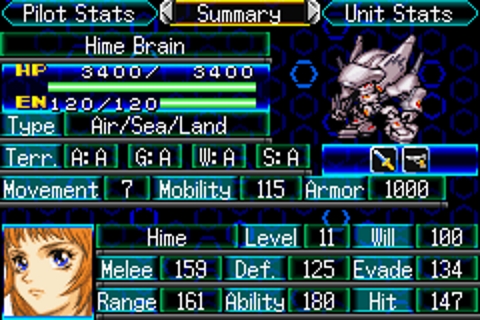 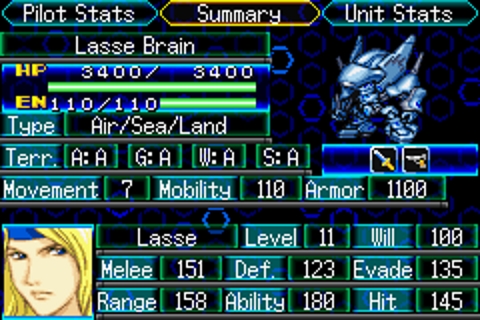 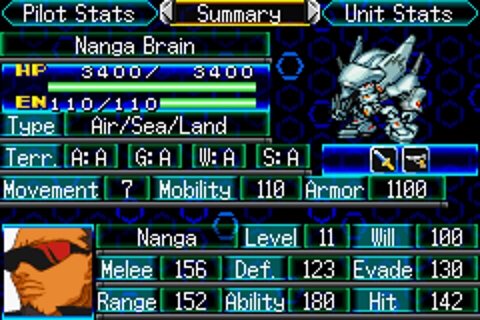 So let's talk about Brains! They're pretty cool units with lots of interesting things to them. They're great in any terrain, they're fast, and they're very dodgy. They also regen HP and EN and tap into some energy line thing that apparently covers the planet and it allows them to �Vital Jump� which is another one of those 50% chance to stone cold dodge an attack once their Will is high enough things, and once their Will is up there their movement is a Zeorymer-style teleport. Also super handy is that all Brain pilots have Antibody which increases Hit, Evade, Attack Damage and Attack Range on the pilot, with higher levels of Antibody giving greater increases. As if this weren't enough, certain Brain pilots can pair off with one another for a Team Attack which are generally speaking very powerful attacks that have a big EN cost but will usually ignore the modifiers that mitigate damage. Very nice things to have on units with EN regen. The pairing for this group is Yuu and Hime, Lasse and Nanga. Every single character in this foursome has one level of Support Attack and Support Defence. For Antibody levels Yuu and Hime are level 3, Nanga is level 2, and Lasse is Level 1. Nanga also rocks Command Level 1. For spirits Yuu has Focus and Alert, Hime has Focus, Cheer and Bless, Lasse has Accel, Focus and Guts, and Nanga has Guard and Focus. Lots of Focus. 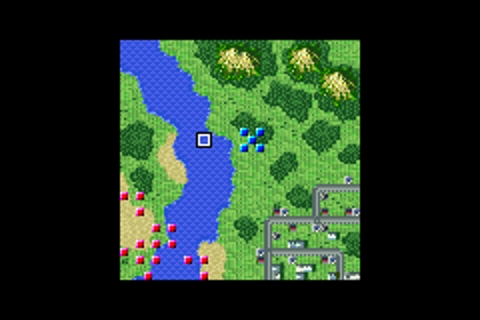 Turn 1 � We move in as a blob, which is a good idea in general because everyone in this grouping has support attack, support defence, and everyone but Char can bust out some team attacks. Enemy phase They come closer. Turn 2 � Everyone pops Focus and takes a moment to bop an enemy unit. Grand Chers are low on health but fairly hardy thanks to their armour. 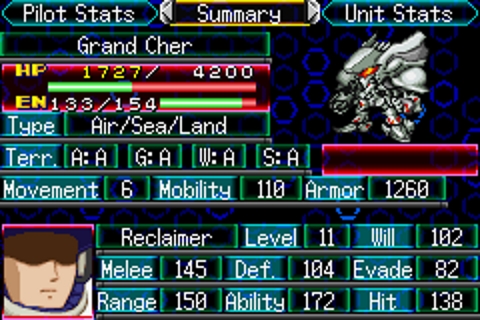 Now we've pinged some of them we can show off the Grand Chers. Ostensibly the same as Brains only tougher, because we hit like trucks and they would probably die too soon otherwise. You might think their HP regen is a big issue but I wouldn't worry too much, they regen a percentage of their max health and a percentage of a small max health is about as lame as you'd think. The Vital Jump thing can be a problem assuming they ever live to get enough Will. I think they have barriers too but everything damages them so much the mitigation isn't that impressive to be honest. Enemy phase Nanga takes some hits but dishes many back out. We're essentially surrounded but being in this cluster works pretty well. The two minibosses haven't come for us yet but we're in a good enough position anyway. Turn 3 - I move Nanga and Lasse closer into our big blob to make Command more effective. Unfortunately I kill enough enemy units that my allies arrive and now I can't actually use any of these Brain units anymore. OOPS. 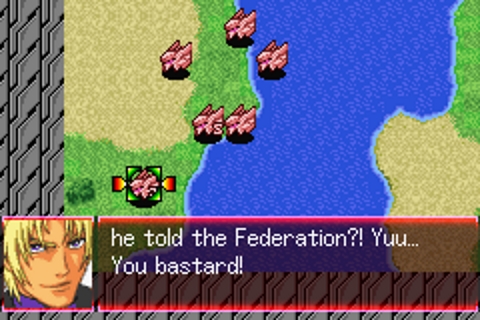 You Yuu! 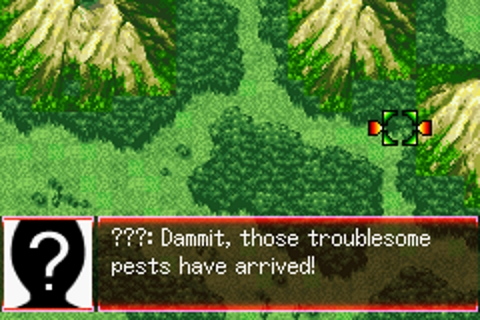 Oh and someone's waiting for us to finish our fight to fight us, probably something to do with Domon forced deploying on us. My turn resumes so I pile my reinforcements into my battleships and pull Hime back since she's the only one that hadn't attacked before everyone appeared. 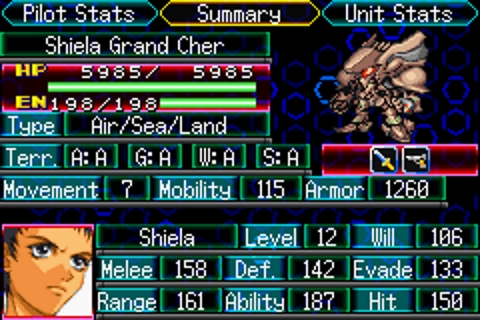 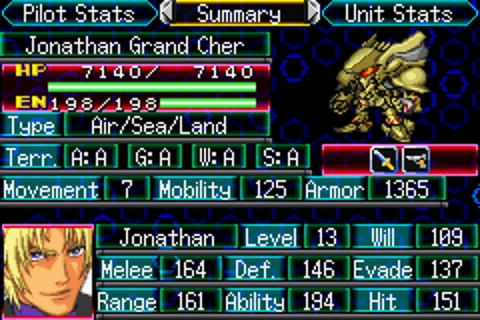 Also now we have units with Scan I made sure to pop them on the two mini-bosses for this stage. There's really not much more to them aside from some better stats. Grand Chers are generally a headache for larger units to hit due to their smaller size and boss dodge-stats are also not much fun like that, but at the same time if we do hit we can bop their skulls in simple enough. Enemy phase everyone attacks the Brains, so I waste the turn not attacking back. Turn 4 - The battleships roar up at all speeds and each destroy a Cher. Char wounds some more enemies with his combo power, and my super robot boys disembark to do some slapping. Koji almost one-shots a Grand Cher with a Turbo Smasher punch which is amazing on its own. Boss can't really do anything because he has no attacks that can reach the sky so he just repairs Char who did take some damage doing support defence. Enemy phase they mostly attack Koji and take ridiculous damage. The Archangel kills a few, and the bosses don't do all that much. Turn 5 - We wipe out all the Grand Cher mooks, and ding up the other two. I try not to move too far away because we're going to be loading up everyone we can to run them back when the second wave arrives. Enemy phase Shiela wipes herself out on the Nadesico. Turn 6 - We wipe out Jonathon, Tetsuya hitting level 14 from the killing blow. I did this cause he has accel and can catch up. 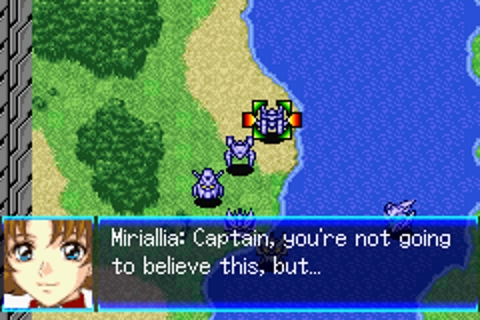 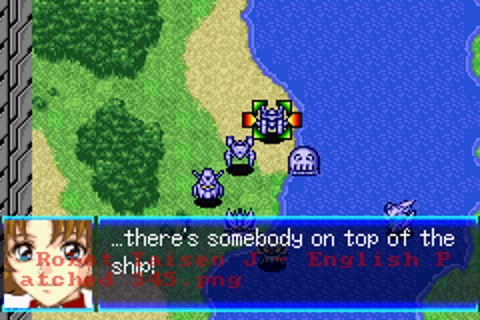 Oh no. 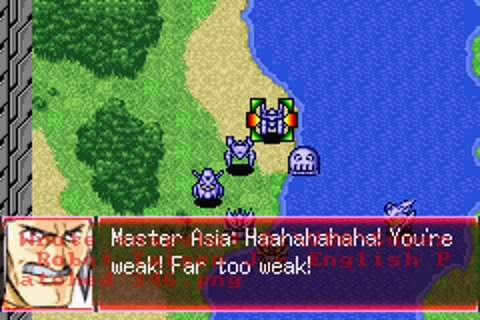 BULLY ALERT Master Asia beat up the Archangel a little. 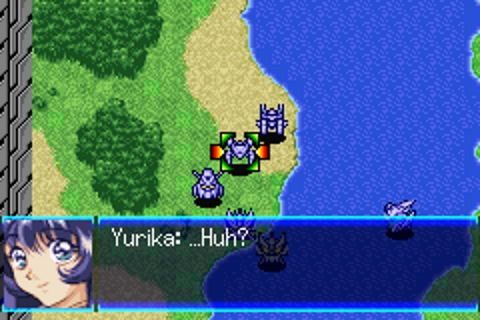 Then he leaps over and bullies the Nadesico too. 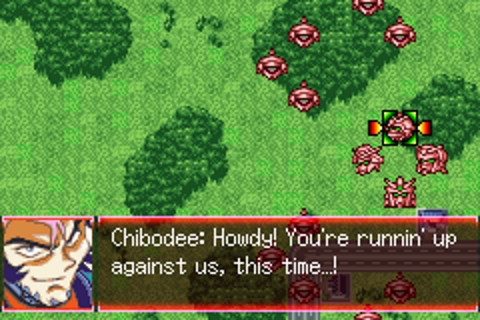 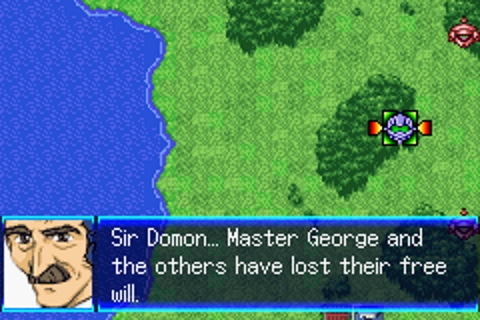 Then he drops his Death Army buddies on us, backed up by his jerksquad made up of all of Domon's friends. Domon thinks they're evil of their own free will somehow but luckily the butler is fine and manages to come and tell us their will was stolen from them! That means we're going to have to fight them!  Yurika's not really coping so well here but she's got the right idea. 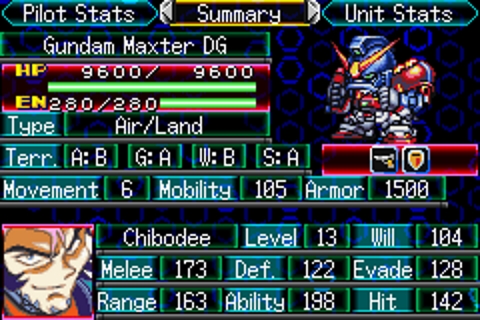 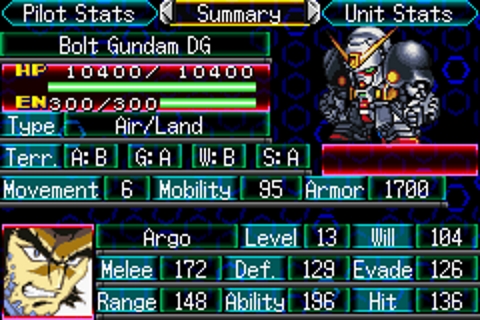 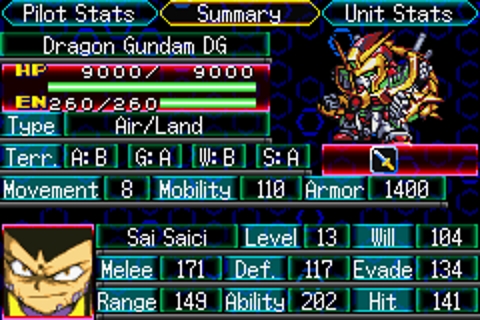 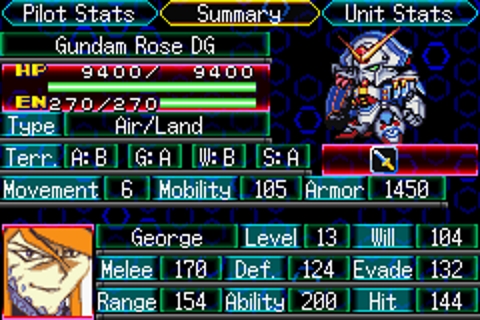 So these G-Boys are our minibosses for the middle of the stage, and they're going to be a pushover. They're not that dodgy or durable. Argo's the toughest to take down by virtue of his HP and armour, and George has a MAP attack which is notable not for its damage but for the fact if he uses it we can't retaliate and hurt him. Continuing our turn I throw everyone else in the Nadesico and Archangel (including Domon who decided to get out again) and woosh them at full speed towards the Death Army. Enemy phase the Death Army trickles forwards. I hope they like punches! Turn 7 - Tetsuya catches up quick as I expected, and everyone else piles out of the clown cars to fight. Lots of Death Army boys start dying, and the child-crew members of the Archangel hit level 12. Enemy phase most of the Death Army suicide onto the Archangel, and the G Boys come running in to trade some hits with our battleships. Turn 8 - We start whittling down our Shuffle-buddies. Tetsuya removes Sai and hits level 15. Enemy phase the last of the Death army dies to Koji, and Combattler V's team removes Chibodee to hit level 15. George uses his MAP to ensure we won't be taking him out this turn. Koji bops Argo and also hits level 15! Turn 9 � We pool our punches and Char finishes off the Rose Gundam. 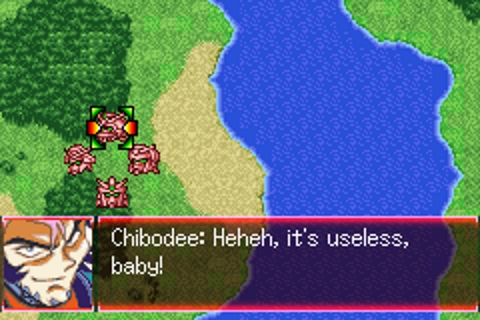 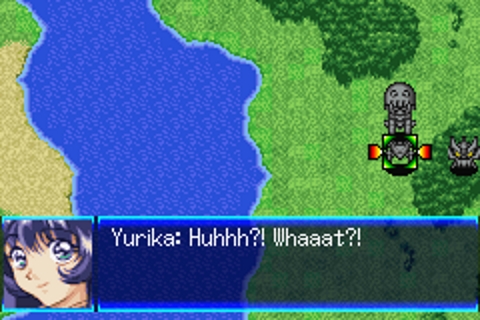 Oh no! They revived due to the DG Cells somehow! 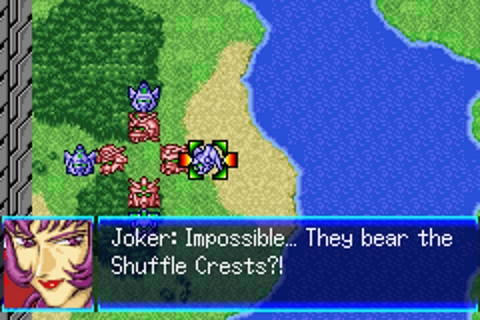 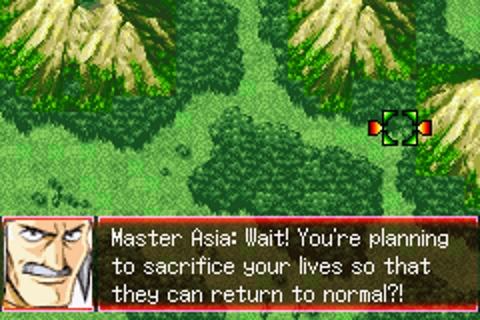 The Shuffle Alliance arrives and quickly realises that Domon's friends are all successors to their Shuffle power or something I don't know it's weird, but anyway they do what they always do which is literally nothing helpful and sacrifice themselves to save the dudes. Master Asia can't decide if he's cool with this or not, but at least it means there's no one to stop him from doing that super cool trick he likes where he has the Devil Gundam hide nearby and jump out to attack people and infect them with DG Cells right? 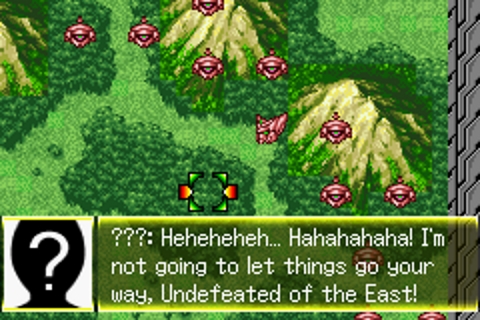 I feel like this is karmic justice for trolling me but anyway some mysterious third party saves the day. But who are they?! 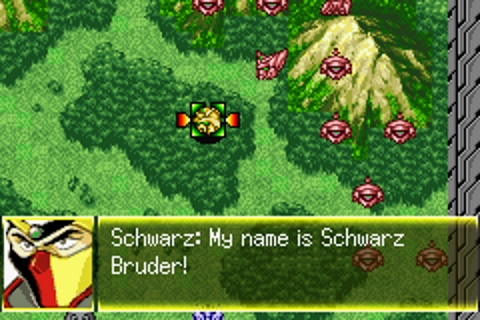 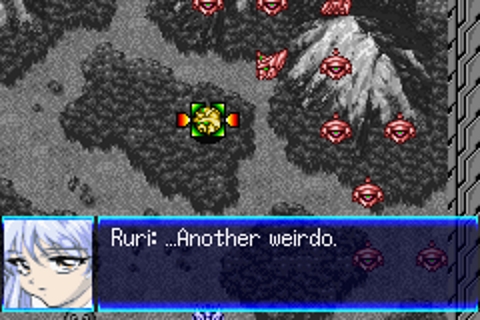 I hear ya, Ruri. Koji and Combattler V move up to bop some snoots. We only need to kill either Master Gundam or Devil Gundam to beat this stage, much as before. The Master Gundam is a fair bit beefier this time and in some trees, but the Devil Gundam is going to be both hiding in the mountains and regenerating its health the whole time so you know what? Not worth it. Enemy phase Death army goons bounce off of my two super robots, the Devil Gundam takes a swing at Koji but Char protects him, and Master Asia fails a MAP attempt. Not too bad really. Turn 10 � Tetsuya catches up and keeps killing Death Army goons, Boss helps out Char and hits level 14. The Archangel's laminate armour also has made it completely invulnerable to the Death Army goons, it's great. We clean some more up, and then... Enemy phase the Archangel tanks and spanks, Murrue and Natarle hitting 13. Master Asia keeps MAPing and it doesn't do much. Turn 11 � The last mook dies, and it's time to mob Master Asia. He's way more tanky this time though, but still doesn't regen. Mazinkaiser actually takes a bit hit. Enemy phase not much changes to be honest, the old man just throws out his MAPs and that's about it. Turn 12 � Boss heals up Mazinkaiser and hits Level 15. We Daunt Master Asia and just keep on swinging! We get the big guy low and then it's time to bust out our biggest gun. See, now we have Mazinkaiser we've unlocked a twin-attack with Great Mazinger. Actually we've unlocked two between them but the one we wants is the strongest one. 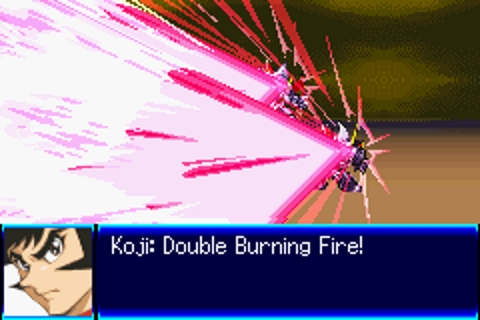 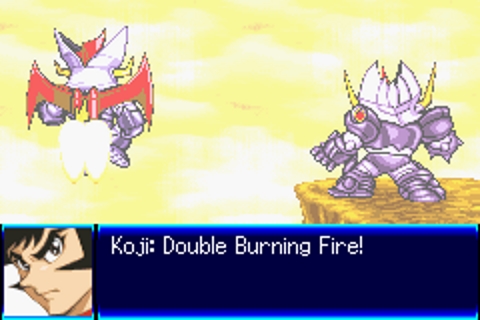 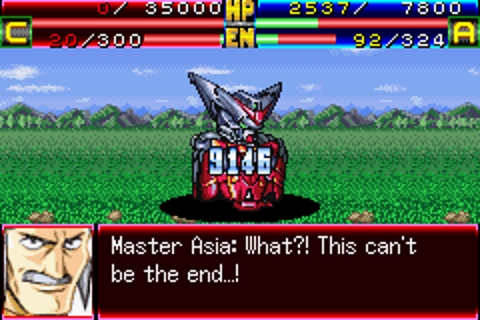 I definitely need to make sure I keep the Mazinbros tucked together more often than not. It's definitely helpful. 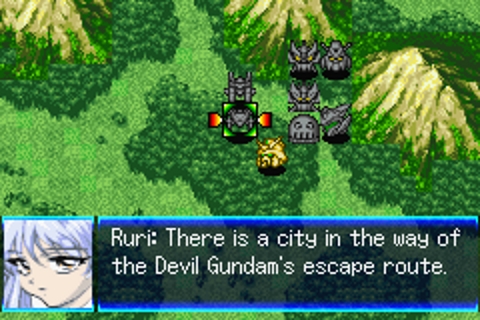 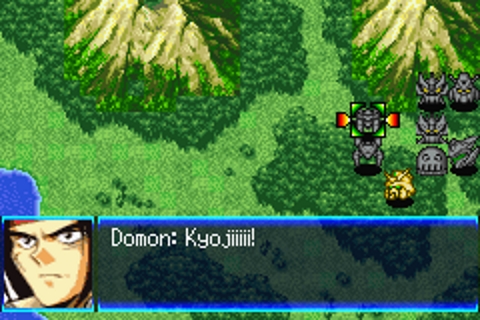 The Devil Gundam decides to run amock but Yuu is able to use the power of his Brain to protect the area with only a small amount of damage. 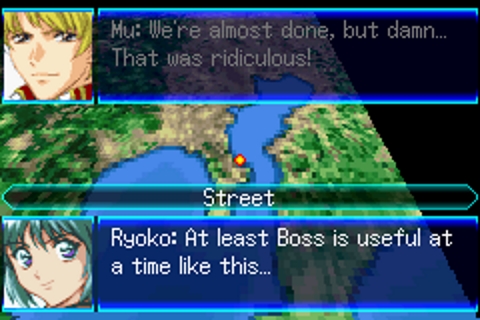 In the aftermath everyone works together to fix the town, and it's apparently Natarle's idea to do it which she works fast to undermine by telling them to arrest Yuu. Except Yuu left earlier and no one really wanted to do it anyway considering he saved the whole town. I didn't screenshot it all because holy poo poo I've done too many already THANKS NEW ENEMIES. The moral of the story is Natarle's a fuckin' idiot. Oh and the G Boys are joining us, which means I get a new unit next mission. Too bad that's not going to make up for the two units the game is taking off me next mission. Turn count 137 Next Time on Super Robot Wars J! Koji Kabuto Dies In High School Reunion
|
|
#
?
Jun 13, 2019 07:51
|
|
|
You know, Domon's kind of an rear end in a top hat and a dumbass in G proper, especially early on, but he gets enough good moments that he's still likable and seems like a guy you want to to have around. Here... not so much. It's a huge contrast with T, where he comes in post-series and is basically a mentor figure to a decent chunk of the cast.
|
|
#
?
Jun 14, 2019 06:58
|
|
|
Stage 19: 4/86 turns Upgrades and equipment: Belzelute: Mega Booster, Apogee Motor Layzner: High-Eff OS, HE Radar 2x Dancouga: Large Generator, Hit & Away, Support attack +1, Weapons +2(10) Launch Strike Gundam: Dustproof, HE Radar Nadesico: Booster, Apogee motor x2, propellant tank Archangel: Booster x2, Flight Unit, Propellant tank Aestivalis Akatsuki - artillery frame: HE Thrusters, Dustproof, Hyper Sensor Buldy: Stable OS x2, Sniper Scope Lasse Brain: Support Defend +1 Dancouga hits weapons 10 and gets all S ranks as it's full upgrade bonus. Akatsuki has a role to play this stage, but I don't want him to be attacked, so he's loaded up with mobility parts. Roanne takes the Buldy, Simone Baybull.  So, stage 19. Because I went Archangel route, it's my first time dealing with Hakkeshu bots. We have to defend a city from them. Zeorymer and Akatsuki jump into the Nadesico. I did this stage in 4 turns, but with a strong enough team a 3 turn is also possible.    Calvina, Eiji and Dan move up and attack them. Eiji has focus and accel cast, Dan has Wall, Spirit and accel, Calvina has focus and snipe.   Lasse and Kira move.  Nadesico moves as well.   The other units move as well, and it ends up looking like this. Simone and the Archangel head south.  Start of turn 2.    Akatsuki jumps out of the Nadesico with Accel and Alert cast, and attacks one of the Hakkeshu bots with support from Dancouga, Kira attacks the other one with support from Eiji. Finally Eiji attacks as well.   Dancouga casts Alert and Accel, attacks the southern Hakkeshu bot, then jumps into Nadesico.   Calvina gets a Cheer, Bless and Valors, then off the southern Hakkeshu. She then moves into Nadesico.   Roanne attacks something and heads into Nadesico as well.  Finally, Lasse does the same.  Nadesico then books it south. Simone and Archangel also get into position.   Nanga and Izumi block some enemies from getting into the city. End turn.   Start of turn 3. The Boazans dropped in on enemy phase and did quite a number on my battleships.    The situation up north first. The Hakkeshu gang will leave when the second boss is dead, so I first get some kills.  Then Kira gets a Cheer and a Bless, and sends the boss away. Doing it with Layzner would have given me more money, but Kira is tied with the Original character for earliest Valor and I'm going to push for it in the next couple of stages. Eiji moves down as far as he can, off-screen.  Next up, the situation down south. Nadesico pops it's propellant tank, then casts Guard and Snipe for the next enemy phase and MAPs some fools.  Simone gets a Cheer, then moves in to kill something with Archangel's support. This pushes her to level 18, and Bless.  Archangel pops its propellant tank as well, then Guts and Guard, and MAPs the Katonbo's.  Dancouga comes out with accel and Guard cast, and attacks the skullhead boss.   Lasse and Roanne set up.  Then Calvina comes in as well.  Turn 4. The way I recorded it isn't exactly the same as the way I ended up doing it, but it's close enough.  First order of business; Dan casts Gain and Luck, then sends the boss packing.  Roanne gets a Bless as well, and sends one of the Katonbo's off.   Simone resupplies Archangel, then Archangel kills the second Katonbo with Luck and Gain up.  Nadesico kills something with Luck and Gain up.  As does Calvina with Bless. What happened in the final product: Eiji moves down and attacks the grunt left of Nadesico, Nadesico moves next to Archangel and picks off one of the grunts there. Calvina takes the second Katonbo instead of Archangel, which goes for one of the remaining grunts instead. Lasse goes for the right most grunt and kills it.
|
|
#
?
Jun 17, 2019 16:29
|
|
|
Stage 20: 4/90 turns Upgrades and equipment: Nadesico: Multi Lock-On SYS, Large Generator, SP +10 (on yurika) Archangel: Flight Unit, Hit rate +5 x2 Belzelute: Mega Booster, Apogee Motor, Hit rate +5, SP +10 Layzner: Booster x2, Apogee Motor, Range +5 x2 Dancouga: Large Generator, Hit & Away, Support attack +1 Launch Strike Gundam: flight Unit, HE Radar, Support attack +1 Aestivalis Akatsuki - air frame: Apogee Motor x2, HE Radar, evade +5 x2 Buldy: Booster, Stable OS x2, Sniper Scope Lasse Brain: Hyper Sensor, HE Radar Akatsuki once again plays a significant role. Ruri still pilots the Nadesico, but I equip Yurika with an SP +10 part. Eiji has all his points put into range. Calvina gets to choose her subpilot at the start of the chapter once again, and I stay with Katia.  So, this chapter. It's the first time I'll be tangling with Boson Jump and then Orgone Cloud enemies. This means they have a flat chance of dodging an attack, outside of normal dodge chance. This chapter took a while to figure out. What needs to happen this map is A) the initial enemies need to be destroyed by turn 3 B) the Layzner reinforcement wave needs to be dealt with on turn 3 player phase C) the Nadesico reinforcement wave has to be destroyed by turn 3 D) enough damage has to be present on the north eastern part of the map to kill the boss in one turn  Dancouga and Archangel move to the south. Dan casts Focus, accel, guard and Spirit. Archangel has Focus, Accel and Spirit.  Kira, Simone, Nanga and Izumi head north. Kira's position here is important     Calvina casts Snipe and attacks the Tetsujin, Akatsuki attacks a Katonbo, and Layzner attacks something. Nadesico, Roanne and Lasse move.   The situation at the start of turn 2. All but one Batta suicided on to Layzner and Calvina on enemy phase, which triggered the Lazyner and Nadesico reinforcement waves. The Tetsujin teleported and attacked the Nadesico.    The Layzner wave has to be dealt with now. Lasse clears a path for Eiji, who moves in to oneshot a Scanned Gueler with a crit and a cheer. The rest of the wave retreats. Gueler will use a repair kit if damaged, so this has to be a oneshot.  Further north, Akatsuki casts alert and snipe, and attacks one of the Katonbo's with Calvina's support. Getting enough damage in the west to kill the Katonbo's by turn 3 was one of the big challenges to getting the 4 turn, and the entire reason for Akatsuki's presence, as he's the only pilot available with Snipe.     In any case, Tetsujin gets scanned, Roanne attacks it and moves, then Calvina gets a bless and Snipe, and finishes him off. Calvina then jumps into the Nadesico to get ferried.    In the south, Dancouga and Archangel take care of what remains of the enemies with MAPs. Dan casts focus, accel and Luck. After attacking, it moves north.  In the north itself, my units set up. End turn.  Turn 3. One of the Katonbo's suicided on Lasse on enemy phase. Now I need to deal with the remaining one, and the last Batta.   I forgot to take a screenshot, but Lasse kills the last Batta with support from Akatsuki, then Akatsuki attacks the Katonbo. Finally, Eiji comes in with a Bless and offs it on a crit. In hindsight, it might have been a good idea to send Simone west, so I wouldn't have to rely on a crit here.  Down south, Archangel casts Luck and kills the last remaining Katonbo.  And the final wave spawns in.      Dan casts Accel and Guard, then moves and attacks Ja-Mu. Nanga lands, Izumi casts focus and break, and attacks as well. Then Nanga attacks, and finally, Kira gets the kill with a cheer up. This gives him Valor. This kill is entirely optional, by the way.     Simone attacks a grunt, then Calvina kills it and moves. Nadesico moves next to her, as does Roanne who also repairs for exp.  Turn 4. Al-Van gonna get rushed down. Yurika casts Tire on him twice, and he gets scanned as well      Folks pile on him. Kira has Valor up, Dan has Strike, Wall and Break up.    With Al-Van in kill range, the left over units grab a few kills.  Calvina casts focus, break, valor and gets a bless and cheer, and goes for the moneyshot. Dance Officer fucked around with this message at 15:10 on Oct 3, 2019 |
|
#
?
Jun 21, 2019 18:59
|
|
|
Super RoboKy Draft Wars Episode 17: Ashura and You Shall Receive I'm really off my screenshot game today I'm sorry. If this were a Tomino series I guess this episode would have been called �Whisperd� or something. 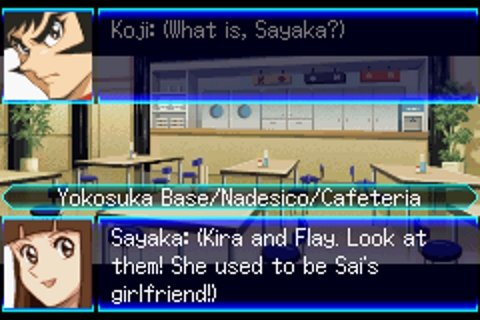 Still a little bit of catching up with everyone going on here, everyone talking about how Kira totes seems to be a lot different but also seems to be spending lots of time with Flay. What could possibly have happened?! Kira got laid. 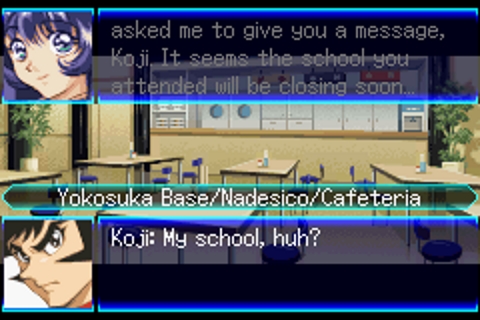 Apparently the school Koji, Sayaka, Boss, and Char went to is being closed down on account of the war mostly trashing the poo poo out of the surrounding area. And the multiple alien invasions. I like this touch because it helps point out just how hosed up the world is at this point. 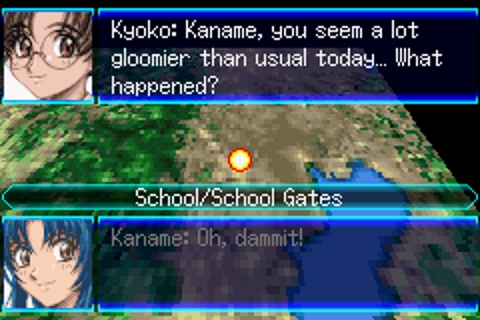 Kaname was in the intro of the game talking about how crazy and from another world all the Photon Labs people were, but whie they've been gone she's been having to put up with this weird guy named Sosuke causing her all sorts of trouble. A real military enthusiast constantly getting in the way. She often beats him up with a large paper fan, but now the school is getting closed down there's a distinct feeling of sadness because she might never see him again. Similarly Koji, Sayaka and Char have turned up to see their old school one last time. Char remarks that he just doesn't even feel a sense of longing to return to his old life. He cares too much about using what he has to try to save the world. 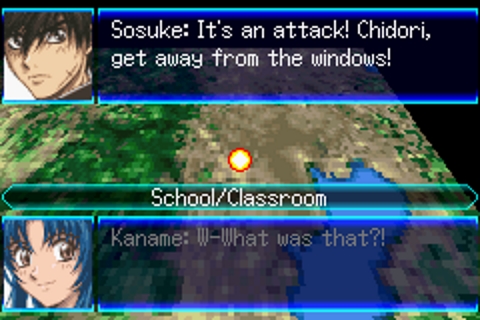 Then someone crashes the party, and we see that yeah, it's our Sosuke from before and he seems to have been focused on protecting Kaname. No worries I'm sure we'll just do a mission where we have to defend the school from-  Oh no wait actually we're hosed Koji, Sayaka, Char and pretty much everyone at the school were kidnapped by Baron Ashura. That's about 200 or so people I think? Boss was actually on the scene with his Borot and almost saved the day, but the dude can't fly (his attacks can't even attack flying units, it's worth noting). Also Ashura broke away from the usual Dr. Hell convention and actually employed normal human mooks to help him instead of the usual corpses with computers stragged to them they usually get by with, said normal humans piloting Arm Slaves not too different from what we saw Sosuke and crew using earlier. 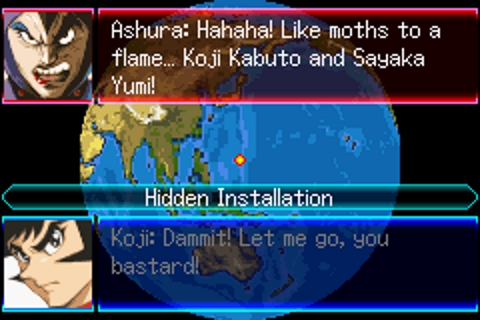 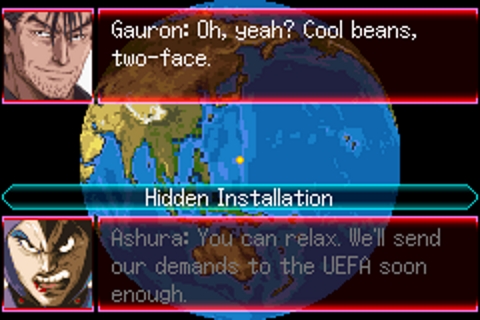 Unsurprisingly Baron Ashura is very aware of who he has captured when it comes to the Photon Labs crew, but apparently that's not who they came to get and the whole Kabuto kidnapping thing was just by chance. Instead Baron Ashura is working with an incredibly nasty fellow by the name of Gauron, and by all accounts he only needed one person out of the couple of hundred they've taken. Kaname Chidori. The rest? Collateral in case the UEFA wants to pursue. Also Gauron will probably just kill them because it's funny. 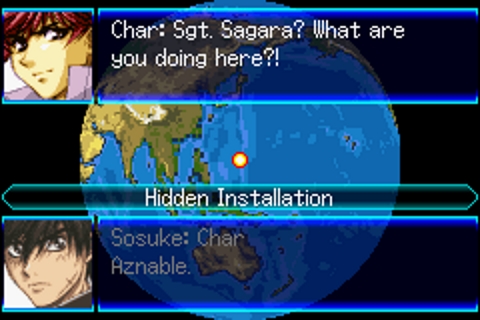 Sosuke almost reveals himself stopping Gauron from killing one of the teachers, and realises this poo poo might be a bit above his problem solving skills alone. Luckily for him no one really knew that Char was the pilot of a robot himself, and even though he doesn't have any particular training as a foot-sloggers, his combat experience makes him better than a regular civilian in the high pressure scenario. So off they go to try to find a means to contact the outside world, because if anyone can arrange a rescue it's Mithril. 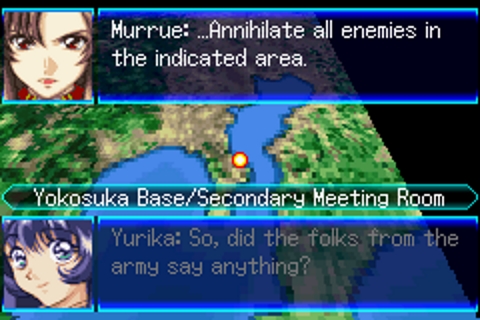 Unsurprisingly the UEFA is a little hamstrung on this one. They don't want to directly contribute to the deaths of the hostages but at the same time don't really have much of a plan. It certainly doesn't help that Baron Ashura has swoosed them all off into territory held by ZAFT. Fortunately Mithril gets in touch and they have a plan for a rescue, and it's going to require our heroes to head into the disputed territory and kick some butt as a decoy. Everyone but Natarle is cool with that. 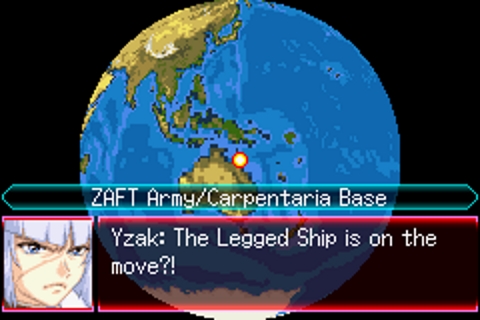 Yzak is super cool with that. Notice he has a scar now? Yeah on the other route he had a bit of a brush with explosions. Athrun is in charge of the crew in the territory, and Yzak is chomping at the bit to get into a fight. Athrun is still hesitant because he doesn't want to fight Kira, but reasons that since Kira should have gotten off the Archangel by now it should be fine right? RIGHT?! It's not like he's been guilted into continuing to fight right? 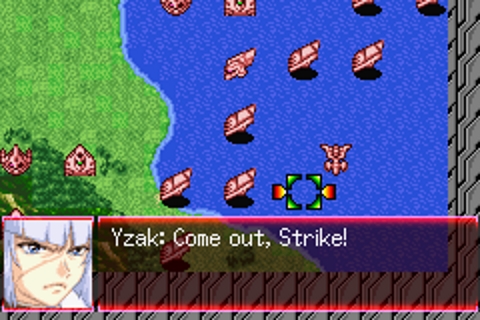 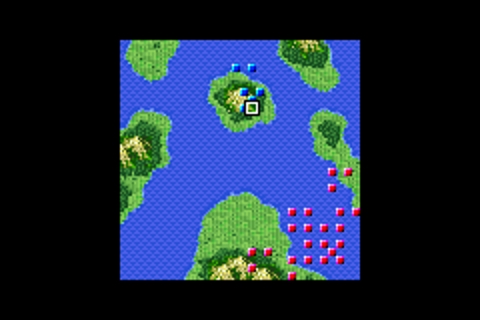 So we pull into the area and sure enough it's time to fight. Interestingly Yzak is going to get pretty pissed off because we aren't deploying Kira or the Strike. It's a nice touch. It's also a little rough on us because we're down two units, one of which is Mazinkaiser. Luckily we still have Combattler V who has been punching well above the weight I thought it was, and we do get ourselves one extra unit. A unit I apparently forgot to screenshot. But it's Chibodee in his AMERICA Gundam. You saw it last mission, and Chibodee is a like Domon in a lot of ways. He's not terribly dodgy which is a bad thing in this game but he's a decent damage dealer that will get more powerful later on so we can't complain too much about that. He rocks Counter and Potential Level 2 for abilities, and in his Spirit pool he has Strike, Wall and Fury which are pretty decent for what is a guy devoted to damage. Chibodee's a work in progress and he'll get better. Never quite as good as our better dudes but honest to god it's fine I'll let you know when we get our unit made entirely out of trash garbage (that isn't Boss). We also have loads of new enemy units to look at! 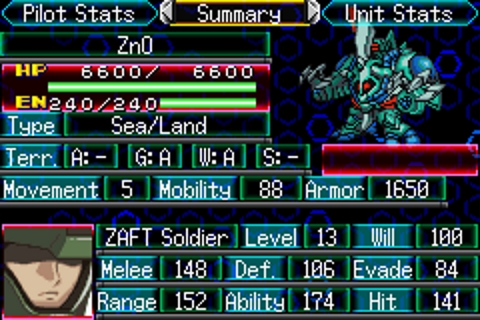 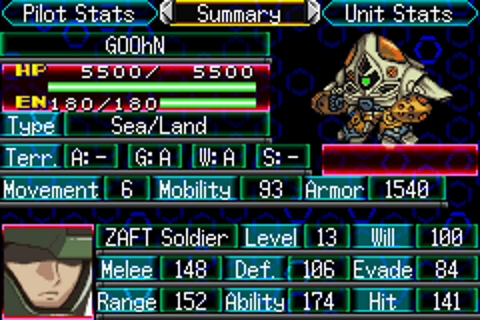 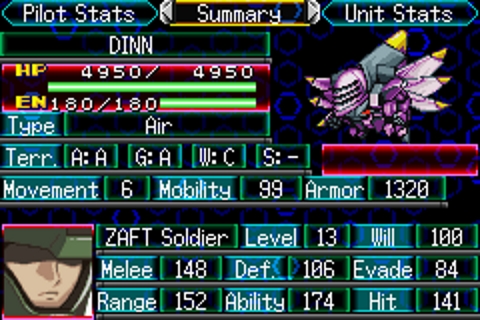 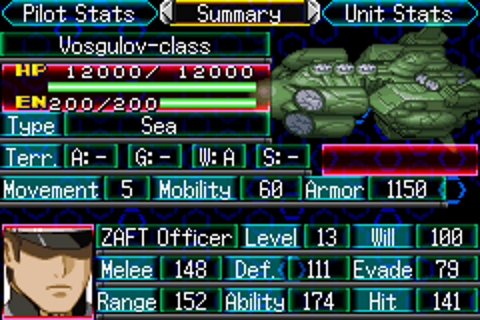 Three water foes and a flying enemy! G00hNs kinda look like ACGuys so hey they're just like Goons in general. Water combat can be troubling in SRW games whenever it happens, because beam weaponry gets neutered due to water and lots of units suck rear end in water. SRWJ has ample amounts of water to fight in and absolutely no Getter unit in sight what the gently caress. Can't say there's too much more about these guys, they have Coordinator and they're not afraid to use it. The DINN is a flying unit and they're mostly a non-threat unless there's lots of them and they get lucky. 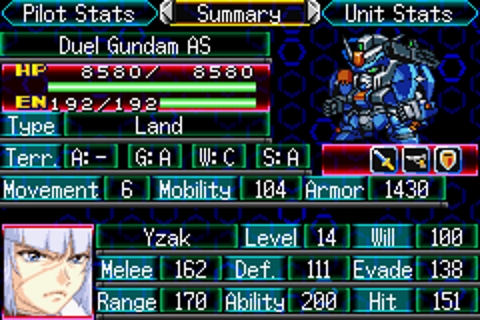 Yzak's not merely sporting a new facial injury, his Duel has actually received an upgrade from its plain vanilla flavour. A slightly different look, a smidge bit more armour right? WRONG. The Duel Gundam now has two lives. Destroy the first health bar and it reverts to its standard form with a fresh health bar at full, because the armour is sort of attached to the machine it isn't actually the machine. There's a few other units that do this in SRW games in general, and a few in SRWJ to boot. Yzak's armour doing that is also canon to SEED so I can't really complain, it's a nice touch. So the mission is to go down and punch some butts of the ZAFT guys to start off with. Let's get to it! Turn 1 � We move everyone down south, I plan on fighting on the little bit of land down there because Zaft has some good water-fighting units I want to try to draw onto land where Chibodee can actually fight. Enemy phase a few units advance but most just hold their ground. Turn 2 � We roar everyone down south some more, and unload some of our dudes. The Archangel kiddy-crew hit level 13, learning the Assault spirit. The rest just do some tapping and we see what happens next. Enemy phase the Archangel kills one enemy, and everyone else goes in swinging for Combattler V who tanks like a champ. Turn 3 - The Nadesico pops a sub-suit and hits level 15, Yurika learning Support Attack Level 1 which is GREAT. Also Great is great and he kills someone too, so does Chibodee for the first time, landing the first blow for Neo-America we'll see in this run. Boss repairs Combattler V some, and we prepare for more hurt. Enemy phase The DINNs push up and the Archangel hits back, with the commander-ladies hitting level 14. Natarle gets Support Attack Level 1 which would be nice if I put her as main pilot. Turn 4 � More destruction sees the kiddies on the Archangel hit level 14 and we learn Snipe which is nice. I say that a lot but +2 range is definitely a nice nice. We're chewing through the enemy at a decent enough clip, though the enemy G Boys are coming in hot now. Enemy phase the enemy battleship opens fire on the Archangel, and there's not really much we can do there because the beam weapons bristling on the Archangel cannot do more than 10 damage to anything in water. It sucks but we could take advantage of it to if we could. Turn 5 � Boss does some patch up work on Chibodee who took some fire, and hits level 16. We spread everyone else out so Yurika can do her MAP, and Miguel dies as a result which unsurprisingly upsets all the ZAFT boys. 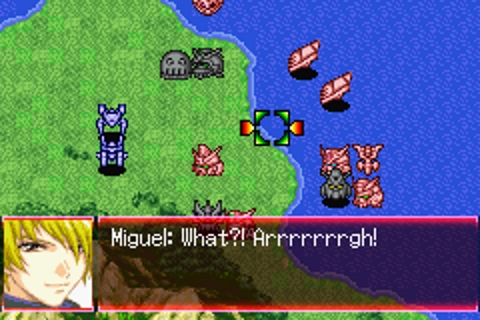 Don't put that on his tombstone, guys. I throw Combattler into the mix of everyone with Guard on in the hope everyone will target them and get mauled. Enemy phase the plan works a treat and the enemy forces starts piling into Combattler V. Athrun and Yzak go for the Nadesico and in spite of the fact it should be a no-chance to hit them, both catch Gravity Blasts to the face, and the Duel loses its first health bar. Turn 6 � The Archangel gets a support attack backup from the Nadesico and sends Yzak packing. 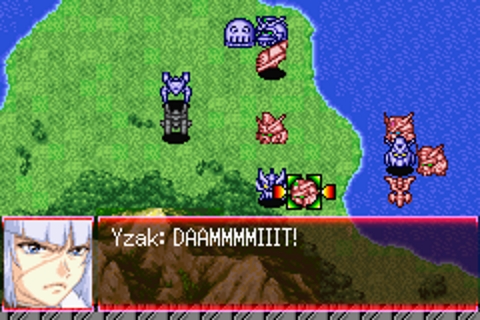 Poor Yzak, gets no revenge and loses a mentor figure all in the same battle. The entire crew hits level 15 and Murrue learns Support Attack Level 1 rendering Natarle pointless again. They also get Gain as a spirit. The Nadesico MAPs again and wipes out two units, one of which being the Blitz trying to hide in water. I don't think that 50/50 dodge ability works against MAPs but hey if I'm wrong that just means I got lucky and I don't mind. Yurika hits level 16 and learns both Support Defence Level 3 and Command Level 2. Command Level 2 is a big deal! Ruri learns Support Defence Level 1 and Command Level 1, just in case you feel like sending her out to fight. Combattler V drops Dearka, and Tetsuya removes Athrun which leaves us the subbleship and a water-mook. Enemy phase Boss kills the mook, and the battleship isn't long for this world, which means next turn is gonna be a big deal. Turn 7 � Tetsuya kills the battleship and hits level 16. 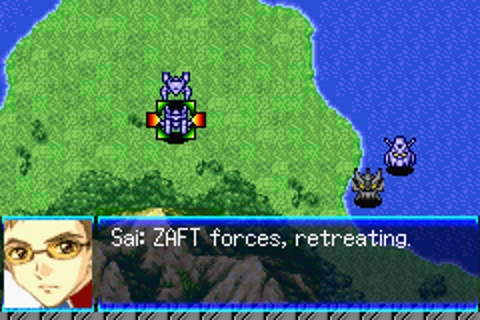 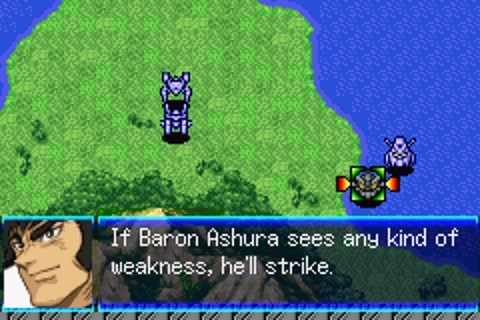 With our enemies taken care of the Nadesico operates its Baron Ashura calling whistle. It sounds like someone yelling �Oh no our units are weakened from fighting I hope no one attacks us! 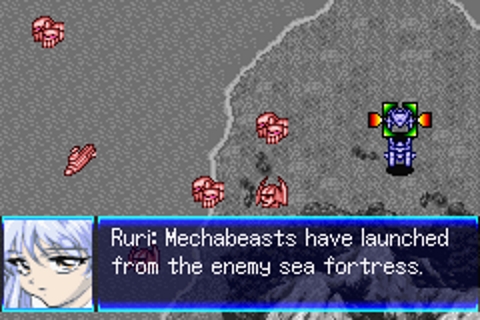 Hi Baron Ashura fancy meeting you out here! Nice submarine! We have to spend about five turns not killing too many enemies, but the game has no problem with you doing something like weakening them. We pull back since we have to spend the next six turns or so doing literally nothing in order to not fail the mission. In that way the best thing to do is just throw everyone in the battleships to restore them and just lure the enemies into a big, wounded blob. Enemy phase OH BOY HERE COME ENEMIES. I'm going to fast forwards a little I think. 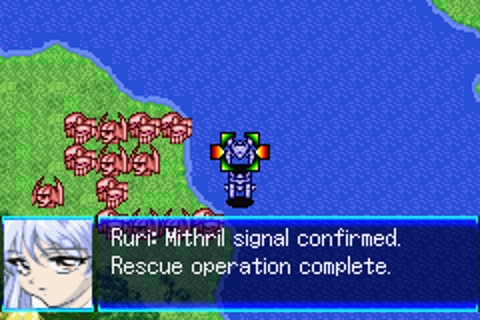 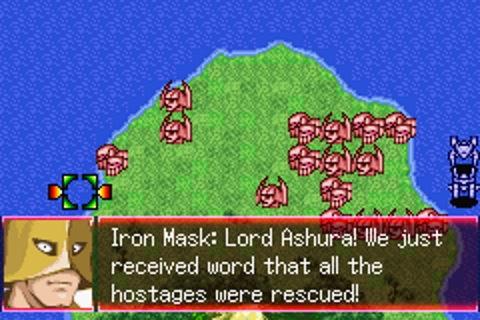 You know how those M9s the Mithril folks had could dodge enemy fire? Well apparently that's a cloaking system in play, and this technology is so practical they've slapped it on helicopters and just stealth-rescued an entire poorly attended school's worth of hostages. But that's not important! What is important is we can destroy them all violently now. 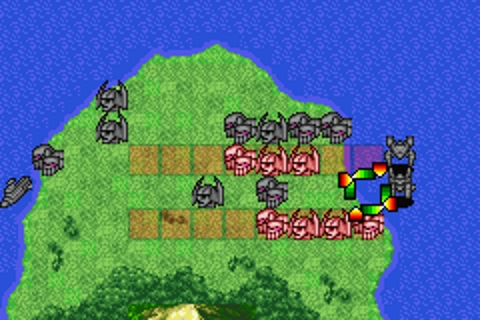 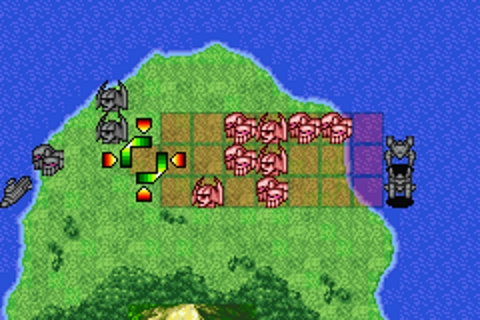 Turn 12 � I spent the entirety of that time drawing my opponents in, and wounding every single one that attacked with my battleships. As you can see, they're all conveniently placed! Not a lot is left after that as you can imagine, and everyone rolls right up towards Ashura. Two more die after our antics leaving the stragglers who didn't get MAP'd behind.  Fresh off of having a giant flying machine named Ghoul we have the giant submersible called Bood! Baron Ashura gets more vehicle variations than I think anyone else does in this game. We have not seen their final form yet. Enemy phase the enemy suicides on the Nadesico and Boss. Yeah that was weird. Turn 13 � There's not much left here but the Bood, so we plink it with our Battleships, and then just because he actually has enough Will to do it, I decide it's time to have Boss do his best attack and also fulfil a request that we kill Boss as often as we can. 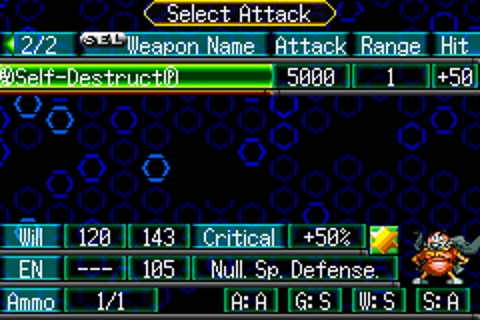 Yes.  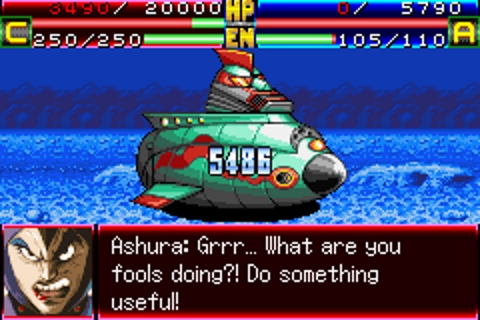 We finish the Bool off with Great, and the cost is high. 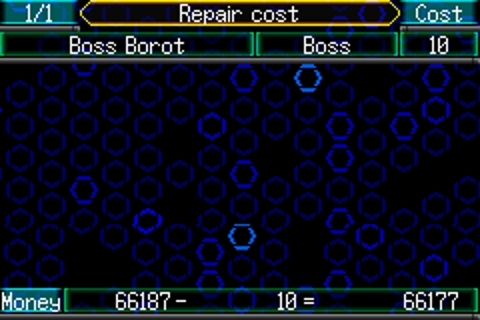 Sorry I just love that screen. A slight problem is noted post-rescue, we haven't got Koji, Sayaka or Char back in our hands and Mithril is keenly aware they have neither Sosuke nor Kaname rescued either. Truth is all five are on the hop running from Gauron's goons and Kaname is a little distraught that Sosuke is acting like he's in charge when he's in the company of actual heroes who fight to defend the world! Then when none of them know how to pilot a standard Arm Frame he has the gall to put his hand up to do it. A novice like him shouldn't try to get in the way like this, right? 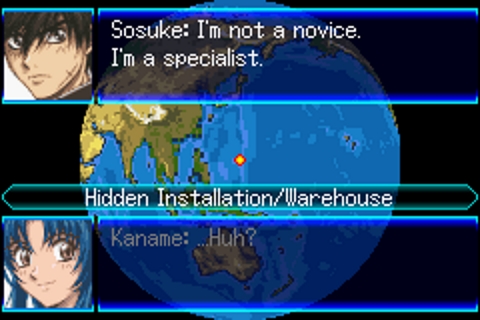 Sorry Kaname, but your entire world just got flipped on its head. Sosuke drops the truth and starts getting everyone out of there. 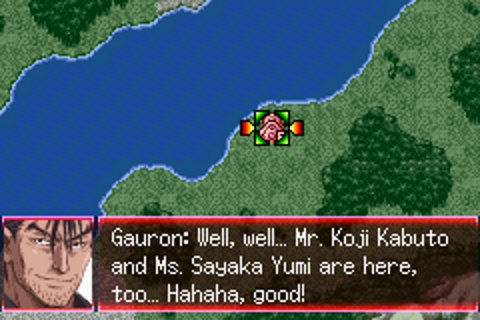  Problem is Gauron is still around, and he refuses to let either a Whispered or his old favourite little boy of war Kasshim go. That's Kaname and Sosuke by the way, with the latter he has some history and it's not a good one. Actually it's one where one was pretty sure they'd already killed the other one so hey that's kinda weird. Gauron's packing some unnatural technology to boot, and Sosuke's Arm Slave is quickly trashed. Things look bad for our heroes but hey, that's why this was just PART ONE. Turn Count: 150 Next time on Super Robot Wars J: Wow, this Lambda's complex.
|
|
#
?
Jun 22, 2019 06:37
|
|
|
thank you TheLastRoboKy
|
|
#
?
Jun 22, 2019 12:11
|
|
|
Stage 21N: 3/93 turns Upgrades and equipment: Nadesico: Booster, Large Generator, SP +10 (on yurika) Belzelute: Mega Booster, Apogee Motor, Hit rate +5, SP +10 Layzner: Booster x2, Apogee Motor, Range +5 x2 Dancouga: Large Generator, Hit & Away, Support attack +1 Aestivalis Akatsuki - air frame: Apogee Motor x2, HE Radar, evade +5 x2 Buldy: Booster, Stable OS x2, Sniper Scope No changes for this stage.  Stage 20 is a breather stage, nothing too challenging.     Everyone moves up. Dancouga has a Spirit, Accel, and Alert cast. Akito, now in his moon frame Aestivalis, moves away from his attackers. He won't be getting attacked at all.   Start of turn 2. A second wave appeared on enemy phase, after I killed a bunch of stuff.  Dancouga casts Accel, Guard and Focus, and moves and attacks here.  Akatsuki attacks the big ship.  Layzner damages something.   Calvina attacks and moves. She's almost out of EN, but surprisingly doesn't need any, anymore.     The scrub squad moves in.  Turn 3. Akatsuki casts Accel, Alert and Snipe, and damages... Genichiro? I forget his name, but he's one of the Nadesico baddies.  Calvina casts Bless, Cheer, Valor, Focus and sends him off.  Dancouga started the turn with ~300hp left, so it Gutses itself back to full health, then casts Luck, Gain, Focus and Guard, and offs the big ship.  Nadesico sprinkles some Cheers around, then MAPs some dudes.  Izumi gets a Cheer and a kill.  Roanne gets a Cheer, Bless and a kill.  Eiji hurts something. All the other enemies die on enemy phase, Roanne gets a surprisingly large amount of them. End stage. Dance Officer fucked around with this message at 15:11 on Oct 3, 2019 |
|
#
?
Jul 6, 2019 16:31
|
|
|
I do just want to poke my head in and let everyone know I'm out of the country and away from my usual stuff for three weeks starting tomorrow so I won't be updating my journey through robots punching one another.
|
|
#
?
Jul 7, 2019 00:47
|
|
|

|
| # ? May 4, 2024 07:15 |
|
|
Stage 22N: 3/96 turns Upgrades and equipment: Nadesico: Booster x3, Apogee Motor, SP +10 x2 (on yurika) Belzelute: Booster, Apogee Motor Layzner: HE Radar x3, Range +5 x2, Weapons +1(11) Dancouga: Mega Booster, Hit & Away, Support attack +1 x2 Aestivalis Akatsuki - air frame: Apogee Motor, evade +5 x2 Buldy: Booster, Stable OS x2, Sniper Scope A few changes. Layzner gets an upgrade to weapons to oneshot a bunch of enemies. Yurika gets 20 SP because it gives her an extra Cheer cast. Dan gets the Mega Booster to get enough movement, though I suppose 2 boosters would have done the same job.  Start of the stage. This is once again a breather stage. All you need to do is kill Genichiro and then wipe out a bunch of Radam mooks.  The scrub squad jumps into Nadesico, everyone moves.  Layzner heads down here. He moves to where the Radam wave will spawn.  Start of turn 2.    Everyone starts laying into the Martians. Dancouga has Guard, Focus and Spirit cast.  Layzner moves to this spot.  Start of turn 3. A bunch of mooks died on enemy phase and a reinforcement wave arrived. Oh, and Dan got pretty close to dying. Again, all that matters is Genichiro biting the dust.   Simone and Roanne both get a Bless, a Cheer and a kill.   Izumi and Akatsuki have to make do with just a Cheer.  Nadesico offs a random mook. Looking back, I could have swapped some parts around to give it a Katonbo kill, but it's not a big loss.  Calvina Valors and Blesses up, then takes out the Martian mothership.  Dan Gains, Lucks, Focuses and Breaks and sends Genichiro packing.  Queue all the Martians leaving the stage.  Only for some Radam trash to enter. If I set up Layzner here, all of them except for the targeted one will attack him on enemy phase, and die. Dance Officer fucked around with this message at 15:12 on Oct 3, 2019 |
|
#
?
Jul 7, 2019 16:33
|
|