


|
 Paper Mario? Paper Mario is a Mario RPG for the Nintendo 64, released by Nintendo and Intelligent Systems in 2001. It's a classic, and worth playing and replaying over and over again. Wait, I Don't Recall Nintendo Making a Master Quest, Though... You're darn right they didn't! Paper Mario: Master Quest is a romhack by Emperor_Thamz, purseit, Rain, Brotenko, JaThePlayer, and others - adapted from the earlier Paper Mario: Pro Mode romhack, which also increased the game's difficulty. Not only does Master Quest make fights tougher, but it also promises, "New Badges! New Enemies! New Maps! New Minibosses!" Blind. I haven't gone any further... yet. I foresee a rough and bumpy time. About the only other thing I know about the game is that you can fight Koopa Koot at some point.  Yeah, um... I ended up becoming part of the Master Quest dev team. For real. So this is almost exactly the opposite of a blind run now! And now (Jan 2021) I kind of am the dev team's head. I'm nervous, but we shall see this grand project through to the end. So How's This Gonna Work? This will be a screenshot LP. I'll post screenshots of my adventures, together with my commentary on exactly how Mario's adventure has been rewritten. I'll try to explain enough so that you don't have to have familiarity with Paper Mario to understand this LP - but it might help if you do, as I'll be highlighting any differences (no matter how small!) between the original game and this romhack as I encounter them. Spoiler Policy This no longer applies. Go nuts. So, without further ado... Can I Play Along? Sure can! The most recent versions of the patch are on GitHub: https://github.com/Brotenko/PMMasterQuest I recommend downloading and playing the easier 'Jr.' patch, for your enjoyment and sanity. Master Quest v1.2.1.0 (This is the previous version of Master Quest before 1.3. It's linked here for historical reasons.) You can patch your Paper Mario ROM (which should have a .z64 file extension) with the Star Rod Web Patcher. If your rom has a .v64 or .n64 file extension, you might need to use the Offline Java Patcher instead. I do NOT vouch for the quality or completeness of any of the linked files. Table of Contents Introduction - Mario Be Trippin' Prologue - A Plea From the Stars Part 1 - In Which Mario Discovers Ancient Ruins Outside Goomba Village Part 2 - The Goomba King Gets Buff Part 3 - The Mushroom Mafia and the Mountain Part 4 - Chuck Quizmo and Other Diversions Chapter 1 - Storming Koopa Bros.' Fortress Part 5 - Fuzzies, Bigoombas, and Koopas, Oh My! Part 6 - Mario Go Boom Part 7 - Bombette, Burgling, Bros, �Bowser�, and a Bill-ion Bullets Post Chapter 1 Part 8 - Into The Pit #1 Part 9 - Tass Times in Toad Town Chapter 2 - The Mystery of Dry Dry Ruins Part 10 - Of Clefts and Other Big Rocks Part 11 - Dune and Out in Dry Dry Desert Part 12 - The Secrets of Dry Dry Desert Part 13 - The (Pokey) Mummy Returns: Tomb of the Marios Part 14 - Later, Chompinator Post Chapter 2 Part 15 - The Dry Dry Quiz Show Scandal (and Other Misadventures) Part 16 - Toad Town Runaround Part 17 - Toad Town Underground (ft. Sexy Blooper) (also includes Into the Pit #2) Chapter 3 - The 'Invincible' Tubba Blubba Part 18 - The Boos and the Bees Part 19 - Mario In the Dark Part 20 - Gulchin' Makes Me Feel Good Part 21 - Mario�d Never Join a Clubba That�d Have Him as a Member Part 22 - A Tale of Red Clubbas (and Tubba Blubba) Part 23 - The Heart of the Chapter Post Chapter 3 The Great Master Quest Changelog Hunt (VERY IMPORTANT) One More Changelog Thing Chapter 4 - Trials in the Toy Box Part 24 - Big Trouble in Little Toad Town Part 25 - Saving Private Tayce Post Chapter 3 (Belated) Part 26 - The Great Star Piece Hunt, or: Mario vs. The Master Part 27 - Into the Pit #3 Master Quest Senior Chapter 4 (Continued) Part 28 - Bedazzled Part 28 1/2 - The Downfall of the Big Lantern Ghost (as Told by Someone with Four Thumbs) Upcoming Balance Changes - Big Lantern Ghost Part 29 - General Guy: The Quackles Review Post Chapter 4 Upcoming Innovation(?) - Unblockable Attacks Part 30 - A Gourmet Battle, or: How I Learned to Stop Worrying and Love the Bob-omb Chapter 5 Part 31A - Welcome to the Jungle (1) Part 31B - Welcome to the Jungle (2) Dev Team Quackles Joins the Dev Team Dev Blog Update: Badges 'n' Items Dev Blog Update: Behind the Curtain Dev Blog Update: The Case of the Misdirected Train Dev Blog Update: Nerf Day Dev Blog Update: The Milestone System Dev Blog Update: Milestone 1 Complete, Thamz Abdicates (IMPORTANT) Thamz Plays Master Quest! (2.0 demo) (IMPORTANT) Dev Blog Update: Cool Milestone 2 Stuff Cross-Promotion - Paper Mario: Black Pit Milestone 2 Complete! Cross-Promotion - Randomizer! {more to come...} Appendices Differences Between Master Quest and MQ Jr., Part 1 Differences Between Master Quest and MQ Jr., Part 2 A Brief History of the Anti Crew Bonus Content Whacka's Revenge (by Explopyro) Whacka's Revenge II: Battle Stats It's a Lovely Morning in the Mushroom Kingdom... (thanks to chitoryu12) Quackles fucked around with this message at 04:32 on Mar 6, 2022 |
 #
¿
Jul 19, 2019 05:40
#
¿
Jul 19, 2019 05:40
|
|


|

|
| # ¿ May 22, 2024 15:28 |
|
|
Badge List Here's a list of all badges (we've found) in the game, along with notes detailing the updates for Master Quest. It'll be updated semi-regularly.  All or Nothing: Gives Mario +1 Attack, but if he fails to make an action command, he does no damage. All or Nothing: Gives Mario +1 Attack, but if he fails to make an action command, he does no damage.Changes: Requires 1 more BP to equip (4 in base game). Costs 100 coins more to buy from Rowf's shop, too.  Attack FX B: Makes Mario's attacks sound like a slide whistle. Attack FX B: Makes Mario's attacks sound like a slide whistle. Attack FX C: Makes Mario's attacks sound like someone saying, "Oh!" Attack FX C: Makes Mario's attacks sound like someone saying, "Oh!" Attack FX D: Makes Mario's attacks sound like a bell. Attack FX D: Makes Mario's attacks sound like a bell. Berserker: Gives Mario +2 Attack and renders him immune to status effects, but he acts on his own - this includes deciding who and how to attack! Mario won't use Items or Star Powers while wearing this Badge. You can still help Mario out by performing the Jump and Hammer action commands on cue, but the visual prompts won't display. Berserker: Gives Mario +2 Attack and renders him immune to status effects, but he acts on his own - this includes deciding who and how to attack! Mario won't use Items or Star Powers while wearing this Badge. You can still help Mario out by performing the Jump and Hammer action commands on cue, but the visual prompts won't display.���������� Added: New in Master Quest. Free to equip. Bought from Donlow for 5 Star Pieces.  Damage Dodge: Increases how much damage your dodge action command protects against, by 1. Damage Dodge: Increases how much damage your dodge action command protects against, by 1. D-Down Jump: For 4 FP, a jump attack that ignores enemies' Defense. D-Down Jump: For 4 FP, a jump attack that ignores enemies' Defense.Changes: Costs +2 FP. Each hit does 1 less damage than a normal jump. Moved from Tubba Blubba's Castle to Jade Jungle.  D-Down Pound: For 4 FP, a hammer attack that ignores enemies' Defense. D-Down Pound: For 4 FP, a hammer attack that ignores enemies' Defense.���������� Changes: Costs +2 FP. Moved from Tubba Blubba's Castle to Rowf's shop after Chapter 3.  Deep Focus: Let Mario charge more Star Energy when using Focus. Doesn't apply to his partners (Group Focus). Deep Focus: Let Mario charge more Star Energy when using Focus. Doesn't apply to his partners (Group Focus). Defend Plus: Mario takes 1 less damage from all attacks. Defend Plus: Mario takes 1 less damage from all attacks.���������� Changes: Requires 2 less BP to equip (6 in base game).  Dizzy Attack: Lets you make the frontmost enemy in a battle dizzy when you Spin Dash into them on the overworld. Dizzy Attack: Lets you make the frontmost enemy in a battle dizzy when you Spin Dash into them on the overworld. Dizzy Dance: For 6 FP, jump on all enemies a la Multibounce, with a 85% base chance to make each enemy dizzy. Doesn't need an action command. Dizzy Dance: For 6 FP, jump on all enemies a la Multibounce, with a 85% base chance to make each enemy dizzy. Doesn't need an action command.���������� Added: New in Master Quest. 2 BP to equip. Found in the Pit of 100 Trials.  Dodge Master: Makes dodge action commands easier to time. It upped the Power Bounce cap for most enemies, both in the base game and prior to game version 1.2.1.0. Dodge Master: Makes dodge action commands easier to time. It upped the Power Bounce cap for most enemies, both in the base game and prior to game version 1.2.1.0.�����������Changes: Requires 1 less BP to equip (2 in base game). Available in Rowf's shop after Chapter 1, instead of after Chapter 2.  Double Dip: For 5 FP, use two items in a turn. Double Dip: For 5 FP, use two items in a turn.���������� Changes: Requires 2 more BP to equip (1 in base game). Costs +2 FP.  Double Pain: Doubles the damage Mario takes. Double Pain: Doubles the damage Mario takes.�����������Added: New in Master Quest. Free to equip. Found in the Pit of 100 Trials.  Flower Saver: All moves that use FP cost 1 FP less (to a minimum of 1). Stacks with itself and Flower Fanatic. Flower Saver: All moves that use FP cost 1 FP less (to a minimum of 1). Stacks with itself and Flower Fanatic.���������� Changes: Requires 1 less BP to equip (6 in base game). The copy in Donlow's stock costs 5 Star Pieces less than the original game.  Flower Fanatic: All moves that use FP cost 2 FP less (to a minimum of 1). Stacks with Flower Saver. Flower Fanatic: All moves that use FP cost 2 FP less (to a minimum of 1). Stacks with Flower Saver.Added: New in Master Quest. 8 (!) BP to equip. Bought from Donlow for 30 Star Pieces.  FP Plus: Gives you 5 FP. FP Plus: Gives you 5 FP. Gambler's Jump: For 3 FP, jump on an enemy to do x0, x.5, x1, x1.5, or x2 the damage of a normal jump (equal probability). Gambler's Jump: For 3 FP, jump on an enemy to do x0, x.5, x1, x1.5, or x2 the damage of a normal jump (equal probability).�����������Added: New in Master Quest. 1 BP to equip. Found in Koopa Bros.' Fortress.  Gambler's Smash: For 3 FP, hammer an enemy with a damage bonus (or penalty) similar to that of Gambler's Jump. Will always do at least 1 damage. Gambler's Smash: For 3 FP, hammer an enemy with a damage bonus (or penalty) similar to that of Gambler's Jump. Will always do at least 1 damage.���������� Added: New in Master Quest. 1 BP to equip. Bought from Rowf's shop after Chapter 2.  Group Focus: Lets your partners also use Focus. Group Focus: Lets your partners also use Focus.���������� Changes: Requires 1 less BP to equip (2 in base game). Found between Dry Dry Desert and Gusty Gulch, instead of being on sale in the Badge Shop after Chapter 3.  Hammer Throw: For 3 FP, throw a Hammer to attack inconveniently placed enemies. Hammer Throw: For 3 FP, throw a Hammer to attack inconveniently placed enemies.�����������Changes: Requires 1 less BP to equip (2 in base game). Costs +1 FP, but does +2 extra damage.  Hold Fast: When in Danger, +1 Defense. 1 BP to equip. Hold Fast: When in Danger, +1 Defense. 1 BP to equip.���������� Changes: Was originally 'Close Call' - for 1 BP, Mario had a 33% chance to dodge attacks while in Danger.  HP Plus: Gives you 5 HP. HP Plus: Gives you 5 HP.���������� Changes: An extra copy of the badge is added to the Pit of 100 Trials, for a total of 4 in the game.  Ice Power: Mario's attacks do 2 more damage to fiery enemies; he can also jump on them safely. Ice Power: Mario's attacks do 2 more damage to fiery enemies; he can also jump on them safely.���������� Changes: Requires 1 more BP to equip (2 in base game).  I Spy: Lets you know when you're in a room with a hidden Star Piece panel. I Spy: Lets you know when you're in a room with a hidden Star Piece panel.���������� Changes: Free to equip (1 BP in base game).  Jump Charge: For 3 FP, charge Mario's Jump, adding 2 damage to the next Jump attack. Stackable. Jump Charge: For 3 FP, charge Mario's Jump, adding 2 damage to the next Jump attack. Stackable.���������� Changes: Costs +2 FP. Now caps at +6 damage (no cap in base game).  Medicine Man: Healing items, in battle, give 50% extra HP and FP. Medicine Man: Healing items, in battle, give 50% extra HP and FP.���������� Added: New in Master Quest. 2 BP to equip. Found in Rowf's shop after Chapter 3.  Mega Rush: When in Peril (1 HP exactly), Mario's Attack is boosted by 4. Does not stack with Power Rush. Mega Rush: When in Peril (1 HP exactly), Mario's Attack is boosted by 4. Does not stack with Power Rush. Multibounce: For 2 FP, jump on every enemy in order. Multibounce: For 2 FP, jump on every enemy in order.���������� Changes: Available in Rowf's shop after Chapter 2, instead of after Chapter 1.  Pay-Off: If Mario gets beaten up a lot during a battle, enemies will drop more coins afterwards. The number of coins dropped will be equal to the damage Mario took. Pay-Off: If Mario gets beaten up a lot during a battle, enemies will drop more coins afterwards. The number of coins dropped will be equal to the damage Mario took.���������� Changes: Requires 1 less BP to equip (2 in base game). Costs 2 Star Pieces more to buy than in Paper Mario.  Peekaboo: See enemies' HP without Tattling them. Peekaboo: See enemies' HP without Tattling them.�����������Changes: Requires 2 less BP to equip (3 in base game). Moved from Merlow's collection to the Pit of 100 Trials.  Power Bounce: For 6 FP, jump on an enemy repeatedly! Power Bounce: For 6 FP, jump on an enemy repeatedly!Changes: Requires 1 more BP to equip (2 in base game). Costs +3 FP. The first jump does +1 damage, but each successive jump does only 3/4 the damage of the previous one (rounded down). Number of bounces capped at 5 hits for normal enemies and 3 hits for bosses. Moved from Koopa Bros' Fortress to Princess Peach's Castle.  Power Jump: For 2 FP, a powerful jump that does 2 more damage than the total damage a regular timed Jump would do. Power Jump: For 2 FP, a powerful jump that does 2 more damage than the total damage a regular timed Jump would do.  Power Smash: For 2 FP, a powerful jump that does 3 more damage than the total damage a regular timed Hammer would do. Power Smash: For 2 FP, a powerful jump that does 3 more damage than the total damage a regular timed Hammer would do. ���������� Changes: Does +1 extra damage.  Power Quake: For 4 FP, a hammer attack that does 3 damage to all enemies on the ground and ceiling, piercing their defenses. Power Quake: For 4 FP, a hammer attack that does 3 damage to all enemies on the ground and ceiling, piercing their defenses.���������� Changes: Does 1 less damage (4 in base game). When all three Quake badges are equipped, this gets a damage boost (info TBD). Moved from Jade Jungle to Tubba Blubba's Castle.  Power Rush: When in Danger, Mario's Attack is boosted by 2. Does not stack with Mega Rush when in Peril. Power Rush: When in Danger, Mario's Attack is boosted by 2. Does not stack with Mega Rush when in Peril. Quake Hammer: For 3 FP, a hammer attack that does 2 damage to all enemies on the ground and ceiling, piercing their defenses. Quake Hammer: For 3 FP, a hammer attack that does 2 damage to all enemies on the ground and ceiling, piercing their defenses.���������� Changes: Requires 1 more BP to equip (1 in base game). Costs +1 FP. When all three Quake badges are equipped, this gets a damage boost (info TBD).  Quick Change: You can switch partners without using a turn. Quick Change: You can switch partners without using a turn.���������� Changes: Requires 1 less BP to equip (4 in base game).  Refund: Refunds coins whenever you use an item in battle, equal to 75% of the item's sale price. Refund: Refunds coins whenever you use an item in battle, equal to 75% of the item's sale price. Runaway Pay: If you run from battle, you keep the Star Points you got so far. Runaway Pay: If you run from battle, you keep the Star Points you got so far.���������� Changes: Requires 1 less BP to equip (2 in base game).  Shrink Stomp: For 4 FP, jump on an enemy and try to Shrink it. Shrink Stomp: For 4 FP, jump on an enemy and try to Shrink it.���������� Changes: Costs +2 FP.  Shrink Smash: For 3 FP, hammer an enemy and try to Shrink it. Shrink Smash: For 3 FP, hammer an enemy and try to Shrink it.���������� Added: New in Master Quest. 1 BP to equip. Found in the Pit of 100 Trials.  Sleep Stomp: For 5 FP, jump on an enemy and try to put it to sleep. Sleep Stomp: For 5 FP, jump on an enemy and try to put it to sleep.���������� Changes: Costs +3 FP.  Slow Go: Mario moves at a slow, walking pace. Slow Go: Mario moves at a slow, walking pace. Smash Charge: For 1 FP, charge Mario's Hammer, adding 2 damage to the next Hammer attack. Stackable. Smash Charge: For 1 FP, charge Mario's Hammer, adding 2 damage to the next Hammer attack. Stackable.�����������Changes: Now caps at +6 damage (no cap in base game).  Speedy Spin: Spin Dash farther and faster. Speedy Spin: Spin Dash farther and faster.�����������Changes: Now equips for free (1 BP in base game). Given by Twink before Chapter 1, instead of being bought from the Badge Shop.  Spike Shield: Mario doesn't take damage when jumping on Spiky enemies (or hammering Bristles). Spike Shield: Mario doesn't take damage when jumping on Spiky enemies (or hammering Bristles).���������� Changes: Requires 1 more BP to equip (2 in base game). Moved from Dry Dry Ruins to the Badge Shop, becoming available after Chapter 3.  Spin Smash: For 1 FP, hammer the frontmost enemy, knocking it into all the enemies behind it (collision damage is piercing). High-flying enemies won't be hit. Spin Smash: For 1 FP, hammer the frontmost enemy, knocking it into all the enemies behind it (collision damage is piercing). High-flying enemies won't be hit.�����������Changes: Costs 1 less FP. Available in Rowf's shop after Chapter 1, instead of after Chapter 3.  Star Gift: Doubles the speed of passive Star Energy regeneration. Costs 3 BP to equip. Star Gift: Doubles the speed of passive Star Energy regeneration. Costs 3 BP to equip.���������� Changes: Was originally 'Pretty Lucky' - for 3 BP, Mario had a 10% chance to dodge each attack.  Truth Stomp: For 1 FP, jump on invisible enemies. Truth Stomp: For 1 FP, jump on invisible enemies.���������� Added: New in Master Quest. 1 BP to equip. Bought from Rowf's shop after Chapter 1.  Zap Tap: Electrify Mario! Enemies take contact damage when they attack, which will interrupt and halt their attack turns. Also lets Mario jump on electrified enemies safely. Zap Tap: Electrify Mario! Enemies take contact damage when they attack, which will interrupt and halt their attack turns. Also lets Mario jump on electrified enemies safely.���������� Changes: The badge itself wasn't changed, but many more enemies are resistant to Zap Tap or even benefit from its presence. Recipe List Here are the Tayce T. recipe's we've found so far, the easiest way to make them, their effects, and any changes Master Quest has made.  Apple Pie: Restores 7 HP and 20 FP. An Apple filling surrounds flaky pastry made from Cake Mix, though it's more like a turnover than a pie. Apple Pie: Restores 7 HP and 20 FP. An Apple filling surrounds flaky pastry made from Cake Mix, though it's more like a turnover than a pie.���������� Changes: Restores 2 more HP and 5 more FP.  Big Cookie: Restores 30 FP. A Goomnut or an Egg help give this cookie body, when mixed with Cake Mix. Big Cookie: Restores 30 FP. A Goomnut or an Egg help give this cookie body, when mixed with Cake Mix.���������� Changes: Restores 10 more FP.  Bland Meal: Restores 10 HP and 10 FP. Many recipes exist to make this dish, but the easiest may be a Goomnut-and-Koopa Leaf hash. Bland Meal: Restores 10 HP and 10 FP. Many recipes exist to make this dish, but the easiest may be a Goomnut-and-Koopa Leaf hash. Boiled Egg: Restores 15 HP and 15 FP. Made by boiling an Egg in water with a chopped Strange Leaf added. Boiled Egg: Restores 15 HP and 15 FP. Made by boiling an Egg in water with a chopped Strange Leaf added.���������� Changes: Restores 7 more HP and FP.  Cake: Restores 15 FP. Make with Cake Mix. Cake: Restores 15 FP. Make with Cake Mix.���������� Changes: Cake Mix is available earlier on (after Chapter 1 instead of during Chapter 4).  Deluxe Feast: Restores 40 HP and 40 FP! A Shroom Steak and Potato Salad of the highest quality combine to make a feast for all the senses. Deluxe Feast: Restores 40 HP and 40 FP! A Shroom Steak and Potato Salad of the highest quality combine to make a feast for all the senses.���������� Changes: You get one (1) Iced Potato early on, in Chapter 4, allowing you to make one Deluxe Feast early, if you so choose.  Dizzy Dial: Has a chance to make all enemies dizzy. Readily purchaseable, but a skilled cook could make one with a Strange Leaf from Boo's Mansion - if they had a recipe to work with. Dizzy Dial: Has a chance to make all enemies dizzy. Readily purchaseable, but a skilled cook could make one with a Strange Leaf from Boo's Mansion - if they had a recipe to work with. Egg Missile: Throw it at an enemy to do 8 explosion damage! Boiling an Egg together with a Fire Flower makes one - handle with care. Egg Missile: Throw it at an enemy to do 8 explosion damage! Boiling an Egg together with a Fire Flower makes one - handle with care.���������� Changes: Does 2 more damage than in Paper Mario. Damage is no longer dual-type (it was Fire and Explosion; now it's only Explosion).  Electro Pop: Restores 15 FP, and electrifies Mario! Volt Shroom chunks give this Cake Mix-based treat a kick. Electro Pop: Restores 15 FP, and electrifies Mario! Volt Shroom chunks give this Cake Mix-based treat a kick.���������� Changes: Properly restores 15 FP - was subject to a bug in the original game that set FP to (Mario's HP + 15).  Fire Flower: Attacks all enemies for 3 fire damage! They grow naturally in the wild, but cooking a Strange Leaf and Dried Fruit somehow makes one. Could the different plant families be related? Fire Flower: Attacks all enemies for 3 fire damage! They grow naturally in the wild, but cooking a Strange Leaf and Dried Fruit somehow makes one. Could the different plant families be related? Fire Pop: Restores 20 FP, but hurts Mario for 1 HP. Cake Mix makes it sweet, but it's the Fire Flower that makes it spicy. Fire Pop: Restores 20 FP, but hurts Mario for 1 HP. Cake Mix makes it sweet, but it's the Fire Flower that makes it spicy. Fried Egg: Restores 9 HP and 1 FP. Made by frying an Egg. Fried Egg: Restores 9 HP and 1 FP. Made by frying an Egg.���������� Changes: Restores 1 less HP, 1 more FP. Eggs are available earlier on, in the Toad Town shop (before Chapter 1 instead of during/after Chapter 2).  Fried Shroom: Restores 6 HP and 4 FP. Made by frying a Mushroom or Super Shroom. Fried Shroom: Restores 6 HP and 4 FP. Made by frying a Mushroom or Super Shroom.���������� Changes: Restores 2 more FP.  Honey Candy: Restores 20 FP. Pouring Honey Syrup into Cake Mix gets you this delicious candy. Honey Candy: Restores 20 FP. Pouring Honey Syrup into Cake Mix gets you this delicious candy. Honey Shroom: Restores 5 HP and 5 FP. Made by slathering a Mushroom with Honey Syrup. Honey Shroom: Restores 5 HP and 5 FP. Made by slathering a Mushroom with Honey Syrup. Honey Super: Restores 10 HP and 5 FP. Made by pouring Honey Syrup over a Super Shroom or Volt Shroom. Honey Super: Restores 10 HP and 5 FP. Made by pouring Honey Syrup over a Super Shroom or Volt Shroom. Hot Shroom: Restores 15 HP. Made by steaming a Volt Shroom, or by cooking a Super Shroom together with a Mushroom or Dried Shroom. Hot Shroom: Restores 15 HP. Made by steaming a Volt Shroom, or by cooking a Super Shroom together with a Mushroom or Dried Shroom.���������� Changes: Restores no FP. (Originally restored 5.)  Kooky Cookie: Restores 15 FP and 1/2 a bar of Star Energy. Adding a Koopa Leaf, or Maple Syrup, to Cake Mix gives this refreshing cookie. Kooky Cookie: Restores 15 FP and 1/2 a bar of Star Energy. Adding a Koopa Leaf, or Maple Syrup, to Cake Mix gives this refreshing cookie. ���������� Major Changes: Originally, this didn't affect Star Energy and instead made Mario Electrified, Asleep, or Invisible.  Koopa Tea: Restores 7 FP. Made by steeping a Koopa Leaf. Koopa Tea: Restores 7 FP. Made by steeping a Koopa Leaf. Koopasta: Restores 10 HP and 15 FP. Made by adding chopped Koopa Leaves to boiled Dried Pasta. Koopasta: Restores 10 HP and 15 FP. Made by adding chopped Koopa Leaves to boiled Dried Pasta.���������� Changes: Restores 3 more HP and 8 more FP.  Lemon Candy: Restores 5 HP and 15 FP. Made by juicing a Lemon from the desert and adding it to Cake Mix. Rumors of certain Shy Guys loving it above all else are greatly exaggerated. Lemon Candy: Restores 5 HP and 15 FP. Made by juicing a Lemon from the desert and adding it to Cake Mix. Rumors of certain Shy Guys loving it above all else are greatly exaggerated.���������� Changes: The recipe is unaltered, but you can't use it to bribe the Anti Guy guarding the chest in Shy Guy's Toy Box any more.  Lime Candy: Restores 20 FP. Adding Lime juice to Cake Mix gives this tart candy. Lime Candy: Restores 20 FP. Adding Lime juice to Cake Mix gives this tart candy. Life Shroom: When Mario would get KO'd, restores 10 HP. Originally, this could be made by cooking a Volt Shroom or Super Shroom together with a Koopa Leaf, Goomnut, or Strange Leaf. Life Shroom: When Mario would get KO'd, restores 10 HP. Originally, this could be made by cooking a Volt Shroom or Super Shroom together with a Koopa Leaf, Goomnut, or Strange Leaf.���������� Major Changes: Importantly, Life Shrooms can no longer be cooked in Master Quest. Any recipe that made a Life Shroom will yield a Sweet Shroom instead. (see below)  Maple Shroom: Restores 5 HP and 10 FP. Made by soaking a Mushroom in Maple Syrup. Maple Shroom: Restores 5 HP and 10 FP. Made by soaking a Mushroom in Maple Syrup. Maple Super: Restores 10 HP and 10 FP. A Super Shroom or Volt Shroom must be soaked in Maple Syrup some time for the flavor to properly infuse the shroom. Maple Super: Restores 10 HP and 10 FP. A Super Shroom or Volt Shroom must be soaked in Maple Syrup some time for the flavor to properly infuse the shroom. Nutty Cake: Restores 1 HP and 9 FP. The cake batter requires a Goomnut. Nutty Cake: Restores 1 HP and 9 FP. The cake batter requires a Goomnut.���������� Changes: Restores 1 more HP, 1 less FP.  Potato Salad: Restores 10 HP. Made by dicing an Iced Potato and adding herbs and spices. Best served cold! Potato Salad: Restores 10 HP. Made by dicing an Iced Potato and adding herbs and spices. Best served cold!���������� Changes: You get one (1) Iced Potato early on, in Chapter 4, allowing you to make one Potato-based dish.  Shroom Cake: Restores 8 HP and 20 FP. Adding Mushroom puree into Cake Mix makes a simple, but surprisingly filling treat. Shroom Cake: Restores 8 HP and 20 FP. Adding Mushroom puree into Cake Mix makes a simple, but surprisingly filling treat.���������� Changes: Restores 2 less HP and 10 more FP.  Shroom Steak: Restores 30 HP and 10 FP. Made by slow-roasting an Ultra Shroom by itself, or a Life Shroom together with a Mushroom or Super Shroom. Shroom Steak: Restores 30 HP and 10 FP. Made by slow-roasting an Ultra Shroom by itself, or a Life Shroom together with a Mushroom or Super Shroom.  Sleepy Sheep: Has a chance to put all enemies to sleep. On sale in most stores, but a clever cook could also make their own by baking a Red Berry, Yellow Berry, or Blue Berry wrapped in a Strange Leaf. Sleepy Sheep: Has a chance to put all enemies to sleep. On sale in most stores, but a clever cook could also make their own by baking a Red Berry, Yellow Berry, or Blue Berry wrapped in a Strange Leaf. Spaghetti: Restores 10 HP and 5 FP. A basic recipe made by boiling Dried Pasta. Spaghetti: Restores 10 HP and 5 FP. A basic recipe made by boiling Dried Pasta.���������� Changes: Restores 4 more HP and 1 more FP.  Spicy Soup: Restores 4 HP and 6 FP. Made with all-natural Fire Flower broth. Spicy Soup: Restores 4 HP and 6 FP. Made with all-natural Fire Flower broth.���������� Changes: Restores 2 more FP.  Strange Cake: Restores 1/2 a bar of Star Energy. May sometimes restore a whole bar or drain 1/2 a bar instead. Made by folding a Strange Leaf into Cake Mix. Strange Cake: Restores 1/2 a bar of Star Energy. May sometimes restore a whole bar or drain 1/2 a bar instead. Made by folding a Strange Leaf into Cake Mix.���������� Major Changes: Originally, this didn't affect Star Energy and instead made Mario Electrified, Asleep, or Invisible.  Super Soda: Restores 5 HP and cures poison and Shrinking. Made by carbonating Honey Syrup or Maple Syrup. Super Soda: Restores 5 HP and cures poison and Shrinking. Made by carbonating Honey Syrup or Maple Syrup. Sweet Shroom: Restores 20 HP and 40 FP. Originally made by grating a high-class Ultra Shroom or Life Shroom into a Cake Mix batter, but many new recipes for this sweet treat have been discovered. (see 'Life Shroom', above) Sweet Shroom: Restores 20 HP and 40 FP. Originally made by grating a high-class Ultra Shroom or Life Shroom into a Cake Mix batter, but many new recipes for this sweet treat have been discovered. (see 'Life Shroom', above)���������� Major Changes: Restores 10 less HP and 20 more FP. Any recipe that made a Life Shroom will yield a Sweet Shroom instead.  Tasty Tonic: In battle, cures poison and Shrinking. Outside of battle, heals to full (99 HP) but drains 10 FP. Made by juicing a Lemon or Lime. Tasty Tonic: In battle, cures poison and Shrinking. Outside of battle, heals to full (99 HP) but drains 10 FP. Made by juicing a Lemon or Lime.���������� Changes: Outside-of-battle effect added.  Thunder Rage: Does 1 damage to every enemy, and is very likely to Shrink them. Made by cooking a Volt Shroom and Dried Fruit together, though they're also easily available at shops. Thunder Rage: Does 1 damage to every enemy, and is very likely to Shrink them. Made by cooking a Volt Shroom and Dried Fruit together, though they're also easily available at shops.���������� Changes: In the base game, did 5 damage to all enemies.  Volt Shroom: Electrifies Mario! Naturally occurring, but a regular Mushroom can be electrified by steeping it in broth with a Koopa Leaf, a Strange Leaf, or Dried Fruit. Volt Shroom: Electrifies Mario! Naturally occurring, but a regular Mushroom can be electrified by steeping it in broth with a Koopa Leaf, a Strange Leaf, or Dried Fruit.���������� Changes: Only electrifies Mario for 1 turn. This was not done by the Master Quest devs, but by clover, maker of the earlier Pro Mode hack. The MQ devs just never bothered to change it back!  Yummy Meal: Restores 20 HP and 20 FP. Boiling Dried Pasta and adding a side of Dried Fruit gives this delectable dish. Yummy Meal: Restores 20 HP and 20 FP. Boiling Dried Pasta and adding a side of Dried Fruit gives this delectable dish.Dry Dry Desert Map and Path Maps This is a map of Dry Dry Desert (Master Quest edition). 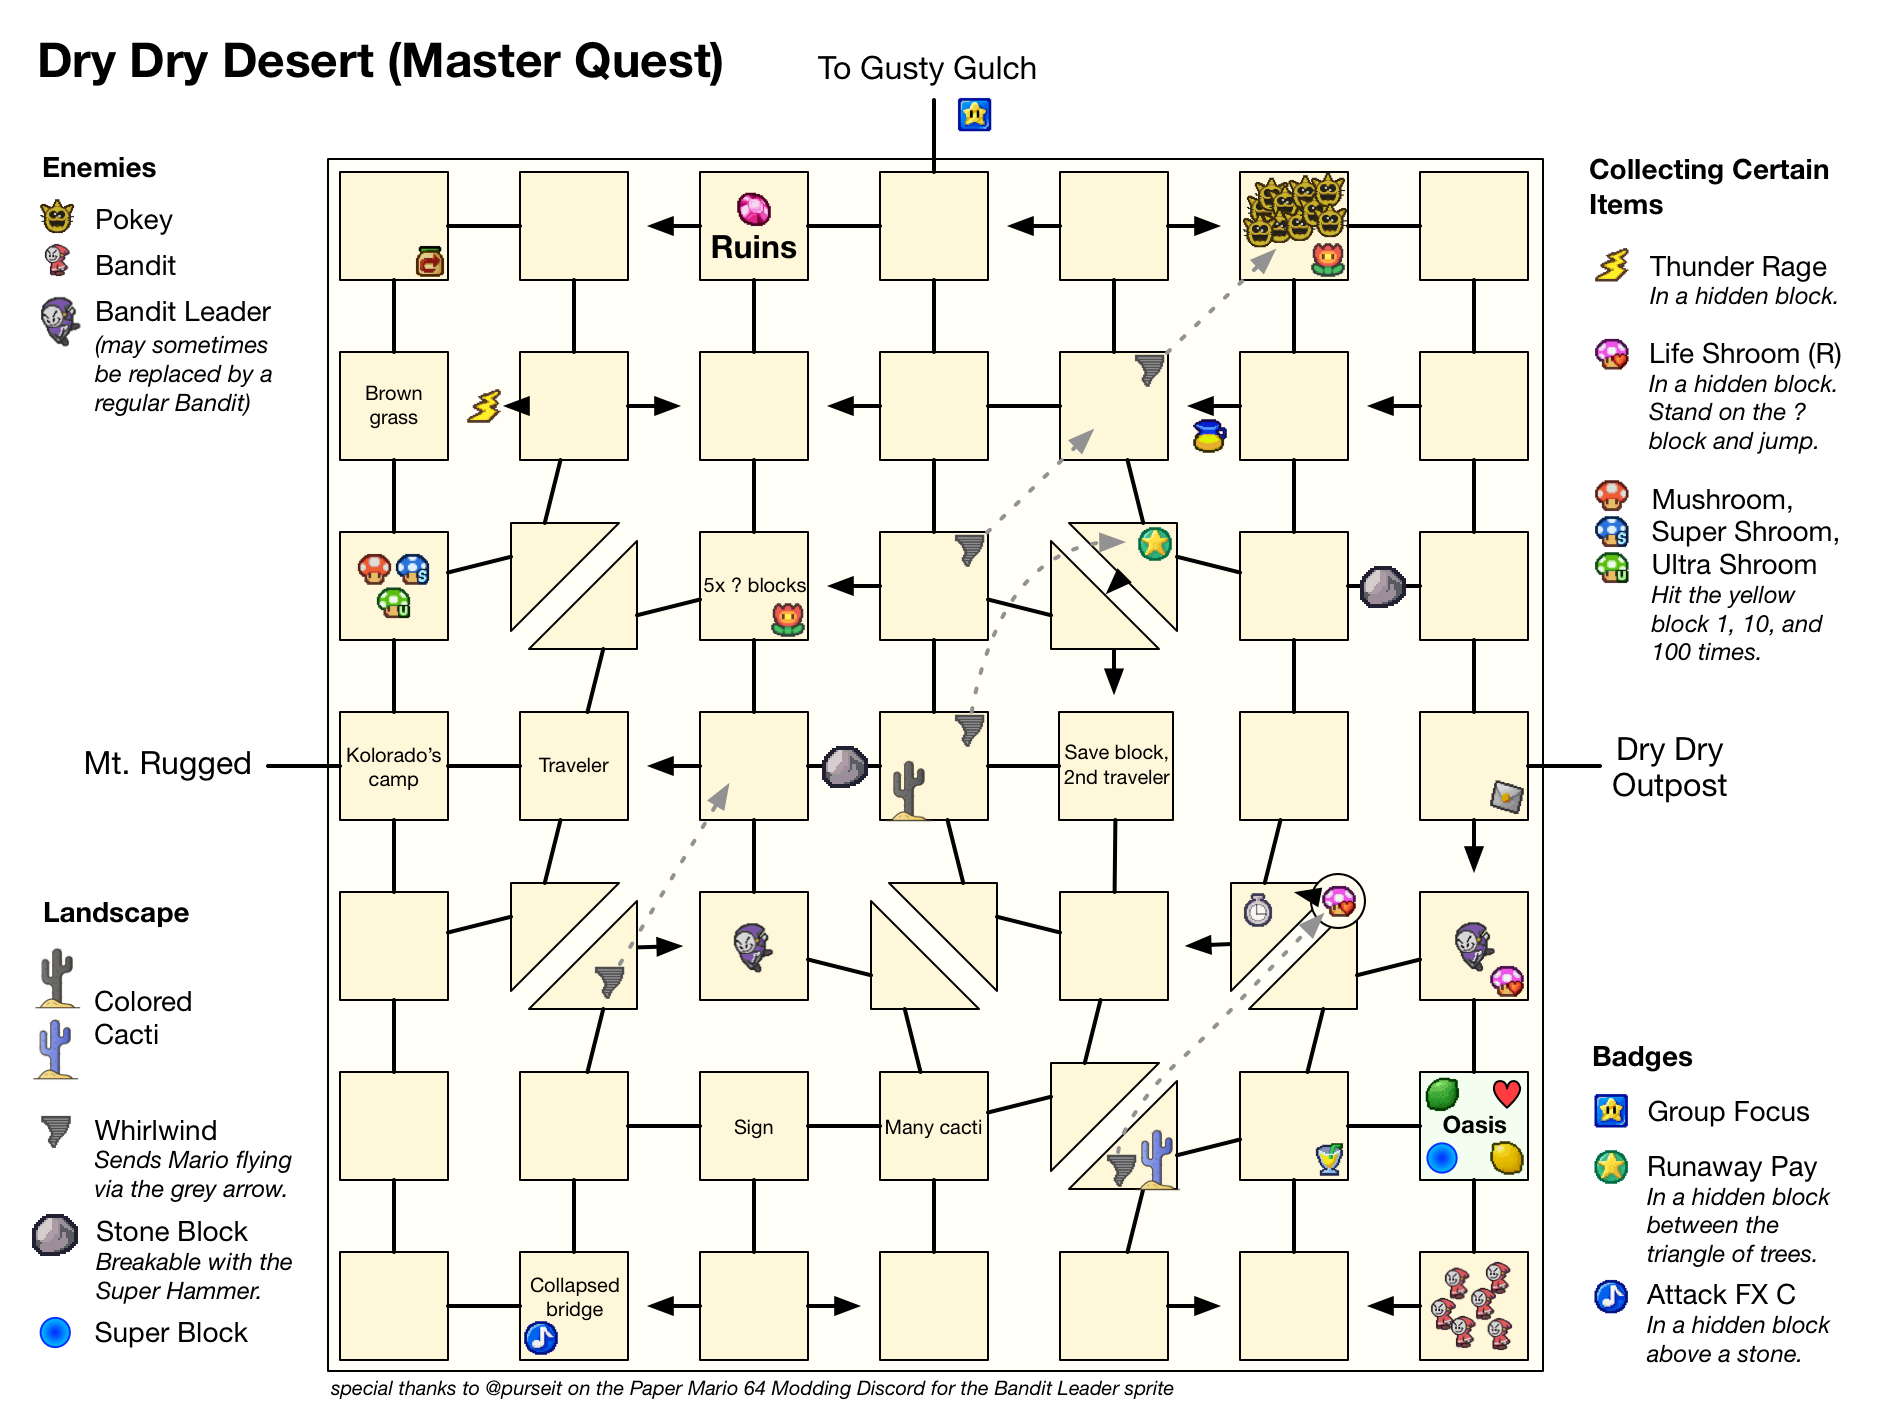 The path maps below detail the quickest way to get to Dry Dry Outpost from Mt. Rugged (both with and without the Super Hammer), as well as how to get to the Oasis and back from Dry Dry Outpost. 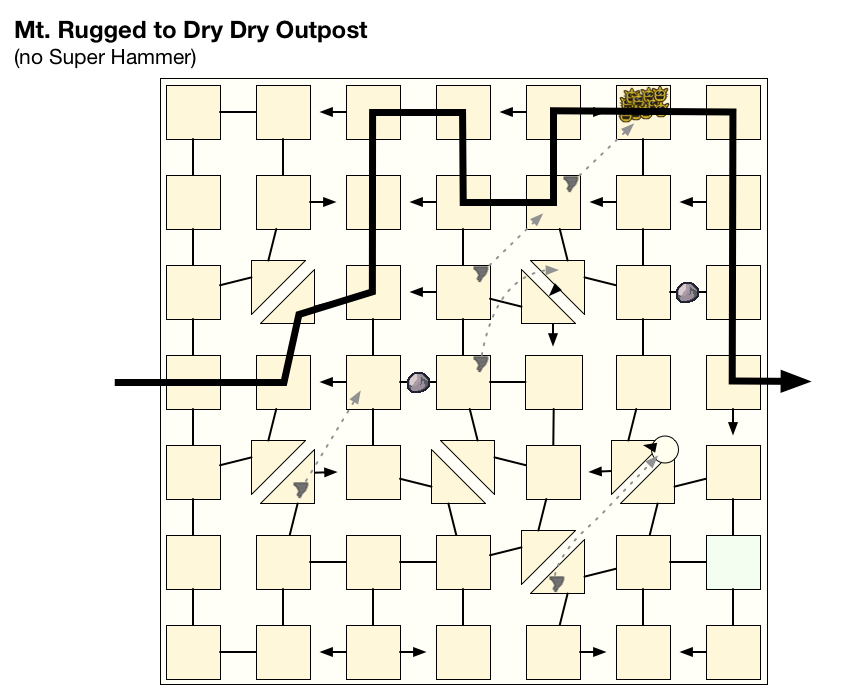 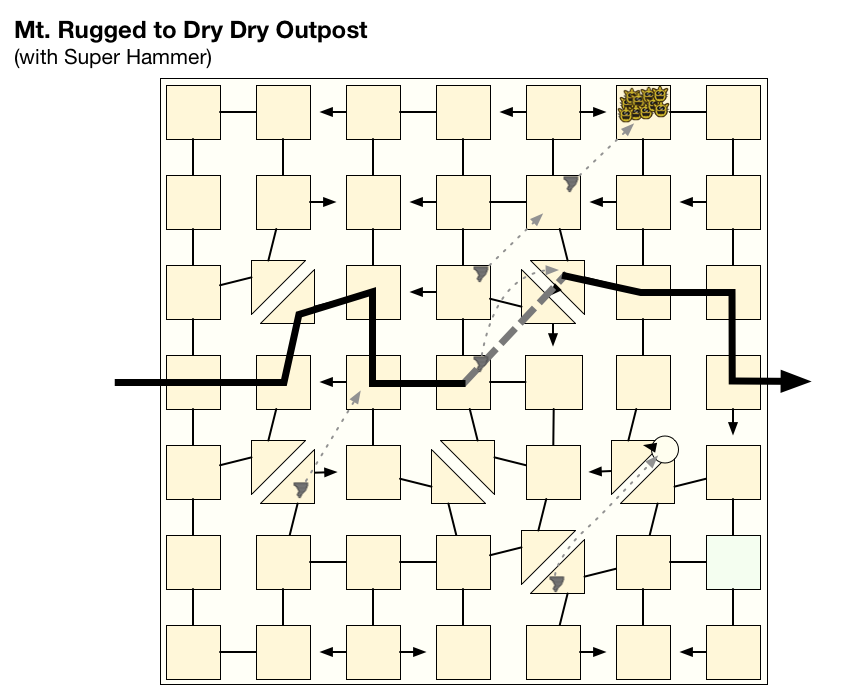 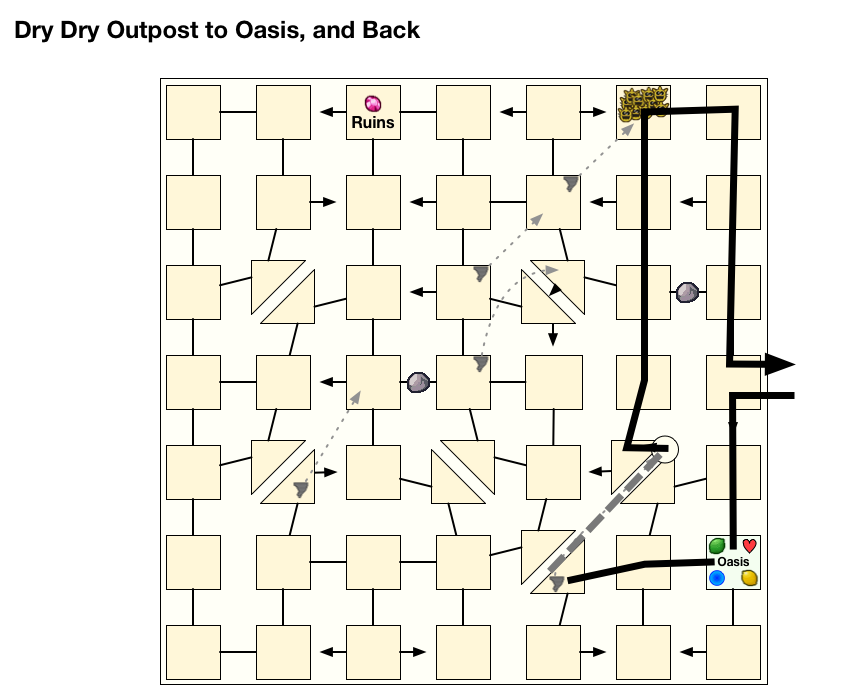 Pit of 100 Trials Reference Enemy formations in the Pit will be listed here as I battle them. Floor 1: Goomba x2 Floor 2: Paragoomba, Koopa, Fuzzy Floor 3: Fuzzy, Paragoomba, Parakoopa Floor 4: Fuzzy, Bigoomba x3 Floor 5: Goomba, Spiked Goomba, Spiked Paragoomba x2 Floor 6: Koopa, Spiked Paragoomba, White Ninjakoopa Floor 7: Koopa, Bullet Bill x2, Parakoopa Floor 8: Bob-omb, Bullet Bill, Bob-omb, Bullet Bill Floor 9: Bob-omb, White Ninjakoopa x3 Floor 10: Rest floor. Items: Mushroom, POW Block. Badge: Peekaboo. Floor 11: Cleft x3 Floor 12: Red Paragoomba x2, Cleft Floor 13: Cleft, Monty Mole x2, Red Paragoomba Floor 14: Bandit, Bandito, Dry Bubble x2 Floor 15: Pokey, Bandit, Dry Bubble x2 Floor 16: Pokey, Bandito x3 Floor 17: Buzzy Beetle, Stone Chomp, Buzzy Beetle (Ceiling), Dull Bones Floor 18: Pokey Mummy, Buzzy Beetle, Chomp, Pokey Mummy Floor 19: Pokey Mummy, Stone Chomp, Chomp, Dry Bubble Floor 20: Rest floor. Items: Honey Syrup, Fire Flower. Badge: Shrink Smash. Floor 21: Forest Fuzzy, Purple Spiny x2, Bzzap! Floor 22: Forest Fuzzy, Piranha Plant, Lakiwun x2 Floor 23: Boo x2, Bzzap! x2 Floor 24: Boo x4 Floor 25: Hyper Goomba, Hyper Paragoomba x2, Hyper Cleft Floor 26: Hyper Cleft x2, Bristle, Hyper Paragoomba Floor 27: Hyper Paragoomba, Bristle, Hyper Paragoombas Floor 28: Hyper Goomba, Hyper Paragoomba, Red Clubba, Bristle Floor 29: Hyper Cleft, Red Clubba x3 Floor 30: Rest floor. Items: Super Shroom, Snowman Doll. Badge: Dizzy Dance. Floor 31: Shy Guy x3, Medi Guy Floor 32: Sky Guy x3, Medi Guy Floor 33: Shy Guy, Cherry Bob-omb x3 Floor 34: Shy Guy, Spy Guy x2, Medi Guy Floor 35: Shy Guy x2, Medi Guy x2 Floor 36: Shy Guy, Groove Guy x3 Floor 37: Pyro Guy x3, Medi Guy Floor 38: Shy Guy x4 (Red, Blue, Green, Yellow) Floor 39: Anti Guy, Medi Guy x3 Floor 40: Rest floor. Items: Maple Syrup, Thunder Rage. Badge: HP Plus. Quackles fucked around with this message at 11:48 on Feb 19, 2020 |
|
#
¿
Jul 19, 2019 05:40
|
|
|
Introduction - Mario Be Trippin� For the most part, Paper Mario: Master Quest starts off the same as the original Paper Mario: Mario and Luigi get invited to a party at Peach's Castle! 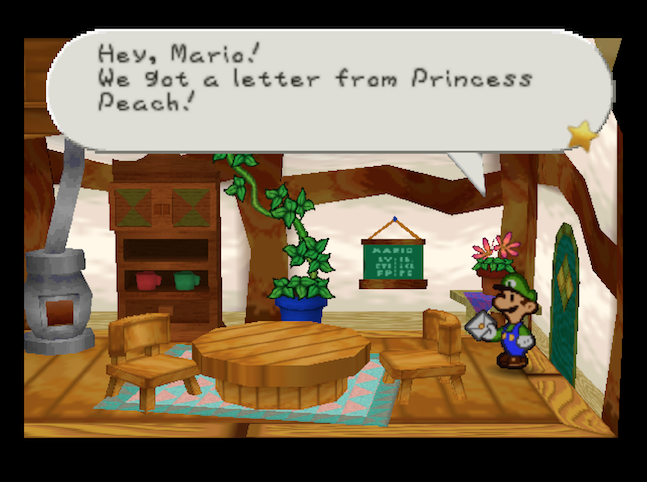   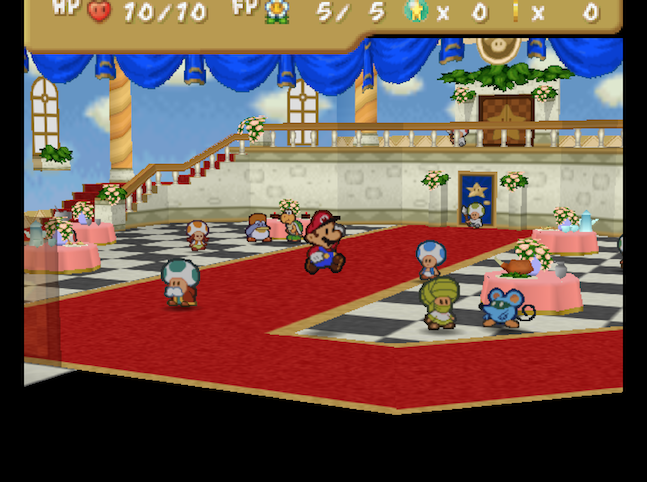 It�s a lovely occasion, with happy party guests who�  Wait, who�s THIS guy? 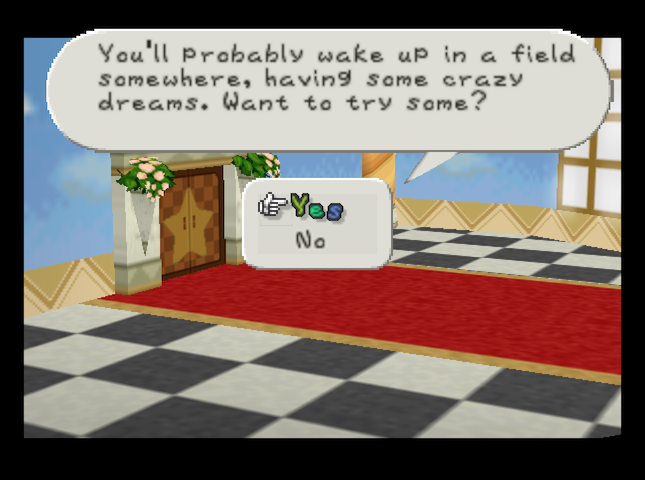 Cake, huh? Mario loves cake! Sure, I�ll try some. 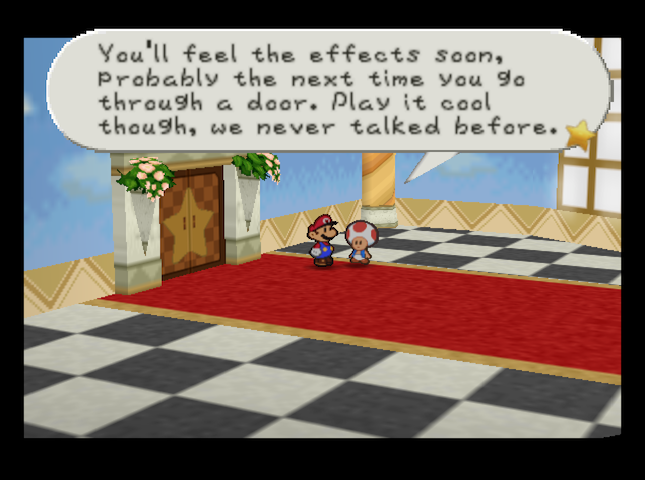 Though I�m not sure what he means by �feel the effects�. Now back to enjoying the�  Mamma mia. (The point of this Extremely Dubious Toad is to let you skip several cutscenes that kick off the plot of the game. By the time Mario comes to, Bowser will have made off with Peach�s Castle, hoisting it high up into the sky on top of his own, flying fortress. Had Mario attempted to fight him, he would have discovered that Bowser was now invulnerable thanks to the power of the magical wish-granting Star Rod, which Bowser filched for his own purposes. Of course, the first Bowser fight didn�t happen, because Mario was off tripping and passed out in the grass near Goomba Village. Go figure.) And so, Mario�s adventure begins in a truly inauspicious manner. SUMMARY OF CHANGES FROM MAIN GAME (in this installment) � A certain Toad lets Mario skip the intro cutscenes, through the time-honored method of getting as high as a Koopa. Next Time On Master Quest: Bonus Dungeon unearthed ahead of schedule.
|
|
#
¿
Jul 19, 2019 05:41
|
|
|
Prologue - Part 1 : In Which Mario Discovers Ancient Ruins Outside Goomba Village The Prologue starts off a lot like the vanilla game� at first. 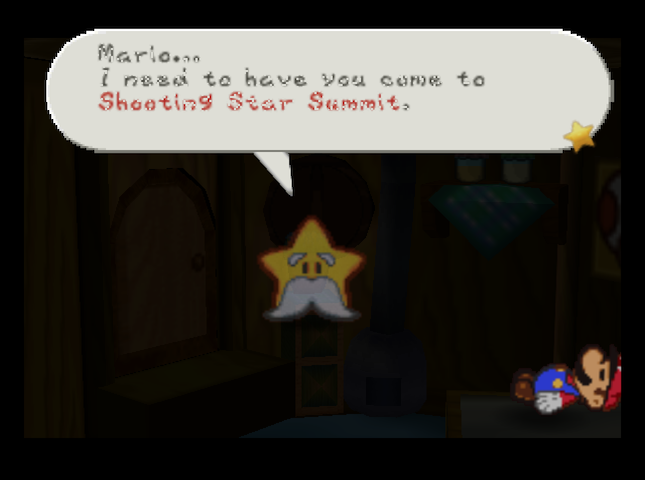 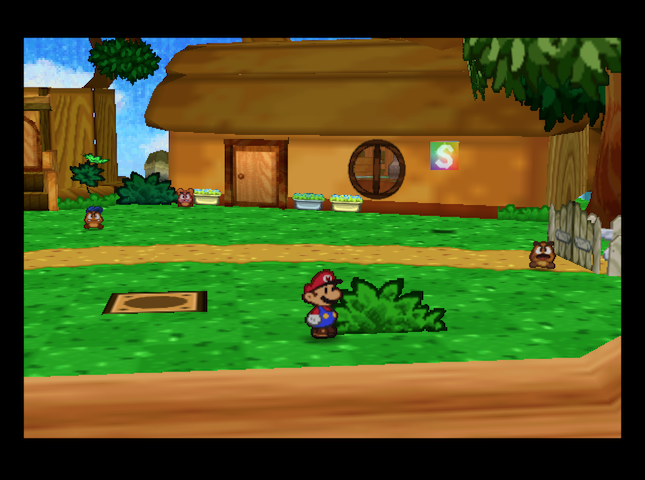 Music: Goomba Village After one heck of a trippy dream, Mario wakes up in Goomba Village, just like in regular Paper Mario. The way to Shooting Star Summit would be through the east gate, but�   �Kammy Koopa shows up and smashes it. Like in the original game, we�ll have to get Goompa�s hammer to remove the big block - he was last seen fixing the veranda.   It seems that Goompa is a lousy carpenter. 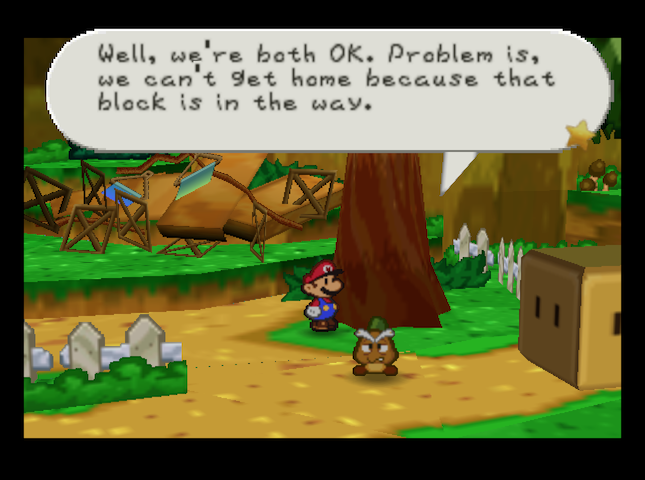 We end up landing in the forest behind Goomba Village. In Paper Mario, this serves as the game�s opening �dungeon�, allowing you to get used to moving around and fighting enemies.   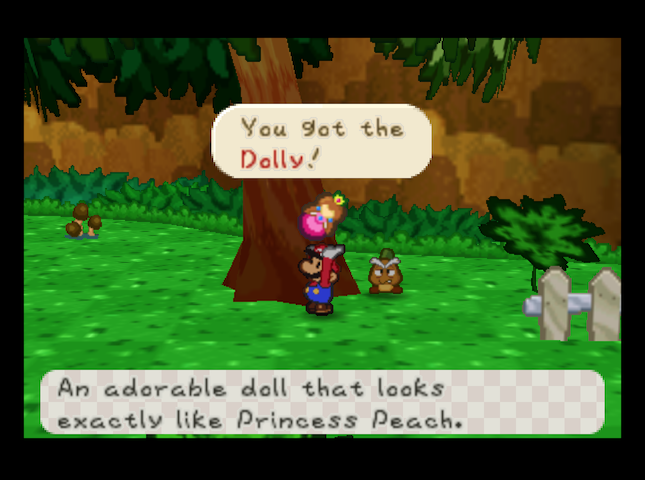 After finding the Hammer behind a bush, we can use it on the trees and Brick Blocks that are scattered around. Most only have coins (or nothing), but one tree has a doll that belongs to Goombaria. 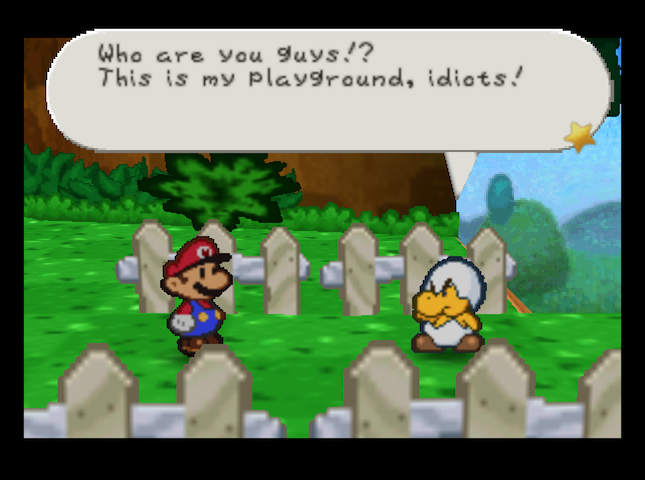 On the way out, we�re horsed into a battle with the neighborhood nuisance, Jr. Troopa. Music: Jr. Troopa Battle 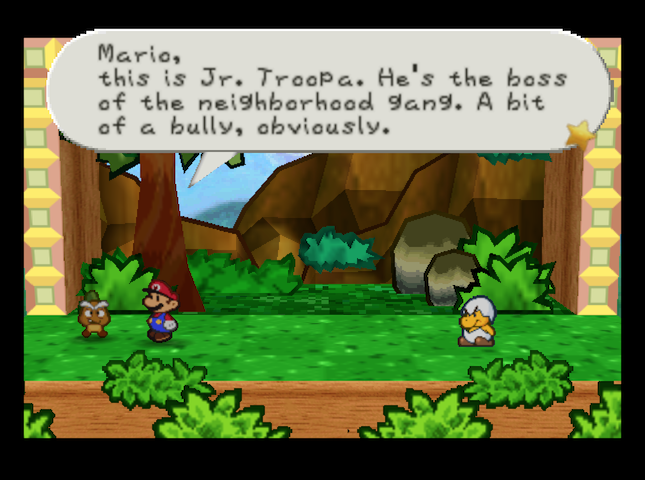 This battle highlights a major difference between Master Quest and regular Paper Mario: You can use action commands during the prologue. In the vanilla game, you don�t get the ability to use action commands until after the prologue, when Princess Peach sends you a 'Lucky Star' pendant. Here, you're able to do them right away. Because of this, at this point in the original Paper Mario, you�d be fighting Jr. Troopa without action commands - so your jump and hammer attacks would only do 1 damage, and Jr. Troopa�s attacks would always do 1 damage to you - 2 when he got down to low health and got mad. To make up for this, Jr. Troopa had only 5 HP. 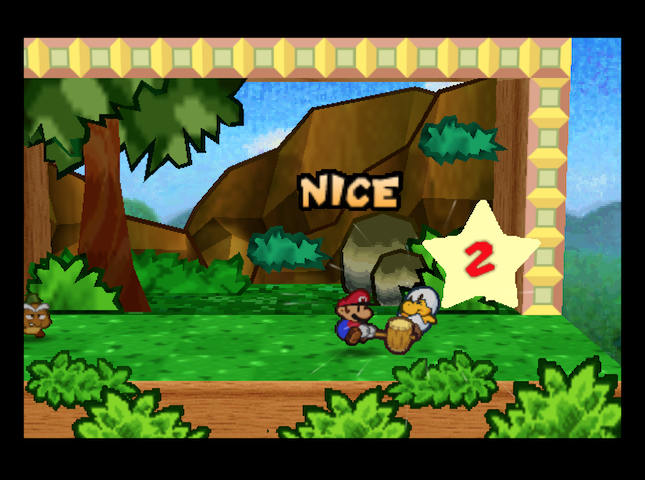 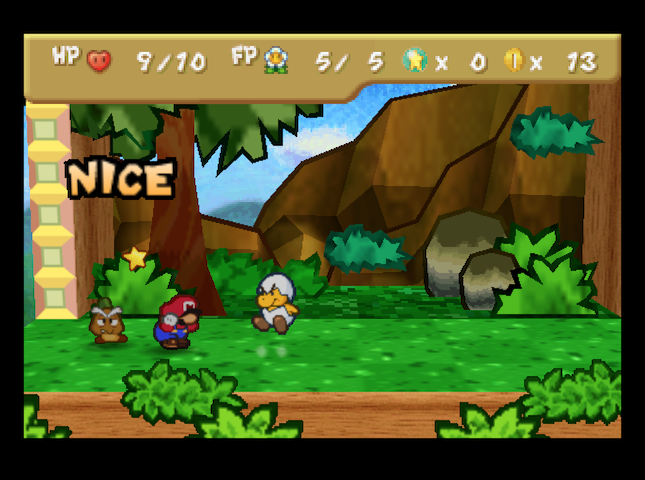 In Master Quest, Jr. Troopa has only 4 HP, and your attacks do 2 damage if you get the action command right! With that and the ability to guard against his jumps, you can easily defeat Jr. Troopa in two successful attacks, without taking damage from him at all. (I missed a guard and took 1 damage.)  With Jr. Troopa defeated, we can smash the block blocking our way.  There�s also a Mushroom hidden in the nearby tree, and a Fire Flower on a nearby cliff. These�ll be our starting supplies until we get back to Goomba Village.  From here, it�s a matter of getting back home. There are parties of hostile Goombas along the way, but they shouldn�t pose too much of a threat - right?  Uh-oh. While the Goombas and Paragoombas found here have not had their stats changed (they have 2 HP and do 1 damage when attacking), Spiked Goombas have been upgraded. They now do 3 damage with their spiky attack� and they also have a Defense of 1. (If an enemy has Defense in Paper Mario, it�s subtracted from the raw damage of each hit of the attack.)  This means that Spiked Goombas (who have 2 HP) now take two separate Hammer attacks to KO, so they�ll always get a chance to stick that spike in your face - and Mario�s �dodge� action command only reduces the damage of any incoming hit by 1. Fortunately, there�s only one Spiked Goomba on the road between here and Goomba Village, and he�s alone.  We even pick up a star piece along the way! As long as Master Quest hasn�t mixed things up too much, we should be able to trade these for Badges later. For now, though, Goomba Village is in sight.  After returning to Goomba Village, Goombaria gives us a Star Piece as thanks for finding her missing doll.  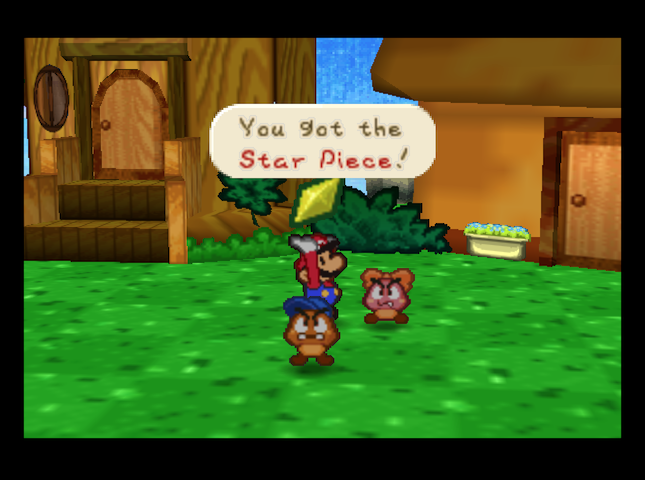 In addition, Goompa has a present for the road: our first badge, Power Jump. Like the original game, it lets Mario deal 2 extra damage on a jump attack by spending two FP. 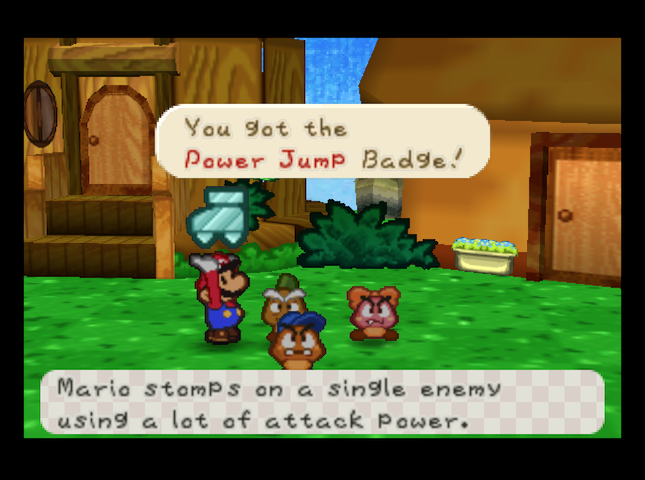 (For those who haven�t played the original Paper Mario, equipping Badges makes your battles easier (usually) in various ways, but they cost BP to equip. Power Jump uses one BP out of our starting three to equip, so we�ve still got plenty of space for any new badges we come across later.) Then, Goompa suggests: time for Goombario to see the world! 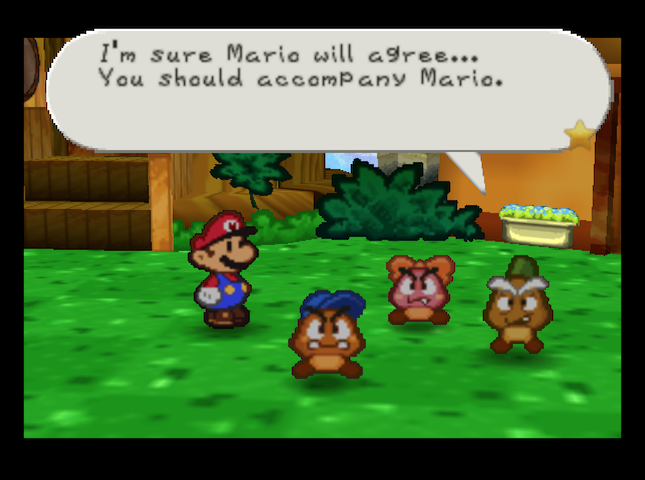 And so we get our first partner. Goombario�s starting moveset is the same as in Paper Mario: He can Headbonk enemies, doing 1 damage twice (the same as Mario�s Jump attack). He can also use Tattle to reveal enemy HP and other useful information - and he can tell Mario about the surrounding area, outside of battle. 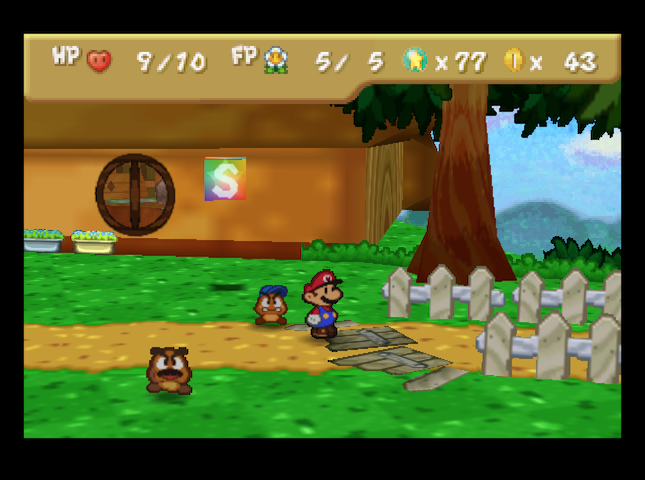 Now, normally, with the block blocking the road taken care of, this would be the cue for Mario to set out on his grand adventure. But let�s do a bit of exploring, first� back to where Mario first fell to earth. 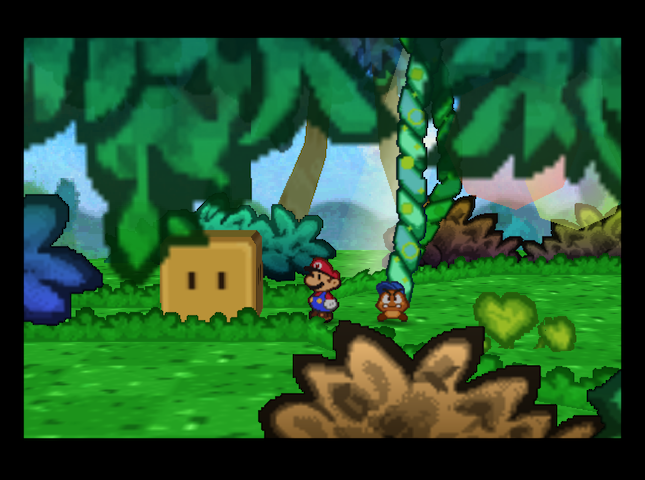 Hey, that�s odd. I don�t remember there being a block or a pathway here in the original Paper Mario. What�s this?  And this area wasn�t here, either.  Goombaria and I aren�t allowed to go back here. Mom said it isn�t safe. But I�m with you now! We can go wherever we want. You always get to do fun stuff, Mario. It must be nice being an adult. Goombaria and I aren�t allowed to go back here. Mom said it isn�t safe. But I�m with you now! We can go wherever we want. You always get to do fun stuff, Mario. It must be nice being an adult.This area has a few Goombas floating around, and a ? Block with a mushroom on a high ledge.  There�s also this extremely dubious-looking cave entrance. (The block here had a Honey Syrup in it.) 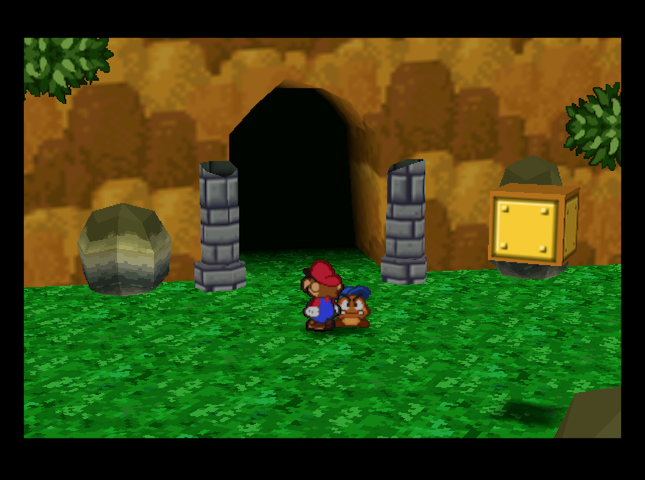 I wonder what�s inside? 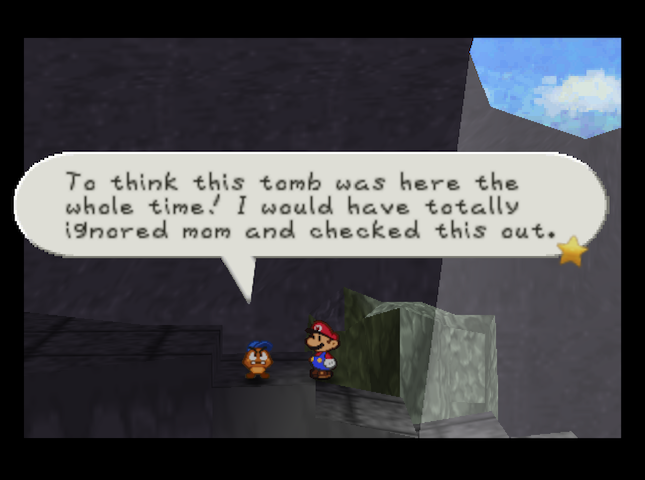 Okay, please don�t tell her I said that. But you have to admit, this place is pretty cool. I bet this place would scare the pants off Goombaria, though. If Goombas wore pants. Okay, please don�t tell her I said that. But you have to admit, this place is pretty cool. I bet this place would scare the pants off Goombaria, though. If Goombas wore pants.OK, now I know this wasn�t in the original game. We�ve got an ancient tomb outside Goomba Village, for pete�s sake!  A spooky ancient tomb, too.  There�s a hidden gap in the railing by the coffins that leads to a walkway with a Star Piece. 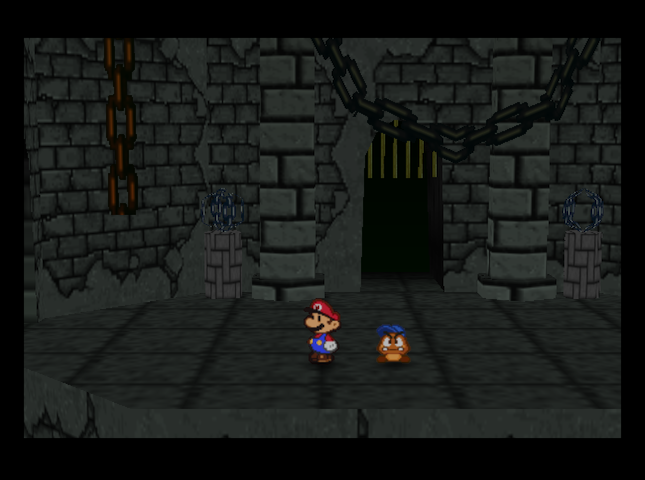 Further in, the atmosphere looks unrelentingly grim. This place must be super old. Even the torches here have burned out long ago. Why do I get a bad feeling about this place? I wonder how Mom is doing. I hope she isn�t missing me. Maybe I should visit. Right now. Inside the center door is a room with� that stuff! I thought this game was E-rated! 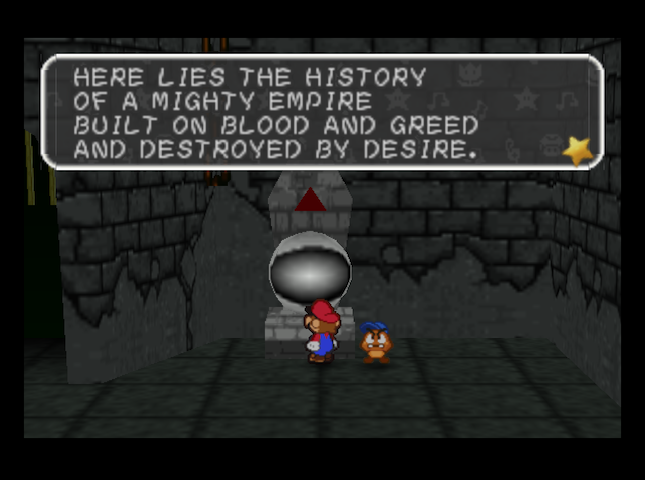 There�s also a statue that looks kind of like a blind Mr. I. It has a message for us, but that�s all. This is getting kinda ominous. Backtracking and going through the right-side door yields a room with some old mushrooms. We�ll leave them here for now.  The mushroom room has a secret exit, which leads to a room with another Mr. I-ish statue. 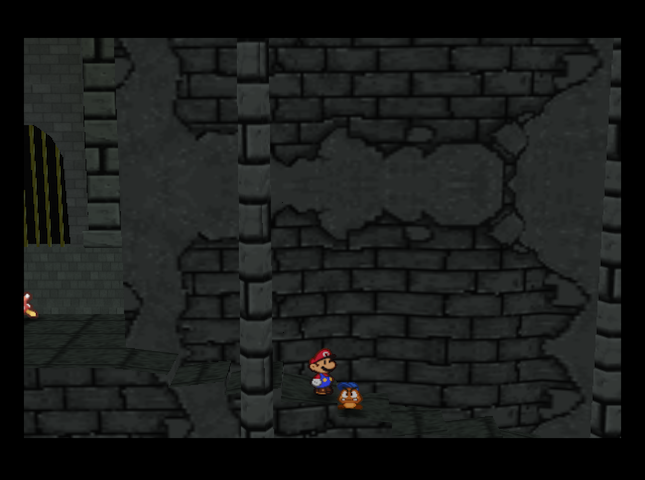 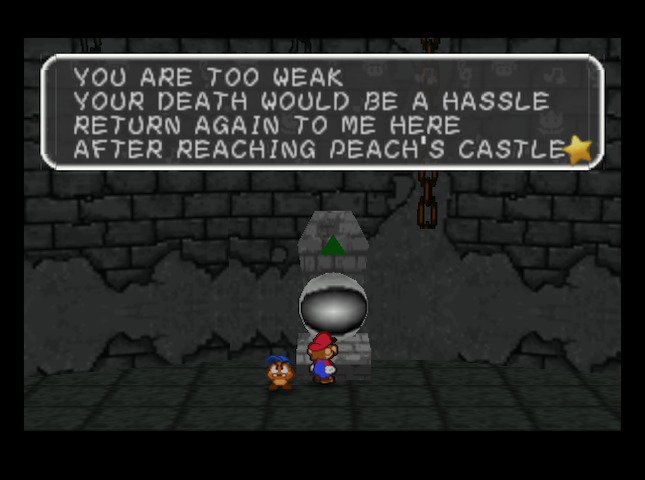 I�m assuming it cues up some sort of boss fight, but we won�t be able to find out until we get to Peach�s Castle - which is around the end of the game. It�ll be a while. If we backtrack and take the regular exit from the old-mushroom room, we end up in a very large hall with a beam of light pouring down� what IS this place?  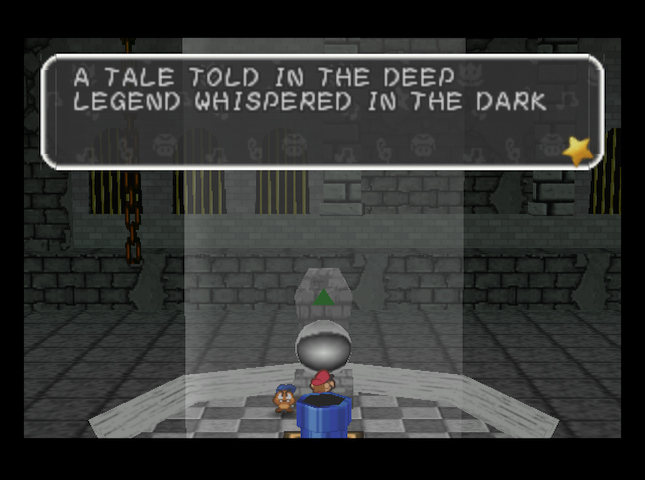  ONE HUNDRED FLOORS TO DELVE FOR A PLACE TO LEAVE THEIR MARK THIS PIT OF TRIALS IS A CENTURY LONG QUEST OF ALL IN THIS WORLD THIS IS THE ULTIMATE TEST ONE HUNDRED FLOORS TO DELVE FOR A PLACE TO LEAVE THEIR MARK THIS PIT OF TRIALS IS A CENTURY LONG QUEST OF ALL IN THIS WORLD THIS IS THE ULTIMATE TESTOh. It seems the Paper Mario: Master Quest devs have back-ported the Pit of 100 Trials into the game. For those who don�t know, the Pit of 100 Trials is an optional dungeon in Paper Mario: The Thousand-Year Door where you have to fight 100 battles in a row, with only whatever you bring into the Pit to help you, plus anything you scrounge up on the trip through. In the pit in The Thousand-Year Door, there are rest floors every 10 floors with no enemies, a prize, and a chance to bail out early and keep the Coins, Star Points, and prizes you were able to get so far. I�m going to enjoy doing the Pit challenge - later! Mario would get stomped on if I tried it now, with my 10 HP, 5 FP, and shiny new Power Jump badge. Instead, it�s time to head back to Goomba Village, and set out in the direction the plot points us.  Badges: 1/87 (New: Power Jump) There are 80 Badges in regular Paper Mario. Star Pieces: 3/180 There are 160 Star Pieces in regular Paper Mario. SUMMARY OF CHANGES FROM MAIN GAME (in this installment) � You can use action commands in the Prologue! � Jr. Troopa has only 4 HP instead of 5, leaving him vulnerable to two well-swung Hammer hits. � Spiked Goombas now deal 3 damage (instead of 2) when attacking, and have a defense of 1 (instead of 0). � Pit of 100 Trials discovered in forest near Goomba Village. Next Time On Master Quest: Mario besieged by inconveniently powered-up Goombas. Quackles fucked around with this message at 23:21 on Aug 3, 2019 |
|
#
¿
Jul 19, 2019 10:23
|
|
|
NewMars posted:They seem to have goombario's dialogue down, which is a good sign. Uh, yeah, that should come with a bit of an asterisk. I cherry-picked the dialogue inside the pit. A few of the things he says have minor issues. Second Room This place is like if the cruddy smelling tunnels and creepy Forever Forest had a child. I don't know if I should vomit or cry and I think I just might do both. I guess I can forget ever sleeping again. At least the coffins look pretty sweet.OK, one, the 'vomit' remark is out of character for Goombario - too negative, and two, I think the way he uses that word wouldn't pass Nintendo Treehouse certification circa 2001. Three, we haven't been to the Toad Town Tunnels or Forever Forest yet, so this is a continuity error. (Four, minor nitpick, but Gombario would say 'those cruddy-smelling tunnels', and the tattle needs a few commas. Punctuation, people!) Guillotine and Red Mr. I? Statue Room That statue looks like it's been here forever. It stares so intently, as if it has something to tell us. It resembles a Mr. I sorta, don't you think? Or maybe not. It looks kinda dumb. Whoever made it was probably blind. How ironic would that be, blind people making statues of eyes.One. Misplaced words and punctuation. 'Sorta' needs to be earlier in the second text block ('sorta resembles'), and the last sentence needs a question mark. Two... the 'probably blind' remark was rude, Goombario. Out of character again. It'd be cooler if he pointed out that the statue looked blind. Old Mushroom Room This tomb is huge! It just keeps going down and down. Do you think we will ever find our way back up? I think the faint scent of fresh air getting stronger as we go back up will lead us. Seriously, how can you stand the stench down here?! Does that moustache trap odors before they reach your nose?OK, I like this one. "Your Death Would Be a Hassle" Mr. I? Room It's so dark. I can't believe I actually miss Forever Forest. Would it have killed the ancient tomb builders to have installed a nightlight?Another good one, but also another continuity error. Pit of 100 Entrance Hall (the huge room with the pipe) Is that... light? How did they even get that big of a beam this far down? I'm not complaining, but it does make you wonder. Whatever the case, it had to take a lot of work. Whoever built this place really wanted this room to stand out. OK, this one is good. So, to summarize, most of the Pit of 100 room tattles are good. A few are kinda... off. A few are good as long as you've been to Forever Forest. Perhaps there was originally a more stony block blocking the way to the Pit in an earlier version of the hack? Procrastine posted:From what little I've played, I've noticed a minor change to Tattle from the original: Goombario no longer tells you attack and defense values for some reason. I'm guessing they changed them a lot during development and didn't want to have to update the tattle text each time? I do actually notice in the next episode, as I'm fighting the Goomba King. quote:Have you thought about posting about this LP in the Romhack thread? Ooh, that's a good idea! On it. Quackles fucked around with this message at 21:42 on Jul 19, 2019 |
|
#
¿
Jul 19, 2019 21:39
|
|
|
Prologue - Part 2 : The Goomba King Gets Buff With the area to the west of Goomba Village thoroughly explored, it�s time to set off for Toad Town. But before that�   The tree next to the Goomba family�s house drops Goomnuts when hammered. They restore 3 FP, and will be useful later when we get access to Tayce T.�s cooking. I ended up stocking up on a few (you can get one Goomnut each time you leave the village and re-enter). Combined with Mushrooms we found earlier (and got from the Goombas outside the Pit of 100 Trials), our inventory is full of HP- and FP-restoring goodies. Now, it�s time to head to Goomba Road.  There�re lots of bad Goombas around these parts. There�re lots of bad Goombas around these parts.It seems pretty nice to me. Oh look, a sign!  All right, I get the h�  Oh.   Fortunately, the Goombas here aren�t any tougher than they were before. I easily deal with this group, but the next group of Goombas down the path�  �has a Spiked Goomba in the back! Which poses a problem. Let�s say I do every Action Command perfectly. It�ll take Mario and Goombario one turn to take out the Goombas in the front, then two turns to deal with the Spiked Goomba in back.  Goombario won�t be able to help while Mario�s attacking the Spiked Goomba, either - he�d hurt his head if he tried headbonking that spiky helmet. By battle�s end, Mario ended up taking a total of 4 damage from just one Spiked Goomba. Fortunately, the Star Points from the battle were able to push Mario to Level 2, so he gets a free heal from the level up.  For the time being, I have enough BP, and I�m not using FP much yet. I�ll start by getting a HP increase - Mario needs the survivability.  I also make sure to get the First Strike on any further Goombas I encounter, which will do 2 damage to the frontmost enemy if it�s a Hammer attack, and 1 if it�s a Jump. The Hammer First Strike is enough to KO one of the Goombas in front without fighting.  We make our way down the road, past coin blocks and through several more marauding Goombas without much trouble. Getting the First Strike helps a lot.   Next up: a red ? block. Red ? blocks have Badges inside.   This one has the �Close Call� badge, which we�re putting on immediately. When Mario has 5 HP or less (known affectionately as �Danger�), this badge makes attacks miss, some of the time - in vanilla Paper Mario, it�s 1/3 of the time. I have no idea if that chance has been changed in Master Quest.   There�s a mushroom on the board, but let�s keep it there for now - our inventory is stuffed, and anyway, there�s a Heart Block (which refills HP and FP) just down the path. As for the reason there�s a Heart Block here, well�    It�s a direct order from the Goomba King. That�s right! I�m sorry, but the only way by is through the Goomba Bros. That�s me, Red Goomba, and my brother, Blue Goomba. It�s a direct order from the Goomba King. That�s right! I�m sorry, but the only way by is through the Goomba Bros. That�s me, Red Goomba, and my brother, Blue Goomba.�the reason is that we�re about to fight our first miniboss: the Red and Blue Goombas! Though calling them a miniboss is a bit much.  This is Red Goomba. He's the older of the two notorious Goomba Bros. The Goomba King ordered him to try to stop you. You can take this guy, no prob. He has just a little more HP than an ordinary Goomba. This is Blue Goomba. He's the younger of the two notorious Goomba Bros. As you heard in his little speech, he's one of the Goomba King's men. He doesn't look that healthy. He's weaker than his brother. This is Red Goomba. He's the older of the two notorious Goomba Bros. The Goomba King ordered him to try to stop you. You can take this guy, no prob. He has just a little more HP than an ordinary Goomba. This is Blue Goomba. He's the younger of the two notorious Goomba Bros. As you heard in his little speech, he's one of the Goomba King's men. He doesn't look that healthy. He's weaker than his brother.The Goomba Brothers are slightly stronger than their appearance in the original game. There, Blue had 6 HP, and Red had 7. Here, each has been given 2 extra HP.  They each attack for 2 damage instead of 1, too, so Mario�ll take chip damage even if he dodges. Good thing we�ve got an inventory full of Mushrooms.   Some repeated hammering/headbonking defeats Blue without too much trouble, provoking an anguished reaction from Red Goomba. Red doesn�t get any stronger, though. Because Red has a bigger HP bar, I try Power Jumping. It works like a charm!  Unlike regular jumps, where Mario springs into the air and lands a second time on doing the action command, Power Jump only hits once. The action command will add an extra 1 damage to the attack, though, bringing it up to 4 damage (as seen here).  One more Headbonk and Power Jump does the trick, and the Goomba brothers beat it.  After a quick trip to the Heart block on the previous screen, it�s time to find out what�s farther to the east.  Turns out it�s a Save Block on the lower path, and the path forward on the upper one.  A little farther down the road is our last chance to prepare before the actual boss of the Prologue: the Goomba King! Fortunately, the battle with Red and Blue Goombas went fairly well, so we don�t need to do much. It�s time to show this �King� what we�re made of!  That�s a very slightly impressive-looking fortress. Hey, look, Mario! See that building over there? I'm pretty sure there used to be a bridge on the other side. I wonder what happened to it. And that�s a very slightly impressive-looking Goomba. We immediately find ourselves sucked into a battle. Music: Goomba King's Decree  Hey Mario! I think maybe we ought to take out the Goomba Bros. first, don't you think? They must be pretty weak since we just finished beating them up back there. Hey Mario! I think maybe we ought to take out the Goomba Bros. first, don't you think? They must be pretty weak since we just finished beating them up back there.Red and Blue Goomba have lost the 2-HP buffs they had in our last encounter, but they�re somehow at full Health again! In the regular Paper Mario, they�d have only 2 HP left (each) after our previous dust-up. Fortunately, we have a secret weapon: the Goomnut Tree in the background. Hammering the tree will drop that very large, spiky Goomnut on the heads of the Goomba King and sundry.  In regular Paper Mario, that�d be enough to KO Red and Blue Goomba again. Here, it�ll take a little more pounding. Sadly, the Goomba King can drop spiky Goomnuts on us, too (once).  Next turn, we�ve got enough accumulated damage to KO Red with Goombario�s Headbonk, and Blue with Mario�s Power Jump. 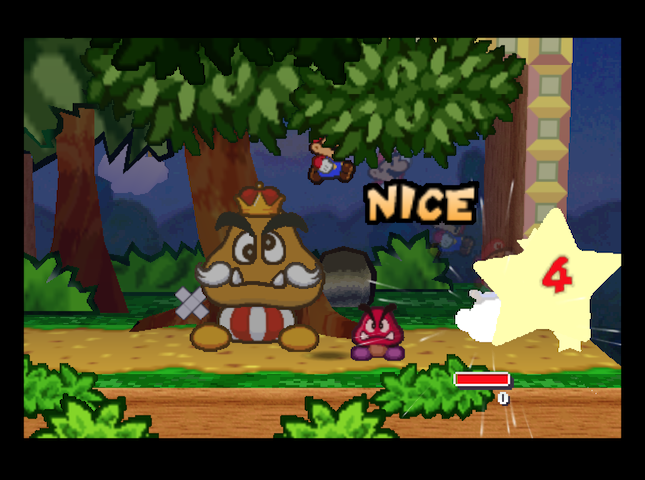  Sadly, the Goomba King shows his non-Goomnut-related power with a nasty spin kick! In vanilla Paper Mario, the kick only did 1 damage. Master Quest has boosted it to 3.  How much HP does the Goomba King have, anyway? 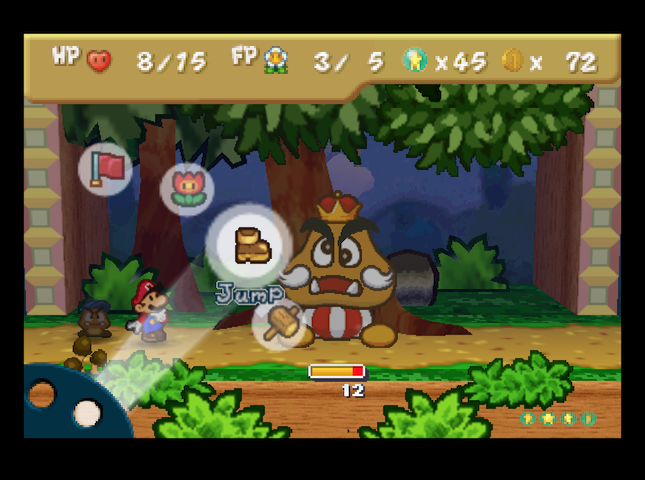 Answer: 12 HP. He took 3 damage from the Goomnut, so he started with 15 HP in total. Not bad for a first boss. (In the original game, he had 10.) This is the Goomba King. He's really big. I mean, look at him! He looks really powerful. He's the boss of Red Goomba and Blue Goomba. Who cares if he's strong? You're much stronger. Gee, I wonder what he ate to become so big? I'd like to be a bit bigger, too.One other thing I only just noticed: Master Quest omits the bit where he tells you enemies� attack and defense in the Tattle blurb itself. Rude! Anyway, with his lackeys gone, there�s nothing to do but unload as much damage on the Goomba King as we can.  Unfortunately, a few missed action commands later, and the battle�s going� not so hot. 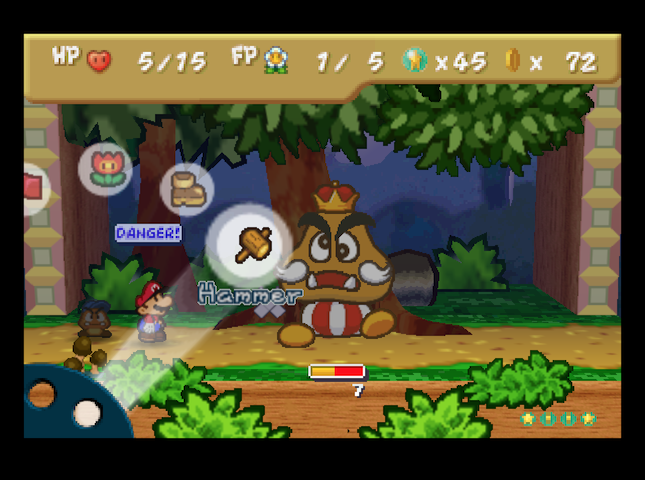 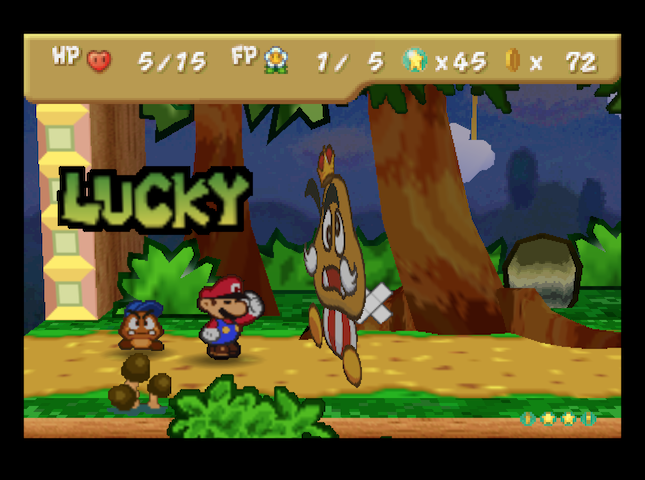 Luckily, the Close Call badge puts in work, letting us completely avoid one of the Goomba King�s attacks.  The King�s next attack lands, but at this point, he�s almost KO�d himself. One last Hammer attack should do it. 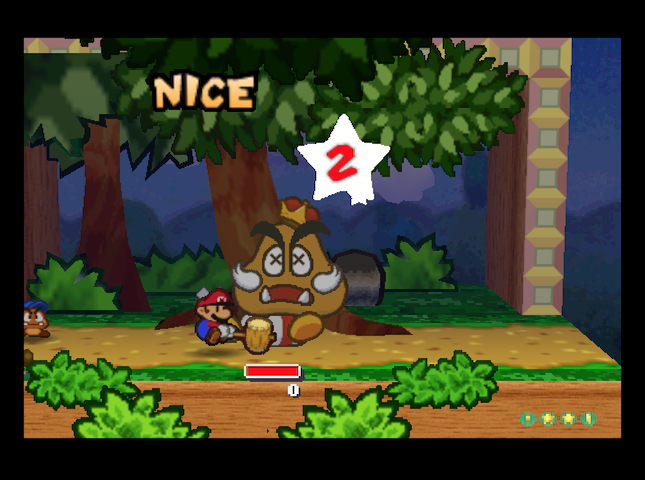 With the Goomba King defeated� he retreats into the walls of his fortress. And there�s still no bridge. Now what?   Of course, King Goomba! I hid it in the grass outside the fortress. Of course, King Goomba! I hid it in the grass outside the fortress. Outside the� You idiot! You didn�t hide it in here? Mario will find it for sure! Outside the� You idiot! You didn�t hide it in here? Mario will find it for sure!Let�s find this switch, then!  Hammering the nearby tree yields no switch, but a Star Piece does fall out.  The nearby grass tuft, though, yields the switch. Hitting it� 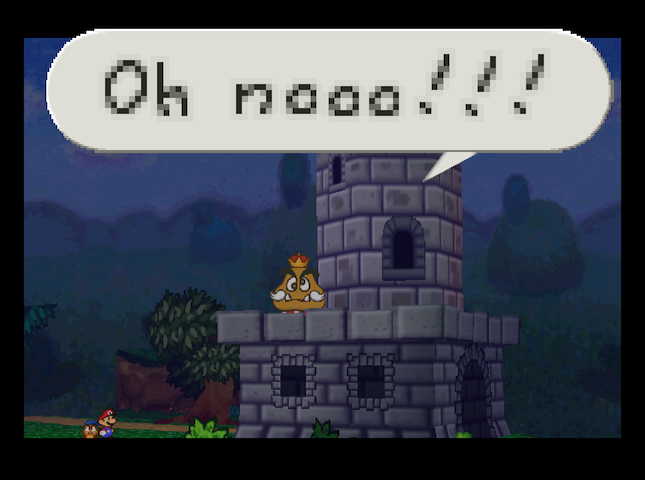   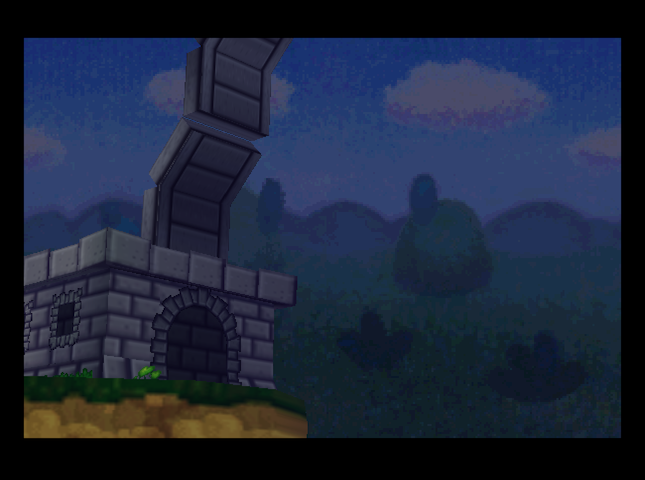  �makes the fortress turn into the missing bridge! All right. Let�s get going.  But as Mario and co. leave, the game notes that Kammy Koopa, Bowser�s No. 1 Henchkoopa, has been spying on them�  Badges: 2/87 (New: Close Call) Star Pieces: 4/180 SUMMARY OF CHANGES FROM MAIN GAME (in this installment) � The Red and Blue Goombas have 2 extra HP each in their first appearance, giving them 9 and 8 HP respectively. � When the Red and Blue Goombas show back up in the King Goomba fight, they�ve lost the extra HP, but they�re fully healed instead of at 2 Health each. � The Goomba King has 15 HP instead of 10, and his spin kick does 3 damage instead of 1. � Goombario doesn�t detail enemy stats any more. When I asked in the romhack�s Discord channel, someone explained that this is carried over from the earlier �Pro Mode� romhack. Next Time On Master Quest: We meet some members of the Toad Town Mafia. Quackles fucked around with this message at 23:22 on Aug 3, 2019 |
|
#
¿
Jul 21, 2019 05:23
|
|
|
Jerry Manderbilt posted:They always did half damage afaik, whether or not you had action command unlocked or not That's good to know! Since I didn't mention it earlier: Jump first attacks still do only 1 damage, though.
|
|
#
¿
Jul 21, 2019 20:57
|
|
|
Prologue - Part 3 : The Mushroom Mafia and the Mountain We begin with an interlude: Kammy Koopa reporting in to Bowser�s Castle.  It�s nothing special, at first� 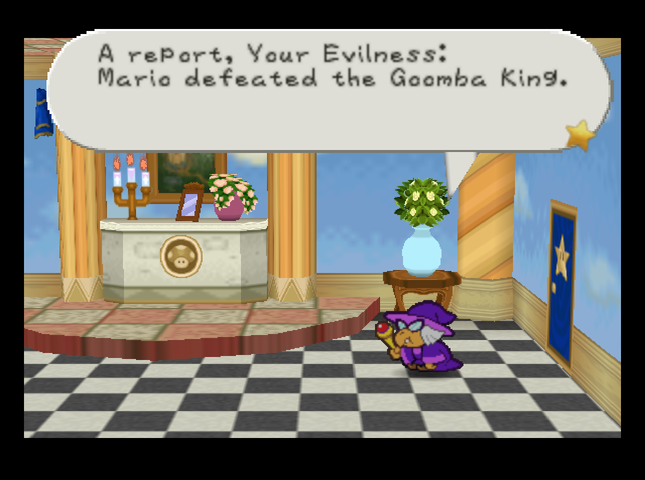 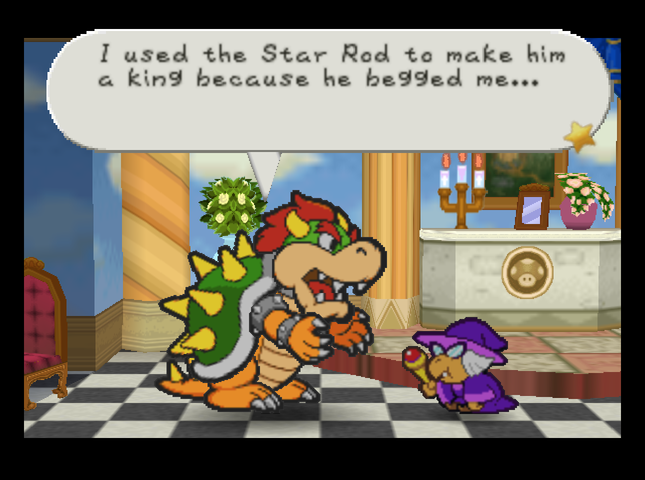  And Mario whips him so easily? What a wimp! And Mario whips him so easily? What a wimp!�though it does shed some light on how the Goomba �King� became a King in the first place. After the conversation turns to the Star Spirits, we also get a preview of our first chapter boss: 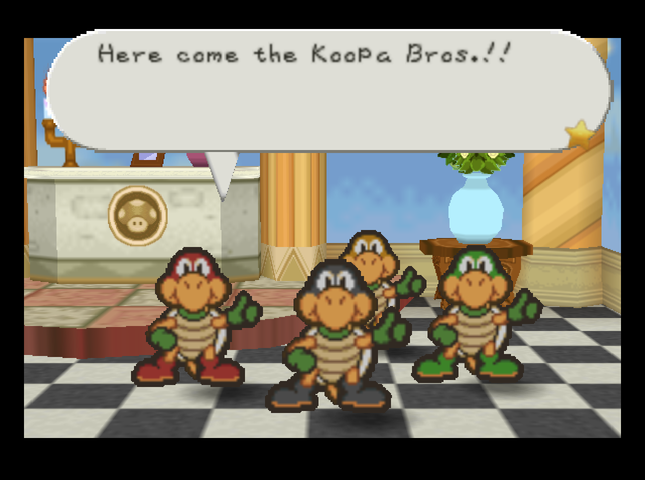 The Teenage Mutant Ninja They show Bowser a preview of their special team attack, but we don�t get to actually see it. In the base game, it�s forming a spinning tower. 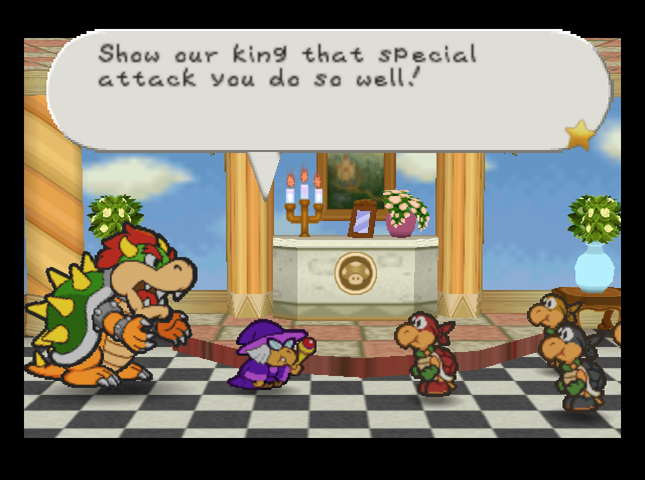  The interlude concludes with Bowser realizing that the Koopa Bros may be a good team, but they�re not the smartest team�     �and we return to Our Heroes. It seems as though a new area has been added to Goomba Road - this bit with the archway is new! That stone block won�t yield to Mario�s current hammer, though. 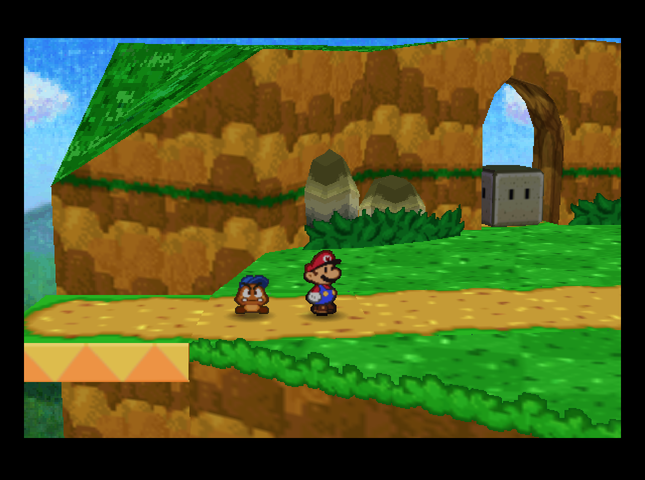 What a neat archway. I bet it took a long time to carve that out. To the east is Toad Town. To the west is my house. What a neat archway. I bet it took a long time to carve that out. To the east is Toad Town. To the west is my house.There�s also a fenced-off area Mario can blow a way into later. 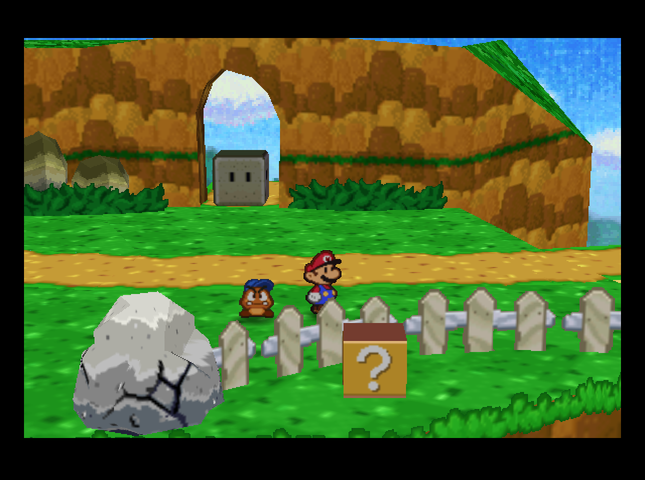 We can�t do anything here right now, so it�s time to keep moving forward.  This ? block contains a Sleepy Sheep, but our inventory�s full. We�ll come back and get it later once we store some stuff at the Item Shop in Toad Town. 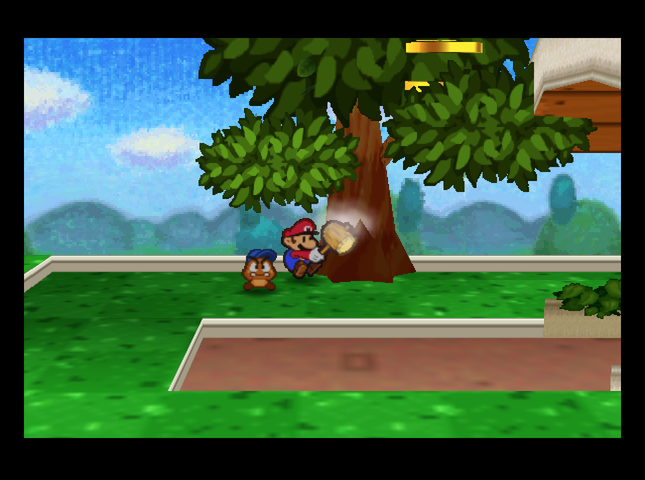 There�s also a spring in a tree. If we hammer the tree, it falls down�    �leading to a chest hidden on top of the nearby awning. It has a new Badge inside! 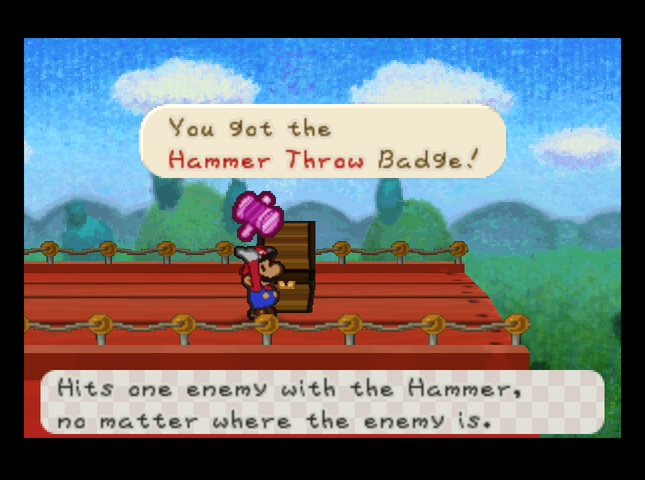  Hammer Throw will let us toss a Hammer at various inconveniently-located enemies, for the low cost of 3 FP. The attack also does one extra damage! We don�t have to fear Spiked Goombas with this any more. Notably, this badge has been rebalanced from the original Paper Mario. There, it cost 2 BP to equip rather than 1, and the attack only cost 2 FP instead of 3 - but there was also no damage boost. With the badge collected and equipped, it�s time to head into Toad Town.  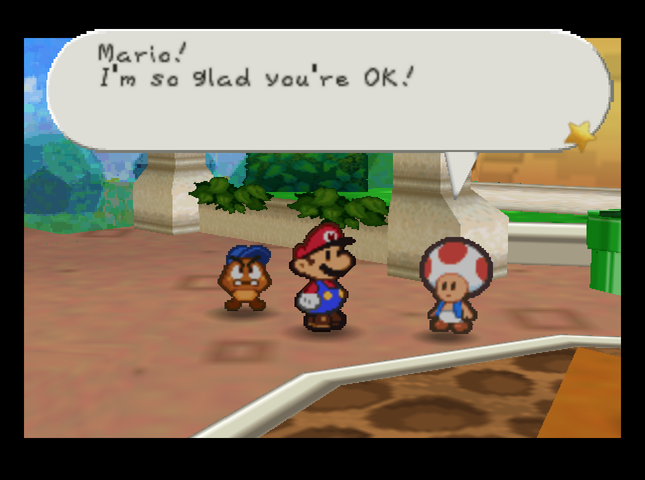 Music: Toad Town Hey, it�s that Toad who gave us the �cake� back in the Introduction! (OK, it�s probably not, but I can imagine, right?)  The town is in an uproar! The princess kidnapped! The castle uprooted! It�s bedlam! Please, Mario! Save Her Highness! The town is in an uproar! The princess kidnapped! The castle uprooted! It�s bedlam! Please, Mario! Save Her Highness!Unfortunately, only a small portion of Toad Town�s facilities are available to us at the moment. The nearest is Russ T.�s information shack, to get useful lore dumps.   So it is told that far away, at the very top of the sky, there exists a Star Haven, where Stars make their home. So it is told that far away, at the very top of the sky, there exists a Star Haven, where Stars make their home. Wait, what?! Oh, mamma mia. I�m sure this won�t have a major impact on the plot of the story later on, no sirree. There are said to be Stars that are particularly strong and good-hearted. They are called Star Spirits. Using the Star Rod, these Star Spirits grant the wishes of everyone in this world. That's why, when we make a wish to the night sky and it comes true, it's all thanks to the Star Spirits and their Star Rod.Some of Russ T�s other lore dumps are the same as in Paper Mario, so I�m skipping over them. Some aren�t. If you go east from the place where Princess Peach's Castle used to be, you'll find a place called Shooting Star Summit.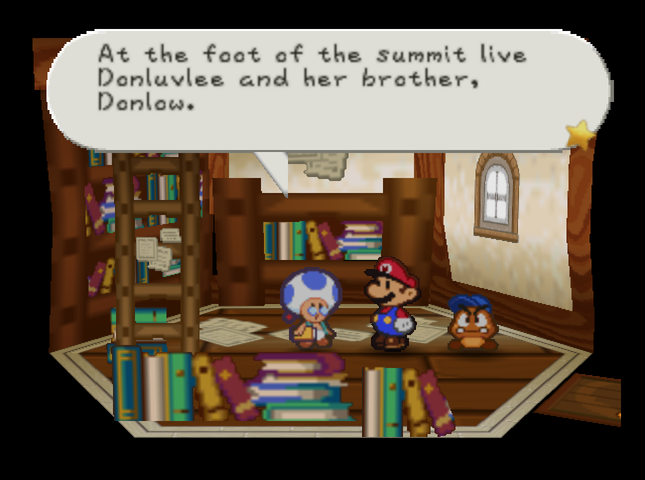 Wait a second� The older sister, Donluvlee, can find things you�re looking for with her connections. The hobby of the younger brother, Donlow, is collecting Star Pieces. If you take him Star Pieces, he'll swap them for Badges. That�s all Russ T.�s got to say for now, but what he�s told us already is confusing enough! Let�s see what else Toad Town has to offer. 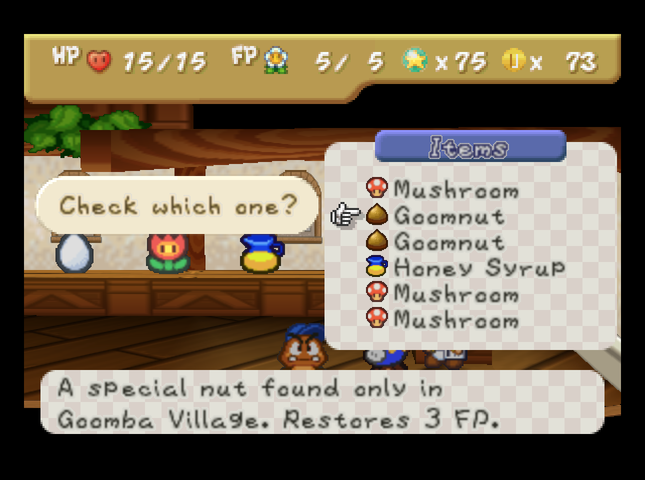 At the shop, we�re able to store all the  In the original Paper Mario, the shop sold POW blocks. Here, they sell Eggs instead, which restore 5 HP and are useful in cooking. The shop�s price list has also been� tweaked, presumably to give a higher difficulty. Mushrooms, which cost 5 Coins in the base game, now cost 8. Fright Jars are also (much) more expensive, going from a cost of 5 coins to one of 15! However, Honey Syrup is now cheaper. Its price has been reduced from 10 coins to 8. 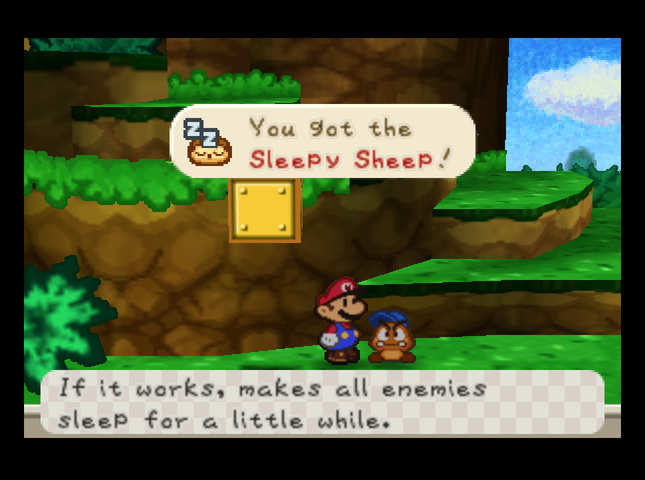 Because we have inventory space, we�re able to backtrack and collect the Sleepy Sheep I mentioned earlier. 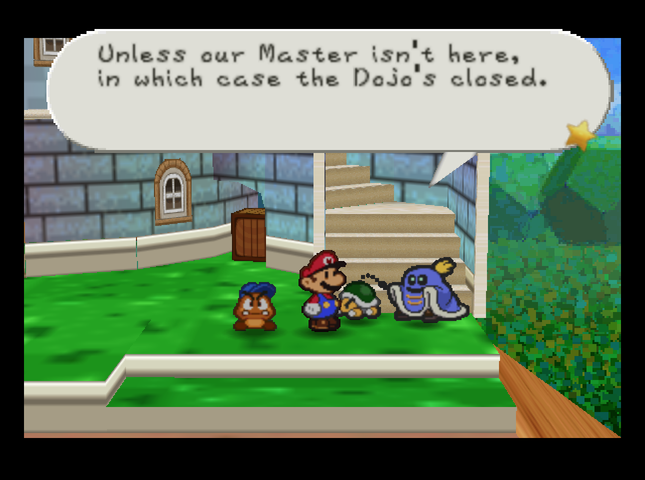 This section of Toad Town is also home to a Dojo. It�s currently closed.  There�s one other thing in this area of the town: the pipe leading to Mario and Luigi�s house!   And you�re all right! After all that castle craziness, I was really worried about you. And you�re all right! After all that castle craziness, I was really worried about you. He�s happy to see us, but he�s kind of miffed that he�s stuck staying at home.   I have lots of talents, and I can jump really high, and... I have lots of talents, and I can jump really high, and... What? Stay home and take care of the house? Man, that's not exciting at all! What? Stay home and take care of the house? Man, that's not exciting at all!If Luigi isn�t a bonus boss later, I�ll be pretty disappointed. Anyway, back to Toad Town! 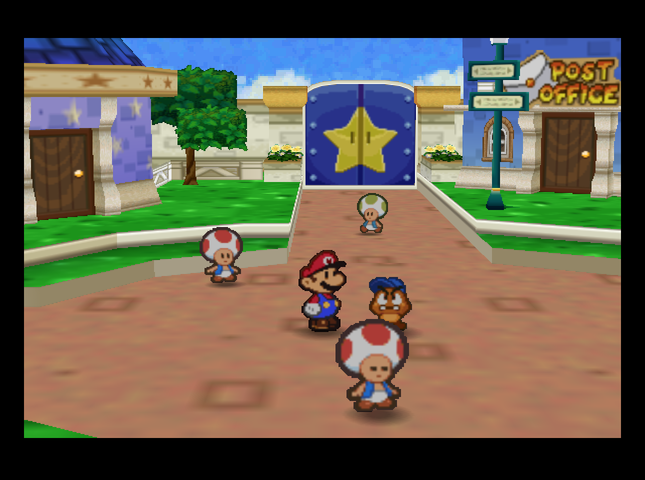 The central plaza of Toad Town has a bunch of buildings. This is the central area of Toad Town, a plaza in front of Princess Peach's Castle. Pleasant Path begins to the east of here. This used to be a bustling area before Bowser's attack. Guests at the castle were always in and out. And tourists came from all over to see the castle. Donlon also lives nearby. If you need help, he has good info, being a mobster and all. Don�t tell him I said that. There's also a Toad House where you can take a short rest and a post office where you can pick up mail for your party members. Also, over by the flower garden, there's a guy named Rowf who's opening his own specialty shop.If we talk to the people here, we find out more about the Don family� though why the Master Quest devs decided to turn a family of magicians into a Mafia clan, I�ll never know.  The building with the spinning roof is Donlon�s house. He also happens to be as stubborn as a mule. He rarely comes out. As scary as he is, though, his connections are no joke. He knows just about everything. He did a shakedown the other day! I�m glad I�m not that guy! The building with the spinning roof is Donlon�s house. He also happens to be as stubborn as a mule. He rarely comes out. As scary as he is, though, his connections are no joke. He knows just about everything. He did a shakedown the other day! I�m glad I�m not that guy! Up on Shooting Star Summit, there are these two siblings named Donluvlee and Donlow. Donluvlee sells information. Her contacts are good at finding Badges or Star Pieces. When you take Star Pieces to Donlow, he�ll trade them for Badges. These two could help you, no? You ought to go meet them. Up on Shooting Star Summit, there are these two siblings named Donluvlee and Donlow. Donluvlee sells information. Her contacts are good at finding Badges or Star Pieces. When you take Star Pieces to Donlow, he�ll trade them for Badges. These two could help you, no? You ought to go meet them.Oh good, Star Pieces still have the same use as the main game. 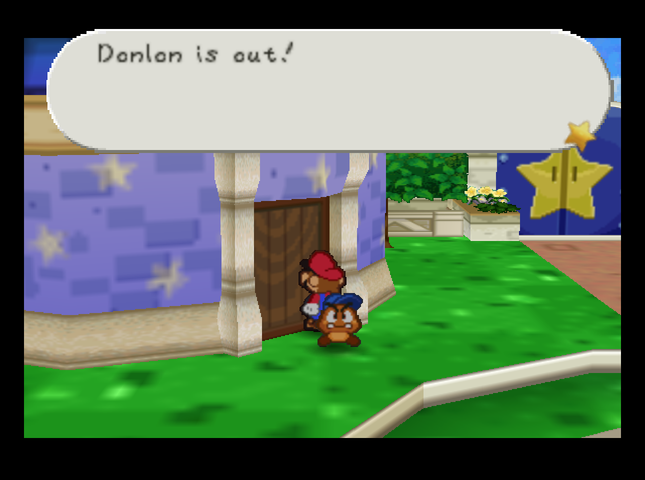  Sadly, Donlon isn�t in, and Rowf�s badge shop isn�t open yet.  The east exit is blocked by the Koopa Bros. in disguise as Toads (though we don�t know that yet).  And if we go out the south exit, there�s a big pile of fallen building materials in Mario�s way.  The post office is open, though, and there�s a letter from the Red and Blue Goombas to Goombario.  Aw, how nice of them. Since we don�t have anywhere else to go, it�s time to go out the blue gate�  �past the ruin where Peach�s Castle stood�  �and on the road to Shooting Star Summit. 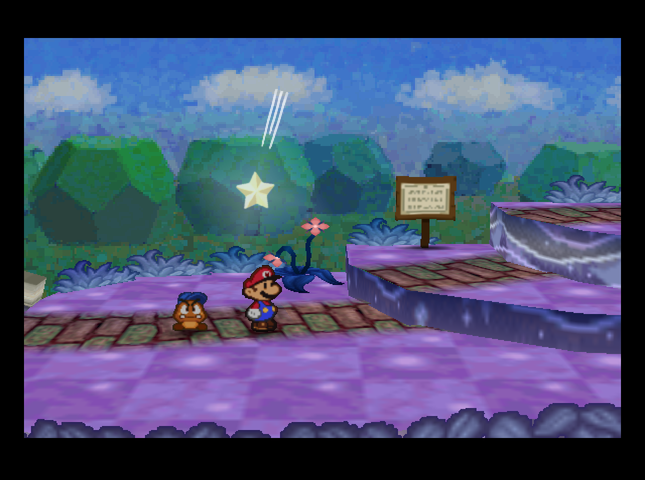 But first, we�re going to stop in at the Don family�s house. 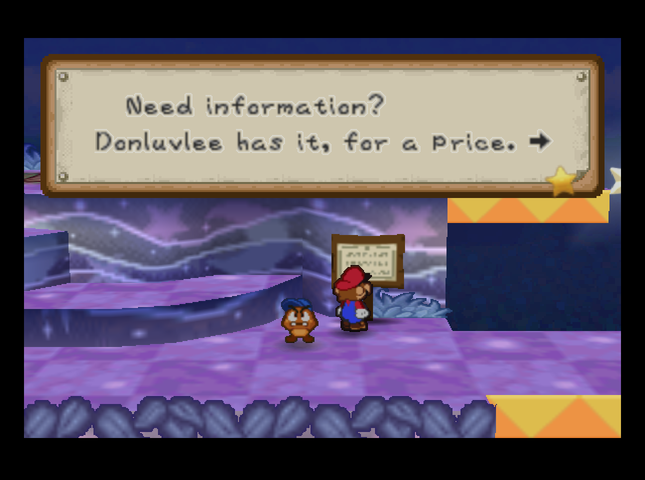  This is the house of an amazingly gorgeous woman, the beautiful mobster Donluvlee. Donlow, who collects Star Pieces, also lives here. It�s weird. I know they�re in the mob. I just don�t have proof. But it�s safe to say they are. They�re not dangerous, are they? What if they don�t like people knowing?! This is the house of an amazingly gorgeous woman, the beautiful mobster Donluvlee. Donlow, who collects Star Pieces, also lives here. It�s weird. I know they�re in the mob. I just don�t have proof. But it�s safe to say they are. They�re not dangerous, are they? What if they don�t like people knowing?! Sadly, 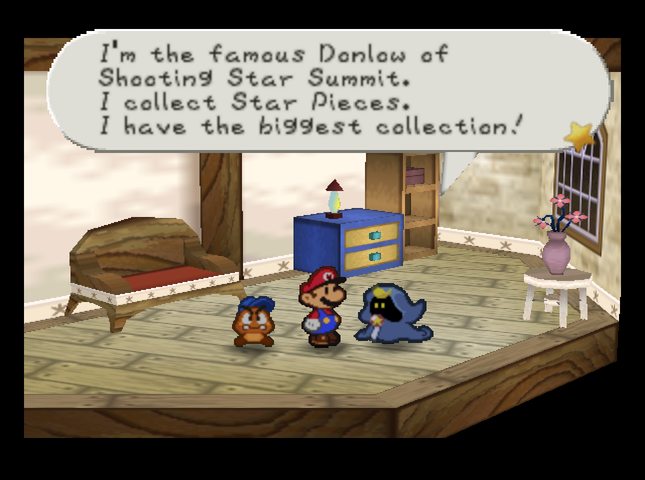 �but her younger brother, Donlow, is always collecting Star Pieces, and will trade badges for them! His collection is a little different than in the vanilla game, though. 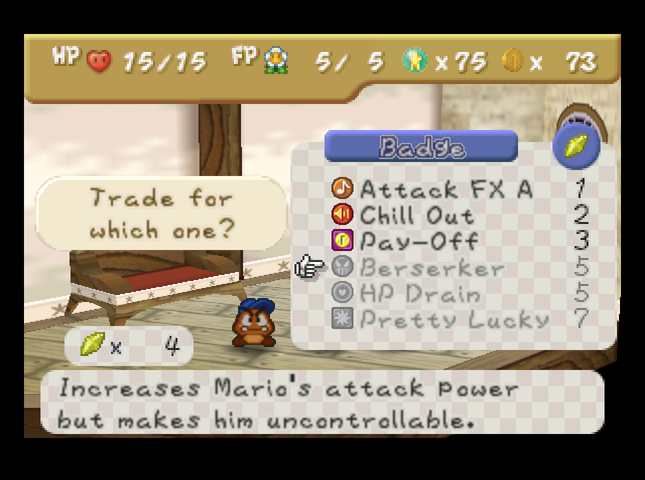 Here�s the full badge list:
The following badges were sold by Merlow, but are not sold by Donlow: Feeling Fine (prevents status effects), Peekaboo (reveals enemy HP without Tattling), Money Money (enemies drop more coins after battle), and Power Plus (gives Mario +1 Attack). Anyway, I don�t have that many Star Pieces right now, so I�m going to hold off on buying anything. Instead, it�s time to head to Shooting Star Summit.  Going on the upper path from the fork in the road, we find ourselves in a new area, with a Star Piece we can get later. Shooting Star Summit is just a bit further to the east. But, there�s two east exits: an upper one that leads to Shooting Star Summit, and a lower one that leads to�  Somewhere new. I�m not sure where we are now. This area isn�t on any maps� This area has strange crystal trees and a cool waterfall. Hitting the trees makes them drop stardust on you. 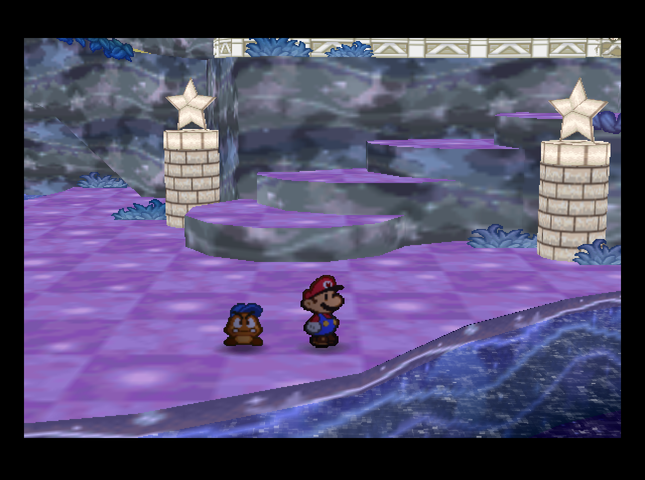 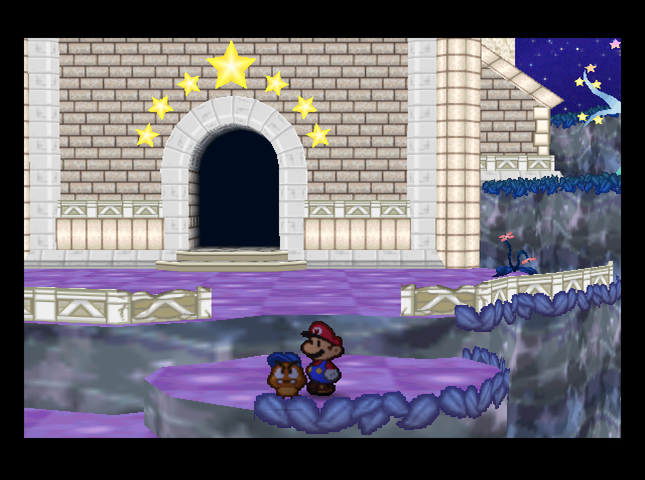 Past the waterfall, there�s an entrance to� what looks like some sort of temple. 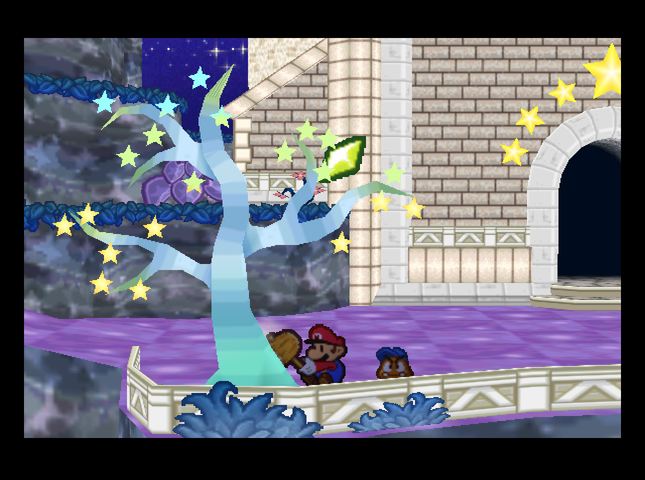 Hitting a nearby crystal tree makes it drop a hidden Star Piece.  There�s also a badge I don�t recognize on a ledge near the waterfall, but we have no way to get up there.  Inside the temple, we see a definite star motif. I�ve heard of this place - it�s the Star Temple. People used to come here to call upon and honor the Star Spirits. 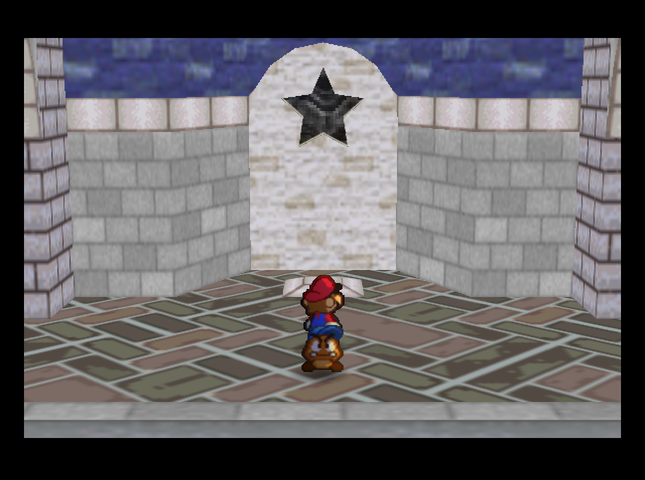 In addition to the stone with the star-shaped cutout by the reflecting pool, there are seven of these niches with a star-shaped cutout - presumably, one for each star spirit.  At the back of the temple, a balcony shows us the night sky. I suspect that if we come back here with all the Star Spirits, this area will open the way to� what? There�s nothing we can do here at the moment, so it�s time to turn around and head for Shooting Star Summit.  This time, we take the upper exit instead of the lower one, and wind up at Shooting Star Summit proper.  There�s a Star Piece hidden around the back of the mountain, to the left.  And our first Star Spirit, Eldstar, is waiting at the top.  The other Star Spirits show up to tell Mario the big scoop: that Bowser filched the Star Rod, and they need Mario�s help to sort things out.     And that�s the tea.  Do you think the Princess is going to be all right? I�m really worried about her. Do you think the Princess is going to be all right? I�m really worried about her.And with that, the game whisks us away to Peach�s Castle. Badges: 3/87 (New: Hammer Throw) Star Pieces: 6/180 SUMMARY OF CHANGES FROM MAIN GAME (in this installment) � Goomba Road has an extra area with a cool archway. � Hammer Throw badge costs 1 less BP, 1 more FP, and does 1 more damage. �� Toad Town�s wizards have given up magic and become mafiosi. � Toad Town shop sells Eggs instead of POW Blocks. �� Mushrooms and Fright Jars are more expensive at Toad Town shop; Honey Syrups are cheaper. �� Donlow sells different badges for Star Pieces, including several not previously seen. � Star Temple found softly glowing near Shooting Star Summit. Purpose unknown. Next Time On Master Quest: The Princess gives Mario the ability to perform Action Commands� wait, that can�t be right. Quackles fucked around with this message at 05:42 on Aug 3, 2019 |
|
#
¿
Jul 22, 2019 09:46
|
|
|
Part 4 : Chuck Quizmo and Other Diversions Princess Peach isn�t doing so hot, all things considered.  It doesn�t help that Bowser keeps showing up to gloat.  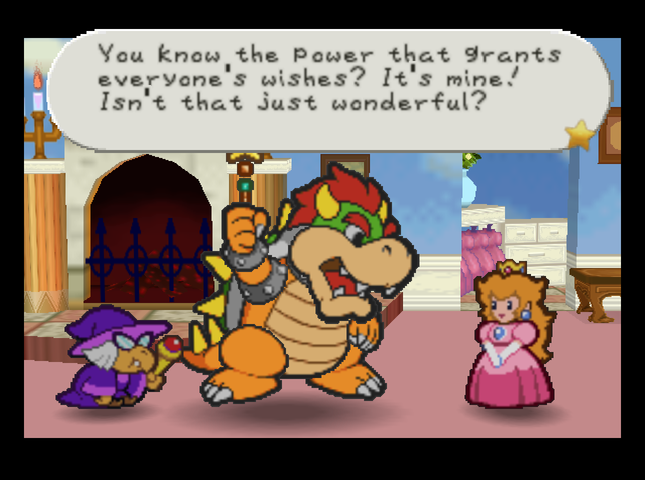  Of course, I�ll only grant requests that I like� anyway, think about it. Of course, I�ll only grant requests that I like� anyway, think about it. Fortunately, someone�s heard Peach�s call for help:  It�s a Star Spirit! A very small Star Spirit, but we�ll take what we can get.   I came from Star Haven to grant your wish! I came from Star Haven to grant your wish! While wishing is one way out of the situation, well.. 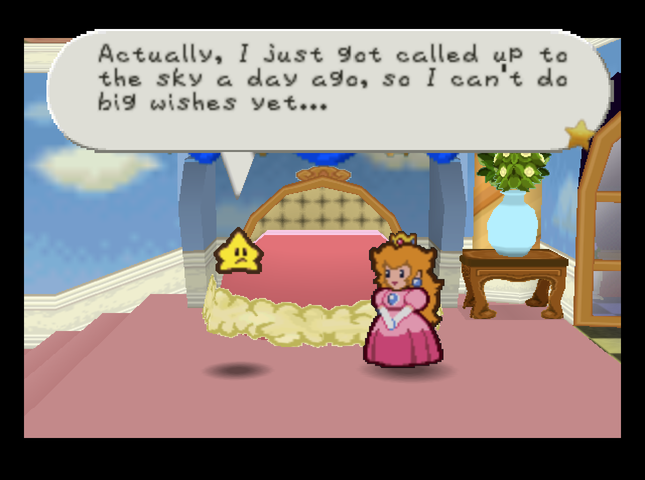 �Twink�s just a Star Kid, so he doesn�t have much power to work with.   I want you to give this to him. I want you to give this to him.Peach can help from the sidelines, at least. 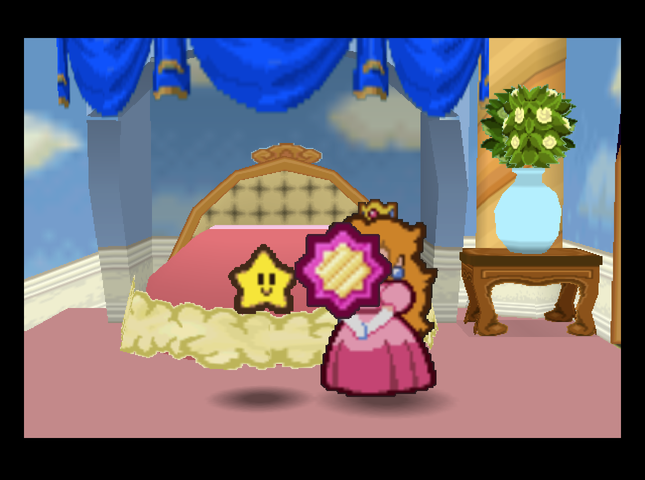 This is Speedy Spin, isn�t it? This is Speedy Spin, isn�t it?In the original game, this was the Lucky Star pendant that let Mario use action commands. Now, it�s the Speedy Spin badge. The fact that we�re getting this badge in particular feels like a nod to speedrunners. Mario has a Spin Dash that lets him move quickly (done by pressing Z while walking), and Speedy Spin makes Mario dash faster and farther while using it. People who speedrun normal Paper Mario try to get Speedy Spin as soon as it becomes available, in Rowf�s badge shop - but Rowf only has three badges from his stock on display at any one time. So, getting the badge can become an exercise of exiting and re-entering Toad Town to try and get the badge to show in the shop. Here, Peach has sent it to Mario by special delivery, removing a large source of speedrun RNG. Peach also has a message for Twink.  After Twink leaves, there is a quiet moment, under the stars.  Next, we return to our heroes, coming back from Shooting Star Summit�  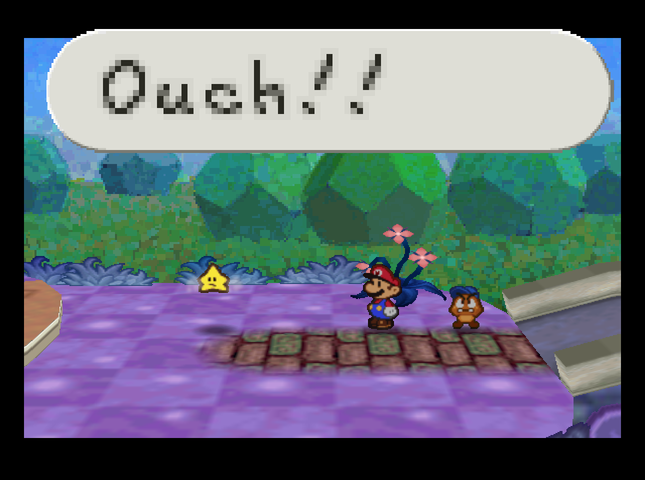 �and then a shooting star konks Mario on the head. Talk about quick (if painful) delivery! 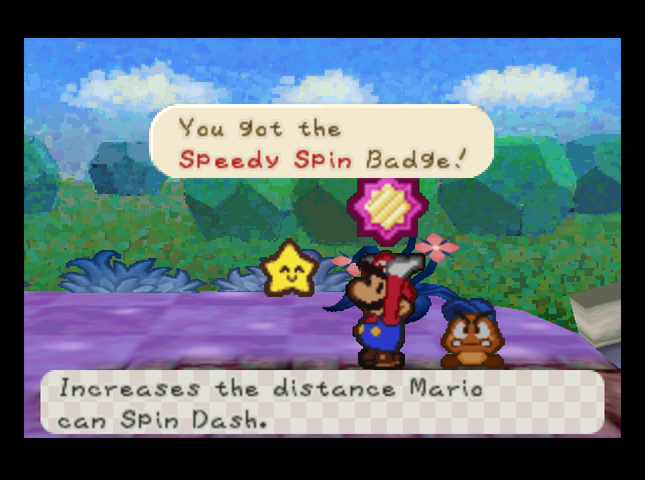  We get our promised badge�  �before being ambushed by a Magikoopa. 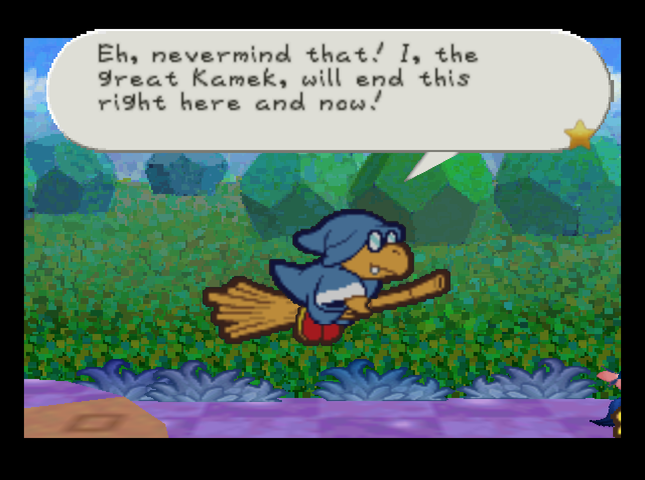  First I�ll take you down, and then Lord Bowser will give me my old job back from Kammy! First I�ll take you down, and then Lord Bowser will give me my old job back from Kammy!He�s apparently Kamek, who wasn�t originally part of the Paper Mario games until Sticker Star. (In the original game, this was just an unnamed Magikoopa.) We find ourselves horsed into a battle!  This is Kamek. This old Koopa must be going senile if he thinks he can take us on! I mean, he isn�t even as strong as a normal Magikoopa, thanks to how old he is. Well, it might be something else, too. He looks like he skipped lunch. Whatever the case, he has low HP compared to others of his class, so we should be grateful. This is Kamek. This old Koopa must be going senile if he thinks he can take us on! I mean, he isn�t even as strong as a normal Magikoopa, thanks to how old he is. Well, it might be something else, too. He looks like he skipped lunch. Whatever the case, he has low HP compared to others of his class, so we should be grateful.OK, Goombario, what has Nintendo Treehouse told you about respecting your elders?! Out-of-character moments aside, take a look at what Goombario said at the end there. Kamek has less HP than the average Magikoopa� at 13?! In the base game, most Magikoopas have 11 HP - and the one who ambushes Mario outside Shooting Star Summit has only 8. Exactly what sort of shenanigans can fully-powered-up Magikoopas get up to?  Being able to use action commands comes in handy. A timed jump will knock Kamek off that broom and make him easier to hit. 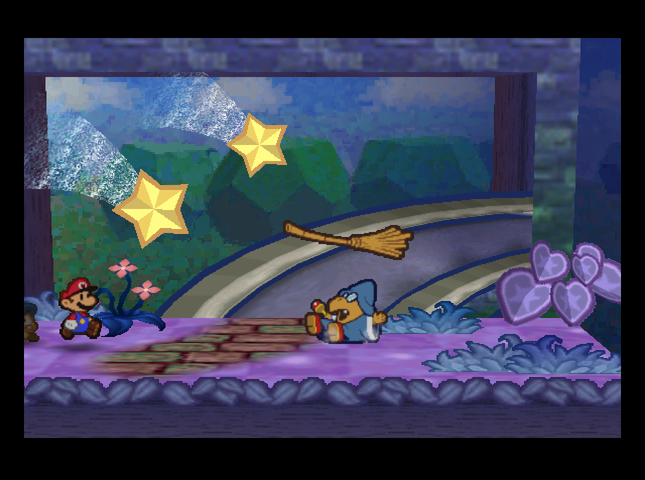 Now let�s see: What sort of attacks can Kamek� 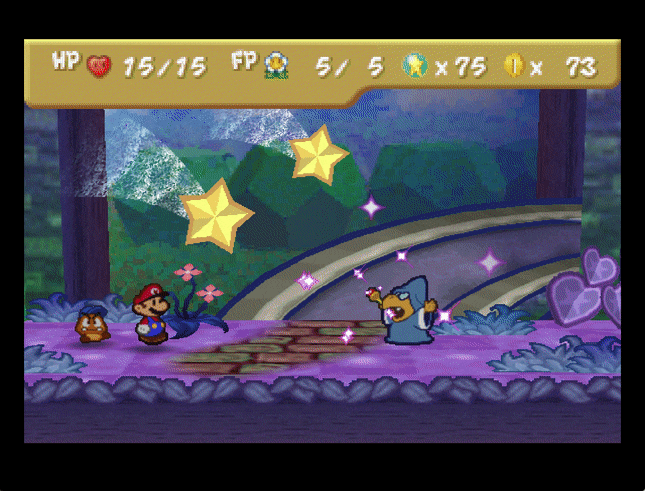 GREAT GOOGLY MOOGLY! That�s a spicy meatball of a magic spell to take. In case you didn�t notice, that magic bolt was aimed from offscreen, making it almost impossible to react to. In regular Paper Mario, Magikoopas fire a slow-moving magic bolt from their wands to Mario. This happened a LOT faster. Well, if Kamek has that level of firepower, it�s time to bring our A-game. Mario will go for as many Power Jumps as he can, while Goombario will headbonk away. 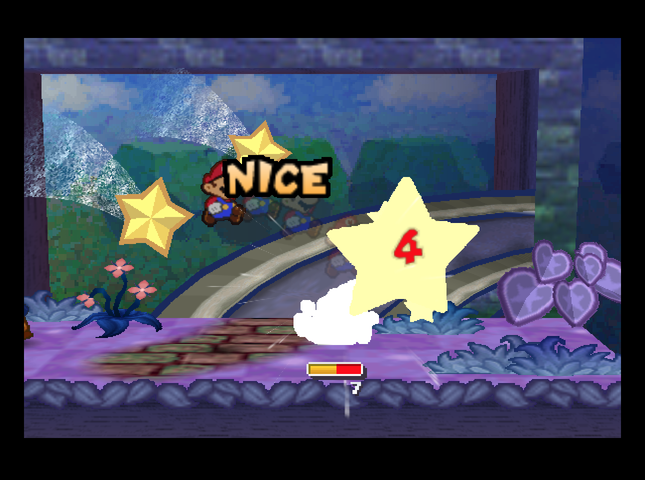 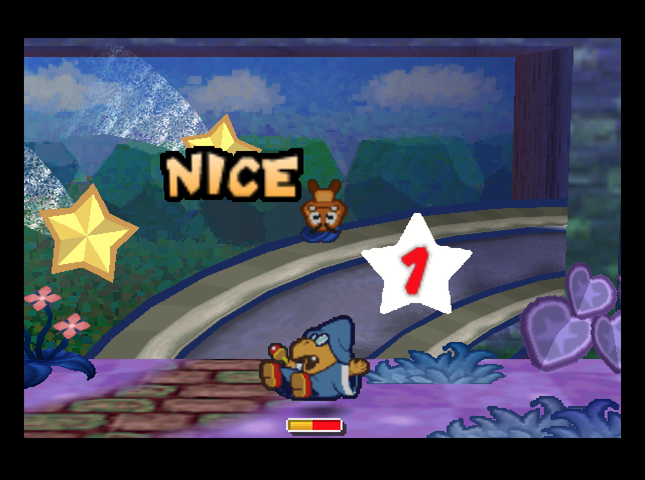 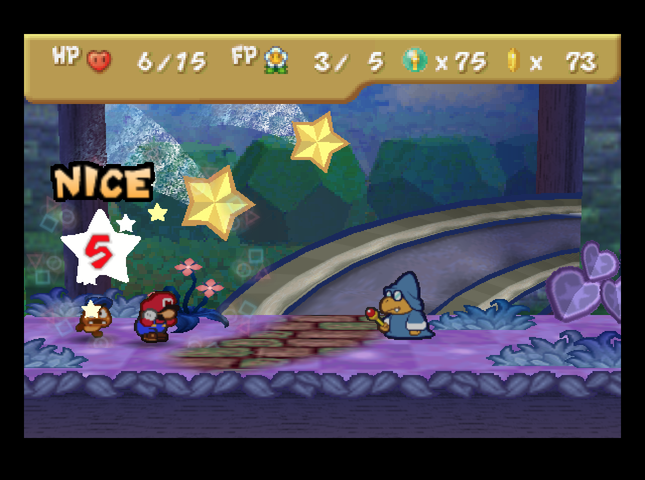 I even managed to block one of the magic spells� a little� but it still leaves me in a bad situation. 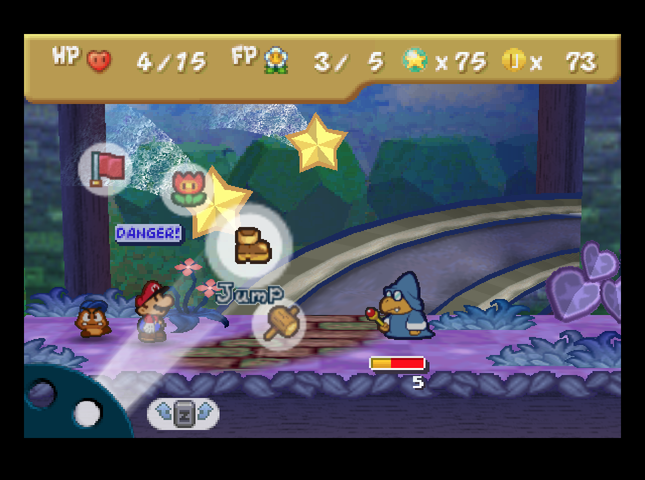 Time to go all out again!   Fortunately, that�s all for Kamek. And late-game Magikoopas are gonna be even tougher? Yikes. With the battle over, Twink has one more thing for us: Peach�s message.  I get the feeling, though� that she�s very lonely. I get the feeling, though� that she�s very lonely. And there he goes. We�ve got a job to do. 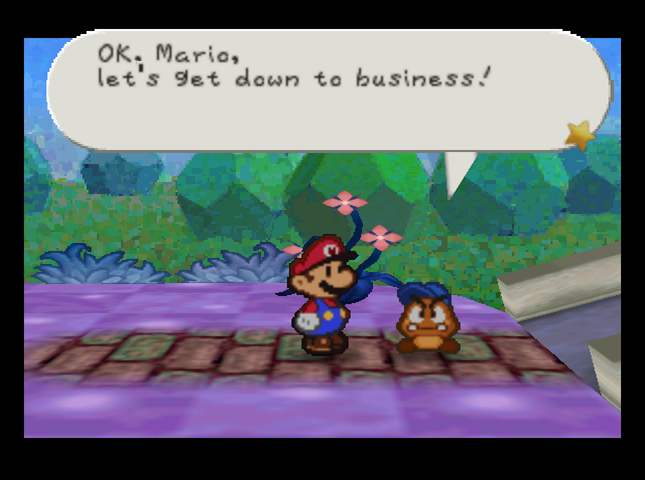  Speedy Spin has been changed from the base game. It is now completely free to equip! Of course, we do. 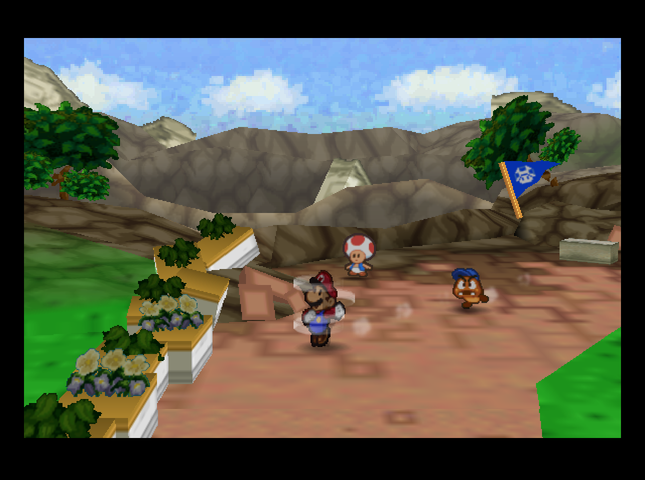 It�s the only way to travel. When we get back to Toad Town, the plot finds us again.  But we have some loose ends to tie up before we head thatta-way. 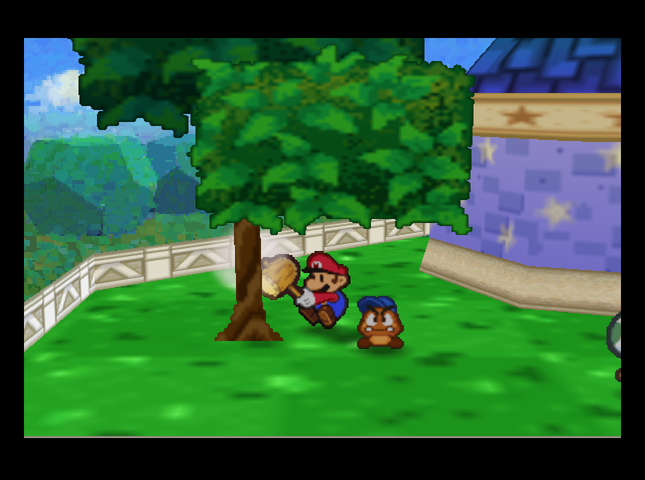 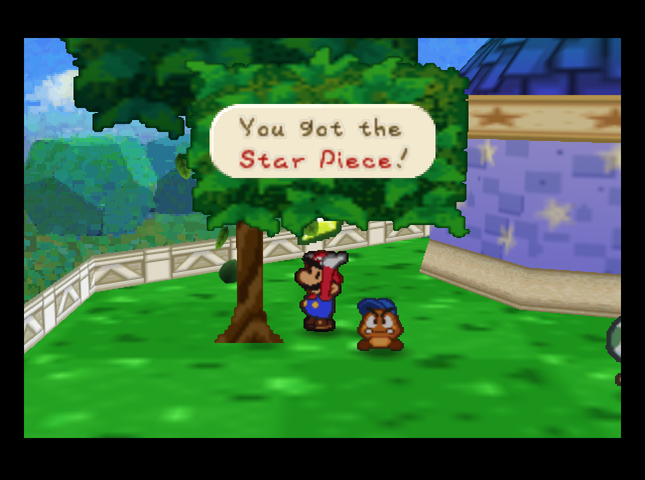 There�s a Star Piece in the tree next to Donlon�s house�   And where would we be without checking the Toad Town message board? Both sides of it. For the next cool thing, we need to travel back to Goomba Village.  There�s a block just past the Goomba King�s fort with a Super Shroom in it - you have to hammer a brick block to make it appear. We missed it the first time through.  Despite our new spin dash, we end up running into some Goombas on the way. This looks like a job for�  Hammer Throw! The damage boost lets us take out the Spiked Goomba in one hit.  We end up leveling up from the battle. I�m taking FP this time since we seem to be using our FP-draining abilities more.  Goomba village is as peaceful as ever, but� is that a new resident in town?  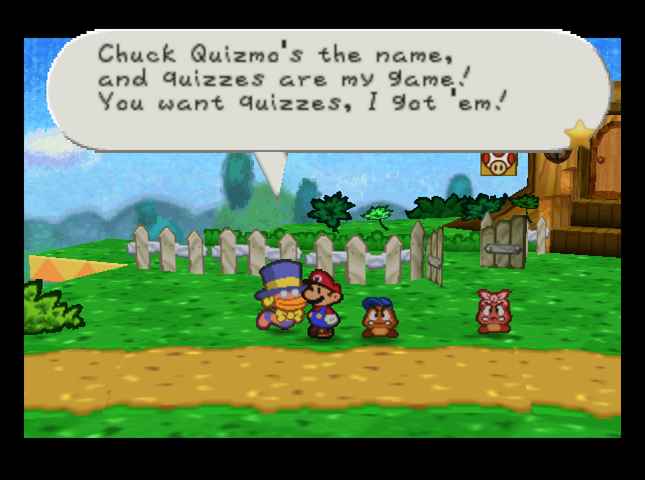 Kaaaa-wiiiizzz! Iiiiit�s Chuck Quizmo, the wandering quiz master! Chuck is going to be a MAJOR source of Star Pieces as we play the game. Each time we answer one of his questions correctly, we get a Star Piece.   There�s one little tweak to Chuck Quizmo in Master Quest that I can really appreciate. 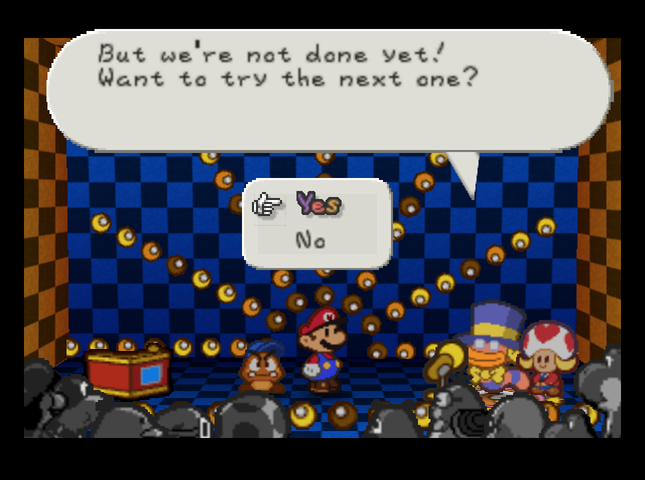 In vanilla Paper Mario, Chuck Quizmo would ask you one question, and then vanish from the town he was currently visiting - whether you got the question right or not. You�d have to go track him down again. Here, you can keep answering questions until he runs out, or we flub. I don�t intend to flub!  What did Luigi want to tell you about back at Princess Peach�s party? What did Luigi want to tell you about back at Princess Peach�s party?[His stamp collection / Zero SP challenge / Real estate investing] This one�s a reference to a hard mode that�s in the game. If you talk to Luigi at the start of the game, he offers to turn hard mode on; in the hard mode, you gain no SP and so don�t level up. However, you get to equip 16 badges for free, in exchange. I did not take Luigi up on his offer. How many bushes can you search in Jr. Troopa�s playground?[Five / Six / Seven] How did Princess Peach close her invitation letter?[Sincerely, Peach / Best wishes, Peach / Yours truly, Peach] How many windows are there in Goomba Village?[One / Two / Three] Which one of the Goomba King�s minions had more health?[Red Goomba / Blue Goomba / Neither] After six Star Pieces, we seem to have bankrupted Chuck Quizmo for the time being.  So, he disappears.  Incidentally, some of those questions are new, and not in the original Paper Mario. I guess a good quizmaster�s got to stay ahead of the times! Now that we�ve seen the quizmaster, it�s time to head back to Toad Town and get the plot rolling - but we�ve got one more stop. 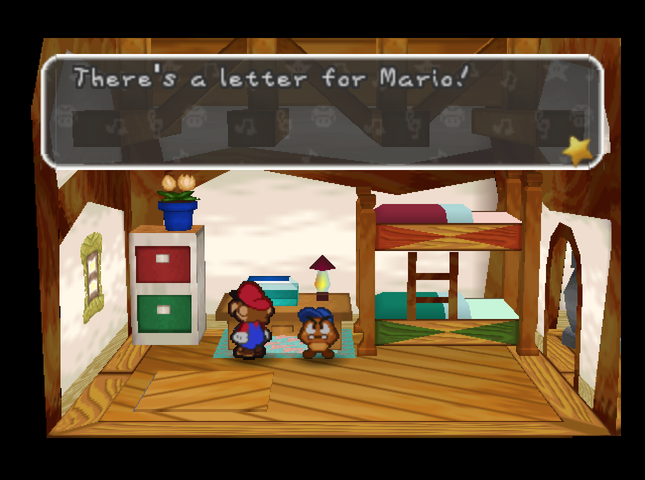 Mario�s got some mail! Two letters, in fact.   I live in Toad Town. I�ve been training at the Dojo so I can save Princess Peach! I�ll write to you again later. Bye! I live in Toad Town. I�ve been training at the Dojo so I can save Princess Peach! I�ll write to you again later. Bye!  Thanks for participating in our quiz show. Our ratings are through the roof. Are those Star Pieces helping you? Please keep coming back until you answer the last question! I�ll cheer you on! Vanna T Thanks for participating in our quiz show. Our ratings are through the roof. Are those Star Pieces helping you? Please keep coming back until you answer the last question! I�ll cheer you on! Vanna TThat�s all the lollygagging we can do, so it�s time to go bother Donlon.  After quite a lot of knocking, Donlon invites us in.   He has something important to tell us�  �but we�ve got to sit through a long story of his, first. 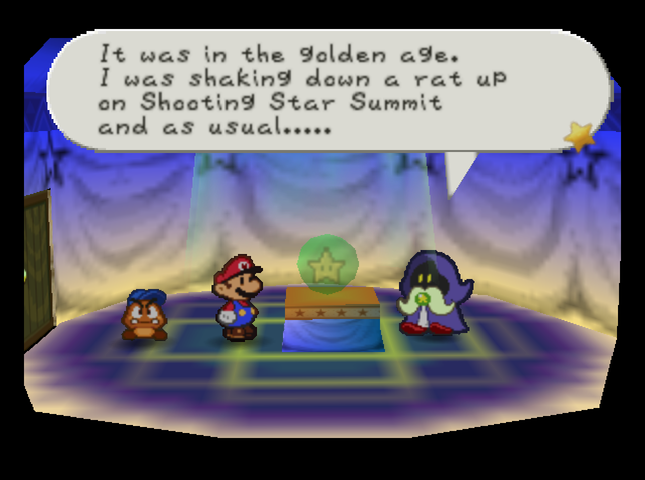  . . . but the crew . . . suddenly . . . a few G�s . . . and I . . . standing face to face . . . Then, the goomah . . . the rat . . . was . . . getting shot up . . . was amazing . . . . . . I was still so young then . . . I did a mock . . . but . . . got away . . . . . . . . . and . . . . . . then . . . . . . so . . . . . . . . . . . . . . . . . . . . . . . . . . . . . . . . . . . . . . . . . . . . . . . . . . . . . . . . . but the crew . . . suddenly . . . a few G�s . . . and I . . . standing face to face . . . Then, the goomah . . . the rat . . . was . . . getting shot up . . . was amazing . . . . . . I was still so young then . . . I did a mock . . . but . . . got away . . . . . . . . . and . . . . . . then . . . . . . so . . . . . . . . . . . . . . . . . . . . . . . . . . . . . . . . . . . . . . . . . . . . . . . . . . . . . .  I�m not gonna lie, I think the �mafia� bit is overdone, but this line made me laugh. Anyway, back to business. �So, anyway, that is why I am able to help you. Right now, your main goal must be to save Princess Peach as quickly as is humanly possible, but� Unfortunately, the road�s still blocked. 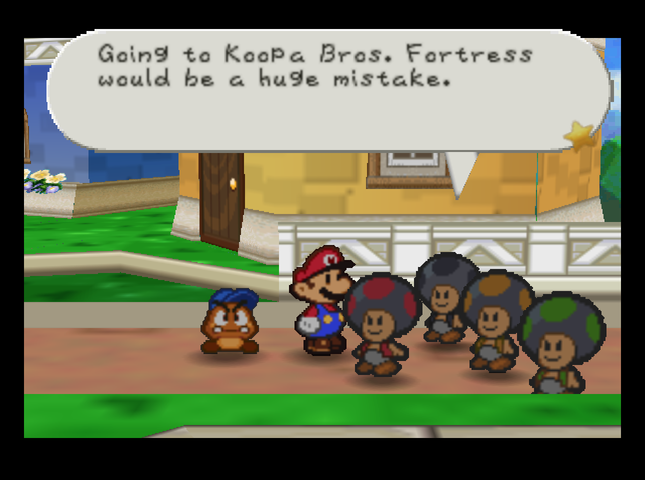  Most of all, though, you shouldn�t go ask the Mafia for help. That would be really bad for us� I mean, for you! Don�t even think about it! Most of all, though, you shouldn�t go ask the Mafia for help. That would be really bad for us� I mean, for you! Don�t even think about it! Oh, now of course we�re gonna ask the Mafia for help. 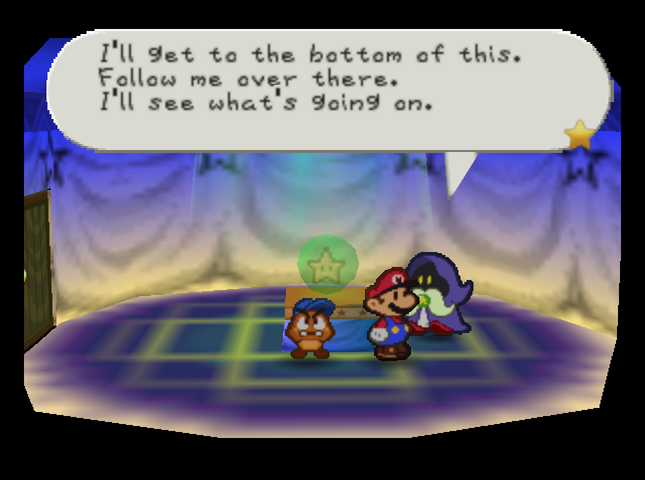  Hmmm! You aren�t Toads, are you?! Hmmm! You aren�t Toads, are you?!  �.Um� we don�t know what you�re talking about. �.Um� we don�t know what you�re talking about. Yeah, right! Fortunately, Donlon can use his   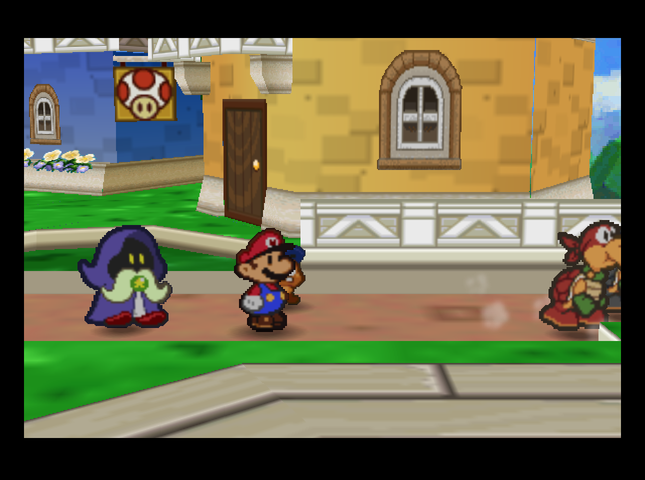 And that�s that. Donlon has one more piece of advice before we head out:  One of my associates knows him. In Koopa Village, you might run into the old geezer. One of my associates knows him. In Koopa Village, you might run into the old geezer.Koopa Koot is in the mafia??? Well, whatever. It�s time to head out on Mario�s grand adventure.   Badges: 4/87 (New: Speedy Spin) Star Pieces: 13/180 Chuck Quizmo�s Quiz Questions: 6/64? SUMMARY OF CHANGES FROM MAIN GAME (in this installment) �� Princess Peach gives Speedy Spin badge for delivery to Mario, instead of Lucky Star pendant. � Mario ambushed by Kamek outside Shooting Star Hill (as opposed to just some random Magikoopa). � �Kamek� has 13 HP (originally 8), and has replaced his 3-damage magic wand with spicy 6-damage magic meteors. � Speedy Spin badge equips for free. � Chuck Quizmo lets you answer quiz questions until you go bust. � Chuck Quizmo has new quiz questions. � Koopa Koot is apparently a mafioso. Next Time On Master Quest: Two words: �Spiked Paragoomba�.
|
|
#
¿
Jul 23, 2019 12:06
|
|
|
FeyerbrandX posted:I can't believe I just said I wanted Piantas in another game. 
|
|
#
¿
Jul 24, 2019 05:51
|
|
|
FPzero posted:... the tools are there to get through. It just might take more than one attempt. I know playing Paper Mario as a kid definitely resulted in me having a fair few game overs throughout so I'd expect the same from a hard mode hack. So far, I haven't had any Game Overs. I think I'll add a counter for that in the end-of-episode lists.
|
|
#
¿
Jul 25, 2019 01:23
|
|
|
Bruceski posted:The main issue with buffs/debuffs is that their value is hard to tell. A game may tell you Protect buffs defense by 10, but it takes some knowledge of damage formulas to figure out if that's good. Poison or sleep may be great, but the hard part is getting it to land and if not the turn's wasted. Usually you don't even know if an enemy's vulnerable to it and you missed or if it's immune. FF4 is made massively easier by most of the bosses being vulnerable to Slow, but good luck knowing that without a guide, or figuring out that it did anything when you don't know how fast they usually attack. Honestly, that's one of the nice parts of how Paper Mario works. Someone's Attack or Defense get buffed (or debuffed)? You can calculate the likely effects in your head. And buffs/debuffs matter. The one I could never figure out for most RPGs was if it's worth using moves that inflict status effects, because most enemies don't need them and most bosses resist them. But I seem to recall beating Macho Grubba in my last play of The Thousand-Year Door thanks in part to a lucky freeze from a stage effect, so I guess they have a place.
|
|
#
¿
Jul 25, 2019 06:30
|
|
|
Part 5 : Fuzzies, Bigoombas, and Koopas, Oh My! We start Chapter 1 by heading onto Pleasant Path. Music: March Ahead  It does look pretty pleasant! But is that a Koopa that�s loyal to Bowser I see?  Yes, yes it is. Thanks to a Jump First Strike, our very first Koopa starts the battle flipped over. It appears that Koopa Troopas� HP has been buffed; they used to have 4 HP, but now they have 5. Their Defense (1 standing up, 0 flipped over) is still the same. 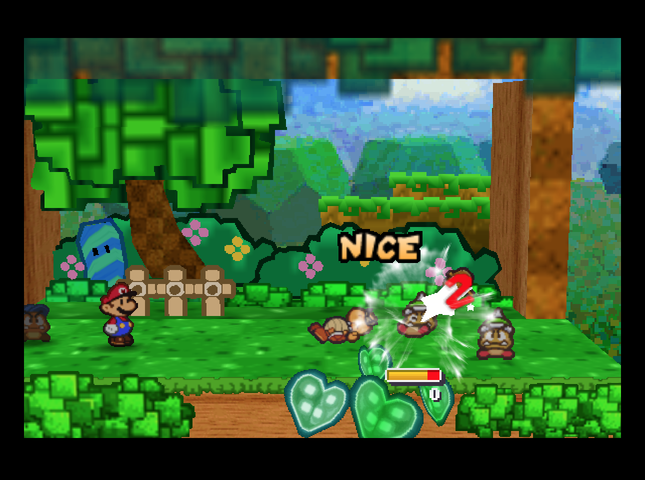 Koopas stay down for several turns after they�re flipped, so we can take out the Spiked Goombas with Hammer Throw while Goombario headbonks the Koopa. 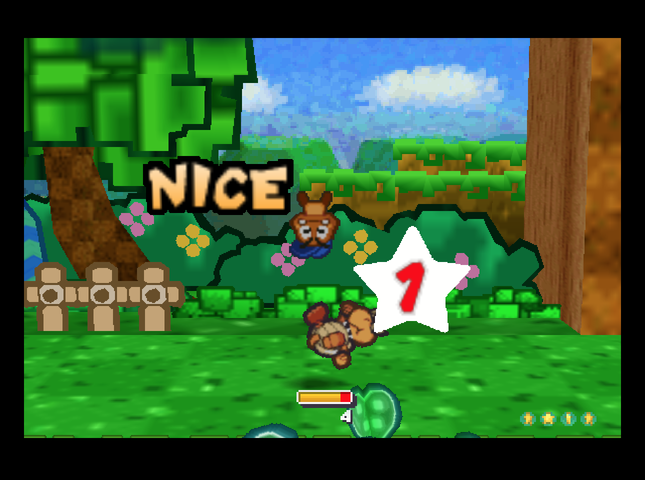 The battle ends without the Koopa getting a chance to actually attack. 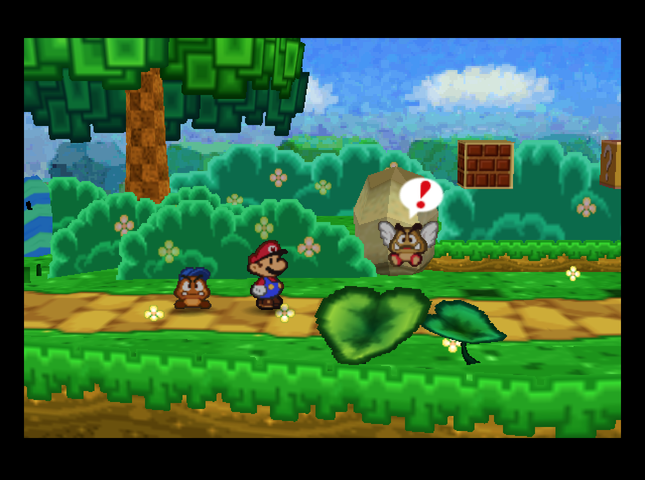 A little further down the path is a Paragoomba. It�s teamed up with� 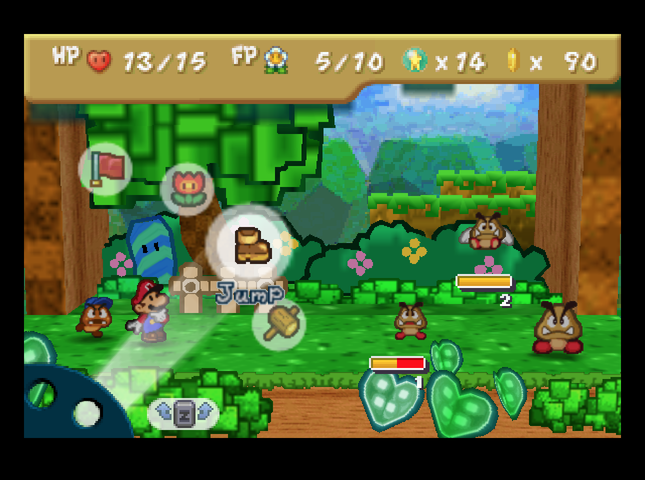 Wait, is that an extra-large Goomba??? 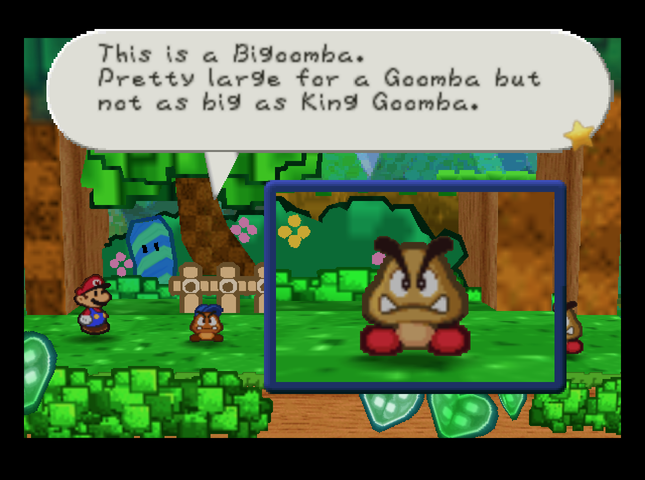 They�re much stronger than a normal Goomba, boasting much more HP. But I�m not a normal Goomba, so you just leave it to me! They�re much stronger than a normal Goomba, boasting much more HP. But I�m not a normal Goomba, so you just leave it to me!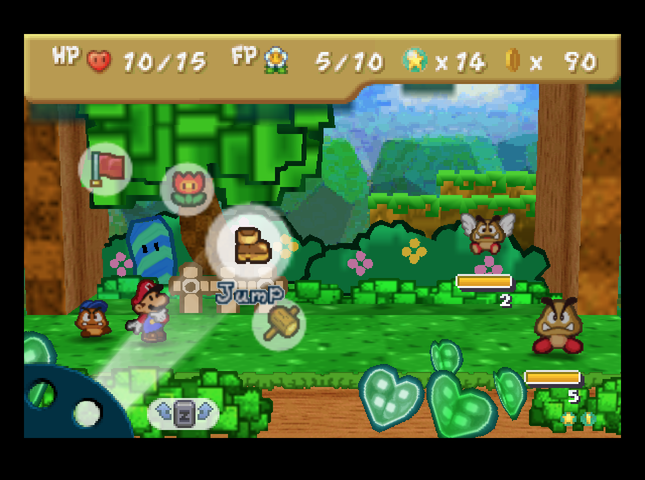 It turns out that Bigoombas have 5 HP� 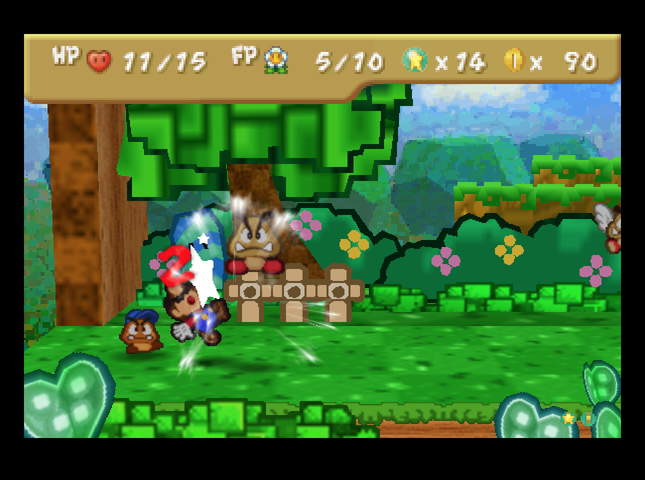 ...and they attack for 2 damage, so we�ll be taking chip damage while fighting one. 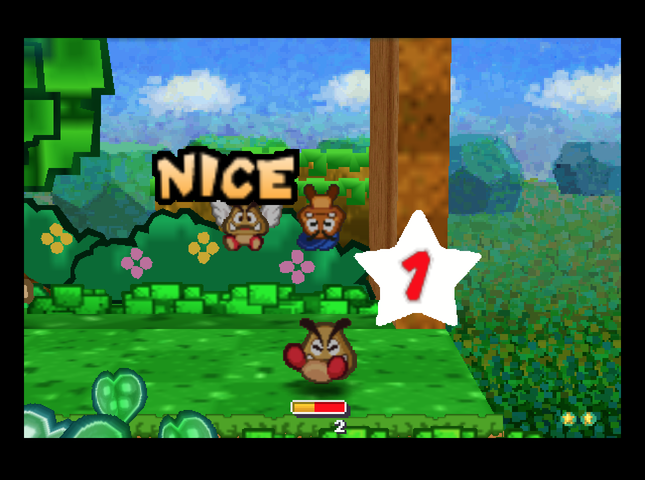 I target the Bigoomba, because if I dodge, the Paragoomba does no damage. 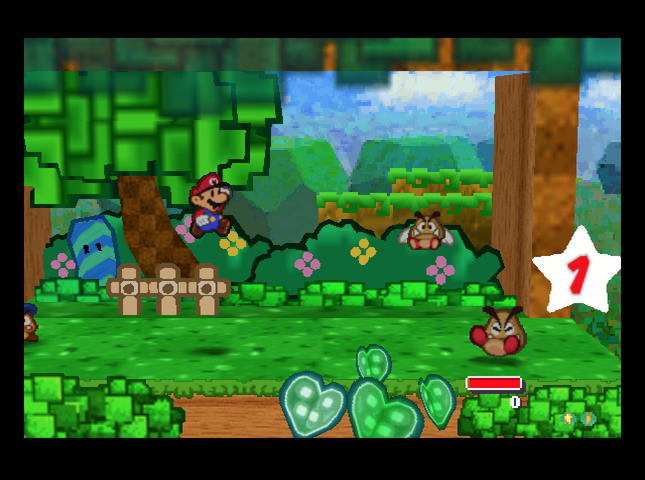 A little farther along, there�s some ? blocks. The one in the background can only be reached by going through a secret passage in some foliage� 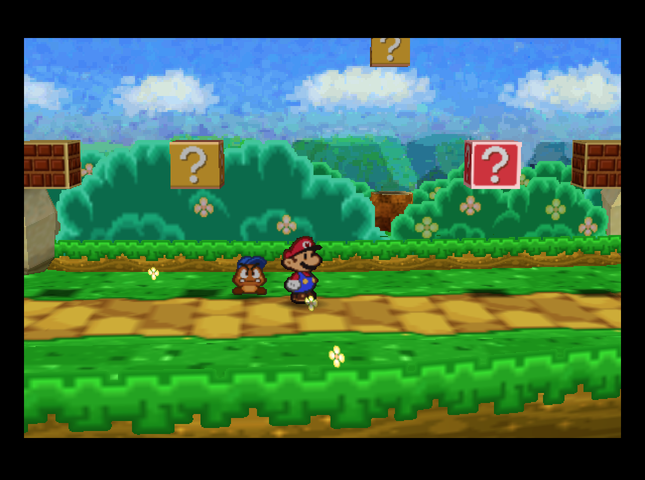 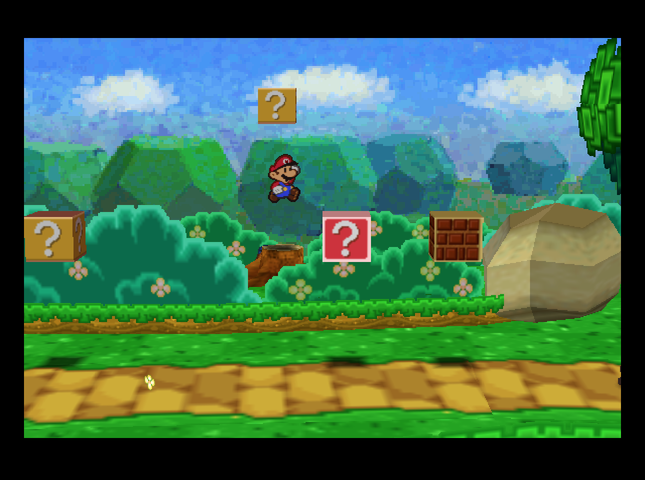 �but even if Mario finds the passage, he�ll need to be able to jump higher to actually hit the block. Best come back later. At this point, I ended up taking a quick side trip back to Toad Town to rest and store inventory (so I could raid the ? blocks) and I noticed the Dojo was open! 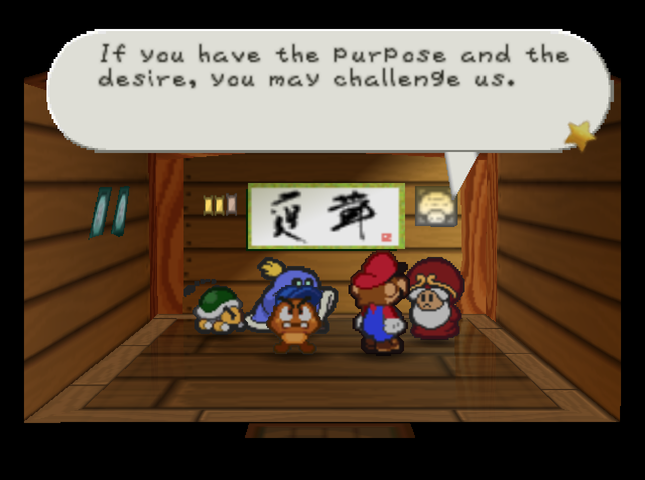 For those who don�t know, the Dojo is a series of five hard, optional boss fights: first against a Buzzy Beetle named Chan, then against Lee the Duplighost, then three bouts of increasing difficulty against The Master. There�s nothing to win but a certificate, and nothing to lose but my pride. So why not? 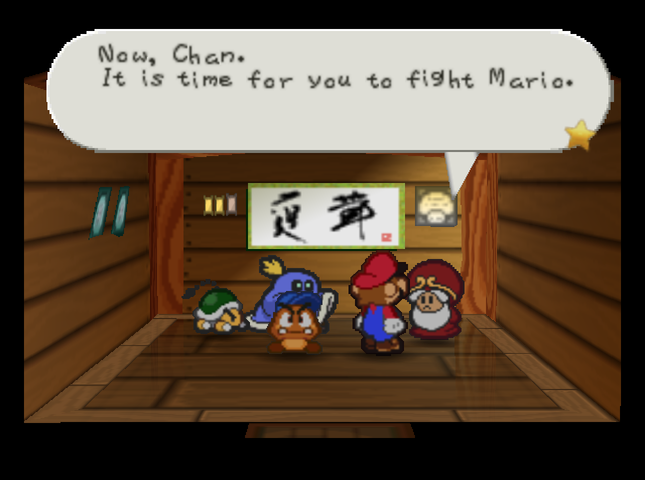 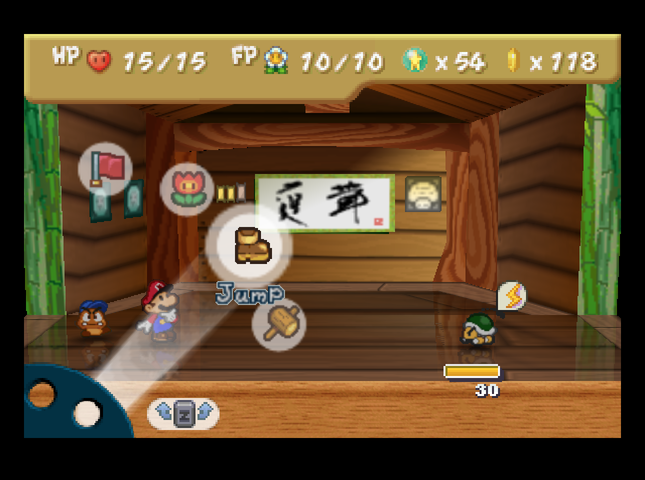 Uh-oh. That lightning bolt means that Chan is electrified! Mario will take contact damage if he jumps on Chan. The Zap Tap badge might help with this, but we haven�t got it yet - or the Star Pieces needed to buy it. Still, we have to try. Let�s see what Hammer Throw does. 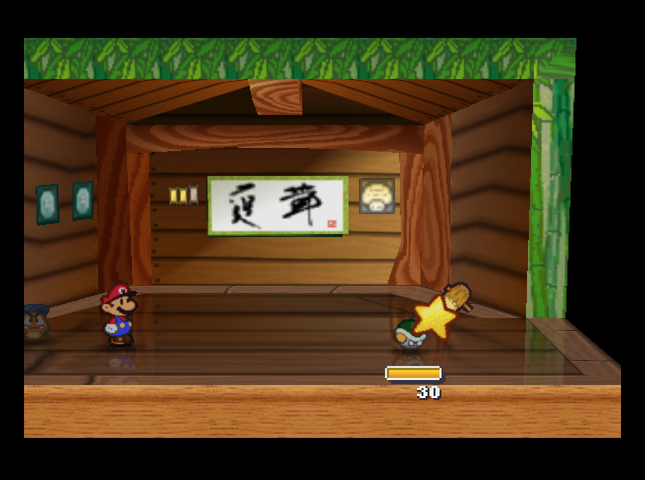 It looks like Chan�s defense is off the charts! Well, it�s at least 3. 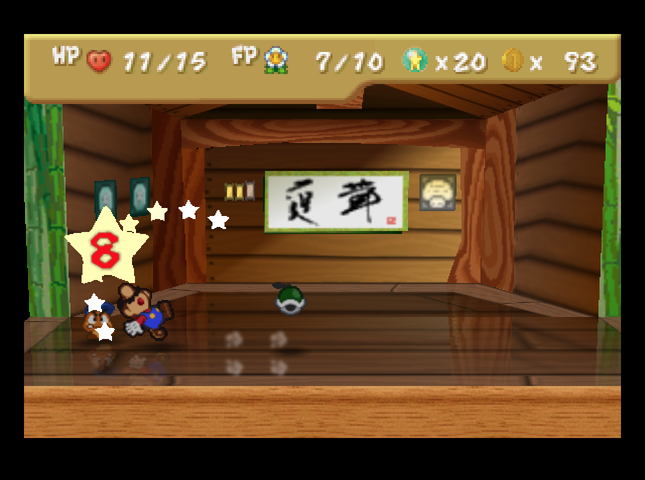 His attack is off the charts, too. (In the original Paper Mario, Chan had 15 HP, 2 Attack and 2 Defense. He�s just a tad stronger here.) 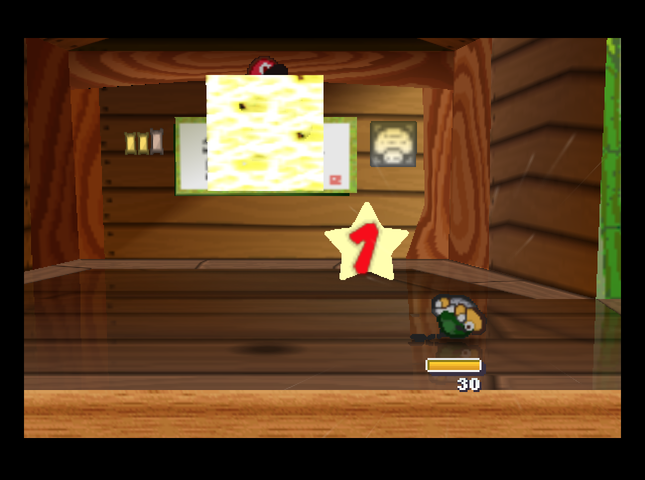 Jumping does flip him, but it hurts! And Chan is still electrified when he�s flipped over. (The yellow square is a �lightning� effect being overlaid on Mario. Graphical glitch.) 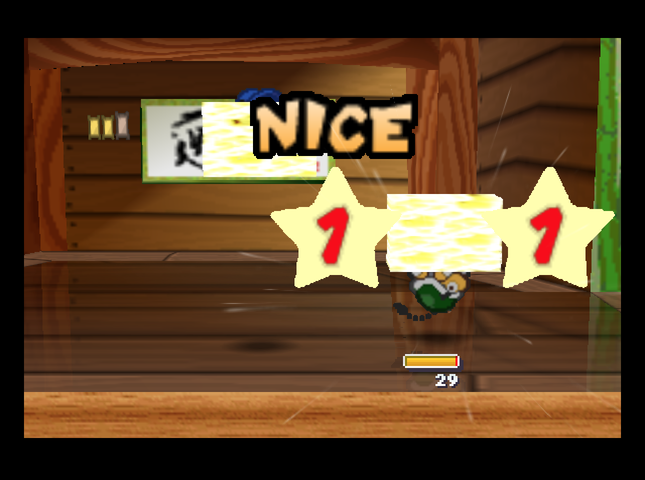 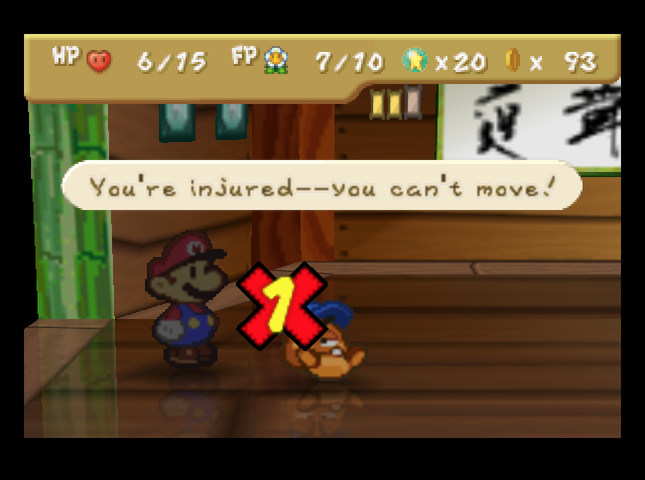 It�s worse for Goombario, who will lose a turn from the shock instead. (He�s headbonking in the first pic.) 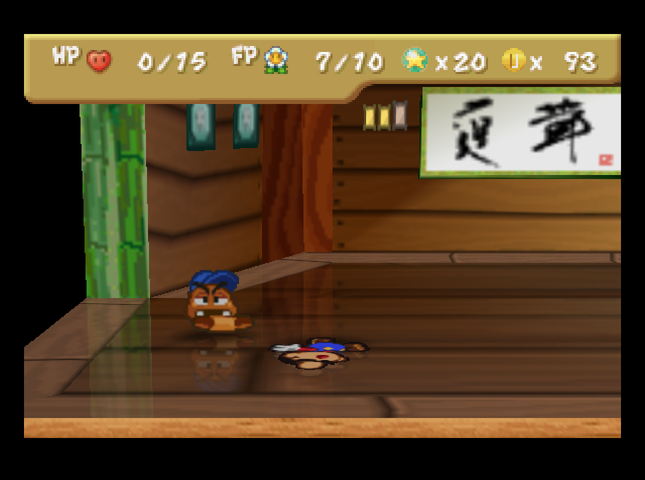 Chan can flip himself upright and attack in the same turn. Unsurprisingly, he defeats us handily.  Hm� You lack strength. Hm� You lack strength. You have skill, though. Please return here after you have trained some more. [cough] [hack] You have skill, though. Please return here after you have trained some more. [cough] [hack]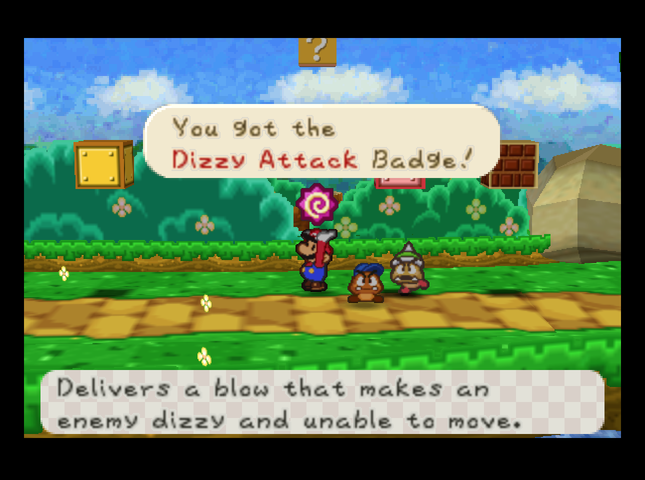 Back on Pleasant Path, the red ? block contains the Dizzy Attack badge. Dizzy Attack makes Mario�s Spin Dash so that if he hits an enemy while dashing, the frontmost enemy in the formation will start the battle with the Dizzy status effect. (Dizzy enemies are stunned until it wears off.) Unfortunately, we don�t have time to see what it does before we�re accosted by a Spiked Goomba. 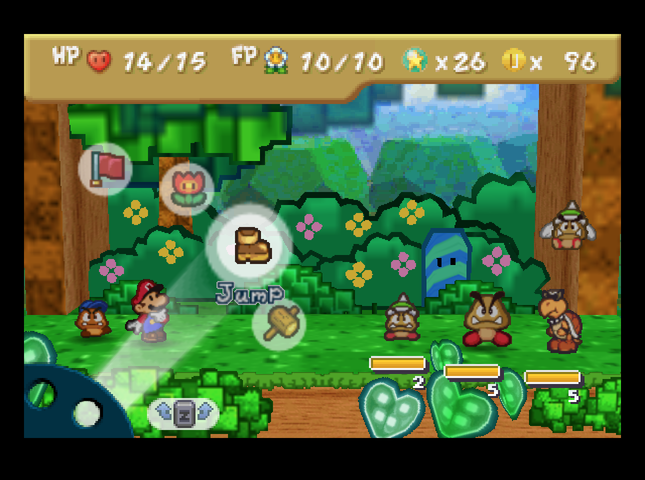 Wait, hold up. Is that what I think it is? This is a Spiked Paragoomba. Well, Mario, we might be in trouble here. As you can see, he�s wearing one of those awesome spiky helmets. That rules out my headbonk and other jump attacks. But how else can we reach him? Don�t we have any other attacks that can hit flying enemies? And where can I get one of those sweet spiky helmets?Yes, Spiked Paragoombas do have a Defense of 1, by the way. There�s one other fact about this formation that a screenshot fails to convey: I can�t jump on the Koopa. The Spiked Paragoomba is directly above the Koopa in the formation, and is thereby blocking anyone from jumping on the Koopa. What teamwork! 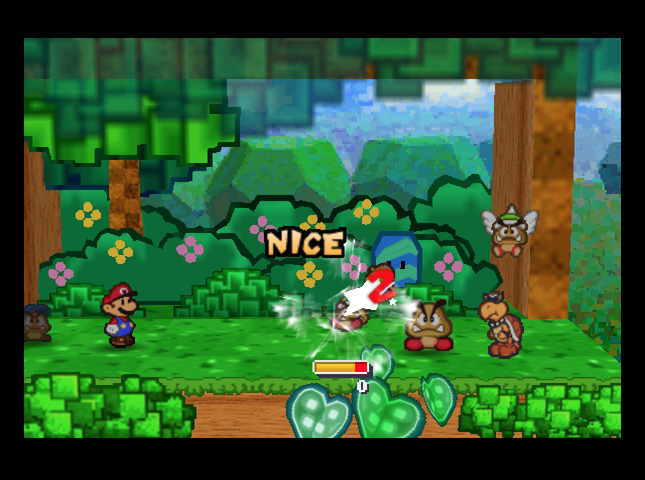 I actually use Hammer Throw to KO the front Spiked Goomba first, just so we take less damage while we sort this formation puzzle out.  Spiked Paragoombas don�t actually attack with the helmet - they just fly into you. So, they only do 2 damage instead of the 3 the Spiked Goomba would do. 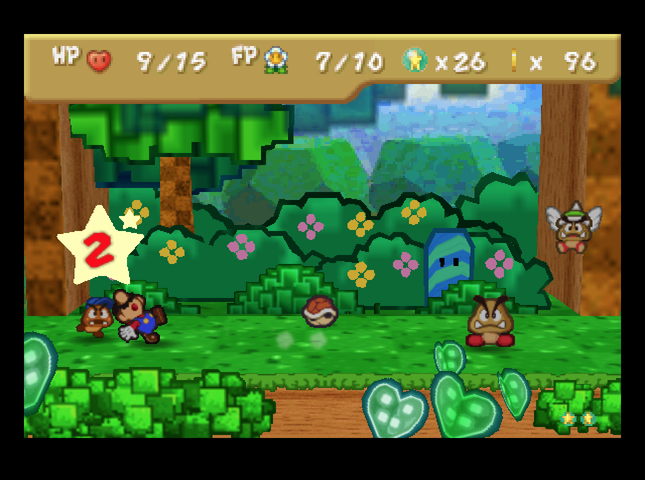 Koopa Troopas attack for 2 damage. In the base game, they attacked for 1. 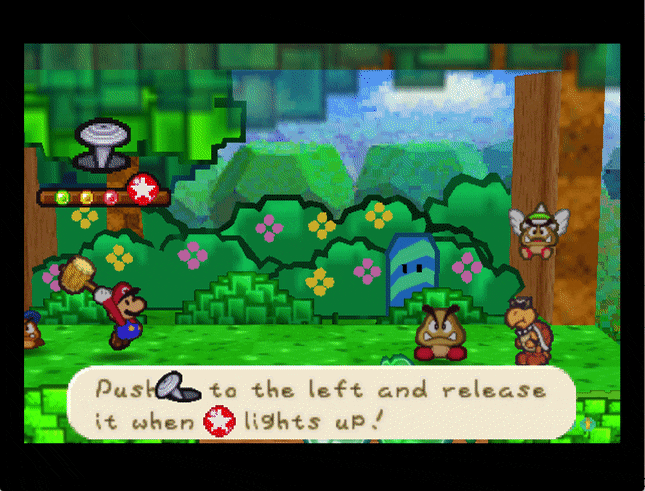 Hammer Throw takes out the Spiked Paragoomba in one smooth hit. This is almost certainly why its damage was buffed. 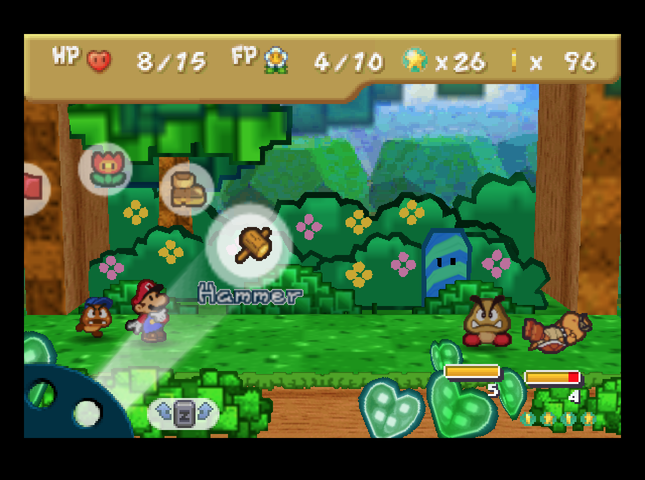 With the helmet-wearers gone, we can take out the rest of the fighters easily. Though that was a tough battle formation, it gave us 8 Star Points, so it�s not all bad. 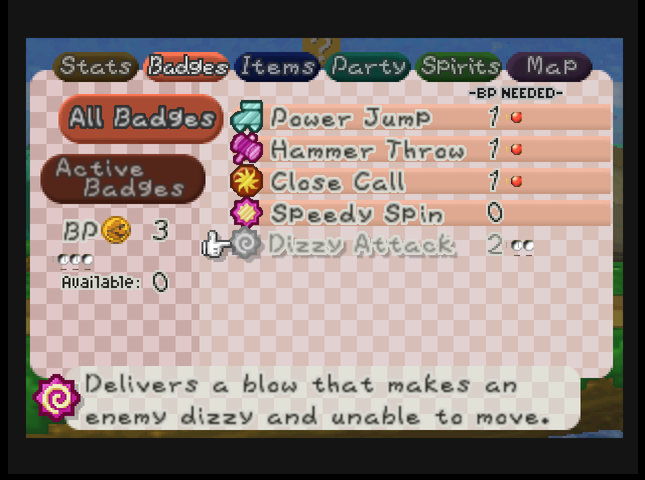 It looks like Dizzy Attack is unchanged from Paper Mario. Sadly, we don�t have the BP to equip it. 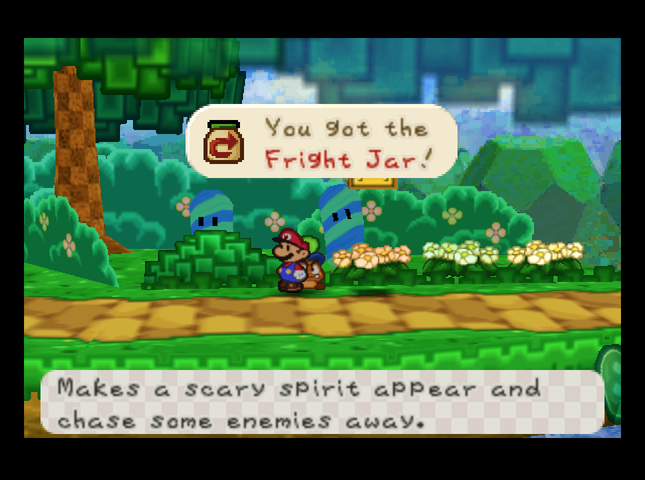 A little ways down the road is a ? block with a Fright Jar.  There�s also a battle with a Koopa with another Spiked Paragoomba in tow. We use Hammer Throw to KO it and flip the Koopas. 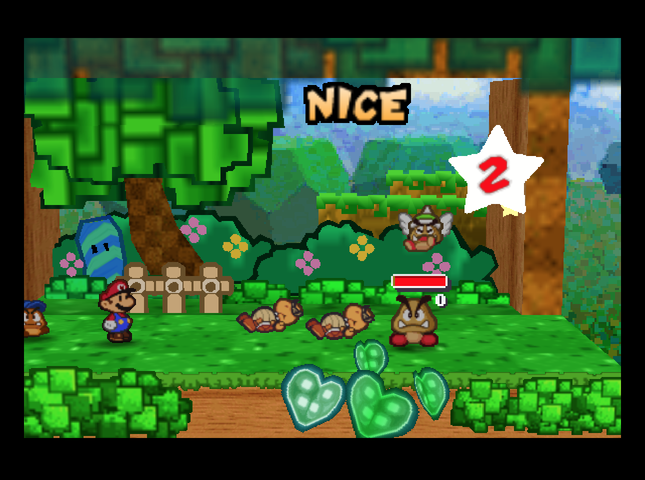 From there, standard tactics apply. After the Koopa is defeated, we�re able to find a POW block in the nearby ? block. 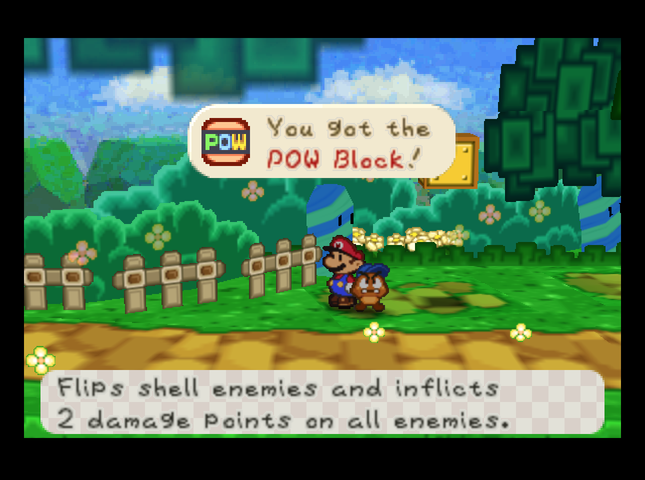 The nearby tree also has a switch that, when hammered, makes a bridge appear across the river. 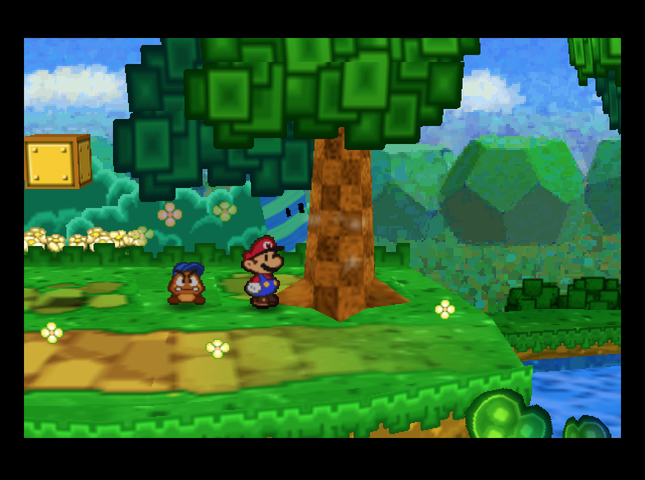 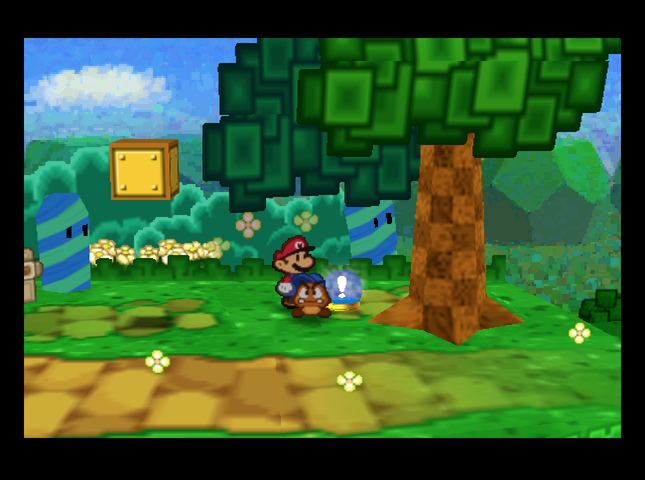  It�s hard to see, but the nearby brick block has a Spiked Goomba atop it. We�re not breaking that block! 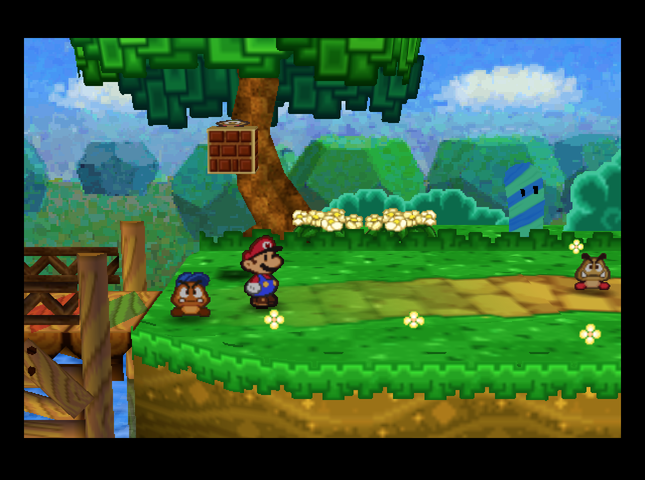 I took another quick trip back to Toad Town at this point to heal. Of course, this means the enemies come back. I zoom past a few with the Speedy Spin. 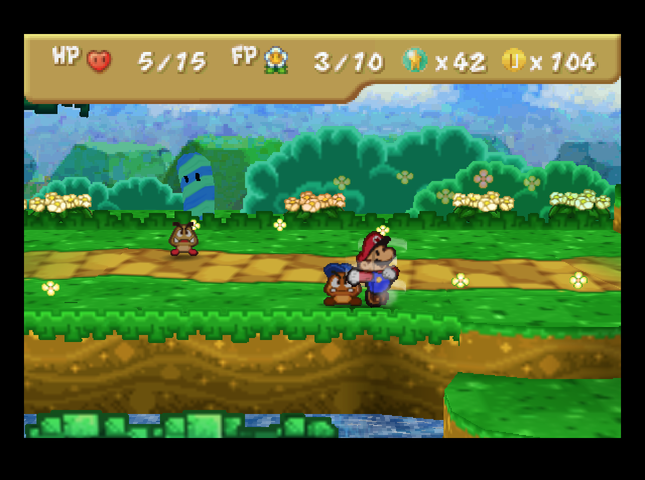 There�s also a Star Piece on this segment of the path, but we�ll only be able to get it once we have Kooper, our next partner. 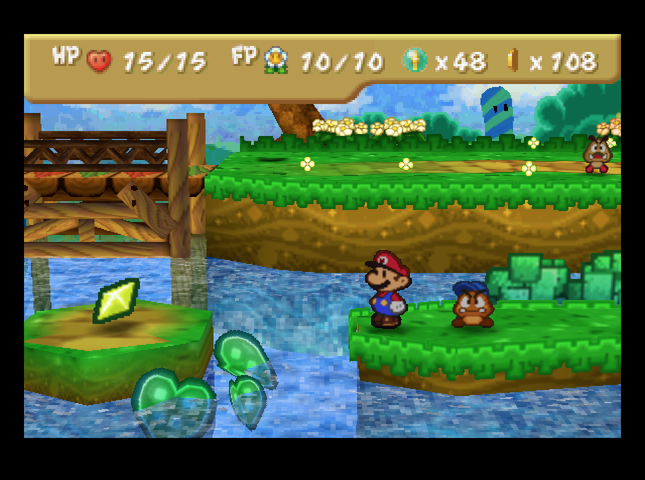 We also pick up a Sleepy Sheep behind a fence, then head to the next area. 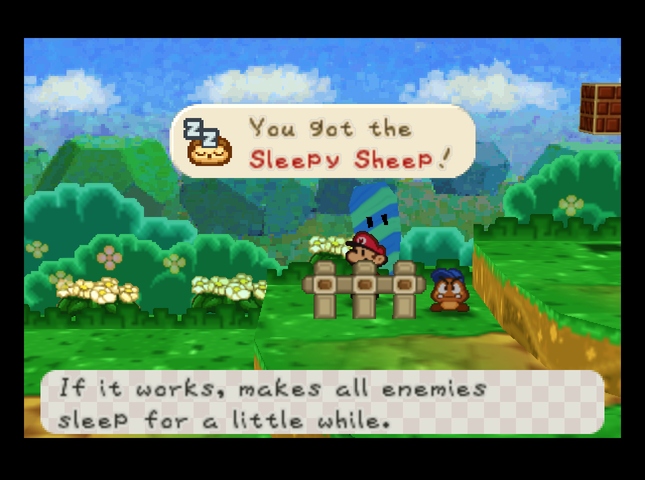 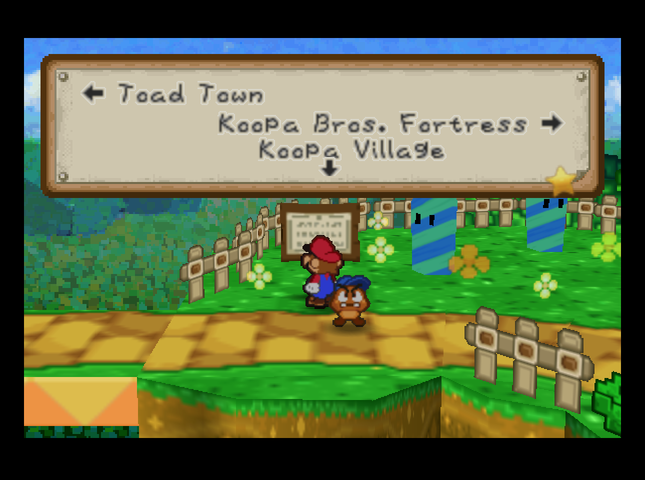 We want to go to Koopa Village. If we tried to go straight to Koopa Bros. Fortress, there�d be a switch we couldn�t hit yet blocking the way. Also: See that blue-and-green Candy Cane by the sign? If we dash around that in a circle, it�ll spit out hearts. We can use this to our advantage to heal if we get beaten up around here. 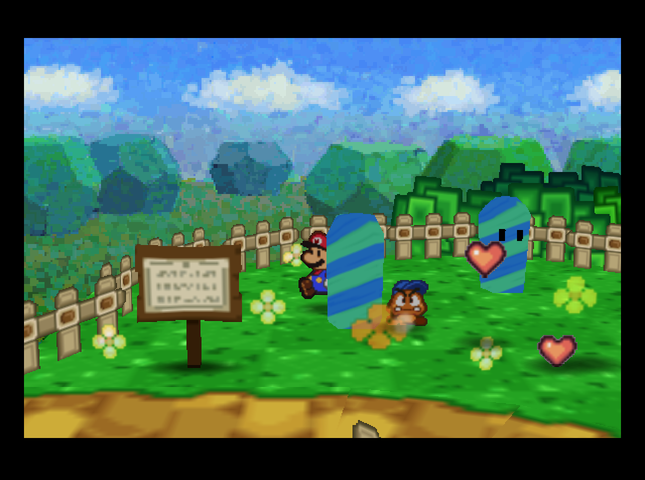 So, once Mario�s fully healed, we head down to Koopa Village instead. 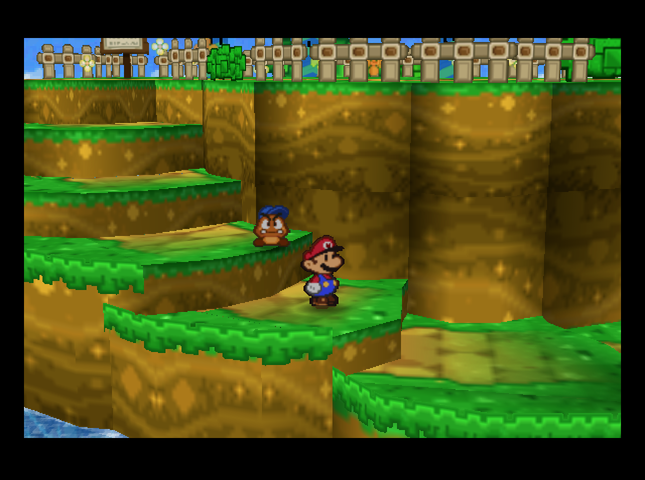 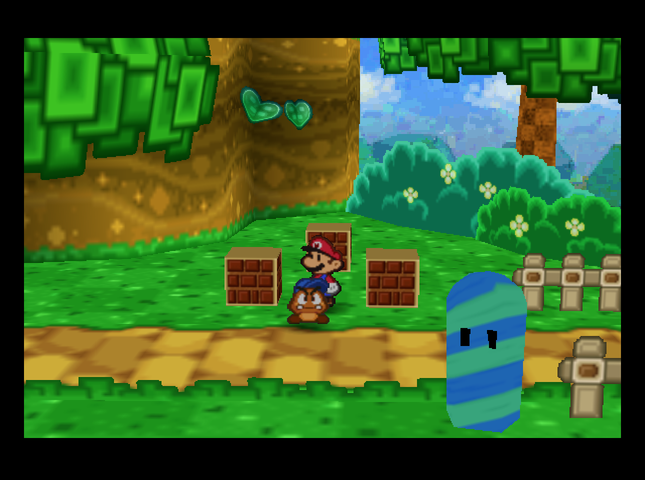 If Mario hits these brick blocks in the order left-right-center, a block with a badge appears.  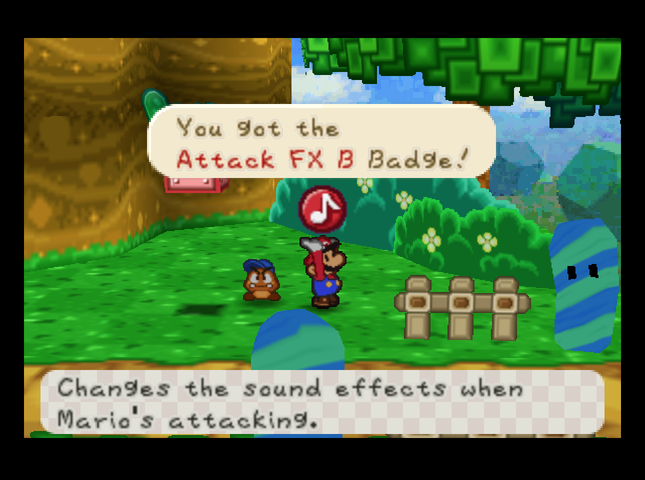 The badge is Attack FX B, which changes Mario�s attacks to have the sound of a slide whistle. Koopa Village is just ahead. 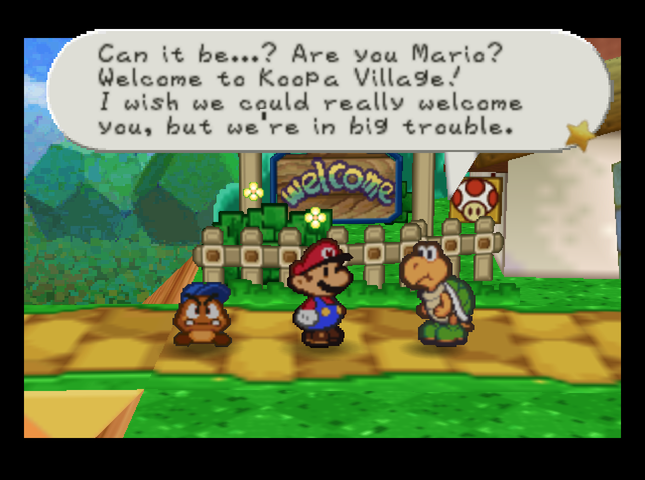 Unfortunately, the place in chaos! Fuzzy-related chaos. 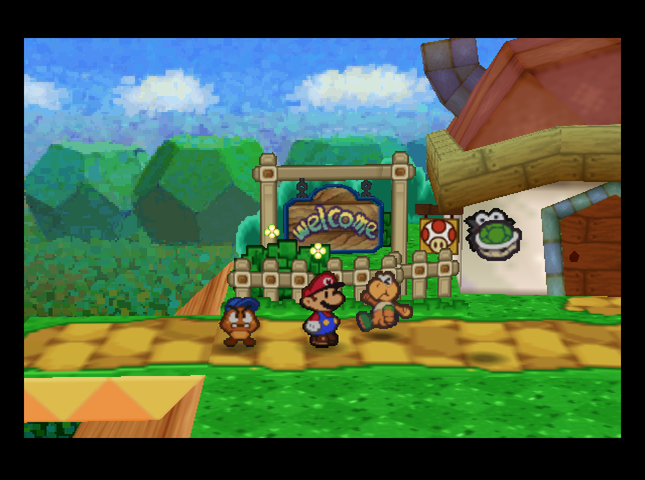  Music: Fuzzies Stole My Shell! Mario can help the Koopas get their shells back by solving some simple puzzles.    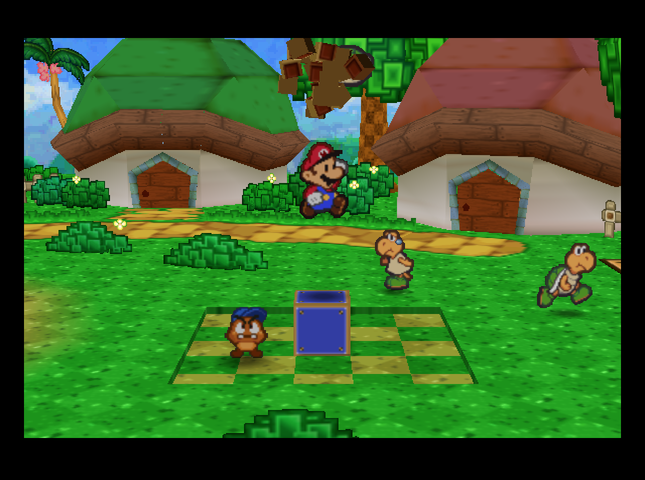 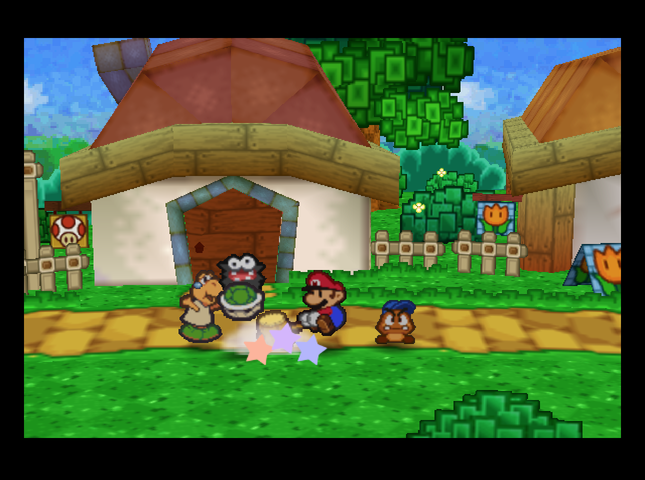  Oh, thank you, Mario! I owe you one. I just can't walk around without my shell on. Talk about embarrassing! Mario, be sure to keep your shell safe from Fuzzies, all right? Oh, thank you, Mario! I owe you one. I just can't walk around without my shell on. Talk about embarrassing! Mario, be sure to keep your shell safe from Fuzzies, all right?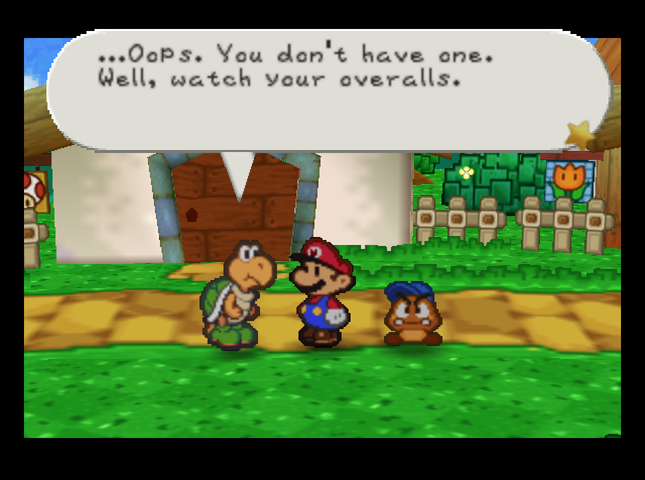 We also find some a Dried Shroom and a Koopa Leaf hidden in bushes. 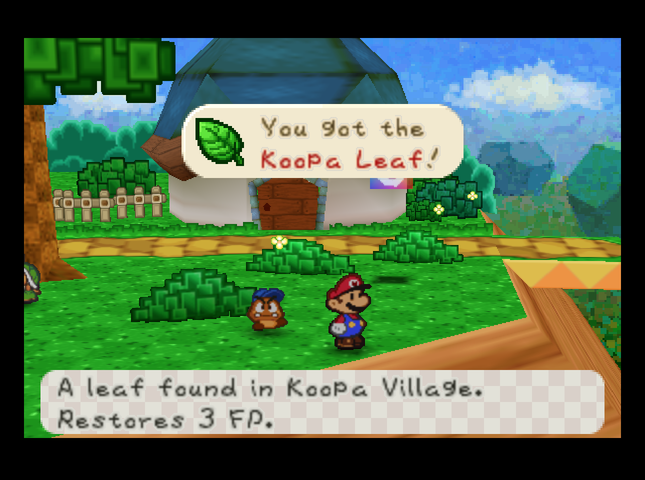 The Koopa Leaf will be useful for cooking later. In the original Paper Mario, I�m pretty sure you could only get one leaf per visit. Here, one bush on each screen of the village gives Leaves, and you can get another leaf each time you change screens - making Koopa Leaf grinding easy. 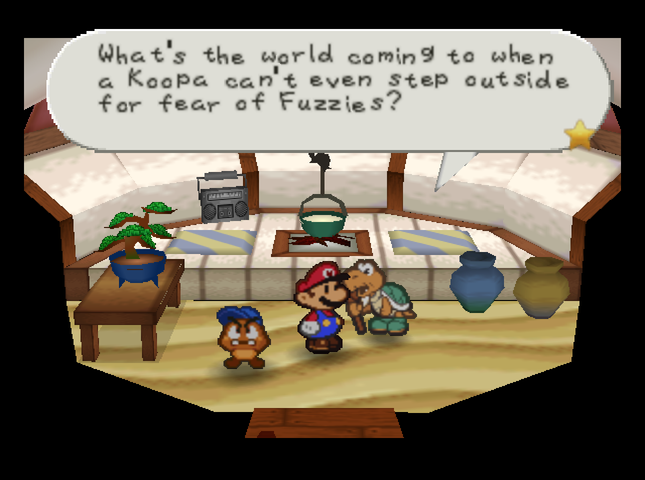 Donlon�s �associate� isn�t much help, but we can just head for the one house in Koopa Village that has the most commotion.  It�s Kooper, our soon-to-be new partner! But with his shell stolen, he�s in trouble. 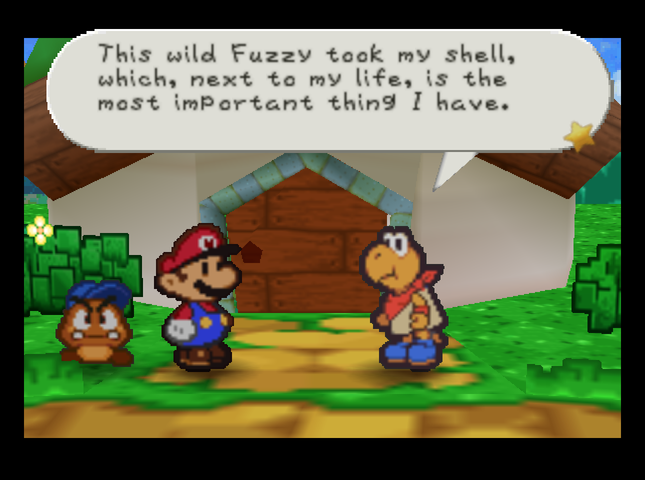 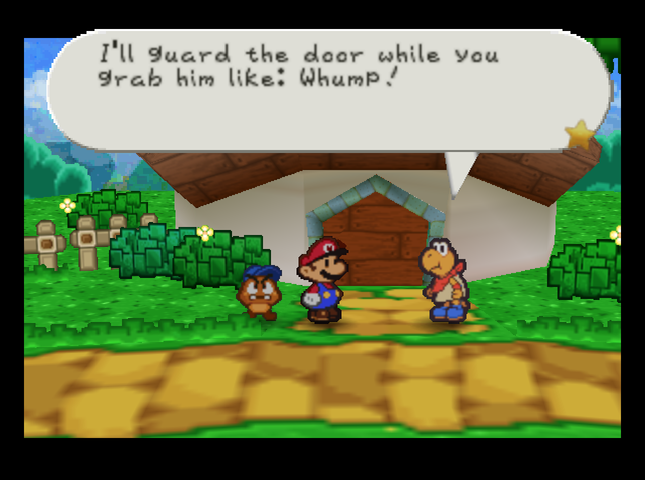 Let's help him out. 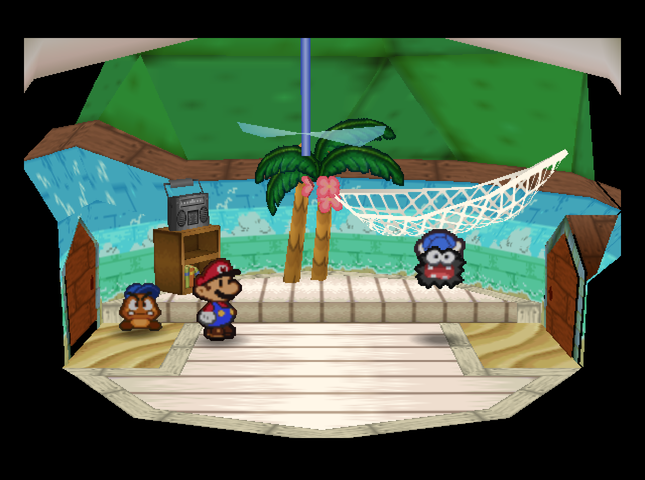 Of course, the shell-stealing Fuzzy absconds out Kooper�s back door. 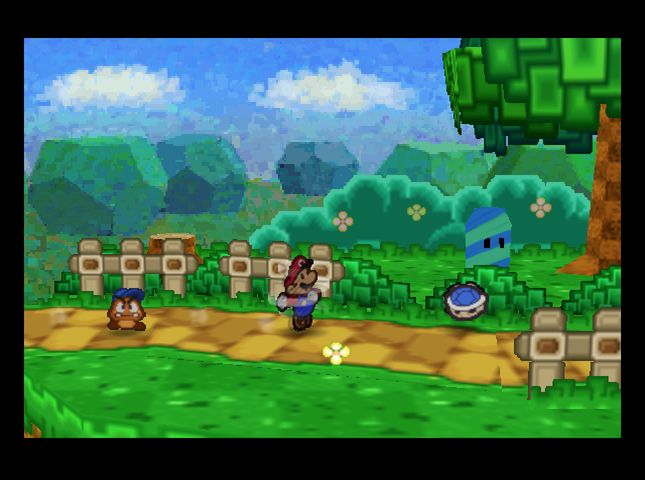 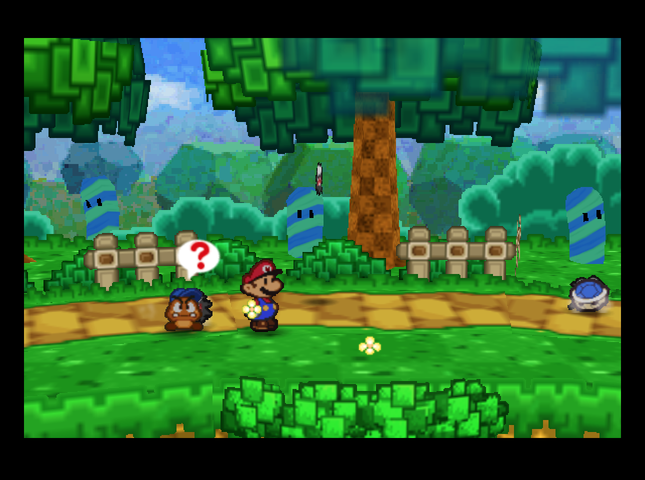 A bunch of other Fuzzies start running interference for the shell-stealing Fuzzy. Unlike the ones in Koopa Village (which just bounce around), these ones fight you. 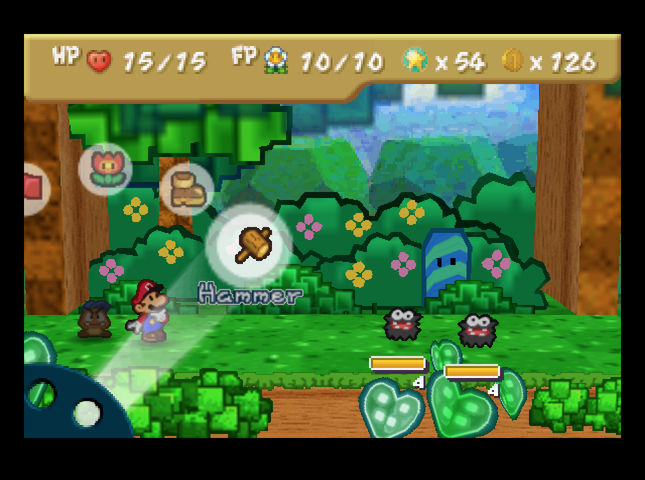 Fuzzies have 4 HP, but if you don�t defeat them in one turn, you�re in trouble� 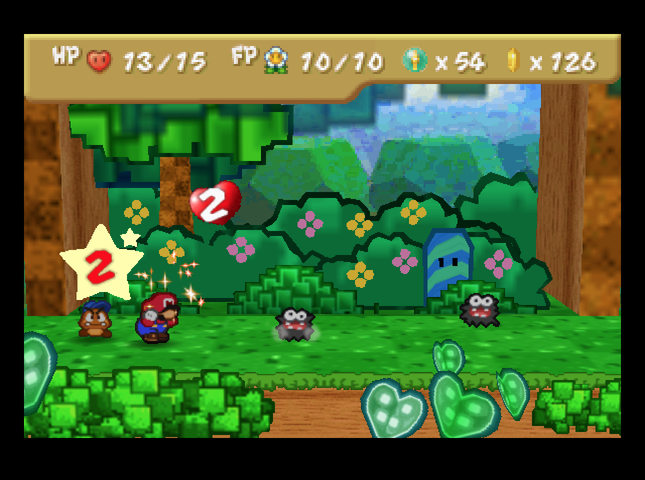 ..because they drain your HP to heal! Note that they have 3 attack, too, so they can always undo the damage of one of your normal attacks. (In the original game, Fuzzies had 3 HP and their attack did only 1 damage.) 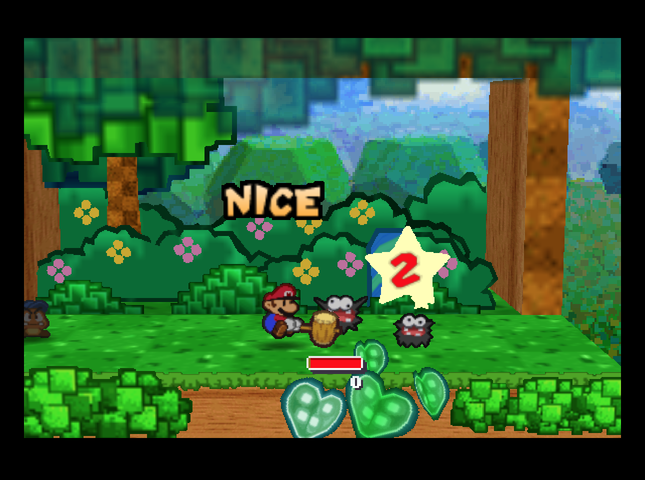 This just means that attacking fuzzies requires teamwork.  The chase leads past an HP Plus badge on some stumps. We won�t be able to get this until we have Kooper to help us. 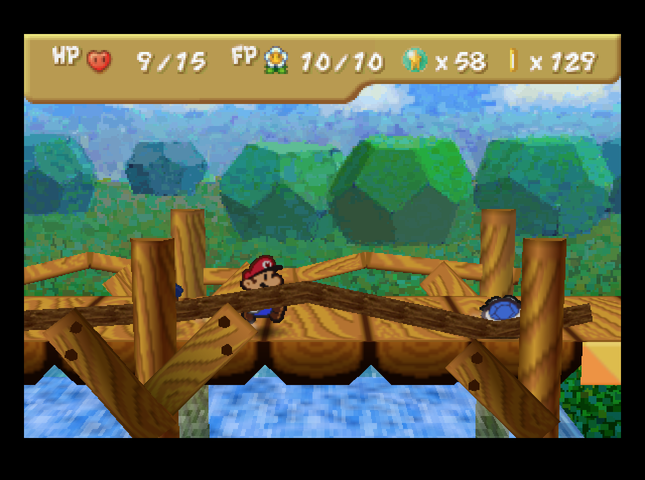 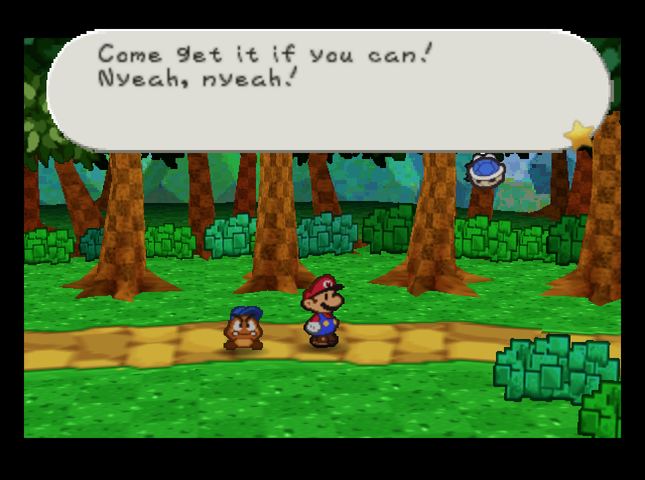 We finally corner the Fuzzy in a grove with four trees, but we have to play hide-and-seek with it to convince it to give up the shell. The Fuzzies jump between trees in the �hiding� phase, and we have to hammer the one we think the shell fuzzy is in.  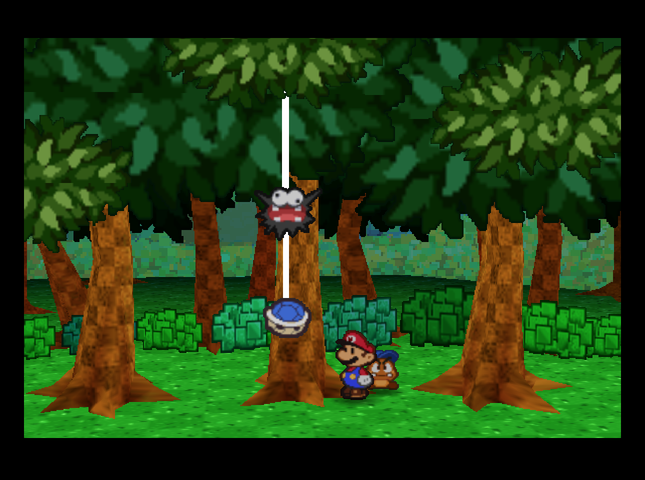 After three rounds of increasing difficulty, we get the shell back and the Fuzzies retreat. 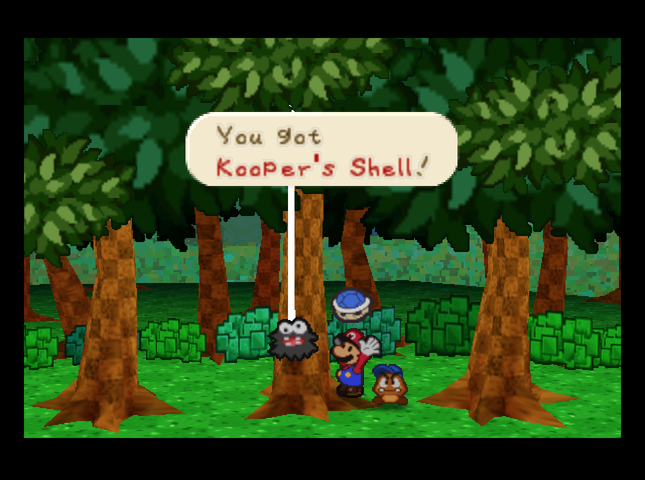 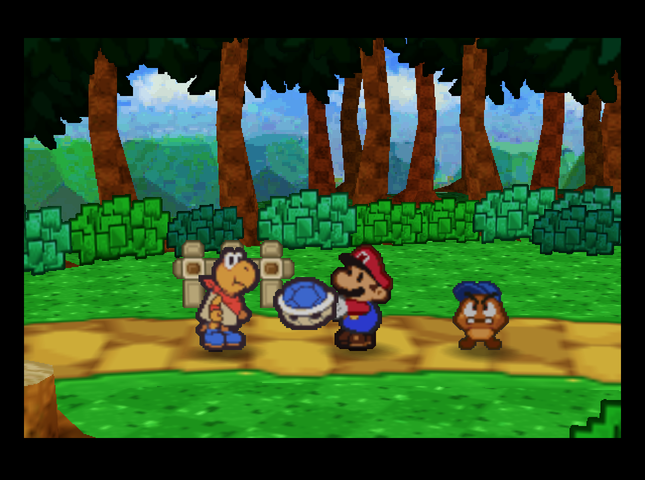 Kooper asks to join us! He�s emulating his archaeokoopagist neighbor, Kolorado. 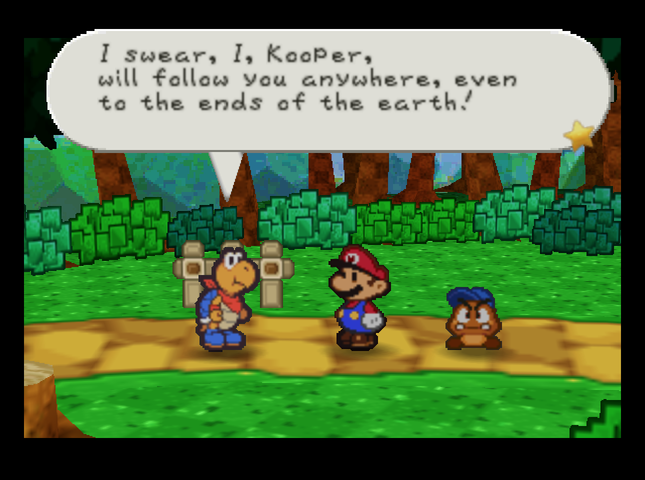 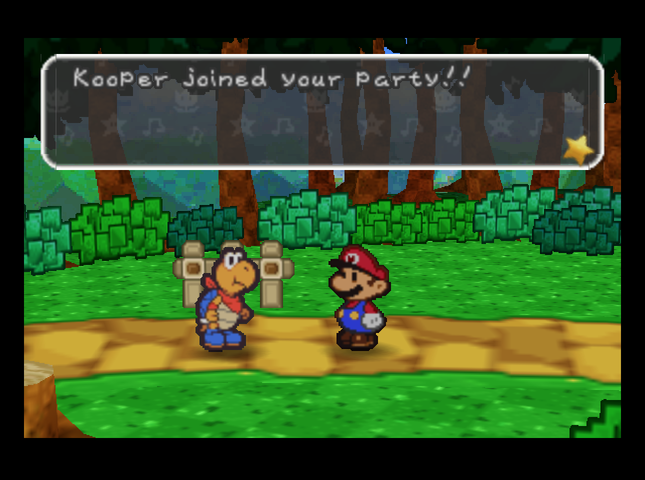 And so we get our second partner. Kooper has two moves: Shell Toss, where he launches his shell at the frontmost enemy, and Power Shell, where he sends himself flying through all ground-bound enemies. 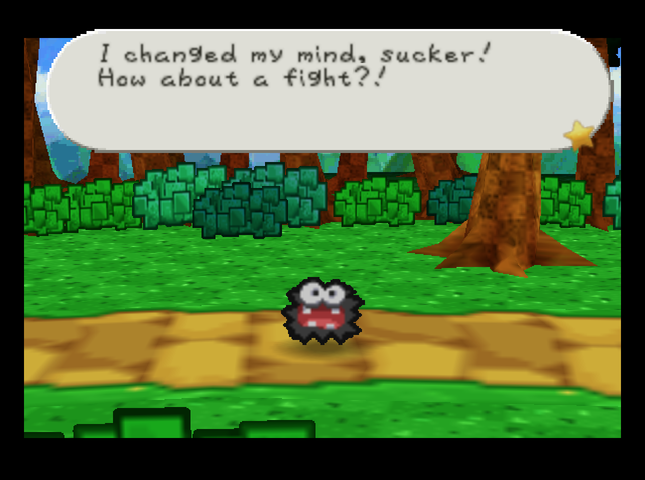 We get to test his moves out when the Fuzzy we beat challenges us!  OK, let�s do the math here. Say we knock out one Fuzzy on this turn. Then, the other Fuzzies will attack us for 6-9 HP when they act, depending on how well we dodge. Then 4-6 HP the turn after knocking out the second Fuzzy, then 2-3 HP before we can KO the last one. I don�t think Mario has enough HP to tank that! Fortunately, we�ve got an alternate strategy. Power Shell time! 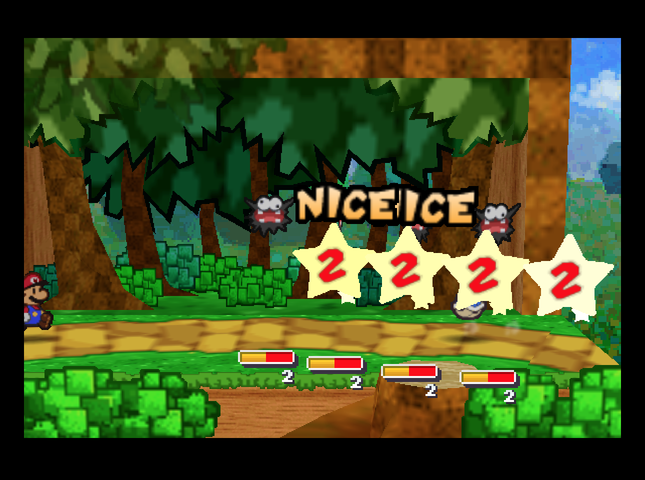 Kooper�s Power Shell has been buffed compared to the base game. It only costs 2 FP, one Flower Point less than in Paper Mario. We use the Fire Flower we picked up back near Goomba Village to finish the Fuzzies off in a blaze of glory. 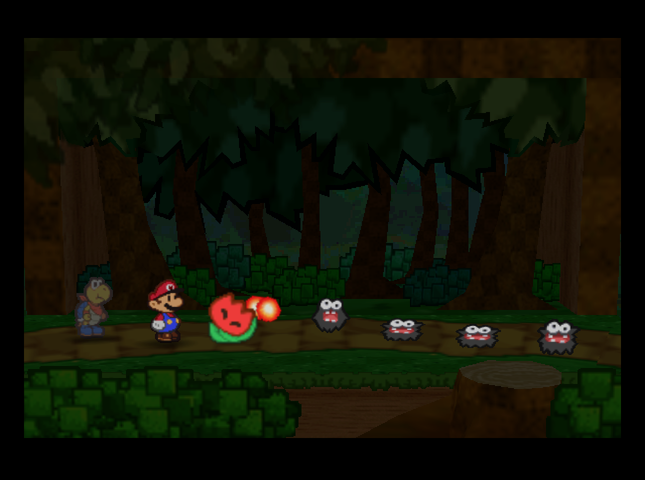 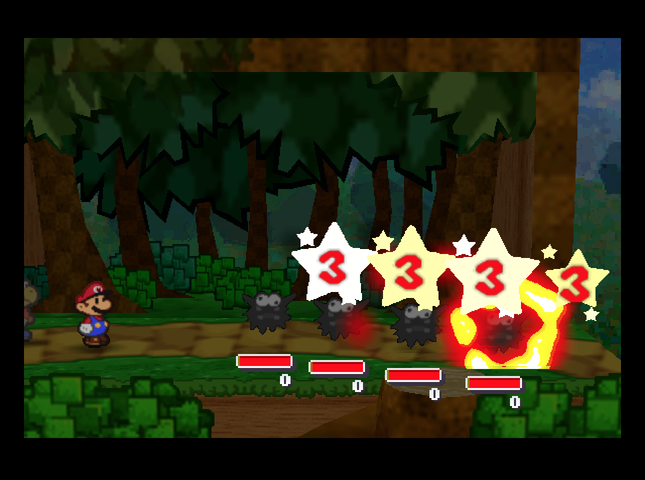 On the way back to Koopa Village proper, we�re able to test out Kooper�s field ability: sending his shell out to hit switches and grab items. Here, we end up snagging the HP Plus badge we saw on the way in.  Like in the vanilla game, the badge is basically a way of trading one level-up�s worth of BP for HP, instead. 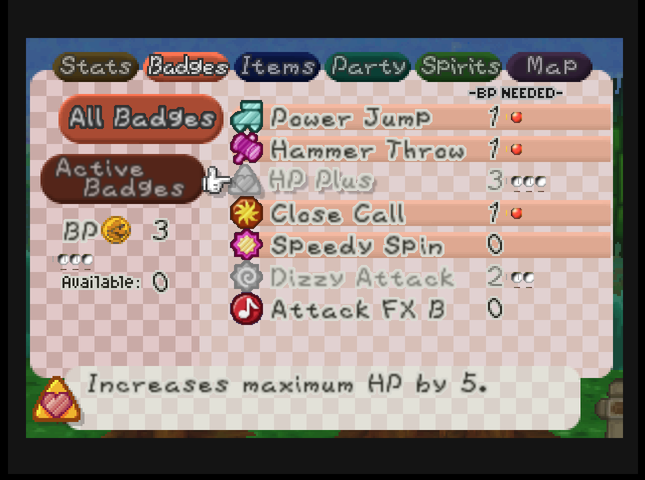 Koopa Village is nice and quiet now that the Fuzzies are sorted out. Music: Koopa Village  The house with the yellowish roof is the home of the famous archaeologist and explorer, Kolorado. Kolorado�s always running from one mysterious place to another to do research. His dad was a warrior, y�know. I think he went to fight a dragon named Hooktail. I wonder how he�s doing. The house with the yellowish roof is the home of the famous archaeologist and explorer, Kolorado. Kolorado�s always running from one mysterious place to another to do research. His dad was a warrior, y�know. I think he went to fight a dragon named Hooktail. I wonder how he�s doing.We can repeat the simple block-pushing puzzle on the east side of town to get a Star Piece. 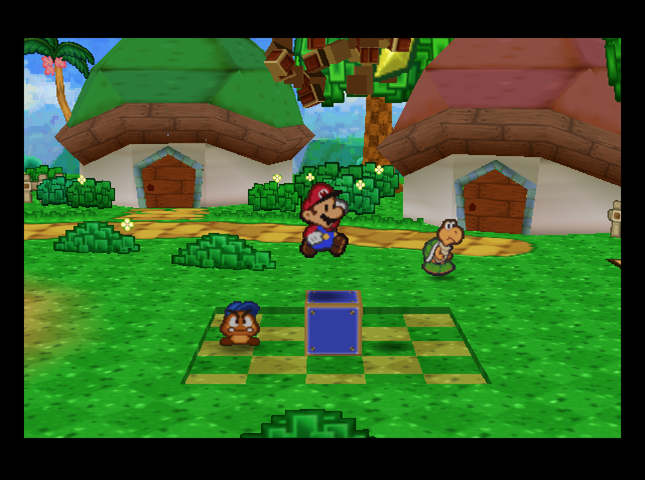 The shop sells a few items we haven�t seen before. 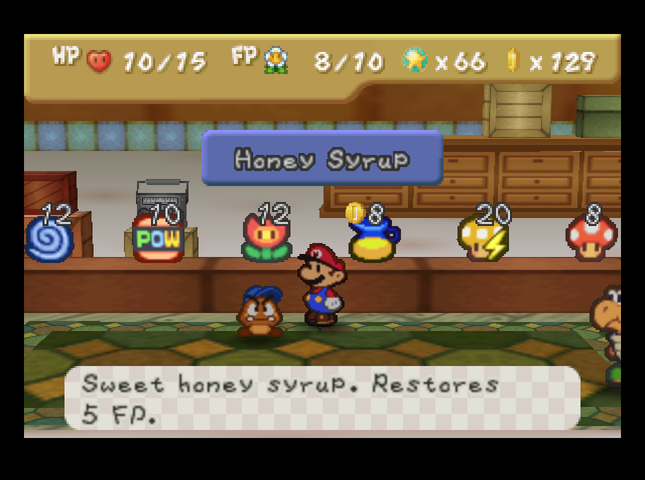 Dizzy Dials can make most enemies dizzy, stunning them. Volt Shrooms will give Mario that nifty electric effect that Chan was using (which we can also get by equipping the Zap Tap badge). Prices are, of course, higher due to Master Quest-related inflation. Dizzy Dials originally cost 10 Coins, not 12. POW Blocks cost 4 Coins in the base game, not 10 - and Fire Flowers previously cost 8 coins instead of 12. Volt Shrooms have been bumped up to 20 coins, from 15! Yikes! There is one more thing we can do here in Koopa Village before it�s time to hit the road. 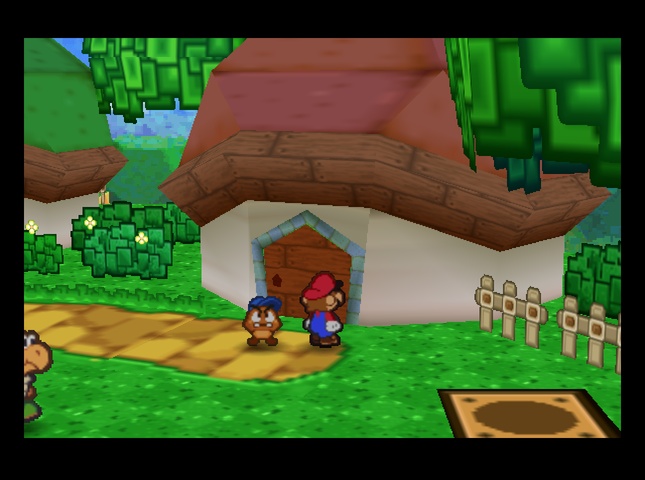 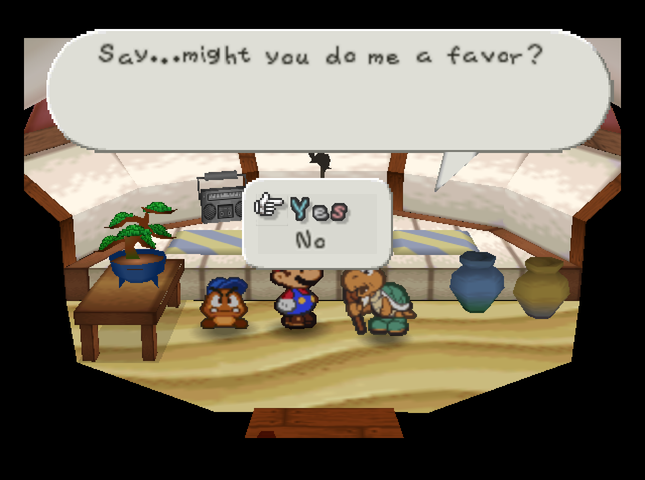 Yep! It�s the start of old Koopa Koot�s favors. This will be a persistent sidequest for the next five or six chapters. 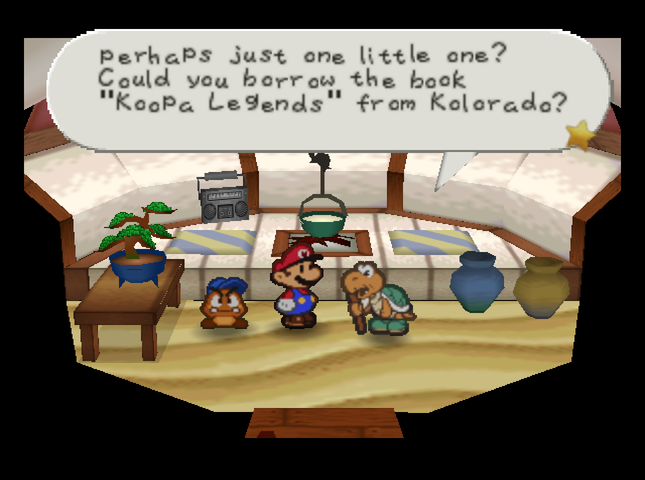 Kolorado�s House is just a few doors down. He isn�t here, but his wife gives us the book. 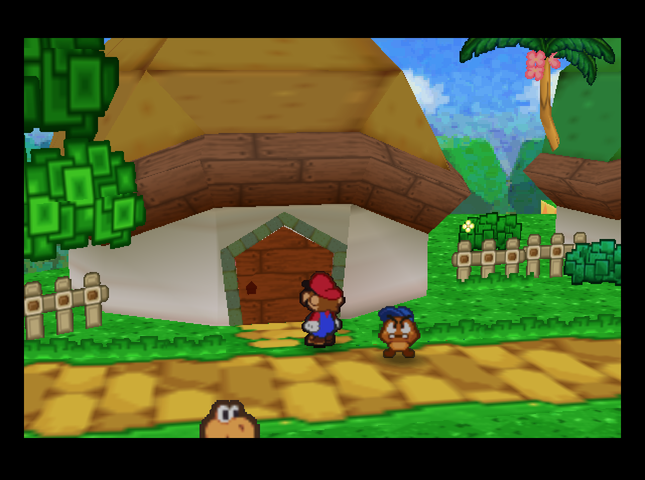 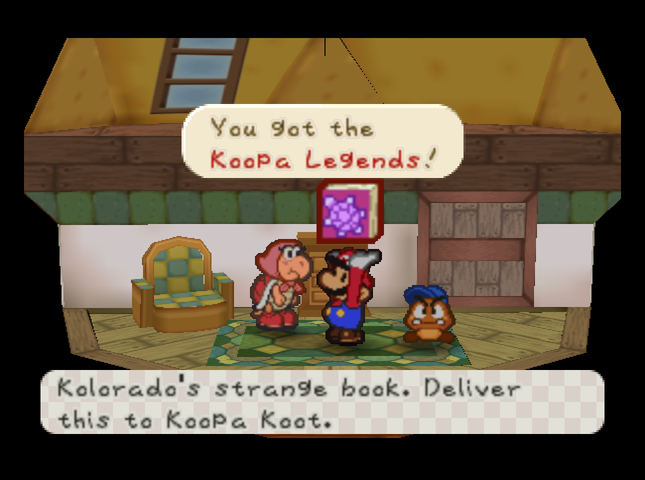  It was behind the bookshelf. It was behind the bookshelf.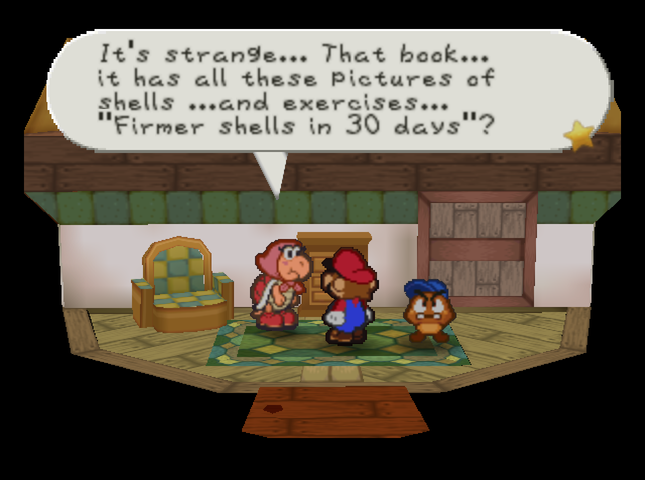 Legends? Is that what they�re calling �em now? Kolorado�s wife has a little extra advice for us. 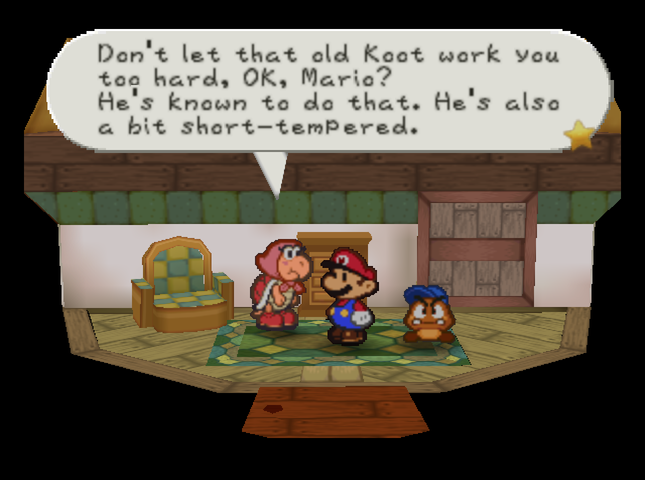 We�re going to ignore it. 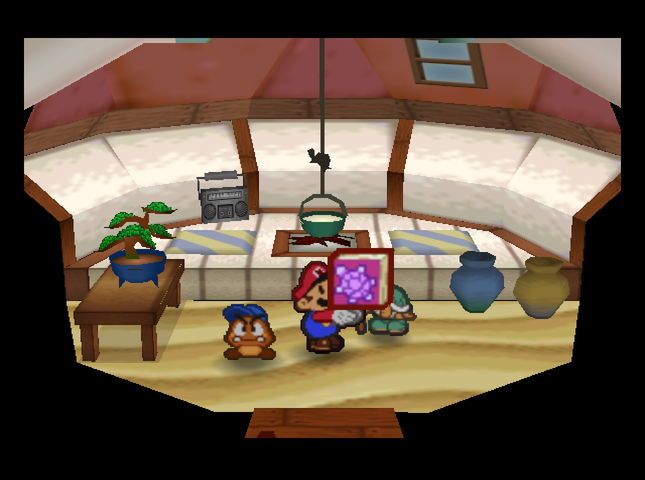 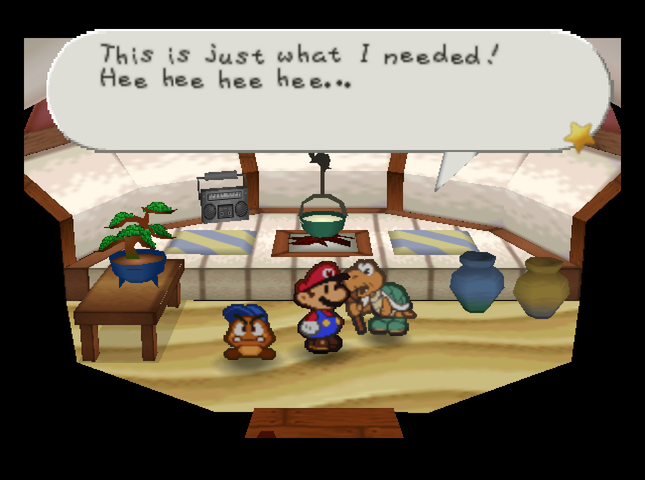 On giving the book to Koopa Koot, he rewards us as we richly deserve. 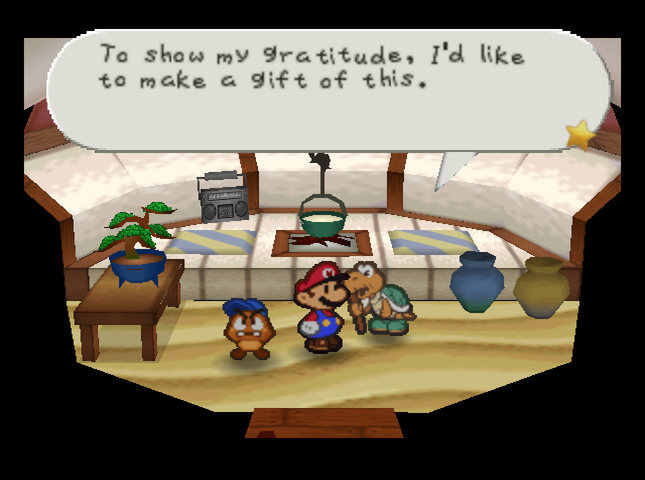 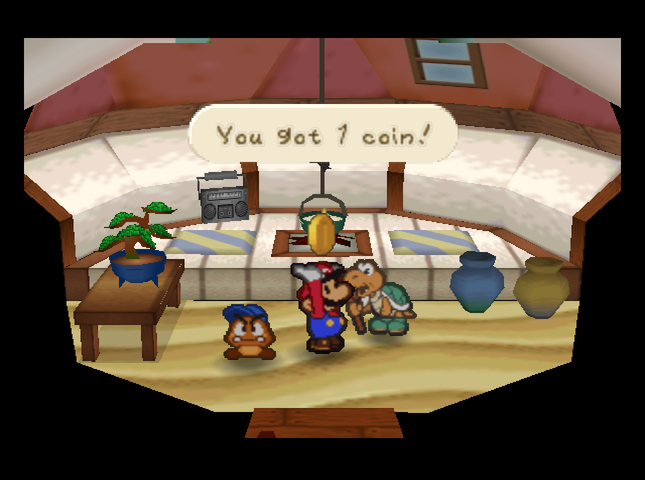 For his next ask, he wants a Sleepy Sheep. We give him the one we picked up outside Koopa Village. 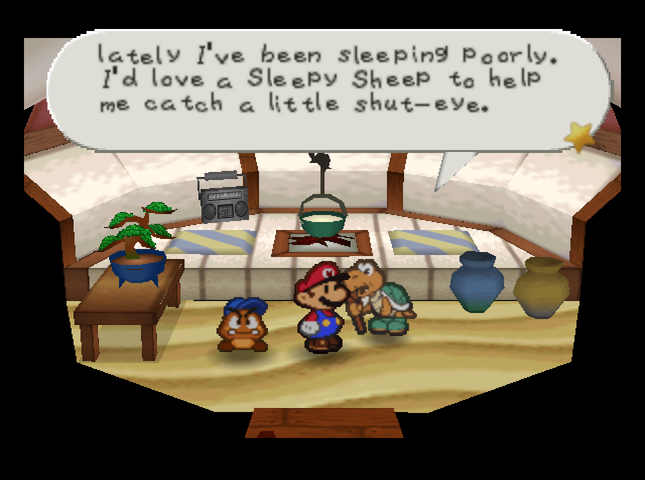 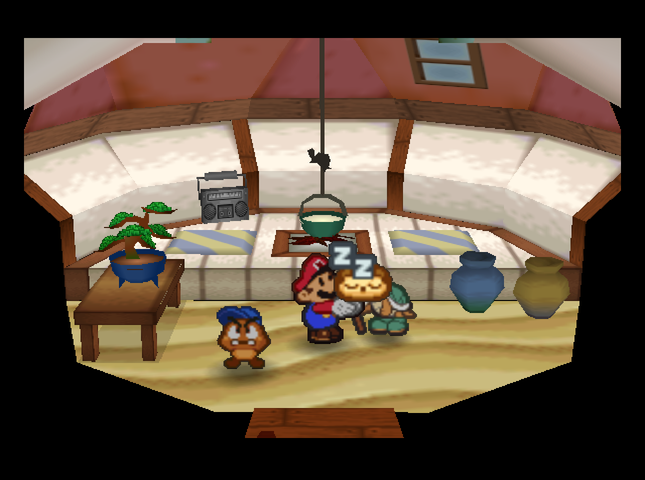 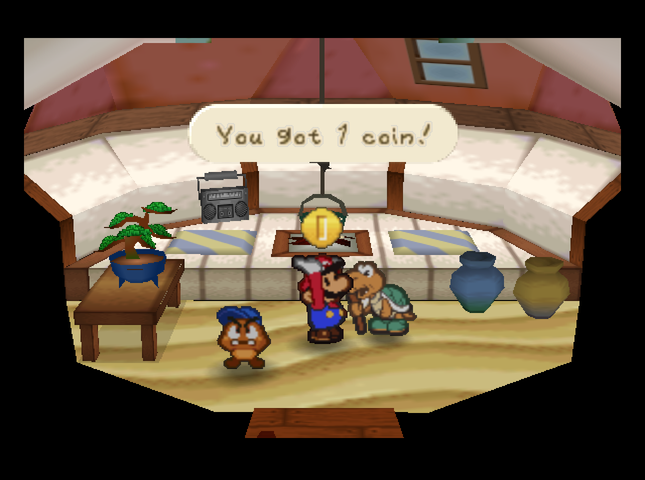 It looks like his payment schedule is going to be a habit. This time, though, he also gives us� 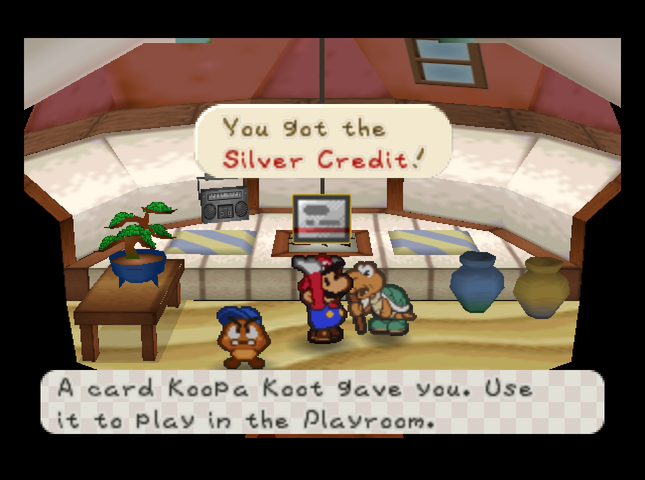  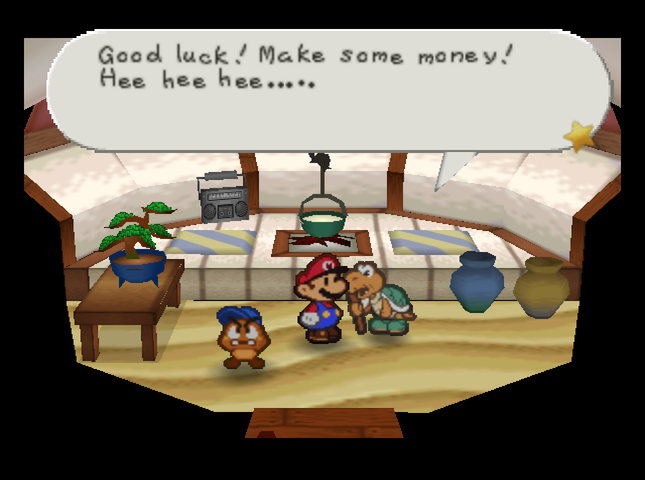 A card for a minigame house in Toad Town! We�ll get access to the �Playroom� once the Toad Town logjam is cleared out of the way, after the Chapter�s over. That�s the last favor Koopa Koot will ask for, at least for now, so it�s time to focus back on the main plot, and head to the Koopa Bros. Castle. 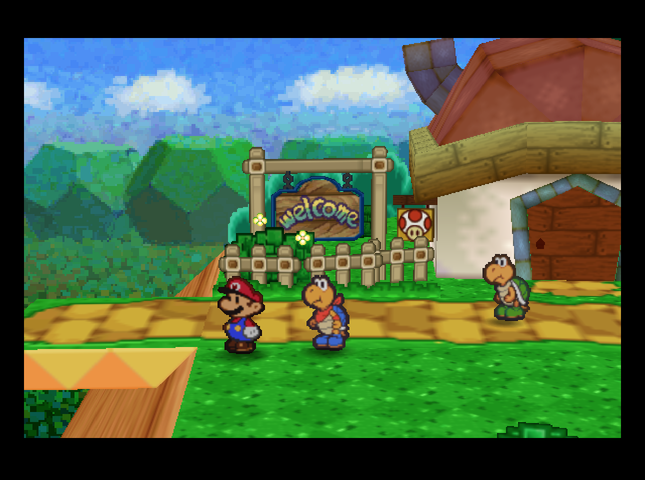 Game Version: Updated from 1.1.6 to 1.2.0 Badges: 7/89 (New: Dizzy Attack, Attack FX B, HP Plus) The previous version of the game said there were 87 badges. That was a mistake, and this version correctly says there are 89. Star Pieces: 14/180 Chuck Quizmo�s Quiz Questions: 6/64? Game Overs: None, yet Chan doesn�t count - you wake up in the Dojo with 1 HP. SUMMARY OF CHANGES FROM MAIN GAME (in this installment) � Chan, Buzzy Beetle at Dojo, trains formidably. ( +15 HP, electrified shell, +6 Attack, +? Defense, can get up and attack same turn) � Extra-large Goombas observed in vicinity of Pleasant Path. (Bigoomba: 5 HP, 2 Attack.) � Hostile Koopas team up with Spiked Paragoombas as anti-air defense. (Spiked Paragoomba: 2 HP, 1 Defense, 2 Attack.) � Bountiful harvest year for Koopa Leaves in Koopa Village. � Koopas get buff. ( +1 HP, +1 Attack) � Fuzzies also get buff. ( +1 HP, +2 Attack) Maybe it�s all the Koopa Leaves? � Koopa Village shop raises prices on Volt Shroom, Fire Flower, Dizzy Dial, POW Block (the last one by a LOT). Next Time On Master Quest: Kooper joins the Bob-omb squad. Quackles fucked around with this message at 03:49 on Aug 3, 2019 |
|
#
¿
Jul 25, 2019 10:52
|
|
|
FPzero posted:See, this I'm a little less cool with. Adding new enemies and formations is cool, but making it so basically everything is doing chip damage the whole time? That means that every battle is going to be a net loss of HP. Not shown in the LP: I've been using Toad Houses and Heart Blocks a lot, often after every two battles or so. Each battle is individually a challenge now - which is arguably the point of the hack - but you do need to hang around Heart Blocks for it to work.
|
|
#
¿
Jul 25, 2019 20:16
|
|
|
Jerry Manderbilt posted:If you have to go back to the Toad House after every two fights or so (or until you get to a heart block) it sounds like it really interrupts the flow of level progression, or otherwise forces you to grind like hell Speedy Spin means you can dash past most enemies while traveling, so I haven't been grinding much. Mario's only at Level 3 so far, if I remember correctly. If I ever find myself needing to grind for something, I'll take a side trip to the Pit of 100.
|
|
#
¿
Jul 25, 2019 20:30
|
|
|
mateo360 posted:I have one hopefully tiny critique about your style. You seem to sometimes have your commentary above the screenshot it's relevant too. It makes it a little hard to follow at points. Yeah, I've been putting it above sometimes and below sometimes, depending on what I felt flowed best for each scene. If it's bothering people, I can try to normalize it a bit.
|
|
#
¿
Jul 25, 2019 22:48
|
|
|
mateo360 posted:I have one hopefully tiny critique about your style. You seem to sometimes have your commentary above the screenshot it's relevant to. FPzero posted:I'd recommend sticking to comments below images just because it's more of a standard among SSLPs. Definitely don't recommend mixing the two, because then it becomes all confusing. senrath posted:I definitely prefer always below. I find it easier to look at an image and then read the comments about it rather than the other way around. OK - will do!
|
|
#
¿
Jul 25, 2019 23:51
|
|
|
Part 6 : Mario Go Boom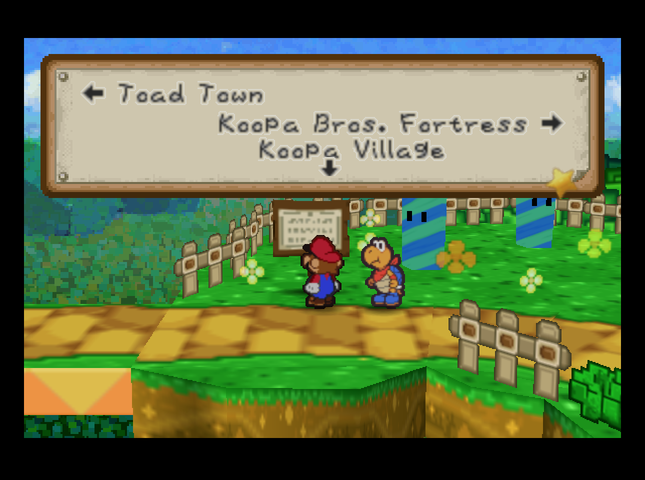 With Kooper in tow, we�re able to get into Koopa Bros. Fortress. 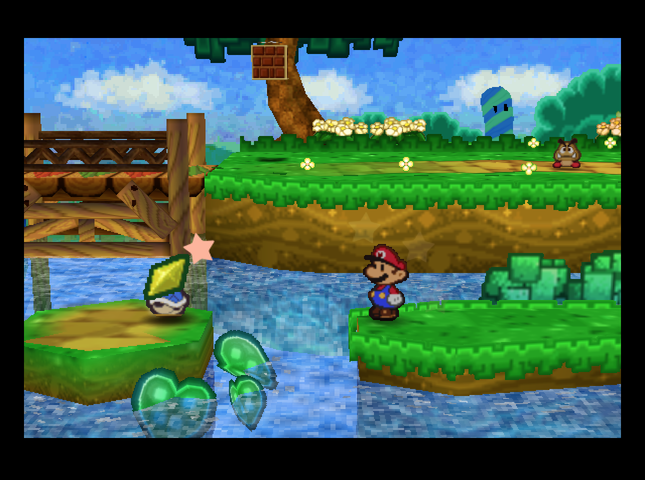 But we�re going to go back one screen in the direction of Toad Town first, to grab that Star Piece we couldn�t get earlier. 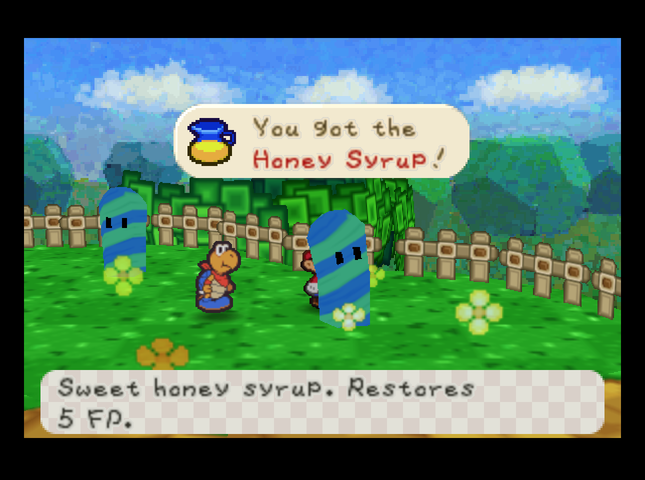 There�s a Honey Syrup hidden behind a Candy Cane on the road to the fortress. 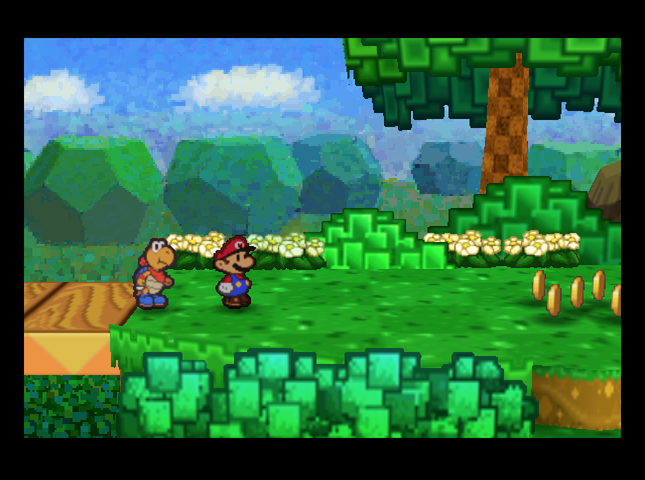 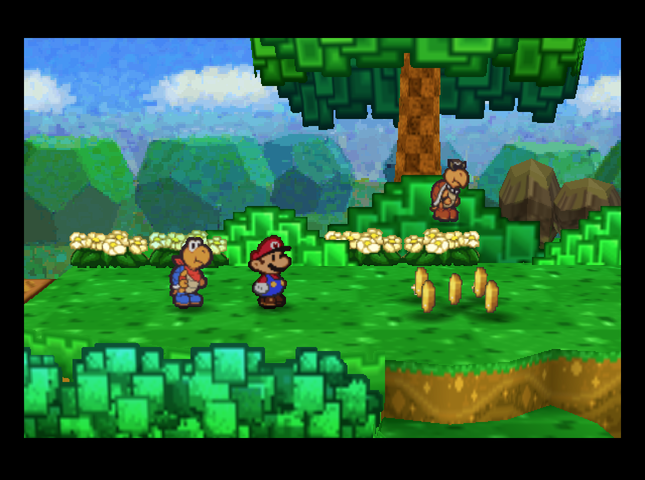 On the next screen, the Koopa Bros have set up an ambush. 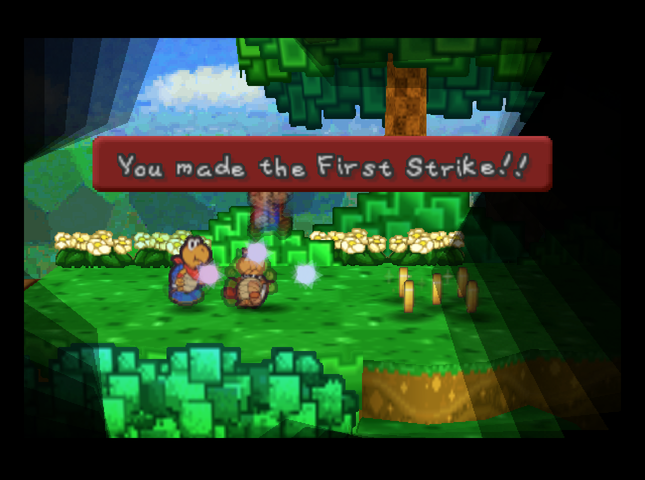 Mario�s ready for it, though! 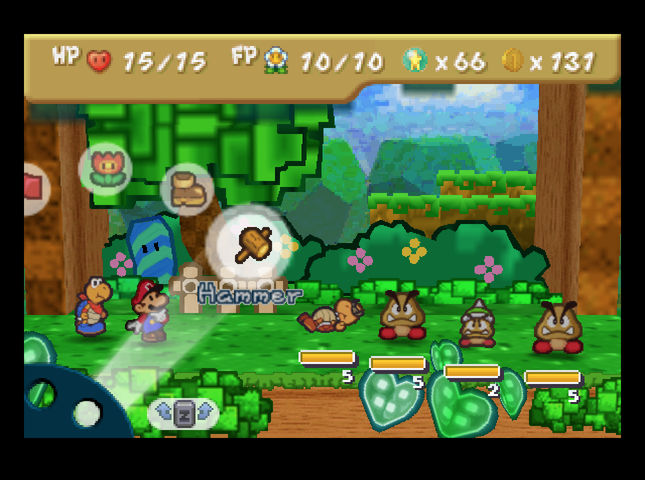 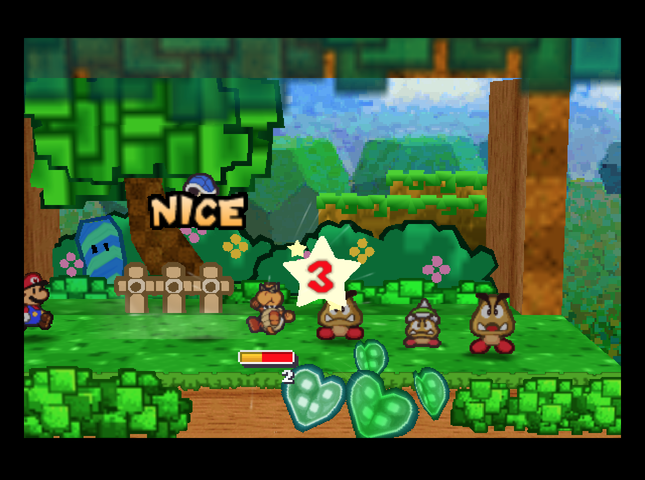 It turns out that Kooper�s Shell Toss does 3 damage! It only does 2 in the base game. 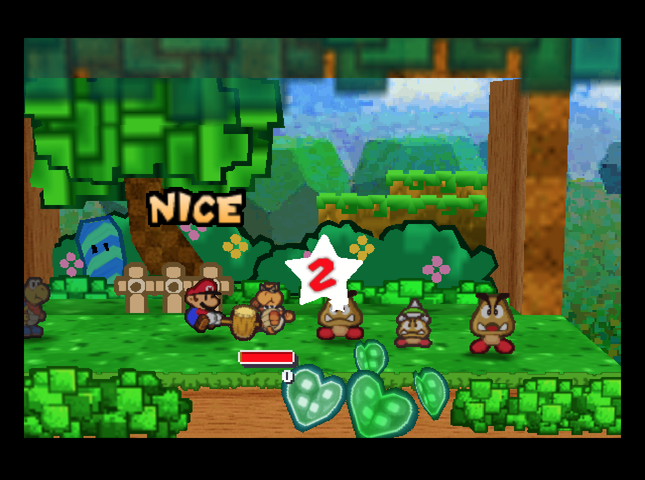 This lines up extremely well with the many 5-health enemies on the Pleasant Path. 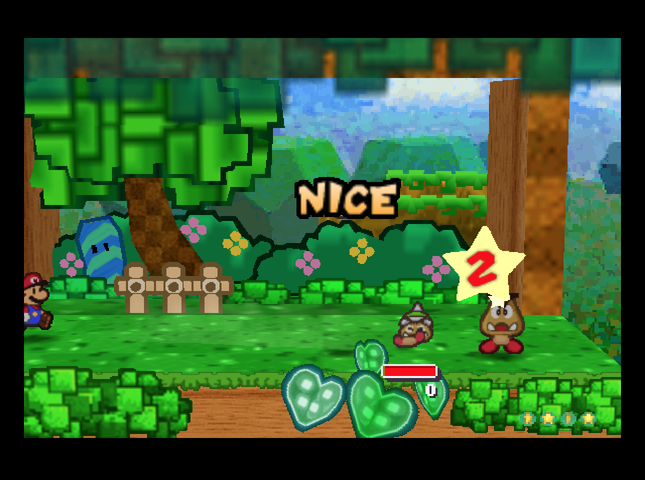 Kooper can also KO Spiked Goombas on his own, too, which is nice. 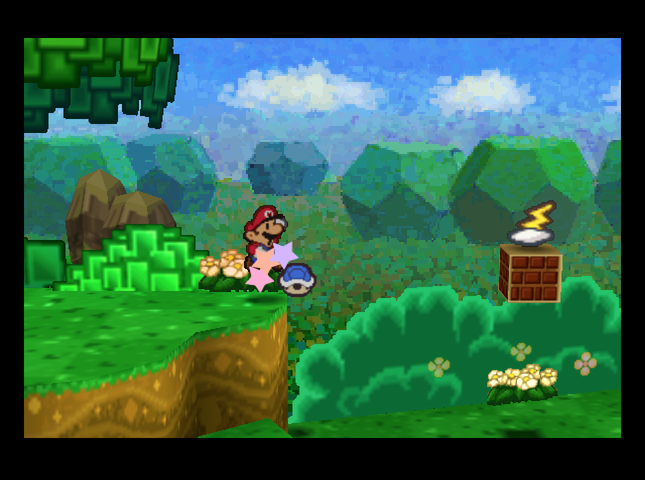 A little past the ambush site, there�s a block Kooper can hit to net us a Thunder Bolt. 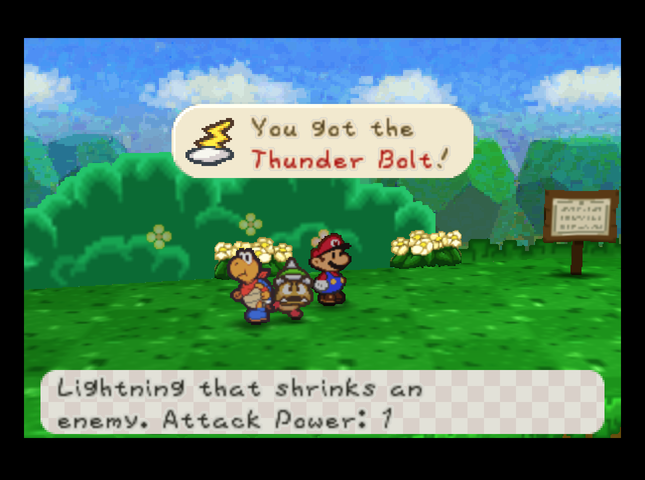 In the base game, Thunder Bolts did 5 damage. Here, they do only 1, but Shrink an enemy, halving its Attack. The change was likely made because there�s an upgraded version of the item, the Thunder Rage, that already hits all enemies for the same damage. 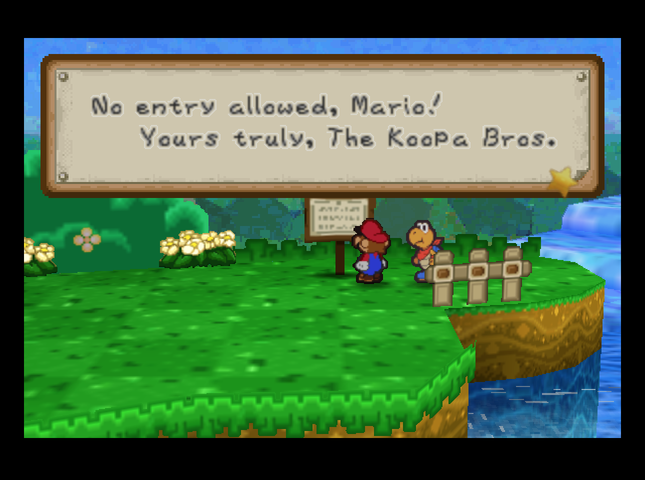 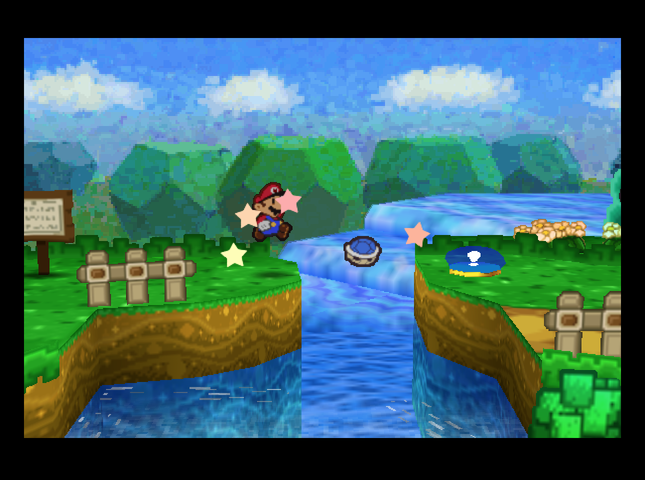 The Koopa Bros.� big �security system� is keeping the bridge leading to their fort locked behind a switch only a Koopa could hit. But we have a Koopa. 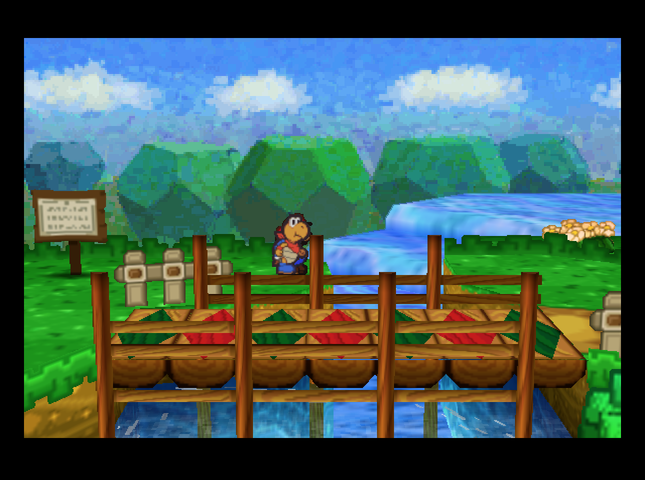  Past the bridge is a new enemy: a Paratroopa. 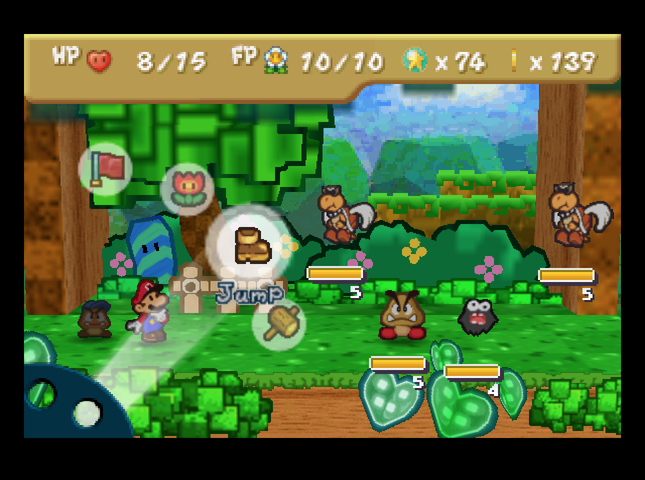 This is a Paratroopa. No surprise here� Paratroopas are Koopa Troopas with wings. When you jump on 'em or use a POW Block, their wings fall off and they become normal Koopa Troopas. It's easy to beat 'em once they're normal Koopa Troopas. Give 'em another Jump attack! They think they're pretty cool because they wear sunglasses, but they're not that tough. This is a Paratroopa. No surprise here� Paratroopas are Koopa Troopas with wings. When you jump on 'em or use a POW Block, their wings fall off and they become normal Koopa Troopas. It's easy to beat 'em once they're normal Koopa Troopas. Give 'em another Jump attack! They think they're pretty cool because they wear sunglasses, but they're not that tough. 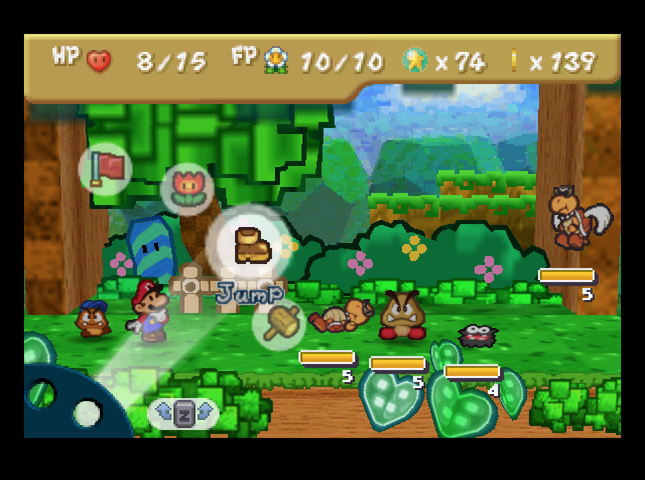 Jumping on a Paratroopa will knock it out of the sky, and if it�s a timed jump, it�ll fall to the ground knocked over. 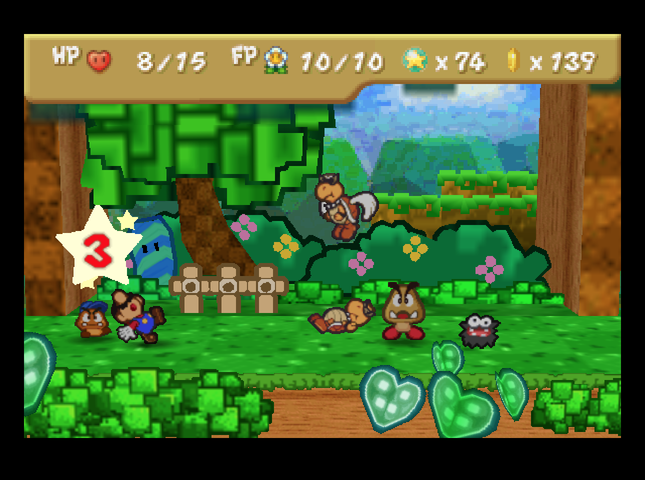 This is just as well, because in this game, Paratroopas attack for 3 damage! They only had an Attack of 1 in Paper Mario.  We end up in trouble thanks to the Fuzzy hitting us repeatedly for 3 damage while we flipped the Paratroopas. 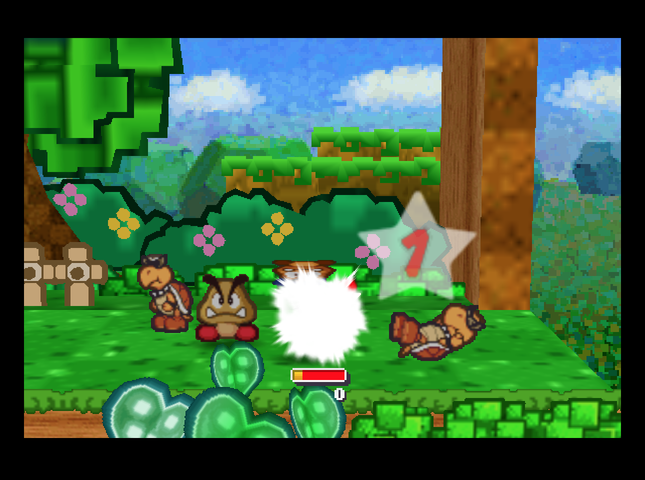 We�re able to focus down the Fuzzy, but� 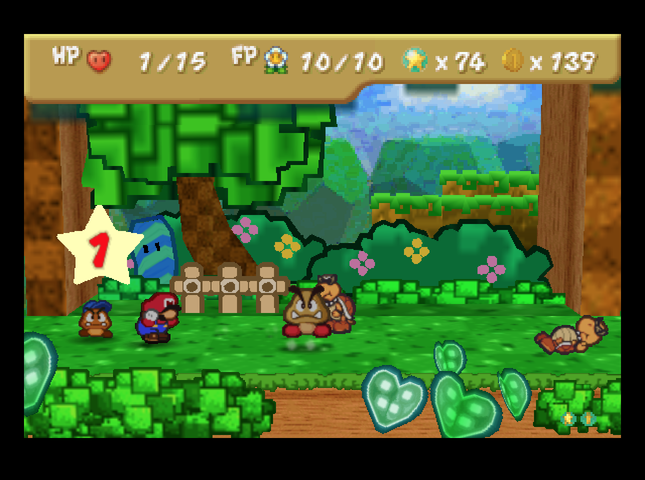 We end up with 1 HP after the opponents have had their turns. This state is known by the game as �Peril�. 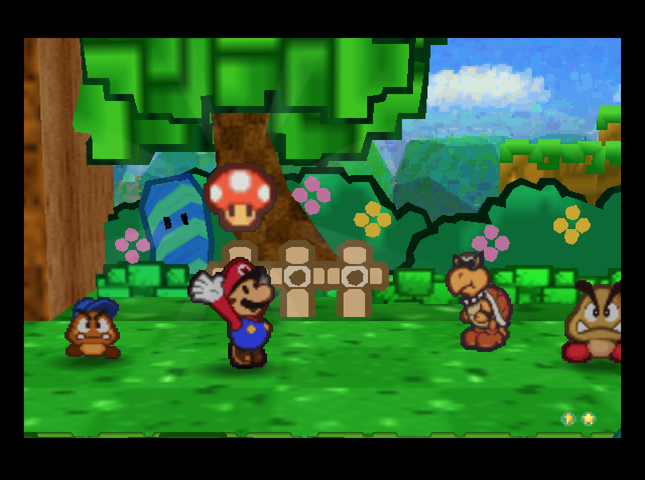  I have Mario eat a Mushroom so we don�t bite it, while Goombario keeps flipping Koopas. Then, next turn, we take out the Bigoomba with a Power Jump.  Once only Koopas are left, we can keep them safely flipped with Jump attacks, and are out of danger.   After the battle, we collect a Fire Flower that was in a hidden block, then head back to the Candy Cane that gives hearts to recover.   On the next screen, there�s a Star Piece hidden in a tree. 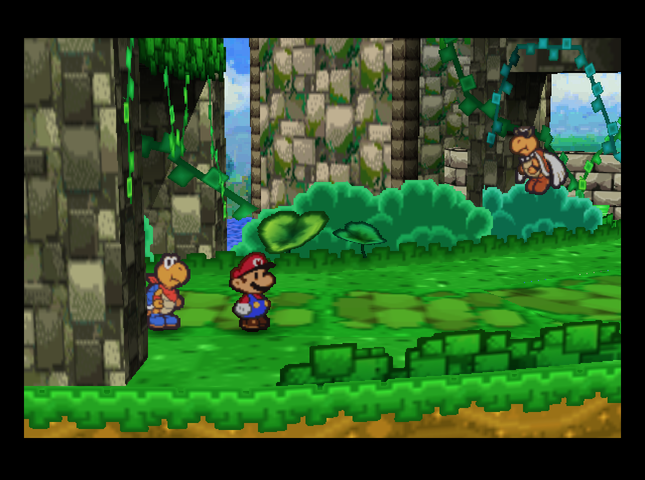  The early outbuildings of the fortress have come into sight! We won�t be able to get through that pipe until we come back with someone who can blast through walls, though.  There�s a Heart block at the end of this path� thank goodness! After using it, it�s time to bust into Koopa Bros. Fortress. Music: Koopa Bros. Fortress 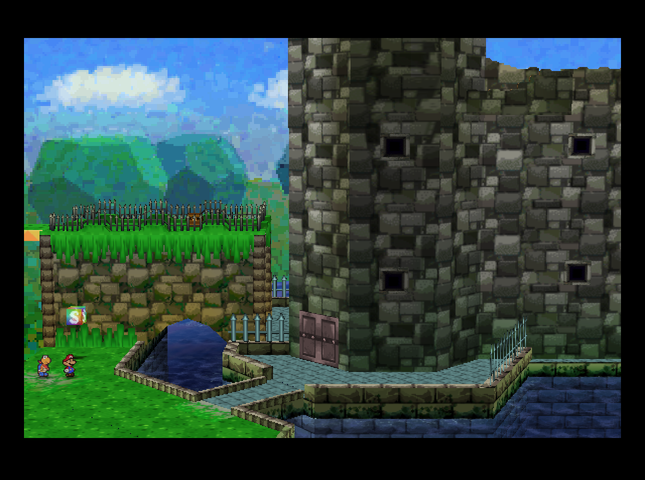 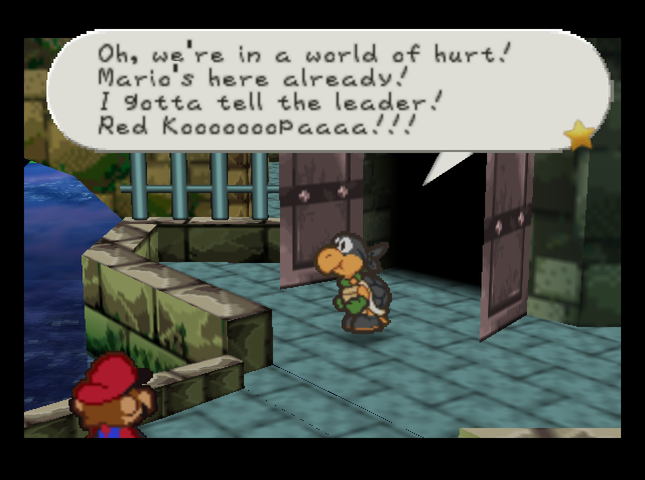 Thankfully, Black Koopa Bro runs inside without locking the door. 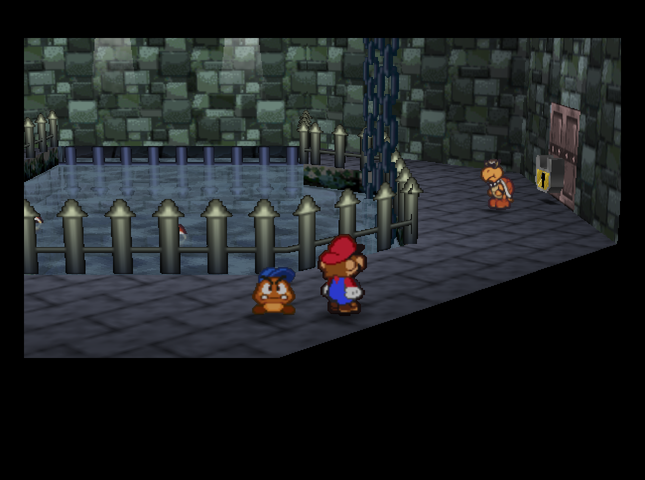 The first room of the fortress has a Koopa guarding a locked door. The Koopa has the key, so we jump on him. 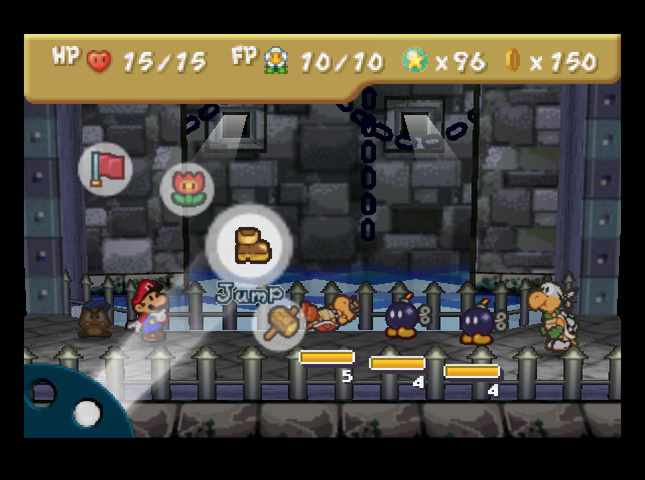 Who are all THESE people? This is a Bob-omb. Bob-ombs are pretty temperamental, and they get steaming mad when you attack �em. You�d better not jump on �em when they�re angry or they�ll blow up in your face. In fact, stay away entirely. Attack �em from a distance with items like Hammers. Or you could send in other things, like shells. If they attack when angry, they�ll charge in and explode. So you�d better take care of them before they blow!Only one problem with that. 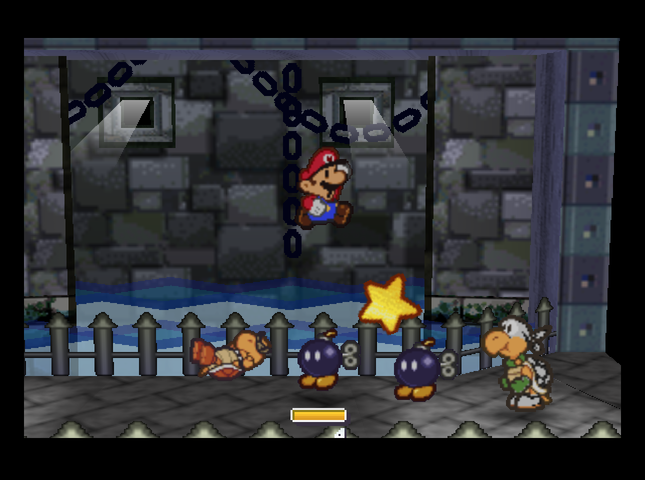 Bob-ombs have a Defense of 1 in this game! It�s not going to be easy to take them out in a single turn, no sirree. 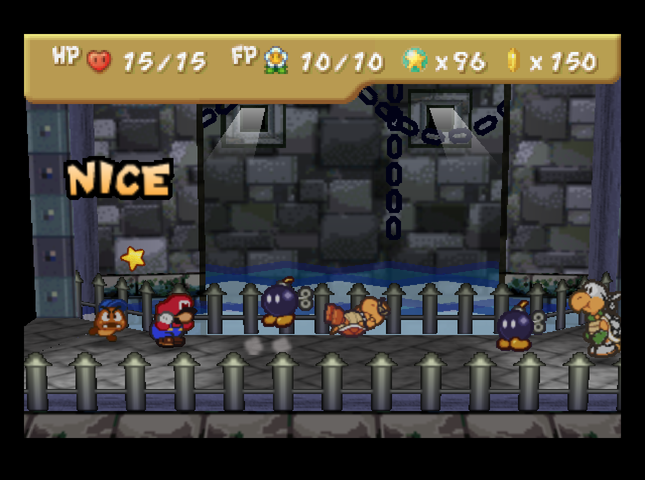 On the other hand, they attack with a jump attack that only does 1 damage� when they�re cooled off. Bob-ombs can randomly get mad after they attack. 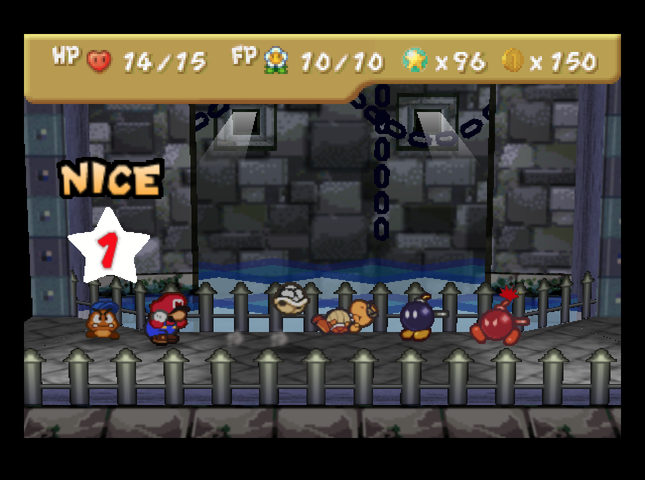 We can see that the rear Bob-omb has decided to get mad. The mystery Koopa in the back seems to do the same 2 damage as a normal Koopa. Who is he, anyway? 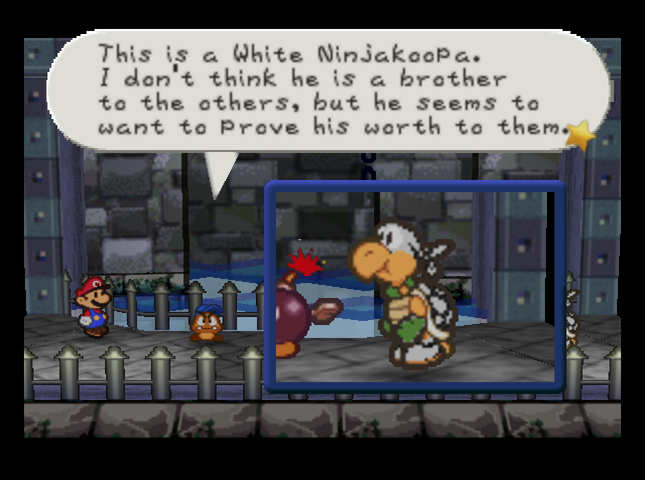 He�s almost as strong as they are, but that isn�t really saying much. They practice ninja skills, so if he jumps, be careful he doesn�t sneak up on us. He also buffs his allies� Defense. That could be bad for us! We need to take this guy out fast! He�s almost as strong as they are, but that isn�t really saying much. They practice ninja skills, so if he jumps, be careful he doesn�t sneak up on us. He also buffs his allies� Defense. That could be bad for us! We need to take this guy out fast!Despite what Goombario says, the Ninjakoopa isn�t top priority. The Bob-ombs are. 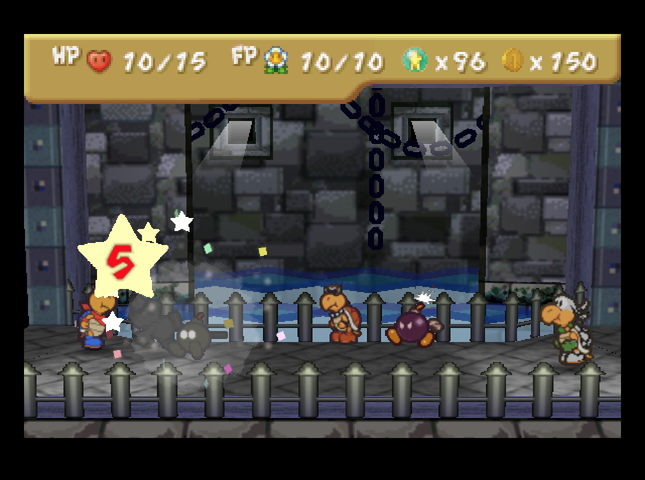 That�s because Bob-ombs do 5 damage to Mario when they explode!! 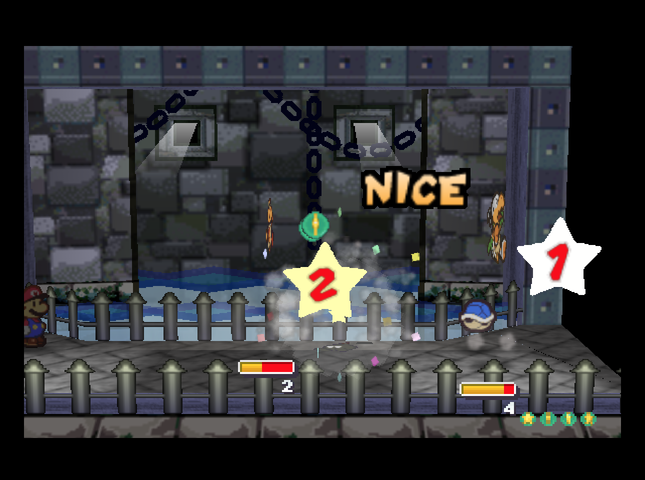 Kooper carries the day with a well-timed Power Shell, stopping the other Bob-omb from blowing up in our grill.   The White Ninjakoopa responds by deploying that Defense buff. He already had a Defense of 1 like a normal Koopa, but now it�s 2 - and he still has the buffed Defense of 1 when he�s on his back!   Mario can still knock over the Ninjakoopa with Jump attacks, despite the Defense buff - he just won't do any damage. The Ninjakoopa can get up and attack in the same turn, though (like Chan back in the Dojo), so it's only useful to lower his Defense for a strong hit.  The last move White Ninjakoopas have is a jump attack, like a Dragoon in Final Fantasy. He jumps on one turn�  �and lands at the end of the next turn, doing 3 damage.  Kooper comes in clutch to KO the pesky Ninjakoopa.  We level up from the battle - and I pick BP, this time. It�ll let us equip that HP Plus badge we got earlier, until something better comes along. 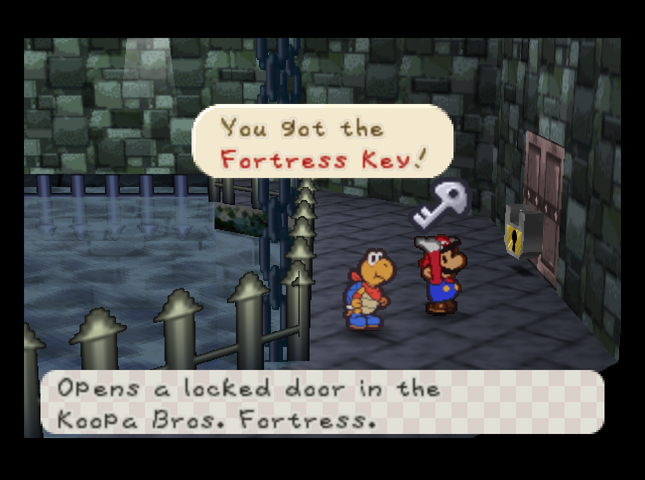 The Koopa drops a door key after the battle. 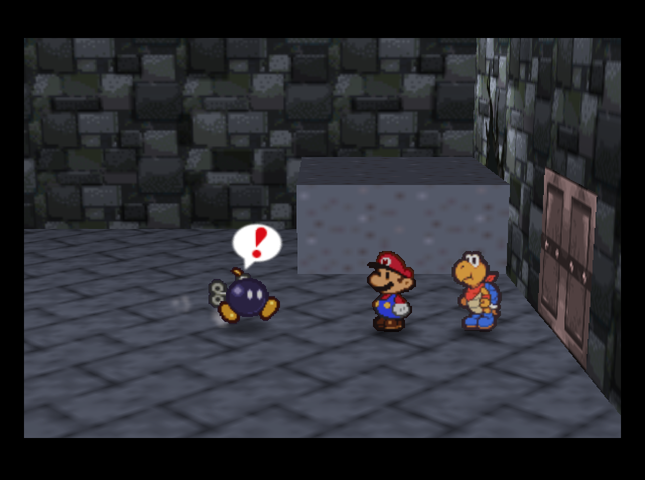 The next room has Bob-ombs in it, but the door out isn�t locked. 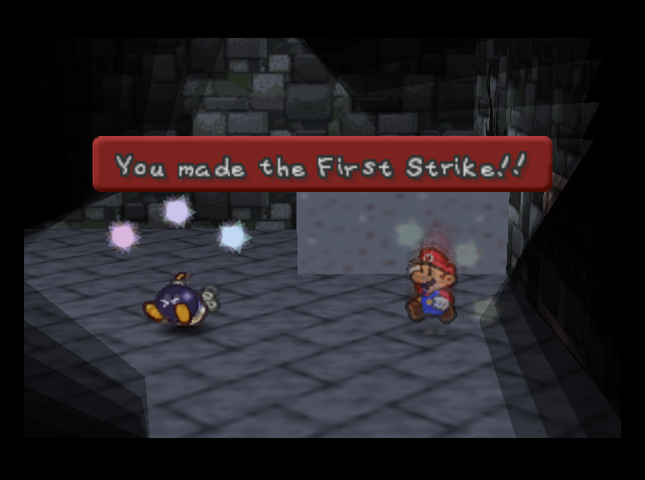 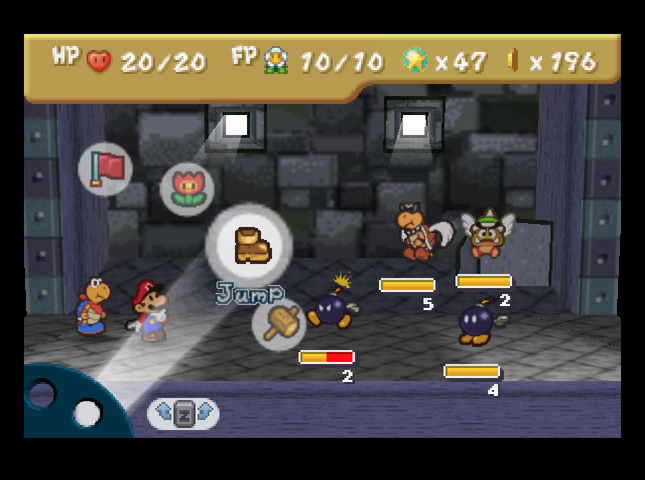 It turns out, if Kooper does a First Strike on a Bob-omb, it starts the battle mad. This means I can explode it right away. 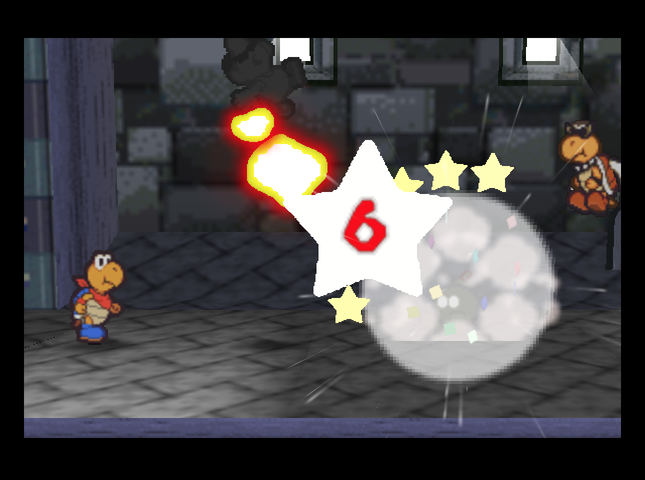 Just� not by jumping on it! Jumping on an upset Bob-omb makes it explode for 6 damage - even more than the 5-damage hit from the regular explosion! 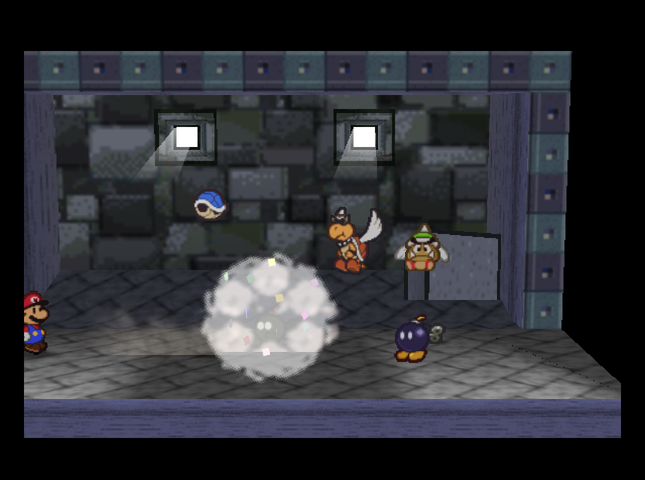 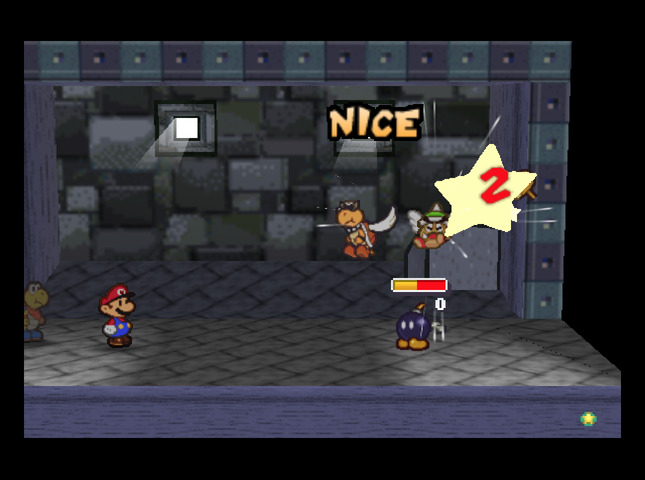 Instead, Kooper can defuse (well, detonate) annoyed Bob-ombs without trouble, as we saw earlier, while Mario takes care of the air side of things. 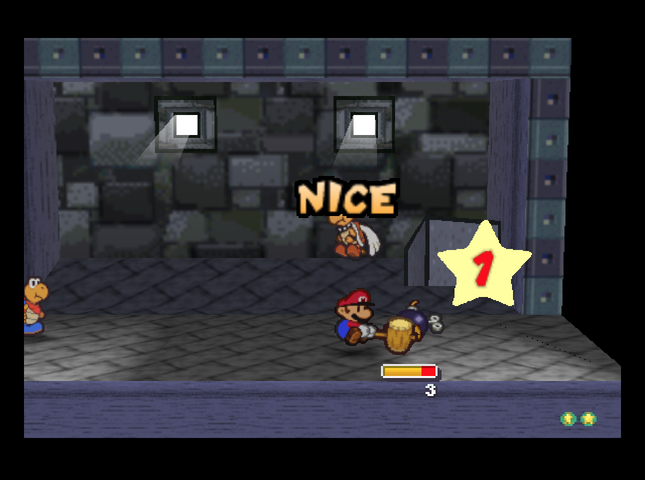 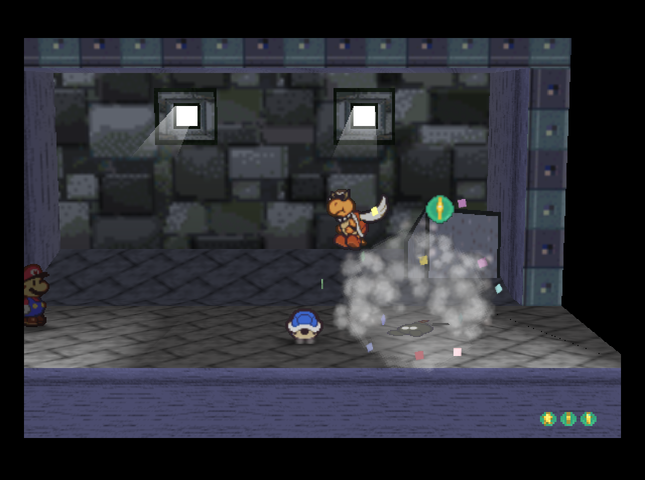 Note that we did not knock the Parakoopa down on purpose. That way, Mario and Kooper can take care of the other Bob-omb from a calm state by attacking it twice next turn: once with Mario's hammer, and once with Kooper. That�s the basics of defusing Bob-ombs: give them a wide berth, detonate them from range, and arrange matters so that you can KO a Bob-omb in one turn if it hasn�t gotten mad yet. 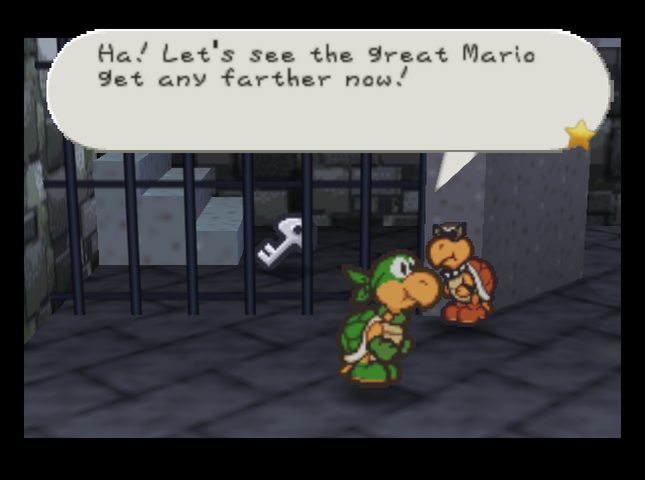 In the next room, the Koopa Bros. have secured some door keys behind gates, where we can�t get at them. 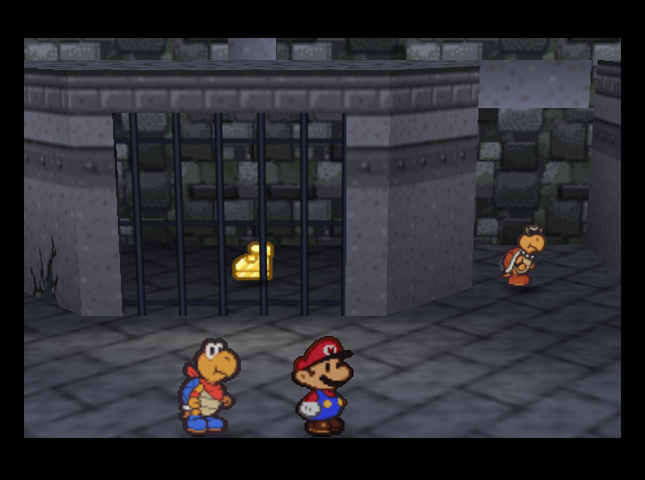 The gated area in the middle of the room, though, has a secret entrance on the right side, which the Koopa in the pic just jumped out from. 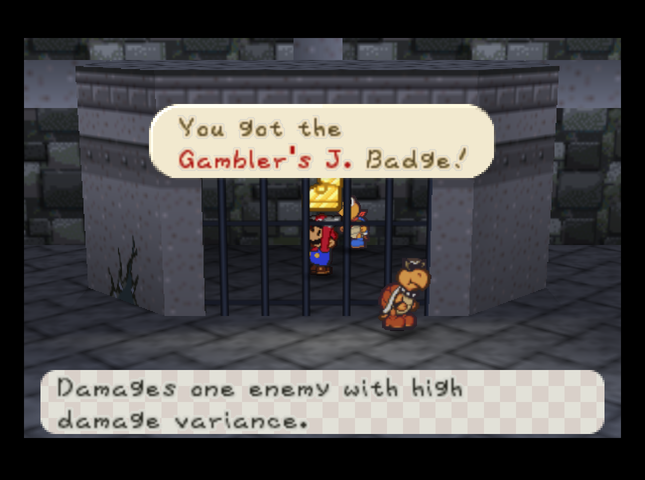 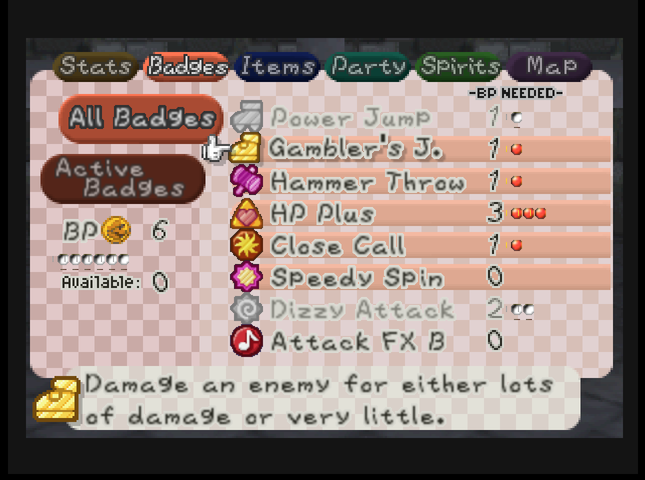 We�re able to go in and get a completely new badge: Gambler�s Jump. (Power Bounce was here in the base game.) Gambler�s Jump does either a lot of damage to an enemy, or almost none. 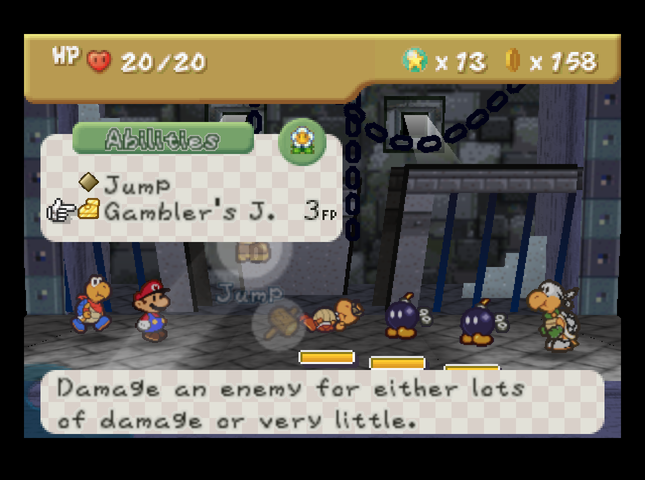 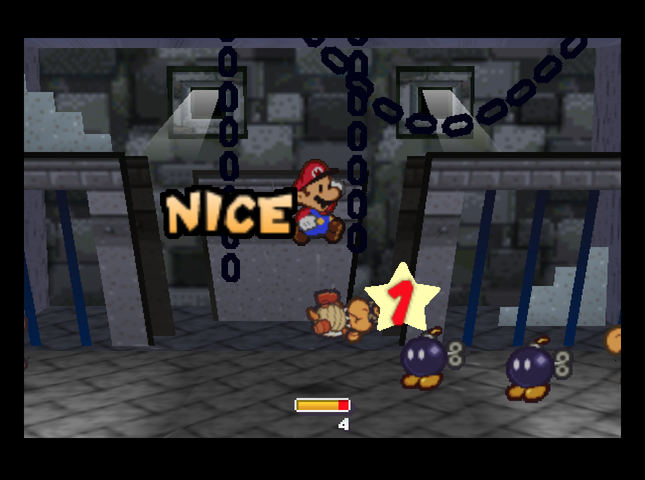 Usually, it�s almost none! I asked around and did some testing. The badge will normally do a standard-damage jump (1+1 = 2 damage) without using an action command. However, it has a 1 in 5 chance to deal +4 extra bonus damage on the first hit (for a total of 5+1 = 6 damage, instead). The chance of a big hit apparently increases as Mario gets better boots, eventually topping out at 1 in 3. I don�t think this badge will be that useful, unless the game gets hard enough for me to have to exploit RNG via save states. I�ll only do that as a last resort, and I�m not there yet! Power Jump is better for dealing bonus damage consistently (albeit less of it). It costs less FP, too. 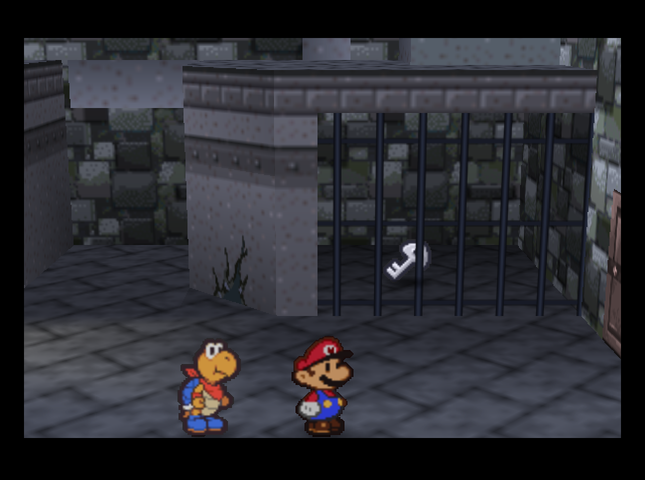 There�s another key in the cage on the right side. We�ll be able to get it once we can blow up the wall. Once again, the door is unlocked, so we can just ignore all of this. 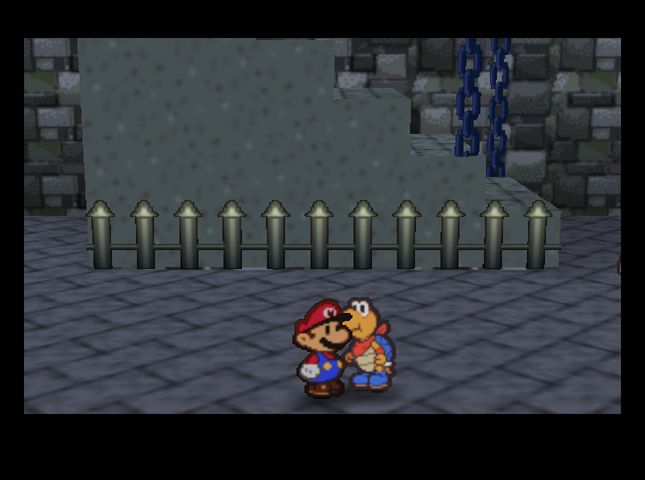 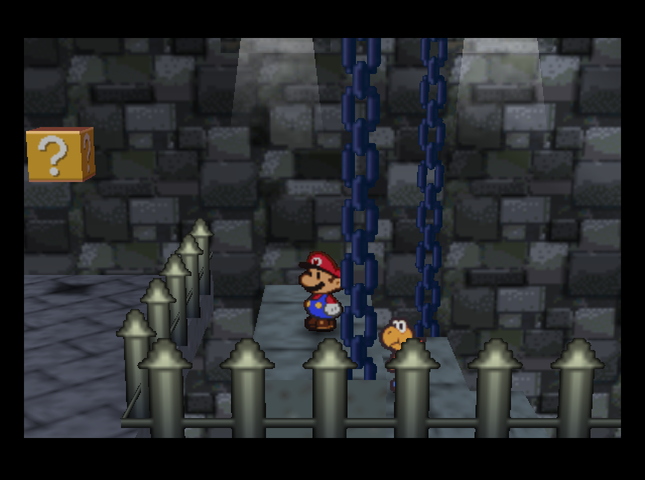 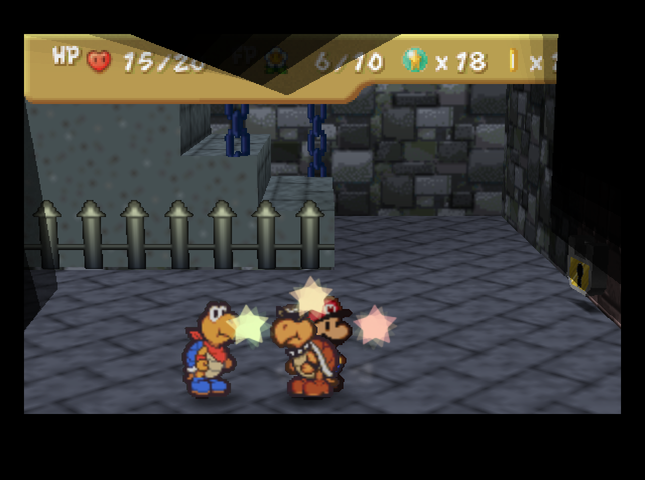 In the next room, the stairway leads nowhere. Instead, we fight a nearby Koopa to see if he�s got a door key. 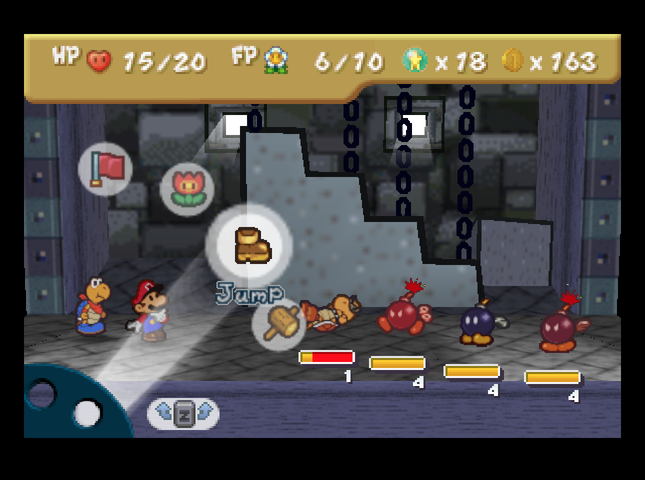 This particular Koopa has three Bob-ombs in tow, making him something of a final exam at Bob-omb defusal. (The solution to this one that doesn�t involve Mario getting blown up is for Kooper to use Power Shell, then Mario can set off the remaining Bob-omb with his hammer.)  This Koopa didn�t have a key, but a switch drops from the ceiling after beating him. 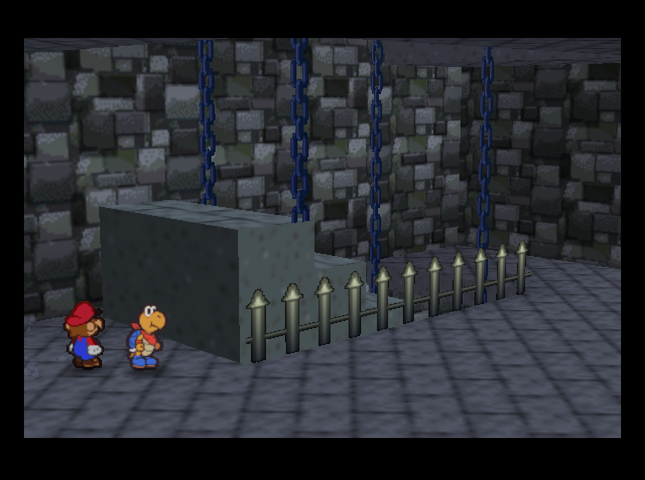 Hitting it makes the stairs lower, becoming a stairway down to the basement. 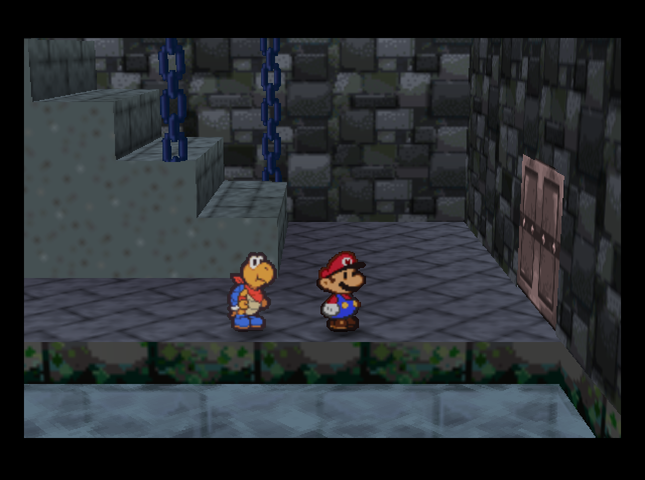 In the basement, there�s a door to the right and a passageway to the left. We take the door� 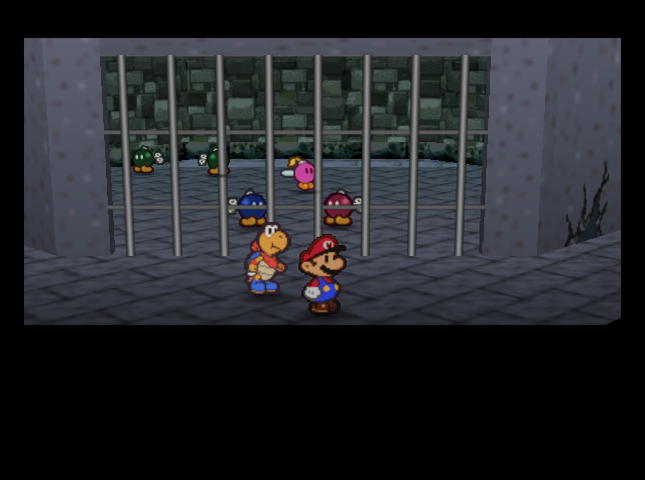 And find a prison cell with a bunch of Bob-ombs. It�s a pity none of them have noticed that the cell wall is weak!  When we go down the left passageway, the ways out levitate off the ground where we can�t get to them. It�s an ambush! 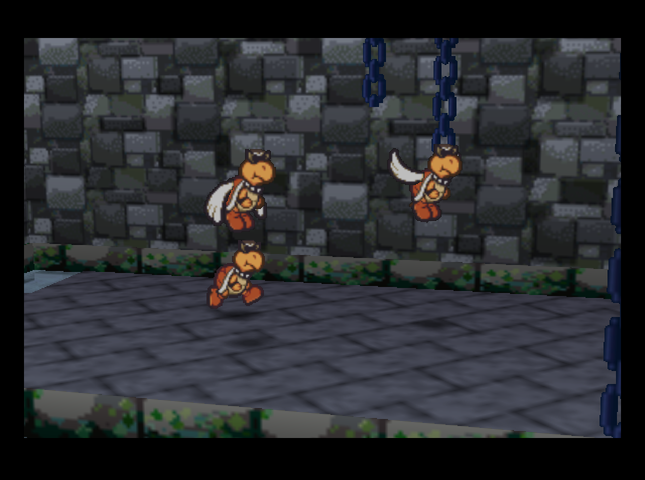 We have to KO a Koopa and two Paratroopas before we can leave. 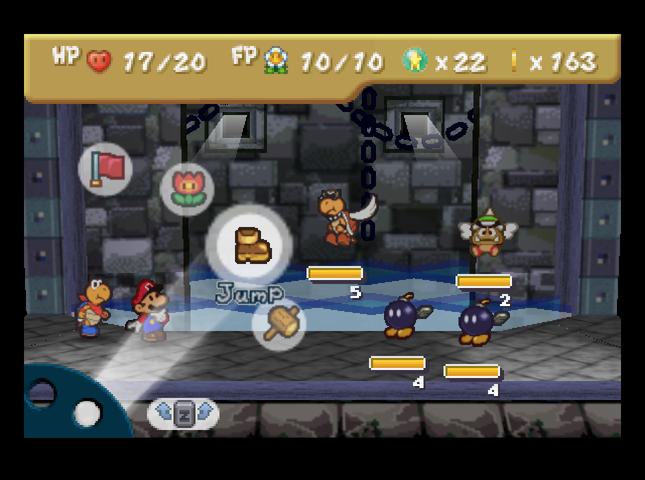  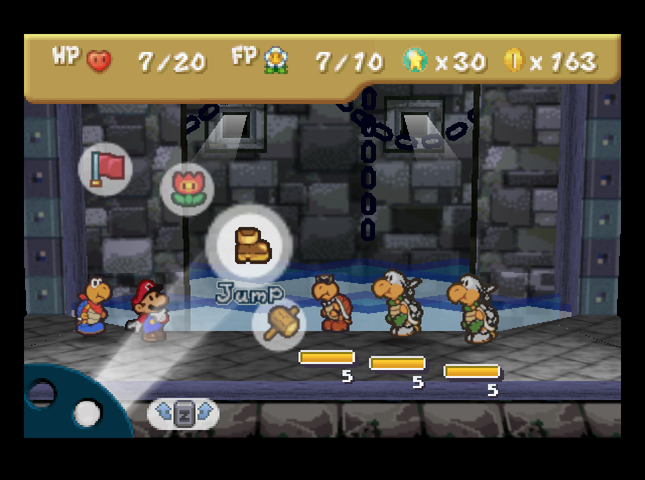 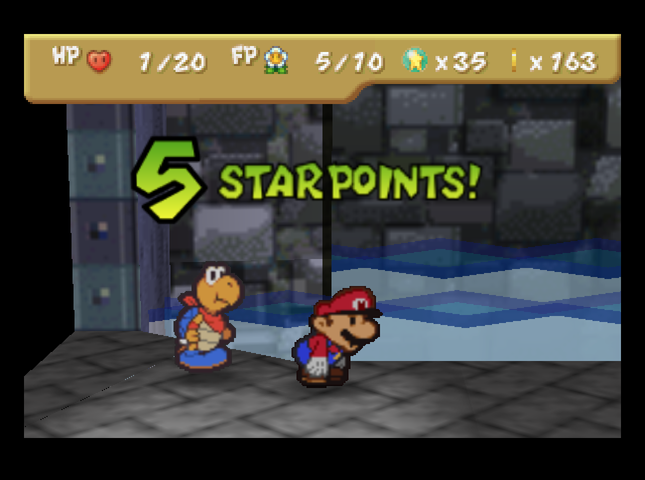 We make it! � just barely. 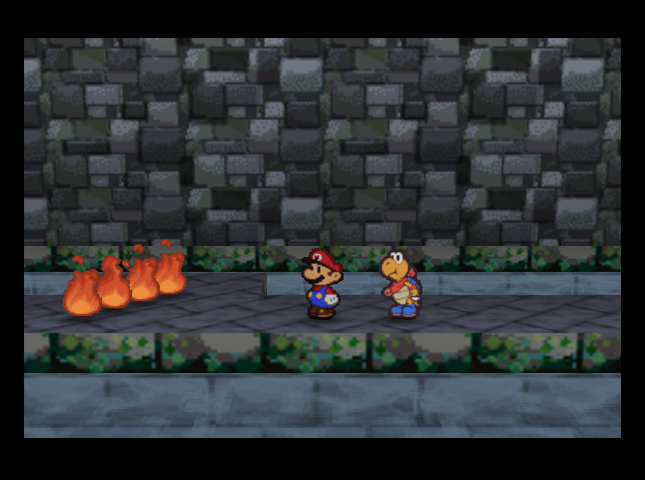 In the next room, there are Fire Bars. 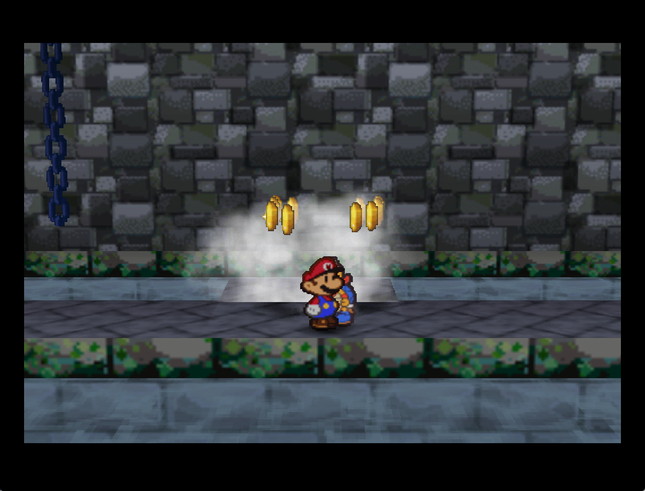 If you jump over a Fire Bar 10 times, it gets faster with each swing - then explodes into a shower of coins.  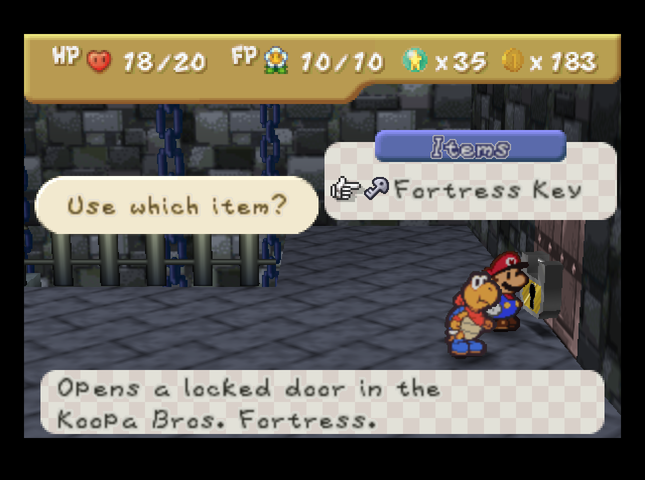 Past the Fire Bars is a key, so we can open the door upstairs. 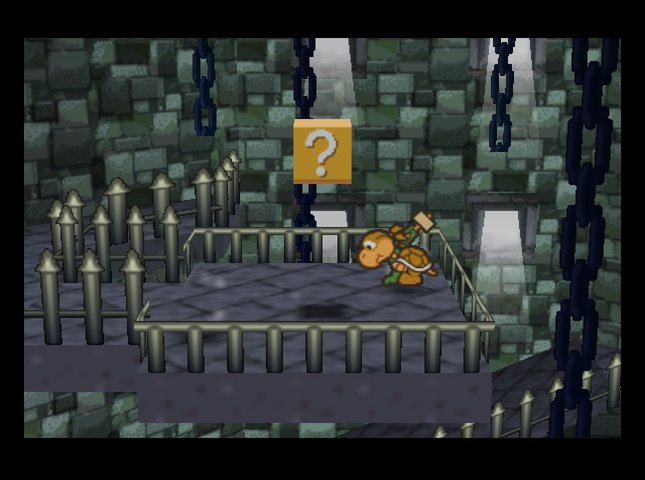 In the next room, Yellow Koopa Bro is working on something awfully suspicious.  OK! This is perfect� I think. OK! This is perfect� I think.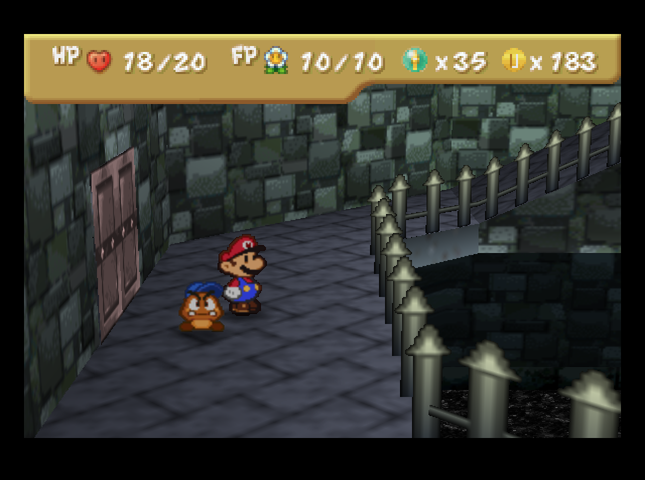 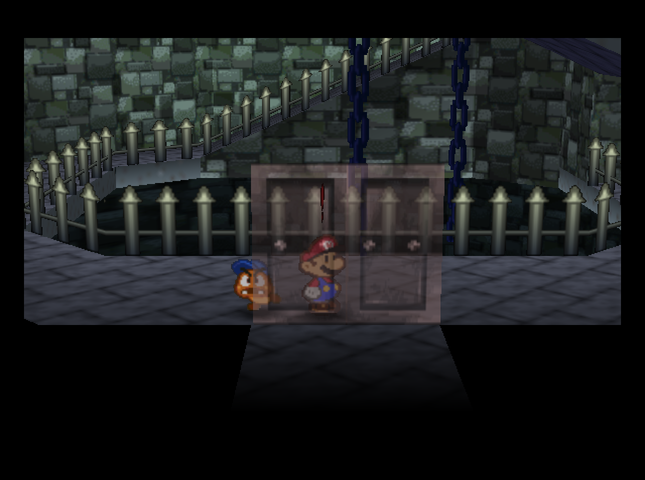 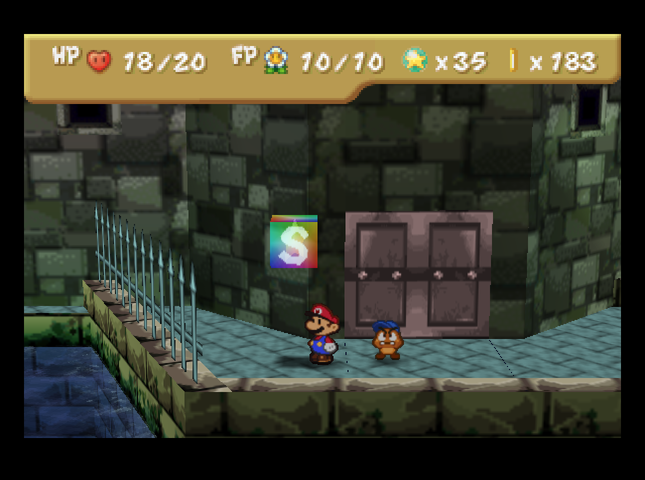 Before we go up there, we go out a side door and save at a conveniently placed outdoor Save Block. 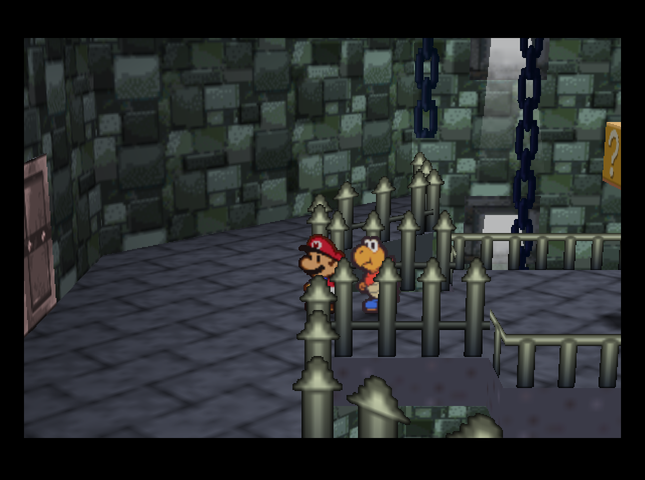 Back in the spiral room, we head to the door to the left, first, and ignore the suspicious ? block. 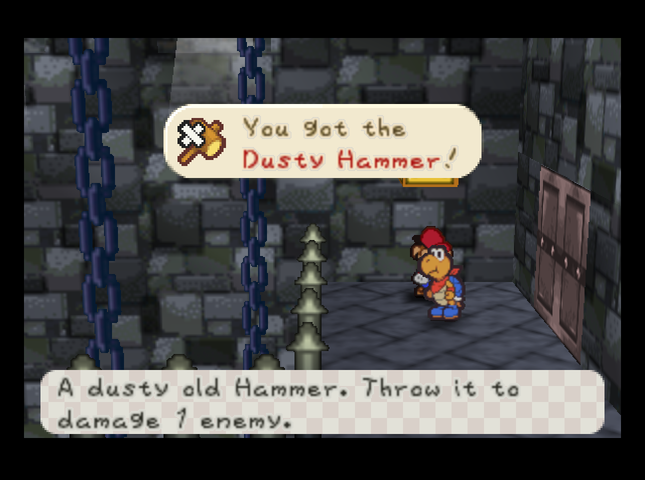 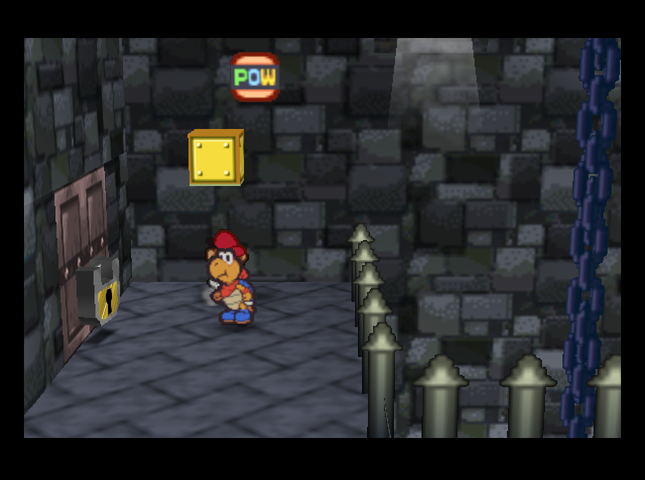 In the room to the left, we pick up a Dusty Hammer and a POW Block from ? blocks. However, the door is locked, so we can�t go farther. (I can�t find any reference to these ? blocks in walkthroughs, so it�s possible they�ve been added for Master Quest.) 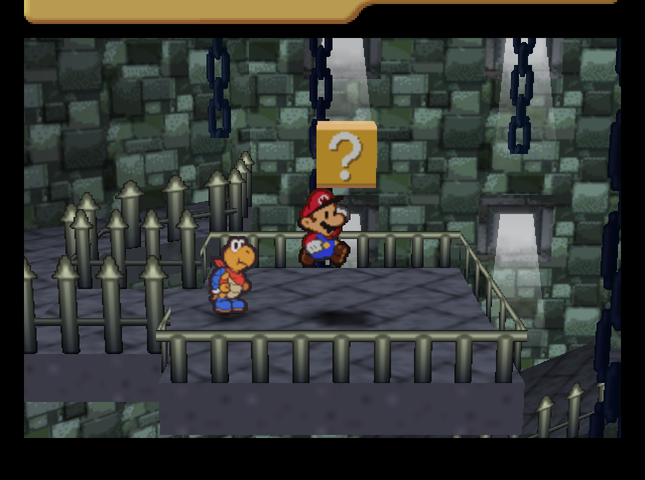 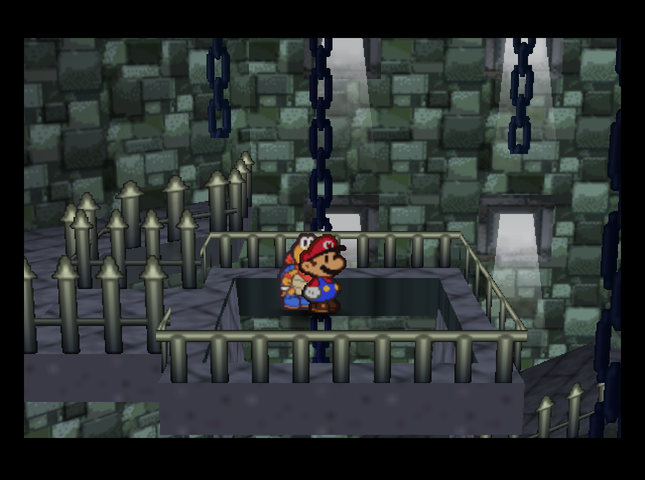 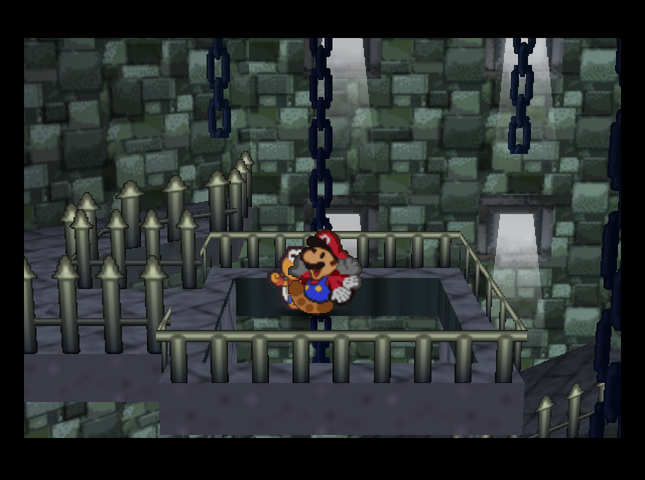 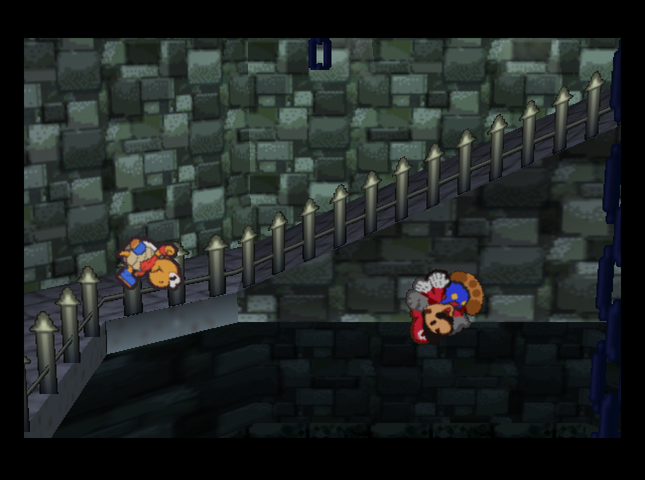  So, we have no choice but to hit the suspicious ? block and, as they say, �fall for it�. 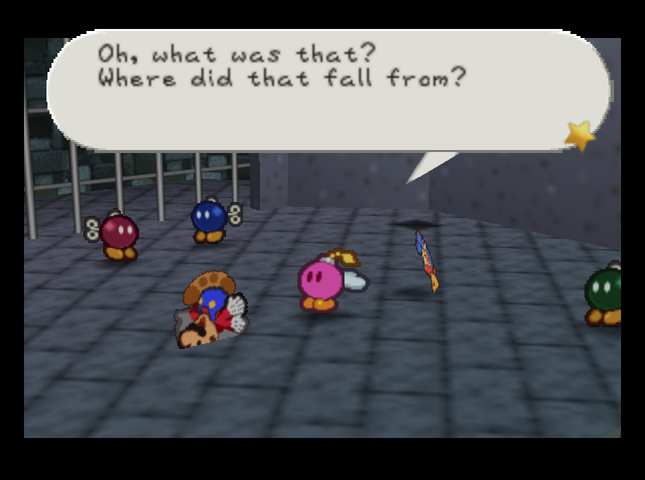 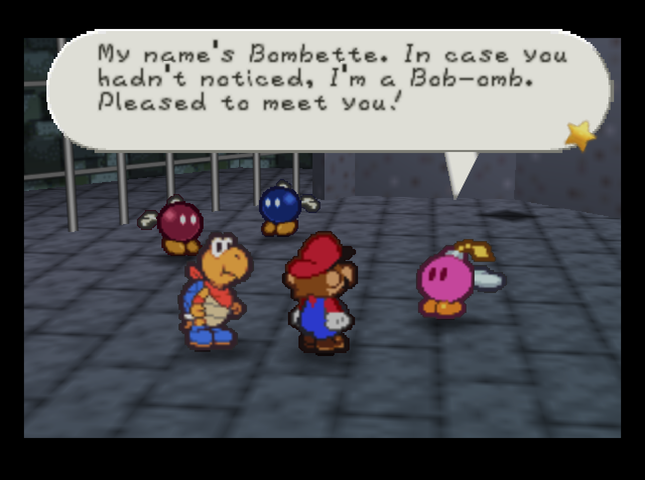 We end up in the same jail as the Bob-ombs we saw earlier, and meet Bombette the Bob-omb. 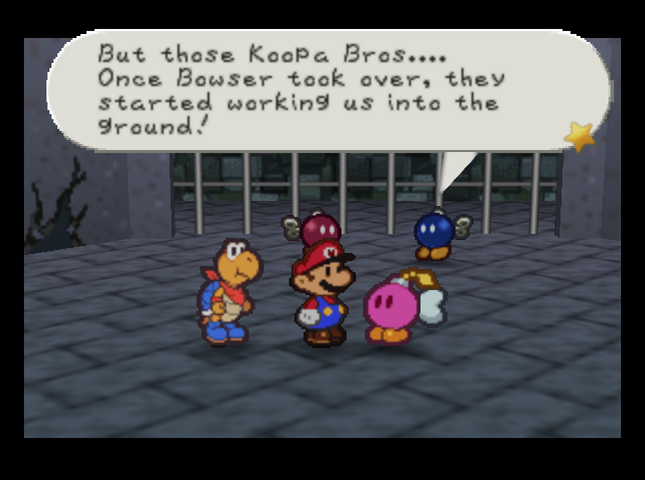 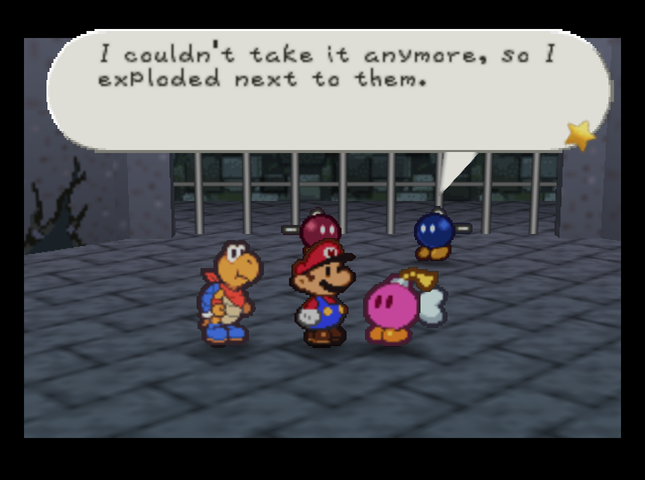 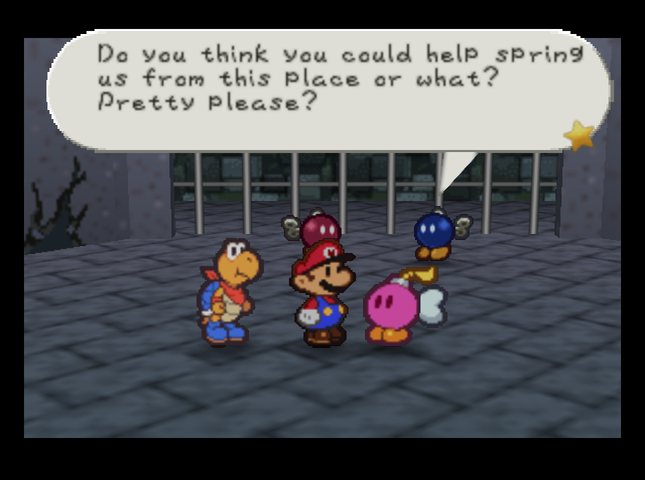 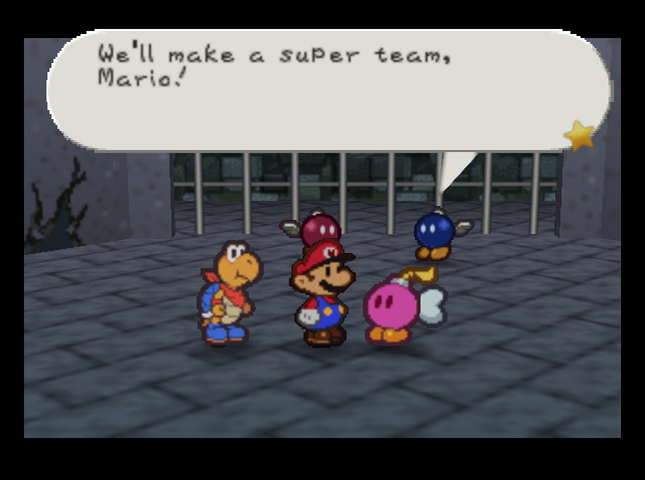 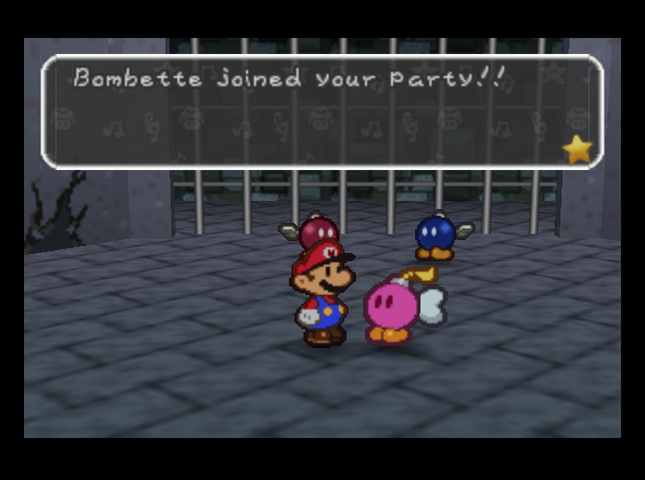 She�ll join us in the fight against the Koopa Bros - they�re the reason she�s locked up here. 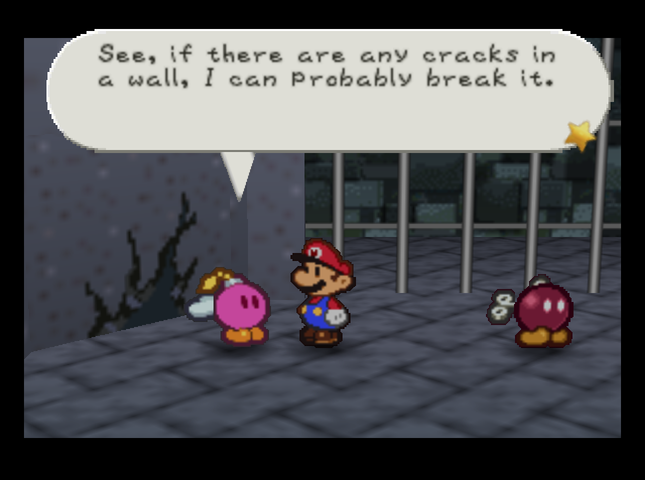 Bombette�s specialty is blowing things up� like cracked walls. 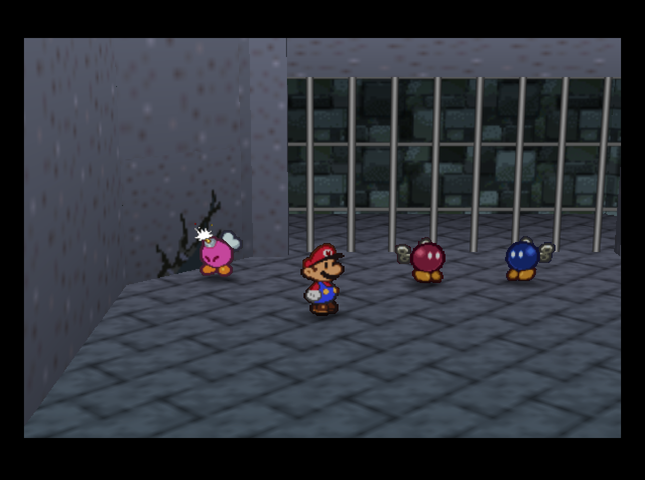 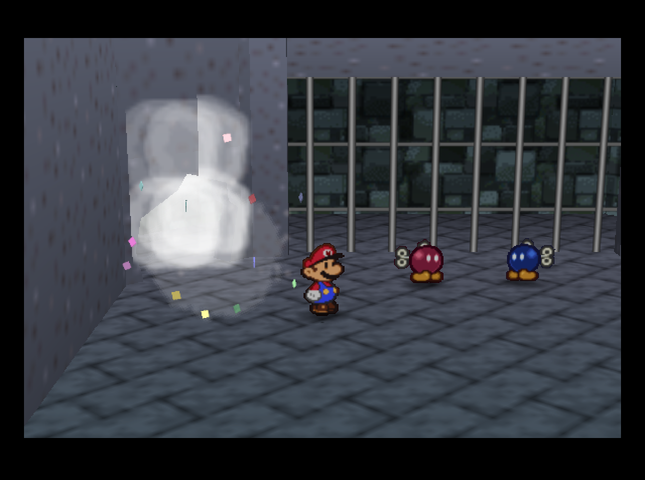 �like the one in this jail cell. 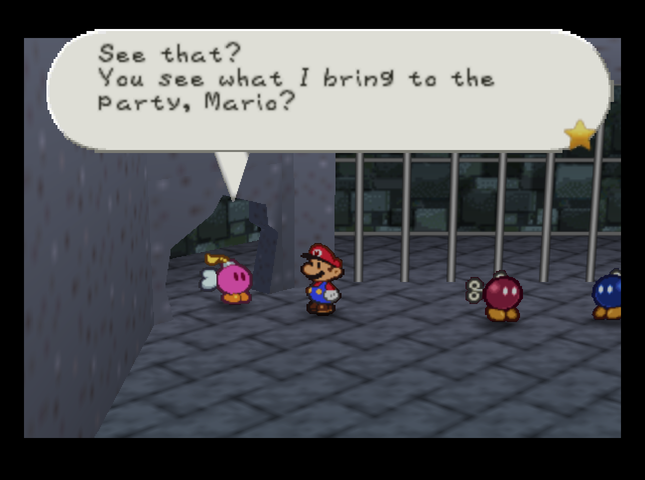  Oh! An escape route! Well, I� I guess I never thought about doing that before� I was so mad, I just blew up over and over in one place! Oh! An escape route! Well, I� I guess I never thought about doing that before� I was so mad, I just blew up over and over in one place! Tee hee! OK, that was a little silly! Tee hee! OK, that was a little silly!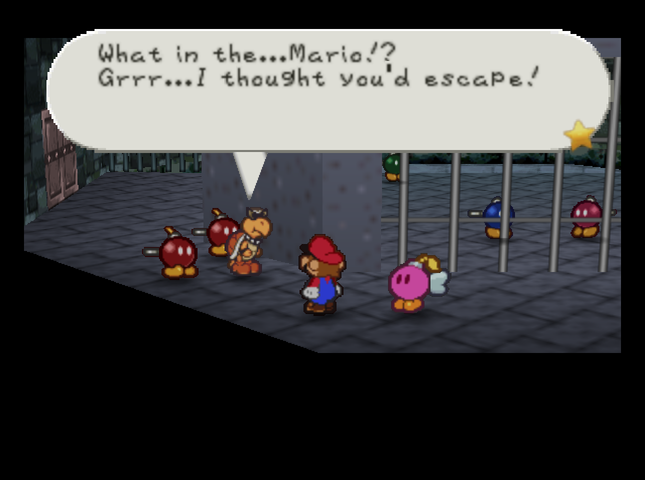 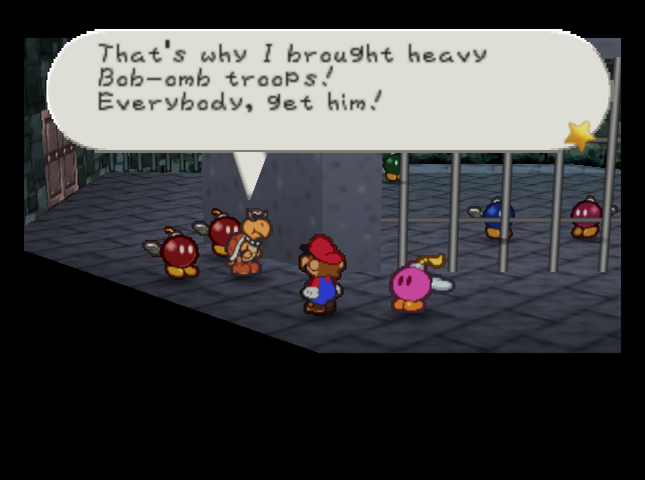 On the way out, we�re ambushed by the Koopa prison guard and� are those red Bob-ombs? 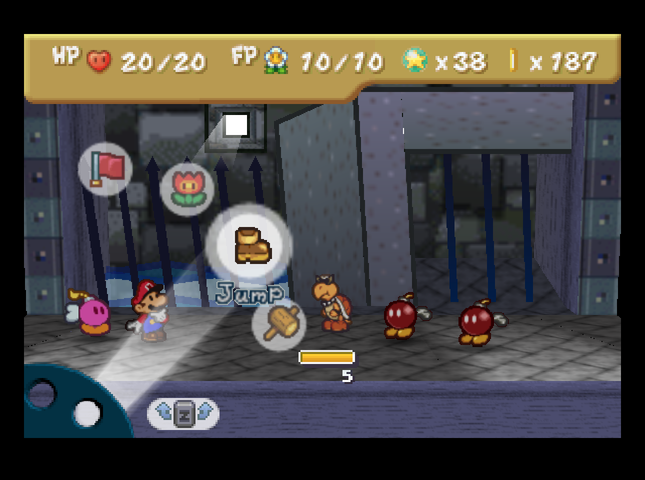 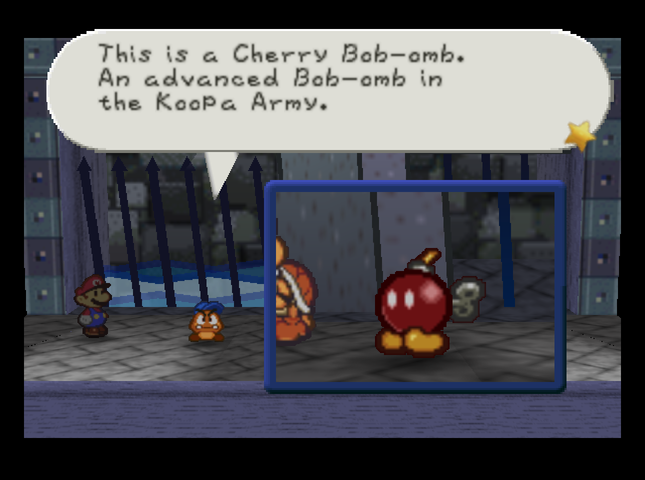 These shiny red jerks have some heavy artillery locked away inside. They somehow found a way to pack twice the firepower into the same tiny body. Technology, amirite? These shiny red jerks have some heavy artillery locked away inside. They somehow found a way to pack twice the firepower into the same tiny body. Technology, amirite?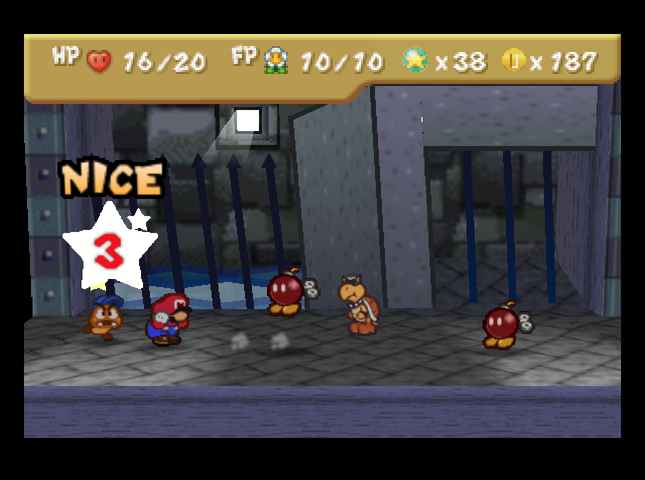 Goombario isn�t joking around. Not only does a standard Cherry Bomb jump attack do 4 damage, instead of 1� 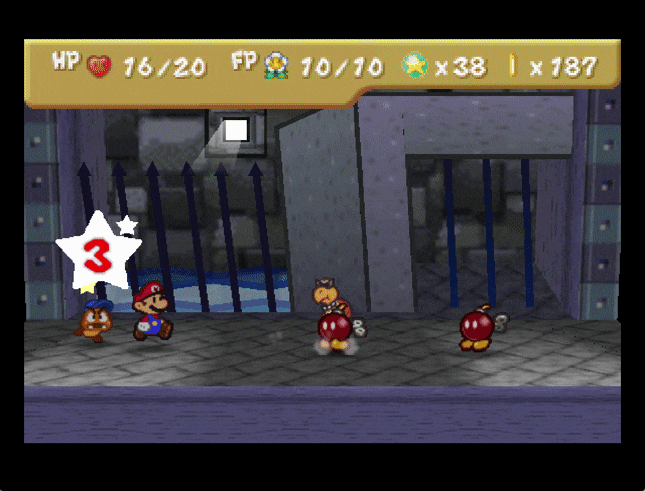 �but they can also light up and attack in the same turn, doing a whopping 10 damage when they explode in Mario�s face! 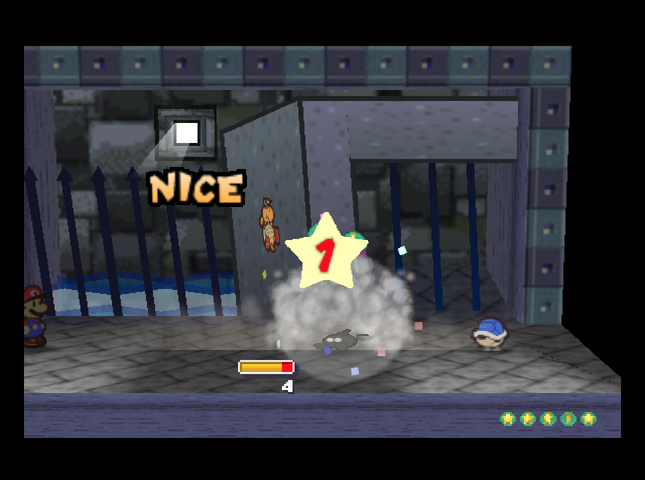 Kooper defuses the second Cherry Bob-omb at range before it can give us a Game Over. From the looks of the damage dealt, the Cherry Bob-ombs also had 2 Defense! 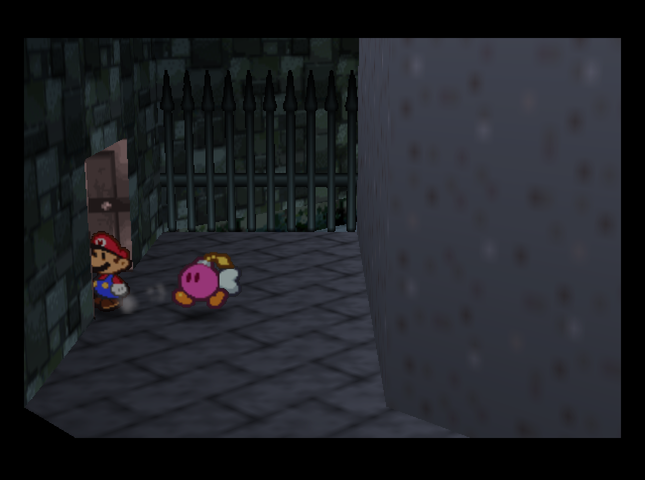 With the Cherry Bob-ombs beaten, and Bombette on our side, it�s time to take another trip through the castle. We now have the key we need to blow everything wide open. But what further nasty surprises do the Koopa Brothers have in store for us? Badges: 8/89 (New: Gambler�s Jump) Star Pieces: 16/180 Chuck Quizmo�s Quiz Questions: 6/64? Game Overs: None so far, but I did have both Cherry Bombs blow up on me on their first turn while I was replaying their fight for testing purposes. SUMMARY OF CHANGES FROM MAIN GAME (in this installment) � Kooper, through advanced velocity training, has a stronger Shell Toss. (3 damage instead of 2) � Thunder Bolt items do only 1 damage, but shrink like Mario Kart. � Paratroopas healthier and meaner. (+1 HP, +2 Attack) � Bob-ombs now extremely dangerous. (+1 Defense, +1 HP, and they explode for 5 damage instead of 2). � Koopa Trainee Ninja Corps hired by Koopa Bros as mercenaries. (White Ninjakoopa: 5 HP, 1 Defense (0 flipped), 2 Attack, 3-damage jump attack, can give an ally +1 Defense, can get up and attack on the same turn.) � Power Bounce badge filched from fortress, replaced with Gambler�s Jump badge. � Cherry Bob-ombs assigned to guard Bob-omb prison cell. Extremeli-er dangerous-er. (Cherry Bob-omb: 8 HP, 2 Defense, 4 Attack, explode for 10 damage. Can light and explode on the same turn.) Next Time On Master Quest: Bob-omb buddy burgles Bros.� bastion, beats Bowser (?). Quackles fucked around with this message at 23:05 on Aug 2, 2019 |
|
#
¿
Jul 28, 2019 04:05
|
|
|
FPzero posted:I feel like even with the small damage increases on things like Hammer Throw and Kooper's attack, this is all a little bit much for what the battle engine is capable of. Those Cherry Bob-ombs (great name honestly) are absolutely ridiculous for what they are and where they're placed in the game! Plus it seems like every enemy encounter here is 3-4 enemies. I don't even want to know how much backtracking to the heart blocks you're doing between battles... Every 2 battles or so, plus/minus 1. And yes, as FPzero said: The new update is the last post of the previous page.
|
|
#
¿
Jul 28, 2019 04:42
|
|
|
FPzero posted:Do battles at least give you boosted Star Points and Coins since you're fighting more guys per battle? Or is it kind of evening out compared to the original since the original would have you fighting more, easier fights where this hack has you fighting less, harder fights? It kind of evens out. Since the battles have more guys, they give more SP and so on. But, I end up fighting less because getting into fights is challenging and taxing. If I ever need to make up the difference, I'll see if I can have any luck in the Pit of 100 Trials.
|
|
#
¿
Jul 28, 2019 04:54
|
|
|
Araxxor posted:From what I've been told, a lot of enemies from the base game have their star point payouts mostly unchanged. Depends on what the new enemies have as their payouts. There's apparently a hidden modifier in the original Paper Mario that makes battles with more enemies give more Star Points. Three-enemy battles give 10% more, and four-enemy battles give 30% more. I think this has been left in, but I'm not sure.
|
|
#
¿
Jul 28, 2019 05:14
|
|
|
Part 7 : Bombette, Burgling, Bros, �Bowser�, and a Bill-ion Bullets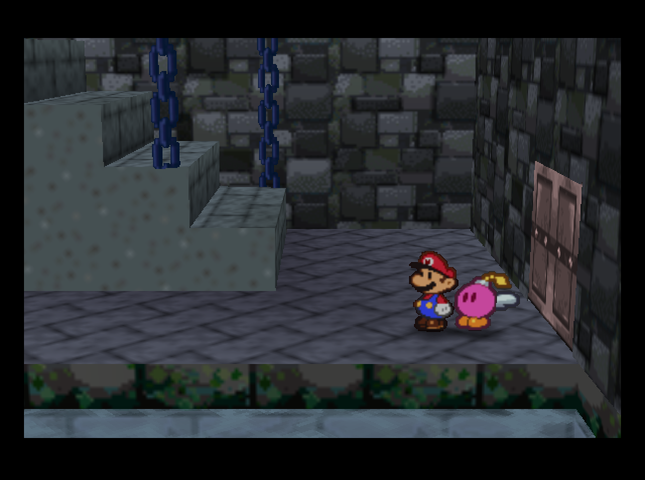 We�ll start by cleaning out Koopa Bros. Fortress of a few loose goodies. First step is to head back to the Fortress�s front door. 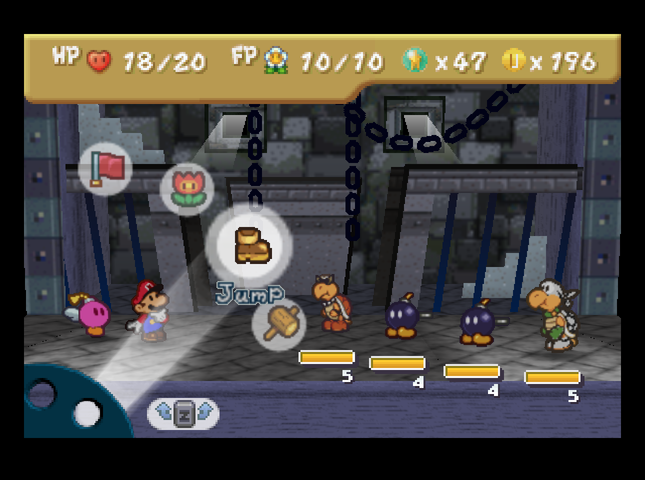 We�re ambushed by a Koopa on the way there, which lets Bombette show off her skills. 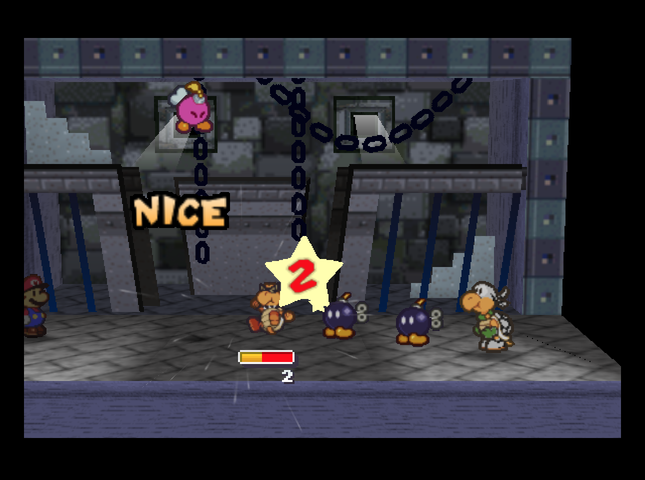 Bombette�s default attack, Body Slam, has 2 Attack - same as in the base game. 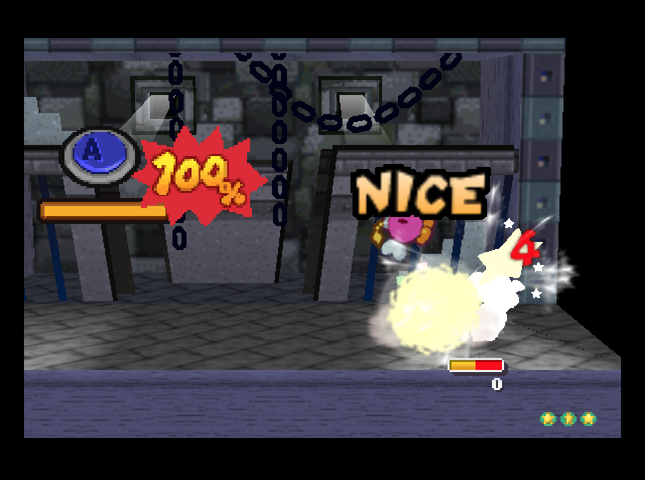 And her Bomb attack lets her explode for 5 damage on the frontmost enemy! It�ll also OHKO Bob-ombs, even if they�re calm. This is the same as the base game, as well.  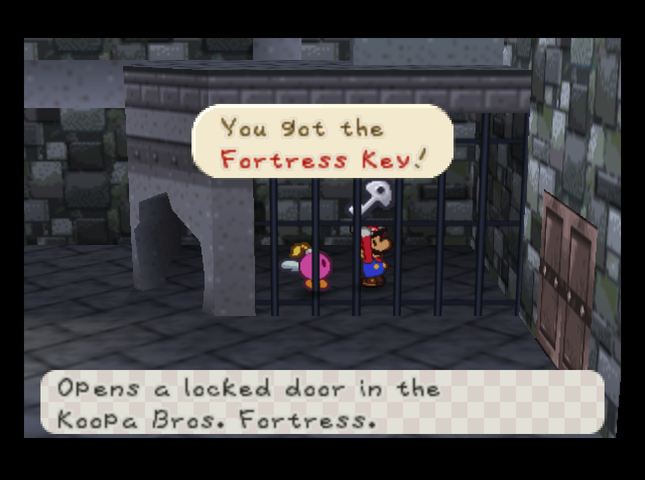 On the way to the door, we blow up the wall of one of the cages with keys. This�ll be our ticket deeper into the fortress later. 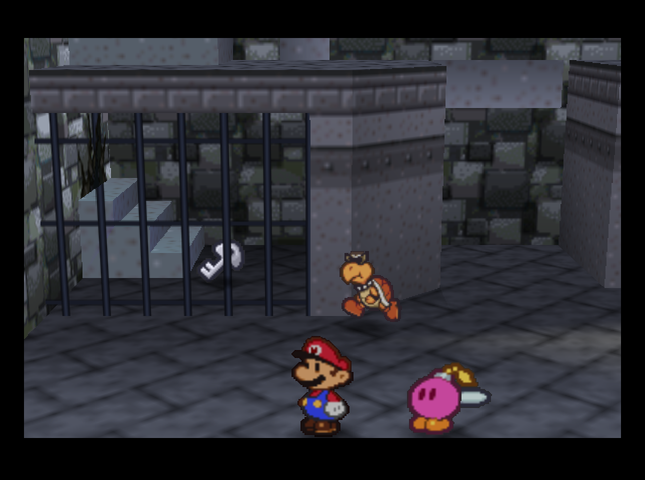 Sadly, the other cage-with-a-key has a weak wall on the inside, so we�ll have to get the second key in this room by a more roundabout method. 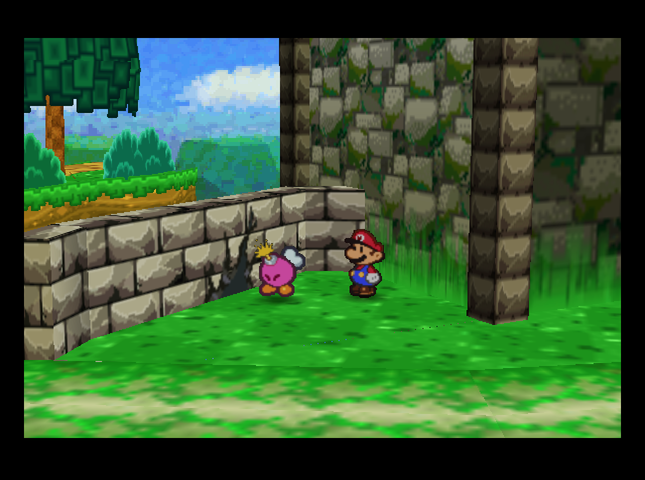  We head back to the path outside the Fortress, where we saw a pipe blocked off with a wall. Bombette gets us through it easily. 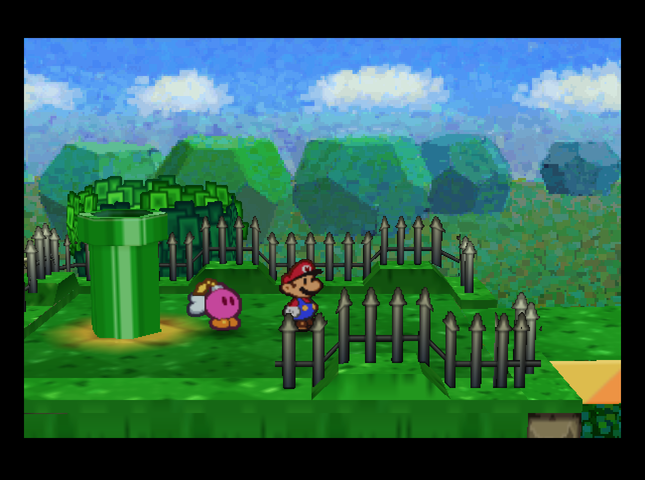 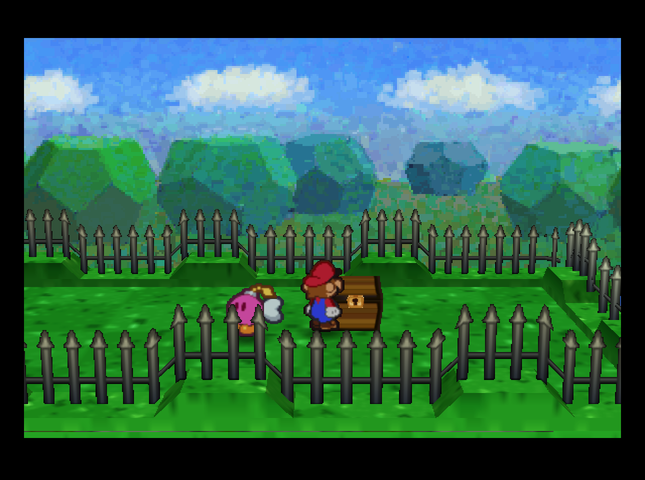 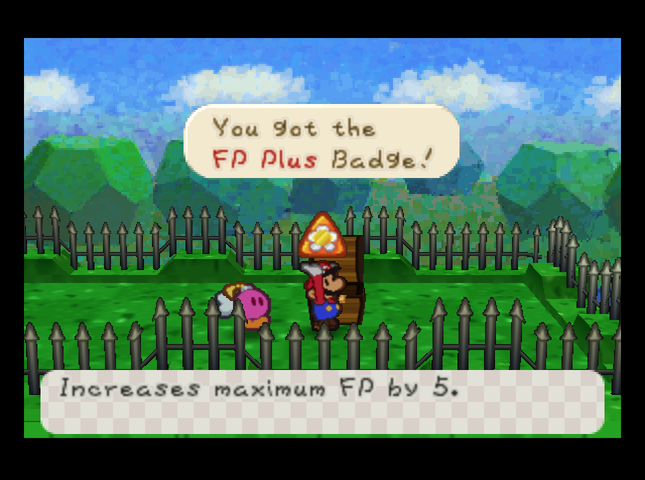 On the other side of the pipe is a grassy, fenced-in area. There�s a chest with a FP Plus badge here! FP Plus lets us trade 3 BP for 5 FP, effectively. It�s the counterpart to HP Plus. With these two badges in our arsenal, we now have some flexibility in what stat distribution we bring to any particular fight. 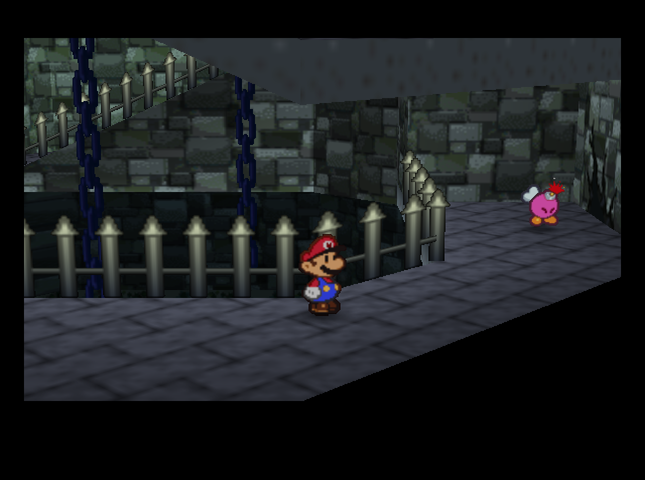  Back in the spiral room, we�re able to blow open a cracked wall, leading to a peaceful outdoor alcove with a chest. 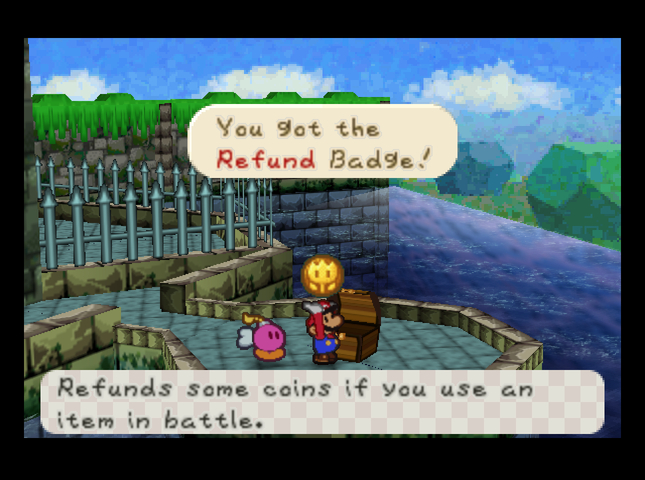 It has the Refund badge, which will give us back some coins if we use an item. I think we get 75% of the purchase price. 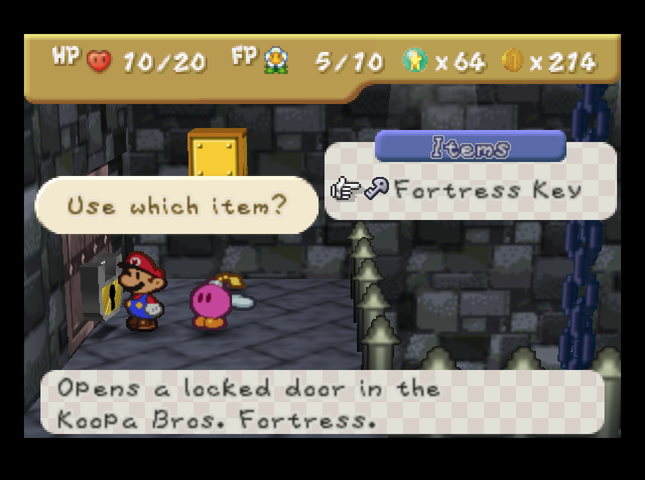 With the key we picked up, we�re able to proceed past that locked door in the room with the item blocks.  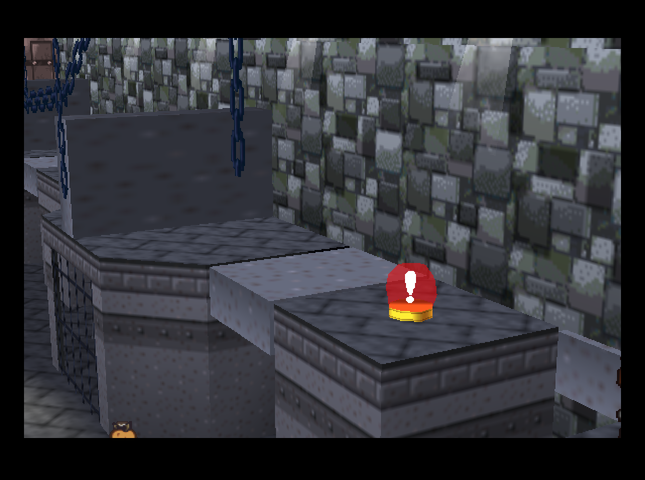 The next room is the room with the cages - but we�re on top of them! There�s a puzzle involving hitting switches with Kooper, which extend barriers and platforms from the walls. 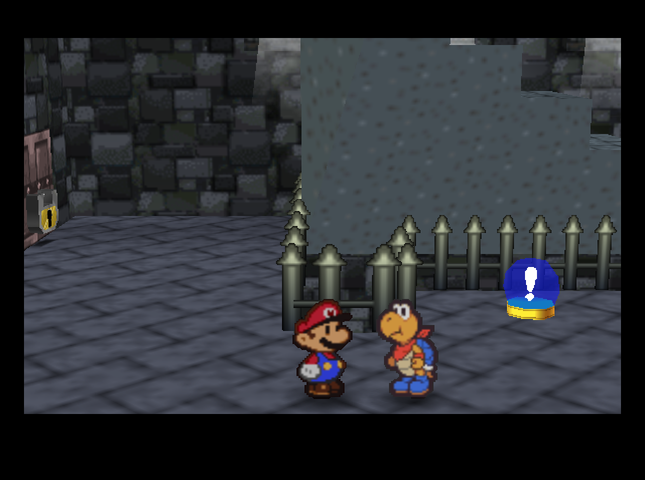 After that, the next room has a switch, another locked door, and another one of those hanging staircases. 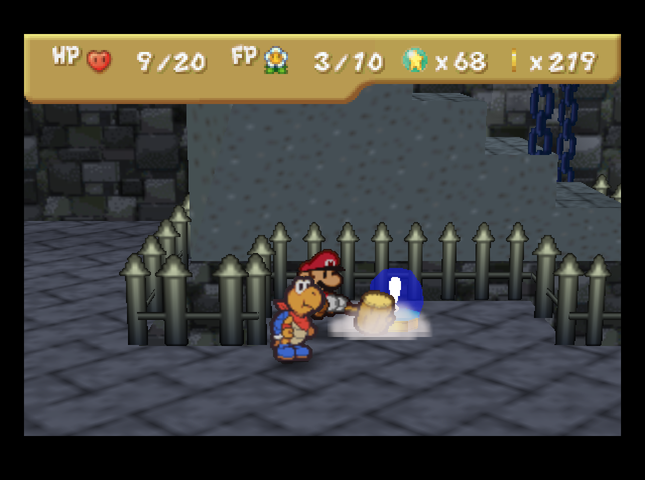 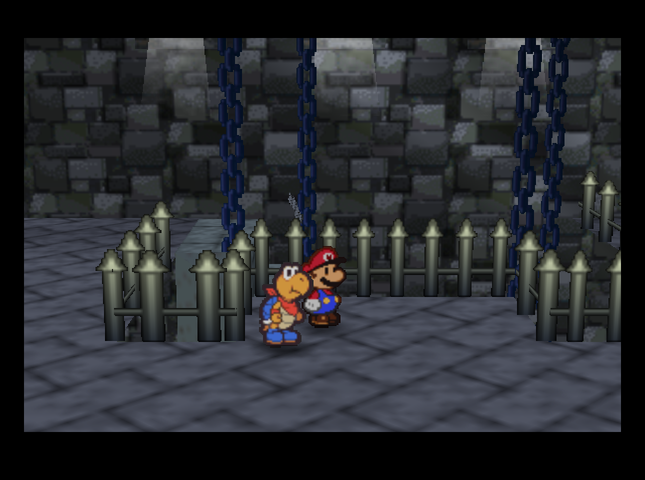 The switch does the same as the last one, lowering the stairs. This set of stairs creates a shortcut to ground level.  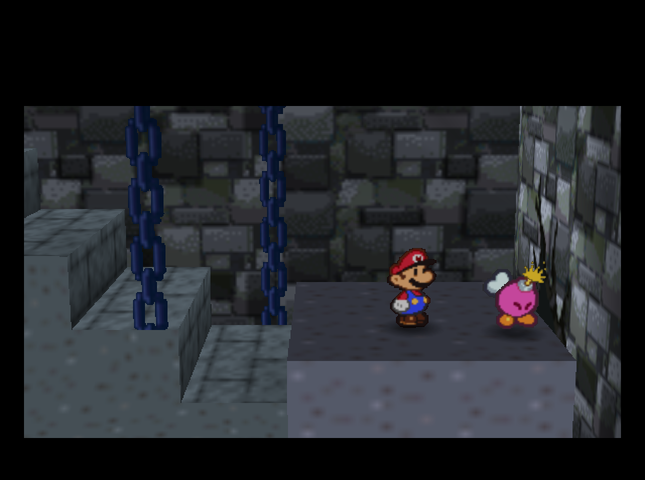 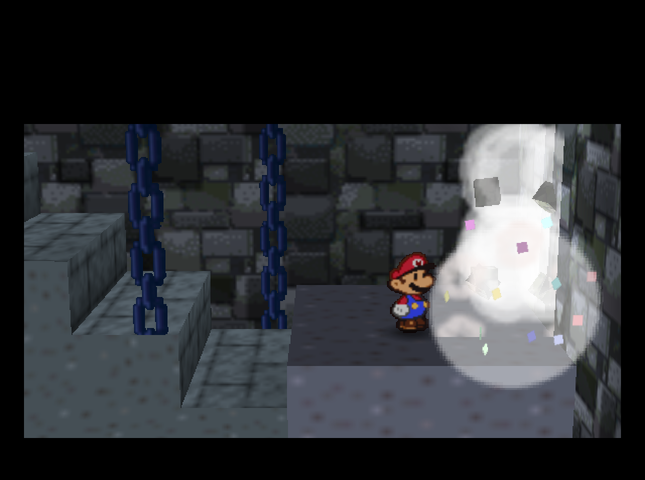 We take the stairs down and find ourselves in the room with the Bob-ombs guarding it. We can now get to the cracked wall in here, using the staircase as a step stool - so, Bombette blows it up. 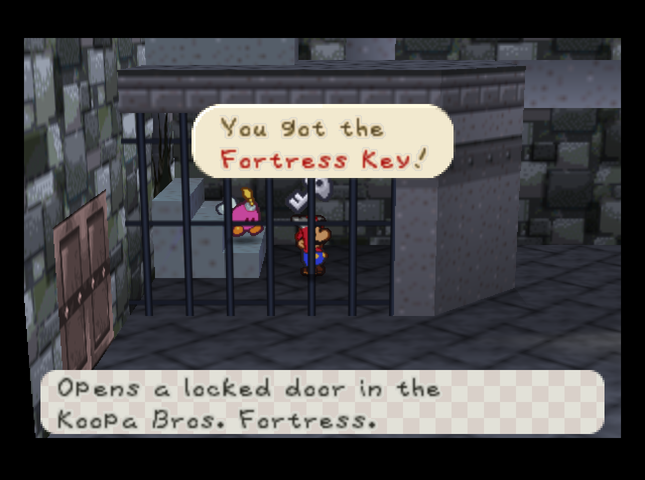 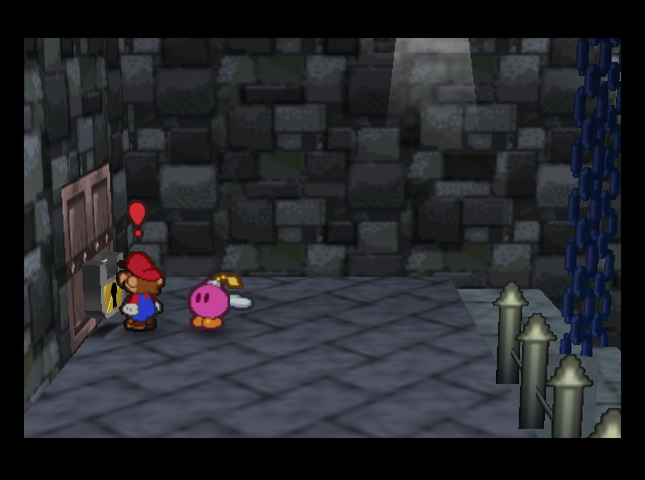 Going through the hole in the wall, we end up in the cage with the other key. This is the last key we�ll have to collect in the Fortress, and it opens the locked door in at the top of the staircase room. 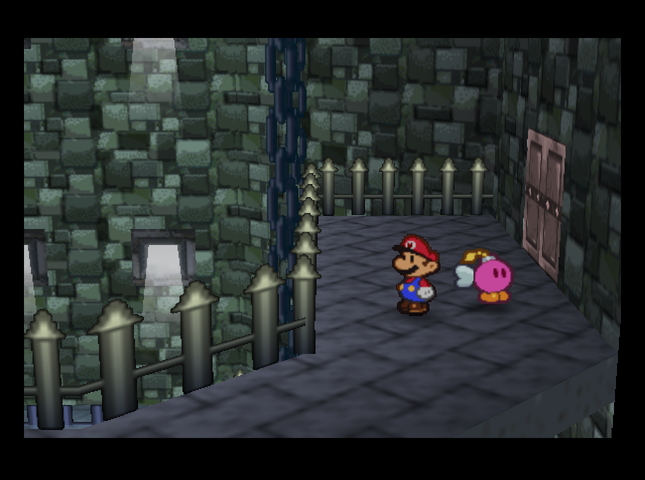 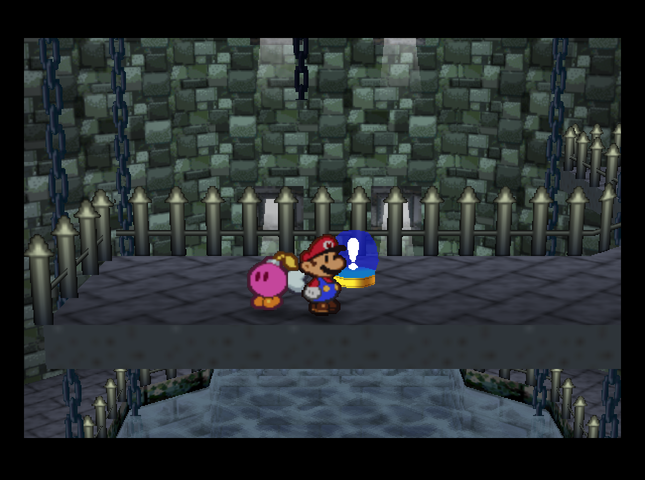 Through the door is� a dead-end, high over the first room we visited in the Fortress with the pool of water. There is a switch, though.  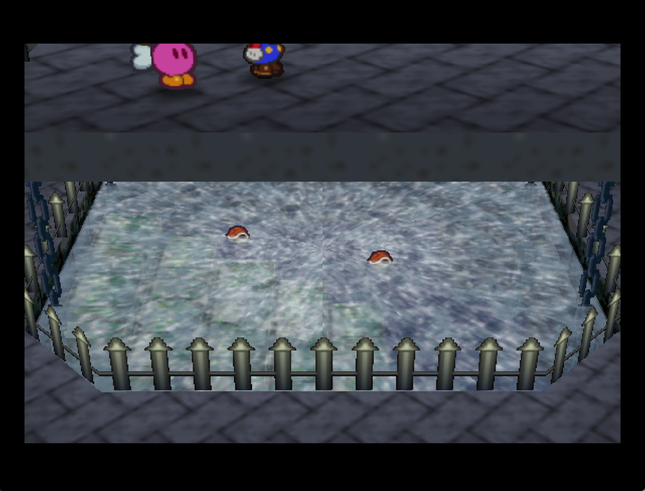 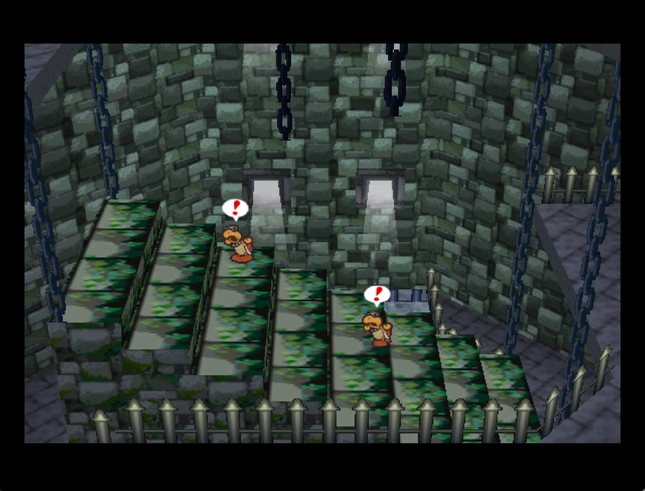 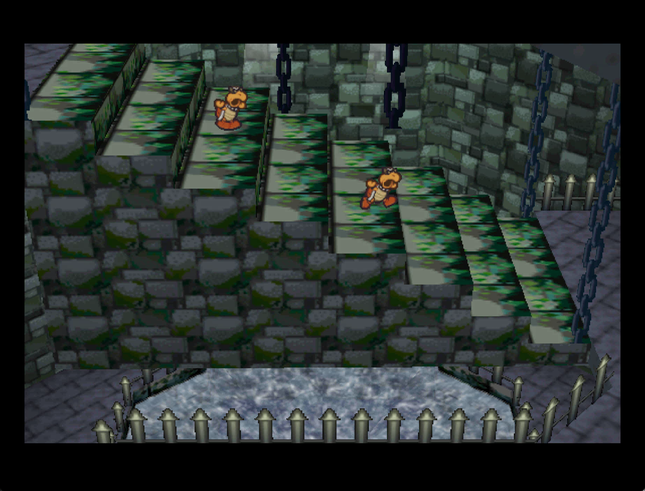 It turns out there was a MASSIVE staircase hidden in that pool! We�ll have to get by those Koopas before we can climb it, though.  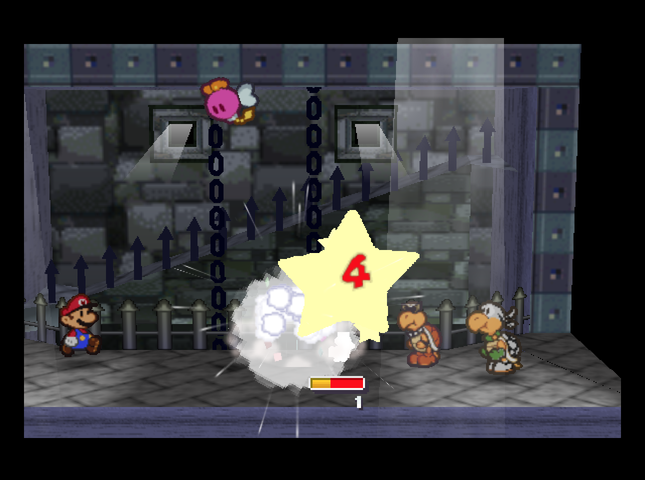 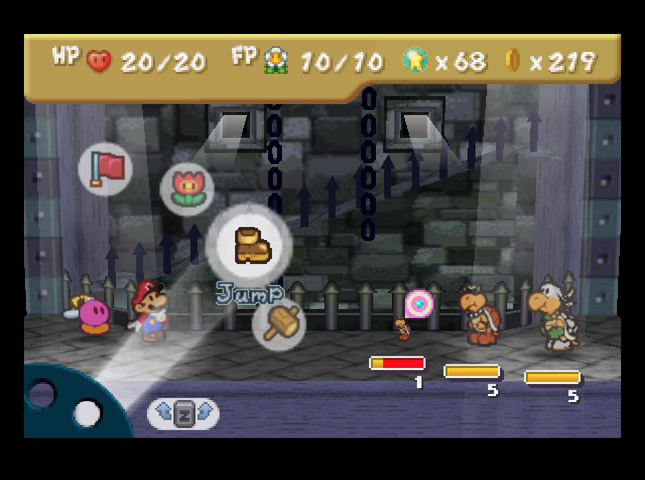 It�s hard to pull off, but Bombette can First Strike enemies if you get her next to them. Not only does this heavily damage the frontmost enemy (the Koopa) - here, it ended up Shrinking the Koopa, too! 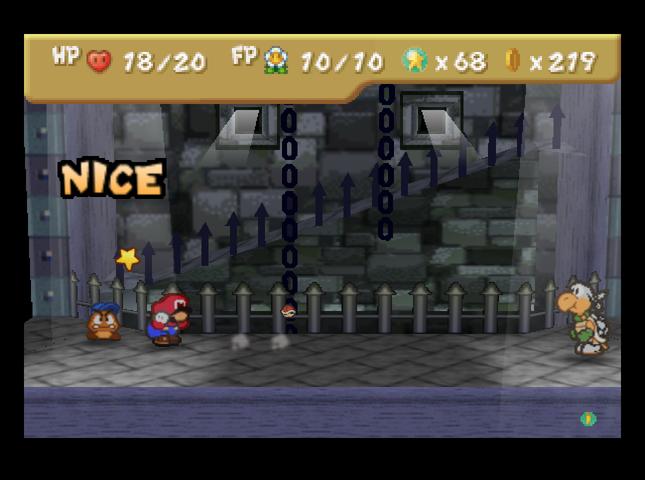 Since this Koopa is Shrunk, its Attack gets cut in half, going to 1. It turns out that any Bomb attack from Bombette has a chance to do this, if it doesn�t KO the enemy first. This is a new addition to Master Quest. 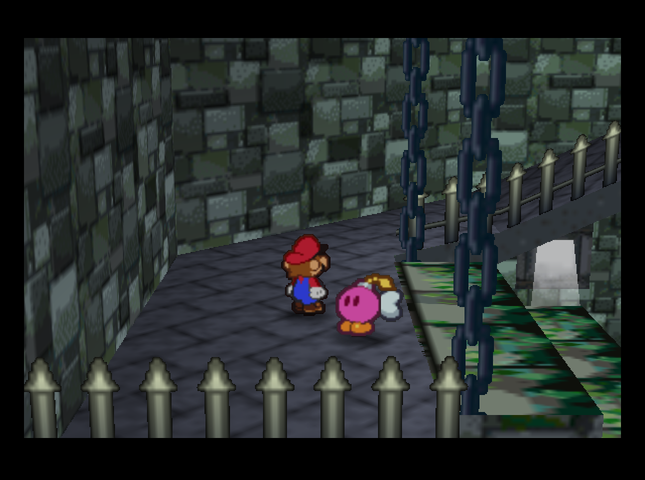 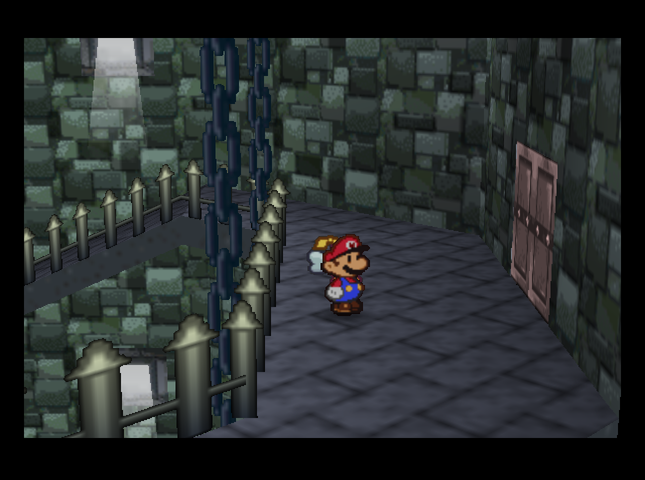 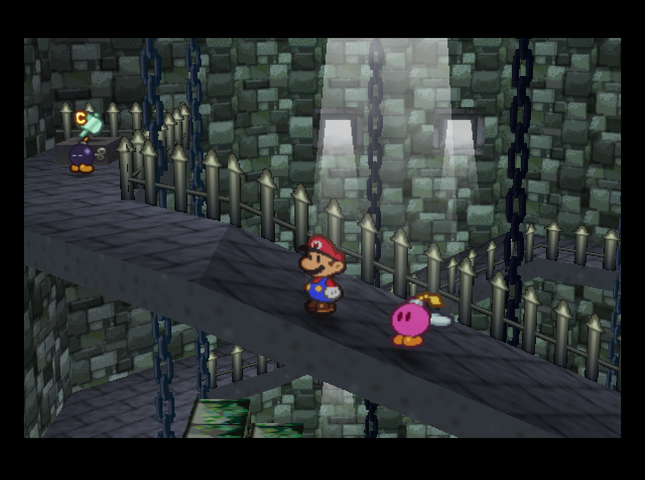 At the top of the big staircase is another spiraling ramp. There�s a door a little ways up. Past that is a Ba-badge guarded by a Bob-omb. 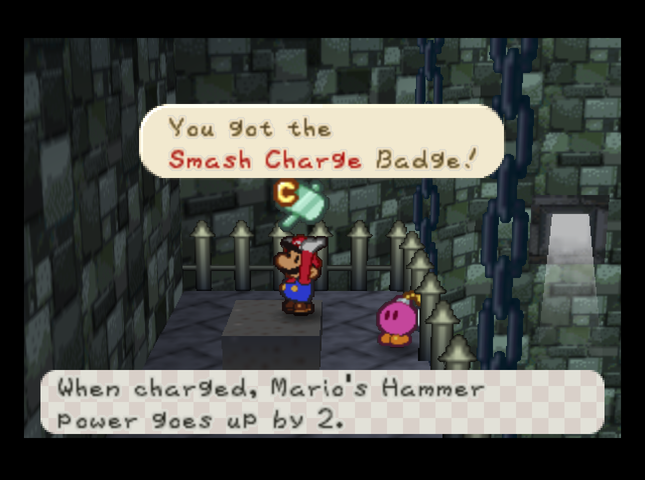 The badge is Smash Charge, which lets Mario charge up his Hammer attack to add +2 damage to the next hit. He can do this repeatedly! 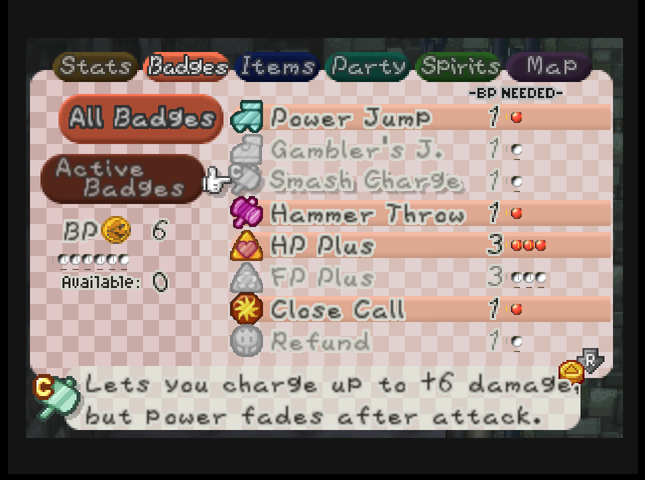 Unlike vanilla Paper Mario, there�s a limit on the maximum level of charge: +6 added damage on any one Hammer attack. 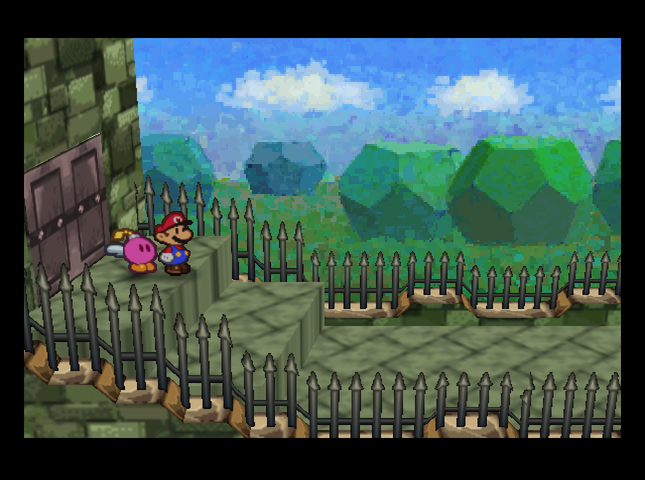 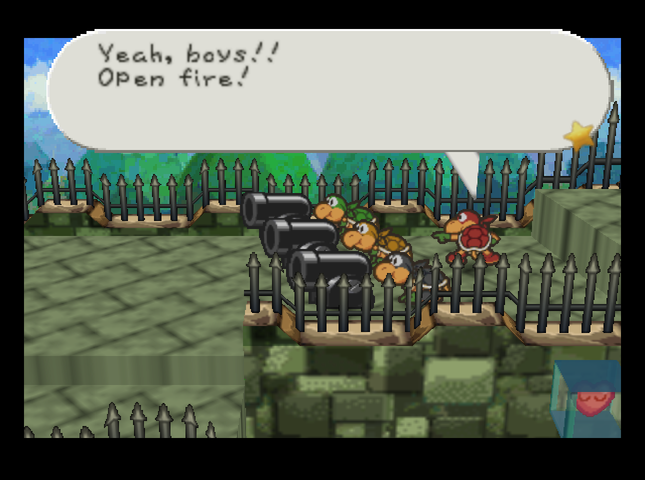 Music: Bill Blaster! Go Faster!  Through the door is a nice, open-air outdoor walkway� and the Koopa Bros are firing Bullet Bills at us!! Not only are the Bills fightable enemies, but if they hit us, it counts as a First Strike. 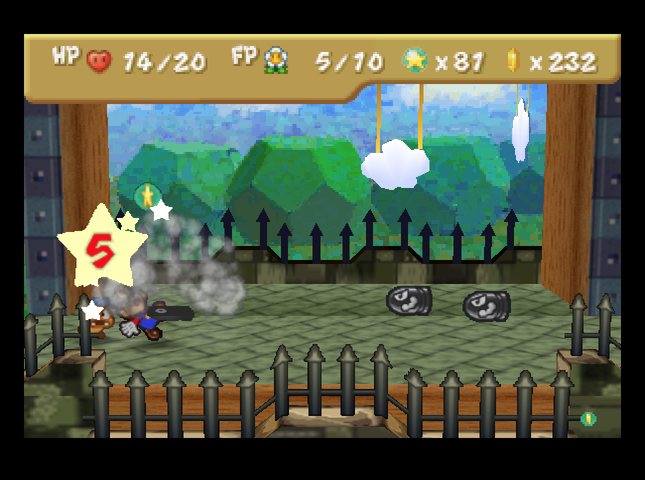 Which is unfortunate, because in Master Quest, Bullet Bills do 5 damage apiece! 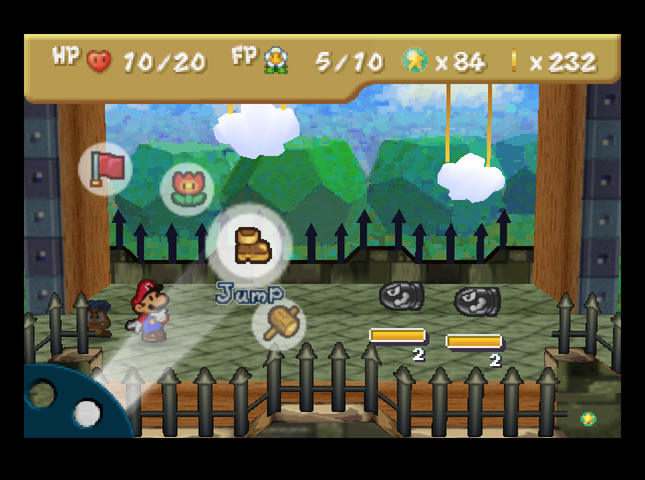 This is a Bullet Bill, a kamikaze attacker. If you don�t beat the Bullet Bills quickly, they�ll slam into you and explode. I�m serious, Mario! These guys will really make us pay if they manage to hit us! We have to beat �em before they get the chance to strike us. This is a Bullet Bill, a kamikaze attacker. If you don�t beat the Bullet Bills quickly, they�ll slam into you and explode. I�m serious, Mario! These guys will really make us pay if they manage to hit us! We have to beat �em before they get the chance to strike us.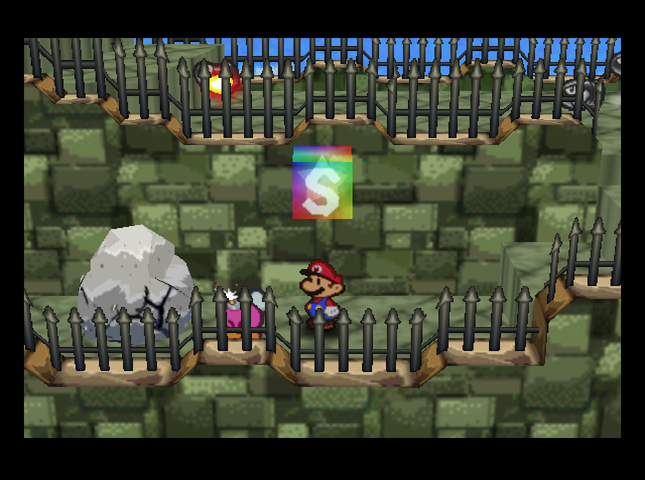 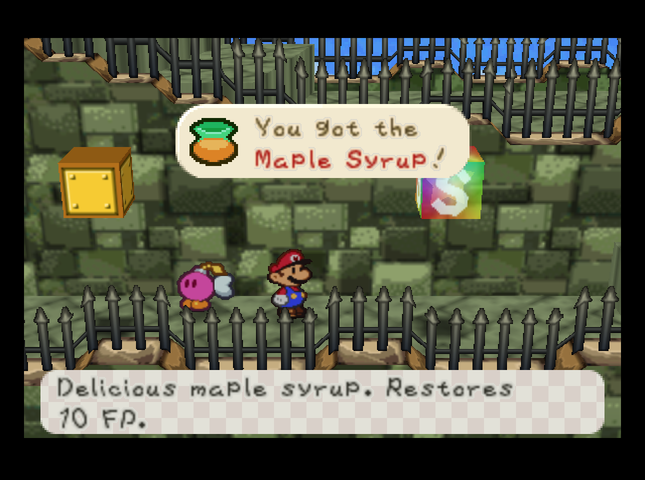 Fortunately, there�s a handy Save Block here. Bombette can blow up a cracked rock to let Mario get at a ? block with a Maple Syrup inside. 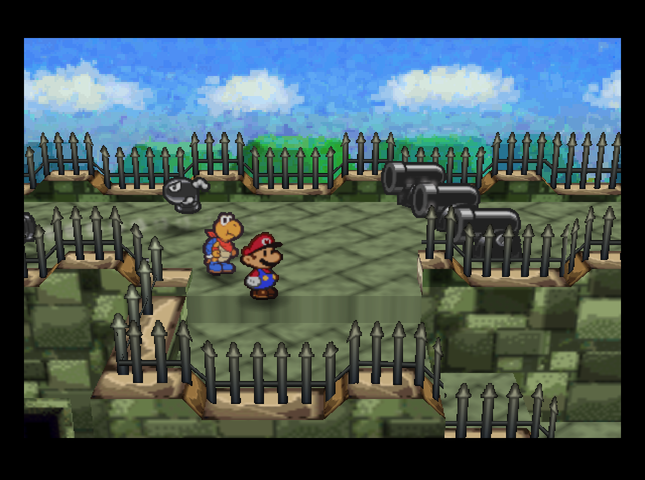 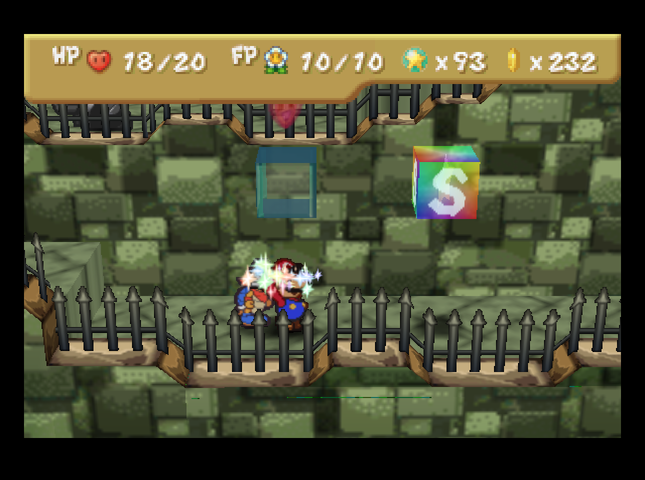 We dodge the Bullet Bills and enter another alcove at the opposite end of the walkway. This one has a Save Block and a Heart Block. We still need to beat the Bill Blasters to get to where the Koopa Bros. are, though.  Actually beating the Bill Blasters is going to pose a serious problem. They have 2 Defense (making our First Strike, above, bounce off). This means the only attacks that can hurt them are Power Shell from Kooper, Power Jump, Hammer Throw, and Bomb from Bombette. (In Paper Mario, Bill Blasters only had 1 Defense.) 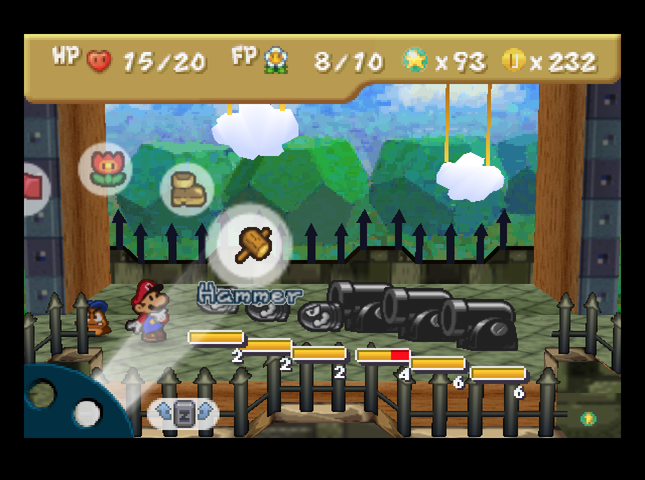 The Blasters have 6 HP, compared to 4 in the base game, so each is going to be trouble to take down. Power Jump makes a good dent, though. The cannons fire a Bullet Bill every other turn; the Bills must wait a turn before they can attack, which gives us time to clear them away. 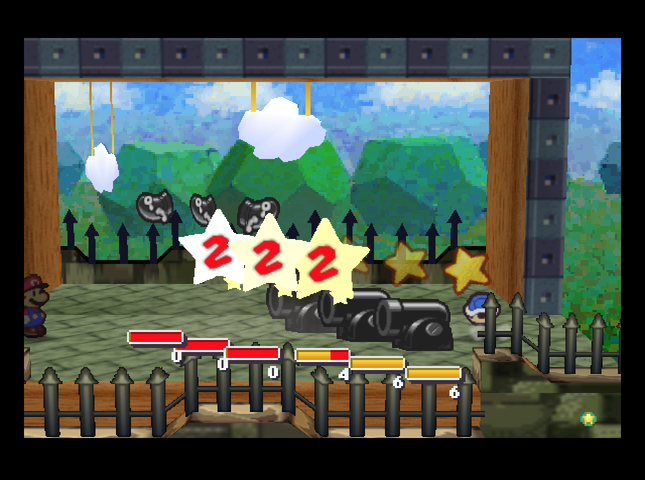 Power Shell can take out the Bullet Bills, but won�t hurt the Blasters.  Mario can keep whittling down the Blasters on the off turns with Power Jump, and Kooper with Shell Toss. Interestingly enough, we can target any of the Blasters with Shell Toss and Mario�s hammer; they are all considered to be the frontmost enemy, as long as no Bullet Bills are present. When Bullet Bills are present, Mario and Kooper can target any of the Bullet Bills at once, as they are all considered to be frontmost.   Once the first Bullet Blaster is taken care of, this miniboss is greatly defanged.  The remaining blasters will spit out two Bills a turn. Mario and Kooper can each take care of one, and the cannons sit inactive on the next turn. In fact, there�s an opportunity here for some Grade A, all-Mushroom-Kingdom cheese.  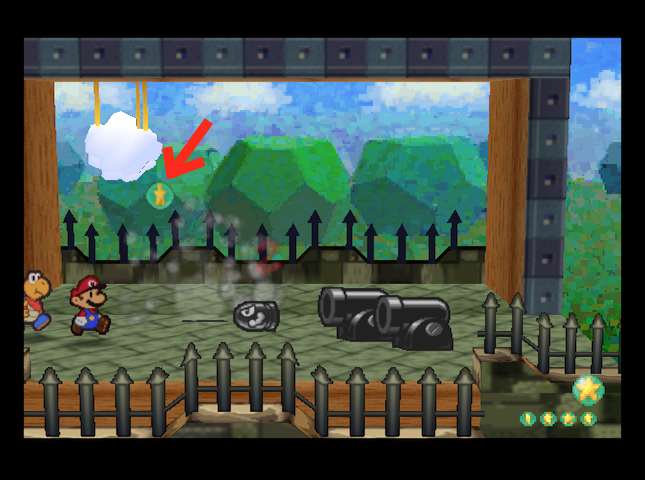 The secret is this: Because we�re only Level 4, each Bullet Bill gives us 1 Star Point when we kill it. The Blasters provide an unlimited supply of Bullet Bills, and we can do 1 damage to one Blaster in any given turn without spending FP (using Shell Toss). Each time we do that 1 damage, we have to kill 2 Bullet Bills first. So, if we merely refrain from using any more FP during the battle, and keep both Blasters alive as long as possible, we will have to fight 2*5*2 + 2 + 1 = 23 more Bullet Bills before the battle�s over! At 1 Star Point apiece. Who�s up for some grinding?  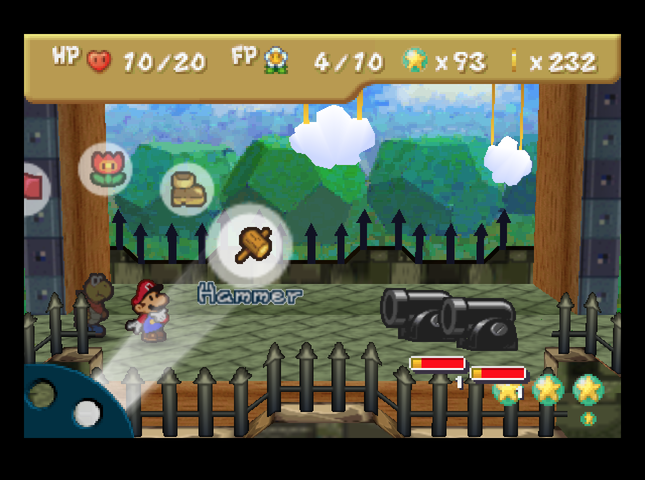 The two cannons are now down to 1 HP. At this point, it�d be proper to call it a day and finish the things off. But in Master Quest, we�re going to need every advantage we can get! The game can store up to 100 Star Points during a battle; any more will be discarded. Let�s get some more Star Points!  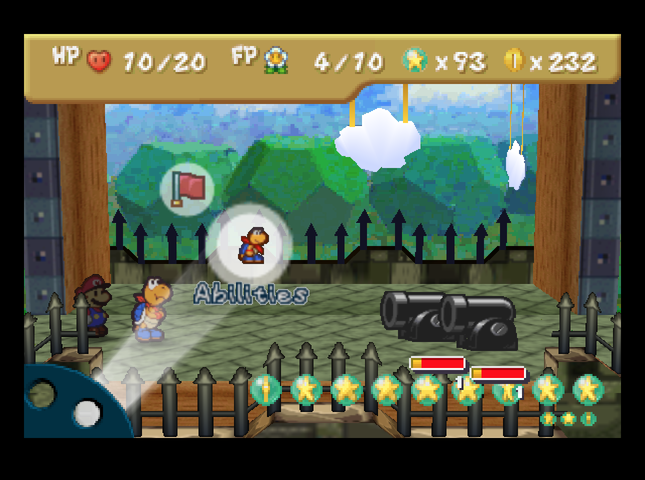 Now we just have to KO the cannons with Kooper and all is well. 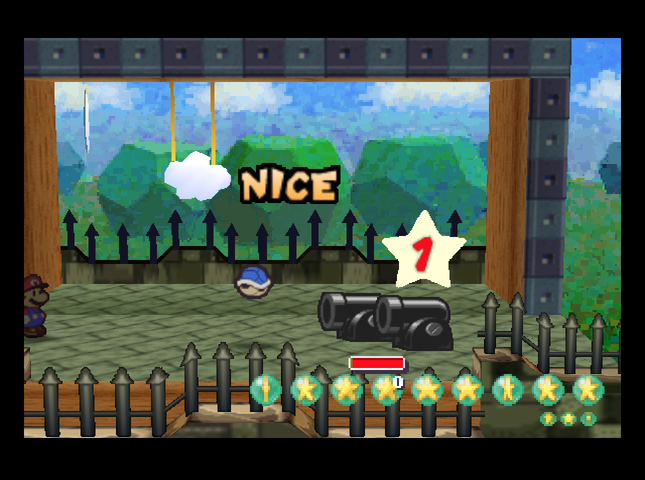 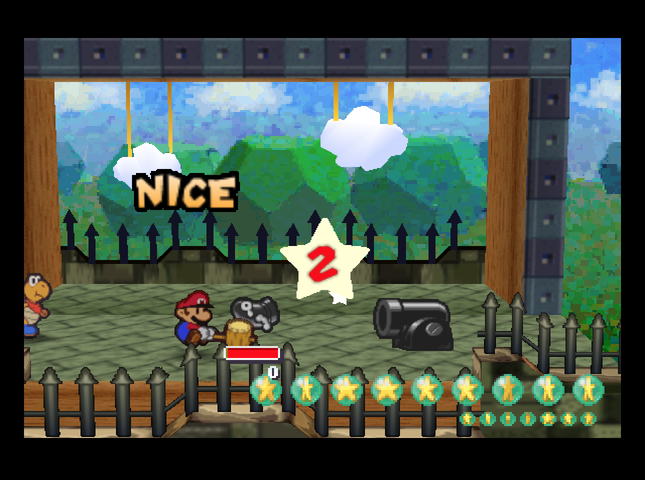 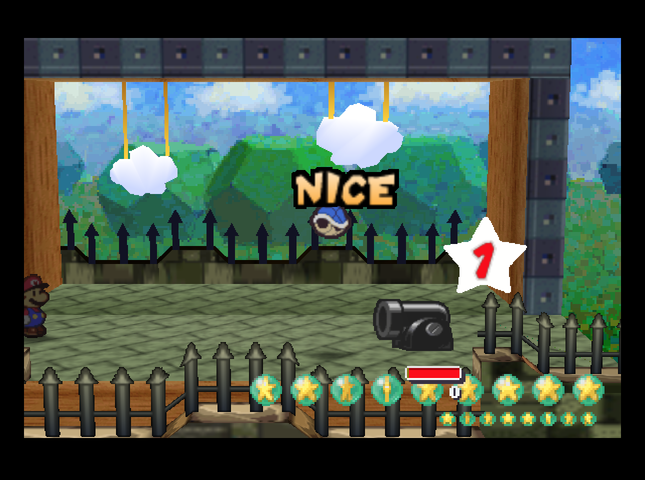   We get 100 Star Points and level up instantly. I�m choosing BP again - this�ll let me trade it for FP with FP Plus, or use it flexibly in other ways. 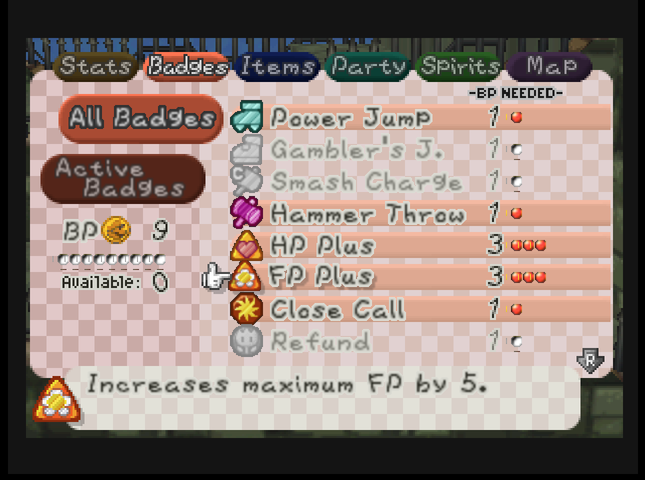 We equip the FP Plus badge. One last bit of cheese comes to mind: We�re at 93 Star Points already. Can we pick a few fights in the Fortress and get those last 7 SP to level up again before we face the Koopa Bros.? 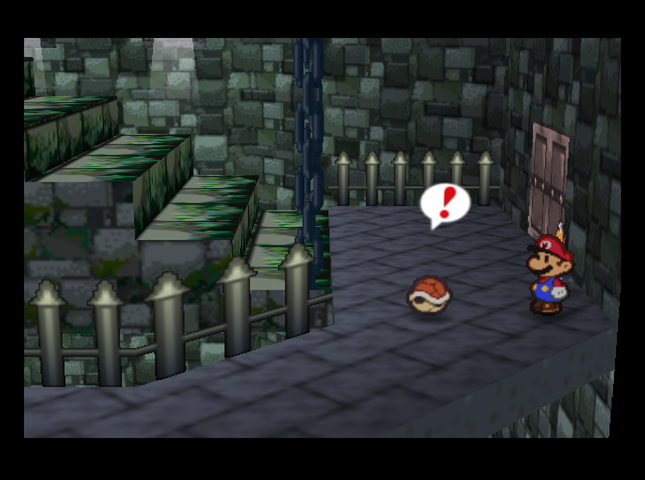 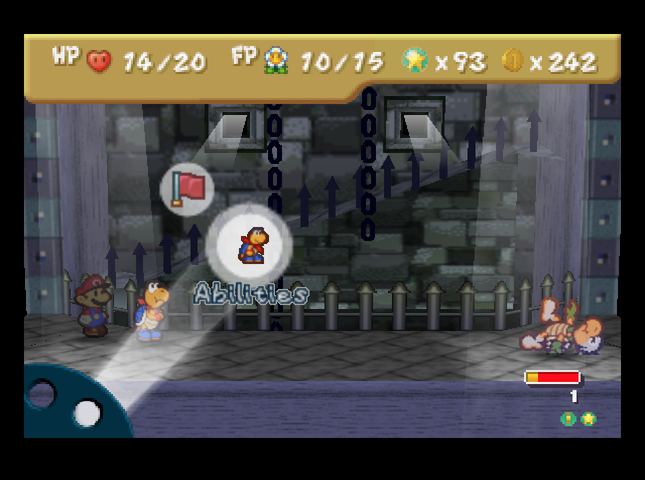 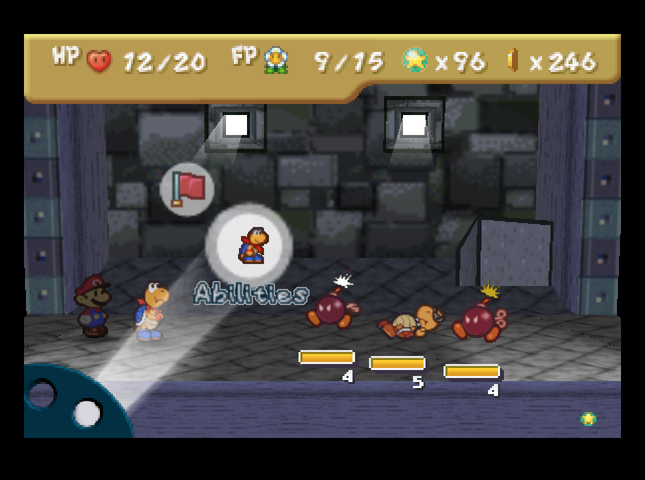 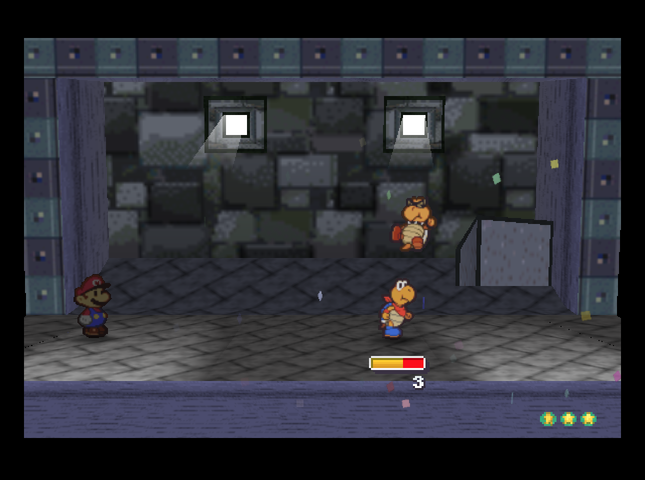 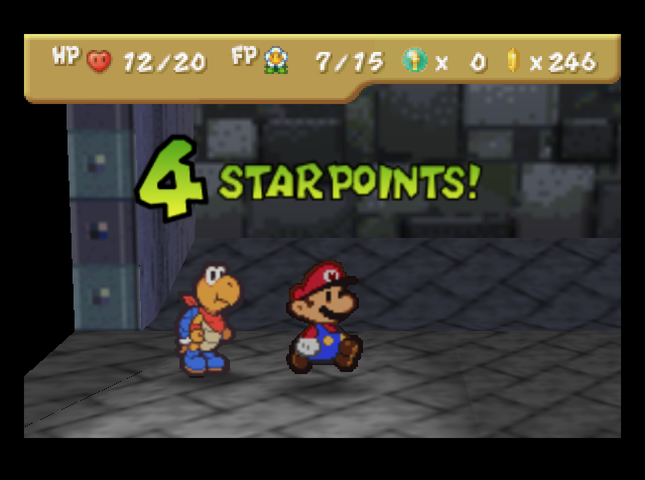 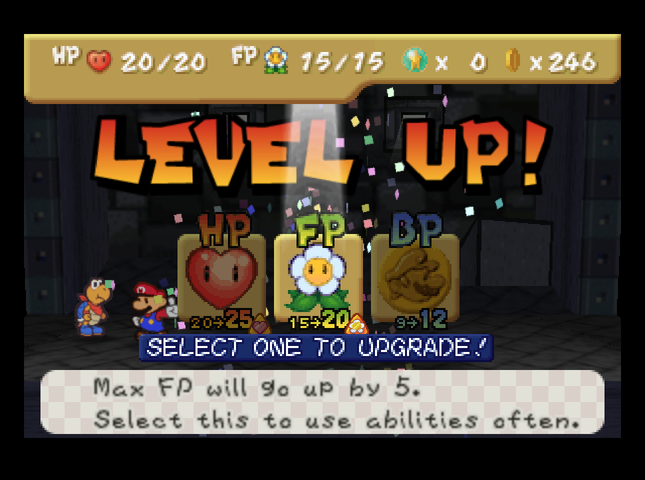 Looks like we can. I choose FP this time, to give us 15 natural FP. We�ll probably need to use a lot of it to do different strategies, given what the game�ll throw at us. 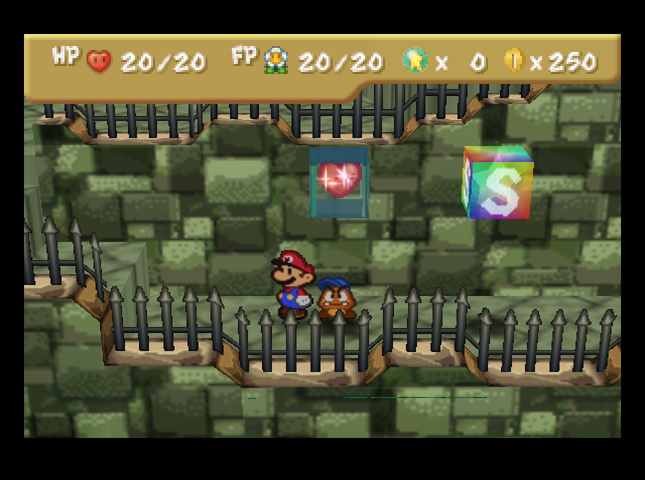 At this point, it�s back to the Heal and Save block by the outdoor walkway. Through the big door above Mario is the Koopa Bros.    I have 20 HP, 20 FP, a random assortment of items I brought along the way, a badge setup that includes Power Bounce and the new Smash Charge, it�s dark, and the Koopa Bros are wearing sunglasses. Let�s hit it.  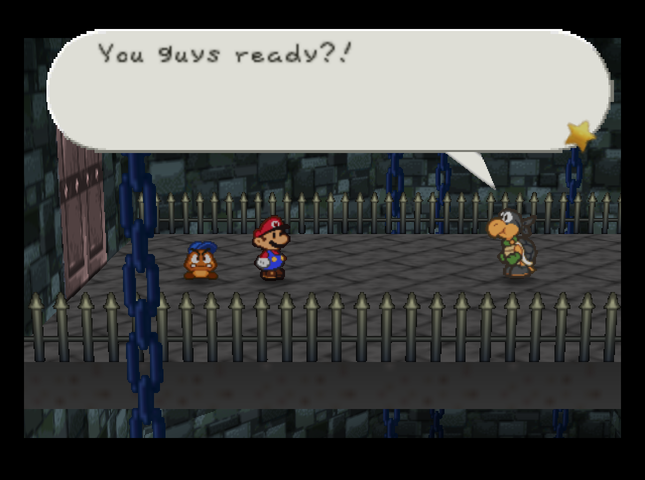  Hey, Black? What are you doing?! Hurry, man! Shake a leg! Hey, Black? What are you doing?! Hurry, man! Shake a leg! Ow! My shell! Get off! Ow! My shell! Get off! WHOA! Oh, for the love of� What are you doing, Yellow?! That doesn�t look cool at all? WHOA! Oh, for the love of� What are you doing, Yellow?! That doesn�t look cool at all? OK, hang on� OK! I�m ready, Red! Finally! Let�s do this! Remember to look cool, guys! OK, hang on� OK! I�m ready, Red! Finally! Let�s do this! Remember to look cool, guys! Mario�s just been standing here the whole time. And then� 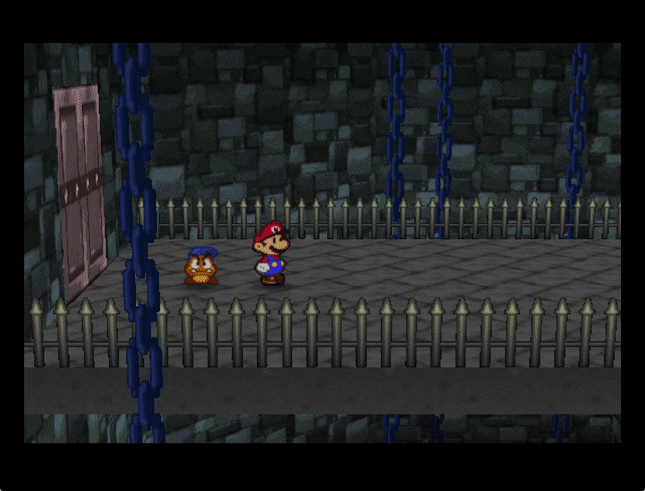 What the� is that Bowser??? It can�t be, can it? Music: Trojan Bowser  Gah ha ha ha!!!! I�ve been waiting for you, Mario! Bwa ha ha ha har! The strongest! And the coolest! Behold the glory that is the great Evil King Bowser!! It�s time for me to beat these foolish ideas out of you! Saving Peach? Please!! Watch this and weep!! Gah ha ha ha!!!! I�ve been waiting for you, Mario! Bwa ha ha ha har! The strongest! And the coolest! Behold the glory that is the great Evil King Bowser!! It�s time for me to beat these foolish ideas out of you! Saving Peach? Please!! Watch this and weep!!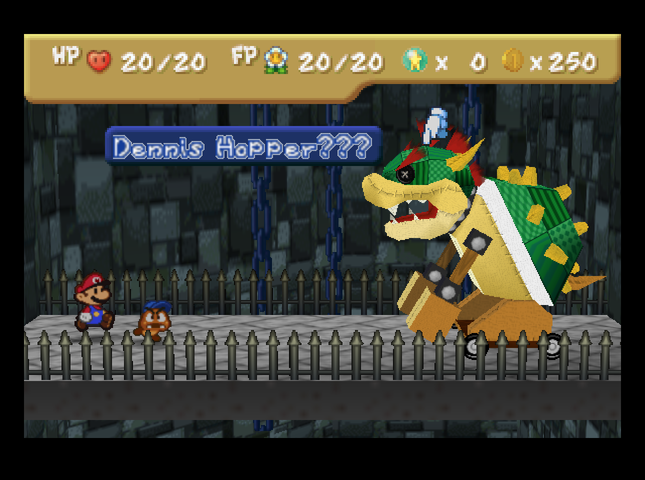 (The name change was effected by the Master Quest crew. For those who don�t get the joke: Dennis Hopper played King Koopa in the Mario Bros. movie. I had to go to Wikipedia to figure this one out.) Bowser�? But he looks kind of � lame. I mean, he�s lame anyway, but� Does Bowser really look like this? I always imagined him looking, well, a lot scarier. 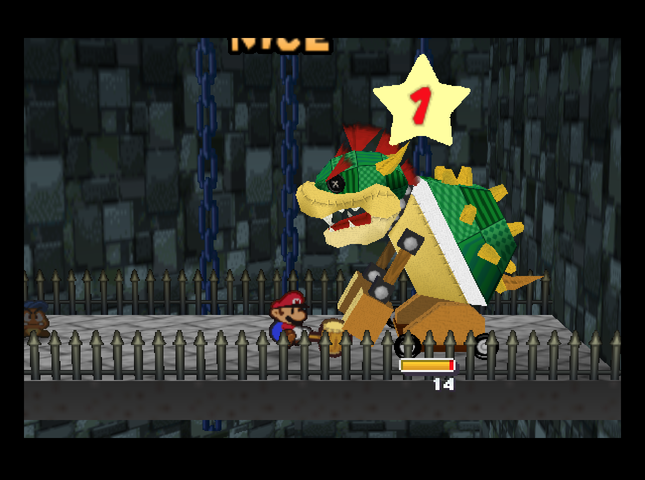 Mecha-Bowser has 15 HP, and a Defense of 1. Ga ha ha ha!! I am invincible! You are powerless before me!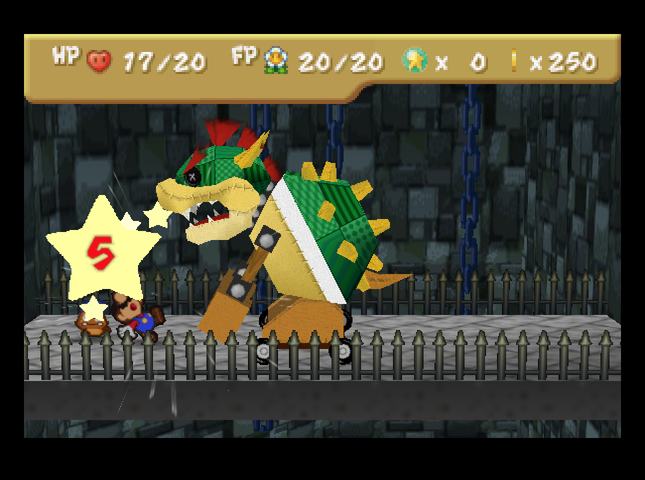 Unfortunately, his Attack has been beefed up compared to Paper Mario. There, he did only 1 damage per hit. Here, well� it�s 5! 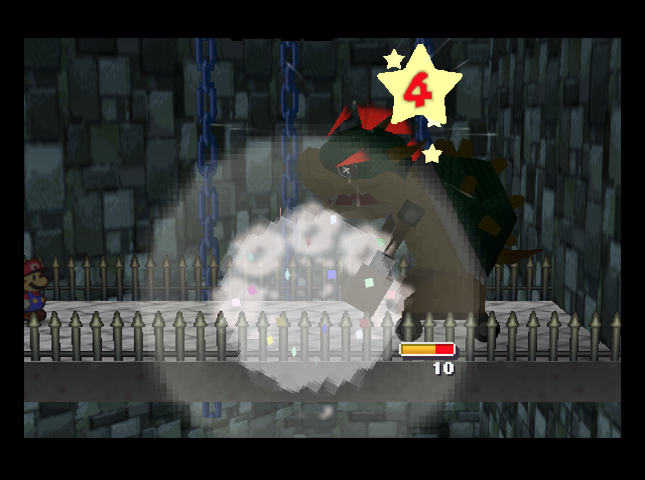 We need to take out Mecha-Bowser as fast as possible, so Bombette gets on the job. What�s the matter with you?! This isn�t even funny! You can�t even touch me?!Are the Bros reading from a script in there? Or are they just trying to laugh off the bomb damage?  (Heh heh heh� Mario really thinks that we�re King Bowser!) (Shhhh!!! Mario�ll hear us!) (Heh heh heh� Mario really thinks that we�re King Bowser!) (Shhhh!!! Mario�ll hear us!)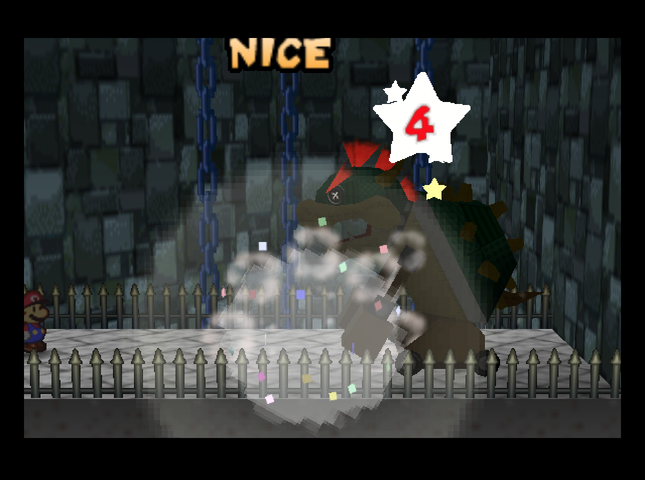 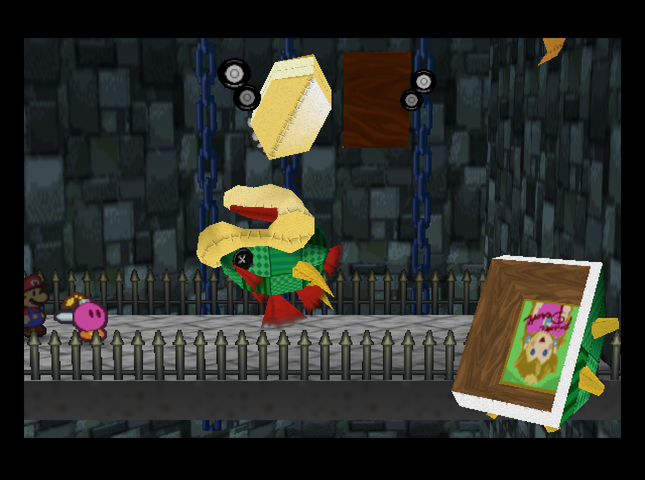 With only a little more pounding, Mecha-Bowser falls apart. The Koopa Bros.� signed picture of Princess Peach (the true source of their fighting spirit) falls down below! But the Koopa Bros. aren�t done yet. Music: Attack of the Koopa Bros! 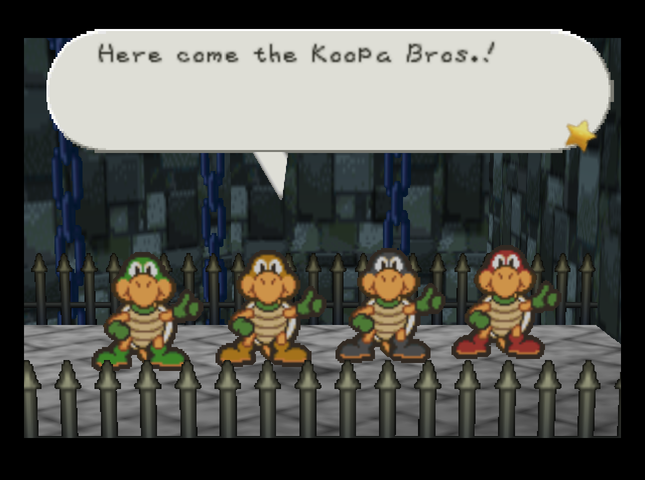 OK, Mario, have a taste of THIS! OK, Mario, have a taste of THIS!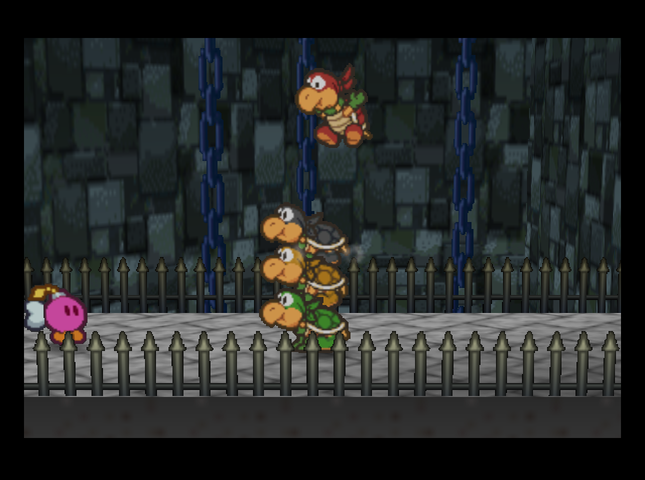 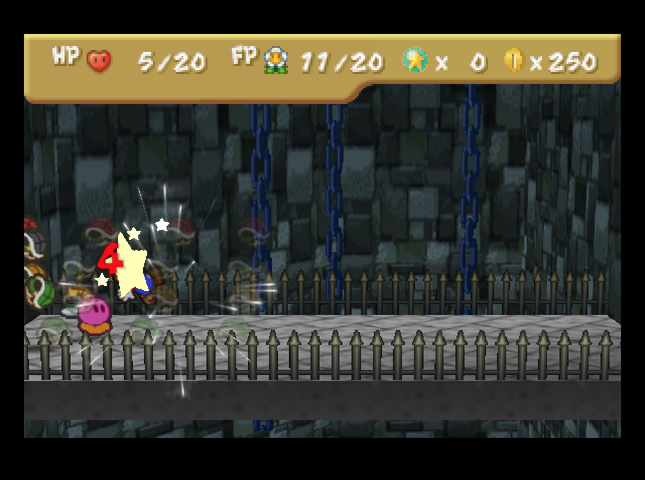 The Koopa Bros launch into their special tower attack. The tower does 1 damage for each Koopa on board.   Normally, it takes two attacks to unseat the Koopa Tower. The first makes it unstable, and the second tips it over. With Bombette, we can take a bit of a shortcut. 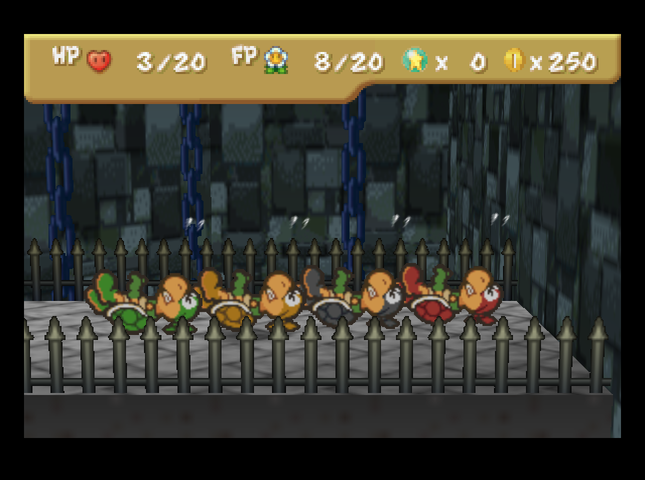 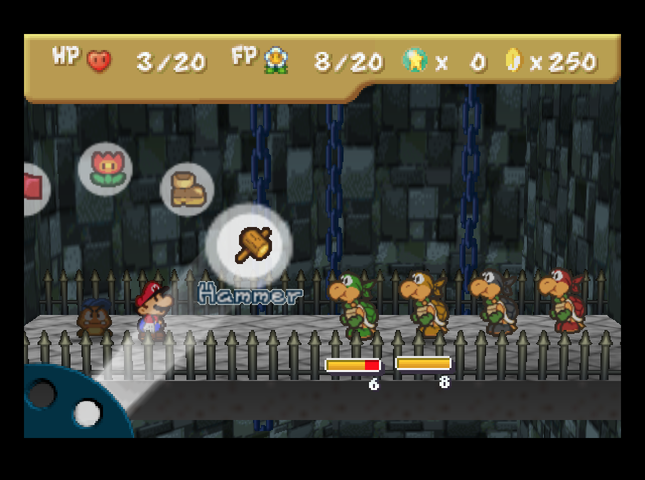 By the time the Koopa Bros. have gotten up, we�ve been able to Tattle two of them. The Bros all have 8 HP, except for Black Ninjakoopa, who has 6. (They all had 5 HP in the vanilla game.) 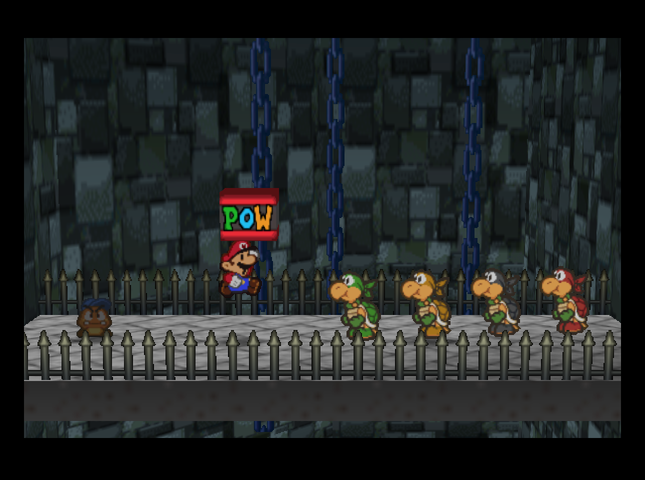 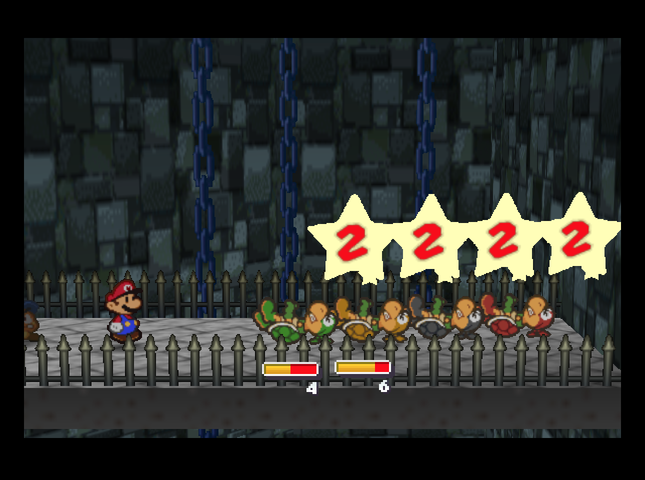 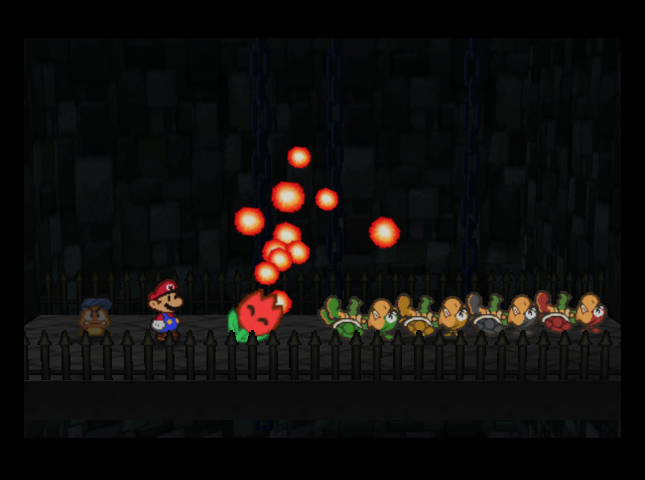 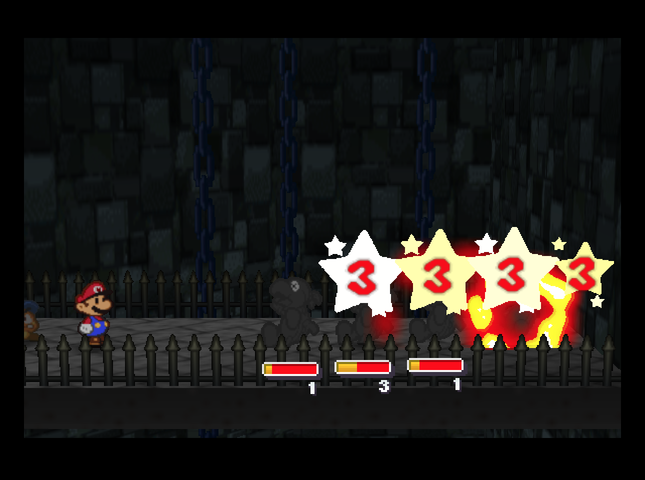 We use a POW block to keep them down, and a Fire Flower to get them close to KO. 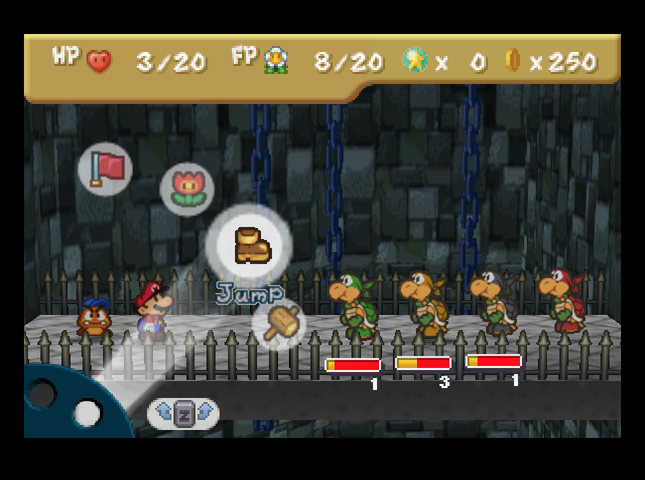  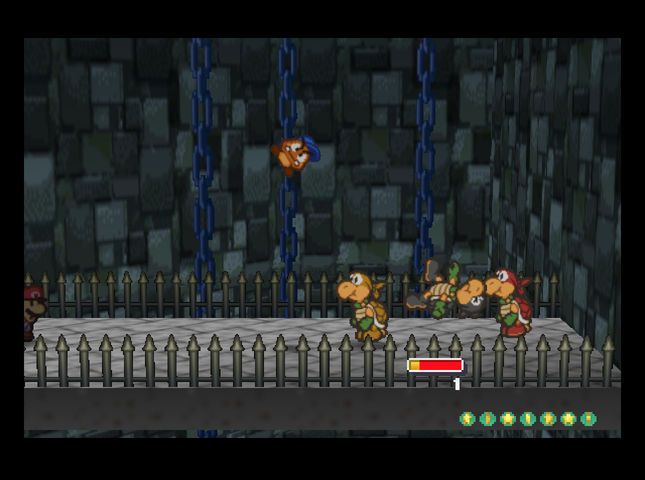 Green Ninjakoopa goes down as Mario jumps on him, but it turns out that Black Ninjakoopa has 1 Defense when flipped, unlike most Koopas. Goombario bounces off. 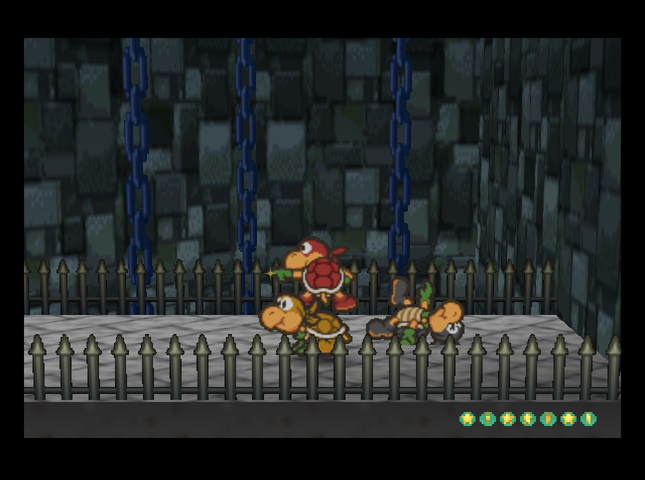  The Bros make their Tower again. It only does 2 Damage this time, �cause it�s a 2-Koopa enterprise.    It turns out Bombette�s Bomb isn�t the only way to one-hit-collapse the Tower. Using a Thunder Bolt will also do it! Good thing we picked one up on the way to the Fortress. This is only hinted at in a few fan-made walkthroughs, unless you count Donlon stunning the Bros with thunder back in Toad Town.   Mario uses the one Mushroom we brought to this fight (!) to get out of Peril, while Goombario KOs Yellow Ninjakoopa.  Red Ninjakoopa is still recovering from flipping, so Black Ninjakoopa tries to make a �Tower� of one. It fails pretty badly. 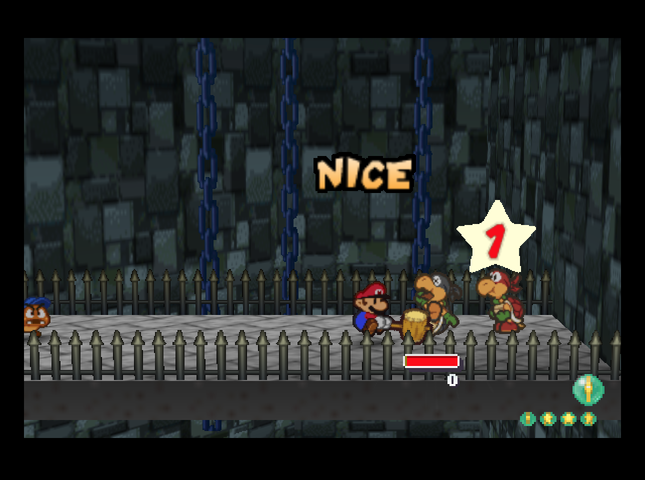 Black Ninjakoopa goes down to a well-placed hammer hit, and only Red is left. 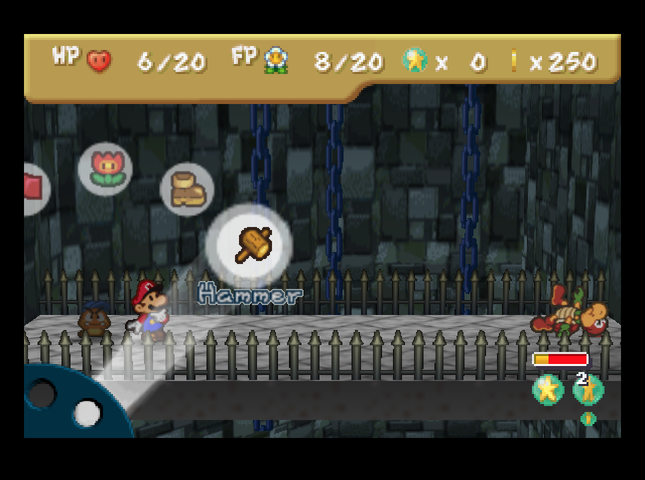 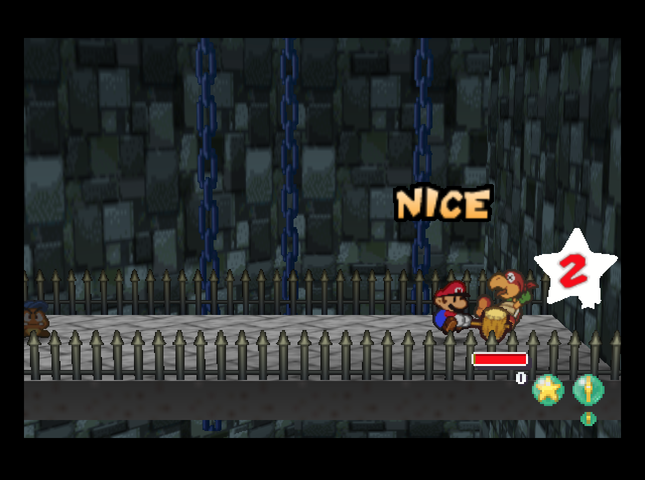 Mario prevails!  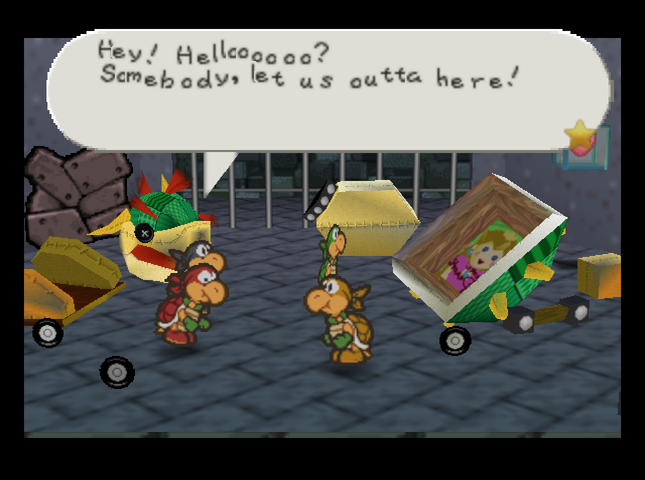 The Koopa Bros end up falling into their own cell, which the escaping Bob-ombs have thoughtfully repaired. 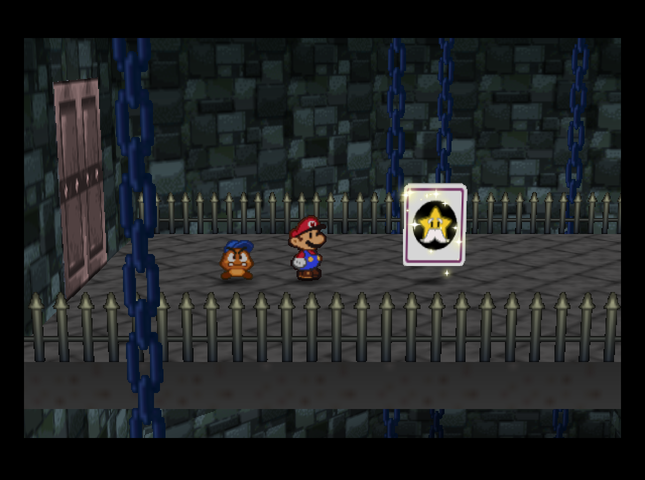 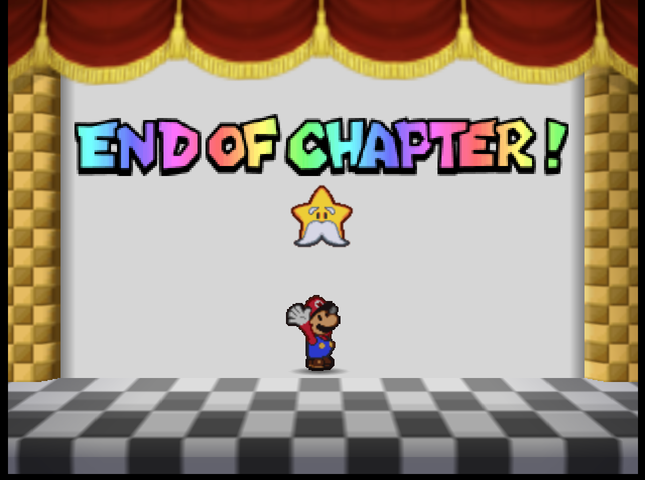 And we claim our first Star Spirit!!! Music: End of Chapter  And so Mario and friends beat the Koopa Bros. at their fortress and rescued the first Star Spirit. Still, six Star Spirits remain imprisoned, and they must save them as quickly as they can. The future of the Mushroom Kingdom, Star Haven and, of course, Princess Peach� ...lies in the hands of Mario� and his new friends. Their adventure has just begun. And so Mario and friends beat the Koopa Bros. at their fortress and rescued the first Star Spirit. Still, six Star Spirits remain imprisoned, and they must save them as quickly as they can. The future of the Mushroom Kingdom, Star Haven and, of course, Princess Peach� ...lies in the hands of Mario� and his new friends. Their adventure has just begun.Badges: 11/89 (New: FP Plus, Refund, Smash Charge) Star Pieces: 16/180 Chuck Quizmo�s Quiz Questions: 6/64? Game Overs: None� somehow! SUMMARY OF CHANGES FROM MAIN GAME (in this installment) � Bombette�s explosions can Shrink enemies. � Smash Charge has +6 damage boost limit. � Bullet Bills now extremely explosive. (+3 Attack) � Bill Blasters now extremely hard to kill. (+2 HP, +1 Defense, possibly now immune to fire attacks but I�m not sure if they were that way originally or not. They also start the battle with a single Bullet Bill in front of them now.) The Bill Blaster cheese strategy to get 100 SP is not unique to Master Quest. It worked in the main game, too, as long as you fought the Bill Blasters at Level 4 or lower. � Mecha-Bowser actually kinda terrifying. (+5 HP, +4 Attack) � Koopa Bros. have mastered the art of ninja stamina. (+3 HP for Red, Green, and Yellow. +1 HP for Black. Black keeps his 1 Defense even while flipped.) Next Time On Master Quest: We get a message from Peach, and visit a Pit. Quackles fucked around with this message at 22:58 on Aug 2, 2019 |
|
#
¿
Aug 1, 2019 08:05
|
|
|
oldskool posted:Considering all the items you just used, it looks like bosses are a good time to equip that Refund badge to rake in some extra spending money before ending a chapter. Hopefully it's not balanced such that it's required... I think I'll do that in future chapters, if I have the BP. I went into the Koopa Bros. battle with Smash Charge instead and never actually used it... ...but then again, I was expecting to get KO'd by the Koopa Bros, and that I'd try again with a proper equipment and badge setup after I saw what they did. Winning on my first try was not expected, but pretty gratifying.
|
|
#
¿
Aug 1, 2019 22:29
|
|
|
Heads up! I've added a Badge List below the OP of this thread! It lists all the badges we've found and any changes or additions. Once we meet Tayce T. the cook, and get into the Pit of 100 Trials, I'll include reference lists on those in that post as well. Badge, Recipe, and Pit List
|
|
#
¿
Aug 2, 2019 02:18
|
|
|
loving love Fiona Apple posted:You should include musical links for the different overworld and battle themes. The Paper Mario soundtrack is really good and the Koopa Bros. theme is especially iconic. Not a bad idea! It'll take me a bit to backport links to past posts, but I'll post a link whenever we encounter a new outdoors theme, or there's a relevant battle theme.
|
|
#
¿
Aug 2, 2019 11:27
|
|
|
Jerry Manderbilt posted:just check out every now and then to see if any music you linked to gets nuked by youtube copyright bullshit I'll do my best. My current tactic looks like 'drawing from a channel whose videos have been around a long time'.
|
|
#
¿
Aug 3, 2019 01:14
|
|
|
Part 8 : Into The Pit #1 We begin with another interlude.  The Princess is pretty clearly on edge. Being shut up in your bedroom�ll do that to you*. *Unless you have an absorbing hobby, like making Let�s Plays.  But there are tons of guards just beyond your door� And it�s impossible for you to escape through the window� But there are tons of guards just beyond your door� And it�s impossible for you to escape through the window� A secret way out? That sounds promising. Let�s look for it.  Maybe there�s somewhere Peach can hide right after she exits her room!   Well, that was a bust. Twink wasn�t kidding about the guards, either. What about in the side alcove with the closet?   Nothing in there but numerous slightly different pink dresses. Hmmm� guess we should look around a bit more.  What�s this?  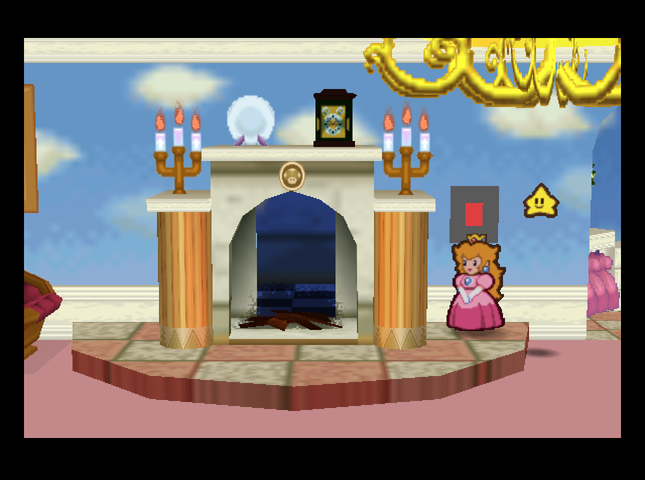 It�s the secret passage! 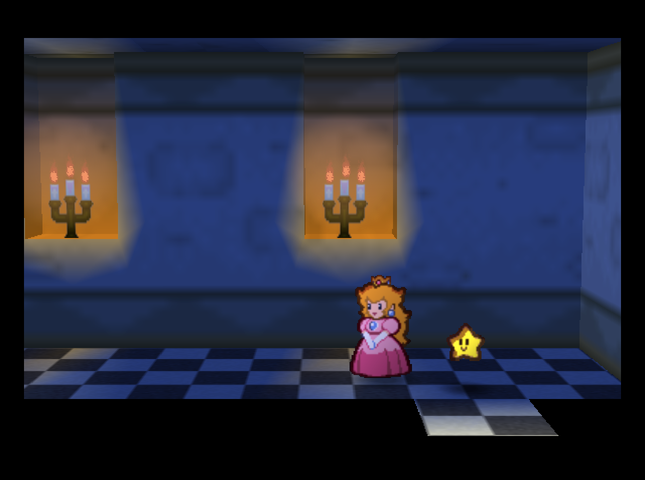 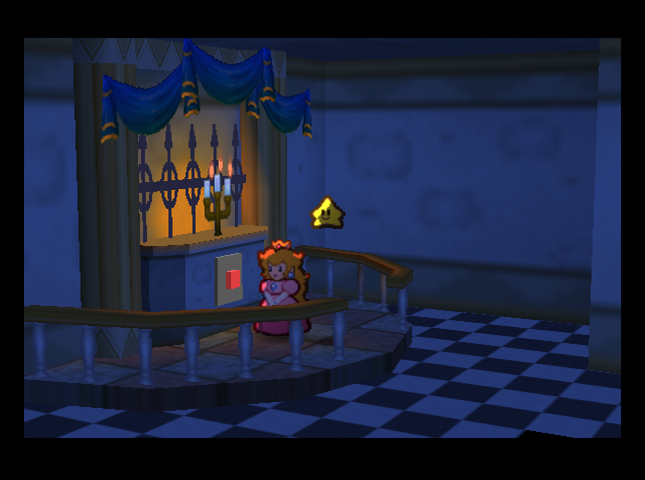 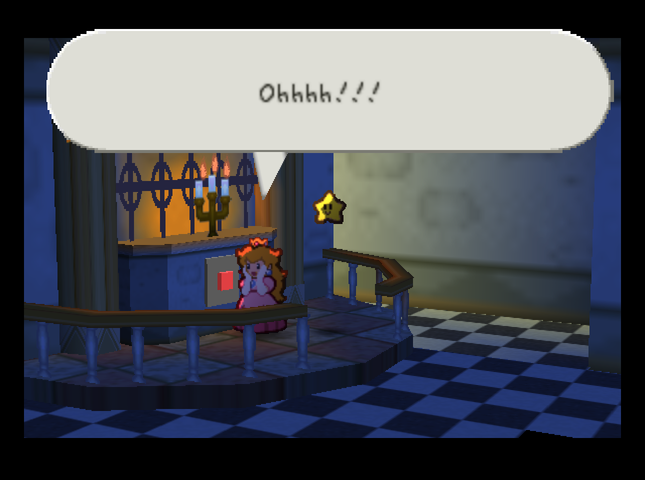 The exit makes a LOUD grinding noise as it spins around. I wonder where this comes out? 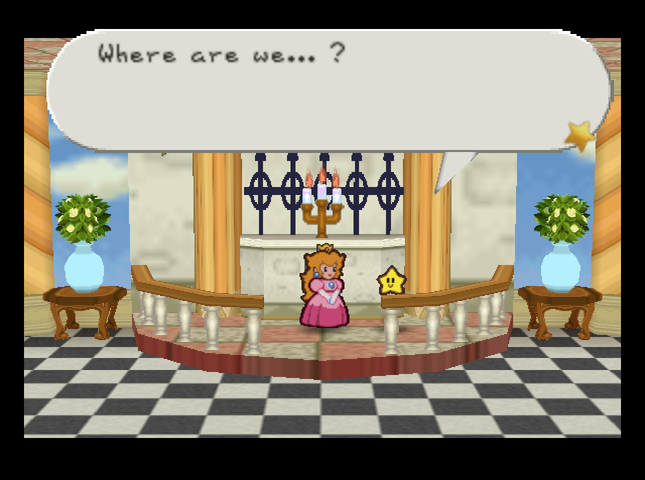 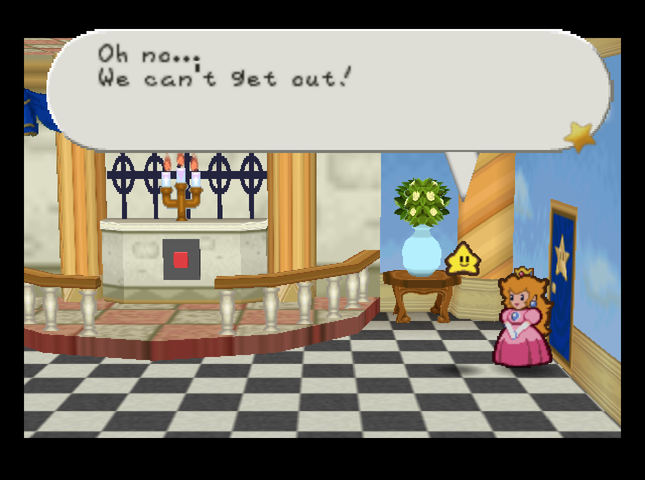 Another side room of the Castle, but the door�s locked. Not much we can do apart from seeing what else is in the room. 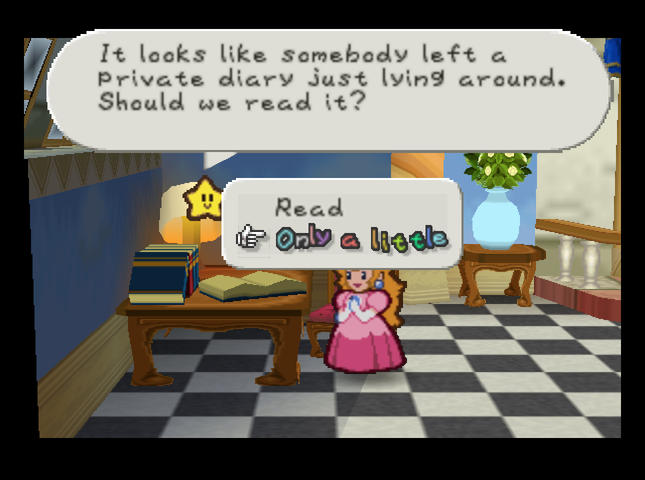 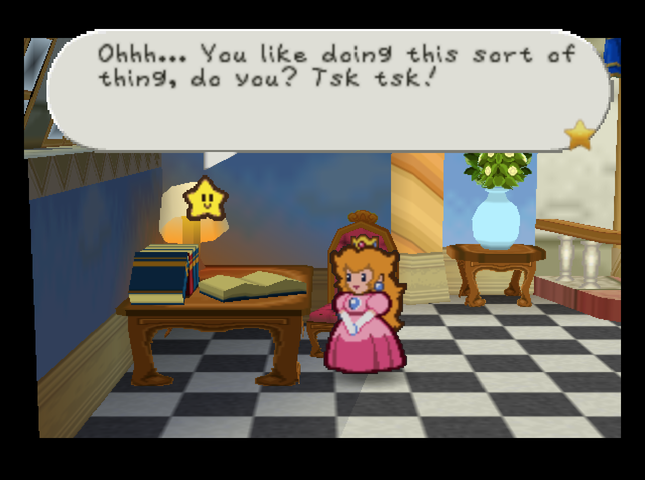 I have it on good authority that reading private diaries is one of Princess Peach�s favorite hobbies, actually - up there with tennis, go-karting, and fighting in Now what have we here�? 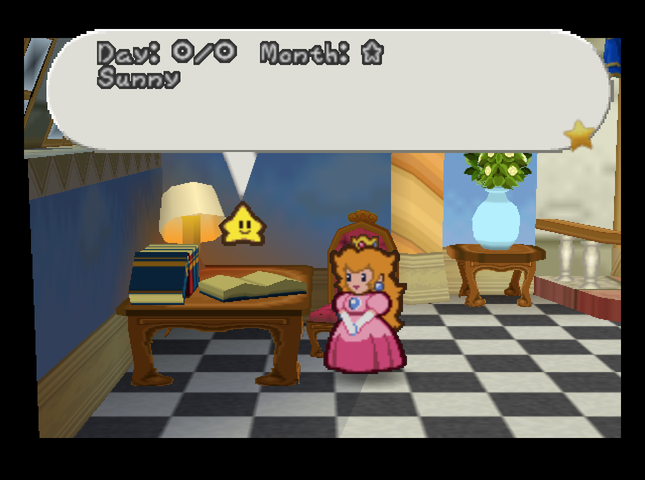 Today I went to Star Haven and stole the Star Rod. Now I�m invincible! Cool! I also captured those seven Star Spirits, so they won�t annoy me any more. It was a hard day�s work and I�m feeling pretty bushed. Dinner was nice but a bit bland. Today I went to Star Haven and stole the Star Rod. Now I�m invincible! Cool! I also captured those seven Star Spirits, so they won�t annoy me any more. It was a hard day�s work and I�m feeling pretty bushed. Dinner was nice but a bit bland.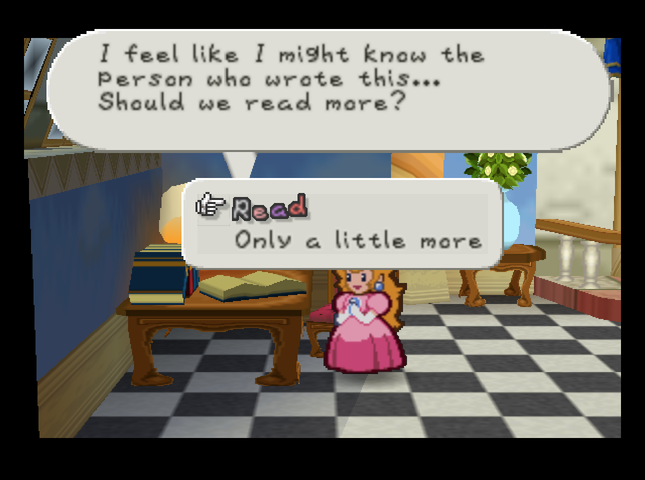 Yeah, we definitely need to keep reading. Day: ○ / ✖︎. Month: ☆. Cloudy then sunny. Today was great, diary! I used my castle to lift Princess Peach�s Castle way up into the sky! Then I barged into Peach�s castle and beat up Mario! Yeah! Unbelievable, I know! So fun! And there's more! After that, I kidnapped Princess Peach! I couldn't be happier, diary! I hope she likes me...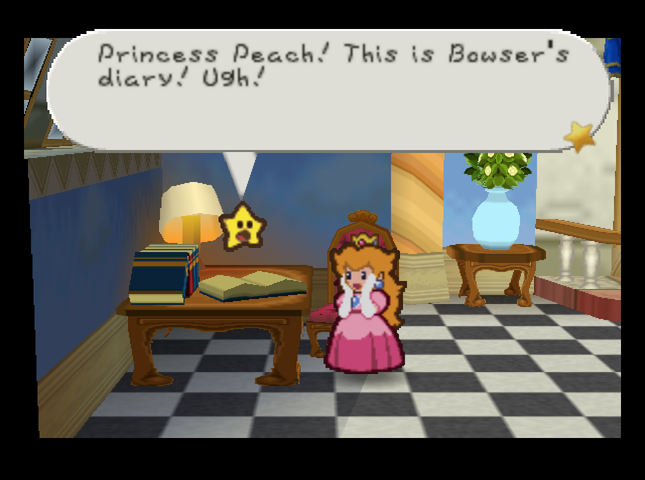 O-kay then. Now we�ve gotta read the rest!! Day: ✖︎ / ✖︎. Month: ☆. Sunny. Well, the Koopa Bros got beaten by Mario, diary. He even set free that stupid Star Spirit I kept there. I�m so mad I can barely write! �Ohh, I�m Mario, I�m so big and strong and good and helpful��It�s not a romance novel, Bowser! I hate him! But I�m not worried. There�s no way Mario can save the Star Spirit being held in Dry Dry Ruins. To do that, he�d have to solve the mystery of the sands and then find Dry Dry Ruins in Dry Dry Desert. How would he even know to go to the desert, anyway? So I�m not worried at all. In fact, I�m so calm I�m gonna go to bed now.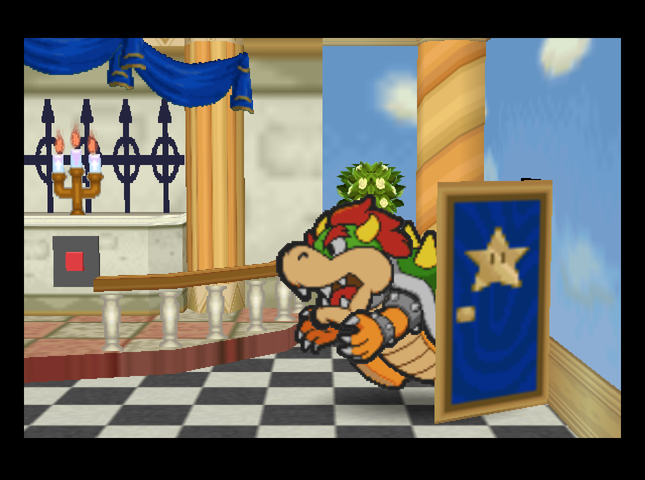 And he does! Oh no! I can�t believe I left my secret diary lying out! It would be so embarassing if someone read that thing�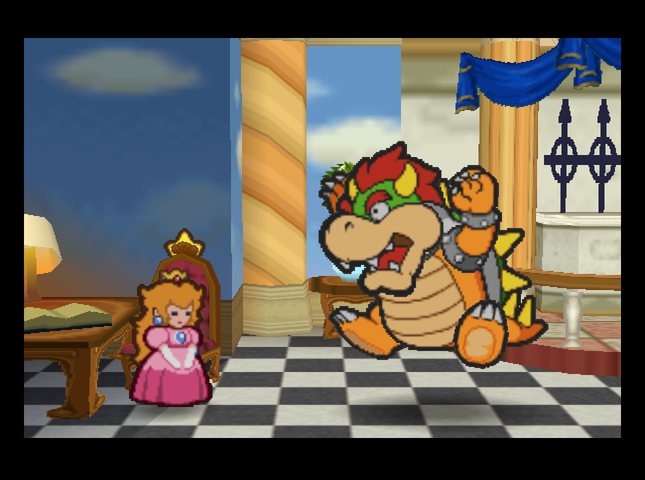 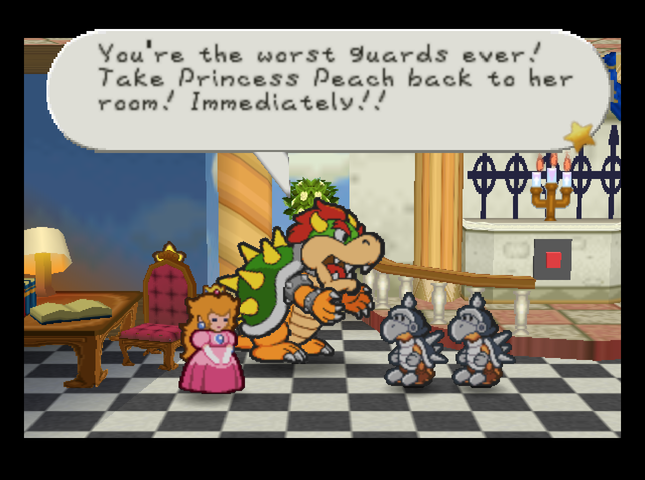 What happens next is kind of a no-brainer.  But Twink is on his way to tell Mario� 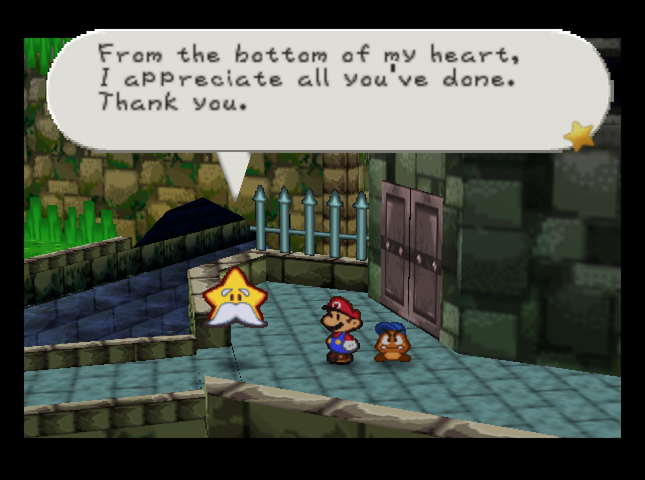 We return to Mario. 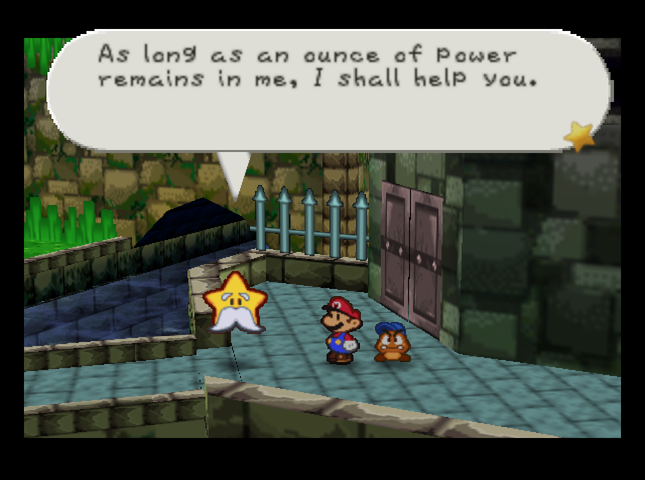 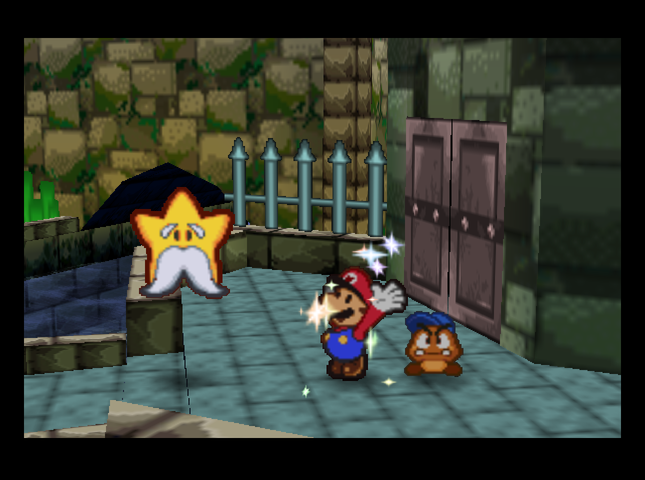 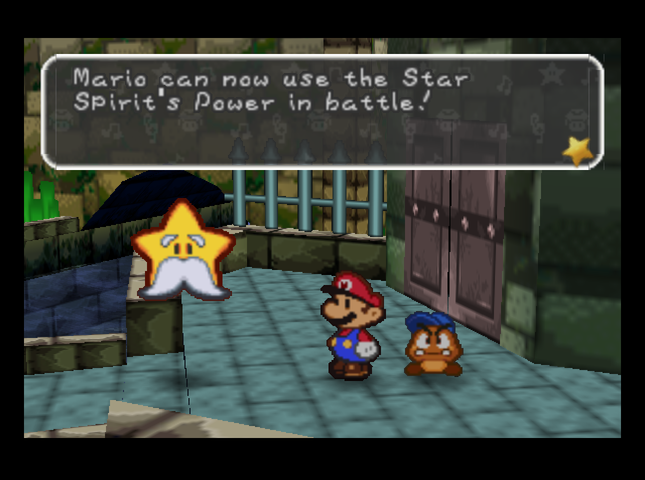 As a thank you for rescuing him, Eldstar grants us the ability to use Star Powers in battle! There�s a tutorial, but I can explain the powers later, when we use them.  If the seven of us come together, we�ll be able to bestow upon you a Star Power called the Star Beam. The Star Beam is the only thing that can counteract the Star Rod that Bowser wields. If the seven of us come together, we�ll be able to bestow upon you a Star Power called the Star Beam. The Star Beam is the only thing that can counteract the Star Rod that Bowser wields. 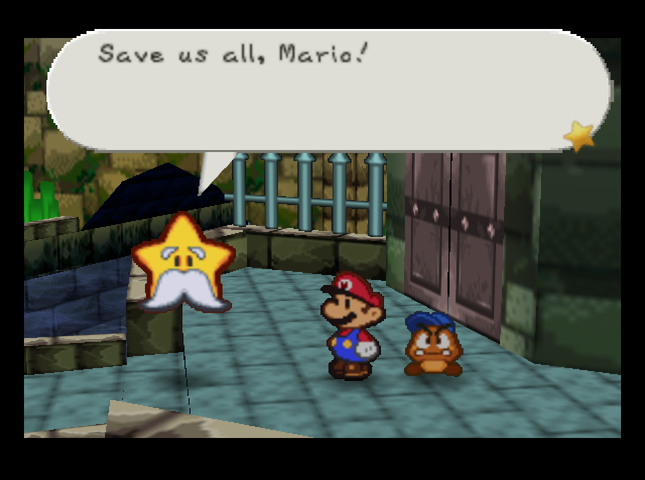 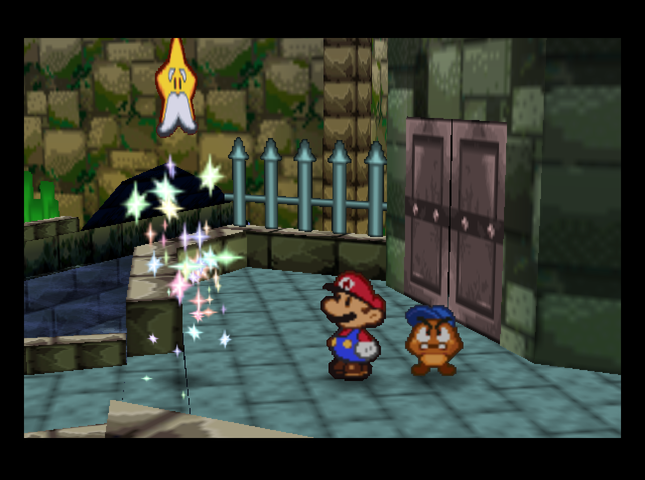 With Eldstar gone, it�s time to hit the road again. Before we head back to Toad Town, it�s time to make a stop at Koopa Village.  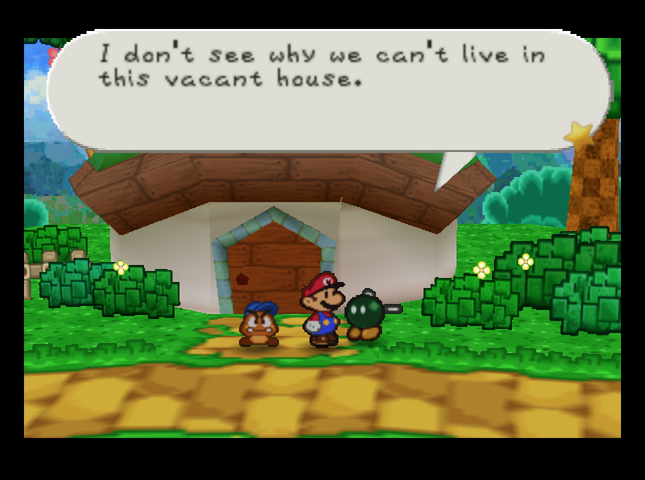 Kooper�s house appears to have been colonized by a family of Bob-ombs. 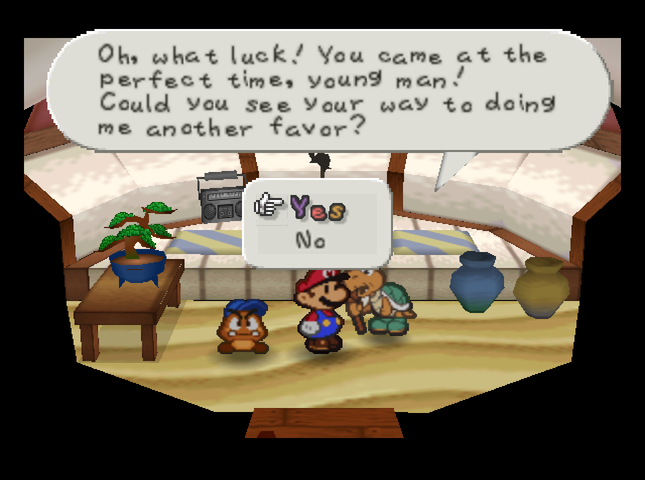 And Koopa Koot wants another favor! I don�t suppose you could go to Goomba Village and find Goompa, the grandfather? He still has a Tape I lent him a while back. Could you get it for me? I really want it. If you say �The Tape�, he�ll know what you�re talking about. Try to keep this whole thing under wraps, would you? You promise, young fella?This particular ask seems kinda sketchy. I�m starting to believe that Koopa Koot might have actually been in the mafia! 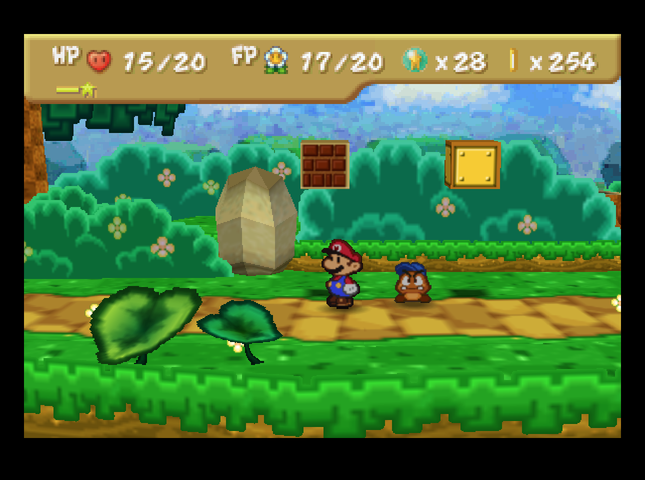 The trip back to Toad Town is uneventful. Until� Music: Jr. Troopa 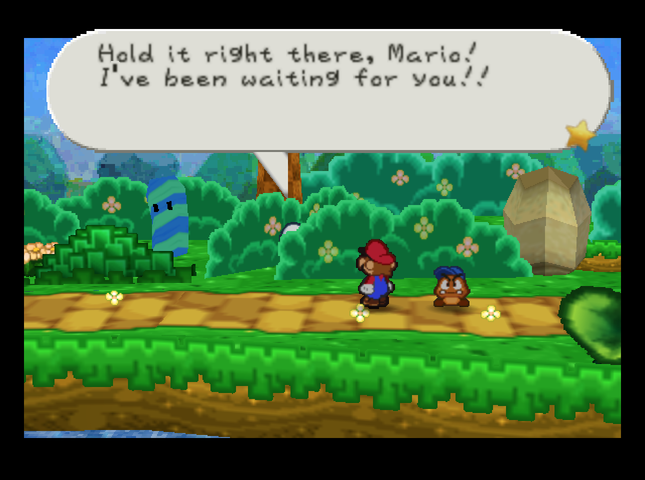 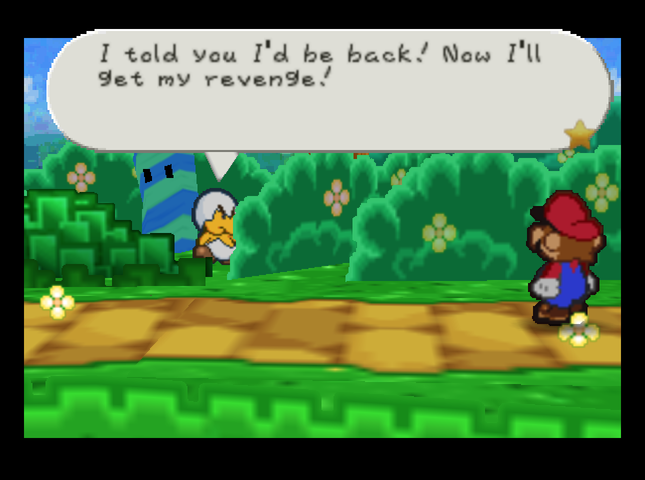  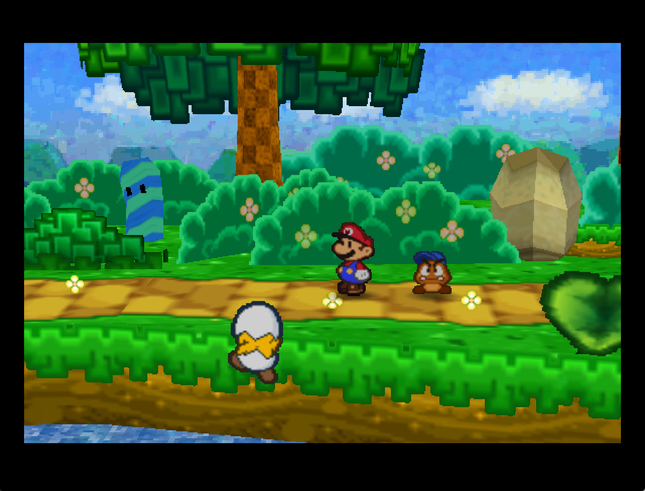 What the� it�s whats-his-name from before! Man, he�s got a bone to pick! Not that he picks it very well, mind you. 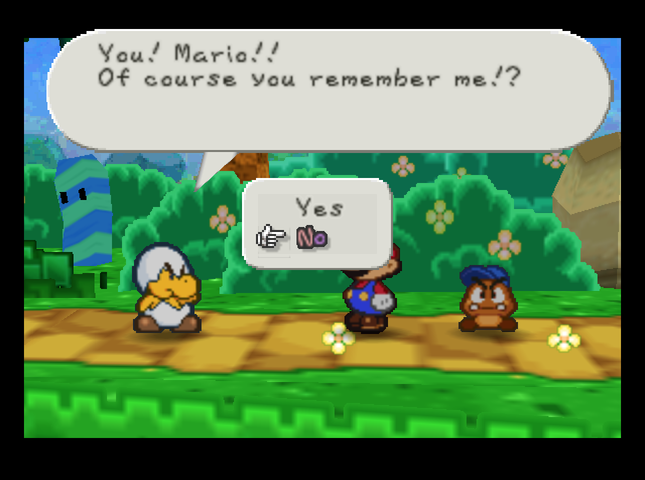 For the sake of comedy, we are going to say no. 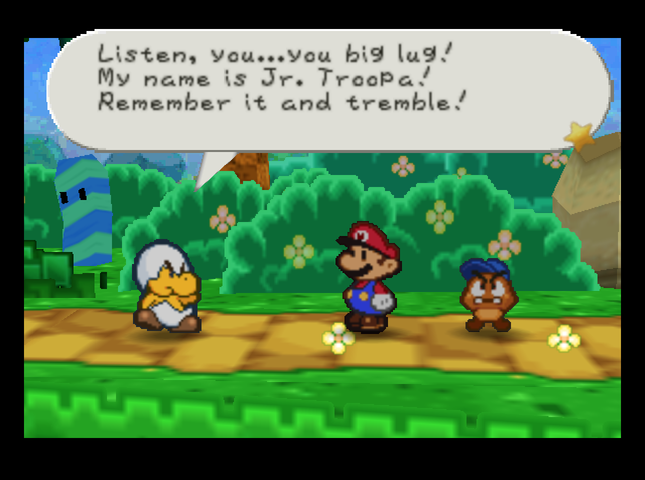 �My name is Jr. Troopa. You hammered my block. Prepare to die!� Music: Jr. Troopa Battle  Get ready to hurt, Mario! I�m gonna show you a new special skill I just picked up! Get ready to hurt, Mario! I�m gonna show you a new special skill I just picked up!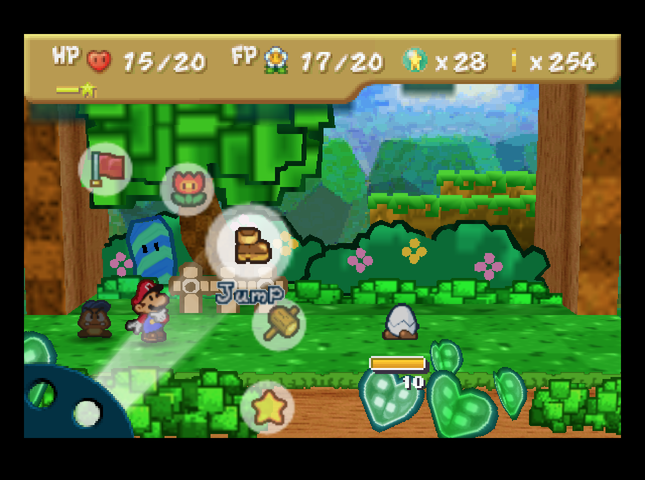  Yeah! Check that out! You�ve never seen anything like it before, have you? Your attacks are useless now! Yeah! Check that out! You�ve never seen anything like it before, have you? Your attacks are useless now!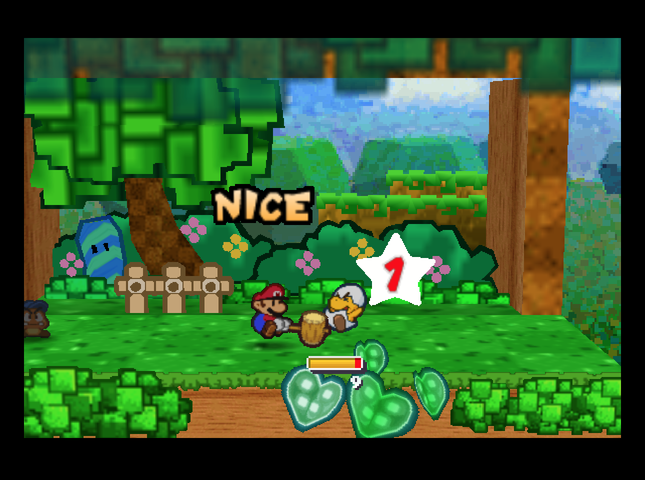 Jr. Troopa has a Defense of 1 now. It�s nothing Mario�s Hammer can�t get through.  Yeeowch! Who knew that Mario had such battle skills? Yeeowch! Who knew that Mario had such battle skills?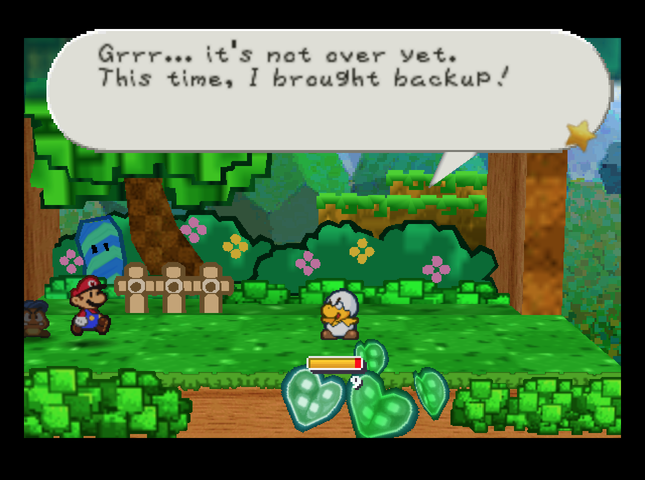  Eeeeeyikes! I don�t remember this happening in Paper Mario. The Koopas are ordinary, but they�re still dangerous. Are these members of that gang Goompa said Jr. runs? 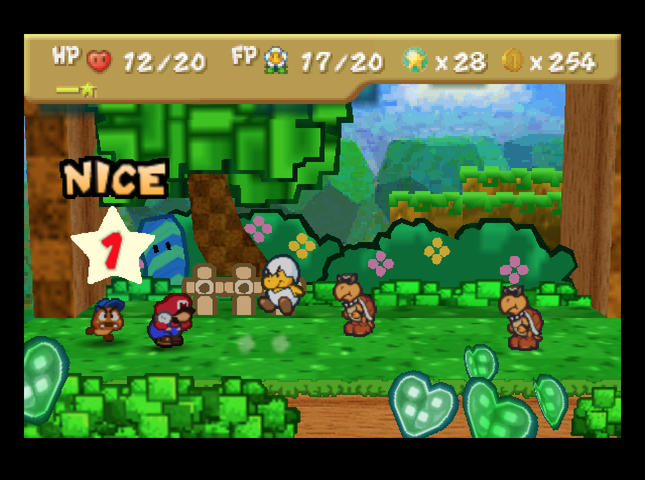 Troopa himself has an Attack of 2. His HP is actually lower than the base game - there, it was 15. 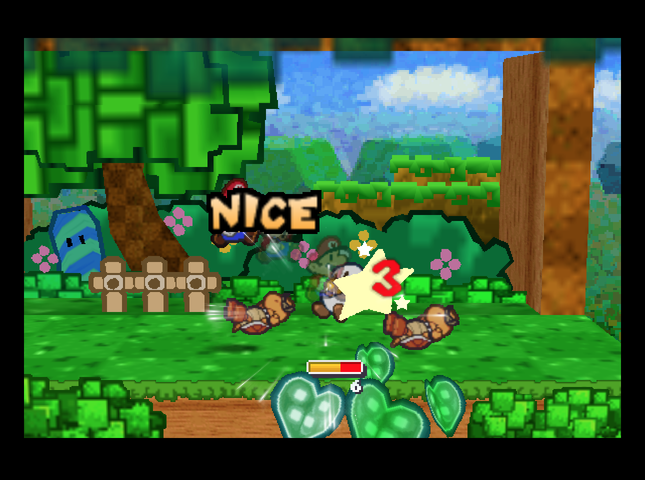 After flipping the Koopas, Mario focuses down Jr. Troopa with Power Jumps. Goombario can�t damage Jr. Troopa and I need his Headbonking for crowd control, so he attacks the Koopa henchmen instead. 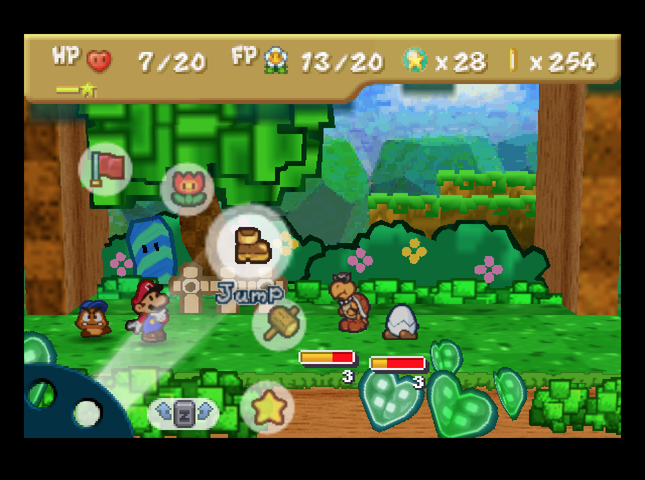 A little ways into the battle, one of the Koopas is down, but Mario�s HP is getting low. What�s a plumber to do? 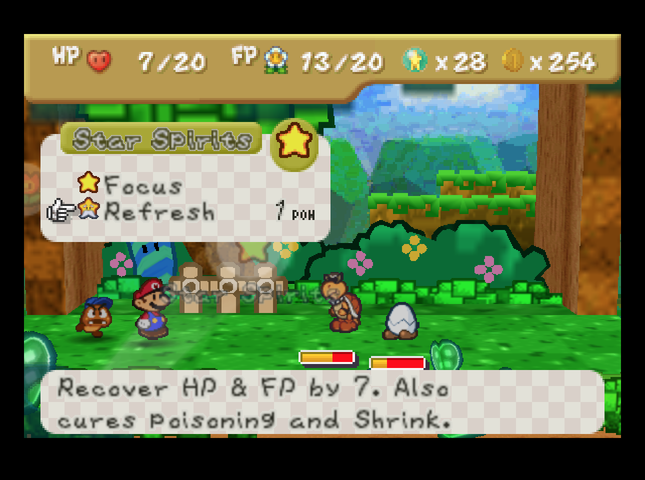 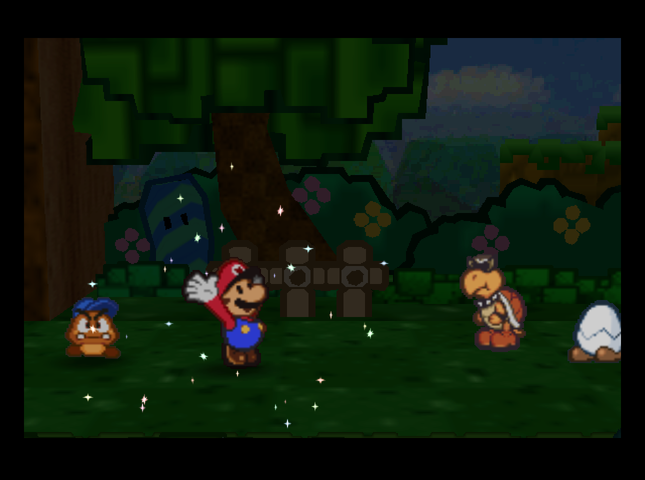 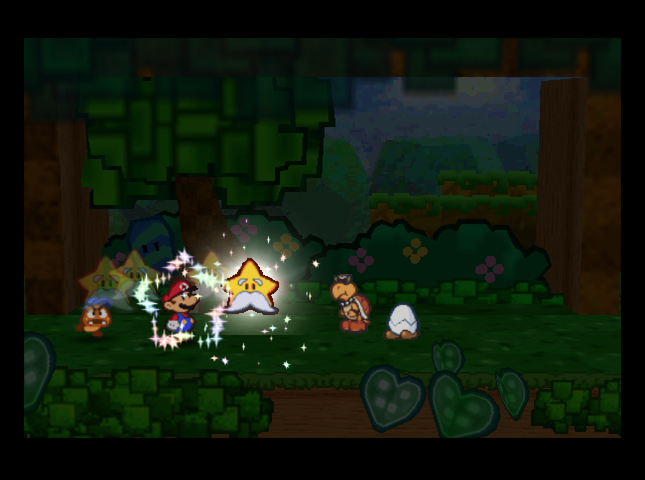 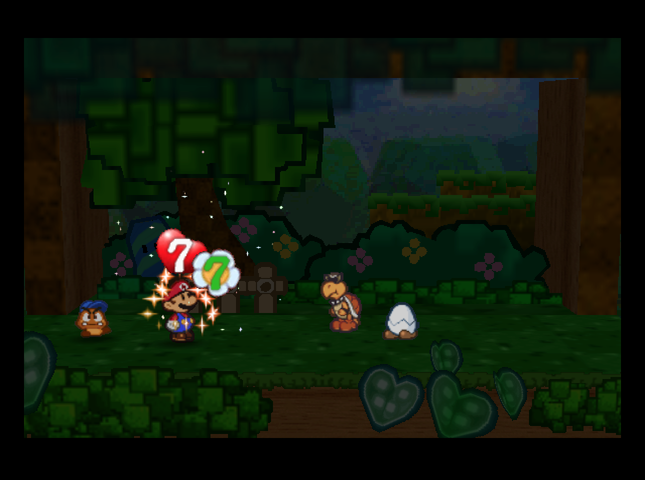 Time to call on the powers of the Stars! Eldstar�s power is �Refresh�, which restores 7 HP and 7 FP to Mario the first time it�s used in a battle. It also clears poison and the Shrink status. 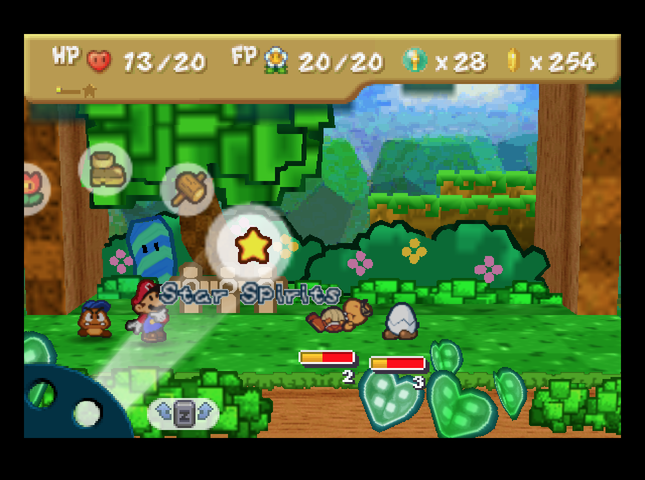 It used up our one unit of �Star Power�, just below our HP count. 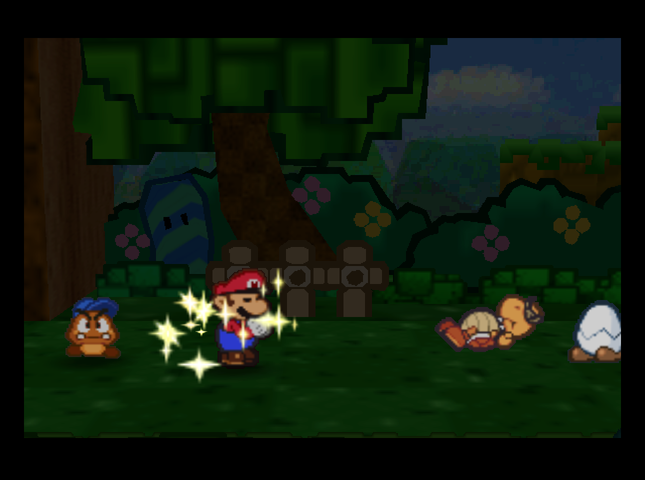 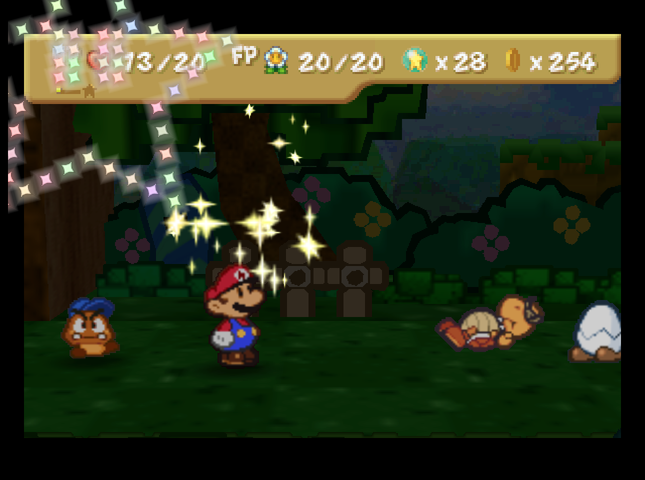 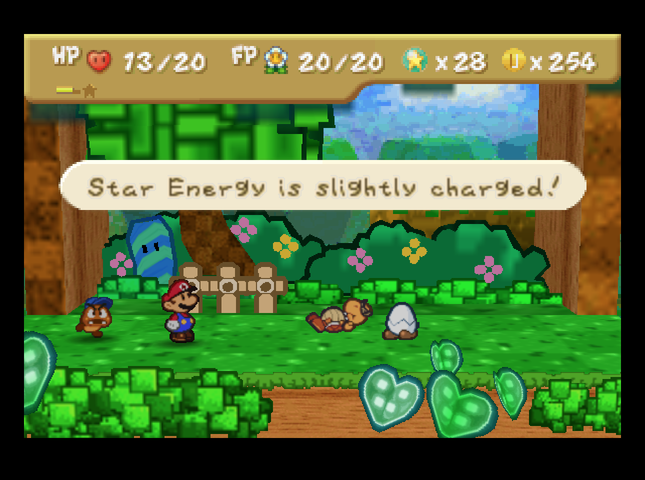 Star Power naturally recharges over time, at the rate of one unit per eight turns. However, Mario can use �Focus� to charge it faster. Each �Focus� charges half a unit; we�ll be able to increase that rate later with certain badges. 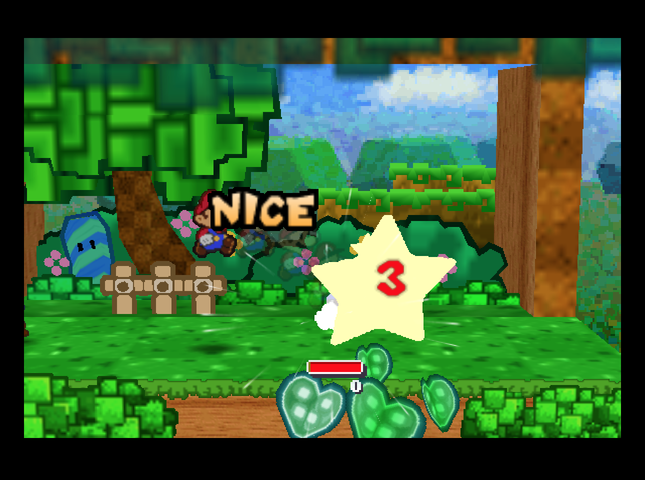 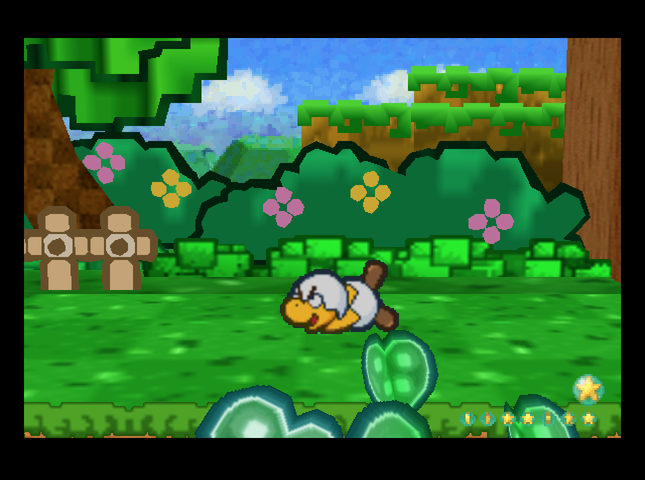 With our pit stop complete, Mario KOs Jr. Troopa with another Power Jump. 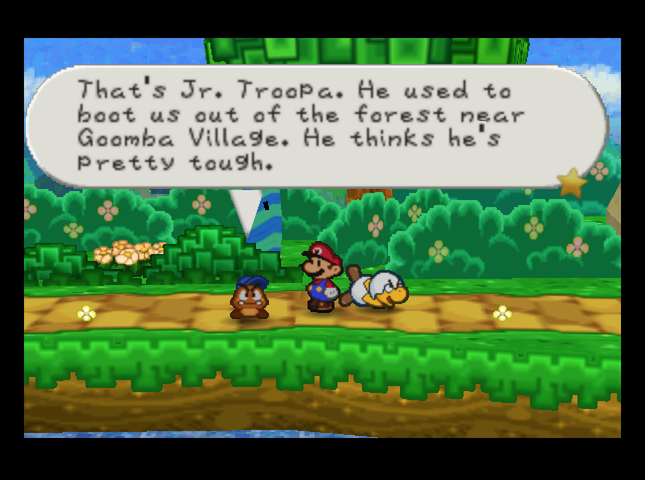 As far as I can tell, he goes around picking fights with people who are stronger than he is. Talk about dumb! His hobbies are working out and ordering stuff by mail. As far as I can tell, he goes around picking fights with people who are stronger than he is. Talk about dumb! His hobbies are working out and ordering stuff by mail.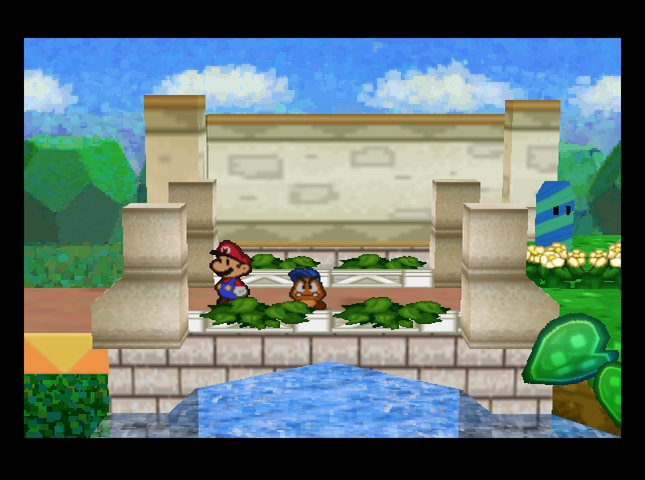 We make it out of Pleasant Path without further incident. 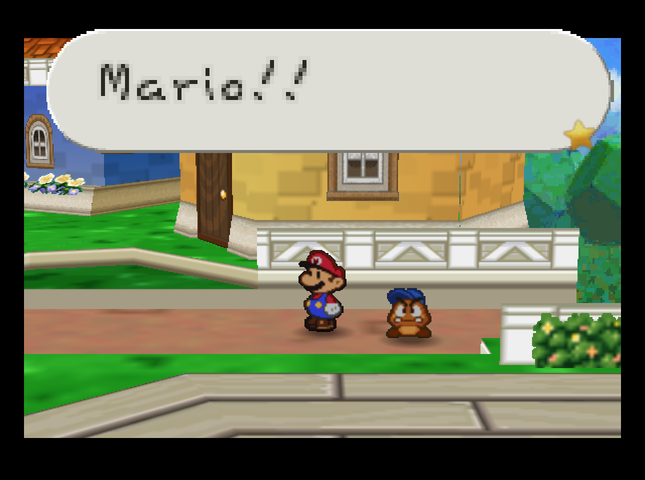 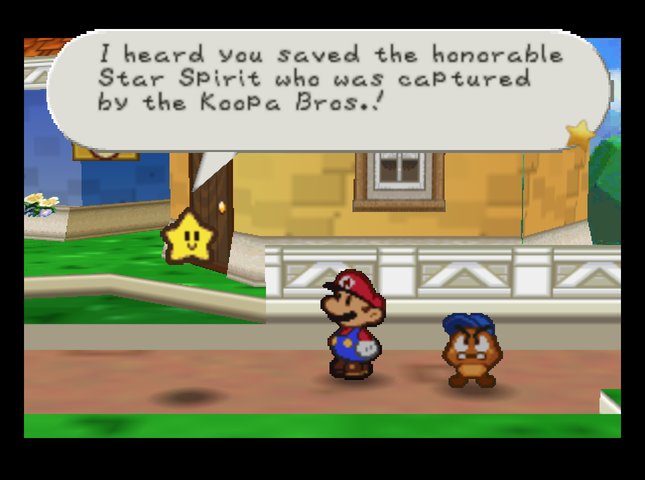 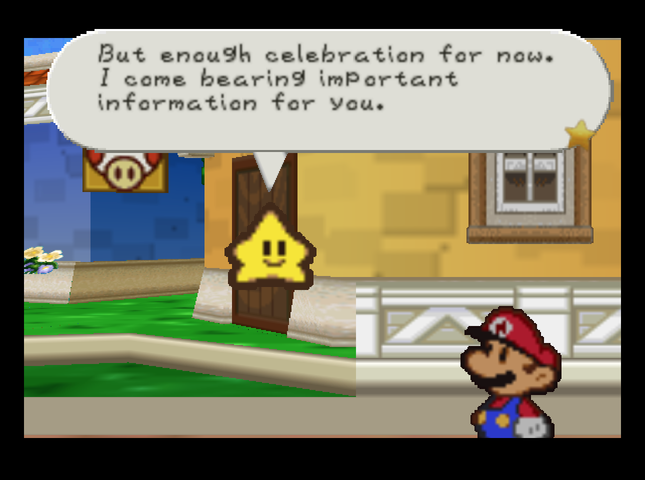 It seems that one of the Star Spirits is being held captive somewhere in Dry Dry Desert. Bowser wrote it in its diary. Some place called Dry Dry Ruins. It seems that one of the Star Spirits is being held captive somewhere in Dry Dry Desert. Bowser wrote it in its diary. Some place called Dry Dry Ruins.Twink meets us as we enter Toad Town, and gives us our hint on where to go next. We take a quick nap at the Toad House before we go on; it�ll recharge our Star Power. (Heart Blocks won�t.) 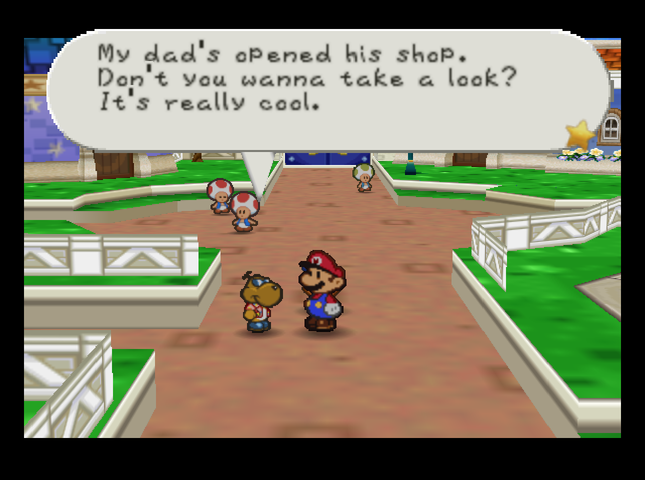 It turns out the Badge Shop is now open! 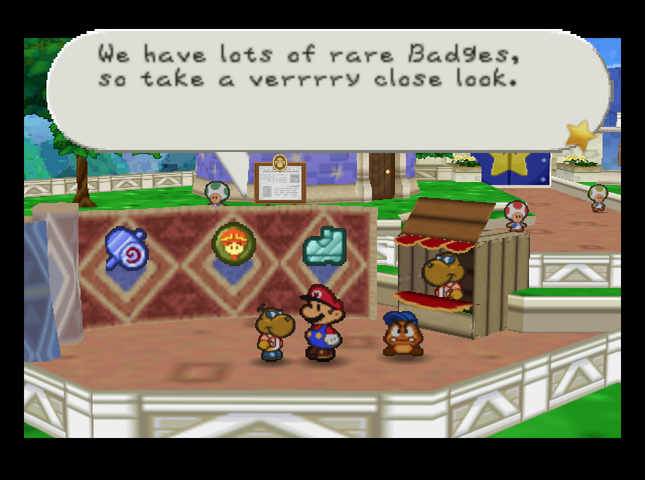    We�ve got just enough coins, so we promptly buy out the shop, getting Multibounce, Spin Smash, and Dodge Master. Multibounce and Spin Smash are combat maneuvers I�ll show off later; Dodge Master simply widens the timing window for the �dodge� action command to work. Interestingly, Rowf�s shop has different stock than he had at this point in the original game. Originally, when the shop opened after Chapter 1, Rowf sold Multibounce, Speedy Spin (now given by Twink), D-Down Pound (a hammer attack that let you bypass an enemy�s Defense), and First Attack (which let Mario KO weak enemies with a First Strike, without battling). Meanwhile, in the base game, you could get Dodge Master from the shop after Chapter 2, and Spin Smash only after Chapter 3.  I unequip the HP Plus badge so we can equip all our new prizes. Dodge Master has been buffed; it originally cost 2 BP to equip, and now costs only 1. We�ll explore more of Toad Town later. For now, let�s head back to Goomba Village. Not only do we want the Tape from Goompa, but it�s also time to check out the Pit of 100 Trials! 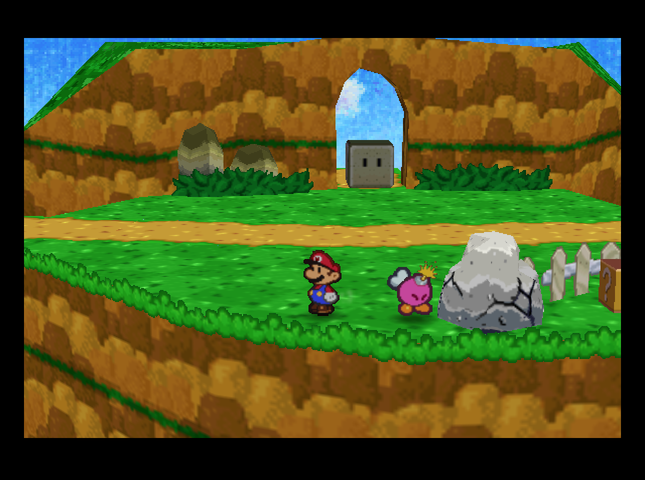 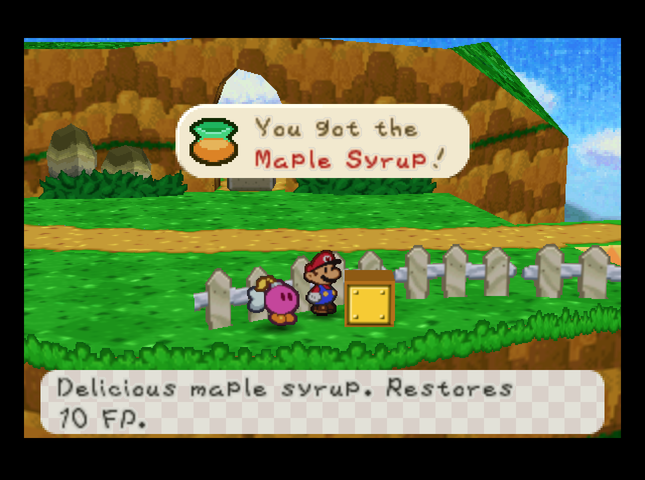 Near the Goomba King�s former fortress, we�re able to use Bombette get at a block we had to pass by earlier. It�s got a Maple Syrup inside.  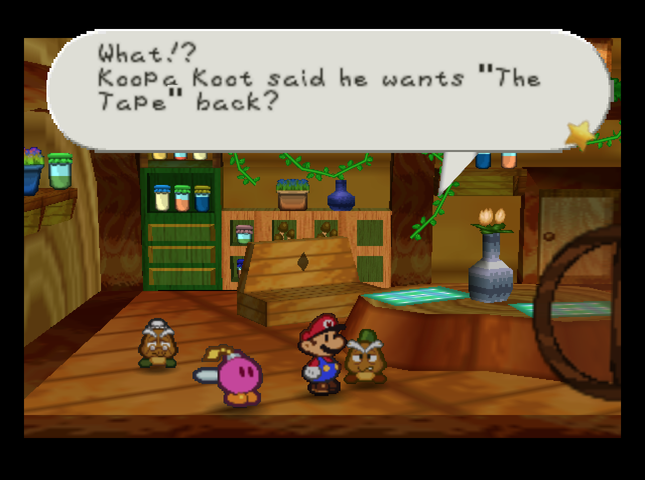  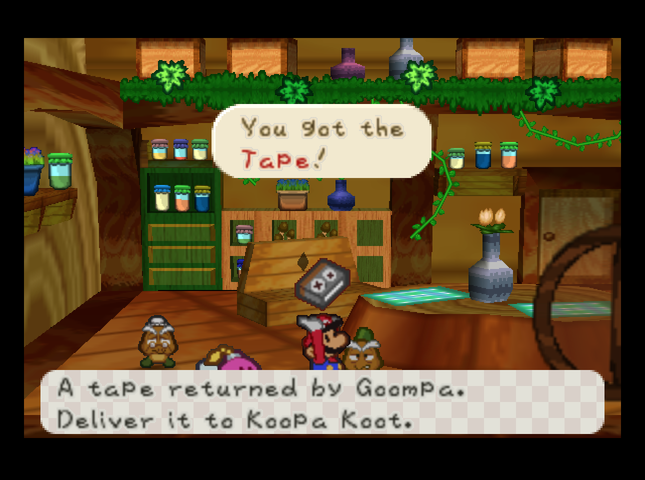 �The Tape� turns out to be hidden behind a chair in the Goombas� house.  What�s that? You want to know what�s on The Tape, do you? Oh, no no� I�m sorry� I�m afraid I can�t tell you at the moment. It was great, though! What�s that? You want to know what�s on The Tape, do you? Oh, no no� I�m sorry� I�m afraid I can�t tell you at the moment. It was great, though!Suuuuuper sketchy. 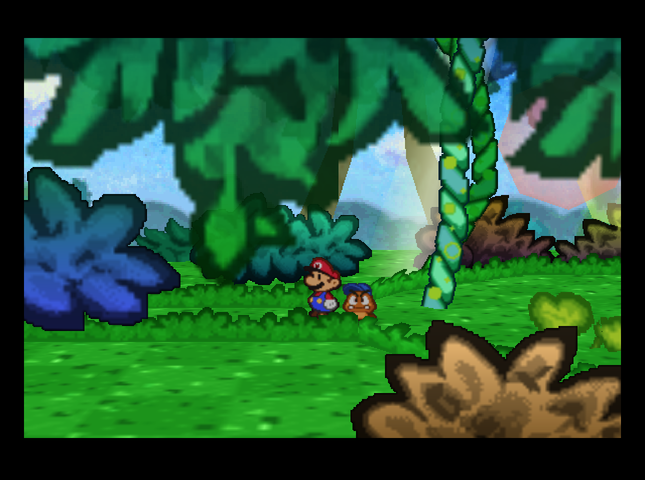  We return to the ancient tomb, the Pit of 100 Trials. 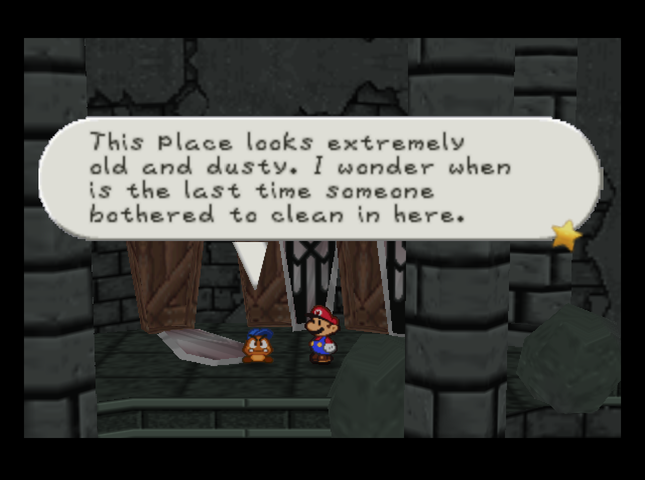 Goombario�s Tattles for the Pit have been updated as of version 1.2.0.0, which fixes a few continuity errors I chose not to showcase before. Seeing how this is an ancient tomb, maybe no one�s ever cleaned in here. That would drive my mom insane. She�d have this place cleaned up in a jiffy, though!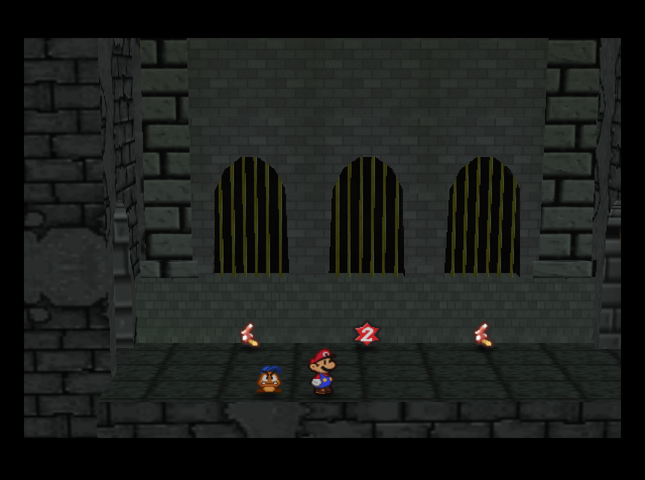 The center mushroom has been replaced with something strange.  It�s the Double Pain badge! This dubious accessory was added in the 1.2.0.1 update, by popular demand on the devs� Discord channel. It doubles the damage Mario takes. That�s it. I am never going to use this Badge. 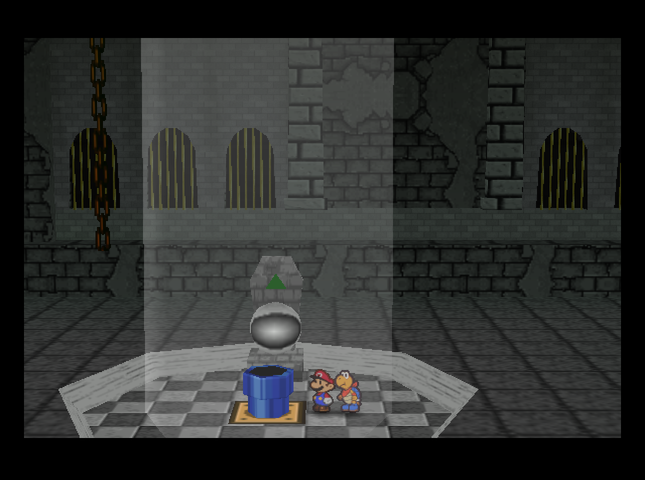 We reach the entrance to the Pit. I switch to Kooper, because his basic attack does the most damage, at the cost of being ground-bound. He also has a strong First Strike, which we�re going to try and use as often as we can. Let�s head into darkness. Suggested Music: Super Paper Mario OST: Pit of 100 Trials The game uses the Dry Dry Ruins theme for the Pit of 100, but we'll be getting our fill of that in Chapter 2. So, let's put on something more fitting...   Floor 1 has a fight with two Goombas. We can take them out in one turn with normal attacks. 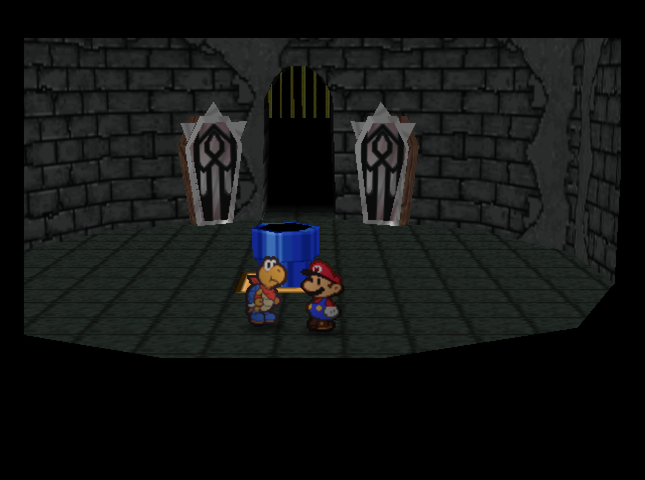 Winning makes a pipe appear.  Floor 2 has a fight with a Paragoomba, a Koopa, and a Fuzzy. We make a jump First Strike, so the Paragoomba starts grounded. This looks like a job for Multibounce! 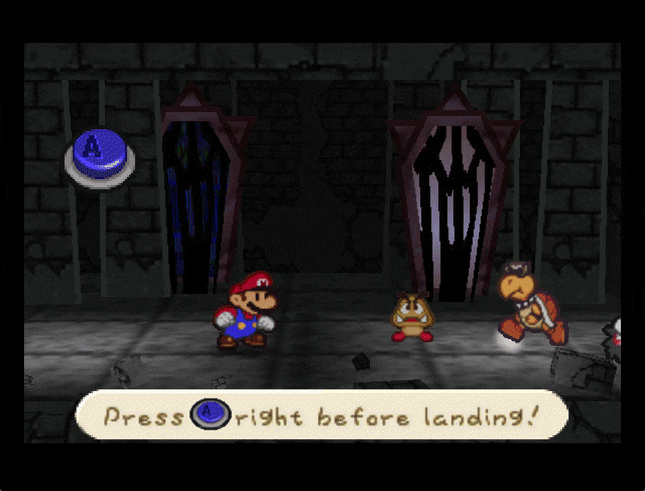 For 2 FP, Multibounce lets Mario jump on all the enemies in order. You have to do the action command for each bounce, so you can stop in the middle of the line if there�s a spiked enemy you don�t particularly want to jump on. 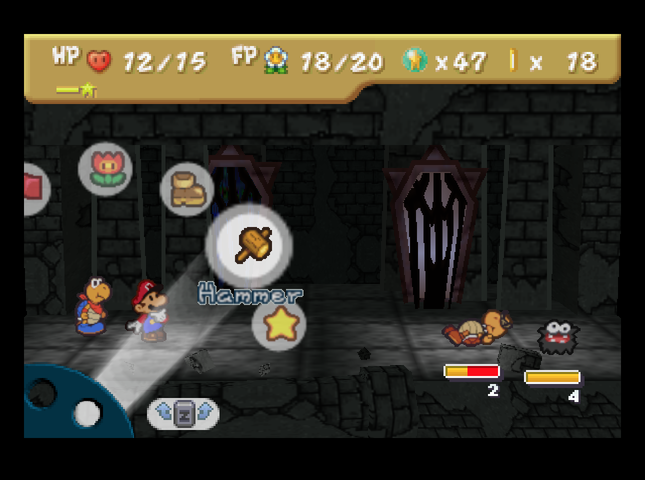 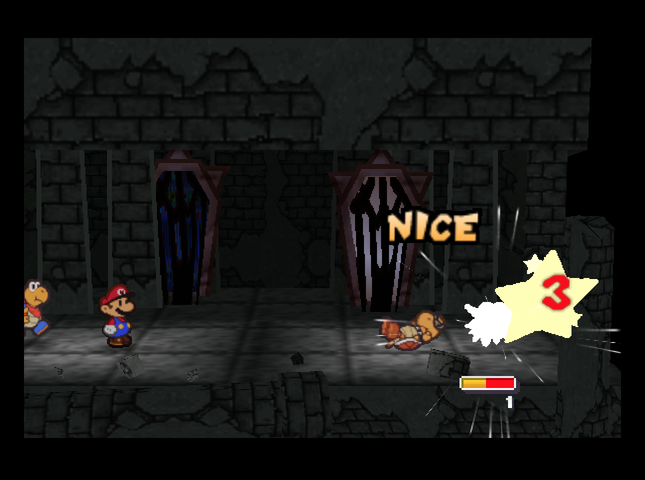 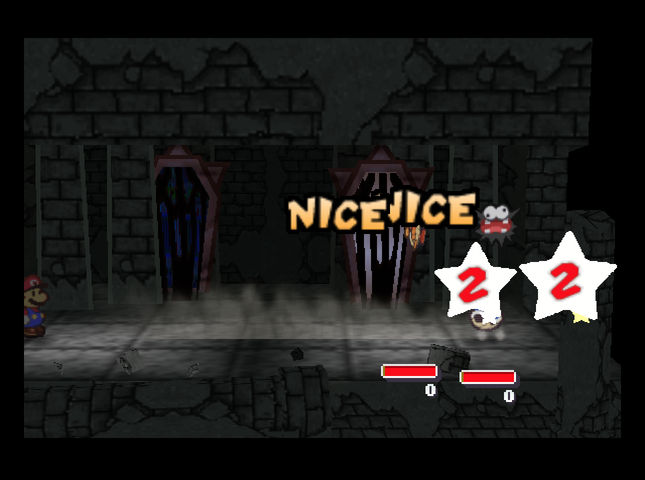 We need to conserve our HP, so we take out the Fuzzy with Hammer Throw and Power Shell (which also KOs the Koopa). 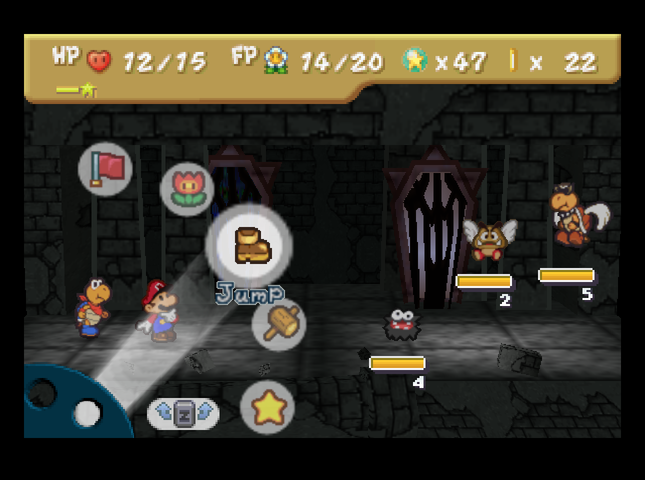 Floor 3 has a Fuzzy, a Paragoomba, and a Parakoopa. We take out the Fuzzy first with normal attacks, then Mario flips the Parakoopa on the next turn. 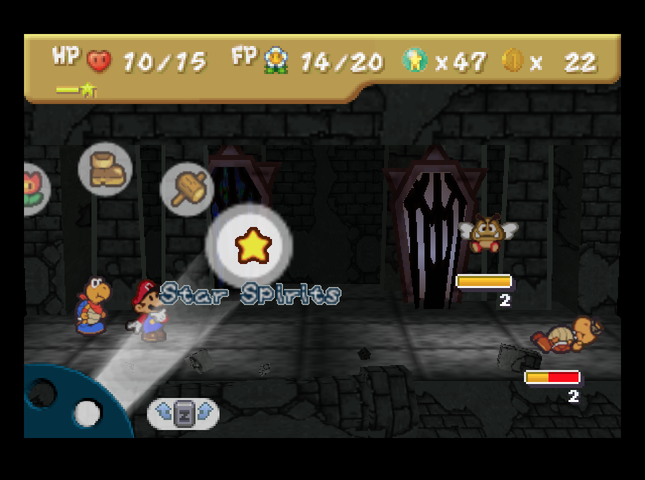 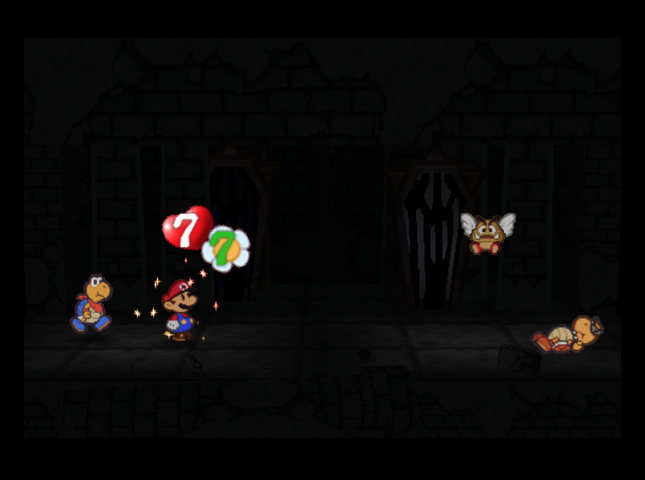 Kooper�s got the Koopa handled, so we use Refresh to restore our HP and FP. The Paragoomba won�t damage Mario if he guards, so I stall for a few turns and use Focus to restore our Star Power. Then we KO it. 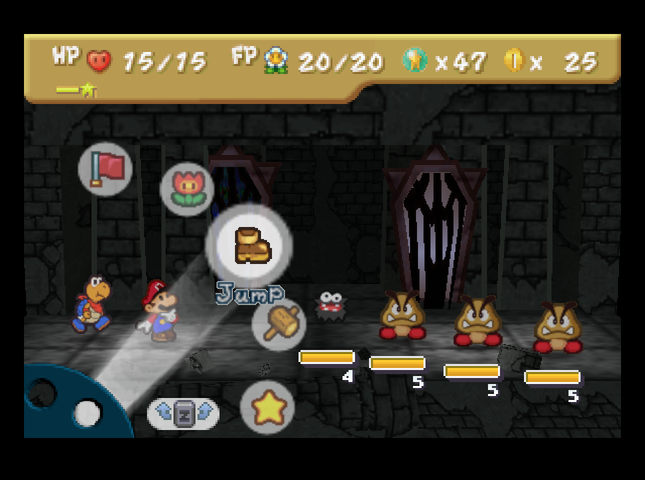 Floor 4 is a Fuzzy and three Bigoombas. Fuzzies bounce around a lot in the Pit room, so it�s hard to get the First Strike on them. 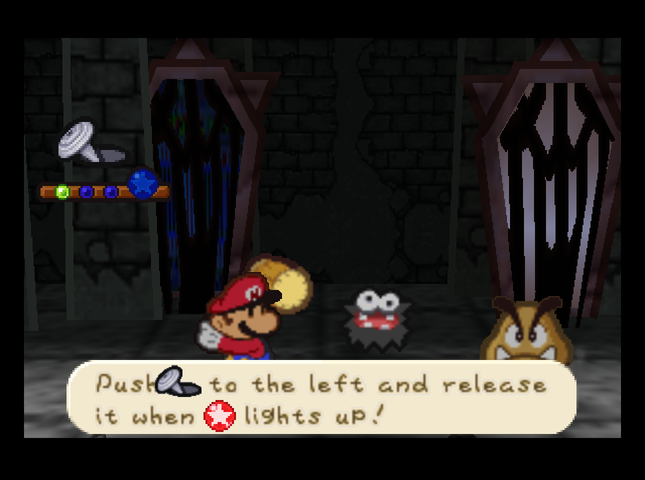 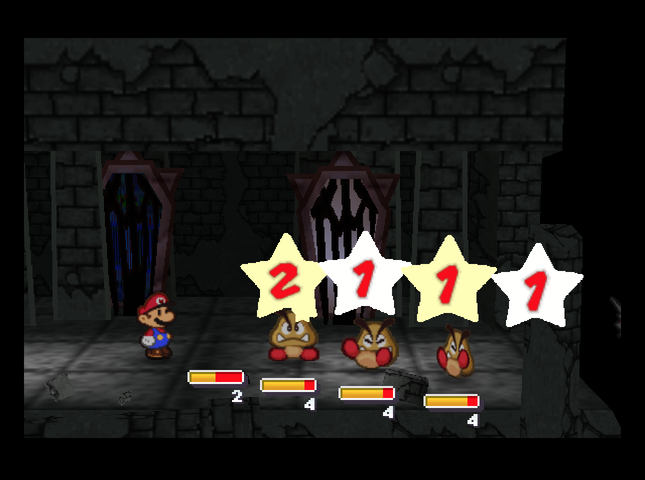 I decide to use another of my new toys: Spin Smash! This Hammer attack sends the hit enemy flying, hitting everything behind it for 1 Damage. It�s worth noting that the splash damage pierces enemy defenses, which can be very useful for resilient enemies. On top of that, Master Quest made the maneuver cheaper. Paper Mario had the move cost 2 FP, but here it costs only 1! Because of this, Multibounce is only useful if you want to hit flying enemies, flip Koopas, or hit certain foes that are rooted to the ground; otherwise, it�s Spin Smash all the way. 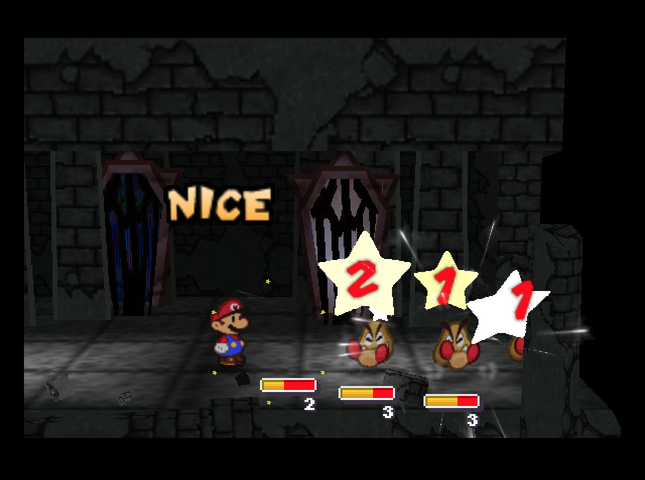 I Spin Smash the next Goomba, too. This has weakened them enough that a third Spin Smash and a Power Shell next turn KOs the last two at once. 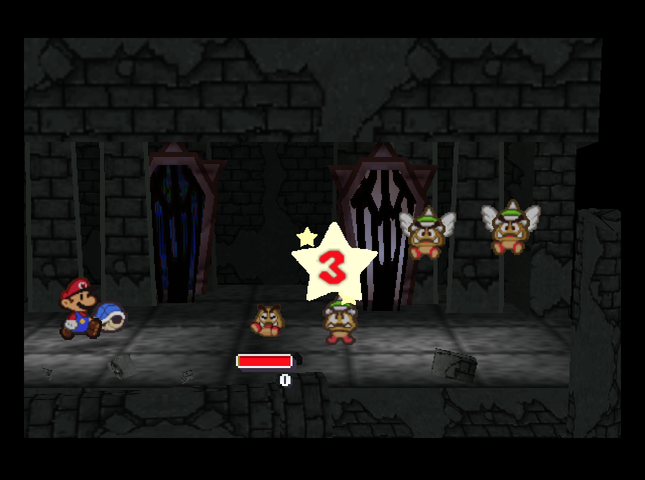 Floor 5 is a Goomba with a Spiked Goomba and two Spiked Paragoombas in tow. Kooper�s First Strike takes out the Goomba, which means he can KO the Spiked Goomba on his actual turn. Mario helps out with Hammer Throw for the first Spiked Paragoomba. 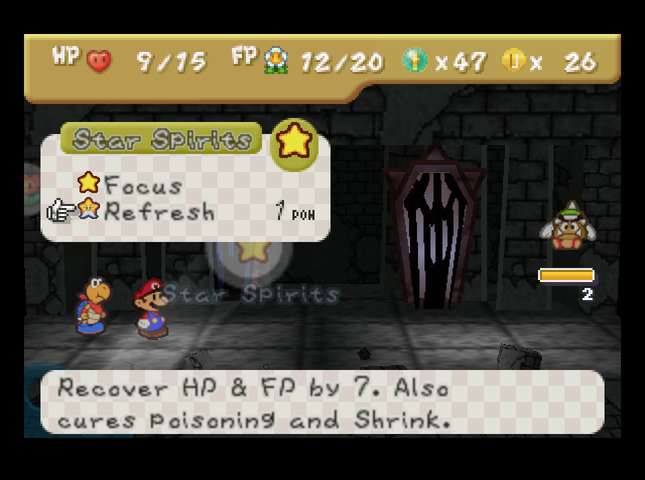 With the battle much lower-pressure, we Refresh again, and Hammer Throw the last Paragoomba on the next turn. (It�s possible to run from Pit battles, so we�d be able to run away and equip Hammer Throw if we didn�t have it on.) 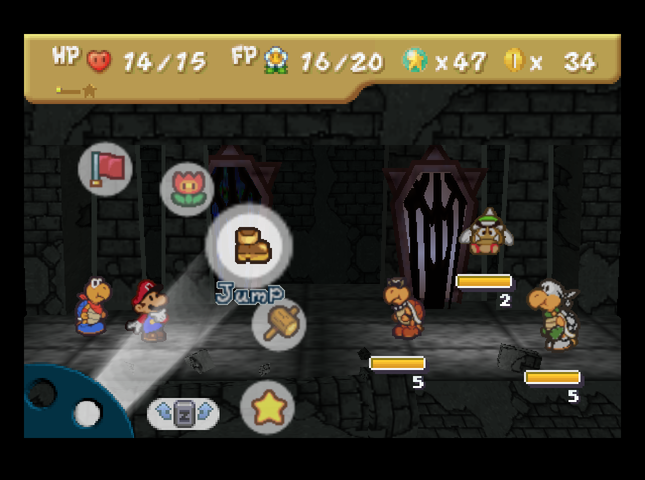 Floor 6 is a Koopa, a Spiked Paragoomba, and a White Ninjakoopa. I almost got the jump First Strike on the Koopa, but missed. Instead, we flip it with regular attacks. Next turn, we Hammer Throw the Paragoomba, and Kooper KOs the Koopa.  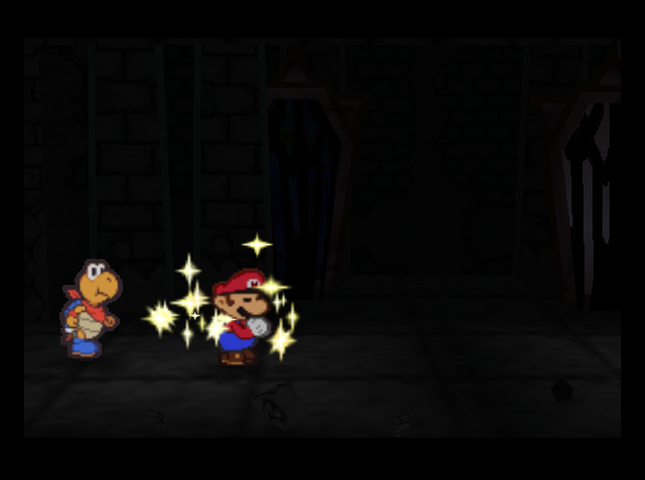 While we�re taking out the White Ninjakoopa, it uses its jump attack. This gives us a free turn to Focus and restore our Star Power; then, Mario uses Refresh next turn, and Kooper gets the KO. 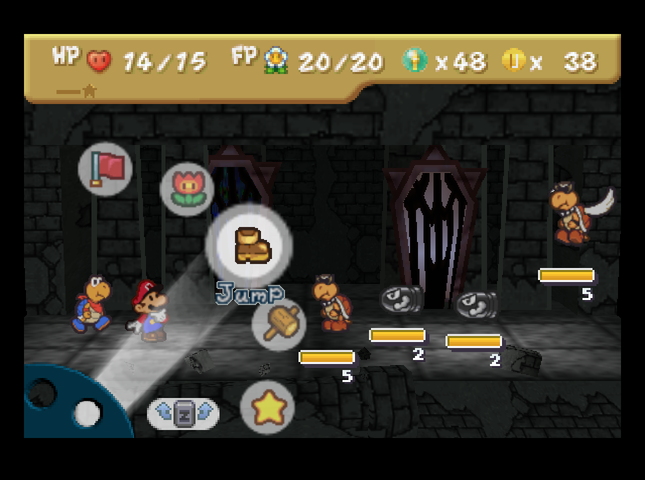 Floor 7 has a Koopa (whose First Strike I got hit by - oops), a Parakoopa� and two Bullet Bills! If we don�t do something this turn, we�re taking 10 damage to the face! 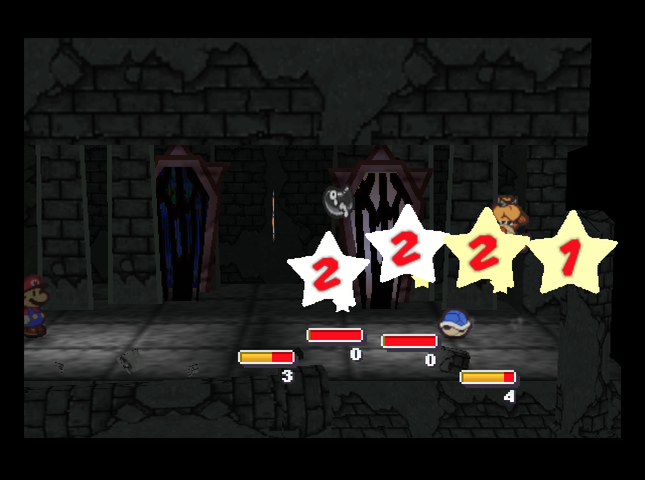 Mario uses Multibounce to get everyone on the ground, then Kooper shows off his bomb defusing skills with Power Shell! With the Bills taken care of, the battle is simple.  Floor 8 has two Bob-ombs and two more Bullet Bills. I made sure to get the First Strike this time! Power Shell KOs three out of four enemies, and the remaining annoyed Bob-omb can be cleared with Mario�s hammer. 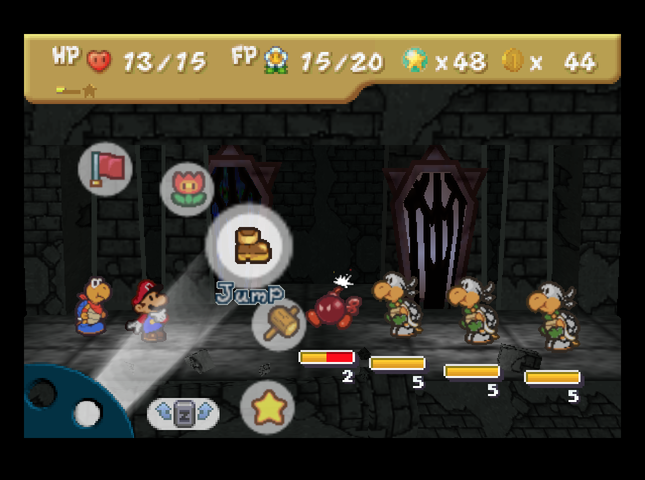 Floor 9 has a Bob-omb (I get the First Strike again)� and three White Ninjakoopas! Final exam time! Mario hammers the Bob-omb to get rid of it, and Kooper attacks the first Ninjakoopa. 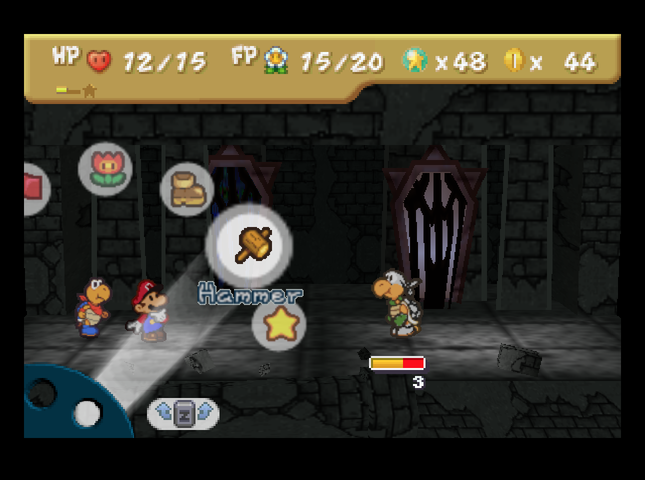 The back two Ninjakoopas both decide to do their Jump attack, so we KO the one that�s left with normal attacks. 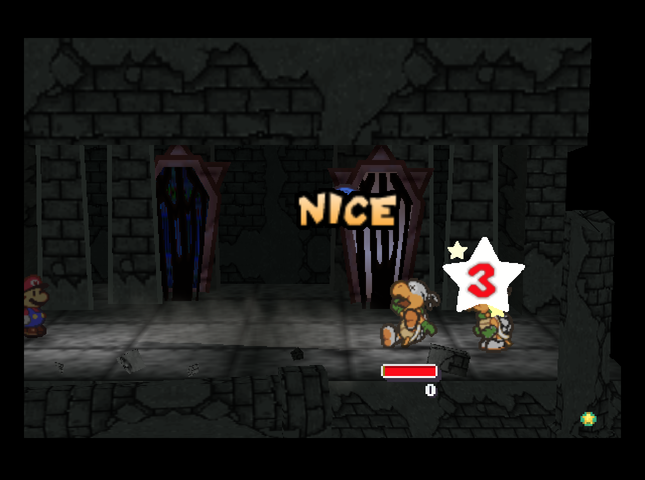 Next turn, I use Power Jump and Shell Toss to KO another Ninjakoopa. 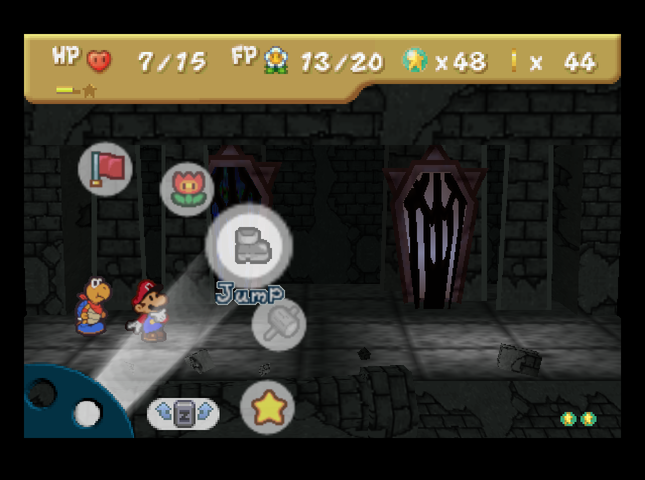 The last one decides to Jump again, so we use Focus. 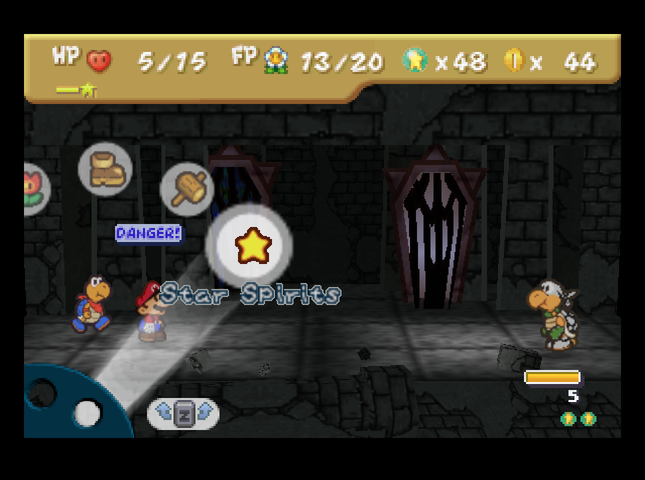 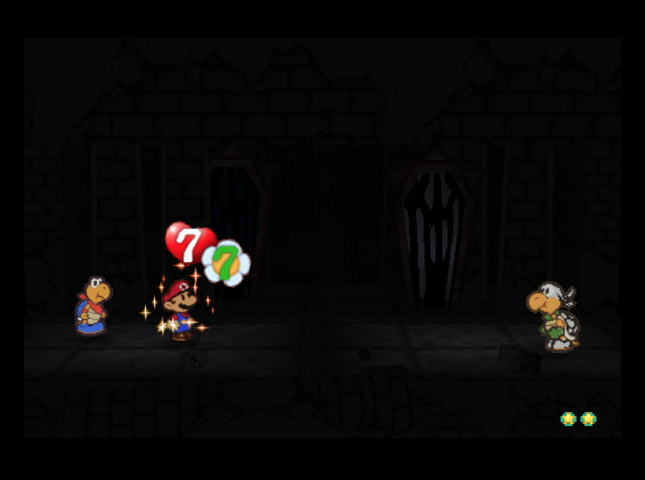 The Jump attack leaves us in Danger, so we Refresh immediately again. So far we haven�t used a single item in the Pit! The Ninjakoopa doesn�t do anything funny on its turn, so we can KO it. 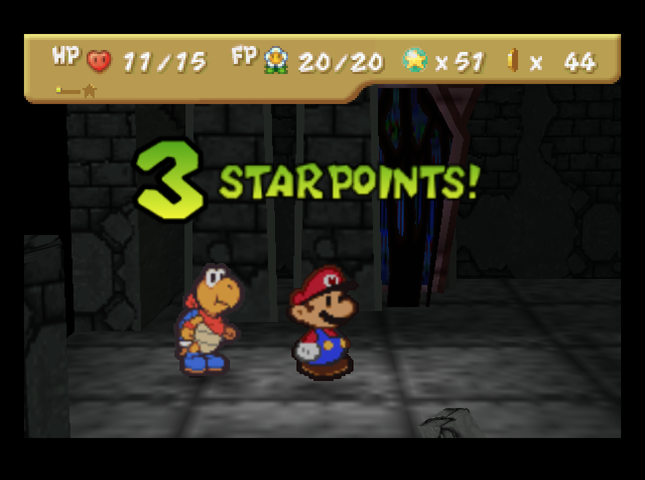 We get Star Points from the battle - each Ninjakoopa gives one (including the one we met earlier on Floor 6). 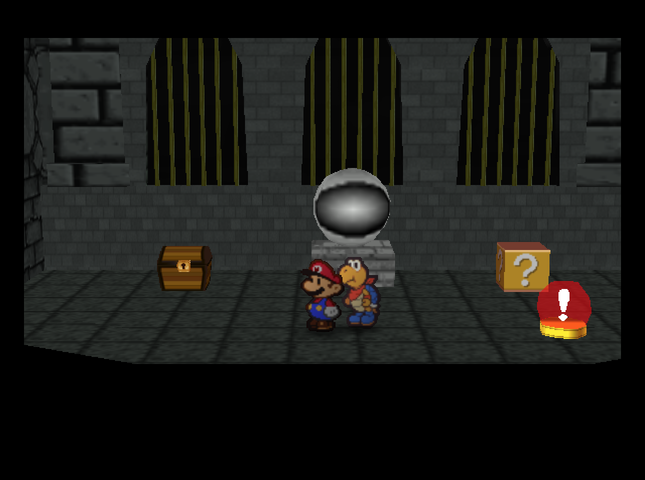 Floor 10 of the pit is a little different. Instead of battles, it�s a rest floor, with a chest, a ? block, a Mr. I statue, and a switch that can let us go deeper into the pit - or let us get out alive! AS YOU CONTINUE DOWN THIS VOYAGE BELOW YOU WILL FIND DANGER AND GIFTS WE BESTOW EACH REST GIVES THE TALE OF ONE WHO HELPED BUILD THEY HAVE ALL DONE A PART IN THIS WORLD THEY HAVE FILLEDHmm. Interesting. 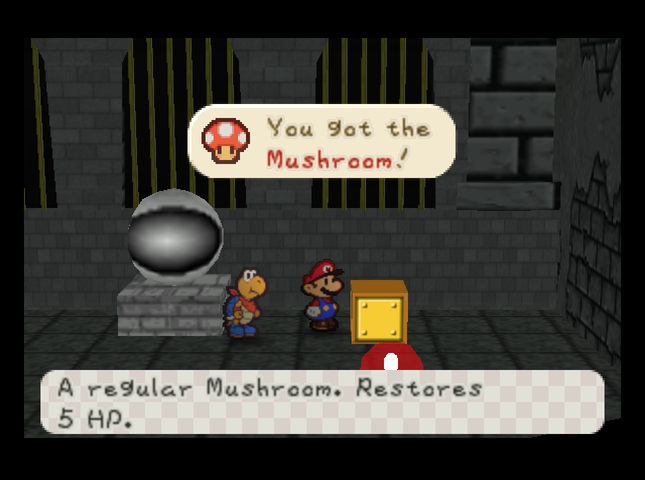 The ? block has a Mushroom.   The chest has the Peekaboo badge! This lets us see the HP of enemies without Tattling them first. In the base game, Merlow sold you this for 10 Star Pieces. Interestingly, the badge only costs 1 BP to equip. In the base game, it was 3 BP - which honestly feels overcosted.  Hitting the switch makes a pipe appear, pointed down. Hitting it again swaps it to pointing up. �Up� will take us back to the entrance, and let us keep our winnings: Peekaboo, a Mushroom, 4 Star Points, and roughly 45 coins.  We�ve survived the Pit of 100 Trials! Well, the first 10 floors, anyway. We�ll have to come back here from time to time, as we get stronger.  Now let�s head back to civilization! The Toad Town logjam should be cleared away by now, so we can freely explore the town and see all it has to offer. We�ll have a chance to prepare before we start our grand expedition to the desert. Game Version: Updated from 1.2.0.0 to 1.2.0.2 Badges: 16/89 (New: Dodge Master, Multibounce, Spin Smash, Double Pain, Peekaboo) Star Pieces: 16/180 Chuck Quizmo�s Quiz Questions: 6/64? Game Overs: None. SUMMARY OF CHANGES FROM MAIN GAME (in this installment) � Jr. Troopa weaker, but has help. (-5 HP, summons 2 Koopas as backup the first time Mario damages him) Yes, that�s only the first time Mario damages him! If Mario sits around and lets another partner do all the work, Jr. Troopa will never summon his henchkoopas. � Rowf opens badge shop with slightly different sources, marketing plan. � Dodge Master badge 1 BP cheaper to equip. � Spin Smash attack 1 FP cheaper to use. (Note that Multibounce is still 2 FP) � Double Pain badge exists, found in ancient pit. � Peekaboo badge now relic of ancients, also found in ruins. It�s 2 BP cheaper to equip, possibly due to awesome lost technology used in its creation. Next Time On Master Quest: We experience all that Toad Town has to offer. 
Quackles fucked around with this message at 09:03 on Aug 3, 2019 |
|
#
¿
Aug 3, 2019 08:48
|
|
|
Clockwork Rocktapus posted:Oh neat, they buffed the star spirit power. In the base game he only recovered 5 HP and FP. With all the really gnarly looking combat difficulty increases, it's nice to see some helpful additions as well. There's a teeny-tiny downside to this, which I haven't gotten around to showcasing yet - though I'll be sure to mention it when we first stumble upon it in-game: Refresh's effectiveness degrades the more times it's used in one battle. First time: 7 HP, 7 FP Second time: 5 HP, 5 FP Third time: 3 HP, 3 FP Fourth time: 1 HP, 1 FP (!) Fifth time+: Zip! (Though I think it still removes poison and Shrink, even then.) Once you finish the battle, the Power's effectiveness resets to 7/7.
|
|
#
¿
Aug 3, 2019 12:01
|
|
|
Ramos posted:That degradation doesn't sound like a big deal since you're probably just going to be using it once a battle at most. If anything, this should improve game flow since now you've got a renewable supply of HP and FP. On the other hand, if you're using it like that, it makes you wonder why not just have enemies drop more HP and FP after each battle? The spamming was mostly relevant in the case of the Pit of 100 Trials.
|
|
#
¿
Aug 3, 2019 19:23
|
|
|
Explopyro posted:I feel kind of obnoxious asking this (and I hope it doesn't transgress site rules regarding The devs don't like strategies they consider 'cheesy', and stalling strategies appear to be one of those. Just wait until you see what they've done to Repel Gel. And: I'll put a link to the latest patch (and the patcher!) in the OP. Finding a Paper Mario ROM is up to you, though. Quackles fucked around with this message at 22:09 on Aug 3, 2019 |
|
#
¿
Aug 3, 2019 22:01
|
|
 ), but are you able to provide a link to someplace we can get a patch for this hack? I've tried Google and can't seem to track it down, and this definitely looks like something I'd be interested in trying out.
|
FPzero posted:Actually here's a question about the koopa bros fortress. Did the Cherry Bob-ombs start showing up as regular enemy encounters after that battle you showed us? Because if they were treated as minibosses and not regular encounters that's a bit more agreeable. They were minibosses only. Regular encounters had only plain old Bob-ombs. Multibounce will be more useful if we ever go somewhere with a lot of flying enemies.
|
|
#
¿
Aug 3, 2019 22:50
|
|
|
Part 9 : Tass Times in Toad Town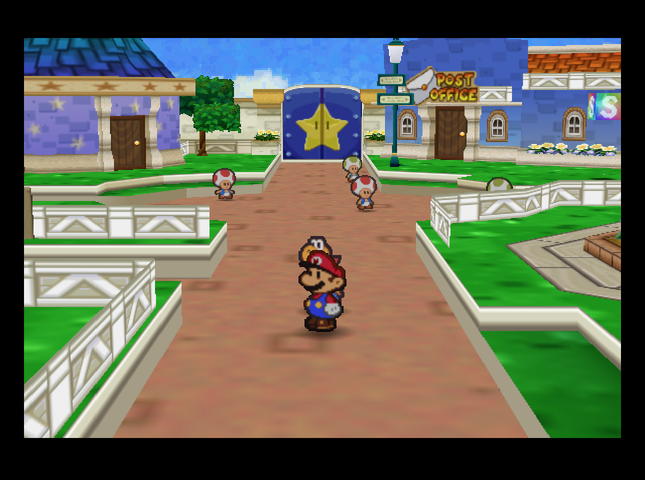 We return to Toad Town. 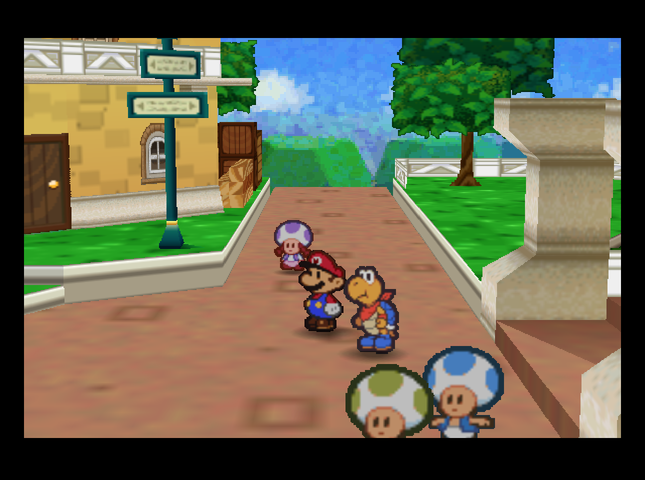 The blockade has been cleared away from the south road, so now we can visit south-central Toad Town. There�s a few things we can do here. 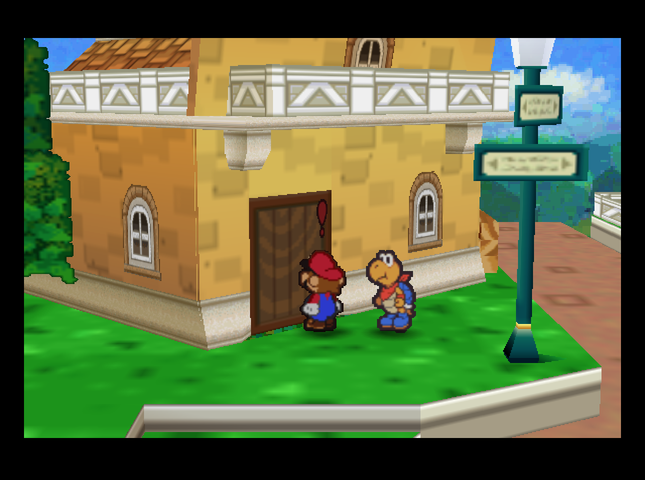  Music: Toad Town Variations This includes the Russ T., Dojo, Merlon, Flower Fields entrance, Badge Shop, Tayce T. (kitchen), Tunnels entrance, and Toy Box entrance music. The house by the northern exit belongs to Tayce T., the cook. She�ll cook up anything we give her. Let�s try out a few things!  Giving Tayce a Mushroom gives us a Fried Shroom. It restores 2 FP more than the base game, so it�s a very useful healing item. 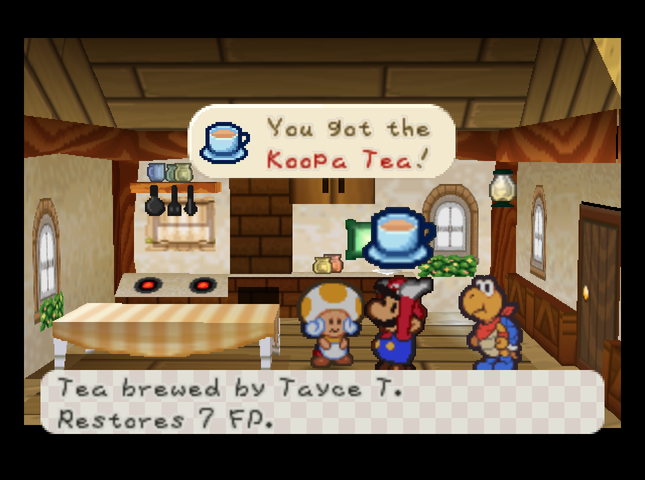 She�ll brew Koopa Tea from Koopa Leaves, making it a strict upgrade from Honey Syrup.  And if you give her an actual Honey Syrup, she�ll whip up a Super Soda. It restores the same FP as the Syrup, but heals Poison and Shrinking too. 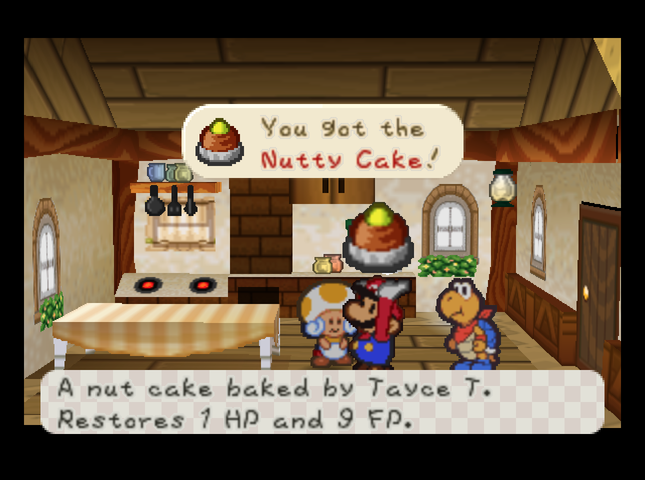 Offering her one of the Goomnuts from Goomba Village yields a Nutty Cake. In the original Paper Mario, this restored 10 FP. Here, it heals 1 HP and restores only 9 FP for some reason. 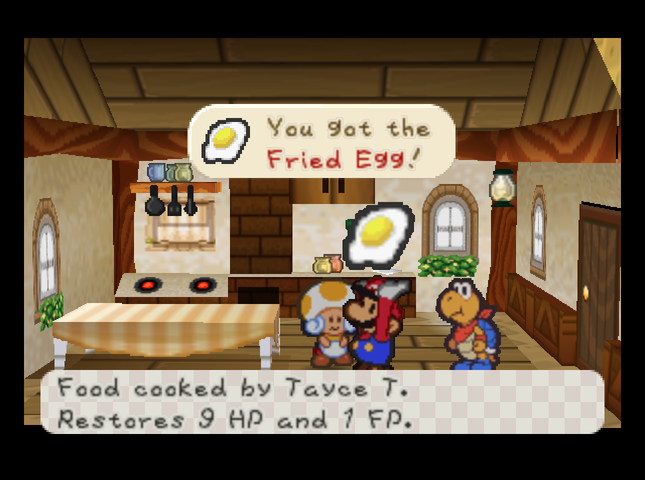 And an Egg from the shop turns into a Fried Egg. This heals 9 HP and restores 1 FP. As you might suspect, it healed a flat 10 HP in the vanilla game. 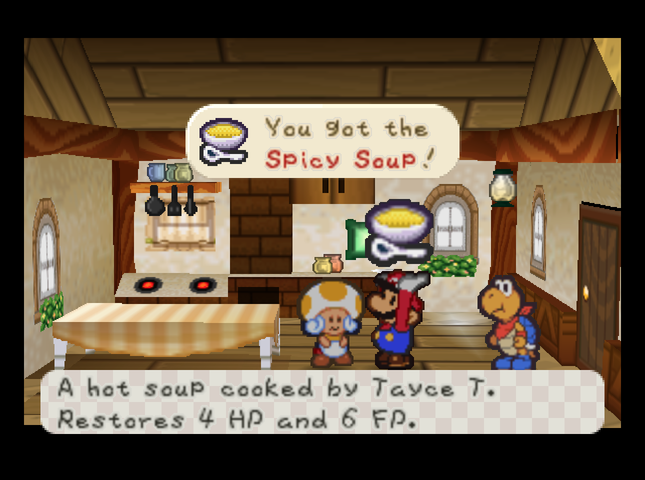 Finally, a Fire Flower becomes a Spicy Soup. This has also been buffed - it only restored 4 HP and 4 FP in the original game, but now the FP gain has been boosted to 6!  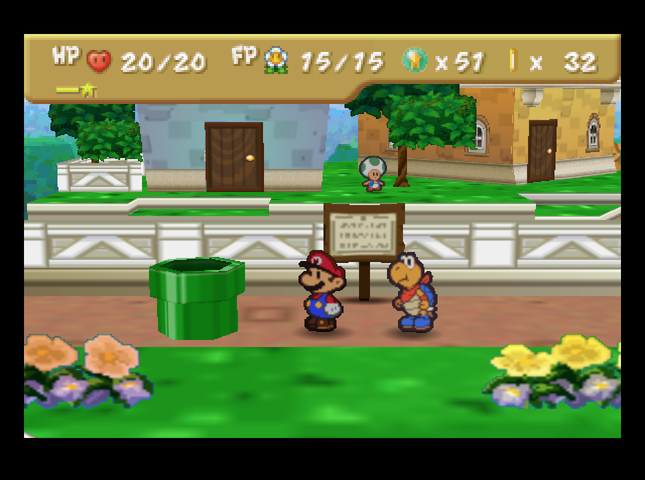 Also in this part of Toad Town is a suspicious pipe. This leads to the Toad Town Tunnels underground area. 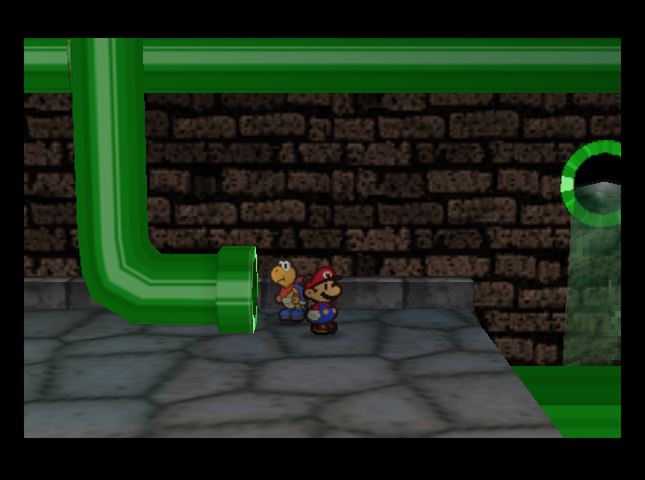 Music: Toad Town Tunnels  On our first visit to the Tunnels, the way left is blocked by a block Mario can�t break yet. So, it�s right or nothing. 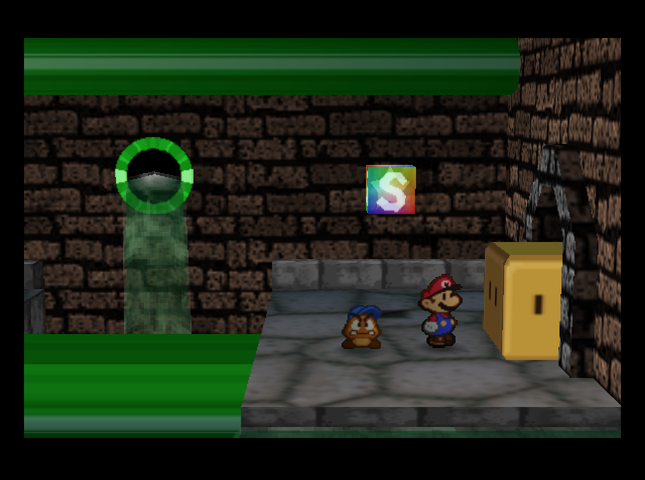  In the next room is a strange, dark-colored Goomba. 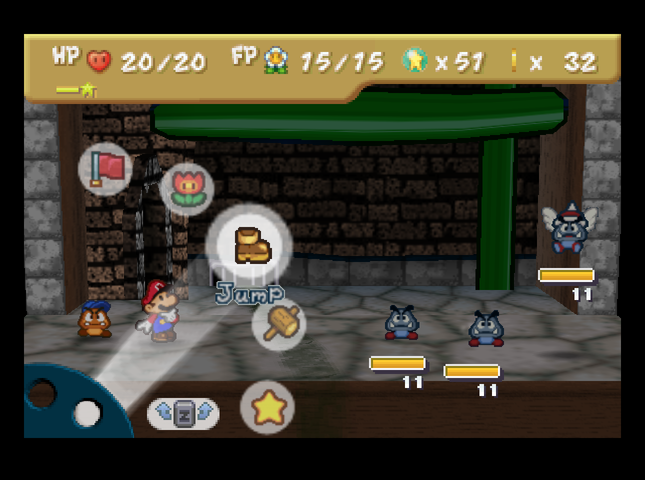 This is a Gloomba. Gloombas are nasty Goombas who live in the Toad Town Tunnels. They�re stronger than ordinary Goombas, but you can take �em. This is a Gloomba. Gloombas are nasty Goombas who live in the Toad Town Tunnels. They�re stronger than ordinary Goombas, but you can take �em.And in the back there� is that what I hope it isn�t? This is a Spiked Paragloomba. Just when I thought these nasty guys couldn�t get worse! As you can see, he�s wearing one of those awesome spiky helmets. That rules out my headbonk and other jump attacks. But how else can we reach him? Don�t we have any other attacks that can hit flying enemies? And where can I get one of those sweet spiky helmets? 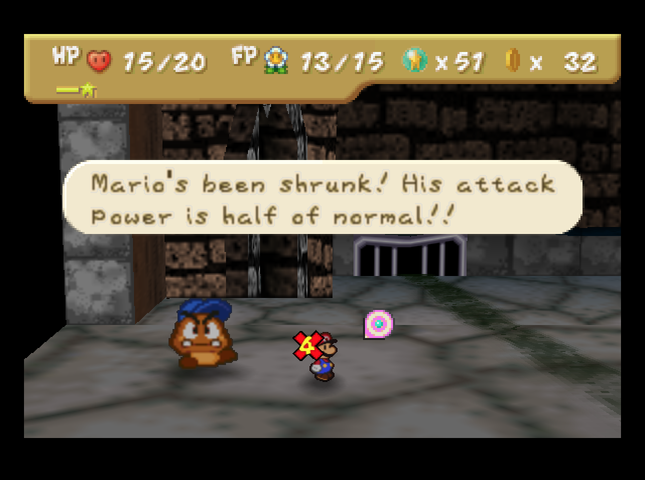 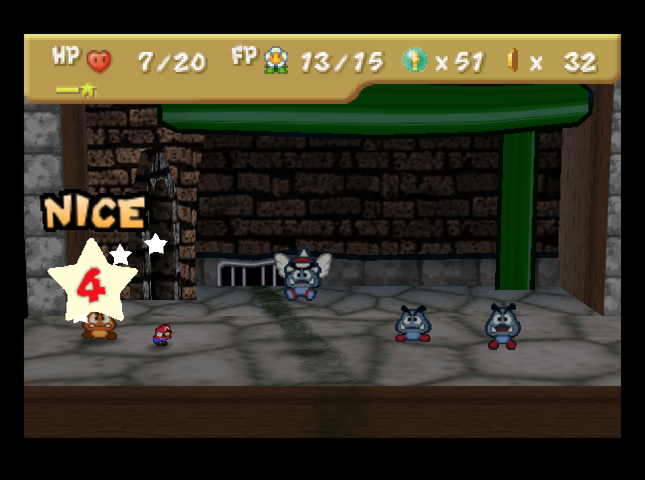 When Goombario said Mario could take these guys, it sounds like he was exaggerating! They (and their winged friends) do 5 damage apiece - and their attacks will Shrink Mario if he doesn�t block them, making it nigh impossible to hurt the Gloombas further! In original Paper Mario, Gloombas had 7 HP and did 2 damage, and Spiked Paragloombas weren�t a thing.  At this point, I decide discretion is the better part of keeping myself in one piece, and run away.  There�s not much else in this room, aside from a Spiked Gloomba hiding atop a Brick Block (which we�ll leave alone), and a hidden block with a Super Shroom.  In the next room, there�s a bridge of pipes leading to a chest with a Badge. We are not going to cross it. This bridge is one of the three places you can encounter a Blooper boss fight in the sewers. When you cross one of those places for the first time, you�ll fight a regular Blooper. When you visit one of the two remaining ones, you�ll encounter the tougher, zaptacular Electro Blooper. The third location will net the powerful Super Blooper. Crossing this bridge would get us a badge, but one of the other Blooper fight points is right before a series of warp pipes that�ll let us fast travel to Goomba Village, Koopa Village, and Dry Dry Outpost. I�d much rather have the first Blooper fight be guarding those - or, to put it another way, I don�t want to have to see what sort of shenanigans the Electro Blooper can get up to in order to activate some warp pipes! By not crossing the bridge now, I�ll make it easy on myself later. This means we�re done with the Toad Town Tunnels for now.  Back in south-central Toad Town, roads lead west to the outskirts of Toad Town, east to Forever Forest, and south to the train station. We�ll be going to the train station to kick off Chapter 2, so we�ll visit there last.   Instead, let�s see how far we can get in Forever Forest! 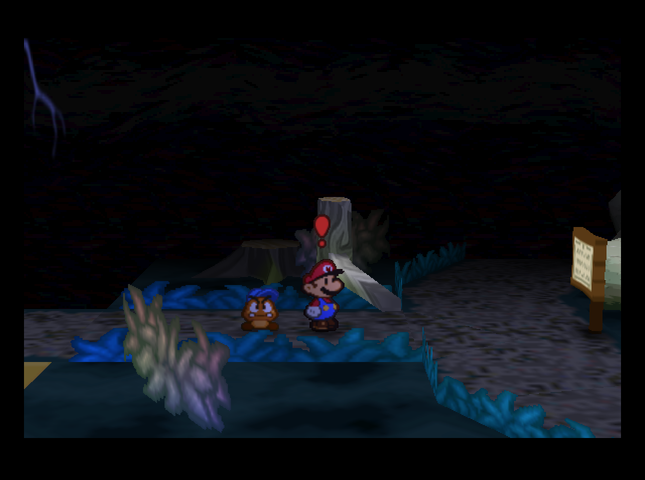 Music: Forever Forest 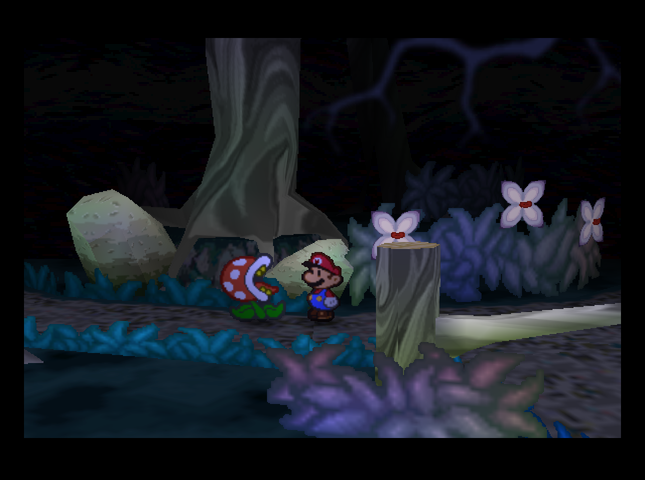 We can get a little ways into the Forest. Each area here is circular, with four paths. On the way to the path deeper into the forest, we run into a Piranha Plant!  We get the First Strike, thankfully. We�re faced with two Piranha Plants and a� Lakiwun? This is a Piranha Plant. Piranha Plants pop out of the ground at unexpected moments, so be on your guard. You�ve seen �em in every one of your adventures, so I imagine you�d know �em pretty well. Their sharp jaws point upward, so you�ll get bitten if you try to jump on �em. They smile after biting people. That smug smile� it makes me hopping mad! This is a Lakiwun. It seems like it�s just a weaker Lakitu. Oh, I get it: Lakiwun, Lakitu. Whoever named these isn�t very creative. I wonder who names these guys? Probably some high-end royalty somewhere. He throws Purple Spinies, and as you can guess, they look like Spinies, but purple. Lakiwun are known for their HP, but I bet they get dizzy easy the way they float like that.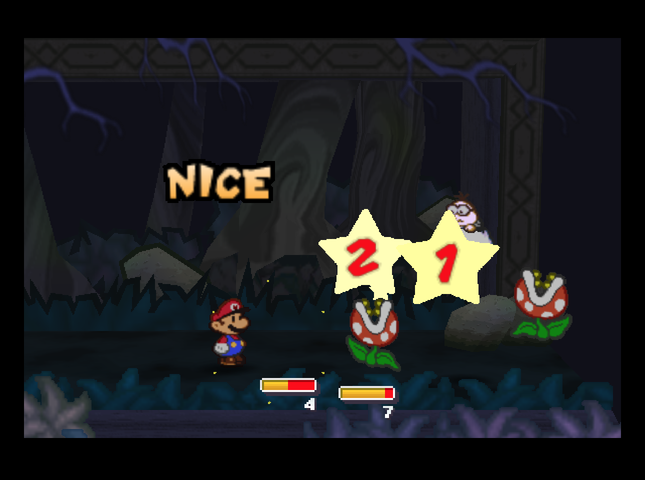 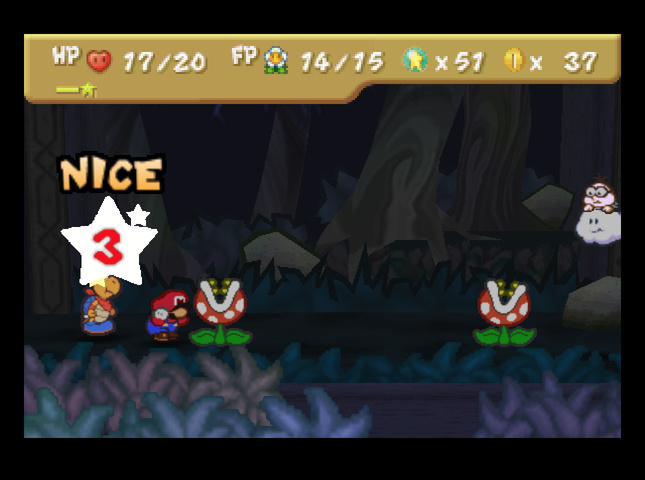 We Spin Smash to try and get rid of the Piranhas ASAP. Their bite attack does 4 damage, 1 more than in the base game. They also have 3 more HP than before.   Lakiwuns hurl 4-damage Purple Spiny Eggs at Mario and his partner. If a partner�s hit, they�ll be out of action next turn. 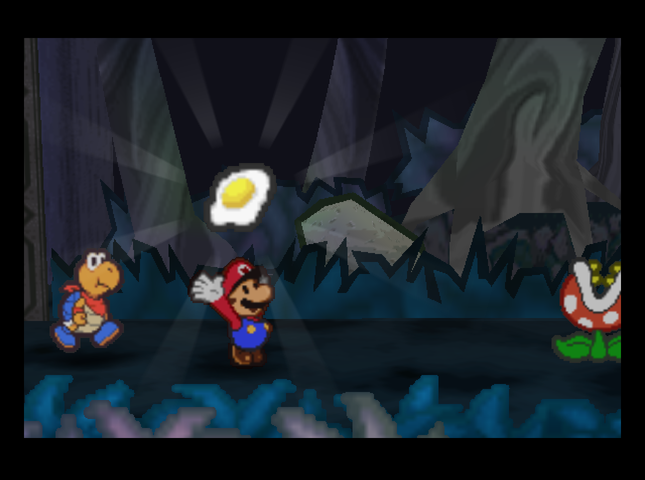 After KOing one of the Piranhas, We eat Tayce�s tasty Fried Egg to recover from the onslaught. 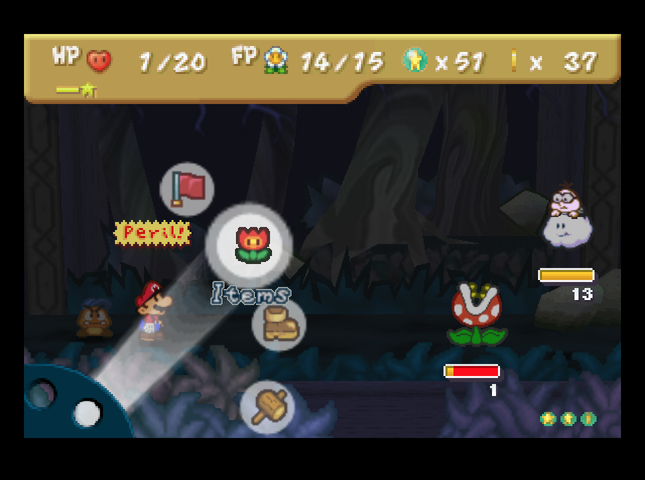  However, time spent switching partners to get Tattles puts us into Peril a turn or two later. That Super Shroom we found in the Tunnels comes in handy almost immediately. 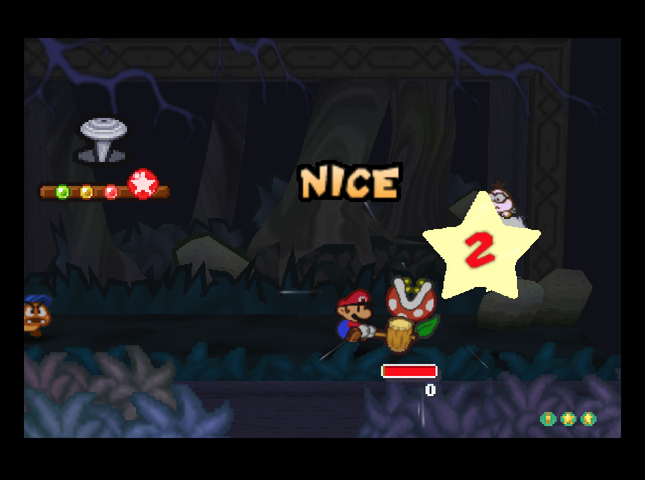 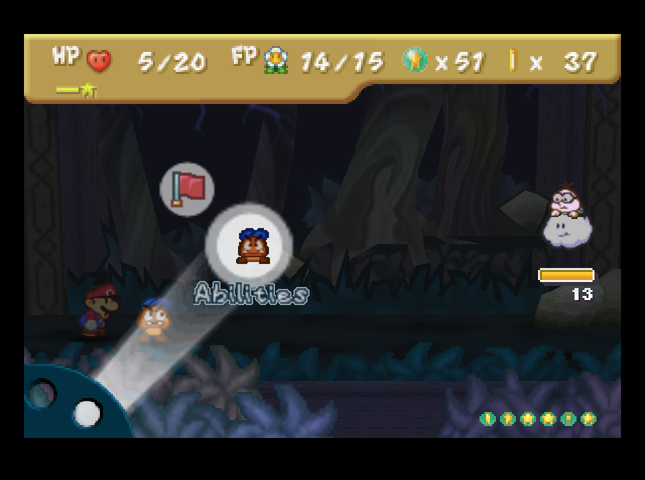 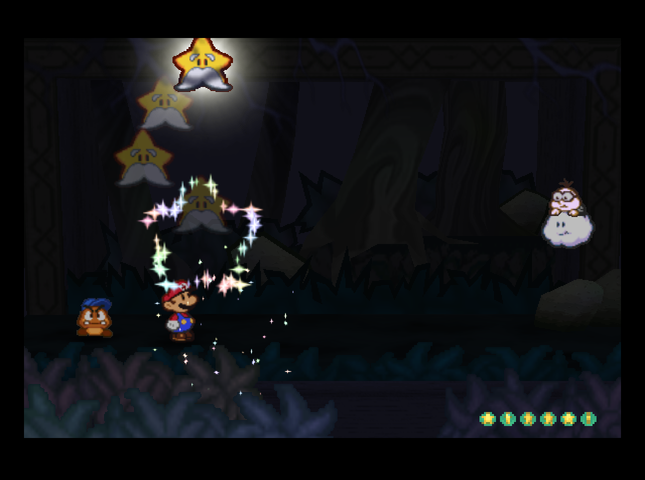 Once we hammer the Piranha, only the Lakiwun is left, giving us some breathing room. We can now use Refresh without the enemies undoing all our hard work in one turn.  A sustained assault of Power Jumps serves to do the Lakiwun in. Yikes! Forever Forest enemies are tough. 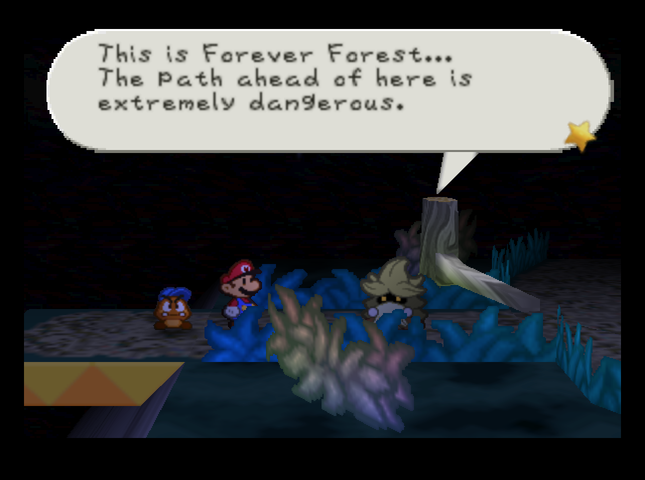 While we make it to the next screen, our way forward is blocked by Oaklie, a community-minded fellow who does his best to stop people So all we can do is, once again, turn around and head back to Toad Town.   The only thing we haven�t explored in South Toad Town is the blue house with the lamp over the door. Unfortunately, it looks like it�s going to stay that way! The door is locked, and we won�t be able to unlock it until we�ve explored a lot further into the Toad Town Tunnels. So, let�s check out southwest Toad Town instead. 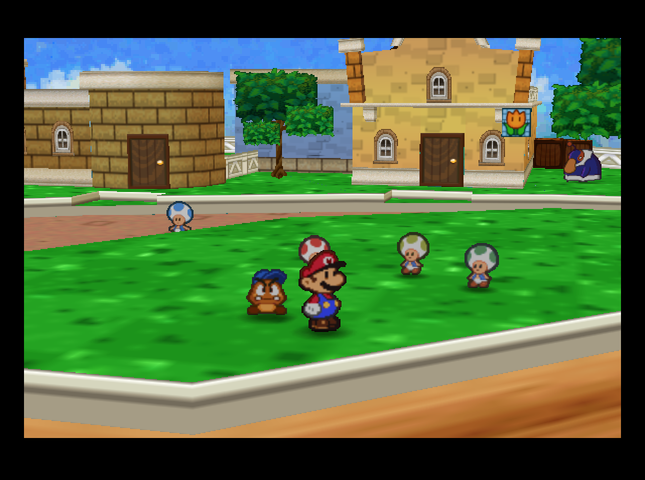 Southwest Toad Town has three buildings: an item shop on the right, someone�s house in the center, and off to the left, an abandoned house that will turn out to house Shy Guy�s Toy Box.  This shop, Harry�s Shop, has several things we couldn�t get before, or not as cheaply. In particular, the yellow bag on the left is Cake Mix! Normally we wouldn�t get access to this stuff until Chapter 4, where we could filch it from Shy Guys. Here, we can just buy it for 10 coins. There is a slight trade-off. In the base game, you could buy Stone Caps here for 30 coins. These items would turn Mario into an invulnerable stone statue for three turns, at the cost of being unable to attack. Harry the shopkeeper also sold Thunder Rages (attack all enemies with thunder, 5 damage) and Tasty Tonics (heals status ailments) as well; they�ve been replaced with POW Blocks (for the low price of 8 Coins) and Super Soda. Prices are also different from the original, too. Dizzy Dials sold for 15 coins here in the base game (though only 10 at Koopa Village); now, they sell for 12 coins here and 15 at Koopa Village. Volt Shrooms here are the cheapest we�ve seen so far, at 13 coins (though they originally sold for 10), and Super Shrooms are discounted to 13 coins (from 20). Now that we�ve visited Harry the grocer, we can get some new recipes from Tayce!  Cake Mix, as you�d expect, becomes Cake. It�s the best FP-restoring item we can get right now. 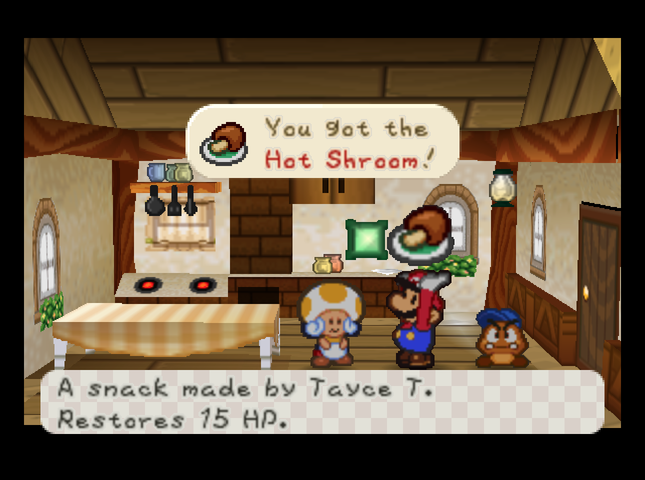 Cooking up a Volt Shroom yields a Hot Shroom. Originally, it healed 15 HP and restored 5 FP; now the FP recovery is gone. This may have been to match its stats to those of the Cake. (You can also cook a Life Shroom to get a Hot Shroom, but� why would you?)  Toad Town�s Port is� a port. There aren�t any boats or anything here at the moment. The building at the north end of the port is a nightclub - Club 64 - but there�s not much we can do there now aside from listen to the cool BGM. 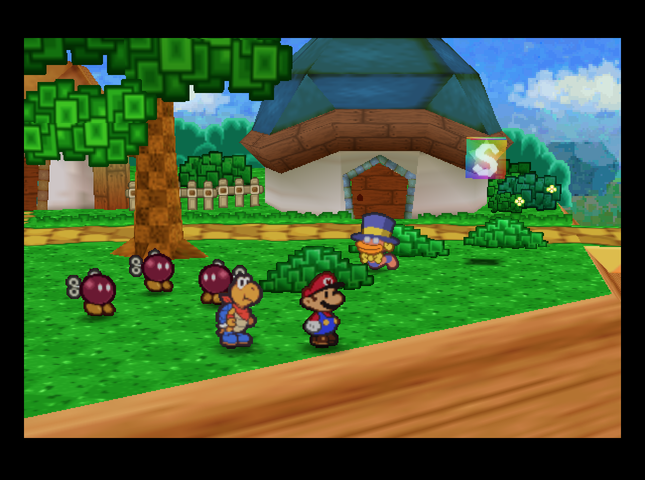 With Toad Town mostly explored, it�s time to head back to Koopa Village and finish delivering �The Tape�. Wait, is that who I think it is? 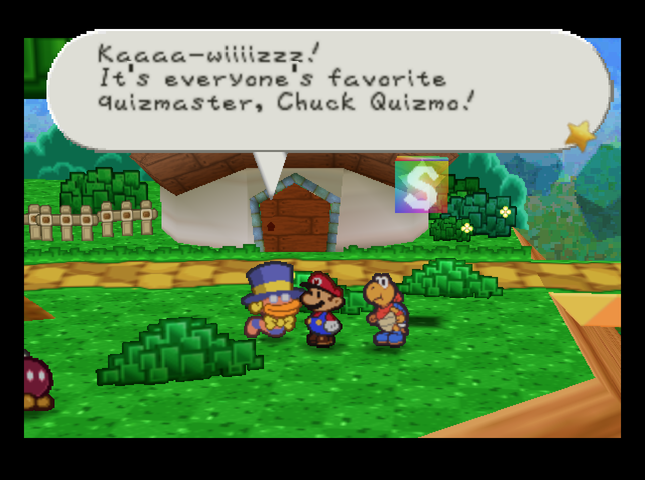 I�m always up for an opportunity to earn more Star Pieces, good sir.  OK, this one isn�t quite unfair, but it�s really hard to find out. One NPC mentions that the Koopa Bros were calling themselves �Nash T.� once Donlon thunderbolts �em. However, if you come back after Chapter 1, the NPC is talking about Dry Dry Desert instead. How many buildings are there in Koopa Village?[Six / Seven / Eight] Which of these could you meet at Princess Peach�s Party?[A Yoshi / A Koopa / A Bob-omb] Which of these stations is NOT available on the radio in Koopa Village?[Golden Oldies / Hot Hits / FM Shroom] The radio in Koopa Village belongs to a Koopa living on the west side of the village. We didn�t see him during the Fuzzy incident because he was staying in his house; he�d realized that if he went outside, there�d be shell to pay. How many Bob-ombs, besides Bombette, were imprisoned in Koopa Bros. Fortress?[Four / Six / Eight] I�d originally thought there were more. What happens if you wait long enough during chapter title screens?[The next chapter begins / A new song begins to play / A secret message appears] The new song is a lite-bit remix of the World 1-1 theme. It starts at about the 10-second mark in the linked video. 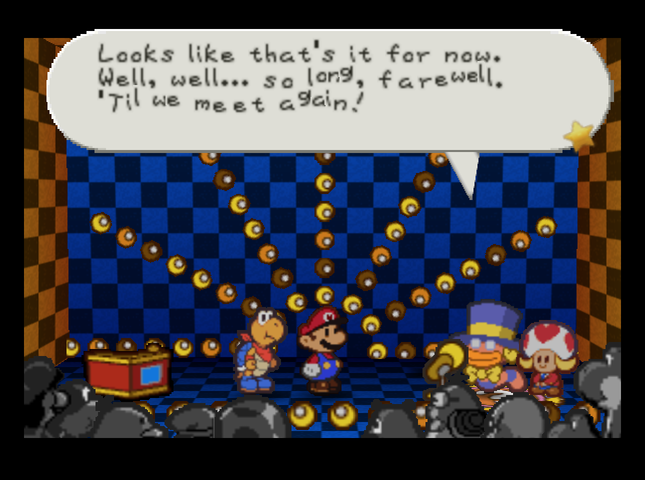 After six more questions, Quizmo calls it quits again. Time to finish our delivery.  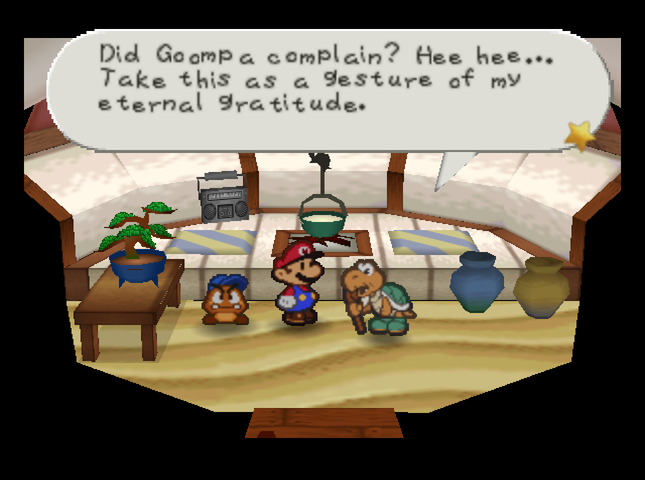 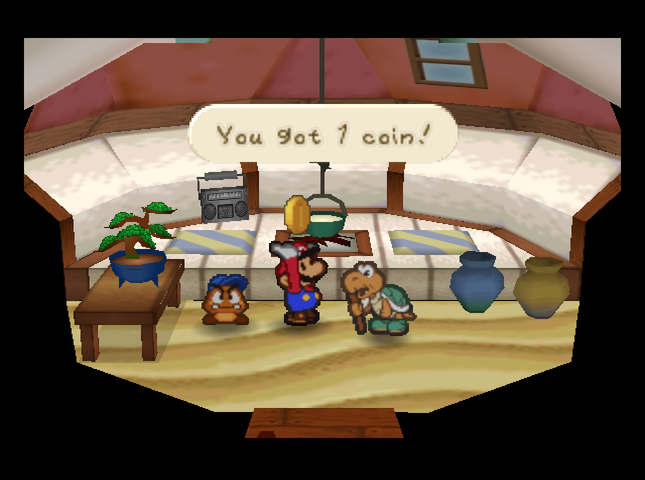 We get paid, as per usual.  Koopa Koot has another favor. This one�s really easy, because we still have the Koopa Tea that Tayce T. made earlier in our inventory. 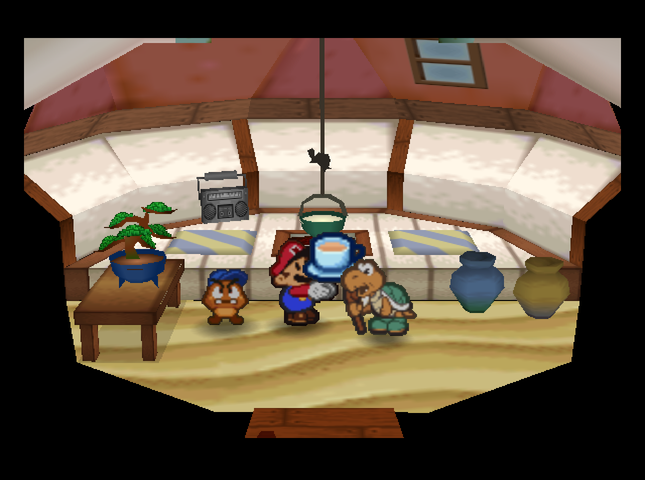    This time, though, he gives us a special reward: 3 Star Pieces!! Koopa Koot�ll do this for every four favors we fulfill. 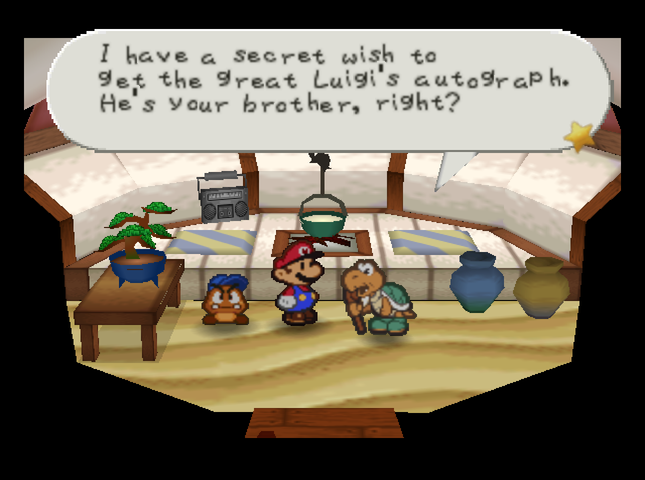 He�s got another ask lined up right away: Luigi�s autograph. We�ll have to head back to Mario�s house to get this one. 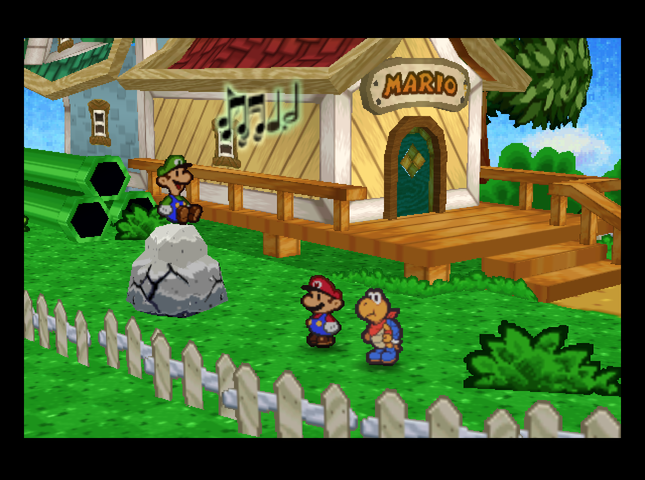   Luigi is singing on a rock. Bombette knocks him down and we can get the autograph. 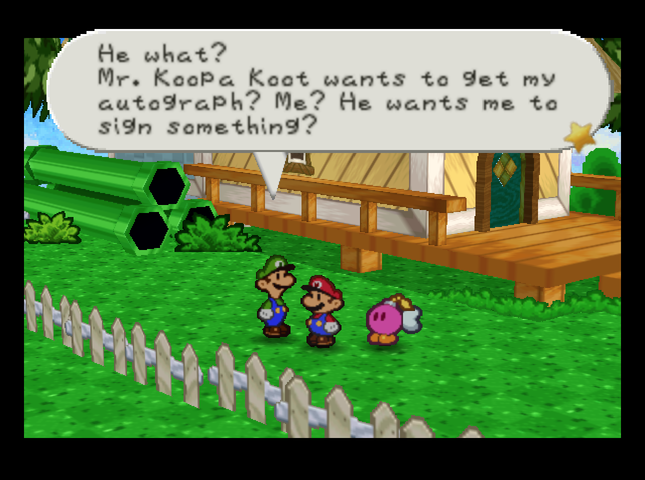 Whoa! Cool! I'm flattered! I guess maybe I'm a little bit of a celebrity, huh? Here you are, Mario. My autograph. Give my regards to Mr. Koopa Koot, OK? Whoa! Cool! I'm flattered! I guess maybe I'm a little bit of a celebrity, huh? Here you are, Mario. My autograph. Give my regards to Mr. Koopa Koot, OK? Honestly, I�m glad someone wants his autograph. It�ll take the sting out of not going on the adventure, at least. 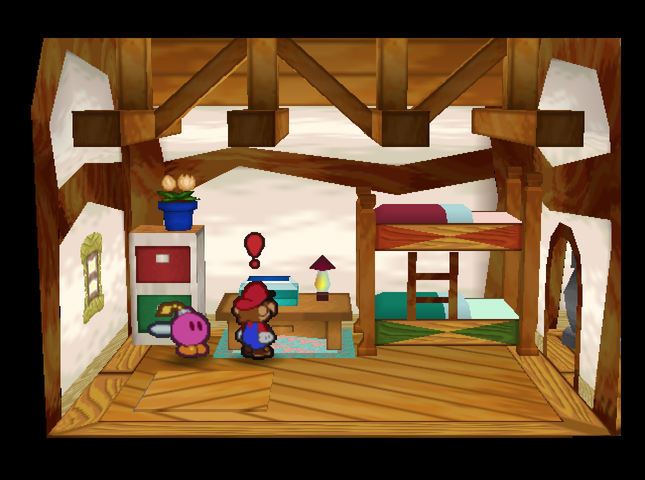  Also, it seems Mario has some mail. Hey! Watch your back when you walk at night! I'm gonna make you cry! You'd better sleep with one eye open, pal! We shall return!! � Koopa Bros.For some reason, I can�t take this threat too seriously�  Since we checked Mario�s mail, we might as well stop in at the Post Office to see if any of the partners have anything. Kooper has a letter. We had a really nice talk over some Koopa Tea. She did seem a touch disappointed that you were still on the road. She said that she's going to cook a delicious dinner when you come back, so you have something to look forward to. Oh yes! If you happen to see my wayward husband, please tell him to come home more often. Take care. � Kolorado's wifeNow it�s back to Koopa Village! 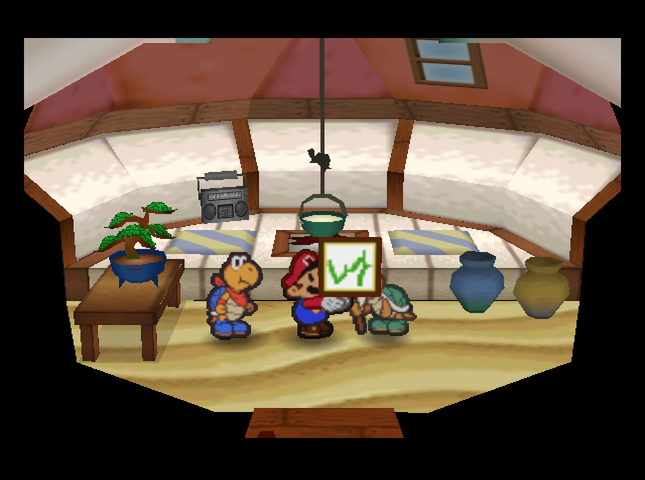 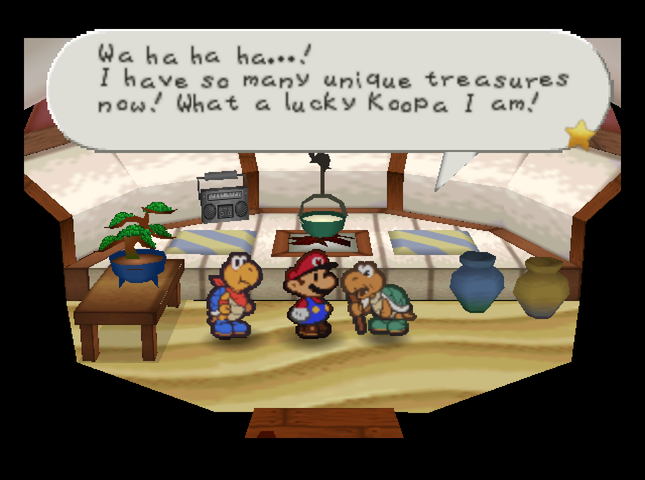  Koopa Koot pays us handsomely for Luigi�s autograph. That�s the last favor he�ll want from us until Chapter 2�s over.  We now have 25 Star Pieces, so we pay another visit to Donluvlee and Donlow.  Donluvlee�s business is still shut down. It turns out this is permanent. In Paper Mario, Merluvlee acted as a �hint system� to find Badges, Star Pieces, and Super Blocks (which can upgrade your Partners - we�ll run into some starting in Chapter 2). However, the Master Quest devs removed this because it would be too much trouble to keep track of where every badge, Star Piece, etc. was moved to. Apparently, they also needed the space used by her hints to add more content.  Donlow is open for business, though! I�ve got something specific in mind for our first buy from him.   It�s Zap Tap! This Badge electrifies Mario, making enemy that does a contact attack take damage in return (unless they�re protected in some way, like Koopas). This damage pierces enemy defenses. The badge will also let us jump on certain electrified enemies.  We�ll need to unequip some other badges in order to use Zap Tap, so we�ll get to actually putting it on later.    We leave Donlow behind and climb a little further towards Shooting Star Summit. In this area, we can grab a Star Piece with Bombette�s help.   And the nearby Star Temple now has some occupants! Let�s see what they have to say.  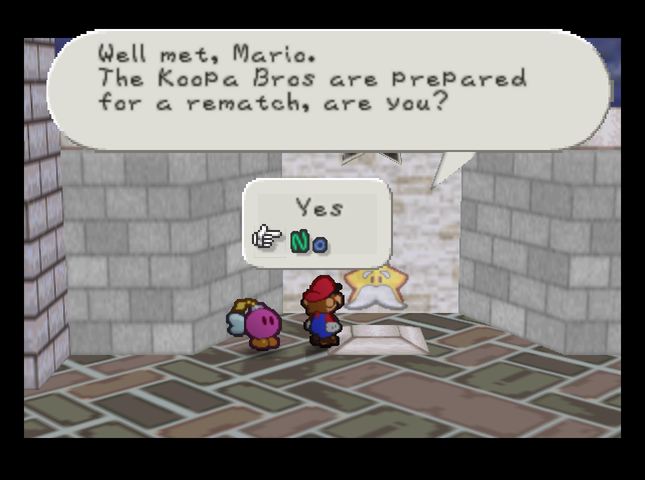 This is the true purpose of the Star Temple: Rematches with heavily beefed-up versions of the game�s major bosses. How heavily, you ask?  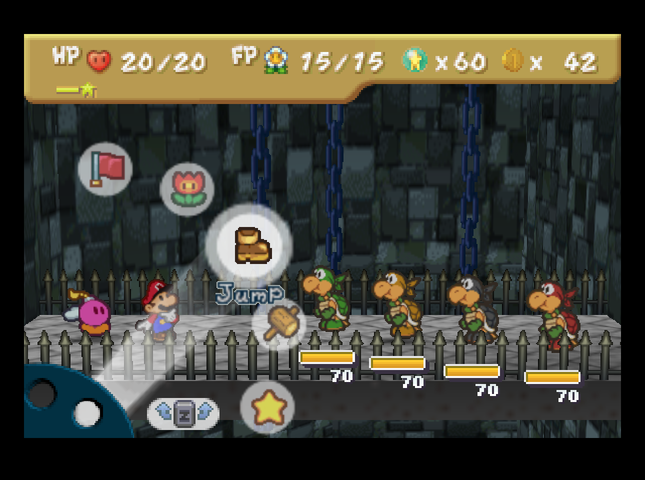 That heavily!! (The Koopa Bros skip the Mecha-Bowser phase.) Given the power level on these bosses, we�ll be coming back to the Star Temple much, much later in the game. 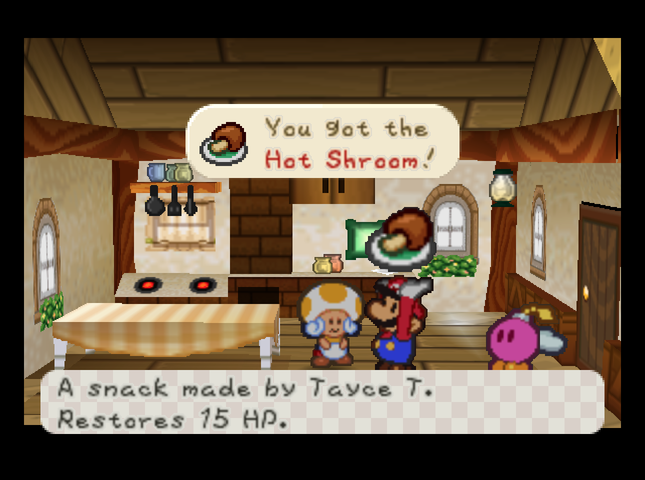 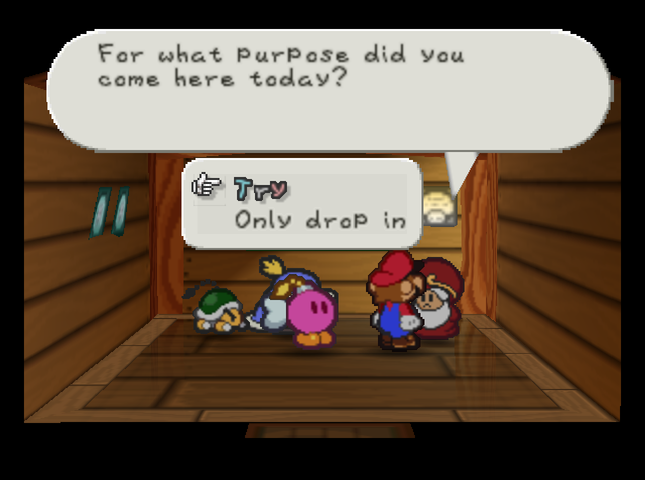  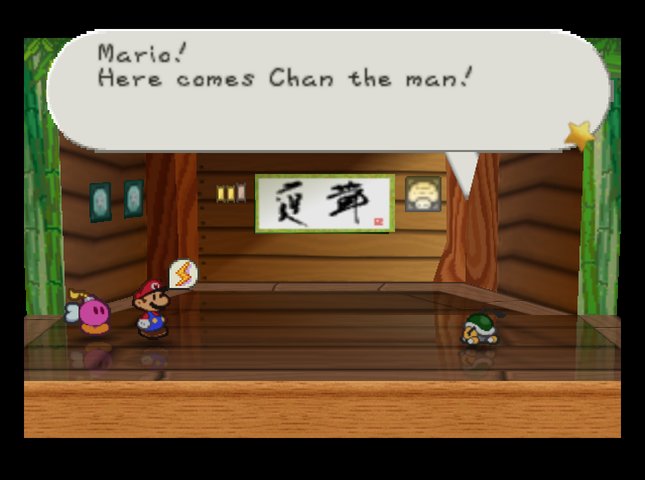 Back in Toad Town, there�s one last loose end to resolve before we head back to the game�s main story. Now that we have Zap Tap, it�s time to try and fight Chan again! We�ve prepared for the fight by making sure we have three of Tayce T.�s finest Hot Shrooms.   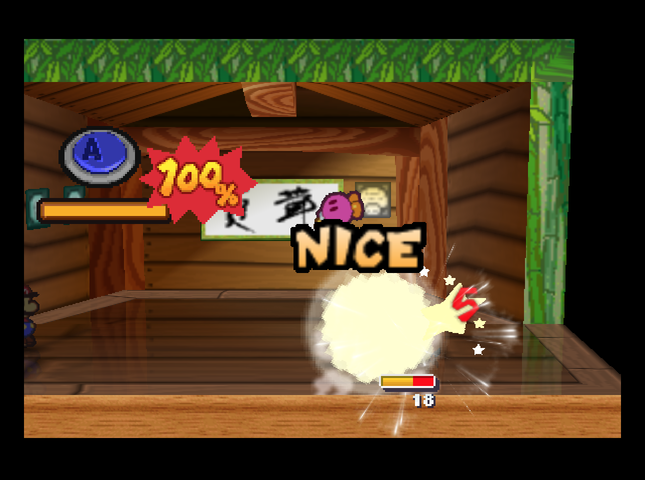 With Zap Tap, Mario can jump on Chan safely. Then, Bombette�s Bomb does heavy damage. 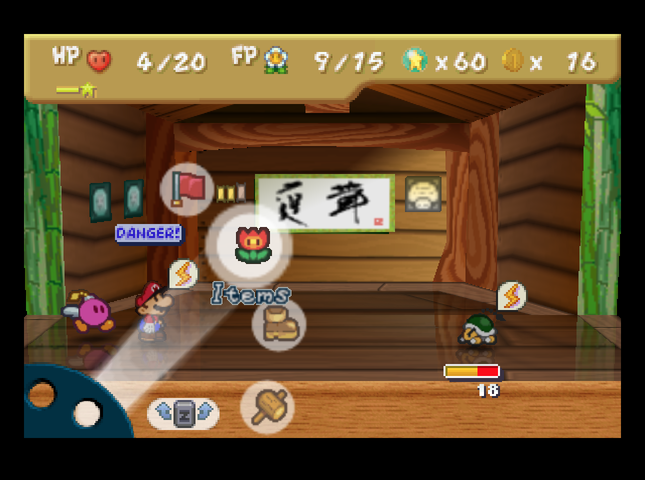 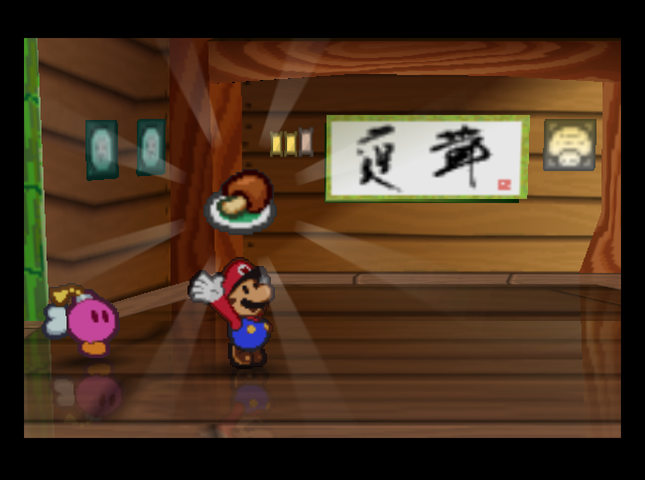 After two attacks from Chan, Mario won�t be able to take a third, so we take a lunch break. Bombette sits the turn out - even her 5-damage Bomb can�t get through Chan�s hard shell. 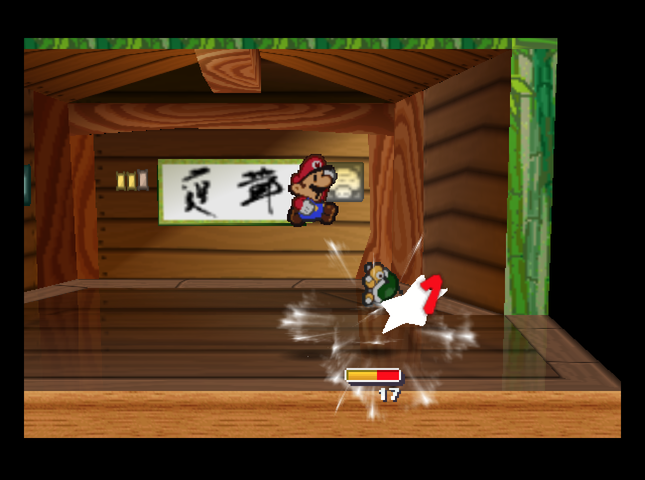  Then it�s back to pounding on him.   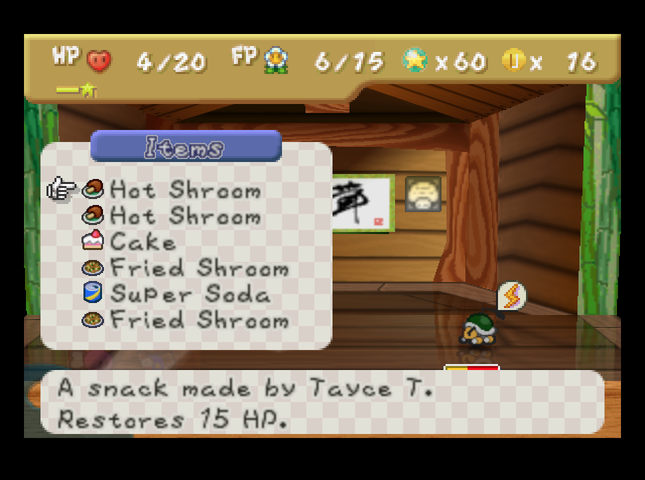 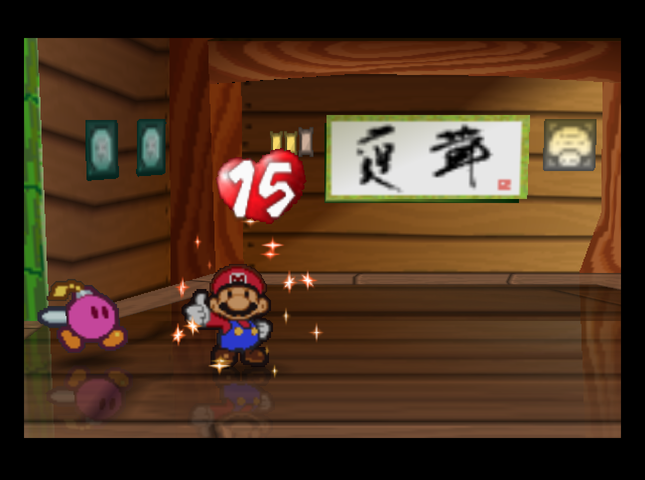 After one more Chan attack, we�re back about where we started. (Don�t forget, he attacked us on the turn we ate the Hot Shroom, too.) So we eat another Hot Shroom. 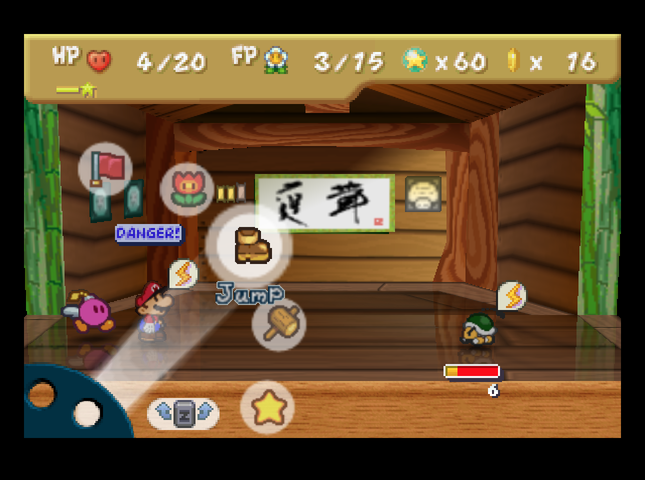 He does bring us down to Danger, but at this point we�ve chipped away at his HP enough that we can KO him without having to heal more.  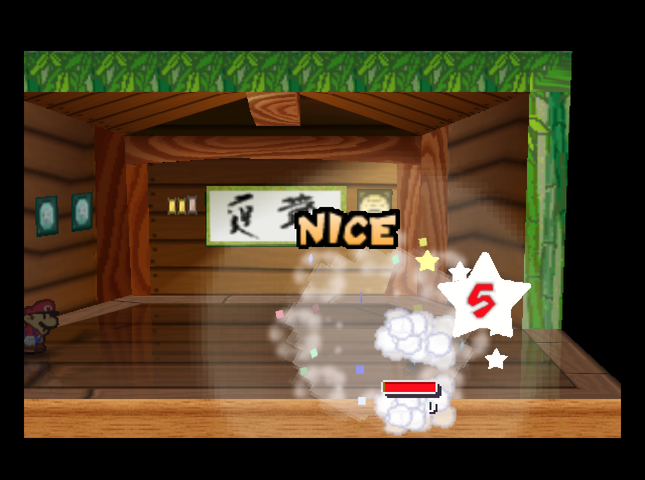  Bombette�s last Bomb attack Shrinks Chan, adding insult to injury. It would have been nice if that had happened earlier! 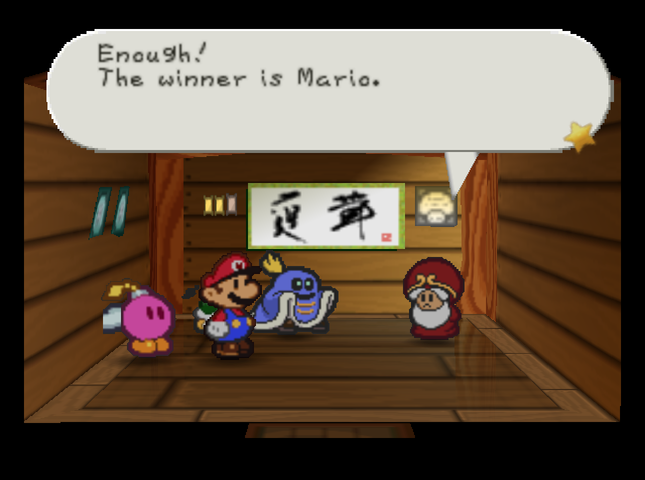 Chan, you must train harder. Very well. I give you this, Mario. Chan, you must train harder. Very well. I give you this, Mario.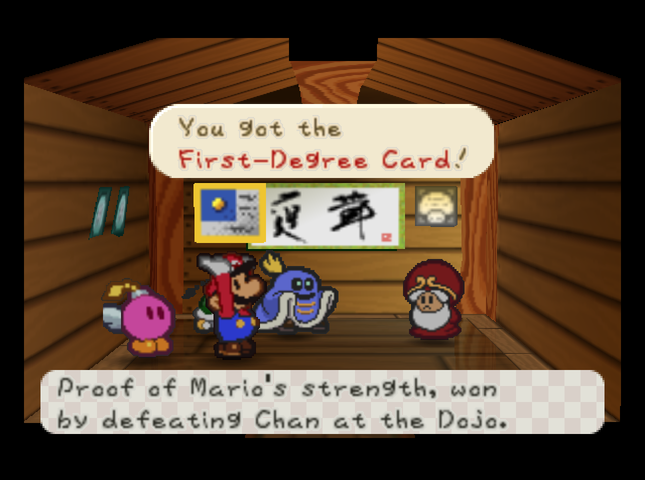 We get the First-Degree Card, showing that we�ve proved our worth at the Dojo� once. I�m not going to ruin our victory against Chan by getting immediately beat up by Lee, so that�s enough fighting in the Dojo for now.  The last part of Toad Town is the Station. There�s a few different things we can do here. 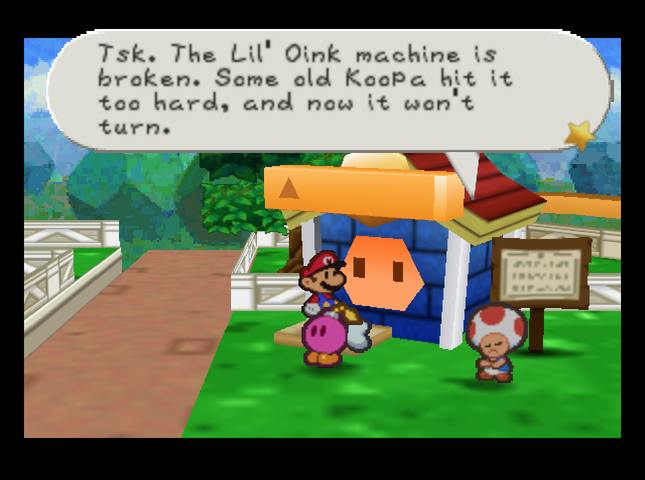 The Li�l Oink machine is broken, cutting off our access to everyone�s famous item-dropping piglets. Apparently, the streamer �Fatguy� used a strategy that involved spamming many �Shooting Star� attack items to beat a particularly hard boss earlier than normal. This is the result: The machine will stay busted until we finish Koopa Koot�s favors� I think. On the upside, according to the sign, Li�l Oinks now cost only 1 Coin to hatch, so once the Li�l Oinks are able to be raised, watch out! 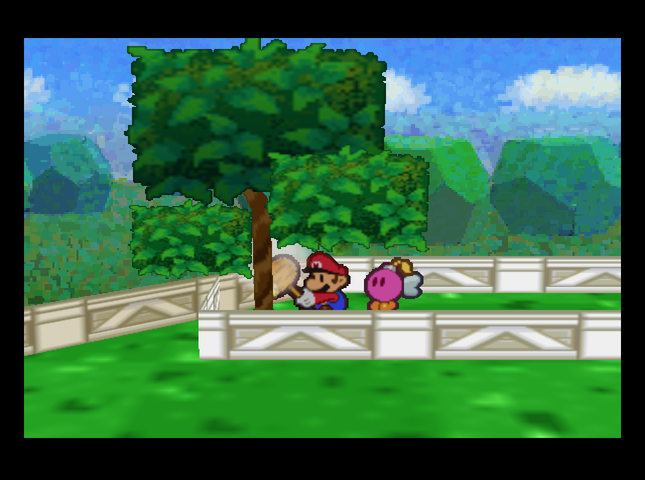  Hammering the tree on the left side of the entrance reveals a pipe leading to the Playroom. We have the opportunity to win Coins here, but we�re not short of money right now - so we�ll come back here later.  The train to Mt. Rugged - the first leg of our trip to Dry Dry Desert - is here, but it�s not going anywhere.  I�m ruined� done for! A huge rock is blocking the train tracks! When Peach�s Castle was uprooted, one of the boulders from that stack rolled off and landed here. What bad luck! If we can�t do something about that boulder, I can�t make my run to Mt. Rugged! I�m ruined� done for! A huge rock is blocking the train tracks! When Peach�s Castle was uprooted, one of the boulders from that stack rolled off and landed here. What bad luck! If we can�t do something about that boulder, I can�t make my run to Mt. Rugged!Let�s do something about that boulder. 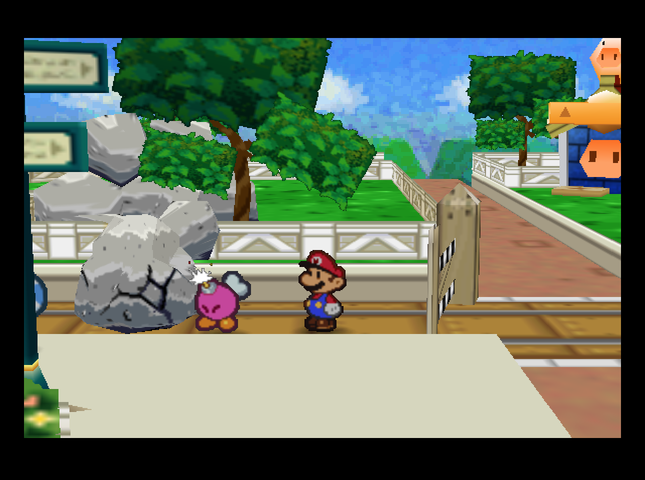 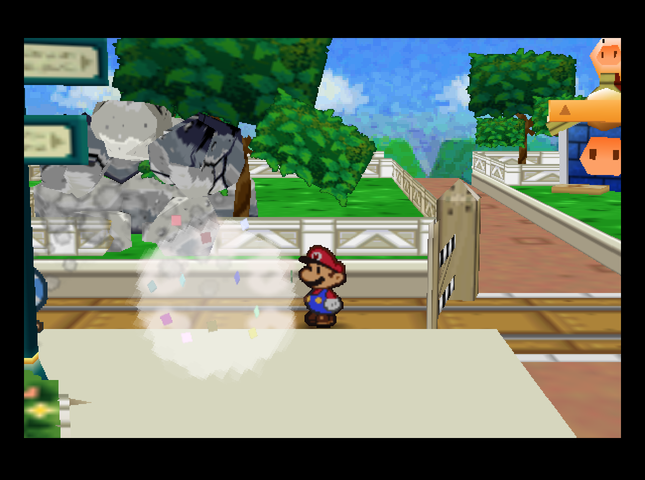  Oh, thank you, Mario!! The train's back on track! All aboard! This train is bound for Mt. Rugged. Oh, thank you, Mario!! The train's back on track! All aboard! This train is bound for Mt. Rugged.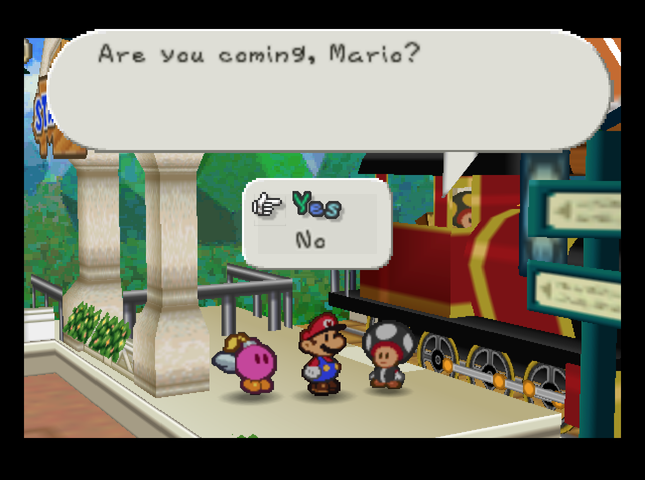 Well, let�s see. We�ve done everything we can do in Toad Town for now�  �and I�ve made sure our inventory has plenty of tasty provisions for the trek ahead of us. Let�s do this!  Sit tight, folks. Now departing for Mt. Rugged. Sit tight, folks. Now departing for Mt. Rugged.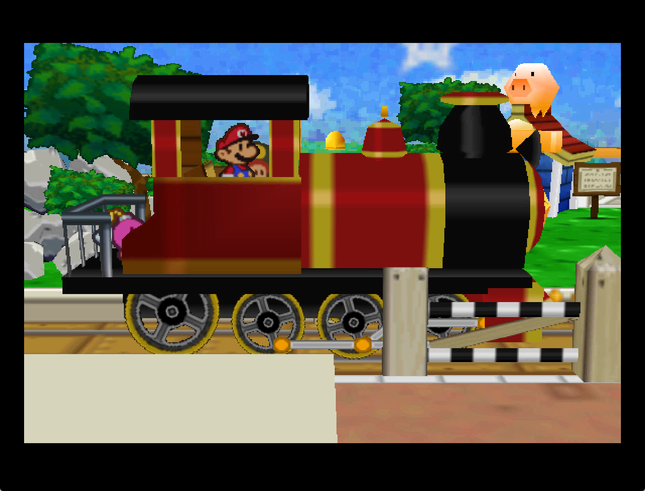 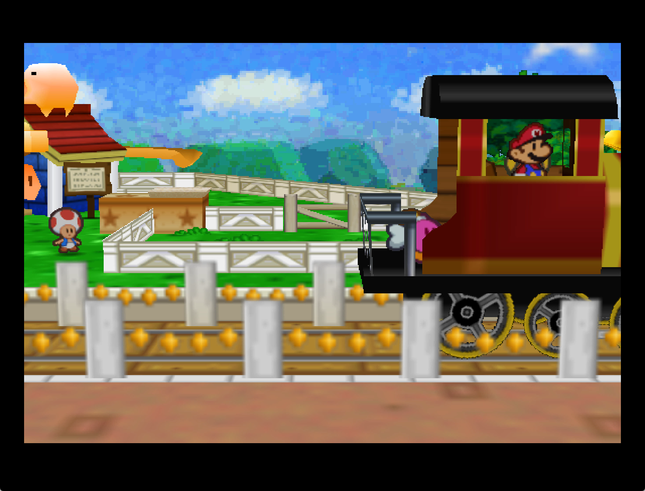 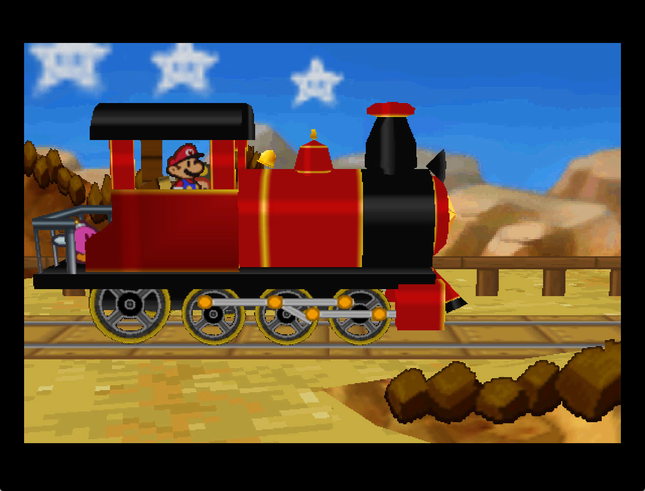  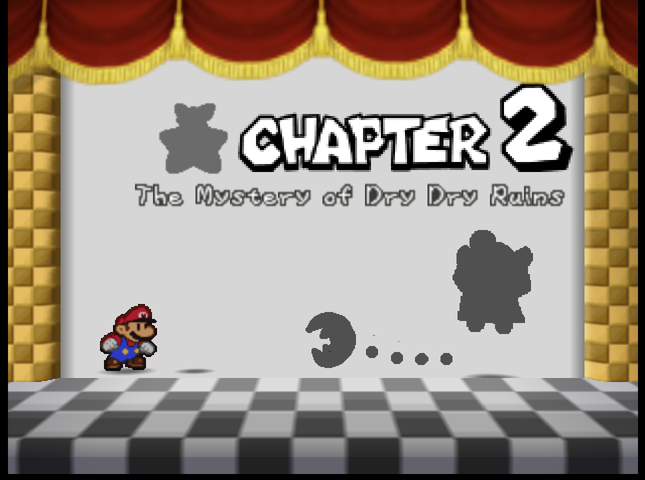 Dojo Promotion: First-Degree Card Badges: 17/89 (New: Zap Tap) Recipes: 8/50 (New: Cake, Fried Egg, Fried Shroom, Hot Shroom, Koopa Tea, Nutty Cake, Spicy Soup, Super Soda) Star Pieces: 26/180 Chuck Quizmo�s Quiz Questions: 12/64? Game Overs: None. SUMMARY OF CHANGES FROM MAIN GAME (in this installment) � Tayce T�s recipes slightly more/less nutritious. (Fried Shroom and Spicy Soup recover +2 FP; Nutty Cake recovers +1 HP, -1 FP; Fried Egg recovers -1 HP, +1 FP; Hot Shroom no longer recovers FP) � Cake Mix now on sale in Harry�s Shop in southwest Toad Town, as are POW Blocks. Stone Caps and Thunder Rage no longer available. � Dizzy Dials and Super Shrooms cheaper than base game prices at Harry�s Shop; Volt Shrooms more expensive. � Gloombas under Toad Town now much nastier. (+4 HP, +3 Attack, and their headbonk now Shrinks) � Spiked Paragloombas observed under Toad Town. (Spiked Paragloomba: 11 HP, probably 1 Defense, 5 Attack. Main attack may or may not Shrink on contact.) � Piranha Plants a bit meaner. (+3 HP, +1 Attack) � Rare �Lakiwun� spotted in Forever Forest. (Lakiwun: 13 HP, 4 Attack, also attacks partner.) � Donluvlee permanently closed; quoted as saying, �I never said I was good at being a mafioso�. � Star Temple purpose revealed: full-contact, max power, boss rematch coliseum. � Li�l Oink machine broke. (It�s Koopa Koot�s fault) Next Time On Master Quest: Mario goes mountain climbing.
|
|
#
¿
Aug 9, 2019 12:02
|
|
|
Part 10: Of Clefts And Other Big Rocks Music: Mt. Rugged 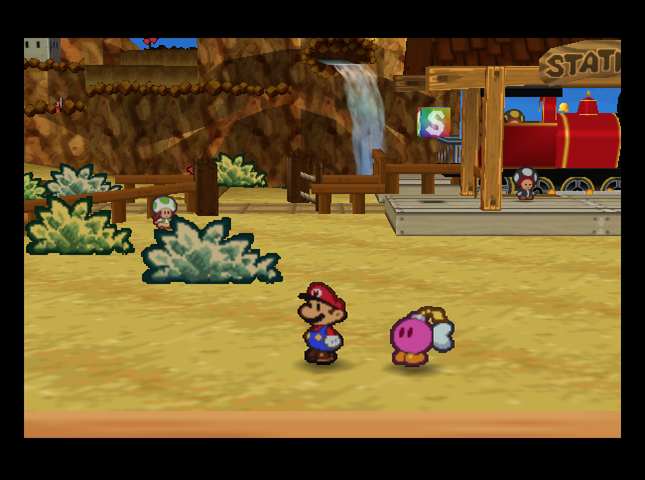 The train drops us off at the Mt. Rugged station.  Mt. Rugged! Mt. Rugged! Passengers heading for Dry Dry Desert or Dry Dry Outpost, should proceed directly over Mt. Rugged from this station. Mt. Rugged! Mt. Rugged! Passengers heading for Dry Dry Desert or Dry Dry Outpost, should proceed directly over Mt. Rugged from this station.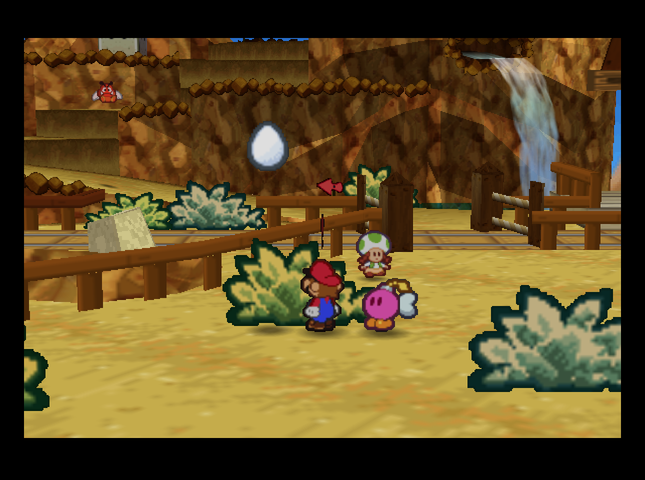 Before we climb the mountain, there�s an Egg hidden in a bush at its base. This is the only place to get Eggs in the base game.  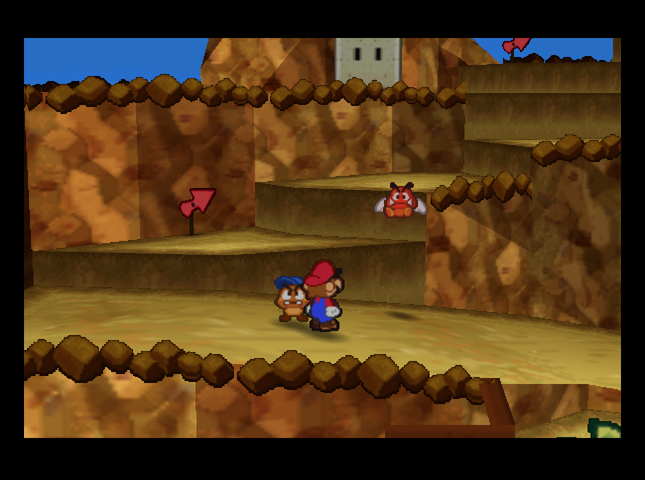 Let�s go climbing! Huh, that�s a strange Paragoomba. 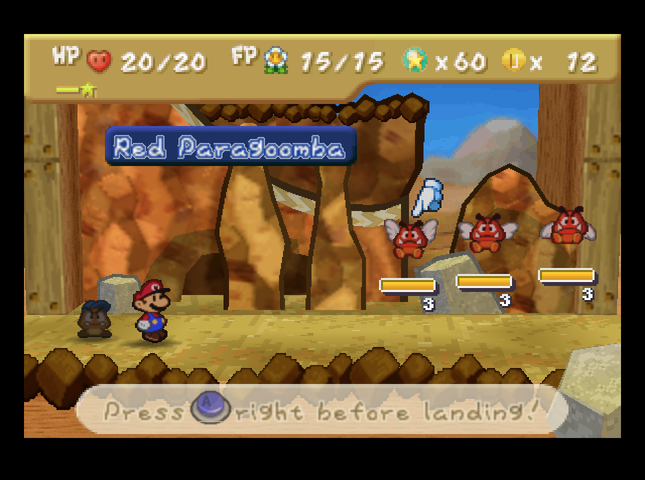 It attacks us! This is a Red Paragoomba. They�re faster, stronger, and more tenacious than normal Paragoombas. They�ll attack you twice, so don�t let your guard down!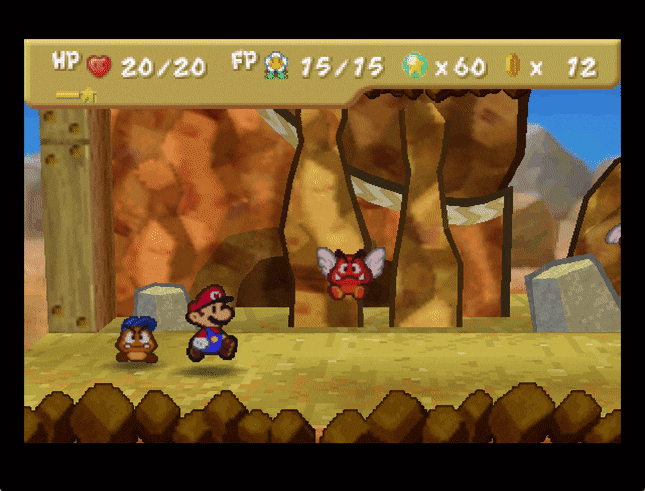 They do, in fact, attack twice, for 2 damage each time. Mario can dodge each attack separately, but it�s still a new wrinkle. Taking them out isn�t hard - jumping works - but since each has 3 HP, they take two jump attacks to KO. They still attack twice when they�re grounded, too.  After the battle, I adjust my strategy accordingly, re-equipping Zap Tap and swapping HP Plus for Multibounce, Spin Smash, and Power Jump. (I�ll customize more when I know what all is on this mountain.) 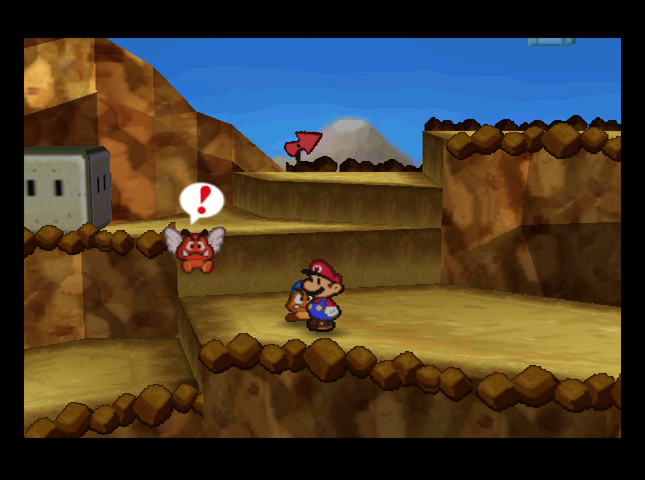 There�s another Paragoomba a little up the mountain, so we can test out our new setup. 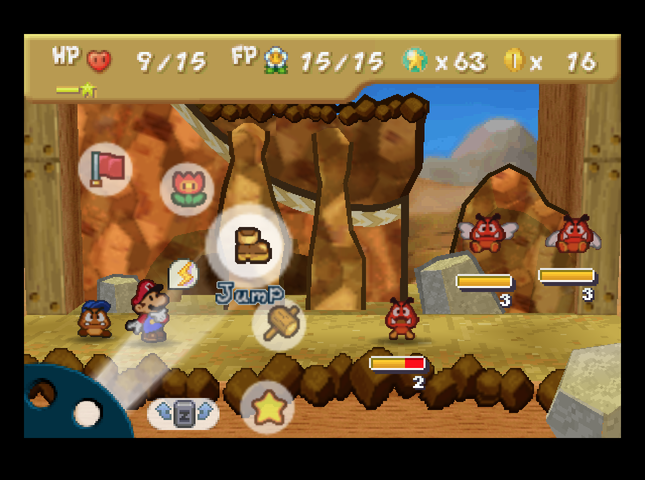 I�m also able to get the First Strike, so we�re able to KO one Paragoomba this turn and ground a second.  With Zap Tap live, the Red Paragoombas take contact damage after attacking. This means I can KO them with one attack the next turn. On top of this, the shock interrupts their combo attack, so they only attack once! 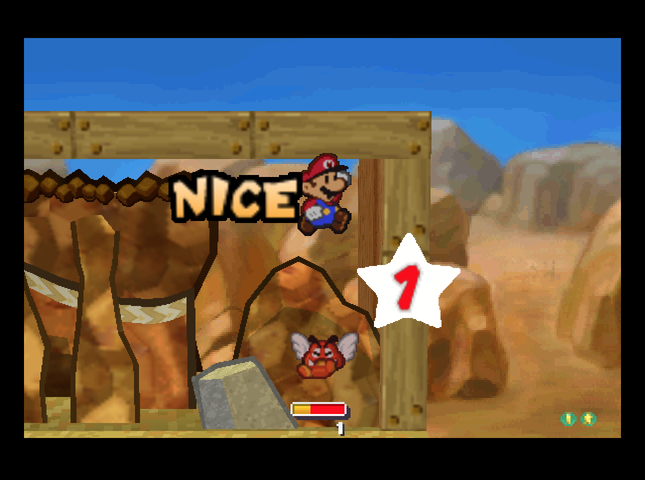 We KO the last Paragoomba, and continue on our way. 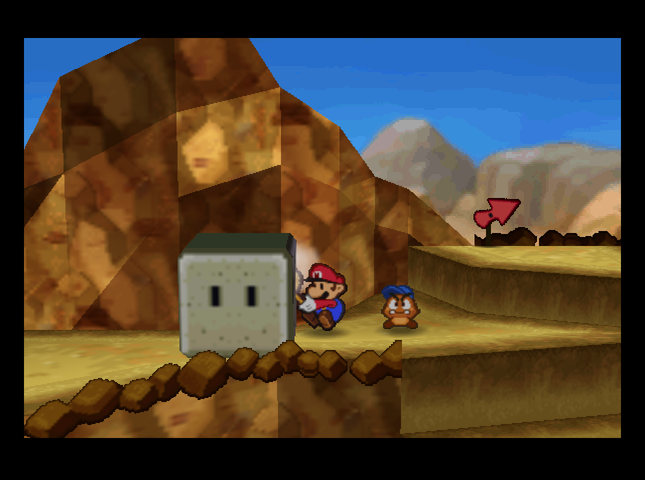 A little farther up the mountain is a block we can�t bust with our current Hammer, so we have to keep climbing up and to the right. 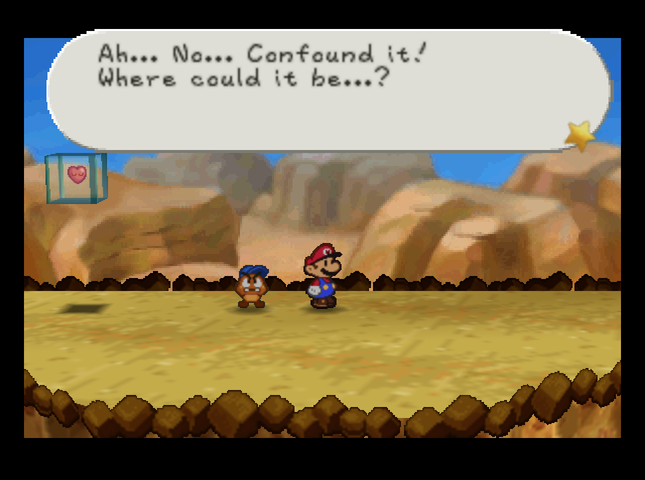  At the top of this part of the mountain, we bump into Parakarry, the postman.  Oh! Sorry, folks! Very sorry! I was looking for something and not watching where I was going. Oh! Sorry, folks! Very sorry! I was looking for something and not watching where I was going. 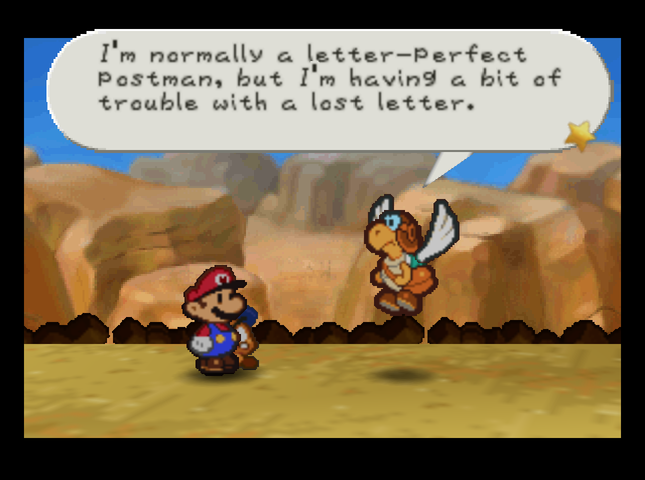 The �something� turns out to be some mail Parakarry dropped as he was flying over Mt. Rugged. If you happen to stumble upon a letter anywhere around here, please tell me, all right? My job could depend on it! We leave Parakarry to his searching for now, and continue. 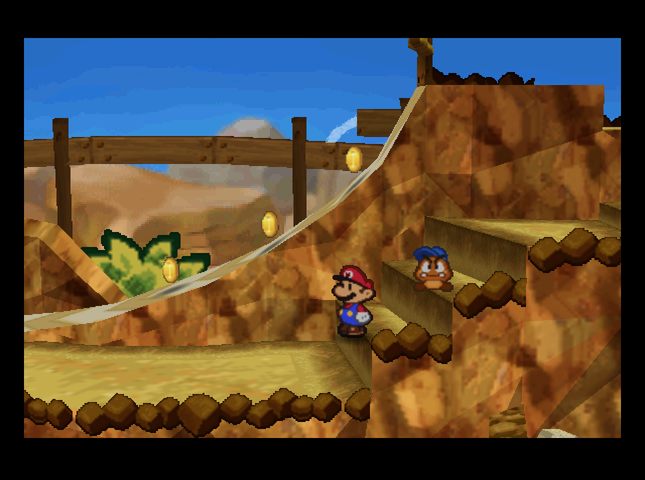  The next area of the mountain has a cool slide Mario can slide down to get some Coins. 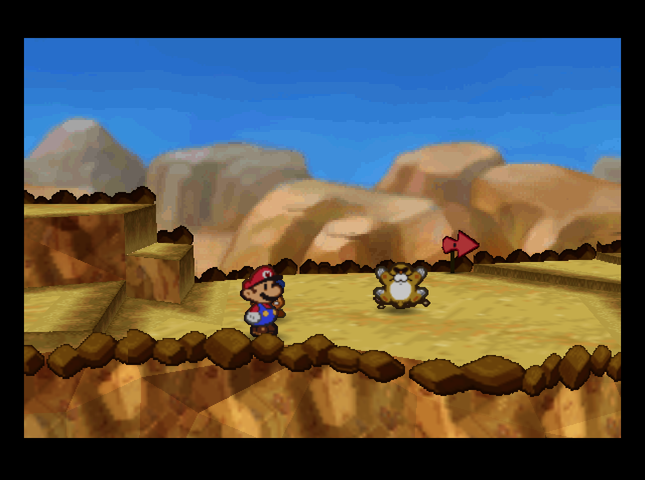 The area is also crawling with Monty Moles. 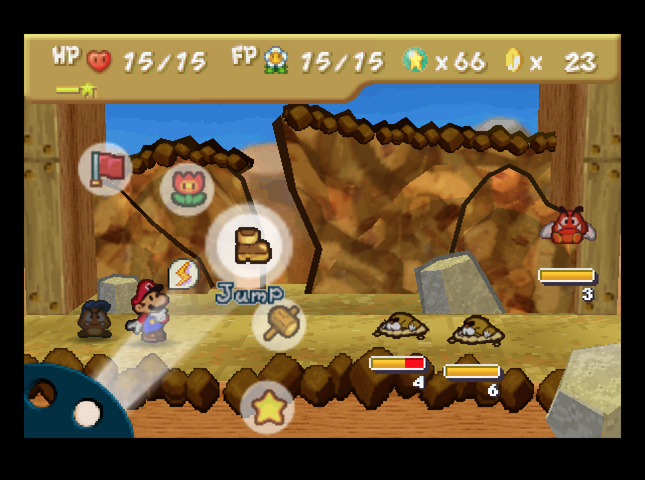 This is a Monty Mole. Monty Moles are rock-throwing moles, big time mischief-makers. Ugh. They have kind of scary-looking faces. I don�t like how they look at me. Maybe they wear sunglasses because they have really sensitive eyes. Or maybe they�re just hip. This is a Monty Mole. Monty Moles are rock-throwing moles, big time mischief-makers. Ugh. They have kind of scary-looking faces. I don�t like how they look at me. Maybe they wear sunglasses because they have really sensitive eyes. Or maybe they�re just hip.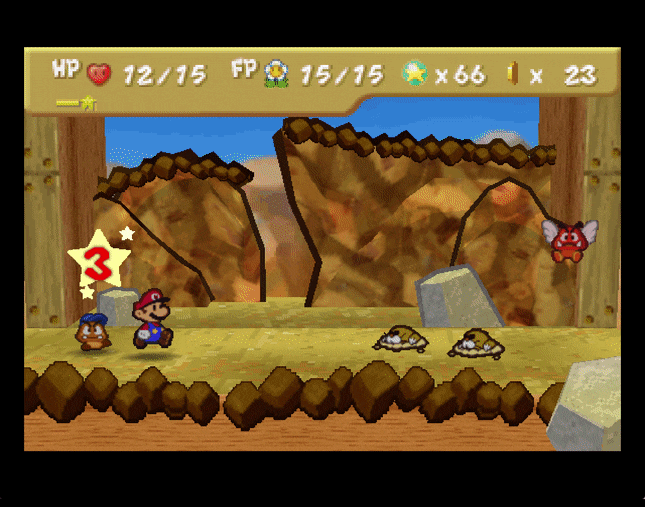 Monty Moles throw fast-moving rocks that do 3 damage. With their high HP bars, they�re top priority to take out before they can pepper us with stones. (Not only did the rocks only do 2 damage in vanilla Paper Mario, but the Moles only had 3 HP, and� I�ve confirmed this by looking at video footage� their rocks flew through the air a lot slower.) 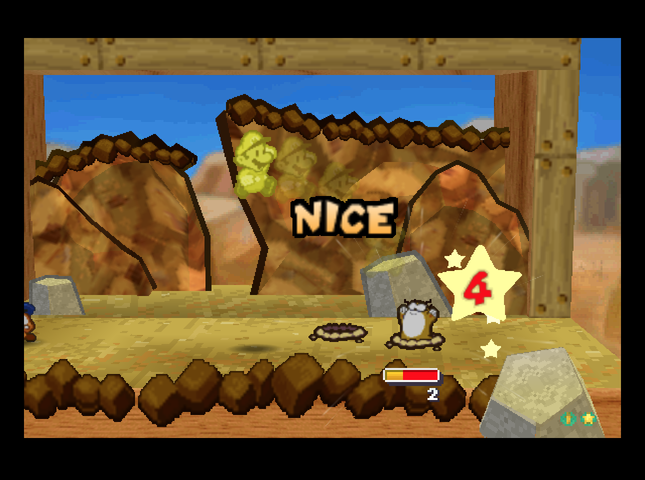 Mario and co. are able to take out the first Monty Mole and the Red Paragoomba with attacks, leaving only one more Mole. The next turn, Mario Power Jumps it so we can KO it ASAP.  After a quick visit to the Heart Block, we keep going. The path splits into two directions: upper and lower. 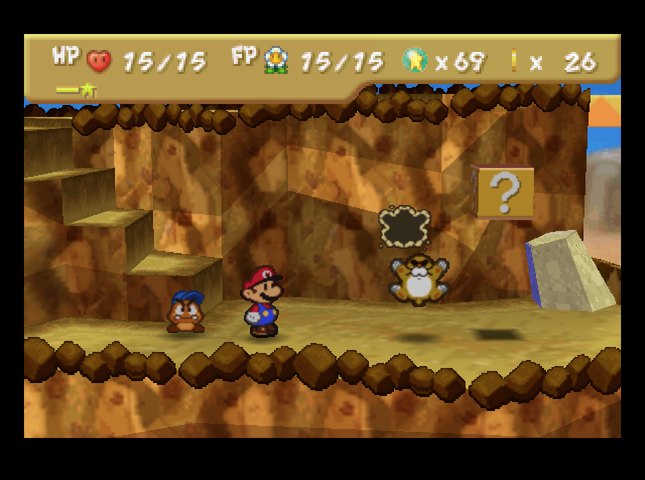 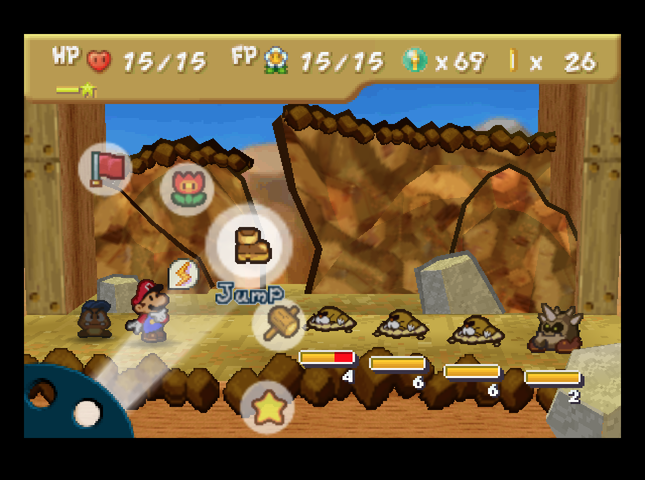 On the lower path, there�s another mole� and it�s teamed up with� what is that? This is a Cleft. Clefts are pretty strong, so you�d better be careful. Their specialty is pretending to be rocks, so watch your step on the mountain. You�ll get hurt if you jump on the spikes on their heads. You know, there�s courage in running away sometimes�Clefts only have 2 HP, but they have a whopping 4 Defense to make up for it! They�re made of rock, after all. (This was buffed up from 2 Defense in Paper Mario.) 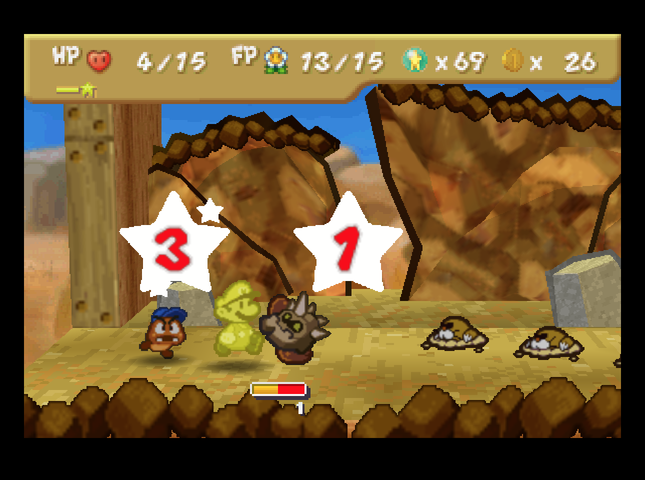 Their attack does 4 damage normally (Mario just finished guarding in the screenshot above). Because of Zap Tap, though, Cleft takes one damage on contact - which ignores their Defense! So, we just have to sit through two of their attacks, and they�ll keel over. 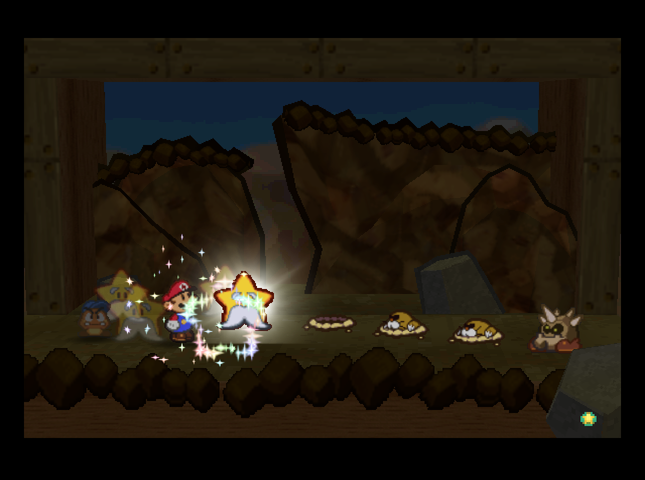 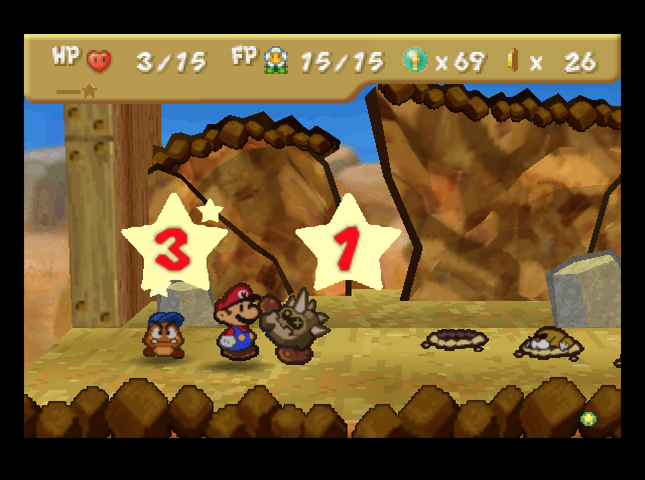 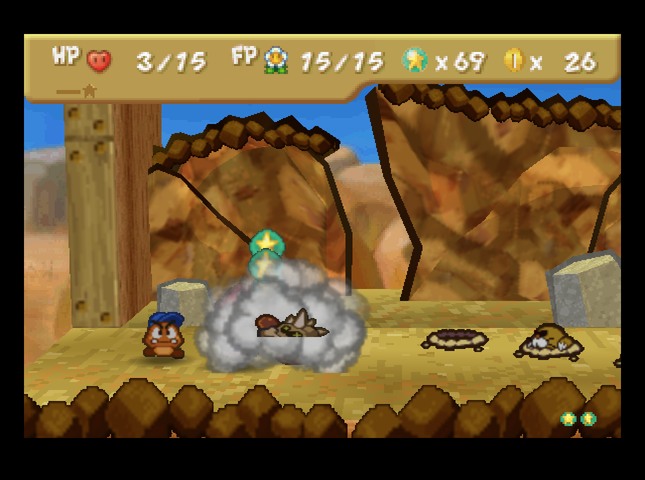 This happens next turn, after a quick Refresh. 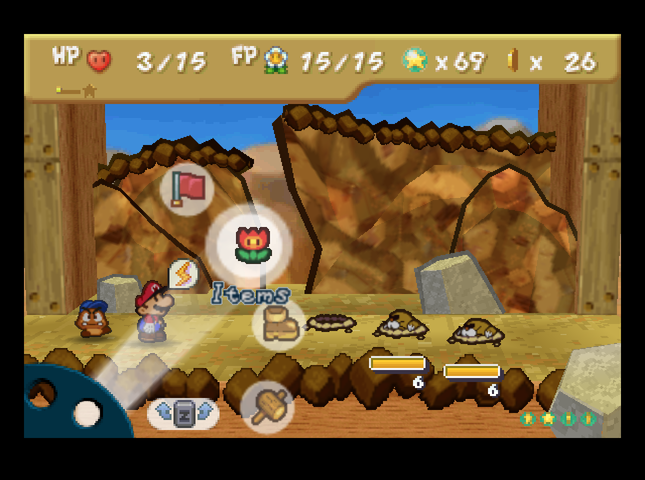  With the Cleft defeated, we�re still in a tough spot. We use the first of our provisions: Tayce T�s Fried Egg. 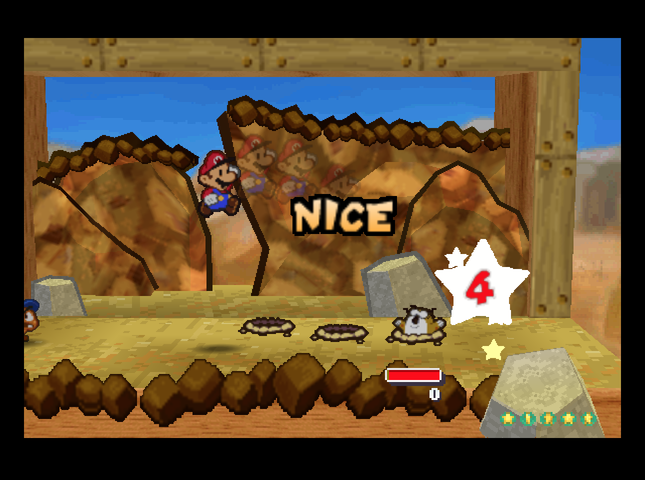 That buys us the time we need to finish off the Moles. 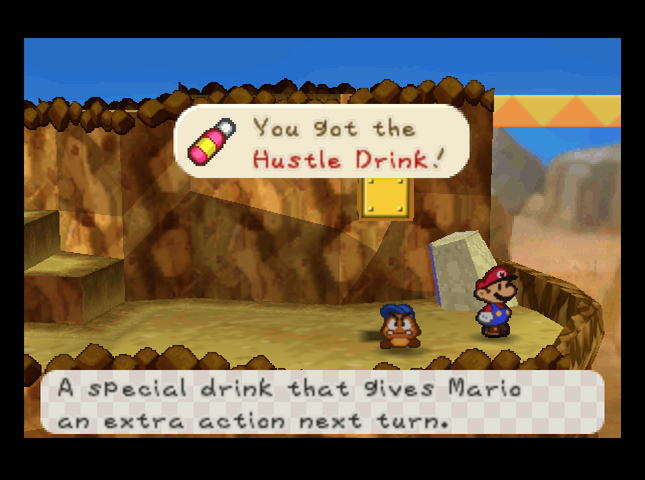 In a nearby ? block, we find a Hustle Drink! This item was present in the code of regular Paper Mario, but was never used anywhere. Drinking it will give Mario two actions next turn - in effect, it�s skipping your current turn to act twice next time. (This block had a Sleepy Sheep in the regular game.)  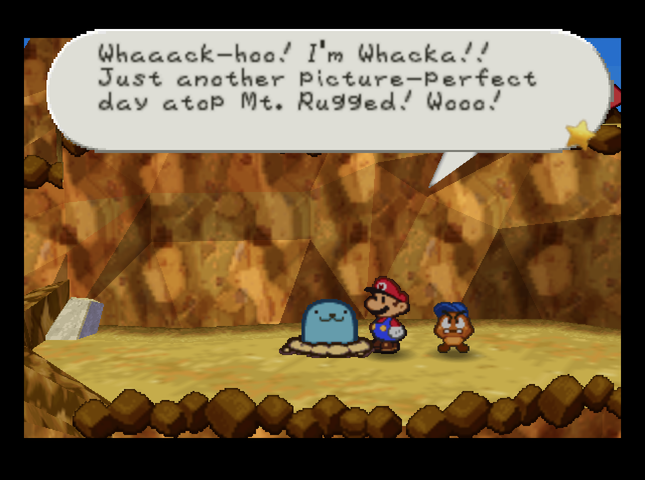 Past a yellow block to the left is Mt. Rugged�s one and only Whacka. This fine fellow is the last of his kind, thanks to people whacking his friends to get the tasty Bumps that fell from them. We could whack Whacka, if we felt like giving this guy brain damage - and eventually driving him to extinction if we whacked him enough. Or we could just leave him alone. We leave him alone.  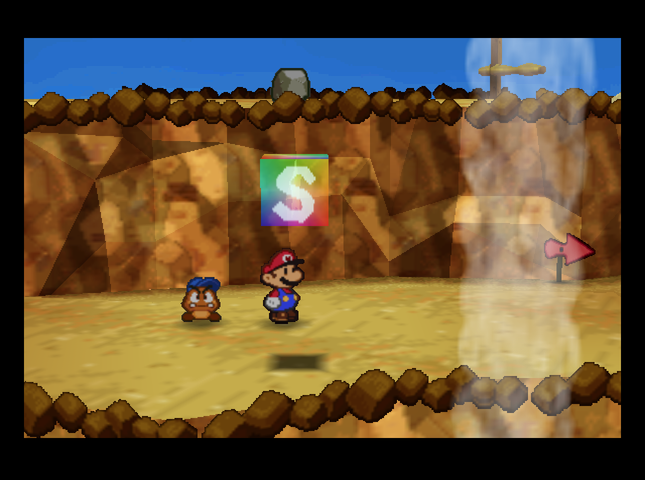  Our path up the mountain takes us to a flat area with many Moles that throw rocks. (This counts as a First Strike if they hit you.)  Past the flat area, there�s a badge on a ledge, another Mole, and� hey, is that Parakarry�s lost letter? But how can we get it? 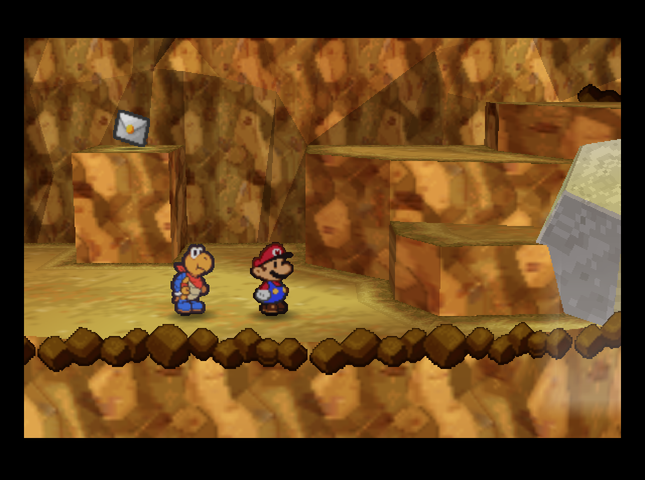 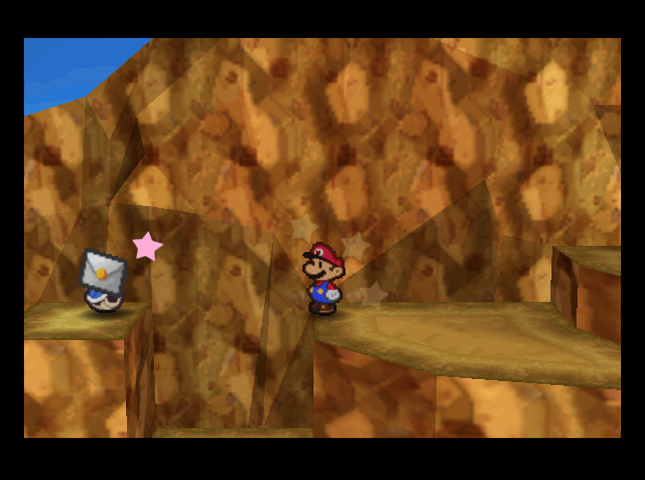 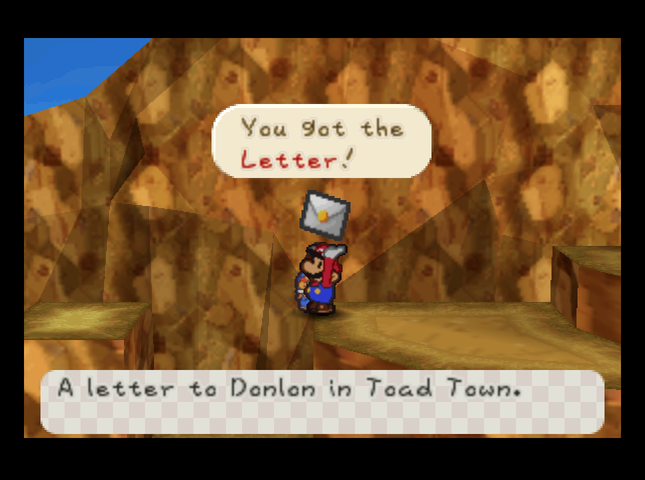 As we go further, a solution presents itself. Kooper nabs the letter. Let�s go tell Parakarry! 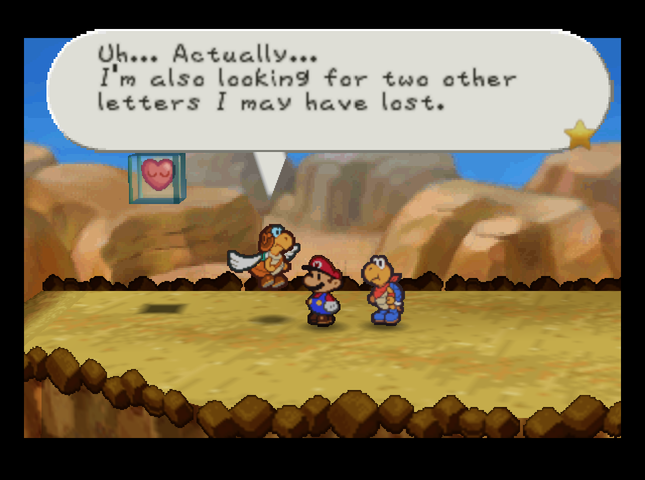 Oh. Oh dear. Well, it�s a good start, I guess. Let�s keep looking as we climb the mountain. 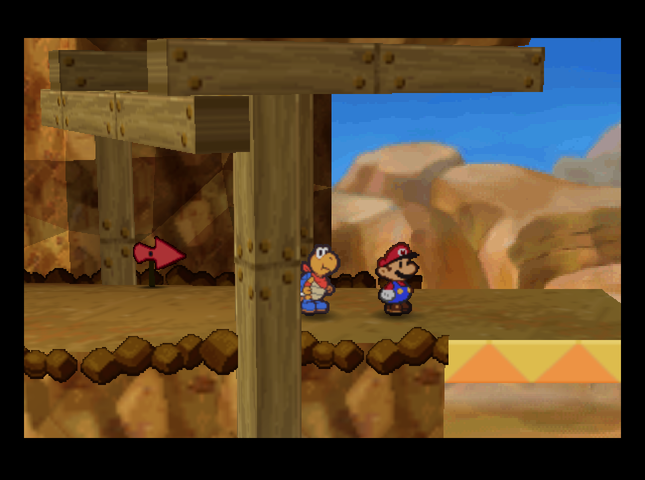  The other two letters must be further thisaway, but there�s a problem. See that gray rock next to the pillar? I�ll bet my boots that�s a Cleft.  Yep, it�s a Cleft! But the fact this step is here lets us get the drop on it.   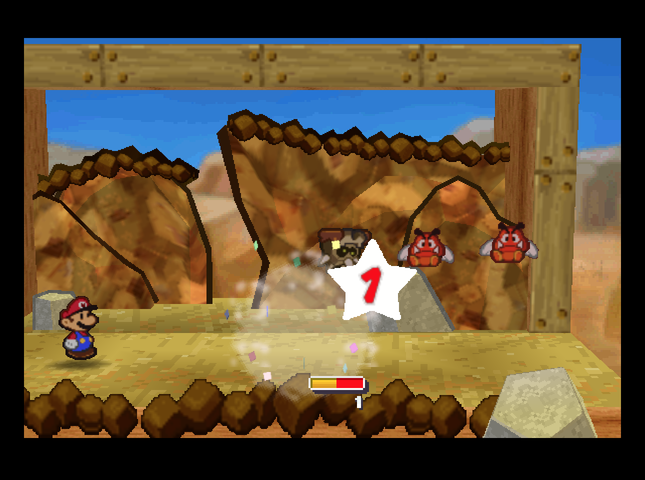 Here we see Clefts� secret weakness: explosions! If Bombette explodes next to a Cleft, it�ll flip over and get its spikes stuck in the ground for several turns. 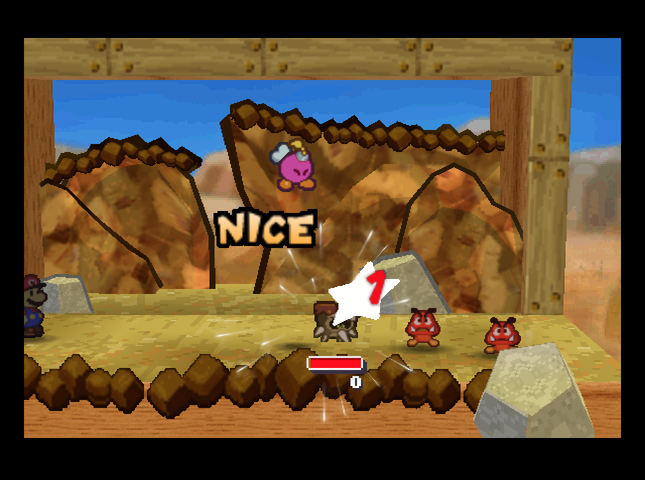 This also drops its Defense to a much more manageable 1, so we can attack it with ease. 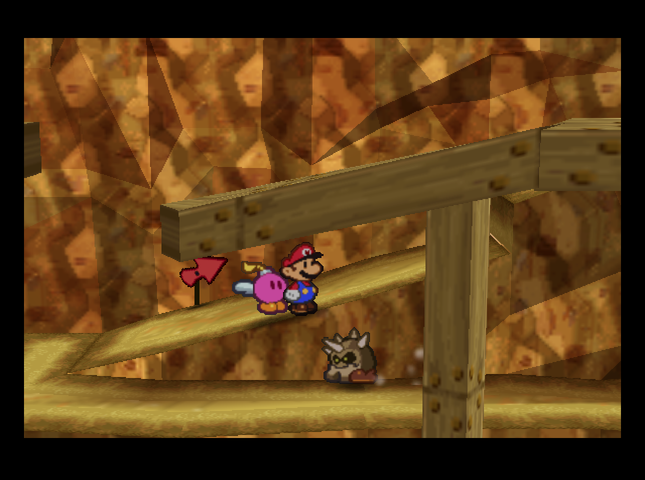  Another Cleft tries to attack us on our way up. We do the same thing. (If Mario stands at the right spot on the edge, Bombette will drop down.) 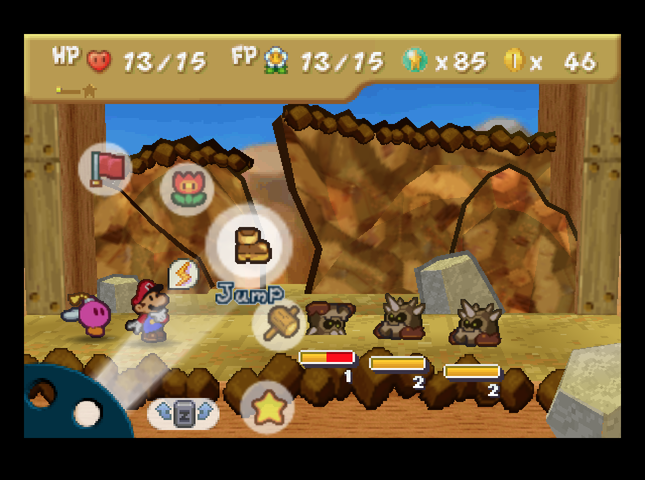 Here, there�s three Clefts, which lets us try and do something clever. It�s Spin Smash time! Spin Smash normally does piercing damage to the enemies behind the thrown one. Perfect for ones like Clefts. 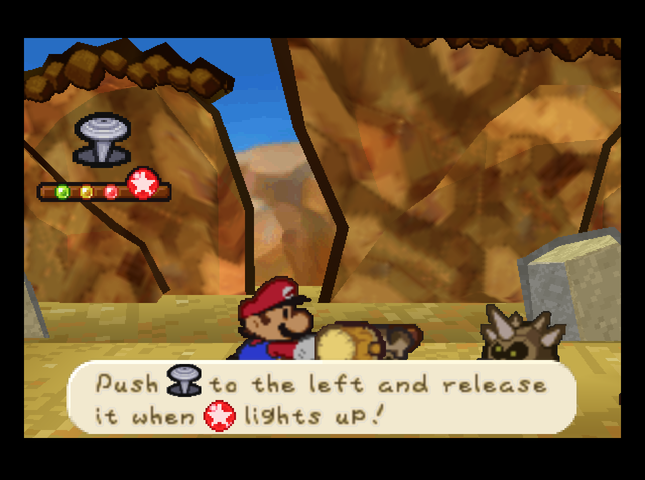  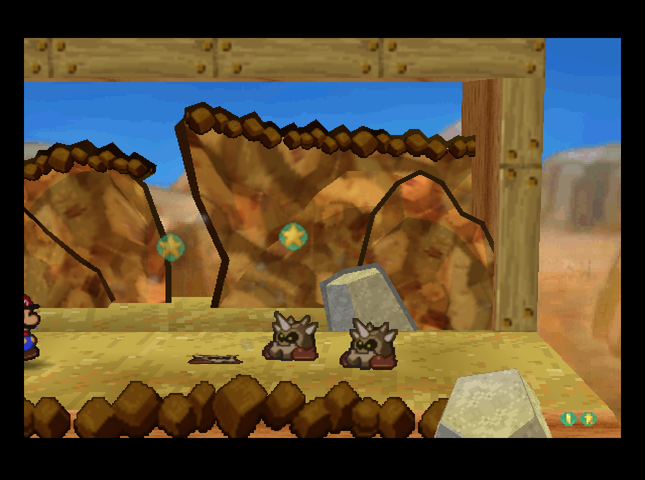 Oh. Turns out Clefts are straight-up immune to the �toss� effect of Spin Smash. I�m unequipping that badge after this battle is over. There are only Clefts, Monty Moles, and Red Paragoombas on this mountain, and the badge is useful against none of them (Monty Moles are immune due to being in their holes). 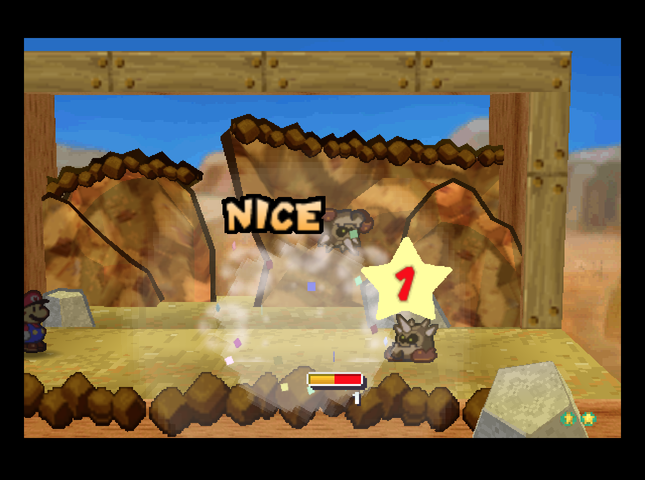 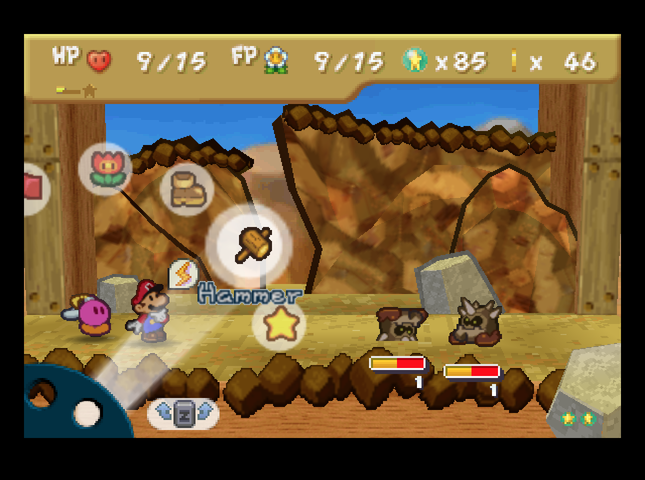 Bombette flips one Cleft, and Zap Tap damages another. We�re able to take care of both next turn. 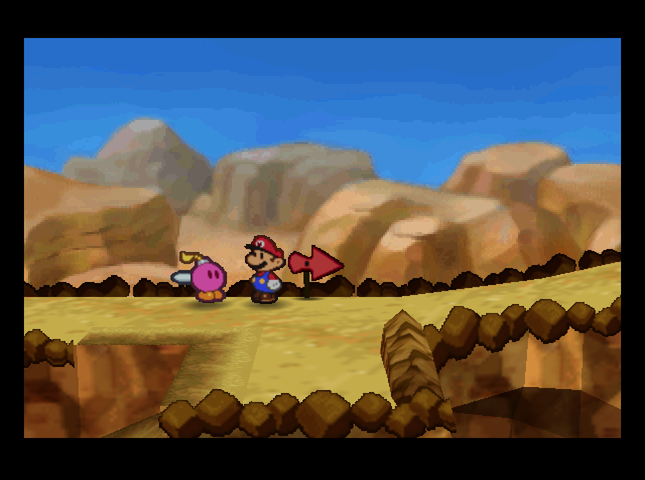 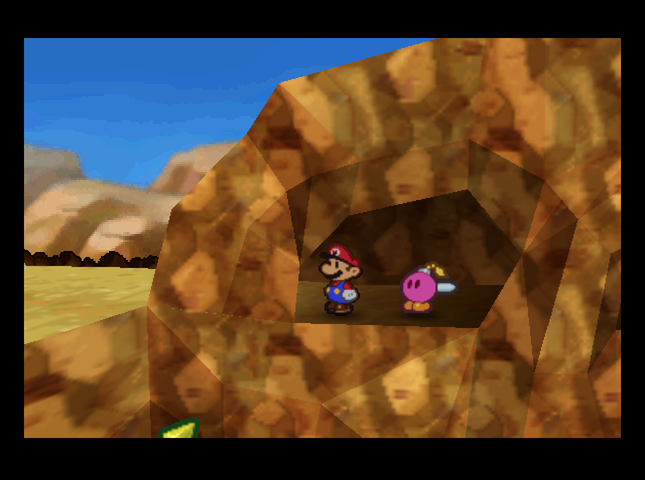 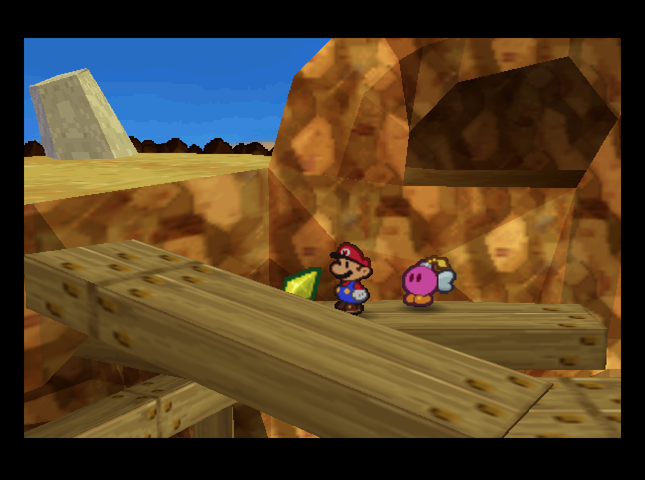 The path splits again at the top of the mountain. We go left, through a cave shaped like two eyes, then drop down to collect a Star Piece on a beam.   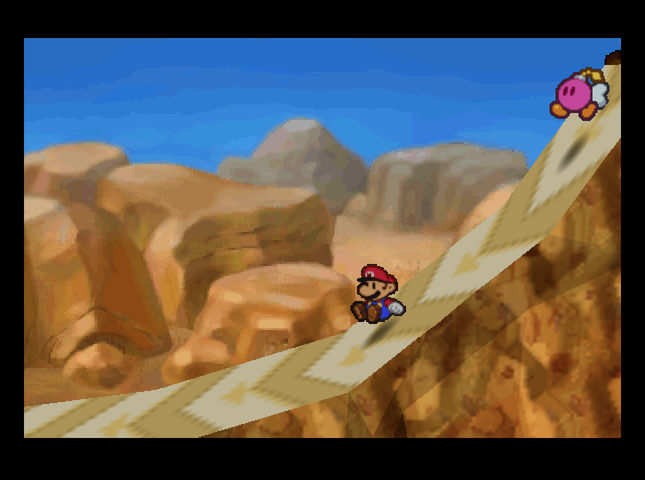 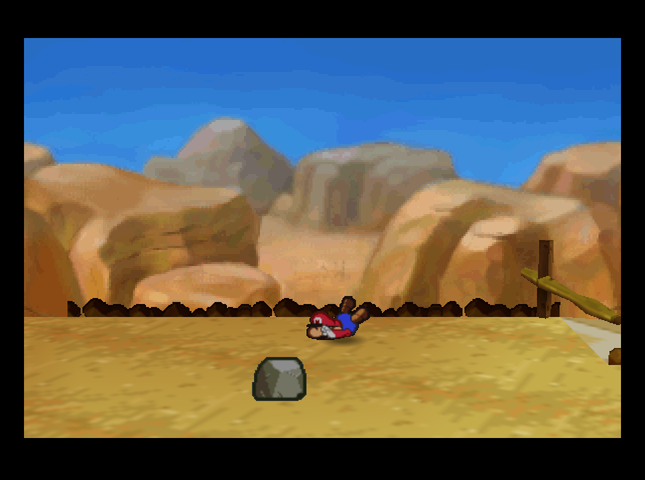 After getting back up on the path, we follow the trail further left and end up at another slide. We go flying! It drops us on a higher area with another Cleft. 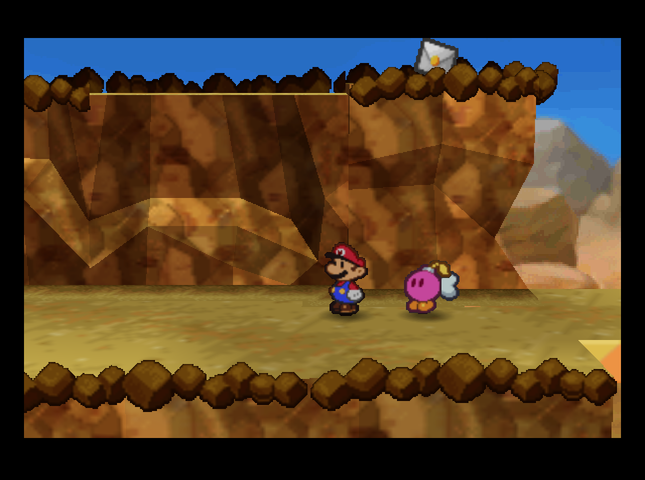 The left exit leads us to a ridge with� another lost letter! There�s still the age-old question of how we�re supposed to get up there, though.  Continuing down the ridge path reveals yet another Cleft. This mountain�s lousy with them.  We bait it into running into Bombette. 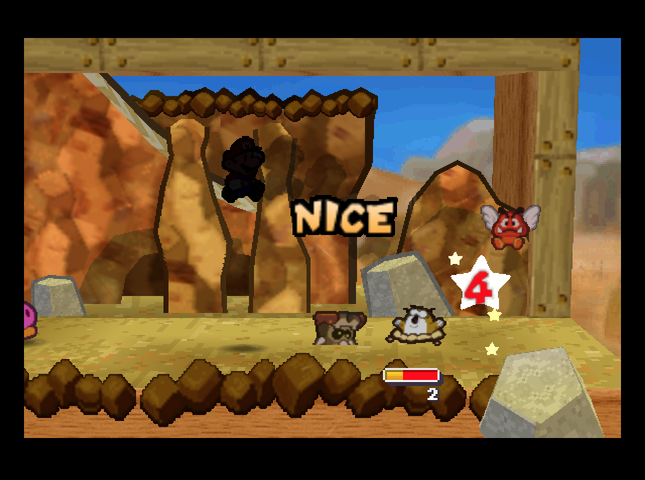 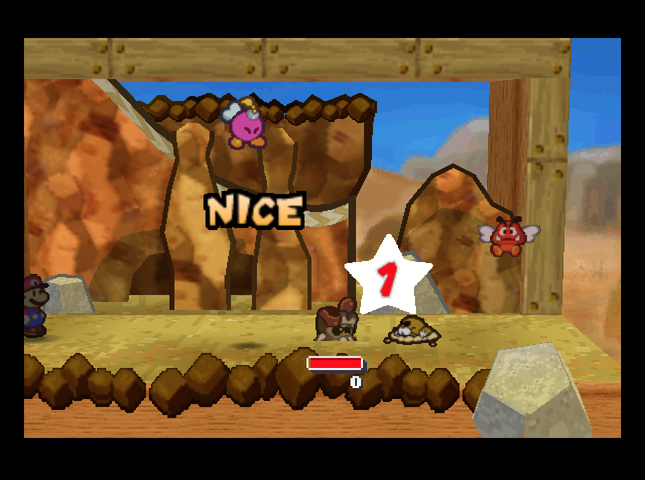  Some generalized bonking later, we defeat the Cleft and its friends - and level up for our trouble. I�m choosing BP this time.  Immediately after the battle, I put HP Plus on. We need the survivability, up here!  This block has a Mushroom. We take it and move on.    This cave we�re passing by has a secret passage in it. It leads to a chest.   Inside is a very important badge: Damage Dodge! This increases the power of our �dodge� action command, so it guards against 2 damage, rather than 1. We equip it right away, of course; it takes HP Plus�s slot.  To the left of the cave mouth, there�s a trampoline. There�s also a Star Piece on a platform over a gap, but it�s too far to jump to. (It�s also too far for Kooper.) 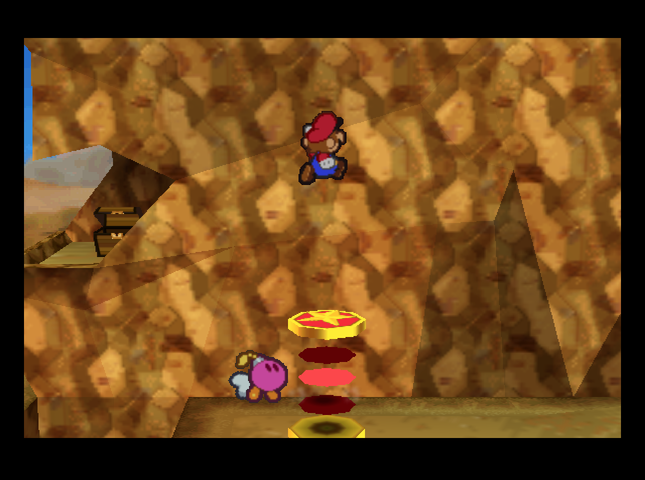  So, up we go, instead! 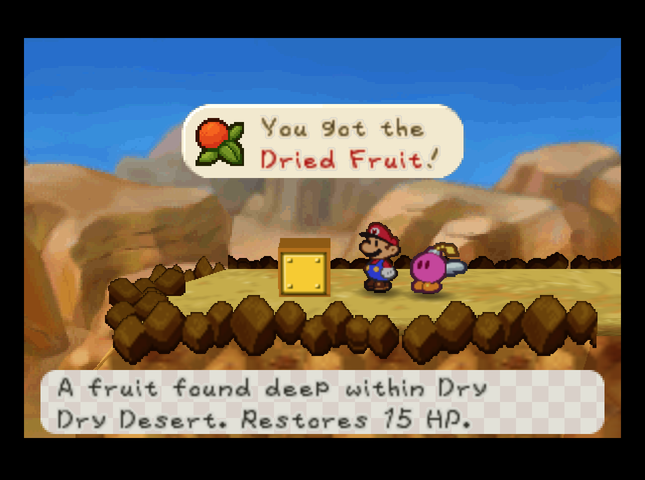 The block at the top left of the ridge has Dried Fruit in it. This�ll be a tasty treat if our HP runs low - it restores as much as a Hot Shroom!  To the right side, there�s a slide and a Cleft, letting us try out our new Damage Dodge badge!  (We were able to bait the Cleft into Bombette�s explosion again. They run at you on the overworld faster than in the base game, so if you get their attention at the last second, they always fall for it.)  Now, when Mario dodges a Cleft attack, he only takes 2 damage! Zap Tap is still in effect, of course.  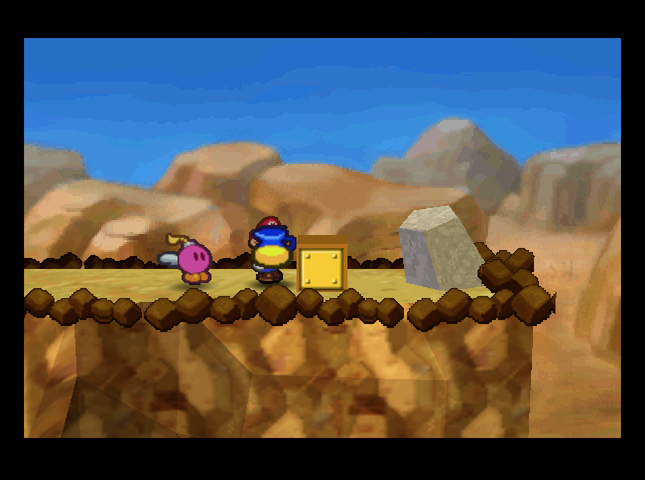 After the battle, we�re a bit low on HP, so we eat the Mushroom we got earlier - then check the block behind the Cleft. It�s got a Honey Syrup. Now it�s time to take the slide! 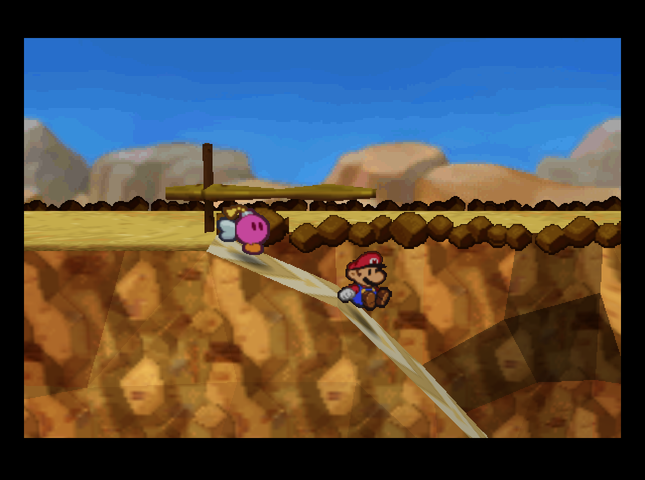   We end up, literally, launched straight into a Cleft on the landing pad. Dirty trick, guys.  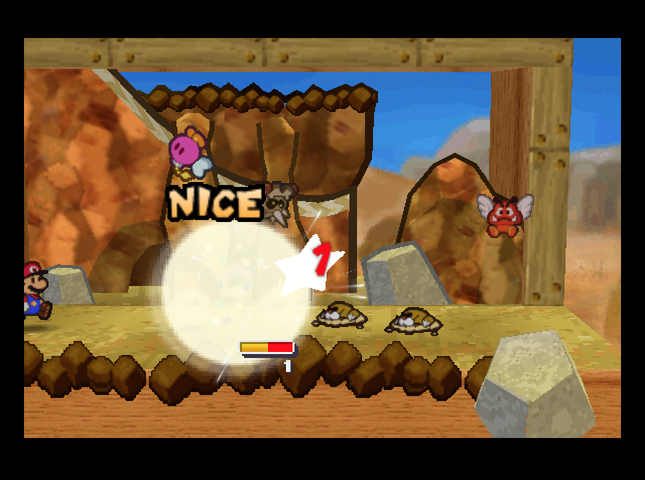 Bombette flips the Cleft; the remaining enemies don�t pose as much of a threat to us.   Moles� rocks only do 1 damage now, and Red Paragoombas bounce off. (This is assuming I guard with good timing, of course.)   We finish off the enemies without incident, then walk along the ridgetop and grab the second missing letter.  That�s all we can do here, so we return to the fork in the path before the �eyes� cave, and go right.   Here, the bridge is out. But, Mario can drop down�   To find the third missing letter, and another Cleft. (We beat it - don�t worry.)  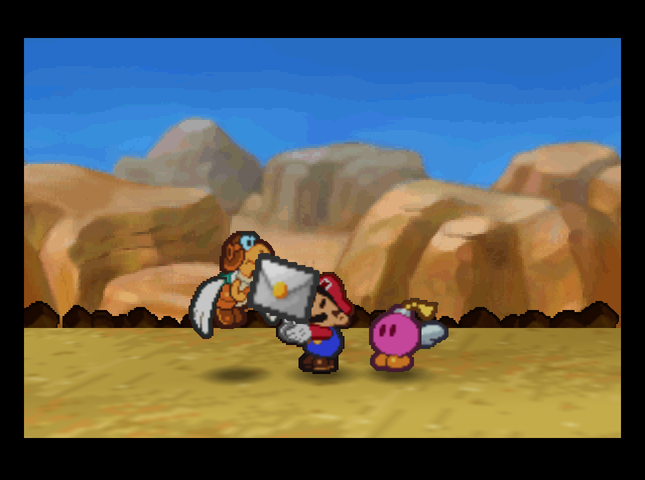 A trampoline takes us back to the bridgehead, and we return to Parakarry. 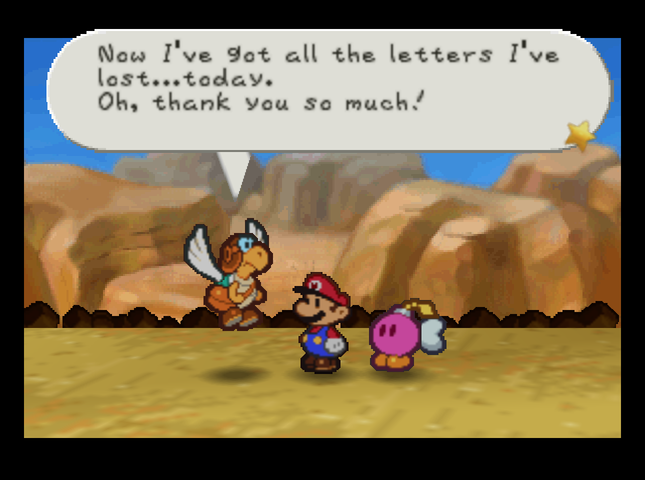 Today?! Actually� to be honest, I haven�t just lost letters on Mt. Rugged� I may have sort of dropped some all over the Mushroom Kingdom while I was flying. Heh heh� yeah. You know, you�re good at finding letters. Do you think you could keep an eye out during your travels? In return, I would offer you whatever help I can. This is definitely one of the more ignoble reasons I�ve seen for a party member joining.  We end up conveniently pestered by a Red Paragoomba again, allowing Parakarry to show off his skills. His Sky Dive does 2 damage, and can hit anyone because he flies in the air. It won�t work against spiky or fiery enemies, though. 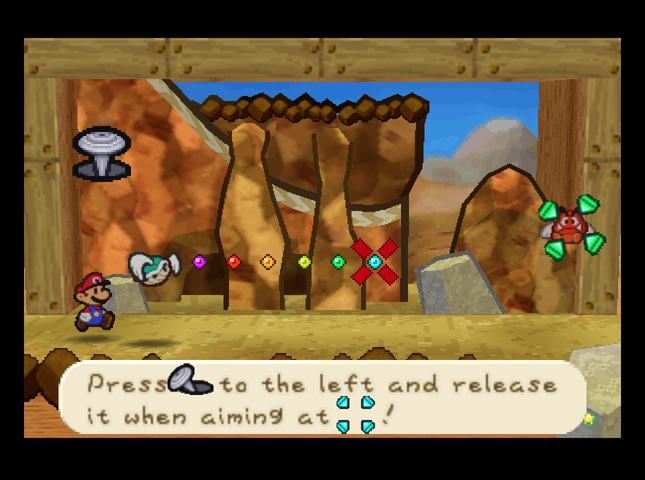 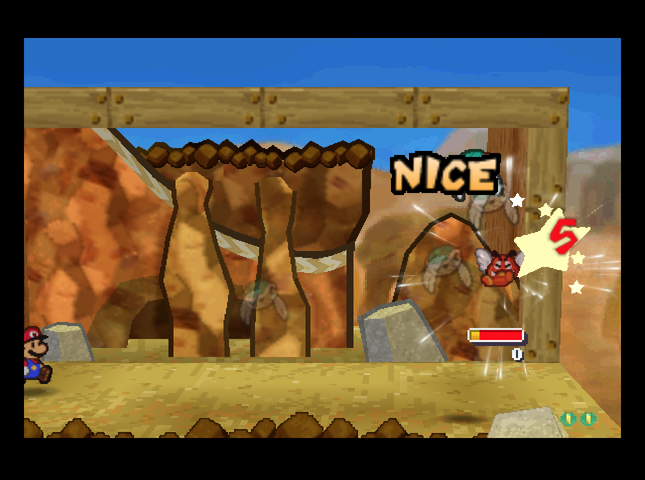 His Shell Shot, which costs 4 FP (1 more than in original Paper Mario), can also hit anyone, and does 5 damage to boot! With Parakarry tucked safely in his shell, he can attack enemies that are otherwise harmful to touch. 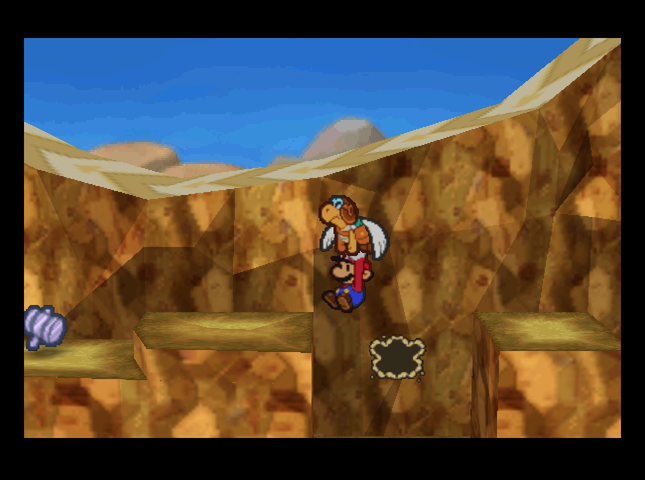 In addition, Parakarry brings a very useful field ability to the party: carrying Mario over gaps in the ground. With it, we can get to several items in Mount Rugged we couldn�t reach before. 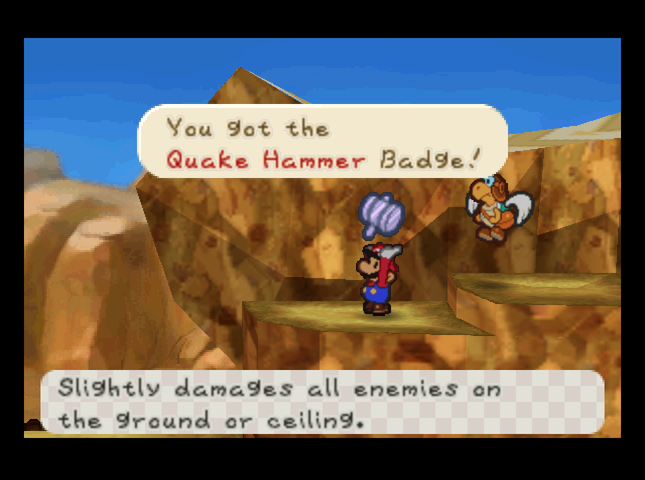 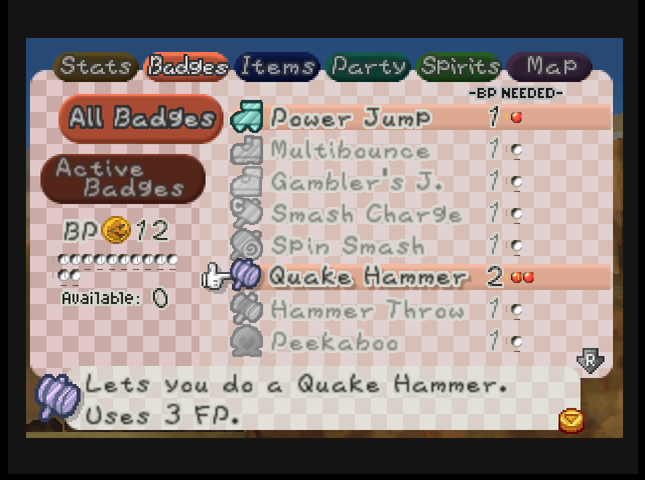 Which lets us get the Quake Hammer badge! This attack lets us hit all enemies who are ground-bound (or clinging to the ceiling). We swap Refund and Multibounce for the badge, which sadly costs 2 BP to equip. (In the vanilla game, it cost only 1 BP.) 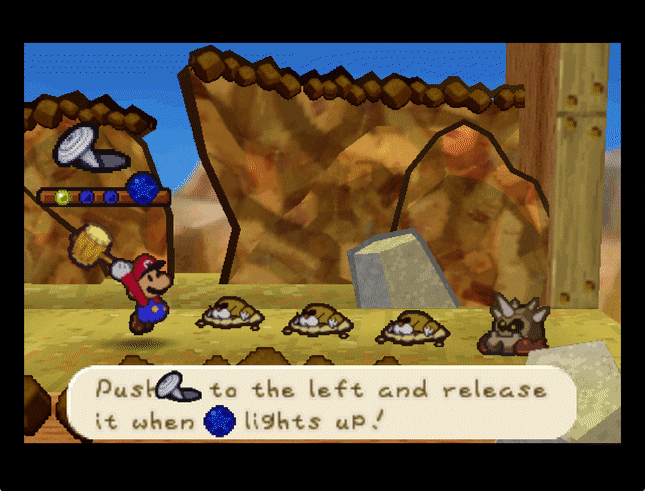 Quake Hammer does 2 damage to all enemies, piercing their Defense. This KOs Clefts pretty much instantly. It costs 1 more FP than the base game, but it�s too useful not to use. 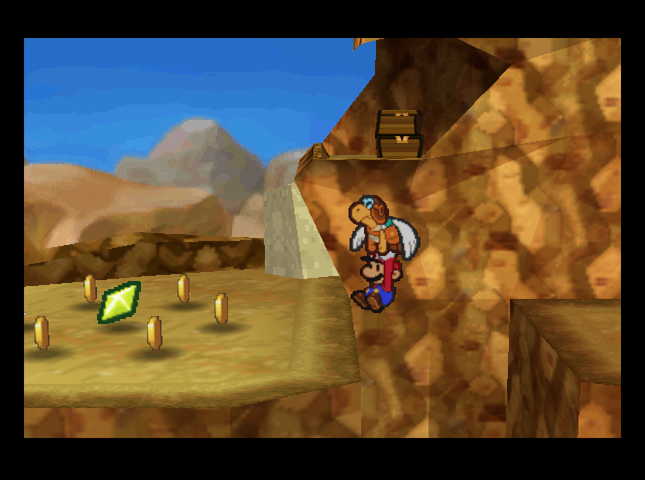 We can also use Parakarry�s ability to get that Star Piece we saw, back on the ridge where we found the second letter. 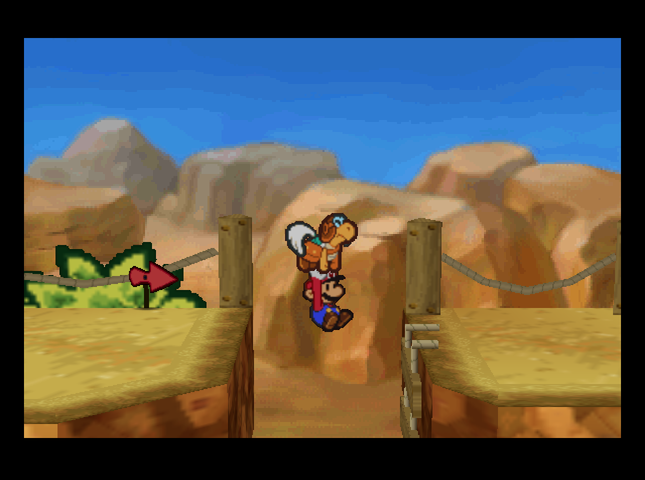 And, of course, he can help us across the gap where the bridge is out. Now, we�re almost over the mountain! All we have to do is� 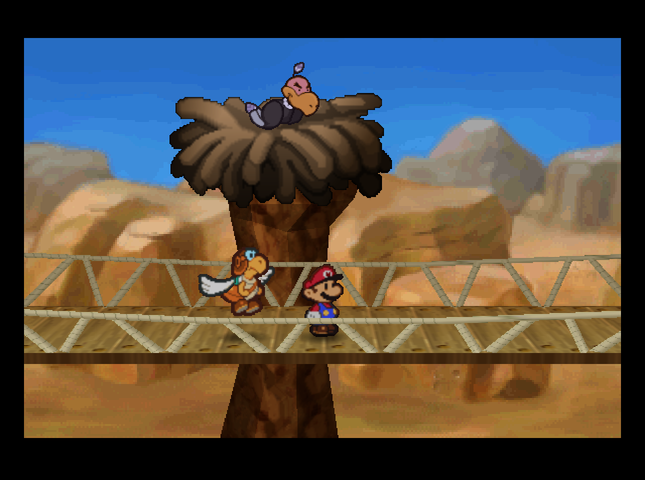    Uh-oh. This is Buzzar. If we say we�re Mario, Buzzar (who works for Bowser) will fight us. If we say we�re Princess Peach, Buzzar will call us a bad liar and then fight us. If we say we�re Luigi, he�ll let us pass, though. 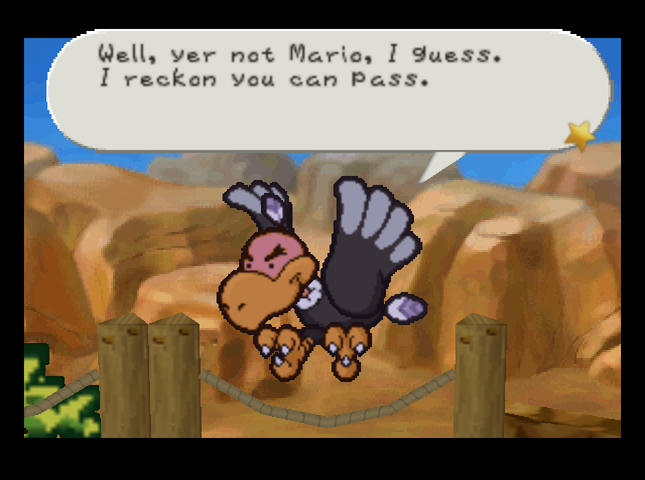 Buzzar�s a vulture, so I have no hestitation �chicken�-ing out of this fight. After all, there�s no way this could come back to haunt us later, right?  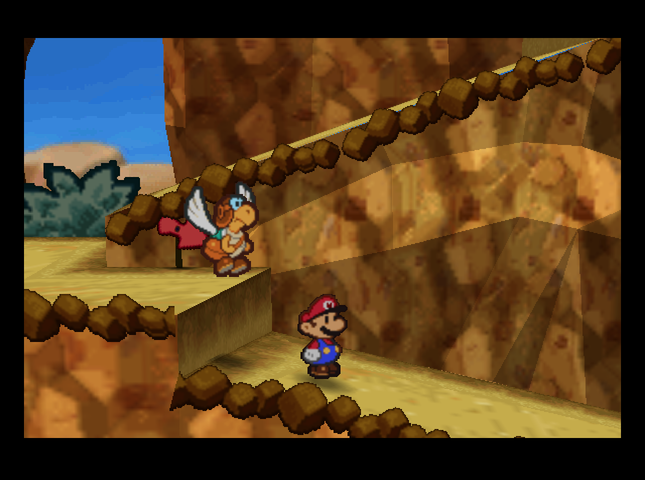 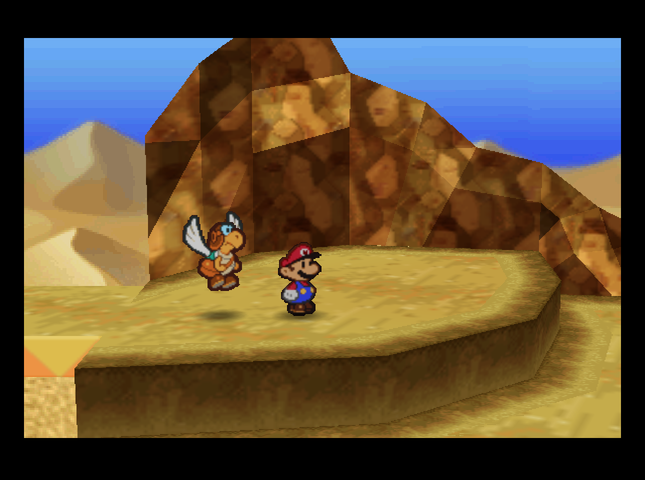 Past Buzzar�s nest, our path goes resolutely down. 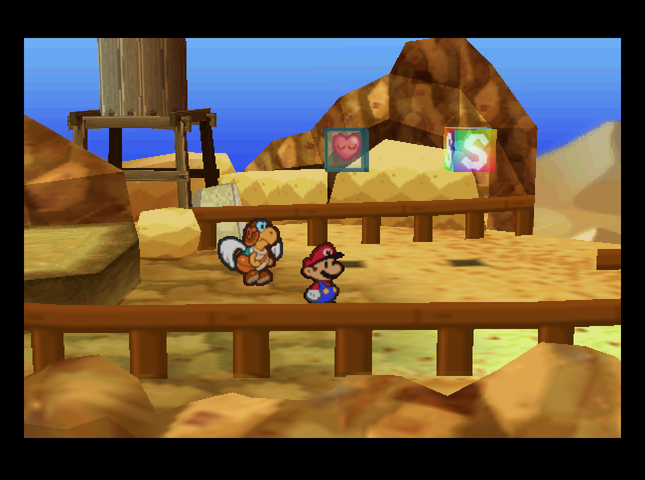 Finally, we reach a rest stop: the gateway between Mt. Rugged and Dry Dry Desert. Next stop, Dry Dry Outpost! Badges: 19/89 (New: Damage Dodge, Quake Hammer) Recipes: 8/50 Star Pieces: 28/180 Chuck Quizmo�s Quiz Questions: 12/64? Game Overs: None. SUMMARY OF CHANGES FROM MAIN GAME (in this installment) � Angry-looking Paragoombas spotted by Mt. Rugged birdwatching club. (Red Paragoomba: 3 HP, 2 Attack. Attacks twice.) � Monty Moles attend target practice course. (+3 HP, +1 Attack, thrown rocks fly faster) � Clefts play hooky from target practice course, become delinquents. (+2 Attack, +2 Defense (+1 while flipped), and they move faster on the overworld) � New energy drink debuts. (Hustle Drink: Grants Mario two actions next turn.) � Parakarry�s Shell Shot slightly more energy-intensive. (Costs +1 FP.) � Quake Hammer badge also more resource-intensive. (Costs +1 BP to equip, and +1 FP to use the attack.) Next Time On Master Quest: Dune�t worry, be happy. Quackles fucked around with this message at 12:27 on Aug 15, 2019 |
|
#
¿
Aug 15, 2019 12:23
|
|
|
FPzero posted:Oh yeah and I think the reason the spin smash didn't work on the Cleft is because it was stuck in the ground at the time. Just like how you can't use it on Monty Mole. According to the lovely Stat and Attack FAQ I'm using, Clefts are immune to Spin Hammer when stuck in the ground, yes. The catch is, if they're right side up, the hammer hit has to do at least 1 damage, or they don't get pushed back either. With 4 Defense to throw around, that'll be a while before I can make that happen.
|
|
#
¿
Aug 15, 2019 22:07
|
|
|
DACK FAYDEN posted:Question for anyone who isn't playing blind: did the devs remove the Blue House Skip altogether, given that they hate the fun pig machine, or just rely on natural encounter power level progression to prevent the sequence breaks? I don't think any actual glitches have been removed.
|
|
#
¿
Aug 16, 2019 06:36
|
|
|
BisbyWorl posted:It's a Jojo reference. The pictures told such a good story that I couldn't resist. Also... Quackles posted:I don't think any actual glitches have been removed. Asked the devs. Only one clipping glitch was fixed in Master Quest, in Shy Guy's Toy Box. Any such fixes from Pro Mode, if they exist, would have also been carried over.
|
|
#
¿
Aug 16, 2019 07:07
|
|
|
Part 11: Dune and Out in Dry Dry Desert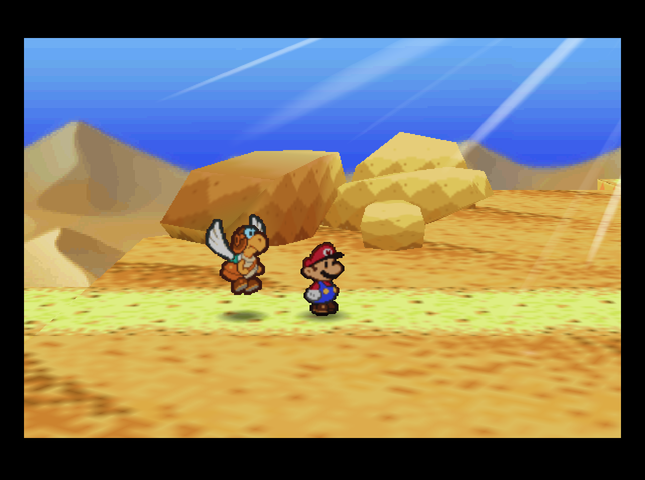 Music: Dry Dry Desert Trek When we last left off, we were about to enter Dry Dry Desert. Our first priority is to get to Dry Dry Outpost - then we can explore and see how the Desert enemies have changed. 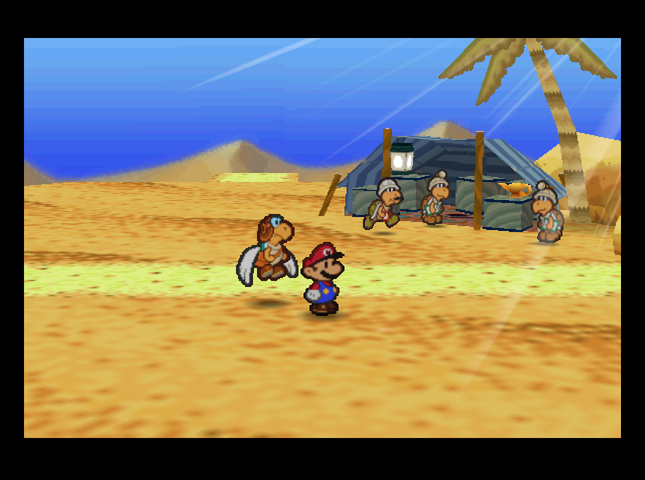 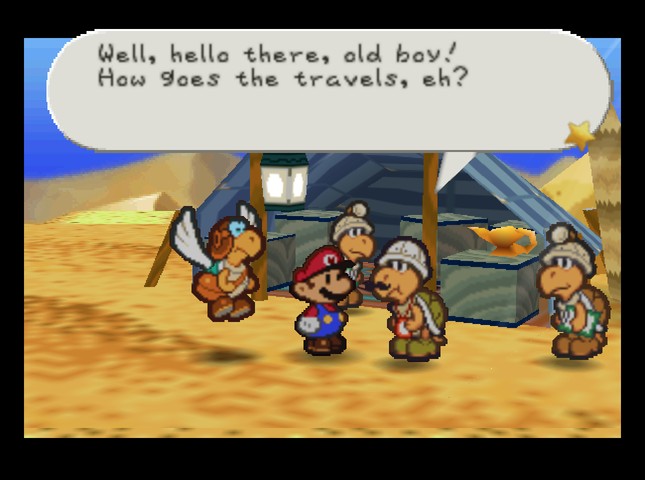 At the entrance to the desert is the campsite of Kolorado, the archaeolokoopagist.  At the moment, I�m turning Dry Dry Desert upside down to find the Dry Dry Ruins. My assistants have attempted to gather information in Dry Dry Outpost, which is near here. Sadly, as of yet, we�re having little success. All we need is a clue and we�ll be golden! At the moment, I�m turning Dry Dry Desert upside down to find the Dry Dry Ruins. My assistants have attempted to gather information in Dry Dry Outpost, which is near here. Sadly, as of yet, we�re having little success. All we need is a clue and we�ll be golden!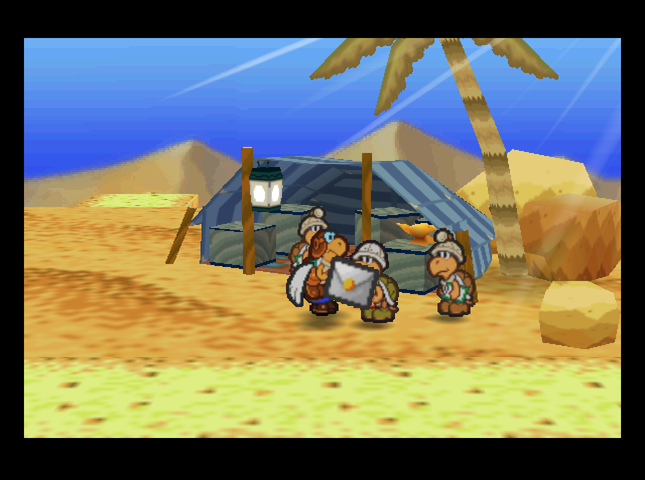 The encounter also gives Parakarry the opportunity to deliver the letter we found back on Mt. Rugged. Oh, good show! It�s a letter from my wife. Thank you ever so, old chap. This is just what I needed to give me strength to go on.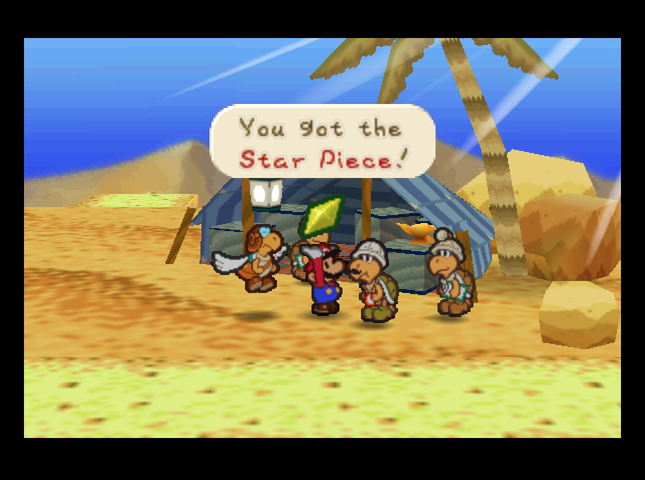 Kolorado gives us a Star Piece as a thank-you for the mail. Most letters we deliver will result in a similar reward. 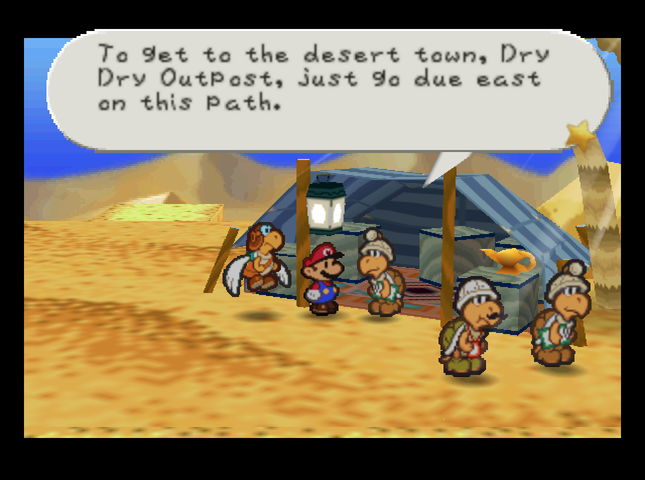 Before we go, Kolorado�s assistant has some advice.  I�d be careful not to stray from the path if I were you. You may find some trouble and you�ll definitely get lost. I�d be careful not to stray from the path if I were you. You may find some trouble and you�ll definitely get lost.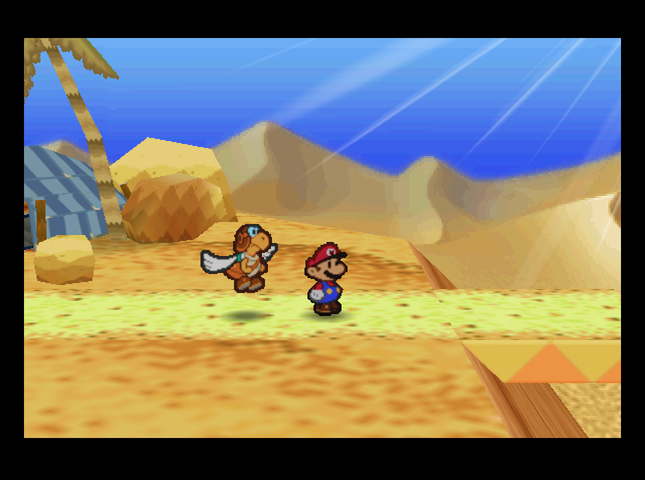  We continue to the east, following the path to� 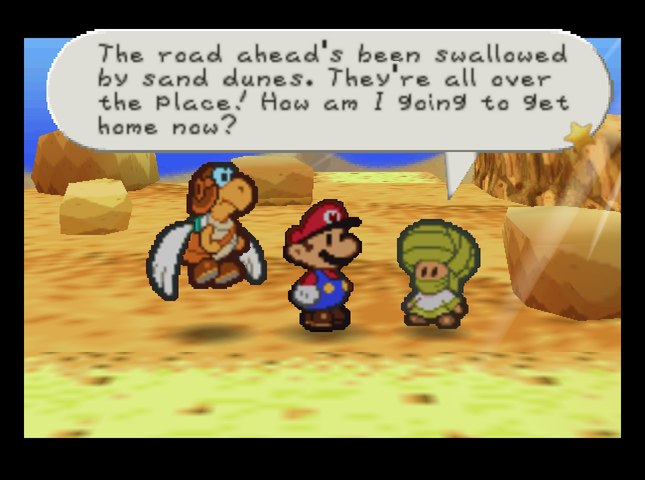 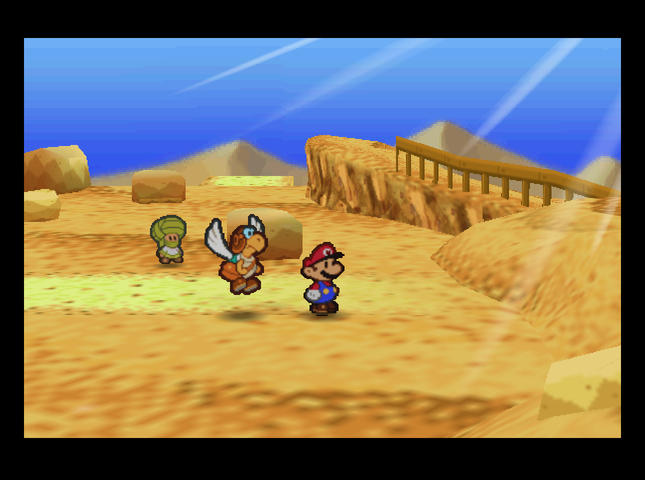 Uh-oh.  We can climb the sand dune from the other side if we�re coming from the east - but in this direction, it�s completely impassable! Looks like we�ve got no choice but to go off-path. Our choices are north or south - let�s head north. Past this point, screenshots taken in the desert will have a minimap in one corner.   A wall and some sand dunes split the area to the north in two. Our only choice is to go east again; if we�d entered from the north, we�d only be able to go west.   The next room has numerous ? blocks - but it turns out it�s also home to some of the desert�s many enemies. 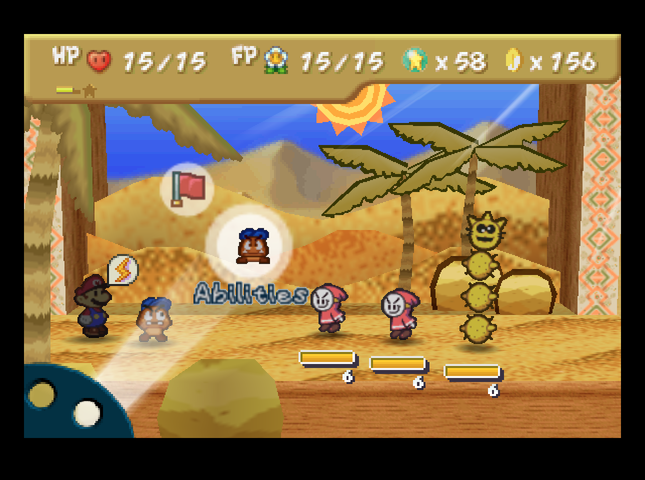 This is a Bandit. Bandits bump into you hard and shake up your pockets. They can steal up to 20 Coins. They�ll slyly approach and then slam into you all of a sudden. If you can damage them in an attack, you can get your stolen Coins back. Let�s beat �em before they can make off with our loot! This is a Bandit. Bandits bump into you hard and shake up your pockets. They can steal up to 20 Coins. They�ll slyly approach and then slam into you all of a sudden. If you can damage them in an attack, you can get your stolen Coins back. Let�s beat �em before they can make off with our loot!And in the back� This is a Pokey, an evil cactus. Pokeys attack by throwing parts of their bodies or by coming up close and falling on you. Be careful fighting them! It�ll hurt if you jump on their spiky heads! They also have an annoying habit of calling in reinforcements. Let�s beat �em quickly! Bandits� attacks do 3 damage, but Zap Tap stops them from stealing anything. In the base game, they had only 5 HP, attacked for 2 damage, and could steal up to 10 coins in one go - so this isn�t that much of an upgrade.   Pokeys attack by falling on you, but they're unusual in that they can lose body segments. The number of segments they have when they start their attack determines the damage done. At full height, Pokeys� �fall� attack does 4 damage. If one only has 3 segments (including the head), it�d do 3, and so on. Pokeys had 4 HP in Paper Mario, and their attacks all did 2 damage - but didn�t lose power when they lost segments. That�s new to Master Quest.  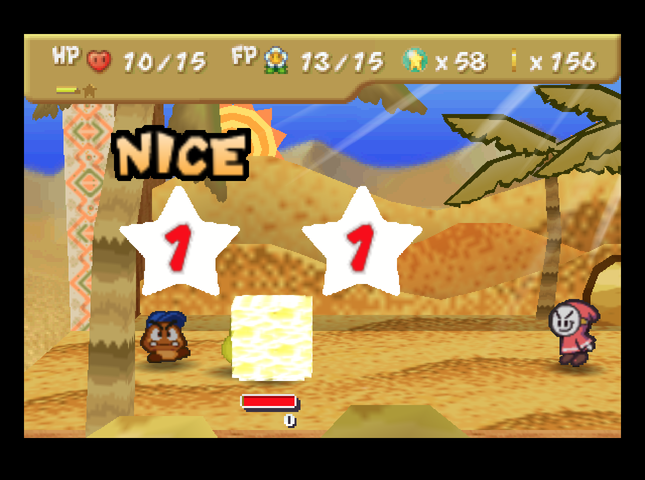  We Power Jump on the first bandit, knowing that Zap Tap will finish him off. The Pokey falls on us again.  A second Power Jump finishes off the second bandit, and we switch to Kooper. This is because Kooper is best suited to deal with Pokeys. 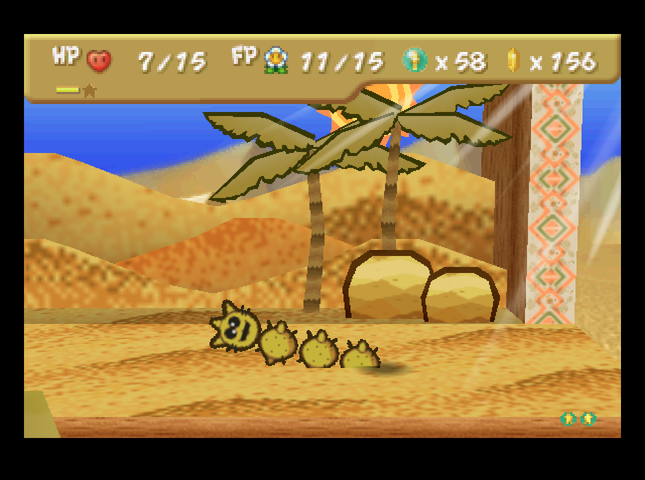 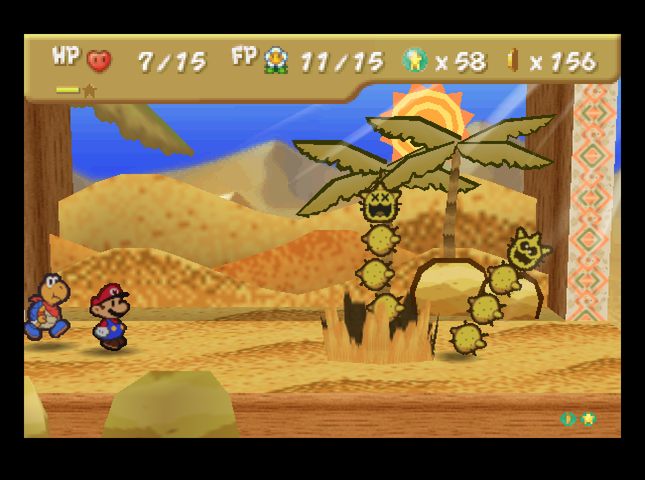 Unfortunately, the Pokey realizes it�s alone and digs up a friend.  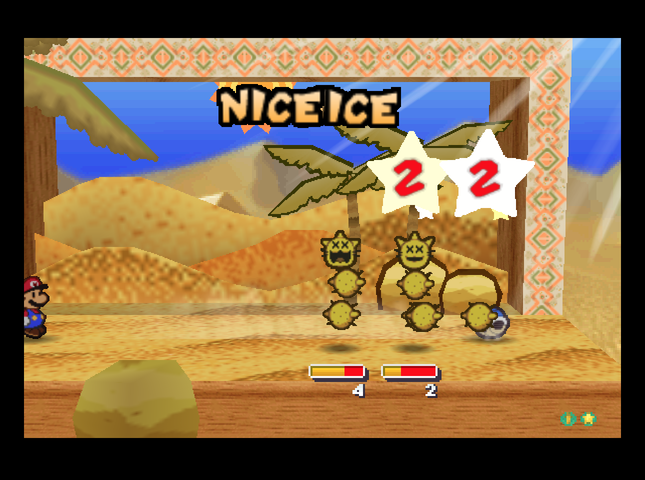 Now that we�ve got Kooper on tap, he can use Power Shell to knock out the Pokeys� segments, in addition to doing damage. Any time a Pokey is hit by a ground-based Shell attack (Shell Toss or Power Shell), it�ll lose a body segment, and its falling attack power will go down. This is also important because Pokeys can only dig up friends if they�re at their full height, so keeping them de-segmented is important for purposes of crowd control.  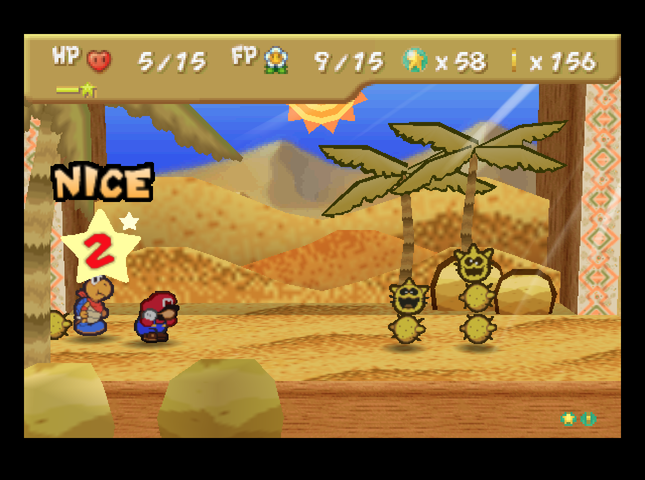 The Pokeys counterattack with their alternate attack: batting body segments at us. With this attack, the segments they toss are gone for good, but the attack always does 4 damage regardless of the Pokey�s height. 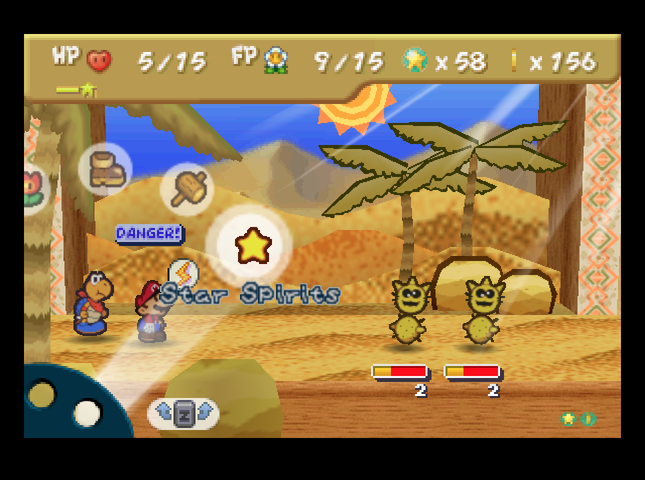  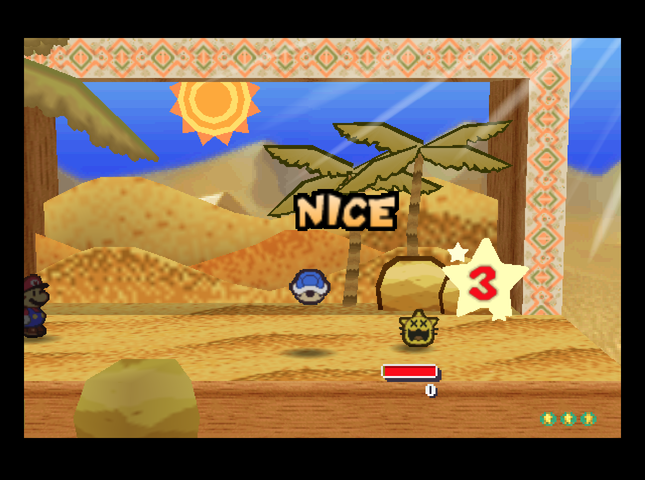 At this point, we can send in Kooper to KO the evil cacti one at a time. (Mario uses Refresh so as to not get KO'd.)  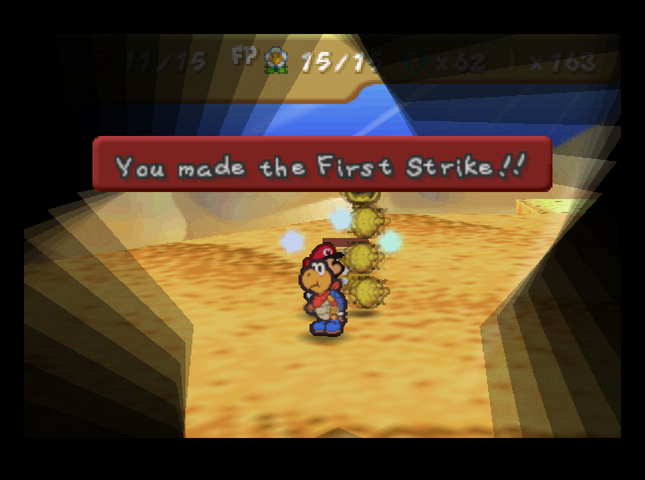 Once the battle�s over, we equip the Spin Smash badge, and pick a fight with another Pokey. 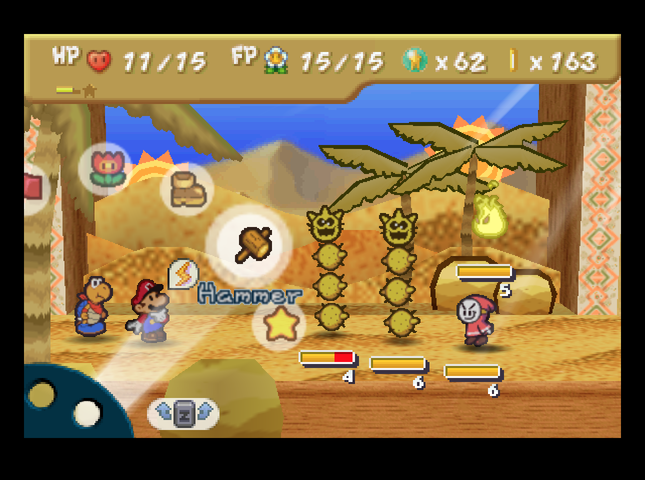  This is because, if a Pokey is hit by a Spin Smash attack, it loses a segment! This is regardless of whether it is directly hit by the hammer, or if it�s just in the path of the enemy that goes flying. There�s also a new enemy here - it looks like a yellow fireball. This is a Dry Bubble. They�re hot burning creatures that thrive in desert climates. They don�t have too much HP, but you can�t get a good jump on them without feeling the heat. You could give them a good what-for with your hammer, but they like to sit up high. They�re so shiny though, I� man, I think the heat is making me delusional.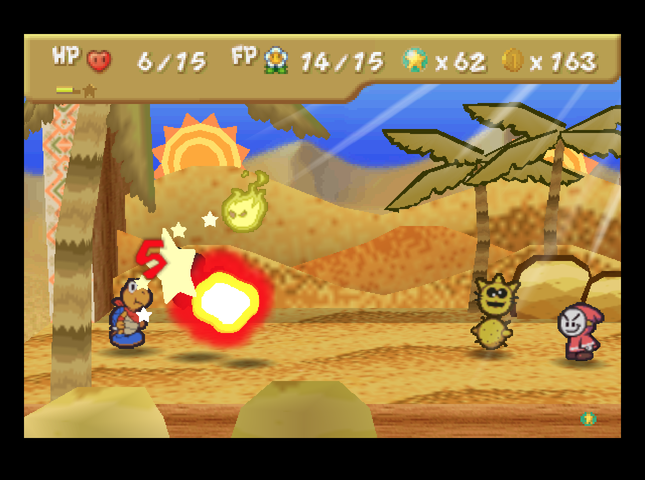 Dry Bubbles do a whopping 5 damage when they land on you. They are, of course, fiery, so jumping on them is out of the question. 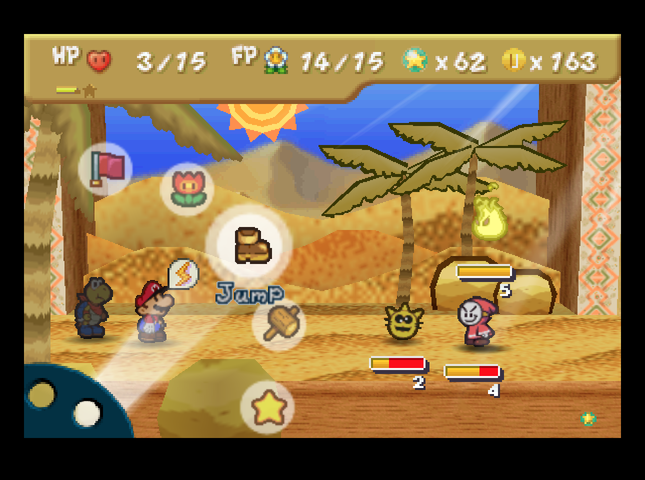  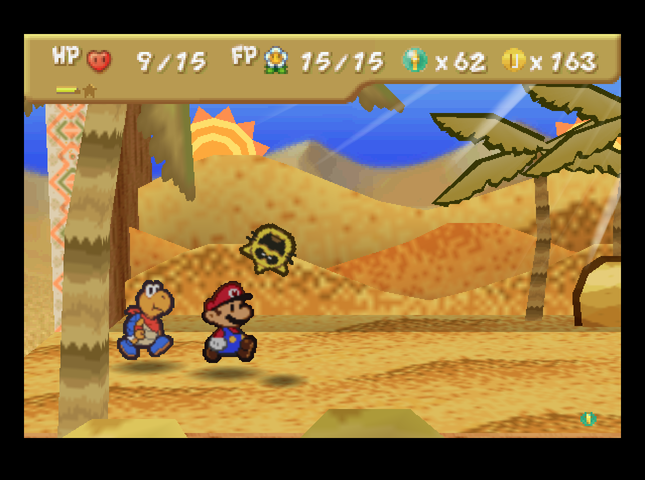 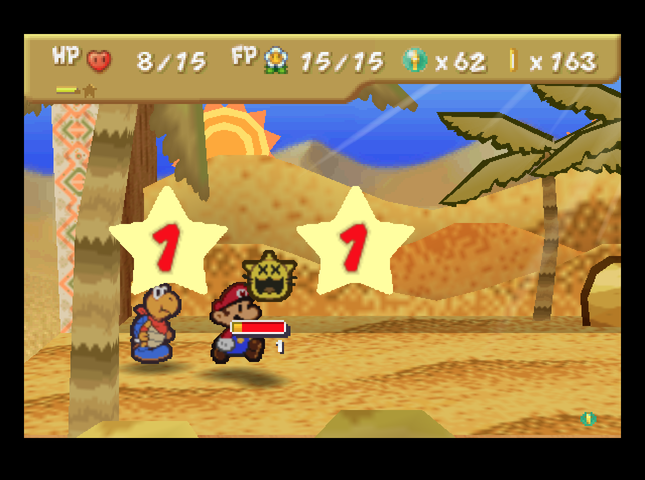 We have to heal from the onslaught, but Kooper was at least able to knock out the Pokey�s last segment beforehand. When Pokeys are down to their head only, they jump face-first onto Mario. This always does 3 damage.   We�re able to KO the ground-based enemes, leaving only the Bubble. 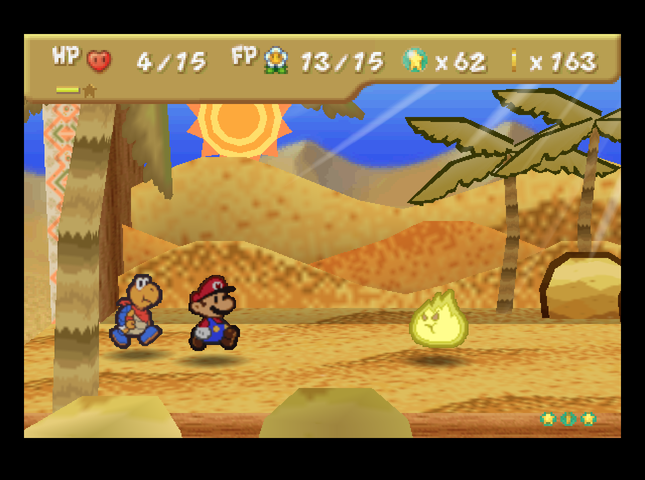 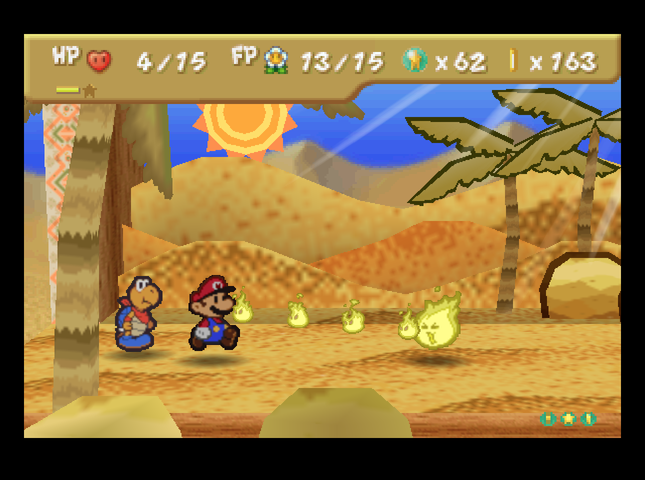 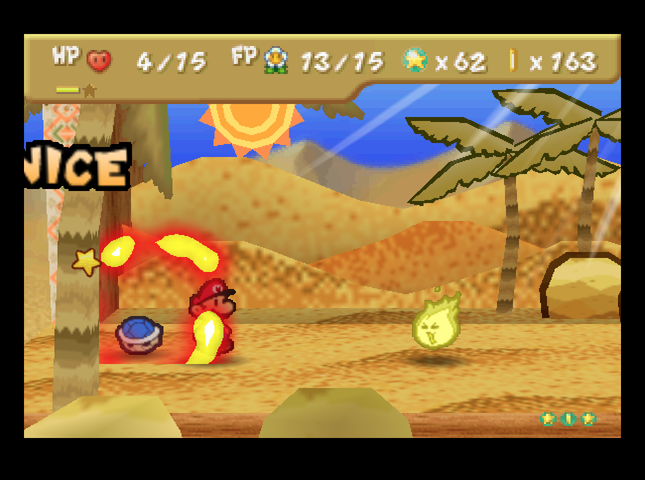 It turns out that Dry Bubbles also have an attack where they blow flames at your partner.  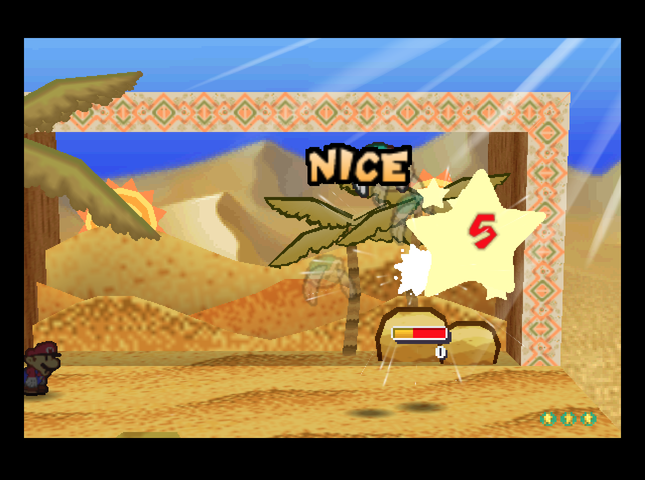 Given that we don�t have Hammer Throw on right now (and it would take two hits to KO the Bubble anyway), the best way to deal with these beasties is Parakarry�s Shell Shot. It�ll OHKO them, while Parakarry remains safe inside his shell. We finish the battle by the skin of our teeth!   Now that there�s no one to bother us in this room, we raid the ? blocks. Most only have coins, but the center one has a Fire Flower.    We have to dodge a Bandit and several Pokeys as we return to the road - only to find the way blocked AGAIN. This time, the barricade requires the Super Hammer to break through. Let�s turn around and try our luck farther north.  The way east of the question-block room is blocked by another one-way dune.  And if we go north of the question-block room, we end up in an area with cliffs that force us to go even farther north.  We end up in the room that�s the site of the Dry Dry Ruins - or, rather, it will be, once we get the Pulse Stone and come back here. Right now, it�s empty, except for the rock that unlocks the place later. Let�s try going east. Maybe we�ll be able to get back to the road again!   The room to the east has something odd about it, and it�s not the four Pokeys chasing us.  It�s this northern exit. I thought we were at the northern edge of the Desert?  It turns out, we are. This is a path that connects Dry Dry Desert and Gusty Gulch, newly added for Master Quest. The Desert and Gulch are so similar. Both are hot and dry, and I just would like to see some water.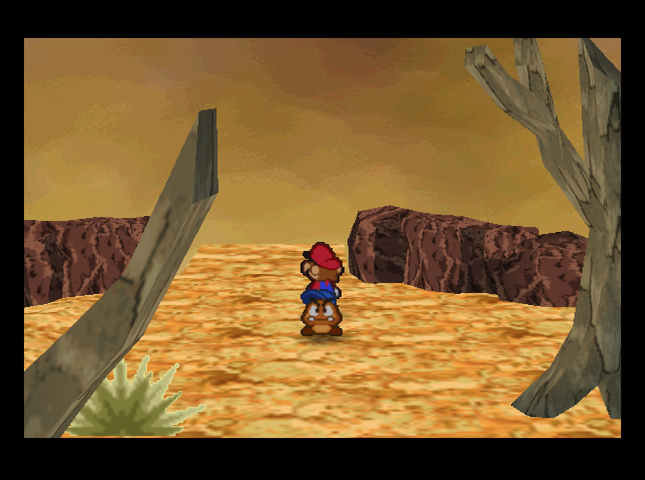 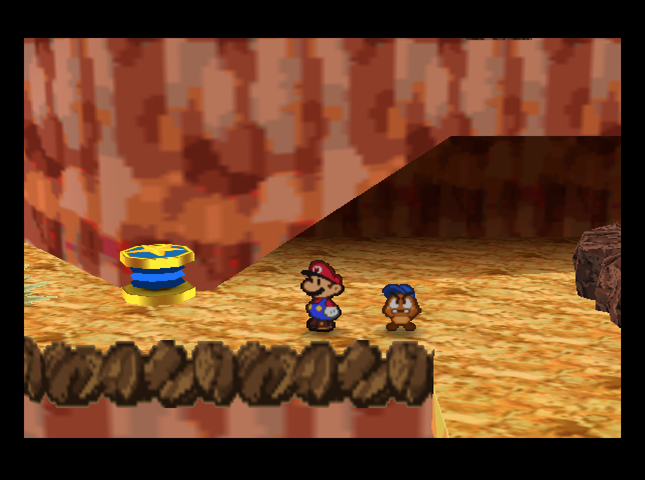  The way to the Gulch proper is blocked by a rock up on a ledge. Wait a minute. The map says Gusty Gulch is above Dry Dry Desert. But then how is it a gulch at all?! I think it should be called... uhhh.... like.... Okay, I can't think of anything.   We can at least go to the right and collect a very important badge: Group Focus! Group Focus lets all our party members use Focus. This grants us several important benefits. Sometimes, a party member can�t attack the enemies on the field (example: Goombario vs. Dry Bubbles) - since switching would take their entire turn, it�s sometimes easier to have them Focus. Also, if both Mario and Partner Focus at once, the team can charge Refresh in a single turn. Basically, it�s a way to let us get to Refreshing faster, which�ll be critical with the tough enemies of this desert.  The badge has been buffed compared to vanilla Paper Mario. There, it cost 2 BP to equip, and you could only get it in Rowf�s Badge Shop after Chapter 3. Here, it only costs 1 BP. We equip it immediately, of course.   With the strange exit explored, we return to the desert and take the only exit we haven�t taken yet: the south one. The room to the south has no unusual obstructions - just a Bandit and two Pokeys that want a piece of us.  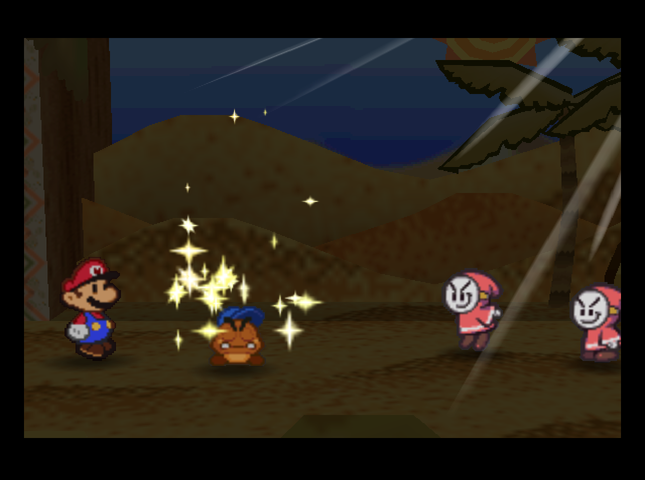 The Bandit ends up ambushing us. However, with our new Group Focus ability, we�re able to queue up an emergency Refresh immediately.  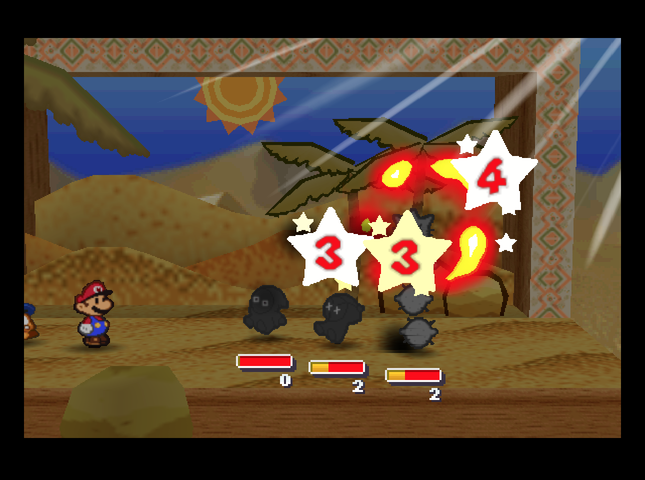 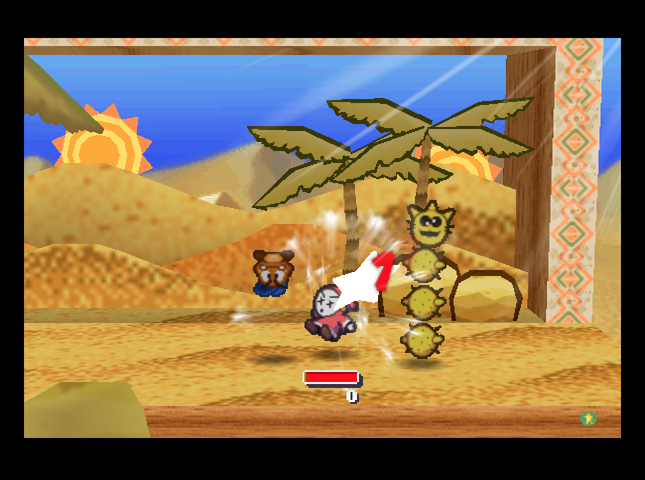 Next turn, we use the Fire Flower we got earlier, and headbonk the second Bandit, so that all�s left is the Pokey. (Did you notice that the Pokey took +1 bonus damage from the Fire Flower? This fire weakness was added to Master Quest.)  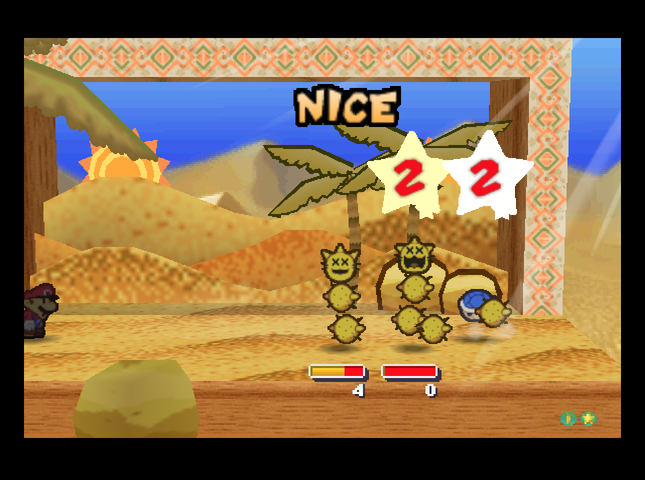 The Pokey opts to unearth a buddy, giving Kooper time to get into position and Power Shell. From there, we easily finish it off.  We head south again, trying to reach the road. The next screen has no enemies, but it does have a Tweester (a whirlwind). Jumping into one will send you one screen north and east of where you started. In normal Dry Dry Desert, this would be fine. Here, it�s a risk. We keep heading south.  We�ve found the road! This landmark - a stone cactus - marks the exact midpoint of the desert. Time to head Outpostward (east).  The next room has a Save block! There�s a traveler resting under a tree. An ancient wall blocks passage to the north, but it�s a clear path in the other direction. The road�s open, at least.   Or, that�s what I thought - but it�s blocked again on the next screen by another sand dune. How much backtracking is this desert going to make us do?! 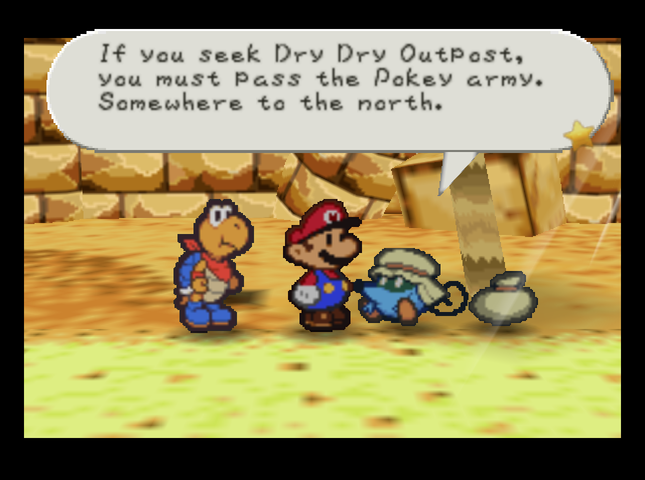 The traveler on the previous screen has some words of wisdom. It sounds� pret-ty ominous. What does a �Pokey army� look like??   Against our better judgement, we head back to the stone cactus and start trekking north, then take the first exit east as soon as we can (in the next room).   We end up in a room with a number of large cacti, but a sand dune blocks our further progress to the east. The only way we can go is south�  �where we end up on the other side of the wall by the save block. That was a bust.  Retracing our steps further, we end up in the room where we tested out Group Focus by fighting the Bandit. We dodge the enemies and head east.  Miraculously, the way is clear. We can�t go further east, but we can head north or south.  Heading south puts us in the north half of the room with the large cacti. There�s a triangle of trees here, which hide an important secret: 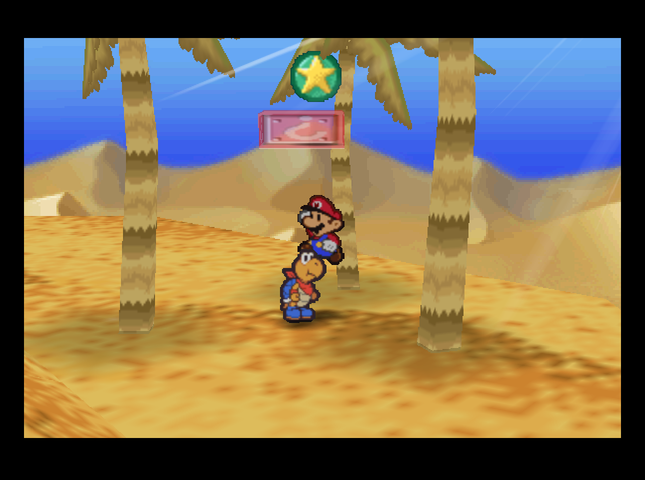 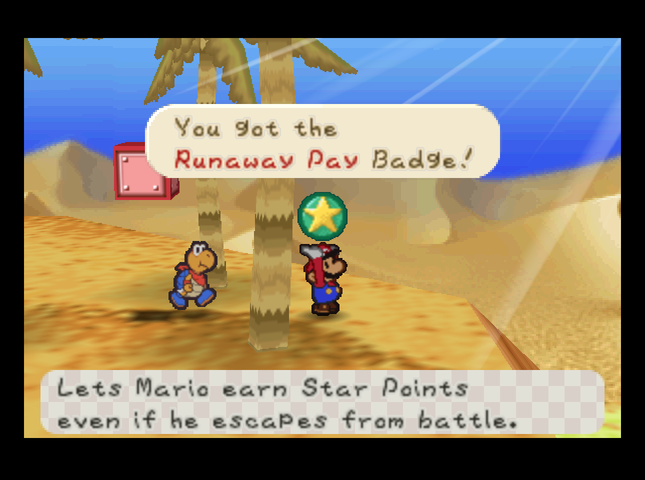 Another badge, Runaway Pay. This one lets us keep any Star Points we�ve earned, even if we run from a battle.  It�s 1 BP cheaper to equip than in the original game.   We head east, and find more palm trees - and some Bandits and Brick Blocks. We must be on the right track! 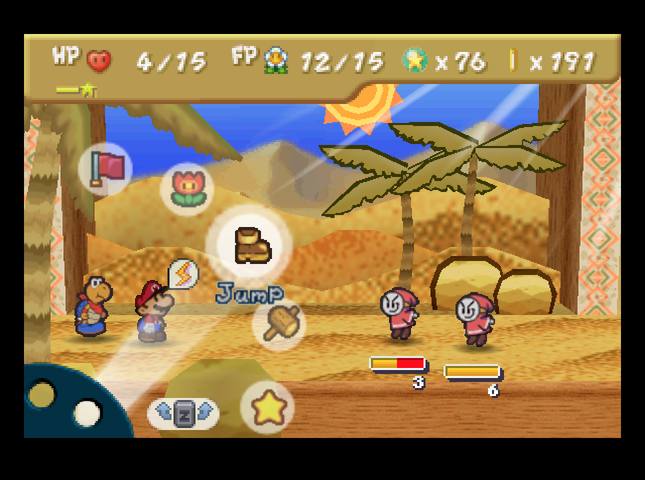 Both Bandits here have this formation, so we fight them to give us a chance to Refresh and recharge.   The path to the eastern edge of the desert is blocked by another Super Hammer block.  And if we try going south to the road, well� it�s blocked in both directions! This is ridiculous.   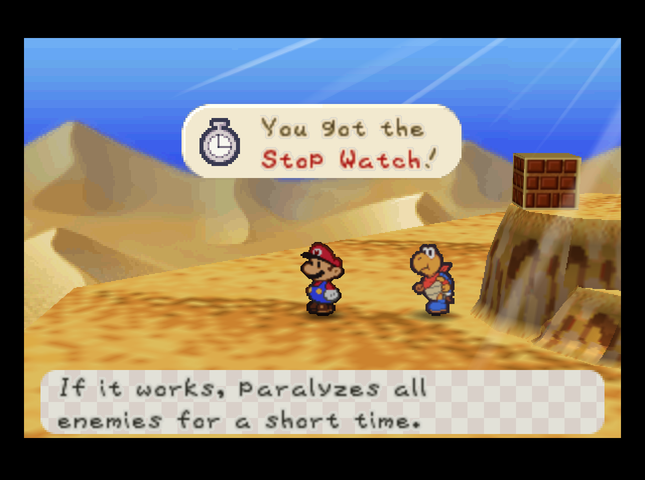 Going to the south of the road nets us another room that�s split in two, keeping us from going east or further south. However, we do pick up a Stop Watch with Kooper�s help. Guess there�s no choice but to turn back, go north, and face the Pokey Army.  But where is it? Not here�  And it�s not here, either - though we still can�t get to the eastern edge of the desert. Going north again will put us at the northern edge of the desert.  Oh, this is the Pokey Army!  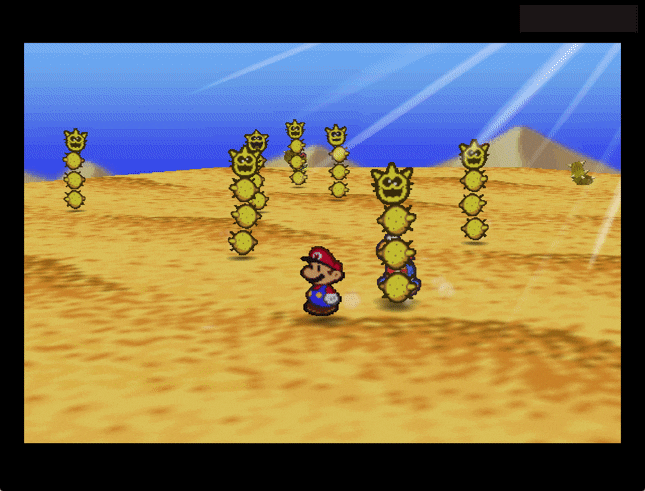 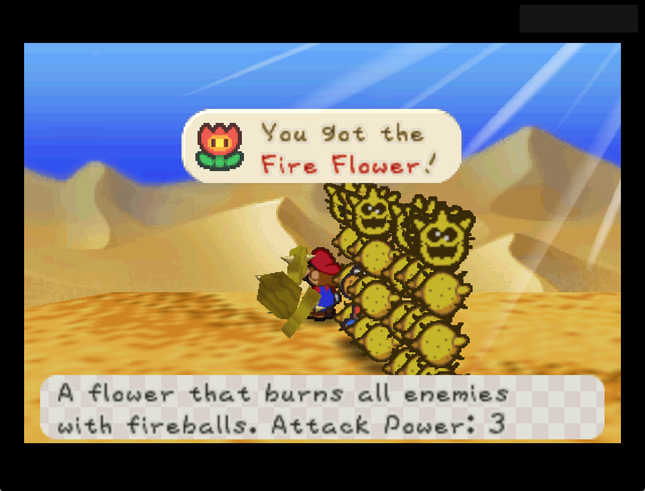 We grab a Fire Flower hidden behind a bush� 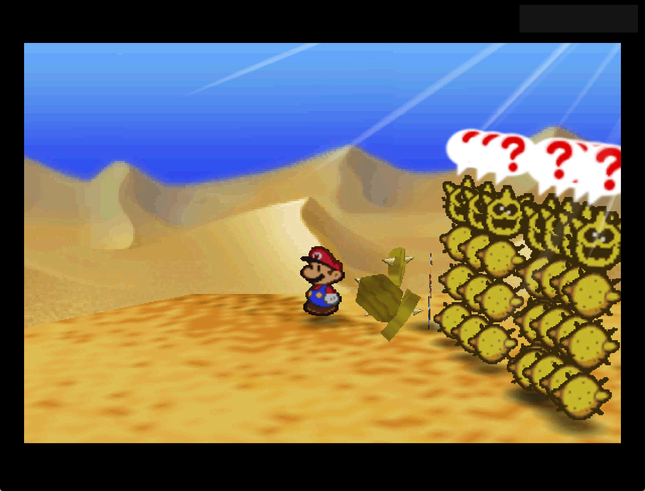 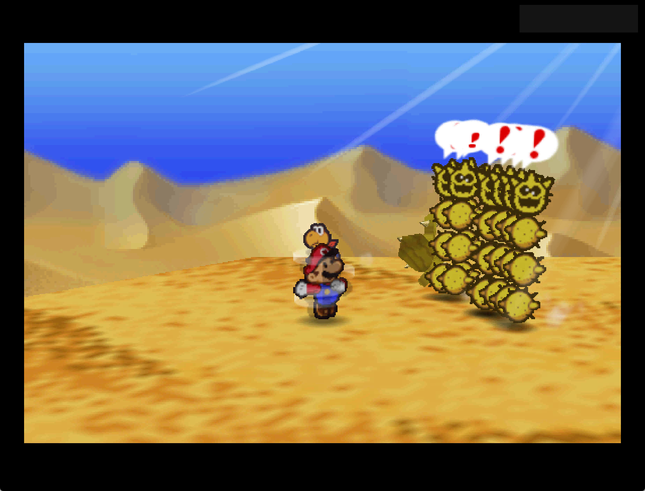   �then get the heck out of there!!  This room is the northeastern corner of the desert. There�s nowhere to go but west (back to the Pokey Army room - no, thank you!), or south.    So south we go.  Finally, we come to the road once more.  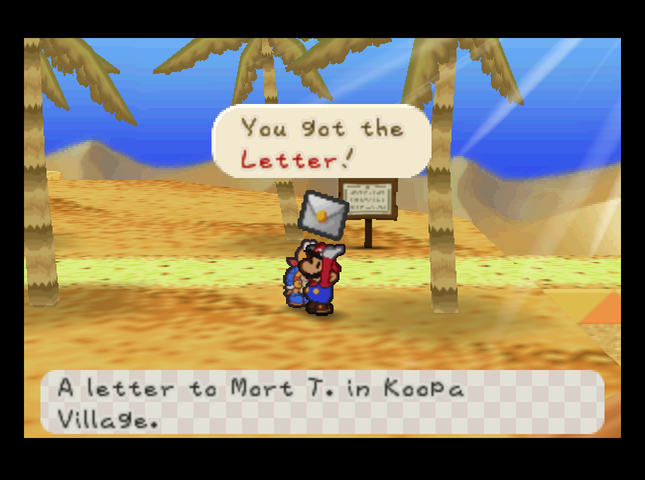 There�s a letter stuck in a tree here.  But more importantly, Dry Dry Outpost is just to the east.  We�ve made it out of the desert! Game Version: Updated from 1.2.0.2 to 1.2.1.0 This version introduces a change we won�t get a chance to see. Remember Chan, in the Dojo? He now only electrifies himself after he�s flipped, for a period of 2 turns. So: a little easier. Badges: 21/89 (New: Group Focus, Runaway Pay) Recipes: 8/50 Star Pieces: 29/180 Chuck Quizmo�s Quiz Questions: 12/64? Game Overs: None canonically, but I did have several noncanon ones while refighting battles to line up good screenshots. Unofficial game over count is at 3 or 4 by this point. SUMMARY OF CHANGES FROM MAIN GAME (in this installment) � Dry Dry Desert now incredibly, extremely easy to get lost in. Map below. � Bandits bulk up. (+1 HP, +1 Attack, steals more coins) � Pokies now 100% spikier thanks to wandering energy drink salesman. (+2 HP, +2 Attack. Attack boost when falling on you is lessened to +1 or 0 if they have fewer segments remaining. They take +1 bonus damage from fire.) � Flame monsters found in desert. (Dry Bubble: 5 HP, 5 Attack, immune to Zap Tap, on fire. Can attack partner instead.) � Connection to Gusty Gulch discovered at northern edge of the desert. � Group Focus and Runaway Pay badges easier to use. (Costs 1 BP less to equip) Next Time On Master Quest: We raid the desert for its goodies. By The Way� (Dry Dry Map) I ended up mapping Dry Dry Desert, including some parts of it we won�t get to until future episodes. This map details all of them. I�ve also made path maps, for those seeking the quickest way to traverse Dry Dry Desert, heading to Dry Dry Outpost from Mt. Rugged (both with and without the Super Hammer). There�s also a path for the best route to the Oasis and back. Those are below. The Pokey horde room was in the original game, by the way - it�s just that Master Quest requires you to go through it to reach Dry Dry Outpost if you haven�t gotten the Super Hammer yet. These maps will also be reproduced in the �Resources� post just below the Table of Contents. Happy desert trekking!
|
|
#
¿
Aug 19, 2019 11:30
|
|
|
BlazetheInferno posted:They probably are, honestly. It's likely intended that if you don't want to go through the desert maze again, you unlock the warp pipe in the sewer. To the best of my knowledge, the sand dunes and etc are permanent. However, once you get the Super Hammer, you can smash those two blocks I showed and shorten the route significantly.
|
|
#
¿
Aug 21, 2019 21:30
|
|
|
Part 12: The Secrets of Dry Dry Desert We stagger into Dry Dry Outpost. Music: Mysterious Dry Dry Outpost 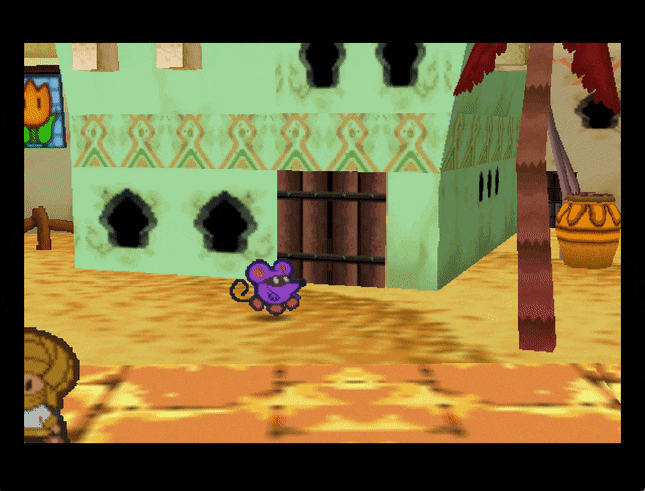 As we venture past the shop, the shopkeeper, Little Mouser, ducks out and heads into the next area.  Kolorado�s assistant is here, in the inner part of the outpost. With all the changes Master Quest made to the desert, no wonder he�s staying here! 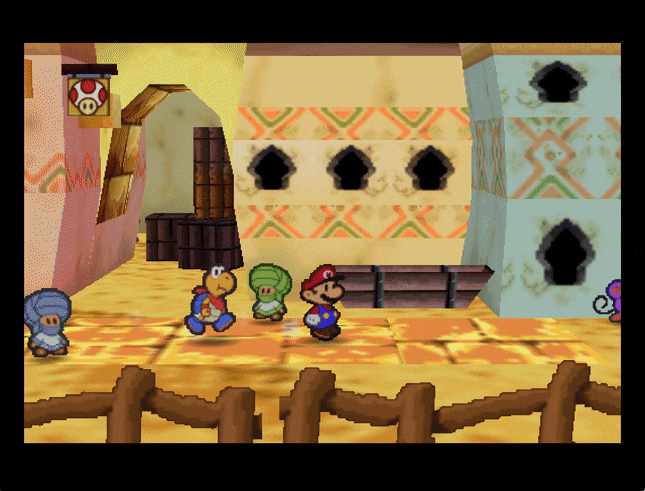 Little Mouser is talking with a mysterious robed figure. When he sees us coming, he skedaddles, returning to his shop. Who is that robed Mouser, anyway? This is Sheek. You�d think the guy could shake the dust from his clothes! If I didn�t know any better I would swear he looks a lot like someone� Zeldah, the Nomadimouse princess! That�s who! But that�s just silly!I thiiiiiiiink Goombario�s got the wrong game. Anyway, here�s how this works. Normally, I�d have to give Sheek three items from my inventory to get him talking, plus one more for each extra question. I�d have to ask two or three questions to determine that the only way to get to Dry Dry Ruins was to meet Moustafa, and that Sheek would only tell how to get to him once I�d given Sheek his favorite food, a Lemon which I�d have to go get from the Oasis. Once I�d gone to the Oasis and returned with Lemon in tow, Sheek would tell me to buy a certain sequence of items in Little Mouser�s shop. That would tip Little Mouser off to clear the way, finally letting me go and see Moustafa. To heck with that.   Little Mouser�s shop has a completely different lineup than most of the shops we�ve seen thus far. His lineup is almost the same as the original Paper Mario, except he now sells Dried Fruit - the slot on the far right originally had him selling Mushrooms. The usual Master Quest-related price increases apply. Thunder Bolts are 10 Coins instead of 5. Dusty Hammers and Dried Shrooms are 4 Coins instead of 2. Dried Pasta has been bumped to 8 Coins from its original price of 3. And Honey Syrup is the usual 3 Coins more expensive.   In terms of items we�d want, the Dried Fruit is a quality healing item, and Dusty Hammers have been buffed. Dried Shrooms and Dried Pasta will mostly be useful in Tayce T�s kitchen. But right now, Mario buys a Dried Shroom, then a Dusty Hammer. This is the secret code.  What ho! Buying a Dusty Hammer after a Dried Shroom� �is a secret sign that only friends of Moustafa know! That means� you�re in with Moustafa! �you want to see Mr. Moustafa? He�s usually up on the highest part of Dry Dry Outpost. Just keep going up, my man! What ho! Buying a Dusty Hammer after a Dried Shroom� �is a secret sign that only friends of Moustafa know! That means� you�re in with Moustafa! �you want to see Mr. Moustafa? He�s usually up on the highest part of Dry Dry Outpost. Just keep going up, my man!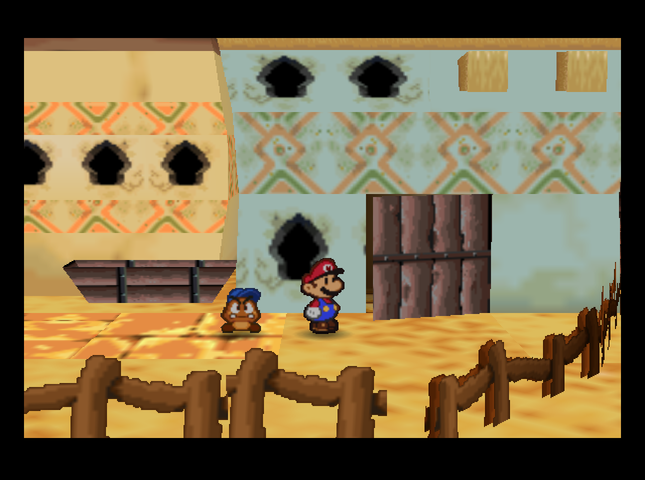 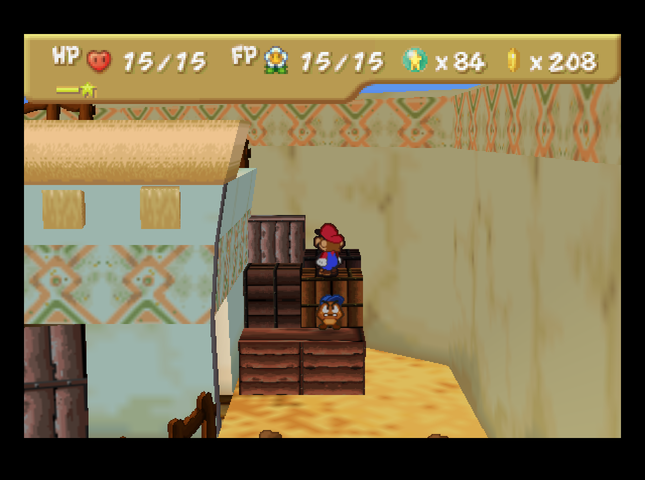 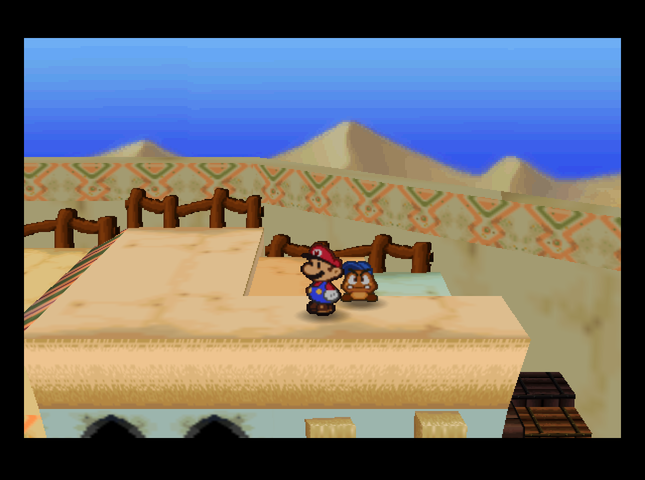 Sheek is now gone from his appointed spot, and inside this house, there�s a secret passage. It leads outside, to a stack of crates piled to allow access to the Dry Dry Rooftops.   We pick up another lost letter where it fell behind a jar, and continue on our way.  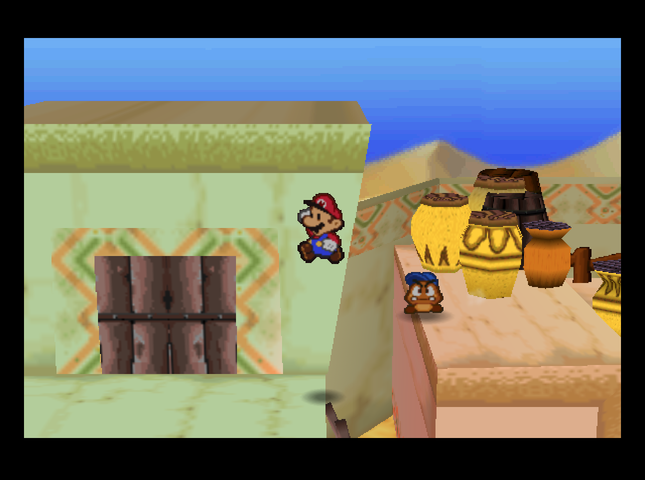  The trail leads to a second-story door� 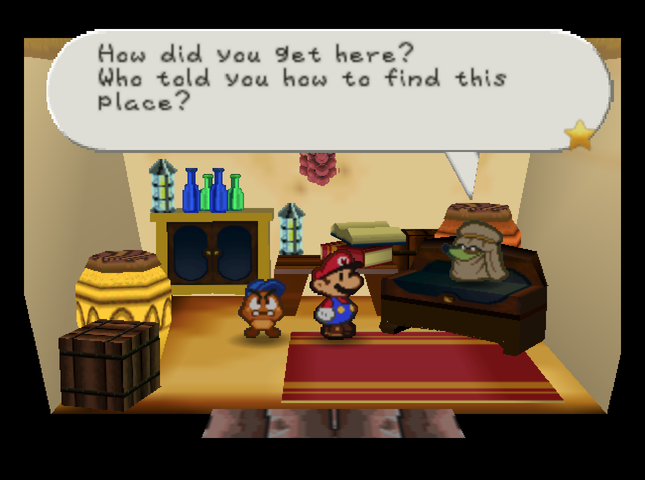 And inside is� Sheek? Or could it be� 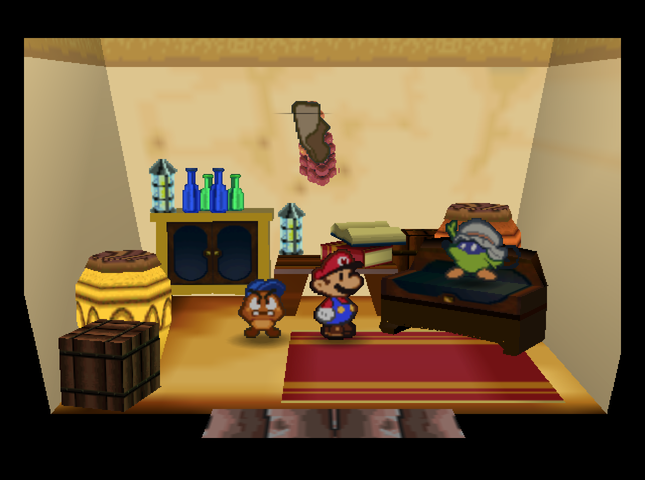 Da Da Da Duuum! Sheek revealed his true self! �I guess that means he�s the boss that everybody talks about. Oh� I was expecting Zeldah though, to be honest. Da Da Da Duuum! Sheek revealed his true self! �I guess that means he�s the boss that everybody talks about. Oh� I was expecting Zeldah though, to be honest.Music: Moustafa 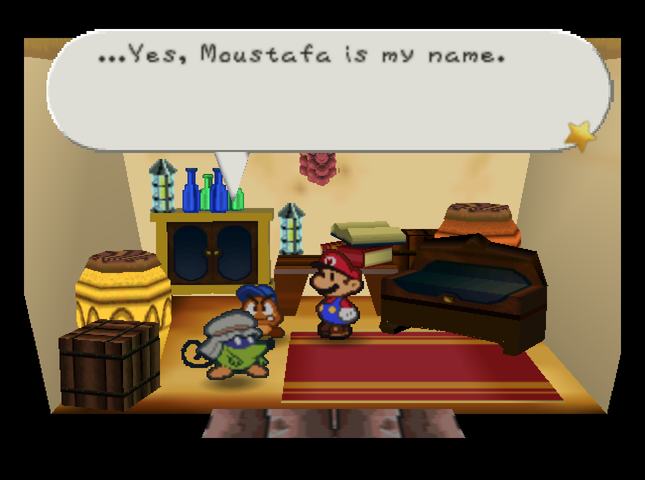  When I�m out and about in Dry Dry Outpost, I use the name Sheek. When I�m out and about in Dry Dry Outpost, I use the name Sheek. That is our story and we are sticking to it. Your name is Mario, yes? I heard you want to go to Dry Dry Ruins. I have a feeling you are on an important journey, so I will tell you the secret.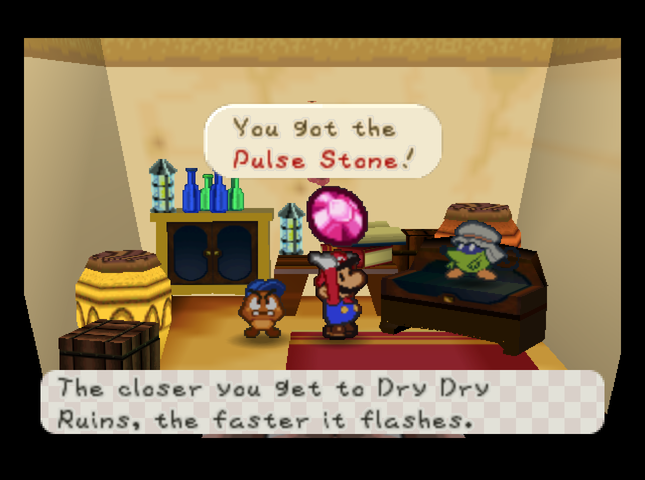 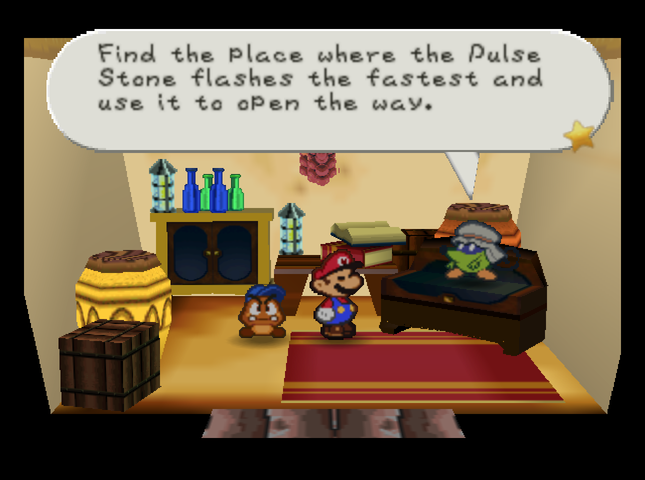 The cool gem we just got is the key to the ruins. In vanilla Paper Mario, we�d have to wander around the desert until we found the place, but� well, we�ve already been past it in Master Quest. Instead of opening the ruins right away, we�re going to scout �round the desert a bit, instead. There�s a bunch of useful items out there! 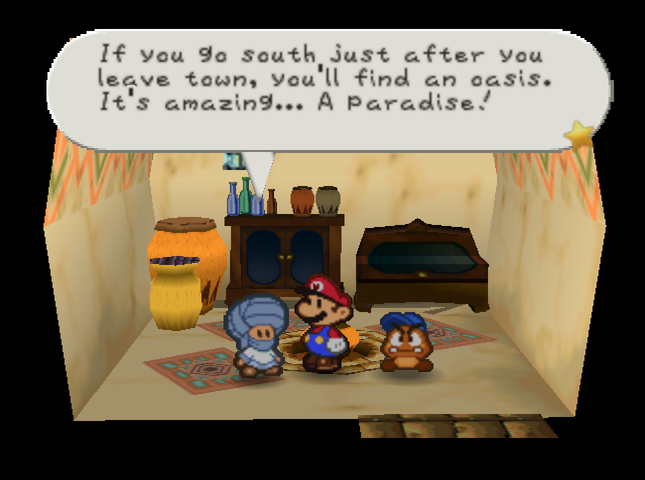 Before we go, the Dryite in the leftmost house on the west side has several pieces of useful advice.  Hey! Guess what! Hey! Somewhere in the desert, there�s a stone cactus. If you move 3 south and 2 west from there, you�ll find something special hidden. Hey! Guess what! Hey! Somewhere in the desert, there�s a stone cactus. If you move 3 south and 2 west from there, you�ll find something special hidden. We leave Dry Dry Outpost. To start our tour, we head to the south, in the direction of the Oasis.  A one-way sandhill keeps us from coming back in this direction. 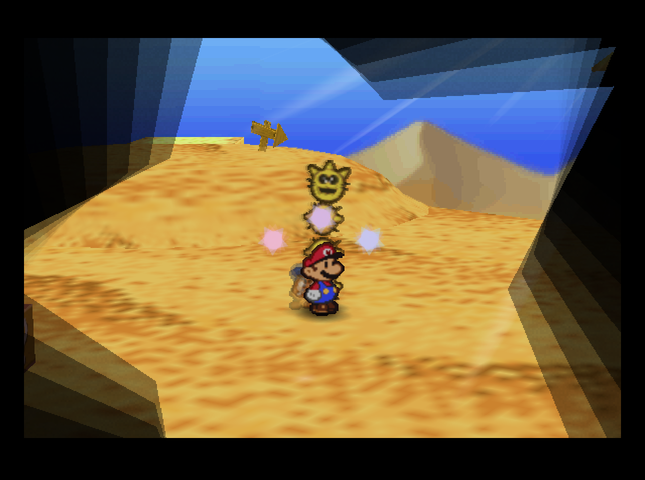 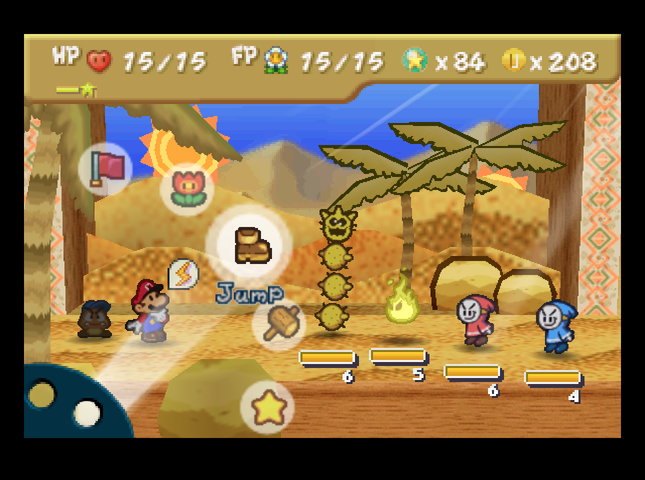 We run into a Pokey on the way. There�s an unusual blue Bandit along with him.  Seriously, if these guys take your coins, you won�t see them again. They don�t take as many as normal Bandits, though. They are also blue, in case you haven�t noticed. Not as blue as you�ll be if they take off with all your money, though! Seriously, if these guys take your coins, you won�t see them again. They don�t take as many as normal Bandits, though. They are also blue, in case you haven�t noticed. Not as blue as you�ll be if they take off with all your money, though! Banditos don�t deal any more damage than regular Bandits, and with less HP, they�re easier to KO. Zap Tap prevents them from stealing at all. However, their attacks have a chance to inflict Dizzy, so it�s important to block their attacks and beat them quickly!  After we beat the Pokey, we hammer a nearby ? block for� a coin.  But there�s a Life Shroom in a hidden block above it! It�ll resurrect us with 10 HP if we(�re about to) get KO�d. [We may want to use Life Shrooms at their full power while we still can. The MQ devs have been talking about a nerf that will make Life Shrooms set your FP to 0 when used. Why? The dev explanation was something like �Because it�s possible to cheese the great majority of bosses by bringing an inventory of 8-10 Life Shrooms.� (Paraphrasing.) I�m not sure exactly how I feel about this, but all those feelings are variants of �I don�t like it�.]  Towards the south of this area, the ground gets green and the air gets fresh. We must be near�  The oasis! There�s several important things to get here. Music: Dry Dry Oasis  First off, there�s a Heart Block, so we can heal up after the battles on the way.     Next, the fruit trees on each side of the oasis drop Lemons and Limes. These will be useful for cooking later.  Last but definitely not least, we have our very first Super Block! This block will let us upgrade one of our partners, giving them an Attack boost and a new move.  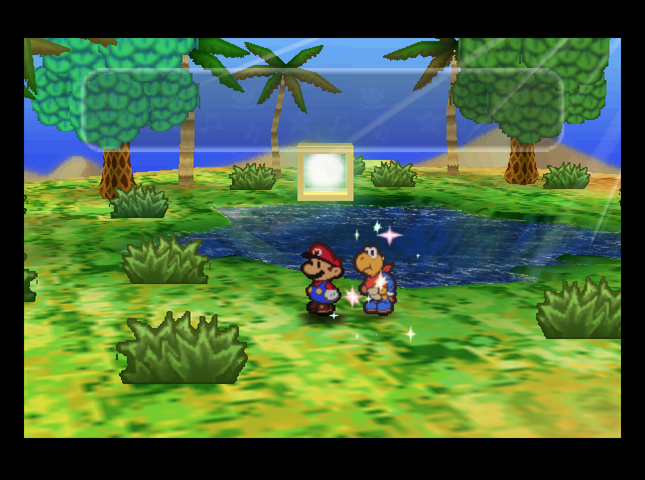  We upgrade Kooper. On the next screen over, a Pokey is willing to help Kooper show off his stuff. 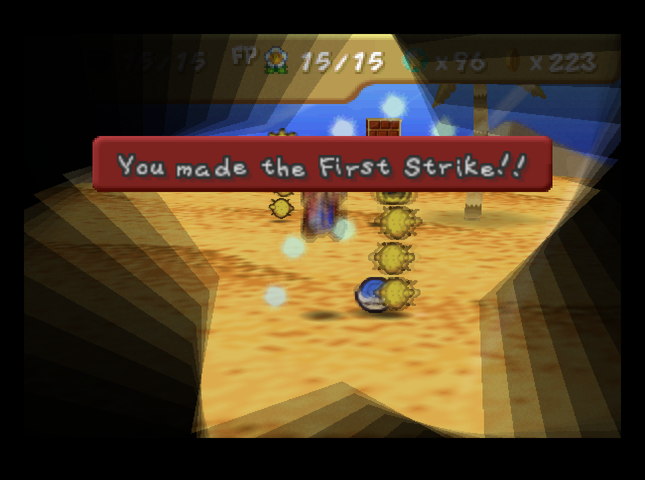 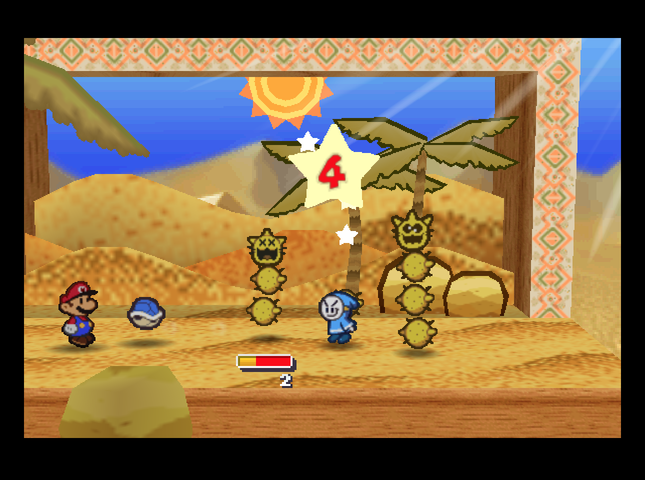 Kooper�s base attack has gone up to 4 (the main reason we upgraded him first - he�s great against almost everything in this desert). 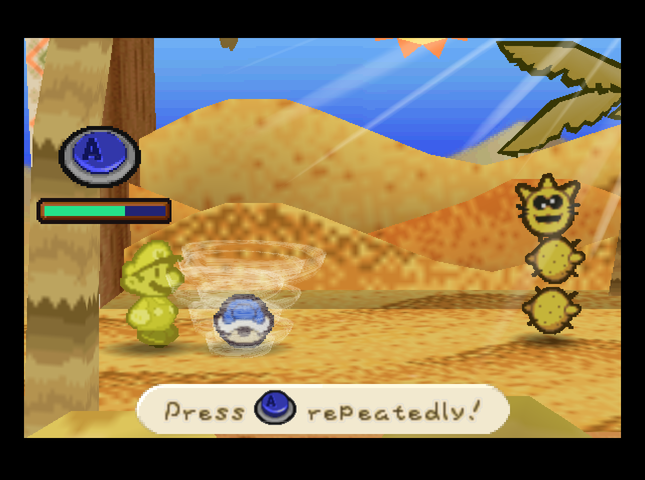 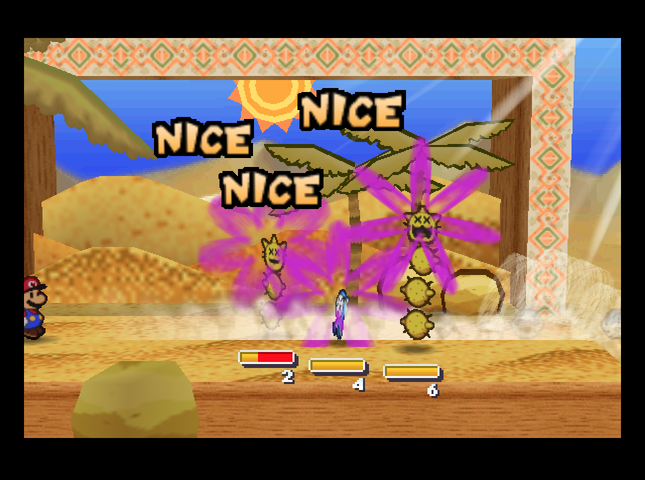 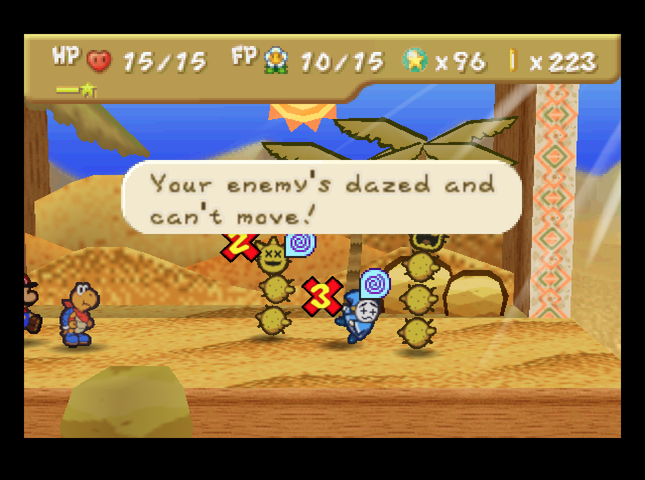  And Dizzy Shell doesn�t do any damage, but can make all ground enemies dizzy! There are two drawbacks, though: [1] The attack costs 5 FP - that�s 1 FP more than in ordinary Paper Mario, and� [2] Like the base game, if one or more enemies are resistant to Dizzy, the action command bar will be harder to fill, and it may be hard to daze even the non-resistant enemies. Still, it�s a useful move for any battle where there�s many dangerous enemies. That�s most of Master Quest, to be honest. 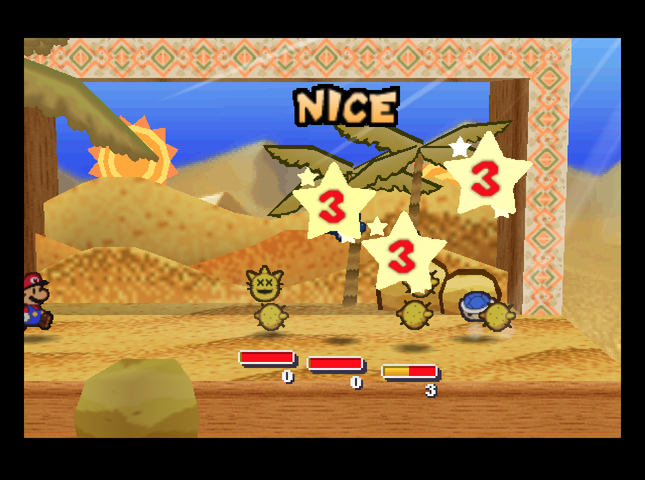 Kooper�s Power Shell is buffed, too - it now does 3 damage to all ground enemies. 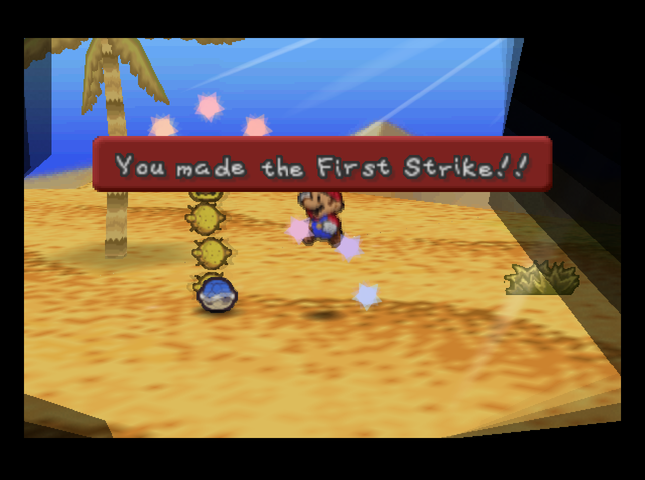 There�s a second Pokey in this area. We battle it, too...  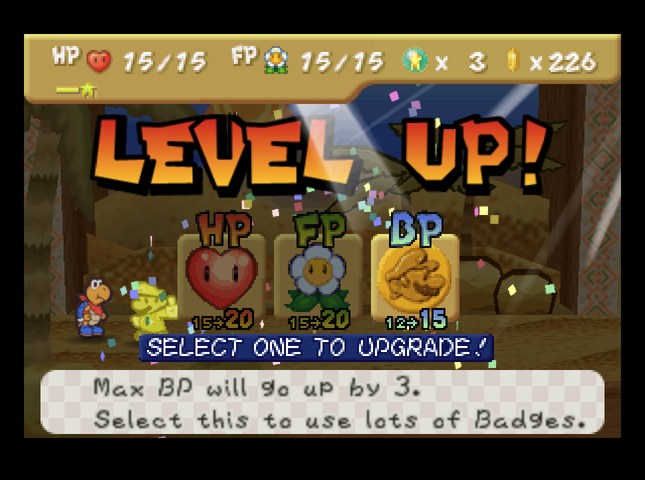 ...and we level up! Once again, we choose BP - we�ll equip HP Plus for the time being, until something better comes along.  We also grab a Tasty Tonic hidden behind a bush in this area. This item has been drastically changed from how it was in the original game. In Paper Mario, Tasty Tonic would remove poison and the Shrink status, while doing nothing outside of battle. Now� it does the same thing during battles� but outside of battles it fully heals Mario, and drains 10 FP in the bargain!   Remember that one-way sand hill we went down coming towards the oasis? This area of the desert is its own little side area, disconnected from the rest. It turns out there�s only one way out: find the room with bright blue cacti, and jump into the whirlwind there.  The whirlwind drops us on this pillar, in the room where we got the Stop Watch. Originally, the Spin Attack badge was here; now, there�s a Life Shroom instead.  Since we�re in the area, we can deliver the letter we found on the Dry Dry Rooftops to the Nomadimouse who hangs out here.  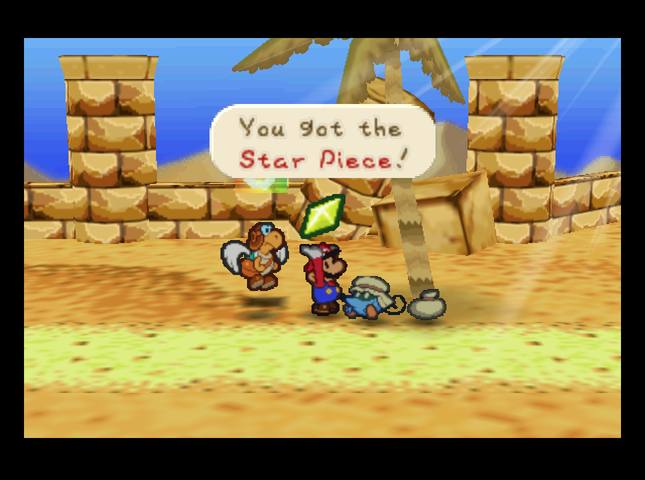 The Nomadimouse gives us a Star Piece as a thank-you.   After a quick jaunt back to Little Mouser�s shop to store our fruity loot, it�s back to the desert. There�s even more cool stuff to find out here.  Like this Honey Syrup in a block by a sand dune.  Our next destination is towards the square southwest of the stone cactus, which the Dryite told us about. However, we run into a very unusual Bandit. 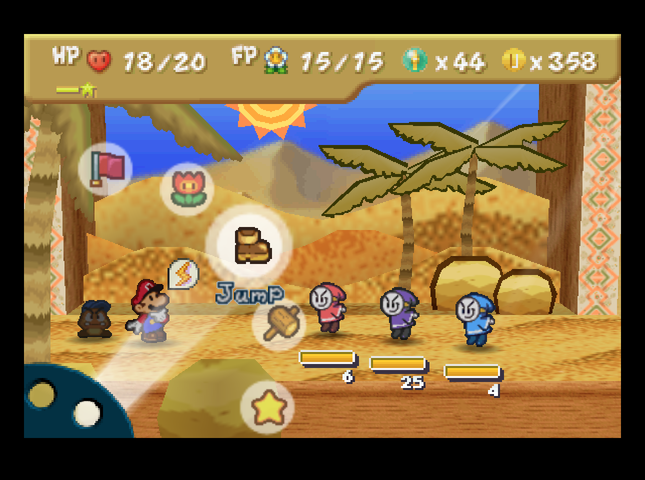 This is a Bandit Leader. They are the big bosses of highway robbery. These guys attack with an odd pause. It can be tough to read their attacks. They do some decent damage and take away our abilities instead of our money! They have loads of HP, so let�s hit them with everything we�ve got! This is a Bandit Leader. They are the big bosses of highway robbery. These guys attack with an odd pause. It can be tough to read their attacks. They do some decent damage and take away our abilities instead of our money! They have loads of HP, so let�s hit them with everything we�ve got!Bandit Leaders are a sort of� optional miniboss. They�re only found in two specific areas of Dry Dry Desert - just north of the Oasis, and here - and they won�t always appear every time you enter the area. By the way: the �odd pause� means that the time interval after they walk up to you, but before they charge at you, is chosen semi-randomly. 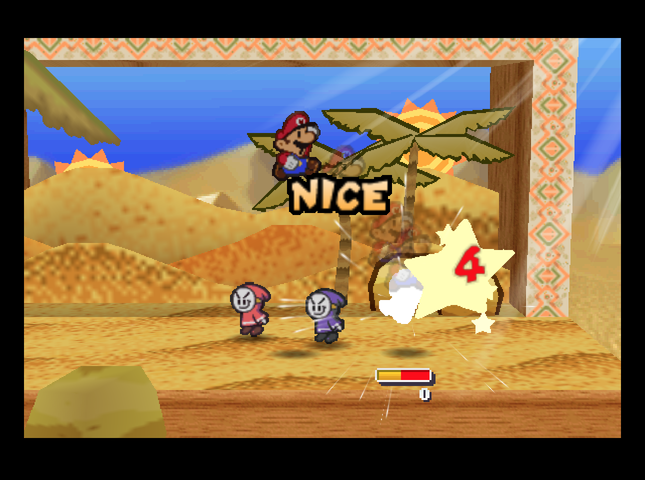 Mario takes out the Bandito with Power Jump, to keep it from dizzying us. 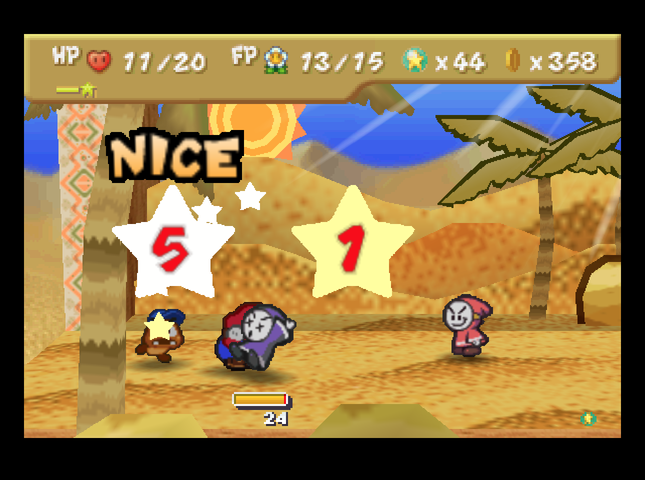 It turns out Bandit Leaders do a whopping 7 damage with their attacks! Zap Tap stops the ability-stealing, fortunately.  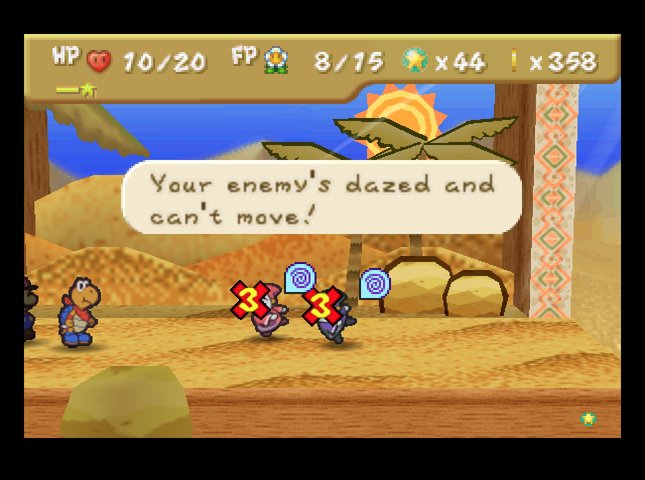 So, I switch to Kooper, and Dizzy Shell gives us some breathing room. 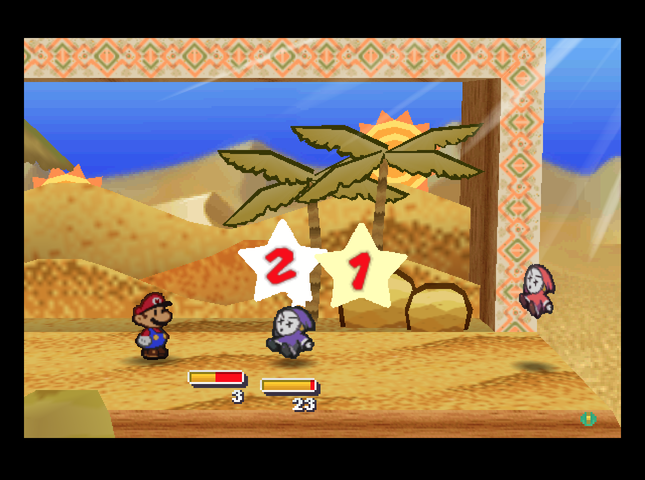 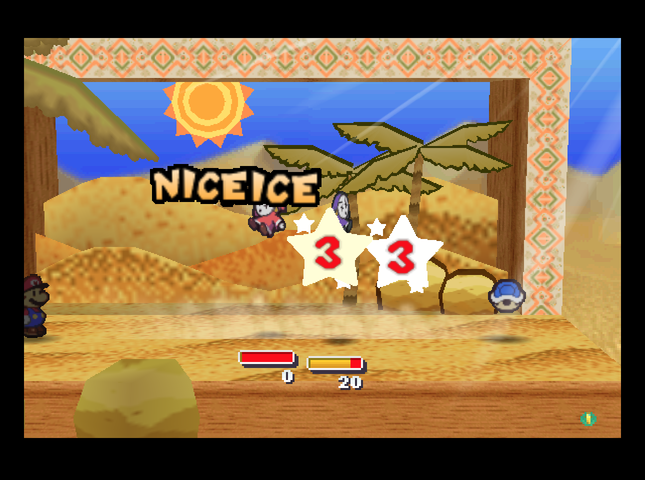 Next turn, I Spin Smash the Bandit, and Power Shell, which KOs it. The Leader is now down to 20 HP. 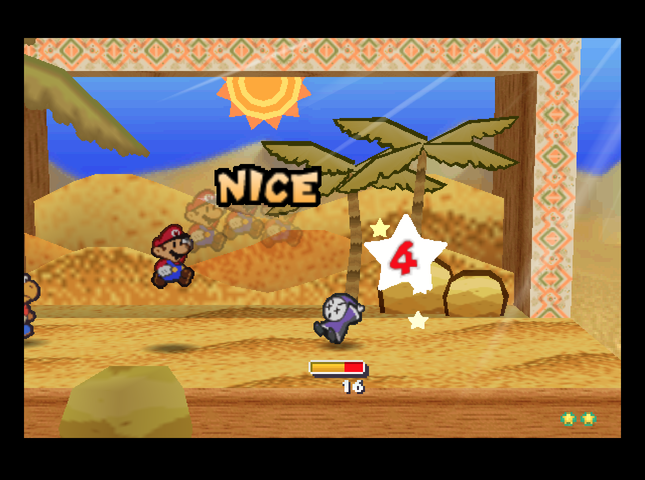 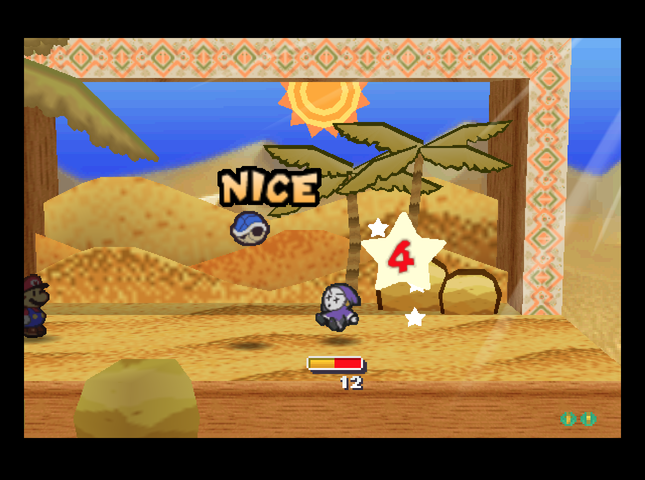 We hit the Leader with Power Jump and Shell Toss for the next two turns.  Once it recovers and attacks again, it�s only got 3 HP left, and we�re able to survive its next attack. 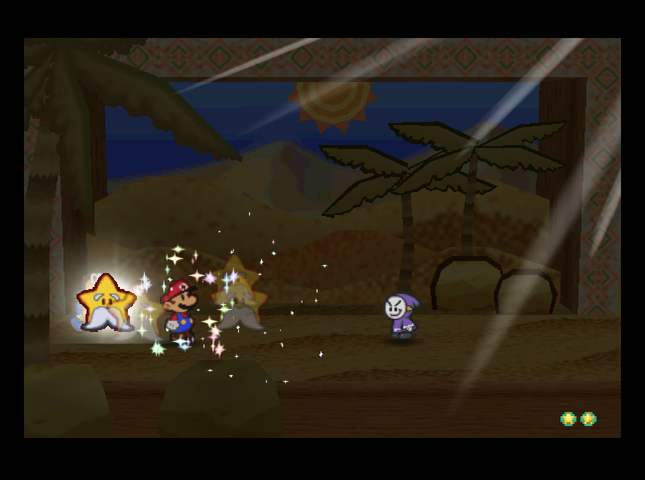  We Refresh, and Kooper KOs it with a Shell Toss.  The Bandit Leader drops a lot of Coins - I think about 20 or so.  We finally reach the area the Dryite mentioned. It has an old, collapsed stone bridge.   There�s a hidden block above the one natural rock, with the Attack FX C badge! It makes Mario�s attacks sound like someone saying �Oh!�   We turn west and head north along the west edge of the desert, passing through Kolorado�s camp. Kooper gets to meet his hero Kolorado!  One screen to the north of the camp, there�s a suspicious yellow block. 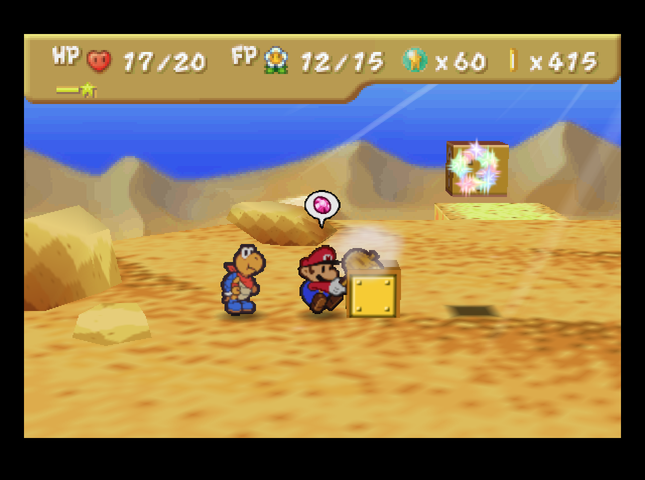 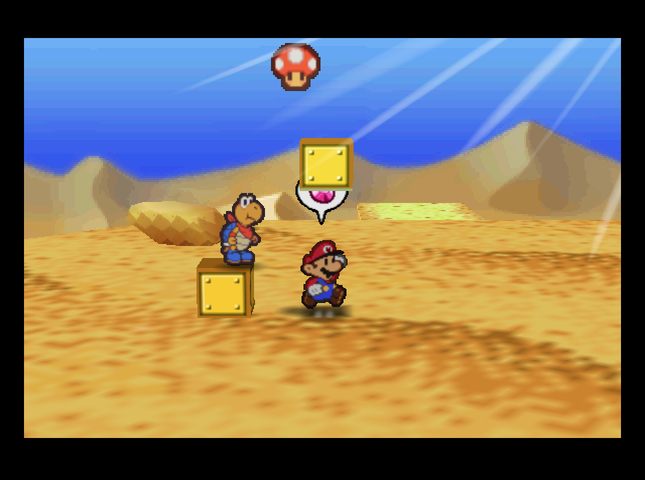 Hitting it once with Mario�s hammer makes a block appear. There�s a Mushroom inside. 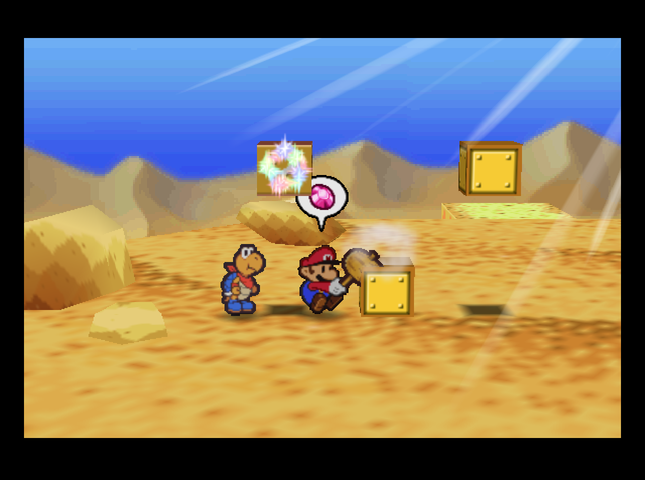 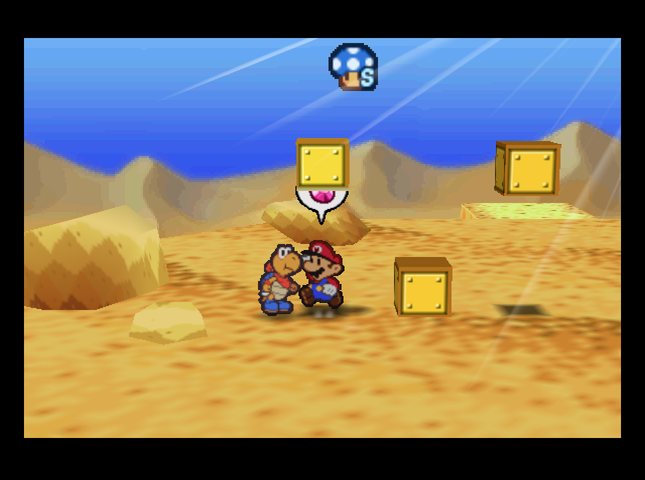 Hitting it 10 times in total makes another block appear! This one has a Super Shroom.  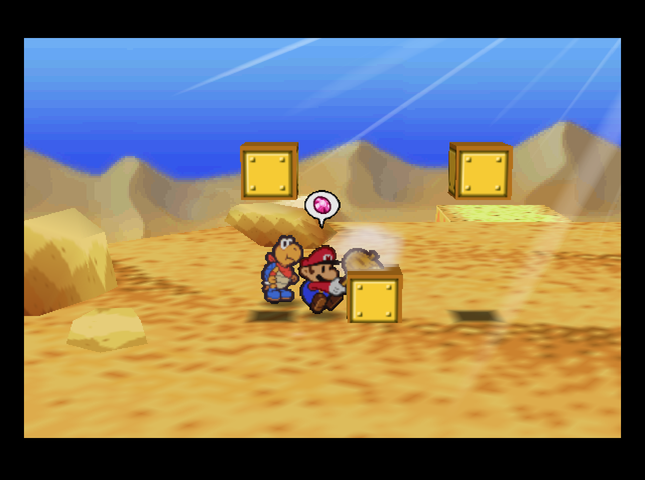 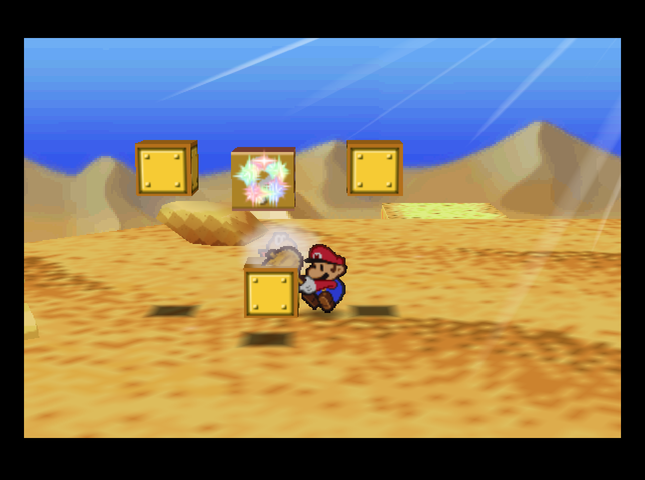  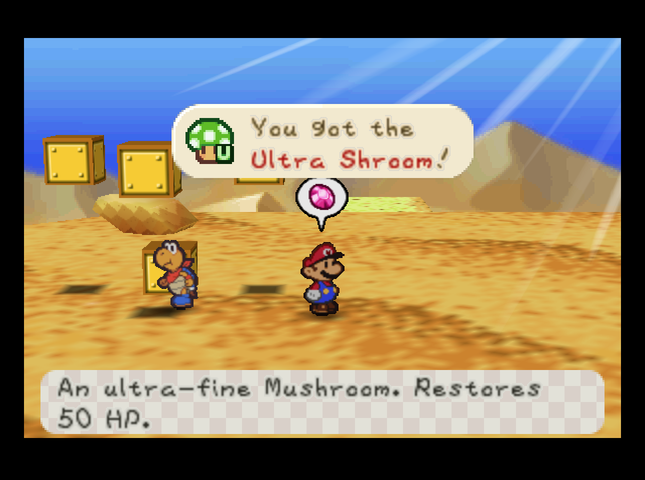 The real secret, though, is what happens if you hit the block 100 times in all. Then, a third block will appear, with an Ultra Shroom! Ultra Shrooms restore 50 HP and are very rare, and they can be cooked into even better healing items later. We�ll store this one in the Dry Dry Outpost shop later.  A block with a Fright Jar is in the northwest corner of the desert.   And just to the south, in a hidden block in an alcove blocked off by a sand dune, is a Thunder Rage! It�s worth noting Master Quest has altered Thunder Rages in the same way that it hit Thunder Bolts. A Thunder Rage hits all enemies, but it does only 1 damage to each. However, it has a high chance to Shrink, and this effect lasts for a long time. This could come in handy!  One thing I haven�t been mentioning up until now is that the Pulse Stone is kicking up quite a ruckus. Dry Dry Ruins must be close by! But where could they be?  This has gotta be the place! 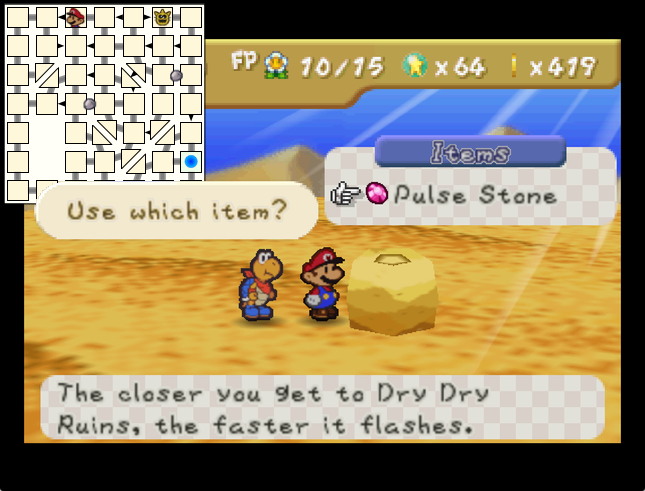 Now we just put the Pulse Stone on this totally ordinary rock, aaand� Music: Dry Dry Ruins Revealed!  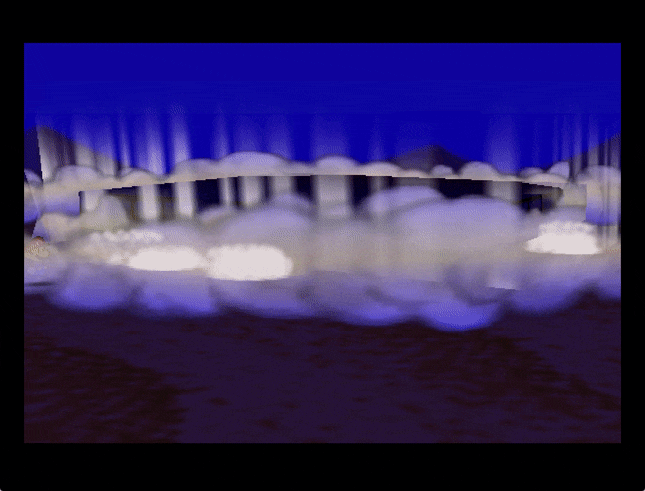 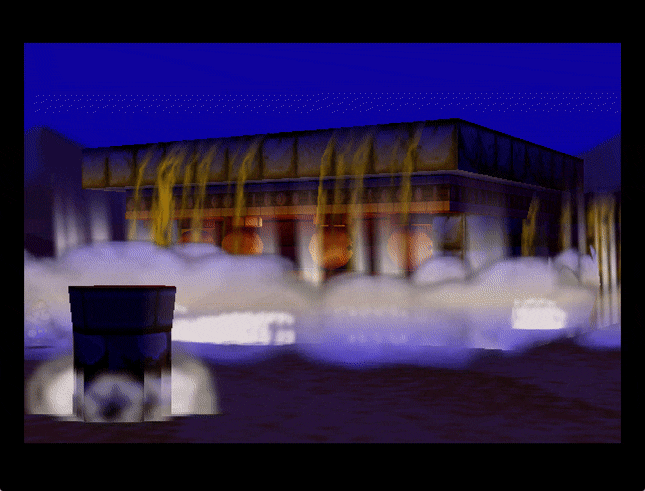   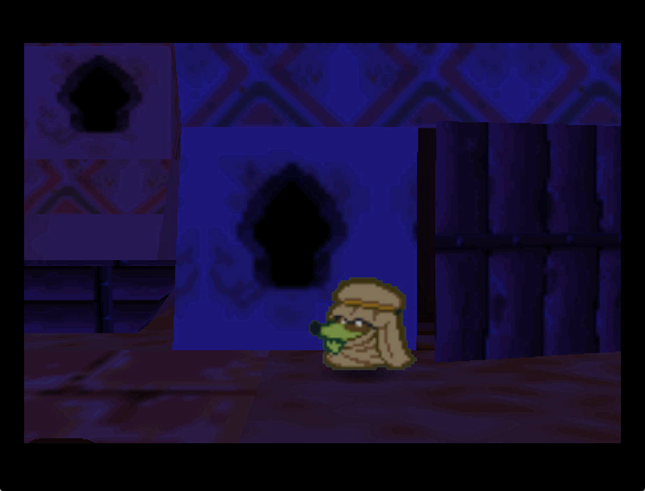 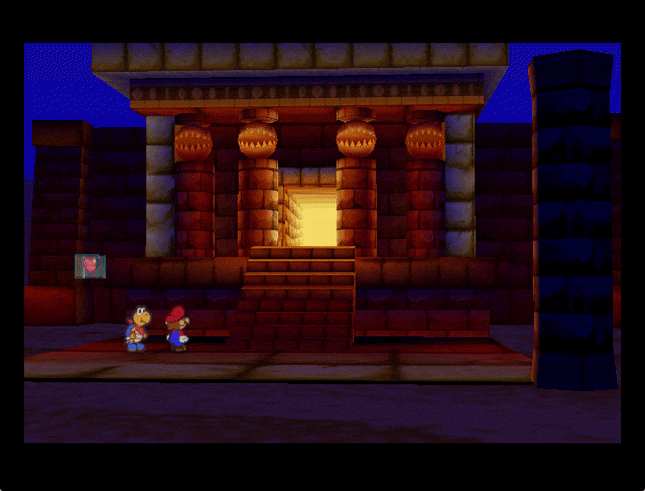  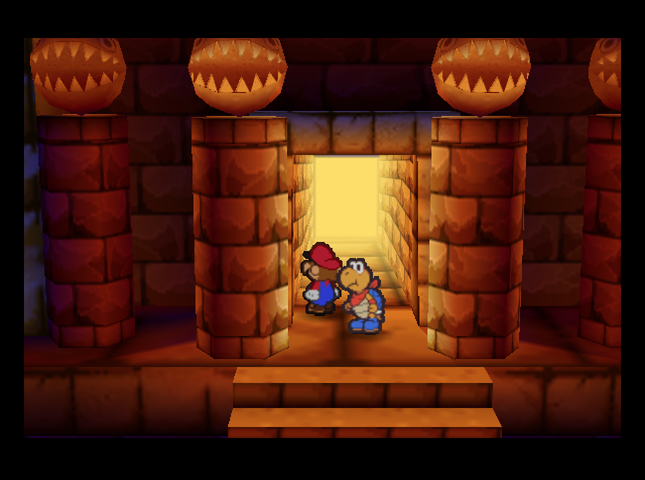 This is it! The legendary Dry Dry Ruins await! Badges: 22/89 (New: Attack FX C) Recipes: 8/50 Star Pieces: 30/180 Chuck Quizmo�s Quiz Questions: 12/64? Game Overs (official): None. I�ll bring back the unofficial Game Over count if more misfortune befalls me while getting good screenshots. SUMMARY OF CHANGES FROM MAIN GAME (in this installment) � Little Mouser, shopkeep, starts lucrative sideline in Dried Fruit. � Everything in Dry Dry Outpost shop now more expensive. � Kooper�s Dizzy Shell slightly more tiring. (Costs +1 FP) � Dancing bandits seen in desert. (Bandito: 4 HP, 3 Attack, steals coins and runs away immediately, attacks cause Dizzy.) � Managers of bandit dance troupe also seen (rarely) in desert. (Bandit Leader: 25 HP, 7 Attack, steals ability icons, probably doesn�t run away.) � Spin Attack badge swept away by desert wind, replaced by Life Shroom. � Tasty Tonics heal 99 HP, drain 10 FP outside of battle. Unchanged while fighting. � Thunder Rages do only 1 damage to everything, but Shrink massively. Next Time On Master Quest: If you bite into something and you die, it�s poisonous. If it bites you and you die, it�s venomous. If you flub an action command and you die� it�s Master Quest. Quackles fucked around with this message at 19:22 on Aug 25, 2019 |
|
#
¿
Aug 25, 2019 01:58
|
|
|

|
| # ¿ May 22, 2024 15:28 |
|
|
SSNeoman posted:Was this the first partner power-up block we could find? Yep. There's one on Mt. Rugged, but it's sealed behind a Stone Block. There's also one in Dry Dry Ruins, but it'll take us a bit before we can get to where it is. Carbon dioxide posted:Those two missing squares on your map annoy me to no end. The missing squares'll get auto-filled in once Mario leaves the Dry Dry Ruins, for consistency's sake. And, well, in regards to the hack? Let me just say that you ain't seen nothin' yet.
|
|
#
¿
Aug 25, 2019 10:06
|
|