|
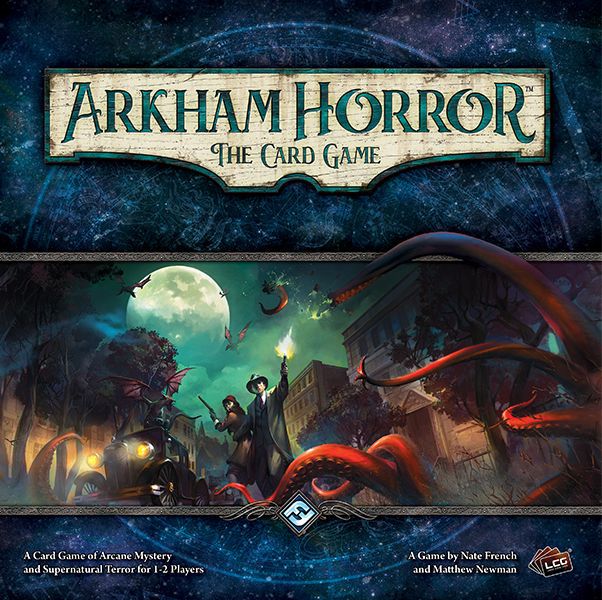
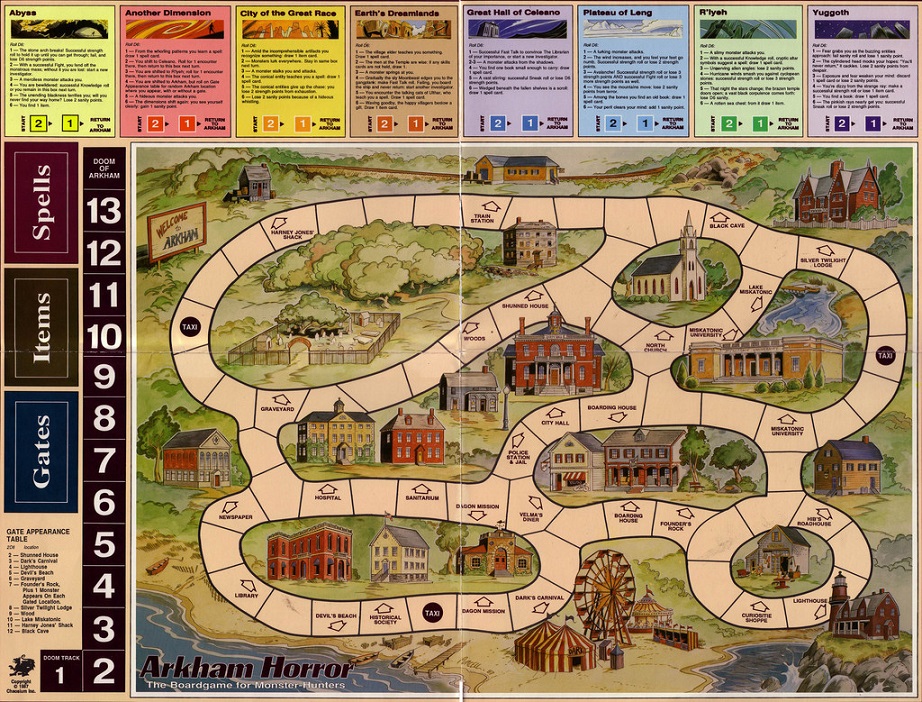 In 1987, game designer Richard Launius submitted a board game design to Chaosium, the publishers of the Call of Cthulhu Roleplaying Game. After a bit of polishing and editing, the final product was released under the title Arkham Horror. A co-operative board game set in the town of Arkham, the aim of the game was to seal up the otherworldly gates spawned by horrors beyond time and space. Fail to seal them all up in time, and Arkham would be overrun by an army of monsters. While relatively popular, the game never saw a reprint, and eventually faded into obscurity. 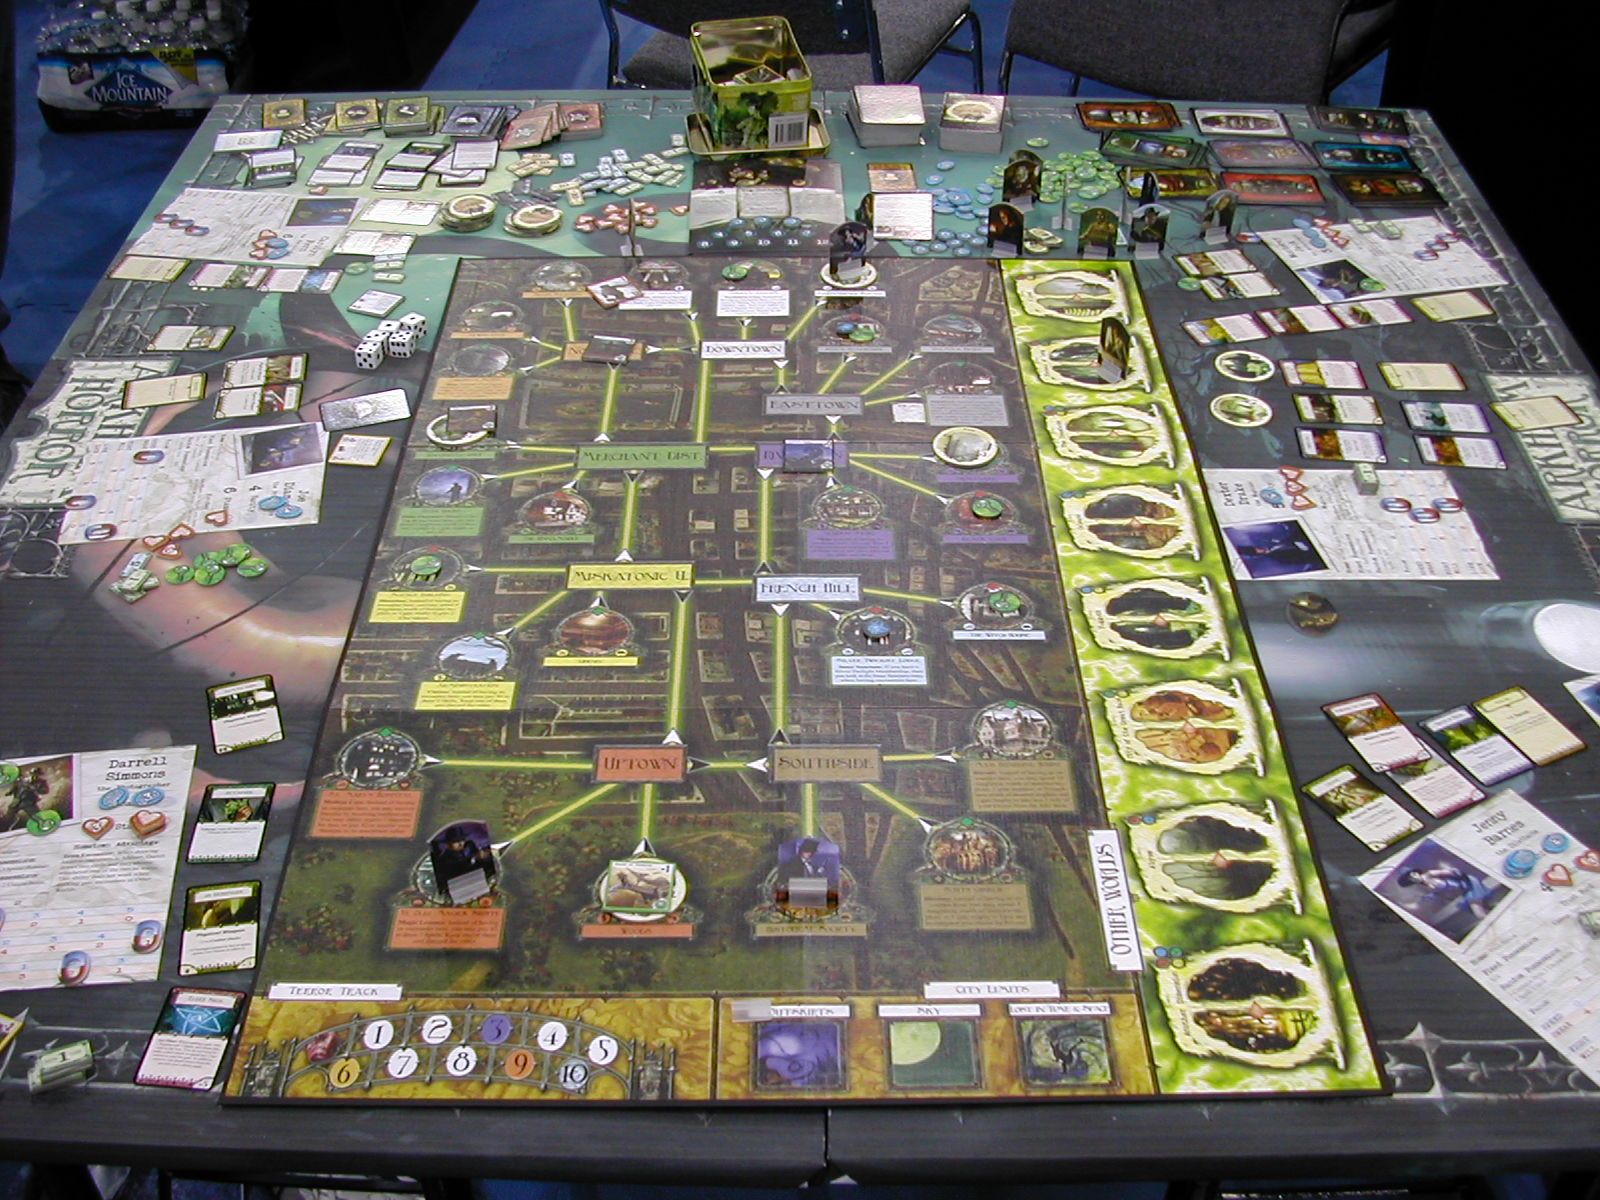 In 2005, Fantasy Flight Games acquired the license and set about revising the game for a second edition. Probably the most well-known version of Arkham Horror, the sprawling behemoth of a game soon became renowned for its confusing and often contradictory morass of rules and exceptions, particularly as expansion after expansion piled on an ever-increasing amount of complexity. In 2011, Fantasy Flight Games decided to expand their repetoire, publishing game after game set in what was now titled the 'Arkham Files' universe. Among the titles published were: - Mansions of Madness, a game which pitted a team of investigators against a 'keeper' responsible for setting up and trapping the titular haunted mansion - Elder Sign, a stripped-down Yahtzee-esque game based around rolling specific dice combinations to seal up otherworldly gates - Eldritch Horror, a game fairly similar to Arkham Horror, but scaled up into a globe-trotting adventure, with the entire world as a playing field And that finally brings us to the topic of this thread:  So what is this game about? As with its predecessors, this is a co-op game for 1-4 players. Investigators pick a scenario and work towards solving a central mystery (abstracted here into the accumulation of clue tokens, no actual deductive reasoning necessary) before the doom clock runs out. Each scenario can be played standalone, but the game is generally played in campaign mode. Scenarios are released in 'cycles', with a full cycle consisting of about 8 scenarios strung together. Investigators begin with the first scenario and play along, gaining experience and leveling up their decks as they go along. The key difference between this game and other Arkham Files game is that it is, of course, a card game. Each investigator is defined by a 30-ish card deck, and players are largely free to customize it as they wish as long as they observe the deckbuilding rules for the chosen investigator. As investigators gain experience, they can earn more powerful cards for their deck, and new player cards are introduced with every scenario to keep deckbuilding fresh. I meant story-wise, not mechanically. The Arkham Files universe definitely leans way more towards the 'pulpy' side of the Cthulhu Mythos than the 'horror' side. Gun-toting nuns do battle with snake-men, polyphemous tentacled horrors are always five minutes from breaking into reality, and you can't swing a cat without hitting a deranged cultist. Nevertheless, it is a horror game, and there'll be plenty of spooks along the way. As far as the campaigns go, they tend to follow the standard Call of Cthulhu/Arkham Horror setup: some ancient eldritch evil is about to break into the world, and it's up to a motley crew of concerned individuals to look into the matter and (hopefully) take care of it. How is this LP going to work? This is going to be a narrative LP, so anyone not into that sort of thing should turn back now. As far as the game goes, I'll be playing via the Arkham Horror Super Complete Edition mod on Tabletop Simulator, running 2 investigators at a time through the campaigns in release order. Readers of the thread will get to vote on which investigators I run and on important campaign decisions, though if I run into one mid-scenario that I don't feel is worth voting on, I'll just play it by ear. What difficulty will you be playing on? Taboo or no Taboo? The 'Taboo' list is a list of optional erratas and updates to nerf the stronger cards and encourage more variety in deckbuilding, usually by adding more costs to their effects or raising their XP cost. I'll be skipping out on it to start off, but we'll see how it goes as the LP continues. Regardless, I'll try to avoid over-reliance on the same few cards with every investigator. As for difficulty, I'll be playing on Standard, and we'll see what that affects in the upcoming update. How often will this be updated? I'll try to keep this regularly updated, though with how busy the upcoming year is starting to look, I doubt I can promise anything better than 'whenever I have the time and energy to spare'. When will this LP be done? Thanks to the episodic nature of released content, actually catching up to published material will be nigh-impossible. Right now the game is in the middle of "The Dream Eaters", its fifth scenario cycle, and I'd like to show off that one in its entirety if the LP makes it that far. As for any further content beyond that, we'll see. Hey, you messed up a rule! While not quite the tangled pile of legalese that was Arkham Horror 2E, this game is still pretty rule-heavy, and there's often interactions that can be easily overlooked or misinterpreted. If you spot me making a mistake while playing, please gently point it out and I'll be happy to issue a correction in the next update. If it's a particularly gamebreaking one I might replay an entire scenario, but hopefully it shouldn't come to that. With all that aside, let's begin! Update: New rule - No Spoilers! The thread will be voting on important campaign decisions from now on, and some of those won't be paying off till way down the line, so it's more fun for everyone if those outcomes are kept secret until the appropriate moment. Inadequately fucked around with this message at 17:09 on Jan 19, 2020 |
 #
?
Dec 31, 2019 18:43
#
?
Dec 31, 2019 18:43
|
|


|

|
| # ? May 6, 2024 03:56 |
|
|
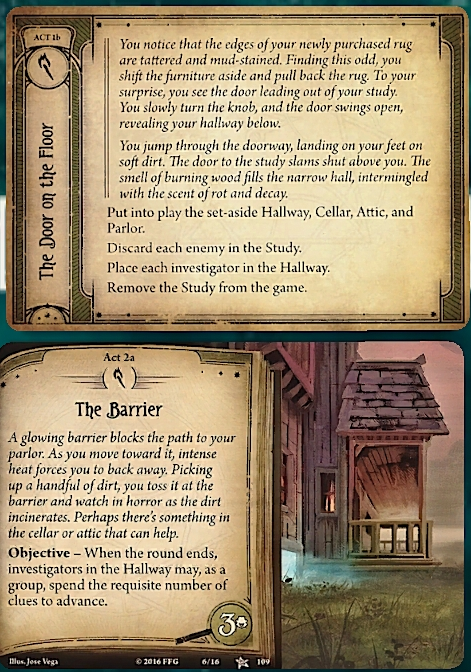
 We�ll start off our journey with Night of the Zealot, a three-scenario mini-campaign included in the Core Set. A fairly simple campaign designed to teach new players the basics, though it�s a little outdated in its design sensibilities by now. The Gathering is our first scenario, and there�s not a lot to be said about it � it�s there to teach players the very basics of the game. As a result, this update will be a little more infodump-heavy than the next few, though to ease up on that most mechanics will be explained only when they become relevant.  It began on Friday, September 18, 1925. The end of a long and abnormally hot summer. A silent, unspoken anger grips the town. Tempers are short, and - It began on Friday, September 18, 1925. The end of a long and abnormally hot summer. A silent, unspoken anger grips the town. Tempers are short, and -  Look, just get to the point. Why are you IN MY HOUSE? Look, just get to the point. Why are you IN MY HOUSE? Oh, I was getting to that. During my investigation, I sensed an intense magical disturbance centered on this very spot. Then the door disappeared, and I've been stuck since then. The what disappeared? Oh, I was getting to that. During my investigation, I sensed an intense magical disturbance centered on this very spot. Then the door disappeared, and I've been stuck since then. The what disappeared?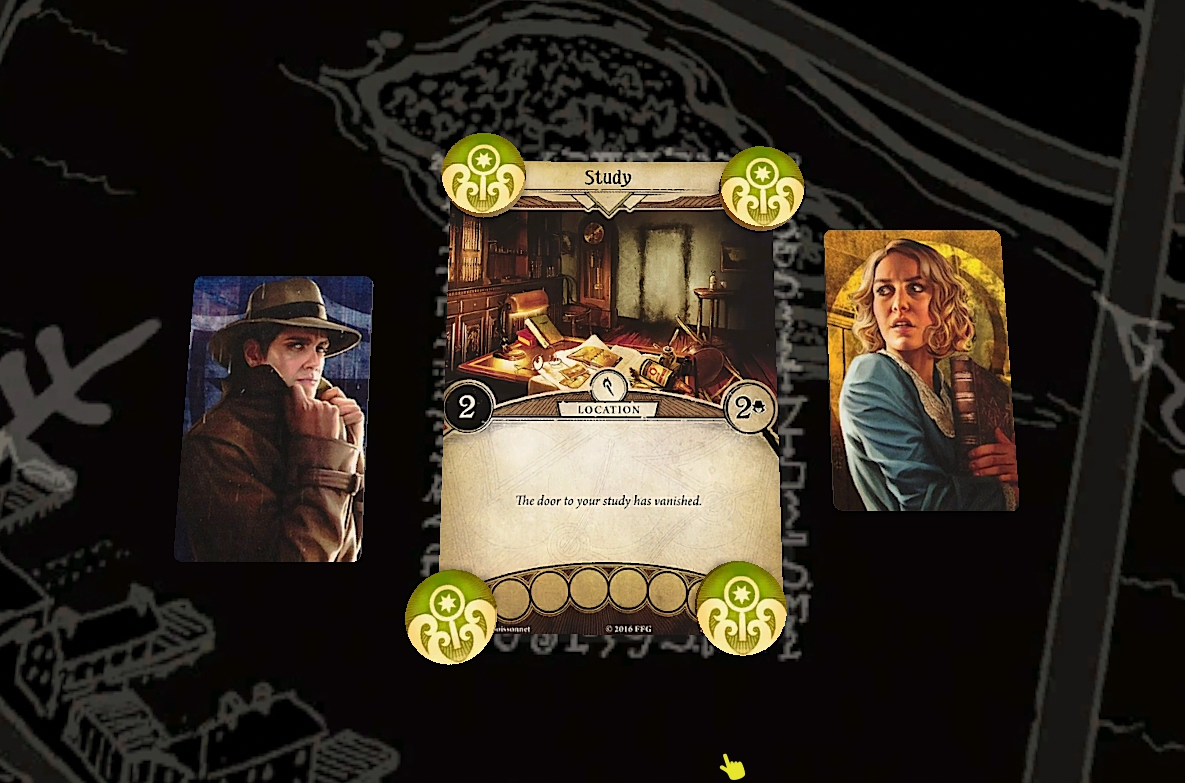 But...but I just walked through that- Yes, it's quite a remarkable spell. I'd love to study it more, but I don't think we have the time. If it couldn't keep you out, it won't keep them out either. But...but I just walked through that- Yes, it's quite a remarkable spell. I'd love to study it more, but I don't think we have the time. If it couldn't keep you out, it won't keep them out either.One round consists of four phases: the Mythos (encounter) phase (skipped on round 1), the investigation phase, the enemy phase, and the upkeep phase. During the Investigation phase, each investigator has three actions. Actions can be spent to: - Move to a connection location, though there are none in play at the moment. - Play an Asset or Event card from our hand (after paying its resource cost). - Draw a card, or gain a resource. - Activate any abilities on assets in play that cost an action - Investigate (more on this later) - Interact with an enemy (more on that when one shows up) Investigators can take their turn in any order they wish, but once they begin a turn they must end it before the next investigator can act. quote:
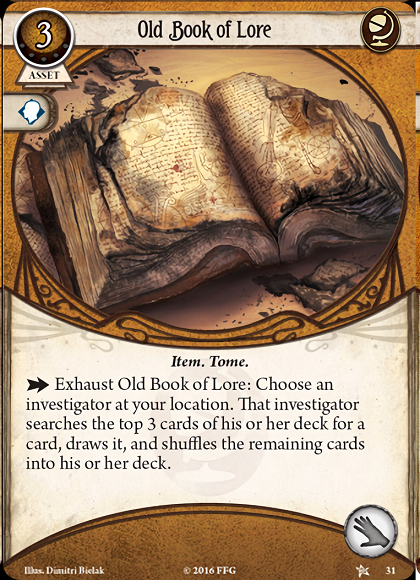
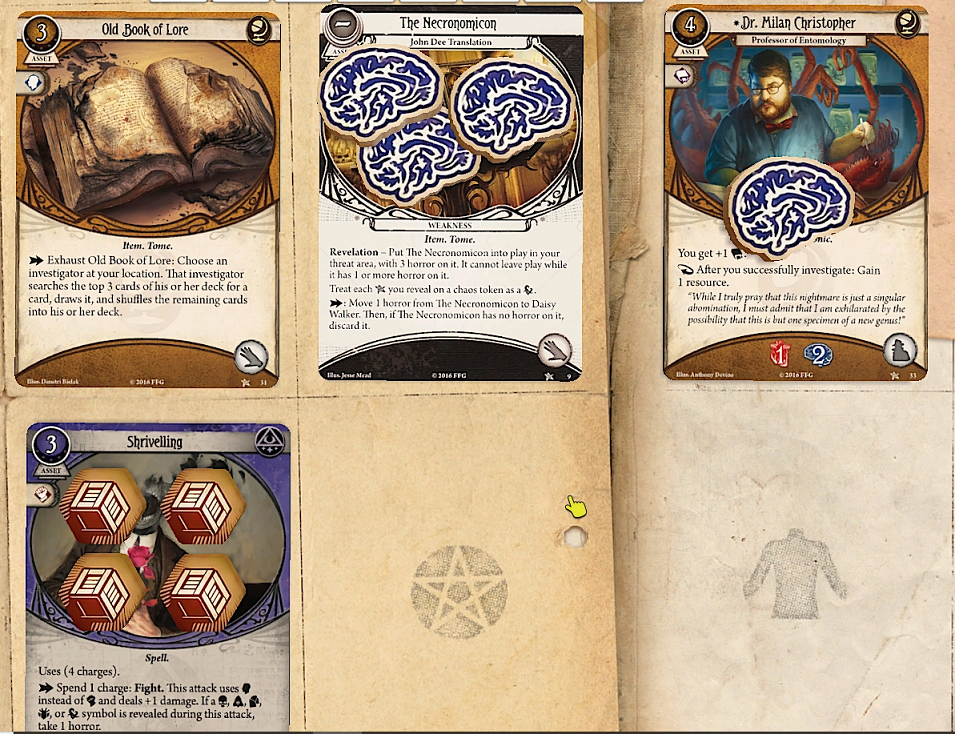
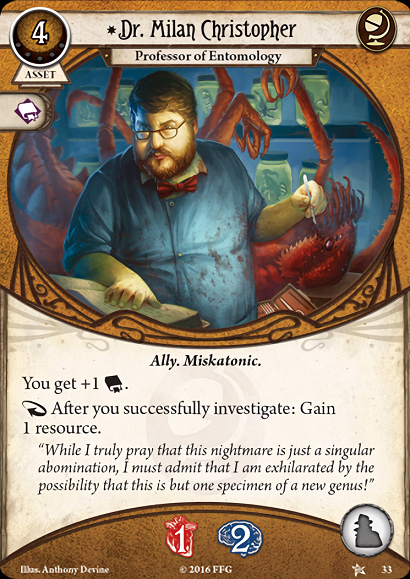 Wait, what were you doing in the closet? Wait, what were you doing in the closet? There was a remarkably fascinating specimen of- We'll save the introductions for later. There was a remarkably fascinating specimen of- We'll save the introductions for later.Some key points about Milan: - He's an Ally asset: he takes up our single Ally slot. If we play another Ally, it'll bump him out of the Ally slot and into the discard pile. - He has 1 health and 2 sanity. Taking 1 damage and/or two horror sends him off to the discard pile. - He gives us a passive +1 Intellect boost. - His Reaction ability automatically triggers whenever we successfully investigate. We'll see why this is so useful later. quote:Daisy successfully investigates, gaining one clue and one resource from Dr. Milan. As you saw earlier, the Study has a Shroud Value of 2 and spawns with 2 x [No. of investigators] clues. To Investigate, we test our Intellect against the Shroud Value of the location, and if we succeed, we take one clue from the location. To make a skill test, we draw a token from the Chaos Bag (this game's equivalent of rolling a die). The chaos bag's contents vary with scenario and difficulty, and can be modified based on the decisions you make in a campaign. Currently, it contains: 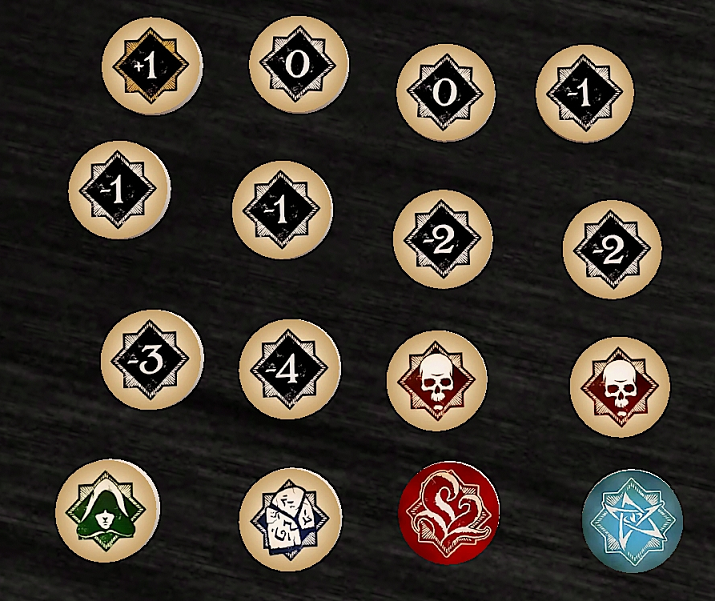 As you can see, the chaos bag tilts way more towards failure than success: if you want a reasonable shot at passing a test, you need to be swinging way above the passing grade. The numerical modifiers are fairly straightforward, while the Skull, Cultist and Tablet have varying modifiers based on scenario and difficulty. Currently: 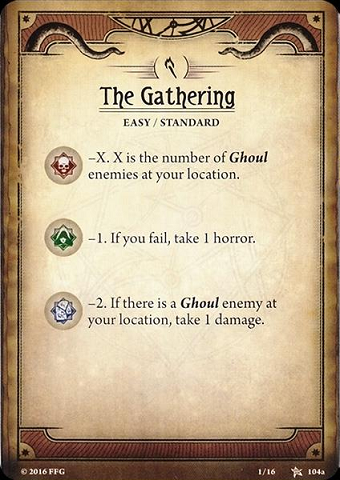 Finally, the red Tentacle token is an automatic failure, while the blue Elder Sign is an investigator-dependent (but usually fairly positive) result. 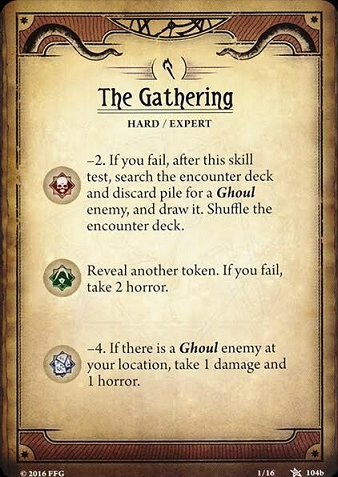 The contents of the Chaos Bag is the main difference between the difficulty modes � the higher the difficulty, the more prevalent the negative tokens in the bag, and the special tokens gain even worse modifiers on Hard and Expert mode. 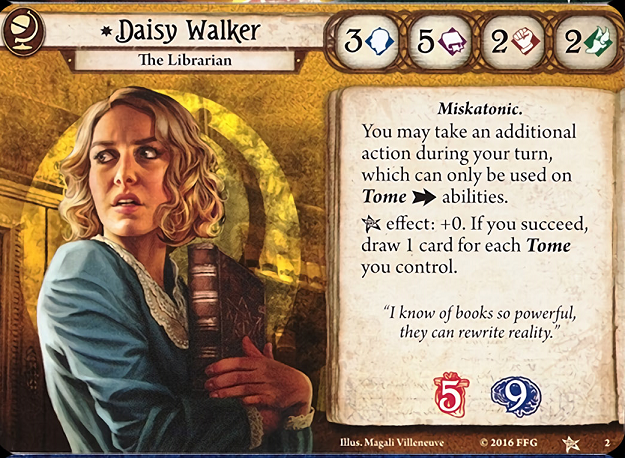 Investigators have four stats: Willpower, Intellect, Combat and Agility. Thanks to Daisy's massive Intellect stat, plus the boost from Milan, we don't really have much cause for worry right now - tentacle aside, every other token allows us to beat or tie with the Shroud of 2, nabbing us a clue and a resource from Milan's triggered ability. quote:Daisy successfully investigates, gaining one clue and one resource. By the way, I found this in the closet. Thanks! Give that back!You can see why getting Milan in play early is helpful. With no limits on his triggered ability, we can get very, very rich by constantly investigating. Since then, later allies (and eventually Milan himself, with the Taboo list) have required Exhausting for similar effects, effectively limiting their reactions to once a turn. quote:
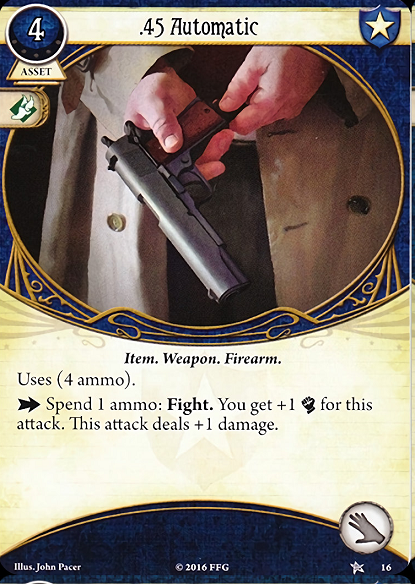 I don't know what's going on, but I'll be damned if I'm going down without a fight. I don't know what's going on, but I'll be damned if I'm going down without a fight.The .45 Automatic takes up one Hand slot. As mentioned earlier, there's only space for so many items in play. Each investigator has: - 2 Hand slots - 2 Arcane slots - 1 Ally slot - 1 Body slot - 1 Accessory slot - 1 Tarot slot If a slot is full, playing another item over it will bump the existing item out and into the discard pile. Some assets may take up multiple slots, while others may take up no slots at all. quote:
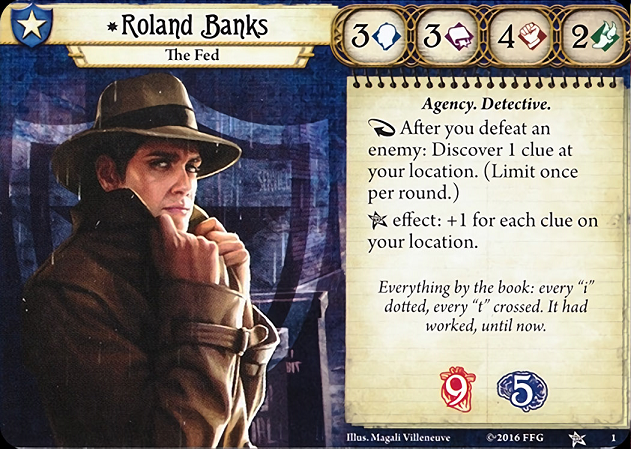 Investigating is going to be a bit of an issue with Roland. 3 Intellect isn't terrible, but it's also not great if we're going up against a Shroud of 2. 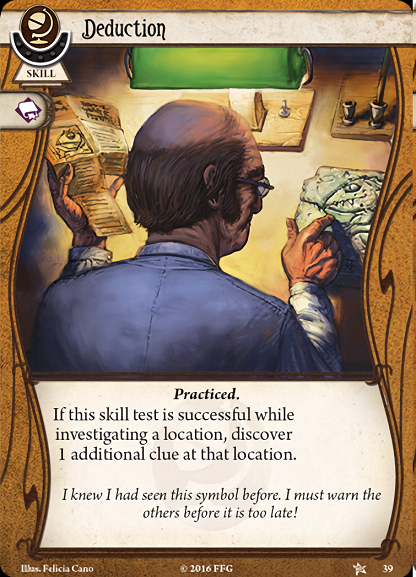 One way of boosting your skill before using a skill test is by Committing cards - discarding cards in your hand with icons that match the skill tested. The investigator making the test can commit as many cards as they want, while other investigators at the same location can only commit one per test. Deduction is a Skill card - it can't be played, only committed, but rewards us with another clue if we commit it on an Investigation. With the help of Deduction, Roland ties with the Shroud value, passing the test and emptying the location of clues. quote:Roland gains 1 resource and ends his turn. We can�t keep them out of here for much longer. We�d better keep moving.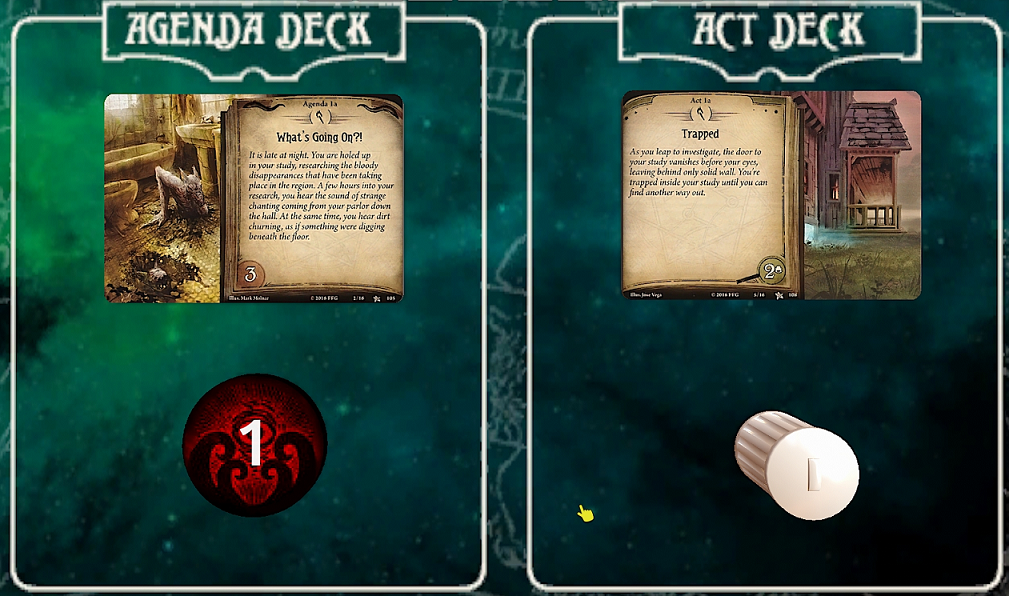 The Act and Agenda decks track our progress through the scenario. The Act represents Investigator progress and is usually advanced through expenditure of clues, while the Agenda deck represents progress by the forces of the Mythos, and advances once enough doom has been accumulated. Unless otherwise stated, we can progress the Act deck anytime we fulfil the requirements. quote:
Is�is that a dead body? How did that get in here?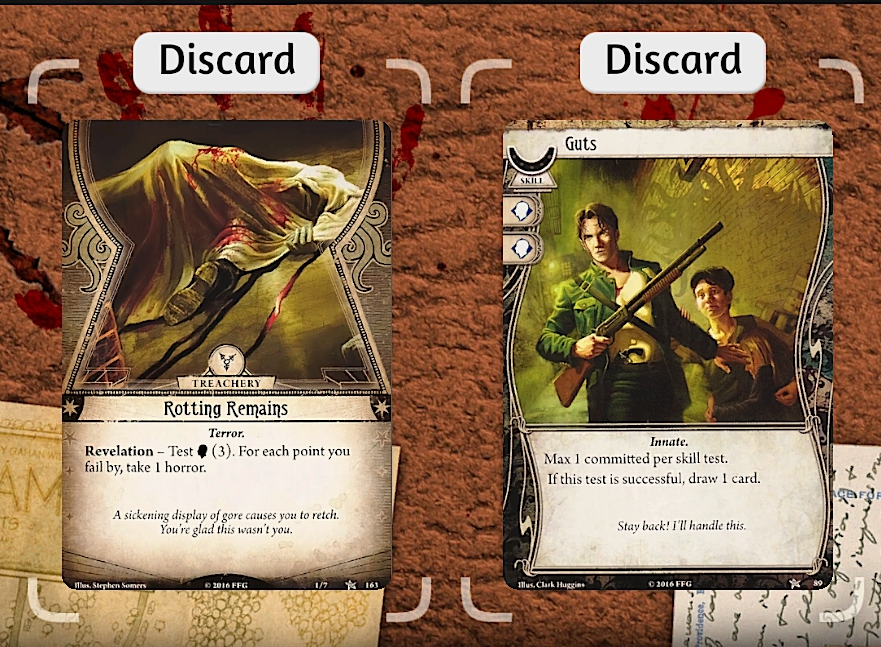 Whenever an investigator takes Damage or Horror, they can choose to distribute it amongst assets they control with their own inbuilt health/sanity scores. This is the only way to mitigate damage (barring certain card effects), and an investigator that can�t/doesn�t want to do so must take that damage/horror themselves. When an investigator accumulates damage or horror equal to their health/sanity, they are Defeated and out of the scenario. In campaign mode, this doesn�t permanently kill them (unless the scenario specifies otherwise). If the rest of the team can make it to the next scenario, they return with 1 physical/mental Trauma corresponding to how they were defeated, and start the next scenario with damage/horror equal to their Trauma already in play. If they accumulate enough Trauma, then they�re for-real dead and a new investigator must be chosen. As you saw earlier, Roland only has 5 Sanity, so we really don�t want him racking up too much horror. Fortunately, he�s got a card in hand that gives him a decent shot at passing this test. quote:
 Hey, look what I found over there. Wha- get that thing away from me! Hey, look what I found over there. Wha- get that thing away from me!quote:
 What the hell? Oh dear. This is going to be a tougher nut to crack. What the hell? Oh dear. This is going to be a tougher nut to crack.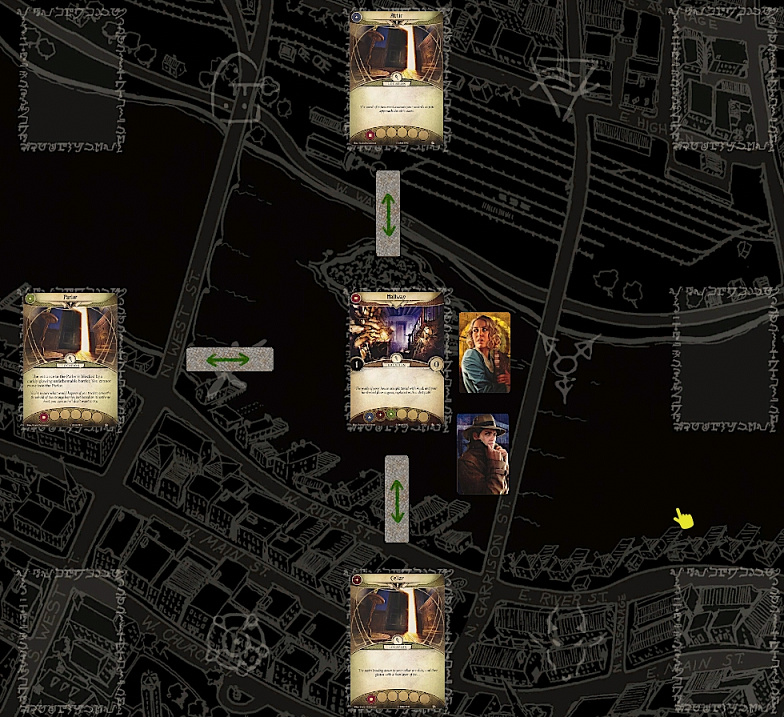 Now that we're not trapped in a single room, it's time to talk location. Location connections are denoted by the connection dots at the corner/bottom, though additional connection markers have been added to make them a little clearer. Locations start on their unrevealed side until an investigator moves into them, at which point they flip to their revealed side and spawn clues (if any). quote:
 Maybe there�s something in here that�ll help� Maybe there�s something in here that�ll help�Daisy's ability gives her a fourth action each turn, that can only be spent to activate a Tome. The Guts will come in handy to pass that Frozen in Fear check later. quote:
 Let me try something. K�nvyan ygauwlethi G�hraat! Did it work? No, but at least now we know for sure it doesn�t! Let me try something. K�nvyan ygauwlethi G�hraat! Did it work? No, but at least now we know for sure it doesn�t! Just because there's no clues here doesn't mean that we can't investigate. As you can see from that chain reaction, even though we didn't find any clues, investigating can still prove very profitable. And the chain reaction's not even done yet! 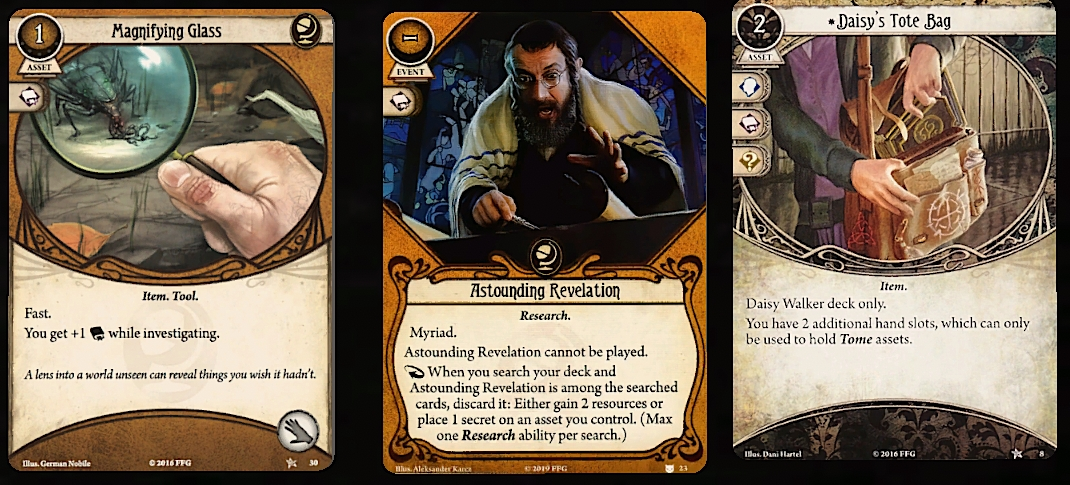 One of the more interesting recent releases, Astounding Revelation does nothing besides provide one Intellect icon for committing if we draw it - but if we stumble across it in a search, we either gain 2 resources or add one Secret charge to an asset. Since we have no Secret-using assets right now, we'll take the resources. quote:
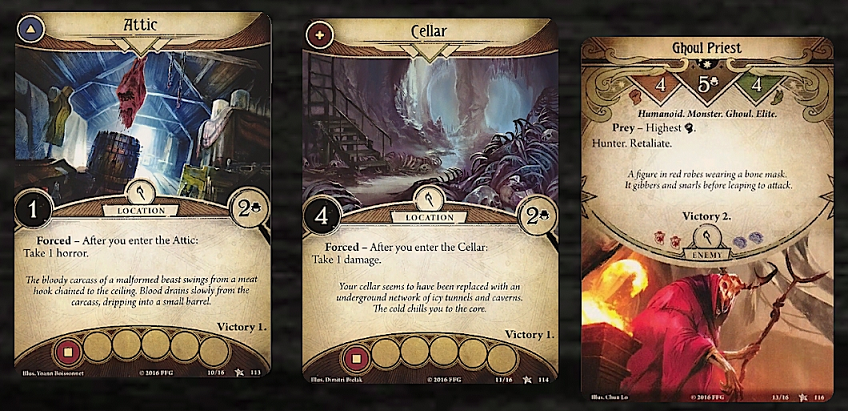
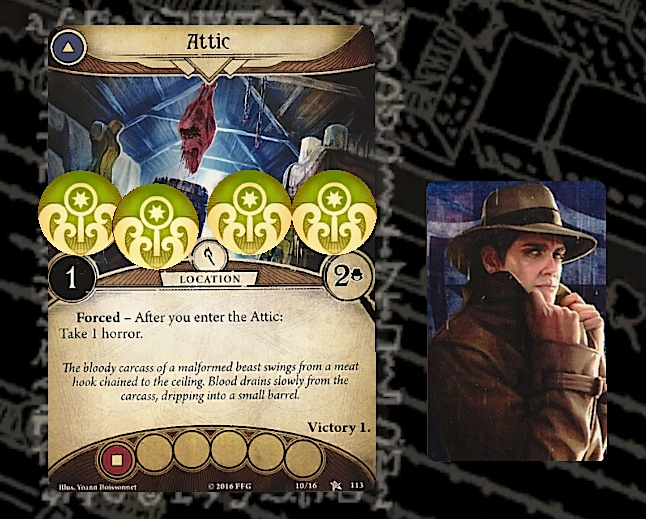 MY ATTIC! MY ATTIC!Note that unless a card specifies that it deals 'direct' damage, any damage or horror taken from any effect can be placed on an ally/asset we control. Unfortunately, we don't have any of those right now, so Roland is just going to have to take this one on the chin. quote:
 Got to be quicker than that! Got to be quicker than that!We got lucky there � Roland drew the Elder sign, giving him just enough of a bonus to pass. Still, Roland�s tanky enough that even an abject failure wouldn�t have bothered him too much. quote:
 Where is all that SCREAMING coming from? Where is all that SCREAMING coming from?quote:Investigation Phase � Daisy�s Turn 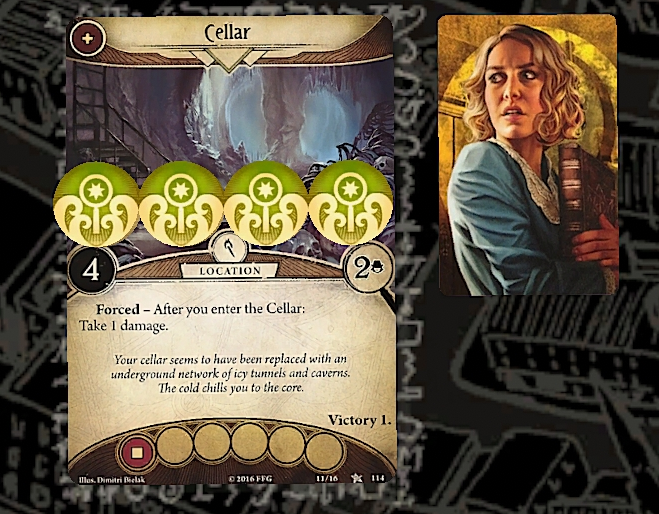 T-this shouldn't be possible. It's not the barrier. It's something else... T-this shouldn't be possible. It's not the barrier. It's something else...We could deflect this one onto Milan, but that would put him out of commission and we want to keep him around for a little while longer, so we'll take this one on the chin again. quote:Daisy investigates twice, succeeding once and failing once for a total of one clue. 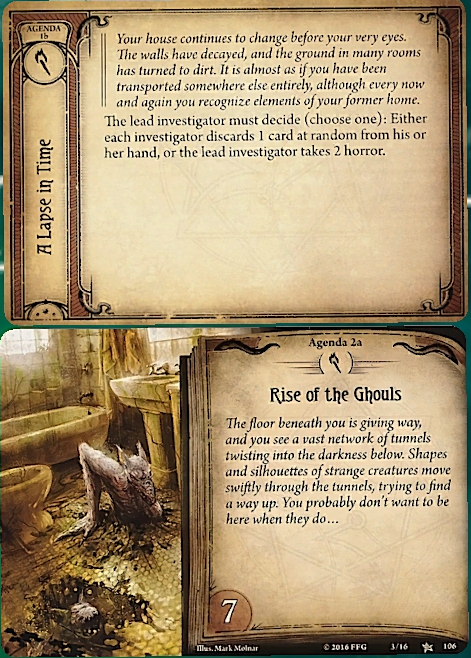 What the hell are these things? The Necronomicon calls them 'ghouls'. Normally, they're content to scavenge rotting flesh. They shouldn't be attacking people like this, unless something's stirred them up. Well, I'll give them something to be stirred up about! What the hell are these things? The Necronomicon calls them 'ghouls'. Normally, they're content to scavenge rotting flesh. They shouldn't be attacking people like this, unless something's stirred them up. Well, I'll give them something to be stirred up about!When the Agenda advances, all doom in play is cleared away. We really don't want Roland to be eating that 2 Horror with his fragile 4 sanity, so we'll randomly discard cards instead. quote:
 W-where�s that wind coming from? W-where�s that wind coming from?quote:
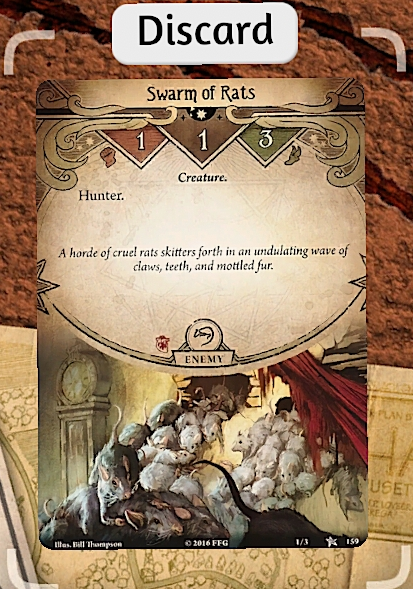 Aaaaah! Calm down! I can deal with this! Aaaaah! Calm down! I can deal with this!With an enemy finally in play, it's time to talk about them. When an investigator draws an enemy, it spawns in the same location as them (unless it has a set Spawn location). Whenever an investigator is in the same room as an unexhausted enemy, it immediately Engages them. An engaged enemy is placed in an investigator's Threat area (a sort of nebulous free-floating area around the investigator, physically located wherever the investigator in question is). An investigator can spend an action to: - Engage the enemy (only possible on an enemy not already engaged with you), pulling it away from another investigator. - Fight the enemy, testing your Combat against the enemy's Fight value (the number on the left). If successful, this deals one damage to the enemy (its' health is the number in the centre). Relying on your bare hands is a last resort, though, and most investigators use Weapon assets to fight, which provide additional Combat bonuses and often grant an additional damage bonus. Investigators can Fight an enemy not currently engaged with them, but if they fail the Fight skill test, they deal that attack's damage to the engaged Investigator instead. - Evade the enemy, testing your Agility against the enemy's Evade value (the number on the right). If successful, the investigator disengages from the enemy, and the enemy exhausts. Outside of special cases, investigators can only Evade enemies engaged with them. On the enemy phase, an unexhausted enemy Attacks, dealing its printed damage and horror to the engaged investigator (1 damage, in the case of this Swarm of Rats). As with any other damage/horror source, this can be distributed amongst any assets in play. Then, any ready Hunter enemies not currently engaged with an investigator moves one step towards the nearest one. Finally, if an engaged investigator attempts any other action than Fight or Evade, all engaged enemies gain an Attack of Opportunity, attacking the investigator. It's best to avoid these unless absolutely necessary. 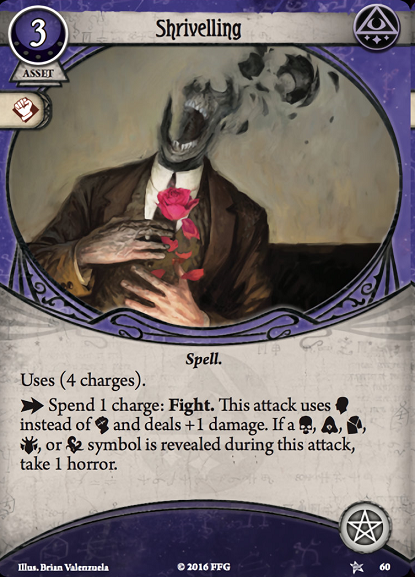 Let's see if there was any truth to that old book of spells... Let's see if there was any truth to that old book of spells...With 1 health and 1 Fight, this Swarm of Rats is not exactly a major threat and even Daisy stands a decent chance of just punching it to death, but we'll play it safe and use a spell. Spending one Shriveling charge allows Daisy to fight with her Willpower instead of her Combat and deals one extra point of damage, but we take a point of horror if we draw a special token during the test. quote:
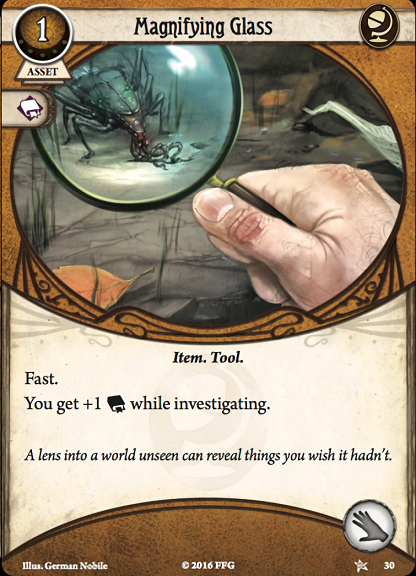 The Magnifying Glass is Fast, which means it doesn't cost an action to play (and thus, would not trigger Attacks of Opportunity if played while engaged with an enemy). quote:
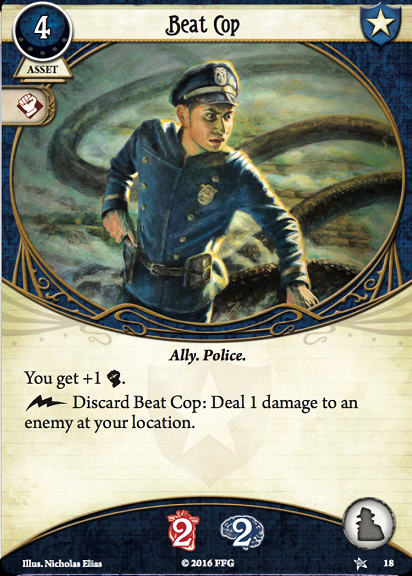  Heya, Banks. Just dropped by to deliver some paperwork, and - Why is my house so popular today? Heya, Banks. Just dropped by to deliver some paperwork, and - Why is my house so popular today?The squiggly line on the Beat Cop�s ability means that it can be activated as a free action anytime, even outside our turn (though only at certain player windows when outside our turn). We want to keep him in play for his combat buff, though. quote:
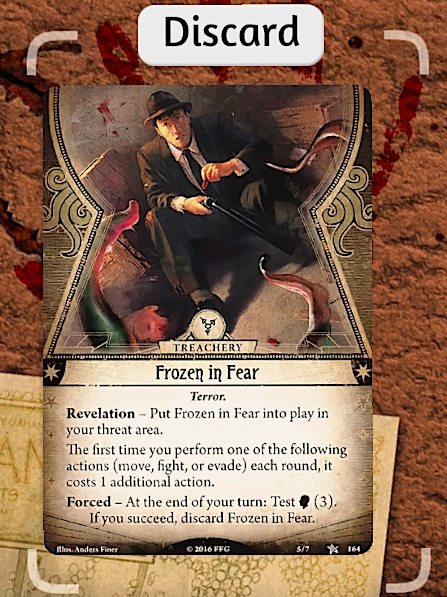
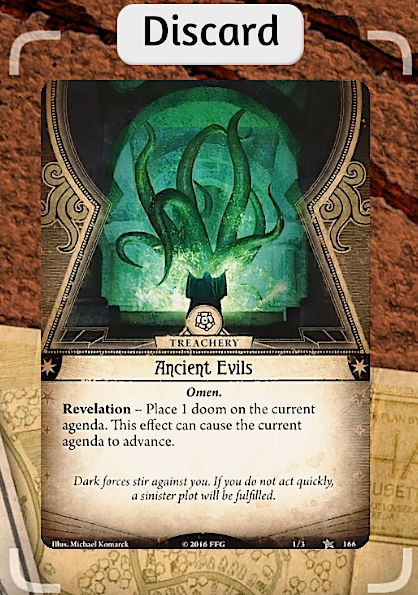 Did you hear a bell tolling? Probably your imagination. Get these rats off me! Did you hear a bell tolling? Probably your imagination. Get these rats off me!This card is a right pain in the rear end - it's not too bad right now with the longish Doom timer on this Agenda and just two investigators, but each Doom on the Agenda is essentially one round's worth of actions lost, which can be quite a lot when more investigators are in play. Note that regardless of how much doom is in play, the Agenda only advances at the check at the start of the Mythos Phase � unless a card like Ancient Evils provides a specific exception to that rule. quote:
 I have no idea what this is, but something tells me it's better kept out of their hands. I have no idea what this is, but something tells me it's better kept out of their hands.quote:
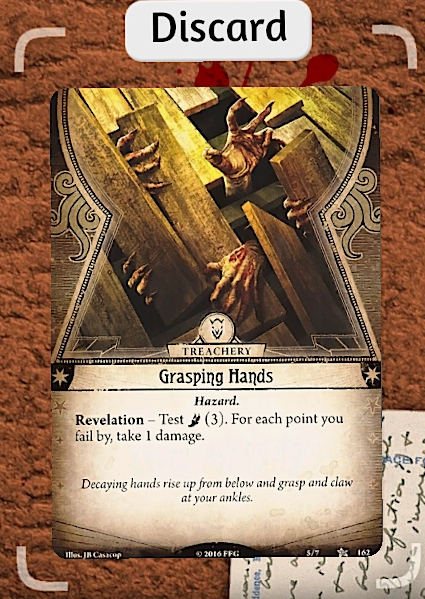
 Ugh, of all the times to flare up... Ugh, of all the times to flare up...Ouch! Each deck has two weaknesses - one character-specific weakness, and one randomly chosen generic weakness. Weaknesses can range from outright crippling to mildly annoying, but by and large you would prefer not seeing them if possible. Note that because this weakness is in Roland's threat area (which is physically located wherever Roland himself happens to be), any investigator at his location can spend the two actions needed to discard it. quote:
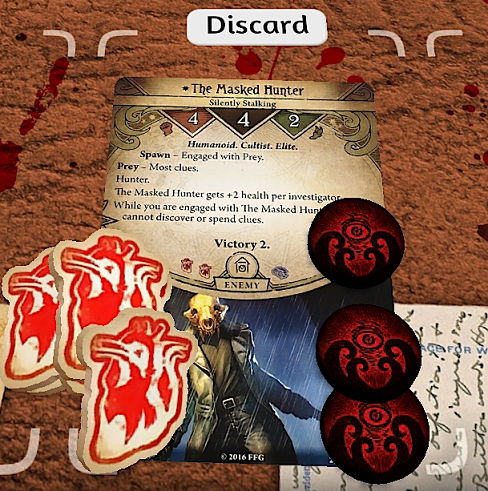
Okay, I think I�ve located a weak point in the magical nexus. What about you? �I found a bucket. You know what, that�s actually pretty helpful right about now.Thanks to the specific wording on Act 2a, we can only advance it by spending 6 clues from investigators in the Hallway at the end of a round. 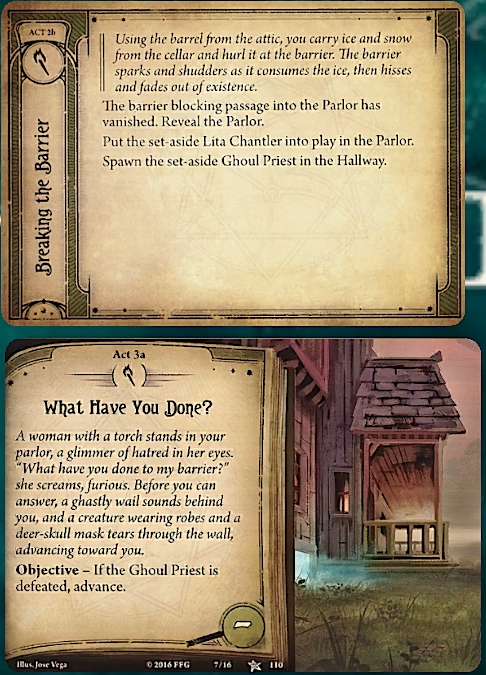  Raaargh! Raaargh! Don't expect me to help you with that creature! Not after what you did to my barrier! Believe me, lady, we didn't ask for your help! Don't expect me to help you with that creature! Not after what you did to my barrier! Believe me, lady, we didn't ask for your help! With the parlor open, any investigator located there can Resign, spending an action to retreat from the scenario with their skins intact (though possibly not their dignity). We can also negotiate with Lita, though Roland doesn't seem to be a big fan of that idea. Killing the Ghoul Priest would also end the scenario, though that's easier said than done. The Priest has 10 health (5xNo. of Investigators), 4 Fight and 4 Evade, and the Retaliate keyword allows it to counterattack whenever a Fight check is failed. Still, 2 victory points is a very nice reward. Finally, Prey: Highest Combat means it will engage the investigator with the highest combat in its location, and if there are none, will move towards said investigator during the enemy phase. quote:
 Give up this futile fight! Umordhoth's will shall be done! I�ve got this, Banks! You handle the big guy! With pleasure! Give up this futile fight! Umordhoth's will shall be done! I�ve got this, Banks! You handle the big guy! With pleasure!quote:
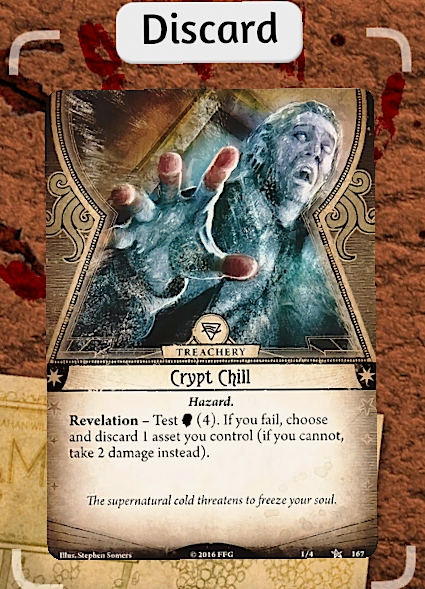
 This would have been a pain if it showed up in the Cellar earlier, but now we can pretty much ignore it. quote:
 Take that! Take that!We�ve been stockpiling combat cards in Roland�s hand in preparation for this encounter, though it�s up to Daisy to finish the job. quote:
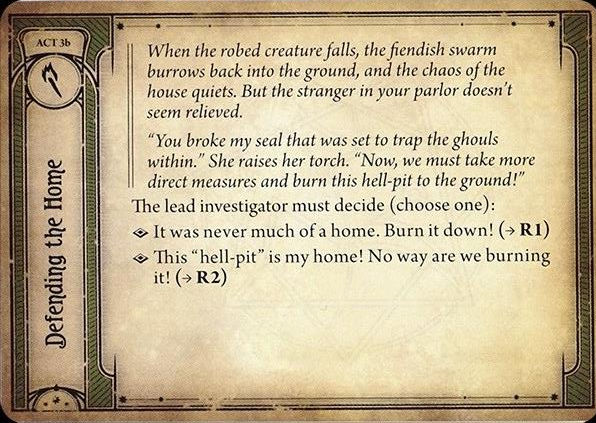 Looks like we have two options open to us, so I'll let the thread de- Are you crazy? Bugger off!Never mind, I guess Roland's made that decision for us. Let's take a look in the campaign guide at R2: quote:
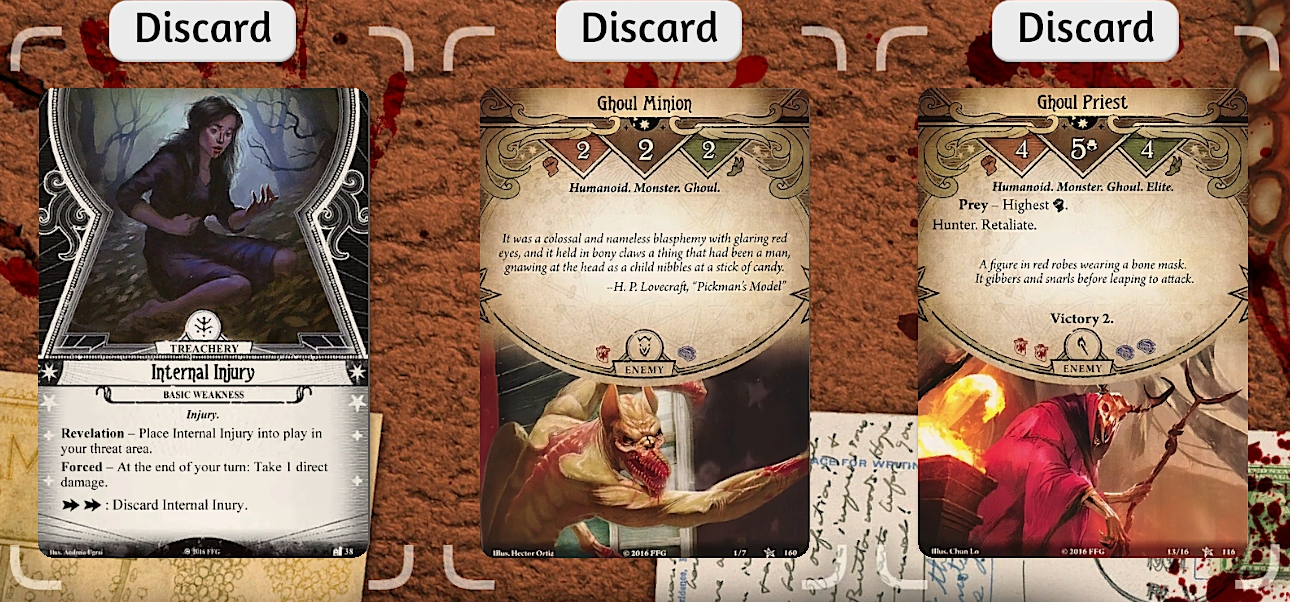
 We earned 4 victory points (2 for completely emptying the Attic and Cellar of clues, and 2 for defeating the Ghoul Priest), so that's a total of 6 experience for Daisy and 7 experience for the lead investigator, Roland. That's going to come in handy as we head into...The Midnight Masks.
|
|
#
?
Dec 31, 2019 18:45
|
|
|
So this is basically a CoC RPG campaign, but made into a co-op card game?
|
|
#
?
Dec 31, 2019 22:08
|
|


|
How much are you going to go into your deckbuilding process? I'd imagine you are going to talk about that in your next update as you spend the XP, but some clarity on why these cards are in your decks would be nice. Some more clarity on how and why cards are played would be nice too, and you didn't show hands or anything like that. Otherwise, looks interesting and a long commitment considering how far this LCG is along. Good luck!
|
|
#
?
Dec 31, 2019 23:25
|
|


|
An overview of the content of your decks would be cool. I though you were using the official starter decks at first, until the new cards showed up. Still, looking forward to this.
|
|
#
?
Jan 1, 2020 00:43
|
|
|
This looks cool. I look forward to see where it goes.
|
|
#
?
Jan 1, 2020 01:27
|
|

|
Cool thread idea. Quality level of posting. Nice flavour text included. I hope you keep going with this OP as it looks mad fun.
|
|
#
?
Jan 1, 2020 05:45
|
|

|
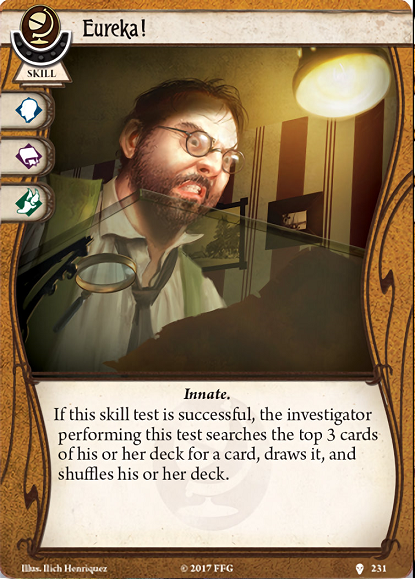
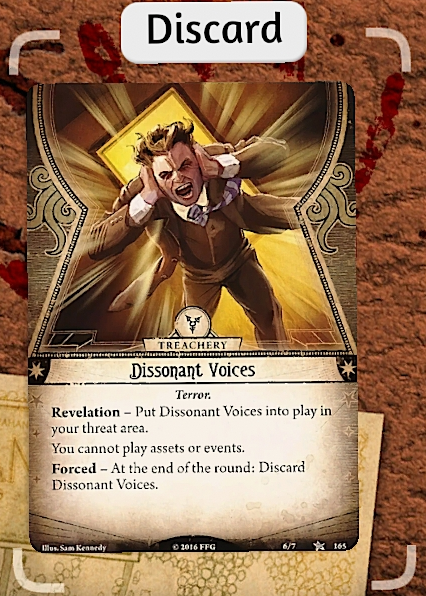
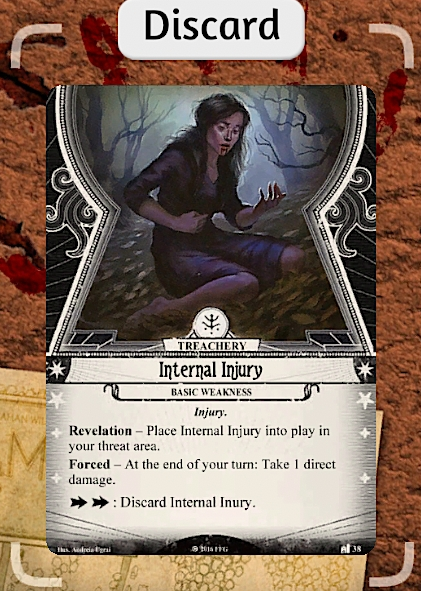
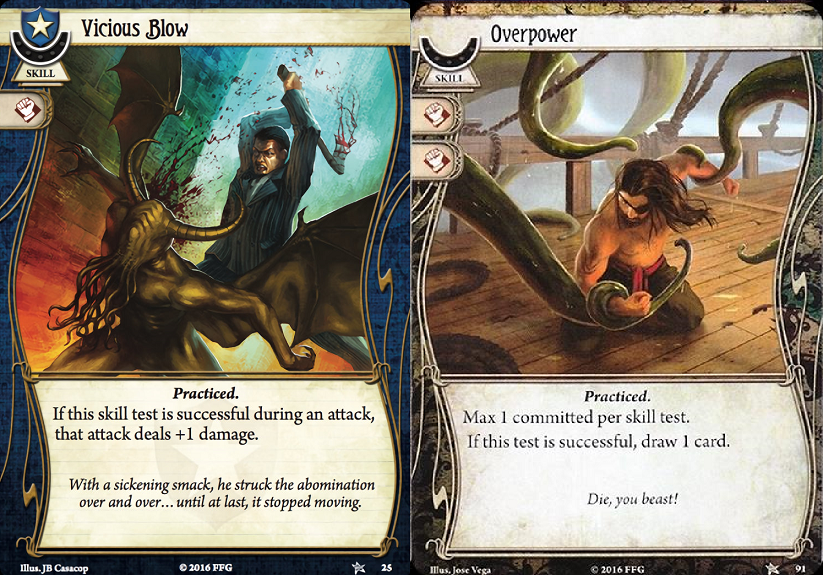
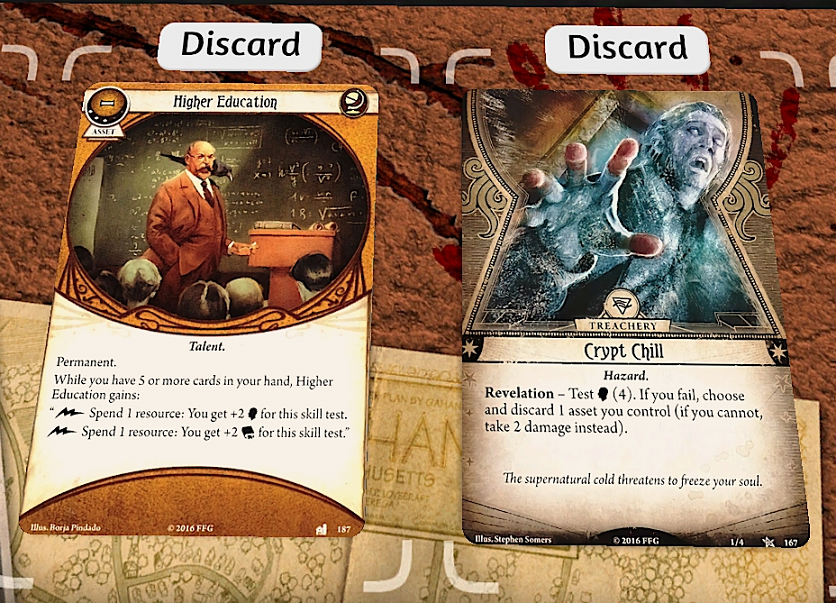
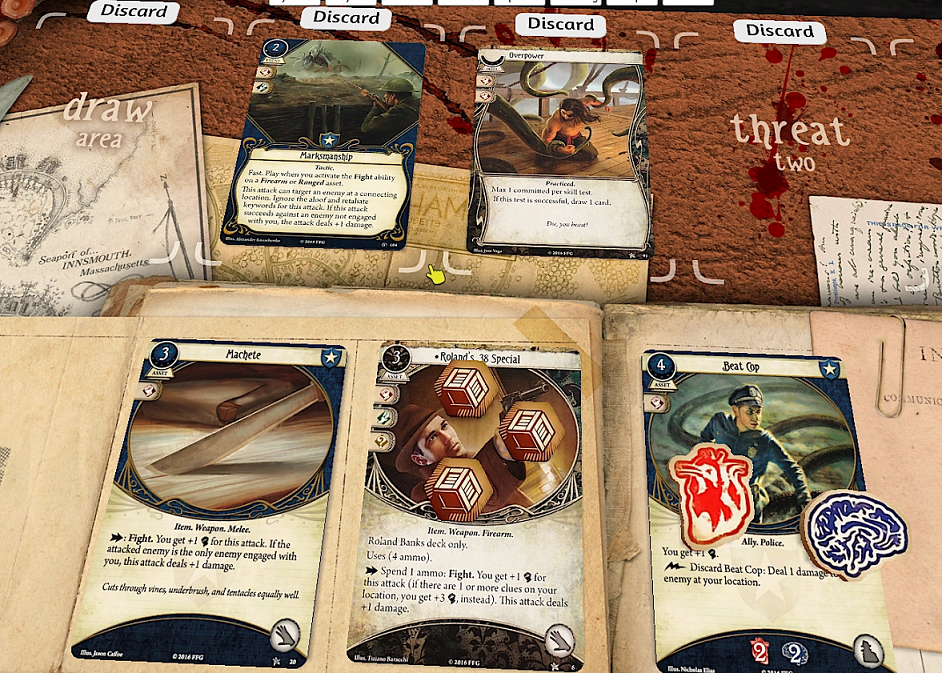
Since most of the replies so far have been along the lines of 'can you show off the decks used', I'll forestall any further comments along that line with an early deckbuilding update. Quick note: I make no claims to be especially good at deckbuilding. These are nowhere near the 'best' decks possible, and may in fact be downright terrible (though I personally hope I'm a little better than that). Still, we'll try our best to make do - after all, a constant theme of horror games is making do with What You've Got, which is often significantly less than What You'd Like To Have. 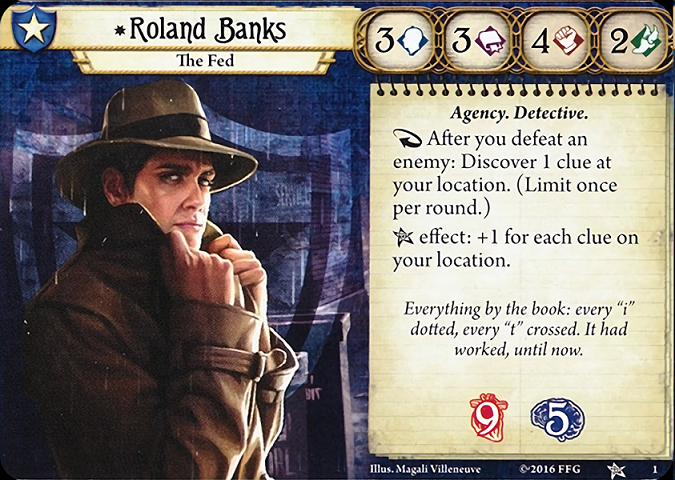 Roland is a Guardian, the class built around fighting monsters and tanking encounters. Once per turn, he can pick up a free clue whenever he kills a monster, allowing him to easily cover both clue-grabbing and monster-killing duties in a team. His weak spot is his low sanity - 5 Sanity is not a lot, especially for an investigator that wants to be constantly hunting down mind-blasting monstrosities. It's a good idea to bring along cards that help to compensate for this. 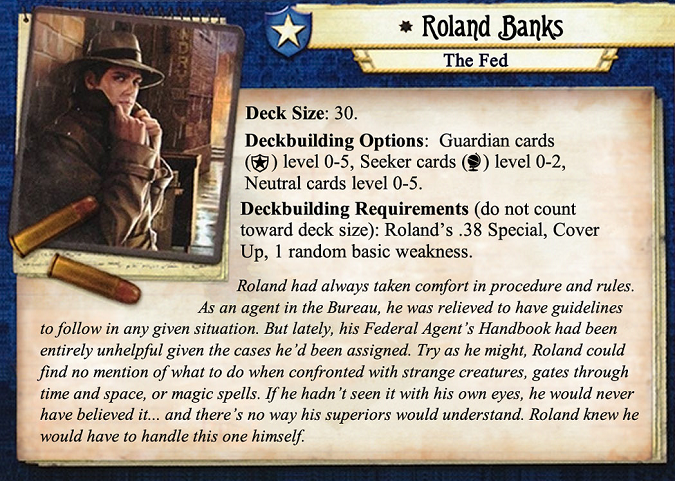 Roland can run Guardian and Neutral cards of level 0-5, and Seeker cards of level 0-2. A card's level is indicated by how much XP it costs - since an investigator starts with no XP, all his cards will be level 0 cards at the start of the game. His deck size is 30 cards, no more or less (not counting his signature cards and random weakness). Hand assets 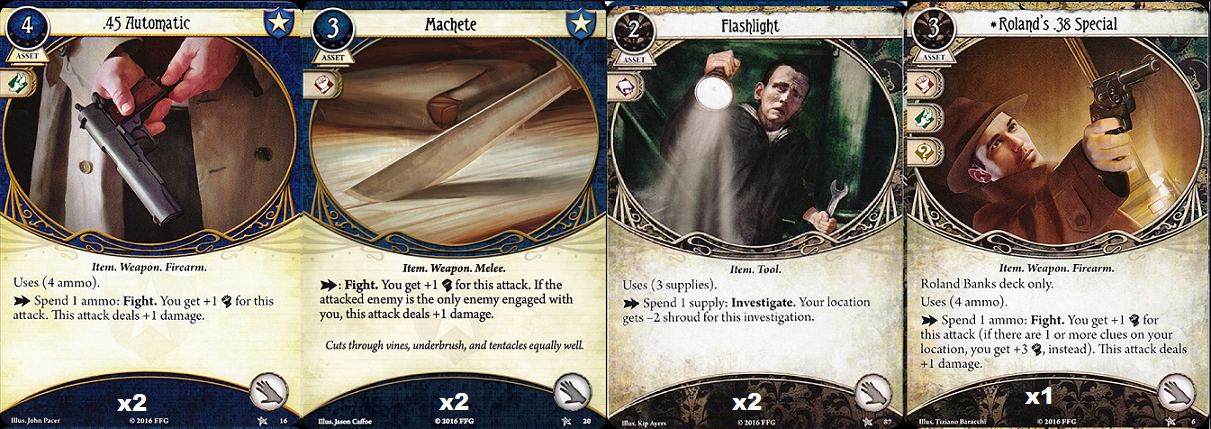 - We've already seen the .45 Automatic last game. A fairly standard weapon, providing an unconditional +1 combat and +1 damage when used to fight, but with only 4 ammo it can run out quickly without a way to refill it. - Machete: provides a similar boost to the .45 Automatic, but only deals extra damage if the attacked enemy is the only enemy engaged. Still, that's a reasonable trade-off for an unlimited-use weapon. - Flashlight lowers the shroud value of a location when used to investigate. There's an important distinction between lowering a test's difficulty and boosting your stats - regardless of modifier, the lowest amount your skills can be lowered to is '0'. Thus, if used on a Shroud 2 location, any investigation would be automatically successful barring the autofail. - Roland's .38 Special: A Cheaper .45 Automatic that powers up in clue-laden locations. Not a card I'm building around, but having it show up never hurts. Allies 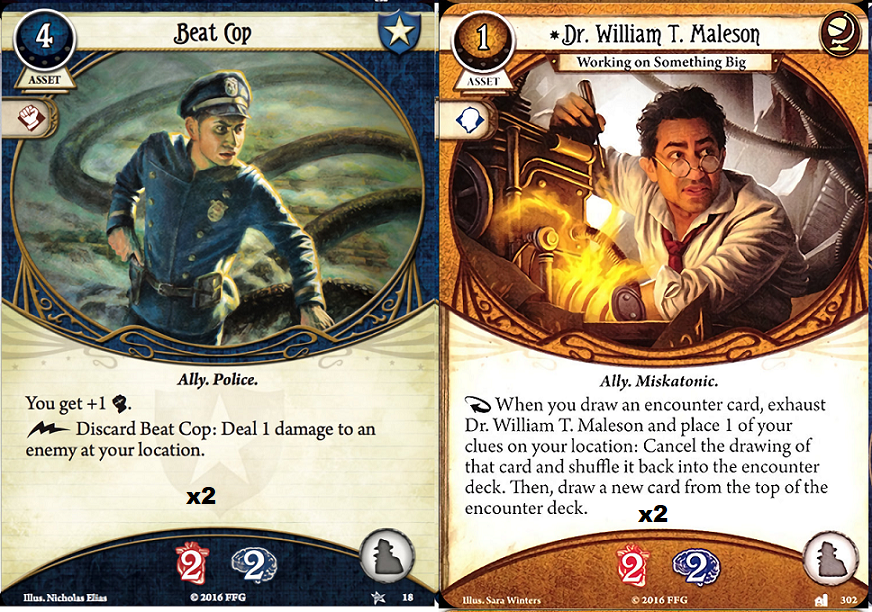 - The Beat Cop provides +1 combat, 2 health/2 sanity soak, and can be discarded in a pinch for a free point of damage - though given how expensive he is to get in play, it's best to save that for emergencies. - Dr. William T. Maleson is our emergency option for dealing with Roland's signature weakness if it pops up (more on that later). He's cheap and provides a fairly useful effect when fishing for enemies, but we only have the one ally slot so we can't run him alongside the Beat Cop. Events 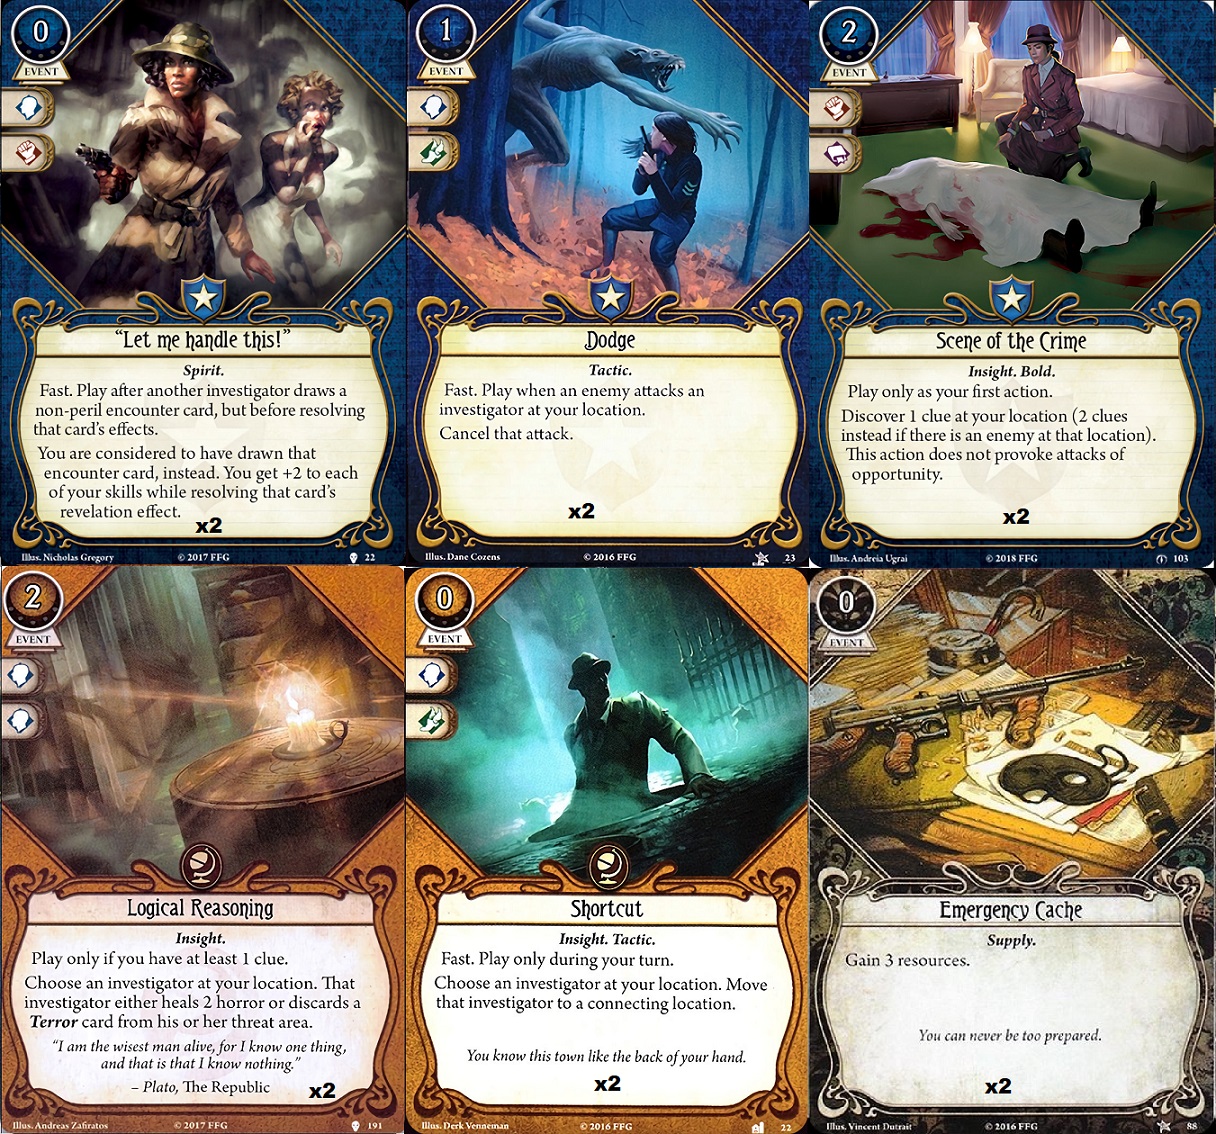 - Emergency Cache: free money. Note that the net effect is only 2 resources - it costs an action to play, one which could just be used to grab a free resource. Still, Guardians tend to be a bit cash-starved, and more resources never hurts. - Scene of the Crime: free clue, conditional second free clue. Not too difficult to leverage in most scenarios. - Shortcut: Action-less move, that can also be used on another investigator at your location. As an action-less card, it will not trigger Attacks of Opportunity from engaged enemies, but since you don't disengage you'll just drag them over to the new location. Roland can use this to drag enemies to high-shroud locations, then beat them up for free clues. - "Let me Handle This!": Mostly for drawing monsters away from Daisy, though the +2 to skills gives Roland a decent shot at clearing Treacheries nabbed as well. - Dodge: Cancels an attack, can be used on other investigators. Very handy to keep Roland's sanity up. - Logical Reasoning: Heals 2 horror, nuff said. Discarding an inopportune Frozen in Fear or Dissonant Voices could also come in handy, though. Skills 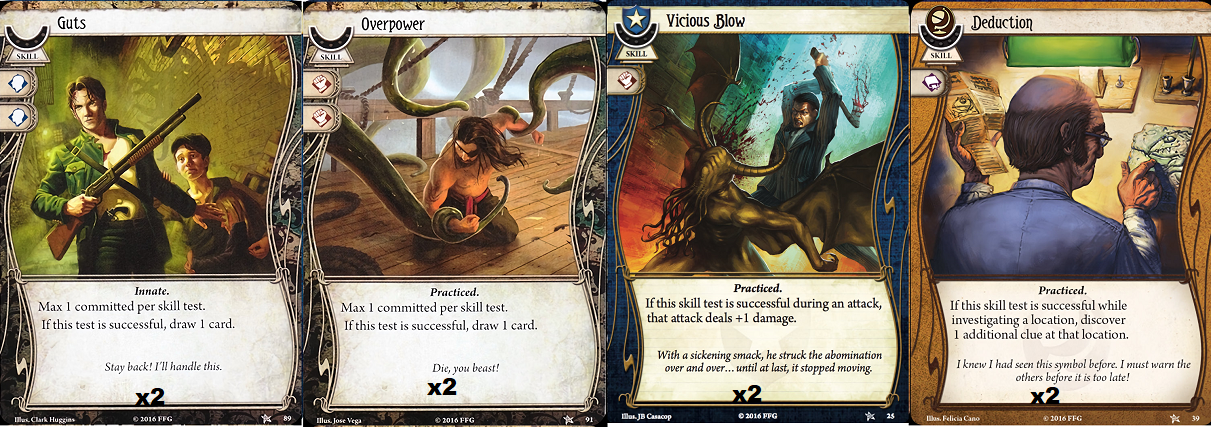 - Guts and Overpower (along with their cousins, Perception and Manual Dexterity) can be found in just about any deck - +2 to a relevant test with a free card draw for succeeding is a very strong effect. Helps Roland pass those Horror-blasting treacheries and hit high-Fight monsters accurately. - Deduction: We've seen how useful it is earlier. In higher player counts Roland might not be doing much (if any) investigating, but with just two investigators he's going to have to pull his weight on that front. - Vicious Blow: This skill is a great time-saver against bosses or tougher enemies, taking off a little more of their health. Saves one whole action if used against a 3-health enemy. Weaknesses 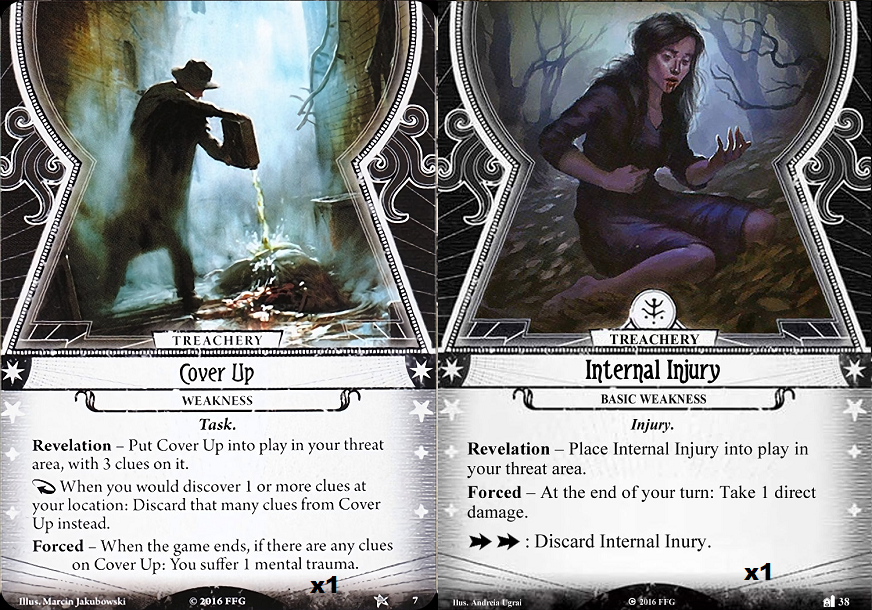 - Internal Injury: we saw this one last game. Annoying, but with Roland's high health, he can tank an Internal Injury hit or two until he has the actions to spare to discard it. - Cover Up: This one, on the other hand, is very, very bad. 3 clues is a lot of tempo lost, and if pulled too late in the scenario, there might be no way to clear it whatsoever. Leaving it uncleared hits Roland right in his weak spot, giving him 1 mental trauma (which causes him to start the next scenario with 1 horror in play). Hopefully we just won't see this at all, but the next best scenario is having it show up early so we can blast away at a low-shroud location to get it cleared. Overall, Roland's deck is built around the following priorities: 1 - Hunting and killing monsters - not just to keep the party safe, but also to trigger his reaction for extra clues. 2 - Shoring up his low sanity, via extra Will icons to commit to treacheries or just being able to heal off the horror. 3 - Investigating - we're mostly leaving that up to Daisy, but if there's enough downtime and no monsters around, having Roland pick up a bit of the slack would be helpful. In all honesty, the deck could probably stand to lean a little more seeker-heavy, but I'm trying not too have too much overlap between his deck and Daisy's.  Daisy is a Seeker, the class based around Investigating and picking up clues. Once per turn, she gets a fourth action that can only be used to activate a Tome ability. This is still an action, though, and will trigger e.g. Attacks of Opportunity. Her health/sanity is the inverse of Roland's, though it's less of a concern for her than it is for Roland, since she won't be actively seeking out monsters to hunt. 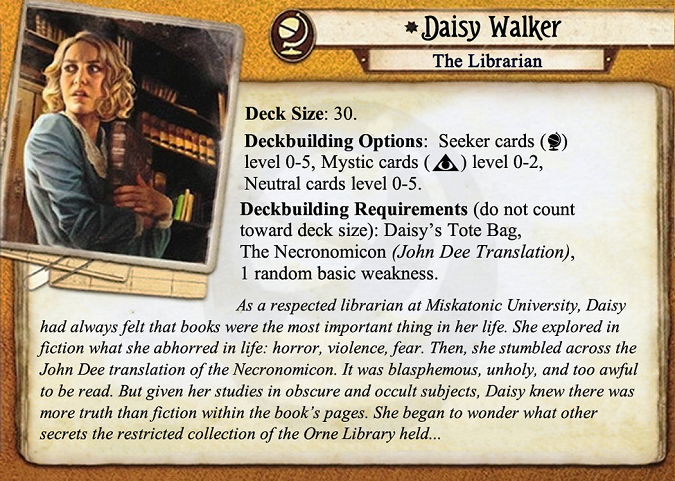 Her deckbuilding rules are similar to Roland's - Seeker/Neutral with a Mystic subclass. Early investigators tend to have fairly straightforward deckbuilding rules - later ones get much wackier. Hand Assets 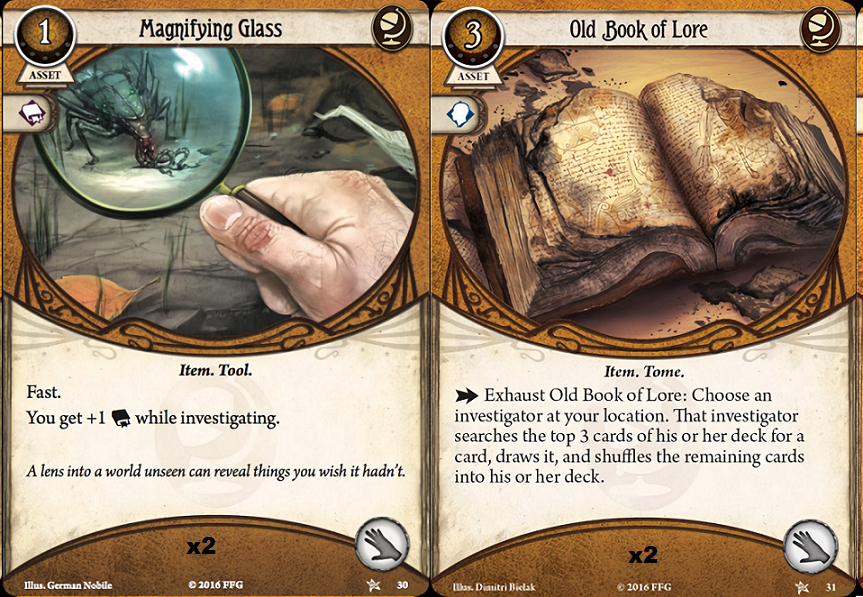 - Magnifying Glass: Fast, cheap, free Intellect boost when investigating. - Old Book of Lore: A free search/card draw every turn, with unlimited uses. Combos well with Astounding Revelations, and another card we'll be picking up later. Arcane Assets 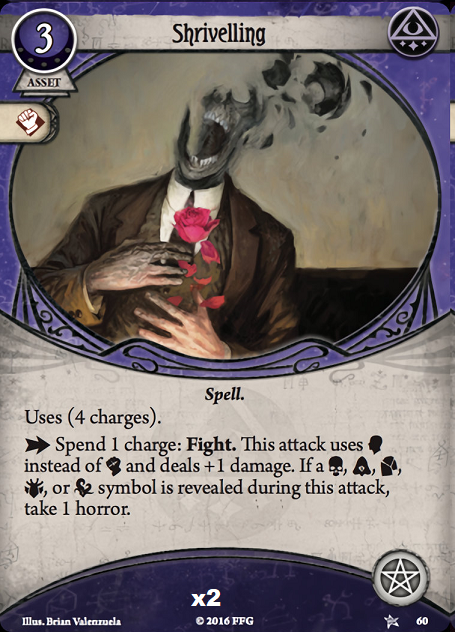 Shrivelling: Sometimes avoiding combat just isn't possible, and with only 2 Agility Daisy doesn't have much of a chance at evading. 3 Will isn't a great baseline for Shrivelling, but it's better than trying to punch with her puny 2 Combat. Plus, succeeding with it gives us an extra point of damage, and the occasional Horror isn't too hard for her to tank with her 9 Sanity. Accessory Assets 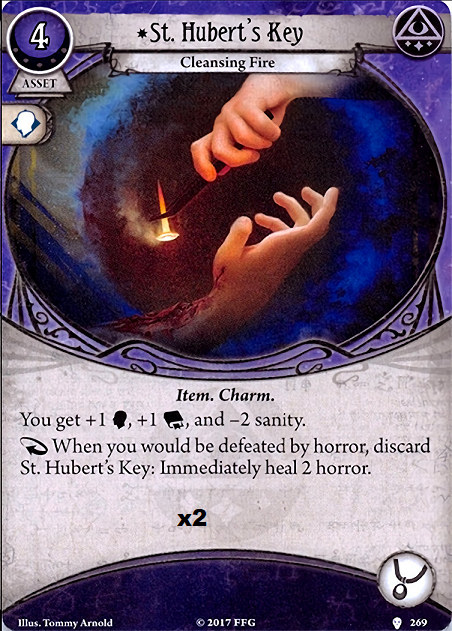 St. Hubert's Key: Pricey, but it gives two free stat boosts and a net 2 horror heal. That last part might be a bit difficult to see, but look at it this way: if you had 4 sanity and 2 horror, equipping this card would bring you to 0 Sanity left, immediately discarding it, returning to 4 Sanity and healing 2 horror. Body assets 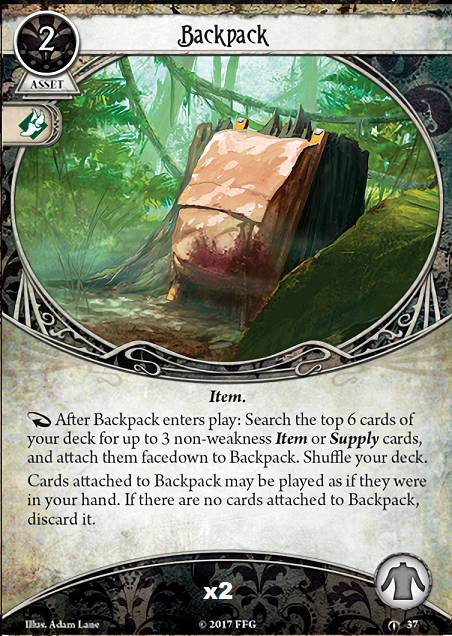 Backpack: More searches for Astounding Revelations, and a quick way to empty our deck of assets, giving us a higher chance of drawing useful events instead. Ally assets 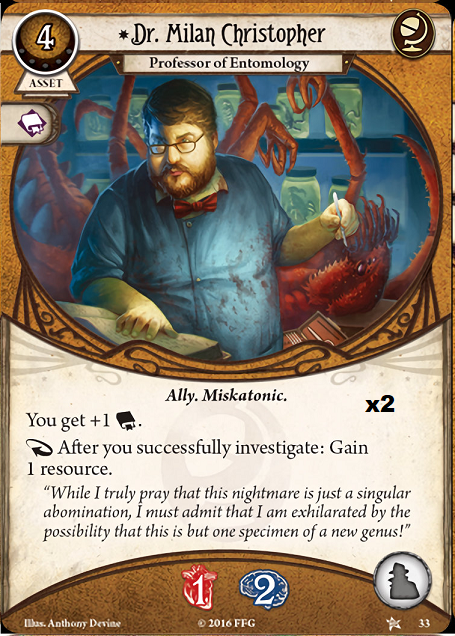 Milan: We've seen what he can do earlier. Our primary source of income if we can get him down early. Other assets 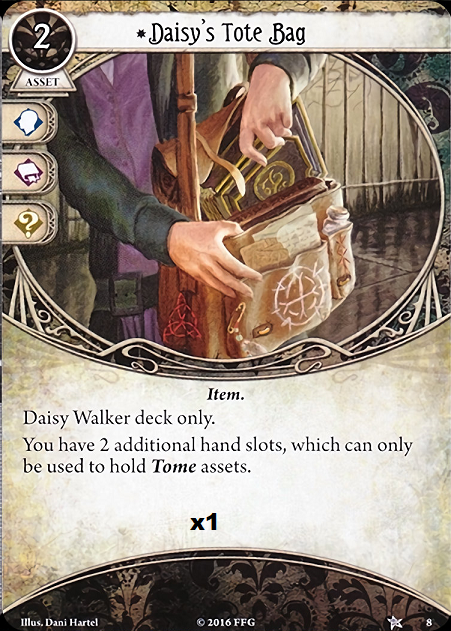 Daisy's Tote Bag: Not especially important for us right now, given that Old Book of Lore is the only tome we're relying on, but can be useful if our signature weakness ever comes into play. Provides some useful icons for committing, at least, and doesn't take up a slot. Events 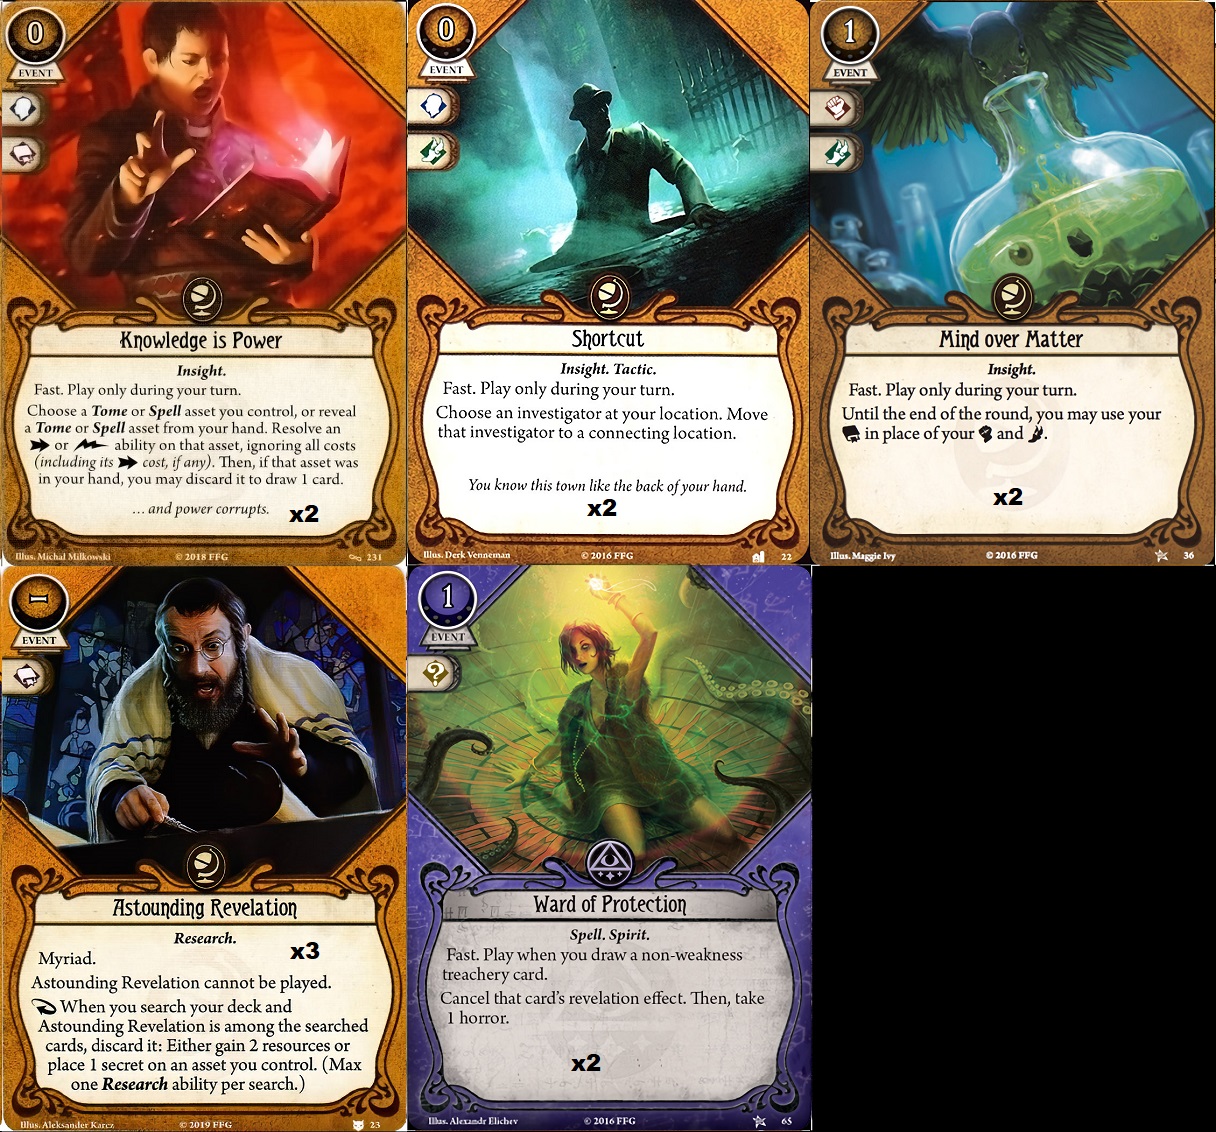 Astounding Revelations: We've seen what these can do earlier. Our secondary source of income besides Milan. The 'Myriad' keyword, incidentally, allows us to put up to 3 copies of this card in our deck (as opposed to the usual limit of 2), and if we were to pick it up later in a campaign, purchasing all 3 copies would only cost 1 XP. Shortcut: As with Roland, an action-less move to speed up our investigations. Knowledge is Power: Saves a charge and/or action for Shrivelling and Old Book of Lore, and they don't even have to be in play! A fantastic event. Mind over Matter: An emergency event for when we really need to pass a Combat/Agility test. Cheap and Fast, but having it show up when you need it can be a crapshoot. Ward of Protection: Cancels a treachery card Daisy draws. The 1 Horror trade-off is usually worth it, particularly if the card cancelled was Ancient Evils. Can only be used on treacheries that Daisy herself draws, though, and only the Revelation effect. Skills 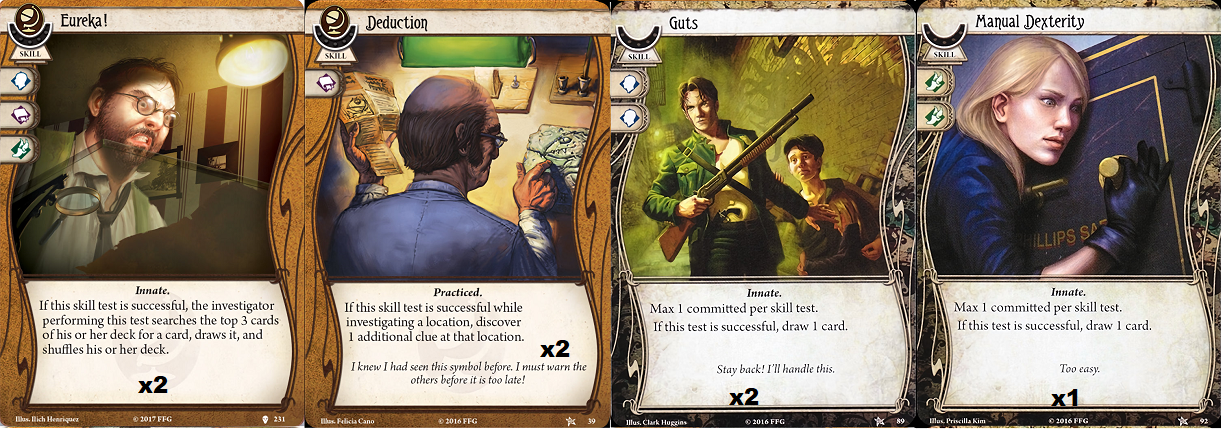 Guts and Manual Dexterity: Discussed earlier. Manual Dexterity helps Daisy to pass Agility-based treacheries, which generally attack her health instead of her sanity. Deduction and Eureka!: We saw what they did in the last game. Deduction accelerates clue pickup, while Eureka! gives her yet more searches for Astounding Revelations. Weaknesses 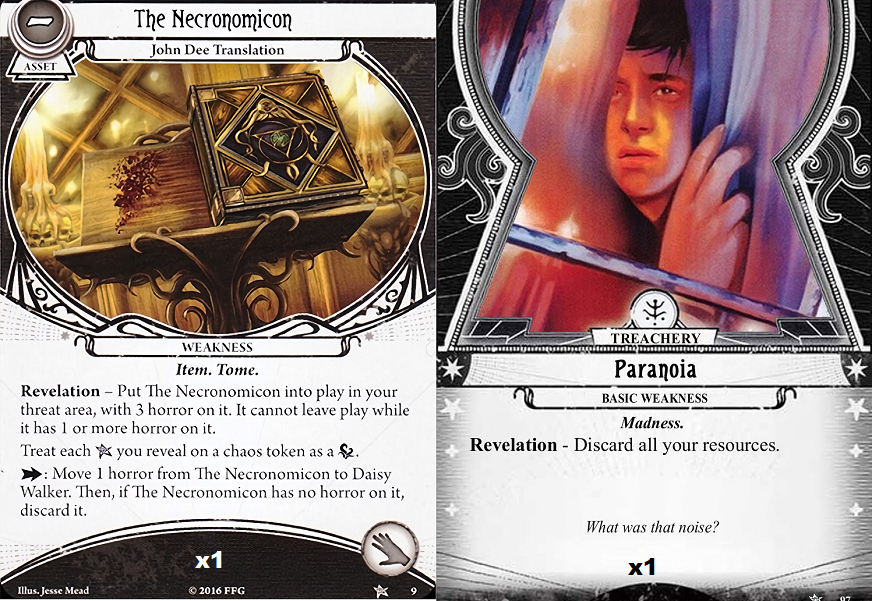 Paranoia: Annoying, but if we've gotten Milan in play before this shows up, we can easily recover from it. The Necronomicon: Also annoying, but not as crippling as Roland's signature weakness. There's no penalty for leaving this one in play at the end of the scenario, so we can just leave it in play and deal with the doubled autofail chance. Actually less of an issue on higher difficulties, where the inclusion of additional penalty tokens in the bag results in a lower chance of drawing the Elder Sign. Overall, Daisy's deck is built around prioritizing the following: 1 - Setting up - leveraging Milan and Old Book of Lore to pull the pieces of her setup and put them into play as early as possible 2 - Investigating - since Roland is busy with monsters, it's mostly up to Daisy to hunt down those clues and advance the Act. Upgrading Roland Removed: 2 Dr. William T. Maleson, 1 Dodge, 1 "Let Me Handle This!" 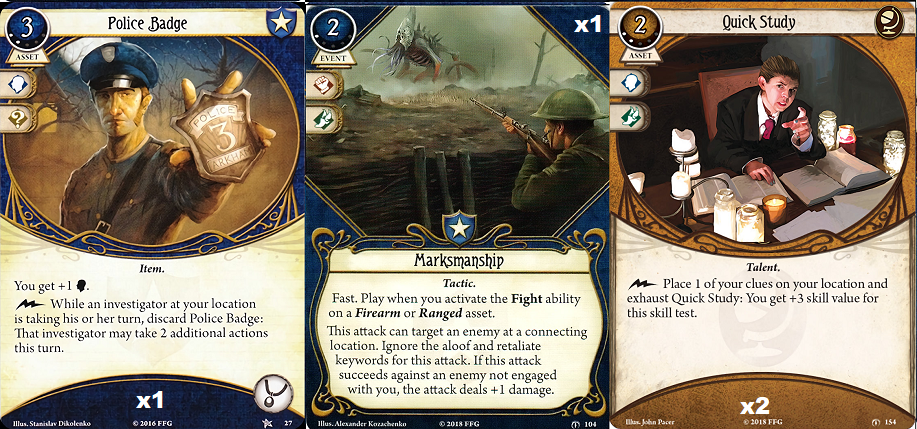 Added: 1 Police Badge, 1 Marksmanship, 2 Quick Study Quick Study gives Roland a way to drop clues for Cover-Up, without taking an asset that competes with Beat Cop for a Slot. Marksmanship saves quite a lot of actions: no need to move and/or engage, just attack and gain a bit of extra damage, to boot. Police Badge, aside from being nicely thematic, shores up Roland's Willpower and gives us two actions in an emergency. Daisy Removed: 1 Magnifying Glass, 1 Eureka! 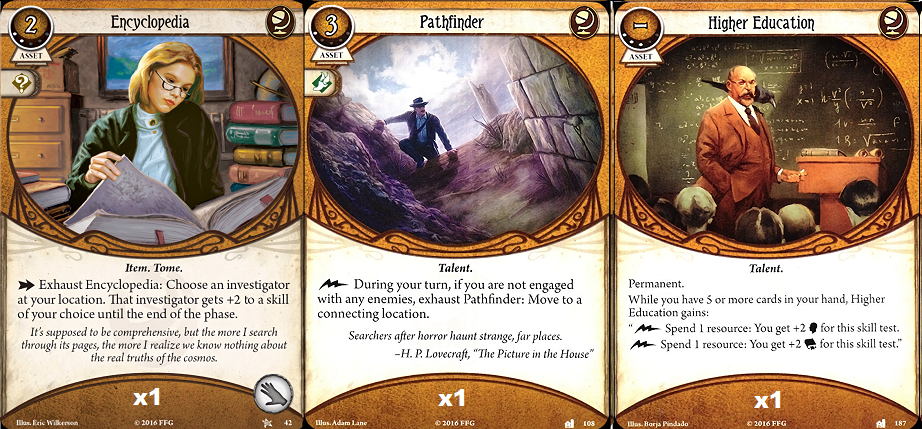 Added: 1 Encyclopedia, 1 Pathfinder, 1 Higher Education Encyclopedia: A decent alternative to the Old Book of Lore, once we're fully set up. A +2 boost to any skill until the end of the phase that can be used on other investigators. Pathfinder: A slotless asset that provides a free move per turn. Saves a lot of time if we can get it out quickly. Higher Education: This one is a Permanent - it starts in play, meaning it's never actually part of our deck (and thus, doesn't count against our deck size). Higher Education allows us to pay to boost our Willpower or Intellect to any amount required, provided we have the resources to pay for it and 5 cards in our hand. And with all our experience spent, we're about as ready for the next scenario as we'll ever be. Hopefully, that should help answer the questions about deckbuilding, as well as the question of 'why did you play X card in this scenario?' (the answer in most cases being: 'the situation I was saving it for came up while it was in my hand'). See you all next time in The Midnight Masks!
|
|
#
?
Jan 1, 2020 07:14
|
|
|
Oh boy I'm excited
|
|
#
?
Jan 3, 2020 15:14
|
|
|
Thanks for the additional info about the decks. I would ask if you plan on switching characters, but that is a question I doubt will be answered at this time.
|
|
#
?
Jan 4, 2020 04:26
|
|
|
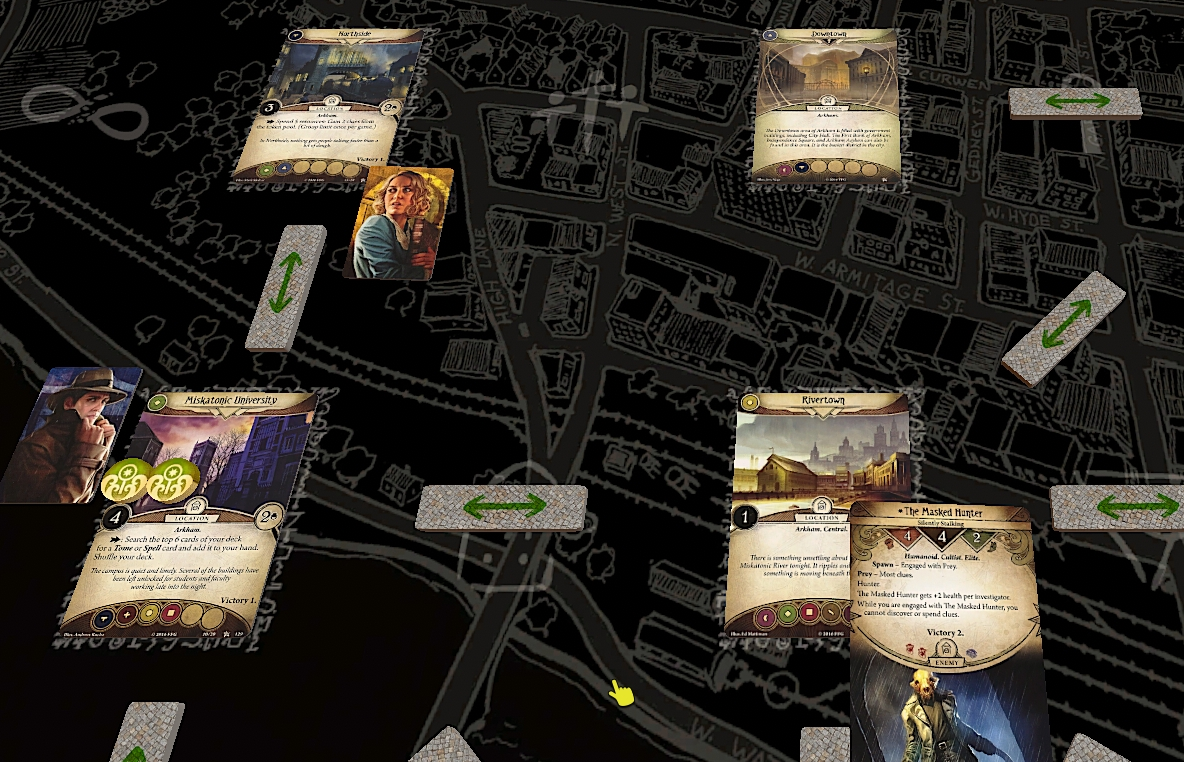
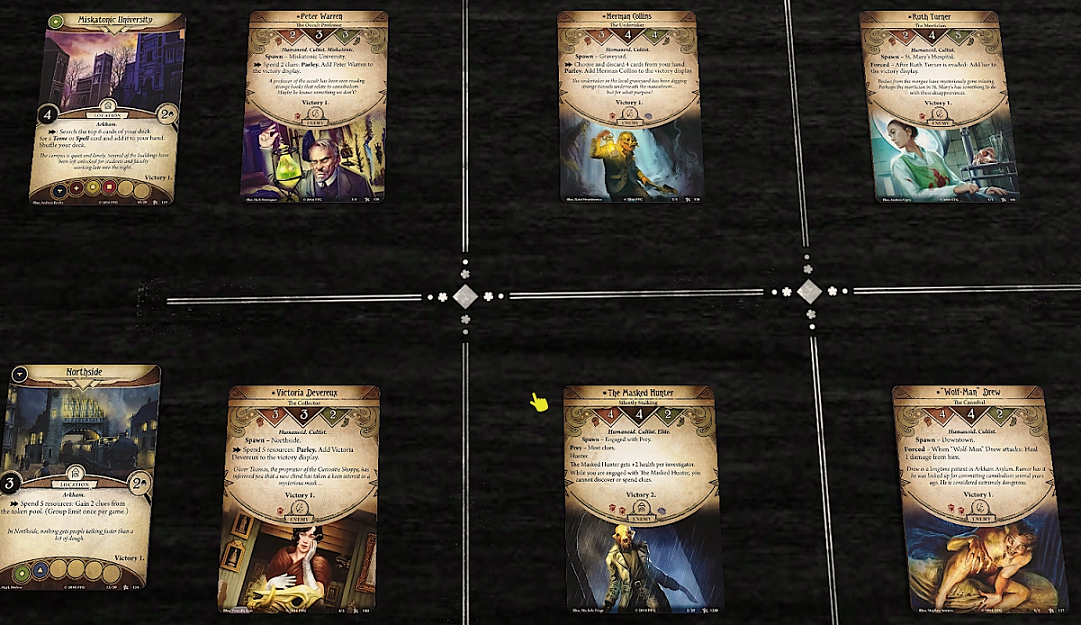
Since it appears people would prefer me going into more detail than less, I'll make a note of that in future updates. For now, it's time for The Midnight Masks. So, there's a cult out there that worships these things? Not directly, no. But they serve the same master. They've been making a nuisance of themselves at the university recently. Stealing from the morgue, poking away at the rare books. We think they're trying to conduct a grand ritual at midnight tonight. We've got a good idea of where it's going to be, but if we go in unprepared, there's no telling what we'll be up against. There's still a few hours till midnight. Most of them shouldn't have left yet. If we can stop them before they're ready, we might buy ourselves some time.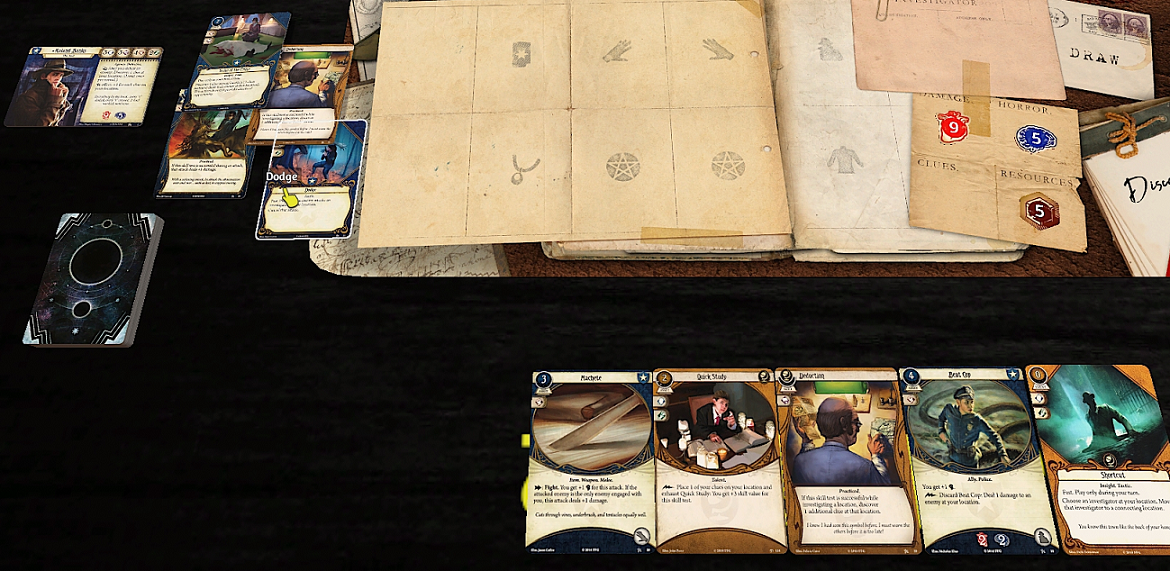 No time like the present, then. Are you ready? No time like the present, then. Are you ready?We skimmed over the opening moves in the last update. Investigators begin the game by taking 5 resources and drawing 5 cards, then deciding whether they want to mulligan or not. If they choose to mulligan, they set up to 5 cards aside (without shuffling them back in the deck) and draw until they have a 5-card hand, then shuffle the set-aside cards back in. Weaknesses drawn in the opening step are immediately set aside, and a replacement is drawn without counting against the mulligan total. In Roland's case, we hung on to Shortcut from the initial draw, and set aside the rest of his opening hand in the hopes of drawing a weapon. Roland doesn�t have a particularly asset-intensive setup - what he really wants to get in play as soon as possible are: - A weapon (preferably Machete, but his special or the .45 will work in a pinch) - Beat Cop Anything after that is fairly situational � Roland usually doesn�t have the cash or actions to spend a lot of time on additional setup. 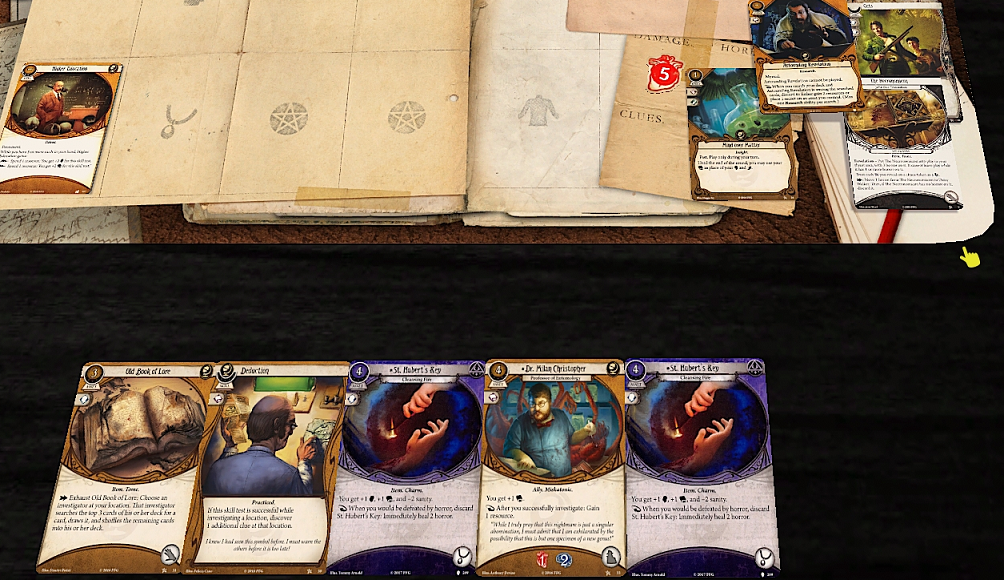 As ready as I'll ever be, I suppose. As ready as I'll ever be, I suppose.In Daisy's case, we tossed aside three cards in search for a Tome. Note that as Higher Education is a Permanent card, it immediately starts in play. Compared to Roland, Daisy�s setup is a little more intensive. She really wants to get the following cards in play, in approximate order of priority: - Dr. Milan Christopher, for a steady income stream - Old Book of Lore, to help her search for the cards she wants - Pathfinder, for the free move every turn - Shrivelling, to let her pick off weaker enemies - St. Hubert�s Key, if she has the resources and actions to spare. On the plus side, Daisy is a lot better at setting up than Roland � Milan ensures that resources are no issue, and Old Book of Lore�s free search-and-draw lets her find the pieces of her setup quickly. Remember, the cult is subtle and treacherous. There's no obvious way of telling who's a cultist, and they'll stay hidden unless - Hold up, there's one right there.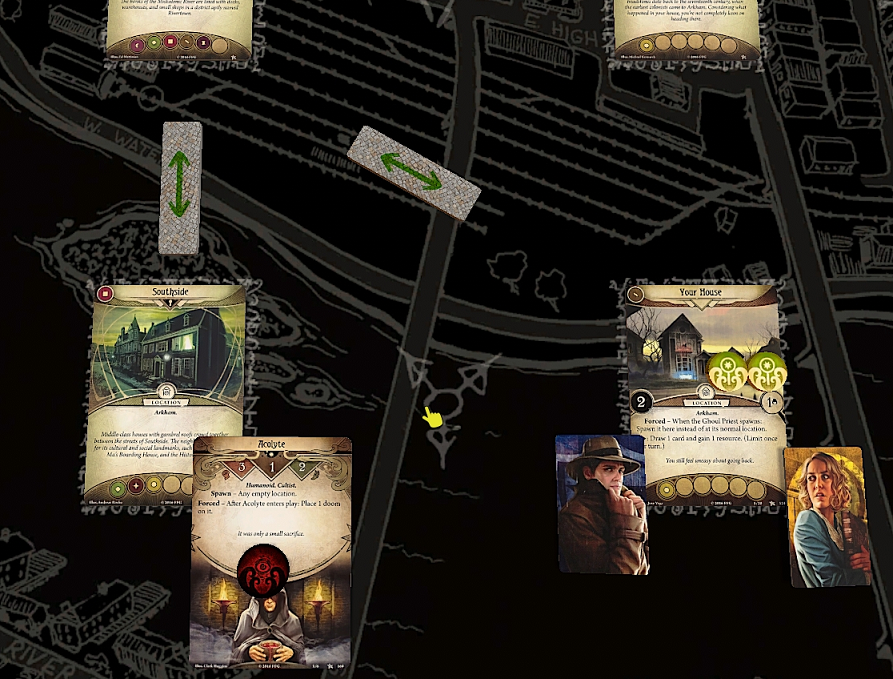 - though I suppose circumstances might have forced them to act a bit more openly tonight. - though I suppose circumstances might have forced them to act a bit more openly tonight.quote:
H-  Glory to Umordhoth! Death to all who oppose him! -okay. Glory to Umordhoth! Death to all who oppose him! -okay.quote:
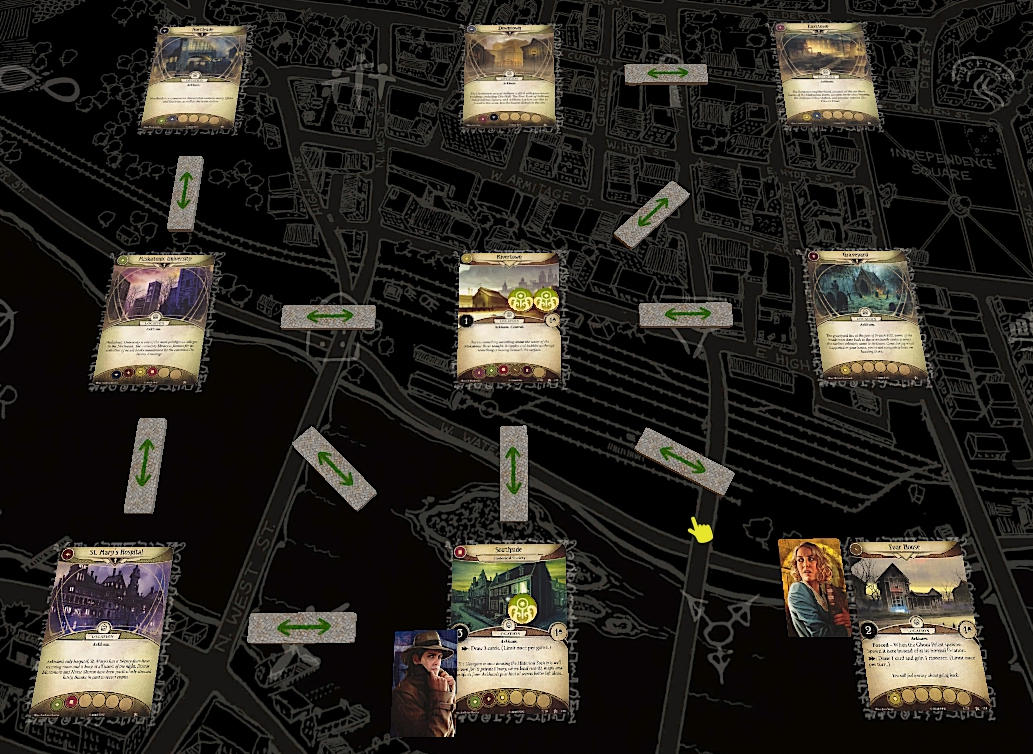
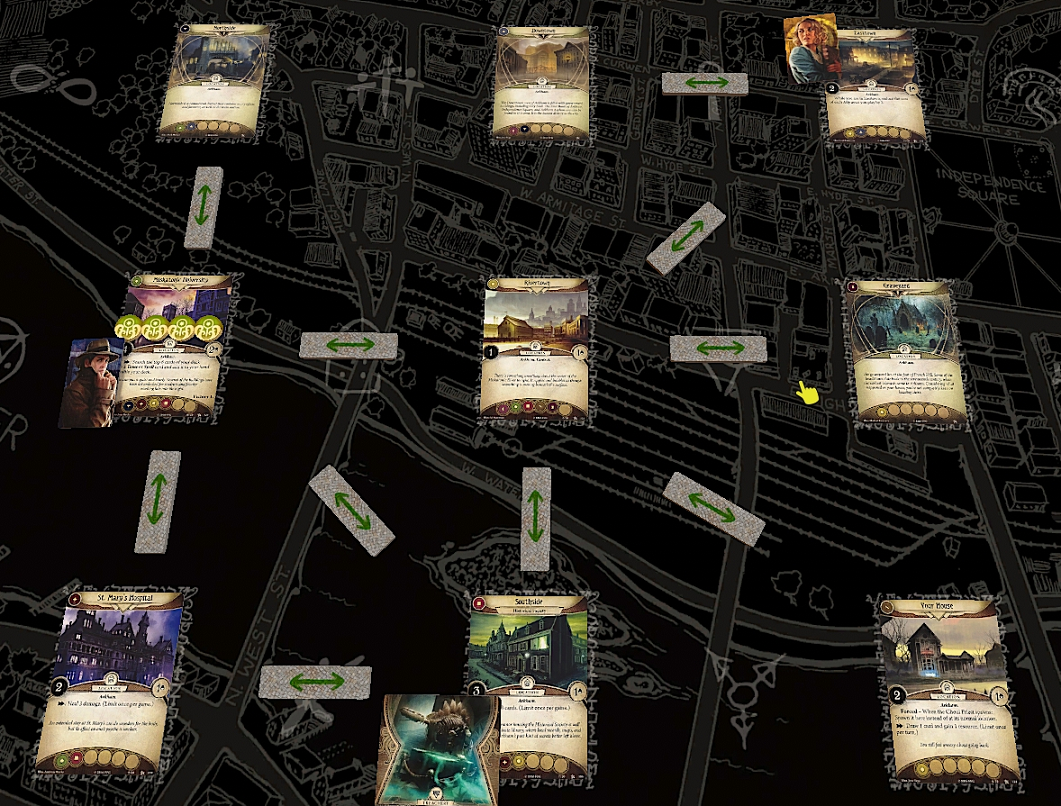
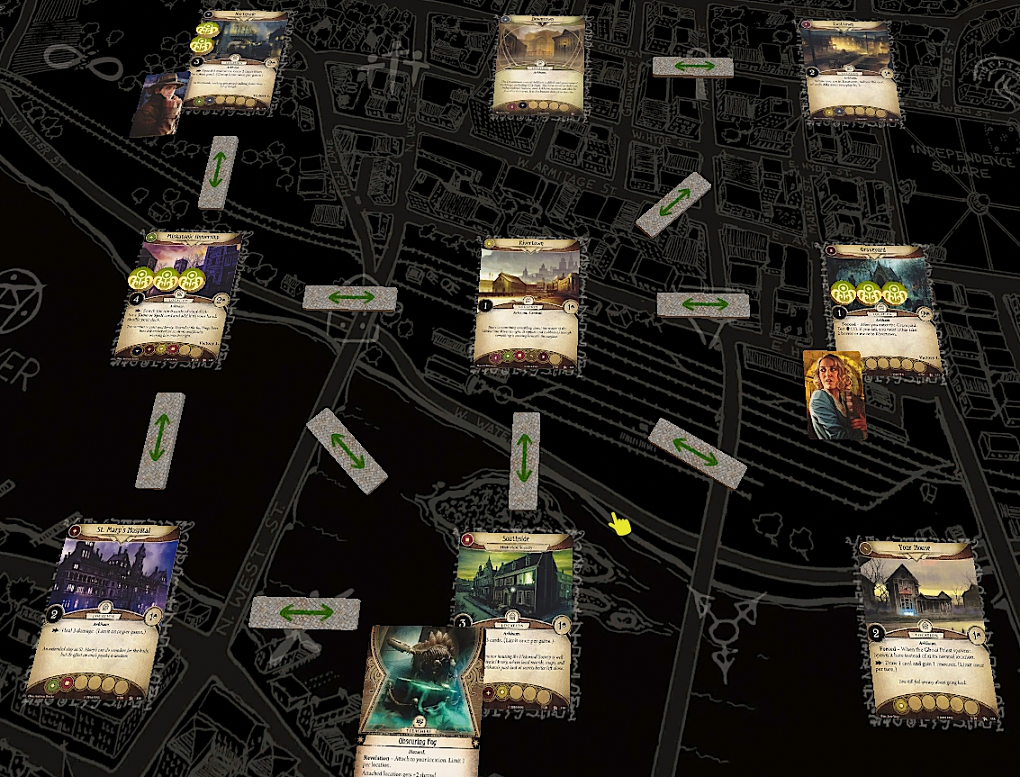
Any luck? Well, I took care of him, but I don't think he's going to be of much use. Death to the enemies of Umordhoth! See what I mean? This is all he says. I had a feeling it wasn't going to be that easy.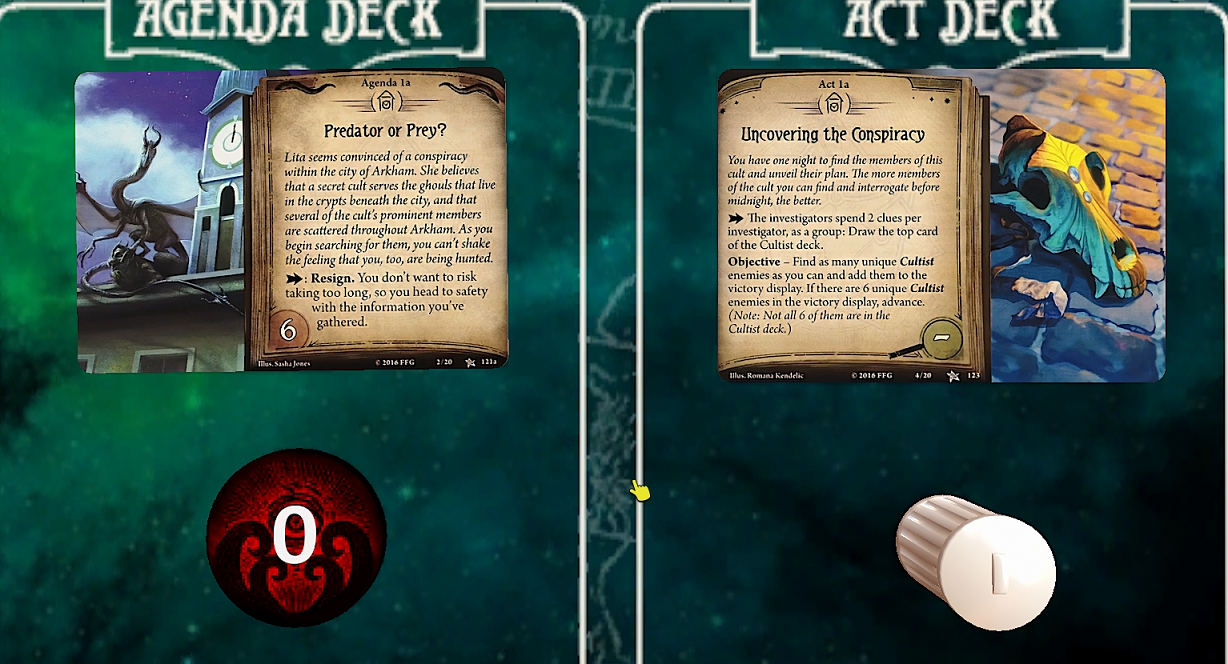 This is a 'do your best' scenario, with a more freeform structure than the last one. Whenever the investigators have a total of 4 clues, they can spend an action to draw one of the Unique cultists, spawning them on the map (where they still have to be dealt with, of course). It's possible to end the scenario without discovering all of them - in fact, we can Resign right now without discovering any of them, but doing so would make things a little more difficult for us down the line.  The setup for this scenario isn�t too bad, though getting a string of cultist tokens could be pretty annoying. 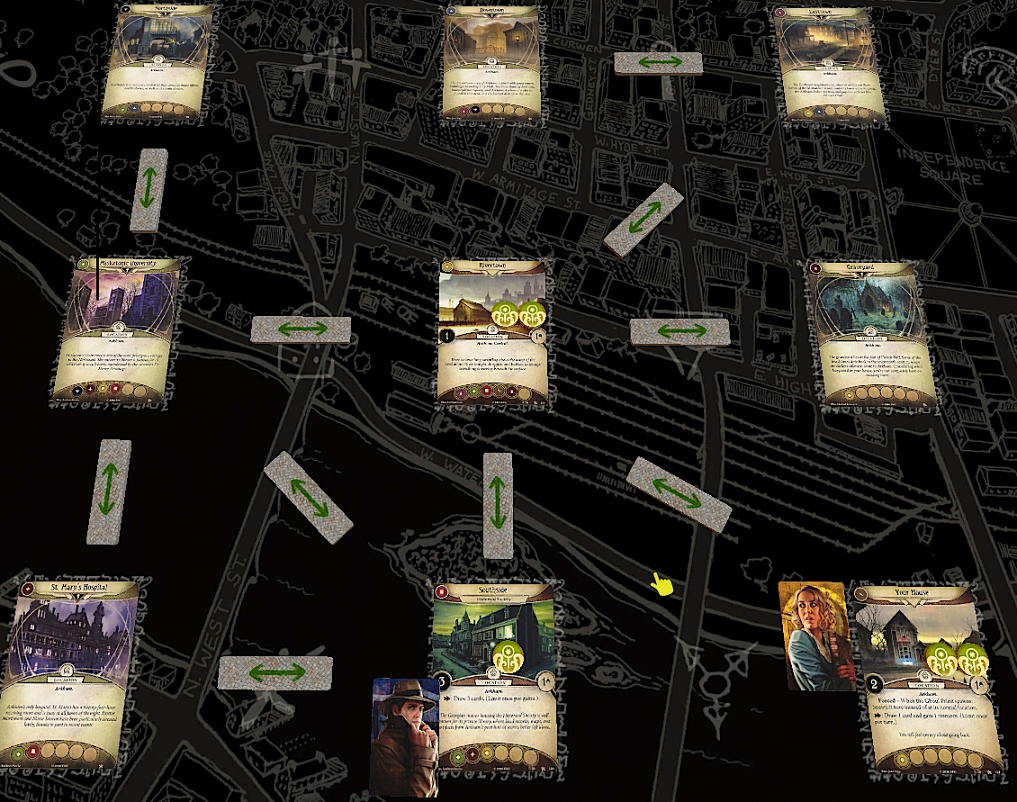 We've got a much bigger playground than just one corridor in this scenario. There's actually a bit of variation on this scenario's setup - some of the locations have alternate versions, and Your House will only show up if you didn't burn it down last scenario. quote:
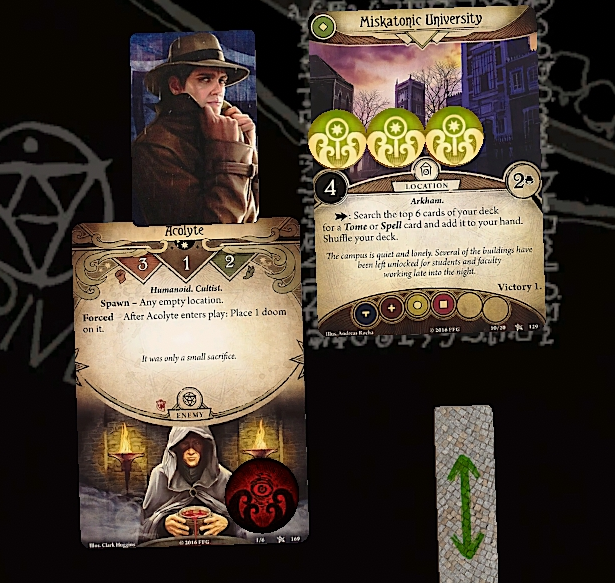
 Some of the Location cards have action abilities on them, which investigators at that location can spend an action to activate. 1 card and 1 resource for 1 action is a solid trade (though Daisy isn't particularly cash-strapped with Milan). What happened to the crazy lady who wanted to burn it down, anyway? Lita? She left a while ago. I think she's headed straight for the ritual site. Weren't you working together with her? Good heavens, no. She approached us a while back, but her methods were far too extreme, so we declined. And that was before she tried to lock us in a ghoul-filled hellpit. Let's hope that's the last we've seen of her, then.quote:
 quote:Round 2 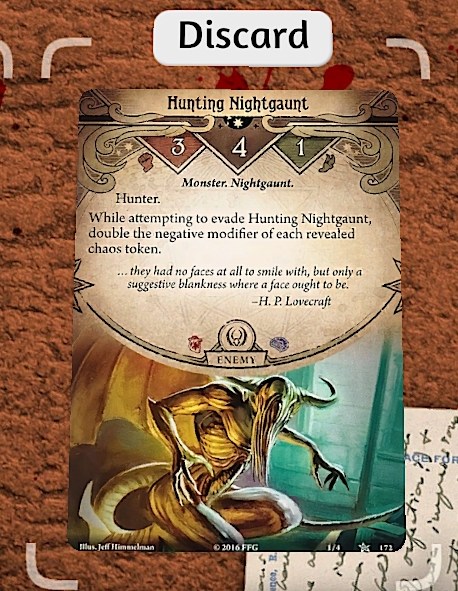 AAAAAH WHAT THE HELL IS THIS THING Don't try to run away! They get upset if you run! Seems plenty upset as it is! AAAAAH WHAT THE HELL IS THIS THING Don't try to run away! They get upset if you run! Seems plenty upset as it is!quote:
 There's another one! Roland, can you - Little busy here! There's another one! Roland, can you - Little busy here!The Acolytes will be a constant annoyance in this scenario. Since they spawn at an empty location, it will always require wasting a move to engage them. They can be left alone for a while, but all that additional doom starts adding up quickly. quote:
*Huff* At least the *huff* drat thing's killable. How do you know so much about these things, anyway? The Miskatonic University has a very extensive library. quote:
 Professor Warren's one of them? That would explain why he's been skulking around the rare books so much. Don't you spend all your time there too? Yes, because I'm a librarian. It's my job. Professor Warren's one of them? That would explain why he's been skulking around the rare books so much. Don't you spend all your time there too? Yes, because I'm a librarian. It's my job.quote:
 quote:
 Interesting...but I don't have time to look into it right now. Interesting...but I don't have time to look into it right now.Daisy has a decent shot at passing the test anyway, but no reason to risk it. quote:
 I know what you're up to, Daisy. It's too late. The ritual can't be stopped anymore, not by you or anyone. Maybe, maybe not. Stay out of my way, that's all I'm asking. I'll make it worth your while. I know what you're up to, Daisy. It's too late. The ritual can't be stopped anymore, not by you or anyone. Maybe, maybe not. Stay out of my way, that's all I'm asking. I'll make it worth your while.quote:
One down! How's it going on your side, Roland? Well, I'd be making a lot more progress if monsters stopped showing up, that's for certain!quote:
 quote:
 Skreee! What are these things, anyway? The Guide to the Dreamlands calls them �The Heralds of Nodens�. They�re not usually supposed to be so hostile, though. Maybe if you tried to look less threatening? Maybe when it stops trying to stab me! Skreee! What are these things, anyway? The Guide to the Dreamlands calls them �The Heralds of Nodens�. They�re not usually supposed to be so hostile, though. Maybe if you tried to look less threatening? Maybe when it stops trying to stab me!quote:
 Hiss! Perhaps we could try negotiAAARGH Hiss! Perhaps we could try negotiAAARGHquote:
-oof. Okay, that didn�t work out.quote:
Got rid of mine. You okay, Daisy? Yes, mine just flew away. I think they're just trying to slow us down. Don't let your guard down. Mine was definitely trying to kill me.quote:
 Clock's ticking. We'd better get a move on. Clock's ticking. We'd better get a move on.quote:
 quote:
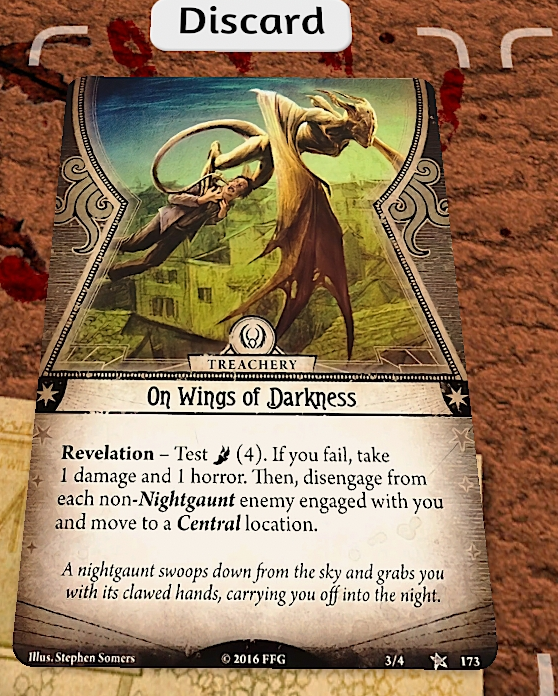
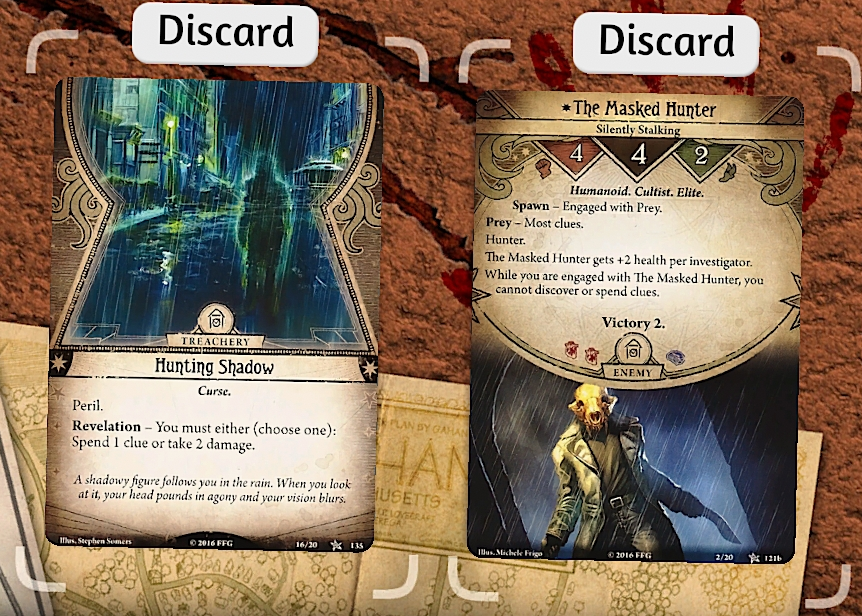
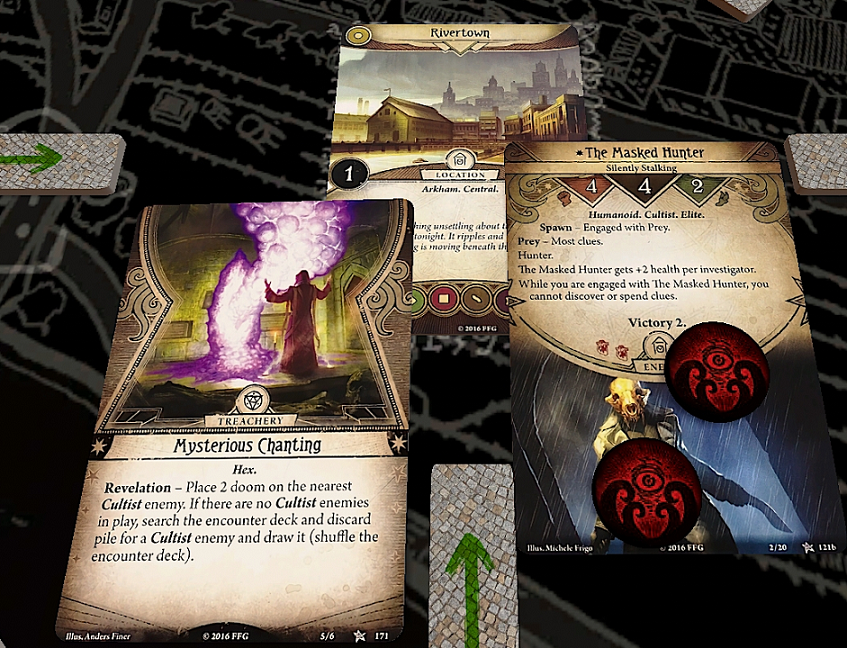
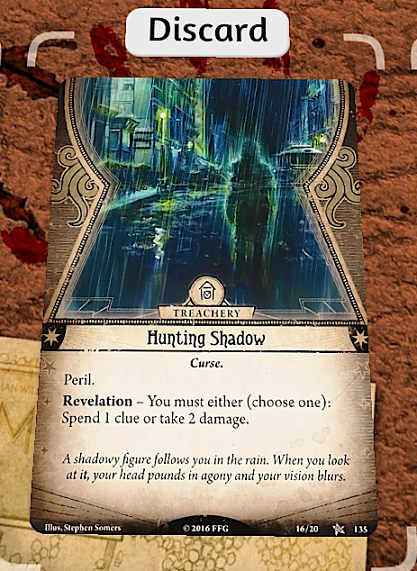 Banks- I know, but we don't have time to deal with it now. We need to keep moving. Banks- I know, but we don't have time to deal with it now. We need to keep moving.The 'Peril' keyword on Hunting Shadow means that this is an encounter an investigator has to face alone - they cannot discuss with other players how to resolve it, and other players cannot help to resolve it in any way (via committing cards, playing events, etc.) quote:
 Thought I felt something. Probably my imagination. Thought I felt something. Probably my imagination.As long as we keep 5 cards in hand, we're not in any danger of failing Willpower or Intellect tests anytime soon (autofail aside), thanks to the steady flow of resources from Milan. quote:
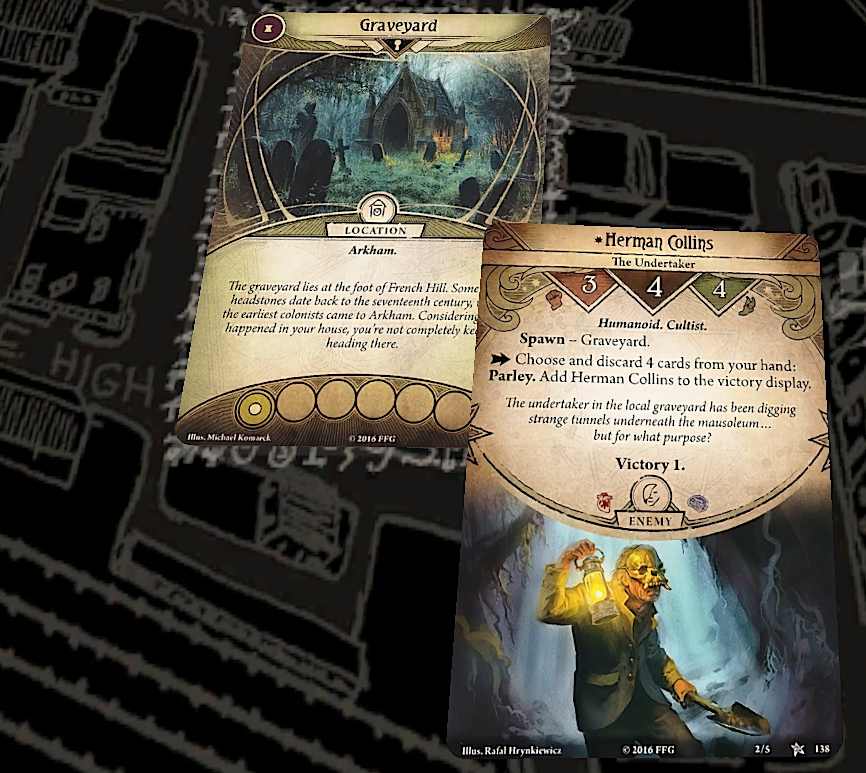 The gravedigger's working with the ghouls? In retrospect, that should have been our first avenue of inquiry. The gravedigger's working with the ghouls? In retrospect, that should have been our first avenue of inquiry.quote:
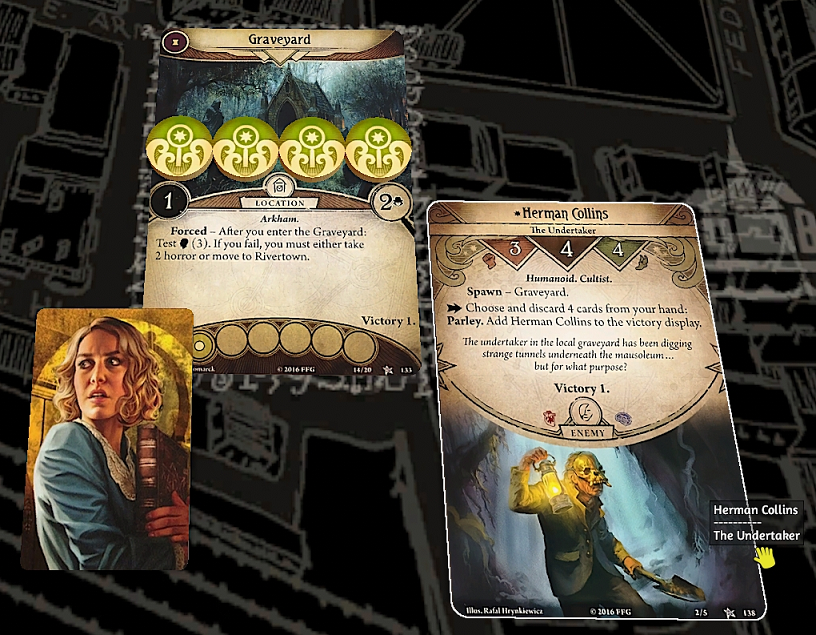  I got nothing against you, girl. But these things need to be fed, and better the dead than the living. If we can stop them tonight, you won't have to fear them ever again. I got nothing against you, girl. But these things need to be fed, and better the dead than the living. If we can stop them tonight, you won't have to fear them ever again.quote:
Incidentally, Herman engages the moment we enter the Graveyard, so if we'd failed the initial Willpower test we'd have dragged him with us to Rivertown, without taking an Attack of Opportunity - it's not a Move Action. quote:Investigation Phase - Roland�s Turn 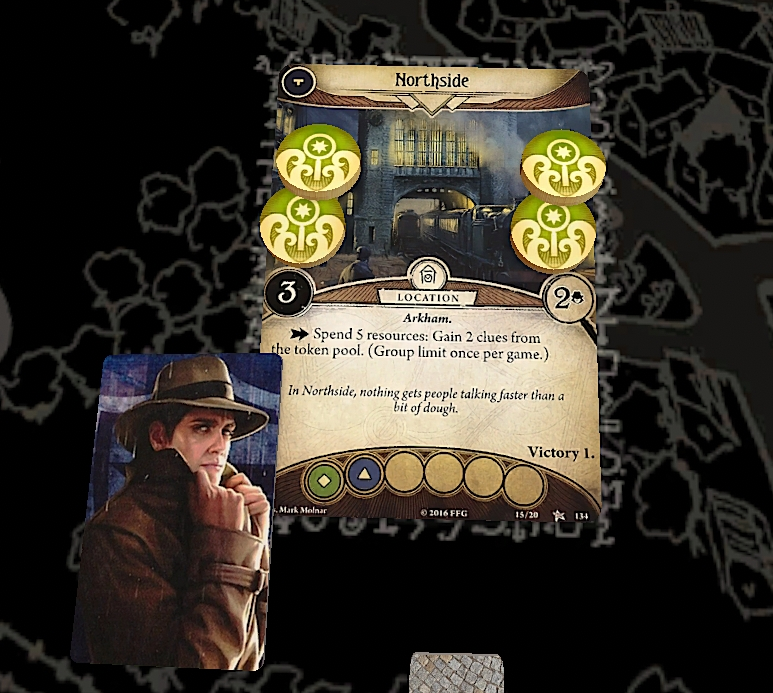 This place was always a little too rich for my blood. But hell, can't hurt to check it out. This place was always a little too rich for my blood. But hell, can't hurt to check it out.quote:
 quote:
We really want to pass that one � both of Roland�s assets are pretty critical to his continued success and he doesn�t have the draw power or resources to replace them. quote:
 Do you hear that? Hear what? Do you hear that? Hear what?We could actually cancel this with Ward of Protection, but I have a better idea. quote:
 Death- Heard it before, buddy. Death- Heard it before, buddy.quote:
Since the Acolyte can be spawned on 'Any Empty Location', it's up to us to choose a valid spawn point. In this case, setting it up at the University allows Roland to beat it up and pull a free clue from the highest-shroud location on the map. quote:
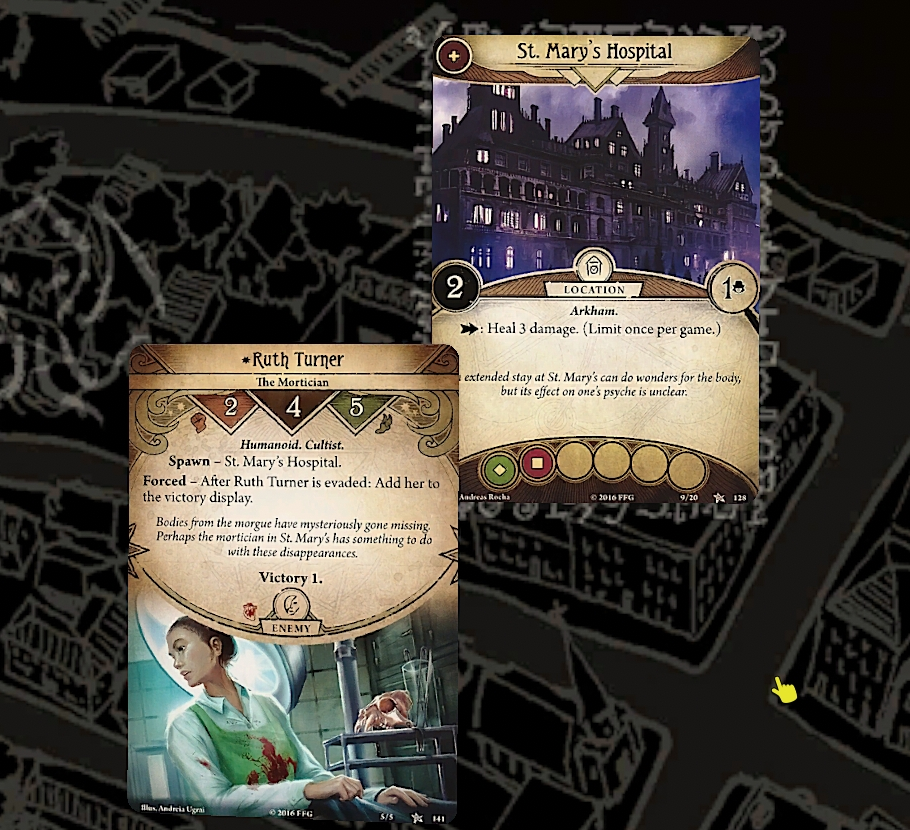 The mortician? So that's why the bodies haven't been showing up in our files. The mortician? So that's why the bodies haven't been showing up in our files.quote:
 drat it! How does this book keep turning up? I thought I got rid of it! drat it! How does this book keep turning up? I thought I got rid of it!We haven't been hitting the Elder Sign a lot, so we'll take our chances and just ignore it for now. quote:
Well, we've hit the doom threshold for this Agenda, so let's flip it over and-  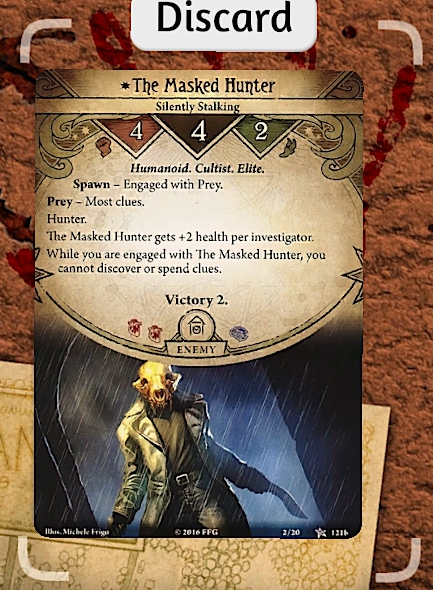  ... W-Who are you? Stay back! ... W-Who are you? Stay back!quote:
 I could use some help here, Roland! Try and shake him! I�ll come over as soon as I can! I could use some help here, Roland! Try and shake him! I�ll come over as soon as I can!quote:
 I have no wish to fight you, but- Then GET OUT OF THE WAY! I have no wish to fight you, but- Then GET OUT OF THE WAY!quote:
Wow, that was quicker than I expected. Amazing what *huff* adrenaline will do for you.In case anyone needed help visualizing that, here's a visual aid: 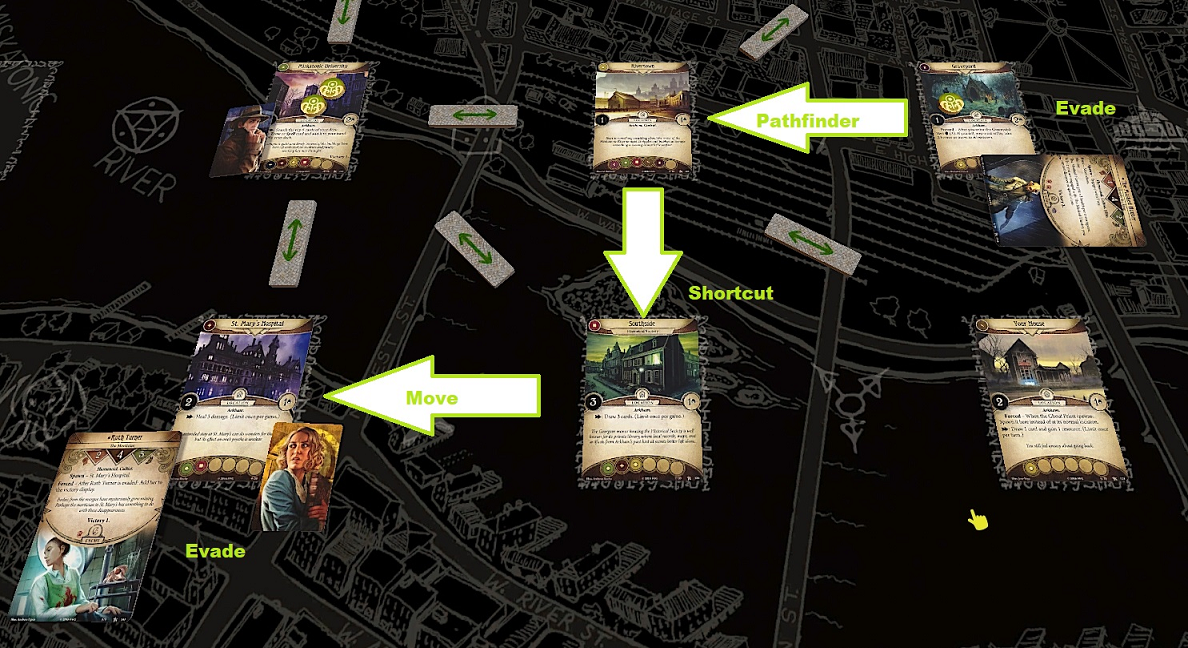 quote:
For the- Enough already!quote:
  Yes, you've found me! Are you satisfied, little man? Do you relish dragging the name of a noble lady through the mud? Lady, I have no idea who you are. Me neither. Impudent peasants! Yes, you've found me! Are you satisfied, little man? Do you relish dragging the name of a noble lady through the mud? Lady, I have no idea who you are. Me neither. Impudent peasants!quote:
Take that, you swine! Ow! Quit it! Don't force my hand, lady!quote:
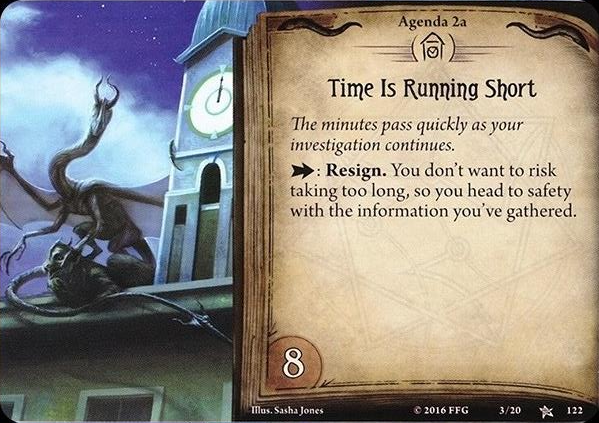 As with the first Agenda, this one allows us to Resign from the scenario at any time and from any location. quote:
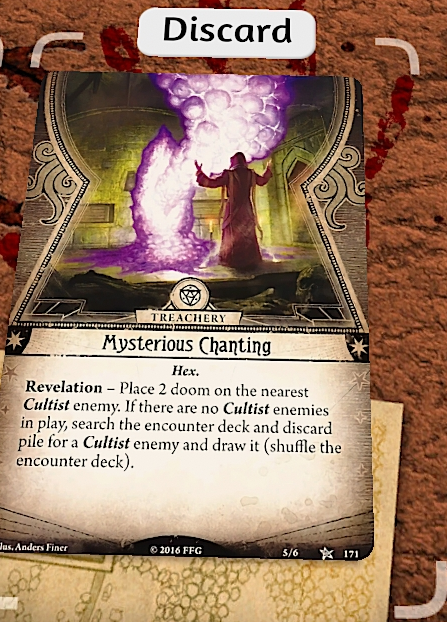
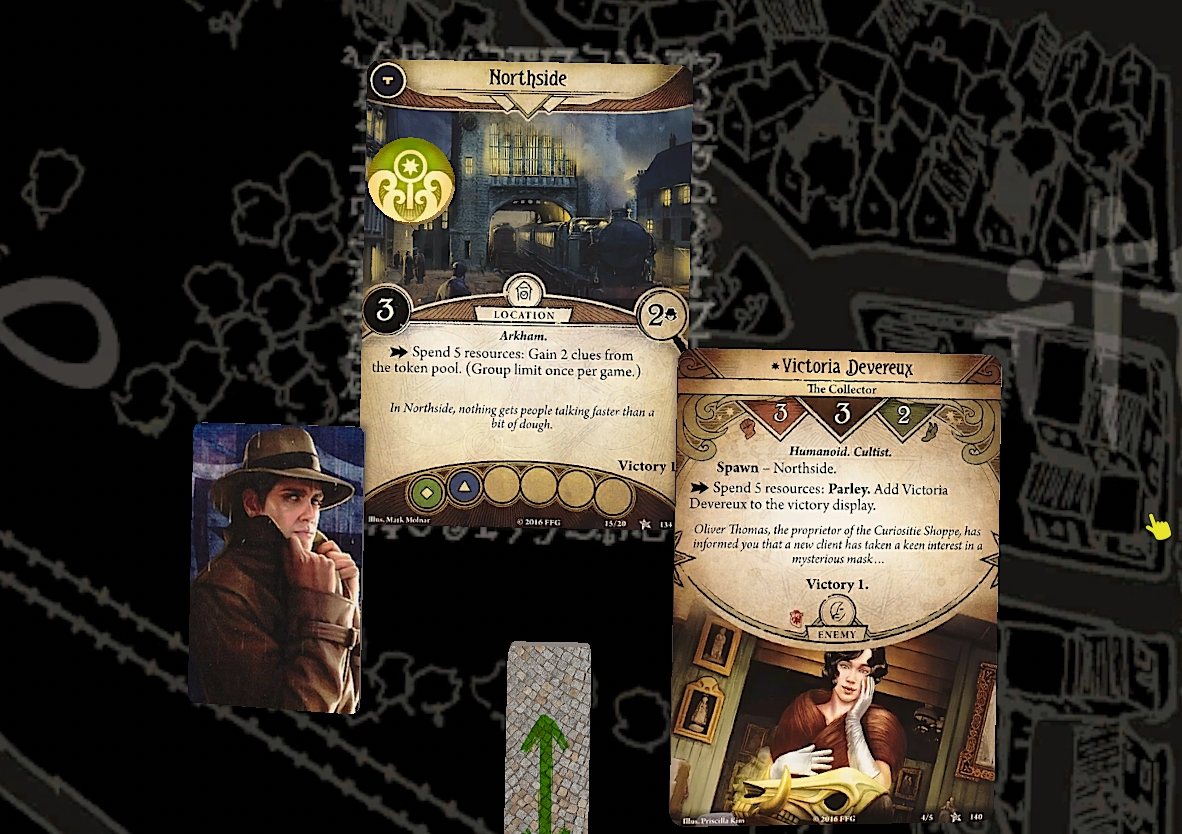
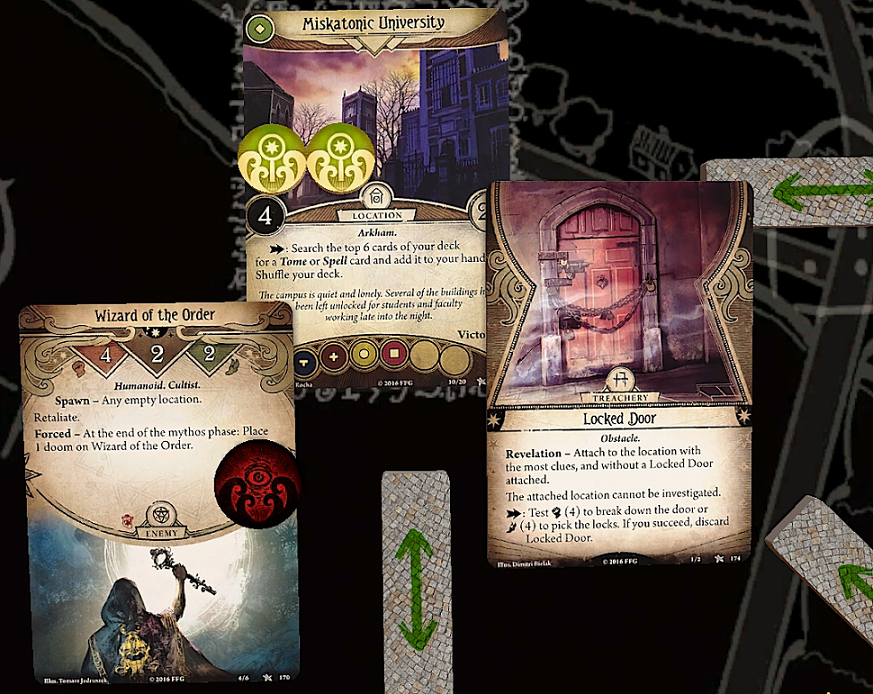 Wow, they really do not want us investigating that university. Something tells me we should take a closer look there. Wow, they really do not want us investigating that university. Something tells me we should take a closer look there.The Wizard of the Order is a beefed-up version of the regular Acolytes. Unlike the Acolytes, the Wizard will actively accumulate Doom with every round, so he's best dealt with sooner rather than later. The Locked Door prevents Investigation until it's cleared away. Of course, investigation isn't the only way to clear a location of clues. quote:
Aaargh! Sorry about this, but I've got no more time to play nice.quote:
 There's really no need for all this violence, friend. Perhaps we could settle this like civilized men, hmm? It's going to take a lot more than fancy words to stop me, 'friend'. There's really no need for all this violence, friend. Perhaps we could settle this like civilized men, hmm? It's going to take a lot more than fancy words to stop me, 'friend'.quote:
 Feeling better? I think so, thanks. That masked man frightened me for a moment, but I think I'm alright now. Feeling better? I think so, thanks. That masked man frightened me for a moment, but I think I'm alright now.Now that Daisy's refilled her hand, we once again hit the all-important 5-card threshold for activating Higher Education. quote:
 Roland - I know. You stay put, I'll handle this. Roland - I know. You stay put, I'll handle this.quote:
 Is - is he singing? Please tell me he's not singing. Don't focus on it! That stuff gets in your head. Is - is he singing? Please tell me he's not singing. Don't focus on it! That stuff gets in your head.quote:
 Ugh, I can feel his presence, even here. We�d better keep moving. Ugh, I can feel his presence, even here. We�d better keep moving.quote:
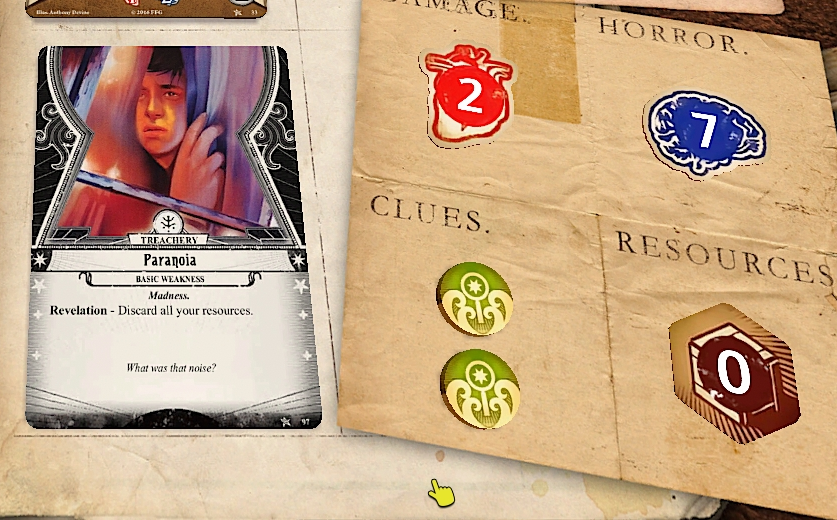 Augh! Was that him? Calm down! He's still at Rivertown! S-sorry, you're right. I think I'd better lie down for a bit. Augh! Was that him? Calm down! He's still at Rivertown! S-sorry, you're right. I think I'd better lie down for a bit.Searching directly for our weakness might sound silly, but with so few cards left in our deck we were bound to get it sooner or later, and we've already made our big purchase. Getting it out of the way now prevents a dead draw and even greater resource loss down the line. quote:
... Enough with that singing!quote:
 ... How are you still standing? ... How are you still standing?The extra Doom on him is because we pulled a Cultist token. quote:
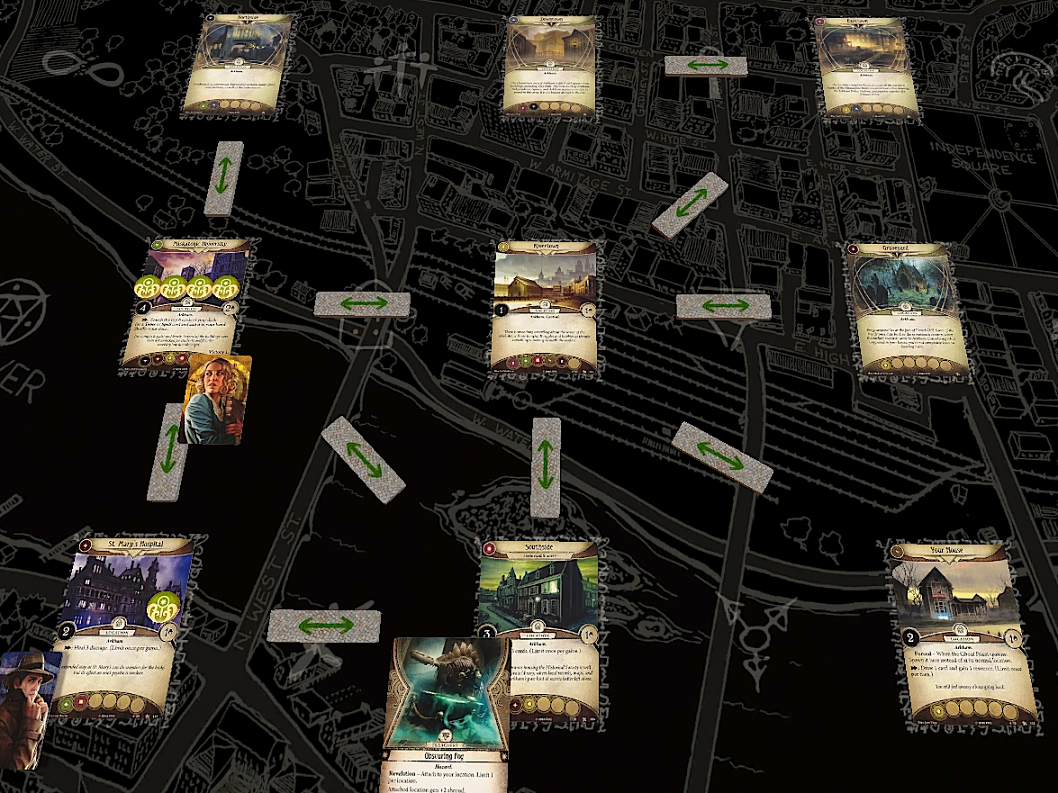
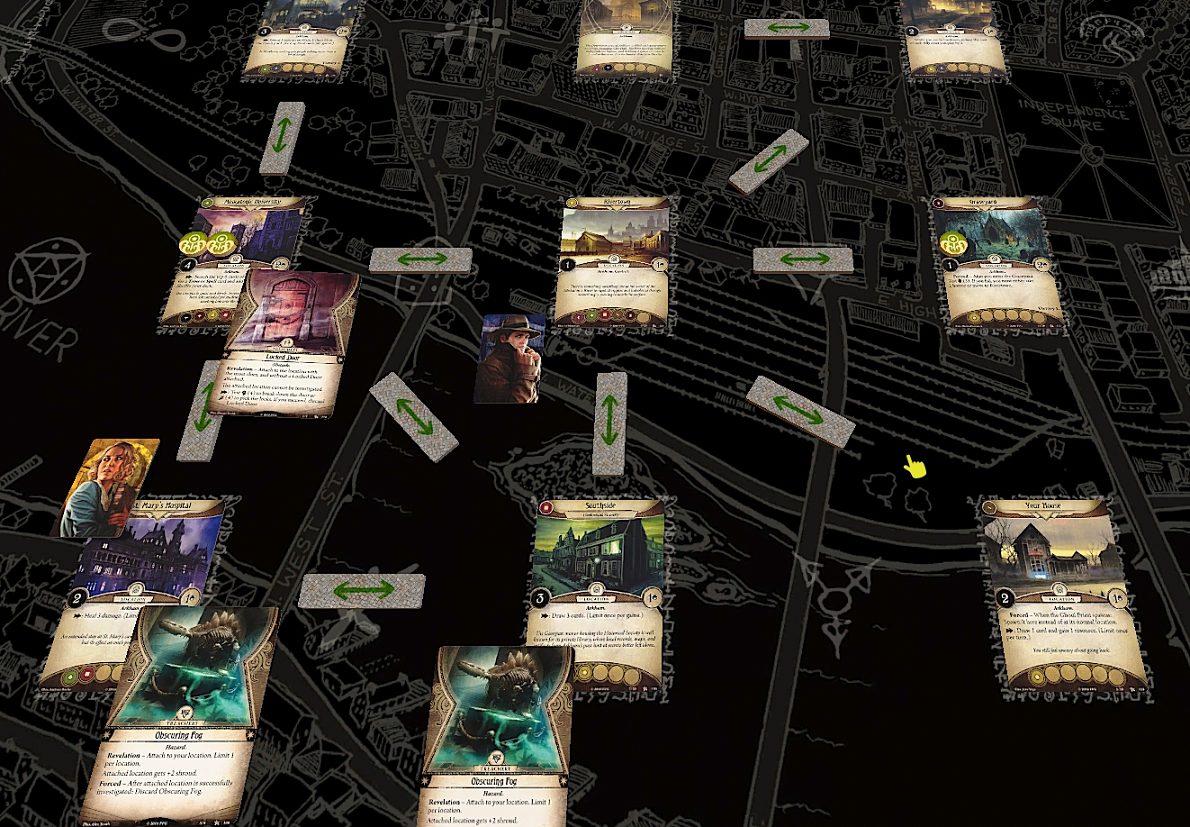 These Obscuring Fogs aren't doing much now that those areas have been investigated, but the Locked Door remains an annoyance. quote:
... Ugh, whatever that thing was, it definitely wasn't human. I've got slime all over my hands now. Are we done? Hold on a moment, let me check the University one last time. Something weird is going on there, and I'm going to get to the bottom of it.quote:
Reminder: Old Book of Lore can be used on any investigator at your location, not just yourself. quote:
 ... What? Are you sure this man is a cult leader? All the clues point to a devious mastermind who's been hiding behind the guise of insanity for years. Frankly, I'm amazed we missed it the first time. *sigh* Well, can't leave an escaped lunatic on the loose, regardless. ... What? Are you sure this man is a cult leader? All the clues point to a devious mastermind who's been hiding behind the guise of insanity for years. Frankly, I'm amazed we missed it the first time. *sigh* Well, can't leave an escaped lunatic on the loose, regardless.quote:
I just wish there was a faster way of getting around townAAARGHquote:
Oh dear, where did I put it? I swear it was on the shelf over there. We don't have time to look for it now.Autofail strikes again! Incidentally, we can�t use this to discard The Necronomicon because it can�t leave play by any means while it still has horror on it. quote:
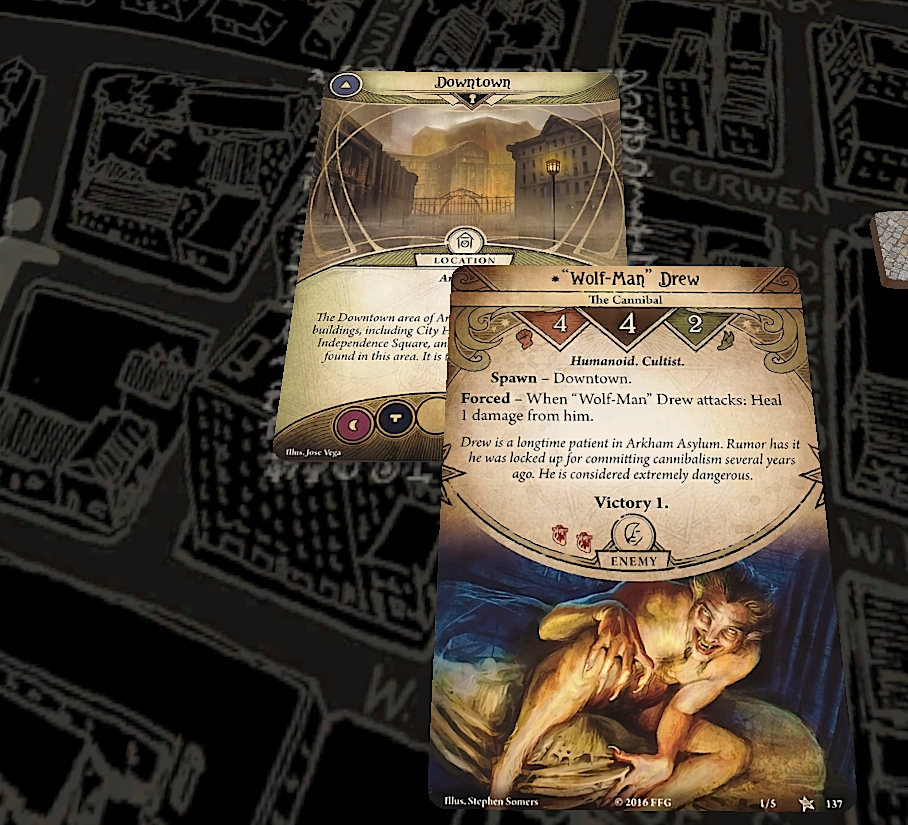
You can drop the act now, Drew. We're on to your little game. RAAAARGH! You're a remarkably convincing actor. RAAAARGH! You're a remarkably convincing actor.quote:
I think it's time I took over the interrogation.quote:
 *whimper* That wasn't an interrogation! You just shot him! He was about to chew your face off! You can thank me anytime, by the way. *whimper* That wasn't an interrogation! You just shot him! He was about to chew your face off! You can thank me anytime, by the way.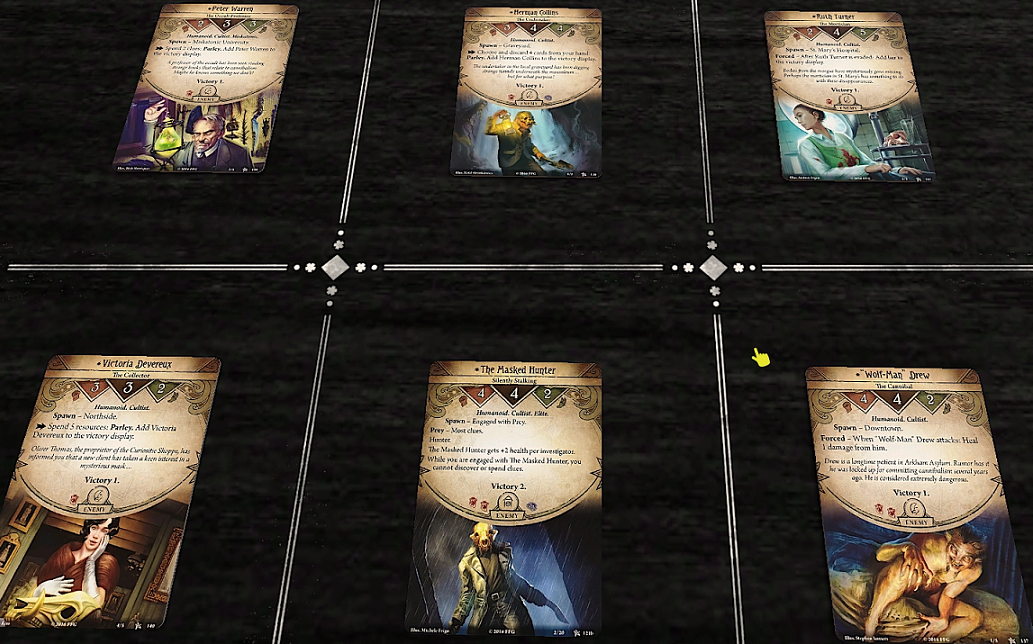 quote:
 quote:
 In addition to the cultists, we earned an additional 2 XP for completely emptying Miskatonic University and Northside of clues, though unfortunately we couldn't empty the Graveyard. Still, defeating all six cultists is about as good as it gets in this scenario - let's just hope that luck carries over to...The Devourer Below.
|
|
#
?
Jan 4, 2020 05:31
|
|
|
Well done. You survived and got all of the cultists and without too much damage. But were you in time in doing so? We will see.
|
|
#
?
Jan 5, 2020 01:03
|
|
|
Wasn't there a rule where if a mechanic is ambiguous it should be interpreted in the worst possible way for the players? I remember whenever I played midnight masks that the cultists would always be placed as far away from the investigators as possible. It made getting anything done pretty much impossible, because we just couldn't get to the cultists before the agenda advanced. If that's wrong, the scenario gets much easier. This is still my favorite scenario from the base game, the size really makes the game come to life.
|
|
#
?
Jan 5, 2020 03:10
|
|
|
mr_stibbons posted:Wasn't there a rule where if a mechanic is ambiguous it should be interpreted in the worst possible way for the players? I remember whenever I played midnight masks that the cultists would always be placed as far away from the investigators as possible. It made getting anything done pretty much impossible, because we just couldn't get to the cultists before the agenda advanced. If that's wrong, the scenario gets much easier. The Grim Rule is not an official �rule� per se - it�s meant to quickly resolve rules/mechanic arguments so the players can quickly get on with the game without bogging it down in endless arguments. From �Rulings and Clarifications�: quote:
If an enemy/encounter is meant to be spawned at the furthest possible location, it will usually specify that on the card, like so.
|
|
#
?
Jan 5, 2020 03:45
|
|
|
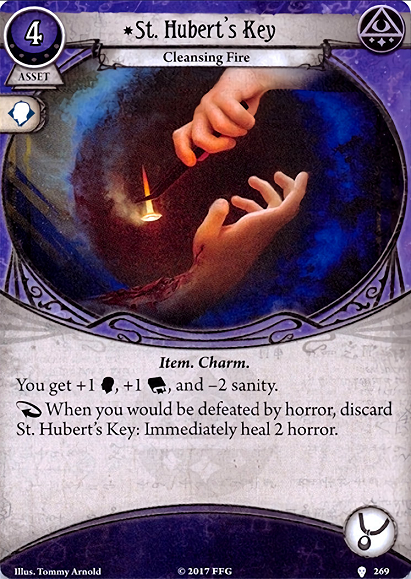
While I'm working on the next scenario, have a quick interstitial update. Class Overview/Core Set Investigators We haven't really gone through all the classes yet, and since we won't be seeing the other Core Set investigators (at least, as far as this three-scenario campaign is concerned), might as well kill two birds with one stone and discuss both the classes and their (initial) representatives. Guardian Main Stat: Combat Guardians feel compelled to defend humanity, and thus go out of their way to combat the forces of the Mythos. They have a strong sense of duty and selflessness that drives them to protect others, and to hunt monsters down. Strengths: - Fighting: Their most straightforward niche. Guardians have the largest selection of Weapon assets (and weapon-related upgrades), straight-up damage-dealing cards, and abilities that trigger off defeated monsters - Tanking: Guardians have plenty of ways to keep attention off other investigators - they can engage drawn enemies, resolve treacheries for them, and just straight-up take the health/sanity hit for them if need be. Of course, surviving such endeavors is another matter entirely. - Healing: Very much a tertiary niche, but nonetheless one worth mentioning. This aspect of Guardians really shines in longer scenarios, where even the sturdiest of investigators will eventually be worn down. Weaknesses: - Expensive: Guardian assets and events can be costly, and they don't have a lot of in-faction economy boosts. Getting one big gun in play (and the ammo cards necessary to keep it fueled) can easily leave you broke. - One-Dimensional: Unlike other factions, Guardians don't have a lot of ways to utilize their main stat (Combat) for other tests - it's pretty much entirely used for monster-fighting, and not much else. As a result, they have to resort to cards from other factions to boost their non-combat prowess, and a Guardian without such options can feel like dead weight if there's no enemies around to fight. Core Set Guardian: Roland Banks We're all familiar with Roland by now, but just for the sake of completeness, let's take a look at him again. With a statline of 3/3/4/2 and Guardian 5/Seeker 2 for his deck, he's a fairly easy investigator for new players to grasp - able to cover both monster-killing and light investigation, and his gimmick lets him grab a free clue from a high-shroud location occasionally. His big weakness is his low sanity - 5 Sanity doesn't give you a lot of room to slip up, and it's compounded by his tendency to throw himself at sanity-shredding monstrosities. It's a good idea to pack horror-tanking assets and/or horror healing, and a couple of extra Willpower boosts to pass critical treacheries. 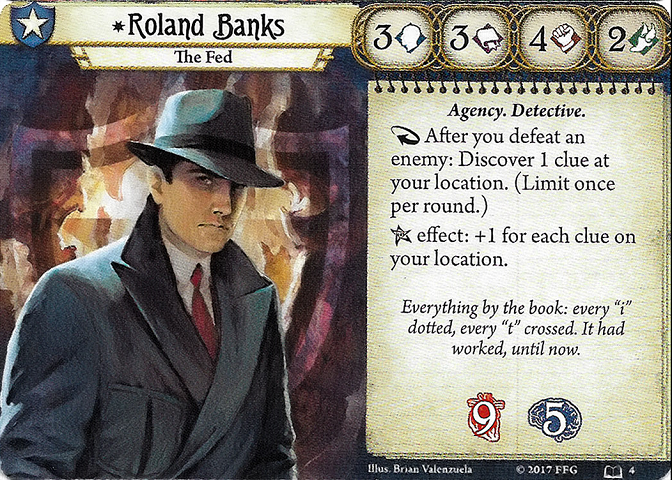 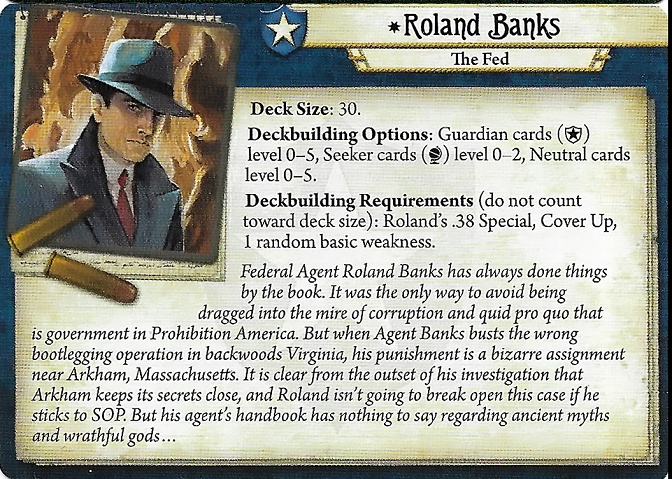 An alternative version of Roland was released with one of the books. As far as his investigator card goes, it's pretty much the same, only with some snazzy new art. 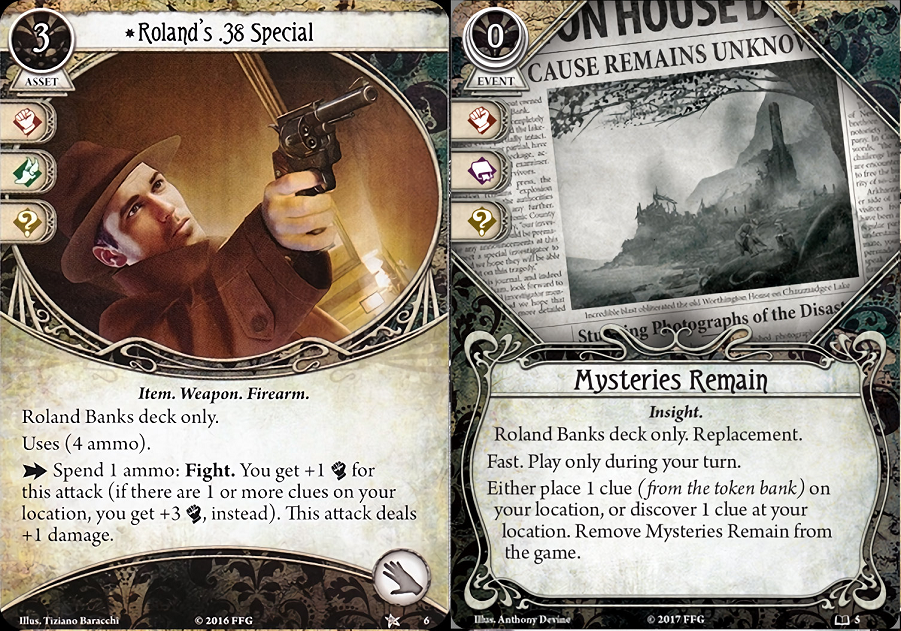 Mysteries Remain is his alternate signature for his book promo version. It's not quite as strong as his .38 Special, but if you're not relying on that as a weapon, then its one-time effect could potentially be more useful. Its ability to just generate a clue from thin air can potentially mess up a scenario, though the 'remove from game' effect limits fancy recursion plays. 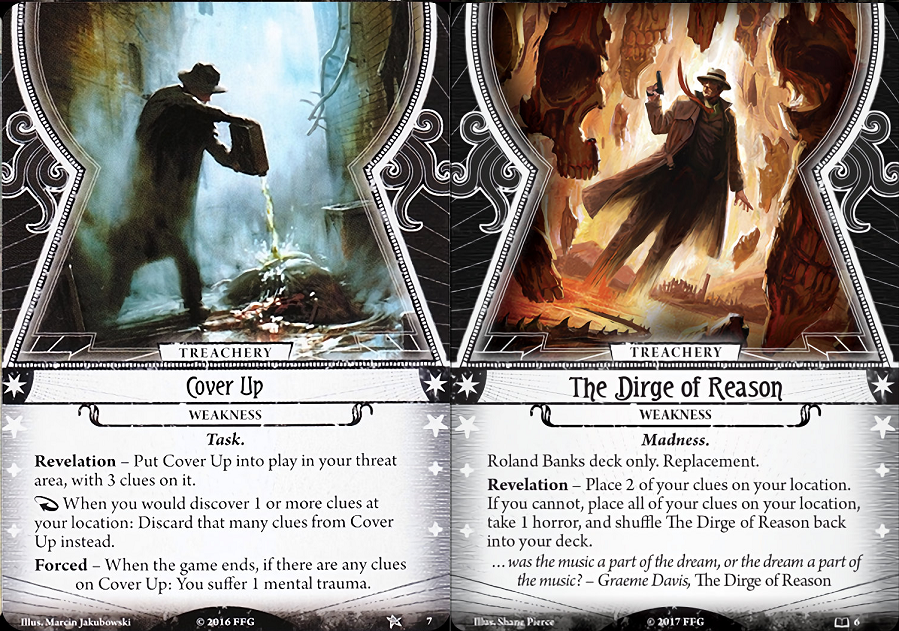 Cover-Up is, as I've mentioned, a massive waste of time and loss of tempo that hits Roland right in his weak spot. Its one silver lining is that it never leaves play - if you pull it early enough and deal with it promptly, you can safely ignore it for the rest of the scenario. The Dirge of Reason is a far lighter and more manageable weakness than Cover-Up, though if you're playing a seeker-focused Roland with high draw (particularly with one specific seeker ally), you might want to skip this one, as it could potentially keep popping up to annoy you until you have the two clues necessary to discard it. Seeker Main Stat: Intellect Seekers are primarily concerned with learning more about the world and about the Mythos. They wish to research forgotten lore, map out uncharted areas, and study strange creatures. Strengths: - Clues: Seekers are the class most focused on clue-gathering, with assets and events that boost Investigative prowess, trigger on successful investigation, or just straight-up grab clues from pesky locations. - Buffing: While Guardians keep their allies healthy, Seekers help to ensure their success by tossing them stat boosts, committing handy skill cards, or lowering an upcoming test's difficulty. - Drawing/Searching: Seekers have the highest card draw/search capability out of any class, and a large part of their strength comes from being reliably able to draw the exact card required from their deck at an opportune moment. Weaknesses: - Setup-Heavy: Seekers have the tools to succeed in just about every situation, but not necessarily the actions to spare to get all of it in play. Aside from that, it's hard to think of what major issues Seekers have as a class, as they have the tools to apply their massive Intellect to just about every situation for reliable (if not guaranteed) success. Individual Seekers can still have their own flaws, of course. Core Set Seeker: Daisy Walker We're also pretty familiar with Daisy by now, though we've mostly just been using her free Tome action as a search engine with Old Book of Lore. While that's certainly a strong option, it's just the tip of the iceberg - you can heal up your allies, imbue them with supernatural power, or just straight-up knock out enemies with a single blow. Gimmick aside, a 3/5/2/2 statline is solid for a pure investigator, and her Seeker 5/Mystic 2 deckbuilding gives her some fun options for Tomes and a few useful spells to bolster her weaknesses, though with only 3 Willpower she tends to need a boost or two there if you're planning to lean on her magey side. 5 health is a little low, so bring options to quickly end/escape fights you really don't want to get stuck in.  (Edit: Whoops, borrowed the image from the deckbuilding update without noticing the numbers I added. It's not wrong, though - signatures and unique weaknesses are one-offs in your deck) Allows Daisy a couple of extra Tome slots. It's okay. Often ends up being committed for its handy icons, though it also helps to mitigate the impact of her weakness. 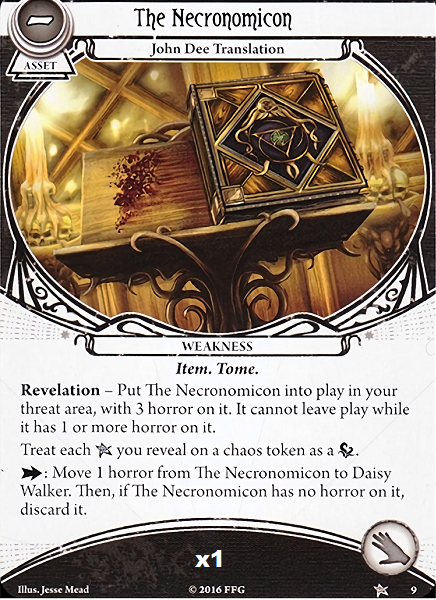 As mentioned earlier, it's not too bad if you're willing to deal with the doubled failure chance - the main penalty is taking up a hand slot. Since there's no limit to how many times you can trigger it per turn, you can spend a turn to clear it out if you know there's a critical part of the scenario coming up where you really can't afford to take chances. Because of its specific wording, the horror must be moved directly to Daisy - it can't be deflected to other assets or cancelled. Mystic Main Stat: Willpower Mystics are drawn to and influenced by the arcane forces of the Mythos. Many have spell-casting abilities, able to manipulate the forces of the universe through magical talent. Strengths: - Focused: Mystics can use their wide variety of Spells to substitute their Willpower for just about any other stat on proactive skill tests (fighting, investigating and the like). Gearing for success is a lot simpler when you only effectively rely on one stat. - Reality Manipulation: Mystics have the highest access to abilities with 'meta' effects - cards that can shift the dynamics of the chaos bag, stack the encounter deck, and even alter the text of other cards. Where other classes might struggle to succeed with mere stat boosts, Mystics scoff as they simply remove the possibility of failure. Weaknesses: - Double-Edged: Many Mystic cards often come with significant drawbacks to match their tremendous power, often requiring you to stack additional Doom on them or hitting you with horror when a special token is drawn. A Mystic can easily become their own worst enemy if the chaos bag is feeling particularly mean. - Spell-dependent: The classic wizard problem - while they can accomplish just about anything with the right spell at the right time, it also requires them to have the right spell at the right time. A Mystic can easily flounder if they can't find their Spells in time, or if they start running out of charge in a long scenario. Core Set Mystic - Agnes Baker  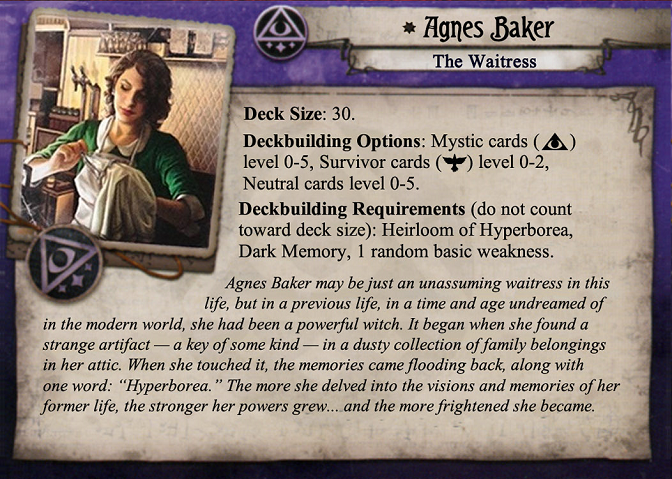 Agnes is fairly strong, as far as Mystics go. A statline of 5/2/2/3 gives her enough Willpower to leverage her spells without needing very much in the way of additional boosts, while her lowish non-willpower stats are compensated for by her spells and her subclass. Her gimmick of counterpunching when taking horror can usually be reliably triggered to good effect at least a couple of times each scenario, especially since Mystics have fairly reliable methods of self-inflicting horror without having to tank enemy attacks or treacheries. Her Mystic 5/Survivor 2 deckbuilding gives her some fairly solid options - the cheap Survivor cards pair well with the pricer Mystic cards, and both classes can be leveraged for their probability-manipulating abilities to great effect. 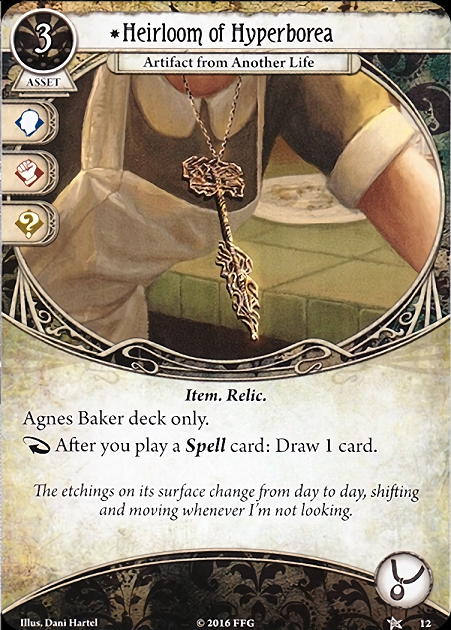 Additional card draw is nice, but this card is pricey and not often worth giving up the hotly-contested Accessory slot for. If you pull this card too late it's fairly dead weight, unless you're running a particularly event-heavy Agnes. Good icons for committing, though.  A nicely thematic (though nonetheless quite annoying) weakness. Agnes can either spend two resources to lose a round, or keep it in her hand and tank the 2 horror-hit (but possibly leverage that to punch an enemy in the process). Neither option is especially desirable, but they both have their silver linings. Note that since the horror is not 'direct' horror, it can still be mitigated via assignment to other assets. Rogue Main Stat: Agility Rogues are self-serving and out for themselves. Wily and opportunistic, they are always eager for a way to exploit their current situation. Strengths: - Economy: A lot of rogues have gimmicks themed around extra resource gain, and many rogue cards boost their resources even further. Rogues can leverage this wealth for fancy expensive assets, or by outright spending their way to victory. - Oversuccesses: A lot of rogue cards are themed around not just success, but spectacular success, with additional effects triggering only if you succeed by 2 or more on a skill test. While these can be difficult to pull off, the resulting pyrotechnics are often worth the extra commitment. - Speed: Rogues have amazing action economy - they can dash about the map quickly, pack a plethora of Fast cards to save some Play actions, and just pick up a free action once in a while. Weaknesses: - Agility can be a janky stat to build around - it's not as limiting as combat, but rogues don't get a lot of ways to turn skill tests into Agility tests early on, and evasion only goes so far in keeping enemies out of the way. - Expensive: Rogues really only start rolling once they start getting some late-game cards high in resource and EXP cost. While the former can be easily mitigated by their massive resource gain, there's no shortcut to the extra EXP cost, and a rogue will often spend the first couple of scenarios struggling to make an impact without their fancy toys. - Self-Centered: Rogues are selfish, opportunistic types only in it for themselves, and don't have a lot of tools specifically centered around helping other investigators out. Of course, what's good for the rogue is good for the rest of the team, even if they may not see it that way. Core Set Rogue - Skids O'Toole 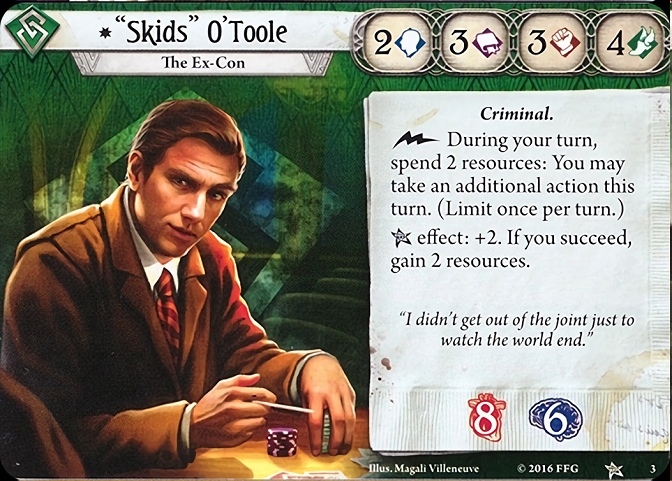 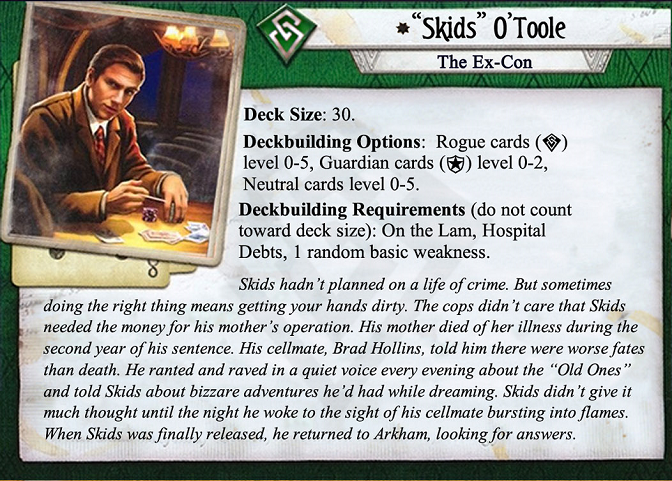 Skids is, unfortunately, a bit of a mess, built before the rogue archetype was truly solidified. His janky 2/3/3/4 statline tends towards the low side (and gives him a hell of a time with willpower treacheries). Rogue 5/Guardian 2 is alright as far as combinations go, but his Combat is a little too low to effectively leverage his subclass. Finally, his gimmick is expensive - if you want to lean in on those extra actions you'll have to run a far cheaper deck than most other rogues, which can be a problem if you're also running costly Guardian assets. 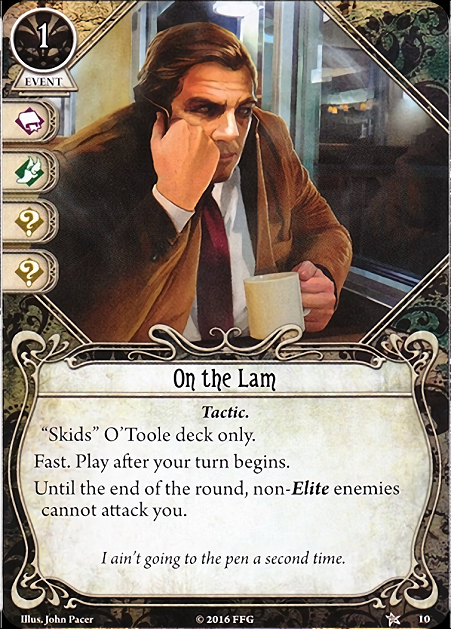 It's rare that you'll get more than one or two enemy attacks cancelled from his signature, but it's still a nicely thematic event that really makes Skids feel like the slippery conman he's supposed to be. Also provides some nice icons for committing if necessary.  This is a pretty crippling weakness. Thanks to its limitations it takes at least three rounds to clear (on top of demanding six resources), and failing to clear it hits Skids right in the Experience points, which he desperately needs as a Rogue. Best pulled either early or not at all. Survivor Main Stat: None Survivors are everyday people in the wrong place at the wrong time, simply trying to survive. Ill-prepared and ill-equipped, Survivors are the underdogs, who rise to the occasion when their lives are threatened. Strengths: - Getting by: Survivor cards are all about mitigating failure - reducing its impact and rewarding you with an extra try or a consolation prize. In some cases, you're better off failing a test than passing it. - Making do: Survivor assets and events are cheap but effective, and several of them can be easily recurred from the discard pile with Survivor trickery. It can be surprisingly difficult for a Survivor to go down if they can keep playing the same Leather Coat over and over again. - Rising to the occasion: Survivors tend to thrive in adversity, with cards that scale based on just how outclassed they are in a given situation, and abilities that reward them for having no resources or cards in your hand. Weaknesses: - Excelling: It's right there in the name - Survivors are great at Not Dying, which is nice but a secondary concern to actually advancing the scenario. When the team is doing well, the Survivor can tend to feel fairly redundant. They also don't have a lot of useful high-end cards, and can tend to feel a little underpowered near the end of a campaign when everyone is toting around god-killing weapons and spellls. Core Set Survivor - Wendy Adams 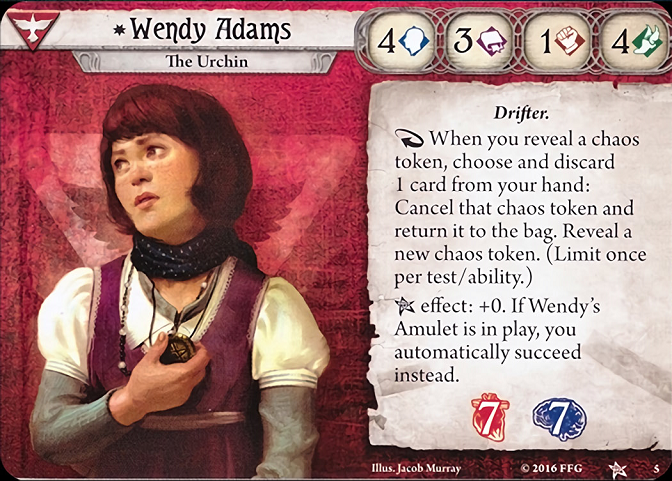 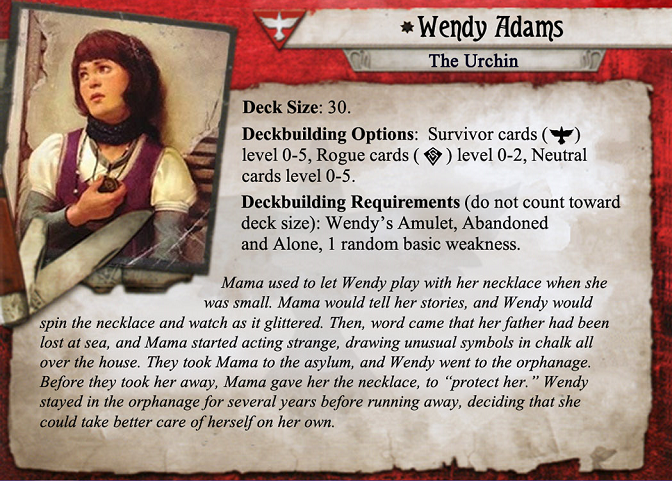 A premier defensive investigator - her statline of 4/3/1/4 allows her to deflect or evade just about anything the encounter deck throws at her, and her gimmick lets her reroll a terrible token draw once per test, provided she has cards remaining in her hand. Survivor 5/Rogue 2 gives her a good selection of cards for a generalist role, though her low Combat means she's going to have to need some assistance taking out enemies. 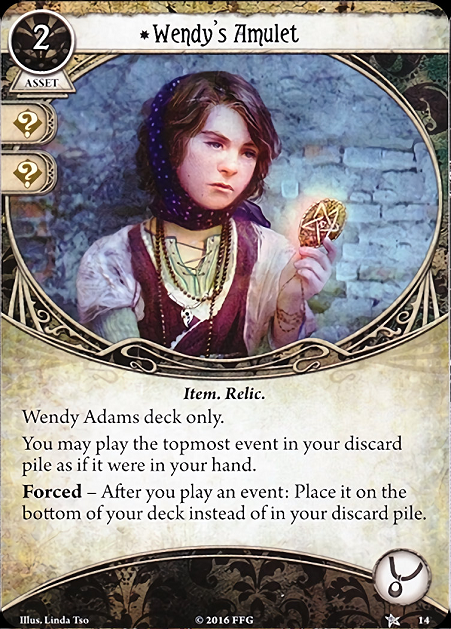 Wendy's Amulet allows her to play the topmost Event card of her discard pile, then add it back to the bottom of her deck. Because the Forced effect triggers on events you play from your hand as well, you want to save actually playing the Amulet for after you've gotten a few powerful Events in your discard, though even after it's in play you can still get Events in your discard by committing them to tests or discarding to fuel her ability. 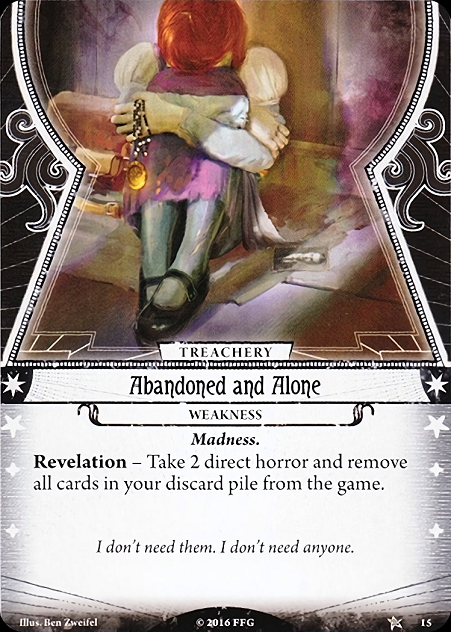 The 2 direct horror isn't too bad - just keep your sanity up and be prepared to take that horror anytime, if you haven't drawn it yet. Removing your discard pile, however, is fairly crippling - Survivors have gotten more and more cards and mechanics focused on recursion since the Core Set, and a card that locks you out of that entire archetype really limits your options. Best pulled early to get rid of it quickly and limit its damage. And that's all the classes/investigators in the Core Set. Next we'll be taking on...The Devourer Below. Inadequately fucked around with this message at 11:45 on Jan 9, 2020 |
|
#
?
Jan 9, 2020 01:14
|
|
|
My impressions of the characters, solely from playing the base game, were based around the assumptions that you win games by getting clues and killing boss monsters, in that order. So it felt to me that Roland and Daisy were the best two characters since daisy was the best at getting clues, and roland was the best at killing things and the second best at getting clues. It will be interesting to see if they manage to break up this dynamic with the design of later scenarios. Wendy I always felt was the weakest, because "not dying" doesn't translate to winning the game easily. In other words, use wendy as an investigator in your next game.
|
|
#
?
Jan 9, 2020 01:53
|
|
|
When we're done with Night of the Zealot (which shouldn't take long, only one scenario left), I'll leave it up to a thread vote to pick the investigators for the next campaign, probably with the options of the investigators from that cycle + unused investigators from previous ones. That said, Wendy is far from the weakest investigator, and I'd be quite happy to play her over several other options.
|
|
#
?
Jan 9, 2020 02:04
|
|
|
This LP is really well written and informative! I love the Cthulhu genre of games but could never justify the cost of the LCG. Have you played all the current cycles?
|
|
#
?
Jan 9, 2020 03:47
|
|

|
I'm familiar with the later cycles, though for some of them I've yet to complete a full campaign solo, and completing a whole campaign with a group sadly remains on my bucket list - it's too much of a time commitment for myself and others right now. If you want to just dabble with the game I'd recommend the same TTS mod I'm currently using, if you don't mind playing on your computer. Just grab one of the inbuilt starter decks there, or borrow one of the more popular decks on ArkhamDB if you don't feel like building your own right away. I do also own a physical copy of the game, but taking pictures of that for the LP would be far too inconvenient - got into it when it was just starting, so purchase-wise I only have to worry about keeping up rather than catching up on backlog.
|
|
#
?
Jan 9, 2020 04:23
|
|
|
Thanks for the information about the other character types.
|
|
#
?
Jan 10, 2020 00:58
|
|
|
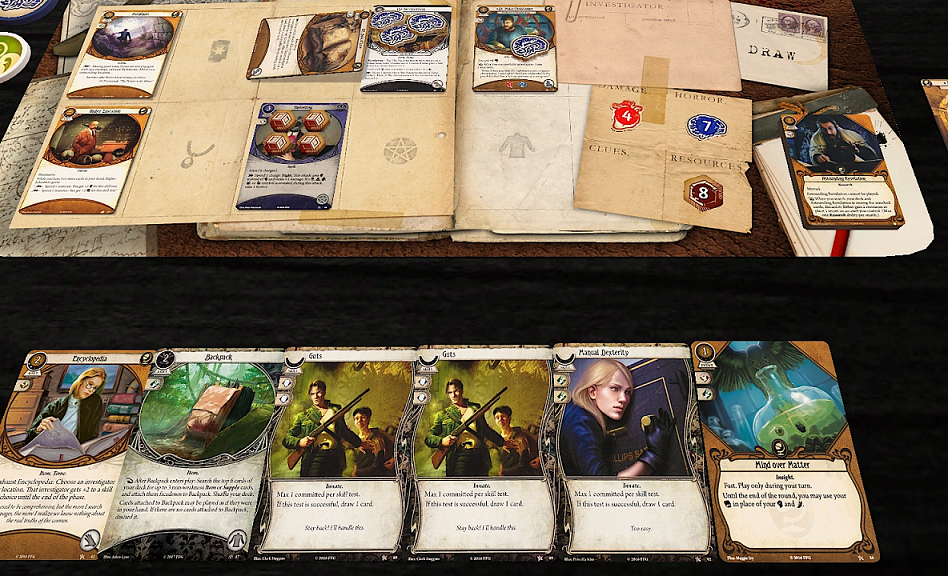
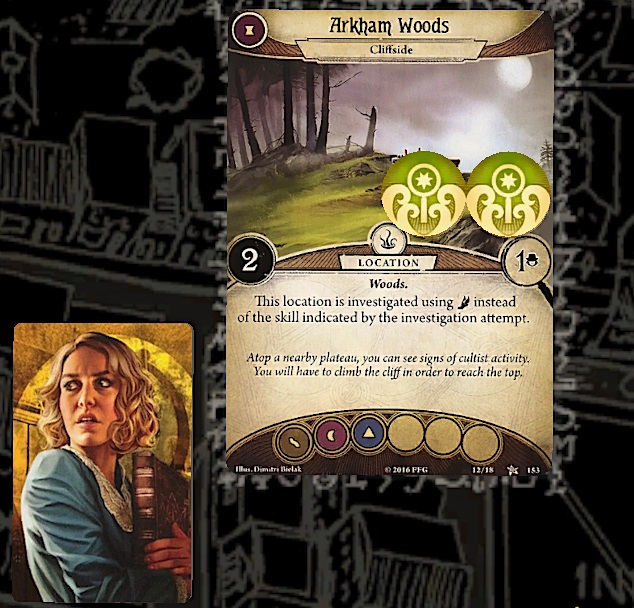
Upgrading: Roland: Removed: 1 Dodge, 1 Emergency Cache 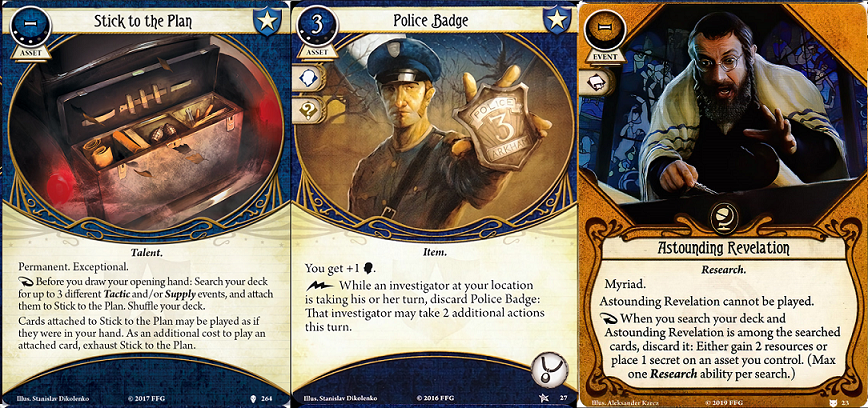 Added: 1 Police Badge, 1 Astounding Revelation, 1 Stick to the Plan This upgrade is mostly based around upgrading Roland's draw consistency. Stick to the Plan is an Exceptional card - while it's still considered a level 3 card, it actually costs twice as much as its printed XP to actually put in our deck. Still, the results are worth it - we essentially have three useful cards in our 'hand' at the start of the game that can be played anytime, and don't have to waste time actually drawing them. The additional Police Badge is there to ensure it actually shows up this time, and the single Astounding Revelation is there to combo with the 'search your deck at the start of the game' card we just added. We could add two more of those, but that'd be pretty pointless - Roland doesn't have any way to search his own deck. Daisy: Removed: 1 Magnifying Glass, 1 Deduction, 2 Ward of Protection, 2 Backpack 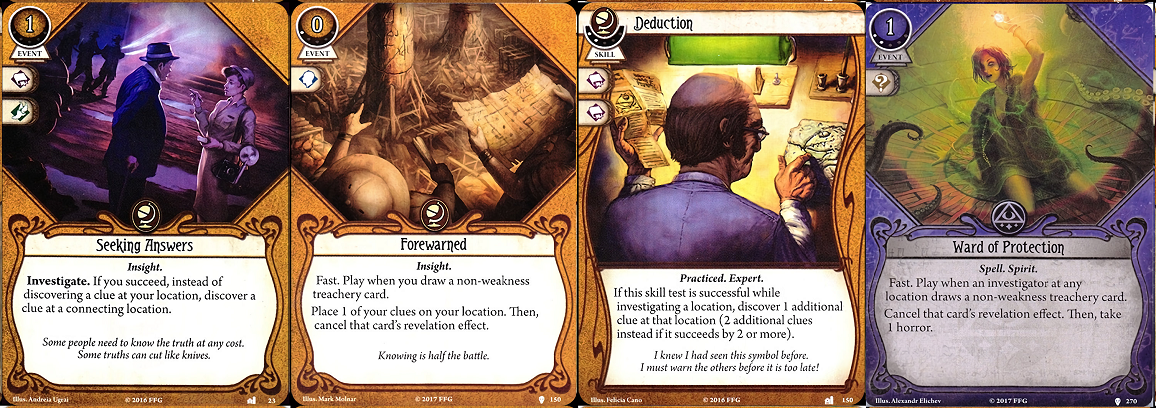 Added: 2 Seeking Answers, 1 Deduction (2), 1 Forewarned, 2 Ward of Protection (2) This upgrade is mostly focused on buffing Daisy's encounter-hate and clue gathering. The upgraded Wards of Protection allow her to cancel Roland's encounter cards from across the map, and Forewarned adds even more encounter cancellation. The upgraded Deduction (2) can save quite a bit of time if we can pull off that +2 Investigation, and as for the 2 Seeking Answers...let's just say that something tells me they'll come in handy in the next scenario. With all that settled, let's begin! So, this is the place he mentioned? Yes, the wolf-man was surprisingly co-operative all things considered. still think you shouldn't have shot him, though Anyway, the ritual site should be right about, uh...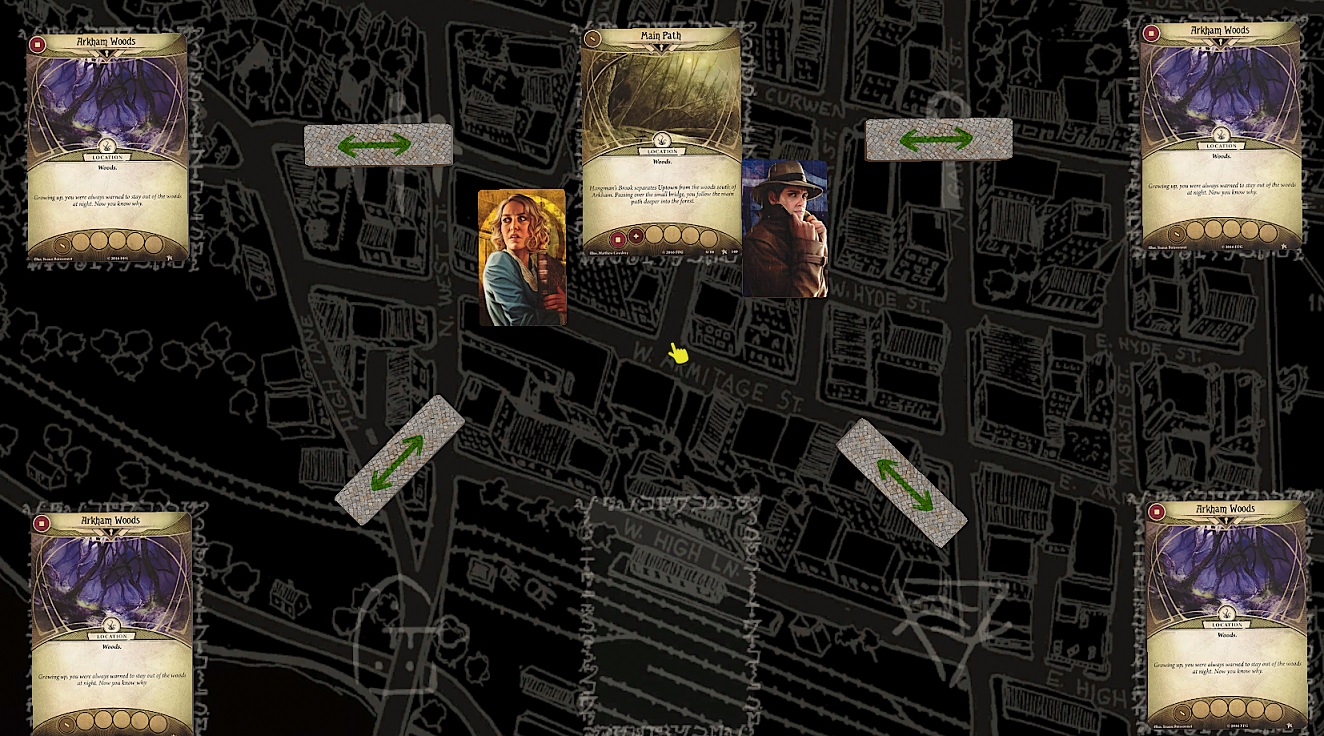 Hmm. Maybe I should have asked him to be a little more specific. I doubt better directions would have helped, anyway. Can't make out a single landmark in this darkness. We'd better start searching, then. I hope there's still time... Hmm. Maybe I should have asked him to be a little more specific. I doubt better directions would have helped, anyway. Can't make out a single landmark in this darkness. We'd better start searching, then. I hope there's still time...Some notes about setting up the scenario: - There are six possible Arkham Woods cards. Four of them are chosen and connected to the Main Path, the remaining two are set aside. 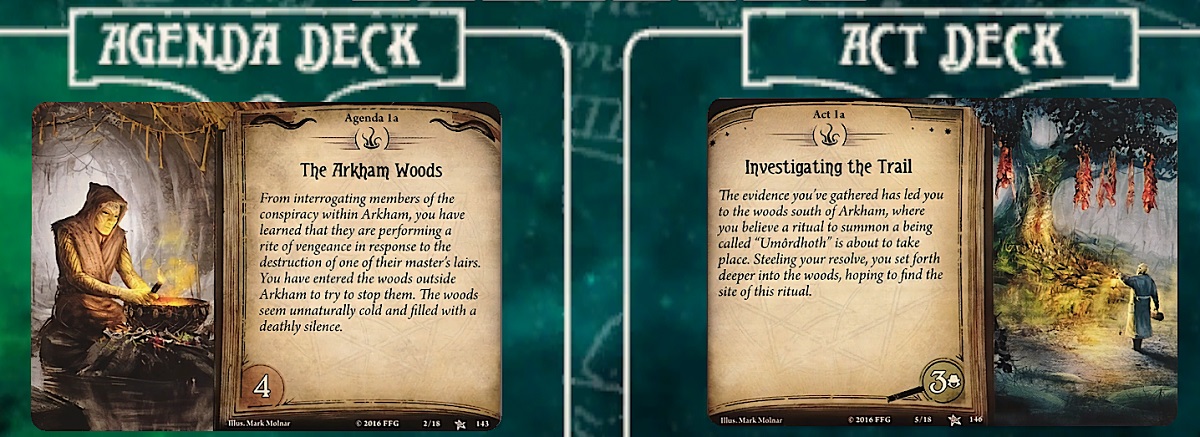 If you performed poorly last scenario, then that bad luck carries over to this one. 1 Doom is placed on Agenda 1A for every 3 cultists that got away, and 2 cards are discarded from your opening hand if the last scenario ended via timing out the Doom clock. Fortunately, we don't have to deal with any of that. 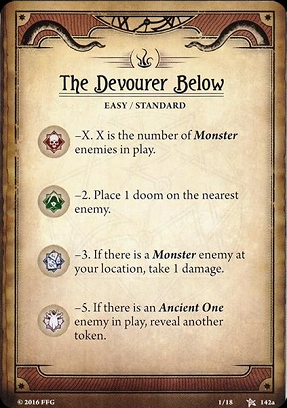 1 Elder Thing token has been added to the Chaos Bag. Let's hope we don't see it!  We haven't really talked about how the encounter deck is set up. Each scenario comes with a few scenario specific encounter cards, and those are shuffled together with a list of specified 'generic' encounter sets to form the encounter deck. For this scenario, in addition to the above, we have to randomly choose and shuffle in one of the following enemy sets: Agents of Yog-Sothoth, Agents of Shub-Niggurath, Agents of Cthulhu, or Agents of Hastur. Apparently the ghoul cult's been outsourcing. quote:Round 1:   A Machete and a Flashlight is a pretty good start for Roland - he's going to have to pull his weight with investigation this scenario. Daisy managed to grab Milan and her Old Book, so that's about as good a start as it gets. quote:Investigation Phase - Roland's Turn 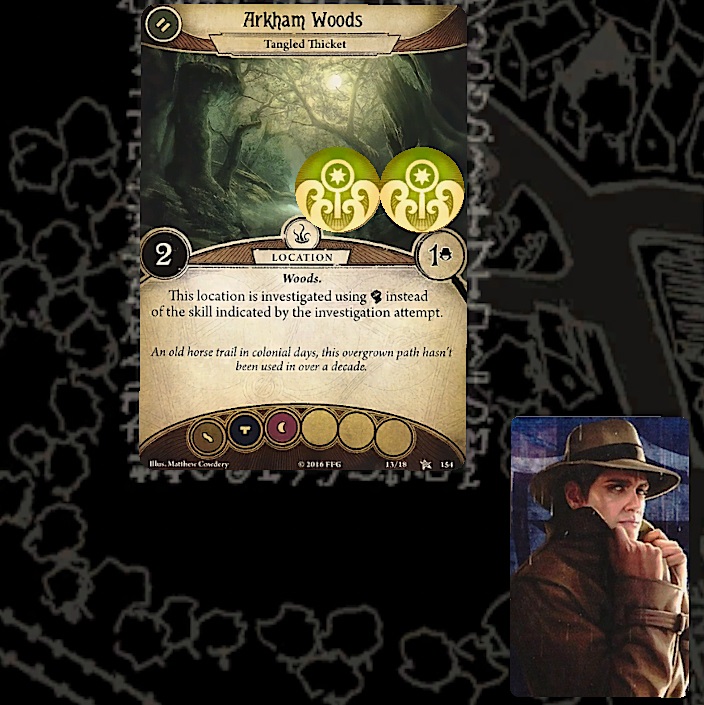 Whoa, I can't even see you in that mess. You okay, Roland? Doing fine, actually! Hah, and to think they laughed when I bought a machete. Whoa, I can't even see you in that mess. You okay, Roland? Doing fine, actually! Hah, and to think they laughed when I bought a machete.These locations are what we brought the Seeking Answers along for. If we end up with one particularly finicky location, Daisy can sit on the Main Path and pull clues from it without having to use her weaker stats. Roland happened to get lucky and ended up in the location best-suited for him, though despite his enthusiasm the Machete isn't actually helping - it only provides a +1 Combat bonus if used on a Fight check. quote:
 Oh dear. I am terrible with heights. We'll take it slow, then. Watch your step. Oh dear. I am terrible with heights. We'll take it slow, then. Watch your step.We have Mind Over Matter for investigating this location, but we'll save it for the next round so we get more uses out of it. quote:
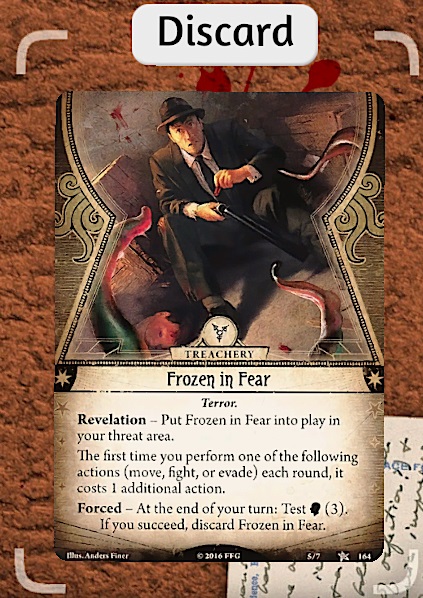 Was that one of those creatures? They couldn't make it through forest this thick, could they? Was that one of those creatures? They couldn't make it through forest this thick, could they?quote:
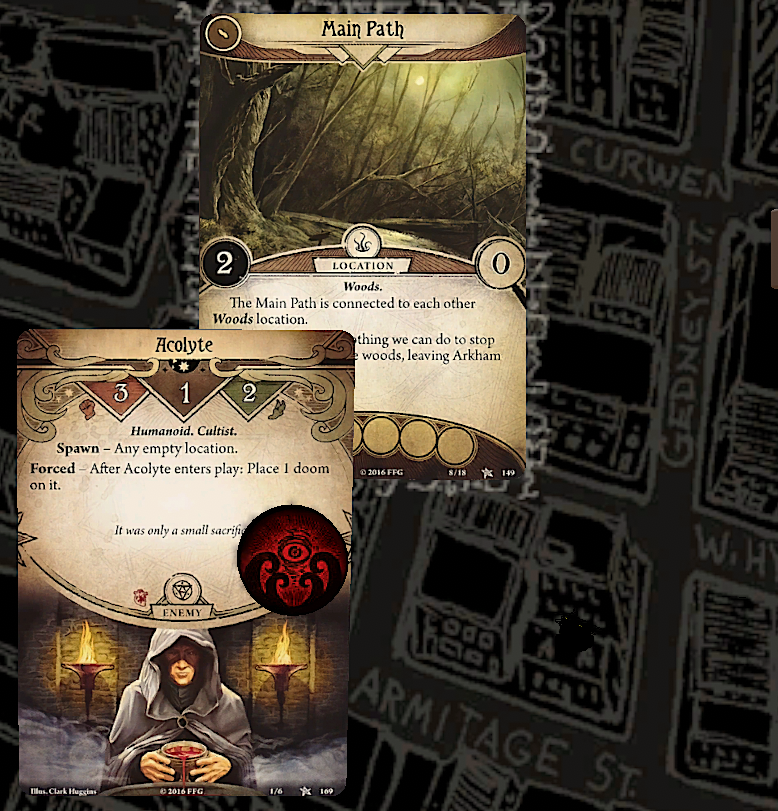 We know you're in there! Don't make this harder on yourself than it needs to be! We know you're in there! Don't make this harder on yourself than it needs to be!quote:Investigation Phase - Daisy's Turn. Nah, there's no way anything could make it through forest this thick.quote:
 Raaargh! Me and my big mouth. Raaargh! Me and my big mouth.quote:
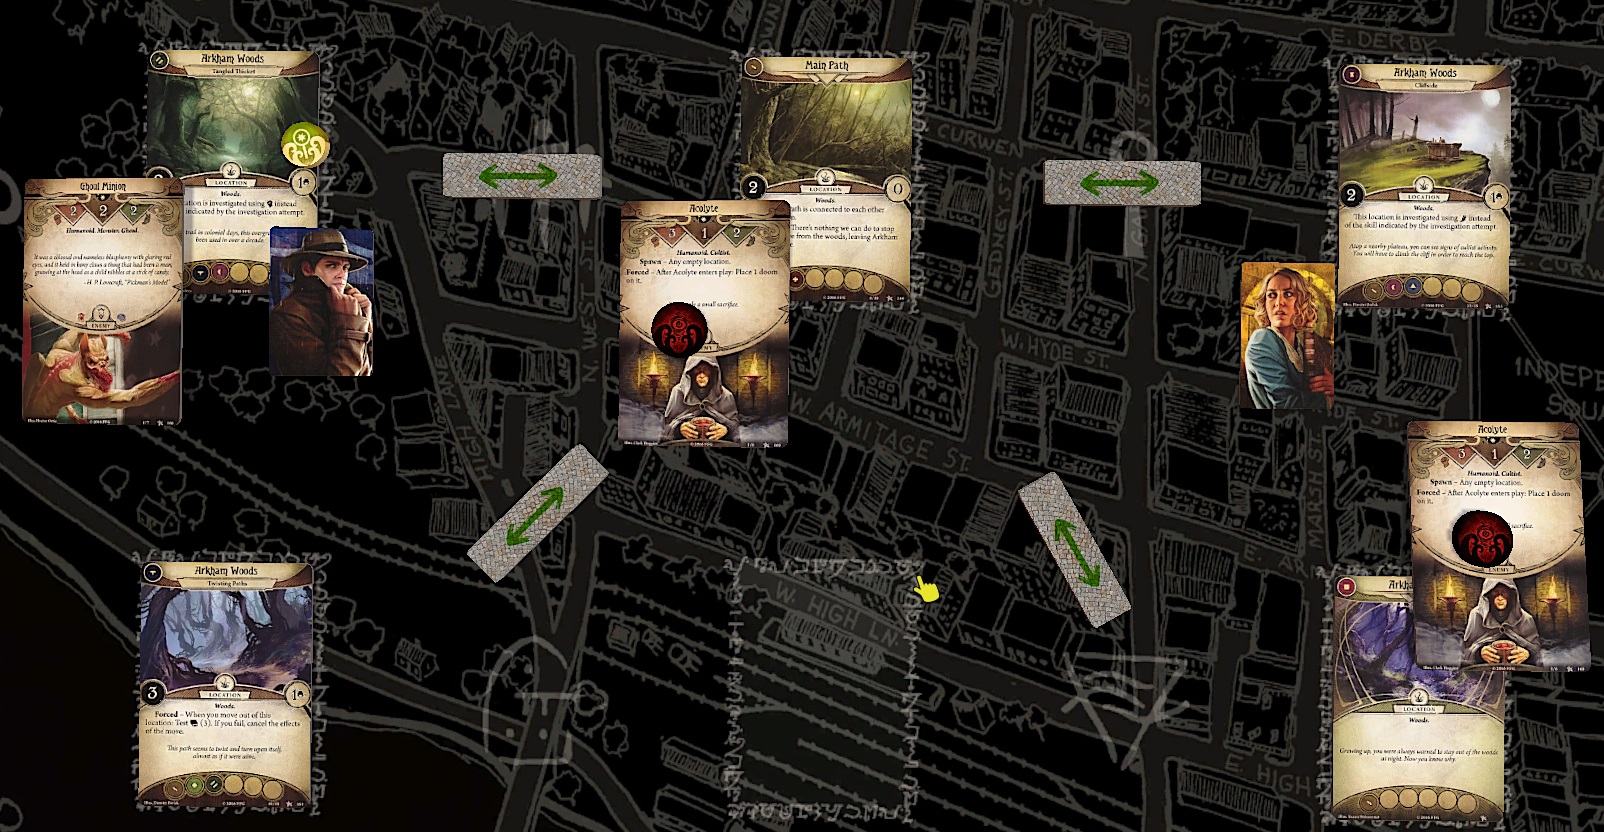 quote:
 We'd better not stray too far in. I can barely see the entrance as it is. We'd better not stray too far in. I can barely see the entrance as it is.quote:
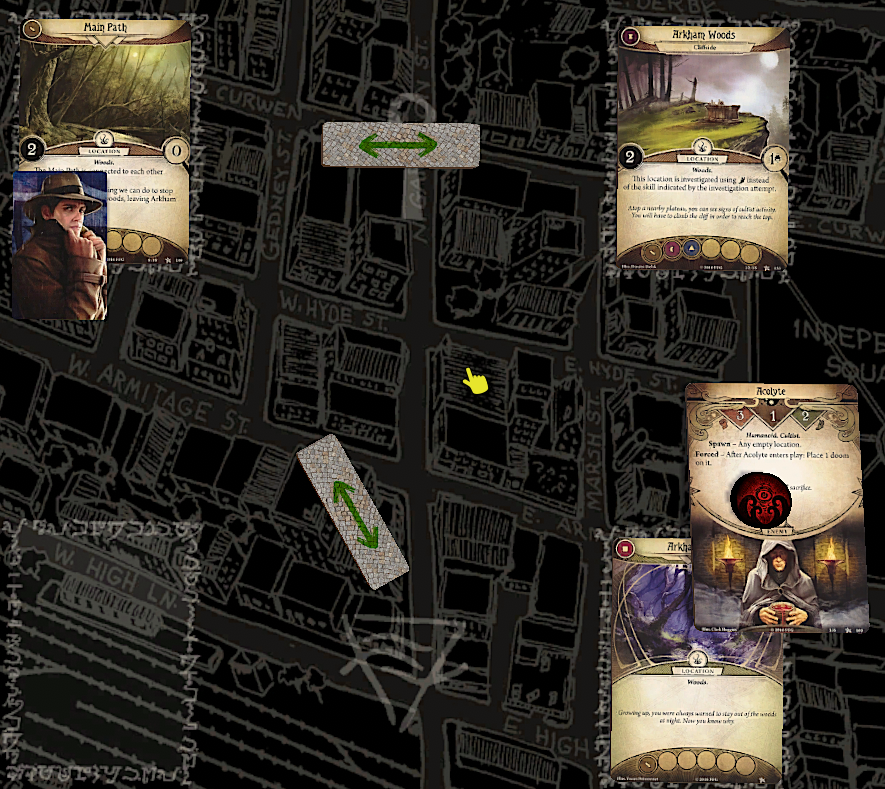 Hey, are you going to come out here sometime? No need. What? You poor fools have no idea what you're in for. You're surrounded on all sides, and you don't even know it yet. Behold...the Masked Legion! Hey, are you going to come out here sometime? No need. What? You poor fools have no idea what you're in for. You're surrounded on all sides, and you don't even know it yet. Behold...the Masked Legion!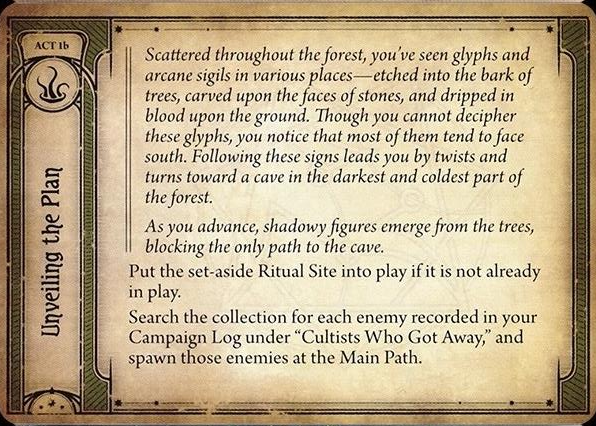 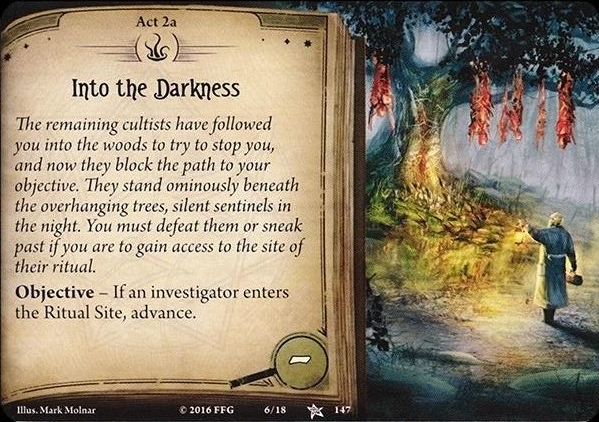 The, uh, Masked Legion? Oh, those guys with the masks. We arrested them all earlier. Except for the one that melted all over me. Ugh. Even the wolf-man? Especially the wolf-man. The, uh, Masked Legion? Oh, those guys with the masks. We arrested them all earlier. Except for the one that melted all over me. Ugh. Even the wolf-man? Especially the wolf-man.This would have been a rude surprise if we resigned early last scenario, but thanks to our overwhelming success there we managed to avoid a nasty trap. quote:
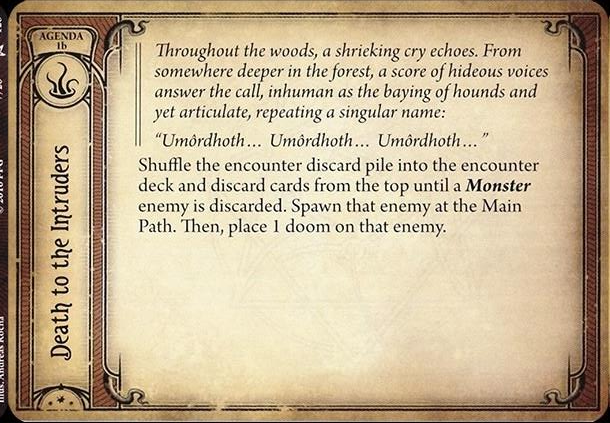  Bah. So you took out a pack of mere humans. Let's see how you stand up against some real power! Bah. So you took out a pack of mere humans. Let's see how you stand up against some real power!quote:
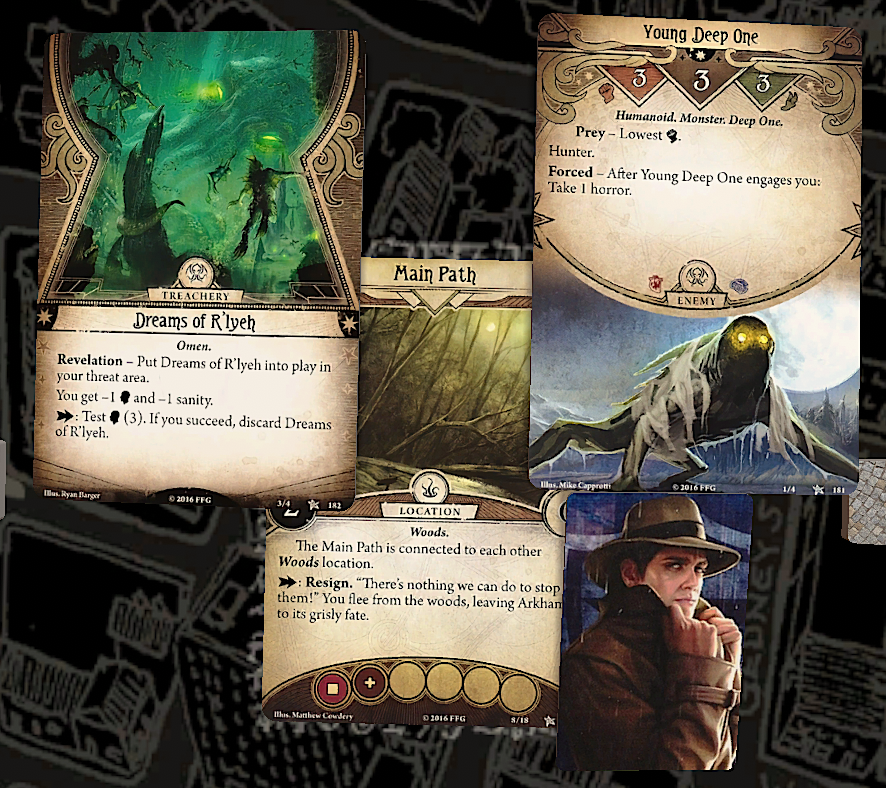  Glurg... What are you doing? Get out of my head! Glurg... What are you doing? Get out of my head!quote:
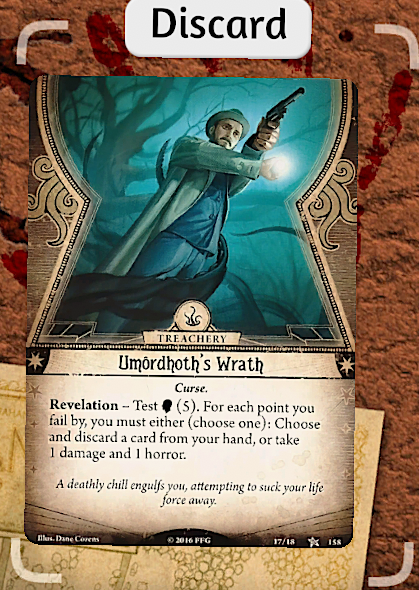 Y-you feel that too, don't you? It's tearing at the walls of reality. We've managed to upset it. That's a lot less comforting than you make it sound! Y-you feel that too, don't you? It's tearing at the walls of reality. We've managed to upset it. That's a lot less comforting than you make it sound!quote:
I've got this. You just focus on taking him down.Remember: investigators can activate Action abilities on any Treachery card at their location, which includes cards in the Threat Area of other investigators at the same location. quote:
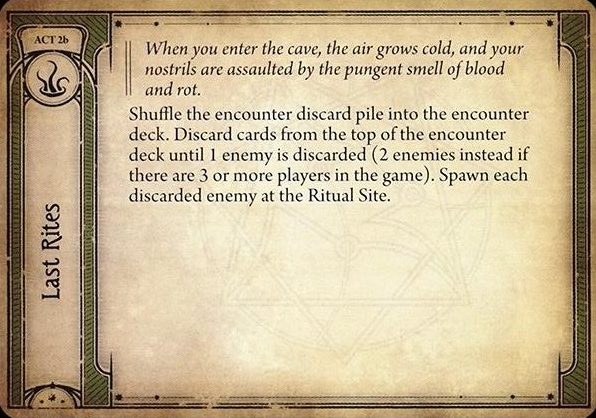 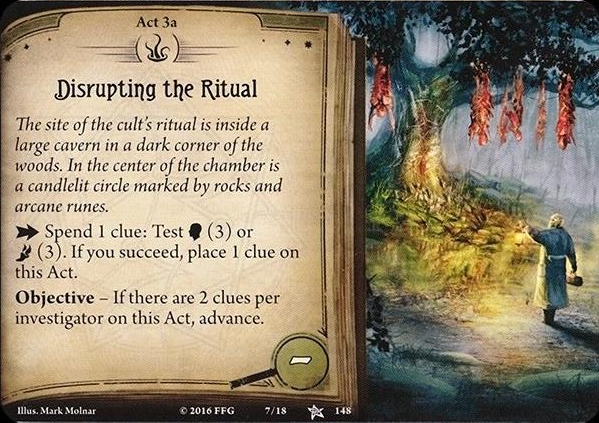 quote:Ghoul Minion spawns at Ritual Site. Ghoul Minion engages Daisy. 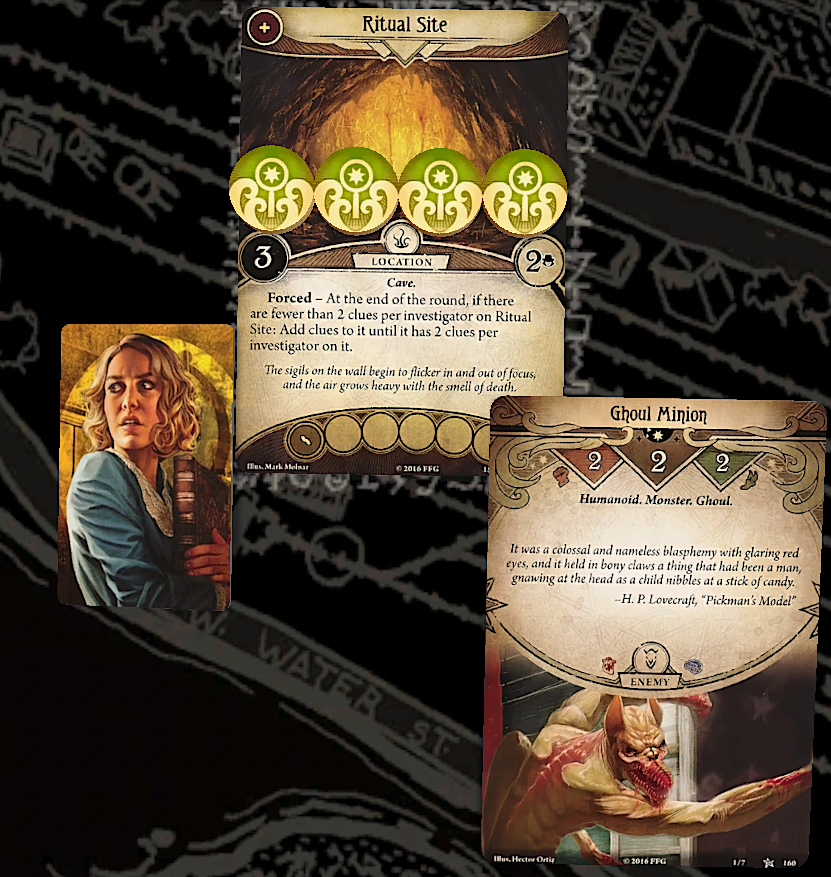 Graaah! Daisy! Hang on, I'm coming! Don't worry about me! I can handle a guy like this on my own. Graaah! Daisy! Hang on, I'm coming! Don't worry about me! I can handle a guy like this on my own. In fact, I think I've got just the ticket. In fact, I think I've got just the ticket.quote:Daisy plays Knowledge is Power on Shrivelling, commits Daisy's Tote Bag and Fights Ghoul Minion. 6 (-3) vs 3  quote:
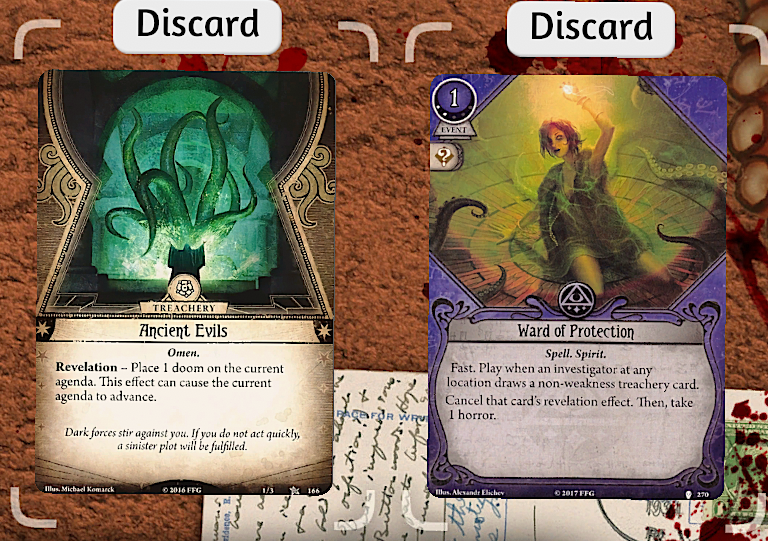 Ow! You okay? Just a bit of a headache. Magic takes a lot out of you. Ow! You okay? Just a bit of a headache. Magic takes a lot out of you.quote:
...and cross the sigil twice. Yes, like that. Are you sure this is doing anything? Frankly, I don't know. This is the first time I've seen such a complex and delicate magical setup. I can counterspell some of it, but I don't know if that'll be enough.quote:
Your fancy signs aren't doing a drat thing! I can feel it getting closer! I'm doing the best I can! I just need a little more time.quote:
Raa- ENOUGH ALREADY!quote:
You know, maybe we've been going about this the wrong way. What? I can feel it coming. You can sense it too, can't you? You said this thing was delicate. Maybe we don't need to directly counter every last bit of it. We just need to muck it up until it stops working. You want to just 'muck up' an unknown magical ritual? We're running out of time! Do you have a better idea? ...Not really, no. *sigh* I suppose we might as well give it a shot. Just be glad you have no idea exactly how dangerous this is.quote:
 I'm no magician, but I think it's working! I'm no magician, but I think it's working!I was fully prepared to just have Roland blow that test and leave it there a round longer, but if the chaos bag feels like throwing us a bone, fine by me! quote:
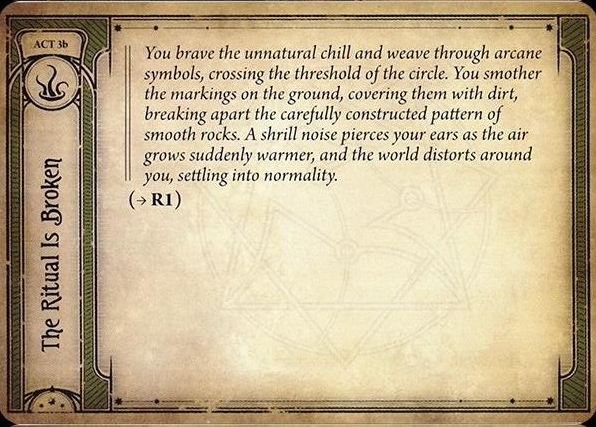 Huh, was that it? That was anticlimatic. What exactly did you expect? Given how things have been going, I figured some big ugly monster would've popped out of it, and then I'd have to shoot it down. That was what we were working to prevent, remember? That's fair. Huh, was that it? That was anticlimatic. What exactly did you expect? Given how things have been going, I figured some big ugly monster would've popped out of it, and then I'd have to shoot it down. That was what we were working to prevent, remember? That's fair.quote:
Epilogue So, you had to let them go? Well, there wasn't much we could actually charge them with, in the end. 'Conspiracy to summon a god' ain't exactly on the lawbooks. Last I heard, most of 'em are leaving town. Whatever they're looking for, it's not in Arkham anymore. It'll be nice to have some peace and quiet around here. By the way, how's your house holding up? Funny story about that, but I went back to look and all the tunnels you mentioned were gone. Tried digging a bit to check, and it's just solid rock down there. Course, all the dead bodies they were storing in there didn't go anywhere, so getting all that cleared out is gonna take a while. Do you want a temporary room in one of the student dorms? It's usually pretty quiet this time of year and we could probably work something out. Nah, I'm overdue for a vacation anyway. Been thinking about taking a trip up to the countryside, get some fresh air. The countryside, eh? Maybe it's time I took a break too. I hear Dunwich is pretty nice this time of year.Night of the Zealot: The End
|
|
#
?
Jan 13, 2020 18:43
|
|
|
I love this game to bits. I will never get to play it as much as I like because my friends all have lame stuff like "jobs" and "families" to get on with. Sickos.
|
|
#
?
Jan 13, 2020 18:59
|
|
|
I do like that the designers decided that things like "dice" were passe and went with the metal-sounding Chaos Bag.
|
|
#
?
Jan 13, 2020 23:19
|
|


|
My girlfriend and I played through this scenario twice ourselves. We had fun, but we did notice that it's hard to recover from failure: we bungled the first mission, so the ghoul priest bossfight got added to the deck and our characters were going into the second wounded and at a disadvantage -- so we had to cut our losses midway through that one, too. This meant that going into the third mission, the doom track was almost full already and we had an enemy that was another mission's bossfight, plus most of the cult mobbing us: we barely lasted a few turns before going down. I reckon the scenarios would work better if instead of losing a mission making the next one harder, it rubber-banded things: the consequences made the next mission easier, but the most you could achieve was keeping the ancient evil slumbering for now, whereas if you ace the early missions you have the option of doing things which make the next mission harder but let you defeat the eldritch horrors more permanently or in a cooler way.
|
|
#
?
Jan 14, 2020 01:17
|
|


|
Good work, you won again. And in one of the best ways, stopping it from ever showing up. Have a good vacation in Dunwich, Roland! 
|
|
#
?
Jan 14, 2020 01:17
|
|
|
Technowolf posted:I do like that the designers decided that things like "dice" were passe and went with the metal-sounding Chaos Bag. Dunno if you're being sarcastic or not ; but the bag has the advantage over various sided dice that it can evolve along with the game to provide a scaling, dynamic difficulty setting. Do too well and you might have to plonk more bad poo poo in there ; get consistently rekt and the game will throw you a bone and maybe an Elder Sign. It's a neat concept that's not just a gimmick IMO.
|
|
#
?
Jan 14, 2020 01:19
|
|
|
Whybird posted:My girlfriend and I played through this scenario twice ourselves. We had fun, but we did notice that it's hard to recover from failure: we bungled the first mission, so the ghoul priest bossfight got added to the deck and our characters were going into the second wounded and at a disadvantage -- so we had to cut our losses midway through that one, too. The game does provide you some advantages even when you gently caress up though. For example, while Inadequately didn't seize the opportunity, Lita from the first scenario is a beast of a combat follower (way better than the beat cop !) and if you succeed in diplomating her you get to add her to your deck for good. That being said, it is a Chtulhu game where the odds are almost explicitly stacked against you. Abject failure is to be expected ") . .
|
|
#
?
Jan 14, 2020 01:27
|
|
|
I am loving this LP Almost enough to plonk cash on TT Simulator myself just to dick about with goons in various TT games from the goony comfort of my own home.
|
|
#
?
Jan 14, 2020 02:45
|
|
|
Kobal2 posted:The game does provide you some advantages even when you gently caress up though. For example, while Inadequately didn't seize the opportunity, Lita from the first scenario is a beast of a combat follower (way better than the beat cop !) and if you succeed in diplomating her you get to add her to your deck for good. And if you have her out and things are going very poorly in the scenario we just saw, she can be a useful bargaining chip . . .
|
|
#
?
Jan 14, 2020 03:43
|
|
|
Kobal2 posted:Dunno if you're being sarcastic or not ; but the bag has the advantage over various sided dice that it can evolve along with the game to provide a scaling, dynamic difficulty setting. Do too well and you might have to plonk more bad poo poo in there ; get consistently rekt and the game will throw you a bone and maybe an Elder Sign. It's a neat concept that's not just a gimmick IMO. Not sarcastic at all; in fact, this explanation made me love the concept even more
|
|
#
?
Jan 14, 2020 05:50
|
|
|
And that's Night of the Zealot complete - or at least, one of the ways in which its events could have played out. Let's take a look at some of the possible alternate paths... The Gathering If all living investigators resign/are defeated: quote:
For reference, here's Lita's card again: 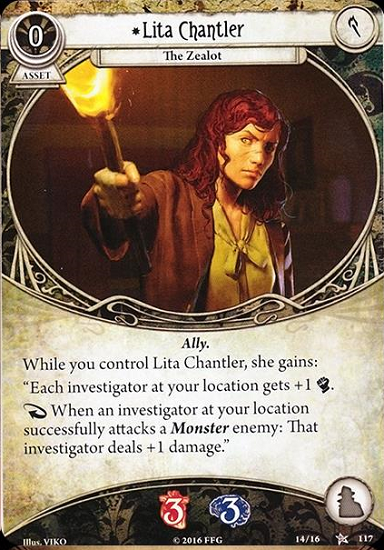 If you defeat the Ghoul Priest, then let Lita set the house on fire: quote:
If the doom track runs out entirely: 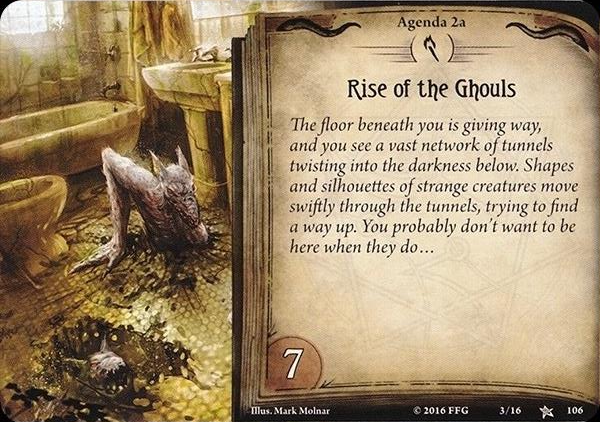 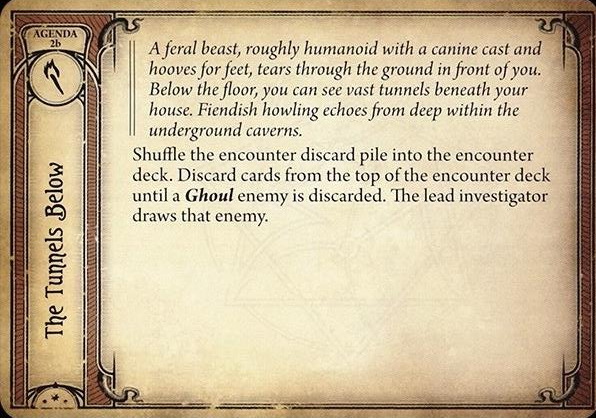 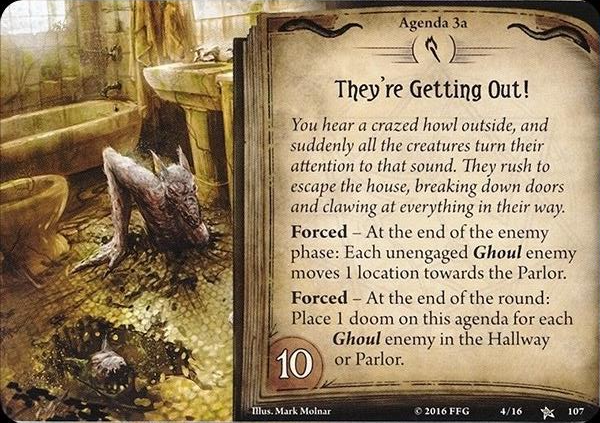 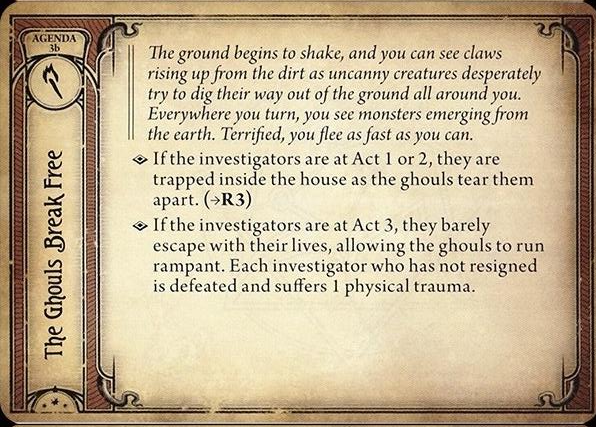 quote:
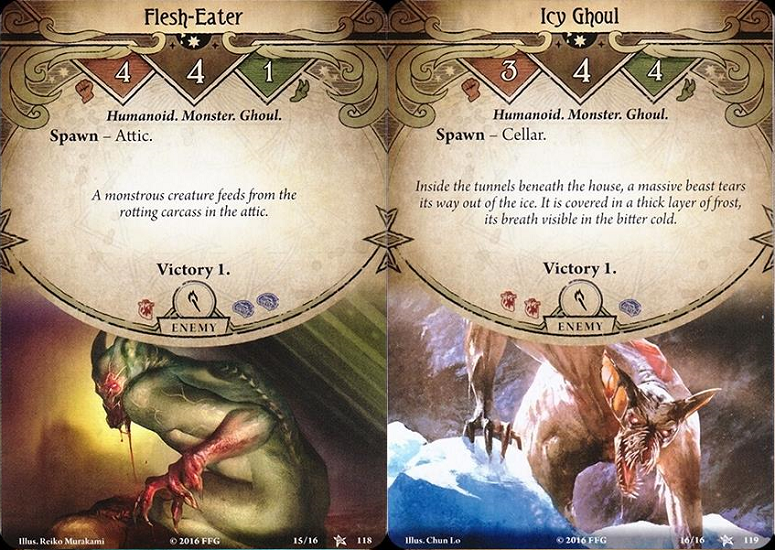 We also missed seeing these two particularly beefy ghouls. They're a pretty challenging fight for the very first scenario, but taking them down is worth an extra victory point each. The Midnight Masks If the Doom Track runs out: 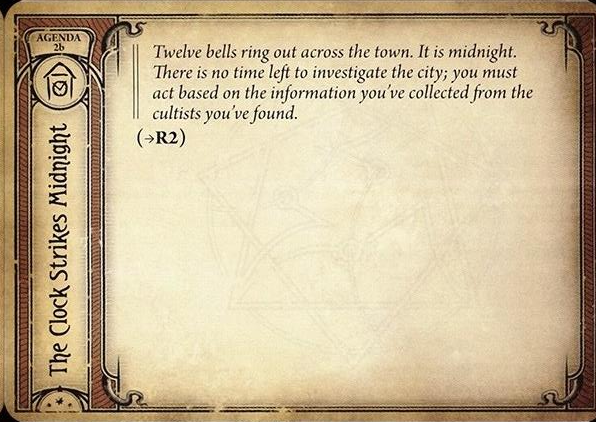 quote:Resolution 2: Ending the scenario by resigning or defeat gets us Resolution 1, the same one we earned through complete victory. The Devourer Below If each investigator resigns/is defeated: quote:
If the Doom Track runs out: 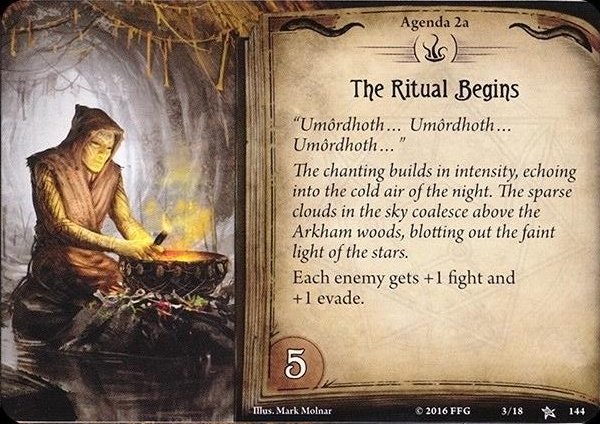 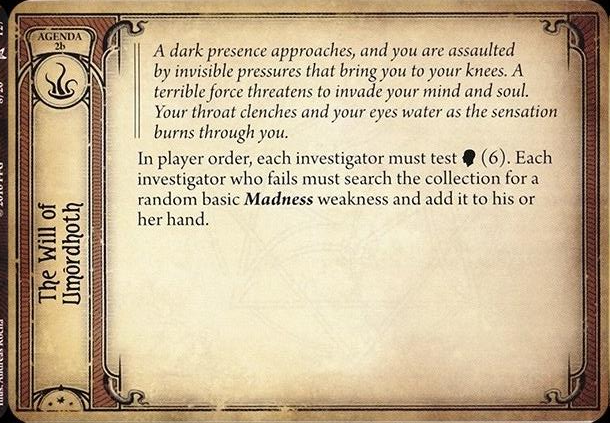 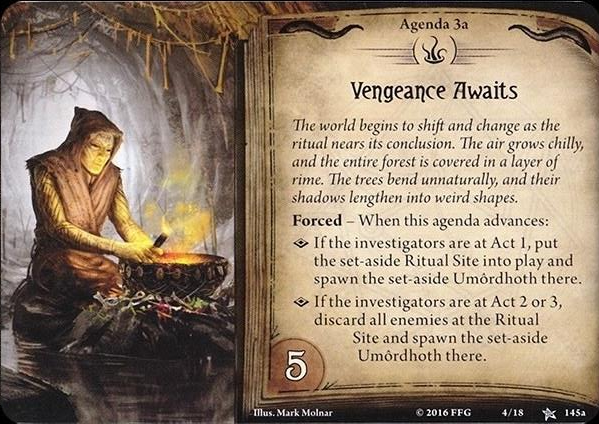  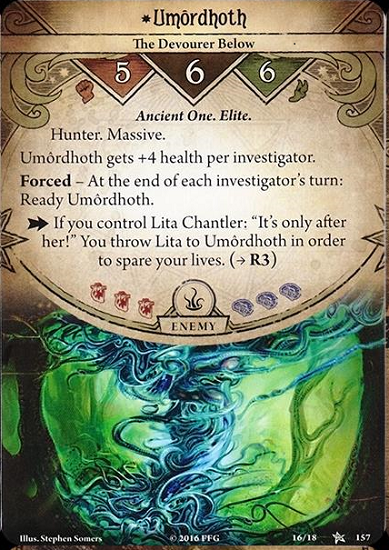 With 5 Fight/6 Evade, 3 damage/horror per attack and anywhere between 10-22 HP, Umordhoth is certainly a difficult foe. That said, taking it down is not impossible, though it's one of those things that needs to be built towards from scenario 1 to have any chance of victory. If you manage to take down Umordhoth with sheer brute force: quote:
Of course, you may no doubt have noticed there's an alternate path to 'victory' right there... If you throw Lita to Umordhoth and run: quote:
Not the most glorious of endings, but sometimes, just surviving is the best you can do. And as Lita herself would say, sometimes sacrifices have to be made. Finally, for the one Wendy detractor, here's a detailed guide to soloing the entire NOTZ campaign on Hard Mode, ending it by killing Umordhoth in a single turn. -------------------------------------------------------------------------------- And with that, we're on to the first proper campaign, The Dunwich Legacy. Night of the Zealot was a decent start, but it suffers from most of it being an extended tutorial for the basics of how to play the game (on top of somewhat antiquated mechanics and wonky balance). Freed from those constraints, The Dunwich Legacy starts off far stronger, and I'm looking forward to getting into it. But before we do, it's time to meet the Dunwich investigators. This won't be a full introduction to them, but since we can't talk about some of them without mentioning their signatures, all the signatures will be shown off in the interests of fairness, regardless of how integral they are to that investigator's playstyle. Weaknesses will remain a surprise, though they're not too hard to look up if you really want to. Deckbuilding-wise, all the Dunwich investigators share the same formula: Level 0-5 cards of their class and Neutral cards, and a 'subclass' of up to 5 level 0 cards from any other class. Zoey Samaras: The Chef 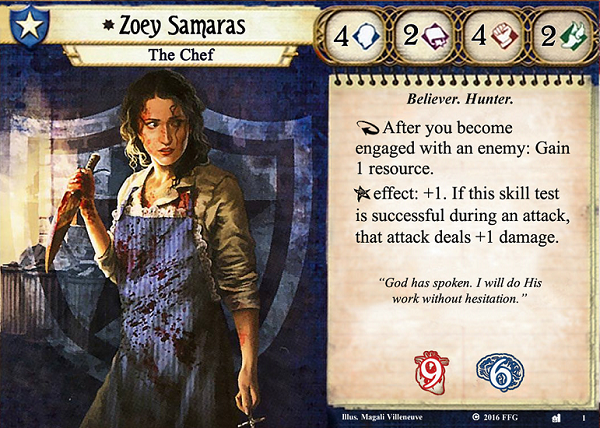 A psychotic chef with a god-given mission to eliminate evil. Her statline of 4/2/4/2 and decently high health/sanity makes her very good at shrugging off or stabbing up anything that comes from the encounter deck, though not great at very much else. Her gimmick is gaining a free resource when engaging/getting engaged by an enemy, making her a potentially very rich Guardian if she devotes herself full-time to monster-hunting. 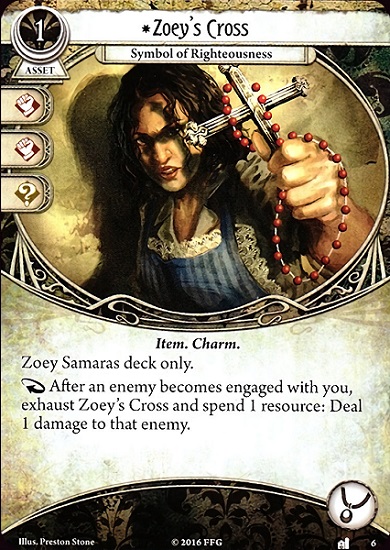 Her signature Cross provides one free damage per round whenever you become engaged with an enemy. The resource cost is practically irrelevant thanks to her ability - the only limitation Zoey really faces is being able to find it and put it into play in time. Rex Murphy: The Reporter 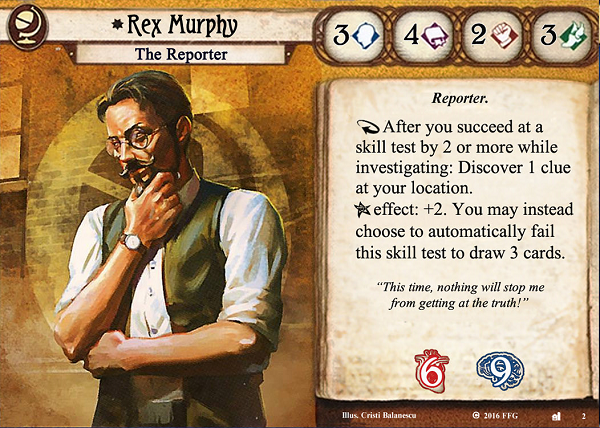 One of the most straightforward Seekers in the game. Rex's gimmick is that he Investigates harder than anyone else, gaining an extra clue whenever he succeeds by 2 or more at an Investigation. His statline of 3/4/2/3 means he's not particularly inclined towards doing much other than what he's best at, and has the additional deckbuilding limitation of being unable to take Fortune cards, which isn't really that much of a limitation in-faction but locks him out of a few handy Rogue/Survivor cards. His ability comes with an upside that might be initially overlooked - it's unlimited-use, and he can trigger its effect as many times as he investigates in a turn. This isn't too impressive at low player counts, but really shines in a full four-man team (where his allies can handle every other non-investigation duty, and locations will actually have enough clues to warrant a full turn of doing nothing but sitting there and investigating) and at lower difficulty levels (where succeeding by 2 requires far less commitment on average). 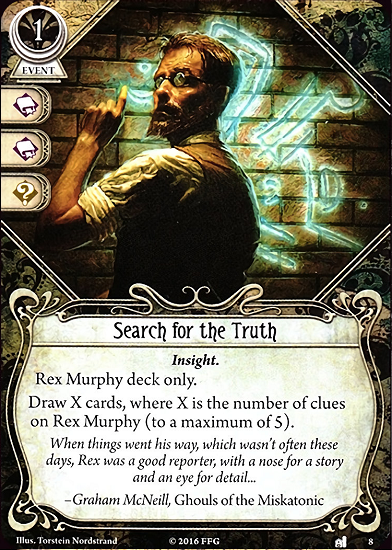 His signature is an event that can be played for extra card draw or committed for a hefty Intellect boost. Handy to keep the Higher Education engine going if you're going down that route. Jim Culver: The Musician 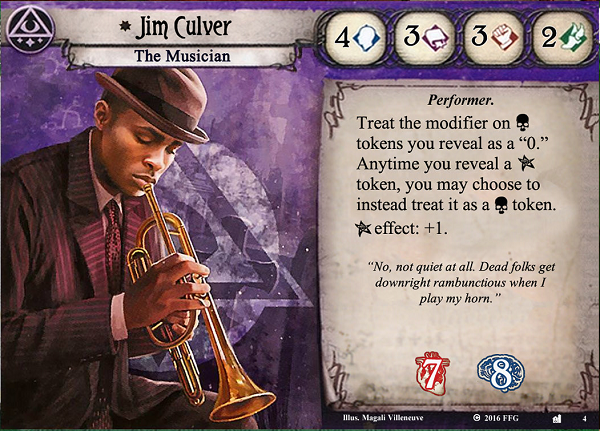 Jim's gimmick of being able to very slightly shift the Chaos Bag's probability in his favor might seem lackluster, but...well, okay, it is. Still, it has its uses, especially on higher difficulties where the Skull token (often already the least threatening of the special tokens) comes with a bad enough modifier that his ability to cancel that out actually becomes relevant. Note that his ability only alters the numerical modifier on Skull tokens - all other specified effects of drawing the skull token still apply. For an effect like e.g. "Draw another token, then -1 for each Skull revealed", his ability would be useless. The token also still counts as a skull and not as a '0' for the purposes of any Mystic card effects that trigger off revealing a skull (or a '0') Semi-useless gimmick aside, he has a fairly standard Mystic statline of 4/3/3/2, though like most Mystics he tends to rely almost exclusively on Willpower and not much else. 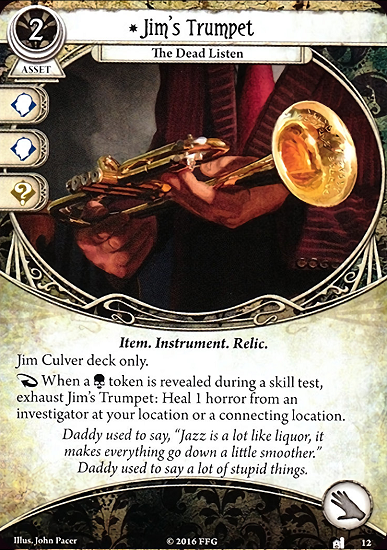 Jim's Trumpet takes up a hand slot and provides somewhat inconsistent horror healing. It's about as exciting as his ability (though can be helpful if you're following a Roland around). Jenny Barnes: The Dilettante 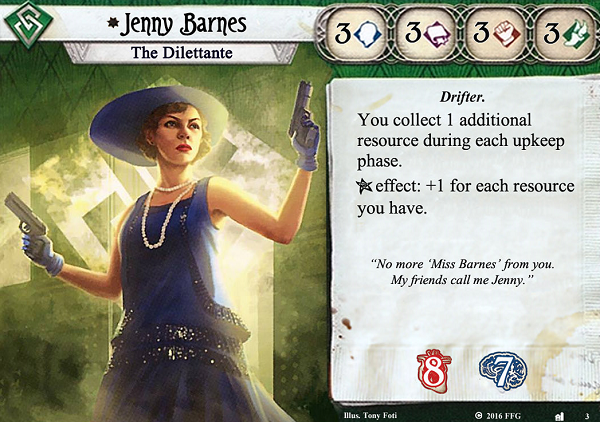 With a statline of 3/3/3/3, Jenny is capable of just about anything, but not likely to excel at it without additional stat boosters. Her gimmick is Money - she gains an additional resource per round, and while other investigators can have potentially stronger economy boosters, few of them can do it with the same ease as Jenny. Once she's built up a good amount of resources, she can easily leverage the expensive rogue toys and pay-to-win stat boosters to make up for her average statline. 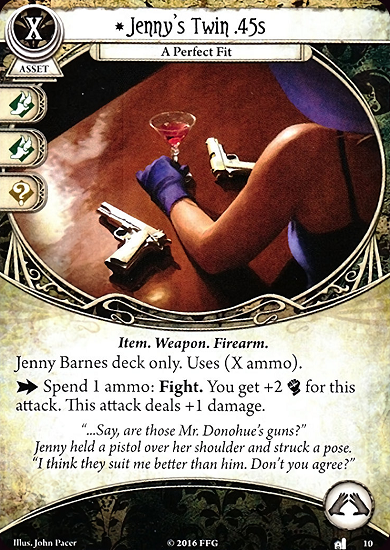 A set of guns that come into play loaded with however much you spent to get them there. They're okay as a weapon, but they take up two valuable hand slots, and the nature of their gimmick requires that you spend a while building up a resource pool before playing them for best effect. "Ashcan" Pete: the Drifter 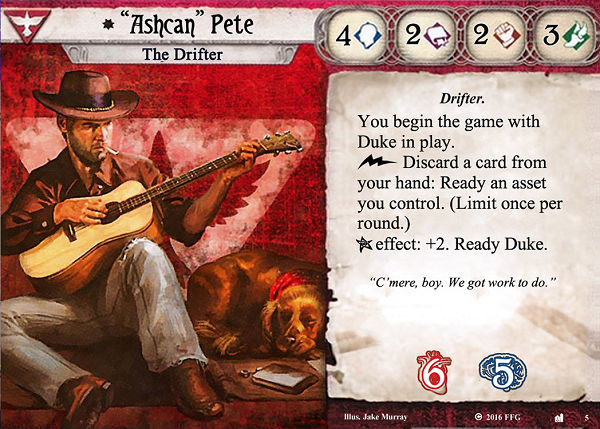 Ashcan Pete's power is owning a dog. 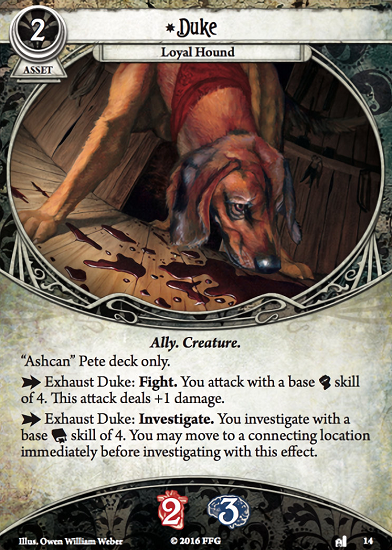 Duke starts in play as an Ally asset, though he doesn't take up the Ally slot. Ashcan Pete can spend an action to give Duke a treat, motivating Duke to either Fight with a base Combat of 4, or Investigate (with or without a free Move) with a base Intellect of 4. Mechanically speaking, it's Pete doing the fighting/investigating, but come on now. Pete's stats are on the low side, but with Duke's help he has an effective statline of 4/4/4/3.He can only use the stat boosts when Fighting/Investigating though, and not on any other skill test that requires those stats. His gimmick allows him to discard a card and ready an asset - no prizes for guessing which good boy those cards will be fed to for most of the game. With all Dunwich investigators introduced, it's time to Choose your Character(s)! Vote for the two Dunwich investigators you prefer, and we'll start the campaign off with them - no guarantees about the ending, though! If none of them catch your eye, pick the Previously Unused Investigator option and I'll choose one of them at random to show off, though if you make a good case for any particular one I'll give that additional consideration. Voting will probably be up for a couple of days, unless there happens to be a particularly unanimous vote.
|
|
#
?
Jan 14, 2020 07:30
|
|
|
Inadequately posted:Rex Murphy: The Reporter Wow, they just stole the name of a reporter from CBC: 
|
|
#
?
Jan 14, 2020 07:48
|
|


|
But you've chucked exactly 0 cats this entire scenario? voting for any investigator that actually can chuck a cat as an option for dealing with cultists
|
|
#
?
Jan 14, 2020 08:29
|
|

|
Voting Jim for perverse reasons - he was the guy I ran Dunwich with and... I felt like I sucked throughout. Not sure if it's because I didn't know the game very well and built a bad deck, or because he's just bad, or because I somehow never quite managed to get my hoodoo ducks in a row before the scenarii turned to violent albeit liquid poo poo around us ; but I'm curious what an actually competent player might do with him or how to make him work. In any event, I felt pretty disappointed when the pitch "Voodoo jazz trumpetist" seemed pretty drat sexy on paper (although I just now realized he's also a straight up magical negro. Not sure what to think of that) I will however say that a well built Jenny is pretty drat effective; and I do love that her shtick is almost literally throwing moneybags at people. Her unique weakness is pretty hobbling however. Kobal2 fucked around with this message at 08:57 on Jan 14, 2020 |
|
#
?
Jan 14, 2020 08:50
|
|
|
Ashcan Pete A hobo and his faithful dog solve problems. Just watch out for bindlestiffs.
|
|
#
?
Jan 14, 2020 10:17
|
|
|
Ashca Pete and Jim because HARDMODE
|
|
#
?
Jan 14, 2020 12:09
|
|
|
Zoey and Duke (oh, and Duke's friend, I guess)
|
|
#
?
Jan 14, 2020 12:59
|
|
|
Ashcan Pete and Jim
|
|
#
?
Jan 14, 2020 14:22
|
|
|

|
| # ? May 6, 2024 03:56 |
|
|
Ashcan Pete and the Chef
|
|
#
?
Jan 14, 2020 18:58
|
|