


|
This is the German team thread! If you are on the American team, stop reading now! If you�re wondering what this is, see this thread. June 8, 1944 St. Marcouf, Utah Sector, France ***Special note: This match is closely based on a real event. I ask that you all refrain from reading up on it until the match is over! It is the third day since the Americans turned your quiet coastal posting into critical, hard-fought ground. You are the embattled garrison of Marine K�sten Batterie "Marcouf", a fixed heavy anti-ship battery and fort forming part of the Atlantikwall in the eastern Cotentin Peninsula.  Since June 6, the enemy has relentlessly bombarded the fort from both air and sea, and with particular fury after your guns sank an enemy destroyer. However, thanks to the thick concrete casemates and underground spaces of the fort, your three 21cm guns have not yet been silenced. Enemy troops hold a beachhead to your south and yesterday, June 7, made their first direct assault against you. With the aid of the 105mm guns of your sister fort at Azeville, you drove the Americans back in a daring counterattack. The continued bombardments make it clear that the Americans have not lost interest in you, however. Renewed attacks are likely today, and you are expected to hold your ground as valiantly as before. Enemy Intel From prisoners taken yesterday, you have identified the enemy as the 22d Infantry Regiment. Enemy tanks have been ashore since the first day of the invasion, though you have not yet faced any. The Americans have bombarded you for two days both with field batteries and warships, and show no sign of stopping. The shelters of the fort will provide you critical protection from enemy shelling. German Forces The fort is defended primarily by a company from the 919th Grenadier Regiment, 709th Static Infantry Division. While the 709th chiefly consists of Georgian conscripts, Soviet PoW�s, and other riff-raff, you are fortunate enough to draw from its regular troops. Additionally, the fort and its guns are manned by Kriegsmarine crews from Marine-Artillerie-Abteilung 260. Some of these men have been armed to take part in the defense, although their training in ground combat is remedial. Your force additionally enjoys detachments of PaK40 anti-tank guns and a pair of Marder tank destroyers. The fort itself consists of concrete blockhouses, underground tunnels, casemated anti-ship guns, and defensive pillboxes. Combat Mission can�t exactly model all this, so it�s basically a large trench network with pillboxes and wire. Bunkers simulate the underground shelters that allowed the garrison to survive the intense bombardments. The 21cm guns are abstracted out since they weren�t suitable for defending against ground attack anyway. The fort survives today as a museum: Photo Force Walkthrough: https://www.youtube.com/watch?v=txm14k1qL28   The Map! The map is 1264m x 1456m. Map conditions are clear and dry. Moderate wind from the east.   Here�s the map walkthrough. https://www.youtube.com/watch?v=dxcHtn69Dak Objectives The fort�s three gun positions are represented by specific points in the fort and are marked as terrain objectives. The Americans can demolish a gun by the following method:
A strongpoint at the front of the fort and the nearby village of Crisbecq are each 250VP Hold objectives for the Americans. The Gun terrain objectives are not worth any VP aside from the demolition process. All German VP is scored by inflicting casualties, up to a maximum of 2000VP. Both teams have exactly the same info about objectives and scoring, and the terrain objectives are visible to all. Reinforcements The nearby 105mm guns at Azeville should become available just like yesterday, although your sister fort reports their munitions are running low. Discord: https://discord.gg/AUQQwGd Ask for the Axis role. Save File: https://drive.google.com/open?id=1pNuprWFFuqxyZdDejRj_BTyNlGyJzWLt Password: ohmsen This file is unofficial. The Americans will do their setup first and pass the turn to you.
|
 #
?
Mar 1, 2020 19:44
#
?
Mar 1, 2020 19:44
|
|

|

|
| # ? May 4, 2024 17:53 |
|
|
Hey everyone it is your friendly neighbourhood inputter here. TABLE OF CONTENTS
------------------------------------------------ Just to repost my usual wall of text about commanding troops in CM. Saros posted:
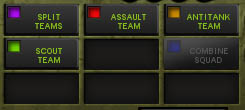
Okay with that out of the way onto our troops. Here is what we are working with. Garrison Kompanie:
Saros fucked around with this message at 12:26 on Mar 31, 2020 |
|
#
?
Mar 1, 2020 21:46
|
|


 If you have not read this do so right now it's crucial to understanding how to command in combat mission.


|
Okay, from the discord, the mission is going to be 2 hours, so strap in for the long haul, and don't be discouraged. Here's a couple of tactical points I'm thinking of. Maybe I'm talking out of my rear end, but here it is.
Davin Valkri fucked around with this message at 17:12 on Mar 2, 2020 |
|
#
?
Mar 2, 2020 17:09
|
|

|
I agree 100% about the need to keep our obstacles covered as much as possible, otherwise they're just explodedy speed bumps.
|
|
#
?
Mar 2, 2020 17:14
|
|


|
Wrt our 75mm guns (Marders, Pak 40) they actually cant reliably penetrate Shermans at longer ranges in CM. Go back and take a look at the shootout in the last game between the Shermans and the PzIV's with the same guns we have, there are Shermans taking 4-5 hits before being knocked out.
|
|
#
?
Mar 2, 2020 17:30
|
|
|
Picking the garrison company
|
|
#
?
Mar 2, 2020 17:45
|
|
|
Here's a lookaround I threw togetther in a hurry, 'scuse the bad quality of ten mins of stream of conciousness. https://www.youtube.com/watch?v=3x-6CeUZ8Tg Saros fucked around with this message at 19:53 on Mar 2, 2020 |
|
#
?
Mar 2, 2020 19:26
|
|
|
 100m grids
|
|
#
?
Mar 2, 2020 19:43
|
|
|
Does anyone know how the heightmap maps are made?
|
|
#
?
Mar 2, 2020 19:55
|
|
|
Bac has taken 8Kom
|
|
#
?
Mar 3, 2020 02:03
|
|
|
First orders are due 10AM EST / 3PM GMT on Saturday, March 7. The Americans have to do their orders first, then they'll pass the file to Saros.
|
|
#
?
Mar 3, 2020 18:45
|
|
|
redacted draft to avoid confusion
sniper4625 fucked around with this message at 18:00 on Mar 5, 2020 |
|
#
?
Mar 4, 2020 18:08
|
|
|
Battalion Orders Alright, this won't be easy, but I think we've got a good chance of making it hard for them as well.  GarKo, you have the east. Take up positions in the town and adjoining forest, with one of your AT guns as previously spotted for East/Central coverage. The other two, as discussed, will go on the hill to the West. 6Ko, you have the west. Work with Saros to determine the best line of resistance and dig in. Keep a platoon in reserve to respond as needed. 8Ko, use your HMGs to support the defensive line, I'll leave positioning to you. Spotters similarly. Marders, you're in reserve - work with Saros to see optimal starting positioning. Gar/6Ko, put forward just enough scouting elements to give us a chance to derive their intention as soon as possible. We don't have the forces to defend everywhere, so the more time we have to react the better. Fortifications: Mines to be placed at chokepoints and crossroads as we determined in stream Foxholes to be doled out in descending order - AT Guns, HMGS, 6Ko, GarKo Wire to be used as interfering mechanism in the forests as determined in stream If I am forgetting or overlooking anything, please do not hesitate to bring it up. sniper4625 fucked around with this message at 18:04 on Mar 5, 2020 |
|
#
?
Mar 5, 2020 17:59
|
|
|
https://www.youtube.com/watch?v=Gjn4Iz1l48Y Video of AT gun v Sherman. First engagement ranges are around 800m I accidentally cut off the bit where I was measuring ranges. Under 800m: Penetrations and partial penetrations, most do damage but not guaranteed instant kill. 800m-1000m: Partial pens and spalling, can kill crew and systems and knock out tanks but less likely. 1000m-1200m: Same as above but with more riccochets. Reccomendation: AT and Marders try not to engage over 800m distance. Saros fucked around with this message at 11:46 on Mar 6, 2020 |
|
#
?
Mar 5, 2020 19:03
|
|
|
GARKO Orders I want the anti-tank guns positioned as in this image. Use foxholes for cover if possible, per Sniper's orders, and do not open fire until enemy units are, at furthest, 800 metres away. Prioritise armoured targets, but anti-personnel fire is fine if the situation demands it, inputter's discretion. The eastern AT gun should position itself in such a way as to enable both east and central coverage, and the guns on the western hills should face the open field on the fort's western approach. If description is unclear, the red arrows in this image indicate the directions I want the guns able to see. For infantry: Referencing the image above, second platoon should split a squad in half and deploy one team each to the positions circled in red; these teams will act as forward scouts and watch for enemy activity. Deploy LMGs if we have them; I'm not sure if "no machineguns" means none at all or just no HMGs. On initial sighting of enemy units, they will engage for two minutes and then move FAST back towards the main body of their platoon. Stay in cover if at all possible, to avoid being shot in the back. The company's main force should deploy, as ordered, in the town itself and adjoining forest, following this general outline:  I'll leave the particular unit-by-unit placements to the inputter, who is considerably more experienced, but I would like first platoon on the left side of Crisbecq as pictured, covering direct approaches to the town. Second platoon, except for the scout squad, should stay on the right, focussing on the back row of houses and covering the east and central approaches; one squad should accompany the AT gun in the forest, to provide cover should it come under direct assault. Flesnolk fucked around with this message at 21:45 on Mar 5, 2020 |
|
#
?
Mar 5, 2020 21:28
|
|
|
Marder Section Orders Nestled in the tree line closest, I want my Marders to remain in Tactical Reserve and concealed.
|
|
#
?
Mar 5, 2020 23:24
|
|


|
Flesnolk posted:the guns on the western hills should face the open field on the fort's western approach. If description is unclear, the red arrows in this image indicate the directions I want the guns able to see. Going to have to move the middle at gun to the narrow neck of the corner woods so it can see directly south. The woods the line is drawn through are dense and block LoS. Saros fucked around with this message at 02:08 on Mar 6, 2020 |
|
#
?
Mar 6, 2020 00:37
|
|
|
That�s fine, the arrows are just a rough �I mean this general direction�
|
|
#
?
Mar 6, 2020 01:32
|
|
|
6th Company Orders Because "6ko" looks like a J-Pop Idol Name  6th Coy HQ: Deploy in forest WSW of fort with good LOS south (roughly C4 on grid map). 3rd Platoon: In reserve in fort bunkers. 2nd Platoon: Detach one scout team from one squad and place it forward as noted in light forest with good LOS south (roughly C7). 2nd Plt. HQ and Panzershrek to be together behind line infantry. 1st Platoon: Detach one scout team from one squad and place it forward as noted in heavy forest with good LOS south (roughly E8). 1nd Plt. HQ and Panzershrek to be together behind line infantry HMGs: Desired lines of fire noted on map. Expect placement in or near grid squares C5 and E5-E6. Please place for good LOS. Foxhole priorities: HQs, Panzershreks, HMGs, squad LMGs.
Davin Valkri fucked around with this message at 02:09 on Mar 7, 2020 |
|
#
?
Mar 7, 2020 02:01
|
|
|
8 Kompanie Overall  8 Ko. HQ  MG HQ  MG Team A  MG Team B  Mortar HQ
|
|
#
?
Mar 7, 2020 06:39
|
|

|
GERMAN TURN 1-6 Men! The enemy are upon us!  Turn Replay: https://www.youtube.com/watch?v=dww7Ca6xmgE Many apologies but for the sake of efficiency I have only done the replay from the final minute, nothing really happened before that and loading, replaying, editing etc for six turns would have significantly delayed the update. Overhead Maps   Good news! We have engaged the enemy!  Positions overview https://www.youtube.com/watch?v=UIOYc7whJtk (This is still uploading as the post is being written so please check back). Any questions or screenshot requests let me know. Finally please consider contingencies in your orders like if AT guns are spotted and fired upon or artillery starts landing near you. Right now I have no flexibility to respond to anything. Saros fucked around with this message at 00:47 on Mar 8, 2020 |
|
#
?
Mar 8, 2020 00:26
|
|
|
Orders are due 3PM EDT / 7PM GMT on Monday, March 9. Going forward, all rounds are fixed at 3 minutes. Fray fucked around with this message at 00:53 on Mar 8, 2020 |
|
#
?
Mar 8, 2020 00:29
|
|
|
I don't think there's a lot I have to do just yet. That is a lot of infantry sound contacts on our west flank, but is that because that's their main push or because our scout teams aren't able to tell what's the same unit? Anyway, I do have one contingency: Scout teams taking fire to fall back towards the main line of resistance, ideally to reintegrate with the squad they were detached from.
|
|
#
?
Mar 8, 2020 05:59
|
|
|
Alright, nothing too unexpected yet. Two questions: 1. What kind of contact picture might they have gotten from that fire? 2. What's the effective radius of mortars in the open field?
|
|
#
?
Mar 8, 2020 17:48
|
|
|
Not much, they were moving and all our guys are in cover. I expect they thought it came from the bunker. 81mm mortars are pretty lethal, not sure what the kill radius is but they definitely do good work. Right now the biggest things we can do is get the other bunkers manned and get arty called in on where we think this advance is going to set up their hmg/mortars to cover them while they advance.
|
|
#
?
Mar 8, 2020 18:20
|
|
|
Saros posted:Not much, they were moving and all our guys are in cover. I expect they thought it came from the bunker. Bac, please chime in with thoughts on the latter.
|
|
#
?
Mar 8, 2020 18:38
|
|
|
GARKO No significant change in orders. All units hold present positions. However, I'm issuing some contingency orders. Saros has permission to take in-round control of units and act independently under the following circumstances: * Moving units taking fire from armour * Releasing AT guns from range restrictions if the situation requires it * Adjusting unit positions slightly to fix line of sight issues, like my easternmost AT gun looking out from the forest but somehow being unable to see anything(???) * If taking fire, be it by infantry or armour, the AT guns are authorised to return fire; no sense having them sit there and get killed
|
|
#
?
Mar 8, 2020 22:37
|
|
|
sniper4625 posted:Bac, please chime in with thoughts on the latter. 8 Ko Move Company HQ to the bunker at the SW corner of the fort (the one with the MG overlooking the big field). Call in a linear fire mission - Medium intensity, Medium duration, No delay along the crest of the ridgeline the Americans in the SW are headed towards.
|
|
#
?
Mar 8, 2020 23:17
|
|
|
Emergency Marder Orders Begin moving to a position to cover an armored advance across the fields as discussed.
|
|
#
?
Mar 9, 2020 18:49
|
|
|
Marder Section Commander discretion. Prepare to leave tactical reserve towards open field (while attempting to remain concealed)
|
|
#
?
Mar 9, 2020 19:01
|
|
|
German Turn Minutes 7-9 Drama in the middle as the scouts see an American but dont quite manage to get a shot off! Start of Round  Round Video https://www.youtube.com/watch?v=Sbs4BGodEWM Artillery Mission  (5 Mins remain at end of round.) End of Round  The bunker. 
Saros fucked around with this message at 16:04 on Mar 12, 2020 |
|
#
?
Mar 10, 2020 01:07
|
|
|
Orders are due 4PM EDT / 8PM GMT on Thursday, March 12.
|
|
#
?
Mar 10, 2020 02:59
|
|
|
Reinforcements Your sister fort at Azeville, and its battery of 105mm artillery, was critical to driving back the previous American attack yesterday. You have just received a message from its commander, Hauptmann Hugo Treiber, that they will soon finish their prior commitment and will stand by once again for fire missions. The past two days have depleted their munitions, however. The following fire asset will become available at 1:45:00. 4x 105mm Howitzer (leFH 18M) ---56 HE Shells ---16 Smoke Shells 919th Regimental HQ is also aware of the American push, and will try to send what assistance it can, though it can't make any promises yet... Historical node: In reality, these guns were French 105 mle 1913 Schneiders, a mainstay of WWI.
|
|
#
?
Mar 10, 2020 03:21
|
|
|
Here's my thoughts, there is a lot of American infantry coming at us across the open field. We need to shift all of 6Ko plus all the HMG to cover their advance while they are still at longer range where our machinegun squads have an advantage over their semi auto riflemen. Garrison can spread out a bit while the AT and Marder remain concealed waiting for them to commit any armor they have. At longer range the Foxholes also offer their greatest advantage.  Imo we should also push men forward into the pictured yellow bulge in our lines as they have some excellent shots at the Ami's trying to cross the open ground and the bunkers can cover their flanks really well (red zones). If the Ami try advance/sneak up the treelines they will run right into the nice barbed wire I have emplaced there. Also someone needs to get in those bunkers for the love of god. Saros fucked around with this message at 11:15 on Mar 10, 2020 |
|
#
?
Mar 10, 2020 11:09
|
|
|
Battalion Orders I concur. GarKo: Begin shifting to the east, leaving enough of a force behind to guard that flank. 6Ko: Move a force up to the marked bulge, and use reserves to man vacant bunkers. 8Ko + Marders: No change.
|
|
#
?
Mar 10, 2020 14:17
|
|
|
GARKO AT guns should stay where they are, except the one on our furthest right that can't see anything; that one is to advance just a few metres straight forwards, to the edge squares of the woods, to see if that alleviates the problem. Be careful not to leave the woods entirely. I largely concur with Saros' suggested orders. For infantry:  1 Platoon should position itself to reinforce 6 and 8 Companies, moving its squads out of the town and into the indicated area. If the exact positions by the blue line cannot be taken, the nearest available approximation is fine. 2 Platoon is to take 1 Platoon's place in Crisbecq, except for the squad the scout team split off from, which can stay in the wood by the AT gun. If there is insufficient strength to man that position, prioritise reinforcing the town. Both platoons should move QUICK. The scout team should maintain its current position, with a slight modification to standing orders; upon spotting enemy, engage for ONE minute, not two, and return to its original squad, moving FAST for one minute and then QUICK the rest of the way. The white lines indicate facing; a unit should position itself however Saros sees fit to best see in that direction. Saros has permission to set target and engagement orders for the garrison infantry as he sees fit; if they see Americans in effective range, I want them to shoot Americans. Previously outlined contingency orders remain in effect.
|
|
#
?
Mar 10, 2020 21:19
|
|
|
Marder Section Upon consulting with my fellow commanders, I believe that my marders are currently too close to the fort. Flesnolk pointed out that if they begin directly shelling the fort that I could be in the blast zone. Since marders are open top, care must be taken to avoid even near misses. ORDERS EDITED!! Disperse near fort keeping at least thirty meters in between Marders. Remain in concealment. Open fire at targets of opportunity. Top Hats Monthly fucked around with this message at 16:48 on Mar 12, 2020 |
|
#
?
Mar 11, 2020 23:25
|
|
|
I agree with this assessment of the enemy disposition, and give orders as follows: 6-1 AND HMGs: Hold position. Use FACE and TARGET ARC and all other commands as needed to get squads to begin firing on any US infantry observed in grid row 11 (~500 meters from their positions) or closer. (Feel free to finangle this between turns if they aren't firing) 6-2: Shift from current positions to occupy the forested area near the bend in the woods at D6-E6-E7. Use MOVE unless fire is taken, then change to FAST. 6-HQ and 6-Panzershrek to shift to the woodbend line on the border between D5 and D6. Try to put at least one "small" square between each deployed squad to avoid a single shell causing casualties across multiple squads. Once in position (taken to mean when the LMGs can fire), fire on observed enemy infantry with the same principles as 6-1. 6-3: Occupy the unoccupied strongpoint bunkers with squads split into teams. MOVE to start, switching to FAST if artillery is observed falling. If bunkers can target approaching infantry using the same principles as 6-1, do so. Bunkers should be occupied with non LMG elements. Remaining platoon elements will be on the line in the forest in C4. HQ and Panzershrek to good cover in C3. If any unit can target enemy infantry, do so. Previous contingency remains in effect--if scout team takes fire, withdraw. Davin Valkri fucked around with this message at 15:03 on Mar 12, 2020 |
|
#
?
Mar 12, 2020 02:55
|
|
|
It only takes a single soldier in a bunker to use its MG.
|
|
#
?
Mar 12, 2020 03:31
|
|
|

|
| # ? May 4, 2024 17:53 |
|
|
Fray posted:It only takes a single soldier in a bunker to use its MG. Thank you. Edits to orders made.
|
|
#
?
Mar 12, 2020 03:36
|
|