


|
Never too late for a project car, right? Even though I've worked on my Miata, it's my daily ride and I don't consider it a project as such, over time I just add various zoom-zoom bits as stuff needs to be replaced. Since normal vacations and travel are out of the question for the foreseeable future, I signed up for our local winter banger type rally. As far as I can tell, it should be just a chill roadtrip around interesting locations I'd never visit otherwise, through some less than ideal roads. All perfectly safe (unless you freeze to death). I just needed a car, sine the Miata is thankfully still too nice to qualify. Here's the solution:  2004, about 150k km / 100k miles. ~80hp of non-VTEC L13A fury. You could probably get something cheaper for the rally, but I didn't want to buy a complete wreck for a few reasons. It costs money to register the car and do the annual tech inspections anyway, and I'd probably also end up driving it while my miata is getting its sills and arches welded, and maybe my parents could use a cheap runaround later. They wanted about $800 originally with some known faults. Probably could've negotiated a bit lower but it's already at about half of what something like this would cost, and he had quotes for replacing the throttle body and EGR valve so there was only so much room until he'd tell me to gently caress off. The priority was making it driveable, registering it, and then preparing it for the rally. I already posted some of this in the stupid questions thread as I was dealing with the problems, though the main stuff is still ahead once I receive the necessary parts: 1. TPS codes P0122, P0221, and P0638. I googled the 3 codes that came up and various Honda forums suggested it was a cut 5v reference wire to the throttle body.  Yep. This is after I already stripped the insulation, then just soldered it together and it runs nicely now. I might need to go back in there because I ended up with an extra bolt  2. P0403 EGR control circuit code Not critical but I'll need it fix to pass emissions in 4 months or so.   Seems reasonably clean to me, and additional cleaning didn't help much. It seems that the valve is just stuck there, I can't pull it out with pliers and applying 12v to pins 4 & 6 (bottom row) doesn't do anything either. Since it seems to be hosed, I'll probably try opening it and seeing what's up inside later. 3. Clutch/input shaft bearing Definitely the most annoying to deal with. The bearings are like $50 but it's at least a day of work, and it's way too cold outside for that kind of work, so I'm ignoring it for now. Thankfully it mostly goes away once it's a bit warmed up. My miata had some noise for years and it never got any worse. 4. Brakes They actually work fine but I should check the pads before going on any long trips in this. My street is on an incline so  5. Rear defroster Something I discovered on the way home with it. I can measure 12v between the left and right terminals, but the elements don't heat up at all, none of them. The rear window has tint applied so I can't get to the elements directly without peeling it off (and I'd like to preserve the tint for now). Every row looks like this though, so maybe these are the damaged parts.  6. Rear right door trim Only saw this today since I never climbed in the back.  Just unscrewed the handle (it was still held in by some clips probably, but this was enough) and jammed the fabric under it with a screwdriver. Instantly looks much nicer. 7. Rust There are a few rust spots, on rear left sill and trunk. Less than my miata TBH. Not urgent but also shouldn't be too difficult to fix before it's too late. Mods The other part is doing some basic mods to make it more suitable for the rally and easier to spend time on a long trip. 1. Lift The best solution I cound find were these spring spacers form a Russian company Tema4x4. Nobody else is crazy enough to make them of course.  https://tema4x4.ru/catalog/detail/prostavki_perednikh_pruzhin_v_stoyki_dlya_honda_hon_15_005_poliuretan/ I'm sure they could be fabricated locally but probably not cheaper than just getting them from Russia. Now just have to wait. 2. Skidplate This is really offroading cosplay so I'm not spending hundreds on a proper one. Thankfully I remembered seeing someone make one out of a traffic sign before. And what do you know, a yield sign's been in ditch not far from me for months now. I'm just helping recycle.  Not the best shape, but if I can bolt it on to the subframe wide side to the front, it should cover most of the engine and transmission. 3. Radiator protection The lower intake seems to directly exponse the radiator (or AC) to gravel, branches and other crap that might be flying around, so Ill try to stick some kind of mesh in there perhaps. 4. Aux in This seems pretty straightforward, the stock stereo supports it and you just need a jumper and an old headphone cable. Thankfully I have all kinds of junk in my drawers.  I just can't get the loving stereo out of the dash without breaking stuff. So that's not installed yet. 5. Lighting I had a bunch of LEDs laying around so why not. Before/After, same exposure settings:   Also had an LED strip...   I snaked the wiring through the left seatbelt hole, the shock mount access hole, and to the stock housing (visible in the photo). I might need to remove the bar for the rally since it's splitting up usable space, but for now it's pretty nice. 6. Theme/decorations Seems like an important part of this rally. Since the car is black, I thought I'd go for the Death Proof Nova look and hopefully the contrast with the cute little car would be funny and/or ridiculous. Already 3d printed and painted the Convoy duck:  And ordered some white self-adhesive vinyl. This size seems about right  7. Camping poo poo If I end up going alone, I probably won't do anything and just sleep in the trunk, since it's just about long enough if I sleep at a slight angle. If a friend of mine does go along though, it might be better to build some kind of sleeping platform which would be longer and let us store all the crap under it without moving everything each night. E.g.: 
|
 #
¿
Jan 27, 2021 21:02
#
¿
Jan 27, 2021 21:02
|
|


|

|
| # ¿ May 15, 2024 18:57 |
|
|
OMGVBFLOL posted:this looks cool as hell and basically what i'm aspiring to do with my 95 impreza As far as I can tell there's going to be only a nominal amount of any actual timed racing this timer around due to covid related limits on organized activities but a dry run is fine by me as well. After that we'll see, there might be another event in the summer, and recently a few <$1000 road racing series started popping up. A turbo might be needed at that point, or maybe a K20, though that would break the budget and the law  An Impreza is an infinitely better starting point though, and now is as good time to kick it off as any!
|
|
#
¿
Jan 27, 2021 23:20
|
|
|
Seat Safety Switch posted:Fits are good cars. Hope this one treats you right. Other than the bearing it's also in shockingly good shape for a $600 car, so I do hope to keep using it a bit whenever the miata is worked on or otherwise not convenient. So almost never, other than perhaps right now when it's raining and/or snowing and absolutely miserable every loving day. Previa_fun posted:I had a USA model 2008 Honda Fit (same generation it looks like) and I think it might be my favorite car I've ever owned overall. Mine was named Lisa because L15A. It's my first and only Honda so I don't really have any frame of reference, but despite the solid rear axle it does seem legit nicer to drive than various comparable econoboxes I've had the pleasure of renting. Really jealous that we didn't get VTEC in these though, yo. Anyway, to my surprise yesterday I received a pair of LED lights from aliexpress in like two weeks flat. NOT surprisingly they're only 10W each and not 42W like the copy claims, but they're pretty drat bright and there's no way they could be more than maybe 15W without melting down anyway.  I went out to see where I could install them, I was thinking either at the front of the roof rack or maybe through the grille, but it's pretty well recessed and there's no easy access from the other side so that looks unlikely. It was raining at just over freezing point so I gave up pretty quickly. Searching around, I've seen these license plate brackets as a solution. But none are for sale locally and even I managed to fabricate something, the cops might get mad if it obstructs the plate at all:  I did check on the AC condenser situation though, and I might be a bit late with the protective mesh idea lol. I couldn't really tell if it was working properly when buying it, and it's hardly critical, but the seller volunteered that it's been serviced and working after I paid so it would be nice if it worked. 
|
|
#
¿
Jan 30, 2021 10:23
|
|
|
Update for today: still too cold to work outside. Picked up an old used roof rack basket and classic metal gas can. Found a new item for my to-do list: https://i.imgur.com/YtdpLHR.mp4 It doesn't seem to be wobbling in the rails so I'll try to take it off and bring inside tomorrow to check it out. E: Also the heating sucks compared to the miata. Takes a while to get anything even warm, and doesn't get that hot even on max. Not sure if something is broken (heater core?) or that's jut how it is. InitialDave posted:No idea why these things seem to do gearbox bearings, I'm not aware of other Honda manuals being particularly delicate.  I'm sure it doesn't affect ever car but seems like a common enough issue. I'm sure it doesn't affect ever car but seems like a common enough issue.The procedure in the service manual (BTW please share it if you have one, I only found a Russian version) looks reasonably straightforward, but there are definitely going to be issues with rusty or otherwise stuck bolts and limited access requiring all sorts of extensions and weird tools. There are some videos on youtube of people doing this, looks like a day or two job, especially since I never pulled a gearbox before. But it's not like covid is going away so what else am I going to do. OMGVBFLOL posted:fwiw the yaris is a solid choice for a cheapass rally car too, especially if you can find one of the vanishingly rare stickshift ones  which would be ok if I wanted to write it off after the rally, but I wasn't so sure I'd be able to DIY the damaged B pillar. They also seemed a bit more unpleasant inside and less practical so I noped out. meatpimp posted:God drat, are those things that cheap now (Edit: Not anywhere around me. 180k w/ salvage title for $3.5k lol) ? I've always liked them straight up. Not really, other than the radical weight reduction as OMGVBFLOL suggeted. An L15A swap would be the cheapest way but we never got that engine here, so maybe if I smuggled one from Russia. Or a junkyard turbo, the ECU is by far the biggest issue there but it seems like a piggyback solution might possible. There are also some open source ECUs like SECU3 which are more appropriately priced but I imagine it's goint to be a huge pain in the rear end to get working. InitialDave posted:That's not even a really cheap one here, my mate's wife's one was �300 in a similar state. ") I saw somebody on youtube buy one like this for �100 at an action. Unfortunately it'd cost more to drive a car like this back so it's not worth it. On the other hand a Cayman/Boxster is like $5-10k less I saw somebody on youtube buy one like this for �100 at an action. Unfortunately it'd cost more to drive a car like this back so it's not worth it. On the other hand a Cayman/Boxster is like $5-10k less 
mobby_6kl fucked around with this message at 01:10 on Feb 1, 2021 |
|
#
¿
Jan 31, 2021 22:33
|
|
|
InitialDave posted:Been a while since I was doing it, but if you pull the driveshafts, support the engine from above, and drop the front subframe, you can get the gearbox out from underneath.  This... Looks doable, but would definitely be the biggest job I ever attempted. I think I'll have to watch it carefully and take note of any special tools or equipment you used there to make sure everything I have everything ready. Or maybe try to convince my friend's BMW shop to help out for a case of beer glyph posted:Do you have an obd scanner that can read out in realtime (like with torque on your phone)? Because that sounds like an engine that has a stuck open thermostat and isn’t warming up properly.
|
|
#
¿
Feb 1, 2021 09:34
|
|
|
Nope, it's not really a "change all fluids immediately" kind of car, but I'll check if the thermostat works first and might do a flush when it's up for the suspension work. Does anyone know how the rear fog light is turned on? It's the middle ring on the left stalk that you're supposed to turn, right? Mine is completely stuck and doesn't move with reasonable amount of force. If they check it during the inspections I might have to fix that too. Since I actually had to park two streets away so I didn't bother dragging the seat here. Instead I worked on the more creative stuff, not exactly laser-cutter quality but it'll do.  I also picked up a cold weather sleeping bag, in the background, since we'll probably be staying overnight in the middle of nowhere. Cost like a third of the car 
|
|
#
¿
Feb 2, 2021 23:24
|
|
|
No kidding. I'm not really into camping so I found that out the hard way when I spent two nights in Yellowstone with only a light summer bag and got like 2-3 hours of sleep total because it was literally freezing at night. Though the fact that I had a sleeping bag with me at all was a huge achievement of foresight for me since I usually just make do with whatever hoodies or jackets I have with me. Not trying that when it could be -15c.
|
|
#
¿
Feb 3, 2021 15:53
|
|
|
I received the spring spacers yesterday and hoped to take the afternoon today to (try) install them, but my manager called me for an urgent task right after lunch when I wanted to GTFO and that was that, the evening was dark and it started raining as soon as I went outside of course. These are from http://tema4x4.ru/ if anyone wants to lift a weird car. surivdaoreht posted:I need that duck in my life. It's look awesome. Can you point me in the direction to where I'd find the file for that one? I have a friend at work with a 3d printer and I think I just found something I'd like to ask him to print for me. Of course, there's a paid version if you google for it but thankfully someone put a free one on thingiverse: https://www.thingiverse.com/thing:2744546 I modified mine so that it sits straight on the steep hood of this car, so if that would be useful I could upload the stl tomorrow.
|
|
#
¿
Feb 6, 2021 00:26
|
|
|
Quick update: not much progress on the car for weather reasons:  But, I did fix the foglight switch! It just needed a bit of encouragement. Also picked up a roof basket from some old Lada probably, it has built-in feet for mounting that I'll have to cut off. Finally an opportunity to use the grinder! Now the bad news. The organizers announced that due to all the covid restrictions, we wouldn't be able to leave the country so they're changing to a fallback route taking us (literally) around the country. And most likely it's all going to be paved and passable with stock cars. So combined with the weather, I think I'll de-prioritize the lift and skid plate installation as they'd be the most pain in the rear end with the least actual benefit. Edit: updated to do list
mobby_6kl fucked around with this message at 17:56 on Feb 10, 2021 |
|
#
¿
Feb 10, 2021 01:50
|
|
|
That should work pretty well, yeah. This HU is CD-only, but thankfully there's a connector prepared for aux input already, it's just a matter of wiring it directly to the stereo input and grounding pin 1 as far as I can tell.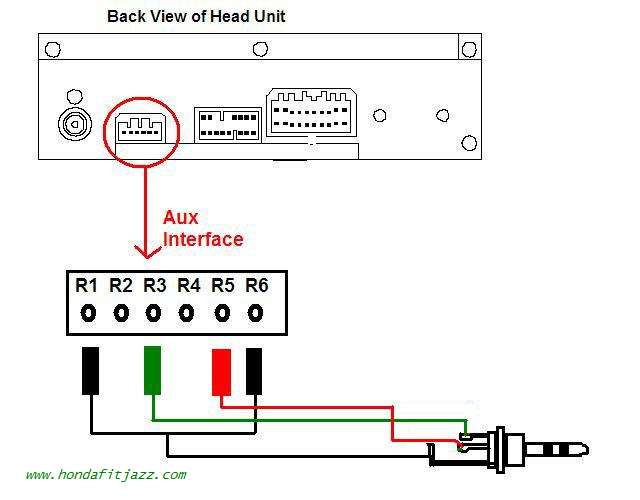 I had the actual cable prepared as pictured in the first post, but the issue was actually getting the stereo out, the clips are very stiff and wouldn't budge any more if I pulled by hands or plastic tools, so I'm kind of stuck in this situation until a set of metal hooks arrives from aliexpress: 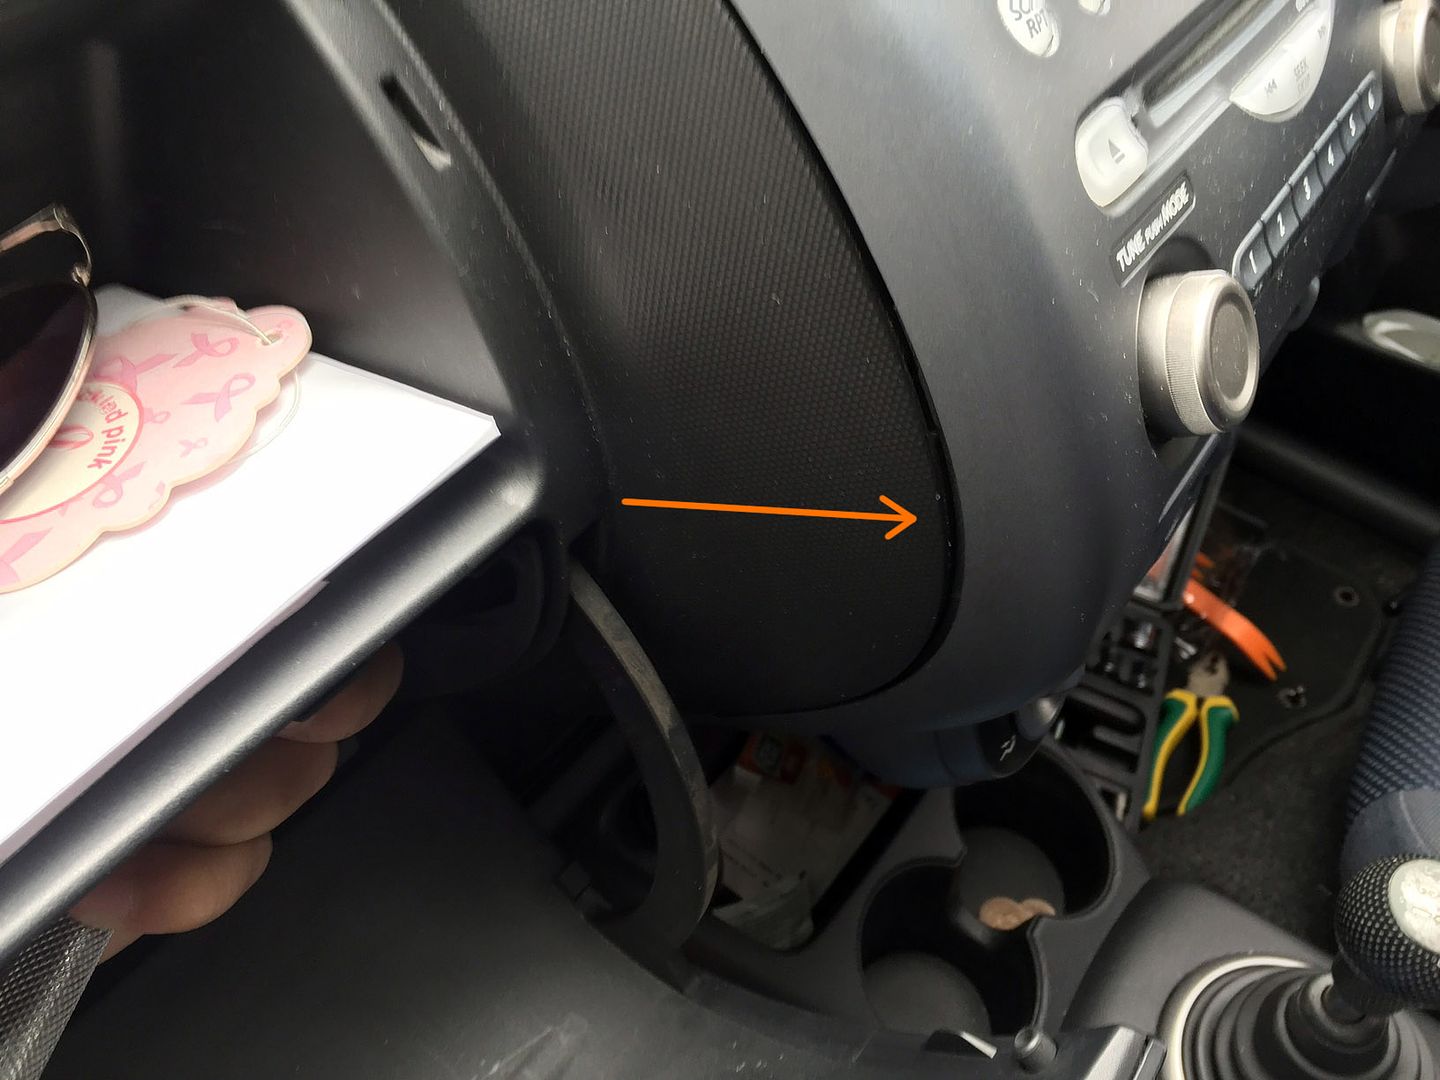 This delay of course gave me just enough time to change the plan to the bluetooth option, but that should definitely make life much easier. Possibly good for resale value too lol. That photo I found on GIS also gives me another minor to do item: my shift boot is torn at the top and the cap is missing. I didn't actually know how it was supposed to look, and now I know so I'll try 3d printing the cap and gluing it to what's left of the boot. Certainly not spending  for a new one from china! for a new one from china!Another one is adjusting the handbrake. It works but only at the very top of the lever motion, it's mildly annoying and might not actually pass inspection later on.
|
|
#
¿
Feb 10, 2021 09:48
|
|
|
STR posted:Look behind wherever you'd typically find foglights, you should find the plugs there, probably with caps on them. That's how they did it way back when, anyway - where drat near every car got the wiring for fogs (and other stuff base models didn't come with, like a tach, clock, etc). It's how I added fogs to both of my Civics (also had to add a dash switch, but again.. wiring already there). Bulk Vanderhuge posted:https://estore.honda.com/honda/accessories/installation-instructions/oui-list.asp?year=2008&model=Fit&modelName=Fit But speaking of the lights, I finally made some progress on that front. First, to figure out the craigslist roofrack. It had these legs that are supposed to mount to an unknown old car:  Two minutes with a grinder and an hour of fabricating light mounts later, it's... somewhat less impressive than I expected. But for fifteen bucks total, that'll do for now. If we do a proper rally in the summer, I'd mount these lights on the bumper and put a larger light bar on the roof instead.  The shift boot situation's been rectified too. Just need a shitton of glue.   Finally, the all important bluetooth mod. Not my proudest moment but it works so:   It's an aliexpress bluetooth module and ST L78 5v linear regulator, cap, and some junk wires. Interestingly, the speaker wires on the stereo loom have already been spliced which is weird since this has the stock HU and speakers. To offset the progress, I also discovered some new things. Some of the foamy insulation in the driver's footwell is missing and it feels kind of wet there. Hopefully it's just from the shoes and there isn't a hole in the floor, but considering the price I'm not too shocked if it is. Also the rear hatch handle seem to get stuck sometimes and makes it very difficult to open the door. A new one is like twenty bucks on ebay but it won't get here anytime soon so I won't bother for now. Next week looks like it will be finally above freezing temp so I'll look into installing the lift kit. Rear should be easy enough but the front has some pretty rusty nuts and bolts so there's a decent chance that's going to fail, but we'll see.
|
|
#
¿
Feb 14, 2021 19:15
|
|
|
meltie posted:Has it got a roofrack? Check the drains aren't blocked. Is that a thing that happens on those? I do have the universal roof rack installed, the kind that attaches between the door frame and the roof. It causes the seal to deform a bit, but I didn't notice it leaking there. Good idea to check it though.
|
|
#
¿
Feb 15, 2021 00:10
|
|
|
Wrar posted:Rally cars don't use roof lights. The new style LED bars are compact and can throw a ton of light. Blue Footed Booby posted:Word. And it's nuts to me that Honda stopped bringing new models years of Fit to the US. I see them all over the place, and everyone I know who has one likes it. I figure it has to be a smaller profit margin than crossovers but how hosed does the US market have to be that everyone is cutting their hatches and other small cars? quote:Under the skin there are new dampers, thicker anti-roll bars and a revised electric power-steering set-up. Since this event's been downgraded somewhat I'm now fairly confident that that the car will make it back in one piece, so making a DIY Fit Type R isn't out of the question. Basically as far as upgrades there's a rear sway bar which should be possible to DIY, coilovers, alignment and wheels/tires. I can't legally put anything other than 175/65 on 14", but the wheels are compatible with the miata so for any event I could just pop my good wheels with AD08 on. It's also impossible to legally swap in a K engine, but a junkyard turbo, intercooler, DIY manifold and Speeduino or SECU ECU could fly under the radar. No promises, but if covid is still around for a while and there's nothing else to do, I'll consider it. So far there are a few LeMons style road course events planned for this year so. The new Fit is a weird hybrid only and at least here it costs as much as a Golf and more than a wagon Octavia so I'm sure everyone will go with those because bigger = better than. Not sure it'll be around for much longer in this situation. E: small progress update for today. Printed a little case for my bluetooth hackjob   mobby_6kl fucked around with this message at 21:26 on Feb 15, 2021 |
|
#
¿
Feb 15, 2021 19:13
|
|
|
Raluek posted:maybe its just the picture, but you might want to heatshrink over that LM7805. The mounting tab is electrically connected to the output pin, and it looks like it's dangerously close to being able to tap all sorts of stuff on the board if there's a bit of vibration or whatever Thankfully it wasn't, and I wasn't completely crazy because I remembered that the tab was supposed to be ground. You're probably right about the LM, but it's thankfully ground on this ST L78. It's not just the picture though, it is hanging just above a micro USB connector on the board. It draws like 20 mA while playing so temperature isn't going to be an issue even with some extra insulation.  There's also this reassuring line in the datasheet: "Each type embeds internal current limiting, thermal shut-down and safe area protection, making it essentially indestructible"
|
|
#
¿
Feb 16, 2021 00:32
|
|
|
Raluek posted:you're right, my bad, i was thinking of the LM317 Looks like the situation is changing and winter is suddenly over. So I probably wasted a ton of money on a winter sleeping bag. But on the other hand, I can now waste more money on new parts to install.  Since I'm more or less done with all the easy stuff, I'll look into installing the lift kit maybe on Friday if I can get off work early enough. As I mentioned, I watched this video on the strut situation: https://www.youtube.com/watch?v=DrcmQSqP1RM and while the top of mine was covered with a rubber condom, the nut wasn't so it's nice and rusty which might make it very fun since you can't use impact or nut buster on it. I also don't have spring compressors but I think I should be able to rig something up with a ratchet strap.  As a stretch goal there's also the input shaft. Although it mostly goes away once warmed up, it's quite a bit more noisy outside the car and I really don't like it. After checking out this videos below, I think definitely underestimated what a gigantic pain in the dick it would be on a FWD car. It should still be doable over a few days and that's less than 10 days I still have, but there's always a chance I won't be able to put it back together in time and DNS would be worse than DNF. I'll order the parts and we'll see depending on when everything arrives. InitialDave posted:Been a while since I was doing it, but if you pull the driveshafts, support the engine from above, and drop the front subframe, you can get the gearbox out from underneath. 
|
|
#
¿
Feb 17, 2021 22:41
|
|
|
Can an admin change the thread title to $600 Jizz (for Jazz/Fit, you see. yes I just came up with that) Sorry for the massive dump. Russian Bear posted:Honda would rather sell the HRV instead of the Fit in the US which sucks. I hope my blue raspberry metallic 2013 lasts me another 10 years. I love my Fit. There's a guy on the fit forum who was up to like 550k miles when he hydrolocked his engine. His only repairs seemed to be replacing clutches every 150k or so for some reason.  sharkytm posted:We're finally getting to the end of the Fit Army in my household. My wife and I both bought Fits in late '06, when they were finally released here in the US. Hers has 200k miles, mine has 97k. They've been excellent cars, and I fully endorse rallying one. But yeah it's actually really cool. Roomy, good visibility, great trick seats, probably reliable. Not that it matters but my fuel economy isn't great so far, averaging around 7l city and highway combined. I do treat the gas pedal as an on/off switch though and it's winter, my mom could probably get to 5 in the summer. It also spins at 4k on the highway like the miata, a bit annoying. InitialDave posted:They're a circlip/snap ring that retains the driveshaft in the gearbox, in theory they should be reusable, but if it seems like there's not much resistance to pullout when you put the shaft in, it's worth replacing them - if the driveshaft comes out too easily, it can do it just enough at full steering lock that you lose drive. As for the event, it's still in the air a bit. There's an ongoing state of emergency and some regions where it was supposed to take place are closed for visitors. But no official cancelation or rescheduling yet, so preparations are continuing. Input shaft bearing While searching for the parts, I tracked down that NTN makes the OEM bearing, as well as its number. vs 40 from Honda. I got it today. Is it normal to be excited about a bearing? It's so smooth, like a shark. Mmmm. The gear oil, seals and a bunch of other crap should arrive tomorrow. Still, considering I'm working full time now, that doesn't leave much time until the start on Friday. So I'll probably leave it alone and hope that nothing goes wrong. The lift I gave it a shot. The top strut mount came off without a big fight, I jammed a piece of wood for the allen wrench to sit on, so I didn't have to hold it by hand.  The two bottom bolts also gave in after a bit of impact action. The anti roll bar linkage though was a bastard. It's very tight, there's no room for a longer wrench, and when it does break loose, it seems like the nut is not actually coming off. Maybe the thread is damaged, I really didn't want to push my luck and end up without a drivable car because I broke it and all the stores are closed. https://i.imgur.com/cQ5bcwJ.mp4 EGR Valve Was the code really just P0403? Because when I checked now it was also P0404. And having the CEL on is annoying because you don't know if something else goes wrong. Previously I tested that it doesn't open if I give it power, so clearly that was at least one of the issues. It was a pain in the rear end to take apart because it was clearly not intended to be repaired, but it didn't stop me. I made a video of the process but even skipping repetitive parts it's over fifteen minutes, and I spend the morning editing it and it's not ready yet. The main reason it's such a pain in the rear end is that the coil tabs are soldered to the cap and you have to break them to get it off. The left one tore out with the post and a bit of wire.  The valve was really stuck. Like I had to hit it with a hammer repeatedly to get it out. I don't have a good phot but I cleaned it up with sandpaper.  I couldn't find what are the correct values, but the pot responds fine:   Was it worth it? Not at all, considering you can get them in any junkyard. And certainly not after this came up after a test drive:   Lights The light situation is solved. Remember how I mentioned that the rear defogger doesn't work? It heating element is damaged, but the wiring is fine. And look what I found:  It works perfectly and it's great to have a proper button on the dash, even with an indicator LED: https://i.imgur.com/DUMOqml.mp4 Decorations I just noticed that the sticker is missing on the engine cover.  That's no good, so I quickly made one:   The duck went on, looked pretty good, and promptly fell off during a test drive. I'll have to make another one, but this time design a proper mount.  Bonus new issue Saw this when taking off the rear wheel to check the spacer installation.  The pads were replaced last year but apparently nothing else was done. It actually seems to brake ok, but if I have some time I'll try to fix this. mobby_6kl fucked around with this message at 23:43 on Feb 22, 2021 |
|
#
¿
Feb 22, 2021 23:17
|
|
|
Welp it's canceled officially. Postponed, actually, but since nobody knows what's going on and when it'll be over... Not like there was any choice since it wouldn't be legal to enter some of the regions. So sorry about lack of exciting go-fast mods or action updates in the near future. Instead I'll take care of the more boring stuff. Here's the new to-do list, hopefully all but the last two could be done tomorrow or Saturday.
|
|
#
¿
Feb 26, 2021 01:15
|
|
|
Not a great update, just had one opportunity to drive around when the weather was a bit nicer and with the window down it sounds like the CV joint might be hosed. https://i.imgur.com/cCuhSED.mp4 (sound) Can't be anything else, right? I guess it's a good thing I'll be taking the front suspension apart anyway.
|
|
#
¿
Mar 7, 2021 22:31
|
|
|
Some good news, the wheel hasn't fallen off and the airbag hasn't killed me:  Took it to Honda for the recall work, probably the first and last time this car saw a dealership. It still shows up as uncompleted online so hopefully it just takes some time to show up in the system, and they didn't just pretend to do it.  Cleaned up and hit with anti-corrosion primer some of the rust in the only place it's visible on the car, which is in itself pretty spectacular. But there's definitely more of it there, I'll need to take off the wheel arch trim and dig in when there's more time.  Made a cap for the wiper arm, very important. https://i.imgur.com/Gm7kKUw.mp4 Gearbox oil was full, unfortunately, so there's no easy fix for the noise and I'll probably have to pull it. But having spend some time under the car, it looks like it might be possible to remove the back casing of the gearbox without decoupling the bellhousing from the engine. Then just pull the bearing and reinstall. There's quite a bit of space there if you removed some of the suspension, but on the other hand, I've no idea how realistic it would be to reassemble the gearbox in the air, horizontally. Probably not at all
|
|
#
¿
Mar 12, 2021 22:10
|
|
|
Boring but major update. A friend of mine had an empty garage over the Easter holidays with a fixed scissor lift, so I decided to do the bearing while we're still in lockdown and the weather sucks. The nuts were almost fused with the driveshaft with rust and I had to mess them up pretty badly, but they came off with a breaker bar and pipe extension. Came out of the hubs pretty easily thankfully. Most instructions call for removing the balljoint but I managed to pull the shafts without removing it or the arb end links by removing the two bolts from the strut and wiggling  Managed to remove everything short of the actual trans mounts and VSS (as always, the connector won't budge no matter how much I press the little tab), and decided to call it a day while My dad volunteered to help which was great but by the time I picked him up, it was almost noon and he wanted to pack it in at around 6. So tomorrow it should be easy, just remove the mounts and the 5 or so bolts holding it to the engine. Right??  Well, uh, hopefully it'll be ok to do just the 3 not-rusty bolts because I really don't want to touch that mess. The starter also doesn't look great so hopefully it can stay in place.  The front main seal might be leaking but I don't have a new one, though I de the belt.  This is by far the biggest job I tried to DIY but so far this wasn't too bad. A more powerful impact gun and an electric ratchet could've saved quite a lot of time. Anyway, tomorrow I hope to have it out before noon tomorrow and put everything back by EOD since we won't have to fight rusty fasteners on the way back. Eric the car guy has a video on replacing the main shaft bearing in a civic tranny which looks identical and it seems pretty straightforward (famous last words )
|
|
#
¿
Apr 3, 2021 21:22
|
|
|
nitsuga posted:Goonspeed! One of the strut nuts on my rusty Fit was pretty well seized and an Allen wrench had no hope of holding it in place after a few attempts at loosening the thing. That board trick may have helped, but in my case, I was able to take an angle grinder and carefully cut enough so I could take a chisel to the top. I was replacing the whole assembly, but it's an option if nothing else pans out there. Of course the anti roll bar end links made up for it. I still have no idea how that nut could just... not come off. Anyway I do have an angle grinder and new one that I'll put in if we can finish the gearbox stuff reasonably quickly. E: one question. I watched Eric's video again. (https://www.youtube.com/watch?v=yRRZUgoSzf4&t=1134s). How do I make sure I put in the shafts back in correctly? I assumed you'd put them in the neutral state but he just kind of wiggles them until spinning the input shaft turns the diff too. mobby_6kl fucked around with this message at 23:43 on Apr 3, 2021 |
|
#
¿
Apr 3, 2021 22:25
|
|
|
Well today was a bust more or less. We had the engine supported with a jack but since there was an engine hoist available it left more open space underneath. Disconnected most transmission mounts without much problems. Except the rusty fucker of course. To avoid touchig it I tried to disconnect the bracket from the transmission instead. Two bolts came off easily with an impact, but the top one had to be taken off manually and started stripping since you couldn't get to it at a reasonable angle. So so gave the rusty mount a go.  One came off after fight, the left one came about halfway out with the impact gun before getting stuck. It didn't even take much pressure with the ratchet and the captive nut broke off inside. Will have to deal with this at some point.  Eventually we got the last shiny bolt off the bracket. That was that, but unfortunately the gearbox just wouldn't separate.  That's as much clearance we could get no matter what. Not even enough to get a pry bar in. It seemed like something was holding it at the top somewhere, but I like quadruple checked that everything was removed. As far as I can tell there are 6 bolts total and I have them: 
|
|
#
¿
Apr 4, 2021 21:18
|
|
|
It's loving done, finally. The day after the last post I had to ask my friend for help separating the transmission. It just wouldn't move more than a mm. He undid the lower engine/trans mount completely and started hitting the bellhousing with a huge hammer until it finally separated. If I knew violence was the solution I could've done it myself  The dowel pin by the differential was completely rusted somehow, which explains why it was so stuck. The dowel pin by the differential was completely rusted somehow, which explains why it was so stuck.After a short delay caused by forgetting to undo one of the bolts on the transmission like an idiot, it popped open. Pretty nasty layer of oil everywhere, I'm guessing the fluid was never changed in 200k km.  Undo exactly 2 bolts from the reverse idler gear and both shafts can be easily removed. Under the input shaft is the suspected source of this horrible noise:  It was a bit rough feeling but really not enough to explain that noise. On to the second input shaft bearing: https://i.imgur.com/89kPqbj.mp4  Well there's your problem. The balls are pitted pretty horribly. I don't know how much longer this could've lasted before things started really falling apart. Probably long enough if the rally took place in March but now I felt like I was driving it on borrowed time. I didn't have this bearing so had to order it for about $20 and wait a day. Other than that I suppose it was in pretty good condition for the distance it covered. Not much wear visible other than maybe on the 2nd (?) gear at the bottom right.  Somewhat surprising amount of wear by the ball detents, but far from actually being a problem.  Two days later I had the new bearing in hand so went over to install it. Had to heat up the casing from the outside to pull it with a seal remover. Weird since according to the manual it's part of the shaft assembly. I popped the new one on and put everything together in the reverse order. Spent like half an hour moving all the syncro collars to make sure they were switching gears correctly. Busted out my priceless loctite 518 sealant and put the case back on. It slid most of the way on, but not enough for the snap ring to go into the groove on the countershaft bearing. My big new bearing has to be pressed into the housing, right? So I started hammering it through rubber and wooden blocks until it seemed to be mostly seated. Started tightening the bolts a bit and... there's weird crunching sounds. gently caress. I removed everything and the transmission was now jammed and 5th/reverse wouldn't switch at all. Fuuuck. Poking at it for a bit, I finally got reverse to engage. This also let me start disassembling the shaft. Eventually I found the issue: somehow the 5th gear synchro hub and ring got misaligned (even though I didn't touch anything on the shafts) and I didn't notice it before re-assembly, so it got a bit crushed.  Ooops! Thankfully it seems like there was enough meat left to prevent the ring from spinning so I cleaned everything up, made super-certain that everything was seated properly, and easily put the case back together. Huh. We did the clutch and seal too, though probably unnecessarily, since it was aftermarket LuK (same as what I got) and had 7mm left, which is much closer to new (7.2-7.9) than to dead (5mm). There's $70 down the drain  Everything else was the reverse of removal. But first I had to do something with the broken trans mount nut. Thankfully the rail to which it was attached had a 10mm hole that matched up with a hole in the mount. $2 of threaded rod and nuts later, the solution is complete. Would TUV approve this? Probably not, but they won't see it, and if it's stupid and works, how stupid is it really?  Attaching all the bits and pieces took a few hours but the results are nothing short of amazing, if I can say so myself. This is before: https://i.imgur.com/C40o9Vp.mp4 for after, imagine there's no extra noise when releasing the pedal. Also it seems that some of what I thought was engine noise while driving under lead, disappeared as well. GD Jizz clutch pro-tips 1. Don't loving DIY unless there's a pandemic lockdown and you can't look at screens any more 2. On the suspension, just undo the damper pinch bolts (C), and it will be enough to tilt the hub sufficiently to get the driveshafts out without touching the sway bar end links or ball joints.  3. Leave the subframe alone, there's enough space to slide the transmission in/out. mobby_6kl fucked around with this message at 20:52 on Apr 11, 2021 |
|
#
¿
Apr 11, 2021 20:46
|
|
|
Actually I think I meant that about the low/reverse, sorry, exhausted posting I don't remember seeing any actual damage on the meshing surfaces of the gears, there might've been some glare or contamination that I hopefully got rid of later. It could be a pit in which case I didn't notice it IRL. The reverse is totally PO's fault though I mean, I did grind it a bit on the test drive but only reversed maybe a couple of times since then. Actually before the rebuild it felt like it wouldn't go fully into reverse every time, it looks like it's in, you release the clutch and GRRRRRR. Hasn't happened since so far  It's a bummer that all the replacement parts are $$$ since you can only get transmission parts from Honda. Obviously it doesn't matter for this beater but if they sold this stuff for less than the car was worth I would've thrown it in too because I definitely don't like putting worn bits back in generally.
|
|
#
¿
Apr 12, 2021 13:43
|
|
|
Sorry, I'm a Mazda fanboy so all the rules of keeping Hondas from eating themselves news to me. And apparently to the PO. Although I see tons of people go into reverse/1st while still rolling in the opposite direction so it's possible they did that too. BTW, opening up the gearbox was really interesting, can recommend. It's pretty easy and you can immediately see how everything works. No amount of reading or youtube videos could do it for me. The loud clank of engaging reverse is now obviously because there's a giant bracket slamming the big, straight-cut gear down on the casing and hopefully engaging the others gears too. Anyway, the rally organizers announced a new date, in early May. So up next up is replacing the sway bar end links(s) since the left one is clunking horribly after our attempts to remove it for the lift kit failed. The grinder might need to come out because it's pretty determined to stay there. I also found a note that 4 spark plugs have been replaced recently, meaning 4 might as well be original still. And I'll probably do valve clearance as well since it's safe to assume nobody followed the schedule.
|
|
#
¿
Apr 12, 2021 18:08
|
|
|
The sway bar end link is off I'm sure you could weld something to the bolt and get it the nut off eventually but considering I got a new end link for like $7, the grinder came out immediately once the bolt broke there and the allen key didn't stay inside. The bottom side was pretty well stuck too and didn't budge even after penetrating fluid and enough torch application to make the boot smoke on the other side. The new one is in and the noise is gone. While in there, I saw some grease on the suspension bits. Seems like the CV boot has a tiny slit somewhere in this area (on the wheel side obviously):  I think it got damaged when I was pushing it into the hub and the sharp edge of the clamp cut through the thick boot somehow. There's no huge gaping hole so hopefully it'll be possible to just glue it shut, because there's no way I'm taking it apart in the near future especially considering that there was some light clicking coming from this side so the whole thing might need to be replaced soon anyway. Another look at the EGR valve, the zip tie didn't really help keep the cap on, so the next step up is completed. Haven't tested it yet.   The fuel economy has been disappointing so far, but I chalked it up to winter conditions and driving it like I drive the miata. On the last ~30km trip, driving like a normal person, I hit 5.3l/100km or 44 mpg. The route was country roads through some villages, 50-90km/h, and some highway, below the limit at 110-120km/h. Still not amazing by modern standards considering it has like 80hp but better than my previous average of 7.5l or so.  Found this interesting chart which suggests it should get a bit better yet once temperatures are in double digits at least.  The friend whose garage I was using seems to be pissed off at me. He wouldn't tell me how much I should pay for it, so I gave him about as much as I used to pay for a garage near me (sans the quick-jack like lift) for a month for less than a week of usage and he was visibly upset. My fault for not demanding a number up front but when someone says "eh whatever you think is appropriate" seems like a "case of beer" situation and not "account for my actual and opportunity costs for me". Hopefully this is fixable because I'd hate to have ruined a relationship over this shitbox
|
|
#
¿
Apr 18, 2021 14:42
|
|
|
mobby_6kl posted:Another look at the EGR valve, the zip tie didn't really help keep the cap on, so the next step up is completed. Haven't tested it yet. Ugh. Still no idea if it's a mechanical issue with the valve or electronic. Found the damage are on the CV boot. A little booger of grease collects on it and then gets flung and sticks to some suspension component.  I cleaned it as much as it was possible with some IPA, tried to get some glue inside and then glued a piece of tape over the top. Only drove it for about 30 minutes afterwards but it's holding up for now. 
|
|
#
¿
Apr 27, 2021 12:49
|
|
|
Thanks, good to know it won't just disintegrate the moment I go for a longer trip. I'm definitely not concerned enough to put a new $10 boot on, so this fix is about as much effort as I could justify
|
|
#
¿
Apr 27, 2021 14:58
|
|
|
So the covid-safe version of the even took place this week. No real racing, just driving around inappropriate checkpoints all around the country, getting stuck, and camping because all hotels are closed. But the day before that:  Of course one headlight bulb died. I ordered a new one but got held up at work until the store closed. I could probably get one at any fuel pump but whatever, at least I have time to do a quick oil change since we'll be driving over 3000km in the coming days. Right?  But the drat filter just wouldn't come off. Not by hand, of course, it never does, but even this chain type wrench that I've used countless times on my miata before not only bent several times, but eventually just broke apart. Tried hammering it at the edge with a chisel, no good. I already drained the oil of course, so screw it, I'll just put the the new oil in and keep the filter for now. Except that by now I've done enough damange that some oil seeped through under pressure. Awesome! In the meantime it got dark and started to rain (doing this outside, at a nearby offoce parking lot of course). I didn't even have a philips screwdriver (that wasn't a bit) so had to hammer first a smaller and then a larger Torx driver in. Even then I just barely got it moving. I was laying in a pretty uncomfortable position due to low car height and spilled oil on the ground, so I just barely managed to get it moving with the larger screwdriver. And even half a revolution didn't loosen it significantly, and since there wasn't any space to keep turning the filter, I had to make another hole.  You motherfucker. On the upside, at least the replacement filter was the appropriate one. Let the car run for a few minutes and there were no leaks. Neither the filter nor the drain plug came off at any point so I'll count that as a win. The car did great. No serious issues during this preiod but
Edit: https://i.imgur.com/aoHcqS3.mp4 mobby_6kl fucked around with this message at 10:15 on May 10, 2021 |
|
#
¿
May 10, 2021 00:05
|
|
|
KYOON GRIFFEY JR posted:I'm pretty sure the rear hatch on those Fits leaked like a sumbitch Yeah it's pretty notorious actually, I remember RCR even bitching about it years ago: https://www.youtube.com/watch?v=LJ2uFkQqMug He complains about quality control but seems more defective or inappropriate sealant that eventually hardened too much and cracked. At first glance it didn't seem to be leaking so I focused on other issues instead, but this certainly explained the sloshing sound I heard at some points Anyway, it's supposed to rain the next couple of days so I tried to fix it now rather than bail out water later again later. As suggested in literature, there were cracks under the rubber gutter cover:  and all the way down too. It didn't actually look like that until I tried cleaning it with an old toothbrush.  I had some black silicone sealant on hand so a smeared a bunch of it all over the seams. Hopefully this will take care of the trunk, though the forums suggest a few other possible areas.  Didn't really want to touch the doors today but I left some paper towels in various areas to hopefully help track down the source if anything does leak in. mobby_6kl fucked around with this message at 17:44 on May 11, 2021 |
|
#
¿
May 11, 2021 17:42
|
|
|
KYOON GRIFFEY JR posted:Hope it does the trick! The camping rally thing looked very fun. Well it's been raining for two days straight, so about that.  At least with the car stationary, you can see where the water is entering from.  It's dripping along the seam but then goes behind the trim so you can't really tell where the origin is without removing all the plastic panels. Which I'm not doing while it's raining on me. Overall yeah it was pretty fun and unique experience. Im not a particularly outdoorsy type but it helps that this was the first time I got outside in like half a year at least. Since all official campsites were still closed so we had to improvise and set up camp in fields and crap. Once got approached by a farmer with an axe and a dog (a loving Yorkie lol) but he was cool.  It was raining the first couple of days so waking up in a swap kind of sucked but thankfully later it was just cold and windy. Unfortunately the checkpoints were such that you didn't have much time to chill anyway.
|
|
#
¿
May 13, 2021 20:32
|
|
|
Yeah a lot of land is privately owned nowadays of course. However any forest, field or other nature has to be publicly accessible with the exception of built-up areas, gardens, backyards, etc. You'd probably need to be a lawyer to tell for sure what is and isn't legal, but generally you're allowed to sleep over anywhere that's publicly accessible (including privately owned fields or forests). Camping is more restricted and the difference is that "sleeping over" means you just have a mat and a sleeping bag for one night, and camping implies a tent, firepit, etc. in a more permanent setup. So this was definitely in a grey area because we always had a tent as it would be absolutely miserable otherwise, but never had an open fire or stayed for more than a night. So I think the outcome would also depend on the mood of whoever came to investigate, but we just generally tried to fly under the radar and GTFO first thing in the morning to avoid any discussions. I actually thought of just sleeping in the car as that would make things infinitely easier, but we packed was way too much crap to deal with to make that practical
|
|
#
¿
May 15, 2021 15:22
|
|
|
Heh just noticed how incomprehensible the thread title has become Anyway, all's been well with the car, I've used it a few times for Ikea trips and to haul other crap. Of course that's until I was supposed to take a longer trip with it since the miata was too small (shocking). It's been super hot recently so I scheduled to have the AC refilled the day before the trip. The time comes and I have 30 minutes between meeting to get there and take the call. Get in, crank, it starts, and besides the CEL, the battery light also stays on. And doesn't blink or go away after a while, at any RPM. Fuuuuuck. Shut down, check battery terminals (clean but loose), tighten, start, same poo poo. The belt and pulley spins normally. I have a cigarette lighter USB charger with a voltmeter and it's showing 12.2v when running. At this point it's clear I won't be going anywhere (though the shop is close enough that I might've made it on battery alone) but I want to figure out more about what's going on, so I fetched the multimeter. Barely manage to squeeze my fingers through to remove the rubber boot from the positive terminal, and it also measures battery voltage (12.2 or so) with the car running. That's it, I then have meetings until like 5pm so I had about 30 minutes to find the right part and order it so that it's ready the next morning. Luckily there was store in town that had them at reasonable prices, because I usually have to wait 3+ days to get parts. Before going to sleep though, I realized it's better to take off as much stuff today as possible, since I'll be installing it in the morning before my normal working time. So there I am, undoing the EGR valve on the street in the middle of the night. There are two rusty studs that needed a bit more leverage so...  One nut came off, and the other stud came out of the head completely, which is even better. But when I removed the EGR valve, I saw that coolant was weeping from some of the passages. I'm sure it wouldn't all just leak out overnight, but I didn't want to risk it so put everything back on. Picked up the new alternator next morning within like 10 minutes of the store opening.  I found the c-clip pliers to be pretty good for undoing the plastic clips holding the EGR wiring to the brackets:  Then there are the two EGR studs, the nut came off this one, the other one isn't visible here  Then loosen the 3 bolts on this bracket to reduce the belt tension, no problems there.  Here's how I moved the EGR valve out of the way without undoing any hoses or clamps. But the fun part is actually getting to the 12mm bolt on bottom of the alternator. It took a long extension, into a short extension, into a u-joint, into a 1/2->3/8th (?) adapter. into a 12mm socket threaded through the various hoses, while reaching with the left hand to guide the socket onto the bolt, but it thankfully came out without too much of a fight.  I suspect if it were any tighter, I would've had to remove the airbox to get a better angle on the u-joint, but thankfully that wasn't needed. It might also be possible to reach it form below, but I was parked on an incline so... I removed the alternator bracket and belt, and after a lot of fighting with a prybar, the alternator came off its pivot point. It was then possible to rotate it enough to undo the connections.  And here's the trick for getting it in/out without removing the intake manifold as the service manual suggest:  The AC hose needs to be tucked in behind the washer filler neck, and at least the bottom EGR stud needs to be removed. The top one is visible here and doesn't get in the way. Then installation is then the opposite of removal. Tensioned the belt by just returning the tension bolt to the original position based on rust The belt itself had some cracking, and although I actually had a new one, I decided not to mess with it because it wasn't clear how I'd get the new one in properly since there was very little space to access all the other pulleys.Well that's it. It started fine and without the battery light and then drove perfectly fine about 500km including at v-max on the autobahn, it was just extremely hot. Here are the remaining known issues:
|
|
#
¿
Jun 24, 2021 20:24
|
|
|
I needed this car again drive more people than fit in the miata again. On the way back, about 300km away from home, it started grinding horribly under braking. A quick check looked like the pads and disks were ok so I just avoided braking the rest of the way since it was night. Even though the pad looked like it has a ton of life left, the wear indicator was already touching the disk. Thankfully there's an easy solution :  Unfortunately I probably bent some of the slider thingies in the process so it was still grinding the next day https://i.imgur.com/cgxo8Yl.mp4 Ended up getting new pads and hardware for like $10. Also got a new CV axle just in case that's what the clicking is and it craps out somewhere but it's getting cold again so I don't want to ouch it if I don't have to.
|
|
#
¿
Sep 21, 2021 12:34
|
|
|
Huh I guess I forgot to post the brake update. I put the new pads in and that resolved the grinding issue. The disks could probably also be replaced but eh. The good (but boring) news is that the EGR is finally fixed! I need to get the car inspected by the end of the month, and although I found a guy who'll get that done for a small fee, it's still better to actually resolve the issue. I also didn't want to just throw new parts at it as I thought it could be a wiring issue initially. The original code was P0403 EGR Valve Circuit Malfunction, but as I was fixing it, I also had P0405, P0406 and P0409 at different times. Basically, the initial problem was that the valve was completely seized. No amount of pulling or spraying carb cleaner did anything, so I had to force it open and hammer the valve out. This process also broke the connection between the valve body and the cap/connector. The actual reason this repair was still causing other codes is that it doesn't really go back together properly. Maybe because of the new wires I soldered getting in the way, so there was a 1-1.5mm gap or so between the cap and the body. This caused the potentiometer to read values outside the range the car expects. Unfortunately nothing would clearly state what the correct resistance was supposed to be. If you look through the troubleshootign steps, it will tell you to: "Check the EGR VLS in the DATA LIST with the HDS. Is about 0.1 V or less indicated?" (DTC Troubleshooting: P0405 (12) (With ETCS)) Is this good or bad? What is the acceptable range under these conditions? You can kind of piece it together by going through several of these guides and all the steps, and it seems that with the ignition on and valve closed, the values at pin 3 (vale lift sensor) should be about >0.1v and <1.7v I measured it with a multimeter at the connector, and got 2.35v, which is too high. Why is it too high? The 5v reference is at 5v and the potentiometer works well since I tested it when I opened the valve, so it's clearly measuring the valve position incorrectly. Well it's because the gap with the cap makes the pot stick out more than it should, so it thinks valve is open by about 1-2mm. Duuuuh. The valve lift sensor is basically just a voltage diver like this, except there's a pot instead of the two resistors. The ratio of the resistor values determines the output voltage:  The actual values were 2.73k and 2.46k, which if you plug into the formula results in 2.37v, or almost exactly what I measured. To get about 1.5v output, you'd need about 3.6k and 1.6k, instead. So I also measured that 1mm or pot/valve travel changes the resistance by about 400 ohms, so to get to my desired values I need to make up about 2mm of travel. I still couldn't get rid of the gap in the valve cap entirely, so instead I 3d printed a little spacer that went on the potentiometer and effectively lengthened the valve by 2mm.   Cleared the codes and after a short test drive P0409 came up I think. I checked under the hood and the hose clamp came off so I tightened it better and it's been code-free since.tl;dr: Trying to fix a sealed EGR valve is in no way worth the time, but can be a fun learning exercise if you're into that sort of thing! Maybe this will be useful for someone regardless. -------------------------------- Unfortunately any further racing plans aren't really working out so far. Some events were canceled and I couldn't get into the ones that weren't. And I'm not sure I want to do another rally like the last one, it was a fun experience but I don't think I'd want to spend a week of vacation to just drive non-stop again. My miata will need some painting done later so I'm definitely keeping it for a bit more, but then might clean up and sell it. On the other hand, I also recently discovered these things:  I mean the AMR superchargers. Look how cute they are, and about the size of an AC compressor.
|
|
#
¿
Jan 26, 2022 13:54
|
|
|
Boring beater log, entry 213. After fixing the EGR issue I went to do the mandatory tech inspection. I gave the guy some extra cash to make sure it passed on first try but anyway he only had two issues to note: rear brake effectiveness and headlight level adjustment. I knew about the brakes and greased the sliders but the left rotors is rusted and probably below min thickness so that's something to look into. Headlight level is ok, he just couldn't adjust them so eh whatever. Overall I'm pretty impressed for a 18 year old $600 car. I then did a long trip, almost 2000km of 50/50 highway and country roads. I filled the oil before leaving and, if the dipstick is roughly linear, lost about 0.2l of oil. I never really tracked the oil consumption but it felt worse than that. Maybe it is on shorter trips. Anyway that brings me to just over 10k km and due for a full oil/filter change. And, ooff, my front washer is dead apparently. No pumping sound, while the rear one works. Looks like Honda, in their infinite winsdom, used different pumps for front and rear so I can't just swap them out (maybe just swap the tubes and use the rear switch?). That's a bummer because the part looks impossible to find and is of course $$$ from the dealer. There's a sketchy generic one on ebay but at that point I'd rather try the junkyards first.
|
|
#
¿
Apr 19, 2022 08:40
|
|
|
Since my manager is in the US, I effectively had a day off today to screw around with the car  Three things were on the agenda:
nitsuga posted:Good luck with your hunt. I would absolutely be scouring junkyards for it, but the reroute and rewire does sound like an entertaining fix too. RIP Paul Walker posted:I�ve used the generic eBay washer pumps for various cars, they�re totally fine most of the time. Thanks! I wanted to first see what was actually the problem before running around to find a pump, which may or may not be even faulty. The pumps aren't accessible from under the hood, but it's not too difficult, just need to remove the fender liner (while breaking some clips of course) and they're right there.  I think that could be the problem right there! No idea how it could exlode like that. I'm pretty much running this blue winter fluid year-round because I don't use that much of it so it always lasts me into the summer. Anyway, there's no fixing this so I'll need a new pump. Until then, I swapped the tubes, which were just long enough to make that possible. I now have to turn on the rear washer to spray the front windshield, and then manually turn on the front wipers It turned out to be impossible to find the exact part number, but there was this one on ebay that claims to be compatible. It's not exactly 1:1 match but might work.  https://www.ebay.co.uk/itm/16541696...%3ABFBM0rr77qJg Replacing the liftgate handle went according to plan... mostly. The process is: 1. Remove rear wiper 2. Remove liftgate trim by just pulling it off 3. Push out all the clips and one bolt that's holding the panel 4. Replace hande.  The problem, it turned out, was the bolt in step 3. Other than the clips it's the only actual fastener holding this panel down and it's rusted to gently caress. When removing it, I just hit it with the impact until it somehow broke free, but on reassembly there's no way to get it back in place. I didn't have a grinder or a saw with me today so the whole thing is just a bit loose on the left side for now :shurg: 
|
|
#
¿
May 30, 2022 23:26
|
|
|
The hood looks like the surface of the loving moon from all the stone chips, which doesn't really matter... so I decided to do some experiments with a paint kit while talking with my grandfather on the phone, so a solid hour or so to get some work done. That's jut the biggest cluster but not all of them, I sanded until the chips were clean from rust and smooth  Applied the paint in at least half a dozen layers, paint always dried out and still left a big hole. Eventually when I thought there was enough (and it turned out to be quite difficult to judge without touching it), sanded it with 600, then 1000 and 2000 grit. A bit of hand-polishing with compound. It's better than a hole but still looks like rear end  There's a smaller finished one just above and to the left, looks a bit better. Obviously it needs a more polishing to get rid of the sanding scratches, I'll get the drill next time. But I think that while the new pain is properly shiny, I probably went through some of the original clearcoat and that's the part just around the new paint that's not as shiny. It also doesn't feel completely flat. I do have clearcoate separately as part of the repair kit and in a spray can but I think I'll try adding a few new layers and see if that would help even it all out. Update I did some more experimental stuff. It also has a decent number of scratches of various depths and general paint shittiness from 20 years of street parking and machine washing I assume. First there's this area on the D pillar, no idea how one gets scratches like that. Seems like someone had a go with pretty fine sandpaper and then just left it there. I had a go at it with a rougher and then finer compound on a foam pad. Took a quite a bit of polishing to get rid of the deeper scratches but it's good now.   It seemed to be also good for the "undamaged" paint, you can see where I stopped polishing near the top sun reflection. I eventually did a bit more of the panel but not too much as I used a cordless drill instead of a DA polisher.  You can see a bunch of other scratches on that panel as well but they were all quite a bit deeper so I left them be for now. The main thing I wanted to finish up were the stone chips. I cleaned and painted in most of the bigger holes a few days ago and now went to finish it. Here's a pretty big one. Looks relatively good but there's a clear low spot and a hole in the top left of the fill.   I probably should've tried to fill the low spot and holes with some more paint at that point, but I didn't want to wait again so I polished it to see how that looked. The little holes and the low spot is still visible of course, but more surprising, I thought that the edge of the chip wouldn't be visible any more. It felt completely smooth to me. And 2000 grit sandpaper isn't fine enough and a pain in the rear end to buff out. Here's another pretty big one. No idea what's the deal with the right side.  I think it's the same one, just rotated?  This type of repair is never going to be perfect of course, and it doesn't really matter on this shitbox, but I'm curious if you could do better. Feels like there are very specific issues like the bubbles (?) and low spots that could be improved if I knew WTF I was doing. So if you have any suggestions, I'd be happy to test them out since there's no risk to loving it up more. Edit 2: Well IPA took care of that fairly easily. I guess I didn't have to drive around with the residue for a year  I also did the most half-assed headlight job ever and the results are... extremely adequate. They were pretty bad to begin with  I did a test on an area that wouldn't impact the light output if I hosed it up really bad  But it turned out pretty well. There's still some weird cracks and crap that seems to be on the inside but  Step 1: Compound with a literal dish sponge on a drill. Step 2: There is no step 2. Well it should probably be to apply some protective coating but I had none on hand. But since it takes literally just 5 minutes, I'll gladly do this again as needed. mobby_6kl fucked around with this message at 17:11 on Feb 19, 2023 |
|
#
¿
Aug 17, 2022 20:00
|
|

|
Non-cosmetic issue gets its own post! Today looked like it would be a reasonably nice day for the first and maybe last time in weeks so I took some time to replace the windshield washer. Since June I had the front and rear washer swapped because the pump somehow exploded, so to use it I had to turn on the rear wiper and then washer, while simultaneously also turning on the front wipers. Quite a pain in the rear end, but I could get away with it during the summer. I wasn't able to find any specs on the OEM pump so had to kind of wing it. The closest one I could find is this one, intended for various Hondas including the Civic 1988-2004. Close enough, right?  https://www.aliexpress.com/item/32869072473.html?spm=a2g0o.order_list.0.0.6e531802jejWkJ  Update: the diameter on the OEM pump is 15.5mm / 16.5 on the rib. So that's what you to aim for  There were... some slight issues.
mobby_6kl fucked around with this message at 20:41 on Sep 28, 2022 |
|
#
¿
Sep 21, 2022 15:44
|
|
|

|
| # ¿ May 15, 2024 18:57 |
|
|
It's slowly getting warm enough outside to mess with the car and I'm thinking of actually attempting the supercharger. I think the main question is whether it'll fit in there easily (maybe in place of the A/C compressor, which is useless anyway), as I don't want a major project for something this silly. And if the dual ignition will pose any challenges with something like the Speeduino. Probably should've done this during the winter but ehh.Anyway, no new issues with the car other than a bad battery and somehow sticking hood release: mobby_6kl posted:The cable was still attached to the handle, and was clearly under tension when pulling it, which was weird. Really couldn't see anything through the grille or the gap between either (there was a rubber gasket). Somehow just pulling on the hood really hard got it open though, which is again strange because pushing it down didn't latch it either I did replaced the HVAC backlight finally. Fan speed and temperature were fine but the directional thing was always a pain in the rear end since the order is different than in the miata. It's #12 here. It's not clear what "Bulb, wedge" is, exactly, but someone on the Fit forums replaced them with T5 / W1.2W /W3W / whatever, I got these: https://www.aliexpress.com/item/1005003294293483.html  You have to undo the cables 14, 13 and 15 within the glove box and then pop the whole radio/HVAC panel out. I couldn't find where the purple cable goes (below) to unhook it so didn't take the radio out completely and left it hanging a bit. The bulbs are here as indicated, pretty difficult to reach through the available gaps:   Reinstalling them turned out to be a bigger pain in the rear end since the little copper tabs apparently were a bit bent, so the plastic bulb holder just refuse to twist in. Ended up bending it with a screwdriver after struggling for like 10 minutes.   The original bulbs were probably more on the amber side, oops. Also not sure if the left one is working, might need to flip the polarity. Already much better anyway though.
|
|
#
¿
May 9, 2023 10:32
|
|

