


|
DKII posted:Yeah apparently the intended path to victory is pretty limited to a horde of infantry/mechs and copters, supported by the occasional bomber/fighter. My challenge in particular happened to be the exact opposite. I think for the purposes of your sanity, "only one unit of each type" shouldn't count infantry/mechs, they're far too necessary. Even with that restriction in place, you did make a valiant effort, though - just need a few more ground units to push the advantage into the enemy triangle and cut off their funds.
|
 #
?
Jul 1, 2021 11:57
#
?
Jul 1, 2021 11:57
|
|


|

|
| # ? May 3, 2024 18:10 |
|
|
cosmicPostman posted:I think for the purposes of your sanity, "only one unit of each type" shouldn't count infantry/mechs, they're far too necessary. Even with that restriction in place, you did make a valiant effort, though - just need a few more ground units to push the advantage into the enemy triangle and cut off their funds. Yeah even then being limited to one copter to carry them over was too much to deal with - I'd drop off a mech and it'd get wiped out before I could even go back and get the infantry. Half the time the copter got wiped out too. Going to try another stab at this run tonight; my youngest has been home sick all week so haven't had a lot of free time. Sorry for the additional delays.
|
|
#
?
Jul 2, 2021 19:28
|
|

|
Part 9: Triangle (2 of 3) Turn 22 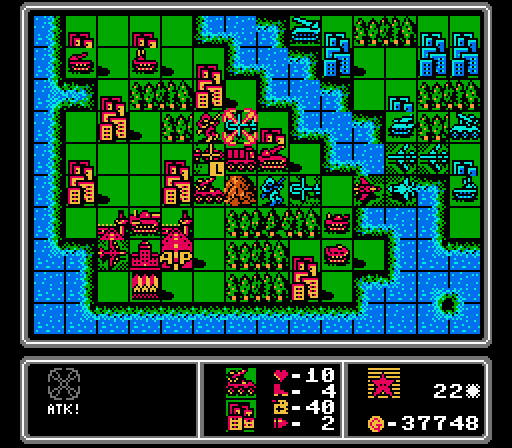 Ok, we left of with finally capturing all of the cities on our triangle. Time to try out some offense; but first we have to deal with the current invaders. First our AA missile and AA tank team up to take out this copter. 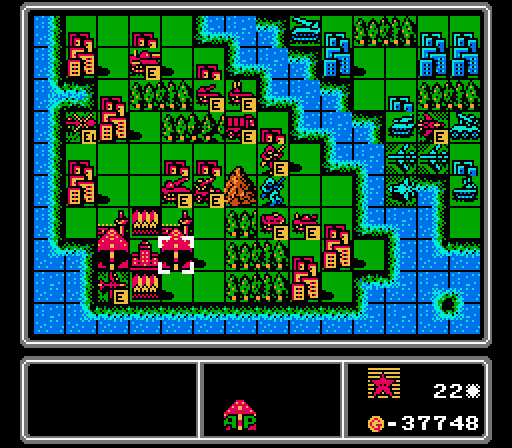 Our tank is able to finish off the other damaged copter, while our APC and infantry weaken the enemy infantry. I can't do much against the enemy planes coming in; we're just going to have to take the hit and get the bomber and loaded copter out of the way. 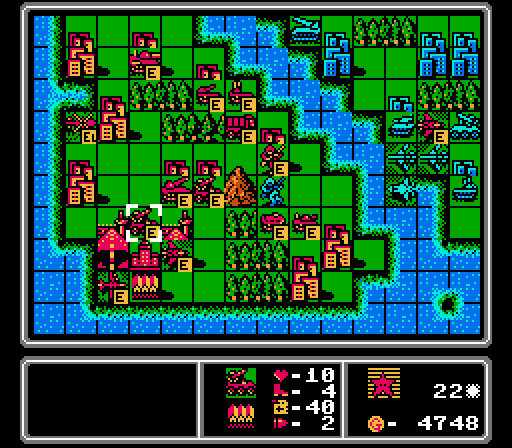 We're modifying the original challenge. Now that we've secured the supply lines on our own triangle by capturing every city, our Limited Supply is expanded to two instances of each unit deployed at the same time. So we get another fighter and another AA missile to deal with our more immediate problems.  The bombers team up to take out our tank, which is really the best case scenario for us. Turn 23 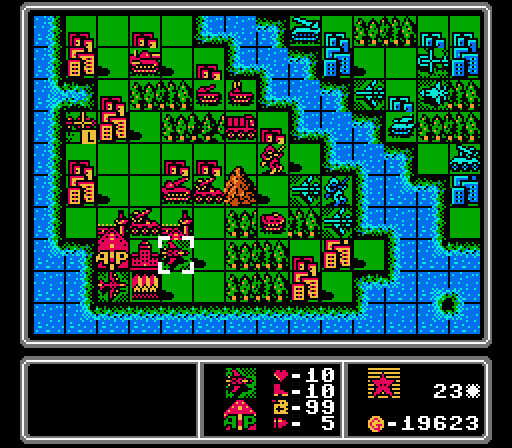 From here, protecting our own triangle is a little bit easier, as our extra fighter and AA missile are able to help take down the bombers. 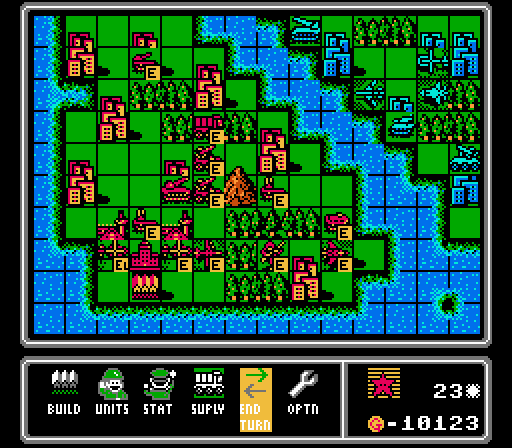 A second copter will help with getting our ground troops ferried over more effectively, and second AA tank will increase our defensive coverage.  The only action on the enemy phase is the last bomber moving up to take out our APC. It's out of the AA missile's protection, however, so our fighter can make quick work of it. 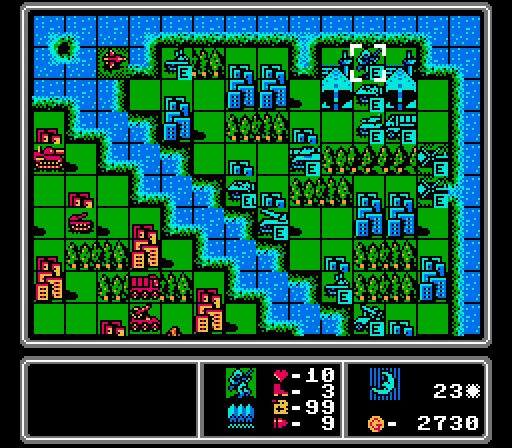 Blue is building more ground units this time, almost like they know I'm coming for them. Turn 24 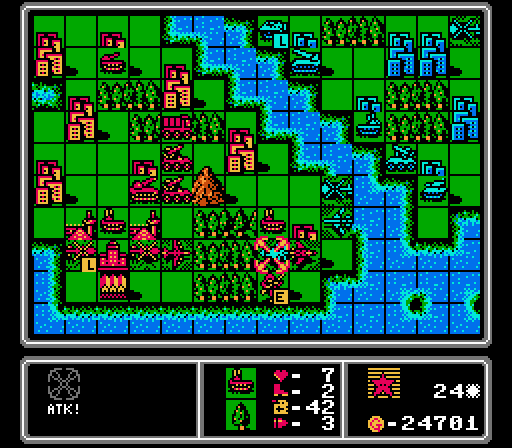 The enemy fighter came back down to harass our infantry, but that movement just put it in range for our AA tank to finish it off. Our fighter also destroys the bomber, but is going to take a hit from the AA missile, which moved up without my noticing. 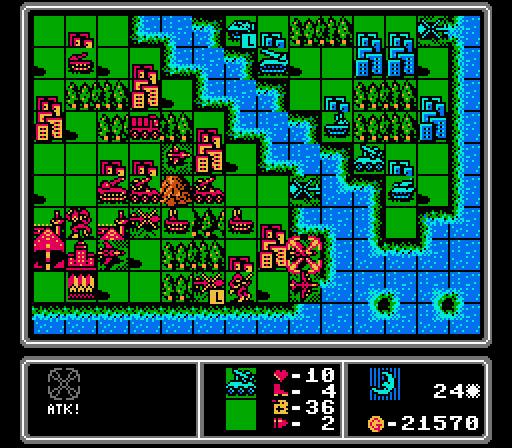 We get another fighter out, which is good because our other fighter is taking a shot from the AA missile here. Turn 25 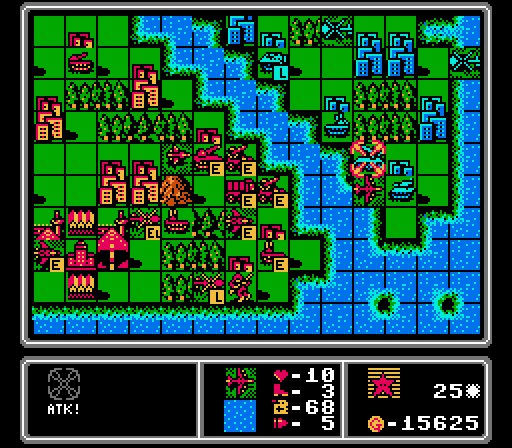 The bomber gets some revenge on the AA missile. For some reason we only do five damage here, even though the wiki says a bomber should do 6-7 damage against an AA missile on neutral terrain. In fact I've noticed enough instances on this map where we do just a bit less daamge than expected, and take a bit more damage than expected, that I expect there's a little random factor in the AI's favor on hard mode. That would explain why every fight that would otherwise be even (two identical units, or a bomber vs an AA tank) almost always ends with us taking more damage, too.  A second rocket to put pressure on the Blue shoreline is our next priority. Our scout goes back to refuel, and our damaged fighter moves back for repairs.  We've got enough defensive and anti-air firepower in particular that Blue isn't really bothering with planes much anymore. That's to our detriment, however; it's going to be tough to dislodge all that equipment up there. In particular there are two rockets, two AA missiles, three AA tanks, a medium tank, a tank, a couple APCs, and four copters. Enough to tear apart any planes and footsoldiers we send over. Turn 26 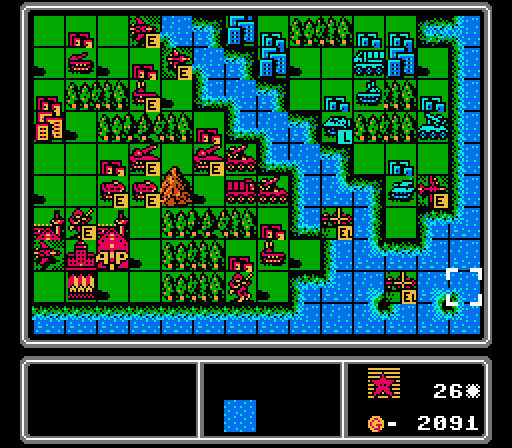 We try to stay aggressive with the bomber but I mis-calculated the AA tank's range here. Our copters are in range to drop off their loads, and we add a couple of APCs back home to fend off any encroaching footsoldiers. 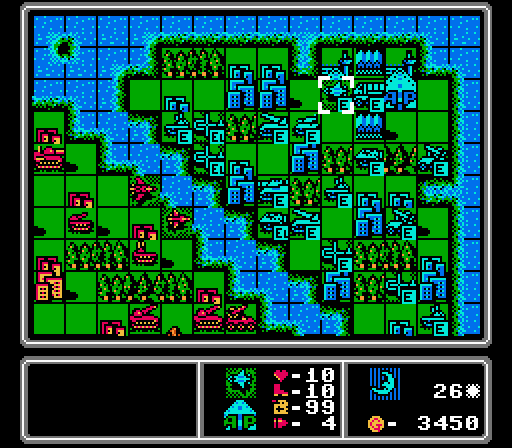 The main actions of note on the enemy phase are our bomber almost getting destroyed, and a new enemy scout getting built. Turn 27   There isn't much for our fighters and scouts to do anyway so I send them deep into enemy territory to take out the new enemy scout. 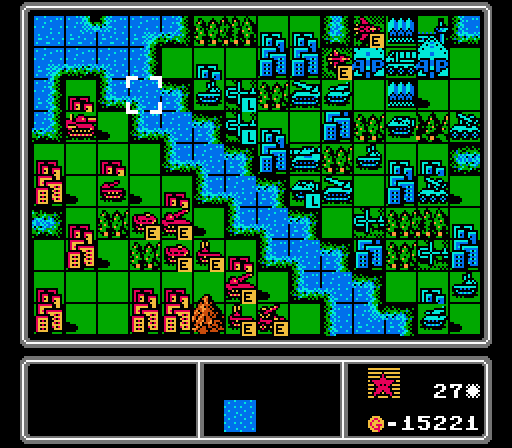 I suicide our bomber but don't build anything, trying to save up for more bombers. In retrospect throwing away the fighter and scout up there was probably not a cost-efficient move.  One enemy copter killed itself on our copter, while the other goes after the loose infantry again. 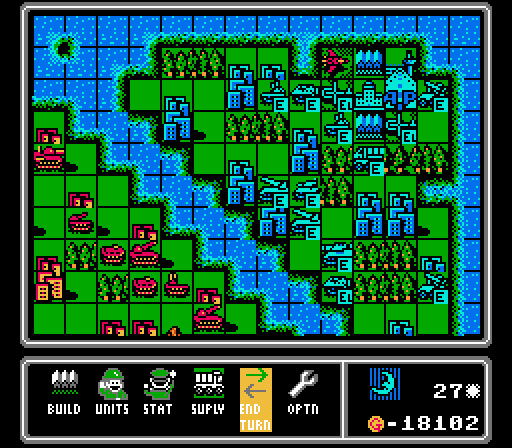 Our scout fell to the AA tank, but our fighter was able to escape unharmed. Turn 28 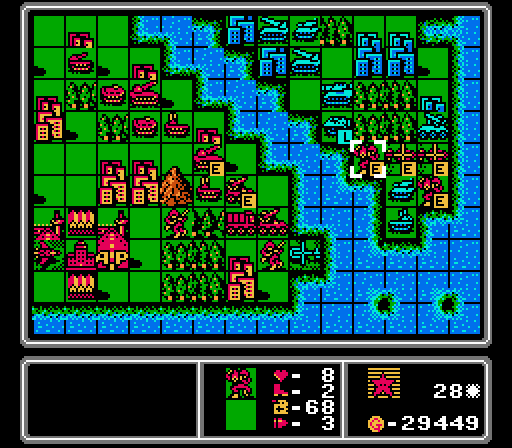 Assault #1 with a couple of mechs. While I got both copters inside the AA missile's minimum range, I wasn't as careful with the mechs. Can anyone spot the immediate problems we're doing to have? 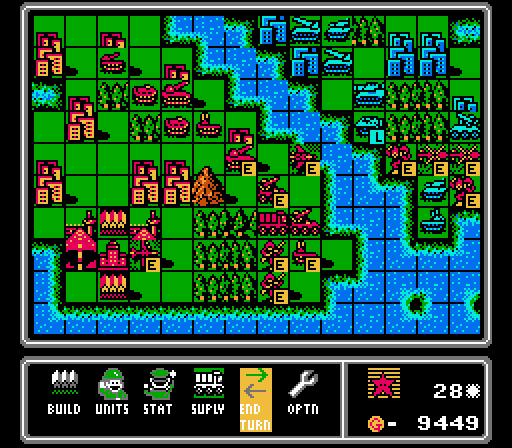 Our advance figher retreated to the far right, next to the enemy AA missile. We've got another fighter coming up to support/distract, and built a new bomber.  One mech was in range of both a rocket and a medium tank and didn't live through the enemy phase. The other just took a hit from the tank on the city. A tank we have no way to dislodge right now.  There's also another enemy scout now. Turn 29  I futilely have the mech start capturing the nearby city. It's still going to get hit by a rocket and a medium tank on the enemy phase.  We get another new bomber and pull our copters back, abandoning the mech to its fate.  I'm still under-estimating the range of enemy planes, and it cost our bomber seven damage here.  Blue didn't even need to use the medium tank to finish off our mech. Look at that cluster of units lumped up in the middle. In fact, I'm getting an idea about how unprotected the upper-left part of Blue's triangle is right now. Turn 30  Here comes Assault #2. We start moving back towards the top of the map, and get another scout off-screen. Our AA missiles, AA tanks, and fighters clear out the enemy copters and scout in the area.  An enemy fighter this time, but not much else going on this enemy phase. Turn 31  This fight started off with our 9-life fighter against the new enemy fighter. Should not have been this lopsided.  Here we had our other fighter at 8 life attack the same enemy fighter, with four damage on each side this time. Should have been a bit more in our favor.  We're able to drop off an infantry and make quick work of the enemy AA tank that was nearby. Though I left one of our rockets in range of an enemy rocket, that'll hurt later. Our defensives forces are also able to finish off the enemy copter and mech that had landed on our triangle, too.  We take some hits from the enemy copters but there is enough distractions around that our assault lives through the first turn. Turn 32  Here's a formation that Advance Wars veterans may recognize - vulnerable ground units protected by air units, who somehow block off the enemy ground units from approaching. 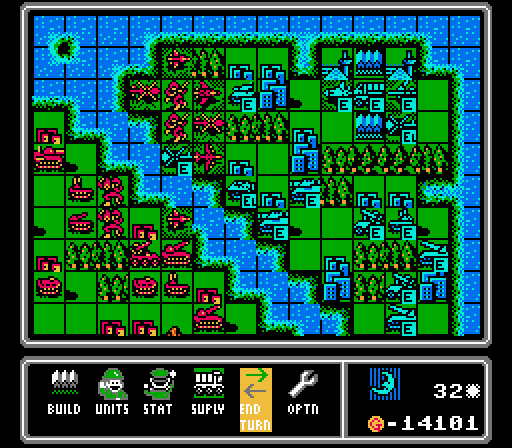 It's mostly successful, though a copter slips through for a couple of damage. Note the new bomber on the enemy airport, too. Turn 33 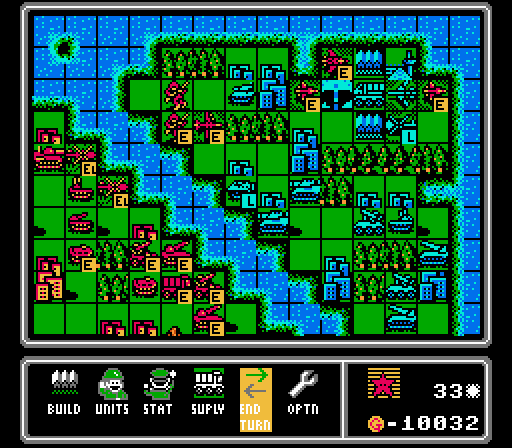 I sent forth our planes to finish off the enemy fighter and damage the new bomber. I'm still leaving our bomber screening the now-capturing infantry (40% complete).  The bomber and tank are able to take out one of our infantry, but the other is left untouched. An AA tank got all the way back to hit one of our scouts, too. Turn 34  Here's what happens when an air unit runs out of fuel at the start of your turn. It crashes, destroying it. In this case the mech our copter was carrying is also destroyed. I'd almost gotten the mech reinforcements across the river, too.  I've still got one scout at almost full strength that is able to come back and nearly destroy the bomber here. Our other air units gather around in their protective formation, as the city capture reaches 80% completion.  There's a new copter and a new AA tank but Blue can't break through our air formation this turn. Turn 35  Well, that's it, we can all go home now, right? Surely the rest of the map will fall like dominoes now. 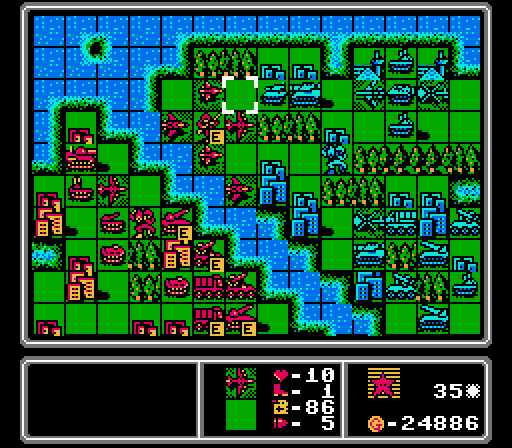 In reality, the next phase of the assault has a couple of challenges. We have to get closer to the enemy units, and further away from our own (particularly our rockets, who provide great covering fire across the river).  Our bombers are our only real offensive option in enemy territory, and they have a hard time doing enough damage to vehicles on cities to overcome both the defensive bonus and the repairs on the enemy phase. 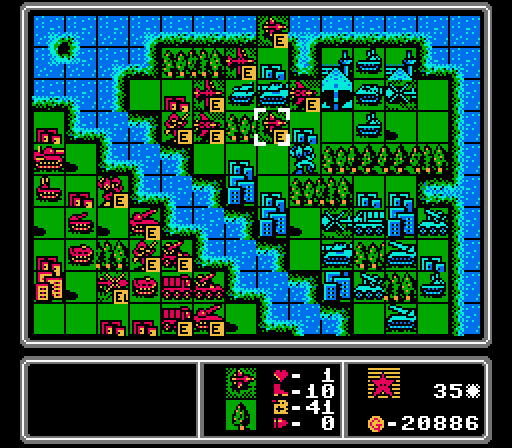 We've got a couple of weakened planes that aren't good for much more than blocking but we'll see how this goes.  They soaked up the attacks from the two AA tanks nearby, but there's another enemy scout added into the mix as well now. Turn 36 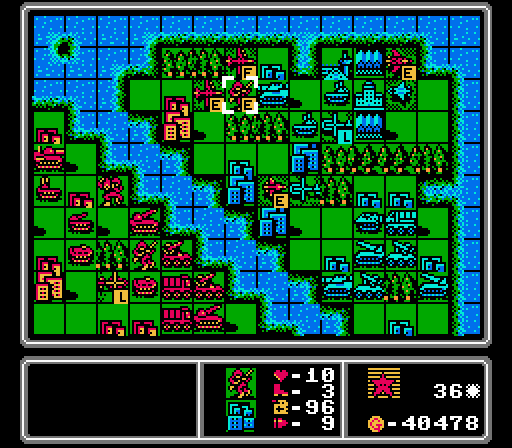 I probably should've retreated to consolidate our gains, but instead threw away our planes to take out a tank, weaken a scout, and weaken a copter. All to start a capture attempt that is likely doomed to failure.  We have enough funds to replace the fighter and scout that we just lost, but I've got four more planes at risk up there and our cash flow isn't really that good yet. 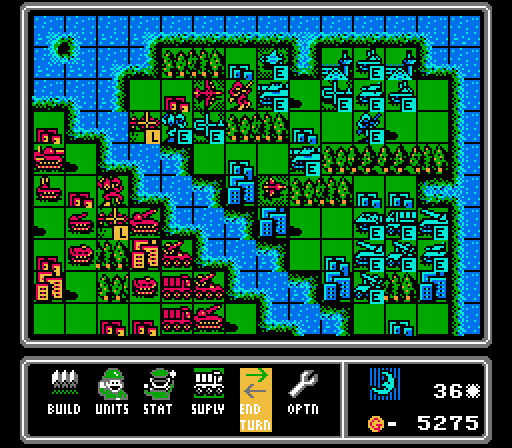 The AA tanks take down our fighter, and the damaged scout is able to destroy our weakened bomber. The medium tank fires on our capturing infantry, and we suddenly have an enemy mech looking to take back the city we captured already. Turn 37 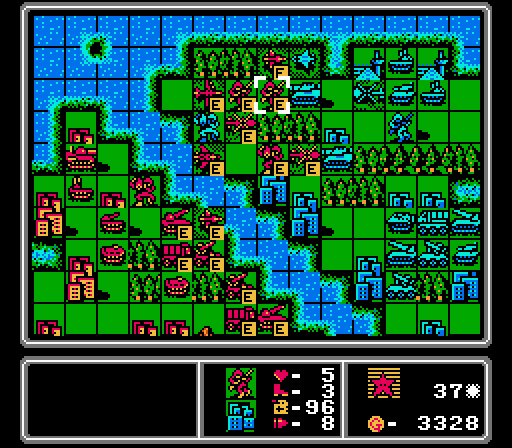 The enemy mech is brought down to two life with a few attacks. If our capturing infantry can live through the enemy phase, I actually have a shot at capturing that city, thanks to the reinforcements that just landed. That infantry lost half its life to the medium tank the first time, but maybe it'll get lucky this time?  Haha yeah no, this map hates me. This turn serves as your friendly reminder that medium tanks are as effective against infantry (and mechs) as APCs; they're just a lot more expensive.  Our mech didn't even survive one turn, and there's an AA tank squatting on the city we were just trying to take. Those are even harder to remove than tanks. The enemy indirect units are all still clustered in the lower portion of the triangle, too. We're going to need a different approach here. Turn 38  I can't rescue our remaining infantry but I can at least get most of our planes out of the way and finish off the enemy mech. 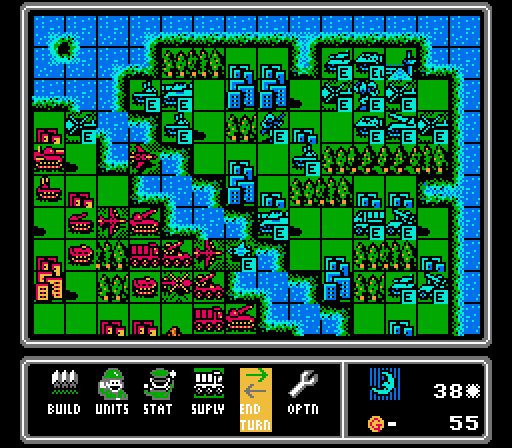 Thus ends our second assault. Though we at least managed to keep that captured city (for now). Turn 39  So I've come to the realization that we need to draw the enemy units in to the river to let our rockets help thin them out. Case in point, an easy six damage on this AA tank.  That lets our bombers in to finish off the AA tank and damage the medium tank. I'm hoping to draw out the other AA tank off the city so we can hurt it better next turn.  An infantry sneaks up to start capturing our hard-won city while the other enemy units retreat. Turn 40  I once again have to send a mix of expensive air units to slow down the cheapest unit in the game. Our bombers are merged together so that we can buy a new one. 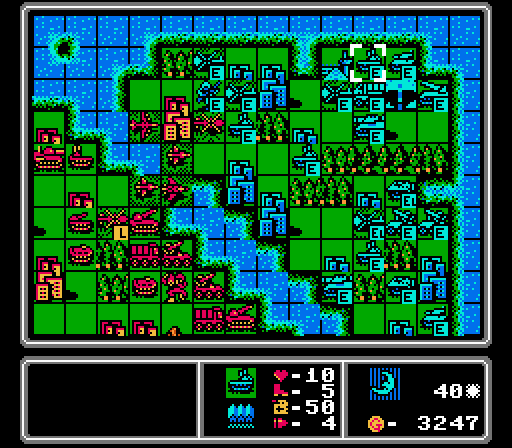 We don't face many attacks on the enemy phase, but there's a new medium tank and AA tank over there (among other things). Turn 41  For some reason I thought it would be a good idea to have all my expensive planes stay exposed to the multiple AA tanks in the area, so that they can chase down copters and infantry. Stupid trade but I've lost my patience at this point. 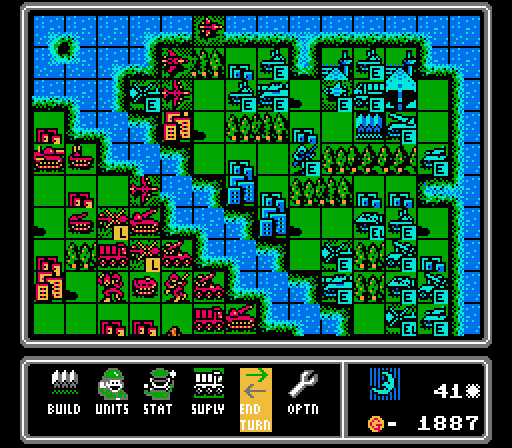 Luckily the two AA tanks only combine to take out a scout, leaving the rest of our planes intact. Blue builds a new scout of their own, too. Turn 42 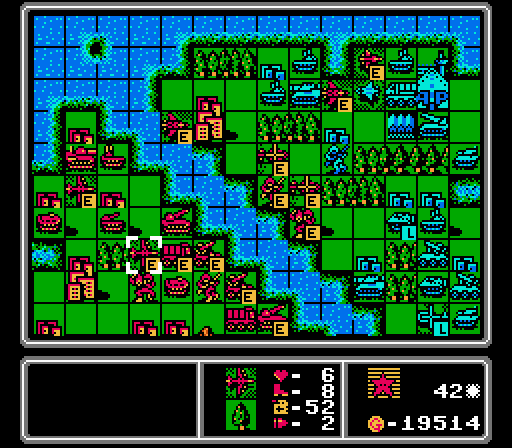 I'm determined to throw good money after bad by sending a damaged fighter and scout to harass the new enemy scout. On the up side I actually managed to get our bombers out of its range for once, and there's a new wave of footsoldiers dropped off on a couple of river cities. Begin Assault #3! 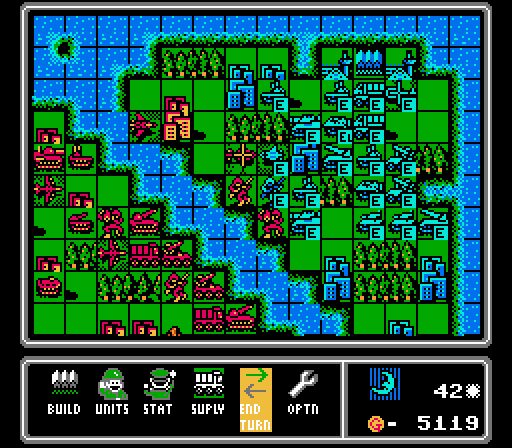 The goal of the third assault is not really to take a city, though it would be nice if I lucked into that. Instead I want to draw out some of those ground units into rocket range. So far it's just that medium tank, and we lost three air units to get it. Not exactly a favorable trade but our footsoldiers are also still alive and excellent bait. Turn 43 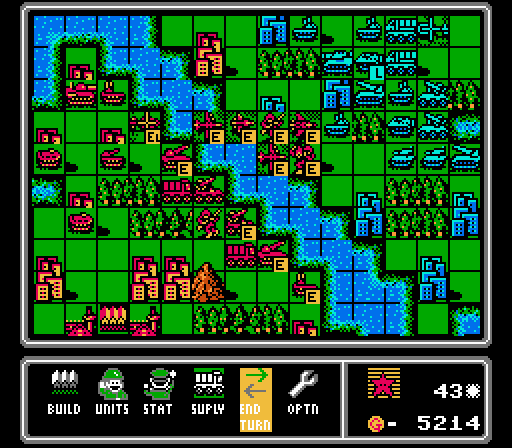 We successfully removed a medium tank, an infantry, and a scout. Though I left our fighter in AA missile range, oops. The enemy rockets also moved up and can fire on us, too.  Losing the infantry to the rockets and tank mean the AA tanks can move up to destroy our scout and bomber here. At least they're exposed to our own rocket fire now. So ends our third assault. 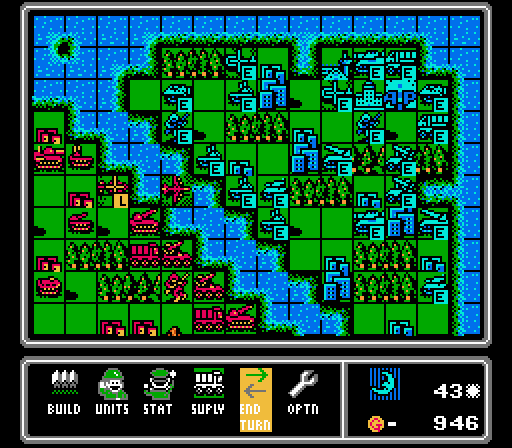 Oh good, another infantry to try and steal back our city, and another new medium tank. Turn 44 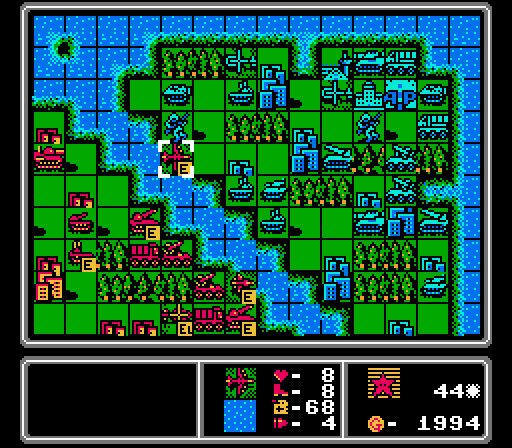 The rockets and our remaining bomber remove one AA tank and damage another. I leave the bomber there just to draw out another AA tank - they're actually pretty closely matched on neutral ground.  I didn't really expect to lose the bomber there, but it got in a few hits of its own. That enemy infantry is halfway to taking back the city though. Turn 45 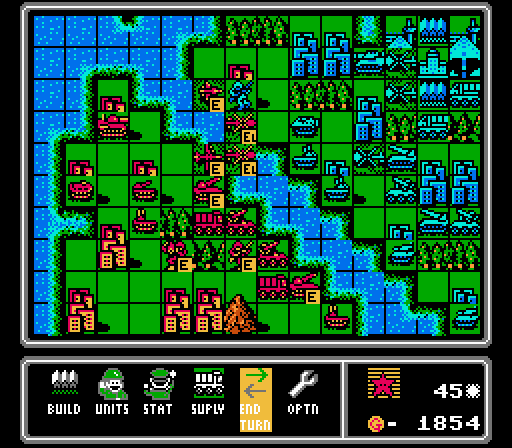 Another AA tank destroyed. Meanwhile we send some air units to weaken the capturing infantry and delay it by a turn. 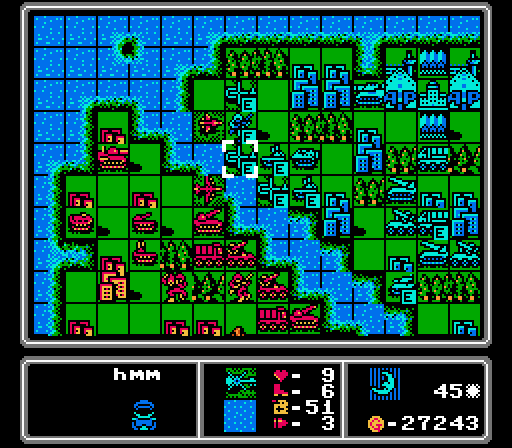 I intentionally sacrificed one of our loaded copters to hurt the capturing infantry and pull an AA tank off its city. I didn't expect the other one to then get blown up by two enemy copters that swooped in though.  You're too late fighter, I already threw away all my air units against your AA tanks. Turn 46 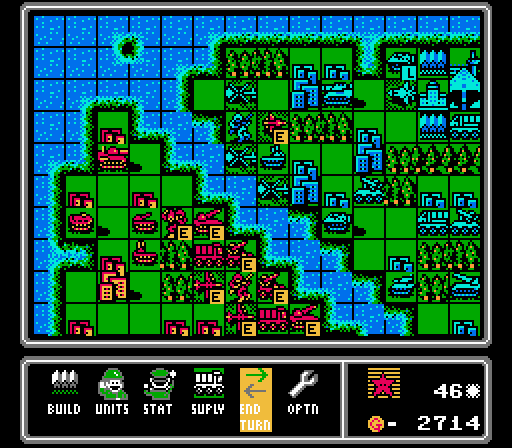 I moved the scout around to the other side of the city to leave room for another attacker, and then neglect to bring forward another attacker. Now the AA missile is going to get it. The AA tanks are neutralized at least - the only one left has just one life remaining.  Apparently Blue is comfortable throwing out expensive planes again. That's actually to our benefit since we have a much easier time getting rid of air units than ground units right now. For example, the enemy fighter flew ahead to attack a mech of all things, and is now vulnerable to both our AA missile and an AA tank. Turn 47 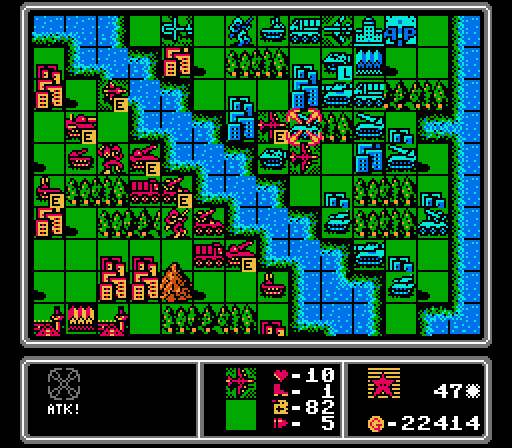 After getting rid of the fighter and copter on our triangle, I realize that there only threats left against our bombers are the AA missiles. Both bombers combined are enough to take out one while staying out of range of the other. We're finally making some progress! 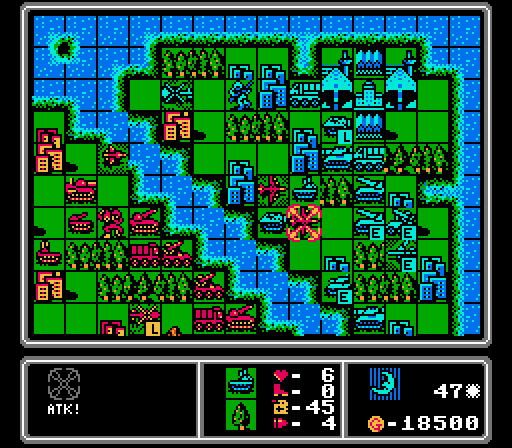 The last enemy AA tank, who is far less damaged than I thought, suicides on one of our bombers. I'll take that trade at this point. We have almost uncontested air superiority for a brief moment. 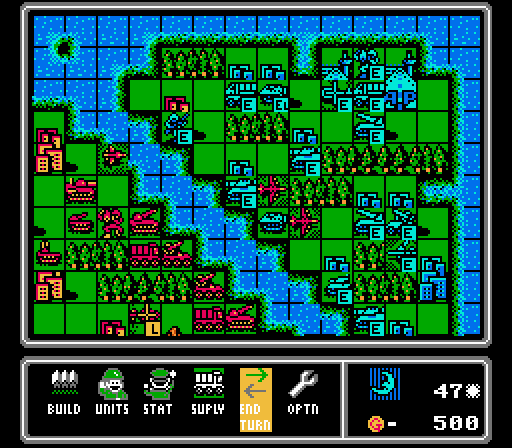 There's another new medium tank but that won't help much against bombers given free reign of the skies. That damaged infantry is back trying to capture our foothold again though. Turn 48  The bombers can't quite finish off the other AA missile, but our scouts do take care of the infantry. I retreat our own AA missiles away from the enemy bomber. I probably should have sent the scouts after that bomber instead.  Particularly since the bomber was able to severely damage one of our rockets, who are central to our current offensive.  Another infantry is dropped off on the captured city, and a new AA missile pops out. Turn 49  Our scouts once again soften up the infantry, our bombers go after the new AA missile, and we have a new fighter move out and cripple the enemy bomber.  There's a new AA tank in town so our bombers will have to be more careful now. Turn 50  Our bombers have been so active that one is out of ammo and the other is about to be. Our scouts are running low as well so one finishes off the enemy infantry while the other harasses a helicopter. That AA tank can only get one of us!  If I'd just attacked the infantry from the other side, the scout wouldn't have been left in range of the now nearly-repaired AA missile. There's a lot to keep track of on this map and none of the helpful player aids of later games, but I've still made a lot of unforced errors like this one that keep slowing things down. Turn 51 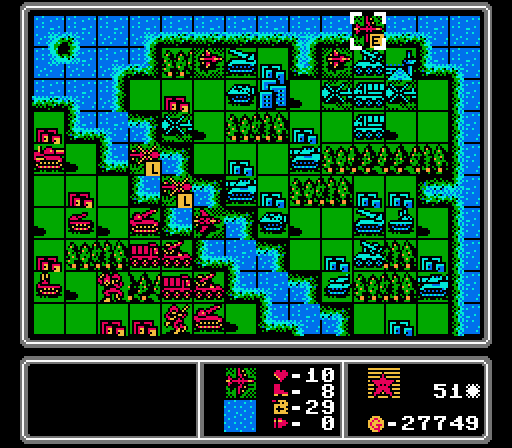 The AA tank destroyed our bomber that had run out of ammo, and our other bomber uses its last shot to not-quite-destroy the AA missile. I really should've focused on one of them instead of trying to weaken both - now they'll both get repaired. I don't think that bomber has enough fuel left to get back to one of our airports to reload and refuel, either.  Using our fighter against a copter isn't a great trade for us, but it can't be touched where it is anyway. We do get a new bomber, and merge together our scouts.  The two damaged AA missiles merged together which is a good result for us. I don't really have a good angle for another assault yet though. Turn 52  Time for another round of trying to bait more units into rocket range. We finished off another medium tank this turn. Off-screen we also picked up a new scout. 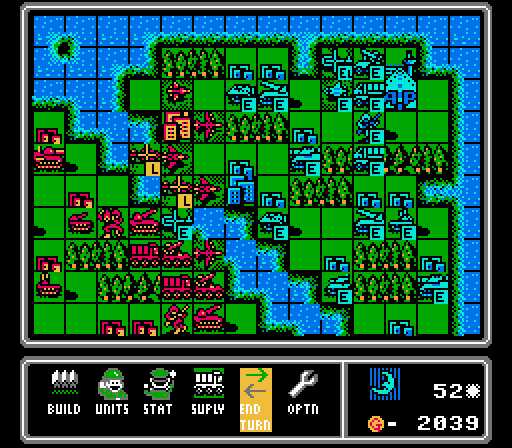 I let a copter sneak in to get in a hit on one of our loaded copters, and Blue built another scout, but otherwise not much else to report on the enemy phase. Turn 53 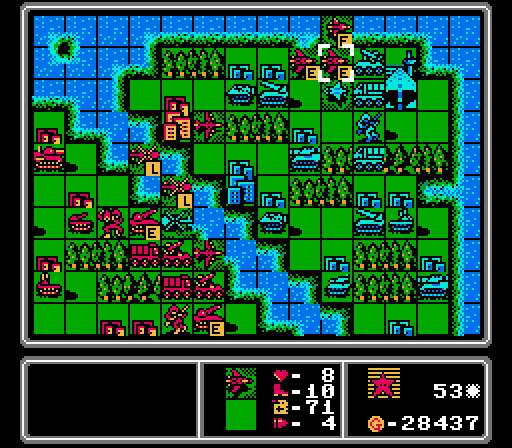 I send a scout and a couple fighters out to take out a copter and weaken the new scout. Still not a great trade but that's really all they can do anyway.  I move a fresh bomber up partly to destroy an enemy tank, but mostly to try and give our ammo-less bomber a place to merge into. However since both bombers are undamaged they can't be merged together.  Here comes Assault #4. Both enemy rockets can cover the two middle river cities so it might not be a long assault.  The mech doesn't make it through the enemy phase, but our bomber is untouched and both copters lived. Better than I expected, really. We've now put in another 30+ turns on this map, and while we've made some progress this time, it's still excruciatingly slow going. I needed to take another break at this point because my hard drive filled up recording this update. So I've gotten it all written up in advance here so I could clear out those videos and continue recording! Thankfully the next recording session went a bit smoother, but we'll see that next time! DKII fucked around with this message at 08:24 on Jul 6, 2021 |
|
#
?
Jul 6, 2021 08:19
|
|
|
PS: It's all over but the writing Any bets on how many turns it took in the end?
|
|
#
?
Jul 7, 2021 03:00
|
|
|
Can the turn counter handle triple digits?
|
|
#
?
Jul 7, 2021 03:38
|
|

|
Hmm that seems like it might be too much of a hint. (Yes.)
|
|
#
?
Jul 7, 2021 04:31
|
|
|
113 drat grueling turns. Horror.
|
|
#
?
Jul 7, 2021 06:07
|
|

|
It took us about 30 turns to establish a beachhead, and we now need to defend it while also handling their existing horde of units, so I'm guessing it'll take at least double that more, so I'm going to go with a guess of 127 turns.
|
|
#
?
Jul 7, 2021 10:48
|
|


|
I'll be honest, I wasn't actually expecting that. 111
|
|
#
?
Jul 7, 2021 12:57
|
|
|
666 turns, and you only won it by offscreen cheating that you won't confess to. It will eat away at you more and more, rendering you more and more empty inside, until finally, on your deathbed, you finally repent with your final words "Triangle islands..."
|
|
#
?
Jul 7, 2021 14:02
|
|


|
Randalor posted:666 turns, and you only won it by offscreen cheating that you won't confess to. It will eat away at you more and more, rendering you more and more empty inside, until finally, on your deathbed, you finally repent with your final words "Triangle islands..." This map will give me nightmares but not for that reason. Also you all have a high opinion of my tolerance for grinding out this map.
|
|
#
?
Jul 8, 2021 05:08
|
|
|
Part 10: Triangle (3 of 3) All right, let's get this poo poo over with. Turn 54  Last we left off, we'd gotten rid of most of Blue's anti-air support. Even without challenges, dealing with AA tanks in particular is difficult on this map. There aren't really any good counters to them that can actually cross the river. Your best bets are bombers, who are an even fight but 4-5 times more expensive, or mechs, who are cheap and can get in 4-5 damage on neutral terrain without taking a counterattack. Thus why the best strategy for this map in general is a flood of copters and mechs.  Anyway we have two full-health bombers here, but one is out of ammo. So I attack this AA tank with the fresh bomber, take a ton of damage, and then merge in the ammo-less bomber. Now I still have one fresh bomber with ammo, and the AA tank is too weak to do much. Better yet I freed up a deployment slot so I can build a new bomber right away! 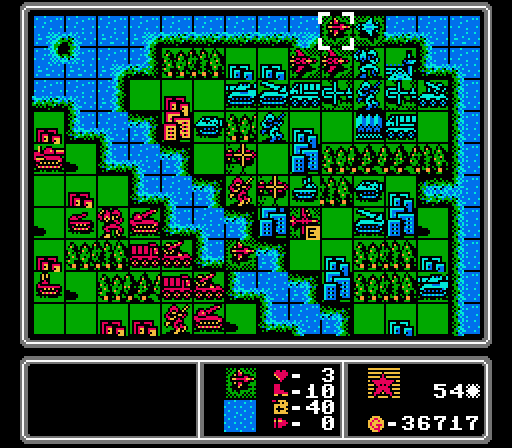 I can't attack the scout any further without getting hit by the AA missile, so everyone retreats back to the river. Unfortunately the scout is going to go after the bomber now. 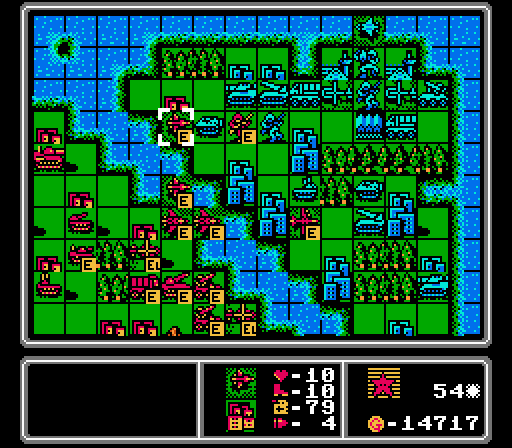 With the Blue triangle thinned out a bit, I start re-arranging our forces. In particular the rockets are moving down to cover more of the Blue cities along the river, and the two copters load up again. Assault #4 is basically already over but I sent the infantry up where it can't be hit by either rocket, to force another unit to stay up there and attack it. Oh and the scout performs my favorite move for this update - using an air unit to keep a footsoldier from being able to capture a city. The AA missile can't reach it and the AA tank and scout can't kill it. Even if they did, using those units there instead of against our bomber would be a win for us.  Not a ton of action on the enemy phase, but several things broke our way here. The scout moved down to hit our bomber for four damage, sure. But the AA tank retreated right into the path of our rockets instead of attacking. Our infantry was wiped out by the medium tank, who is now stuck three turns away from the bottom of the map. And the AI built a tank and two copters - no real threats. Turn 55 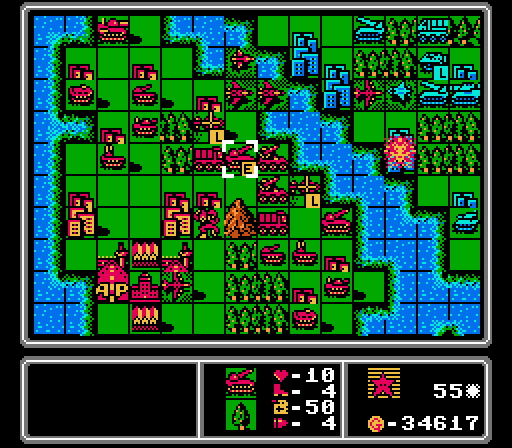 I pause the great rocket move to take out the AA tank as the obvious first action of the turn. The other rocket goes after the tank squatting on the city on the far lower-right corner.  As long as I don't do it too much in one turn, I can afford to throw away a plane to get rid of anti-air forces. In particular that fighter is going to get destroyed by the AA missile, but the scout is no longer a threat to our bombers. I had our bomber go after the AA missile, but it only did three damage and most of that will get fixed up on the enemy phase. Off-screen I built a medium tank, just so I'd have an even two copies of every unit type - much easier for me to keep track of what's missing / needs to be built each turn that way.  There's a new AA missile on the field now, but we actually got a couple good breaks here. The two rockets separated, and the lower one in particular is not covered by the AA missiles right now. Turn 56 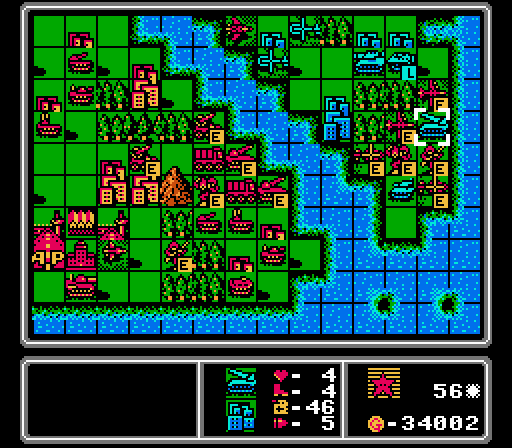 A lot to unpack here. The bombers took out most of the rocket's health, and our own rocket weakened the tank further. But more importantly I've got two footsoldiers down that are both inside the rocket's range, and protected by a wall of air units from anything but the tank on the city. Here we go, Assault #5! 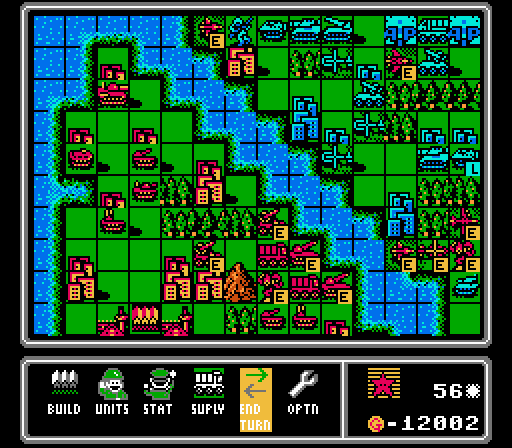 Up top, the scout moves off the city to get away from the new AA missile, but still attacks the infantry to make it harder to capture anything there. The fighter moves up to wipe out the damaged scout - it's sitting inside the range of both AA missiles, with nothing else around that can attack it. Our other scout and fighter merge together, and we buy a new fighter back at HQ.  The tank on the city attacks our mech, but can't do much to it. 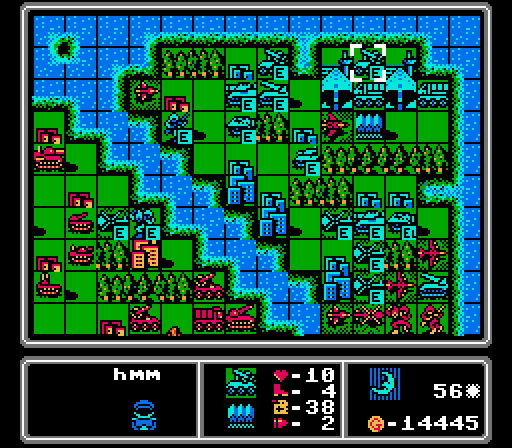 The biggest problem with the assault is a few copters, though one is heavily damaged already. The two AA missiles both actually retreat, leaving us even more open with our air assault. Oh and a mech landed in our territory, but it won't survive long. 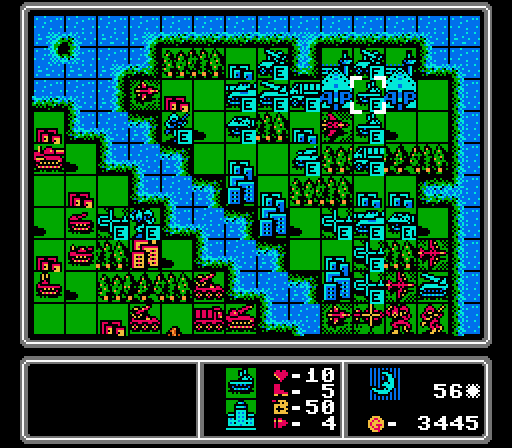 Dealing with AA tanks is the worst part of this map, and Blue just built two more of them. Turn 57 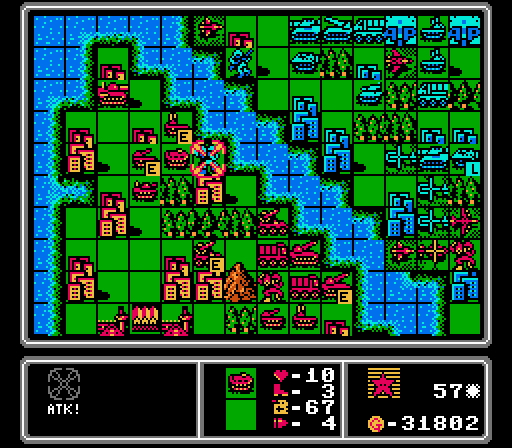 We use a rocket to remove the tank on the lower-right. Then an AA missile and an AA tank get rid of the intruding copter, while an artillery and an APC combine to take out the mech.  The bomber and the mech take out the rocket, while the infantry starts its capture. My eyes light up as I realize the mech is now right next to a second available city that's protected behind the air wall. Our copters merge together. 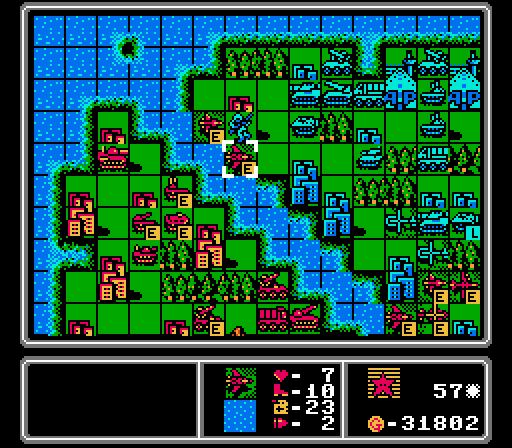 Up top, the scout and fighter go after the infantry to protect our city up there. Another scout and fighter form the rest of the air wall down at the bottom. The main goal there is to keep the enemy copters from being able to reach either the infantry or the mech.  More good news for us on the enemy phase. The copters move down off-screen but can't reach anyone, and will be easy to pick off next turn. The AA tanks don't advance close enough to reach any of our planes next turn, so we can maintain the air wall another turn. And the AI builds a bomber, which is a huge funds-soak and an easy threat for us to handle right now. Turn 58  We finally capture another city. With a little patience we'll finally be able to crack this map open now. 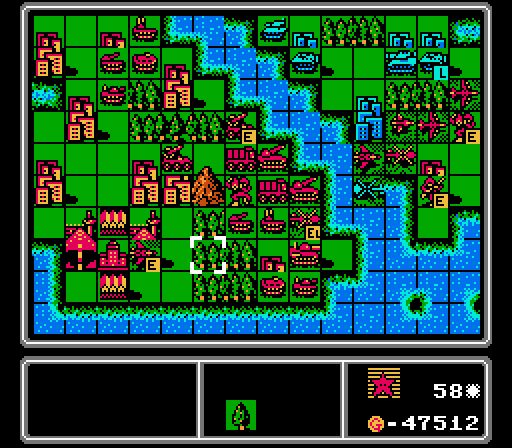 The mech starts a capture, too. We also load up another infantry into a copter to help out, shoot down a copter with an AA missile, and retreat a fighter that had just eight fuel left. 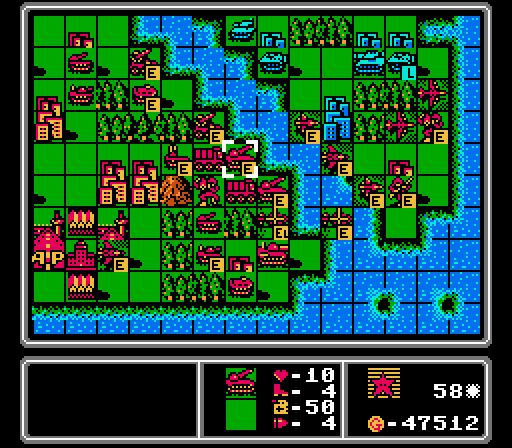 I have to move some of our air wall around to deal with the other copter. That leaves an opening for the enemy medium tank, but it can't reach the capturing mech, and if it tries it'll get torn up by our rockets and bombers. Speaking of which, our rockets fire on the APC on the upper-left, dishing out eight damage.  The medium tank takes the bait, and while it hurt our infantry pretty bad, it'll heal up a lot of that next turn anyway. 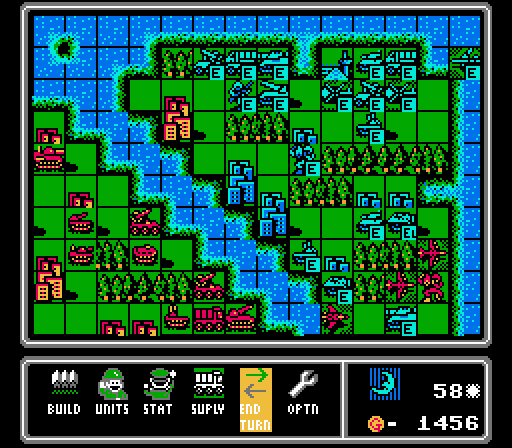 One of the AA tanks moves down to take out one of our scouts, but it's also in rocket range now. The AI builds a bunch of units that don't matter - two copters, a mech, and a tank. Turn 59  The medium tank can wait, that AA tank has got to go. 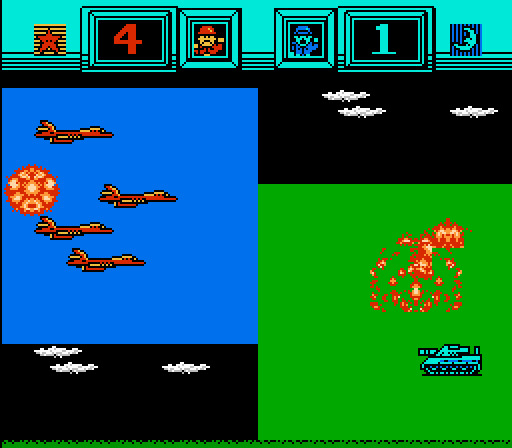 The two bombers are almost able to kill it on their own anyway. 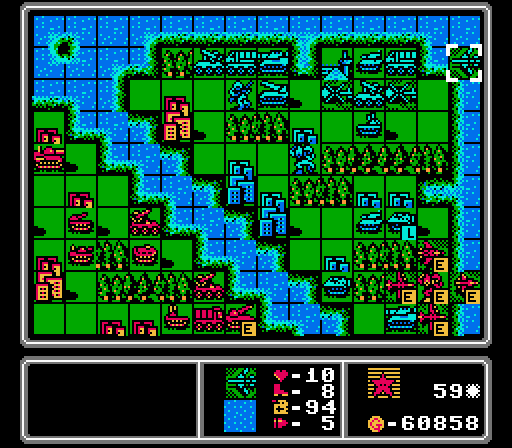 I kind of forgot this bomber was up here. Luckily it can't touch our mech, but I think it can reach our infantry. 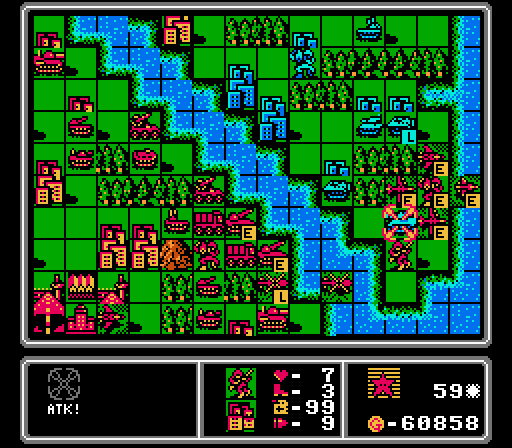 I do enjoy it when I can have an infantry finish off a medium tank.  There we go, another infantry dropped off and they're both protected by the air wall. We also built a new scout and a new copter, after merging our damaged copter into the unloading one. 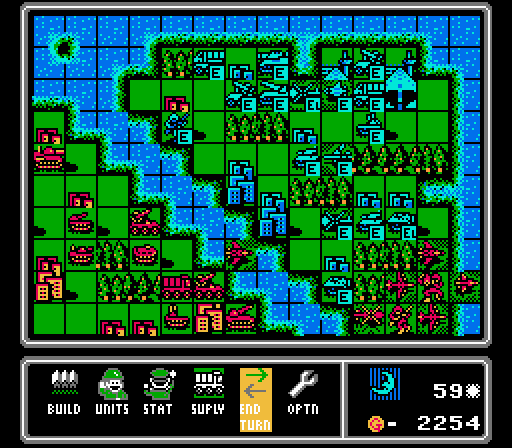 The enemy bomber moves up and Blue builds a new scout. Turn 60  The mech finishes its capture. We've got three of Blue's cities now, giving us a 6000 G per turn advantage. In fact you may have noticed that I already can't spend everything we're making each turn.  The rockets remove the APC from the city. I happen to have a fresh infantry in range to start capturing it, if I can figure out how to protect it long enough. 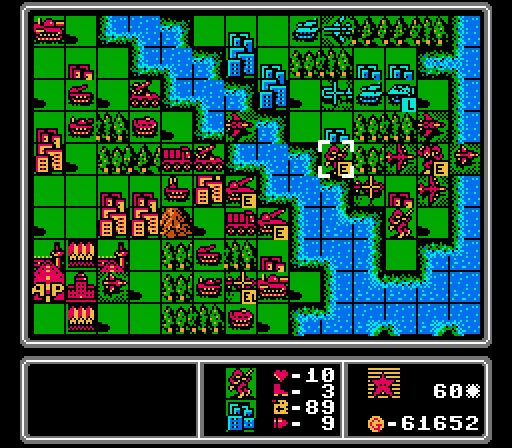 Eh gently caress it I'll figure out the details later. (I proceed to spend the next several minutes doing those chess moves where I move a piece, keep my finger on it for a minute, then move it back, trying to piece the puzzle together. Only with planes.) 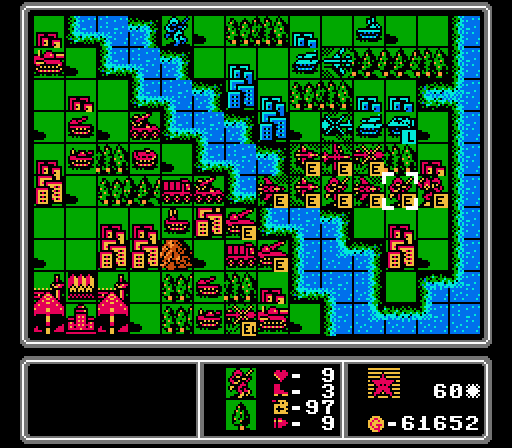 I guess I went with more quantity over quality. I did take our damaged bomber, which was out of ammo, and move it into the healthier bomber so I could go buy a new one. And I moved up an infantry just to keep the other units from being able to gang up on the mech as easily. Oh and don't worry about that enemy infantry on the upper-left city, it has only three life so will take forever to complete the capture. 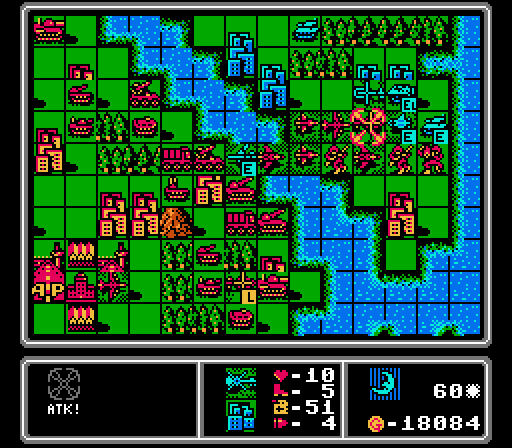 The scout and copter team up to take out our copter, which is really the most expendable unit from our air wall anyway. The tank hits the mech but can't do much to it, and the bomber takes a chunk out of one of our rockets.  I made sure that the only unit the AA tank could reach was the bomber, so that it'd at least take some damage from attacking us.  Another medium tank shows up. Nothing to worry about. I can't believe I'm saying that, but I'd much rather see a medium tank than the three AA tanks that the AI could've bought instead. Turn 61 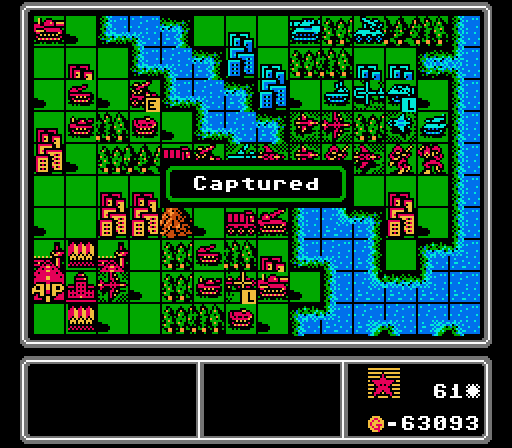 That's three cities captured by the fifth assault. An unqualified success beyond my wildest dreams.  Here's where we currently stand. We're short by the copter that got blown up last turn but otherwise full up on units and with plenty of funds, so we can keep playing aggressively with our planes to start thinning out the Blue army. The goal is going to be to do more damage each turn than Blue can gain back in funds. So in addition to targeting the immediate threats, we'll be going after the most expensive units we can hit - medium tanks, rockets, AA missiles, and any air units. 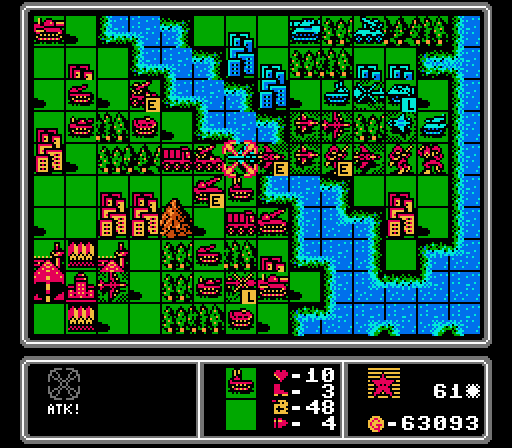 For instance, our own AA tank gets some action by finishing off the bomber (after our fighter weakened it first). That's 20000 G in damage right there. 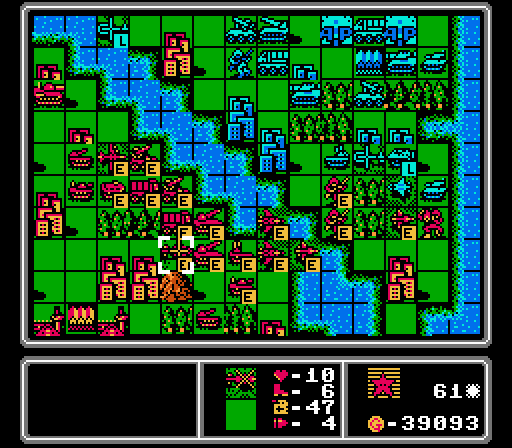 I suicide our damaged bomber to weaken the AA tank further, than have an infantry chip it down to just one life remaining, but don't manage to finish it off (0.4 * 5500 = 2200 G damage). The AA missile fires on the loaded copter as well (0.7 * 4000 + 0.7 * 2000 = 4200 G damage). We also have another bomber near the top of the map, safely out of the enemy scout's range this time, but able to reach anything near the river next turn. 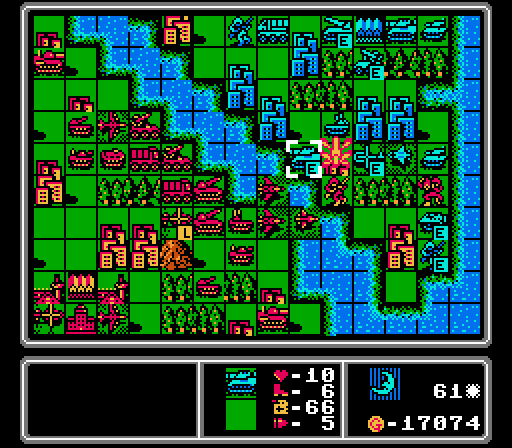 A medium tank rolls down to finish off our infantry after the copter softened it up. But our rockets will get some revenge next turn. Also I stupidly left a scout in range of an AA missile, but it was already heavily damaged anyway so now I just get to make a new one.  The tank goes after our mech again, then for some reason the scout decides to attack our infantry. We'll heal up all of that damage in just the next turn. Oh and the copter (0.1 * 4000 = 400 G damage), the tank (0.2 * 6000 = 1200 G damage) and the scout (0.1 * 15000 = 1500 G damage) were hurt by their attacks, too. 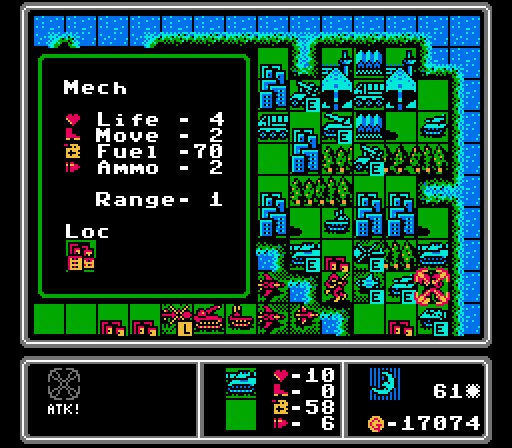 Oops, I did not see that opening for the medium tank at all. Bye mech!  Ugh, Blue builds another AA tank, along with an APC and a copter. However we did a grand total of 29500 G in damage this turn, almost double the enemy's income. Turn 62  Our rockets combine to get one medium tank but because one of our rockets is still damaged, it can't get the kill (0.8 * 16000 = 12800 G damage). 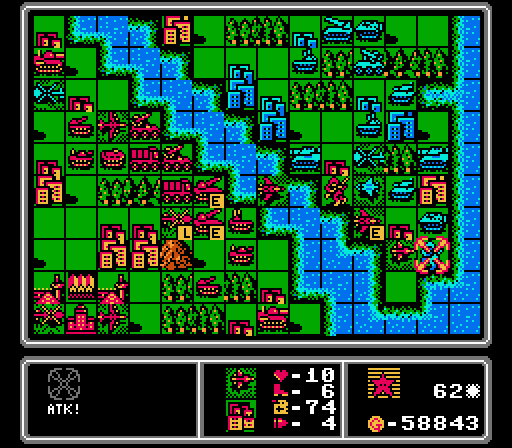 Our fighter hits the scout hard, and another fighter will later finish it off (15000 G damage), while our scout performs a city capture blockage while also hurting the infantry a bit (0.3 * 1000 = 300 G damage).  The infantry is pretty screwed on its own anyway, so might as well finish off this AA tank (0.1 * 5500 = 550 G damage).  On the home front, the AA missile shoots down the copter and the APC finishes off the mech (0.3 * 4000 + 0.3 * 2000 = 1800 G damage).  All that damage and we've still got two fresh bombers that didn't even get used this turn. We've still got plenty of funds to burn, too.  So, I was trying to draw out that AA tank. I did not notice that the AA missile would be able to shoot down our other fighter, though. Also that sneaky infantry at the bottom right is trying to get a different city back instead. The AA tank took a tiny bit of damage from the fighter (0.1 * 5500 = 550 G damage). Our total score for this turn? 31000 G in damage, more than double Blue's income this time. 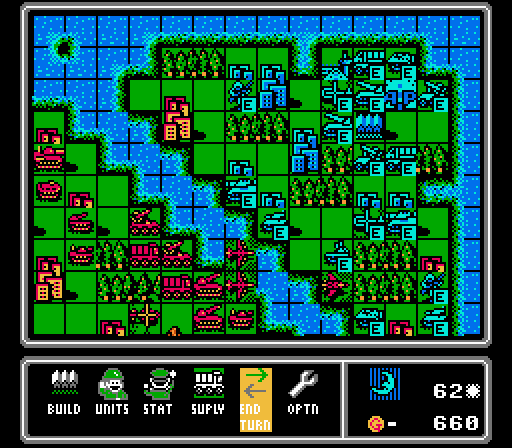 A new rocket will make approaching the HQ tricky, but isn't a threat to our planes so I'm thrilled at the money sink. Turn 63  I'm going to stop keeping score now, but destroying that AA missile alone almost hits our quota. We also have the scout attack the capturing infantry again, and our damaged fighter suicides on the copter. One rocket strikes the AA tank and the other finishes off the medium tank.  I'm not sure why I dropped off that mech without support, but at least we have two new fighters, even if it took most of our cash reserves.  It's a bad enemy phase this time. One bomber gets hit by the remaining AA missile as planned, while the other counter-kills the AA tank. However our mech and copter both get immediately wiped out. I'm not even counting that as an assault attempt. I've got another capture attempt on our initial foothold, too. 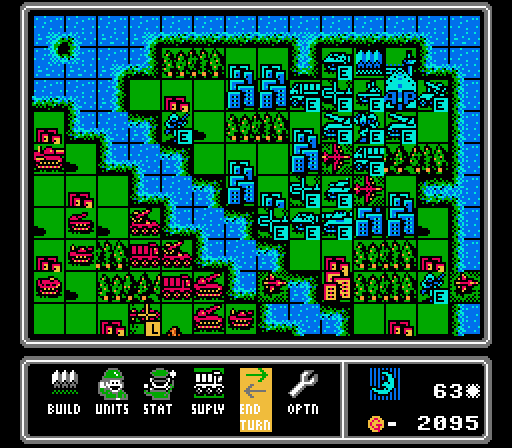 Another AA tank (and a copter and a mech). Just can't keep these gone. They're just too cheap for how hard they are to get rid of on this map. Turn 64 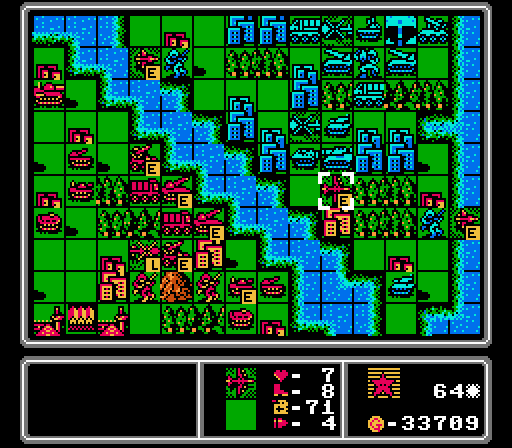 One bomber takes a shot at the medium tank while the other merges into it. One rocket repositions while the other hits the APC. An AA missile shoots down a nearby copter. And our two scouts keep weakening the two capturing infantry. 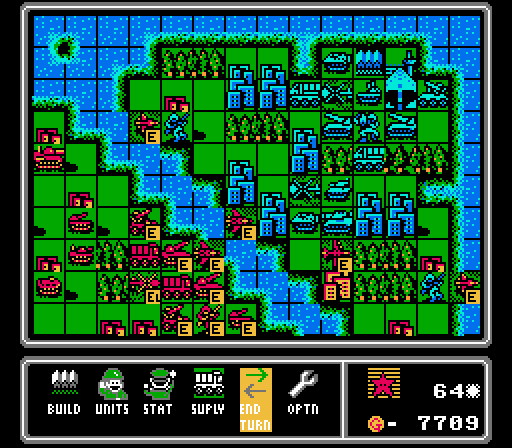 Our fighters move up, and we replace all our lost units. We've still got a healthy income each turn but I can't keep throwing away planes all the time anymore. 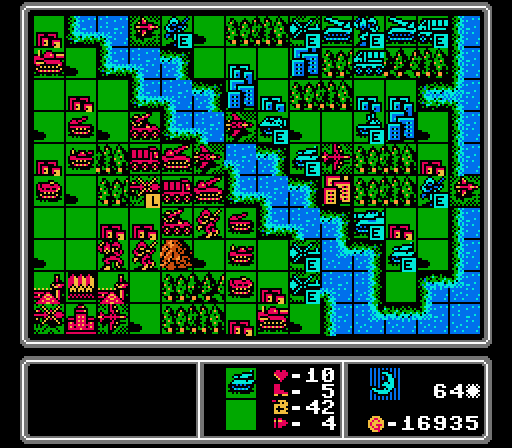 I'm not sure why the enemy vehicles are hanging out near our captured cities, they can't do anything down there and we don't need to ever go back there. I guess it's better for us that they're out of the way so I shouldn't complain.  The rocket moves up into range of our rockets and the AI builds another mostly-useless medium tank. Two wins there. Turn 65  Fighters can't do much to most vehicles, but they can still finish off heavily damaged ones like this APC. We also had one scout finish off an infantry while the other moved over to finish off a copter that the AA missile had weakened first. The other fighter also dives in to get in a couple more damage on the rocket, and try to pull out the AA tank.  Well we did draw in the AA tank at least. Also a collection of enemy vehicles continues to hang out in captured territory. That infantry is down to just one life and will never finish that capture. 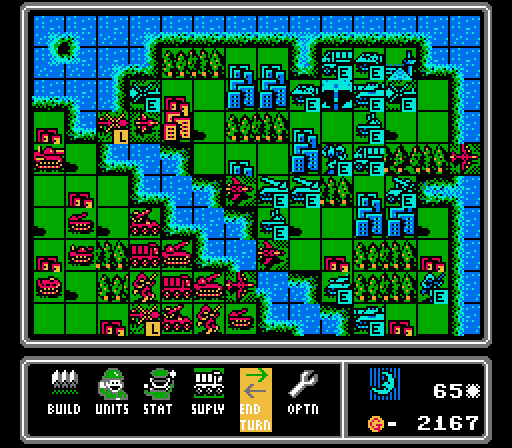 Well the other rocket came out to play, but Blue builds yet another AA tank. Turn 66 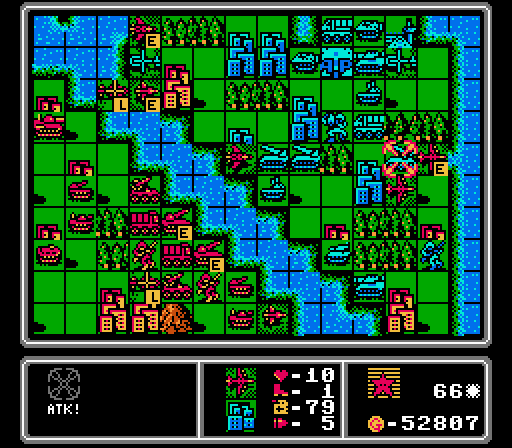 Our rockets cripple the nearby AA tank, and our bombers take out the AA missile. On the upper left, our scout and damaged fighter attack a copter but can't destroy it.  Assault #6 is a bit better coordinated. A fighter finishes off a damaged rocket, and a mech gets dropped off inside the other rocket's range. It's still vulnerable but only from one side. I do eventually remember to have our AA missile shoot down the copter on the upper-left, too.  The damaged AA tank suicided on our bomber, while the fresh one went after our fighter instead - a good trade for us. The tank does go after the mech, as expected, but only does a couple damage. 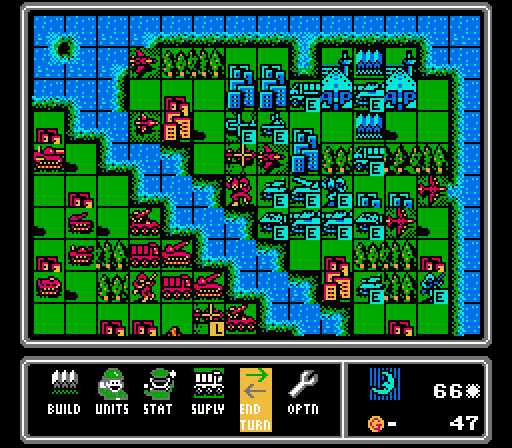 Yes, another medium tank! Still feels weird to cheer for that. We've got quite the cluster of targets in the center of the map now. Turn 67 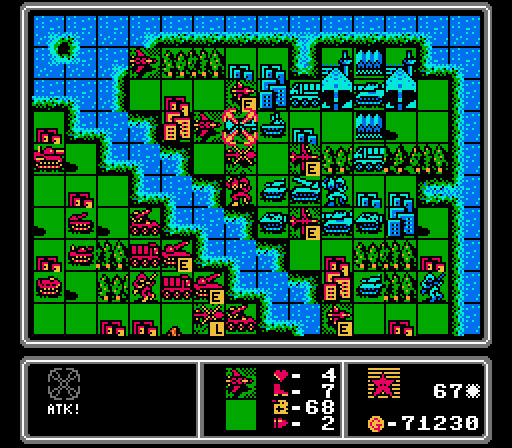 The bombers go after the remaining rocket, the rockets go after the APC and medium tank, and our damaged scout and fighter finish off a copter. 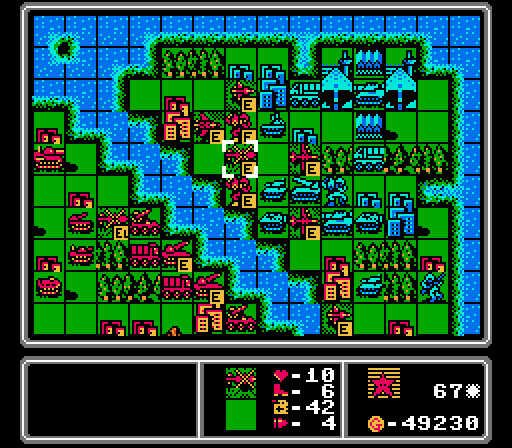 Our fighters merge together so I can buy a new one. Our capturing mech moves off to get some damage in on the AA tank, and we get a new mech dropped off in the same spot.  The main action on the enemy phase is the AA tank shooting down a damaged scout, and a new rocket getting built. Our new mech got attacked by the tank again, but again only for a couple damage. Turn 68 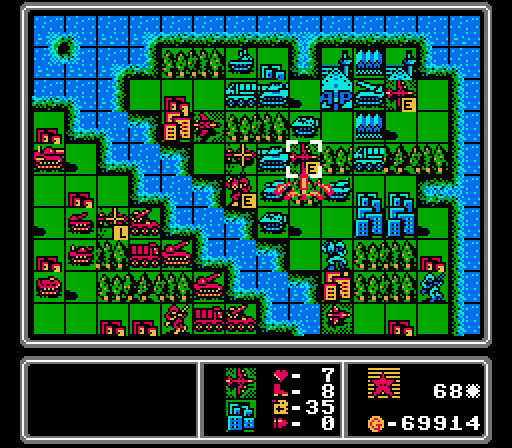 One mech starts capturing (40% progress) and the other mech merges into it. The bombers each attack a rocket, destroying one of them. 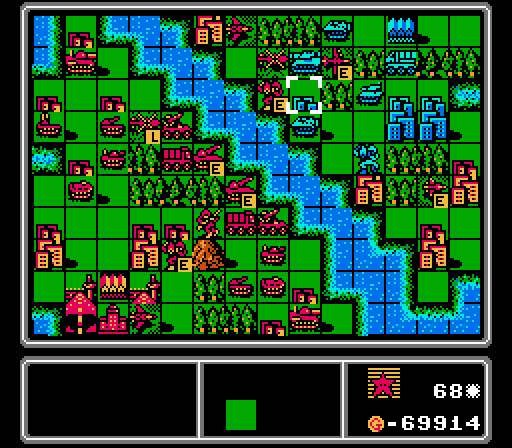 I finally remember to get rid of the capturing infantry on the lower-right. Meanwhile one rocket finishes off a tank, and the other starts in on the APC. 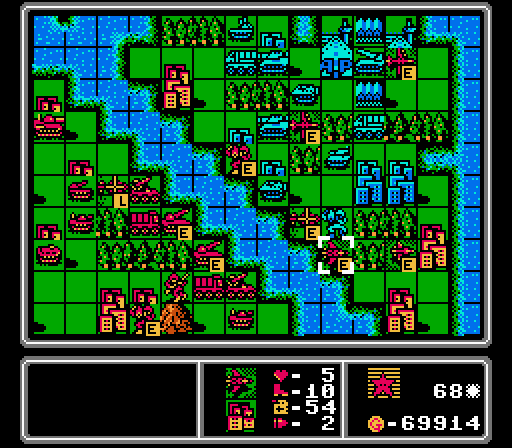 The fighter hovers over the city to keep the mech away. 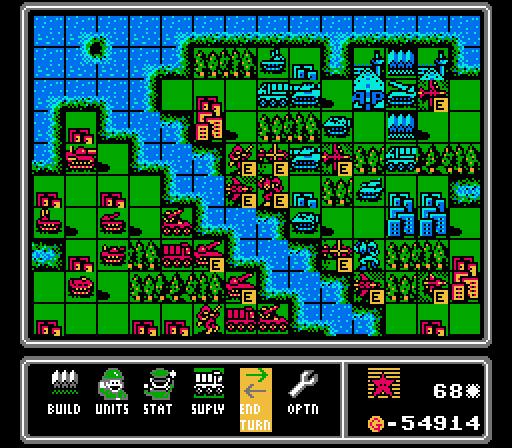 Another infantry is dropped off, though it's pretty vulnerable up there. We build a new scout to replace the one lost last turn, too.  The enemy phase has some action but most of it not meaningful. The medium tank attacks our infantry, the APC attacks our mech, and the AA tank attacks our bomber (taking a ton of damage in return). Oh and there's a new AA missile - mildly annoying at this point but not a big concern. Turn 69 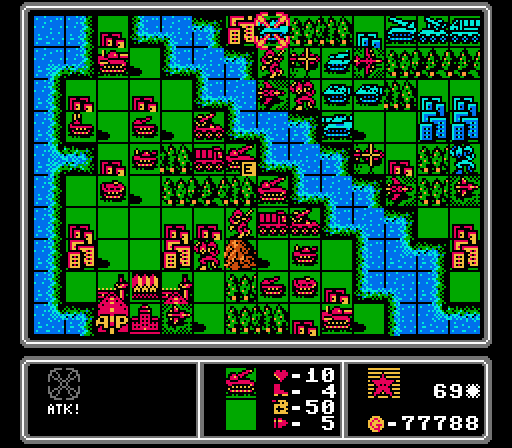 The rockets combine to take out one of the medium tanks. 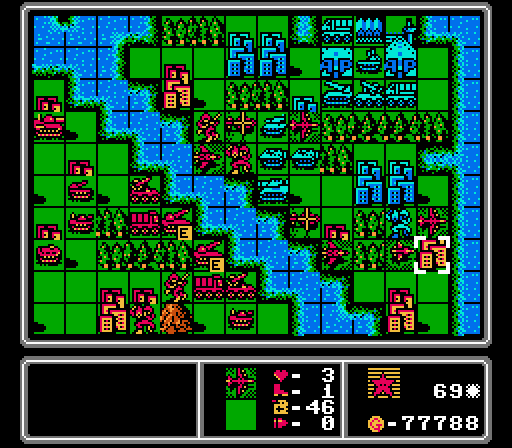 The bomber that just got hit by the AA tank is now out of ammo, so it parks on the city for a turn. The other bomber is also out of ammo and merges. That doesn't give the merged unit any more ammo, but it does free up a slot for me to build a new bomber. (Our bombers have been running out of ammo like crazy in this update!) 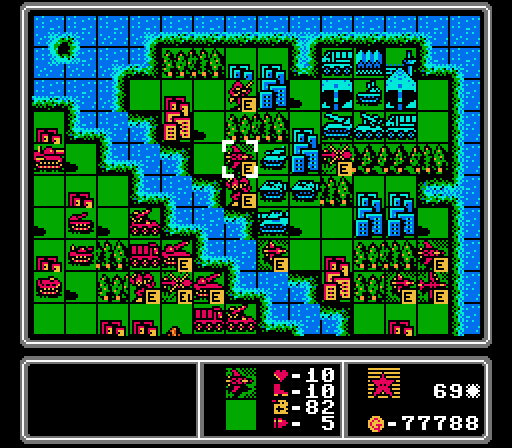 Down near the bomber, we have a scout and a fighter finish off the nearby mech. Meanwhile I move the copter near our capturing mech inside the AA missile's range, then throw a fighter into that spot instead. The fighter won't get shot down in one turn, so it's a more effective (if more expensive) screen. I also send the wounded infantry up to start capturing as a distraction, trying to keep our mech alive long enough to complete its capture (70% complete now).  The distraction is successful as the rocket goes after the infantry instead of the mech.  The mech does get hit by the APC next to it, but I can still theoretically complete the capture with it (it'll just take three more turns instead of one, now). 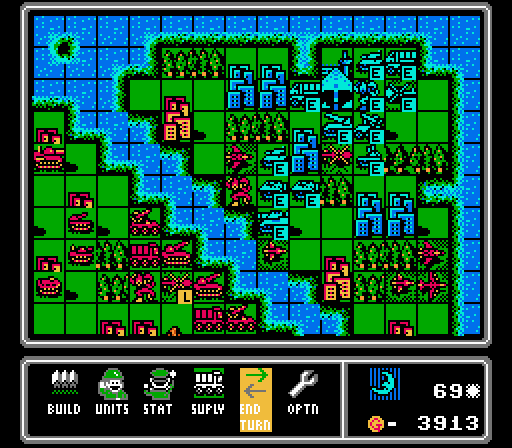 Blue ends up the turn by building a copter, a mech, and a tank. Nothing stressful there. Turn 70 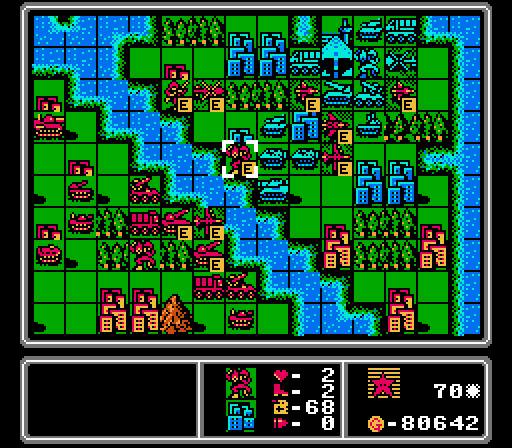 The fighters merge together, the scouts attack the rocket and the copter, the copter drops off a new infantry, and the mech continues its capture (now 80% complete). Oh and a damaged copter suicides on the AA tank. 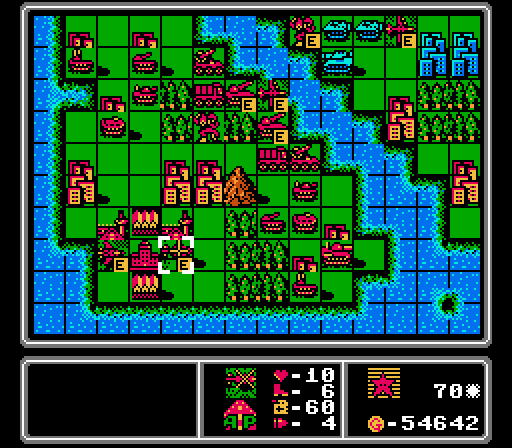 So we get a new fighter and a new copter.  The new infantry successfully distracts the rockets again. Even better, the infantry will heal all that damage back up next turn. 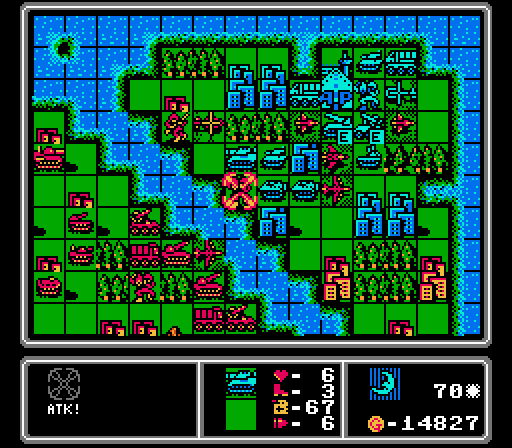 The mech doesn't make it through another turn, though it does pull the last medium tank off of its city protection. The AA missile also fired at our ammo-less bomber - I set that up on purpose so I could merge the two bombers together next turn. 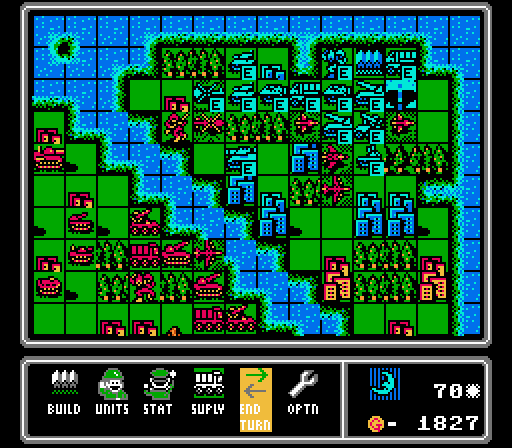 Most of Blue's units retreat to the top of the map, leaving the middle wide open if I can take advantage. There's also a new rocket. Anything that's not an AA tank is fine by me here. Turn 71 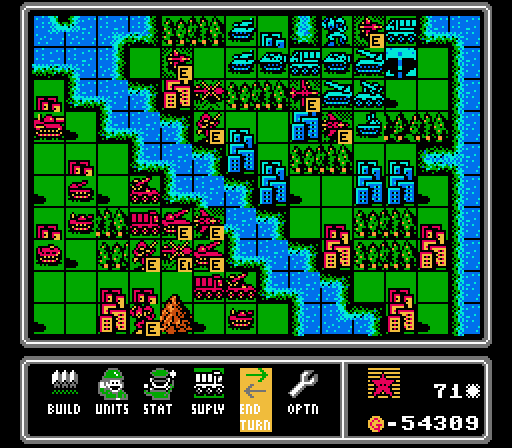 The fresh bomber goes after a rocket, then the ammo-less bomber merges into it as planned so we can build a new bomber. One scout shoots down a copter while the other harasses a mech. I try to move the infantry out of the way but it's not going to work - it's not only still in range of the rocket, but the screening copter is in range of the AA missile. 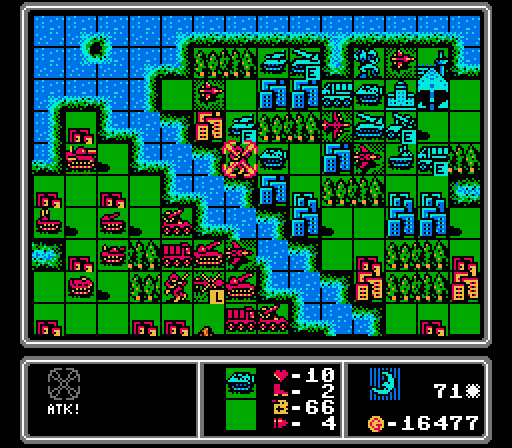 As I said, the copter goes down first and then the infantry gets ganged up on by a tank and an APC. Assault #6 wasn't very successful in terms of capturing, but we did thin out Blue's army a fair bit. No more medium tanks, and the remaining AA tank is severely damaged. 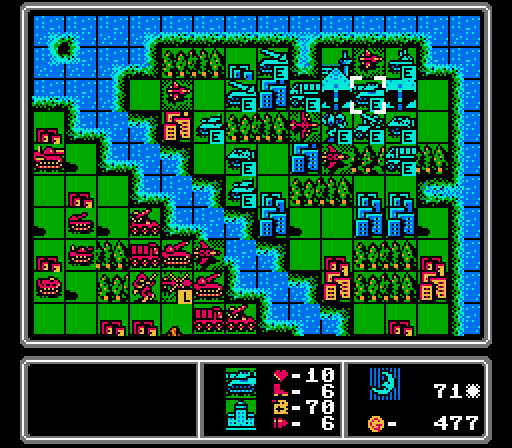 Well, for a brief moment there were no enemy medium tanks, anyway. Turn 72 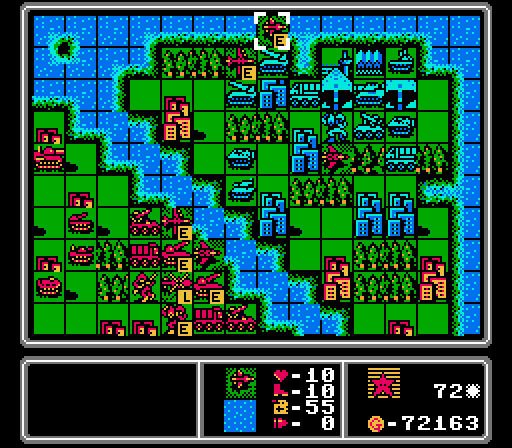 The rockets take out one of the tanks, and we get a bomber strike in on an unprotected rocket. The scout arrives to chip in on the rocket with its last shot, but it's mostly there to let our other scout (also out of ammo) merge into it so we can get a new one. It's during this merge I realize that merging doesn't actually add the remaining fuel of both planes together, it just keeps the highest value. 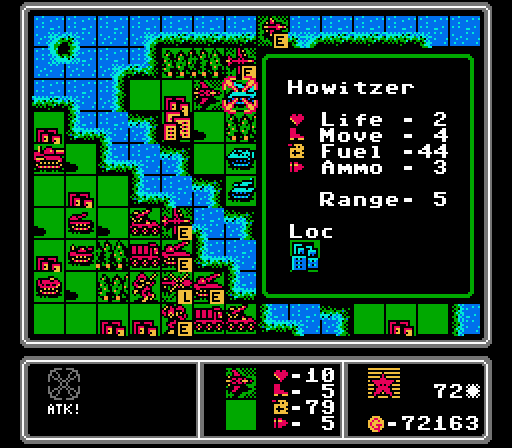 A fresh fighter is actually able to finish off this rocket. Using fighters and scouts against rockets isn't very efficient, but they're free shots against units that can't strike back, and there aren't any enemy air units on the map for them to target anyway.  A new scout and copter later and we're back up to full strength again. No one's in range of either the AA missile or the AA tank right now so it should be a quiet enemy phase. 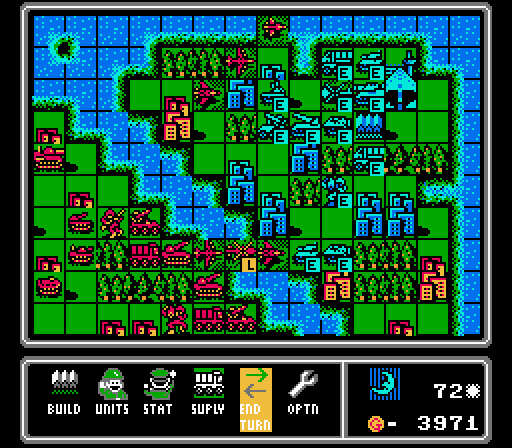 The AA missile and AA tank both move up and the AI gets a new copter and tank, but that's about it. Turn 73  Our bombers act first, finishing off the last rocket and taking off half the life of the AA missile.  The rockets are next, damaging both the tank and the APC here. 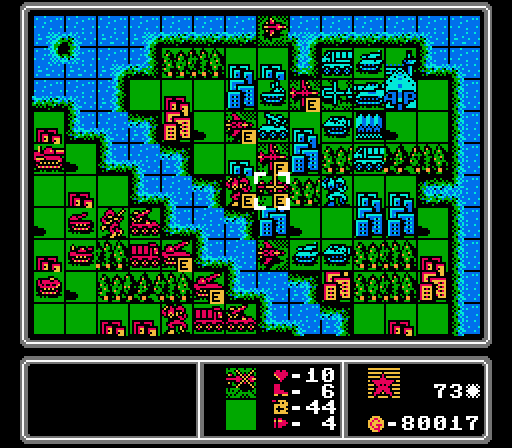 I wanted both of those units damaged instead of destroying one of them, in case whichever one was left could get to the mech we just landed. Go, Assault #7!  The fighters each get in some chip damage on the AA missile, while our ammo-less scout moves back to screen the mech. 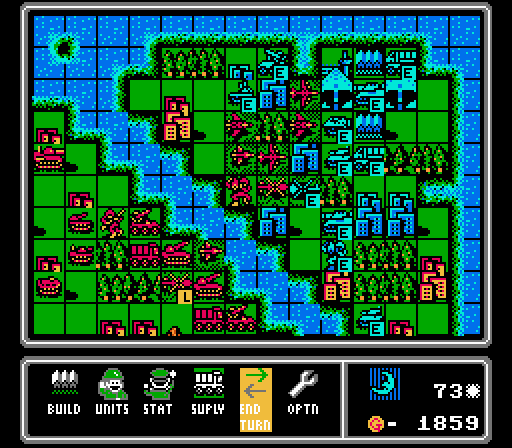 Our copter and fighter each take a hit but our mech is untouched. Oh hey another medium tank has come out to play. Turn 74  The bombers finish off the AA missile and AA tank, giving us momentary uncontested control of the skies. A fresh scout comes in to finish off this copter, leaving our now-capturing mech protected by another air wall. 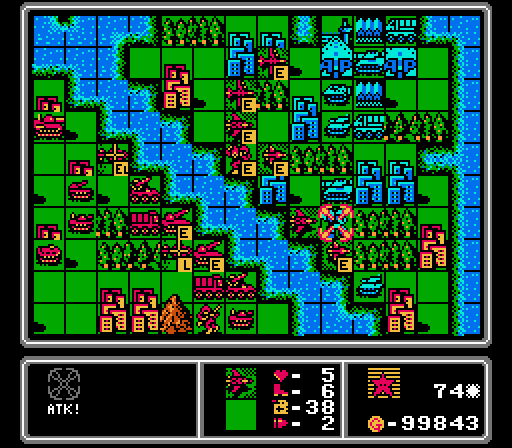 The rockets couldn't reach anything but this mech, and this fighter didn't have anything better to do so came down to finish it off. We've reached the funds cap but the only thing we could try and merge together to replace is our fighters and scouts, and new ones aren't going to help me much right now.  The assault is augmented as a copter drops off another mech and joins the air wall.  Lots of movement but no action on the enemy phase. That new rocket and mech aren't going to help against those planes, either. Turn 75  Another riverfront property acquired for Red Star!  The bombers go after the new rocket and also happen to be blocking the enemy airports. Blue can't afford it anyway, but they definitely won't be putting out new planes this turn.  Our rockets pitch in with an attack on an APC and on this medium tank. 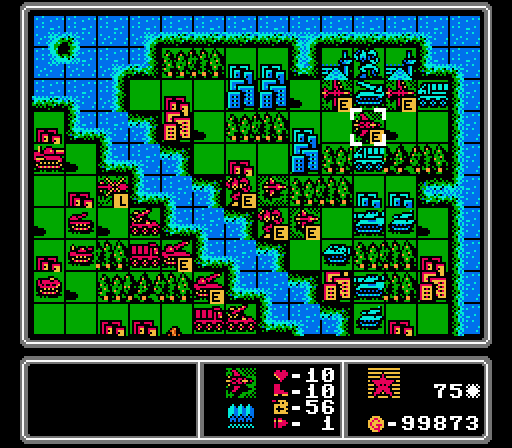 Our air wall re-arranges a bit. A fighter chips in on the rocket and then gets merged with the other fighter, while the copter heads back to pick up another infantry. 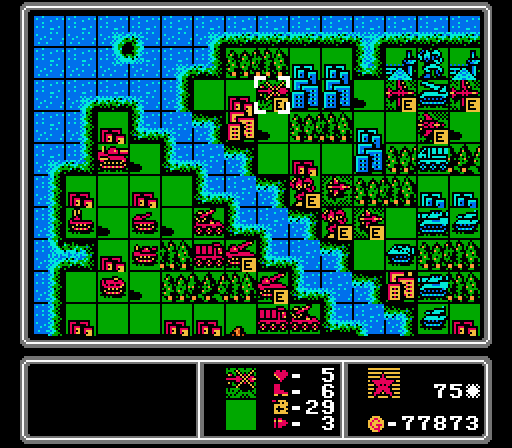 Our other infantry is already in this copter. I choose not to unload it yet because I have a vague idea of clearing off the rocket and trying to grab the HQ next turn. 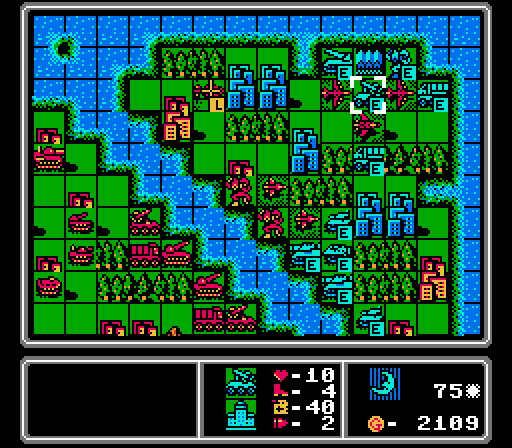 Unfortunately the rocket retreats and an AA missile is thrown out on top of the HQ instead. Being able to build directly from the HQ sure makes capturing it a lot harder in this game. Turn 76  The last riverfront city is captured! 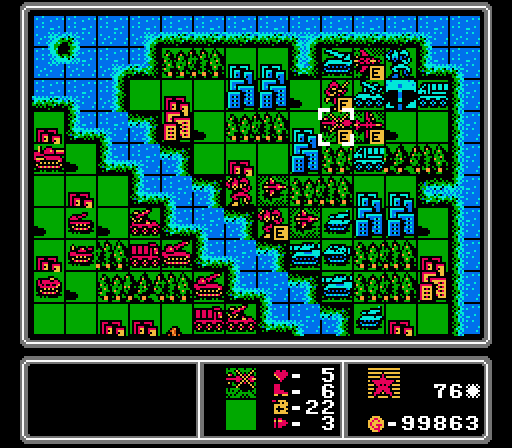 One bomber is out of ammo so it merges in with the other one. I then set the infantry down on the enemy airport, mostly just to give it something to do while I try to pry the HQ open.  The first mech moves up towards the next batch of cities, while one scout moves up to continue blocking the airport and chip away at the AA missile. Those moves open up space for another infantry to land. 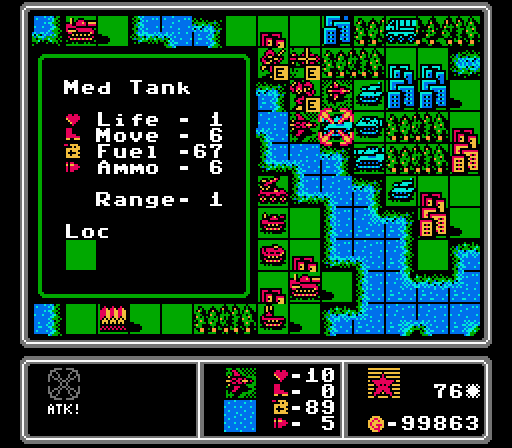 Our rockets can't quite destroy this medium tank, so our fresh fighter moves in and finishes the job.  The only attack on the enemy phase was a couple of damage on the mech from the rocket, but I forgot / couldn't block the hidden base so we have to deal with one more AA tank now. Turn 77  Our rockets this time strike the tank and the medium tank, damaging both but destroying neither.  This mech had nowhere else to go anyway but a couple damage on an AA tank isn't going to help much, when it'll just get fixed up on the enemy phase. 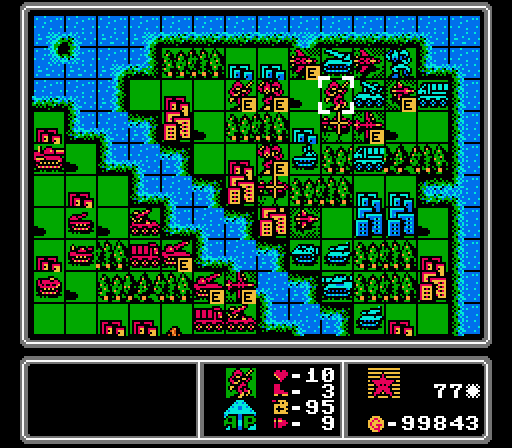 Our mech and infantry on the upper-left both start capturing. Near the HQ, the bomber does some more damage to the AA missile but I can't finish it off. The nearby infantry, with nothing better to do, starts capturing the airport:  It won't really serve much of a purpose but hey it's been awhile since we've seen a new animation so why not? 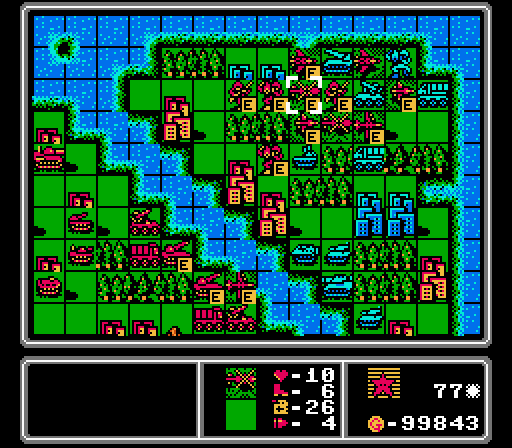 The scout and fighter are exposed to the AA missile, but it won't hit as hard now that it's been beat up.  Only three damage to the fighter, which is about to merge in with the ammo-less one nearby anyway.  I did kind of forget about the AA tank, but that scout was out of ammo anyway.  The damaged medium tank goes after one of our mechs, to its detriment. 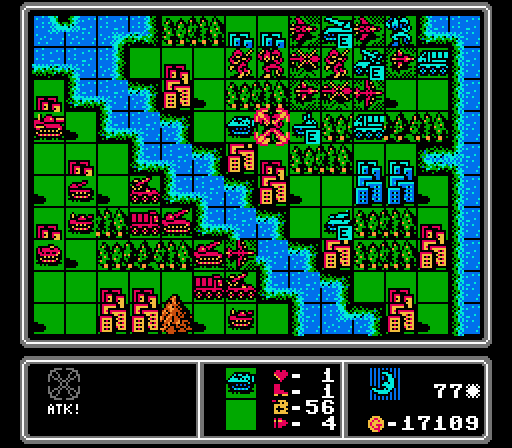 This APC meets the same fate. 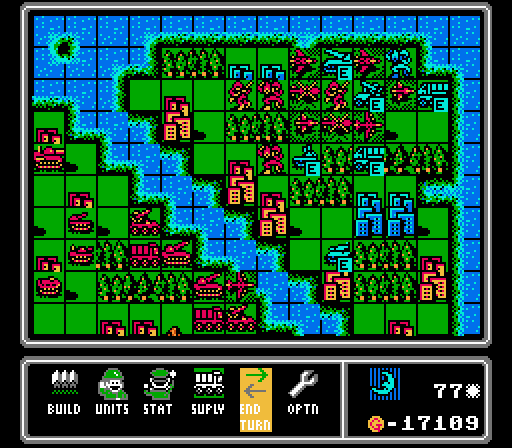 All of Blue's build points are blocked up right now, a great position for us for as long as I can hold it. Turn 78  Two enemy tanks merged together but it's the only thing our rockets can reach so it has to go.  Other than the different background, the animation for capturing an airport is the same as for capturing anything else. Our other infantry also completes its city capture. The mech got hit by the rocket so it's a little behind. 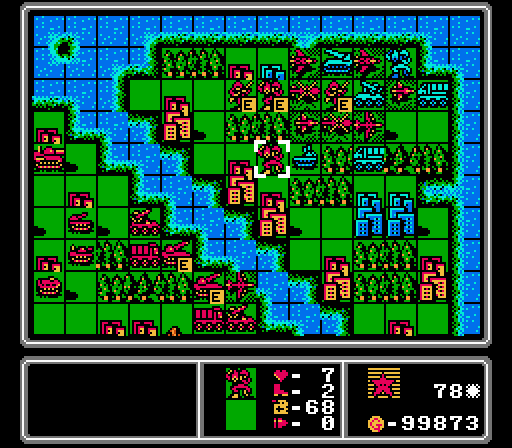 I tried to have our other mech go after the AA tank again, but apparently the suicide attacks from the medium tank and APC last turns used up all its ammo. I think I've run out of ammo more often on this map than in all my Advance Wars experience combined. Anyway the mech merges up with the capturing one instead.  Our fighters and scouts merge together again. We've got a fresh bomber here, and while going after the AA tank on a city isn't usually a good idea, our other bomber is out of ammo and can merge into this one to fix it back up.  The copters chip away at the AA missile some more but still can't quite get rid of it.  The AA missile gets a bit of damage in on our fighter, but more importantly the AA tank moves off the city and finishes off our copter.  That moves frees up two build points, but luckily Blue just builds a tank and a medium tank. More AA tanks would have really slowed things down. Turn 79  The mech finishes its capture a turn late. Blue just has three cities plus its core buildings now. 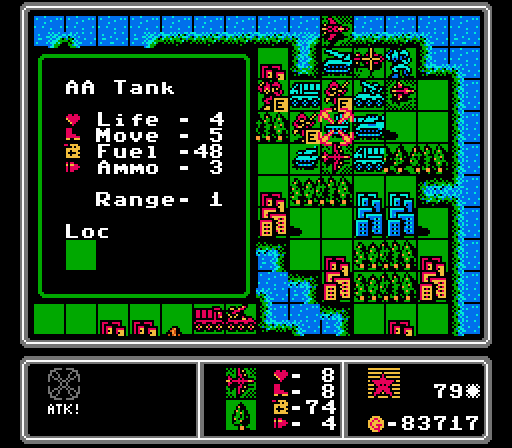 With nothing much better to do, our two infantry chip away at the AA tank so that our bomber can finish it off.  The fighter and copter, meanwhile, are finally able to finish off the AA missile. 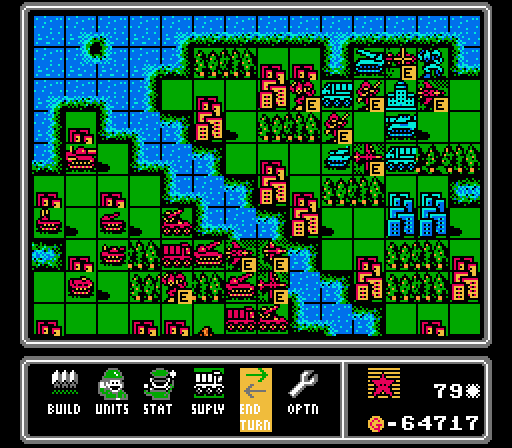 The HQ is clear but I don't have anyone left to move in to block it. 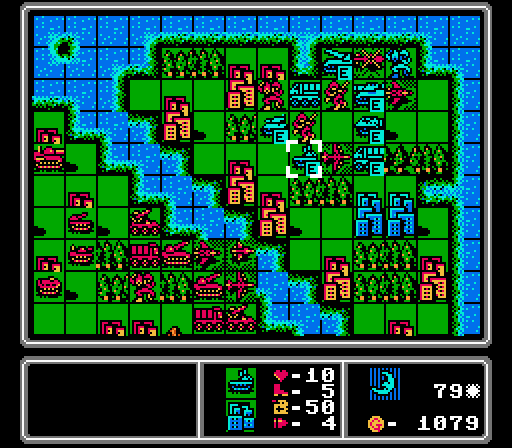 The medium tank moves onto the HQ and rips apart our infantry. Blue then builds an APC and  another AA tank. another AA tank.Turn 80 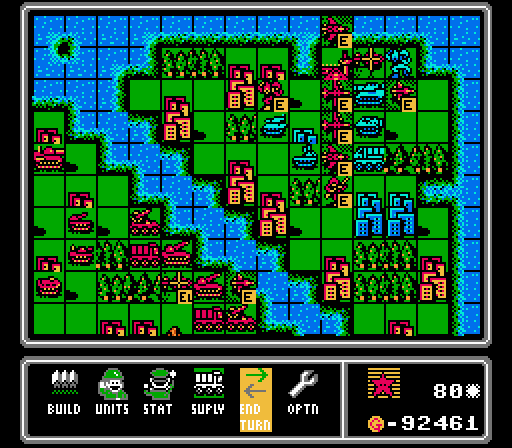 I've given up on the HQ capture for the moment so our infantry run away and merge together. The fighter manages to finally finish off the rocket. Our damaged bomber parks on the captured airport and finishes off a supply (that our mech had just damaged). We can't build on captured bases and airports, but we can supply on them! The other bomber hits the APC since I'm sick of attacking AA tanks on cities. 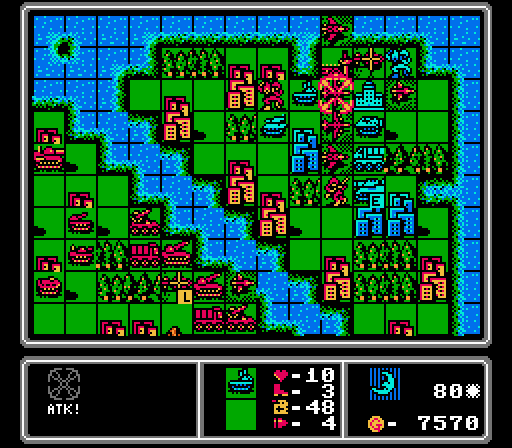 The AA tank finishes off our damaged bomber on the enemy phase anyway, but at least it takes some damage and it's in open terrain now. 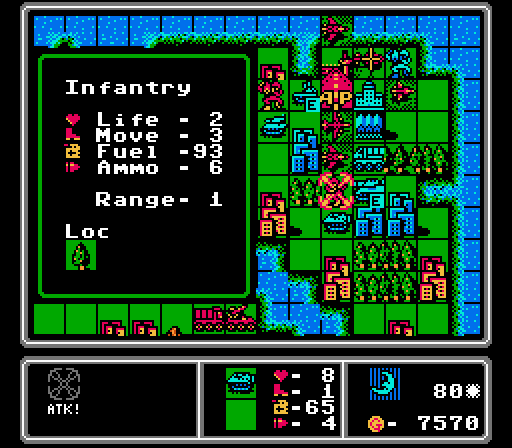 Our infantry then falls to the combined attacks of the medium tank and the APC.  The tank attacks our mech again, but the fight isn't lopsided enough to overcome the mech's healing each turn. Blue could build something here, but their income is now so low that they choose to save up for another turn instead. Turn 81  I don't intend to give them another chance. The mech and the bomber combine to take out the AA tank, and our planes helpfully squat on every other build point. With no anti-air units deployed, the enemy can't remove our planes anymore. Unfortunately we just lost our infantry so an HQ capture is out. (The copter on its way over has a mech inside.) 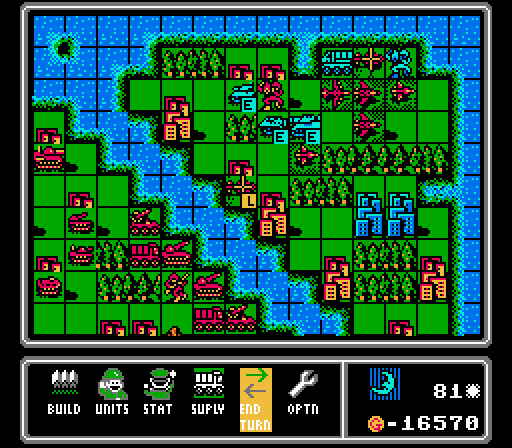 All the remaining enemy vehicles can do is gang up on our poor mech. Turn 82 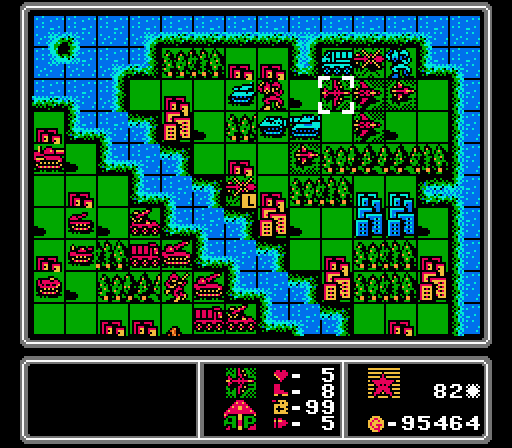 Proof that we can supply our planes on captured airports. This bomber has an extra two life and full fuel and ammo now.  Speaking of which, the bomber softens up the APC for the mech to finish off.  Pictured here: Me discovering that a copter can't drop a unit directly on the enemy HQ for some reason.  I also remembered that mechs can't capture HQs anyway, so I reset to the start of the turn and sent the copter back to pick up an infantry instead. 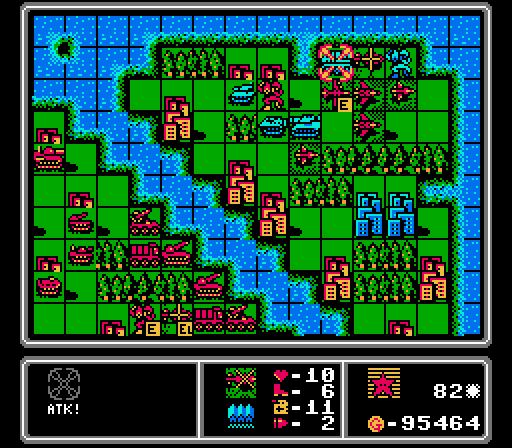 New plan for the planes - the bomber and the copter take out the supply, and all the enemy build points stay blocked. The mech is screwed but oh well. 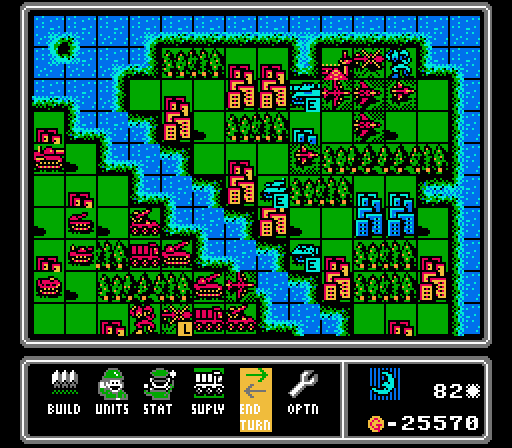 The mech falls to the medium tank but more importantly, the enemy tank and APC both retreat straight into rocket range. Turn 83 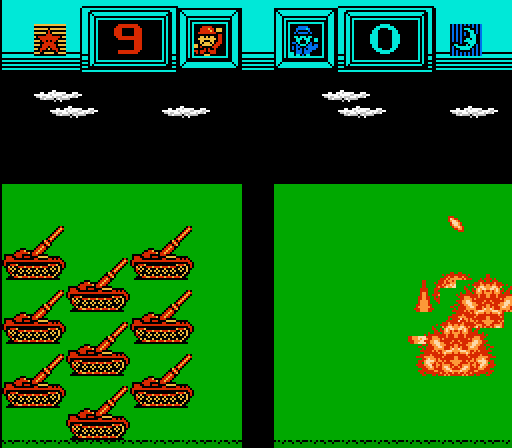 Truly these two rockets are the MVPs of this map. 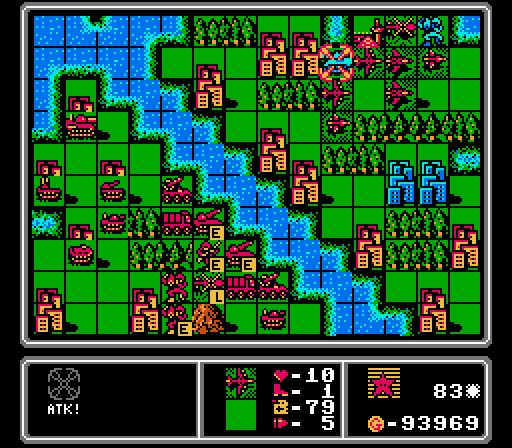 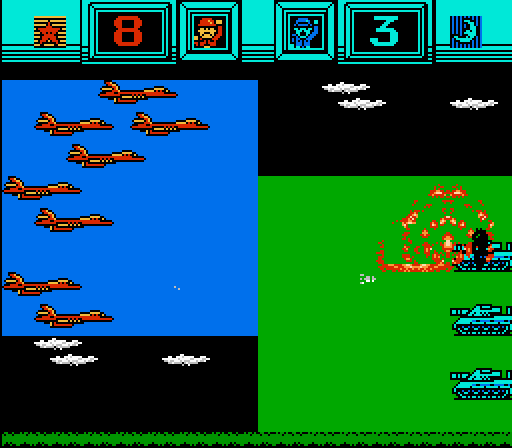 We've got a new bomber and it can reach the medium tank.   Our "old" bomber has gotten enough repairs from the captured airport to finish it off. 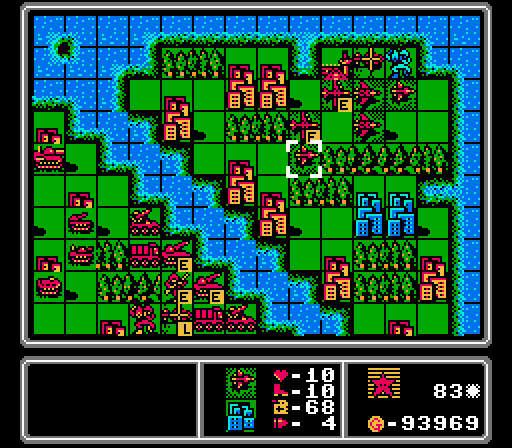 The only enemy unit left is this mech. Can the remaining air units with ammo finish the map this turn? 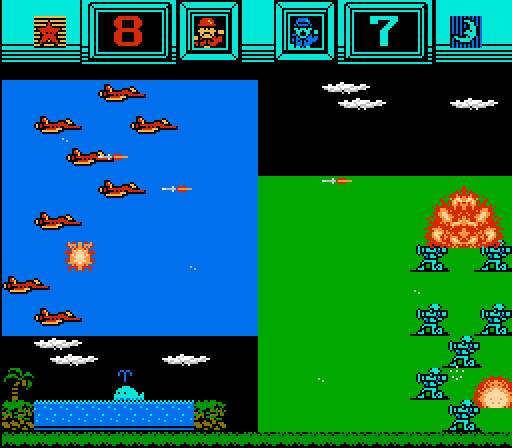 Yes.  They.  Can. 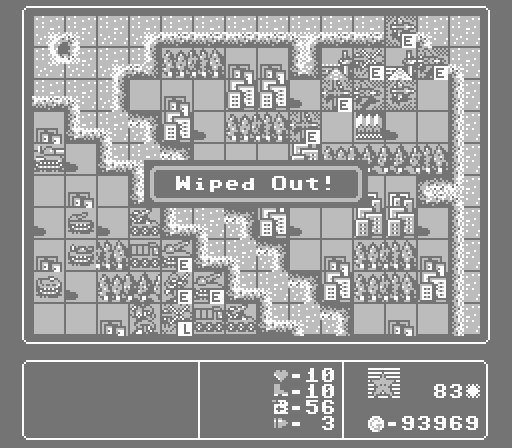  Holy poo poo that map was insane. And I literally picked the worst possible challenge for it. This map is meant to highlight your new units, the planes. So a challenge that limits how many you can put out is really a foolish move on my part. Next time I won't pick the challenge blindly. 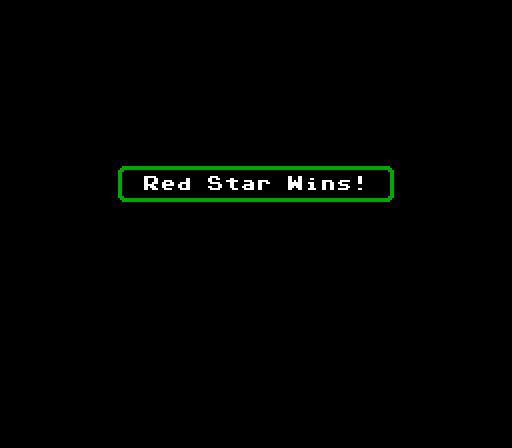 gently caress yeah we did. It only took an extended trench war and filling up my hard drive three times, but we won!  I'm sure both of these CO's mean something but I'm too sick of this map to think about it any further. Edit: Arbitrary Number posted:Rocke looks like a rocket and Uni looks like a sea urchin (uni, in Japanese). Well that's straightforward enough. 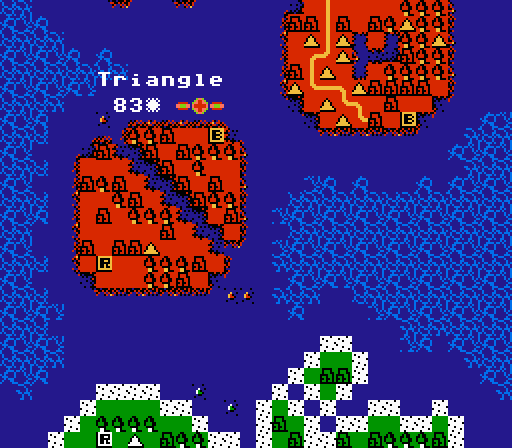 The triangle turns red for us, but a score of 83 days, what an eyesore. The average duration for this map is supposedly 19 days, so the challenge was quite the handicap if that wasn't obvious already. I apologize for dragging you all through it.  Onto the next map - Ball. This map looks a bit larger and it has a couple of islands again, but that won't be nearly the same problem as it was in Triangle. As for the challenge, I clearly can't be trusted to pick, so you get to choose from these options:
DKII fucked around with this message at 01:56 on Jul 10, 2021 |
|
#
?
Jul 9, 2021 16:21
|
|
|
I really want to do a Permanent Lock on Tank and MdTank, but not for this map. This map feels like Mirror Mode time.
|
|
#
?
Jul 9, 2021 18:13
|
|


|
That was an impressive feat. How much patience does it take to slog through all that? Rocke looks like a rocket and Uni looks like a sea urchin (uni, in Japanese). Imagine these chumps in a modern Advance Wars game. What kind of CO powers would they have? Something missile-related for Rocke and poison for Uni?
|
|
#
?
Jul 9, 2021 21:28
|
|
|
Arbitrary Number posted:That was an impressive feat. How much patience does it take to slog through all that? A lot. Though more stubbornness than patience. Across three sessions it was over ten hours of recordings. Then at least that much writing it all up. I did at least grab the shots for the next couple unit overviews already. Make sure you vote in the linked poll; I won't be counting thread votes, though you're welcome to lobby for your choice in here. If the Permanent Lock 2.0 option is chosen, I'll do another vote on which units to ban. I'll leave the poll open through the weekend.
|
|
#
?
Jul 10, 2021 02:01
|
|
|
Voting is closed:  The last few updates seems to have lost a lot of the initial interest, which is totally fair. I'll try to win people back with the next map. This challenge will actually mainly affect the end of the map, where the typical strategy is to cut off enemy income by capturing cities. In this case we'd also be cutting off our own income at the same time, so we'll need to have a healthy-sized army advantage before then.
|
|
#
?
Jul 12, 2021 15:49
|
|
|
Speaking personally, the most interesting part of this is seeing the weird mechanics relative to later games, and maybe the map design. Slogging through all the actual play-by-play gets tedious, and if it's tedious to read I can only imagine what it's like to play and to write.
|
|
#
?
Jul 12, 2021 16:19
|
|
|
Explopyro posted:Speaking personally, the most interesting part of this is seeing the weird mechanics relative to later games, and maybe the map design. Slogging through all the actual play-by-play gets tedious, and if it's tedious to read I can only imagine what it's like to play and to write. Fair enough - the completionist in me has trouble letting go of the details but the last map in particular could've used more aggressive editing, particularly once all the unit strengths and weaknesses had been established and I was just grinding through the challenge. Speaking of which the challenges are supposed to be making the gameplay a little more interesting but I suspect they're just making the maps take longer without really adding anything. Any thoughts from the thread on that?
|
|
#
?
Jul 13, 2021 04:26
|
|
|
I think you can certainly serve to be a bit more brief on the play-by-play - if there are turns where not much happens (e.g., the early part of the map where you're both just making a few units and trying to conquer towns; the late part of the map where you're rolling and it's just a matter of time), you could cut back by summarizing a couple turns at once rather than every single one. As for the challenges, I think Triangle was just a particularly bad map for a challenge because the river limits your options so much. Maybe give it another mission and let's see how it goes; if it still feels like it's not helping much, then you can drop it after that.
|
|
#
?
Jul 13, 2021 11:45
|
|
|
Yeah there's a lot of stuff you can elide, esp since after the first update or two most of the audience "gets" the basics of what you're doing. We know what a combat is and we know what your units do and so on, which means that a lot of stuff can be summarized, particularly for grinding slog maps. If anything it's more readable to just have a before/after with some highlights for where units were damaged, but you want to balance that against talking about what your thought process is and when you make decisions. When the decision is something like "I'm going to throw 8 infantry across a mountain to attack all the infantry on the other side," that's really just one thing even if it's 16 actions (8 moves 8 attacks).
|
|
#
?
Jul 13, 2021 12:47
|
|
|
I definitely feel you could summarize what's going on in the updates as well, as they get repetitive reading every single move. Personally, I don't think the challenges have made the LP more enjoyable, the last one especially just made it take ages and it read like it was very unfun to play. It may just be that one specifically, but it made me feel like the LP would be better off without them.
|
|
#
?
Jul 13, 2021 22:24
|
|

|
Yeah you can probably get through each phase of a turn in a couple pictures instead of doing a picture for every action? Possibly with some helpful arrows maddened onto the images. That might make it a bit easier and quicker to both read and write.
|
|
#
?
Jul 14, 2021 07:15
|
|


|
Part 11: Unit Overview: APC  Basic Info: pre:Cost 4200 G Movement 6 Move Type Vehicle Fuel 70 Ammo 4 Ammo Cost 3 G Range 1 Special Can carry one infantry or mech pre:Opposing Unit Damage Dealt Damage Taken Infantry 8.5 2.5 Mech 9.5 4.5 Medium Tank 1.5 7.5 Tank 2.5 9.5 APC 4.5 4.5 Rocket 3.5 6.5 Artillery 3.5 5.5 Supply 5.5 N/A AA Missile 3.5 N/A AA Tank 3.5 N/A Fighter 1.5 2.5 Scout 2.5 1.5 Bomber 1.5 7.5 Copter 2.5 1.5 Armored Personnel Carriers, or APCs, are the cheapest of the ground vehicles, but come with a lot of versatility. They're tied for the highest movement amongst the ground units, though as a vehicle class they'll move half as far in forests and can't enter mountain tiles. They're very efficient at taking out the invading infantry and mechs that will be coming after your cities; just keep them away from the smaller tanks. In addition to their combat and movement utility, APCs can carry a single infantry or mech around the map, though they can only unload them both from and onto flat terrain (plains, roads, and non-HQ buildings).
|
|
#
?
Jul 15, 2021 03:27
|
|
|
Part 12: Ball (1 of 2) The challenge for this map is Mirror Mode. We can only spend what the opposing player will have available for funds on the same turn. No income advantage from efficient initial capturing, or from taking enemy territory. 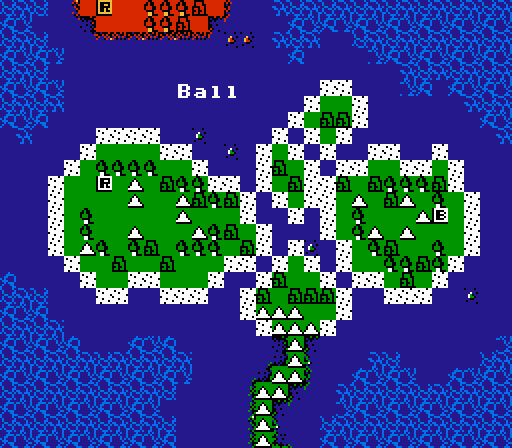 We're just four maps in, but all of the training wheels will be off with this one. Let's take a closer look: 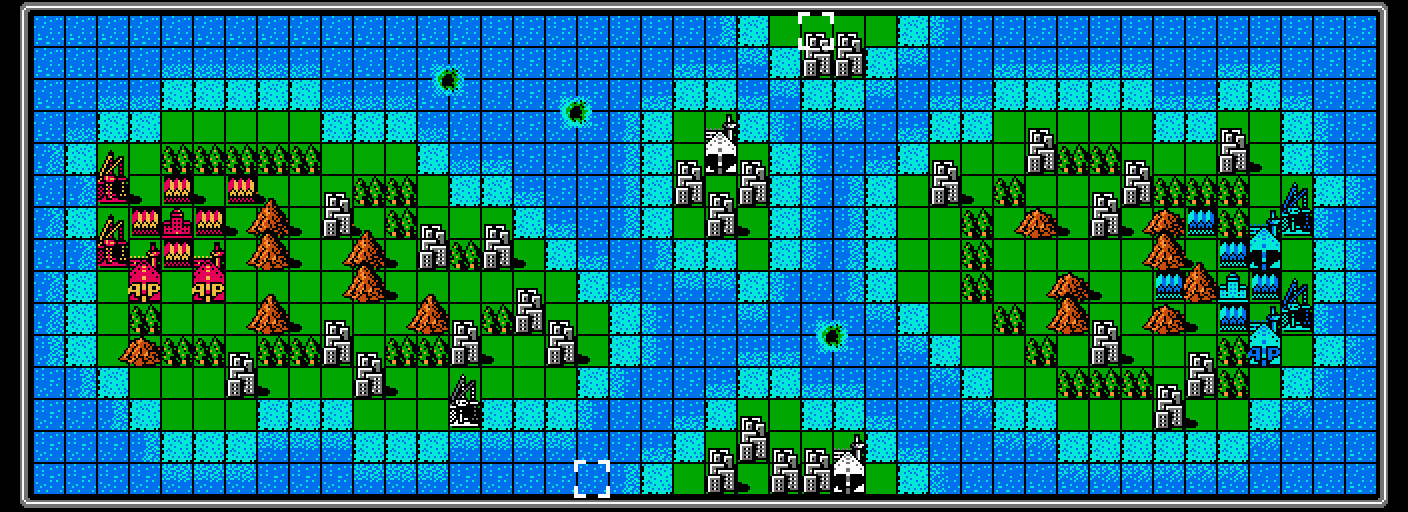 As you might've guessed from the preview, this map is our first large-sized one. It's a full three screens wide, on top of the normal 1.5 screens tall. That's a grand total of 42 tiles wide and 15 tiles tall. So even a bomber would take five turns and half of its fuel to get all the way across the map.  We've also got our last building type on this map - ports. As you might expect, ports can be used to build ships (naval units). I'll get into those as we build some, but two other things to note for this map. First, there are two neutral airports and a neutral port to capture in the larger-than-normal middle area of the map. Second, both sides start the map with maximum funds. There's a good reason for that; we'll see it shortly. Turn 1  There are just two types of ships, and both are fairly expensive. The battleship is by far the most expensive unit in the game, and only the fighter and bomber are more expensive than the lander.  Since we're flush with cash at the start of this map, in addition to using up every ground and air build point to aid in capturing, we get ourselves not one but two battleships.  The Blue side is a little less organized on the ground front, throwing out a medium tank way earlier than necessary. There's also both a battleship and a lander at the ports. Turn 2 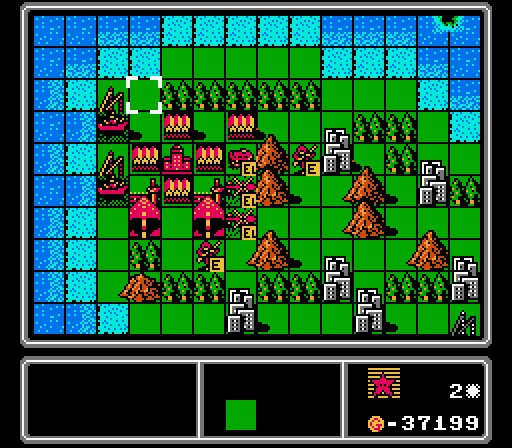 The capturing wave begins its advance. 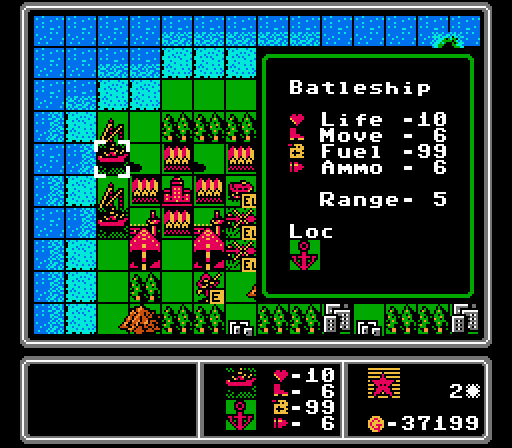 Here's the first look at the battleship. It's a ranged unit like a rocket or an AA missile, and it's got a high movement, high fuel, and high ammo load. That alone wouldn't justify the expense, but it's also a combat juggernaut. The two naval units can each fire on any other units in the game (ground, air, and naval). Battleships in particular will do at least 8 damage to all ground units on neutral terrain, and at least 6 damage to all air units. They also will take no more than 2 damage from any unit except bombers and other naval units, so they can take a few hits, too. Having two of these early on will win us the first half of the map.  This map isn't quite balanced - the neutral cities on Blue's island are closer to the HQ, so their infantry can start capturing a couple of cities right away. The mountains there also form a better defensive wall, and the neutral islands are slightly closer to the Blue side. In exchange Red's island is the only one that has a neutral port.  When the medium tank moves onto the lander, we get a new animation:  The same transport theme plays as for loading an APC or a copter. Sharp eyes may notice that there's more room on the lander in this animation, and that's because landers can not only carry any ground unit, they can carry two of them. (Okay, that's the same as in later games, but coming off being limited to copters for island invasions, these landers are a god-send.) Turn 3 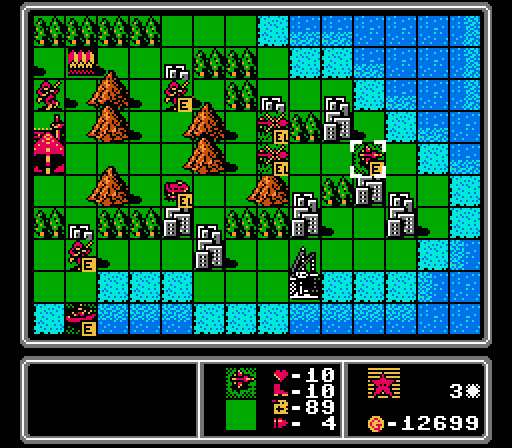 We're able to start a couple of captures of our own. The copters are headed straight for the neutral islands, with a scout as escort. 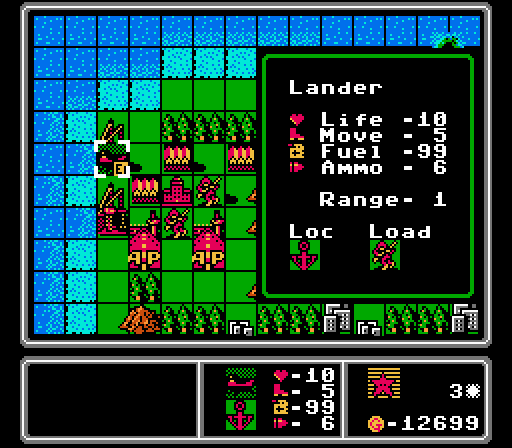 Here's a lander. Like the APC and copter, it can both carry units and hold its own in combat. It's got the same fuel and ammo as a battleship with one less movement. It can do decent damage to a battleship if it can get close without getting hit first, but its main combat purpose is to clear away any nearby aircraft. While it does less damage to air units than a battleship, the lander is more flexible since it can move and attack in the same turn. Landers are a solid sea-based bomber-deterrent, only slightly less effective than AA tanks. I don't know if I ever showed it before, but this overview screen will also show any units loaded inside the transport unit. Handy for seeing what the enemy is bringing over to us, if I forget. (Side note: Don't ever put an infantry into a lander when you can use a much cheaper copter instead.)  Blue completes a couple captures, starts a couple more, and generally just messes around otherwise. Turn 4  We're actually facing an income disparity here, making the challenge a moot point early on. That won't last though. 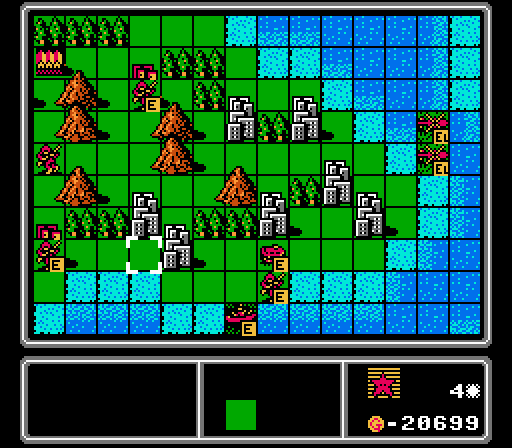 We finish two captures of our own, while our naval and air units keep heading for the center of the map. 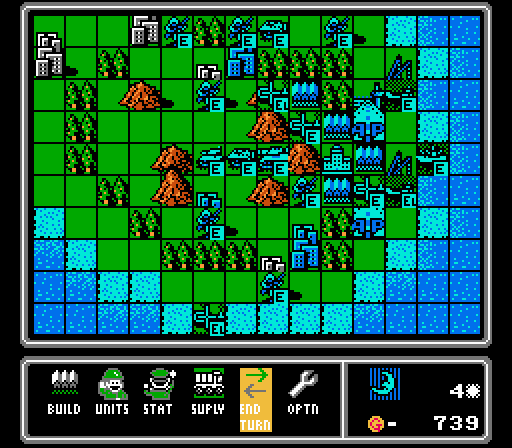 Still just more capturing and building on Blue's end. Turn 5  We start capturing the neutral port on our island. 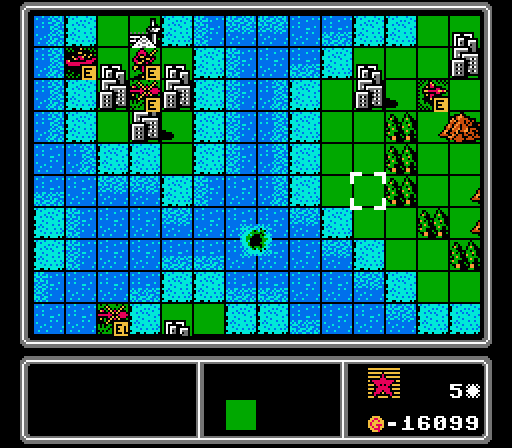 Meanwhile our advance force has reached the first of the neutral islands, and our scout is out there taunting Blue's copters. 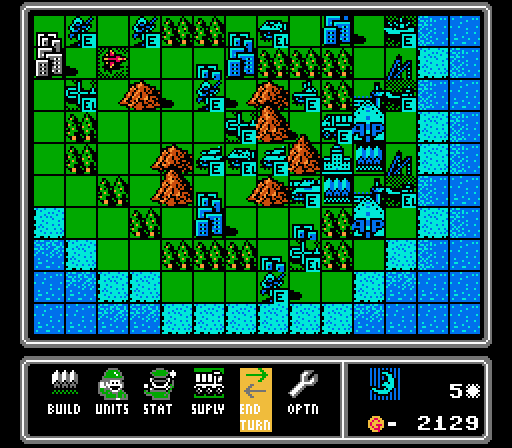 Blue has just about finished capturing everything on its island, but hasn't moved up anyone to contest our rush to the center yet. Turn 6 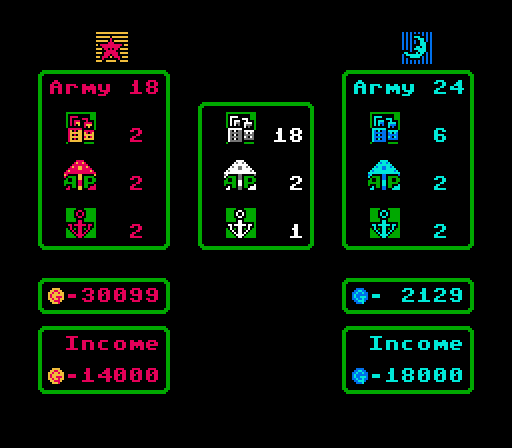 We're four cities behind now, but now that we've reached the center we'll start to catch up.  Completing the takeover of this port will help.  It's also fun to pick on loaded copters while there are no anti-air forces nearby.  We've got three infantry off to work on the central islands now (one is just off the bottom of the screen), and both of our battleships are in position to protect them. 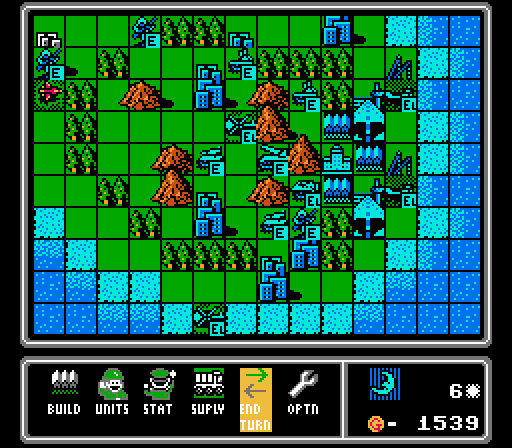 There are a couple of enemy AA tanks and a rocket now, so Blue's island is starting to get clogged up. Off-screen the enemy battleship is slowly headed our way, and the damaged copter is making a run at us. Turn 7 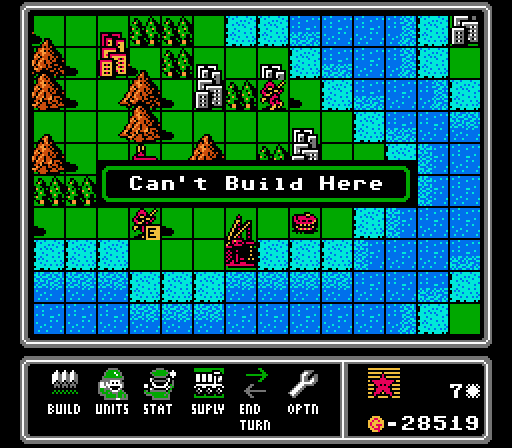 Remember that great port we captured? We can't actually build new units on it, a fact that was majorly disappointing to me since it means all new naval units have to spend at least five turns just getting from the back to the front. We can use it for repairs and supply, though. 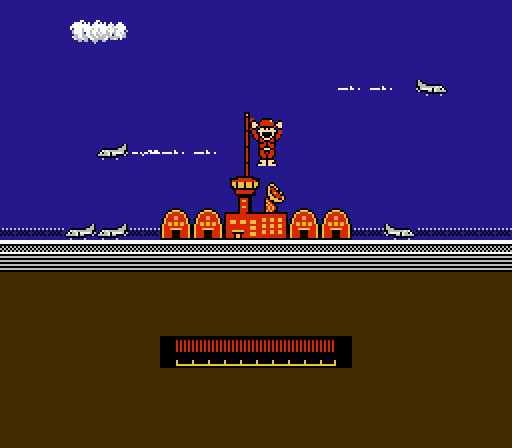 Similarly we can't build from the central airport we just captured, but it's a good refueling station for our air units. 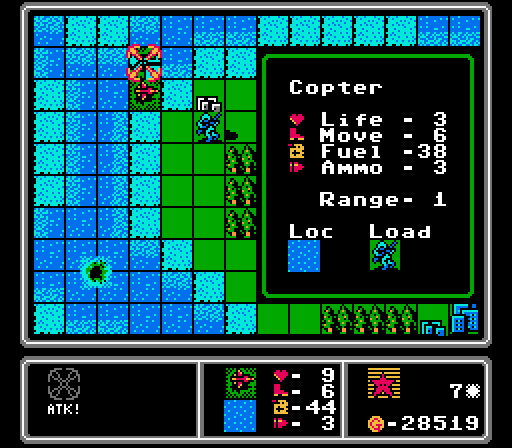 Our scout keeps the skies clear around our advance force.  Blue captures the last city on its starting island, and starts moving its units forward. Turn 8 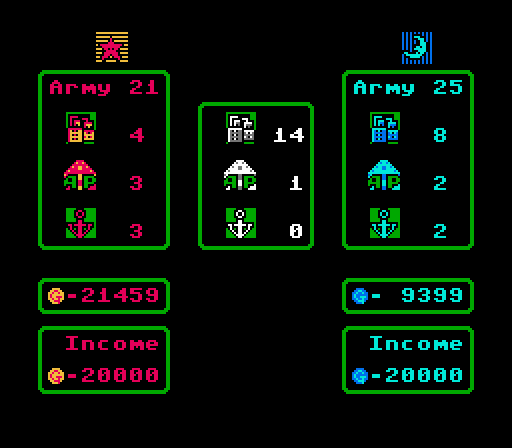 We're back at income equality here. We haven't captured nearly as many cities, but the extra port and airport are worth 2000 G of income each, as opposed to just 1000 G for cities. Another good reason to go after those first.  Let's see our battleship in action for the first time!  Magnificent. Battleships deal as much damage to air units as AA missiles, with a lot more ammo and mobility. We actually have both of our battleships in range so the other one finishes off this copter. 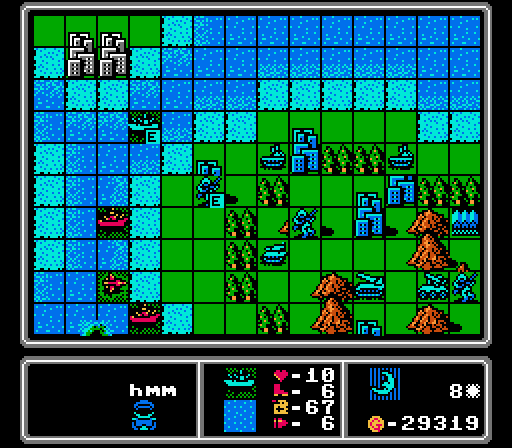 Blue moved its own battleship right into our range. First strike in a battle between ranged units is important, and we'll have it next turn. Turn 9  The only things that battleships don't immediately wreck is other battleships. 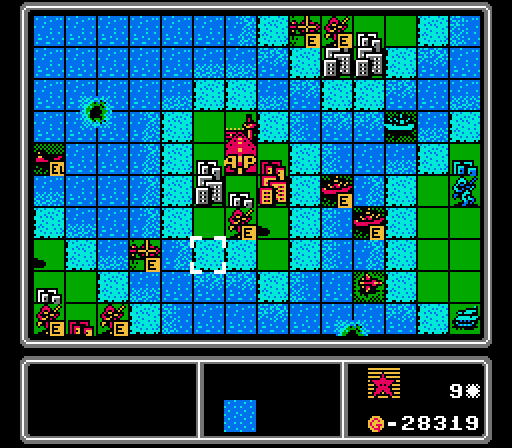 We're still more jockeying for position than seriously engaging so far. After a couple turns of me forgetting to move them, the first of our landers is finally approaching the front.  Another example of the AI cheating. No way the 60% strength battleship should've done the same amount of damage back to us. 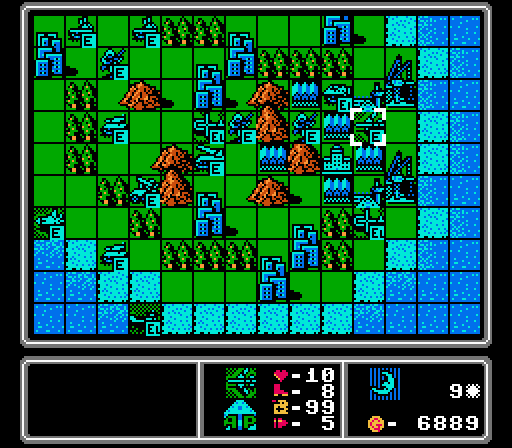 The enemy hasn't stopped building stuff, with a fighter approaching us and a new bomber. Turn 10  We've got a serious income advantage now, and if I play it right then Blue's income will never increase from where it is now. Starting this turn our cumulative income has surpassed the enemy's, so I'll have to start holding cash in reserve to meet the challenge and only spend what Blue's making. I won't bother you with the details.  I immediately blow most of our cash reserves on a fighter and load in more vehicles in the latest in the train of landers. 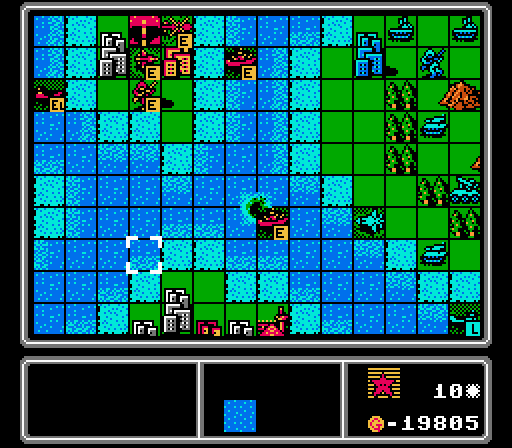 While I get in another shot on the enemy battleship with our fresh one, our damaged battleship retreats down near the fighter. That fighter can only reach our copter on the lower airport, and by attacking it, the fighter will be in range of the battleship next turn. 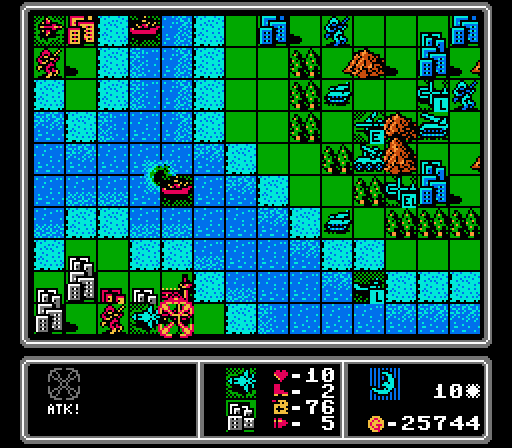 Like so. Wait, that bomber is gonna put the hurt on our battleship next turn, isn't it? Turn 11  Our damaged battleship still does four damage to the fighter that's just off the screen here. It's going to take a hit from the bomber on the enemy phase, though. 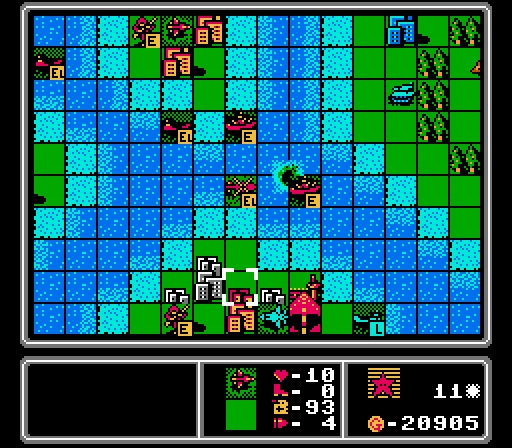 That lander on the bottom can reach our damaged battleship, too. I try to arrange the rest of our units to at least be able to strike back at whatever attacks us. 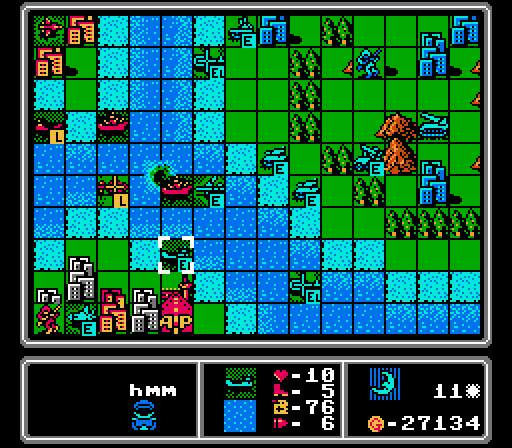 The bomber strikes as expected, but the lander (carrying a medium tank) isn't willing to put its cargo at risk and sits where the battleships can't hurt it. Turn 12  Our scout goes after the bomber, and our battleships retreat rather than expose themselves to the landers above and below. I shove a rocket and an AA missile out onto the central island for some extra protection, and discover that landers in this game can only unload one unit at a time. Our new fighter also moves up to say hello. 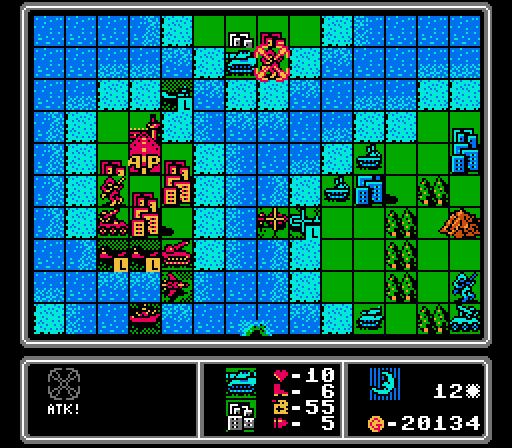 A couple turns ago an enemy lander dropped off a medium tank on the tiny island at the top of the map, and it's been harassing our infantry ever since. Not that I particularly mind, since that medium tank will now be trapped up there for the rest of the map.  The enemy bomber retreats, and we get a couple of infantry and an off-screen APC dropped off on the central islands. We've got plenty of firepower to handle this invasion, though. Turn 13 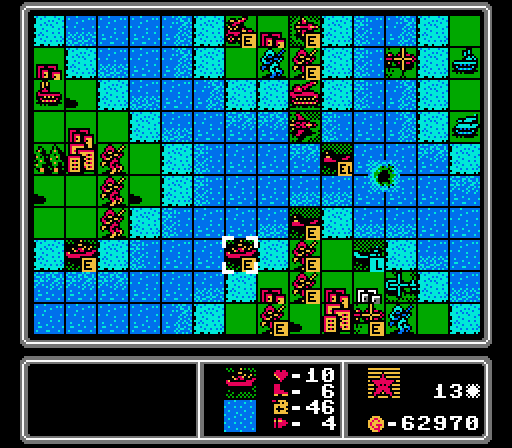 The scout takes out the copter at the top of the screen, while the two enemy infantry get hit but neither are killed. Our battleships retreat further because I am more afraid of that lander than I should be. Our fighter eventually moves down to attack the other copter. 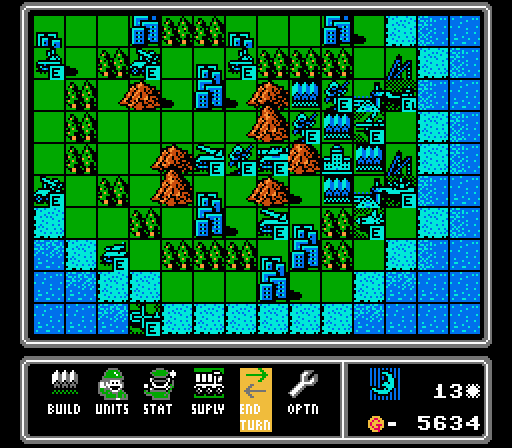 Nothing much on the enemy phase. The damaged planes get back to the airports. There are a bunch of anti-air units on the island's leading edge now. Turn 14 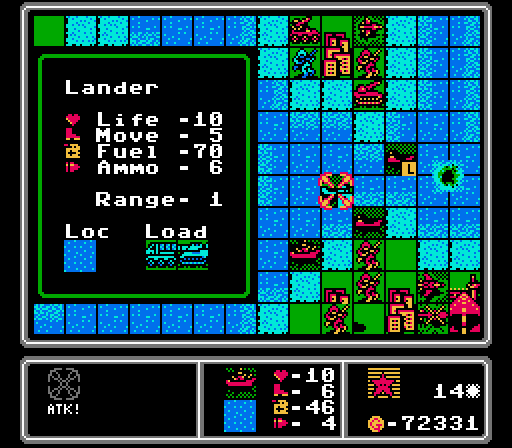  Landers are one of the few units that can do appreciable damage to our battleships, but they have to get close enough first. Otherwise a first strike from the battleship renders the lander non-threatening. The rocket is able to finish off the lander, sinking it and the medium tank it was carrying.  While we finish off the infantry and copter at the bottom of the map, I optimistically drop off a medium tank on the enemy island with no support.  It survives the enemy phase pretty well, but it'll get ganged up on pretty quickly from here. I didn't even notice when playing, but the AI pulled off the Russian doll trick here. The infantry was loaded inside the APC, which was itself loaded inside the lander. Turn 15 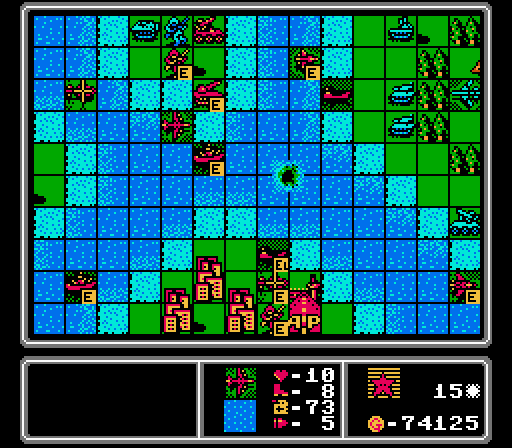 With everything on the lower-middle island captured now, it's time to start moving the infantry off of it. On the lower-right I've got a damaged fighter dueling with another damaged fighter while trying to stay away from the anti-air units. I've also got a new battleship finally arriving to the party. I really should have waited to drop off that medium tank until the battleships could support it.  Landers can't do a lot of damage to ground units, but AA tanks can't fight back either so might as well take the free damage and see how it looks in combat.  I still haven't forgiven AA tanks for the last map. 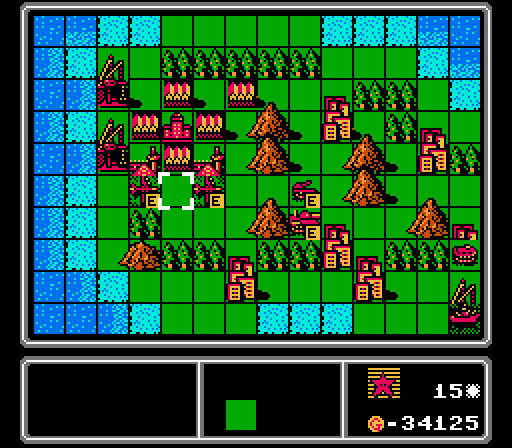 I was getting close to the funds cap so I get a couple bombers as throwaway funds to park in the far corners of the map to idle away. 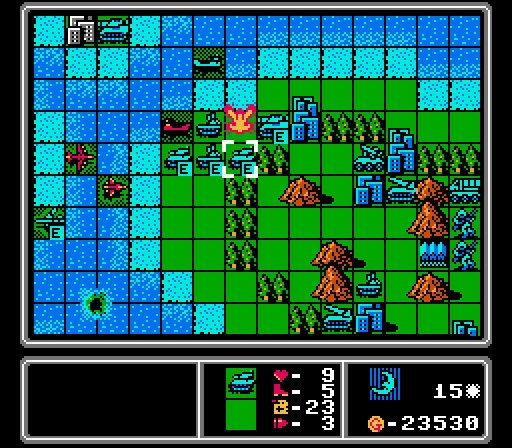 Our medium tank gets ganged up on and destroyed here with some more "extra damage" chicanery from the hard-mode AI. Turn 16   This lander attacked our lander on the enemy phase, and took enough damage that our bomber can now move in and finish it off without getting beat up too bad. Further down the enemy bomber went after our rocket but wasn't at full strength, so our scout is able to finish it off. 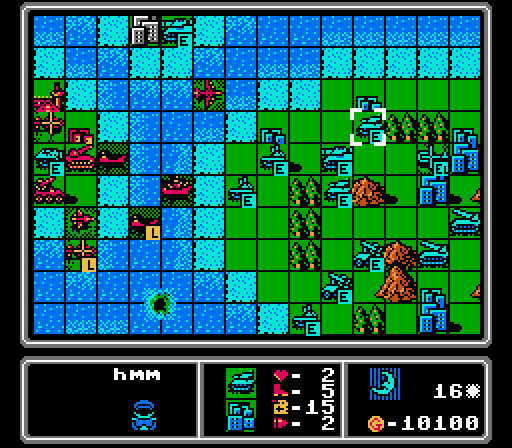 I've got a battleship near the enemy island now, and it scares away most of Blue's units. Turn 17 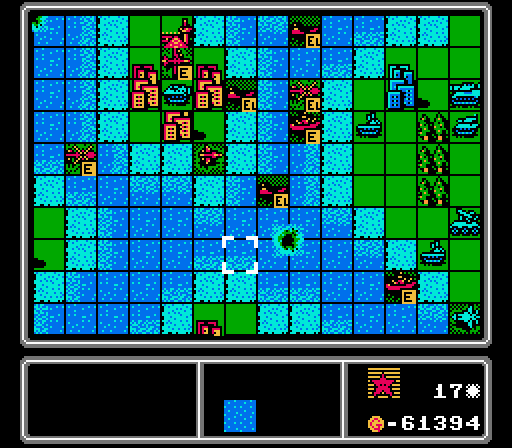 The battleship takes out the damaged AA tank that was trying to get repaired on the city. Another battleship reaches the enemy island from the lower side. And our bomber retreats back to the airport and takes a bite out of the APC when it gets there. The rocket and AA missile are missing because I stuck them back onto a lander.  Nothing to see here, just two more throwaway bombers to keep my funds down. 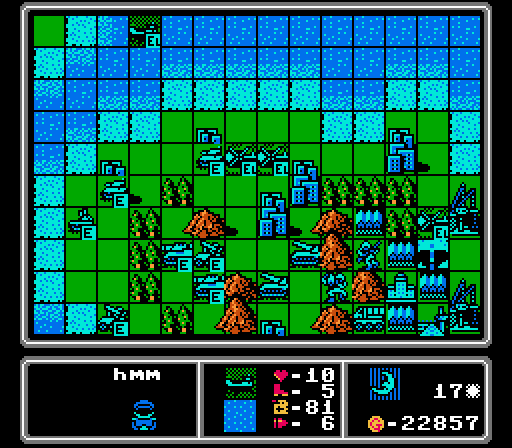 It's kind of interesting watching the AI try to crowd its units into the few tiles that our battleships can't reach. Turn 18  The big news on this turn is that our damaged battleship from forever ago is finally fully repaired and ready to return to the fight. 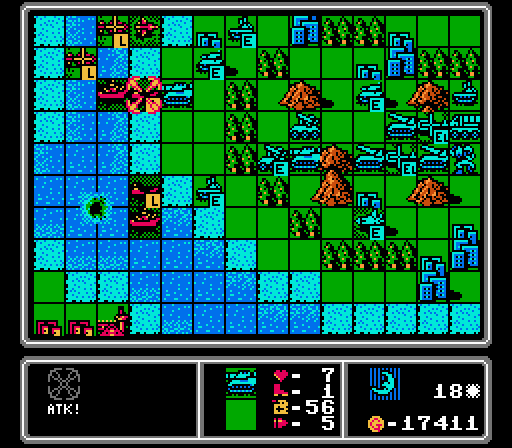 I got greedy and used a lander to chip at another AA tank, forgetting that it could be attacked on the enemy phase and risking its valuable cargo. Luckily the medium tank wasn't at full strength and only did one damage to the lander and its occupants here. 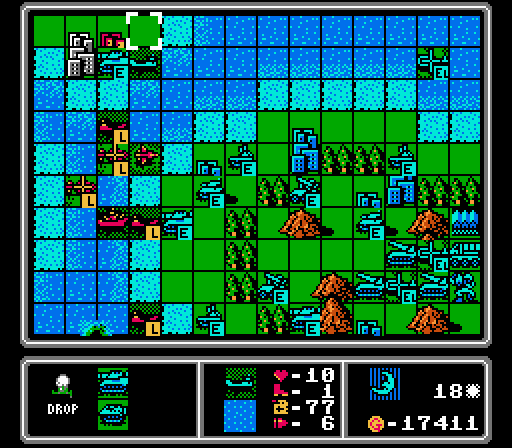 No joke, the AI dropped off another medium tank on this tiny island. That's two medium tanks that'll never leave there.  I don't think I showed off lander unloading yet, so there you go. You can see there's still an APC left in the lander, too. When you unload a lander that's carrying two units, you first pick which unit to unload, and then which tile to unload onto. That ends the lander's turn, so no going back and also unloading the second unit, even if there's a free space for it. Turn 19 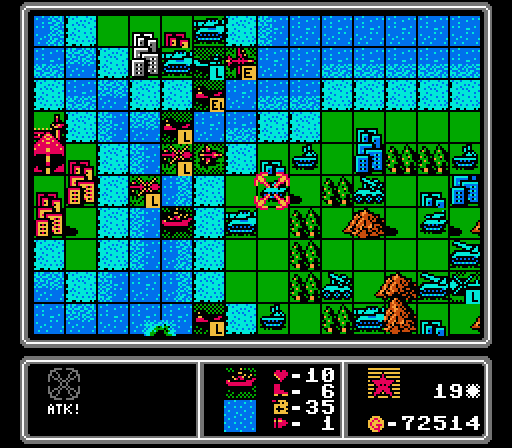 While up top I send a lander and a bomber to harass and pin the enemy lander, the battleships are able to take out both the tank targeted here and the nearby medium tank. 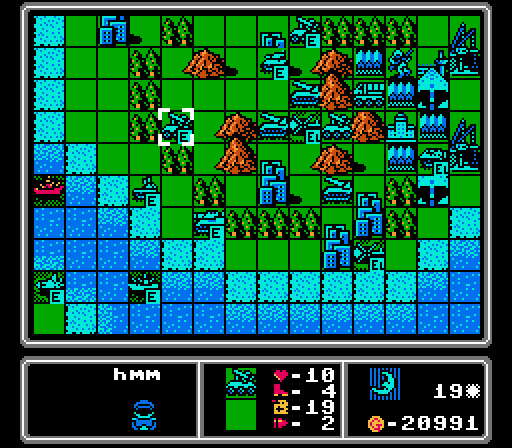 It's another quiet enemy phase. The fighter at the bottom was still damaged and went after our fully-repaired fighter, to its detriment. The enemy battleship creeping up on us is also only half-repaired. Turn 20 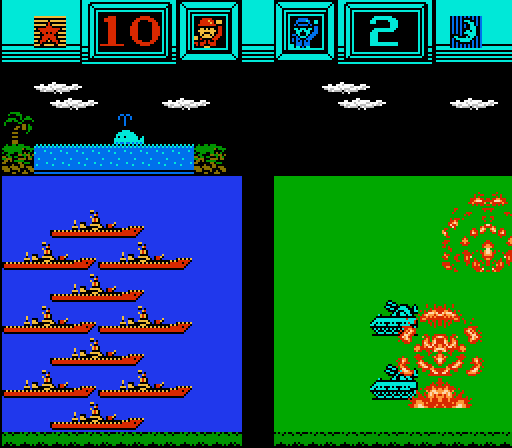 It does my heart good to see so much damage done to an AA tank all at once.  One of our battleships ran out of ammo and had to pull back, but I'm able to land six units at once on Blue's island between all the landers and copters we have in the area. 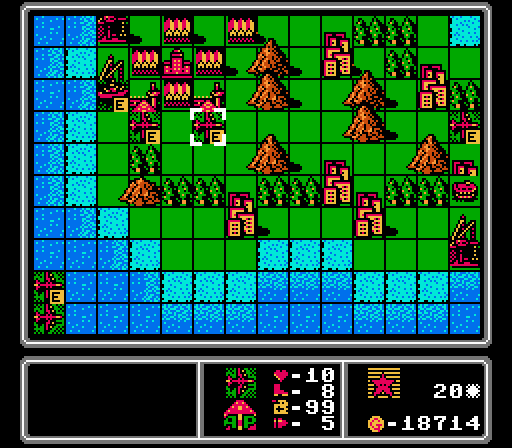 We get a fourth battleship, and toss out two more throwaway bombers to keep our funds down below the cap.  All three of our copters get hit on the enemy phase, but somehow all of them survive. There's an enemy city sitting under one of of our infantry that we'll be able to start capturing next turn. Turn 21  The battleships teamed up to take out the scout, the rocket went after the AA tank, and everyone else just kind of moved around to try and protect the capturing infantry. I'm not sure why I bothered to unload an unprotected AA missile, though.  We lose a copter and an infantry on the enemy phase, but otherwise see surprisingly few attacks. The AI isn't willing to put its units into the firing range of our battleships. Turn 22  There's the first enemy city captured. We'll have even less income available to us now, thanks to the challenge. 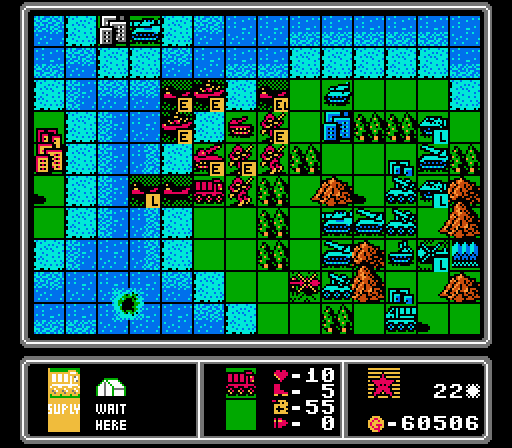 I was trying to have our supply fill up the lander here, but it didn't work. Supply units can only help out ground units. Good thing we have the captured port and airports for our other units. 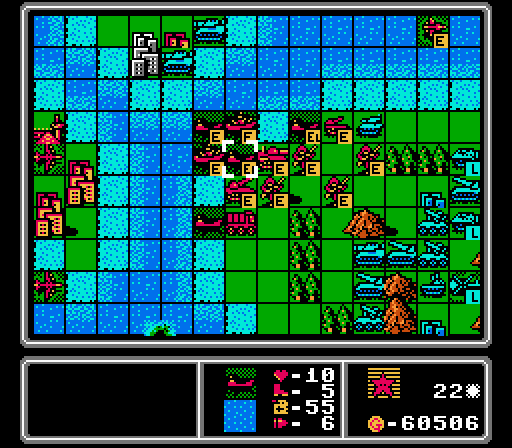 One of our infantry makes a bold play for a second enemy city, with me not realizing that it's in range of all three enemy rockets. But we do get a medium tank offloaded with much better support available this time. 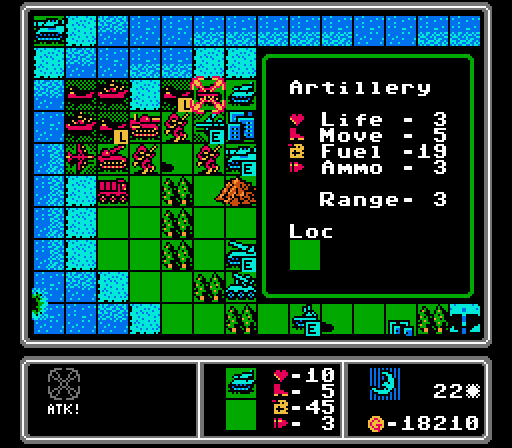 We lost the infantry to the rockets as expected, and another copter to some AA missiles, but I did not see that bomber coming out of nowhere to wreck our artillery. The tank here finishes it off. Turn 23 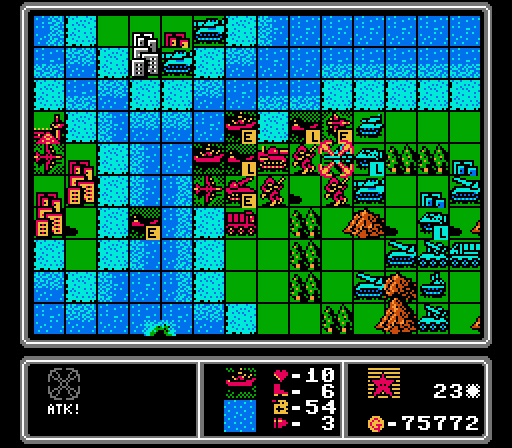 Our scout is still hanging around and slips in to beat up the bomber so that the battleship can finish it off. Our other battleship hits the nearby tank, while our rocket takes a bite out of the medium tank. 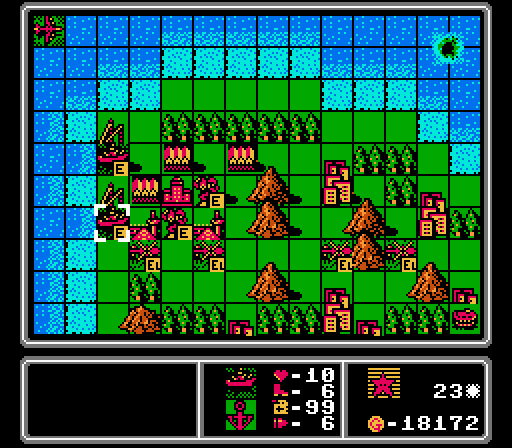 Our airports are currently busy quietly building up a fleet of copters to ferry over a horde of mechs, so I build two throwaway battleships this time to burn up our extra funds.  The enemy phase just has a couple more rocket strikes on our infantry. Turn 24  I've got an identical formation of throwaway units gathering together in the lower corner.  The battleships erase the APC and the tank, then the fresh artillery finishes off the medium tank.  The three enemy rockets all covering each other is a tough formation to break, so I throw our medium tank at the center rocket to try and crack it open. 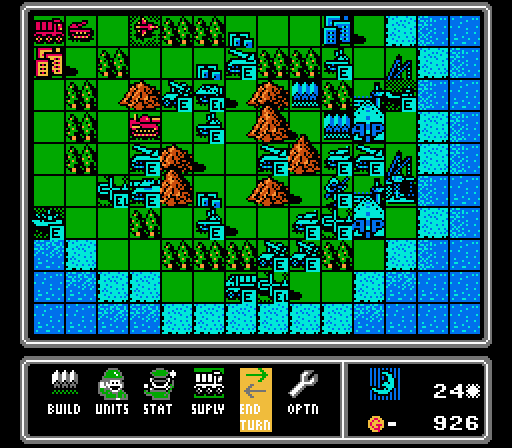 Our last infantry falls to one rocket, our medium tank loses half its Life to another rocket, and the third rocket retreats while a fourth one gets built. Turn 25  The retreating rocket opens up the formation enough to allow a bomber in after the AA missile, and a fighter in after the copter. Our medium tank retreats to the city we captured, but I didn't realize it was still in range of the enemy battleship. Luckily it'll be able to barely survive the enemy phase, and I can set up to get rid of that battleship next turn. So at this point, we're 25 turns in and comfortably in charge of the map. We've got a solid foothold on the enemy island, and strong units leading the charge. Winning the map eventually is a pretty sure thing now. Looking ahead though I'm pretty sure the challenge is just going to make actually completing the map a grueling grind like the last one, as our income keeps shrinking to match Blue's shrinking income, and our supply lines get longer and longer. So I decide, gently caress the challenge.  Release the hounds!
|
|
#
?
Jul 21, 2021 16:00
|
|
|
Man the inelegant balance is always jarring after being used to AW1. Transports with partial combat roles and non-build ports are just bizarre. I love the care and attention in the Lander animation though
|
|
#
?
Jul 21, 2021 16:23
|
|
|
DKII posted:So at this point, we're 25 turns in and comfortably in charge of the map. We've got a solid foothold on the enemy island, and strong units leading the charge. Winning the map eventually is a pretty sure thing now. Looking ahead though I'm pretty sure the challenge is just going to make actually completing the map a grueling grind like the last one, as our income keeps shrinking to match Blue's shrinking income, and our supply lines get longer and longer. Definitely the right way to go. If you want to keep doing these challenges, stop when the map's already over and it'll just make it take longer. That should be faster and less frustrating for you and make for more dynamic updates too.
|
|
#
?
Jul 21, 2021 17:47
|
|
|
Part 13: Ball (2 of 2) Previously, I decided the challenge of limiting our spending to the enemy's income was going to be too boring for finishing off the map, and threw it out the window after 25 turns. So we burn all our built-up funds on fun stuff, and send out our stashed funds-burning "throwaway" units to go overwhelm the enemy.  The enemy phase isn't terribly interesting, but I did leave this battleship on the coast where it could get hit by both a rocket and a medium tank. Luckily battleships are so sturdy that it only took a combined 3 damage from the two attacks. The bigger problem was the AA tanks severely damaging both our scout and our fighter, but I didn't have much use for those two units anyway. There are no worthy targets for the fighter, and the scout is about to crash for running out of fuel. Turn 26  With six bombers and two battleships from locked challenge funds now on the way, let's see how long it takes to mop up this map. The longest part is just getting everyone across this extra-large map. Most of the bombers need to stop to refuel on the way, too.  We can get more aggressive on offense now, and we start with a couple of lander attacks. Battleship sunk!  A couple bombers finish off a rocket and an AA missile, opening up the middle area of the map.  I probably wouldn't have been so aggressive with the bombers under the challenge rules, given that the scout and AA tank each hurt one pretty bad here, but given all the reinforcements on the way it's worth the trade now. The AI also builds a lander that will proceed to sit at the port for the rest of the map. Turn 27  Not sure I've ever seen this message before, but apparently we've hit a hard cap on the number of units we can have out at once. 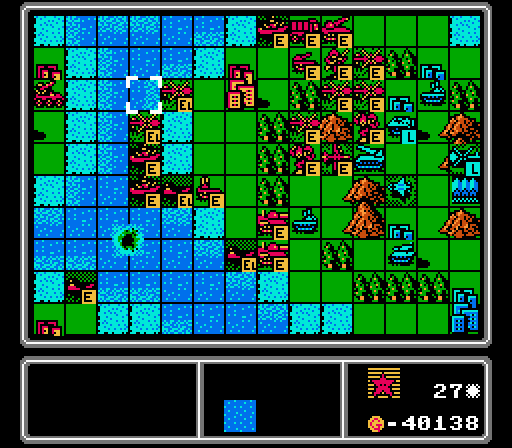 Our battleships and artillery collectively wipe out a medium tank and an AA tank. I've got a wall of copters protecting a capturing infantry, and the first of the horde of mechs has arrived. The landers also drop off some reinforcments - a new medium tank, and an AA tank to scare off the scout. I also merged a couple bombers together so that I could go buy a new one.  We had a bomber get shot down and lost a rocket to a tank, but otherwise the enemy phase was pretty uneventful. Turn 28 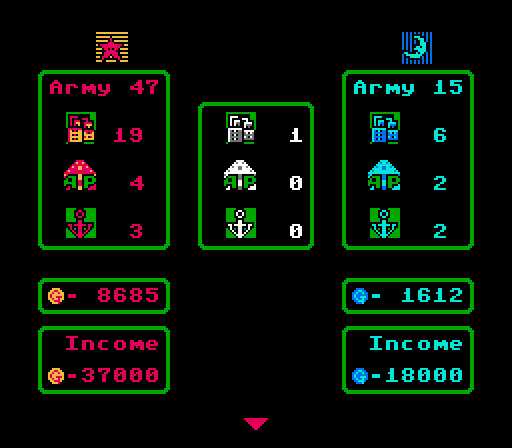 I probably could've kept going with the challenge, given enough time and leveraging a fleet of battleships to do massive damage unchecked. 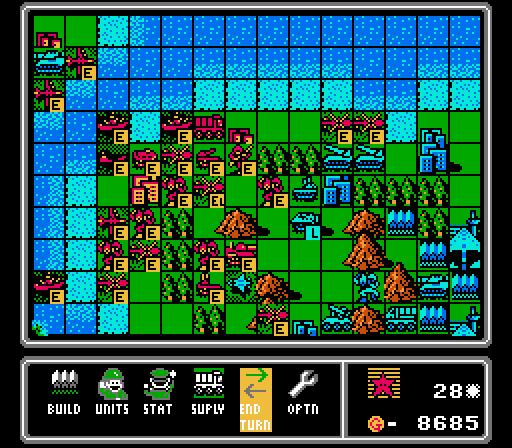 But that's much less fun than seeing a max-size army steamroll the opposition. A couple more tanks and an AA tank got removed here, and our own AA tank hit the enemy scout. I diverted a couple of bombers to take care of the stranded medium tanks on the upper-left, too. A wipeout is going to be a much quicker victory path given all the firepower we have now.  We lost a mech and a copter, both cheap disposable units. And we have lots of options to take out the few remaining threats here (chiefly the rockets and AA missiles). Turn 29 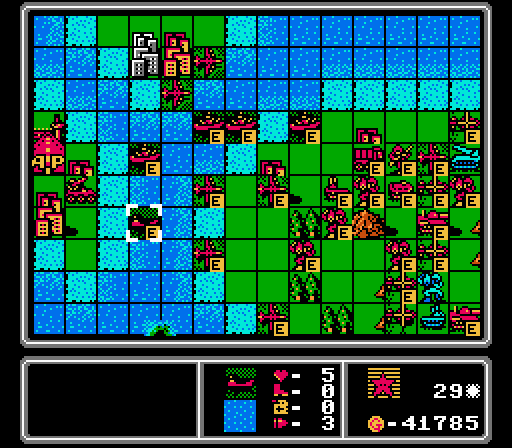 Pictured here: Me about to lose a lander without realizing it. Naval units don't consume additional fuel each turn, but they will be destroyed if they move around enough to start the next turn with no fuel. 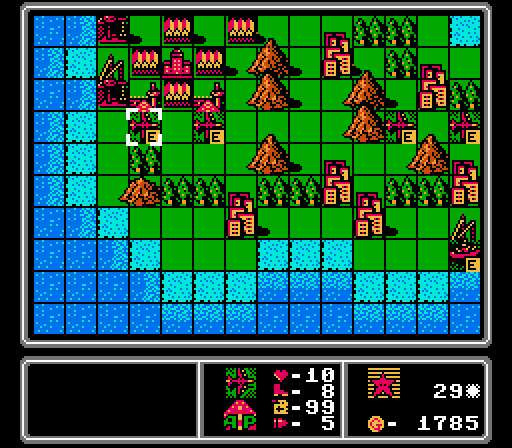 I'm only buying bombers at this point, since I don't think any other unit would make a difference right now. The map is too large and everything else is too slow. 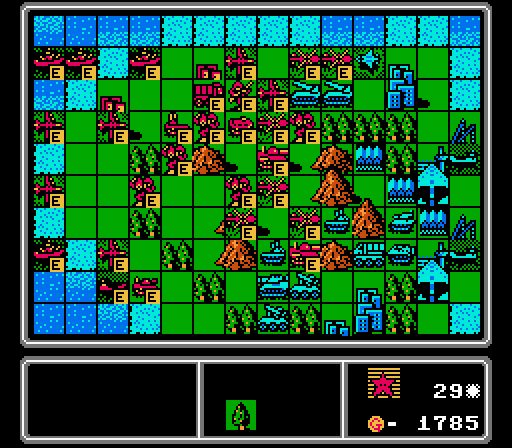 Taking over more of the middle area here. We also hit one of the rockets and one of the AA missiles, and the remaining enemy anti-air units can't reach our bombers. 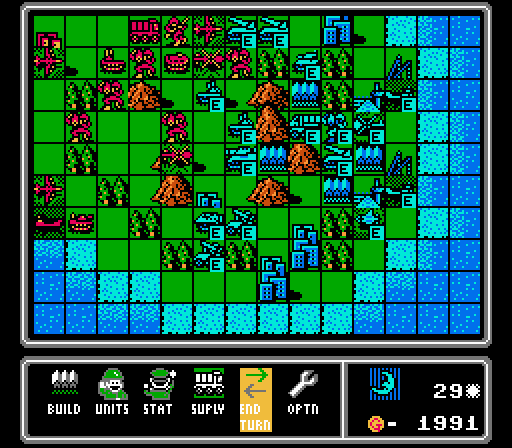 We did lose two medium tanks to the enemy this turn but those aren't our most important units right now anyway. Turn 30  Yup, ran that lander right out of fuel. 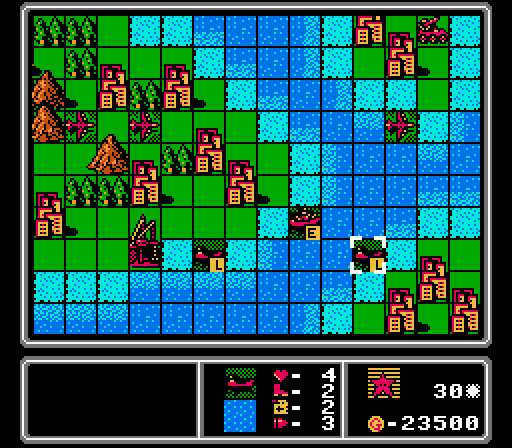 I panicked and checked all our other naval units and found out that this lander carrying two medium tanks was also critically low on fuel. Luckily it was close enough to this island to unload its passengers before it sunk. (Spoiler alert: Those medium tanks never make it across to the enemy island anyway.) 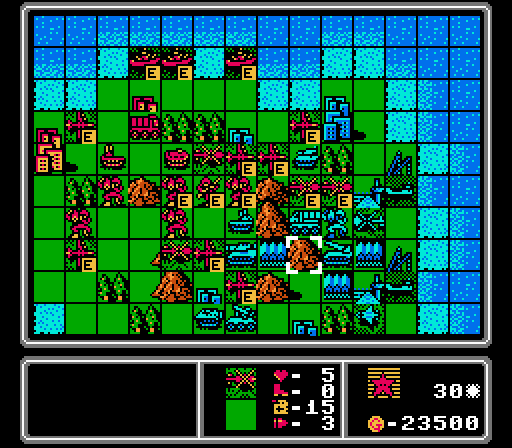 The surge of bombers has finally arrived, taking out two rockets and one AA missile while neutralizing another. I even had a couple of mechs take out an AA tank to let an infantry start capturing another city. 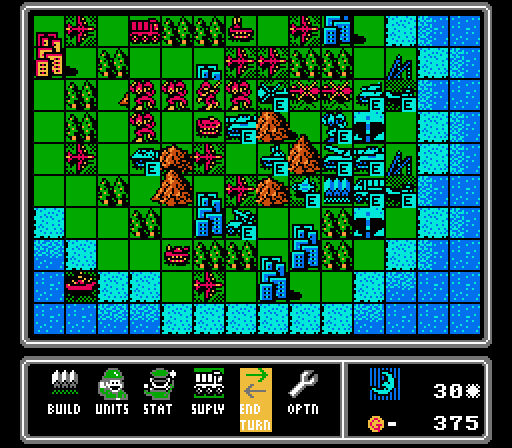 Our copters and mechs took some more hits but our battleships and bombers are still ready to continue pounding the enemy. The toughest enemy units left to deal with are the scout and copter, unless one happens to wander into range of a battleship or AA tank. Turn 31 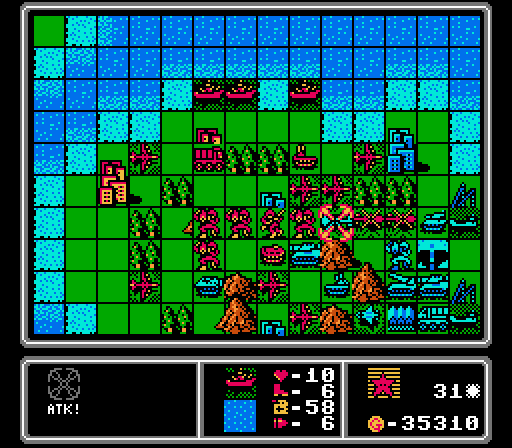 Normally I'd have the battleship go after the medium tank, but I have plenty of bombers to deal with those, and not many other ways to handle this copter. 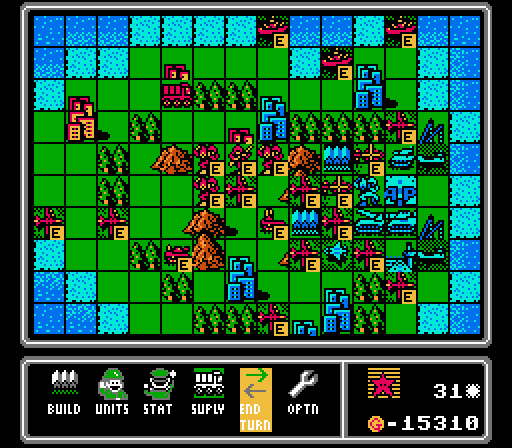 Won't be too much longer now. 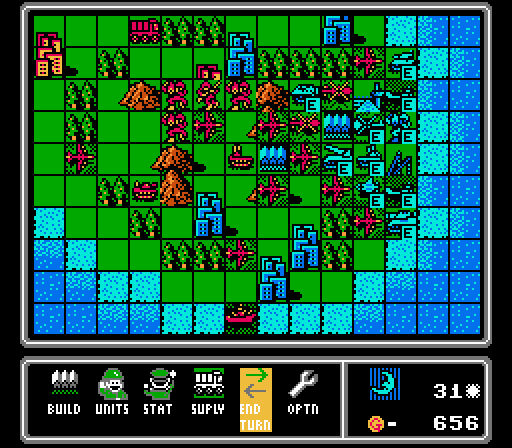 Even after building a few cheap units, Blue's army is down to just ten units remaining. I don't even care about the new AA tank, because our battleship fleet can make quick work of it and we have plenty of bombers to throw at it, too. Turn 32 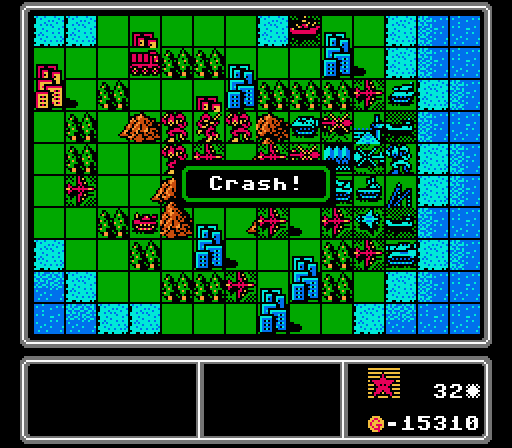 Nothing to see here, just a copter running out of fuel. They've been targeted by so many attacks lately that I'm surprised one survived long enough to crash. 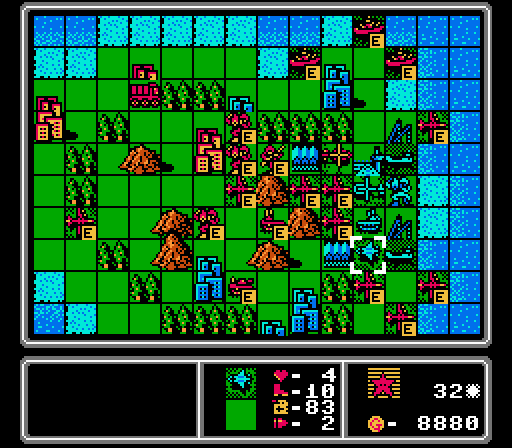 I've got bombers and battleships everywhere but that scout is still causing trouble. Our damaged fighter from way back at the beginning of the update is finally fully repaired and on its way to deal with the problem.  The landers expose themselves to go after the nearby bombers, and the scout left itself in range of two different battleships, so I might not even need the fighter. Turn 33  Still, it's not like the figher has anything better to do.  The battleships finish off a lander and soften up this copter for a mech to destroy. 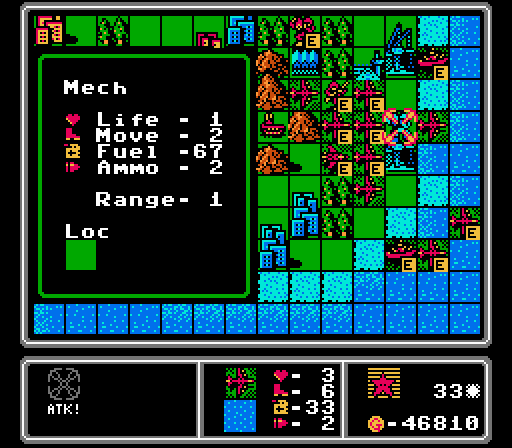 The bombers take care of the rest, destroying the second lander and the AA missile before finishing off this mech.  Ten bombers and five battleships involved with that last round of attacks. Not much they can't do. 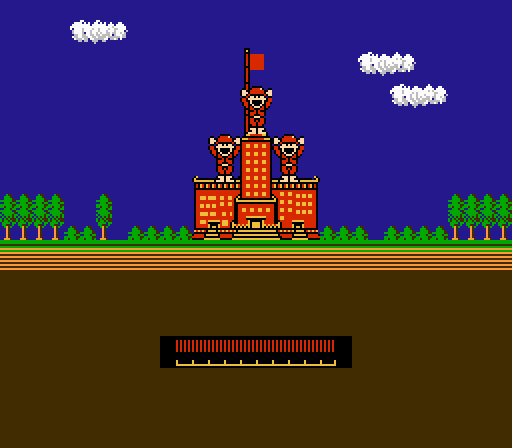 Huzzah!  We ended the map with about 50% more funds spent compared to the enemy. So the challenge was holding us back but not by a lot. Sure I wouldn't have had over a dozen bombers and battleships wiping out the enemy at the end, but I'm pretty sure we would've gotten there eventually. It just would've been boring to watch. Not sure what the COs are again; I know "Homme" is "Man" in French but "Tonbana" is a mystery to me. A quick Google search mostly brought up sex sites and a reference to a Japanese Iris Society. Tulip posted:Tonbana is a pig. The onyomi for 豚 is "ton," you may have seen "tonkatsu" in a Japanese restaurant, and that's what his face is designed to look like. "Bana" could mean any of a number of things and none of them leap out to me as obvious.  A final score of 33 turns for the Ball map. Average is supposedly 32 turns, and we definitely could've gone a little quicker without the challenge so I'll take that. Anything is better than the Triangle map at this point.  Next up we have the Coral map. I've got an idea for a challenge this time that will make the map harder in the middle without slowing down the beginning or end. I'm calling it Ride or Die - once a unit has joined the fight, it's committed! No retreat, no surrender! (In other words: No repairs allowed.) DKII fucked around with this message at 06:05 on Jul 27, 2021 |
|
#
?
Jul 25, 2021 22:01
|
|
|
Tonbana is a pig. The onyomi for 豚 is "ton," you may have seen "tonkatsu" in a Japanese restaurant, and that's what his face is designed to look like. "Bana" could mean any of a number of things and none of them leap out to me as obvious.
|
|
#
?
Jul 26, 2021 17:12
|
|
|
Part of me wonders if Homme is the french word or if it's some Japanese "Honme" but I don't know what that would mean exactly.
|
|
#
?
Jul 27, 2021 07:37
|
|
|
Part 14: Unit Overview: Tank  Basic Info: pre:Cost 6000 G Movement 5 Move Type Vehicle Fuel 50 Ammo 4 Ammo Cost 4 G Range 1 Special None pre:Opposing Unit Damage Dealt Damage Taken Infantry 5.5 1.5 Mech 4.5 3.5 Medium Tank 2.5 6.5 Tank 4.5 4.5 APC 9.5 2.5 Rocket 5.5 6.5 Artillery 7.5 5.5 Supply 6.5 N/A AA Missile 8.5 N/A AA Tank 7.5 N/A Fighter 1.5 1.5 Scout 2.5 0.5 Bomber 1.5 7.5 Copter 2.5 0.5 Battleship 1.5 9.5 Lander 1.5 2.5 Tanks (also sometimes called light tanks) are the cheapest of the ground vehicles that are just meant for taking on other ground units. They've got decent movement, fuel, and ammo, and can trade blows with any ground unit besides its heavier cousin and come out ahead. Tanks are excellent counters to APCs in particular, but also do well against vehicles that can't fight back (the ranged and anti-air units). They're really only especially vulnerable to the heaviest attackers in the game, though they can be worn down by a swarm of mechs as well. Assuming the mechs can ever catch up with them.
|
|
#
?
Jul 28, 2021 04:07
|
|
|
This is cool. I knew there was an NES wars game but knew nothing about it. I'm surprised the series laid dormant for so long until the GBA revitalized it
|
|
#
?
Jul 29, 2021 09:04
|
|
|
I like that you commented on the two blue tanks that never left that island then later dumped a few red ones on a different one to be fair
|
|
#
?
Jul 29, 2021 15:41
|
|


|
MR. J posted:This is cool. I knew there was an NES wars game but knew nothing about it. I'm surprised the series laid dormant for so long until the GBA revitalized it Actually it wasn't dormant! It got a couple sequels on Game Boy and Super NES, then two more sequels on Game Boy Color! They just never left Japan, like the original. It's actually somewhat dormant now; it's been 13 years now since the last game, though there is a Switch remake of the first two Advance Wars game coming soon. ilmucche posted:I like that you commented on the two blue tanks that never left that island then later dumped a few red ones on a different one to be fair OMG I did not even notice that, too funny! I have the next map fully recorded. Slightly painful at points but not too bad. I should have the first part up this weekend.
|
|
#
?
Jul 30, 2021 04:17
|
|
|
DKII posted:Actually it wasn't dormant! It got a couple sequels on Game Boy and Super NES, then two more sequels on Game Boy Color! They just never left Japan, like the original. Oh, I took your calling Days of Ruin the 4th entry wrong, then. I guess it is, but only under the Advance Wars title. In retrospect I was even more wrong because I forgot to count Black Hole Rising so I was under the impression of the other 3 Advance titles and Famicom Wars being the whole series. 
|
|
#
?
Jul 30, 2021 04:38
|
|
|
DKII posted:Part 14: Unit Overview: Tank pre:Opposing Unit Gold Dealt Gold Taken Infantry 550 900 Mech 900 2100 Med Tank 4000 3900 Tank 2700 2700 APC 3990 1500 Rocket 7150 3900 Artillery 4125 3300 Supply 1950 N/A AA Missile 9350 N/A AA Tank 4125 N/A Fighter 3300 900 Scout 3750 300 Bomber 3000 4500 Copter 1000 300 Battleship 4320 5700 Lander 2775 1500 Interestingly, attacking infantry/mechs with tanks is counterproductive if you're limited by gold instead of build slots/chokepoints
|
|
#
?
Jul 30, 2021 06:25
|
|

|
That's really interesting! The decisions games make about the relative balance of tanks vs infantry are really fun because there's so little consensus.
|
|
#
?
Jul 30, 2021 23:04
|
|
|
Foxfire_ posted:
Wow you spoiled the next update. ")
|
|
#
?
Jul 31, 2021 02:15
|
|
|
Part 15: Coral (1 of 2)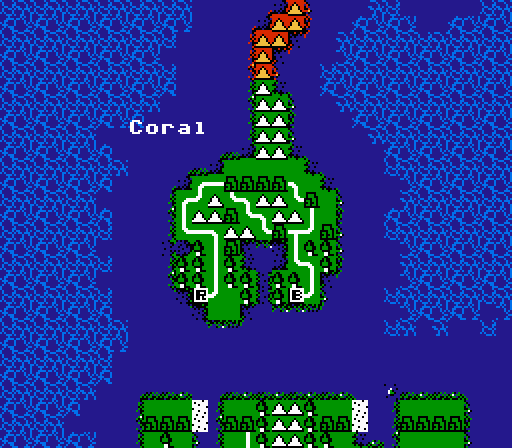 After the last extra-large map, it looks like we're back down to a normal size for Coral. Our challenge this time is Ride or Die, but you can just think of it as "no repairs". We can only pull this challenge off because each turn's supply is a manual action in this game, so I just won't do it if it would cause a unit to get repaired. 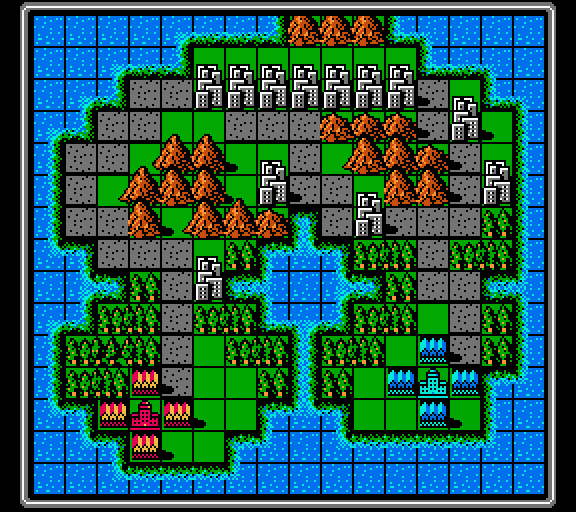 This map is actually the same size as the first map, and laid out somewhat similarly as well. We're back to using only ground units, with a long row of neutral cities in the middle of the map. The main difference is that Blue has a rather unfair advantage in how close most of the neutral cities are to its HQ. We'll have to hustle to win the capturing race here. Turn 1  We have just the base 4000 G income from the starting HQ and bases, so the first turn is just both sides building four infantry to run off and start capturing. Turn 2 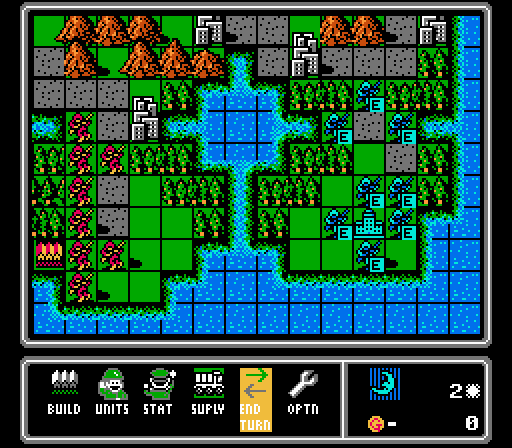 Really it's the same thing on the second turn. Move one set of infantry up, and build another set. Turn 3  Both sides reach their first neutral city, and both sides decline to build anything further this turn. Turn 4  Pretty similar turn for both sides again. One city captured for each player now, but Blue is able to start more captures. We can't even reach our next city without getting attacked next turn. Oh and we get an APC built by each player, too. Turn 5 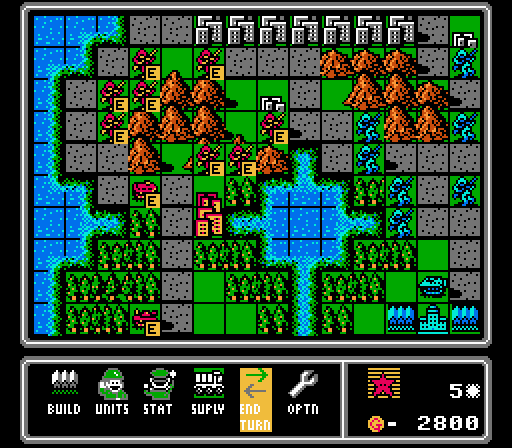 We're able to start one more capture but can't quite reach the top row of cities yet. I put out a tank this time but another couple of APCs would've probably been better with all that enemy infantry around.  Our first combat for the map! That'll delay our capture by another turn.  Blue captures two more cities and builds the two additional APCs that I should have built. Ah well. Turn 6 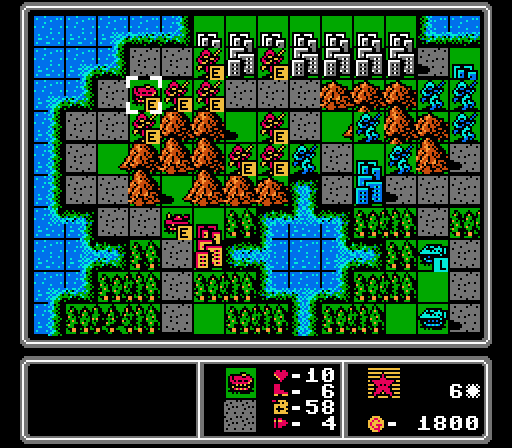 Three captures in progress now; all should complete next turn. We also get another tank.  Blue makes a strong play for the top row. The left-most infantry is the injured one from last turn. A fresh infantry attacked our capturing one in the center again, but didn't do enough damage to prevent the capture from completing. 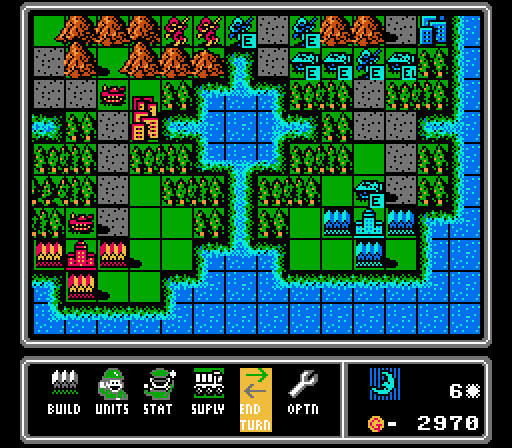 Another enemy APC. Our new tanks have plenty of targets but they'll be busy clearing out infantry for awhile first. Turn 7  Three cities captured this turn, so we will finally have a decent income soon. 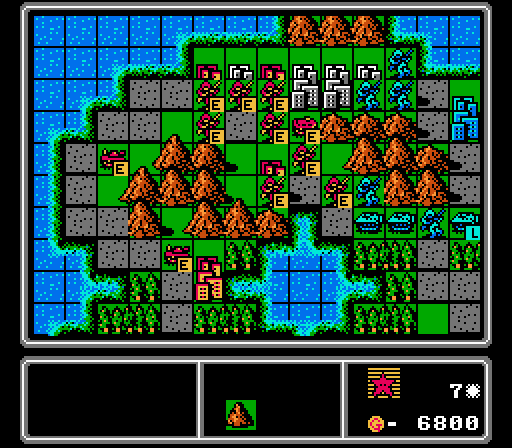 Our APC took out the nearby wounded infantry, while some of our own infantry ganged up on and killed another one. Down by the HQ I put out yet another tank.  Blue finally gets its own APCs involved, killing this infantry.  We lose another infantry to an APC, and Blue finishes two more captures, pulling ahead in the capturing race again. Luckily the AI movements are not always very economical, which makes up for the way our half of the road curves all the way around the stupid mountains before reaching the center. 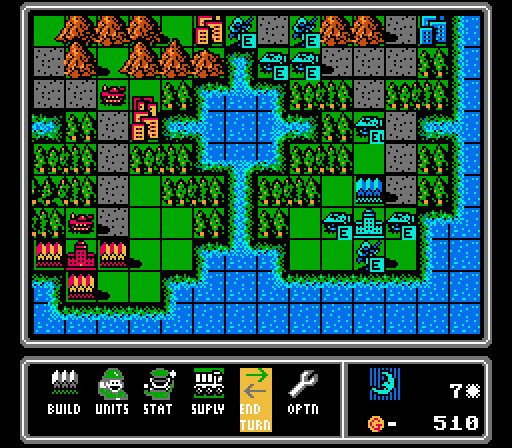 Yet more APCs. Turn 8  Yes, that's another tank. No, I don't have a good plan for clearing out the enemy infantry.  Our APC didn't do as much damage to the capturing infantry as I would've liked (just three), so Blue's going to eventually get that city. But we do start capturing the other two remaining neutral cities, and I set up a little screen for each capturing infantry while taking out one of Blue's infantry. 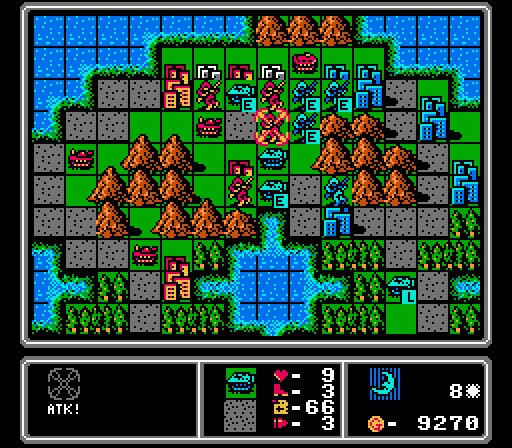 Those enemy APCs tore through us, killing two of our infantry and getting to a capturing one.  Blue finally gets its own tank, plus a mech. I think we'll have to start saving up for something stronger soon. Turn 9  Luckily the APC attacked the infantry on the left. The one on the right completes its capture, and I'm able to use the tanks to get rid of the APC and also set up a screen to finish off the last neutral city. Back at HQ I panic at how many infantry are around to capture stuff and build another two APCs. 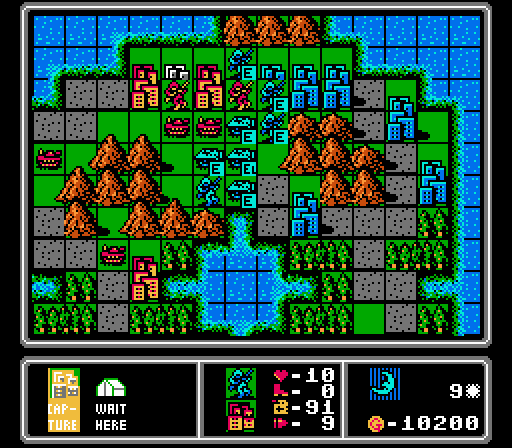 Okay, this looks bad. Okay, this is bad. APCs cleared out the central city and an enemy infantry started capturing it. We cannot afford to lose that city! Turn 10 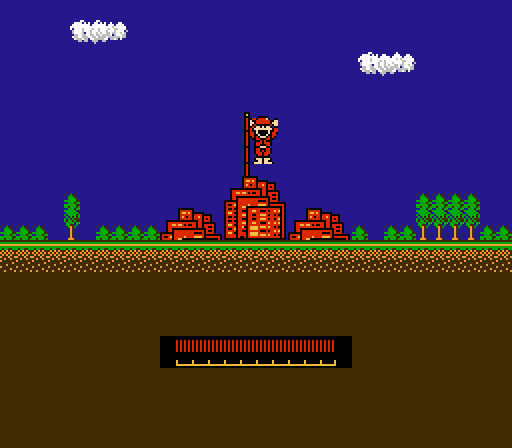 Hey, at least we got that last city captured.  So the capturing race is now over. We ended up even, which is actually a pretty good result considering the terrain advantages that Blue has here. Notice how many more units that Blue has deployed, however.  My only priority is getting rid of that infantry on the central city. Unfortunately the tank only does three damage, and the APCs are preventing us from getting in any other attacks this turn. 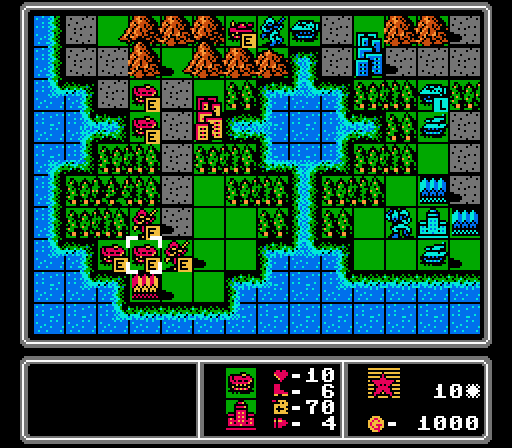 I realize we're going to lose our remaining infantry so build a couple more, plus transport to get them to the middle of the map more quickly. 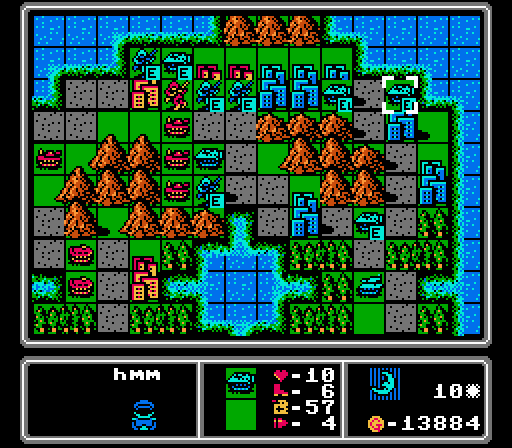 poo poo poo poo poo poo. Two more of our cities are getting captured now. Luckily neither infantry has full life, so we have some time to deal with them. But all I have are tanks, and having them attacking infantry means they aren't dealing with the APCs. And as Foxfire_ mentioned earlier in the thread, tanks against infantry are a cash-loss, and we're pretty cash-constrained right now, so hitting these infantry - on cities no less - will cause us to take more damage than the infantry is worth in total.  Blue gets another tank and the first ranged unit of the map. That'll complicate the latter half of this battle. Assuming we make it that long! To be continued...
|
|
#
?
Jul 31, 2021 02:51
|
|
|
Wow, a bad start that had nothing to do with your challenge for the mission.
|
|
#
?
Jul 31, 2021 03:08
|
|
|

|
| # ? May 3, 2024 18:10 |
|
|
Blaze Dragon posted:Wow, a bad start that had nothing to do with your challenge for the mission. Yeah I haven't been talking about the challenge much because the effects are kind of subtle. But every time we attack in particular, we're taking a couple points of damage that can't be undone. Which makes the next attack less effective, and makes the units more vulnerable to being attacked in turn. But it's hard to show without going into more detail than we really want to see. I'll try and highlight it in the next update more. I do think the map layout (and my switching from APCs to tanks too soon) is causing more of the problems right now though.
|
|
#
?
Jul 31, 2021 15:51
|
|