


|
Part 16: Coral (2 of 2) Turn 11  Here's how I know I should have built an extra couple of APCs way back on Turn 5. Here I have four tanks each spending their turns desperately attacking infantry. Two of our tanks are able to get rid of the one on the central city, another weakens one of the top row crew, and a fresh tank finally joins the fray by blocking the last of our open cities in the top row and shredding another infantry. Phew!  Trying to get some infantry to do some capturing eventually.  Slight trouble - two of the infantry merged together, and the freshly healed two-headed monster is going to finish that capture next turn if I can't stop it. Turn 12 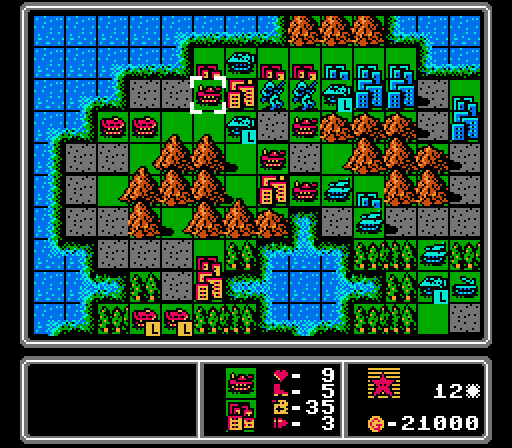 I haven't really mentioned the challenge much, but it's had an impact already since I haven't been able to keep my damaged units topped off, like this tank here. Instead they keep getting weaker and weaker with each attack, until I eventually lose them or have to merge them together. Sure, I have more funds available for building new units instead, but it really takes them forever to get to the contested area of the map. 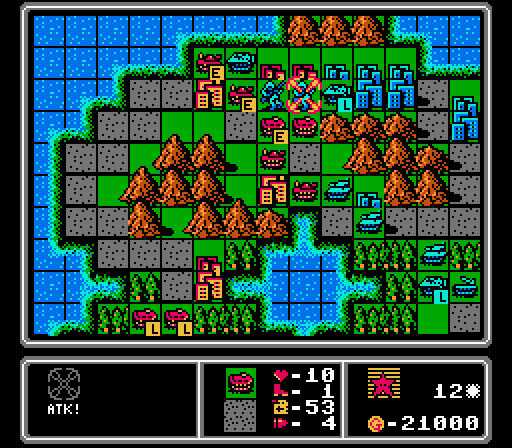 Here's why I said that infantry merge last turn was only slight trouble. Our two new APCs are finally here, and can easily eliminate the threat. There is still an infantry inside the nearby enemy APC to handle, but we've dealt with the immediate crisis now.  As a reward we splurge on a medium tank! 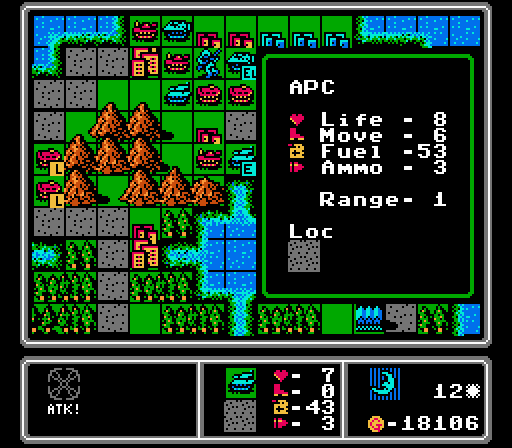  A seven-life tank against an eight-life APC. Somehow it results in a kill. Stupid cheating hard-mode AI. 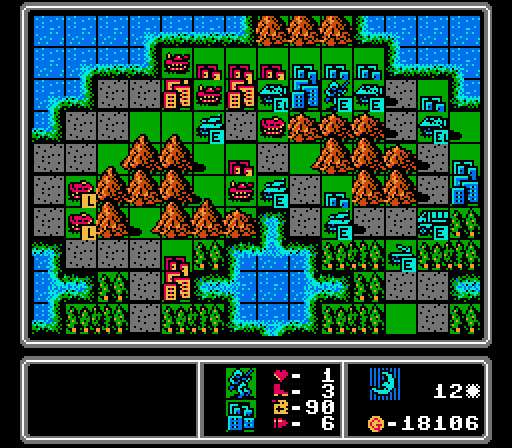 Suddenly I'm bringing a bunch of fresh APCs right into the teeth of a few tanks. Not a great matchup, and our own tanks are all beat up.  As if that situation weren't bad enough, Blue also gets a medium tank. So we won't even get an advantage there. Turn 13 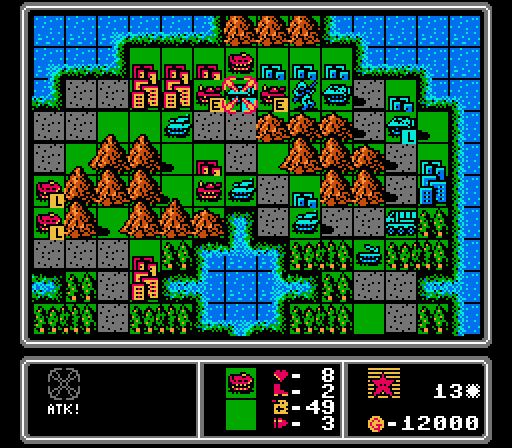 I can't really hit the enemy tanks head-on, but I can throw everything we have at this loaded APC to forestall any future capture attempts. 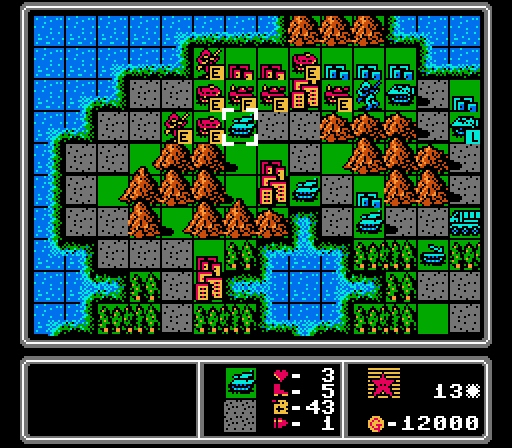 We unload the APCs to protect their passengers, then move our last tank up to keep the infantry protected. We actually have one of the enemy tanks fairly beat up now. 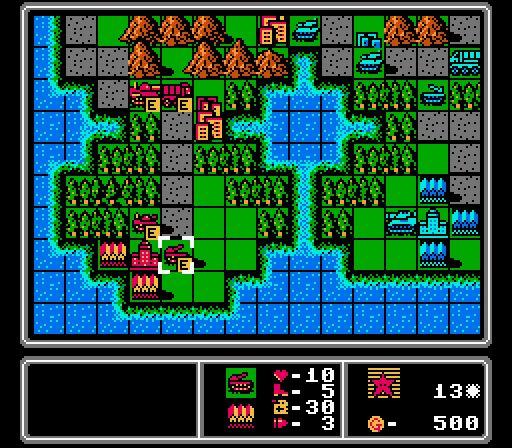 I'm a little behind, but we also get a tank and artillery. I got a supply last turn, too - one of our tanks up top has run out of ammo.  We lose an APC, but counter-kill an enemy APC, so it evens out. That medium tank is awfully close to us already, though. Turn 14  Our tanks are in rough shape. This one is the most well-off, but has just one shot left in it. The other two tanks have half the life and no ammo. 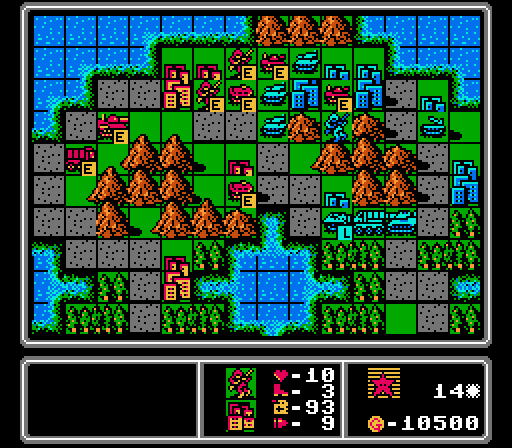 I end up merging a couple of the tanks together and using one infantry to try and screen the other one. I put the APCs each on a city so that when the tanks go after them, they'll at least get a defensive bonus out of it.  The APCs each take a hit but we only lost one of our ammo-less tanks.  Oh, great, a rocket. Turn 15  One way to be efficient when we can't repair our units, is to have our damaged units attack other damaged units. Here we're able to take care of this infantry with an APC that couldn't really do anything else anyway.   Our medium tank is able to focus on wearing down the squatter on our city here. 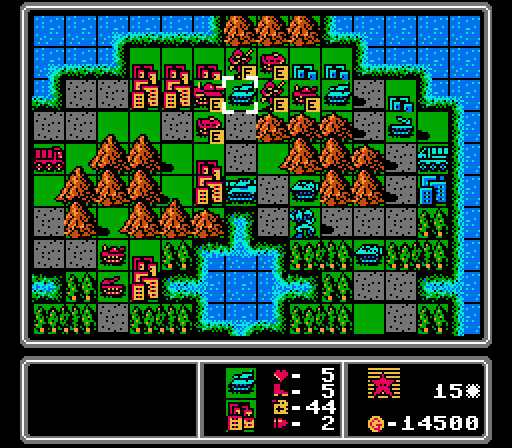 Time for a capturing gambit of our own. 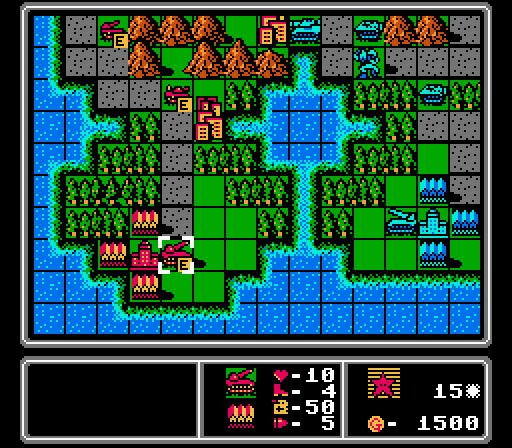 I've got big plans for this rocket. It's going to be the key to winning the middle part of the map.  The AI makes some inefficient attacks here, luckily for us. A fresh tank and medium tank finish off our damaged APCs, who were no threat to anyone. Then the damaged tank takes this shot at our capturing infantry, for just one damage. If it had just moved out of the way, the enemy APC could've come in and really torn into that infantry instead. Turn 16 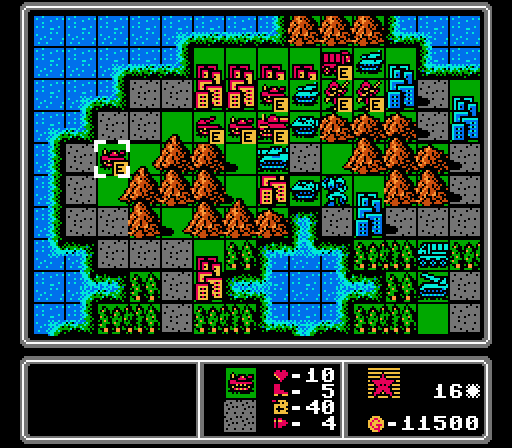 We send in a second infantry to start capturing, while the supply just tries to take up space. I'm mostly just counting on the AI not being able to efficiently slow us down here. We also attacked the medium tank with our own; both are at half-life now. Our artillery is finally in range to do some damage next turn, too.  How about another infantry wave? 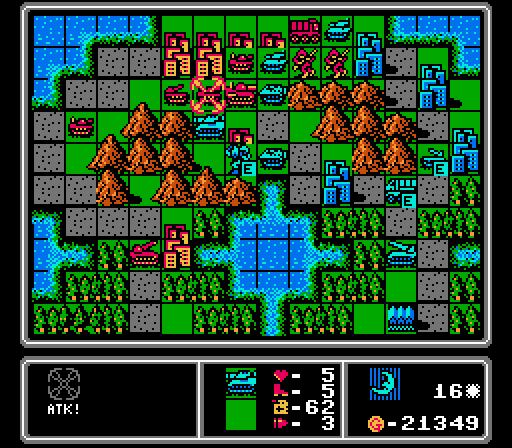  I totally missed that the mech was going to start capturing the central city, but the enemy medium tank moves right into artillery range and will get finished off next turn.  One tank attacks our right-most infantry for a few damage, but nothing too concerning. The other tank and the nearby APC just retreat. Probably a mix of getting away from our medium tank, and trying to draw us into rocket range. 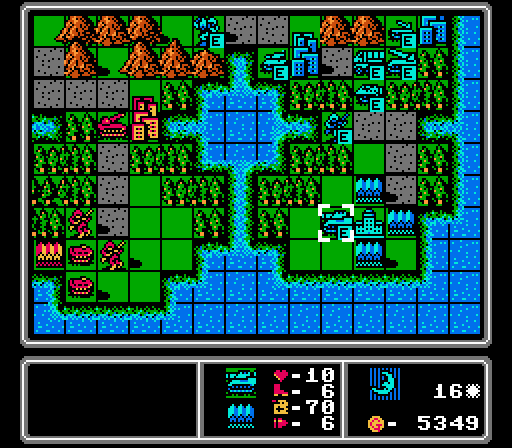 We haven't even taken care of the first medium tank yet, but Blue already has another one. Turn 17  From here, our rocket can cover our own central city and reach Blue's nearby city. 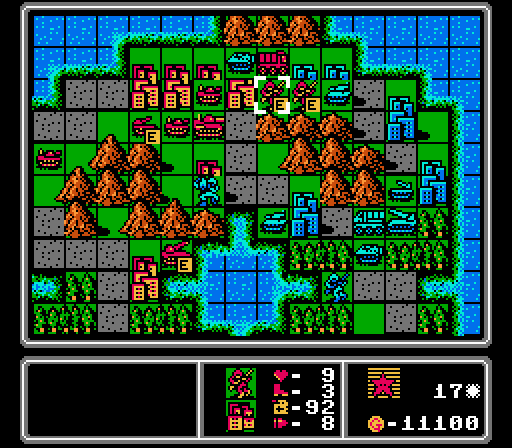 Our artillery finished off the enemy medium tank, but more importantly we finished taking this city from Blue! 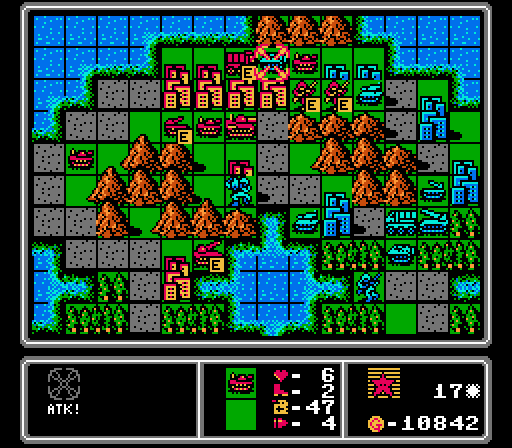 This damaged tank was out of ammo and could've been repaired and reloaded on the city it started on. Instead I have to use the supply truck to re-arm it and attack this APC without the extra bit of firepower from the repair.  Our other tank comes in to finish off the APC, while our own medium tank, itself now heavily damaged, gets in some chip damage on the capturing mech. That buys us another turn to get rid of it.  On the enemy phase, our other capturing infantry is hit again by the nearby tank, but still has enough life left to complete the capture next turn. 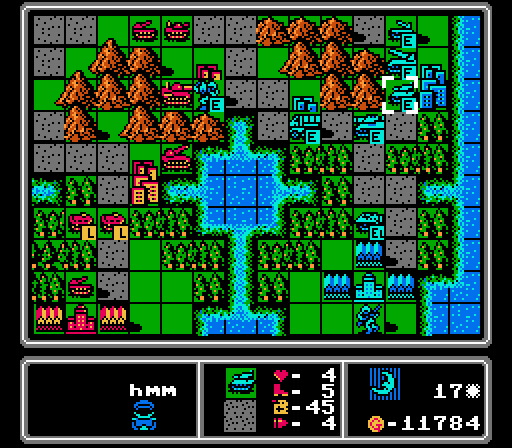 Blue abandons the middle of the map thanks to our rocket coverage, and moves its ranged units to cover the last city in the top row. Turn 18  There's the second of Blue's cities taken. 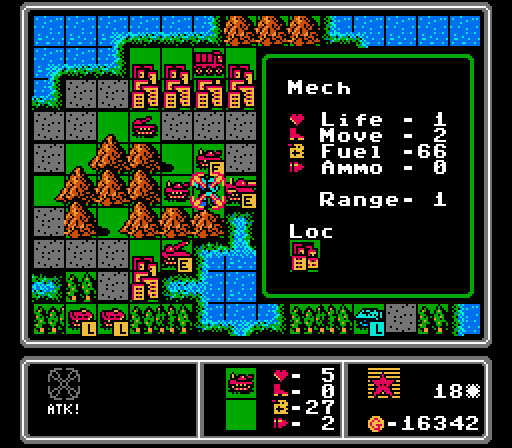 Our rocket, a damaged tank, a damaged medium tank, and a fresh tank all converge to take out the mech and protect our central city. With that action, the middle part of this battle is basically over. We have full control over the central region of the map, and have taken two of Blue's cities without losing any of our own. 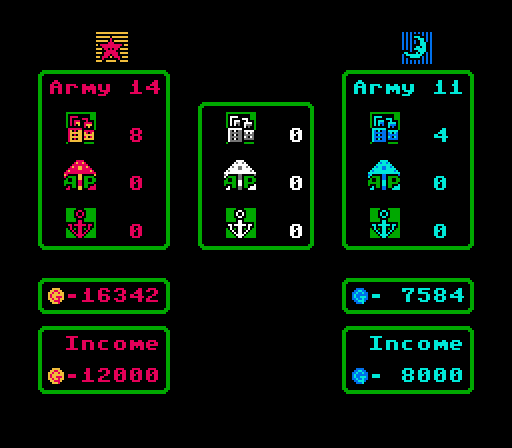 With a map this small, taking two cities already gives us a 50% income edge. It'll take some time for that edge to manifest with how long it takes to get our units around the mountains, but we should be in the clear for winning this map now. 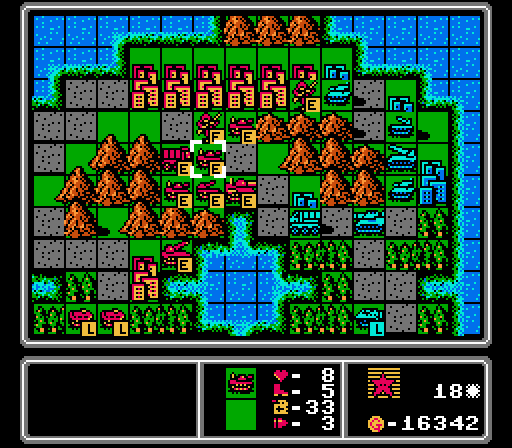 Here's an interesting formation. I'm leaving lots of tempting targets in the open to draw out the enemy medium tank. If it takes the bait, it'll be in range of both our rocket and our artillery. 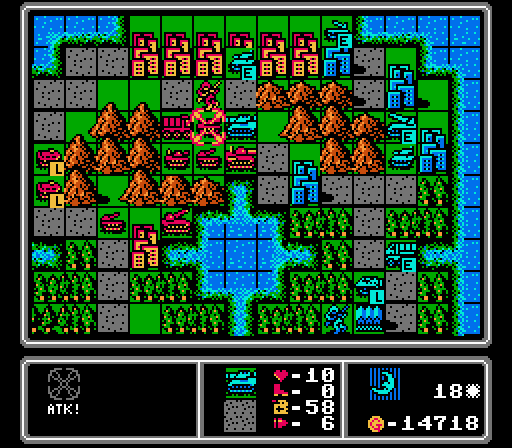 Mostly successful here. The rocket finished off one of our infantry, the tank finished off one of our tanks, and the medium tank indeed came out to attack another tank. I'm not worried about all the enemy units in the top row yet, since there are no footsoldiers nearby to try any captures. 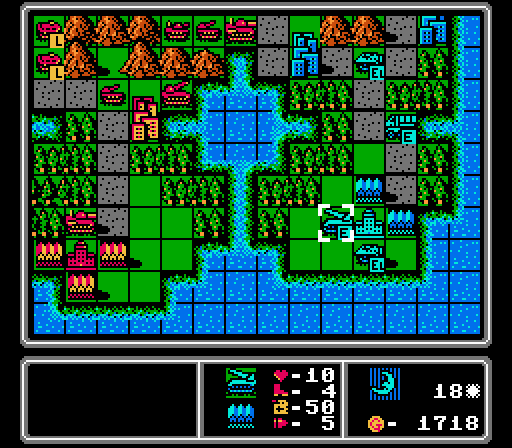 As usual for the later stages of a map, getting to all the ranged units to neutralize them is the most challenging part, and now we have another rocket to take care of later. Turn 19  The rocket and artillery successfully destroy the medium tank. I'm not sure what I'm doing with the rest of this formation; trying to draw in the enemy tanks while staying away from the enemy rocket I think. A couple of APCs arrive and unload their passengers, with a new artillery not far behind them.  Blue sends its tanks after the newly-arrived APCs, while its other units retreat back to protect the approach to its HQ. Turn 20  After blowing up one tank with the rocket and merging together our two APCs, I'm able to use the menu supply option for the first time. The artillery is the only unit affected since the APC already ended its turn, and the artillery isn't damaged, so it just gets a refuel/reload. 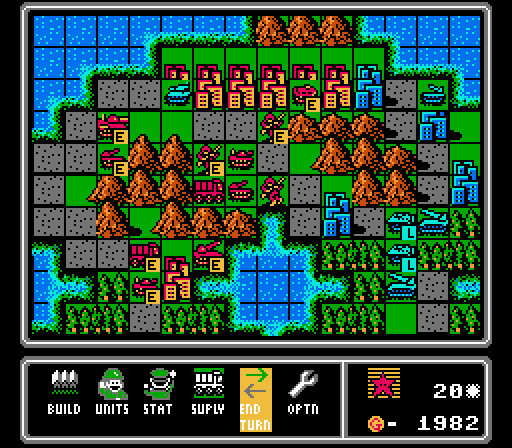 I'd love to send a tank after that loaded APC but I don't feel like losing it to the rockets just yet. We've got the income edge and already have a good edge on army size, so it's better to be patient here and wait for a more overwhelming force. 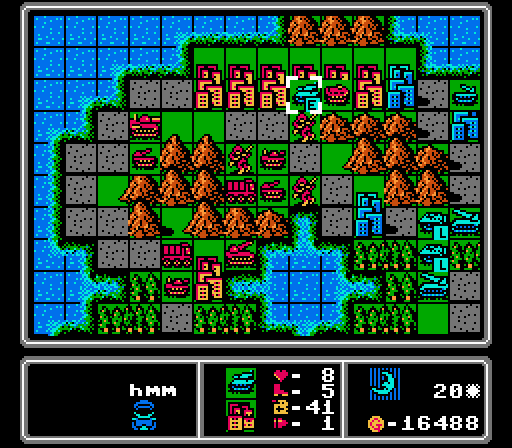 For some reason the enemy tank ended its turn here without attacking. It only has one ammo left, so maybe it didn't want to be left defenseless next turn?  Blue gets another medium tank, putting us back to even in the heavy unit department (two rockets and a medium tank on each side). Turn 21  Thanks to the enemy tank not attacking our APC, we can now attack the newly-unloaded infantry and take off half its life before it gets near our cities. The APC will be lost to the two rockets, but it's done its job.  Meanwhile the enemy tank uses its last round of ammo to fight back against our medium tank. Was that single point of damage worth exposing the infantry to our APC? Doesn't really make sense to me.  I kind of wish I'd been more aggressive here and sent a tank after that loaded APC while the rockets were out of position to protect it, but I guess I was more worried about screening off our artillery.  Our APC is lost to a rocket as expected. We take a hit from the APC on our infantry, and the wounded enemy infantry starts its capture attempt while the damaged enemy tank retreats for repairs. Note that the enemy ranged units are no longer positioned to protect that last enemy city in the top row. Turn 22 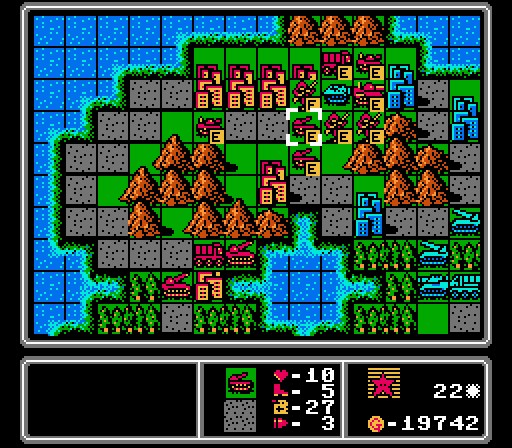 Our tank finishes off the enemy infantry, freeing up a space for our medium tank to finish off the enemy tank. I surround the enemy APC so it can't move, and the artilleries can both fire on it next turn to get rid of it. The APC can only attack one of our infantry so the other one will be in position to capture that last top-row city. 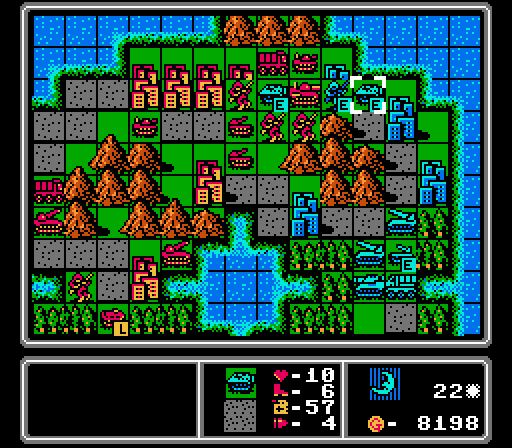 Well, the plan would've worked if the AI hadn't dumped a fresh infantry onto that city to protect it. 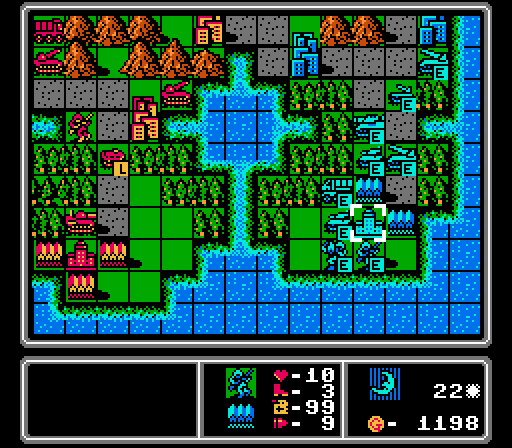 Our rocket-artillery crews are scaring Blue away from the middle of the map, which is giving us plenty of time to gain control over the rest of the upper-right region. Turn 23 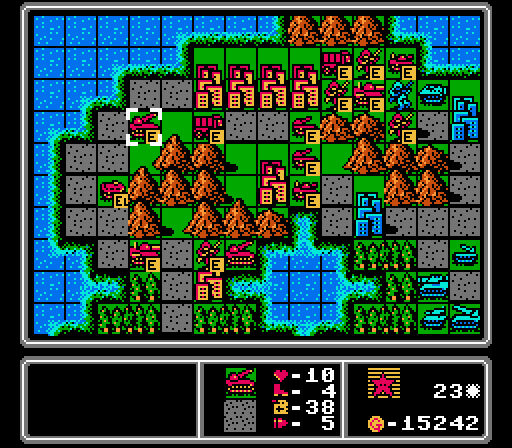 I couldn't repair our medium tank, so the enemy infantry just barely lives on here. Even if we'd been able to get rid of it, the APC sitting there would've prevented us from completing a capture. We did get rid of the other APC with our artilleries, though. And some nice reinforcements have nearly arrived. 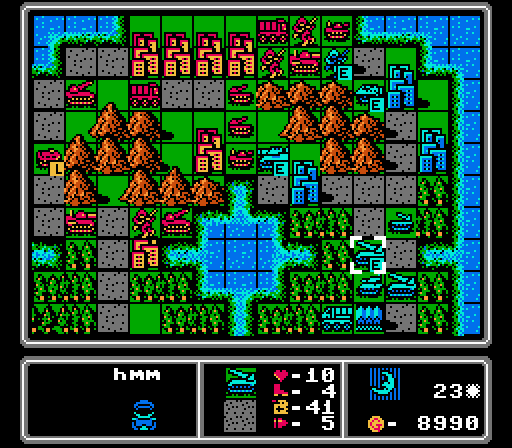 Some breaks went our way here. The enemy medium tank took the bait and went straight into the attack zone of three of our ranged units. On the upper-right, the infantry and APC destoyed one of our infantry but made it easier for us to grab that last top-row city. Turn 24  A rocket and artillery are enough to destroy the enemy medium tank. We also take care of the enemy infantry, and move a tank up to block off the APC so that our last full-life infantry can start a capture. Our other artillery moves in behind it to attack any enemy unit that sticks around. Down in the middle I move a tank to the edge of enemy rocket range. I've noticed that the enemy ranged units keep retreating when I get something close that can reach it on the following turn, and I want to keep driving them back.  The rockets don't actually retreat any further, but the enemy APC does. All of the remaining enemy units are now clustered together in this shot, including a new medium tank. Busting that wall of ranged units is the last real challenge of the map. Turn 25  We've got the entire top row of cities under our control now. The rest of the turn is some positioning to strike at the enemy rockets next turn, if they're left in place, or counter with massed ranged fire against anyone who dares approach us.  We're firmly in control now.  An APC moves up to take out an infantry, but the enemy ranged units all retreat. We're clear to advance now. Turn 26  The enemy APC is taken out by a quick rocket strike. We start two more captures, with each infantry protected by other units that are out of range of the enemy rockets and artillery. I've got good ranged coverage against any enemy units that approach either position, too. 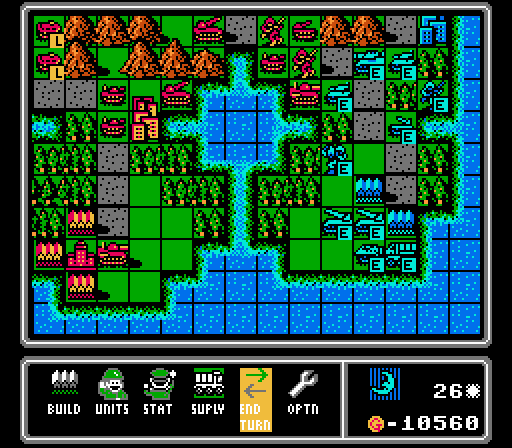 Blue sends up a tank and medium tank to take out our screening APC, but can't touch the infantry itself. Both units will be hit hard by our ranged units next turn now. Turn 27  First step this turn is completing both of the captures that we started, really putting a choke on the AI's income. 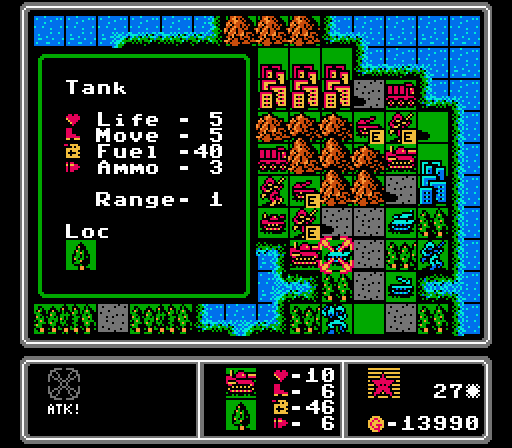 Our two artilleries team up to take out the enemy medium tank. I think that's the third medium tank we've been able to take out with ranged fire before it could do much damage to us. Meanwhile our rocket strikes this tank from across the lake, allowing our medium tank to finish it off.  I missed that one of the enemy rockets had moved to where it could hit our medium tank and took a rough hit for it, but we've got plenty of backup at this point.  The enemy ranged units are a bit exposed again, but they're all still covering each other. I'm going to have to sacrifice some units to make headway here. Turn 28 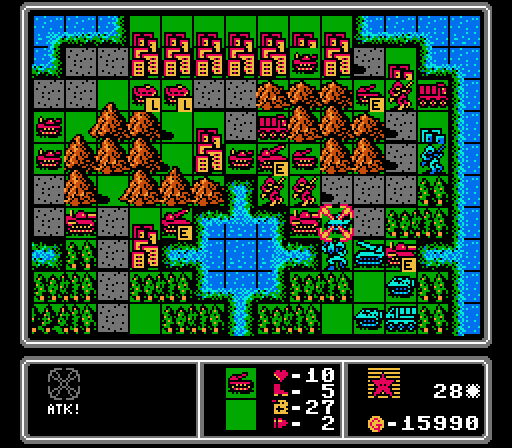 Luckily Blue keeps sending its units into the firing zone. The enemy artillery falls to a rocket and an artillery, while the other rocket-artillery pair take out this tank. Down on the lower-right you can see where I sent a medium tank in to cripple one of the rockets. 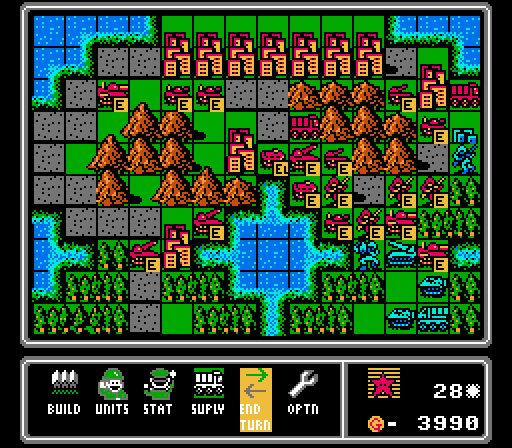 With just one enemy ranged unit still functioning, we send in everyone to rush ahead. That last rocket can only hit one of us! 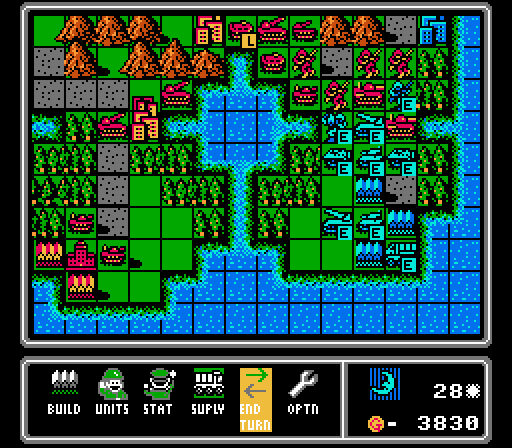 The rocket strikes our healthiest medium tank, the mech almost kills our infantry, and that's about it for the enemy phase. Turn 29 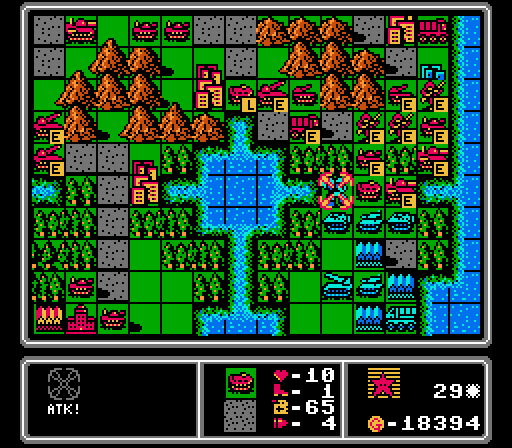 We finish off some damaged units, including this mech, and start capturing Blue's last city. I'm going to need some fresh reinforcements to break through that last line of vehicles protecting the last rocket, however. 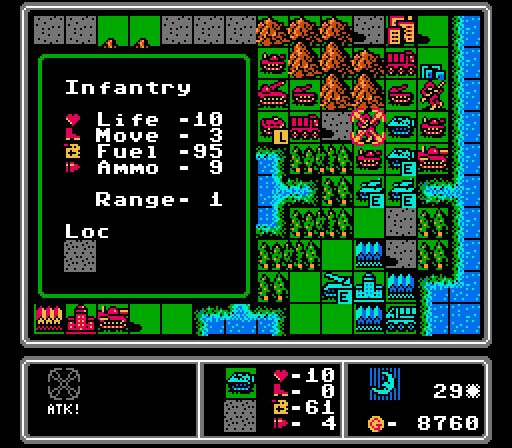  Another example of hard-mode AI cheating. Fresh APC against fresh infantry should not be a one-shot-kill. At least we drew the enemy vehicles out. Turn 30 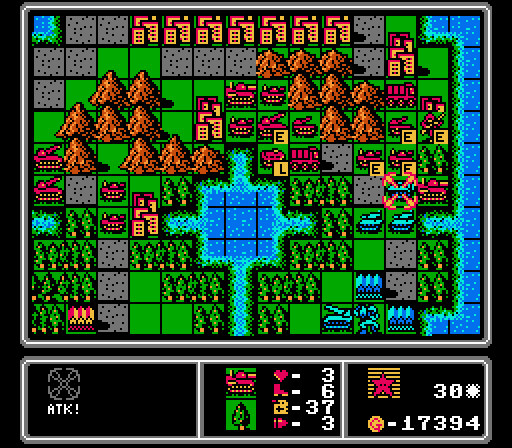 A rocket and a tank combine on one APC, while another tank and our damaged medium tank finish off the other. Our artillery also gets in a hit on the nearby tank. 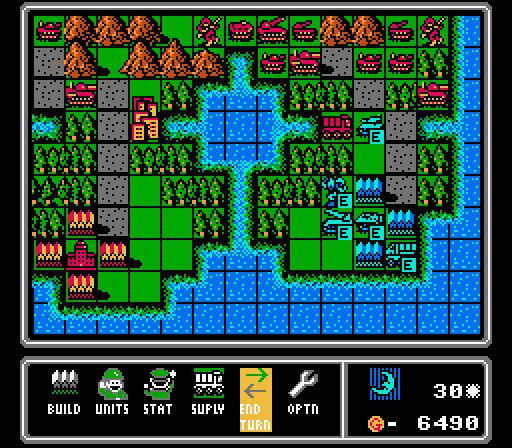 The only thing the enemy rocket can hit is the supply we threw out to get out of the way. The two damaged tanks merged together without attacks, the mech moves to screen the rocket, and a new APC is built. Still, we're well-positioned to advance next turn. Turn 31  The enemy tank is now gone, and we're creeping closer to HQ. Only that rocket can really hurt us now.  Well I guess the mech can hurt us a bit, too. The enemy APC takes out our supply, letting the mech finish off one of our artillery after the rocket weakened it. Turn 32  Clearing units off of bases is hard, but we get in a couple of good hits on the enemy rocket with our own rocket and medium tank.  The rocket wastes its turn attacking an infantry, the enemy mech suicides on the same infantry, and then the fresh tank takes a shot at our medium tank. Nothing to worry about now. Turn 33  This time I hit the supply button to get a free reload on that rocket sitting next to the supply truck. The only unit we have sitting on a city is that rocket in the central city, which hasn't been hit all map.  The ends of these maps could probably be cleaner, but I'm dealing with a lot of damaged units that are low on ammo trying to clear off enemy units getting tough defensive bonuses. We at least take care of the last enemy rocket with a combined rocket and artillery strike. Nothing happens on the enemy phase since I have everything blocked off. Turn 34  You'd think a win would be easy on this turn. The rockets can of course handle that tank simply enough. But I don't have enough strong and healthy units left to get rid of that mech with just two attacks. 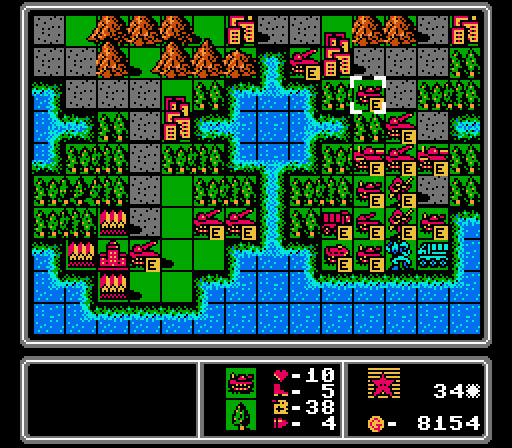 So more of our ranged units move up to finish things off next turn. The infantry also starts an HQ capture, but the mech is going to harass it to prevent that option from happening quickly enough to matter. Turn 35  We end the map in a fitting manner, with a barrage of rocket and artillery strikes.  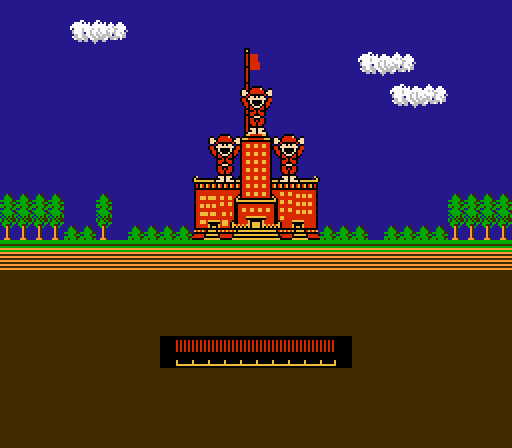 Another victory for Red Star, this time without any challenge-related drama! 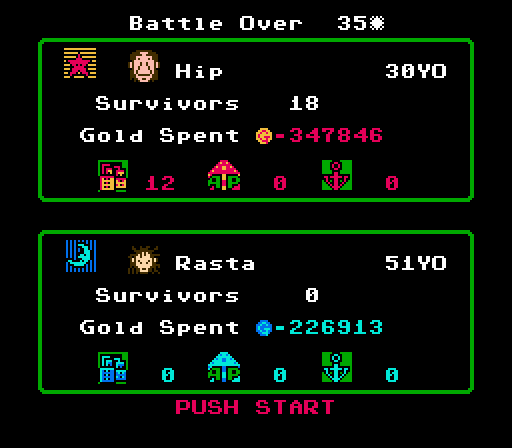 Here are the COs for this map. The only thing I could find for Rasta is a reference to a Jamaican reggae movement that took off in Japan around this time, with "Rasta" referring to one of the popular albums that came about from a collaboration between Jamaican and Japanese artists. As for Hip, there's a hip-hop icon known as the Bathing Ape (or Bape) in Japan, and this guy kind of looks like an ape, but that didn't really start until five years after this game came out, so unless the game can predict the future, I don't think that's the right reference. Could be there's some other hip-hop icon I'm not picking up; it would make sense of both of these COs were music references I suppose.  So, 35 turns for a map of this size seems like a bad score. And it kind of is, but not as much as you might think. Average is about 25 turns, because each side starts out with absolutely nothing so the map takes awhile to get going regardless. The early mistake with switching to building tanks too early probably set us back a couple turns, as did the challenge not letting us take full advantage of repairing our units in the central area. Letting our vehicles repair for a few turns instead of waiting for a new one to make its way all the way around the mountains would definitely have sped things up in the middle parts of the map. 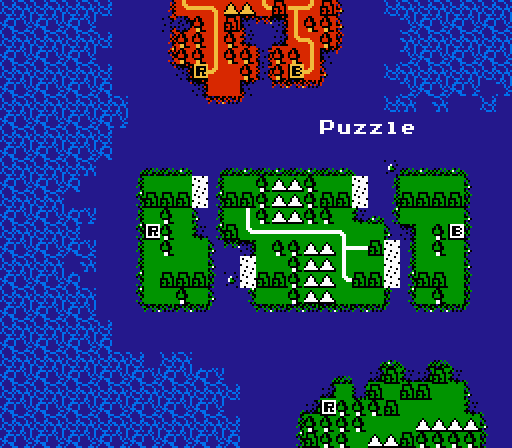 Next up is Puzzle, with a large central island holding most of the action. Seems like a good time for the No Fly Zone challenge - our air units cannot end their turn on the starting island, except for at airports. And yes, air and naval units will both be back for this map.
|
 #
?
Aug 4, 2021 02:45
#
?
Aug 4, 2021 02:45
|
|


|

|
| # ? May 3, 2024 21:05 |
|
|
So the next map is an L and a reversed L pieces, with a Z piece in the middle. I can see why it's called Puzzle.
|
|
#
?
Aug 4, 2021 04:11
|
|

|
Part 17: Unit Overview: Medium Tank  Basic Info: pre:Cost 16000 G Movement 6 Move Type Vehicle Fuel 70 Ammo 6 Ammo Cost 5 G Range 1 Special None pre:Opposing Unit Damage Dealt Damage Taken Infantry 8.5 0.5 Mech 9.5 2.5 Medium Tank 4.5 4.5 Tank 6.5 2.5 APC 7.5 1.5 Rocket 8.5 5.5 Artillery 9.5 4.5 Supply 8.5 N/A AA Missile 7.5 N/A AA Tank 8.5 N/A Fighter 1.5 0.5 Scout 2.5 0.5 Bomber 1.5 6.5 Copter 2.5 0.5 Battleship 1.5 8.5 Lander 1.5 2.5 Medium tanks are the most expensive ground unit, but for the price you get a vehicle that absolutely dominates ground battles, with a ton of movement, fuel, and ammo to keep them going. Their main weakness is ranged fire from artilleries, rockets, and of course battleships. Because medium tanks are so expensive, you probably don't want to take one against a mech, either - you'll lose more in the damage taken than the entire mech is worth.
|
|
#
?
Aug 6, 2021 01:19
|
|
|
DKII posted:Part 17: Unit Overview: Medium Tank Because medium tanks are so expensive, you probably don't want to take one against a mech, either - you'll lose more in the damage taken than the entire mech is worth. In fairness, the mech is going to lose basically its entire worth.
|
|
#
?
Aug 7, 2021 01:09
|
|


|
Yeah it's one of those trade-offs where you can theoretically get four mechs for half the price of a medium tank and take it out. But good luck actually positioning the mechs to all get at that medium tank at the same time.
|
|
#
?
Aug 7, 2021 17:46
|
|
|
"rasta" is just going to be referring to the dreadlocks of the enemy CO.
|
|
#
?
Aug 8, 2021 03:48
|
|
|
Part 18: Puzzle (1 of 2) Next up we have a map that looks like a few puzzle pieces about to come together. Let's take a closer look:  We have another large-size map today. While not exactly a symmetrical start, the map is actually pretty even. Sure, Blue starts with an extra five cities from the middie island. However our half of that island has an extra city and an extra port, so as long as we can fight off Blue's initial advantage, we'll end up coming out ahead. Turn 1  The challenge of the day is No Fly Zone, where our aircraft cannot end turn on our starting island, unless at an airport. So I'll have to load up these mechs on the next turn with the copters still at the airport, preventing me from purchasing additional ones and slowing down our initial expedition to the central island. Our extra cash goes towards a couple more footsoldiers, who will get used next turn.  Blue only builds one copter for some reason, which is fine by me. Anything less than optimal building will slow down Blue's own invasion. Turn 2 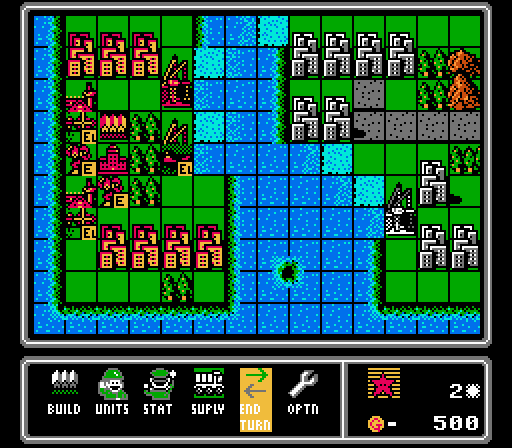 Landers aren't very efficient for transporting footsoldiers around, but I couldn't build any more copters this turn anyway. The three mechs and one infantry from last turn are all loaded up, and we get a couple more mechs for next turn.  Blue loads up the copter and APC and then spends all its extra funds on a battleship. While annoying, that battleship is not going to help Blue get any of its infantry across the water, so that's another win for us. Turn 3 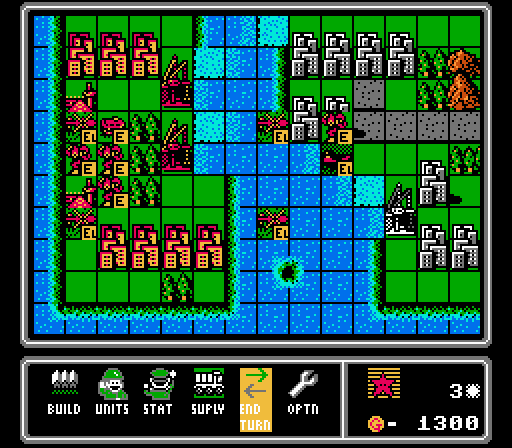 Our lander unloads one of its passengers, and our initial copters advance. We get two more copters and stuff the mechs from last turn inside, getting three more mechs and an APC for later. 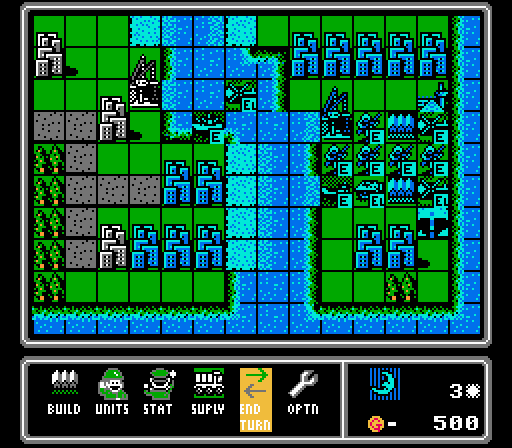 Blue's copter and battleship head our way, with a small horde of infantry backing up on the island. There's now a lander there to help ferry troops across the water. Turn 4  One mech starts capturing, while a copter and the lander each dump out more troops. The other copter on the upper-right is headed deeper into the island. Meanwhile we get more copters and load in more mechs. I'm going with mechs over infantry for a few reasons here. One, we have the cash to spare at the moment. Two, their limited mobility is less of a problem with copters dropping them off exactly where they need to be. Three, we're going to be in a serious ground war on this island soon and I'd rather have a mech's firepower available than the toothless infantry. That said, I did get one infantry because its additional movement got it onto the lander in one turn, and will get it to the neutral port here in one turn, saving us some time. 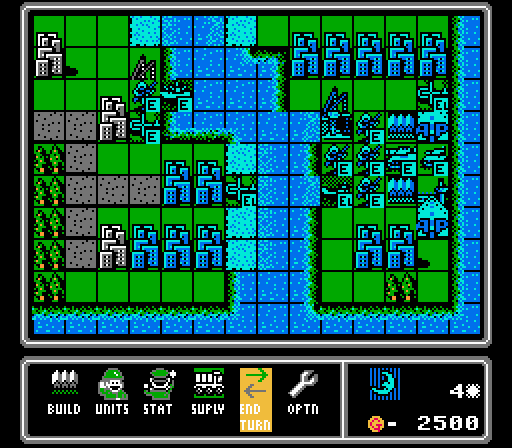 Blue finally drops off a single infantry, and then loads the lander with an APC that is itself holding an infantry. Blue screws up by building a tank and a medium tank early, though - they should really still be getting more copters in the air at this point. Turn 5 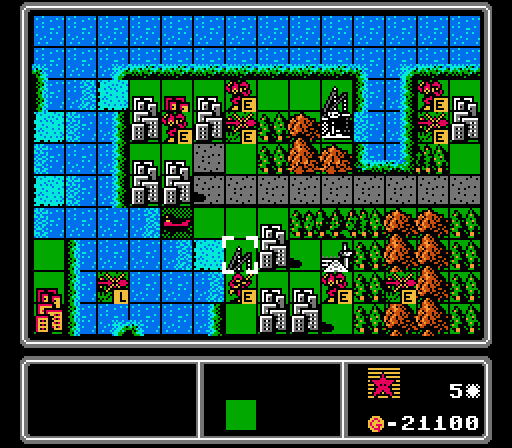 We get our first city on the central island, and start capturing a port and an airport. Remember those properties are worth twice as much income as cities, so it's better to grab them first. Off on the upper-right I drop off a mech near another neutral airport to try and steal it. 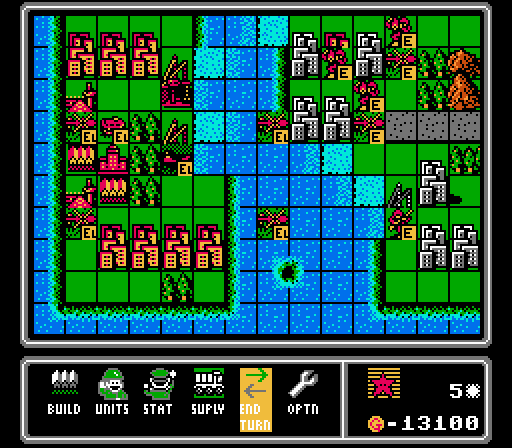 I'm a fan of the loaded-APC-on-a-lander trick myself, so I send our lander back to pick up a couple. With this trick, the lander can actually transport four units, as long as two of them are APCs and two are footsoldiers. We get a couple more copters and load in the latest set of mechs, but I think I have enough of them for now so we save up the rest of our cash for a bigger splash next turn. 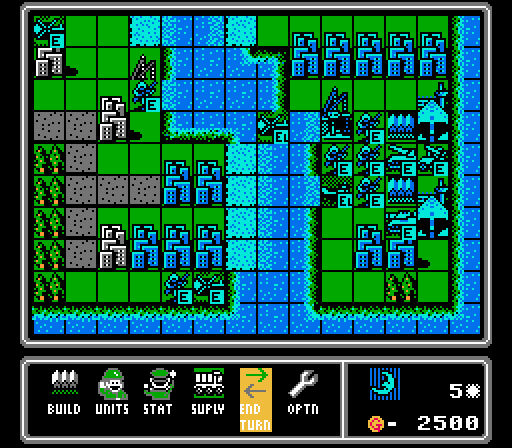 Blue sends up a copter to harass our mech, and the battleship moves up to keep our mech from being able to capture anything nearby. Meanwhile back at HQ, Blue is already more concerned about defense than offense, building a rocket and an AA missile. Turn 6  One advantage of having so many copters around, is that after they're done dropping off their passenger, they can go harass the enemy infantry. It would be nice if I could keep Blue from capturing that port, for example. Meanwhile we finish capturing the port and the airport on the lower-left, bringing us to income parity with Blue already. Back at HQ we build a gently caress-you bomber for that enemy battleship. 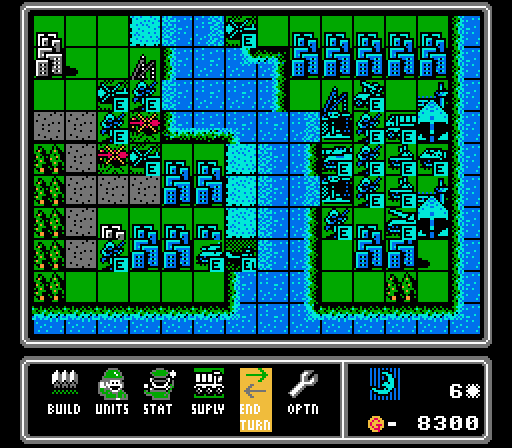 I'm not sure if it's the bomber we just built or all the copters we have hanging around nearby, but Blue spends most of its money this turn on a couple of AA tanks. A couple more infantry and a tank get dropped off, the copters start fighting each other, and off-screen the enemy battleship wipes out our mech. Turn 7  The capturing continues, giving us the income advantage for the moment.  We've got enough spare cash for our own battleship now.  Meanwhile our copters wreak havoc on the enemy infantry, destroying the one that was trying to capture the port and injuring two others. My new challenge for this map is not letting Blue capture a single property.  Our copters take some hits from the other copters and the battleship, but Blue really doesn't like them hanging around and not only moves up the AA missile, but builds a fighter for which we currently have no counter. Turn 8 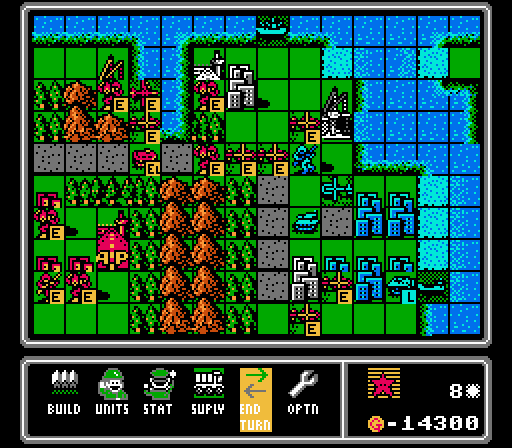 Our copters run around attacking the enemy infantry and merging together. I sneak another mech to try and capture the airport near the battleship again. Our bomber is in range to strike the battleship next turn but I think the enemy fighter will beat us there. So we build another bomber as backup. Most of our half of the middle island is captured now.  The battleship and fighter took out a couple of our copters, and Blue built a new lander, but not much else happened. Turn 9 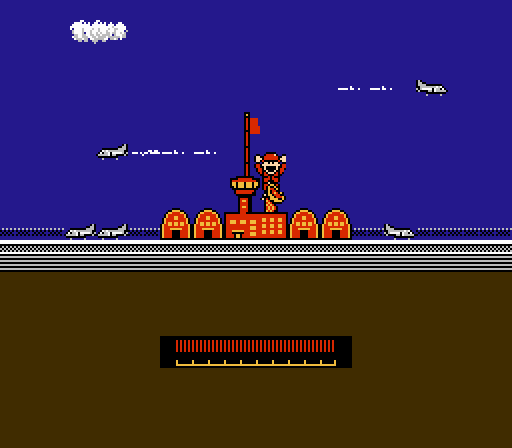 Most notably, our invading mech was ignored and is now able to complete capturing the neutral airport on Blue's side of the island.   We've now captured every building in our half of the map, while denying Blue the ability to capture anything of its own. So with the initial phase of the battle complete, we already have a sizeable advantage.  I've already got a battleship and a couple of bombers to handle the enemy battleship, so let's build a couple of fighters to also get the skies under our control. 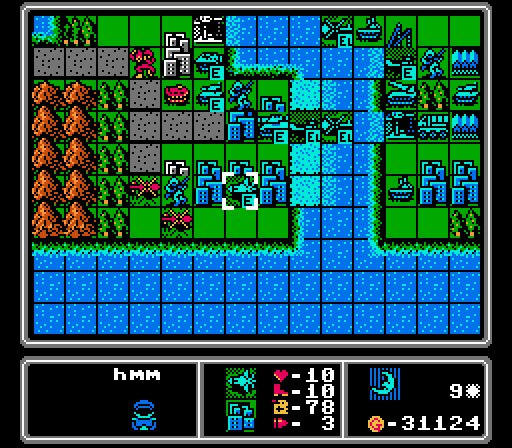 The right side of the central island gets a bit messy. The enemy battleship, tank, and APC each go after our mechs, and the fighter shoots down another copter. However the fighter's movement brought it away from the battleship, so we'll be able to strike at it next turn. That medium tank that just rolled off the lander won't be a concern, either.  The new bomber that Blue just built is a threat to our battleships, but the fighters we just got for ourselves will be able to take care of it. Really this map is already well in hand at this point, as we'll see in the thrilling conclusion....next time!
|
|
#
?
Aug 22, 2021 23:51
|
|
|
This looks like the kind of map that can quickly spiral out of control. Like it did, in fact, you already got so much more purchasing power than the other side.
|
|
#
?
Aug 23, 2021 03:50
|
|
|
Yeah there's definitely a snowball effect with these maps in general. Strategy games are tough to balance for individual maps without resorting to some goofy elements like giant cannons. ") One of the most impactful differences in this game in terms of strategy is the fact that you can build units on your HQ like it's a base. Suddenly the HQ is almost always protected by a unit getting a strong defensive bonus, so it's tough to try and sneak in for an HQ capture without wiping everything out along the way. Add in the fact that the HQ is almost always surrounded by four bases, and you basically have a setup where it's impossible to do anything but a steamroll-wipeout on every single map.
|
|
#
?
Aug 23, 2021 04:35
|
|
|
At that point it's probably good for balance that you can't build at captured bases/ports/airports, IIRC?
|
|
#
?
Aug 23, 2021 07:33
|
|


|
Maybe; in these near-even maps it really just slows things down and makes it more tedious, particularly at the end. The middle of the map might be more interesting if both sides had build points closer to the action. Also, the later games set up campaigns where you could only play one side and typically made the maps more interesting by making them more uneven, but you still had a snowball effect by the end of the map; it was just quicker to wrap things up. Another factor that slows down the middle/end of the map here is the heavy defensive advantage in this game, due to units not getting a first strike advantage. Our direct-attack units are always taking damage and needing to get replaced and the supply line always stretches all the way back to the HQ. I guess I'm saying the snowball effect is always there, it's just more noticeable/painful here due to how slow the wrap-up phase is in this game.
|
|
#
?
Aug 23, 2021 15:03
|
|
|
Yeah, you still wind up with a tank a turn this way, it's just that any counters you buy take forever to move up and you're pointlessly moving a ton more units each turn.
|
|
#
?
Aug 23, 2021 15:35
|
|
|
Part 19: Puzzle (2 of 2) Turn 10  First order of business is to take advantage of the opening that the AI left us last time, and take a bite out of the battleship. 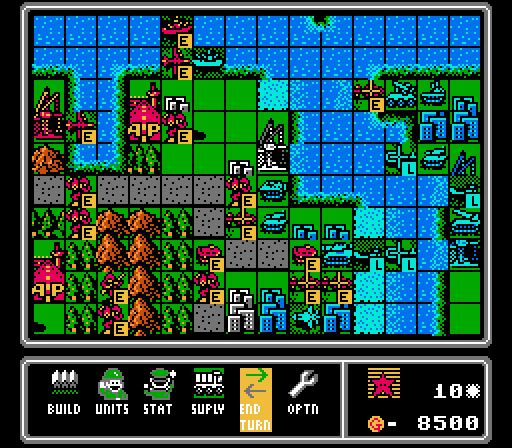 Our copters take out the last of the enemy infantry on the island, though there are a couple more loaded copters headed our way. We've got a couple more captures started, though they're more a distraction than a serious attempt. Back at base, we get another battleship. 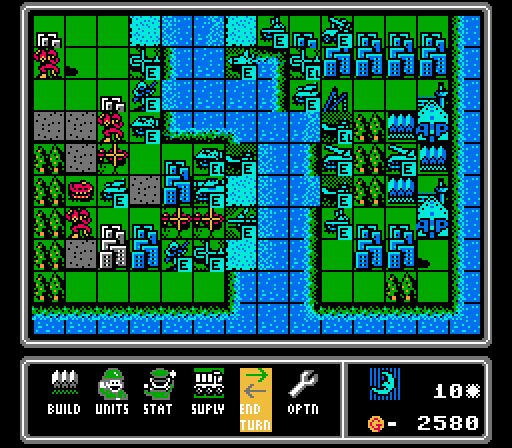 We're running low on copters now and took some hits on our mechs and APCs, but Blue is still pretty well bottled up. The new rocket and lander that the AI just built will slow us down but not by much. Turn 11 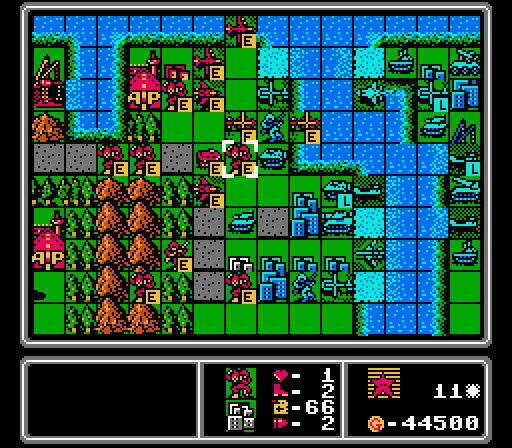 The highlighted mech isn't going to complete its capture, but it performed its distraction job beautifully as the other mech on the upper-left was left untouched and completed its own capture. We sneak another mech onto the bottom row of cities, take out the enemy battleship with a pair of bomber strikes, and harass the new infantry on the port with a couple of copters. Our fighters are on scene and ready to cause trouble next turn, too. 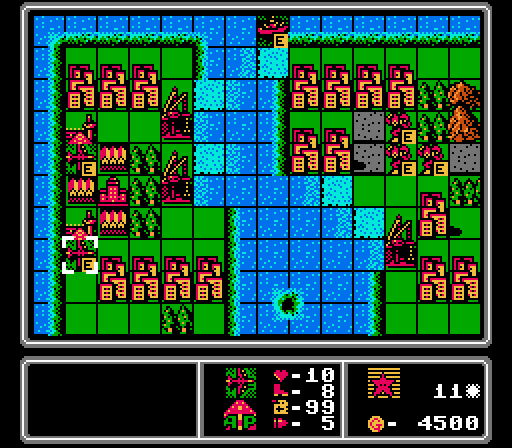 We have enough income to throw out a battleship or a couple of bombers every turn now, so that's what we're going to do for most of the rest of the map. There aren't many problems they can't solve.  Our mechs got taken out as expected, but what's worse is I foolishly left our lead battleship too far out in front, and the enemy bomber was able to reach it. Turn 12  With the bombers' initial mission of taking out the enemy battleship already complete, they set their sights to clearing the enemy ground units off of the central island. We've got more mechs approaching from the initial capturing wave - my next goal is that neutral port. I'm able to get one fighter after the enemy bomber, and the enemy AA missile was kind enough to retreat to where it can't reach us, for some reason.   While the AA missile can't get our fighter, the lander can. I completely missed that opening, but it's still a good trade to take the enemy bomber out of the fight.  Blue lands another infantry on the upper-left, and builds another rocket and AA missile to turn its starting island into a tricky fortress to approach. Turn 13 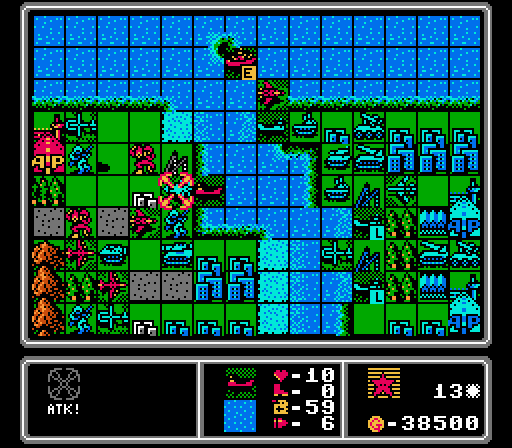 Our own lander is able to get the jump on the enemy fighter here, allowing our fighters to finish it off and our mech to sneak in to start capturing the port. 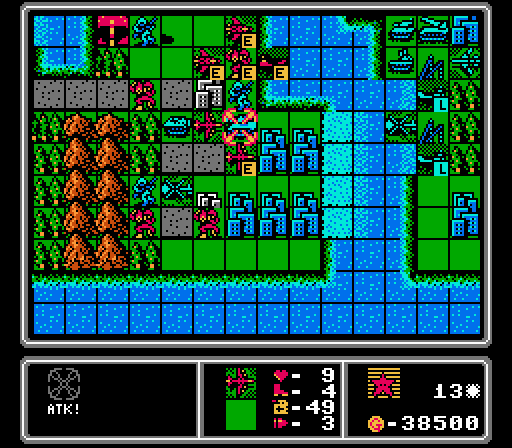 Our bombers saunter over to wipe out the medium tank. 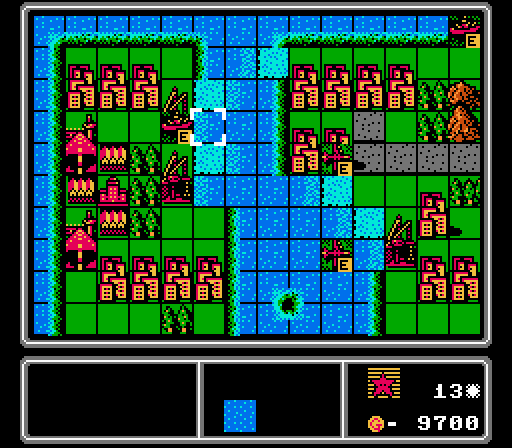 There are four more bombers and a couple of battleships on the way. 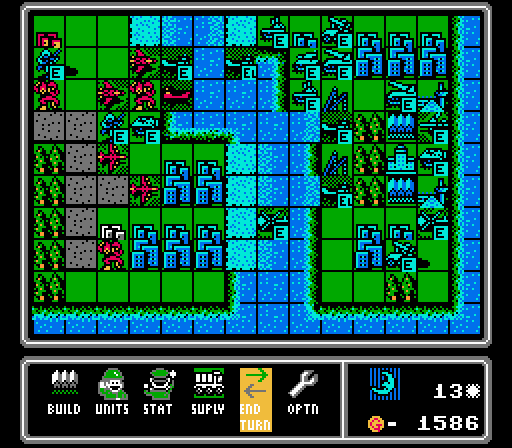 Blue builds a new lander, while another lander gets in a shot on our fighter again. Those four landers are the next big obstacle for the map, as they can threaten both our battleships and our bombers. The enemy APC gets in a hit on our capturing mech, but it's taken so many counter-attacks from mechs now that it can't put together a strong attack anymore. Turn 14  We're able to get in a capture on the bottom row of cities, thanks to some timely merging last turn.  One enemy lander falls to the combined attacks of our battleship, lander, and bomber. The rest of the turn is spent destroying the enemy APC and injuring the capturing infantry.   I did not notice that our lander would be in rocket range. Or that the damaged bomber would be able to come in and finish it off. Oops.  We also lost one of our bombers to another lander, but we have plenty more bombers on the way so I'll take the damage to the lander anyway. Blue builds a medium tank and an APC that will never leave their home island. Turn 15  The last neutral port is ours!  An enemy infantry is making a clever play over the mountains into our lightly-guarded territory, so I move a mech down to stop him. 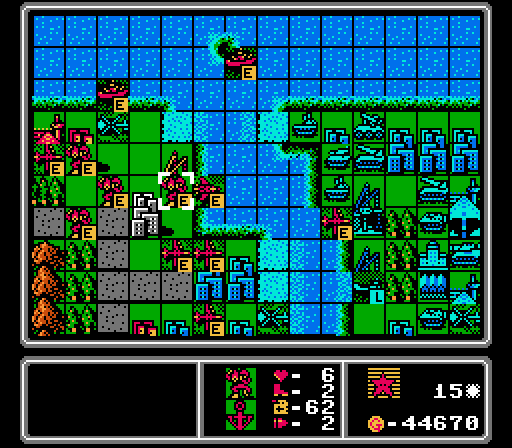 I send a damaged bomber after the lander that had retreated to the enemy port, knowing I'm going to lose it on the enemy phase. Another fresh bomber takes out the damaged lander that attacked us last turn, while our damaged fighter finishes off the enemy bomber. Our other bombers and one of our battleships wipe out the rest of the enemy infantry, leaving only the one in the mountains and a couple of copters on the central island. 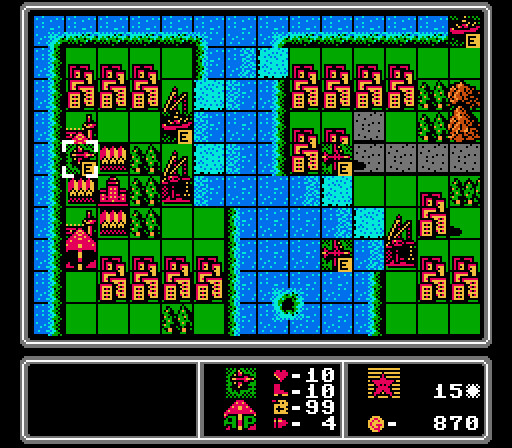 I could've built a couple more bombers, but the enemy copters are annoying to chase down with battleships so instead we get a scout, along with another battleship.  Blue's last remaining lander is loaded up with a rocket and a medium tank. Blue also gets its own scout, which will soon be harassing our bombers. Turn 16 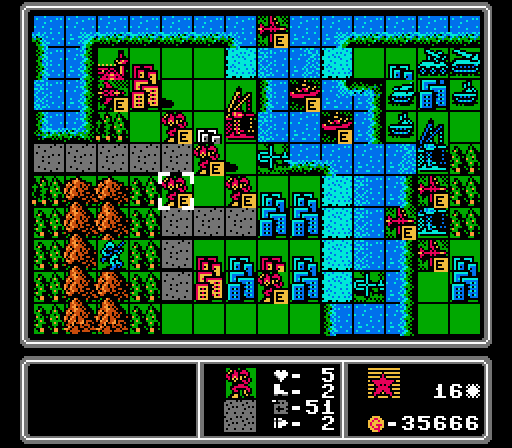 The second phase of the map, taking control of the central island, is nearly complete. So our battleships position themselves for phase three (total wipeout) while I throw three bombers away to take out the enemy lander (which was carrying a rocket and a medium tank, well worth the trade given our current advantage).  Sure enough, we lose the bombers to a couple of AA missiles and the scout. The remaining enemy copters waste their turns attacking a mech that already captured one of Blue's cities, though. Blue does build a new bomber to try and scare off our battleships. Turn 17 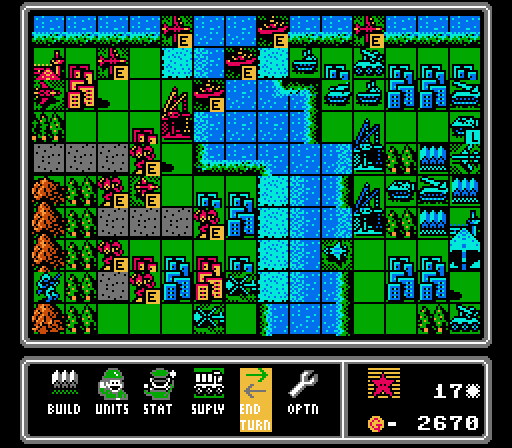 Our battleships move away from the enemy bomber, with a fresh one joining the line. A bomber gets in an attack on the enemy AA missile, while the mechs continue to take over the rest of the central island. We build two more bombers to help replace the ones we lost last turn.  Off the top of the screen, the enemy scout strikes at our bomber, but is in range of our battleships. Blue blows all its cash on a new battleship, which we'll take care of as soon as it leaves the port. As I discovered when I sent three bombers against a lander last turn, the port provides a significant defensive bonus to any naval units on it. Turn 18 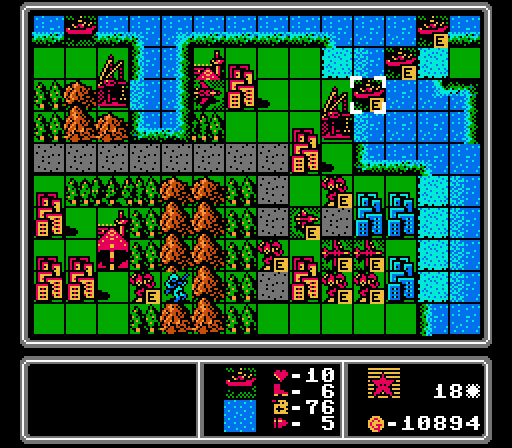 I got sick of the enemy copters hanging around shooting up our mechs, so took one out with a battleship and downed the other with the scout. The other battleships targeted the enemy scout and an AA tank, while our bombers lined up for a run into enemy territory next turn. I'm also sick of that last enemy infantry hiding in the mountains, so sent in the mech to scare it out. 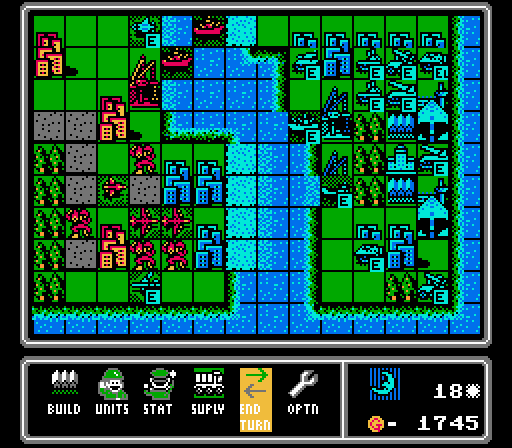 The enemy scout downs another bomber, while the enemy bomber moves up to harass our mechs again. The enemy battleship moved off the port but stayed out of range of our own battleships. It'll be our primary target next turn. Blue also gets a new lander. Turn 19  I've been repairing this fighter on a captured airport for the last several turns, and it's finally able to fly forth and shoot down the enemy scout.  Our scout is then able to fly down and put the hurt on the enemy bomber.  Blue left an opening for two bombers to come in and wreck the battleship but stay out of range of the AA missiles. They'll still fall to the AA tanks and the lander, but at least they'll do some more damage on the way out.  We send one battleship back to the captured port for repairs and reloading, while the others reposition to strike deeper into the enemy island.  As expected we lose one bomber to an AA tank and a lander, but the other one remains untouched. The new medium tank and copter that Blue just built won't slow us down much, so we're making good progress now. Turn 20 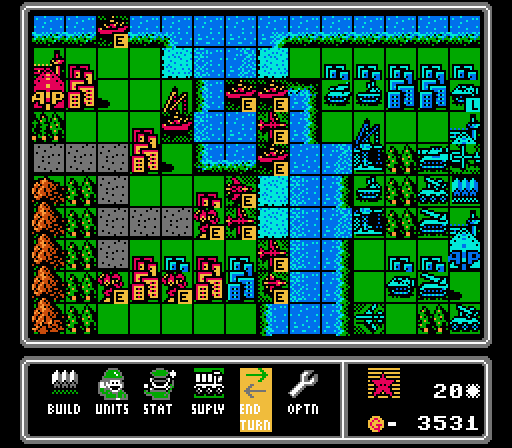 Our battleships finish off the enemy lander and battleship, handing us total control of the seas now. A new wave of bombers arrive with fresh battleships right behind them. We also finally finish off the enemy infantry that had been hiding in the mountains for several turns. 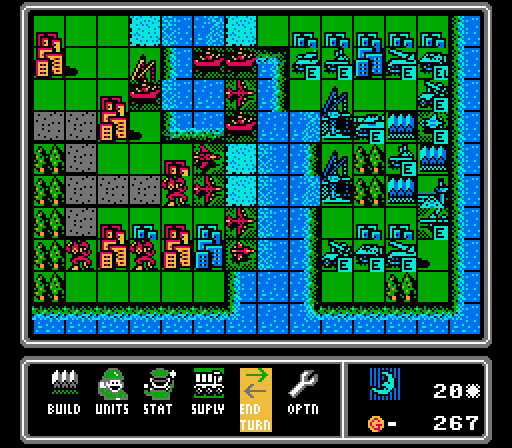 Blue re-arranges the deck chairs and throws out another AA tank and scout to slow down the bomber wave that's coming for it. Turn 21  Two bombers take out one AA missile at the bottom of the map, while our scout finishes off the enemy bomber.  The battleships strike at the nearby rocket and take out an AA tank, while another bomber cruises in for a strike against the other AA missile and our fighter gets a shot in on the scout. The enemy anti-air presence is suddenly significantly reduced.  I have more than enough battleships, and they typically don't get hurt or need replacing, so it's all bombers from here on out. 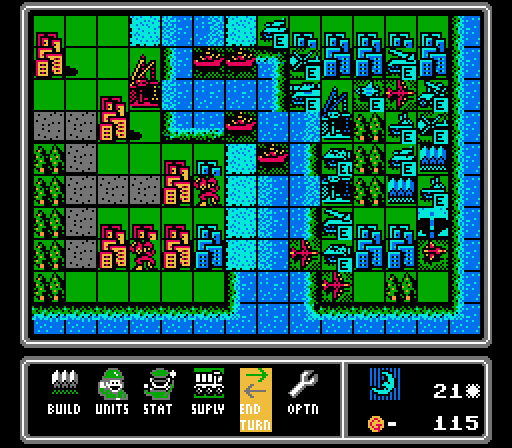 The AA tank took out our fighter, and the AA missile hurt our scout, but that was it. Blue built a tank, a copter, and another AA tank. Mere annoyances. Turn 22 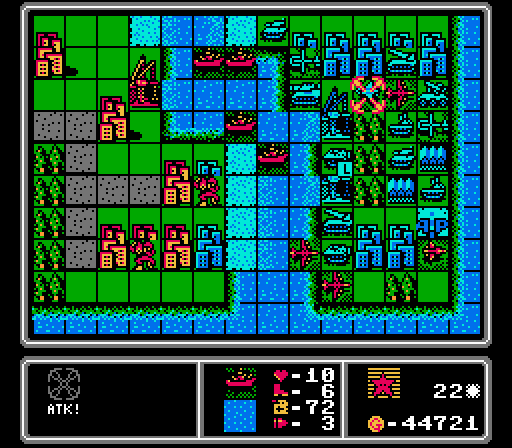 We don't have much anti-air power left ourselves, so the battleships will be doing the heavy lifting on that front from here on out. To start, one takes out the enemy scout. 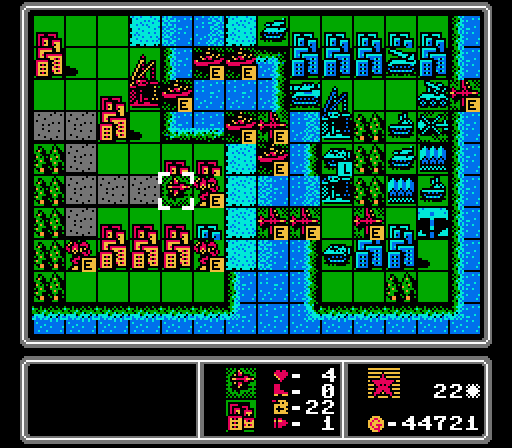 The other battleships shoot down a copter and damage a rocket and a tank. Two bombers take out the other rocket while another fails to finish off the AA missile, and our scout retreats. 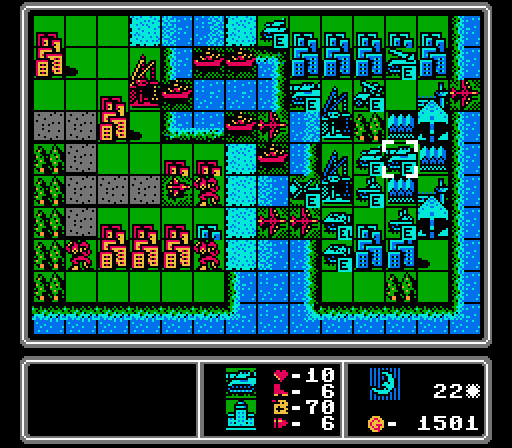 Two AA tanks hurt themselves to take out a bomber, and the rocket and tank get in some chip damage on a battleship. Blue then wastes most of its funds on a medium tank. Turn 23  That's the last property captured on the central island now. I'm not even going to bother trying to capture anything on Blue's starting island, we're actually pretty close to a wipeout victory already. 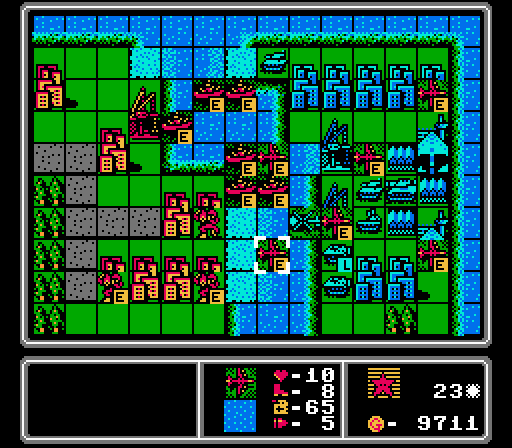 Collectively our battleships and bombers took out a medium tank, an AA tank, an AA missile, and a rocket while also damaging another AA tank, a regular tank, and a copter.  The copter then suicided on a nearby mech, saving us some trouble next turn.  The damaged AA tank also killed itself on a bomber, but Blue bought a replacement, and another rocket. Turn 24 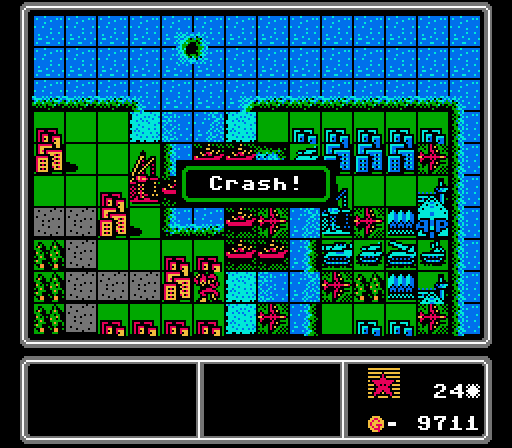 The damaged bomber on the upper right actually ran out of fuel.  The battleships take out a tank and soften up each of the remaining units. That leaves the bombers free to take out the rocket and an APC and damage the remaining tank. 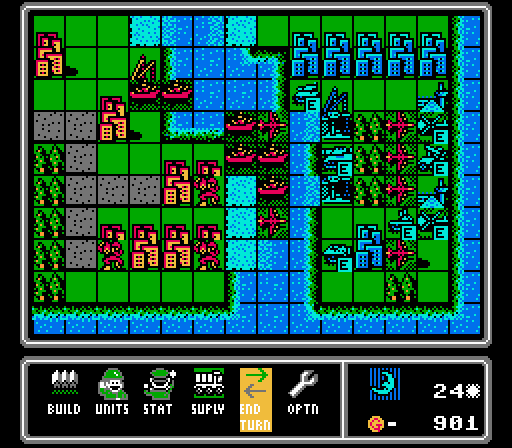 The enemy AA tank hurts itself on one of our bombers. More annoyingly, the AI builds another AA missile and a couple copters. None of the battleships are covering the airports so I won't be able to deal with those copters next turn. Turn 25 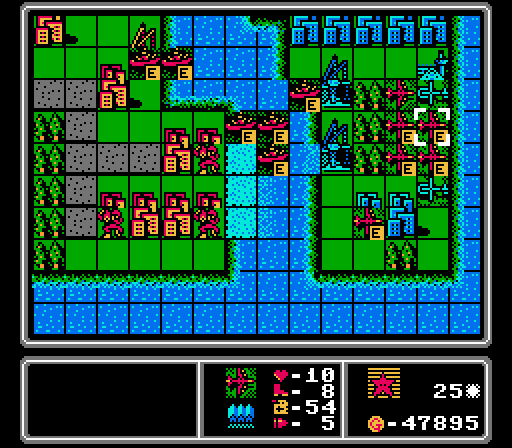 I can at least take care of the remaining ground units, and block up all of the ground build points.  For some reason the AI moves out the copters into the range of multiple battleships each, and doesn't build anything new on the freed-up airports. Turn 26 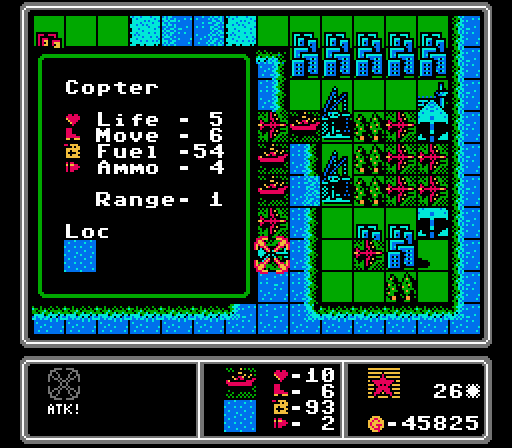 The mop-up has dragged on long enough as it is, so I won't complain about being able to end it here.   Another victory for Red Star! The main challenge didn't end up mattering a whole lot, but we also met the bonus challenge by not letting Blue Moon capture a single property! 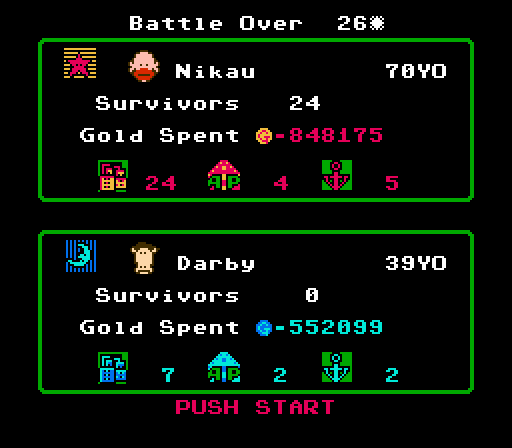 Your COs for this map. I'm not really seeing any obvious references for either of those names. Edit: A guess from the thread: Arbitrary Number posted:For the COs, Darby looks like he's a horse from a horse derby. 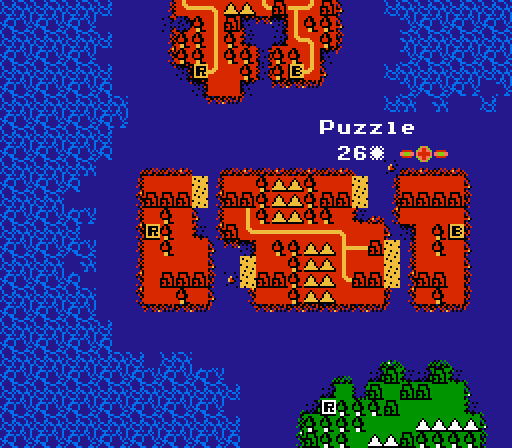 Well, 26 turns isn't a bad score. The average is 24 days; the challenge slowed us by a turn or so and I probably could have been more efficient in the middle of the map (there were definitely a couple points where I unnecessarily let our units get attacked), or cleaned up the end of the map more efficiently with a couple of fighters or scouts instead of yet more bombers.  There's another large island ahead of us, but first we're just dealing with the knobby peninsula. Up next is the Mist map. Thankfully the map name does not refer to a "fog of war" condition, which does not exist in this game. Our next challenge will be Hold the Line 2.0 - prevent enemy footsoldiers from even attempting to capture a property. Sounds impossible, but this next map is going to be something special.... DKII fucked around with this message at 14:53 on Aug 27, 2021 |
|
#
?
Aug 27, 2021 03:15
|
|
|
That seemed like a rather simple map. The next map looks interesting, although I can't imagine what Mist is meant to mean if FoW doesn't exist here.
|
|
#
?
Aug 27, 2021 03:56
|
|
|
It's interesting how blue has the stronger economic start on this map, but a bunch of their starting economic is in the center island, so their base is easier to ultimately crack than red's.DKII posted:Part 19: Puzzle (2 of 2) Have I mentioned how alien this entry is, coming to it from its progenitor?
|
|
#
?
Aug 27, 2021 04:08
|
|
|
For the COs, Darby looks like he's a horse from a horse derby. For Nikau, spelt with Japanese characters the first result on Google is this actor: https://en.wikipedia.org/wiki/Nǃxau_ǂToma Apparently the first film he was in was the highest-grossing film of 1982 in Japan. Famicom Wars came out in 1988, so the timing works out. The image is pretty  if it is though if it is though
|
|
#
?
Aug 27, 2021 04:58
|
|
|
Is there a valid challenge to be had in "must build something from every possible facility every turn" or "Must spend as much on construction as possible every turn," or does that just go without saying or just be a minor pain?
|
|
#
?
Aug 27, 2021 07:48
|
|
|
The Golux posted:Is there a valid challenge to be had in "must build something from every possible facility every turn" or "Must spend as much on construction as possible every turn," or does that just go without saying or just be a minor pain? Yeah that's a good one, I'll put it in the rotation in some form.
|
|
#
?
Aug 27, 2021 14:54
|
|
|
I can already see the mech spam. 
|
|
#
?
Aug 27, 2021 18:01
|
|
|
Part 20: Unit Overview: Artillery  Basic Info: pre:Cost 5500 G Movement 5 Move Type Vehicle Fuel 30 Ammo 3 Ammo Cost 6 G Range 2-3 Special Cannot attack and move in same turn; cannot counterattack pre:Opposing Unit Damage Dealt Damage Taken Infantry 4.5 1.5 Mech 3.5 4.5 Medium Tank 4.5 9.5 Tank 5.5 7.5 APC 5.5 3.5 Rocket 3.5 5.5 Artillery 4.5 4.5 Supply 5.5 N/A AA Missile 4.5 N/A AA Tank 6.5 N/A Fighter N/A 2.5 Scout N/A 1.5 Bomber N/A 7.5 Copter N/A 0.5 Battleship 1.5 8.5 Lander 2.5 2.5 Artillery are your cheapest ranged unit, good for early in the map or for holding strategic chokepoints. They'll do well against pretty much any other ground unit, though they're less effective against footsoldiers and they're vulnerable to direct attacks from tanks and medium tanks. Still, if you can keep them protected, artillery are a cost-effective way of hurting the enemy without taking any damage in return. Just keep them on a city or near a supply truck so they can reload every few turns. DKII fucked around with this message at 18:38 on Aug 29, 2021 |
|
#
?
Aug 29, 2021 18:31
|
|
|
Part 21: Mist (1 of 2) We're invading a new continent today, starting with this knobby peninsula.  Mist is one of the smaller maps, and one of the most asymmetric setups in this game. Blue starts off with a defensive position and ownership of all 20 neutral cities, consistent with a theme of Red Star invading Blue Moon's territory. Our challenge for this map is Hold the Line 2.0 - do not allow any capturing attempts. We won't have to worry about this challenge early on, given that Blue already owns everything around. Turn 1 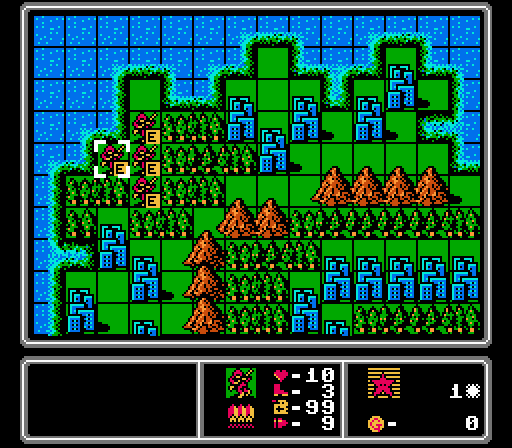 We start off with almost no income, but luckily infantry are cheap. 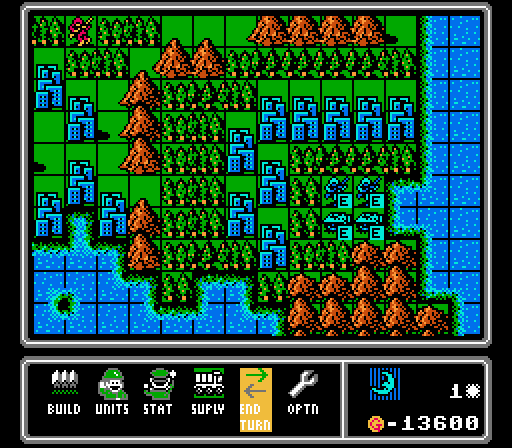 Blue gets 24000 G each turn but for some reason only builds a couple infantry and APCs. Our only advantage in this map is weird AI scripting. Turn 2 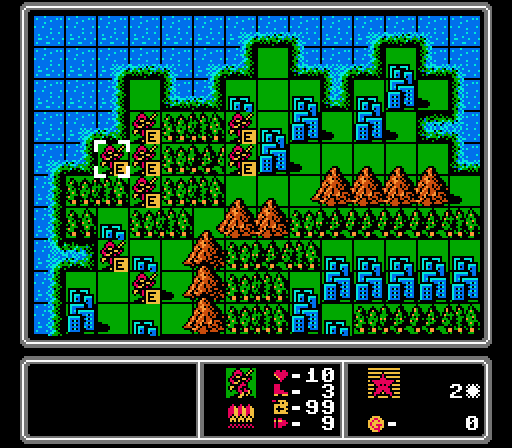 More infantry, and starting a few captures.  Blue loads up its first pair of APCs and throws out another set. Turn 3 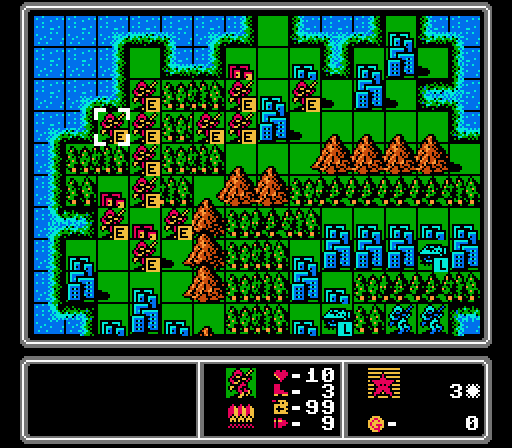 We're fortunate that it takes Blue awhile to get going, letting us get a flood of infantry out there to try and turn the tide. Here we complete three captures, start a fourth, and get another quad of infantry deployed.  The first of Blue's APCs unloads and blocks off one of the cities we were looking to take. Back at HQ another set is built. My strategy for dealing with all of these APCs is basically clogging the passes with a flood of infantry until I can get some income together. Turn 4 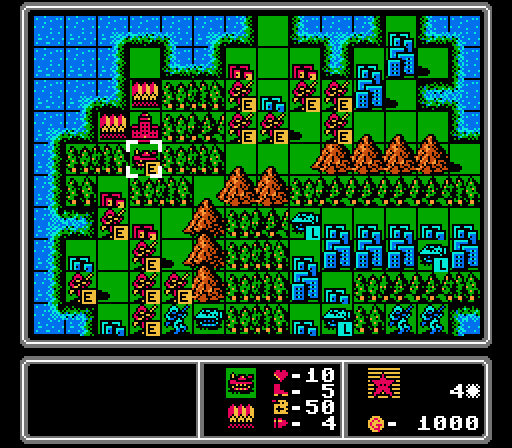 A few more captures get started, and we finally have enough income to throw out a tank to help against those APCs.  Our infantry are starting to take some attacks now. This APC attack will delay our capture of the city by a turn. Also look at those cash reserves that Blue has already! 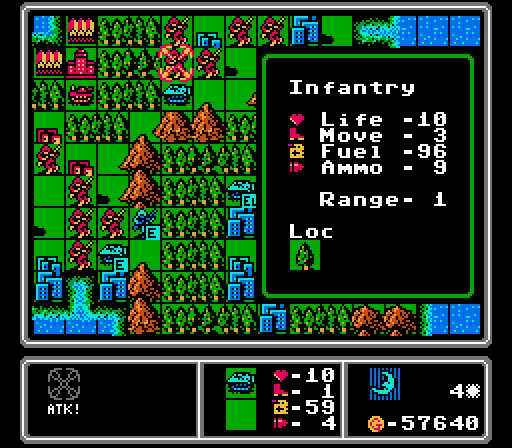 On the other side of the map, the APC bypasses the capturing infantry to hit one in the forest for some reason. It's in easy range for our tank for next turn. 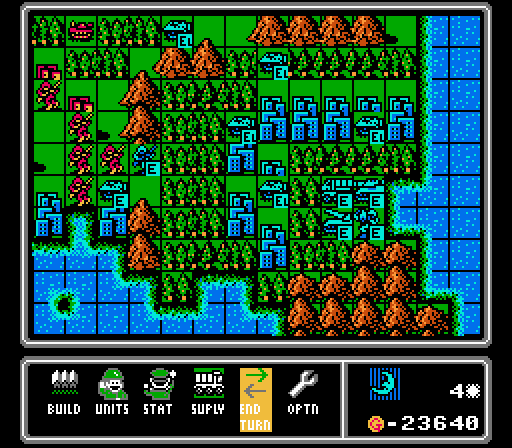 Now that we've built a tank, Blue lets loose and casually throws out a medium tank and a rocket. Turn 5  Two more captures completed, and our tank blows up this APC and the infantry it was still carrying. 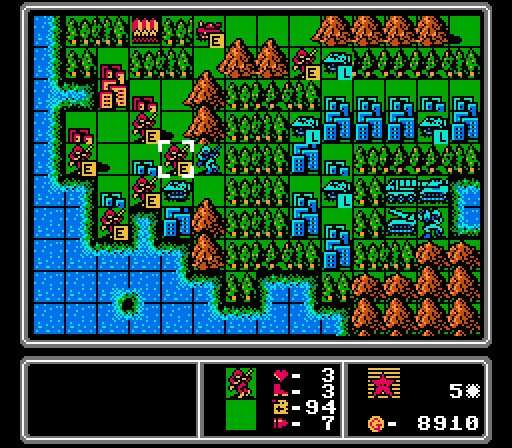 Trying to block up the passes through the mountains. Infantry don't really hold up well defensively but they're cheap and I can throw a lot of them out there. Meanwhile we build another tank because it's still all we can really afford.  The infantry hold in the lower pass. For some reason the APCs are hesitant to attack the infantry blocking the upper pass. 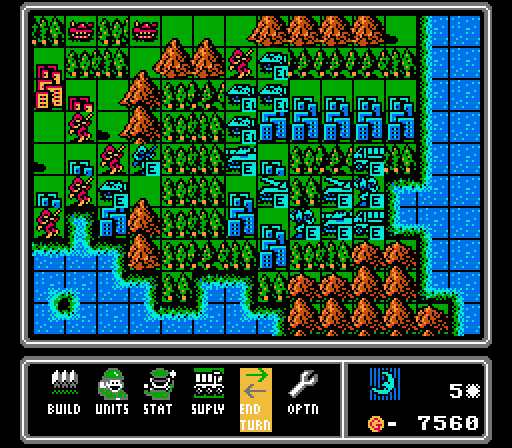 I guess why spend APCs when you can throw out another medium tank and rocket duo? Whatever, the delays will only work in our favor here. Turn 6 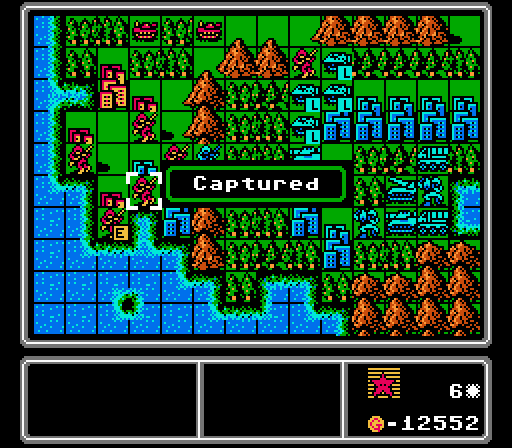 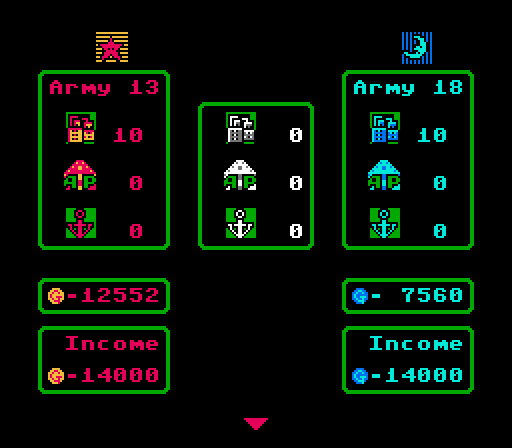 We finish up four more captures, so the only city outside the mountains that isn't under our control is the one that's blocked off by the APC down here. We've actually reached income parity but we have a lot of catching up to do still.  At the lower pass, we merge a couple infantry together, then take out the enemy infantry in the mountains.  At the upper pass, it's another infantry blockage backed up by a tank. Now that we have some more money coming in, we throw out a couple artillery to try and slow down Blue's charge. 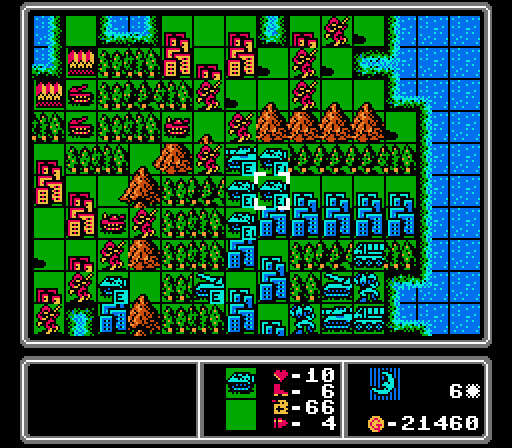 The first medium tank reaches us but can't finish off the infantry alone, and clogs up the pass so the APCs can't get through, either. Similarly the APC in the lower pass can't break free, but down there I'm going to get pushed back by the approaching rocket soon. 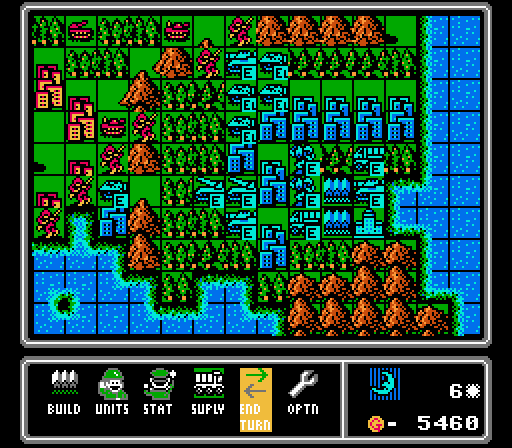 And there's another medium tank. Turn 7 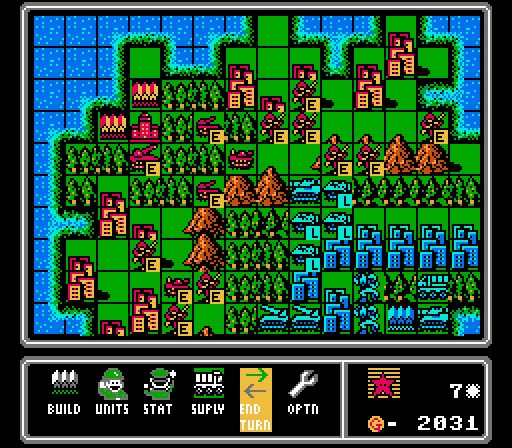 Our tank clears out the lower pass, and I send an infantry down to try and capture the last city on our side of the mountains, but the enemy rockets and an approaching medium tank are going to complicate that plan. Out at the upper pass, I pull back out of rocket range and try to bait the medium tank into artillery range. We also get a rocket of our own, already in range to attack anything coming out of the upper pass. 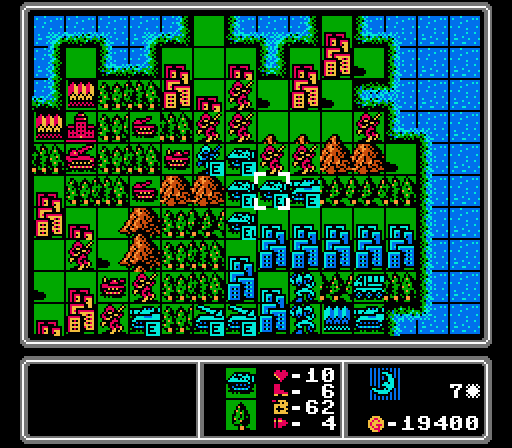 Our infantry hang on in the lower pass, surviving two rocket strikes and a hit from the medium tank. The upper pass doesn't play out how I expected, with the medium tank going after an infantry in the mountains and an APC unloading near us instead. 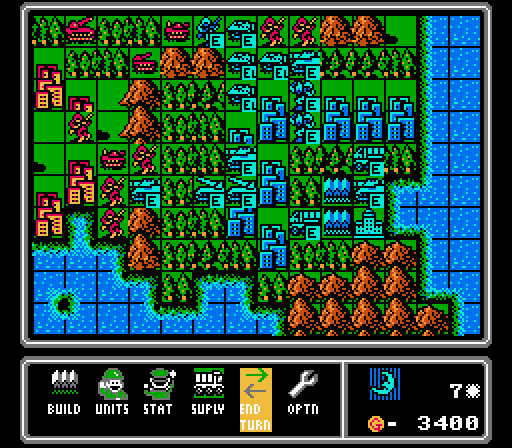 It's unfortunate that the AI has figured out that just building a medium tank every turn is a pretty good strategy. Turn 8 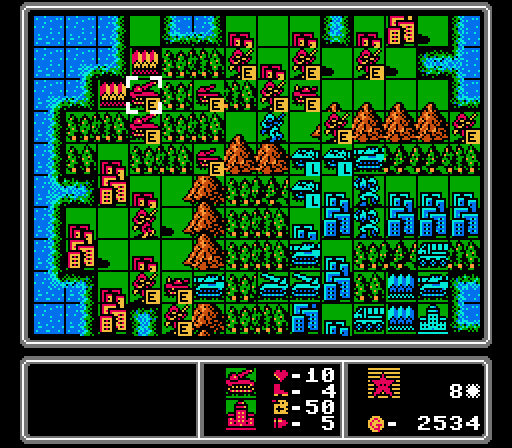 Our ranged units spread out their attacks on an infantry and a couple of APCs, letting a tank move up to finish off one of the APCs. Down in the lower pass we merged the infantry together again and try to plug the gap with a weakened tank. But hey, at least we got another rocket built! 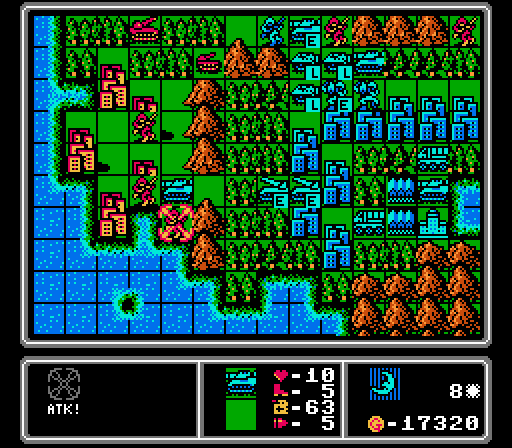 Down in the lower pass, the rockets clear out our tank and the medium tank breaks through to isolate and weaken our capturing infantry. We won't be able to reinforce it again next turn. 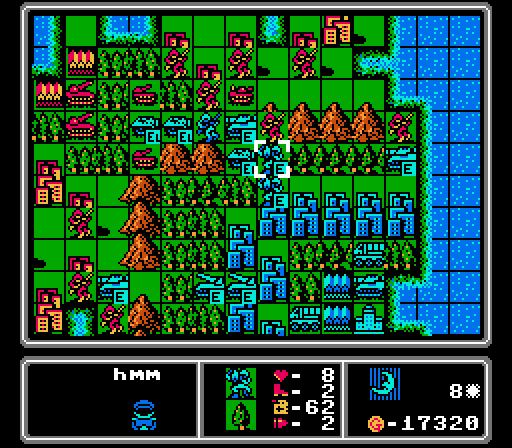 The enemy is running wild at the upper pass, but only the medium tank actually makes an attack. On the far right you can see where I tried to sneak an infantry over the mountains, mostly to distract a medium tank and keep it away from the main battle.  Another turn, another medium tank. Turn 9  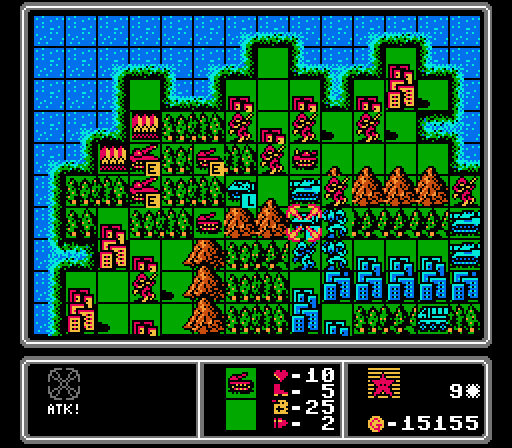 Once again the ranged units each target a different enemy, destroying one APC and damaging two others and the medium tank. Having a higher number of damaged enemy units around is to our advantage here, since they take up space that fresh units could use more effectively. 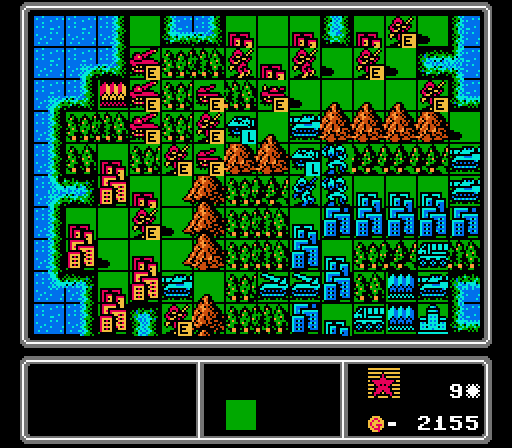 Not much I can do down at the lower pass but retreat a couple of infantry and hope the medium tank wanders into rocket range. Speaking of rockets, we build a third to help with the HQ defense here.  Uh that's not what I meant about getting the medium tank into rocket range. Luckily the base defense bonus limits the damage, and we'll repair half of it next turn.  The damaged medium tank retreats from the upper pass, but two loaded APCs motor through and drop off their loads right at our cities. 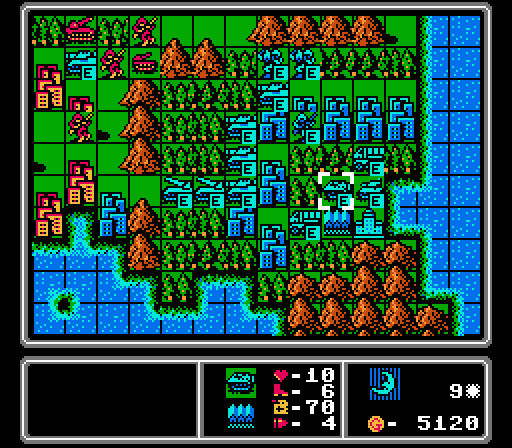 For once the enemy did not have the funds for a medium tank, so they build an APC and a tank instead. Turn 10  We start off the turn by killing off an infantry with an artillery strike and a follow-up from our own infantry. 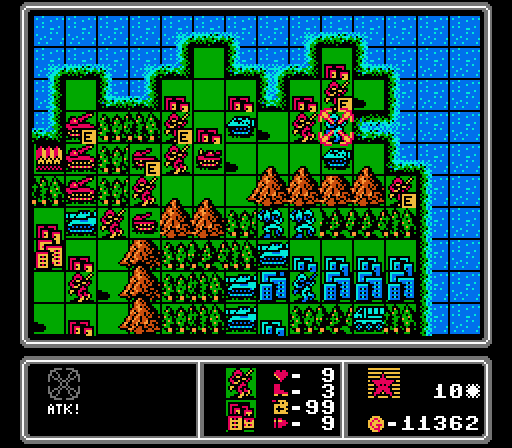 The other invading infantry is taken care of by two more of our infantry. I'm doing a lot of defensive fighting from our cities here to take advantage of the repairs each turn, to try and turn this map around. 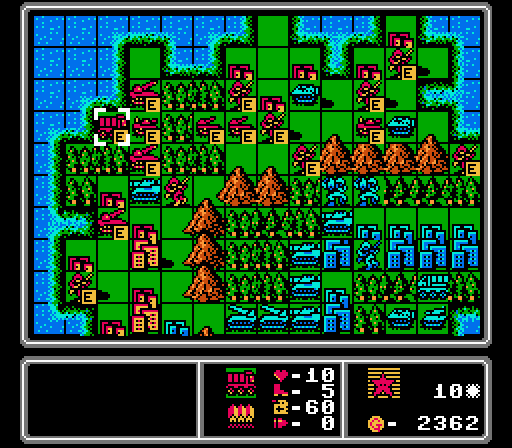 Of course all of those repairs eat into our funds so I can't get another rocket this turn. Instead we get a tank and a supply. Our artilleries need a reload next turn anyway. 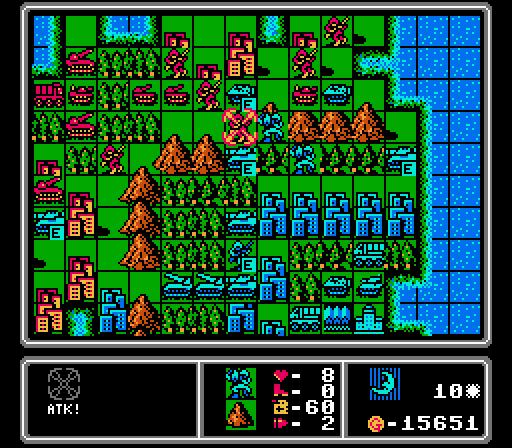 I thought the infantry could plug up the upper pass again, but forgot that the APC and mech could both also reach it.  Luckily one medium tank got baited off to the right by another encroaching infantry, while the other can't reach our artillery and settles for hitting another infantry on a city. 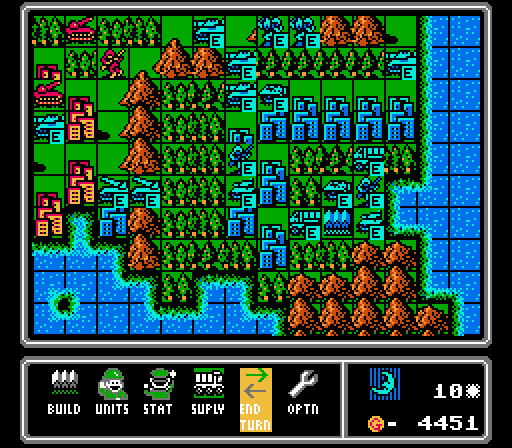 That lower pass is looking a little dicey now but those rockets don't have a lot of protection, either. Blue builds a few more smaller units because it's just short of funds for another medium tank. Turn 11  After a quick resupply, both artilleries go after the nearby medium tank, severely damaging it. 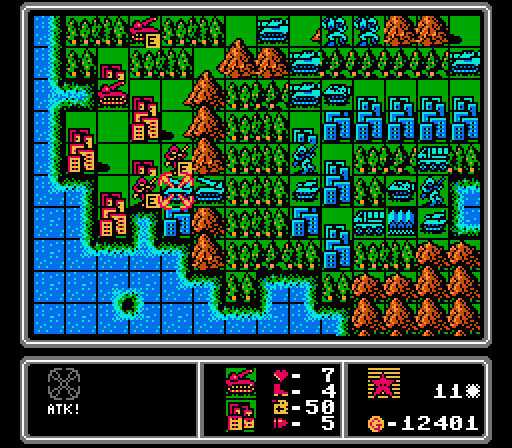 The rocket on the upper-left finished off the medium tank that made it through the lower pass. I move a couple infantry to block off the enemy rockets while firing on the lead one with our own rocket. 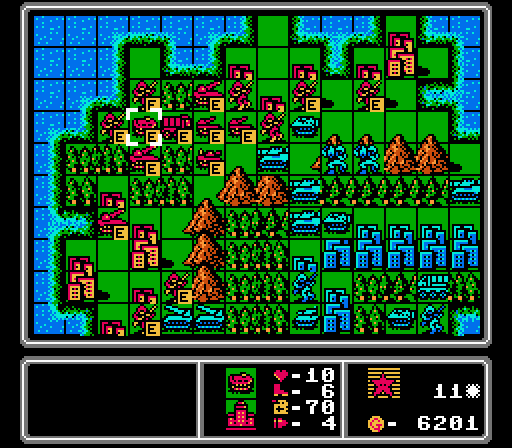 We can't afford any good stuff this turn, so we throw out a few cheap units and save the rest for next turn.  I missed that our new tank wandered into rocket range, and it's now down to half its health. 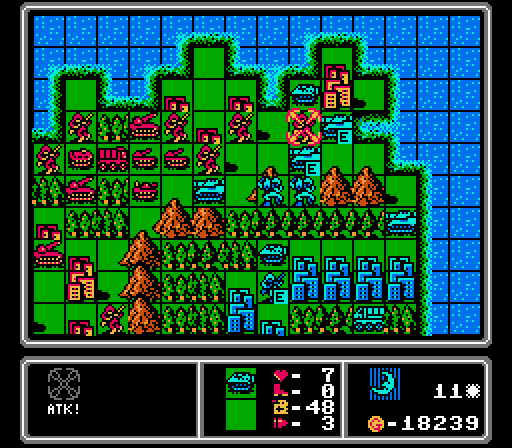 Here's a problem. Some medium tanks have broken free and team up with the APC to take out our last infantry on the upper-right corner. Now that mech can move in and start capturing the city. So much for the challenge. gently caress this map, anyway. It took me almost a month to even try this map because I was dreading playing it, so we're not starting over now. 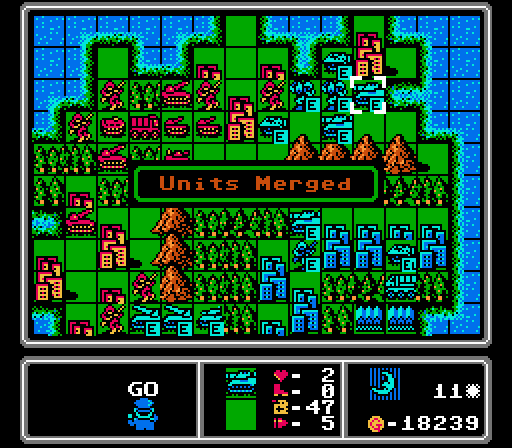 That's quite the enemy force holding the upper-right corner now. It's going to be a mess to unravel. The damaged medium tanks merged together and are all sitting out of the range of our indirect fire units.  Don't worry, Blue built a replacement medium tank, so we won't be running out of targets anytime soon. Turn 12  The lower pass is under control for now, so I rush everyone else at the upper pass. I think it's about time we get our own medium tank. 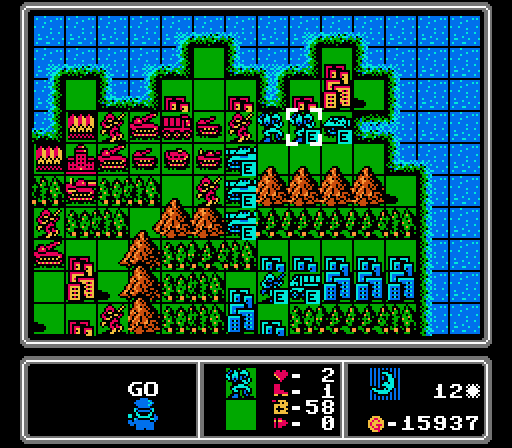 The medium tanks waste their attacks on infantry, and line up nicely in range of all of our indirect units. The enemy mechs merge together, meaning I'm not going to be able to stop that capture and we're going to lose some ground next turn. 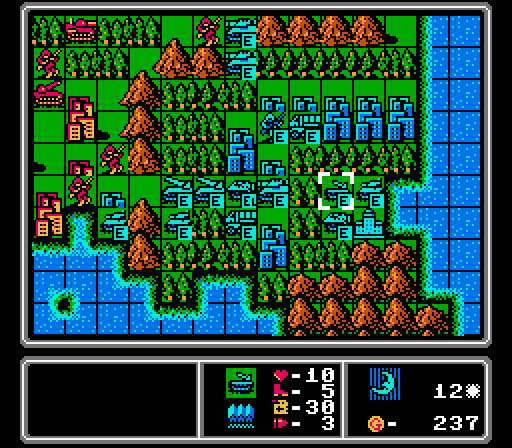 Blue retreats from the lower pass to let some tanks through, then builds a few cheaper vehicles to keep up the pressure. We're in a bit of trouble here, but with some careful chokepoint management and some heavy ranged fire, we can still turn it around. To Be Continued...
|
|
#
?
Sep 27, 2021 02:30
|
|
|
I don't think the challenge was needed here. This map gives you a challenge by itself in how much of a handicap you have in comparison to the AI. That's a brutal income difference.
|
|
#
?
Sep 27, 2021 04:19
|
|
|
Well that was a hell of a difficulty spike You should swap places and stomp orange as blue as a nice pick me up after the win
|
|
#
?
Sep 27, 2021 15:05
|
|
|
Yeah, wonder if you can pull it off in less than 10 turns or something.
|
|
#
?
Sep 27, 2021 16:45
|
|
|
Blaze Dragon posted:I don't think the challenge was needed here. This map gives you a challenge by itself in how much of a handicap you have in comparison to the AI. That's a brutal income difference. That said, maybe this is a good time to ask: How does the side you pick affect things? Is the map pre-set so you'd just have steamrolled it If you had chosen to play as Blue...or would it just flip things so now the AI starts with two dozen cities to your 3?
|
|
#
?
Sep 28, 2021 01:39
|
|


|
MagusofStars posted:I don't think it was needed either, but it doesn't really look like it particularly affected things - the healing of DKII's cities seems to be pretty important to holding the line early and not getting overwhelmed by the massive disadvantage. I tried it out and you have to start a new save file (you're locked into one side once you pick) but since you can play any map in any order, I just started a new game, picked Blue, and went straight to this map. Red still goes first but I was playing Blue exactly as you see it here. I mentioned it on one of the early updates, but if I have enough steam left by the end of all of the maps, I might do some highlights from a Blue run afterwards.
|
|
#
?
Sep 29, 2021 05:17
|
|
|
Part 22: Mist (2 of 2)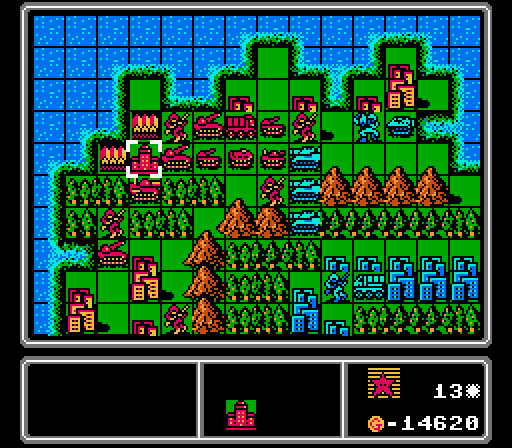 We left off last time with the enemy about to re-take one of our cities and sending a train of medium tanks our way. Lucky for us they've stumbled right into the teeth of our defense. Turn 13 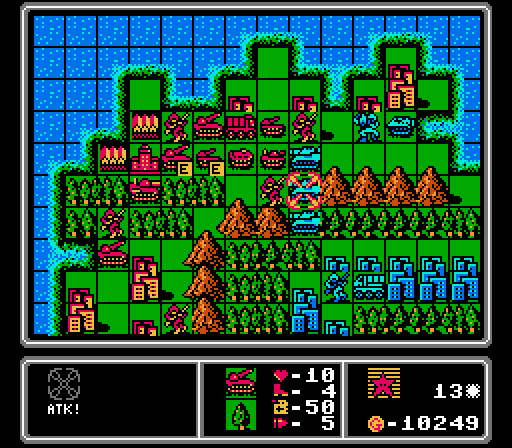  A pair of rocket strikes take out one medium tank.  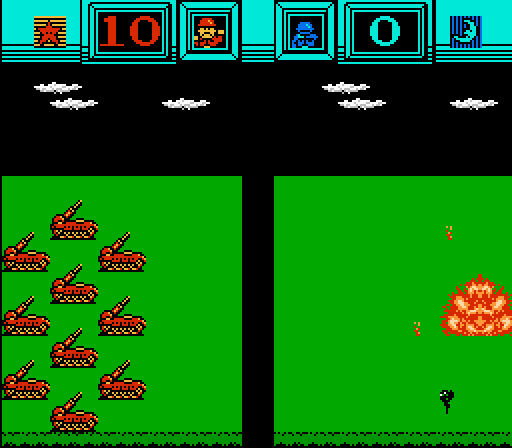 A couple of artillery shells finish off another one. 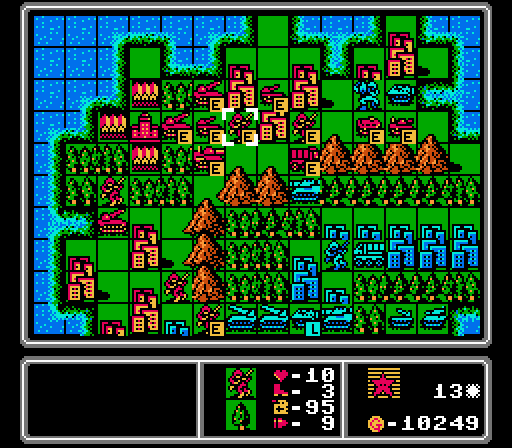 The upper-right corner is in a bit better shape now. The tank goes after the APC and the APC goes after the mech, but I can't do enough damage to that mech to prevent it from taking our city this turn. You can also see the unconventional tactic of having a supply plug up a chokepoint - it can survive one attack from anything, and the enemy can't get more than one unit in on it.  For the lower pass, we send in the infantry to plug it up again, but that paper defense isn't going to hold much longer. 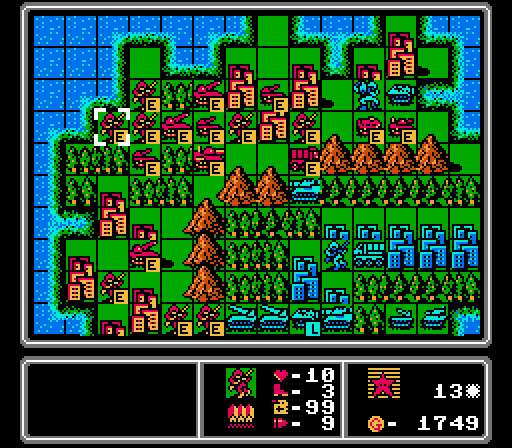 We're once again short on cash so I settle for an artillery and some more cannon fodder.  There's that city lost. For now.  Our supply admirably fends off the enemy medium tank and holds the pass.  The lower pass holds as well, though we lose an infantry to the loose tank. We'll have to deal with a third enemy rocket soon as well. Turn 14  Our rocket at the lower pass is finally fully repaired and gets in a strike on the loose tank. 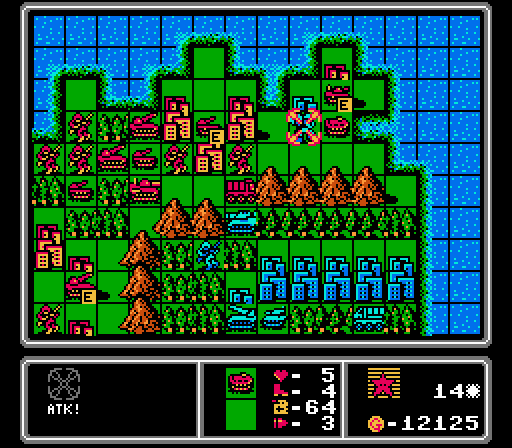 The tank and APC finish off the invaders in the upper-right region.  With the city open, we get an infantry in to start taking it back, with no enemy units nearby to stop us. 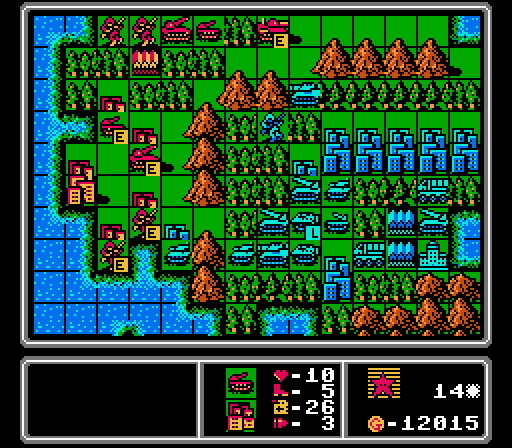 I'm not sure what I was doing with the lower pass but apparently I didn't think those infantry could hold up any longer and pulled them back. 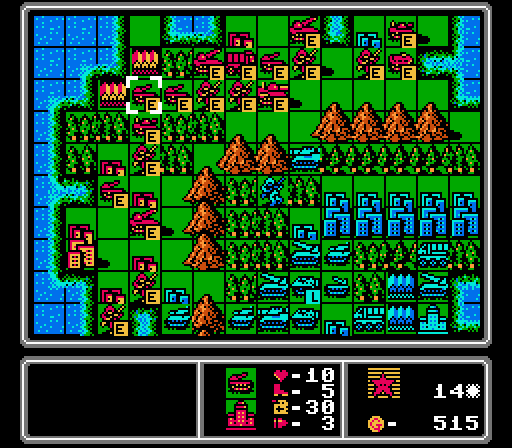 The upper pass is also left open to draw more units into indirect firing range. We build another tank and artillery to help hold the line, and maybe start making a push. 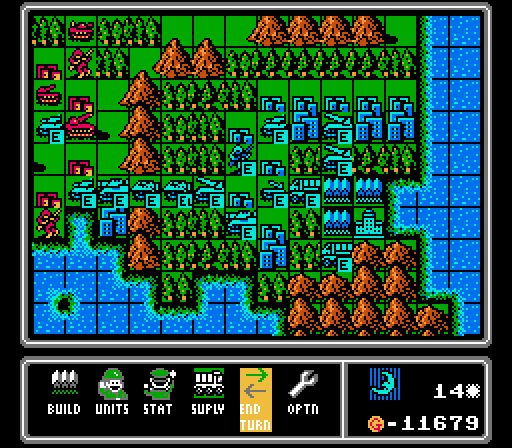 Blue breaks free in the lower pass again, taking out an infantry and getting a hit in on our artillery. We actually don't see any movement on the upper pass, and the AI doesn't build anything this turn, either. Turn 15  First order of business - get that city back.  Down at the lower pass, we hit the medium tank with our rocket and move a tank down to strike at the enemy tank, while arranging a screen for the pair of artillery. 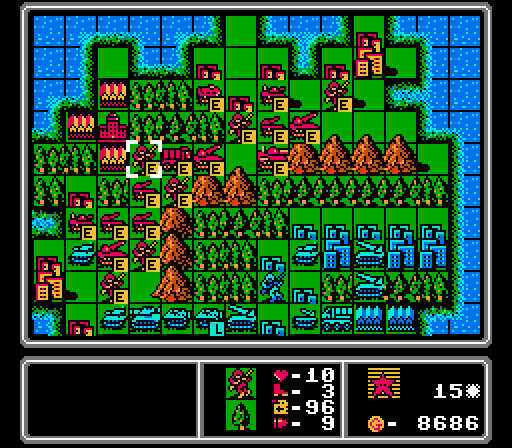 The upper pass is held by our medium tank, safely out of rocket range and backed up by our own ranged units. 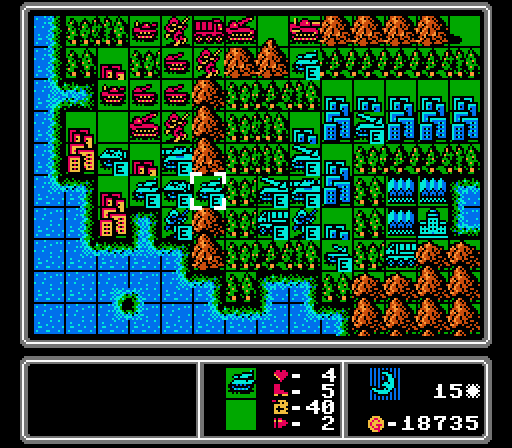 On the enemy phase a rocket and a medium tank hit one of our infantry, while a tank and an APC kill the other. The damaged tank retreats, while the other enemy rockets advance. You can see at the upper pass where an enemy tank challenged our medium tank, but it didn't go well for them. 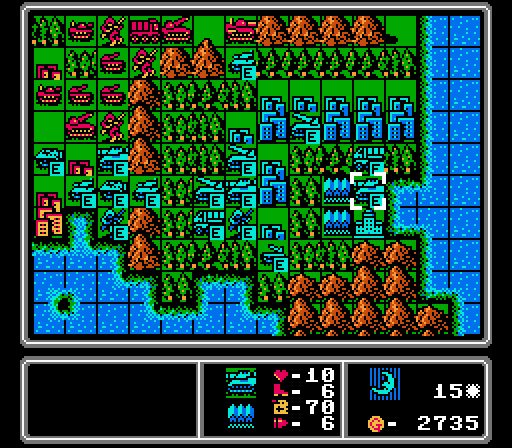 Not even worried about that new medium tank. Turn 16 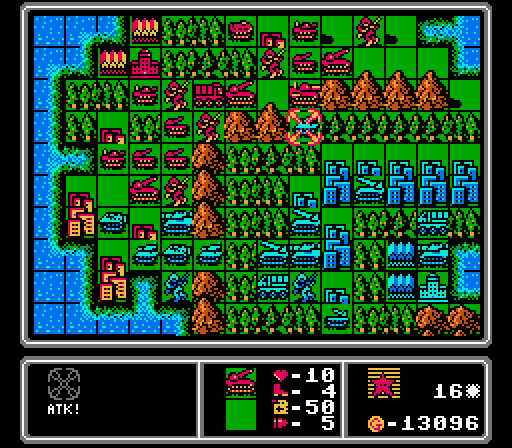 We start off by erasing the offending tank at the upper pass with a nearby rocket.  Our other rocket can reach this enemy rocket, and the medium tank eagerly parks on a Blue city to finish it off. 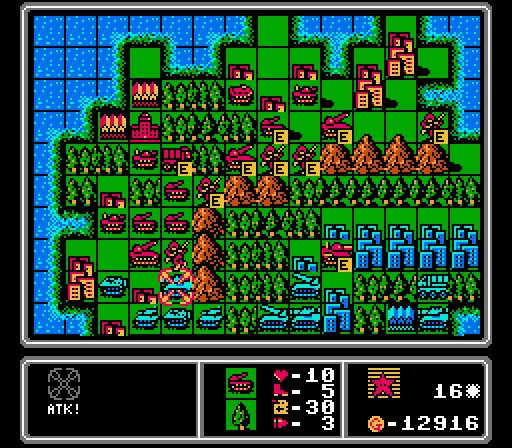 In the lower pass an artillery barrage finishes off this medium tank and also damages the nearby tank and APC. 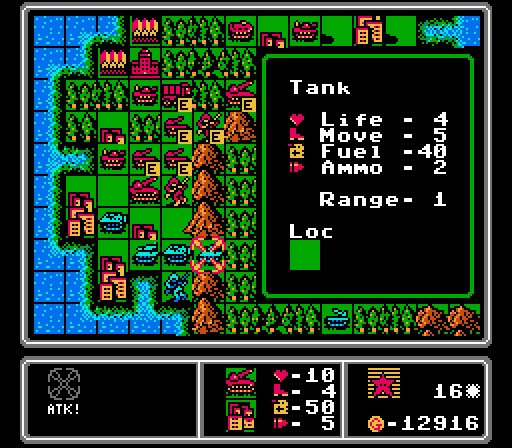 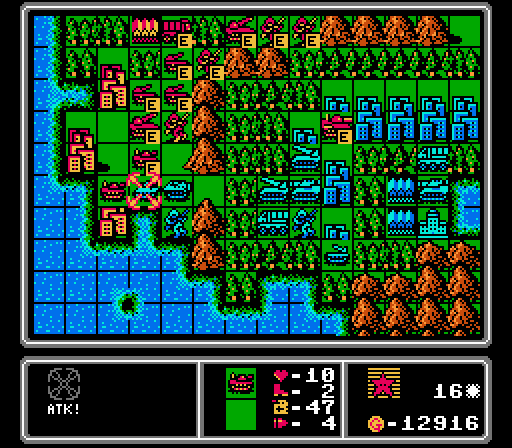 The rocket then finishes off the damaged tank in the pass. Our tanks move in to take out an APC and further damage this enemy tank. 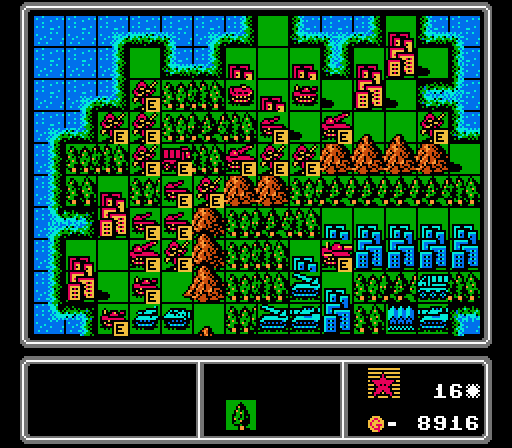 We finish up the turn by getting four more infantry, for future capturing purposes. That'll allow us to save up some funds for next turn, too. 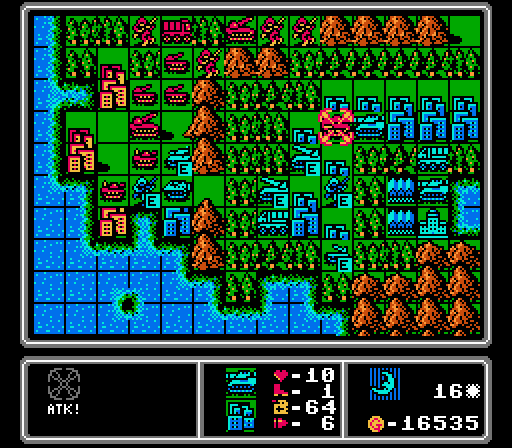 The enemy rockets hit our medium tank and one of our tanks at the lower pass. We lose our injured infantry at the lower pass to the enemy tank, which frees up the enemy infantry to start capturing a city. One of the enemy medium tanks moves back to finish off our medium tank. 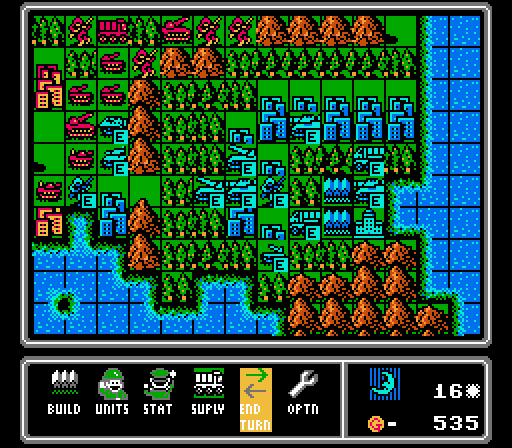 Blue gets another medium tank, but I think we're actually starting to get control here. Turn 17  Our ranged units fire first. On the far right, a rocket is able to reach a medium tank. At the lower pass, we get another artillery barrage in to finish off the APC and tank.  I call this one operation infantry distraction. Either they soak up attacks and spare our heavier units, or they're in range to start taking cities next turn. We get a new rocket and tank to keep up the pressure. 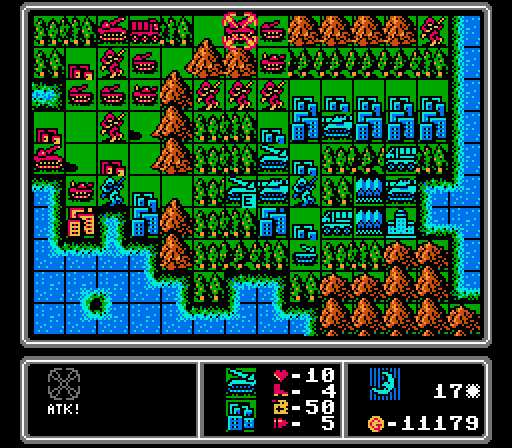 The enemy rockets don't take the bait, and focus fire to take out our rocket instead.  Our infantry distraction does work on the enemy vehicles, with all three medium tanks going after the infantry and letting us keep pushing through the passes. Turn 18 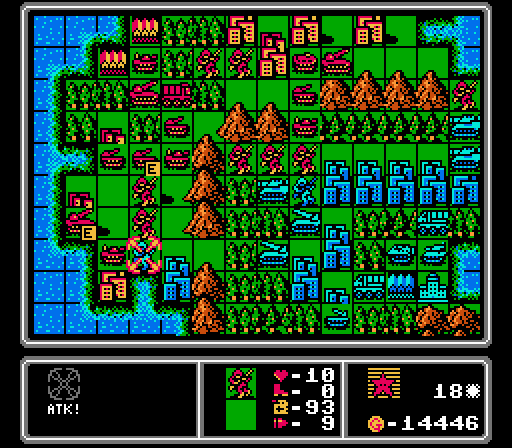 That enemy infantry needs to go or it'll finish taking our city. The rocket and artillery soften it up, allowing our infantry to get the kill.  We start boldly marching through the lower pass. I'm mostly trying to cause enough chaos to grab that last Blue city outside the mountains. At the upper pass, the infantry continue to cause trouble, and an artillery finishes off this infantry. 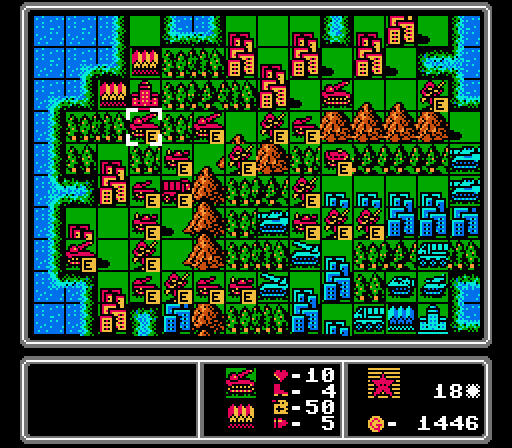 We get in a couple tank hits on the enemy rockets, and build a new rocket of our own to replace the one we lost last turn. 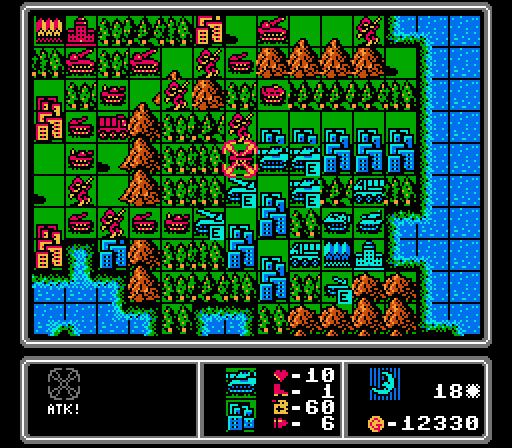 Blue targets our capturing infantry first, taking them out with a rocket and two medium tanks. The other medium tank goes after one of our tanks, and the other rocket hits one of our artillery.  Hitting Blue's expensive units while they're sitting on cities is forcing Blue to spend funds on repairs, so we're not seeing the same quality of reinforcements. Turn 19 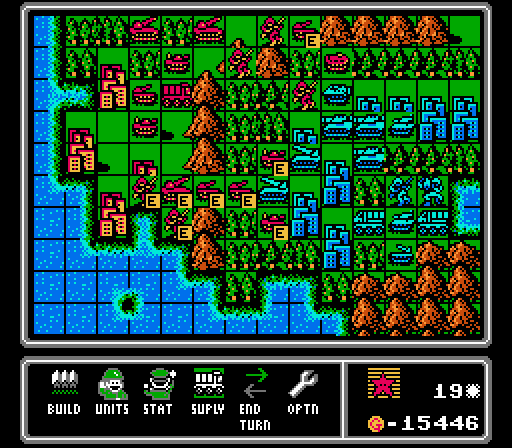 Our damaged tanks and artillery get in some chip damage on one of the rockets, while we start capturing the last coastal city. 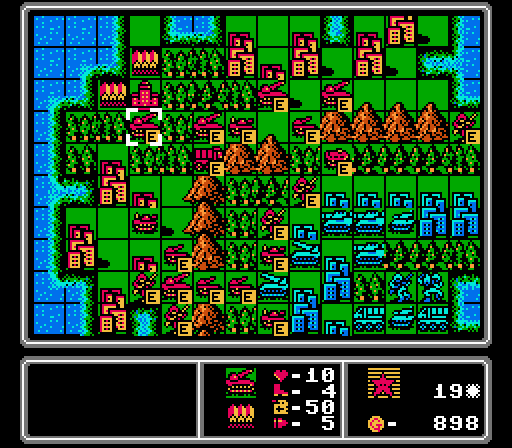 We position a series of rockets around the upper pass, and I figure another one can't hurt here. There are still three enemy medium tanks needing some love. Our shock troops inside the mountains finish off an APC and otherwise are just there to draw in rocket-targets.  We lost an APC and a tank, but two of the enemy medium tanks wasted their attacks on our infantry so we're still in good shape for next turn. 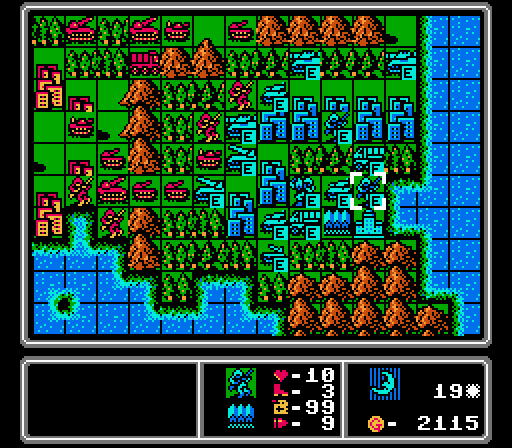 Still just cheap units making up the next Blue wave. Turn 20 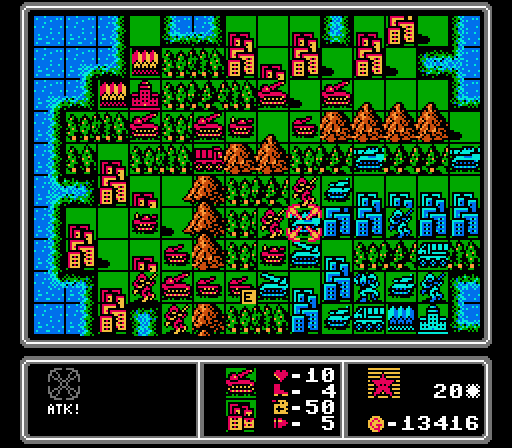 This medium tank falls to an artillery and a rocket. The nearby medium tank also gets hit by a rocket.  Our ranged units lined up at the lower pass can take out this enemy rocket.  We finally get that last coastal city.  Blue's heavy hitters are softened up now so we keep pushing with some more ground fodder to absorb attacks. 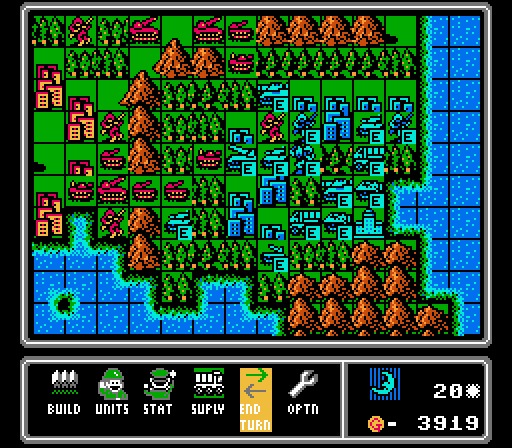 The enemy rocket hits our rocket but the rest of the enemy units pretty much only attack our infantry. That's not a new medium tank back at Blue's HQ, either - the damaged one retreated. Turn 21  The map is starting to snowball here - we've got the income advantage and we've built up a pretty solid lead on our deployed units, too. 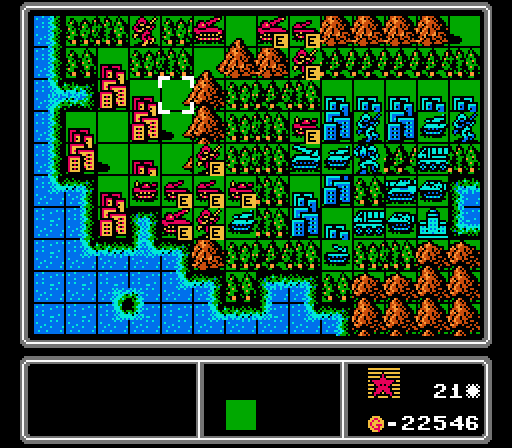 Another medium tank gone, and we got in a hit on that last rocket with a full-life tank for major damage, too. 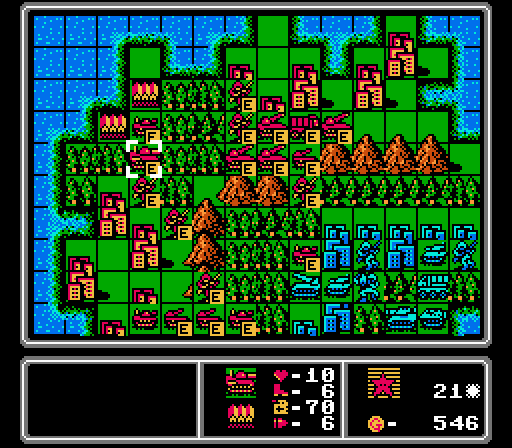 Time to bring in our own heavy hitters. 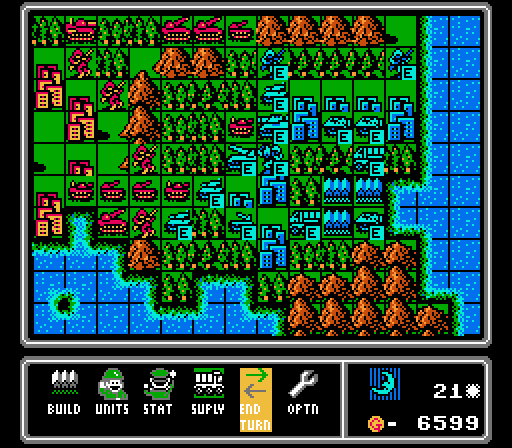 We took some hits on our tanks and artillery but only actually lost an infantry again. Blue only built a single APC, which isn't going to offset the losses they've suffered this turn. Turn 22 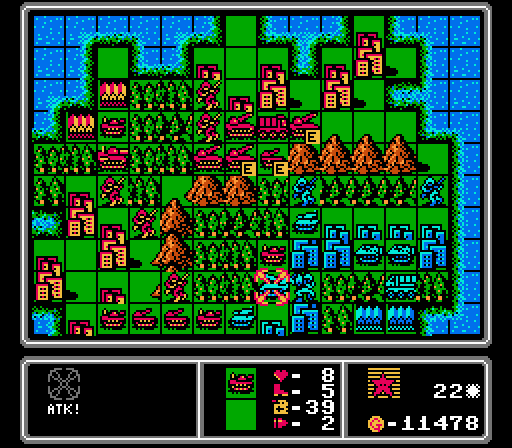 That's the last enemy medium tank and last enemy rocket both taken care of now. 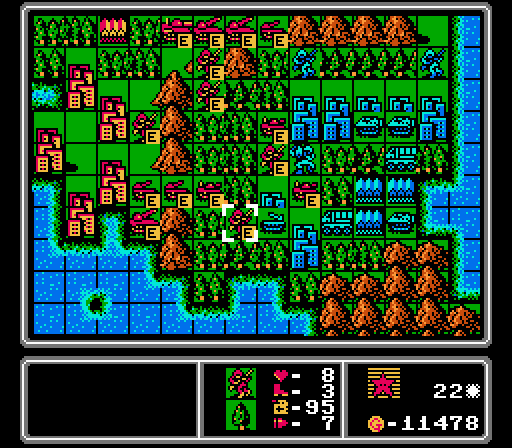 The rest is pretty inevitable from here, as we finish off three more tanks and move closer to a wipeout victory. 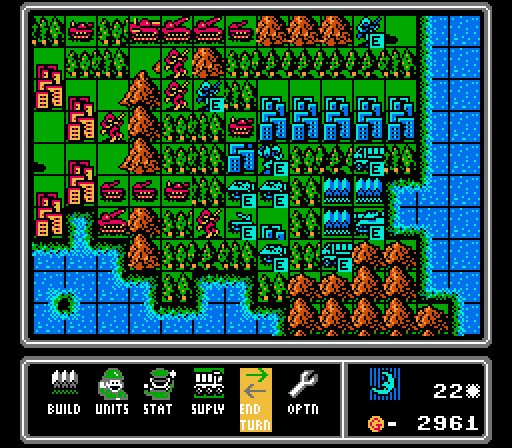 Blue is able to get rid of one of our tanks and infantry and build itself a new medium tank. Turn 23  I was probably overly worried about that loose infantry on the upper-right, but we do still finish off an APC and an infantry and start working on the enemy artillery. 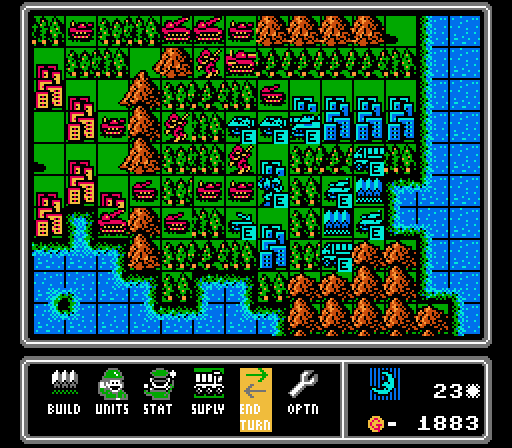 We lose just one infantry on the enemy phase. The new medium tank doesn't even attack anyone, just rolls right into rocket range. Turn 24 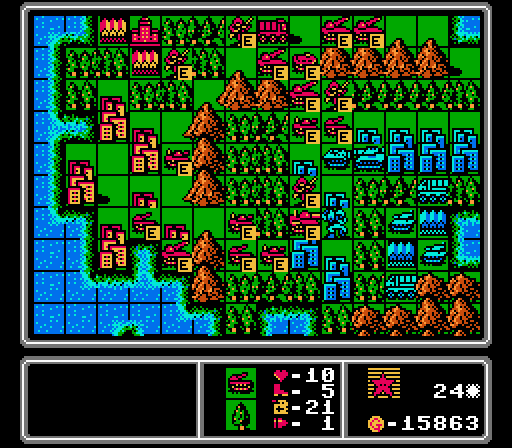 Our medium tank arrives in time to finish off the artillery. We also take out an APC and the infantry that wandered into our territory on the upper-right. The enemy medium tank lives on, but barely. 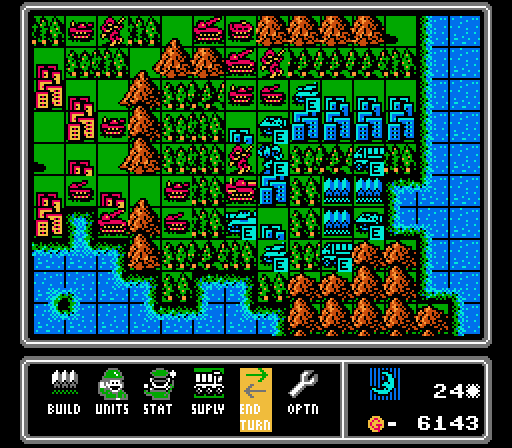 We lost a tank to the medium tank, and our artillery was damaged by the tank and APC, but we're still firmly in control here. Turn 25  Everything finally breaks loose here, as our ranged units take out a medium tank and a tank, and our fresh vehicles roll in to finish off an APC and a mech. We'll start capturing these cities but I'm not sure it'll even be necessary anymore - Blue only has four units left now. 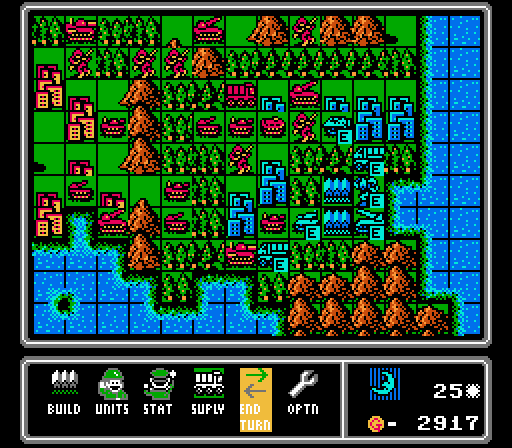 The enemy tank and APC each get in an attack, and Blue annoyingly throws out one last rocket. Turn 26 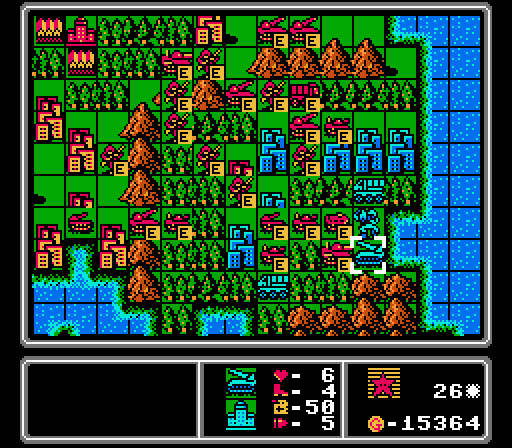 We get rid of the tank and APC and close in on the enemy HQ. One of Blue's cities is captured, but it won't really matter.  The rocket hits our tank, the mech doesn't even bother to attack, and a single tank is built. Turn 27 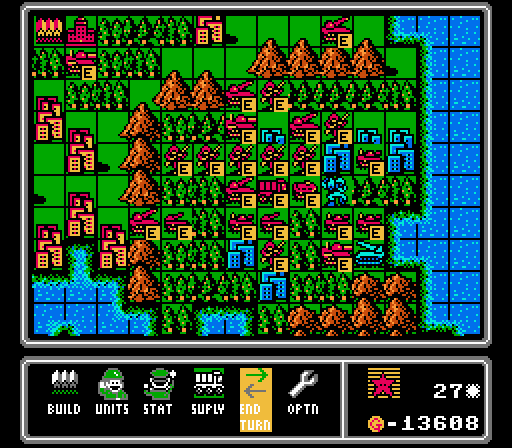 It's going to take one more turn to finish this thing off, but at least Blue's bases are blocked so what we see is what we'll get. The rocket and mech each make attacks but nothing that matters. Turn 28  The mech falls to a stiff breeze. Can the medium tank finish off this rocket in one shot?  Hell yes. 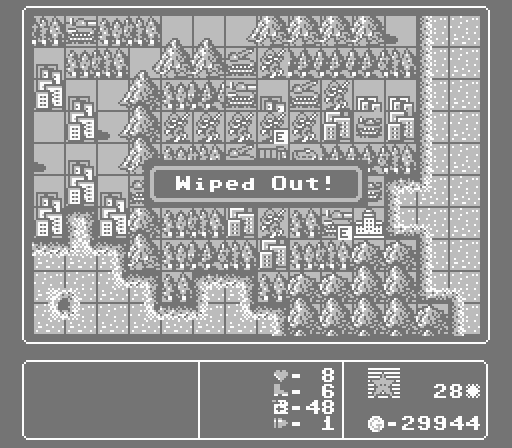 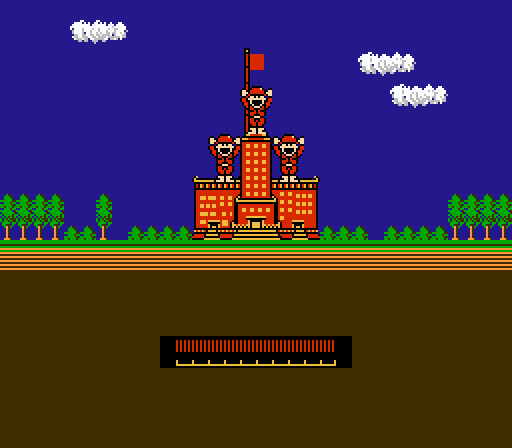 This map can just go gently caress off. 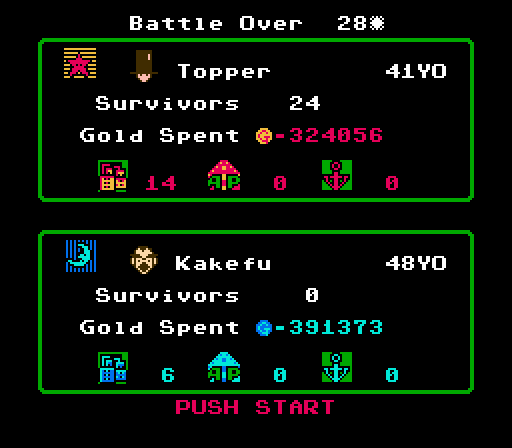 Even with how quickly we caught up in the income department, Blue still ended up spending more then 67,000 more gold than we did. Our CO Topper appears to have a ludicrously large top hat. The enemy CO Kakefu...has an interesting hairstyle? 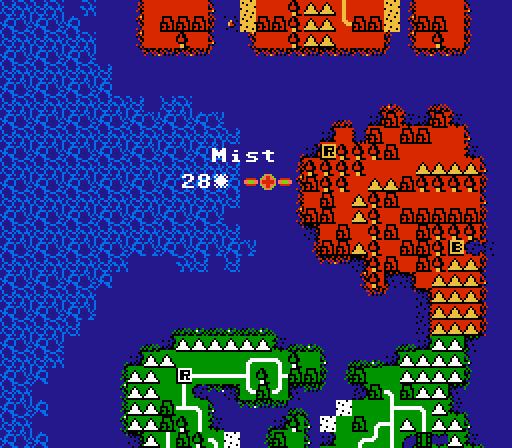 Finishing in 28 turns here is slightly better than average. This map is just rough and only a sub-optimal AI really allows it to be possible. Maybe eventually I'll show off playing this map from the other side.  For now, we're continuing our invasion with...Deer. Maybe if you squint the shape of the inner waterways looks like a deer?
|
|
#
?
Oct 7, 2021 05:00
|
|
|
It's an interesting situation at least, but yeah, I can't imagine that was fun to play at all. Hopefully next map is a bit more fair.
|
|
#
?
Oct 7, 2021 16:22
|
|
|
That looked like a pretty brutal one, but nice work pulling it off. This game seems to lean more heavily on longer, more drawn-out maps than future games, which I don't think are particularly fun because once you're at the point of funds/unit advantage, you just snowball to an inevitable, but extremely slow victory. Next map should be interesting, the waterways do look like they might be awkward, though. Good luck!
|
|
#
?
Oct 7, 2021 22:10
|
|

|
cosmicPostman posted:That looked like a pretty brutal one, but nice work pulling it off. This game seems to lean more heavily on longer, more drawn-out maps than future games, which I don't think are particularly fun because once you're at the point of funds/unit advantage, you just snowball to an inevitable, but extremely slow victory. Yeah both sides starting empty drags it out more. And honestly having so many bases next to the HQ (and also being able to build on the HQ itself) not only drags out the end of the map (by having more build points / more cheap units getting in the way), but it makes quicker HQ capture wins almost impossible, because it's so easy to just plop a heavy unit on the HQ and keep enemy infantry away from it. You're almost never going to expose an enemy HQ without destroying all of their units anyway. Speaking of the next map, I haven't done a vote in awhile, so I'll offer a choice on the challenge:
Make your choice in the poll here.
|
|
#
?
Oct 8, 2021 04:50
|
|
|
Part 23: Unit Overview: Rocket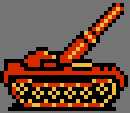  Basic Info: pre:Cost 13000 G Movement 4 Move Type Vehicle Fuel 50 Ammo 5 Ammo Cost 7 G Range 3-5 Special Cannot attack and move in same turn; cannot counterattack pre:Opposing Unit Damage Dealt Damage Taken Infantry 4.5 0.5 Mech 3.5 3.5 Medium Tank 5.5 8.5 Tank 6.5 5.5 APC 6.5 3.5 Rocket 4.5 4.5 Artillery 5.5 3.5 Supply 6.5 N/A AA Missile 5.5 N/A AA Tank 6.5 N/A Fighter N/A 1.5 Scout N/A 0.5 Bomber N/A 6.5 Copter N/A 0.5 Battleship 1.5 8.5 Lander 2.5 2.5 Rockets are the ranged companion to medium tanks - expensive and worth it. They've got massive range, able to strike across mountain ranges or through a chokepoint behind multiple protectors. They hit hard against all vehicles, but are relatively weak against footsoldiers and can't do much against naval units. They even have a healthy supply of ammo. Their main drawback is a lack of mobility, making it a bit harder to get them into the perfect position, especially in forests. Try not to let any tanks or medium tanks get near them, either.
|
|
#
?
Oct 10, 2021 18:09
|
|
|
Part 24: Deer (1 of 2)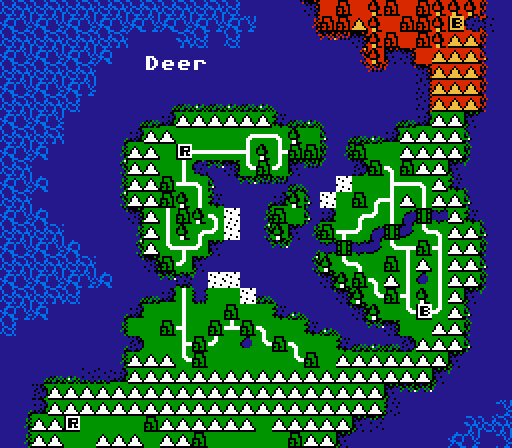 Today we're headed into the Deer map, our most complicated map to date. Let's take a closer look: 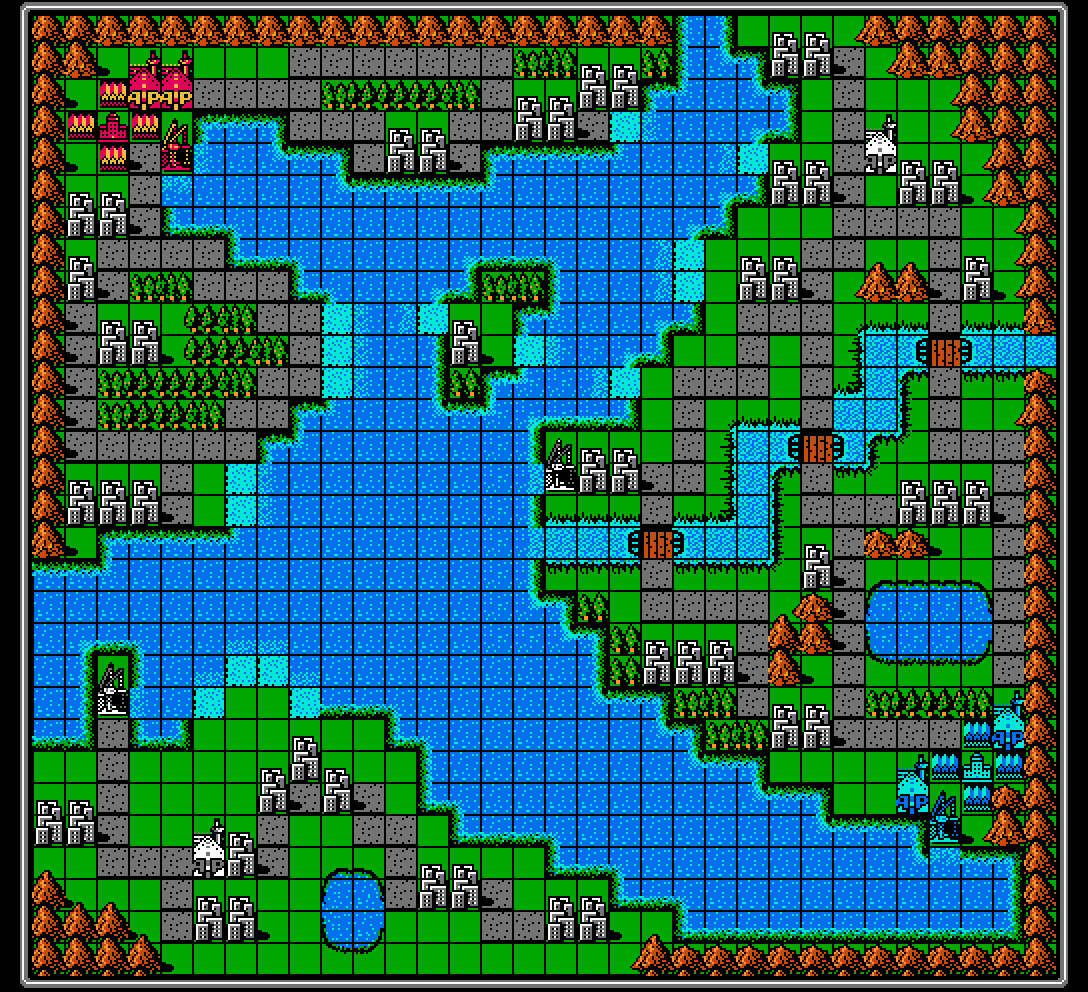 This map is huge, easily the largest we've seen so far. It's 32 tiles wide by 30 tiles high. For context, that's about 2 and 1/3 screens wide and a full three screens tall. The same width as Puzzle, but twice as tall. While these large maps can be exciting in later games, here they're mostly tedious. The HQs are a full 47 tiles apart, meaning even a bomber will take six turns to get from one to the other, and copters will use up most of their fuel en route. You don't have to suffer through it, but I spend a lot of time just slowly scrolling around looking for where units are, with no global view available. Anyway, this map is fairly even, a refreshing change from the last map. We start off with a slight disadvantage on this map, with Blue having more properties reachable by land, including an extra port and airport. We get a couple of cities reachable on the first turn and that's about it. 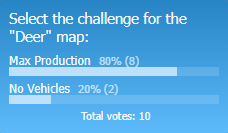 Our challenge for this map is Max Production. We need to spend as much money as we can, at least up until we hit the max number of units (48). Turn 1  Luckily our ideal build for the first few turns is a couple of copters and a couple of infantry, which uses up all of our cash each turn. 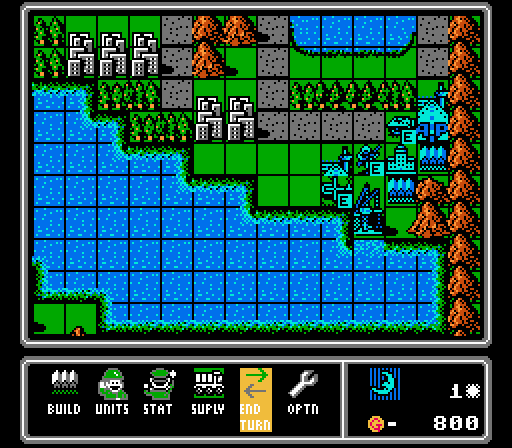 As we've seen in prior maps, large maps with a lot of territory to grab don't really play into the AI's strengths. Building two transports to start with just one infantry isn't ideal here. Turn 2  We load up the first two copters, who will be headed for the distant corners of the map, then build a wave of footsoldiers to start capturing the nearby cities.  Blue doesn't even load up either of the transports it built last turn, but does get a better ratio of infantry out there this turn. Turn 3 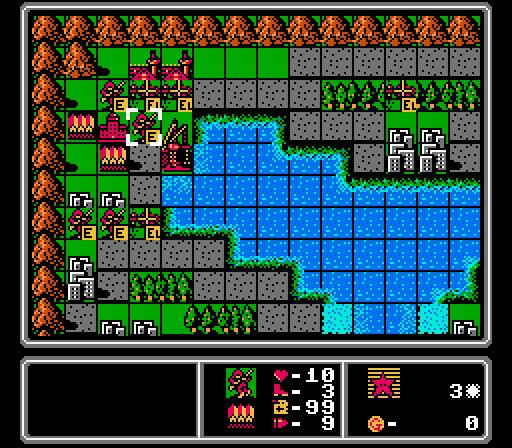 Our first wave of copters is away, and we build a couple more copters and immediately load them. A couple of infantry stay local and start capturing two cities for us.  The AI loads up an APC and a copter and starts its first capture. Oddly they don't build anything new this turn, building up funds for next turn instead. Turn 4  We end the turn in a similar state as last turn, with a couple new copters loaded from last turn's infantry, and two new infantry waiting for their turn to load. We also finish off our first two city captures. Off-screen our initial copter wave is approaching their destinations.  Blue also gets its first city capture, and starts another one nearby. The loaded copter actually dropped off its infantry just across the lake; not a very efficient use of the transport. We also see a lander here; it will be a useful money sink for its entire existence. Turn 5  Our first copter arrives at its destination, dropping off an infantry on the neutral island well before the AI is looking this way. Our goal is to capture all four neutral ports/airports. They're worth twice as much as cities and the ones connected to Blue's island will provide a useful staging point for later. 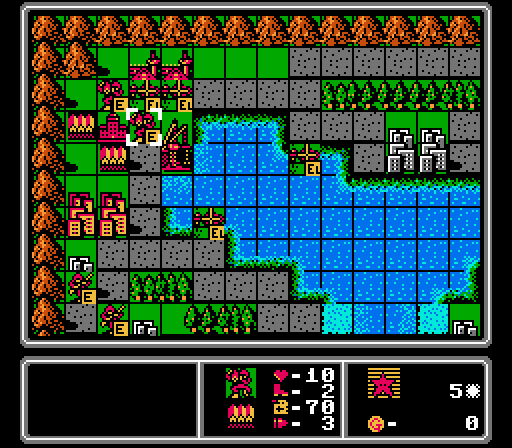 We have some more funds this turn so we build a couple of mechs instead of infantry, but otherwise we're continuing the copter waves here.  Blue is stepping up its own capturing efforts now. It really would've been better off building more infantry on that first turn though, the way it's going now.  The APC unloads on a city and a copter takes on a passenger. Then Blue ends its turn without building anything again. Turn 6 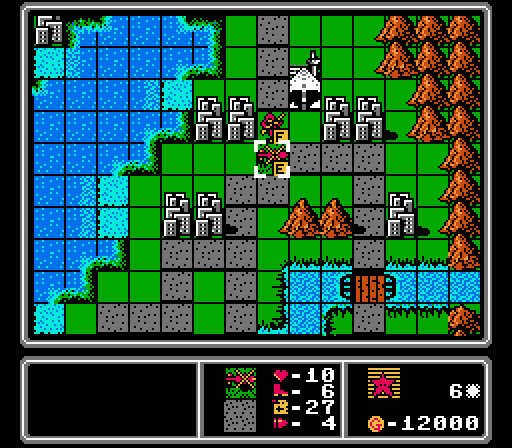 The second copter reaches its destination, dropping off an infantry to capture that airport. Down on the neutral island, we start capturing the other neutral airport.  We also dropped off an infantry to get these distant cities on our island last turn, and it starts capturing now. 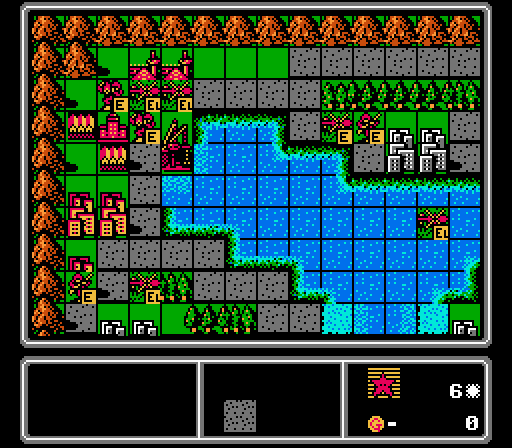 More mechs and copters.  At this point I start checking the unit list every turn to see if there are any units I forgot to move. The map is just too big to scroll around and look for lost units, and we already have 26 units built, a lot to keep track of just visually. 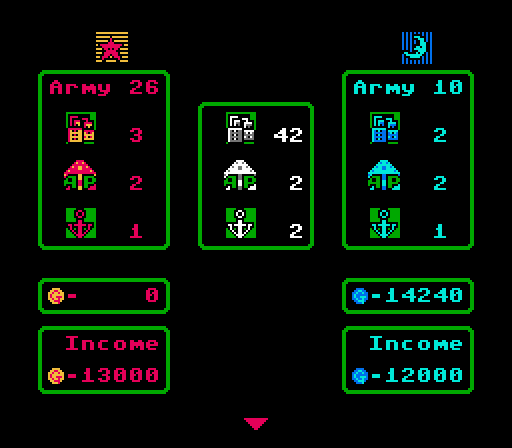 We've got the early lead, but there are still a ton of properties to grab. We're already in great position though.  Blue finishes two captures and starts two more. They've temporarily passed us, but will it last? 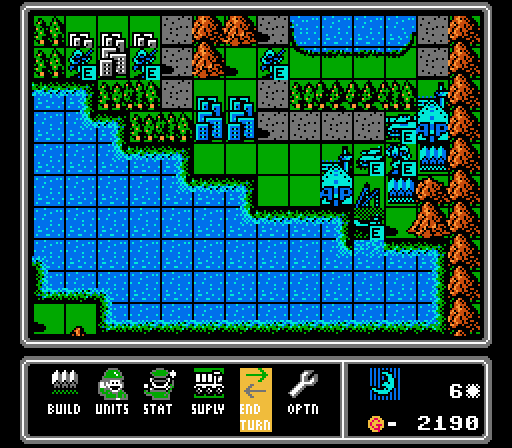 Well a couple of tanks aren't going to contribute anytime soon, so more inefficient spending from the AI here. Turn 7 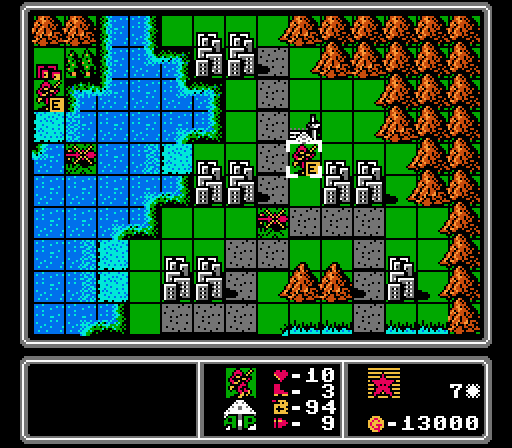 Starting the capture on the neutral airport here. On the upper-left you can see our new city at the far corner of our starting island.  We'll start in on this neutral port next turn, too.  This neutral airport is now ours, and we've started on the neutral port as well. The copters are going to go on a suicide run at the enemy island next. 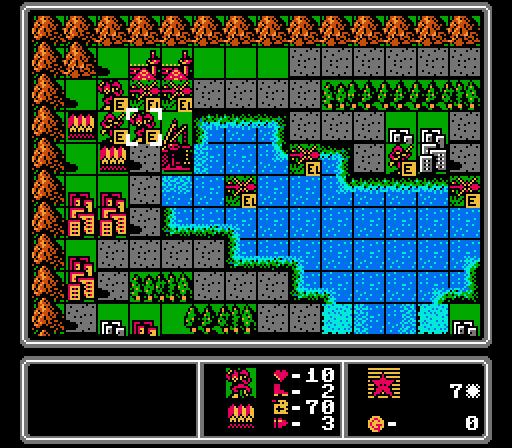 An extra city captured last turn means we have to build an extra infantry this turn to use up all our cash.  Blue has some more cities but hasn't ventured beyond its starting area yet.  The tanks built last turn get onto the lander, making it a tempting target if we had anything that could attack it yet. A new rocket isn't going to come into play for awhile, either. Turn 8  The airport here is ours now.  So is this port. That's an extra 4000 G per turn with those two.  With some extra cash on hand, our extra unit this turn is a tank. 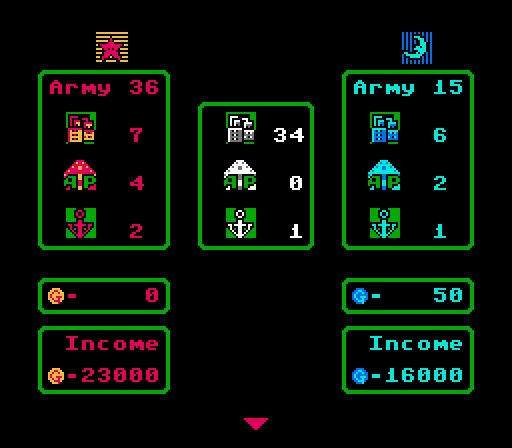 We've suddenly jumped well ahead in the income race, and won't be looking back.  Blue's started to take the last two cities on its island, but you can see we have our first wave of unloaded helicopters about to arrive to cause some trouble.  The lander is on its way to somewhere, and two loaded copters are right behind it. There's a new AA missile but it's too far away to matter for our upcoming copter attacks. Turn 9  And there's the second neutral port. That's all four of our targets acquired before Blue has even left their starting area. 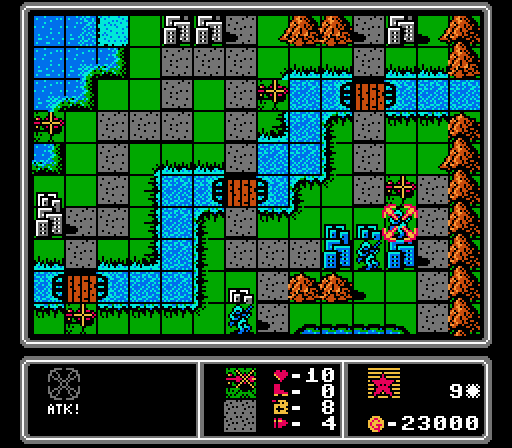  It's the ninth turn and we finally have our first shots fired of the map. 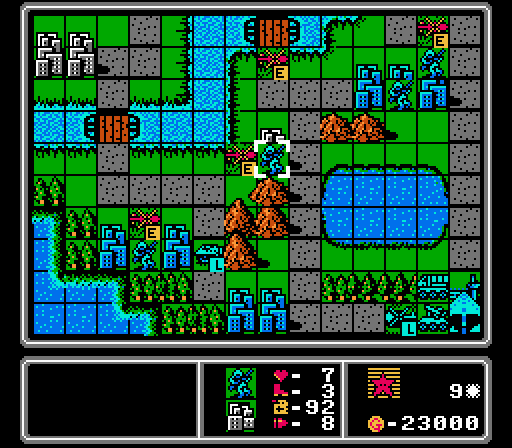 The rest of the copters arrive, interrupting two of Blue's captures.  We're still making progress on capturing cities all over the map. We took that single city on that central island this turn, too. 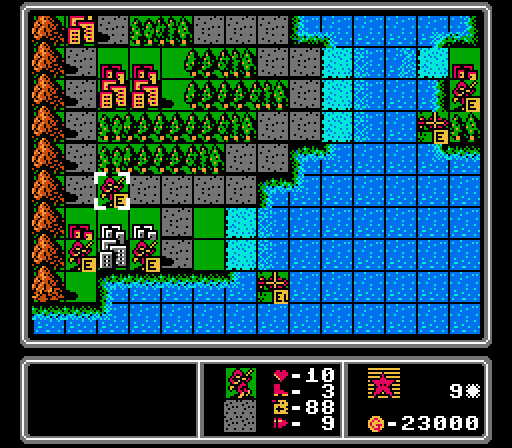 Only a couple of cities left to grab on this end of our starting island.  With the port and airport under control, we start taking the cities on the neutral island.  We've got enough income now to grab a bomber, and one is needed to take care of that incoming lander anyway. With the leftover funds we get a supply truck that'll never get used.  Blue's infantry units make a break for the river, but I don't really want to let anyone across before we've secured the territory on the other side.  Our new bomber prompts Blue to build a couple of AA tanks. The lander and one of the loaded copters each advance, but the other loaded copter rests on the airport to refuel first. Turn 10  The very first copter we built is finally out of fuel. At least it got in one attack first.  Trying to step up our takeover of the upper-right area, with another mech dropped off to help with the capturing.   Four more low-fuel copter attacks finish off a pair of capturing infantry, delaying Blue even further.  We have just enough cash for a battleship, which is a great way to meet the challenge this turn.  We've captured 19 properties to Blue's seven, giving us an almost 2:1 income advantage already. 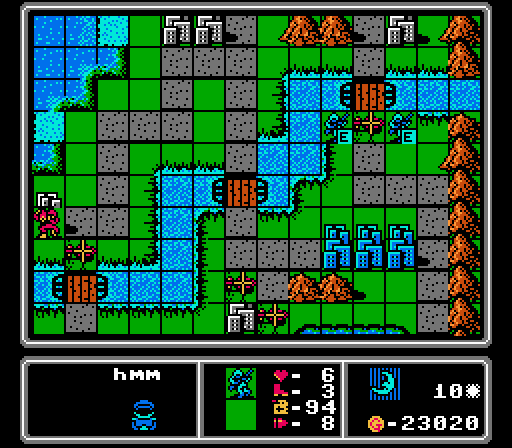 Our copters are blocking the bridges as I briefly forget that infantry can cross rivers anyway.  Well that fighter's going to be a problem. We only have a bomber and a bunch of copters, they'll all get chewed up. Turn 11 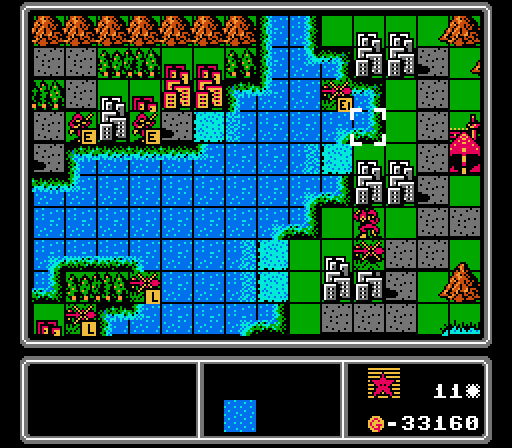 Still trying to take as much as we can before Blue breaks out.  We're up to six copters in Blue's territory, harassing units and basically just acting as a giant distraction. They almost kill that infantry and get in a couple of damage on the AA missile. 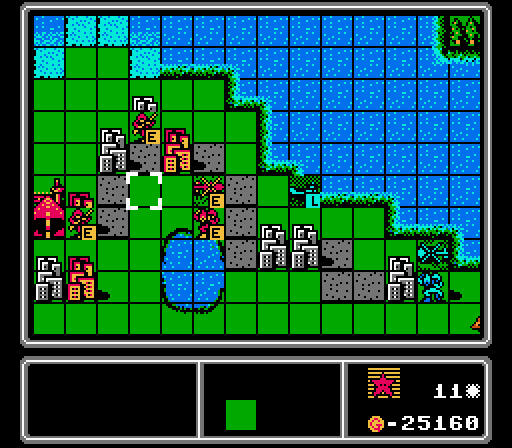 I forgot to show it last turn, but Blue managed to land a mech on the neutral island. So we've lost containment a bit, but we still have the numbers advantage here. 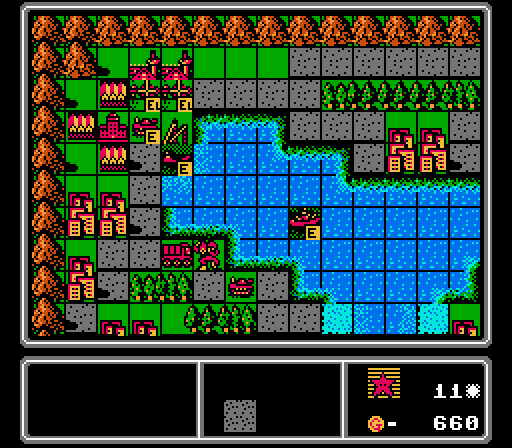 Kind of an odd build this turn, with a couple more copters and a lander for getting more troops over to Blue's island. 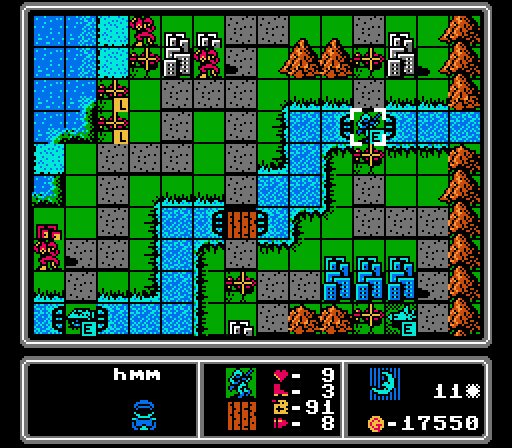 The two infantry up here merged together but snuck right by the copter. Down in Blue's territory, the fighter and the AA missile each shoot at a copter but can't quite bring either one down.  Luckily that lander can only land further up the coast, or that lower island would be in trouble. 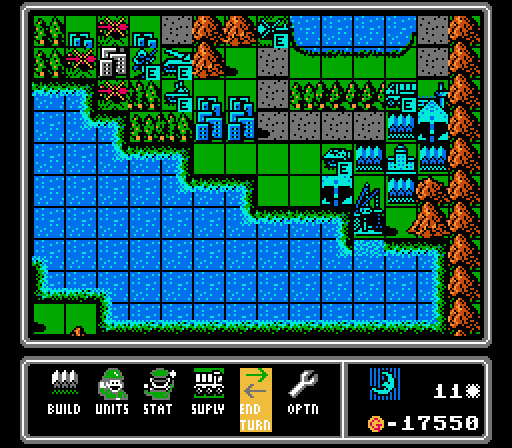 Blue elects not to build anything again. We'll see what they splurge on next turn. Turn 12 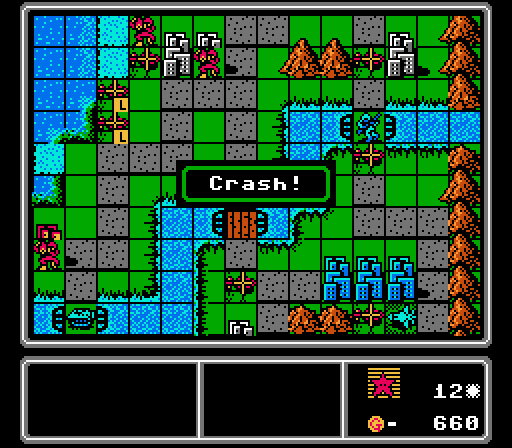 The copter that failed to block off the infantry runs out of fuel and dives into the river in shame. 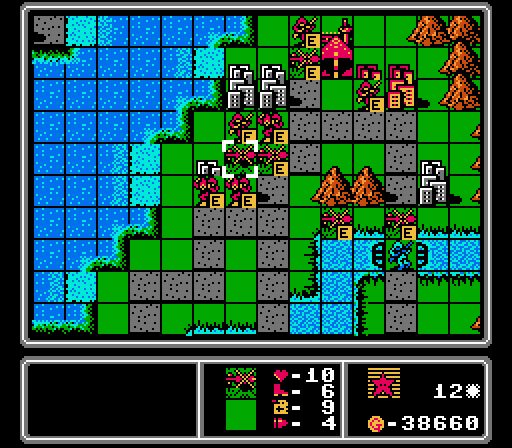 We're starting to get the upper-right part of the map under control now.  The copters continue their harassment campaign, killing off an infantry and preventing the APC from crossing over to get our capturing mech. 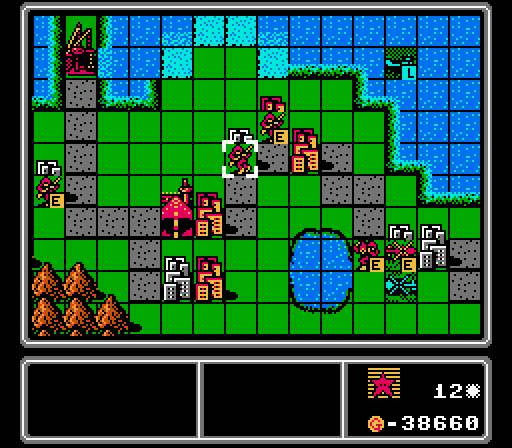 We weaken the copter here before it can go after our footsoldiers, and keep on capturing stuff.  We're starting to build up a number of trapped units on our island. We're actually getting enough cash each turn now that it's tricky to use our build points to spend exactly the right amount.  The tanks load up in the lander, and we get a fighter and a scout to eventually take over the air battle. With the leftover cash, another trapped infantry is recruited. 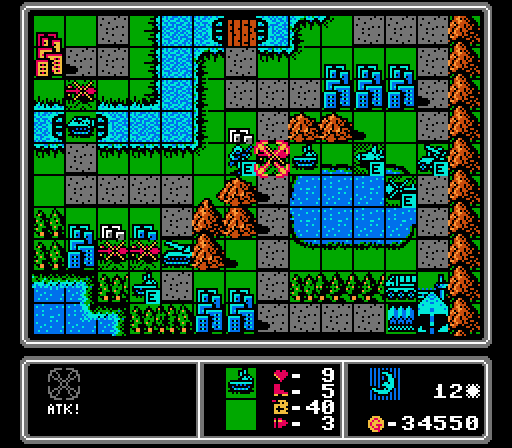 Our copters soak up a few attacks and keep Blue distracted near their island. 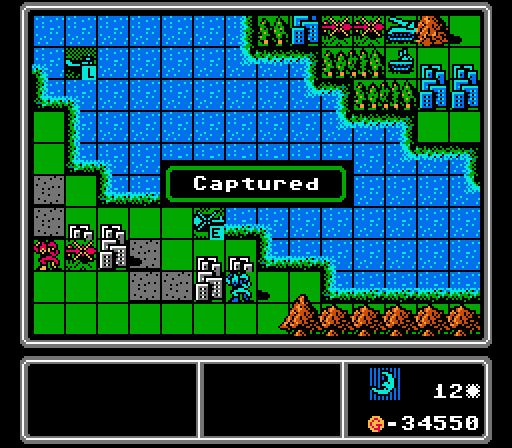 However, Blue successfully grabs its first city outside its starting area.  Then the AI blows its funds on a medium tank and a rocket. The action's starting to heat up, and we've got a decisive income advantage, but will we be able to project that power all the way across this extra-large map? To Be Continued... DKII fucked around with this message at 03:52 on Oct 18, 2021 |
|
#
?
Oct 17, 2021 05:01
|
|
|
Large maps just sound miserable in this one. Only being able to build back at your starting base means it takes so much longer for you to respond to your opponent than the other way around and this game is basically rock paper scissors. I can't imagine how long this map would take with 2 human players capable of exploiting that.
|
|
#
?
Oct 17, 2021 05:13
|
|
|
Yeah I would not recommend trying this map in multiplayer. You're going to give me nightmares just thinking about it.
|
|
#
?
Oct 17, 2021 05:31
|
|
|
At least the challenge now seems a lot more doable than in the last map.
|
|
#
?
Oct 18, 2021 04:27
|
|
|
Seems like it literally revolves around guessing what your opponent is going to build 3 turns in advance. Or just having more of everything as they swarm around a remote airport like bees waiting their turn to refuel. Can supply trucks refuel air and naval units in this?
|
|
#
?
Oct 18, 2021 04:32
|
|
|
MR. J posted:Can supply trucks refuel air and naval units in this? Alas they cannot. Which I guess makes sense. There are the extra ports and airports for resupply but the airports in particular are still pretty far away.
|
|
#
?
Oct 18, 2021 06:43
|
|
|
Part 25: Deer (2 of 2) Turn 13  When last we left off, Blue had just taken its first city in neutral territory and fought off most of our copters. Now, three more of our copters have crashed, running out of fuel.  On a positive note, we've finally captured the last city in our starting area.  A new wave of copters is already on the way.  This lander is carrying a tank and a medium tank and they're all about to have a very bad day.  Nice to have some heavy hitters finally seeing some action.  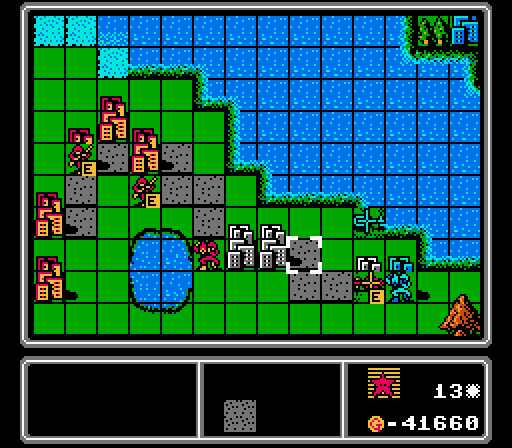 We're still trying to wrap up the lower island here. We've driven off the copter but need to keep that mech from going anywhere. Parking that copter on the city right next to him will keep him frozen. 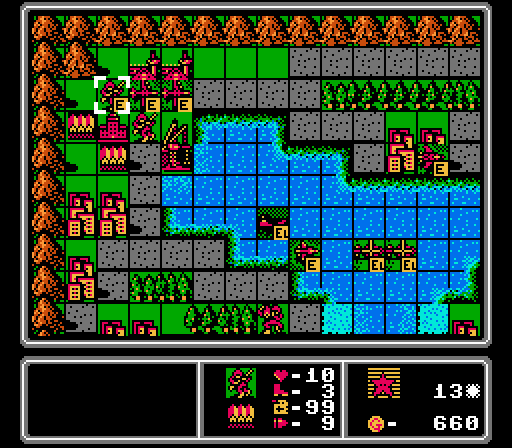 We've got enough income now to get ourselves two bombers this turn, plus an infantry to use up the spare change.  Another shot of our stranded units. 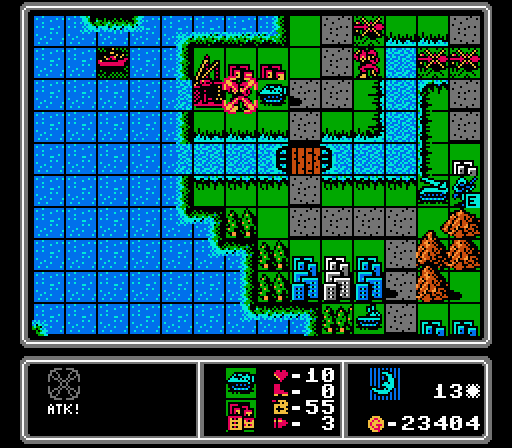 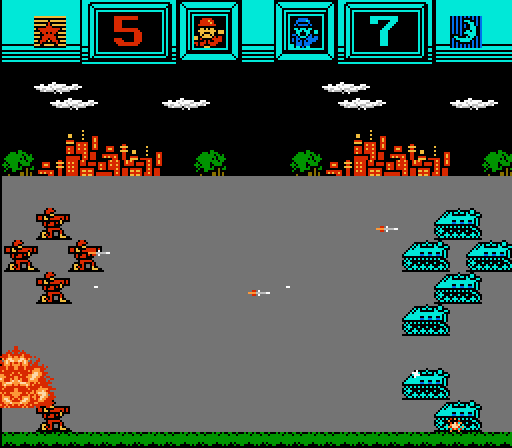 This mech has finished its capturing missions, so it's okay to let the APC across now.  Our copters are still an effective distraction. We lost one to the figher and the AA tank hit another. 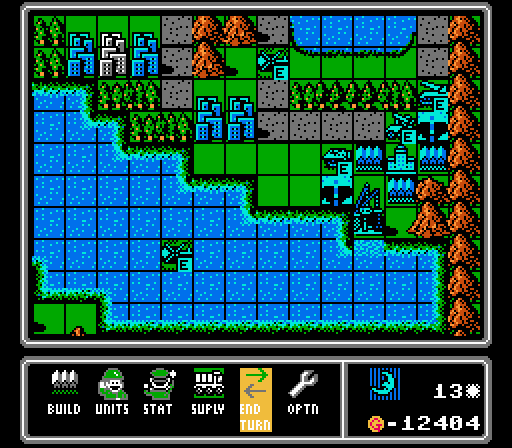 Just a new AA missile. Turn 14 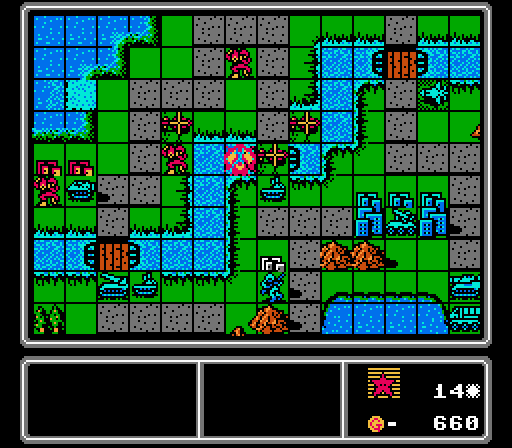 This copter didn't quite make it to the front before it ran out of fuel. 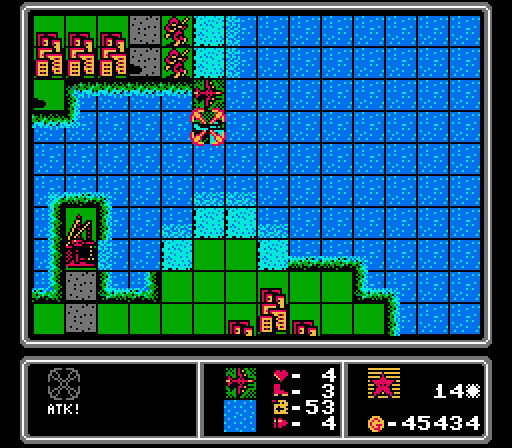 Our bomber keeps harassing the lander. 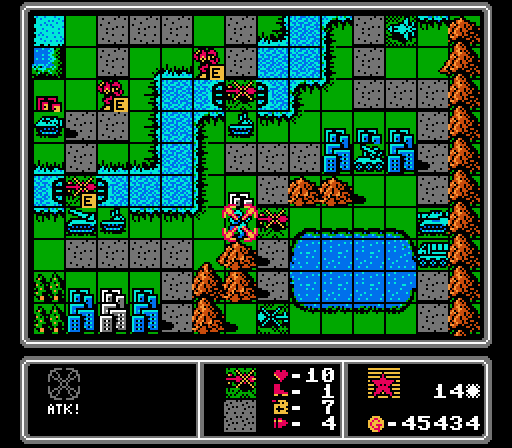 We bring another copter down to finish off this capturing infantry, while others continue to block the bridges.  This time we get a battleship and two copters (immediately loaded with nearby infantry), and burn the rest of our funds on a tank and a mech. 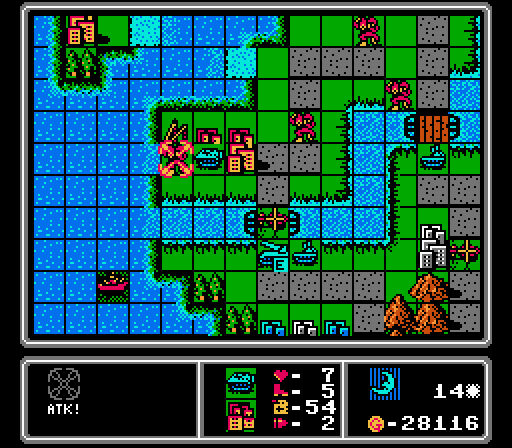 I pulled this mech back to get out of rocket range, but it turns out ports don't actually repair ground units so it's going to eventually lose to that APC. And of course I had moved a different mech back into rocket range anyway.  We lose a few more copters in enemy territory. Keeping Blue distracted while our heavy hitters slowly make their way over. 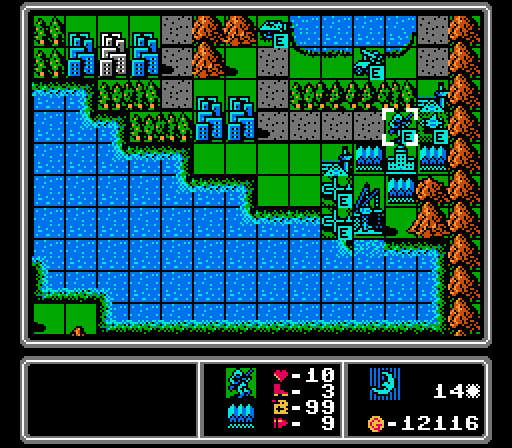 Blue gets a scout this time, to more efficiently play with our copters. Turn 15 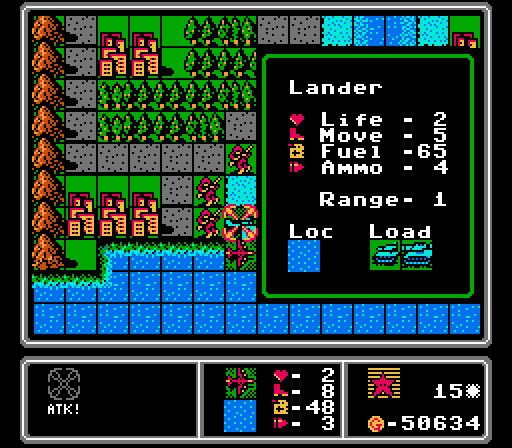  Showing off this fun bug one more time. These two units destroy each other in the same battle...   The game glitches out and puts the defending unit back on the map, but with the barest sliver of health. The infantry is able to finish off the lander here, sinking it and the tank and medium tank that it was carrying (over 40,000 G destroyed here). Sure, it cost us a 20,000 G bomber, but we have plenty to throw away now.  Just grabbing the last couple of cities from the upper-right area.  It's really tough to rush a rocket with these slow mechs. So the copter keeps chipping away at it instead. Our first battleship is finally in the area, continuing to move towards Blue's HQ. 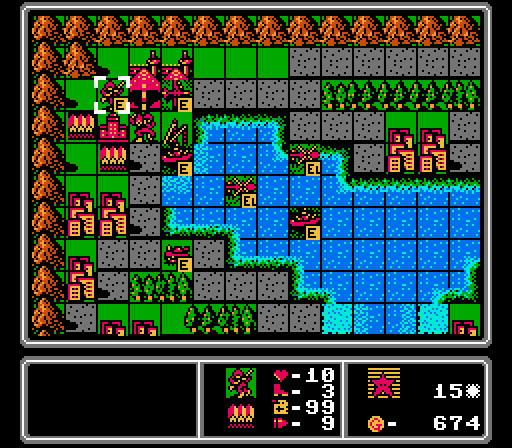 We now have enough income each turn to get both a battleship and a bomber. With enough left over for an infantry!  Not much interesting on the enemy phase. This mech finally came off the city to hit our mech. It's out in the open now so we can easily take care of it.  The enemy scout came out and took out another copter. This fighter is retreating back to the airport for more ammo. You can see in this shot how spread out all of Blue's units are - their starting island is large and has some good chokepoints for ground assaults, but too much open water and mountains for keeping air units out.  Blue blows another chunk of funds on a lander. This one will never even leave the port area. Turn 16 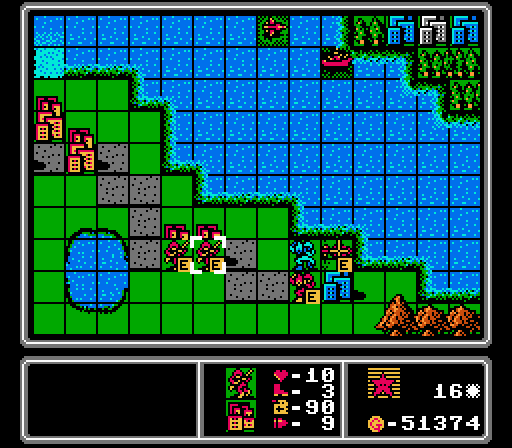 Our copter and mech can't finish off the other mech, but there are only three cities left to capture on this island now. 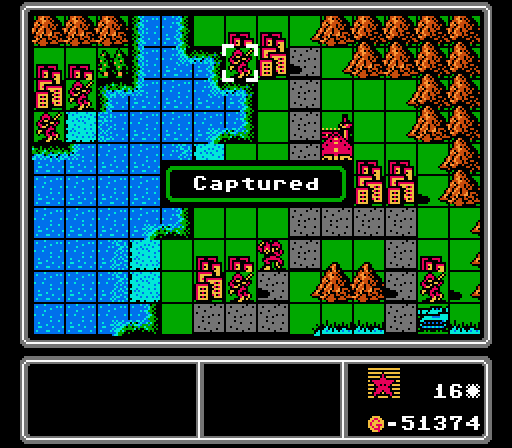 The last city in the upper-right region is under our control now as well. 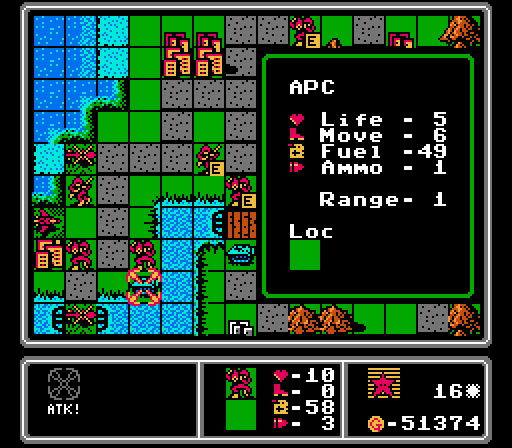 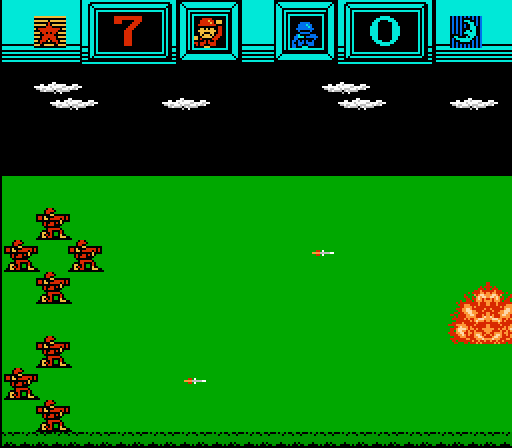 A mech against an APC isn't normally a good matchup for us, but in this case the APC is weak enough that our mech gets the kill without taking too much damage.  I'm not real sure what I'm doing here. The copter and fighter chip away at the rocket for a couple more damage but I still can't get a mech close enough to actually hit it yet.  A medium tank has broken through and an AA tank is right behind it, but we have a couple of bombers ready to take control soon. 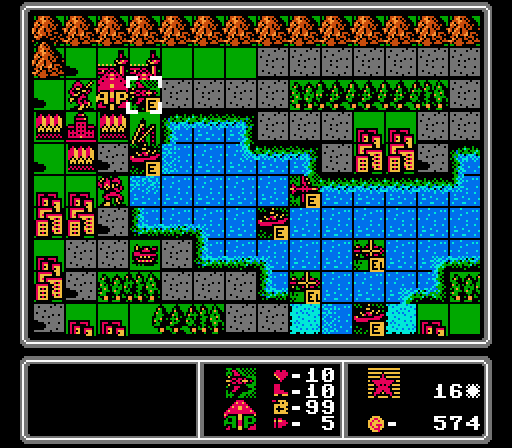 I'm trying to minimize the units built at this point so we build a battleship and a fighter to hit the exact amount we need to spend.  We lose another bridge as this APC one-shots our mech. We're spending like crazy but it just takes forever to get our units to the river here. 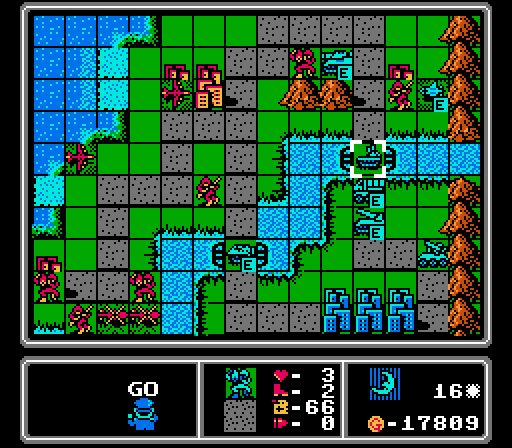 The medium tank advances and hits our mech, and an enemy scout moves up to harass our infantry and scare away our bombers. I'd forgotten that the highlighted AA tank was damaged and it retreats back to a city for repairs. 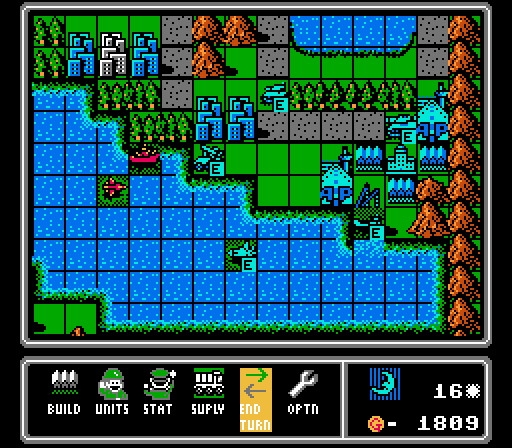 Just another medium tank. We have plenty of forces en route that can handle it. Eventually... Turn 17 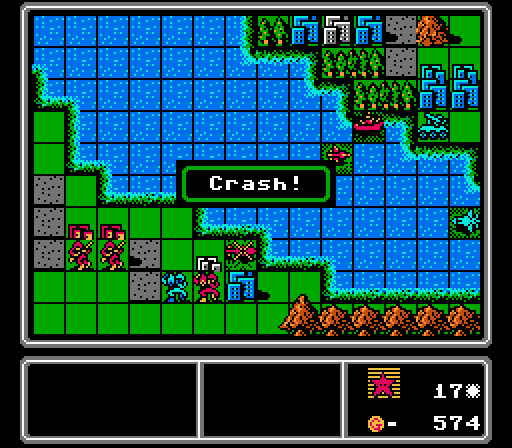 Another copter lost in the struggle. I think I might set a record for running air units out of fuel in this map. 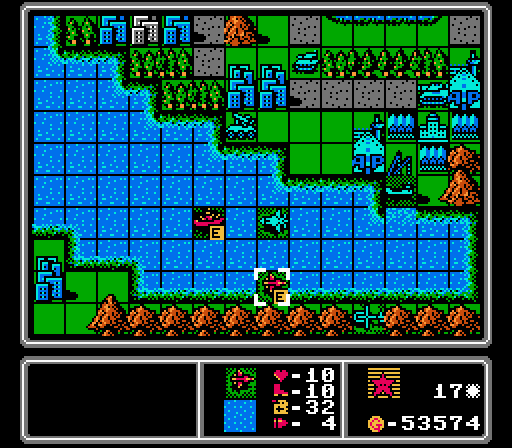 I'm trying to dance around the enemy units here. I needed the scout away from the AA missile. If the enemy fighter goes after the scout, I can hit it with our battleship. If the scout is left open, it can go after the enemy copter. And the battleship can hit the AA missile if it stays in range, too.  These are the last two cities outside of Blue's island that we don't already own, and now that the enemy mech is gone they'll be ours in a few more turns.  A bomber finally arrives on the scene and wipes out this rocket, clearing the chokepoint. 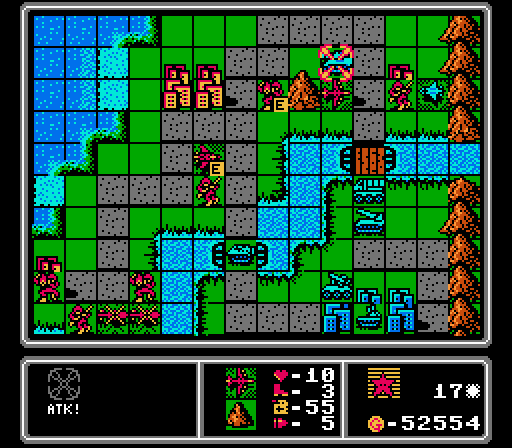  Our other bomber neutralizes the medium tank. It's in range of the enemy scout, but I moved our fighter up to cover it. 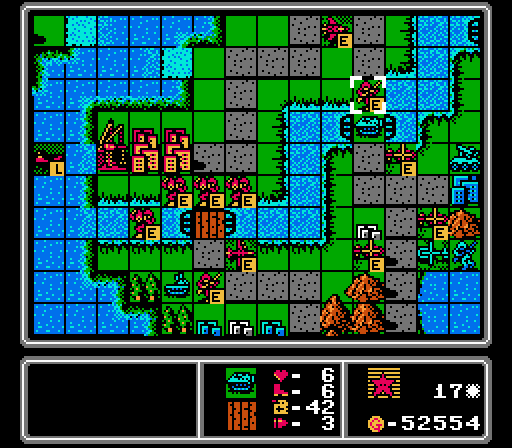 We start to break through the left side of the island. The current round of copters moves over to make trouble at the next bridge. The highlighted infantry is plugging up the bridge - the APC will tear him to bits, but won't kill it and nothing else can get through. That lander on the far left finally reaches the port and drops off a tank. 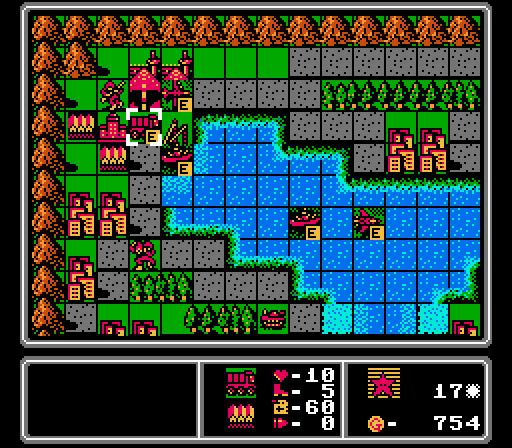 It's another bomber and battleship pair this turn, with a supply using up the extra funds. 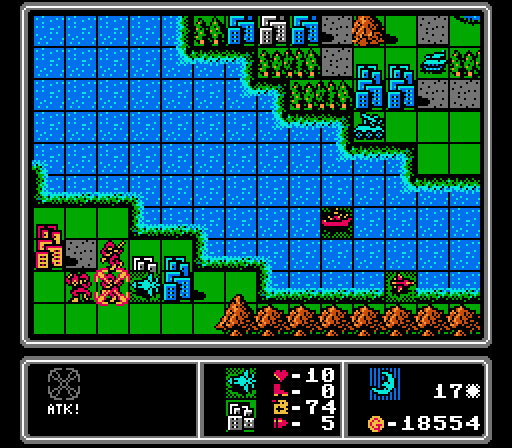 Well, that was unexpected. The enemy fighter avoided our trap and went after one of our infantry. That'll delay our capturing efforts down there. 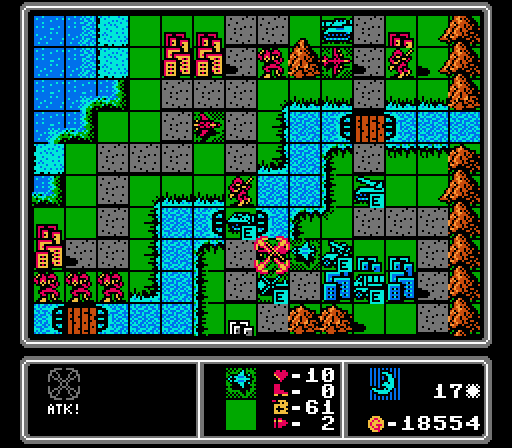 We lose a couple more copters, with the scout coming down to finish off this one. However it's still in range of our fighter, and not in a position where the AA missile can cover it, either. 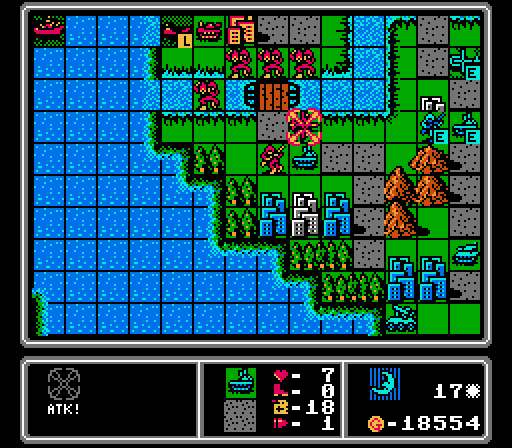 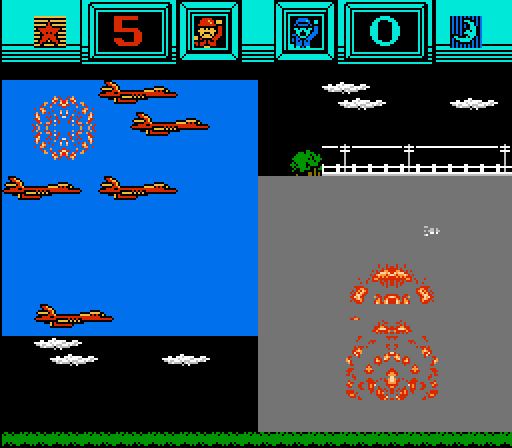 This AA tank suicides on our bomber, but does a fair bit of damage on its way out.  Another medium tank appears, as Blue moves some reinforcements over to our break-in area. Turn 18  We start off the turn in style, with the fighter going after the scout and the bomber hitting the AA missile. It's nice to finally be able to strike real blows here.  Starting to attack the cities on Blue's starting island now.  Blue's foothold on our second island has lasted long enough, let's kick them out. Note how our battleship is positioned to cover both the capturing infantry and the scout, in case the fighter goes after either one.  Another round of reinforcments - a battleship, a bomber, a copter, and an infantry. The nearby infantry immediately jumps into the copter.  We've tripled our enemy's income now. It's just a matter of getting all these expensive units we've been building all the way across the map. 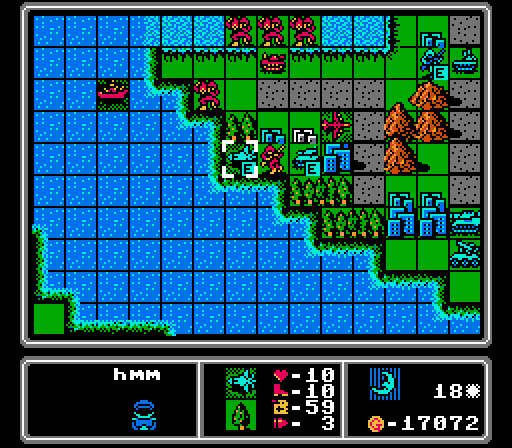 I know I keep under-estimating the range of a fighter, but I really did not expect it to make it all the way back to all but kill this infantry.  The scout, copter, and AA tank are all damaged and all retreat, leaving our air units untouched this turn.  Just another rocket and copter here. Turn 19  We kick Blue out of the lower-left island.  Our scout is in position to finish off the enemy scout that had retreated. It's getting pretty low on fuel so I don't really care that the lander will attack it on the enemy phase.  I'm determined to get our battleships some action next turn. They're in great position to cover our footsoldiers as they try to capture those cities. 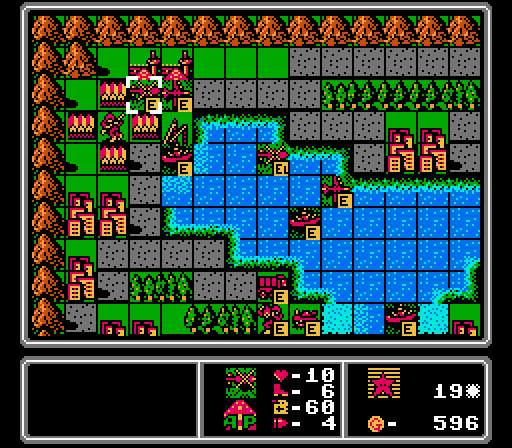 Still spending all our cash every turn. We've hit the unit cap now.  This AA tank kills itself on our bomber, the second time that's happened in three turns. Down on the lower left, we lose a tank but there are plenty of targets left in range of our battleships. Turn 20  Our lander made it back to pick up a couple of the stranded units on our starting island.   One medium tank is summarily destroyed by a battleship. 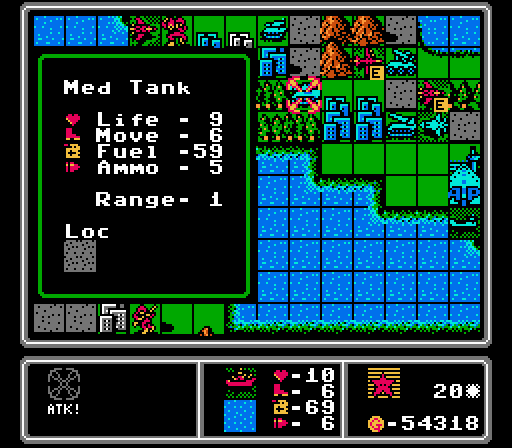  Two shots, two kills. Against fairly healthy medium tanks. Beautiful. 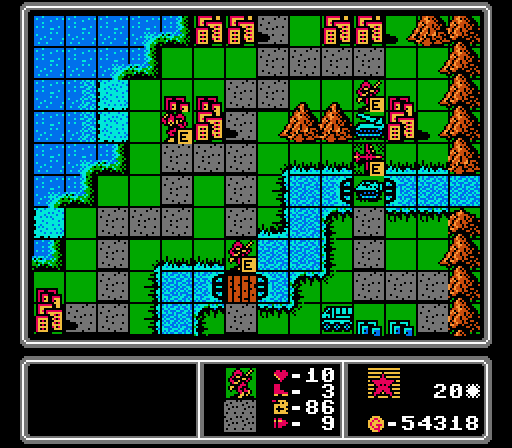 We've got one bomber left on the upper-right trying to clean up an attempted breakout.  With the medium tanks gone, everyone else swarms ahead, with two more copters unloading their passengers. Nearby a bomber neutralizes an AA missle and one of our fighters squares off with the enemy fighter while the other finishes off an infantry. I ended up suiciding our damaged scout and mech and merging in a damaged bomber to free up space to build more units this turn. 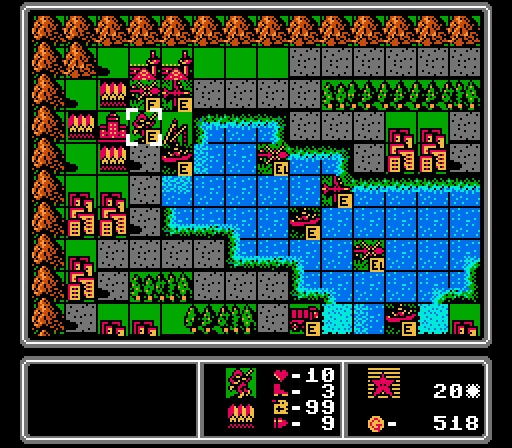 We get the usual set. 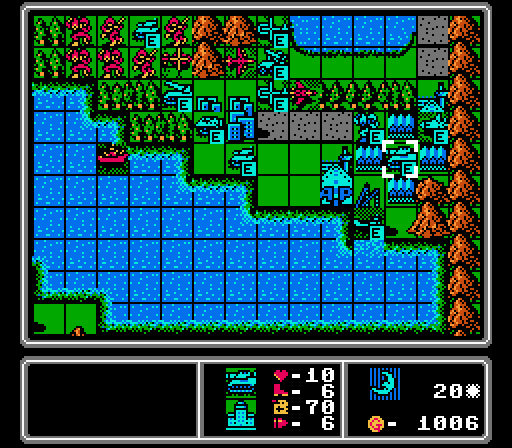 No significant attacks or movements from the enemy forces this turn. Just a new medium tank built. 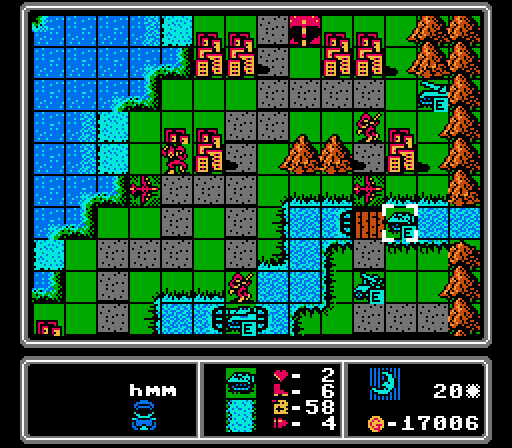 Well, not exactly significant, but this movement is at least unusual. I had no idea APCs could cross rivers in this game. Doing so seem to use up all of their movement, but an interesting wrinkle to keep in mind for later maps. Turn 21 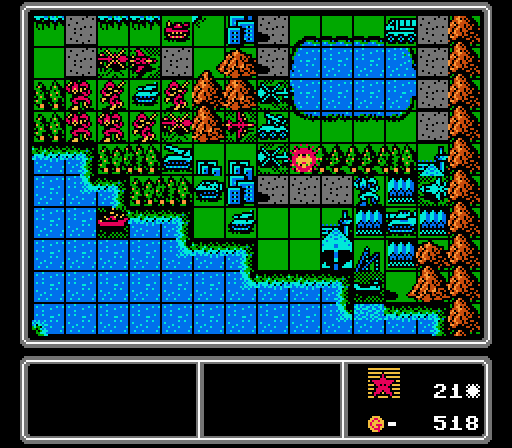 Lost a fighter to a fuel crash this time, but it did its job forcing the enemy fighter to retreat already. 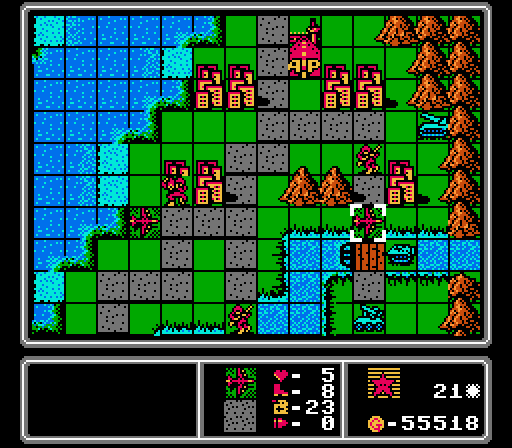 This bomber is damaged, out of ammo, and low on fuel so it goes back to the nearby airport. 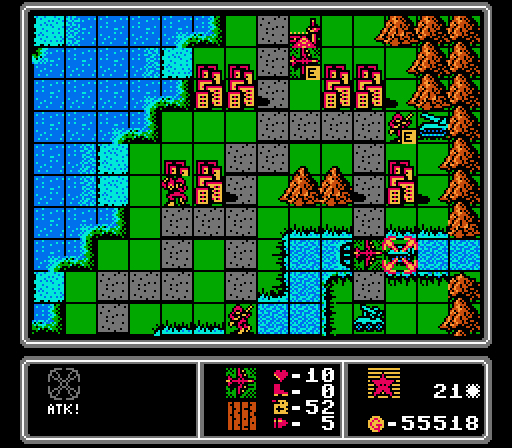 The rocket is heavily damaged so I send in an infantry to try and finish it off, but fall short. A fresh bomber arrives to destroy this APC however. 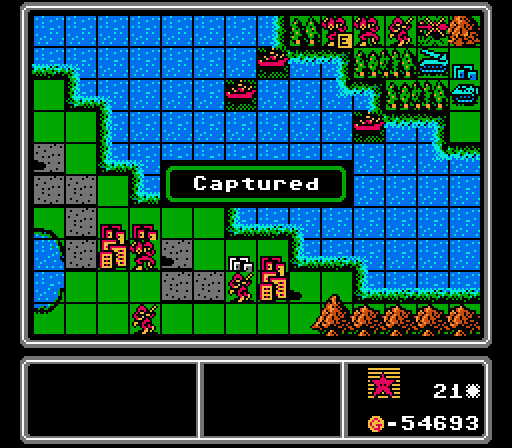 We've got the last city on the lower-left island, and have also captured the first of Blue's cities on their starting island.  Our lead battleships are continuing their destructive wave, dealing eight damage to this rocket and also finishing off the nearby tank. 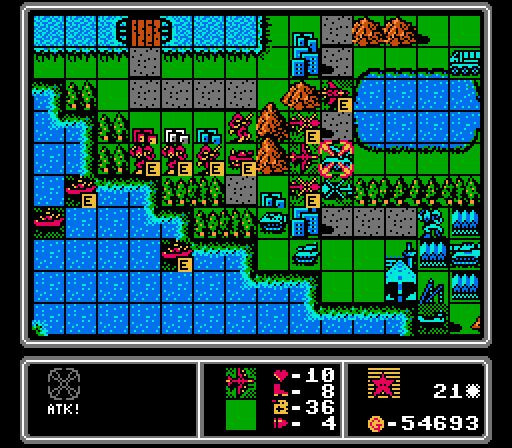 We have a tank move down to finish off the rocket, and our air units hit two copters (destroying one) and finish off this AA missile. Two more city captures are ongoing, with the injured footsoldiers merging together to speed things up there. Blue has lost a lot of ground all of the sudden; it's really just a matter of wrapping up now.  Our extra unit for the challenge is an AA tank this time; I had a weird amount left over and was too close to the unit cap to do a copter+infantry combo.  The enemy fighter finished off one of our copters that was about to crash anyway, and this APC takes out an injured infantry that I only moved forward to screen our capturing troops. 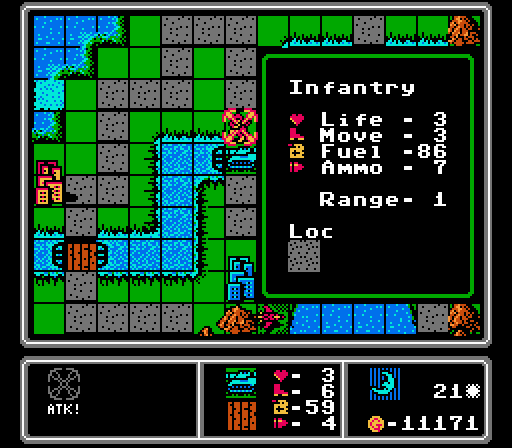 This infantry finally loses its battle with the damaged medium tank, but I have a couple bombers nearby that can take over next turn.  The AA builds an AA tank and a copter, two of the most annoying units for my bomber-heavy army to remove. Turn 22 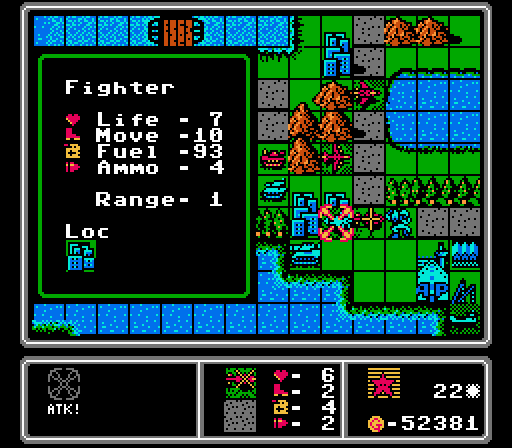 This copter is just about out of fuel and while it could do some damage to the mech, I opt to have it destroy itself against the fighter so I can build more this turn.  The battleship waves are starting to build on each other now. Here they finish off the fighter and tank, and dish out heavy damage to the medium tank and APC (there's one more battleship just off-screen).  The tank finishes off the APC, and this bomber finishes off the medium tank. Our fighter doesn't have a lot else to do so goes after the new copter. 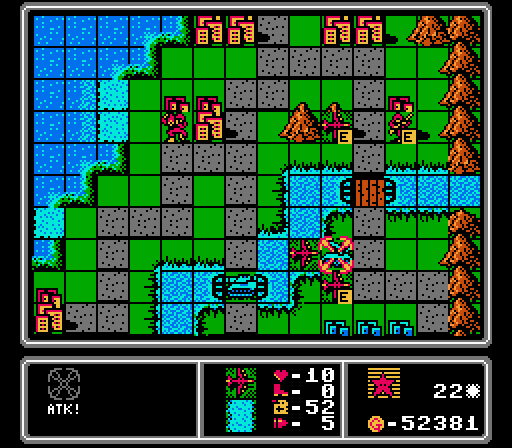 The bombers continue to clean up this area of the map, finish off the damaged rocket that had crossed the bridge a few turns back, then teaming up to take out this AA missile. 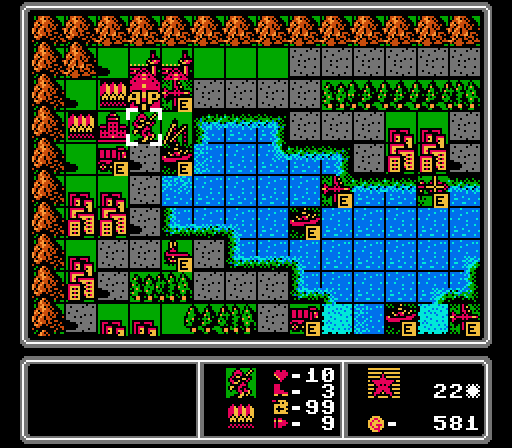 This turn is the last time I'll show the reinforcements, since I don't think they'll be relevant afterwards. We'll likely finish off this map before they can advance far enough to contribute. The extra unit is just a supply; we spent some of our funds repairing a bomber earlier.  There are only six enemy units left but as usual our opponent has enough income to make things drag out at the end here. The drama is all gone at this point so I'll just summarize the subsequent turns.  This loose medium tank was already heavily damaged, and it kills itself on our mech. 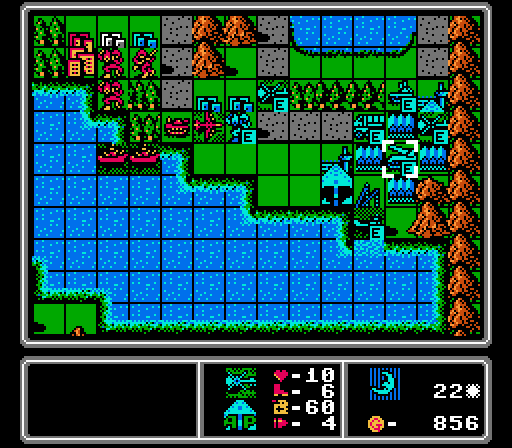 Our fighter is shot down by the AA tank, and Blue builds another copter and a rocket. Turn 23  We finish off two city captures, the bomber hits the AA tank, the battleships take out the mech that was in range, and our tank just runs straight into rocket range because it's damaged and out of ammo and I want to just get rid of it.  I know I said I wouldn't show reinforcement again, but because we're up against the unit cap I had to modify the challenge slightly. I built the two most expensive units I could and still couldn't spend all our money, but I'm still maxing out the production we're allowed to have within the game's constraints. That workaround will continue for the rest of the map.  The rocket blew up our throwaway tank and the AA tank finished off one of our bombers, but that's about it. There's a new AA missile and a mech. Turn 24 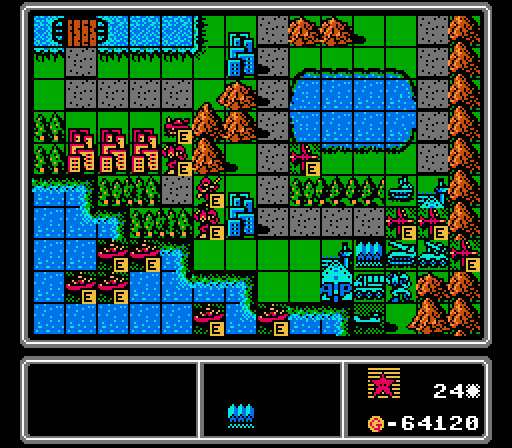 Our fleet of battleships shot down the two copters and are preparing to go after the lander. The bombers went after the AA missile and rocket but couldn't finish off either one. Stupid defensive bonuses.  The AA tank destroyed itself on a bomber and the AA missile and rocket helpfully moved away from the defensive bonuses, allowing the AI to build a tank and an APC in those spaces instead. There's also a new copter. Turn 25  The AA missile and lander are both gone but the bombers are having trouble clearing out the enemy vehicles sitting on the HQ and bases. They've taken enough counterattack damage now that they just don't have the firepower to punch through. It'll be up to the battleships to move in and finish things off here. 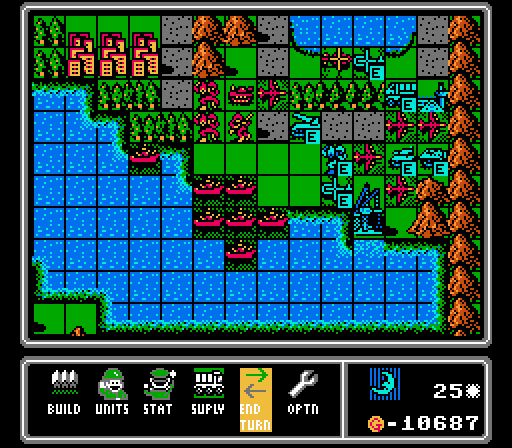 Just a new copter here, since I have the vehicles trapped and we're blocking every other build point. Turn 26  There seems to be a common theme in this LP where the end of the map drag on because I can't get enough units together to finish off one last supply truck.  Because I couldn't finish off the map this turn and also couldn't block all of the build points, we have to take care of a medium tank and a tank next turn. And most of the battleships can't reach anything so won't be of any help. Turn 27  Once again we have only the enemy supply remaining. That one bomber that hasn't moved yet has only four life and can't get the kill, so I leave it blocking the airport. At least the massive fleet of battleships is finally in position to wreck everything next turn.  One final shot of all the units left behind on our starting island. I actually did get in one more lander run to pick up an AA tank and a mech, but they never reached the front lines. There are four more footsoldiers trapped elsewhere on the map that were just never worth picking up.  Blue opts for quantity over quality which is probably the easiest way to keep dragging this map out further, since those are three more units getting full defensive bonuses and requiring at least six attacks to remove. Turn 28 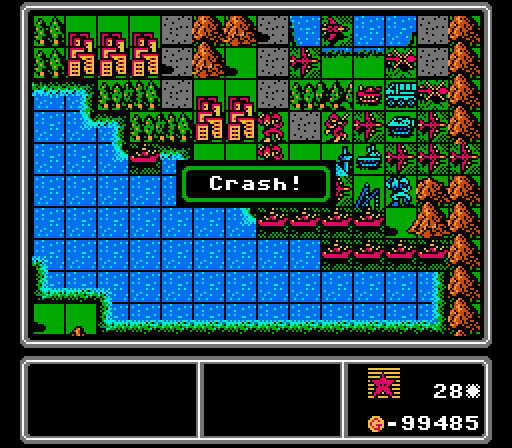 Two bombers and two copters are out of fuel, but I won't need them. 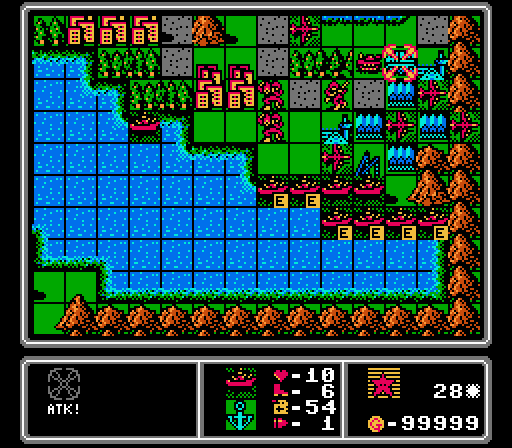 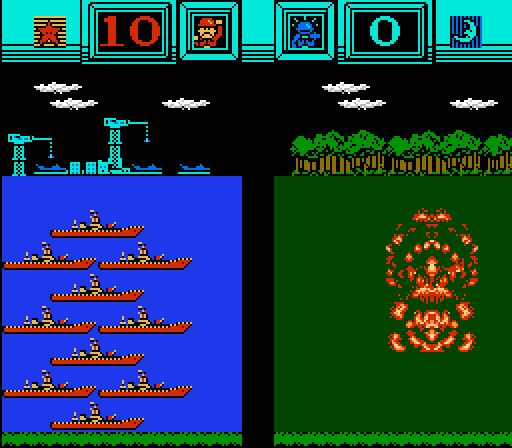 It turns out seven battleships all firing at once are enough to wreck even units sitting on bases.   And we're finally done.  We ran into game limitations at the end but still spent a ton of money. We ended up capturing all of Blue's cities before the map finally ended, too. 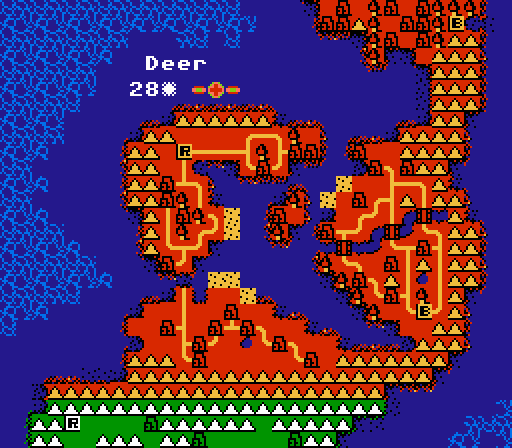 Finishing in 28 turns is actually pretty good. The average is supposed to be 33 turns. Our initial strategy of going for the neutral ports and airports first gave us a quick income advantage that inevitably led to an avalanche of battleships and bombers wiping out the enemy. This map really highlights one of the drawbacks of this game - being unable to build from the captured ports and airports slows down the end of the map considerably, and does nothing to really change the outcome. Good thing they changed that in later games. 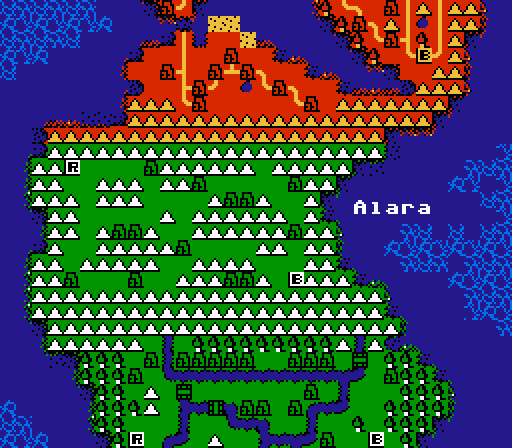 We appear to be headed for another ground battle next time, with a ton of narrow mountain passes. Not sure what Alara refers to - the most common search result appears to be as an acronym related to radiation exposure, "As Low As Reasonably Achievable". There's also a minor reference to a plane of existence in Magic: The Gathering. Not sure how either one would really fit in here, but we'll see the map in action next time! In the meantime, make your pick for the challenge for next map:
Vote in the linked poll here.
|
|
#
?
Oct 23, 2021 03:40
|
|
|
As annoying as only getting to build halfway across the map was, I think this is the only time in the series that I've ever seen fuel matter at all barring drolaf.
|
|
#
?
Oct 23, 2021 14:07
|
|
|

|
| # ? May 3, 2024 21:05 |
|
|
DKII posted:There seems to be a common theme in this LP where the end of the map drag on because I can't get enough units together to finish off one last supply truck. Same thing happened to me in AW1's Enigma and The Final Battle with APCs. It would be quicker if the AI could recognise when you've snowballed to the point of no return and yield, but I suppose that wouldn't be quite as satisfying as taking the time to finish them off thoroughly. In cases like this, though, it really is just busywork. DKII posted:We appear to be headed for another ground battle next time, with a ton of narrow mountain passes. Not sure what Alara refers to - the most common search result appears to be as an acronym related to radiation exposure, "As Low As Reasonably Achievable" Huh, interesting. The Alara region is also referenced in AW1's tutorial, it's the region that Nell says we're fighting with Olaf over. Looks like it was a reference to this game the whole time, how intriguing. Nice playing on this map, by the way, it didn't look easy to manage all that fuel.
|
|
#
?
Oct 23, 2021 15:43
|
|