


|
cosmicPostman posted:Nice playing on this map, by the way, it didn't look easy to manage all that fuel. It looked to me like they managed the fuel in the only sane way possible for that map. I deem it the Rocky IV approach.
|
 #
?
Oct 23, 2021 20:02
#
?
Oct 23, 2021 20:02
|
|


|

|
| # ? May 3, 2024 23:48 |
|
|
It really seems like a lot of missions have a clear snowball effect - the more aggressive you can play upfront and get an early lead in cities/income, the smoother the rest of the map goes.
|
|
#
?
Oct 24, 2021 01:28
|
|


|
FoolyCharged posted:As annoying as only getting to build halfway across the map was, I think this is the only time in the series that I've ever seen fuel matter at all barring drolaf. Yeah it's the only time I remember playing this series and having so many fuel issues. I probably could've micro-managed more and sent air units to the corner airports first for a pit stop, but it would've slowed the map down even more and as you can see it wasn't really necessary.
|
|
#
?
Oct 24, 2021 04:45
|
|

|
ALARA/ALARP are terrible acronyms lol the spend all the money challenge seems uneccesarily cruel for the poor copters that kept running out of fuel
|
|
#
?
Oct 24, 2021 11:43
|
|


|
Oh, and as near as I can tell, the "Deer" might be the shape of the body of water, tilted on its side? It looks to me like a head, with the nose pointing north, neck goes to the southeast, and the two extensions on the west are the (short) antlers, and the small island is an eye?
|
|
#
?
Oct 25, 2021 07:50
|
|


|
The Golux posted:Oh, and as near as I can tell, the "Deer" might be the shape of the body of water, tilted on its side? It looks to me like a head, with the nose pointing north, neck goes to the southeast, and the two extensions on the west are the (short) antlers, and the small island is an eye? 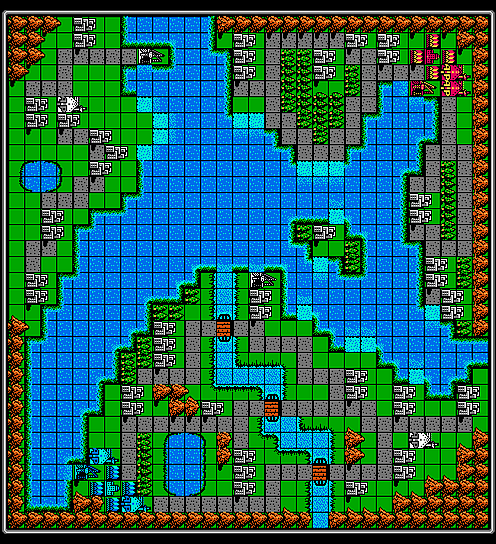 "Deer" Maybe? I can almost see it I guess.
|
|
#
?
Oct 26, 2021 04:19
|
|
|
With the map tilted like that, I can fully see it. Still an odd name, but one that actually makes sense considering the river does look like a deer.
|
|
#
?
Oct 26, 2021 13:58
|
|

|
 Could be interesting with all those mountains in the way. Will try and record this one soon.
|
|
#
?
Oct 29, 2021 03:58
|
|
|
Part 26: Unit Overview: Supply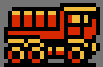  Basic Info: pre:Cost 3000 G Movement 5 Move Type Vehicle Fuel 60 Ammo N/A Ammo Cost N/A Range N/A Special Cannot attack; supplies fuel/ammo for adjacent units that haven't ended turn pre:Opposing Unit Damage Dealt Damage Taken Infantry N/A 2.5 Mech N/A 9.5 Medium Tank N/A 8.5 Tank N/A 6.5 APC N/A 5.5 Rocket N/A 6.5 Artillery N/A 5.5 Supply N/A N/A AA Missile N/A N/A AA Tank N/A N/A Fighter N/A 4.5 Scout N/A 3.5 Bomber N/A 7.5 Copter N/A 4.5 Battleship N/A 9.5 Lander N/A 2.5 Ah, the humble supply truck. It can't attack on its own, yet in ground battles it is essential to keeping your vehicles able to fight. The supply will refill the ammo and fuel for all adjacent ground units when the "Supply" menu command is selected, and also once per turn on demand by selecting the "Supply" action for the unit. Only units that haven't already ended their turn can be supplied, but a single supply truck can theoretically support eight units each turn this way. Your advancing artillery and rocket units will quickly run out of ammo without a supply truck nearby, and they're cheap, so make sure to have one or two out there for any ground advances. Air and naval battles won't need them, however; supply trucks can't help those units. The supply truck doesn't show up in later games; instead the APC takes over its functions and loses the ability to attack.
|
|
#
?
Oct 30, 2021 01:45
|
|
|
Part 27: Alara It's time for the Alara map. Lots of mountains and narrow passes, time for a grueling ground campaign.  Never mind, we have airports. This map is going to be easy. To spice things up, our challenge is Ride or Die 2.0, where every unit has to move closer to an enemy unit each turn and attack if possible. I'll also throw in No Vehicles because we're going to be doing this map with just footsoldiers and aircraft. Turn 1 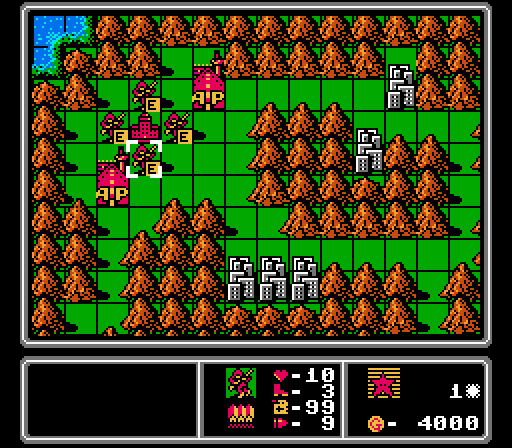 Typical start, a bunch of infantry. I could've thrown in an APC into the mix instead but I'd already decided to avoid using ground vehicles at this point.  The AI puts out what is probably a more optimal first-turn deployment. Turn 2  We'll be copter-heavy again this map. Two get loaded up to head for the neutral airports, while the other infantry are off towards the nearby neutral cities. 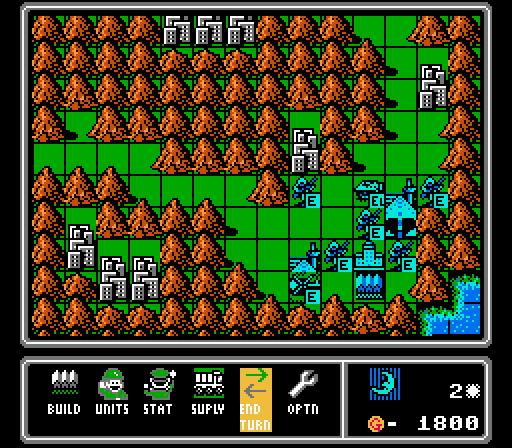 Blue also puts out a copter and loads up its APC. Turn 3  Two more copters that immediately get loaded up. 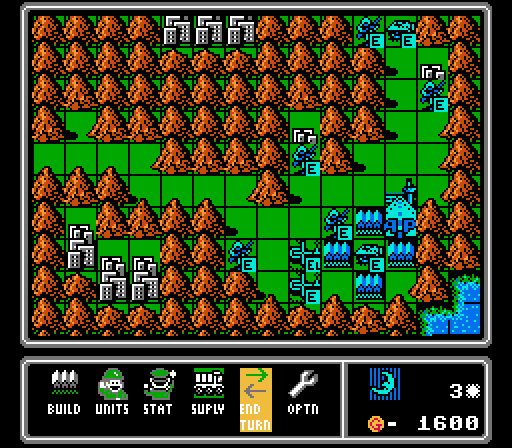 Blue has an early advantage, able to reach two cities and start capturing this turn. They also build another copter and APC. Turn 4  Our first copter reaches its destination, dropping off an infantry at this airport. I won't really use them much for supplying, but they're worth double the income of cities so worth capturing first anyway.  We only have cash for one copter this turn, but we start capturing two cities ourselves. 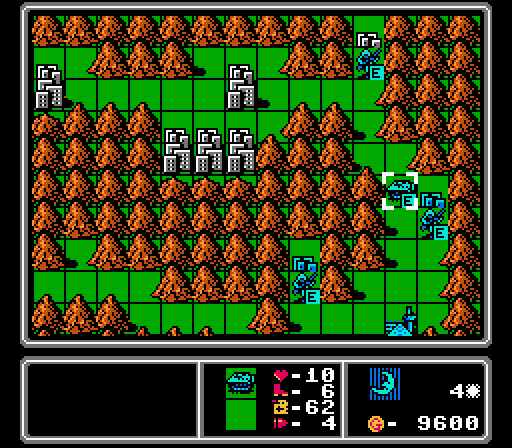 Two captures for Blue, with a third in progress up in the corner. The APC luckily doesn't advance any farther; it will cause problems for our infantry until we can get some bombers up and running. 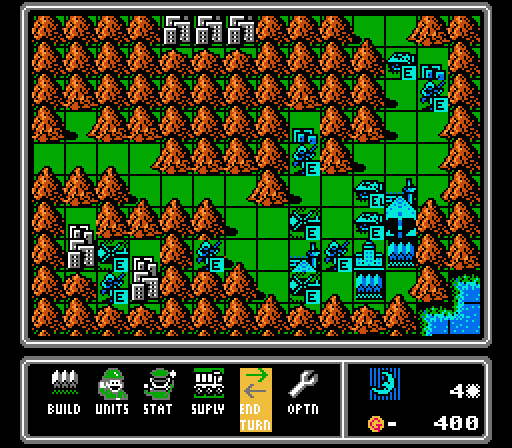 The start of this map is really just building as many infantry, APCs, and copters as possible. Copters are actually more efficient - they're 5% cheaper, have the same movement, and aren't hindered by mountains. Though you do have to watch their fuel so they have trouble making multiple trips. Turn 5  We land at another neutral airport, but you can see there's an enemy copter nearby that will complicate our capturing efforts. 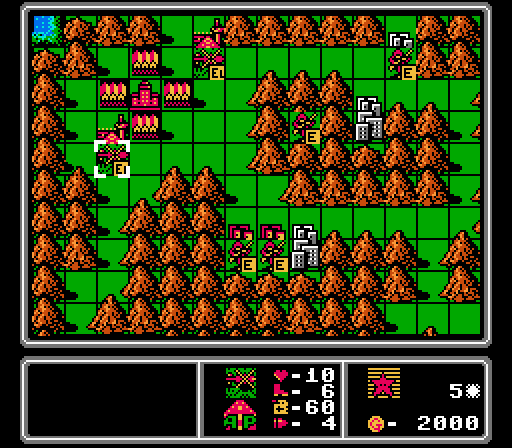 Two more copters built. I could build another set of infantry but I'm going to start saving up for more expensive planes now that we're getting some more income. 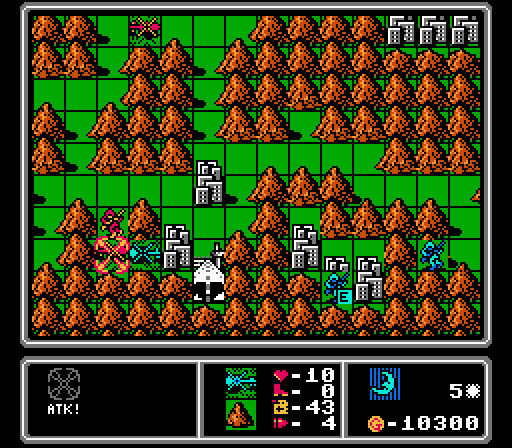 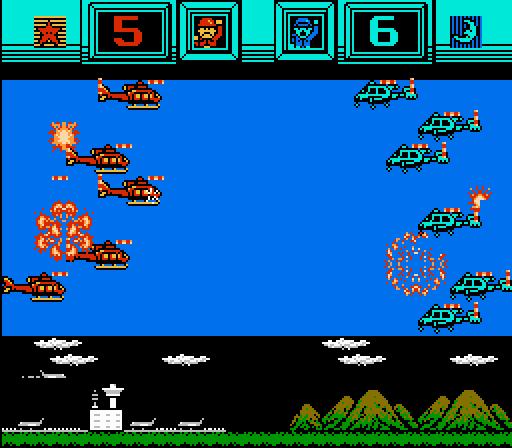 We get a copter clash, with hard mode giving the AI the edge in the neutral battle again. 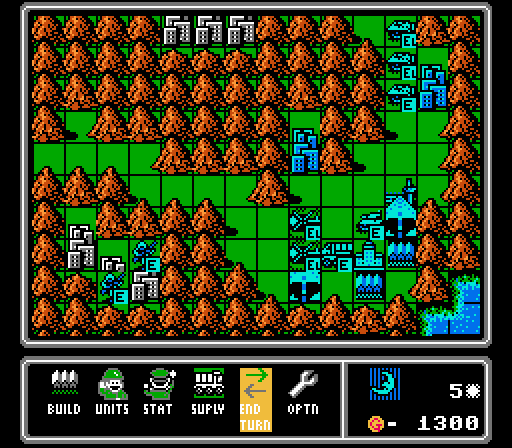 A tank and a supply for Blue. A supply is a weird choice this early on. Turn 6  The challenge forces our copters to keep advancing after dropping off their passengers, and this time we have to attack this infantry on an already-captured city. Most of the damage will be healed up on the enemy phase, but at least we have the passage blocked so that the enemy APCs can't get through. 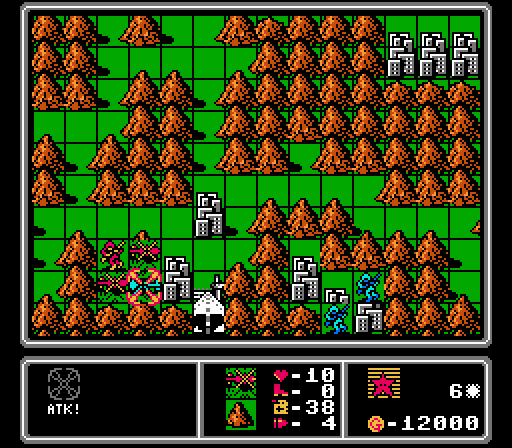 Another fresh copter moves down to help take out this enemy copter, so that our infantry can capture the airport in peace. 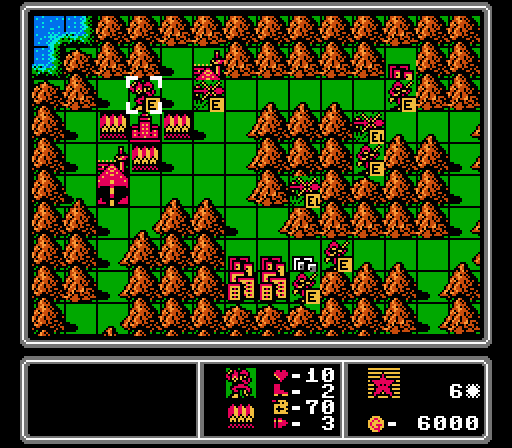 I decide I need one more copter and build a mech to throw in it. They'll try to grab some of the cities in the upper-right corner before the enemy APCs break through. (That was the intent; they end up getting caught up in the action in the middle later.) 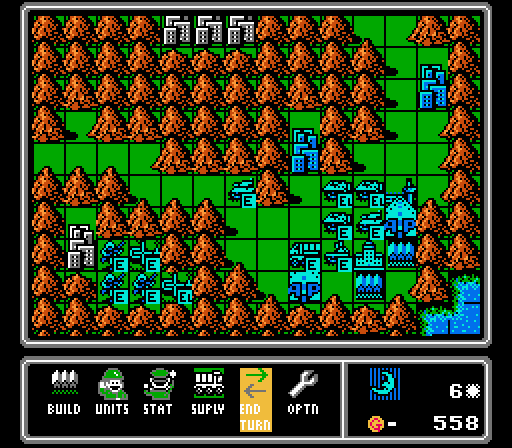 We have more copters approaching through the lower passes, with some vehicles on their way as well. And there's an AA tank now, the bane of my existence for this map. Turn 7 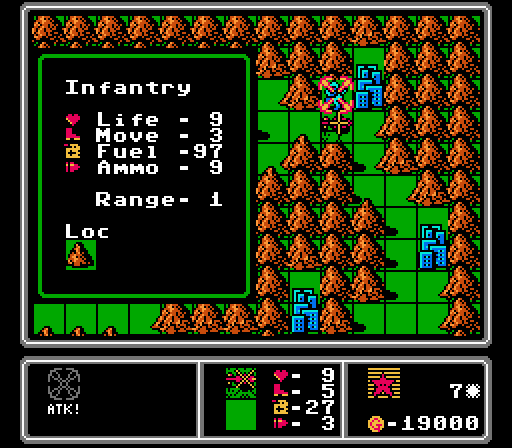 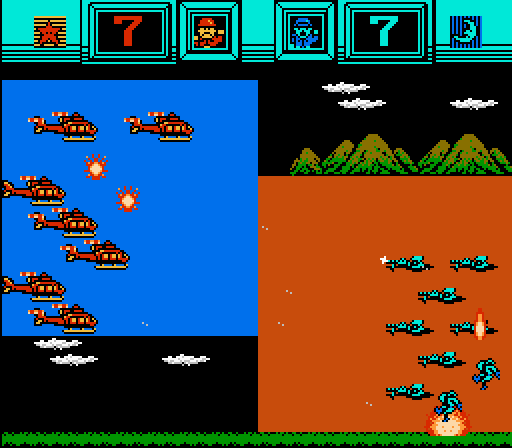 Our copter continues to harass this infantry. No one else is nearby now; the APCs all retreated last turn. 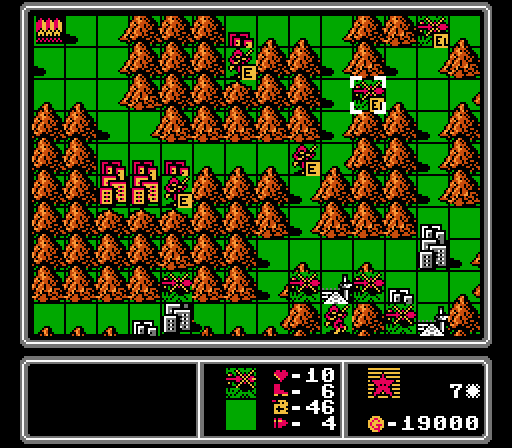 We now have all the cities near our HQ, and two of the neutral airports. The stranded infantry will slowly move through the passes to the front lines.  The last neutral airport will be more difficult to grab. Our nearby copters are forced by the challenge to advance and attack the infantry. We have more copters coming up to reinforce them, and one of them blocks off the airport so that the enemy copter can't unload directly on it. 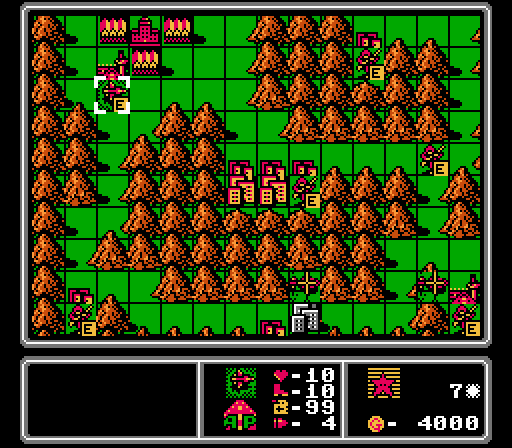 We have enough cash now for some serious planes, and start off with a scout to counter the enemy copters. 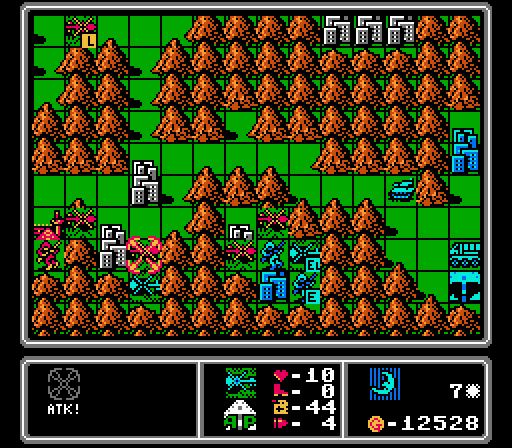 One enemy copter loads up an infantry, while the other goes after our fresh copter near the airport. That exchange is a good trade for us, because we also hurt the infantry inside the enemy copter.  Blue's tanks continue to advance, and they also build an AA missile. I'm less worried about that unit because our planes will have much better mobility than the ground vehicles on this map. Turn 8 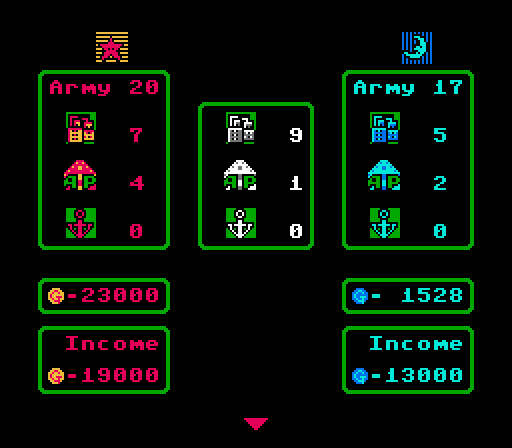 We've already got a healthy income advantage, with almost enough cash flow to get a bomber every turn.   All our copters down here have to keep attacking, even though the first two copters are pretty damaged at this point. We're still able to eliminate one enemy copter, while harassing an infantry and blocking off the last neutral city in this little pocket.  Starting to make some progress in the upper-right corner, which Blue has all but abandoned to us. 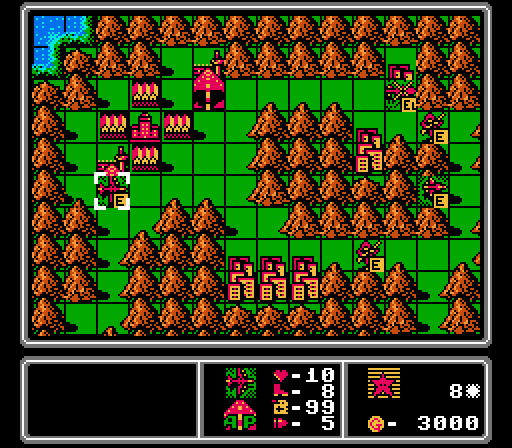 Time for a bomber to clear out the enemy vehicles. 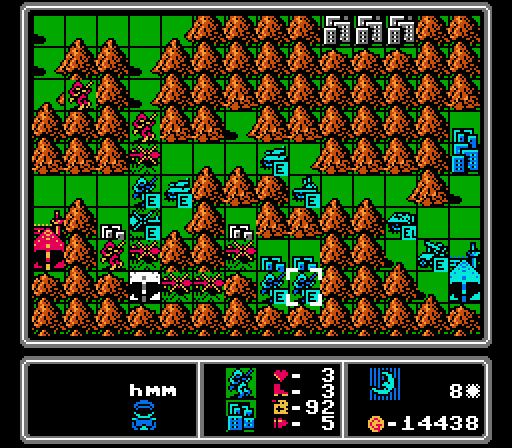 We're starting to get tangled up around the last airport.  I wasn't worried about this new rocket but it ends up being pretty annoying later. Turn 9 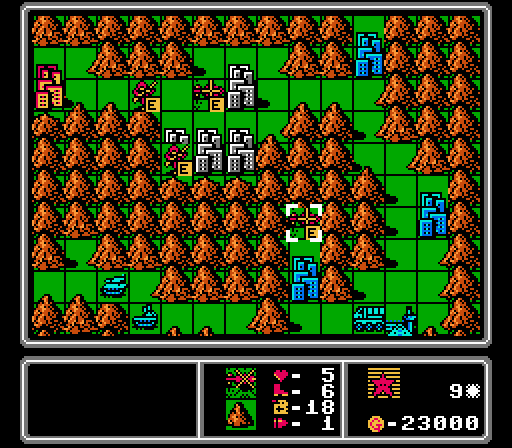 A fresh copter moves in to finish off the enemy infantry as we start capturing the last block of cities.   The scout arrives on the scene, heavily damaging this copter.  Our copters finish it off, then start in on the infantry that's parked on a city here. 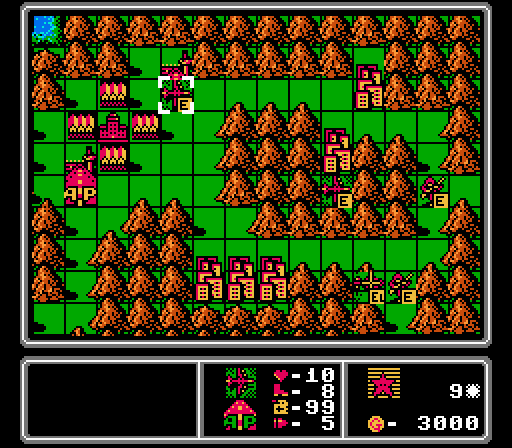 Let's keep the bomber train rolling. 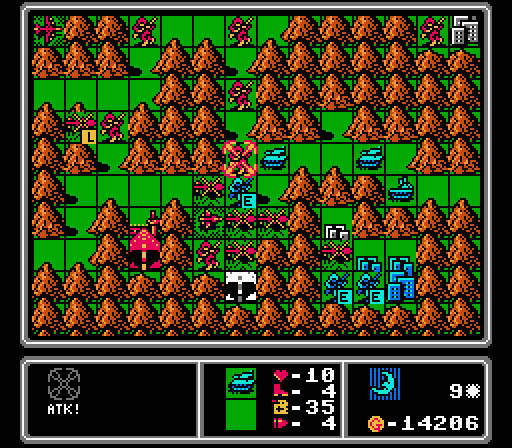 Our infantry got in range and had to attack, leaving it exposed to this tank on the enemy phase. 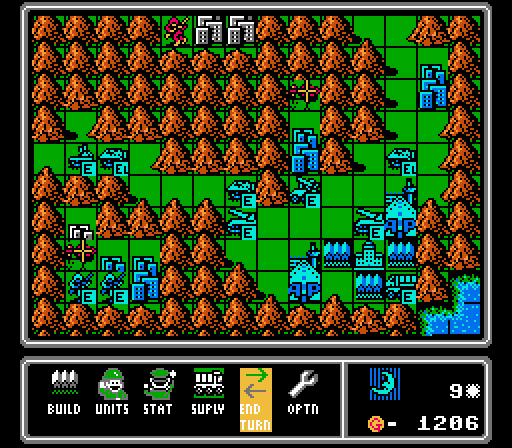 Another rocket for Blue. We're gonna need a lot of bombers. Turn 10  We've captured more than twice as many properties and the map is starting to snowball already, but we still have a tangle in the center of the map to unravel. I could stop here for a break, but let's keep pushing.  Copters and a scout against tanks really just makes for a giant traffic jam with no one really able to damage each other.  Going after infantry is about the best our air units can do right now. One of our copters has attacked so often that it's out of ammo. 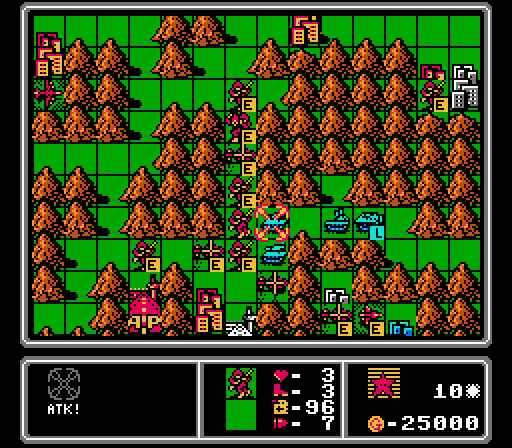 The challenge costs us an infantry here - it has to attack and the tank is more than capable of killing it. 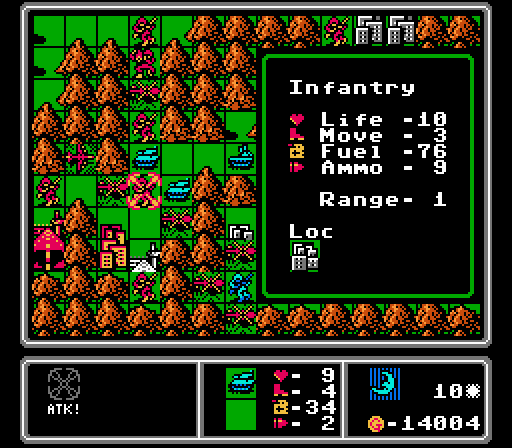  Both tanks go after our capturing infantry, but it's able to hang on for another turn. 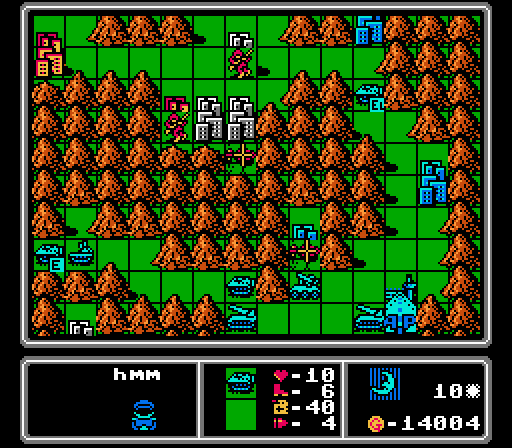 A loaded APC sneaks up the upper pass, where our copters aren't in position to cut it off.  The problem with these rockets is that they're going to be positioned to fire on any infantry we have capturing nearby cities. Not a big hindrance at this stage, but still annoying. Turn 11 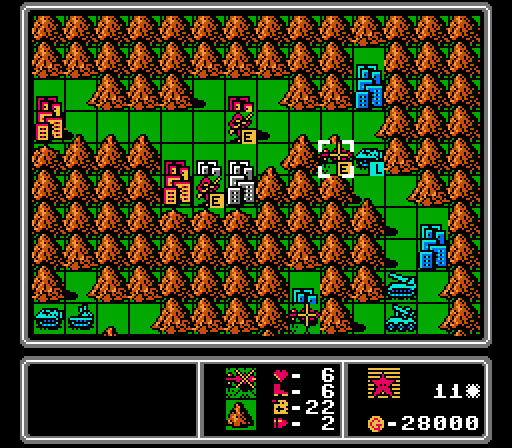 We've got a couple more cities up here, and the copter gets some chip damage in on the loaded APC. 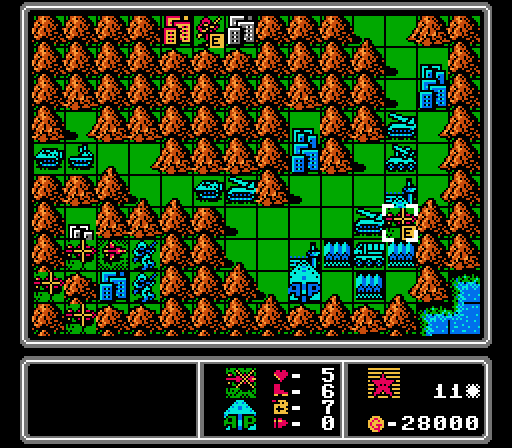 The first copter we built on this map is out of ammo and almost out of fuel, so just sits on the enemy airport to be annoying.  Blue stopped building copters and the other enemy units were easy to screen off, so we are able to capture the last neutral airport with relative ease. 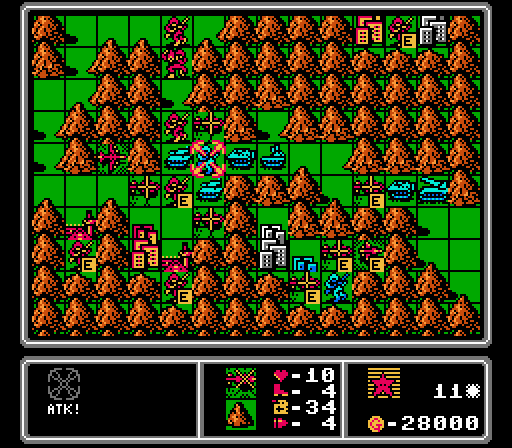 Our air units continue to harass the enemy infantry, not having any other worthwhile targets.  Our first bomber finally reaches us, all but destroying this tank. The nearby infantry will finish it off.  More copters with low health, ammo, and fuel clog up the middle. 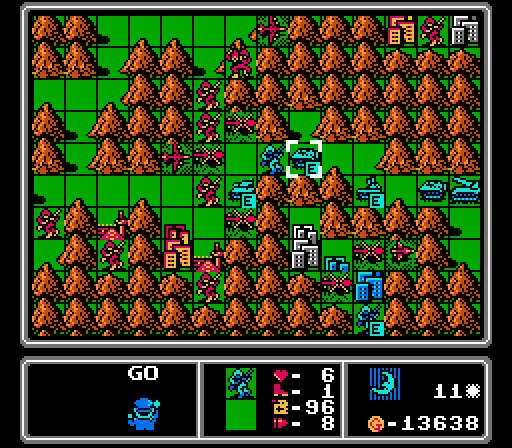 On the enemy phase, the tank goes after our capturing infantry again, the AA tank moves back to finish off our ammo-less copter, and the infantry gets back in the APC for some reason. 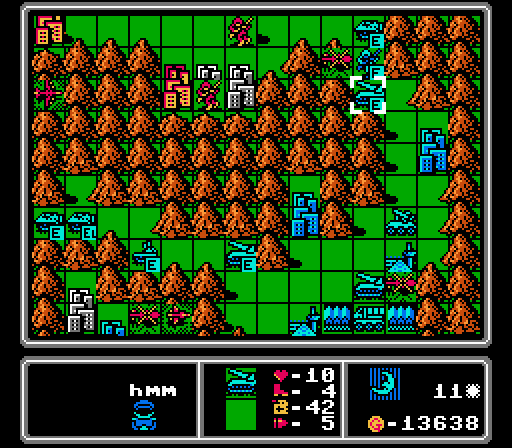 On the upper-right, the APC unloads the infantry well away from the neutral cities, failing to keep up the pressure on us. That rocket is now in range to harass our infantry though. 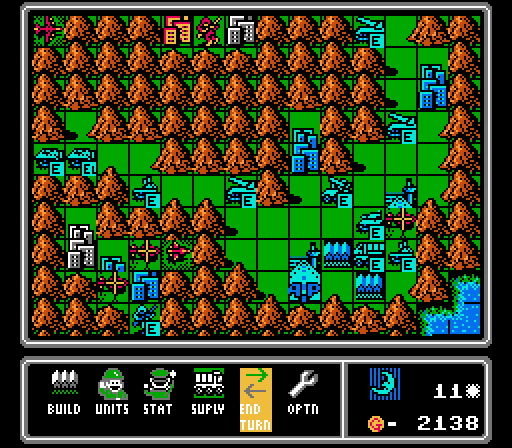 Another AA tank, great. Turn 12 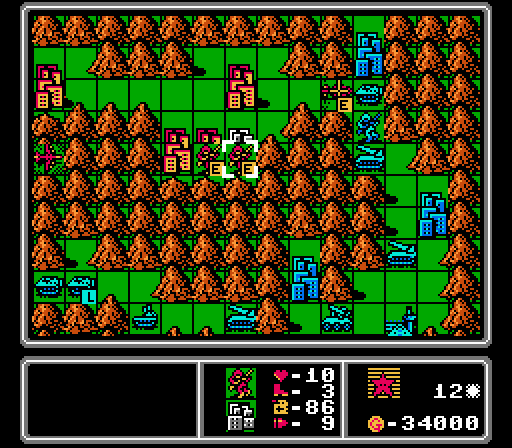 I hadn't noticed the rocket trap yet. The highlighted infantry is going to get hit by two of them. I did stick the copter in the pass to keep it clear of vehicles, but the enemy infantry can go right over the mountains instead.  The enemy infantry in the three-city pocket here are gone so we can move our own infantry in now. We have another ammo-less copter blocking the AA tank from moving up any further. 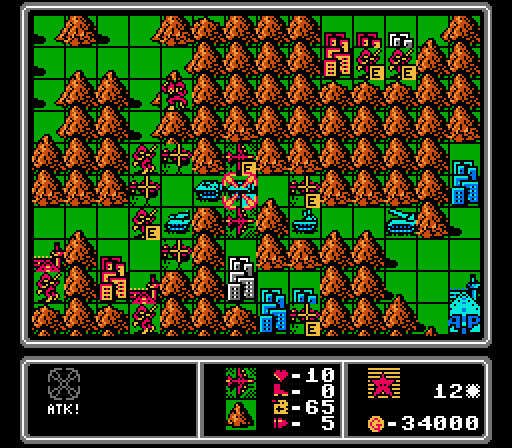 We've got two bombers in the mix now, and they team up to take out this loaded APC. The APCs are actually a bigger threat to our infantry than the tanks, and the fact that we also got rid of an infantry at the same time is just a bonus.  Starting to get control of this area now.  Here's where I get surprised by our infantry in the upper-right section being in range of two rockets.  Our non-standard army makeup seems to be confusing the AI. The AA tank shoots down the empty copter and the tank goes after our infantry again, but that's about it down here. 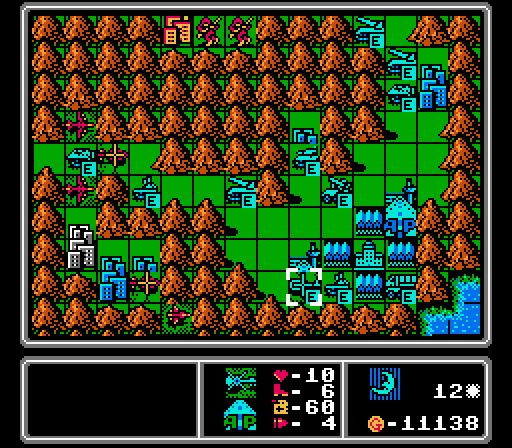 Just a new copter here. Turn 13 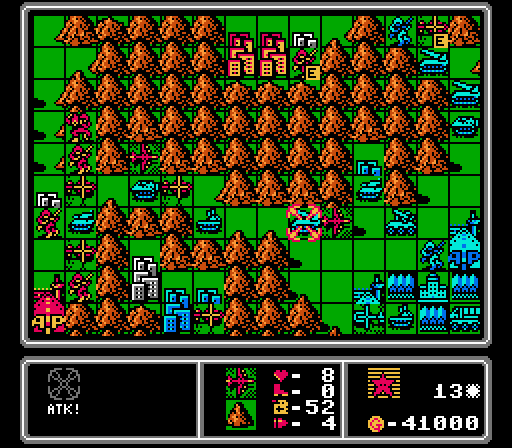 I'm still trying to capture that last city in the upper-right section, so we send a bomber in to try and limit the rocket damage.  I wanted to send the scout after the new copter, but it's out of ammo, so it heads back to the airport to re-arm. The only situation in which the challenge will allow retreat is to get more ammo to fight with I guess. 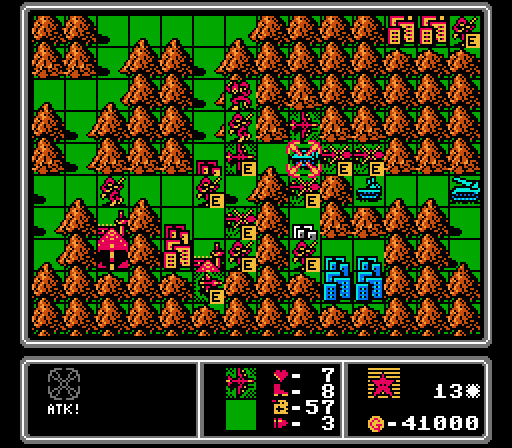 One bomber finishes off the tank, while another gets started on this APC. We finish capturing the central city and get started on the three-city pocket along the bottom of the map. 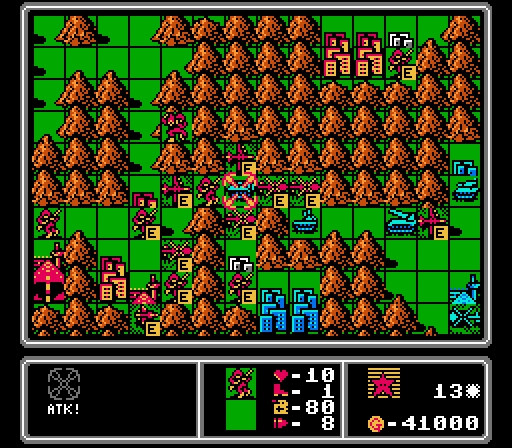 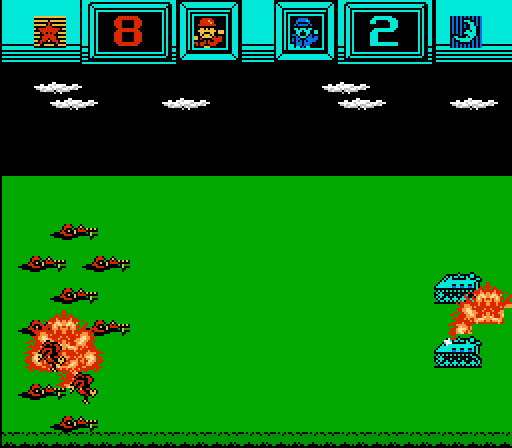 We have a fresh infantry that's in range of the APC so we're forced to attack. Luckily the APC got damaged enough by the bomber that it's an even fight. A lot of my movements on this map are geared towards making sure that units aren't forced to make sub-optimal attacks, but sometimes we get boxed into one anyway.  We've got enough cash saved up for two bombers this turn.   The AA tanks here take out one of our bombers, but we have plenty more on the way.  There are three rockets in range of our capturing infantry now, we're going to have to pull back until some bombers can get over there. 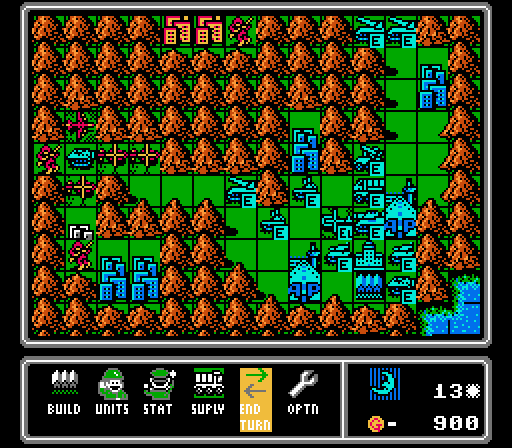 I get real excited when the AI builds a medium tank. That's a lot of funds not going to AA tanks. Turn 14  We actually ran one of the copters all the way out of fuel here. 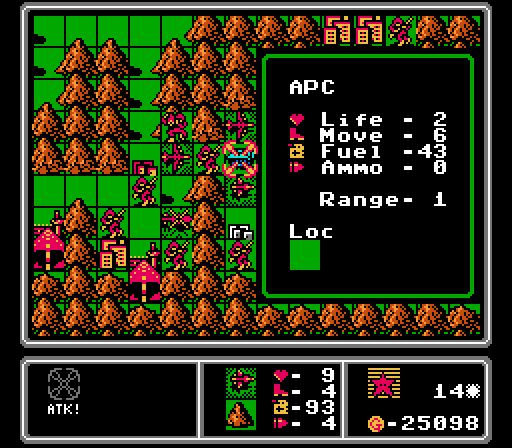 The re-armed scout can't reach the enemy copter, but it can finish off this APC. 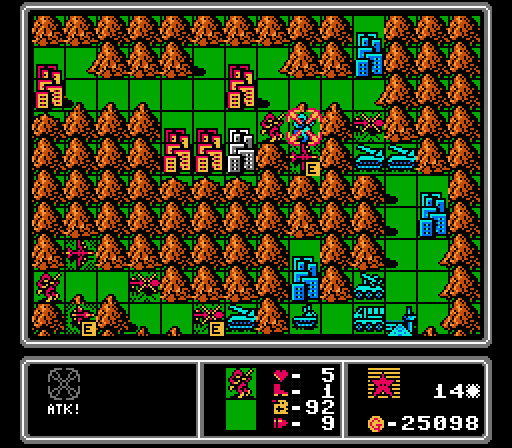 Our capturing infantry can't actually retreat due to the challenge, it's forced to attack this infantry. I sent the bomber in to get in some damage first though.  Slight mis-play again with the challenge here. This bomber is forced to move in to attack this rocket, even though it'll be in range of the AA missile. One less rocket around at least.  Our extra funds this turn go to another copter and infantry to try and get the rest of the upper-right section under control. 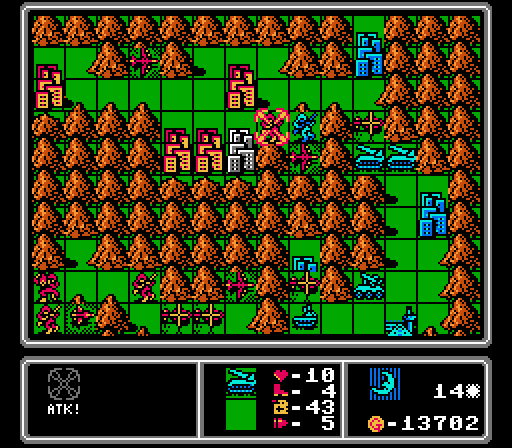 We need the new infantry because our old one is finally wiped out by these rockets.  Each bomber takes a hit but both survive. We do lose a copter to an AA tank, though. 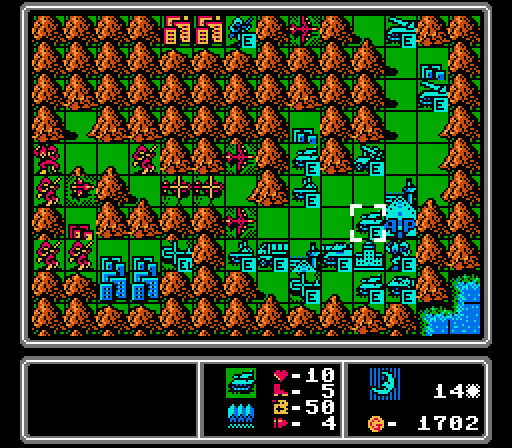 A copter, a mech, and a tank are built. Turn 15 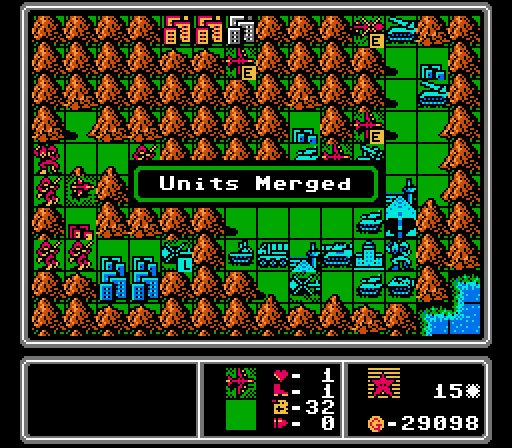 A new bomber flies in to take out the infantry along the top of the map. The others gang up on the AA missile. One of our damaged bombers was out of ammo so just merges in with the other. 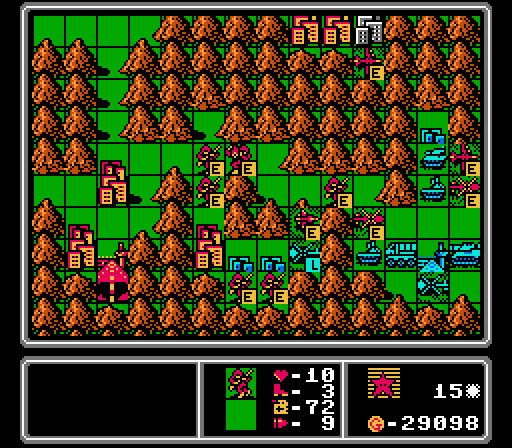 Approaching from the other side, the scout fires on the loaded copter to great effect. You can see we're starting to capture another couple of cities down here, too.  The enemy supply drops off some more missiles. There's actually a unique animation for it:  Normally there's a crate of ammo, but this time you just see a missile tossed over. 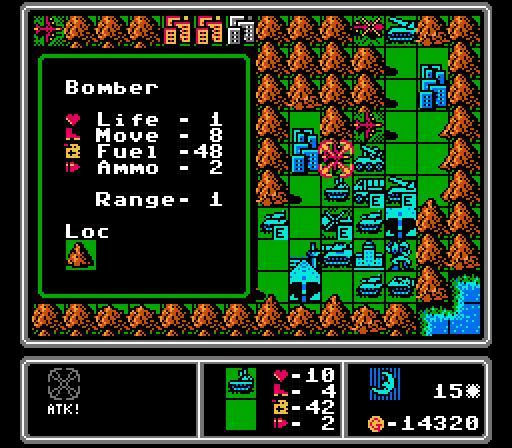 Anyway, the enemy copter finishes off our copter, which opens up space for this AA tank to finish off a bomber. 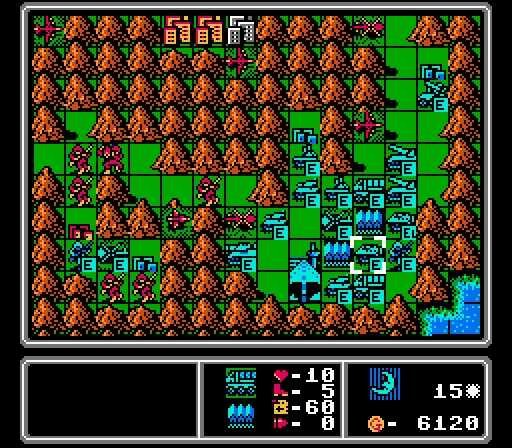 Building an APC, an infantry, and another supply is an interesting choice. I'm sure that supply will frustrate my efforts at finishing off this map later. Turn 16 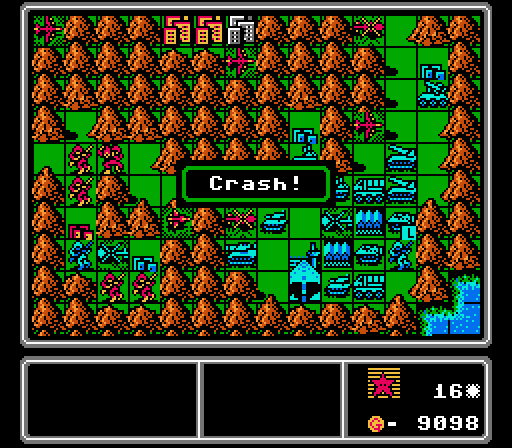 Another copter finally ran out of fuel. 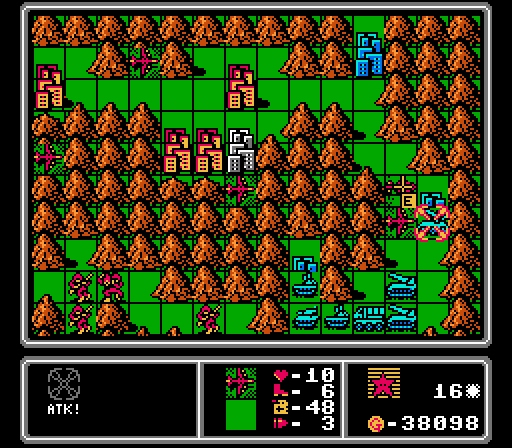 We get rid of this AA missile first, so the rest of our bombers can approach safely.  The scout finishes off this copter, leaving behind just a weakened infantry.   We once again have an infantry reach the front lines with no choice but to charge head-on into a tank, not even doing any damage.  We're really just mopping up now, but it'll still take awhile to dislodge all the beefy vehicles from the bases and HQ. 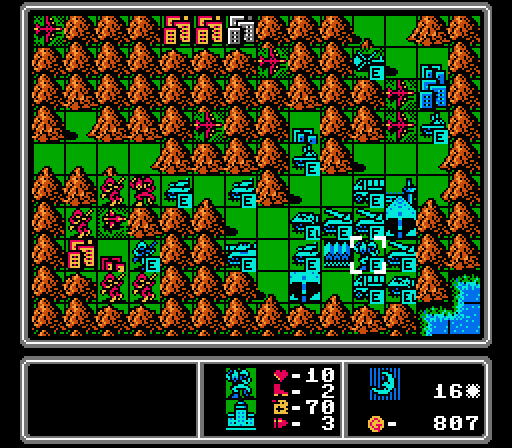 The enemy phase saw us lose an infantry and a copter, and a bomber took a hit from an AA tank, but that's about it. The AI builds yet another rocket, plus a mech. Turn 17 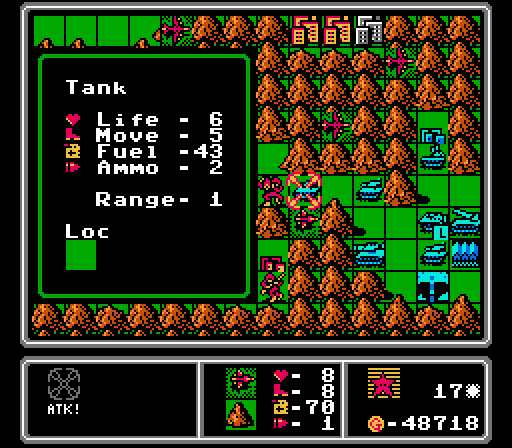 Our scout can't reach a soft target so has to go after this tank. Somehow the scout takes three damage; I guess that's normal but I wasn't expecting it.  The nearby mech also has to hit the tank; it actually does a little damage at least.  We've got bombers running amok at Blue's HQ now, finishing off a rocket and damaging a few tanks. 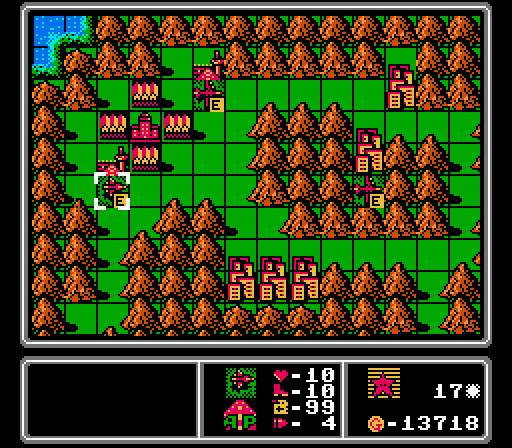 I'm worried about more copters showing up, so instead of a second bomber we get another scout.  The enemy phase is pretty light. We take another hit from an AA tank, and a couple of loaded APCs are making a run at the upper pass again. The AI builds another copter, so good thing we got that new scout. Turn 18  We start off with a mech and an infantry finishing off this damaged tank. 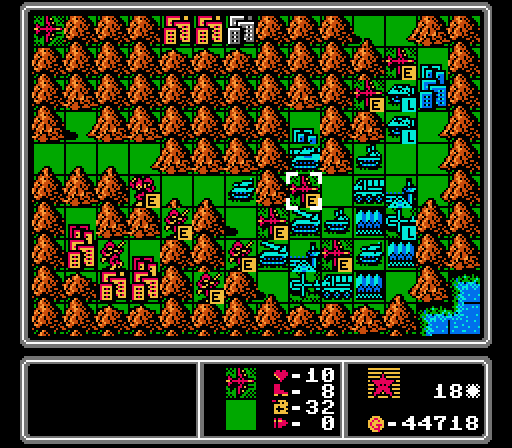 Our bombers block off the APCs and hit the nearby rockets. 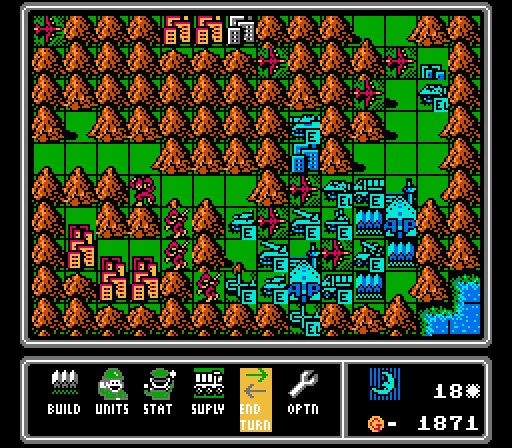 The enemy copters, rockets, and tanks all get distracted by our infantry. I guess we aren't likely to get an HQ capture here. Blue gets another AA missile that will have to go. Turn 19 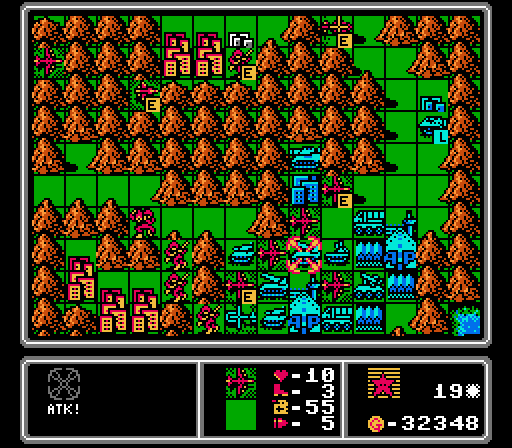 An APC goes down to a bomber, while the others continue to work over the rockets.  We have to send an infantry against a tank again, but at least this time we get to attack from the mountain. 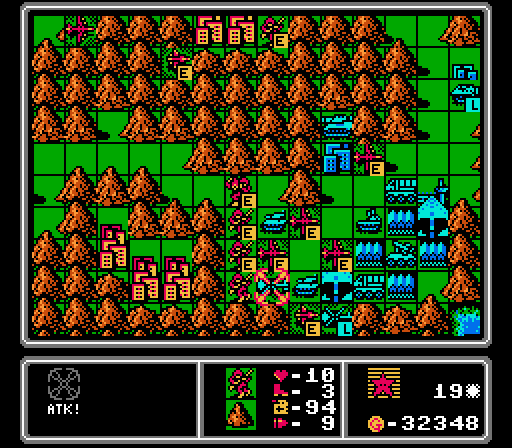 Another infantry attacks a copter from a mountiain, a surprisingly even battle.  I kind of forgot to keep our bombers out of missile range, but I'm not sure it would've been possible anyway. 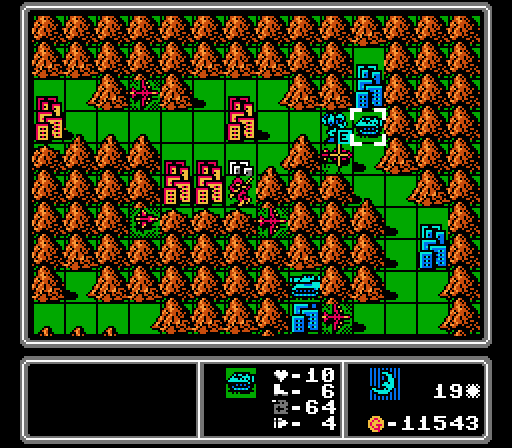 An APC sneaks up and drops off a mech, but we have plenty of firepower in the area this time. 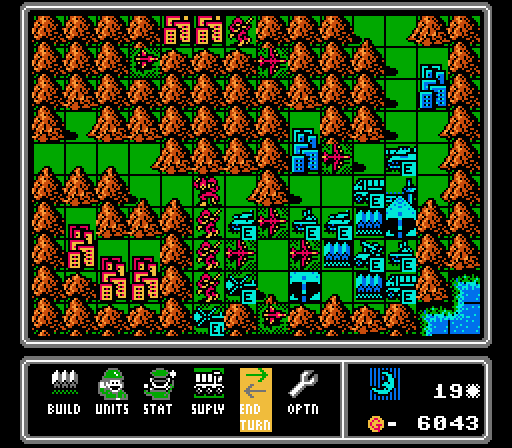 Ugh, another AA tank. Turn 20 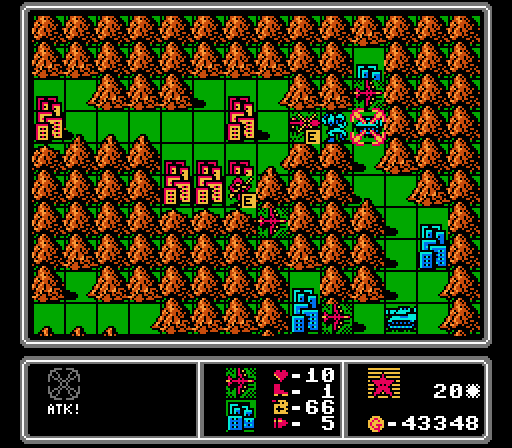 The last neutral city is finally captured, as a copter and bomber deal with the interlopers. 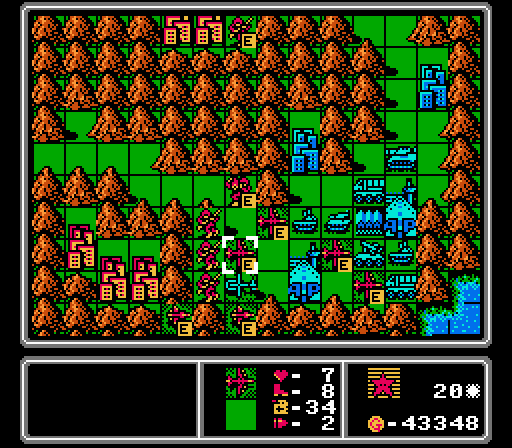 Our bombers are starting to run out of ammo, but they're able to take out a tank and damage the AA missile. The second scout arrives and finishes off a copter.  The AA tank comes off the base to target a bomber; that's a good trade for us. Throwing bombers at AA tanks that have high defensive bonuses isn't fun. 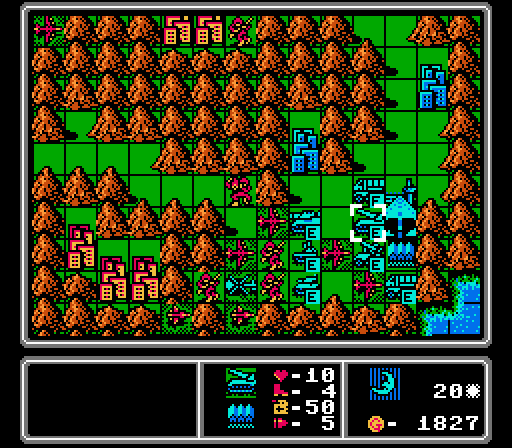 The AI builds a rocket, which is notably not an AA tank. Turn 21  The APC is already gone, and the enemy mech won't last much longer.  I thought this mech was going to have to attack the medium tank, but it's out of ammo. Our planes move in to block the enemy build points, clearing out the AA missile in the process. 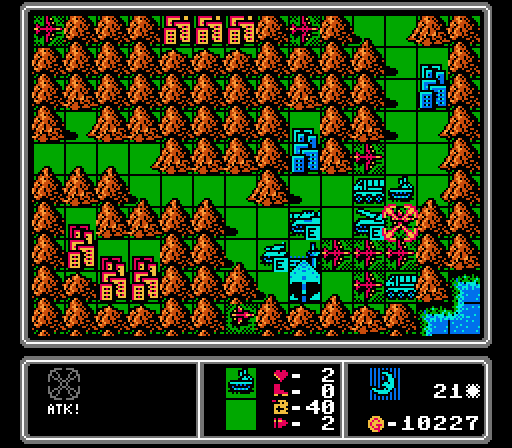 On the enemy phase our footsoldiers are wiped out, but this AA tank suicides on our scout of all things. 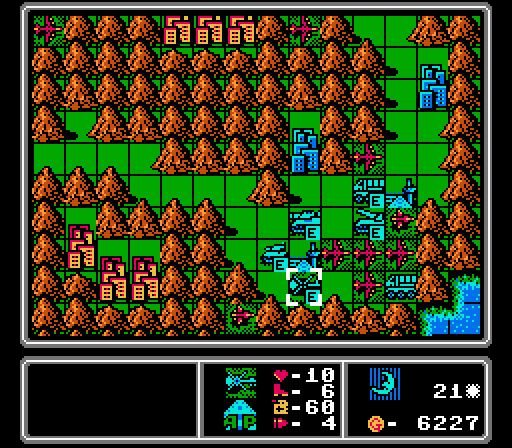 The only thing Blue can build is a copter, with every other build point blocked. Turn 22  The bombers remove the rocket and a supply, while the scouts can't quite finish off the new copter. The lone mech in the upper pass is killed off as well. 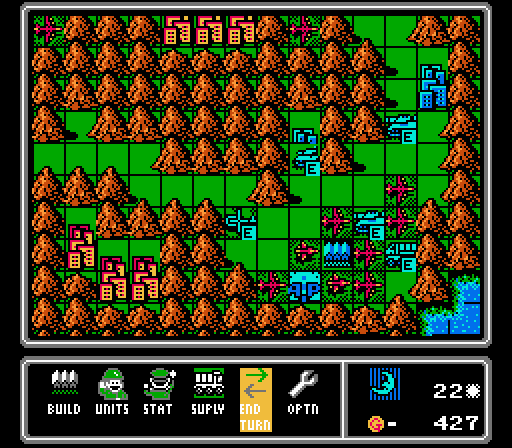 I had to leave the bases free, and luckily the AI just threw out a medium tank. Turn 23  Our scouts are both out of ammo. It's going to take a couple turns for them to re-arm and get back out to finish off the copter. 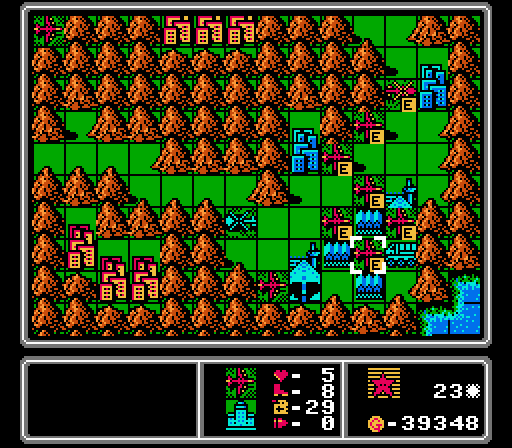 The bomber squad is able to take out both medium tanks and the tank, leaving just the supply and the copter. 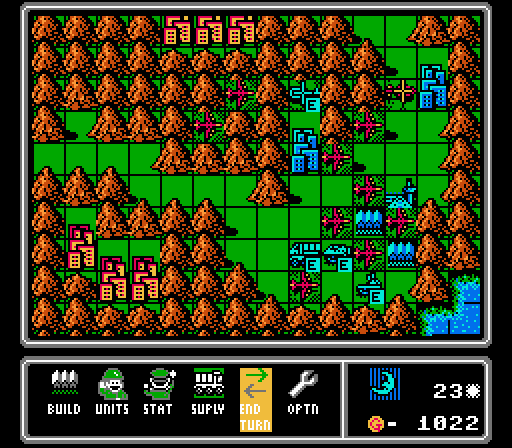 We're going to be slowed down by chasing down that last copter anyway, so a new AA tank doesn't even phase me. Turn 24 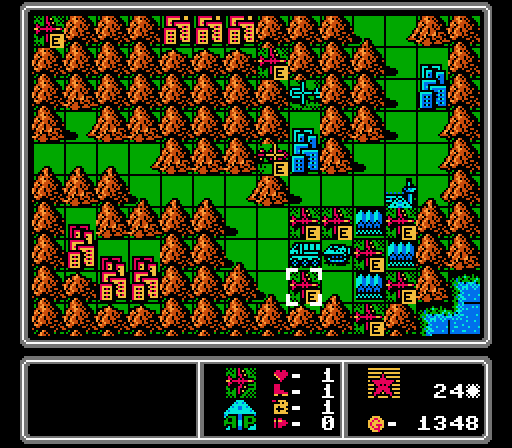 We get rid of the AA tank but not much else. Look at how far down we've run this bomber - no ammo, one fuel, one life.  Yeah that's another AA tank. Turn 25  The enemy copter made its way up to our infantry, who had just finished capturing this city. The infantry is able to heal up and hit back, downing the copter.  The enemy units are soaking up so many hits on the bases that we're running out of ammo faster than we can get reinforcements in to finish the job.  Our re-armed scouts no longer have a target with the copter down, but this one is able to finish off the supply. We're at the end of the map and there's just a mech left this time.  Thankfully, the AI just puts out an AA missile. We're actually better able to handle fewer more expensive targets at this point, due to how much ammo we're using up. Turn 26 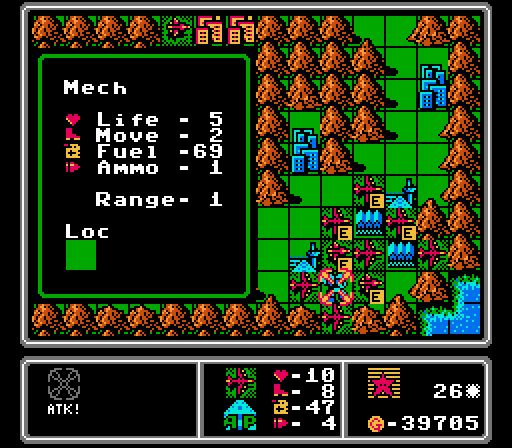 Three bombers take out the AA missile, while two scouts and another bomber are able to finish off the mech, mercifully ending the map. 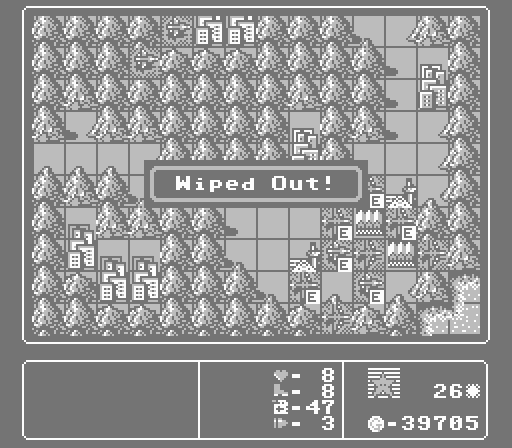  Hurrah! 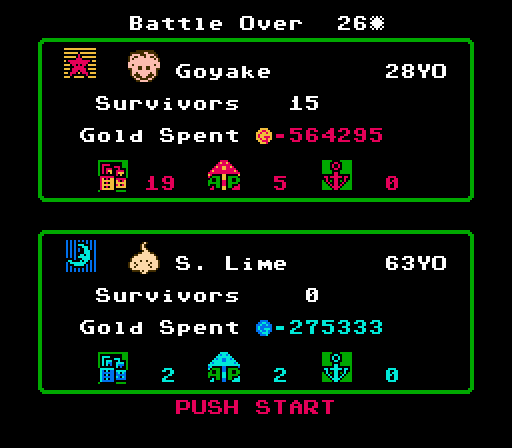 Not sure what Goyake is, but the enemy CO was apparently a slime. 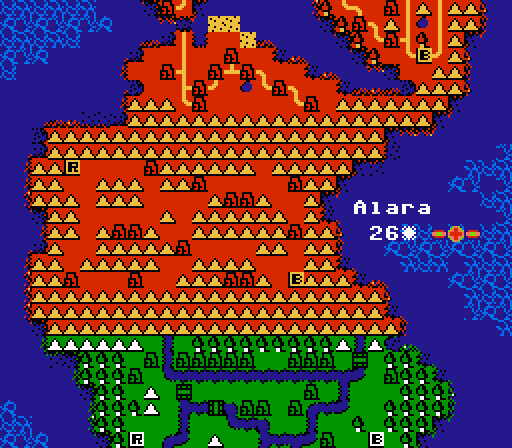 Finishing in 26 turns is a bit worse than average, but we definitely had some issues with the challenge forcing sub-optimal moves at times. Still, the outcome was never really in doubt.  Next up we have Lost. It's not immediately clear, but the rivers actually don't include a ground path from one HQ to the other. So ground vehicles will be at a disadvantage once again. I'll throw out two challenge options again, this time a pair that are diametrically opposed to each other:
Vote for the challenge in the linked poll here.
|
|
#
?
Dec 4, 2021 23:47
|
|
|
I guess it isn't an RPG without a Slime. More Advance Wars could use slime COs, really.
|
|
#
?
Dec 5, 2021 02:03
|
|
|
That is super lime erasure
|
|
#
?
Dec 5, 2021 02:14
|
|
|
That was a pretty brutal grind! I have no idea what Goyake could mean, maybe something will come to me later but right now I'm equally "what" about it.
|
|
#
?
Dec 5, 2021 16:35
|
|


|
Southern limes just have that extra bit of tartness to them. Also unsure if it's been said but I recognize a lot of these maps from the War Room in future titles and seeing them here under different rules is one of the most interesting bits of this LP to me.
|
|
#
?
Dec 6, 2021 07:01
|
|
|
MR. J posted:Also unsure if it's been said but I recognize a lot of these maps from the War Room in future titles and seeing them here under different rules is one of the most interesting bits of this LP to me. The War Room actually got a number of its maps from the new maps introduced in Super Famicom Wars. All of the original game's maps are present in the "Classic" folder, however.
|
|
#
?
Dec 6, 2021 08:56
|
|
|
Part 28: Unit Overview: Anti-Air Tank  Basic Info: pre:Cost 5500 G Movement 5 Move Type Vehicle Fuel 50 Ammo 4 Ammo Cost 3 G Range 1 Special None pre:Opposing Unit Damage Dealt Damage Taken Infantry N/A 1.5 Mech N/A 4.5 Medium Tank N/A 7.5 Tank N/A 7.5 APC N/A 4.5 Rocket N/A 6.5 Artillery N/A 6.5 Supply N/A N/A AA Missile N/A N/A AA Tank N/A N/A Fighter 6.5 1.5 Scout 7.5 1.5 Bomber 6.5 6.5 Copter 7.5 1.5 Battleship N/A 9.5 Lander N/A 2.5 The Anti-Air (AA) Tank is a cheap and annoying plane-killer. They're heavily vulnerable to ground vehicles and battleships (against whom they can't even fight back) but are very difficult to remove effectively otherwise. So on maps where ground vehicles can't cross to the enemy HQ, and battleships aren't available, your only option for going after an AA tank is a bomber, which costs almost four times as much and is at best an even fight on neutral ground. On the off chance you're fighting a defensive battle against enemy air units, they're great on your side, but how often does that happen in this game? Otherwise they can't attack ground or naval units at all here, so have limited utility.
|
|
#
?
Dec 12, 2021 07:35
|
|
|
 Well I will do my best with this one. No flood of infantry and copters I suppose.
|
|
#
?
Dec 12, 2021 07:38
|
|
|
Part 29: Lost (1 of 2)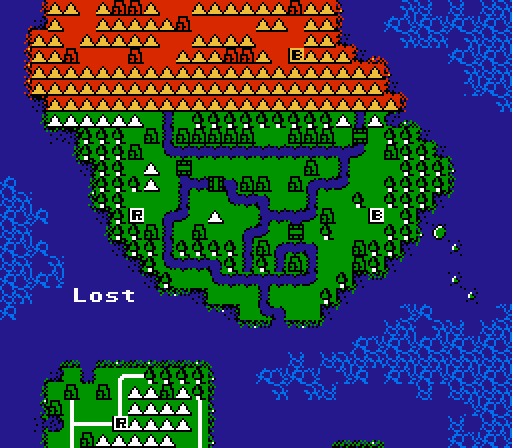 Time to conquer the peninsula of Lost. Let's see what we're dealing with here. 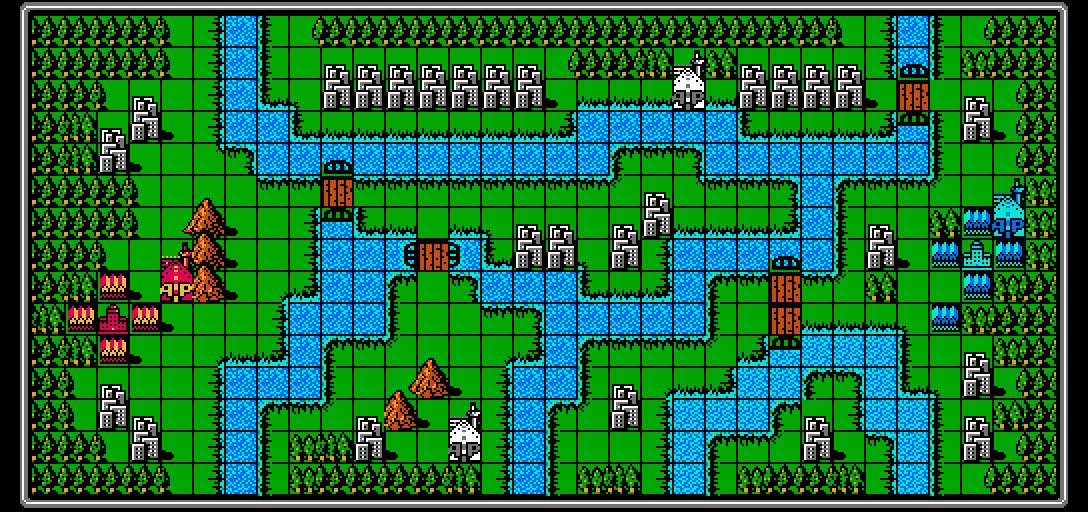 Okay, where to start here. Blue has a bit of an advantage, starting with an extra base and with more neutral cities accessible by land. Luckily bases aren't actually worth any income or we'd be looking at a cash flow disadvantage to start the map, too. Anyway, the key to this map is, as usual, getting to the neutral airports first and then spreading out to capture neutral cities from there. In particular the cluster of seven cities at the top of the map will be important for us to grab first. Our challenge today is Fair Play, suggested by MagusofStars. In order to be fair to our overmatched opponent, we will not be building any units unless Blue currently has more units on the field. We'll exclude the first turn from that rule, and we'll consider the challenge complete once we reach the enemy HQ (since at that point the outcome isn't really in doubt, but the challenge would just drag the end out unnecessarily). Turn 1  We start off with a couple of infantry and a copter. We'll be making a break for the most distant airport.  I was hoping Blue would build a bunch of infantry so we could put some more units out there ourselves next turn, but no such luck. Turn 2  Anyway we're stuck not building anything this turn, and I'm already not liking this challenge.  It's weird rooting for the AI to build more units. Turn 3  Anyway we're able to capture our first city, and our first copter is on its way to one of the neutral airports. We're able to build a couple more units this turn, and I opt for another copter and infantry pair. 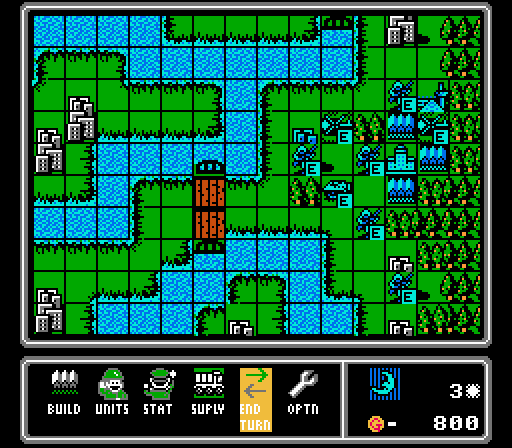 Blue likewise captures a city, and I'm happy to see three more units built by the AI this turn. Turn 4  You can still see almost everything we have on one screen. I'm building mechs instead of infantry now, in the hopes that they'll be a little more useful in between captures.  The enemy is starting to spread out now, with a second city captured and another on the way. For some reason though, none of the enemy copters or APCs have been loaded up with infantry here. Turn 5 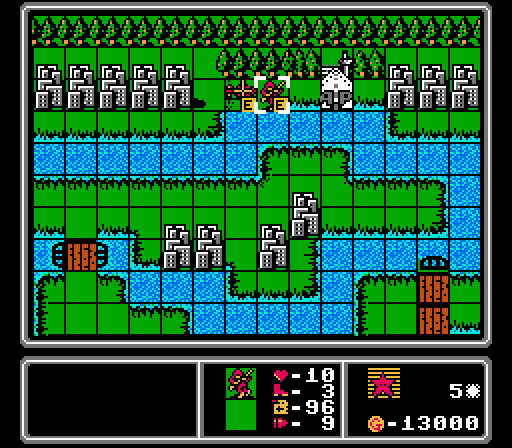 We'll start capturing this airport next turn, hopefully before any enemy units arrive. 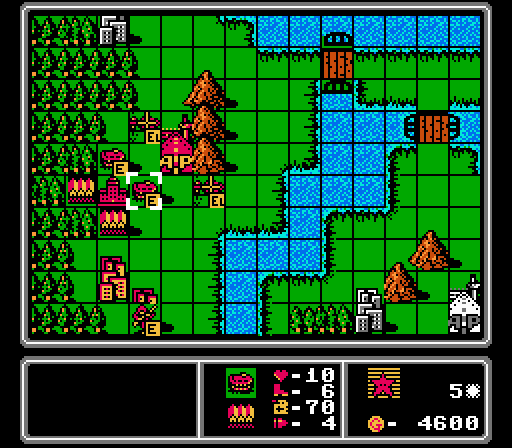 We have room to build another couple of units, so this time we have two APCs. They can cross the rivers so I'm thinking they'll be helpful in keeping the enemy infantry in check. 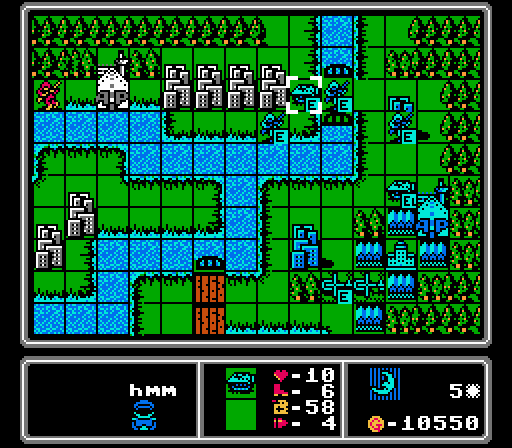 Blue makes its way towards the upper island. That APC is going to be trouble. 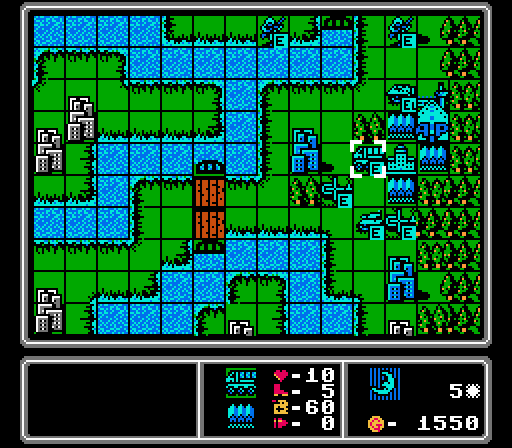 Another couple more enemy units. By all means build more supply trucks. Turn 6 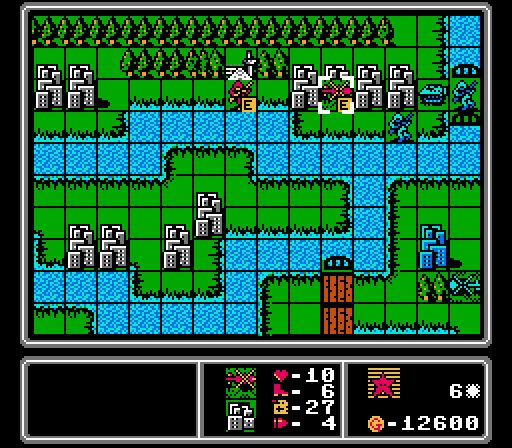 We start capturing the airport, and then position the copter to keep the APC away for one more turn. 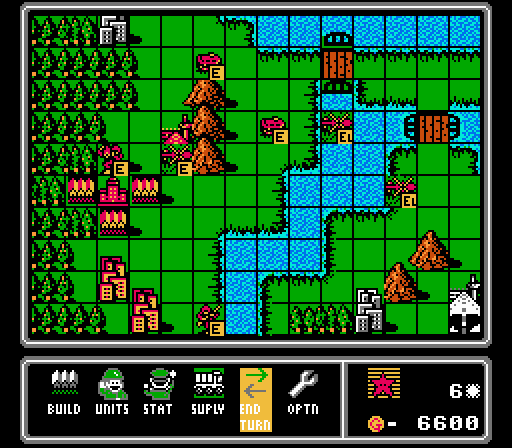 Another copter and mech for us, as our other units slowly make their way forward.  Blue has all four of the cities in its starting area now. These infantry will make their way over the river to grab another city soon, too.  I'm not going to be able to stop Blue from taking these four cities on the upper island, but I'm hoping to be able to at least slow them down while also protecting the airport. 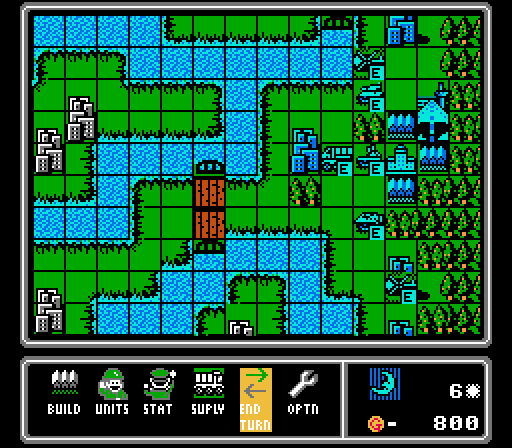 Our opponent is already putting out AA tanks, which is just rude considering I only have a few copters out there. Turn 7 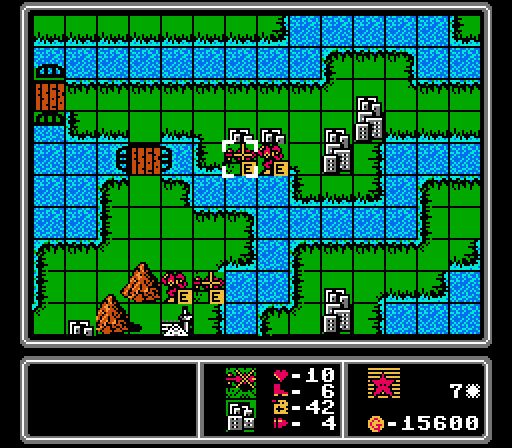 Two mechs are dropped off, one near the second neutral airport and one in the center of the map at another city cluster. 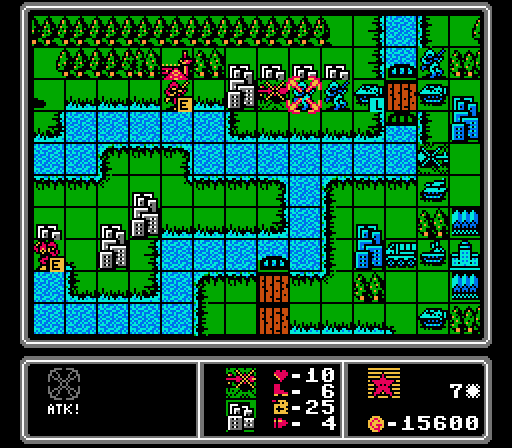 We take the first neutral airport, and our copter gets in some chip damage on this capturing infantry to delay it by a turn. 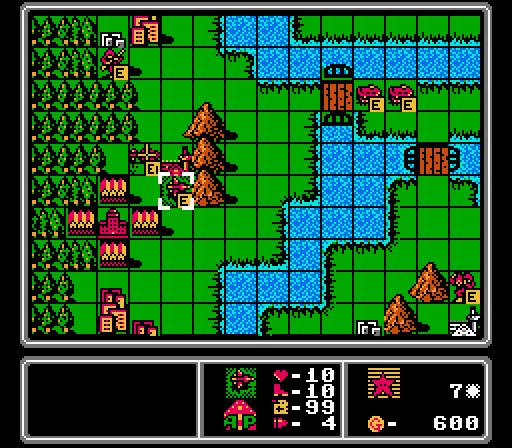 We're allowed to build two units at the moment, but instead we put out a scout to harass the enemy copters.  The lower part of the map is pretty calm since there aren't nearly as many cities down there.  The upper island, on the other hand, is getting rather crowded. Blue ends up not building anything this turn, probably saving up for something more expensive. Bad luck for us. Turn 8 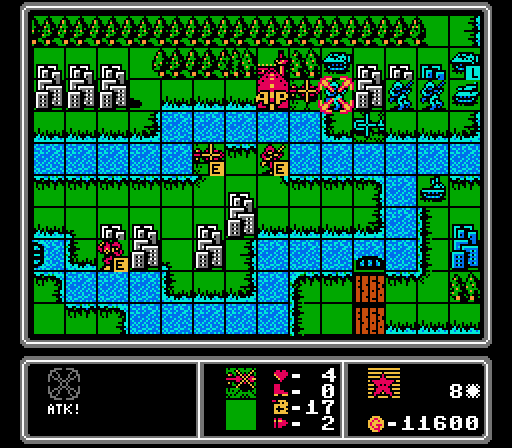 Time for a fighting retreat at the upper islands. The copter covers and chips away at a capturing infantry, while our own infantry hustles back across the river.  Meanwhile, we start some captures on the lower islands. 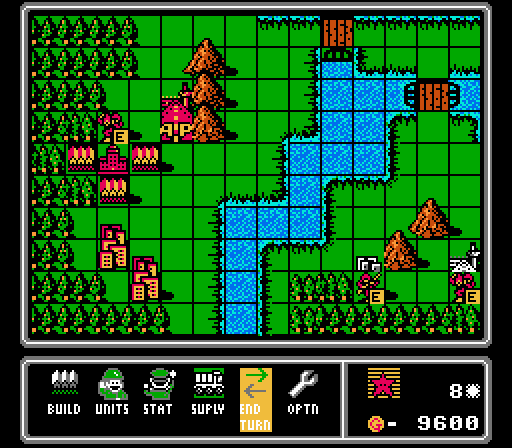 We still have room to build one more unit, so I put out a mech in hopes of loading it into a copter next turn. Offscreen at the top, our infantry finally captures the fourth and final city from our starting area.  Starting to look a little bleak on the upper island.  Blue builds two more units, including the first medium tank of the map. Turn 9 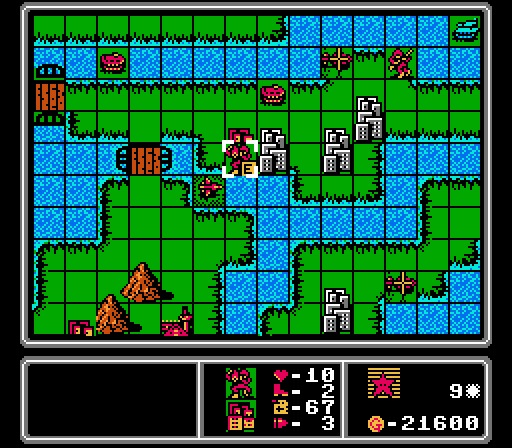 We keep up the capturing pressure, getting two cities and the last airport here. 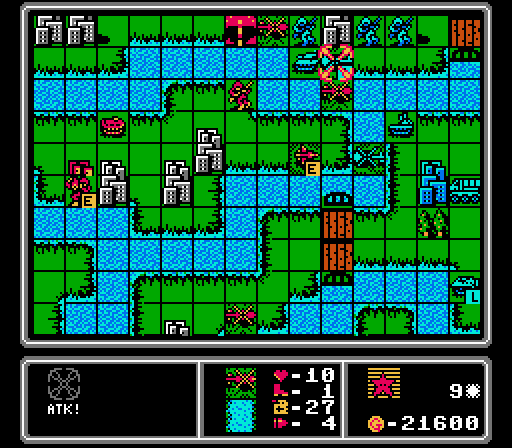 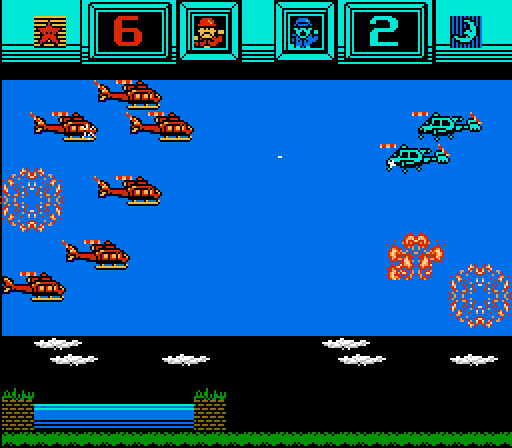 A fresh copter arrives to attack the enemy copter and its passenger. 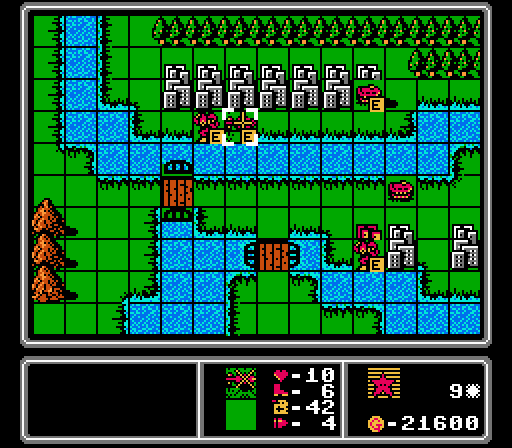 Our APCs start crossing the river to provide some support, as a fresh mech gets dropped off to start on this city cluster.  We only have one airport we can use to build air units, so instead of a copter, the mech gets into an APC. That choice leaves the airport free to build another scout.  We've got a damaged copter protecting the airport, but Blue is just going to go right around it. 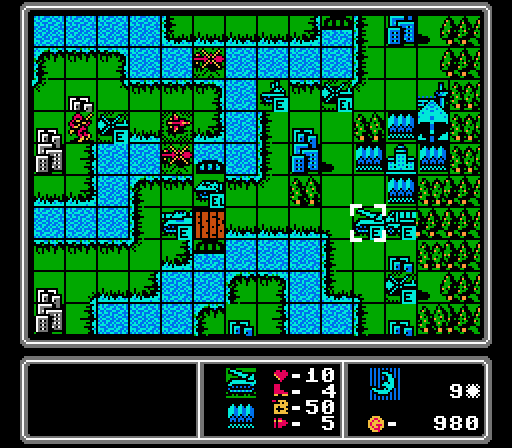 The rocket built here could be annoying since it can reach any of the islands. Turn 10 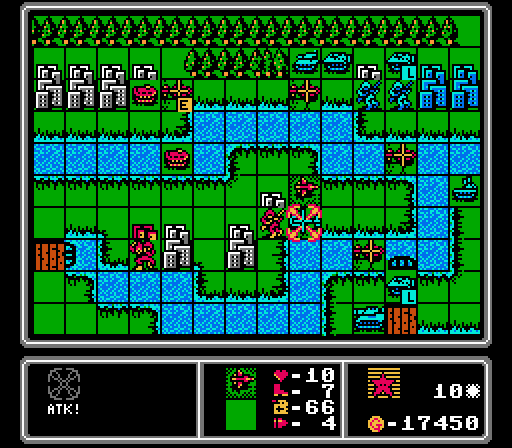 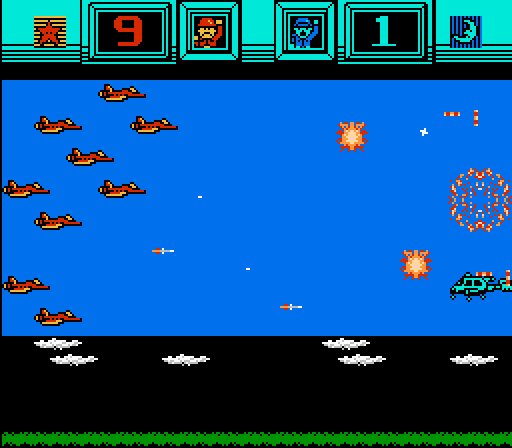 Our scout attacks this copter, who had the nerve to take some life from our capturing infantry. I could finish off this copter with one of our own copters, but given the challenge, I'm better off leaving damaged enemy units around so that we can keep building more ourselves.  Instead our copters are going to try and just get in the way at the upper island. 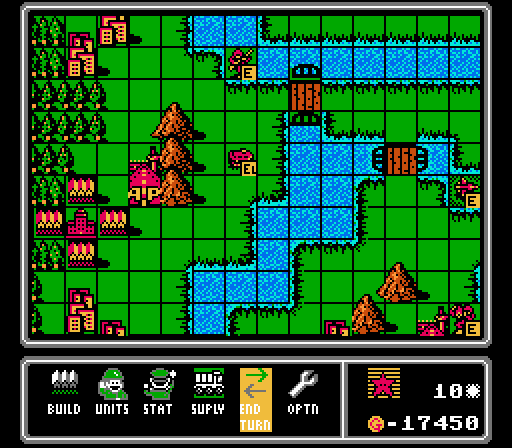 I could build another scout here, but we really need to start getting some bombers out there so instead we save up for next turn.  The enemy tank is trouble for our APCs, but at least the other units all retreated. 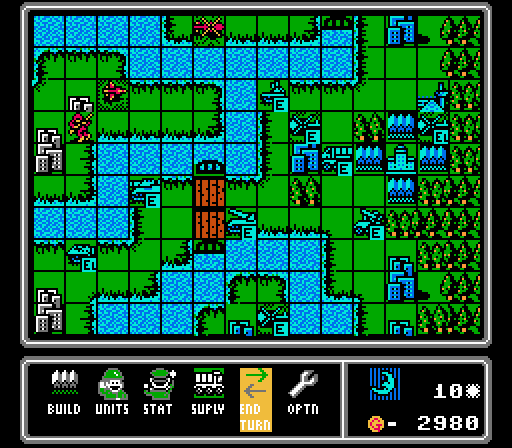 A new AA missile and not much else going on elsewhere on the map. Turn 11 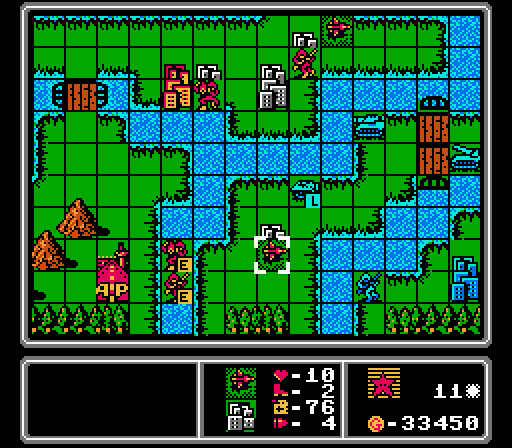 We park a scout on this neutral city to keep Blue from grabbing it with whatever's in that APC.  Meanwhile we finish off three more city captures, including one off-screen in the upper-left cluster. 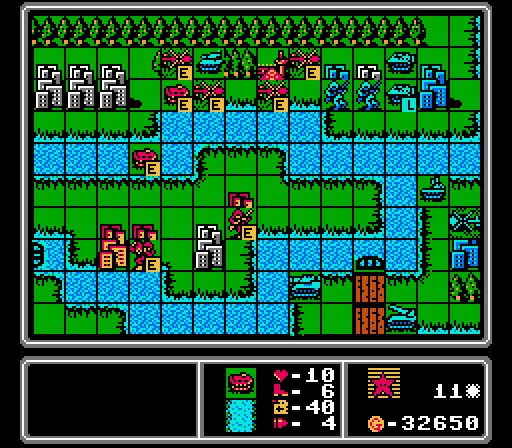 The upper island is still a mess, with our copters still trying to keep the enemy tank away from the neutral cities and everyone else away from our airport.  We finally get a bomber out, and with the leftover cash I get an AA missile. I figure it'll at least be a copter-deterrent.  The lower part of the map is still mostly quiet. An enemy infantry gets into a copter right in front of my hungry scouts. There's a medium tank and a rocket just kind of sitting threateningly in the middle but they can't do much since they're stuck on the starting island.  The upper island is at kind of a stalemate, too. I'm okay with that condition - I just want to buy time until we get more of the neutral cities captured, anyway.  Wait, what the gently caress?!?! Medium tanks can cross rivers?! poo poo poo poo poo poo I have nothing over there to stop it. I've just been ignoring it since it can't touch us.   Turn 12 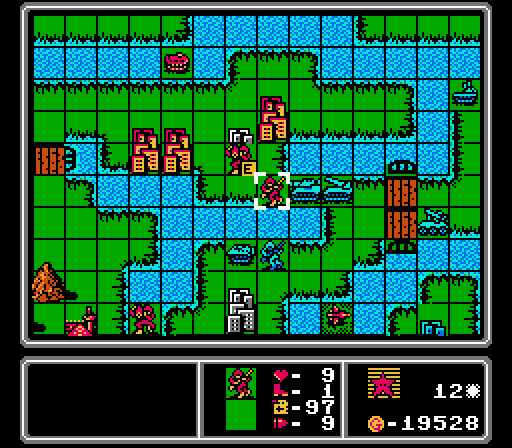 To stall, I shove this infantry in front of the medium tank to keep it from completing the crossing this turn. Here's what I think is going on here. Rivers must cost six movement for vehicle movement types. Only APCs and medium tanks have six movement, so they're the only vehicles able to cross rivers (and it takes all of their movement to do so). Not a great surprise but it could've come at a worse time I suppose. 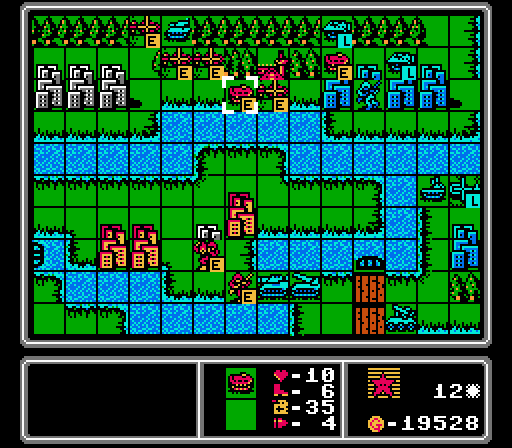 At the upper island, our copters continue to hem in the tank, and our APCs slip by and get in a shot on an enemy APC and its passenger. 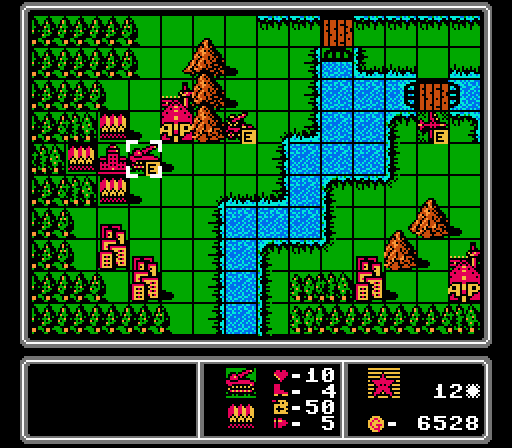 We throw out a rocket to help control the center of the map.  Lots to unpack here. The rocket hits our capturing mech but only takes off a couple of life. The medium tank tears into our infantry, and then an enemy infantry also crosses the river to grab the kill. Down on the lower island an APC circles around to make our mech bleed. Meanwhile a copter moves in and drops off another infantry, but both are already heavily damaged from a scout attack earlier in the turn.  Well, gently caress. An enemy fighter has taken the field, right as our bomber is about to make a difference. Oh and a copter dropped off another infantry on our central island. We're in a bit of scramble now, are we going to be able to hold on and get to the enemy HQ? To Be Continued...
|
|
#
?
Dec 20, 2021 01:00
|
|
|
Honestly at this point I have to wonder if these challenges are making the game any more fun to you or just more painful.
|
|
#
?
Dec 20, 2021 15:09
|
|
|
Blaze Dragon posted:Honestly at this point I have to wonder if these challenges are making the game any more fun to you or just more painful. Eh this one isn't too bad yet, and keeps me actually thinking while playing. It slowed us down a bit at the beginning for the capture race but we still came out well ahead. We're still spending all our money every turn at this point. It'll hurt more later as I debate just sacrificing a unit to sit on the HQ and end the challenge or not.
|
|
#
?
Dec 20, 2021 16:02
|
|
|
Part 30: Lost (2 of 2) Turn 13 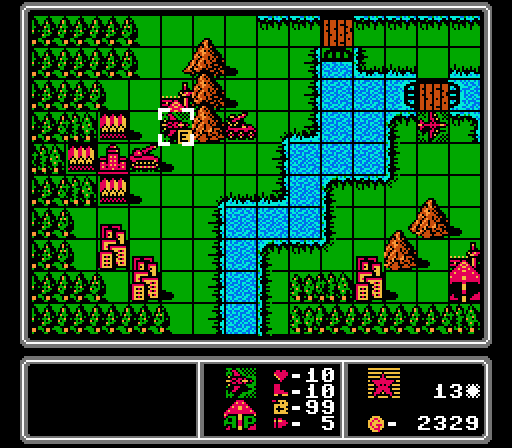 Okay, we last left off with an enemy medium tank crossing the river to invade our island and an enemy fighter about to tear up our air units. So the first course of action here is to get a fighter of our own.  We've been quietly working on capturing this cluster of seven cities, and get two more of them this turn. 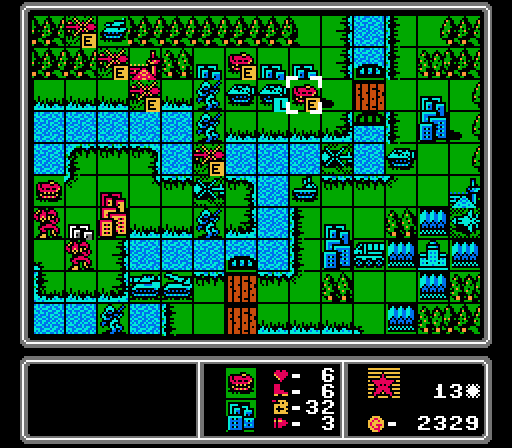 Our copters keep forcing the enemy tank back. One of the copters blocks the river to keep more infantry from crossing. Meanwhile our APCs are causing some trouble but not really able to do a whole lot.   This attack has the triple benefit of shredding the enemy infantry, keeping the enemy medium tank from crossing for another turn, and showing off what an attack screen on a river looks like. 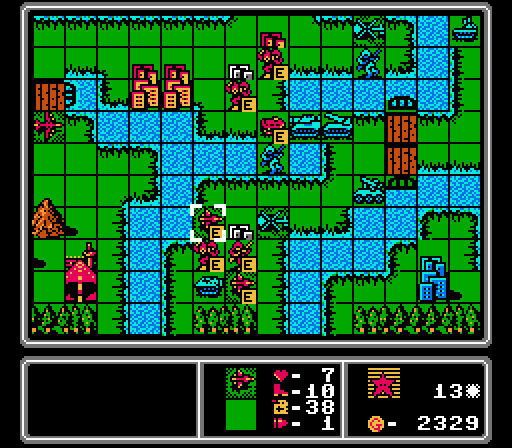 On the lower island, one of our scouts finishes off the enemy infantry, while the other teams up with the mech to keep the enemy APC from getting to our capturing infantry. You can also see our bomber about to be able to help us out, but I can't get too close or it'll just get shot down by the enemy fighter. 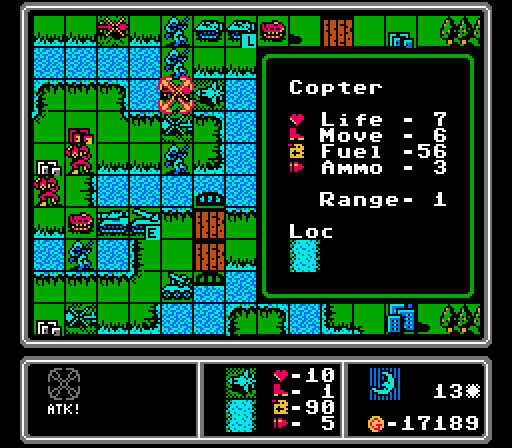 The enemy fighter is able to rather easily shoot down one of our copters instead.  The enemy tank keeps getting pushed back, while the other enemy units keep pushing across the river.  Down on the lower front, the medium tank hits the APC but can't quite destroy it. Our capturing mech takes another hit from the rocket, while down at the bottom the enemy APC takes out our mech as most of the other units retreat. The AA missile is now positioned to protect the medium tank and rocket from our bomber.  Blue gets a new copter, but also merges two other copters together, so no net gain. We did lose a couple units in combat lately though, so we can replace those. As a reminder, our challenge for this map only allows us to build units if the enemy currently has more units in the field than we do, though the challenge ends once we reach the enemy HQ. Turn 14  We start off with two more city captures. The only remaining neutral cities are part of the seven-city cluster on the upper island, and we're well on our way to grabbing those as well.  Our copters weaken the nearby infantry. I sent one damaged APC deep into enemy territory as a distraction, with the other blowing itself up on a loaded APC. My goal here was to make sure no full-life infantry were around to get in a quick capture on us. Down on the central island, a mech takes up position blocking the medium tank.  Time for another bomber.  Our mechs and infantry each take an attack, but all three survive another turn. 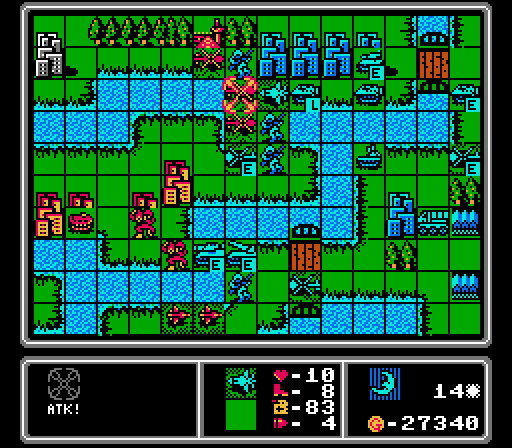 We do lose another copter to the enemy fighter, however. 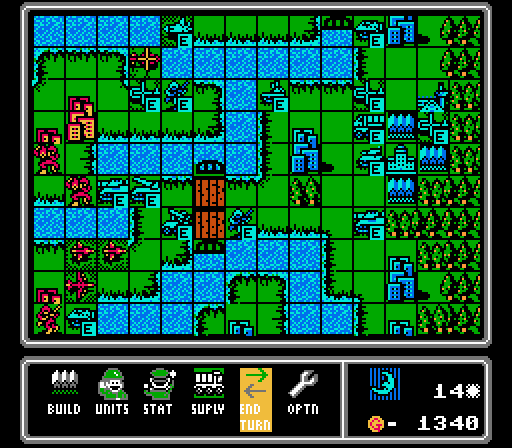 Three new enemy units - a copter, a tank, and a medium tank. Turn 15  Our bomber finishes off the medium tank, our remaining copters get in some shots on an enemy copter and infantry, and we send a scout up to the captured airport for refueling. I was trying to protect our bomber from the enemy fighter, but the enemy AA missile messed up my positioning. 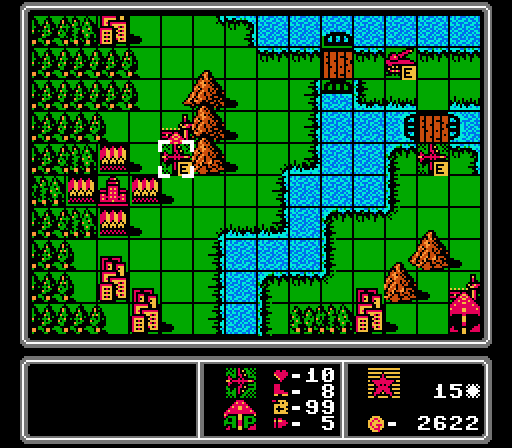 I briefly debate about getting a second fighter to really control the skies, but settle on an extra bomber instead.  I totally missed that one of our copters was in missile range and it goes down. The enemy fighter then handily shoots down our bomber. Rough turn.  The middle is getting quite congested now, with a new medium tank arriving on the scene. Blue also builds a second rocket, keeping up the pressure on us. Turn 16  I don't have to worry too much about the challenge at the moment; we're heavily outnumbered now. In fact, maybe I should start fully destroying some enemy units to make some room.  Anyway, our fighter attacks the enemy fighter, and one of our mechs joins in for some chip damage. Our scout then hits the AA missile for a lack of other worthy targets.  With the enemy fighter somewhat neutralized, let's keep going with the bombers.  The upper island is getting away from me again. Also an enemy copter flew down to the central island and wiped out our mech.  Some of the damaged enemy units retreat, giving us some breathing room. Blue doesn't build anything, saving up funds for next turn, but we're still well behind on unit count anyway. Turn 17  The last neutral city is captured. Elsewhere in this image, we have a copter attack an infantry, a scout attack a copter, and an APC attack an infantry. Then our fighter heads for the captured airport for repairs.  The enemy medium tank is headed for our exposed infantry on the lower island, but we have enough bombers in the area to handle it. One of those bombers hit the nearby rocket as well.  More bombers! 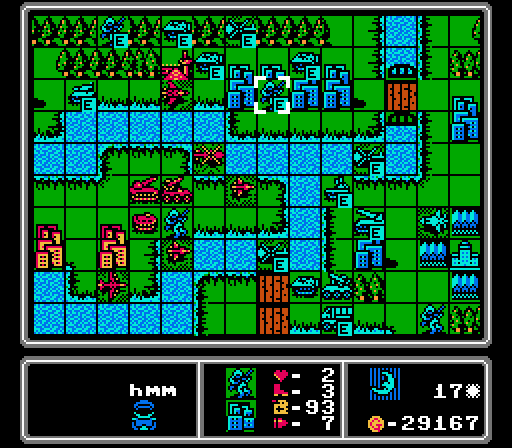 The tank has made it through the woods on the upper island, but we've already finished capturing everything so it's too late.  As the enemy fighter blocks the airport, Blue puts out a medium tank and an AA missile with its extra funds this turn. Turn 18 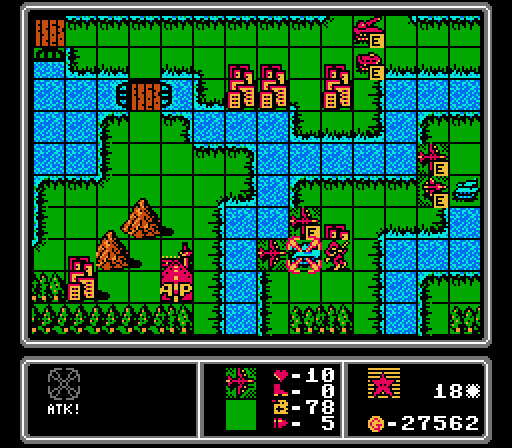 The bombers finally make a difference, taking out a rocket and a medium tank here. 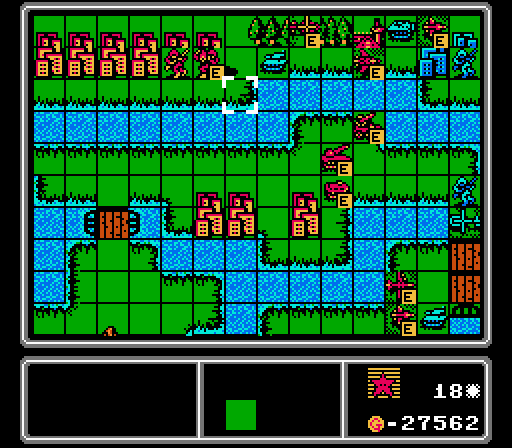 Our rocket also finally takes its first shot, weakening the enemy tank. Elsewhere on the upper island, a scout attacks a copter and a copter attacks an infantry.  We've got a solid bomber crew now, so I get a medium tank this turn, now that I know they can cross rivers so aren't totally useless on this map.  The enemy tank gets to our infantry before it can escape across the river, and the enemy copters merge together, but not much else happens this turn. 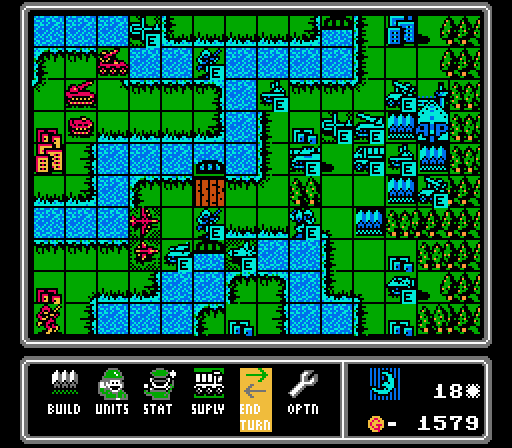 There's a new AA tank, but more importantly the enemy fighter is back in the fray after just one turn of repairs. Turn 19 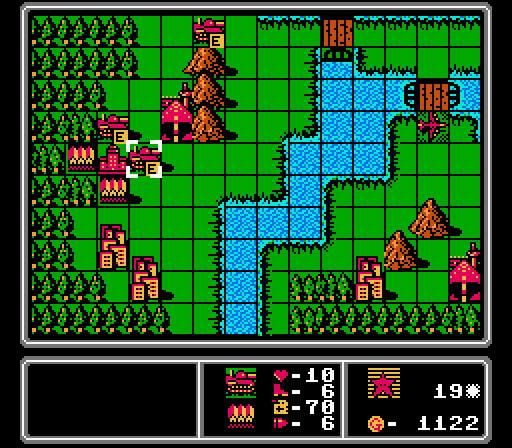 Sometimes I'll build units at the start of the turn, in case we kill some enemy units and leave ourselves no longer outnumbered and unable to build. Anyway I think a new pair of medium tanks will do just nicely here. 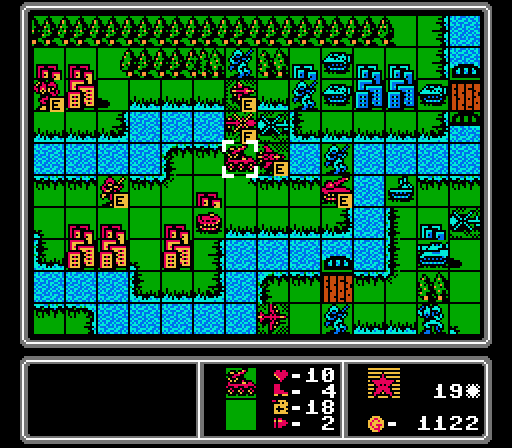 Our mech finishes off the intruding tank, and our fighter hits the enemy copter and tries to get close enough to reach the enemy fighter next turn. 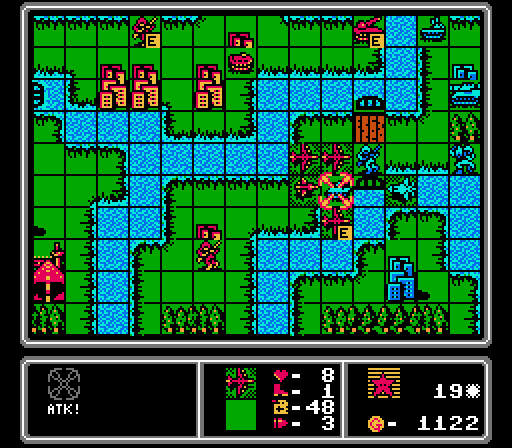 I figure the enemy fighter can only attack once, and recklessly move in our bombers to also finish off this tank.  Annoyingly the enemy fighter destroys our damaged bomber in one shot here.  Blue merges together several units and overall retreats, leaving the central island clear of enemy units. 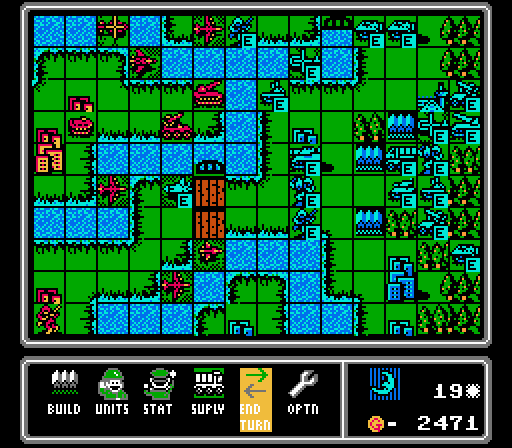 The AI then builds three more cheaper units - a copter, a mech, and a tank. Win for us. Turn 20 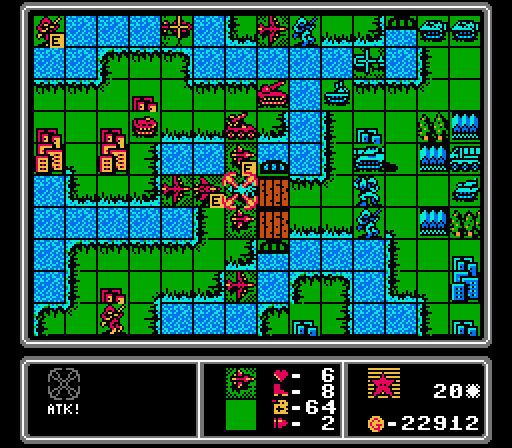 I was sick of this enemy fighter at this point so ganged up on it with our fighter and then two scouts, but still couldn't finish it off. 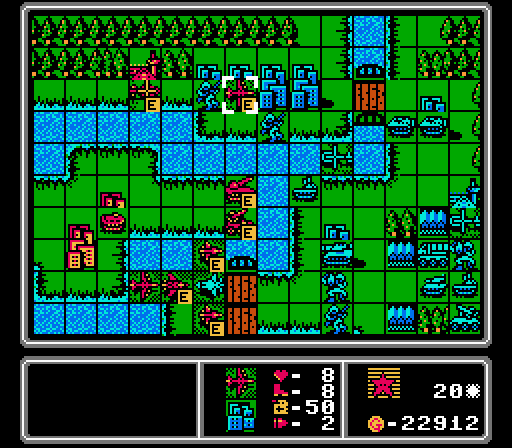 Our rocket and a bomber finish off an enemy APC, while a copter keeps the airport protected.  I get a little over-excited and move two of our bombers up, one of which is now exposed to an enemy AA tank. Off-screen, we purchase another bomber for reinforcements. 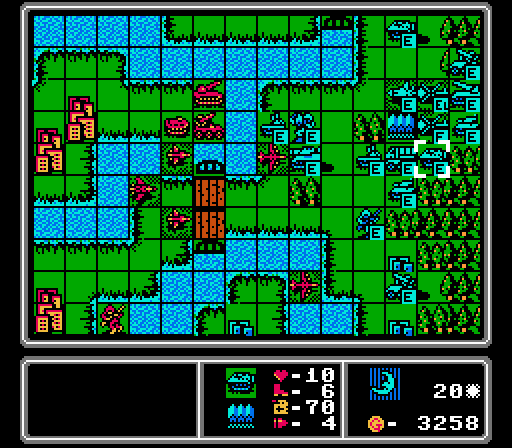 Blue's rocket and AA missiles retreat from our bombers, then the AI builds another tank and APC. Turn 21  The upper island is looking a lot better after a bomber finishes off an APC and a copter finishes off an infantry. Our fighter retreats for repairs again, trying to stay ahead of the enemy fighter. The enemy AA tank did attack our bomber last turn, but that left it exposed to our rocket, which gets the kill here.  I finally realized that our rocket and AA missile have no way to supply so push out a supply truck in addition to another bomber. 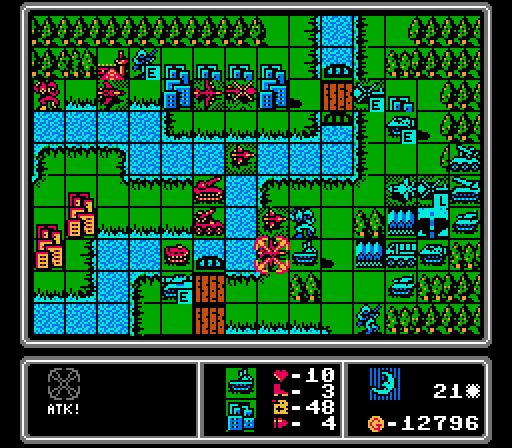 I thought our bomber would be safe here, but the medium tank moved out of the way and attacked our APC. That left this city open for the AA tank to shoot down our bomber. 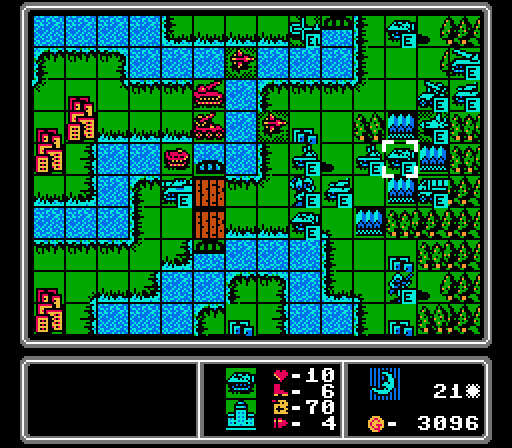 An APC, and another AA tank. Luckily I'm not dependent solely on bombers to deal with the AA tanks on this map. Turn 22 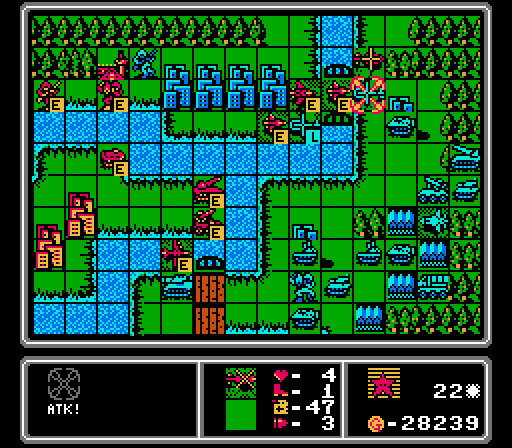 Our scouts, fighter, and copter go after the two enemy copters on the upper-right; unfortunately our copter is actually destroyed in the attack. Down by the central island, we bomb the medium tank. 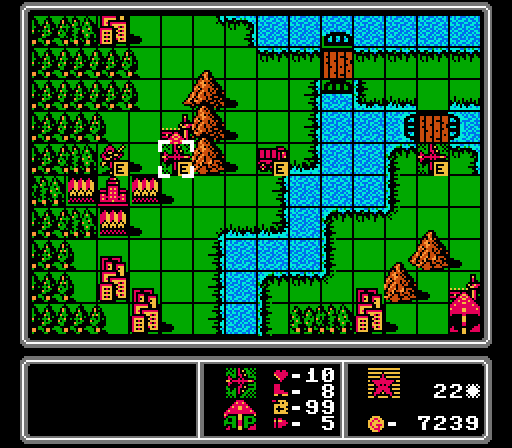 In addition to a bomber, we build an infantry. I'll try and get it into a copter or an APC next turn. 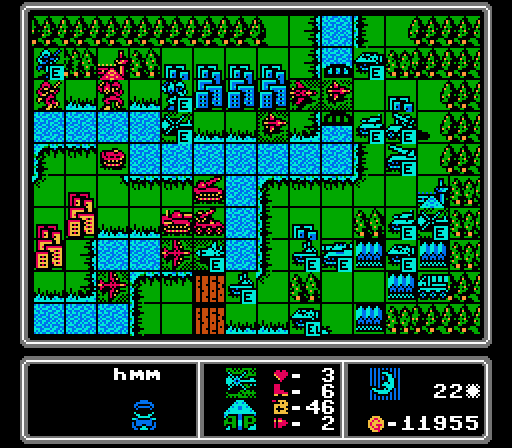 That's a lot of units building up on the upper-right. Also the enemy fighter came back out to play; I think we'll finally be able to finish it off this time. Blue doesn't build anything this turn. Turn 23  Our rocket and AA missile strike out at an AA tank and a copter, respectively, with the copter going down. 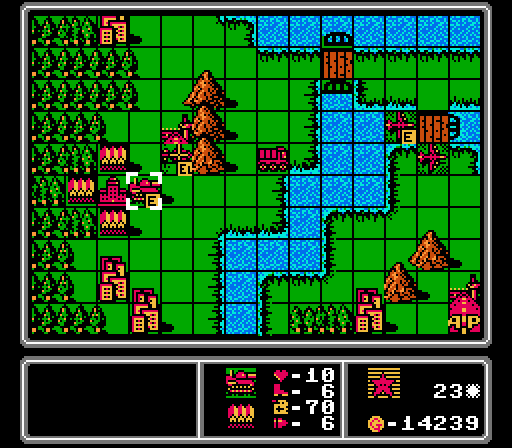 We build a copter for the infantry from last turn, and get another medium tank. 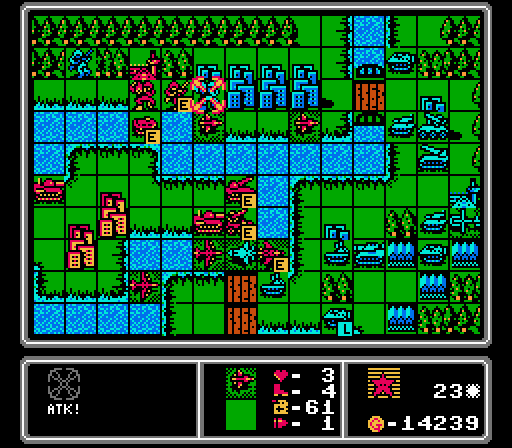 Our infantry just barely couldn't kill this enemy mech so I move in a damaged scout to finish it off. That leave the enemy city free for our own mech to move in and start capturing it.  Likewise our fighter just barely couldn't destroy this enemy fighter, so as our medium tank starts crossing the river it also finishes off the fighter. 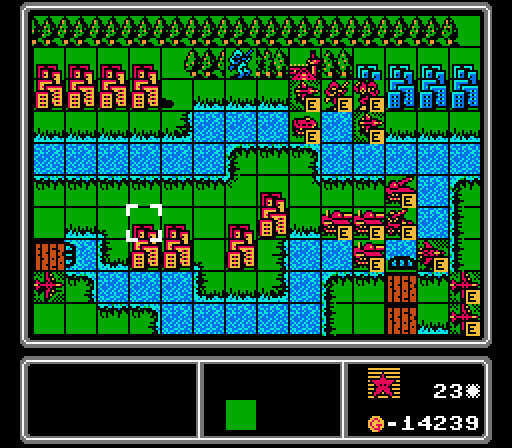 It's been awhile since I've been able to rely on a cluster of medium tanks for controlling a map. We'll get these across the river soon. 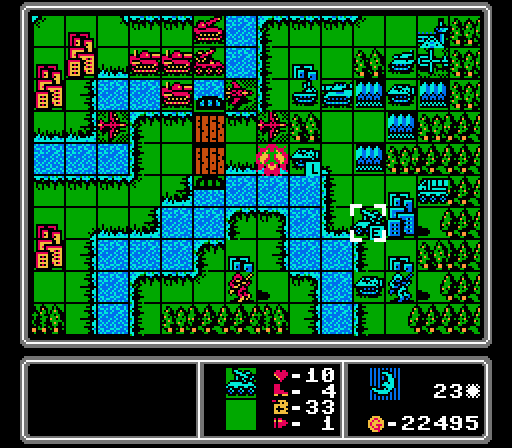 Our damaged bomber falls to an AA missile, but that'll just help us build another one later. 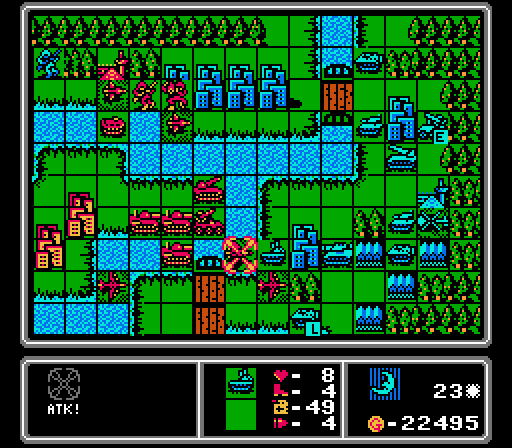 We also lose our damaged fighter to an AA tank. Again, not much of a loss here, and the AA tank stayed in rocket range for next turn. 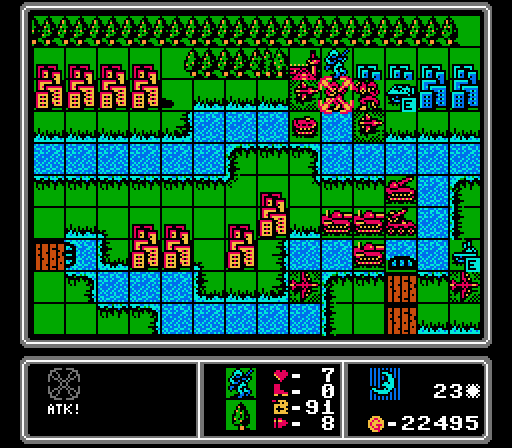 I expected to lose that infantry, but I did not see that the enemy APC could reach all the way out and severely injure our capturing mech. 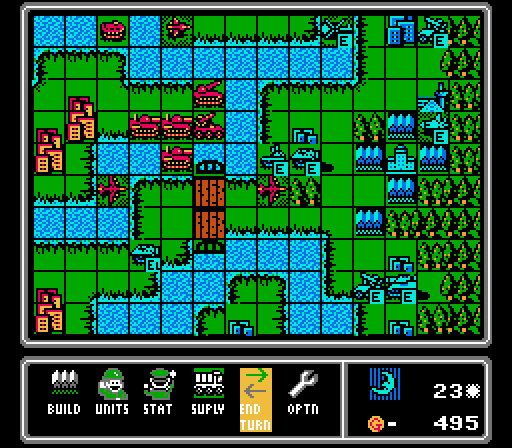 Blue builds another fighter and I suddenly have no easy counter for it. The enemy HQ is wide-open for a change; I could end the challenge here by sacrificing a bomber but I decide it's not really time for that yet. Turn 24  We can't build anything this turn, unless we lose a unit first. You can see we're starting to build up more and more cash reserves as the challenge really becomes limiting now.  Remember how I thought our rocket could finish off that AA tank this turn? Well, it's out of ammo, so nix that plan. Instead it retreats so our supply truck can reach it next turn.  We finally have a medium tank loose on the enemy island, and it immediately wipes out this loaded APC before it can cause any trouble. 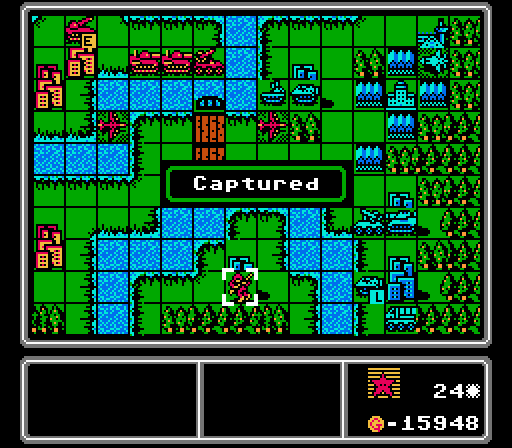 We quietly capture the city on the lower island, now giving us a 2:1 income advantage. 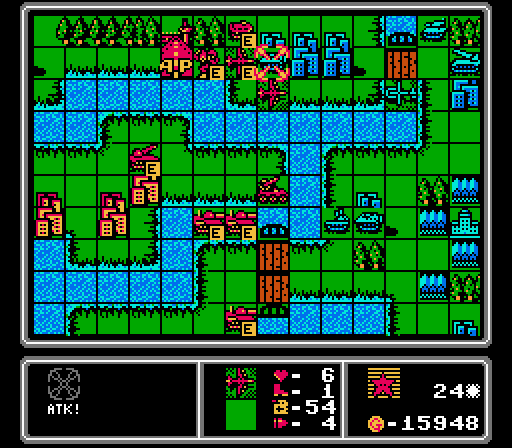 At the upper island, our APC, scout, and mech take out the enemy infantry, making room for two bombers to get rid of the APC. Then I merge in the other scout to give us some room to build.  The new enemy fighter goes after a damaged bomber. I had moved our AA missile back a space to ensure it could cover the bombers from every direction. 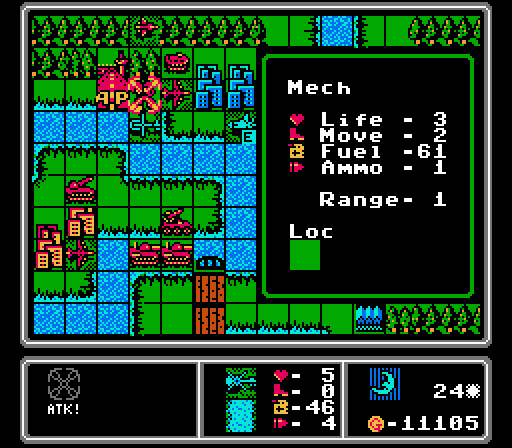 Losing our mech to this copter is disappointing but it would've taken that mech forever to do any captures now anyway. There's a fresh infantry headed in via copter soon.  The rest of the turn is just shuffling units around, with an AA tank blocking off one of our medium tanks, and a regular tank squatting on the upper island and getting in the way. Blue builds three new cheap units, easing up some of the challenge pressure for us. Turn 25  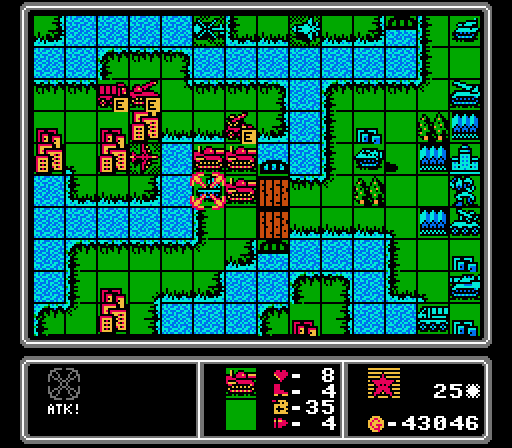 First step is supplying the rocket so it can shoot again. The rocket and the medium tank then take out the AA tank, clearing the way for our other medium tanks to cross. 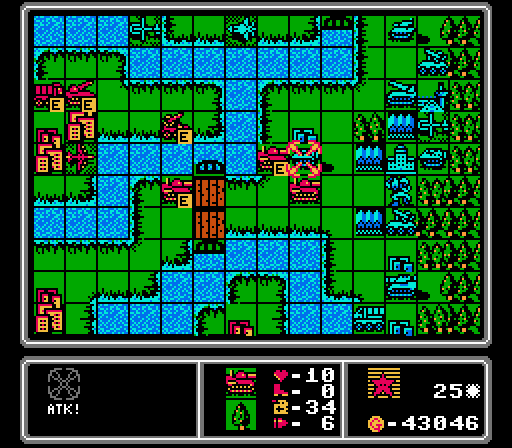 The medium tanks proceed to take out this APC, reaching striking distance of the HQ. 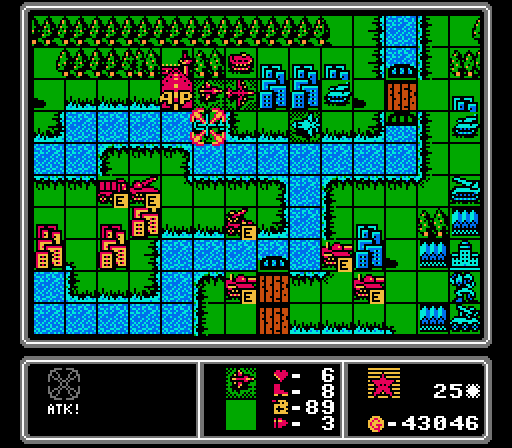 At the upper island, the AA missile hits the enemy fighter, while our scout takes down the copter. 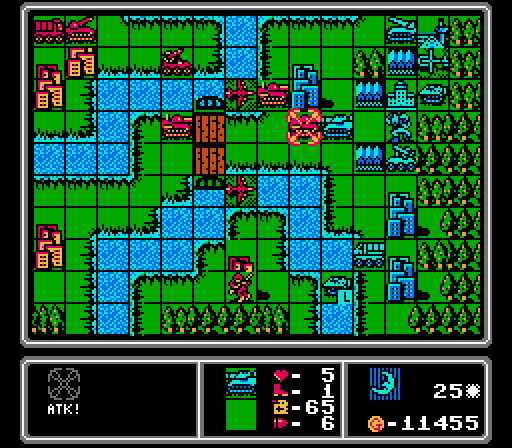 This enemy medium tank was still damaged from earlier, but the chip damage on our medium tanks is going to add up quickly here. 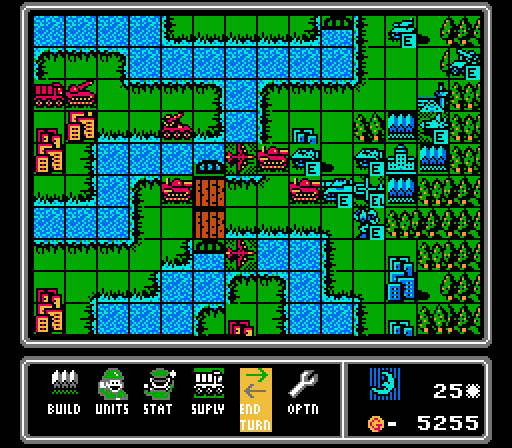 The enemy indirect fire units keep running out of medium tank/bomber range, leaving the middle of the map pretty open for us. The AI builds another mech and APC, just stuff to get in the way really. Turn 26   We still can't build anything, unless we throw away a damaged unit first. So we suicide our APC on this full-life tank and then build a bomber; a pretty nice trade for us. Also in this image: Our rocket and AA missile have now both been re-supplied and are ready to get back in the action next turn. 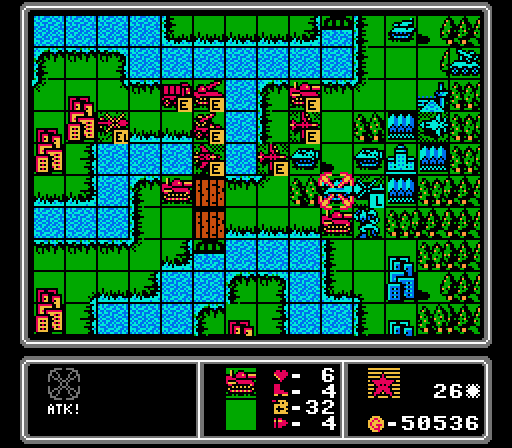 A couple bombers go after a fresh APC, while our medium tank finishes off the enemy medium tank. Another medium tank later moves in to finish off the APC. 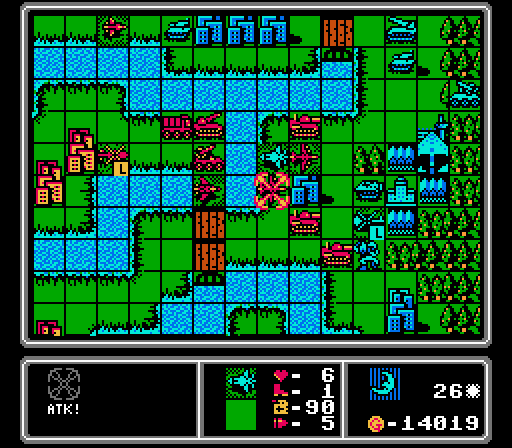 The enemy fighter comes back out to hit one of our bombers but doesn't quite bring it down.  More trash to deal with around the lower islands. Our infantry is almost gone but the enemy infantry is also hurt and won't get off a quick capture. Up at the top of the screen you can see where a tank tangled with our medium tank.  Blue puts out three more new units - a copter, an APC, and an AA tank. The HQ is wide open, and that AA tank makes for a tempting target for our medium tanks... Turn 27 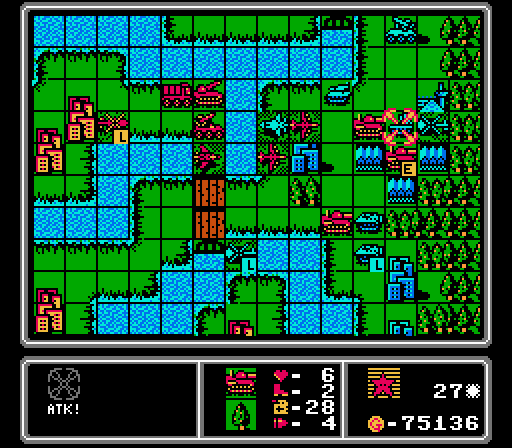 Two medium tanks go after the new AA tank. We've officially reached the enemy HQ and the challenge is mercifully over. We're pretty clearly in control now so I'll skim over the highlights from here...  Our fighter and scout team up to take out the enemy fighter. Our AA missile takes a shot at the loaded copter, neutralizing that threat. And our rocket and bomber go after the tank on the upper island, trying to clear it for the newly-landed infantry. 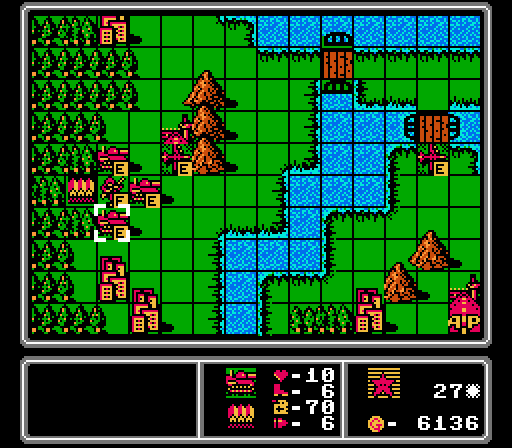 If the challenge were still in effect, I could've manipulated the action enough to build the bomber and two of the medium tanks anyway. Really all the extra troops from here on out are just speeding up the final wrap-up, since it'll take awhile to get them all the way to the enemy HQ area.  The AI gets another copter and AA tank, and hits our medium tank with its tank. That's really it. Turn 28 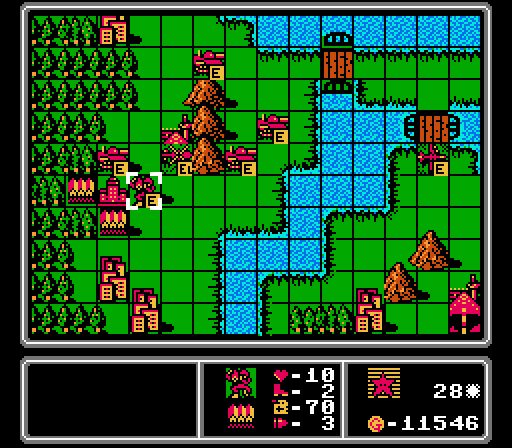 Do you like waves of medium tanks?  Anyway, what happened this turn. We started capturing the rest of the upper island, finishing off the tank that was there with our rocket and then starting on the AA missile. The medium tanks hit the AA tank and then merged together, but they won't be able to do much more without support.  Blue sacrificed a damaged tank on our medium tank, and the damaged AA tank on our bomber, then built a new tank and AA tank. Yay. Turn 29 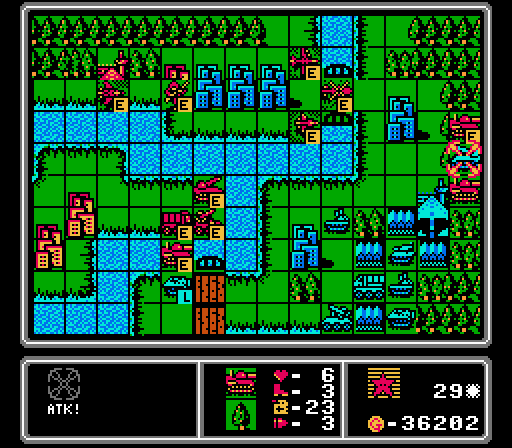 The upper island is clear now. Our medium tanks teamed up to take out the rocket. Our rocket hit the AA tank, and at the river the loaded APC successfully blocked our medium tank but took a hit for the trouble.  Some troop movements, including an AA tank hitting our copter on the upper bridge, and a new rocket. Turn 30  Our air units move towards the enemy HQ now that the AA tanks have been drawn away, with the scout finishing off a copter on the way down. The capturing infantry on the upper island is free to continue its work (the AA tanks can't attack it). The rocket and nearby medium tank took out the remaining AA missile. And yes I brought in two bombers to take out a supply. If you're wondering why I hit the supply, you obviously don't remember how many times I was sitting around at the end of the map unable to muster enough attacks to finish off the last enemy unit (inevitably a supply truck). 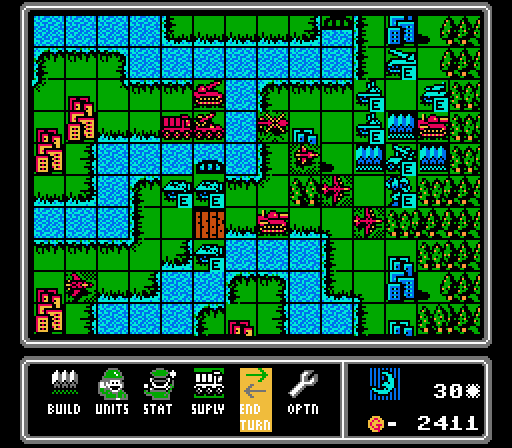 Just a new AA missile here. Blue is down to nine units remaining, even after finishing its turn. Turn 31  The bombers hit the rocket and AA missile, and our other air units are blocking bases and trying to distract the AA tank. Our medium tank sitting on the enemy airport is out of ammo and just trying to keep the AI from building any more copters (the one cheap unit we can't easily deal with right now). 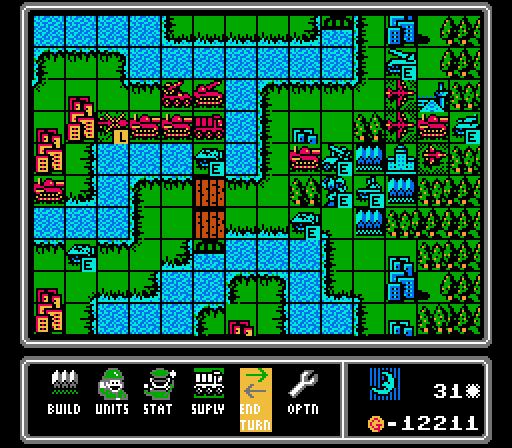 The biggest action here was the AA tank shooting down our copter. Blue didn't build anything this turn, so I really need to make sure the airport stays blocked next turn. Turn 32  We're only just now getting the extra units from completing the challenge into the action, and you can see we already really had the map won, it was just a matter of how much cleanup time would be needed.  A medium tank took out the enemy rocket, and a couple of bombers took care of the AA missile. Another bomber finished off a tank. Our new medium tanks are finally crossing the river and will help finish off this map - there are just four enemy units left at the moment. This turn would've been a good one to block all the enemy build points, but I didn't actually have enough units nearby to pull it off. We do have a couple infantry positioned for capturing. Will we finally get an HQ capture victory? 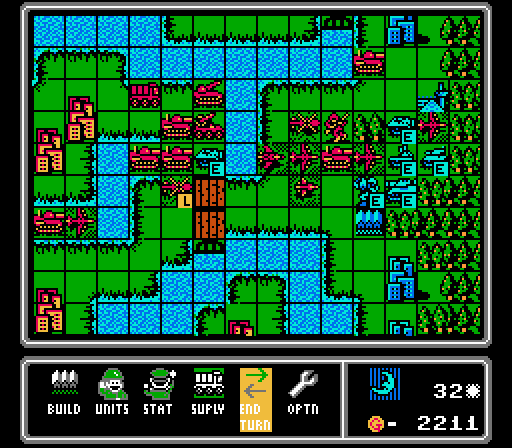 The enemy AA tank parked itself on the HQ and hit one of our bombers hard, and then the AI built a tank and a medium tank. So probably no HQ capture this time. Turn 33 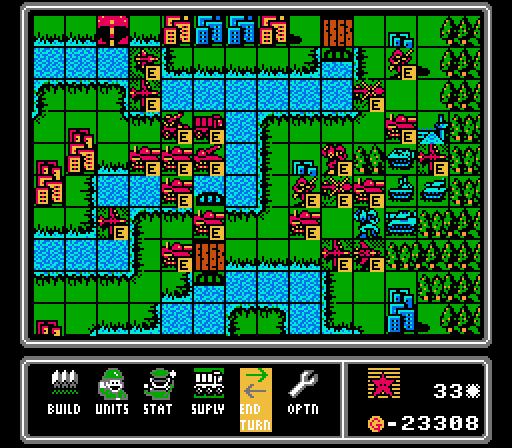 We took out an APC and hit a couple other units, but this turn was mostly just positioning. I tried to protect the capturing infantry but, well, you'll see...  The enemy medium tank hit our mech hard, and the enemy APC was able to circle around and poke at our capturing infantry for a couple of damage points. A new AA missile isn't much to worry about at least. Turn 34  Not much longer now. Our rocket and a bomber took out the enemy medium tank. Our own medium tanks took out the APC and the AA tank. And our copter moved in to finish off the mech. Just two enemy units left, and every build point is blocked. 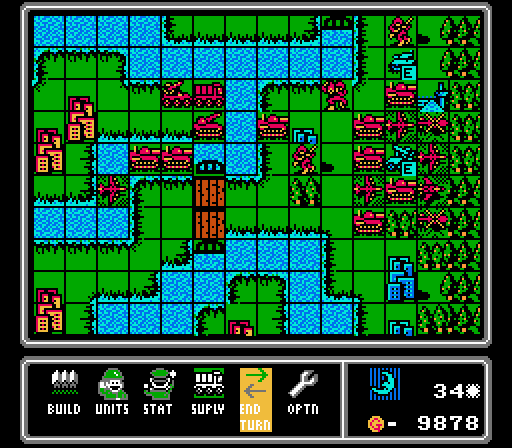 I left our damaged scout in range of the AA missile, and the enemy tank took a shot at our infantry, but that's it. Turn 35 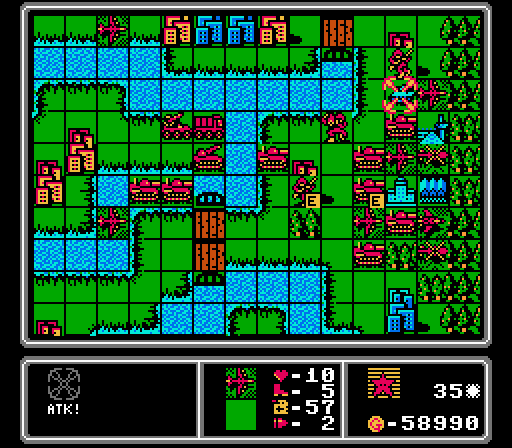 A medium tank finishes off the AA missile, and a bomber finishes off the tank, and we're done.  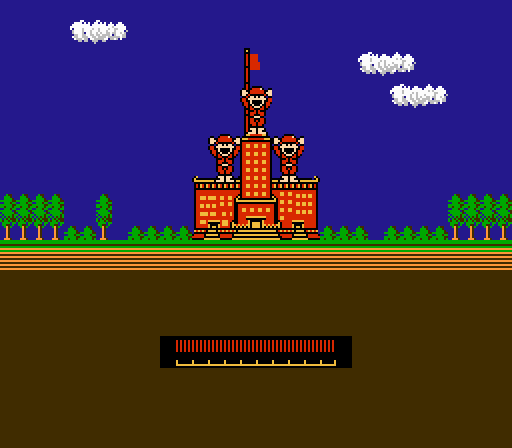 No HQ capture victory, though we came a lot closer this time. It's just really hard to keep the HQ area clear without almost accidentally wiping out every unit along the way. Maybe next time.  Our CO was...an apple? And I've got nothing on the enemy CO - the only search result is literally just a list of the COs in this game. 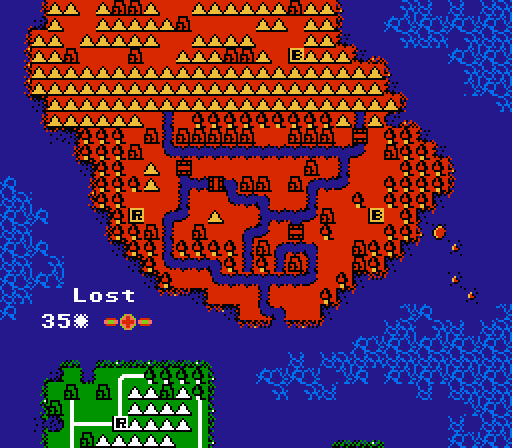 We've finished taking over the large continent. Needing 35 turns for this map is not a good score (average is 30) but the challenge really slowed down our initial efforts which in turn slowed down the usual snowball effect. But we got there eventually. 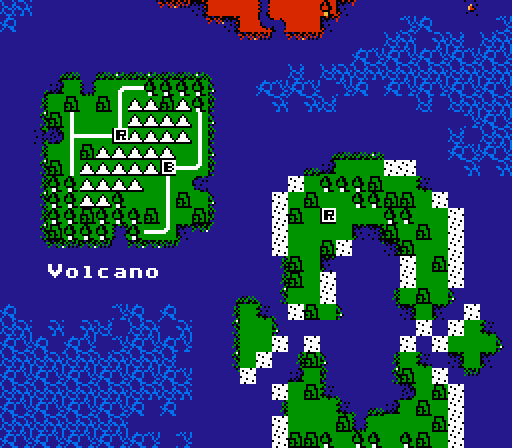 A handful of islands remain to us. Next up is Volcano - the HQs are close together, with a large mountain range in between. Should be fun! Here are a couple challenge options, bringing back a couple of classics:
Vote in the linked poll here!
|
|
#
?
Jan 3, 2022 06:53
|
|
|
Well, the second half of Henokappe's name clearly comes from kappa, which he resembles, but the "heno" I have no idea.
|
|
#
?
Jan 3, 2022 21:11
|
|
|
Blaze Dragon posted:Well, the second half of Henokappe's name clearly comes from kappa, which he resembles, but the "heno" I have no idea. Some sketchy Google results suggest "heno kappa" roughly means "very easy".
|
|
#
?
Jan 4, 2022 04:51
|
|
|
Well we had a runaway winner for the challenge vote: Here's the follow-up vote - pick two units to ban for the next map. Vote in the poll here. For some context, here's a preview of the next map: 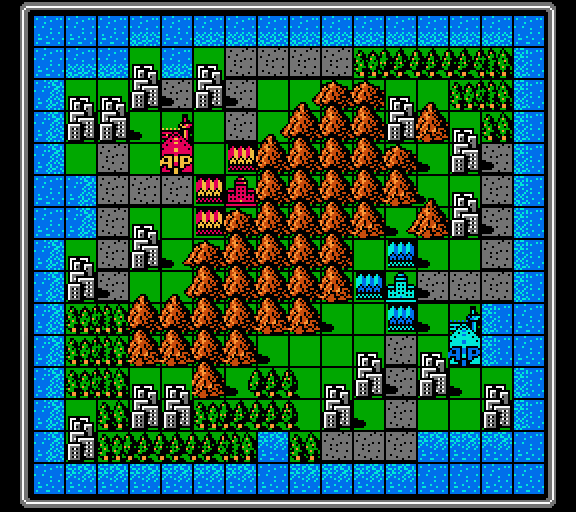
|
|
#
?
Jan 5, 2022 06:32
|
|
|
 Seems like everyone's picked up on how I've been cheesing maps - a healthy supply of copter-carried infantry to capture everything, followed by waves of bombers to blow up everything. Guess we'll see how I do without them now.
|
|
#
?
Jan 9, 2022 01:09
|
|
|
Part 31: Unit Overview: Anti-Air Missile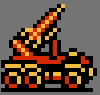  Basic Info: pre:Cost 11000 G Movement 4 Move Type Vehicle Fuel 40 Ammo 2 Ammo Cost 8 G Range 3-5 Special None pre:Opposing Unit Damage Dealt Damage Taken Infantry N/A 0.5 Mech N/A 4.5 Medium Tank N/A 8.5 Tank N/A 8.5 APC N/A 3.5 Rocket N/A 5.5 Artillery N/A 4.5 Supply N/A N/A AA Missile N/A N/A AA Tank N/A N/A Fighter 6.5 1.5 Scout 7.5 1.5 Bomber 6.5 6.5 Copter 7.5 1.5 Battleship N/A 8.5 Lander N/A 2.5 The Anti-Air (AA) Missile is quite simply "rockets but for planes". It does the same damage as an AA tank, but with the retaliation-free extended range of a rocket. In exchange it takes a bit more damage from tanks and medium tanks, and can only fire two shots without a supply. Useful for area-denial for fighters, which can be hard to reach with just an AA tank.
|
|
#
?
Jan 9, 2022 01:16
|
|
|
Wow, missiles don't even kill in one hit. Impressive, that's even worse than the gba entries.
|
|
#
?
Jan 9, 2022 04:05
|
|
|
FoolyCharged posted:Wow, missiles don't even kill in one hit. Impressive, that's even worse than the gba entries. Yeah for how easy it is for planes with high movement to avoid them, they really should be stronger.
|
|
#
?
Jan 9, 2022 05:03
|
|
|
This looks like a fun map to try to march infantry across the mountains, possibly with copter cover, and get a capture victory, but that would be its own challenge and the CPU might make it hard.
|
|
#
?
Jan 9, 2022 07:26
|
|
|
Part 32: Volcano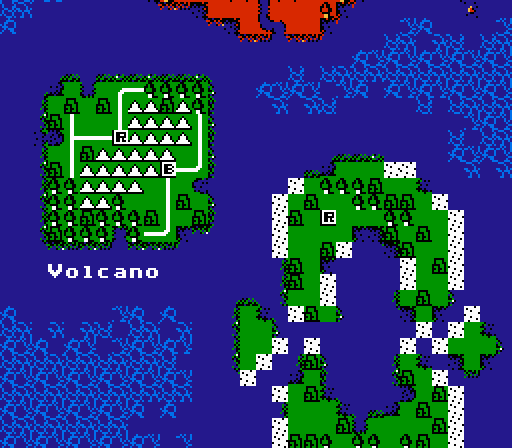 I'm not sure which of these mountains is supposed to be the volcano, but either way we're about to dive in. This map is laid out pretty evenly, with Blue getting a slight advantage with three cities in capturing distance on the first turn, each of which are one turn away from another city to capture. Blue has a cheat though - one of the neutral cities closest to the HQ is actually a base that can be used to build units. Turn 1 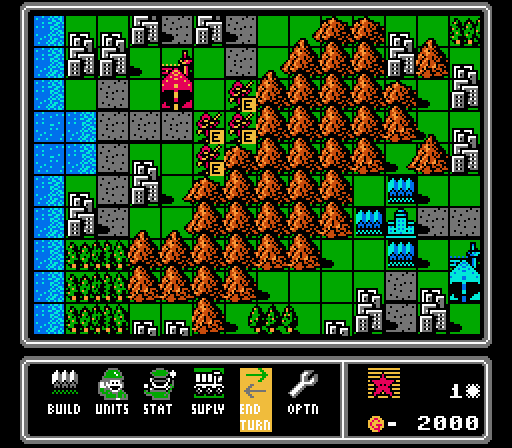 Pretty simple start with four infantry. Our challenge for this map is Permanent Lock 2.0, and the thread voted to forbid us from using any copters or bombers. So no copter waves carrying infantry to every corner of the map. The neutral cities are close enough to us that building an APC isn't really worth the extra funds, either. 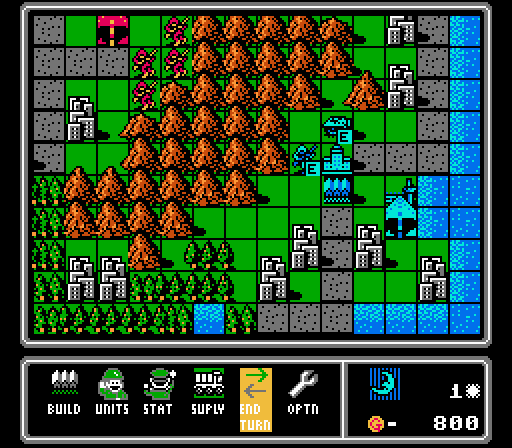 Blue goes a different direction with an infantry and an APC, negating the starting advantage they had with the city layout. Turn 2  Mechs can be difficult to use properly in this game, since they're normally better off holding defensive positions and the player is usually moving forward offensively instead. But this map happens to have a huge mountain range with massive defensive bonuses that mechs can cross... 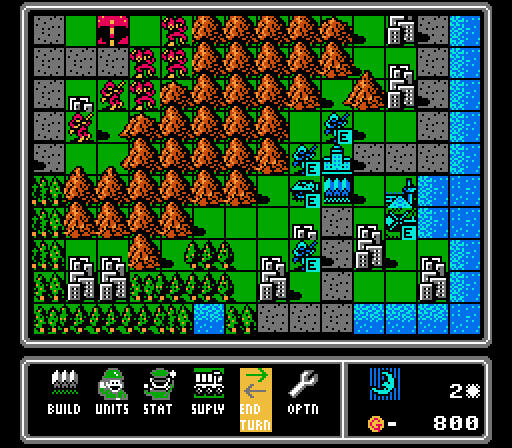 Two more infantry and a copter for the AI. The APC doesn't even get loaded. What was the point? Turn 3  We get our first couple of cities, as the mechs start their long march.  Blue gets another couple of infantry and another APC, despite never having loaded the first one. Though I guess with what we've built so far, an APC counter makes some sense. Turn 4  The only limitation of this strategy is the number of build points. But four new mechs every turn can go a long way...eventually.  I raced this infantry up to this city but the copter beat me there. Ah well. 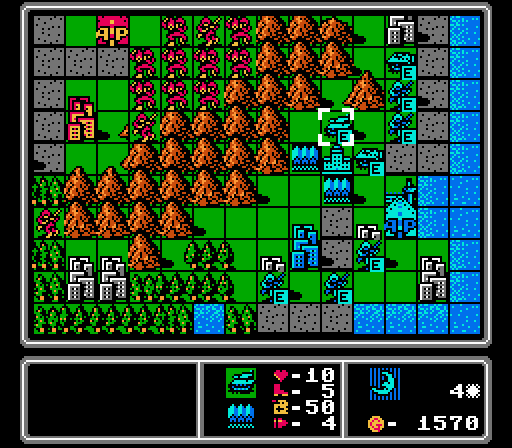 A new tank here. The AI still hasn't loaded either APC. Turn 5  Finished another couple city captures. More importantly: More mechs!  Blue finished off one of our infantry with an APC and then sent the copter after one of the mech brotherhood before building a tank (on the upper-right city!) and a mech of their own. Turn 6  The mechs continue to advance. I consider having them attack the copter, but leave it alone for now. Advancing is more important than attrition at the moment, and mechs have very limited ammo. 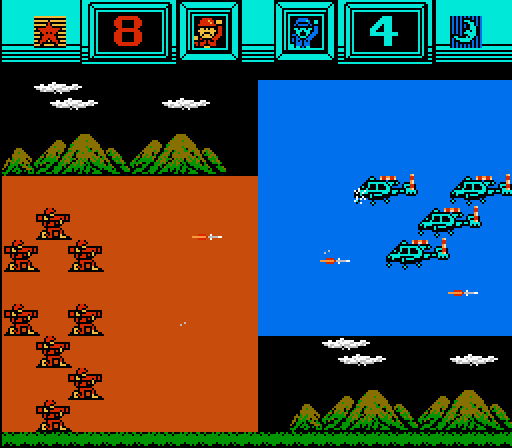 The enemy copter goes after a different mech this time, and is now heavily damaged. Mechs normally lose out to copters, but the defensive bonus from the mountains evens things out. 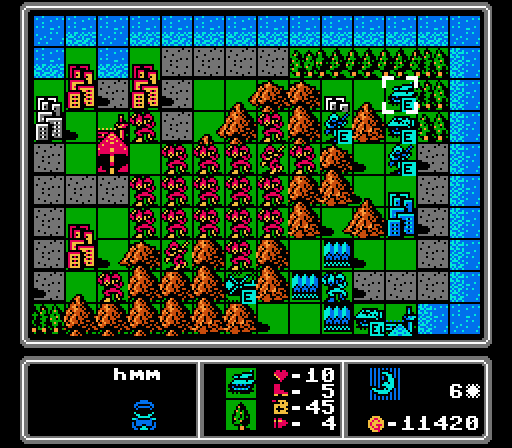 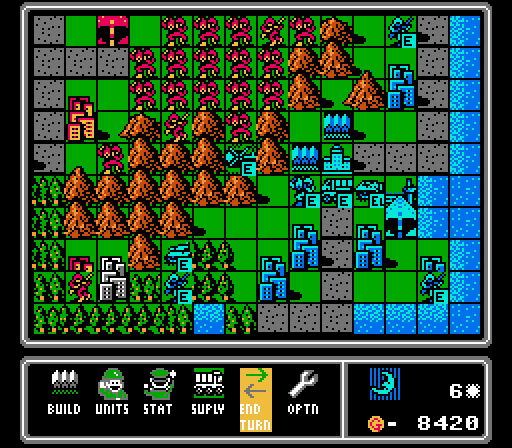 There are three spots to watch on this map now. The two passes around the mountains in the corners of the map, and the direct route over the mountains that only a crazy person would use. We're obviously pretty lacking in troops for the passes at the moment. Blue finally loads up one of its APCs, and then builds a supply that'll never be useful. Turn 7  I think we are going to narrowly win the capture race, but I'm leaving it close.  The mechs make their first attacks, as I decide that keeping the enemy infantry from an easy capture is worth spending some ammo. 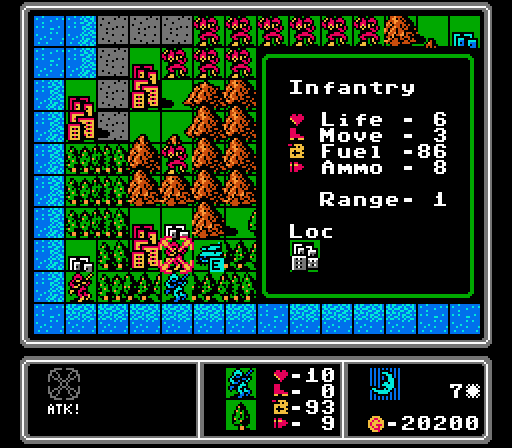 We're not going to quite get all three of the cities in the lower pass right away, ending up one turn short. 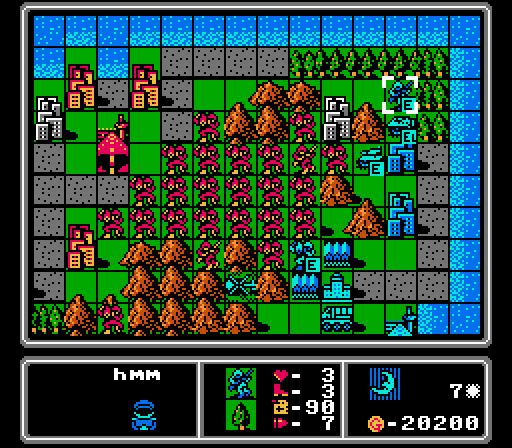 At the upper pass, the enemy infantry was hurt badly enough to actually abandon a capture attempt. Our mech army took a couple hits from the enemy tank and mech but we shook them off.  A medium tank is a hard counter to a mech, able to almost one-shot it and taking very little damage in return. An APC would be more cost-efficient, but would also take more damage. Turn 8 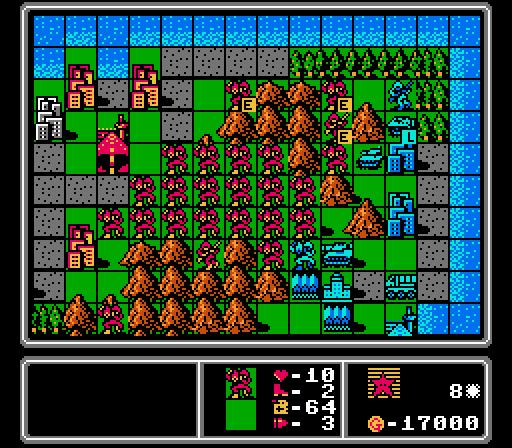 We've got a decent chunk of change now. What should we get to counter that medium tank. Bombers are out, and we can't afford one yet anyway. Our own medium tank?  A rocket, or a couple of artillery? 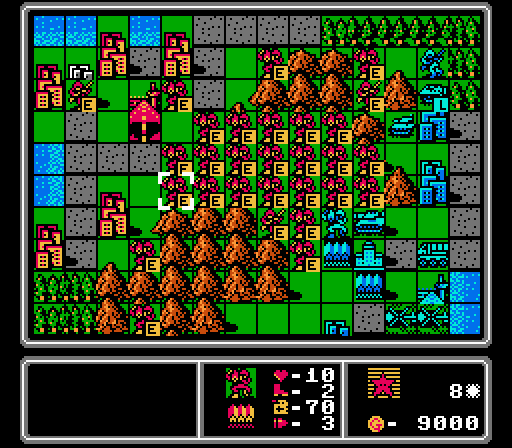 Nah. How about four more mechs? It's been a long time since I posted it, but four mechs are actually a somewhat even match for a medium tank - if they can be positioned properly. Four full-strength mech attacks will take out a medium tank, and cost half as much. The medium tank obviously has the movement advantage and will all but kill the first mech in one shot, but will get progressively weaker with each subsequent mech attack. The key is controlling the range. Like, with a bunch of mountains that the medium tank can't access.  The lower pass is looking a bit shaky right now, as we lose an infantry here to the enemy tank. But help is on the way! 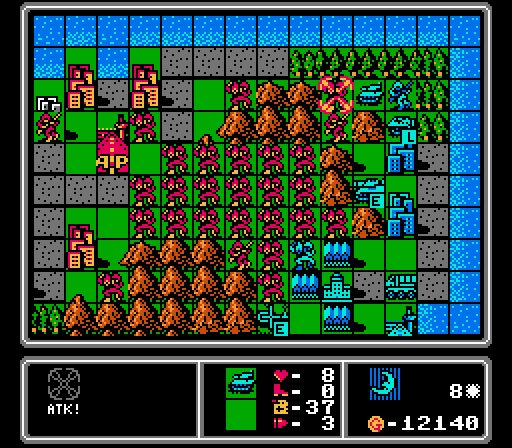 The upper pass is in somewhat better shape, just because the mech horde is close by for support. You can see here where the medium tank circled all the way around to finish off one of our injured mechs. Oh, it will pay for that... Turn 9  Anyway, we've got two more cities, including all the ones in our starting area, one in the upper pass, and two in the lower pass. We're starting to build up more funds than I can spend on just mechs each turn. 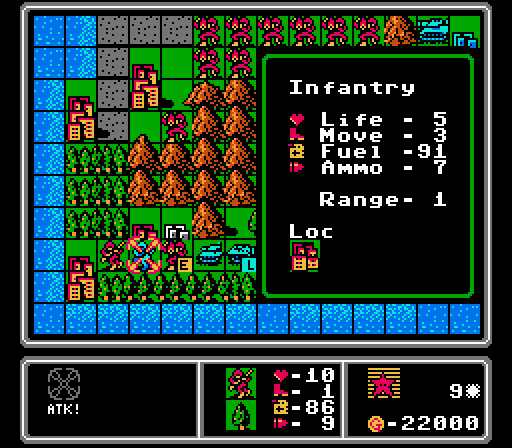 This enemy infantry decided to try and take one of our cities, but our own mech and infantry aren't about to let that happen. (No kill here, though.)  Blue neglected to build anything last turn, and the new medium tank is far away. Right as our mechs are in range...  For a couple of base captures! I would've started capturing the HQ as well, but, well, mechs can't do that in this game. And that position would get eaten up by the medium tank anyway. This first attempt at base capturing might not be successful, but there are plenty more mechs behind these ones. 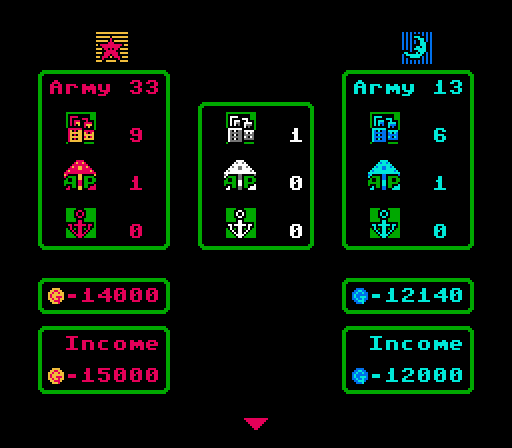 Well we've won the capturing race and there are somewhere around thirty mechs making their way over the mountains to cause havoc at the Blue HQ. I could start spending some of these funds on some heavier vehicles, or even some air support (I'm still allowed scouts and fighters, after all). But I'm going to go ahead and declare an additional hidden challenge attempt: No Vehicles 2.0 - win the map with only infantry and mechs!  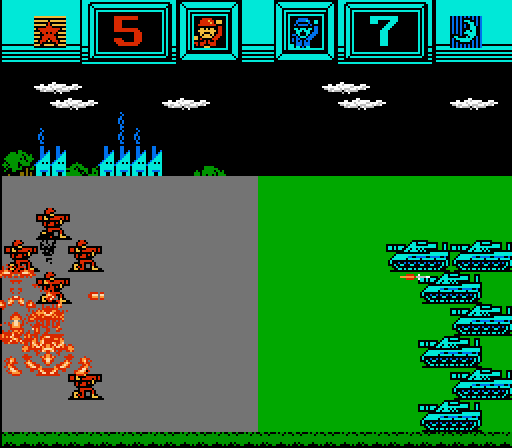 The multiplayer strategies in the early Advance Wars games often devolve into sending waves of infantry and/or mechs at the opposing player. They're cost-efficient and can capture property for healing and resupply as they go. In this game the strategy isn't as effective, except this map happens to have a huge amount of defensive cover between the two HQs. Even the enemy bases provide a huge defensive bonus, so this medium tank is far less effective against our capturing mech. 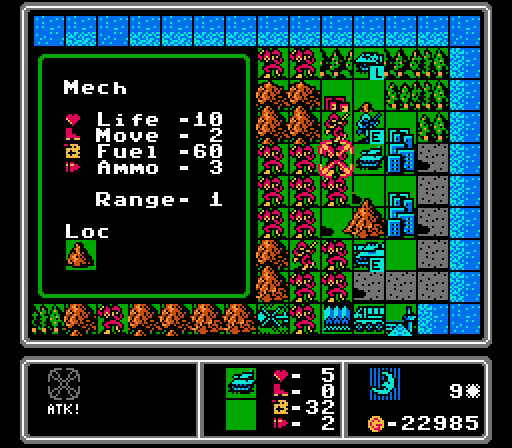  I've complained a lot in prior maps on how hard it is to keep up an attacking force when even attacks that are in your favor on paper result in chip damage that keeps adding up. Now that mechanic is finally in my favor, as this enemy tank attacks its third mech and can't make much headway on it. 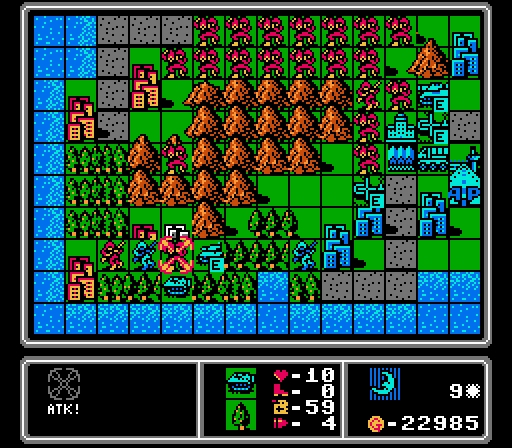 It's not all good news - we did lose the mech that was on the HQ to a copter, and another mech in the lower pass to this APC. But overall we're still producing more mechs each turn than we're losing. 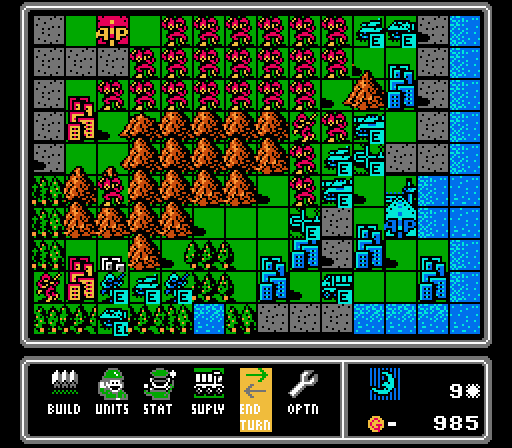 The hardest part of this strategy is dealing with the AI building heavy units on its HQ right as you're going for it. I have an infantry ready to pounce, but can't get it an opening. The extra medium tank is no picnic, either. Turn 10  Now, you should notice that the mechs I had capturing bases both survived the turn. And I have plenty of mechs following up behind them to merge in and reinforce them, keeping the capturing attempt alive. For this particular base, the mech just needs to live with 4 life remaining to finish the capture next turn. 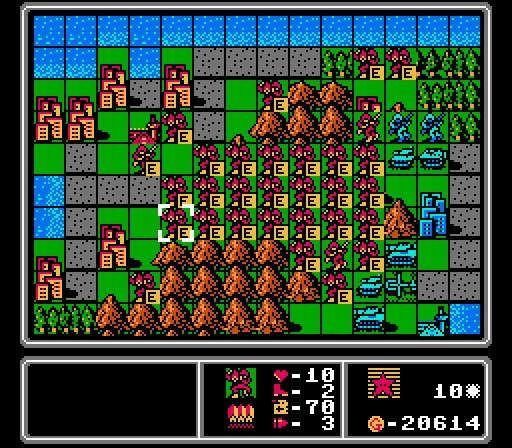 The upper pass is looking a little better now - we have the city there, and two mechs in the forest guarding the pass. Our base captures are still ongoing but we've been pushed back a bit at the HQ for now. 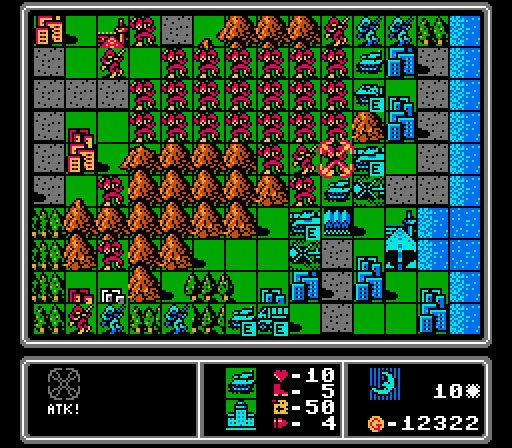 Our strategy was not really to capture both bases at once here, but to divide attention so that one capture would be successful. Here a medium tank goes after each capturing mech, but the regular tank at the HQ can only attack and finish off one of them.  Annoyingly the copters also got in some damage so we can't finish the other capture either. However the AI didn't build anything so the upper base is still free for another capture attempt next turn. Turn 11  It's hard to break through when the enemy is able to form up a line of units like this shot, since the mechs can really only deal damage when multiple of them are able to attack at once. But we're still playing defensively right now, sticking to the mountains and bases and forcing the AI to take damage with counterattacks.   For instance, these medium tanks are far less effective now that they've been weakened by multiple mech strikes. Our captures are much more likely to succeed now.  The lower pass is still being contended. I have a mech capturing the last city with an infantry screening it, keeping the enemy units out of reach for just the one more turn needed to complete the capture. The loaded APC is trying to sneak through the forest but I already have it covered.  The AI is clearly feeling the hurt on is medium tanks so throws out another one, in addition to this mech. Turn 12 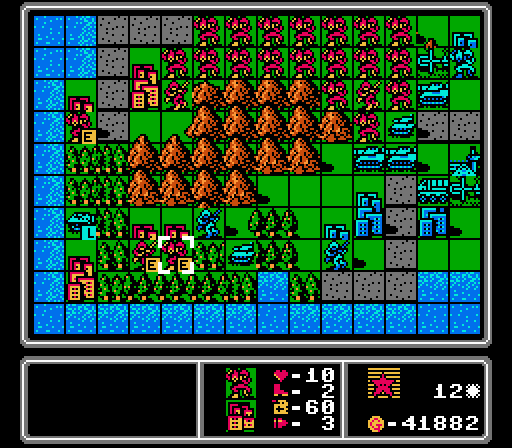 The last neutral city is captured, and the lower pass is ours for the moment. We don't really need the funds, but denying them to the enemy is still useful.  By the way, those medium tanks were too damaged to hurt our capturing mechs enough this turn, so we successfully steal one of the bases. Too bad that we can't build from them, and there is no income from them. But, critically, we can repair and supply at them! 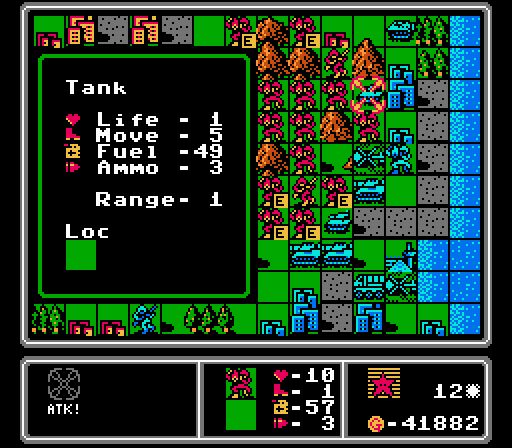 Now that we have a forward supply point, we can start using ammo to finish off the scattered units that have been damaged by their own attacks. Starting with this tank. 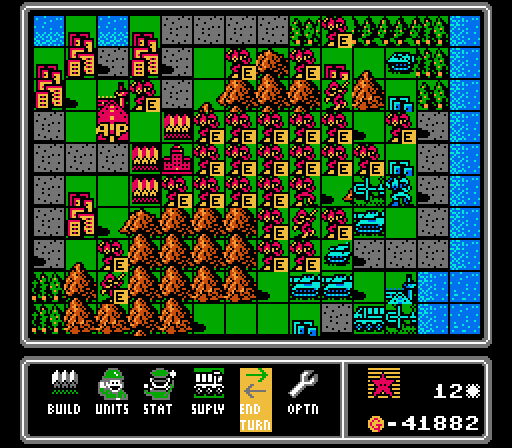 I'm not really trying to capture Blue's city in the upper-right so much as provide another distraction. However can you see something I forgot? 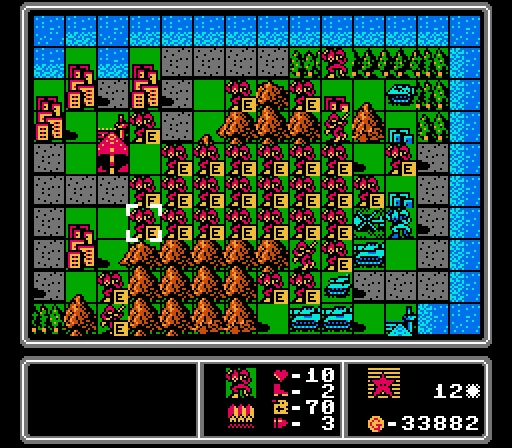 Yeah I forgot to actually build the mechs this turn, and had to reset to the start of the turn and replay it. Anyway, everything played out the same except I filled in the open space next to the enemy copter this time. Somehow I forget to build like four different times on the map; apparently I get impatient to end the turn after painstakingly moving 30 mechs one space at a time.  We're still trying to capture another of the bases, and our mechs are heroically holding off the medium tanks. 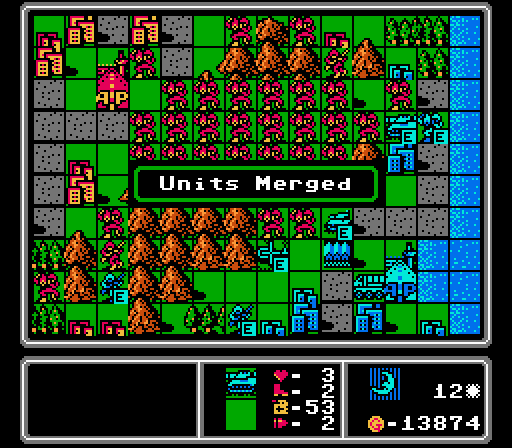 So much so that Blue merged two of its damaged medium tanks together - as good as a kill in my book. The two copters also merged.  Blue builds a rocket this time, probably the best move it has made all map. We can't counter-attack it, it can strike our waiting and vulnerable infantry, and it blocks the base from us. Turn 13 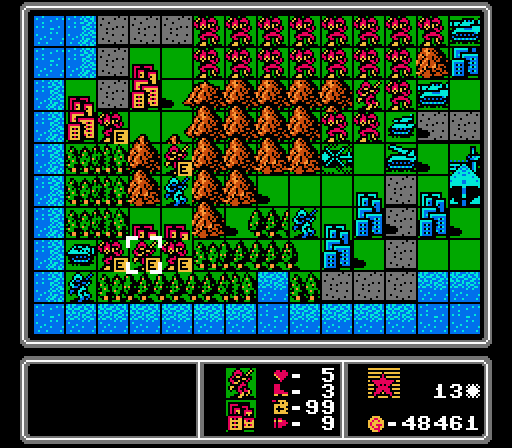 At the lower pass, the mech finished off its capture last turn and then held off the enemy tank. Then this turn it healed up the damage and finished off the tank by itself. Mechs on cities can be pretty tough to dislodge. We just need to keep that enemy infantry from taking our city in the corner. 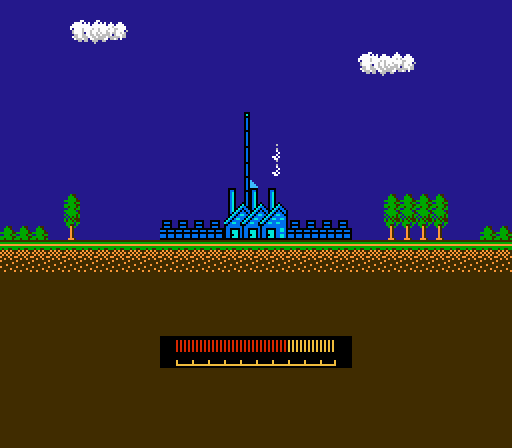 The second base capture is slowly marching along. I'll need this mech to have 6 life after the enemy phase to complete the capture next turn. 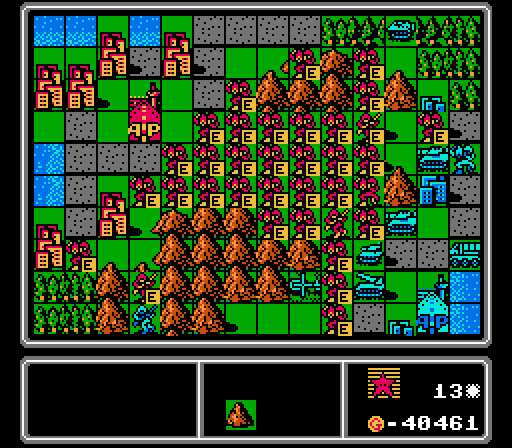 I take a shot at the rocket, mostly just to force Blue to spend some funds repairing it. Dislodging it will require a coordinated effort. The upper pass is looking better, with just a damaged APC in the way. We still have a Blue city getting captured as well.  I was worried about this situation happening - the rocket went straight after the infantry, so I won't be able to pounce with a quick capture if the HQ opens up.  For some reason, the AI doesn't really go after the mech that's capturing the upper base, instead spreading out its attacks on various other mechs. We did lose an infantry at the lower pass, however. Turn 14   We start off by taking the first of Blue's cities, momentum firmly on our side now.  A second base is now ours as well.  Actually getting rid of the rocket is going to be difficult from the position we're in. The mechs are going to have to leave the mountains, and flood into the valley! Something to note here - between us chipping away at Blue's units, and making it difficult for Blue to have space to build more, the AI only has 12 units deployed right now, and most have a lot of damage already.  I don't know why I thought moving this infantry here was a good idea. Probably to get it inside the rocket's range. But the medium tank absolutely obliterates it anyway. 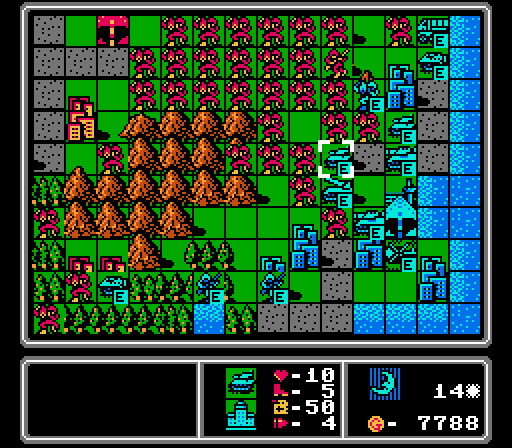 The enemy tank moves off the HQ to attack a different mech, and the AI follows that up by building...another tank. Could have been worse; Blue actually had the cash to afford another rocket. Turn 15 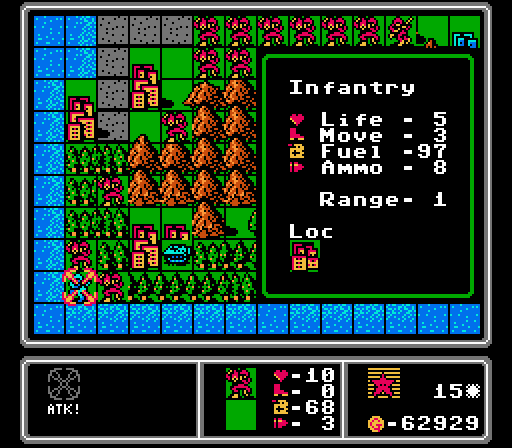 The lower pass is free of enemy infantry again. Just an APC in the way in each pass now.  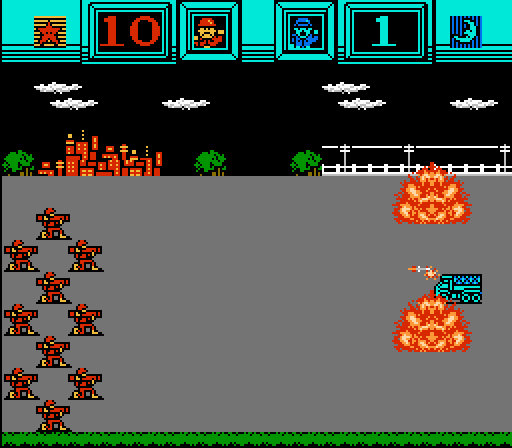 Mechs are unusually effective against supply trucks, and I will never not enjoy beating them up. 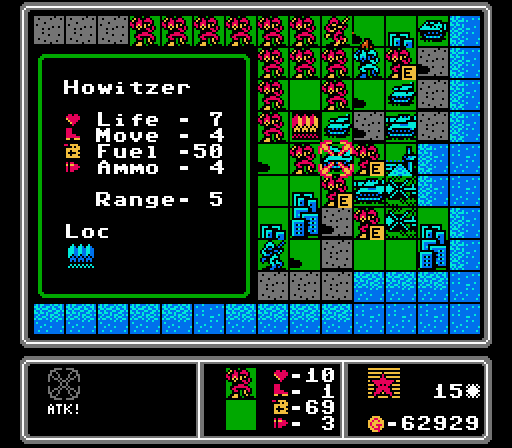 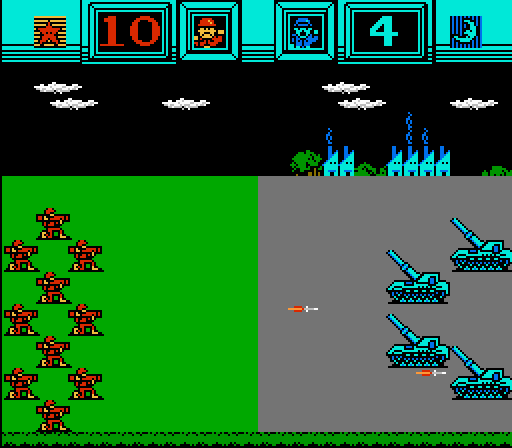 We're also able to partially surround the rocket and get in some good damage this turn.  I may have advanced too quickly; there are some gaps in the formation here. I guess we'll see how it goes.  That damned rocket is still harassing whatever infantry I get close.  One mech falls to a copter and a medium tank, but as this was the lead mech I'm not concerned about it. Plenty more waiting to take its spot. 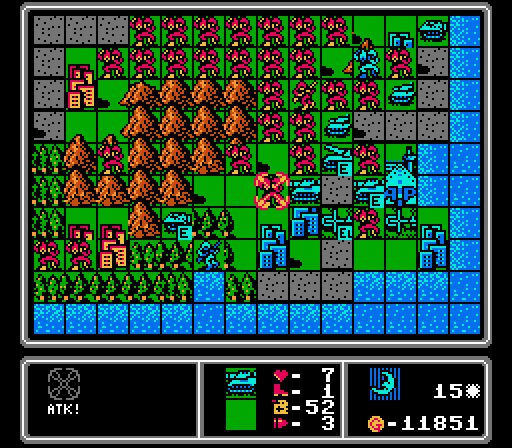 More concerning is this medium tank not just attacking us here, but blocking us from getting beneath the rocket next turn for another attack. 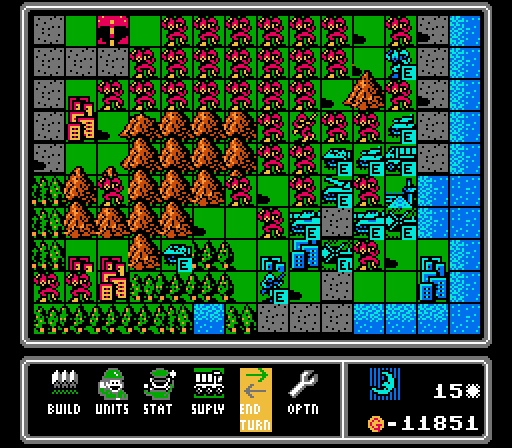 Blue didn't build anything, but did move its tank off the HQ and replaced it with a damaged APC. That move is a huge benefit to us, since we can remove a damaged APC much more easily than a full-strength tank. Blue also didn't build anything again. Turn 16 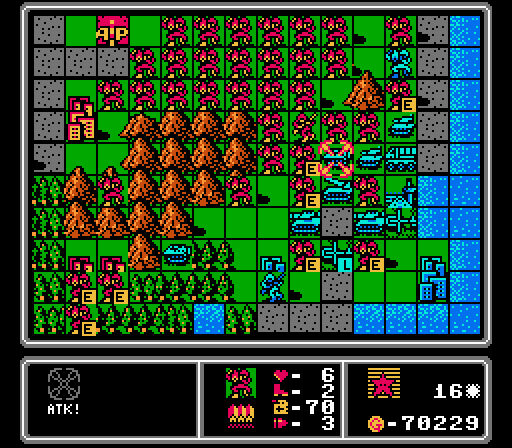 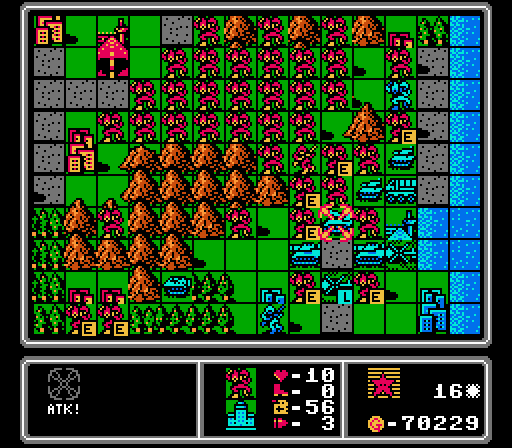 We finished off the damaged APC, and immediately move a fresh mech onto the HQ to block it and take a shot at the rocket. Unfortunately we can't quite finish it off. Being able to both clear a build point and move a fresh unit onto it in the same turn is key to advancing this map, and we're going to lose that chance on that lower base when the rocket retreats.  That damaged APC, by the way, came from the upper pass, which has been completely abandoned to us now. For good measure we clear out this mech as well.  The lower pass is clear, too, with the APC also retreating here. In my head I thought I was still struggling with the map at this point, but it's pretty clear from the picture that we're starting to overwhelm the other side now.  I had a few mechs isolated well below the base, mostly as a distraction since they were all severely injured anyway. And sure enough the AI spends a few attacks clearing them out.  As previously mentioned, the enemy rocket retreats and in its spot, Blue pops out a medium tank. Thanks! At least the regular tanks merged, opening up more space for us to advance. Turn 17 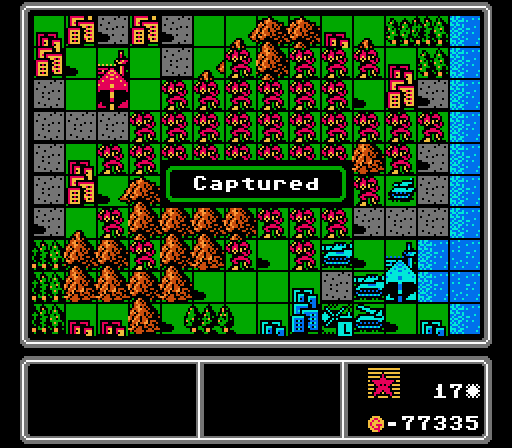 This capture has some understated importance - it's "just" a city to us, the last of Blue's cities in the upper pass area, but it's also Blue's hidden extra base. One less build point for the enemy. 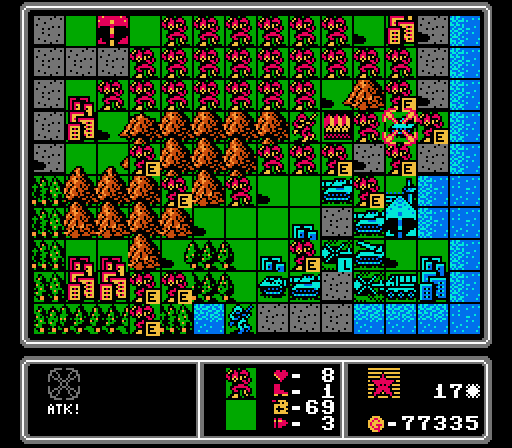 A mech swarm takes out the merged tank. Almost like two kills at once that way! 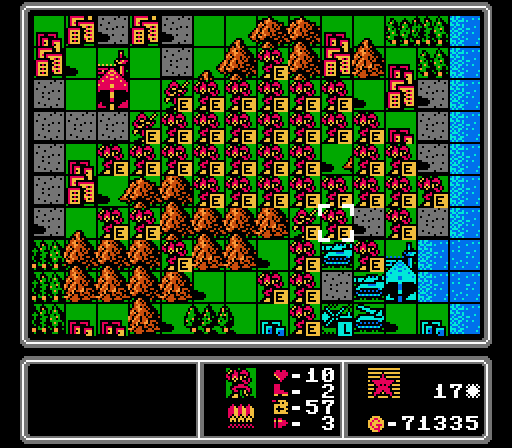 I can't do much directly about the new medium tank right now, so I just rush everyone forward. I have one infantry left and it needs to heal up on the captured base. Unfortunately the bases are all in rocket range. I decide to risk it but also build a couple more infantry as backups.  Oh hey the supply truck did actually get to do something. That medium tank only had one shot left. 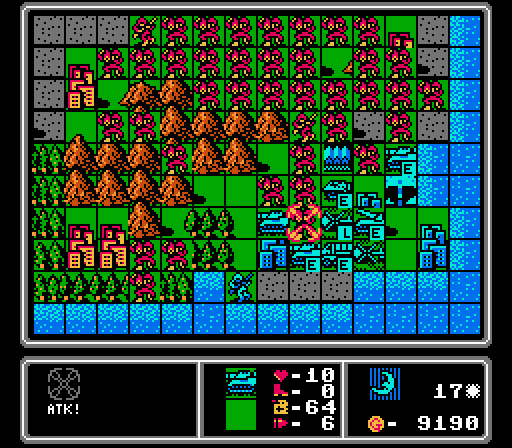 The enemy units scatter some attacks on our mechs, with the fresh medium tank moving out to finish off this one. The enemy rocket also shot at our mech on the HQ instead of the infantry; good luck for us. Blue doesn't have a lot of funds this turn - we've been steadily taking cities, and it spent a good chunk repairing the rocket. So what will it throw out at us on its last base?  Yeah, that checks out. Turn 18 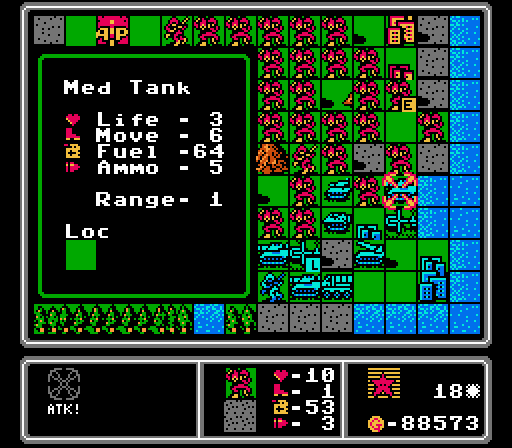 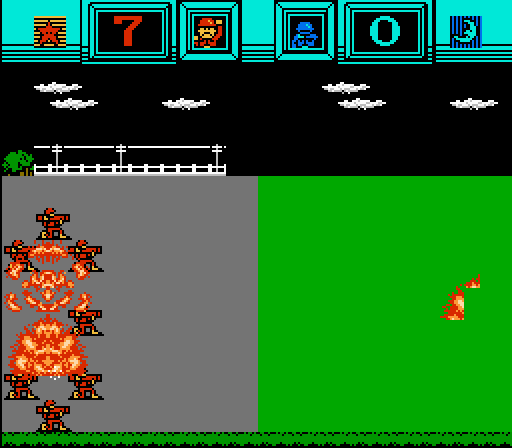 Here's an easy trade, finishing off a medium tank for some chip damage on one of our many mechs.   We need to keep this rocket from getting fully repaired, so hit it with the only mech in range for a bit more damage. 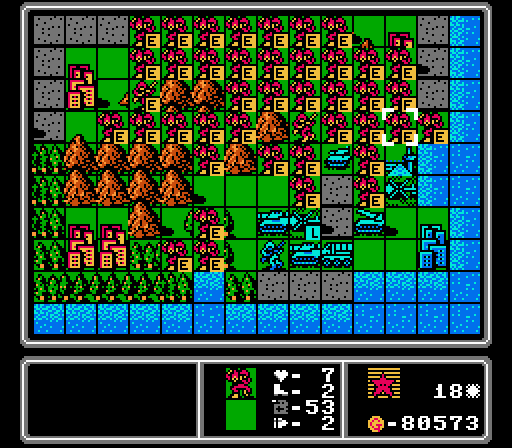 We swarmed the new tank, and also finshed off the APC just below it. I couldn't quite cut off the tank's retreat though.  However, we luck out on the enemy phase. The damaged tank retreats, but an equally-damaged copter moves into that spot instead. The copter not only blocks the build point, but it can't be repaired on the base and gets no defensive bonuses from it. Best-case scenario for us really. 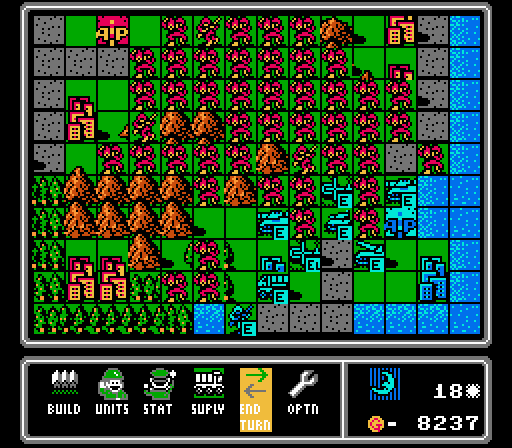 The airport is still clear but Blue declines to build another copter. The medium tanks are still causing trouble but they're limited in number and getting weaker with every attack. Turn 19  We quickly finish off the copter and move in a fresh mech to start taking the last base.  I've got an infantry waiting to take the HQ, but it's still healing up on the captured base. If it moved for the HQ now, the rocket would eat it up and actually delay the HQ capture more than just waiting a turn now.  Blue scatters some attacks but doesn't get a single kill. I just notice here that Blue is down to only seven units left, including an infantry inside the copter. All of the enemy build points are blocked. Turn 20 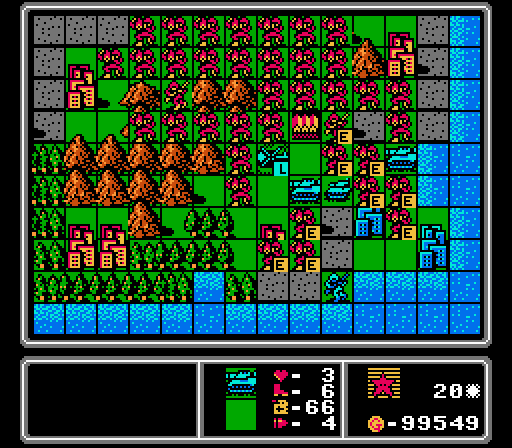 I missed some footage at the start of the turn, but we finished off the rocket and then moved in the infantry to start taking the HQ. The infantry will take 3 turns to capture since it wasn't quite fully healed. 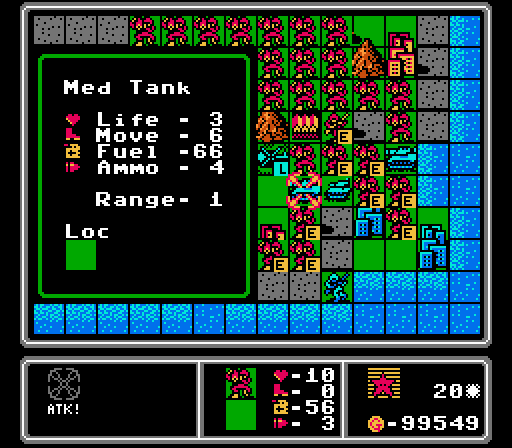 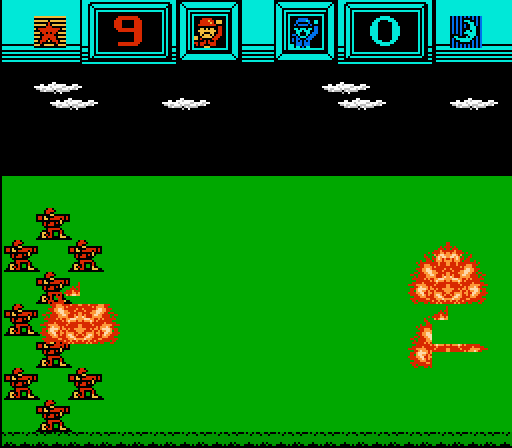 Mechs killing medium tanks, still fun. 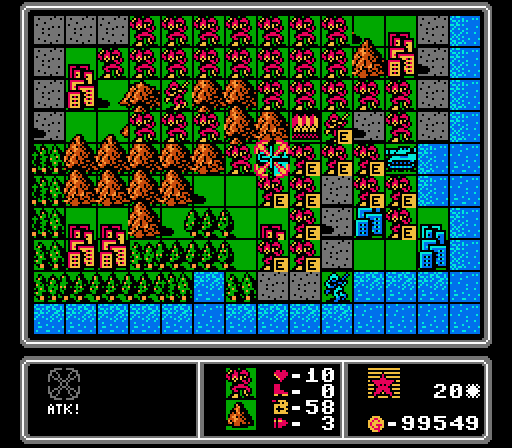 The tank and copter both fall as well. 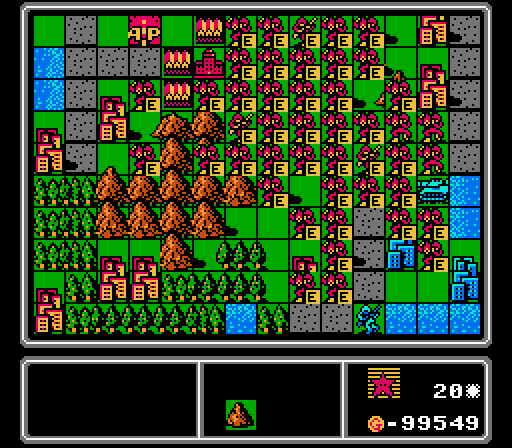 Suddenly we're close to almost accidentally winning via rout again, despite my best efforts to actually capture the HQ this time. 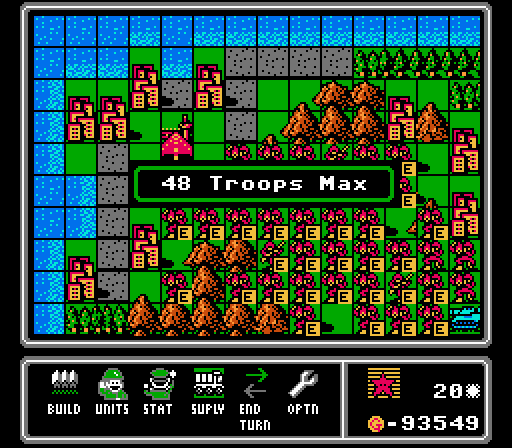 We also hit the unit cap this turn; I suppose we have enough mechs now.  The last enemy medium tank is trapped and unable to reach our infantry, but still insists on attacking us and wearing itself down. Turn 21  The enemy infantry is next to perish. I have more than enough mechs to swarm and finish off the last medium tank as well, but where's the fun in that? Turn 22  It's worth waiting one extra turn to finally win by HQ capture.  Well, there you have it. We won the map with 8 infantry and 72 mechs (of which 11 mechs were lost in action, and another 16 lost to merges). Blue only built 23 total units (including four medium tanks and one rocket), thanks to us also winning the capture race and limiting their income.  We'll celebrate this achievement with another victory animation.  Hey, we actually won a map where the AI out-spent us. I think that's a first. Maybe there's something to this all-mechs strategy. Our CO was Surume the squid, defeating a bull. These early-era COs sure are strange. 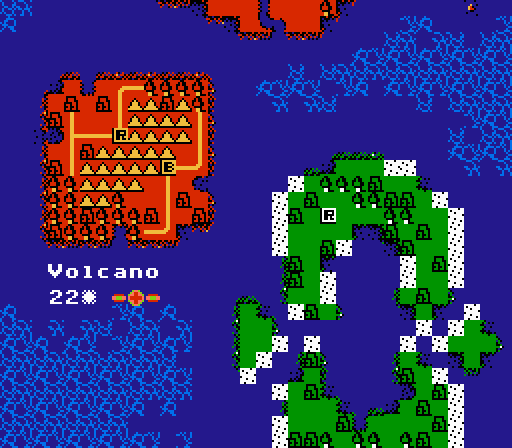 Winning in 22 turns isn't really a good score (average is 18 turns) but given the challenges, it's pretty understandable. Not sure I could've really cut it down much given the constraints. Maybe managed the infantry a little better to sneak in a capture sooner? Really though we got a little lucky with some of the AI unit movements. 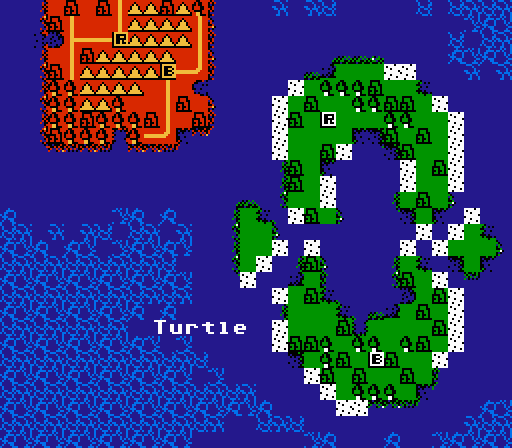 Next time we're back to naval warfare with the Turtle islands. This map is going to be a slog as it is but I've come up with three minor challenge options:
Vote in the linked poll here. DKII fucked around with this message at 07:21 on Jan 16, 2022 |
|
#
?
Jan 15, 2022 05:17
|
|
|
As someone who has to play AW by only deploying named units, I've never even seen someone hit the unit cap, or deploy so many mechs. An entertaining map throughout, I'm still impressed that a horde of mechs managed to take out medium tanks without much trouble. There might be something to that strategy after all. I seem to recall AW2 also having a volcano map that was mostly mountains in the centre and paths on the outside, though that one was much larger and had to be approached in a different way. I do wonder if it was an intentional callback to this map, though. No suggestions for a challenge this time around - if it's going to be a slog anyway, may as well cut down on your frustration.
|
|
#
?
Jan 15, 2022 12:57
|
|

|
That was a lot of Mechs.
|
|
#
?
Jan 16, 2022 00:40
|
|
|
That's a fun one lol
|
|
#
?
Jan 16, 2022 03:37
|
|
|
I think I had 45 mechs and 3 infantry at the end there. It took a few minutes just to move each individual one each turn, mostly one space at a time. Fun for a one-time thing but not sure I'd want to try it again. Ok I've come up with three minor challenges on how to go about this map:
Vote in the linked poll here.
|
|
#
?
Jan 16, 2022 07:20
|
|
|
That was a really cool one to read. Have to imagine it'd be a huge pain in the rear end to move all those units every turn, but I liked it.
|
|
#
?
Jan 17, 2022 00:24
|
|
|
The Golux posted:This looks like a fun map to try to march infantry across the mountains, possibly with copter cover, and get a capture victory, but that would be its own challenge and the CPU might make it hard. Well I was right that it was fun, but mechs instead of infantry. And the CPU didn't make it as hard as I expected.
|
|
#
?
Jan 17, 2022 09:08
|
|
|
The Golux posted:Well I was right that it was fun, but mechs instead of infantry. And the CPU didn't make it as hard as I expected. My practice run did stall out - I initially went all mechs and no captures, and the AI had enough income to keep throwing out rockets and medium tanks every turn, and I couldn't keep up. A littlie adjustment to at least keep some presence in each corner pass worked out, though.
|
|
#
?
Jan 17, 2022 16:09
|
|
|
I'm happy to see the classic "flood of mechs" strat is a tradition going all the way back to the original Wars game. 
|
|
#
?
Jan 18, 2022 09:08
|
|
|
As someone who's favourite CO is Sami, I approve of ridiculous Mech floods.
|
|
#
?
Jan 18, 2022 09:28
|
|

|

|
| # ? May 3, 2024 23:48 |
|
|
 Well that was pretty clear. Maybe I can find a fun graphical way to do a checklist.
|
|
#
?
Jan 21, 2022 05:40
|
|