


|
Part 33: Unit Overview: Copter  Basic Info: pre:Cost 4000 G Movement 6 Move Type Air Fuel 60 Ammo 4 Ammo Cost 3 G Range 1 Special Can carry one infantry or mech pre:Opposing Unit Damage Dealt Damage Taken Infantry 5.5 1.5 Mech 5.5 2.5 Medium Tank 0.5 2.5 Tank 0.5 2.5 APC 1.5 2.5 Rocket 0.5 N/A Artillery 0.5 N/A Supply 4.5 N/A AA Missile 1.5 7.5 AA Tank 1.5 7.5 Fighter 0.5 6.5 Scout 0.5 7.5 Bomber 0.5 N/A Copter 4.5 4.5 Battleship 0.5 7.5 Lander 0.5 6.5 Copters are basically APCs that fly. They can carry an infantry or mech with them, and can actually fight back if attacked. In later games, copters also get split into two separate units - a battle copter for fighting, and a transport copter for carrying grunts around. Unlike APCs, copters don't really have a good niche in combat. They're somewhat effective against footsoldiers and other copters, and that's about it. Keep them away from pretty much any unit that's designed to counter air units, too. Still, they're cheap and useful for carrying your capturing forces to far-flung corners of the map.
|
 #
?
Jan 21, 2022 05:51
#
?
Jan 21, 2022 05:51
|
|


|

|
| # ? May 4, 2024 00:22 |
|
|
Part 34: Turtle (1 of 2) Time for the Turtle map. Welcome to defensive slog hell. 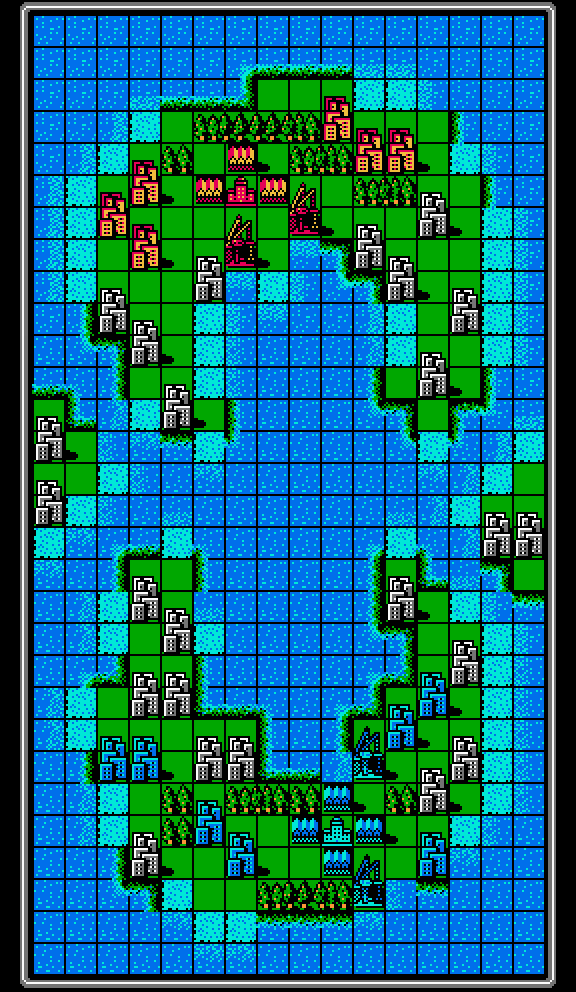 Couple things with this map. Note that there are no airports - this is the first naval map we've had without air support. So we're going to have a lot of landers carrying ground troops, supported by battleships as we can afford them. Blue starts with one extra city, and also has three more cities on its starting island. In exchange one of their ports is on the back side of their island. There are a ton of cities overall, so Blue is going to be pouring out medium tanks and rockets everywhere as it turtles up when we approach. Our challenge for this map is Door Knob (Everyone Gets a Turn!), so all of our unit types that are able to attack will have to get at least one kill this map. To that end, I've made this handy checklist: 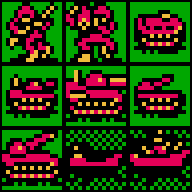 Any bets on which unit type will be the first to get a kill? How about the last? Turn 1 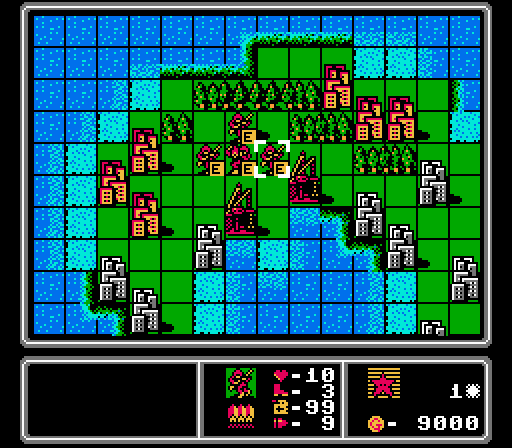 Pretty standard start here.  The AI opts for a couple APCs. I didn't bother; our starting island isn't that large that they'd really help. Turn 2 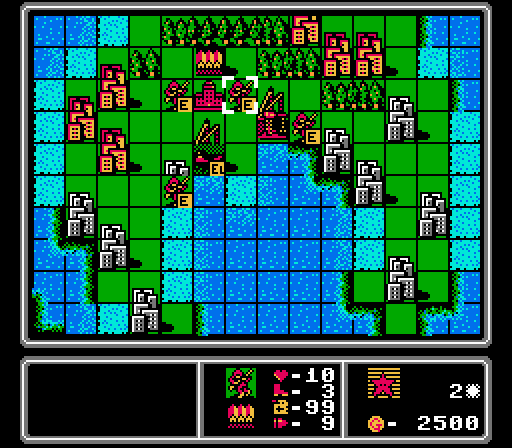 Instead we get a lander, to try and take those small central islands. We'll need all four cities on those islands just to have a slight income edge on this map. 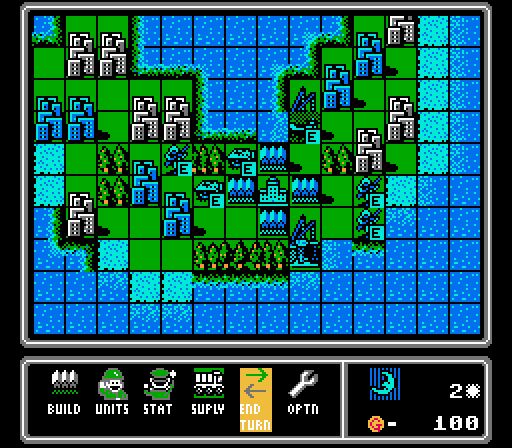 Blue doesn't even put anyone into its APCs, and also puts out a lander. Turn 3 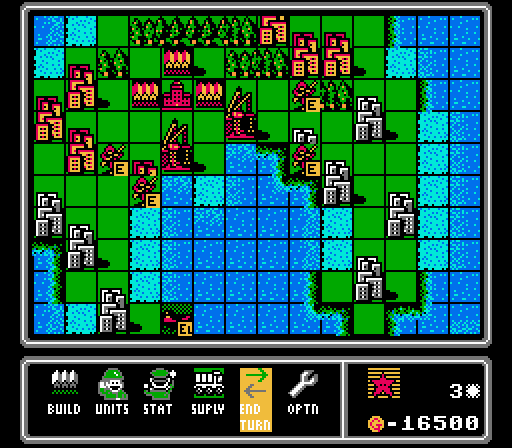 I don't build anything this turn. In a practice run I started putting out ground vehicles to send over, but this time I'm saving up for a battleship first. 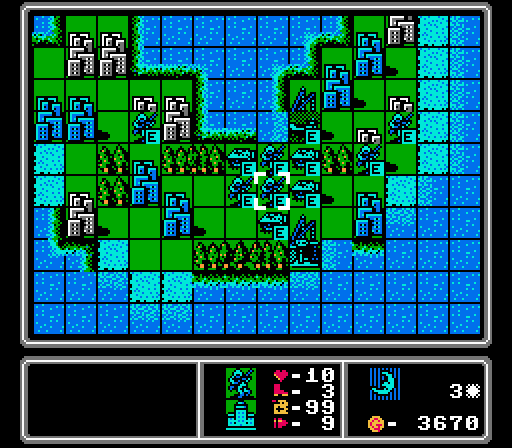 Two more APCs for Blue, and nothing loaded into any of the transports. Good thing; they could've really messed me up if they sent infantry out for one of the central islands now. Turn 4 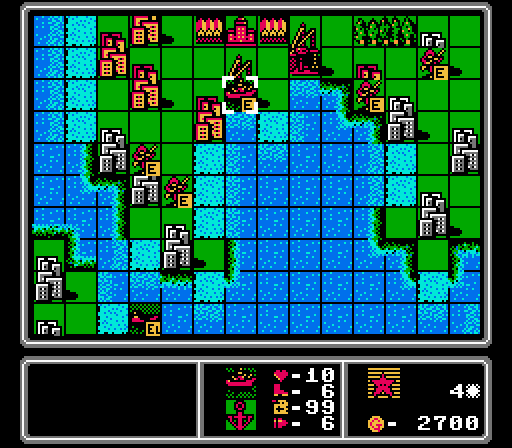 Notice how whenever we have a naval map, we start with a bunch of cities so we get a good income going right away. Battleships are expensive but so worth it. 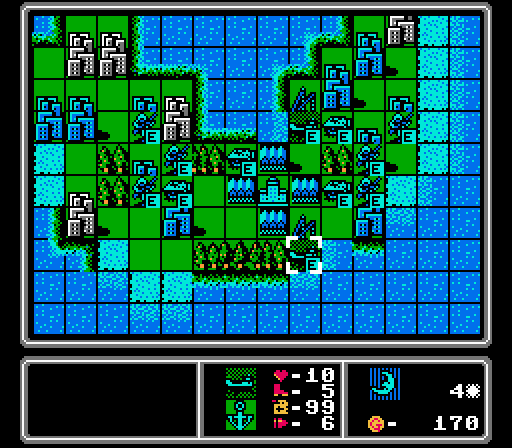 Blue builds another lander. How long will this one just sit there? Turn 5  Okay, now we start building some vehicles to send over. We get a mech onto one of the central islands, too. 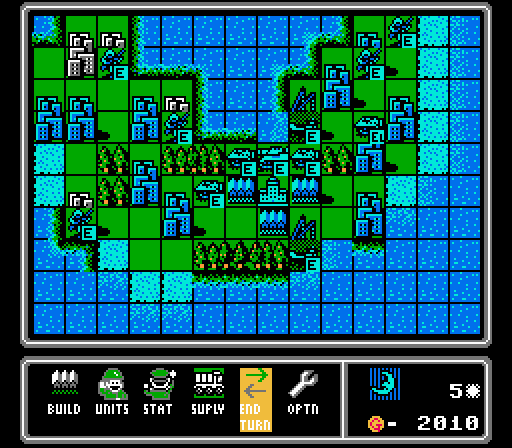 Oh good, we're already at the point where the AI is going to start spamming medium tanks. Turn 6  We build another lander and load up the tank and APC inside. 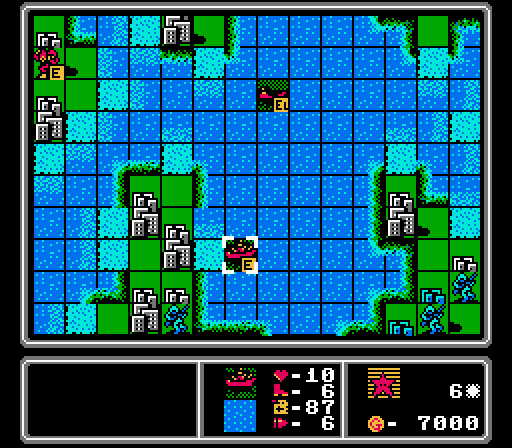 Our first battleship is now ready to cause some trouble. Mostly slowing down Blue's captures.  The enemy medium tank sits right outside battleship range, as Blue puts out a rocket this time. Turn 7 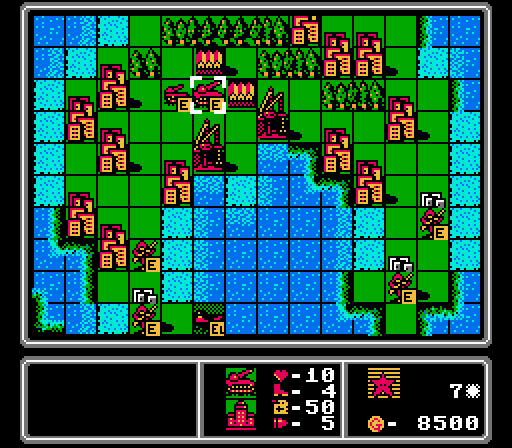 This map is just such a slow start. Our battleship doesn't have anything to hit that's worth spending ammo on, so we just put out the next round of vehicles to put in a lander later. 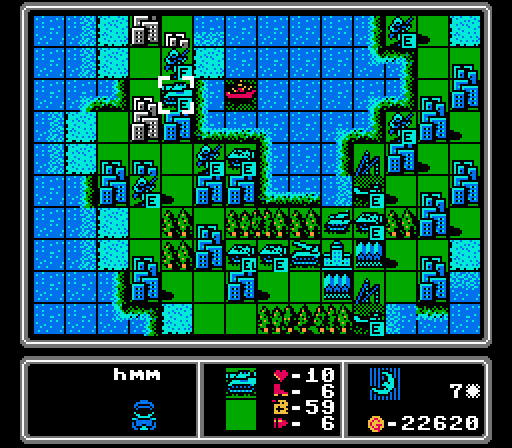 The medium tank parks in the battleship's blind spot. Later the enemy rocket loads into the back-side lander. Turn 8 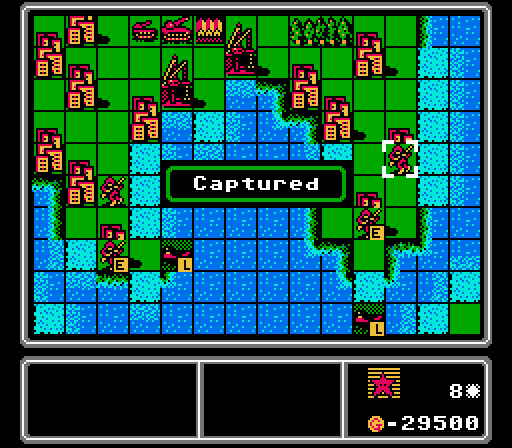 That's the last city on our starting island. 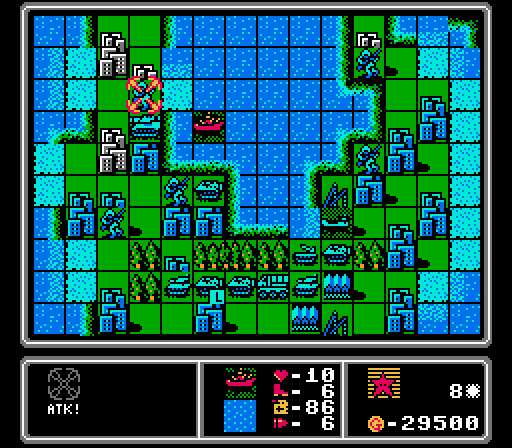  Battleships against infantry isn't very efficient, but we want to delay Blue getting these last couple cities as long as possible. And I was sick of not attacking anything.  We're going to need another battleship pretty quickly at the rate that Blue is putting out the heavy vehicles, so I take that option instead of loading up another lander.  This lander is ready to cause trouble now. 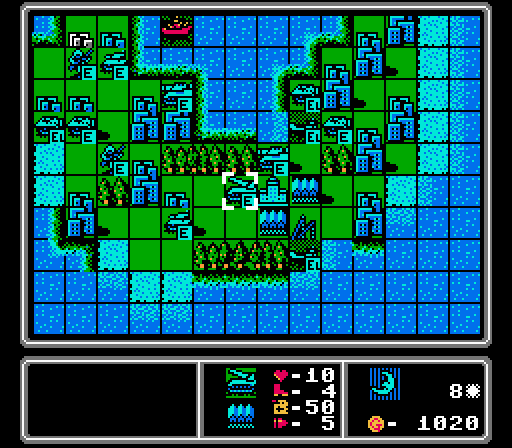 Some turns Blue puts out both a medium tank and a rocket. We're going to need more battleships. Turn 9  We start off by building a lander and loading up the waiting artillery and rocket. 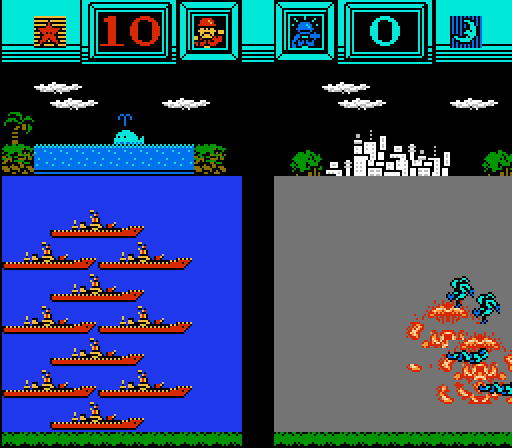 The battleship then finishes off the capturing infantry, scoring the first kill of the map.  No bonus points if you guessed that one, the battleship would've been a heavy favorite for first kill. One down, eight to go.  We also start our ground invasion. Though there are enough enemy units around here that I'm not real confident in this round. 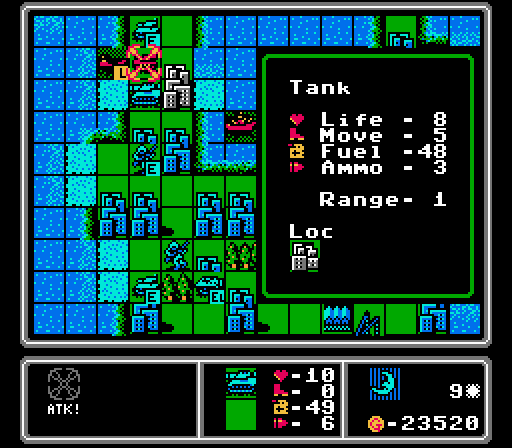 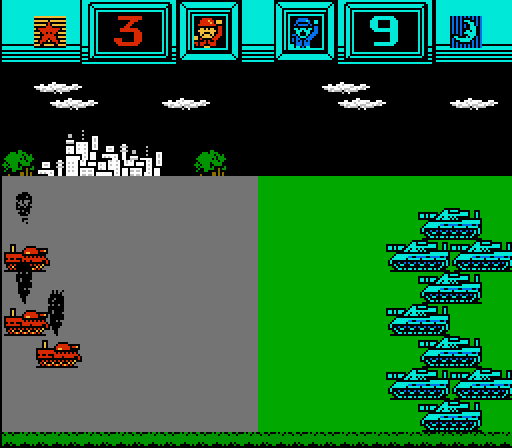 Sure enough the tank is immediately hammered. 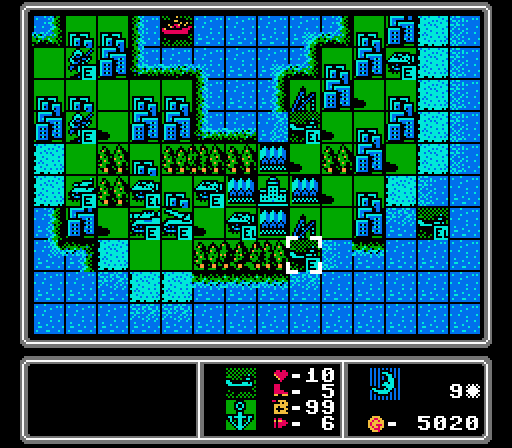 Blue built another lander. I didn't notice right away that the other lander had moved away, and this was a new one. Turn 10 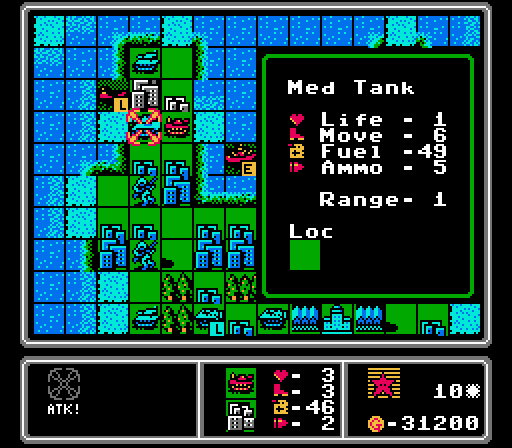  While our tank is doomed, our battleship weakens the medium tank enough that the tank can still finish it off.  Two down! 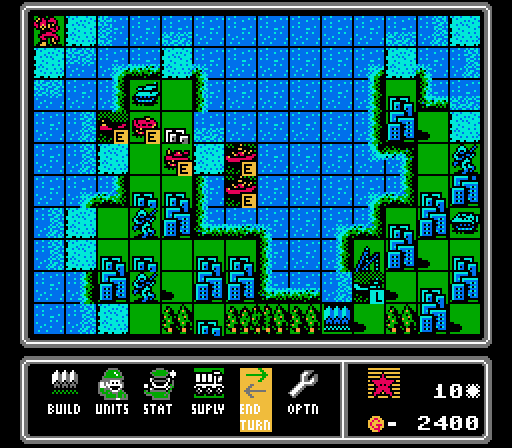 We unload the APC, because why not at this point. Another battleship arrives to support, and we build a third back at our island.  The damaged tank hits our APC, but that's about it. 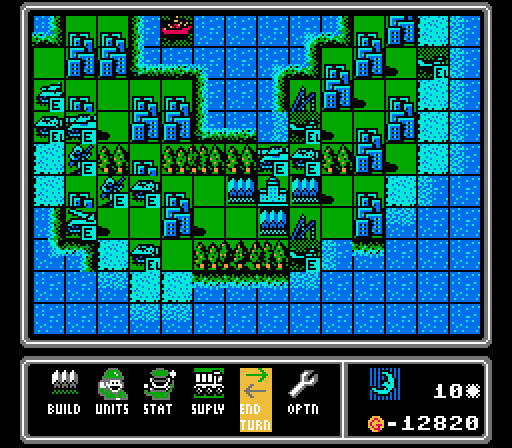 Everyone else is wary of our battleships. Turn 11 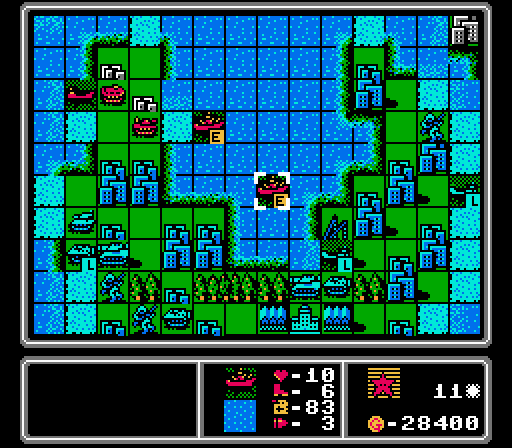 We wipe out the nearby tank but don't have anything else to hit, so one battleship repositions to threaten the port and HQ area. 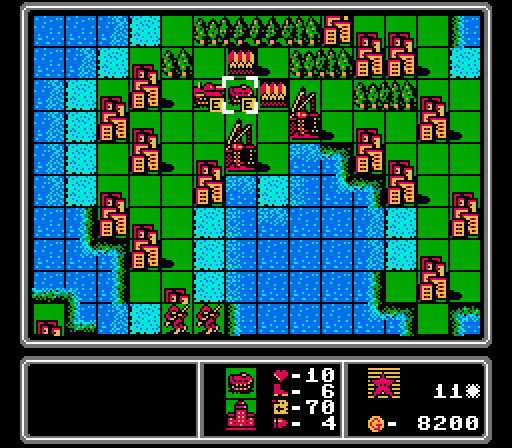 Another wave forming. 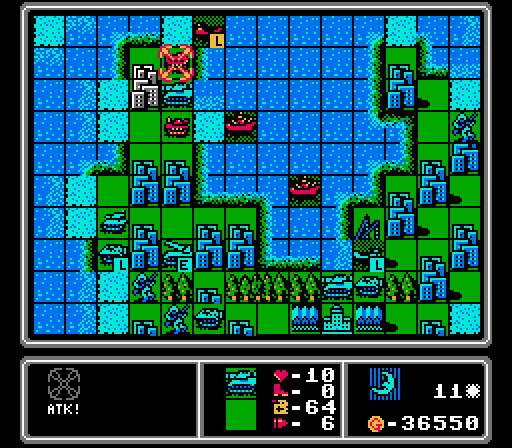  Good thing because our first wave is wiped out here.  There's just too much money available in this map. Blue puts out a tank, a medium tank, and a rocket all at once here. Turn 12  That's the last city on the central islands under our control now. We've won the capture race but having 19 cities to Blue's 16 (plus the HQ and 2 ports on each side) isn't much of an edge.  One battleship hits the medium tank for 8 damage, and the other hits a loaded APC to try to keep those last two cities free. A third battleship arrives on the scene, just as we have two landers carrying troops that don't really have a clear beachhead anymore. 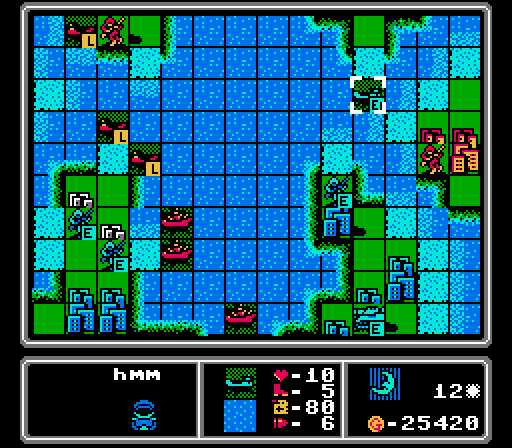 Blue starts capturing the last two cities on its island, but everyone else gets away from the battleships. Pictured here is the point where I realized there was a loose lander carrying a rocket and artillery. There's not much damage they can do on their own but I'd still not rather have them running amok on our island. 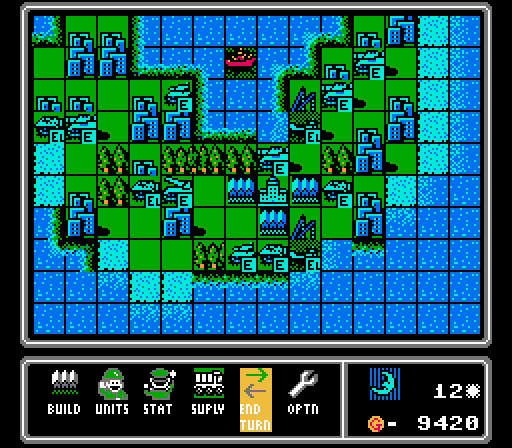 Look at all those medium tanks! We're going to need some more heavy-hitters, pronto. Turn 13 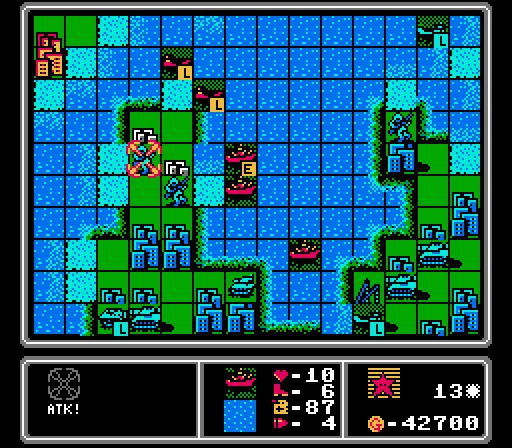 The battleships each fire on a capturing infantry, taking both down to half-life.  The other battleship hit the nearby tank. I'm not sure what to unload here with the enemy medium tank still nearby, but figure an infantry is at least easy to replace.  Battleship number four, and some more fodder.  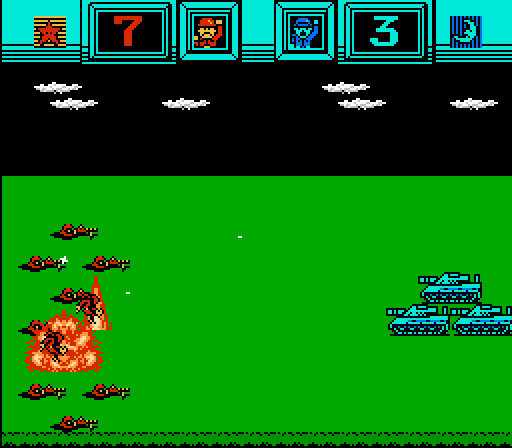 Apparently this medium tank already got hit by a battleship earlier, so our infantry didn't fare too badly. 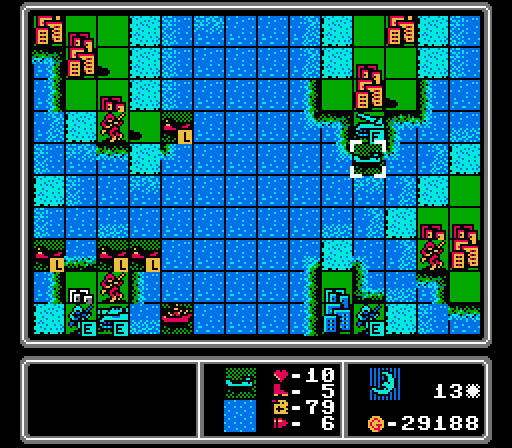 Oops, we let the enemy onto our island. Luckily they're even worse at maintaining invasions than I am.  Another medium tank, and another rocket. Turn 14  The lander hits the medium tank but can't finish it off. The battleships here each finish off a capturing infantry. 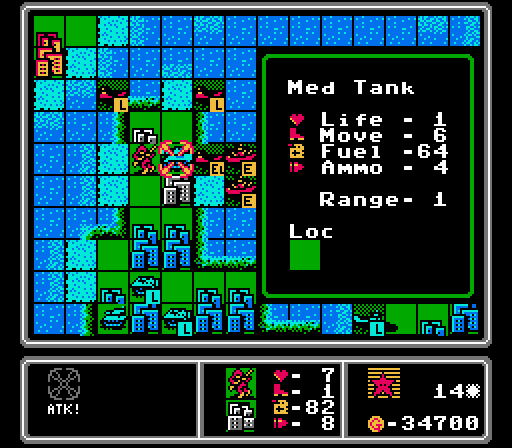  This is not how I expected the infantry to get its kill, but here we are.  I expected the infantry to be one of the last ones to get a kill, honestly. 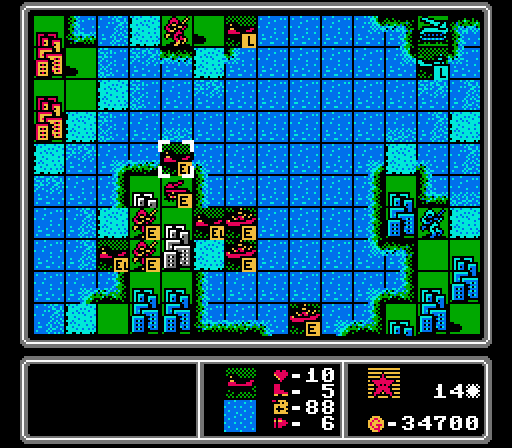 The area is momentarily clear, so let's drop off a couple more units.  I set the battleship to chase the rocket down for now, while more ground troops load into another lander. 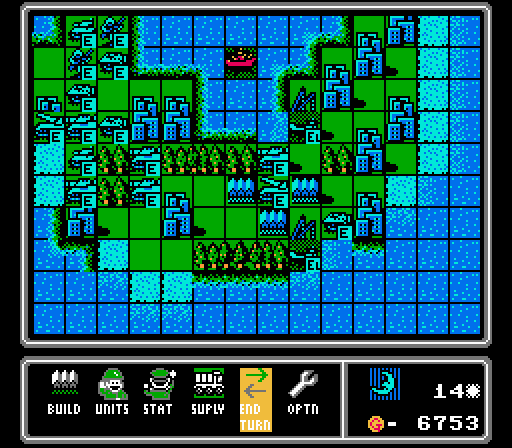 Our infantry took a hit from a tank, and the rocket on the enemy HQ scratched our battleship. Just look at this horde on the left side now. That's five medium tanks out there! Turn 15  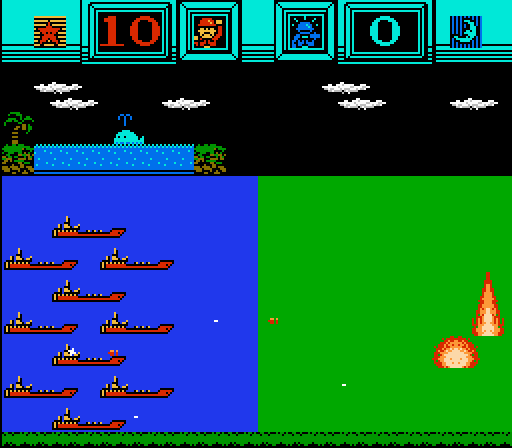 I don't usually like to attack with loaded landers but this opportunity to finish off the damaged tank was too good to pass up.  It can be tough to get a kill from a lander on this map, since they're not really effective against anything but air units, but that's another one checked off. 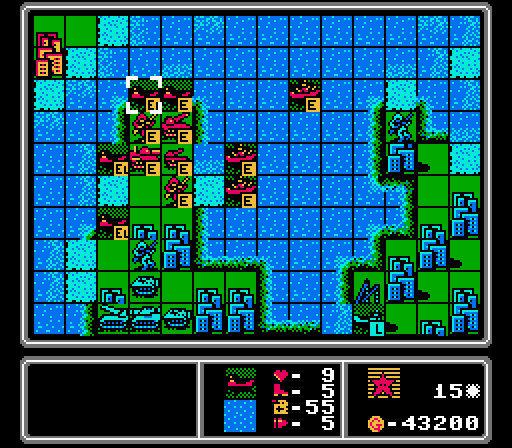 In the meantime, the battleships finished off an APC and weakened an infantry. Our first battleship is out of ammo and has to retreat. We also finished off one infantry with one of our own, and unloaded a couple more units from landers. We have the makings of a proper beachhead now.  The enemy rocket and artillery are both unloaded now. I'm wasting battleships trying to go after them but will switch it up soon.  Let's see, what happened here. A rocket and two medium tanks went after one of our landers for a total of 7 damage. Another medium tank killed our infantry, freeing up the city for a capturing attempt by Blue again. And then this tank decided to hit our medium tank for some chip damage. 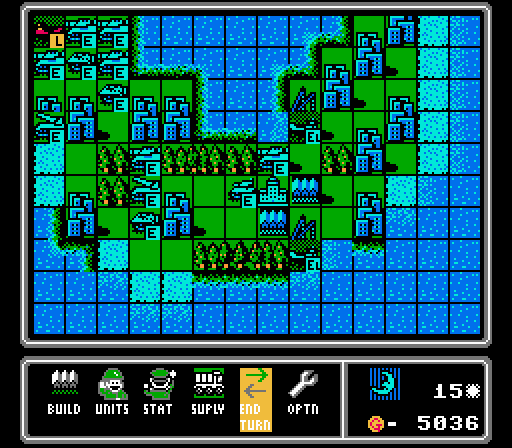 Well it's a target-rich environment for our battleships at least. Turn 16 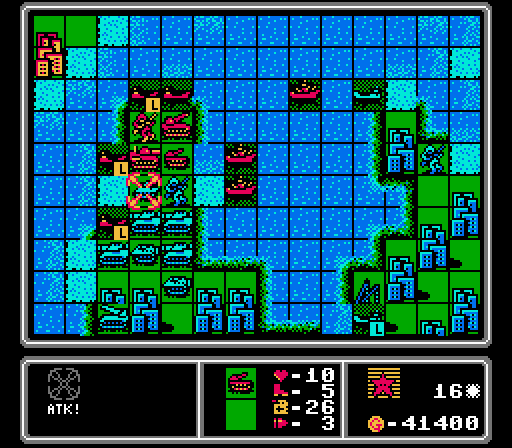 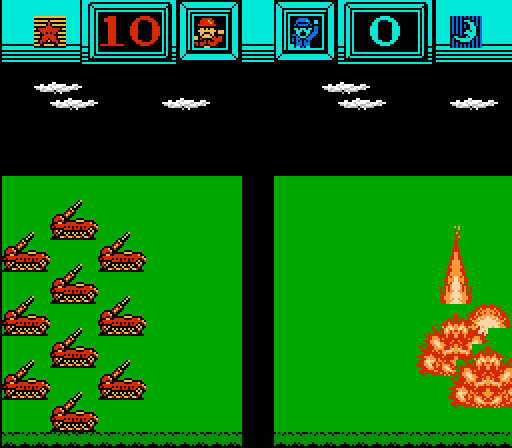 First our artillery finishes off this enemy tank.  More than halfway done with the challenge! 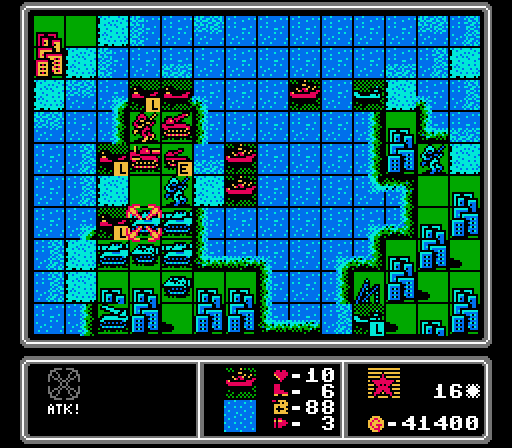 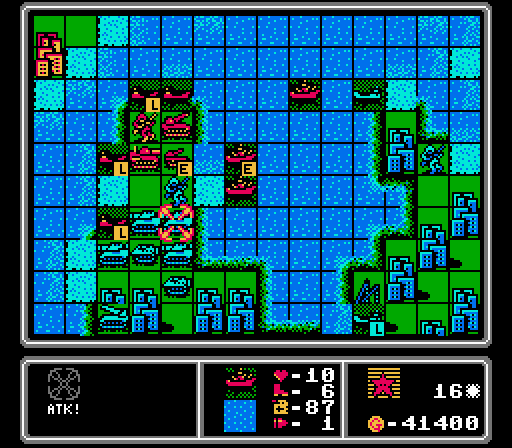 Our battleships each chew up a medium tank. I wish I had more in the area instead of chasing the rocket on our starting island. 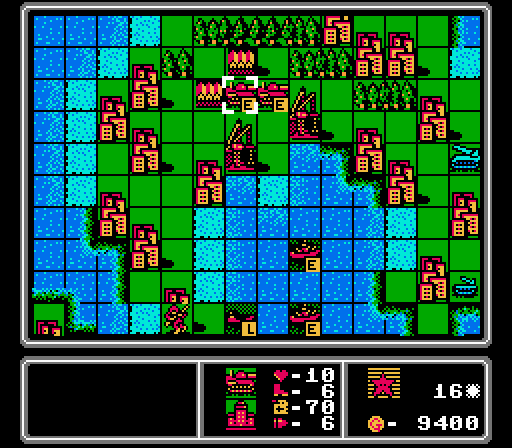 These two are going to hunt down the interlopers on our island. 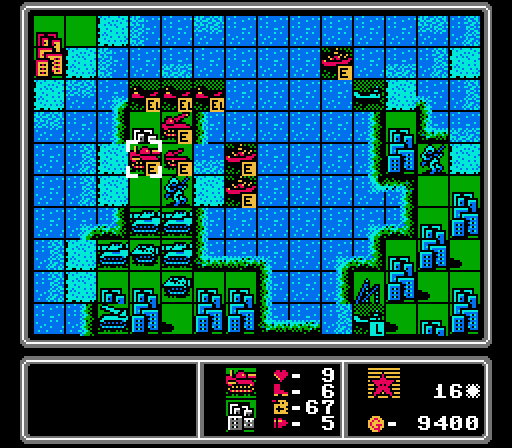 Our rocket hits the APC, and our infantry heads back into a lander. 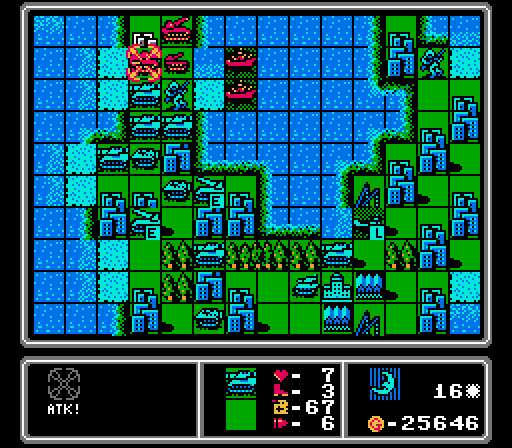 Still too many enemy medium tanks running around. 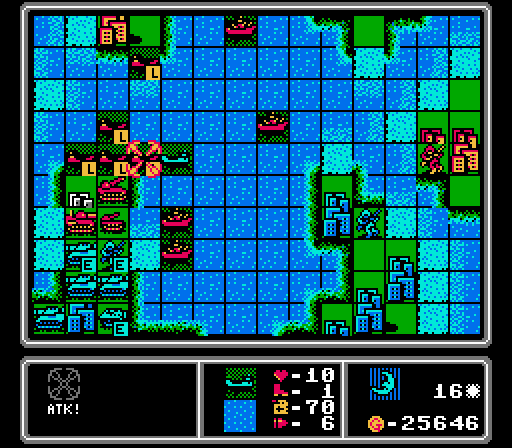  I kind of forgot about this enemy lander that had gotten loose. We only have an APC in our lander but still not ideal.  Just keep 'em coming. Turn 17  One of our battleships hits the enemy rocket that wandered into range. The other is out of ammo and has to retreat. I don't have anyone else that can hit that capturing infantry, so Blue is finally going to get that city. 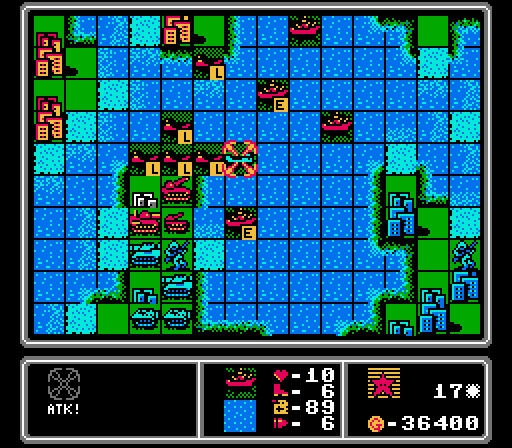 I do have a battleship that was en route and is able to finish off this enemy lander, at least. 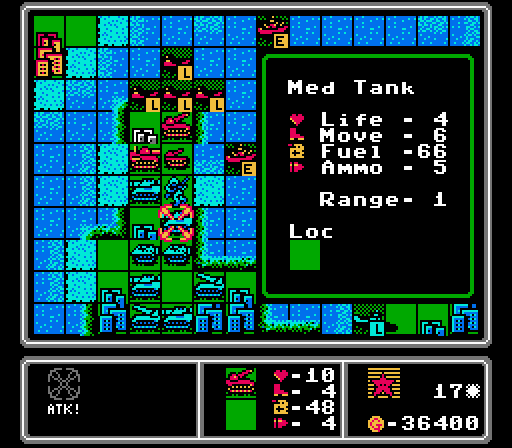  First kill for the rocket, finishing off a medium tank.  Hey we've got three in a row now. 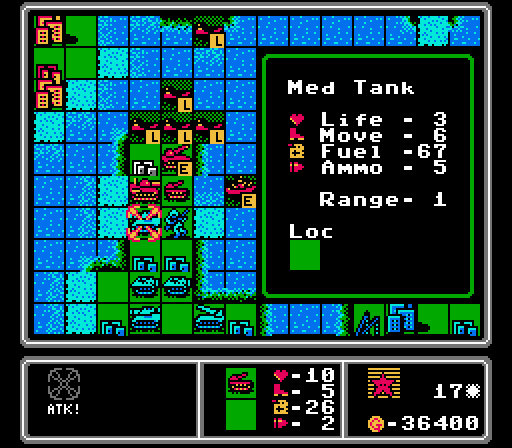 The artillery manages to finish off another medium tank.  Here was my last-ditch effort to delay that capturing infantry, but we didn't even do any damage. 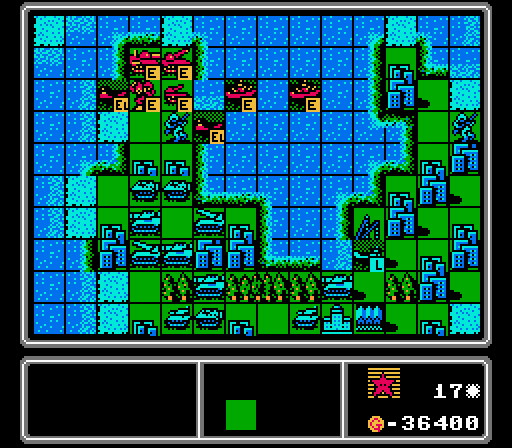 I unloaded the mech onto this city even though it's in rocket range. We should be okay there for one turn.  We're definitely going to need more medium tanks. Our first battleship has finally made it back to a port for re-supply, too.  The mech shakes off a hit from a rocket and then survives an attack from an APC.  Blue is staying cautious with us, not wanting to approach our battleship and rocket combo. 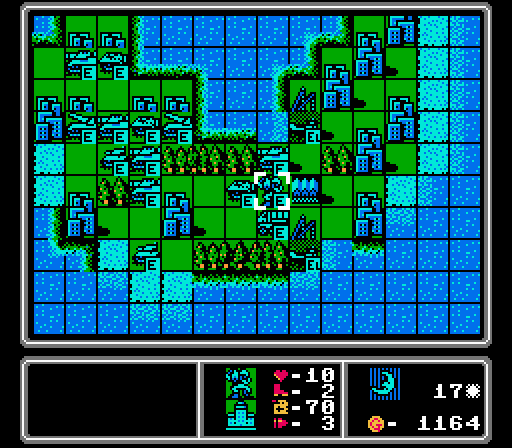 It's really hard to deal with a new medium tank every single freaking turn though. Turn 18   One useful property of a lander's weak offense is to soften up units for this challenge. In this case, the APC is brought down to the point where even our injured mech can get the kill.  Okay who thought we'd have infantry, mech, and lander before medium tank?  Our third battleship's final shot goes towards finishing off this rocket. Just before, the artillery hit the APC and the rocket hit the medium tank. They'll repair most of that damage though.  We had a couple units take damage from inside their landers, so I sent them back for repairs.  While the first pair of medium tanks continue to stalk the enemy invaders, we build a lander to hold the second pair. Then I build a supply because I belatedly realized that our artillery and rocket can't actually fire forever with no captured cities. 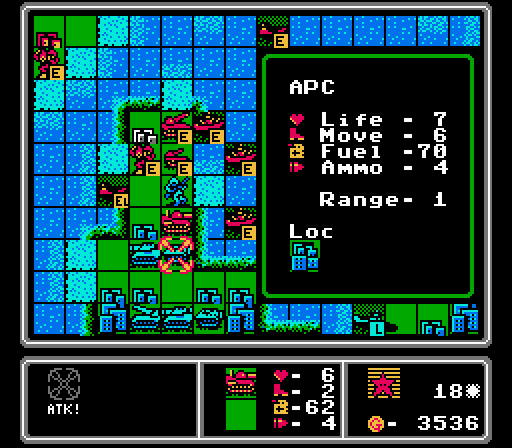 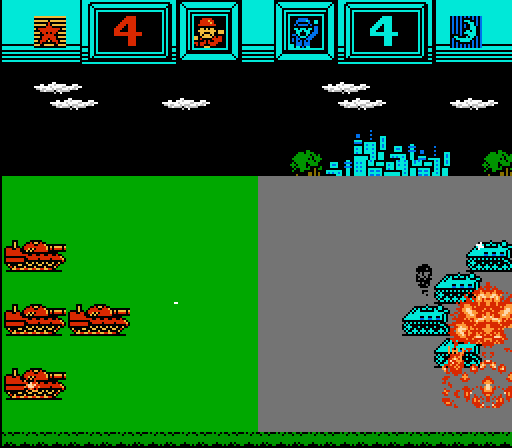 I kind of thought this medium tank would hit the APC a lot harder than it did, but between the city bonus and the hard mode bonus it really doesn't work out.  And now this still-fresh rocket is able to destroy our unprotected medium tank. Oy. 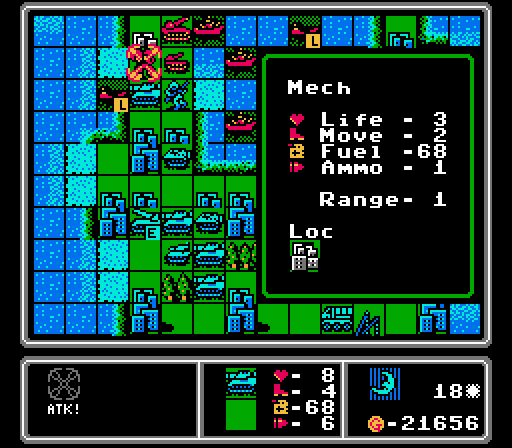 Yeah this mech was pretty doomed as well. 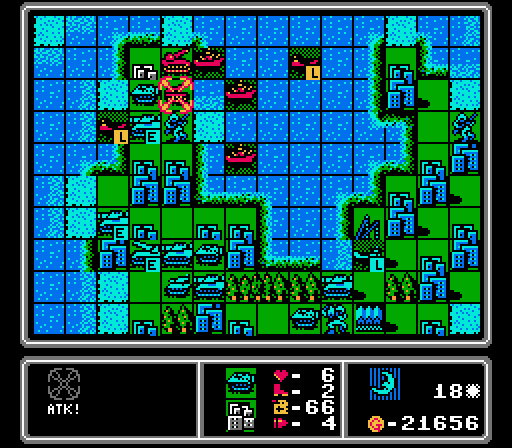 Lucky for us, the AI sends in a damaged APC to hit our artillery instead of a brand new medium tank. Still I think we're about out of luck on this invasion attempt. 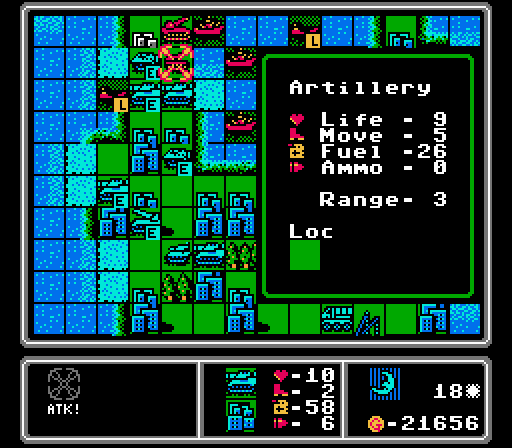 Oh never mind. The enemy infantry moves into the APC, and frees up space for that medium tank to come in and wreck our artillery anyway. It was already out of ammo so wasn't really of much use anymore, but now all we have left on the ground is a vulnerable rocket.  Yeah that's another medium tank. Well our second invasion is pretty much dead now. We've accomplished my primary goals though: Keep at least one city out of Blue's hands, complete most of the challenge checklist, maximize total damage to keep Blue from building up a navy, and...well I'll explain the last part next time! To Be Continued...
|
|
#
?
Jan 31, 2022 04:54
|
|
|
Honestly thought Infantry would be pretty early, from killing another Infantry during a capture slap fight cuz that happens both frequently and early.
|
|
#
?
Jan 31, 2022 16:22
|
|


|
As soon as I saw the map was two completely separate islands, my immediate guess was APC simply because you�re already going to have to load up on landers, so why bother buying APC�s?Tulip posted:Honestly thought Infantry would be pretty early, from killing another Infantry during a capture slap fight cuz that happens both frequently and early.  I figured you�d push for the enemy�s island ASAP to try to steal a few cities and you�d get into an infantry fight as part of that.
|
|
#
?
Jan 31, 2022 18:16
|
|


|
Tulip posted:Honestly thought Infantry would be pretty early, from killing another Infantry during a capture slap fight cuz that happens both frequently and early. MagusofStars posted:As soon as I saw the map was two completely separate islands, my immediate guess was APC simply because you�re already going to have to load up on landers, so why bother buying APC�s? Yeah if this were a land map with more of a contested area in the middle, infantry would be a good choice for first kill, but it's hard to put them straight out onto a contested island. APC is a good guess for last kill though, they really don't have a good use on this map and I probably wouldn't have bought one at all if I didn't have to. Really I probably wouldn't have been pushing out ground units this much early on at all without the challenge, so it's been good for getting me to play differently at least.
|
|
#
?
Feb 1, 2022 05:37
|
|
|
Does this game let you put a loaded APC on a lander?
|
|
#
?
Feb 1, 2022 09:33
|
|
|
MR. J posted:Does this game let you put a loaded APC on a lander? Actually yes, though I didn't take advantage of it here. Loading APCs is kind of a losing move in this game, since the APC's turn ends when it's loaded so it's tougher to use efficiently.
|
|
#
?
Feb 2, 2022 03:14
|
|
|
Part 35: Turtle (2 of 2) Turn 19 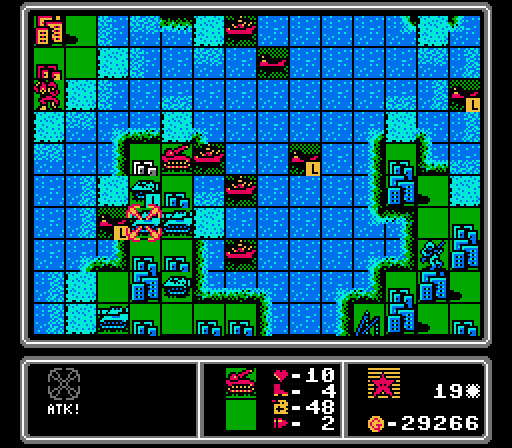 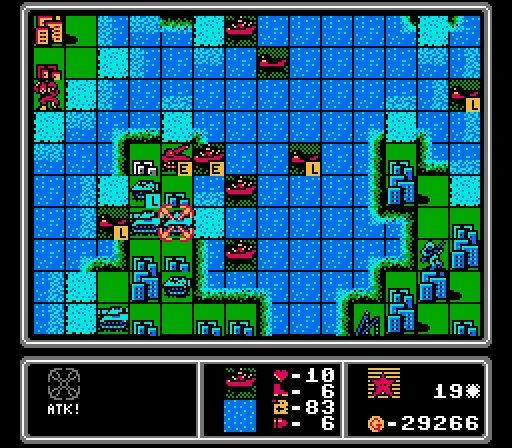 Last we left off, our rocket was making a heroic last stand. Here it hits one medium tank for major damage, while two battleships combine to take out the one parked on a city.  Here's the hidden benefit of focusing on the left peninsula for so long - almost nothing is left defending the right peninsula, and the beaches are better positioned for dropping off two infantry at once. If we can take just one city, we suddenly have a forward base to use for repairs and refilling ammo. 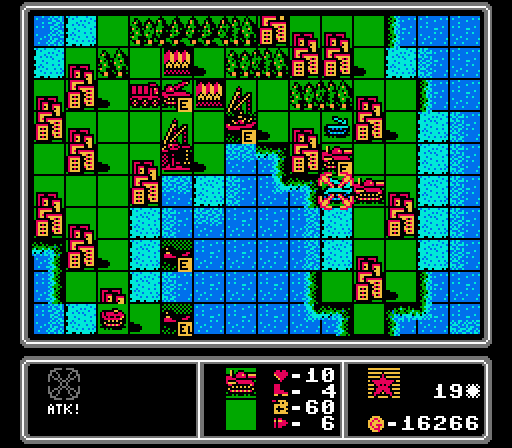 We've also finally cornered the enemy indirect units that have been running around our island for far too long. They'll both get in a shot at our battleship that put in for new ammo though. 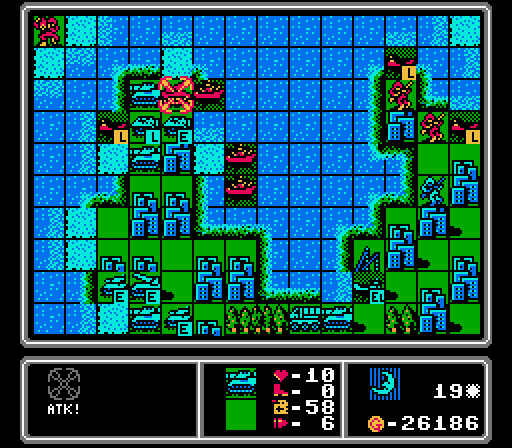 Our rocket falls to the APC and medium tank, formally ending the second invasion. 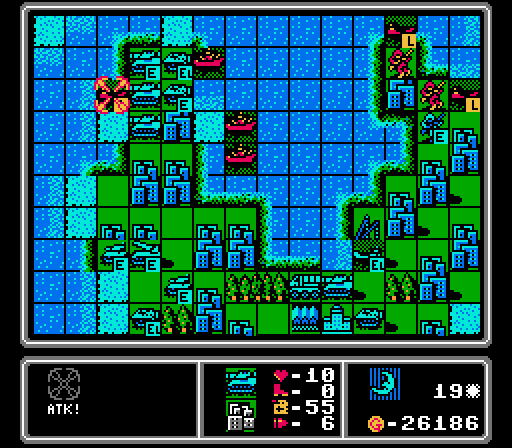 Another medium tank is baited forward for some chip damage on this lander. 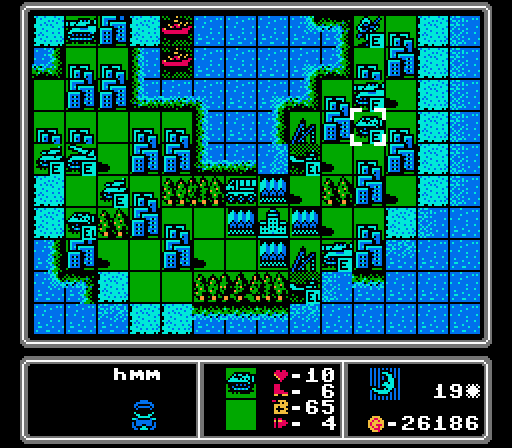 These islands aren't all that large and medium tanks and APCs have a ton of movement (for this game), so they're already making their way up to our infantry. 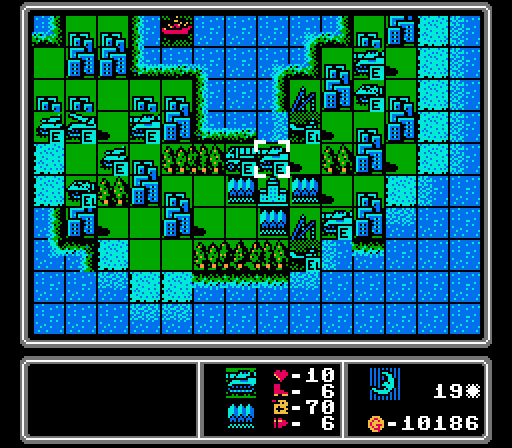 Yes, another medium tank. Turn 20  The invasion from Blue that I embarassingly allowed is now over. I have better uses for those medium tanks.  Not very exciting, but for the first time I'm re-using an old lander to take on the next pair of troops from the HQ instead of building a new one. Not having to build new landers will let us get more battleships and vehicles out more quickly.  Rather than continuing to whittle down the units remaining on the left peninsula, I leave them several turns away and move our battleships over to cover the right peninsula instead. 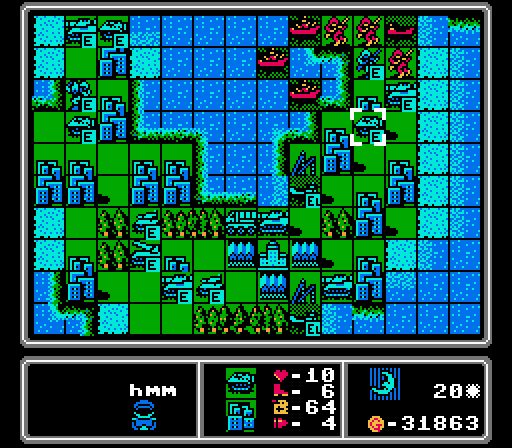 The medium tank can't get through to us. 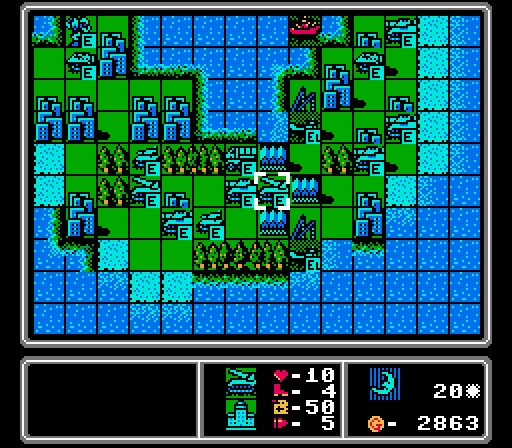 Won't stop the AI from building more. This time there's also a new rocket. Turn 21  Two battleships quickly remove a medium tank. The other one hits the nearby APC. 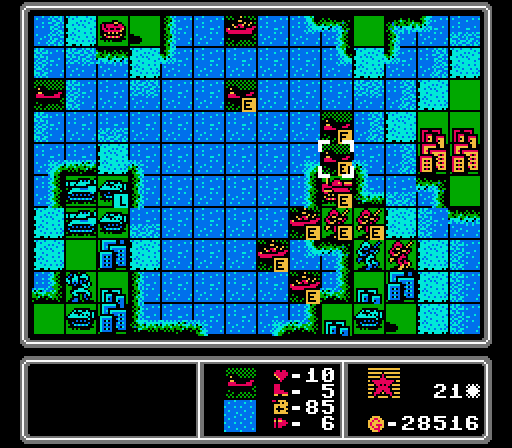 The capture continues (the infantry was slightly injured, so it'll take a third turn). But we merged together two other infantry for a healthier screen, then unloaded a medium tank for some stronger support.  The home defense force gets onto a new lander. 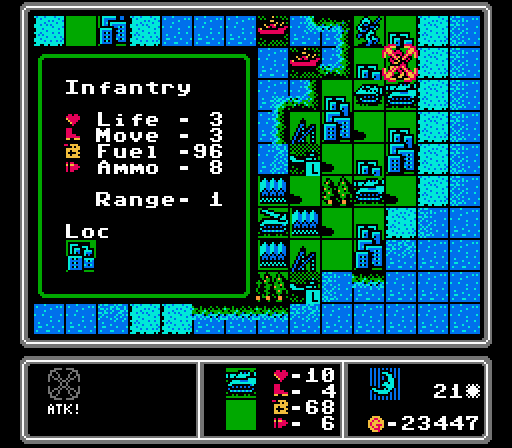 I moved this injured infantry onto the city specifically so that when this medium tank attacked it, it'd have to do so from the plains and forego any city protection. 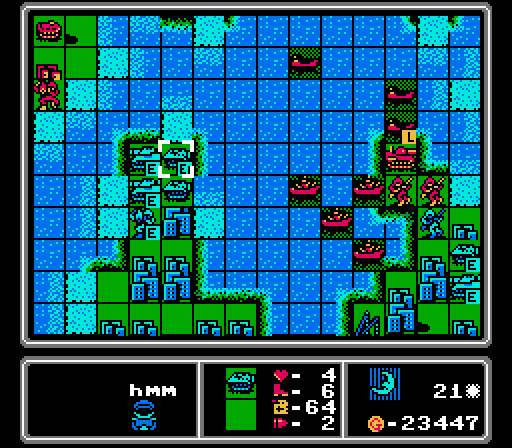 Still not getting many units on the right side, and the ones on the left side are in no hurry to go anywhere apparently. 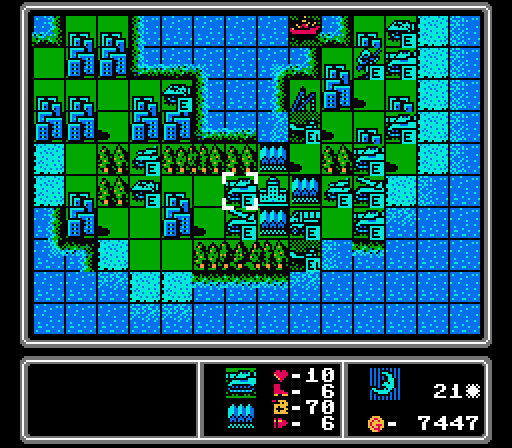 There isn't enough offense in this game to make dealing with a new medium tank every turn any fun. Turn 22  Finally! 22 turns in and we've taken our first city from Blue. 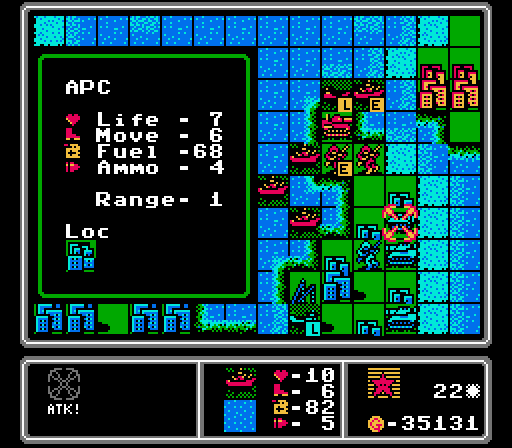 One battleship is able to erase this APC even though it's on a city. 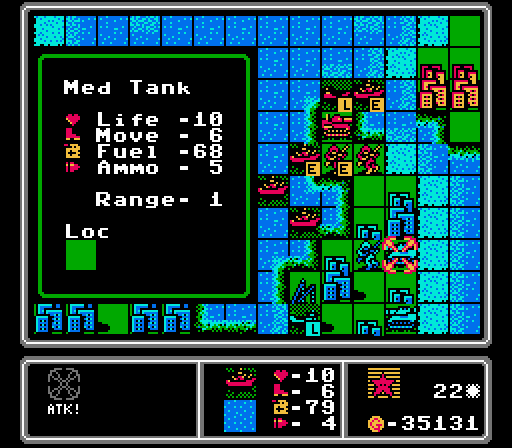  Another battleship gets in a shot on this medium tank. Note that hard mode effect again - battleships should do 8-9 damage to an unprotected medium tank, but we only got in 7 damage here.   Our medium tank rolls ahead and gets the kill here anyway.  I did not expect the first medium tank kill to not happen until turn 22.  Getting some more heavy hitters now that we have a forward supply point. 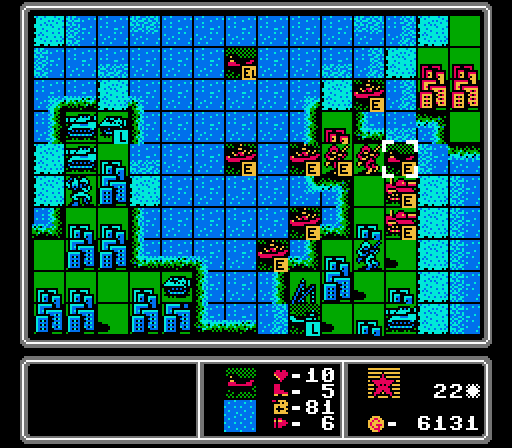 A second medium tank unloads right behind the first.  Two medium tanks hit us on the right side, but can't knock us free. The left side is starting to clear up again, with a mech starting to capture the last neutral city.  Before this map is over I should look up how many medium tanks Blue built. Turn 23  A new battleship has arrived and can't reach anything on the right side, so I get a bit of enjoyment out of hitting the capturing mech.   Spending battleship ammo on this infantry isn't really efficient, but the other two battleships already hit the medium tanks, killing one, so there weren't a lot of better targets left. 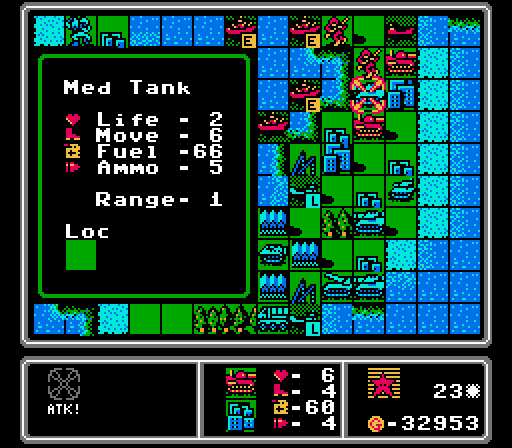 Our damaged medium tank heads out to finish off another enemy. Notably that's two enemy medium tanks destroyed this turn, above replacement level. 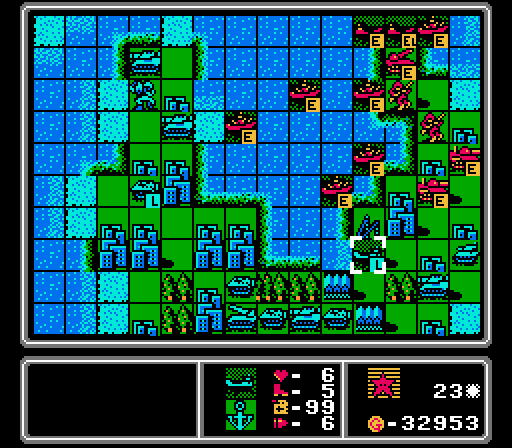 Another battleship hits this docked lander - the fifth battleship attack this turn. A sixth battleship enters the bay on the left side. We also unload a fresh rocket next to our supply point.  Our damaged medium tank barely hangs on, eating an attack from one from Blue's endless supply. 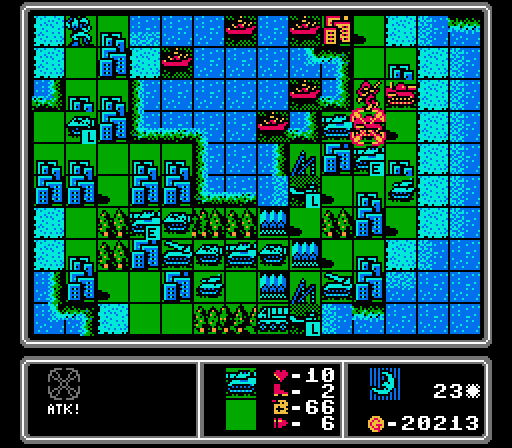 I mentioned there were a lot of enemy medium tanks around, right? A second one moves in to finish off ours. 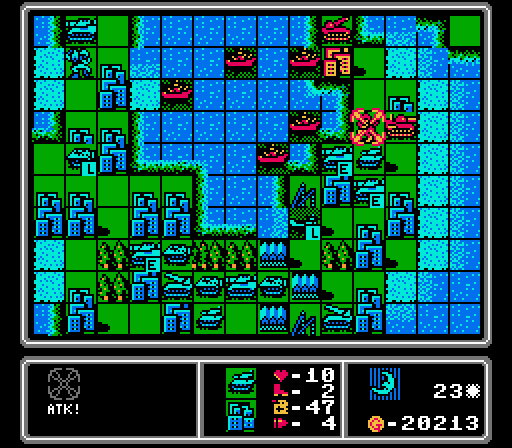  I went through all the trouble of getting this infantry back up to full-life for a quicker capture, and this tank up and ruins it.  I have run out of lines for talking about the AI building new medium tanks. Turn 24 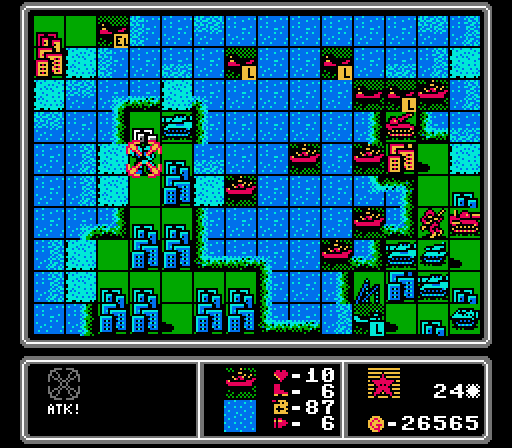  The left side is looking pretty vulnerable again, and Blue still hasn't taken that last city. 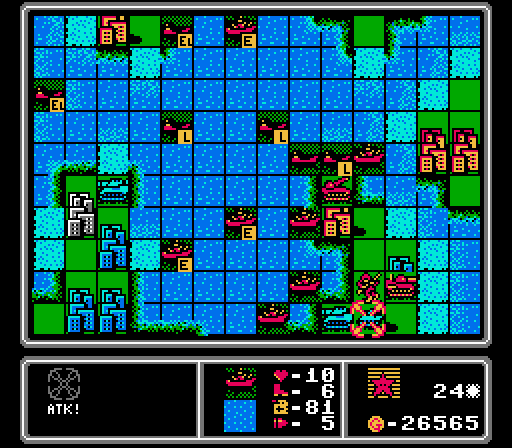  Battleship and rocket eliminate a tank. Three other battleships each hit a couple medium tanks and the docked lander, respectively, but don't get any kills.  Slight delay in the third invasion as we tactically retreat and regroup. 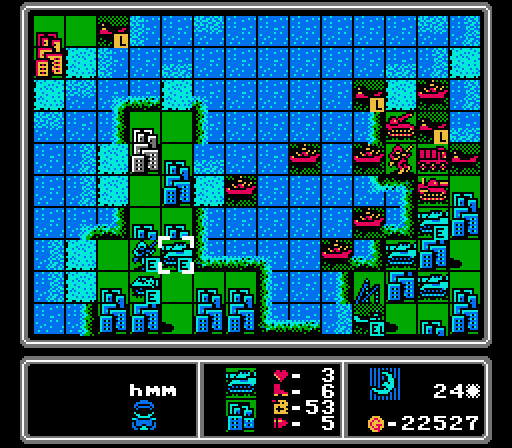 Only one fresh medium tank is able to hit us on the right side thanks to that momentary retreat. There's a new infantry on the left side but I'm not any more inclined to let it take that last city this time.  ... Turn 25  I'll have to move up this battleship eventually, but for now it can still reach and finish off the closest medium tank. 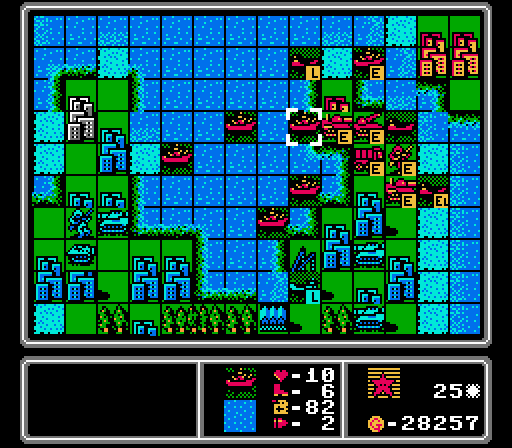  This battleship finishes off the docked lander and the supply it's been carrying the whole map. We also unloaded a new medium tank and re-arranged everyone else to let the other medium tank repair on the city and protect the rocket and infantry. Yes, that's a supply I have on the front line, it'll be fine for one turn. 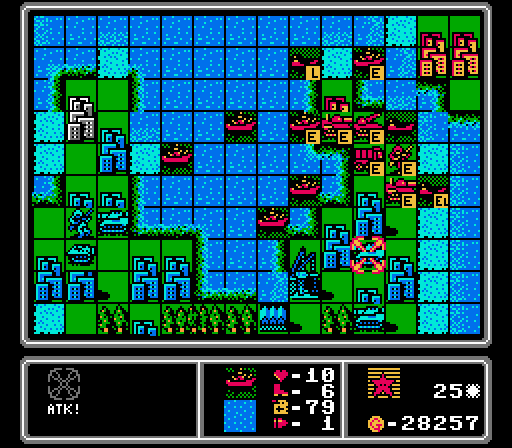  Two more battleships each finish off a medium tank that took damage on prior turns. 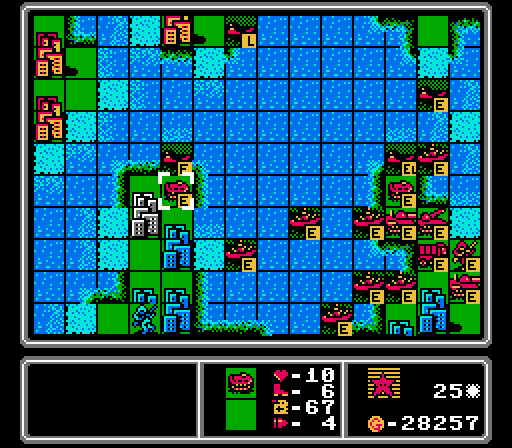 We also unload an APC on each island. The last unit type on the checklist! 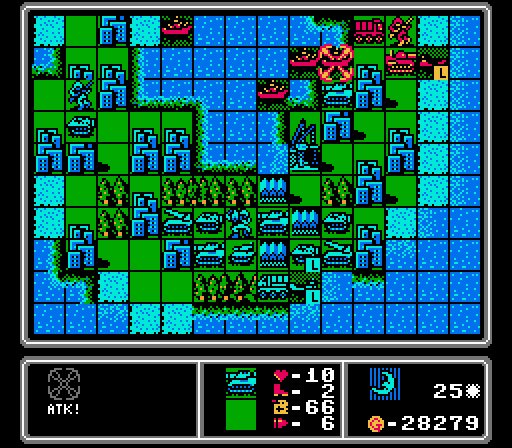 This medium tank could've reached our medium tank or supply, but instead wasted its turn getting in a single point of damage on a battleship that only has one ammo left anyway. 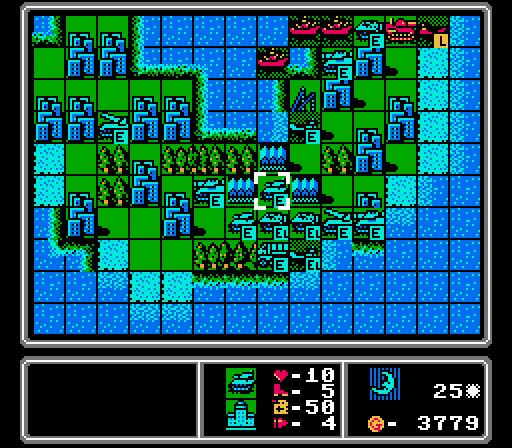 An APC does make it to our supply but that's it. And for once Blue doesn't build a medium tank! Instead the open port fills up with a new lander, and the leftover funds are only enough for a regular tank. Turn 26  Not letting this infantry take this last city. It was already hurt from when it got hit inside an APC a few turns ago, and the battleship finishes it off here.  The lander repeats its setup act from the first half, bringing the APC down to critical health. 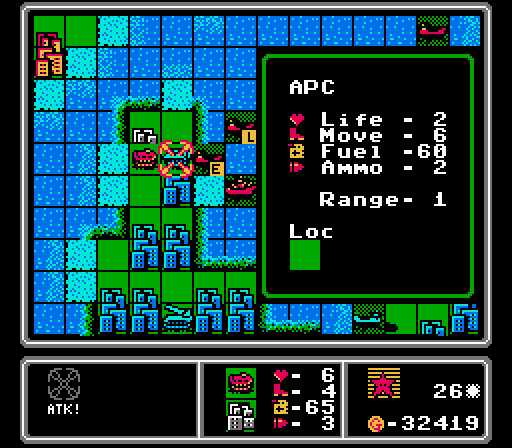  More than enough for our APC to get its first kill in.  Challenge complete! APCs are hard to use in an island invasion but now I don't have to anymore. With the challenge over with, we can focus on the unit types that are actually helpful here. Let's go win this thing!  Rockets and battleships make a great team. The rocket goes first and gets in enough damage for the battleship to finish off this medium tank. 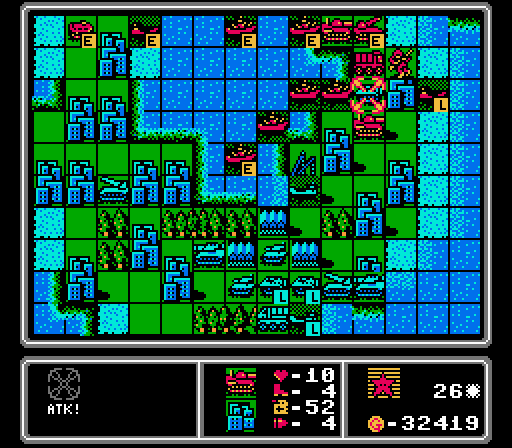 A fresh medium tank finishes off this APC after a battleship strike weakened it.  There's a rocket approaching us on the left side, so we unload a rocket and move in two battleships to keep it in check. On the right side, we unload another medium tank to form a solid line while our infantry starts capturing another city.  The rocket goes after one of the battleships, a good trade for us since battleships don't take any nonsense from anyone. 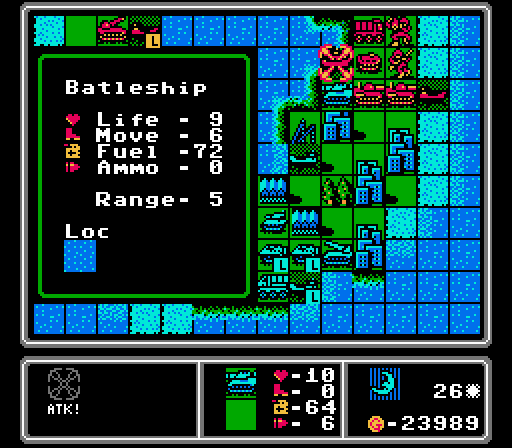 The AI really prioritizes hitting units that can't counter-attack, once again sending a medium tank against a battleship, this time one that's already out of ammo and about to retreat anyway.  Another medium tank and some trash to go with it. Turn 27 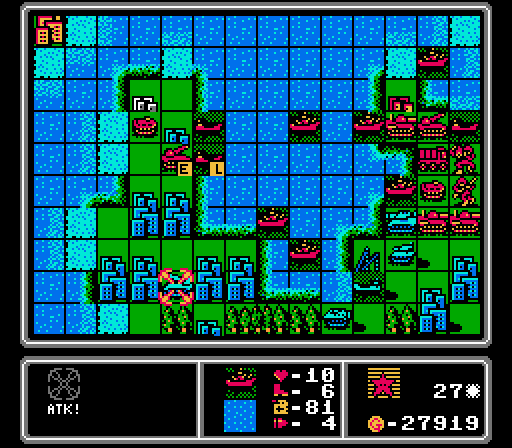 The rocket+battleship combo strikes again, wiping out this enemy rocket.  The rocket+medium tank combo isn't quite as effective, "only" doing 9 damage to this medium tank. 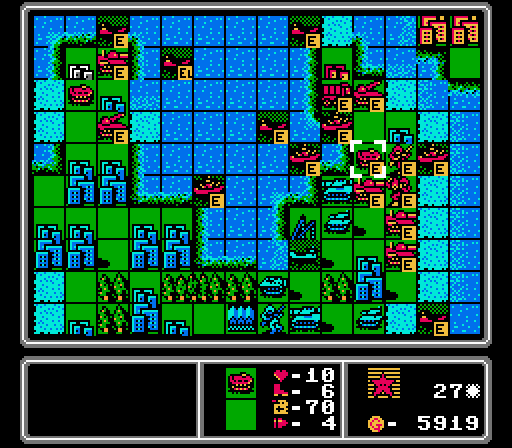 Starting to make some headway on the right side now. If I could get some footsoldiers on the left side we'd have a good foothold there now as well. 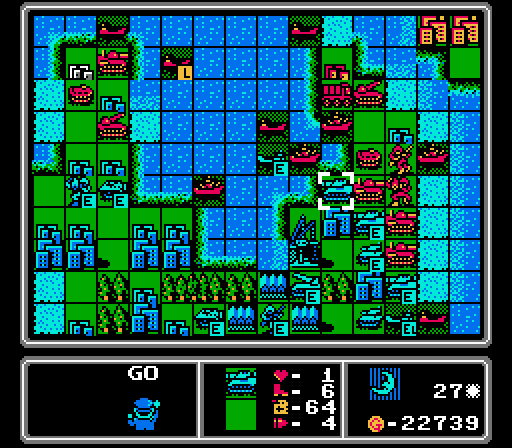 The AI is getting desperate now. We had the usual attacks from a couple medium tanks and a tank (all our units lived), but also both of Blue's landers came out and attacked our landers. Even the rocket moved up into battleship range and close to our medium tanks. The remaining enemy medium tank highlighted here, heavily damaged, just merged into one of the other ones. 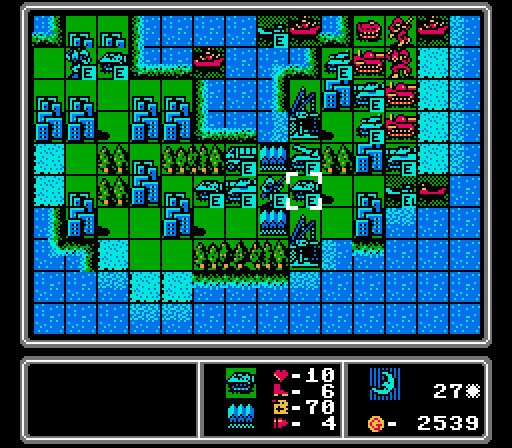 I don't really have to tell you what Blue built this turn, do I? Turn 28  The ports give strong defensive bonuses to naval units, but battleships make quick work of landers out in the open ocean. 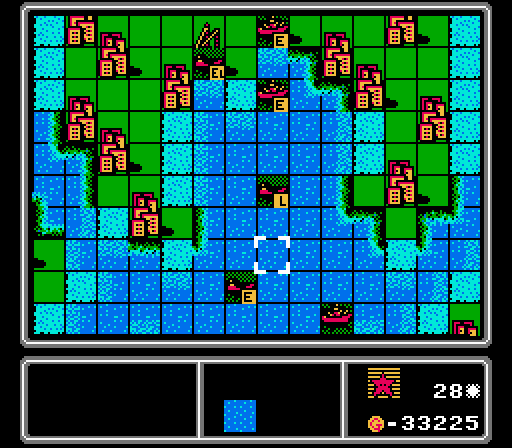 Three battleships going back for more ammo, and three landers (one off-screen) going back for more reinforcements. 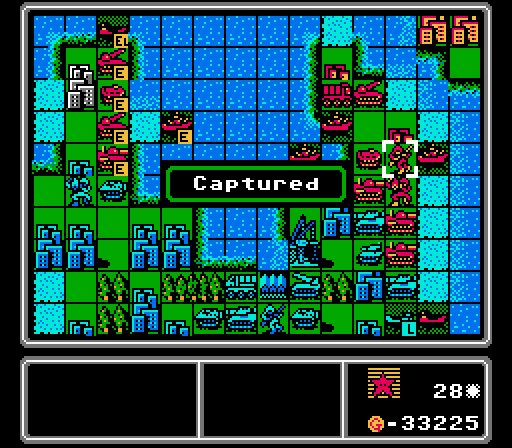 We've got a second city on Blue's island. It's all downhill from here.  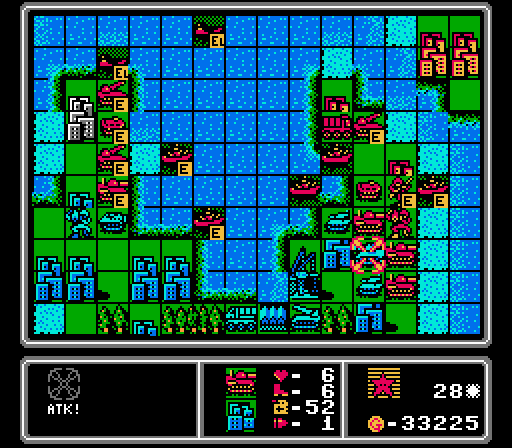 A battleship finishes off one medium tank, while I have a rocket and medium tank finish off another one. Blue's only medium tank remaining is the one that just got built last turn - that turned around quickly.  Another battleship gets in a first strike on the rocket that tried to sneak up on us, pretty much neutralizing it. 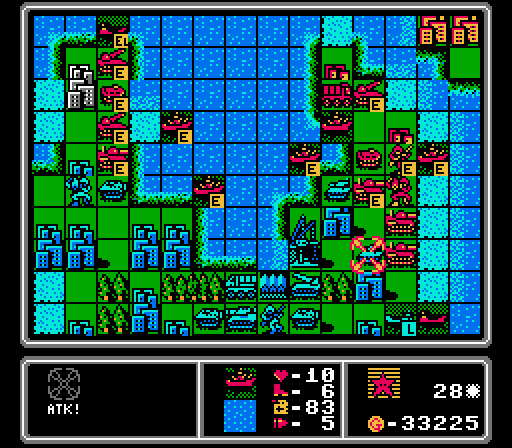 The last battleship in range finishes off this tank. 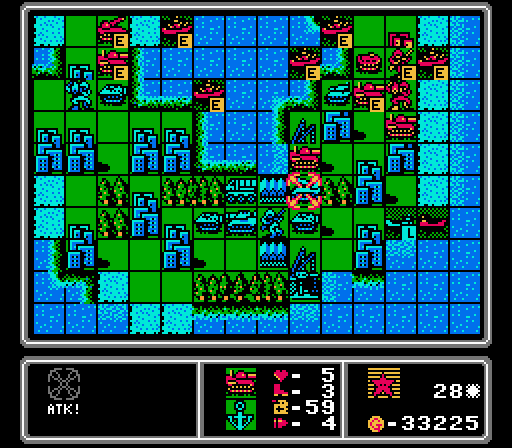 This medium tank is probably doomed so I use it to finish off the rocket. The only rocket that Blue has left now is sitting uselessly on the last remaining lander.  The mech starts capturing another city, somewhat protected by a line of vehicles.  Our medium tank on the enemy port eats the attack from the last enemy medium tank and somehow lives through it.  Likewise our damaged APC on the left peninsula survives the surprise arrival of an enemy APC.  Remember how I thought the mech was protected?  I'm not sure if this is a bug or a feature, but apparently a lander on a coast tile allows for ground units to pass through it as if it were a plain land tile. So the APC here is able to bypass our line and shred our capturing mech. That lander-coast tile only cost the APC one movement, too. 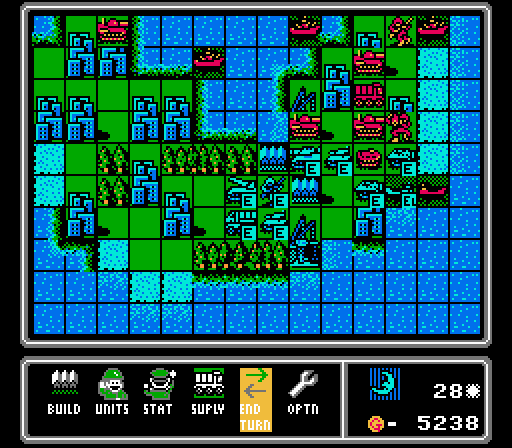 Some other nuisance attacks on our APCs and that's it for this turn. Blue turns out a rocket instead of a medium tank for once. Turn 29   Battleships straight out eliminating vehicles will never not be fun.  The left side is back under control as well, with a battleship taking out an APC and a rocket, medium tank, and lander all combining to kill a mech.  Our right-side units are getting a little worn down, but Blue's actually down to just nine units remaining now. And two of those are trapped on a lander. The medium tank also took a battleship hit this turn and won't be hurting us again.  We've got two landers coming in at once to pick up some new troops, and enough cash saved up for a fearsome foursome. 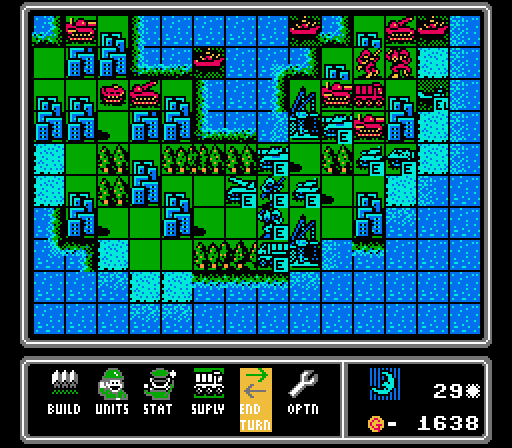 We lost an APC to an APC and a lander to a lander, but our medium tanks held strong. The rocket also scratched our battleship. And Blue is back to building medium tanks. Turn 30 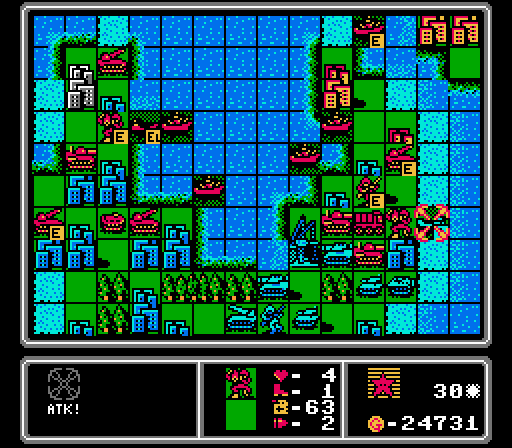 Rockets and mechs don't do much damage to landers, but this one was already weak enough that they're able to take it out together. Along with the rocket and APC it was carrying! 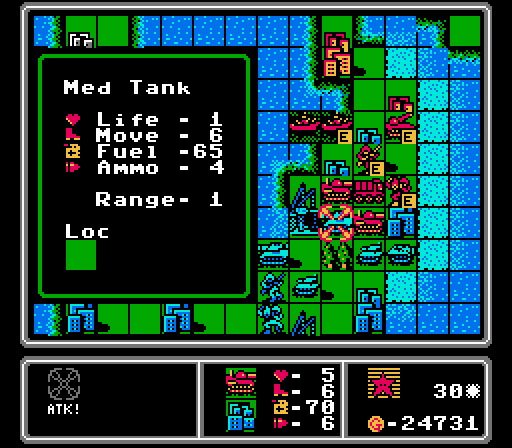 Sometimes the key to winning these slugfests is using your own damaged units to most effectively finish off your opponent's damaged units. That leaves the fresh ones free to maximize their worth. 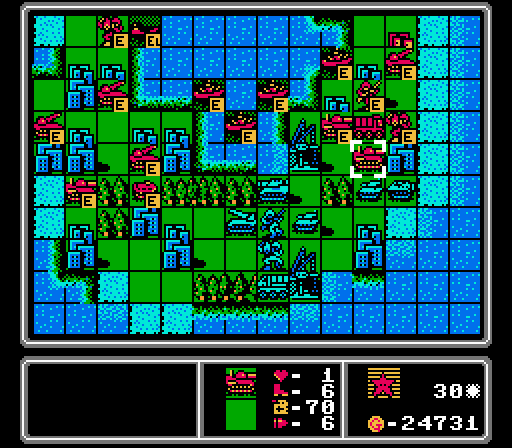 I can't decide what to do with this almost-dead medium tank, and end up just leaving it there to soak up an attack and try to keep our capturing infantry protected. On the left side I have a killing zone of rockets with an almost-dead APC out in front to bait the enemy medium tank.   Our medium tank and mech on the right side both fall to attacks, letting this APC through. But our infantry survives with enough life remainining to finish the capture next turn. 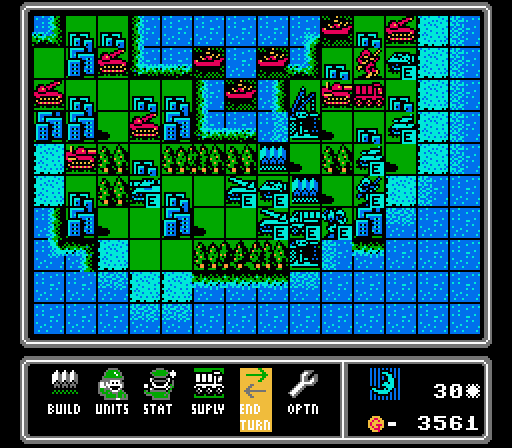 The AI opts for a rocket again this turn. Turn 31 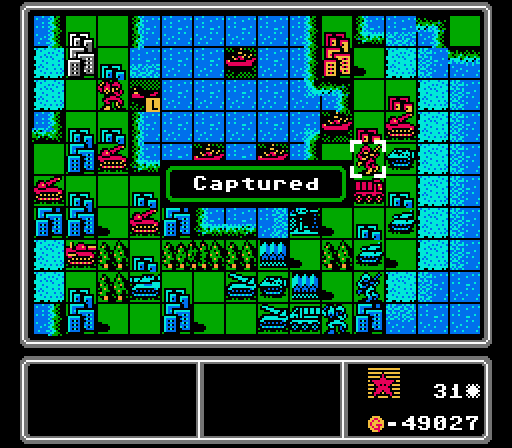 First things first, taking a third city from Blue here. 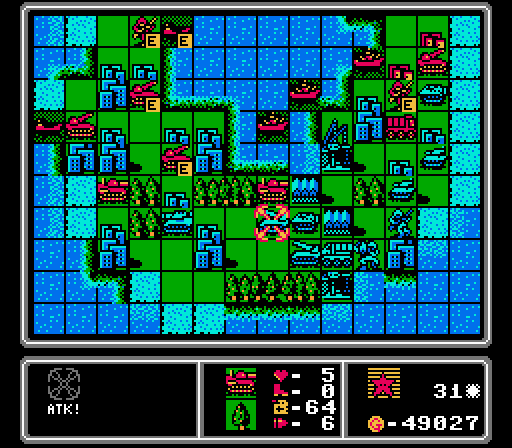 Only one of our rockets is able to hit the medium tank, but the other one teams up with our medium tank to finish off an enemy rocket here.  Two battleships are then able to destroy the other rocket.  If I didn't have to keep sending battleships back for more ammo, we'd be done a lot more quickly here. We do get rid of an APC on the right side, but we're running short of front-liners over there. Luckily a lander just arrived to drop off a new medium tank. 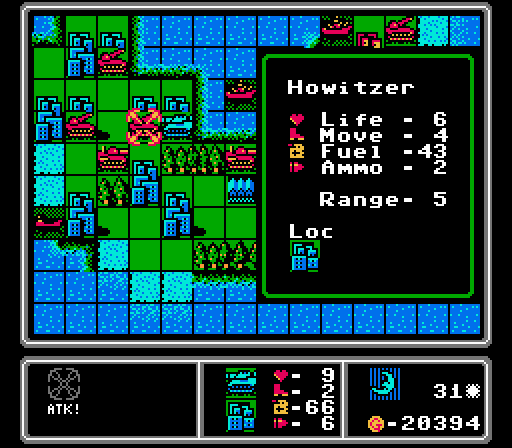 This medium tank is the last real threat remaining for Blue, and while it kills off our rocket here it's sitting in range of two rockets, two medium tanks, and two battleships.  The two tanks waste their turns attacking a battleship and a supply, but this APC does manage to finish off our infantry. We won't be doing any more captures on this side, but I don't think we'll need to anyway.  Blue still has plenty of income. Turn 32  That last neutral city that Blue was never able to get? It's now ours.  Two rockets and a medium tank team up to take out a medium tank.   The battleships focus on the biggest remaining threats, a tank and the new medium tank.  Another battleship damages the last tank, while a rocket and this medium tank take out an APC. 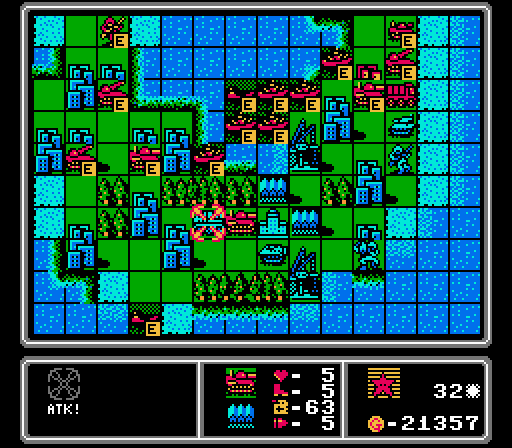  This medium tank can't do much but I can have it beat up on a supply and block a build point. 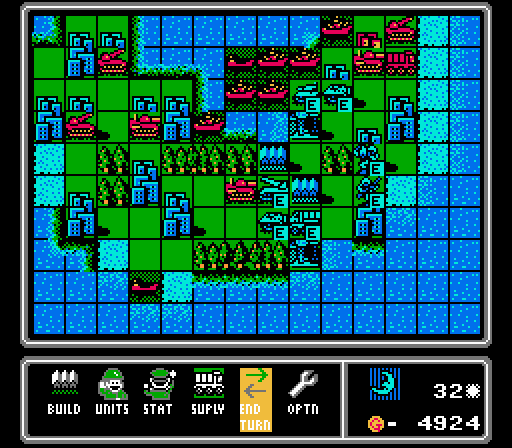 Blue still has a lot of income left for what is now the mop-up phase, but the only attack they get in is a damaged tank chipping on a battleship. Turn 33  We wipe out the new rocket, the tank, the mech, and both APCs with a series of overwhelming attacks. At least it wasn't just a supply left standing at the end this time.  We've actually taken four of Blue's cities now (plus a neutral one on their island that we never let them capture) but they still have enough income for all this. Turn 34  Ha it wasn't the supply left at the end. But we're just one attack short of being able to end it this turn again. 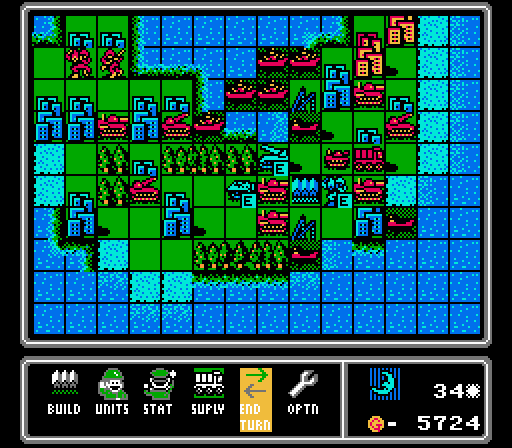 Now we're in business, that rocket doesn't stand a chance. Turn 35  Enough medium tanks, rockets, and battleships can overcome anything. At least in our hands. 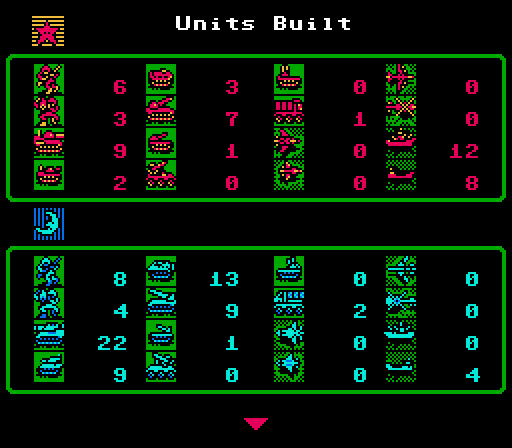 Blue ended up building 22 medium tanks in 34 turns. Our heavy hitters were more evenly spread with a focus on the mighty battleships.  Let's allow the medium tank to finish things here. 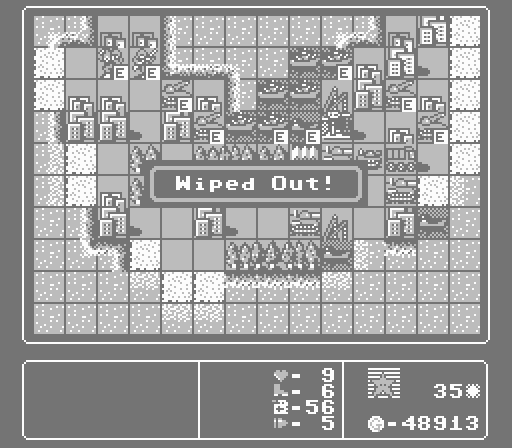 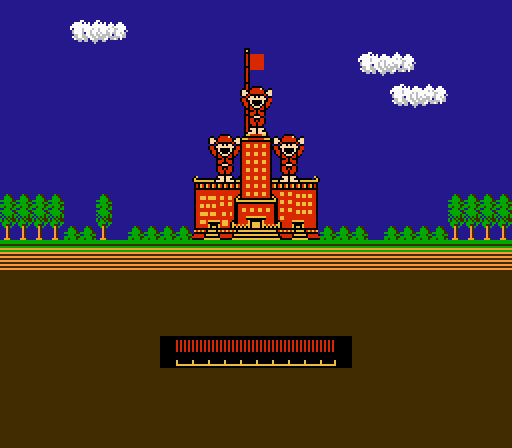 There we go. This map was something of a slog as advertised, with the AI dumping a lot of income into turtling up on its island, but the challenge at least kept me engaged, so thanks for that. Hopefully it helped you all as well. 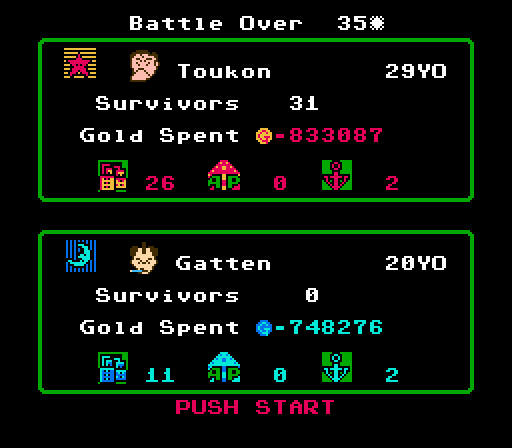 We ended up not even having that much of a cash advantage, with both sides having a huge base of funds for most of the map. But by the end we'd taken almost a third of Blue's cities anyway.  Well, 35 turns is a slightly better than average score. Pretty sure we would've been faster without the challenge and a higher focus on battleships early on (or maybe even all-battleships), but where would have been the fun in that?  We're back to a single island for the next map, a long skinny one at that. I'll keep the challenge options simple here:
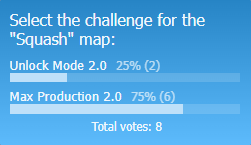
Vote for your preferred challenge option in the poll here. If you have any other challenge ideas, toss them out there and maybe I'll pick up some extras!
|
|
#
?
Feb 2, 2022 06:41
|
|
|
Looks more like a pickle to me. Can't believe people paid real money for this lying junk back I'm the day
|
|
#
?
Feb 2, 2022 07:46
|
|

|
Part 36: Unit Overview: Scout Scouts can't be supplied or load into other units, so don't have an animation image, alas. Basic Info: pre:Cost 15000 G Movement 10 Move Type Air Fuel 99 Ammo 4 Ammo Cost 8 G Range 1 Special None pre:Opposing Unit Damage Dealt Damage Taken Infantry 4.5 0.5 Mech 4.5 2.5 Medium Tank 0.5 2.5 Tank 0.5 2.5 APC 1.5 2.5 Rocket 0.5 N/A Artillery 1.5 N/A Supply 3.5 N/A AA Missile 1.5 7.5 AA Tank 1.5 7.5 Fighter 1.5 6.5 Scout 4.5 4.5 Bomber 6.5 N/A Copter 7.5 0.5 Battleship 0.5 7.5 Lander 0.5 6.5 Scouts are "light" fighters, air units for fighting off other air units. However a scout costs almost as much as a medium tank, so not really "light" on your wallet. They don't really have a good niche in this game, really only being effective against copters. Against anything else, you're probably better off saving up for a fighter, and even against copters you might be better off putting out an AA missile or a couple of AA tanks. So I guess there's a reason this unit type doesn't appear in the first few Advance Wars games. DKII fucked around with this message at 18:10 on Feb 5, 2022 |
|
#
?
Feb 5, 2022 18:04
|
|
|
 This one will be tricky just calculating what I'm allowed to build each turn!
|
|
#
?
Feb 5, 2022 19:14
|
|
|
Part 37: Squash (1 of 2)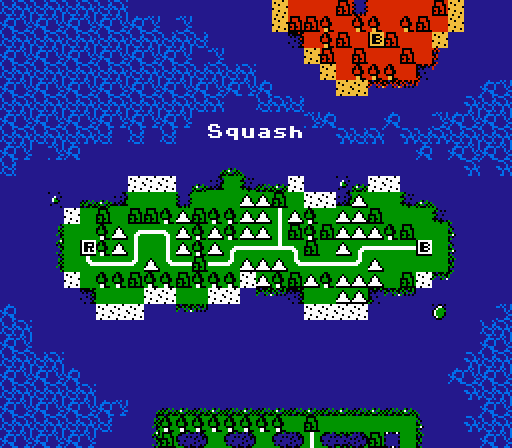 We've finished taking over Blue's main continent, time to finish off the outlying islands. Starting with this vegetable. 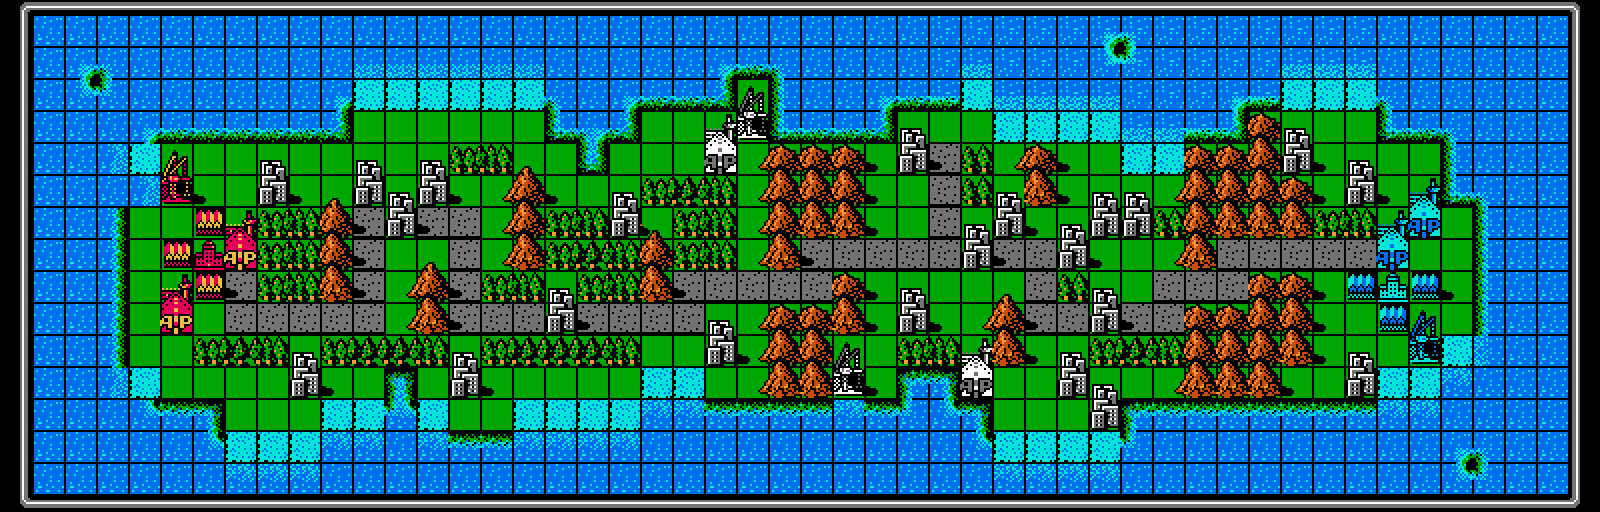 We have a very long map here, with an even longer road connecting the two HQs while winding around and through several mountain ranges. Blue has more cities both nearby and on its half of the island in general. Blue's starting area also has a lot of mountains that are better-positioned for defense, but we can turn that chokepoint to our advantage with some careful planning. Turn 1  Of course, our challenge negates a lot of planning. We're dealing with Max Production 2.0, where we have to first maximize the number of units produced, and then the amount of funds spent each turn. In order to avoid manipulating the challenge conditions later in the map, we have to merge or suicide units that are low on life to free up space against the unit cap. On the first turn, we have 10000 G and can build four units lots of different ways, but this particular configuration is the only way to build five units this turn. Lucky for us this setup works well enough for the initial capturing rush.  The AI is free to build whatever it pleases and chooses to put out two transport units with only one footsoldier to put in them. Turn 2 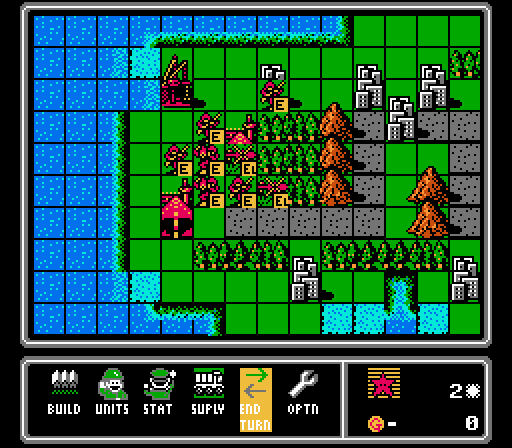 We're stuck building the same set of units as last time, but load up both copters. We'll be making a run at the neutral airports to try and grab them before Blue can get over there. Rushing those is the only way to secure an income advantage in this map, with the cities heaviliy tilted in Blue's favor. 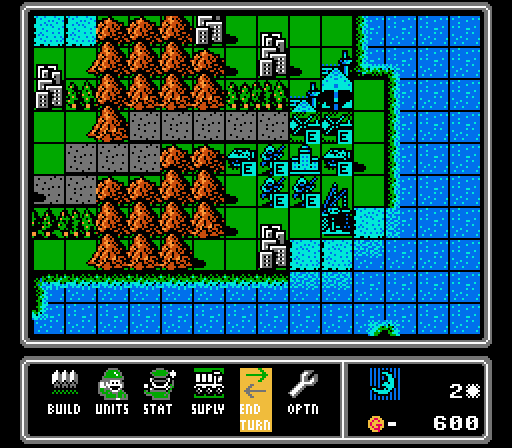 More of Blue doing Blue things. Turn 3  It doesn't look very different each time, but I do like to show off the first capture of the map. 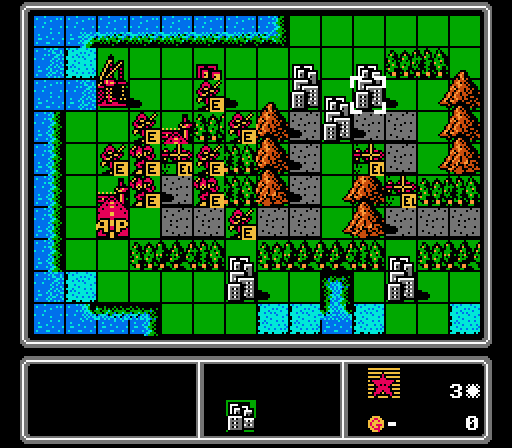 Anyway we build the same set again, with the first couple copters on their way forward.  I'm sure Blue has a strategy here. I think all the copters are to counter our copters, and the APCs are for our footsoldiers. Not that they'll actually cross paths anytime soon. Turn 4  The copters continue to advance, with one nearing its destination. The other has another couple of turns to go still.  Because we captured a city last turn, our income went up a bit, so we change out one of the infantry for a mech. 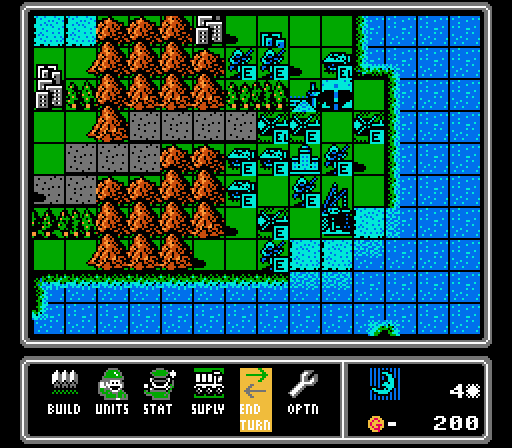 Blue is still clustered around the HQ but will start spreading out soon. Turn 5  Our first copter unloads, with another right behind it. 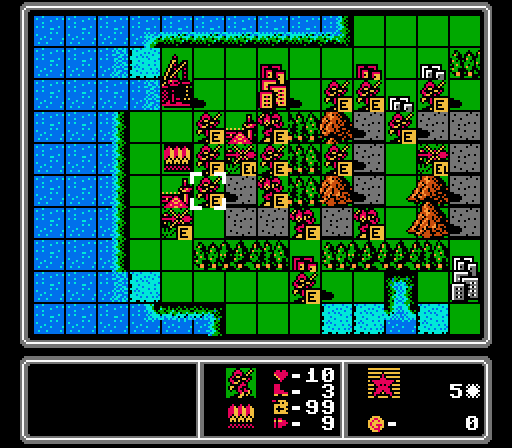 Look, just be glad you don't have to sit and watch me figure out all the math behind what to build each turn. This time I figured out I could get a second copter instead of a bunch of mechs, and still end up with five new units.  Blue finally crosses the mountains, and also starts building some heavier units, throwing out a tank and an AA tank. Turn 6 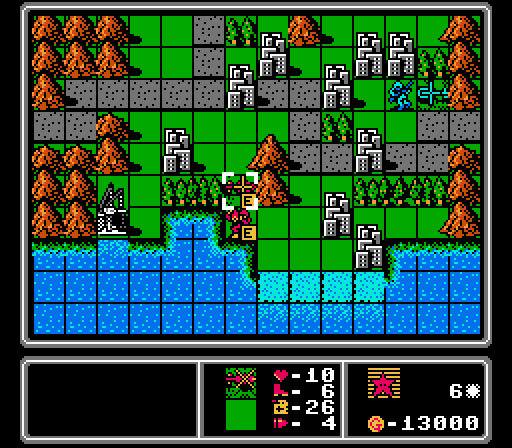 Our second copter arrives at the other neutral airport, though we're uncomfortably close to the lead elements of Blue's army now. 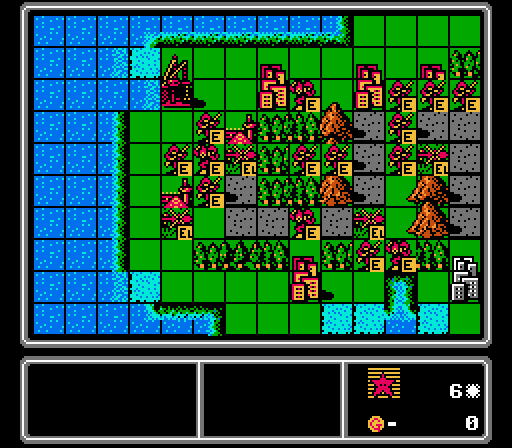 Our income is now high enough for six units a turn, churning out another pair of copters and four footsoldiers. We captured two cities last turn to get this much income, and got two more cities this turn. 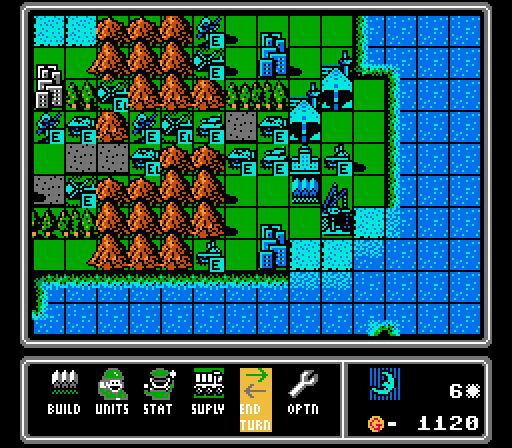 The enemy is really crossing the mountains in earnest now. There's another tank and AA tank, too. Turn 7  The first neutral port is ours! Time to turn this income race on its head and put out some heavier units of our own. 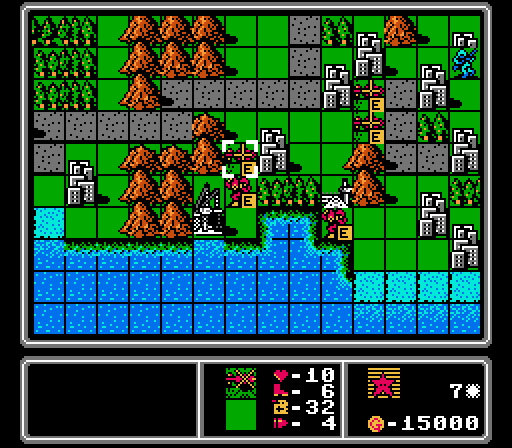 The copters that have already dropped off their passengers will now perform their usual duty of slowing down Blue's captures by any means possible. 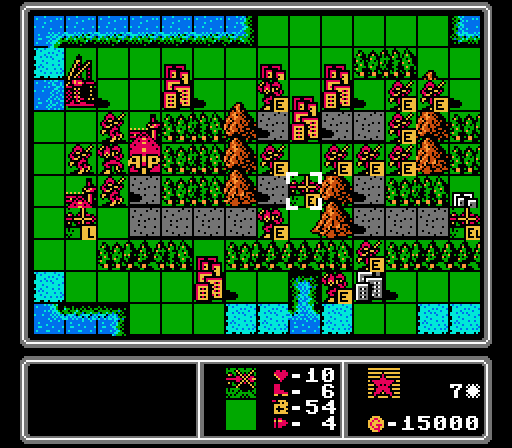 There are more copters right behind them, and waves of infantry headed over on foot and taking any city they find along the way.  I think next turn we'll finally be able to build something other than infantry, mechs, and copters.   Copter fight! We're still slightly losing every neutral battle. Thanks hard mode. 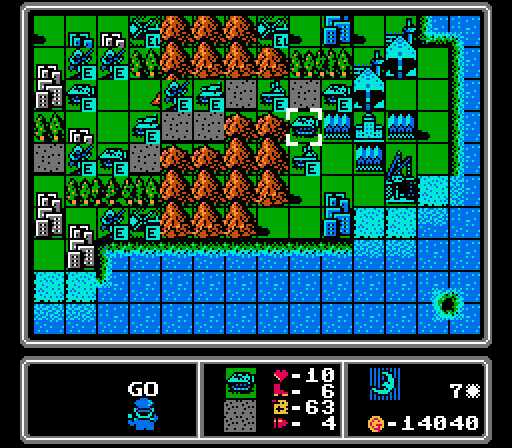 Lots of enemy infantry running around in contested territory all of the sudden. Blue follows up by building a rocket. Turn 8  Now we have one of the central airports. 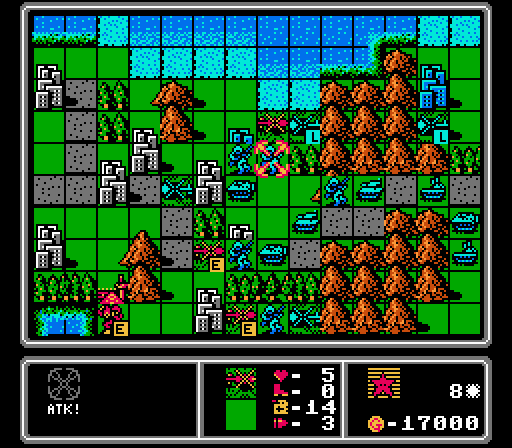 One copter goes after an infantry that just got dropped off and is unprotected. The other two stall pending captures by a turn with some chip damage on the cities. 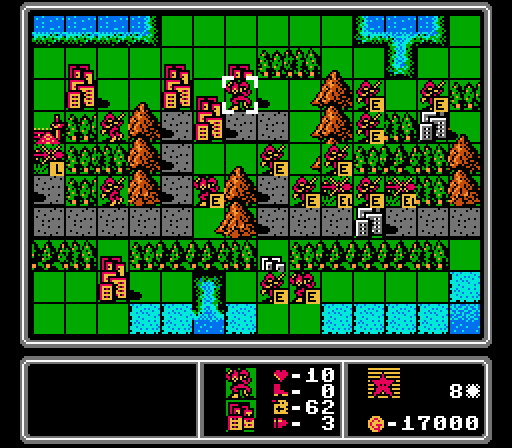 More slow progress from the oncoming horde. Not quite as bad as the red mech wave from a couple maps ago though. 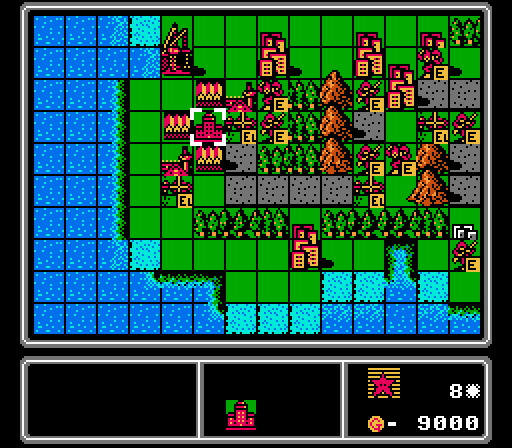 I need a new plan for meeting the challenge this turn. We still have to build six units, so a couple of copters is a given. But I can't spend all our cash with four mechs, so I need a different combination. Any guesses? 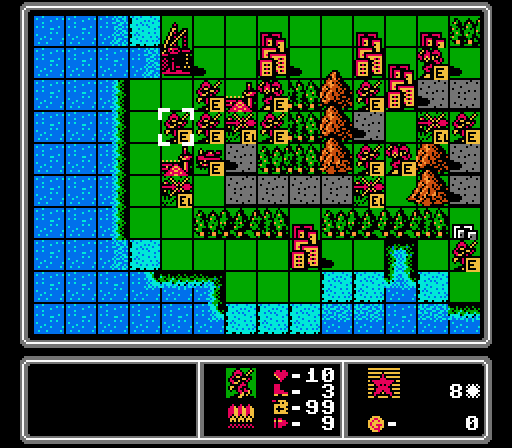 The correct answer is: A tank and three infantry. A supply and three mechs also would have worked, but then I would have a supply for no reason. That tank might actually come in handy with all those enemy APCs about. Depending on how long it takes to get over there. 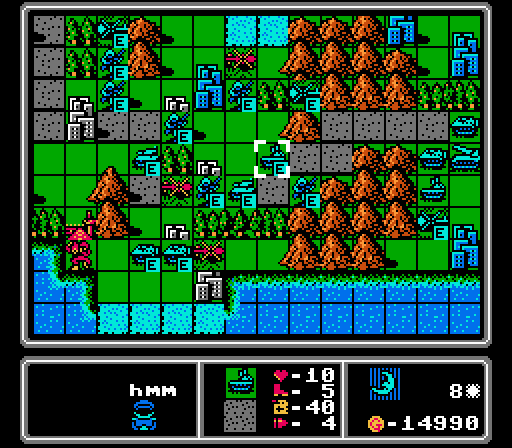 Short-term I'm not going to be able to stand up to this rush, but I just have to distract and stall long enough to get some better units deployed.  Blue still slinging rockets. Turn 9  We have a decent number of copters up here now, but they can't really do a whole lot on their own, especially with a couple of AA tanks coming up. Most of them go after various infantry units. The one selected here is below half-life, which means we have to get rid of it this turn for the challenge. In this case it suicides on an infantry. I'll explain why this rule is part of the challenge in a bit. 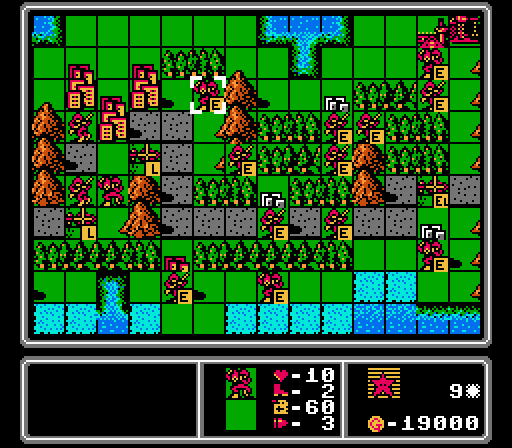 Starting to capture the few cities in the center of the map.  We get another tank on top of the usual suspects.  We're actually at the unit cap now. If we hadn't gotten rid of that damaged copter, we would have only been able to build five units this turn. Since the challenge is to build as many units as possible, and then spend as much money as possible, we would have been able to get better units that way. Thus the challenge forbidding us from getting around it by taking up space against the unit cap with damaged units. You can see we're doing pretty well in the income race already, too. We have all four neutral ports/airports captured now, and a slight edge in cities as well.  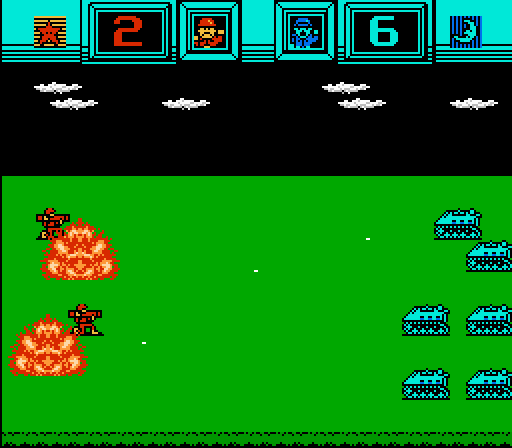 Blue is starting to hit our front-line footsoldiers now, as an APC shreds this mech. You'll notice I put mostly mechs in the first waves of copters, so at least they'd get in some counterattack damage as they fell.  We also lose a copter to an AA tank; the start of a trend. 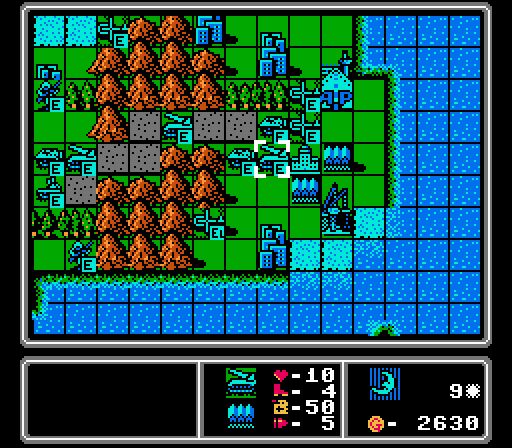 Ugh three rockets in a row. Turn 10 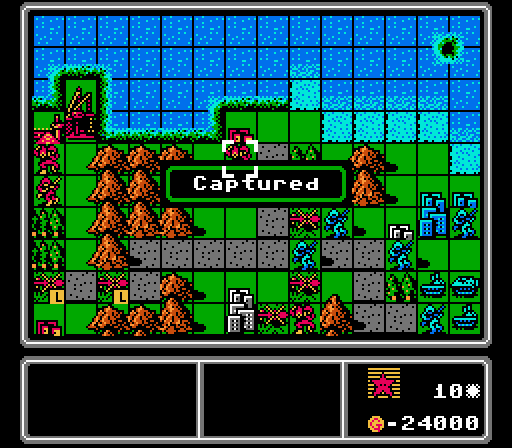 First we finish capturing the three cities in the central region of the map, and one here on the right side, guaranteeing us the income edge even if we completely blow it on the rest of the cities. 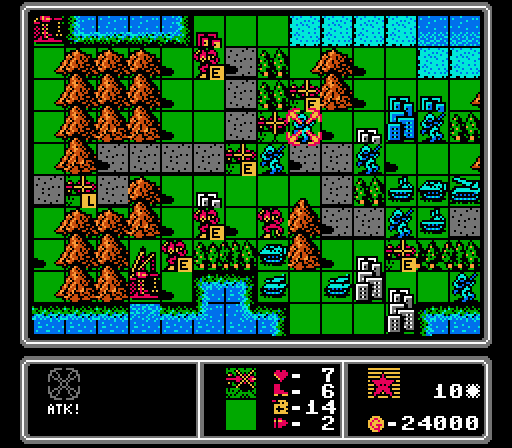 The copters once again go after the capturing infantry, killing one and bringing two others to the brink of death.  The injured mech from last turn merges into a fresh one, per the challenge rules. We're a little exposed to the enemy vehicles in that lower pass, though. 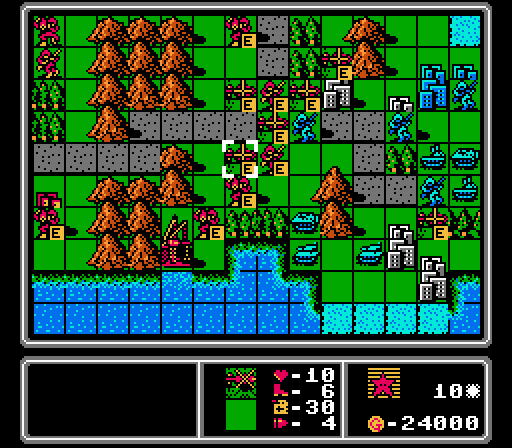 Two more copters come in but they're carrying just infantry. I'm hoping some enemy units will go after the toothless infantry instead of our capturing mech. 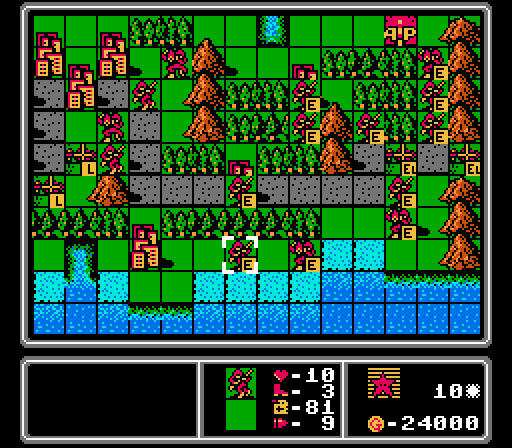 Our ground army is almost to the central mountains, many turns later.  Here is where the challenge completely changes. After just barely hitting the unit cap last turn, we lost a copter and had to merge in a mech. So we only have room to build two units this turn. Maxing out our expenditures with two units gets us much more useful troops than doing so spread over six units.  I should have gotten a bomer and a copter, but I panicked on the math and put out a figher and a mech instead. The fighter will still be useful just because it will terrify all the enemy copters into retreating with its mere presence. 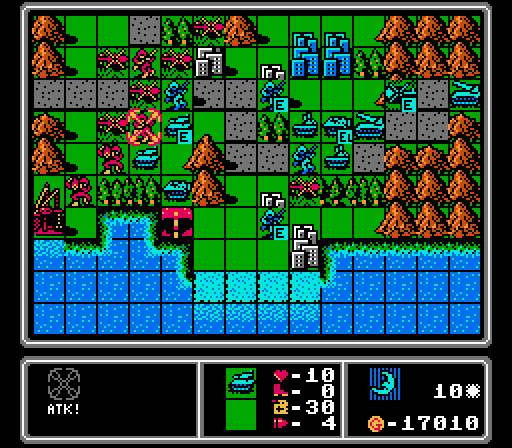 As I hoped, the enemy tanks go after the infantry here. 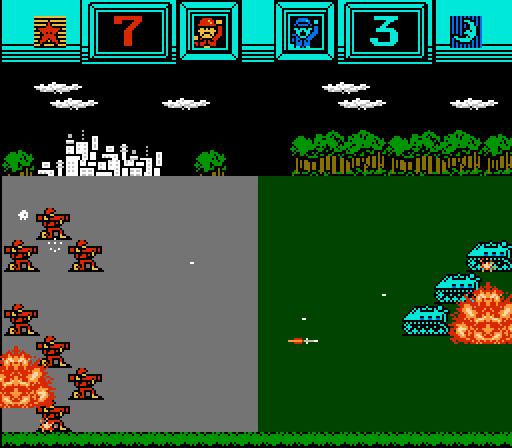 Our capturing mech is hit by the damaged APC, but fares much better this turn than last.   We also lose two more copters to AA tanks. More hard mode cheating here - a fresh AA tank is only supposed to do 7.5 damage to a copter, but we lost one that was at 9-life.  The enemy rockets advance, making it difficult for us to approach any further with mere footsoldiers. Three enemy infantry merged together and will likely finish capturing the highlighted city next turn, if I can't throw enough copters at it. But two other capture attempts were abandoned to achieve that merge, so we already achieved our delaying goal.  Ah crap, a medium tank. There goes the neighborhood. To Be Continued...
|
|
#
?
Feb 25, 2022 16:42
|
|
|
Part 38: Squash (2 of 2) That medium tank is going to roll right through us if we don't do something about it. Let's see what can get together. Turn 11  I have an infantry start capturing a city here and merge the mostly-dead infantry into it for the challenge.  Three copters team up to take out one of Blue's capturing infantry, though we won't be able to do anything about the other one. Two more copters arrive and drop off fresh footsoldiers. 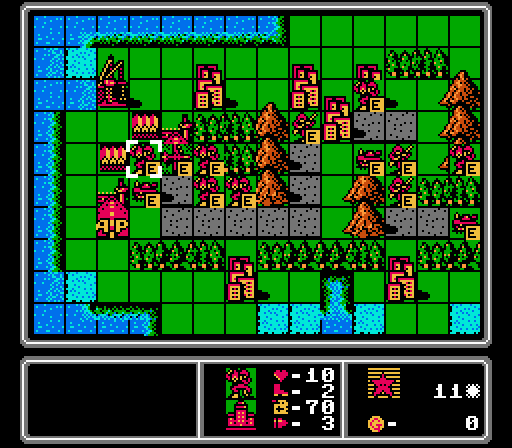 This time we have to build three units, but we have enough funds to get a bomber anyway.  Our capturing infantry doesn't make it, falling to the rocket and the two tanks, but it does successfully distract the enemy from our capturing mech!  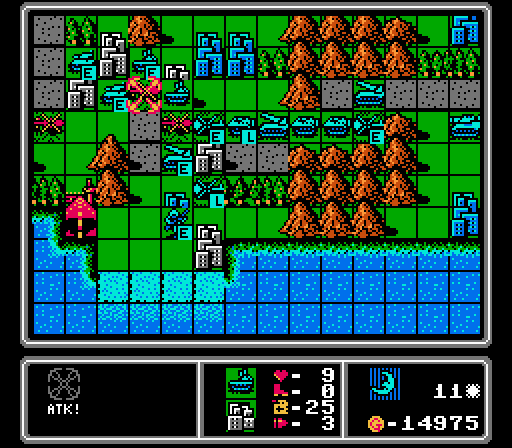 We once again lose two copters to AA tanks, with a third copter taking a hit from an enemy copter.  Blue has three rockets guarding the contested zone now. We won't be able to capture anything nearby until we deal with those. That medium tank will arrive soon as well. 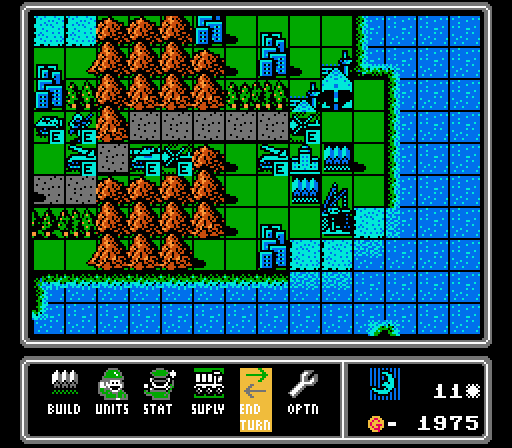 I think the mountains have made the AI very rocket-happy on this map. Turn 12 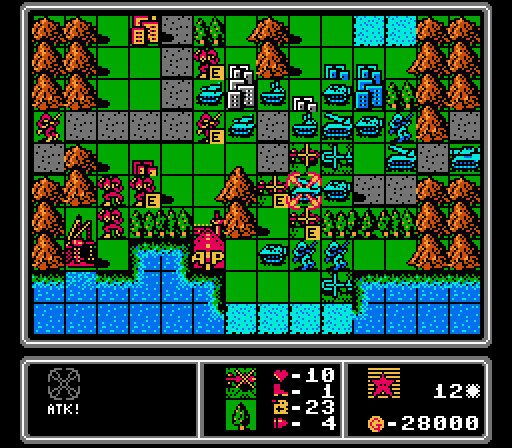 Our copters aren't much use against the heavy machinery in play now, and the only infantry they could reach was protected by a city. So this turn they gang up on a rocket and combine for just a single point of damage. 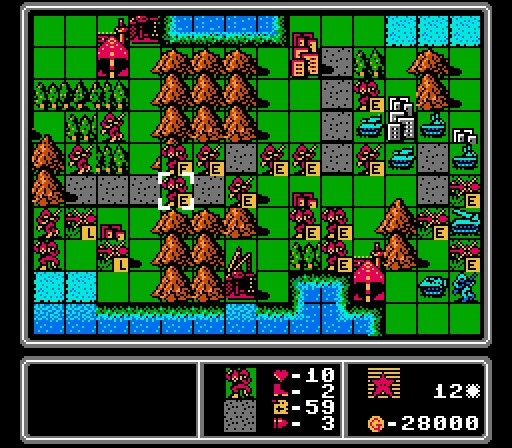 The first of the footsoldiers that didn't get an airlift are getting through the central pass now. We do finish a city capture with a mech in the lower area, and start another distraction capture with an infantry in the middle. 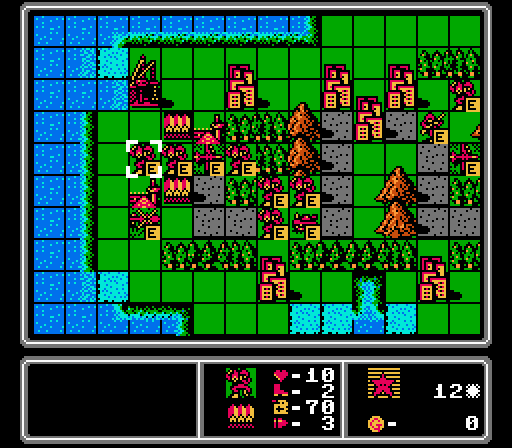 We're building four units with 28,000 G this turn. First priority of course is another bomber, with a copter and two mechs filling out the rest.  The enemy phase is a busy one. Two APCs take out this mech. Two rockets target our capturing infantry. A tank moves all the way up to the mountains to pick on an infantry. And three enemy infantry start captures, including one on our airport that I totally didn't see coming.  We also lose a couple copters to the enemy copters and AA tanks.  An AA missile will be annoying with all the bombers we have on the way. Building two supply trucks is an odd choice, but the AI does have a lot of rockets firing on us now. Turn 13 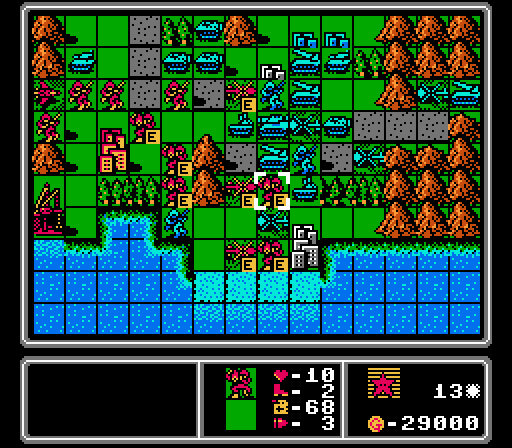 I don't remember if I'm trying to stealth-capture a city or blow up some rockets and AA tanks with these mechs, but they get dropped off right in the middle of the chaos. A mech and a copter also get in shots on two of the capturing infantry, but the third will be able to complete its capture uncontested. 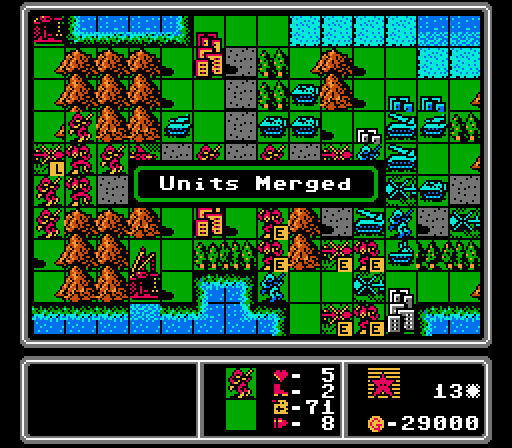 Four infantry merge back into two, including the one that is still capturing in the center. 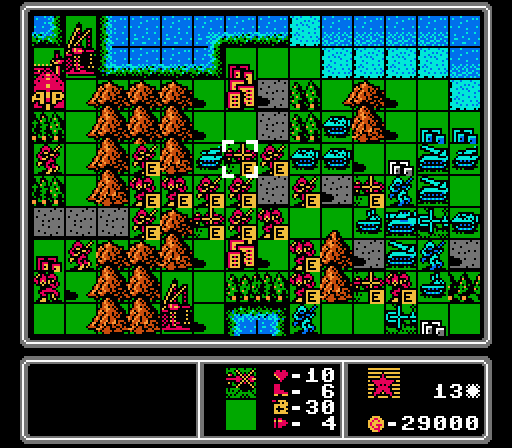 More footsoldiers pour through the pass, with another two infantry dropped off by copters. This phase of the map is starting to look like the mech flood in Volcano, just overwhelming the enemy with raw numbers and sneaking in captures along the way. 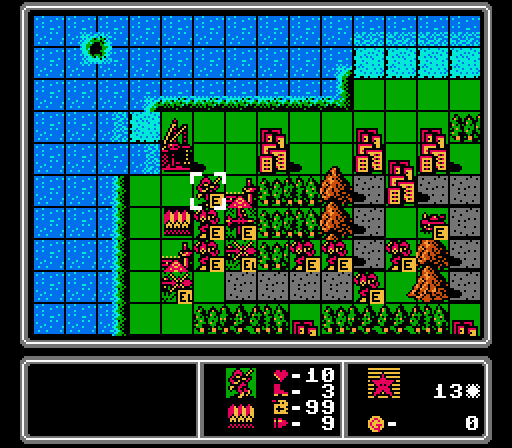 Between the losses and the merging, we have to build five units this turn with 29,000 G, so end up with a similar configuration as last turn.  The capturing infantry in the middle continues to be a distraction but eventually falls to three rockets and a tank.   The enemy infantry continue their captures (completing one). One of the AA tanks is straight out of ammo and retreats. The first enemy medium tank arrives and wrecks our mech here.  Three APCs are loose at the front and kill off one infantry while severly injuring another. 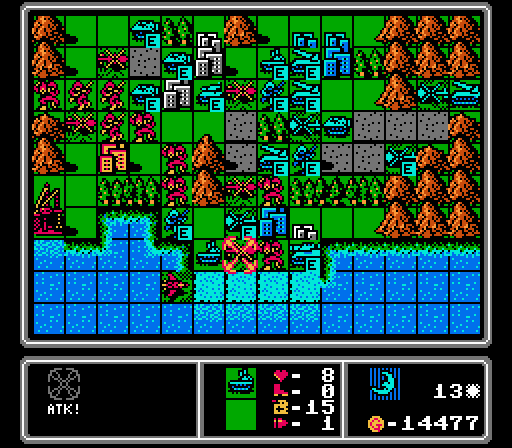 A copter and an AA tank take out another of our copters. That AA tank is now also out of ammo, so our fighter and bomber can run free next turn.  Reinforcements continue to advance, but Blue chooses to build nothing at all this turn, saving up for next turn instead. Turn 14 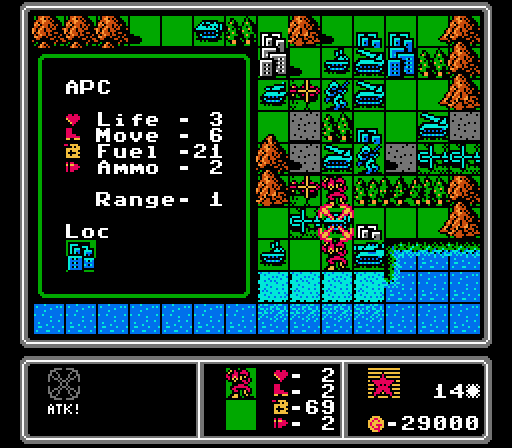 First step this turn is throwing away this mech which is too damaged to leave around and can't reach anyone for merging. This APC had retreated back to this city for repairs so it's not a totally one-sided affair.  The damage from our mech is enough for the fighter to move in and finish off the APC. Not a normal use for a fighter, granted, but I was more interested in freeing up the city.  That way our other mech is able to start capturing it. This capture will draw away some of the attention from the middle of the map.  Our copters continue their missions of wiping out enemy infantry, killing off two here, including the one that was going for our airport. 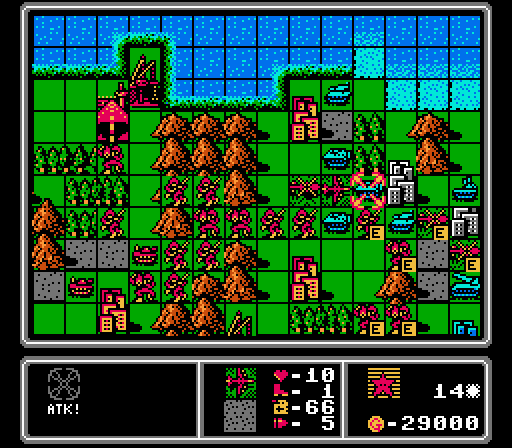 Our first bomber finally arrives, wiping out the a nearby APC. With all the footsoldiers we have in the area, the enemy APCs are a priority for removal. 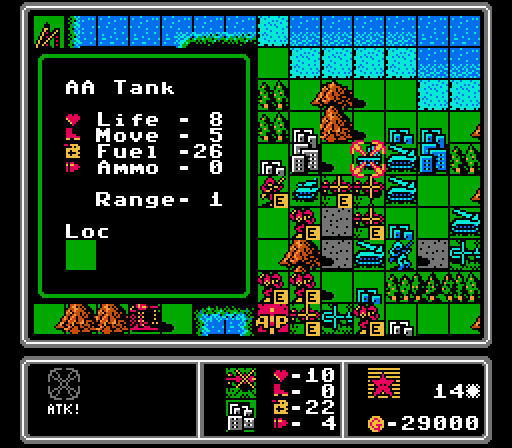 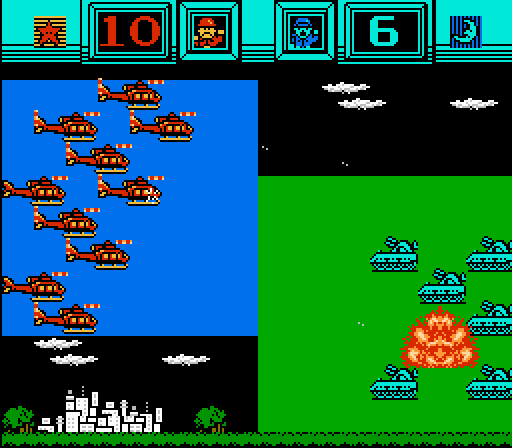 Here's something you don't see every day - a copter attacking an AA tank. Here we're taking advantage of the fact that the AA tank is out of ammo, to get in some free damage.  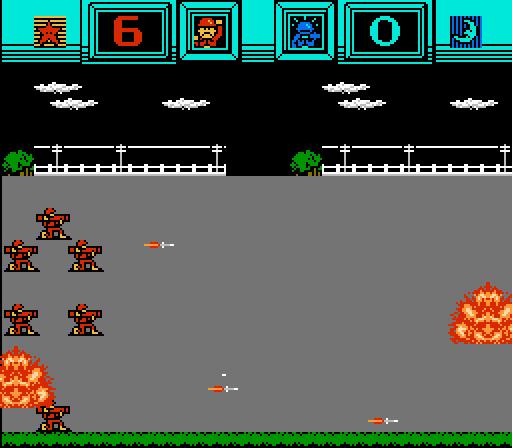 A mech against an APC isn't usually a great matchup for us, either, but here I'll glady take the damage to finish off another APC. 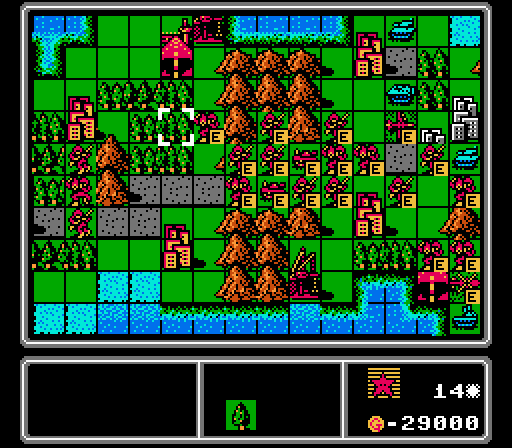 More reinforcements making their way through the mountains, including a couple of tanks. 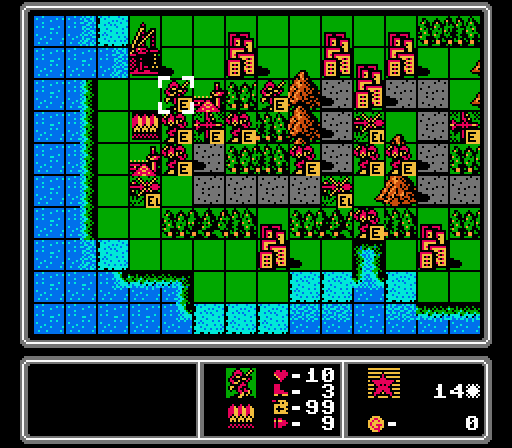 We need to build five units again to get back to the cap, and have the same 29,000 G to spend, so put out the same set of units.   Our capturing mech survives both a rocket barrage and a shot from the medium tank. Actually we hurt the medium tank a good bit, too.  We do lose our capturing infantry anyway, to two rockets and this tank. But notice how two cheap footsoldiers sitting on cities soaked up the attacks of five heavy vehicles? That defense frees up the rest of our army to keep advancing.  We also lose a mech to the last APC in the area. 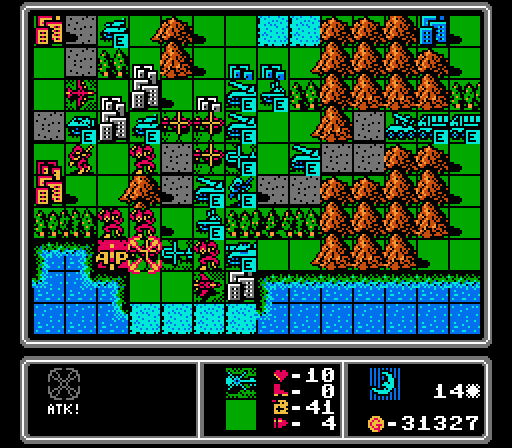 Our copters take hits from the enemy copters, but with the AA tanks temporarily out of action, for once we don't lose a copter on the enemy phase. 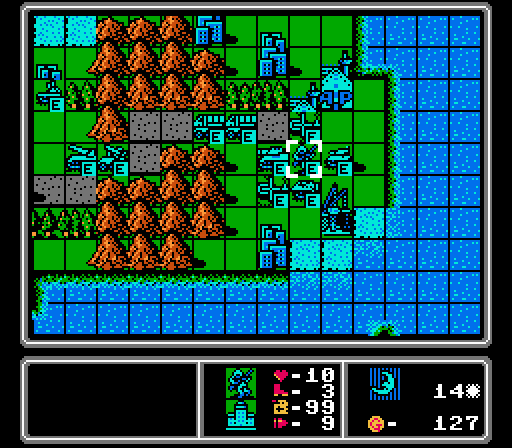 Blue goes on a spending spree this turn, with a bunch more vehicles, a new copter, and a new infantry. Turn 15 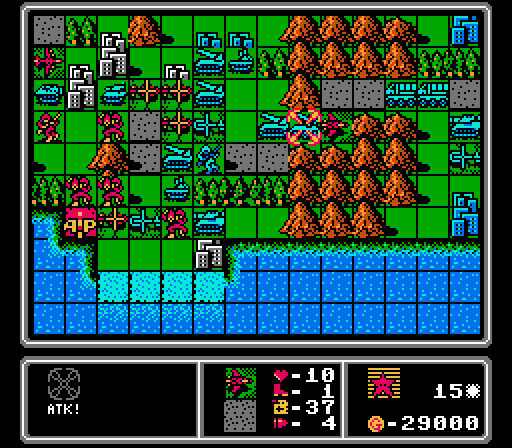 A fighter doesn't hit for much damage on this AA missile, but it does block up the pass and prevent any enemy vehicle reinforcements from getting through. 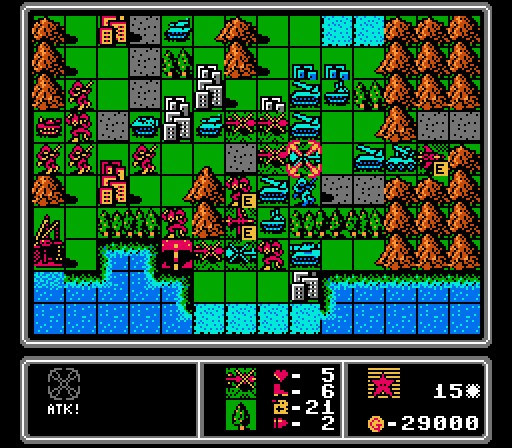 We're finally starting to get in some offense. The bomber hits the empty AA tank, the mech picks away at the rocket, and our damaged copter finishes off an even-more-damaged enemy copter. 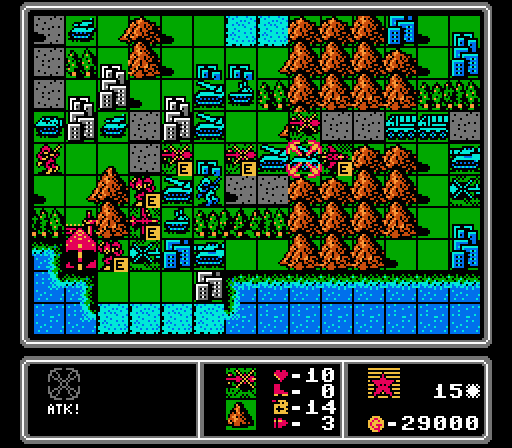 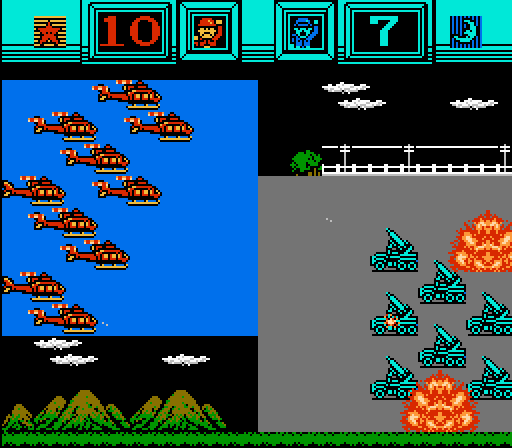 We had to throw away a damaged mech and merge in one copter, but this full-strength copter is able to reach the AA missile for some extra damage.  We're finally able to start working some matchups in our favor, with this tank wiping out the last enemy APC in the area. 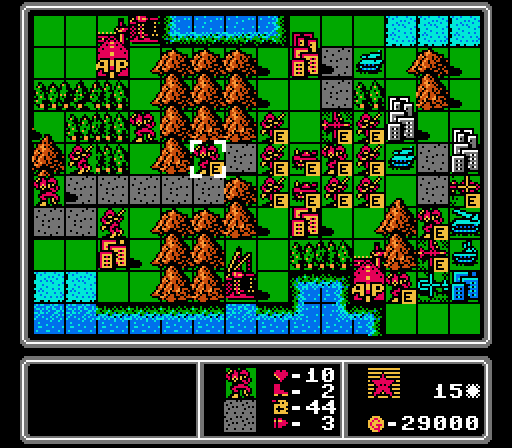 Another infantry parks on the central city, as more reinforcements line up behind it.  Same build again, replacing five units with the same income. 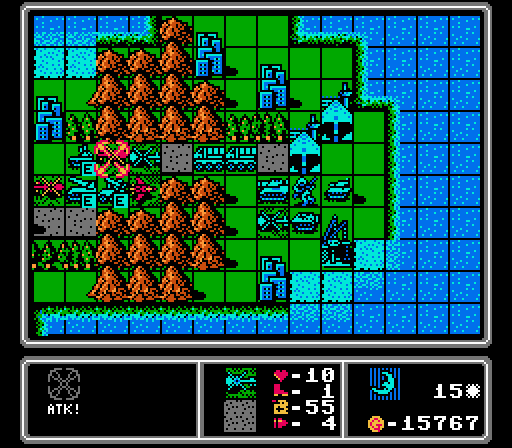 We lose one copter to an AA missile and another to a re-armed AA tank and a fresh enemy copter. 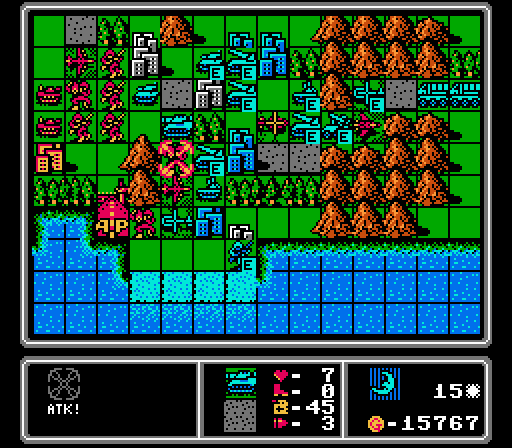 This mech falls to a pair of rockets and a finishing strike from the medium tank. 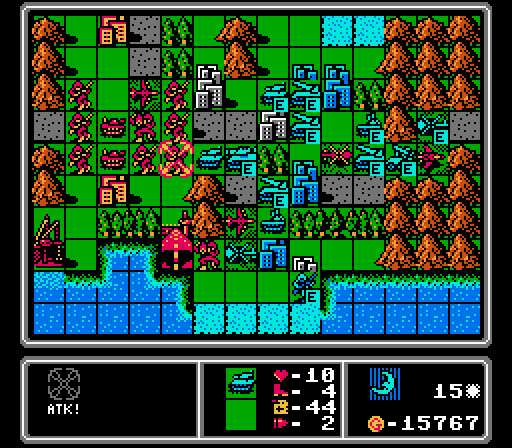 Oddly this tank is more interested in hitting an unprotected infantry, than finishing off our capturing infantry that ate another two rocket strikes. 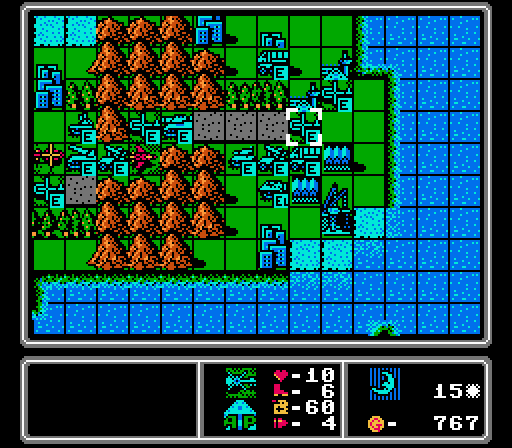 Another AA missile is built, while the new medium tank gets stuck in the mountain pass. Turn 16  This AA tank thought it could retreat for some repairs and fresh ammo, but I still had one mech left nearby to finish it off. 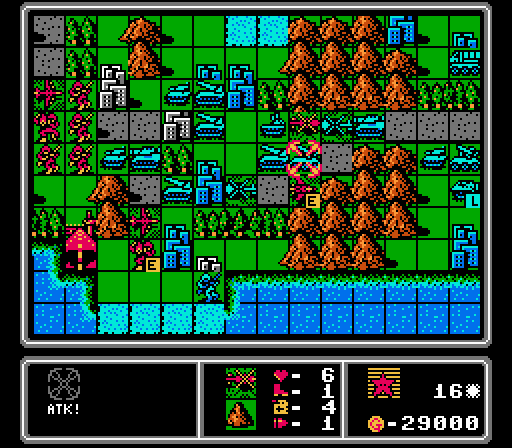 More chipping away at the AA missile. I had to un-block the pass to stay away from the second AA missile that just got built.  I probably should've hit the AA tank to protect our fighter, but I'm really sick of all these rockets.  The center is clear enough for a second infantry to start capturing - I'm hopeful that at least one will sneak through. In the meantime a second bomber arrives with a bang, blowing up this rocket.  We're taking heavy losses, but starting to actually push the enemy back now.  This turn we only need to replace four units, so a supply truck rolls out to use up all of the funds we have. 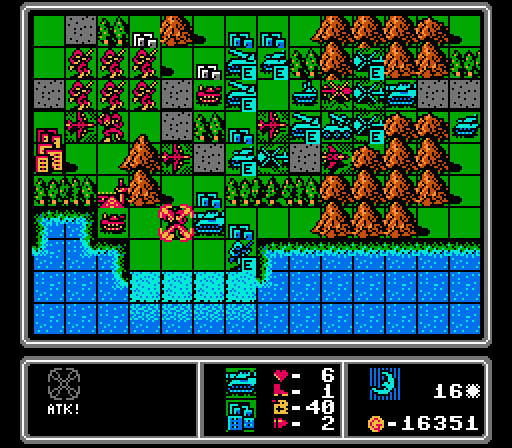 Two rockets hit one of our capturing infantry again, but the other one is left alone as the tanks choose to retreat instead. Even with one medium tank taking a shot at our mech here, and Blue's last infantry in the area completing another capture, we're well set up for next turn now.  We do lose a copter to an AA tank here, but I'd rather lose the copter than have our fighter take a hit. 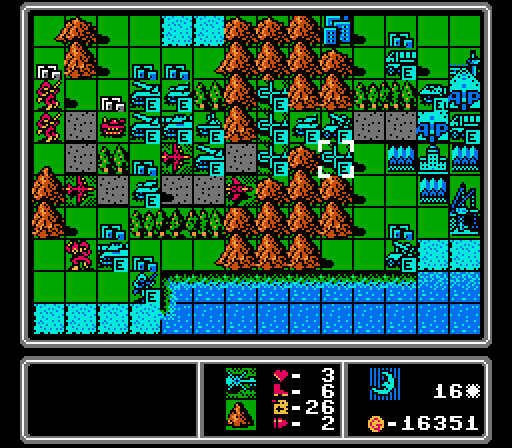 A new enemy medium tank makes it through the pass, but we have multiple bombers in the area to deal with it now. The enemy AA missile is actually damaged enough that it runs away from our bomber, while the second AA missile moves down to a defensive position instead of advancing.  Blue builds its first serious air unit, putting out a scout. That unit is a threat to our bombers, but we have a fighter nearby already to contain it. Turn 17 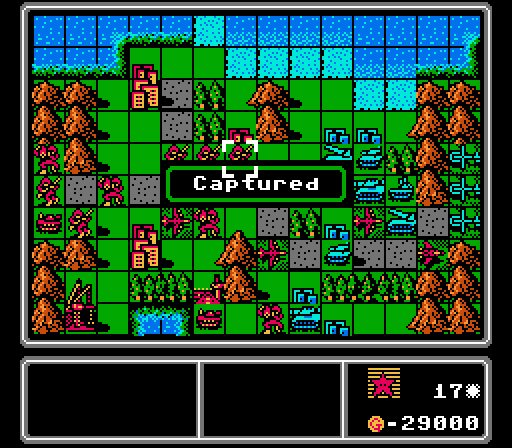 We finally had enough going on that Blue wasn't able to hit both of our capturing infantry, and finish off this city capture now. The other infantry is literally a single point away from completing its capture, and we should be able to protect it this turn.   This medium tank took enough damage from our mechs that a bomber is able to fly in and finish it off, even with the city protecting it.   Another bomber finishes off a rocket, opening up space for our lead tank to get a hit in on the remaining enemy AA tank. 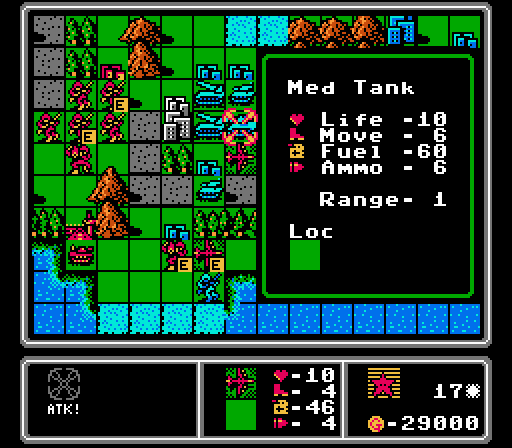  A third bomber is able to put the hurt on another medium tank before it can get to us. 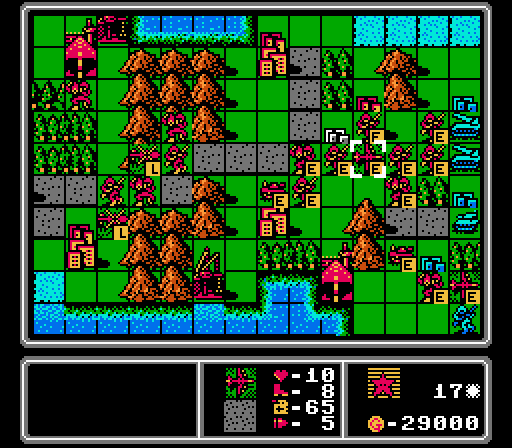 A fourth bomber has arrived for some action next turn, as everyone else moves ahead. We actually start capturing one of Blue's cities with one of the lead infantry.  Here's a math puzzle for you. How can we build two units to get back to the cap, while spending all 29,000 G?  We can't get any more planes, but we get two useful units at least. It might take them awhile to get all the way to Blue's territory, though.  I did not do a good job of protecting our bombers from the enemy scout, and basically lose one on the enemy phase. 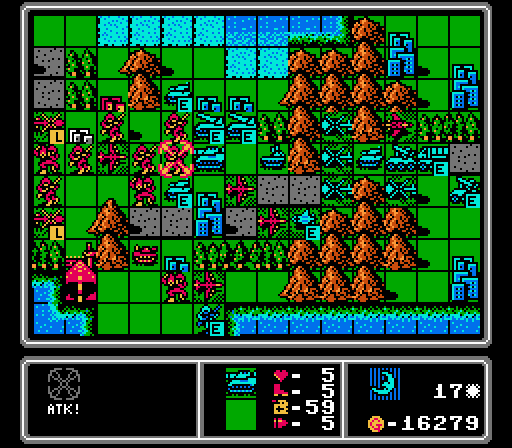 We also lose our front-line tank to one rocket, while the other rocket retreats for more ammo. The enemy tanks and medium tank attack our nearby infantry, but can't finish off either one. Neither get close to the capturing infantry on the left, either.  The AA missiles continue to sit back, wary of our bombers. Our fighter is free to go after that scout now, though. Blue built just a mech and a tank this turn, nothing to worry about. Turn 18  I thought this battle would go better for us, but forgot about the hard mode penalty again. This scout is out of action for the moment at least. 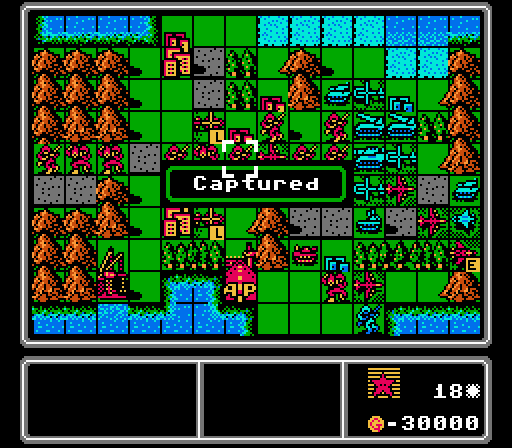 We take another city on Blue's side, slowly building up more income. 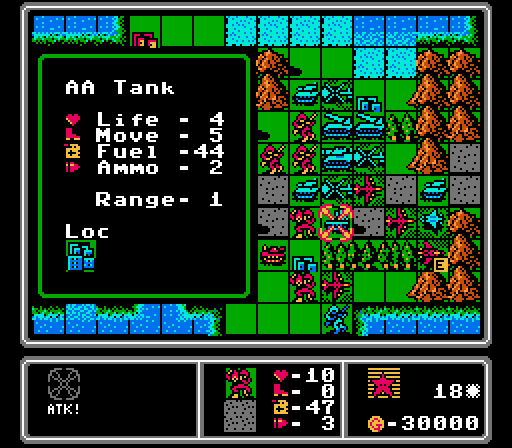  A mech reaches the hiding AA tank and finishes it off. With the AA missiles sitting back, our bombers can really let loose without fear now.  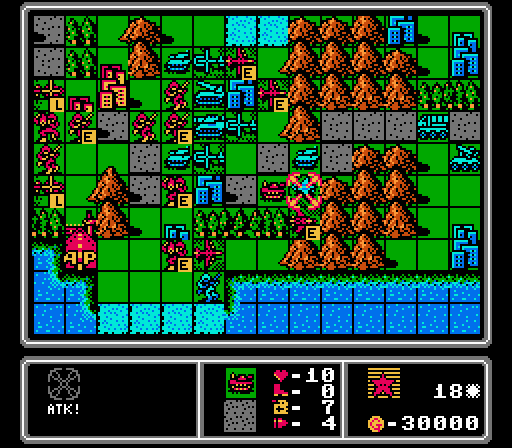 Two bombers finish off this rocket, with the damaged bomber then merging into them. Our second tank advances on this scout for some extra damage; not much but every bit helps against air units. 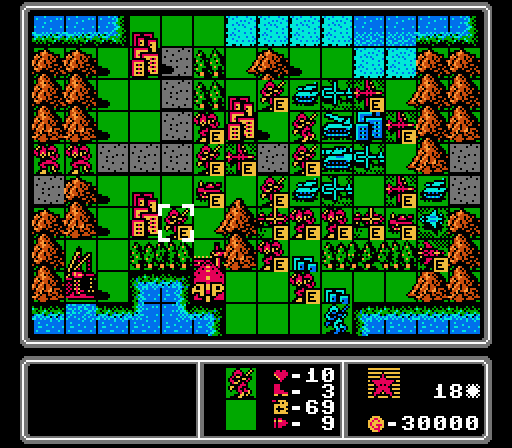 We've got a couple more captures in work, a pair of mechs getting dropped off by copters, and a bomber blocking the pass. We basically have Blue's army encircled now.  We need to build three units this time, so have some more flexibility in how to spend all our funds.  The enemy medium tank retreats to a city, and everyone else takes potshots at our footsoldiers and copters, but aren't able to kill anything. 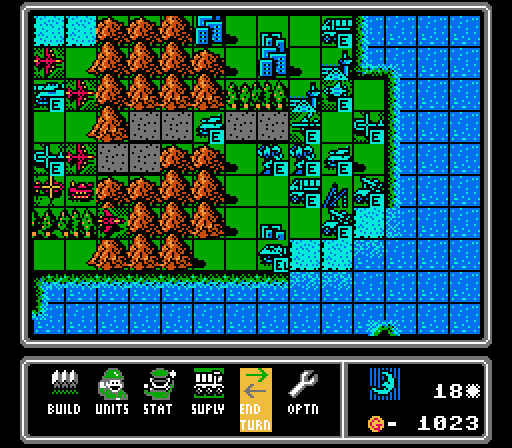 Blue puts out a bomber, which will be annoying but can't do much on its own. The enemy airports are each protected by both AA missiles, so I can't move our fighter in for a pre-emptive strike. Turn 19  Uh, oops. There goes our fighter, and our only defense against that bomber. 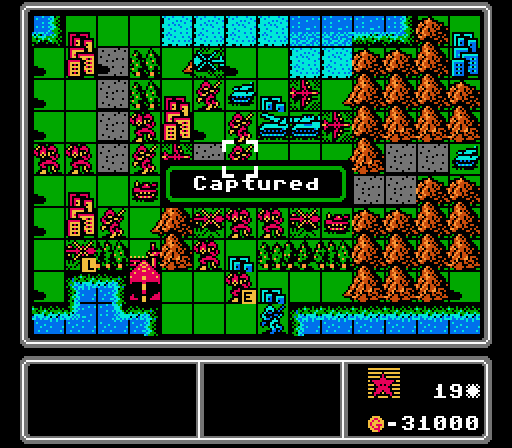 On the bright side, we're able to sneak in another city capture here.   We spend three bomber attacks to take out the last enemy rocket, with a fourth bomber finishing off the medium tank. Just like that, all of Blue's heavy vehicles are gone. 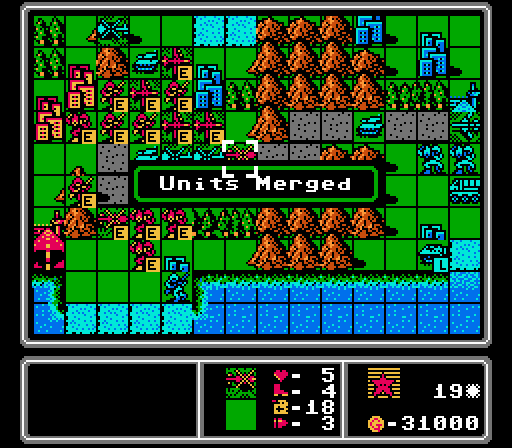 Even with a lot of units merging together (a copter, a tank, a mech, and an infantry), we still have three more city captures ongoing with very few enemy units remaining to disrupt them.  With five units to build this turn, we put out a new fighter to deal with the enemy bomber, then a copter to keep ferrying our footsoldiers ahead and new footsoldiers to fill up the rest of the slots.  The only enemy attacks are the damaged scout hitting one of our copters, and an enemy copter hitting one of our capturing infantry.  A new rocket won't be much trouble at this point. Those AA missiles are close enough to protect the enemy bomber, but I don't have anything that can hit it yet anyway. Turn 20  We start off by finishing two more city captures, really ramping up the pressure on Blue.  Suddenly I have a lot of bombers without a lot of targets. Two tanks are polished off, and one bomber flies all the way in to hit this AA missile with its last shot. Since it's out of ammo now, I don't even really care that the other AA missile will shoot it down next turn.  It's just a matter of time now.  We took so few hits last turn that we only have room to build one unit, and more funds than we can spend. So for the first time we'll actually end a turn with money still in the bank.  Still the challenge rules say we have to spend as much as possible, so we build the most expensive unit out there - a battleship. 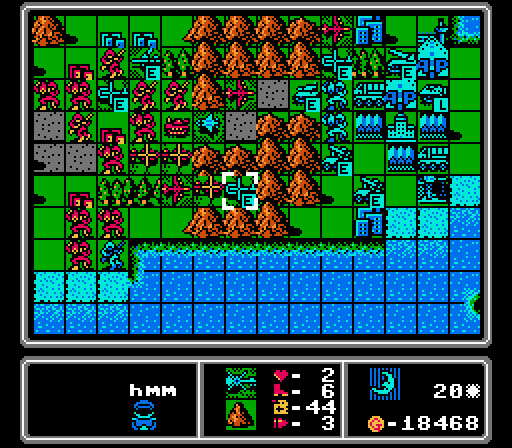 Not much happened on the enemy phase. A bomber and a copter hit our capturing infantry but couldn't kill it, and I have plenty more in the area. Another copter hit our copter. And the AA missile shot down our dry bomber. 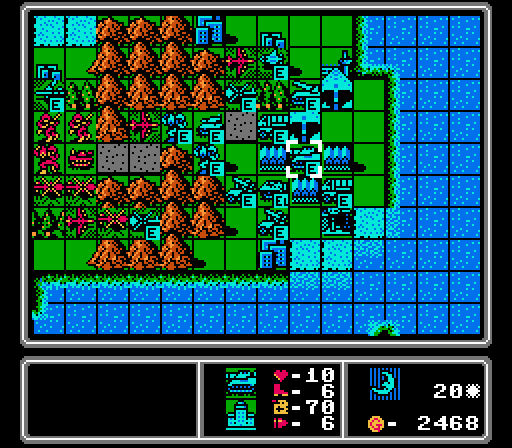 Just a medium tank. Turn 21  Our copters finish off an AA missile and a copter, and our mech wave takes out the enemy infantry on the lower city and damages the last copter in the area. Near the enemy HQ, our bombers hit the other AA missile, a mech, and a rocket.  More reinforcments. Couldn't quite get back to zero funds left, since the battleship we got last turn doesn't cost a nice round figure, but close enough.  The only excitement on the enemy phase was Blue's bomber hitting our tank. We have the last pass well and truly jammed up now. Those new AA tanks are going to be a pain, however. Turn 22 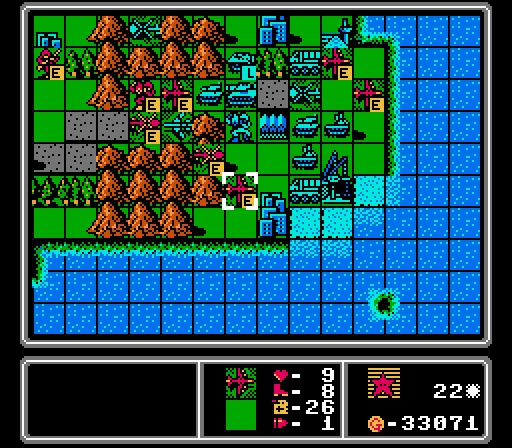 Our bombers finish off the rocket and the AA missile and get in the first strike on a tank, and a copter actually gets the kill in on the damaged scout. Per the challenge rules we throw away our damaged tank and mech on the enemy bomber, using up its ammo and actually getting in some chip damage.  Our fighter has joined the party now. You can see we completely control the central area as well. 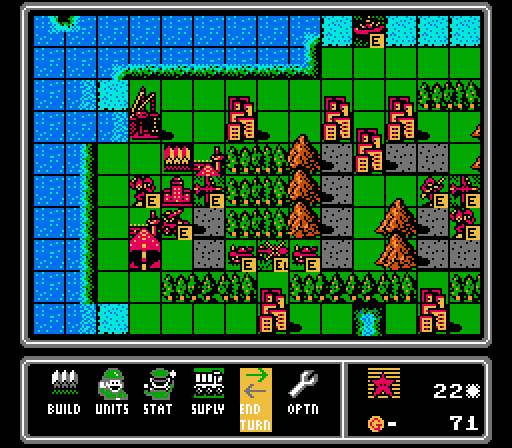 Okay, an AA missile probably isn't going to help us much, but really no ground unit I build now is going to make a difference anyway. 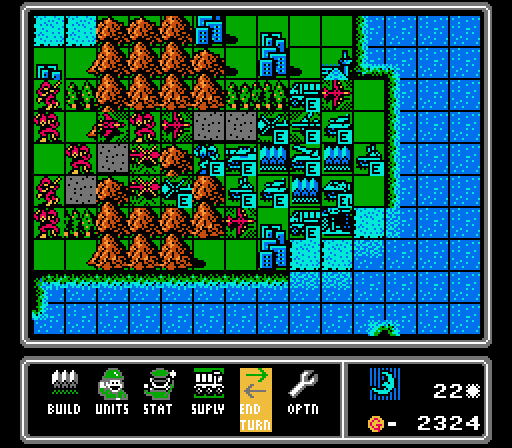 The AA tanks shoot down a copter and a bomber, and the AI puts out another rocket. Turn 23  We complete two more city captures, finishing our takeover of the central region.  One copter finishes off another, freeing up space for our fighter to take out the enemy bomber, as our bombers then go after an AA tank, the medium tank, and the rocket. I think we're still going to need some more firepower up here to finish this thing off, however; those mechs aren't going to cut it. 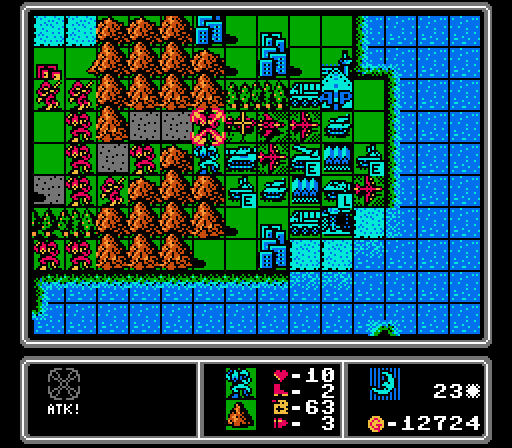 We lose a copter to an AA tank, but this mech also takes out an attacking copter before falling to hits from the rocket and mech. Blue also builds an AA missile. Turn 24  This crash was just a damaged copter, nothing important. 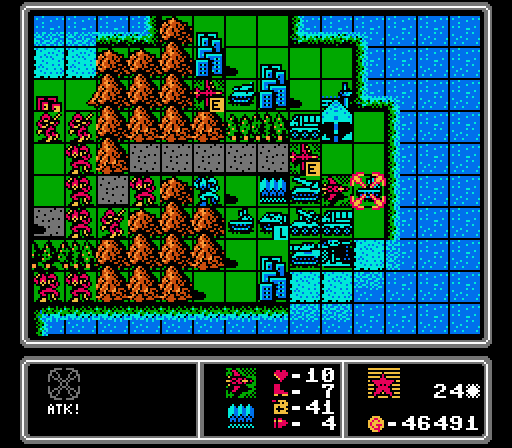 The bombers go after the tanks, killing one. Our fighter, with not much else to do, finishes off this AA tank. 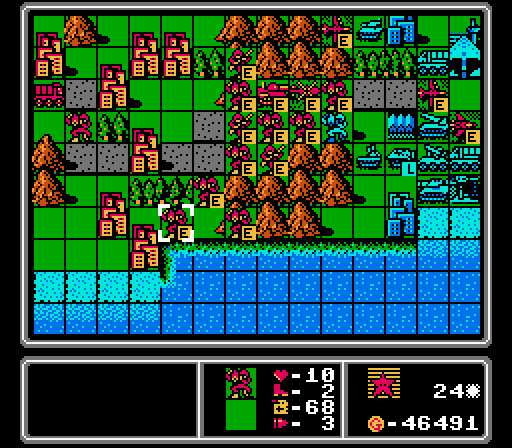 We need to wait for some more reinforcements to really make progress towards finishing this map, but at least that medium tank we built seven turns ago is finally in position to strike. Just have to avoid that rocket.  The rocket fires on our mech in the mountains, while the enemy medium tank, already weakened, hits the fresh mech we put down from a copter ride. The enemy AA tank then clashes with our bomber here. 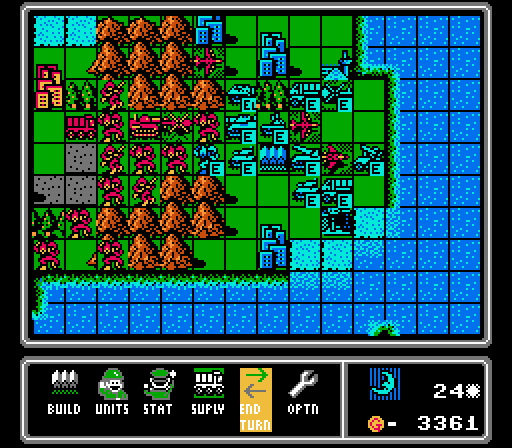 Blue is using the mountain pass to its defensive advantage now, clogging up the area with vehicles that are protected by a rocket. The AI then puts out a copter and a tank to keep up the clutter. Turn 25  One bomber chips away at the AA missile, while the other is out of ammo. Meanwhile, the fighter hits the new copter, and the mechs can't break through the pass. I don't want to bring the medium tank up yet, because it'll just be rocket fodder right now.  Not much of interest on the enemy phase. The medium tank finished off our mech, letting a tank through to hit our infantry. The AA missile shot down our toothless bomber, the rocket scratched another mech, and the damaged AA tank barely hit our fighter. Blue does build another rocket; we really need to get through the pass and take care of them. Turn 26  First we take out the copter with our own copter and some help from our fighter. The enemy copters are still the most annoying units right now, since our ground units and bombers can't really do much to them.  A fresh bomber removes the tank from the pass, freeing up space for a mostly-healthy mech to finish off the medium tank.  Now our medium tank is free to approach the rockets, and Blue doesn't have anything left that can really stop it. We're all but finished here.  We ran another bomber out of ammo, but we're basically through the pass now. The enemy mech fell to our footsoldiers as they passed by.  The rockets hit our approaching infantry, while the tank hits our decoy supply. The only real damage was this AA tank finally finishing off our fighter. 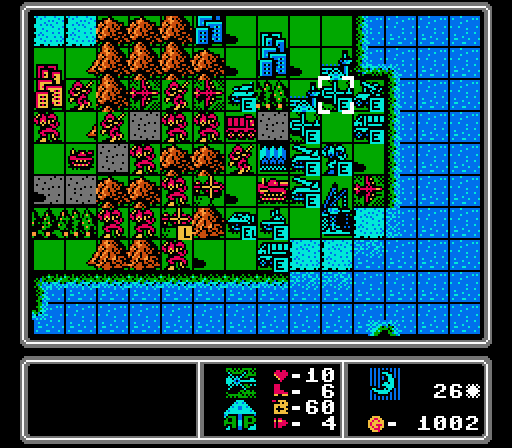 The APC also finished off one of our infantry, which is mildly irritating. More importantly Blue built a mech and not one but two copters, right after we lost our fighter. Annoying! Turn 27  Here's a weird problem. The HQs are so far away that our vehicles are close to running out of fuel by the time they make it all the way out here. Some like the rocket would actually run out if they didn't stop on a city along the way. Here I send the supply truck back to refuel the tank; the supply is also almost out of fuel! 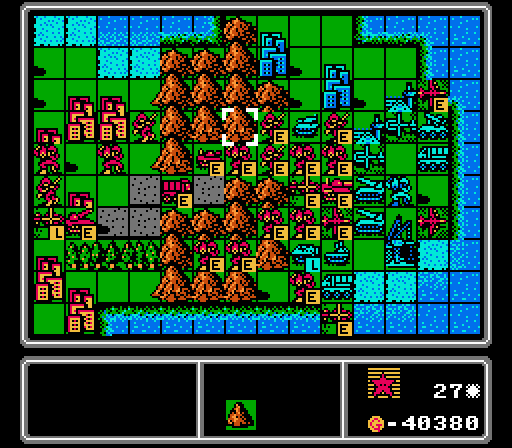 Anyway our heavy hitters strike the rockets and the AA missile, while everyone else just kind of gets in the way. Blue is going to spend most of its funds repairing those rockets, which I would appreciate much more than building more of them. 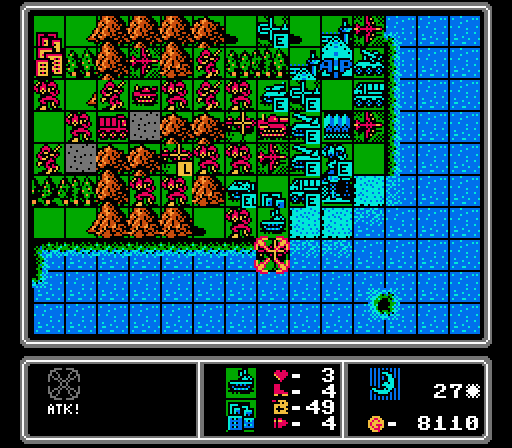 Our footsoldiers feel the heat and we lose an infantry and a mech to various attacks, while this copter is finished off by the AA tank. Luckily Blue only has enough cash for a tank this turn. Turn 28   Hey that battleship we built eight turns ago is finally here and able to help with this nasty copter problem!  More bombers have quietly arrived on the scene, and between them and the vehicles and mechs already here, we take out both rockets, the APC, and a copter. The highlighted supply is about to head back to a city to refuel.  Only our footsoldiers are attacked again, and we don't even lose anyone. Blue puts out a mech and an APC to guard its HQ though. Turn 29 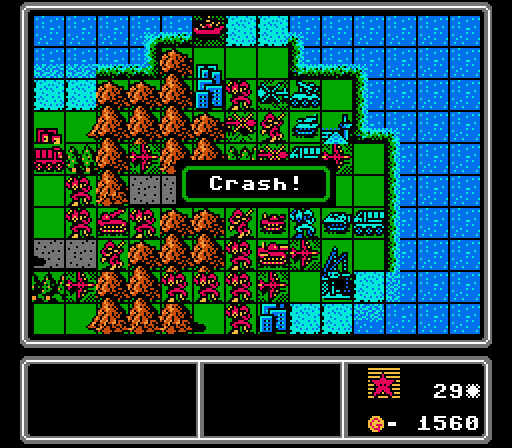 Just another copter, nothing important. 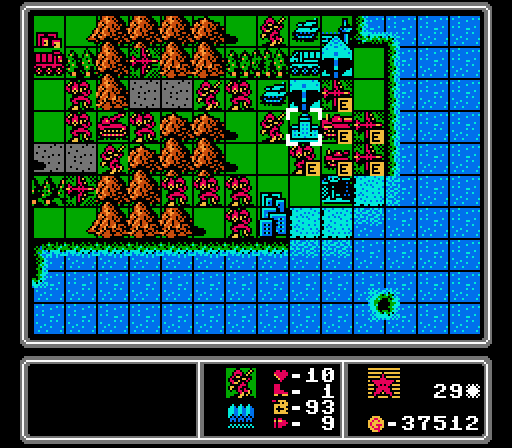 The battleship and copter take out an enemy copter, a bomber finishes off a supply, two bombers and the tank wreck the new APC, and the medium tank and mech kill the new mech. Freeing up the HQ space for this nicely-protected full-health infantry... 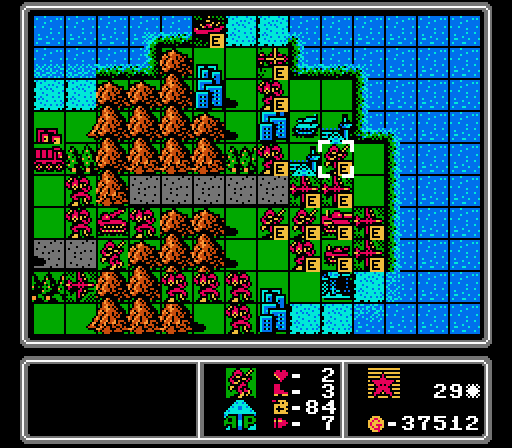 We also conveniently take out another supply and a tank with a newly-arrived bomber and a mech. We now have all of Blue's build points blocked, and just a tank remaining. That rocket we built twelve turns ago is finally here just in time to not have anything to do! Turn 30 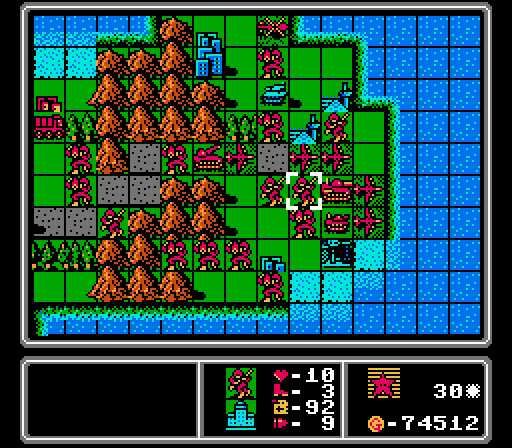 It would be easy to end this map in a rout, but for once we can legitimately win with an HQ capture at the same speed!  That's an oddly Hitler-looking CO for one of these games. 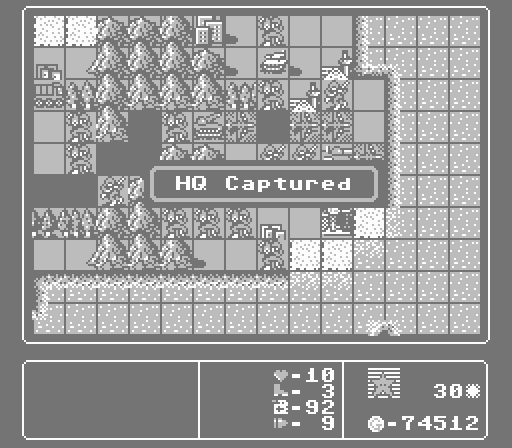 Victory! 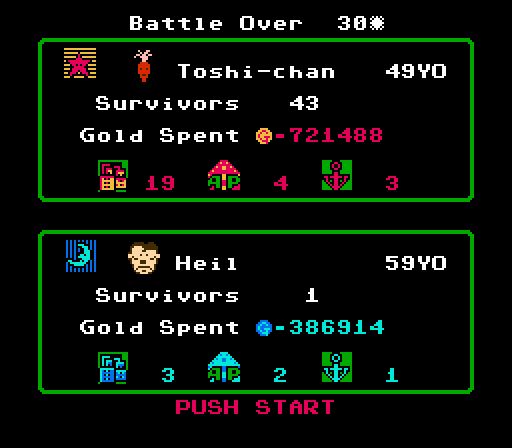 Oh, okay. The enemy CO really was Hitler, I mean "Heil". And our CO was some kind of vegetable, though not the same one the map is named after. From what I can tell "Toshi" is a common Japanese name that has nothing to do with vegetables. 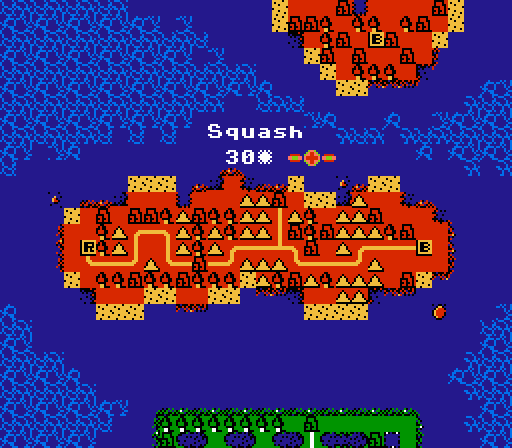 We finished in 30 turns, a bit worse than average but we definitely got slowed down by the challenge forcing us to build so many slow footsoldiers and vehicles on this incredibly wide map.  Next up is Cube, a map that at has an interesting layout, with a variety of ground paths and HQs that aren't a hundred miles apart. Our challenge for the next map will be Door Knob 2.0, where every unit type has to get at least two kills. For this map I'm also going to run a little side contest. For those patient enough to wait around and make it through this whole LP that want to participate, reply or private message with a number between 1 and 75 (inclusive) and I'll set it all up.
|
|
#
?
Mar 25, 2022 03:51
|
|
|
dang we killed Hitler, good going. 66
|
|
#
?
Mar 26, 2022 01:04
|
|
|
42 because of course. That challenge was interesting. Seems like the biggest impact was that it forced you to over-invest in early stuff (infantry / mechs) much more than necessary so it slowed your ability to pump out the break items.
|
|
#
?
Mar 26, 2022 02:18
|
|
|
MagusofStars posted:42 because of course. Yeah though early on all those extra mechs and infantry actually came in handy for taking over the middle of the map. Still it could've been a lot more efficient.
|
|
#
?
Mar 26, 2022 05:22
|
|
|
50 In honor of the unit cap the challenges keep making you ram
|
|
#
?
Mar 26, 2022 06:27
|
|
|
FoolyCharged posted:50 I appreciate the sentiment, but the unit cap is actually 48. Want to change your answer?
|
|
#
?
Mar 26, 2022 06:46
|
|
|
DKII posted:I appreciate the sentiment, but the unit cap is actually 48. Want to change your answer? Huh, I just assumed it was the same 50 as in all the later releases. Yes I would.
|
|
#
?
Mar 26, 2022 06:52
|
|
|
27
|
|
#
?
Mar 26, 2022 07:52
|
|

|
Part 39: Interlude: Wars World Bingo The challenge for the next map is Door Knob 2.0, where every unit gets not one but two turns (ie: each unit type has to get at least two kills in the map). Last time we did this challenge, I made a grid-like checklist to keep track of our progress; with just nine unit types available on that map, it was an easy 3x3 grid. This time around, we have ground and air units for a total of 13 units types; meaning we need at least 26 kills. I couldn't fit a checklist into a nice grid, but there is something else you can do with a 5x5 grid....bingo cards! Behold:  Above is the Wars World Bingo card for cardinale, who was the first to pick a number and get a card assigned and built. I took standard bingo cards with the numbers 1-75 on them, and converted the numbers to a unit type and a number from 1 to 5. For each kill made on the map, each player can mark off a square corresponding to the unit that got the kill, and the turn in which the kill occurred. For turns after the 5th turn, just keep subtracting 5 until you get to a number between 1 and 5. For example, a bomber getting a kill on the 15th turn would result in the lower-right space above getting marked. The same for if a bomber gets a kill on the 20th turn, 25th, etc. Hopefully the unit icons and numbers are clear up there. The tanks and APCs can be a little hard to make out in the second column, but the tanks have a turret on the upper-right; the medium tank is pretty obvious there. Similarly the air units in the fifth column can be hard to tell apart; the scout is the small one, the fighter is the big one with the swept-back wing, and the bomber is the big one with the straight wing. If you can't tell the rest: The first column has infantry and mechs; the third column has artillery and rockets; and the fourth column has AA tanks, AA missiles, and copters. Now, I know what you're all thinking - the whole fun of bingo is listening to the numbers called out live and yelling out "Bingo!" when you have five marked squares in a row. How will that work in an LP format? Here's my plan: I'll record and write-up the entire battle in advance, but only post it a small bit at a time (maybe a turn at a time, maybe a kill at a time?) by editing the same post over and over. So players will need to keep an eye on when the "numbers" get called; the first one to reply in the thread with "Bingo!" (and an accurate list of which called squares make up five in a row) will win the contest! The prize: A forum upgrade of your choice, including a new avatar/title. Basically I'll send a gift certificate of your choice from this list, excluding the "Smilie" one. So far there are four entries, including the one from cardinale above. Here's the current list of cards: Edit: The contest has concluded! If you want to make your own card and follow along, here's how to do it:
Now you can go play! The squares get called out in the second update of the next map, Cube DKII fucked around with this message at 19:21 on Apr 23, 2022 |
|
#
?
Mar 27, 2022 18:40
|
|
|
13, the luckiest number.
|
|
#
?
Mar 27, 2022 19:42
|
|

|
Give me 1.
|
|
#
?
Mar 27, 2022 19:52
|
|
|
Good news is I have your cards ready. Bad news is neither one was very lucky - both are missing bomber squares entirely, approximately a 4% chance of happening and it hit twice. Tulip your card is even stranger, also missing tank and copter squares. That's like a 0.0063% chance, or 1 in 15,835 or so. Anyway here they are:
|
|
#
?
Mar 28, 2022 01:03
|
|
|
I'm seeing some promising lines on mine. This should be fun
|
|
#
?
Mar 28, 2022 02:25
|
|
|
I will take card 11, please.
|
|
#
?
Mar 28, 2022 14:11
|
|
|
Well that's odd, it's another card with no bombers. No AA missiles, either: If you care about my process, I found a pack of 75 numbered bingo cards so your number leads to me pulling that one from the set, then running a conversion. Bombers are numbers 71-75 on the card. They look sufficiently random; it's not just the early cards affected, we just got unlucky three times in a row here. In fact only 6 of the 75 cards in the set have no bomber squares, and somehow we hit three of them in a row here. (And no, I'm not telling you which ones the other three are! At least, not until the contest starts!) DKII fucked around with this message at 04:26 on Mar 29, 2022 |
|
#
?
Mar 29, 2022 04:19
|
|
|
Part 40: Unit Overview: Fighter Like scouts, fighters don't show up in any animations. Basic Info: pre:Cost 22000 G Movement 10 Move Type Air Fuel 99 Ammo 5 Ammo Cost 8 G Range 1 Special None pre:Opposing Unit Damage Dealt Damage Taken Infantry 5.5 0.5 Mech 5.5 1.5 Medium Tank 0.5 1.5 Tank 1.5 1.5 APC 2.5 1.5 Rocket 1.5 N/A Artillery 2.5 N/A Supply 4.5 N/A AA Missile 1.5 6.5 AA Tank 1.5 6.5 Fighter 4.5 4.5 Scout 6.5 1.5 Bomber 9.5 N/A Copter 6.5 0.5 Battleship 0.5 6.5 Lander 1.5 4.5 Fighters are the scouts' big brothers, able to hit a little harder against everything but a copter, and more resilient to all attacks as well. For that benefit, they are almost 50% more expensive. Ultimately they're worth the price later in the map when cash is flowing freely, though early on a scout is more effective against the initial copter wave. A fighter has the same incredible movement and long-lasting fuel tank that a scout carries, so between the two of them you can maintain a large area of control in the skies.
|
|
#
?
Apr 3, 2022 00:40
|
|
|
Part 41: Cube (1 of 2) This map has an interesting layout, with lots of branching paths. Reminds me of the Alara map earlier, except with water instead of mountains separating the paths. Let's take a closer look...  We've got a large map here, three screens tall and 2.25 screens wide. I think that comes out to 32 tiles wide and 30 tiles tall. The HQs are 38 tiles apart by my count, so we've got another long hike for any ground vehicles. And I set us up with a challenge that requires using everything, including the super-slow rockets and AA missiles. Great timing! Anyway, our challenge is Door Knob 2.0, where every unit gets not one but two turns. Basically, every unit type that can attack has to get at least two kills on this map. We have thirteen attacking unit types available (not counting the supply trucks) so will need to get at least 26 kills out of them. We're also running a bingo contest on the side based on what unit types get kills on what turns. I'll call out each specific square as it comes up and be posting smaller updates more frequently (but all in the same post). But this first update will include just the initial kill-free content. The contest itself will start this Friday morning (April 15th) and the updates will all be in the "Part 2" post I'll put out that morning. By the way, morning for me is US Mountain Daylight Time, which is six hours behind GMT. Turn 1 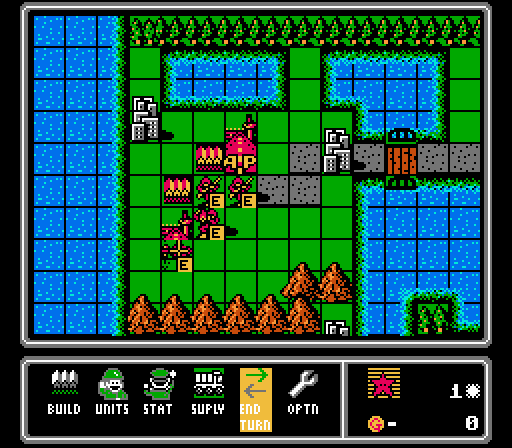 We have three neutral airports to take, so our usual starting strategy of heading straight for them with infantry and copters is still viable. Those mountains right below us are going to make using vehicles more difficult, since they can't reach the lower-left corner of the map without going a long way around first. 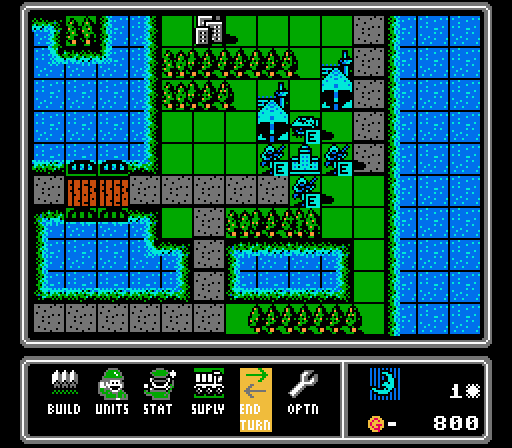 Blue goes with a similar first-turn setup. Turn 2  Just building and loading a couple more copters.  I don't know if it's the spread-out cities or the limited pathways, but the AI is a lot more efficient at the initial capturing rush in this map and I don't like it. Turn 3  More of the same here. 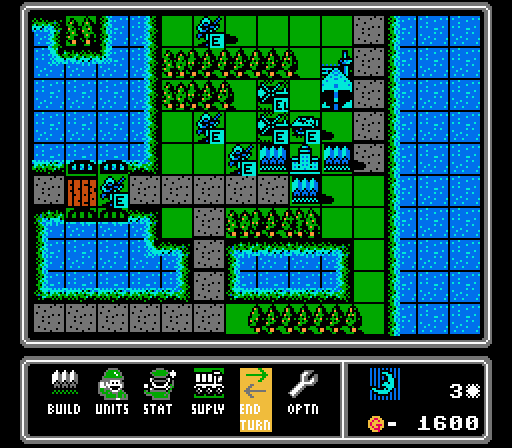 Blue starts capturing its first city. The first APC is moving up the road off-screen as well. Turn 4 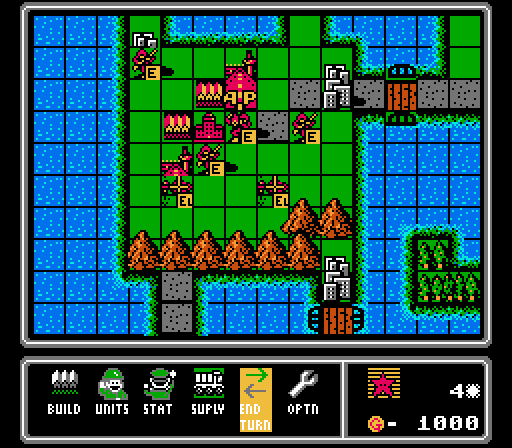 Our first few copters are headed towards the neutral airports, with a couple more infantry staying nearby to take the local cities. 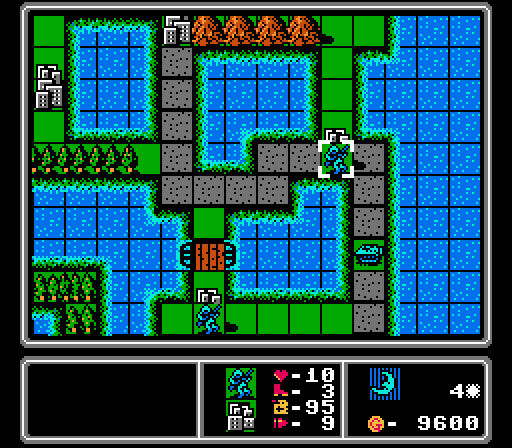 A second city capture is underway in the Blue corner.  More APCs and copters, most of them loaded already. Startlingly efficient. Turn 5  We've reached the central airport, though you can see just how close we are to Blue's area already.  We're at the lower-left airport as well. This one is still a bit more isolated. 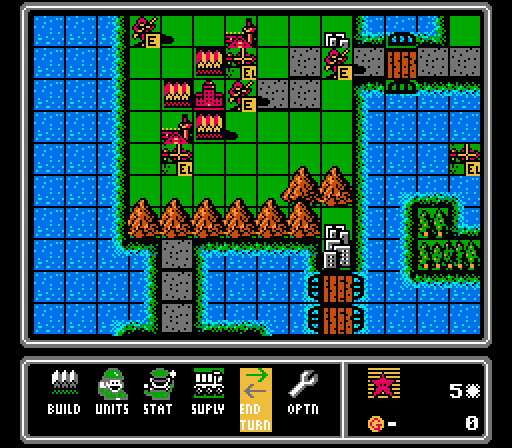 Our first city is captured, and we build some more copters and infantry.  Blue is about to grab two more cities in the lower edge of the map. That copter is actually really close to the central aiport, and probably going to cause us trouble. 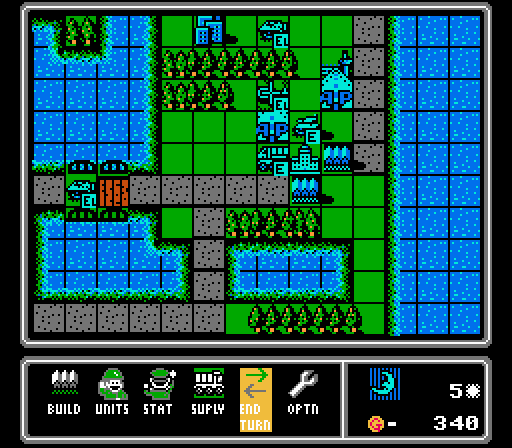 Every infantry got loaded up and carried away immediately! What is this nonsense. Blue's confident enough to start building tanks already, too. Turn 6 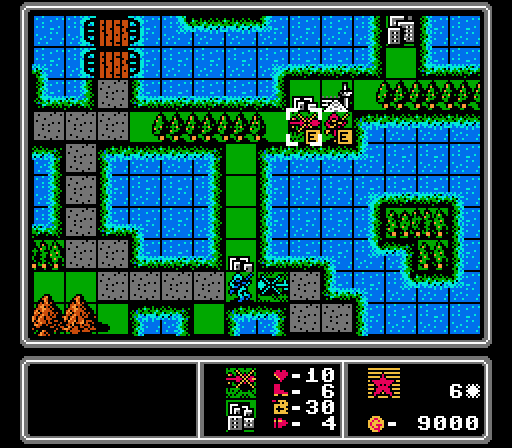 I can't really protect our infantry at the central airport; we'll just have to wait and hit back.  The upper-right airport is a bit further away then the others and took us an extra turn to reach. Upside is it's more isolated so we won't have a problem grabbing it.  More copters and infantry. Good chance on those squares going early.   Our infantry at the central airport loses half its health. If I can drive off the copter, that'll only delay capture by a turn. 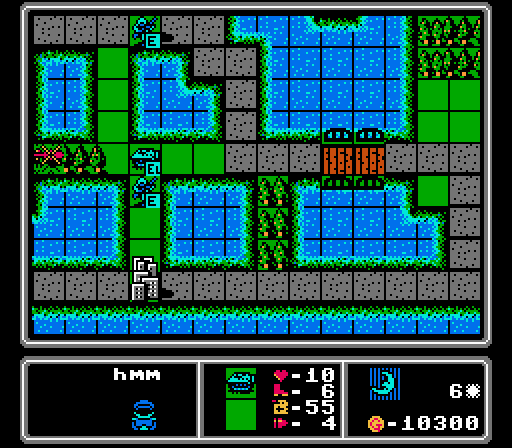 The lower edge of the map is going to be difficult to contest. Blue's got the most push here and I can only get copters down here. For now, however, copters make for effective blockades on these tiny land bridges.  The first enemy tank is on its way to the center, and another tank is right behind it. Turn 7  We start off by taking the lower-left airport, plus another city, before starting a few more captures (including the final airport).  It's about time to start varying our unit types. I need to get two kills from every type, after all. So a couple of the cheaper alternatives come out, with an APC and two mechs. 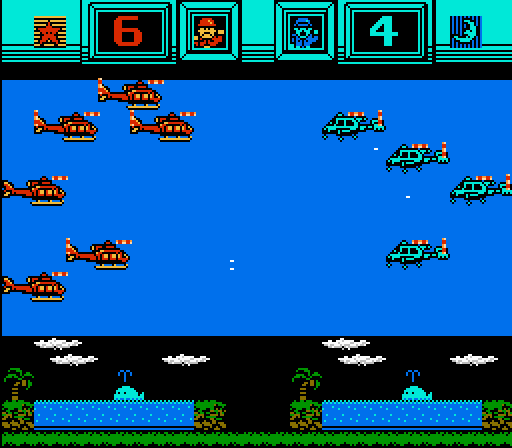 The damage that our infantry did to the enemy copter last turn is enough to give our copter the edge here. That might be enough to force the enemy to retreat, which would hand us the central airport. 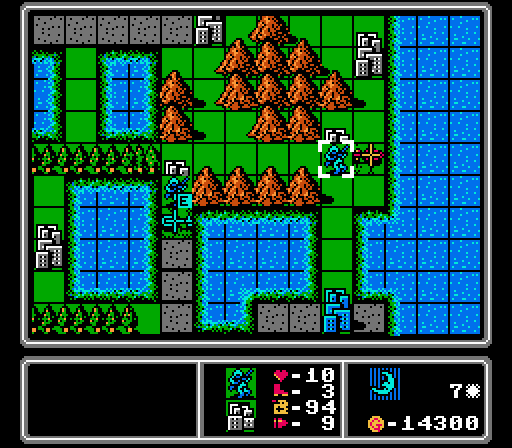 Blue is encroaching upon the upper-right island now, taking one city and starting a capture on another. I think we'll be able to prevent that second one.  Meanwhile we're trying to hold the lower-left island with just a copter. Blue has taken two cities in this area already and has unloaded to go for a third. 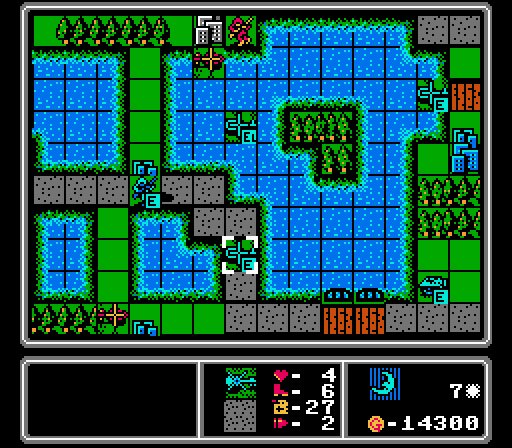 In the center, the damaged enemy copter retreats, leaving us alone with the central airport. Two more copters (and an APC offscreen) are already on the way, however.  Blue is a big fan of rockets on this map. There are a few points where they have great coverage across the water with minimal exposure to ground attacks. They're still vulnerable to bombers though! To Be Continued...
|
|
#
?
Apr 10, 2022 23:24
|
|
|
There's still time to enter the contest! Just post here picking a number between 1 and 75 (that isn't already taken) and I'll make up the bingo card for you! I'll stop taking new entries once I post the first update for part 2 of this map and start calling out squares, so you have a few days left!
|
|
#
?
Apr 10, 2022 23:28
|
|
|
Part 42: Cube (2 of 2) The Wars World Bingo contest is concluded! See the end of the post for the full list of called squares and the winner, or continue reading to play along! Turn 8   That enemy copter that tried to run away ended up right in range of one of our other copters, leading to the first kill of the map! That'd be square Copter-3 for those playing along.   Meanwhile we capture the two remaining neutral airports, plus another city. We've got a solid income advantage now, but there are still 15 cities left to take.  This copter is just trying to slow down the enemy captures in the upper-right corner. 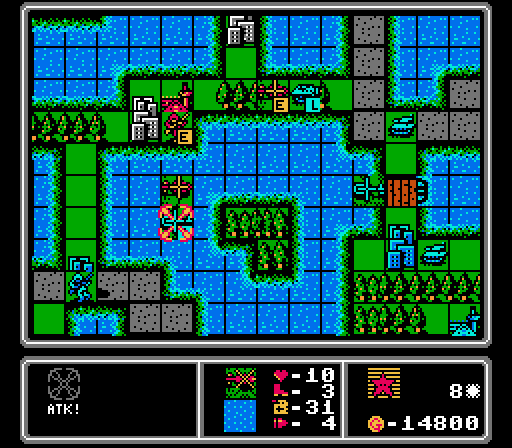 In the center area, a damaged copter blocks off an enemy APC while a fresh copter gets in a hit on an enemy copter that's carrying an infantry.  The mechs load up into new copters, and we put out another APC to deal with the encroaching infantry. 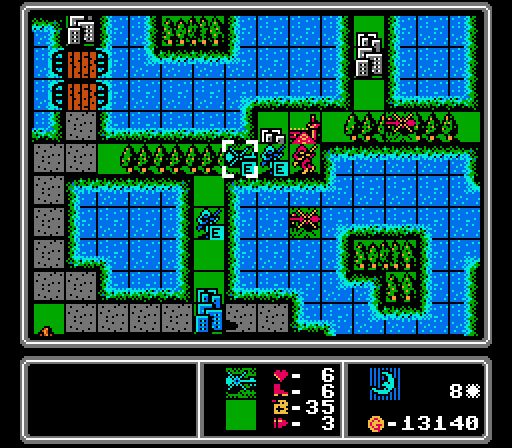 The enemy phase has a lot of capturing and infantry movements. The most notable is the copter we just hit dropping off its infantry right next to us at the central airport.  A new rocket for Blue, as the previously-built vehicles keep advancing. Turn 9 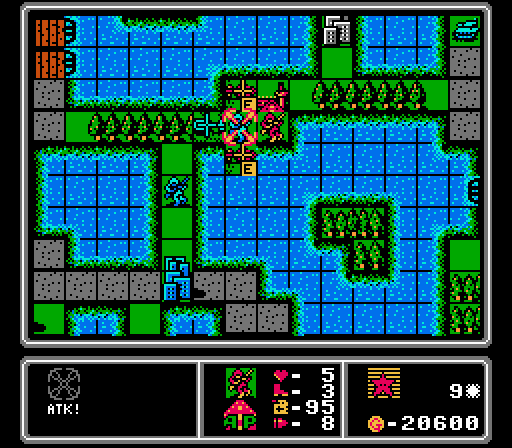  Our two weakened copters sting the enemy infantry here enough for our own injured infantry to grab the kill. Square Infantry-4! 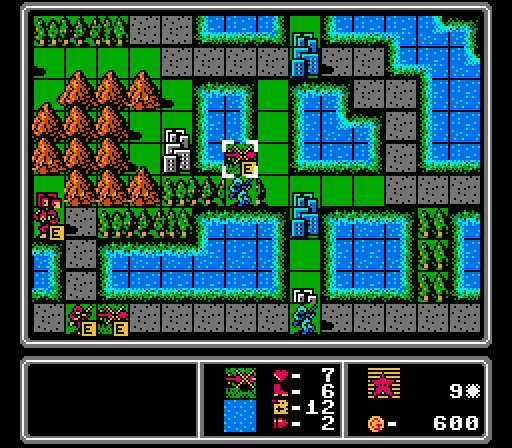 Blue is actually somewhat over-extended here. They've got unsupported infantry that we can try and remove with the copters, and follow up with taking the nearby cities.  Not a kill here, obviously, and that infantry will still finish its capture this turn, but the copter does block the pass so the enemy APC and tank can't get through. 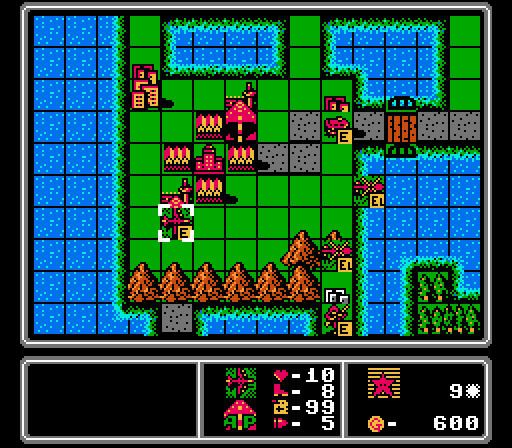 We had enough cash lying around for a bomber so I couldn't resist. In retrospect I might've been better off getting the expensive slow vehicles out first, since they'll take forever to get anywhere. 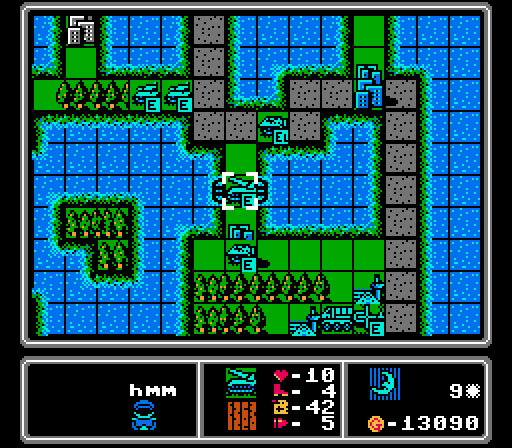 Those tanks are now within reach of the central airport and the infantry we have nearby. And the enemy rockets aren't far behind them.  Third straight rocket. Turn 10  Our first APC is finally in range to strike next turn. Meanwhile our copters keep trying to keep the enemy infantry busy.   Our copter here is actually carrying an infantry so I wouldn't normally get into a fight with it, but I take a chance here and we're able to finish off this infantry without taking any damage. Anyone have square Copter-5?  We have two damaged copters trying to block off the central airport, while another copter drops in a fresh infantry to help take the nearby city. 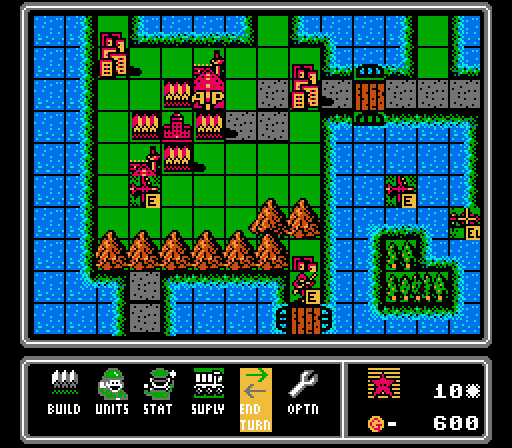 I couldn't resist a second bomber here. 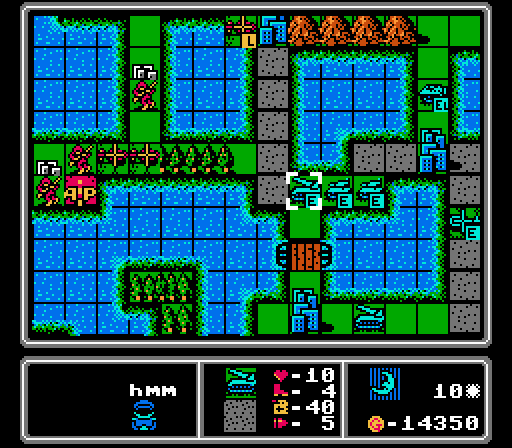 An interesting effect from blocking off certain paths - the AI will often waste time backtracking to go around the blockade rather than waiting for it to get busted. So all the vehicles that Blue has been building lately are still clustered near its HQ.  The AI adjusts to our bombers by putting out an AA missile. Way better than a couple of AA tanks. Turn 11 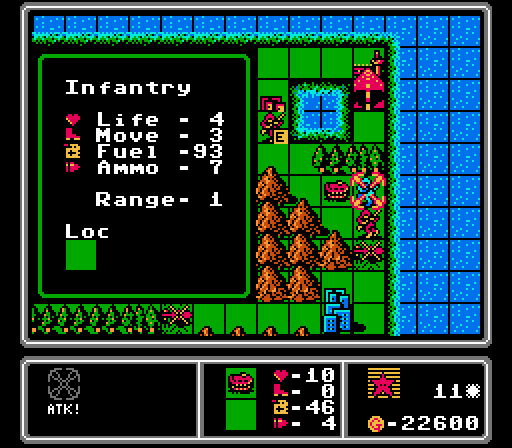 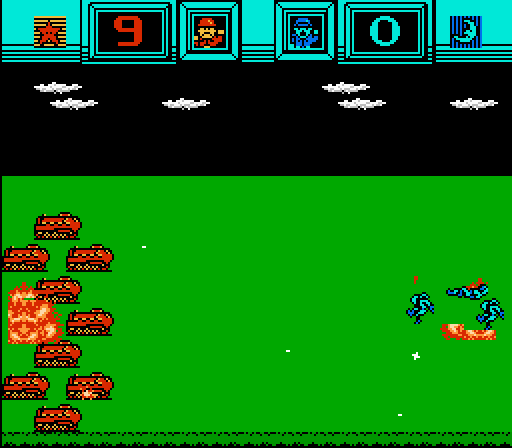 We get in a few more city captures, but more importantly our APC is able to get in on the action by finishing off this infantry. So mark off square APC-1 if you have it! 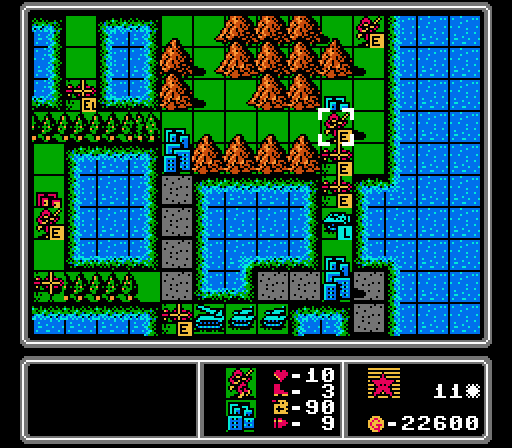 Continuing the copter blockade while dropping off another infantry to take over these cities from Blue.   Another loaded copter takes the opportunity to finish off a capturing infantry on its way by. So we get two squares this turn - mark off Copter-1!  We're getting the central area under control now. Just a loose infantry to take care of here. 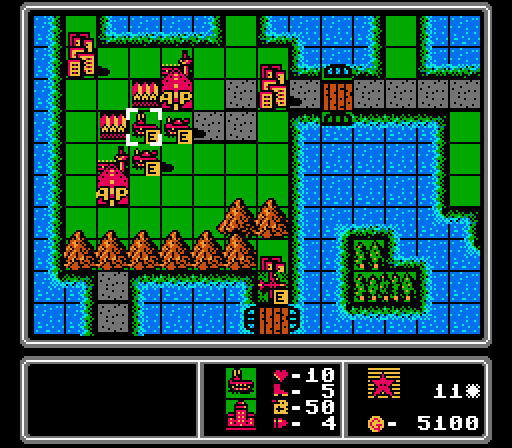 Now we're starting to get out more ground vehicles. Can't have copters and bombers hogging all the kills, after all. 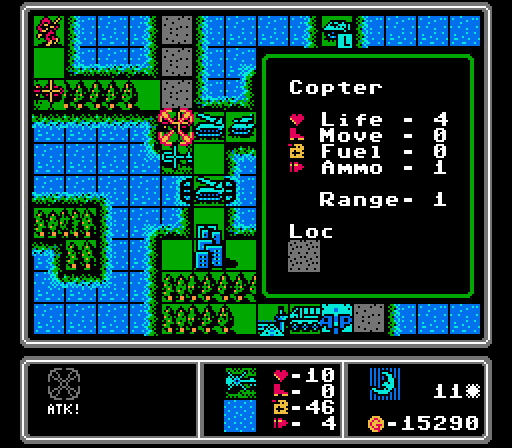  Unfortunately the copter blockade doesn't work as well when you use damaged copters and there are enemy copters around.  The enemy vehicles don't seem to know what to do with their new-found freedom though, only one tank moves past the blockade point.  This triple rocket cluster would be a problem if I didn't have a couple of bombers on the way already. 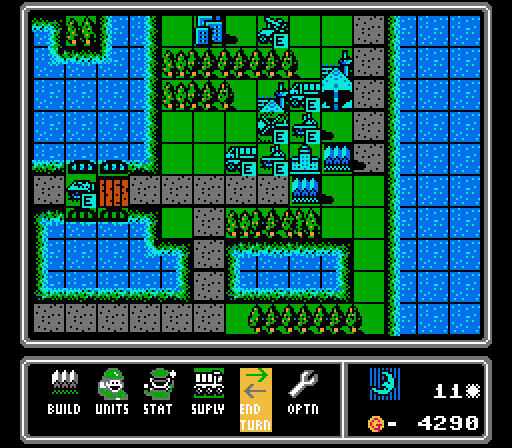 I'll just have to avoid the AA missile from last turn and the two newly-built AA tanks here. Turn 12  The nearby copters are weak and low on fuel so I had to resort to blocking this APC with an infantry; not ideal but it happens to work out in this case, as the APC retreats. 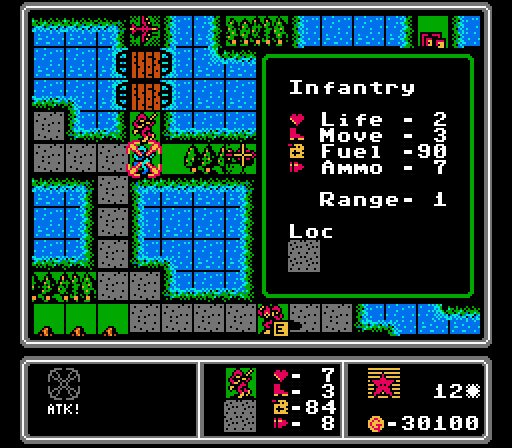  By the central airport, we're able to finish off the last unit in the area with an infantry kill. That's square Infantry-2 for those keeping score. 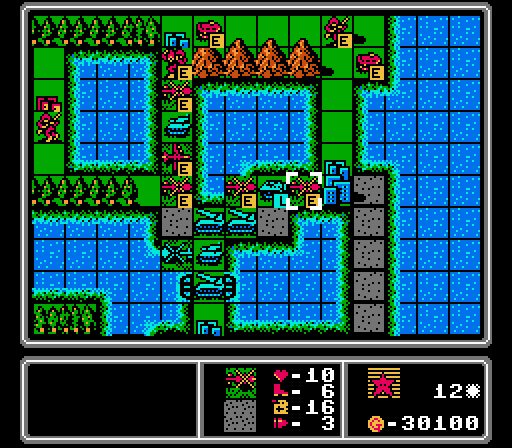 Our bomber hits the lead tank while our copters continue their blockade efforts.  We've got the income for a couple of scouts this turn so that's what we get. 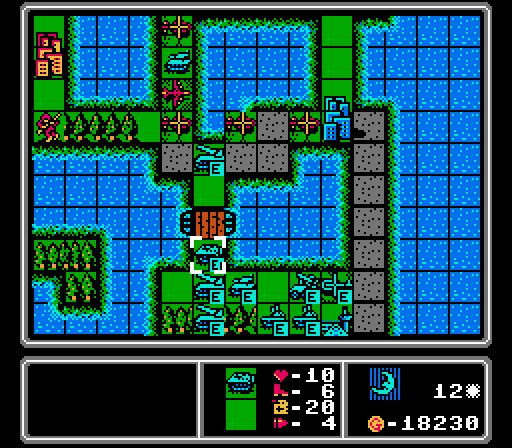 The AI can't attack anything and wants to get away from our bomber but doesn't really manage it. Still, we've got the enemy pinned even deeper in their own territory now, and an enemy rocket that's exposed. 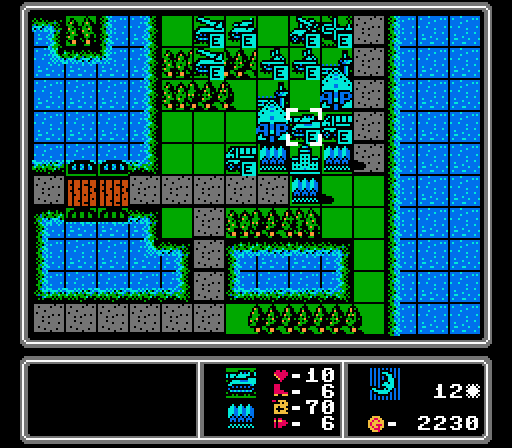 Slightly more troublesome than a rocket, but better than enemy planes coming out. Turn 13 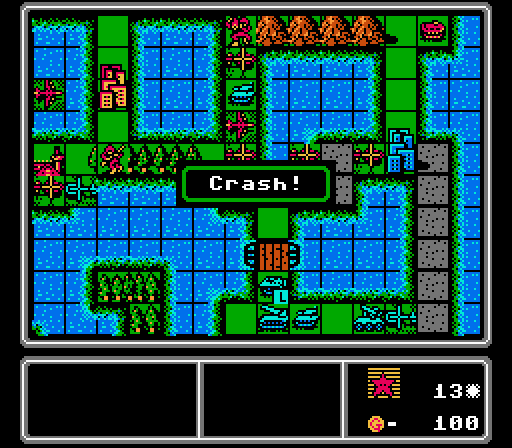 One of our copters runs out of fuel after dancing around the last few turns. 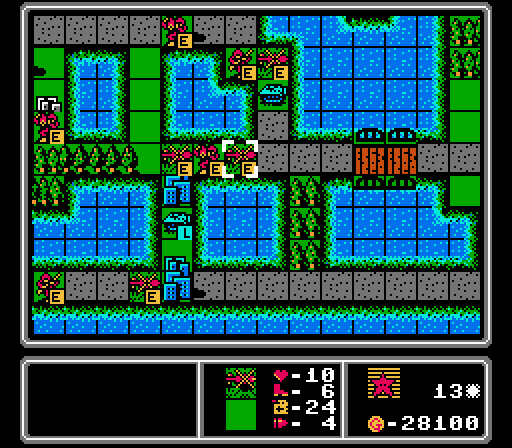 We're positioned to take another few cities on the lower paths, with a couple of APCs both screened away.  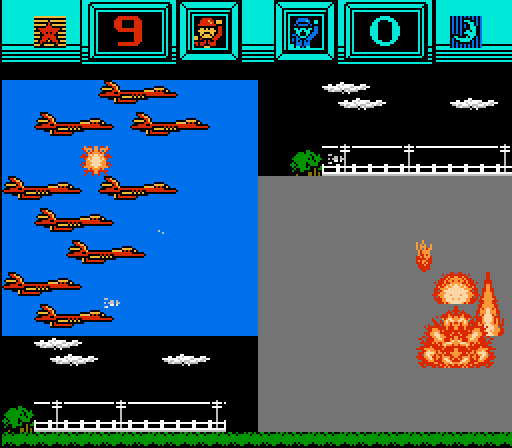 Our first bomber hits the exposed rocket but the second can only reach this tank. It does grab the kill for square Bomber-3. 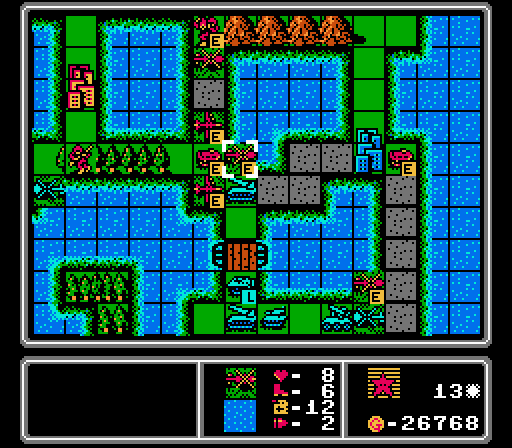 Continuing to advance and make room for our footsoldiers to keep taking cities.  Right about now it occurs to me that we're firmly in control of the map, somewhat close to winning it outright even, and we haven't even built some of our unit types, let alone gotten two kills with them. So I finally put out one of each of our slowest vehicles.  No squares for enemy kills, but the copter I sent into harms way (since it was low on fuel) falls to the AA tank. 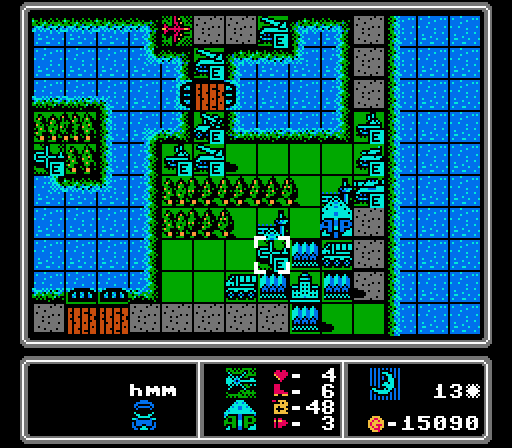 Otherwise Blue mainly shuffles around its units ineffectively, and then puts out a fourth rocket. Turn 14 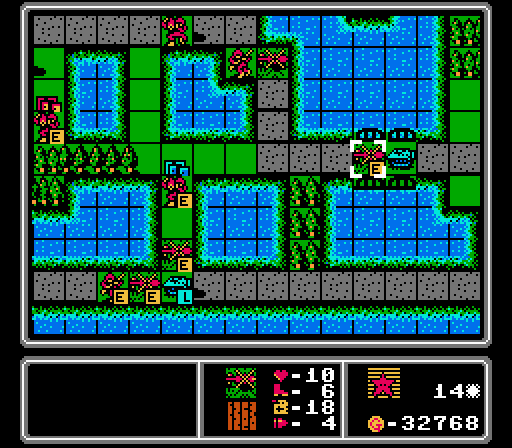 Our copters continue to herd the APCs away while we take more cities.  I get a little over-aggressive with our APCs here, trying too hard to get them a second kill. Instead they're exposed to rocket and tank fire. Our bombers hit the AA missile and the loaded APC, but again no kills.  Just showing the capture of the last neutral city, and our total control over the upper-right island. We've taken two of Blue's cities from this island already, too. 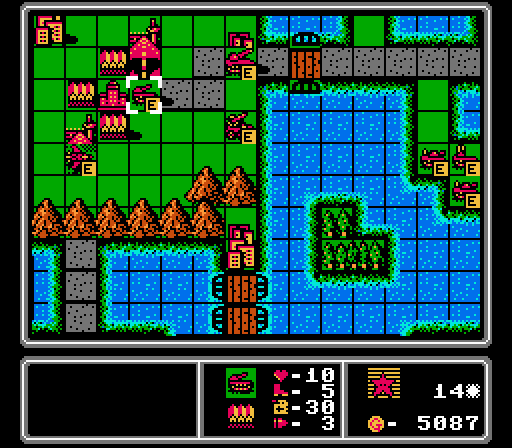 Tossing out more units that need kills here. It's a long slow road for those ground vehicles. 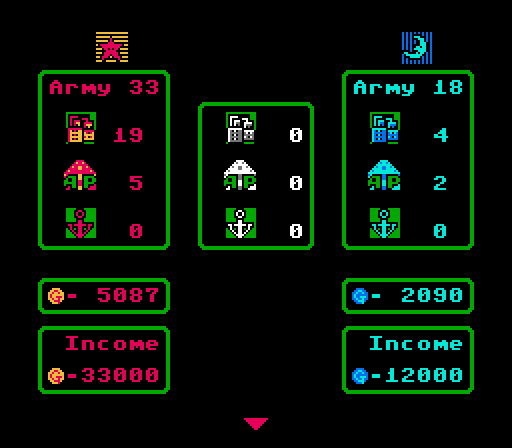 The capturing race is complete, and we easily won here, not only taking all three airports and most of the neutral cities, but even grabbing some of the cities that Blue initially took. If I just threw out bombers non-stop we'd probably be done with this map in just a few more turns. 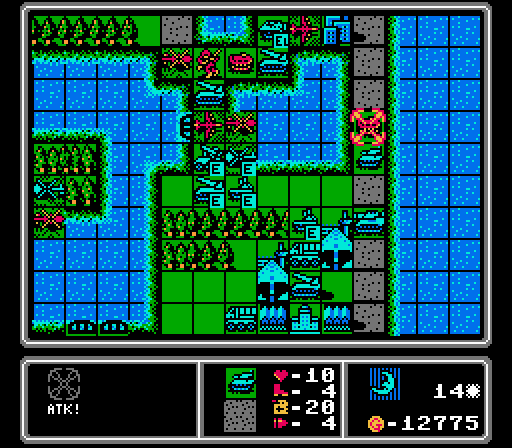 One APC takes a hit from the rocket as expected, and the other is destroyed by this tank after the AA tank retreats. We also had a couple of copters take hits from another copter and the AA missile, but both survived.  That medium tank will complicate my efforts to take more of Blue's cities here. 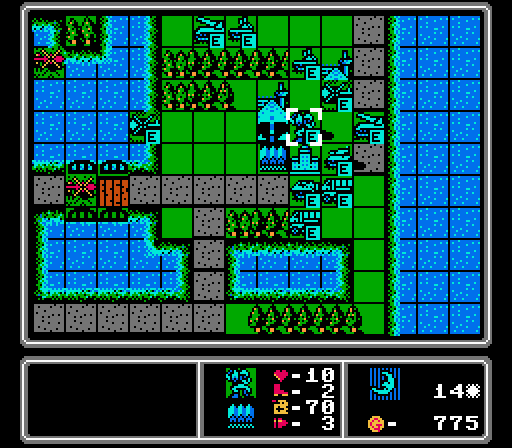 Blue doesn't have a lot of income left so throws out a few cheaper units this turn. Turn 15  Two more copters run out of fuel. I'm going to be running low on them soon since we haven't been building any more lately.  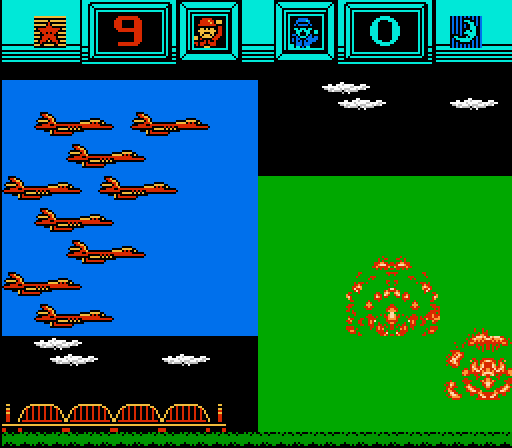 Another bomber kill here, finishing off the AA missile. That's square Bomber-5 for you.   A wounded copter is easy prey for the newly-arrived scout, also giving us square Scout-5.  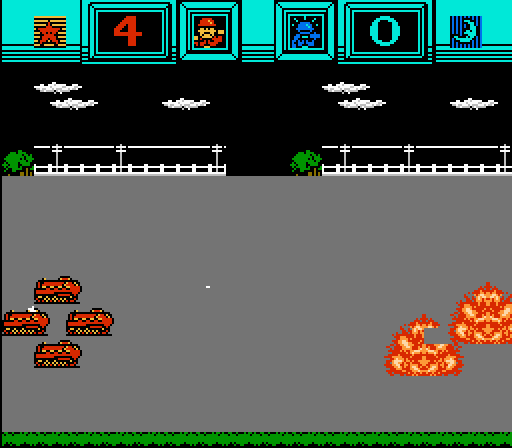 Getting a second scout kill this turn would be a waste, so instead the other scout chips in on this rocket so that the APC can finish it off. So we also get square APC-5 this turn!  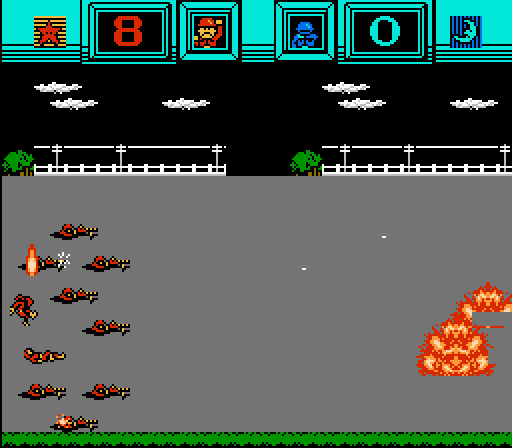 But wait, we're not done! This enemy APC got damaged by a bomber strike last turn, and I have a surplus of infantry in the area, so two of them are able to team up to take out both the APC and the infantry it was carrying. Mark off square Infantry-5 as well!  Still herding this enemy APC away while we take over the rest of the lower edge.  Our first medium tanks, plus a couple of mechs since they don't have any kills yet. 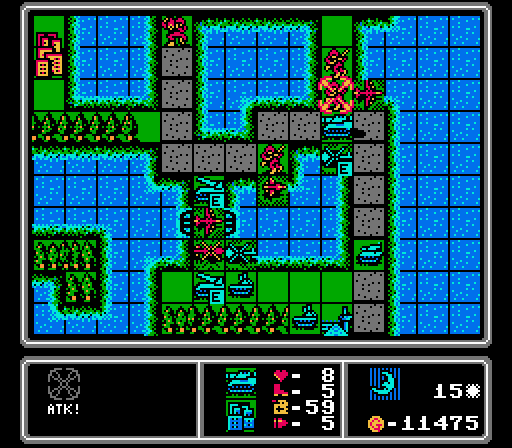 Blue gets in a few kills as well, finishing off an infantry and an APC with rockets and then destroying one of our copters with a copter. The medium tank then parks on this city to hit our infantry. It'll be tough to dislodge with what we have in the area right now, but it'll also soak up the enemy funds getting repaired every turn, so it's not all bad. 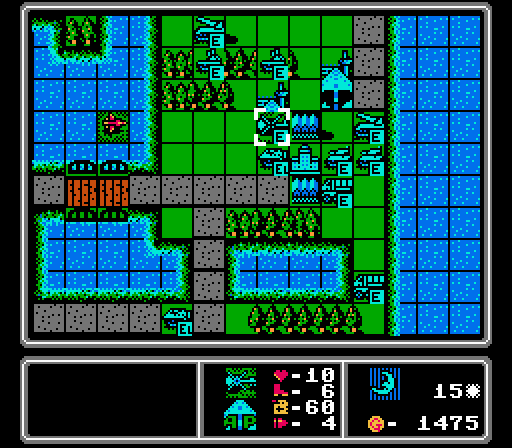 The AI puts out another tank and copter to harass us. Turn 16 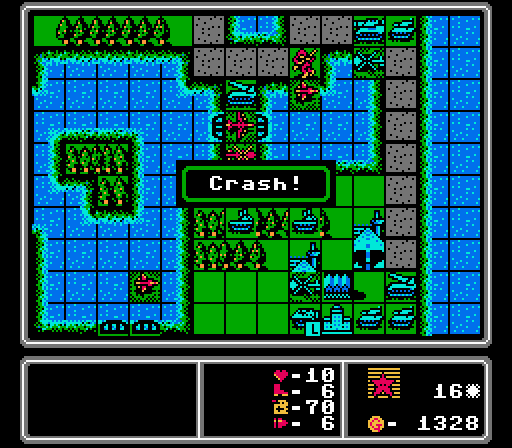 Another pair of copters run dry and crash. That's five total now. I guess the free space on the board is for copters killing themselves.  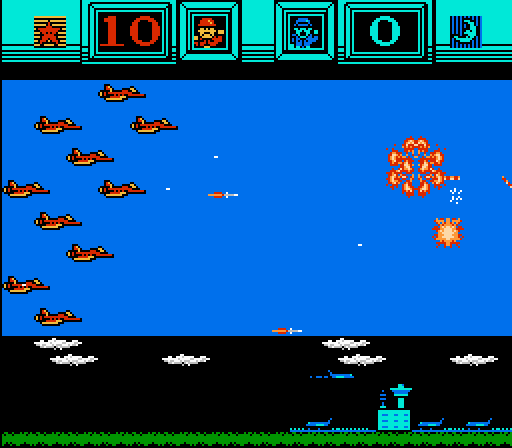 I only need one more kill from the scouts for the challenge, so they go straight after the newly-built copter, even though they'll be exposed to the AA tanks. Anyway, we get square Scout-1 as a result.  We're suddenly rather short-handed in this area. The bombers take up screening duties but one of them is down to 20% life and no ammo. If it survives the turn I'll probably send it back to the central airport to rearm and repair. You can see in the upper-left corner that our second round of ground vehicles have almost (finally) arrived.  We've gotten all the cities on the lower edge now, and the copters keep driving back the APC. We'll have a footsoldier clog on these bridges soon, since vehicles can't get down there. 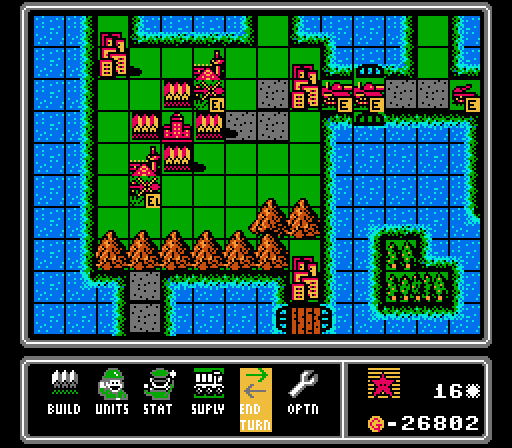 We build a couple of copters to carry the new mechs, and then I forget to build anything else. I'm not sure if I was saving up for something or what here. 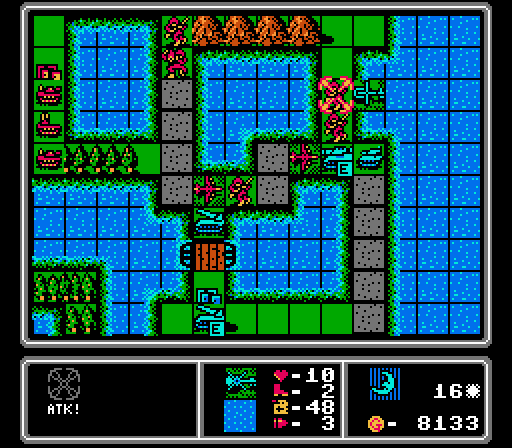 I thought I had plenty of infantry here, but one gets hit by a rocket, another is almost killed by the medium tank, and the third loses half its life to a copter here. 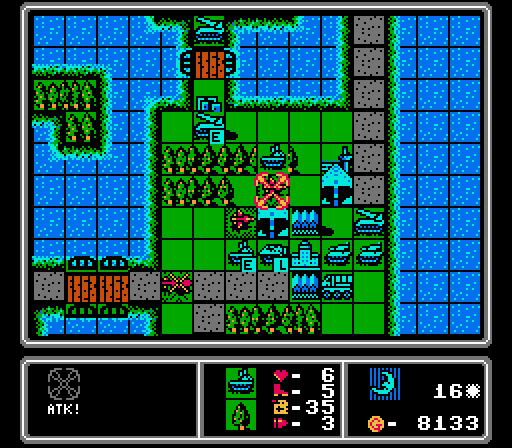 Both of our scouts get hit by an AA tank, but both survive. 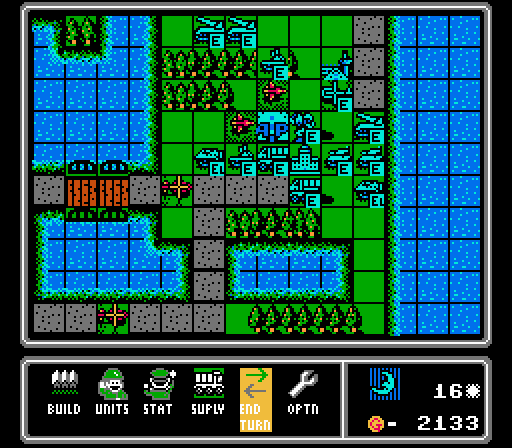 Blue continues to cluster around its HQ and then builds another copter and a mech. Turn 17  Both copters here are almost out of fuel, but they've done their job in pushing the APC back and covering for our footsoldier advance.  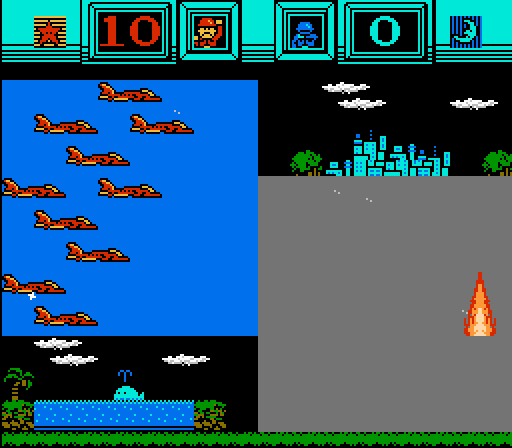 The bomber can't quite finish off this medium tank, but it does get in enough damage for an unconventional fighter kill here. Go mark off square Fighter-2 if you have it!  I'm actually baiting the rockets to advance here, since there aren't any other vehicles around to support them. We'll see how it goes.  I think I have the ground vehicles covered for the challenge at this point, so put out a couple more planes to help with battlefield control. 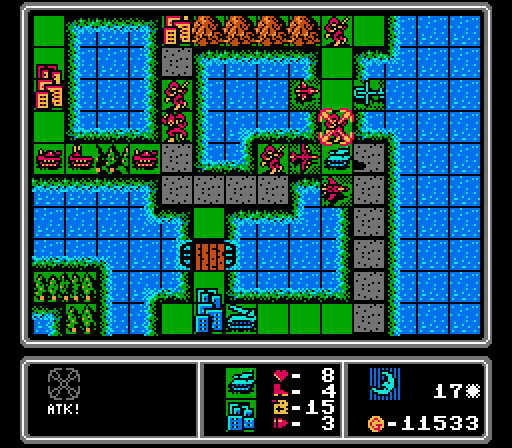  The enemy tank and copter each finish off an infantry, but luckily there are no other enemy units around to take advantage of the break in our lines. 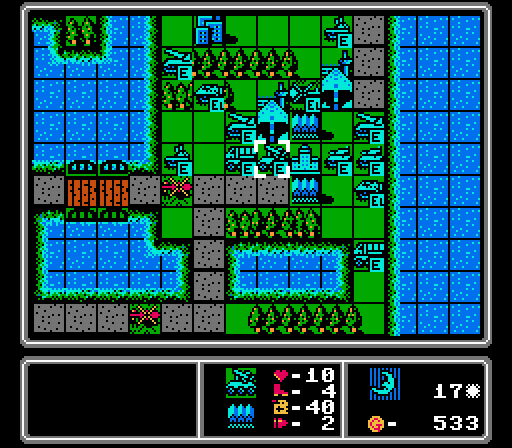 The rockets don't take the bait, choosing to hang back and wait for us to approach, along with almost everything else. The only other attack here was an AA tank hitting our low-fuel copter. The AI wraps up the turn by deploying a new AA missile. Turn 18 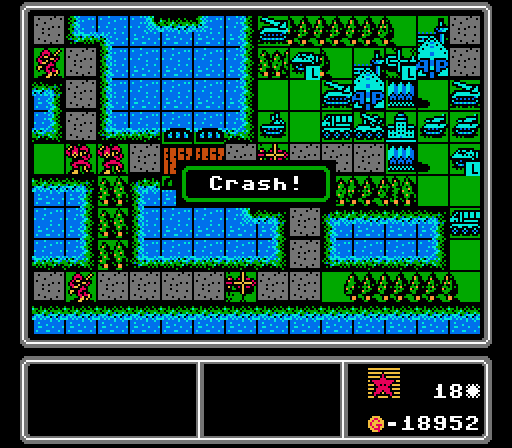 Copter crash #6, the lower one this time. 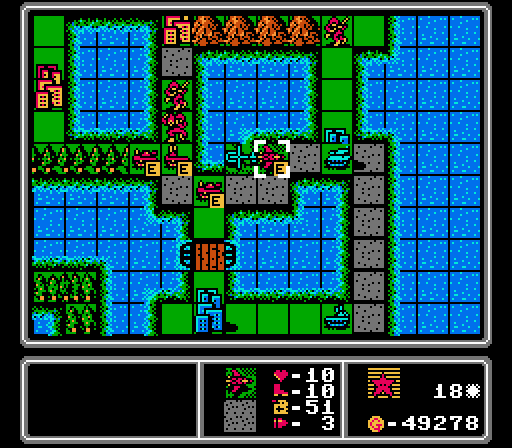 A quiet turn as our vehicles carefully approach. Our fighter attacks the enemy copter but can't finish it off. 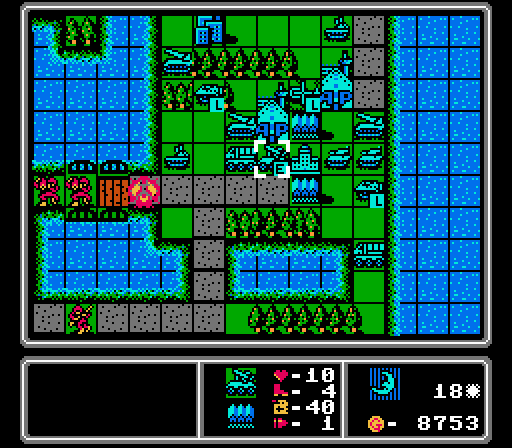 I tried to have the other copter bait the AA tank into mech range, but forgot about the AA missile. 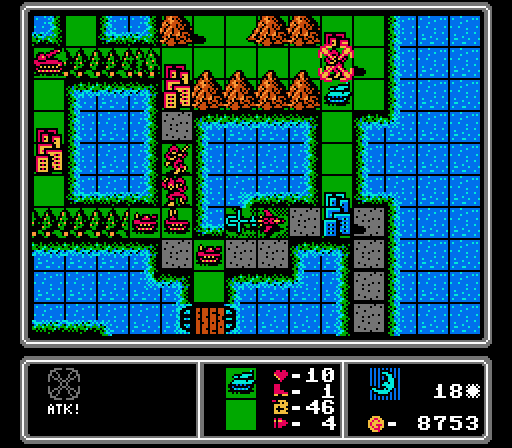 We lose another infantry here. There's a loose tank in our territory now, but I've got some vehicles on the way that are dying to get in some kills.  Blue continues to consolidate its units into a tough knot around its HQ, and puts out another tank. Turn 19 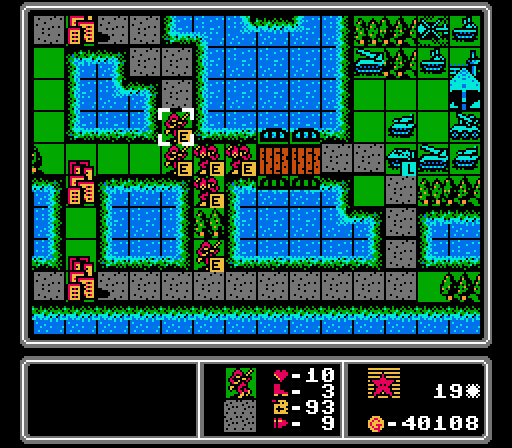 Our footsoldiers on the lower bridges have lost their screens, so I sit them out of rocket range to see what comes out.  While our scouts retreat for repairs, I set up a trap here for the enemy tank.   I'll probably lose this tank to rocket fire later, but I wanted to take the opportunity to get in a kill on this damaged copter. So you can mark off square Tank-4 now. 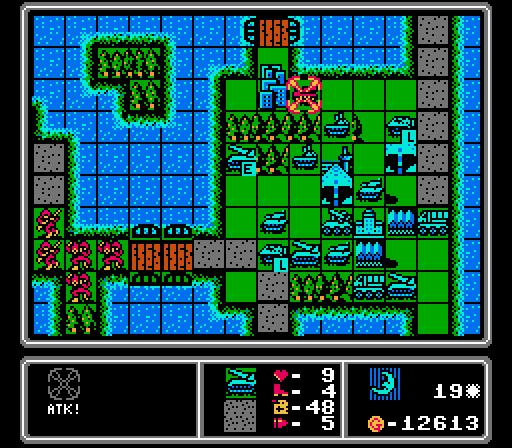 Yup there goes the tank.  Oh poo poo I didn't see this opening at all. Our AA tank gets wrecked. That's the only one I've built and it hasn't gotten any kills yet, so this hit is a real setback. 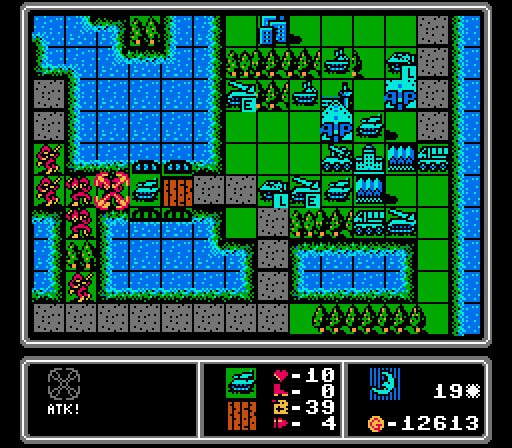 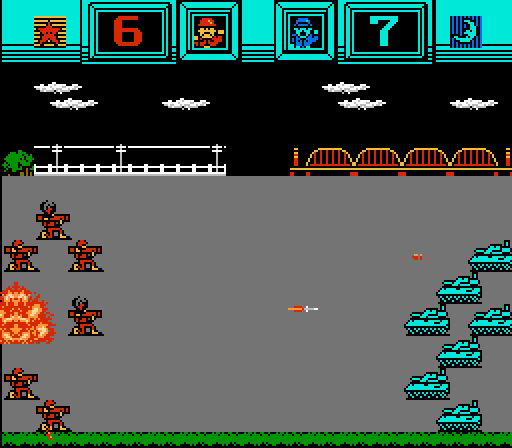 Another tank comes out to challenge our footsoldiers. 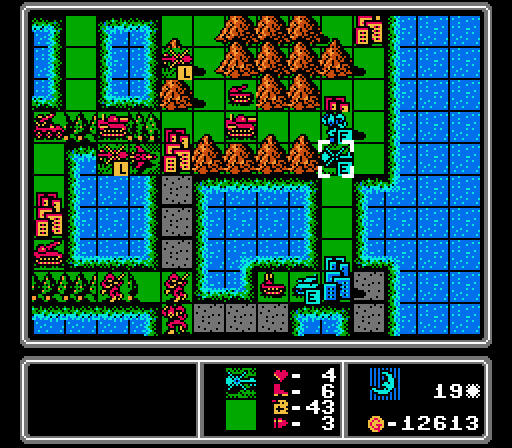 I hit this copter with a fighter earlier on this turn, and it still tosses its passenger down right in front of our medium tank. Okay then. 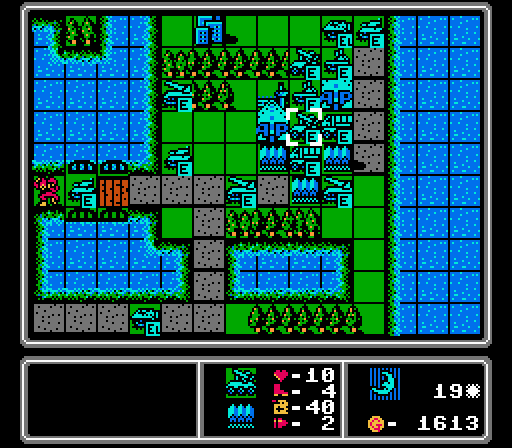 Blue's got enough money to throw out another AA missile, and I see a loaded APC trying to sneak by on that lower bridge, too. Turn 20 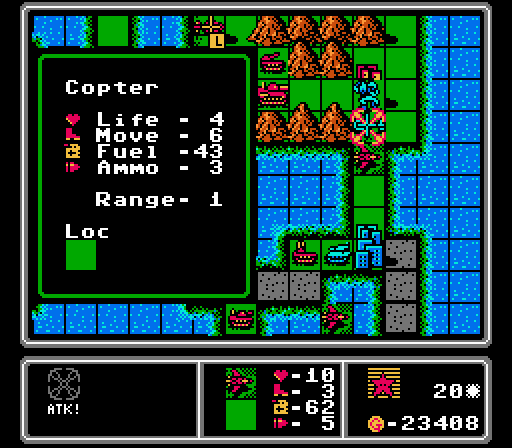  A second figher arrives on the scene and takes the opening to finish off this copter for the second fighter kill and square Fighter-5.  Apologies if you wanted a medium tank kill here, but those are easy to come by and I'd rather set up an artillery kill on this mech if possible. 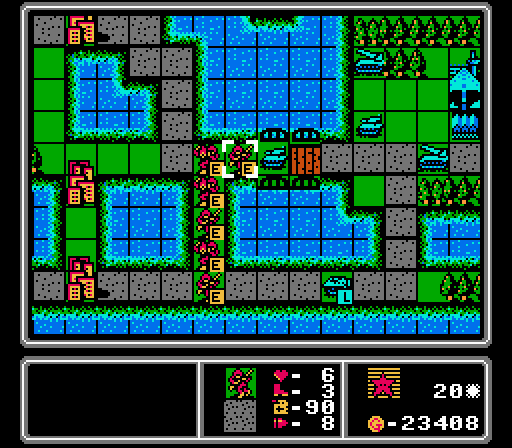 I already have enough infantry kills for the challenge, so they sit out front to protect the mechs for now. 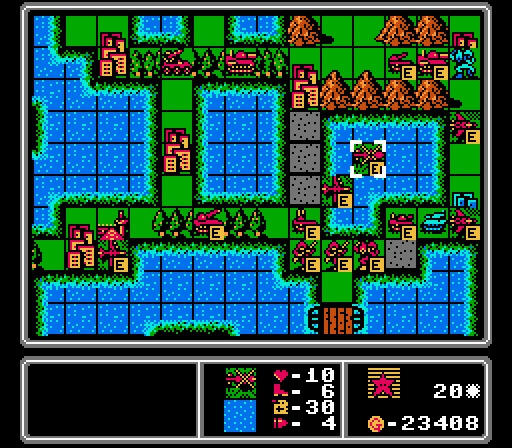 The enemy tank is pinned as our AA tank retreats for repairs. 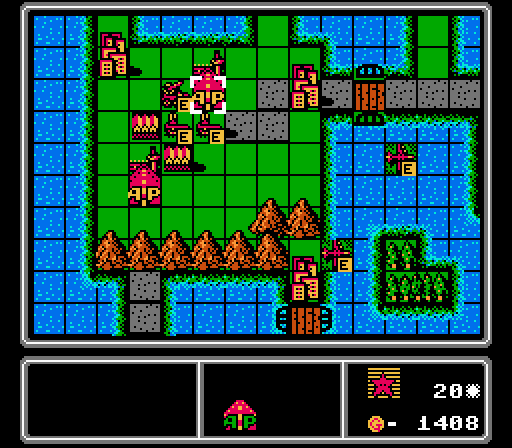 Just building some more anti-air units to try and finish off the challenge. 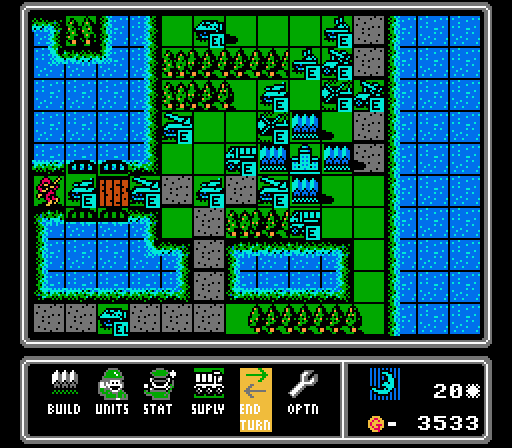 Blue is pushing harder on the lower bridges now, sending in another tank and rocket support before building a pair of copters. Turn 21   The artillery gets the kill here, though it needed some help from our mech first. Anyway you can mark off square Artillery-1 now.   Our fighters don't have much to do, so soften up this tank to get our second tank kill, and square Tank-1. 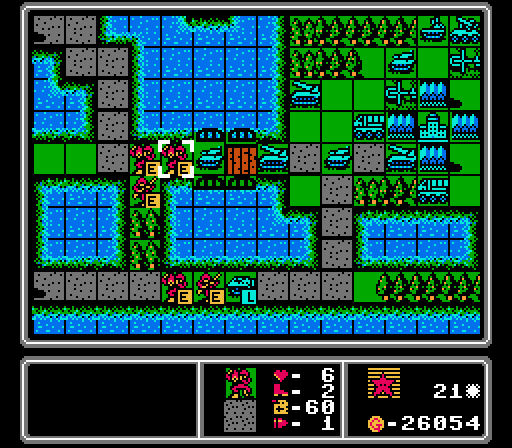 Our footsoldiers are stuck, I'm going to need to send them some support or we'll have a breakout here soon. 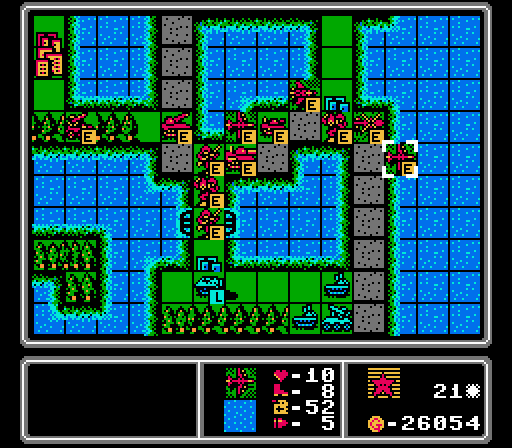 With the rockets all focused on the lower bridges, we get some more vehicles onto these bridges. 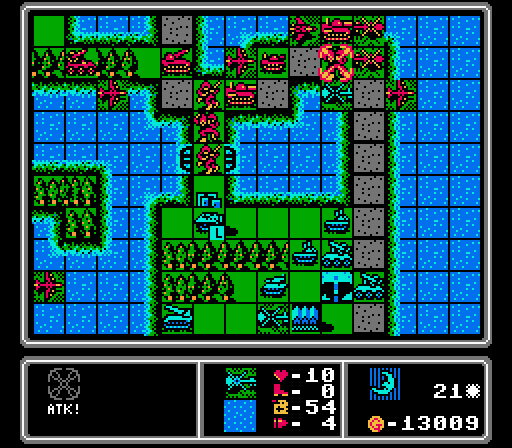 I can't catch a break with this city as the enemy copter hits our mech before it can even start a capture. 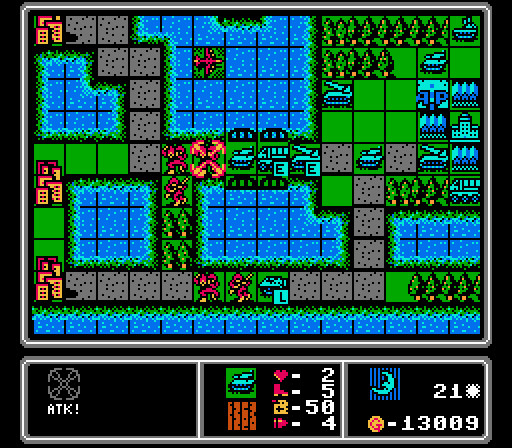  The rocket and tank finish off one mech, opening up space for another tank to cross the bridge and fire on another mech.  A fresh copter draws out an AA tank, which I guess is good news?  The AI has all its anti-air units focused on the upper bridges, and all its anti-ground units focused on the lower bridges. Good time to switch things up. 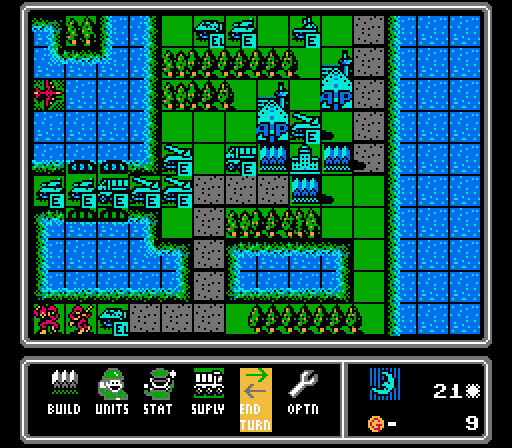 Yet another rocket. Turn 22 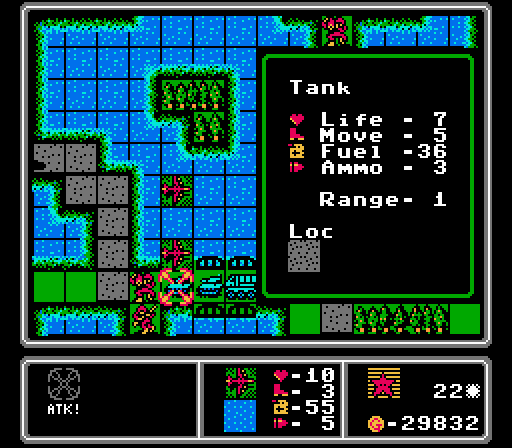 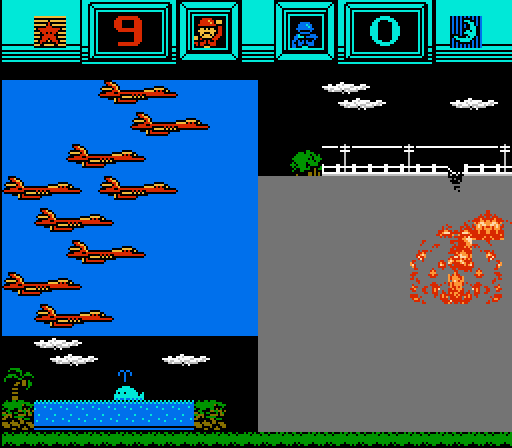 Some fresh bombers have arrived, and immediately take out one of the tanks. That's square Bomber-2 for you. (I think that's the first square I've called that's not on anyone's boards, actually.)  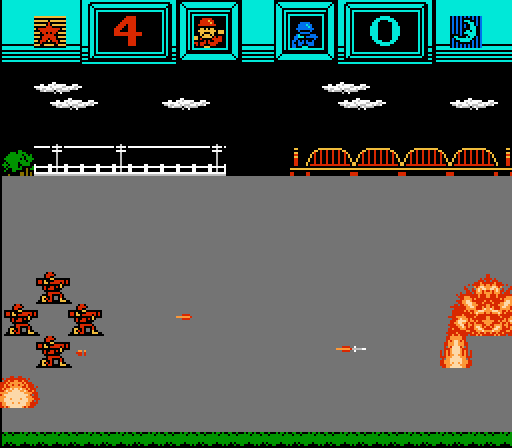 The open space lets us advance a mech to finish off the other tank, giving us square Mech-2 as well. 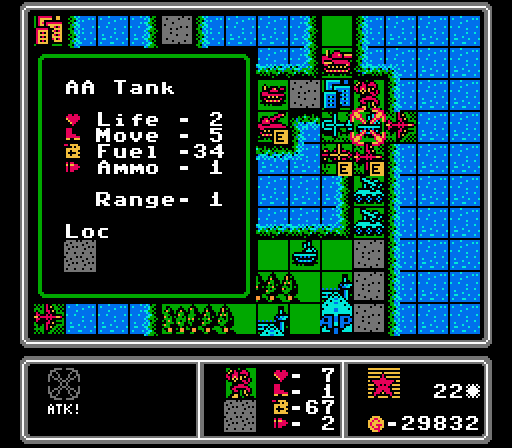 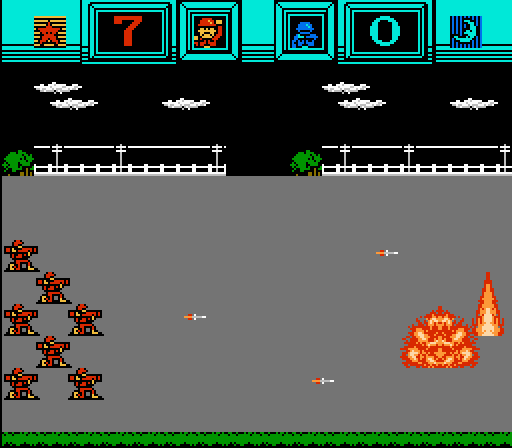 There's a second mech kill here after a bomber softens up the AA tank, which helps my challenge but doesn't help anyone's cards. 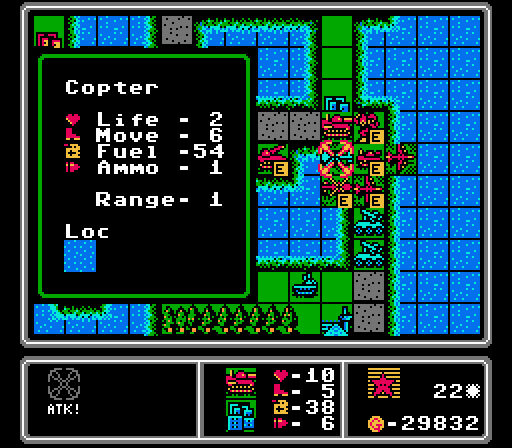  We do set up a copter kill for our medium tank, however. So there's another square after all but it's square Medium Tank-2. 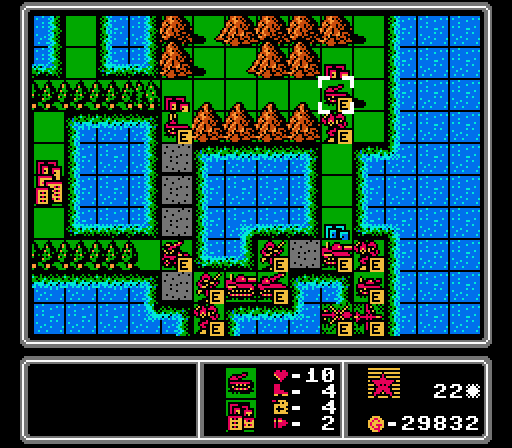 This artillery has spent the whole map just trying to the other side of the map and has almost run out of fuel. It'll get a resupply from the city next turn. Maybe I should have built a supply truck. 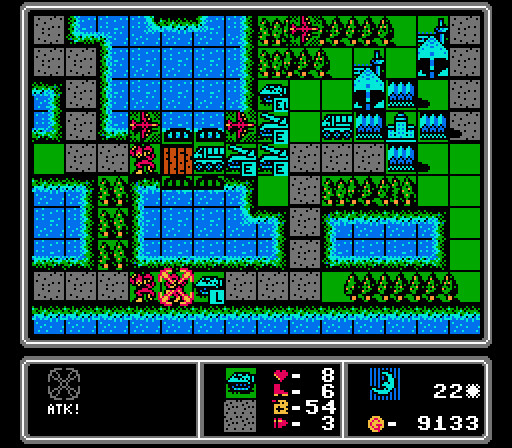 The rockets and APCs finish off a couple more infantry on the lower bridges, but with the bombers here we'll have the situation under control soon. 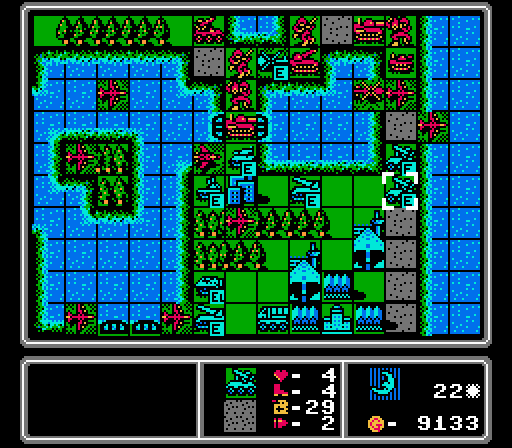 We take a couple more hits on the upper bridges but nothing too threatening. A copter was shot at by an AA missile, a fighter was hit by an AA tank, an infantry was fired upon by a damaged copter, and a tank challenged our medium tank. Blue then builds a new tank. Turn 23 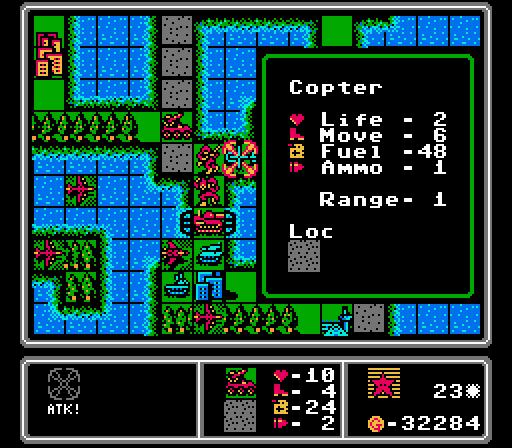  The enemy copter wandered right into range of our AA missile, finally on the scene. That'd be square AA Missile-3 if you have it.   This enemy tank also put itself right into rocket range, and the damage it took from attacking our medium tank last turn is enough for the rocket to get the kill here, and square Rocket-3. 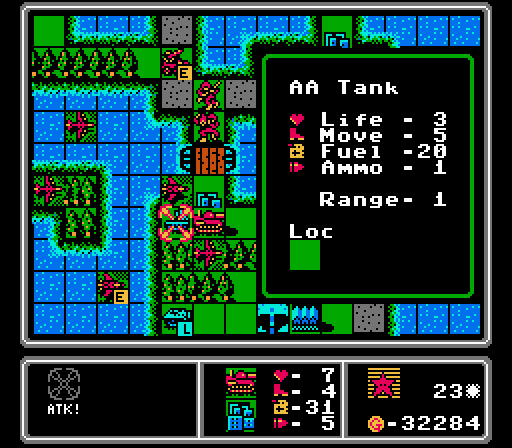 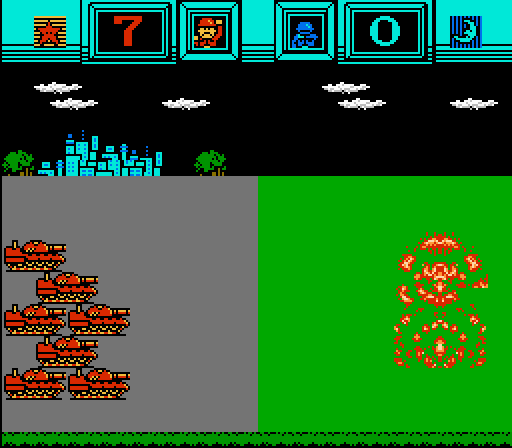 Our medium tank, meanwhile, is able to break into Blue's home island, park itself on a city, and finish off this AA tank. So we get another square, this time Medium Tank-3. 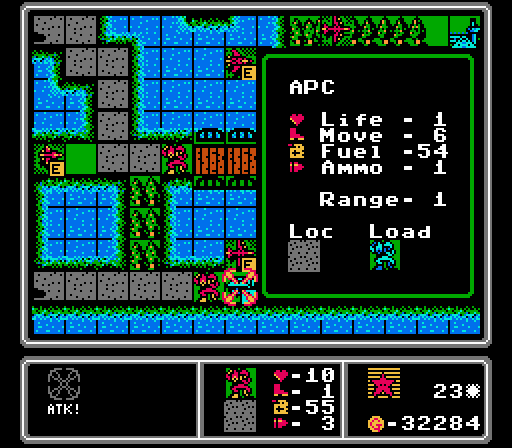  After some setup from the nearby bomber, our mech on this lowest bridge is able to finish off the APC and its passenger. That's square Mech-3 for you. 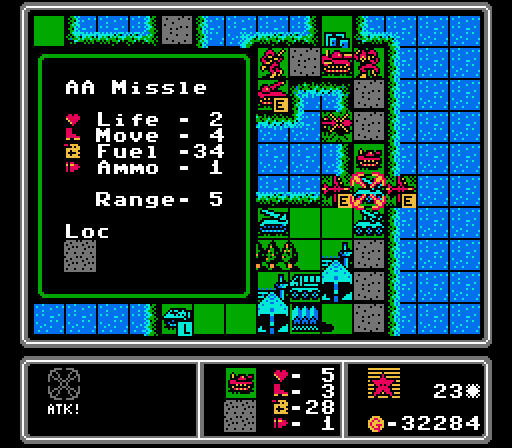  More bomber prep lets our tank advance and take out this AA missile, also netting us square Tank-3.  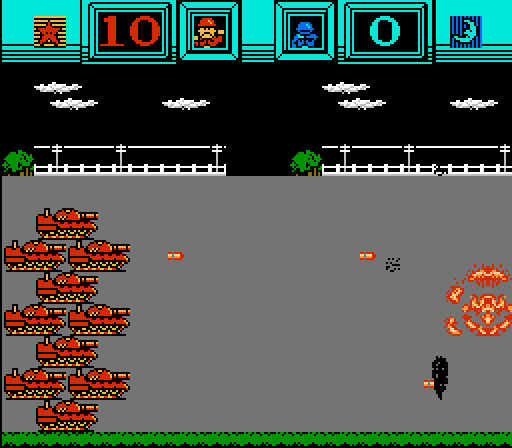 It's not a new square, but our other medium tank is able to roll forward and destroy the second AA missile here.   Likewise we already had this square from ten turns ago, but I'll show you the bomber blowing up this rocket anyway. That's actually the seventh kill this turn!  Blue merges together a couple of rockets, fires on our medium tank with another damaged rocket, kills off our mech with a loaded APC, and builds a new AA missile. Turn 24   That damaged rocket falls prey to our own rocket, giving us square Rocket-4. 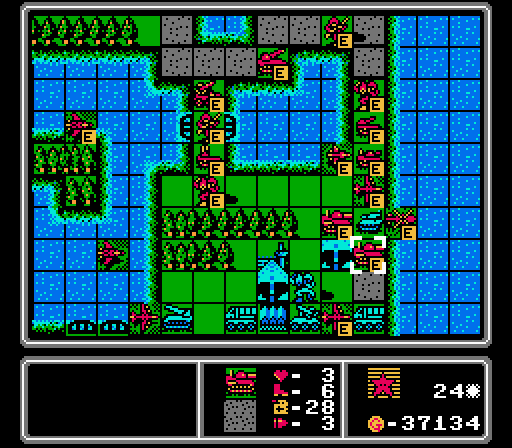 We're advancing down both of these upper bridges now, storming Blue's HQ area.  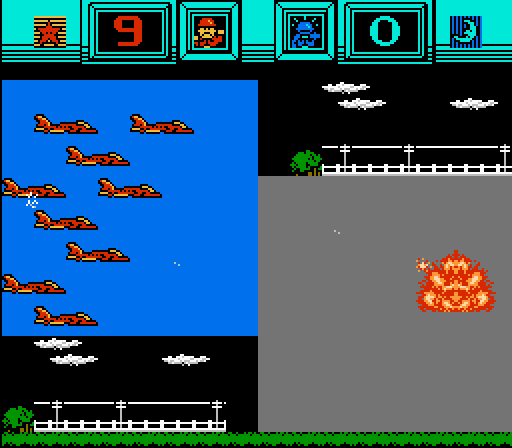 After some more bomber prep, a fighter finishes off this loaded APC. That's square Fighter-4 for you. 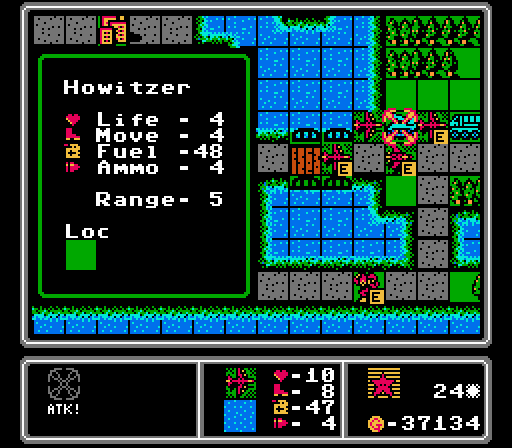  More bombers buzzing around end up with a kill on this rocket and square Bomber-4. 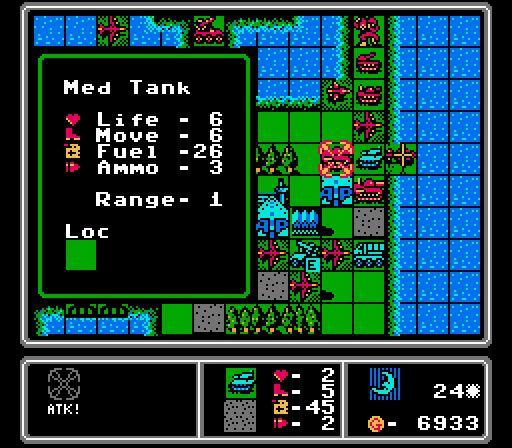  This trapped tank kills itself on our medium tank, but that's good enough for square Medium Tank-4. I think that's our first square from the enemy phase. 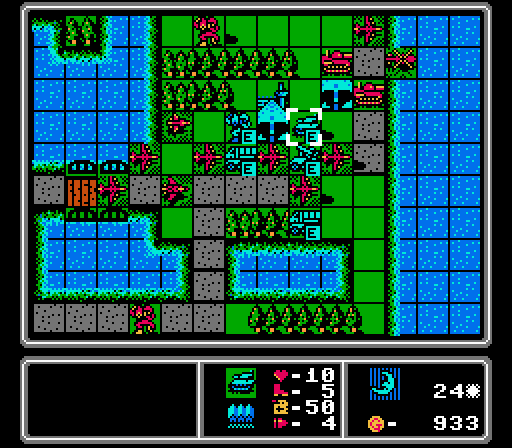 I've got enough bombers around to finish off the map, but for the challenge we still need to get two AA Tank kills, an AA missile kill, and an artillery kill. I'm going to need to encourage the AI to build more copters I think. Turn 25 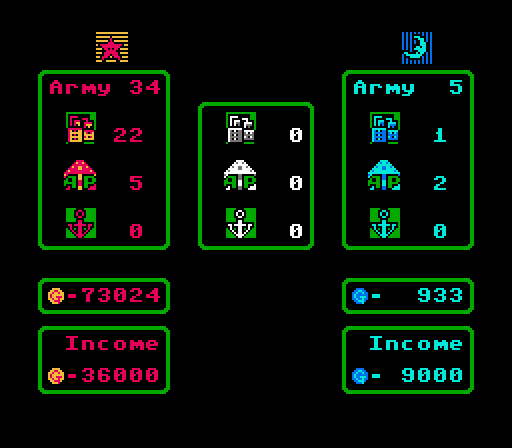 With five enemy units left and a bunch of our bombers hanging around, it'd be pretty trivial to finish the map now. But we have more to do for the challenge. I'll be brief from here though.  This tank could cause problems for our anti-air units as they approach, so I use the bombers to eliminate it. No new square for that kill, however. 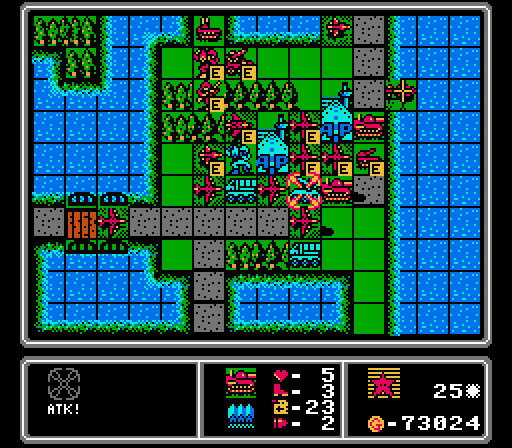 Similarly, the AA missile could hit all our air units that are mostly busy blockading ground units and deploy points, so it also has to go. We do get a new square this time, Medium Tank-5. 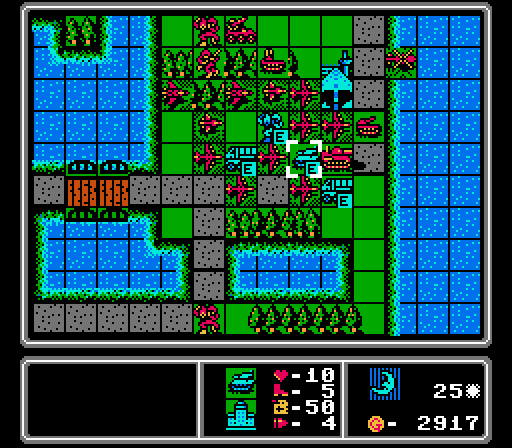 The AI put out a new tank but left its airports unused. We'll still make use of it. Turn 26  Lost another copter and a fighter this time. 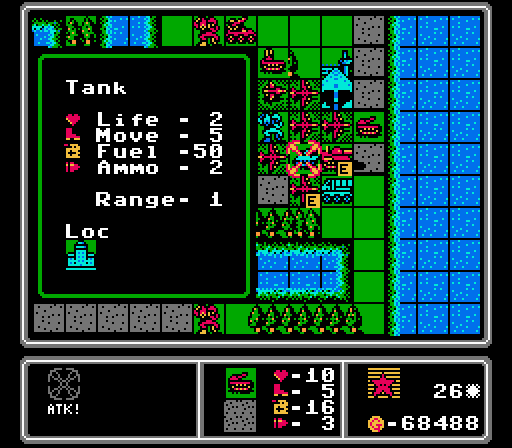 The new tank is the perfect target for our artillery (after a bomber and a medium tank damage it first). That's another repeat square, but we needed that second artillery kill for the challenge.   We also clean up some of Blue's other units, getting bomber and fighter kills in for squares Bomber-1 and Fighter-1. 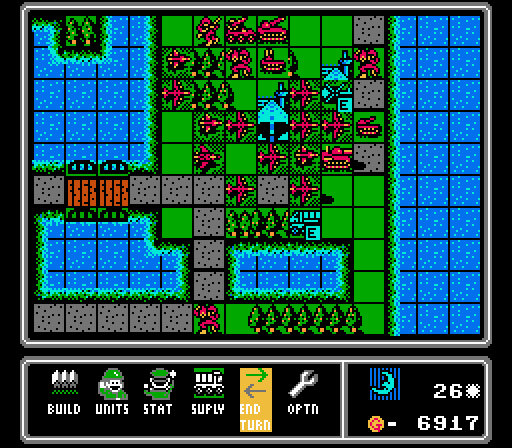 I need the AI to build copters to finish off the challenge, so I blocked every other build point except the airports. For some reason Blue only built one copter, but I can work with that. Also note how I left a supply truck alive on the outskirts of the island - it's actually useful to have it as the last unit here, since it can't attack so can't inadvertently destroy itself on the enemy phase. Turn 27 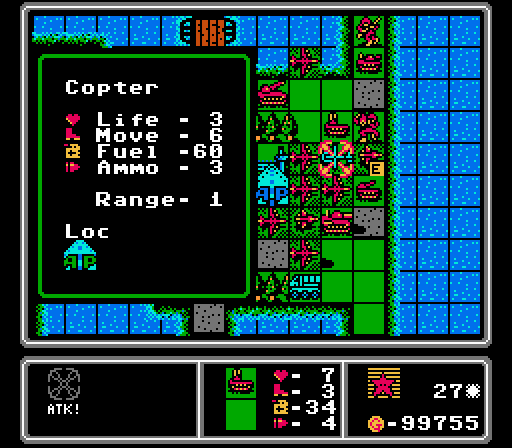 The AA tank finally gets in on the action, finish off a copter after the scout damaged it first. We haven't hit the fourth column much, but this square is AA Tank-2. Turn 28  Next turn is a repeat - the AI built just one copter, and we take it out with the same AA tank, for square AA Tank-3 this time. Turn 29 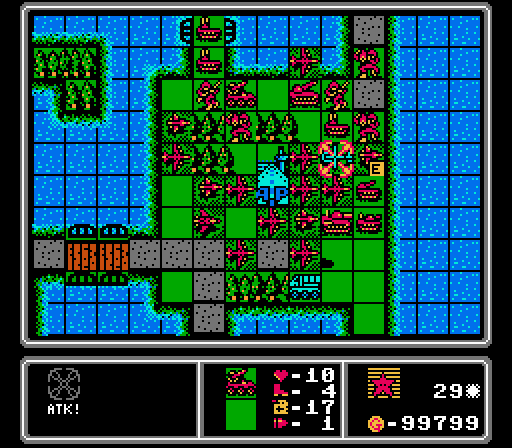 Finally, we have the AA missile shoot down the lone copter that was built last turn, finishing off the challenge and getting us square AA Missile-4.  We still have to finish off this supply to end the map, so I hand it off to one of the scouts for square Scout-4, the last square of the game. Looking at the data, six of the seven entries got a bingo, with 36 total squares called. Much better than I was fearing when this update first started. 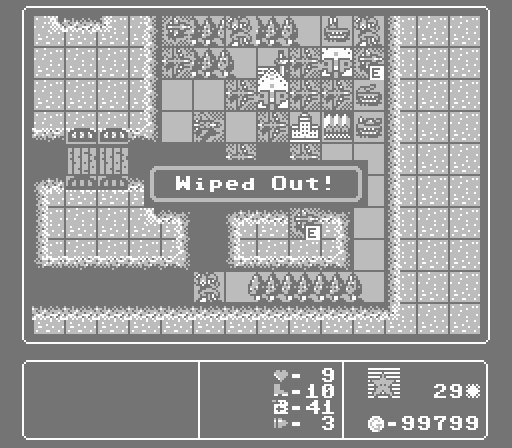 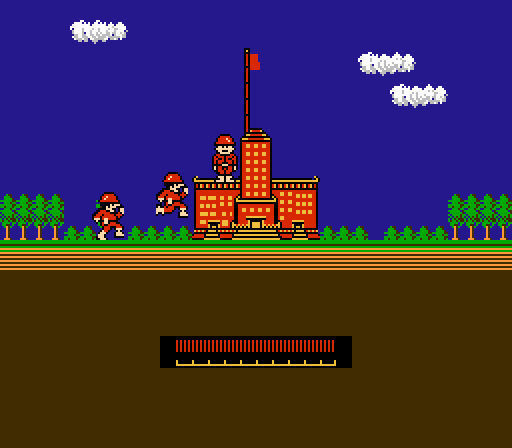 The usual post-victory celebrations.  I suppose the dark CO's here are fitting for this map that was so focused on death. The enemy CO is apparently so old he's just a skeleton, at age 99.  So, 29 turns is frankly terrible for this map. You saw how set up we were for victory at half that total. The average timeframe is 23 days, and I think we could've easily beaten that without the challenge forcing us to build some sloooowww vehicles and wait for them to get all the way to the front lines. 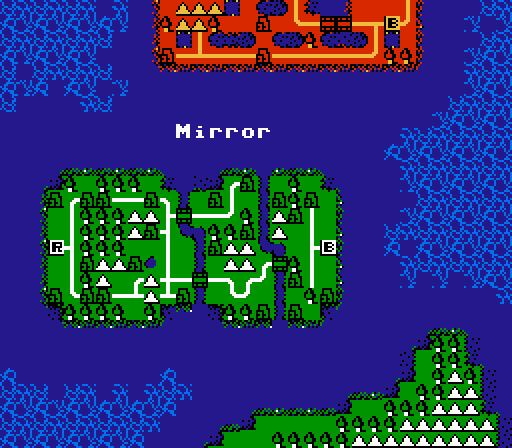 Our final map is Mirror, and I will be attempting the suitably appropriate Mirror Mode 2.0 challenge. What does that mean? Well, I can only build what the AI builds. Including the first turn. Should make for an interesting start to the map; I'll call the challenge complete once I can park a unit on the enemy HQ. ----- Called squares, final list (winner: Marluxia): Copter-3, Infantry-4, Copter-5, APC-1, Copter-1, Infantry-2, Bomber-3, Bomber-5, Scout-5, APC-5, Infantry-5, Scout-1, Fighter-2, Tank-4, Fighter-5, Artillery-1, Tank-1, Bomber-2, Mech-2, Medium Tank-2, AA Missile-3, Rocket-3, Medium Tank-3, Mech-3, Tank-3, Rocket-4, Fighter-4, Bomber-4, Medium Tank-4, Medium Tank-5, Bomber-1, Fighter-1, AA Tank-2, AA Tank-3, AA Missile-4, Scout-4. DKII fucked around with this message at 19:05 on Apr 23, 2022 |
|
#
?
Apr 15, 2022 15:55
|
|
|
To be honest, I expected the game to trigger a bit more discussion. Is everyone staying quiet hoping for an advantage?
|
|
#
?
Apr 18, 2022 16:04
|
|
|
This thread has always kind of been quiet. But I will say that I am one away from a bingo, with one unit type that hasn't gotten any kills yet. And two away with another unit type that also hasn't gotten any kills.
|
|
#
?
Apr 18, 2022 16:23
|
|
|
Marluxia posted:This thread has always kind of been quiet. But I will say that I am one away from a bingo, with one unit type that hasn't gotten any kills yet. And two away with another unit type that also hasn't gotten any kills. lol nice , i am...not anywhere near that.
|
|
#
?
Apr 18, 2022 16:28
|
|
|
I've got two away on a diagonal, myself.
|
|
#
?
Apr 18, 2022 20:35
|
|
|
I opened the update on a new tab days ago intending to check it after work, and forgot it until now  It's been fun marking things off on the bingo card, I think I am two away from a bingo if I have correctly identified all the shapes (the unit overviews were helpful for that!) It's been fun marking things off on the bingo card, I think I am two away from a bingo if I have correctly identified all the shapes (the unit overviews were helpful for that!)
|
|
#
?
Apr 18, 2022 22:17
|
|
|
-I am currently two away in three separate directions, so we'll see. -I somehow didn't see this while reading previous updates but the mechs are apparently two-headed abominations. -The amount of individual paths and water make this seem like a more interesting map than the normal because there's a lot of potential chokepoints. I think if this was a map where they didn't give you air units, this could be a really interesting map to play defensively on.
|
|
#
?
Apr 19, 2022 04:13
|
|
|
Huh. Despite only actually getting one aircraft square, I am now currently one away on three separate directions. That's kind of impressive. edit: If I'm reading this correctly, that appears to be a bingo for me. 
Marluxia fucked around with this message at 06:58 on Apr 19, 2022 |
|
#
?
Apr 19, 2022 06:00
|
|
|
OK, I'm back from vacation and have cell service. Looks like the bingo game didn't finish yet let's check my card... oh I still believe in you, unit cap E: or not. Don't worry buddy, we'll get em next time
|
|
#
?
Apr 19, 2022 12:53
|
|
|

|
| # ? May 4, 2024 00:22 |
|
|
Marluxia posted:Huh. Despite only actually getting one aircraft square, I am now currently one away on three separate directions. That's kind of impressive. Congrats! I did not expect the footsoldier column to be the winner! PM me or reply with what store item you want. FoolyCharged posted:OK, I'm back from vacation and have cell service. Looks like the bingo game didn't finish yet let's check my card... oh Believe it or not your card was the only one to not get a bingo by the end of the map somehow. I'll slip in the rest of the update now.
|
|
#
?
Apr 19, 2022 15:13
|
|