


|
I had a pretty good laugh filling it in. It was like every initial piece was trying its best not to line up with anything else.
|
 #
?
Apr 19, 2022 22:33
#
?
Apr 19, 2022 22:33
|
|


|

|
| # ? May 3, 2024 23:33 |
|
|
 genuinely surprised I got there given that I had no bombers or tanks.
|
|
#
?
Apr 19, 2022 22:47
|
|


|
Looks like Fighter 4 would have been where I would have bingo'd. Is okay though, I was honestly just in this for fun. I'm still sitting on an avatar certificate from winning a Danganronpa Deadpool, I've already got Platinum... honestly had I bingo'd I probably would have just said "Second Place can have it"
|
|
#
?
Apr 19, 2022 22:50
|
|

|
From my notes, I had Marluxia winning on turn 23, and then nothing until cardinale and SMaster777 both had bingo on Turn 28 (with square AA Tank-3), and then the final turn 29 had Tulip getting a bingo with square AA Missile-4 and MagusofStars and Blue Link each getting bingo with square Scout-4. Weird rush at the end but kind of makes sense with getting in some more of those fourth-column squares finally. SMaster777 had the most squares at 18, including the free space (three others had 17). FoolyCharged had the fewest squares at 12. I called 36 squares and there were 65 possibilities (13 unit types with a 5-turn cycle on each), so the average board would've had 14.3 filled in (including the free space). Thanks for letting me have some fun with this one. DKII fucked around with this message at 04:03 on Apr 20, 2022 |
|
#
?
Apr 20, 2022 03:59
|
|

|
It was really fun! Congrats marluxia
|
|
#
?
Apr 20, 2022 08:02
|
|
|
Congrats to the winner Marluxia, enjoyed it. Mirror seems like it'll be an interesting map. From the screenshot, the name seems like a bit of a misnomer because it's not quite symmetrical - most relevantly for you, there appear to be a couple more cities on Red's starting island than Blue's.
|
|
#
?
Apr 23, 2022 03:50
|
|


|
Part 43: Unit Overview: Bomber Like scouts and fighters, bombers don't show up in any animations. Basic Info: pre:Cost 20000 G Movement 8 Move Type Air Fuel 99 Ammo 5 Ammo Cost 6 G Range 1 Special None pre:Opposing Unit Damage Dealt Damage Taken Infantry 5.5 0.5 Mech 5.5 1.5 Medium Tank 6.5 1.5 Tank 7.5 1.5 APC 7.5 1.5 Rocket 6.5 N/A Artillery 7.5 N/A Supply 7.5 N/A AA Missile 6.5 6.5 AA Tank 6.5 6.5 Fighter N/A 9.5 Scout N/A 6.5 Bomber N/A N/A Copter N/A 0.5 Battleship 4.5 6.5 Lander 6.5 5.5 Bombers are a commander's best friend. High mobility and heavy damage to everything on the ground, even ostensibly anti-air units like the AA Tank, AA Missile, and lander. They'll even take a sizable chunk out of a battleship. They're a bit fragile and expensive, but if you can properly manage their strikes (or just build a whole lot of them), they'll win the map for you.
|
|
#
?
Apr 23, 2022 18:57
|
|
|
Part 44: Mirror (1 of 2) We've reached the last of the 15 maps in the first Famicom Wars game. Here is Mirror, a map that is not at all symmetric.  The map is just as wide as last time, but with about half the height. The ground path between HQs is a lot simpler this time as well. We have a slight long-term advantage with an extra airport, but Blue starts out with a massive advantage with nine cities already captured. Both halves of the map have an equal number of cities, so we'll have to scramble to catch up. Turn 1  Since the name of the map is Mirror, our challenge will be Mirror Mode 2.0. We're only allowed to build what the AI builds, including building nothing on the first turn. Our normal strategy of rushing out copters to take the middle of the map before it's contested won't work here, since we built nothing the first turn and will only get one copter next turn. Turn 2 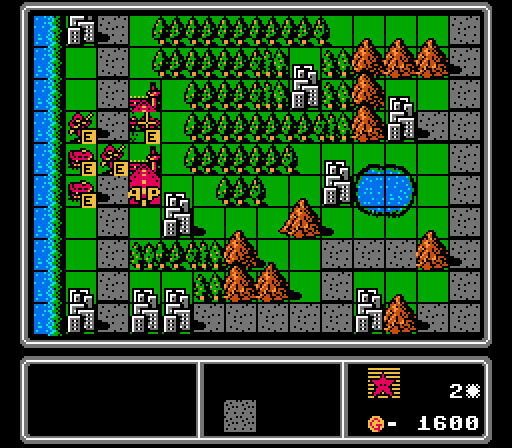 For this turn, we build exactly what Blue built last turn. In future turns we're going to have to be more selective, since Blue has almost twice our income to start so we're not actually going to be able to afford everything that the AI builds each turn. 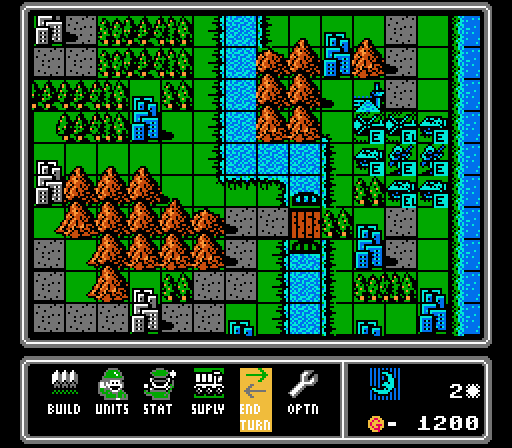 Blue actually loads both of its infantry and will be sending them off to take the last few cities on their half of the map that they don't already own. Another disturbingly competent capturing start from the AI. I wonder if these last couple maps were placed at the end here because the AI happened to perform the best on them. Turn 3  I won't show this screen often, but here's how I'm tracking what the AI has built so far and what I'm allowed to build each turn. It'll get more complicated over time as we fall further behind in total income, but this screen makes the calculations easy at least. 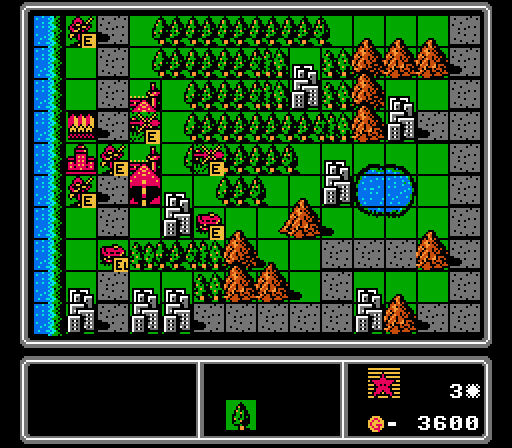 In this case we build a copter and two infantry, but forgo the extra two APCs. We start capturing a city in the upper-left corner, and load another infantry in an APC to head for the lower-right corner.  Blue's turn is pretty much the same as before, loading up its infantry and building another identical set of units. Turn 4 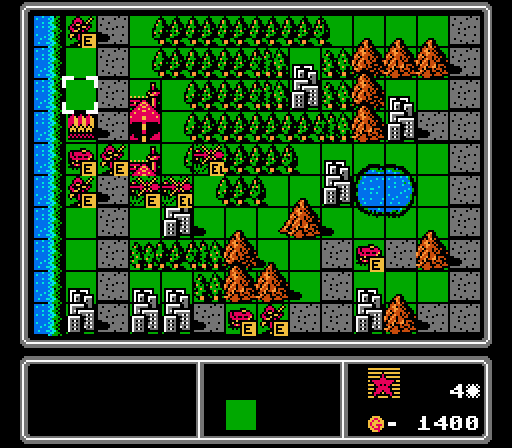 The copters will head for the more distant cities on our island.  So Blue not only has a couple of infantry already at neutral cities for capturing, but they are confident enough and rich enough to put out a medium tank already. Turn 5 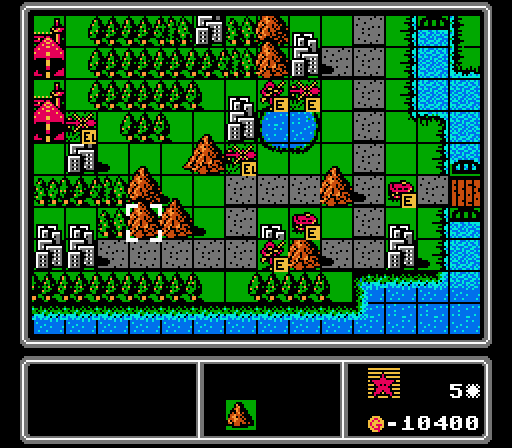 It's important that we grab the bridges in the center of the map to control access and keep from getting overwhelmed early on. 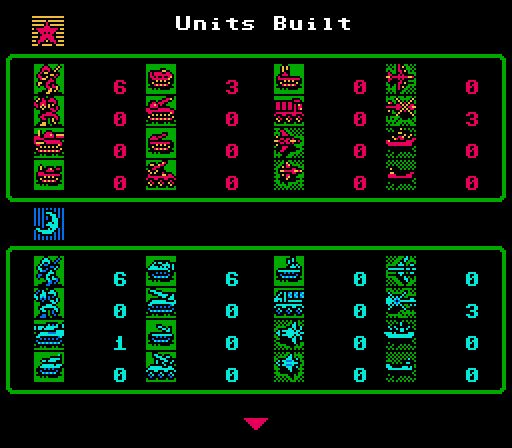 We can't afford a medium tank and I don't really feel the need for more APCs so we stand pat this turn.   My overall strategy for this map is to avoid losing units as much as possible, retreating for repairs instead. We're limited in what we can build, but not in what we can repair, and preserving our units while the AI builds more to replace its losses will eventually give us an advantage in what we can field. In this case our copter is protecting our infantry and will try to drive away the enemy copter before heading back to an airport. 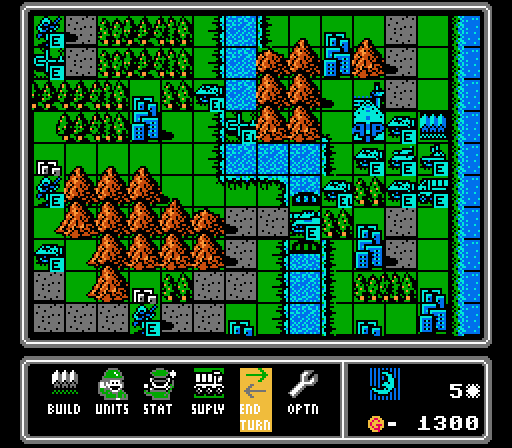 The enemy is starting to spread out over their second island and then gives us some new units to play with - a tank, an AA tank, and a supply. Turn 6   I immediately violate my prime directive of preserving our units by exposing an APC to delay a capture here. But we already have three more APCs we can build if needed.   We're at risk of losing this copter, but I'm pretty sure the AI will choose to retreat and save its own copter instead. Either way our capturing infantry is protected. 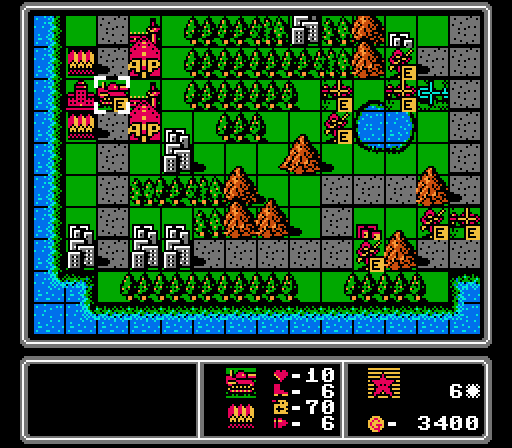 We need to match heavy-for-heavy here so we put out a medium tank as soon as possible. 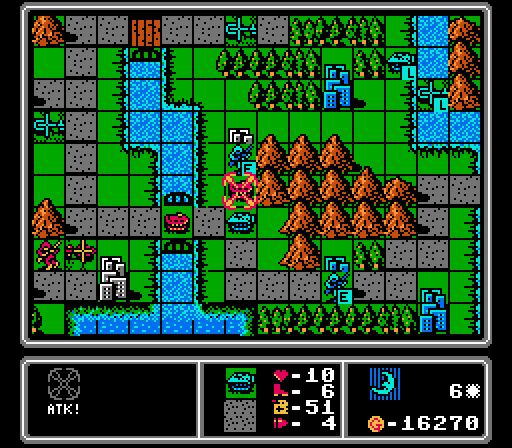 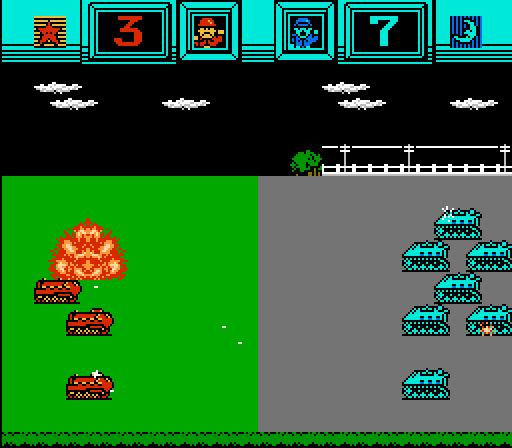 Our APC takes a hit but survives the turn.  Another heavy unit comes out, a rocket. It'll take us another couple turns of saving to get one ourselves. Turn 7 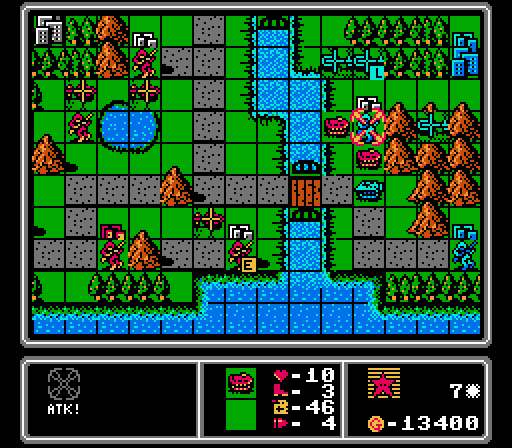  A fresh APC moves up to finish off this capturing infantry and cover the retreat for the other APC.  Starting to gain control of our island here, with a few cities captured this turn. 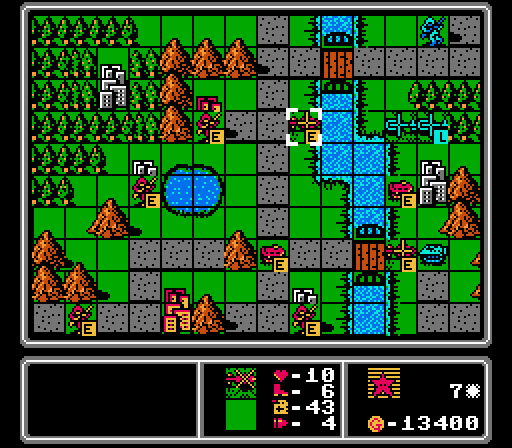 While our damaged copter retreats, the other two run interference, blocking off the lower bridge and screening off our infantry. 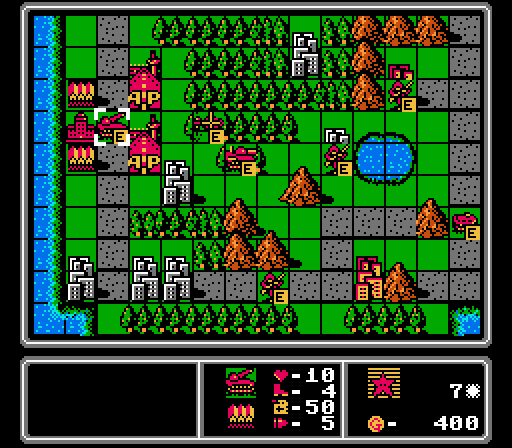 To my delight, we're able to afford a rocket right away. This baby will be key to holding the bridges.  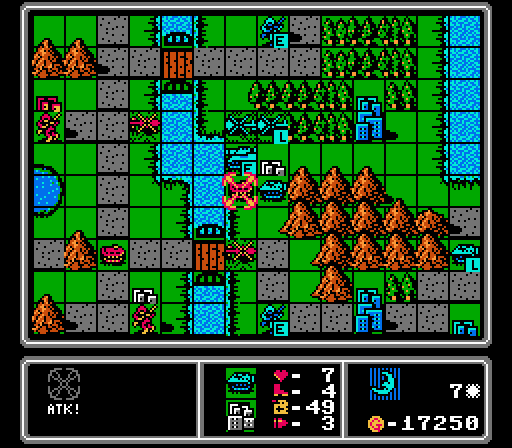 I did not see that the enemy medium tank had reached us already, and our APC pays the price here.  Blue has its own islands pretty well controlled now and is feeling comfortable sending in infantry to harass us.  I only have a couple of copters flying around but apparently the AI is concerned about them, putting out an AA missile here. Turn 8  I don't remember why I pulled our infantry off of the lake city here (probably looking to capture the one on the other side of the mountains), but I left it wide open for the enemy infantry here while going after the enemy copter instead. At least our medium tank is here to save the day! 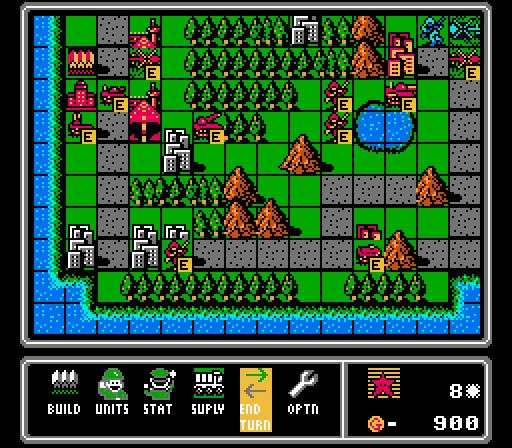 We catch up on some units that the AI built awhile ago, putting out a tank and an AA tank. 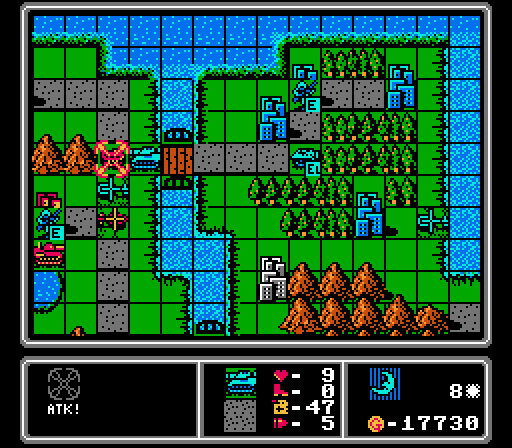  Oof. For the second straight turn I lost sight of the enemy medium tank and an APC paid the price.  Two damaged enemy copters merge together. A merge is as good as a kill for our strategy; I mostly want the AI spending its funds on new units rather than repairs, and merges take away from possible repairs.  There's another medium tank headed for us, and we haven't dealt with the first one yet. At least we'll get to build another one ourselves soon. Turn 9   I want to take care of the enemy infantry, but I can't leave this medium tank alone to run amok on our island either.   A copter flies up to block off the enemy retreat, and gets in some chip damage to keep the matchup favorable for us next turn.  We didn't hit the enemy infantry much (just two damage) but are positioned for a better strike next turn. Our damaged APC was able to retreat as well. 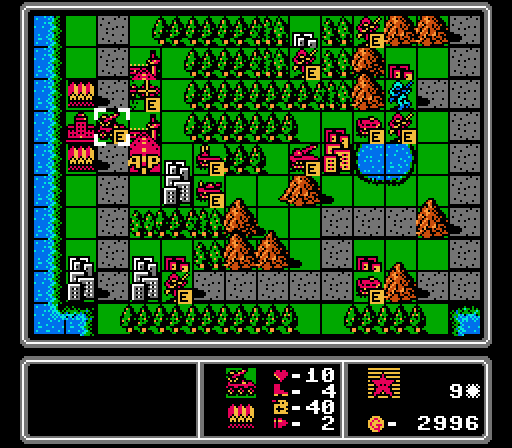 We can't quite afford another medium tank yet, but I do get out an AA missile to ward off future copter invasions.  Blue is taking another shot at the last neutral city on their islands, as our copter continues to hold the bridge for now. That enemy AA tank is getting closer, though...  I think blocking bridges confuses the AI, they just kind of shuffle around aimlessly here. 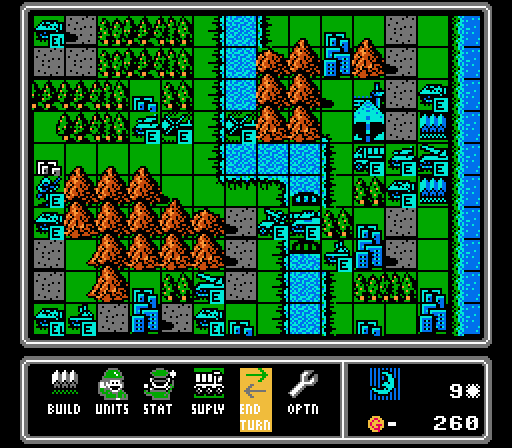 Add another tank and rocket to our to-build list. Turn 10  A rocket strike and two infantry charges are enough to eliminate this infantry before they can finish their capture.   We're also able to destroy the enemy medium tank to regain total control of our island for the moment. 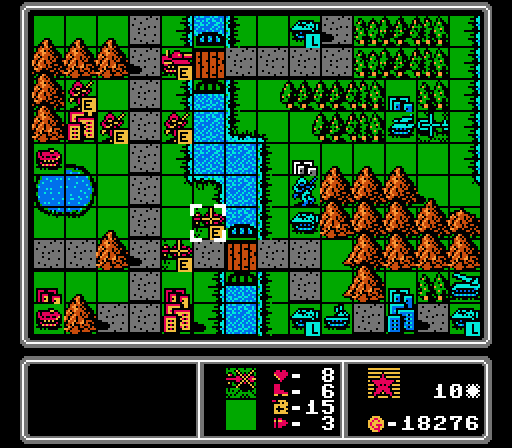 I have to pull back from the bridge due to the AA tank getting close, but go for a partial blockade anyway.  We've reached income parity, but still have a long way to go to catch up on total funds spent and total army size.  Another medium tank will help with that problem.  Right after we clean up the upper bridge area, we have a breakout at the lower bridge. 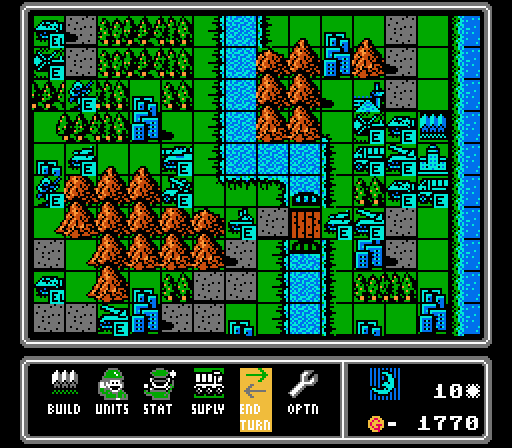 A new rocket is built. You can see the train of vehicles headed our way, too. Turn 11  Our first APC is recovered enough to park on this city and fend off the enemy infantry. I intentionally don't attack, since I'd rather keep the APC healthy enough to defend.  Our copters have to retreat, but I position a rocket to blow away anything that comes across the bridge. 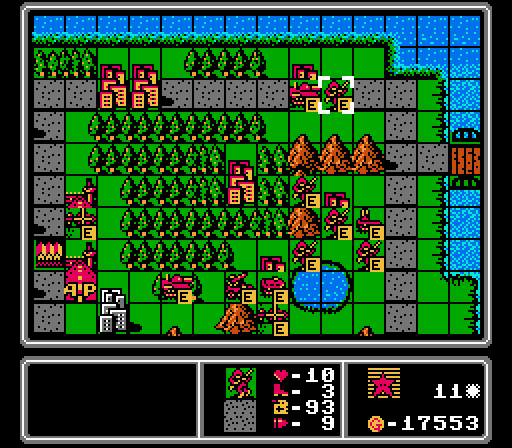 Our first medium tank is also sitting back to get repaired. 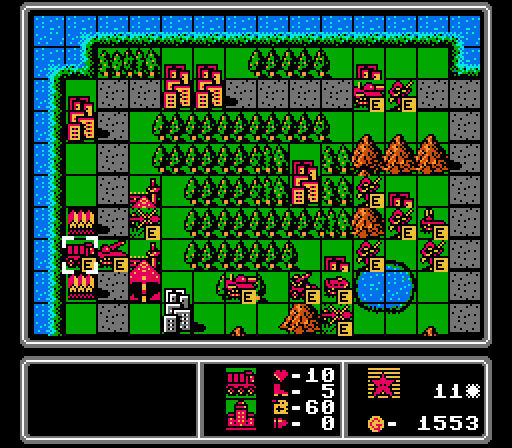 More rockets will come in handy for holding the bridges, and a supply will be needed to keep them full on ammo. 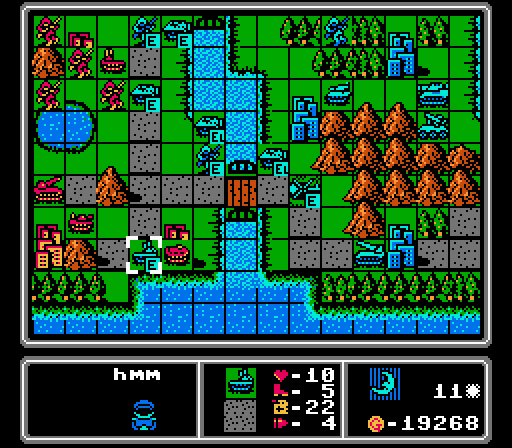 Okay that surge was bigger than I expected. The only attack was an APC on our infantry, but we survive it. 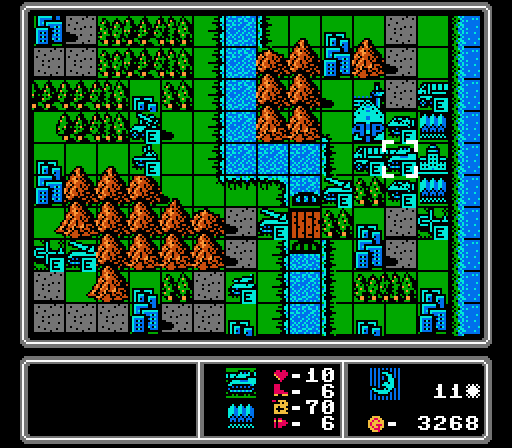 Another medium tank. Turn 12 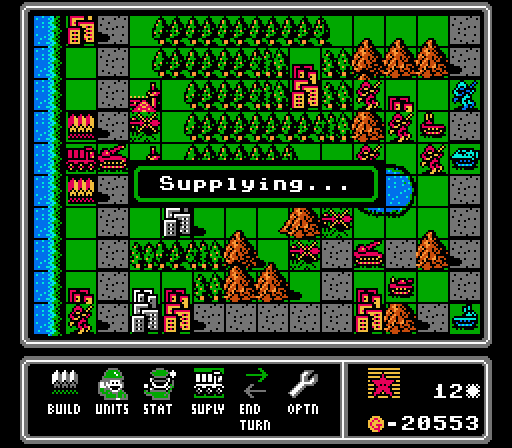  Even though we've matched Blue's income now, we're still spending a lot of our funds on repairs each turn (especially when repairing medium tanks, like we are here). You can see that even though we started off with plenty of cash, after repairing our units we don't have enough left over to match the enemy medium tank that just got built. In the long-term we'll still be at an advantage, since we can choose what to build more selectively while maintaining the presence of the units we've already built, but we're still getting slowed down now.   While one copter is fully repaired and headed back out, and another is about to make it back to the airport, I screwed up with this copter and now it doesn't have enough fuel to get back to the airport. Instead it merges into the other damaged copter. Note that even though I merged together one copter with 6 life and another copter with 8 life, I don't get any compensation for the "extra" life that's lost in the merge. I just have a 10-life copter with the same funds as before. The fuel and ammo don't merge either - the merged copter just keep the highest totals from the individual copters.   I have a bit of a dilemma with three APCs nearby and only one tank at our disposal, but choose to finish off the one that was slightly damaged when it attacked our infantry, ensuring a kill. Somehow all of the APCs avoided rocket range, too. 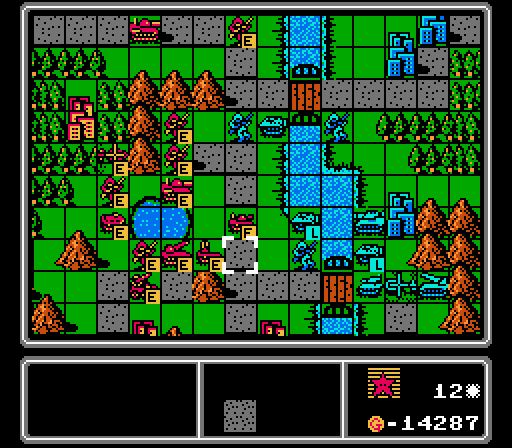 Our damaged units pull back and the rocket takes aim at the lower bridge area again. 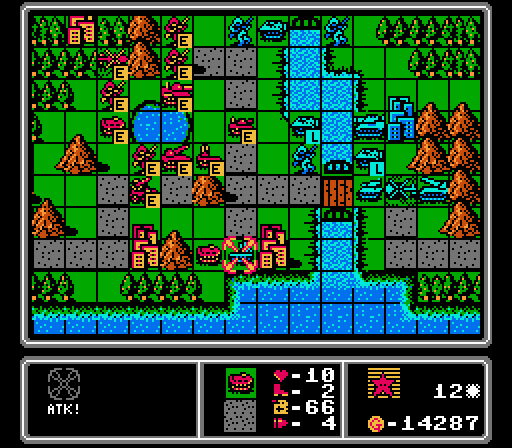 This APC needs to pull back a bit, but gets in a hit on the AA tank on the way back. 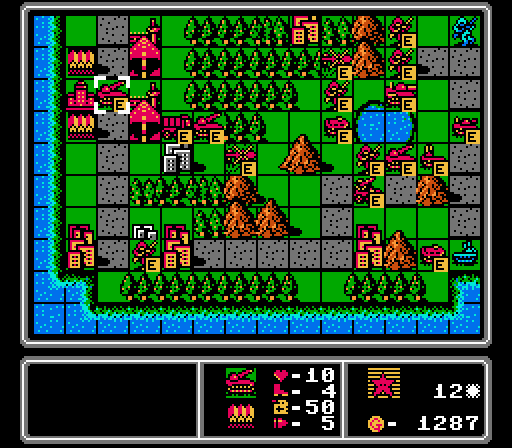 We can't get a medium tank, but we do have enough cash on hand to match Blue's third rocket. 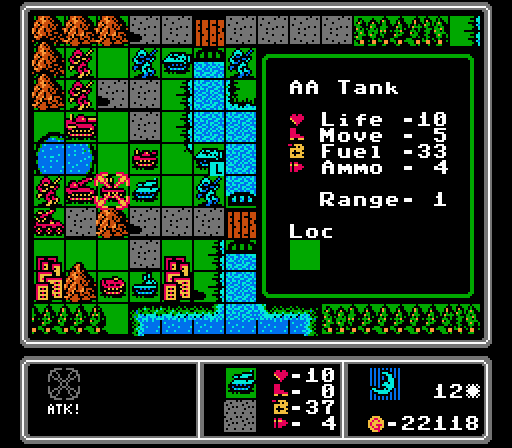  I was too focused on the enemy medium tank this time, and totally missed that the enemy tank could reach our AA tank. Hope we don't have to deal with any enemy air units anytime soon.  We lost this infantry that I put out as a sacrifice. We're ahead enough on infantry kills that we'll be fine here.  Three enemy footsoldiers on our island now, two in reach of our cities. And that AA tank is gunning for our copter, but we can literally fly circles around it.  Oh, good, an enemy fighter. Turn 13  A medium tank normally does 7.5 damage to an APC, and an APC normally does 1.5 damage to a medium tank. Both units are slightly damaged here, but the medium tank is actually better off, so we should have an easy victory here, right?  Not with hard mode cheating on! Somehow our medium tank takes three damage from a damaged APC! And our medium tank only hit the APC for five damage! I'm pretty sure the hard mode bonuses that the AI gets have an even greater effect when using damaged units; the randomness has more room to nudge the dice rolls or something.   Luckily the AI can't cheat their way out of this rocket kill.   A fresh medium tank is able to pull the teeth from this enemy tank while protecting our rocket. 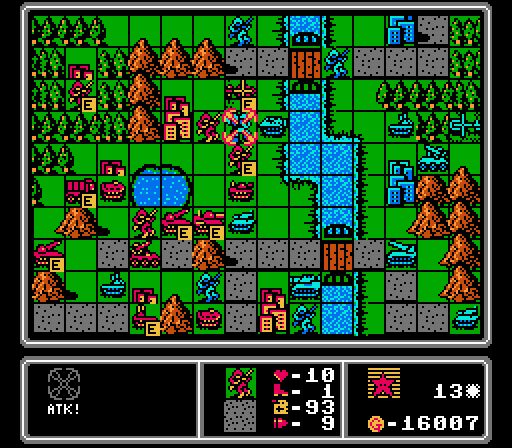 I get a little over-aggressive here and have a copter and two infantry move out to take out this mech. They're all a little exposed now, though. 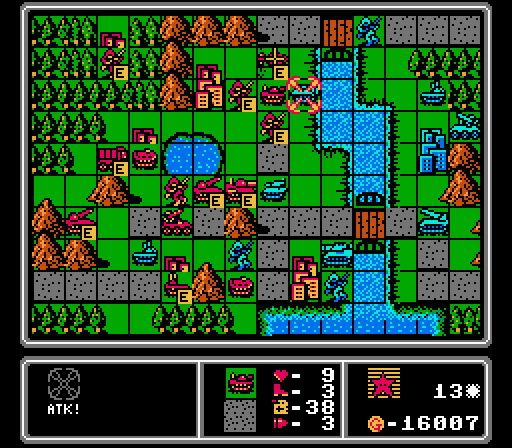 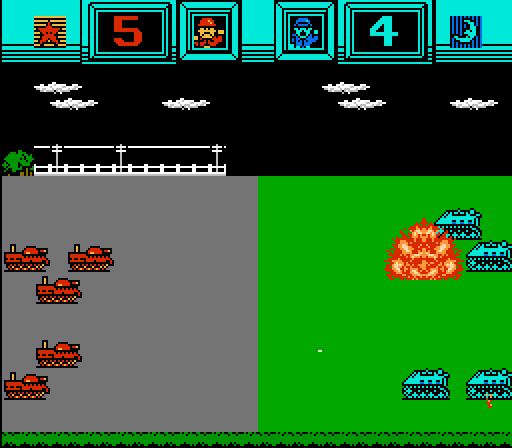 I really wanted to free up the space for our tank to slide in against this APC. A tank against an APC is an extremely favorable matchup normally, right? Tanks do 9.5 damage to APCs, and take only 2.5 damage from them. Even with our tank slightly damaged, we should have come out much better off than we did here, taking 4 damage and only dishing out 6 damage. There's no information on plains tiles giving slight defensive bonuses, but even if they do we shouldn't be taking that much damage in return!  This APC is trapped so I park it on the city to make removing it more difficult. 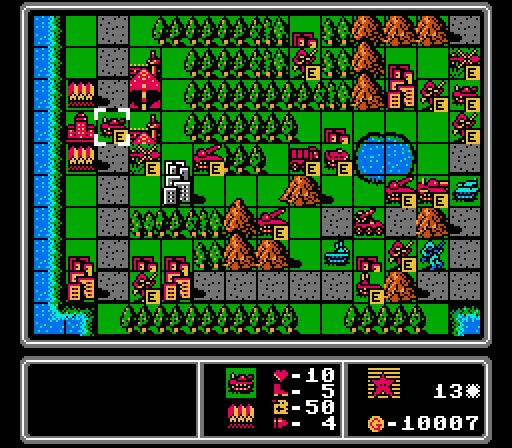 I'm trying to save up to get a fighter to counter the one that the AI just built, so we only put out a tank this turn.  We lose another infantry to this medium tank, but I'm happy to have it eat that attack.  Another infantry is hit by this enemy infantry but surives the assault. 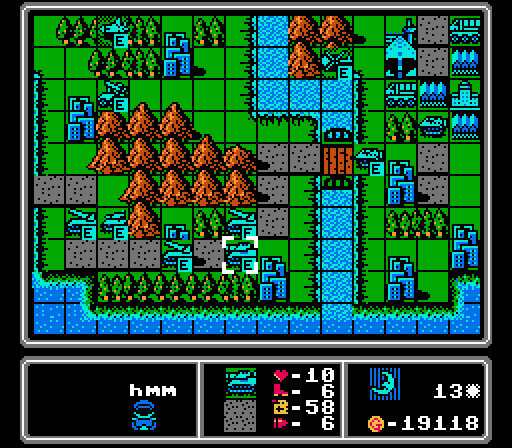 The lower pass here is getting a bit tangled. Three rockets are going to be tough to crack. 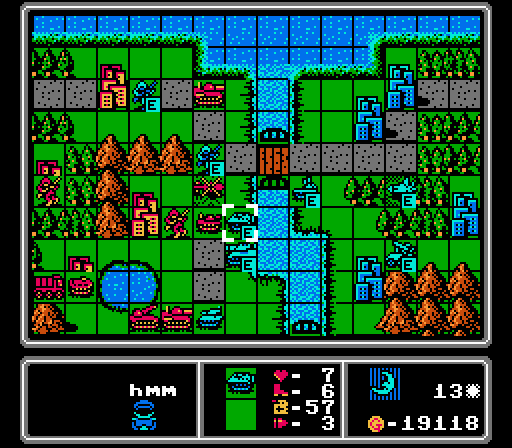 A lucky break here as two damaged APCs merge together, neither one attacking.  The damaged tank also retreats, leaving us in much better shape for next turn.  Yet another medium tank out to get us. Turn 14  The enemy AA tank wandered right into the range of our third rocket and got wiped off the map.  Our APC has to pull back to get away from the enemy rocket, but hits this exposed infantry on the way, and a second, freshly-repaired APC is able to finish them off. 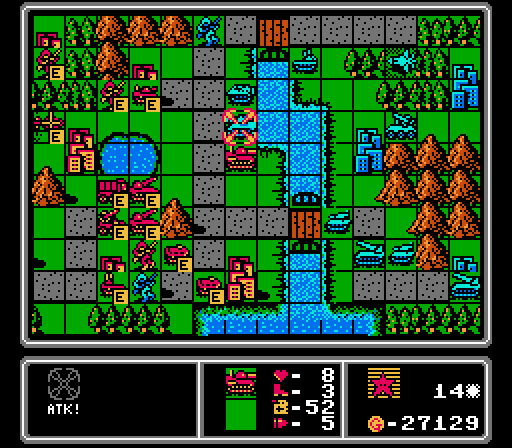  We use a rocket to soften up the enemy medium tank, and follow up with our own medium tank, but can't quite get the kill. 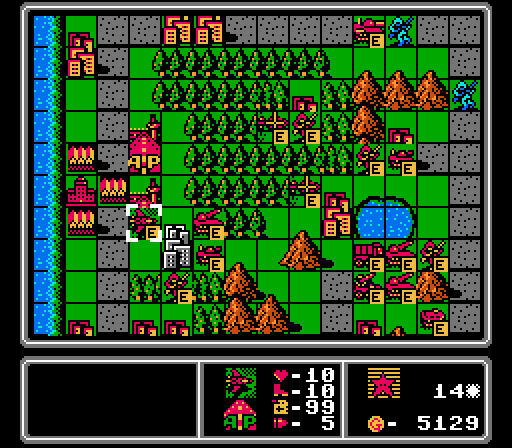 We have enough for our own fighter now. We couldn't get rid of all the encroaching enemy vehicles, so I have a damaged infantry trying to screen the lead rocket. 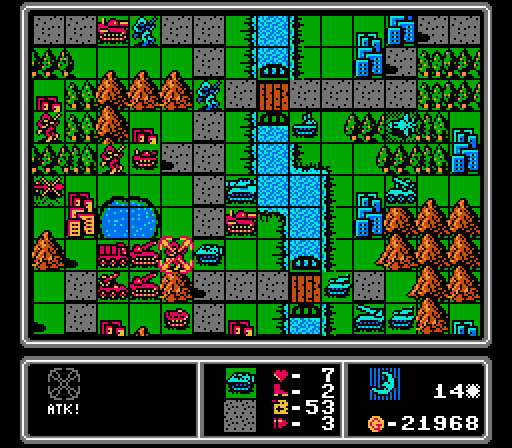 Losing another infantry is preferable to letting a rocket take a hit. I'm not sure I could've saved that infantry anwyay. 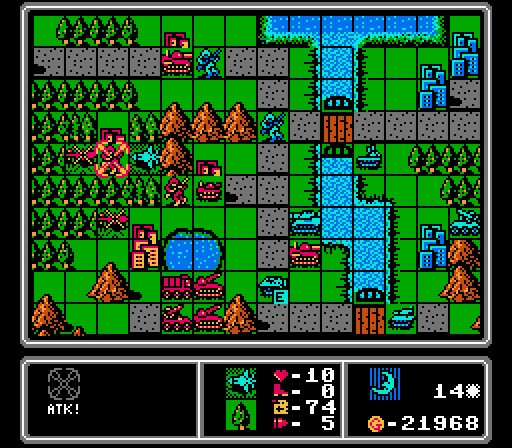  The enemy fighter has reached us already, taking a cheap shot at our infantry that was trying to heal up, but they barely hung on.  The enemy infantry run around trying to reach an unoccupied city, the damaged medium tank retreats, and a fresh AA tank and rocket cross over to our island.  A fifth medium tank from the AI, plus an AA tank. We're actually three behind on building medium tanks now, need to start cranking those out before we get overrun. Turn 15   A straight-up dogfight between two fresh fighter groups results in us taking the slightly worse result again. 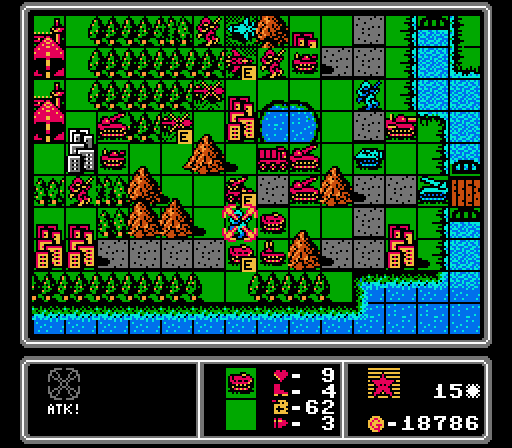 Our two APCs continue to move back and take out another infantry on the way. Up near the enemy fighter, I position our air units so that our AA missile can attack no matter which unit the enemy fighter hits. 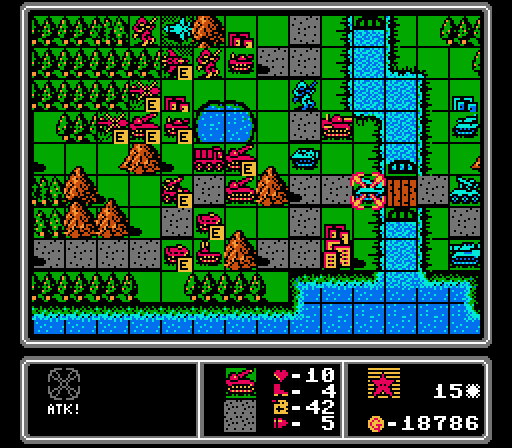 I can't pass up the opportunity to hit an exposed enemy rocket, and use both of our rockets to bombard it but can't completely destroy it. 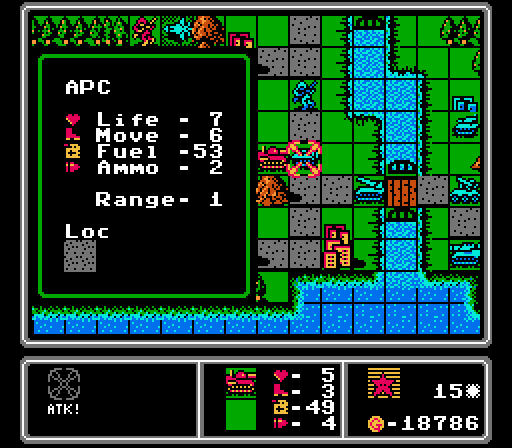  This medium tank is starting to fall apart but I have it hit the enemy APC anyway before it retreats.  We need to catch up on medium tanks, so here's a start.  Augh the enemy fighter is able to hit our infantry that was one turn away from capturing the last neutral city on the map. And it's out of the range of our AA missile, too.  The enemy retreats its own damaged units behind the bridge, giving us room to regroup a bit. Then the AA missile randomly crosses over into our rocket range for some reason.  A new infantry and yet another medium tank! Turn 16 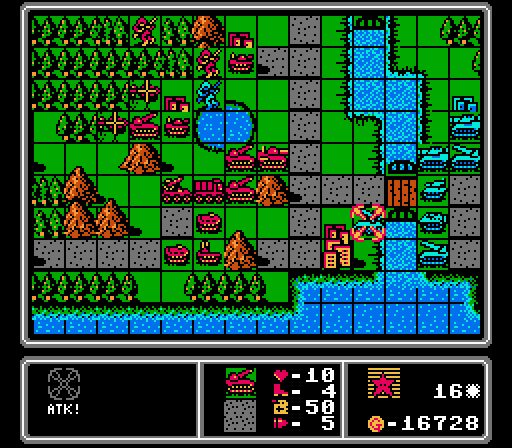  Free shot at an AA missile, why not.  Our other lakeside rocket doesn't have anything else to do, so hits this infantry and allowed the tank to follow up to grab the kill. 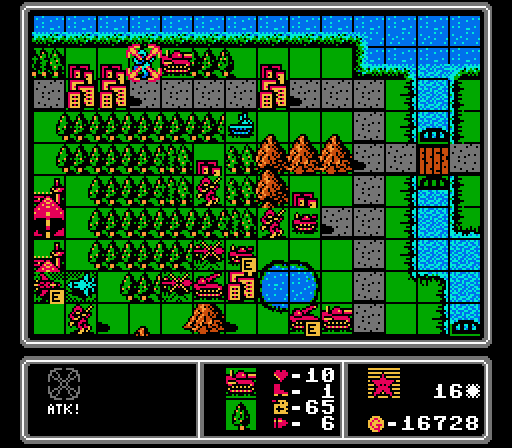  I've been letting this enemy infantry creep ever closer to our HQ while our medium tank got repaired, but it's time to take it out. Note that we should've dealt 8.5 damage to this infantry, and an infantry getting in even the one damage against our medium tank in a forest is bullshit.  A copter attacking a fighter isn't usually a smart move, but in this case I want to take the hit to drain that fighter of the last of its ammo.  Now we have the fighter locked in, unable to move or shoot, and an AA missile ready to shoot it down next turn.  Blue can't reach us but we want to get some more repairs in so we sit back and wait for them to come closer. 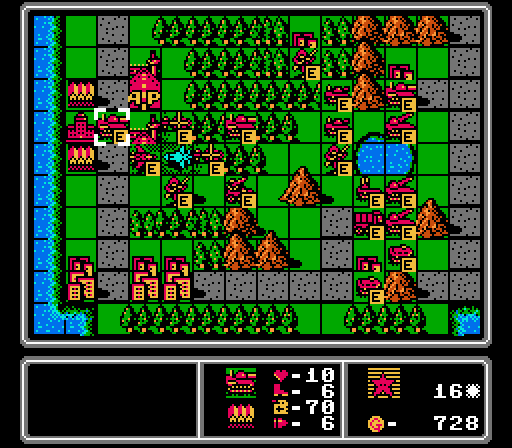 More medium tanks, more! 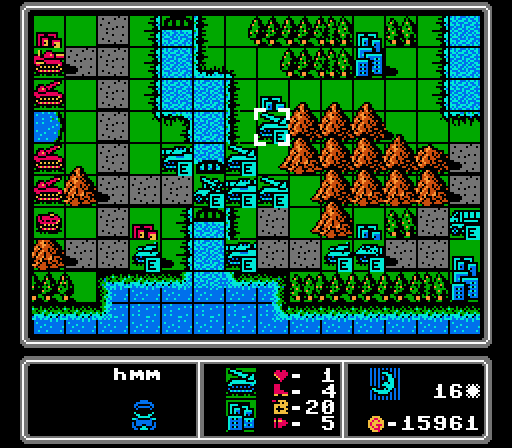 I expected the AI to be more aggressive here. Instead it parks a tank on one of our cities, and puts a medium tank right into rocket range.  Another infantry and another rocket. Turn 17 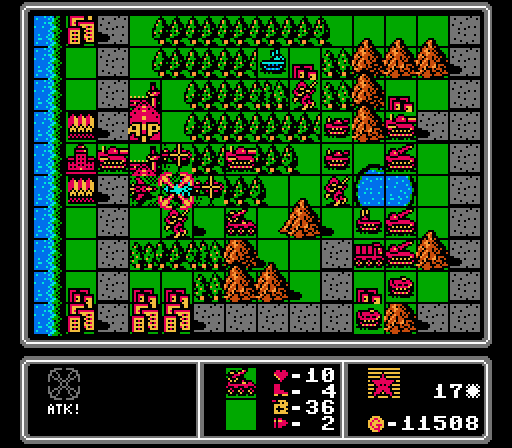 Shooting down this fighter first. Now our own fighter is already getting repaired on the airport, so we'll be up a fighter for as long as we can keep ours flying. 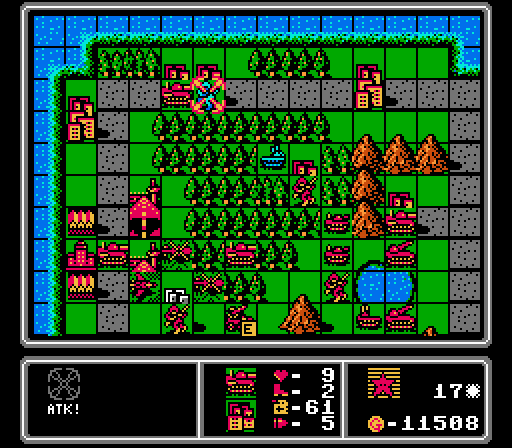 Finishing off this infantry, with the added benefit of getting repaired on the city next turn.  This AA tank is getting too close to our copters so it has to go as well. 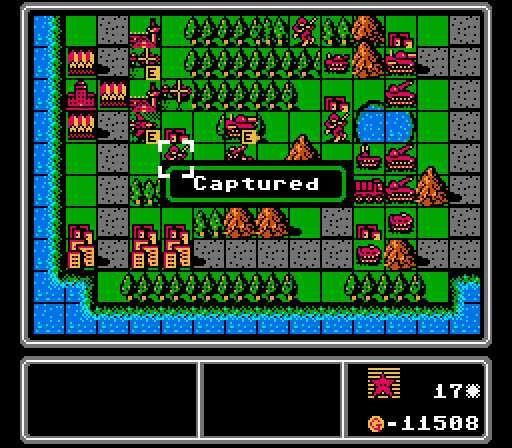 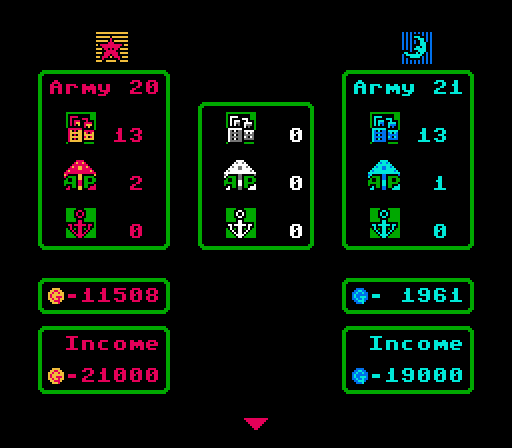 The last neutral city is ours. A little later than normal, but we did win the capturing race, despite Blue's head start. Really though it was more a function of city distribution - we each grabbed all the cities on our own halves of the map. Our income edge is from that extra starting airport we have.  Not sure what the AI was doing sending this damaged medium tank out here, but a rocket quickly removes it.  Lined up to keep the rockets out of range and minimize the exposure of other units. 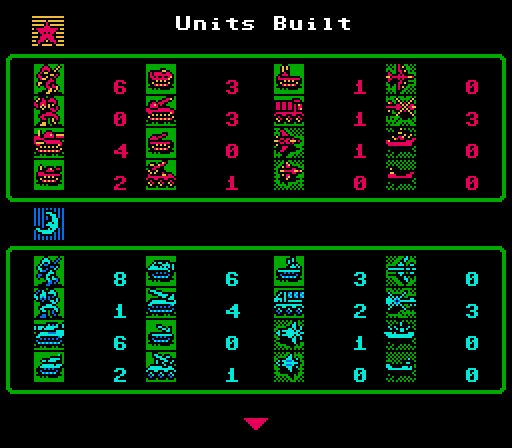 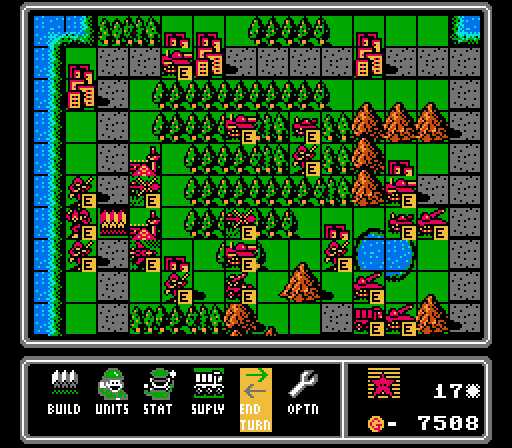 We still have lots of build options because of how much extra funds Blue built up over the early turns. Not a lot of cash on hand though, due to all the repairs we're doing (fighters and medium tanks are as expensive to repair as they are to build). So I take the opportunity to catch up on footsoldiers this turn.  Two medium tanks and a rocket cross over the bridge, one of them wrecking our AA tank.  Blue gets its seventh medium tank. We've got a lot of pressure on us now, though we're poised to turn things around once we get some of our damaged units repaired and our new units up to the front. Good time for a stop for today! To Be Continued...
|
|
#
?
Apr 29, 2022 05:16
|
|
|
Seems like the AI is pulling punches here later on, what with their reluctance to push over the bridge with a clear numbers advantage.
|
|
#
?
May 4, 2022 07:19
|
|
|
MR. J posted:Seems like the AI is pulling punches here later on, what with their reluctance to push over the bridge with a clear numbers advantage. Yeah sometimes it seems overly cautious. And then it throws a medium tank out in front of multiple rockets for no reason. There's a reason I'm playing on hard and throwing in challenges; the game just isn't all that difficult. I should have the second half up in a day or two.
|
|
#
?
May 5, 2022 01:26
|
|
|
Part 45: Mirror (2 of 2) Turn 18 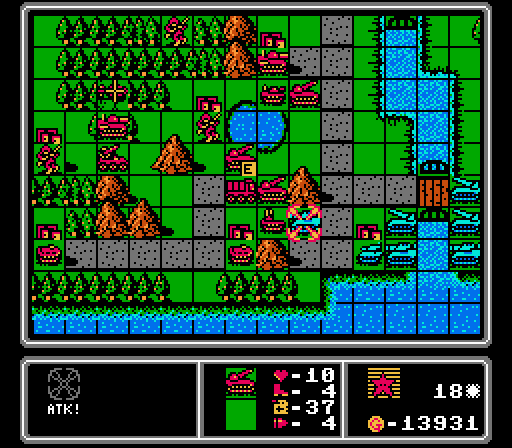 Blue has a lot of heavy units putting pressure on us here. We kick off the turn by having two rockets eliminate this medium tank.   The third rocket fires on this enemy rocket to keep it from hurting us too bad on the enemy phase. 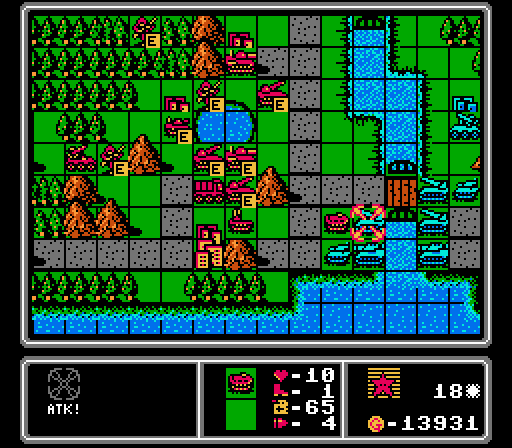  I can't do much with APCs right now anyway, so I throw this one away to get in some more damage on the rocket. 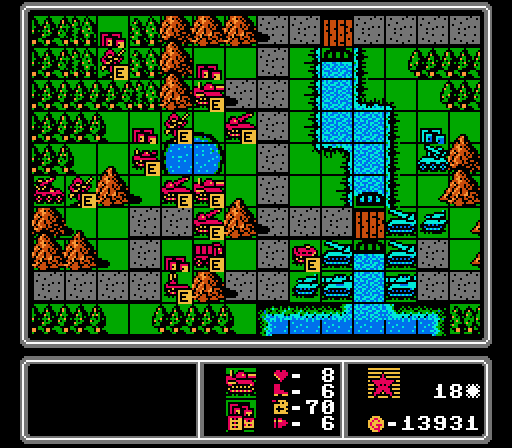 A fresh medium tank moves in front of our lower rockets, though I have a lowly supply truck blocking the lower pass between the mountains. 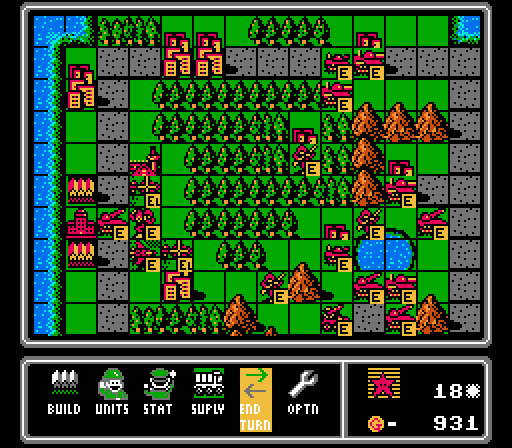 We get to match the rocket that the AI built a couple turns ago. Our two infantry that we built last turn are now both inside copters.  The enemy phase sees our APC quickly removed from the field. 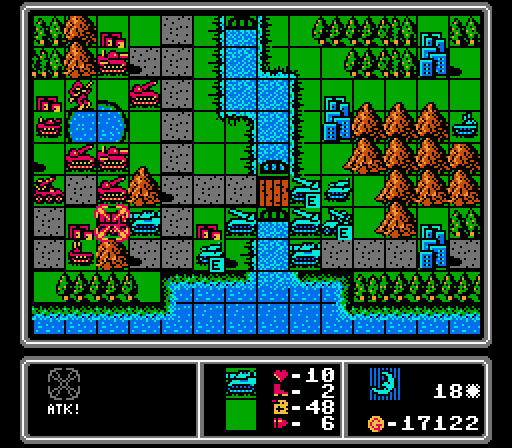 The supply truck blocking the pass draws another medium tank into rocket range. 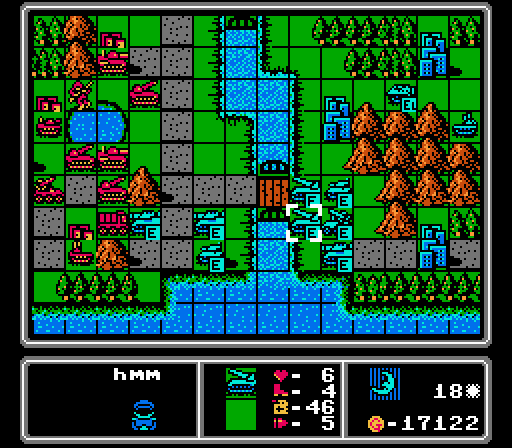 Another medium tank crosses over; it's also in range of a rocket, but otherwise protected by their own rockets. The damaged enemy rocket retreated and merged with another damaged rocket; as good as a kill for us. 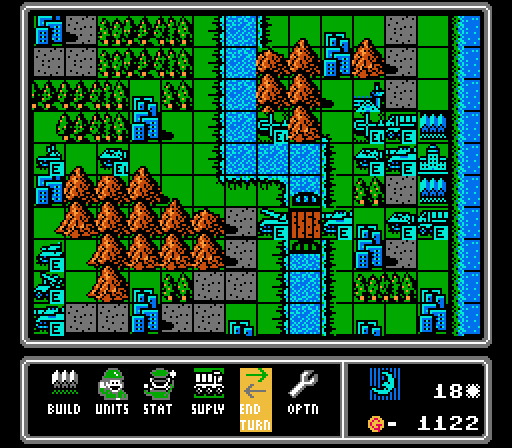 I think every time we destroy a medium tank, the AI builds another one. Works for me; we haven't lost one of our own yet. Turn 19 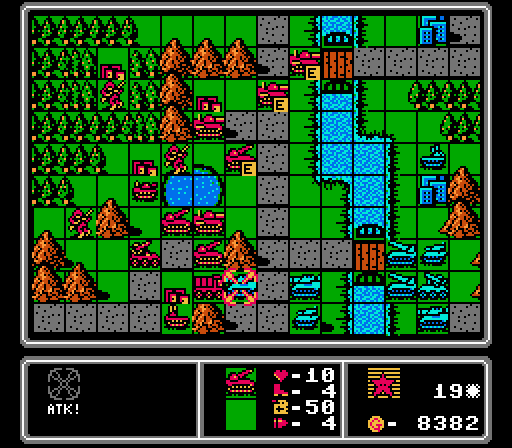 First we use a pair of rockets to remove one of these medium tanks again.   The third rocket hits the other medium tank. I can't follow up on that medium tank directly because of the enemy rockets. But I can have this medium tank sally forth across the bridge to wreck this rocket, without either enemy rocket being able to hit back. We have plenty of medium tanks around and plenty more we can build, so I'm okay with risking one here to take out a rocket. 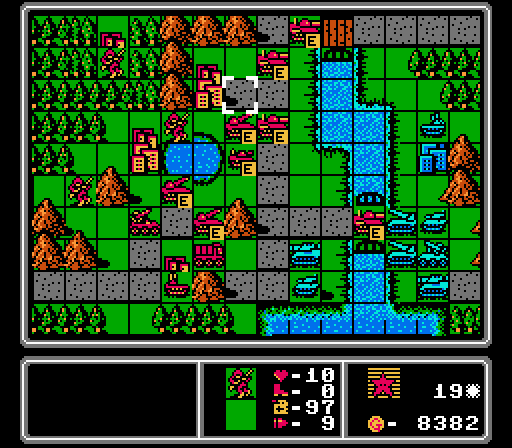 The upper bridge has been pretty empty as Blue marches its troops along the shortest path to the lower bridge instead. We have some new and repaired medium tanks on the way, and suddenly we're the ones with overwhelming force in the area. 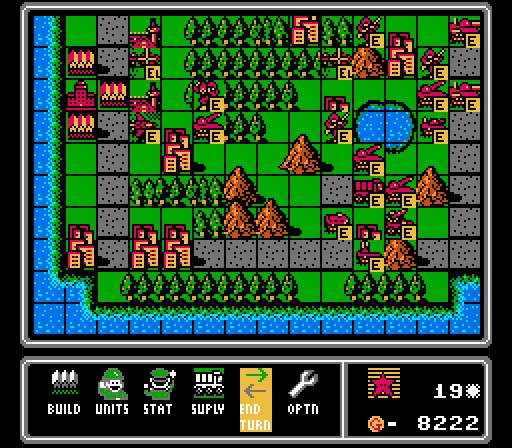 I've been spending most of our cash on repairs, so decline to build anything this turn. Note how I now have the AA missile blocking the lower pass. I really should get something stronger down there. 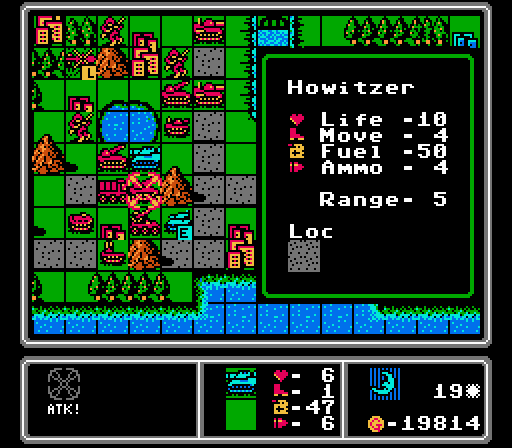 The AA missile took the hit from the tank, but I didn't have anything left to keep the damaged medium tank away from our rockets, and one lost half its Life here. 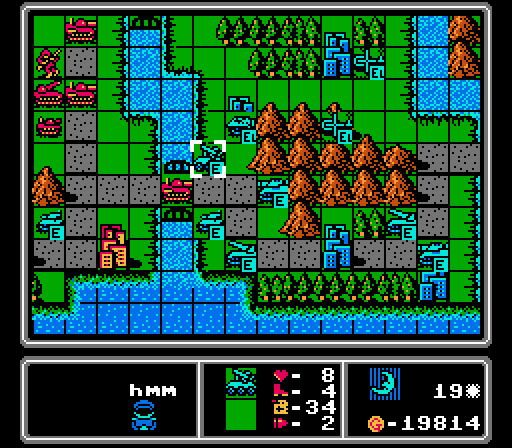 The damaged rockets retreated and merged again. Interestingly this retreat happened only after the nearby tank and medium tank had already taken their turn, so no one was left to hit our medium tank on the bridge. I'm not sure how the AI determines in what order to move its units (maybe in the order they were built?) but it's clearly sub-optimal here. 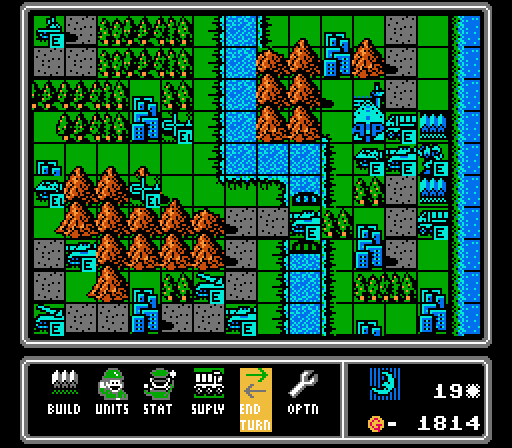 It's whack-a-mole with medium tanks here. Turn 20   Only one of our rockets can reach this medium tank, but one is all we need.  Our damaged rocket heads to a city for repairs, while the other one hits this tank and allows our medium tank to finish it off.  We've got full control of the lower bridge. I didn't actually attack with any of our other vehicles here; they're just sitting there being intimidating. 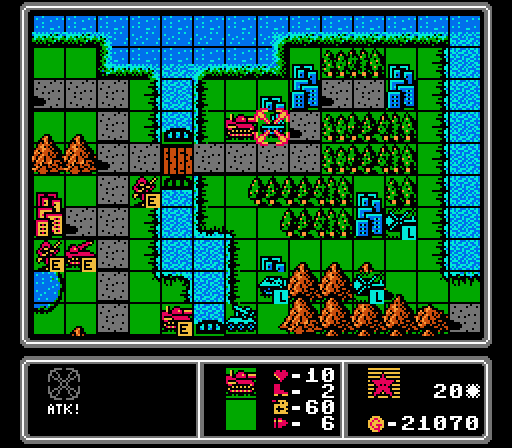  Meanwhile we begin our invasion across the upper bridge, starting with a hit on this AA tank. 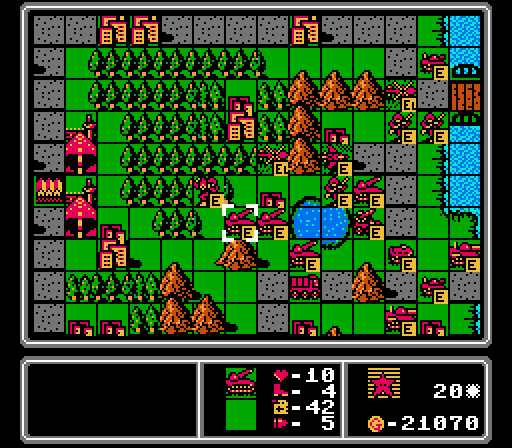 Everyone is repaired and rushing ahead now, with both bridges under control. I did make one mistake here though... 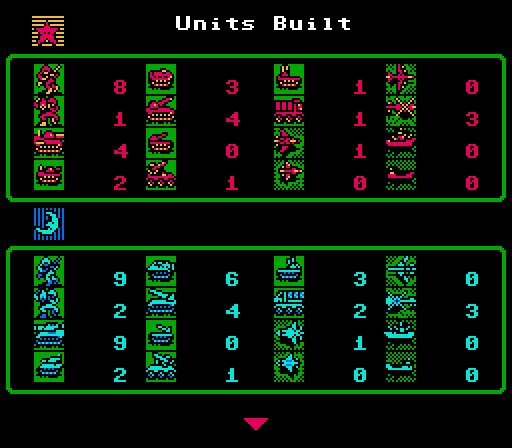 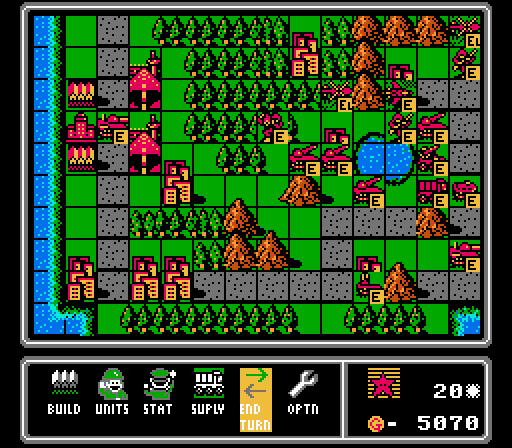 I went looking for what we're allowed to build, and noted that Blue has built nine medium tanks now, five more than we have. Since we have the funds for it, let's get one more for our side.   Here's the mistake I made - the enemy AA tank repaired half its damage and was able to reach our copter, severely damaging it and the infantry it's carrying.  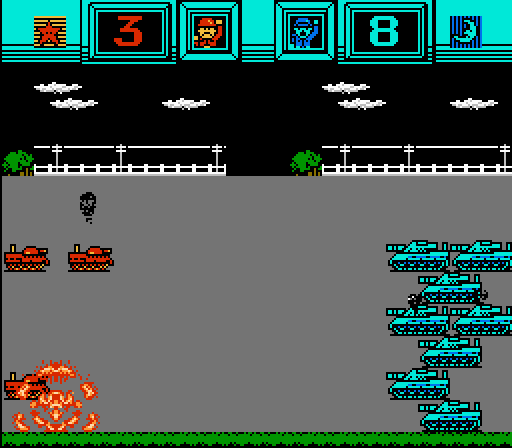 This medium tank completely ignored our medium tank and headed for our tank instead. I guess that was another unforced error on my part. 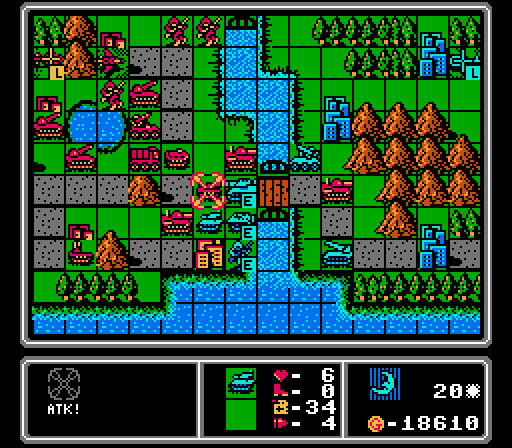 Oh crap, the enemy tank can reach us, too. Luckily it's still damaged... 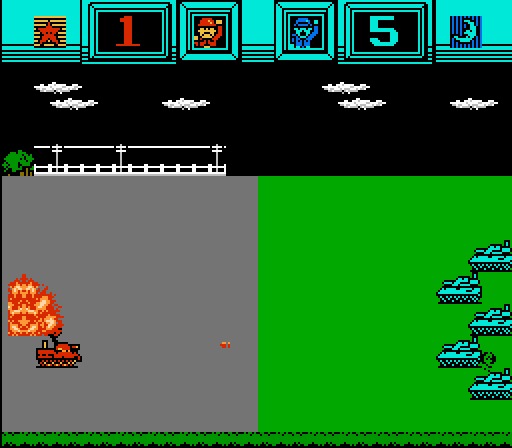 Phew, we survived. It feels weird caring about each individual unit in this game. That tank probably isn't going to matter much with all the medium tanks we have available, yet I can't help wanting to min-max this challenge.  For some reason Blue put out a tank and an AA missile this turn. Maybe they didn't like our fighter flying forth again. Turn 21 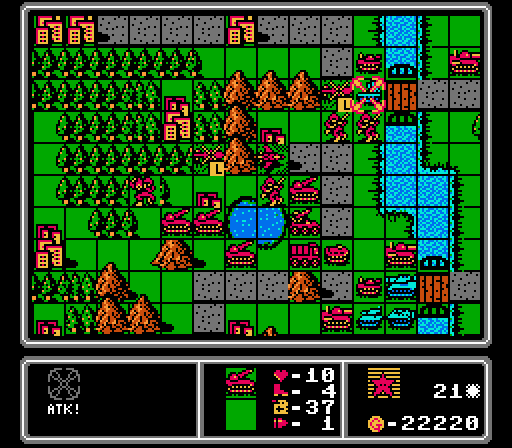 First up - a rocket wipes out this offensive enemy AA tank.   One medium tank finishes off the tank, while two others take care of the remaining medium tank here. 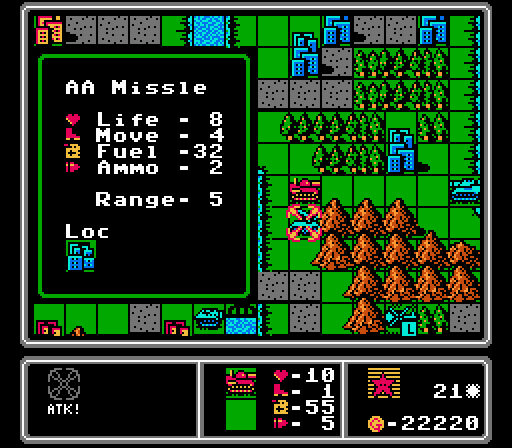  A fourth medium tank continues to cause chaos on Blue's island, roughing up this AA missile.  Playing my favorite game of using a fighter to blockade ground units. Also shown: A rocket is out of ammo, so I move a supply truck up to refill it next turn. Two infantry are crossing the upper bridge, and will start a city capture next turn.  Look, if the AI is going to keep throwing medium tanks at us, I'm going to throw them right back. We also get a tank to match the one that Blue built last turn. 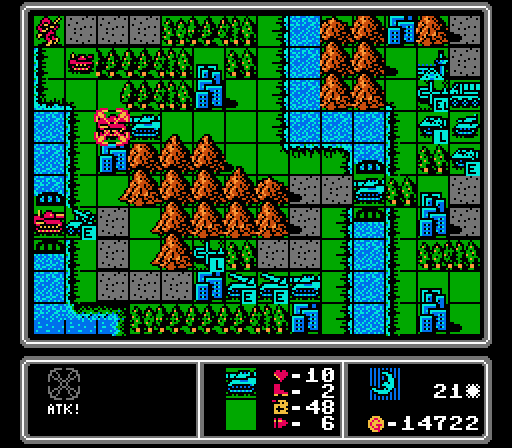  We've got the enemy on the run in the lower road. Meanwhile another enemy medium tank arrives to do battle with our medium tank. Both units on plains tiles, but we end up a bit worse off anyway. 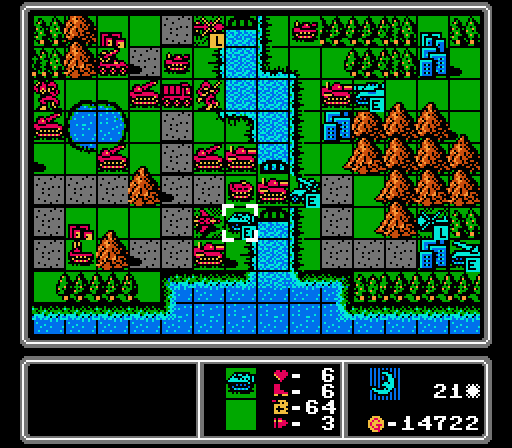 The enemy APC attacked our APC, and then the infantry jumped inside it. So our rocket will be able to take out both with one strike next turn. Thanks weird AI!  Looks like we took out enough rockets to encourage Blue to build one more. Turn 22  I promised that the rocket would take out the APC and its passenger and I deliver here.   Our fighter is back in the action, and hits this loaded copter while sitting in the safe zone close to the enemy AA missile.  Not that the AA missile is much of an obstacle. I snuck a tank across the upper bridge last turn, and it hits the AA missile from behind to destroy it.   One medium tank retreats across the upper bridge, while another crosses the lower bridge to hit this enemy medium tank. 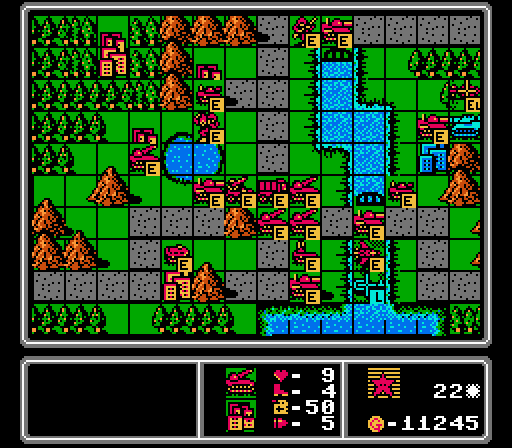 We hold the bridge with another medium tank, backed up by three rockets. I debated building an AA missile for awhile here, but decide to just save our funds for next turn.  Blue doesn't challenge us at the lower bridge; probably a wise decision. We're going to need some more firepower in the upper half of the island though. 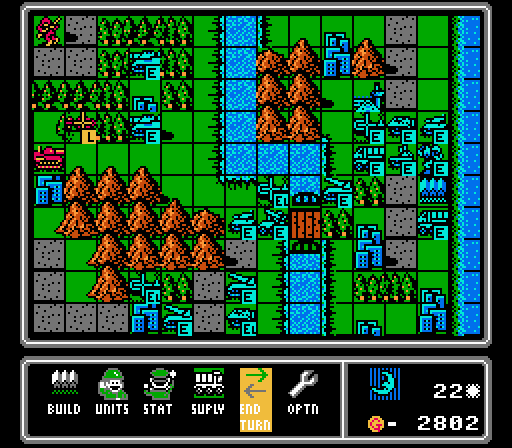 The AI puts out several cheaper units this turn - a copter, a tank, an AA tank, and a mech. Turn 23  The snowball has started - we've taken our first city from Blue.  Fun fact - if you hit a copter with a fighter, it can't actually get away from you. We finish off the copter and its passenger this turn while also sitting on Blue's city and clogging the pass.  Our rockets are in the lead and appear to be exposed, but I checked about four times that nothing could reach them.  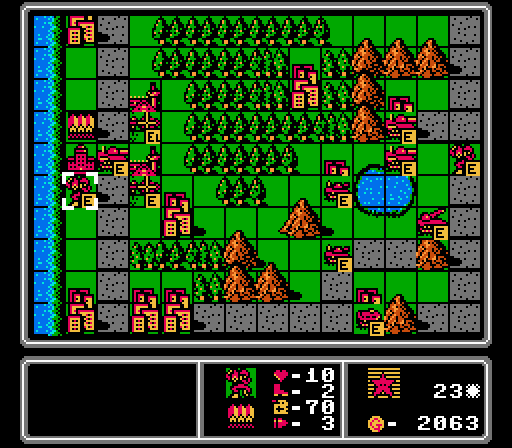 We still have a lot more units we can build before we catch up to Blue. I opt for the obvious choice with a medium tank, and use some leftover funds on a mech.  Part of why we're still so far behind on units built, is that we have a huge advantage in units killed. We've killed a ton of Blue's units, and only lost a handful of our own. So our funds are going towards reparing damaged but salvageable units, rather than buying new ones. Having a backlog of units that we can build will help us as we capture more of Blue's cities and build up more and more of an income advantage.  Oops, got a little aggressive dropping off this infantry, and it loses half of its Life. 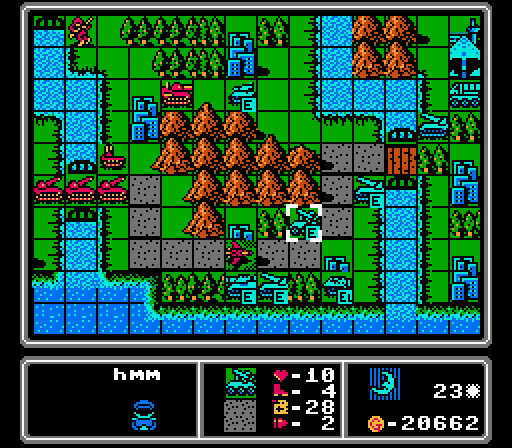 Still not much going on at the lower road, but an AA missile moves up to threaten our fighter.  Blue finally builds its second serious air unit, a scout, along with an AA tank. Turn 24  We start off the turn by taking a second city from Blue.  A fresh medium tank arrives to finish off this enemy medium tank.  I think I'm clever here by hiding the injured infantry back inside the copter, but the copter is just barely still in range of the enemy scout.  We're still being cautious at the lower bridge, but I do put a couple rockets onto Blue's island.  Here's where I notice that the AI built a scout last turn, and mildly panic since I just sent our fighter back to refuel and we don't have enough cash to get our own scout.   Instead we build nothing, and I panic again as I realize that the enemy scout can reach our copter. Somehow we barely survive this one.   Another battle between two fresh medium tanks, this time both on roads instead of plains, but the same result. 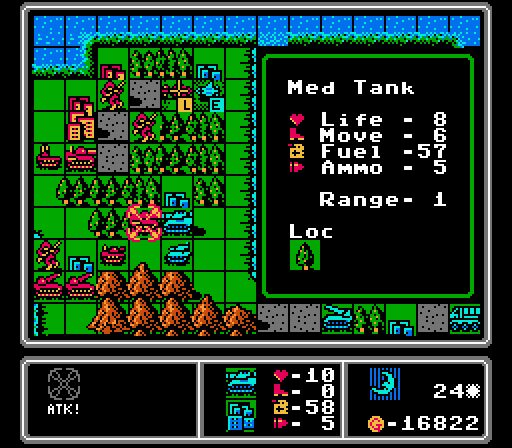  This medium tank battle also doesn't go our way, but like in the last one, the enemy unit is now in rocket range. 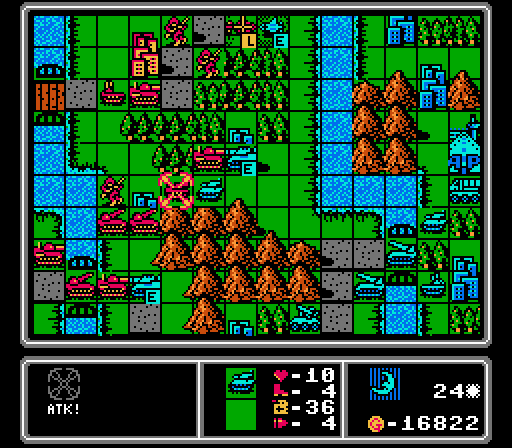  Hey, a neutral battle where we don't mysteriously take more damage for once.  Some more cheap units come out - a copter, a tank, and an infantry. Turn 25  One of our medium tank attackers falls to a rocket and a tank here.   Two other rockets finish off a tank and damage another medium tank.   I've got a fresh medium tank on the upper half of the island to get the kill here.  I thought about protecting the copter here, but decide it'd be better to keep the infantry since that copter is probably going to run out of fuel soon anyway. 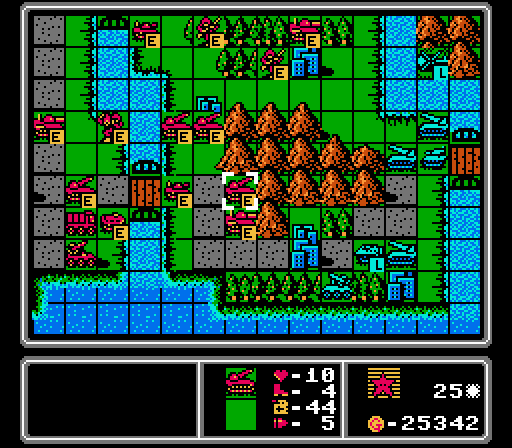 Starting to advance along the lower road. 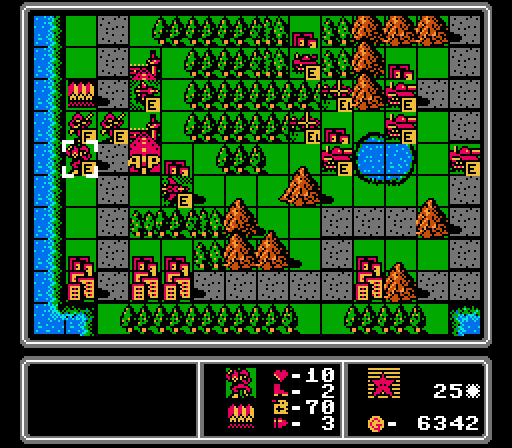 We match Blue's scout, and then catch up on footsoldiers.  The copter is lost on the enemy phase, but we'll be able to hit that scout with our AA tank now. 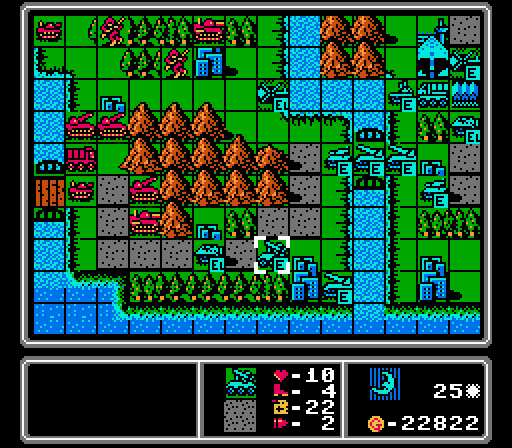 The AI is not sure what to do on the road so just kind of sits there.  I'm more excited that we can finally build a bomber than worried about what the AI can do with this one. Turn 26 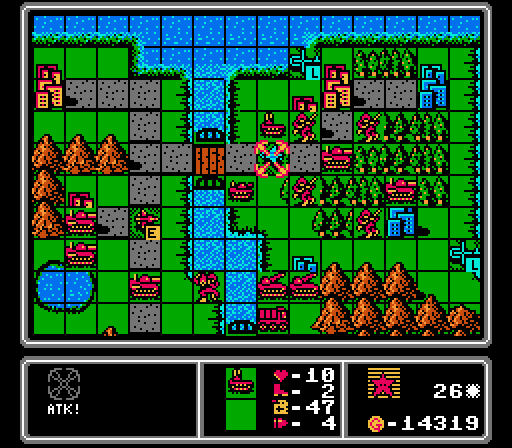  It feels good to be the one with the annoying AA tank for once. 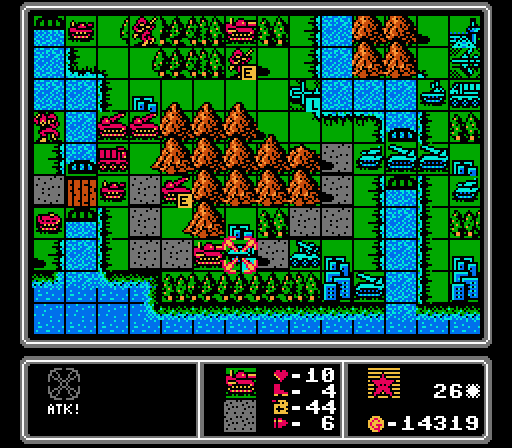 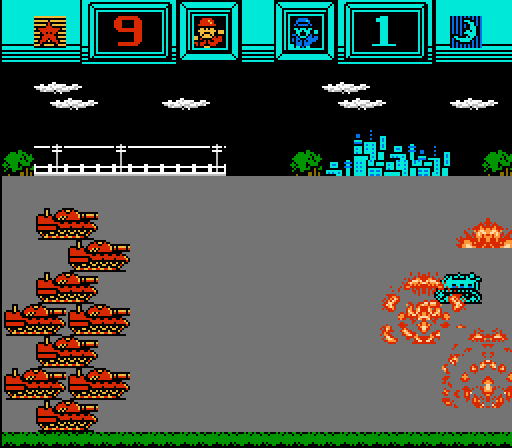 Somehow a rocket and a medium tank aren't enough to dislodge this APC from the city. 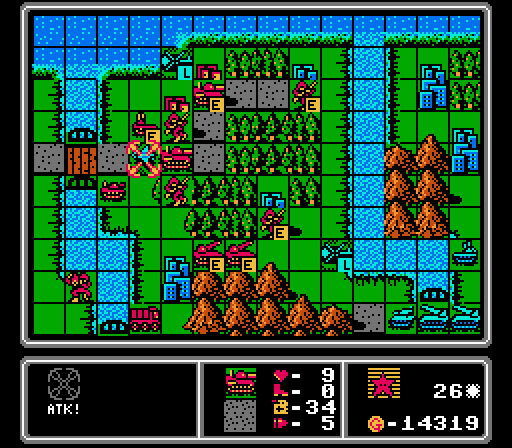 A medium tank finishes off this scout before it can retreat, while our rockets advance with all the ground units in the area gone. We also start capturing three more of Blue's cities. 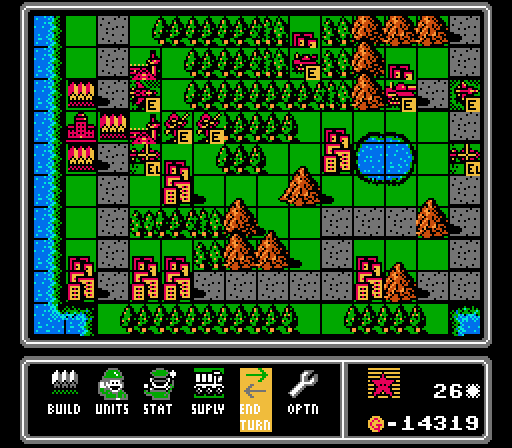 Can't afford a bomber yet, so we just get a copter and load a mech into it.   I really have a blind spot when it comes to checking the range of newly-built air units. 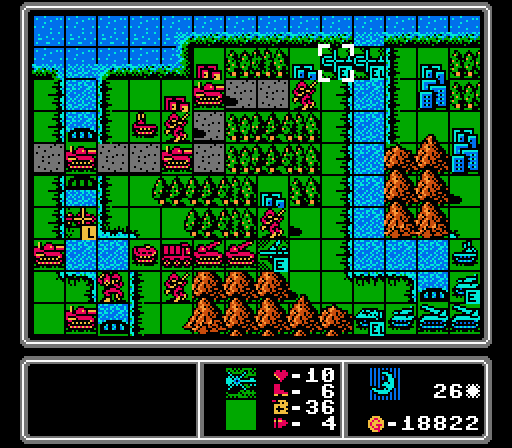 I'm not sure what these copters were trying to do, but apparently they were scared off by our AA tank.  Blue seems to be pulling back to hold its last bridge. The road isn't much of an obstacle now with everything we have here. 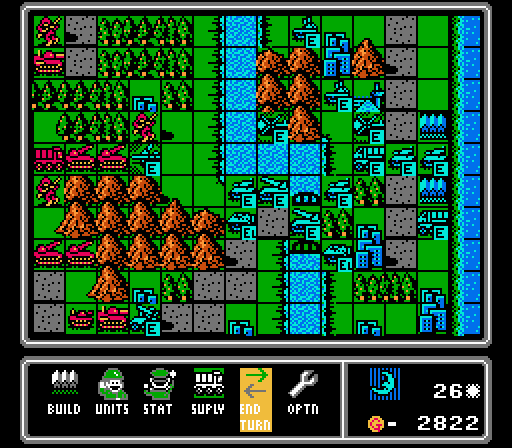 Another copter and two more tanks. We should get some more anti-air units up front to deal with these copters. Turn 27 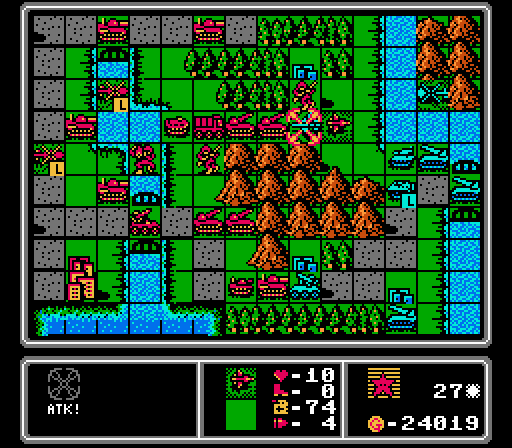  Our scout has arrived and pulled the teeth from the bomber. 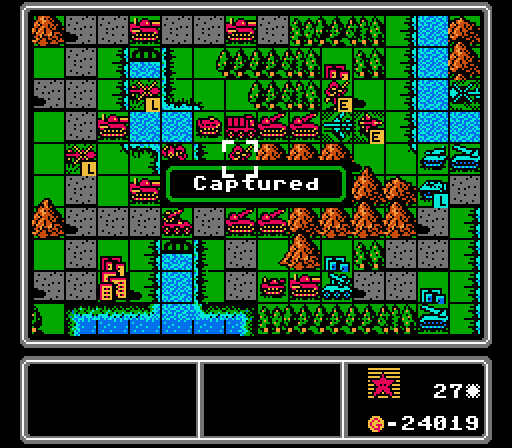 We finish all three captures that we started last turn, putting a large dent into Blue's finances and really all but ending the map at this point. 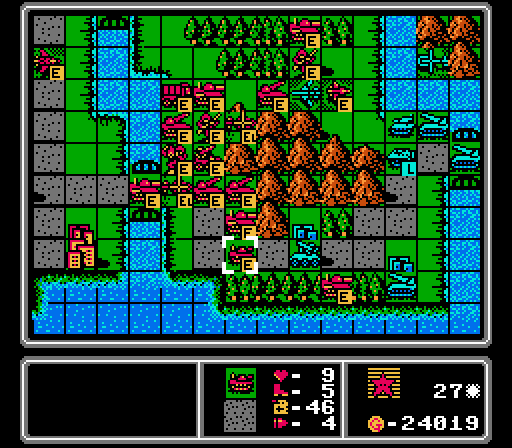 Our rockets each hit the AA missile but can't remove it. Meanwhile a medium tank sneaks up on the rocket while everyone else waits safely out of reach. 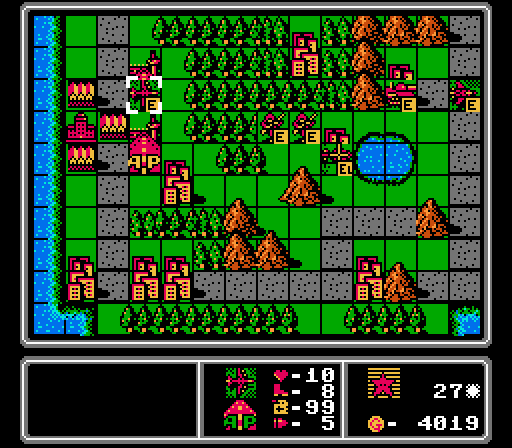 It's finally bomber time for us! 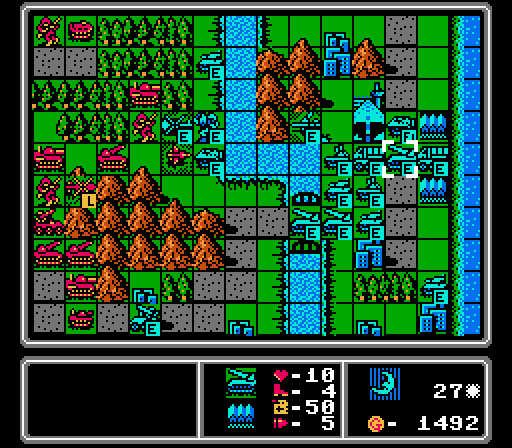 A couple of copters attacked our infantry that are still sitting on their newly-captured cities, and some vehicles came up to play, but not much else happened here. The bomber retreated, and Blue built a supply and a rocket. Turn 28 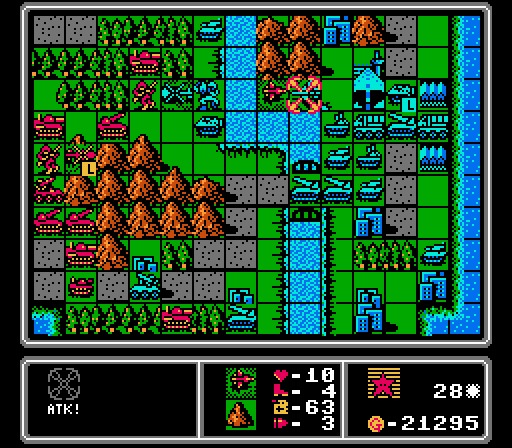 Both air units are on mountain tiles here, so our scout can finish off the enemy bomber without being threatened by the AA tanks.  Down on the lower road, we took out the AA missile with a couple of rockets and advanced to attack another rocket, then dropped off a mech to take the freed-up city. I intentionally exposed our tank to the enemy rockets on the bridge, willing to take some losses now to end the map more quickly. 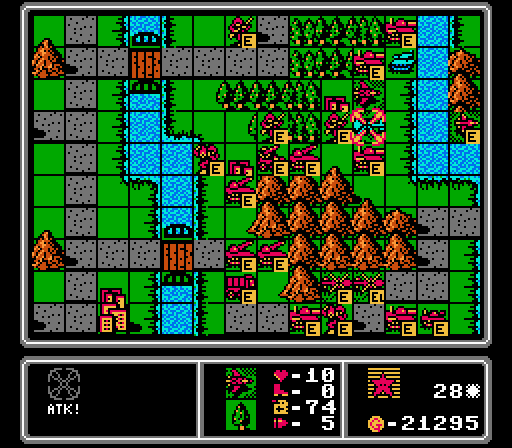 Around the rest of the island, we destroyed an APC with a medium tank and killed a mech with a rocket, then did some damage to the copter and tank in the upper corner. Finally our refueled fighter arrives to hit the other copter.  I'm not sure how much these will matter, but here's a copter and a medium tank for you. 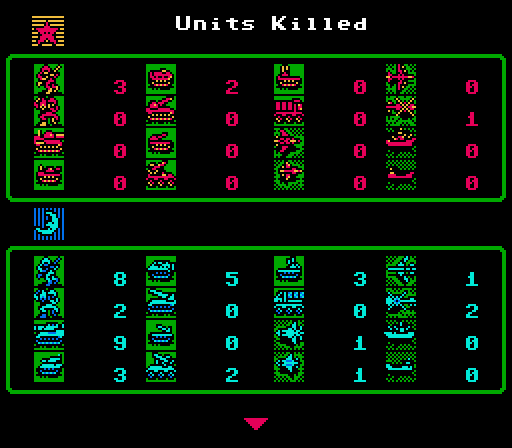 Just capturing our low losses before I start throwing units away to make progress. It was fun while it lasted. 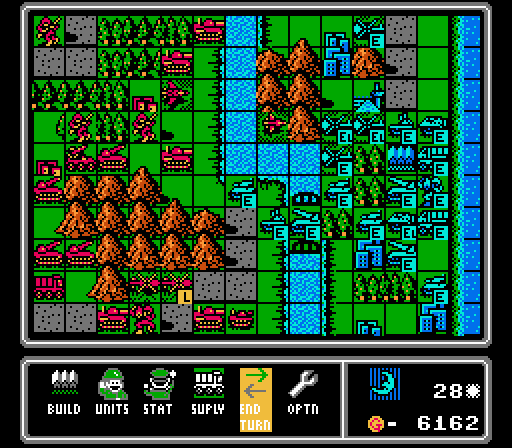 Our tank survived! And all of Blue's damaged units retreated, with no other attacks. The AI then built an APC and a mech; nothing important there. Turn 29 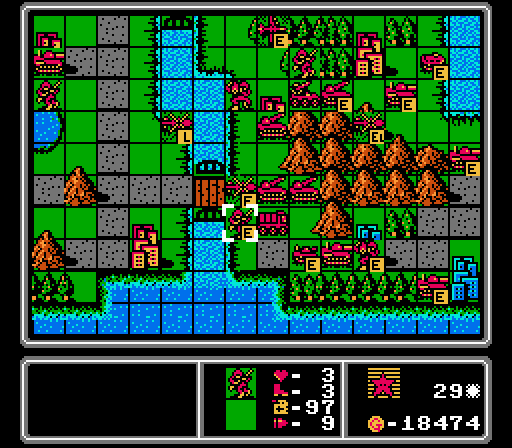 Here's something weird. This infantry has been riding around in the copter above it for a long time. The copter took a hit down to 3 Life and went back to the airport for a few turns of repairs, getting back up to 9 Life. However while the infantry here took the damage while they were inside the copter, they did not get the benefit of repairs while in the copter. I was going to have this infantry start capturing the other Blue city shown here, but that obviously won't work with how injured they are now.  Anyway we removed a damaged tank with this rocket, then finished off the rocket in the lower road with a medium tank, and advanced another medium tank along the road to challenge the chokepoint there, hitting the AA tank.  We're matched up on medium tanks now. In fact Blue doesn't have any left on the field, and we haven't lost any. So we now have nine unchallenged medium tanks out here.  Well, Blue built another medium tank, go figure. The damaged AA tank went after our copter that I didn't realize was exposed, and then a tank moved up to hit our medium tank. The rocket formation here is a little more difficult to crack, but I'm not about to retreat now. Turn 30 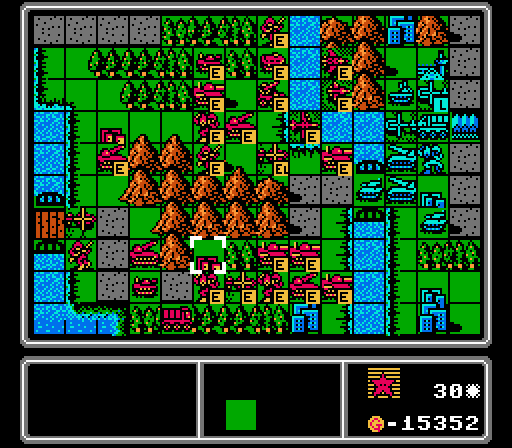 We finished off the AA tank with a distant rocket, and used a couple medium tanks to wipe out an enemy rocket and another one to destroy a tank. We have a bit of an odd formation here - three medium tanks are all in range of one enemy rocket, but not in range of the other rocket. So we'll only take one rocket hit, and probably only lose one medium tank as a result. I realized a little late that the remaining enemy tank on the bridge could reach a rocket and an AA missile and cause some trouble, so put a copter in its way, even though it has a passenger. 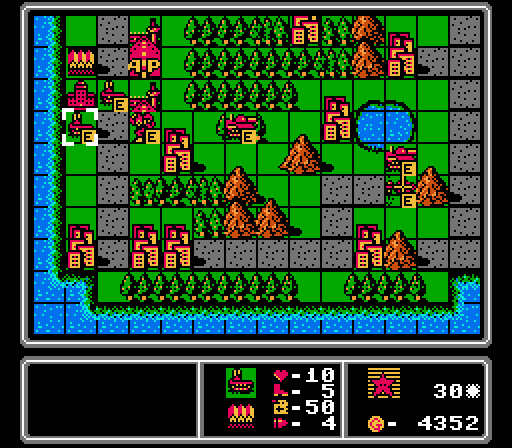 Can't afford a medium tank, and I was mildly concerned about how to deal with enemy copters, so we get a couple of AA tanks instead.  We lose the medium tank by the bridge, and we also lose the copter here to a couple of enemy copters. Lucky for us the enemy tanks moved first, so couldn't take advantage of the opening.  Ugh, rockets are so annoying at this stage. Whatever I have plenty of tanks to throw at that bridge. Turn 31   The enemy copters all came out to play once we got our AA missile close enough to hit the airport. I've had our fighter and scout sitting safely in the mountains waiting for this moment, and between those two air units and the AA missile and our own copters, all three enemy copters are eliminated here.  Meanwhile our rockets eliminate one tank, and damage the other tank and the lead rocket enough for our medium tanks to march right down the bridge, wiping out the tank and rocket in the process. Our bomber then flies in to finish off the second enemy rocket. Note how we're still out of range of Blue's new rocket. Our bomber is exposed to the AA tank, but I'd rather have the rocket gone and the bridge clear anyway now.  We wiped out almost half of the enemy army this turn, so as long as I'm not critically stupid we should be done in the next few turns.  Nothing we build now is going to make a difference in this map, but for as long as I'm following this challenge, you're going to see what I'm building for it. 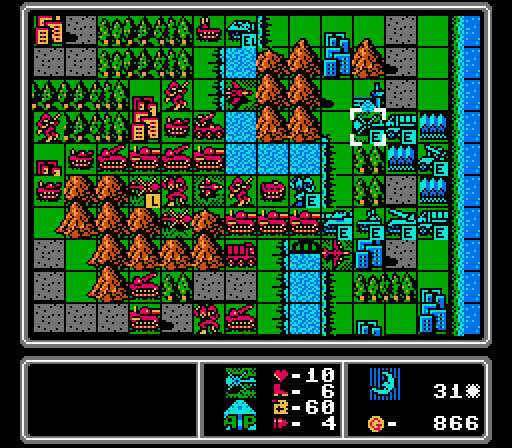 Our bomber is safe, because the medium tank took up the square to hit our medium tank instead. I also get a reminder that APCs can cross rivers, as one hit our AA tank up top. And an enemy mech entered the river but didn't attack anyone. We also have a new AA missile and a new copter. Turn 32  The enemy medium tank is taken out by our medium tank and bomber, freeing up space for another medium tank to roll forward and whallop the enemy AA tank. Our APC also finished off the enemy mech with help from a rocket. And another medium tank moved up to whack the APC in the river. Another enemy APC was hit by a rocket on the lower road. 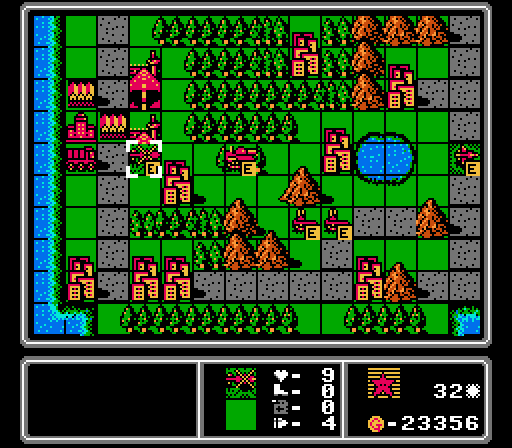 Here's another fun fact - this copter had literally just enough fuel to make it back to this airport. At the start of the next turn, it should crash for being out of fuel, right? Well, it turns out that air units don't consume fuel on owned airports, so this copter will survive and get refueled.  Also we're way behind on building tanks so I toss a few out there.  We lost a medium tank on the bridge to the rocket, but that's the only casualty on our side. The enemy APC on the river suicided on our infantry, and the enemy AA tank went after our fighter instead of killing itself on our bomber. We also have three new units - a copter, a tank, and a mech. Turn 33 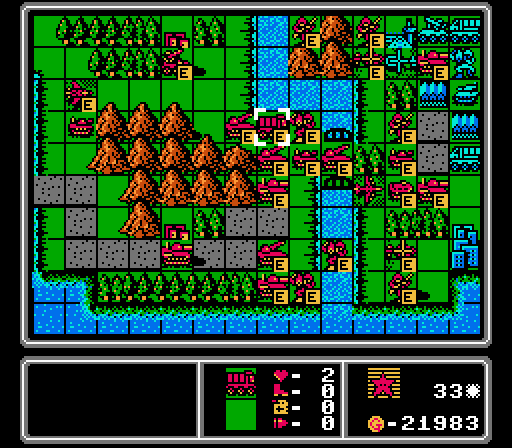 Our rockets finished off an APC and AA tank, and we had a tank and medium tank destroy the last enemy rocket. Another medium tank rolled all the way past Blue's HQ to hit the AA missile. And a couple copters dropped off footsoldiers for some capturing, with others ready to cross over on foot. Highlighted here is a situation I've never seen - our supply truck ran out of fuel and can no longer move! (Somehow it can still provide fuel to other units that wait nearby, though!) 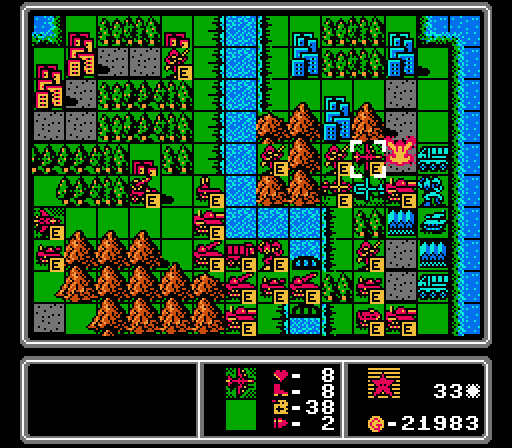 I forgot, our bomber actually flew up and finished off the AA missile. No anti-air units left for Blue.  We built a copter, an AA tank, and two tanks here. That scout is the same one we've always had, just looking for more fuel.  The enemy phase isn't very exciting but we did lose an infantry to that tank and copter, and the AI then built an APC and an AA tank. Turn 34  We wiped out a tank and an APC, then damaged a bunch of other units while blocking build points as much as I could. Off-screen I built a rocket. 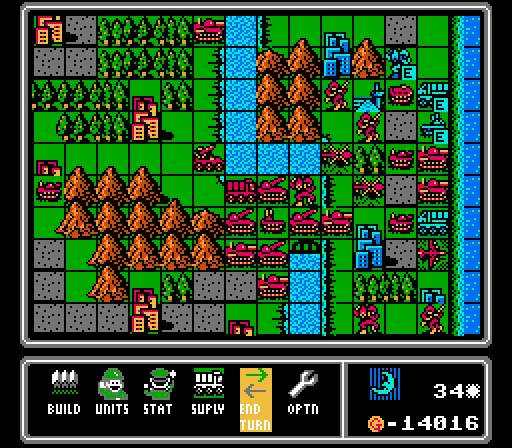 The enemy copter killed itself on our infantry, and nothing else happened. Blue didn't even clear its AA tank off of its base to try and build something else. Turn 35  It took some careful maneuvering and ordering of operations here, but I managed to finish off every enemy unit this turn!  The final count of units built - we met the challenge through the very end. 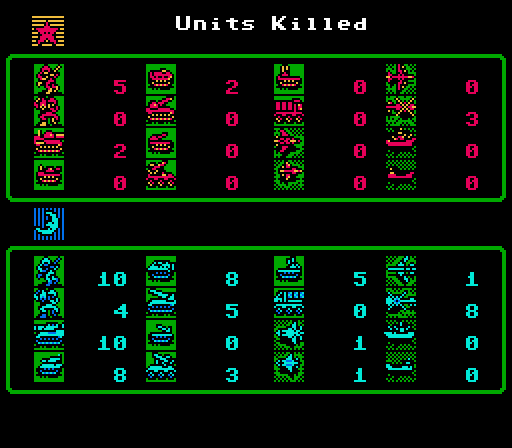 We lost a few more units in the final push once the conclusion was no longer in doubt, but still a pretty good ratio here. (This snap was taken at the start of the turn, before Blue's last few units were killed.)  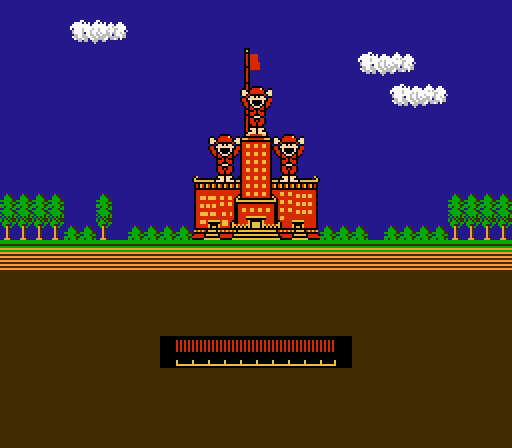 Victory! 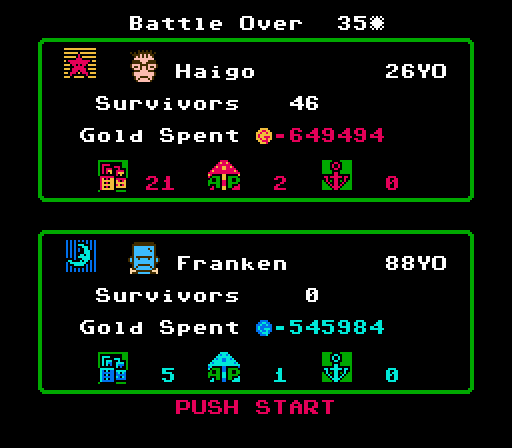 Not sure what our CO "Haigo" refers to; I guess it means "back" or "rear end" in Japanese but I don't really see it. The enemy CO is a bit more obvious, looking like Frankenstein's monster. Notice how we did eventually surpass Blue in total income, even though we never really caught up in total units built, since we spent so much more of our funds on repairs.  There are 15 maps on the map selection screen in this game, and we've just completed the last one! And with a slightly above average score, no less! The challenge was pretty fun for me this time, forcing a mostly ground-assault strategy. Hopefully you enjoyed it as well. Now, before we wrap up this LP...  We actually get a special bonus map upon completing every map in the selection screen! 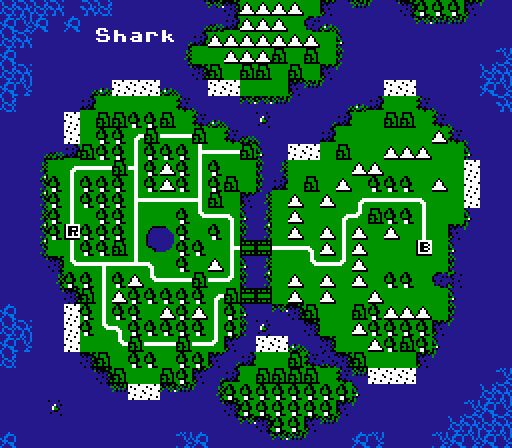 We're left on the selection screen here, but with the new map as our only option (moving up or down doesn't do anything). So next time, we'll take a look at the Shark map!
|
|
#
?
May 6, 2022 04:15
|
|
|
That is a biiiig lookin' map.
|
|
#
?
May 11, 2022 04:13
|
|
|
Part 46: Unit Overview: Battleship Like the heavier air units, battleships don't show up in any animations. Basic Info: pre:Cost 28800 G Movement 6 Move Type Ship Fuel 99 Ammo 6 Ammo Cost 6 G Range 3-5 Special Cannot attack after moving; cannot counterattack pre:Opposing Unit Damage Dealt Damage Taken Infantry 8.5 0.5 Mech 8.5 0.5 Medium Tank 8.5 1.5 Tank 9.5 1.5 APC 9.5 0.5 Rocket 8.5 1.5 Artillery 8.5 1.5 Supply 9.5 N/A AA Missile 8.5 N/A AA Tank 9.5 N/A Fighter 6.5 0.5 Scout 7.5 0.5 Bomber 6.5 4.5 Copter 7.5 0.5 Battleship 4.5 4.5 Lander 7.5 2.5 Battleships are the super units of this game. For a very heavy price, they can wreck literally anything they come across except another battleship. They also don't take a lot of damage from anyone except bombers and other battleships. Send out a few, position them right, and let them wreak havoc on your enemies. Their only limitation is that they can only move on water, but their range still lets them be useful in ground bombardments in most maps.
|
|
#
?
May 14, 2022 05:15
|
|
|
Oh yes, I didn't mention which upgrade I'd take did I? I'll take the platinum upgrade.
|
|
#
?
May 15, 2022 14:38
|
|

|
Marluxia posted:Oh yes, I didn't mention which upgrade I'd take did I? I'll take the platinum upgrade. Hmm I've found a flaw in the system. I have the gift certificate but can't message it to you since you don't have the platinum upgrade yet. It's a circular loop! Maybe, uh, encode your email address here somehow?
|
|
#
?
May 16, 2022 01:30
|
|
|
I did wonder if this was going to happen, yes. You can send it to throw9876away1111@gmail.com No need for encoding, it is what it says it is.
|
|
#
?
May 16, 2022 02:12
|
|
|
Marluxia posted:I did wonder if this was going to happen, yes. You can send it to Ha, clever. Sent it just now, let me know if there are any issues.
|
|
#
?
May 16, 2022 03:23
|
|
|
No issues. Thank you.
|
|
#
?
May 16, 2022 04:25
|
|
|
Part 47: Shark (1 of 2) Welcome to hell everyone. This "bonus map" does not pull any punches. 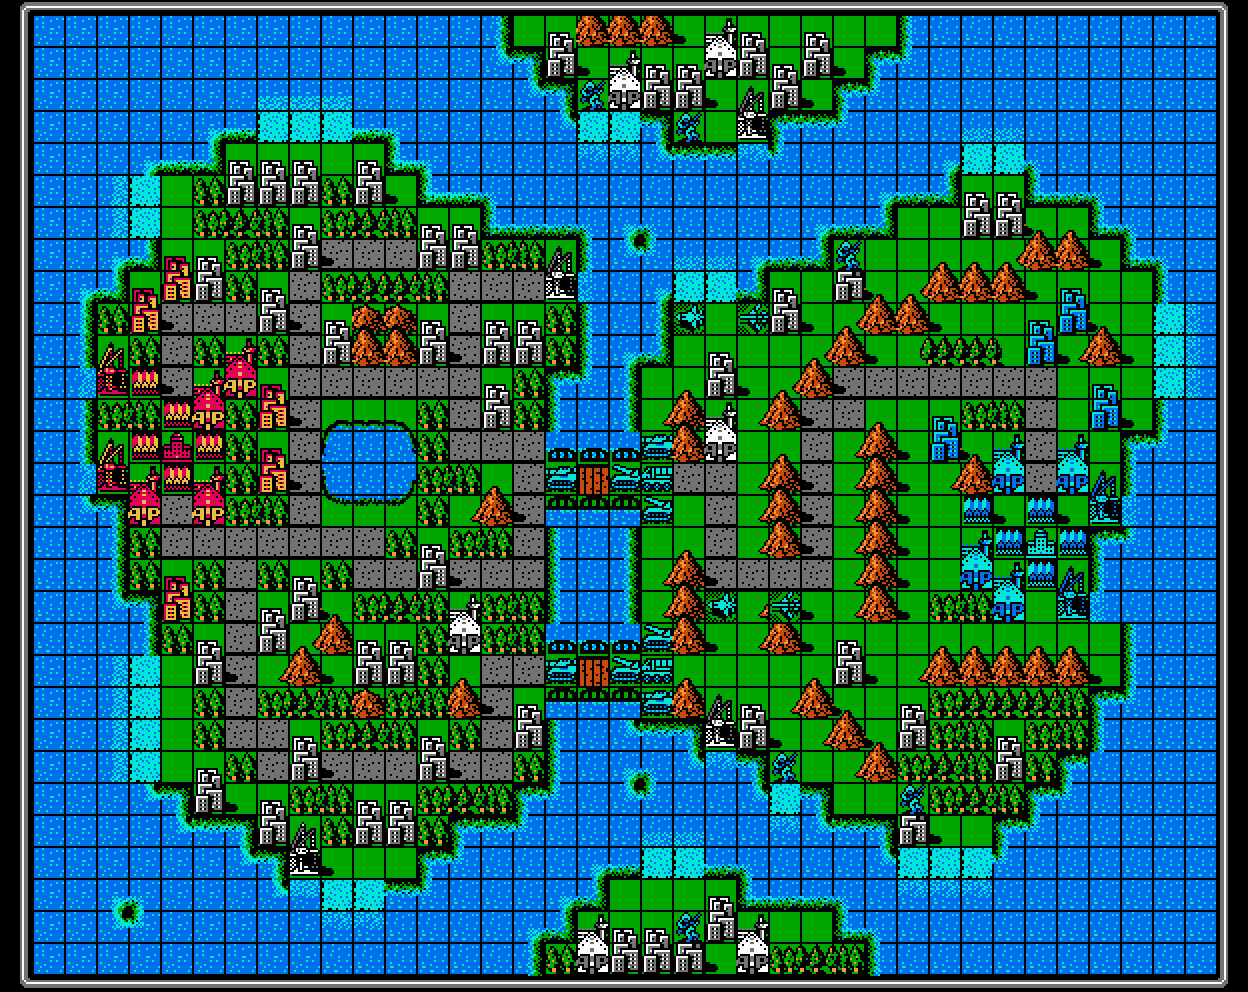 So, let me get this straight. You're telling me that this game had the ability to start the map with a bunch of units already out there, and chose not to take advantage of that capability until the bonus post-game map? And look what's out here - four medium tanks, four rockets, two bombers, two fighters, and two supply trucks just in case we survive long enough for the vehicles to run out of ammo. Waves of death headed for us when we have nothing out there. And to top it all off, Blue also starts with six infantry already in prime capturing territory. This map might be the most unfair setup I've ever seen. Buckle up, this one is going to be rough. Turn 1 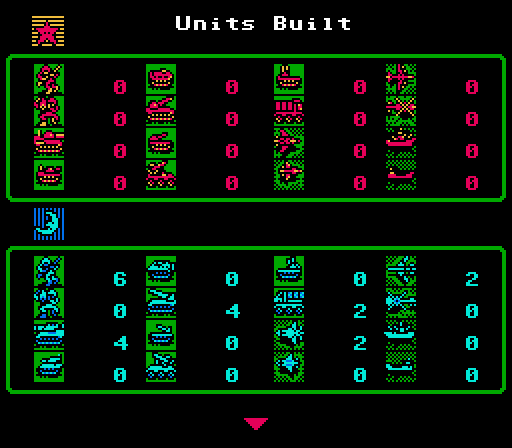 I wanted to check and yes, the stats screen counts all those pre-deployed units as "built". Mostly I just wanted to complain again. To put that in perspective, that's 212,000 G in free units (about ten turns' worth of income), combined with several turns' worth of positioning. Basically Blue got to take ~6-10 turns in advance while we sat around not only not doing anything, but not even accruing income. Okay, I'll calm down now.  Honestly this advantage wouldn't be that bad if it weren't for the positioning of these units. But we don't even have time to respond properly. Those planes will be here in two turns and we need to scramble to meet them now. Oh and the medium tanks will be here in three turns and we won't have the funds to properly handle those by then. I also throw out a few infantry who will alternate between masquerading as speed bumps and trying to sneak in city captures.  Here they come...  I pay almost no attention to what the AI chooses to build in the early turns, since the start of the map is really just a scramble to survive the initial waves of death coming for us. But Blue starts off with enough income for a medium tank or a bomber every turn, and will capture at least six properties every two turns until they're all gone. By the way, this enemy phase took a full five minutes to play out, and it only gets worse from here. This map was just a nightmare to play through. Turn 2 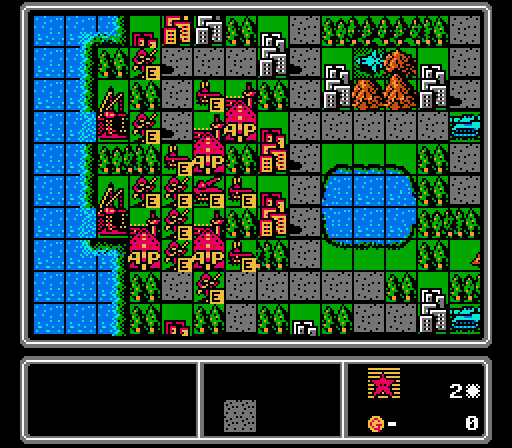 Positioning our AA tanks for the arrival of the enemy planes, and putting out our first rocket to help deal with the incoming medium tanks. We also get a fourth AA tank, because there are four planes headed for us, and a few more infantry.  I was wrong, the medium tanks actually get to us at the same time as the planes. The rocket can hit one of them but the other is going to go after our AA tanks, and there's nothing I can do about it. The fighters actually reach our infantry so I'll be sending the AA tanks there while I still have them.  Blue puts out a bunch of cheaper units, good for us. Another five-minute enemy phase, by the way. Turn 3 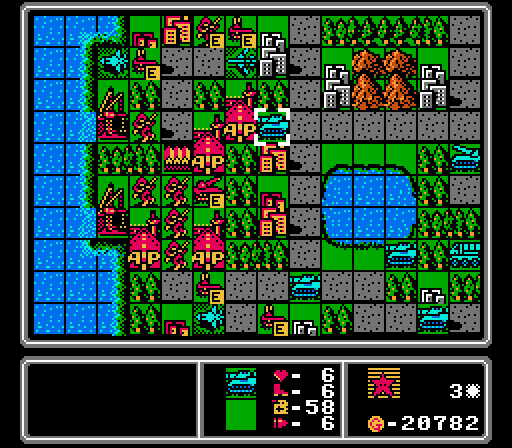 The AA tanks go after the fighters and bombers, so all of the enemy planes have now taken enough damage that they'll retreat on the enemy phase.  Next step is handling the medium tanks, for which I build a bomber and build a wall of infantry around our rocket. 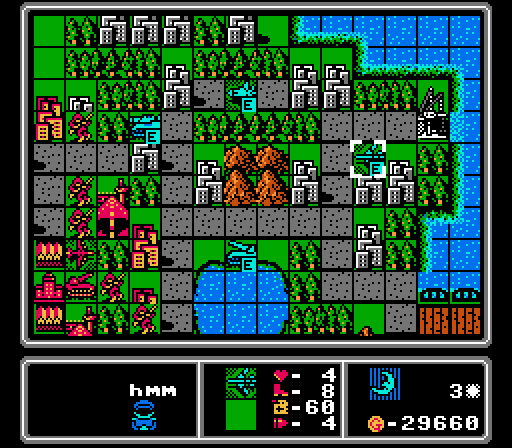 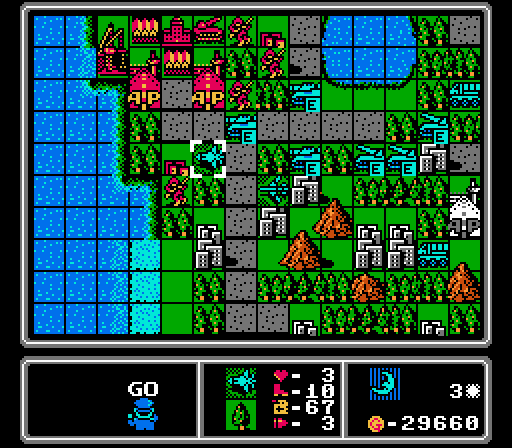 The enemy planes retreat as expected, but the medium tanks are able to wipe out three of our AA tanks in return. They're exposed now, but those rockets are coming up fast. We need to deal with the medium tanks before the rockets get here. 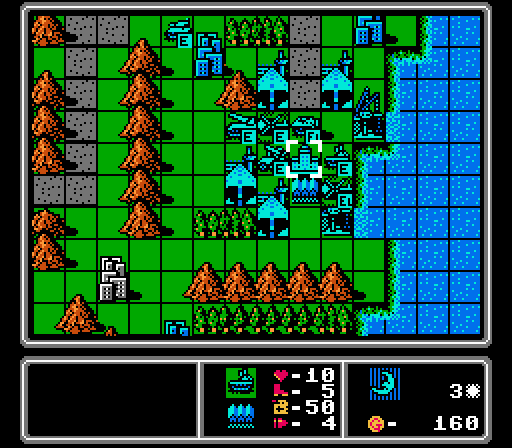 Blue builds some more expensive units this time, but luckily no planes still. Enemy phase took 5.5 minutes this time.... Turn 4 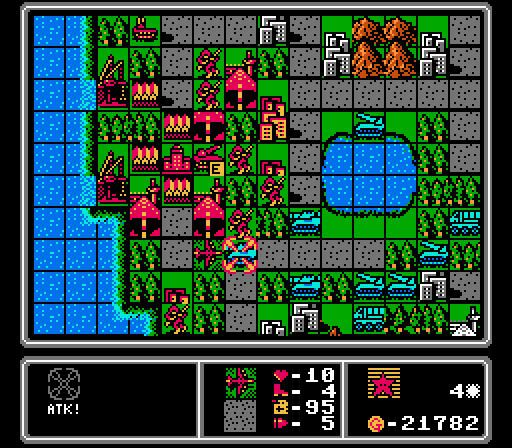 We start the turn by having our rocket and bomber remove this medium tank. I opted to get rid of one medium tank entirely instead of weakening two of them, just to limit the number of attacks that the AI can make on the enemy phase. 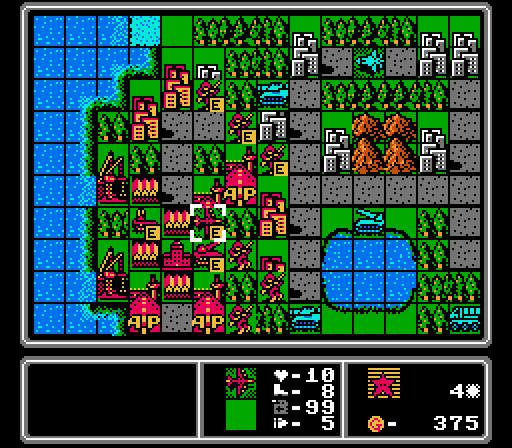 We get another bomber and keep up two smaller separate screens of infantry this time. Our remaining AA tank also moves back behind cover.  The medium tanks and the one rocket in range spread their attacks out over multiple infantry. That'll slow down our captures later but keeps the screen intact and preserves our rocket, so it's a good trade for now. 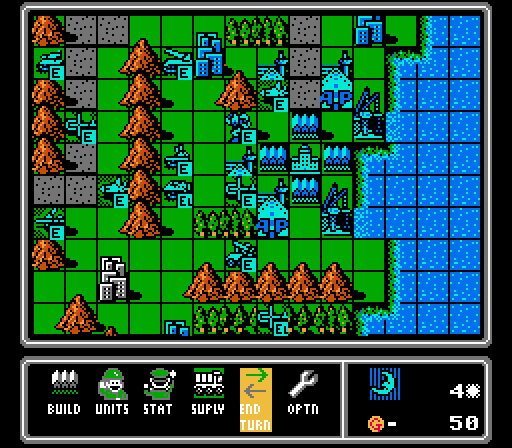 A new fighter will cause trouble. The damaged planes are going to be repaired soon as well. I'll need some more anti-air units going, but first we have to get a safe zone established around our HQ. Enemy phase took another 5.5 minutes here. Turn 5  Here's an important moment - we finally capture our first city. We need to start churning out our own planes here, and need every scrap of income we can get. 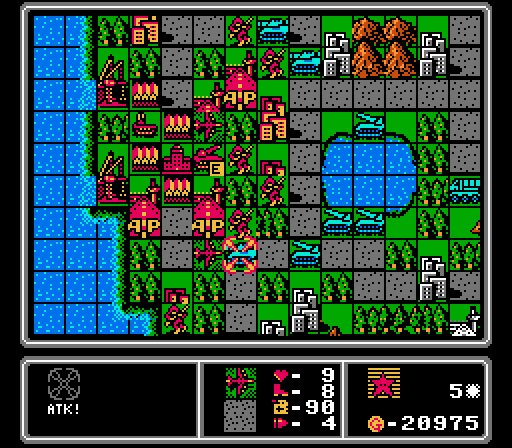 The same rocket+bomber combo removes another medium tank. 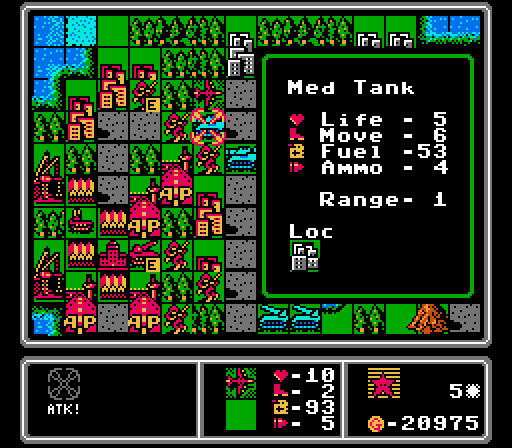 This medium tank took a hit from a rocket a couple turns ago, and our fresh bomber is able to finish it off despite the defensive bonus from the city. Just one medium tank left...plus the four rockets...plus everything else the AI has been able to freely build since the start of the map....  There are more enemy planes coming, but we need more firepower for the rockets first, so we put out another bomber. Our infantry are still protecting our rocket, but all four enemy rockets are in position to fire upon us now. 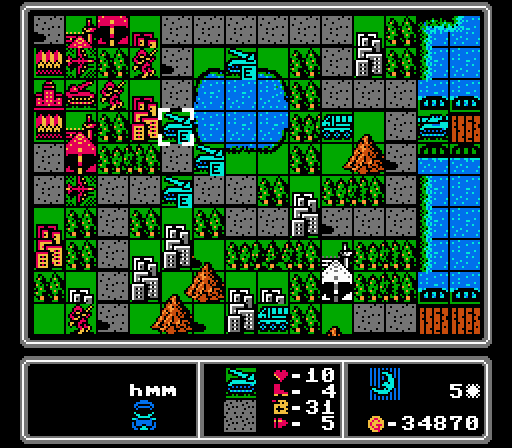 We lost one infantry to a pair of rockets, and two others were injured by another rocket and the last of the initial medium tanks. The fourth enemy rocket lost its only available target (bad planning from the AI I guess) and rolled forward instead.  That's a new scout alongside an old bomber that made it back for repairs. The two damaged fighters also merged together, so they'll head back our way soon. Another 5.5 minutes for that enemy phase. Turn 6 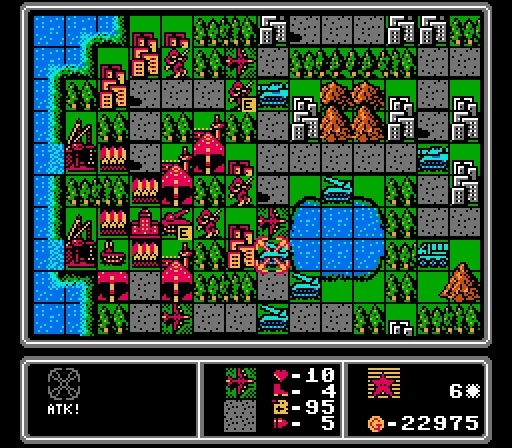 Another rocket+bomber duo take out the first enemy rocket.  Two other bombers took some recoil damage from the medium tanks last turn, so can't quite finish off the second rocket. 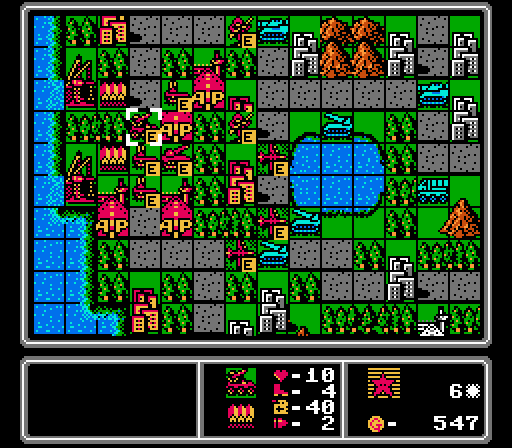 Getting ready for the next wave of planes.  I didn't notice that the medium tank could reach our infantry up here. 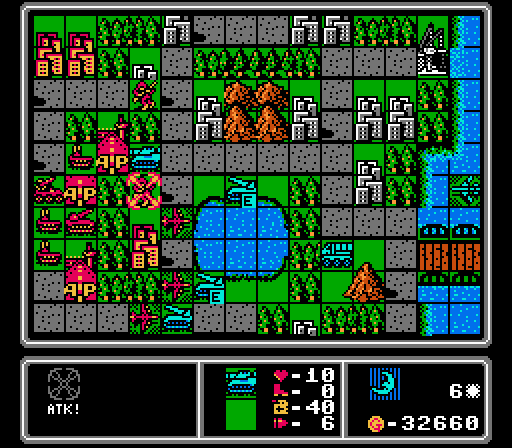 Another medium tank has arrived and kills off our infantry that had just taken two rocket barrages. This medium tank is the one that Blue built back on the first turn, so we're dealing with fresh reinforcments making their way over now, even as we try to fend off the last of the AI's starting waves. 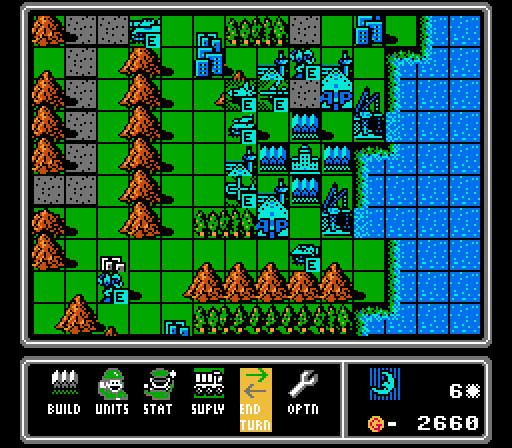 The merged fighter kept retreating but Blue built a new bomber alongside some other trash. Enemy phase was 6.5 minutes this time, lots of enemy units to move around and lots of time spent thinking about it. Turn 7 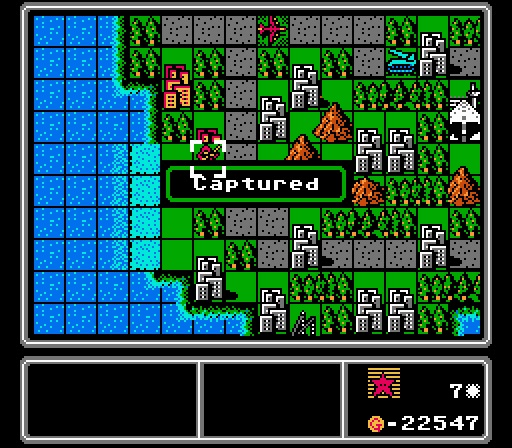 We got a second city! Sure, Blue has grabbed 18 properties by now, but every little bit helps us here.  The new medium tank falls to another rocket+bomber burst. Now to see if I can protect that bomber from the enemy fighter hovering over the lake.  Apparently I gave up on protecting the bombers, in favor of wrecking another rocket. That fighter can only get one of us!  We've got a bunch of anti-air units (including a new fighter) ready for when that fighter comes at us. They'll help for the scout that's right behind it, too. 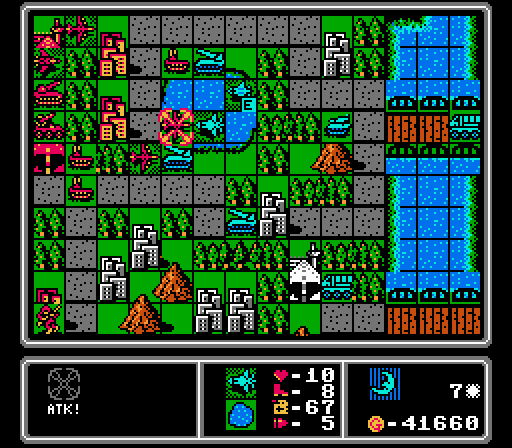 We lose the bomber, as expected. But we're well positioned for a counterattack next turn.  Blue built a battleship. That's great news for us - the AI has no idea what to do with battleships, so all that money is just going to sit there. Just six minutes on the enemy phase this time! Turn 8  Our AA missile takes a shot at the fighter and our fighter goes after the scout. Both planes will now retreat again. I could finish them off with our AA tanks, but I'm reluctant to expose them to enemy fire. 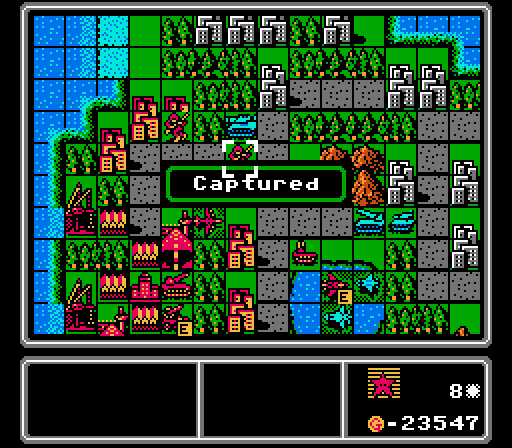 Despite getting attacked multiple times, our infantry manages to finish off this capture. 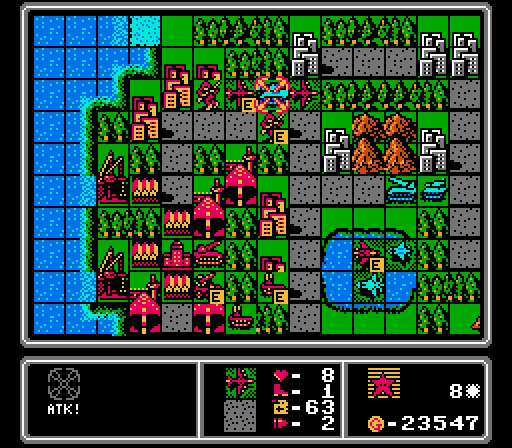 I really need to get some more captures going, so our bombers take out the last medium tank in the area to keep our infantry safe. 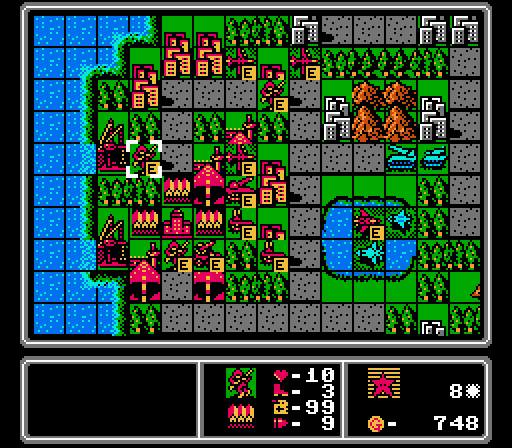 With the enemy planes under control for the moment, we put out another bomber for vehicle deterrence and a couple more infantry to replace our recent losses and speed up our capturing. 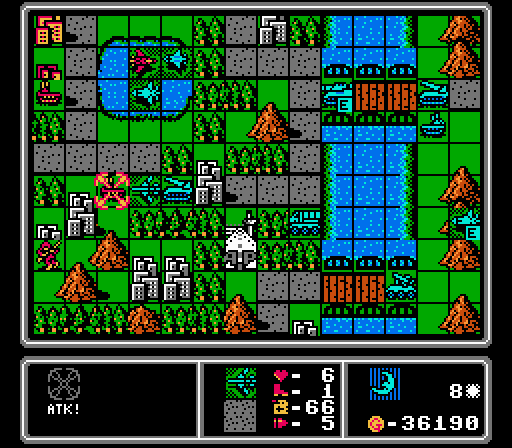 For some reason this damaged bomber flew at us again and killed itself on our AA tank. I'll take it!  Afterwards Blue retreats its damaged units, leaving the lower region open. At least, if it weren't for that fresh bomber threatening the area.  Five new vehicles for the AI; one a medium tank but otherwise nothing special here. Almost seven full minutes for the enemy phase this turn. Turn 9  Every capture is crucial now, giving us a little wiggle room to keep putting out planes and sneak in a few repairs.  We take advantage of the rare lapse in pressure from Blue to send three bombers and a rocket after the enemy tank and rocket here. Neither are destroyed but both will retreat now. 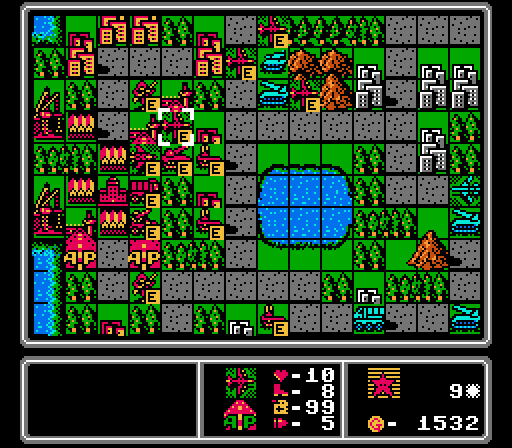 Our fighter could've gone after the enemy bomber, but there was an AA tank nearby that would've shredded it on the enemy phase, so instead we sit back and wait. Oh and we get another bomber, because we really can't have too many of them. 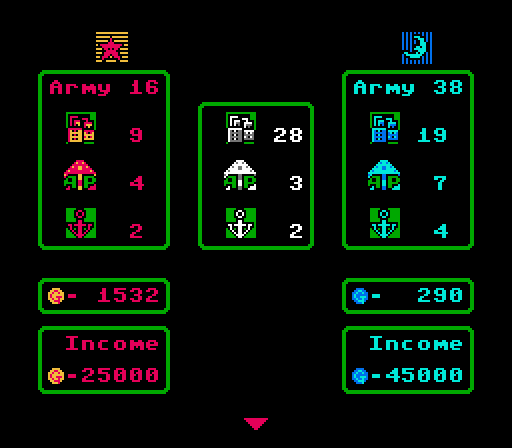 We've captured four cities in nine turns, probably a record low for this LP, but we've had other concerns up until now. In just eight turns, Blue has actually taken three airports, two ports, and a whopping 15 cities. We've got a lot of catching up to do, but I think we can play efficiently enough to make up a 2:1 income advantage, as long as we don't let it get beyond that. (I may have had three prior runs totaling eight hours that did not go nearly this well to this point.) 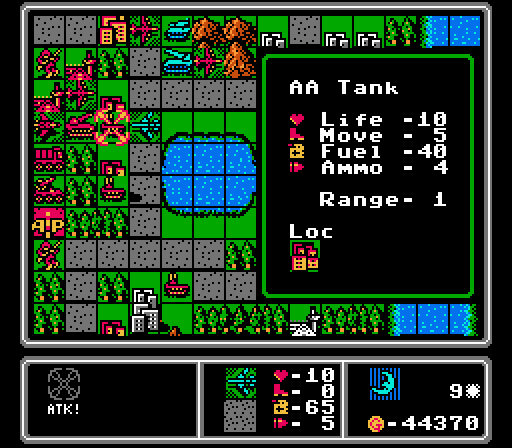  The AI sends another bomber straight into the teeth of a fortified AA tank. We'll repair half of the damage for relative pennies next turn and have an easy time finishing off that isolated bomber now.  Another bomber aborts its repairs and heads our way, but it'll be easy pickings for our fighter. 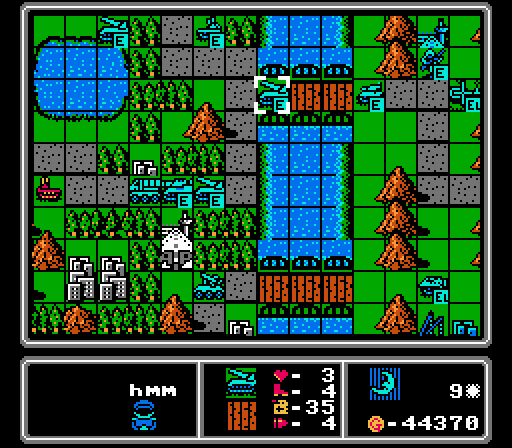 While the damaged units retreat, there are three new heavy vehicles that have crossed over now - a medium tank, a rocket, and an AA missile. Right behind them we have some loaded APCs and copters that are going to start grabbing properties on our island, and we absolutely have to minimize what they can take there. 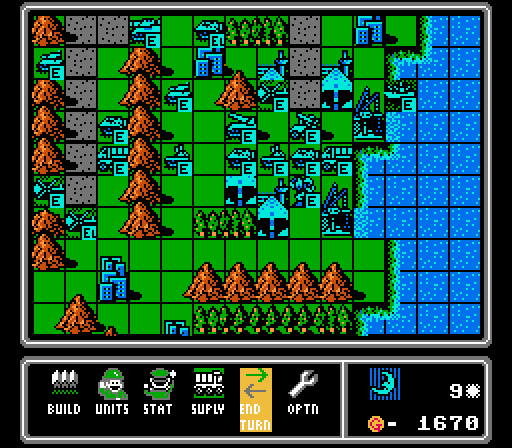 Seven new units for Blue, including another rocket and AA missile. They're actually getting close to the unit cap now, which means every cheap unit they throw out is a win for us. The enemy phase runtime ballooned up to eight full minutes this time, as the battlespace gets more crowded and more complicated. Turn 10  I missed this repaired fighter headed back towards us already. We'll have to be careful in how we move our bombers this turn. Might be a good time for them to head back for repairs, actually.  After our AA missile shoots down the damaged bomber, our rocket finishes off the damaged rocket, opening up some breathing room for our ground troops.  As promised, our partially-repaired fighter picks off this bomber before it can do any further damage to us. That's three bombers down in three turns, each with minimal damage to us, a pretty big funds swing in our direction.  Two bombers head back for repairs, two others lurk near the heavy vehicles headed our way, and we build a fifth just because. 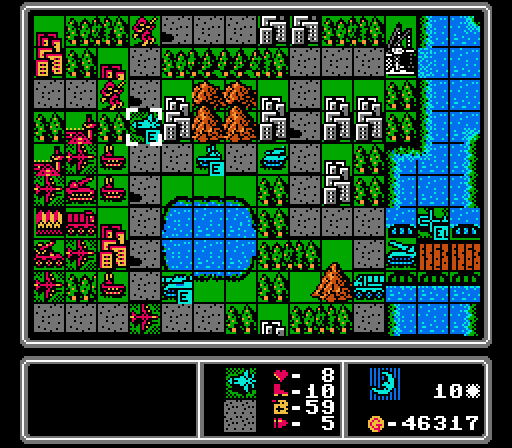 The mostly-repaired enemy fighter wanders helpfully right up to our AA tanks and presents its soft belly for us. Up offscreen a partially repaired scout does the same thing, stopping right next to our fighter.  Ugh, a new fighter and a new scout. I'll have to shore up our anti-air units again. Total enemy phase runtime this turn: 8 minutes, 45 seconds. For reference, I only have space for 200 minutes of footage at a time, and the player phases take me some time to work through as well. Turn 11 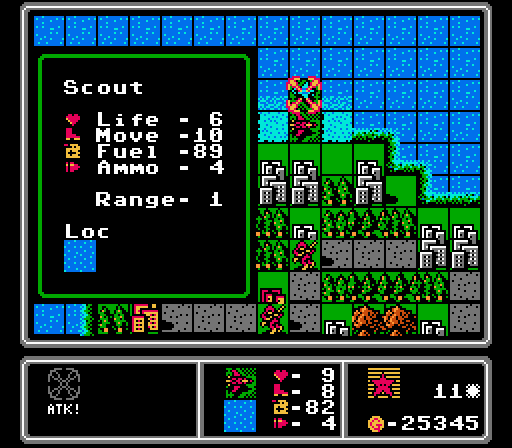 Second turn in a row that an enemy plane, that really could've used another turn of repairs, instead wandered into fighter range and got sunk off-shore. I'll take all the help I can get at this point. 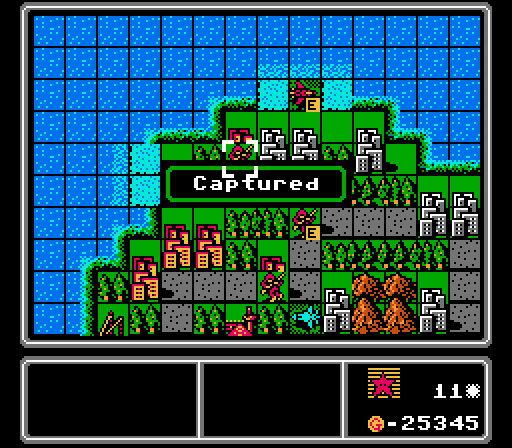 We also grab two more cities in the upper half of the island.  Our AA tanks quickly dispose of the fighter, while our rocket takes advantage of the enemy AA tank rolling into range. 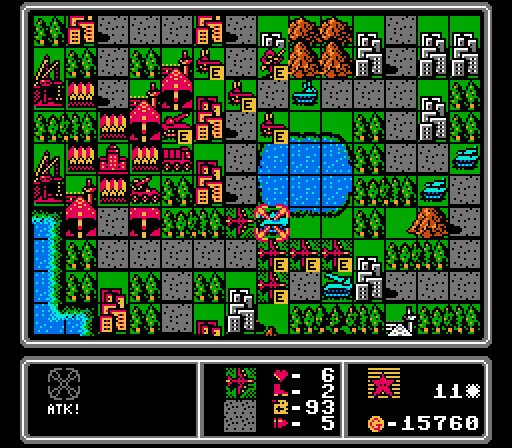 Bomber swarm! We take out the AA missile and hit the rocket and medium tank, but two of the bombers were too damaged to finish off the medium tank. Still they're forming a blockade on one side of the lake, while a wall of AA tanks are screening the enemy AA tank on the other side. 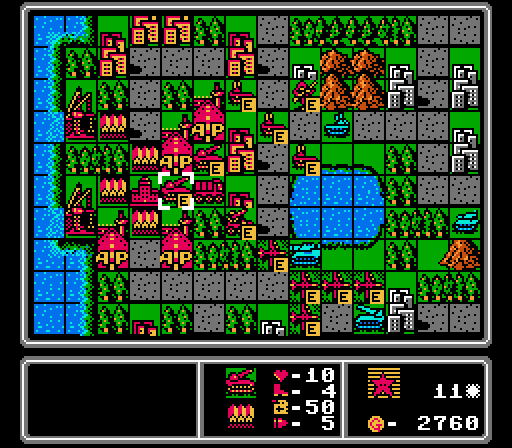 We spent a good chunk of our income this turn repairing units (particularly a couple of bombers) so use the leftovers on a second rocket. Having enough indirect fire support will be key to pushing out to take the rest of the island.  Ugh, we have a mech taking a city on our island and an infantry just dropped off to do the same. And the new fighter and scout will keep our bombers from getting close.  Another turn of annoying vehicles getting built - a medium tank, a rocket, an AA missile, and an AA tank. And the enemy phase "only" took 7.5 minutes this turn, too! Turn 12 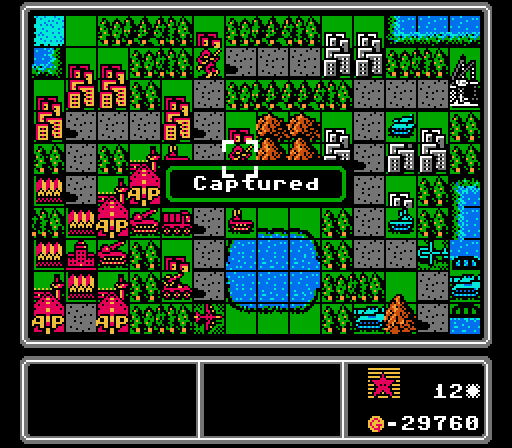 Snuck in a capture of this mountain city after driving Blue back the last couple turns. 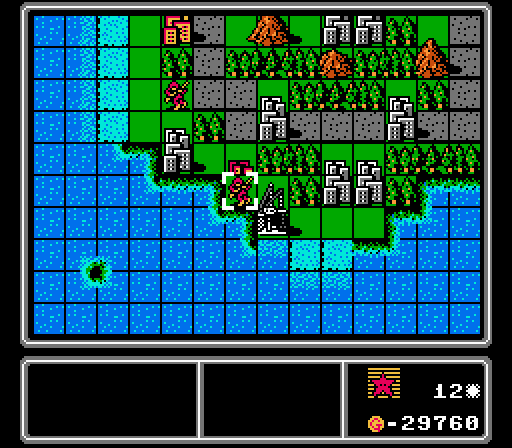 We also grab our first city on the lower shore as we race Blue to grab properties in this area.  We've gained four cities in the last three turns, a much better pace. In the same period, Blue took two airports and three more cities, but we're still avoiding getting doubled up on income. 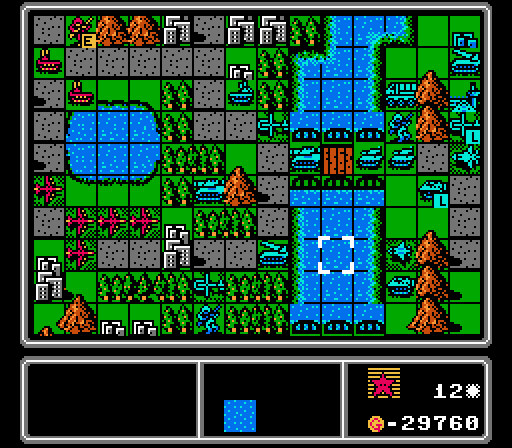 I could use some medium tanks here to press our ground advantage. The bombers are going to have to retreat in the face of the fresh fighter+scout pair there. 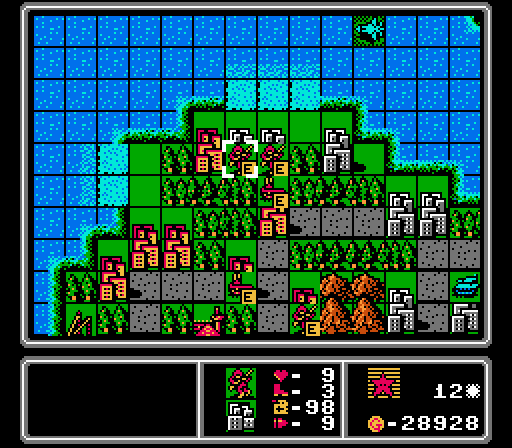 Another fighter that's only partially repaired wandered over, and I bait it in further with a couple of capturing infantry backed up by a somewhat-fresh AA tank.  I thought about getting another fighter here, but decide that our current anti-air defenses are sufficient. Instead we get a medium tank to support an advance, and then I end up getting an AA missile anyway with the leftover funds. Our bombers are safely out of the way (two of the more damaged ones actually merged together on the airport), and our rockets tentatively roll forward on the upper lakeshore road. To be fair to the AI, this turn took me nine minutes to play out, trying to micromanage every move so carefully, so the map drags on both ends.  Bad news for us - the enemy fighter and scout only partially advance, providing cover for their footsoldiers to keep capturing properties on our island. We're going to have to get a bit more aggressive here.  A bomber and a medium tank for the AI, saving the rest of the funds for later. Not much action this turn so only a 6.5 minute runtime here. Turn 13  To start we use the pre-positioned AA tank to dispose of this damaged fighter. 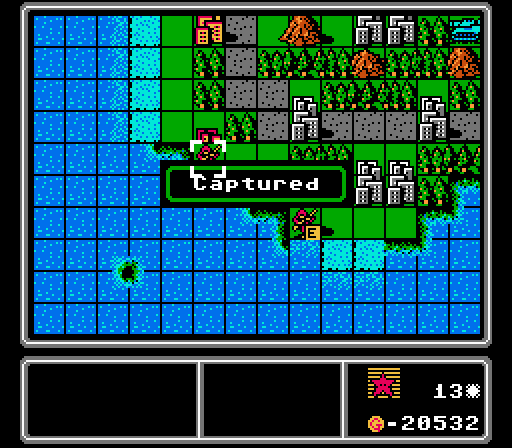 Just another city capture. 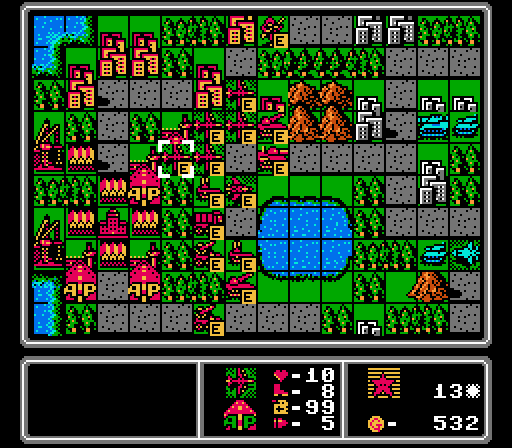 More dancing around, clustering our bombers in a safe pocket and trying to extend from our HQ area a bit. We built a new bomber to replace the one we lost from merging units last turn, getting back up to a wing of five full-strength bombers in waiting here. 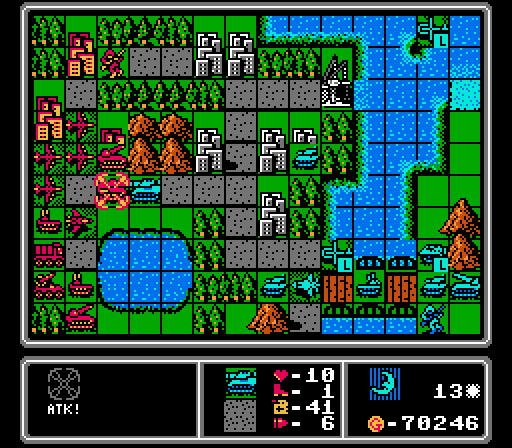  Our medium tank gets in the action right away, drawing in and holding off an enemy medium tank.   The enemy fighter also gets baited in, attacking our fighter.   The enemy scout stays away to harass a capturing infantry instead. I really wanted that port!  There are six enemy footsoldiers on our island now. Need to get that under control.  With the light action the last couple turns, Blue is up against the unit cap now. They're flush with cash but only build a rocket. More going on with all the troop movements and attacks this turn, as the enemy phase ran for 8.5 minutes. Turn 14 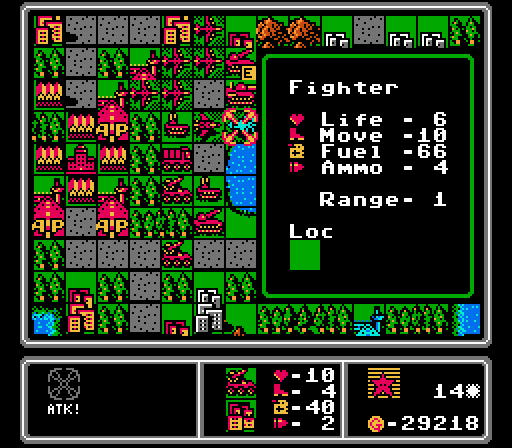 Our AA missile quickly removes the fighter. 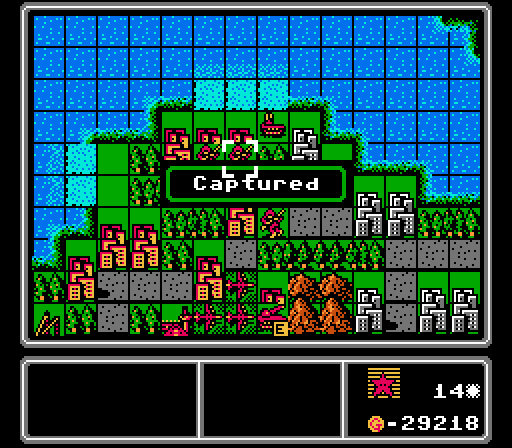 Two more city captures. Our income is giving us a little more breathing room now to put out the units we need each turn and still do some repairs. 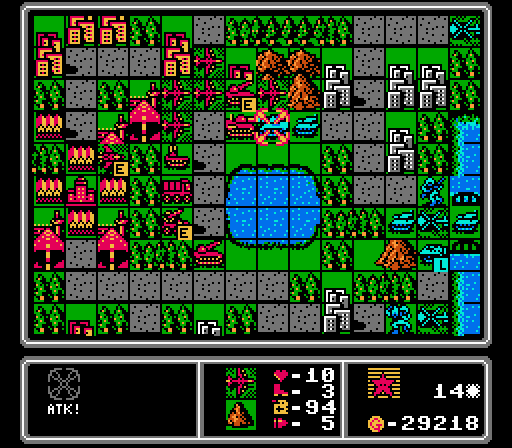 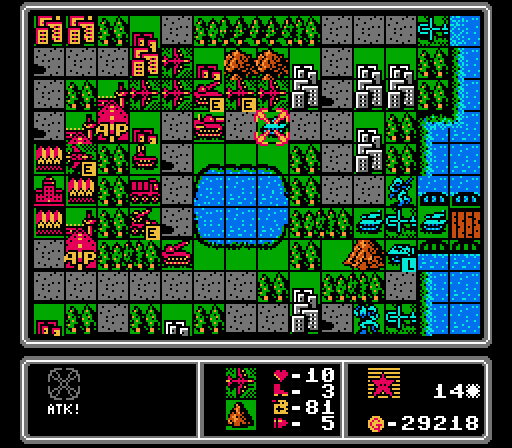 While the scout is distracted on the lower shore, the bombers can run wild around the upper half of the island. The first two quickly finish off the medium tank and tank here (with an assist from the rocket). 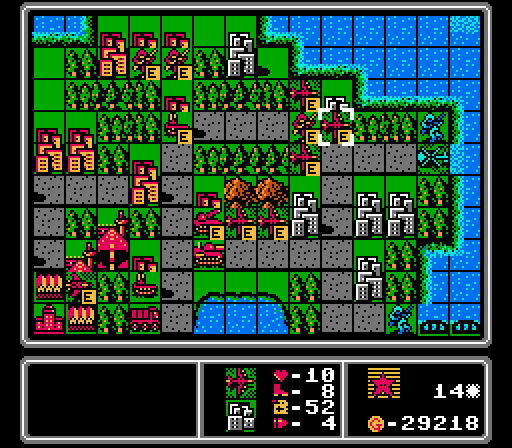 The other three bombers can't actually reach anyone to attack, so run a screen for a capturing infantry instead. 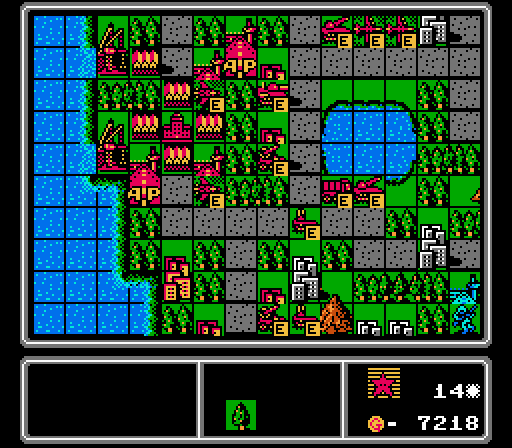 We send an AA tank and an AA missile after the enemy scout, and build a new fighter to either run it down or fend off the bomber headed our way.  The scout retreats, I'm not really sure why, but there's a medium tank in the area now to ruin our day anyway.  Well there's a triple threat for you. Blue puts out a fighter, a bomber, and a medium tank. And another 8.5 minutes goes by on the enemy phase. (You're probably tired of hearing about it; at least you're not the one sitting through it!) Turn 15   We start off with a couple more captures, this time getting a city and a port. 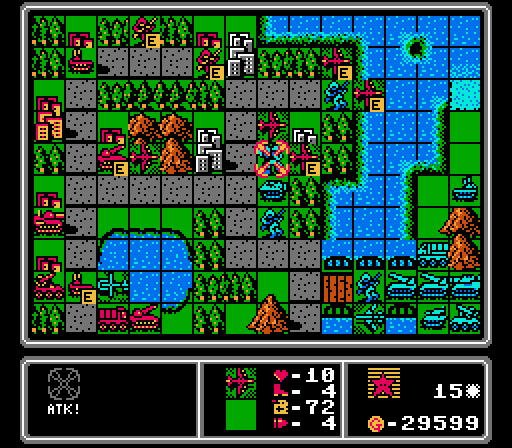 It's not the most efficient use of bombers, but I can't let Blue get a foothold on the upper half of our island when they already have a heavy presence on the lower half. And the enemy scout is denying our bombers access to the rest of the island at the moment anyway. 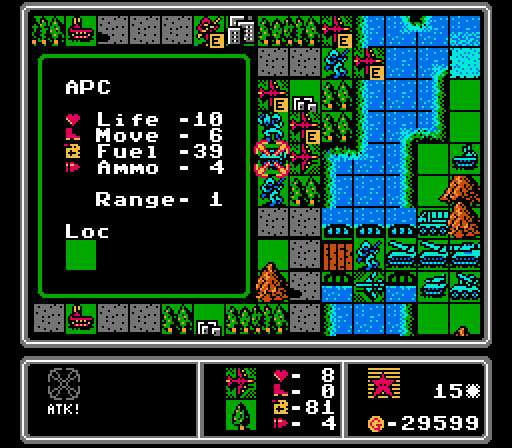  I know the bomber was already in some disrepair going into this attack, but how does it make sense for an APC to take off three Life from it? 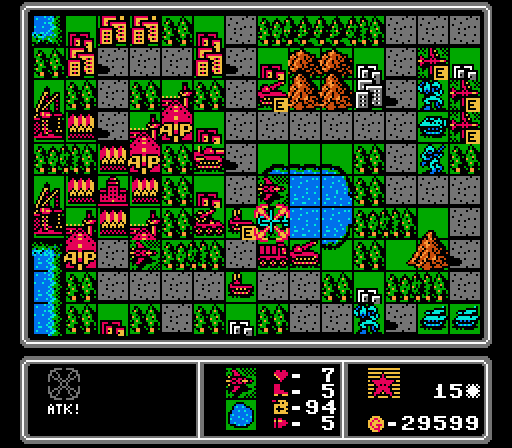 This copter is annoying and hurt our supply truck last turn, so I have an AA tank and a fighter remove it.  With more enemy planes on the way, I figure it's time to put out another fighter. Our new fighter from last turn takes point out over the lake, daring the enemy bomber to come closer.  The medium tank comes out to mess with our capturing infantry, as Blue completes two more captures on our island. 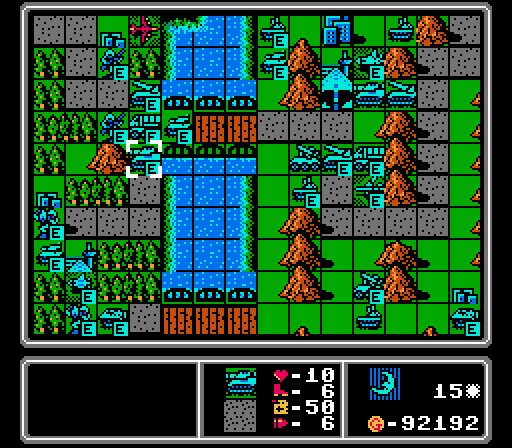 More reinforcements cross the bridges into our territory. The scout annoyingly retreats to an airport that Blue owns on our island, while the new fighter and bomber lurk just out of reach. 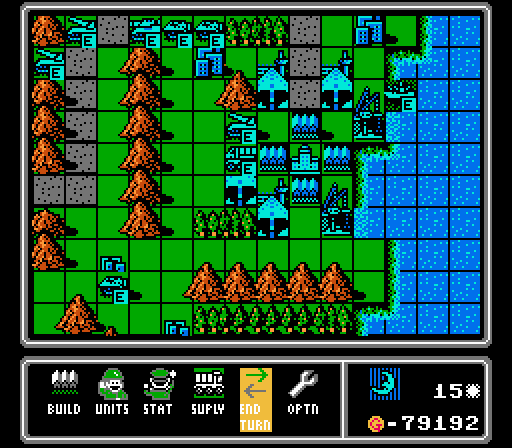 I'm not killing enough of Blue's units again, as they're stuck building only a rocket. Just about 8 minutes, 15 seconds for this enemy phase. Here's the first point where my hard drive filled up - about 200 minutes of footage to get through 15 turns, 102 of which were spent just watching the AI think and move around without my input. It's like a bunch of long boring cutscenes! Okay, I'll stop now. Turn 16 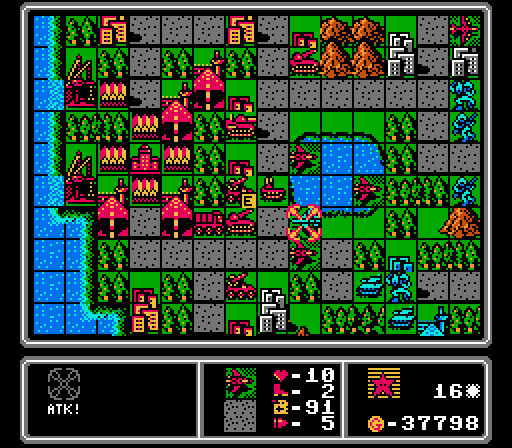 That bomber got awfully close, but an AA missile and our new fighter quickly get rid of it.  Two other fighters team up to take out the scout that had been lurking around. 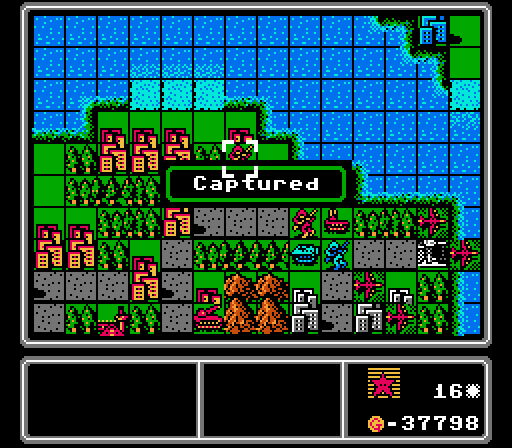 Still celebrating every capture. We've got most of the upper shore under control now.   To that end we have a rocket finish off an APC, and a damaged bomber kill off an infantry. 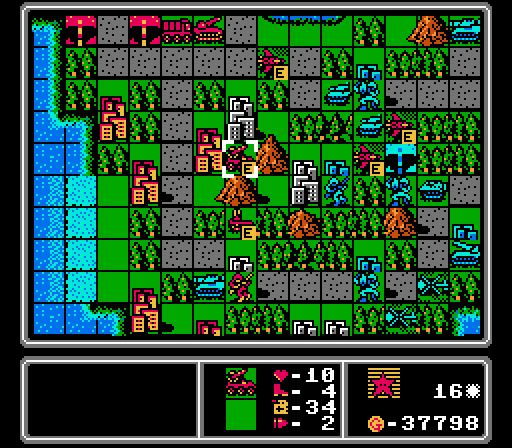 The lower shore is still crawling with enemy units. We move some anti-air forces down to try and scare off the copters and protect our lone remaining infantry in the area. 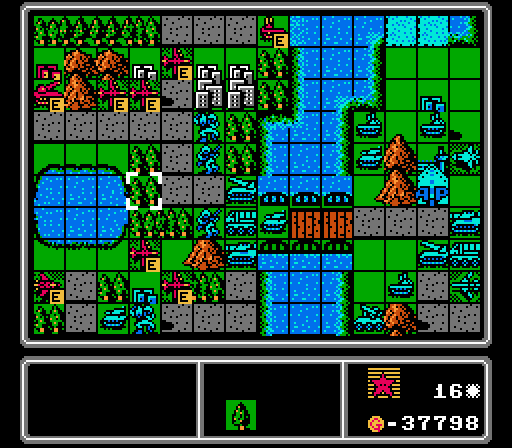 Our bombers re-arrange themselves to stay away from the enemy fighter while still remaining nearby.  We get another medium tank and rocket, and a small horde of infantry with a copter to carry one of them away on a special mission.  For some reason I thought positioning the AA missile was worth throwing away a supply as a screen. At least that tank is going to get chewed up next turn I guess.   One of the copters comes after us anyway, but our infantry hangs on. The other copter can't reach us after the medium tank got in the way. 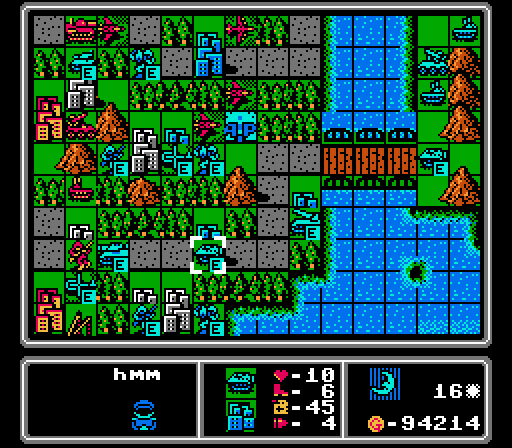 There sure are a lot of enemy footsoldiers on the lower half of our island now. Is this what losing looks like? 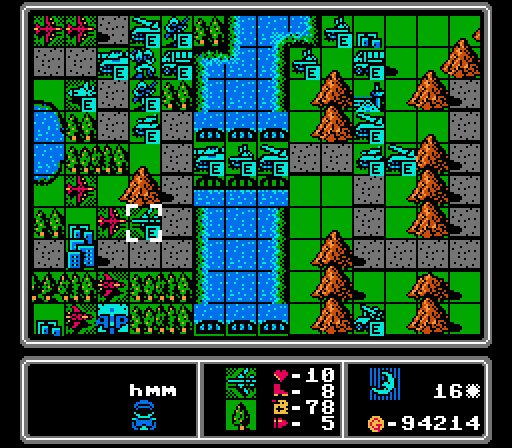 The upper half of the island is suddenly looking more concerning as well. 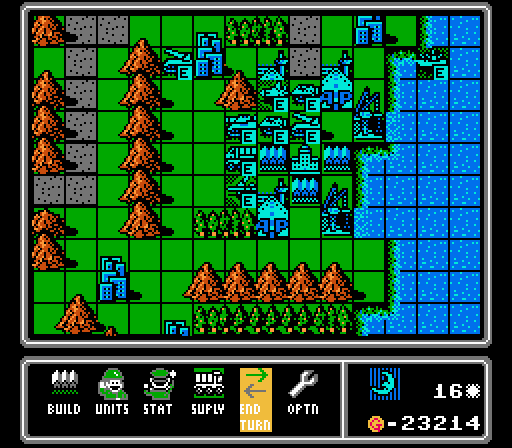 Fighter, bomber, medium tank, rocket. Probably the worst-case combination for us. Turn 17  We need to blunt this advance. An AA tank is able to reach the fighter and mostly neutralize it, allowing our bombers to stay in play. One wipes out this damaged rocket, while our own rocket fires on the nearby medium tank.   Grabbing two more cities will help keep us afloat.  The enemy copters buzzing around are entirely too effective at crippling our capturing infantry, so an AA tank goes after the lower one while the AA missile targets one near our fighters. 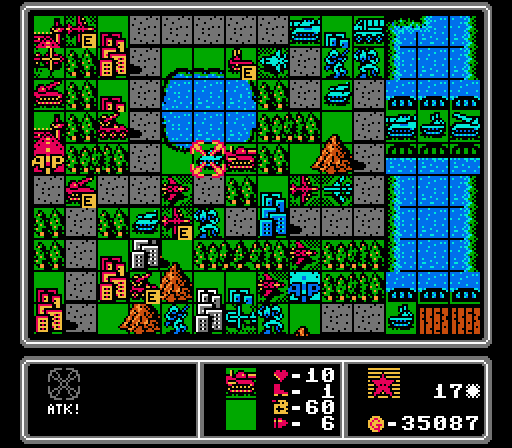 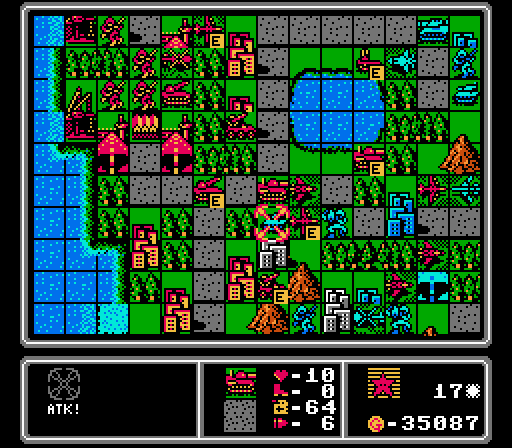 We finally get some action for our own medium tanks, as each one finishes off an enemy tank (that were weakened by a rocket or bomber strike first). 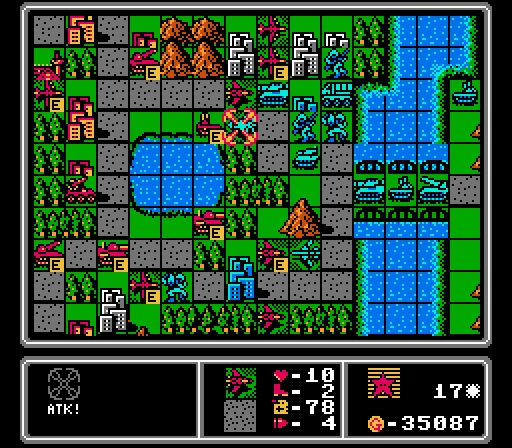 Our healthy fighter flies up to finish off the enemy fighter, while our other fighters harass the bomber that flew over and finish off one of the damaged copters from earlier in the turn.  We set up another aircraft screen on the upper road, then build a medium tank, an AA missile, and two copters for hauling infantry around. 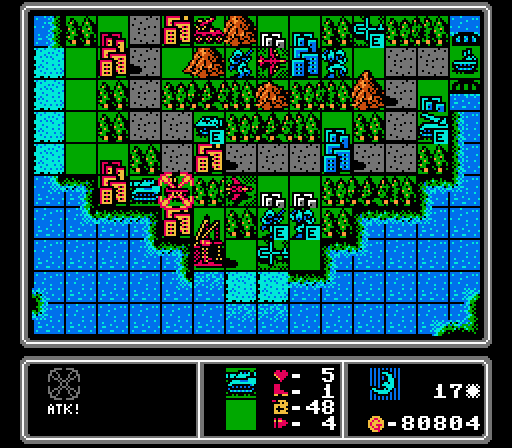 We lose our infantry to an enemy APC and then our AA tank takes a hit from this medium tank. Way too much Blue in this region still.  I parked this AA tank here to try and keep that enemy copter away (and the infantry it's carrying), and got surprised by another medium tank attack. With our AA tanks all taking hits and endless waves of enemy planes still coming, I think we'll need to put out some more soon. 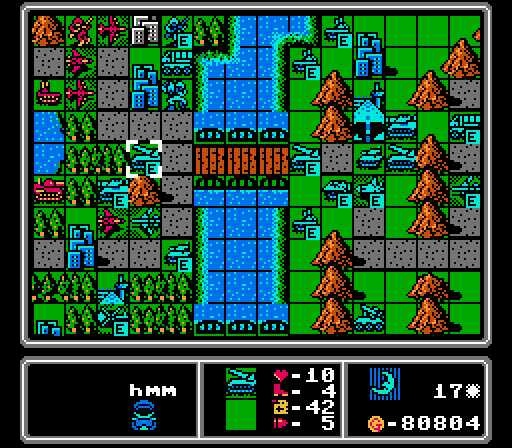 More heavy vehicles cross over into what is supposed to be our territory, as the two new planes lurk in striking range. 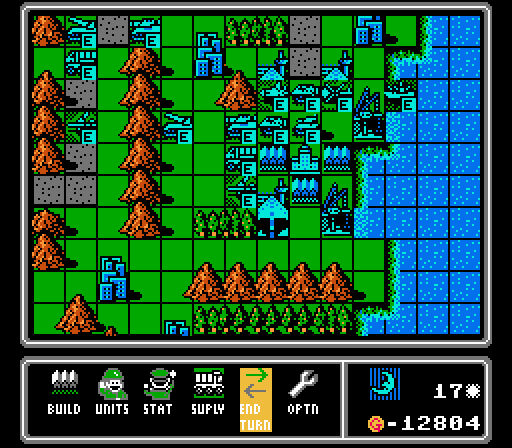 Yup, definitely need more anti-air support. Turn 18 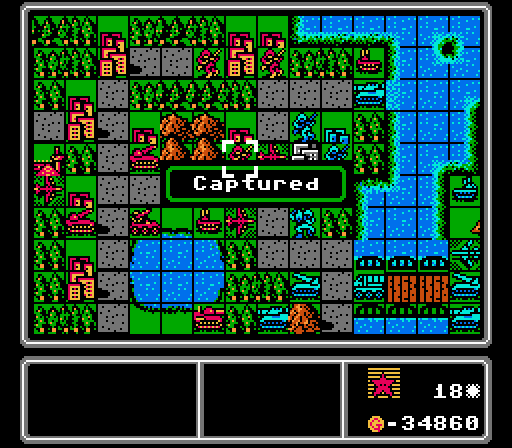 One more capture down, though I think we'll be somewhat stalled for the next few turns. We've taken all the easy cities on the upper half and don't have any infantry left on the lower half. 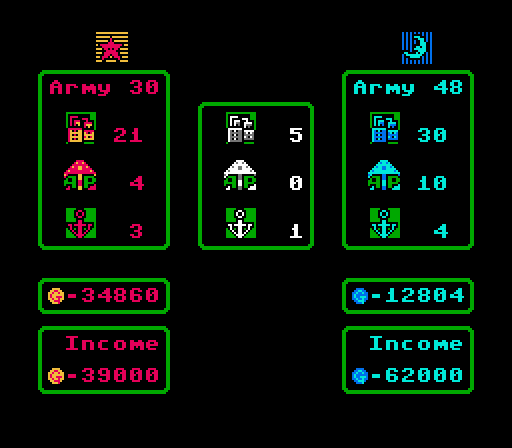 We're still chipping away at Blue's lead, though. Relatively, anyway. In the last six turns, we've both gained 8 cities and either an airport or port (so 10000 G income increase). But that gain means a lot more to us right now. 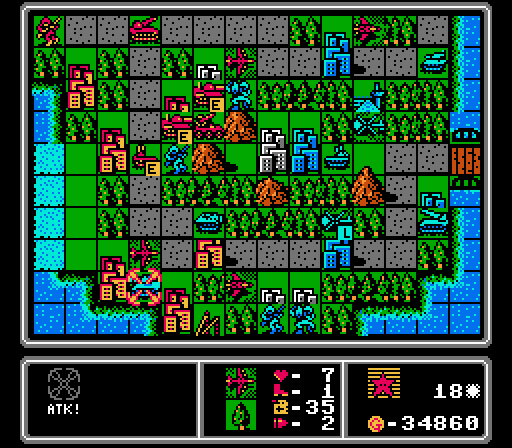 As our medium tanks harass the nearby enemy footsoldiers, a bomber flies down to keep this medium tank from bothering us again. 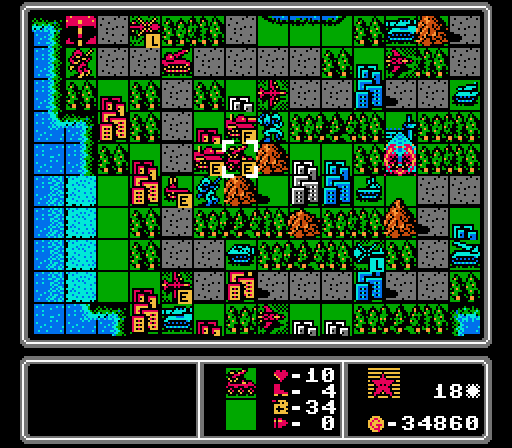 Our AA missile is able to shoot down an enemy copter that fled to the airport. With our supply truck gone, however, this AA missile isn't going to be able to fire again next turn. AA missiles are really limited with just two shots, and it will bite us here.   A fresh bomber is able to finish off this medium tank while still staying out of the approaching fighter's range. 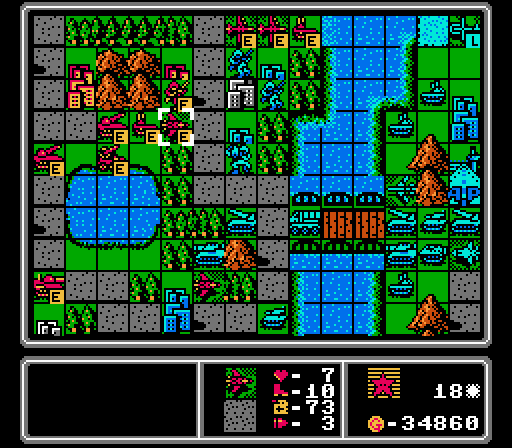 Continuing the fighter screen, while keeping the ground units just out of rocket range. 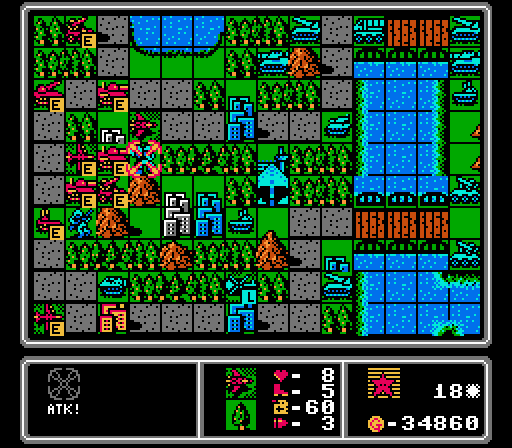  Our fighters can't touch the remaining copter with that AA tank nearby, so they pull back and finish off a couple of footsoldiers instead. 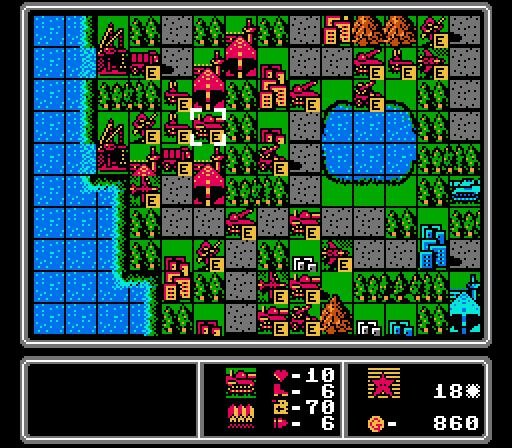 Our income is allowing us to put out a lot more units now. We get not only a medium tank, but two AA tanks, two supply trucks, and another random infantry for good measure.   This attack was the point where I decided I really need to avoid direct attacks between evenly matched units. Or really any attacks against units that can hit back if possible. We just always end up worse off for it. I need more rockets.  We lost this AA tank but that APC is over-extended now. 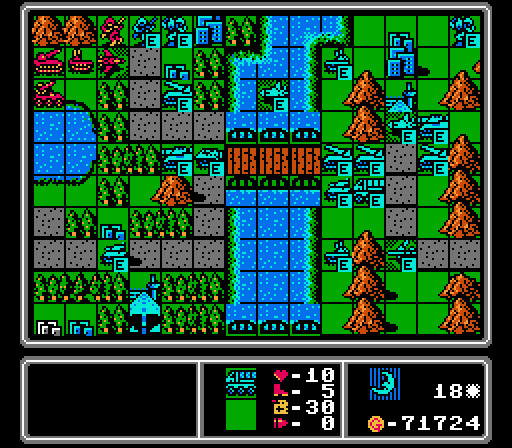 The enemy reinforcements just keep on coming. The incoming bomber took a curious detour (off the screen to the upper-right) to avoid our fighters; I'll have to remember not to lose sight of it later.  Third straight enemy turn building a bomber. We've been lucky enough to have fighters on hand to wipe them out before they can hurt us so far, will we be able to continue that streak? Turn 19  We can't dislodge the enemy rocket here, especially with a fresh medium tank lurking behind it, so our ground units pull back. We do use a rocket to finish off this damaged medium tank though! 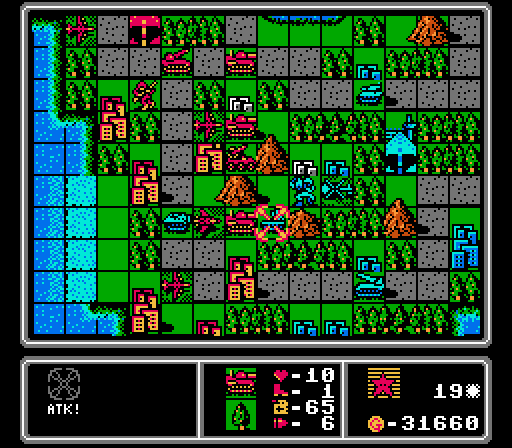  AA tanks are annoying to my air-dominance strategy, but lucky for us they can't fight back against medium tanks so we get a free shot in here.  Meanwhile a rocket and another medium tank are able to take out this APC.  It's kind of silly, but I use a few planes to keep that enemy infantry from reaching one of our properties this turn. Two of them are damaged anyway, and the third one (highlighted here) couldn't reach anything else without getting too close to that AA tank. 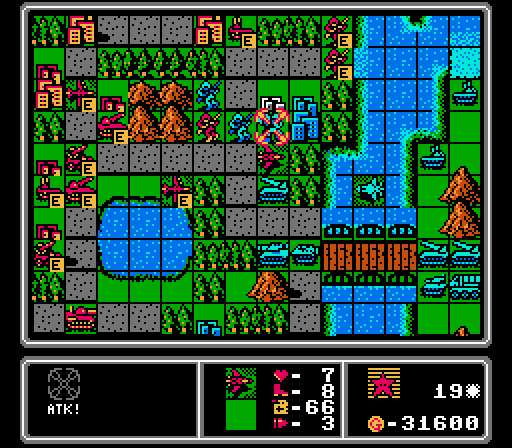 We start capturing the port in the upper-right corner here, an action which will have an interesting side effect on the enemy phase. I leave a damaged bomber near the lake to lure a fighter into missile range, then use this fighter to finish off an injured mech.  I'm a little paranoid about all the bombers headed our way, so put out a new fighter to help deal with them (the other fighter and bomber on airports here are in for repairs and refueling). We also get another copter for infantry ferrying, and a new swarm of infantry. 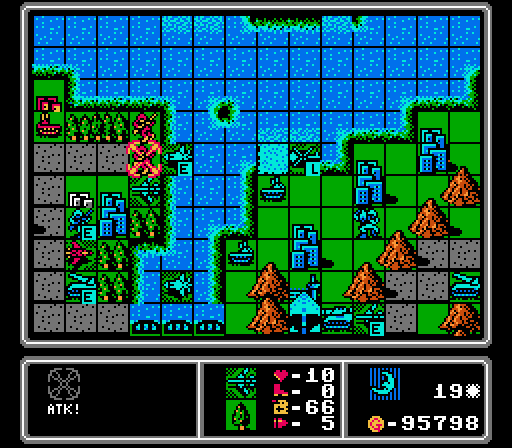 Yeah, so the AI really did not like me trying to capture that port, and sent both a fighter a bomber to take care of that problem.  The loaded copter that had been hovering nearby for several turns takes advantage of the opening to drop its own infantry on the port instead. We also lost an infantry to a rocket and medium tank combo. At least our bomber bait was able to draw in that second fighter.  Down on the lower shore, all the annoying units nearby helpfully removed themselves from defensive terrain to sit exposed on plains and roads. 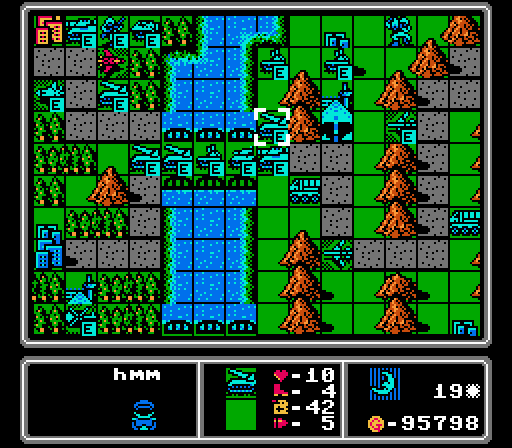 Two more rockets cross over into guarding position on the other rocket, with plenty more vehicles right behind them. Between the overlapping rocket coverage keeping ground units away, and the nearby AA tank and fighter keeping bombers away, we're going to lose ground here next turn. 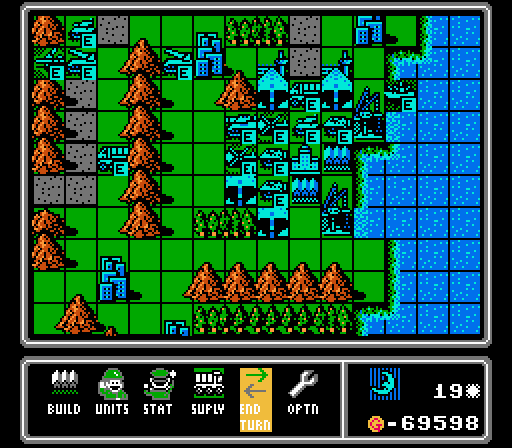 Blue "only" builds a medium tank, a tank, and an APC this turn, giving us a slight breather. Turn 20  I left our infantry too far forward and it took a hit from this tank, but we're able to remove it with a couple of rocket strikes.  This rocket also advanced too far and got stranded on the road and taken out by a pair of medium tanks. 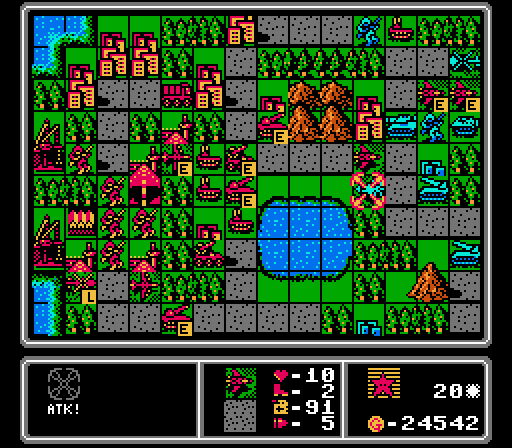 We do get rid of this fighter that took our bomber bait, hitting it first with an AA missile and then following up with our own fighter. We could've used an AA tank, but it would've been vulnerable to a rocket on the enemy phase.  No further kills up here, but a lot of attacks on the nearby units, including damaging the bomber and a couple of capturing infantry. Our rocket also hit the medium tank.  An enemy bomber sat back away from all of our fighters, so I build a wall of AA tanks to protect our indirect fire units. Our bomber highlighted here is going to limp back to the airport for fuel, ammo, and repairs.  We build a copter fleet to carry away the infantry swarm, and then an AA missile because the AI keeps throwing planes at us. 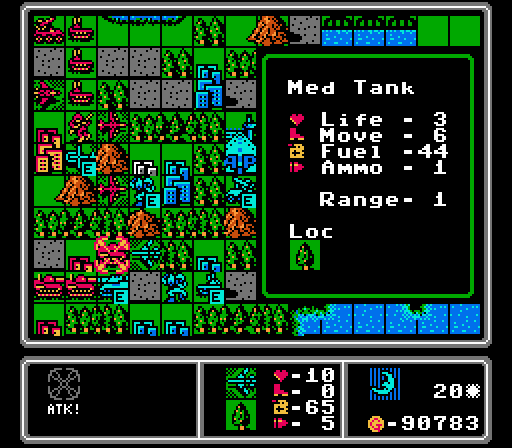 I missed that the enemy bomber could reach our medium tank, but it had taken a lot of damage and fired most of its shots already anyway.   A damaged medium tank finishes off our AA tank, and an APC and copter take out our infantry.   This fighter battle is rather lopsided, but I have others in the area to help out next turn.  Yikes look at all those heavy vehicles coming at us. That's four rockets all lined up in a formation that's almost impossible to take out without heavy losses, backed up by a couple more medium tanks. Are we still gaining ground here, or about to succumb to an avalanche? 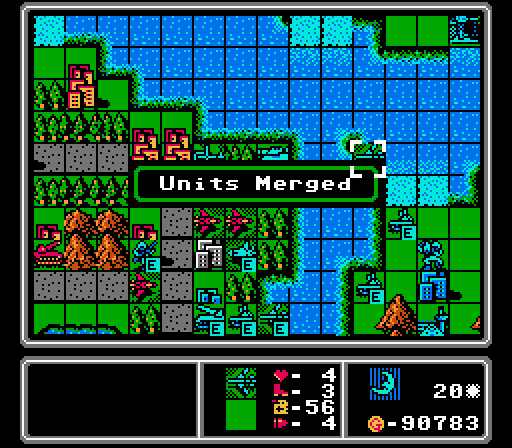 A couple of damaged bombers merge together, presenting a single juicy target for all of our nearby fighters.  Another deadly quartet - fighter, bomber, medium tank, rocket. Plus an infantry just because. And I know you don't care anymore, but that enemy phase set a new record at 9.5 minutes. This map is a marathon, and you'll have to wait to see how it plays out next time! To Be Continued....
|
|
#
?
Jun 7, 2022 03:15
|
|
|
This was my favorite update, sorry for your suffering
|
|
#
?
Jun 7, 2022 20:27
|
|
|
Tulip posted:This was my favorite update, sorry for your suffering  A mission where you really had to struggle and at a clear disadvantage adds some drama. I wonder why they never used this mechanic before, because it would help ramp things up in some of the later maps. Also, IIRC, you said the overall map layout is the same for both sides. If you�d been blue, would you be the guy starting with a solid army? Or would it just be that you�ve got the same disadvantaged start just that you�re heading west instead of east?
|
|
#
?
Jun 7, 2022 20:33
|
|
|
That's a wild map
|
|
#
?
Jun 7, 2022 23:32
|
|


|
MagusofStars posted:
I meant more like the map was divided into two islands. I realized later though that the Red island has way more cities than the Blue island, so the "balance point" is assuming Blue is going to take the top and bottom islands in their entirety. In reality they grab a bunch of stuff on the Red island, too. There's...not actually a way to play this map as Blue, for reasons I'll try to get into later.
|
|
#
?
Jun 8, 2022 03:36
|
|
|
Part 48: Shark (2a of 2) Apparently this update was just a bit too long so I'm breaking it up into two pieces, but you get them both now. Turn 21 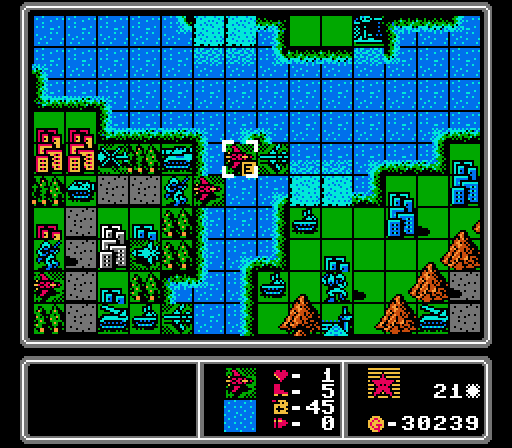 One fighter goes after the merged bomber, and then we merge our damaged fighter into it for a tiny bit of extra Life. 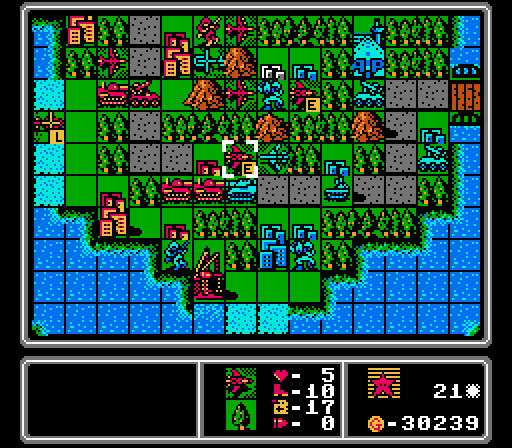 The other fighters switch arenas, hitting another bomber and a capturing mech. That nearby AA tank could be trouble....  This copter got to our healing infantry, so we take it down with an AA missile and an AA tank. 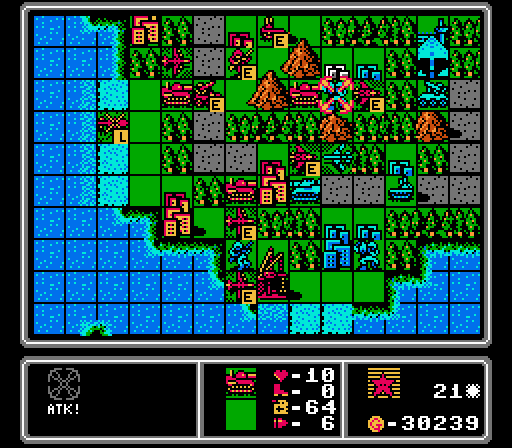 After a couple of bombers go after the capturing infantry on the lower shore, a medium tank finishes off this mech.  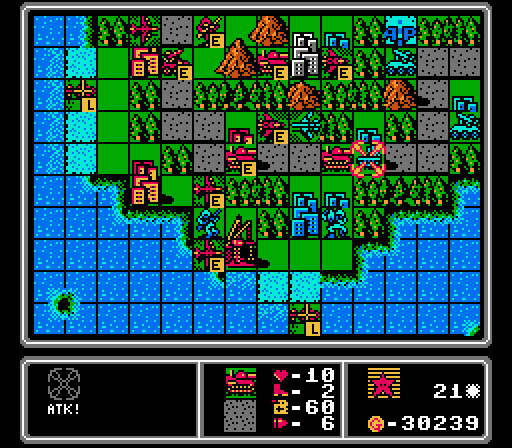 Here's why our fighters are safe. We first take the back-line medium tank forward to finish off the enemy medium tank. That kill frees up the road for a another medium tank to advance and finish off the AA tank.  Here's an interesting formation. We've kind of abandoned the middle of the island. There's a bomber just off-screen, and the only thing it can hit now is a fortified AA tank. That enemy fighter also can't reach anything important. 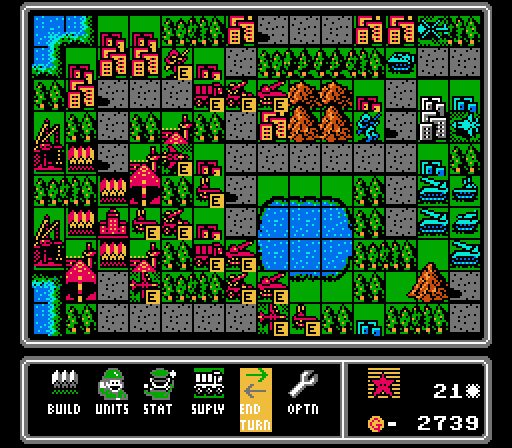 We lost a fighter and an AA tank recently, so put out a couple of replacements. We're going to need something against those heavy ground vehicles soon though.   This enemy fighter throws itself away against our stronger fighter here, a nice win for us. Too bad there's another one right behind it.   Here's another positive exchange, taking out more than half of a bomber for less damage on a much cheaper unit, that will get half-repaired next turn anyway. 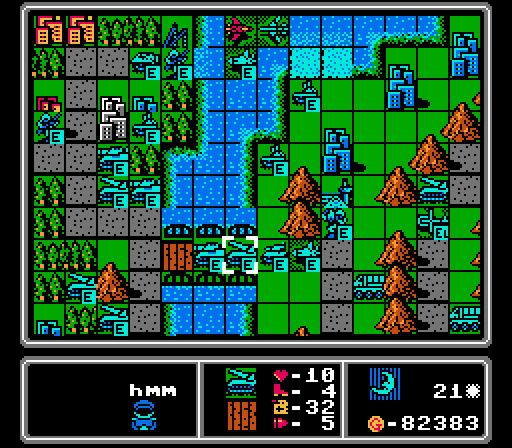 Those were the only two attacks we faced this turn. Here three of the rockets actually head down the lower road, with a medium tank on the upper road. Blue does capture that port we'd been fighting over, unfortunately.  Tank, rocket, AA tank, bomber. Turn 22  A rocket hits the capturing infantry, and then we take care of this bomber with an AA missile. 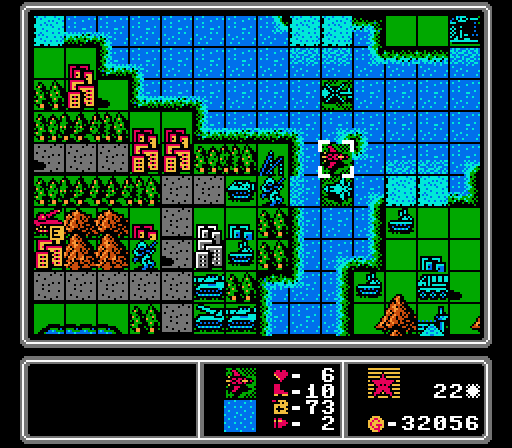 The enemy bomber retreated to the small upper island that we've ignored for the entire map, because Blue started with two infantry there and captured the whole thing early on. Let's chase it down.  Have you been wondering where all our loaded copters went? Well we managed to sneak a couple onto this island, and after we remove this bomber we can start capturing an airport up here.  The enemy AA missiles retreated and left an opening for us to take this fighter and finish off another bomber. That's three dead bombers this turn! The other fighter is also damaged and has no ammo and not enough fuel to make it back to the airport, so it merges with the first one. 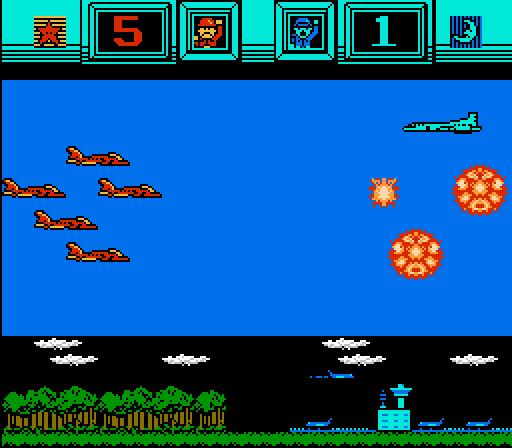 Oops I guess we didn't quite kill this bomber after all. Still it's the thought that counts. We'll get it next turn. 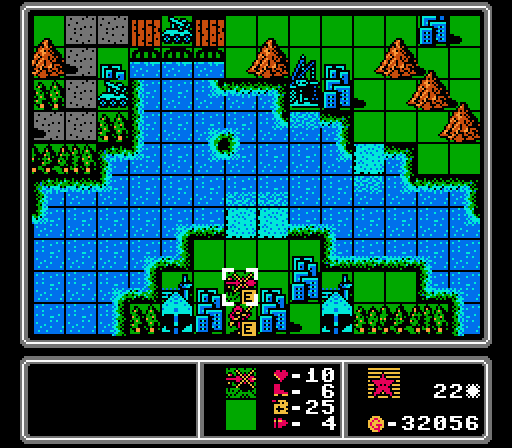 We also got a copter to the lower island!  Dancing around on both fronts here. A couple of planes screen the upper road, while we hit one rocket that wandered into our own rocket range, and otherwise stay away from that group for now. 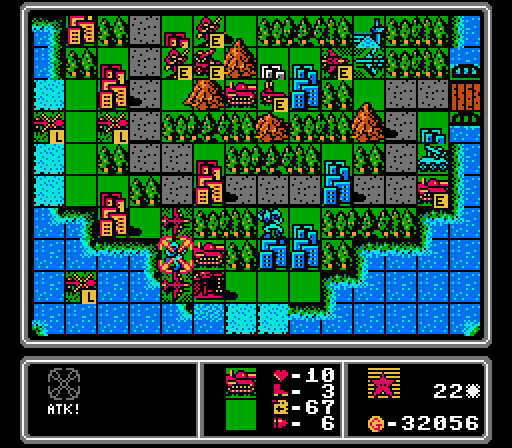 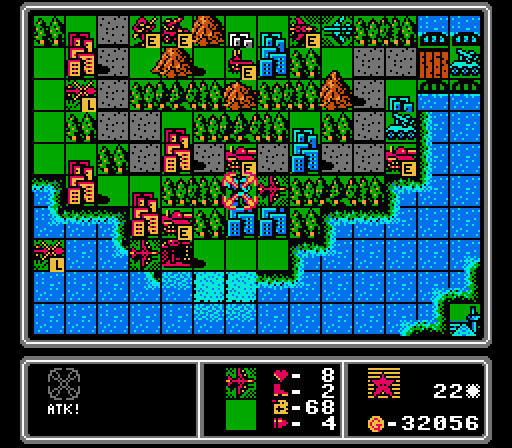 A medium tank finishes off this infantry before it can take another city from us, and then another medium tank teams up with a bomber to take out this mech. Notice how clear the lower shore is now? And we have three loaded copters nearby ready to start taking some of these cities back. 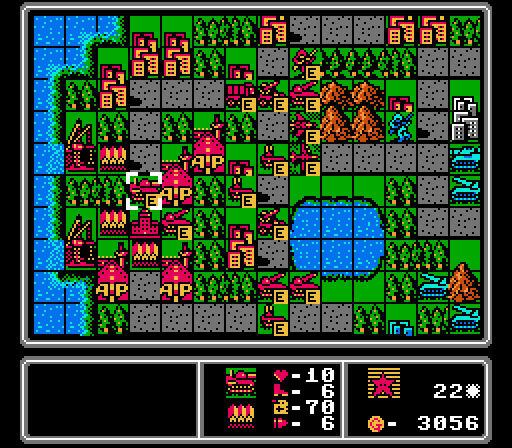 Time for a couple of units that can help turn the ground battle in our favor. 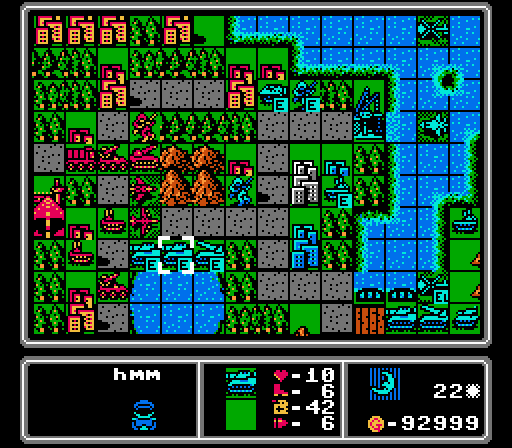 Blue sends its heavy hitters straight into our defense on the upper road, betting that we can't take them all out. 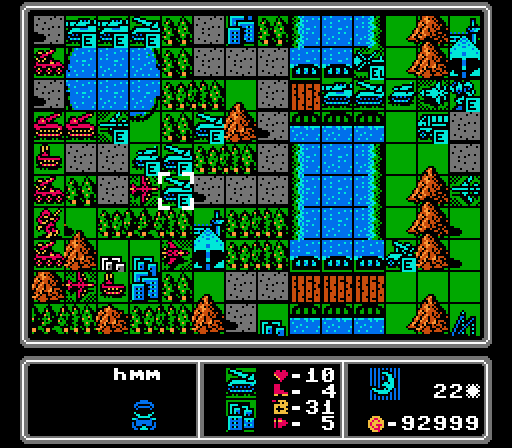 The lower road also sees an advance, with the damaged bomber and rocket hitting one of our rockets. Otherwise we don't take any hits this turn.  A new fighter lurks behind the line of rockets, while a new bomber sits back from our fighters and is actually threatening the infantry we just put on the lower island. 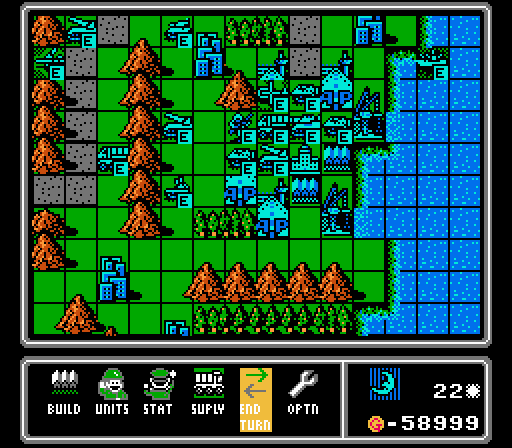 Medium tank, rocket, copter, and infantry. Looks like Blue will be sending more capture attempts our way. Turn 23 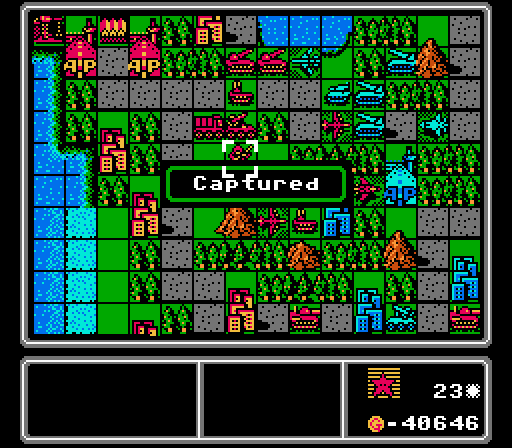 I'm shocked that it took until the 23rd turn to capture a city so close to our HQ, but there it is.  Hopefully this airport capture is a turning point, a 4000 G income swing in our direction.  We hit this AA missile last turn and it tried to run away, but we hunted it down and destroyed it. That unit was the last enemy on the lower third of our island.  We stalled out for a little while the last five turns, but we've gone up 3000 G and Blue has only increased 2000 G, the first true gain we've had. Look at how our total army size is creeping up to near-parity with the enemy as well!   I'm pretty sure this damaged fighter wandered over just to tempt our AA missile into firing instead of moving, but I'm not scared! Another AA missile finishes off the damaged bomber. 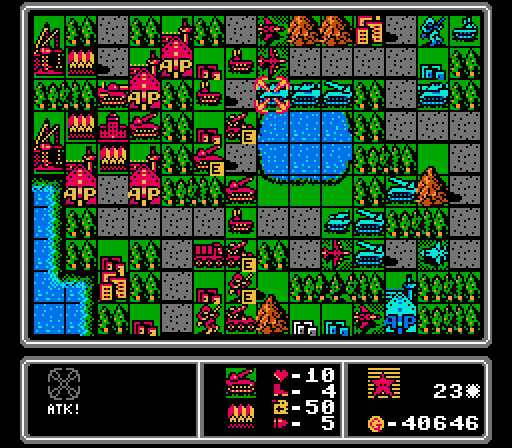 Our new rocket is already close enough to finish off this medium tank.  The other medium tank takes hits from a rocket and our new medium tank, as a bomber hits the nearby rocket. That's the upper road assault neutralized. 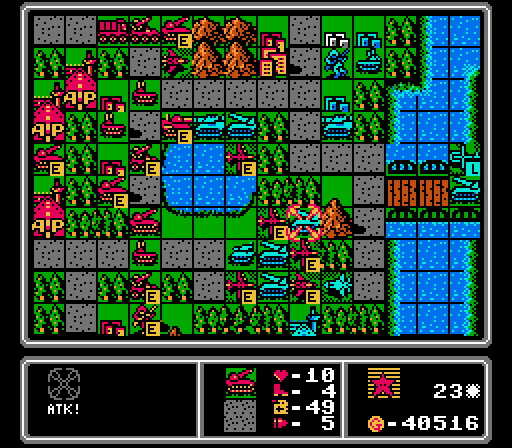 Our other bombers pick apart the lower road assuault, with a rocket chipping in here. We also toss a fighter at the fresh enemy fighter, just to keep it from outright killing a bomber. The only full-strength unit in this group now is the lowest rocket, which is parked on a city and not worth trying to damage right now.  A fighter helps block the upper road, as the rest of our units hold a ragged line. We've got just over 40,000 in funds, so I can't resist putting out two bombers to really throw back this attack next turn. 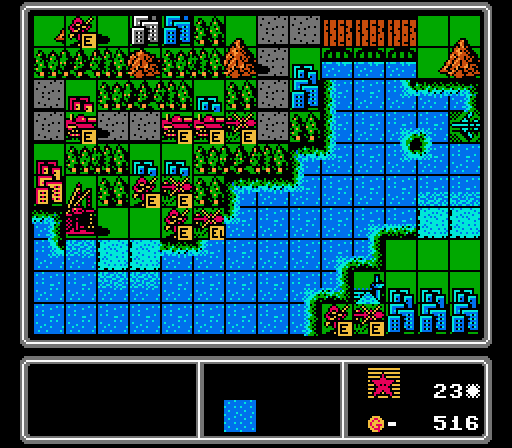 Down on the lower shore, we drop off another infantry and use our copters to keep the bomber away.  The only full-strength enemy rocket we left behind wasted its attack on an AA tank and didn't even destroy it.  Here's another break for us - this fresh medium tank advances before the other units retreat, and has to end its turn unable to attack anyone.  The enemy rocket on the upper road also wastes its attack on an AA tank for some chip damage.   Oops. The enemy fighter was able to reach our loaded copter and hurt the infantry inside. That damage will slow us down a bit. 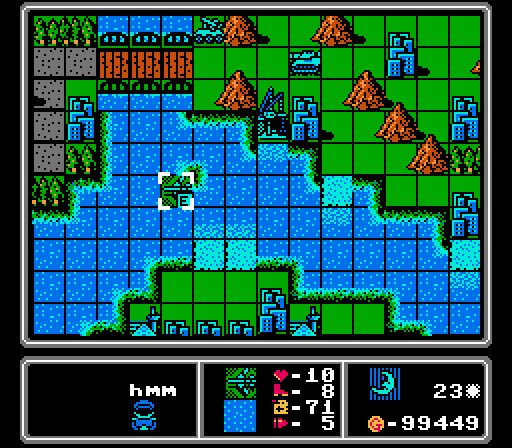 This bomber just moves a few spaces, still threatening both the lower island and the lower shore of our island, but not actually able to hit anything yet.  Still more heavy vehicles crossing the bridges, but the endless tide of reinforcements has actually slowed somewhat - this part of the island is much less dense with enemies than it used to be. 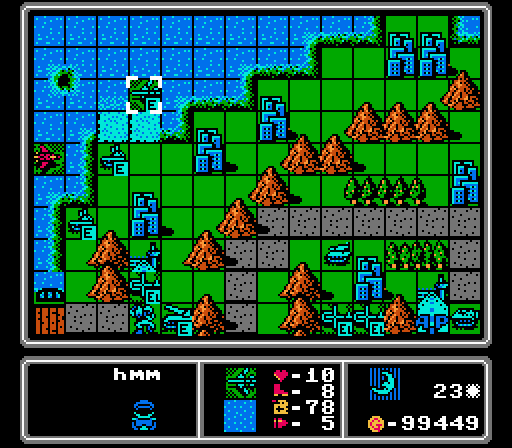 I think this bomber is headed for the upper island. I have a fighter nearby but it only has one shot left and has already taken some damage.  The two most heavily damaged enemy rockets both pulled back, but surprisingly didn't merge together.  AA missile, fighter, bomber, medium tank, copter. My hard drive filled up again here...so another 200 minutes of footage. This time was mostly my fault, spending a lot of time measuring exact movements and even replaying turns sometimes to get the perfect setup. 70 of those minutes were enemy phase time, not as bad as the first set of turns. Turn 24 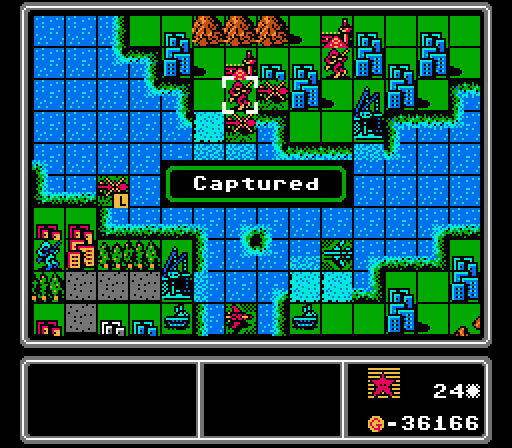 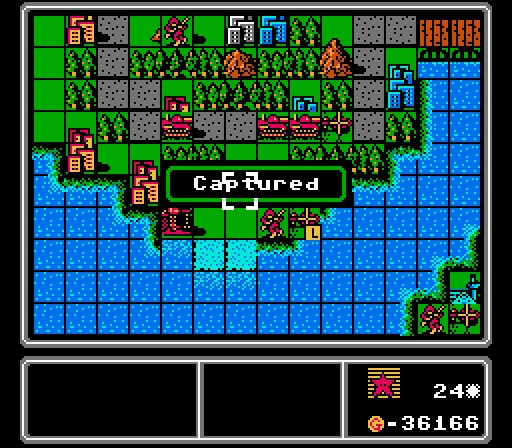 We swiped the second airport on the upper island! Also a random city on the lower shore of our island.  It's just one turn since I last showed this screen, but it already looks quite a bit different to my eye. We're close to the unit cap ourselves now, too. 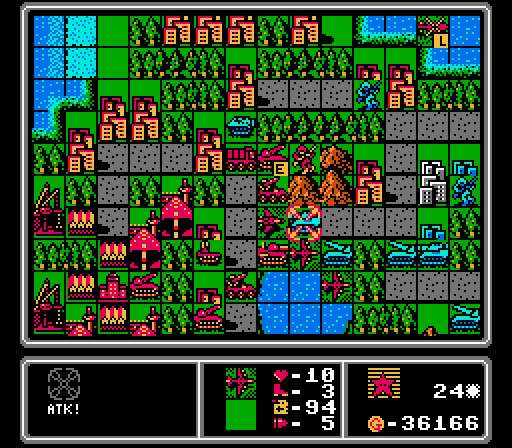 Rocket+bomber combo is still my favorite way to instantly remove a fresh medium tank.  I'm tired of letting Blue capture stuff on our island, so cut this infantry down a bit with a copter and an infantry.   Two bombers finish off two damaged rockets. Elsewhere a medium tank heads to the upper road to punish an APC for getting close to us. 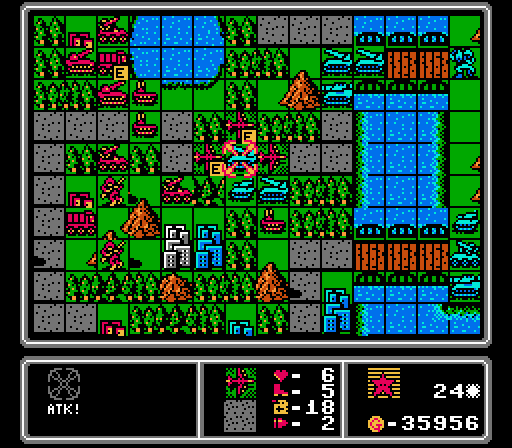 This time with the more immediate threats handled, we send a trio of bombers to remove this fresh rocket from the city. 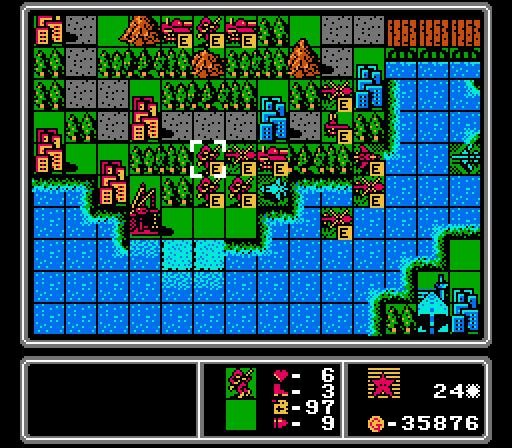 Down on the lower shore, we form a plane screen against the enemy bomber while hitting the damaged enemy fighter with a medium tank to try and push it into retreating.  We've got bombers guarding both lakeshore approaches from Blue's heavy reinforcements. The tank and rocket down near the enemy airport are both heavily damaged and won't even attack, so we're set up pretty well here.  We get another fighter to fend off all the planes still headed for us, and another rocket to start holding the bridges now that we've almost cleared our island. 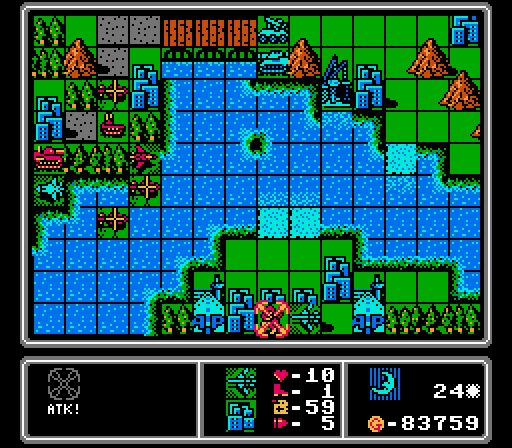 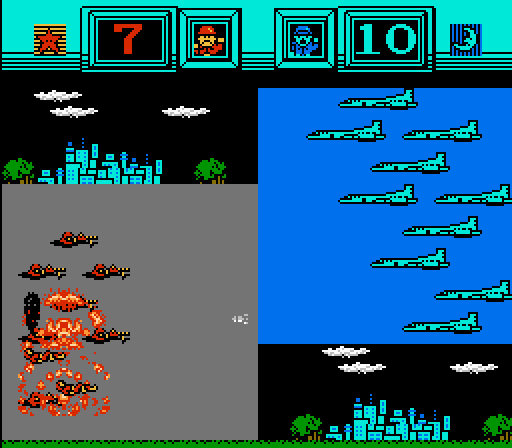 Our biggest problem on the enemy phase is a bomber going after our infantry trying to solo the lower island, but it can't do much damage against the city defense. 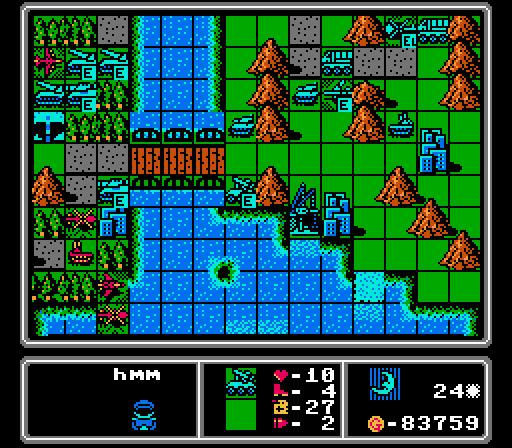 No attacks here, but two medium tanks and two rockets cross over to our island to cause trouble later. A healthy dose of bombers will help, but notice how that lower medium tank is protected by the AA missile. 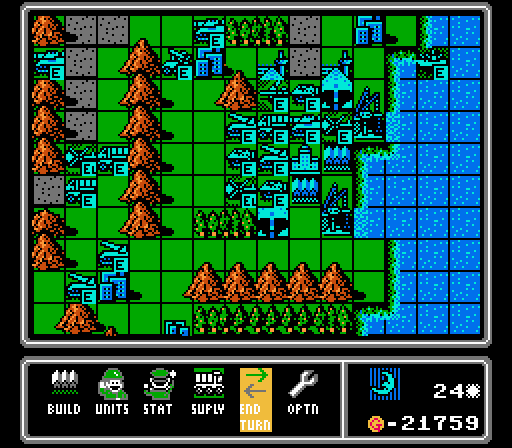 Two rockets, a medium tank, and another bomber. We've been pretty successful at not letting the enemy bombers hit our expensive units (so they're just a cash-drain on the enemy) and will have to continue that process through this phase of the battle. Turn 25 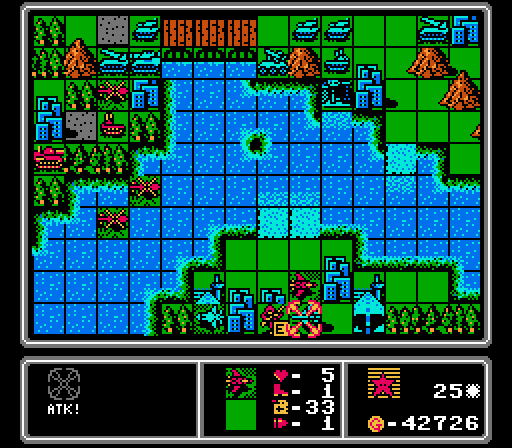 We've got a couple micro-battles brewing on the two side islands. I need to keep that infantry just healthy enough to finish that city capture and stay alive afterward, so I'll probably need another fighter down here. This one uses its last shot to take off half of the bomber's Life. The enemy fighter here is the damaged one from earlier, but will repair a bit on the enemy phase.  The upper island is in slightly better shape. Since we already have both airports, we can re-arm our fighter there. The enemy bomber here is already damaged and barely scratched our infantry. There's a loaded copter headed our way so we send one of our copters to get in some damage. We really don't want a full-strength infantry landing and taking these properties back. 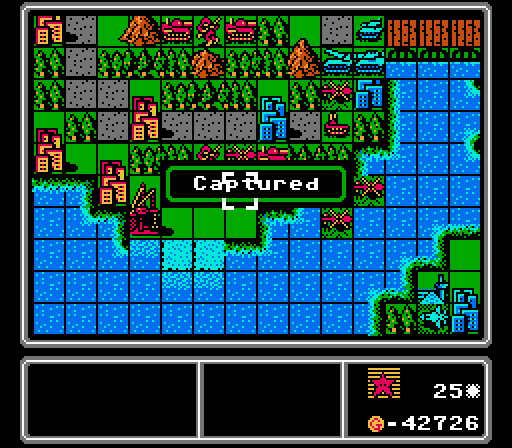 In the meantime we grab another city on the lower shore, slowly taking back our island. 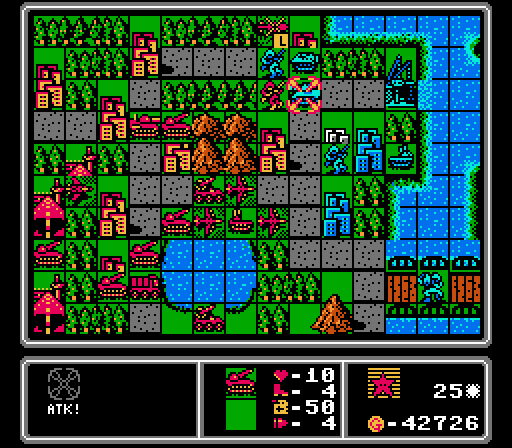  Three already-damaged enemy units all fall here. The rocket gets the medium tank, the copter takes care of the infantry, and then a medium tank rolls all the way up to finish off the APC. I don't usually use a loaded copter for combat, but the minor damage it took here is worth keeping that city and getting rid of a pesky infantry. 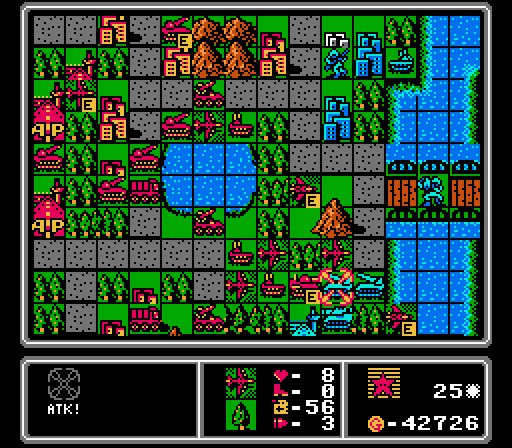 Time to do what we can with the fresh arrivals. First a medium tank and a bomber take out one of the rockets.  Two more bombers get rid of this medium tank. Yet another bomber finished off the damaged tank that was nearby.  A medium tank than destroys this damaged rocket. That leaves a fresh rocket and medium tank able to attack us on the enemy phase, but we have gained enough on this map now that the trade of letting those units fire on us is worth the benefit of being more aggressive and taking out all the units we could here.  I also left most of our bombers in range of the new enemy fighter for the same reason. I did get all of them covered by at least one AA missile at least.  That said, we get a couple of replacement bombers just in case; they've been very effective lately, with not much enemy anti-air in the area. The third bomber here is looking for some supply love next turn. 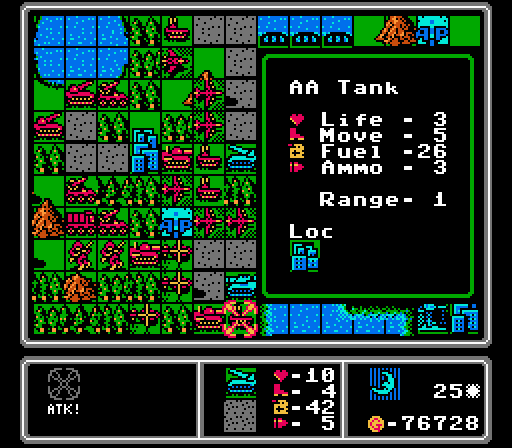 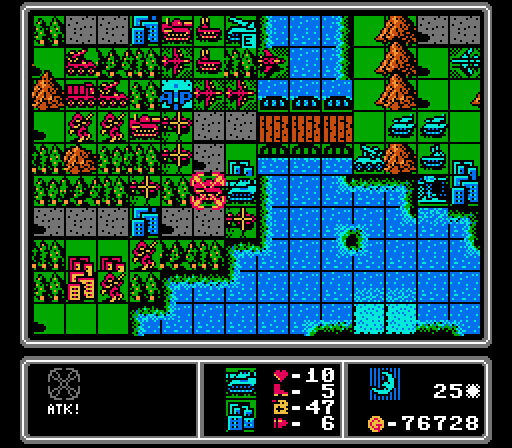 The enemy rocket uses its shot to remove a damaged AA tank, probably the least-damaging result for us. The only downside is the enemy medium tank is able to use the freed-up city to attack our medium tank.  This enemy fighter can't resist hitting a defenseless target (our fighter is out of ammo so can't fight back), but I'd much rather have this result than have the fighter going after our capturing infantry. What's even better is the bomber didn't attack either, just flew back to the airport for repairs. 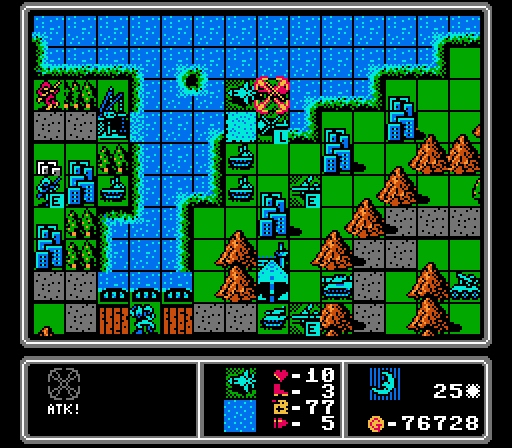 The new enemy fighter decides not to throw itself away on our protected bombers, and instead takes out a copter and complicates our mini-battle on the upper island. The loaded copter here then drops off its passenger on one of its cities on the upper island. Once again though the damaged bomber retreated rather than continuing to chip away at our capturing infantry. 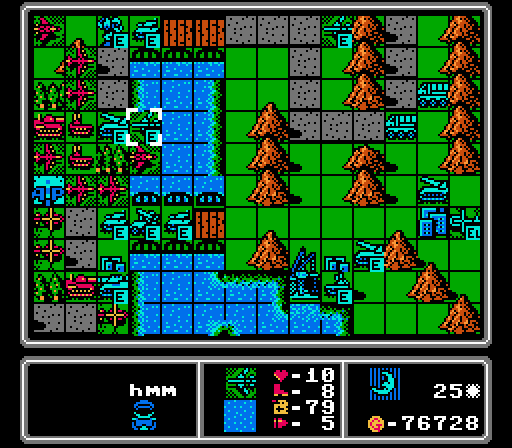 Some more reinforcements roll over the bridges, but it's a much less threatening crew this turn. The bomber here can't reach anyone either, so puts itself in a spot where it gets some protection from the AA missile. There's still a gap we can exploit, however, and our fighter is already sitting right in the position where it can hit the bomber without getting struck by the AA missile in return. Why didn't the bomber just hang back one more space for full protection?  We destroyed a lot of enemy units this turn, freeing up room under the cap for Blue to build a ton here. A bomber, two medium tanks, a rocket, a tank, an APC, and an infantry. Turn 26 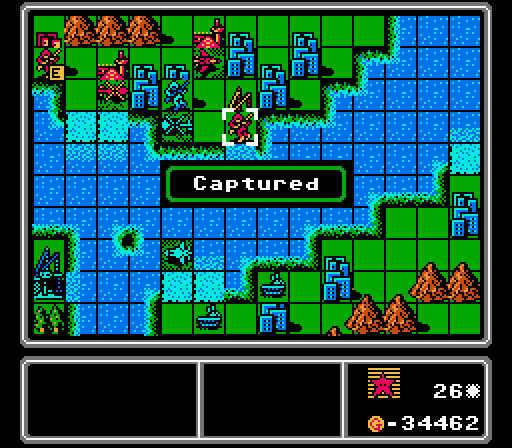  We get a port and a city on the upper island, and our first capture on the lower island! Our copter on the upper island also hits the enemy infantry to make sure it can't capture anything anytime soon.  We also get two more city captures in this middle area, producing a huge swing in income this turn. 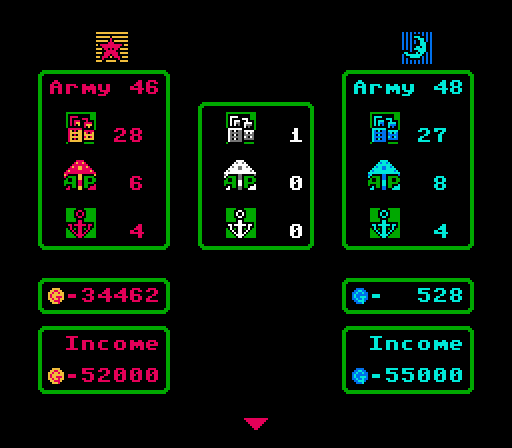 We're so close to income parity now that we can keep up the extra aggression we've had lately. We are certainly doing more damage to Blue each turn than we've been taking, so can afford to lose a few units and keep buying replacements. One major milestone here - we now have more cities than Blue does! 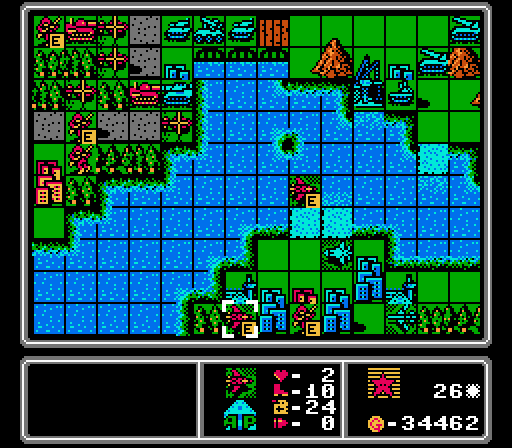 Looking back at the lower island, a fresh fighter arrives to help out our infantry, while our damaged fighter parks on the enemy airport to deny its supply services. 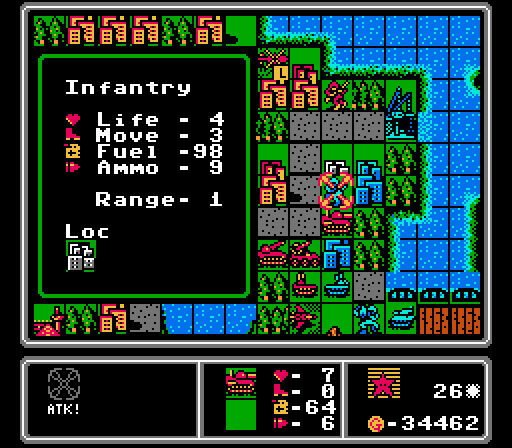 This infantry thought its best option was to try and capture the last neutral city and hope we ignored it for five turns. Not happening. 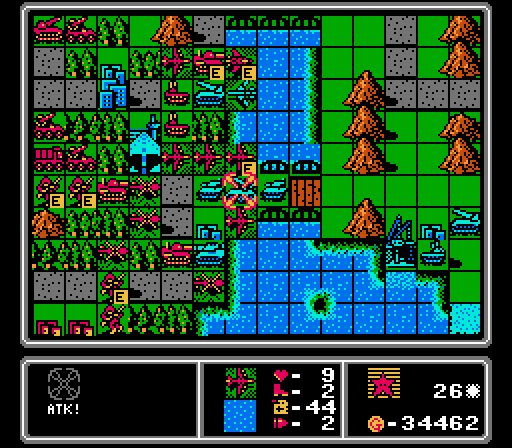 This AA missile advanced without any anti-air backup so two bombers quickly remove it. Because I knew the AA missile wouldn't be a problem, a new fighter arrival was able to destroy 90% of that new bomber without worrying about getting hit on the enemy phase. The positioning of our fighter there is very important for later.  Two more bombers are able to surgically remove this medium tank despite its city protection, while our own medium tank that got hit last turn heads back for repairs. 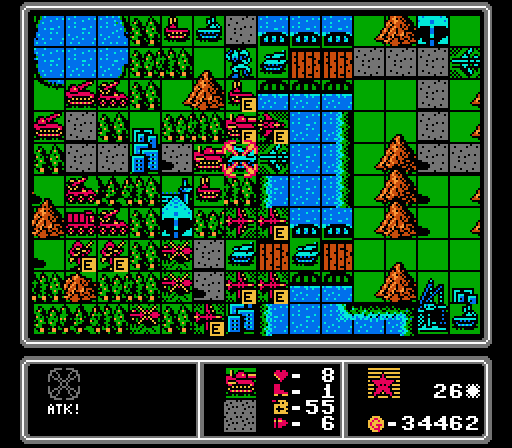 Two of our medium tanks wipe out the last rocket in the area, freeing up space for an AA tank to finish off the bomber. 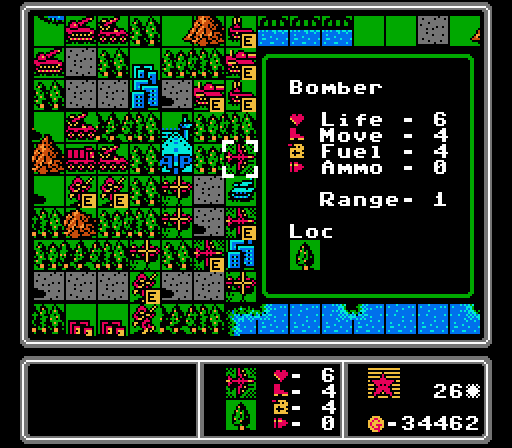 I ran this bomber all the way out of fuel and ammo but it has just enough juice left to merge into another half-strength bomber, producing one fully-capable plane for next turn. I'm at the point where we're so close to the unit cap that we're better off merging damaged units together so we have room to build new ones.  This copter took a bit of damage attacking infantry earlier, but I unload its passenger onto one of our cities so it'll be at full strength when it moves to capture the nearby neutral city next turn. The port also gets a capture started, though our infantry there is at half-strength so will take four turns to complete it. We also use the rocket here to hit the AA tank so it's not much threat to our bombers. 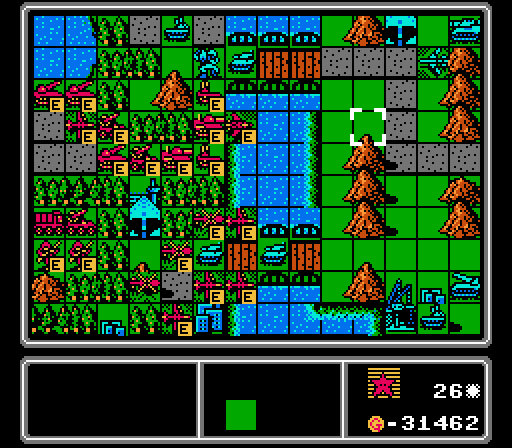 Here's our bridge positioning for this turn. That new bomber could have reached our medium tank, if I hadn't put the fighter out in front of it. I actually reset this turn once to achieve that positioning after screwing it up the first time. 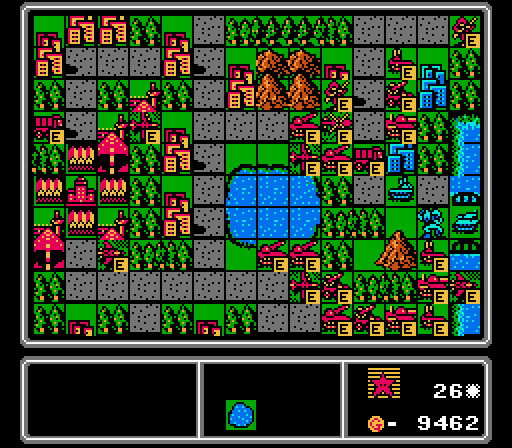 With more enemy bombers on the way and some of our fighters distracted supporting the side islands, we get another fighter to help out. I also have a damaged supply out as a screen so build a replacement. That bomber on the airport is still looking for some more repair time, but the two new ones advanced to a striking position for next turn.   Our infantry on the lower island takes a bigger hit this time, but it's already taken the city so will be able to heal up now.   A fresh bomber gets to our AA tank but pays a big price for it. Ensuring the enemy bombers only hit our cheaper units (and then using fighters to quickly remove them) has been a key to turning this map around. 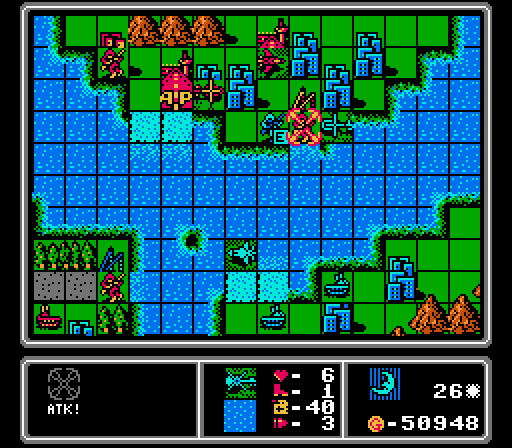  The enemy infantry and copter, while damaged earlier, team up to punish our infantry. We actually won't heal up on a port but at least we're still alive here.  This fighter probably could've finished off our infantry on the lower island, but instead shoots some holes in one of our bombers. 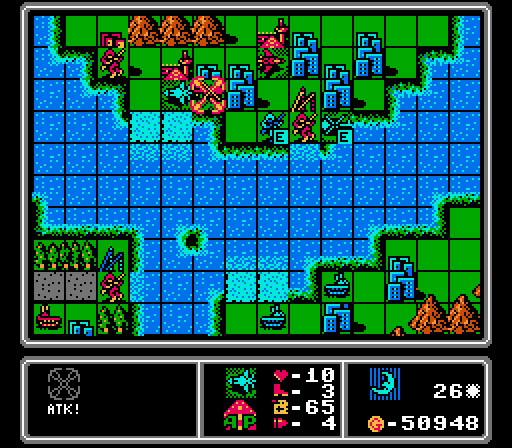 Another fighter takes out our remaining copter on the upper island. We might need some more support up here. 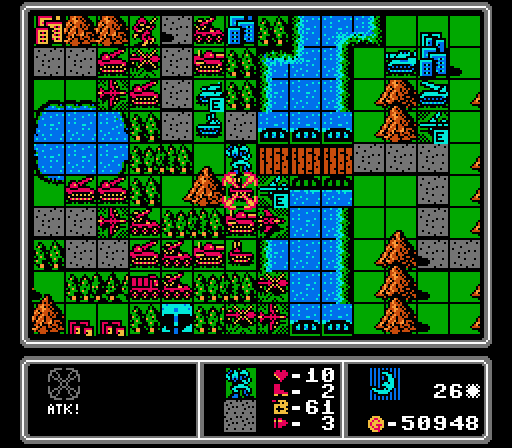 This mech finishes off our AA tank, but after the enemy tank had already moved to take out our supply. Those two losses are easily replaced and really just give us room under the unit cap to build something better. The enemy AA tank here was hit by our rocket and hides in the trees.  Another wave is building on the enemy island, but they're far enough back that we can fortify the bridges next turn.  Bomber, medium tank, rocket, infantry. Note however that Blue's run its treasury empty again; we're finally making an impact with our captures. Turn 27  There's another loaded copter headed for the upper island, so our first priority is ensuring it takes a big hit before getting there. We might lose an infantry as a result but we'll at least keep what we've taken so far. 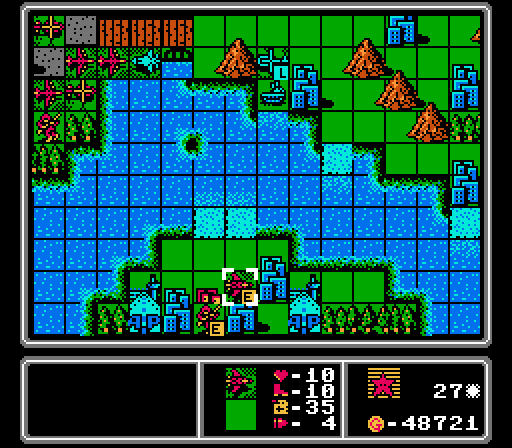 A fresh fighter arrives and finishes off the bomber on the lower island. There's still an enemy fighter nearby, and another loaded copter ready to dump on us on the enemy phase, so we're not done here yet. Our damaged fighter merged into the new one just to get our unit count down (it had just two Life and no ammo, so wasn't worth keeping around).  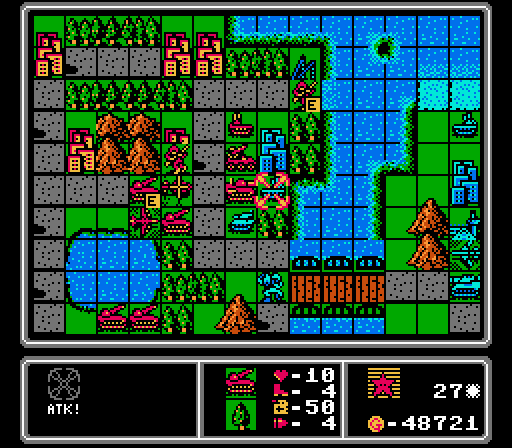 Our indirect fire units go first in the main battle, finishing off a bomber and an AA tank here. Another rocket hit the nearby tank to keep it from causing trouble. 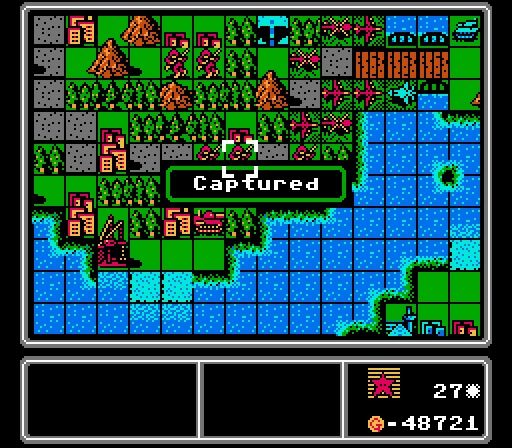 I was so focused on getting those attacks in, I didn't remember to capture this city right away. 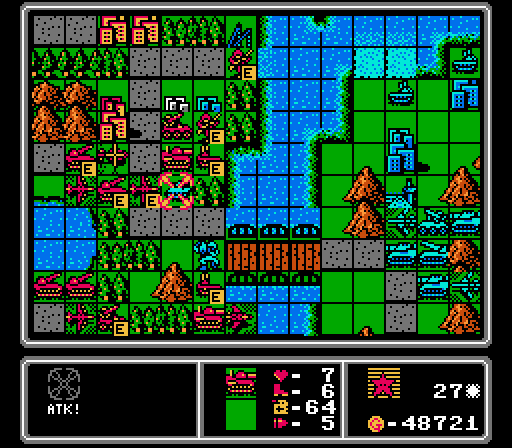 Anyway, after the tank is hit by the rocket, a mostly-repaired bomber and a lurking medium tank finish it off. The tank was sitting on a city so was a bit tougher to remove than normal.  A copter and a bomber hurt this mech but can't quite kill it. I really want control of this bridge though!  We start our first attacks on the enemy island. A copter blocks the mountain pass so that the AA tank can't reach our bombers, which team up to take out a tank. These tanks had been on the bridge but ran away last turn. I also merged in a damaged bomber to reinforce the ones left. 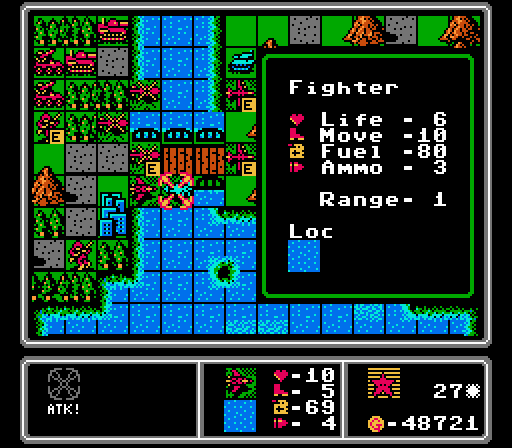  This fighter won't be much trouble anymore. That attack will help out the situation at the lower island.  I had a spare bomber to finish off the mech on the bridge, and moved a medium tank right behind it. For the first time we have our island clear of enemies and we have both bridges fortified so no new ones can cross over this turn. We've got mostly air units out in front here, with the enemy anti-air either too far away or distracted. 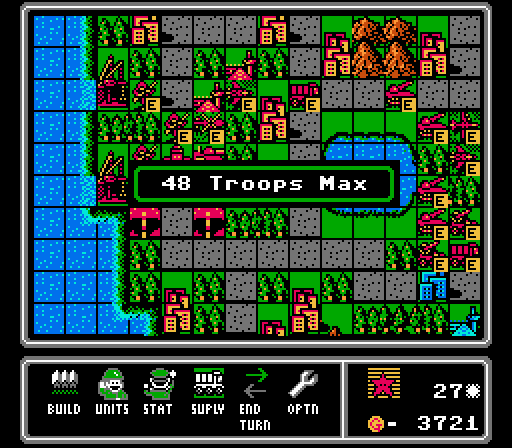 I rammed full speed into the unit cap for the first time, trying to pump out more infantry to speed up taking the two side islands. We also get another fighter to help fend off the incoming bombers and win the side battles, a medium tank to keep up the ground pressure, and a copter to carry some infantry around.   This damaged bomber got some repairs and is able to reach one of our capturing infantry, but can't hurt it much. Luckily the bomber couldn't reach the injured infantry we have trying to slowly take that port. 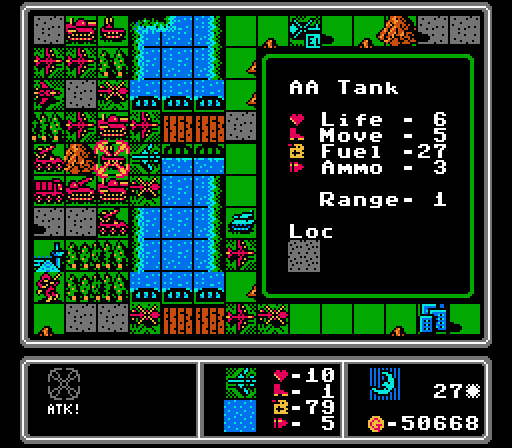  Another bomber runs right into an AA tank, but this one wasn't at full strength so loses the exchange. 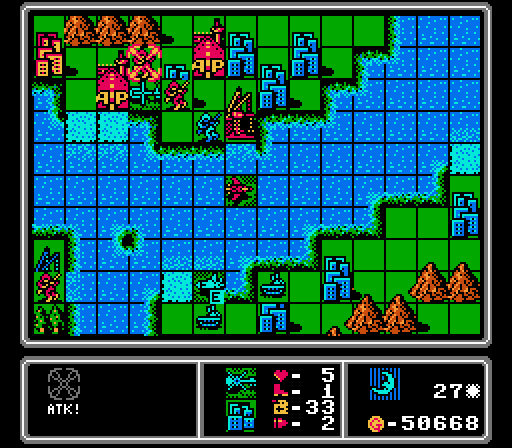 On the upper island, the fighter ran away (maybe more worried about our bomber fleet?) and the loaded copter likewise retreated. The remaining copter went after our healthy infantry instead of killing off the injured one. Altogether a pretty positive development for us, as we'll keep control up here for the rest of the map. 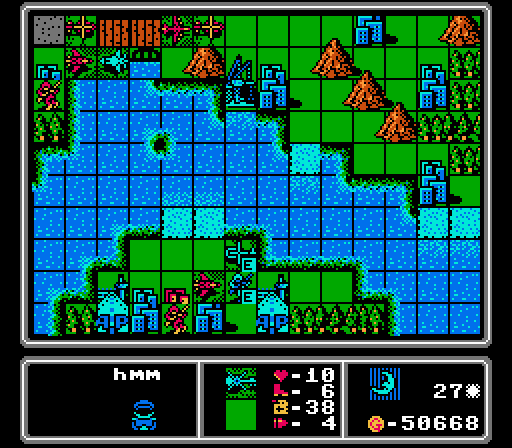 We will have to deal with a fresh infantry and copter on the lower island, however. That damaged fighter will retreat to the nearby airport as well. 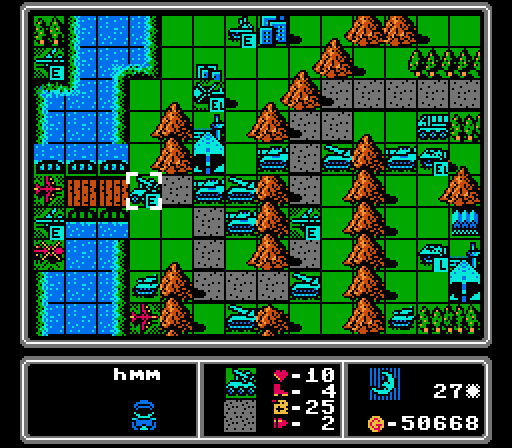 I don't know what happened here, but for some reason after moving this AA missile the AI got "stuck" in thinking mode for over three minutes here. Maybe this point was where the AI realized it was doomed....  AA missile, AA tank, yet another bomber, and two tanks. Turn 28 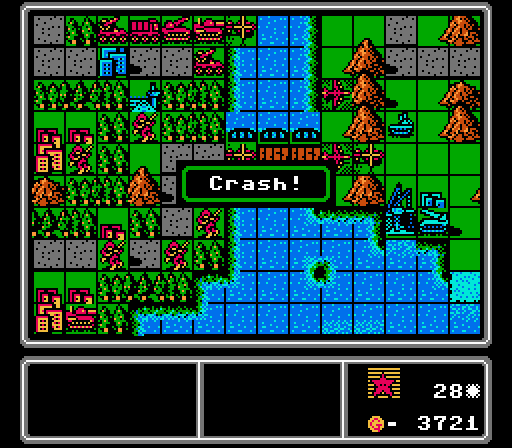 No worries, just a copter that was hanging around taking up space after dropping off its passenger. We could use fewer cheap units out here anyway. 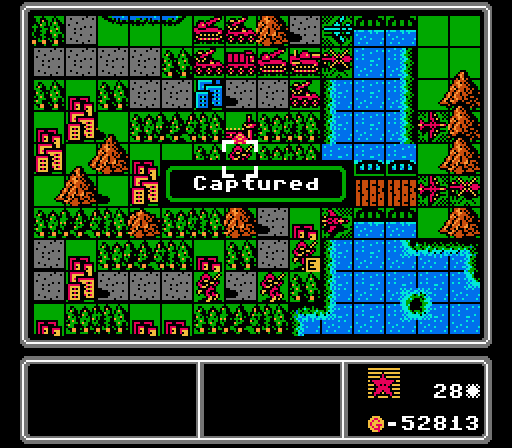 We take back the airport on our island and also the city by the lower bridge.  We've finally done it! Our income has surpassed Blue's! Between that milestone and us having control of the bridges, this map is basically over. 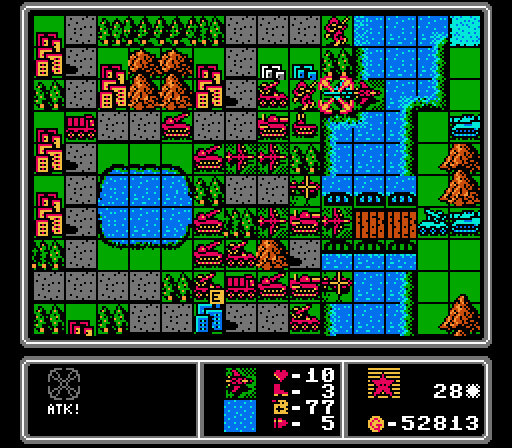  Removing bombers.... 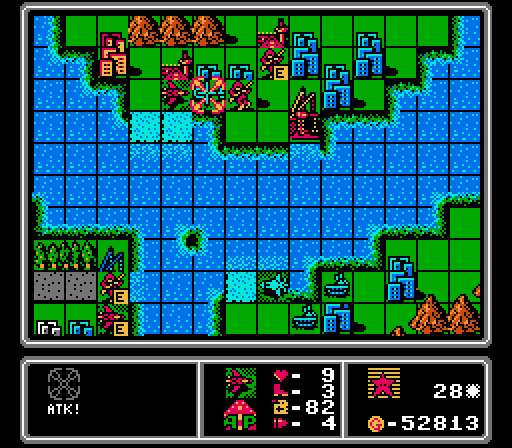 The upper island is looking better now. Our healthier infantry kills off the enemy infantry, and our fighter is able to finish off this copter while sitting on the airport for some repairs next turn. There's still a healthy enemy fighter in the area, but I think it'll get distracted by our bombers instead of remaining up here. 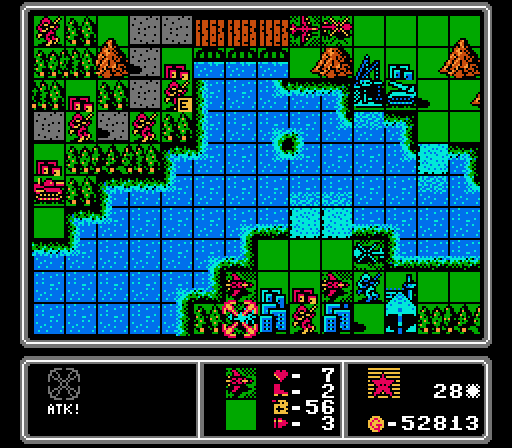 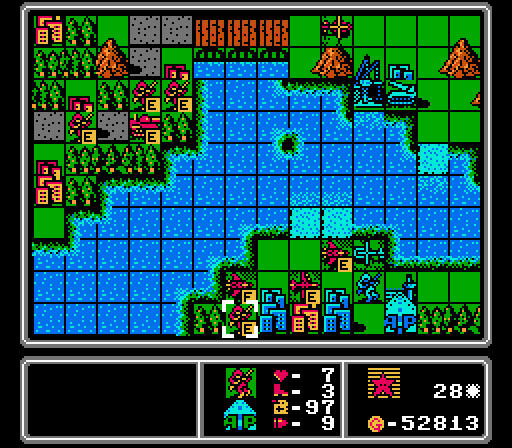 The lower island is still in trouble. First we free up the airport by taking out the damaged enemy fighter, then go after the copter to keep it away from our infantry, which in turn starts capturing the airport to give our planes a refueling station and stay away from the enemy infantry. I also send down a bomber to help take out the enemy infantry later. 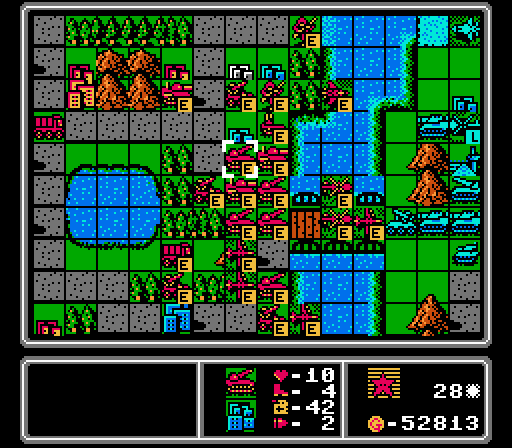 We've got the upper bridge blocked off with more air units, and a literal handful of rockets ready to launch across the water for some hurting next turn. The gap you see on the bridge is where the enemy bomber can reach.  We get a couple copters to carry away the infantry, and round off with another bomber. For the first time we have enough funds left over to get another expensive plane, but we're at the unit cap so can't put one out.  Letting the AA missile shoot down this damaged copter was important for a reason I don't remember anymore. Maybe I was trying to keep the AA missile in place for a rocket attack next turn, and wanted to get rid of some copters to make more room for bombers anyway? Yeah, let's go with that explanation. 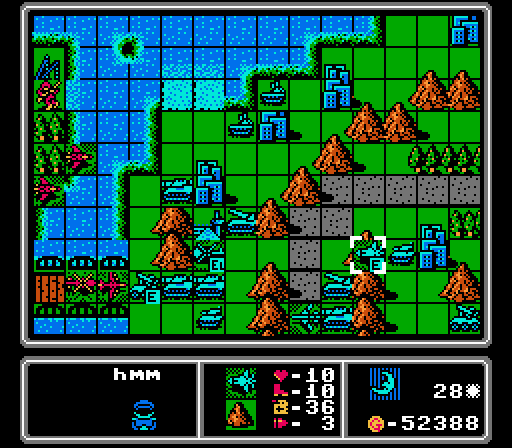 I don't know what happened here. The enemy fighter, still at full strength, just retreated back into the center of the enemy island instead of harassing us at either the upper island or the upper bridge.  I left the lower bridge open so Blue sent most of its vehicles down there instead of challenging our rocket squad at the upper bridge. We lost a copter to an AA tank down there last turn, and it hurts another one this turn.  The plan on the lower island works out in our favor again. The enemy infantry starts capturing the city we just took, but we have three air units that can prevent that capture from completing. More importantly, the enemy copter parked on the airport to get in some repairs instead of hitting our infantry. 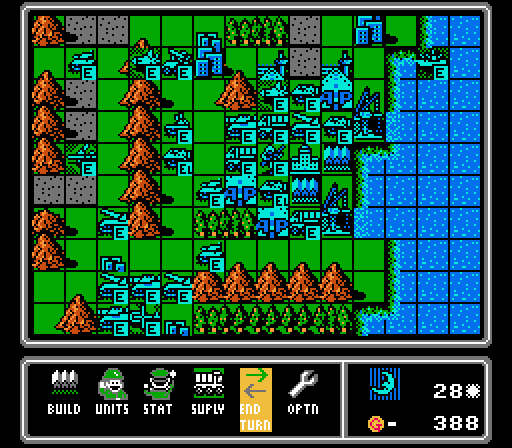 Blue still has enough income to cause trouble - a fighter, a medium tank, a rocket, and an infantry this time. Turn 29 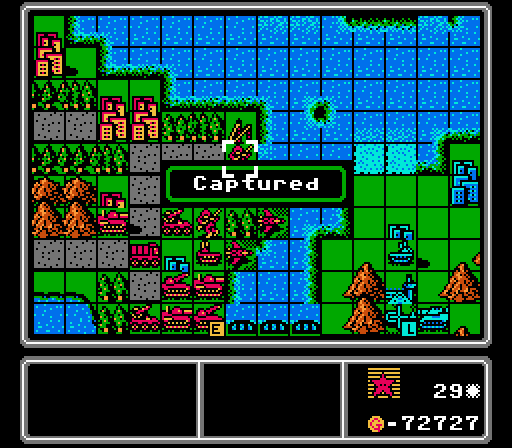 We finish taking the port and the nearby city for another boost. 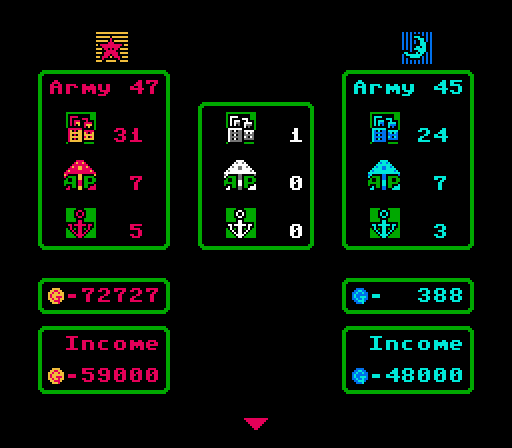 For the first time in recent memory, Blue ran out of money before hitting the unit cap last turn. We've really turned it around now. I'll start summarizing a bit more from here, but there are still four different fronts we're fighting. 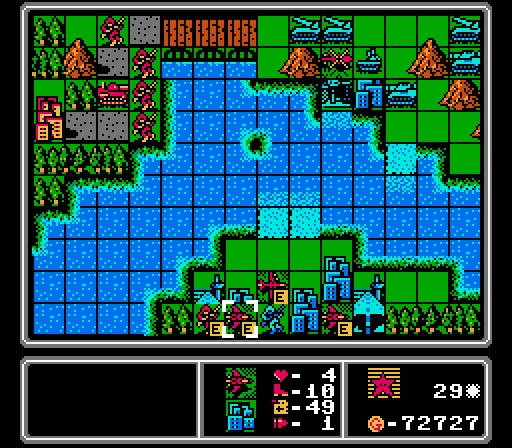 On the lower island, one fighter takes out the copter while our other air units slow down the infantry. 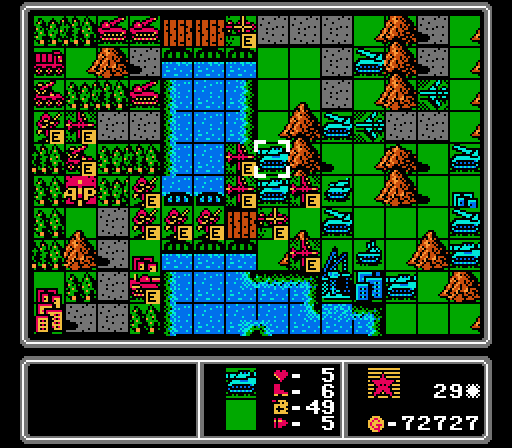 At the lower bridge, the bombers run free and take out a rocket while damaging two medium tanks. That AA tank will probably go after the copter, but even if it hits a bomber it'll take a lot of damage in the process. I'm also no longer worrying about the enemy fighters, since we can produce replacement bombers faster than the AI can destroy them now. We also start moving infantry forward, despite the remaining enemy rocket. 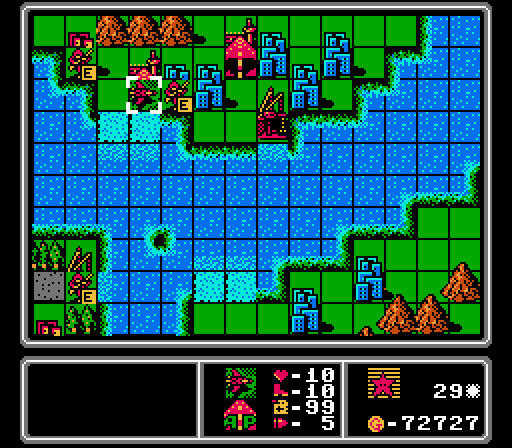 The upper island is clear of enemies now, so our fighter is free to rejoin the main battle. One infantry heads back to a city to heal up, while the other starts a long capture on another city. 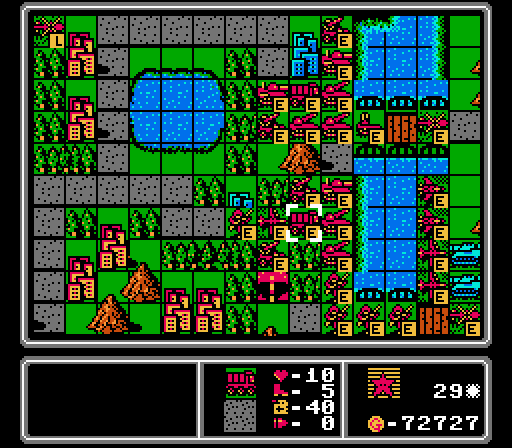 Our other fighters help form a wall to limit where the enemy bomber can go. After a copter finishes off the AA missile, we load up the upper bridge as well as the coastline between the bridges.  We performed a little too well this turn and can only put out one unit, so I pick a fighter. 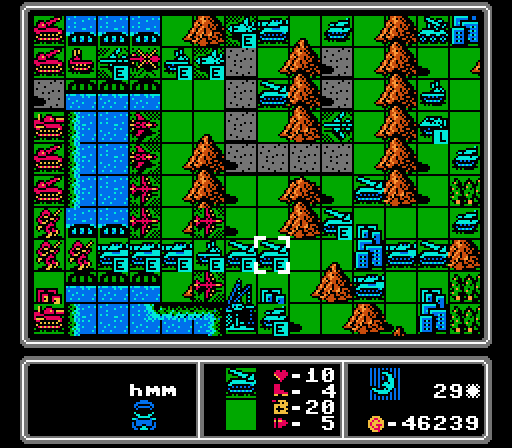 I made a bit of a mistake at the lower bridge. The AA tank indeed finishes off the copter, freeing up space for the medium tanks to wipe out one infantry and hurt another. It's not much of a mistake, though, as both medium tanks were damaged by our bombers and are now in rocket range. There are several more medium tanks and rockets piling up nearby, however.... 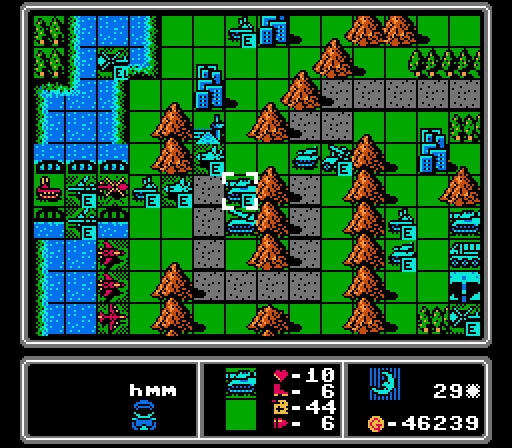 We fare a bit better at the upper bridge. An AA tank comes out to hit our copter but will fall to rocket fire next turn. Both bombers come out but they can only reach an AA tank. Both fighters advance a bit but don't attack anything again. 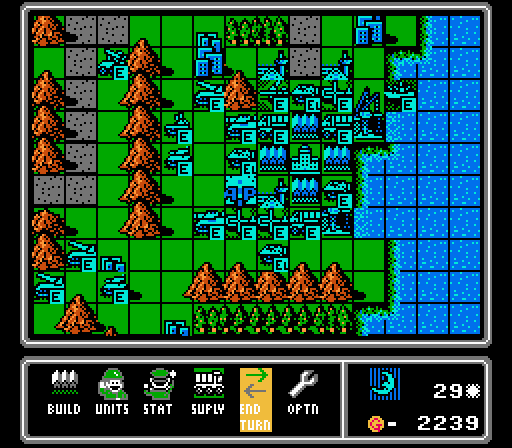 Blue puts out a bomber, a medium tank, and two copters. Turn 30  The copter that the AA tank came out to hit ran out of fuel and crashed anyway. 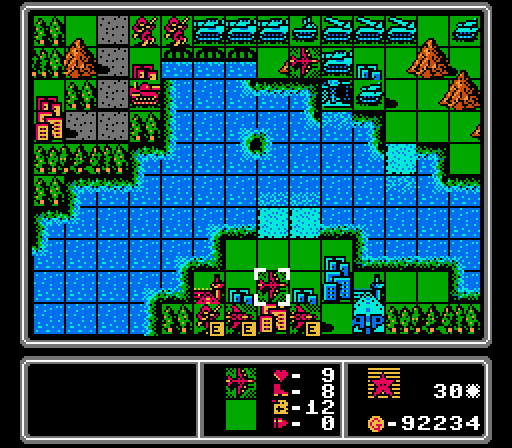 We complete the airport capture at the lower island, and our two fighters are able to finish off the enemy infantry, putting the island totally within our control now. This bomber is out of ammo and low on fuel so it'll wait around until next turn, when it can move to the newly-captured airport for a supply. 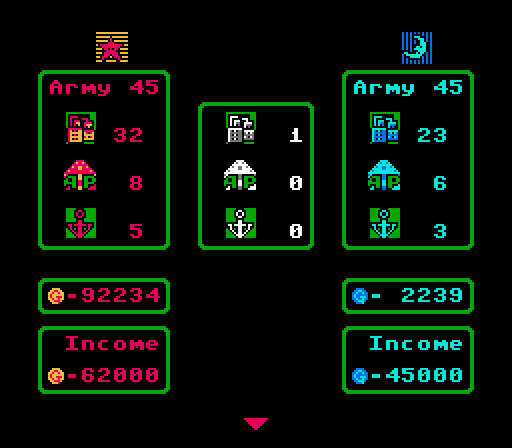 We also finish a city capture on our island. In the span of just six turns, we've completely reversed the income edge from 45k-61k, to now 62k-45k. That's a huge swing! 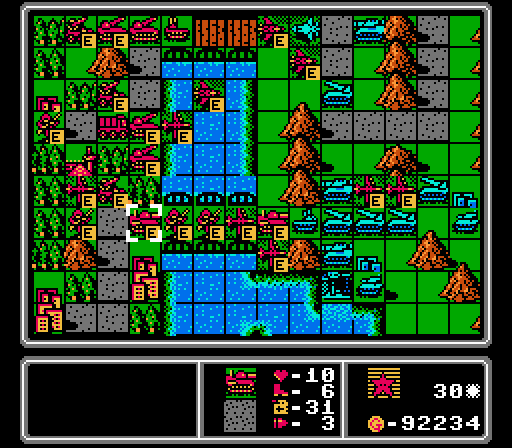 Highlights at the lower bridge: Rockets take out the two lead medium tanks on the bridge. Bombers take out a third medium tank, opening up space for our medium tank to advance and all but destroy the AA tank. Two other bombers weaken nearby rockets to protect the medium tank, while a pair of infantry advance as decoys. 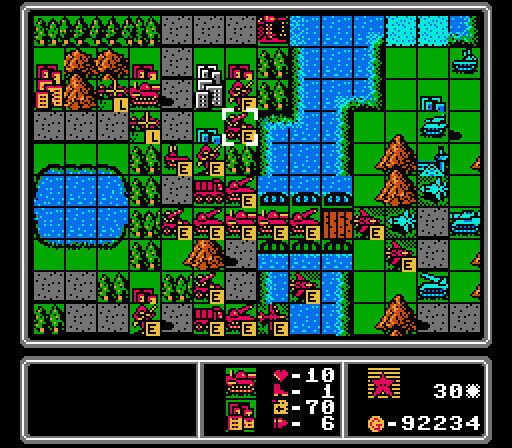 At the upper bridge, AA missiles and fighters shoot down a loaded copter and two bombers. Rockets wipe out an AA tank. More fighters go after one of the enemy fighters. Now the only threat to our air force this turn is one fresh fighter. 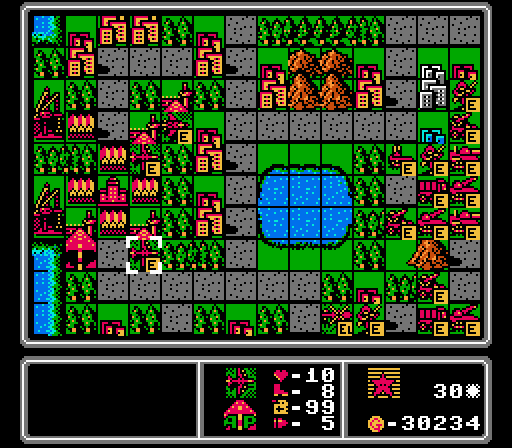 Nothing to report at the upper island - one infantry continues a capture while the other continues healing. Back at the HQ, we build a fighter and two bombers to maximize the value we can get within the unit cap. 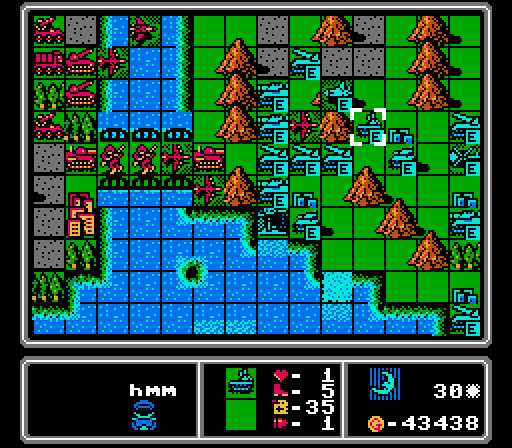 All the action on the enemy phase was at the lower bridge. We did lose a bomber to the enemy fighter, and two rockets hit our medium tank while the third hit an infantry. The damaged AA tank ran away but lucky for us only after the medium tanks ended their turn, unable to move. Otherwise one of them could've moved into that gap to finish off our medium tank.  With Blue's income down so much, for the first time in eight turns they don't build a bomber or a fighter. Instead we get a medium tank, tank, rocket, copter, and two mechs.
|
|
#
?
Jun 12, 2022 20:28
|
|
|
Part 49: Shark (2b of 2) Turn 31 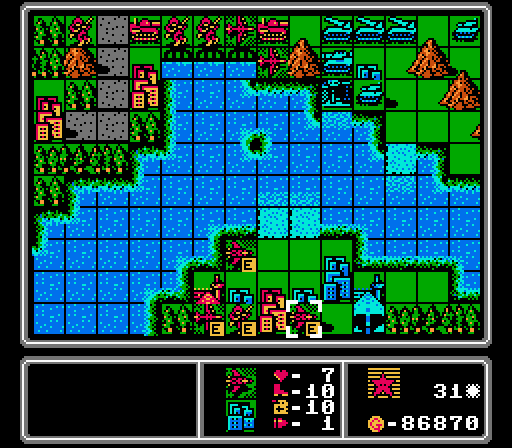 This image is the last time I'll show the lower island. The bomber heads for our new airport to rearm and refuel, while the nearby fighters wait their turn to do the same. So the next few turns will just have a plane getting supply and headed back out to the fight, while the infantry slowly takes over the whole island.  The lower bridge sees our fighters headed down to take care of the enemy fighter. Our damaged medium tank retreats but a fresh one is right behind it and heavily damages a rocket. Our bombers continue to swarm hitting most of the rockets and a medium tank. The highlighted rocket here is the only one left that can really hurt us, and it can't reach the medium tank. We also advance a couple rockets and an AA missile to support the lower bridge, and retreat a bomber that ran out of ammo to our advance airport for a supply next turn. 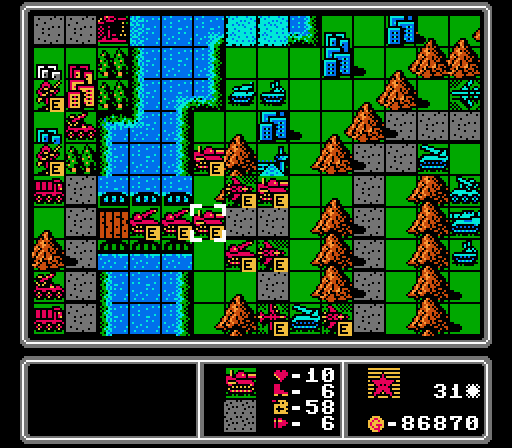 All the attention the AI spent on the lower bridge resulted in no one really left at the upper bridge. We took care of a damaged enemy fighter and then moved everyone forward to secure the area. That lead medium tank on the airport is going to take a hit from the last enemy bomber, but our nearby fighters will make sure it only gets off one shot. 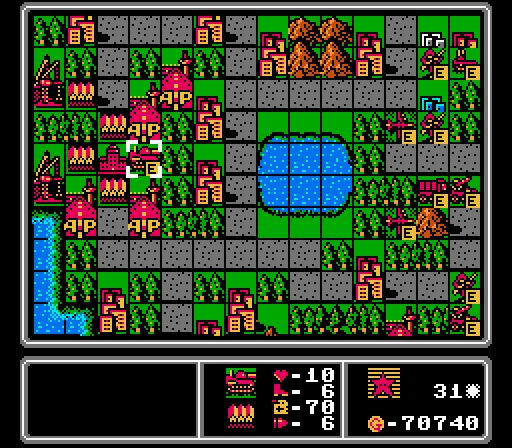 We can only build one unit so I opt for a medium tank, since we had one take two rocket hits last turn and another is about to eat a bomber strike this turn.  We indeed take the hit from the bomber, and this tank also feels brave enough to hit a medium tank, but that's about all the action up here.  The one mostly-intact rocket hits one of our infantry, and then the medium tanks again take their turns and move around fruitlessly before the damaged rockets retreat, losing the opportunity to hit our medium tank.  Hard drive filled up right at the end of the turn, and I missed grabbing Blue's builds here until starting a new video at the start of the next turn, but we have here a scout, an AA missile, a tank, an AA tank, a copter, and a mech. You know the AI is getting cash-strapped when it starts resorting to scouts. So with another 205 minutes gone by (75 minutes on the enemy phase this time), we head into the final stretch. Turn 32  Light action at the upper bridge: The rockets finish off a damaged rocket and damaged tank, a fighter takes out the bomber, and medium tanks swarm the AA tank but can't finish it off. 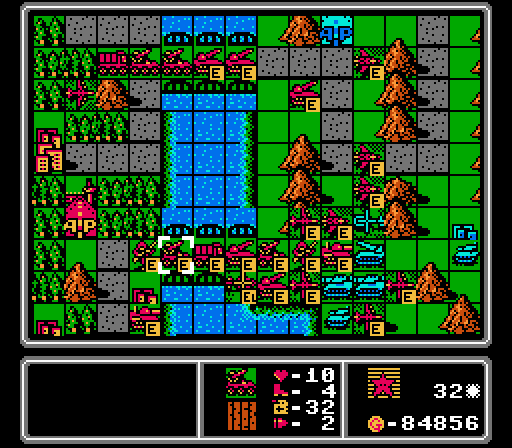 The area just beyond the lower bridge is getting crowded. Our medium tank advanced to hit the healthiest rocket, while a rocket that went across the upper bridge actually got close enough to finish off a medium tank. Our bomber fleet took out an AA tank, a rocket, and a medium tank while hitting two other medium tanks. Finally two fighters went after a copter but couldn't quite destroy it. We also get a couple rockets across the lower bridge ready to help out next turn, and merge together two infantry to try and capture something soon.  Some merges freed up space for us to build three units, so we go with a fighter and two bombers here. 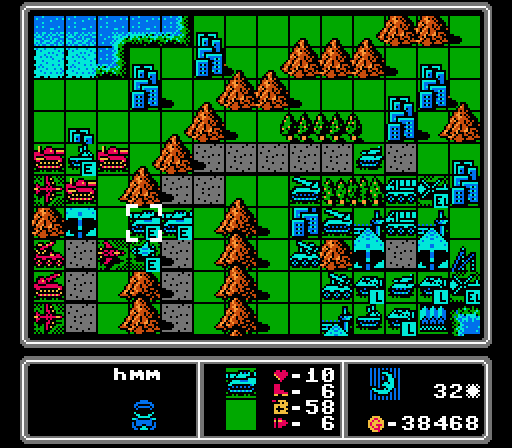 The new enemy scout for some reason went straight at our fighter and lost 60% of its Life as a result. Two more medium tanks showed up but we can choke them in that mountain pass if needed. 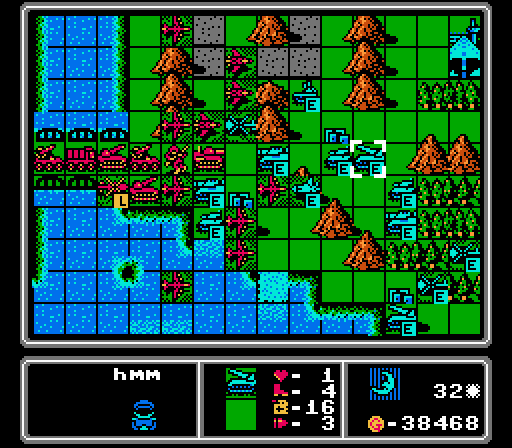 This rocket retreated, but only after everyone else nearby had already acted, so only one medium tank was able to lightly hit our medium tank. The half-repaired fighter hit our bomber, and that was it for the enemy phase. 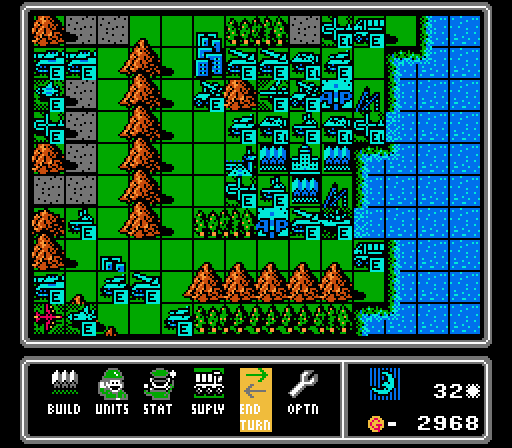 Bomber, copter, tank, and AA tank. Turn 33 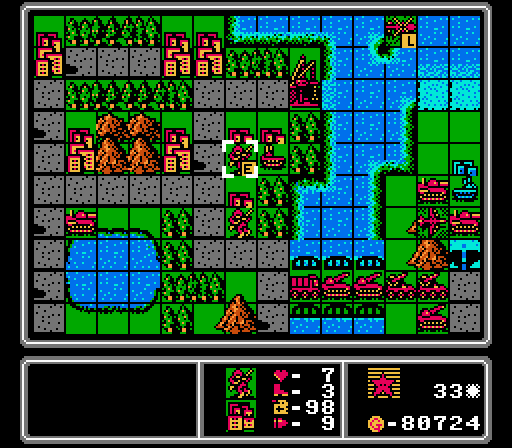 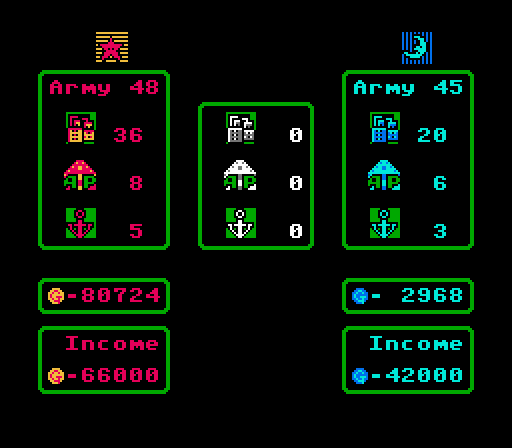 We take another city on the lower island, and the last city on our island and last neutral city on the map. Technically the capture race isn't over until the last neutral property is taken, so I guess we won it?  Upper bridge action: Two damaged medium tanks finish off the AA tank, while a rocket, two bombers, and a full-strength medium tank take out two enemy medium tanks. Our fighter also finishes off the scout that came for it, while a damaged fighter finishes off a copter that ran away. With the city here now open, a copter drops off an infantry for some capturing payback. 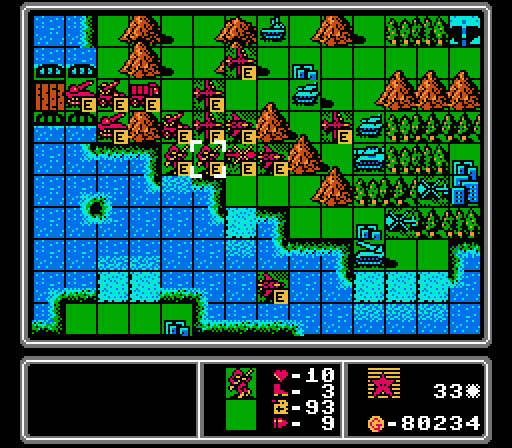 Down at the lower bridge: Two rockets remove the tank from the port, and with a bomber taking out the other medium tank blocking it, we're able to get an infantry there to start capturing it. A medium tank hits the AA tank to keep it from doing too much to our planes on the enemy phase. Two bombers take out another medium tank further in, as two fighters down the enemy fighter. A damaged bomber also finishes off a damaged rocket, sitting way out in front of the rest of our troops. Another loaded copter arrives, dropping off another infantry at another of Blue's cities. Back at the HQ we build a couple of replacement bombers for some planes that we merged together down here. 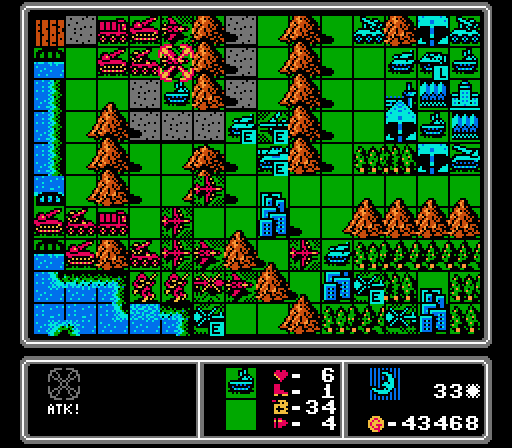 The new bomber took out our medium tank and opened up the pass for this AA tank to finish off a damaged fighter, but that was about it for the enemy phase. The AI built a scout, a medium tank, a tank, and a copter. Turn 34 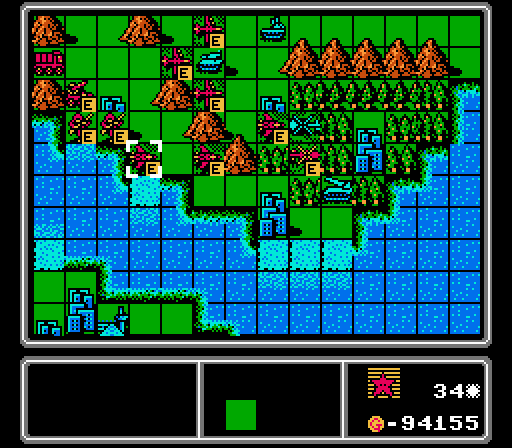 Donw in this lower area, an AA missile shot down one copter while two fighters took out another. A couple bombers then hit a foritified tank and a fighter and a copter went after another copter, but neither were destroyed. We also finished capturing the port and started taking a city.  Taking a port from the enemy has a bit different animation with the enemy soldier getting kicked out straight into the water with a little splash. Kind of cute. I missed it the first couple times but caught it here.  In the upper area, we had a medium tank destroy an AA tank, and two damaged medium tanks merged together to hold the pass. Closer to the middle, two bombers wiped out a tank, a fighter wrecked a bomber, and two more bombers destroyed a medium tank. For reinforcements we picked up a trio of bombers. 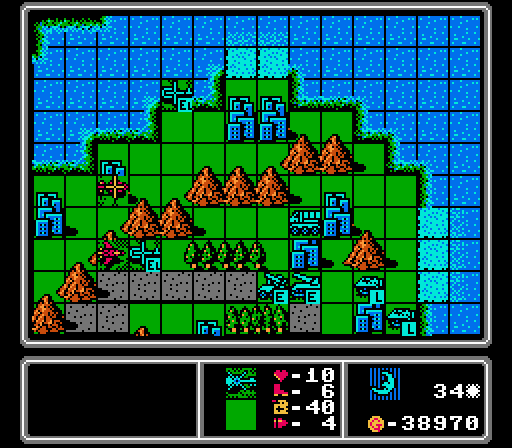 I haven't shown this part of the map much, but I noticed a loaded copter headed for the upper island and set up a copter and a fighter nearby to head it off. A second loaded copter also showed up this turn, but that one is in range of our AA missile. 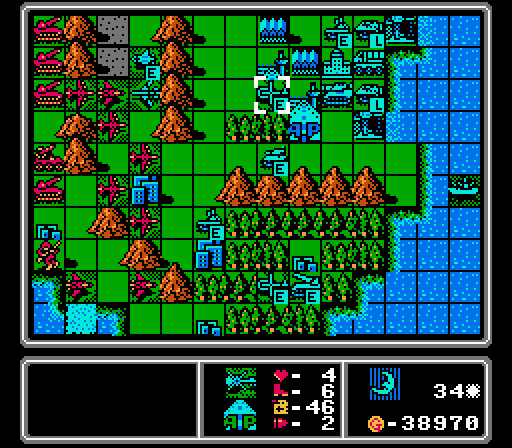 The new scout shot down a bomber and the new copter blew up a copter. An AA tank also finished off a fighter. Just off-screen in the upper pass, a tank threw itself against our medium tank blockade and lost. Blue then retreated its damaged planes and built a rocket, an AA missile, an AA tank, and a copter. Turn 35 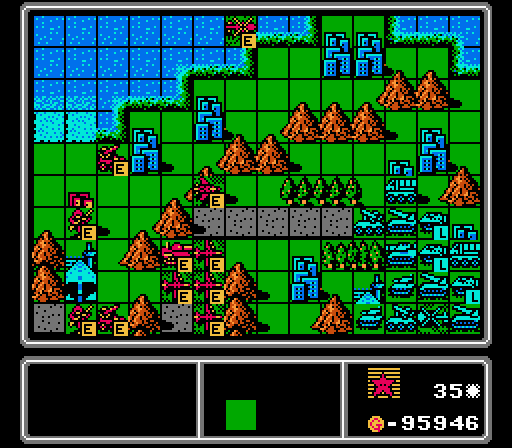 In this upper area: Two fighters, an AA missile, and a copter combine to take out the two loaded copters. Rockets finish off one tank, and soften up another for a bomber to finish off. More bombers file in from the lower area, avoiding an AA tank that I can't deal with after having lost the medium tank in that area.  Down here we have a fighter finishes off the scout, while another hits a copter while staying away from the AA tank. Everyone else moves forward while keeping the planes away from the AA tank. Back at the base, we build two fighters and two medium tanks for some variety and to replace recent and expected future losses. 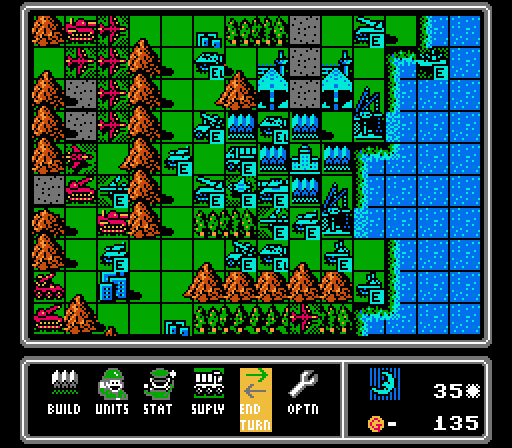 Not much happened here - a partially-repaired bomber hit our rocket, and a new tank came out to challenge our medium tank. Down off-screen two damaged copters merged together, and after a lot more shuffling around, Blue built a scout and a bomber in one last air raid. Turn 36  We finally take the last property on the upper island. Note how I put a third infantry here to speed things up. Now we try to ferry the infantry back to the main enemy island to take the unprotected cities outside the mountain barrier.  Two medium tanks each hit an AA missile, a rocket hits an enemy rocket, and an AA missile shoots down the not-repaired enemy bomber. Our fighters go after the new bomber and a copter, and for each one another ammo-less fighter merges into it. Bombers fly in to finish off both AA missiles and the rocket (thus why you don't see them here) before hitting the tank and two loaded APCs still shown. We build two more bombers back at HQ; it'll be nothing but bombers from here on out, so I won't be mentioning them anymore.  The new scout shoots down a bomber, our medium tanks each take a hit from a bomber and a medium tank, and we lose a fighter to a pair of AA tanks. We also had a couple damaged copters and a tank head out for some chip damage on capturing infantry; our captures at this point are more harassment than strategic so getting the enemies out of the way is better of us anyway. Blue then builds a medium tank, a tank, and a copter - no more planes at least! Turn 37 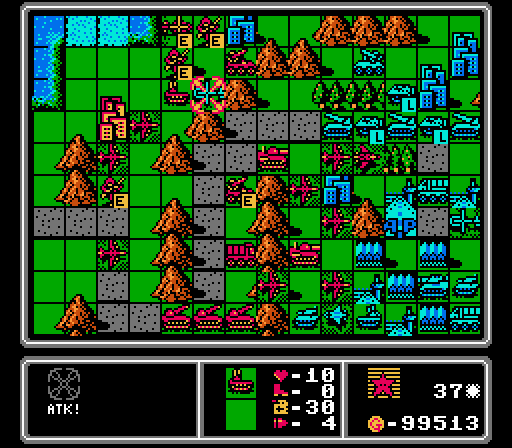 I've been carrying around this last AA tank for awhile, and it finally comes in handy taking down this copter. We also take the airport that was just past the upper bridge, and finish off the damaged tank and copter in the lower area with a rocket and an AA missile, respectively. Another AA missile shot down the damaged bomber that hit us last turn. Also pictured here is a line of rockets mixed with loaded APCs all clustered together. Tough to send in our medium tanks, at least it would be if I were worried about taking damage anymore. 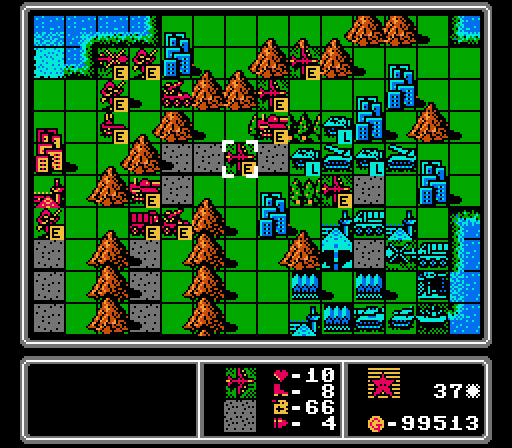 We end up taking out the AA missile and half of the rockets but our medium tank is still going to get hid hard on the enemy phase.  Closer to the enemy HQ, our rockets hit a tank and AA tank, our bombers finished off a loaded APC and tank, and one medium tank hit the full-strength AA tank, while the other heavily-damaged medium tank was just strong enough to finish off this AA tank.  This lower area is getting slowly cleared out, as an AA tank kills itself on our fresh bomber. 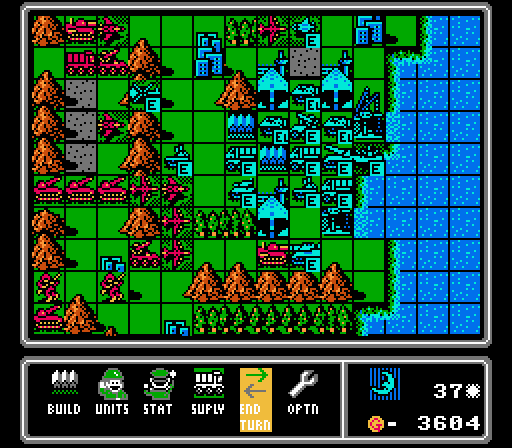 We lost our damaged medium tank to a fresh tank, and our other medium tank took a hit from the fresh medium tank. The damaged enemy scout flew up to pick on a bomber, with a damaged AA tank chipping at our fighter. Just off-screen the enemy rockets did wreck our medium tank. Blue builds a rocket, an AA missile, and an AA tank this time. Turn 38  Just marking the turn by celebrating taking the last of the neutral ports/airports on the map. Not too long ago Blue owned every single one of these except one of the ports on our island, now they're all ours. That last city will join us in two more turns, too. While I'm showing this screen, that enemy rocket finally falls to our rocket. Blue now only has what's right next to its HQ.  One fighter finishes off the scout while another teams up with an AA missile to shoot down a copter. Our rockets hit a tank, our damaged medium tank finishes off an AA tank, and then our other medium tank merges into it. Our fleet of bombers collectively wipe out a loaded APC, hit the upper rockets (destroying one), and take a couple shots at the battleship, AA missile, and medium tank to keep them from hurting us too bad on the enemy phase. 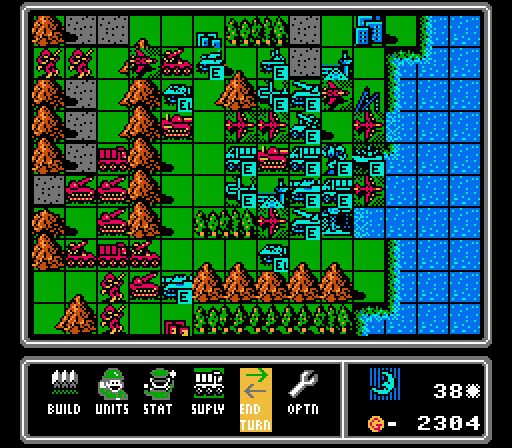 The AA missile shoots down a bomber, the AA tank finishes off a fighter, the APC hurt our AA missile, and the medium tank hurts our rocket. The battleship scratched another of our fighters but nothing too bad. Blue builds two copters, a mech, and a medium tank. The copters will be the hardest ones to deal with, given we have mostly bombers on the way. Turn 39  The AA missiles take aim at the copters and the rockets finish off the advance medium tank and start on a supply. The fighters finish off one copter, while the medium tanks - both heavily damaged now - keep the AA tank in check. The bombers finish off the battleship, the AA missile, a rocket, the tank, and a loaded APC while hitting some other units but not destroying them. That's a total of eight kills this turn, with ten enemy units remaining. If it weren't for our bombers running out of ammo, we'd be done even sooner.  On the enemy phase we lose a medium tank to a rocket and an infantry to a medium tank and copter. The AI then puts out a tank, a rocket, and another copter. Turn 40  The rockets took care of the medium tank and APC, the fighters took out a copter, and a medium tank finally finished off the last AA tank. The bombers destroyed two rockets and a supply but I need to wait for reinforcements to end this thing. 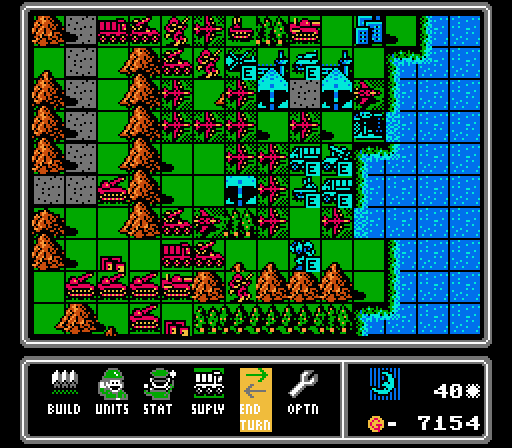 We suffer a couple of attacks but don't lose anyone, as Blue builds an AA missile and an AA tank in a last-ditch effort to ward off our bombers. Turn 41  Our AA tank shot down a copter, proving it was worth me hauling it all the way across the map. Our medium tanks took out the tank and enough of the AA tank for a bomber to finish it off. The rest of the bombers handily removed a mech, a tank, and two supply trucks but I was down just one attack on the AA missile to end the map here. So we're left just short again.  The AA missile gets off a shot on a bomber, and then puts out a medium tank and a copter. We've got this. Turn 42 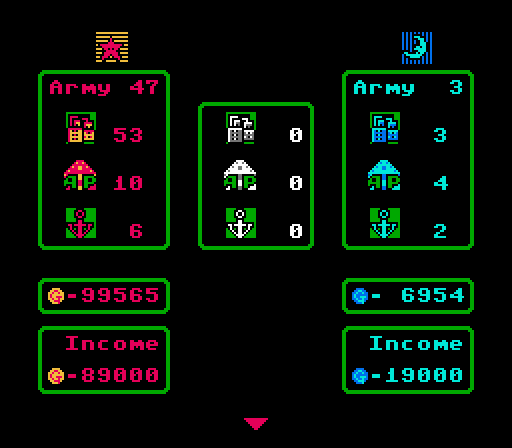 A final look at how we've turned this map around. Blue has fewer cities now than when it started the map. 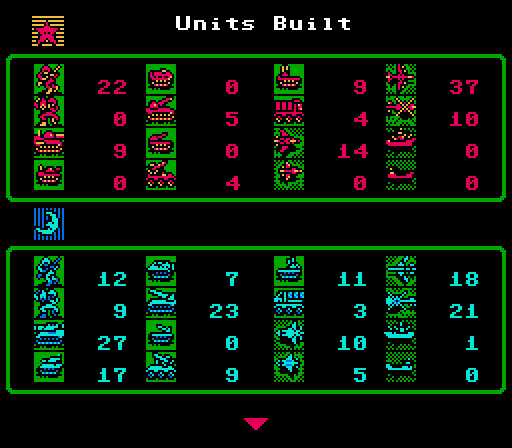 Look at all those units built on this map! Clearly we were pretty plane heavy ourselves, but we also defeated 27 medium tanks, 23 rockets, and 18 bombers along the way.  The difference in the killed lists is even more wild - we hardly lost any units in comparison. I did a lot more retreats and merges instead of losing entire units most of the time, and of course we will end the map with a full army that's still alive and intact. Building 37 bombers and only getting 7 of them killed is an interesting feat. Another interesting stat - we built five rockets and four AA missiles and didn't lose a single one, leaving us free to focus on pumping out direct attackers for most of the map. On the other hand, we built nine AA tanks and only one made it to the end. 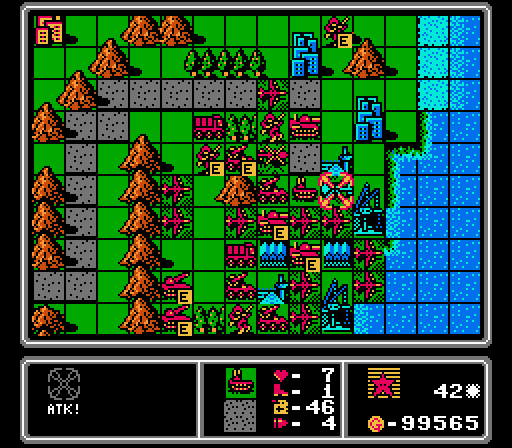 I know we had a lot of bombers out there (ten just in this screenshot, with two more just off-screen in the lower mountains and several reinforcements on the way) but let's celebrate a more balanced attack by ending the map without a single bomber this turn. The rockets and the medium tanks together take out the new medium tank and the AA missile. Then our own AA missile hits the new copter, allowing this scrappy AA tank to finally end this.   Finally! Our total runtime for this map: Almost 13 hours, of which we had five hours just watching the AI think and move. I'm pretty sure some modern strategy campaigns as a whole don't last as long as that one map did. To be honest that's just the final cut - I probably spent another 5-6 hours perfecting those first dozen turns or so until I came up with an exact build-move-attack pattern that worked. 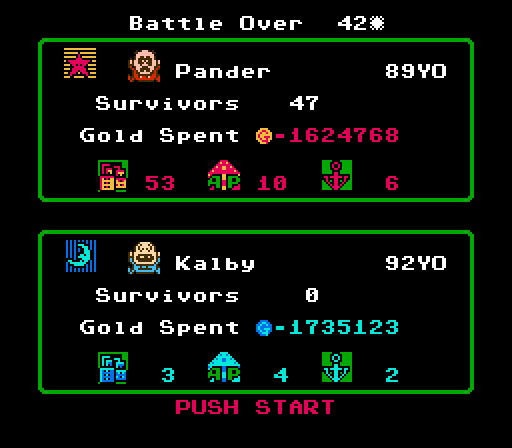 We were within a couple turns of actually catching up to Blue on total gold spent, though I'm not sure if Blue's total counts the pre-built units or not. Our CO was some kind of panda maybe? And the Blue CO just looks like a crying baby to me, but I can't see straight after so long staring at this screen. 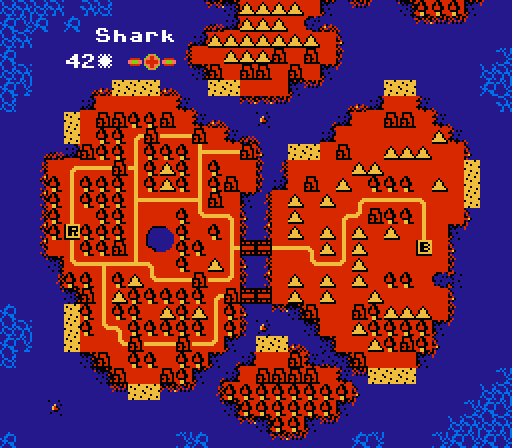 I have no idea what a good score is for this map, but I dare anyone to do better. I'll cut off the update here, but we have some final wrap-up still to go.
|
|
#
?
Jun 12, 2022 20:28
|
|
|
Good God, that map looked like a slog. And I thought Days of ruin could get bogged down.
|
|
#
?
Jun 12, 2022 22:36
|
|
|
That map sure made you work for it - that one (played straight) was much harder than any of the other maps even with quirky challenges added on. Very interesting to watch the tide slowly turn.
|
|
#
?
Jun 14, 2022 00:43
|
|
|
I have to wonder if the same setup is even possible if you replicate it with better AI like in AW:DS. Though in that instance the AI wouldn't typically have free extra damage like it does here, unless you give them free com towers.
|
|
#
?
Jun 14, 2022 07:55
|
|
|
Part 50: Unit Overview: Lander 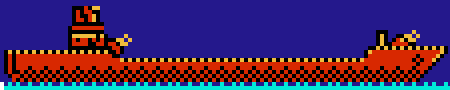 Landers do show up in an animation when they're loaded, though they're a bit...large. A nice touch in the animation is a couple of small anti-air guns, showing the lander's combat niche (more on that below). Basic Info: pre:Cost 18500 G Movement 5 Move Type Ship Fuel 99 Ammo 6 Ammo Cost 3 G Range 1 Special Can carry any two ground units pre:Opposing Unit Damage Dealt Damage Taken Infantry 1.5 0.5 Mech 1.5 0.5 Medium Tank 2.5 1.5 Tank 2.5 1.5 APC 2.5 0.5 Rocket 2.5 2.5 Artillery 2.5 2.5 Supply 2.5 N/A AA Missile 2.5 N/A AA Tank 2.5 N/A Fighter 4.5 1.5 Scout 6.5 0.5 Bomber 5.5 6.5 Copter 6.5 0.5 Battleship 2.5 7.5 Lander 4.5 4.5 Like APCs, landers are transport units that could originally also serve a combat niche. Landers can carry any two ground units, though they can only unload them one at a time in this game. They are also effective against air units; not as good as an anti-air tank or missile, but good enough for naval air denial and battleship protection. They also can do decent damage against battleships, if they can get close. They're best at carrying your heavy vehicles over to an enemy island for a ground invasion, but they can still help out after their primary job is done. DKII fucked around with this message at 20:09 on Jul 3, 2022 |
|
#
?
Jun 19, 2022 18:41
|
|
|
Part 51: Roundup and Credits Beating the bonus map unlocks the credits! We get more of the cute animations and music to go with them! Music: Credit Roll  As the credits roll, we see all our units march by while the locals cheer them on. A squad of infantry and mechs, a medium tank, a tank, a rocket, and an artillery. Producer Gunpei Yokoi is like the grandfather of Nintendo. He was Miyamoto's mentor and responsible for producing several early games (including Kid Icarus and Metroid) and the early handheld hardware systems (Game & Watch and Game Boy). He's most remembered for the commercially-disastrous Virtual Boy system now, but focusing on that system really understates the impact he had in his 30+ year career at Nintendo from 1966-1996. Unfortunately he was killed in a car accident a year after he retired.  After a brief break with a dog running across and a baloon in the background, we see an AA tank and an AA missile. Followed by a skateboarder and a ball? Then an APC and a supply truck.  A fighter, scout, bomber, and copter fly across the sky, followed by a lander and a battleship towed through town. I guess the big planes and the battleship show up in an animation after all.  And in appropriate fashion for this goofy game, the credits end with an infantry missing his ride and getting attacked by a flying snake. Here's our final list of maps, victory turn, and challenge:
And another random list of all the weird things I noticed in this game that are different from future games:
And finally a handful of music tracks I didn't get to show off in the main game:
That's it...or is it?! 
|
|
#
?
Jun 24, 2022 15:28
|
|
|
Time to make Olaf's granddad proud?
|
|
#
?
Jun 24, 2022 18:57
|
|
|
The credit sequence is really charming.
|
|
#
?
Jun 24, 2022 22:38
|
|
|
Part 52: Blue Moon Speed Run What happens if Blue Moon wins? Let's find out!  We'll play on normal mode without any challenges on each map. I'm taking a personal challenge to go through all 15 maps as quickly as I can though (both in total runtime and in total turns spent). Here's how it went! Map 1 - Bean  The first map is fairly symmetric, so the only real difference in playing as Blue is that we don't go first. Here you can see we've already formed a cluster in the middle of the map, and taken half of the six-group of cities in the center, pretty much just like in the original run. Red here has more vehicles in the area, but we're the first to build both an artillery and a rocket so between those and our tanks we'll be able to take control here pretty quickly. 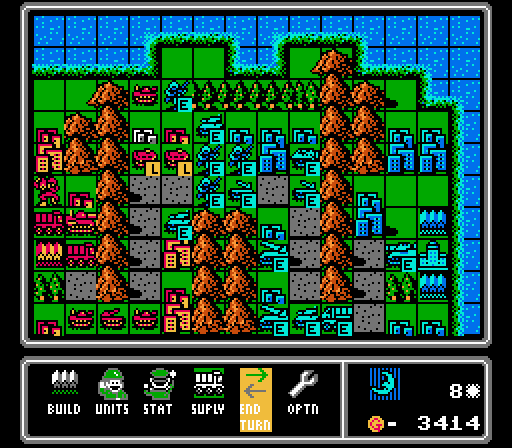 Indeed, a couple of turns later we've thinned out the opposition in the center and deployed another rocket and a medium tank. We prevented Red from capturing more than one city in the center and eventually marched down the road and wiped them out in 17 turns and 1.25 hours. Our original run took 19 turns with hard mode and a mild challenge of only building a unit after the AI had built one of that type. Map 2 - Crater  This map is more challenging as Blue, since Red starts with seven cities already under their control while we have none. We have to spam a lot of infantry at first to grab everything we can and try to break even in capturing the remaining cities. 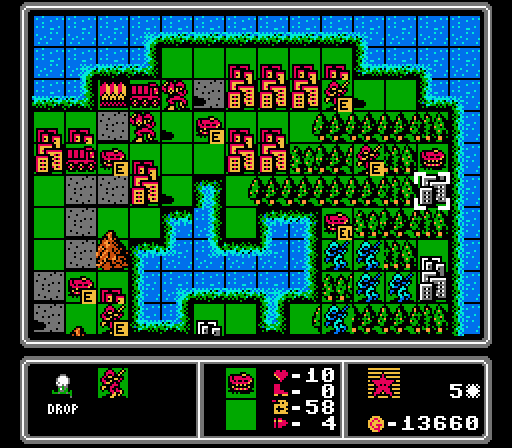 Red puts out a ton of APCs to counter our infantry spam, and the map eventually turns on the cities in the corners and who can grab them first. Here an enemy infantry is dropped off on a city that we really want for ourselves, so I'll actually use our spare infantry to keep it free for a little longer. 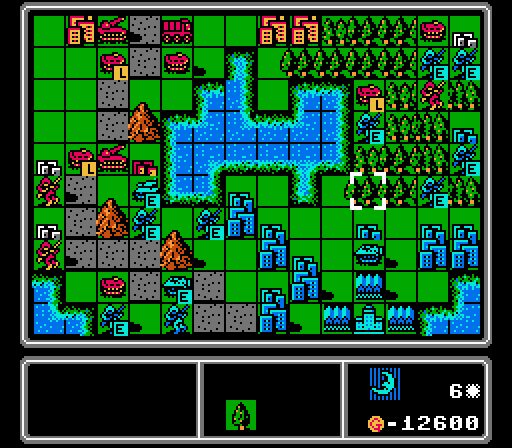 Once we're able to get some vehicles out and stall the enemy advance on both approaches, the map plays out pretty much the same as last time. We end up barely losing the capture race, but we have a tank on a red city that we'll be taking shortly. 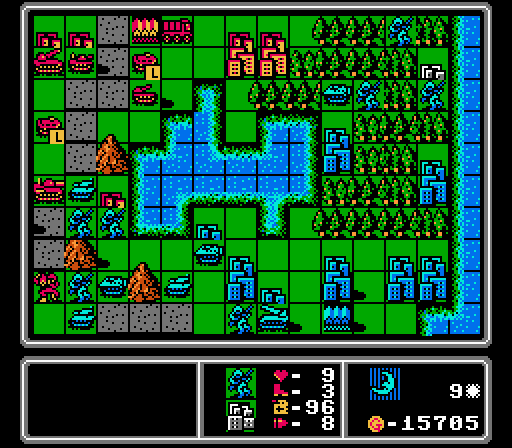 Here's the turning point where we grab the last neutral city while also taking the key lakeside city from Red. Overcoming the enemy's initial income advantage took some time but we eventually won this map after 19 turns and 1.5 hours. In the original run, we were slowed down by only having mechs for capturing and took 22 turns to win. Being able to beat that score as Blue in this map is a nice accomplishment. Map 3 - Triangle 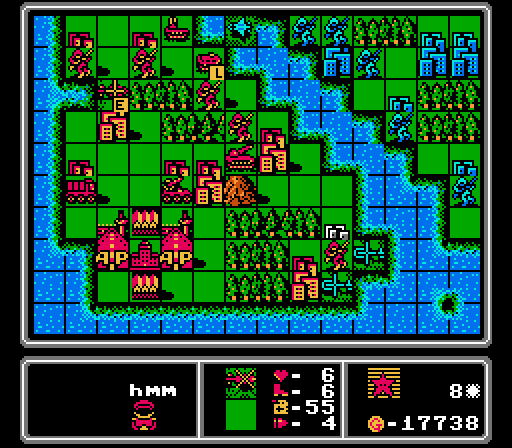 Triangle was slow torture in the original run thanks to a poorly-chosen challenge. In a regular playthrough, the map is pretty symmetrical with 11 cities on each island. Here we're able to get some copters down to prevent a city capture and maintain a slight income edge that will eventually carry the map. We also built an early scout to deal with enemy copters, after initially sending out infantry and copters in the early turns to grab everything on our island.  A few turns later we've landed a handful of footsoldiers. The infantry group is mostly a distraction to keep some enemy units occupied and use up units that had nothing to do after we'd finished capturing everything on our island. The real threat here are the mechs that are capturing Red's cities already and protected by an air screen.  With a growing income advantage we keep throwing out more mech+copter combos to keep stealing Red cities, joined later on by occasional bombers and fighters to claw back air superiority. Mechs are a pain to remove from cities and the mostly air units that the AI has out here aren't well suited to it. The map was still a long one but we completed it on the 23rd turn after 2.5 hours, a vast improvement over the original run. There an initial challenge of only building one unit of each type was too limiting, and even relaxing the challenge after taking control of our island to allow for building two units of each type proved to be more trouble than it was worth, resulting in an excruciating 83-turn victory. Map 4 - Ball  The fourth map gave us a larger space to play in and our first exposure to the expensive naval units. We start this map with 99,999 gold in order to immediately play with said naval units, and this time in addition to getting two battleships right away I also put out a scout to go harass the enemy copters. Red has a slight advantage here with an extra port and city on its island, so we need to be extra sure we can grab the islands in the middle without taking hits from any enemies.  After building a set of infantry to grab the cities on our island, the next few turns are all about sending out copters and mechs for taking the central islands and advancing the battleships to claim the central sea. Really, the same as the first run.  By the start of the 10th turn we're already landing mechs on the enemy island again. We were able to keep Red from capturing one of the cities on its island, while taking over all of the central islands unopposed.  Our biggest challenge was keeping the landers away; eventually I boxed them in with copters to that our battleship could pin them down and sink them. One lander had a medium tank and a rocket aboard (a total of almost 50,000 G down the drain without firing a shot). From here we had enough of an income edge to start putting out more battleships and then the usual waves of bombers to finish the map. We were victorious after 20 turns and 2.75 hours here, another large improvement over our 33-turn original score. Our original challenge limited what we could build to what the enemy could afford. I eventually abandoned that challenge when it became clear that we were going to win anyway after taking the central islands, with the challenge just slowing us down at that point. Map 5 - Coral 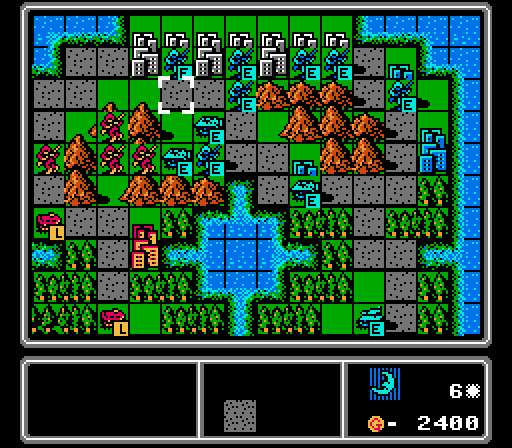 Coral on the surface looked pretty symmetric but a spur of mountains jutting out on Red's side actually gives Blue quite an advantage in the initial capturing phase just from accessibility. We're actually able to take the central lakeside city as well as most of the upper group before Red can even get any vehicles near us. 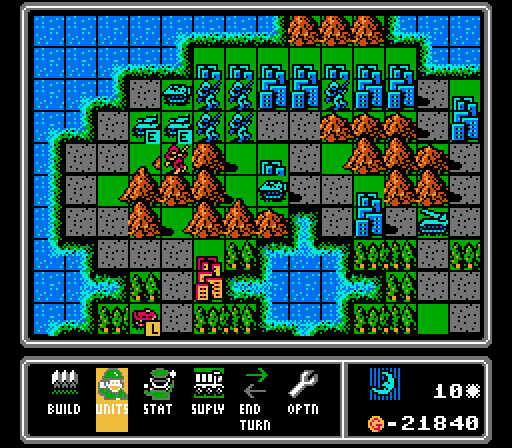 We end up taking every city in the upper group, with Red only able to capture a single city near its HQ. At this point we had enough income for a medium tank every turn while Red was stuck with just 5,000 G each turn, so the result was inevitable from here. We won in the 16th turn after just 0.75 hours, again a massive improvement on our original score of 35 turns. Our challenge for the original run forbid us from using repairs, and subtly slowed down our advance as we kept having to wait for new vehicles to get all the way around those mountains. Map 6 - Puzzle 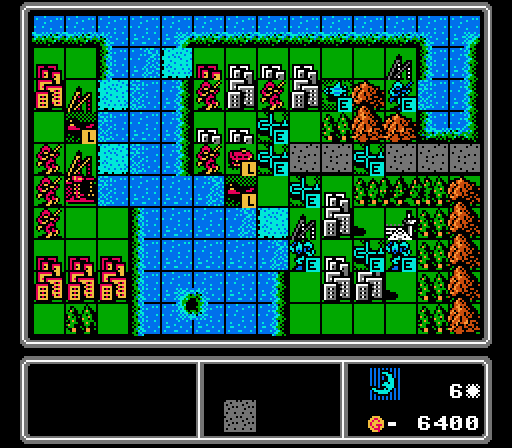 This map was laid out like puzzle pieces, with both sides having the same layout on the end pieces. The central piece had more properties on Red's side, but Blue started with five of the cities on its side. We were able to use that income advantage to quickly send a scout and waves of copters out to contest Red's entrance to the central island.  The AI was only ever able to take two cities here, leaving us to gobble up the rest and send out another squad of battleships followed by more bomber waves. We cleared the central island after just a couple more turns and pressed on to victory after 16 turns and 1.5 hours. Our original run took 26 turns with a rather trivial challenge of not letting air units stay on our starting island after they were built, though we also satisfied a hidden extra challenge by not letting the AI capture any properties in that run. Map 7 - Mist  Some of you were asking for this one after we first played it, and here it is. This map is one of the most asymmetric in the game, as Blue starts off owning every city but is hemmed in by forests and mountains so can't stop Red from taking back several cities in the beginning. We start off by rushing out eight APCs (which have great movement even through forests, tear up infantry, and are cheap enough for us to max out production on them here).  An "even" result would be holding on to just two of the outer cities, but you can see we're protecting to three on the lower-left corner and we're holding on to another four in the upper-right region. We have enough APCs so it's all medium tanks from here. 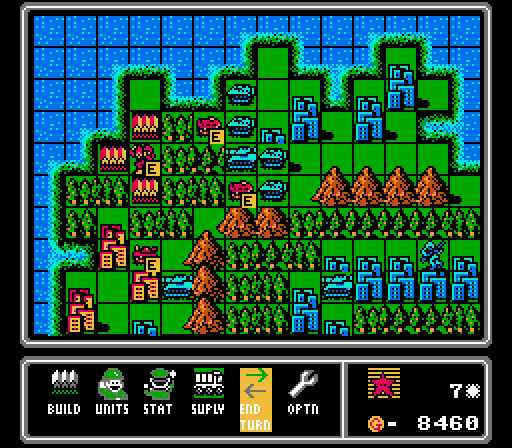 Once the medium tanks are in play, the map doesn't take much longer. We actually won by wipeout on this 7th turn with three medium tanks and seven APCs here all working to take out the remaining enemies. Total runtime was just over 15 minutes! When we played as Red, it took us 28 turns and our challenge of preventing any enemy capture attempts failed halfway through. Map 8 - Deer  The Deer map is the first jumbo-sized map, both wide and tall. It plays out pretty much the same for both sides, but in this case Red is content to stay on its own island so we're able to grab all the neutral ports and airports and then all of the cities on every other island as well.  We're even able to use our copters to keep Red from taking all of the cities on its own island right away, building up even more of an income edge. That lander is loaded up with a medium tank and a tank, so I also play around with using copters to block the beaches so it can't unload anywhere. 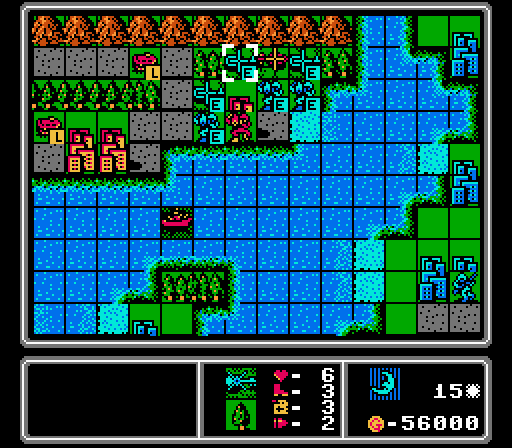 We keep putting out more mech+copter combos to keep Red distracted while we start to roll out our battleships and bombers and get them all the way across the map.  The battleships come out first since they're slower, and once we get more stuff captured we'll start throwing in bombers. 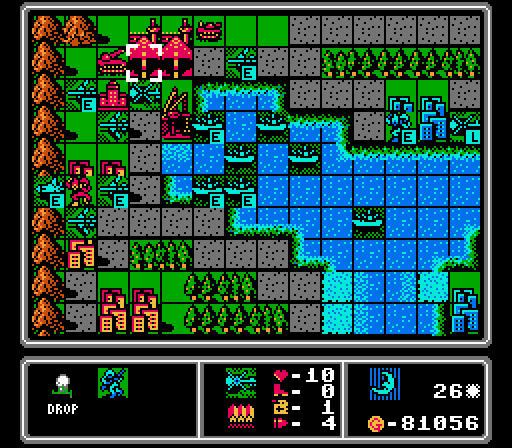 A long time later we finally have enough heavy hitters at the enemy HQ to wipe them out on turn 27 after 3.25 hours. Our original run took 28 turns with a challenge of spending as much cash as possible, that ended up mostly resulting in the same stuff getting built anyway. Just not much to be done to speed that one up. Pictured here though is another game quirk I discovered - copters can't unload directly onto the enemy HQ, making an HQ capture victory even more unlikely to happen naturally. Map 9 - Alara  Another map that is mostly symmetric so plays out pretty much the same as last time. We rush copters to grab the neutral airports first, then use the same copters to block off the mountain passes and pin Red close to their HQ.  Eventually we start putting out a couple medium tanks and rockets to hold the passes, followed shortly thereafter by the typical bomber train. 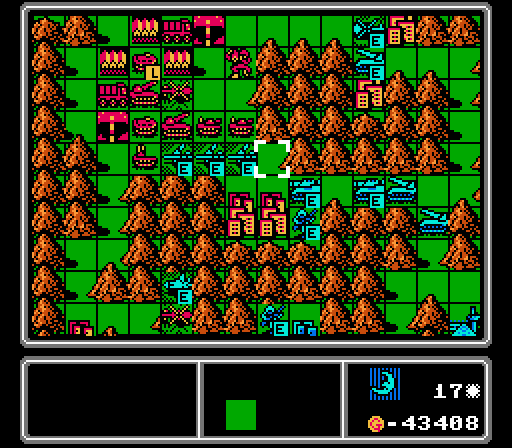 Soon after Red is pushed back even farther and we start taking the rest of its cities, cutting off its income and sealing the map. It took a few more turns to finally get the wipeout victory here, but we won after 21 turns and 2.25 hours. The first time through we had two challenges - always moving towards an enemy unit, and not using any ground vehicles - and won in 26 turns. Map 10 - Lost 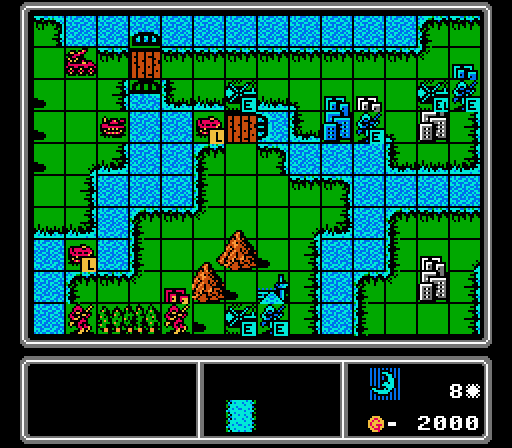 Lost is an interesting map with a lot of rivers separating the two HQs. We start off the same way with copters headed first for the neutral airports and then grabbing as many cities in the center of the map as we can. 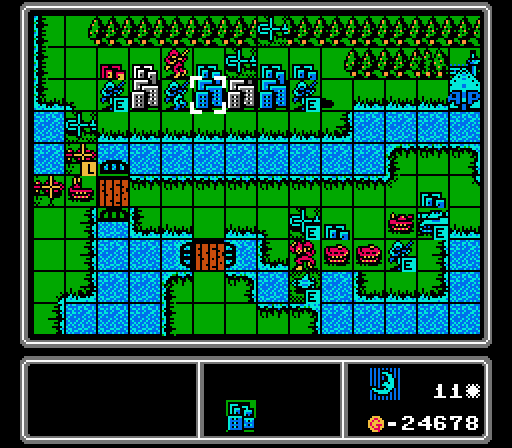 This cluster of cities is still key, and we're able to grab most of them. Red does get one city here and one down by the airport in the previous shot. However we have a medium tank much sooner than last time, now that I know they can cross rivers.  Anyway we soon gain full control over the center of the map and start the bomber train up again. We cleared this map in just 20 turns and 1.75 hours. Last time it was 35 turns with a challenge of only building units up to the number that the enemy had deployed, slowing down the snowball effect. Map 11 - Volcano 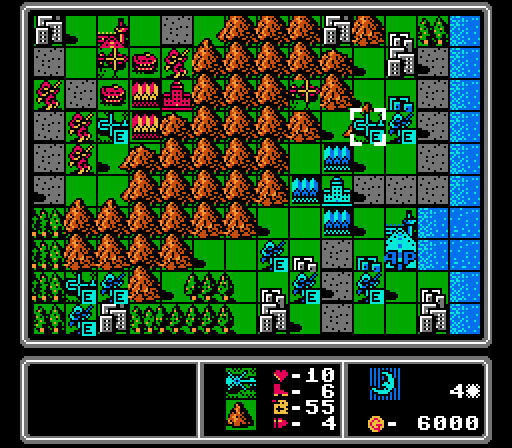 This map is another even one. We spread out infantry to grab the corners before Red can get there; doing so eventually gets us a 16k-to-12k income edge, that we then have to exploit over the next several turns. Our one advantage here is the city we just took in this shot is really a base, so we can build our heavy vehicles a little closer to that upper pass. 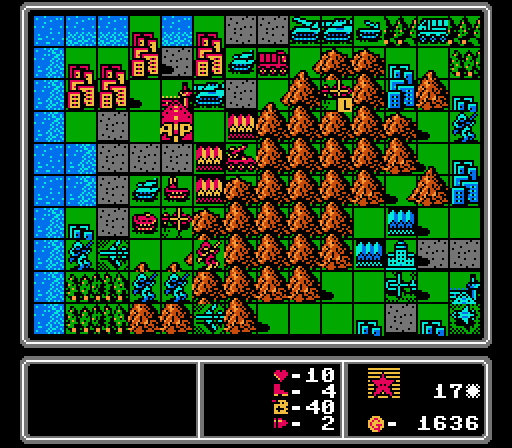 Ever so slowly we pile up heavy vehicles through the upper pass, drawing in the enemy units and then finishing them off with an artillery and a rocket. The lower pass I hold with a handful of infantry getting defensive bonuses on forests and cities until we can get another set of vehicles down there. By that time we're able to afford bombers every couple of turns, and use them to bust the lower pass open and surround the HQ. We win this map just a couple of turns later on turn 19 with a runtime of just 1.5 hours. The first time around our challenge was to avoid using copters or bombers, a pretty severe limitation for my usual strategies. Instead I one-upped myself and won the map in 22 turns using just a handful of infantry and then around 72 mechs to meet an additional challenge of using no ground vehicles or air units at all. Map 12 - Turtle 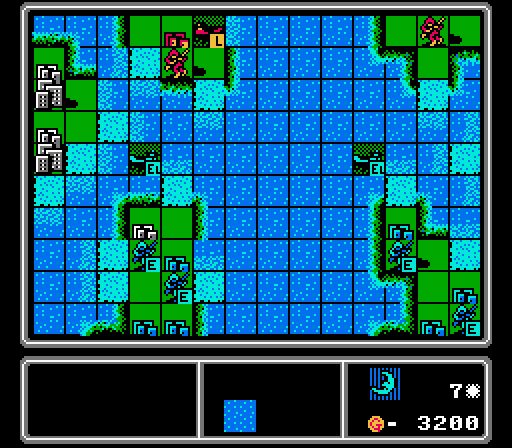 The Turtle map is a little easier as Blue. We start off with an extra city, and there are two additional neutral cities on our starting island. We're able to grab the two small islands first and secure a solid income edge early on. 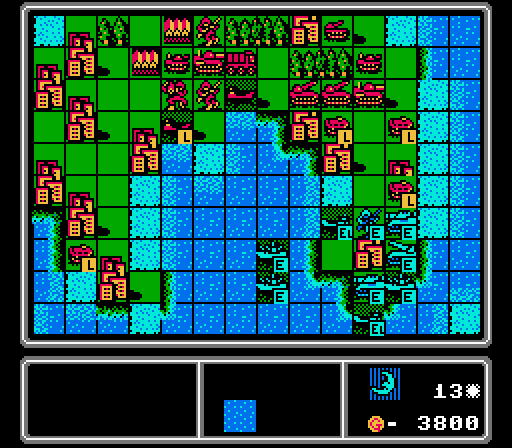 From there we start throwing out battleships and a ground invasion force. No airports, so no bomber waves in this one. 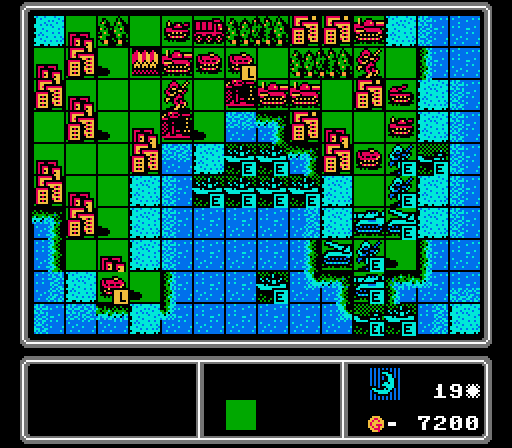 It doesn't take long to snowball from there. Our biggest holdup was running out of ammo on the battleships; we eventually had 13 of them out there and wiped out Red's forces on turn 24 after 2.0 hours. Our original victory was on the 35th turn, with a tricky challenge that required us to score a kill with every unit type. Map 13 - Squash  This map is another Blue-advantage one. It's a super-wide map with a thick mountain range splitting it in half, and Blue has four extra cities in its half. Pictured here is us grabbing everything in our half, plus the airport and port just on the other side of the mountains. 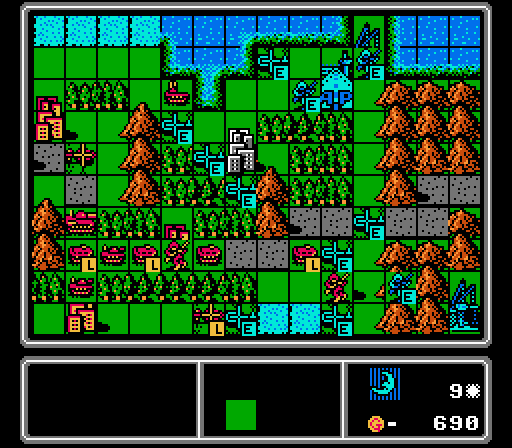 A few turns later we have spare copters trying to hold off the Red horde until we can get turn our cash advantage into solid reinforcements.  It's a long road but eventually the medium tanks and rockets make it to the central pass, at which point we start picking off enemy vehicles and sending forth bombers to wrap things up.  It takes a bit longer to drive Red back and dislodge their heavy units from the HQ area, but eventually we just overwhelm them with numbers as usual. We are victorious after 23 turns and a sporty 2.5 hour run. The first time through we won in 30 turns while meeting a challenge to produce as many units as possible while spending as much as possible. Lots of mechs again in that one. Map 14 - Cube 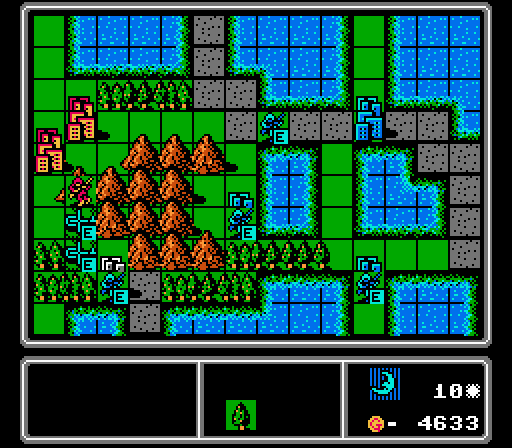 Now here's an interesting map where the cities are so spread out along narrow land paths, that our usual copter-swarm capturing strategy is even more effective than normal. Here we've got the lower-left corner locked down, grabbing the airport and several cities for our own while Red was only able to take two itself.  The center region looks a lot like last time, with even more copters. 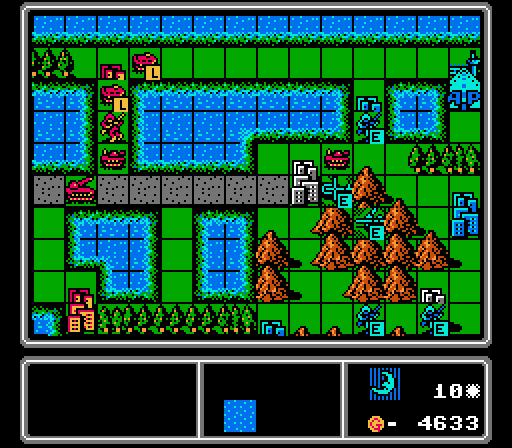 The upper-right corner is where Red sends all its vehicles, due to an inconvenient mountain range separating its HQ from the lower half of the map. Still we're able to stall the enemy AI enough to capture most of the properties in this area and keep Red mostly bottled up until we can get some bombers deployed.  A few turns later and we have an advance squad of Red units trapped on a land bridge with the remaining forces stuck in the HQ area, as we close in with an air force of bombers, scouts, and copters and a newly-built ground force of medium tanks and rockets making their way slowly across the map. 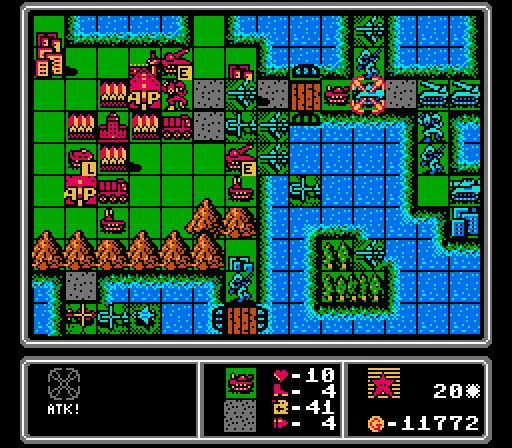 With enough ground forces in play to handle the anti-air units, enough scouts and copters to take out the enemy copters, and enough bombers around to wipe out everything else, the end of the map just turns into a shooting gallery. We actually win this one just a couple of turns later on the 22nd turn with another 2.5-hour runtime. Our original run had us winning in 29 turns, with a challenge requiring every unit type to get two kills and really slowing us down waiting for anti-air tanks and missiles to get all the way over to the enemy HQ and shoot down some copters. We also got to play a fun bingo game with squares called based on what units got kills in which turns. Map 15 - Mirror 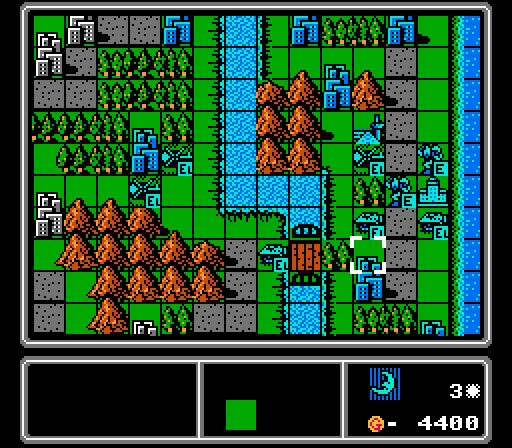 I haven't shown the early turns much in this run since they're usually all the same, but the Mirror map is a bit different. Blue starts off with nine additional owned cities, but only four neutral cities in the center area to take. We also only have a single airport, so can't flood with copters very effectively. So for probably the only time in this run, I put out an APC every turn to carry our footsoldiers forward for capturing duty. We also go with mechs instead of infantry, since we have the extra cash and they're better able to hold any captured cities in enemy territory. 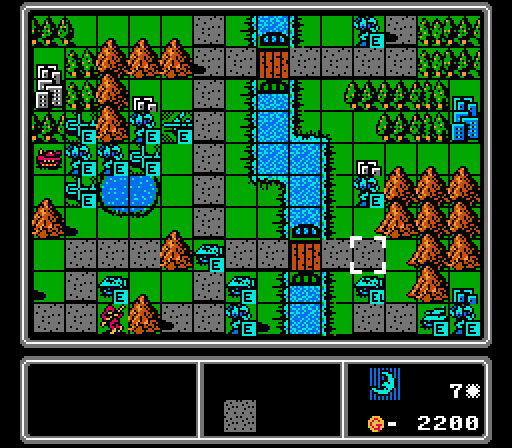 You can see it doesn't take long for us to not only have captured what's left on our side of the map, but also land a sizeable force on Red's island to start taking a couple of cities there. We even have a bomber out at the front already. 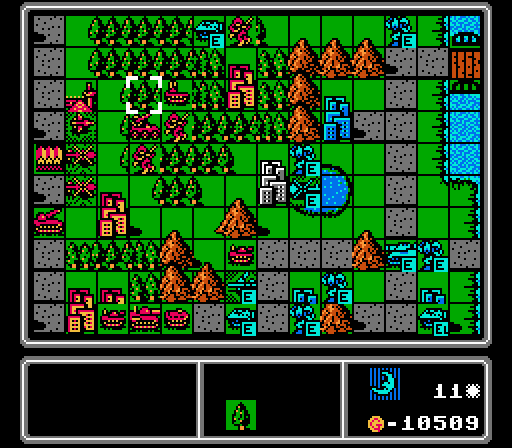 Soon we've got a couple more of Red's cities and our heavy ground vehicles making their way to the enemy island.  Another few turns later and we haven't made a lot more progress but we've gotten more reinforcements to form a pretty solid entrenched line and thinned out Red's forces a fair bit. 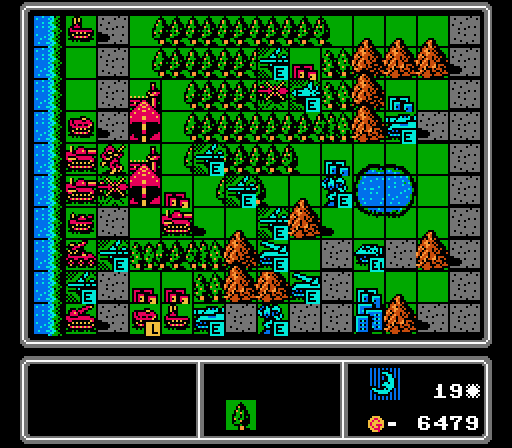 Then the bomber train starts rolling and Red is forced back further and further.  Of course in keeping with this LP, we fall just one attack short of finishing the map on this turn. That bomber that hasn't moved yet has no ammo. Instead we win on turn 24 with another 2.5 hours gone by. The first time around we challenged ourselves to only build up to match what the AI had built (not difficult with Blue having the income advantage early on) and took 35 turns to overcome Blue's early advantages and claim victory.  And with that, we've steamrolled through every map and claimed a Blue victory on each! With a grand total of 298 turns and 28.75 hours, it was actually a fun campaign for me that made this game actually feel like playing a game again.  Of course, we're not done quite yet. Winning every map as Blue unlocks the second bonus map! After the slog the last one turned into, I have to admit I'm a bit nervous now....  Oh good, a naval invasion map....  Holy poo poo, look at that start. This one may actually be impossible!
|
|
#
?
Jul 3, 2022 20:04
|
|
|
Well now I'm stoked.
|
|
#
?
Jul 6, 2022 09:04
|
|
|
Holy hell that start. I guess the optimal strategy is to use that 25k starting gold to pump out AA units to knock out the planes to hold on, then go after the battleships, then just try to catch up from there? But that also depends on how far away the enemy base is - you'll probably take several turns just furiously trying to hold together against the invasion force on your doorstep, so if they're close enough to get a wave of tanks in shortly thereafter, oof.
|
|
#
?
Jul 6, 2022 12:30
|
|
|
MagusofStars posted:Holy hell that start. I guess the optimal strategy is to use that 25k starting gold to pump out AA units to knock out the planes to hold on, then go after the battleships, then just try to catch up from there? I'll give you a hint - one particular tile is the key to the whole map, and you can see it in that shot
|
|
#
?
Jul 6, 2022 16:00
|
|
|
DKII posted:I'll give you a hint - one particular tile is the key to the whole map, and you can see it in that shot
|
|
#
?
Jul 7, 2022 08:02
|
|

|
Part 53: Royal (1 of 2) I spoiled the surprise last time, so here's the full map now:  Here we have the larget map of the game, just edging out Shark (Red's bonus map) by being two tiles wider. It's also a whole new level of unfair, since Red still goes first so gets to move all its pre-deployed units before we can even build anything to stop them. So we start our first turn with four planes and three battleships already in view of our HQ! Elsewhere on our island we have two medium tanks and three infantry to capture all our stuff. Meanwhile Red also starts with two more infantry for capturing on its own island, plus two landers that are each loaded with a medium tank and an artillery. (Plus the random things that Red built on its first turn, still sitting around its HQ area.) Turn 1 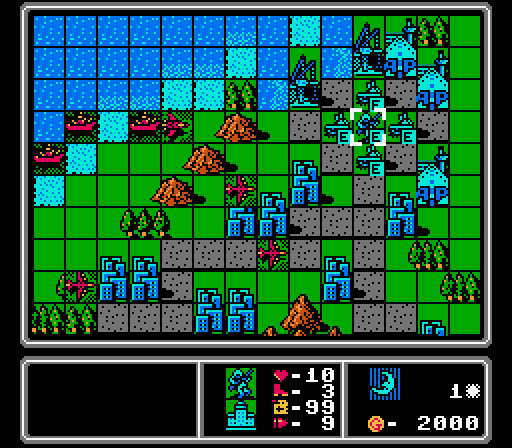 I missed Red's part of the turn but you saw where all their stuff ended up. Three of the planes will be on us next turn so we need some AA tanks right away to fend them off. We can worry about the battleships next turn. We also put out an infantry in the center just to tempt the fighter in closer, but it doesn't end up working.  All told Red starts off with 248,400 G in pre-deployed units, a 17% increase over Blue's advantage in Red's bonus map. With so many forces arrayed against us, and us not even having the first turn advantage, we must be pretty screwed, right?  Not quite; we actually have several factors that make this map even easier than Red's bonus map:
Anyway, let's see how badly my analysis turns out.... Turn 2 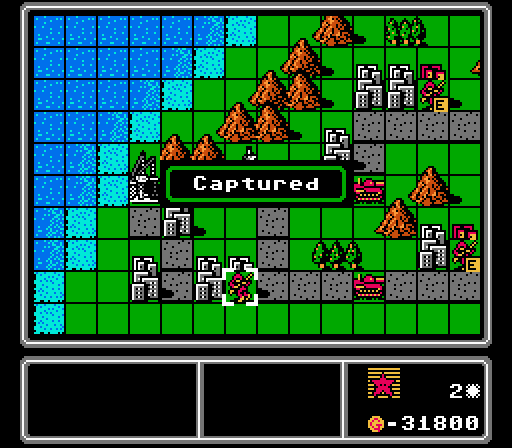 Picture five of these happening every two turns for the next ten turns. 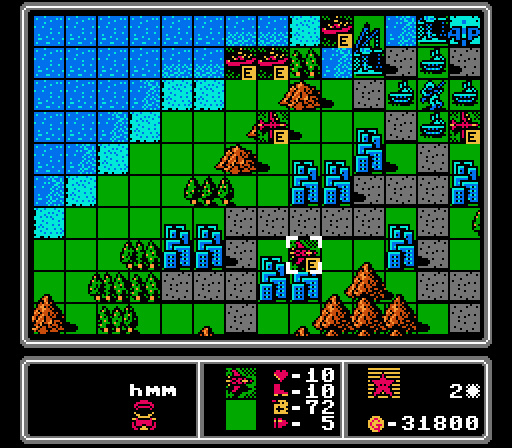 Two bombers lose half their life on our fortified AA tank, while the other bomber and the three battleships creep closer. The fighter unfortunately stays away, ruining my initial strategy.  Red's income starts high and keeps climbing for the first 20 turns or so, so just imagine lots of stuff getting built every turn. I'll let you know when dangerous units are headed our way. 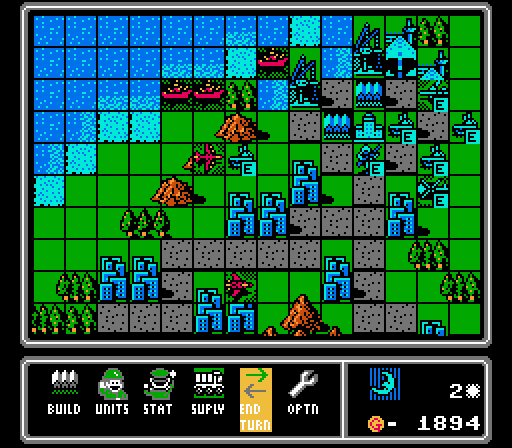 Our AA tanks finish off the two bombers that came after us and heavily damage the other that thought it could hide in the mountains. We can't reach the fighter so our new bomber is built with a screen of AA tanks protecting it. Note how our units have to pull away from the HQ due to the approaching battleships. Turn 3  We do lose this AA tank to one of the battleships, but crippling the bomber was worth it. That bomber ends up retreating to the tiny island with the airport on it.  This copter is much better bait for the enemy fighter. Better still, a damaged copter is just as capable of carrying our infantry around, so I don't even care that it takes a hit here. 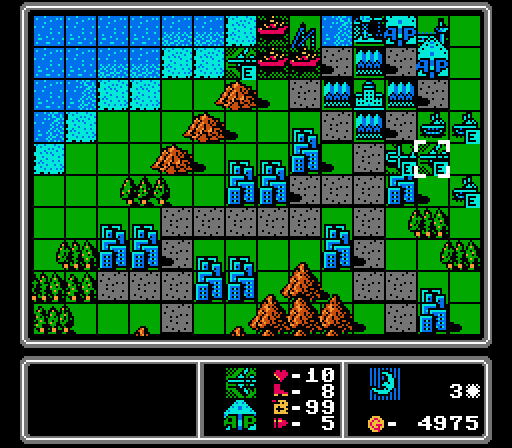 The battleships helpfully bunch up, allowing our first bomber to get in a risk-free shot on it. Bombers are the only way to reliably hurt battleships, so we're just going to keep pumping them out here. Elsewhere two AA tanks finished off the enemy fighter, allowing us to keep building more bombers risk-free. Highlighted is our special third airport. You may notice that the lead enemy battleship is able to fire on all of our bases, both of our ports, and two of our airports. This special airport is literally the only place we can build right now without eating one or more battleship strikes right away. Without this airport, I'm not sure we could fight our way out of this starting position. Turn 4 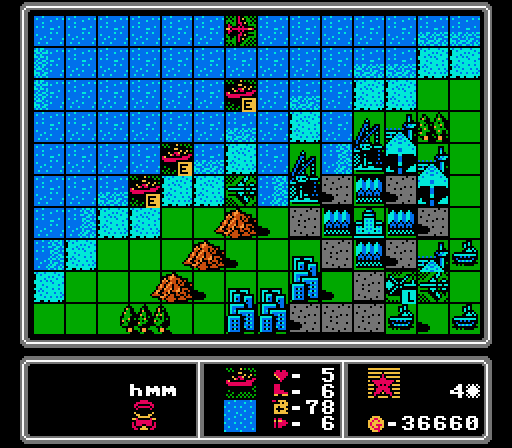 Man not going first really messes with my writing flow. Anyway the battleships spread out and cover each other so we can't get in another free hit. However they also pulled back far enough that I can afford to leave them alone this turn. 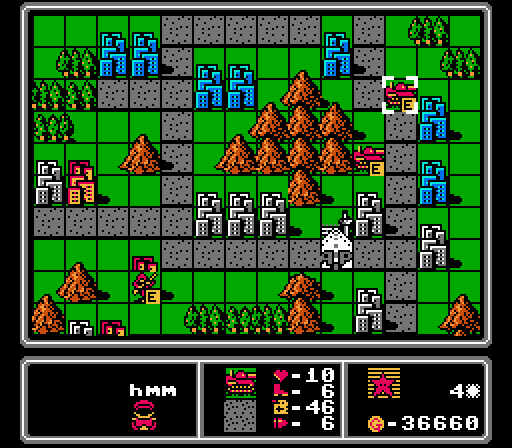 The two medium tanks that started out on our island are almost to our HQ, so we'll have to deal with them soon. Luckily the bombers serve well against both battleships and medium tanks. 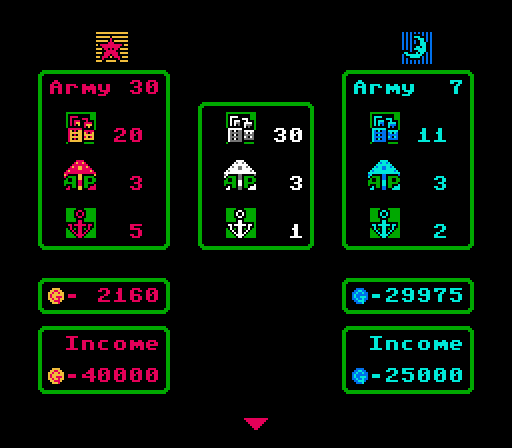 Rule of thumb for the first half of this map is the same as for Red's bonus map - we want to keep Red at no more than double our income. 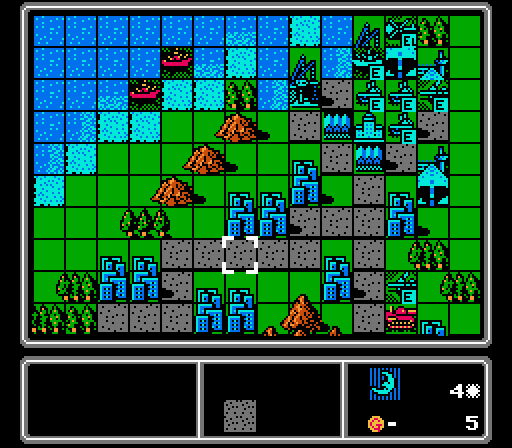 We don't have to worry about capturing too much early on, but there is an opportunity for a quick gain by grabbing the airport and port on the small island above us, so our loaded copter heads up there. One bomber strikes the lead medium tank, while the other waits in reserve. I had just the right amount of cash on hand for a battleship and couldn't resist getting one, even though another bomber probably would've been more useful. However our battleship makes for better bait, and will get defensive bonuses in the port. Turn 5 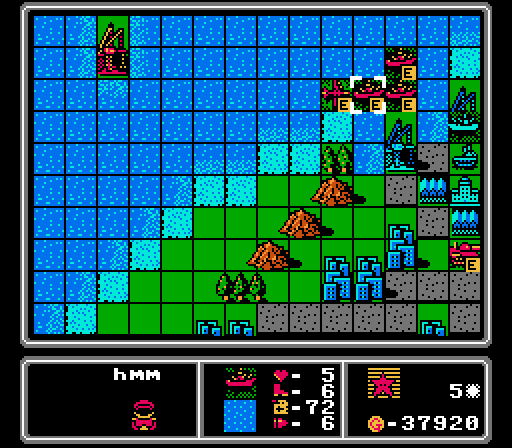 Notice how the enemy battleships are clustered together again, each angling for a shot at our battleship. They're once again sitting ducks for our bombers. Even that fresh medium tank wandered right into range of our battleship. The enemy bomber there isn't new, it got one turn of repairs and headed back for us but won't be much of a problem - the only thing it can hit is our fortified battleship and AA tanks. 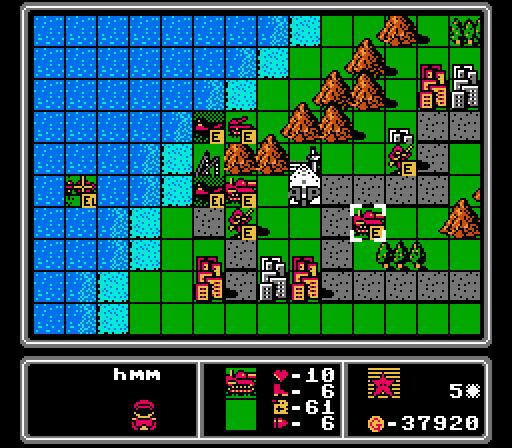 Here's why the AI is just no good at handling naval invasions. It only has at most two landers unloading at a time, and each one can only unload one unit at a time. The AI then sprints each ground unit ahead as soon as it can, instead of building up an overwhelming force that moves more slowly but is harder to defend against. Anyway, other than the loaded copter still over the ocean, every unit pictured here is still one of the pre-deployed ones. 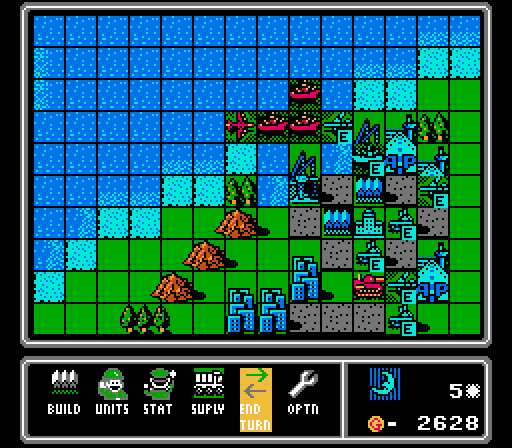 We hit the medium tank and two of the battleships, then build another bomber. Now we just have to survive a turn with three battlships, a bomber, and a medium tank all hitting us. Fortunately they're all at 4-6 Life now so will only hit at half-strength. Turn 6  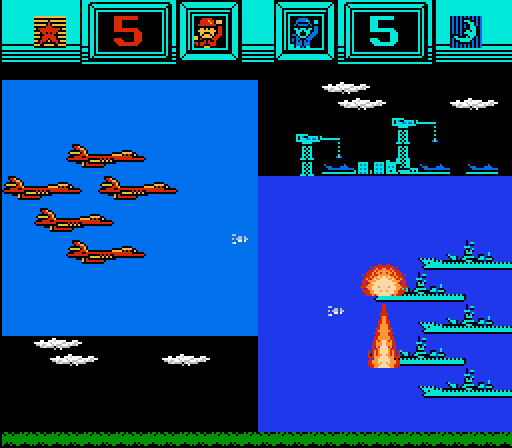 All three battleships and this bomber go after our battleship, but thanks to the damage they'd already taken and the defensive bonus from the port, we easily survive. Those will be some expensive repairs, but all four of our attackers are vulnerable this turn now. The medium tank down there ended up running away, so our AA tanks didn't even take a hit.  An AA tank destroys the enemy bomber, and our bombers and battleship are able to finish off all three enemy battleships. It took six turns but all seven heavy units from that first image are now destroyed.  The first ground wave is just four medium tanks (two already damaged) and two artillery, most of which are still at the far end of the island. There's also a bomber here that got built early on and just arrived, but it can only hit our AA tanks. Anyway, there's nothing nearby that we can't handle with what we already have here, and we've got the cash for another bomber as well. Turn 7  More from Red's disjointed advance. The two artillery are nowhere near each other or the medium tanks. We can easily pick them off one by one. There's a new battleship on the way over though.  That enemy bomber didn't actually attack us, so we send an AA tank out after it ourselves. It's time to start spreading out a bit from the immediate HQ area, and we also get a fighter instead of a bomber; there's an enemy fighter on the way and they travel fast. Really enemy fighters are about the only concern we have right now. Turn 8  The enemy phase was dull with just units moving slowly towards us, so I didn't show it. Once we take back control, we have one bomber hit the medium tank pictured here, while the other goes after one just off the bottom of the screen. Our other units get ready for the approaching fighter. I spent some of our cash repairing our battleship this turn, so we don't have enough for another bomber. Instead I put out an AA missile since the enemy fighters are the biggest threat right now. Turn 9 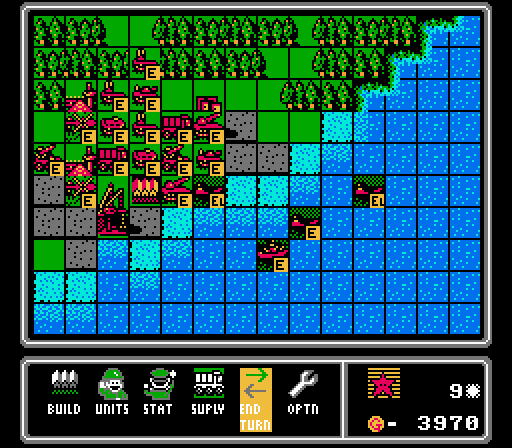 Another enemy phase without much to show, as the damaged medium tanks retreated and the fighter crept closer but stayed away from our AA tanks. Back at the Red HQ, the AI keeps building more ground units than it can ferry over in its landers. Hey, at least there's not another fighter yet! 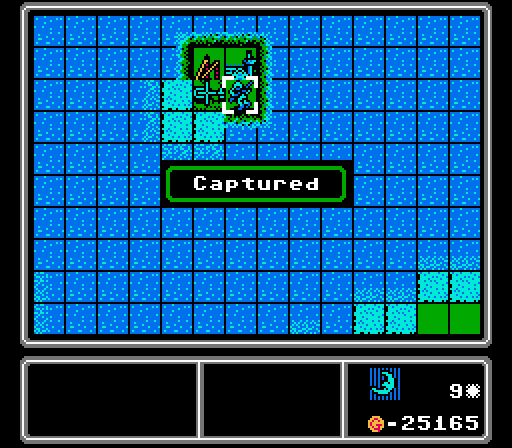 We get our first capture, taking away the airport! That port will be ours in a couple turns, too! 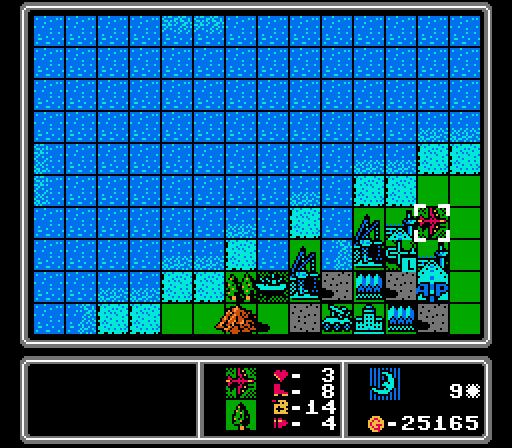 Taking that airport ruined this bomber's retreat plans. Assuming I don't drag an AA tank back there to shoot it down eventually, we might actually see an AI-controlled plane crash from running out of fuel. 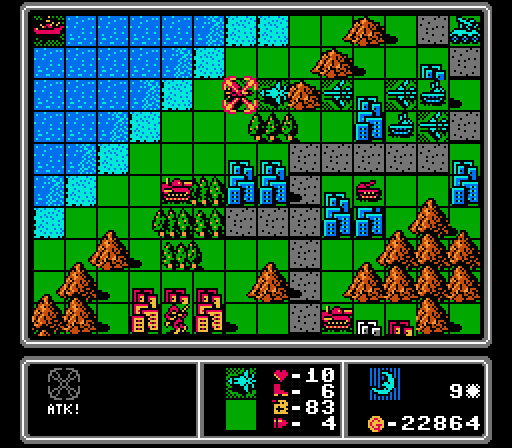 Anyway, our first order of business here is limiting the damage that the enemy fighter can do to us next turn. I don't want to retreat all of our bombers, preferring to keep attacking the vehicles coming at us, so one of them is going to take a hit here but at least it won't be a full one. 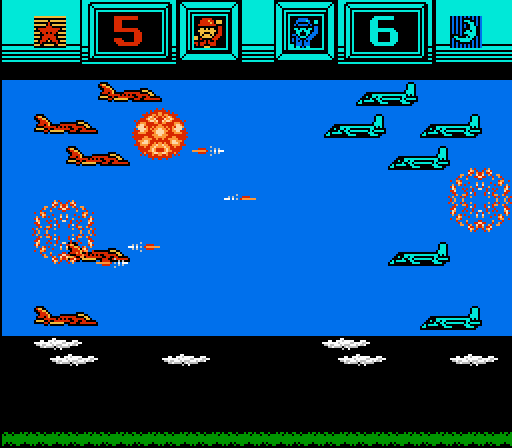 I don't think I've mentioned it yet, but it is such a relief to be playing on normal mode and not taking the short end of every single neutral engagement. We actually came out ahead here!  Two bombers take out the artillery that got too close to us, the third lines up with it under the AA missile's protection, and a fourth flies out of range off-screen to finish off a medium tank. Meanwhile we have another copter loaded up and if the fighter gets any ideas about it, our battleship is waiting to take it out. Oh and we build a second fighter just because our first one took some damage. That's three turns in a row without building a bomber, after I initially said we'd only be building bombers. Oh well. Turn 10 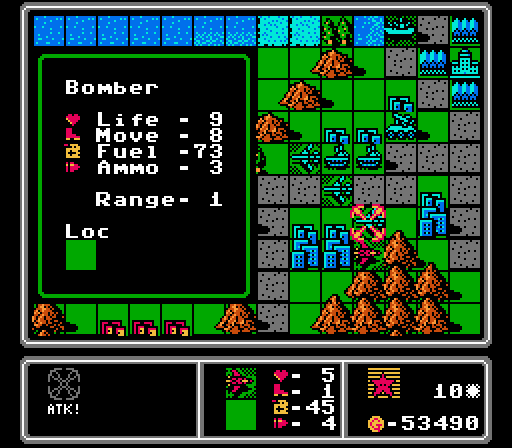  We take the expected hit from the fighter, but it'll fall to the AA missile now. 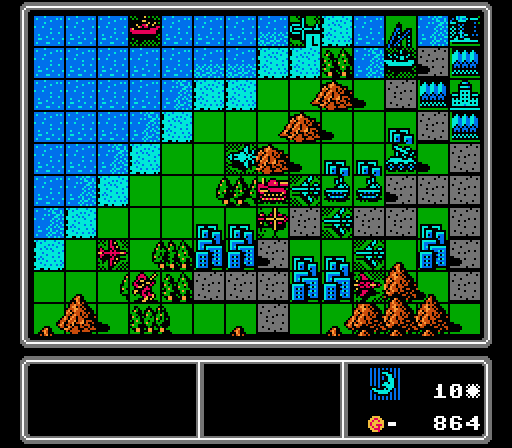 I'm not sure what that enemy copter thinks it's doing, but our AA tanks can make short work of it. That new medium tank ran straight until our bomber wall as well. The concerning parts of this image are the enemy infantry about to start taking our cities, and the enemy battleship that has snuck its way almost to our HQ area and out of bomber range.  Did you know copters can slightly damage battleships? It's not much and it feels a little petty, but we were moving towards it anyway and don't take any damage in return, so might as well.  Anyway we take out the fighter, medium tank, and copter as planned. Our damaged fighter also hurts the enemy bomber, so that it can't hit our exposed AA tanks too badly. Our battleship sails forth to get in on some action as well. Our fourth bomber is still running loose in the lower half of the island, hitting the second artillery this time. We also fly our damaged bomber back for repairs and use our funds to get a fifth bomber out there. Turn 11 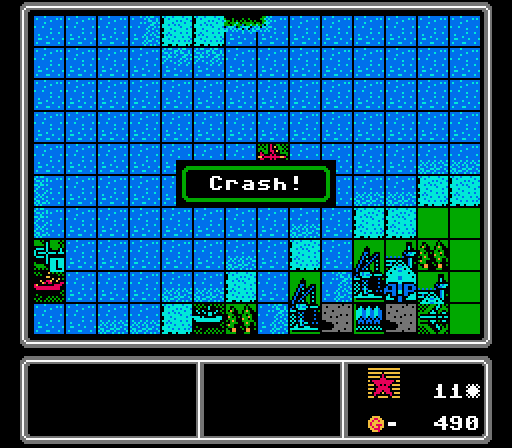 It's pretty satisfying to watch an expensive enemy plane crash and burn, even if we'd already damaged it pretty heavily. 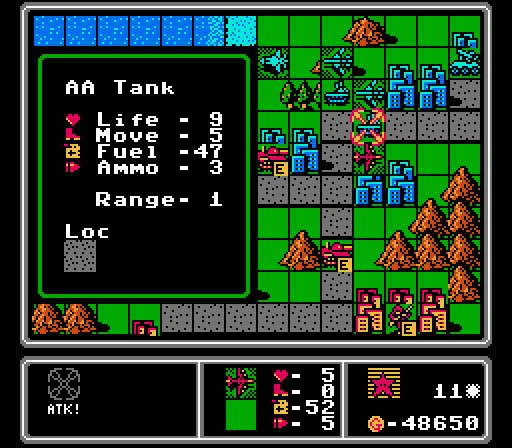 Anyway, the enemy bomber kills itself on our AA tank. A couple more medium tanks are coming after us again, but that's what our bombers are for. One of those medium tanks also helpfully blocked our city, so the enemy infantry couldn't start taking it this turn.  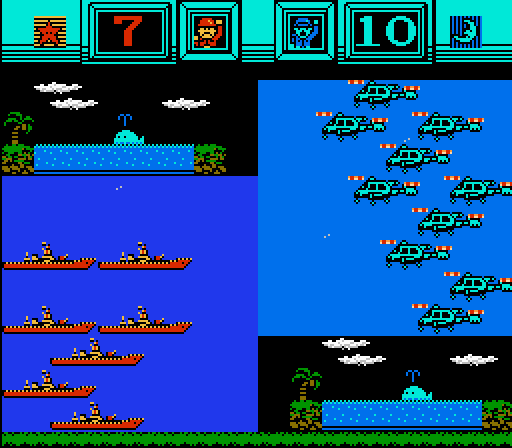 This enemy battleship continues to be annoying, preventing our copter from unloading to take that port. So I'm going to keep attacking it with the copter until it goes away.  We take the second property on this tiny island. Our income is now up to a healthy 29,000 G, meaning we can get in some expensive repairs while still putting out bombers.  Two of our bombers go after the nearest medium tank for a lot of damage, while our fresh fighter starts in on the infantry. Once this area has settled down a bit, our next priority will be clearing the enemy footsoldiers from our island and getting our own out there to start capturing everything. The second medium tank pictured here took a few hits in earlier turns and only got in one turn of repairs, so isn't really a threat, but I pull our AA tanks back anyway. We also send our damaged fighter back for repairs, and pick up bomber #6. Turn 12 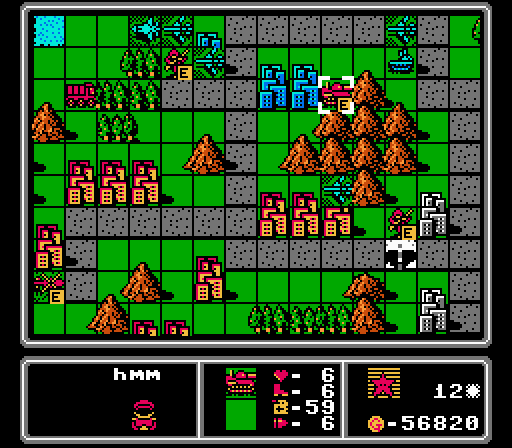 The two damaged medium tanks merged together, and you can see from this shot that Red doesn't really have much else left in the area anymore. It's time to expand, but first we have to deal with a second enemy fighter that has almost reached us.  Here is said fighter, plus some ground reinforcements that are a bit better positioned this time. Still, they're no threat to our current army. 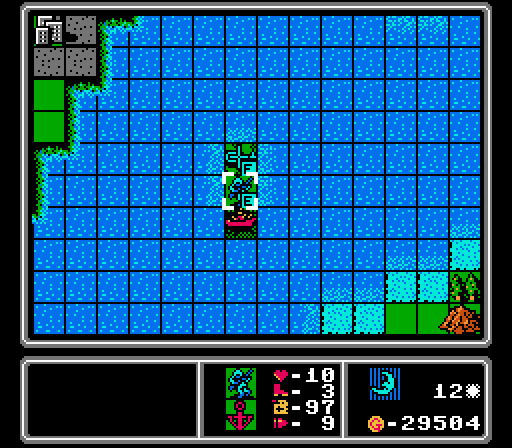 The enemy battleship kindly moved, allowing us to drop off an infantry right on top of it.  One bomber finishes off this medium tank, while our fighter continues to harass the infantry that had the nerve to try and take one of our precious cities. 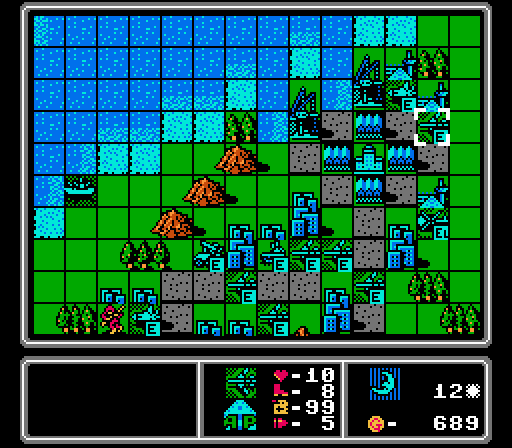 The rest of our bombers stay away from the enemy fighter, while our AA missile sneaks up to cover our fighter. Also, say hello to bomber #7. Turn 13   The two fighters clash, and while we slightly lose this battle (thanks to attacking the infantry a couple times earlier), our AA missile will get revenge for us.  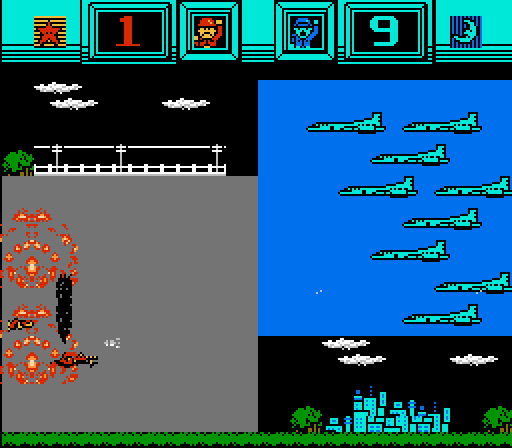 Two of the three infantry that started already on our island are now effectively neutralized. 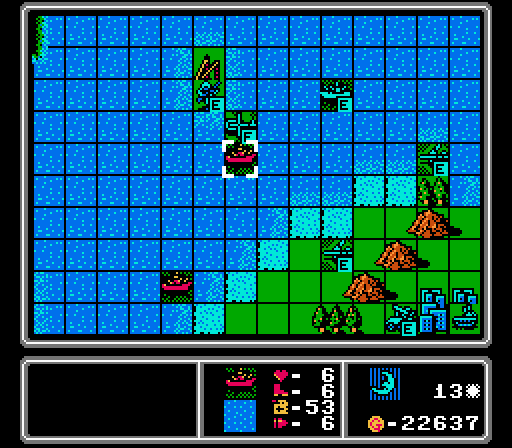 Our copter hits this battleship for the third time and has now done almost as much damage as a single bomber strike. That's not normal. This unit is like a super copter or something. Anyway I put our battleship out as bait, to protect our capturing infantry, and position a couple of bombers for next turn. I've ignored these enemy battleships for too long, however, and they're going to be in position to cover each other next turn.  It's not often safe enough to send a fighter alone behind enemy lines, but there are still no anti-air units anywhere near us, and I want to weaken that bomber so it kills itself on an AA tank again next turn. I also later fly a bomber up to finish off the nearby infantry.  I intentionally built bomber #8 before clicking the "Supply" command this turn, because otherwise this fighter repair would've taken up too much of our cash. Instead it sits on the airport for another turn. Turn 14 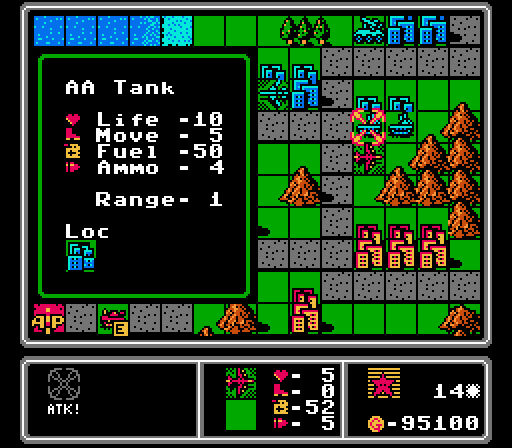 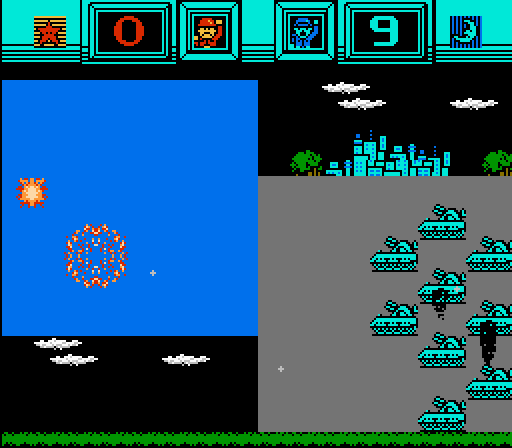 Another suicide bomber barely hurts our AA tank. That 20,000 G in enemy funds caused us just 550 G in damage.  While one enemy battleship attacked our battleship, another moved up to cover it while both staying out of range of our bombers and threatening our infantry.  We can partially resolve this problem by having our battleship return fire (the enemy battleship in the middle is now down to 3 Life) while our copter uses its last shot to chip away at the other battleship. We then park a couple of bombers in between the two battleships to be able to strike at either one next turn.  Meanwhile our original copter+infantry duo are off to cause trouble on the upper corner of Red's island. There are not many enemy units up here right now, just some footsoldiers, an APC, and a copter. 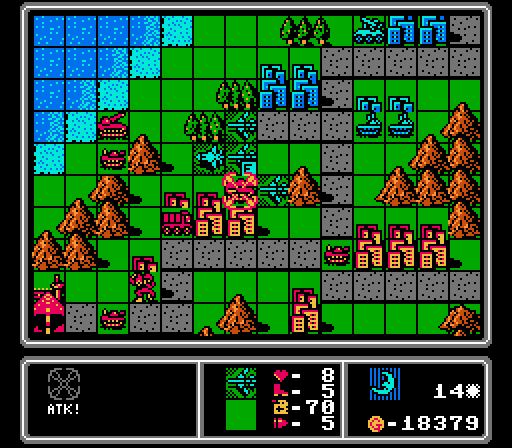 Another medium tank falls to coordinated bomber fire, with a third bomber later hitting the tank that's getting a little too close to our AA tanks. 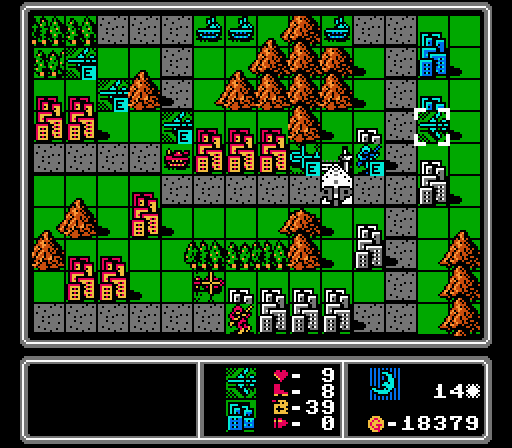 Down in the lower corner, a copter finishes off an enemy infantry and we finally start our first city capture on our own island. The highlighted bomber has been wreaking havoc down here but finally ran out of ammo so will head back up to our airports for a reload. 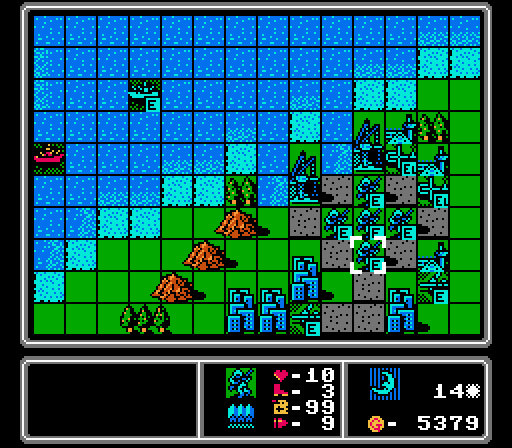 With a lot of repairs needed this turn, we don't have enough funds left over for another bomber, but I wanted to get some copters to go start some more captures anyway. With the remaining cash we trigger an infantry swarm. Turn 15  We get to see another crash, though this time it's just a copter. This map is actually too big for copters generally; there are 39 tiles between the two HQs, and a copter has a max range of 42 tiles without refueling. By the time they get across the map, they don't have enough fuel left for maneuvering to get in multiple shots. Still, Red has an airport on our island, you'd think they'd use it for refueling once in awhile. 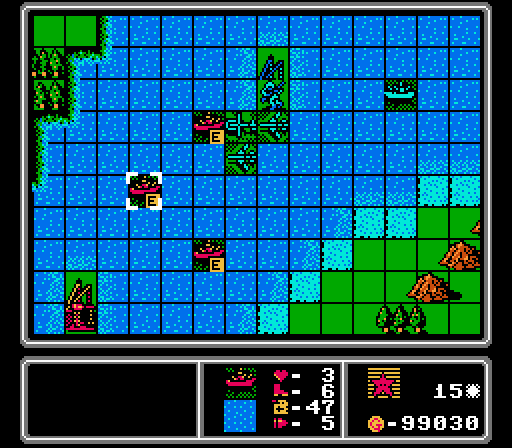 This battleship formation is trouble. I've neglected them for so long that a third one joined the group, and they've formed up into a triangle with each battleship protected by two others. Worse, there is a fighter nearby protecting the lower battleship, so I can't just try and hit all of them. We're going to have to have a bomber take a hit here. Our infantry also took a hit from a battleship and lost half its Life, and it can't heal up on ports, so we need to just get out of there if we ever want that infantry to capture anything again. 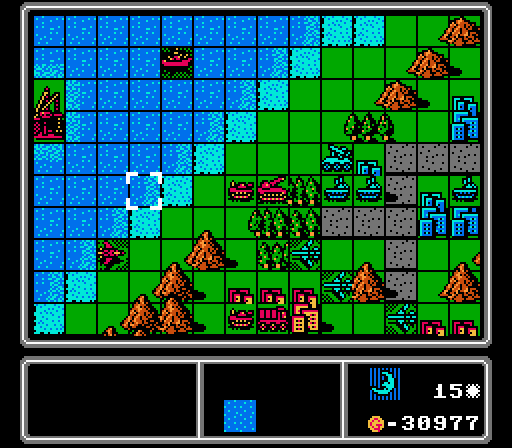 A fresh tank and rocket threaten our anti-air units, while that fighter prevents us from just bombing them into oblivion. Time for a tactical retreat. 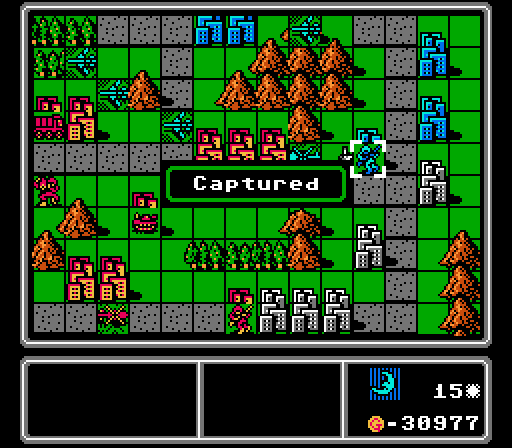  But first, let's celebrate our first city capture! We're up to a 32,000 G income now. Red's income is massive, but we're still not quite getting doubled up here.  The two bombers take out one of the battleships. We'll take a hit from the other two, but only one is at full strength and we'll actually manage to weather the strikes pretty well. 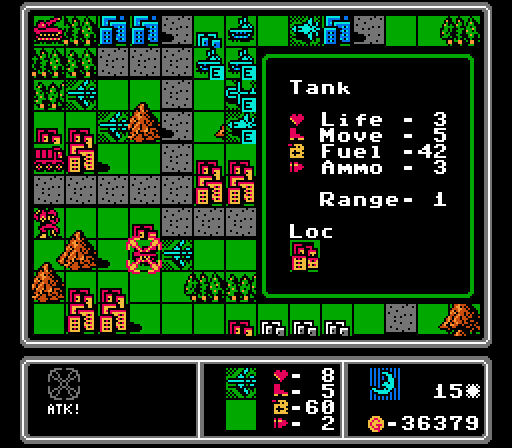 There's an enemy fighter coming, but this bomber is able to stay out of reach while finishing off this tank.  Here's a carefully-crafted formation. The enemy fighter can only reach our copter and AA tank, and will be drawn in by the chance to hit our copter. Meanwhile I have a fighter, an AA missile, and three AA tanks all waiting to pounce on it, with our bombers safely out of the way and ready to go after the enemy battleships once the skies are clear.  We also get bomber #9 and another copter, while a few other infantry make their way to the nearest enemy cities on foot. Our second fighter is back in for repairs as well. Turn 16   Bait taken. Our copter suffered 2,400 G in damage to allow us to easily take out a 22,000 G fighter.  Our bombers will be free to act this turn, so I'm not worried about the encroaching vehicles here.  While we did take a hit from one battleship, the damaged one retreated instead of piling on, leaving the full-strength battleship without any cover.  Once we're able to move, we first remove this fighter with an AA missile and AA tank.  Our fighter and copter, suddenly left without anything to do, screen off this enemy copter so that our infantry can start capturing the airport. Now, you may be wondering, how is that copter screened off? It can still reach the infantry with its six movement? Well, that copter will actually only have four fuel left next turn, so won't be able to get around that screen. 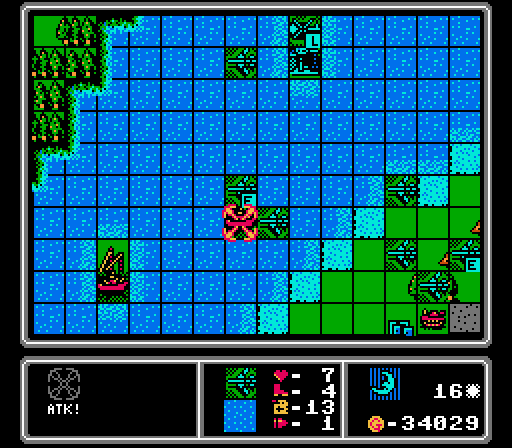 Here's why taking the battleship hit doesn't matter that much. This bomber was already almost out of fuel and on its last shot. So I can take the damaged bomber and merge it into this one, getting back one full-strength bomber with plenty of ammo and fuel instead! All while making sure this battleship can't hurt us again.  I don't know how many of these we'll get up here, but stealing a city on Blue's island this early on feels pretty good.  Before I decide what to do with the rest of our bombers, we put out bomber #10, plus a copter for more infantry-ferrying. Our battleship has returned to port for repairs as well.  The bombers end up taking out the rocket and nearby tank, while also damaging this tank enough that it can't hurt our AA tank too badly. Turn 17  The two damaged battleships merge together. Another fresh battleship enters the scene, but isn't close enough to provide full cover.  For some reason the AI brought over three supply trucks. None of them will ever supply anything. 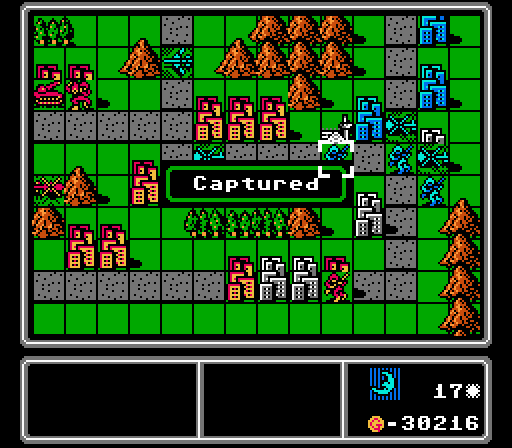 Taking this airport gives us an important forward refueling/rearming point. Too bad we can't build from these, too.  Other than a merge last turn, we haven't lost any units since the third turn. Red, however, has a ton of losses. We're turning this map around rather quickly.  I'm done with letting these battleships hang around. Our two lead bombers go after the one in the port, while two fresh bombers take out this one.  A couple bombers also hit the nearest rocket, while more air units screen off our AA tanks so that the enemy bomber has to fly within missile range to hit us. 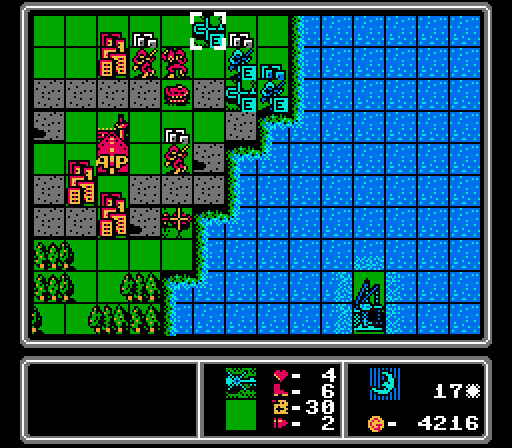 I don't think we're going to hold here, but we can at least be a solid distraction. Maybe it's time to start with the copter+mech waves. Note how this entire coastline has no beaches on it, so we can't ferry troops over on landers.  Yeah, let's get another copter wave going. And more bombers are always welcome, too. Turn 18 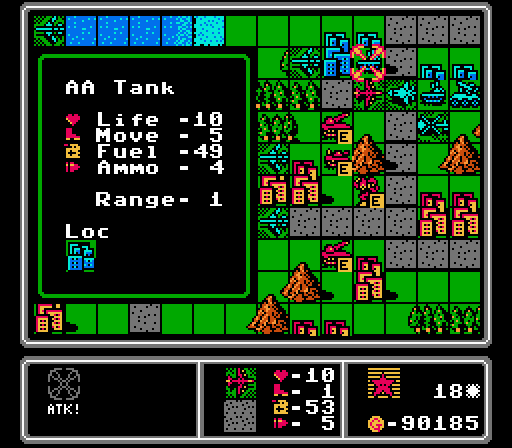 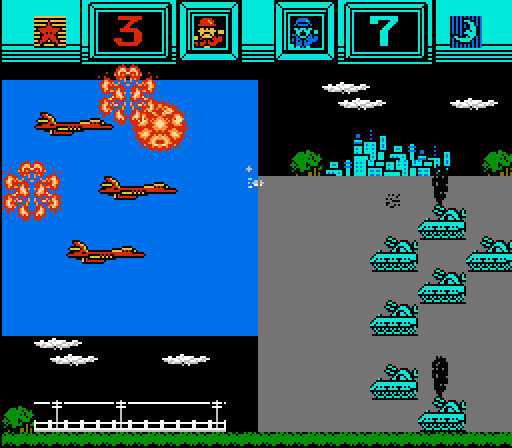 We didn't get to weaken this bomber first this time, but the city's protection is still enough that we'll repair most of the damage to our AA tank right away. And that bomber is easy picking for our AA missile now. 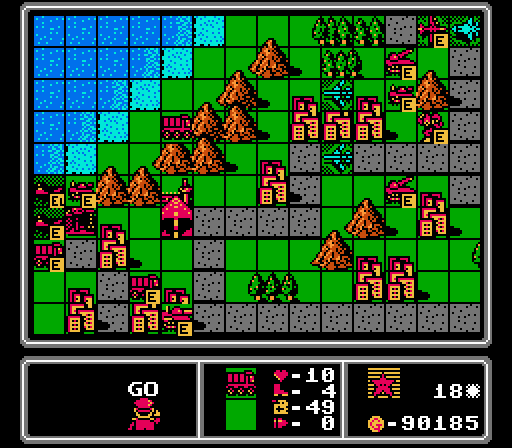 Some enemy vehicles move up but our bombers have free action next turn so we can clean these up.  Of course, Red responds by putting out another fighter, a bomber, and a new battleship. 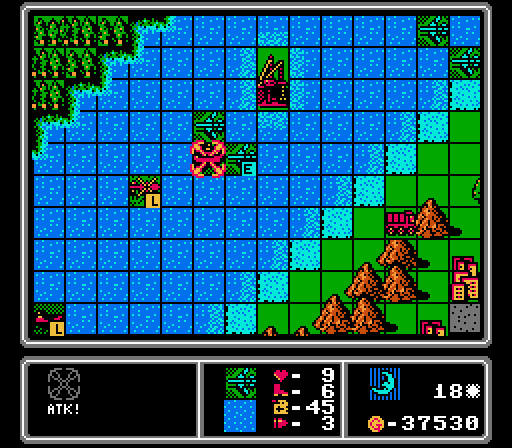 That fighter can't reach us quite yet, so we'll keep our bombers active over the water to finish off this battleship. 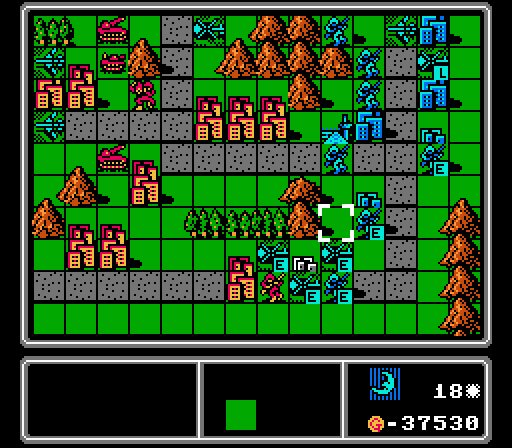 We take two more cities, and work on taking out Red's last infantry so we can move in and capture the rest of our island.  The AA missile shoots down the bomber as planned, then a bomber finishes off the rocket and two fighters wipe out this mech before it can cause any trouble. 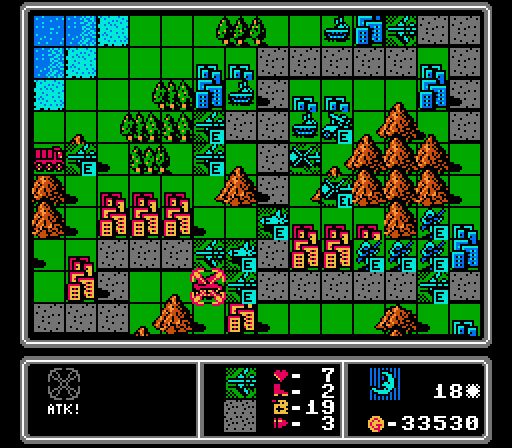 Other bombers take out the tank and another rocket, clearing the immediate area. A supply truck also takes a hit for fun.  Close to taking this city, we merge the two infantry together. 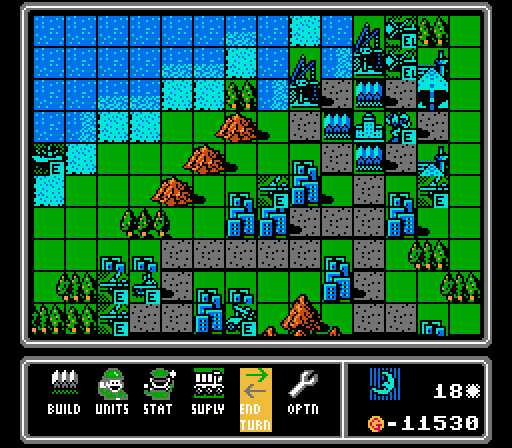 Another bomber for us, plus another copter+mech pair for later. Turn 19 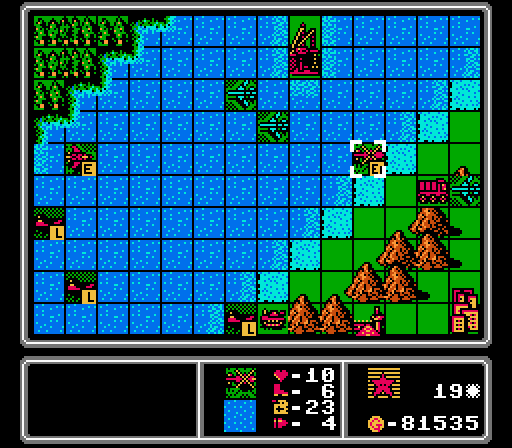 That fighter gets to us a lot quicker the further along we get. We'll have to prepare a welcome for it. 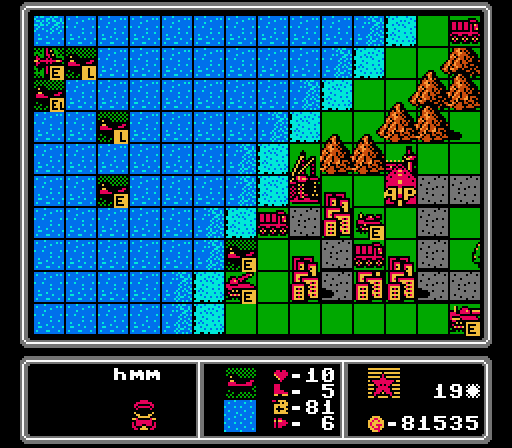 Otherwise we've pushed Red back to a tiny corner of our island.  Ugh a second fighter right behind the first. 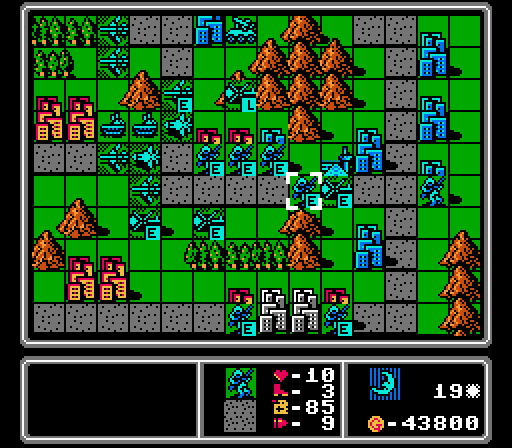 The last enemy footsoldier on our island is finally gone, and we grab one of Red's cities while starting captures on four others.  Preparing for the enemy fighter arrival next turn.  We get another city on Red's island, but have to merge our copters together since one is almost out of fuel. I think that infantry is in trouble next turn.  After getting another bomber and copter, I use our remaining cash on a lander. I have a vague idea of a couple of medium tanks being useful on Red's island eventually. Turn 20 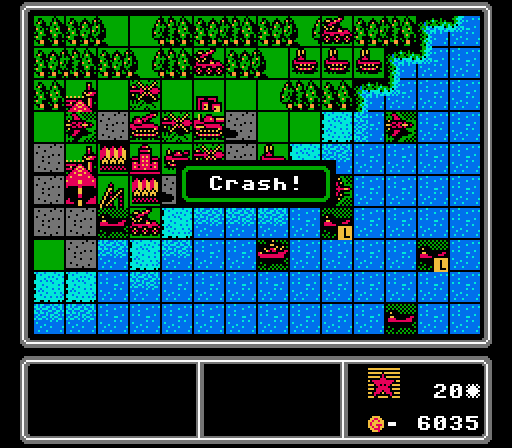 The AI somehow let a copter run out of fuel without ever going anywhere.  Yeah our infantry is toast. Still that copter can sit around for awhile and at least block one of the cities. That's the same super-copter from earlier, and now it's going to single-handedly hold our meager foothold on Red's island for several turns. 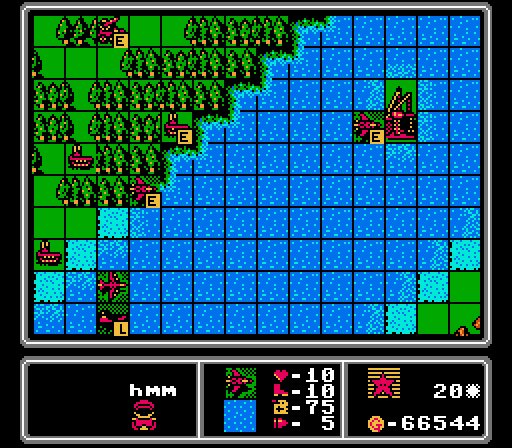 The fighters approach a bit more carefully. I think we'll have to lure them in directly. 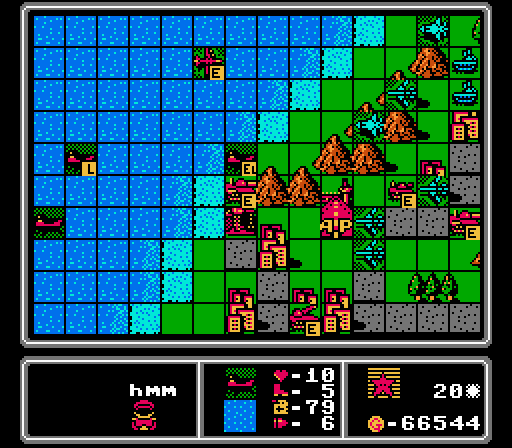 Upside is the fighters are too far out to protect most of these units on the lower edge of the map, so our bombers can still run free here.  Our turn. Let's finish taking these four cities for a nice income swing. 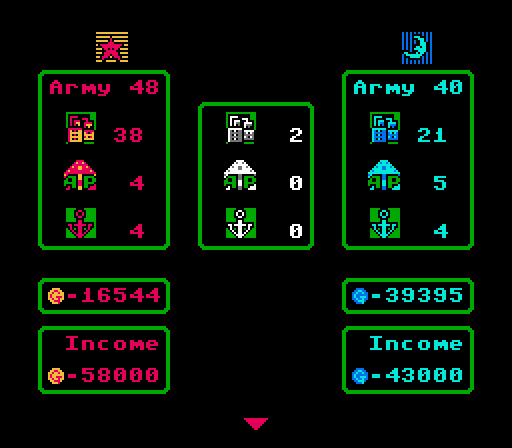 Starting to catch up now. 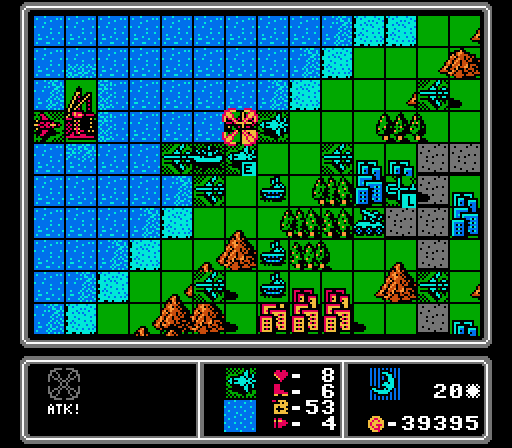 Our fighters have to stick around to help with the enemy fighters later, so in the meantime they take out this loaded copter. No more enemy capturing on our island!  The bombers hang around down here out of fighter range, and take out a tank and a medium tank. Two others go after the last rocket in the area but can't quite destroy it.  More bombers, copters, and mechs. One of those bombers is actually looking for more ammo and fuel. Another bomber is at out new airport in the lower area for the same reason.  Here's our defensive formation this time. The enemy bomber can only reach an AA tank on a forest, and will be in range of two other AA tanks and the AA missile. The enemy fighter can reach our fighters, but would also be in range of our AA missile and our battleship. So plenty of options for next turn! To Be Continued...
|
|
#
?
Jul 8, 2022 03:29
|
|
|
Dang, you weren't kidding about this one being way easier.
|
|
#
?
Jul 8, 2022 05:00
|
|
|

|
| # ? May 3, 2024 23:33 |
|
|
Part 54: Royal (2 of 2) Turn 21 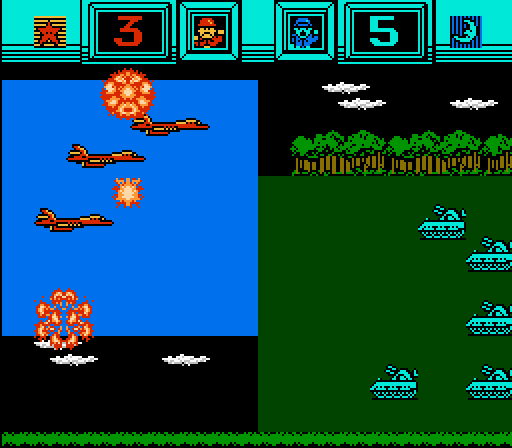 The bomber lure is successful. The AA tank takes a little more damage on a forest than on a city, but they won't be of much use for longer as the map transitions to a water battle. 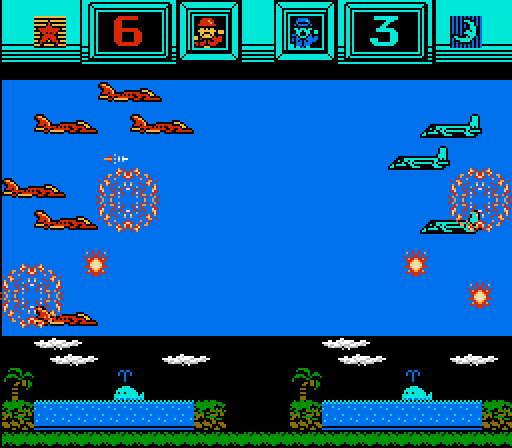 Our fighter likewise draws in the enemy fighter, and gets in enough damage that our battleship can get a kill here. The other enemy fighter can't reach anything so just flies a little closer. 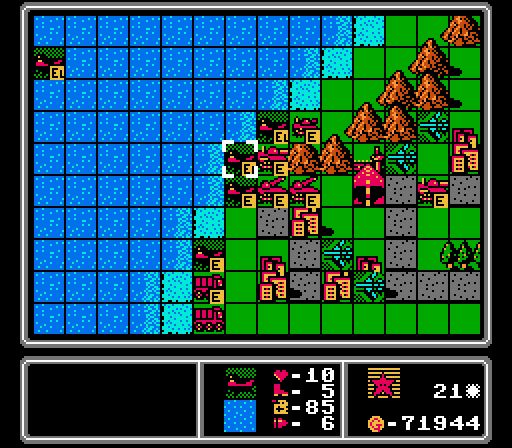 We'll have to take out the landers soon. Our bombers will take some damage, but if they can hit a loaded lander they can do a lot of damage to three units at once. 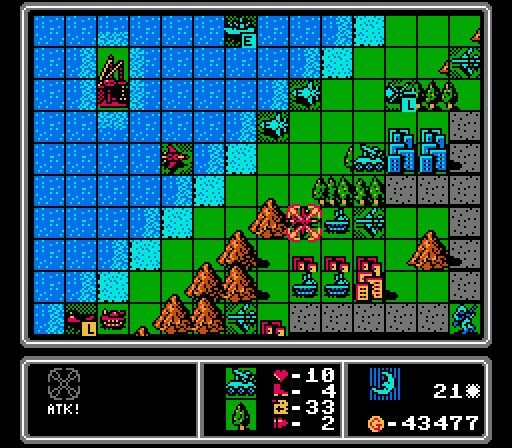 Our battleship takes out the fighter, and our AA missile finishes off the bomber.  We've gone a long time without losses, and have a ton of bombers around, so let's take this bomber that's almost out of fuel and ammo and use it as fighter bait. The bomber is sitting right where both the battleship and the AA missile can cover it. We also merge the two fighters together to get back one full-strength one. 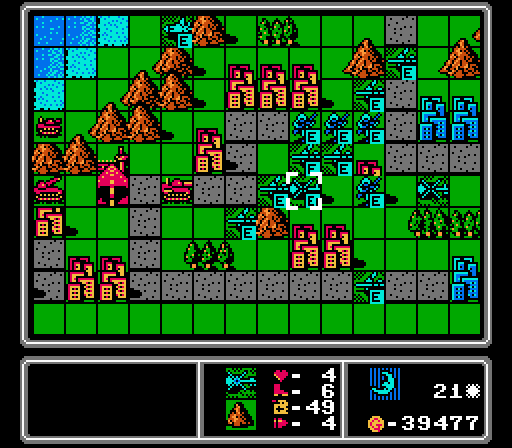 The rest of our bombers hang back, though the enemy medium tank is going to be able to reach our infantry as a result. Still I'd rather lose an infantry and be able to get rid of that pesky fighter. The loaded copter here is going to drop off an infantry on that last airport as soon as we get an opening.  Another bomber hot off the assembly line, with a medium tank also rolling out for a voyage across the water. Turn 22  The fighter took the bomber bait; our first serious combat loss in quite awhile.  Ugh, another fighter.  We lost one of our cities up on Red's island, but take three more here.  Well one more fighter down at least. That AA tank will be bomber food next turn; I can't send our fighter out after the bomber, because of the battleship giving it cover.  Until the new fighter gets here, we have plenty of bombers to cause trouble. Two medium tanks down here.  Another rocket goes down right afterward, leaving room for us to drop off an infantry. Ugh those landers have gotten better at dumping more vehicles on us, though.  Time to start our air invasion in earnest. Two copters unload with more right behind them. I also peel off a bomber to provide some support, particularly against that APC. 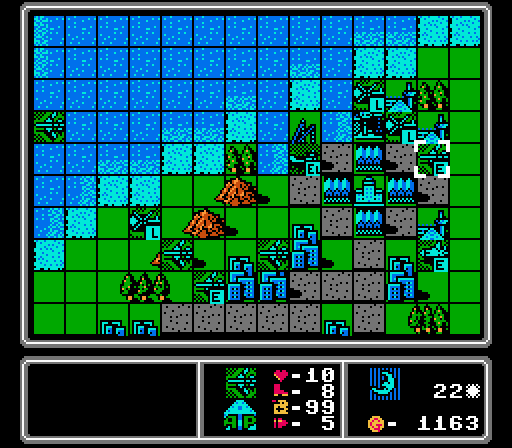 I actually built these earlier, but here are the new fighter and bomber. We may have lost a bomber this turn, but we still have 14 of them out on the field. Turn 23 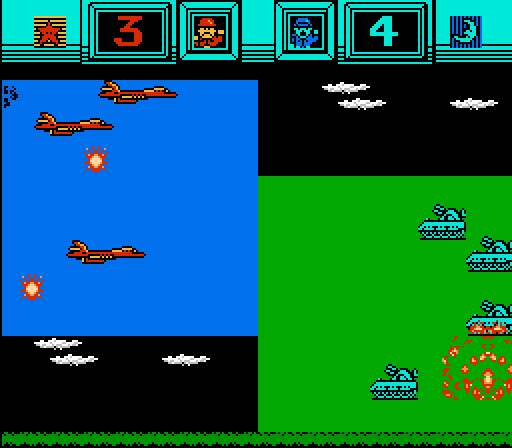 The AA tanks continue to perform admirably at drawing in bombers.  While the enemy fighter gets a little closer, the enemy battleship tries to find a spot it can threaten us. Down at the bottom of the screen, our fighter kept the enemy tank away from our AA tank.  Two more battleships on the way, and I think Red is up to eight landers now, but that's still better than another fighter. 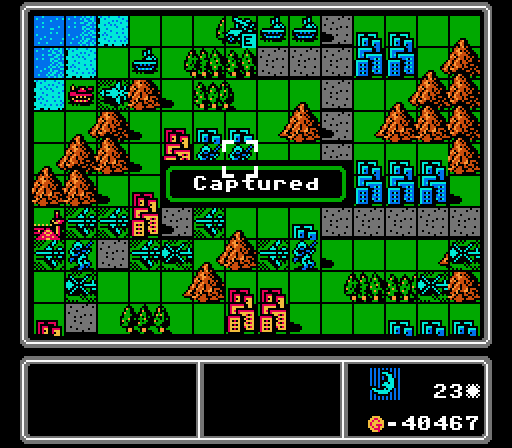 It's our turn now, and we shoot down the bomber with our AA missile again and snatch a couple more of Red's cities away.  While we have a battleship and a bomber take care of an enemy battleship, we're able to get a copter out to grab this last tiny island. Our fighter also takes a shot at a loaded copter, while waiting for the next enemy fighter to arrive.  Up here we have two bombers able to wipe out this tank while staying just out of the fighter's range. Down below we start capturing the airport while the bombers take out a rocket and another tank and form up in a line to keep the infantry safe.  We get another bomber, and then a second medium tank for the lander. We're up against the unit cap now so I hold off on more mechs and copters.  No one attacked us up here, so the bomber just destroys the APC and the copters kill off an infantry. As our mech starts capturing, the remaining copter gets between it and the other mech. Another copter arrives to drop off another mech by the airport. Turn 24 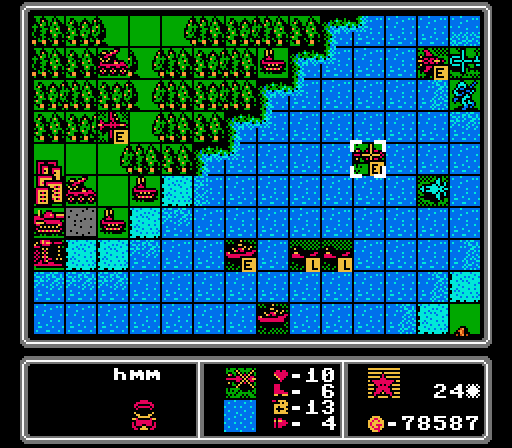 Another loaded copter approaches, as the fighter hits our copter. I kind of would rather lose that copter right now so we can put out more heavy units. 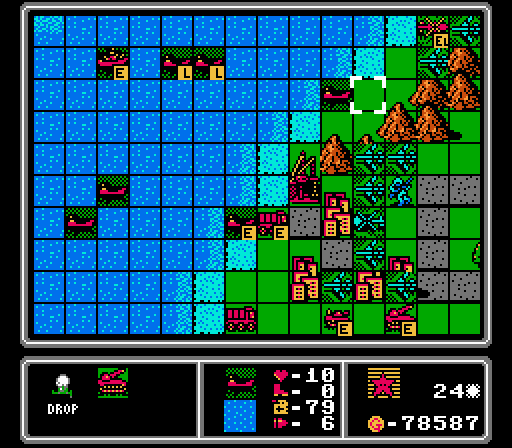 We had almost cleared our island, but this lander drops another rocket and another one unloads a medium tank. 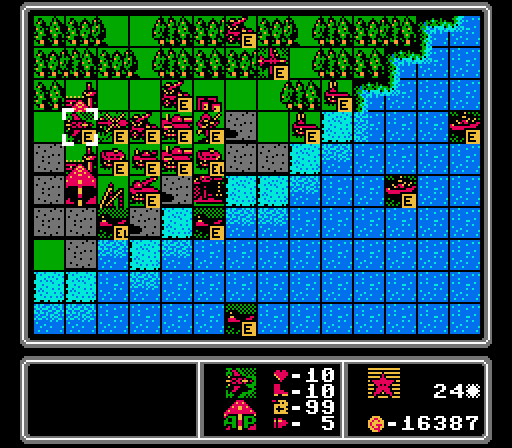 Red still has a pretty obscene income and can keep throwing the heavy units at us, including another fighter here. 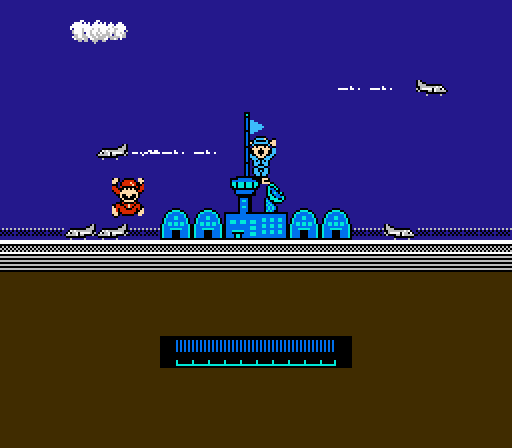 Taking the last airport on our island will help fix that income gap. 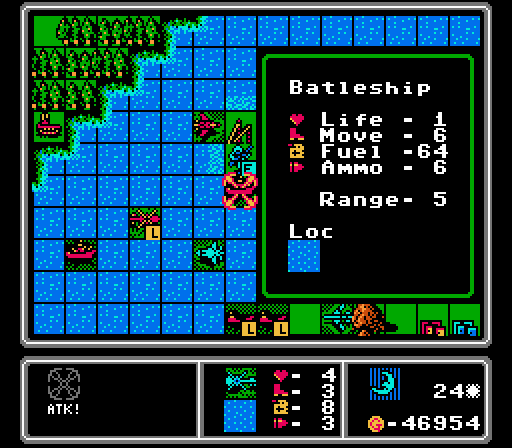 Our damaged copter is still able to get one last shot in to finish off this battleship.  Our new fighter arrives to tag-team the enemy fighter here.  Two bombers take out the medium tank, and then an AA tank finishes off this loaded copter. 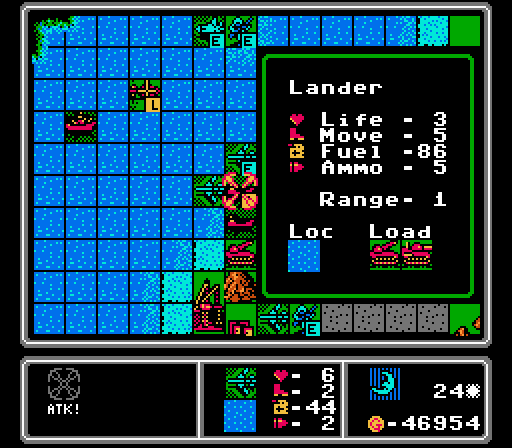 This lander is still carrying a medium tank and a rocket, so we eat the damage to two bombers to wipe out all three enemy units at once. We ended up taking 12,000 G in damage on the bombers, but destroyed 47,500 G worth of enemy units. 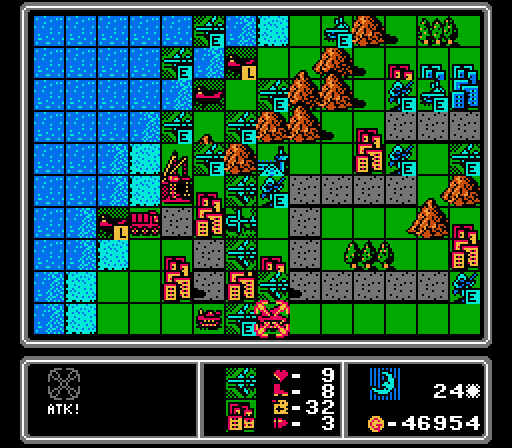 More bombers are able to take out both remaining enemy rockets. I end up merging the remaining bomber into one of the ones that took damage from the lander.  Up in this corner, we take back this city and start taking the airport and another city. The bomber and copters combine to take out the mech, leaving us all alone up here for now.  We're almost perfectly even now, and over the next few turns we'll finish taking over the rest of our island and make some gains on Red's island to start pulling away. Note also how Red is no longer near the unit cap - their income will soon no longer enough to keep putting out heavy units at the rate it has been up until now. 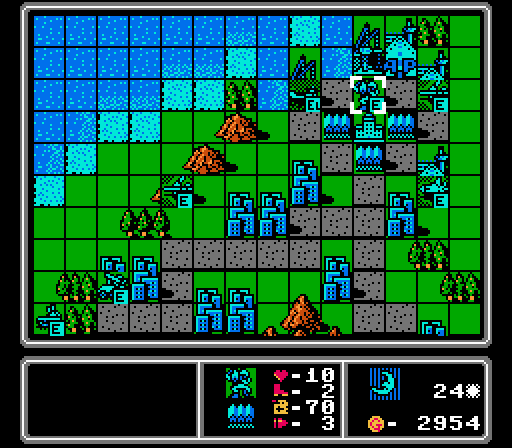 Having enough cash to get a fighter and a bomber in the same turn is nice. We also get a mech for later. Turn 25  Oops, that last merge we did opened up a path for the tank to get at our infantry here. Oh well, that'll be the last ground attack we face on our island. 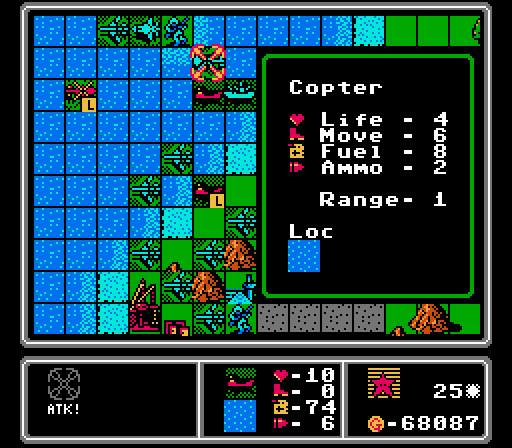 Now that we've attacked the landers, they're going to get more aggressive on us. This one sails up to take out our damaged copter.  The enemy fighter is lurking back there, but the battleships have too much separation. That lower one is too far from the fighter, too.  As soon as it's our turn, we take advantage of the opening for the easy kill. 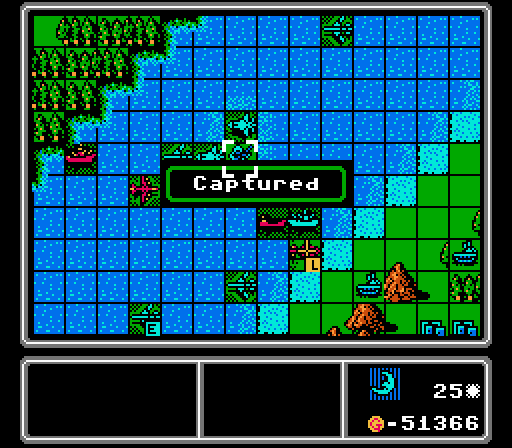 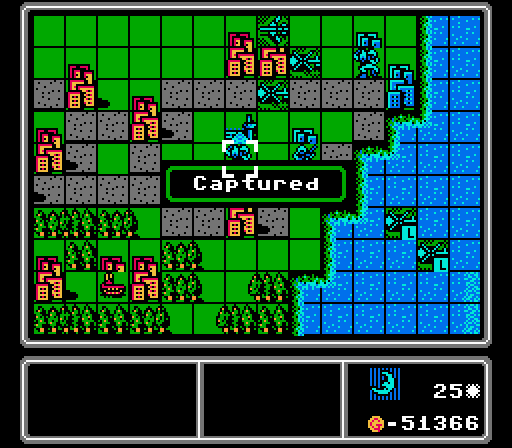 We grab the last island port and one of Red's airports, plus a couple more cities for another big income swing. Up on Red's island we also drop off two more mechs for some more capturing later. 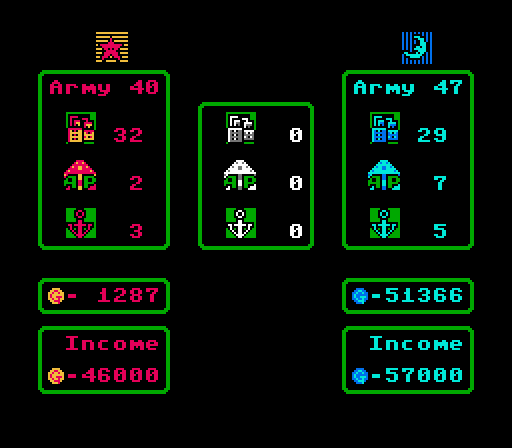 We've got the advantage now! It only took 25 turns....  Two bombers take out the tank that hit us earlier, while two more quickly destroy the rocket that just unloaded. Another bomber is out of ammo and looking for more at the airport.  The enemy bomber is protected by the battleship and an approaching fighter, so our fighters take out this loaded copter instead. 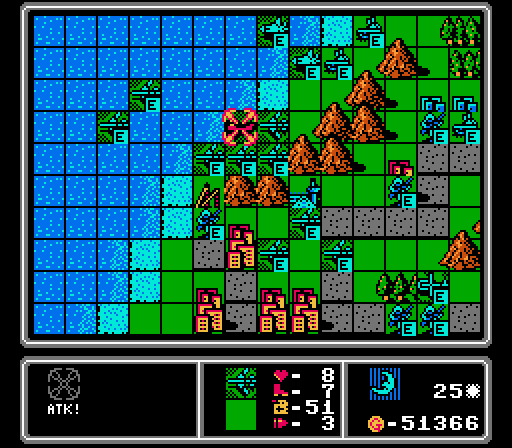 This lander's empty but it's time to start taking them out anyway. I can merge together the damaged bombers to make room for creating new ones. 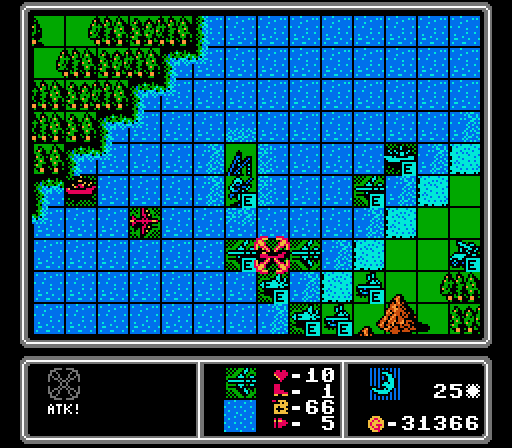 Ditto for this lander. That enemy bomber now can only reach our AA tanks in a position that will leave it vulnerable to our AA missile again. 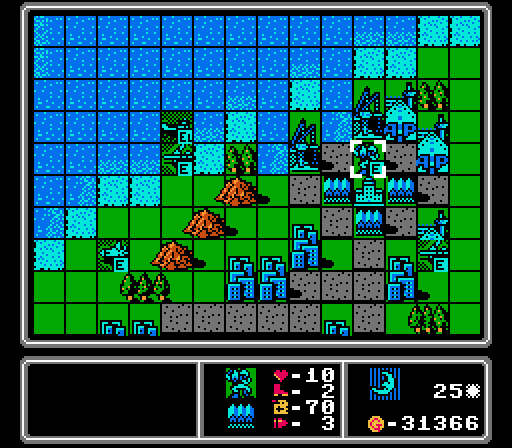 We're almost at the unit cap but have just enough room to put out another bomber. Turn 26 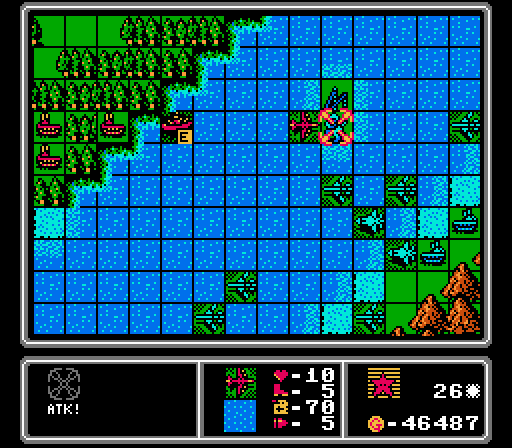 I kind of forgot about this infantry, and it gets murdered by a battleship and a bomber here. This infantry wasn't going anywhere and was taking up space on the unit cap so I'm actually kind of happy about it.  Quiet enemy phase so let's get our attacks in now. This new battleship is exposed and we can just barely reach it with one bomber. Two other bombers are able to take out the other battleship shown here. 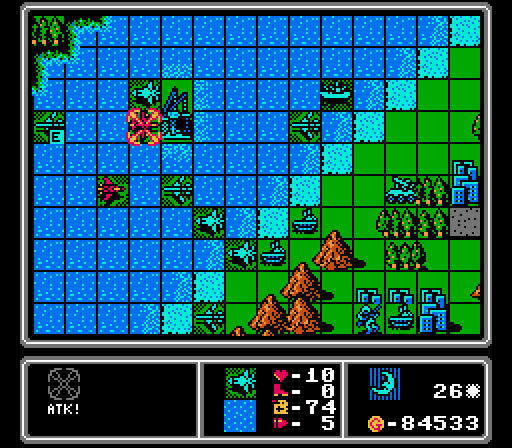 A new fighter is just barely able to reach and shoot down this bomber.  Up here a copter took a hit from the AA tank, so it merged into another one in the screen while our bomber gets some repairs and topped off fuel.  This lander is just carrying a supply truck, but might as well take it out while we're here. That's four of Red's eight landers sunk now. More bombers get rid of the other supply truck, leaving our island completely free of enemy units for the first time!  Now that's what I call getting full use out of a plane. Out of ammo and it's going to use its last bit of fuel to reach the other fighter for merging. We also merge in a bomber into one of the ones damaged by the lander.  That enemy fighter is going to hit one of our bombers, I'm just trying to make sure we can take it out when it does. 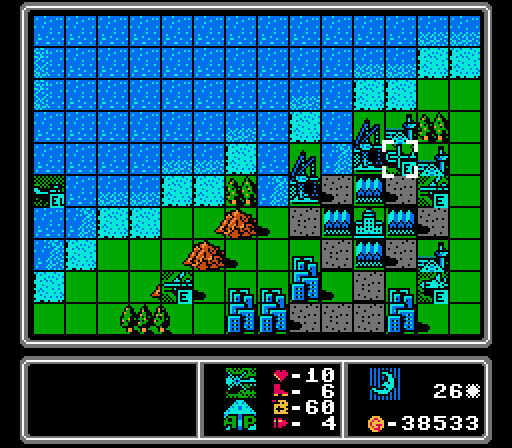 That'll probably be the last copter I build - I think we have enough capturing going on Red's island already. Thanks to the merges and losses we can also put out another bomber and fighter pair. That's 12 turns in a row with a bomber, finally following my original strategy. Pop quiz: How many bombers do we currently have on this map? 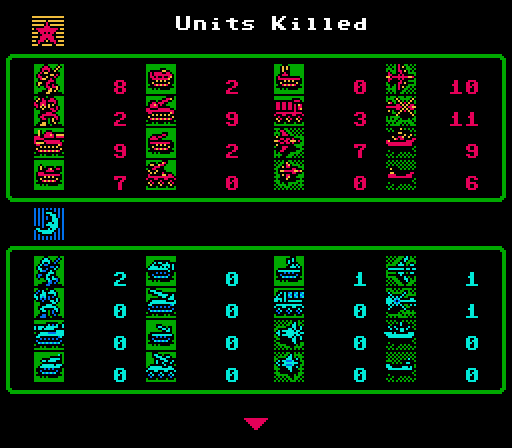 One last shot at our incredible survival rate vs kill list before we start to get more aggressive. Now that our island is clear, it's time to really take the fight to Red! By the way, the answer is we currently have 16 bombers flying around. We built 20, lost one to a fighter, and lost three others to merges (mostly in the last few turns). Turn 27 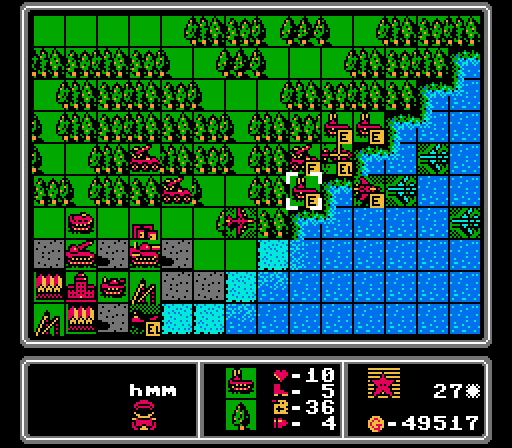 We lose most of a bomber to the fighter as expected. Unfortunately my grand plan of making sure we can attack the enemy fighter in return is a bust, since every space free for attacking the fighter is covered by an AA tank or AA missile.  Not much else happened but the AI did put out another fighter and bomber pair.  Anyway we can at least get rid of this bomber before it can hurt us, using the battleship and a fighter.  We have a lot of bombers around and need to both remove these landers and make room for new bombers. So let's bite the bullet here. 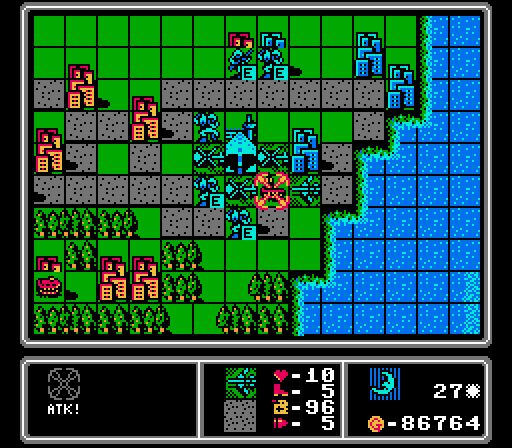 Our distraction invasion is still going well. We grabbed three more cities up here and used a refreshed bomber to finish off this AA tank to keep our copters safe a little longer.  We merge some other bombers together to make room to build more, and park each one where the AA missile can cover them.  Having three airports that can build planes for us is very handy for this part of the map. Turn 28  Fun fact - loaded transport units can't merge, for obvious reasons. So these damaged ones just retreat under fighter and battleship cover. The other enemy fighter didn't take our bait and flew most of the way back to its home airport for some reason. 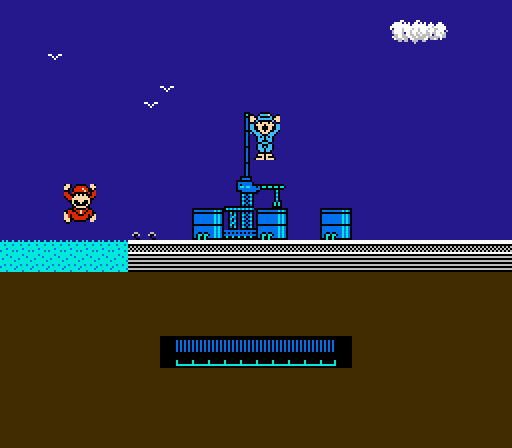 We finally finish taking the only neutral port on either main island, where I will use it exactly once the rest of the way. 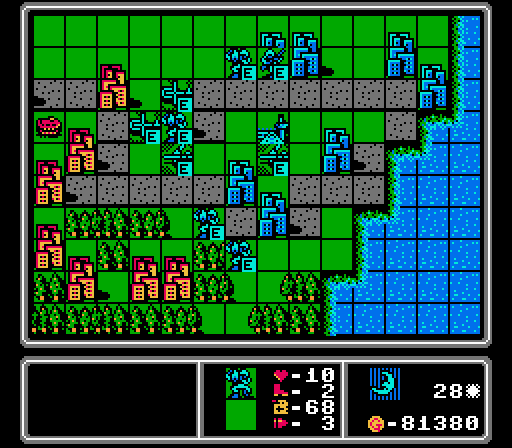 We also take a few more cities across both islands. This area is starting to look a lot healthier with the arrival of a second bomber and no real resistance in the area. 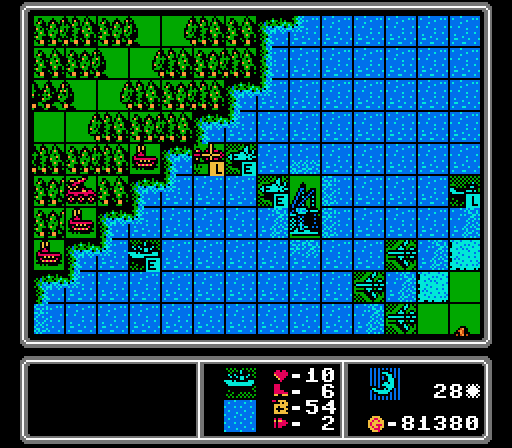 The loaded copter strayed too far from its anti-air support so I send a fighter after it. Then our battleship finally gets in position to threaten the enemy coastline and all the anti-air units giving us trouble there. 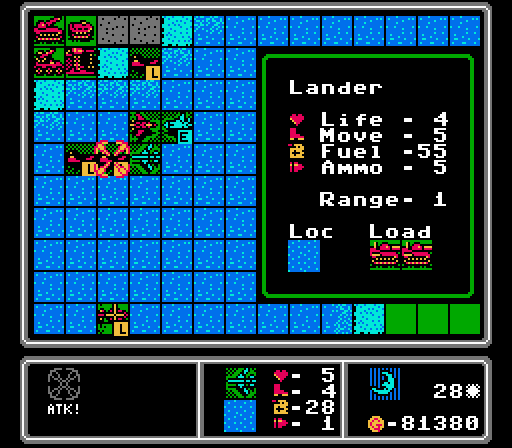 While another fighter of ours softens up the enemy fighter, we actually get a clean kill of this lander (and its two medium tanks) with a damaged bomber.  A couple more merges of damaged bombers gives us room to repeat the same build order as last turn.  The captures of the last few turns have really turned around the income to the point where now we're the ones with nearly double the income of our opponent. Notice also how Red's army size has dropped off recently. We'll need to continue capturing just to keep limiting Red's income - we want to limit how many fighters and battleships they can put out. Turn 29  This fighter attacked one bomber a couple turns ago and then headed back to the airport for some reason. It wasn't particularly low on fuel, either. Strange behavior.  If I have a stroke and forget about this infantry, it'll capture that port in another five turns. 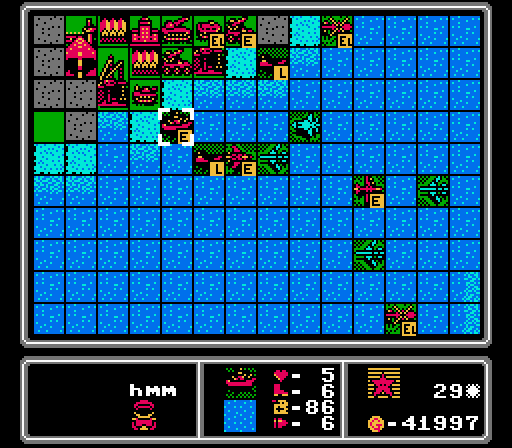 I think I need to back off of Red's HQ area for now until we can get more support. I can't break open the battleship+fighter+AA missile coverage here.  Red puts out a scout, a sure sign that it's feeling the pinch we've put on its income. 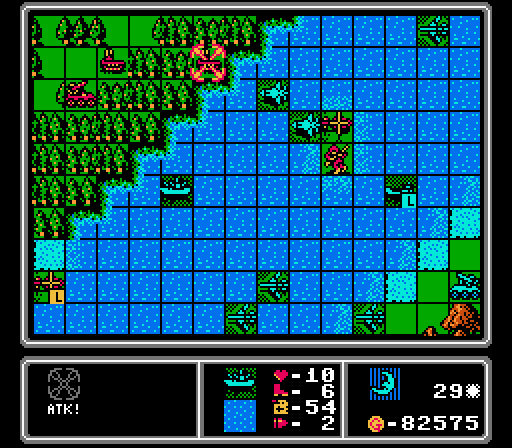  I'm not sure why this AA tank stayed in range but I'll gladly take advantage of the opportunity for a lot of risk-free damage to it. 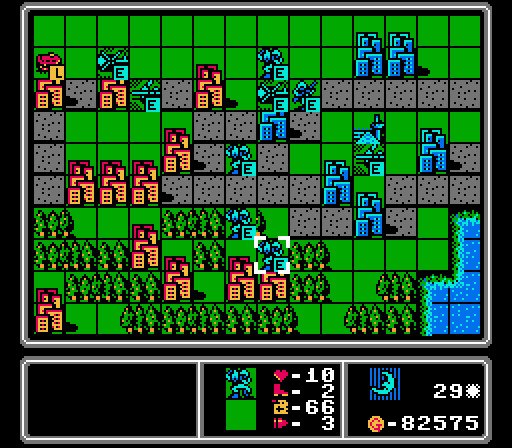 We're going to start drawing some attention up here soon, so I'm trying to grab as much as I can before that happens. 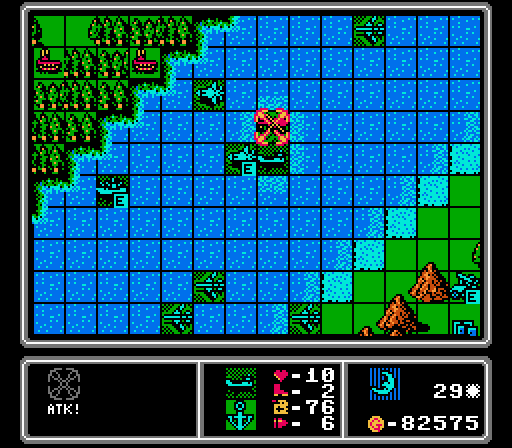 A fighter finishes off the infantry, leaving our loaded lander to take out the copter without suffering any damage in return.  A pair of bombers sinks another lander and its expensive passengers. 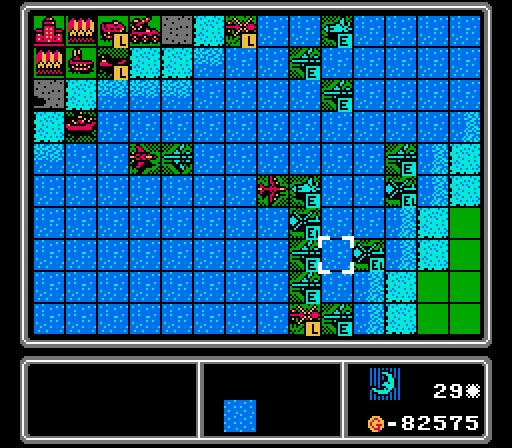 I form up a weird plane wall to keep the loaded copter from reaching our island next turn. A damaged fighter also hits that enemy bomber to keep it in check.  I'm looking for more support against the enemy planes and anti-air units so we get a battleship to go with the fighter and bomber pair this time. Turn 30 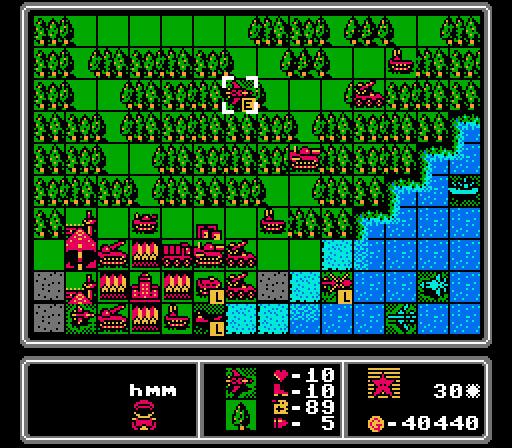 I mildly panic as I realize this fighter is headed for our distraction invasion and the bombers and copters I have there. I'm going to have to re-route a fighter or two up there I think.  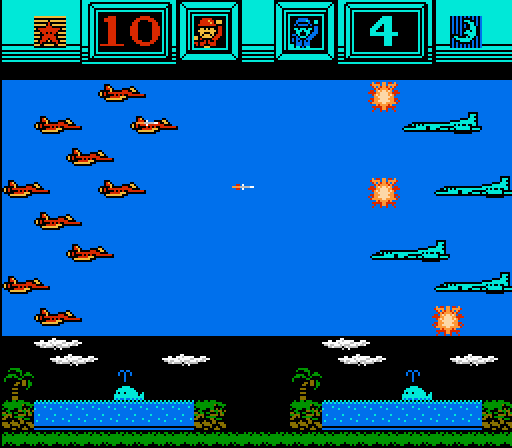 Attacking the lander resulted in this bomber staying out where the scout could reach it, but at least now that scout is exposed. 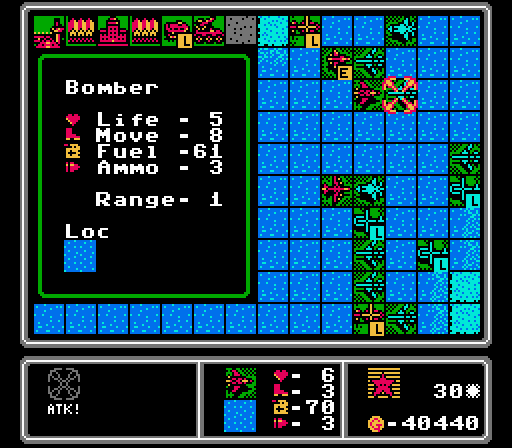 The damaged enemy fighter is then able to finish off this bomber, only our second one lost in actual combat (rather than merges) and the first since the 22nd turn.  So much for that scout being exposed. It's now covered by a battleship and two AA missiles. 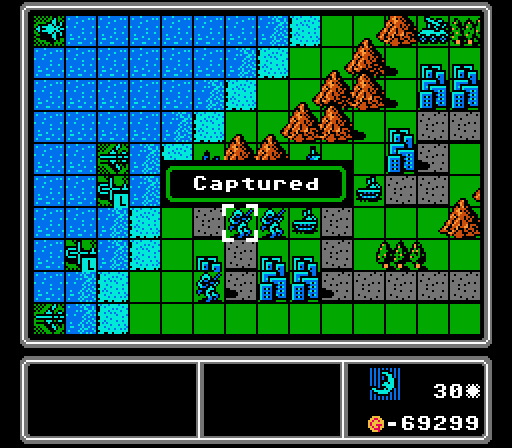 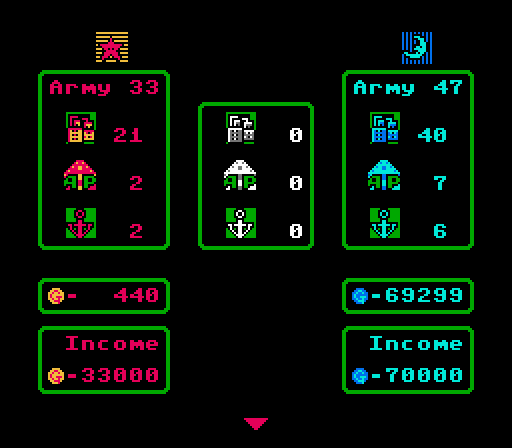 There it is - the last property on our island is now ours, and with it we now have more than double the enemy income.  We start capturing four more cities on Red's island, but the area is being contested now so not all of these captures will complete next turn.  The enemy scout may be protected, but we can finish off this fighter at least. 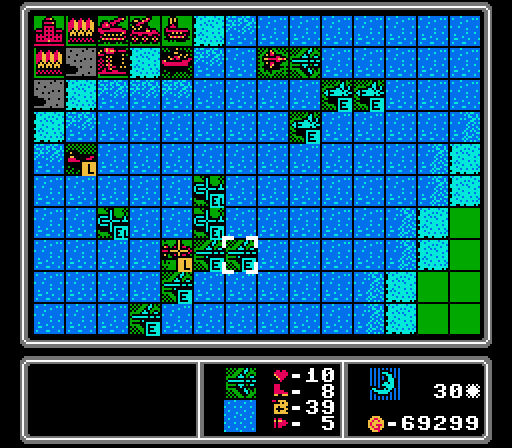 The enemy copter retreated, so I just move up the plane wall behind it. Spot the mistake?  This bomber can't get away from the scout and is almost out of fuel, so I throw it away on an AA tank to make room to build a new one.  Another battleship+bomber combo this turn. Those battleships will come in handy once it's time to clear out Red's HQ area. Turn 31 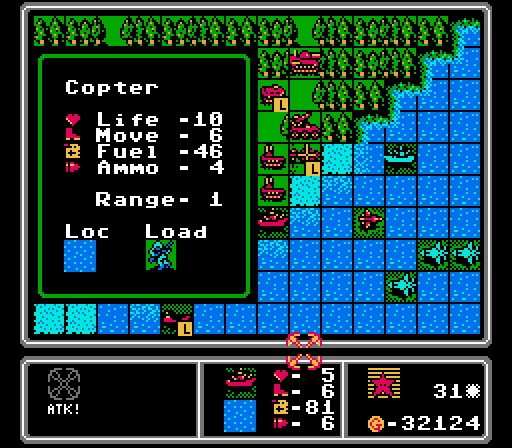 Speaking of battleships, I left a loaded copter in range of this one. Luckily it had already taken some damage so didn't hurt us too badly.   Another loaded copter is wrecked by the scout, and then the enemy copter abandons its attempts to reach our island and gets in some more damage on our copter. Our attempt to sneak over some infantry is pretty much over before it really started. 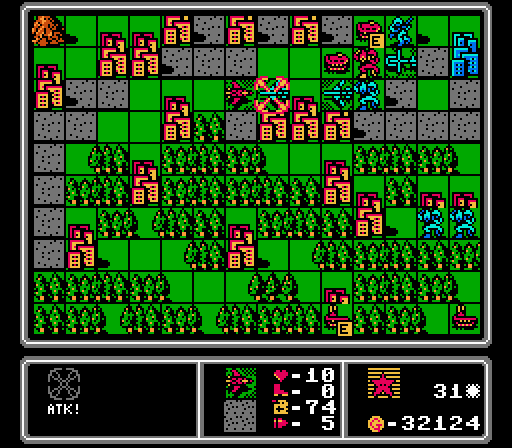 The enemy fighter arrives at the distraction theater and immediately wipes out a bomber. The other units in the area chip away at our capturing footsoldiers to delay two of the captures by a turn. 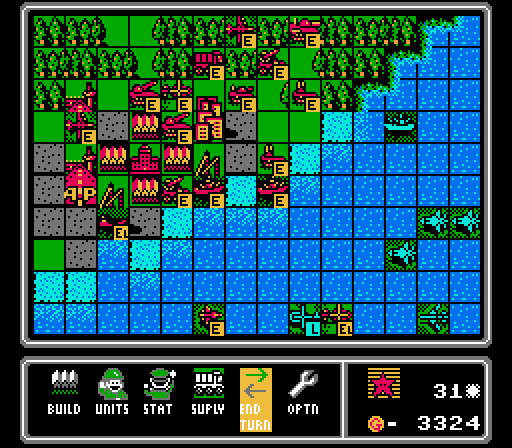 Red finishes off its turn by putting out another battleship. We really need to get a stronger presence here to make some headway.   We do finish off two more city captures, but two medium tanks are on the way, we just lost one of our bombers in the area, and the other one is exposed to the enemy fighter next turn. Still I guess they did pretty well for a distraction? 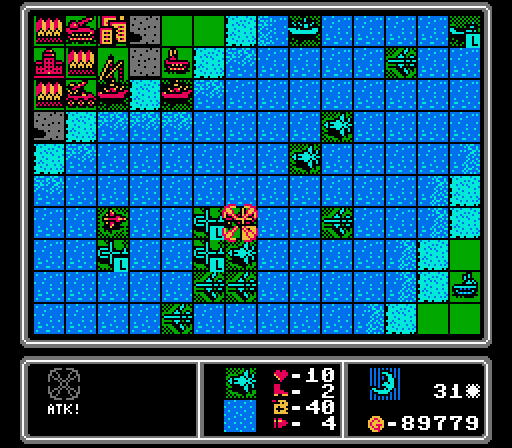  Apparently I decided it was time to stop being so timid here. After using a fighter to take out a loaded copter, I send in a fresh bomber to finish off this battleship even though it has an AA missile and another battleship ready to wreck it.   Two more bombers go after the other battleship, but the port's defensive bonuses are tough to overcome.  Another fighter goes after the scout for a lot of damage, followed by a third fighter (that is out of ammo) merging in with it to get it back to full strength. 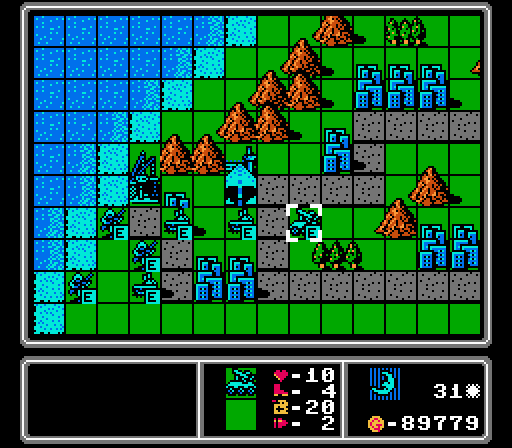 With most of our loaded copters heavily damaged, now would be a great time to make a few more to carry these infantry over, but it'll be way too many turns before I think of doing that. 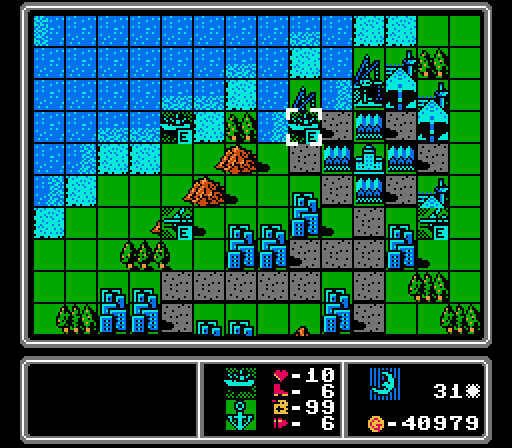 Instead it's another battleship+bomber pair to use up the tiny bit of space we have under the unit cap. Turn 32  The battleship and two AA missiles each fire on a different bomber for a lot of total damage.  Up here we lose the other bomber to the fighter, and our mech takes a hit from the first medium tank to arrive.  Another bomber falls to this AA tank.  The distraction invasion is finally living up to its name, as the AI has now sent three medium tanks, a tank, a fighter, a bomber, a couple of AA tanks, an AA missile, and a couple of loaded transport units up there.  We finish off two more city captures. It occures to me that a wipeout victory is going to be difficult with so many of the enemy units spread out all over the island, and we've just lost most of our air-lifted infantry near the HQ for a capture victory. This one's going to drag out again, isn't it?  As we use a fighter and a mech to wear down the enemy fighter, two other mechs start new captures and our copters try to keep the medium tanks away for one more turn. 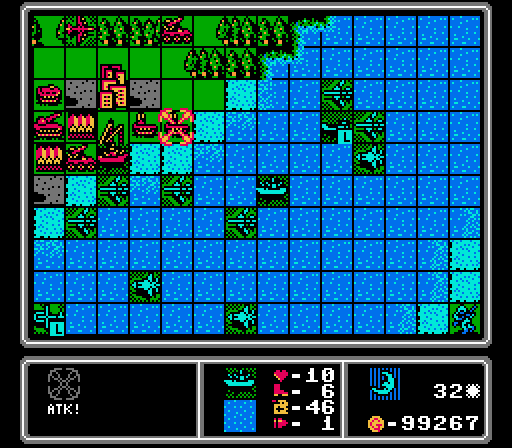 Our first battleship from the very beginning of the map finally uses up its last shot here, to finish off an AA tank.  Two damaged bombers are still enough to finish off this battleship.  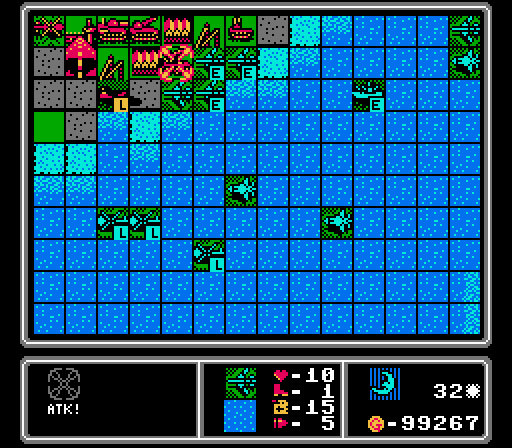 With Red getting spread a little thin, now seems like a good time to start picking off the ground units. We unload a medium tank and send in four more bombers to remove both AA missiles. Suddenly the enemy anti-air presence in the HQ area is down to a damaged scout, a damaged AA tank, and a loaded lander. 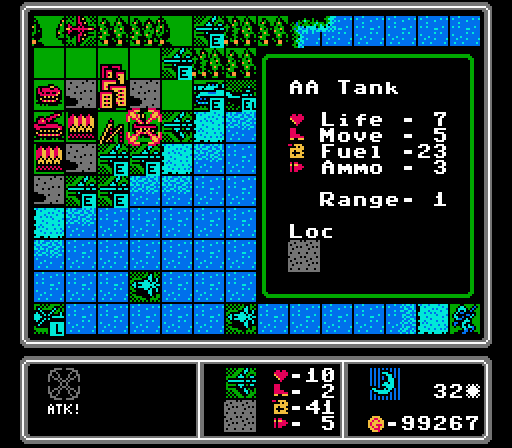 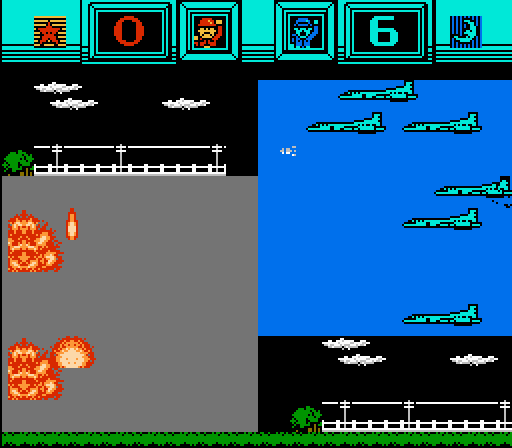 Scratch that, the AA tank is no longer a concern either.  Might as well start unloading these copters then, right?  We still only have room to build two units, so another battleship+bomber pair appear. Turn 33  I totally missed that this third AA missile was sitting up here, and we lost another bomber as a result. Still, it was worth taking out the other AA missile last turn. 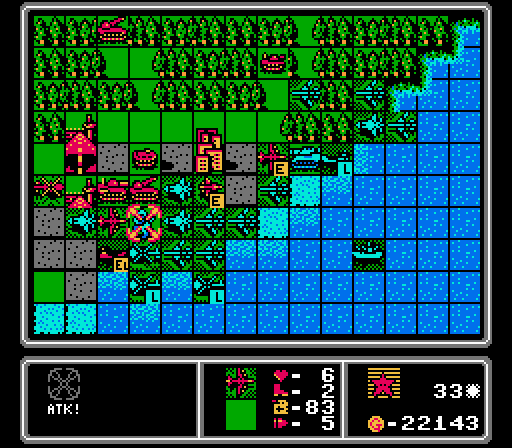 The ground invasion is off to a rough start, as one bomber hits our medium tank and the other finishes off this infantry.  We also lose this copter before it can even unload its passenger. 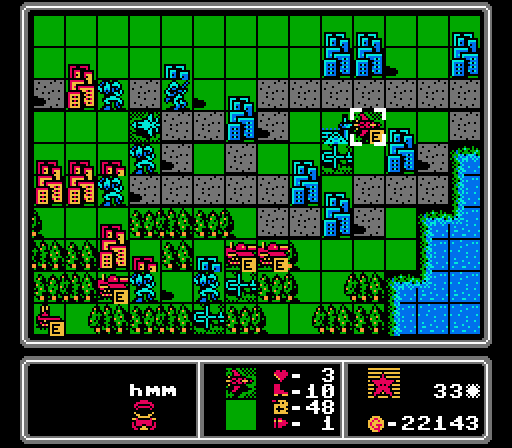 While two of the medium tanks are successfully blocked off by the copters, the third one is able to creep up the left side to hit our capturing mech.  Looks like we ran one of our bombers straight out of fuel. 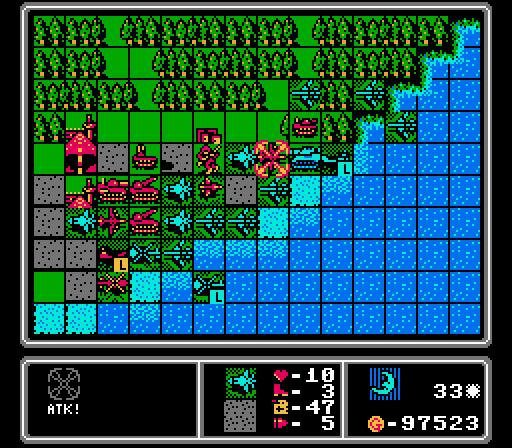  Our fighters make short work of the enemy bombers. 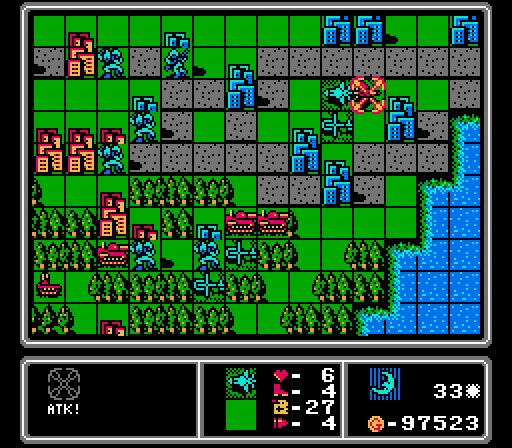 We also finish off this enemy fighter. 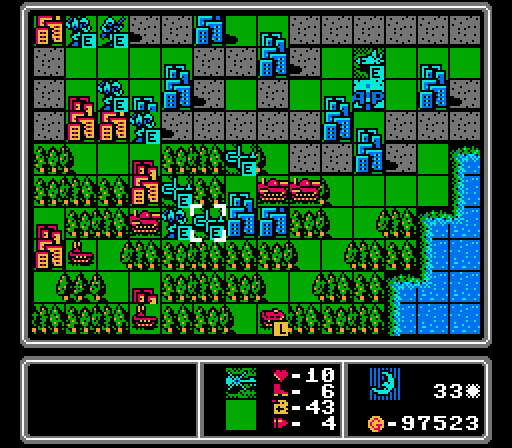 One mech completes its capture. The other mech continues capturing and gets a boost by merging with a damaged mech. The copters are once again trying for some partial protection here. 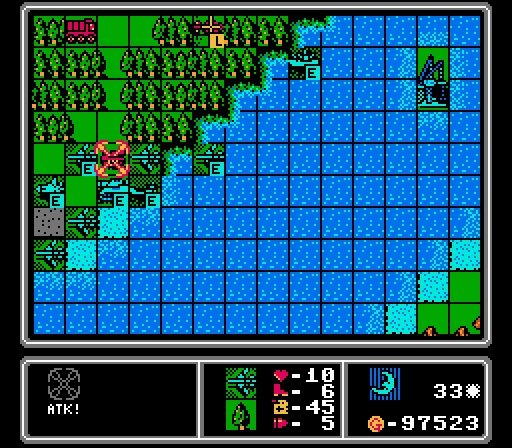 This tank also snuck in an attack on our medium tank earlier in the turn, so a couple of bombers take it out. 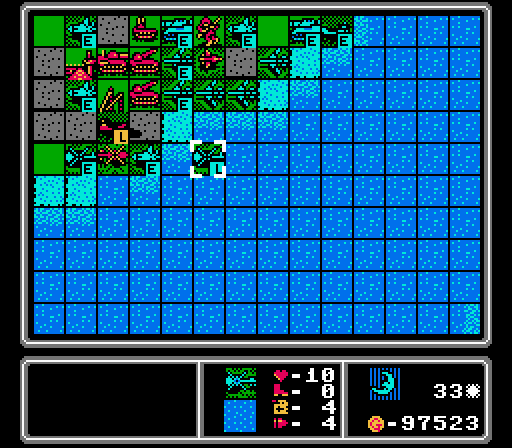 Other bombers try to weaken the rockets, but the defensive bonuses from the HQ and the base are too strong. This copter has our last healthy infantry but it has to unload this turn or it'll crash. 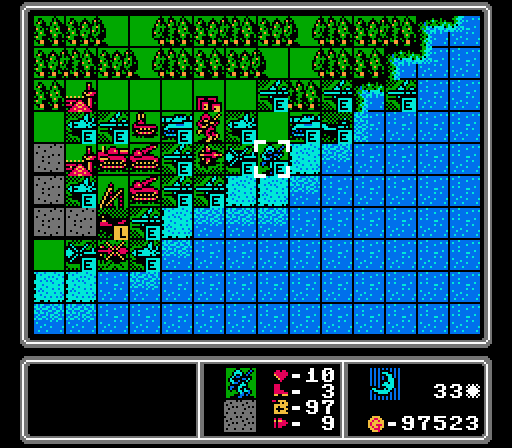 Not an ideal location but it'll have to do. I really should've built a few more copters a few turns ago. 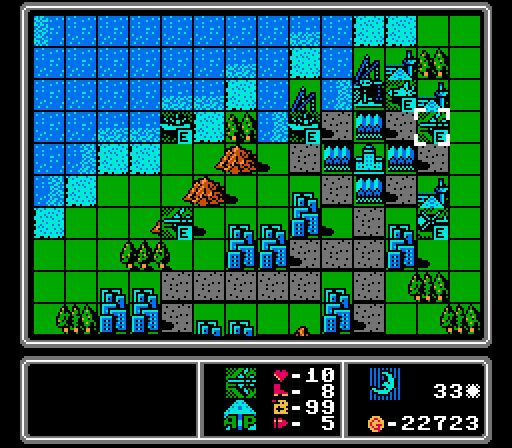 Well no time like the present I guess. In addition to our new normal of building a battleship and a bomber, we also have room for a fighter and a copter. Turn 34 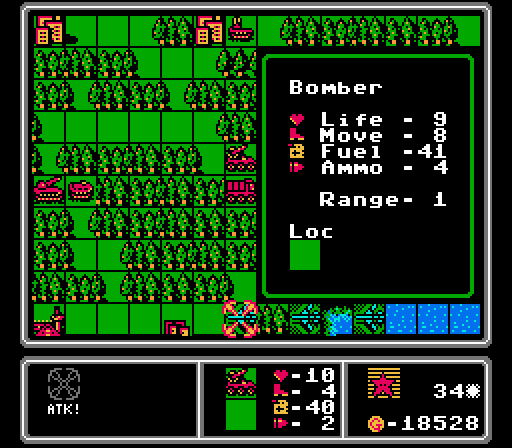 This AA missile got us again, though our bomber barely survives this time.  The two rockets hit our infantry near the HQ, making an HQ capture unlikely.  After the enemy medium tank finishes off our damaged medium tank, an AA tank goes after a fighter that is out of fuel and ammo and is just sitting around blocking the airport.   The loaded lander decides to start participating in the battle, firing at another of our fighters. 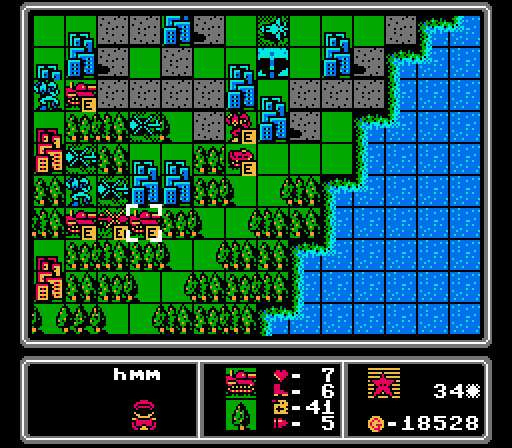 A couple of medium tanks hit our mechs again. More importantly though an enemy mech is dropped off well in range to start re-taking some poo poo. Can't let that happen. 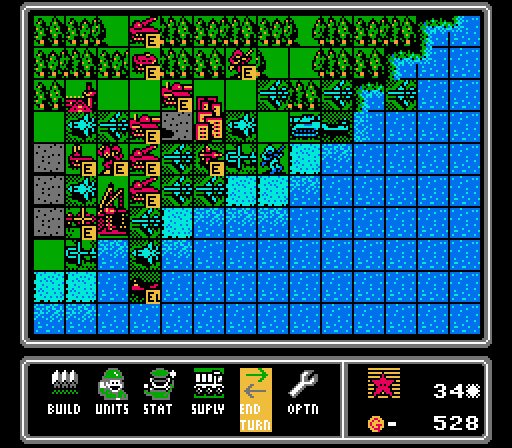 The scout went after our copter instead of doing something useful. Red then built another medium tank and a mech. 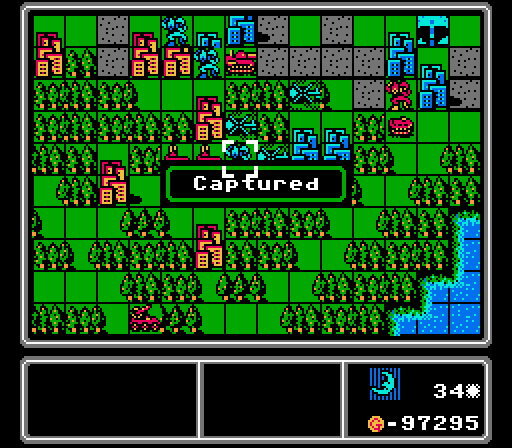 The medium tank attacks aren't enough to keep us from taking one more city away. Every little bit of income we snatch from the AI here is going to help keep those reinforcments down.  Our copters take a break from screening medium tanks to ensure this mech won't be capturing anything anytime soon. The enemy AA tanks were getting too close anyway.  For similar reasons, our third copter takes out the loaded enemy copter that attacked us, even though it's going to fall to those AA tanks next turn. 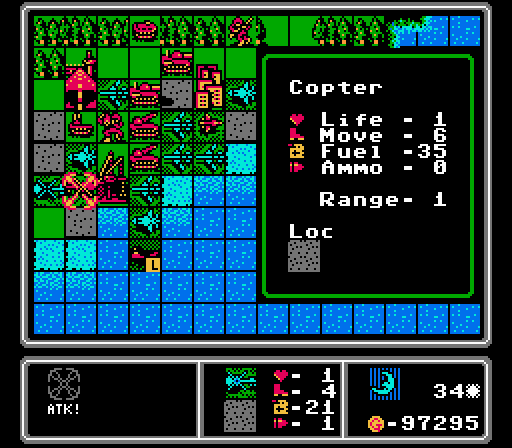 Here's some economy of action for you. Our extremely damaged copter is able to finish off another extremely damaged copter (that was out of ammo so couldn't fight back anyway).  After a bomber takes out one of the rockets, a fighter moves in to finish off this scout.  We're going to lose this bomber to a fuel crash next turn anyway, so might as well have it go out swinging against an AA tank and block the enemy airport at the same time.  I got real sick of this AA missile surprising me every turn so diverted a bomber to deal with it. 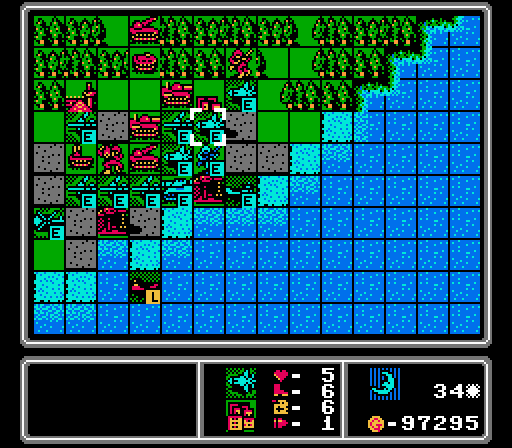 Keeping the infantry out of rocket range, and arranging the fighters to try and protect it from everything else. 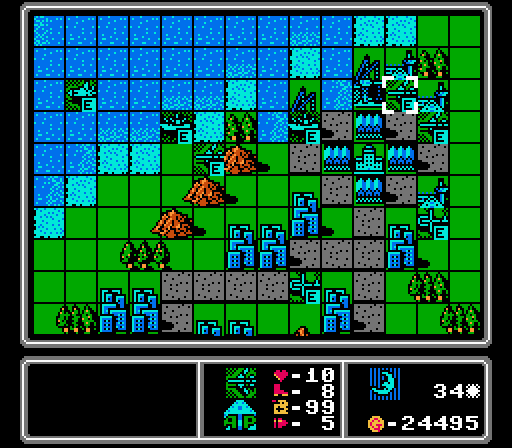 We've lost a lot of bombers lately, so let's build two this turn. Turn 35 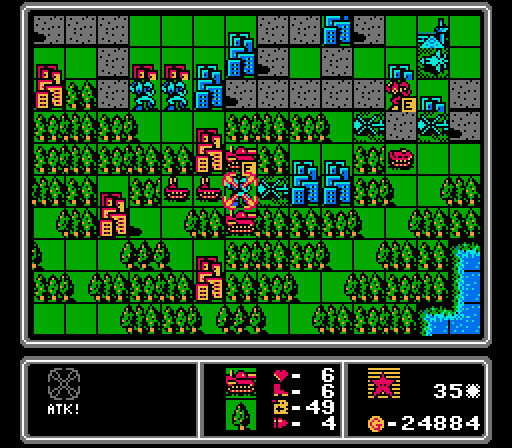 We do finally lose this mech to the medium tanks, but at least it finished taking the city first.  Likewise this copter falls to the AA tanks. The rest of this area is still doing relatively well though.  Another AA tank takes out another copter here. The rocket fired on our lander for almost no damage. 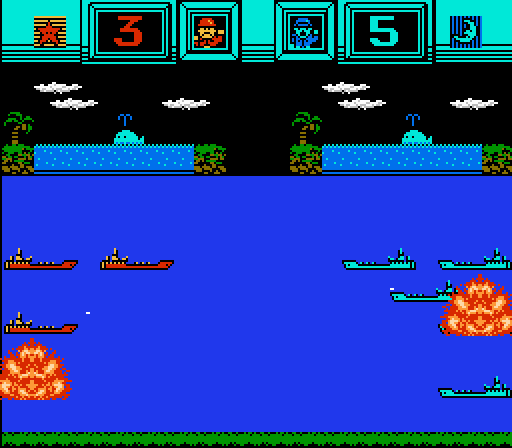 The enemy lander then tried to take advantage by hitting our lander, but didn't fare too well.  We're starting to benefit from being able to block most of Red's build points. Here they're only able to put out a tank and an APC.  We got in another two city captures despite the medium tank harassment.  The first of our battleship reinforcements has finally arrived, and announces its entry to the battle by killing off an infantry. 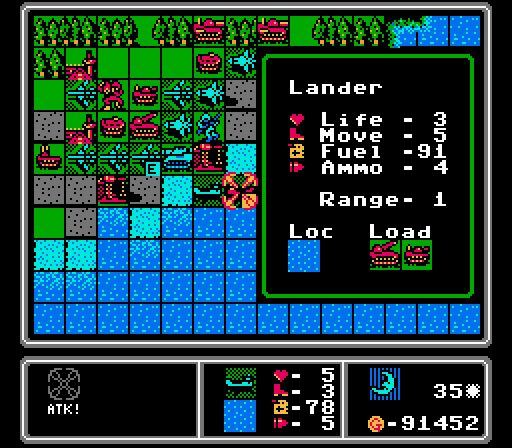 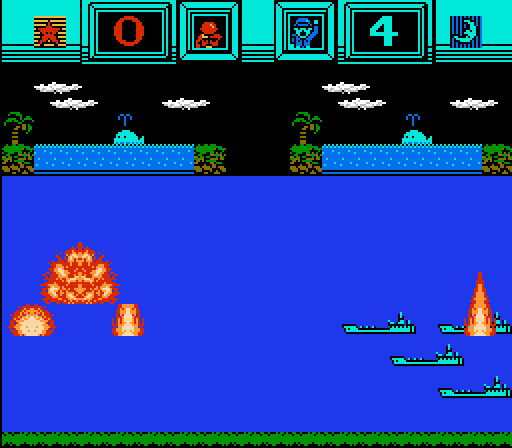 The lander battle ends in our favor, also sinking two vehicles. 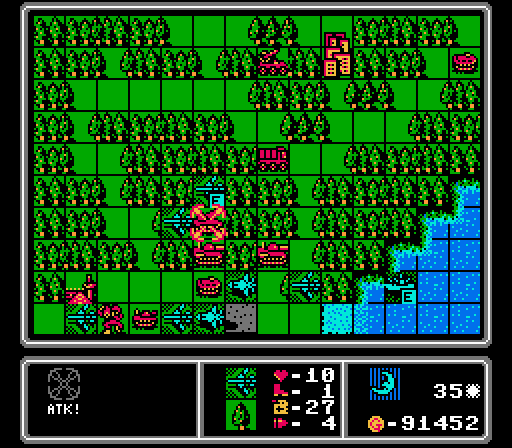 This rocket could cause trouble later, so a couple of bombers quickly remove it. 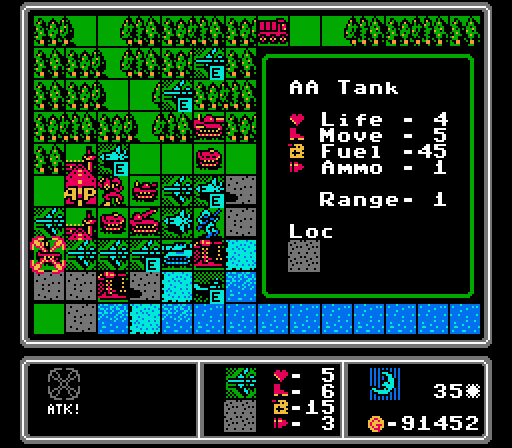 Another bomber, low on fuel, is able to finish off this AA tank. 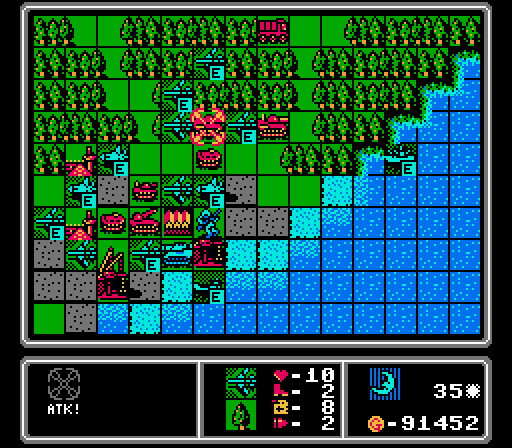 Two more bombers take out a medium tank. We're making a lot of progress this turn whittling away at Red's army! 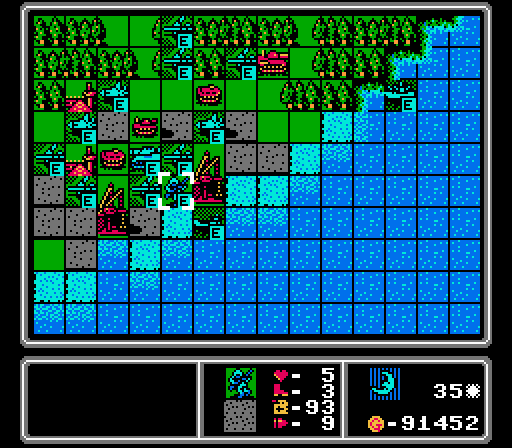 We got the rocket off of the HQ, and moved in our medium tank to block it, but I don't have anyone left that can protect our infantry from that APC so an HQ capture really isn't going to happen now. Turn 36 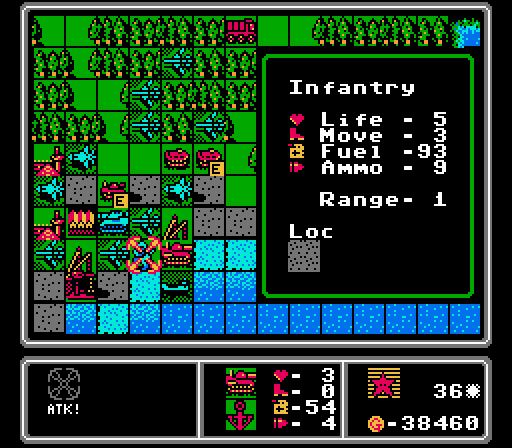  I didn't even notice that the damaged medium tank could reach us. I guess we could wait around seven more turns for an HQ capture still? 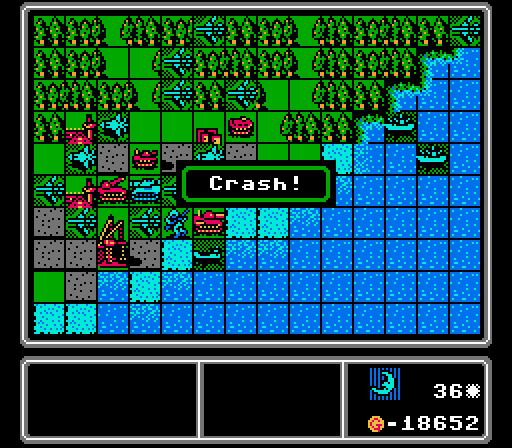 One of our fighters finally ran out of gas.  Our lander finishes off the medium tank; that's a weird thing to say. 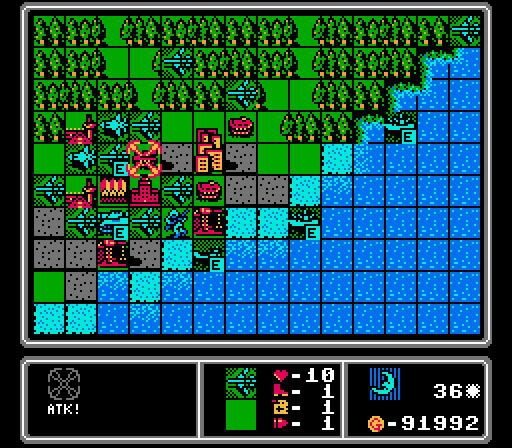 Red built a rocket and we took it out with a medium tank and a bomber before I could even show it. Another bomber finishes off this tank.  I thought I was very clever here, blocking every obvious build point. Unfortunately the city I have highlighted here is another one of those hidden bases. 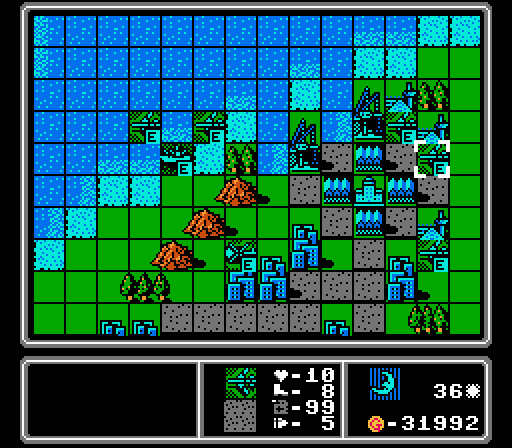 Finally fulfilling the promise of the third airport by putting out three bombers at once.  Two more cities captured! Our distraction force was wore more successful than I ever expected it to be. Turn 37 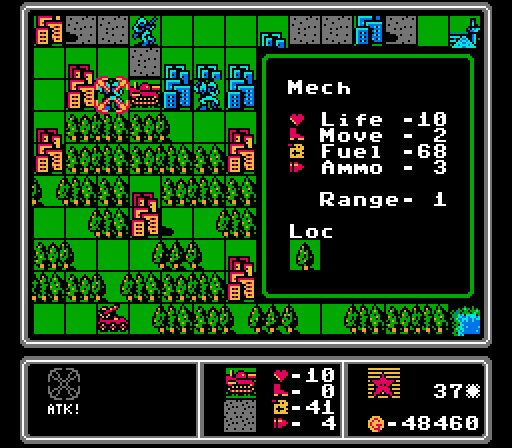 Two of the enemy medium tanks merged together last turn, and used their combined strength on this poor mech.  We lose this mech entirely to an APC attack, despite the city protection.  This copter barely survives the AA tanks. We'll need some help up here to complete the wipeout victory. 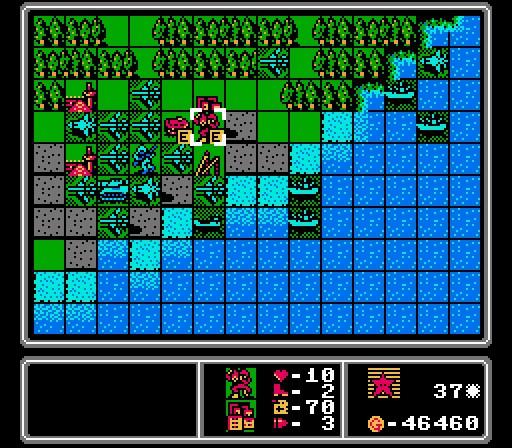 Flush with cash, Red uses its single build point to put out a mech.  The mech quickly falls to a battleship and a new fighter.  Another fighter flies in to finish off this APC (it took damage from a battleship last turn) and block the secret base.  Some careful re-arrangement allows us to continue blocking all the build points while sending up two bombers. One finishes off the last AA missile, while the other hits a supply truck. Turn 38 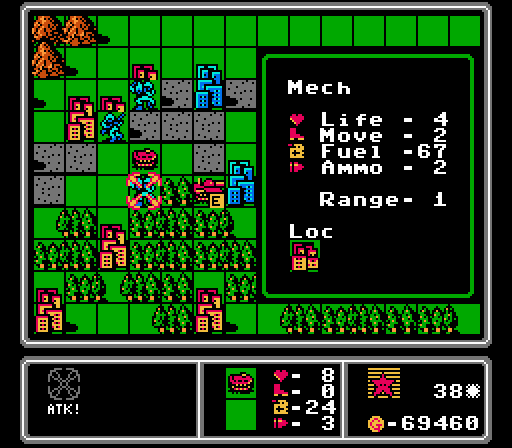 The enemy phase here is pretty light - the two AA tanks merged together, as did the two medium tanks. This APC then took out another of our mechs.  Lucky for us, the merged AA tank is in range of a battleship we sent this way last turn, and the battleship is able to take it out in one shot.  While we're able to easily take out the supply truck, none of our bombers can reach the APC and only one can reach the medium tank, so we're going to need one more turn here. Turn 39 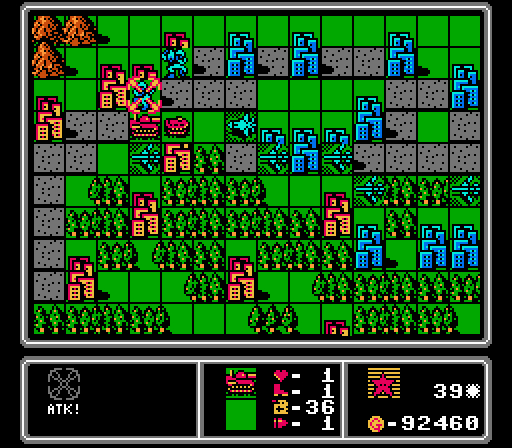 The medium tank kills itself on our infantry on the enemy phase.  Before we finish off the lonely APC, one final snapshot of where we stand as we wrap up the map. We ended up taking most of Red's cities in the upper half of its island.  We built an obscene number of bombers, including at least one every single turn since the 14th turn. What's more interesting is what we didn't build - not a single tank, APC, rocket, or artillery; no scouts; and only one AA missile and one lander (for a naval invasion map, having one lander is pretty odd). Red in turn had a lot of medium tanks and rockets that never really accomplished much, a dozen battleships that were annoying but never did as much damage to us as they cost the AI to build, and only nine fighters? It felt like a lot more when we were dealing with them. The AI only putting out three AA missiles and six AA tanks is pretty unusual, too, given how bomber-heavy we were. 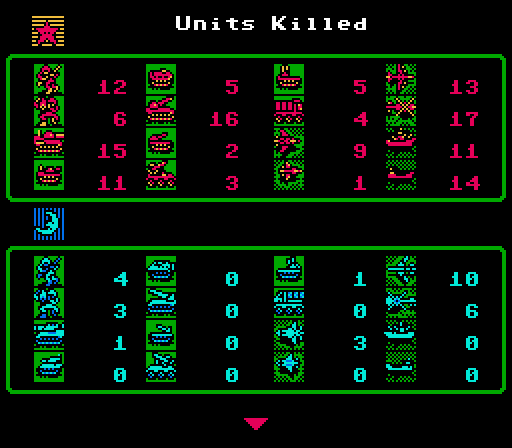 Our losses skyrocketed at the tail end of the map, and are even higher if you take into account all the merges we did (by my count we had 11 merges for bombers alone). We still are ending the map here with 21 bombers out in the field though. 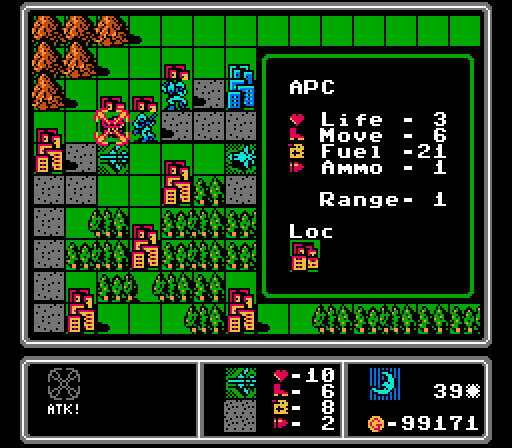 Anyway, this APC took a lot of damage going after our mechs and infantry, so one bomber strike is all we need to claim victory.  You know, even if we had started building copters way back on the 31st turn when I first thought of it, they wouldn't have even made it to the enemy HQ by now. And our damaged infantry was just 4 turns into the 7-turn capture with its paltry 3 Life remaining. So I guess a wipeout was still inevitable here.  One last victory screen for you all. 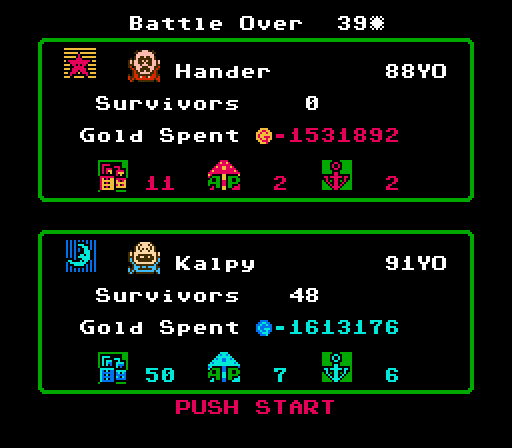 These are the same two COs as on Red's bonus map! We actually ended up with more total gold spent this time around, completely turning around Red's initial advantages. 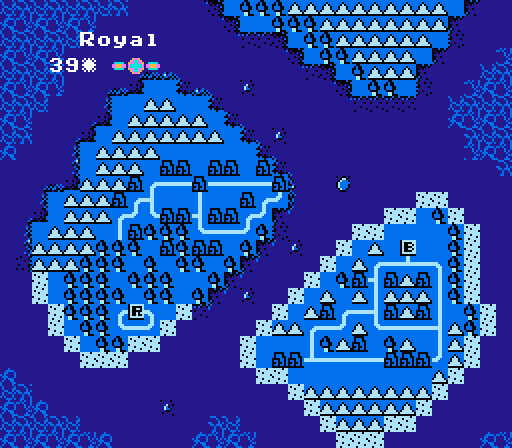 We beat our score compared to Red's bonus map, too (that one took 42 turns). The AI just can't handle naval maps. Our total runtime was also just under 9 hours, a large improvement over the almost 13 hours that the Shark map consumed from my life. Our total time for the entire Blue campaign now stands at 37.5 hours! Hopefully it didn't you that long to read all of it!
|
|
#
?
Jul 9, 2022 18:57
|
|