


|
After having wanted one for a while (and after printing a ton at work), I've grabbed myself a Creality CR-6 SE as a birthday present. Since it seems like it's more or less an Ender 3 v2, but with a bunch of the upgrades built in. I really appreciate how well it works just right out of the box, haven't really tweaked anything yet, but managed a pretty good lithophane print right off the bat. A couple lines throughout, not entirely sure what caused them, but I think some of those artifacts might be because it was a bit too thin in some places. (scaled it down instead of re-generating it when I realized I wouldn't have enough time to print it before bed otherwise.) Pretty impressed at the actual 'resolution', considering the size and time. (5 hours, 0.2mm layers, 0.4mm nozzle, roughly 150x76mm, curved. Basic Creality PLA that came with the printer.)  (Used https://itslitho.com/, only annoyance is that superslicer took a loooong time slicing it, since the mesh quickly becomes pretty heavy.) Main annoyance is needing to find a micro-sd card in addition to the sd card that came with it to flash the touchscreen, because the newest community firmware requires a touchscreen flash at the same time. I'll probably look at swapping out the hot end assembly for a proper metal one, since I imagine it's probably similar to the Ender 3 in having one that breaks fairly easily. I've just gotten some nozzles, so I'll be trying to print the parts for an enclosure with a 0.6 or 0.8 nozzle so that I can speed it up a lot. e: By the way, I was thinking of repurposing my old phone to run Octoprint on it, as opposed to buying a raspberry pi or something for that express purpose. Does anyone have any experience with running Octoprint off an android phone, as opposed to a raspberry pi? SubNat fucked around with this message at 14:06 on Jul 13, 2022 |
 #
¿
Jul 13, 2022 12:51
#
¿
Jul 13, 2022 12:51
|
|


|

|
| # ¿ May 9, 2024 19:59 |
|
|
bbcisdabomb posted:When I tried it my phone (an old Nexus 6) couldn't do both power and data through the USB port simultaneously. The actual software worked incredibly well on battery, so if your phone can do charge and data I would recommend it. Yeah, I ordered a usb c dongle that should allow for charging plus data, so all that remains to be seen is if my old Huawei mate 9 pro can do it in practice.
|
|
#
¿
Jul 13, 2022 16:36
|
|
|
By the way, I've been skimming the thread while on vacation and I'm kind of curious about Octoprint v Klipper. My understanding is that the primary bonus/benefit from using Octoprint is being able to remotely manage the printer, in addition to setting up a camera + timelapse if you want to, but it doesn't actually do anything with print quality/speed, correct? Or are there some benefits to the extra processing power that people just don't talk about that much? While Klipper is meant to be used if you want to push the printer a bit with higher speeds with all the fancy features it has, right? With more precise stepper control, input shaping and stuff like that. Basically the typical balance between 'printing is the focus vs tinkering is the focus' of 3d printing as a hobby? (A shame I can't run that off an old phone as well, like with Octoprint though.)
|
|
#
¿
Jul 17, 2022 16:23
|
|
|
Dr. Fishopolis posted:op did not know that klipper replaces the firmware on your machine, you are high on your own farts if you think converting an ender 3 to klipper out of the box is a 20 minute job for someone with zero experience with this stuff. Yeah, I was aware it would have to be flashed over the original firmware, I was mostly unsure about the distinctions between them other than Klipper being the goto for gotta go fast. Now that some other goon specifed that the difference was sending commands to the printer, as opposed to controlling it directly it makes a lot more sense that it can push the printer further. It was the one thing I was pretty vague on, what actually set it apart from a normal or community firmware alongside octoprint, since I guess I assumed that octoprint did more than it does. Thanks for the replies, it really helped clear it up.
|
|
#
¿
Jul 18, 2022 12:24
|
|
|
RabbitWizard posted:Anyone got any tips about seams on round objects? I managed to make a rear seam align through all the parts which is ok if it is just a decor object but rather have something less visible. "Random" gives terrible results. If you're printing only the round object on it's own like the lightsaber-beam, wouldn't vase mode work? Maybe with a bigger nozzle for a bit extra strength. Would be more fragile than something made with multiple walls/perimeters though, I imagine. Also I've gotten Klipper + Fluiddpi up and running with my CR-6 SE, so that's neat. (Though I need to troubleshoot my slanted bed mesh, yeesh.) I also thought I'd be fine with the glass plate + some glue goo but hooh nah, ordering a flex plate today. The first rounds of magigoo seemed to work, but it just feels like a coinflip if a print will pop off with no issue once the bed is cold, or if it'll stick like hell. Printed a 4-pack of risers for my lack enclosure at the same time, all gooed up. 2 popped off without any issue ( Pick up, twist, pop off. ), one needed a bit of leverage, and the last one I needed to reheat the bed and plasticize before I could even get the spatula under it.
|
|
#
¿
Jul 23, 2022 12:35
|
|
|
Roundboy posted:What are the odds it's coming to superslicer anytime soon or should I just up and change slicers again It's guaranteed to eventually, since every Superslicer release is merged against a Prusaslicer release, I imagine it'll take a few weeks. They already mentioned that the last stable release was going to be the last release based on prusaslicer 2.4, so they're working on it. That said, I really like the lightning-infill type they added, a new infill focused on generating infill only to support tops and overhangs, for models that don't otherwise need it. 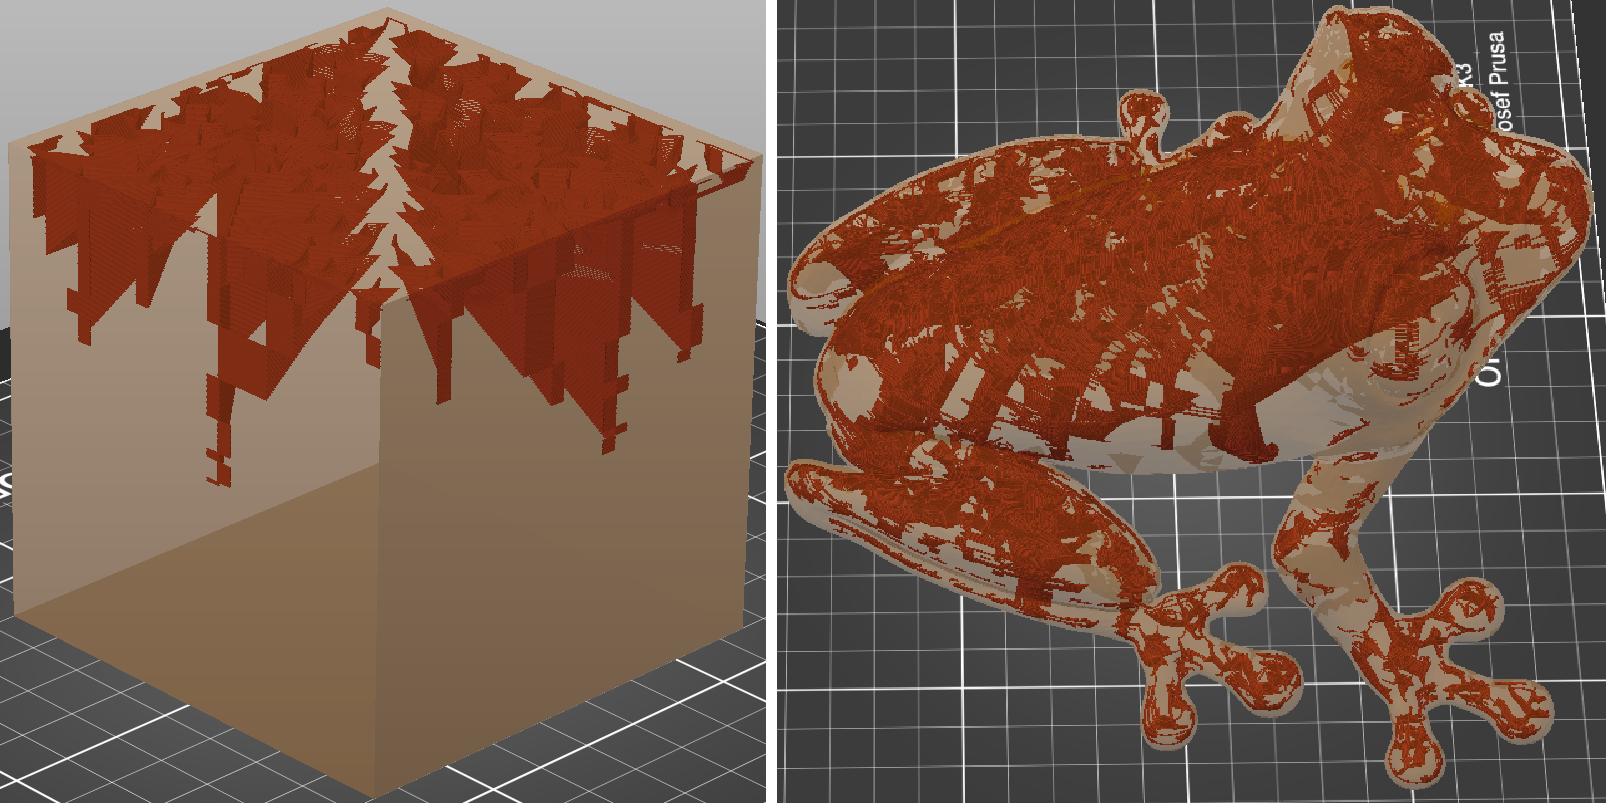
|
|
#
¿
Jul 24, 2022 18:27
|
|
|
I pirated a seal. Though I wish that: a: I had slapped on variable-layer size so that I could reduce the plateau stepping on the fin and head. b: I had some way to minimize those drat layer seams/zits, they're super obvious on a smooth shape like this unfortunately.  (Photoscanned/Photogrammetry-ized the seal with Reality Capture.)
|
|
#
¿
Jul 26, 2022 12:18
|
|
|
Hadlock posted:I was fully expecting them to only have a $10k enterprise product, looks like you can buy credits, somewhat reasonably priced. Do you mind me asking what that cost to, uh, scan It cost a whopping 0.75 usd to export/scan, I could optimize it by using fewer images. (Flat rate based on how many megapixels you shove in.) When you use credits you 'license' the images you shove in. So once you've paid for the images for a scan you can export and tweak it as much as you want with the same dataset. Also it's completely free up to the export phase, so you're free to import and test and play around with models to see how they look and if it's something you want to spend money on. (You only actually use the credits when starting up the export of the finished model.) It's a weird licensing scheme, but I don't mind dropping 0.5-a couple bux now and then on the occasional model, instead of having to buy an expensive program or get another tedious subscription. Another model I did with like 230, 1080p images cost around 0.3 usd. (Frames from a video.) It can be dropped down to 100 or so images and 0.1-0.15 usd without much loss in quality, especially for models I'd be postprocessing in a 3d program afterwards, or just using as reference to build a new, clean model.  SubNat fucked around with this message at 14:52 on Jul 26, 2022 |
|
#
¿
Jul 26, 2022 12:34
|
|
|
Oh yeah, a heads up with Prusaslicer 2.5, Lighting (and possibly some other 'adaptive' infills) infill seem to break if you use variable layer height. I assume it's something like it getting coded to be 'x layers' high relative to the base layer height x structure it's supposed to support, which then breaks when some layers are a fraction of the height. It still generates a bit, but it doesn't 'grow' as much as it otherwise does if you just have a static layer height. I double checked a print and noticed that it was generating only a small fraction of the support mass it was doing pre-variable layer height getting applied.
|
|
#
¿
Jul 26, 2022 18:31
|
|
|
By the way, has anyone tried those anti-vibration feet made with squash balls? I'm considering grabbing a couple, and I'm curious if it's worth it. I'm building a lack enclosure (slightly enlarged to fit a cr-6 se), and I worry a bit about vibration considering the thing has no issue wobbling the large table it's currently on when it gets into the right mood. (Y-axis gyroid infill is a big wobble-maker.) If it helps a bit it would be nice, but I'm very much considering if I should just fasten the enclosure to a wall as well, especially if I want the printer on the 'second floor' instead of first. (~110cm off the floor instead of ~55cm off the floor.)
|
|
#
¿
Jul 27, 2022 18:48
|
|
|
Alright, looks like there's nowhere near me that sells pavers specifically, but there are a couple of stores that sell stone tiles for floors and walls. Looks like if I grab a pack of one of them (And manage to get it back home on my bike.), I should have enough for up-to-3 layers of stone, so... 10-30lbs ish. I guess I'll give that a fair swing.
|
|
#
¿
Jul 27, 2022 19:49
|
|
|
mattfl posted:Is there not a home depot or lowes near you? I live in a suburban area in Norway, and primarily travel by bike so the amount of stores I can get to without it being a huge hassle is kinda limited, there are a couple stores that fit the bill, but I did find one that sells suitable slabs & had them in stock nearby. Anyhow, thanks for the replies, very useful stuff. I'll slab it up and see how it works. If it doesn't work out, then atleast the printer will have a nice grey stone slab to sit on.
|
|
#
¿
Jul 27, 2022 20:46
|
|
|
I'd say not in a way that matters, no. Heat resistance in paint would just mean that the paint itself could tackle the temps, not that it'd insulate or protect the material under from the temps. What you'd want in a case like that would be like, covering it with aluminium foil to reflect the heat a bit, or something to physically insulate it. https://www.amazon.com/SmartSHIELD-...ps%2C147&sr=8-1 Something like that both protects from radiant heat, as well as insulates a bit, but the thickness would make it very difficult to implement into a design. (But maybe you can find some thinner insulation material that might protect the PLA more.) Aluminium foil tapes might be a good option, and might also hold the PLA in place a bit more if it does start sagging a bit. That said, I have no idea how well or how long something like this would protect the PLA from the temps in practice/use. I think if you'd want a PLA shroud you'd be better of making it larger to give it more space/air, or have active cooling. I'm guessing since you're not mentioning ABS that both ABS and ABA are off the table? Alternatively, if PETG is being a hassle, why not buy a print from someone else, so that they have to deal with it? Might be the easiest solution to just getting something that works.
|
|
#
¿
Jul 31, 2022 13:51
|
|
|
Mikey Purp posted:I find it so weird how there are literally 100 different options that all boil down to <$500 bedslinger ender clones with slight tweaks, and then basically nothing mass market until you get into the realm of the Prusa XL. I feel like there should be a It Just Works option with a larger print volume at the $1000 price point, but there just isn't. I think the Bambu lab X1 printer could hit that 1000$ price point, but it's one of those very-recently kickstarted things where it's just unavailable outside of a handful of youtube reviewers who tried it, and little info on how it is over time. Or how 'it just works' it is in the hands of the average person as opposed to the QC-ed and tuned to hell units they might be sending out to big reviewers. From the initial reviews it seemed really neat, and if it is as good once it's actually on the market, I might consider getting one as an upgrade/my next machine next year. It is pretty neat that they've gotten to the point where they're slapping in LIDAR into the units for calibration and stuff like noticing that the print has loosened. That said, it does advertise printing in multiple colours, but is hilariously inefficient in doing so. (Though it's a bit unfair to compare it to the Prusa XL, since the XL with 2 heads is like 2.5x the cost.)
|
|
#
¿
Aug 4, 2022 16:37
|
|
|
On the vague topic of print quality, I'm kind of amazed at how wildly different PLA filaments perform. Like these store-brand (dried, so the moisture wasn't a culprit) filaments I bought with my printer are just the most rear end imaginable. (3Dnet PLA, for any other  s out there.) s out there.)(Extruder wheezed and clicked on doing gap/top fills, surface finishes were rough and ugly, material was stringy and flowed poorly regardless of me printing at 190 or 230, even after a ton of retraction and flow% tuning it was still pretty rough.) And then I swap them out with some other filament I bought alongside it that was like 2$ a roll more, and it prints like a dream, with a notably prettier end result. (Polymaker Polyterra) It does make me wonder how often people get stuck on tuning their printer around some filament that's just wildly uncooperative, and blaming the printer/settings, when that exact same setup can work notably better with a different filament. (Though with a slight temp adjustment.) I had a lot more luck printing a (supposedly very) finnicky bronze-filled filament than the storebrand PLA, but I feel like I've seen the sentiment of 'X filament was recommended, but sucks for me' mentioned in 3d-printing communities pretty often. SubNat fucked around with this message at 17:16 on Aug 6, 2022 |
|
#
¿
Aug 6, 2022 17:13
|
|
|
withak posted:Can someone post a good stl for a gate model? Do Stargates count?  Tweaked variant of https://www.printables.com/model/84452-milky-way-stargate, filled with resin.
|
|
#
¿
Aug 8, 2022 19:15
|
|
|
If you can snap some pics it'll be easier to diagnose. First layer shenanigans can be stuff like z-offset / the nozzle printing too high or low, leading to stuff like poor adhesion on the first layer. But it's easier if we can see what's happened. (Temps, unclean bed etc etc are other possible factors.) Actual leveling and z-height/offset are 2 different things, which isn't often very well conveyed. (Autolevel corrects for the bed not being perfectly flat, z-offset is +/- height on top of that.) I'd suggest getting superslicer and running the calibration-tests it has, it's a very informative step by step process that I found super helpful, since you can tweak a lot of the tests. 
|
|
#
¿
Aug 14, 2022 16:15
|
|
|
Len posted:Ive spent the morning messing with retraction settings and I'm not sure if I've made any real progress. 6 7 and 8 mm all end up super stringy. What are some other settings to fiddle with to try and fix it? Too high and too low temps can both cause it with some filaments. (When it's low it's because it gets too viscous and keeps oozing out after extruding is done.) I'd suggest superslicer's extruder retraction calibration, because then you can set up a test that both tries multiple different temps + multiple different retraction settings at once, so you can compare. If not, then just try running multiple other retraction towers at higher and lower temps, and see how it differs. Like this setup for example:  It would generate 2 towers, one with 0-7mm retraction, at 215C, and a second with 0-7mm retraction at 205.
|
|
#
¿
Aug 16, 2022 17:48
|
|
|
Also it's worth noting that slicers just calculate roughly how long a print will take based on a list of speeds + acceleration values for your printer. If your printer differs, and say the firmware is pushing a max-speed cap that the slicer isn't aware of, or has other acceleration values, then those differences will keep adding up to a different result. It can be worth double checking that the settings your slicer has matches up with what your printer pushes, if you know what they are. (In prusa/superslicer it should be under printer/machine limits or something like that.)
|
|
#
¿
Aug 17, 2022 22:53
|
|
|
By the way, does anyone have any routines for nozzle cleaning at the start of a print, or do you all just prep it manually? I usually just have my printer ready so I can start prints from my pc, but there are a couple filaments that ooze a lot after a print has finished, so the printer ends up with a bit of hard plastic at the nozzle tip for the next print. And if that bit sticks around when the printhead does a z-calibration at the start of the next print, it can gently caress up the z-height and cause the first layer to fail on some of the more finnicky prints. (Which I guess makes me understand why some designs don't use the nozzle for calibration, some Vorons seem to use a clicker or something?) I have seen a couple people add in routines where the nozzle scrubs itself with a brush (usually one fastened to the print plate or right outside it.), but that was also on a voron. Or is it better to just change the start-routine to have the nozzle heat up to max first, so that it'll melt and push away any stray filament perhaps? Aside from that, printing stuff seems to be going well. But now I'm slowly falling down the rabbit hole of printing more and bigger stuff, already got the blade for a master sword printed and ready to be gap-filled, sanded, primed, and painted.  It honestly looked quite nice on it's own with the eSun PLA+ Silver, but the gaps kinda ruin it, so I'll be trying my hand at some post + painting. (There were also some mini-holes in some of the walls due to too-large retraction distance, so it'll be nice to fill up those as well.)
|
|
#
¿
Aug 27, 2022 19:59
|
|
|
Nerobro posted:A nozzle brush, and purge bucket around it, is a lovely thing. You should do it! I'm adding it to my V0 this week. Sadly, there's no print head over travel available, so that requires a servo driven bucket and brush. Yeah, I think I'll poke a bit at it the next time I order some stuff, and grab an additional brass brush I can use. (And once I figure out a decent place to mount it/etc. The CR-6's movement range is pretty much limited to the size of the build plate, so I'd need to sacrifice a little bit of space.) The z-tap, clean, z-tap routine seems like it would be quite nice. RabbitWizard posted:The message will appear instantly so if you didn't change the filament you can just directly press the button after starting the print. (You have a CR-something using Marlin, right?) Yes/no, CR-6 with Klipper. Seems like I can do what you described by slapping in a pause-keeptemp macro into the print-start sequence, then firing a resume. Thanks for the input, I think I'll be doing this until I can experiment with a mounted brush.
|
|
#
¿
Aug 28, 2022 11:14
|
|
|
IncredibleIgloo posted:Folks that print a lot of terrain with an FDM printer for miniature games, what size nozzle do you use? Do you mostly use a 4, or is a 2 reasonable for printing terrain. I want it to look as nice as possible. If you want to boost effective resolution you could print it standing upright if possible, that's a notable resolution upgrade. (After all, then you can suddenly be doing 0.1mm layer details in the floor.) Like with lithophanes, you can get pretty high effective resolution by printing details heightwise, at the expense of more annoying prints due to smaller footprints. (Which you can offset with a brim.) Probably won't be practical, but doesn't hurt to try printing a tile or two like that to see how it ends up in comparison to a top-down print. e: Here's what I mean:  For some random dungeon-tile I grabbed at thingiverse. At 0.2mm height, 0.6mm nozzle, you go from the topmost detail of the floor be rendered in 2-3 layers, to having dozens of layers worth of slight variation, a massively higher effective resolution if you're willing to bear the tradeoffs. You can see that there are some slight, shallow cracks in the stone that just straight up aren't parsed in the 'top down' print. But yeah, there will be more overhangs and other challenging pieces to print, depending on the individual object you're printing. Nerobro posted:Klipper? You can use a servo driven tray. Here: ... Nice, I'll check if I have the fitting pinout and etc needed, if I do then it might be a fun little project. SubNat fucked around with this message at 18:53 on Aug 28, 2022 |
|
#
¿
Aug 28, 2022 18:46
|
|
|
cruft posted:And I'm gonna be like, yeah, that's probably what needed to happen. Some of them are starting to do neat stuff in this space. The Bambu X1 which was kickstarted earlier this year and has been arriving to backers now has LIDAR which it uses for calibration, and also to scan/verify the first layer for issues before continuing the print. It's kinda neat. Can do flow-calibration tests and the like as well because the lidar opens up a lot of opportunities for the printer to notice and check issues. The main thing I've heard against it is that the multi-filament solution it has is hilariously wasteful, but I imagine more issue will crop up now that base units are out, and not just the hyper-tuned ones sent out to reviewers and the like. e: Also some software issues and the like since it's a brand new thing. SubNat fucked around with this message at 20:01 on Aug 31, 2022 |
|
#
¿
Aug 31, 2022 19:56
|
|
|
So, when you're printing a diagonal bit that goes outwards with each layer, and it bends/curls up a bit, does that count as warping, or does it have a different term? Currently a bit stuck on printing a part, because it has 2 small islands that get printed separately from the main part, but join up after 2 cm or so. Or they would, if not for the fact that the edges on them can curl up a tiny bit, get nudged by the nozzle, and one invariably pops off. (Currently re-printing with a brim, but it's really obnoxious that I can't just generate a brim for that one specific location.)  Slowly working my way through the Master Sword print, but a bunch of these pieces are pretty fiddly. Like those two small islands. I'm just trying to brute force them surviving on the plate long enough to join up by using brims, but otherwise I'm not sure how I would counter the warping itself, if that's what it is. I might just redesign a bunch of these pieces to be simplified and adhesive-fits, because some of these parts are annoying to deal with.
|
|
#
¿
Sep 1, 2022 19:09
|
|
|
RabbitWizard posted:Not sure if PrusaSlicer supports it, I use SuperSlicer but can't hurt to mention it: A smart tip, that was what threw me off (I looked at just using a modifier, but apparently Skirt Brim only seems to pop up for shapes.) I'll give that a spin on the next print then, I can just chop a little bit off of the model in maya and use that as the shape. Seems to be possible in prusaslicer as well, it's just that it's a bit unintuitive which options can be used on shapes, and which can be used on modifier volumes. Thanks!
|
|
#
¿
Sep 1, 2022 19:52
|
|
|
If octoprint has a plugin for Philips hue, or other smart plugs it might be able to do it that way easily, without needing to mess with pins and etc. And then just use a smart plug. That's how my raspi turns on my printer when I queue something up atleast. (Klipper pluss fluidpi, though.)
|
|
#
¿
Sep 10, 2022 02:22
|
|
|
Over network, or USB? In Super/Prusasclier atleast, profiles are a separate thing from 'physical printers'. You might need to add the Mega X as a physical printer / set up a connection to be able to push stuff to it, the profile is just a grouping of settings for it. https://support.ultimaker.com/hc/en-us/articles/360012033899-How-to-add-a-printer-to-Ultimaker-Cura Might need to go to the networked printer, or custom printer articles to find a fit if it doesn't get added to the printer manager when setting it up.
|
|
#
¿
Sep 13, 2022 13:39
|
|
|
Chainclaw posted:When breaking prints into smaller pieces, is there a way in prusaslicer to have it also add little in/out nubs to make it easier to line up the parts after printing? It really doesn't have any good tools to help with that unfortunately, doesn't really have anything beyond negative volumes/modifiers, and you'd have issues with aligning those sensibly without a lot of hassle. If you have to do it in prusaslicer, and have a simple way to line them up, you could just use a 1.7mm diam cylinder as a negative modifier to add space for a small filament pin, but that depends heavily on if you can easily line the modifier up with the parts. (Like if you split them apart, but they're both on the same axis still, etc.) I think the best suggestion for a case like this would be trying to get into one of the cad programs, just using a shape to split it apart should be fairly easy in any of them. Also ugh. Figured out why I've had some issues with print edges curling up: Prusaslicer by default only pushes like 35% fan speed, while Superslicer defaults to 100% for PLA prints. Oh well, now I know. I can't wait for Superslicer to update with arachne, it's insane how much better it is to use thanks to a ton of tiny QoL stuff.
|
|
#
¿
Sep 16, 2022 16:04
|
|
|
Dr. Despair posted:There's a version of superslicer with arachne out already, just updated to it this morning. Not sure it's a stable release but it's out there. Yeah, considering the big change I'll let it mature into a stable release before diving in. Deviant posted:this is a comission so i'm doing precisely fuckall. you cannot pay me to use my finite hours on this earth sanding your bullshit. And yup, gap-filling and sanding takes a surprising amount of work, especially when you don't have like a dedicated workshop and/or do it enough to have a good flow.  Printed, gapfilled, sanded, primed, and chromed. I've pretty much finished the master sword print, and painted over the blade. I just hope it won't look too jarring/disconnected smacking a shiny, metallic blade into a grip that's just unprocessed, printed PLA. (But I really don't think I can be bothered to go over and postprocess the grip as well.) It all just really makes me wish I had a garage or something where I could just go nuts with a sander and etc, for future projects.
|
|
#
¿
Sep 16, 2022 17:16
|
|
|
Doctor Zero posted:Try Krylon ultra flat Camouflage primer (any color). It�s fantastic at hiding print lines but retaining details. Then you can skip two steps. Thanks for the good tip, but unfortunately it's not really available in Norway. It's one of the frustrating things, because outside of a few large brands like Citadel, it's incredibly difficult to find stuff around here based on tips from abroad. It's usually a matter of finding something close-enough that's carried in stores here. But I will try to cast a wider net and see if some online stores might have flattening/smoothing primer like that, whenever I get on to doing another post+paint project like this.
|
|
#
¿
Sep 17, 2022 23:38
|
|
|
One thing I don't get about the Bambu X1, despite it looking very interesting in a lot of regards: Why does it claim to be able to do 16 colour printing? I always assumed it just used 1 filament at a time, then purged and swapped, but to get 16 it'd need to be able to splice them together, like those external multimaterial-things you can buy. Otherwise, it is certainly pretty interesting if the units going out now are good. It's incredibly tempting to go for one, though it'll have to be next year probably. Also I guess once it's in enough hands it'll be possible to hear more about issues it might have, reliability, part swapping, etc etc.
|
|
#
¿
Sep 29, 2022 17:09
|
|
|
Serenade posted:If you don't mind me asking, why is tool changing significantly better for multiple materials? I've been eyeing multi material for my second printer lately and filament swapping seemed like the easier approach Some purged filament for every change, since you need a clean nozzle. And then there's possibly multiple changes per layer. Imagine printing with 3 colours, and needing to purge the nozzle 3 times every layer, it quickly adds up. Which you avoid entirely when each toolhead only uses 1 filament, since there's no need to purge. It's more technically complex and parts-expensive, but less wasteful, basically. w00tmonger posted:It has chainable multi material units. So if you feed 4 of them into a 5th multiplexer, there's your 16 Aha, I guess it's a bit more neat than I gave it credit. I really do hope it's enough of a success to shift price points in the market around a bit.
|
|
#
¿
Sep 29, 2022 17:31
|
|
|
On a slightly different note, a colleague brought in a resin printer (One of the ~400$ish Elegoos) to work to showcase it a bit, and claimed that the water washable resin he used was un-stinky enough that he could run it in his living room. Said claim couldn't be challenged/tested because he brought the wrong kind with him. Is there any truth to that, or does it just sound like typical 'downplay any issues with my shiny new toy' talk? I know there are a couple goons in this thread with fancy resin printers. The machine itself had a tiny bar-shaped usb fan + charcoal filter, which probably helps cut down on odour a little bit, but looking up the resin itself (eSun), the instructions are very clear that you should treat it with respect (and gloves, and a mask, and also goggles.) just like any other resin. (While also marketing itself a 'low odour'.)
|
|
#
¿
Sep 29, 2022 18:50
|
|
|
ImplicitAssembler posted:Hrmm. Moved to a new place, got printer setup again, with new 'smart' router and now I'm only getting ~5kb/s when uploading prints to the Duet Wifi. 'Smart' how? I know some devices really dislike the 2.4G / 5G mix, and some devices can poo poo themselves when the network has the same SSID/name for both the 2.4G and 5G networks, if it runs both in parallel. Otherwise it's hard to guess since I don't know how your network is set up. ('Only change is the router' makes me assume you have your own network set up, only using the router as a modem.) Are you running your own network, separate from the router/modem in the new apartment? If that's the case, making sure it's in bridge mode can alleviate some issues. Networking is arbitrary bullshit too, unfortunately. e: ^^ Yeah, pinging the networking thread is probably a great bet. They'll probably correctly diagnose that since mercury is in retrograde, you need to reorient your router 5 degrees and pat your head three times to make it all work.
|
|
#
¿
Oct 2, 2022 20:35
|
|
|
Buying new equipment is always fun, but if the issue is 2.4G and 5G with the same name, then that's just a quick trip to the router's settings to fix.
|
|
#
¿
Oct 2, 2022 21:39
|
|
|
Vaporware posted:in general warping means ambient temp too cold Does the same apply to curling? Aka thin edges curling upwards as they get printed? Because on the prints I've had where it's manifested, I never really figured out anything better than 'more fan, lower temp, more slow'.
|
|
#
¿
Oct 11, 2022 18:56
|
|
|
IncredibleIgloo posted:Are naked models a common customer request? I feel like half the time I open any miniature-marketplace site, the first thing that's visible is going to be some giant ladymonster with her tits all the way out. w00tmonger posted:Dude you have no idea. "Sure, but there's an extra fee for the extra required supports." God, I really want a resin printer, especially now that I'm in a dnd group again. But no, I've set myself the hard requirement that I won't get one unless I have a dedicated workroom/space it can be in, either outdoor, or with a fan-assisted vent I can use. I've tried printing a couple not-intended-for-fdm models, but what generally happens is that I'll have to sit for ages nipping off supports. Atleast it's a lot easier now that I found out I can just have a cup of hot water to dunk them in, and the supports usually just bend right off. (Along with the model itself sometimes.)
|
|
#
¿
Oct 15, 2022 17:29
|
|
|
That sounds kind of neat, which cabinet did you use? / How's your setup? Seems like there are quite a couple larger ones that could easily fit a printer and a purifier, no stress. I know Ikea has an air purifier with separate gas and dust filters, at a fairly sensible price, though it is pretty big. Otherwise I'm mostly finding big expensive stuff, unless I get some cheap mini-thing from china, though I'm still looking around to see what's available. Because if getting a sensible air purifier up and running works, then I actually have a couple friends who want to chip in on a machine in exchange for some print time.
|
|
#
¿
Oct 15, 2022 19:12
|
|
|
Paradoxish posted:Something to consider is that vertical space will be the primary limitation of an enclosure for a resin printer. Yeah, I was looking at that. A couple of the cabinets intended for dressers seem like they'd be a good fit, like Platsa. One of the modules is a 60x55x120 cm empty frame, can put in a shelf at 40cm and have roughly 80cm of height on the shelf for the printer. And plenty of space to have a filter running beside it if needed. Which is enough to be able to take the top straight up and off the units I might be considering to get. (Which are usually in the 40cm range, heightwise. So around 70cm needed to take the top straight up and off?) IncredibleIgloo posted:Right now Anycubic has a photon mono 4k for less than 200 bucks. Like 189 or so. It is small, but that suits your needs better. It will print great looking minis. The smaller the printer the easier to manage. Especially if you are not printing stuff off all the time. If you just want to do a couple things and let your friends do a few things it would be ideal. Yeah, I'm norwegian, so that offer probably doesn't apply to me unfortunately. We were considering maybe a Elegoo Mars 3 Pro, since a colleague has that and is very happy with it so far. The difference between it and the Anycubic Photon Mono is like 100$ here (350 v 450ish). SubNat fucked around with this message at 20:06 on Oct 15, 2022 |
|
#
¿
Oct 15, 2022 20:04
|
|
|

|
| # ¿ May 9, 2024 19:59 |
|
|
I mean, like anything, drives can fail in strange and amusing ways. I had a corsair memory stick a decade or so ago that soft-failed in a way that made windows explorer run at incredibly sluggish speeds (we're talking 30 seconds just to navigate to the drive from my computer), before dying a couple days later. Never hurts to try a different stick and see if that helps, like you're doing. It's not unheard of that the drive might be bad. Compatibility with drives is usually just stuff like the formatting of the data on it, I'd be surprised if you had issues due to the type. (Unless the printer expects 3.0/3.1 / 30MB/s++ speeds and you show up with a 2.0 drive, but I kinda doubt that's the case.)
|
|
#
¿
Oct 17, 2022 17:56
|
|