


|
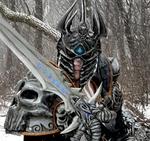
xsf421 posted:Dressed up at a con for the first time ever. I seriously underestimated the amount of people who would want pictures. I'll have to post some more pictures of my friend's sith armor, he made it all out of fiberglass cloth and resin. Hey, I saw you guys walking around when I was in line! You both have some pretty amazing costumes!
|
 #
?
Apr 21, 2014 15:54
#
?
Apr 21, 2014 15:54
|
|


|

|
| # ? May 9, 2024 08:34 |
|
|
I'm thinking on doing an Olimar costume and I need some help in finding materials, specifically the helmet:  I'm not sure what I should search for for a big oblong plastic bowl, one made of plastic I can drill into as well. Anyone have any recommendations on the rest of the costume as well? I was thinking of going for Hockey gloves for the hands and Khaki coveralls for the main part of the suit since I can't find coveralls in that yellow tinge.
|
|
#
?
Apr 22, 2014 22:45
|
|


|
Sire Oblivion posted:I'm thinking on doing an Olimar costume and I need some help in finding materials, specifically the helmet: I found this, maybe it will help? http://www.instructables.com/id/Captain-Olimar-and-Pikmin-Constume/ If you put that mouthpiece on the costume and make it part of the helmet and not connected to the suit, it would be an excellent place to hide a small 12v fan to keep air circulation going. Never underestimate how hot a helmet can get, even with vent holes. They are easy to wire, and you could hide a small push button toggle on the mouth piece as well. It shouldn't work so well, but I have a 12v fan on one of my Repo masks that runs off of a 9v battery. It just means that my battery dies faster than if I used 2 batteries plus resistors. I didn't know how to wire things at the time...You could also probably make a glowing light with a single red LED. Again, this shouldn't work, but you could run it off of one AA battery probably. I am running something like 18 LEDs on my first Repo mask with 2 AA batteries. I was really bad figuring these things out...But it works none the less. If you decide to do either of these things, look on amazon for LEDs and fans. It's way cheaper than radioshack. You could get arcade buttons and use those as the buttons on the overalls. Arcade buttons are usually really cheap.
|
|
#
?
Apr 23, 2014 01:27
|
|

|
So, Finished up my second pair of gloves, pictures forthcoming, and decided to tackle the fabric - at least, the waist portion of the fabric! In order to get it to look as weathered as I wanted, I sandpapered the hell out of the edges after cutting it into roughly the right shape, fraying the edges, ripping where needed, etc. I'll probably continue to work inwards a little bit so that the weathering is a little more even. Afterwards, I had to make it darker. I experimented with a 1/1 bleach/water solution to dull the fabric, but that was a huge bust - the fabric fades to soft pink, rather than a dull gray. Even greatly diluted, it falls into pink territory. After the pink spots, I used another spray bottle to hit it with a black ink and water mixture. - it looks alright, but it didn't really mask the pink parts as much as I'd like. So, I eventually wound up just mixing a little bit of bleach into a slightly diluted water/ink mix. The bleach fades out the blue, but the black is there to make sure it doesn't go so far as to become pink.  Ink / Bleach is on the left, untreated on right.
|
|
#
?
Apr 23, 2014 11:58
|
|
|
7thBatallion posted:Anyone got tips on repainting those plastic severed fingers so they don't look like poo poo? Lightly sand with like a 200-300 grit, use acrylic paint, and then clear coat with something that's safe for plastic. If you don't want them shiny after clear coating, you can sand again (put it on thick if so). Is that kind of what you meant?
|
|
#
?
Apr 24, 2014 23:31
|
|

|
Working on leather for a Riddick costume. Taking a bunch of different pieces and distressing and painting them. Hoping it looks cool in the end- I have never worked with leather before.
|
|
#
?
Apr 25, 2014 03:25
|
|

|
Funhilde posted:Working on leather for a Riddick costume. Taking a bunch of different pieces and distressing and painting them. Hoping it looks cool in the end- I have never worked with leather before. I just came here to ask, is there a preferred method of painting leather or pleather? I'm working on a Star-Lord costume and I have an old brown pleather jacket which would be close if I could make it red.
|
|
#
?
Apr 26, 2014 05:29
|
|


|
Vargo posted:I just came here to ask, is there a preferred method of painting leather or pleather? I'm working on a Star-Lord costume and I have an old brown pleather jacket which would be close if I could make it red. I have purchased leather paint from Dharma Trading Company and done some tests that I think look pretty good. My friend has used the same paints to paint shoes and has had great success. They aren't super expensive so it is probably worth a try.
|
|
#
?
Apr 26, 2014 06:34
|
|
|
 Have spent the past 3 hours slowly killing two silver Markers. Still not done, but my back is killing me at the moment. The reference I'm using isn't particularly good either, but better than nothing.
|
|
#
?
Apr 26, 2014 07:51
|
|
|
Hard to tell from the pictures but wouldn't it be better to have a stencil and a silver paint rattlecan?
|
|
#
?
Apr 26, 2014 14:52
|
|

|
~Coxy posted:Hard to tell from the pictures but wouldn't it be better to have a stencil and a silver paint rattlecan? You usually need to use an acrylic paint mixed with this stuff that allows you to paint on fabric. Metallic spray paint has some properties that would make it less than ideal. He would have to get a silver metallic acrylic paint, mix it with the fabric paint, and then roll it on over a stencil, but that WOULD be easier than doing it all by hand. It's impressive the amount of detail they have on that just by using a marker. I would just be worried about it fading over time.
|
|
#
?
Apr 26, 2014 16:38
|
|
|
I'd love to know where you found a clean reference for the cape pattern. Did you recreate it from concept art?
|
|
#
?
Apr 26, 2014 22:15
|
|


|
The Repo Man posted:You usually need to use an acrylic paint mixed with this stuff that allows you to paint on fabric. Metallic spray paint has some properties that would make it less than ideal. He would have to get a silver metallic acrylic paint, mix it with the fabric paint, and then roll it on over a stencil, but that WOULD be easier than doing it all by hand. It's impressive the amount of detail they have on that just by using a marker. I would just be worried about it fading over time. I just wouldn't want to freehand something that big and that symmetrical, though for something weathered and tatty any lapses in symmetry are unlikely to be noticeable compared to something clean and crisp
|
|
#
?
Apr 27, 2014 00:15
|
|

|
The Repo Man posted:You usually need to use an acrylic paint mixed with this stuff that allows you to paint on fabric. Metallic spray paint has some properties that would make it less than ideal. He would have to get a silver metallic acrylic paint, mix it with the fabric paint, and then roll it on over a stencil, but that WOULD be easier than doing it all by hand. It's impressive the amount of detail they have on that just by using a marker. I would just be worried about it fading over time. Well, I'd still have to make and cut the stencil but hand, so I think it's about the same amount of work. Since this is the 'corrupted' version anyway, any fading over time is a feature, not a flaw. my cat is norris posted:I'd love to know where you found a clean reference for the cape pattern. Did you recreate it from concept art? Someone made a mod for a 'clean' and shiny version of the artorias armor, and there were a couple decent screenshots of the cape from the back. I've no idea where THEY got the reference, but I imagine they would have just gone over the in-game texture. That's where I got the reference. I don't think I'm going to add any designwork for the front of the cape - it's too much of a chaotic, folded mess to predict where the design would wind up. Every time I put it on it's slightly different. Fatkraken posted:I just wouldn't want to freehand something that big and that symmetrical, though for something weathered and tatty any lapses in symmetry are unlikely to be noticeable compared to something clean and crisp Yeah, I've got a pretty steady hand and I'm confident enough to attempt to freehand something like this, but you're right in that it's not 100% symmterical. Of course, no-one's going to notice anyway.    Anyway - a few more update pictures. I've still got a few things to make - the Belt, and there's a few small armour bits here and there that I've neglected to add, but overall, things are coming together nicely. McKilligan fucked around with this message at 08:06 on Apr 27, 2014 |
|
#
?
Apr 27, 2014 03:09
|
|
|
McKilligan posted:
How many rings, out of curiosity? I'm getting into chainmail like, tomorrow. I'm curious to how pissed off i'll be come september.
|
|
#
?
Apr 29, 2014 01:00
|
|


|
McKilligan posted:
The above post reminded me I wanted to comment on this one as well. Did you end up doing anything with the belt where the rings attach? In the image it definitely looks like you need more rings attaching the mail to the belt. Those few rings may warp/bend/break open if all the stress of the mail is on those alone. Not sure what to do with all your spare time huh? After my first project (for a cosplay as well) I took up mailing as a hooby. Now I mail more than I costume haha dogstile posted:How many rings, out of curiosity? I'm getting into chainmail like, tomorrow. I'm curious to how pissed off i'll be come september. That will vary drastically based on what ring size you use.
|
|
#
?
Apr 29, 2014 01:23
|
|

|
dogstile posted:How many rings, out of curiosity? I'm getting into chainmail like, tomorrow. I'm curious to how pissed off i'll be come september. I have no idea - 2000, maybe? That was about 3 weeks of work, but I wound the wire and everything by hand. If you can get pre-made rings, that'll speed things up. Wire is much cheaper, though. Reformed Tomboy posted:The above post reminded me I wanted to comment on this one as well. Did you end up doing anything with the belt where the rings attach? In the image it definitely looks like you need more rings attaching the mail to the belt. Those few rings may warp/bend/break open if all the stress of the mail is on those alone. I've actually already reworked the belt with a new strap with more support rings - I'll keep a close eyes to make sure that they don't warp or open in the future though. Too many holes in the belt and I'll compromise the integrity of the fabric, too few and I compromise the mail, but so far it seems to be in a pretty good balance.
|
|
#
?
Apr 29, 2014 04:54
|
|
|
Aye, i'm definitely doing wire. Wanted to make proper chainmail since forever but since the rings are so expensive it works out way better if I just make them. I've already got a way to spin the wire and cut it (i've done small patterns before, just nothing huge). I've also got a friend who wants to learn how to spin the wire into rings, so i'll be teaching him how to do it as I go. Hopefully that'll speed it up (with him cutting while I put stuff together). I'm not making a full suit mind, i'm just making some chain that I can weave into a tunic. Thanks for your posts McKilligan, been cool seeing your cosplay come together, its inspired me to start up again.
|
|
#
?
Apr 29, 2014 10:09
|
|
|
Xun posted:Where/how can I acquire a mechanicus hoodie?! Through judicious usage of the following items, plus black spray paint, acrylic paint, and sharpie.  Traced a couple circles into the pizza box using the large pot and medium lid, then drew the cog between them so it came close but not too close to the edges. I also doodled a bit in the parts I was going to cut out so I could visualize where I'd be cutting. The vertical line was to mark where the colors flipped. Each edge of the cog was approximately half an inch, and I put the cardinal direction ones in before the others so I wouldn't muck it up. Still had to correct my drawing a bit, but it meant I didn't have to retry on the sweatshirt itself.  I then cut out one side of the cog, put the whole rest of the box on the back of my blank red sweatshirt, and applied spraypaint. Somehow, I didn't miss.  After giving it a bit to dry and cutting out the other half of the cog, I realized I needed to secure the main part of the box with the internals; As you can see, right where the colors flip, there's no material to hold the stencil together. After securing it with as little tape as possible, I spraypainted it again, let it dry, and practiced drawing the outline of the skull and filling it in. I'm absolutely terrible at drawing, so I did that a few times before I felt ready, and even then I ended up progressively cutting the outline down and using it as a tracing stencil. Final product circa January 2013, with stencil trimmings still plainly visible:  Most of the coloring on the skull was with a small brush and some acrylic paint, but the detail and line work was sharpie. Even with it being part sharpie, I've thrown it in the washing machine quite a few times (because not washing it would be disgusting), but it's held up great! Here it is again circa last night: 
|
|
#
?
Apr 29, 2014 23:39
|
|

|
I'm making this riddick costume for a client. working with scraps of leather to get it to look right. Here is the front layed out after I sewed it up. Still removing all the silver and shiny parts and then painting it darker. 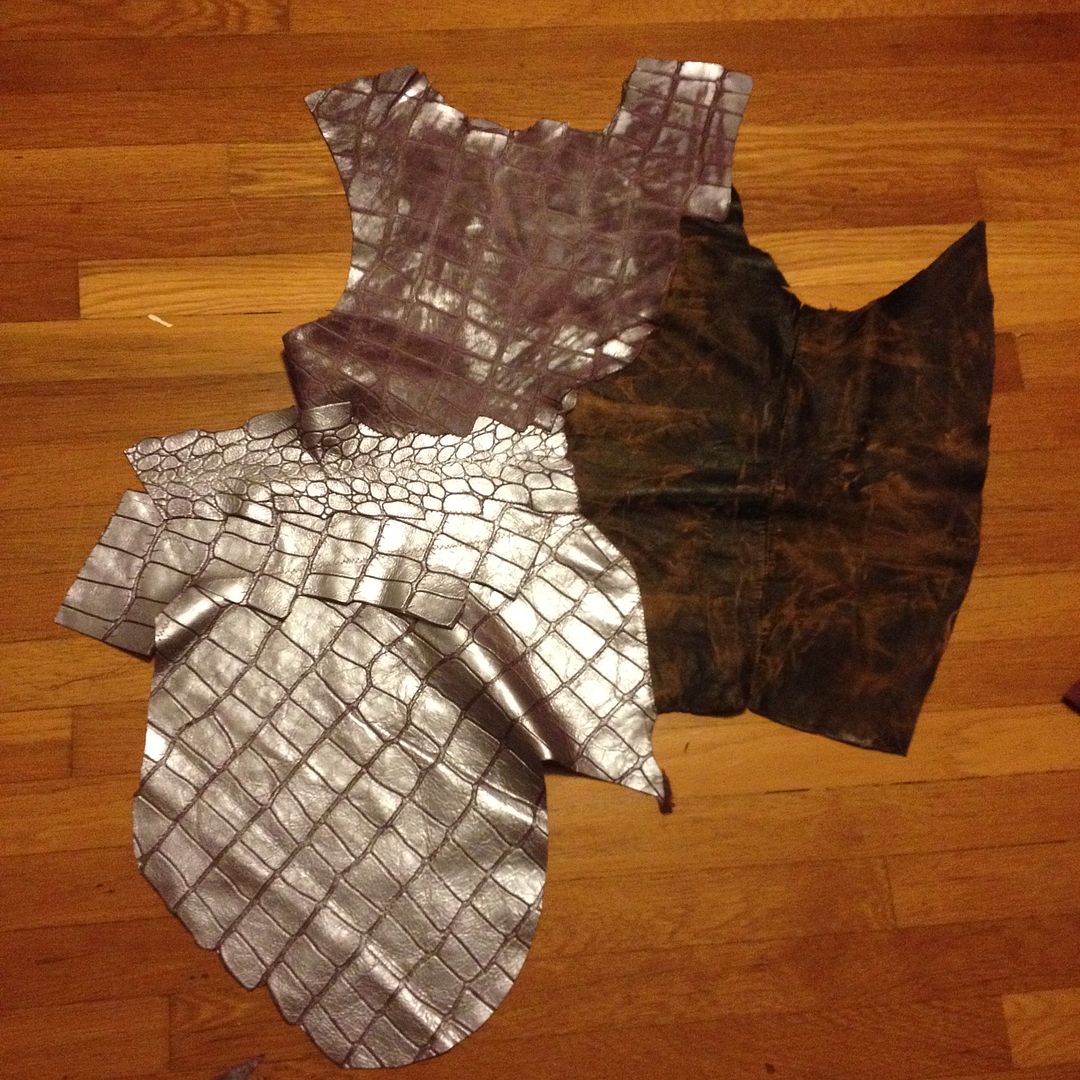 Had a great fitting with my client that happens to look like Vin Diesel. Now if only the weather can cooperate so I can do the rest outside that would be grand.
|
|
#
?
Apr 30, 2014 01:29
|
|
|
I'm currently working on the Pilot design of Pearl, from Steven Universe. I hope to have it complete before A-Kon! I've completed her Spear, which funnily enough is the premiere design: 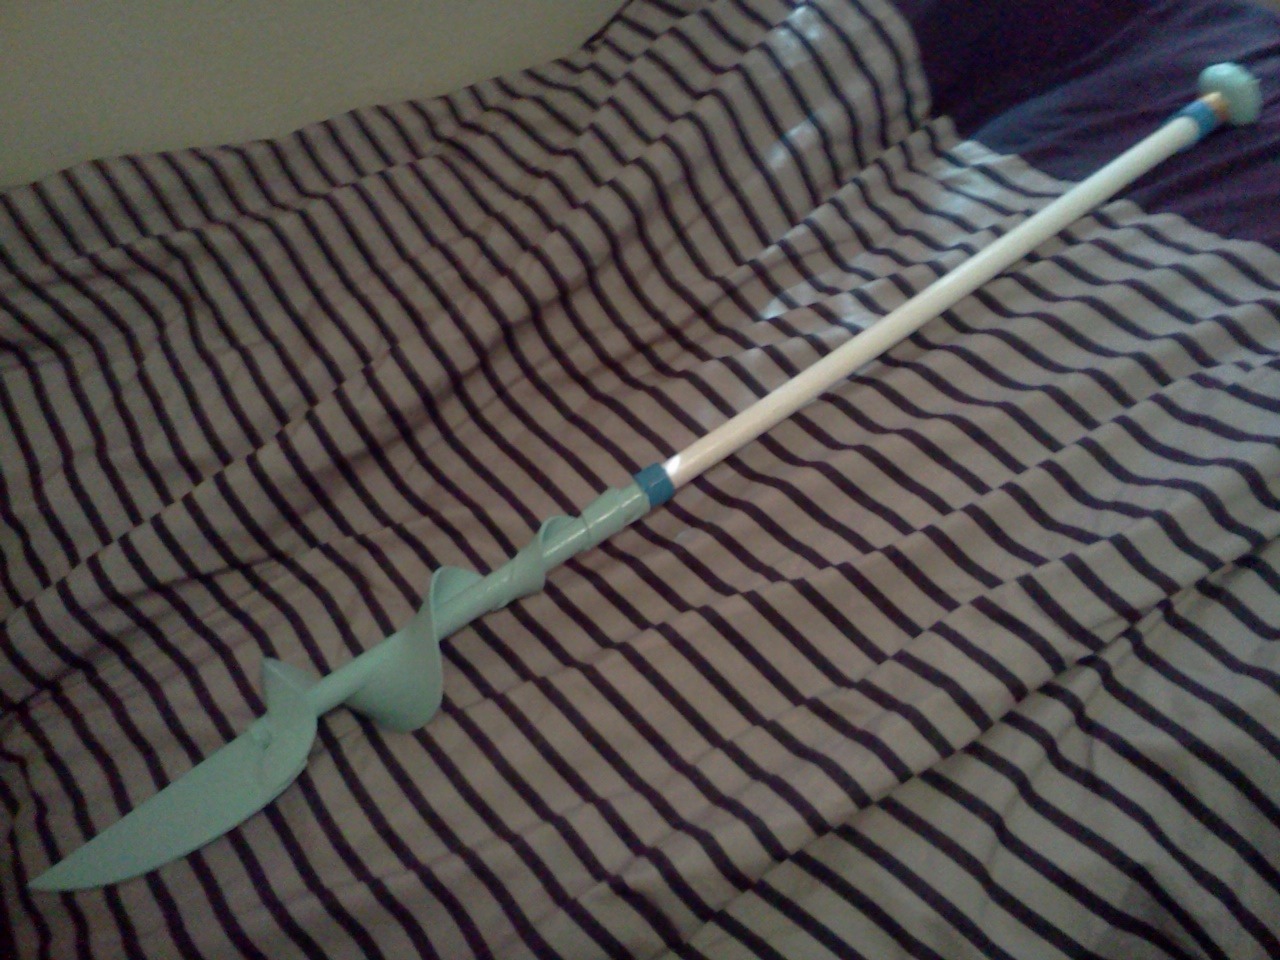 Currently working on her bubble skirt, which is actually my first time sewing... 
|
|
#
?
Apr 30, 2014 09:12
|
|

|
I'm clearly insane, because I just bought 250ft of steel wire. I had no idea of how much i'd need for a chain shirt, but this seems like it'd last a while and by the time I realise "oh poo poo, i might need more rings" i'll have more money to order more steel. This chain is actually for my girlfriend, who'll be cosplaying Lagertha so i've got motivation to finish it at least. In return, she'll be making me Ragnars armour as she's way better with leather than I am. This year is gonna be good for cosplay, I fully expect that once I get going i'll be doing 5 hours a day on the chain on weekdays (while catching up on shows).
|
|
#
?
Apr 30, 2014 18:43
|
|
|
Last few weeks have been pretty batshit crazy for my cosplay group. We did the C2E2 Crown Championship last weekend with our StarCraft stuff and while we didn't win anything, it was a ridiculously awesome contest and we had a TON of fun. But we have another convention coming up the 16th-18th and there's work to be done! We're doing our 10-person Valkyria Chronicles squad on Friday so it's been: Custom cast buttons!  Individual accessories!  And soooo many armor sculpts and forms   We're going to have about 80 or so plates to paint this weekend, they're getting red and white stripes plus urban camo on the sides. Should be an exciting week.
|
|
#
?
Apr 30, 2014 18:55
|
|
|
I've always wanted to do a FreeSpace 2 pilot cosplay, but I wasn't sure how to go about doing so, but maybe people here will have some ideas. There's no views of pilots in the games, but as the game goes on you're award various medals, and also you transfer squadrons quite a bit, and squadrons have their own insignia. So I'm thinking of just buying a pretty standard flight suit, and putting as much appropriate insignias on it. Since medals would only be on a dress uniform, I probably wouldn't want any of them (except maybe the pilot wings and the ace/double ace/triple ace medals?), but probably as many squadron patches as I could onto the flightsuit. So I have to figure out what's standard military procedure for squadron insignia. But anyway, the purpose of this post. Is there an inexpensive way to get a single embroidered patch made? I'm guessing that the super low resolution of those images could be a problem, but at least a couple of the squadrons have high res versions that have been made by fans.
|
|
#
?
May 1, 2014 00:52
|
|

|
Embroidery is something i'd literally just ask a friend about. Someone is bound to know someone who does embroidery. I asked my nan when I needed a patch done, because where I live I have never met a single old woman who doesn't know how to do that stuff. Failing that, just make it yourself. The supplies will be cheap as hell and there's a couple of youtube tutorials that'll get you up to speed in about 10 minutes at most.
|
|
#
?
May 1, 2014 11:39
|
|
|
I do embroidery! I'm working on a big set of patches for my VC stuff right now and what I did is redid the art in illustrator, paid $9 to get the file prepared for embroidery through a site called Speed4designs (it's more expensive if the final thing is big but mine were all patch sized), then ran it through my machine at work. If you have a little mom 'n pop type place near you you could call and see if they'd do a one-off thing for you for not too much. Or else I could maybe help you out after AnimeCentral. Those are my sample stitchouts that we did on some random sweatshirt fabric. McPantserton fucked around with this message at 13:19 on May 1, 2014 |
|
#
?
May 1, 2014 13:14
|
|
|
~My Girlfriend~ (our very own Norse Dance Party) has a custom embroidery shop on Etsy: https://www.etsy.com/shop/NorseDanceParty
|
|
#
?
May 1, 2014 13:20
|
|
|
I'm looking to get together an X-Force Deadpool together for a group costume for next year's C2E2. I've got tons of time before the convention, obviously, but this year I ended up getting nothing done and having no costume at all. Plus, I've got some cash now, so it'd be a good time to buy a few things. Regardless, my question is, for the main suit piece, would it be better to get solid grey and paint the details on with fabric paint, or attach a separately piece of cloth for the black parts? Also, what would the harness on his upper body be called? I'm struggling to figure out what to search for to find one. Pic for reference (on the right): 
|
|
#
?
May 1, 2014 19:35
|
|

|
You'd essentially be looking for a nylon webbing shoulder holster. So look for tactical stores online or maybe even local army surplus. Looking at all the pieces and depending on how fancy you wanted to get you could get the nylon webbing and plastic buckles and make it yourself.
|
|
#
?
May 1, 2014 20:03
|
|

|
I assume it's possible to get one of those without the actual gun holster in it? I would most likely attach the swords to in on the back instead of putting a prop gun in it anywhere.
|
|
#
?
May 1, 2014 20:20
|
|
|
Dr. Platypus posted:I assume it's possible to get one of those without the actual gun holster in it? I would most likely attach the swords to in on the back instead of putting a prop gun in it anywhere. That stuff is totally modular and you can buy any combination and colors you could dream up if you really wanted to.
|
|
#
?
May 1, 2014 20:27
|
|


|
That sounds like it'll be just about perfect. I'm pretty new to this whole cosplaying thing, my only previous costume being a pretty by-the-numbers classic Batman, so expect a lot of questions forthcoming as I slowly put this thing together.
|
|
#
?
May 1, 2014 20:31
|
|
|
Search for "MOLLE" (Modular Lightweight Load-carrying Equipment). It is ridiculously customizable, and you'll find tons of sites that sell it.
|
|
#
?
May 2, 2014 18:56
|
|


|
Riddick is basically done. Here is the tunic on a non-men's dress form (I need to fix this). There are already a few things that I think I'd like to change but my client is wearing it tomorrow to Star Con in Denver and then again to the Denver Comic Con. I figure I can change it before the big one. Mostly it looks too "clean"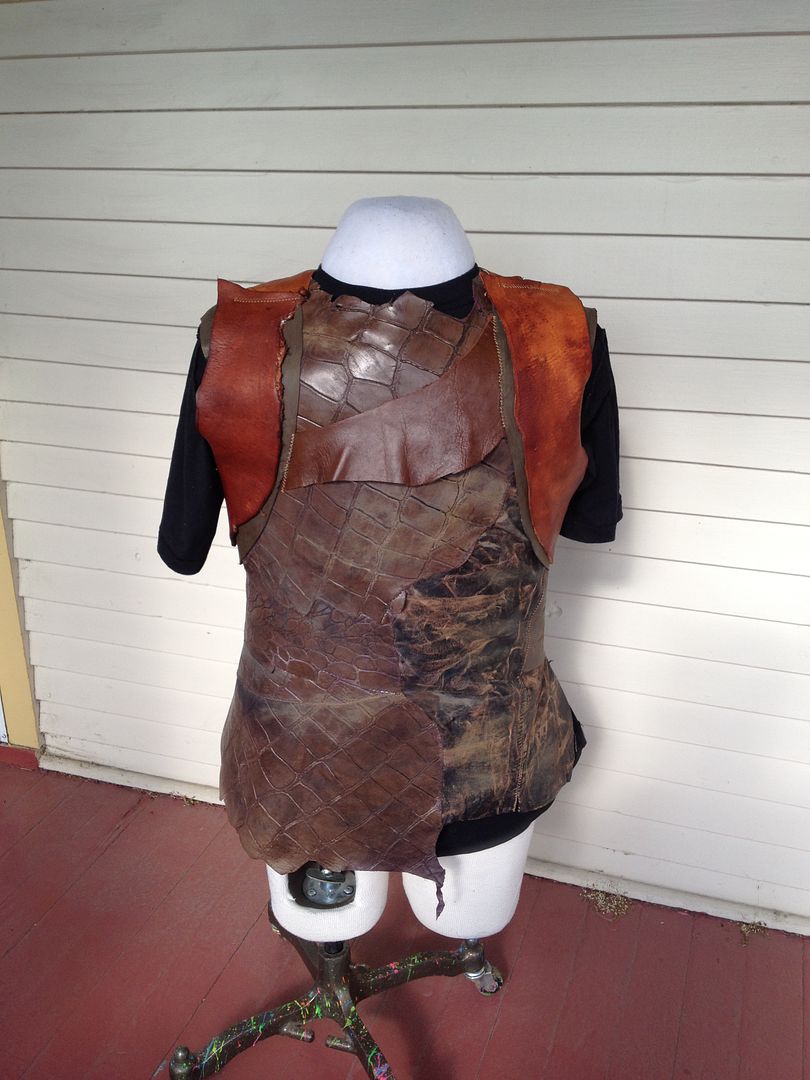 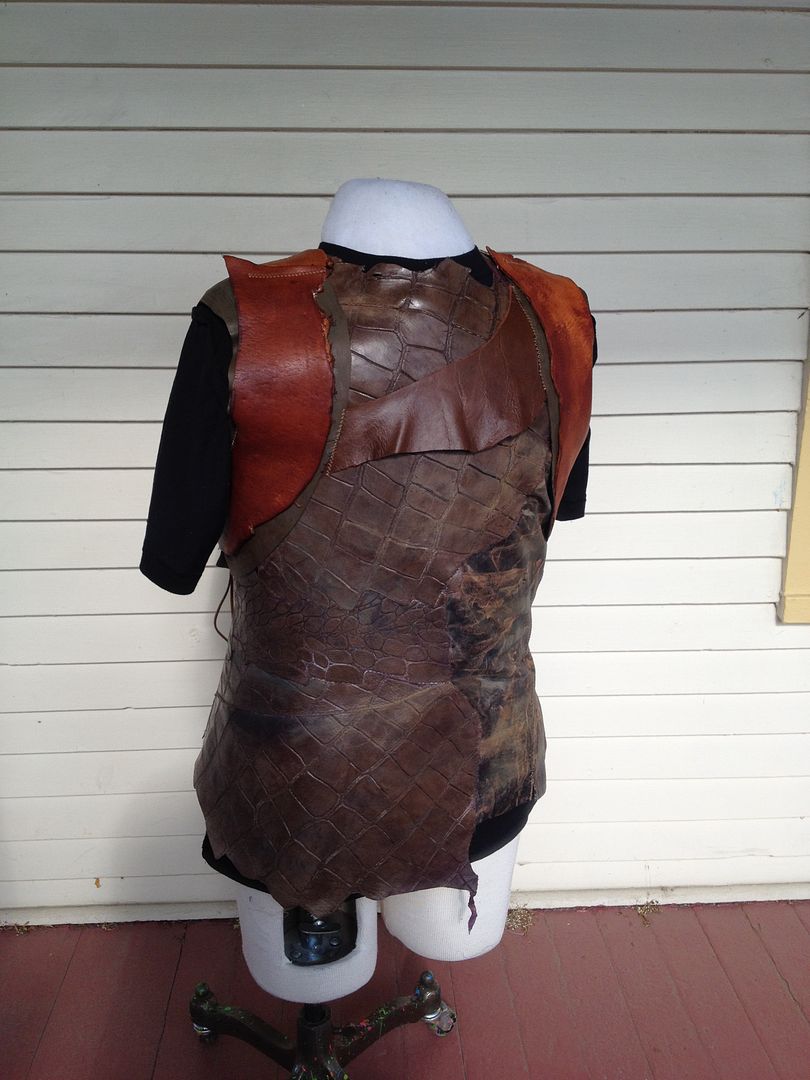 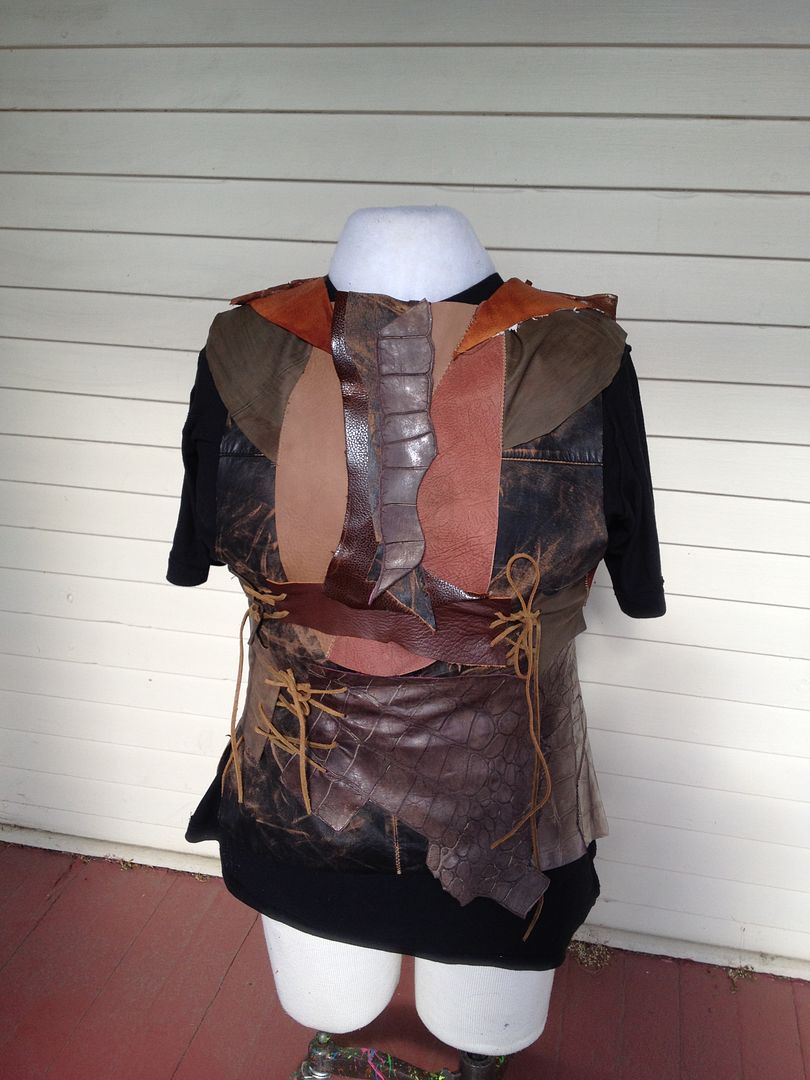
|
|
#
?
May 3, 2014 00:47
|
|
|
Black shoe polish, sandpaper and a few sharp tools are your best friends when it comes to distressing/aging leather armor.
|
|
#
?
May 3, 2014 03:34
|
|


|
Silhouette posted:Black shoe polish, sandpaper and a few sharp tools are your best friends when it comes to distressing/aging leather armor. It isn't armor really. It is just a top. 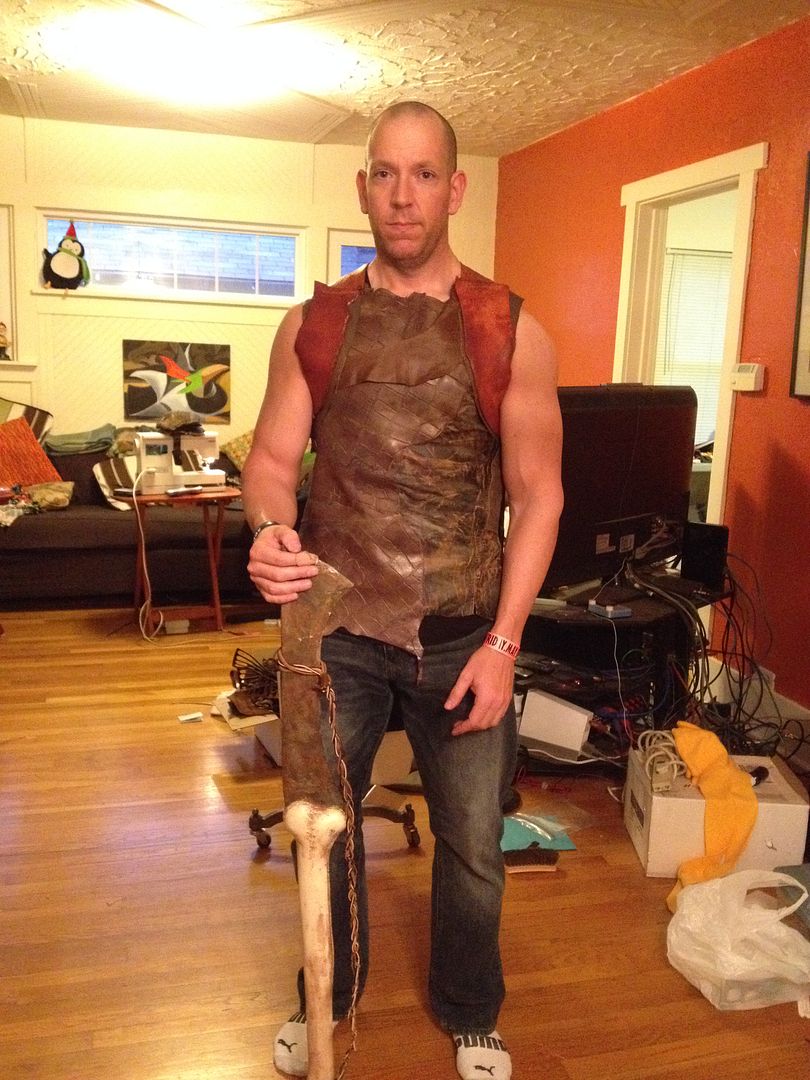 Reference Picture. 
|
|
#
?
May 3, 2014 03:37
|
|
|
Funhilde posted:It isn't armor really. It is just a top. All of the leather that Riddick is wearing in the reference photo is roughly the same color/tone. The two orangish strips along the shoulders could really use a layer of paint or shoe polish to bring them in line with the rest of the top; right now they kind of look like he is wearing a holster. Looks really good though, I think you nailed the textures and fit.
|
|
#
?
May 3, 2014 10:22
|
|
|
Agile Sumo posted:All of the leather that Riddick is wearing in the reference photo is roughly the same color/tone. The two orangish strips along the shoulders could really use a layer of paint or shoe polish to bring them in line with the rest of the top; right now they kind of look like he is wearing a holster. Looks really good though, I think you nailed the textures and fit. Yeah I agree. I used a waterstain instead of polish. It doesn't smell or shine and is water-based. It was a little picky about saturation but I didn't mind working with it.
|
|
#
?
May 3, 2014 15:27
|
|
|
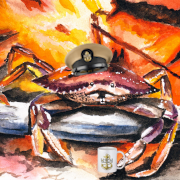
McPantserton posted:I do embroidery! I'm working on a big set of patches for my VC stuff right now and what I did is redid the art in illustrator, paid $9 to get the file prepared for embroidery through a site called Speed4designs (it's more expensive if the final thing is big but mine were all patch sized), then ran it through my machine at work. If you have a little mom 'n pop type place near you you could call and see if they'd do a one-off thing for you for not too much. Or else I could maybe help you out after AnimeCentral. Holy crap if I ever need some crazy embroidery stuff figured out I now know who to ask. Those are just beautiful. In cosplay/personal news: Shoulder is all checked out so I can get back into crazy builds once my garage is all cleaned up. Though because I wasn't thinking it would be cleared by now I haven't really planned anything major armor or weight wise for this year. However this is my next massive undertaking that I will attempt to compete with.  I am going to have to remake my dress form because the bottom fell out of my old one. Once I finish drafting patterns for it and make the cage for the skirt I will have tons of fabric dying and design painting to do I will definitely need a bigger set up for the mass amounts of fabric I am going to be gradient dying but I am looking forward to hating myself on this one.
|
|
#
?
May 5, 2014 03:26
|
|
|

|
| # ? May 9, 2024 08:34 |
|
|
LadyRavenWaves posted:Holy crap if I ever need some crazy embroidery stuff figured out I now know who to ask. Those are just beautiful. Thanks! Being a printer has so many cosplay perks. I cannot wait to see how your Lapras turns out.  I love that set of artwork and Lapras is my all-time favorite pokemon. I love that set of artwork and Lapras is my all-time favorite pokemon.My weekend was paint, paint, and more paint. I have about 80 plates to do urban camo and stripes on. Already so sick of masking tape.  Test run, didn't like the high contrast so we're misting them instead.   e. Here's the other weird thing I worked on, binocular case dingus. The base is made from sintra, I warped the back plate to make the 'shelf' and then did a second back plate for the lower curve so the binoculars' weight would rest all on one solid piece. I hate trusting just glue for things like that. Covering the whole deal in fabric so it's got a sueded leather look. 
McPantserton fucked around with this message at 04:14 on May 5, 2014 |
|
#
?
May 5, 2014 03:38
|
|