


|
Looks neat! I'm eyeing on making the Wrath armor from XCOM and EL wire would be perfect. I'll check it out!
|
 #
?
Feb 29, 2016 20:07
#
?
Feb 29, 2016 20:07
|
|


|

|
| # ? May 9, 2024 13:11 |
|
|
For some reason my wife is watching Heroes of Cosplay on repeat forever and it's making me want to build some Xcom armor...
|
|
#
?
Feb 29, 2016 20:54
|
|

|
Back from vacation! I have a bunch of cons coming up so I figured I'd put together something goofy and fun for comfy wear quick. Been super into Steven Universe lately and so I present to you: cheeseburger backpack! I ordered a super cheap plush burger on ebay before we left and just slit open a seam to add a zip pocket and straps. I'll be printing the shirt at work this week and boom, done.
|
|
#
?
Feb 29, 2016 22:00
|
|

|
Inzombiac posted:Looks neat! Make sure you actually order the wire by the foot rather than in premade kits. Most of the stuff you get already attached to an inverter is hot garbage. My wholesaler is https://www.coolneon.com and they have the "3rd Generation" wire which both has a halfway decent shelf life and is made from the guys who used to run Lytech, which was the gold standard for EL-wire in the early days. The "hella phat" 5mm wire is nice and chunky and durable, so I'd recomend the thick stuff if you're not weaving it into patterns. You can also try panels and tape, but those colors are really limited for some reason.
|
|
#
?
Mar 1, 2016 04:54
|
|

|
McPantserton posted:Back from vacation! I have a bunch of cons coming up so I figured I'd put together something goofy and fun for comfy wear quick. Been super into Steven Universe lately and so I present to you: cheeseburger backpack! I am mad at myself for not coming up with this idea.
|
|
#
?
Mar 1, 2016 18:57
|
|


|
RandomFerret posted:I am mad at myself for not coming up with this idea. Fortunately, you don't have to! Plush burgers for all!!
|
|
#
?
Mar 1, 2016 19:32
|
|
|
Oh, I ordered one for myself right after I read your last post. Gonna fill it with these things: 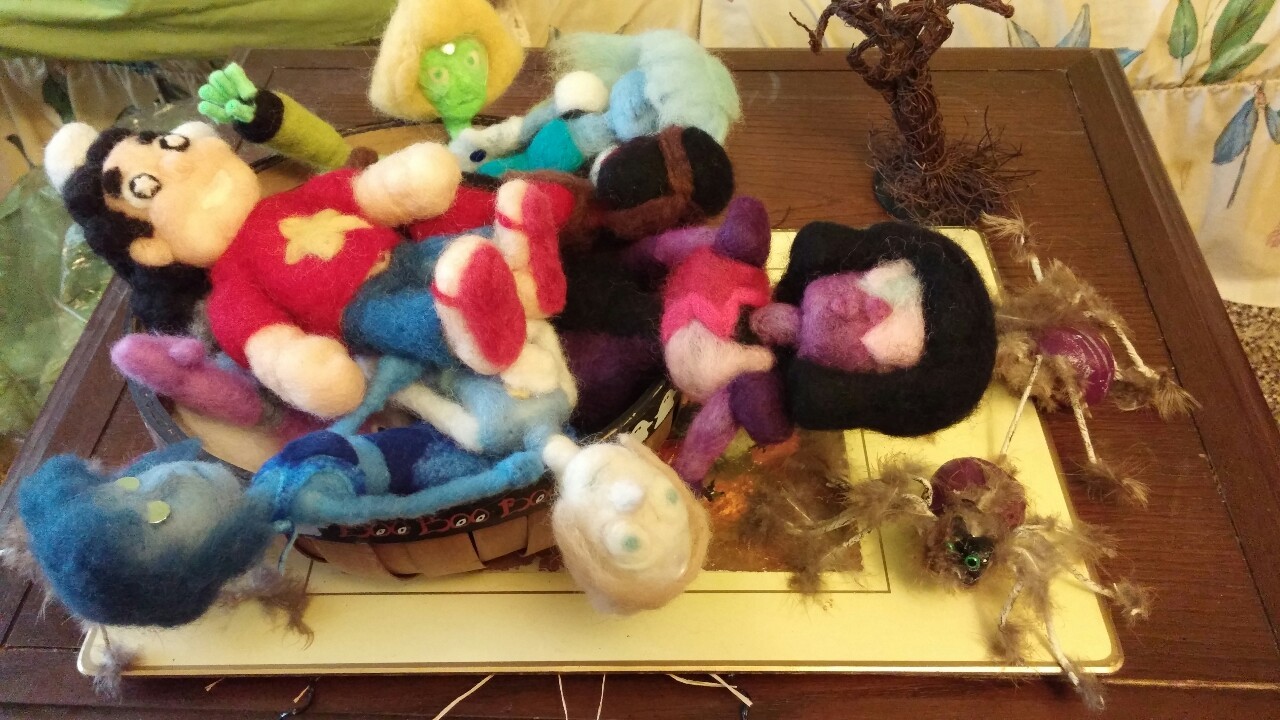
|
|
#
?
Mar 2, 2016 03:10
|
|
|
Stupid_Sexy_Flander posted:Wouldn't it speed it up a lot to just make a jig and cut it with a dremel? Take a wooden dowel the size of the rings you want, cut out a V shape down one side, roll the wire up along the dowel, crank on the dremel with a cutting disc and just slice down the V. Instant shitton of rings without having to slice each one by hand. CheetoRamen posted:Since you have heavier gauge wire you probably ought to wind it with a drill or a lathe. Making mail is tough enough without it also being physically painful making the rings. If you're making small things you could get away with it but if you want to make a shirt, a drill and dremel is not going to blow out your time:cost ratio. It'll save you time too, and let you focus more on the therapeutic ring-linking. Those would be a good idea, but I can't really justify another $150 for the exclusive purpose of ring cutting (Dremel products are kinda expensive in Korea). Doing it by hand isn't so bad, though, only takes a couple of minutes. Plus, by the time I'm done, I'll be able to open any goddamn pickle-jar in the WORLD. It's not like the entire process isn't already incredibly tedious (though also relaxing and satisfying at the same time). Now, if I had a dowel with a crank or something that I could feel the wire into and just wind it up, THAT would be amazing. Anyway, in case anyone was wondering, THIS:  Is what 100ft of steel looks like. It's just enough to wrap around my upper arm (not including shoulder). Another 100ft ought to be enough to cover the arm down to the wrist, so that means another 200ft for the OTHER arm, then re-up again to get enough for the legs. Fortunately, I've decided that for the legs, I'm just going to make enough to cover the front, rather than wrap all the way around. Not quite sure how I'll handle the chest area, but I think I'll make enough to cover either shoulder, then have them attached to one another via straps. There's no way I'm making a full chest of mail when most of it is obscured by the plate / tabard. I've ordered another 300ft, we'll see if anything is left by the time I start on the legs. I've also got to find a thinner gauge of wire so I can begin work on the helmet - this stuff is way too thick to be able to make a decent structure. McKilligan fucked around with this message at 06:34 on Mar 3, 2016 |
|
#
?
Mar 3, 2016 06:31
|
|

|
McKilligan posted:Now, if I had a dowel with a crank or something that I could feel the wire into and just wind it up, THAT would be amazing. Check out the mandrel that this guy put together. It's basically some scrap wood and a steel rod with a couple 90* bends to make a handle to crank. I've always used my well gloved* thumb as a wire guide, but you can build them pretty easily with a second rod and some more wire. There's instructions for that here (step 24). *(ask me about slicing open the entire pad of my thumb when I slipped and the giant spring of 18 ga. wire I just created released tension!  ) )
Magnus Praeda fucked around with this message at 07:49 on Mar 3, 2016 |
|
#
?
Mar 3, 2016 07:46
|
|
|
McKilligan posted:Those would be a good idea, but I can't really justify another $150 for the exclusive purpose of ring cutting (Dremel products are kinda expensive in Korea). Doing it by hand isn't so bad, though, only takes a couple of minutes. Plus, by the time I'm done, I'll be able to open any goddamn pickle-jar in the WORLD. It's not like the entire process isn't already incredibly tedious (though also relaxing and satisfying at the same time). I always used to buy 14 gauge galvanized electric fence wire by the half mile for making maille. This stuff, in fact : http://www.tractorsupply.com/tsc/product/bekaert-14-gauge-galvanized-electric-fence-wire-1-2-mile-spool
|
|
#
?
Mar 3, 2016 08:27
|
|


|
Liquid Communism posted:I always used to buy 14 gauge galvanized electric fence wire by the half mile for making maille. Ooooh, I'll see what the damage is if they ship to Korea...
|
|
#
?
Mar 4, 2016 08:06
|
|
|
I'm looking to put together an outfit that involves chest armour with a large logo on it, so I need something with a big relatively flat space on it. I don't really want to make something completely from scratch, so could I just get something like this http://www.amazon.co.uk/Possbay-Protectors-Motorcycle-Cycling-Snowboarding/dp/B018WWNM1G/ and stick a layer of EVA foam across the front of the plastic somehow, then paint that? Or could I just fill the gaps in the chest protector with something, sand it all smooth and then paint it?
|
|
#
?
Mar 4, 2016 21:23
|
|


|
I'm working on a Sith cosplay. I've got a mask (that I need to paint, but no big deal), but it has a screen for eyeholes when what I'd rather is smoked or colored plastic (like Vader's mask). I'm not sure how to do that, though, and would appreciate any help.
|
|
#
?
Mar 5, 2016 18:57
|
|

|
Pop the lenses out of some sunglasses, maybe?
|
|
#
?
Mar 5, 2016 20:41
|
|

|
I guess I'm trying to figure out if I can shape them so they work correctly. Is there a pliable material that would work without getting distorted?
|
|
#
?
Mar 5, 2016 20:42
|
|
|
Not sure how pretinted lenses would form but you could also form clear plastic first and buy tint in sheets at a hardware store to apply once it's done
|
|
#
?
Mar 6, 2016 00:52
|
|
|
Colonial Air Force posted:I guess I'm trying to figure out if I can shape them so they work correctly. Is there a pliable material that would work without getting distorted? I imagine somewhere you can get acrylic for lenses somewhere.
|
|
#
?
Mar 6, 2016 01:29
|
|

|
Might be a little hard to track down now, but plastic christmas ornaments. Sometimes they have smaller ones you fill with things like glitter or candy or something. Wouldn't take much work to dremel out the lens size you need and then paint it or tint it.
|
|
#
?
Mar 6, 2016 02:28
|
|

|
It's one week until the competition and con and I am about 3 hours of work behind schedule so I thought I'd take a moment to post an update. I have now finished the weapon and all the painting, although the main chest armor piece still needs a gloss coat. This is pretty much wearable at this point and the stuff I still have to do is niceties and final touches so I am pretty stoked. I have a huge, impractical weapon   And I spent forever free-handing gold and silver lines.  And I got a blister on my finger from rubbing in the shading.   Shiny accessories which all ready to go:  Test fit planned for Wednesday or Thursday. ")
|
|
#
?
Mar 6, 2016 09:28
|
|
|
Dori posted:It's one week until the competition and con and I am about 3 hours of work behind schedule so I thought I'd take a moment to post an update. That blister was frickin worth it because the shading is definitely the first thing I noticed, looks phenomenal!
|
|
#
?
Mar 6, 2016 19:02
|
|
|
Funhilde posted:I imagine somewhere you can get acrylic for lenses somewhere. Can they be shaped easily, or should I just resign myself to them being flat? Stupid_Sexy_Flander posted:Might be a little hard to track down now, but plastic christmas ornaments. That might work, although the area is actually pretty big. I'll get a pic later.
|
|
#
?
Mar 10, 2016 16:30
|
|
|
Man, white plastic Xmas ornaments would be perfect for every comic character like Batman for the eyes.
|
|
#
?
Mar 10, 2016 18:45
|
|
|
Colonial Air Force posted:Can they be shaped easily, or should I just resign myself to them being flat? Maybe search the Rpf or instructables websites for some better resources. Lots of cool solutions there for sure.
|
|
#
?
Mar 11, 2016 07:42
|
|
|
Con ready with time to sleep to spare!!! Thanks so much for all the advice and help and positive feedback everyone. I've really appreciated it.       Now crossing my fingers that I won't gently caress up my skit at the competition.
|
|
#
?
Mar 11, 2016 10:28
|
|
|
Holy poo poo that looks amazing Yeah!
|
|
#
?
Mar 11, 2016 12:18
|
|

|
Dori posted:Con ready with time to sleep to spare!!! It's a cosplay miracle! What is your giant weapon made of?
|
|
#
?
Mar 11, 2016 20:06
|
|

|
Spent a few hours today swearing at pliers.   I've got some thinner, much more pliable wire that I'll use to sort of 'spiderweb' between the more empty areas. Basically this is all just a framework for the super sculpey which will be the main component. At any rate, I'm pretty pleased with the overall shape and structure so far. I'll have to work on the lower-half of the helmet soon.
|
|
#
?
Mar 12, 2016 10:38
|
|
|
So I won the Best Novice Award at the competition. So proud of myself. I am also still hoping for better footage, as this one doesn't show my background video but here's a copy of my cheesy skit: https://www.youtube.com/watch?v=ZbjEongUnnc It's a piss-take of the fact that Air New Zealand makes really over the top air safety videos. Reformed Tomboy posted:What is your giant weapon made of? Giant weapon is: - a thin wooden core for strength - a 3mm EVA foam topping over the wood for the basic shape - covered in a mountain of expanding foam which is cut to shape - 2 layers of standard paper mache to cover the expanding foam holes - 2 layers (with endless sanding in between) of paper mache 'clay' using this recipe - 2 layers of homemade Gesso (recipe from the same website as the 'clay') with still more and more sanding - 2 layers of enamel silver spray paint - acrylic paint for the handle and weathering all over - 2 layers of gloss spray finish
|
|
#
?
Mar 13, 2016 10:05
|
|
|
I finally got off my rear end to drive to a local Harbor Freight and hahahaha holy poo poo is EVA cheap there l.
|
|
#
?
Mar 13, 2016 20:24
|
|
|
Dori posted:So I won the Best Novice Award at the competition. So proud of myself. Hey, congrats!! That's awesome, and the finished product looks absolutely great. I wish I had the type of access to photoshoot locations in New Zealand, I was there a few years ago and I am super jealous!
|
|
#
?
Mar 13, 2016 22:15
|
|
|
  Got a little impatient, so I decided to see how the Sculpey would look when overlaid onto the current frame. All in all, it seems to offer more than enough support, as long as I don't spread it too thin. It's going to take a lot a careful sculpting to achieve the right look, but I'm pretty excited to get to the burned 'crown' part at the top. Plus, if it turns out that it needs more support, I can always strip the sculpey away and remake it. It'll mean scrapping a few hours of work, but it's nice to have the option to restart from scratch if I need to.
|
|
#
?
Mar 15, 2016 01:01
|
|
|
Are you just using the sculpy to make a form you will shape something else around, or is that part of the end design? I only ask because from what I recall, sculpy can get kind of heavy.
|
|
#
?
Mar 15, 2016 01:10
|
|

|
CzarChasm posted:Are you just using the sculpy to make a form you will shape something else around, or is that part of the end design? I only ask because from what I recall, sculpy can get kind of heavy. If I had the means, I might consider making it into a mould, but as it is, it's just going to be sculpey. I should start doing some neck exercises. EDIT - Started with the sculpey, I'm really liking the shape so far, but it's very finnicky to work with. It holds the shape very well, but it's difficult to work with where it's thin. It's the first time I've tried using sculpey for a project like this, so we'll see how it works out. I don't know if I'd try it again, but it's working well enough.    
McKilligan fucked around with this message at 11:10 on Mar 16, 2016 |
|
#
?
Mar 15, 2016 06:38
|
|
|
Textured, baked, hardened. I'm super loving pumped about how the whole thing came out - I might take some sandpaper to a few parts of it to rough up some edges (I love make things that are imperfect/rough, fune detail work). My tiny-rear end little electric oven was barely able to fit the whole thing, so the very top and bottom wound up a bit burned where they came close to the coils, but honestly, I think that really lends to the overall effect (and certainly to the theme). Now I just need to make the Jaw guard bit, and figure out the best way to attach the two together.   
|
|
#
?
Mar 18, 2016 13:31
|
|
|
There was a C2E2 kick-off party at the Adler Planetarium last night in Chicago. They included a cosplay contest.    Oh hai, Best in Show  
|
|
#
?
Mar 18, 2016 16:57
|
|

|
Yayyy congrats! I'm here too, I'm about to get suited up for judging for the Crown Championships. I'm not panicking, YOU'RE PANICKING
|
|
#
?
Mar 19, 2016 15:25
|
|
|
WHOA whassup there Taskmaster buddy! It's like a blast from the past! I just began working on my 2nd cosplay to date and it's none other than the Modern take on you! I just finished the primary detailing work on the mask and will begin working on the shield in the coming weeks. Please ignore my Winter Soldier (tm) long sleeve shirt as its the only long sleeve that fits a little tight I have at the moment. I will be getting in my Under Armor compression shirt next week.    
|
|
#
?
Mar 21, 2016 04:04
|
|

|
Some more pics from C2E2  
|
|
#
?
Mar 21, 2016 16:30
|
|
|
I also did C2E2, was a ton of fun.     I'm really glad I made the leg guards out of hockey pads, as with the kneepad there, I could drop down to my knee really quickly and confidently to take pictures with all the little kids.
|
|
#
?
Mar 21, 2016 17:16
|
|


|

|
| # ? May 9, 2024 13:11 |
|
|
Looks neat, good job! I need to get my hands on two desert eagle replicas. Problem is that they run $25 a piece and $50 for props of guns I do t even like is really dumb. How would I go about sculpting and painting my own, say, out of pink foam?
|
|
#
?
Mar 22, 2016 00:57
|
|