


|
Kinda reminds me of a bolt carrier for a 6mm airsoft gun?
|
 #
?
May 21, 2018 03:57
#
?
May 21, 2018 03:57
|
|


|

|
| # ? May 24, 2024 22:36 |
|
|
bred posted:Those are some tiny features. You can try and grind down a HSS cutoff tool for prototyping. Can you redesign so you're feeding in a 30, 45, or 90 deg cutter so the profile is like a big zag? That's a pretty good idea, 15 degrees of draft per side would make em a lot easier to cut and adds some visual interest without seriously compromising them still managing heat. I'd still be boned irt having to buy or make the tooling but a 30-degree wedge with clearance and a very modest nose is easy enough to hand-grind without much fussing about.
|
|
#
?
May 21, 2018 04:29
|
|

|
M_Gargantua posted:Kinda reminds me of a bolt carrier for a 6mm airsoft gun? oh its more degenerate than that, it's my own ultra-miniaturized take on cutting-edge weedlordism  (i've been weird and evasive about all the titanium work ive been doing this past year or two and it's mostly because it's a little too identifying for my comfort but rest assured that it's moral + spiritual degeneracy from top to bottom)
|
|
#
?
May 21, 2018 04:45
|
|
|
shame on an IGA posted:Also just want to say that lead angle was a major oversight in my training and finding out about it was like discovering fire. I hope nobody needs to be told this like I did but angling the point of your tool away from the direction of cut instead of into it makes all the difference in the world. I did not take that into consideration for the carbide insert actually. I know of it but it's all about the HSS in my head, I set up the carbide insert straight to the lathe so it could turn and face with the same insert, that leaves a lead angle of about zero. I should try angling it and see what it does. BTW I am quickly improving with the 4-jaw chuck. I do like using it because the 3-jaw on this is such a worn out piece of poo poo. The 4 jaw has had a hard life too, but it works much better after I bored the jaws. I found the best way (for me) to dial in a 4-jaw was: 1. find the lowest point and zero the indicator on that 2. then find the highest point. Divide the result by two. 3. Rotate the chuck until it's in the middle of the two values and zero again. 4. Turn to the next jaw and start moving the jaws towards zero. Really works well for me. His Divine Shadow fucked around with this message at 08:24 on May 21, 2018 |
|
#
?
May 21, 2018 07:28
|
|

|
Ambrose Burnside posted:That's a pretty good idea, 15 degrees of draft per side would make em a lot easier to cut and adds some visual interest without seriously compromising them still managing heat. I'd still be boned irt having to buy or make the tooling but a 30-degree wedge with clearance and a very modest nose is easy enough to hand-grind without much fussing about. Ya I was thinking something like McMaster 3367A914.
|
|
#
?
May 21, 2018 19:00
|
|
|
shame on an IGA posted:Learning to grind your own HSS tools is the best time investment for hobby machinists imo. Keep a box of blanks on hand and you can set up in an hour all kinds of crazy poo poo what would take days of shipping lead + cash monies to get carbide for. Could you link to some tutorials? I took a "intro to machining" class and was taught the basics of how to run a mill safely. I'm primarily interested in milling out openings for knife handles, but I realize that this is a skill that could open up a ton of new techniques for me. I would love to be able to make my own cutting tools, and if you know of some good links or tutorials, I'd love to see them.
|
|
#
?
May 21, 2018 20:11
|
|

|
This is the best textbook I've come across and the older, entirely adequate editions are cheap as free. Despite having CNC in the title, its one of the very few that get down into the nitty gritty practicals like "How the hell do I clamp this goofy workpiece to the table" and "Hey, don't forget to always approach your coordinate from the same direction on a manual machine because screw backlash" Keep an eye on amazon and you should be able to find it for ~$3 + shipping. mrpete222 aka tubalcain on youtube is great too. https://www.amazon.com/gp/aw/d/0078298601 E: I keep seeing people on practicalmachinist reccomend Walker's Machining Fundamentals, it's what we had at my school, it's dogshit. Just endless diagrams of hand tools and machine tools and their parts and names with almost no guide to application. Audel Millwright & Mechanic Handbook does everything it does and much more, much better, and should be considered must-have if only for the insanely comprehensive coverage of framing squares. Starrett and Norton have comprehensive introductory books about precision measurement and all things grinding, respectively, that I believe they e-publish freely. On higher-level mechanical engineering / machine design, global needle bearing juggernaut Schaeffler publishes a really nice technical handbook that's a quick reference for all sorts of statics and load formulae, metallurgy, interference/clearance fit class tolerances, etc and have that available both as mobile apps or free physical copies you can order 20x at a time from their marketing dept. It's around 350 pages and full color, most valuable for the heat treat and tempering color charts. If you get the carbide bug, honestly the manufacturer catalogs are the best references out there. shame on an IGA fucked around with this message at 21:36 on May 21, 2018 |
|
#
?
May 21, 2018 21:15
|
|

|
Pagan posted:Could you link to some tutorials? I took a "intro to machining" class and was taught the basics of how to run a mill safely. I'm primarily interested in milling out openings for knife handles, but I realize that this is a skill that could open up a ton of new techniques for me. Above and beyond the best educational tool for me for learning lathe tool grinding was This Old Tony's video on the subject: https://www.youtube.com/watch?v=__A2xtLF0AU Lots of other people explain how to produce a good lathe cutter, but my hurdle was not yet grasping -why- an effective tool has the form it does- it all seems so arbitrary and opaque at first, doesn't it?- and that meant I had no idea why my attempts were working or not working and why. TOT starts from absolute first principles in the most literal way- trying to turn with a square block of steel for a tool- and then observes the specific issues preventing effective work, and then does a single operation to fix that issue. And you watch an undressed tool steel blank that just makes a mess of a rod get refined in a coherent and common-sense way into a tool that does good work. And once you grasp that whole Deal, you have a basic working framework for how to produce any turning tool a job could ask for from first principles. And oh yeah, TOT is actually reasonably entertaining, which is really rare for this kind of thing I never found the old foundational textbooks that helpful for things like this, but I think that's down to the authors assuming a far greater 'fluency' in muddy ambiguous print-reading than I or most others hold (because it isn't as vital as it was when tool&die was king and cnc was small on the horizon). Looking back at basic stuff I know what they're communicating, and it's coherent and sound the way they present it, but third-angle projections of Mystery Prisms you're told are actually roughing tools just don't connect when you're missing the underlying logic of tool-grinding. Ambrose Burnside fucked around with this message at 01:53 on May 22, 2018 |
|
#
?
May 22, 2018 01:46
|
|
|
shame on an IGA posted:On higher-level mechanical engineering / machine design, global needle bearing juggernaut Schaeffler publishes a really nice technical handbook that's a quick reference for all sorts of statics and load formulae, metallurgy, interference/clearance fit class tolerances, etc and have that available both as mobile apps or free physical copies you can order 20x at a time from their marketing dept. It's around 350 pages and full color, most valuable for the heat treat and tempering color charts. oh man do you know what this doc is called, i'm rooting around the canadian site but can't find it in the Media Library e: Pretty sure it's the STT, but I guess word got around b/c the hardcopies seem to be out of stock forever, rip. there's still an app tho https://play.google.com/store/apps/details?id=de.schaeffler.stt&hl=en_CA Ambrose Burnside fucked around with this message at 02:33 on May 22, 2018 |
|
#
?
May 22, 2018 02:13
|
|
|
TOT is loving hilarious, but I enjoy a good Dad joke.
|
|
#
?
May 22, 2018 03:56
|
|


|
Continuing with my experiments, this piece of steel is really hard to get a good finish on, I have no idea what it is, a 20mm rod of some kind.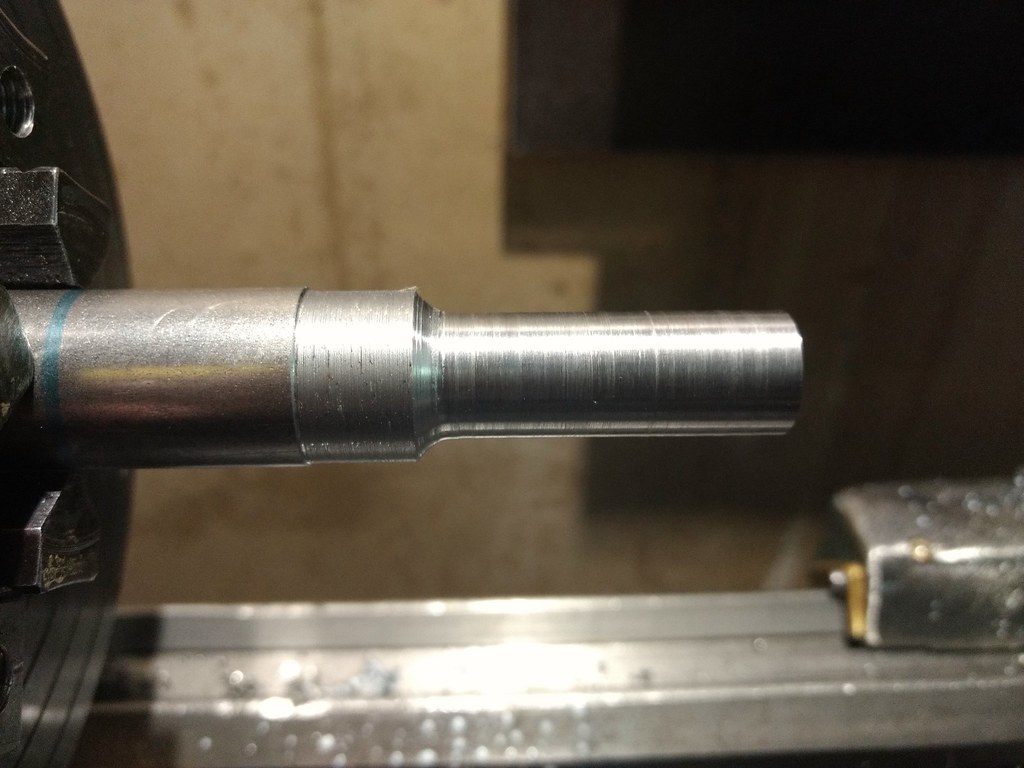 Both HSS and carbide (WNMG) left very ugly results on this piece of unknown metal. Oil did not help the finish with carbide, nor did soluble oil cutting fluid, tried different speeds and cutting depths. Only with HSS and a lower RPM with cutting fluid did I achieve a resonable finish. The thicker part is what both the carbide turned out like, the narrow pass was the best I could achieve with a round nose HSS bit and cutting fluid in a spray bottle. The cutting fluid really helps, also prevents edge build up. I don't have any proper sulfur cutting oil, just this old fashioned motor oil I am using for general lubrication on this lathe so that might be a reason the oil isn't doing much, does seem to help plenty though when parting.
|
|
#
?
May 22, 2018 06:55
|
|
|
His Divine Shadow posted:Continuing with my experiments, this piece of steel is really hard to get a good finish on, I have no idea what it is, a 20mm rod of some kind. Whats your feed rate and carbide tool nose radius? Using a center?
|
|
#
?
May 22, 2018 10:51
|
|

|
Can't remember the feed rate, but pretty slow. I have to look it up when I get home but it's gonna be in some metric units. I tried with and without a center but saw no difference. Also the edge buildup on the HSS was significant unless I used cutting fluid, only got it off by stoning it.
|
|
#
?
May 22, 2018 11:45
|
|
|
So I'm tryna design a really, really small picket twister for easy + repeatable + concentric fancy twists, and I'm not sure what the best tack for self-centering non-blind (also ideally cheap + off-the-shelf) fixturing solutions is. Here's your standard full-size picket twister, for reference-  But I wanna make one scaled way the hell down to work with 1/8 - 1/4" hand-squared-up stock, and the typical picket twister workholding of 4 setscrews adjusted for the barstock you're using probably won't work because the wee lil 1/8" squared-up bars can be, like, 25-50% out from nominal, and it isn't viable to readjust the screws for each unit; any clamping solution has to dynamically adapt to all sorts of wobbly almost-square profiles, quickly, and center the stock along a fairly constant axis regardless of the profile geometry. Right now I'm thinking sth like my expert MS paint schematic in the attachment at the bottom. It'll consist of an aluminum extrusion linear rail with several pillow blocks along its length, able to slide wherever as needed, and with the rotating clamping things installed in the bearings. Grey base is the extrusion, blue is the pillow-block modular things, green are the hypothetical rotating clamps, red is the stock. For the end clamps it's acceptable if one is blind so t-handle tap wrenches are the obvious and easy solution there (depicted at the bottom). The middle and ideally opposite-end clamps, though, should have through-holes, and I should be able to rotate em freely -or- lock em down depending on the twist I'm trying to do. A straight tap wrench is the usual pick for freehand twisting here, but they're not self-centering and won't play nice with the fixed-single-axis thing I need. I can make something or buy something here. A little 4-jaw self-centering chuck like a Taig chuck would be swank and very fast to use but that's tremendous overkill I reckon + the chuck body is way too deep for working at multiple points along short stock lengths, I'm twisting stuff that's only 4-5" long as it stands. Adding twisting handles would also be tricky. I could also steal the v-jaw straight tap wrench concept and build two adjustable v-jaws into a bespoke pillow block bearing-installed twisting wrench, but it won't be automatically self-centering and will be a lot of work if I want two or more of 'em. And the off-the-shelf pillow blocks themselves are a nice convenient platform for all this, but they might be so large at the shaft size I'll need- the clamp itself will have a shank fixed in the bearing that will itself need a thru-hole of at least 1/4" and change- that they'll limit the effective working travel of any clamps between the two endpoints so I might have to do something slim n svelte from scratch there. I could also use this as an extremely flimsy excuse to buy a Taig lathe and make a handwheel to replace/clamp over the pulley spindle and Frankenstein up the tailstock as needed and that'd also work fine, but I definitely don't need to shell out that much for this purpose, and I really do need to resist the siren song of the Extremely Cute But Limited-Functionality Watch Lathe because I know I'll regret not upgrading to the standard entry-level mini lathe or even a Sherline. excellent tentative micro-twister diagram below vvvvvvvvvvvvvvvvvvvv
|
|
#
?
May 22, 2018 20:45
|
|
|
on second thought that custom clamp might not actually be that hard. this needs some refining, i want the jaw portion of the v-blocks to rise through a slot in the top plate and be flush with / proud from the faceplate and if i rework the assembly screws i can make em totally flush with the clamp but for now w/e
|
|
#
?
May 22, 2018 22:20
|
|
|
If you're trying to mill a cube are there any special tricks for really shooting for accuracy? Could you realistically mill a 20.00mm perfect to <0.01mm in a vice? I am also wondering (related) how you tell when you have enough vice pressure - I am always a bit paranoid about the part flying out at me so I think I may be overclamping and thus distorting the part, causing inaccuracies in the machining. e: I've seen this old tony's etc. videos but I'm still getting inaccurate faces. Mudfly fucked around with this message at 01:18 on May 23, 2018 |
|
#
?
May 22, 2018 23:57
|
|

|
RE: Self-centering vise I wonder if you could use double-ended insert screws. Use E-clips or something to keep it centered in the vise body. Your clamp would need to be cantilevered to let the part go through but you could probably get it good enough. How close to centered are you looking for? https://www.mcmaster.com/#carbide-insert-holder-set-screws/=1cyhpu7
|
|
#
?
May 23, 2018 00:33
|
|


|
Karia posted:RE: Self-centering vise The stock itself will never be perfectly straight given that I'm hand-forging it, there's always a touch of banana to em if I'm inspecting em pickily enough, so i'm not worried as long as whatever I end up with produces twists that look machine-straight to the casual eye. each piece will end up working on its own slightly-different twisting axis depending on the stock and how the vise lands, but as long as all the work done on the stock is along the same approximate axis it won't really matter. having each jaw of the middle vise be independently-adjustable might actually be useful because the stock won't necessarily land on the tool's Nominal Axis every time, and using a middle vise that only respects that Nominal Axis could, I figure, lead to a jig that's overly-picky about the straightness of the stock I feed it. A good twist actually straightens irregular squared-up stock, the inevitable banana gets spun around so that one continual bowed eccentricity gets chopped up into several smaller ones that average out to make for less runout. in any case, i don't quite follow, what would the screw do here? e: oh nvm i get it, the opposed-handed threads would pull or push components apart at the same rate, yeah that could definitely work, hmmmmm Ambrose Burnside fucked around with this message at 03:11 on May 23, 2018 |
|
#
?
May 23, 2018 03:02
|
|
|
Mudfly posted:If you're trying to mill a cube are there any special tricks for really shooting for accuracy? Could you realistically mill a 20.00mm perfect to <0.01mm in a vice? -Tighten until the handle is about as hard to turn as raising the knee -Tap with soft face -If you can't move the parallels, it's tight enough. Have you trammed the head recently? The other major keys to squareness are: Obsessive cleanliness Obsessive deburring at every step Surface grinders shame on an IGA fucked around with this message at 03:58 on May 23, 2018 |
|
#
?
May 23, 2018 03:42
|
|
|
Mudfly posted:If you're trying to mill a cube are there any special tricks for really shooting for accuracy? Could you realistically mill a 20.00mm perfect to <0.01mm in a vice? You can overtighten but its a problem more with thin stock or stuff like plastic. You don't need to tighten much unless you're taking really heavy cuts. As said above, how well is your head trammed in? How about the vise? Is it perpendicular in z? Are your parallels parallel? Stick something like a 1-2-3 block in there and check it with an indicator. Also are you trying to do it all with face milling or profiling 4 sides, facing the top, and then flipping it?
|
|
#
?
May 23, 2018 04:09
|
|


|
shame on an IGA posted:Have you trammed the head recently? this is my biggest issue with my lil Taig, its not hard to learn how to tighten-tap-tighten-tap to counter the vise upthrust effectively but the smaller scale of everything and much simpler + less rigid assembly makes it much harder to get stuff exactly where you want it and have it reliably stay there. you adjust a bridgeport with mallet taps and slightly-loosened screws no problem but with the taig it can be a huge struggle to contact it softly enough to not overshoot what you wanted. even indicating for tramming purposes is a huge headache because the table is so small that getting enough sweep to show less-than-dramatic differences is a challenge. the y-axis tram is best done by fuckin shimming at different points on the dovetail mount (gently caress right off) and, naturally, a crash or even a good bump of your oafish self into the machine can upset the tram juuuust enough to make everything come out weird (without me realizing til ive run a part or three). i've read about people tack-welding the column to the base once they're happy with the tram and that's a pretty goddamn good idea from where i'm standing. i've seen people make tramming aids for little mills that's just a precisely-turned wheel-and-axle sort of thing, with the face of the wheel turned very flat and as perpendicular to the axis as possible; you put the axle in the spindle and bring the head way down and loosen the tram-relevant fasteners as needed to let the wheel 'find' the proper tram when it's sitting perfectly flat on the table. apparently they work pretty well if well-made, well enough to constitute Tramming without need for indicating for typical "around a thou"-tolerance machining, but more importantly they seem to tram very quickly and easily, which sounds wonderful given how often mine has shifted because i machined on a day that ends with -y or whatever e: apparently commercial tramming tools intended specifically for taigs/sherlines use this specific approach to good effect, i.e. http://www.cartertools.com/nanotram.html Our shop has a Hardinge that could turn sth like this very accurately without breaking a sweat, I oughta put a pitch together for the techs who rightly keep it under lock and key so it doesn't get trashed by students Ambrose Burnside fucked around with this message at 04:28 on May 23, 2018 |
|
#
?
May 23, 2018 04:14
|
|
|
shame on an IGA posted:-Tighten until the handle is about as hard to turn as raising the knee 10/10 advice EDIT: Also: -Obviously you might need to stick something round between the moving jaw and the work holder so that you can flat against the dead jaw. -If you wanna be really flat you might need to mill the first surface after all this is done. -Cutters with large diameters (Fly cutters, face mills) will make this process easier with better surface finishes. Particularly if your spindle isn't vibrating or running out too badly. CarForumPoster fucked around with this message at 22:32 on May 23, 2018 |
|
#
?
May 23, 2018 22:28
|
|
|
I need to watch some videos on tramming a mill. I went to make my cube and found a nice ridge down the middle of the face (using a face cutter) running in the X axis. Put on the dial indicator and found that the vise was way out of square to the X axis (like .015" across 5" or so). I spent like 10 minutes tapping that back and forth so now it's square to about .00025" over the same 5", but that's an estimate because the indicator was .0005"/division. I didn't really know what to do next so I just did was sounded right in my head. I clamped down a 123 block on a single parallel with a dowel pin applying pressure, tapped it down into the vise and indicated along it's length. There was virtually no deviation from zero on the indicator across the length. This is probably not the right setup, though. Next, I flipped the block so that it was the long way in the vise to indicate the Y axis. I ended up with about .00125" over 2.800" of travel. Again, this is probably not the right setup for it, but the measurement jibed with the ridge that I saw. Edit: In watching a video, I realize now that I've made a huge mistake. I just had the dial indicator in a collet in the quill, so I was only checking how square the 123 block was in the vice. I needed to get an offset from the axis and rotate the quill. Makes a lot more sense. carticket fucked around with this message at 00:59 on May 24, 2018 |
|
#
?
May 24, 2018 00:51
|
|
|
Single parallel and dowel pin is to get a totally non square piece of material to sit as flat as possible against the back jaw. For a 1-2-3 block (or squared up material) use two parallels and no dowel and tap it down. Sweeping the indicator 360 will tell you how perpendicular your z is relative to x and y. Your table may be beat up so placing 1-2-3 blocks or anything that you know is good and flat (and the same height) at the 4 extremes of x and y that you hit will take a nice average. You can also move the same piece to each position. Using the quill to go up and down vs the back jaw of the vise will tell you how perpendicular the vise is to y. (After the head is trammed in to the table). It is possible that your vise or vise jaw is off and will cause no end of problems even if you're perfect relative to the table. Moving the table in x you already covered. It will never be perfect but the closer you get the better and everything adds up. .0002 here, .0003 there and you're off .0005. A little run-out in the spindle and you're out .001 etc. Also stuff will shift a little when you tighten it the rest of the way. Sweep it one last time after you tighten everything down. If it throws it off, loosen it, offset it the amount you saw the other way, tighten, and check again. The guy who taught me to run a mill would have me tram the whole thing in, check it, then loosen something and hit it and have me do it again. It takes a lot of practice but is super satisfying when you get good at it.
|
|
#
?
May 24, 2018 04:04
|
|
|
My favorite project ever was having to make a 2.000 ± .008" cube with hand files
|
|
#
?
May 24, 2018 05:06
|
|
|
What size stock did you start with?
|
|
#
?
May 24, 2018 05:23
|
|


|
I broke my HSS parting tool trying to part a beefy piece of round stock, broke off after an inch into the material. It's 1/2 X 1/8 in size, tapered profile, very old school. But instead of buying more HSS blades for this old holder I took a recommendation of a local machinist and got this: https://www.ebay.com/itm/SMBB2032-C...~gAAOSw~y9ZCpi8 https://www.ebay.com/itm/10pcs-SP20...BAAAOSwXetZO8iT They are apparently the bees knees according to him, 2mm instead of 1/8 (3mm) so they're thinner and thus imparts 33% less force on the parting tool and can be run faster too. And when it breaks it's cheaper to replace. Will be interesting to see if it works.
|
|
#
?
May 24, 2018 11:12
|
|
|
My latest project has been designing and building a flugelhorn. I'm pretty happy with the result. Plays like 90% of where I want it. Just gotta figure out how to dial in the last 10%. 
|
|
#
?
May 24, 2018 15:48
|
|
|
Dayum. Is that hard? It looks impossible.
|
|
#
?
May 24, 2018 17:56
|
|


|
Definitely worse than building a trumpet, but that could be because that is my first flugel, and I have built many trumpets.
|
|
#
?
May 24, 2018 23:49
|
|
|
Trammed the head tonight. We got to .003"/8” in the Y axis and .00025”/8” in the X axis. Couldn't really dial in the Y any closer because the adjustments at that point we're too minute on the bolt. I don't know if these numbers are good, but it gave a nice ridge-free face.
|
|
#
?
May 25, 2018 02:51
|
|
|
Mr. Powers posted:Trammed the head tonight. We got to .003"/8” in the Y axis and .00025”/8” in the X axis. Couldn't really dial in the Y any closer because the adjustments at that point we're too minute on the bolt. I don't know if these numbers are good, but it gave a nice ridge-free face. The X is good...the Y is not. Are you taking the backlash out of the tramming bolt and only going in one direction? Are the head adjustment bolts semi tight while youre going at it? I had a fairly garbage bridgeport and measuring ~4" radius with an indicator & arm could easily get it to .001" measuring X-X and Y-Y of that swing. Also I'm assuming this is in the center of the table for X? There will probably be table droop at the ends of the travel.
|
|
#
?
May 25, 2018 23:55
|
|
|
X was center, as was Y. Bolts were semi tight after we realized we needed that. Before that we were oscillating back and forth by like .015". I didn't dial in the last bit, so I don't know if it was all in the same direction.
|
|
#
?
May 26, 2018 00:43
|
|
|
Those big modern VMCs with milling heads that rotate left and right with servos - how is backlash avoided on the rotation? Is it just 1 to 1 drive between servo and the milling head?
|
|
#
?
May 26, 2018 08:37
|
|
|
Mudfly posted:Those big modern VMCs with milling heads that rotate left and right with servos - how is backlash avoided on the rotation? Is it just 1 to 1 drive between servo and the milling head? I believe roller gear cams are used. Not sure if there are other mechanism types too. EDIT: Here's a PDF with good pics specific to a trunion type 4th axis. https://www.pascaleng.co.jp/application/files/3614/6699/1134/pa-164e.pdf EDIT2: I didnt answer your questions. Its mechanisms like that + you calibrate the machine. The machine parameters page will have adjustments for backlash in your conventional axes (X-Y-Z with ball screws) and your rotating axes (whether head rotation or trunion) CarForumPoster fucked around with this message at 14:06 on May 26, 2018 |
|
#
?
May 26, 2018 13:51
|
|
|
Brekelefuw posted:My latest project has been designing and building a flugelhorn. I bet it feels so good 
shame on an IGA fucked around with this message at 18:00 on May 26, 2018 |
|
#
?
May 26, 2018 17:57
|
|
|
shame on an IGA posted:I bet it feels so good My entire ad copy for the horn is Mangione puns.
|
|
#
?
May 26, 2018 18:02
|
|
|
Mudfly posted:Those big modern VMCs with milling heads that rotate left and right with servos - how is backlash avoided on the rotation? Is it just 1 to 1 drive between servo and the milling head? There's a whole bunch of different mechanisms: adjustable worm gears are probably the most common, roller gear cams like CarForums mentioned (though that specific model is just for indexing), or if all you care about is indexing, a Hirth/curvic coupling. They'll also have a rotary encoder on the actual head so they're reading the actual head position, not extrapolating from the servo rotation (like how glass scales can be used on linear axes, though those are often over-hyped.) But the actual answer to your question is: direct-drive motors are the hot new thing, where the rotary table/head itself acts as the shaft of a motor. They have no backlash since there's no mechanical mechanism at all, and use a rotary encoder directly mounted to the moving axis. They're way, way faster, too. The downside is that for heavy cutting you probably need to clamp the axis, since otherwise the motor has to fight to compensate for all the cutting forces and vibration. Not really a huge deal for 5 axis work most of the time, though, since you just clamp it while roughing and then do full 5 axis for finishing passes. As a tangent, since CarForums mentioned it: backlash compensation isn't really as much a thing on modern high-end machines, since even if you can compensate it out it makes the machine less rigid. They preload ballscrews by using oversized balls, or using two nuts that are pushed apart, and can get essentially zero backlash. Some of them do use compensation tables, but that's pretty much just to account for inaccuracies in the ballscrew pitch (there's also a few weirder edge cases like thermal comp or the newer volumetric compensation.) If it's worn to the point that it's got notable backlash, there's a few option. Sometimes the preload can be adjusted. If you're only using a small portion of the travel regularly (say you've got a vise right in the middle of the table and that's where most of your cutting time is), you can shift your work to a different part of the travel that hasn't worn that badly. Or maybe it's time to replace the ballscrews (they are, ultimately, wear components.)
|
|
#
?
May 26, 2018 19:07
|
|
|
I finished my "cube". At least I finished the machining. I hand filed it and had a nice-ish finish and then immediately got scratches. I might try to DIY anodize (clear) it just for durability. E: going to weigh and measure tomorrow to see how close I was. I think I was pretty drat close. The Fusion 360 model says it should be ~22.8 oz.
|
|
#
?
May 31, 2018 02:54
|
|
|

|
| # ? May 24, 2024 22:36 |
|
|
Last weekend Absentmindedwelder came over to help me take the saddle and apron off the lathe to drill and tap holes for the threading dial. This machine never had one and this one was in rough shape. No pics from that work as I forgot to take them. BUT I needed to take the threading dial apart and clean it prior to mounting on the machine. Condition I got it in:  After cleaning/stripping:  After painting, light polishing, and reassembly. I added an oil felt to the existing oiler and passageway to try to improve on the original. I don't know if it originally had one, but there was none when I took it apart and the oil hole was fully plugged with grime.    
|
|
#
?
Jun 1, 2018 01:56
|
|
