


|
Discendo Vox posted:Difficulty isn't a knob you just turn upward. Who are you calling a knob?!   
Quackles fucked around with this message at 09:23 on Dec 7, 2019 |
 #
?
Dec 7, 2019 09:20
#
?
Dec 7, 2019 09:20
|
|


|

|
| # ? Jun 3, 2024 16:25 |
|
|
Transient People posted:It was, but it was also meaningless. I remember using Goombario and Parakarry exclusively when I first played through it, because Charge and Multibonk was so blatantly the best pick for dismantling hard enemies and Parakarry didn't care about any protections, for example. The fact all the other partners were left to rot is a good indicator of how this kind of things was unnoticeable in PM -- likewise, I don't think I /ever/ made a single food item with Tayce T, not even basic ones. Why bother, when simply moving forward was all that was needed to win? By raising the difficulty, these things that existed in base PM are allowed to finally matter, instead of being drowned by the sheer power of basic first-order strategies relative to the difficulty of the game. I mean you can't do a run without Goombario regardless of his power... what's even the point of playing if you don't get all enemy tattles in the game?
|
|
#
?
Dec 7, 2019 10:27
|
|

|
BTW, this may please you. The Master Quest devs added a clue to the Blooper Baby tattle that suggests why it's (not) a good idea to use Zap Tap in the Electro Blooper fight:quote:
|
|
#
?
Dec 8, 2019 05:52
|
|
|
Transient People posted:Parakarry didn't care about any protections 
|
|
#
?
Dec 9, 2019 21:20
|
|

|
Quackles posted:BTW, this may please you. The Master Quest devs added a clue to the Blooper Baby tattle that suggests why it's (not) a good idea to use Zap Tap in the Electro Blooper fight: That's one good thing to see. In fact, over the recent updates, the Tattles have been more effective in not blinding the player with something like that.
|
|
#
?
Dec 10, 2019 01:16
|
|

|
I mean do the tattles really help? You find out during the fight anyway and it's not like you can change your badges mid-battle.
|
|
#
?
Dec 10, 2019 01:22
|
|

|
It does, because you might otherwise be completely unaware it affects the boss pattern at all because you only see the berserk pattern
|
|
#
?
Dec 10, 2019 03:13
|
|


|
Part 26: The Great Star Piece Hunt, or: Mario vs. The Master It�s time to run all those errands we�ve been holding out on doing since the end of Chapter 3. First off is the Post Office.    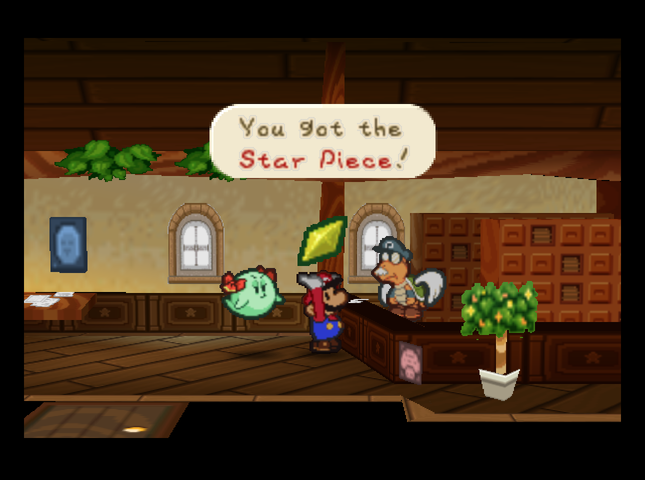 Returning the missing Mailbag, we get a Star Piece as thanks - just as if we�d delivered a letter. Now we can check our mail again!  Goombario has a letter from Goompa�  �and Bow has one from the Boos of Gusty Gulch.  Let�s go check Mario�s mail, too!   We grab a hidden Star Piece before taking the pipe to Mario�s house.  There�s one more Shy Guy making mischief!    We chase him off and talk to Luigi.  Still, Shy Guys are nothing compared to that Clog Monster� Don�t tell me you forgot about the Clog Monster! Remember, with the Clog Cleaner? Still, Shy Guys are nothing compared to that Clog Monster� Don�t tell me you forgot about the Clog Monster! Remember, with the Clog Cleaner? Sheesh, I guess not even you watched our Super Show. Never mind. Sheesh, I guess not even you watched our Super Show. Never mind. It looks like Mario�s also got some mail.   It comforts me to know that Bowser's creatures no longer loot the ancient ruins. Unfortunately, some relics are missing. This is a shame. I've heard that a Koopa was wandering around the ruins... That sounds very suspicious. You should be careful if you meet any suspicious types. It comforts me to know that Bowser's creatures no longer loot the ancient ruins. Unfortunately, some relics are missing. This is a shame. I've heard that a Koopa was wandering around the ruins... That sounds very suspicious. You should be careful if you meet any suspicious types.Uh-oh. What�s in the next letter?   Sadly, I did not find any treasures as valuable as I had hoped. I will press on, though, old chap! There are treasures hidden all over the world! I hear them calling my famous name, asking me to dig them up! Sadly, I did not find any treasures as valuable as I had hoped. I will press on, though, old chap! There are treasures hidden all over the world! I hear them calling my famous name, asking me to dig them up! Yeah, I�m not so sure we should have given him that idol thingy. Oh well.  Tayce sends us a thank-you for the Cookbook:  The Cookbook you gave me really comes in handy.♥ I already knew a lot of recipes, but with this book, I can cook a world of new dishes! I want to tell you about the latest dish I've been cooking. It's unique! It takes a Fire Flower and an Egg to fix it. When I first made it, it blew me away! It might help you on your adventures. Please come visit and bring those ingredients!♥ The Cookbook you gave me really comes in handy.♥ I already knew a lot of recipes, but with this book, I can cook a world of new dishes! I want to tell you about the latest dish I've been cooking. It's unique! It takes a Fire Flower and an Egg to fix it. When I first made it, it blew me away! It might help you on your adventures. Please come visit and bring those ingredients!♥For anyone who�s forgotten, this recipe makes the explosive Egg Missile.   Now, what�s up with this strange floor panel?  Whooooa! A secret room! And is that a book?  I should probably not read this, but�  Luigi�s only made two entries. Let�s check out the first one.   Once again, he went alone. It's so unfair! I remember the carefree days when we played Golf and Tennis and had Parties. I remodeled the house and made a secret basement. My brother has no idea! It's the perfect place to write in you, my secret diary. I think I'll do some reading while I have the extra time. Maybe I can learn some neat stuff to impress my brother when he gets back! Once again, he went alone. It's so unfair! I remember the carefree days when we played Golf and Tennis and had Parties. I remodeled the house and made a secret basement. My brother has no idea! It's the perfect place to write in you, my secret diary. I think I'll do some reading while I have the extra time. Maybe I can learn some neat stuff to impress my brother when he gets back!Hmm.  The book said a powerful ruler was buried there, after being tortured by the many traps and monsters. Legend has it, the ultimate treasure is buried there with him. That sounds nice, but to tell you the truth it sounds too scary for me! Maybe when Mario gets back I'll see if he wants to check it out. Alone. The book said a powerful ruler was buried there, after being tortured by the many traps and monsters. Legend has it, the ultimate treasure is buried there with him. That sounds nice, but to tell you the truth it sounds too scary for me! Maybe when Mario gets back I'll see if he wants to check it out. Alone.That�s, uh, thoughtful of him.   Back to the adventure!   Our next stop is Koopa Village, but we�re taking the long way there so we can test out our new Star Piece tracker.   We get our first alert in the room with the Candy Canes. 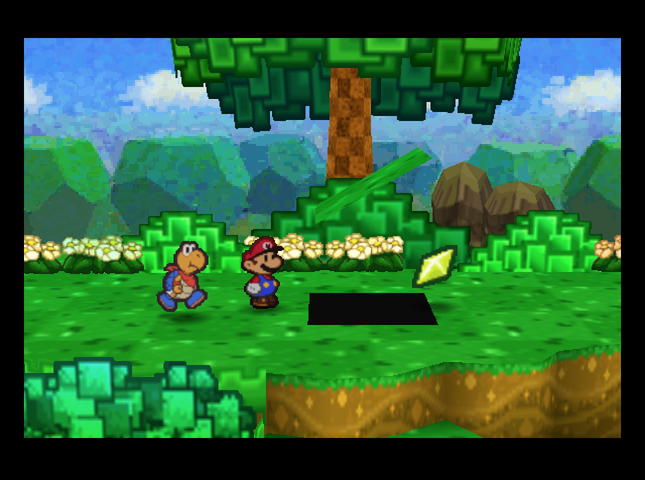 There�s another hidden Star Piece on the path to Koopa Bros. Castle, but none further that way (or in the castle itself, thank goodness).   We make it to Koopa Village without incident, and get another Star Piece while we�re there.  And further in, we run into an old friend!  Kaaaa-wiiiizzz! It�s everyone�s favorite quizmaster, Chuck Quizmo! Kaaaa-wiiiizzz! It�s everyone�s favorite quizmaster, Chuck Quizmo!Let�s see what this Chapter�s quiz has to offer.  You use a gate each time you enter an area in the Forest and each time you leave it. You have to go through seven areas to get to Boo�s Mansion, so� One of the Toads has a crush on Donluvlee. What color is he?[Red / Green / Blue] The Toad in question is just south of Tayce T.�s kitchen. He does not admit to the crush if talked to during Chapter 4 - you have to Tattle him with Goombario. Which one of these dishes are available on the Sailor�s Lunch Special at Club 64?[Mushroom Salad / Seafood Soup / Fishy Fry]  I was under the impression you could only find one Apple per trip, but apparently there�s a second one hidden in Boo�s Mansion somewhere. What is the color of the roof of the house in Koopa Village where you can listen to a radio?[Red / Yellow / Blue] What event had to be canceled after Princess Peach�s castle disappeared?[Mushroom Gala / Cooking Contest / Talent Show] Good thing we happened to read the Toad Town news board when we did! What giant furniture piece cannot be found in Tubba Blubba�s Castle?[Trunk / Clock / Dresser] The fact that there�s also a giant clock in Boo�s Mansion is a red herring.  Uhhhhhhhhhhhhhhhhhhhhhh�..  OK, let�s think about this. Chuck Quizmo is a� some sort of worm or something? And we did meet him in Koopa Village. So he�d likely have�   Aha! A Koopa Leaf!   That is, thankfully, the last question for now. Now let�s see what Mr. Koopa Koot wants today.   You could tell me the news then. My eyes aren�t so good, see? Don�t spare the juicy gossip, either! I�m all ears! You could tell me the news then. My eyes aren�t so good, see? Don�t spare the juicy gossip, either! I�m all ears!  We pop over to Toad Town and read the message board.   Not just the front side...   �the back side, too!    I�m pretty sure �hip� folks pay better, Mr. Koot.  Koopa Koot�s next favor is a VERY BIG ask in Master Quest, considering only three or four Life Shrooms are available before Chapter 7 or 8.  We have an extra, from Shooting Star Summit where the  This had better be worth it!   It wasn�t worth it. Hey, by the way, have you been going to the Playroom? I found this old thing since the last time I saw you. OK, maybe it was worth it. This�ll unlock a new game at the Playroom, once we�re back in Toad Town!  Koopa Koot wants one more favor. This one�s an easy one again.   We warp to Goomba Village and pick up a Goomnut (actually two Goomnuts; the extra�s for good luck).  We�re taking the long way back to Toad Town for the same reason we hiked over to Koopa Village: to grab some Star Pieces.  There turns out to be one just past the Goomba King�s castle�   �and another by the run-down old house that�s new in Master Quest.  Once we reach Toad Town, Tayce T. cooks one of the Goomnuts into the Nutty Cake Koopa Koot wanted.    We turn in our reward, and Koot pays us the usual. That�s all the favors there are to do before finishing Chapter 4.   As long as we�re here, let�s see if there�s another Trading Contest live on the radio.  Fun fact: For helping out Chanterelle, the Pop Diva, last chapter, there�s now a new radio station we can listen to in this house. It plays her song!  Music: Chanterelle's Song (Instrumental) Music: Chanterelle's Song (Instrumental) But yes, there is a trading quest going on. And� Dry Dry Ruins? With the way Master Quest changed the desert around, we gotta hurry!   First order of business is to warp to Toad Town and get another Nutty Cake from Tayce. Good thing we picked up that extra Goomnut!  After that it�s off to Dry Dry Outpost�     And we head through the desert as fast as we can!    Thankfully, we make it there in time. Our prize is a Maple Super! I�m sure we can find a good use for this.  There�s a few Star Pieces in the area we can grab before we head back to Toad Town. The first is one hidden on the Dry Dry Rooftops, of all places.  Another is in the dead center of the desert, by the big stone cactus. We�re going to take the long way home to Toad Town so that we can grab Star Pieces hidden on Mt. Rugged.    Kolorado has struck camp now that Dry Dry Ruins is explored. We hammer the tree behind where he pitched his tent, and find another letter Parakarry dropped.  We then hike to the top of Mt. Rugged and find another Star Piece under a large cliff, near where there are many moles.    The train takes us home to Toad Town.  The playroom is right nearby, so we pop in to try the new game, Smash Attack!    Smash Attack has us hammering blocks, which contain either nothing, a Fuzzy, a Bob-omb, or a Peach panel. Every so often, the contents of each block will pop out and reveal what�s inside, if there is anything.   The goal is to get ten Peach panels in 30 seconds. If you hit a Bob-omb, it stuns Mario for a second, and if you hit a Fuzzy, you have to mash A to get it off of you.   If you win (which took us several tries), you get 10 coins for each second remaining. It�s pretty fun!  At this point, we�ve finished most of our errands! Only one remains: grab all the hidden Star Pieces we can.   There�s one hidden in Toad Town�s port.   Warping back to Goomba Village, it turns out there�s a Star Piece hidden where Mario landed at the beginning of the game.  And another by the Pit of 100 Trials entrance.  A third is east of the crashed veranda.  Before we leave Goomba Village, we take the opportunity to deliver the letter from the desert.  Now what could this be...? Koopa Koot...? Eh...I have a bad feeling about this, so I'll read it later. It's probably the old Koot's usual backstabbing gossip. He really needs to get out more. What's the point of sending all of these gossipy letters? Huh? Now what could this be...? Koopa Koot...? Eh...I have a bad feeling about this, so I'll read it later. It's probably the old Koot's usual backstabbing gossip. He really needs to get out more. What's the point of sending all of these gossipy letters? Huh? We get a Star Piece for the delivery.  With that out of the way, we return to Toad Town - we�re almost to the end of our Star Piece hunt, but there�s one area that�s now open to us that we need to check.    That area would be the connecting area between Gusty Gulch and Dry Dry Desert. And hey, there�s a Star Piece here!  The road is now clear - we can walk in front of the rock that was blocking it before.   Past this point, there�s a gap, then a high ridge.   We have Parakarry para-carry us across; the Star Piece is hidden on top of the ridge.   We drop down; there are Hyper Clefts on this ridge!  To the left is a springboard leading back up to the ridgetop.    If we go back to the right and around the rear side of the ridge instead, the path continues down.   There�s an archway we can walk through down here, and a badge block - but it�s just a hair too high off the ground for us. We�ll need to come back with the Ultra Boots!  Through the arch, the path leads to a cliff edge with a Super Soda, blocked by a rock Bombette can destroy. We�ve been here before - this is as far as we were able to get when we came from the Dry Dry Desert side!    Bombette destroys the rock and we exit out the south exit, which leads to Dry Dry Desert.    A quick jaunt to Dry Dry Outpost and we can warp home. Now, it�s time to put all this sweet loot we�re collecting to good use!   We head towards Shooting Star Summit, grabbing another Star Piece along the way.  It turns out there�s one by the Star Temple as well�  �and another on the lower slopes of the summit itself.  And one just outside Donlow�s house! Time to trade Star Pieces.  It turns out we have no fewer than 55 Star Pieces! Previously, I had asked about which one badge we should buy from Donlow, but instead�     �we�re buying four! Today�s selection includes Flower Saver (which reduces all FP costs by 1), Star Gift (which speeds up Star Energy regen), Berserker (+2 Attack, but Mario acts on his own), and Pay-Off (get more coins if we get beaten up in battle� which�ll happen a lot!) And we still have 20 Star Pieces left over!   Star Gift and Berserker are all-new. The former costs 3 BP, and the latter is free.   Pay-Off and Flower Saver both costs 1 BP less compared to the costs in the base game (2 BP and 6 BP, respectively). We�re probably going to equip Flower Saver as soon as we level up (and can take off this FP Plus badge, or get more BP).  We�re almost done with our big list of errands in Toad Town, but one last thing remains within city limits: take on the Master of the Toad Town Dojo!!  We�re at full strength. There�s nothing to hold us back. Let�s do this!   SFX: Gong  To battle!! Music: To battle!! Music:  The Master The Master This is The Master. He owns the Dojo� and he�s the strongest member. Rumor is, he was part of the underground mafia run by the �Don� family. Years of training in Star Haven have given him a strong connection to Star Energy. He�s the best in the Dojo, so he must be pretty tough! This is The Master. He owns the Dojo� and he�s the strongest member. Rumor is, he was part of the underground mafia run by the �Don� family. Years of training in Star Haven have given him a strong connection to Star Energy. He�s the best in the Dojo, so he must be pretty tough!The Master had 50 HP in the base game.  We attack! Hm! Excellent move. He responds in kind�. �wait a second.  You all saw that, right? When The Master hits Mario, he drains all our Star Power - whether Mario blocks the attack or not!   We resume attacking. Mario jumps on The Master again, while Goombario Charges.   His attack gives the trick of this battle away, complete with helpful explanation. Basically: The Master�s Attack starts at 0. Each time he takes a hit of damage from any source, his Attack goes up by 2. So, when Mario jumped on the Master during the first turn, his attack went up by 4 total � 2 for each hit of the jump attack. This will continue escalating until his Attack caps at 50. That�s the only twist for the first version of The Master. No fancy tricks, no shenanigans. Just, the more you hit him, the harder he hits you.   Because of this, we continue Charging with Goombario, while Mario whacks with his hammer.  The Master is up to 10 damage per attack, now� but Goombario�s ready to go!    Goombario megabonks The Master, while we follow up with another Hammer attack. If I�d known this was what to expect, I�d have brought Charge badges for Mario.   At this point, The Master�s attack is up to ludicrous levels. There�s no way we can survive!   We forfeit. But we�re not going to give up.  At this point, I spent about an hour coming up with a cunning plan. It relies on several things, all of which have come together in our favor.  First, when you lose to The Master, you exit the battle with exactly 1 HP.  Second, Close Call was changed to Hold Fast, which grants an extra point of Defense when in Danger.  Third, we just got Flower Saver, which is especially valuable when using many low-FP attacks in sequence.  And fourth, we finally, finally have gotten our hands on Jump Charge. With these things, plus some ingenuity and the odd healing item courtesy of Tayce T., we are going to style on The Master like he has never been styled on before. For anyone following along who wants to try this: Mario needs to be Level 11 or 12 (25 HP, 15 FP, 18-21 BP) with Flower Saver, and Level 12 (25 HP, 25 FP, 15 BP) without. This can be done as soon as the Defend Plus badge is retrieved from Shy Guy�s Toy Box, though it might be better to wait until the Cookbook is given to Tayce T. instead.  Before we start, I put on a very specific badge loadout: Jump Charge and Mega Rush will be the centerpiece of the strategy. Defend Plus, Damage Dodge, and Hold Fast are there for survival. Flower Saver is to make the FP economy work (Mario has 20 max FP right now). Quick Change because we�ll need to switch partners in a hurry sometimes. Dodge Master isn�t strictly required, and the badge loadout takes only 18 BP total if we don�t have it (thus allowing the Level 11 KO), but I�m wearing it anyway - if we flub any blocks in the later part, we�re in trouble, and I�d rather not take the risk.  As I�ve got spare BP, I add in Refund too.   Now, to battle!    The Master�s attack starts at 0, so we have unlimited turns to prepare as long as we don�t actually damage him. We take advantage of this by having Mario and Goombario both Charge their attacks - for two turns in a row!    Because Goombario�s Charge is +3, while Mario�s Jump Charge is +2, Goombario reaches the charge cap of +6 first. We have Mario Charge one last time, while Goombario lays down a 16-damage smackdown!   Here�s where our plan pays off: The two hits from Goombario�s attack have put The Master at 4 Attack. He attacks, but since we�re in Peril, Hold Fast is active! Our three defensive badges and Mario�s natural block soak one damage each, so we take no damage.   Our turn. Mario attacks with a fully-charged jump, with Mega Rush adding to its power. All told, we do 2 + 6 (Charge) + 4 (Mega Rush) = 12 damage per hit, for a total of 24 damage in all! It feels good to not be on the receiving end of a Master Quest beatdown for once.   At this point, The Master is up to 8 Attack, so we need to swap to Bow and Outta Sight to survive this turn. You have natural talent.  Next turn, we can heal - but the healing item must restore exactly 20 HP for this strategy to work. I go with a Sweet Shroom. A Yummy Meal would also work, but this gives us back more Coins with Refund! (Fun fact: that Outta Sight we just did is responsible for why we had to bring Flower Saver to this fight - it�s got to do with the amount of FP used in the fight before we have this chance to heal. Without Flower Saver, Jump Charge is 3 FP and Goombario�s Charge is 4 FP. Charging both characters to maximum thus ends up costing 3*3 + 4*2 = 17 FP. As Outta Sight is normally 4 FP, doing this strategy without Flower Saver needs Mario to have at least 21 FP! With Flower Saver, the math is simpler. Jump Charge is 2 FP, Goombario�s Charge is 3 FP, and Outta Sight is 3 FP, so at most 2*3 + 3*2 + 3 = 15 FP is used.)  The Master�s attacks now do exactly 5 damage if we block, and we just healed to 21 HP. This blow knocks us down to 16.     At this point, we switch back to Goombario and take two more turns of both him and Mario charging. The Master continues attacking, putting us down to 6 HP.    Goombario�s charge is now maxed out, so he skips this turn. Mario charges one last time - and the Master�s 5-damage attack puts Mario down to exactly 1 HP.  Showtime.    Goombario�s 16-damage charged bonk, and Mario�s desperate 24-damage jump, deal exactly 40 damage - enough to perfectly KO The Master.  We have triumphed.  Now that we�re the envy of all Toad Town, it�s time to take on the other - and greater - of the two combat challenges open to us in this post Chapter-3 world: further floors of the Pit of 100 Trials! Badges: 49/90 (New: Berserker, Flower Saver, Pay-Off, Star Gift) Recipes: 37/50 Star Pieces: 90/202 Chuck Quizmo�s Quiz Questions: 26/64 Game Overs (this time): None. Game Overs (total): 15. SUMMARY OF CHANGES FROM MAIN GAME (in this installment) � Luigi�s diary slightly different. � A few extra Star Pieces added in odd corners. � Pretty Lucky badge now Star Gift: 3 BP, doubles natural Star Energy regeneration. � Berserker badge purchaseable from Donlow for 5 Star Pieces. � Pay-Off badge 1 BP cheaper to equip, but costs two Star Pieces more to buy. � Flower Saver badge 1 BP cheaper to equip, and costs 5 Star Pieces less to buy. � The Master trains, surpasses himself. (Master I: +30 HP. Attack is based on (num hits taken) * 2, capped at 50. Immune to Zap Tap. Drains all Star Energy on landing a hit.) Next Time On Master Quest: Things are looking down.
|
|
#
?
Dec 13, 2019 12:46
|
|
|
That Master fight was great! Very nice strat.
|
|
#
?
Dec 13, 2019 13:30
|
|

|
I like the page full of math involved in coming up with this cunning strategy. That's some speedrunner bullshit right there.
|
|
#
?
Dec 13, 2019 13:36
|
|
|
"There's ancient dangerous ruins near the house...I wonder if I could get my brother, who I recently expressed hostility towards, to check them out?" You ok, buddy?
|
|
#
?
Dec 13, 2019 17:16
|
|

|
Rabbi Raccoon posted:"There's ancient dangerous ruins near the house...I wonder if I could get my brother, who I recently expressed hostility towards, to check them out?" Of course he isn't. They canceled the cooking competition. The cooking competition!
|
|
#
?
Dec 13, 2019 18:06
|
|
|
That was an impressive strategy. Awesome. It was possible to really cheese the Master last version, since Goombario's Charge was uncapped and you could just not attack him until you'd charged enough for a one-hit kill. It's probably for the best that they fixed that. I'm honestly not sure how much I like this gimmick, though it's definitely interesting the first time (and this isn't an awful place to put it, though we'll see something similar crop up other places too). Thamz et al definitely seem to like the idea of putting what are effectively time limits on fights by having the enemies get gradual but permanent stat increases, and that's very much not to my personal taste, but it does end up creating fights that are tricky in interesting ways.
|
|
#
?
Dec 13, 2019 20:05
|
|
|
FoolyCharged posted:Of course he isn't. They canceled the cooking competition. The cooking competition! Look, all I'm saying is there are plenty of bad guys in videogames who could have been entirely avoided if they talked to someone earlier in life. That's all.
|
|
#
?
Dec 13, 2019 20:22
|
|
|
Is Luigi going to turn out to be the ultimate super boss or something.
|
|
#
?
Dec 13, 2019 22:28
|
|

|
"What are you talking about? Who's this Luigi fool you're talking about? It's just me, Mr. L!"
|
|
#
?
Dec 13, 2019 22:47
|
|


|
Yo, that notepad with the boss strategy written out brought back some memories. FFX, being a kid and trying to figure out the travesty that was the monster arena. I think I looked it up and most of them are solved if you level up Anima enough, but I got through the Chocobo Eater upgrade �fairly� with a good whole lot of scratch paper
|
|
#
?
Dec 14, 2019 21:26
|
|
|
I'm probably going to be doing that again a few more times. In terms of bonus bosses, we've got Master II, Master III, whatever's at the bottom of the Pit of 100, and remixed versions of the chapter bosses in the Star Temple.
|
|
#
?
Dec 14, 2019 22:09
|
|
|
I remember seeing a vanilla PM video where someone cheesed the final Master fight by spamming Stone Caps to protect Mario, and charging Goombario up 25 times so he could one-shot with Headbonk. I'm glad that even with all the changes, something in the same spirit is still possible in MQ. 
|
|
#
?
Dec 16, 2019 18:44
|
|
|
You mean like when Stryder put together a ludicrous plan to try and one-turn vanilla Bowser? https://www.youtube.com/watch?v=y3HGs1yKGug
|
|
#
?
Dec 17, 2019 08:20
|
|

|
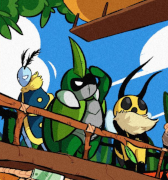
A Brief History of the Anti Crew So you might have noticed that the Anti Guy who headlines the Anti Crew mentions someone named Sin Biscuit before he and his friends jump you. But just who was Sin Biscuit, and what did he have to do with making the Anti Crew who it was today? It turns out that the Anti Crew has a truly interesting development history. Almost all of the information in this post is provided by the ever-helpful starlite. Stage 1: Three Anti Guys  Originally, the Power Plus Anti Guy fight was going to be simply... three Anti Guys with 75 HP each. Sin Biscuit - who was a beta tester for early Master Quest - found ways to cheese the fight during Chapter 4, easily knocking off the Anti Guys and collecting the Power Plus badge. So, he said that the fight was too easy. This was to turn into a case of 'famous last words'. Stage 2: The Early Crew    Thamz's first iteration of the Anti Crew had Anti Guy, Covert Guy (not yet 007 Guy!), Dandy Guy, and Malpractice Guy. All four were weaker than we know them today by a significant margin, though apparently the Anti Guy could hit through invisibility at the time. Sin Biscuit beat them all again with little difficulty. Stage 3: The Crew, Version 2 The next iteration of the Anti Crew didn't make any obvious changes on the surface. It was mostly just a buff to the Crew's stats. However, Anti Guy didn't always do his acrobatic attack, and Malpractice Guy would attack or heal - not both in the same turn. In short, the Crew was still significantly weaker than they are today. It's worth noting that Dandy Guy, being an Anti Groove Guy, was meant to resummon further Anti Guys, Covert/007 Guys, or Malpractice Guys, but the summoning code could not be made to work. So, it was omitted. The demise of this iteration was heralded, once again, by Sin Biscuit managing to squeak out a win against them - this time during Chapter 5. This time, Sin Biscuit begged Thamz to leave the fight alone, but... well, he didn't! Stage 4: Inferno Guy Gets Added  To increase the crew's DPS, Thamz added Inferno Guy to the mix. He also made Malpractice Guy always attack and heal in the same turn, and Anti Guy always use his acrobatic attack. Anti Guy's invisibility-piercing ability was removed, and given to 007 Guy's slingshot (note the name change). For a long period, this was almost the version of the Anti Crew we know and love today. However, fate intervened in the form of a streamer named FatGuy703. Stage 5: Patch Job + FatGuy703 made a video where he beat the Anti Crew after Chapter 4, using a combination of: � Double Dip, � Shooting Star attack items (which do 6 damage to all enemies) farmed from the Li'l Oink machine, � Kooky Cookies to restore FP and gain invisibility, � and also through the use of a glitch where attacks that pierced invisibility would only ignore Outta Sight; Repel Gel and Kooky Cookie would still block them thanks to additional code elsewhere in the ROM. The changes to plug this method were quite swift and comprehensive. � The Li'l Oink machine is now broken by Koopa Koot before the start of the game, and only repaired once you fight him. Oinks do only cost 1 Coin to hatch now, though. � Kooky Cookies were changed to mess around with your Star Energy, and not grant invisibility. � Invisibility-piercing attacks now hit through Repel Gel... And, most important of all, Dandy Guy is now immune to Star-elemental damage. So this strategy would have a very hard time working even if there was some way to bring it back, anyway! And with that, ladies and gentlemen: we have our modern Anti Crew. 
Quackles fucked around with this message at 23:11 on Dec 18, 2019 |
|
#
?
Dec 18, 2019 12:50
|
|
|
Quackles posted:� The Li'l Oink machine is now broken by Koopa Koot before the start of the game, and only repaired once you fight him. This is going to go places.
|
|
#
?
Dec 18, 2019 13:42
|
|
|
The guy who made the mod also worked on Final Fantasy XI I take it? Because drat, if that isn't some Absolute Virtue level of spite, I Don't know what is.
|
|
#
?
Dec 18, 2019 13:50
|
|
|
Randalor posted:The guy who made the mod also worked on Final Fantasy XI I take it? Because drat, if that isn't some Absolute Virtue level of spite, I Don't know what is. (I will tell his tale at every opportunity)
|
|
#
?
Dec 18, 2019 15:05
|
|
|
I'm pretty sure the only way that list could be any more full of spite for the playerbase was if he worked on any of the Souls games (that's a lie, the souls games are more fair than his games are)
|
|
#
?
Dec 18, 2019 15:11
|
|
|
Had no idea star-elemental damage was a thing.
|
|
#
?
Dec 18, 2019 16:04
|
|


|
Electric Phantasm posted:Had no idea star-elemental damage was a thing. There is only one time in the base game where that is ever a factor. Giving Monstar immunity to Starstorm and Shooting Stars. I basically kind of freaked out a bit as a kid when Star Storm didn't work against it as that was my go-to strategy for a lot of enemies at the time. (And then it did that big impressive flashy attack that only did 1 damage and yeah.)
|
|
#
?
Dec 18, 2019 17:57
|
|

|
DACK FAYDEN posted:No, that guy went from FF11 -> FF3 DS -> FF14 1.0 -> mobile gacha game Puzzle & Dragons That reminds me, I should play - or Let's Play - Puzzle and Dragons Z some day.
|
|
#
?
Dec 18, 2019 21:58
|
|
|
I'm actually okay with the gently caress You boss being upgraded until you can't beat it too early. The actual target demographic for games like this might find that unsatisfying - plus, it being beatable in Chapter 4 means to a certain mindset it's mandatory to beat him in Chapter 4 or else you're a chump. Suddenly there's an unfun grind that feels like you have to do it. See also the problem of EV training minigames in the 3DS Pokemon games: It's easy and effective enough early on that some people get stuck "having" to play the ball shooter game and mess around with punching bags. If it had been harder, less rewarding, or locked behind a later plot gate, those folks wouldn't have hit that mental block. And people who don't have the optimizer compulsion likely wouldn't care either way.
|
|
#
?
Dec 19, 2019 01:29
|
|
|
I know I've been down on this hack a lot, but the Master fight is actually pretty neat. It has a simple, easily understandable gimmick that's clearly explained and can be overcome with some ingenuity. I like it.
|
|
#
?
Dec 20, 2019 15:36
|
|


|
Cerebral Bore posted:I know I've been down on this hack a lot, but the Master fight is actually pretty neat. It has a simple, easily understandable gimmick that's clearly explained and can be overcome with some ingenuity. I like it. It will be a problem if it pops up much elsewhere, imo, because Paper Mario as a game doesn't really have much in the way of tools to deal with mechanics that are "thing happens every time you hit enemy". You've got your charge abilities and... that's about it. Devising a strategy to beat a boss is cool. Using the same (or very similar) strategy every time gets tedious eventually.
|
|
#
?
Dec 21, 2019 02:12
|
|

|
bio347 posted:I think it's a fine gimmick... once. Or maybe a fine gimmick so long as it's limited to just the Master. So long as it doesn't appear anywhere else, it's a cool mechanic that you can use smarts to overcome early. Now I haven't actually played this hack, so take this with a grain of salt, but I think I've seen enough of the general design philosophy (i.e. every boss basically has exactly one correct strategy to beat it) to hazard a guess that they won't be reusing the same gimmick very much.
|
|
#
?
Dec 21, 2019 03:16
|
|
|
DACK FAYDEN posted:No, that guy went from FF11 -> FF3 DS -> FF14 1.0 -> mobile gacha game Puzzle & Dragons FFXI forums used to burn him in effigy. Entire threads were dedicated to ranting about his decisions. Also after XIV 1.0 he returned to ruin XI some more and there was much despair. His favourite gamedev tool was poo poo drop rates, in the name of balance. Which the player base quickly memed to "BARANSU".
|
|
#
?
Dec 21, 2019 04:34
|
|

|
Part 27: Into The Pit #3 When we last left off, we survived being whaled upon by Toad Town�s martial arts master.   After a quick nap - and changing our badge layout to something more general-purpose - it�s time to get ready for adventure again. (Note that we�ve added Flower Saver and Star Gift. The Pit doesn�t really have many ways to restore HP and FP, so being able to use Refresh twice as often is a great boon. Pay-Off is just there for funsies.)   We stock up on supplies with Tayce T.�s help, though a lot of this is left over from our previous cooking spree. (Not shown below the fold: Boiled Egg.)  Now let�s go delving into the abyss! Suggested Music: Hollow Knight OST: Greenpath (Extended) The pit has been remodeled again since last we were here. The huge hall that housed the entrance is now a smaller hall, though it retains some of its majesty.  The default camera on pit rooms seems to have been zoomed out slightly, as well�  �and a floor count sign has been added. Useful!  We make it through floors 1-9 without incident. Nothing has changed - except, we�ve gotten stronger. The Goomba on Floor 1 and the Fuzzy on Floor 3 both dropped mushrooms. I didn�t have space for the second one! Also, I ended up taking the Pay-Off badge off when I found out it replaces, not adds to, your normal coin drops - and the number of coins dropped is exactly equal to the damage you took in the fight. It got replaced with Hammer Throw, for Spiked Paragoombas.  The design of rest floors is also changed slightly. The hidden ? block is made visible, and a Star Piece has been added to each rest floor level.  I swap out the Mushroom I grabbed earlier for the POW Block that�s kept here.   After a quick tweak to our badges (we�ll need Quake Hammer for the Clefts), we continue.   Floors 11 and 12 are unchanged, but�  Floor 13�s layout is different! Previously, this floor had a Cleft, a Monty Mole, and a Red Paragoomba. Now there are two Monty Moles. We were able to bait the Cleft into Bombette�s explosion, thankfully.   None of the enemies here can harm us if we block, so we KO them at our leisure.   We swap to Ice Power before going on; as I recall, the next few floors have Dry Bubbles.  Sure enough, that�s what�s there. Floor 14 isn�t changed from before, but the tweak that made Banditos invisible means that the Bandito in the back starts that way.  Jumping on Dry Bubbles is a satisfying feeling, at least.  Floor 15 switches things up on us again! This enemy formation used to be two Pokeys and two Dry Bubbles. Now the rear Pokey is replaced with a Bandit. Nothing we can�t handle.  Floor 16 hasn�t changed in terms of who�s there - it�s still a Pokey and three Banditos. Having the Banditos start invisible, though, is awfully aggravating.   After we beat the Banditos, I swap out Ice Power for Power Quake. If my memory serves, Buzzy Beetles and Stone Chomps lie ahead.  I was right on the money, though I didn�t realize it! Floor 17 originally contained two Buzzy Beetles, a Pokey Mummy between them, and a Dull Bones in back. Now, the Pokey Mummy has turned into a Stone Chomp.   A combination of Power Quake and Power Shell sort out everybody except the Chomp.  And Bombette fixes that next turn! Her attack Shrinks the Chomp, too.  That was bad enough, but the next floor is worse! Floor 18 was originally home to a Pokey Mummy, a Buzzy Beetle, and two Dull Bones in the rear. Unfortunately, the Dull Bones have been replaced with another Pokey Mummy, and a Chomp of all things.   We Power Quake immediately, while Goombario at least gets rid of the Beetle.    Next turn, Bombette and another Power Quake save the day.  Floor 19 is in the same vein as the rest: obnoxious! This formation isn�t changed too much from before - just, that Chomp in the back used to be a Stone Chomp.   Power Quake weakens the ground enemies, while Parakarry KOs the Dry Bubble.    We flub the blocks for both Chomps; an emergency Refresh is in order while Kooper KOs the Pokey Mummy.    After that, the POW Block from Floor 10 comes in handy, weakening the Stone Chomp to the point Kooper can KO it.   After another Refresh, Bombette closes the battle.   Slightly grueling, but we made it to Floor 20! Past here is unknown territory, though we�ll likely be fighting enemies from Forever Forest, Gusty Gulch, and Tubba Blubba�s Castle.     We grab the Star Piece, heal up with the provided Honey Syrup, and save the Fire Flower for later.  Then: downwards!   Sure enough - Floor 21 appears to have at least one Forest Fuzzy. We swap badges again, this time to add Hammer Throw, Power Smash, and also to bring Pay-Off back - we may very well need it.    The Forest Fuzzy isn�t alone, by any margin. It�s accompanied by two Purple Spinies (fine) and a Bzzap! (argh). We Power Smash the Fuzzy, and have Bow slap the Bzzap! away.   From there, the Purple Spinies are no trouble. And the Fuzzy drops a Mushroom afterward - which we gratefully snarf down immediately. (Also, Pay-Off paid off that time, but we�re still swapping it for Group Focus. We need every edge we can get!)  Floor 22 has another Forest Fuzzy, backed up by a Piranha Plant and two Lakiwuns. Fun fact: In the Master Quest code, Piranha Plants were originally supposed to inflict either Poison or Dizzy with an 80% chance on hit, but this was later removed.   Once again, we Power Smash the Fuzzy, while Kooper sets up the Piranha Plant for a KO.    Next turn, we KO the Piranha Plant - from there, it�s easy to stall, Focus, and Refresh, as the Lakiwuns do little damage.   The next floor (Floor 23) has a Boo� which turns out to be two Boos, with two Bzzap!s in tow.    We take out the Bzzap!s immediately.  Boos are, sadly, hard to block as ever. Defend Plus helps a little, at least, as does the decrease in their damage.   We switch to Dizzy Shell to stun the Boos. It only hits one of them, so we jump on the other. We don�t use anything stronger to keep it from going invisible (which it would at 5 HP or below).   Next turn, we�re in trouble! Bombette KOs the active Boo, and weakens the dizzy one, while we Refresh to avoid calamity.    The Dizzy on the other Boo wears off next turn. We use another Refresh to get back on our feet, while Goombario KOs the Boo before it can become invisible.   We do get a windfall from Donlee after the battle�s over, at least!   Floor 24 has more Boos. 4 more Boos. Fortunately, we happen to be prepared to deal with this. (By the way: Star Gift makes that large, impressive Star animation happen on your Star Energy bar every turn, whether it�s full or not.)   The first order of business is sitting out the first turn, until such time as the Boos are reachable.  Remember when we had Tayce T. cook a Strange Leaf and it turned into a Dizzy Dial? Well, we�ve still got it lying around!    It seems the Dial has a partial failure rate, but it�s given us the chance we need.   We weaken the dizzy Boos with Power Bomb, and KO the one in the back so it doesn�t turn invisible again.   Next turn, we reapply Dizzy with Kooper, and KO the Boo that wasn�t affected.    From here, we have a little breathing room - enough to Refresh and KO the rest of the Boos. Phew! That was a tough fight.   Halfway through this wing. Floor 25 has a Hyper Goomba, so I slot in Power Quake in anticipation of Hyper Clefts.    The formation here doesn�t look too bad. We knock down one of the Hyper Paragoombas, and Bow KOs the one we hit with First Strike.   All three enemies Charge. We knock down the other Paragoomba, then hide.    Next turn, we just do light damage on the frontmost Goomba, but� they Charge again!   This time, though, Bombette can knock everyone out of it. From here, the battle�s won. (In retrospect, I realize I could / should have done this the first time they Charged. Oops.)  We get extra rewards from this fight. The Hyper Cleft gives a Star Point, and also drops a Mushroom once we leave the battle!   Floor 26 picks up the pace with armored enemies. Not only are there two Hyper Clefts in front, but there�s a Bristle from Tubba Blubba�s Castle to mix things up! Fortunately, we were able to trick the front Hyper Cleft into running into Bombette.   We Power Quake immediately, and Bombette KOs the other Cleft with Bomb.  The Bristle does its dash, while the Hyper Paragoomba Charges�   �but we KO it next turn before it can do anything.  Floor 27 is a comparative breather. It only has two Hyper Paragoombas and a Bristle�   �and after some jumping work by Goombario, and a Power Quake, it doesn�t even have that.  With only Hyper Goombas left, the fight is easy.  Floor 28 just has a Hyper Goomba! This�ll be a breeze!  Uh-oh. (The Red Clubba doesn�t have a tattle because they were separated out from regular Clubbas in the 1.3 update, and I never actually got the new one properly. We�ll fix that at the end of this fight.)   We Headbonk the Paragoomba and Power Quake, both to get rid of the Bristle and, well - if we flub the Clubba�s shrinking attack, we won�t be able to deal with the Bristle this way next turn!   The second of those is exactly what happens. The Hyper Goombas charge, too.   Fortunately, we can KO them!  Now that we have Defend Plus, Red Clubbas� multi-hit attacks deal a lot less damage.    Once the tattle for Red Clubbas is present, it�s mostly a matter of attacking this one with all we�ve got.  We get another windfall from Donlee, too!   This room, Floor 29, has one last Hyper Cleft. Once again, we trick it into Bombettes� explosio� oh, no.  Yep, it�s the three-Red-Clubba fight alllllll over again. At least we�re a bit stronger this time around.   We KO the Cleft with a Power Bomb, doing good damage to the other Clubbas. It also shrinks the middle one. Power Quake does further chip damage.    We don�t take much damage from the first Clubba, but the other two use their big attacks. And we get Shrunk again.   Another Power Bomb leaves us out of FP. However, the frontmost Clubba is Shrunk!   We heal up with a Yummy Meal, then prepare for an onslaught� but all three Clubbas use their multi-hit attack!    At this point, the tables have turned. The Fire Flower from Floor 20, and a quick Power Shell, finish off the Clubbas. Phew!    We�ve made it to Floor 30. We eat the Mushroom we picked up along the way, and plunder the items in the ? blocks: a Super Shroom and a Snowman Doll.  Now, what�s the statue say?  AN IMPATIENT YOUNG STAR IS BEGGING FOR RELEASE THE ONE FUN GUY WHOSE CRIES NEVER CEASE HIS TAUNTING RELENTLESS OF DECEMBERS LONG PAST HIS PATIENCE REWARDED WITH THE QUEST AT LAST AN IMPATIENT YOUNG STAR IS BEGGING FOR RELEASE THE ONE FUN GUY WHOSE CRIES NEVER CEASE HIS TAUNTING RELENTLESS OF DECEMBERS LONG PAST HIS PATIENCE REWARDED WITH THE QUEST AT LASTThis is apparently a reference to Funghi, an early server member who apparently pestered Thamz and co. quite a lot asking when Master Quest would be released, and so served as motivation.   And in the chest is� oho! Here is a badge we have not seen in a Paper Mario game before. Dizzy Dance is a jumping attack on all enemies that may inflict Dizzy. Finally, an answer on how to Dizzy those annoying flying enemies! The badge is 2 BP to equip, and the attack costs 6 FP to do.   We�ve still got plenty of healing items, and we know what enemies to expect in the coming floors (Shy Guy�s Toy Box enemies, mostly). Why not make this a double-header? Before we go on, we equip Zap Tap, swapping it for Star Gift. We�ll need the protection against Shy Guy jump attacks.  Floor 31 has three Shy Guys and a Medi Guy. Let�s try out Dizzy Dance!   So, for 6 FP, Dizzy Dance is basically Multibounce, but it acts automatically. It has an 85% base chance to dizzy.    We take out the Shy Guys while they�re distracted, and are left with a still-stunned Medi Guy.    By the time it�s recovered, we�ve hit it with a barrage of attacks!  The Shy Guy drops a Mushroom. Thank you, Shy Guy.  Floor 32 is three Sky Guys and a Medi Guy.     Sky Guys are pretty weak to Dizzy. We try Dizzy Dance again, and it succeeds beyond our wildest dreams! Thanks, Donlee!    Bow KOs the one Sky Guy who isn�t Dizzy, then we take the opportunity to rest, Refresh, and generally beat everyone in formation up.  Floor 33 has a Shy Guy. Unfortunately, he�s got 3 Cherry Bob-ombs in tow!   We run for it, and add Quake Hammer.    On our return, we don�t First Strike (on purpose). Quake Hammer activates the Cherry Bob-Ombs, and Power Shell safely detonates them. This leaves the Shy Guy, and we have breathing room to heal and regain Star Energy.  Floor 34 continues the Shy Guy parade - this time, we�ve got a Shy Guy, two Spy Guys, and a Medi Guy.     We Quake Hammer to get the Shy Guys into slingshot mode - and Donlee helps us out with a big Quake power boost! After this, the only logical thing to do is Air Lift the Medi Guy away.    We unfortunately get Shrunk by a slingshot stone we don�t quite time properly, so a Refresh is in order. Bombette then KOs one of the Spy Guys.  We charge Star Energy and finish off the other Spy Guy soon after.  Floor 35 presents us with a challenge in the form of two Medi Guys. We do get the First Strike, which�ll be really important here.   Bow KOs the Shy Guy, then we jump on one of the Medi Guys so they don�t both attack.   The first one heals everybody, and the second attacks us and takes chip damage.   We KO the second Shy Guy next turn. One Medi Guy attacks, one heals.   Now that the major threats are taken care of, we Air Lift one Medi Guy and KO the other.  This Shy Guy formation drops another Mushroom. We�re full on inventory space, so we eat the Mushroom we got earlier from the first Shy Guy we fought.  For Floor 36� uh-oh. It�s Groove Guys! This is going to be a nasty fight if we don�t use some cheese.   We run for it, and put on Group Focus.    On return to the battle, Kooper brings us up to full Star Energy� and then we use Star Storm! This KOs the Shy Guy in front.    The first Groove Guy summons another Shy Guy. The second attacks, but we block it. And the third Dizzies Mario.  This is fine, because Kooper sorts out the Groove Guys with Power Shell!   The Shy Guy�s attack Shrinks us, removing the Dizzy effect. With only one Shy Guy left, we have an opportunity to Focus and Refresh before we end the battle.   On Floor 37, there�s a Pyro Guy. We end up taking off Zap Tap and replacing it with Ice Power, and Power Smash. With Ice Power equipped, a Power Smash on a Pyro Guy will OHKO.  Sure enough, one Pyro Guy turns into three, with a Medi Guy in tow.   After getting the First Strike, we take out the first two Pyro Guys with Shell Shot and Power Smash.   Another Power Smash KOs the last Pyro Guy, and we�re left with only the Medi Guy. Time to stall and heal up!  We get Star Points from the Pyro Guys. We�ve been managing to get a decent Star Point income from these past few floors - the Groove Guys, Hyper Clefts, and Red Clubbas also gave SP.  The next floor probably has Shy Guys, so we put Zap Tap back on.  Interestingly, though, it�s Guys in four different colors: Red, Blue, Green, and Yellow. What could this mean?     We KO everyone.  We get another Mushroom! Once again, we eat the previous one we picked up to make space in our inventory.  And on Floor 39� oh, poo poo! Well, it was bound to happen sooner or later.  And the formation is worse than I could have imagined! We�ll have to deal with the Medi Guys before we can touch the Anti Guy.  We run for it so that I can do the math.  So, we have to either stun the Medi Guys or remove them (or both), while the Anti Guy is attacking for 16 damage a turn. Dizzy Dance has a base 85% activation rate, and Medi Guys have a 90% weakness to Dizzy, so there�s a 76.5% chance each individual Medi Guy will be affected. That�s a 45% chance it hits all three. So stunning them is unlikely to work well. And there�s only one way to really be sure of KOing all the Medi Guys at once. Cheese time!  Here�s our final badge layout: Power Smash for the Anti Guy, Medicine Man and HP Plus for increased survivability� and Group Focus for the cheese. Flower Saver has to come off for all this to work, alas.   We enter battle against the Anti Guy. Then Kooper Focuses. Then we Run Away. In total, we do this twice, filling up our Star Energy gauge. Incidentally, both times we barely make the Run Away roll. I should have equipped Dodge Master to make the mashing easier�  We�re ready to go!   Bow hits everyone for 3 damage with Screech - then Mario follows with a devastating Star Storm! This KOs all three Medi Guys in one turn.   Next turn, Mario�s HP is quite low thanks to the Anti Guy.    We attack with our strongest single-target attack - Bombette�s Bomb - and heal up with Tayce T.�s Boiled Egg. (Thanks Medicine Man!)   After the Anti Guy acts, Mario still has enough HP to take another attack from him later. So, we go full blast, with another Bomb attack and a Power Smash. We get the Shrink on the Anti Guy, too! (Not that it matters, because it wears off before the Guy attacks.)     Once again we heal, this time with a plate of Koopasta. Bombette keeps the damage coming.    Once the Anti Guy takes chip damage from Zap Tap, we�re in a position to KO it. Bombette Focuses to recover Star Energy, then we Power Smash!   Pow! No more Anti Guy. (This Anti Guy gives more SP than the last free-roaming one because it�s in a party of 4, triggering the game�s internal bonus for facing bigger parties of enemies.)  And we�ve made it to Floor 40. We�ll stop here for now. The next enemies we face will probably be Chapter 5 enemies, and I suspect they�ll outmatch us.   Instead, we nab a Maple Syrup and a Thunder Rage from the blocks�   And grab the Star Piece and another HP Plus from the chest!  Time to check out the next statue. AN ARMY OF ONE BRINGS MONSTERS FROM AFAR YOU WOULD NOT FARE WELL SHOULD YOU HAVE TO SPAR WITH BRISTLES AND BONES SHE ASSEMBLES YOUR DOOM YOU KNOW HER AS MIH / A CLASSY NOM DE PLUMEThis is a reference to Mihdoko, who created sprites for a large number of the custom enemies in the romhack (incl. Bristles and Dull Bones).  Now, let�s get out of here.     Next installment, we�ll be heading back into Shy Guy�s Toy Box. Badges: 51/90 (New: Dizzy Dance, HP Plus) Recipes: 37/50 Star Pieces: 94/202 (we have 24 on our person) Chuck Quizmo�s Quiz Questions: 26/64 Game Overs (this time): None. Game Overs (total): 15. SUMMARY OF CHANGES FROM MAIN GAME (in this installment) � Pit of 100 Trials remodeled, now has floor signs, quality-of-life improvements. � More Stone Chomps and Chomps added to early floors of Pit of 100 Trials. � Dizzy Dance badge found in Pit: acts like an automatic Multibounce, with a base 85% chance to dizzy each enemy. 2 BP to equip, 6 FP to use. � Extra HP Plus badge found in the Pit of 100 Trials. Next Time On Master Quest: This game is toying with us!
|
|
#
?
Dec 22, 2019 13:05
|
|
|
I love the cheese strats.
|
|
#
?
Dec 22, 2019 19:46
|
|

|
I'm a pretty big fan of Dizzy Dance, not gonna lie.
|
|
#
?
Dec 22, 2019 19:49
|
|

|
Wow, I think they made it even more brutal than it was last version. I don't remember the fights with multiple Red Clubbas being a thing before (although the Anti Guy room was definitely there last version, that one's fun), and the changes to invisibility with Boos and Banditos looks really annoying. FYI, in last version there was definitely some degree of randomness in which formations showed up on which floors (similar to how it worked in TTYD, actually, you didn't always fight the same things). Admittedly, I probably wouldn't have noticed that if I hadn't played around with savestates in there a bit... That said, if a formation is different to what you remember it doesn't necessarily mean it's something they changed from last version, although it could be (as I said, some of these do look new to me). Although the Star Pieces are definitely new (I wonder why? the hack already had more Star Pieces than you could spend, unless they've also tweaked prices again), and I like the invisible blocks being made visible. Dizzy Dance is a really interesting badge, I should probably have used it more (seems like it's been slightly buffed, too, it cost 7 FP to use last version). I really like it conceptually, too, because it's a really clever way to make something interesting out of an unused badge. One of the unused badges that was left in the game's code was basically Multibounce but it did the action command automatically (I imagine it was probably there for testing purposes, or something?), and Thamz et al turned it into this. The automatic action command thing is also kind of interesting, because it can be a drawback sometimes (e.g. if there's a spiked or fire enemy in the back of the formation, with normal Multibounce you can deliberately miss the action command to cut it short and not hurt yourself; not so here). This is a really fun badge to plan around using and I'm a big fan of the concept.
|
|
#
?
Dec 22, 2019 19:58
|
|
|
I think I�m warming up to the design a bit. While some things are just dumb, now that you actually have options on what to do/how to set up it seems like it�d be a lot more enjoyable.
|
|
#
?
Dec 22, 2019 20:22
|
|

|
You're expected to savescum in the pit, so expect it to get much harder.
|
|
#
?
Dec 22, 2019 20:35
|
|
|

|
| # ? Jun 3, 2024 16:25 |
|
|
Explopyro posted:Wow, I think they made it even more brutal than it was last version. I don't remember the fights with multiple Red Clubbas being a thing before (although the Anti Guy room was definitely there last version, that one's fun), and the changes to invisibility with Boos and Banditos looks really annoying. I am informed that Floors 91, 93, 95, 97, and 98 have randomized formations. For everywhere else it's static. Explopyro posted:Although the Star Pieces are definitely new (I wonder why? the hack already had more Star Pieces than you could spend, unless they've also tweaked prices again), and I like the invisible blocks being made visible. They added an extra Happy Heart and Happy Flower badge each to Donlow's shop to make up for it. There are now 202 Star Pieces in the game. Grapplejack posted:You're expected to savescum in the pit, so expect it to get much harder. I believe there's a Pit speedrunning contest that the devs are hosting, or were planning to host? I don't know if it allows save states or not, though. Quackles fucked around with this message at 20:42 on Dec 22, 2019 |
|
#
?
Dec 22, 2019 20:39
|
|